HOLIDAY DONATION DRIVE - SUPPORT MSW - DO YOUR PART TO KEEP THIS GREAT FORUM GOING! (Only 20 donations so far - C'mon guys!)
×


hamilton
-
Posts
1,931 -
Joined
-
Last visited
Content Type
Profiles
Forums
Gallery
Events
Everything posted by hamilton
-
 Hi Ferit: She looks magnificent - maybe you address this questions elsewhere in your log, but did you replace any of the wood stock provided in the kit for the planking or the superstructures? Can't wait to see the much-longed-for profile shot! There were some flirtatious gestures in the last post! hamilton
 -
Lucky you, Mark! I'm still counting down the years...though I know I'll miss it..... hamilton
-
Thanks Mark - I'm usually late, too - in revisiting your Licorne log, for example!! I'll get there soon to see how you're doing..... hamilton
-
I think the drop keel looks strange in the present context but might look more appropriate when the hull is fully planked - a matter of taste I suppose. Anyway, it will be nice to see one of these beautiful hulls in a nice large format, drop keel or not! hamilton
-
If anyone working on the St Roch lives outside of the Lower Mainland of BC, I can forward reference shots of the real thing, kept in the Vancouver Maritime museum. I sent a number of shots to another forum member who had a St Roch build log on the old MSW....but i think he may have discontinued his build.....let me know if you're interested....
-
Hi Richard: No sooner is the Pickle done than this beauty emerges off the shelf?!?! I looked long and hard at this kit during my annual "kit acquisition season" but the size put me off - the Admiral does want to move to a bigger place, but I'm not sure this is the reason she had in mind!! Looking forward to following this one hamilton
-
Hi Ferit: Beautiful to look at! The model really stands up to the extreme close-ups - such incredible precision. Really masterful work. Question - the euphroe block you used on the crowsfeet - is this a modified long-tackle block or was this part supplied with the kit with multiple holes, or did you scratch build it? hamilton
-
I can attest to this!! hamilton
-
I'm sure I'll eventually have time to read through your build log, Augie - for now, let me only say - excellent work! hamilton
- 2,191 replies
-
- 1
-

-
- confederacy
- Model Shipways
- (and 1 more)
-
Hi Jack: I agree with Dan as far as the sails go - make them early. As I recall from building this kit, I had the mast hoops on the masts before adding the sails, though. This makes lacing them to the sails quite difficult (not impossible, just delicate). I definitely laced the sails to the booms/gaffs where appropriate (obviously unnecessary for the staysails, flying jibsail, jibsail, fore staysail. Anyway, I wish I had some photos of that part of the process, but i don't....it seems to be coming along very well in any case and I'm sure you'll get through the sails with some excellent results hamilton
-
On to the fun part now, eh Jason! Looks great hamilton
-
Wow John - I didn't know about that old fort - beautiful. I "liked" the post that included the bit about the gov't shutdown - kind of a weird thing to "like", but the rest is great! hamilton
- 2,250 replies
-
- 1
-
-
- model shipways
- Charles W Morgan
- (and 1 more)
-
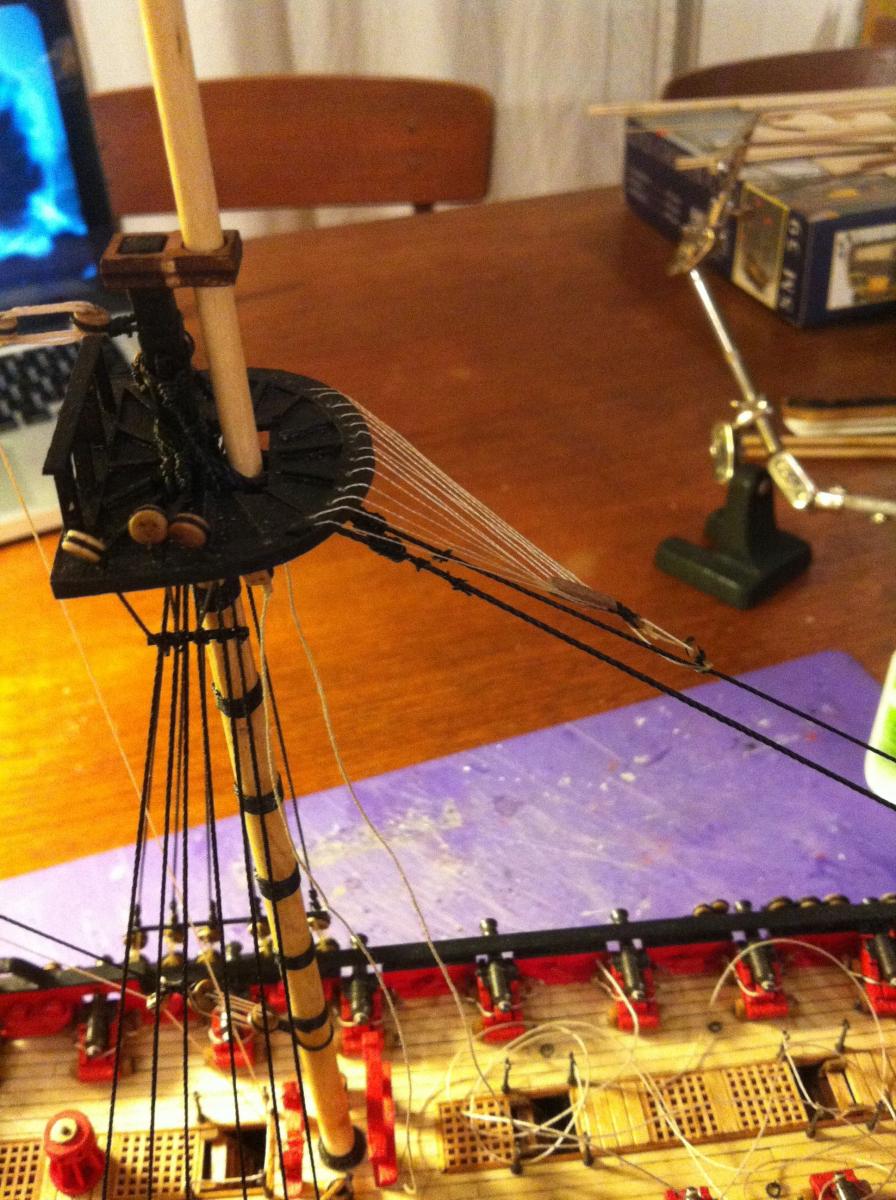
Hi Bob - just saw your message after the last reply! Thanks for coming by and thanks for the compliment! Yes they were tricky - and my first attempt (documented above) was pretty disappointing. The hardest part was remembering the correct procedure for threading the line between the top and the euphroe...I would often get the wrong sequence and have to unthread and start again from an earlier point.....many mistakes later I think they look ok - and they do add a lot to the build - they aren't part of the Corel design, but I've tried to stick as close to Goodwin's documentation as is within my skill level and as the often stubborn Corel kit allows. Bye for now hamilton
-
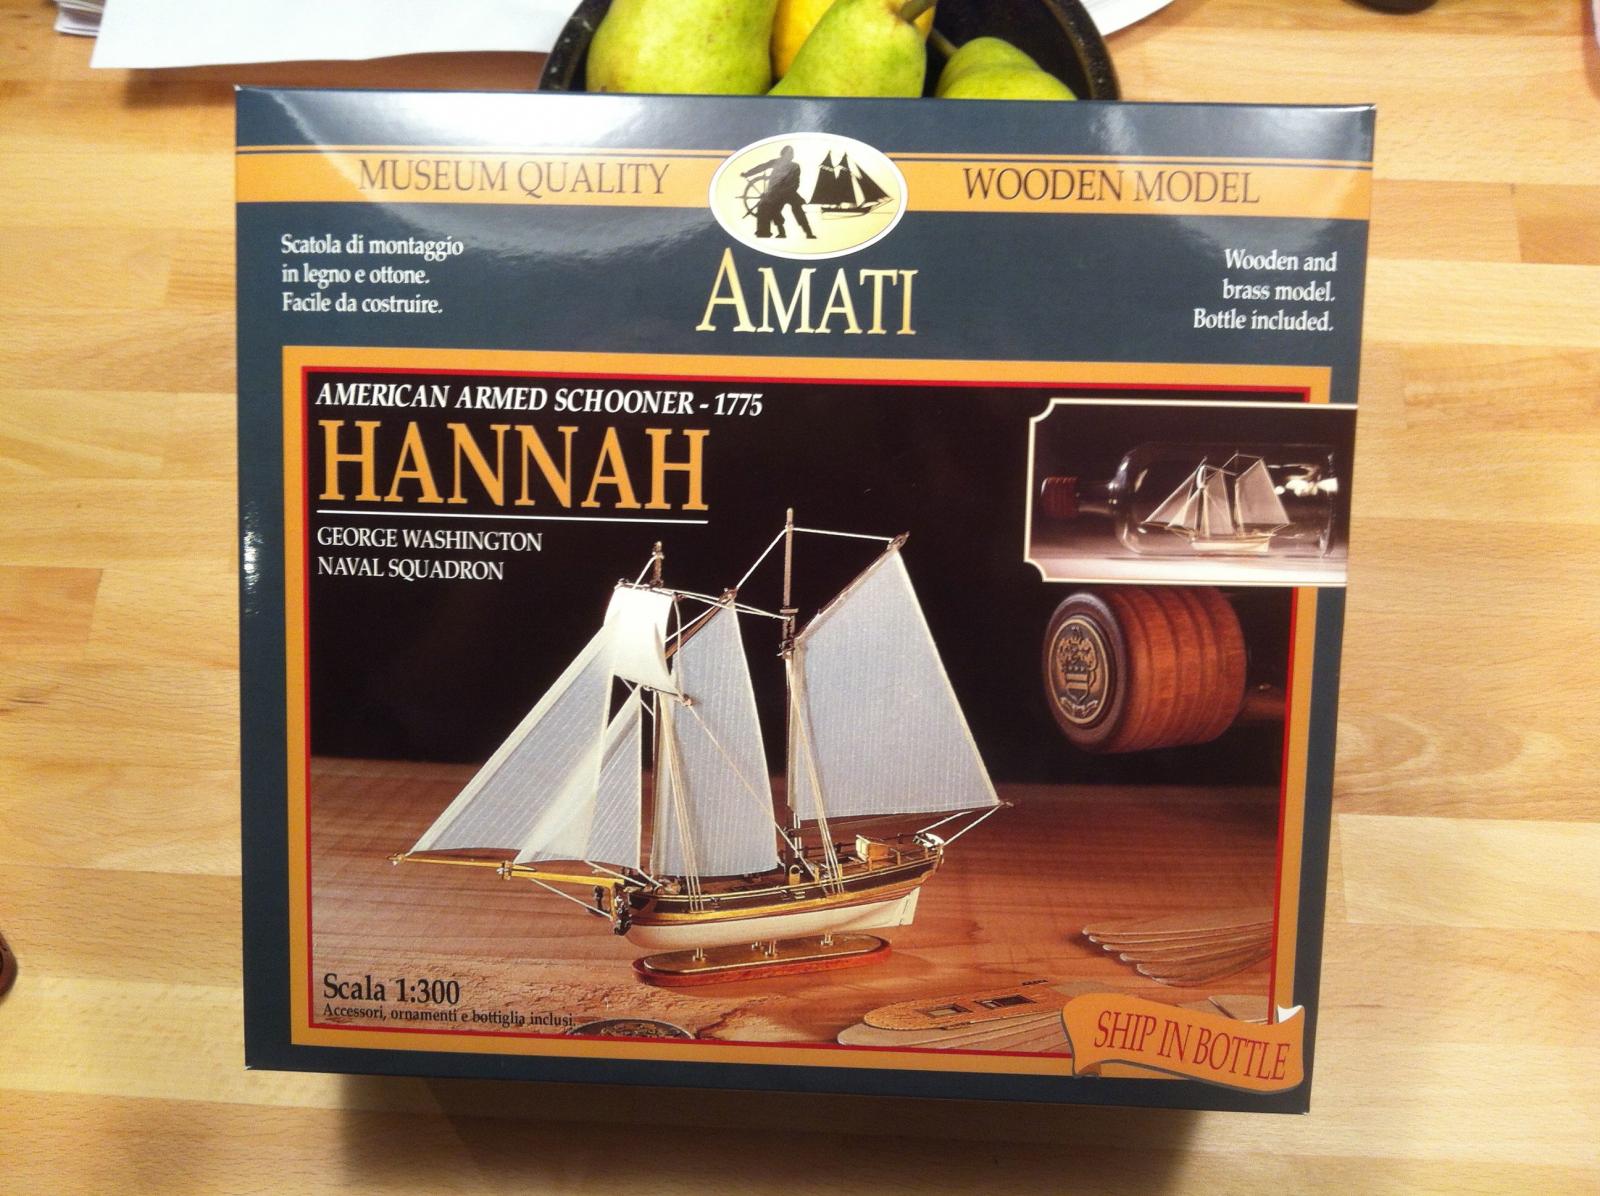
Thanks Alistair and hello Mike! The Hannah does look like a challenge - I read through a build log for it that used to be over on Dry Dock Models back when that forum was still around and I ended up finding the same log posted elsewhere on the web - I see you're not keeping one. I anticipate that the scale is going to be a challenge, but I've found that every build has both frustrations and joys! Do you have some images of your Hannah in progress? Water in the bottle sounds like a great addition, but I assume that this also will influence how you finish the hull.....anyway thanks for coming by hamilton
-
Thanks for the comments all! I feel like I've been in limbo on this build for a while - hopefully something resembling progress will occur soon hamilton
-
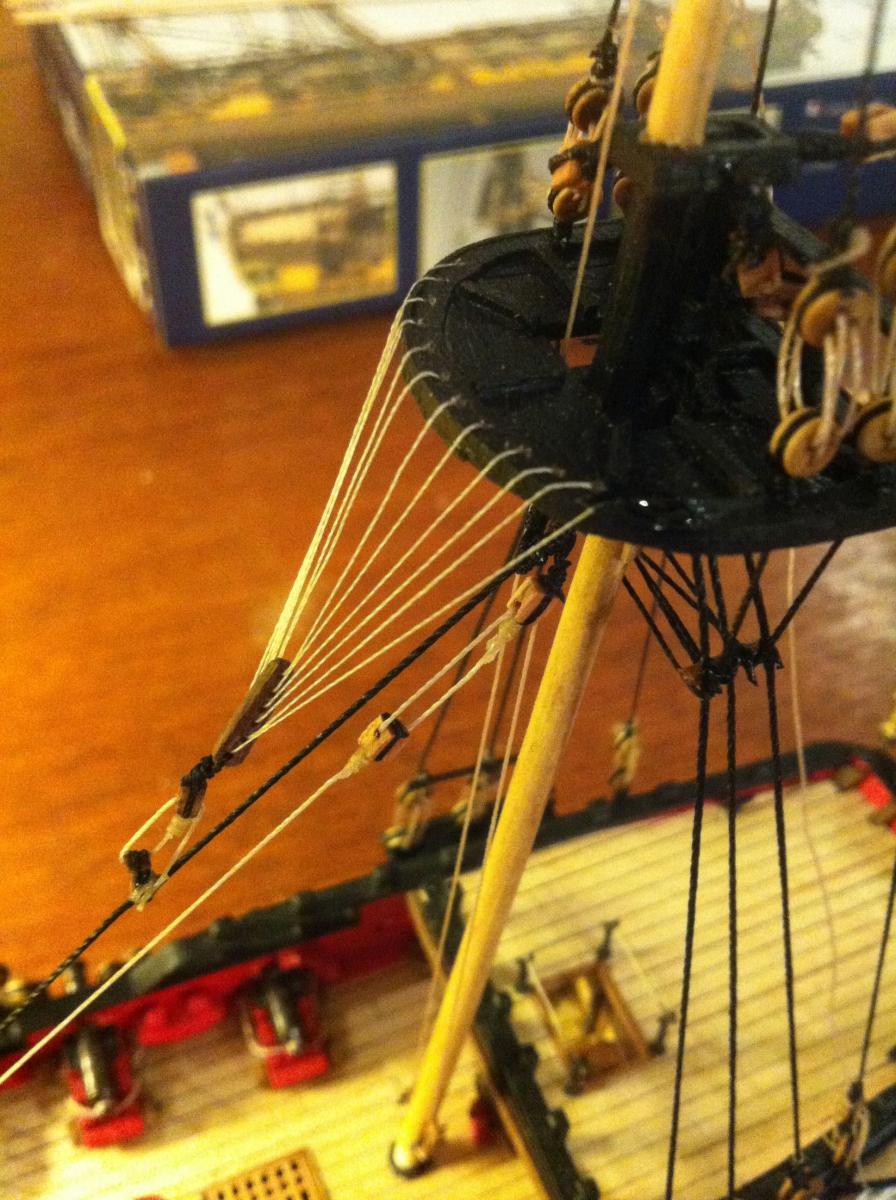
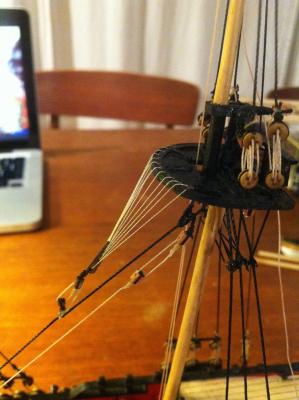
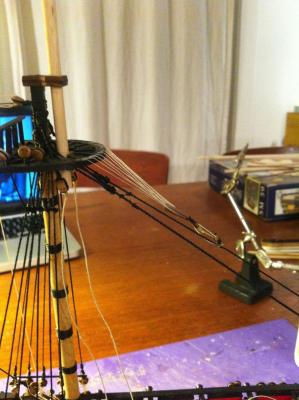
Well I thought I would just quickly update the results of my re-doing of the mizzen crowsfeet (and adding the crowsfeet on the main mast). Thanks to Alistair for the encouragement & BE for the tips on materials. Now that this is figured out I can finally move ahead - first to the main topmast and then to the foremast shrouds & stays and on and on.... hamilton


- 594 replies
-
- 14
-
-
Fun little projects Mobbsie - and very well handled! hamilton
- 1,279 replies
-
- 1
-
-
- agamemnon
- caldercraft
- (and 1 more)
-
Definitely deeply in denial!
-
The planking looks great! The diligence has clearly paid off hamilton
-
A glutton for punishment....? Probably! I just thought the ship in a bottle would be an interesting challenge - something different to try....Since I started this I've always wanted to build one, though now that I see the instructions.....well, let's just say that I'm less worried about rigging the Blandford....I'll start a build log here once I start - though I think I'll do the OcCre Dos Amigos first and then the Yacht America before the Hannah....then there's the Syren and the Bellona!!! Sheesh! What have I done!!! hamilton
-
Hi Alistair. Thanks a lot for this info - I've been looking at the Antscherl set but it is currently off the table....especially after I've purchased not one but 2 more model kits!!! The Amati Hannah in a Bottle and the Mamoli Yacht America. The latter will be a gift for a friend - I've been promising them for a while so....that's my excuse anyway. And now you've decided me - I will re-do the crowsfeet in tan rigging line and using finer material. I was already leaning in this direction given the prominents of this feature and the clumsiness of my first attempt. I think BE earlier suggested using fine sewing thread - I have some from Model Expo that came with one or another kit....though the quality is not great - I may invest in something at my go-to place. The blocks have worked out great - though I need more practice in attaching them in a way that doesn't look so clunky! Unfortunately I have a tendency to practice on the model rather than off.....Thanks again! hamilton
-
Hello all: I was just looking at a couple of other build logs and noticed that the crowsfeet are in white or hemp line rather than black....I went in assuming that this was an element of the standing rigging and so added them in black - should they be hemp? If so I will absolutely re-do them....thanks in advance hamilton
-
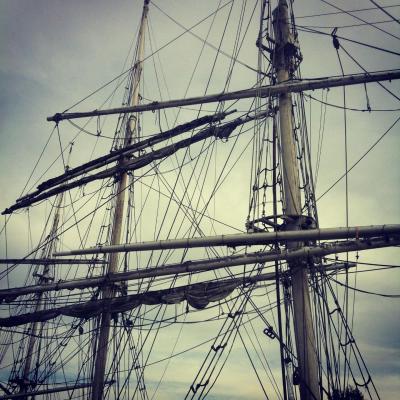
Well normally I spend my Sunday nights modelling, but this time I've got too much work to do and am grading essays instead. However, I thought I'd share a couple of photos with you - not of the Blandford. This afternoon I took my son and his friend to the Vancouver Maritime Museum where the St. Roch is housed. The museum is being renovated so the ship is closed unfortunately. There is a small marina close to the museum where boats of interest are often docked. Today we found the North Star, Canada's only fully rigged ship. It is pretty small, but the rig is quite impressive and of extreme interest on such a strange vessel. I just have a shot up into the rigging, so sorry for the lack of context.... The second photo is of a future project - I've been toying with the idea of this one for a while, and when I saw the kit at the museum gift shop and compared with what I would pay shipping it from an online supplier I snatched it up! Once I get through a couple of other builds I'll start a log on this one! Bye for now hamilton

-
Thanks Alistair & Ferit: The scale is quite daunting for the little tasks, to be sure. As for the slackness in the lines - in some cases the lines haven't been rigged - the jeers I had to seize into the upper jeers blocks so they had to go on when the blocks did, though they won't get rigged for a while and will go on dangling and getting in the way until the lower yards are fitted. Also, I had to put on the mizzen topsail yard halliard well before the yard itself since (following Lees) it is seized with an eye onto the mizzen topmast. It is always my preference to attach these lines while the masts are off the ship as it reduces the complexity and danger of trying to attach them amidst the spider web of other rigging.... There are other lines, however - and in the photos the mizzen topmast shrouds and the crowsfeet tackle are obvious culprits - where it is builder error that has led to an imperfect look. The more I look at the crowsfeet tackle, for instance, the more I want to redo it entirely. I think I could re-do it without too much bother....and if I get through all my house chores and grade enough of my student's essays I may try this evening, in tandem with the main crowsfeet and main catharpins....So while the crowsfeet themselves are by no means perfect, fixing the tackle will hopefully go some way toward making the whole rig look a little better..... hamilton