


niwotwill
-
Posts
586 -
Joined
-
Last visited
Content Type
Profiles
Forums
Gallery
Events
Posts posted by niwotwill
-
-
Thanks Patrick and everyone on the likes.
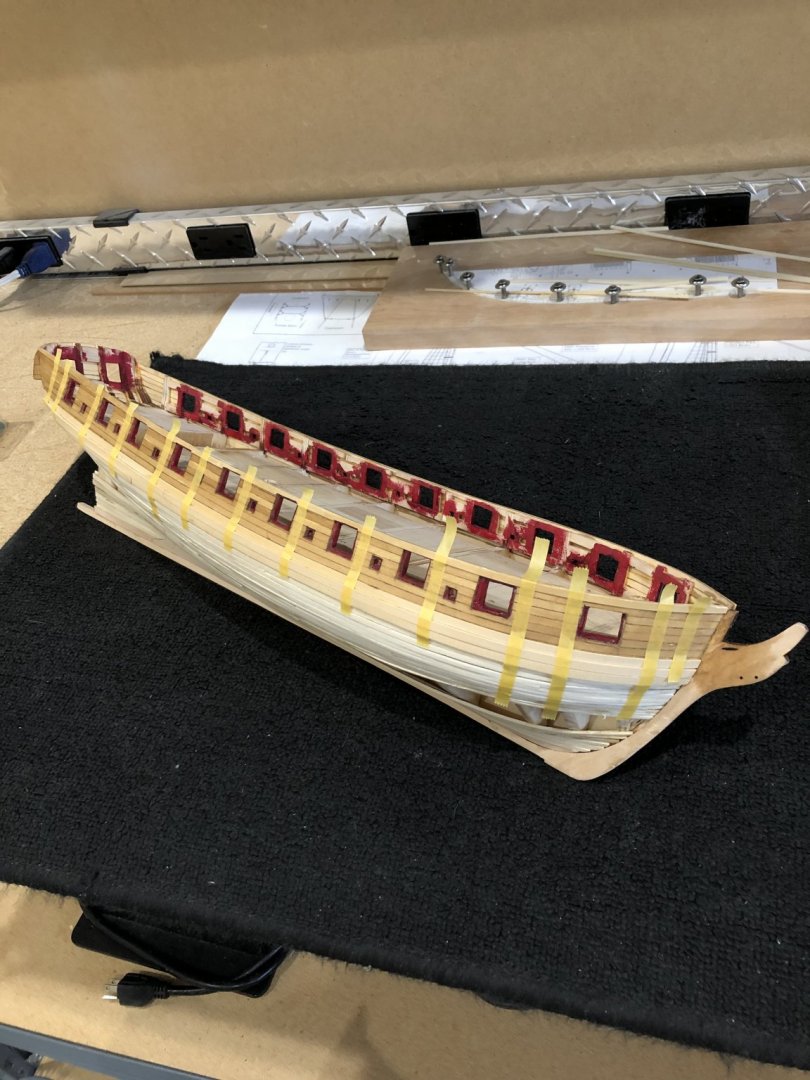
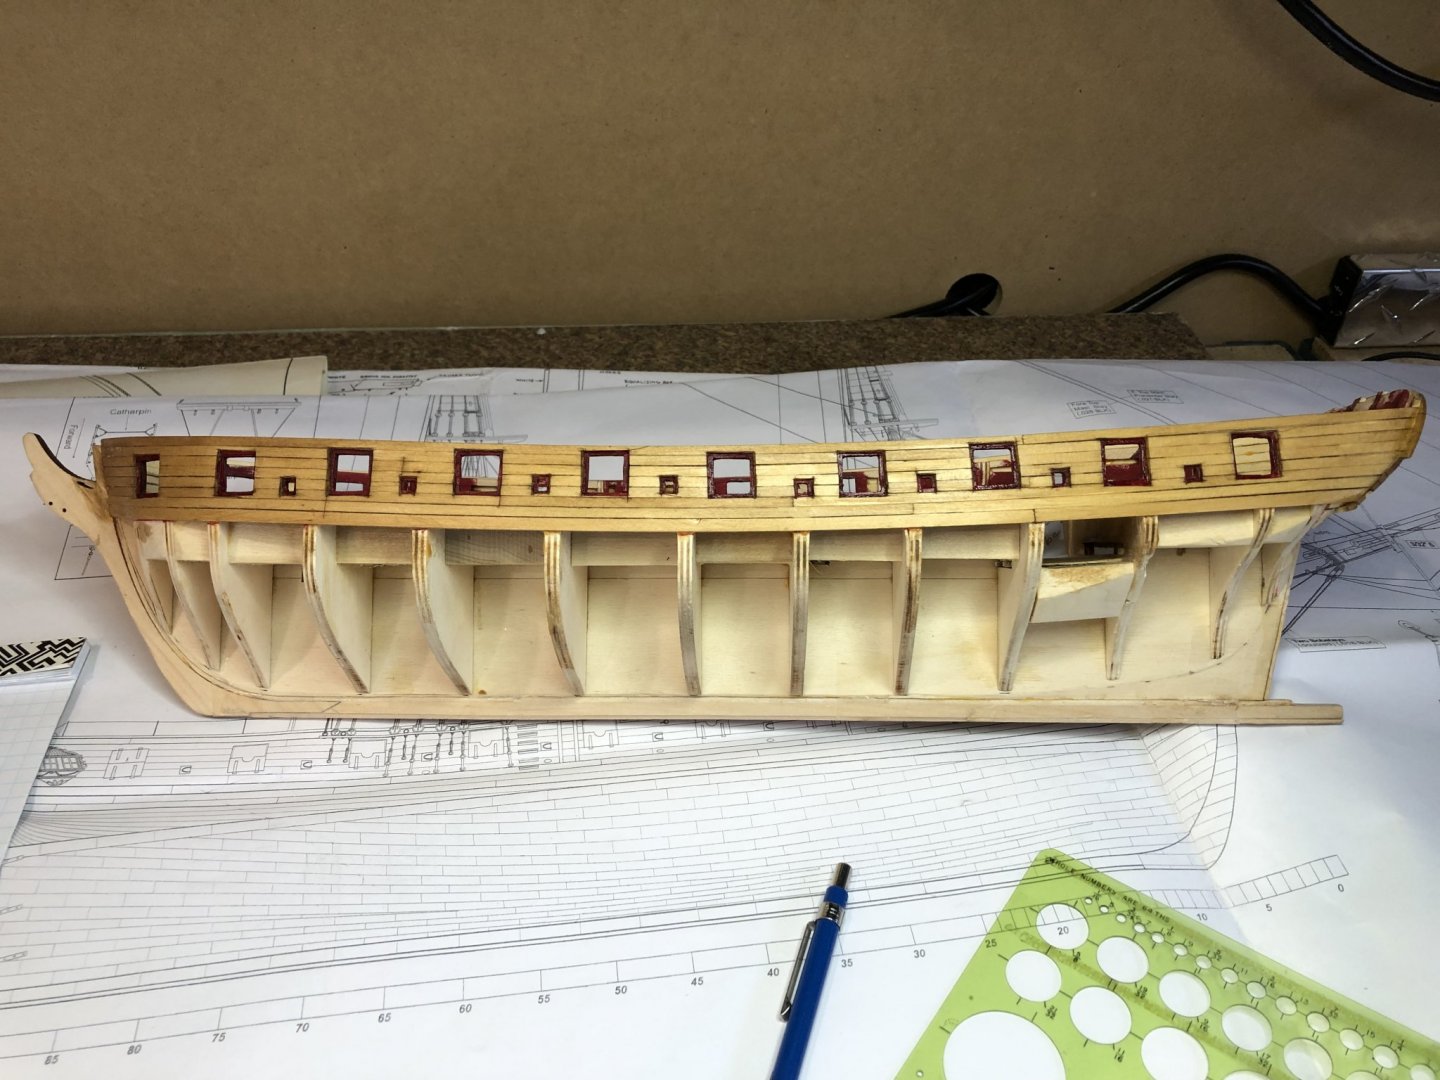
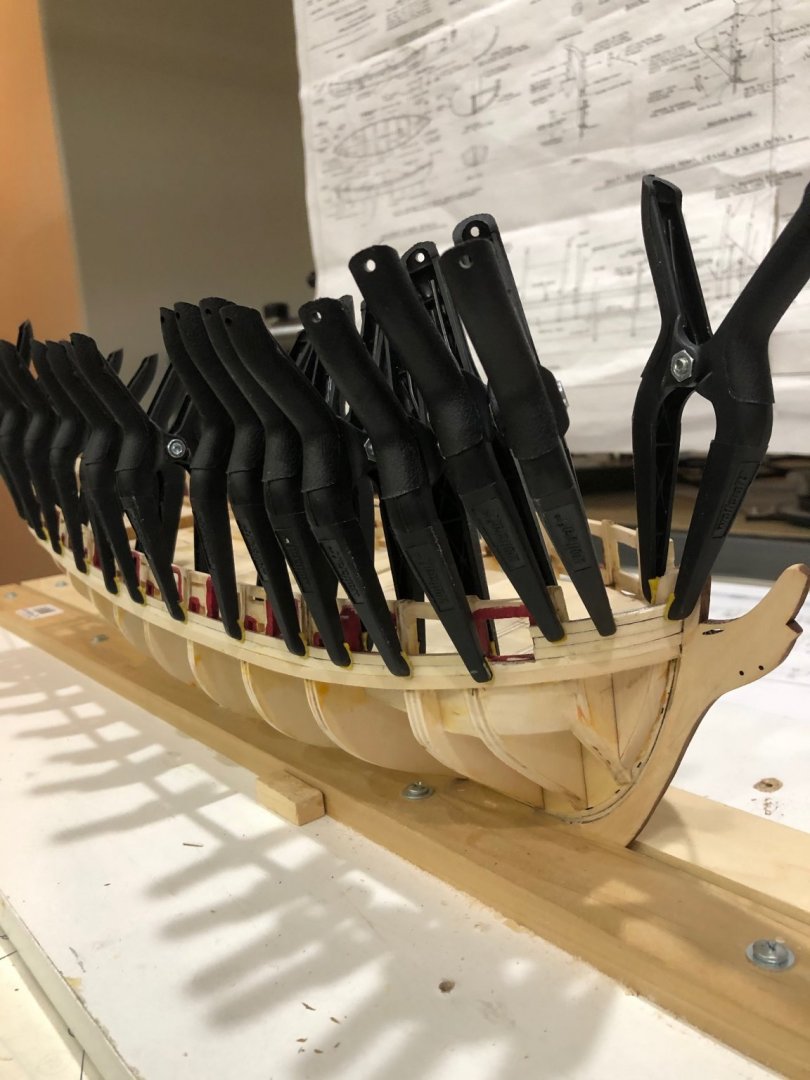
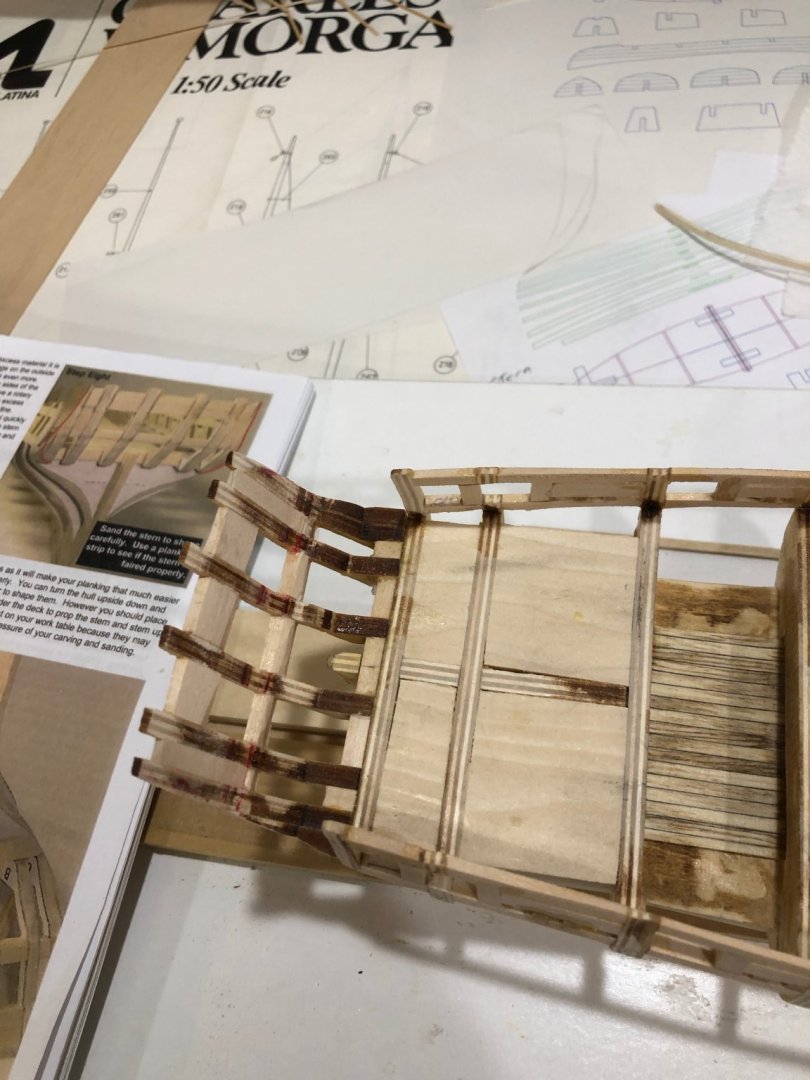
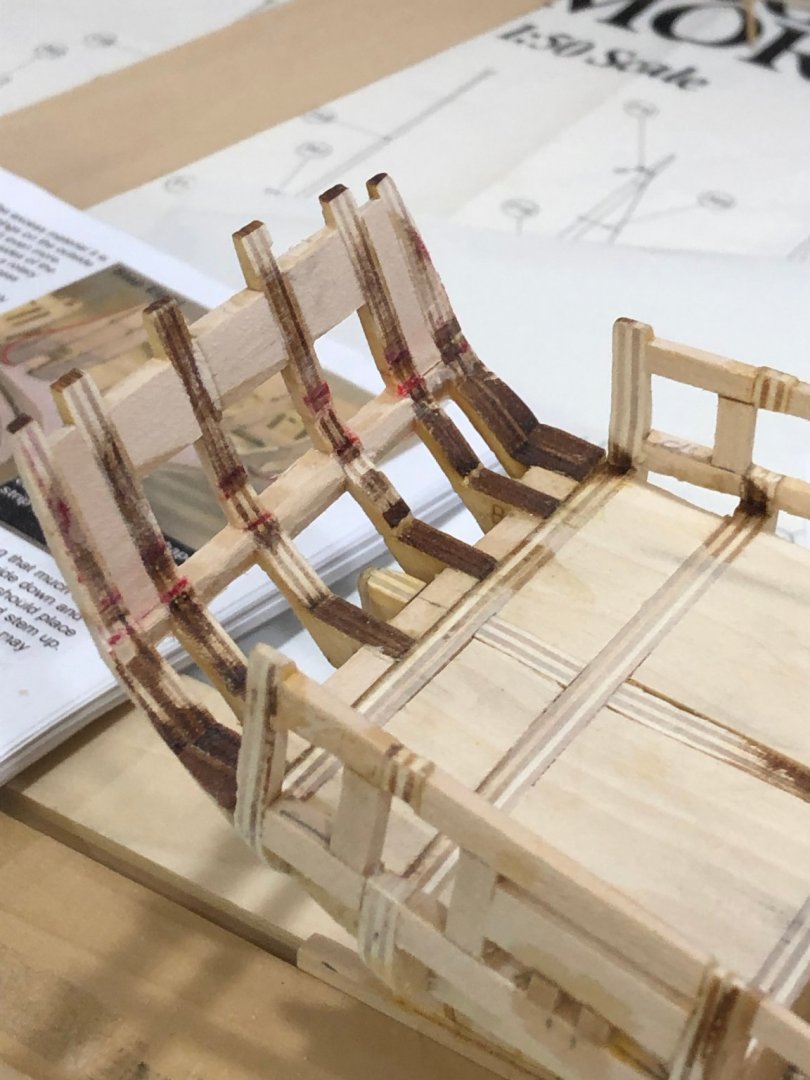
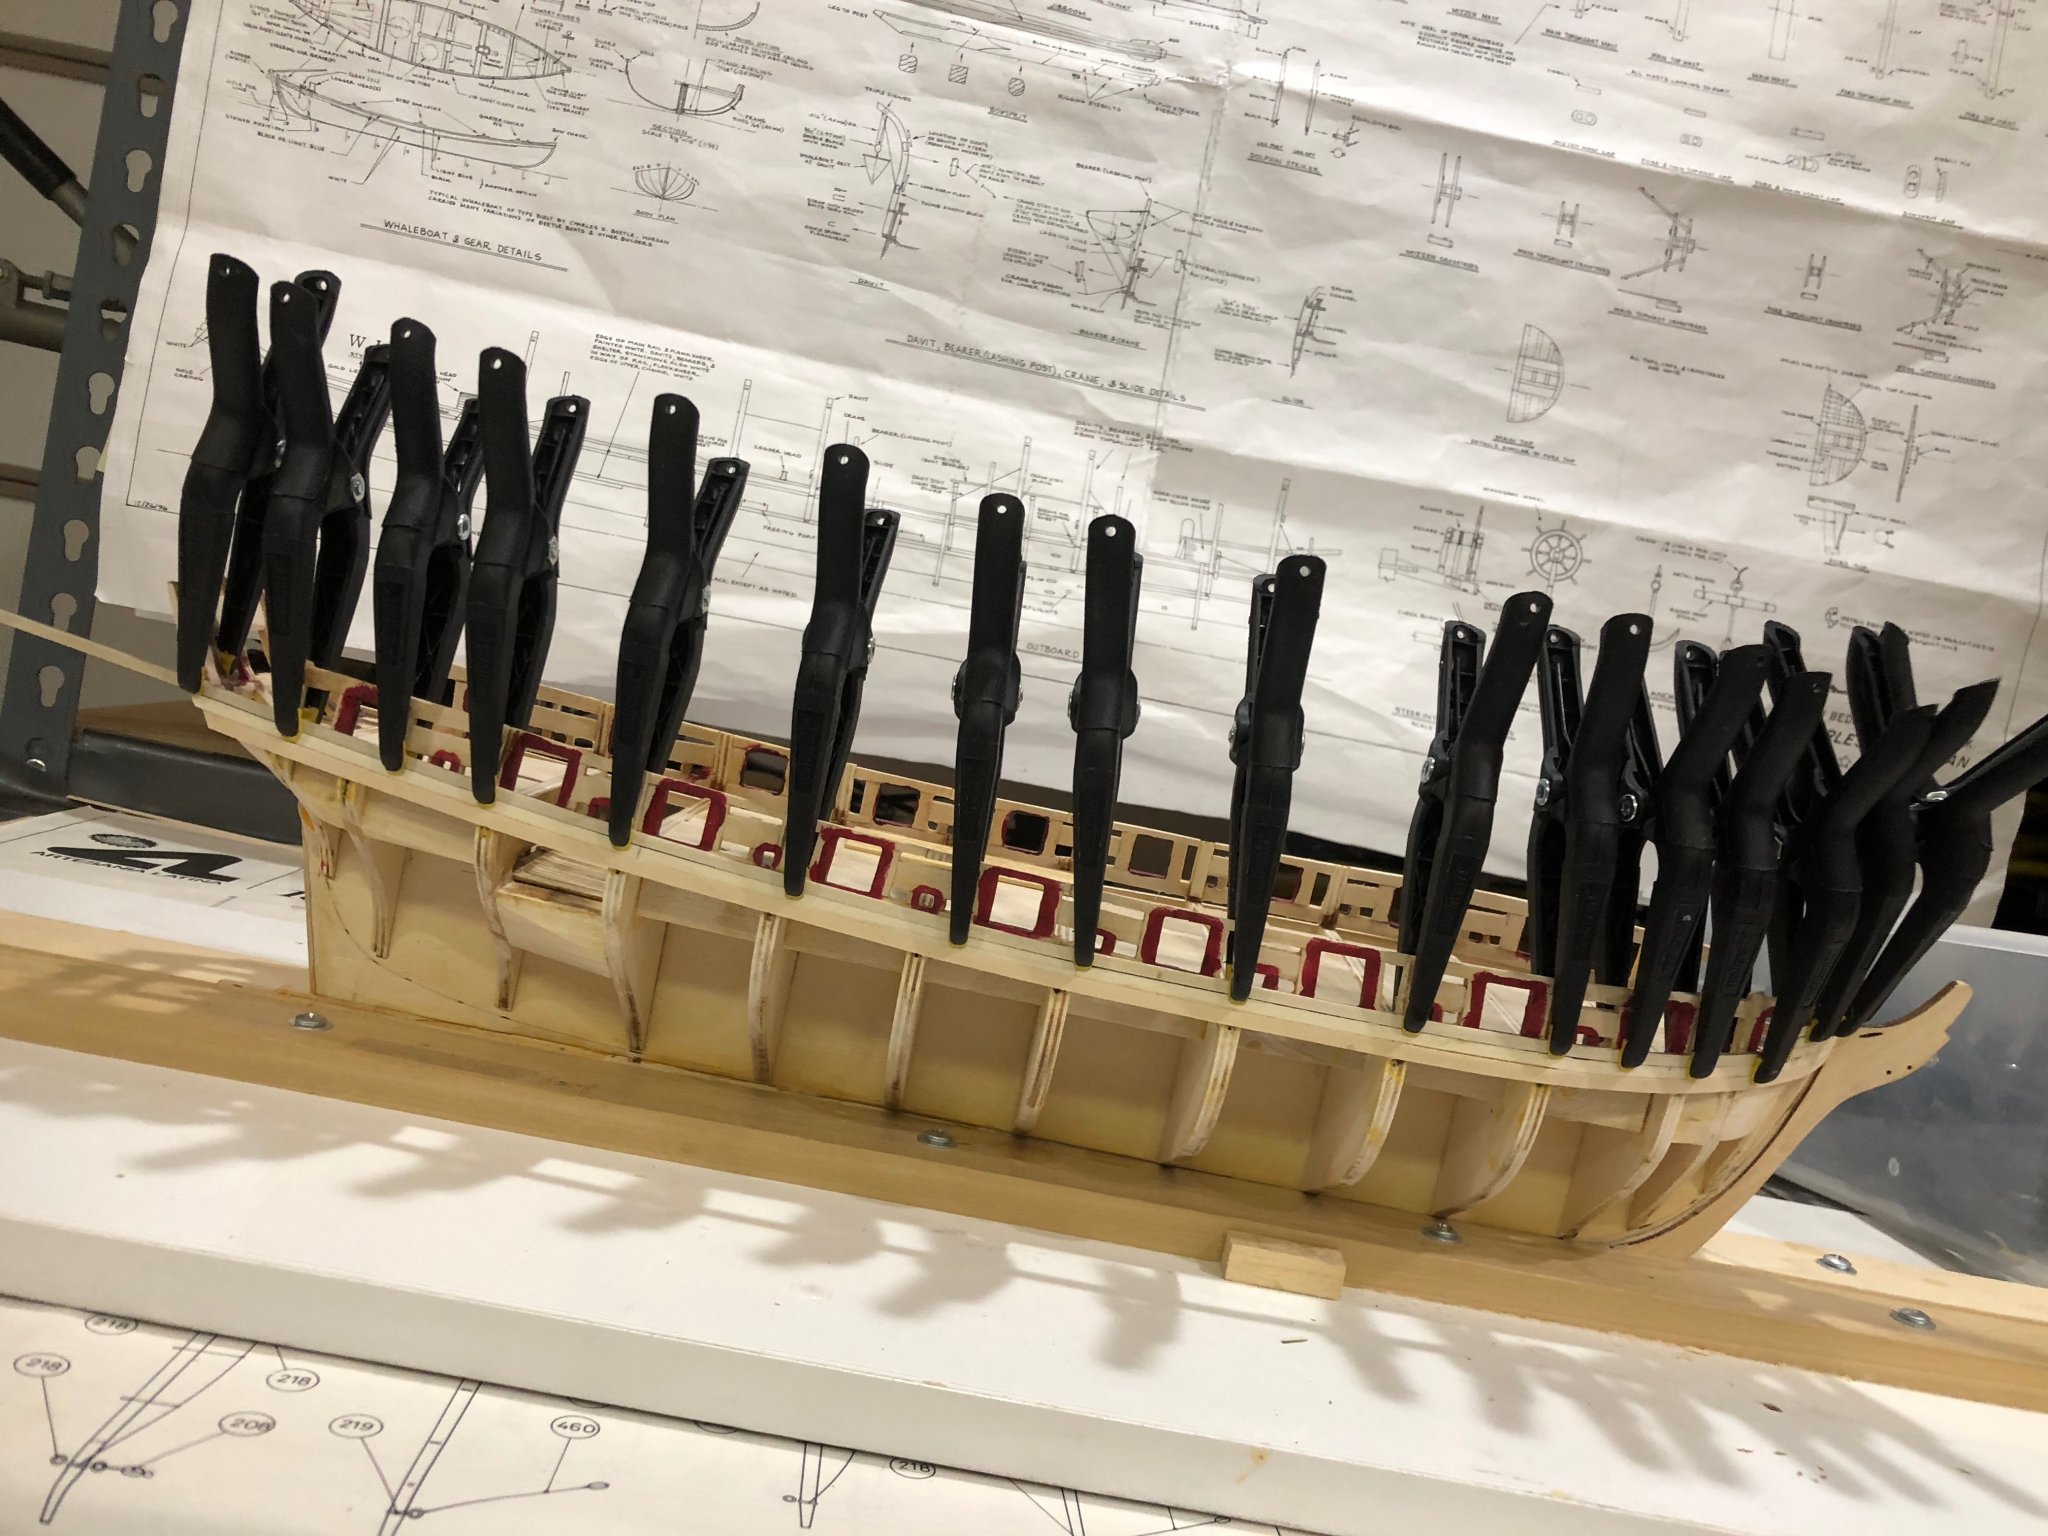
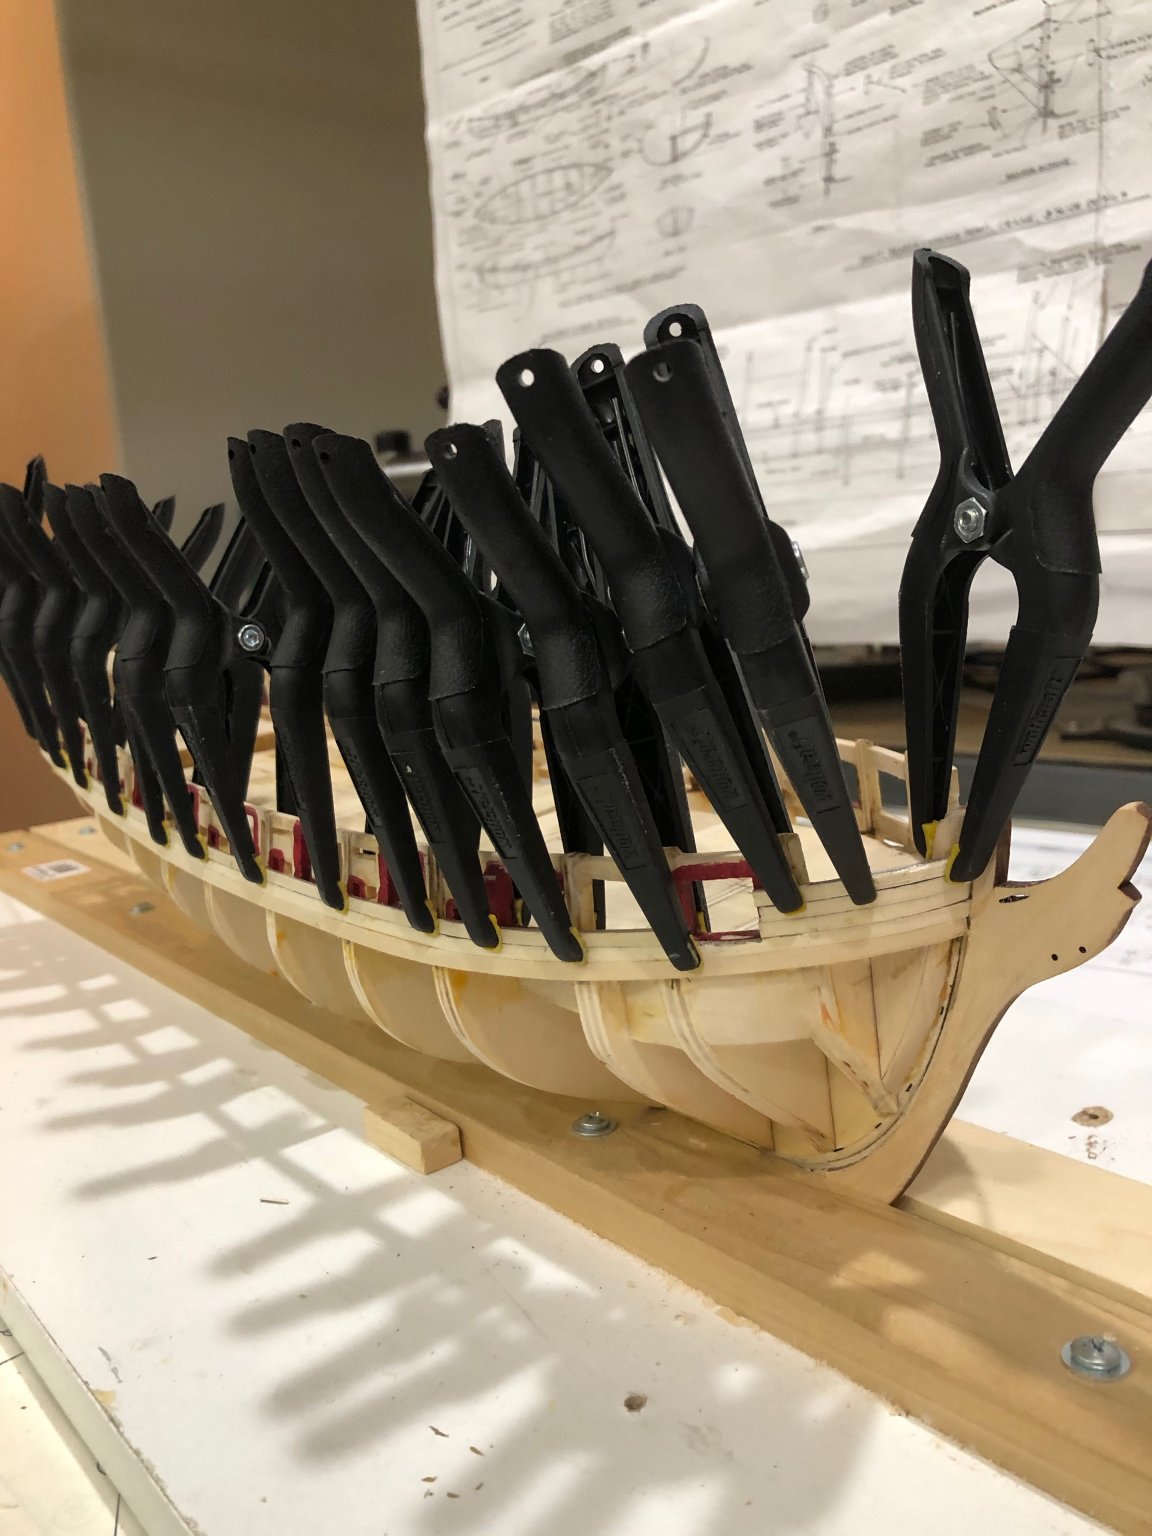
I spent the last week planking and finished today. When half finished I marked off the frames with tape to located where to drill for the simulated plank nailing on the bulwarks. Then I finished the planking's and sanded to a smooth even surface. Covered planking with putty and sanded and sanded more putty more sanding more sanding what a mess. Spent an afternoon cleaning the shop. This afternoon I spent working of my idea of how to make working sheaves. Was able to prove that I can make them as I envisioned so now I'll start making them in boxwood (easier to machine).

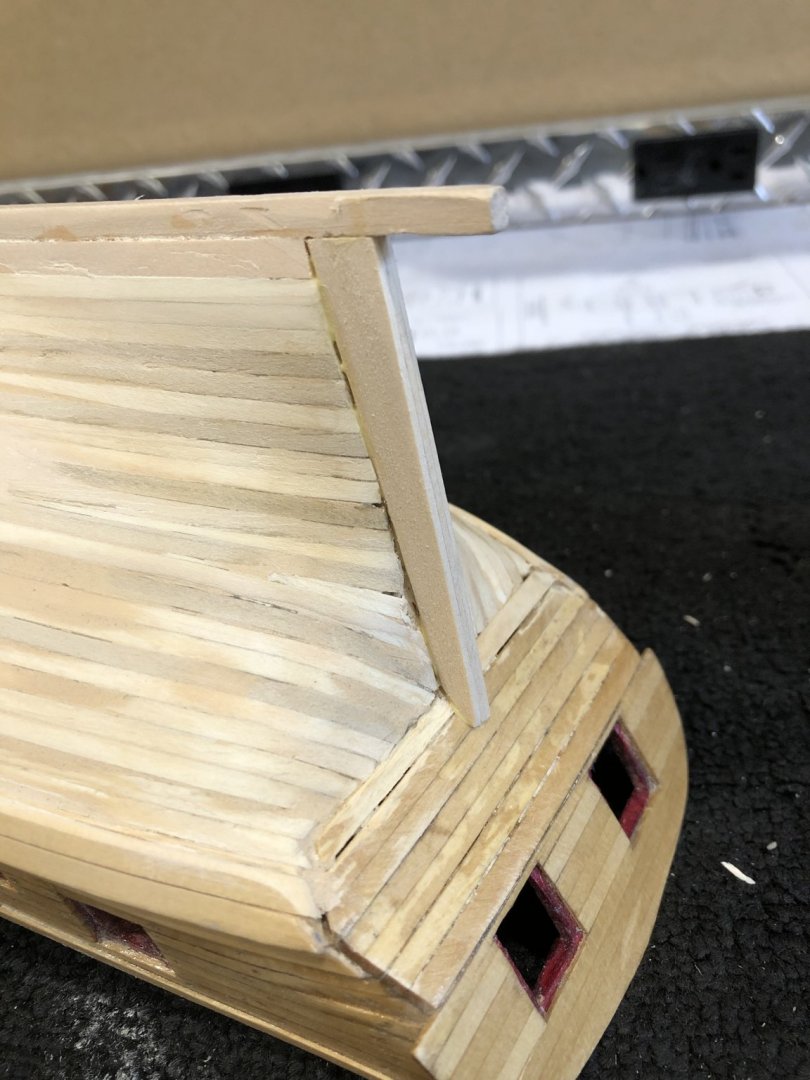
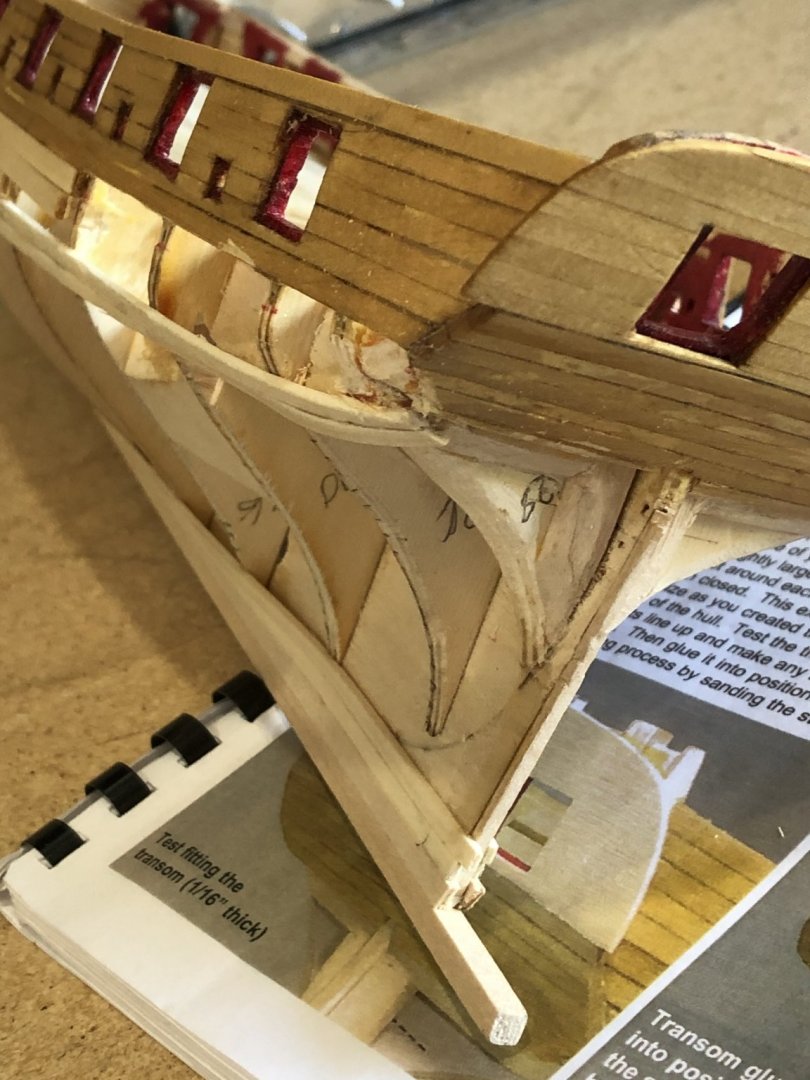
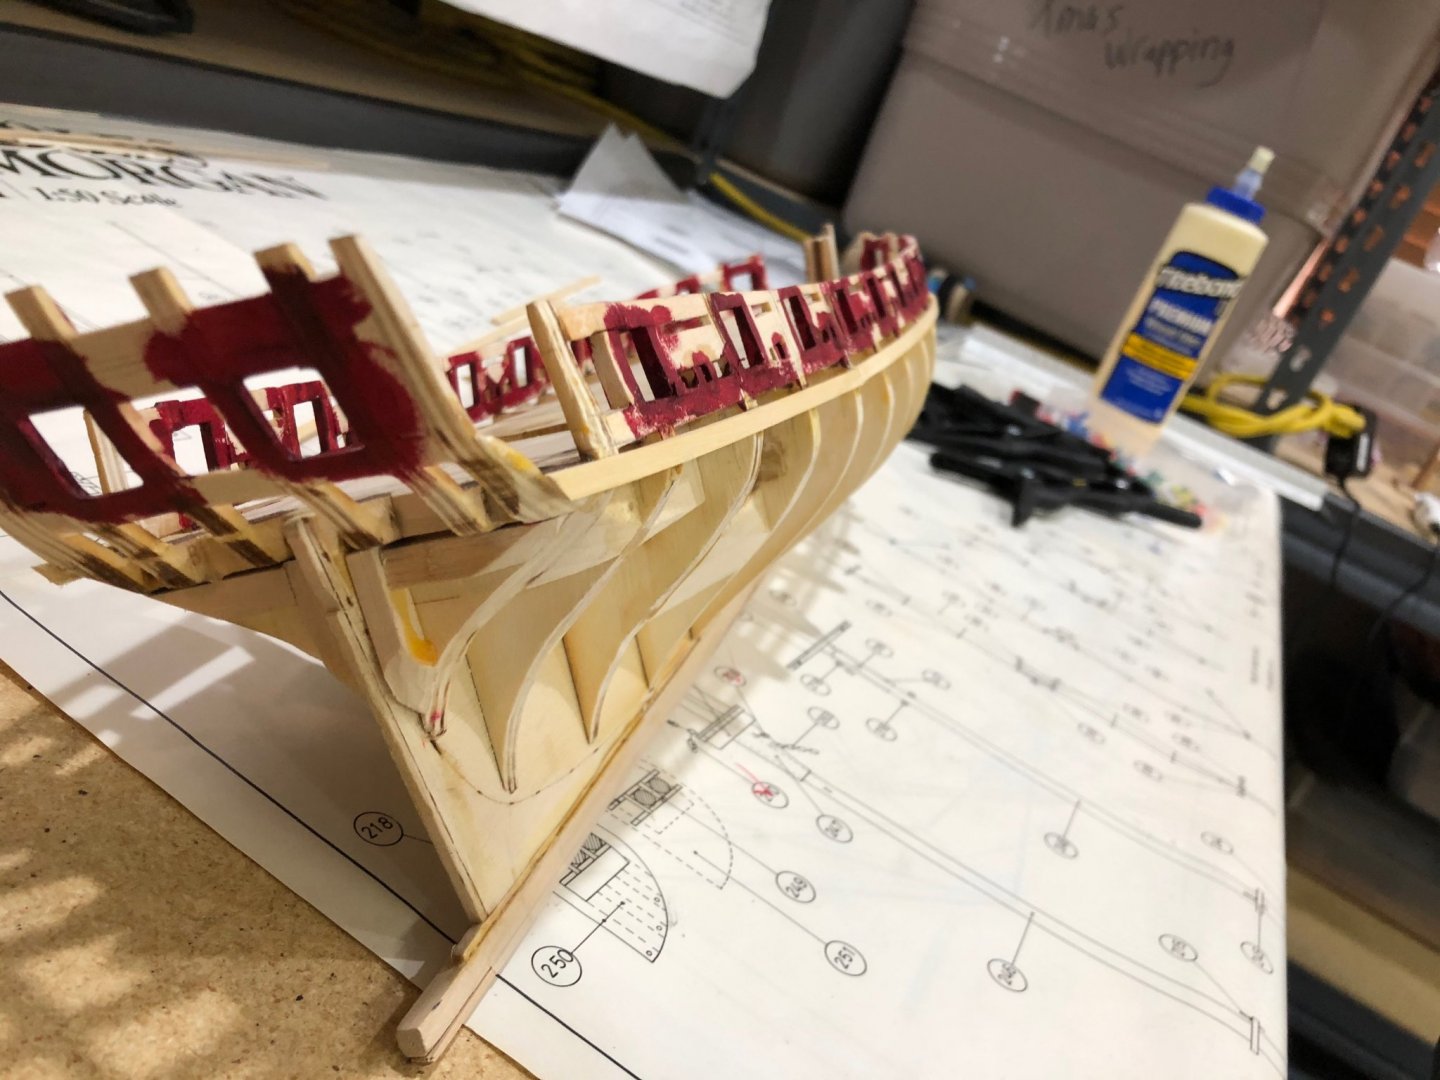
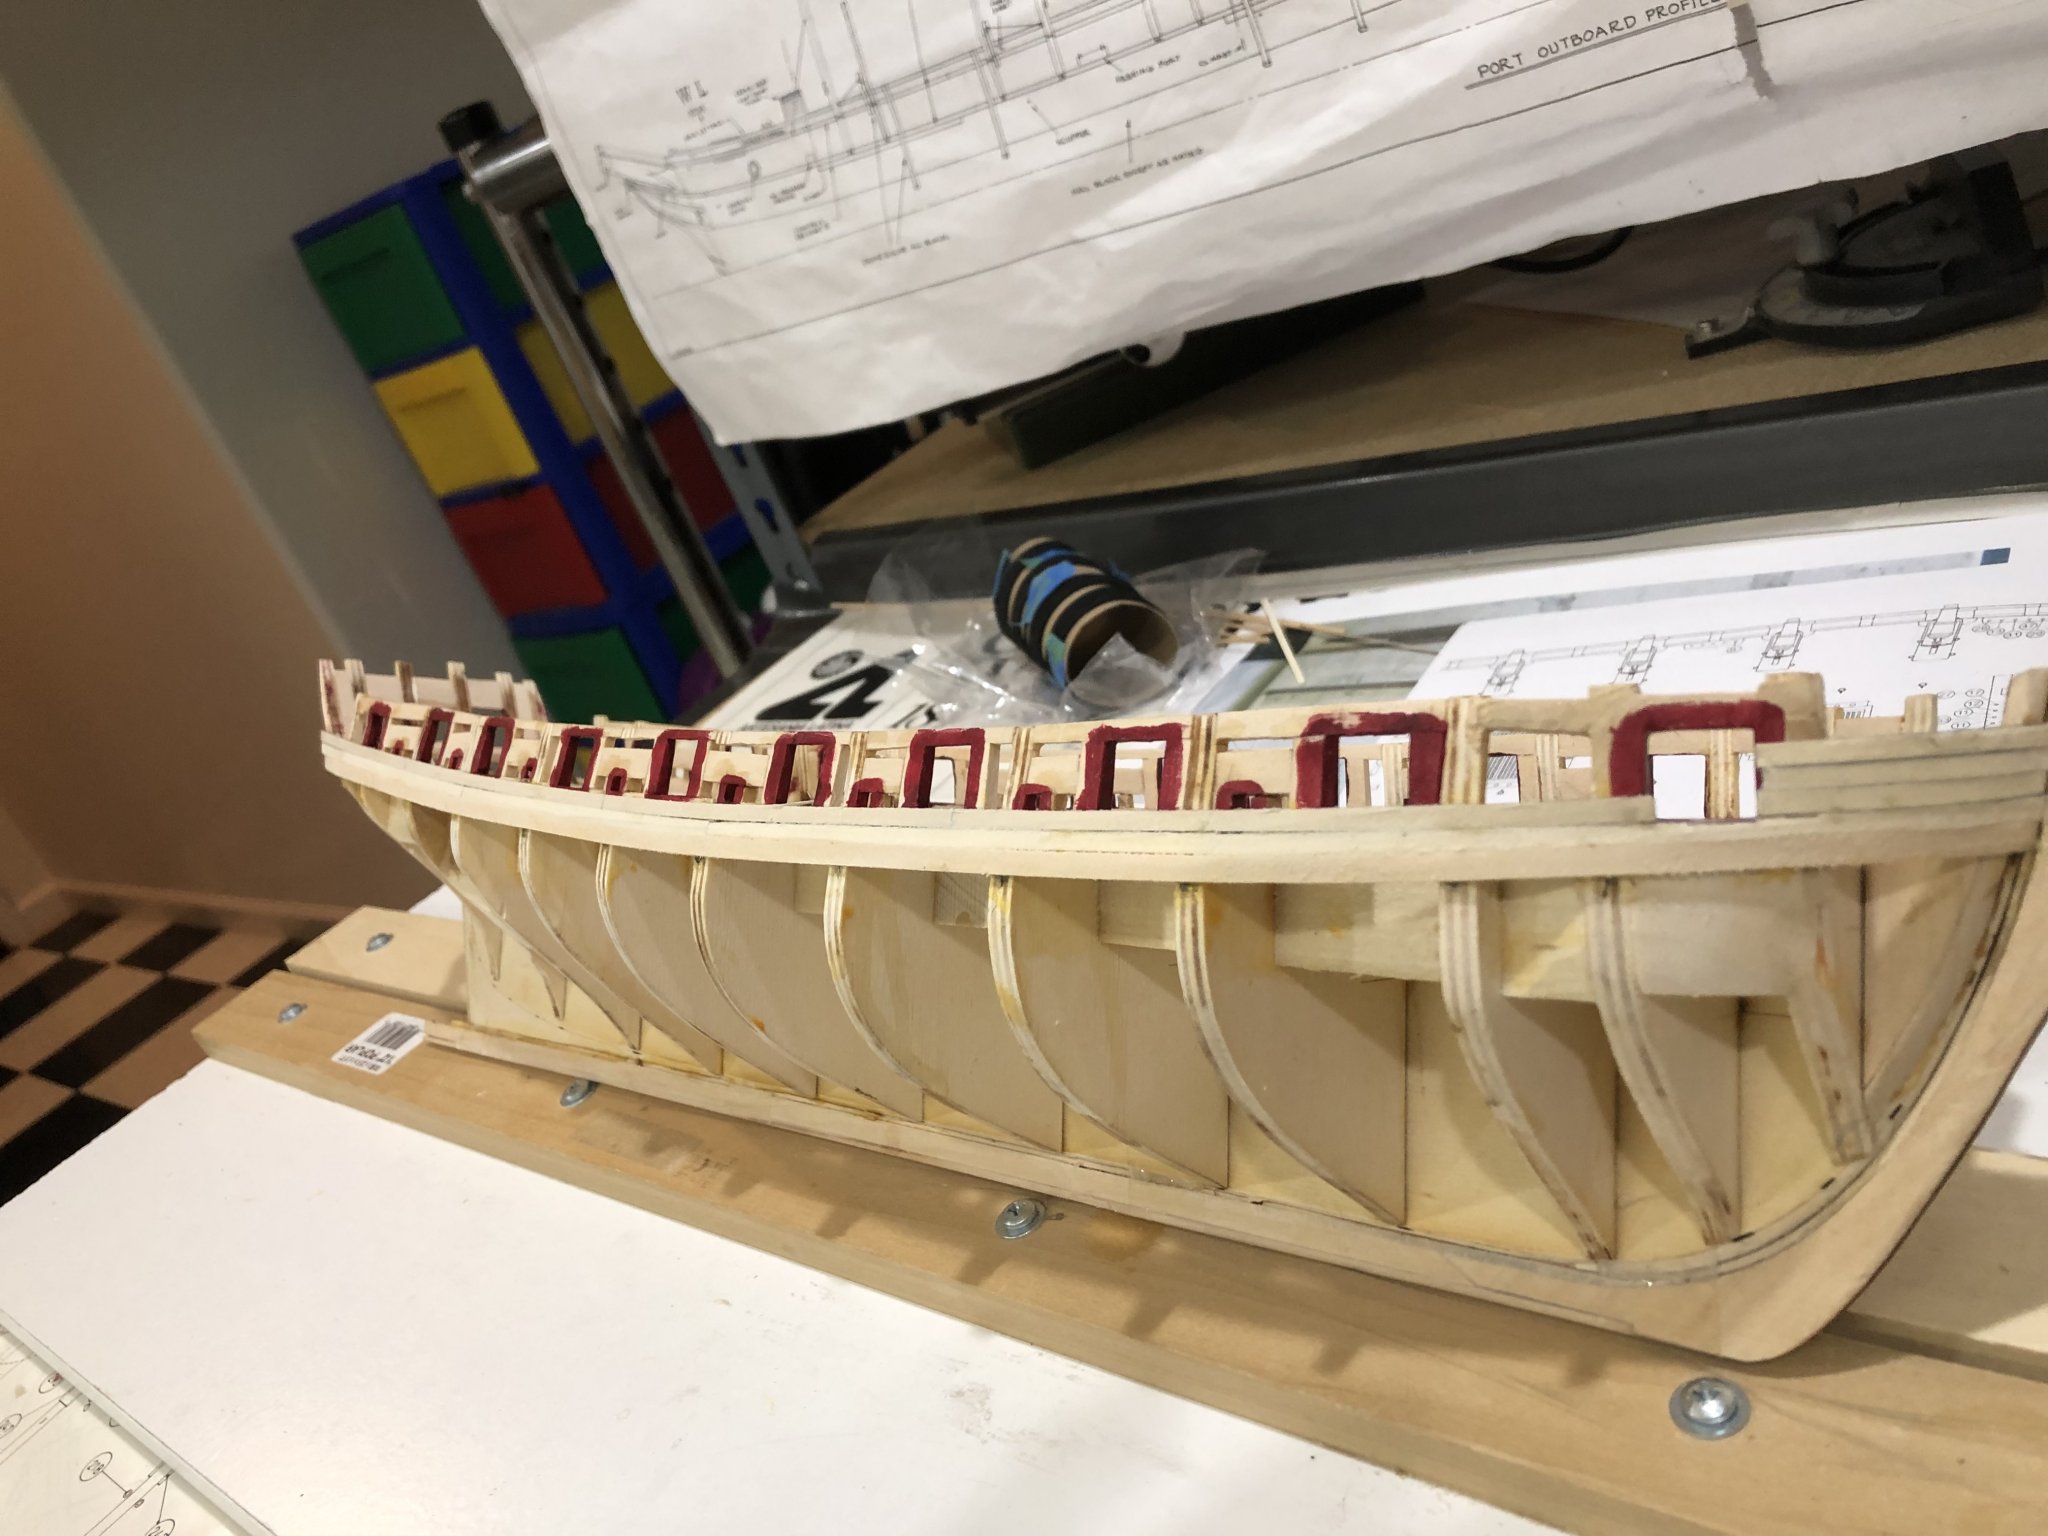
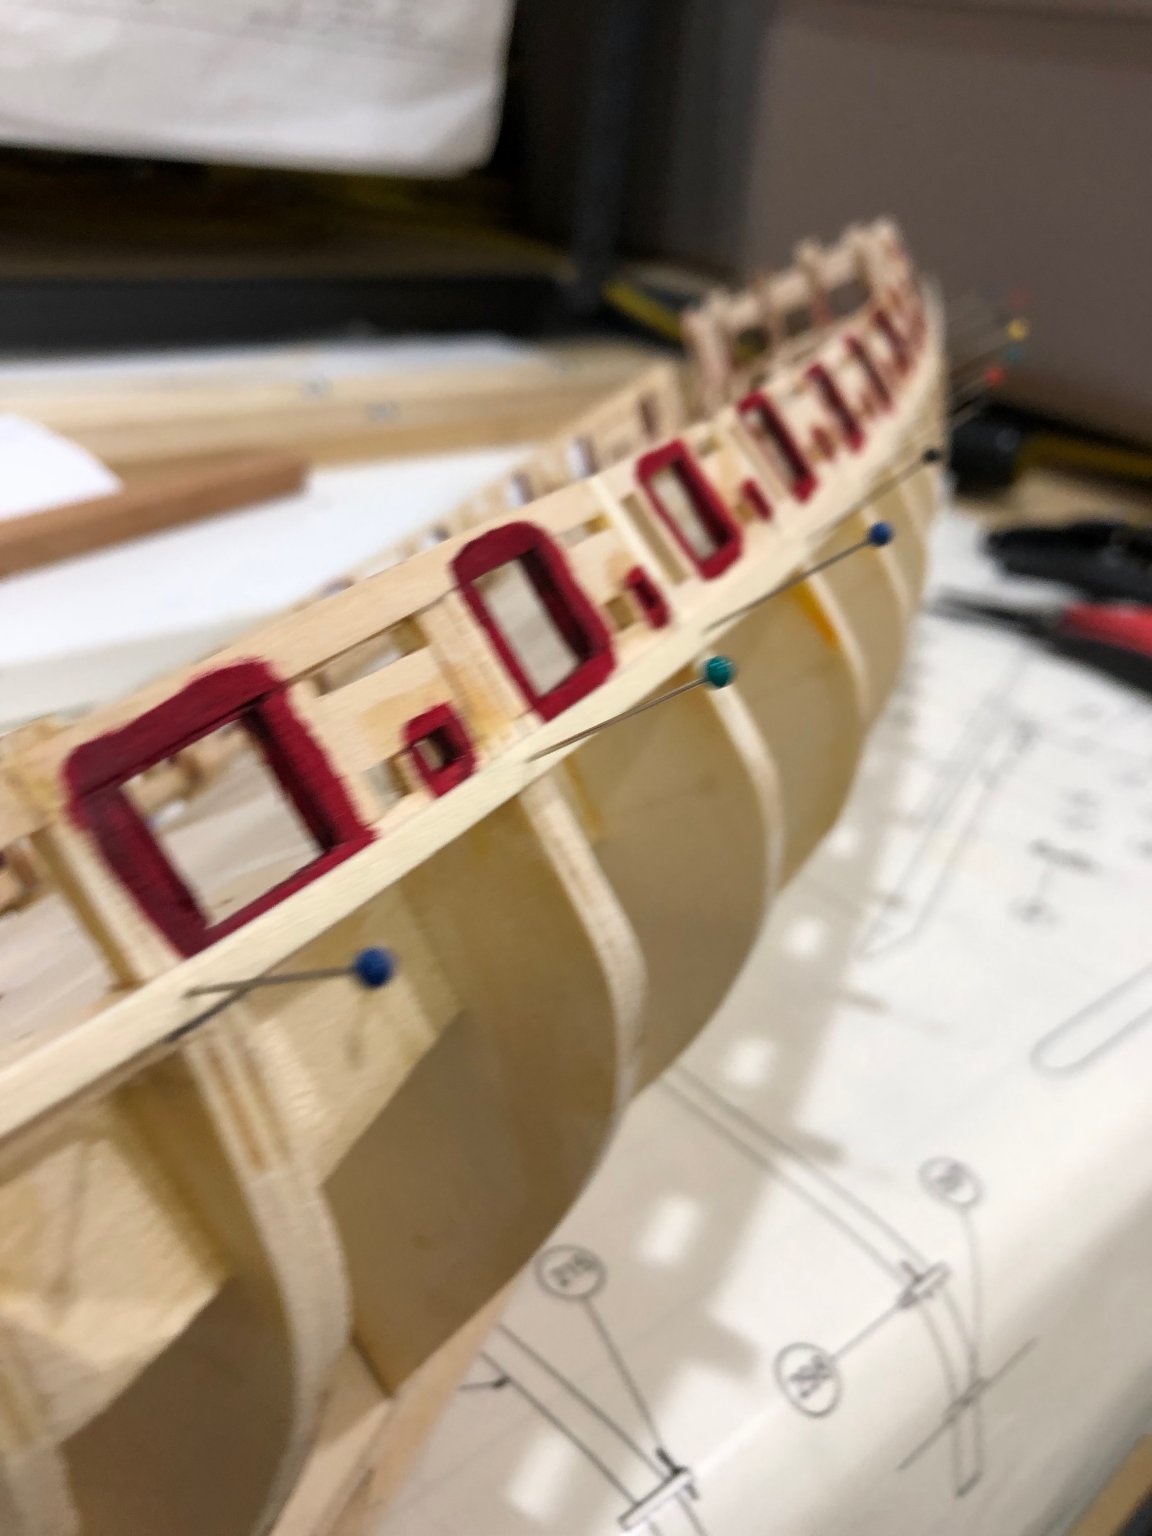
In this photo you can see the work I did to get the counter into proper shape. Doesn't look pretty but it'll be covered with black paint and copper plates. You can see the tick marks on the frames which tell me how much to shape and if I'm staying on the marks.

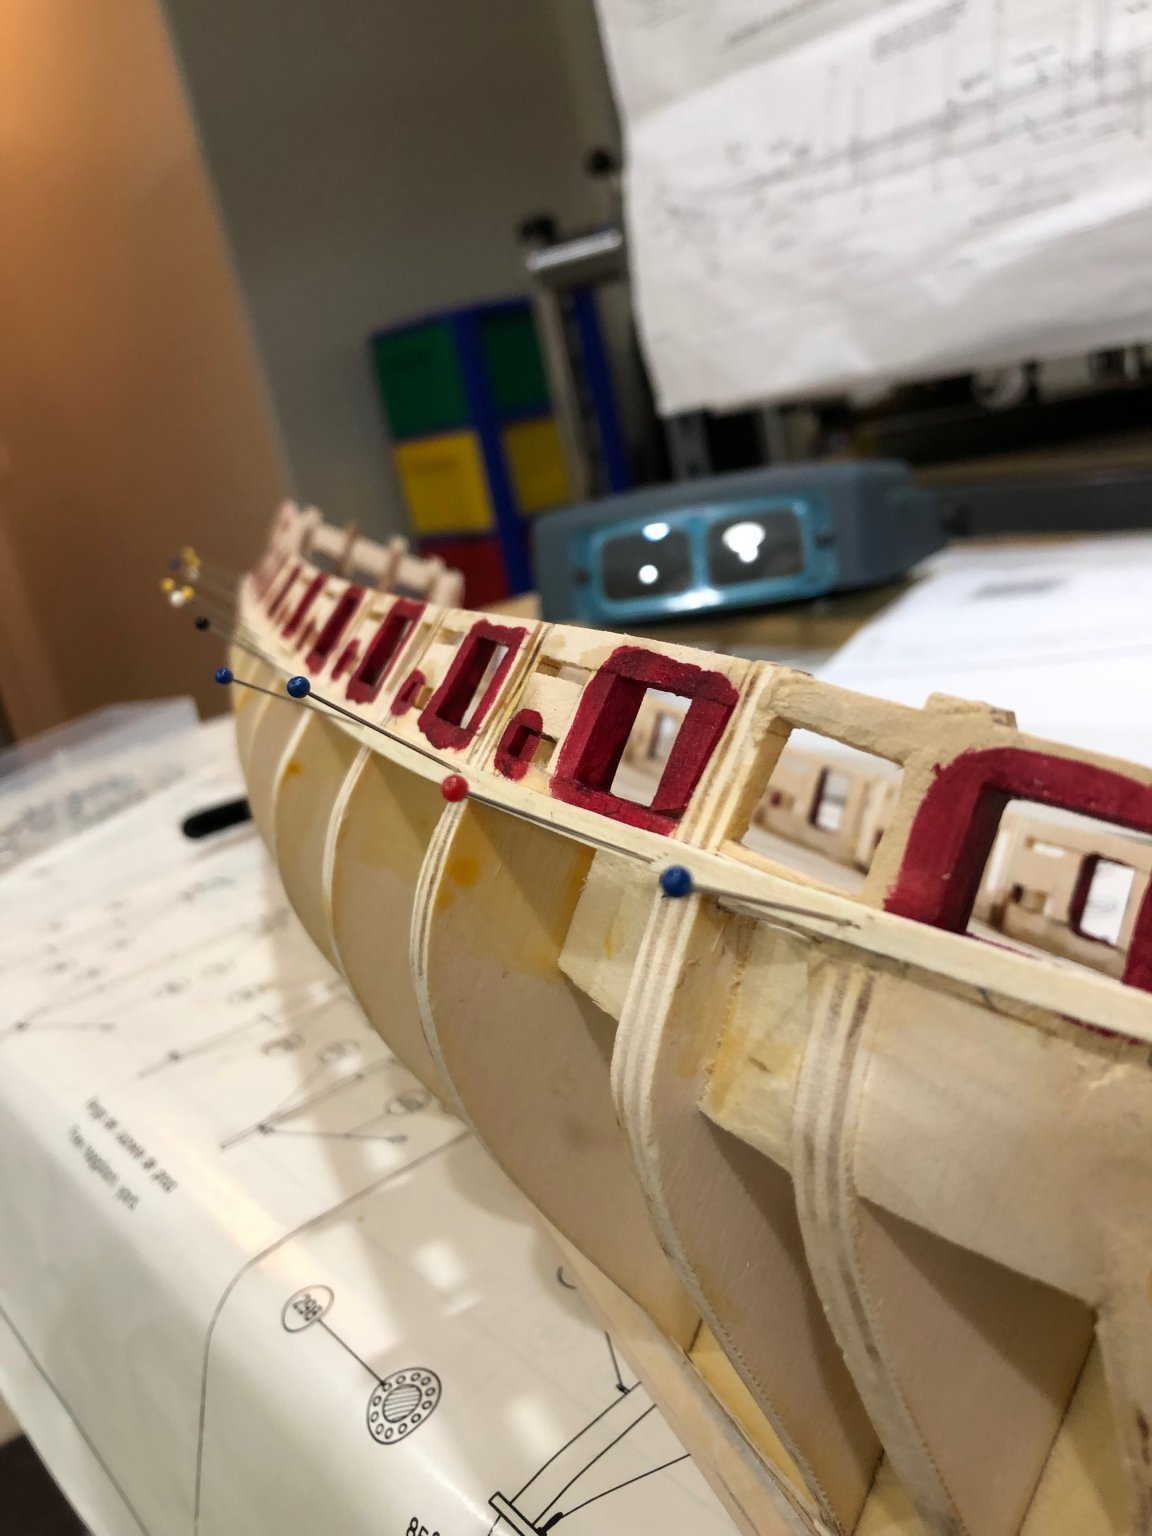
Plank symmetry is looking very good. I guess I'll press ahead.
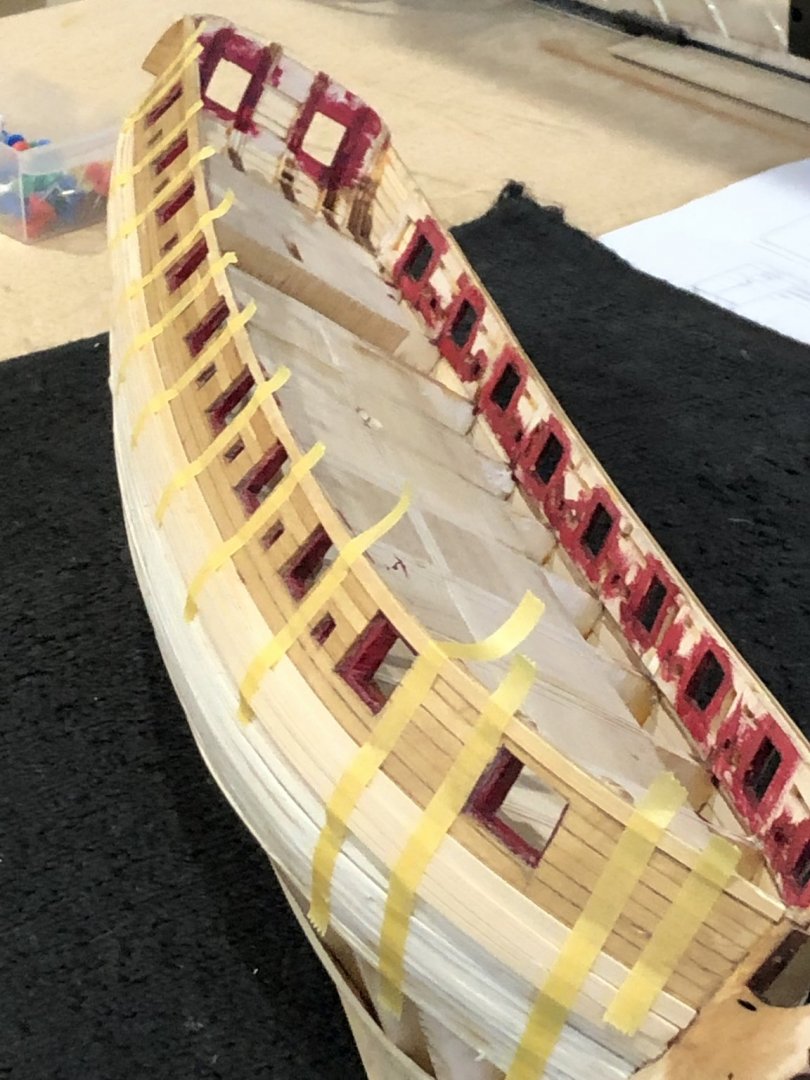
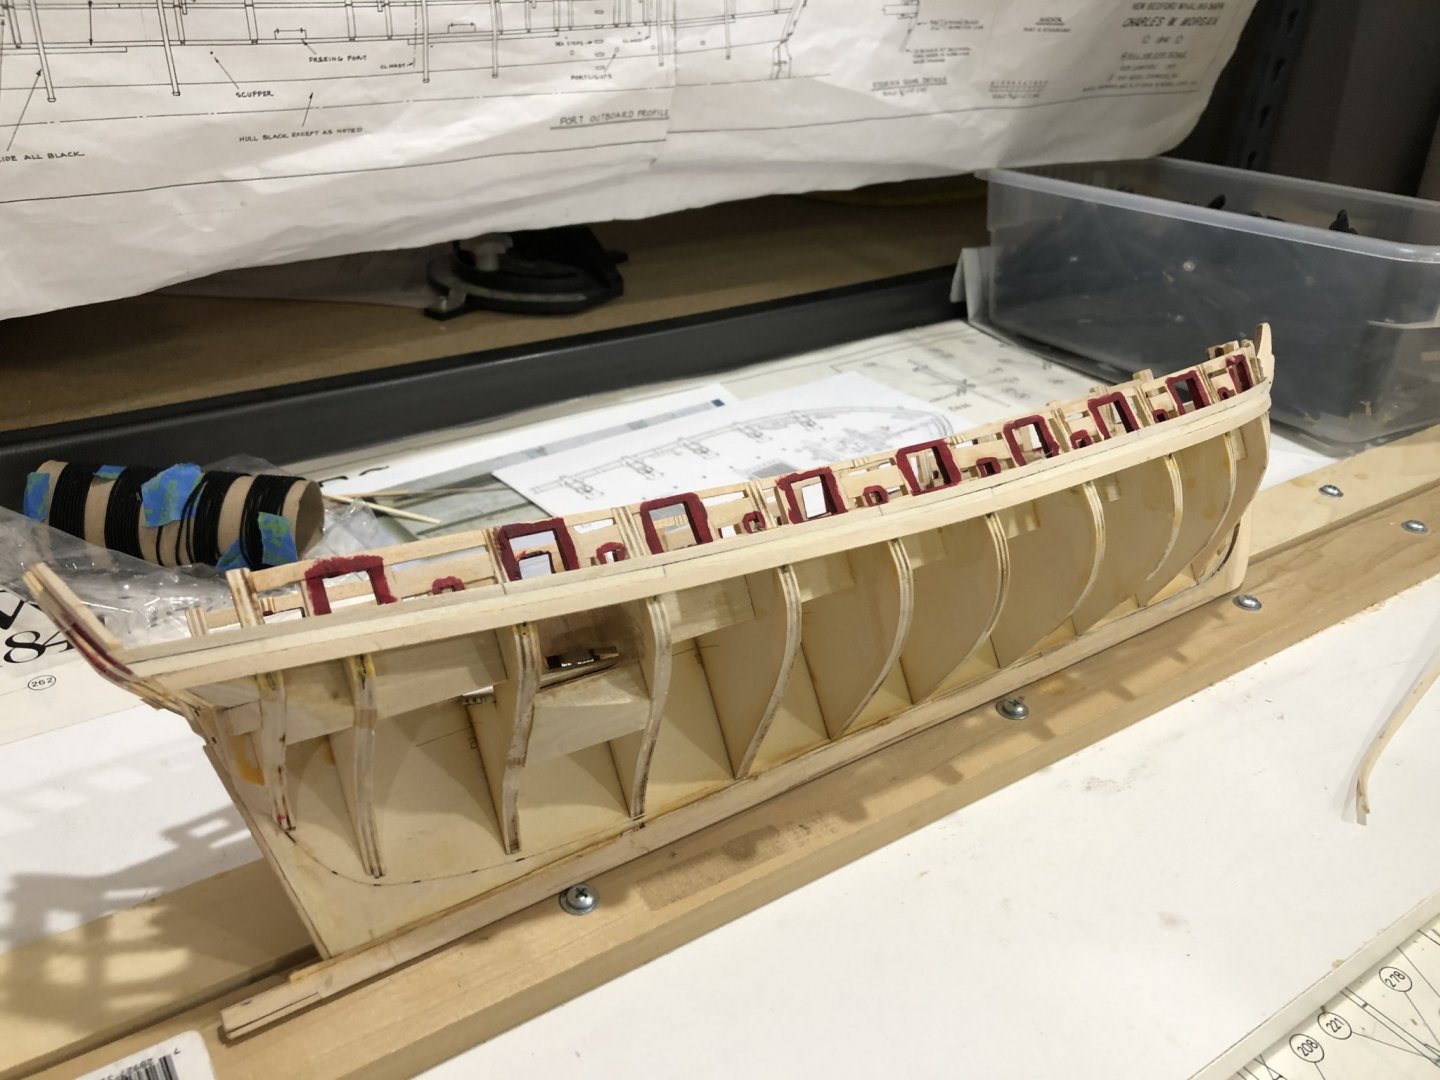
Here the tape shows where the frames are behind the bulwark and this allowed me to make the pattern.

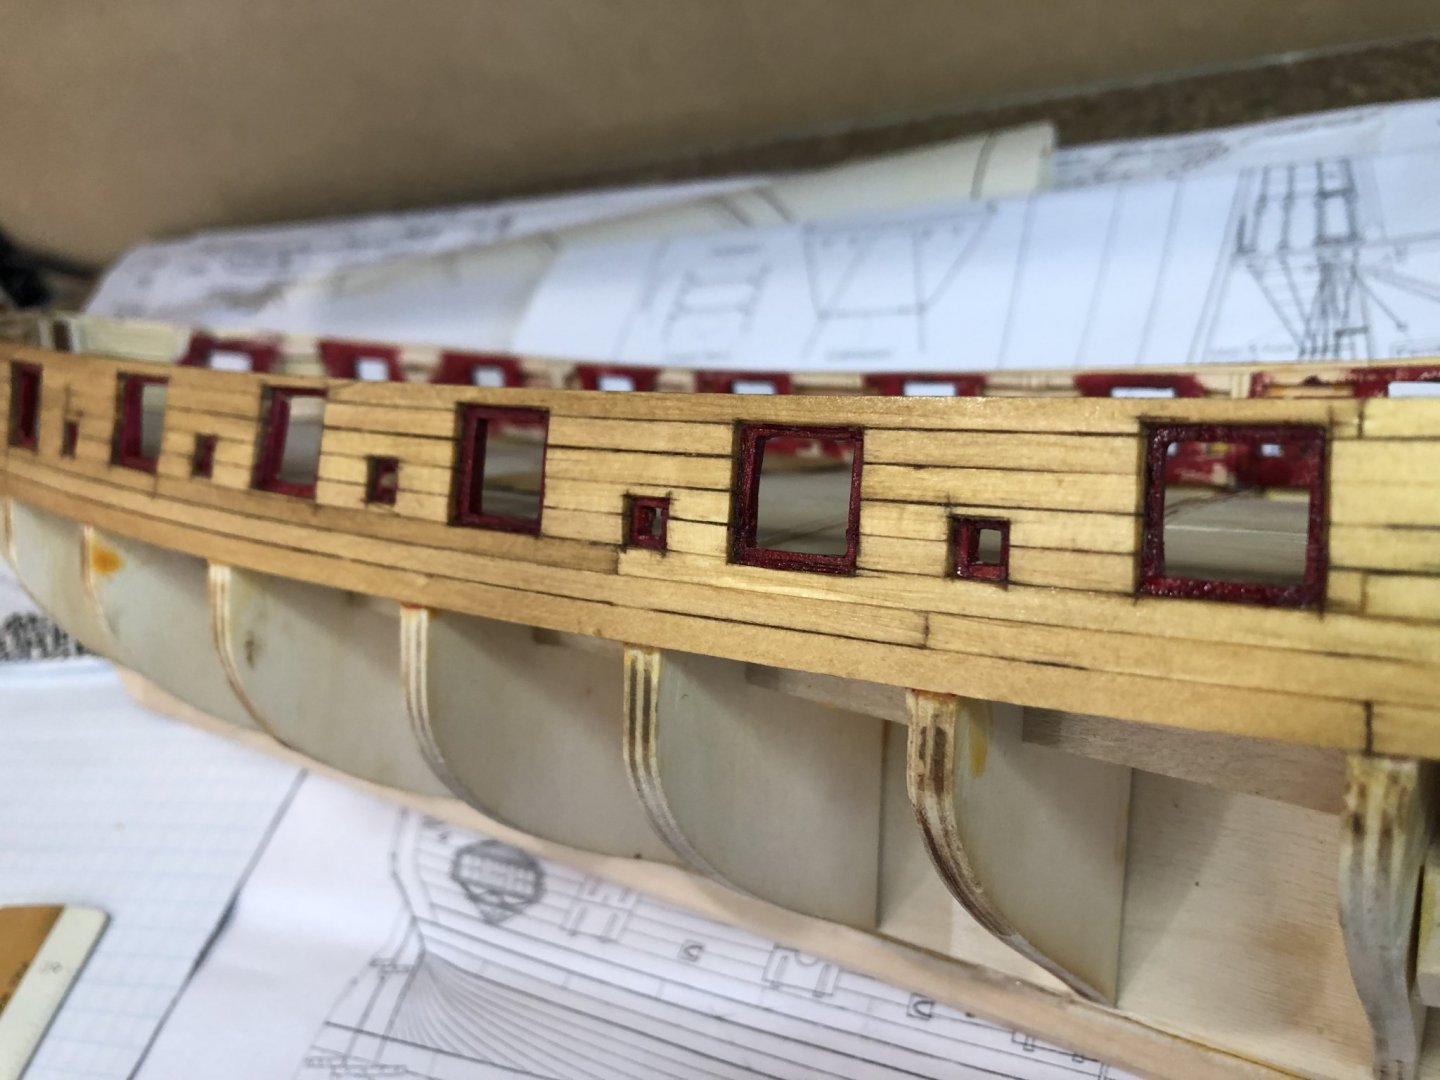
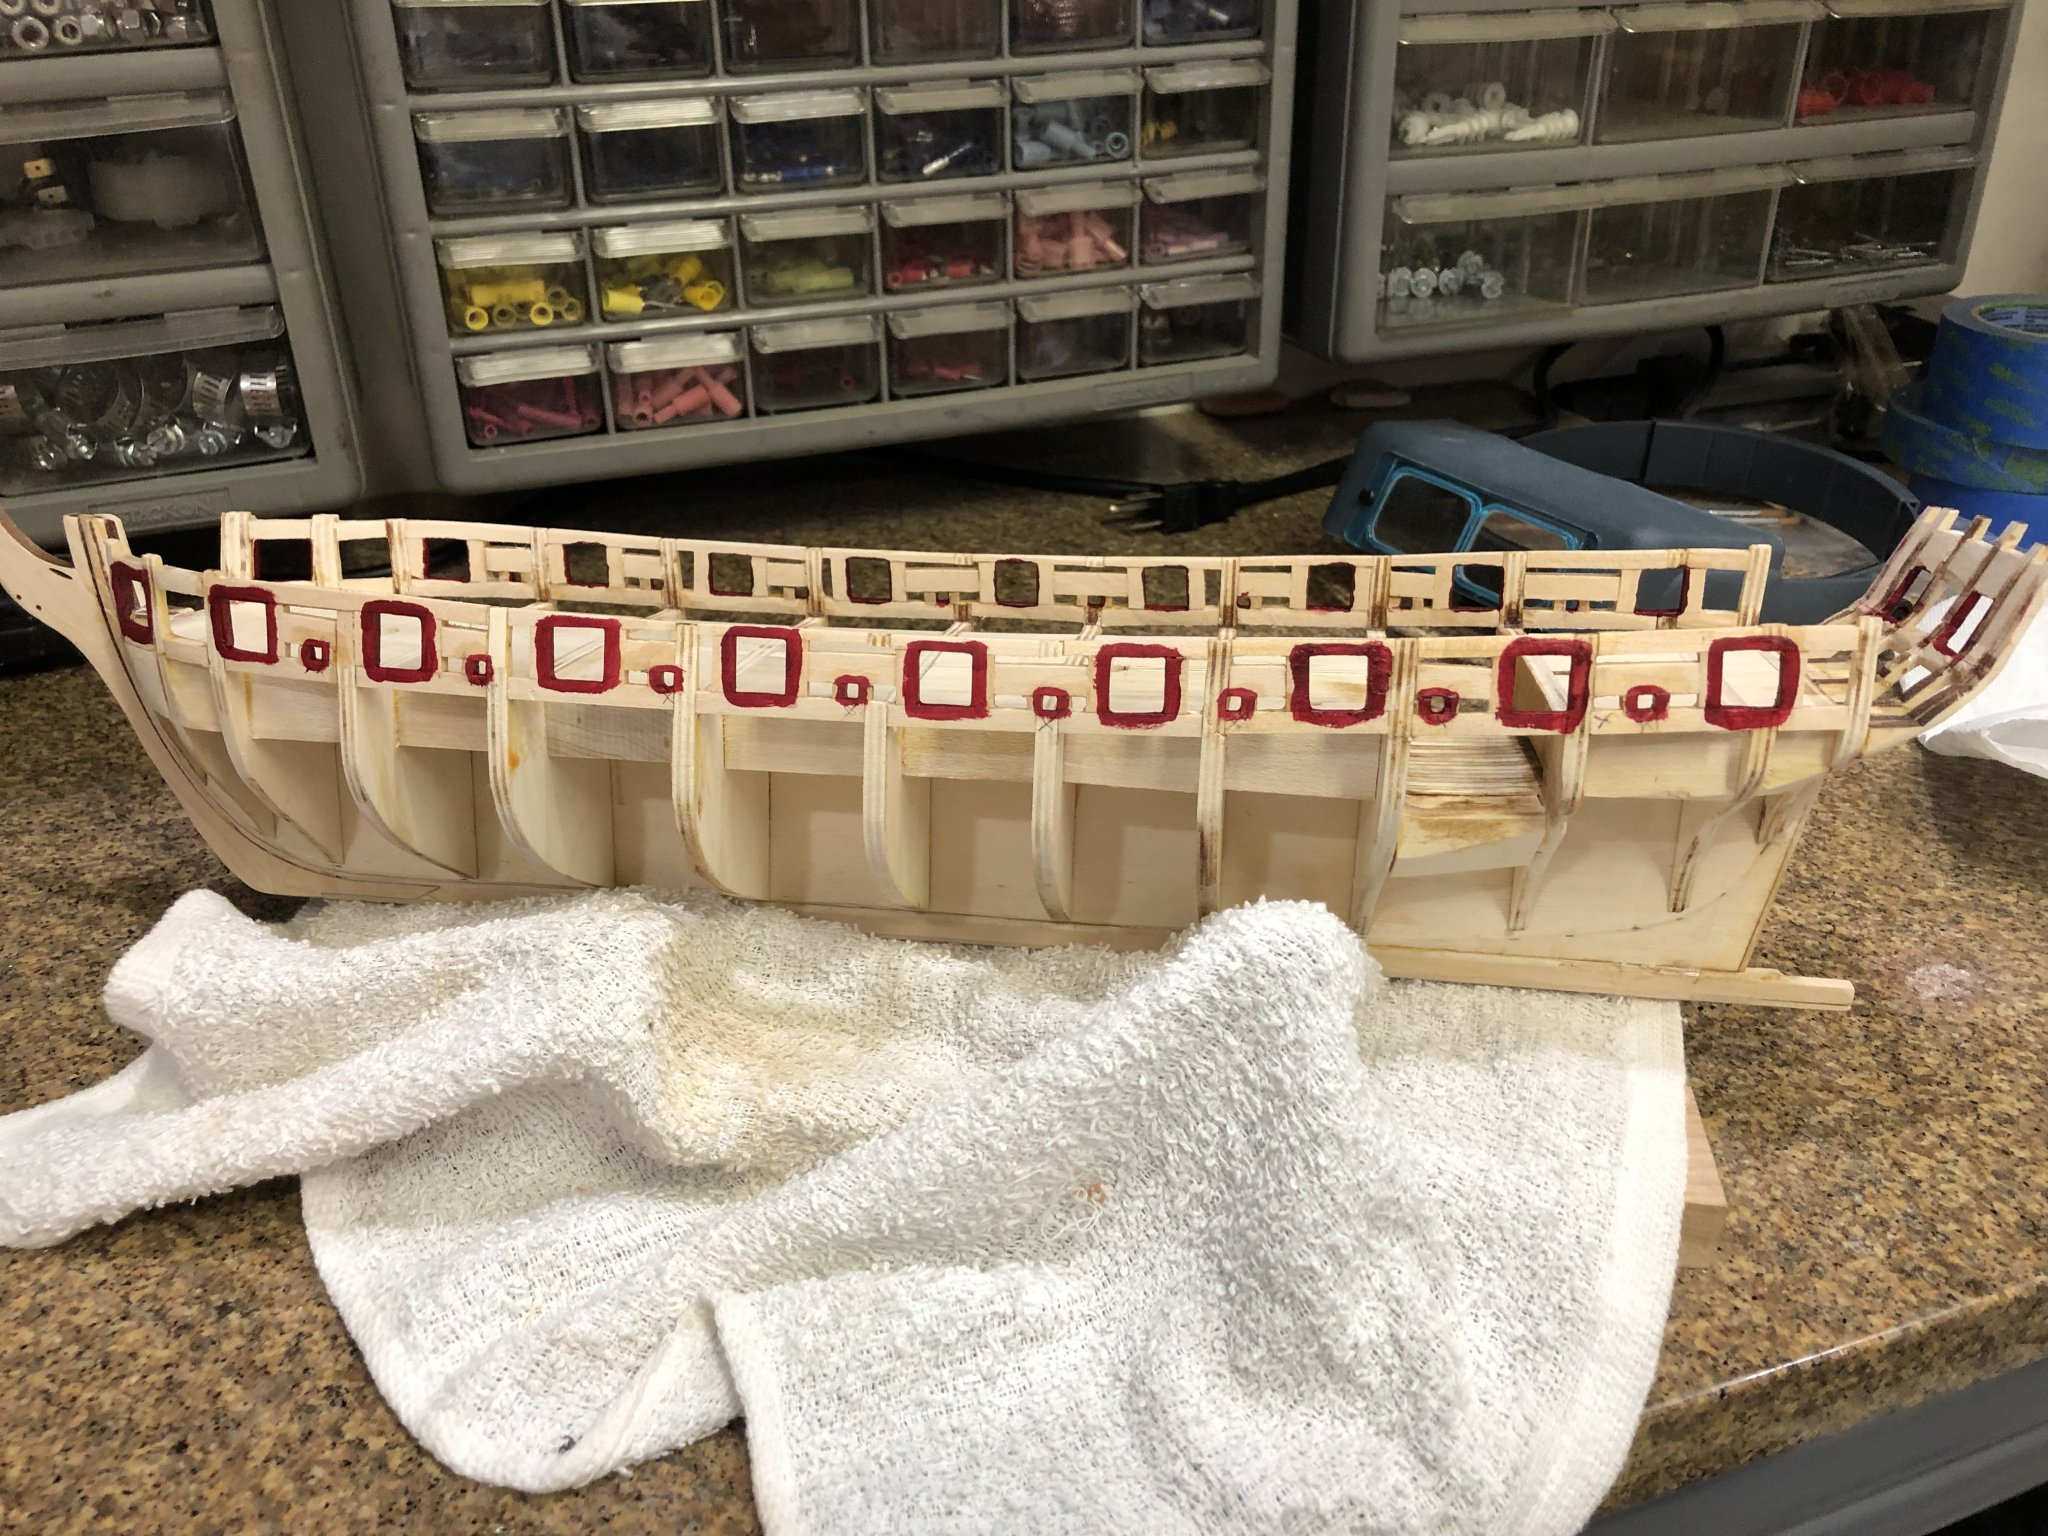
Planking finished and the bulwark nailing clearly visible. I had stained the alaskan yellow cedar with golden oak and applied a coat of satin wipe on poly.
View of finished stern planking before sanding and putty. I had also attached the stern most to see how much filler i would need.

I sanded the stem so the mermaid fits as she should. I'm not a carver but I have to do something about this casting its quality is right in order with basswood. Sorry another gripe. I'll try to do better.
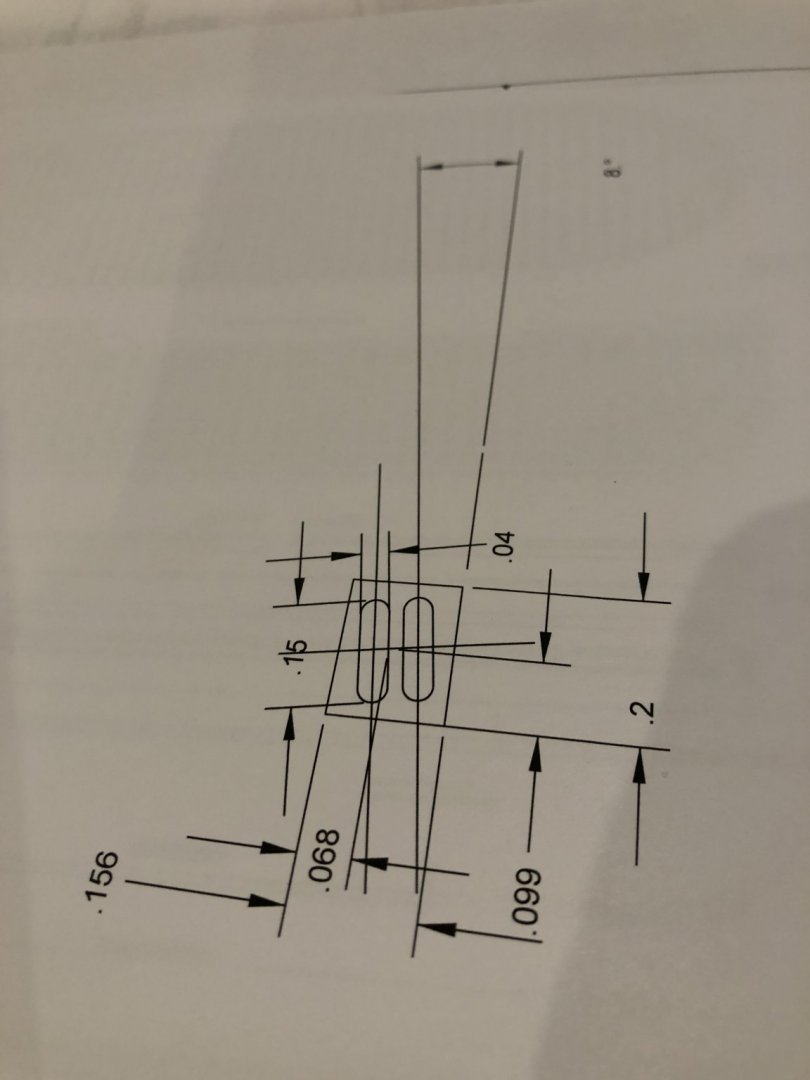
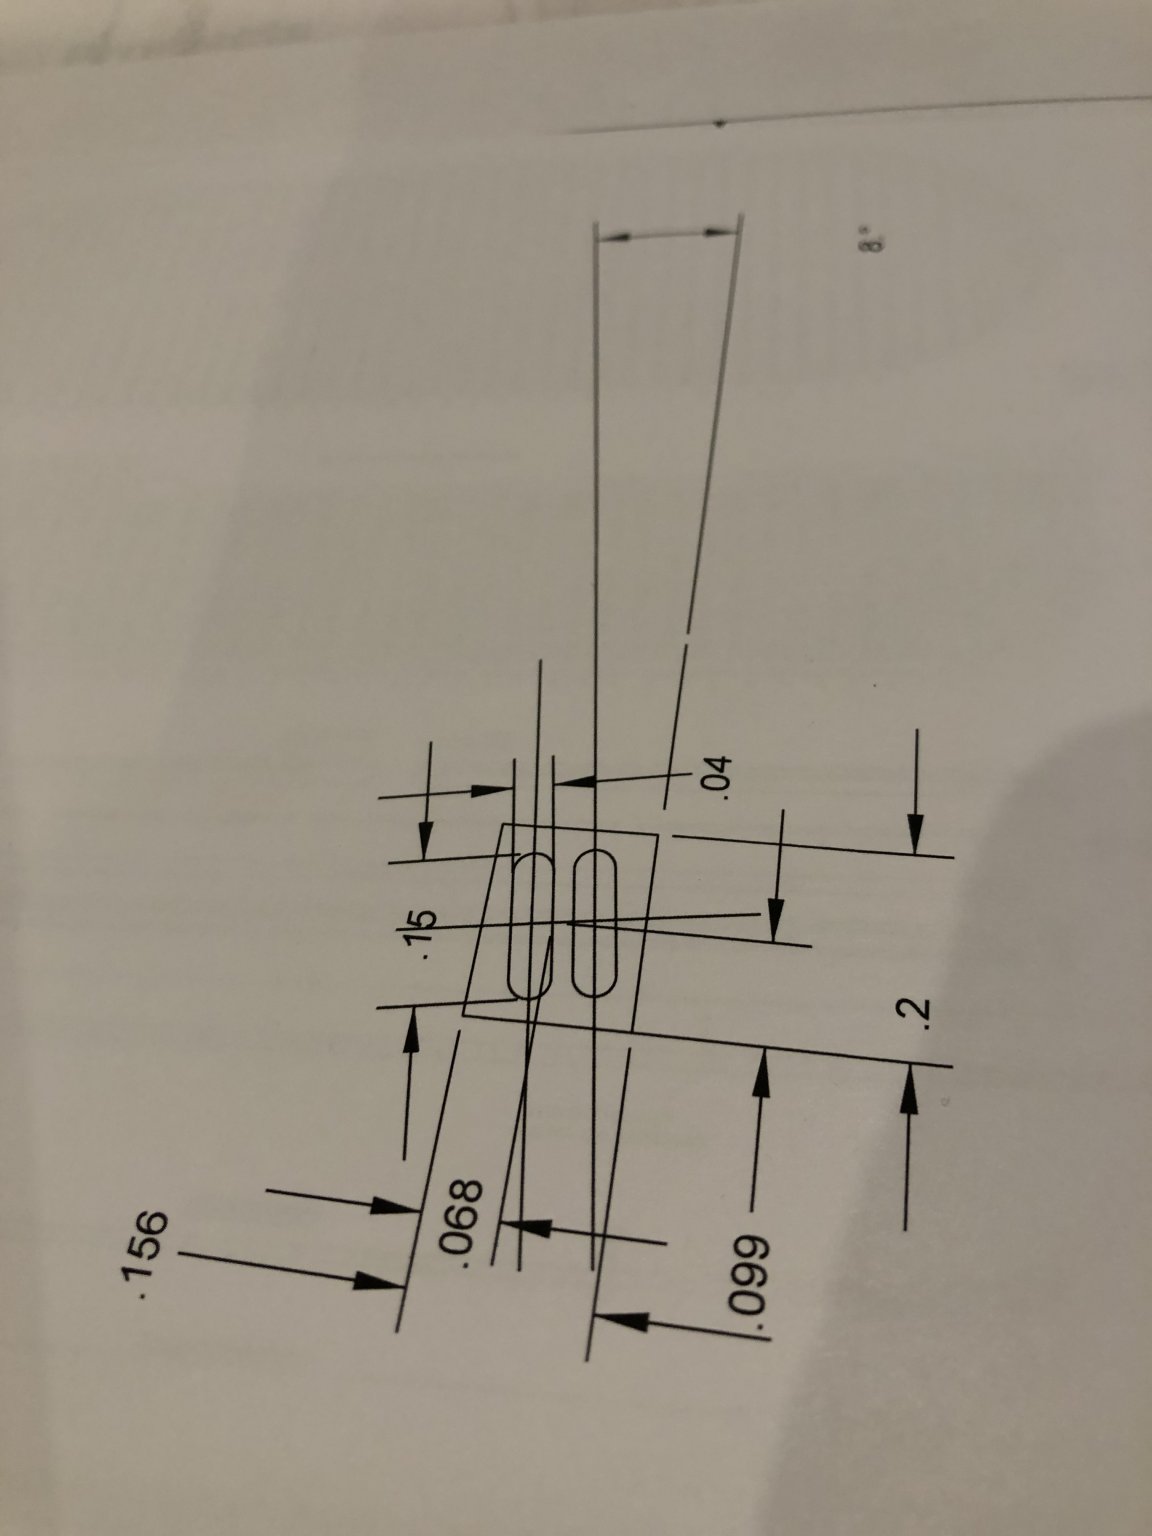
My double sheave plans
Short video of how my setup works on the mill.
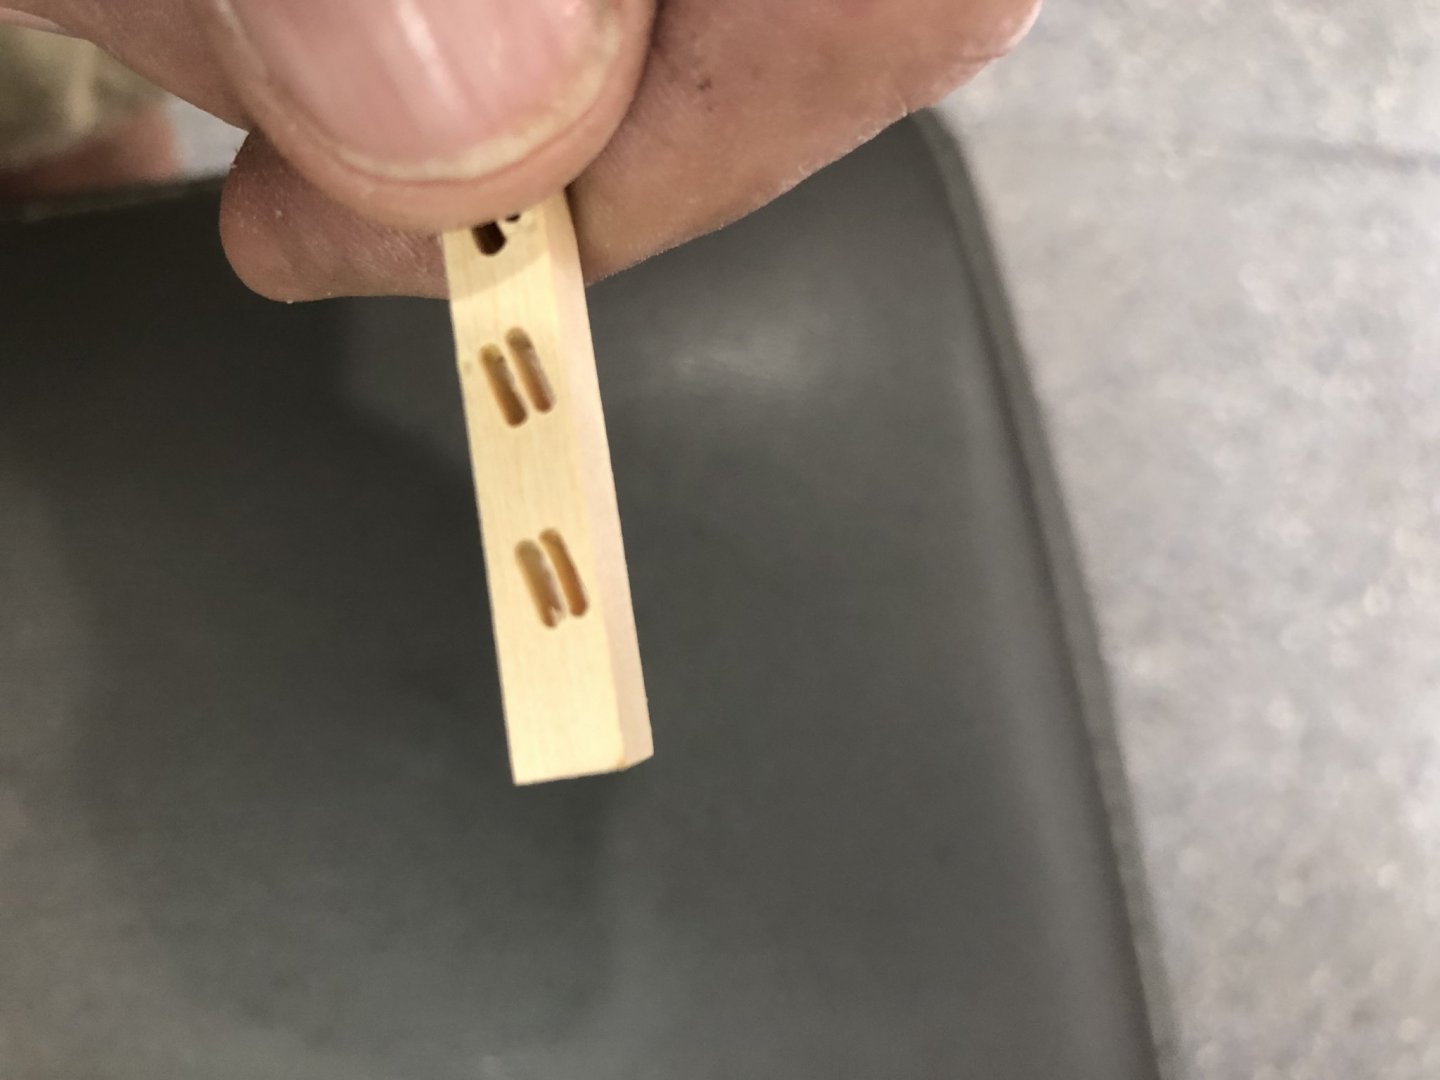
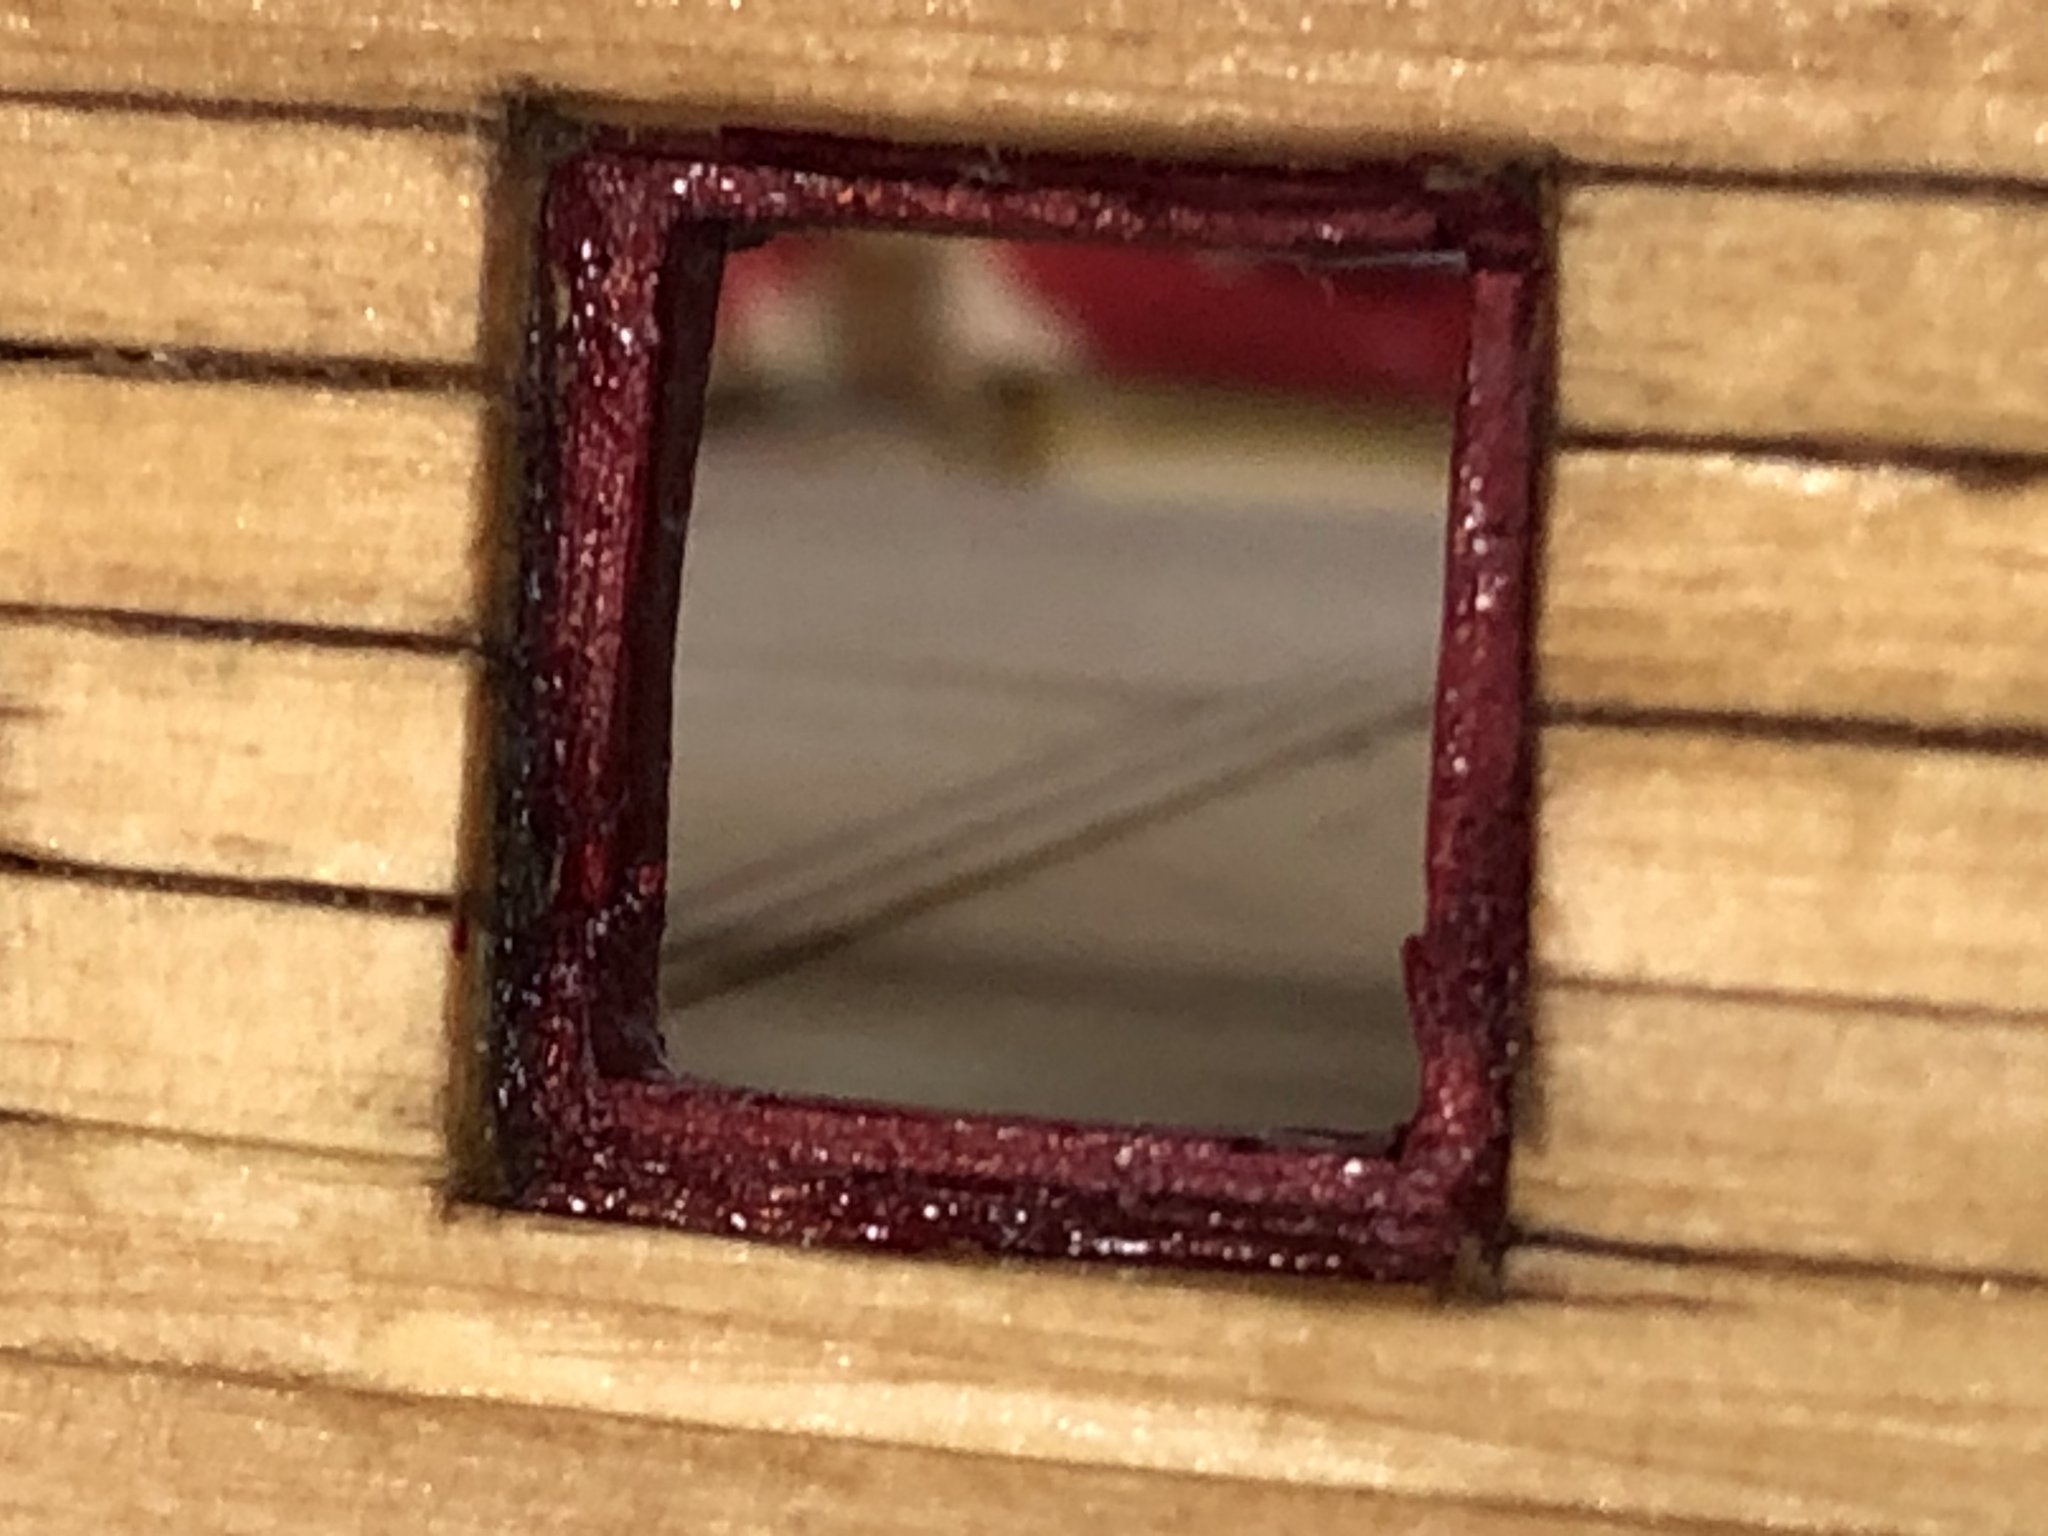
I used a 1mm dental burr in the mill and made many .030 passes and you can see the slots. Notice the fuzzy edges with basswood.
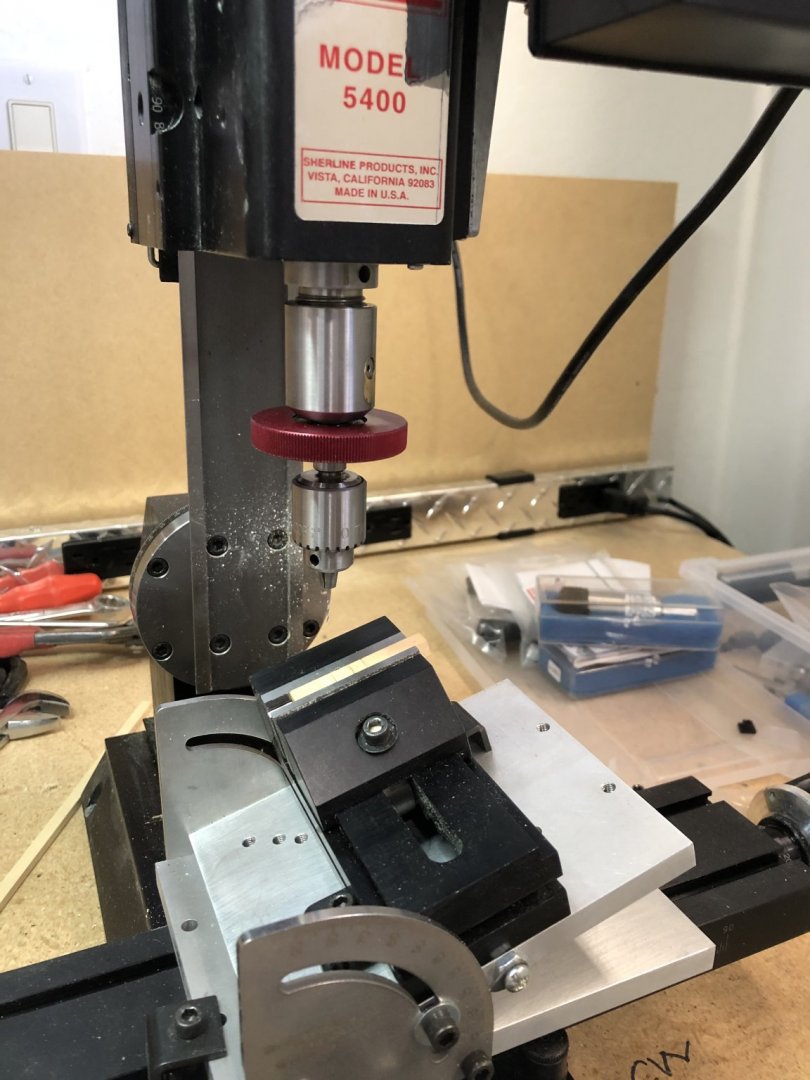
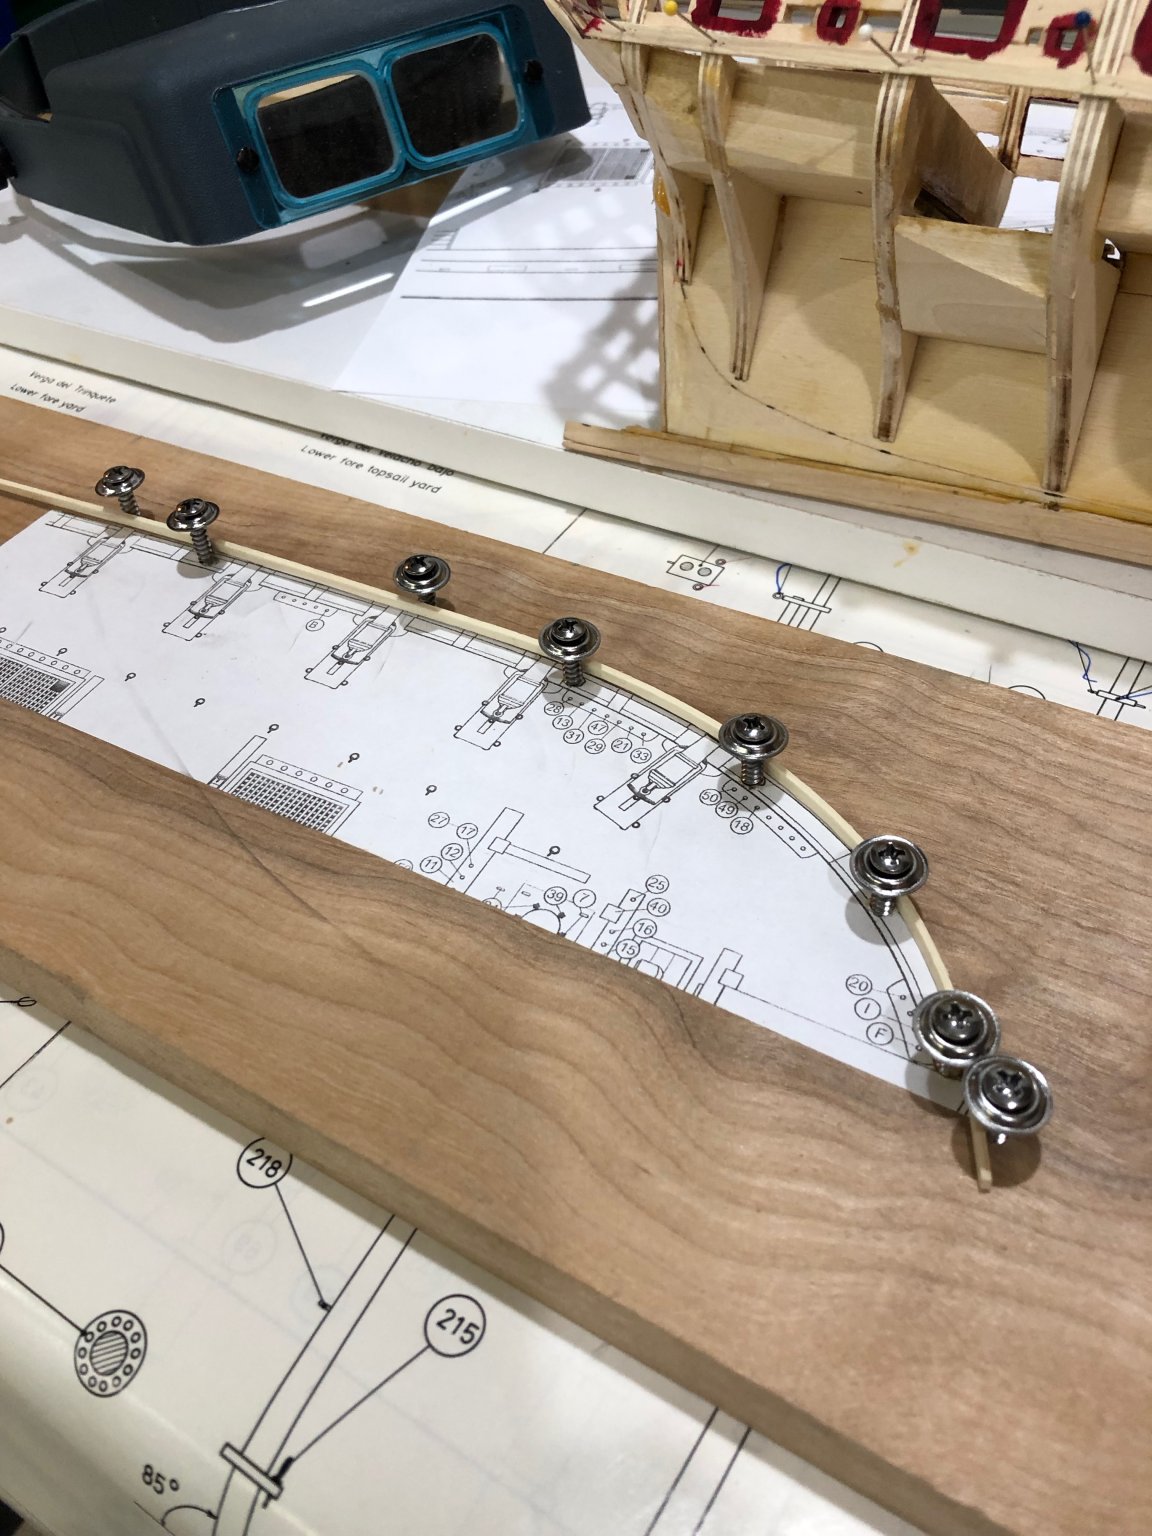
Drill setup using the adjustable angle plate with the vise mounted. The plate is set at 15 degrees which should give the main braces lines the correct angle. I drilled a .021 hole through the part and thens used a .020 copper wire for the axel. I'll turn .093 dia brass rod for the sheaves with a .031 dia hole through which the copper wire will pass making a working sheave.
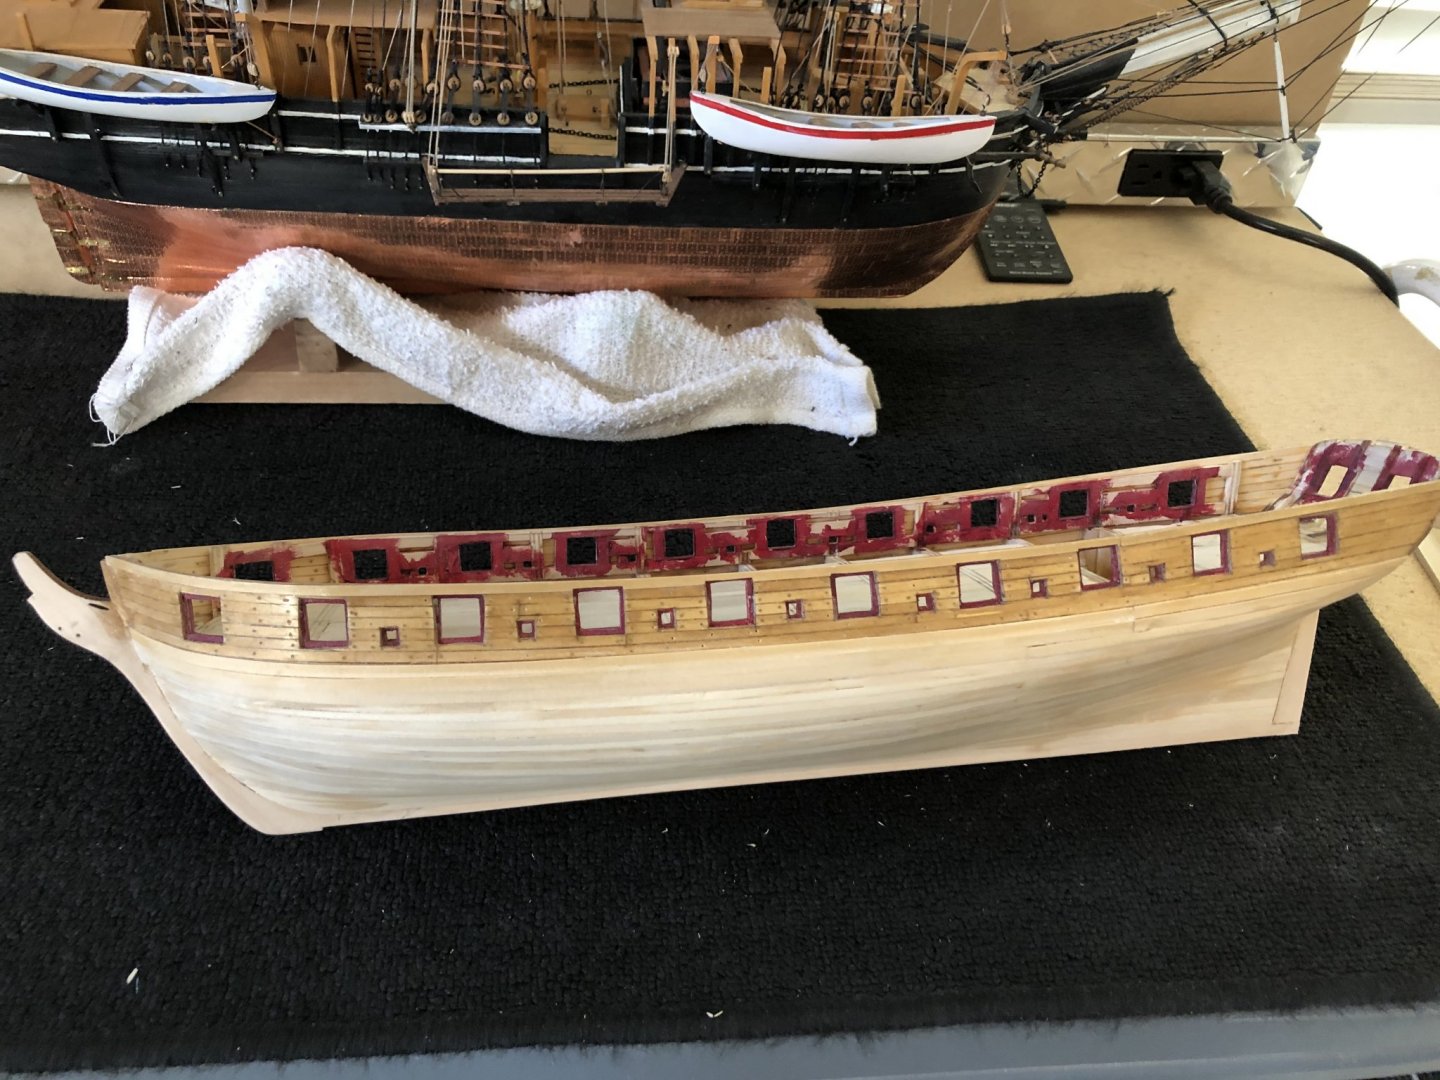
One last photo of the Syren sitting in front of the Charles W. Morgan that I just finished.
All is well here everyone stay healthy
Will
-
Just jumped on and am very impressed. Great work. I've got copper plating to come so I'm very keen on how you manage. Keep up with the great posts and pictures.
Will 😎
- Overworked724 and WalrusGuy
-
 2
2
-
Patrick I'm building the Syren and just a little ahead of you. I finished my planking today. Your work looks really good. I like your idea to fair the lintels as you go but not to to the stanchions. Nice work I look forward to you progress.
Will😎 -
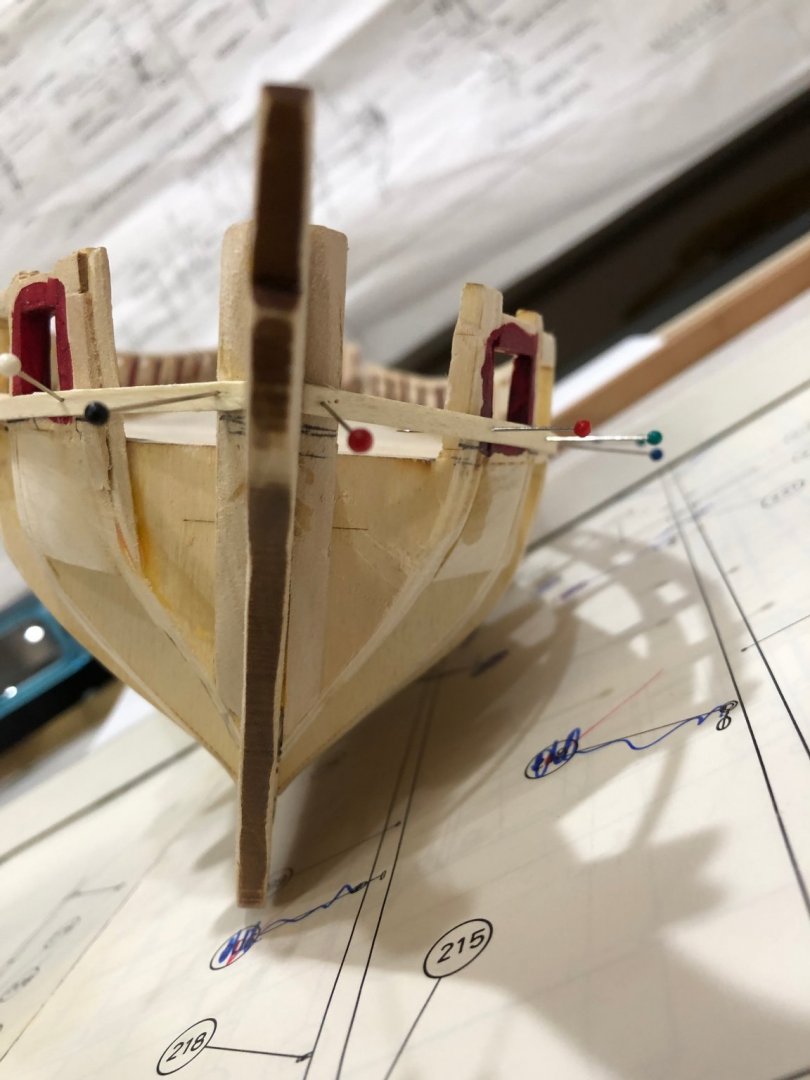
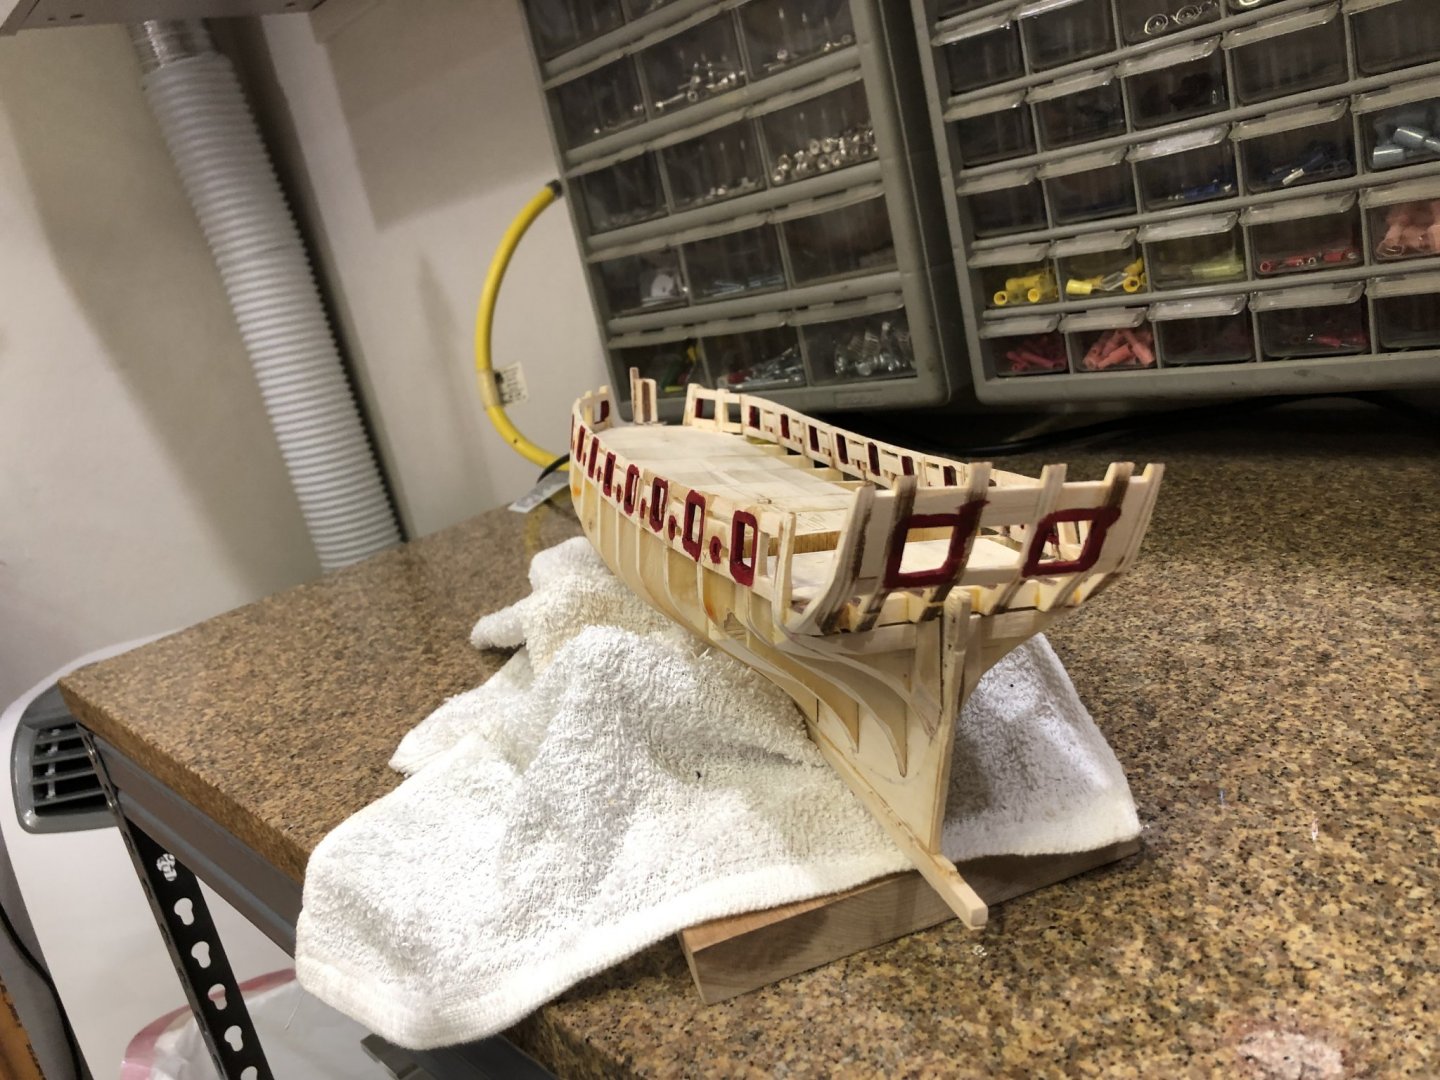
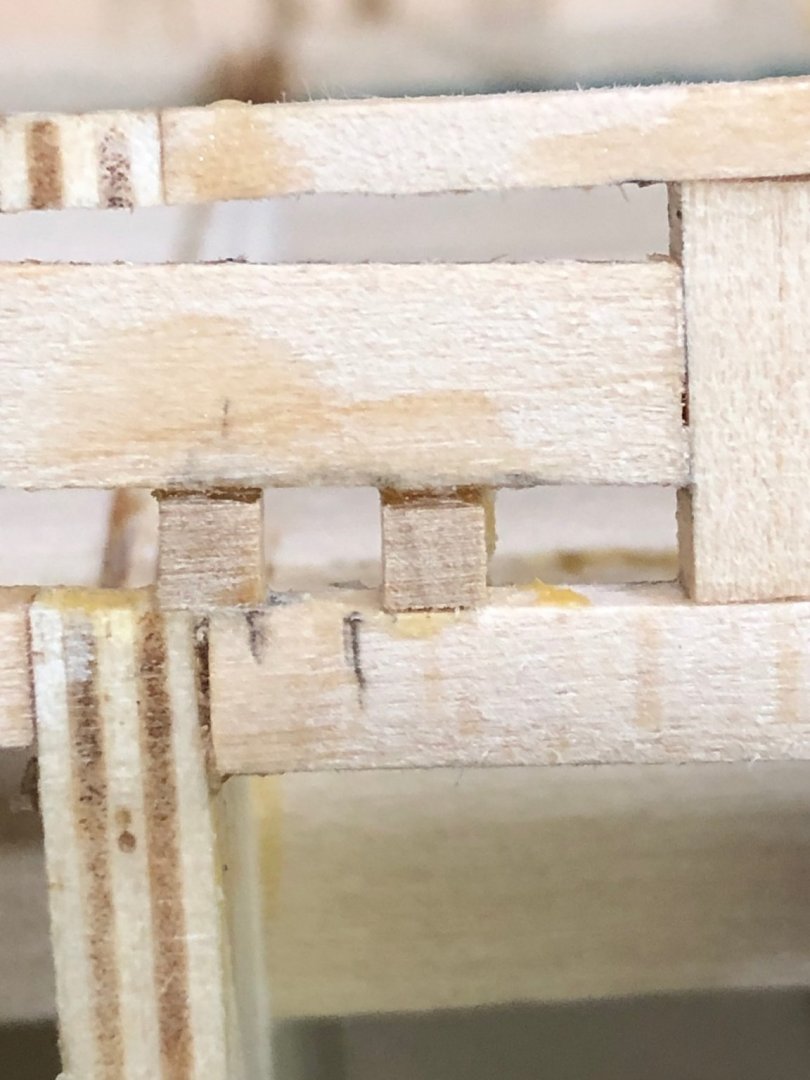
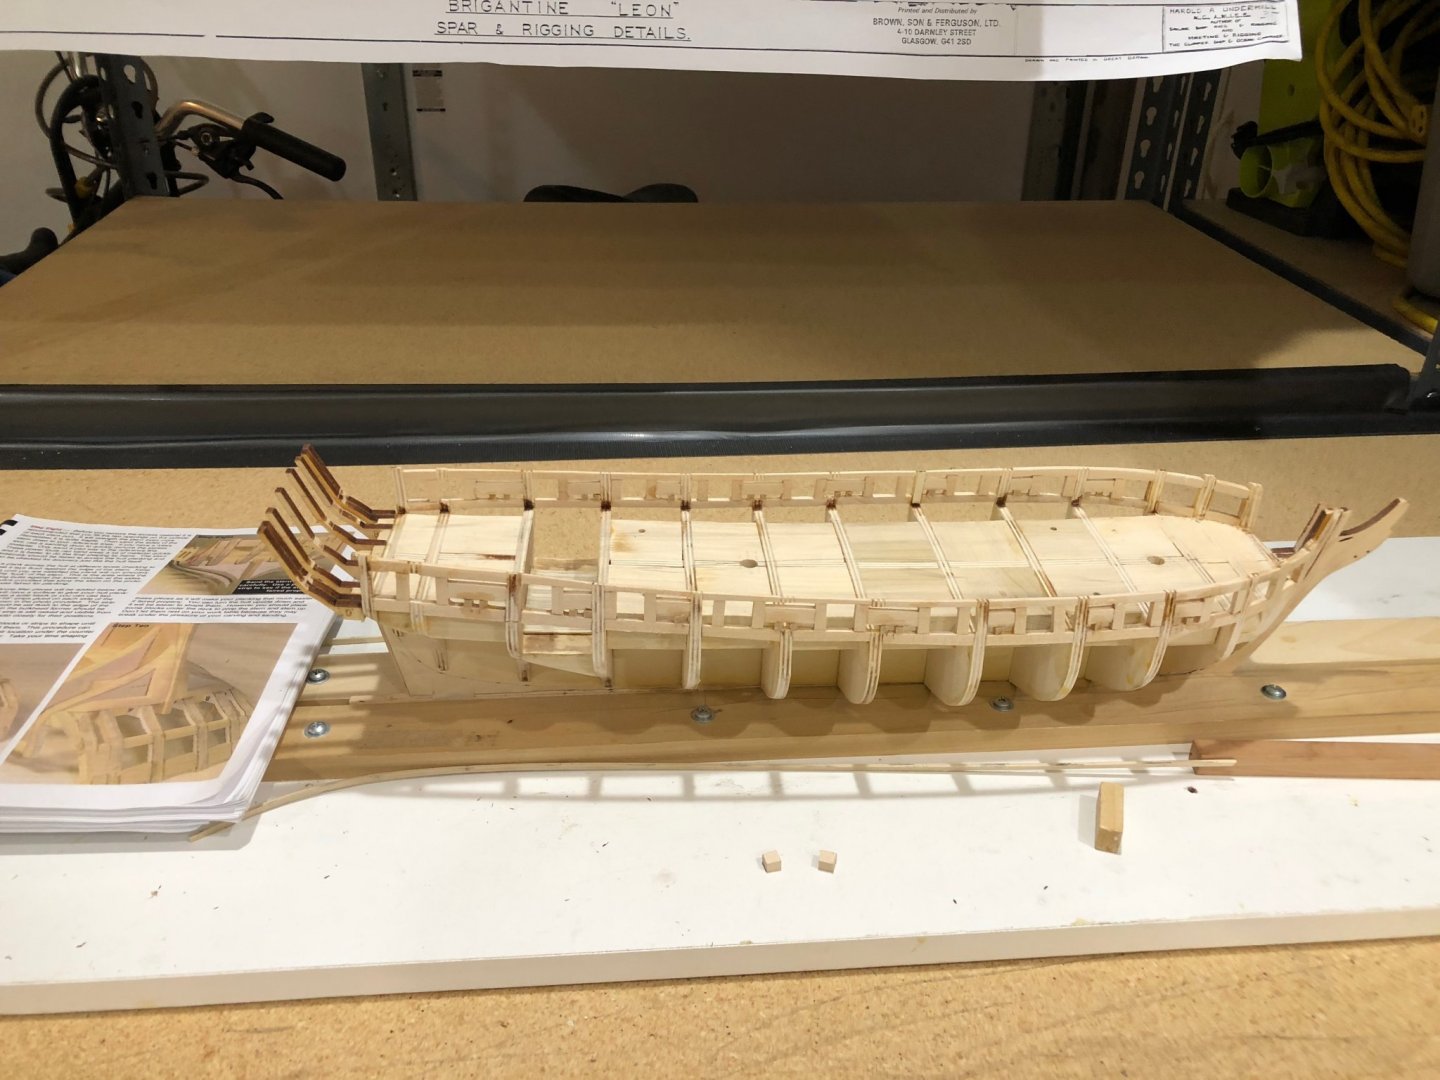
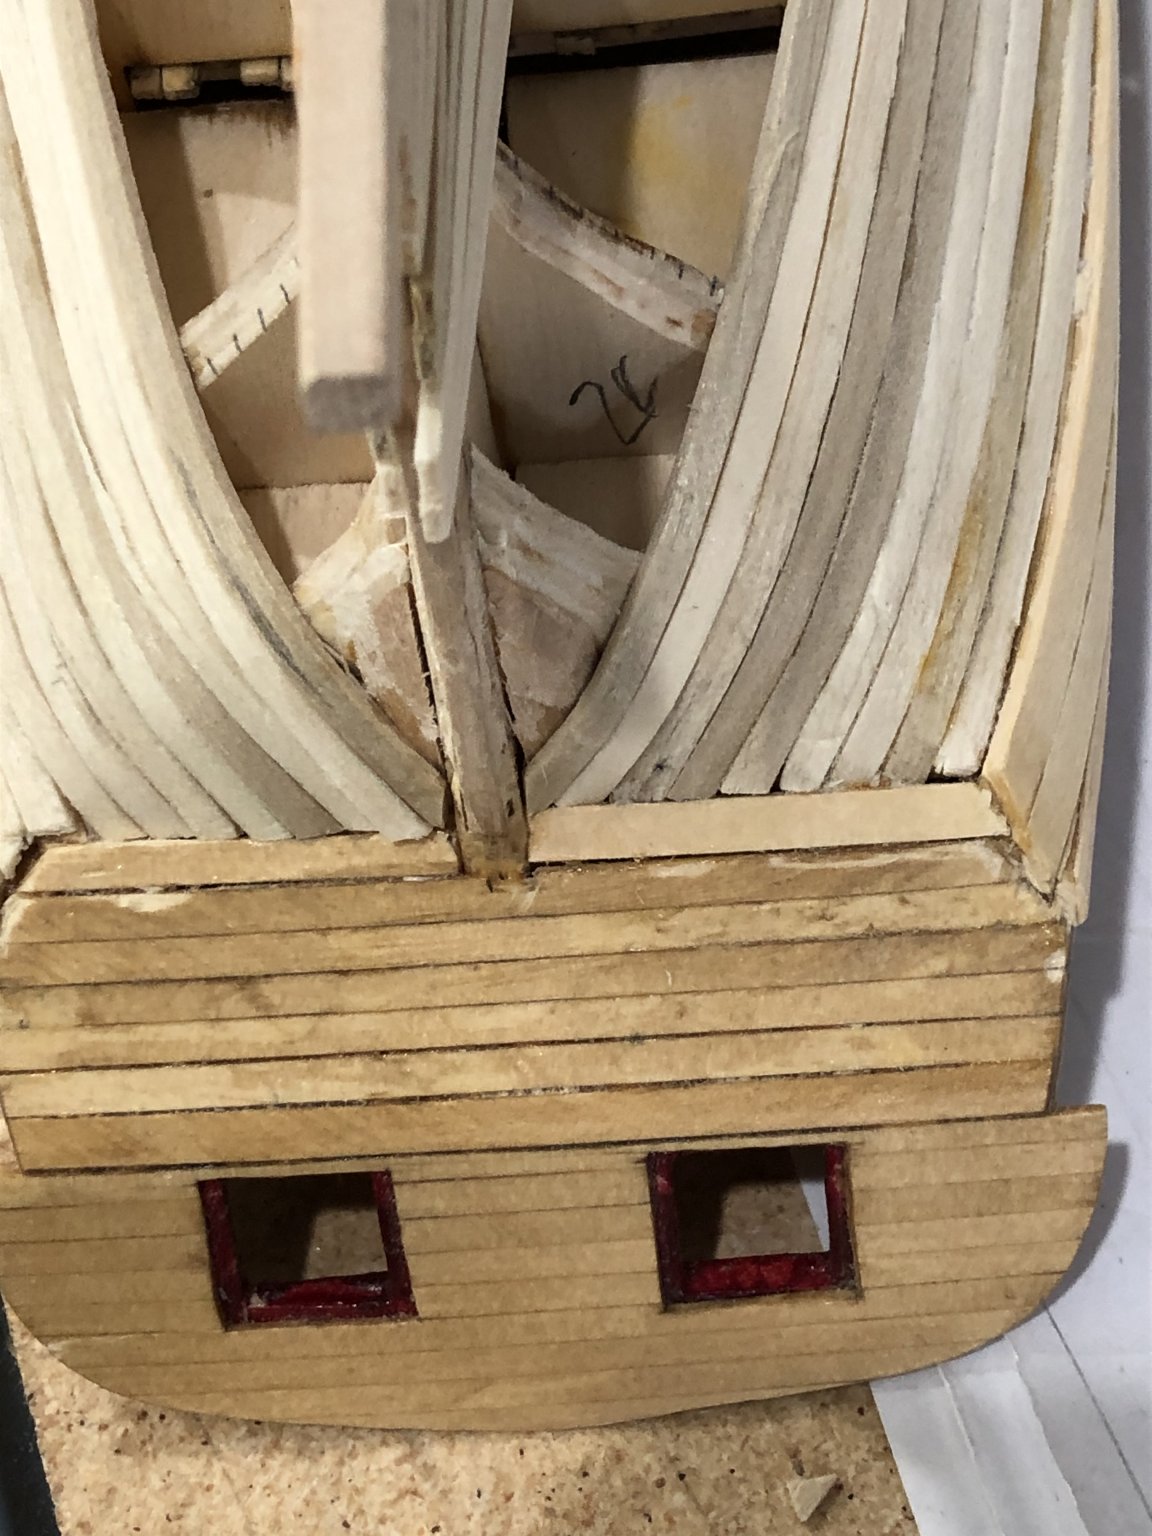
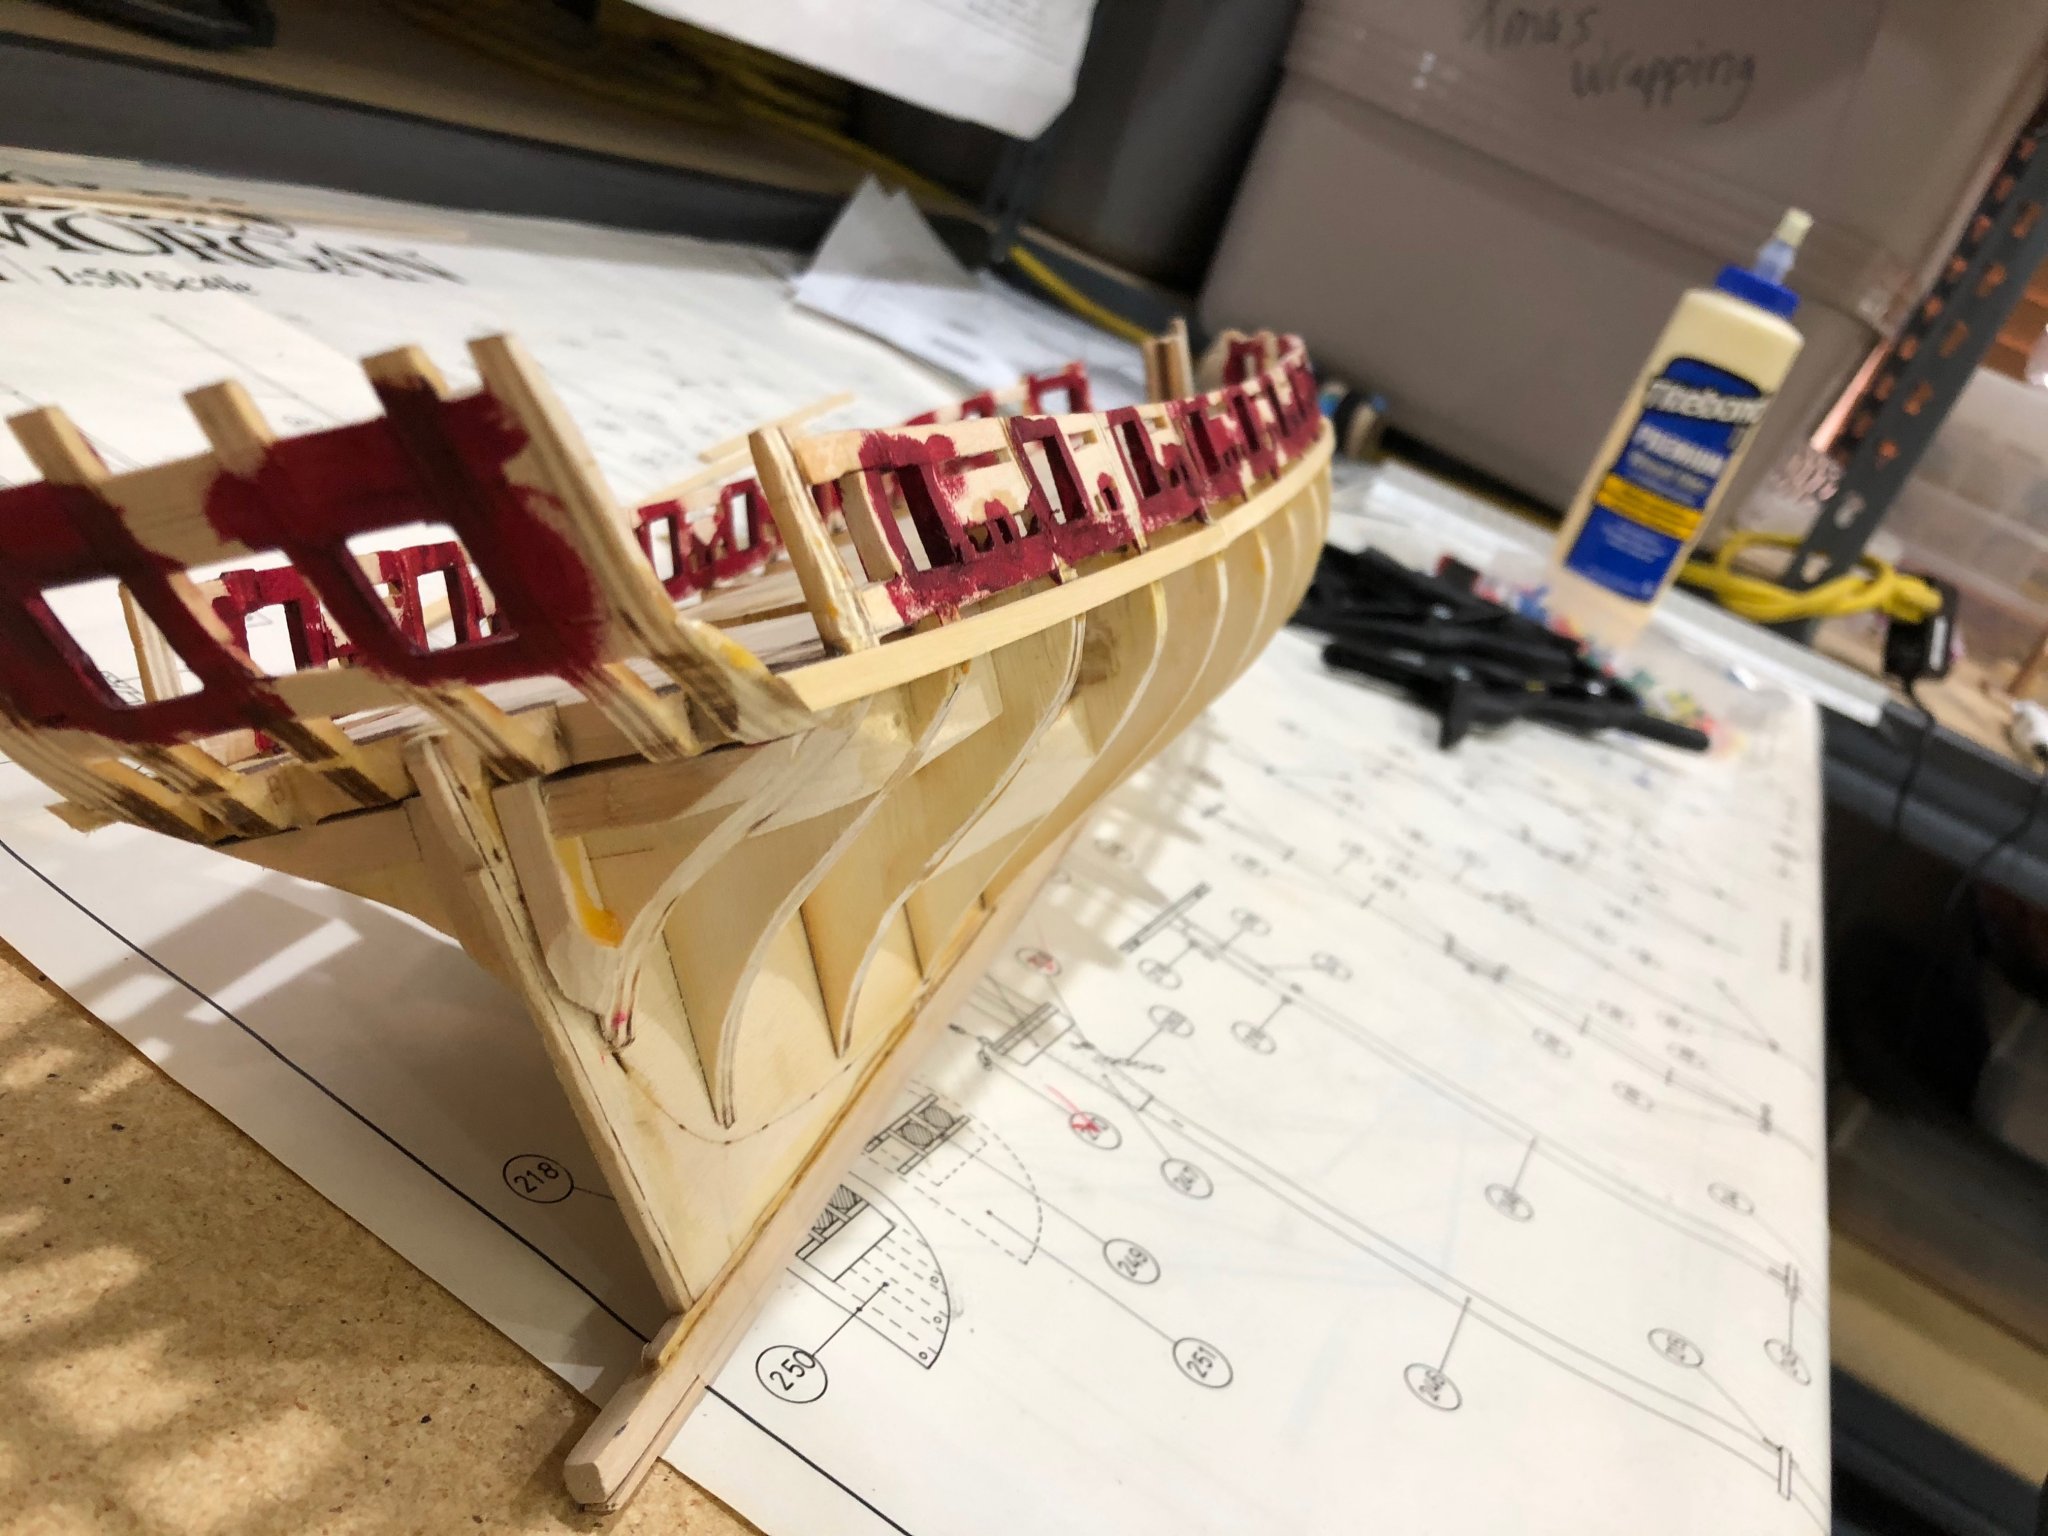
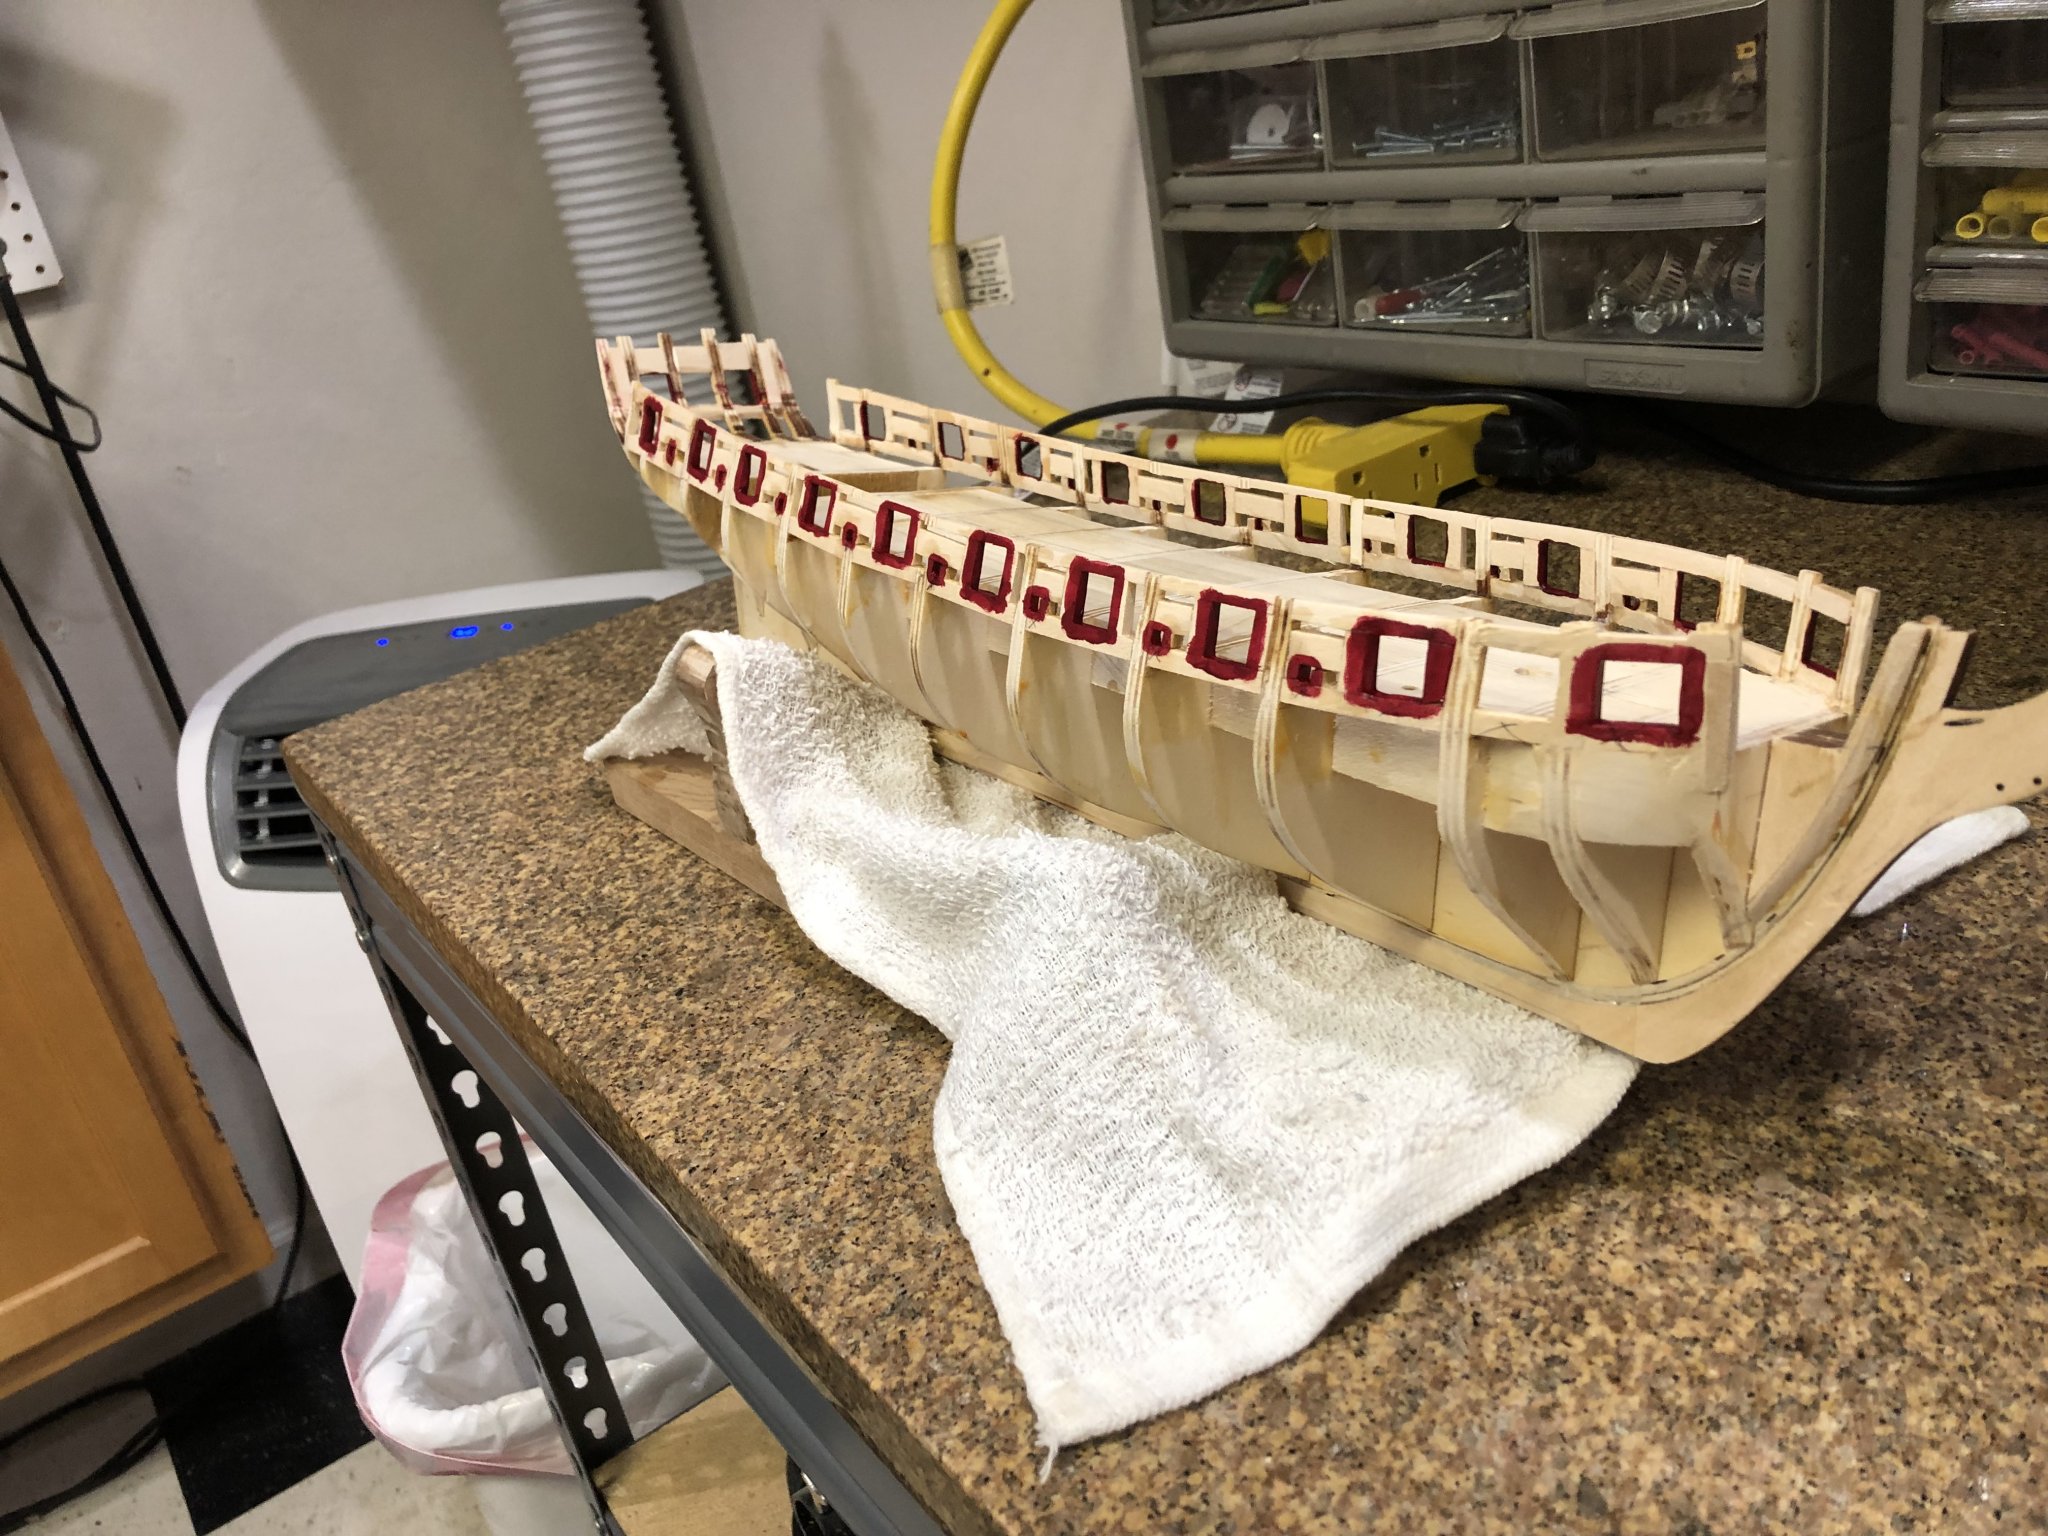
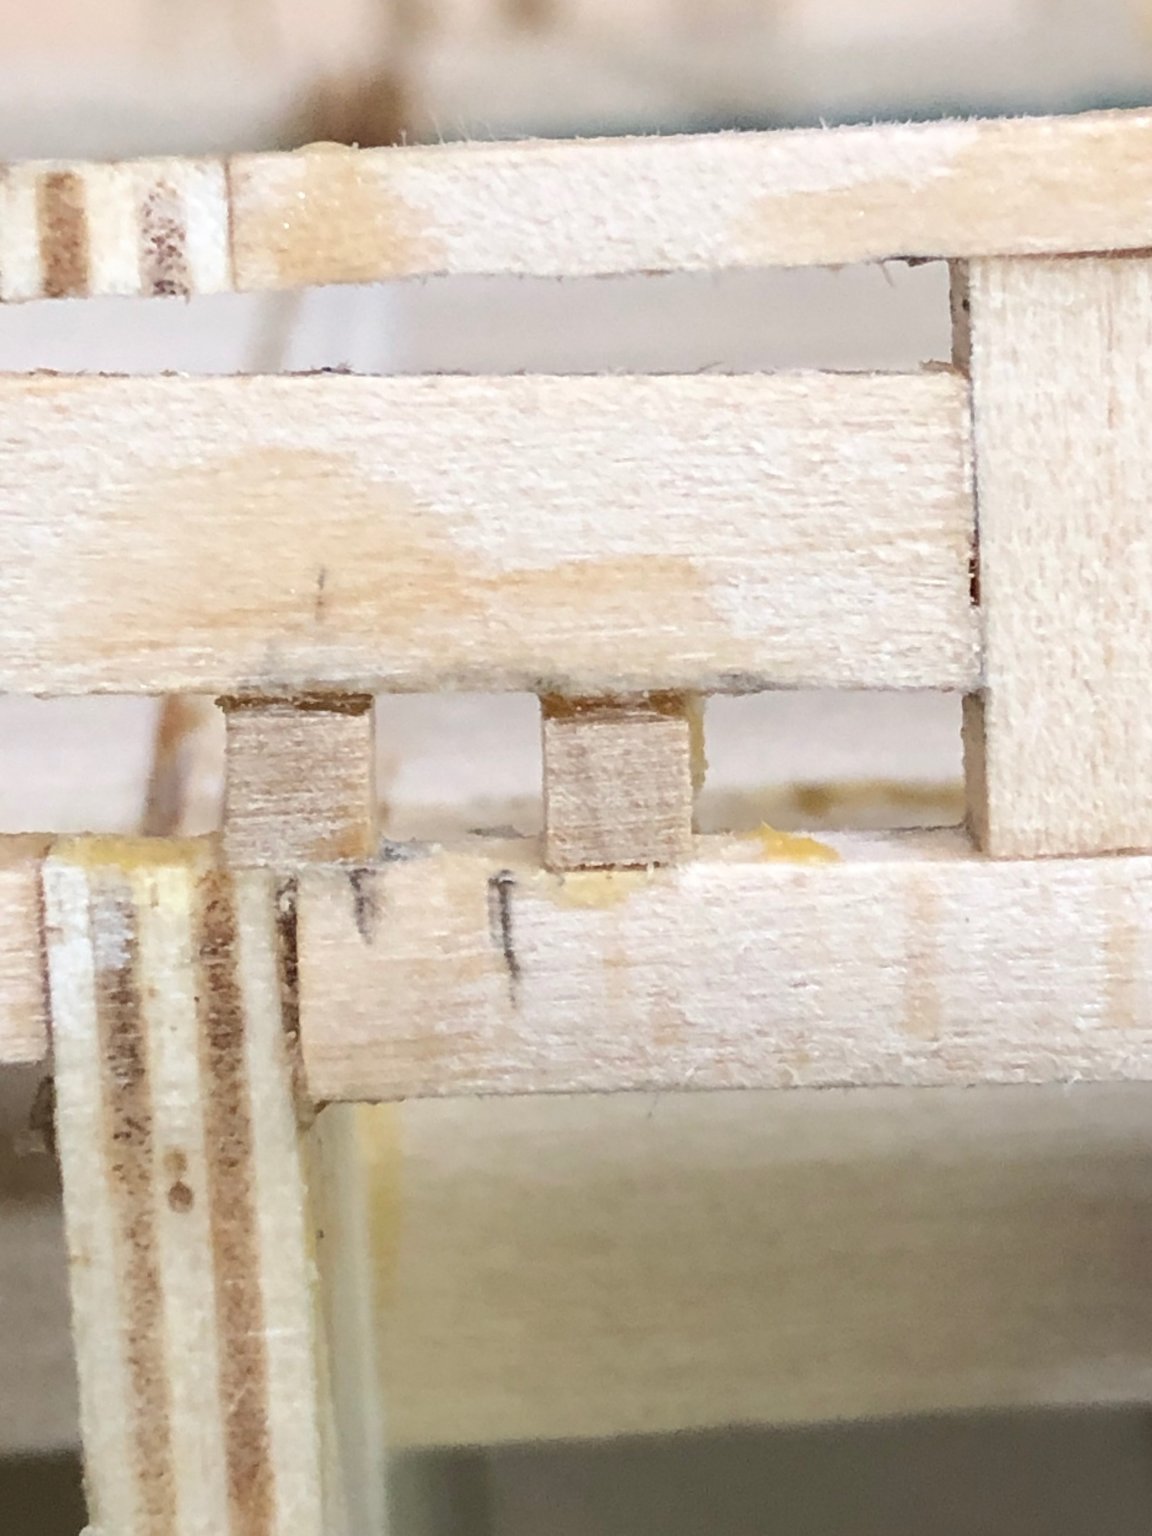
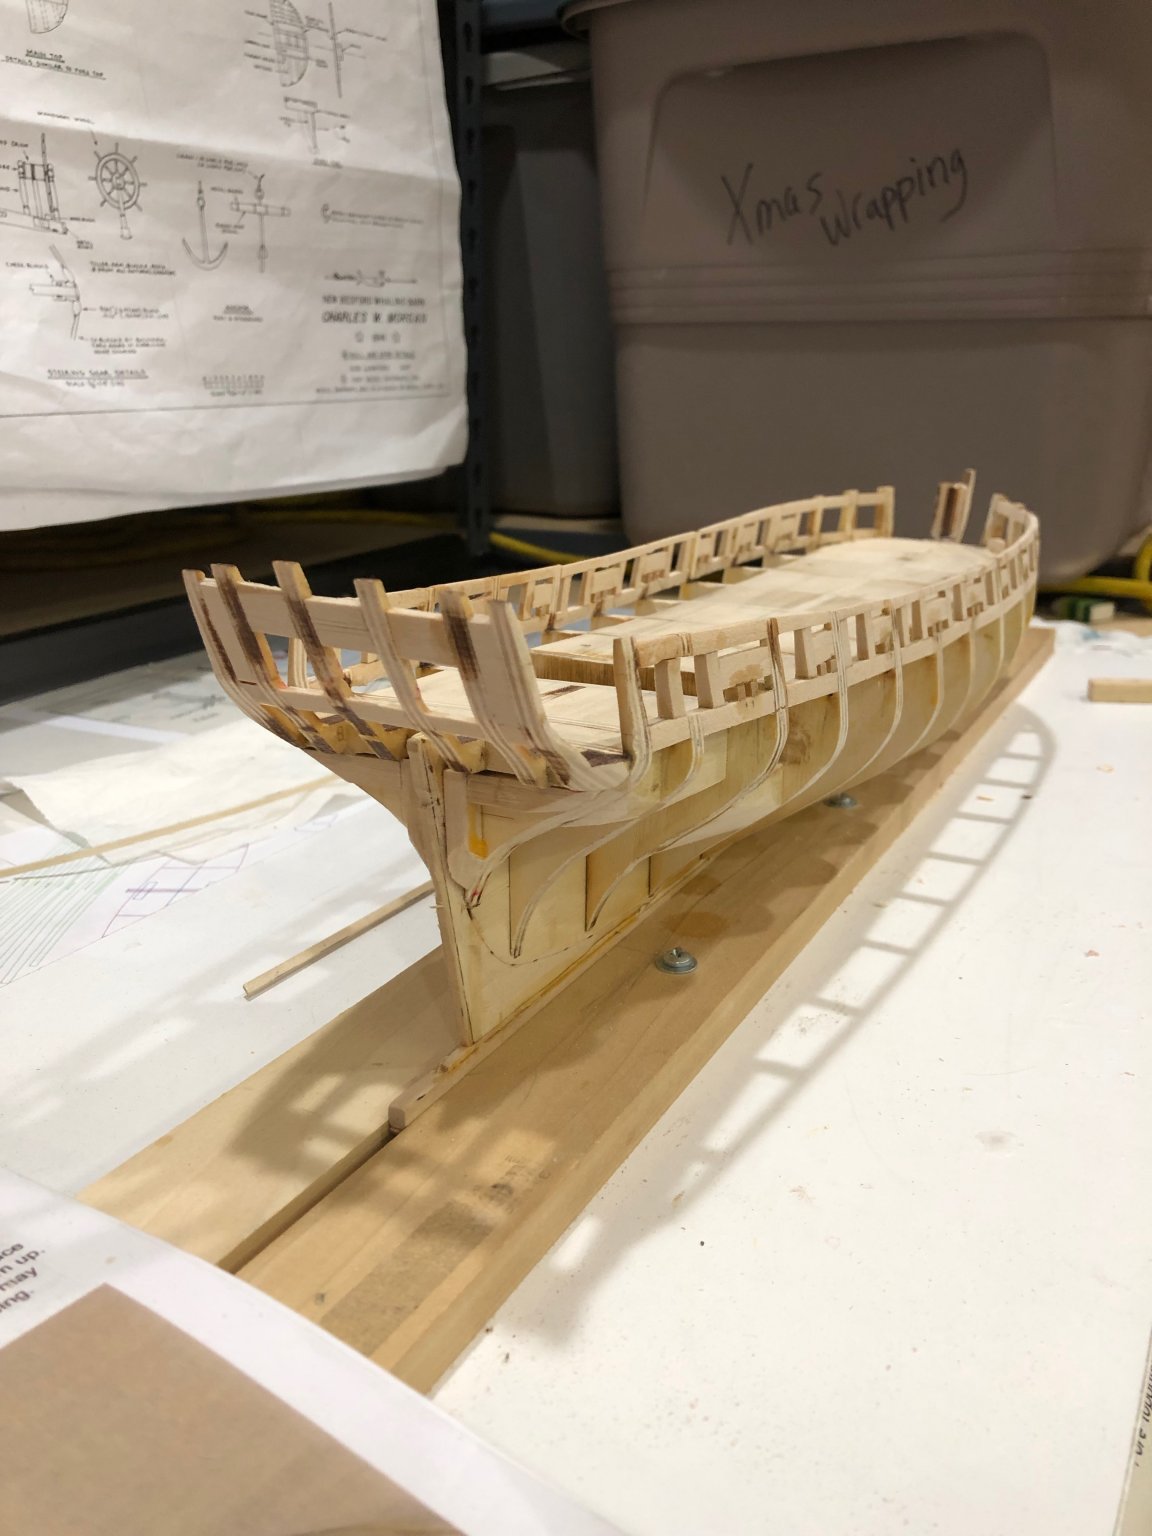
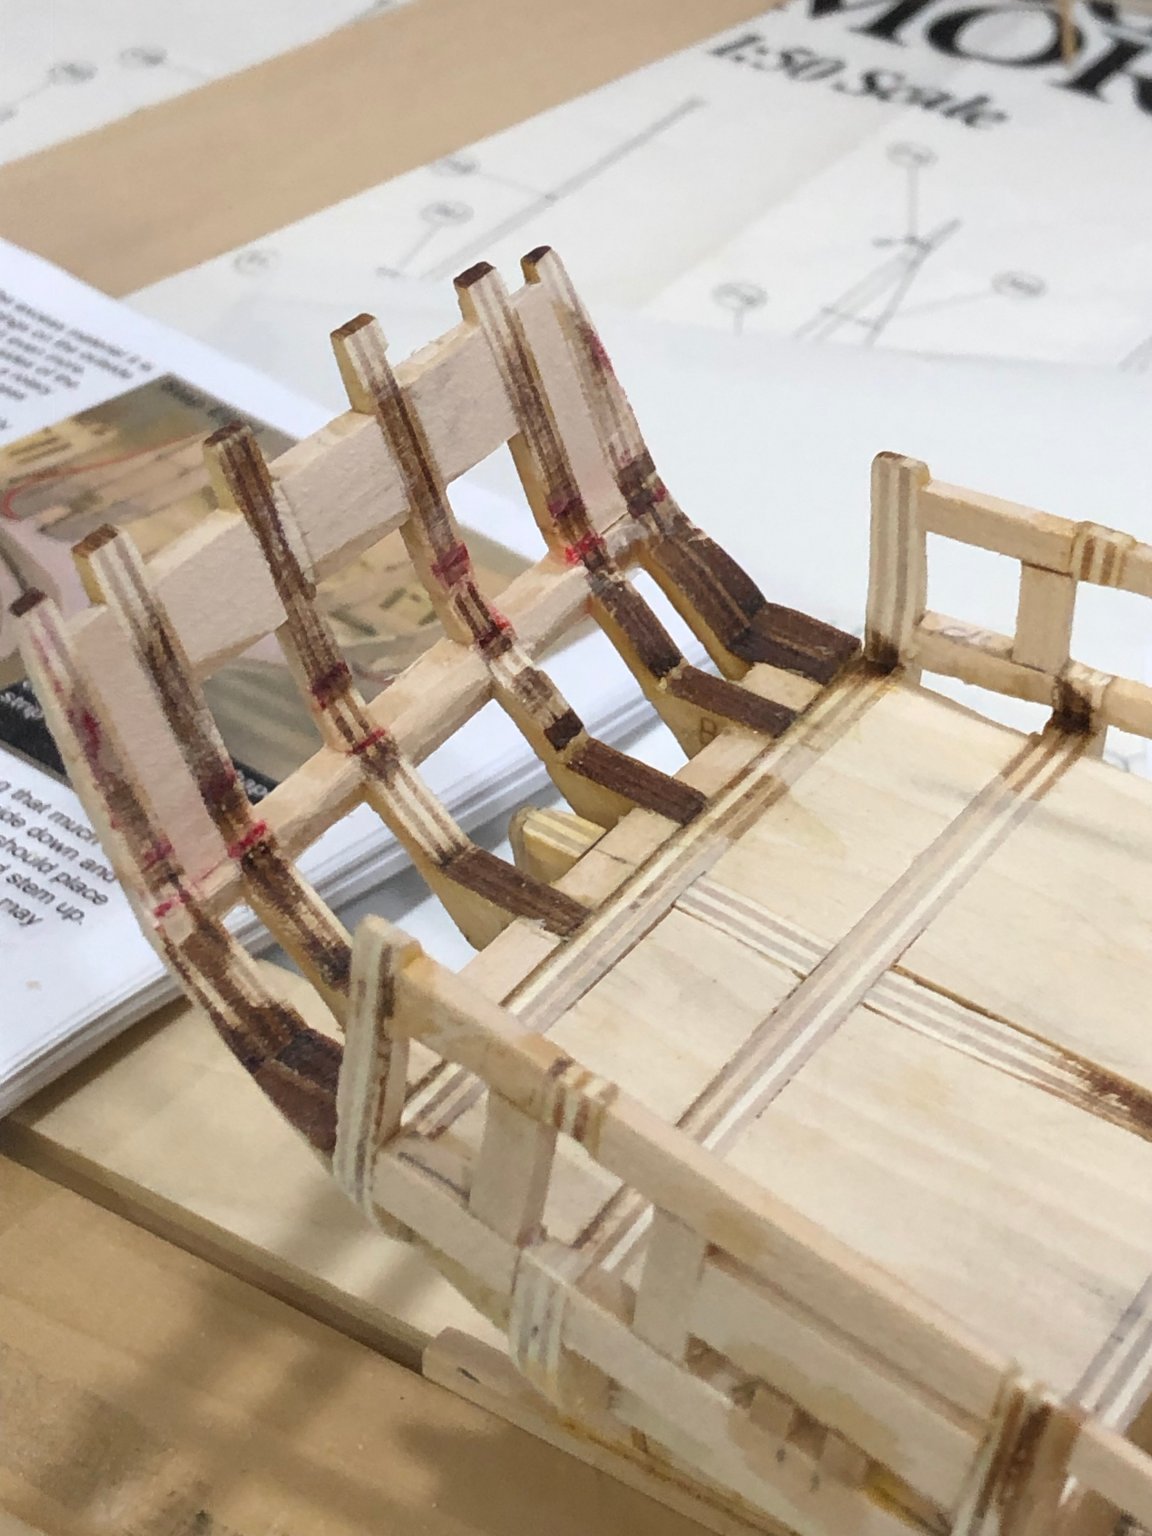
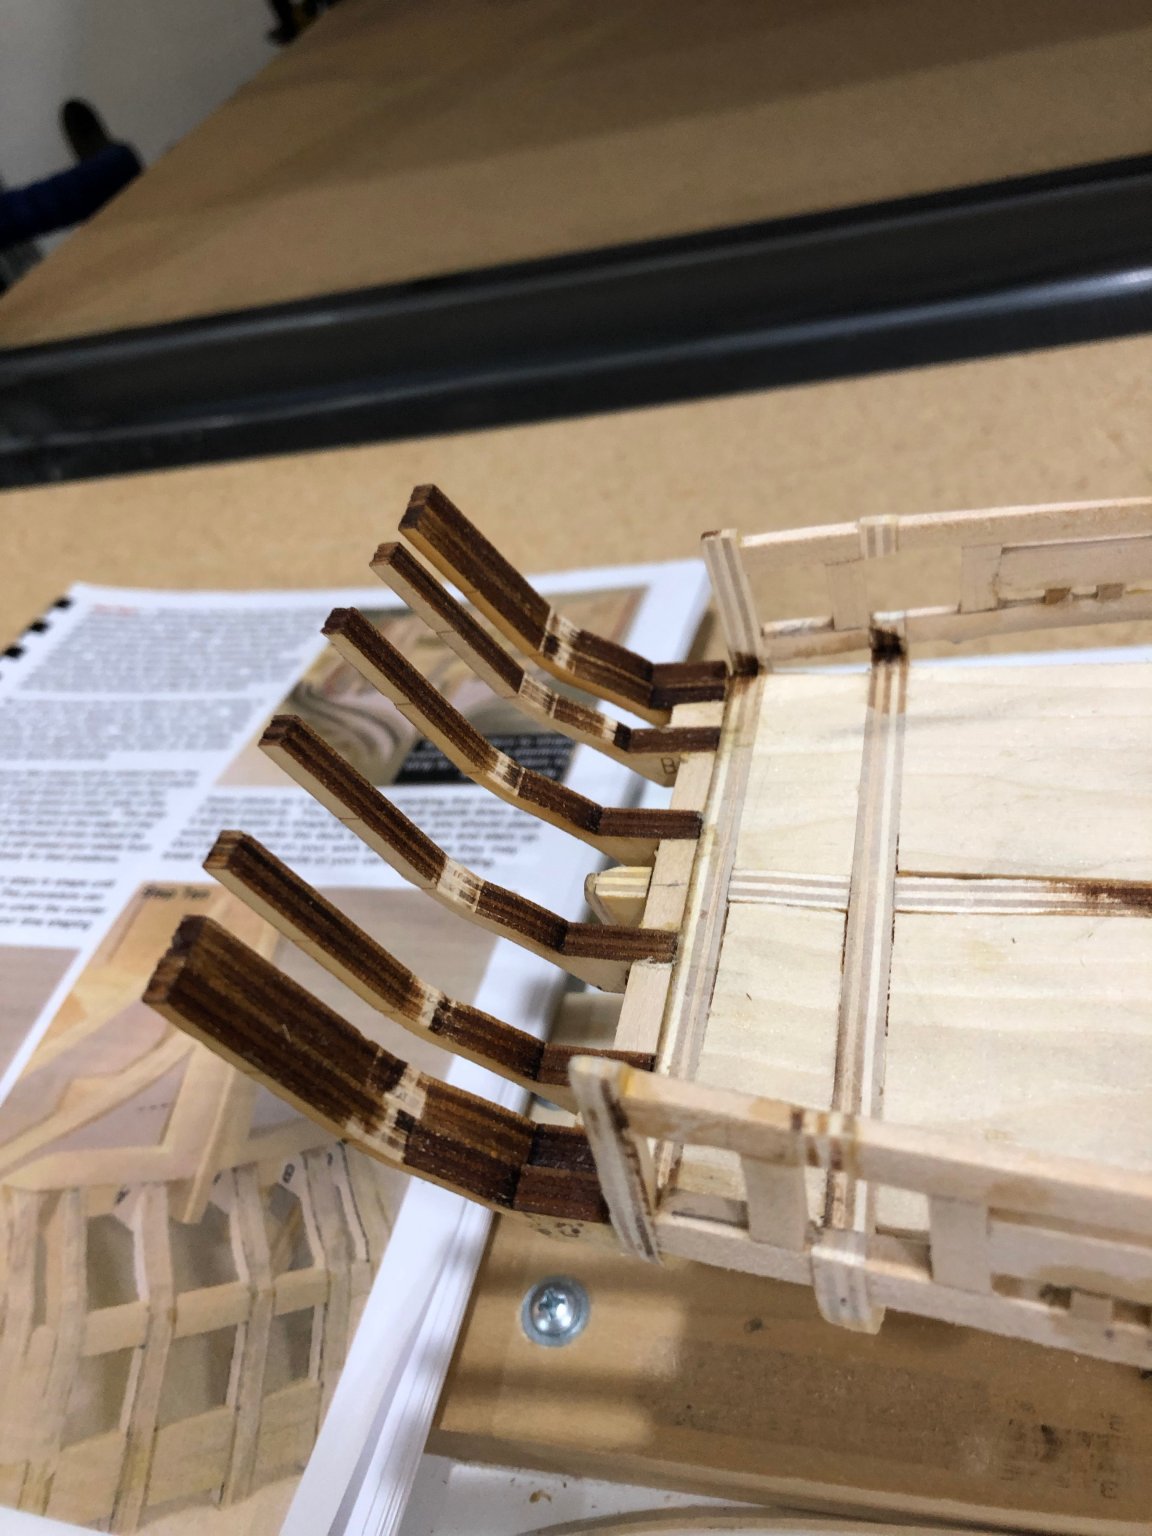
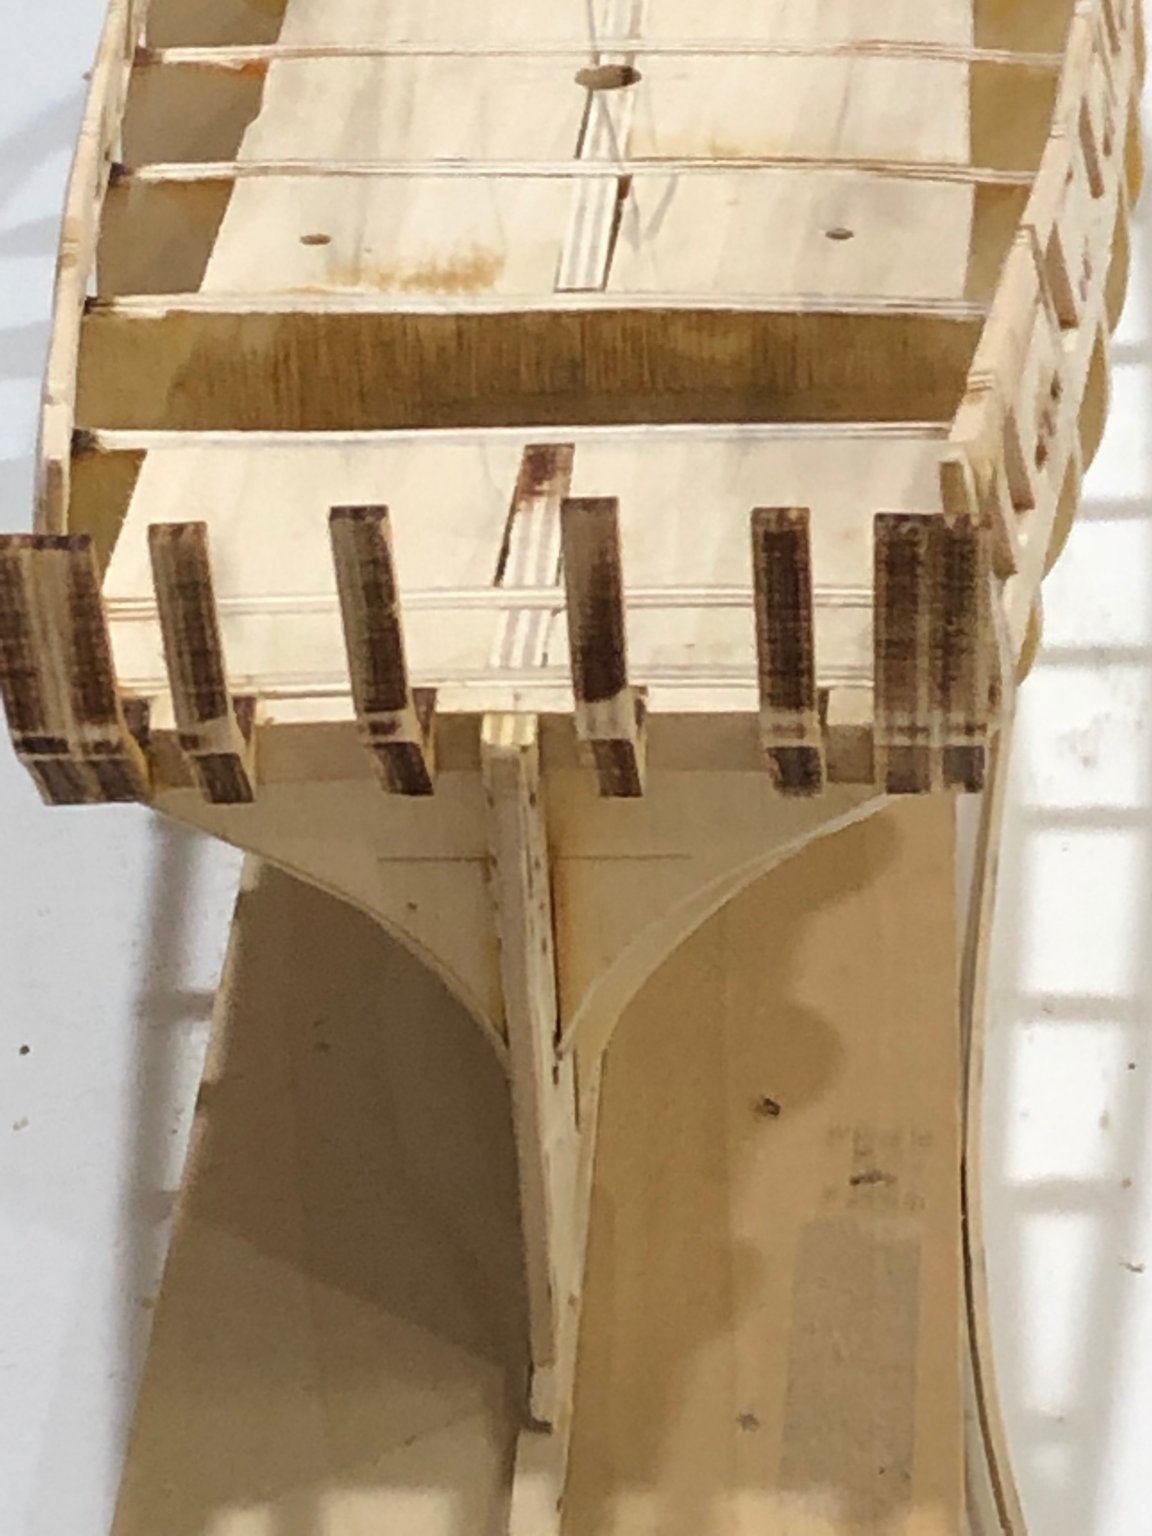
`I've finished my Morgan and now can concentrate on the Syren. The next thing will be the wales and sheer strake. Discovered a big OOPS after getting the wales on I have the last frame and filler pieces not faired properly which was causing the joint between the counter and wales tone misaligned. I took the wales off back to frame middle and the four frames aft of this.

You can see from the photos how the counter meets up with the filler pieces which caused the wales to land to high. So I then went and removed the filler pieces and started aggressively fairing the last frame. I then made new filler pieces and during the fairing process I could see the the counter had also taken the wrong shape when I faired the transom frames for the counter planks. I had to remove the counter planks and add some strips on the transom frames so I could then reshape them to correct the counter to frame and filler geometry. All's looking much better so I went ahead and removed the two strakes the were also offending the stern shape. Tomorrow I'll start adding wales, so we'll see how it turns out. This has been the largest mistake Ive had to fix and a very good learning experience..
Good Night
Will
- Mahuna, GrandpaPhil, Overworked724 and 3 others
-
6
-
Jesse Lee I started following your log just the this last weekend to learn more as I'm building a Syren. I'm up to hull planking. I've learned many things to use on my Syren and want to thank you for your wonderful build and log. Really enjoyed reading and looking at the photos. Can't say enough about how wonderful the ship looks you've done an amazing job creating something to strive for.
Willdf
- popeye the sailor, Canute and JesseLee
-
3
-
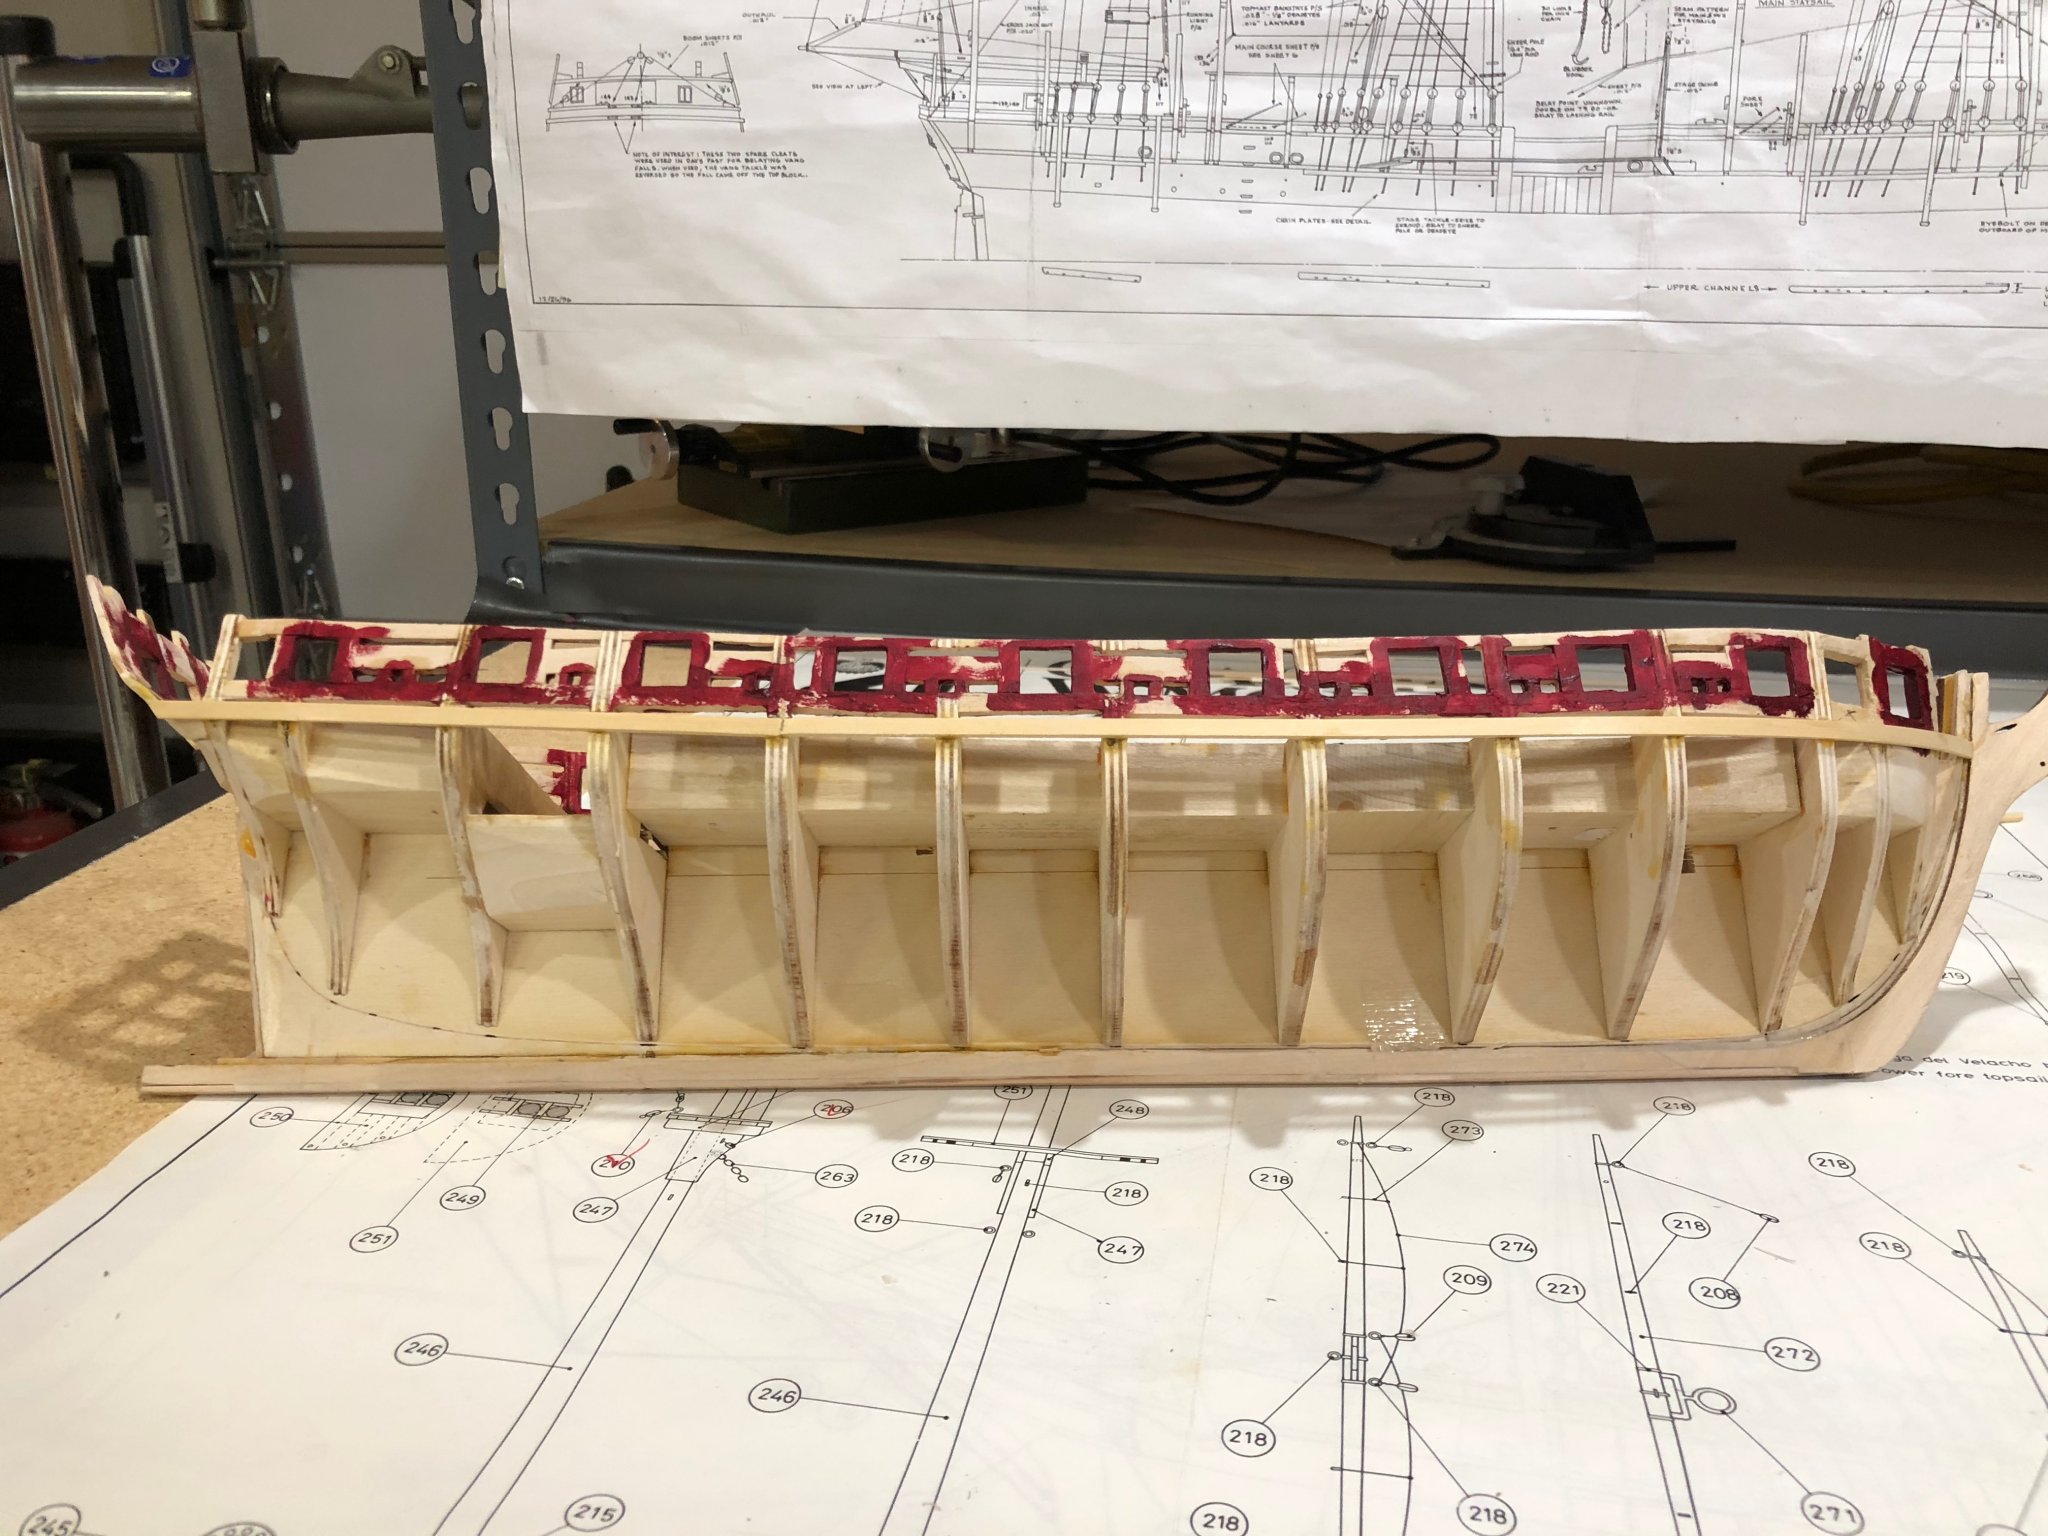
Well I'm back after a long break. Finished rigging my Morgan. Moved to a new house and now during the quarantine I've been able to get some work done on Syren. Finished up the ports and planking along with the transom and counter. I followed Gahms transom planking to give a more detailed look. Thanks Thomas for your posts.
I used a darker vermillion as I wanted a different contrast between the planking stain and the red vermillion. Now I'm off to starting hull planking and trying to make real sheaves for the back stay to pull through.

-
-
Been following your build throughout the process and its looking very very very nice. Im designing the Pungy Amanda F. Lewis, plans from Smithsonian, on TurboCad and you've given me many ideas. While reading your last post I remembered I.ve made similar parts using brass beading wire, hobby lobby, of .02 did wire which results into .96 dia. For the small i.d. I wrapped the wire around a #56 (.043) drill bit held in a vice and made a loop of the wire held in a pin vice and twisted the wire forming the loop. The wire work hardness during the twisting.
Again model looks great really enjoy your posts.
Will
- mtaylor and FriedClams
-
2
-
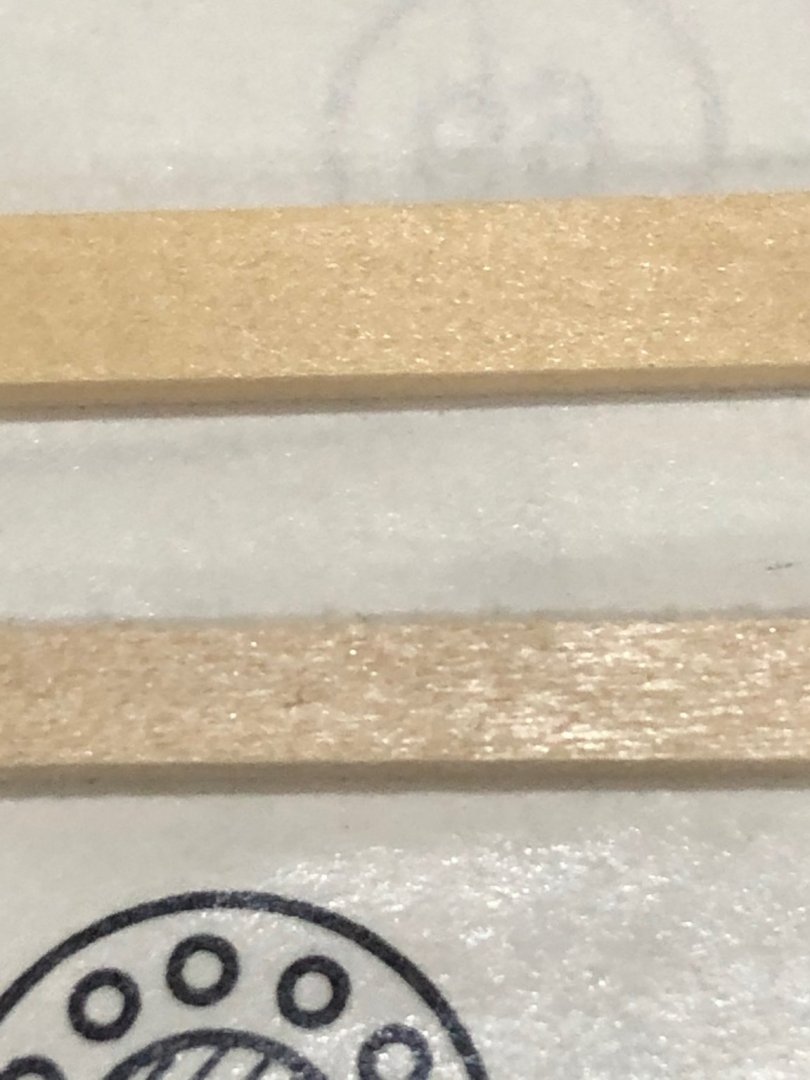
I was given a foot locker full of many types of wood, but one is particularly unknown to me so does anyone have ideas of the type?
 These are .5mm veneer 12" X 18" and there are 10- sheets. The image is approximately 2/3's of a sheet.
Any Ideas
Will
-
Thank you Ed for the quick response, I checked online and found 1/2" X 2' X 4' at Menards for $11.96 and they will ship to my home in Queen Creek. Home Depot & Lowes carry a sound barrier foam board but they are not the same as Homasote. Again thanks now I'll continue with my TurboCad database of the schooner Lettie G. Howard from the HAER drawings. I'll use your approach to test my lofting and your assembly methods before I get too far down the road.
Will
-
Ed
I just finished going through your Young America log and found the work and log to be truly amazing and I can't thank you enough for your contributions to the MSW. There is so much information in the log that Ive made a excel spreadsheet to use as an index to help me find any particular item I need to review and am using it now to review your frame making tutorial, but have one question What type of board do you use to pin the frame pieces too? I tried MDF with no results.
Again thank you for all you do.
Will
-
I like you stanchion alignment very ingenious for drilling the turned stiles you bought. For your reference I'm building a pattern follower for my lathe using David Antscherl's plan on HMN Swan Class Sloops volume 1 page 288 I'll let you know how it works.
C. Chase is looking really great and I especially like the centerboard.
Will
- mtaylor and FriedClams
-
2
-
Yahoo! I got my wood late yesterday and inspected and measured each piece for imperfections, grain, color, size and flatness. I am very happy with the quality of the wood the grain is very tight and straight and the color is very uniform so after ripping and milling the sorting for planking uniformity will be very easy. I only milled enough for the wales, bulwark, and deck planking so now I started installing the first wale layer and next will be the acid test as I start the bulwark planking and fitting/trimming the sills around the gunports and sweeps. Once the wale glue is dry I'll start the bulwarks. Now I'd better get back to rigging the Morgan. Its getting close so I need to stay after it.
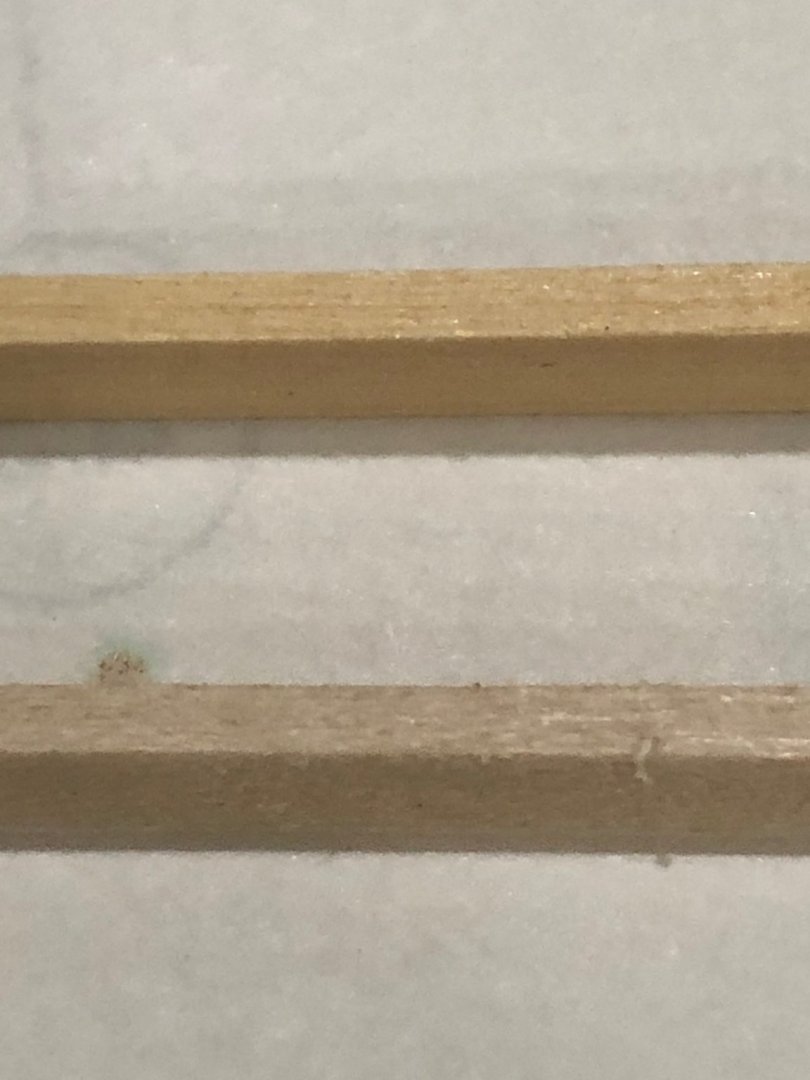
Oh yeh, I've posted of the alaskan yellow cedar and basswood strips for you comparison. The cedar is on top


Still more glue left from removing the planking done earlier. Just a lot of fine sanding but the old glue comes off fairly easily and leaves the surface ready for the new pieces. I really had no problems getting the surface ready for the wales hoping the rest goes as easily.
Till next post
Will
- J11, GrandpaPhil, Edwardkenway and 2 others
-
5
-
Thanks for the comment Jonathan and everyone else for the likes
Well another day spent de-constructing a model. I got all the bulwark strakes and the first wale off with not problems, just time to soak with water. The PVA glue became a rubbery layer of somewhat sticky goo which enabled me to just gently pry up the pieces and the slowly lifted off in one piece. Just took time to soak. I worked on my Morgan rigging while waiting for the soaking still a good day of modeling. I did find one good attribute of basswood during this process and that is it is so soft and porous that it soaks up the water and holds it in place while the PVA softens other than this I don't like the stuff and will never use it again.
Now I just need to wait for my Alaskan Yellow Cedar to arrive and I can start ripping and milling to 5/32" x 1/16" and 1/8" x 1/16" strips. Waiting is the hardest part as the song says.
Will
-
Been awhile since last post but I have been working of the first wale and then starting the bulwark planking. Pictures to follow. When I needed to start cutting the plank around the gunports and sweeps I ran into problems. I have tried and tried to cut the gunport lid sills as described in the manual but can get the cuts as clean and straight as I'd like. No matter what I use if I put too much pressure while cutting the wood starts to crush and not make a clean crisp cut. I use a new #11 blade for each cut and it still is not as I'd like. What I've found is that the basswood does not carve like a hardwood and carving is really what needs to be done on the bottom and top edges so you have a clean crisp straight cut for the sill. The fore and aft edges are much easier since the cut is against the wood grain so the cuts are fine BUT the end grain is problematic since it is so coarse that you can see and and I can't imagine what a stain would do with the open grain. ugh! And then trying to keep the sill less that 1/32" perimeter is very trying. So I took everything off and will start again with harder wood. Chuck has been really talking up yellow alaskan cedar so what the heck I tried some I had around and found it to be much superior to basswood and have ordered enough to plank the bulkheads. I hope it works as well as the little I had to try in my experiment. Let you know when I get my delivery and get it ripped and milled to the correct size next week.
Bye for now
Will
and thanks to everyone for my thanks.
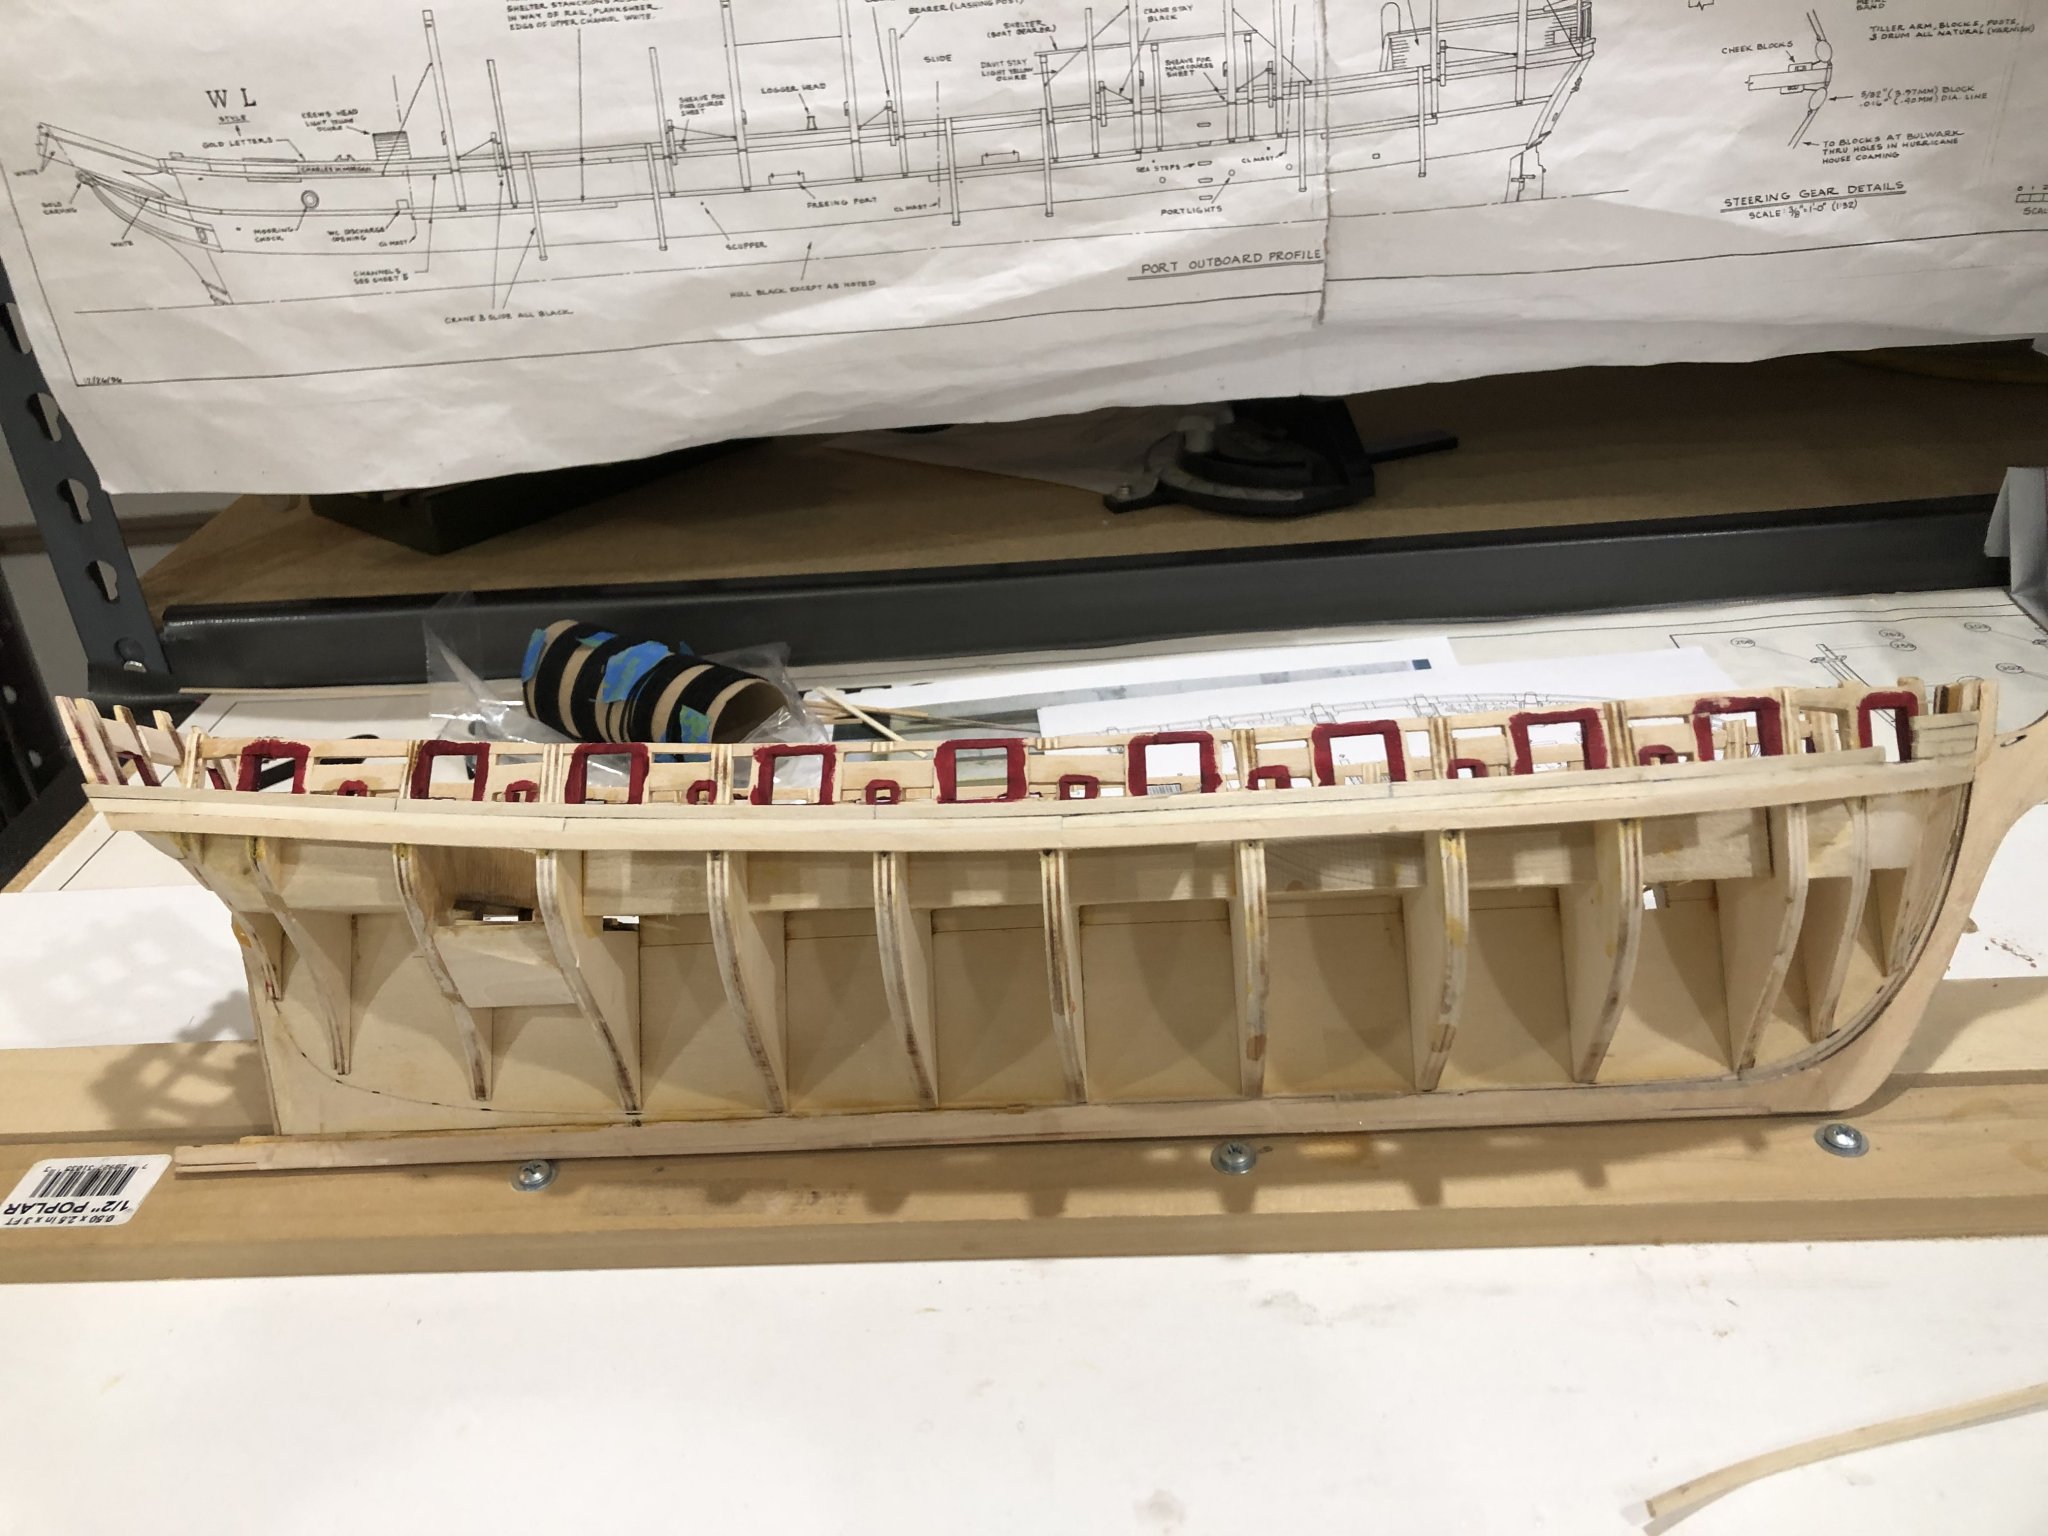
PS I forgot to mention the wood in its many shades of yellow, tan, or grey. I realized the I'd have to sort the kit wood for each area that was going to be stained and not painted. Look at the pictures and you'll see the different colors of the basswood.


-
Very nice Maury. I've been following your log and now started to follow with MSB so I get your updates on a regular basis. I'm using TurboCad to develop plans and loft the brigantine Leon from Harold Underhills plans but with so many copies of copies of copies the plans are quite unreliable as the waterline have become blurred. I friend of mine has suggested my starting a pungy she schooner from plans he bought from Mystic Seaport years back. So I'm very interested in your model and the research you've put into getting a very nice model.
Great looking model the scale really shows the models construction details.
Will
- mtaylor and FriedClams
-
2
-
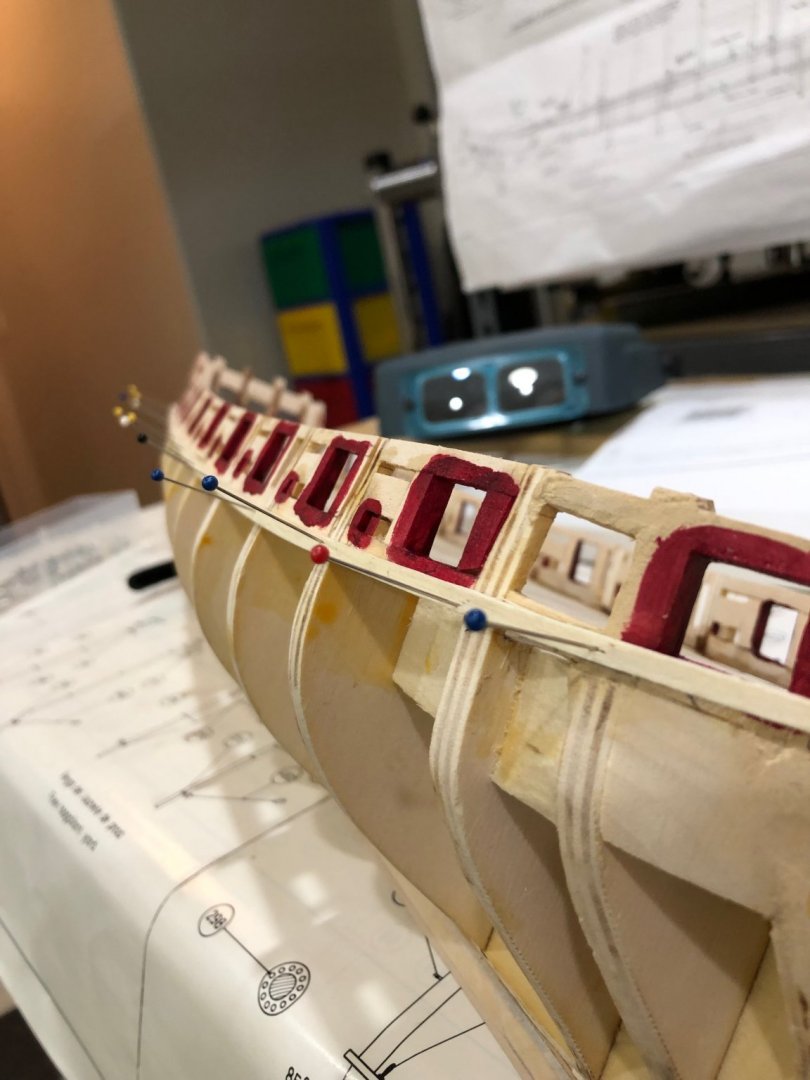
Paints dry and now onto first wale. I used a 1/8" strip that i'd bent to fit the shape of the deck plan to determine if my construction matched up with the laser marks on the frames. With the battens on I looked at the line from all directions, felt it looked good and went to lunch and a swim. Came back in much refreshed and the battens didn't look as good as I first thought, so I took the pins out and moved the middle up until the run looked good from all angles. Checked the the batten to the laser marks and sure enough the marks on frames 6, 7, 8 & 9 were approximately 1/32" lower than my batten top. Question, question, and question where was the difference. I took 7 pieces of 1/8" strip and glued the together like the planking will be, using the jig of strips I started moving down the sides to see if the jig aligns with the top of the wale and the top of the bulwark. It aligned perfectly along the entire length of the batten, so!!!!!! I guess its correct. Went back and checked everything again with the same result. Being a retired engineer (I know an electrical one but still and engineer) as the saying goes "there comes a time to shoot the engineer and go to production". I put the wales on.
Wale photos to follow
Will


- J11, Mahuna and Edwardkenway
-
3
-
Painted the gunport and sweep ports with sanding sealer and then used 400 girt wet and dry to smooth the insides of the ports prior to painting. Spent a fair amount of time cleaning the surfaces to be painted by vacuuming and then wiping with new tack rags to get all the dust and debris off before painting. I'm painting with acrylic paint and am using Winsor & Newton Professional Acrylic on my models. For the red color I'll use vermillion straight from the tube and thinned very little. I really like the color with the contrast with golden oak stain and black trim, pops nicely but not too bright. I'm going to use english holly on the deck with a diluted golden oak stain to give a golden bleached look. Can't wait to see, but first things first.


- GrandpaPhil, Mahuna, Ryland Craze and 4 others
-
7
-
Getting ready to start hull planking as described in chapter 5. First thing is to paint the gunport and sweep port frame linings vermillion red. Sanding them out to prepare for painting I remembered something I read somewhere "PHOTOGRAPHS SEE AND REVEAL EVERYTHING" so I took closeup photos of gunport and sweep ports and boy what a mess. I then spent the rest of the day filing out each port using small swiss cut files. Take a photo, file more, photo, file more until satisfied.
After all completed I'll paint with sanding sealer and check again tomorrow. Thing to remember is PHOTOS REVEAL EVERYTHING.
Will
- Matt D, Ryland Craze, GrandpaPhil and 3 others
-
6
-
Got stern gunports installed using the same 15/32" square tool used on the port and starboard gunports. Counter filler blocks installed without incident. Marked the bulwark fairing on the outside counter as described in the manual using a wood strip. Faired the counter to the bulkwarks and the counter frames, what was amazing was that I did this without breaking one of the frames. Man are they fragile.

- Edwardkenway, J11, Mahuna and 1 other
-
4
-
Well here I'm back after many interruptions. Spent way too much time putting on the stern counters. What a pain in the ***, but after many starts and one broken i've got them done to my satifaction. Now on the gun ports and fillers.


- Ryland Craze, Edwardkenway, J11 and 2 others
-
5
-
-
Mike
i read your entire log and now I’m getting ready to start my galley. Still trying to decide on which wood type to use when picked I’ll then rip and mill to size. I think I’ll start my log when I order my timber.
i love your work and have one question, oh maybe more but one for now. Did you use silver solder on the stove? Ok another question what silver did you use sheet, wire, or paste?
your work is amazing and something to try for
Will
-
I’ll check this out tomorrow
thanks


US Brig Syren by WalrusGuy - FINISHED - Model Shipways - Scale 1:64 - Second wooden ship build
in - Kit build logs for subjects built from 1801 - 1850
Posted
The copper pattern looks really nice when the plates are in such neat rows. Greet work. I like your approach to the punch using steel wire as I've read where some people use syringe needles which scared me. Looking forward to your progress.
Will