


niwotwill
-
Posts
586 -
Joined
-
Last visited
Content Type
Profiles
Forums
Gallery
Events
Posts posted by niwotwill
-
-
Thanks Patrick and all for the likes and comments. The fenders were make from yellow cedar as the basswood didn't stain to match the bulwark planking it gets dark on the cut edges as it works like a sponge and soaks up the stain to almost black.
Stay well and be safe
Will

-
Thanks Mike for the words of encouragement. This is my first scratch and I'm learning how to use my new tools especially the scroll saw, but you are right it's getting faster and not so much going into the scrape bin.
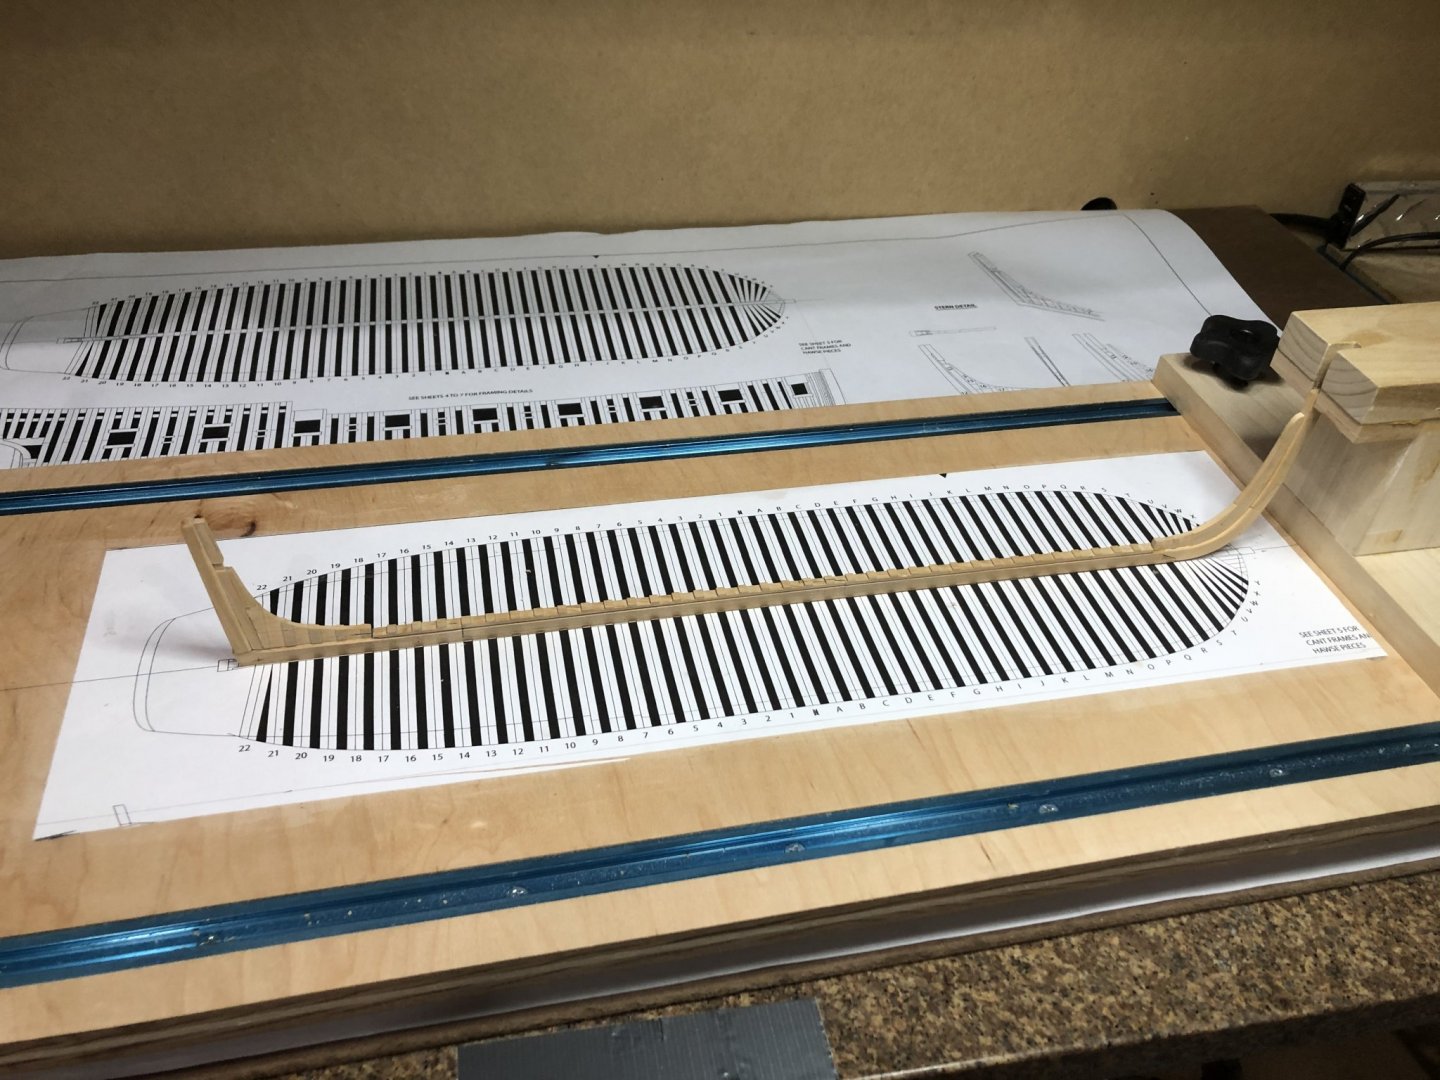
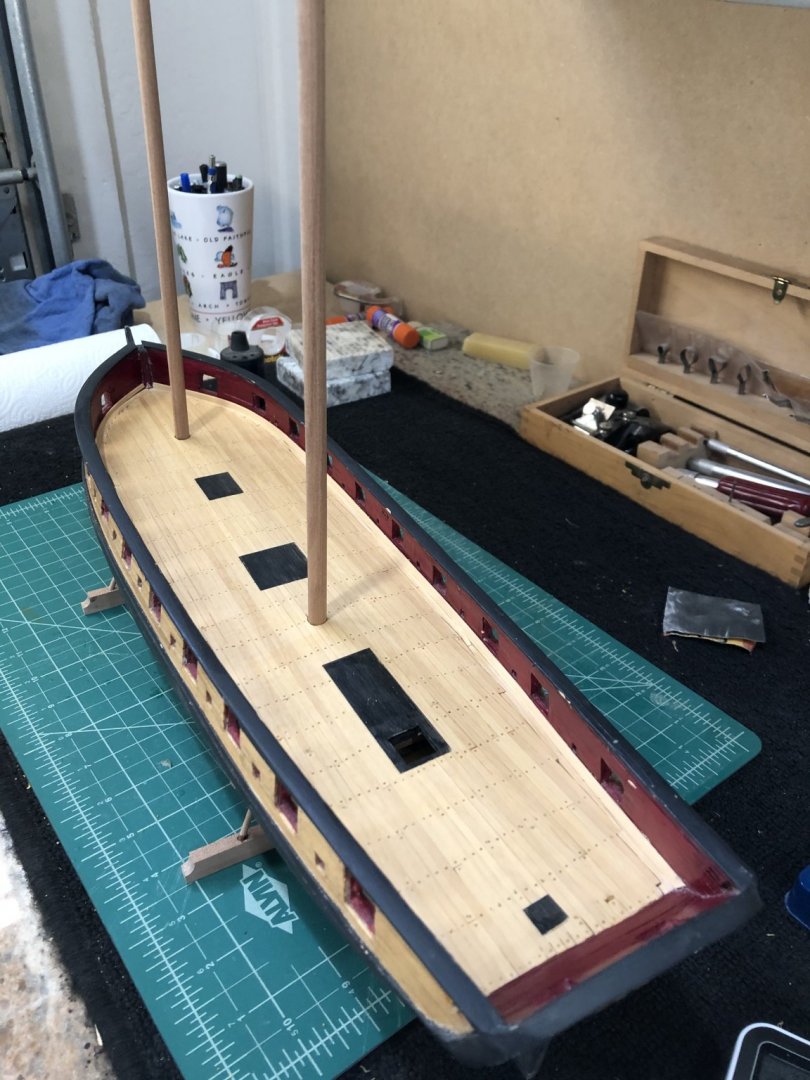
Just a brief update more to let all know I am still here working on frames in my spare time. Today I stepped "G" and cut and getting ready to assemble "H", "I" and "J" so tomorrow I'll be ready to step "H" since I can do one a day waiting for glue to dry.
A picture of the current status
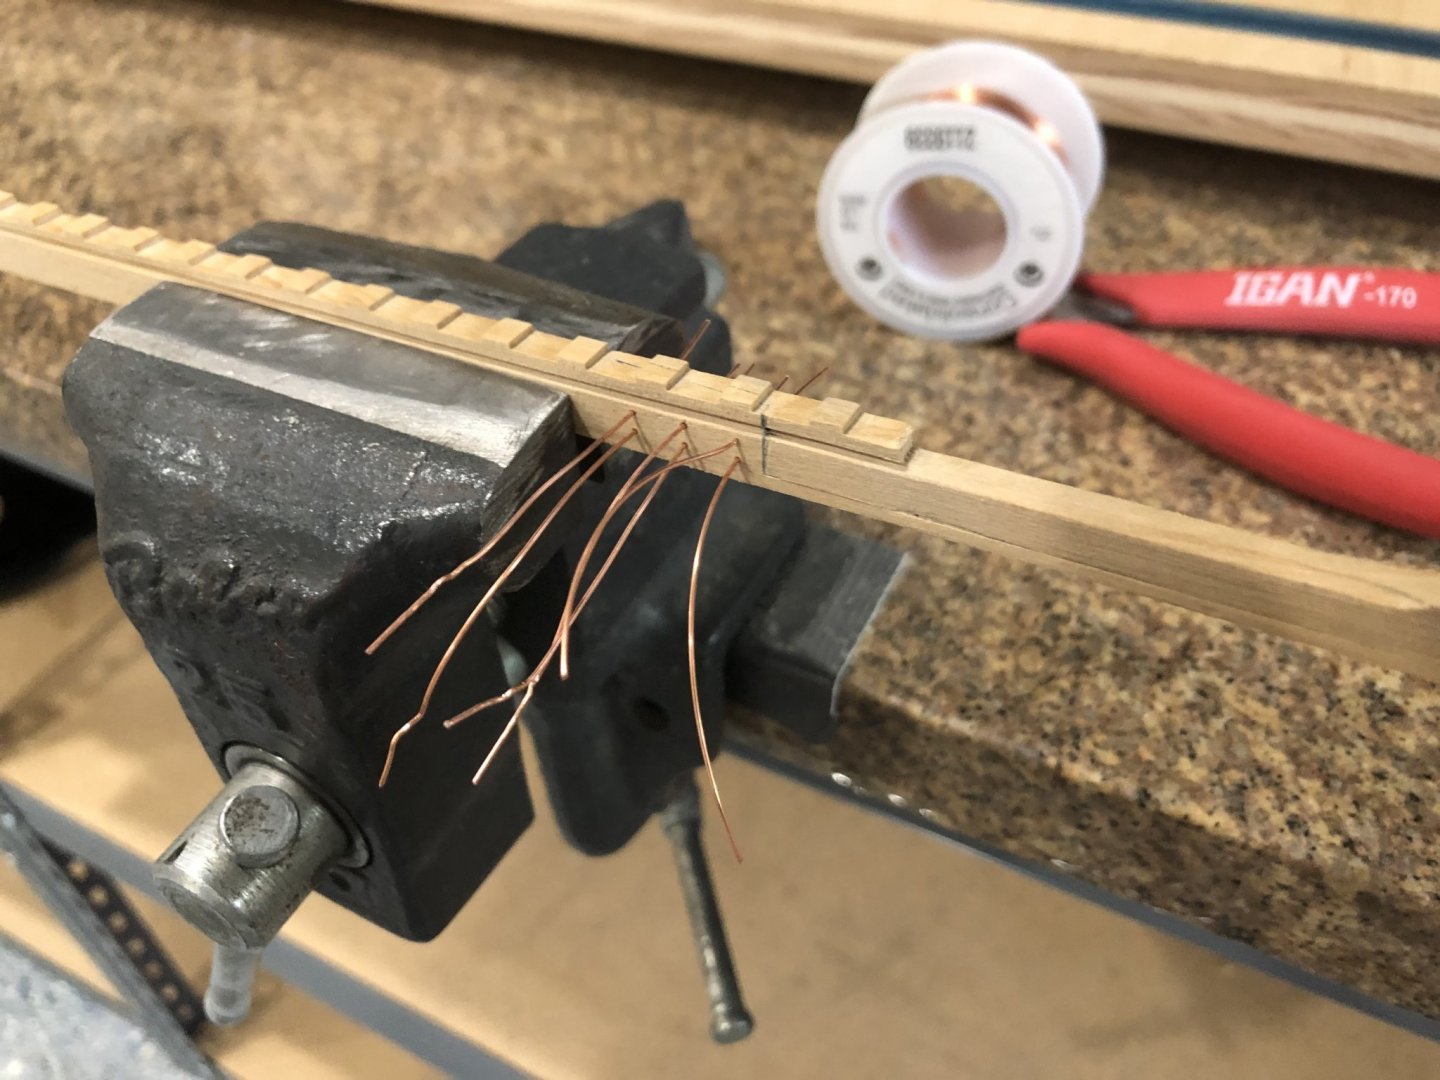
I just realized this is the status up to "F". I don't know if I mentioned that I'm using 22 AWG bare copper wire and then blacken them with liver of sulfur which does not stain the wood. You can see the joints with the colored glue showing nicely to simulate the "goo" they used to seal the open ends of the frame pieces. I'm using Ed Tosti's method of using raw umber pigment powder mixed into Titebond II.
More in a coupe of days
Stay Well and Safe
Will
-
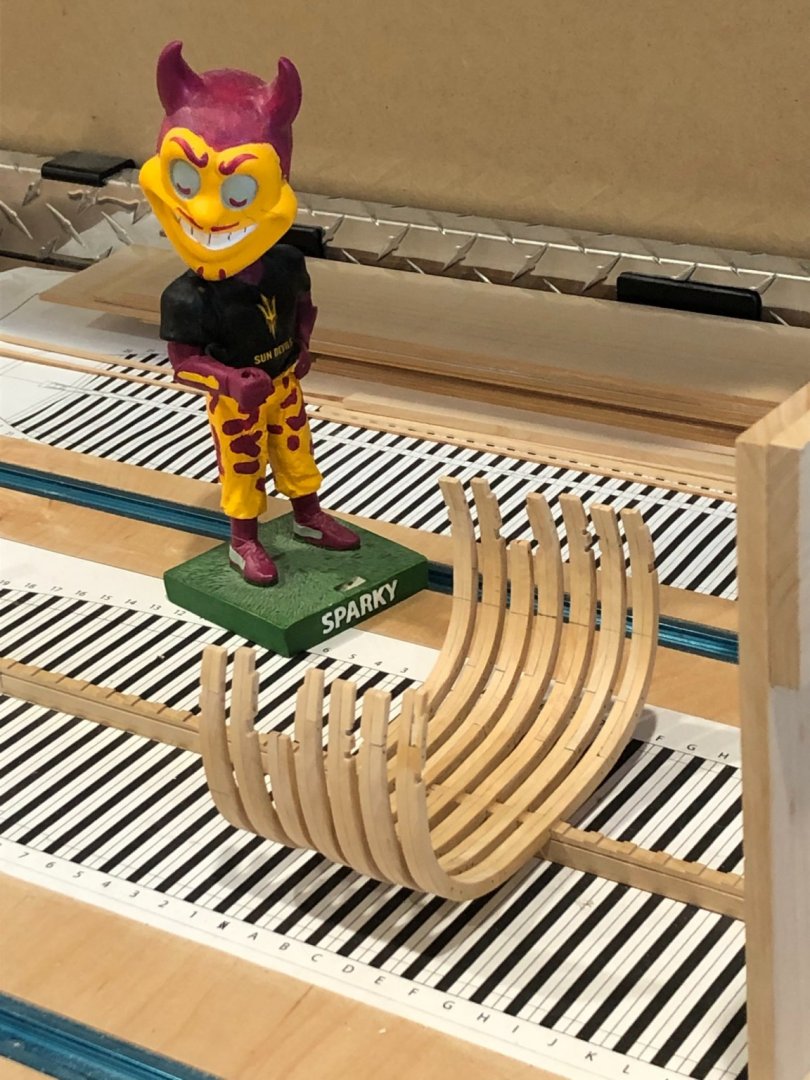
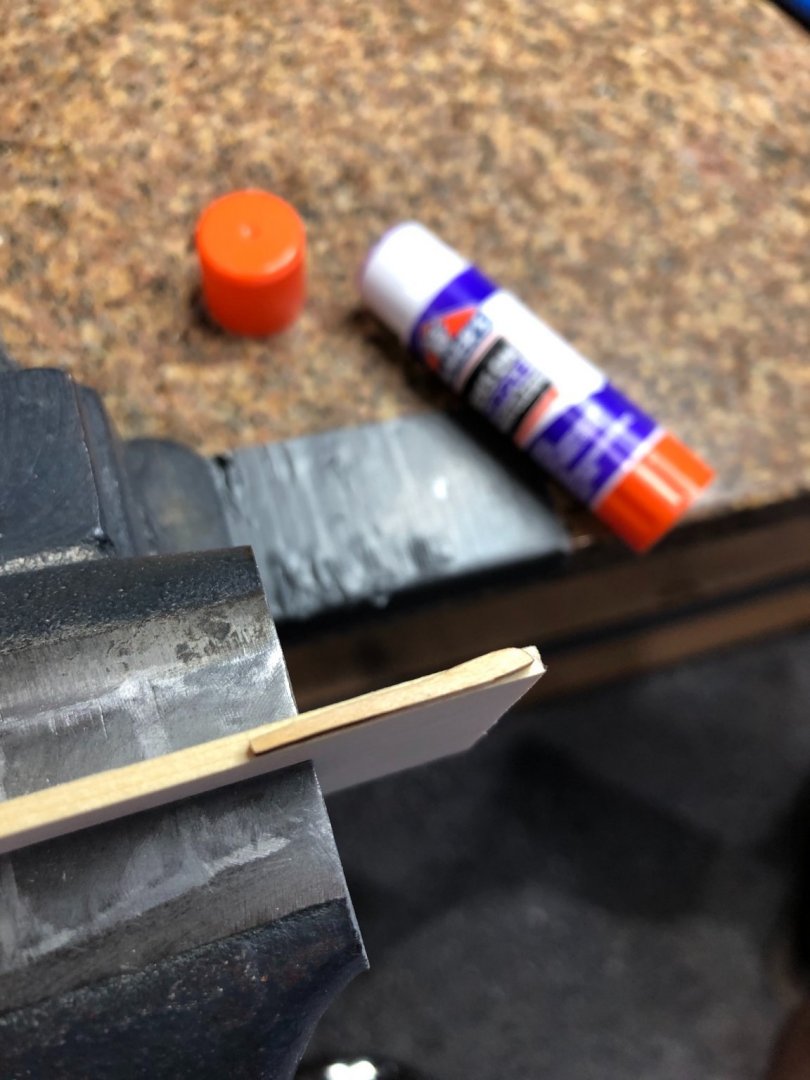
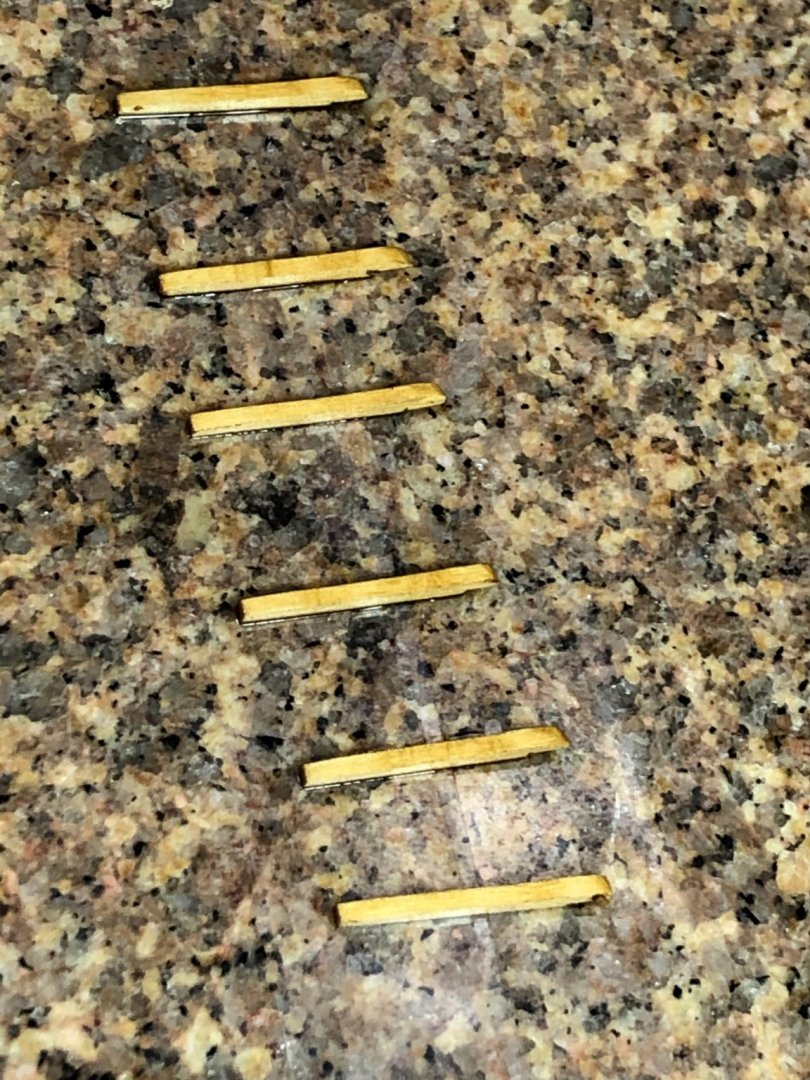
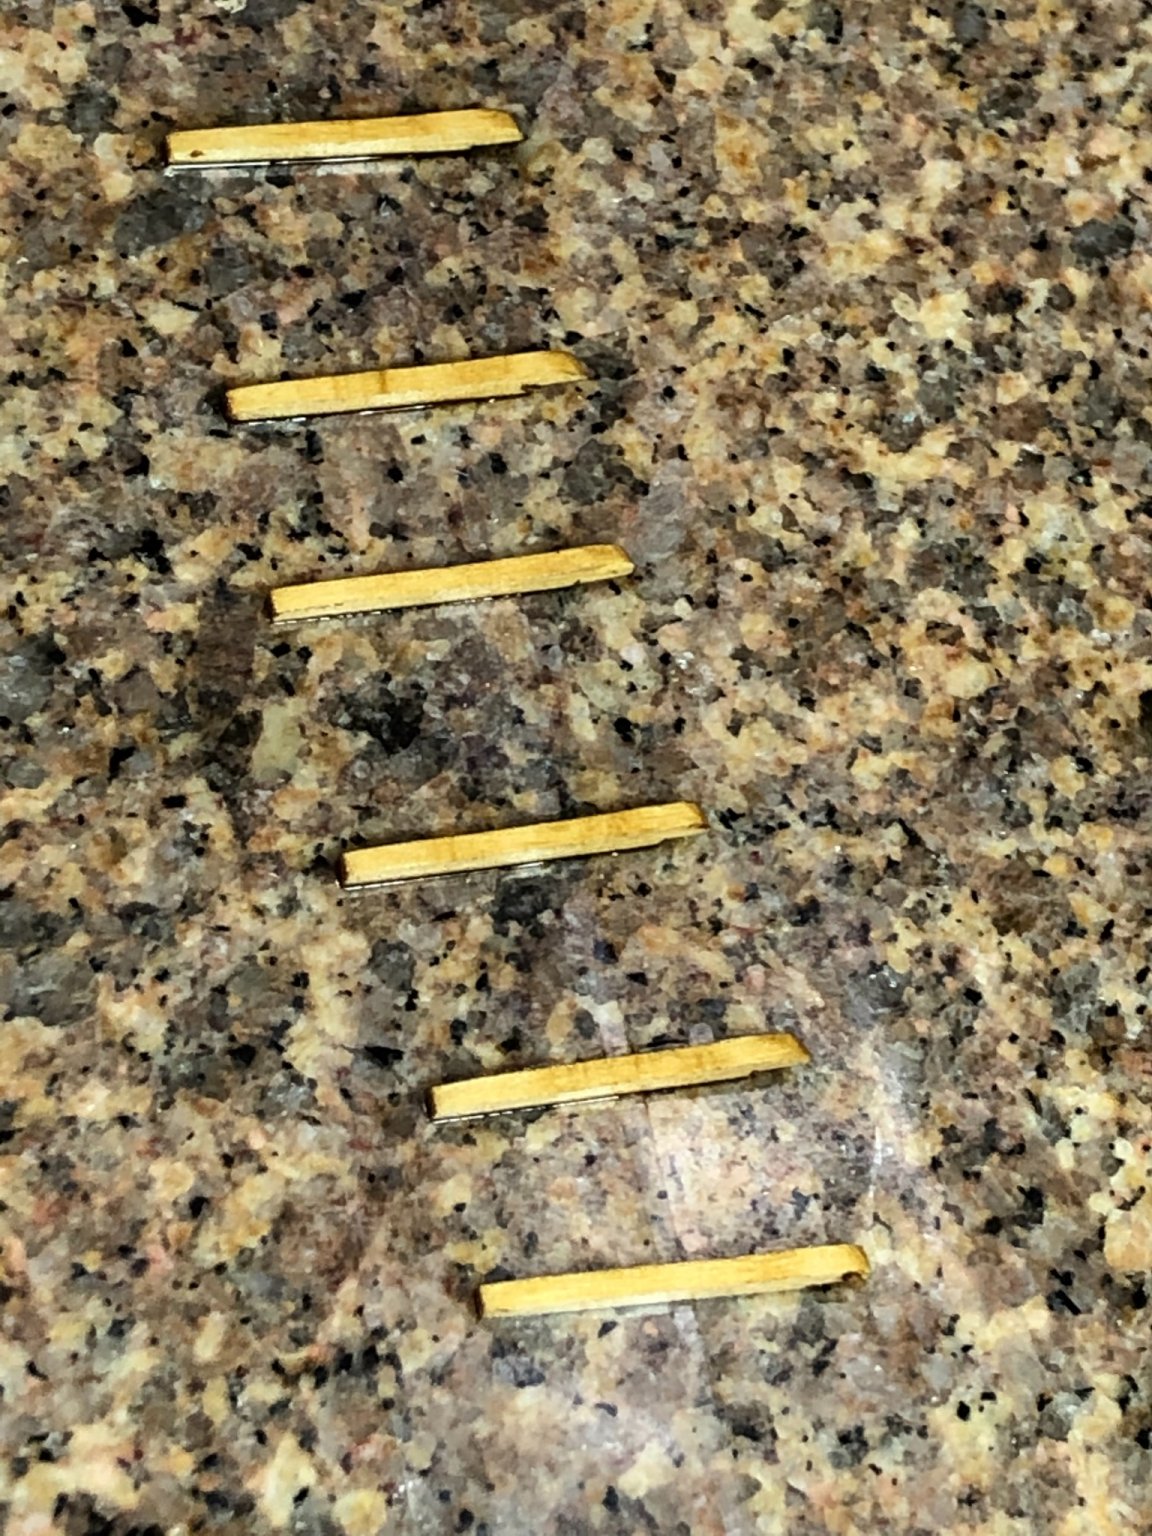
Well chapter 9 is finished gun port and sweep port lids made and mounted. I tried to use the basswood fenders and chesstree but the stain didn't come out well and was way off in color/texture against the cedar stained bulwark planking so I made new ones of cedar. Making the parts was a straight forward process where I milled a piece of cedar to the fenders width and then glued a basswood fender to the edge of the cedar to use as a pattern and sanded the cedar to shape then using a slitting blade sliced off the new parts.
Using the glue stick works great enough adhesion but water soluble to remove
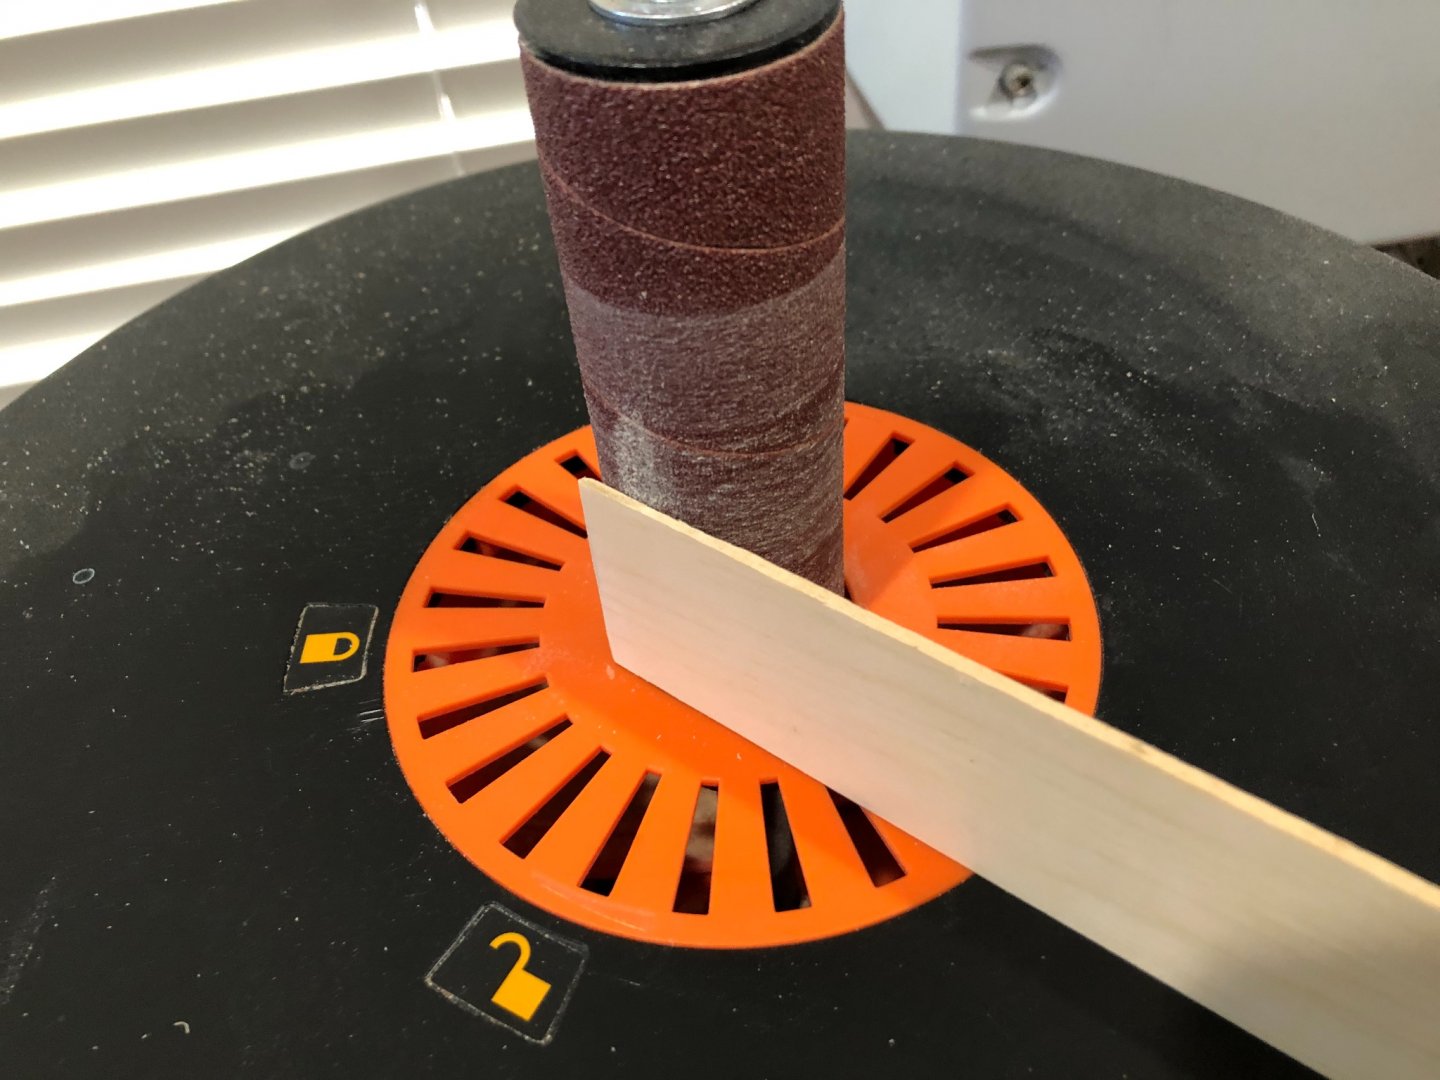
Using the drum sander to get uniform shape the width of the cedar
Stain the parts on double sided tape with the edge to be glued against the tape
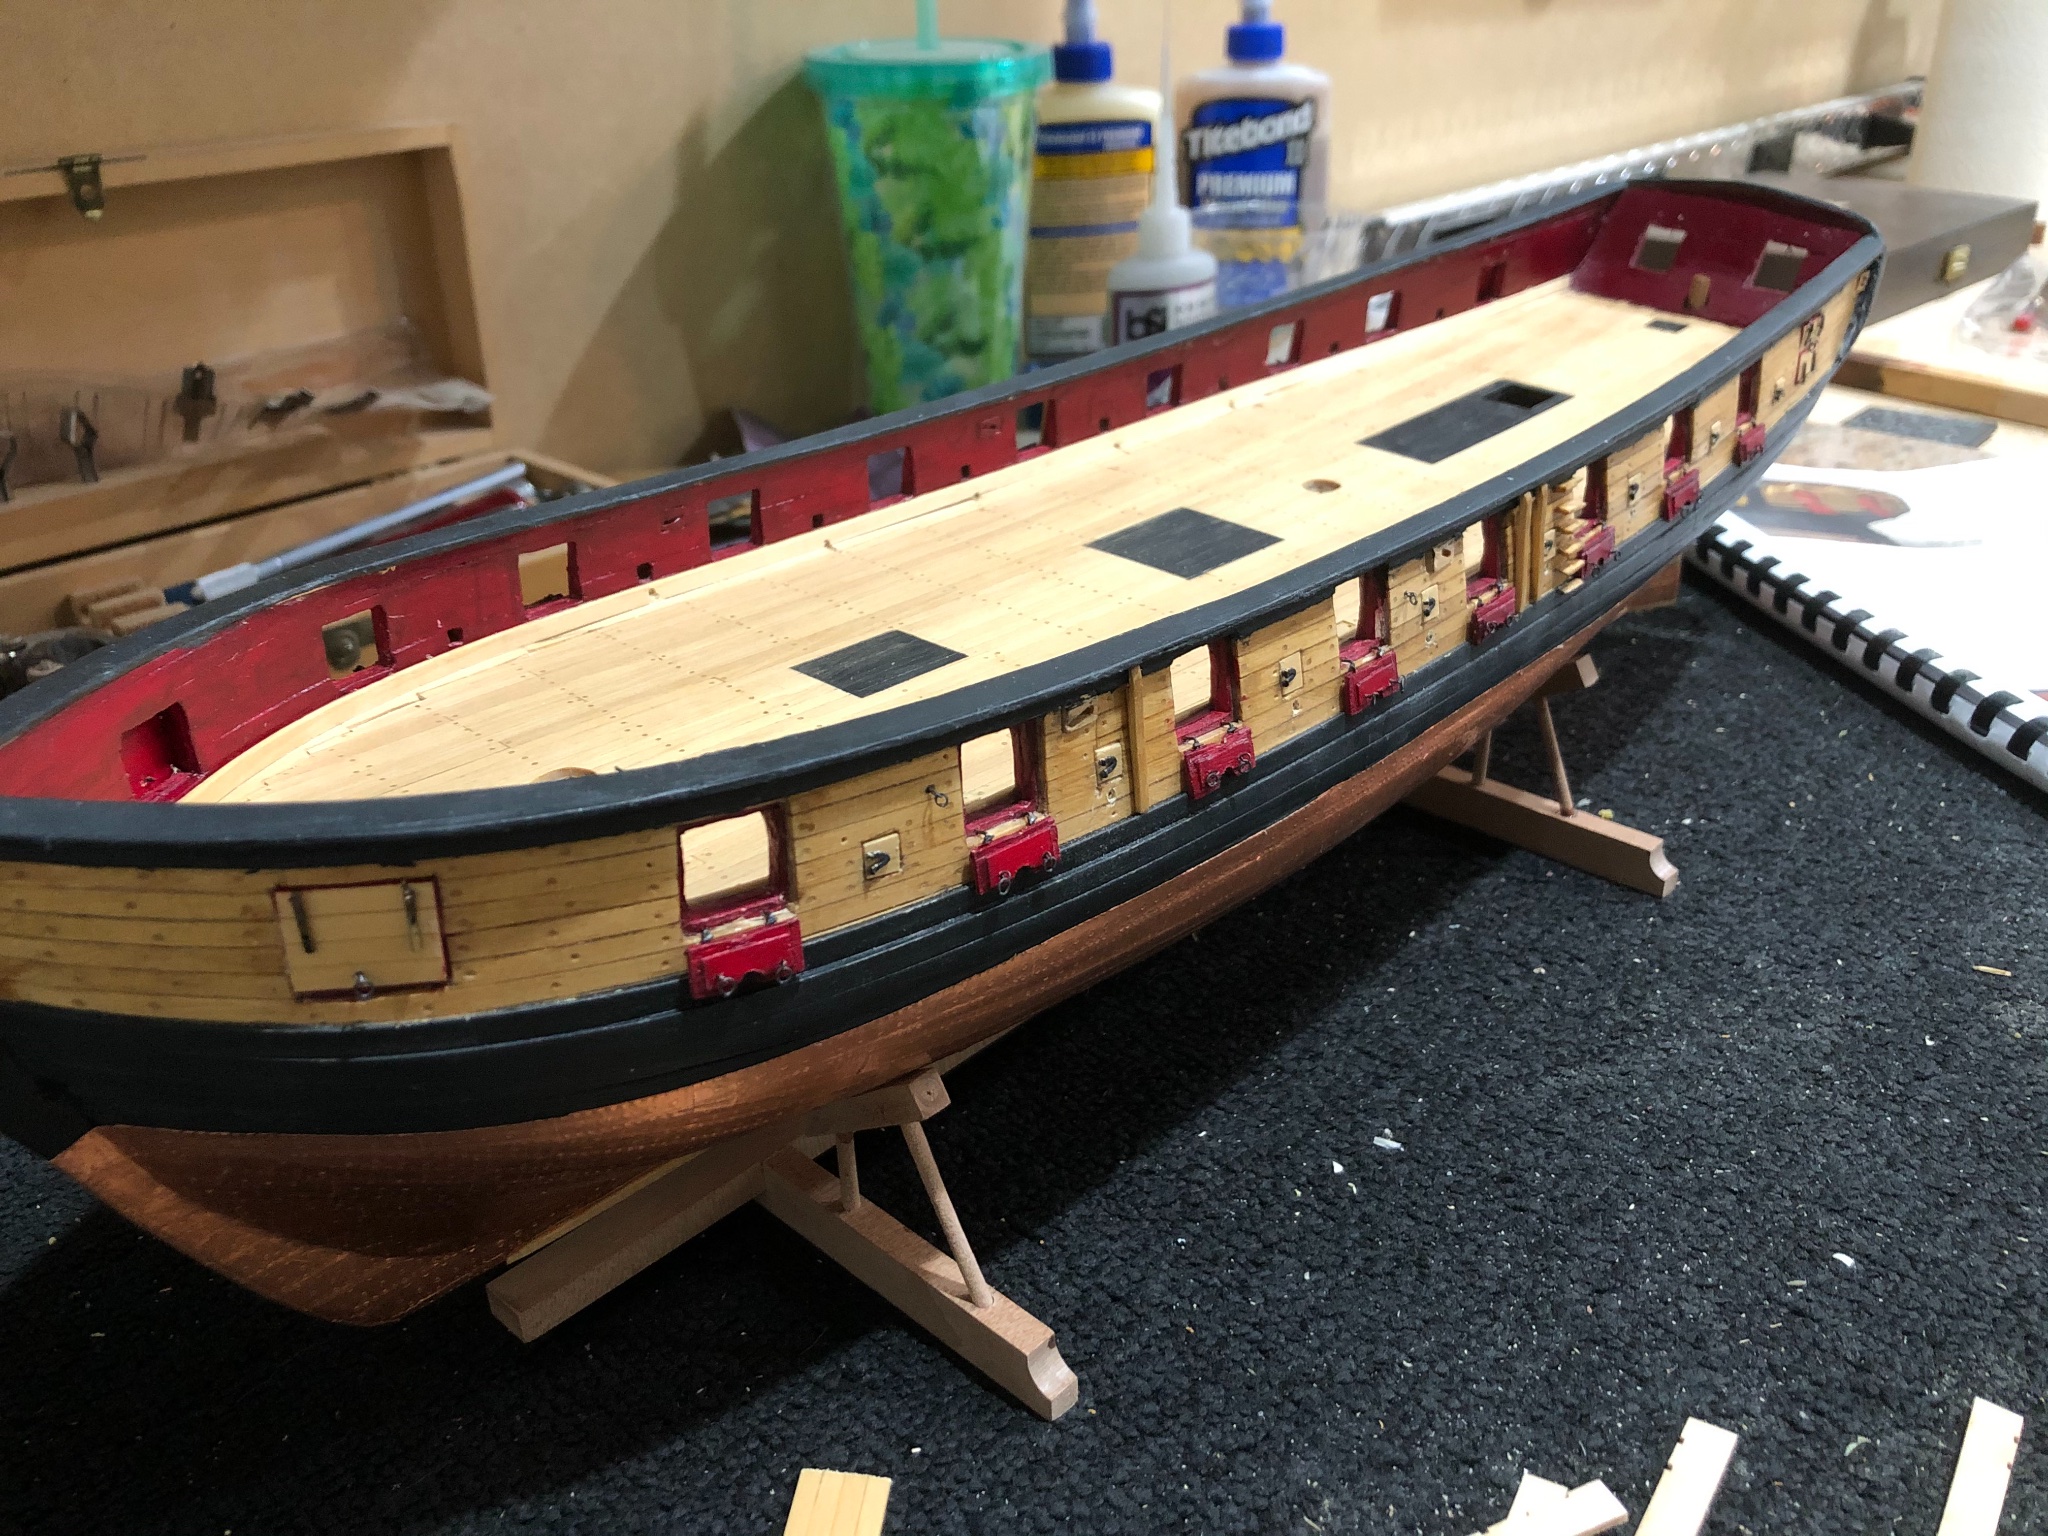
The channels were straight forward to make and mount I did drill a hole into the channel and a corresponding one in the bulkhead with a 22 AWG copper wire to make them very sturdy.


The Syren after chapter 9
Now on to the dreaded chapter 10 (Head rails and Cheeks) not looking forward to this chapter.
Thats it for now
Stay well and safe
Will
-
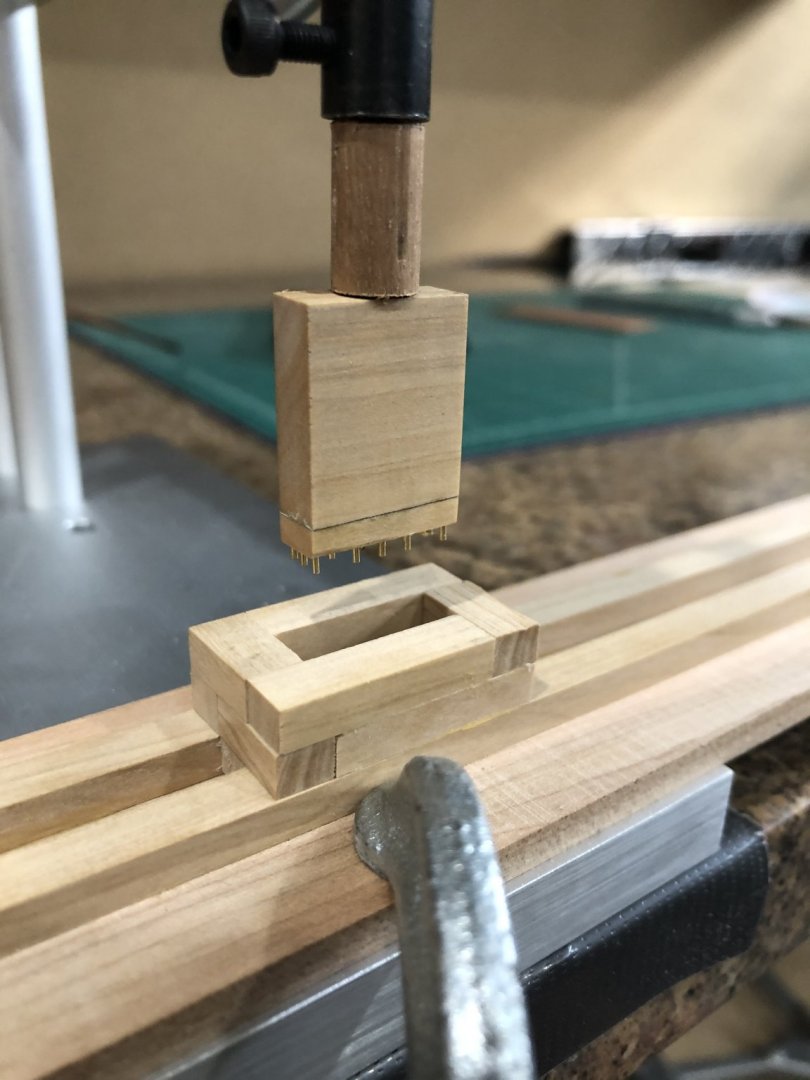
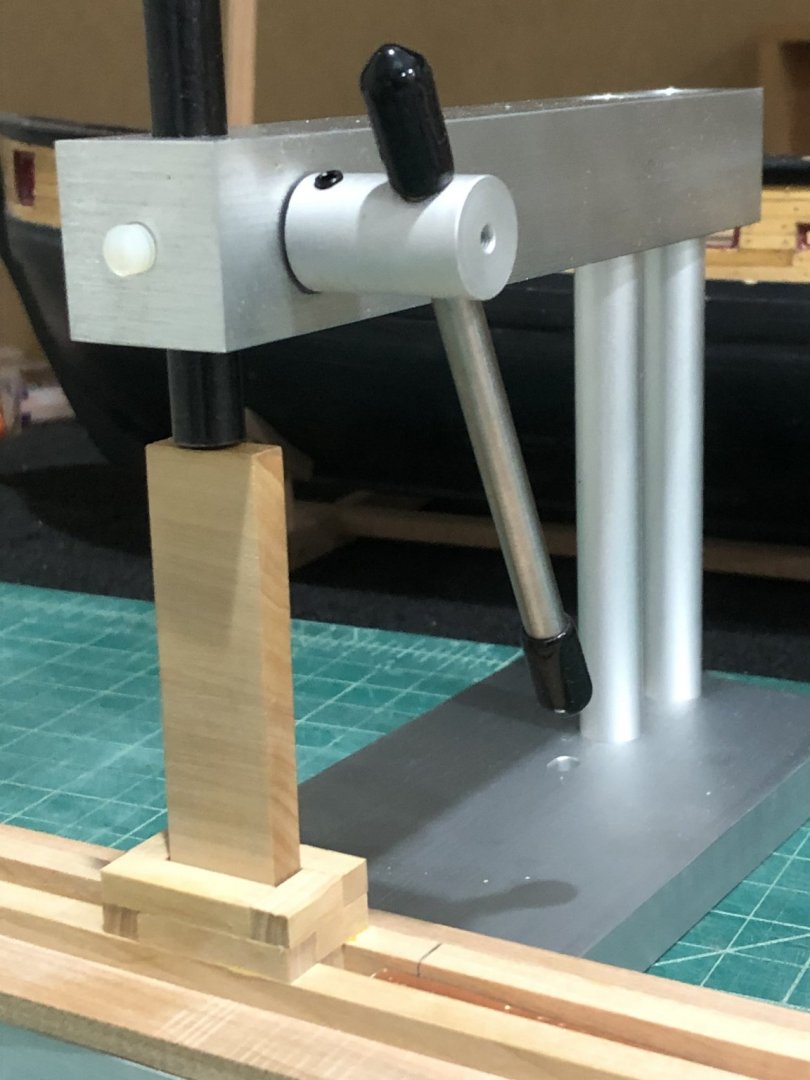
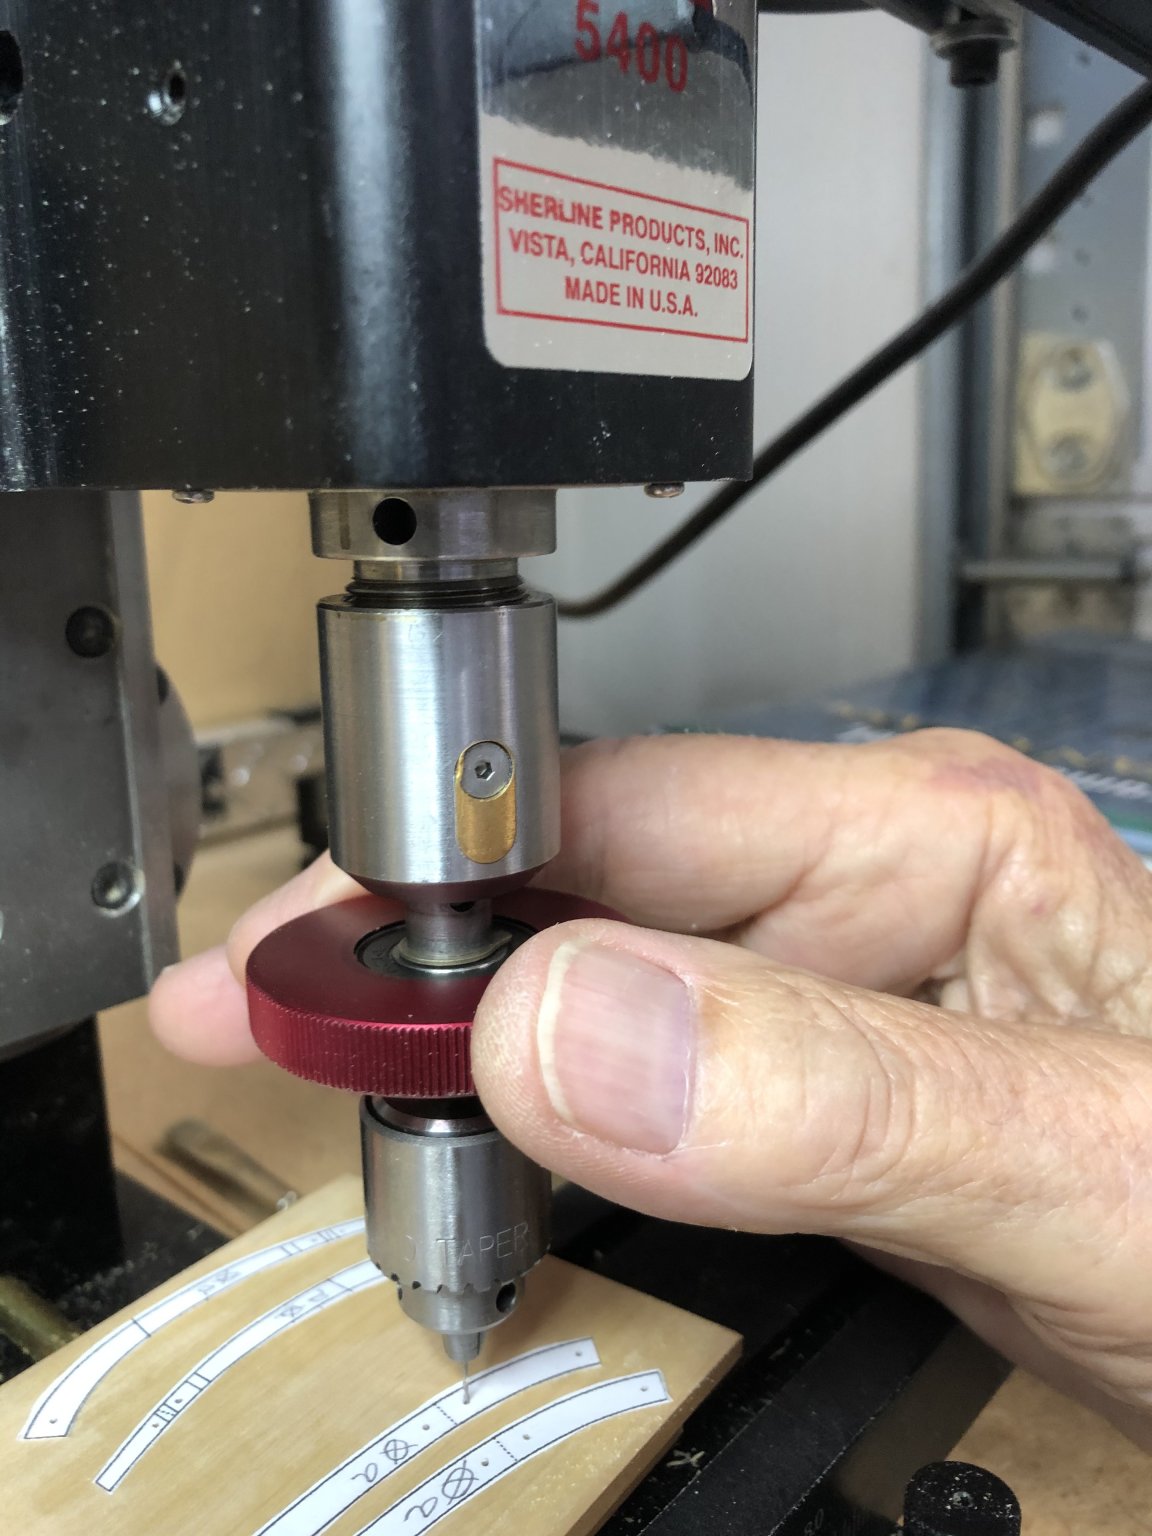
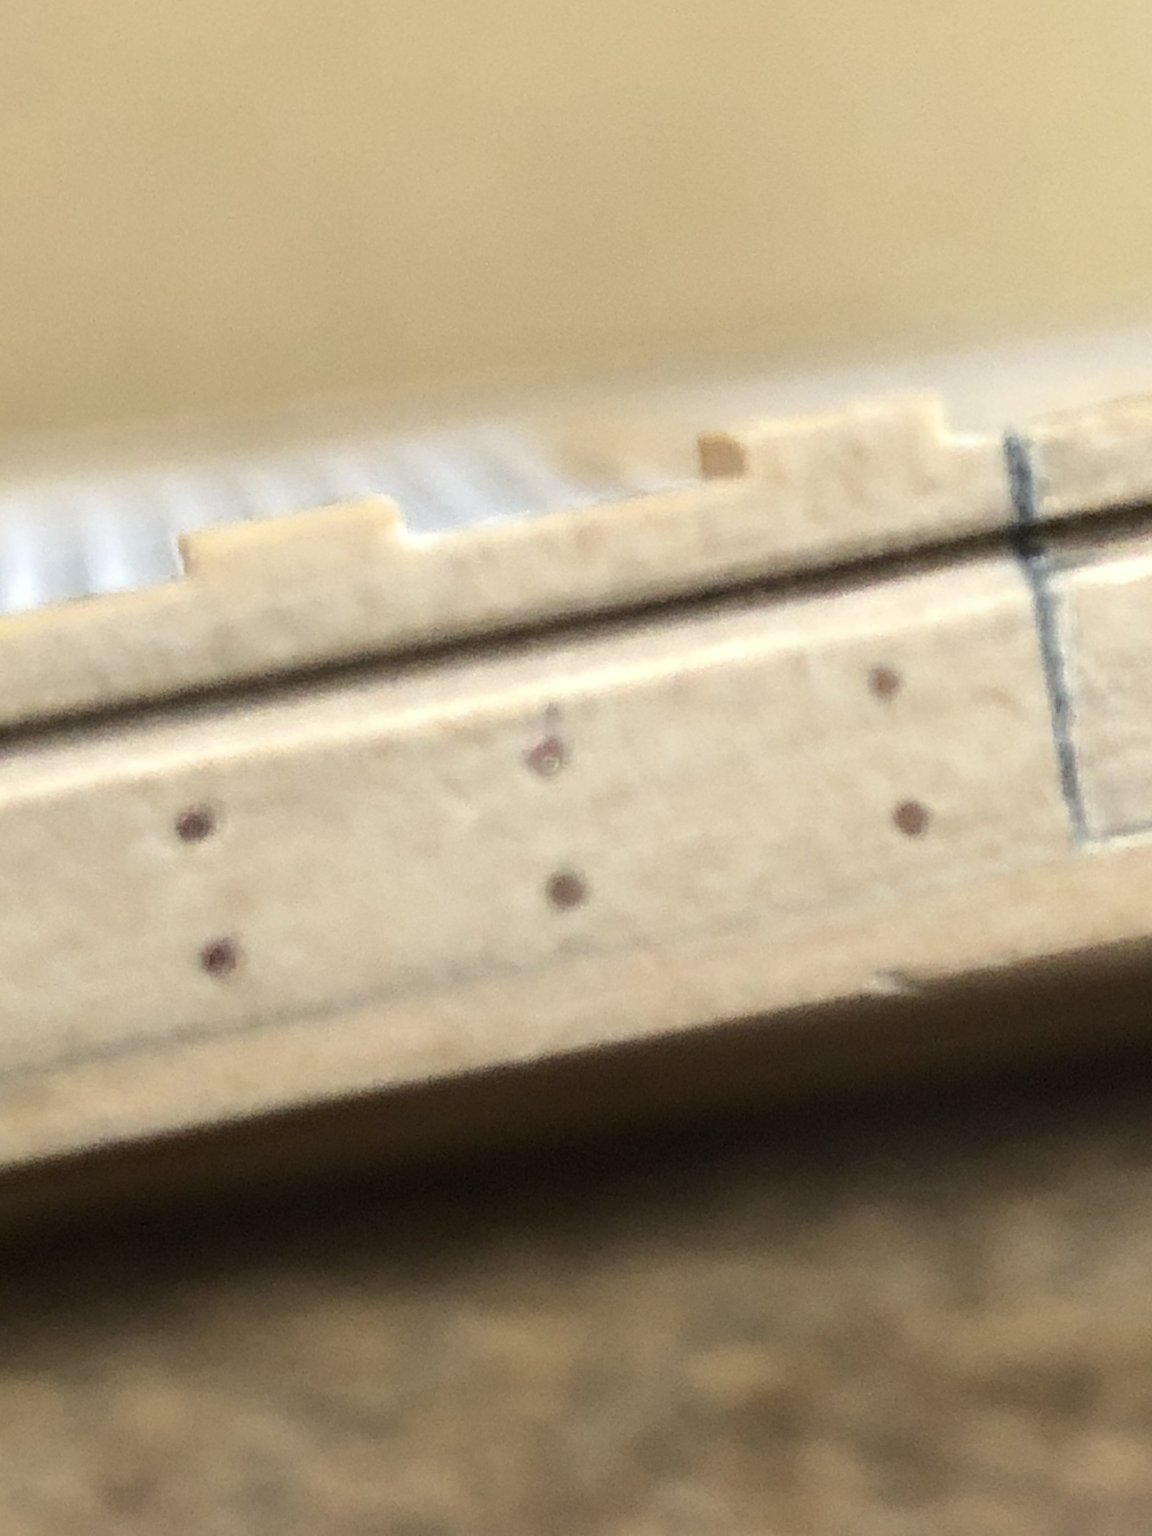
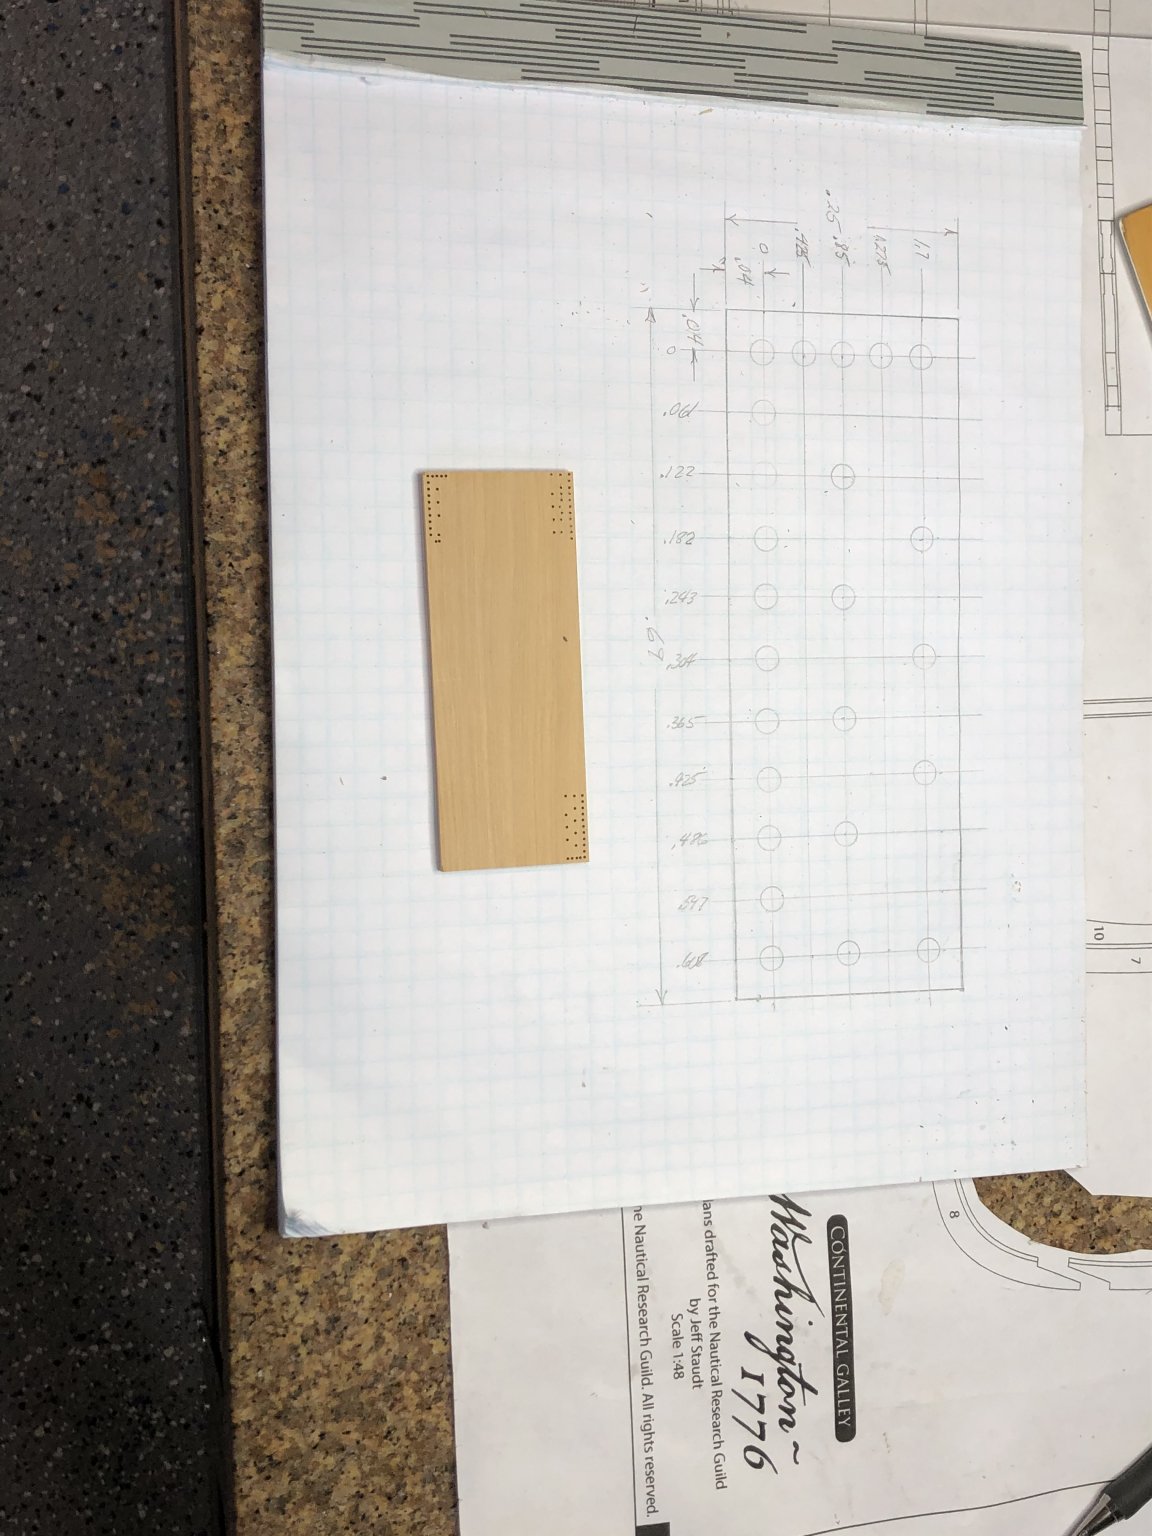
I finally took some time out from other models to work on the Washington. Patterns for frames 0, A, B, C, D, E, F have been cut and frame 0 was glued to a piece of timber. Cut all the pieces and fit them together with just the junction points finish sanded. Using a modified Ed Tosti pinning method to assemble the frames. First take the glued patterns and drill a hole in each spot where the pattern had a dot. I drilled a .026 hole the created a snug fit to a #9 silk sewing straight pin. Then dry fitting the parts with the pins as alignment registration. When all fit you take the parts apart and glue them with the previously darkened Titebond glue. The darkened glue makes a very nice line at the joints simulating the tar substance used in 1776. (To darken the glue I use raw umber artist pigment power mixed into the glue. Empty an 8 fl oz bottle of titebond and mix in 2 teaspoons of pigment stirring until completely mixed and the color of chocolate milk. It'll darken as it drys) All the done and the first frame has been raised. Yippee. Now on the the next six.
Drilling alignment holes will have copper wire placed after assembled

Dry fitting parts after drilling and scroll saw
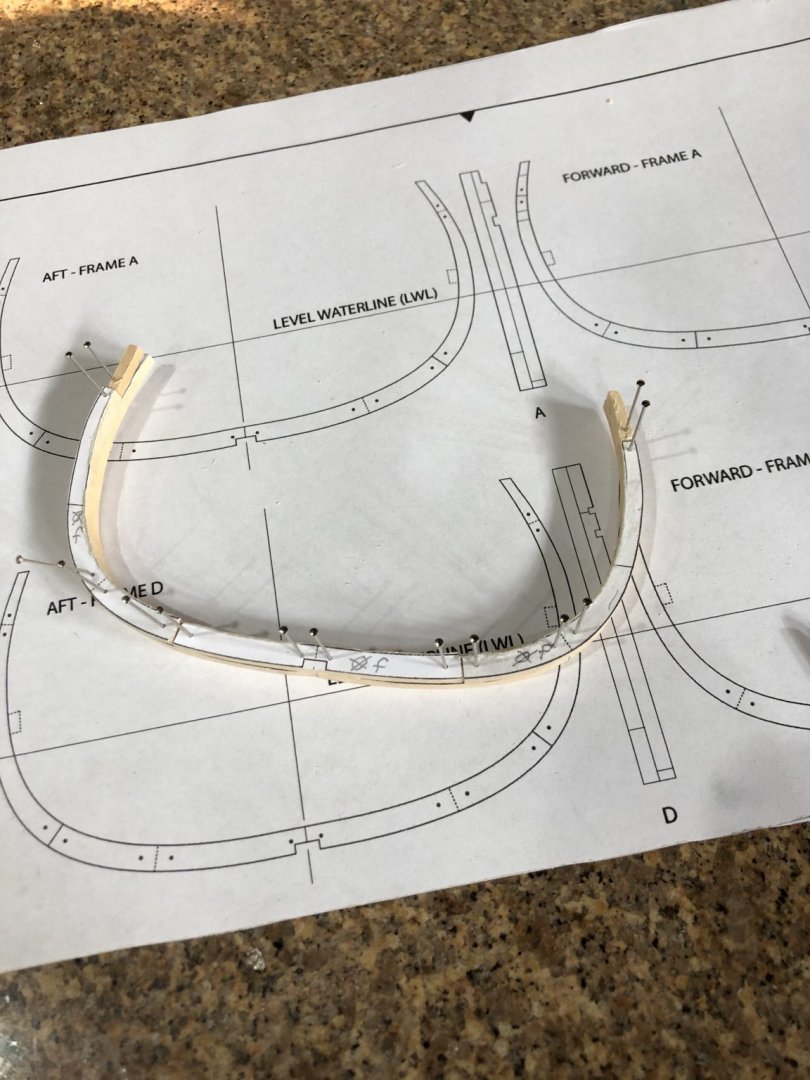
First frame raised yipee

Now back to the scroll saw for more sawdust and parts to assemble. I hope making frames gets quicker as I progress.
I'll get back to the Syren for awhile and then make more frames when I get tired of the Syren.
Stay Well and Safe
Will
-
-
I just read through your log again to refresh my memory and now i'm more impressed by your work, its looking fantastic. I now have a target for mine to achieve.
Stay safe and well
Will
Good luck in grad school, it'll be a breeze based on the Syren. One of my daughters is getting her masters degree in biomedical engineering so I can relate to what your grad school will entail.
-
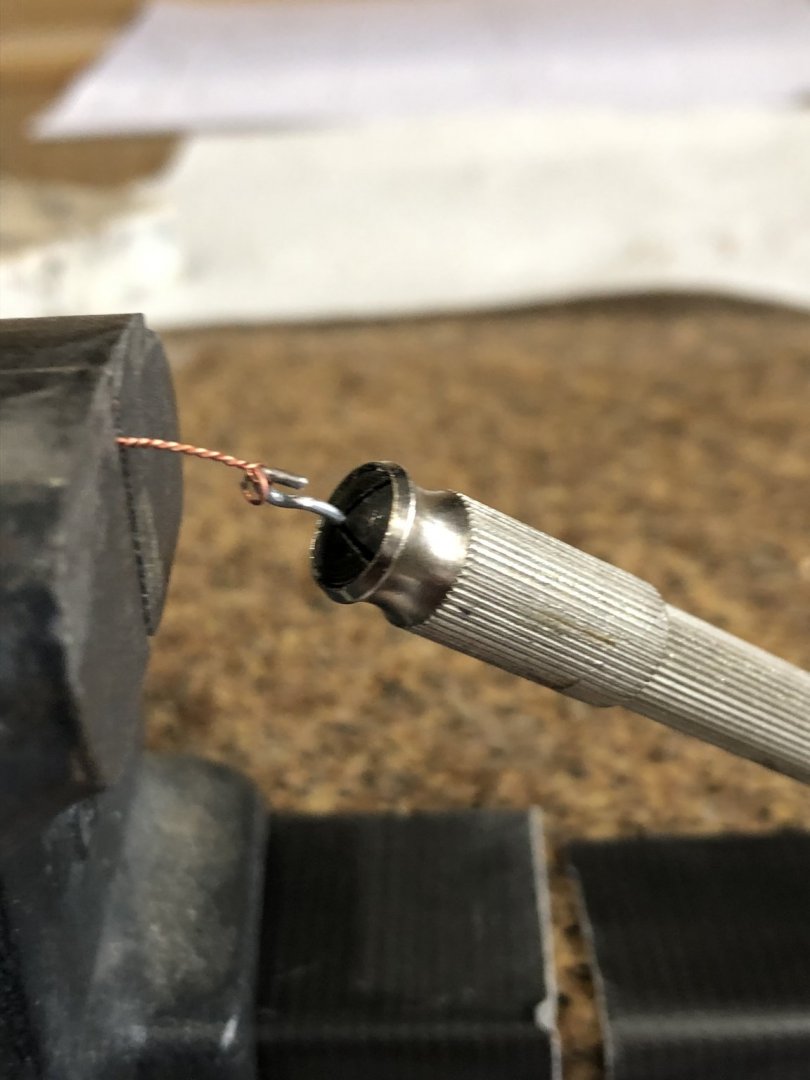
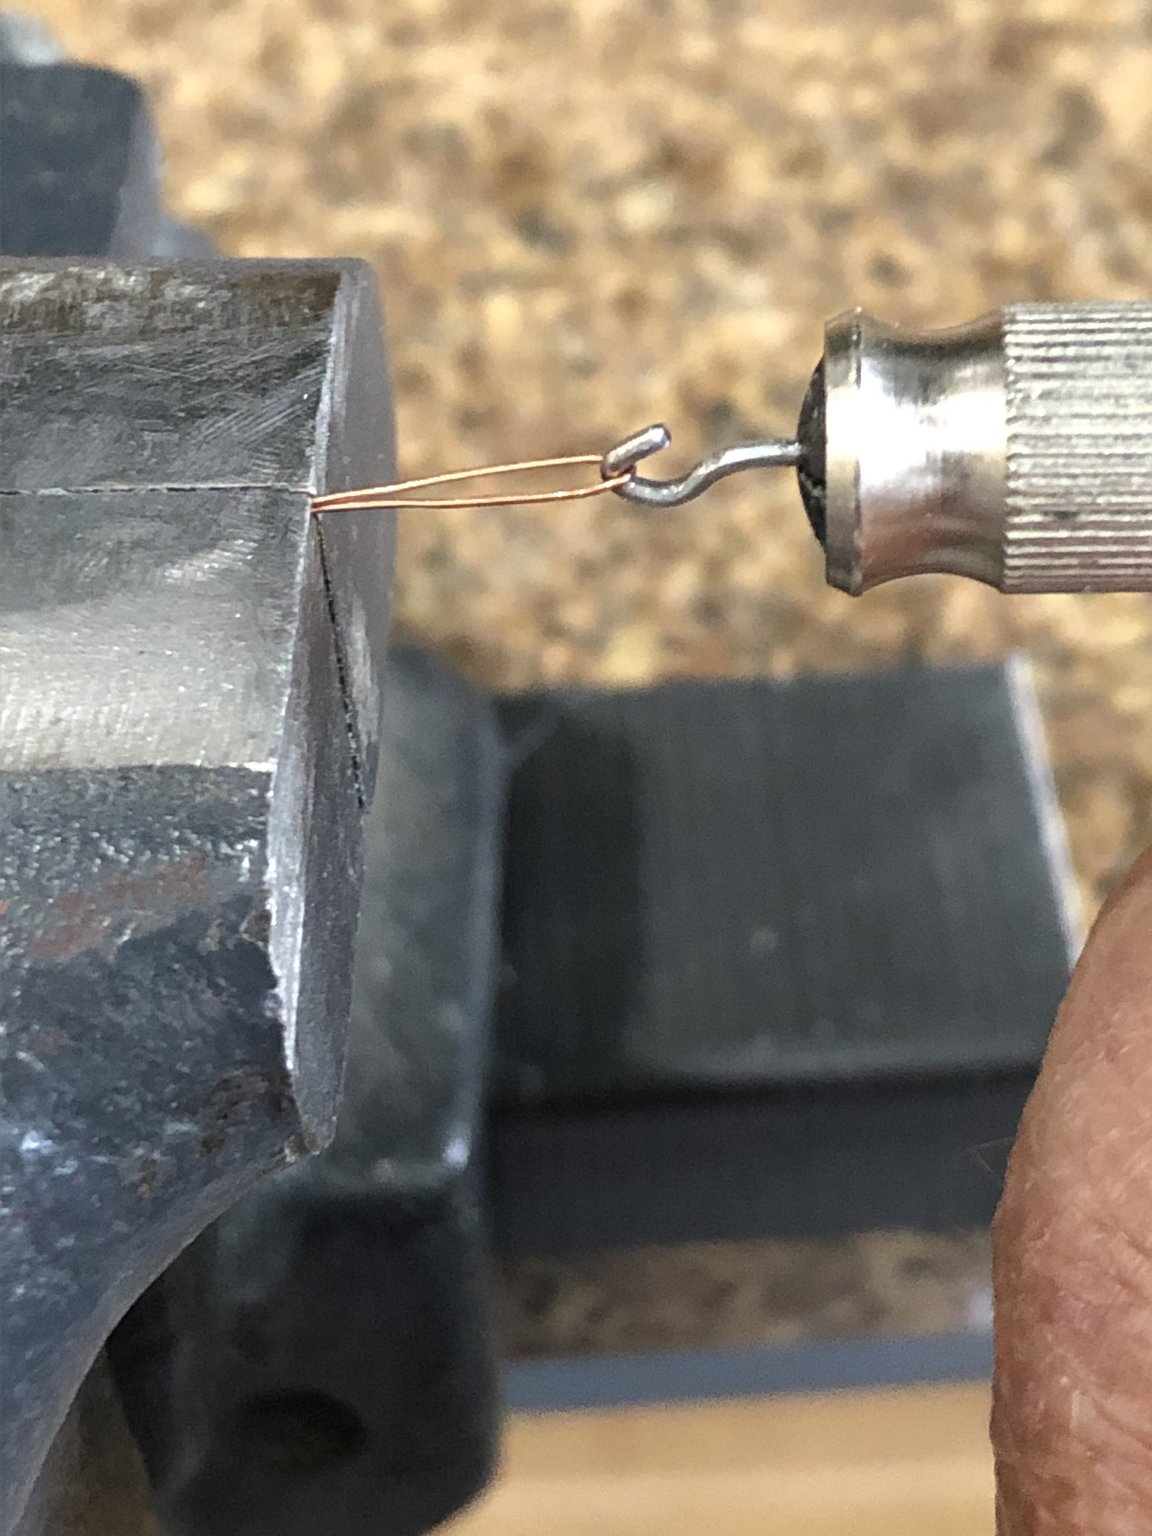
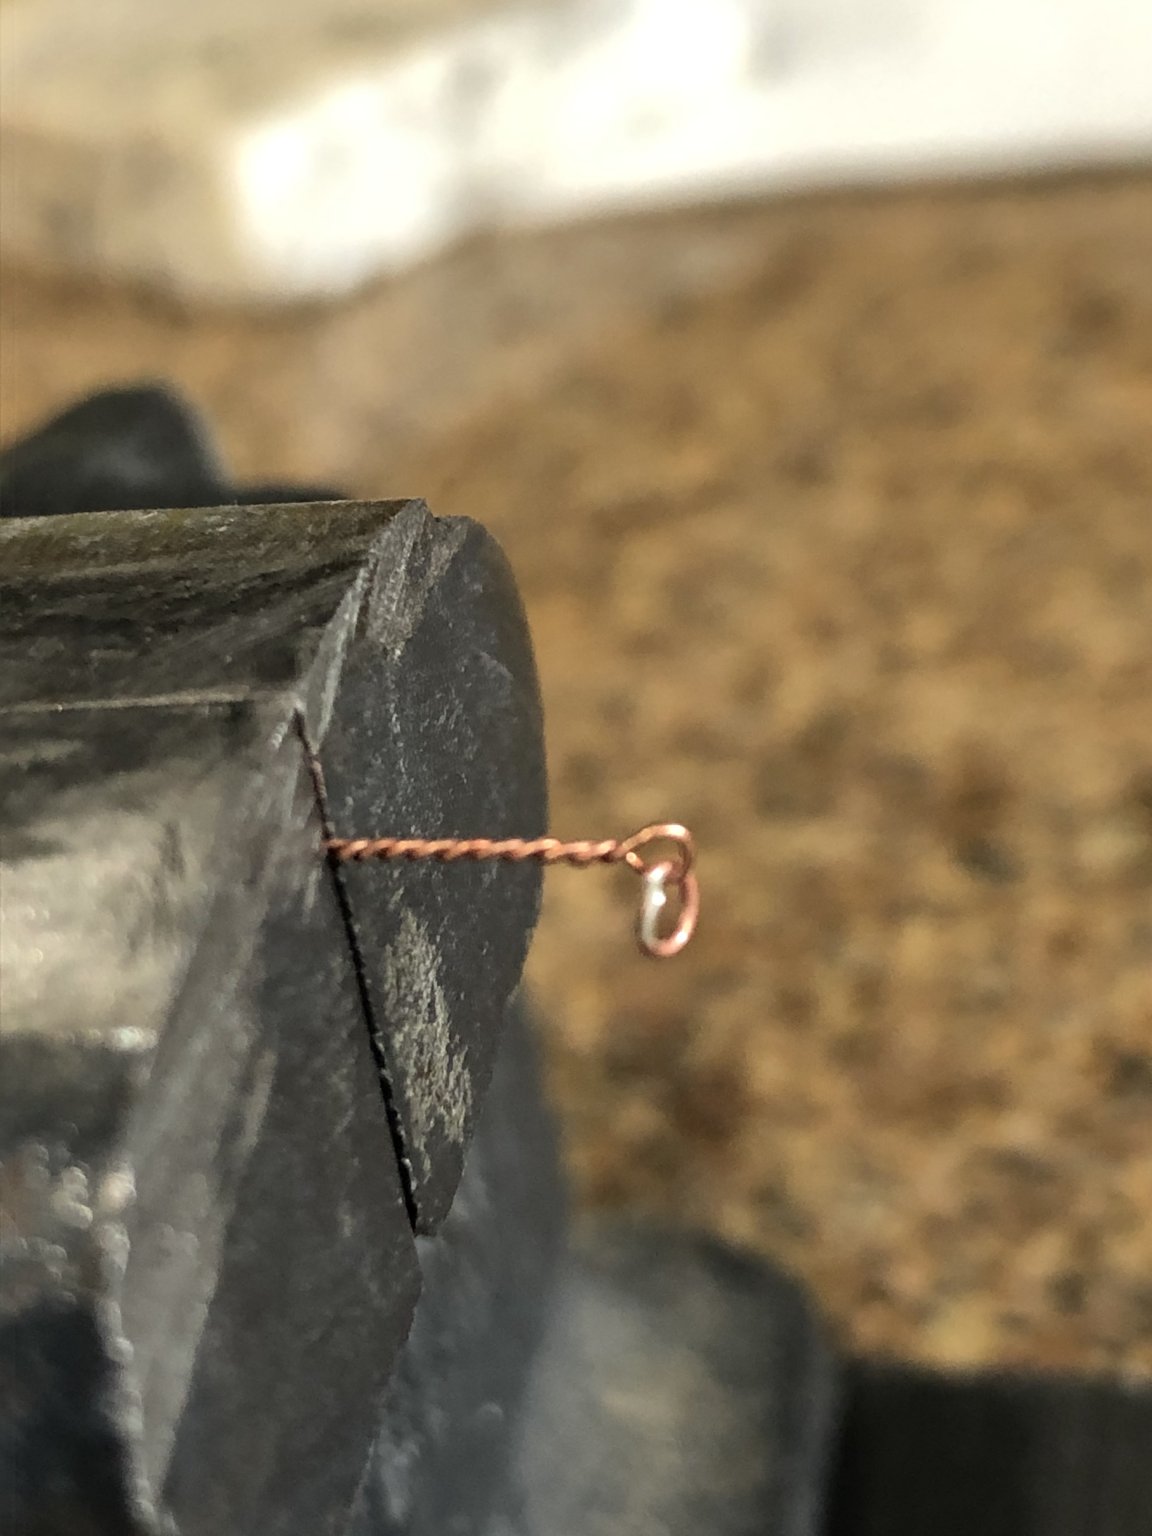
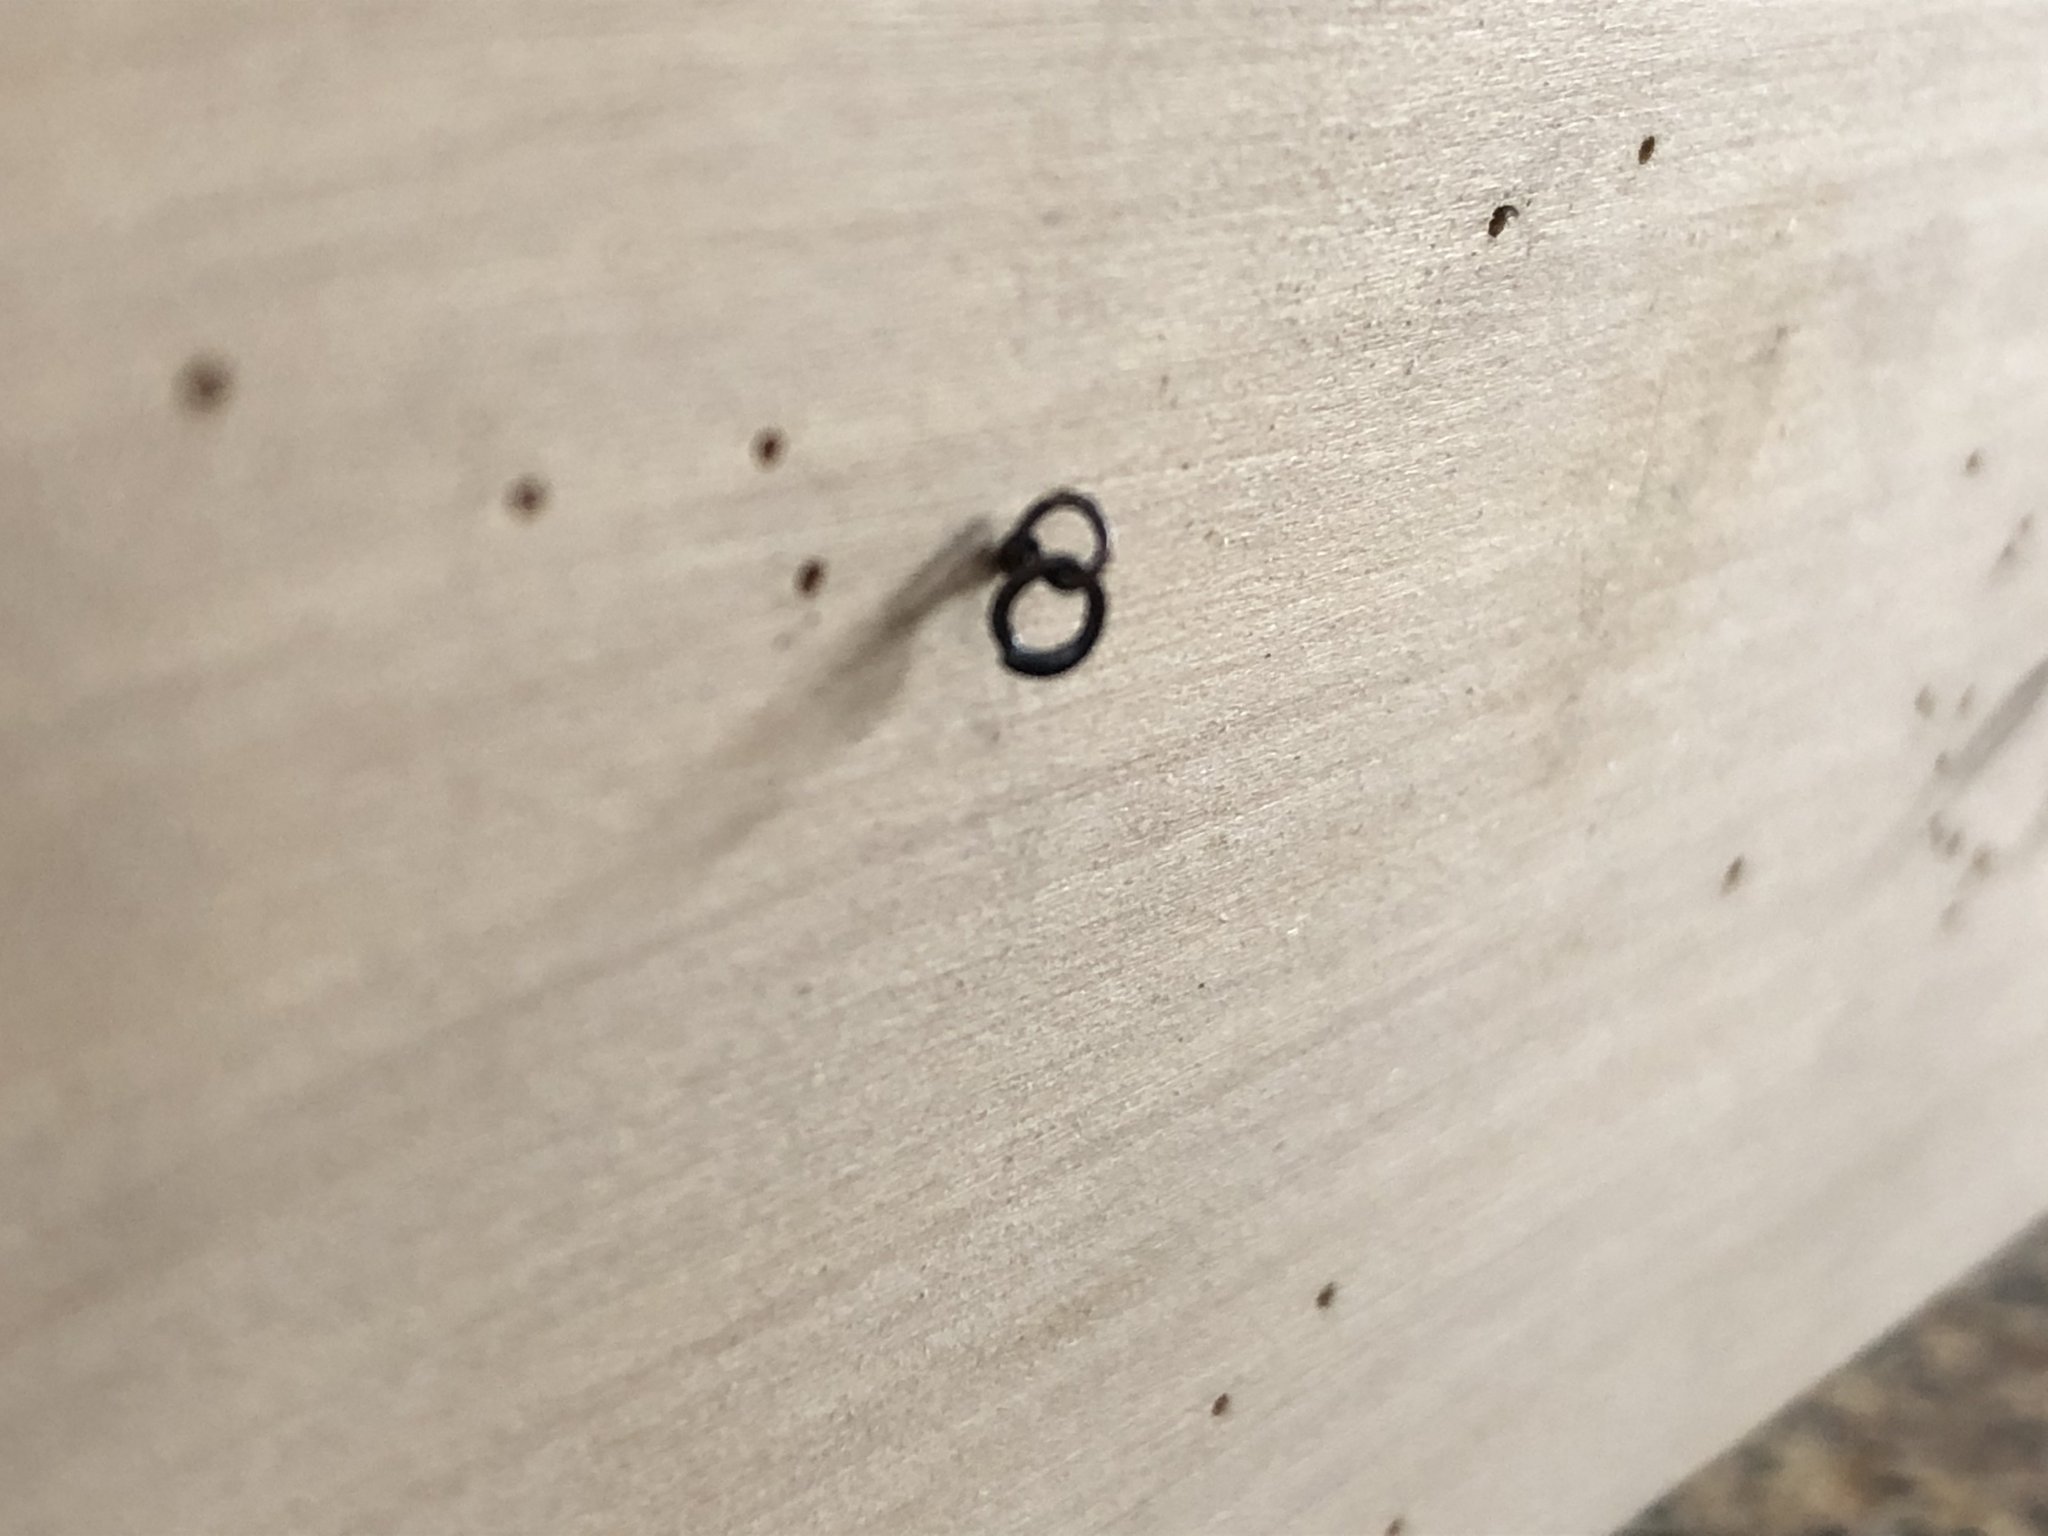
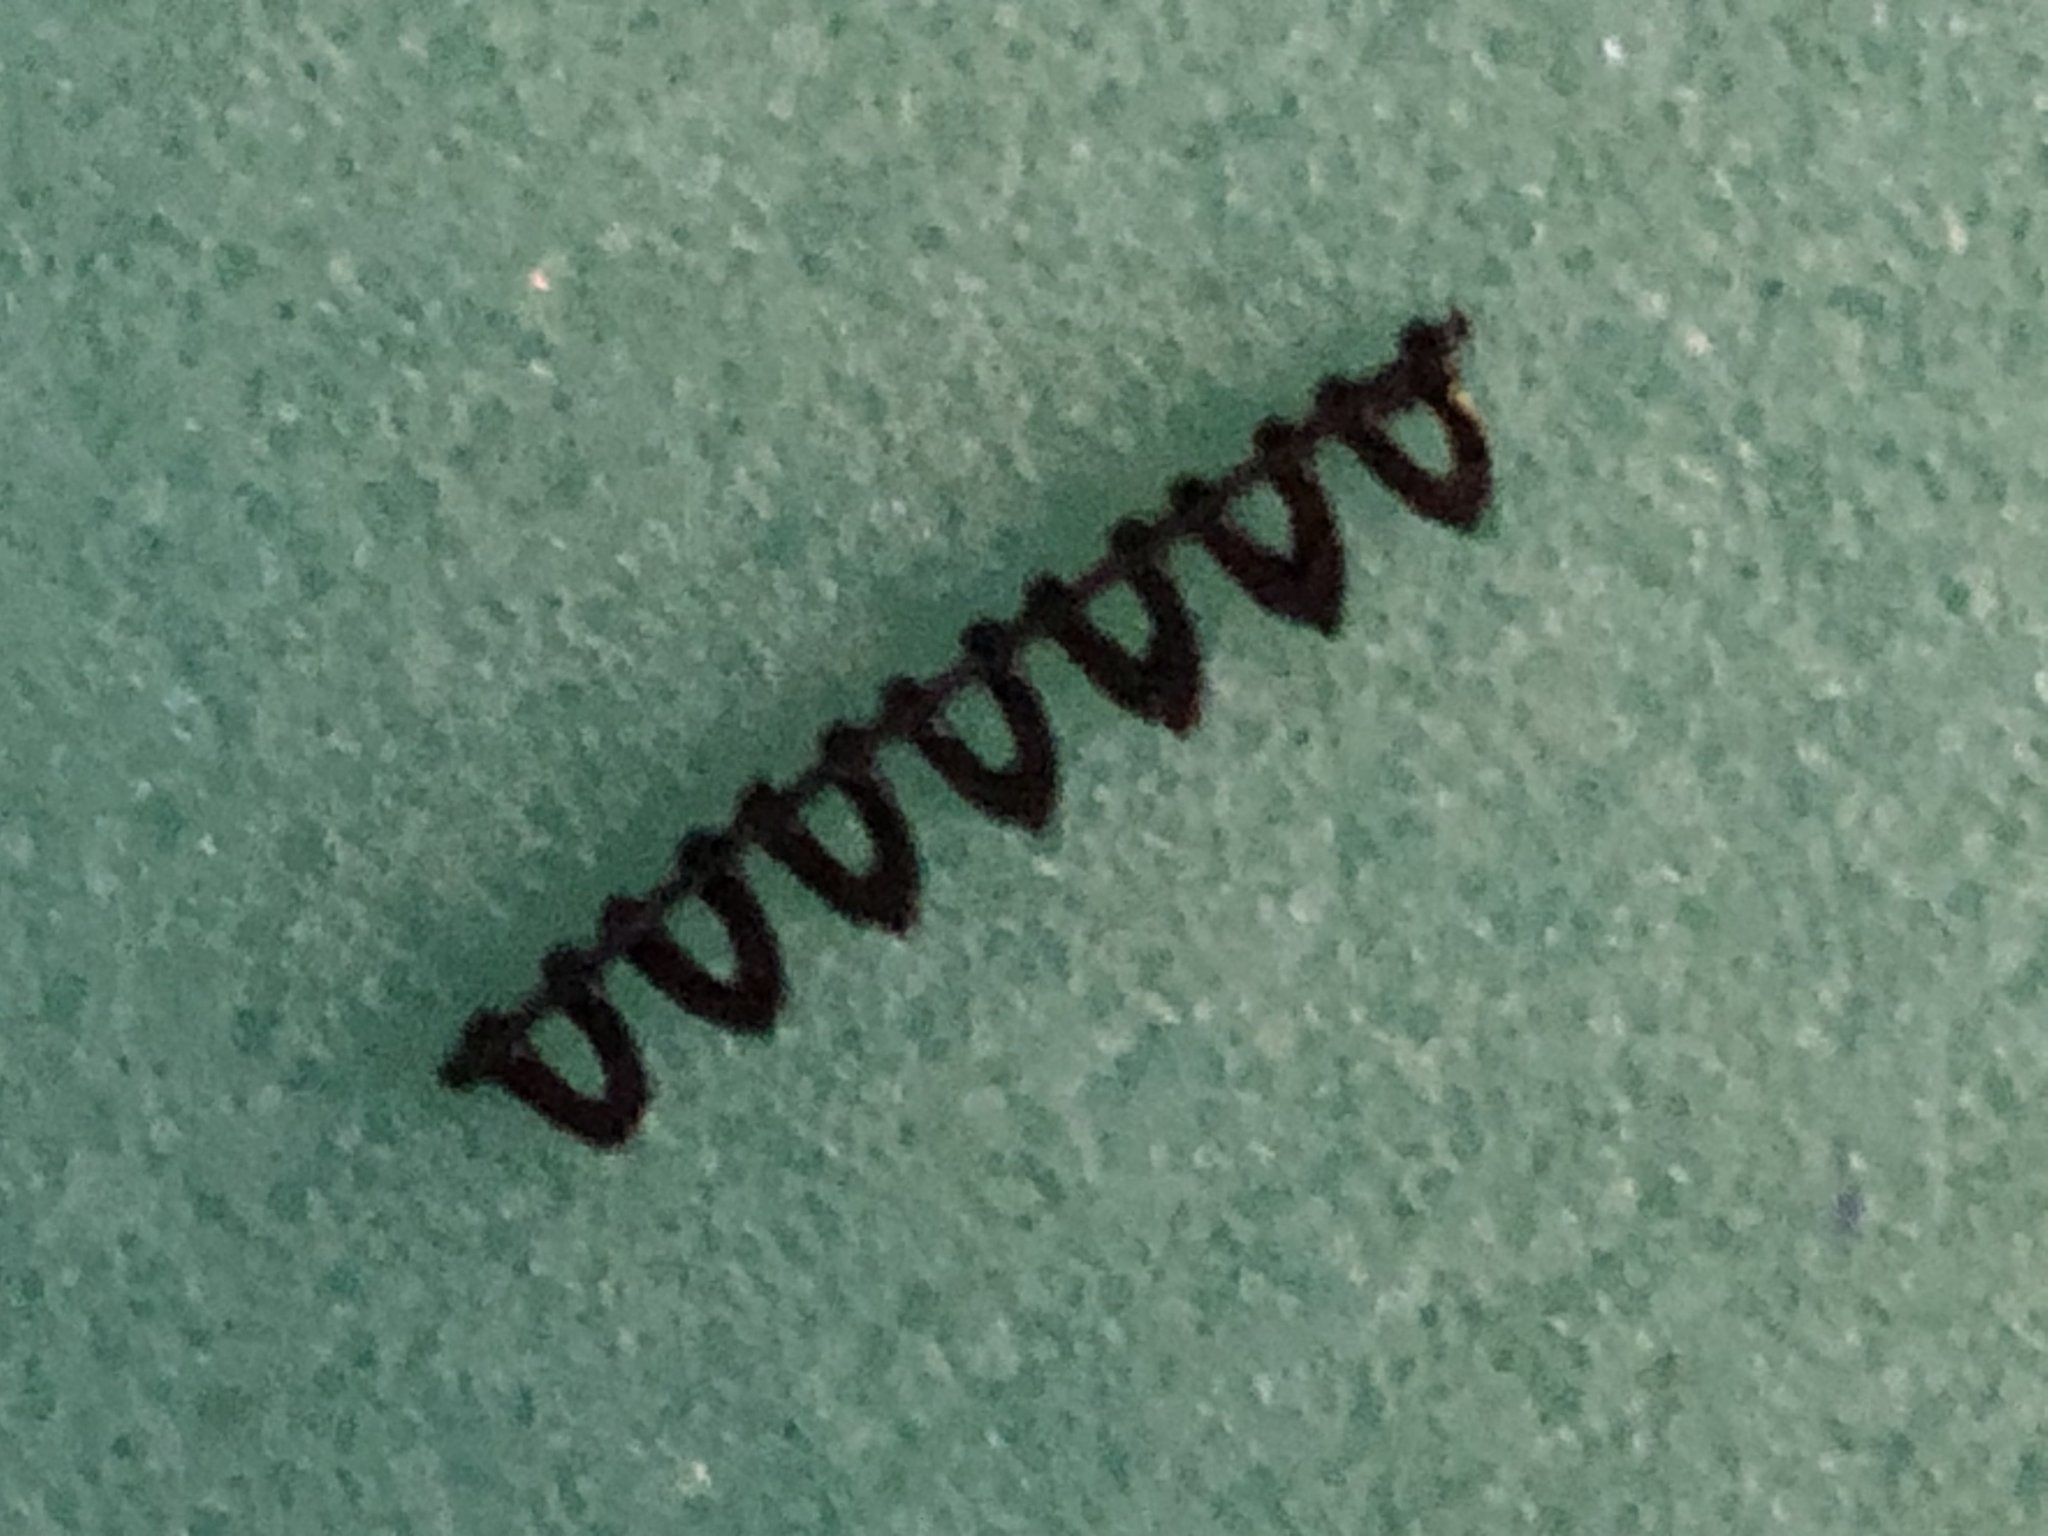
Not much to show for todays work. I made 100 eye bolts and 50 eye bolt with rings. The old saying apples hear "a picture is worth a 1000 words" so here goes.
Spinning wire with a hook mounted in a pin vise.
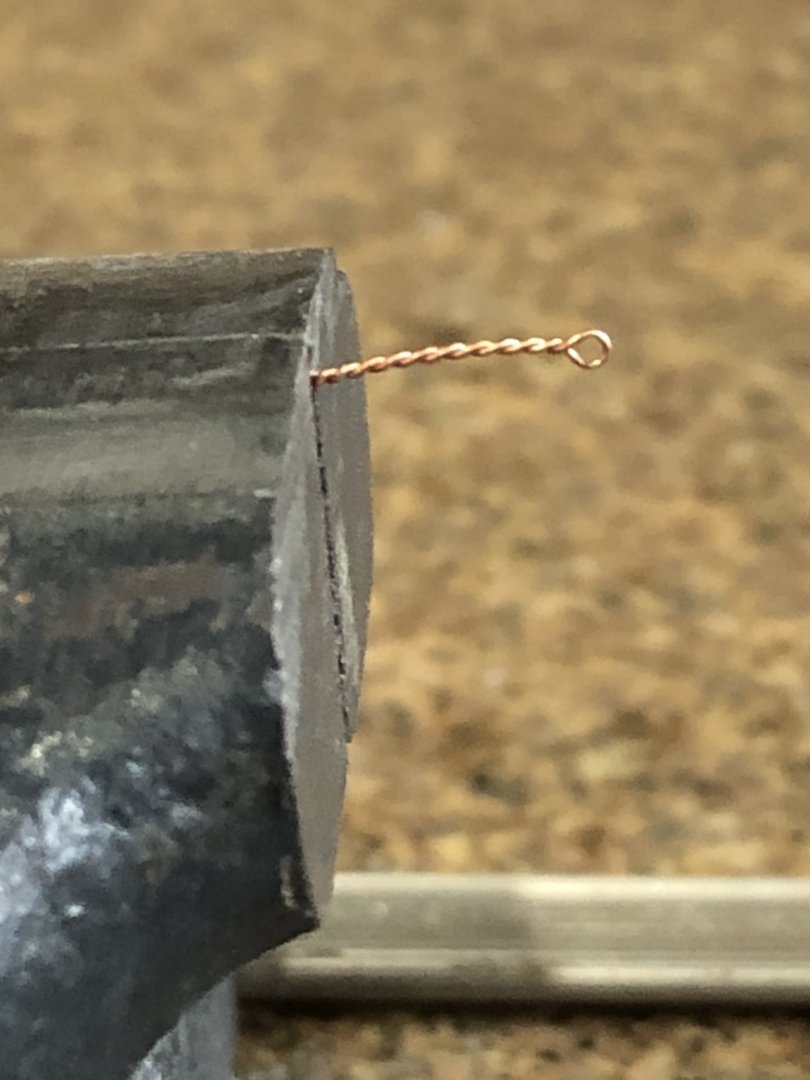

eye bolt with ring attached

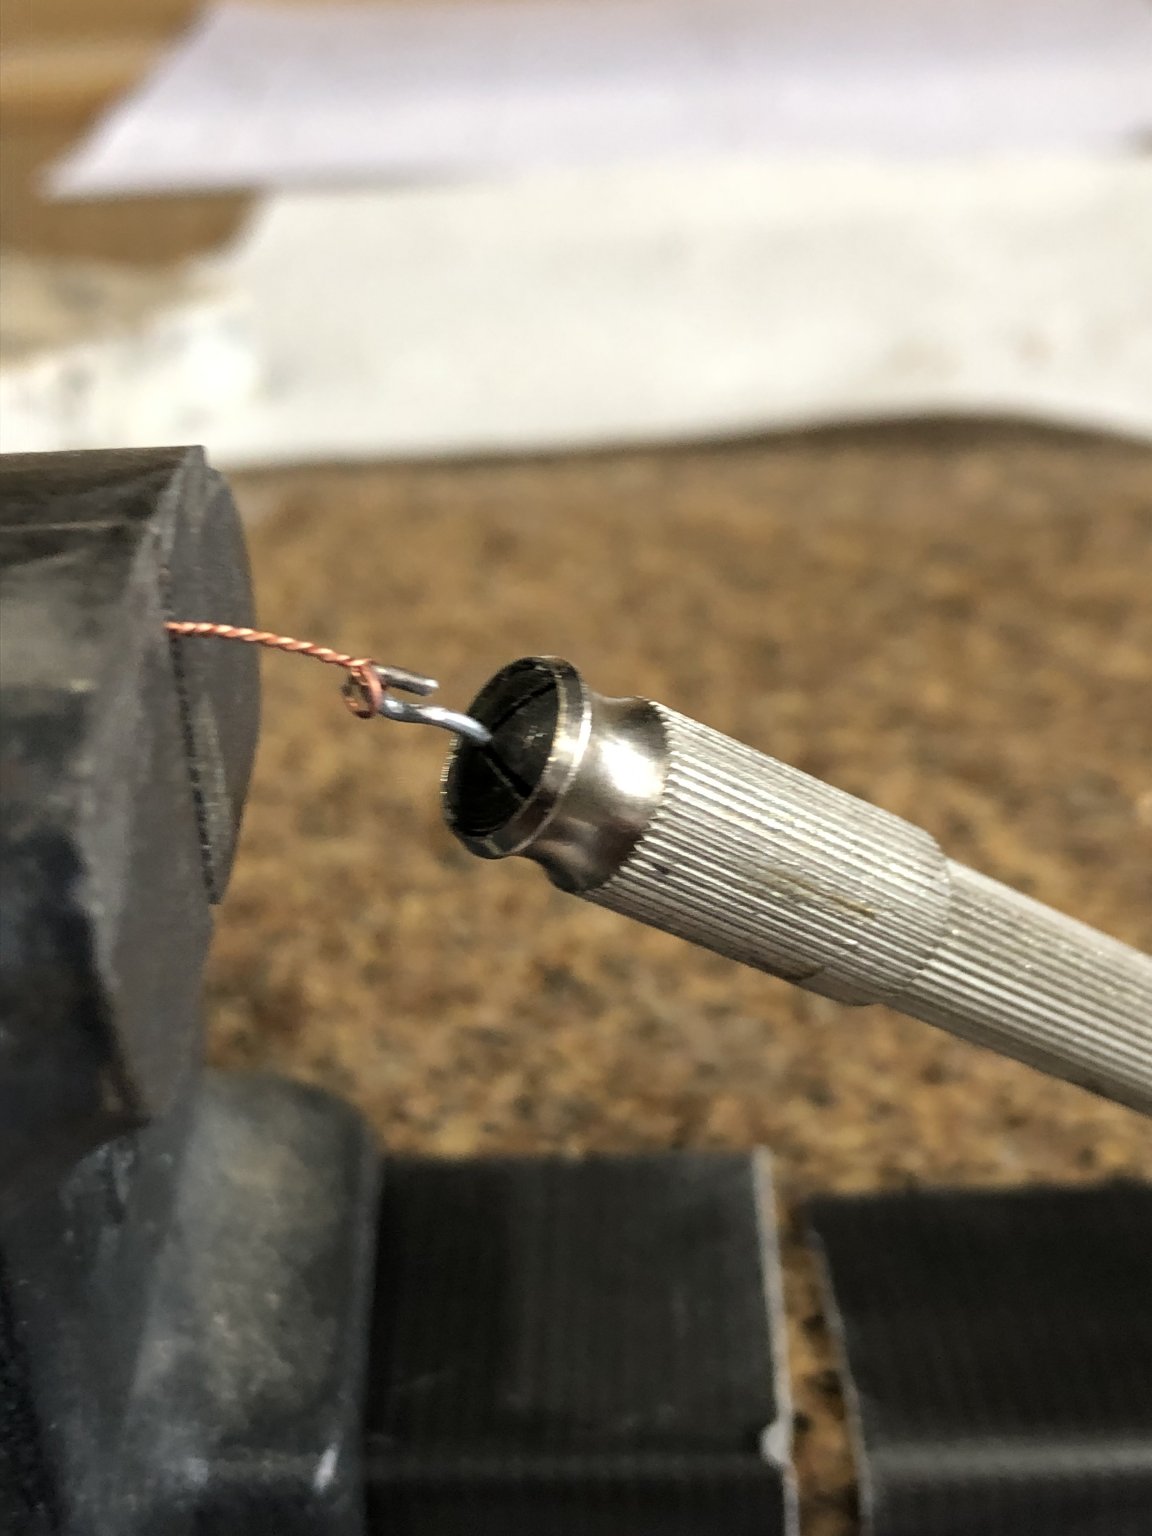
method to attach a soldered ring
first place the ring on the wire to spin place in a vise and spin with the pin vise
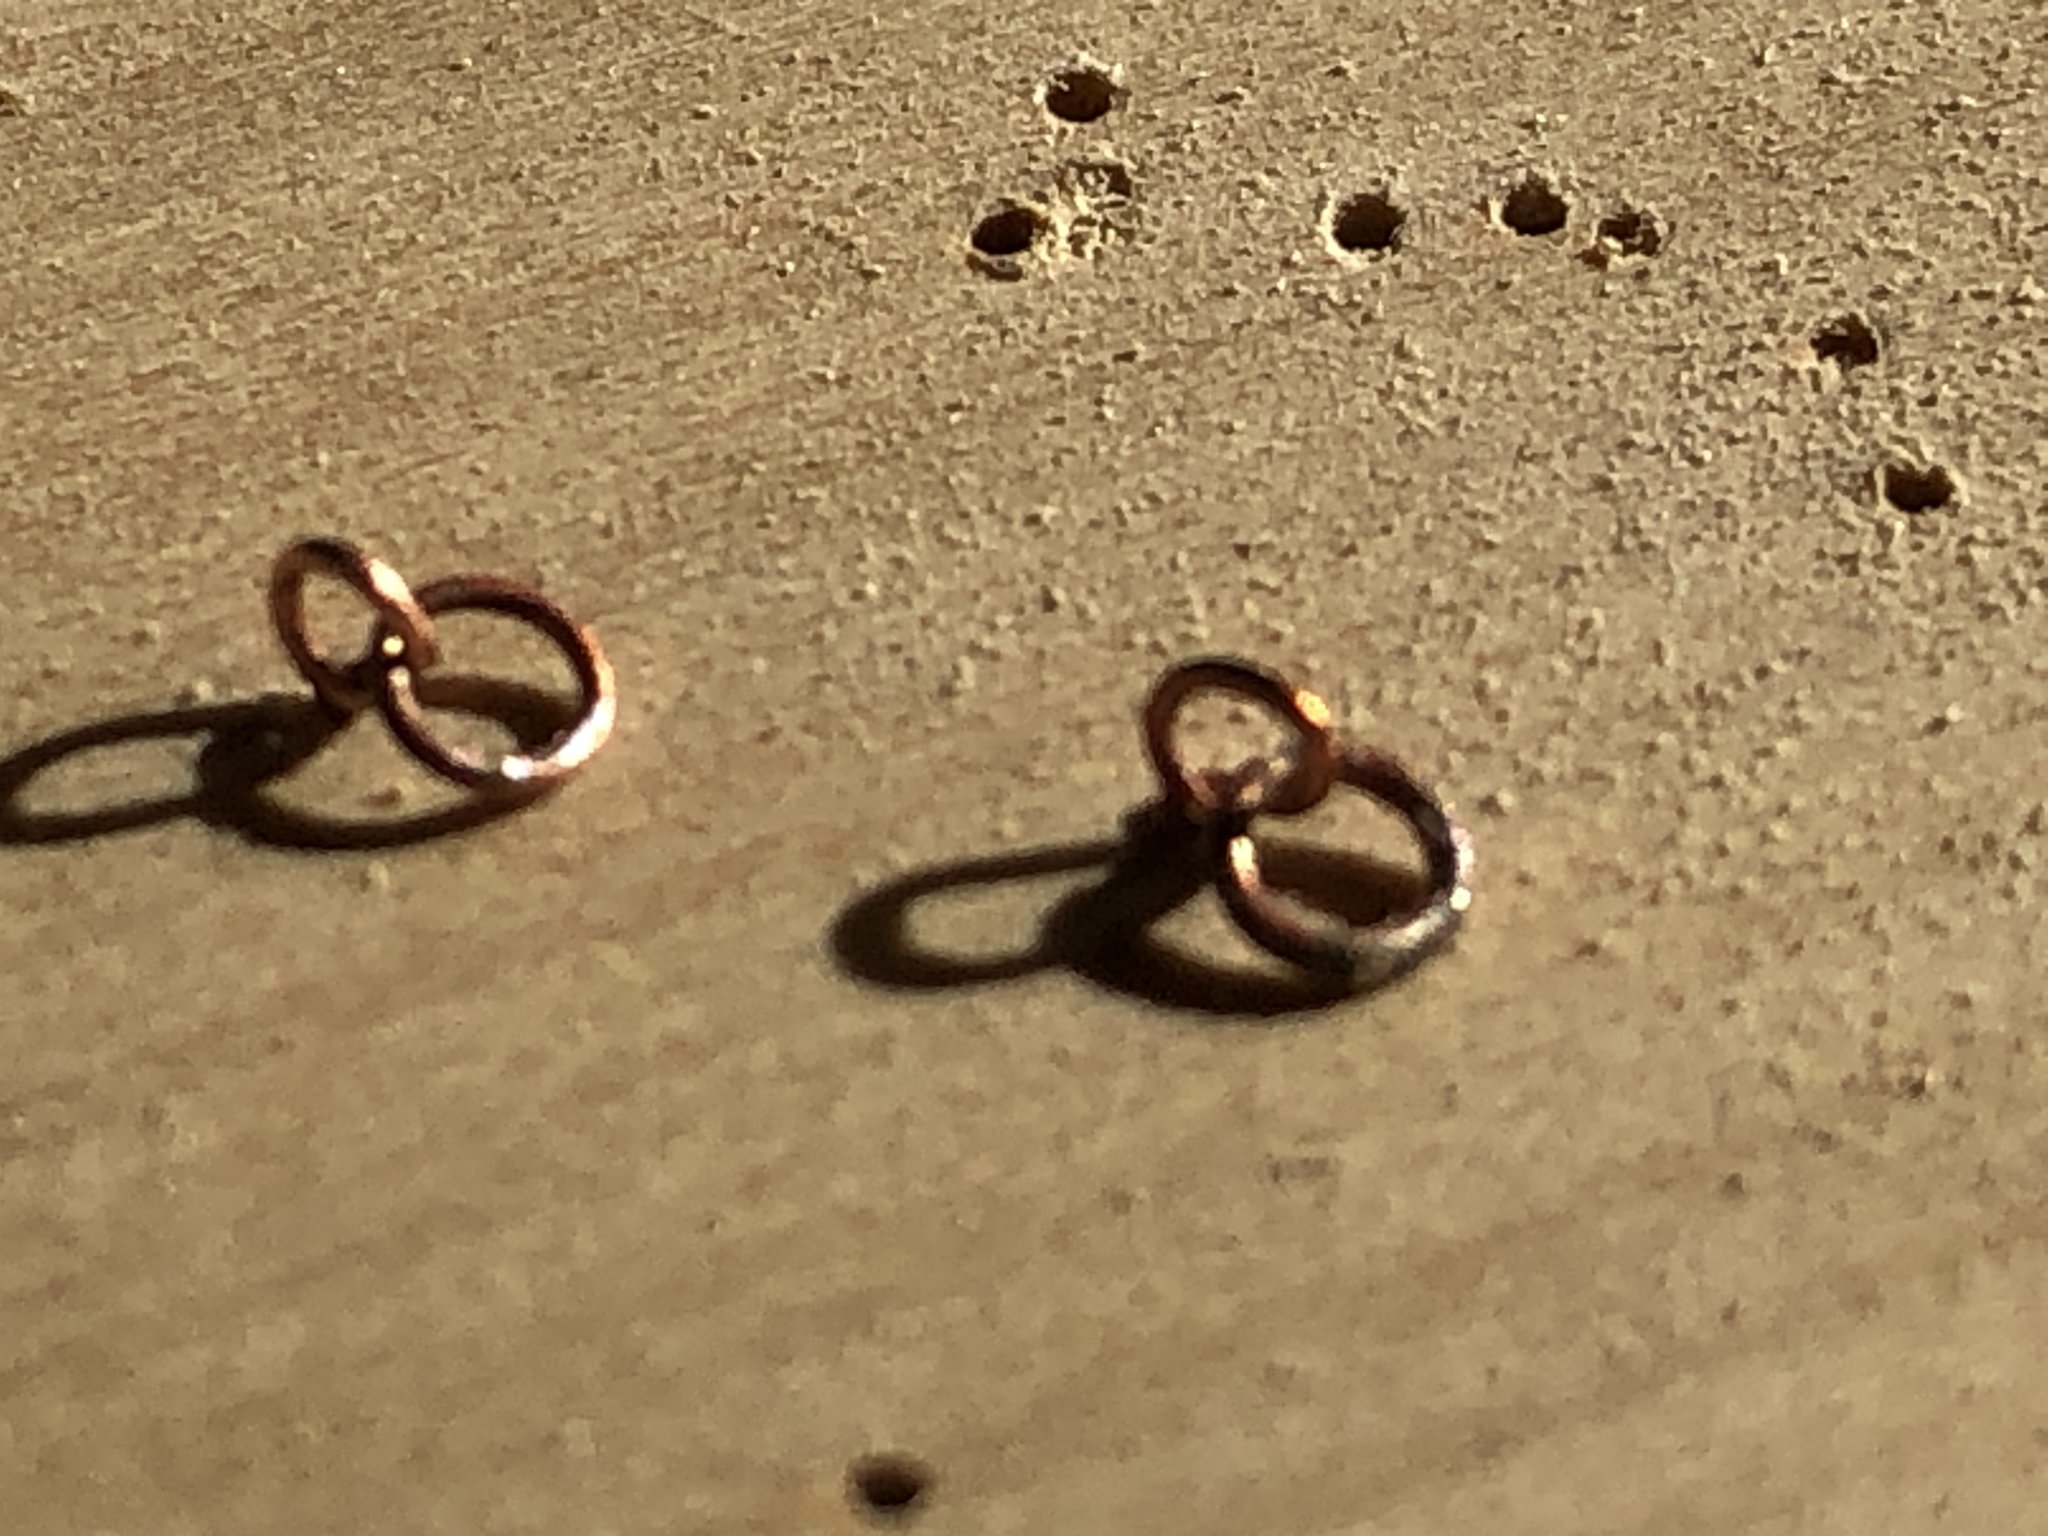
finished eye bolt and ring

blacken with "liver of sulfur" and a finished eye bolt

Using silver soldered rings allow the liver of sulfur to blacken the assembly and the soldered ring is strong enough to withstand the tension of rigging.
Like I said not much to show but tomorrow I start on gun port lids and bulwark eye bolts. Oh yea, more work on the castings.
Take care and stay well
Will
- WalrusGuy, bruce d, Edwardkenway and 3 others
-
 6
6
-
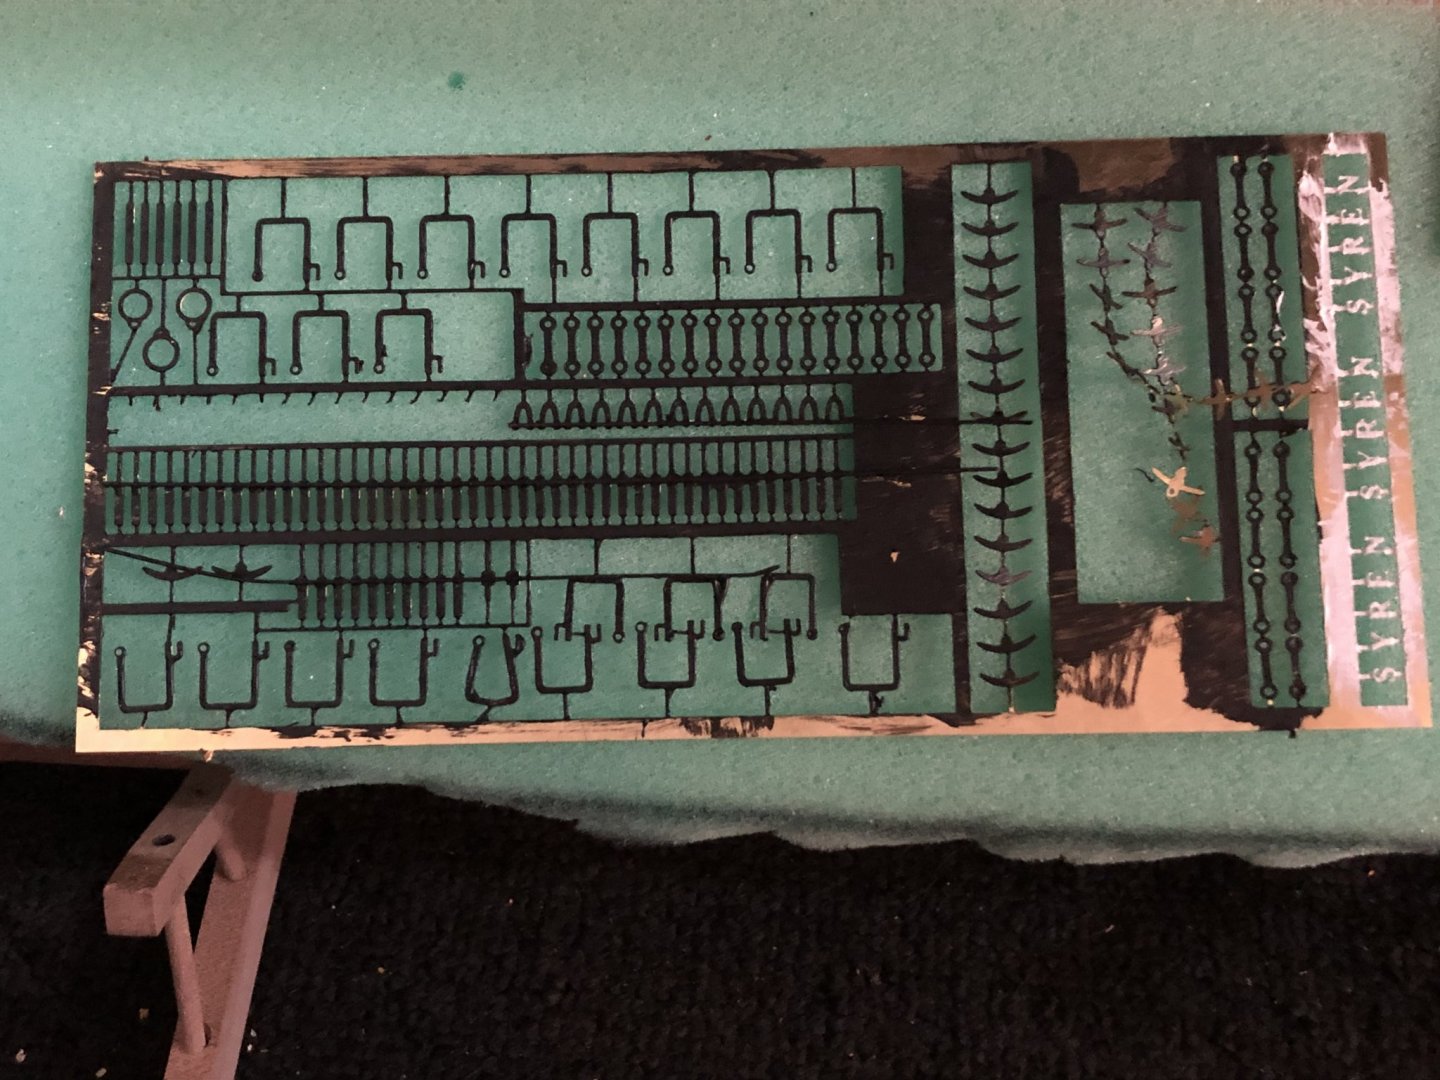
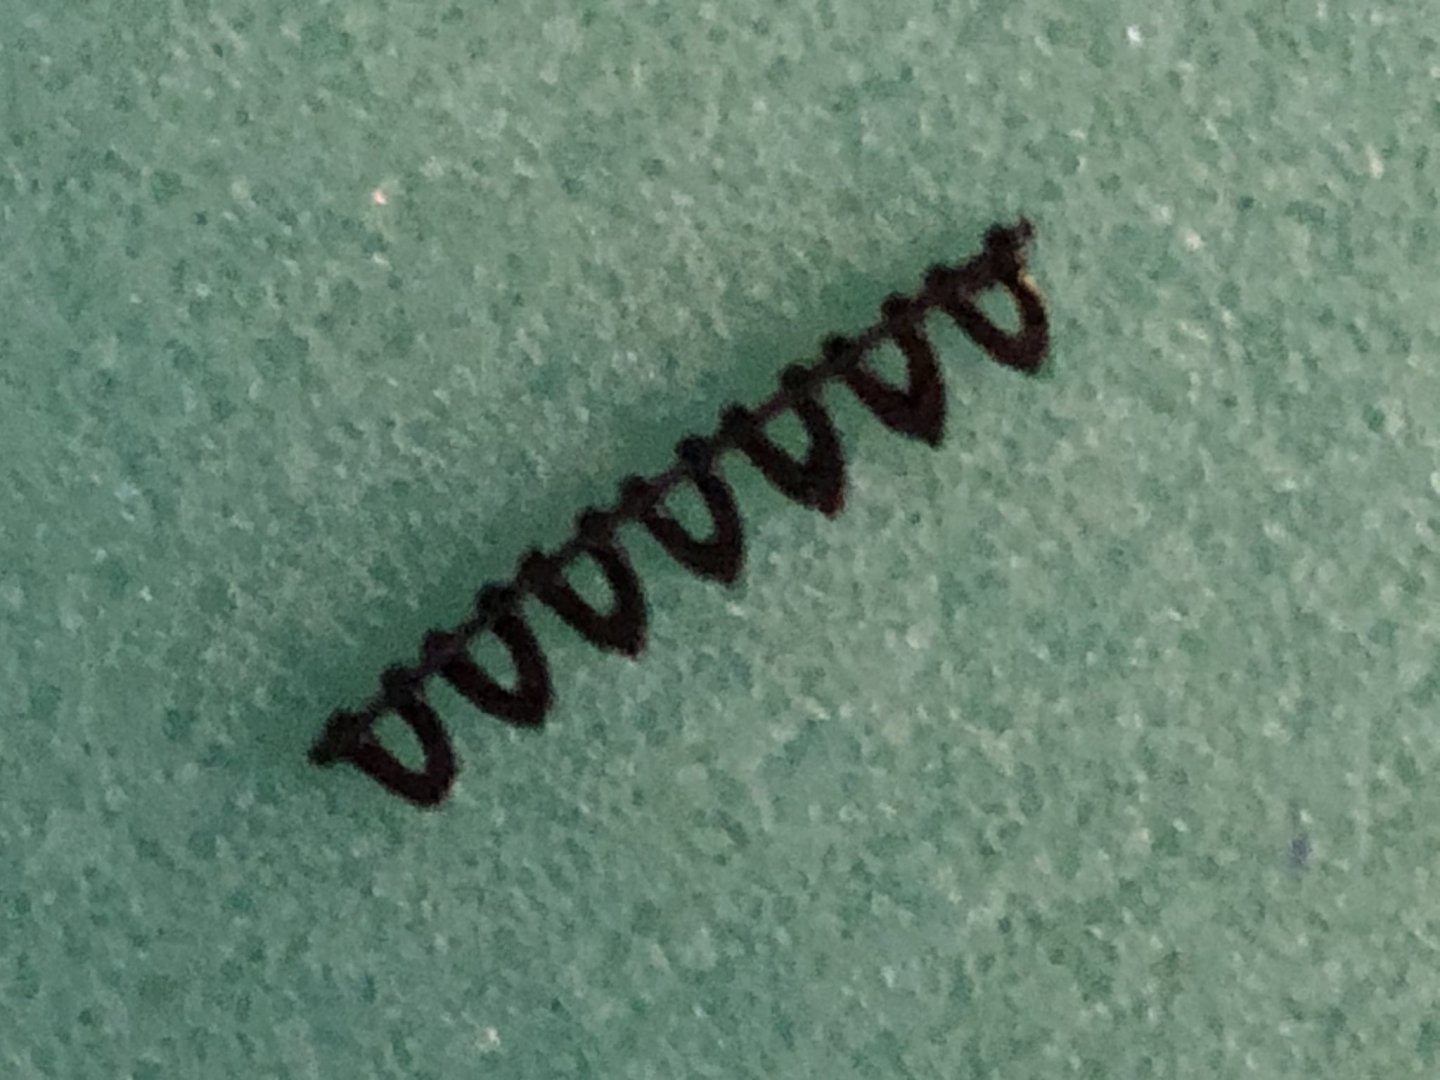
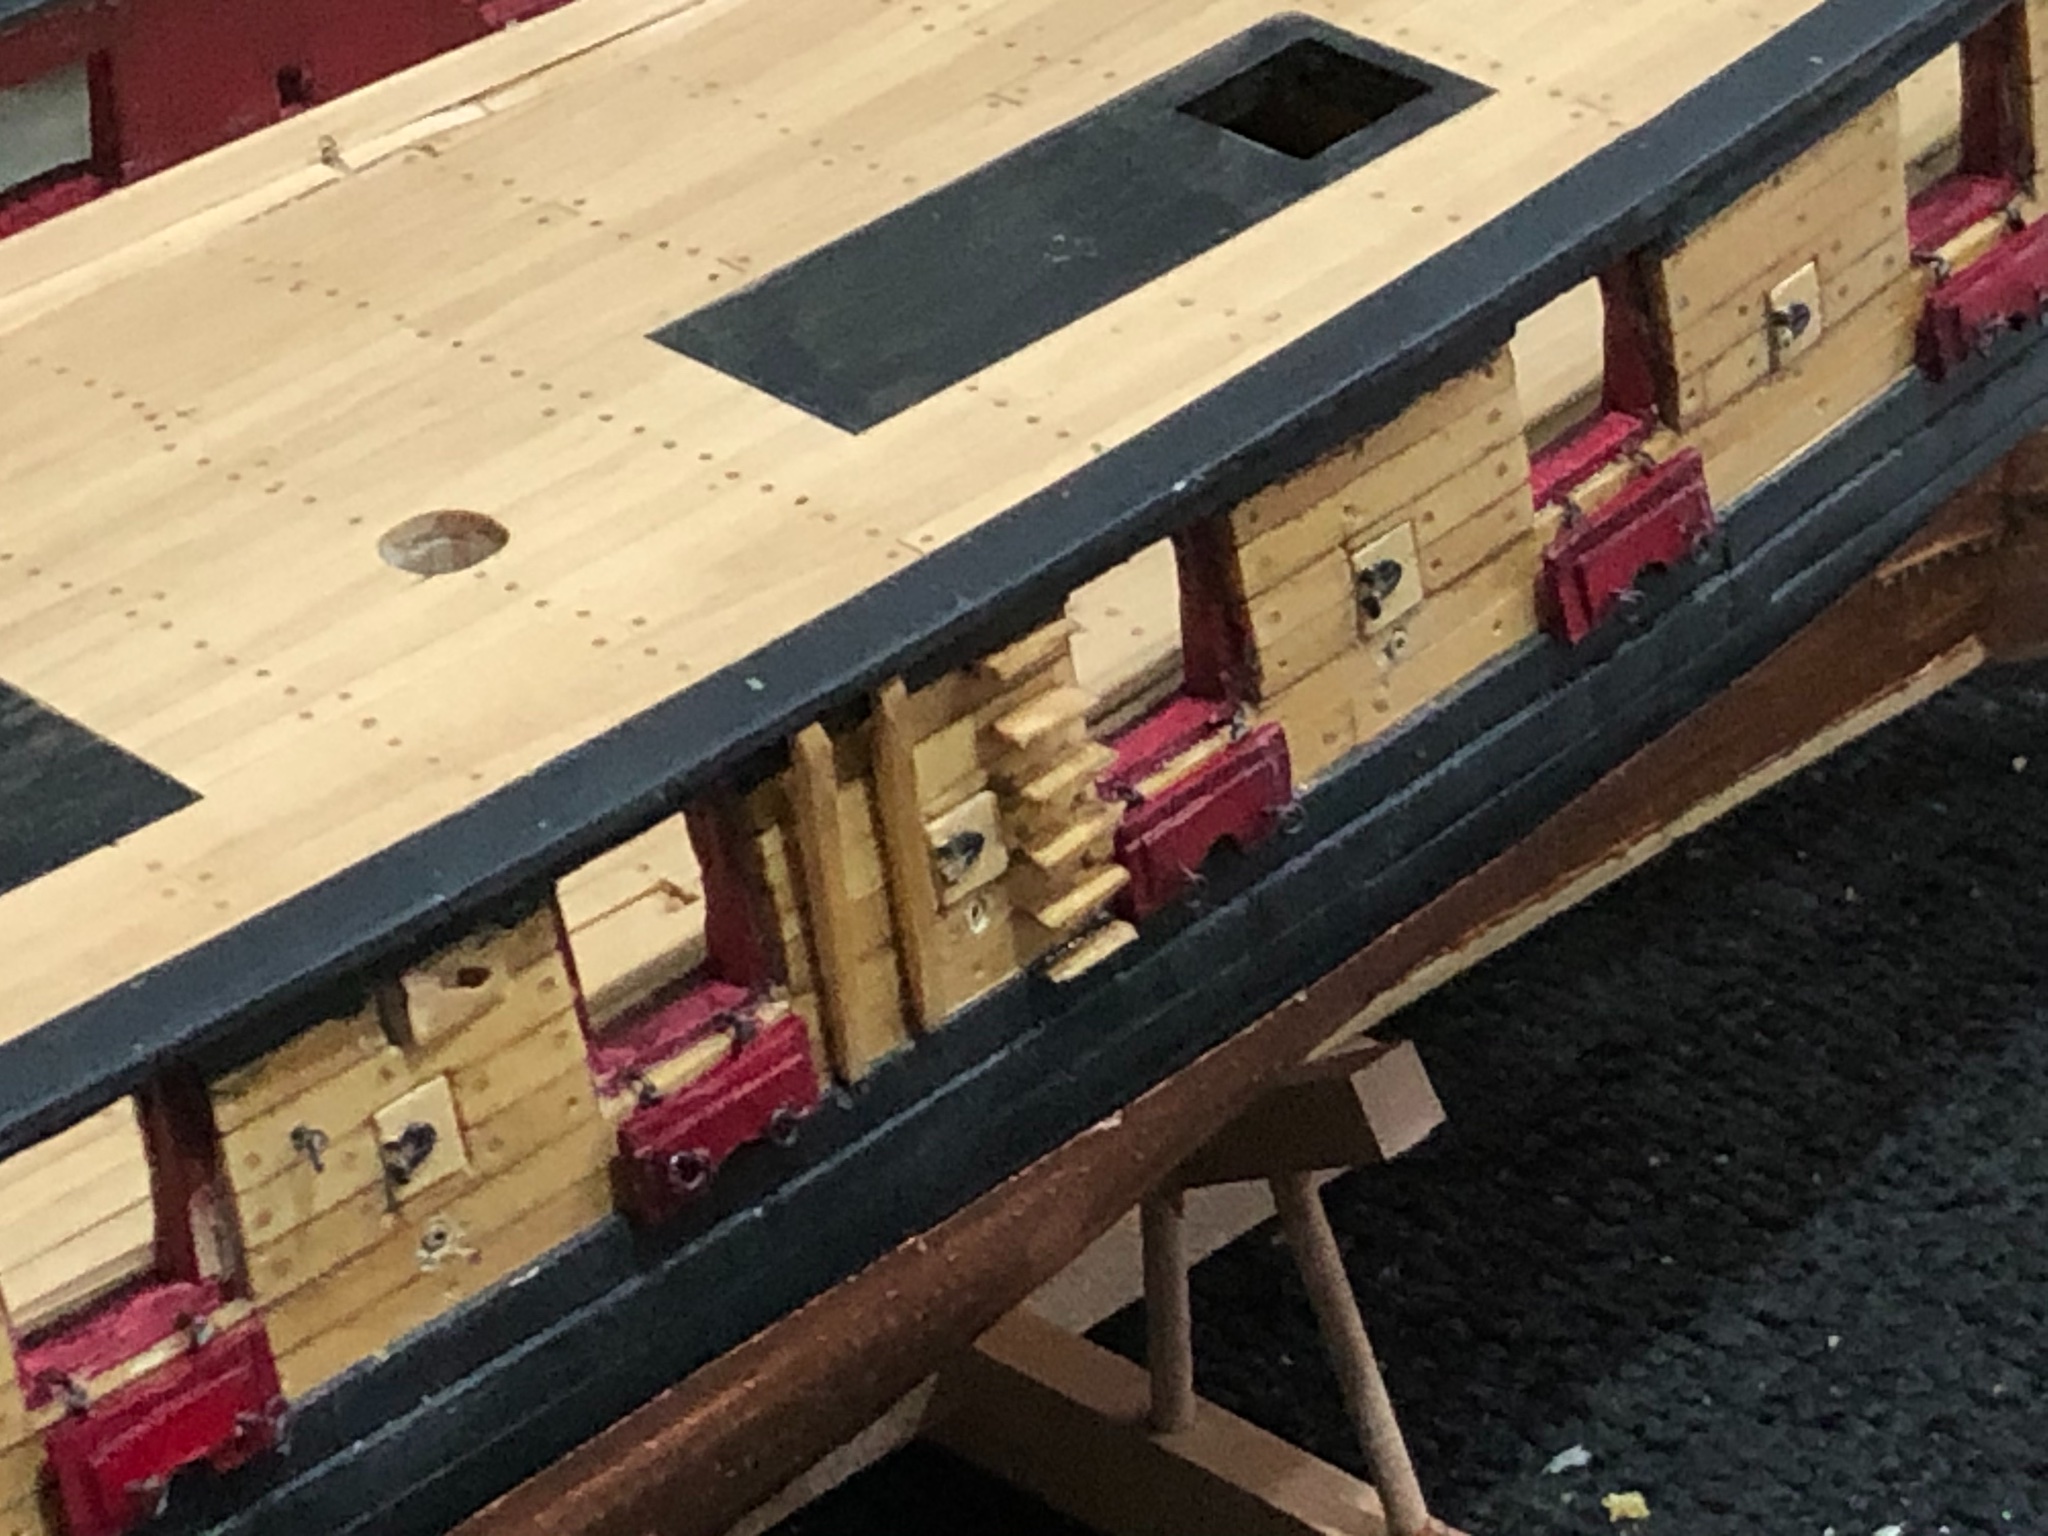
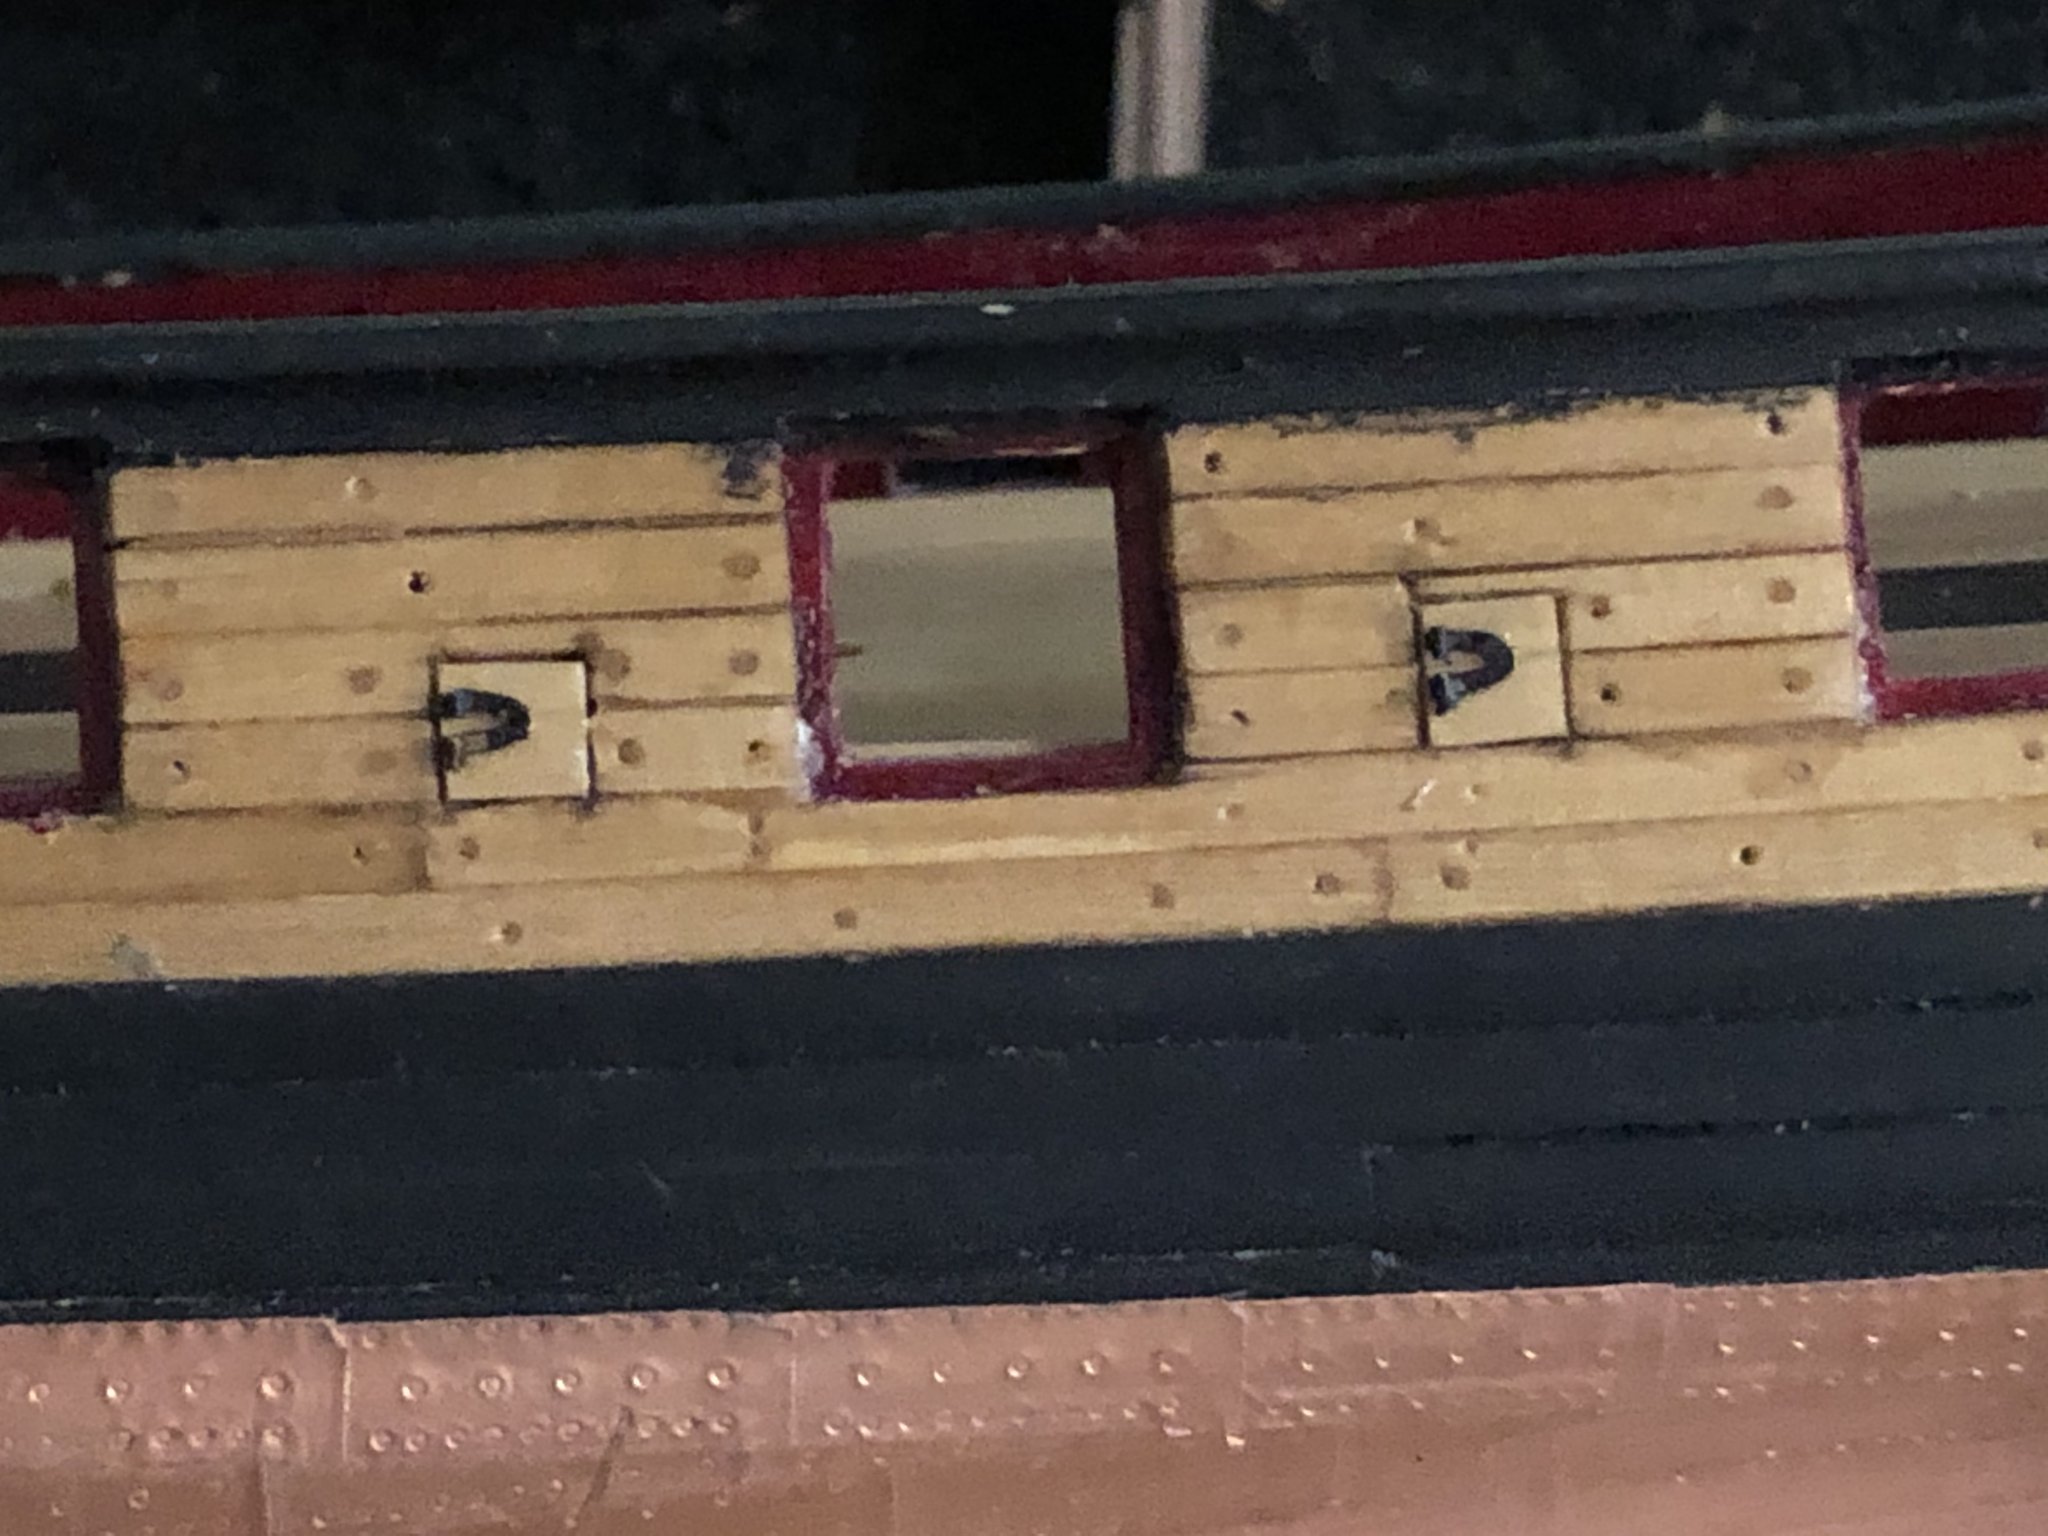
Started the next chapter about hull finishing. First thing was to decide rather to use the gallery castings or to make my own. I mounted the casting on a piece of wood and started cleaning up the images with my Micromotor. Its a work in progress and they are starting to look better with the features being more clearly defined. I'll post more about them as I progress and what decision I make to whether to use them or make my own. I looked at the photo etched panel specifically the sweep port hinges and thought I'd never be able to place the black wire for the hinges as described so I tried another method. I measured the black wire in the kit and found it to be .028 diameter, 1.792" in real scale, and the port doors are .125", 8" in scale, so I felt the wire was much too large. I straightened a length of 26 awe copper wire and attached the wire along the hinges where the simulated hinge pin were to be placed. Clear JBWeld was used by applying it on the parts with a toothpick.
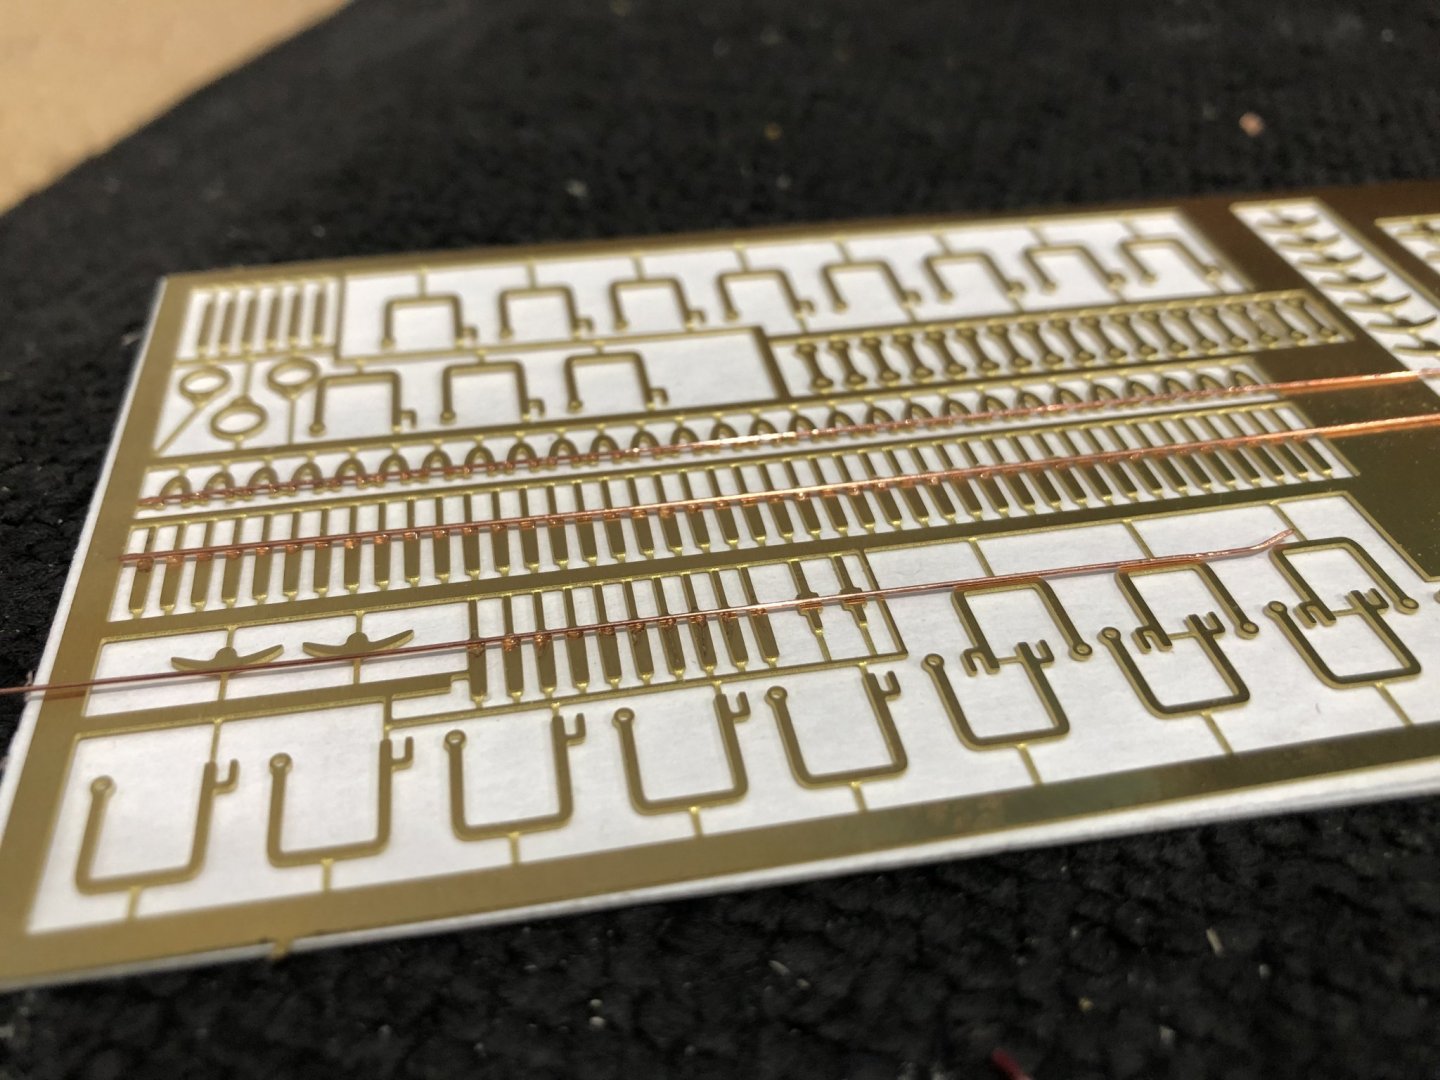
I then painted the photo etched panel black and let it all dry to set up for a couple of days.
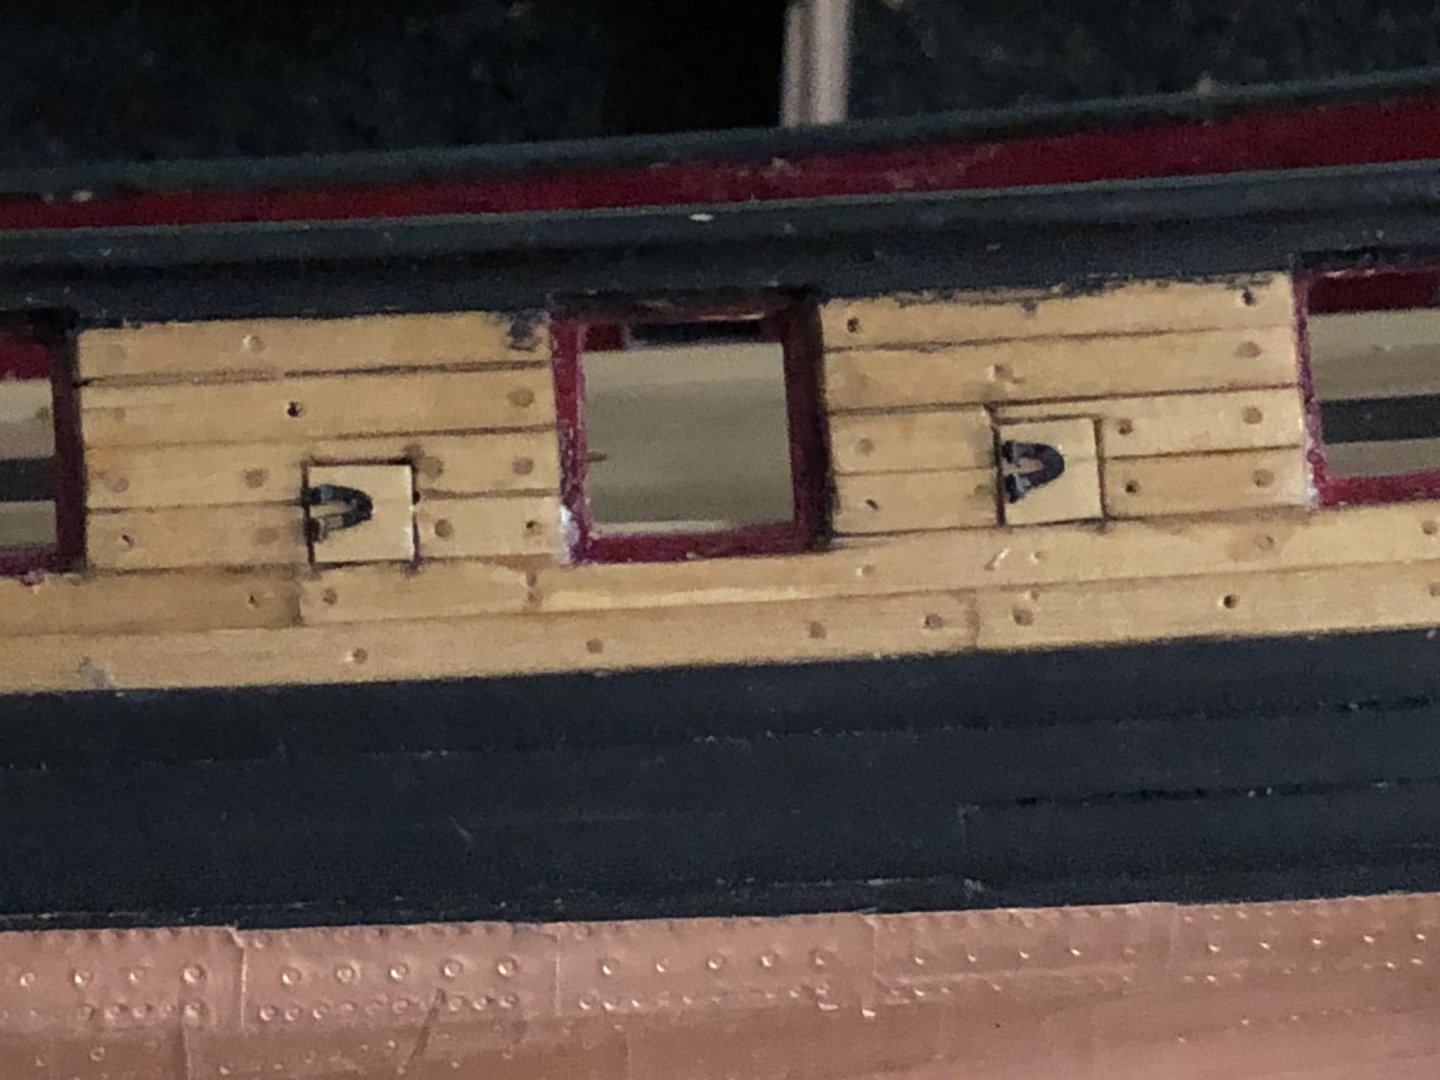
I then make the sweep doors staining and wipe on poly ready to mount. After mounting the sweep doors I snipped of a hinge as I needed.
A quick look a the doors assembled.
next I'll make eyebolts and eyebolts with rings for rigging and gun port lids.
Stay Well and Safe
Will
-
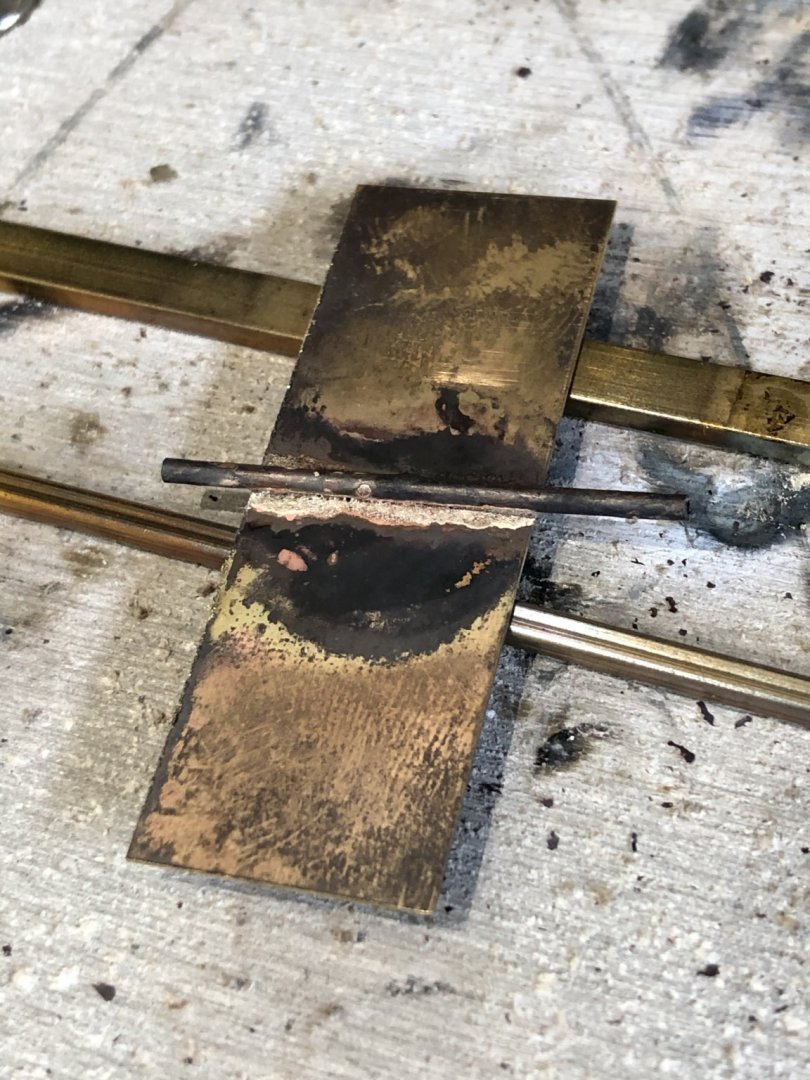
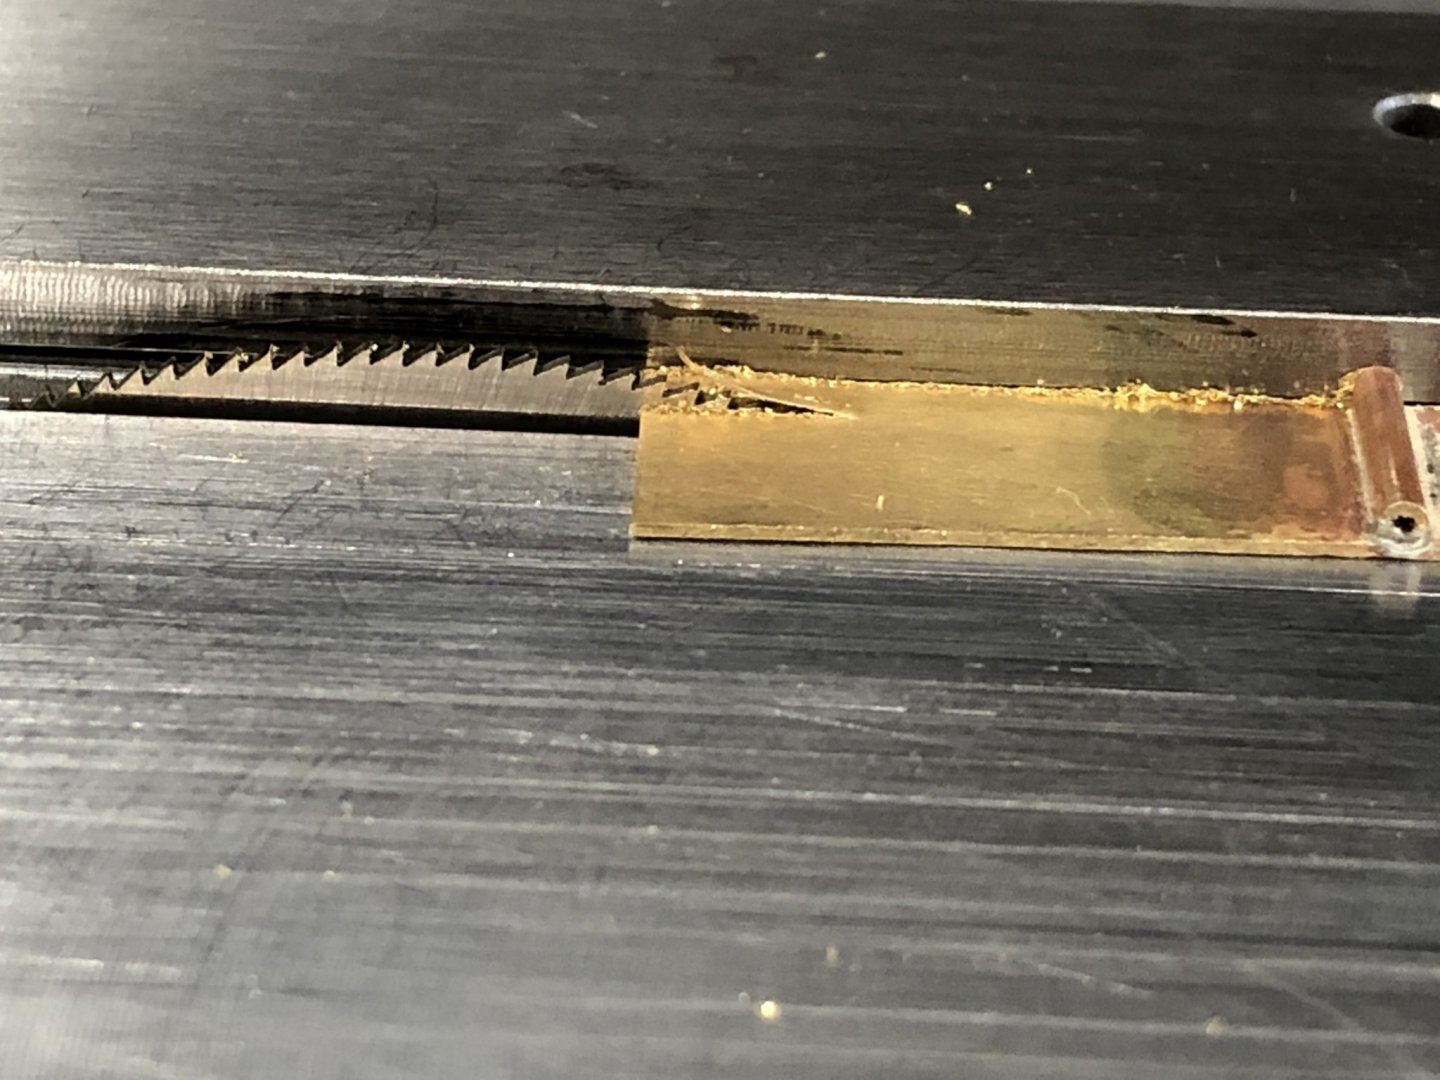
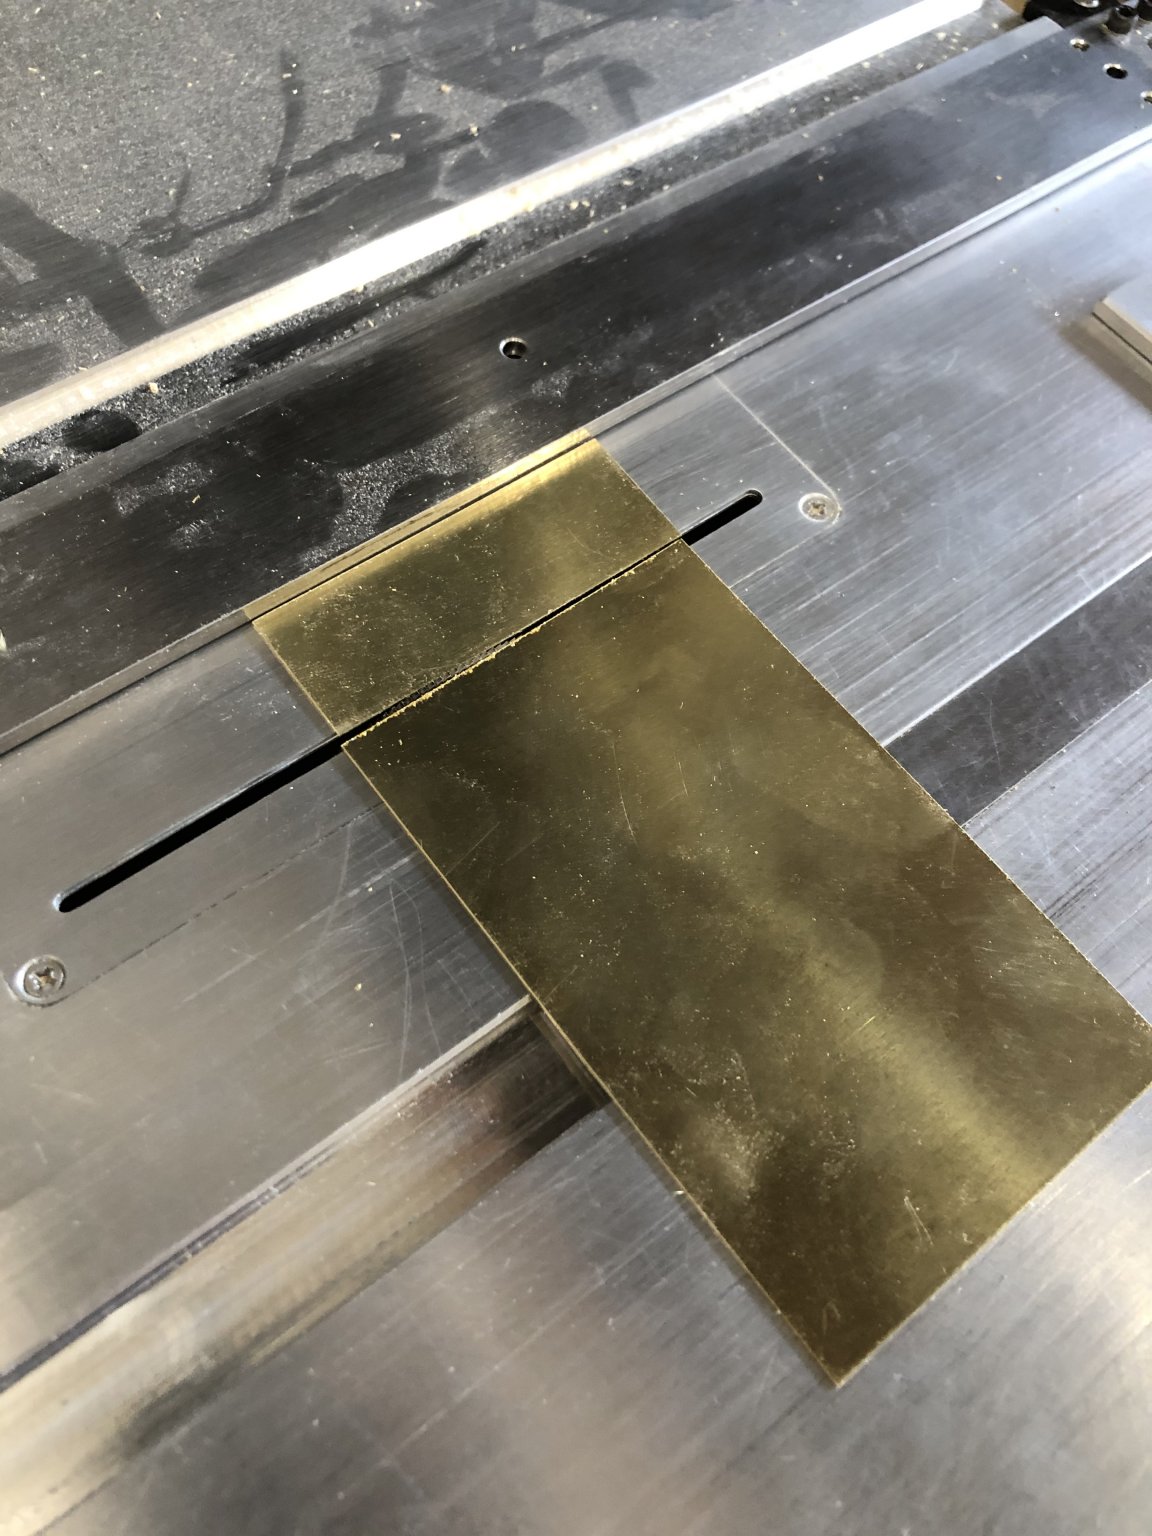
Pintles and gudgeons made and rudder attached is the current update to the Syren. I used Ed Tostis method to make the pintles and gudgeons as he describes in his book "Young America" pages 192 through 196 and the results were excellent. Tho make the parts I took a piece of .03 brass sheet cut to the maximum length required to make the parts and wide enough to make the 8 pieces .06 wide when finished. as show in the picture below.

I then used the mitre saw (.03 kefir) to scratch a line across the piece and the used a round swiss file to make a channel that the .06 dia tube would lay into.

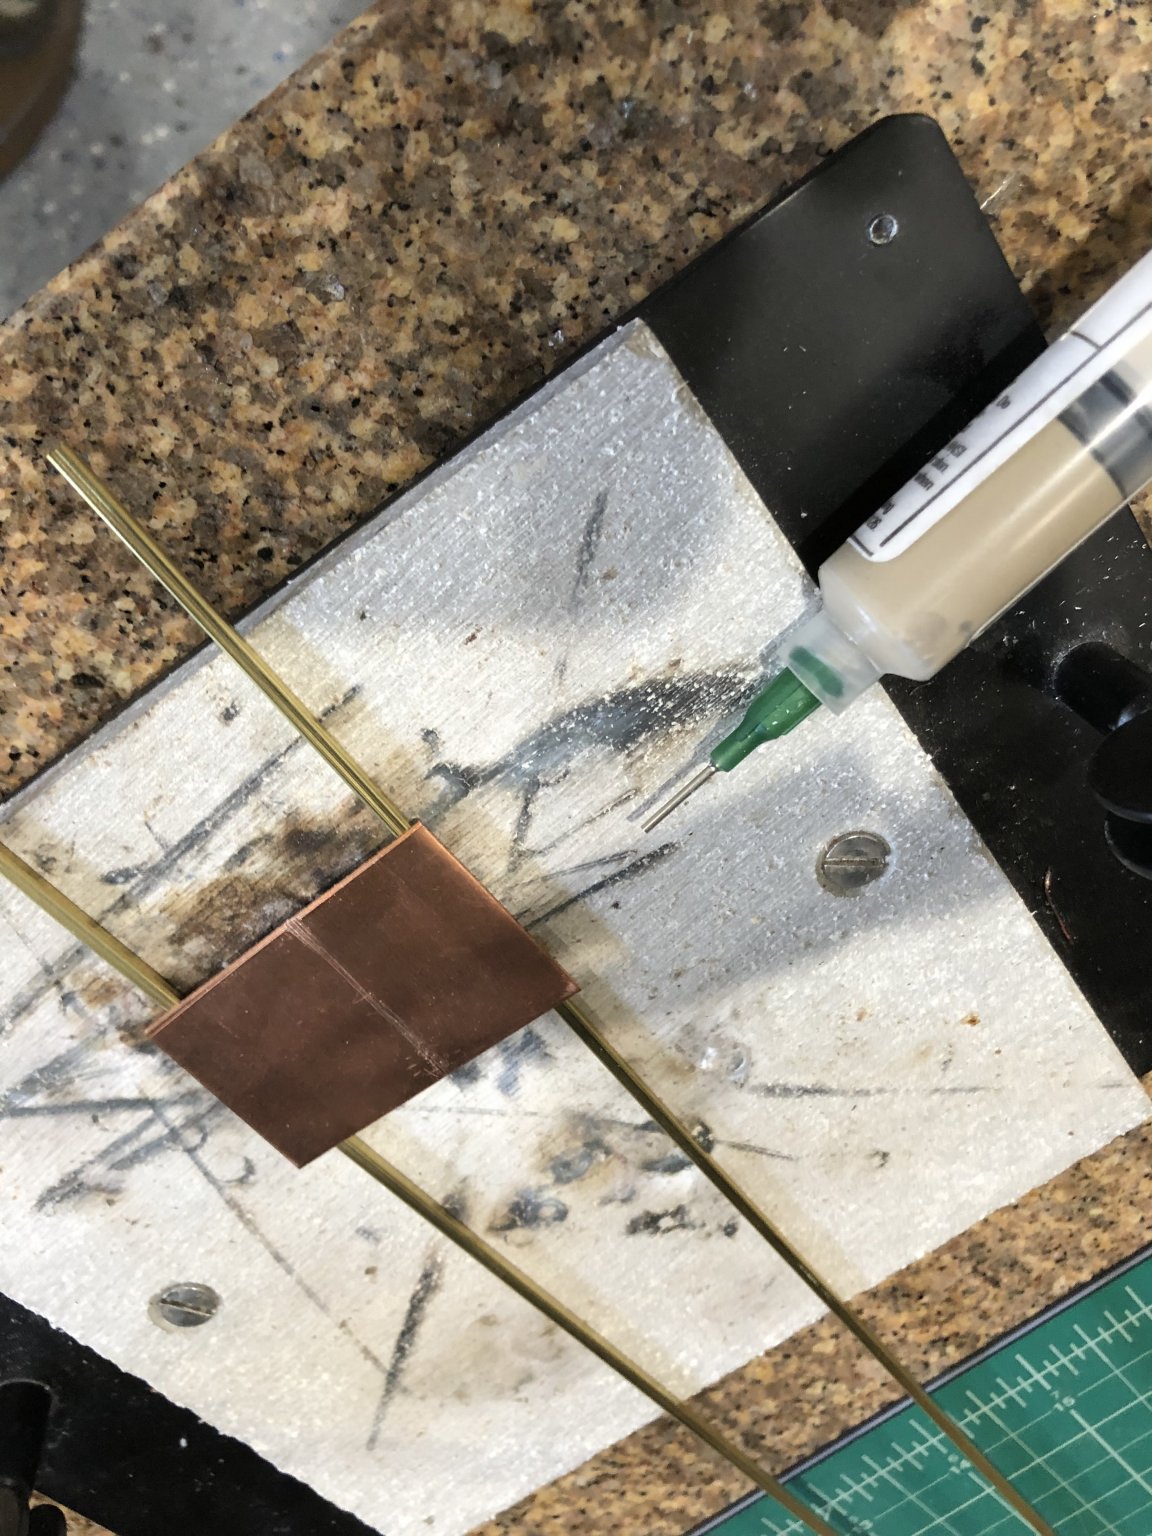
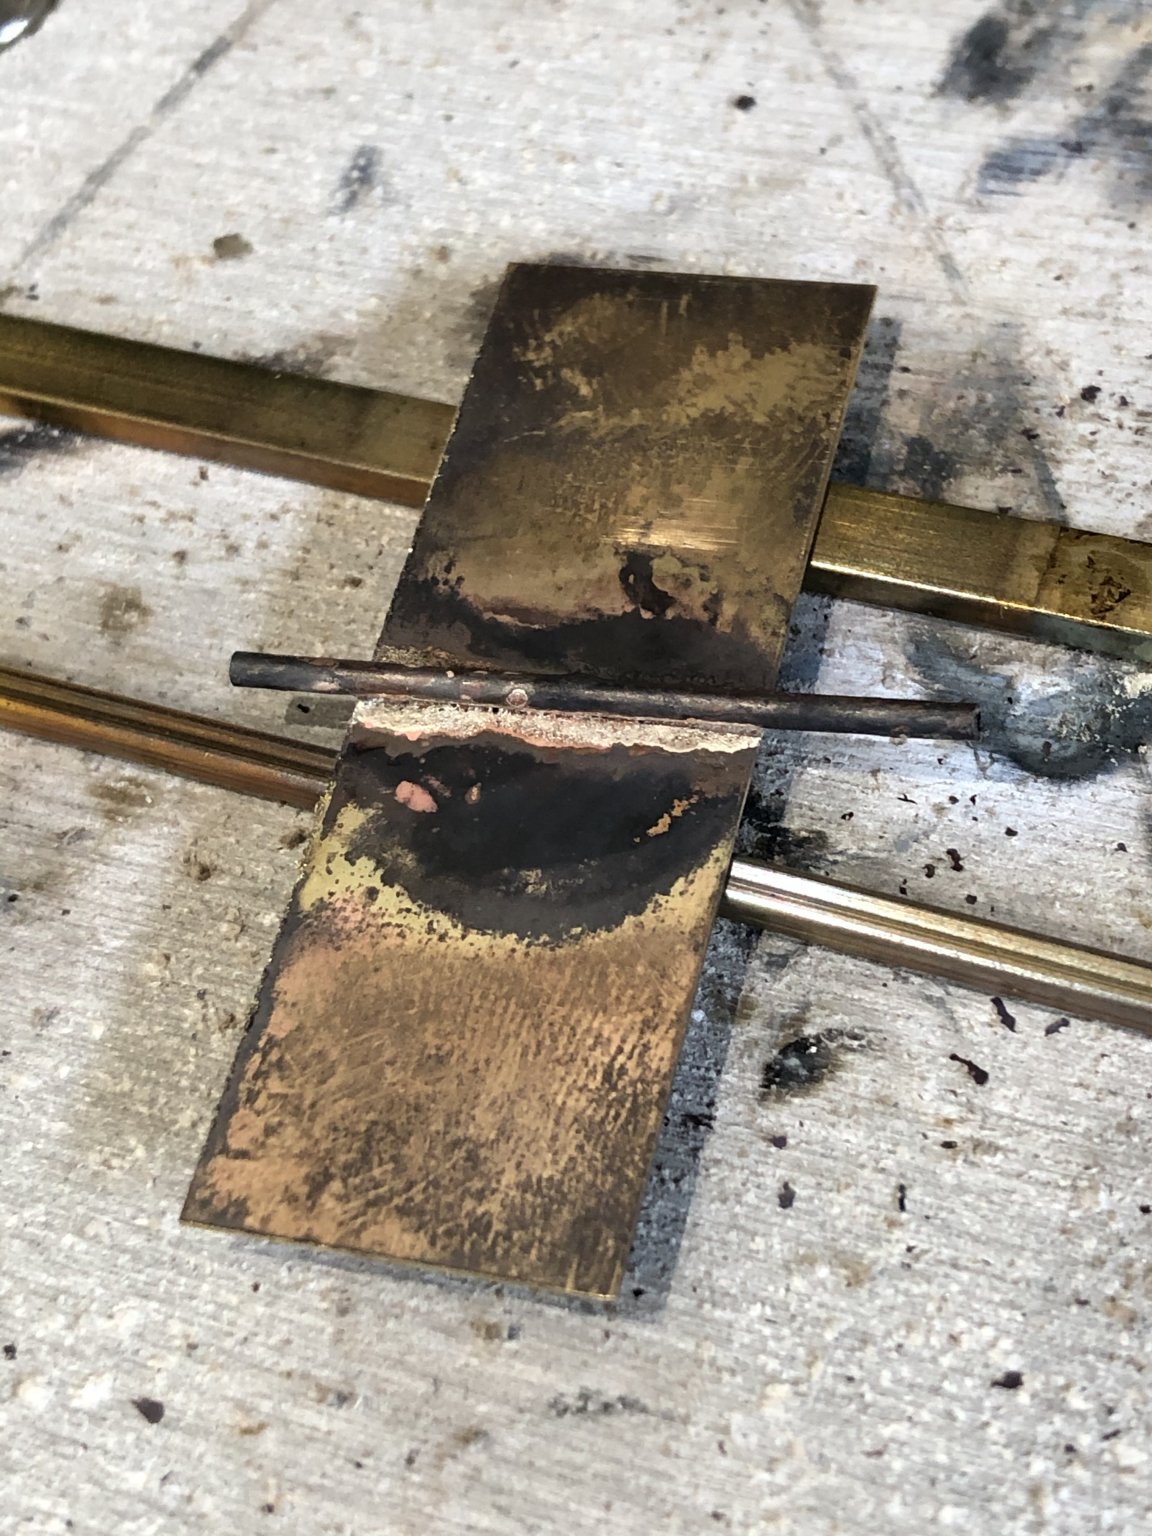
Next I layed a length of the .06 turbo into the channel to hold it in place while being soldered. Using silver solder paste of the medium hard variety so when the pins are soldered using easy solder paste (lower temperature) the harder (higher temperature) paste wont melt.

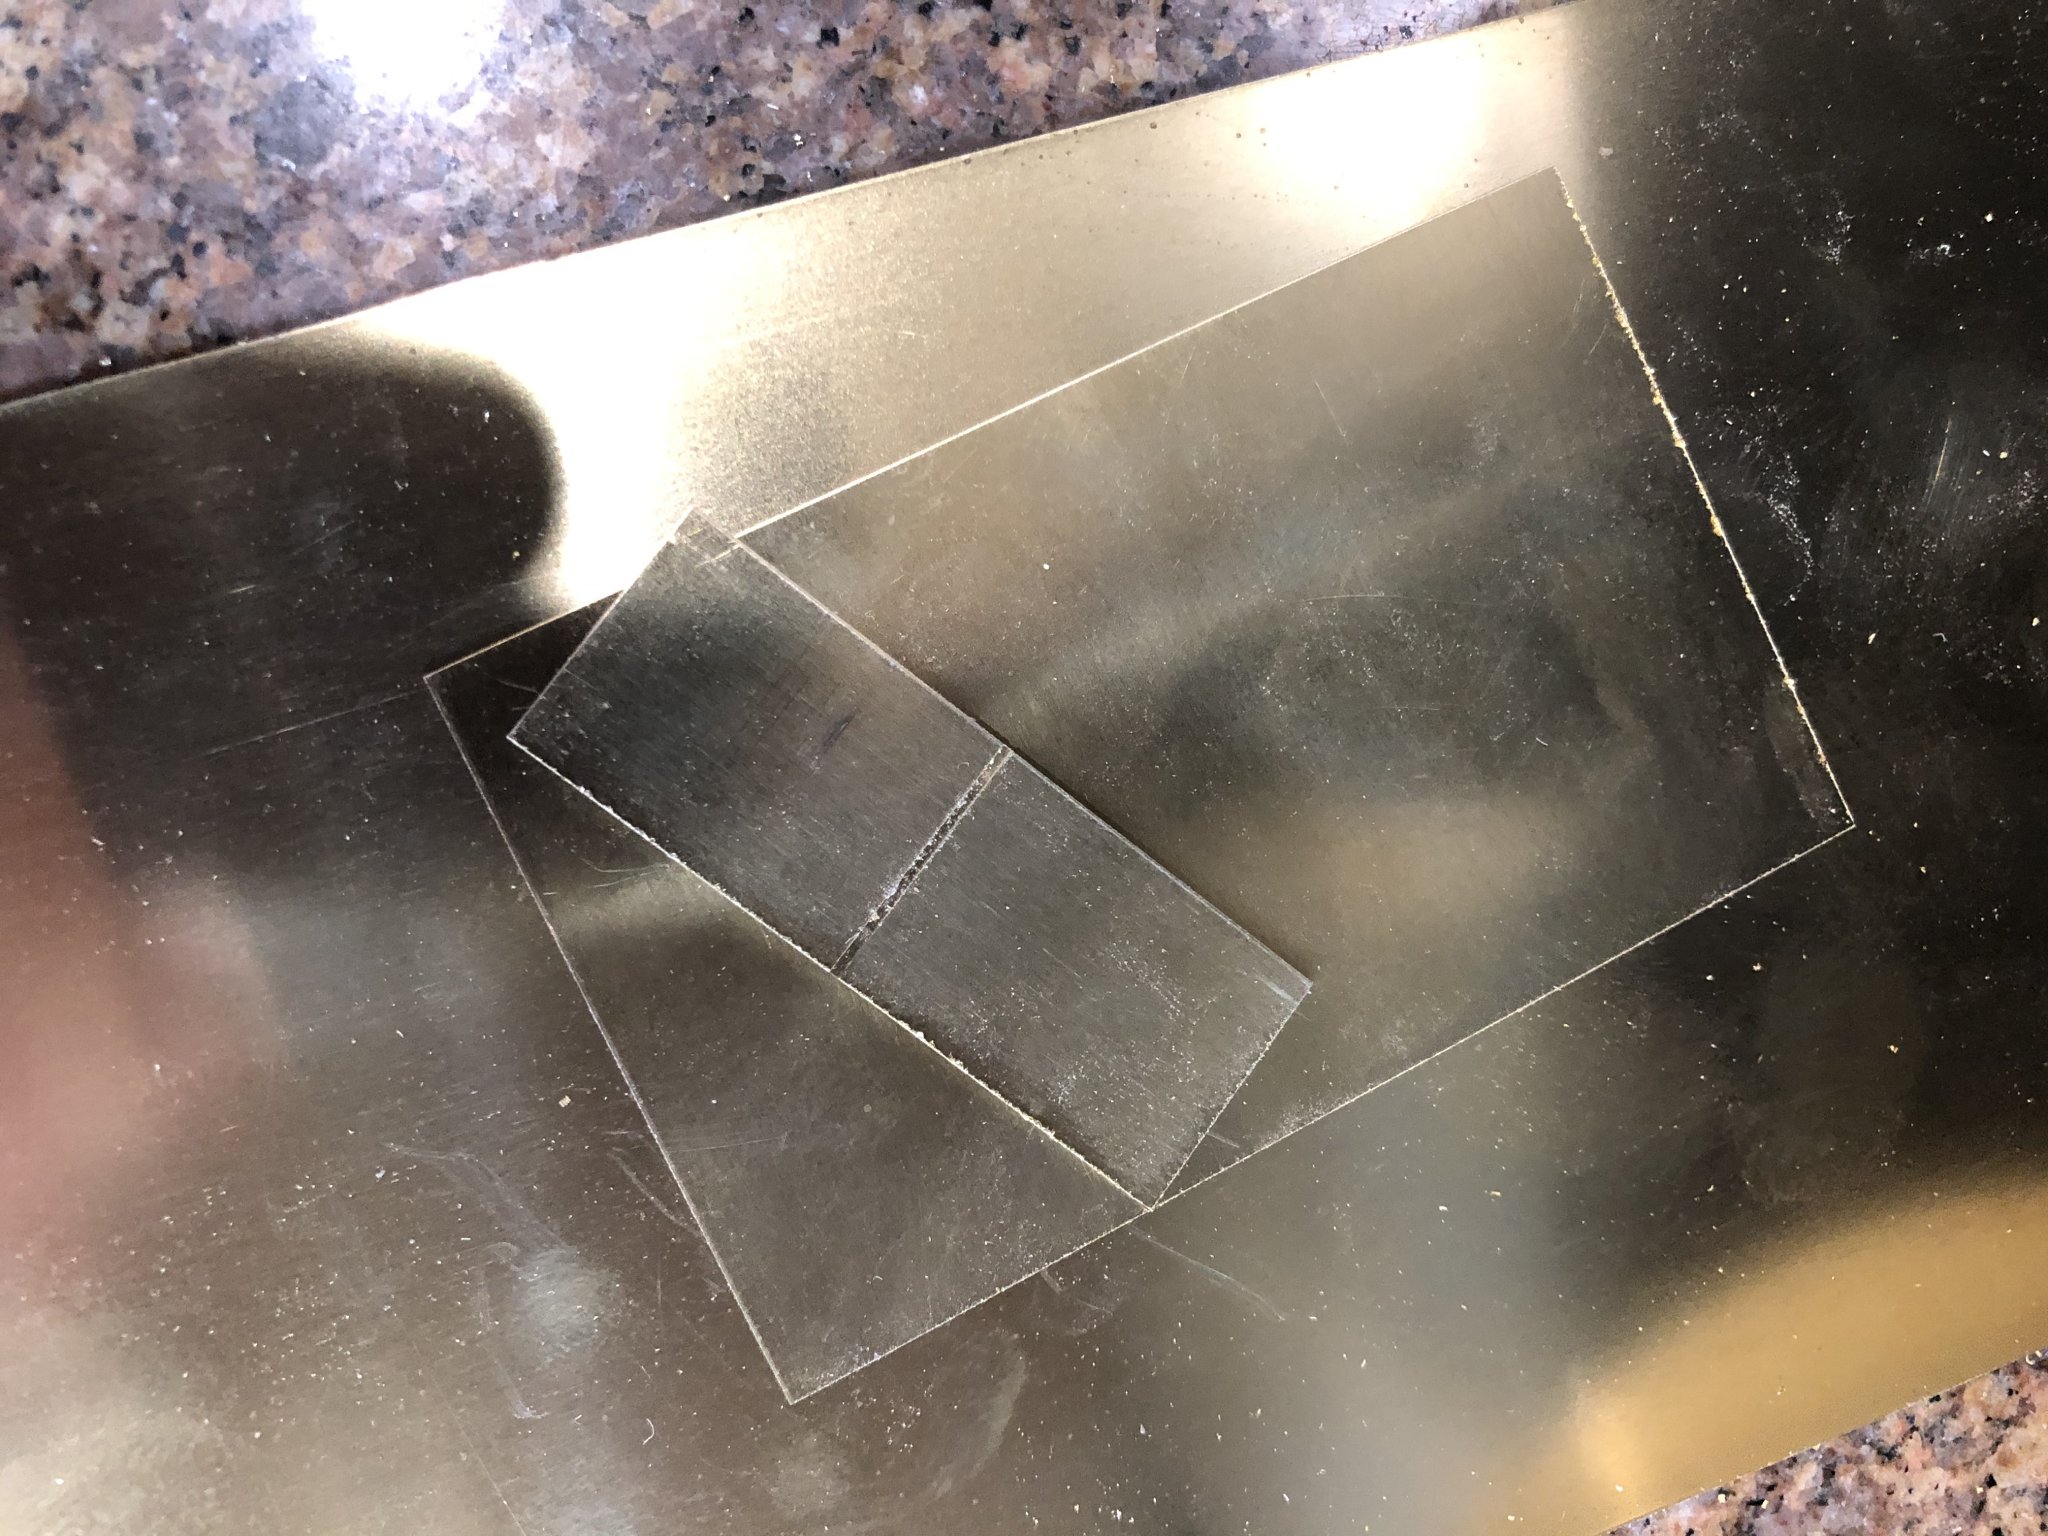
As ugly as the piece is it cleans up nicely when I pickled it in 91% alcohol as you can see in the next picture. Using my table saw with a .023 kerf slitting I just sliced off the pieces to make the pintles and gudgeons.
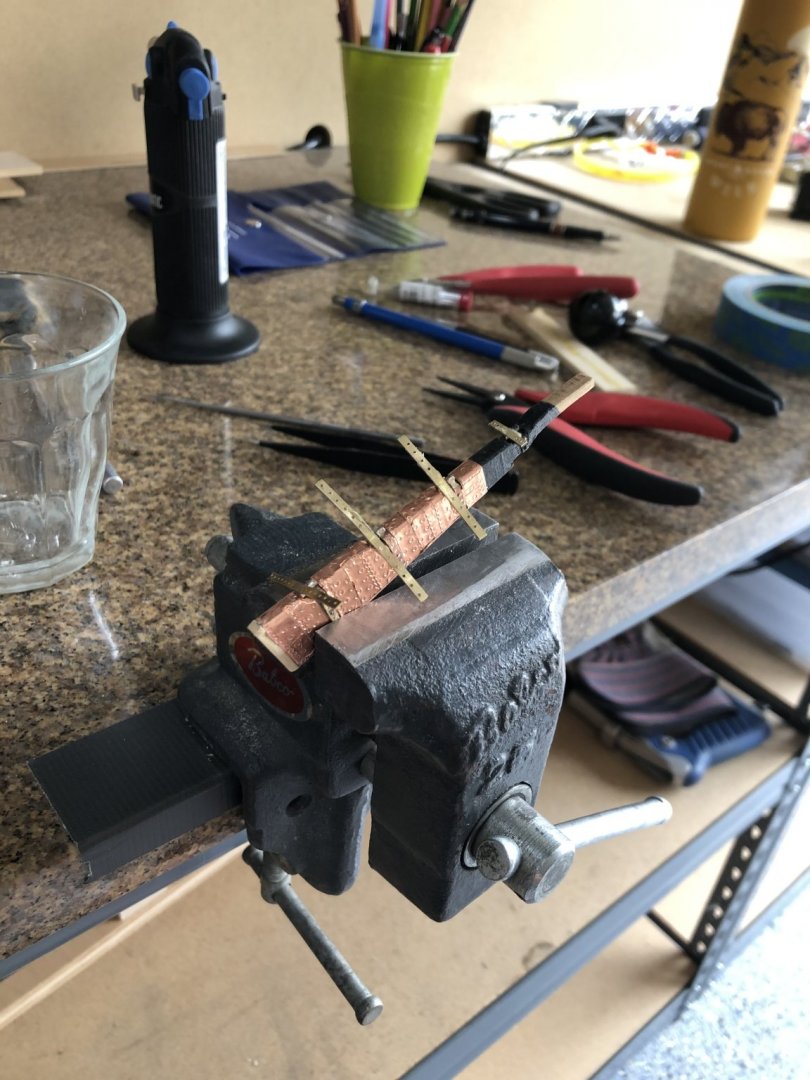
When all the pieces had cooled and had been cleaned smooth I glued them to a piece of scrap wood to hold in place while drilling.

The finished rudder
and the finished rudder on the Syrene
This method worked really well for me and I'll use it again on the next model.
I hope this will help anyone considering how to make pintles and gudgeons
Stay Well and Safe
Will
-
Well tomorrow stretched into a week and a half. We took some time to go visit some friends in the northern mountains and spend some time in Prescott. Had to get out of the heat its been above 110 degrees and up to to 118 one day. Summer has got to end.
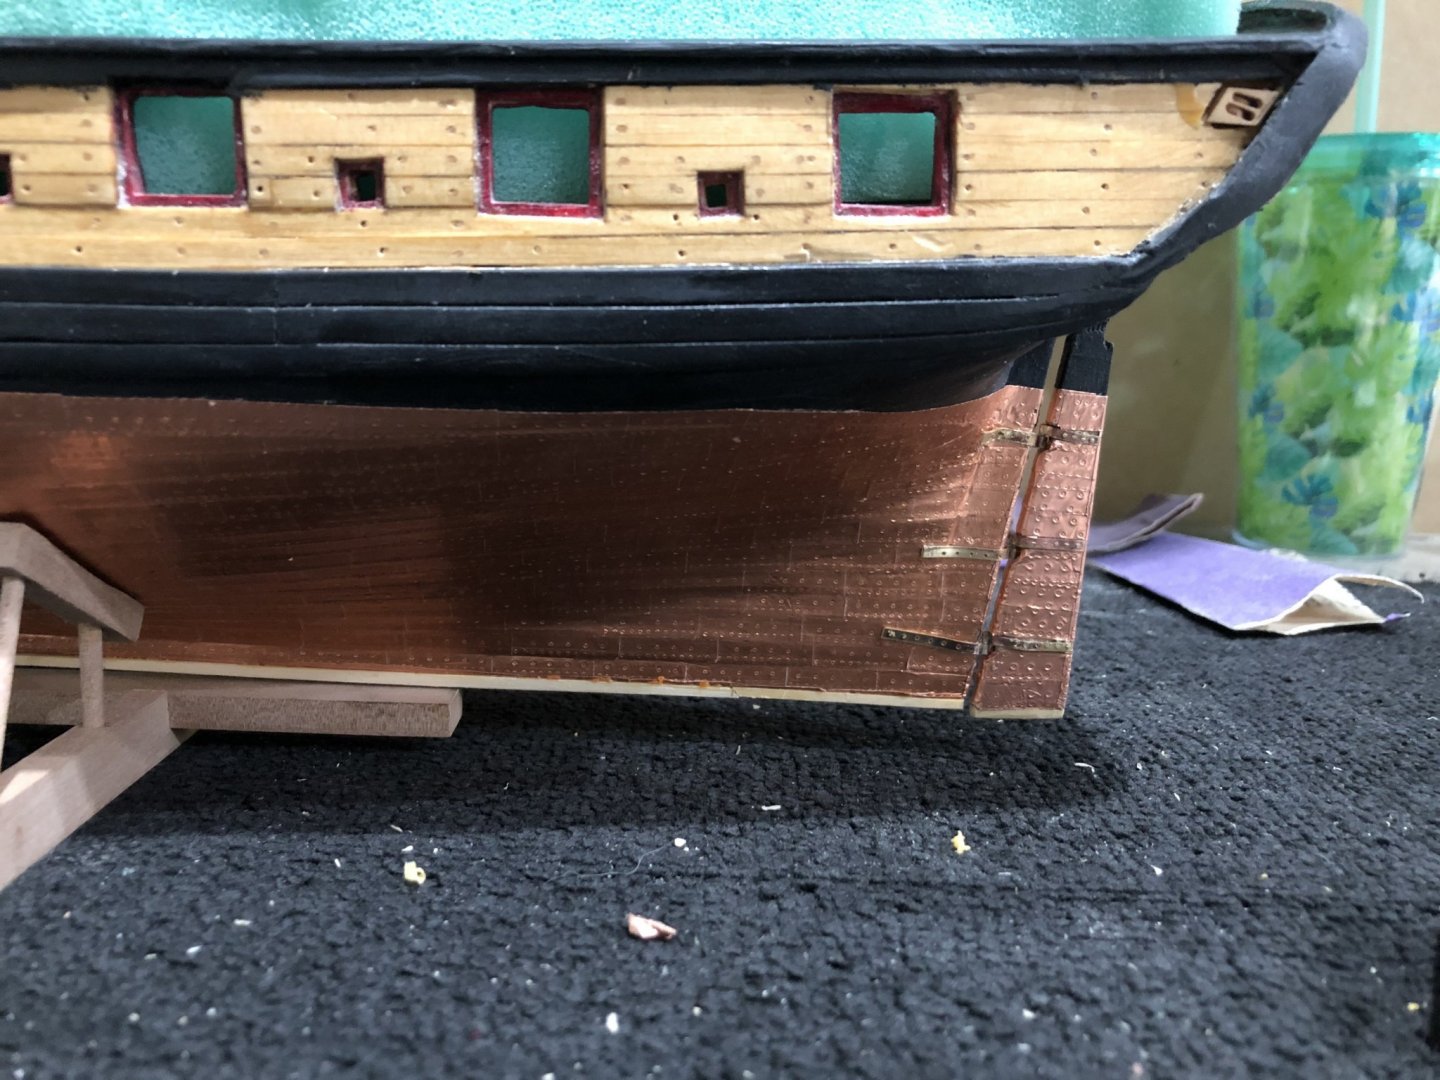
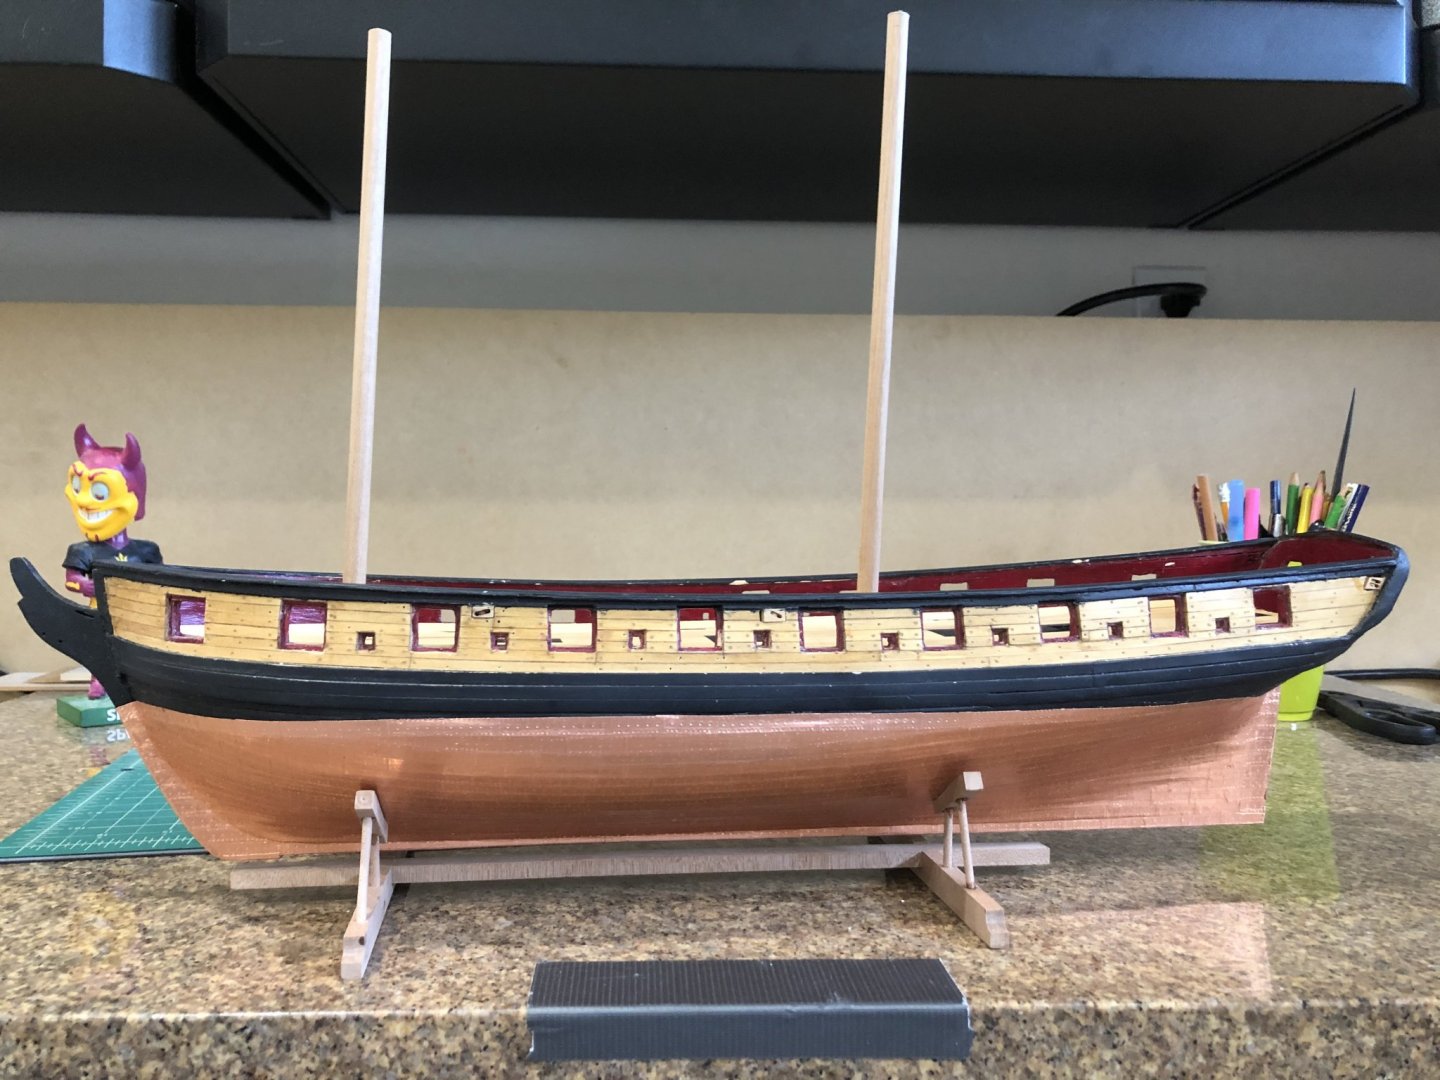
Came home and made all the plates all three patterns and plated the ship. Completed the plating today and added the false keel. I made the keel out of 4 pieces which simulated 3 pieces being 24' and the last 8' added the false keel and is now drying.
Just some pictures of the completed plating.
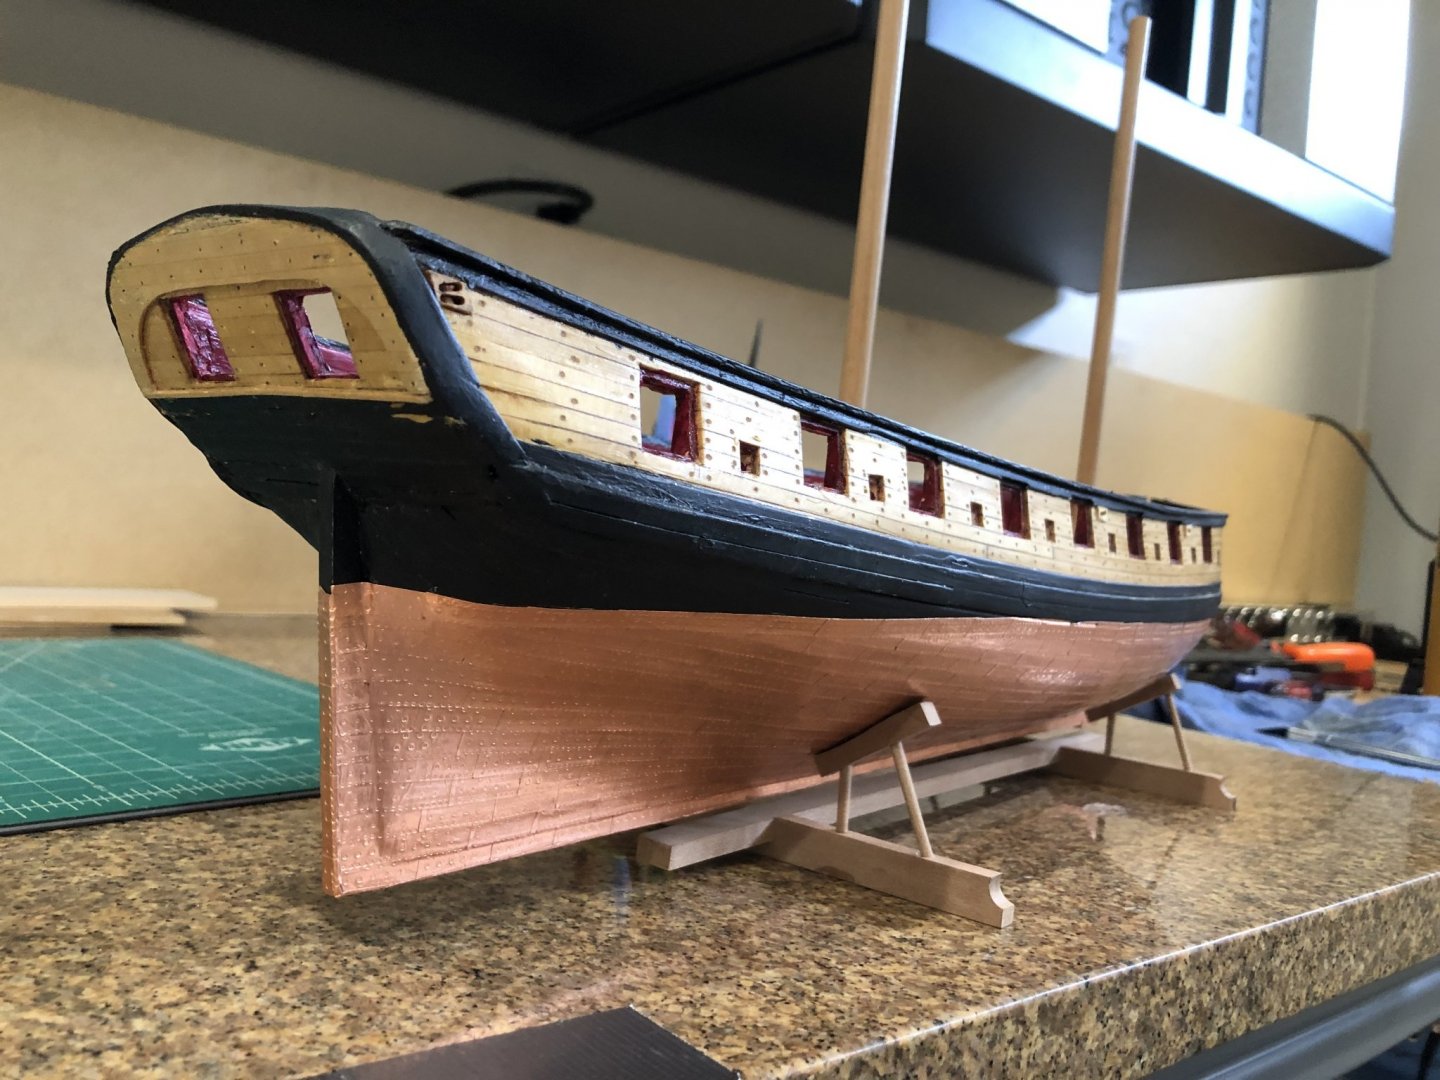
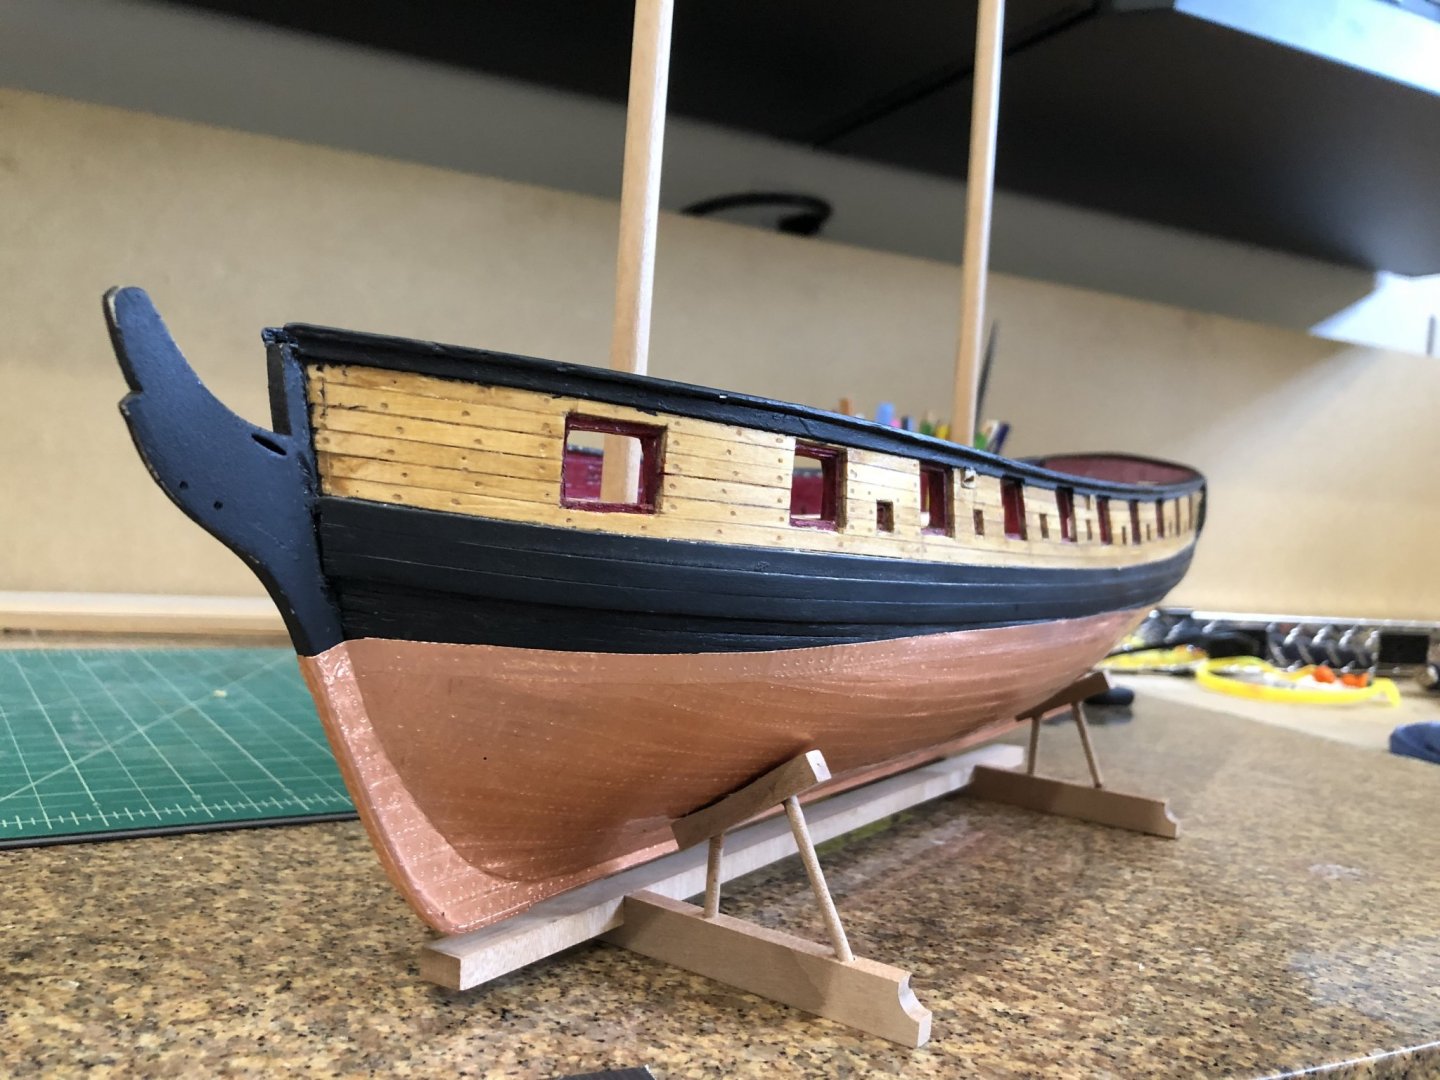
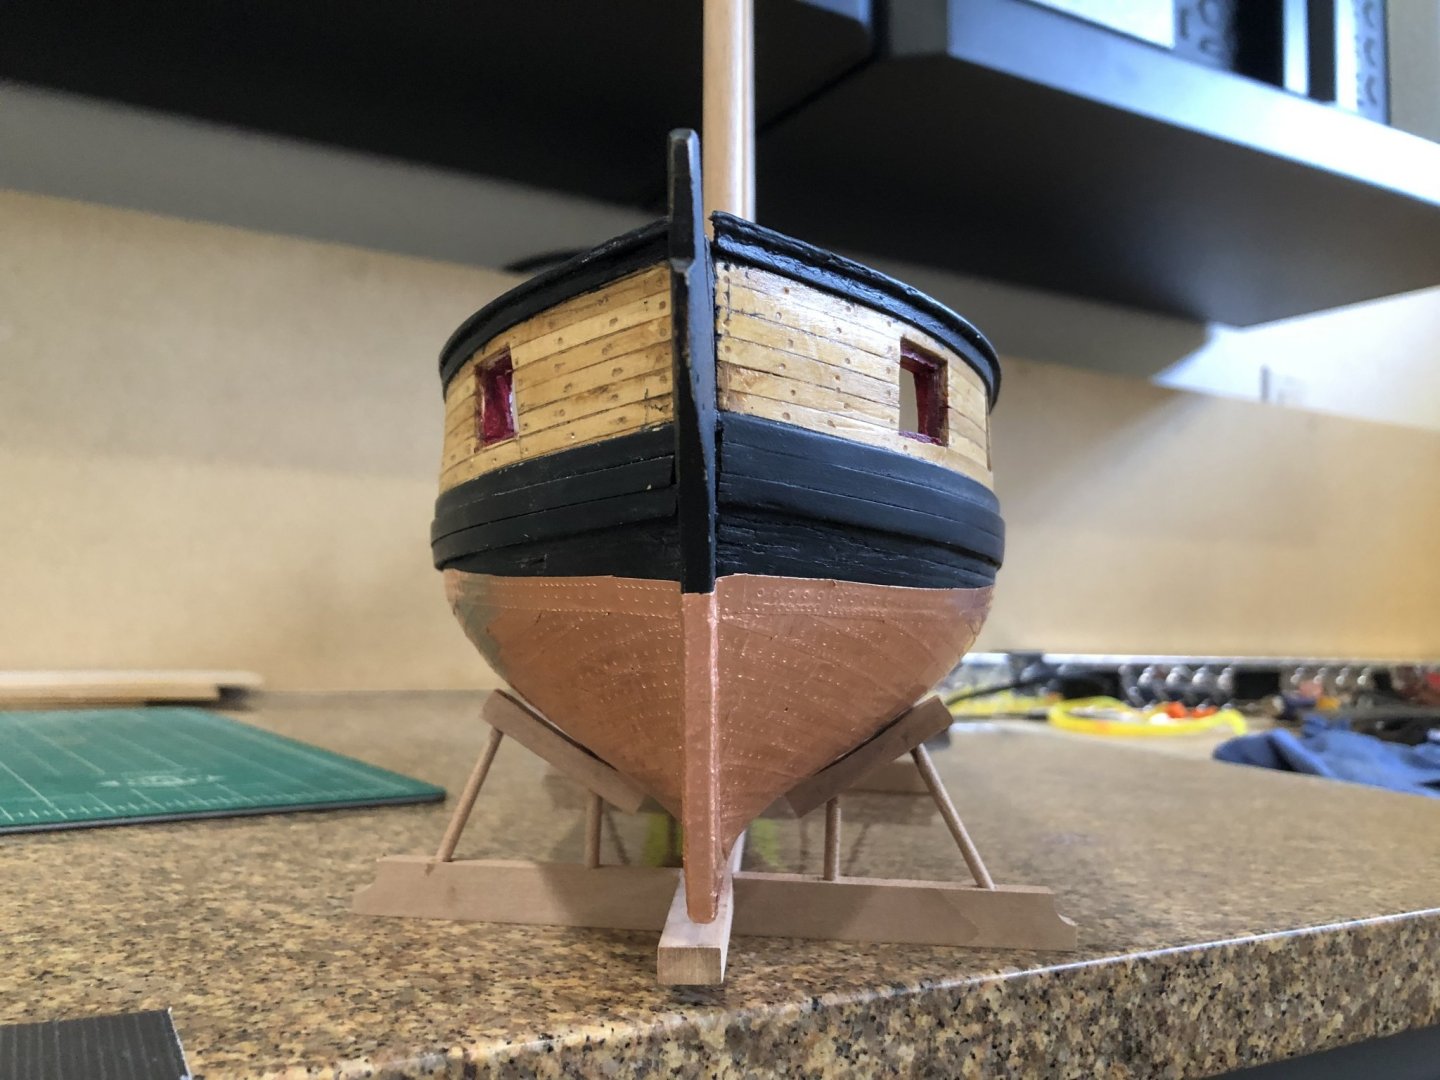
Tomorrow onto pintles and gungeons
Stay Well and Safe
Will
- JpR62, WalrusGuy and Edwardkenway
-
3
-
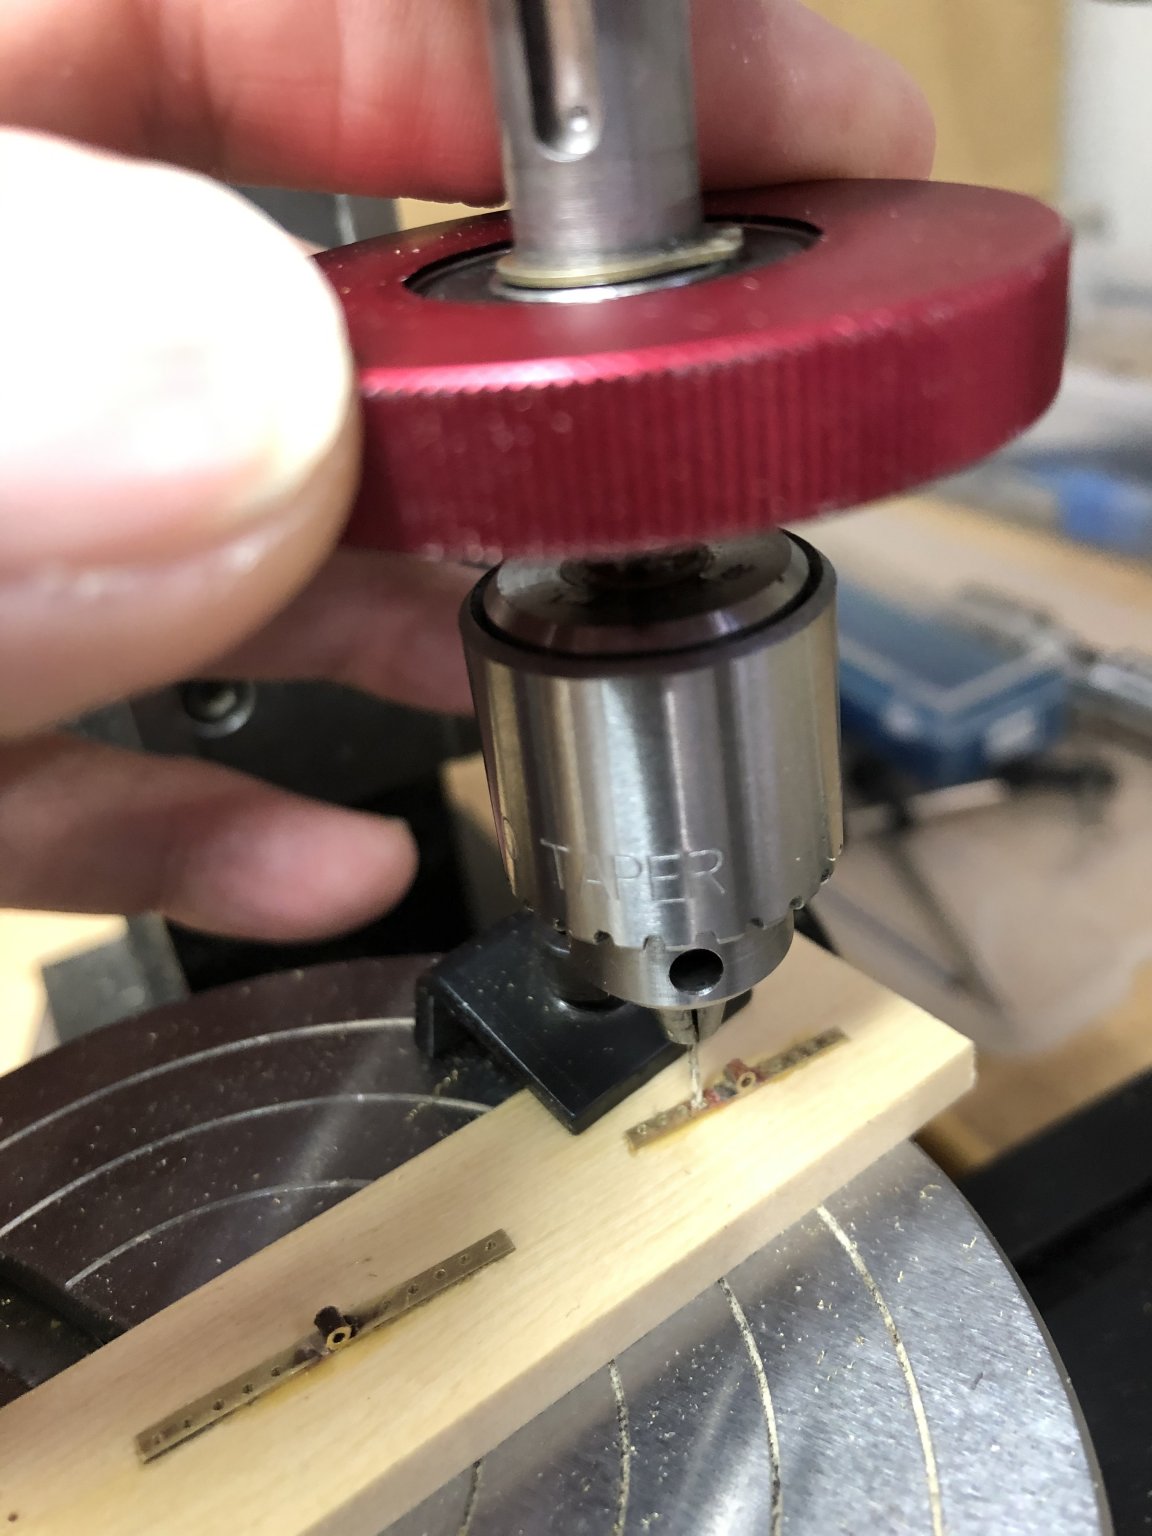
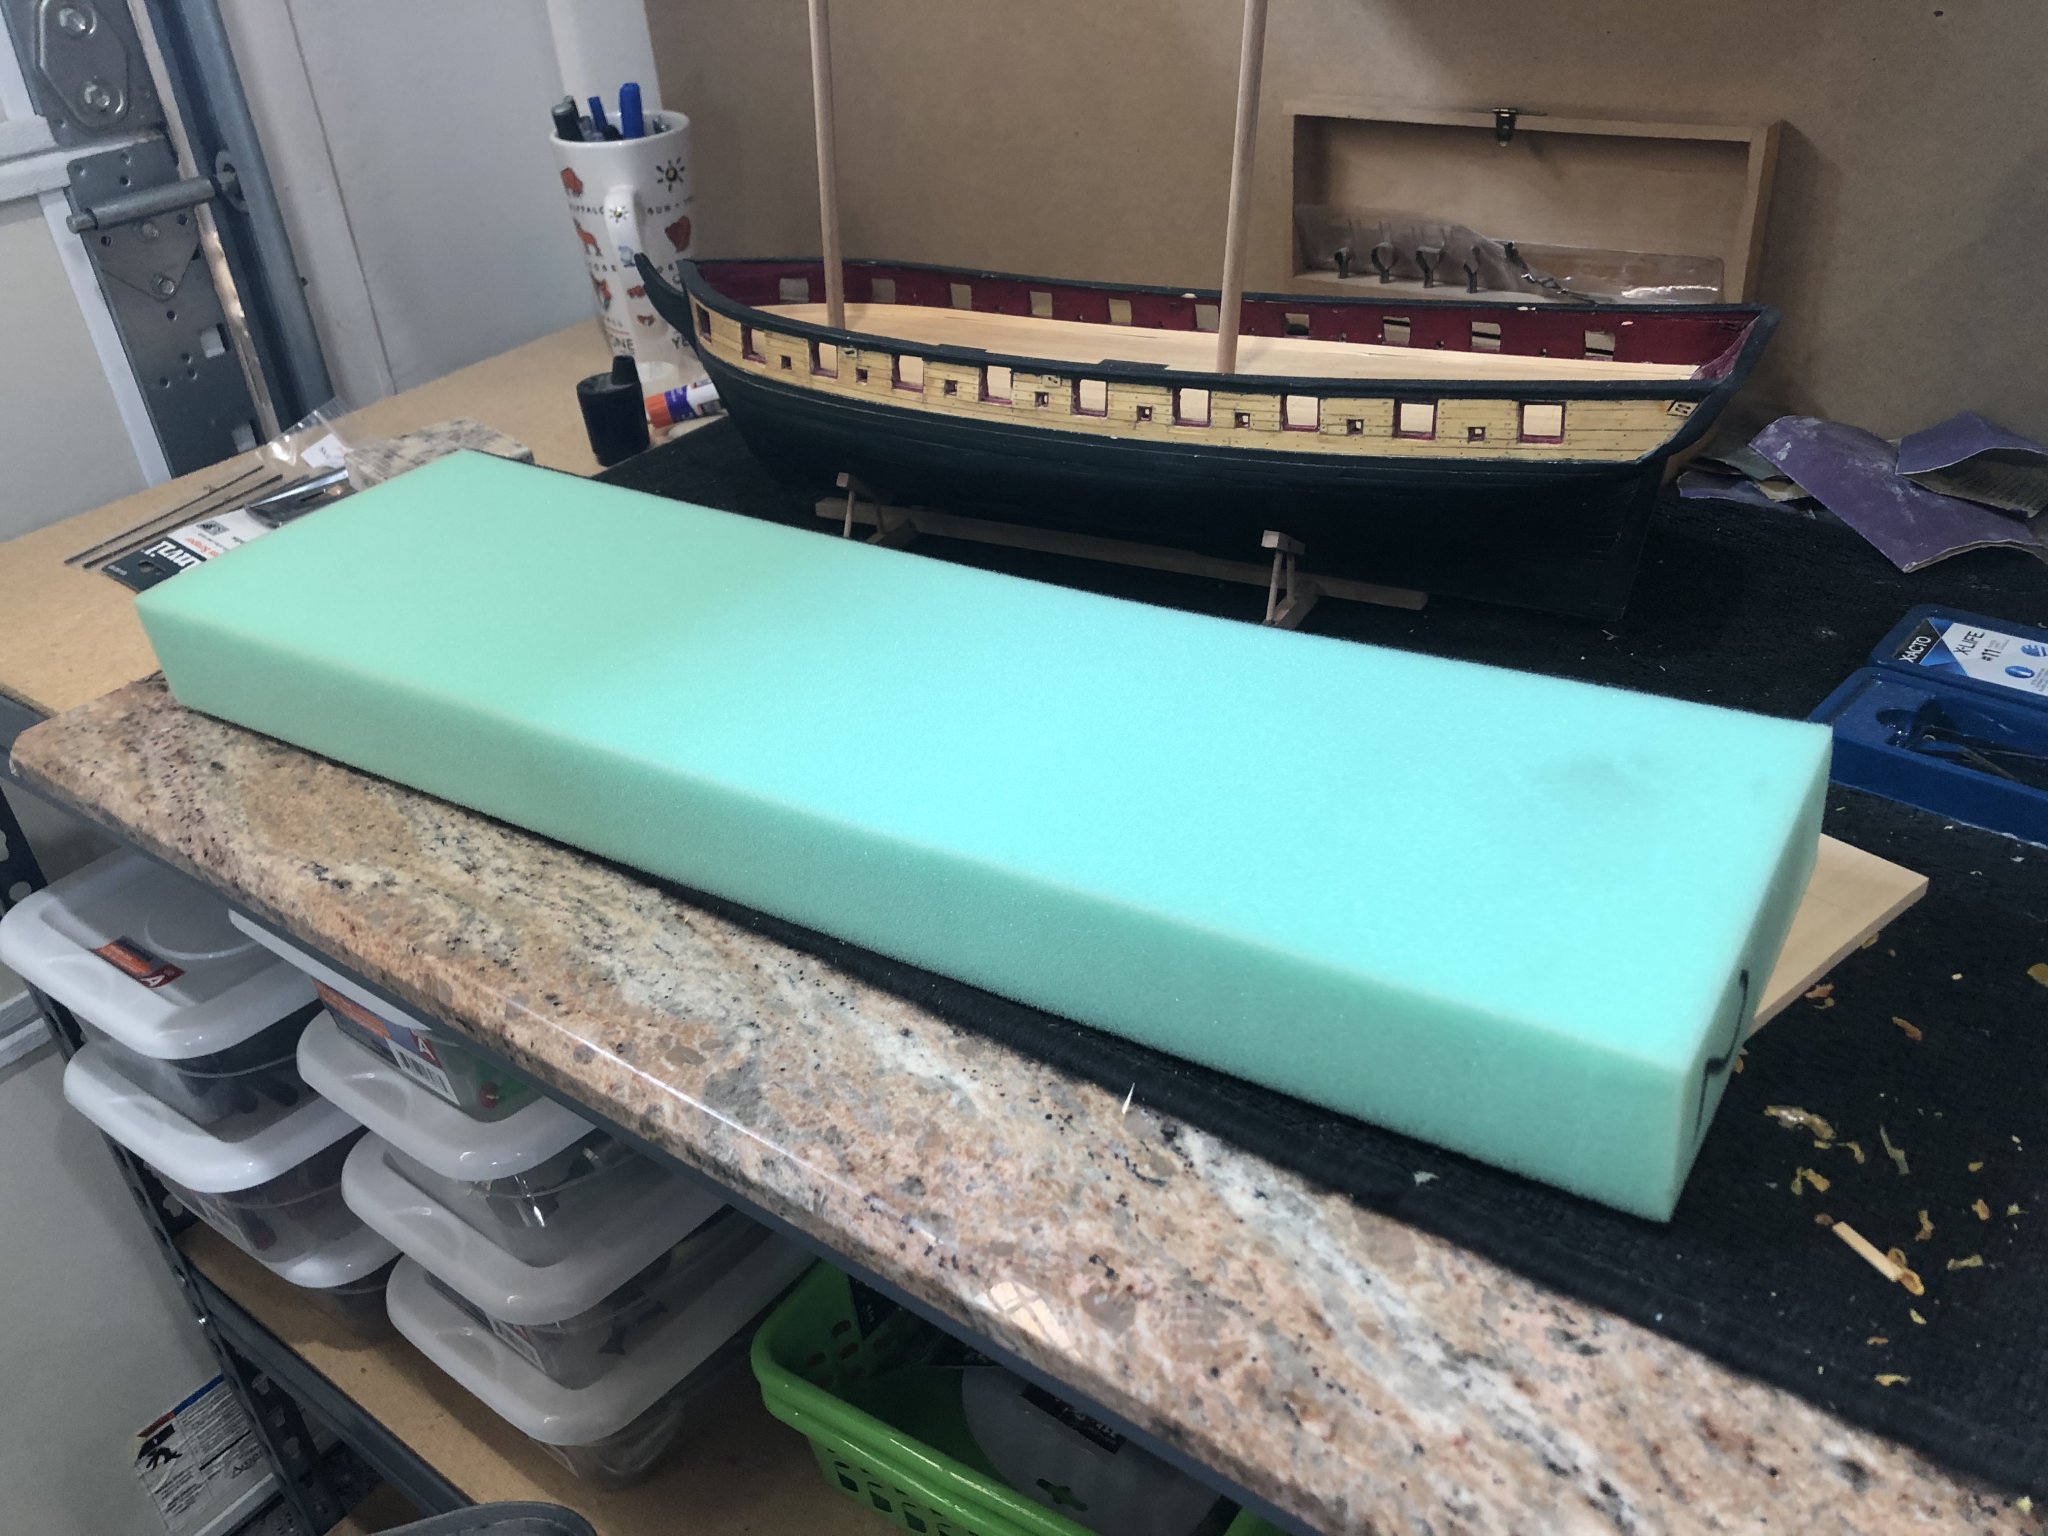
Started copper plating today. First thing was to make plates so I spent some time making 400 starboard and port plates. Punch and tape worked nice together and it went very smoothly. Next I made a foam pad to protect the Syren on in the inverted position while I added the plates. I went to a local sewing/hobby store and bought a piece of 2" think foam to make the pad then I used a view of the deck from the plans and cut the foam to shape and simply installed the pad between the bulwarks.
2" foam
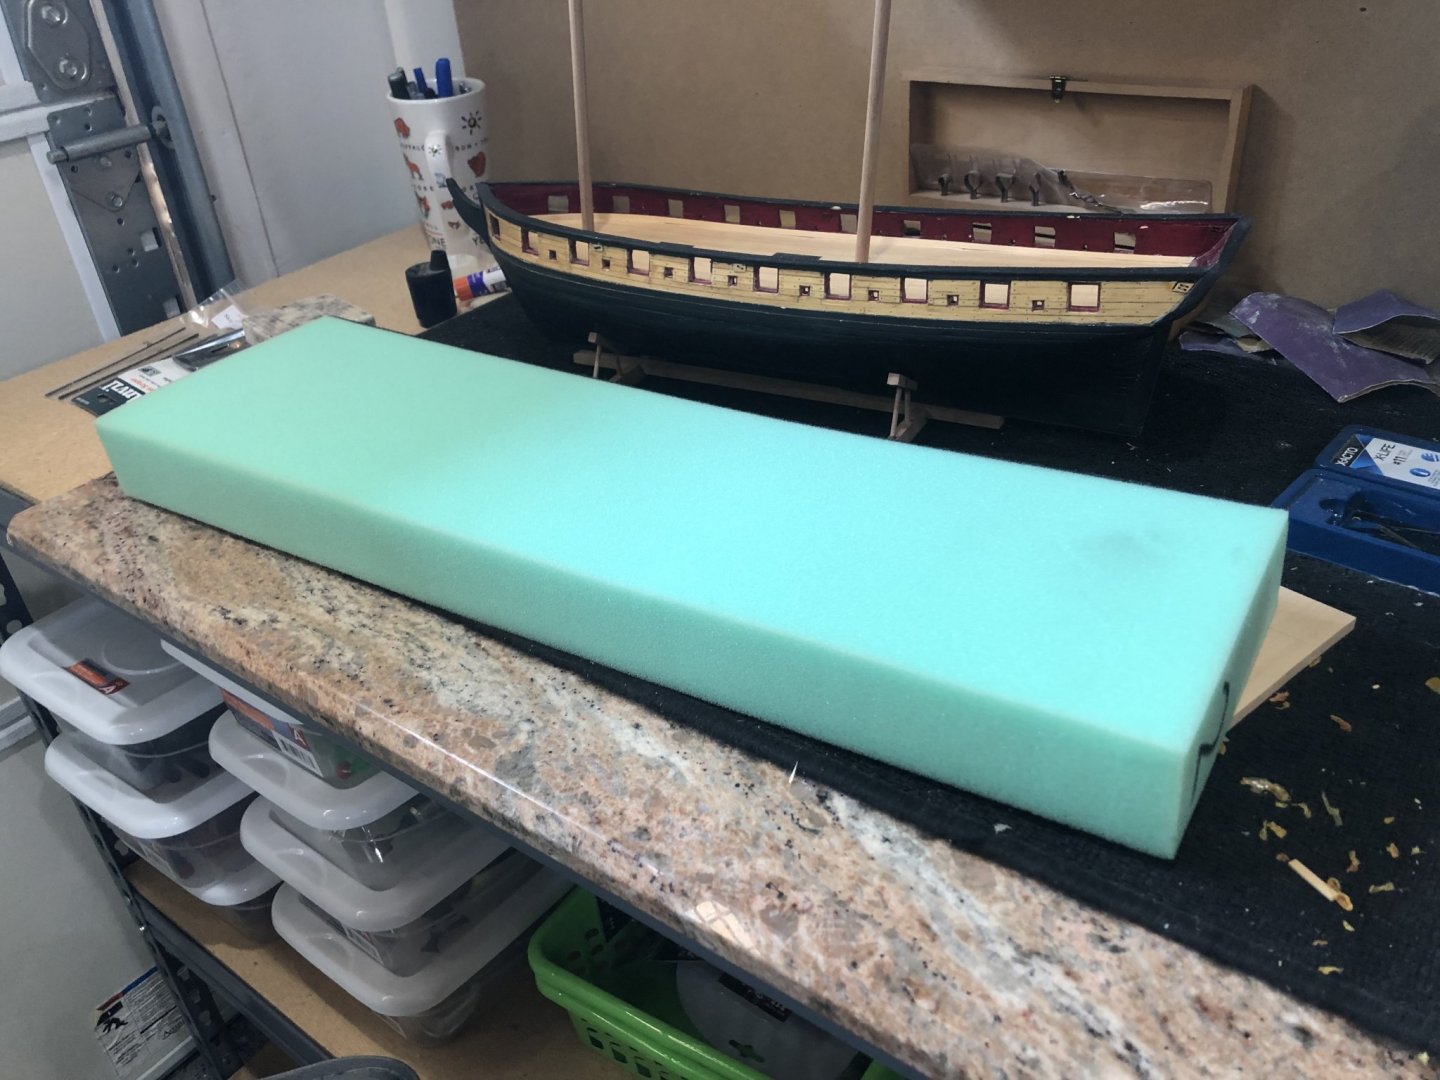
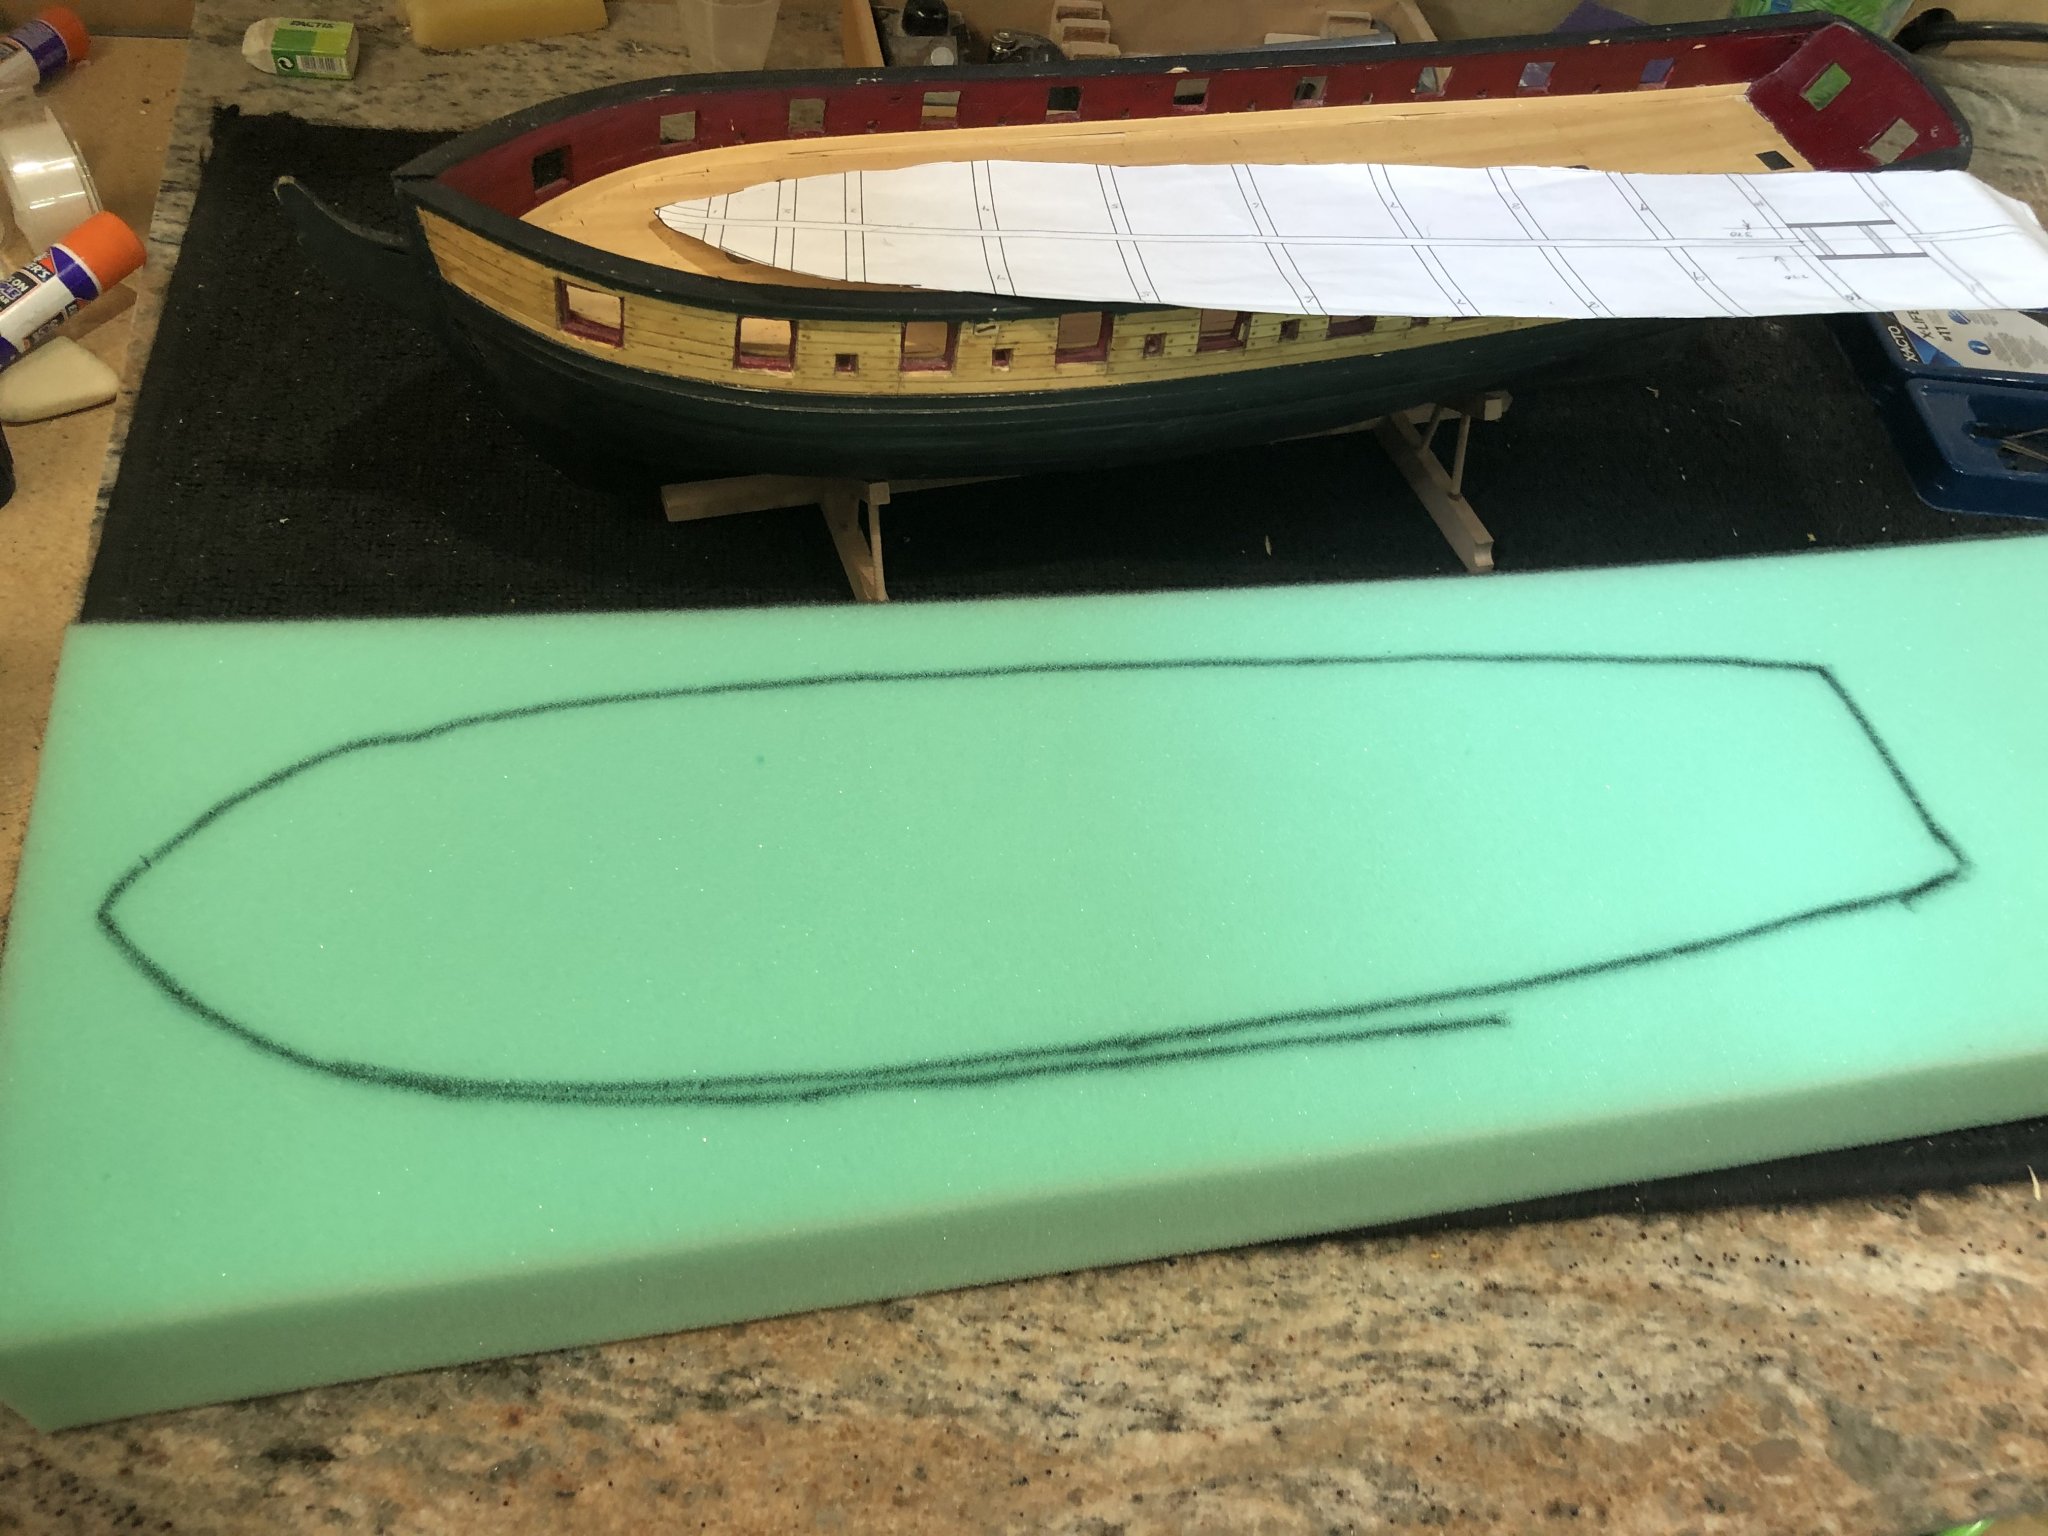
Next I traced the deck pattern onto the foam

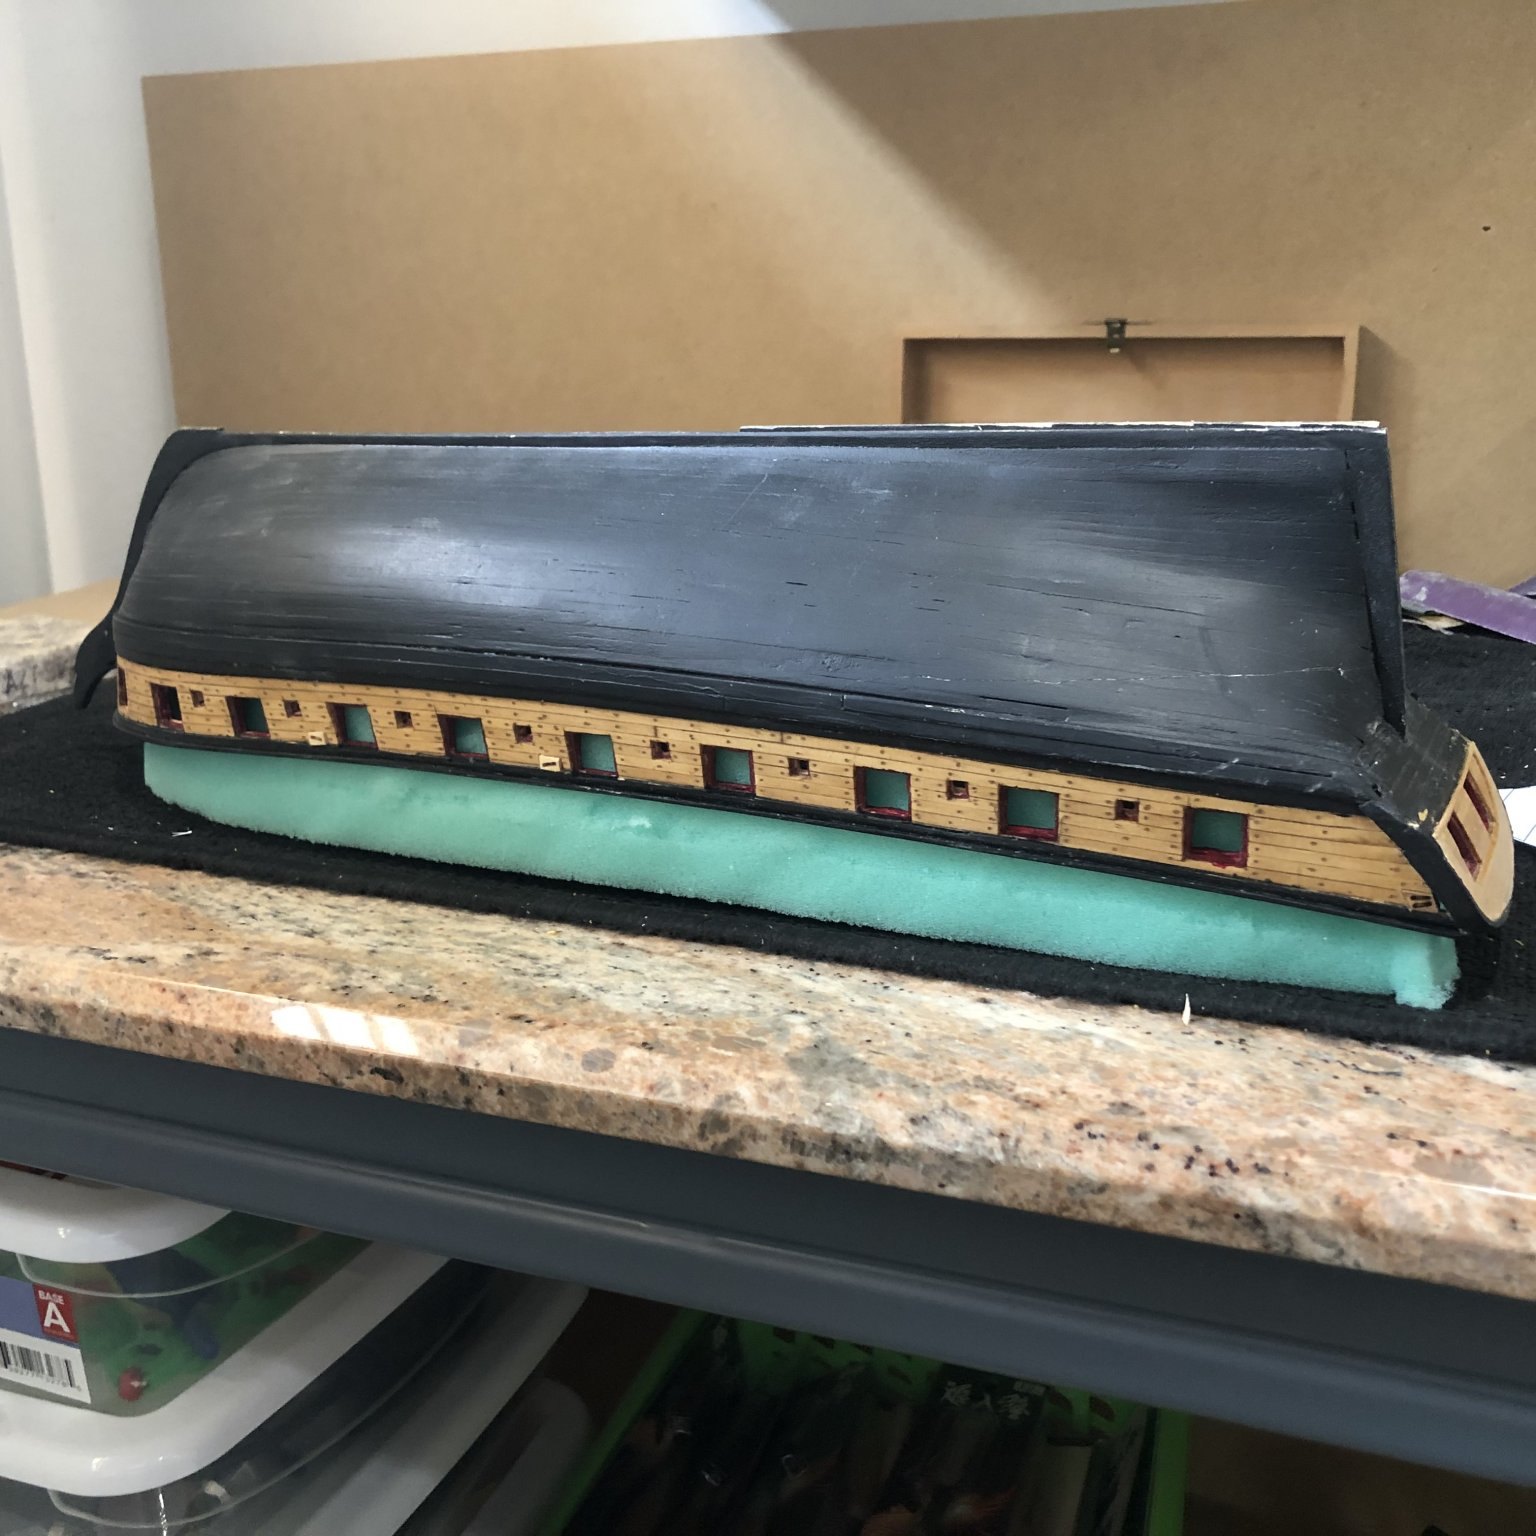
Then simply cut the foam with a hobby knife and put it on the deck between the bulwarks
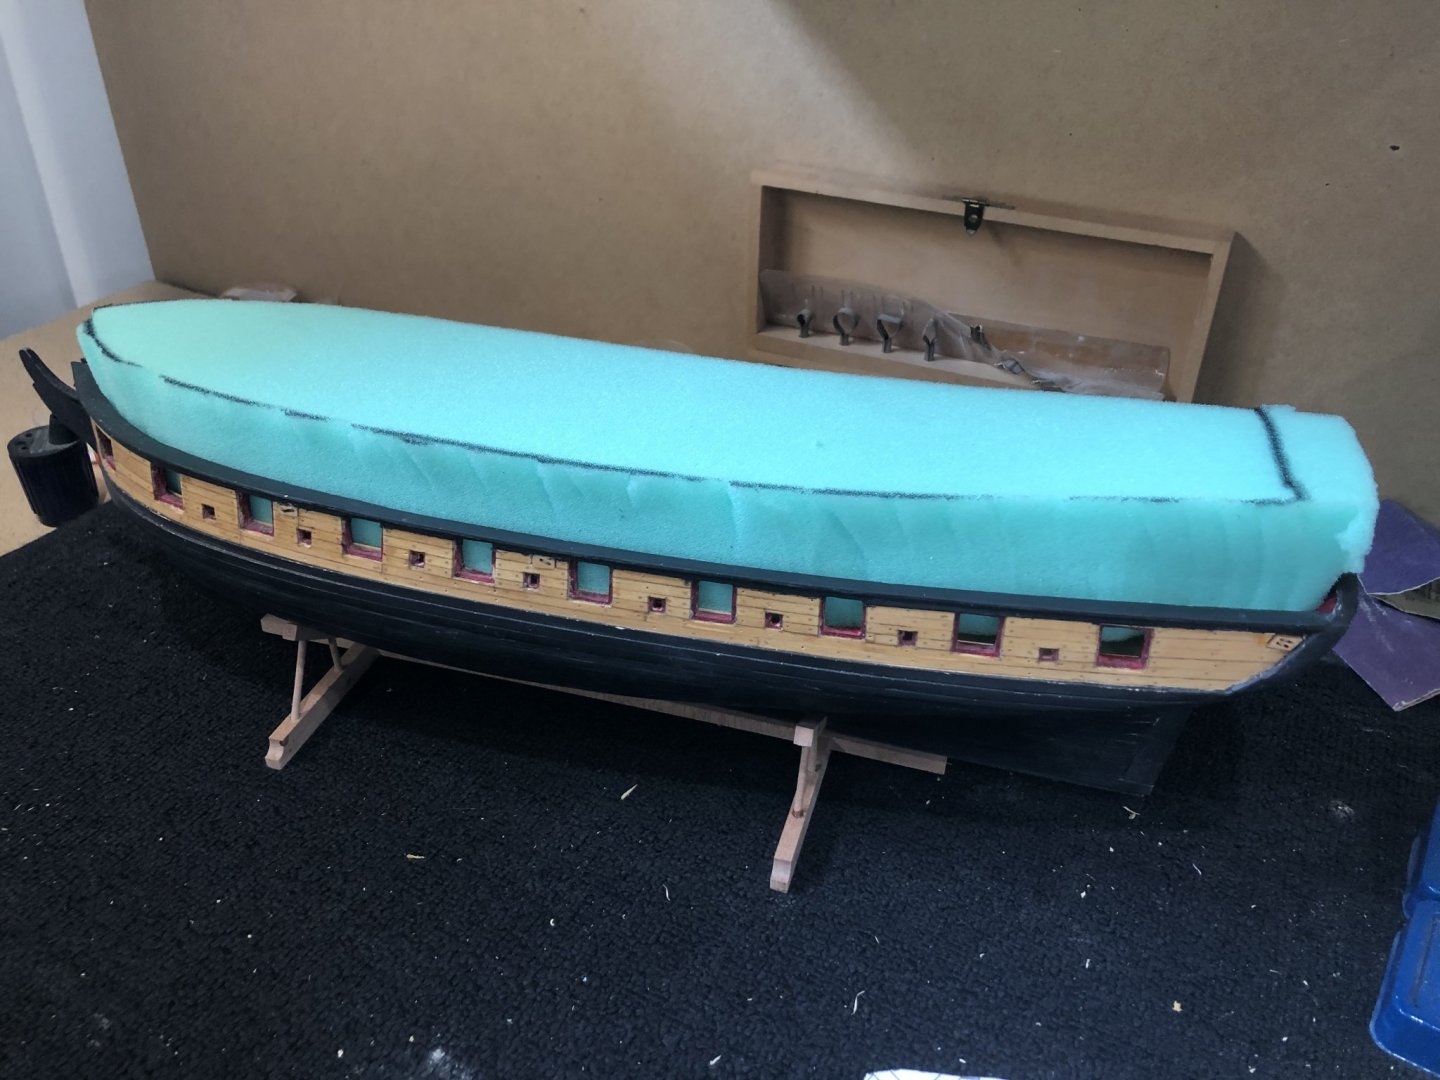

I read Dubz log and am impressed with how he made the finishing plate pattern using 6mm tape and decided to use the same method to end the port and starboard plates and then add the finishing plates right against the waterline mark.
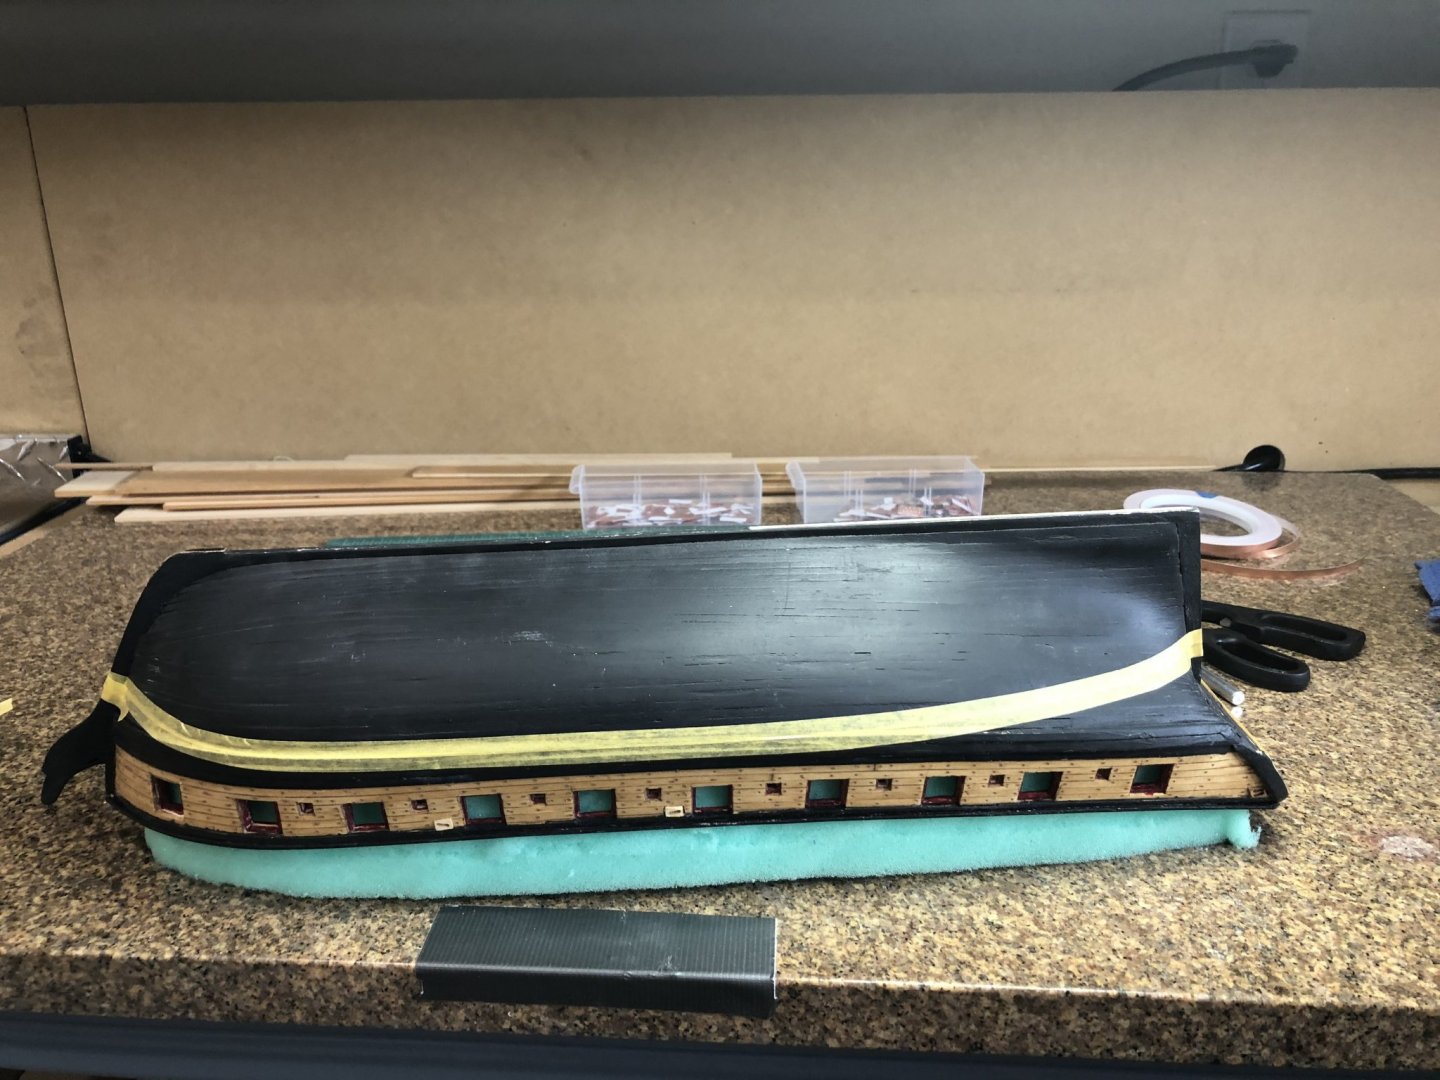

and now it begins

Tomorrow is plate day. I figure I will make plates as I need them since I don't know the total number required.
Stay well and Safe
Will
-
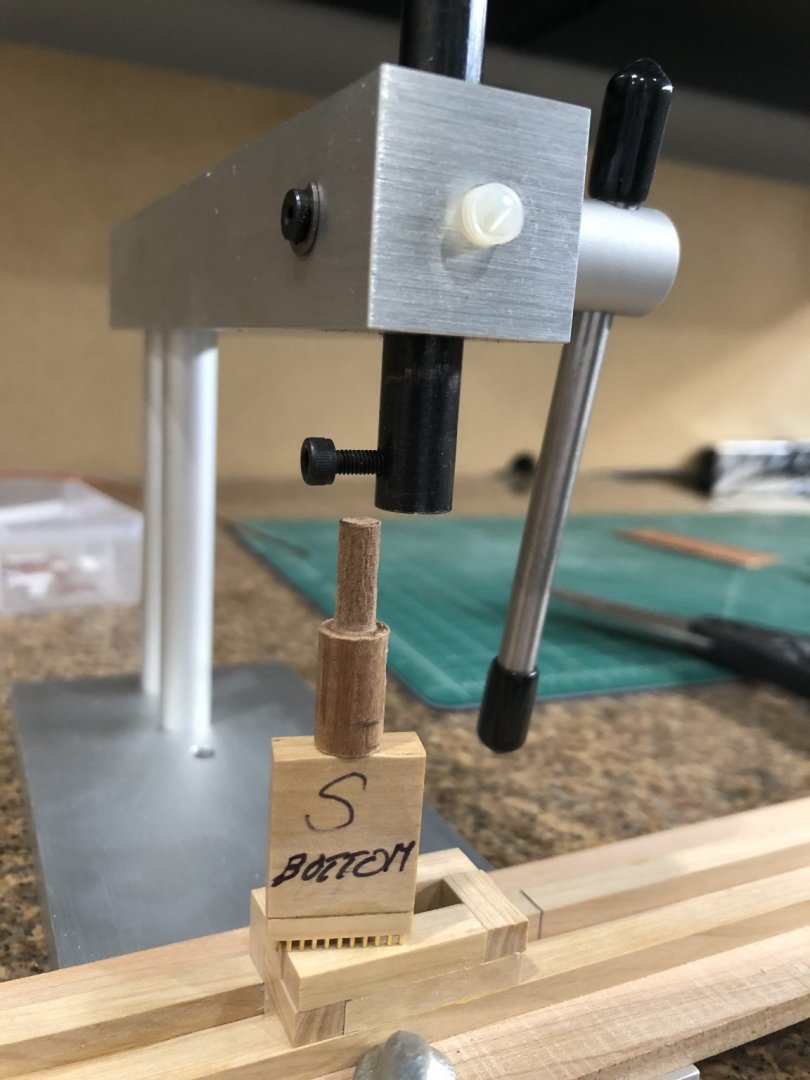
Had a productive day working on my die for the press and making plates for the starboard side. Took time to make some test pieces on installation of the plates trying to develop my skills. I might say the first were very rough but the placement pattern improved as I progressed. While examining my test piece I realized that my punch pattern was wrong, I had placed nails on the forward edge so when I placed the plates overlapping as the should it made too many nails on the forward edge It was an easy fix as I just snipped off the offending nails and the pattern now allows overlapping without the extra nails.
I modified the press as I described in the previous post with the results I'd hoped for. I took a scrap 5/16" mast dowel cut it to 1" long and put it in the lathe. The end for the ram was turned to 3/16" to fit into the hole on the end of the ram. Reversed the dowel and turned the opposite end to 1/8" by 1/4" long. Drilled a 1/8" hole in the die and covered the 1/8" stub of the dowel with CA glue and pressed it into the die. Really happy with the results and the way it works. Spending tomorrow making port, starboard, and finish plates and then onto putting them on Syren.
A couple of photos
Stay Well and Safe
Will
-
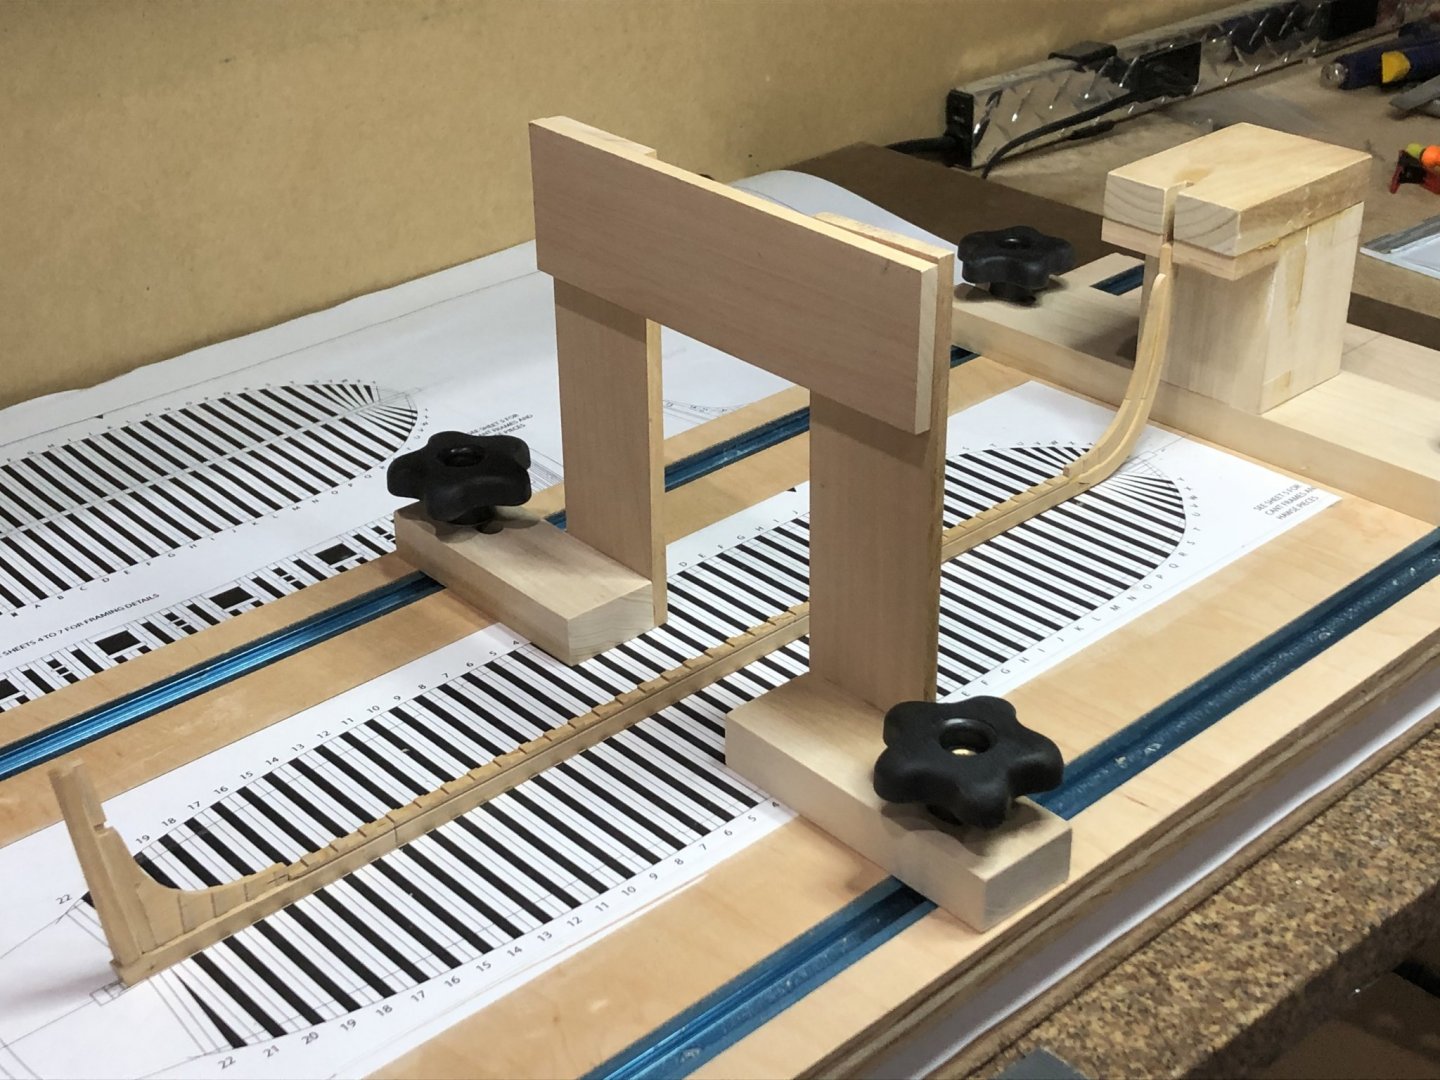
Well I've finally got the 3 stamps made and started testing. Did I say tricky. I tried to use a hammer method but a small hammer didn't have sufficient force and regular carpenters hammer was very unwieldy so I started using my little press with much better results.

Now that I'm using the press I can shorten the punch to make it less unwieldy. The other thing I need to do is mount the press on the table top and attach the rod to the punch to lift the punch while advancing the tape. I plan to drill a hole in the top of the punch placing a metal rod in the hole and attached to the ram on the press so I can press down to imprint and lift to advance tape. I let you know in the next post after I make some plates and attach them to test panels.
Thats all folks
Stay Well and Safe
Will
-
I have finally made a keel, stem and stern post correctly. Yesterday I glued them together making the assemblies that match the drawing. I forgot to mention the copies of sheets 1 thru 10 were not to scale. Dumb me I never measured them. The total length of the keel was .135 shorter than the original and you can guess what happened. Note to self always measure and measure again always. So I measured the scale on the original and it is within 1/64" of the dimensions noted. I took the original to an engineering copy center (Mesa Blueprint, Mesa, AZ great people and made 3 copies while I waited) and had perfect copies made so I could work from. More wood to the hungry scrap box.
Finished it up and Saturday I assembled the pieces after checking the fit with dry fitting. Glued the stem and stern pieces together and set aside to dry.
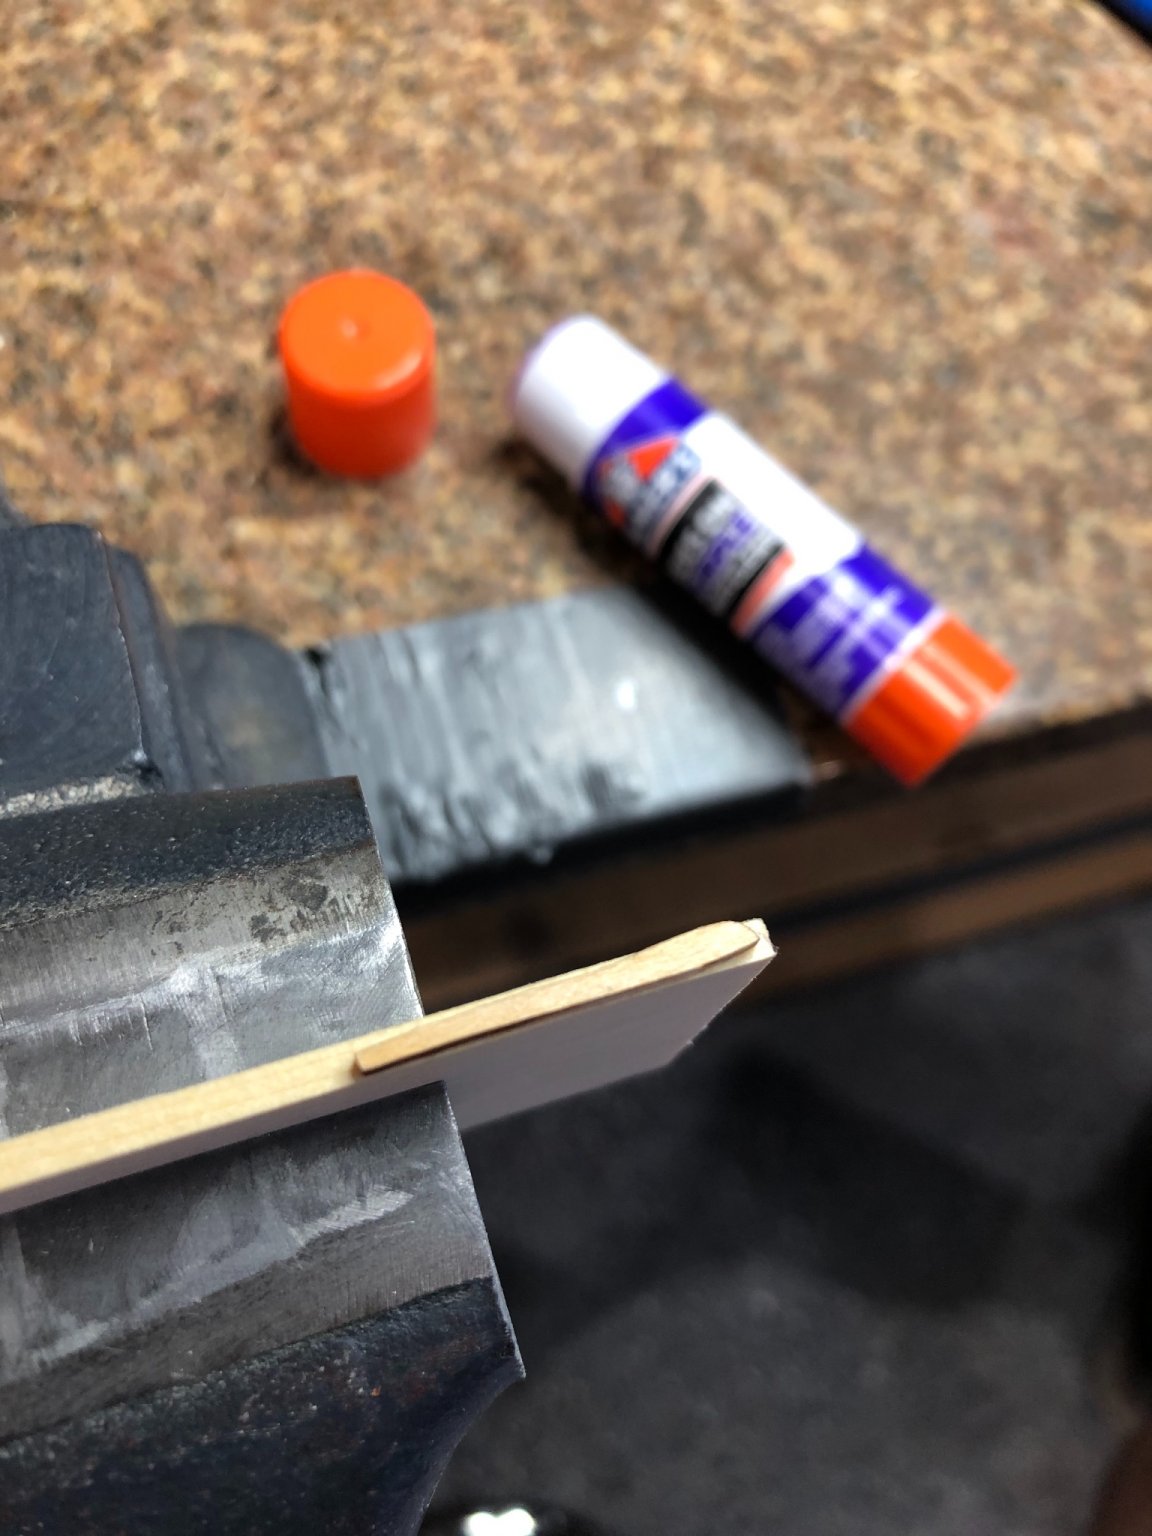
I decided to add copper bolts to the keel scarf joints after doing the the stems bolts that looked so nice. So I drilled a pattern of .018 diameter holes thru the keel in the scarfs and pushed .019 diameter copper wire into the holes after dipping the wire in CA glue. I then snipped off the wire with side cutters and filed them flush to the keel surface. I then used a razor blade to scrape the CA residue and will blacken the copper with liver of sulfur after everything dries.
You see the small clamp on vice that I modifies by filing the top of the jaws flat and parallel to use in paring scarf joints or any flat surface. I put tape on the jaw faces so parts won't get damaged.

With all this done it was time to drill the holes for the .093 brass rod to locate the keel assembly to the building board. I have been obsessing about drilling the hole in both the keel and building board since I don't have a drill press the would handle items as large as a building board. But with a little ingenuity and measuring measuring and more measuring it got done and low and behold the keel fits.
So this is where I stopped next on the frames.
I have to rip some wood and mill it to .125 for the frames, not very exciting but must be done.
Stay Safe and Well
Will


- Matt D, Mike 41, Bill Brown and 5 others
-
8
-
I've come up with a pattern for the copper plates and devised a method of how to hold the nails into the stamp while pressing the copper tape.
This is the starboard pattern

The pattern in the upper left corner is the final one the others are earlier attempts. The port side will be the same but reversed and the waterline belt line will have the holes on the top as the others have on the lower edges.
This is the test pattern with the brass nails inserted. The nails are a .024 dia so then at scale (1.5" dia) they are a little to large but no so large to become obtrusive.
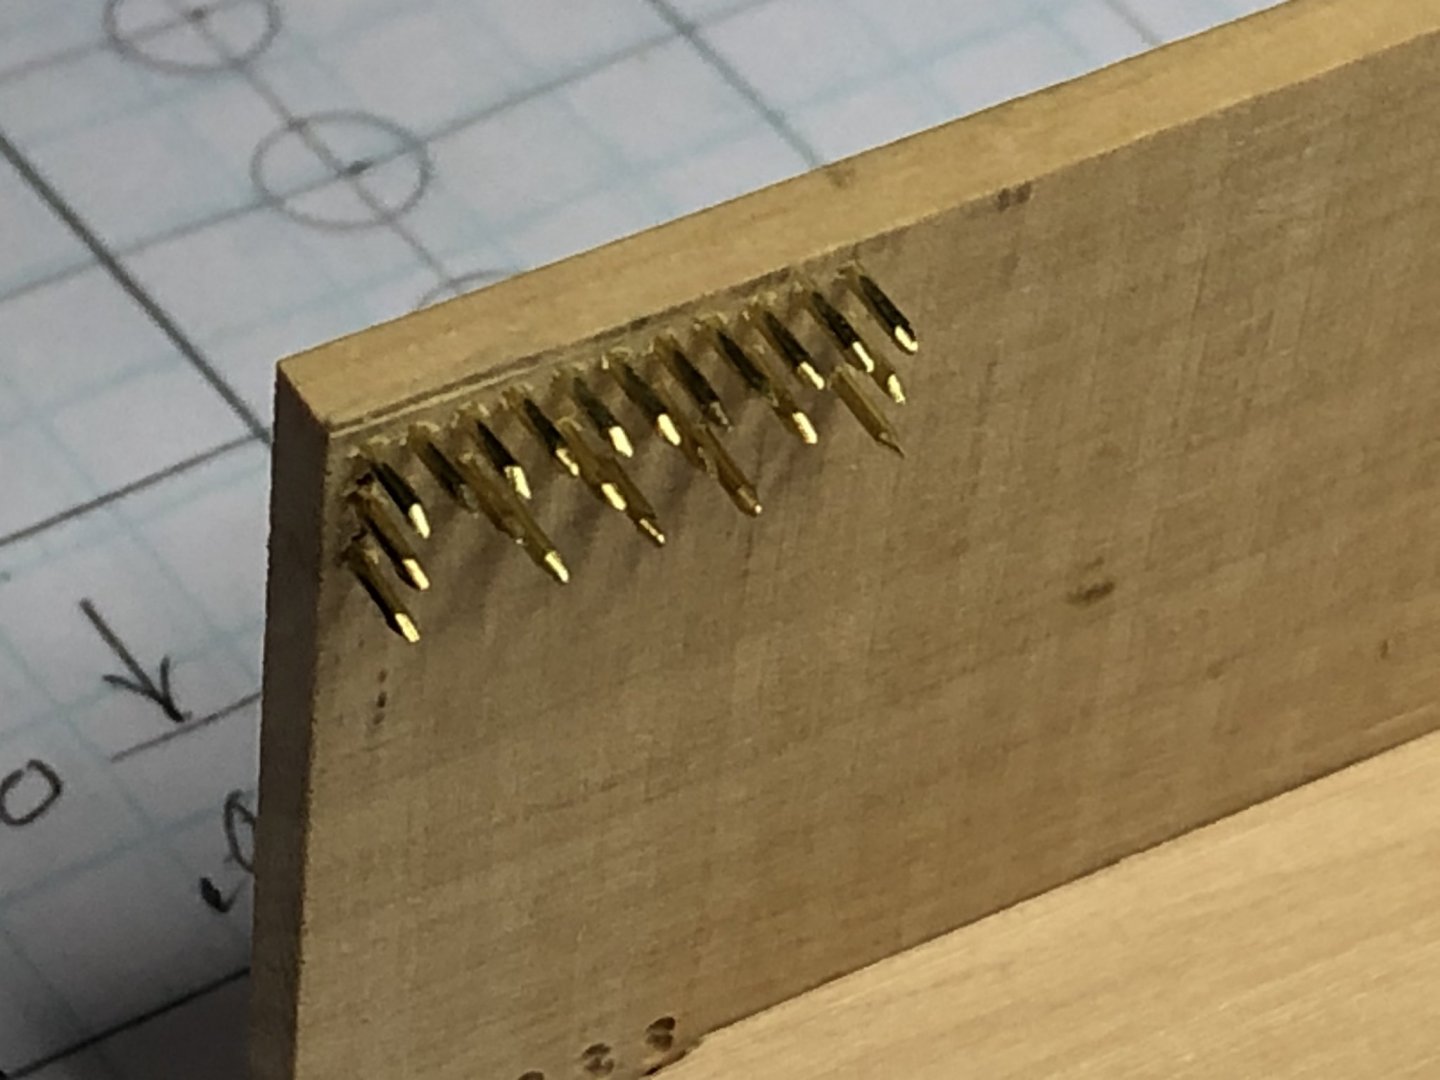
Now to my question how far has everyone left the nails protrude beyond the surface of the stamp? I'd like all the help I can get here.
I'm going to make the jig and the stamp this afternoon and will post more when they are complete. But I have another question, how do you accurately cut the tape into 11/16" lengths without damaging the tape edges?
Stay well and safe
Will
-
These are some great tips of how to trim strake planks, I'm going to keep them in mind the next time I've got planking. Patrick as too have spaces and gaps in you planking a thing I came across while reading about copper plating was from Gahms log about how he used filler extensively on the entire hull until he had a smooth surface to apply finish and then the copper plates. His Syren is beautiful and read how he obtained the fantastic copper plating and don't be so hard on yourself. GREAT JOB
Stay well and safe
Will
-
The head rails and cheeks are first class. You did I magnificent job for the first time. I can imagine how fustratating dry fitting those timber must have been but it is really a great job. 🙌🙌
I'm not looking forward to that part of my build, but I'll look to your log for inspiration.
Stay safe and Well
Will
- WalrusGuy and Retired guy
-
2
-
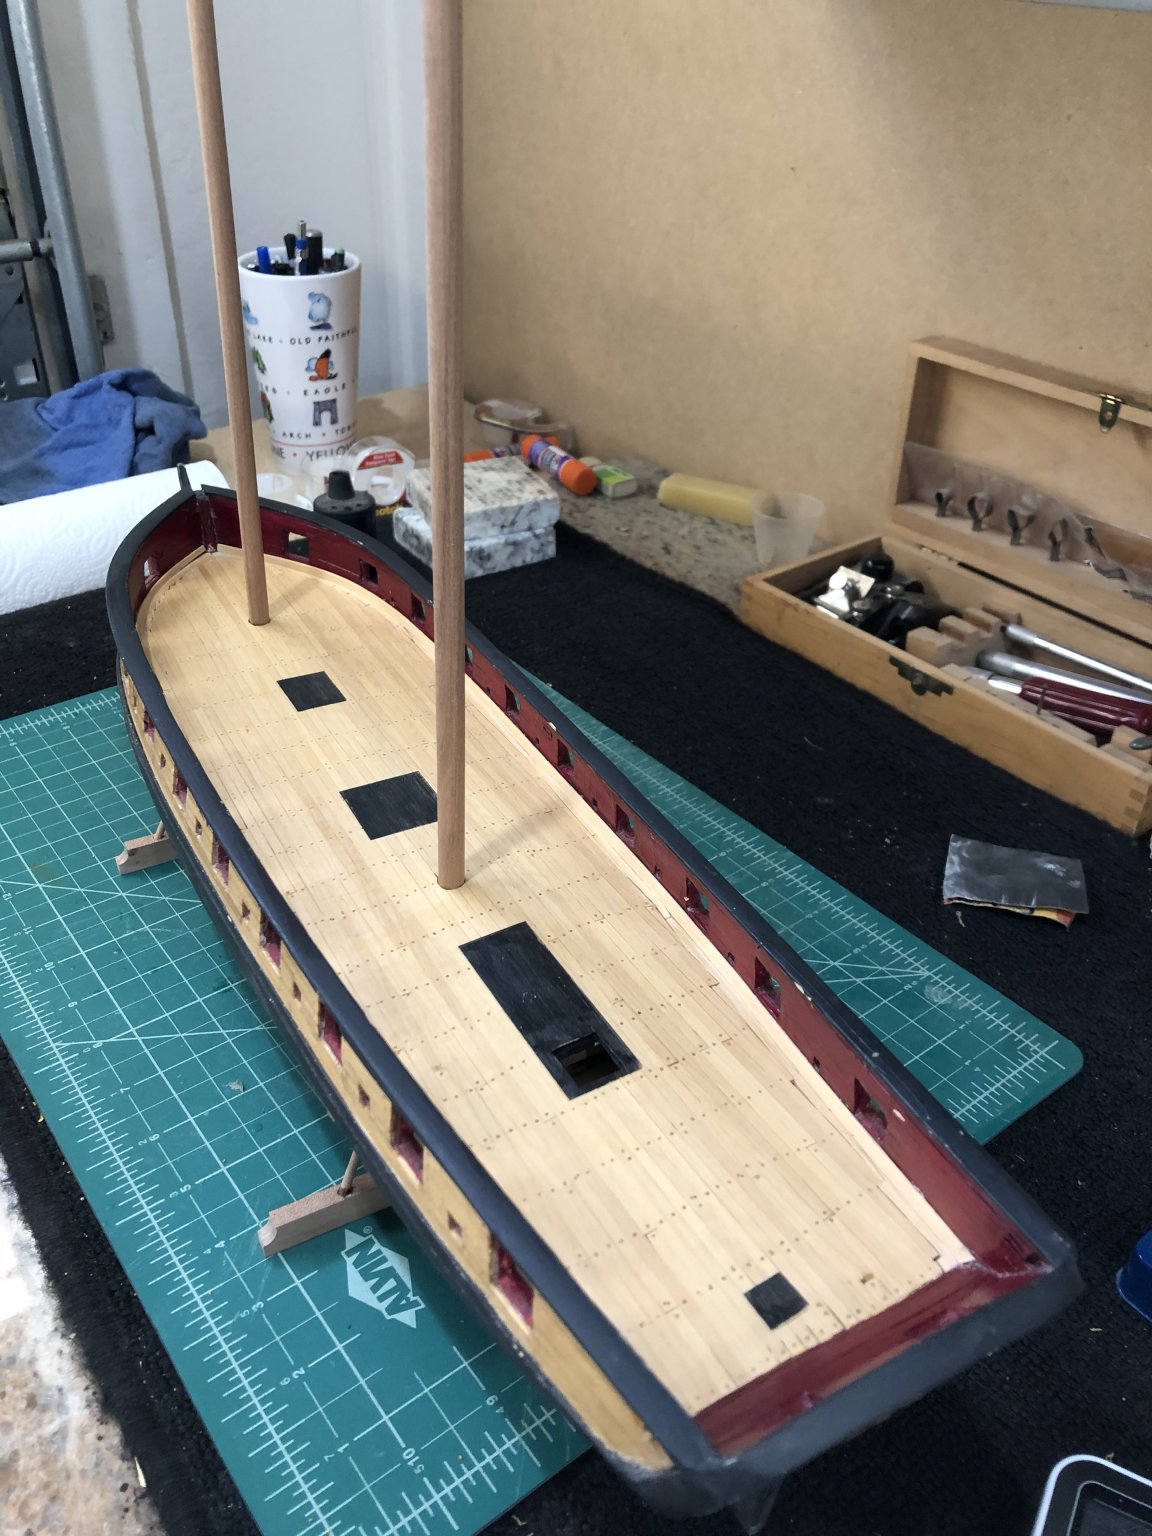
Well the deck is planked, drilled, tree nailed and sanded. I left the deck unstained with just wipe on poly.
Deck planked and sanded ready for some filler to take care of large openings
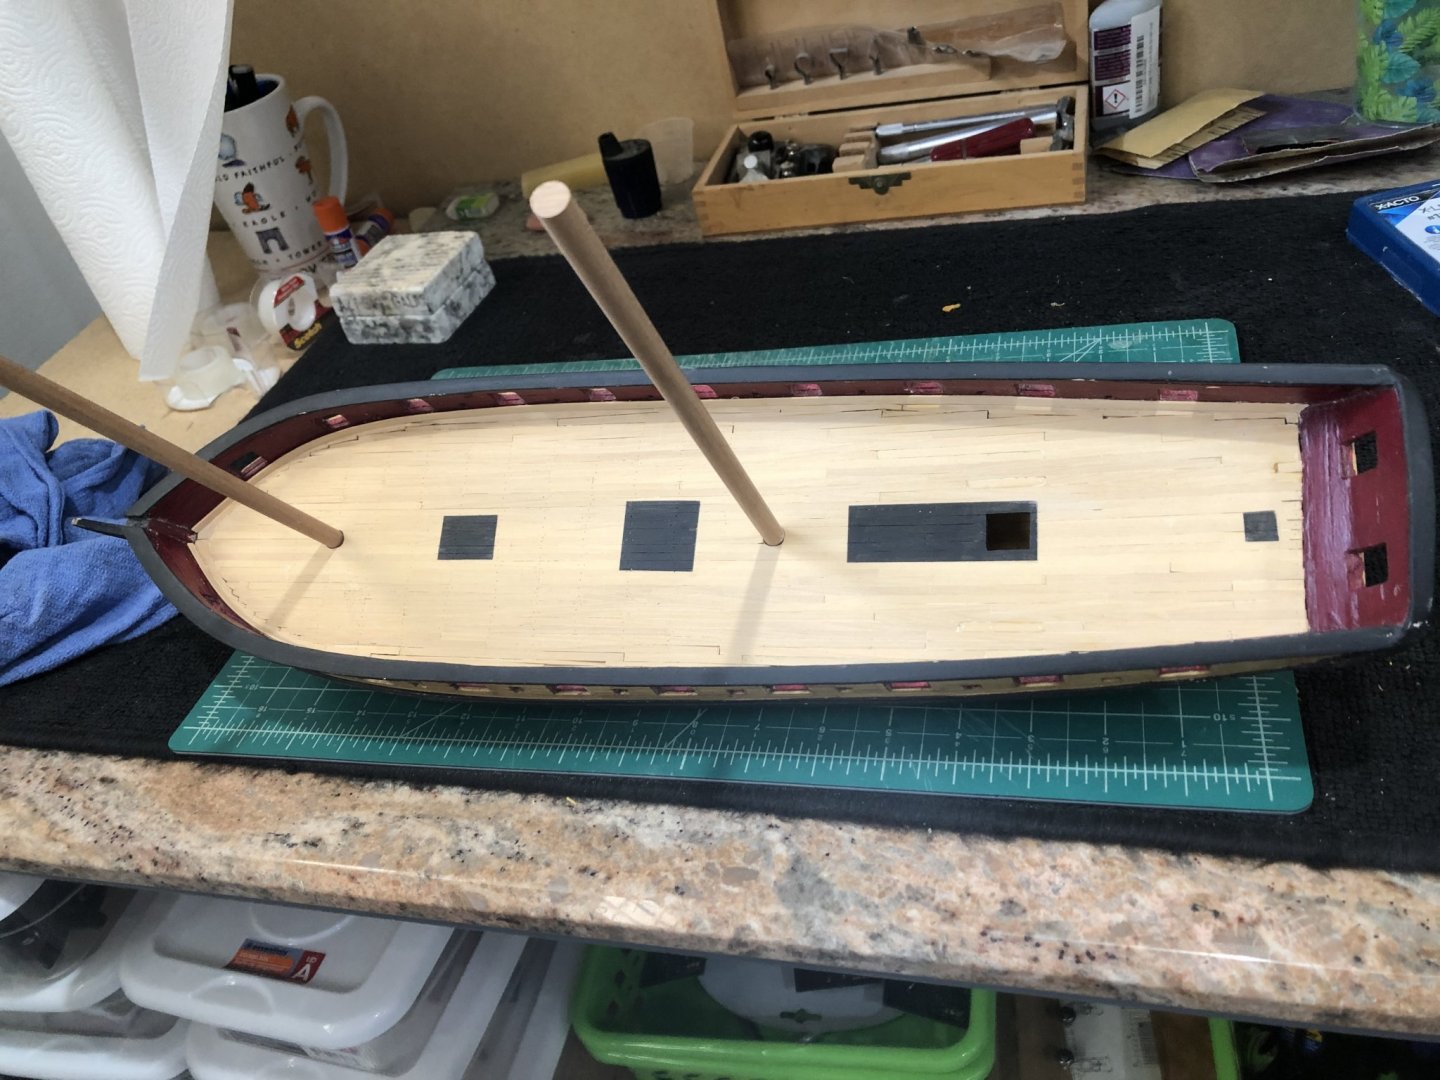
Completed deck
I've been studying logs to see what others have done for copper planking. While doing this I came across logs using syringes, nails, copper wire, steel wire for the pattern jigs. Sometimes too much information leads to being frozen with indecision and that is where I presently reside. I'll start making jigs and punches tomorrow so maybe I can get unstuck from indecision. In reading the logs I've come up with an idea how to use nails so that the nail heads will be restrained between two layers of wood. I'm going to use my press-it as Gahm used his sensipress instead of the hammer method. I hope it all works. 😅 Check the next post to see.
Thats all for nmow
Stay Well and Safe
Will
-
Just catching up with your log and see you've taken some time off, just a supportive note your work is great and your great work will follow though with the planking. Keep in mind that sometimes it is best to remove an unacceptable piece and start a new piece. Don't be disappointed it will come together and be great. Keep it up.
Stay safe and well
Will
-
-
Patrick you are not alone with the planking problems we've all been there and done that and I still have the same feelings each time I plank another boat. Search the msw logs and find ones the appeal to you and see what they've done. There are many tutorials on the subject and you'll find them on the msw logs and web searches. Chuck Passaro has written about lining off the frames and planking from there, I used that system on my Syren and was very happy with the results. Chuck also has videos of how he planked the group project HMS Winchelsea Google "youtube Chuck Passaro" and you will see all for videos about 30 minutes total.
Hope this helps
Stay Well and Safe
Will
-
Thanks Mike my scrap bin is getting quite full and will be getting more contributions as I go on.
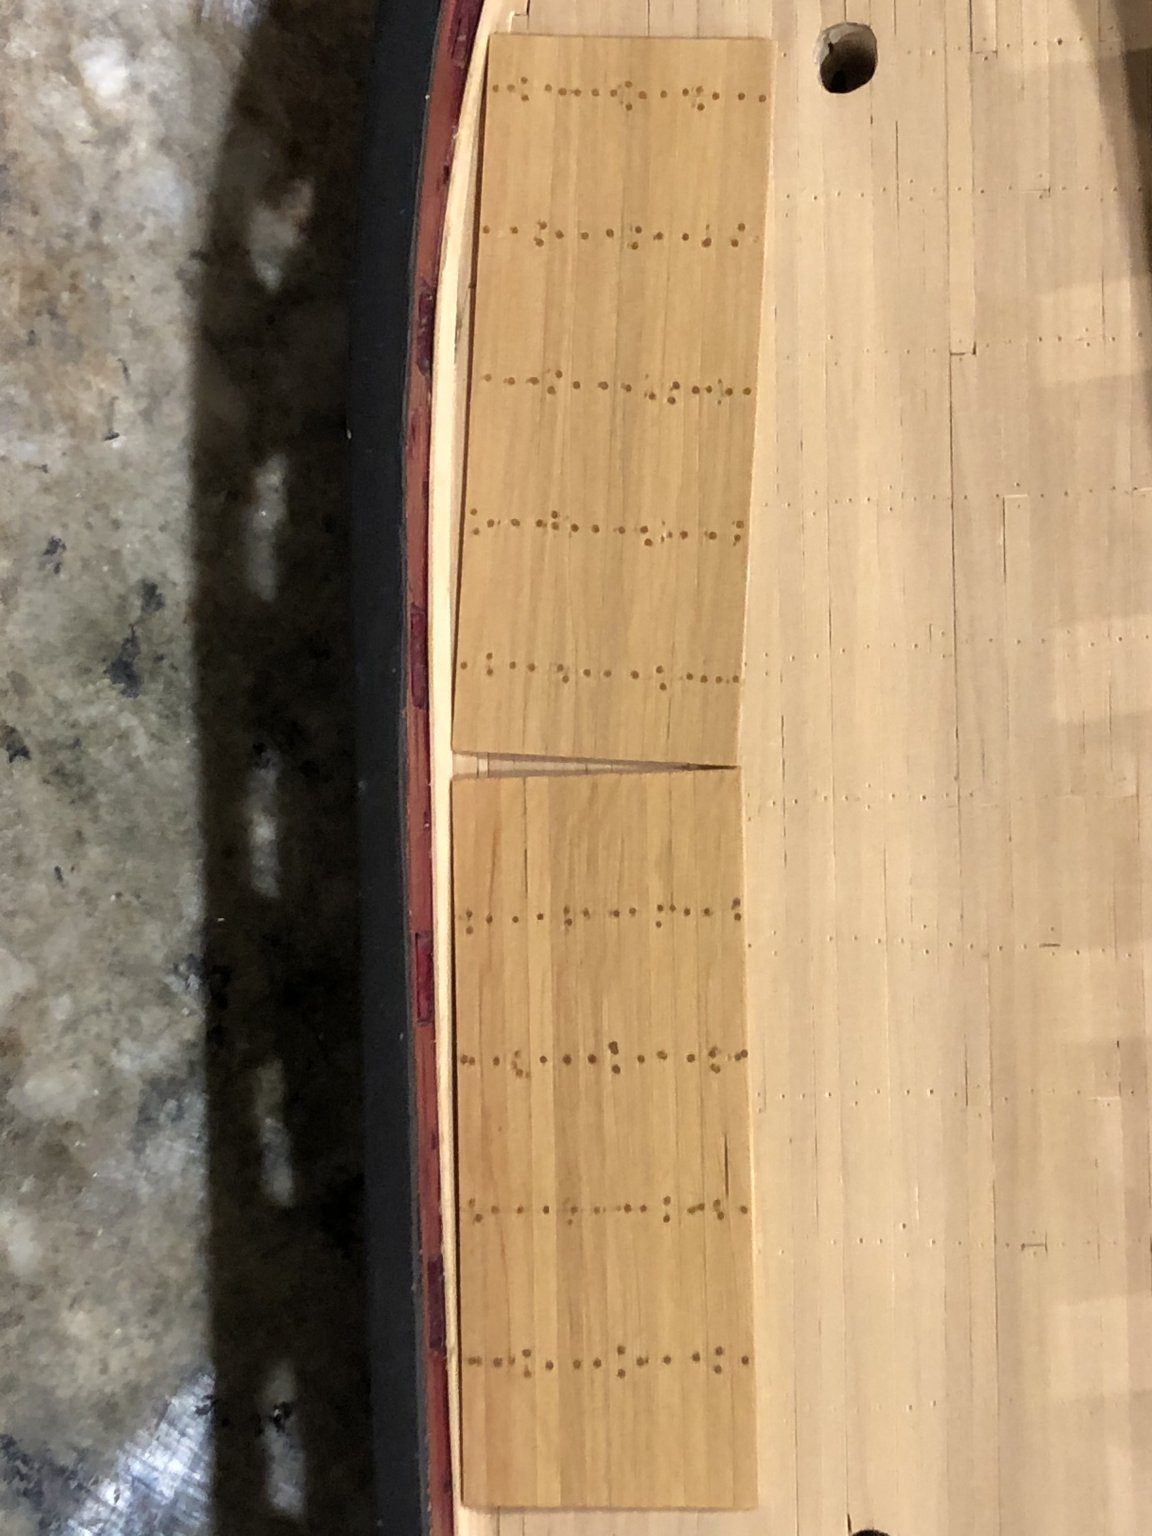
Need some opinions on deck stain color. On the photo below I have two samples of boxwood planking the same as the deck planking. The sample on the top is boxwood with NO stain just a quick coat of wipe on poly, the sample on the bottom is boxwood stained with minwax golden oak and a quick coat of wipe on poly. Question which do you like? I'm leaning towards no stain as the stain really darkened the treenails. I like to hear from you on your opinion.

Thanks everyone
Stay Well and Safe
Will
-
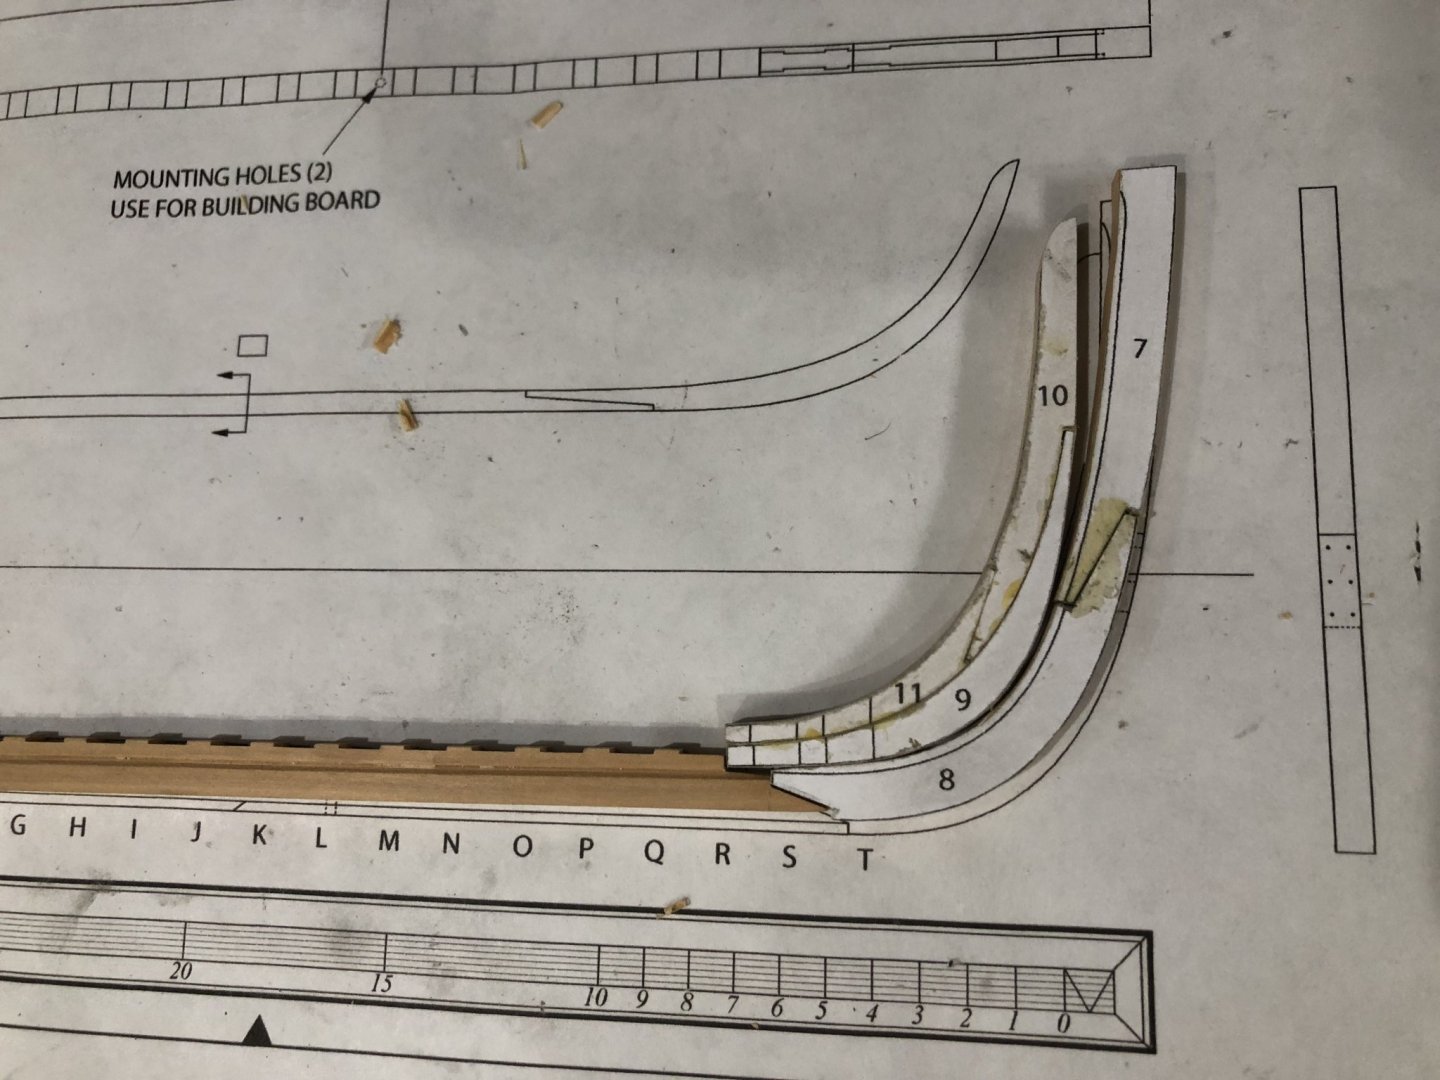
Well oops!!!! while dry fitting part #8 to the keel I discovered that i'd made an error with the keel and had to make another keel. Actually I made two errors one I cut the stem scarf end incorrectly and the other was I cut the rabbit as a 45 degree "V".
some photos of my boo-boo's
This one shows how I missed cutting the first frame relief
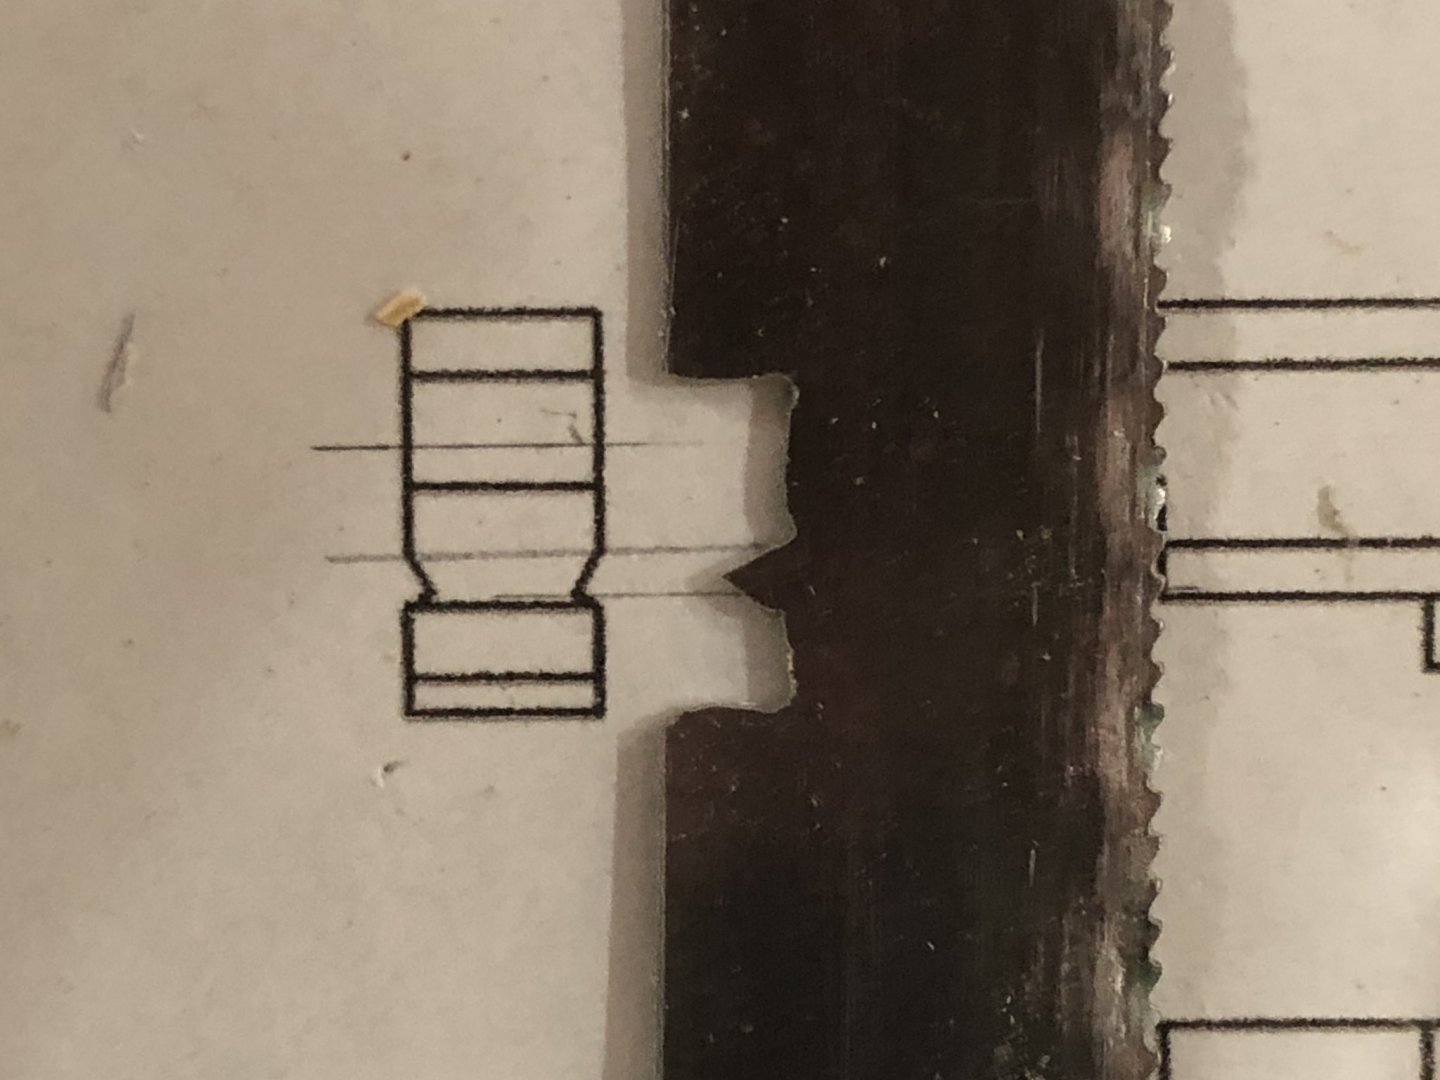
This one shows an end view of the rabbit (Kind of blurry but you get the idea)
Now to making new parts a keel and stem #7 & #8
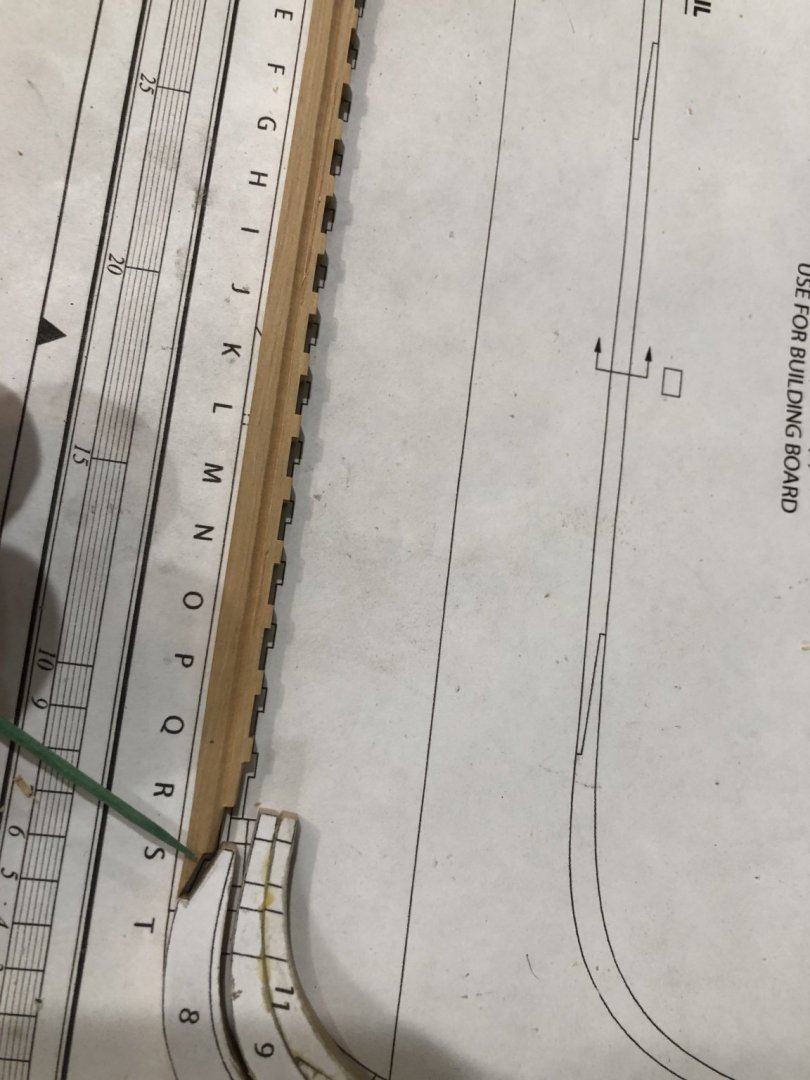
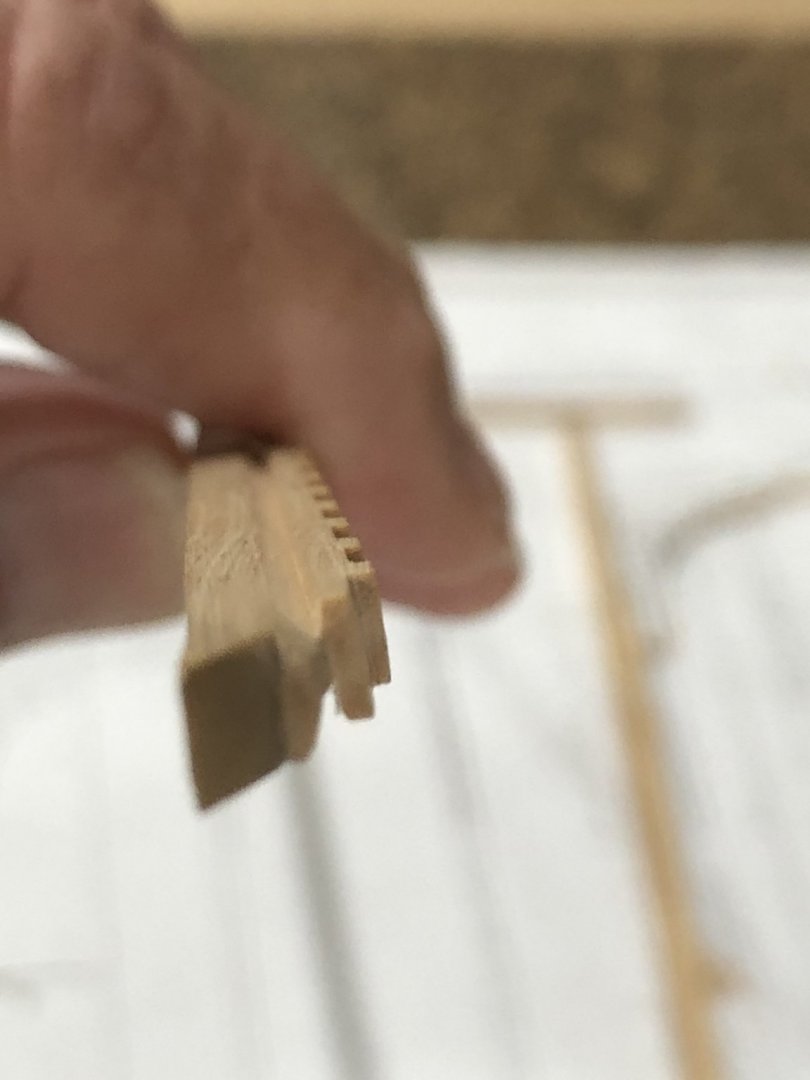
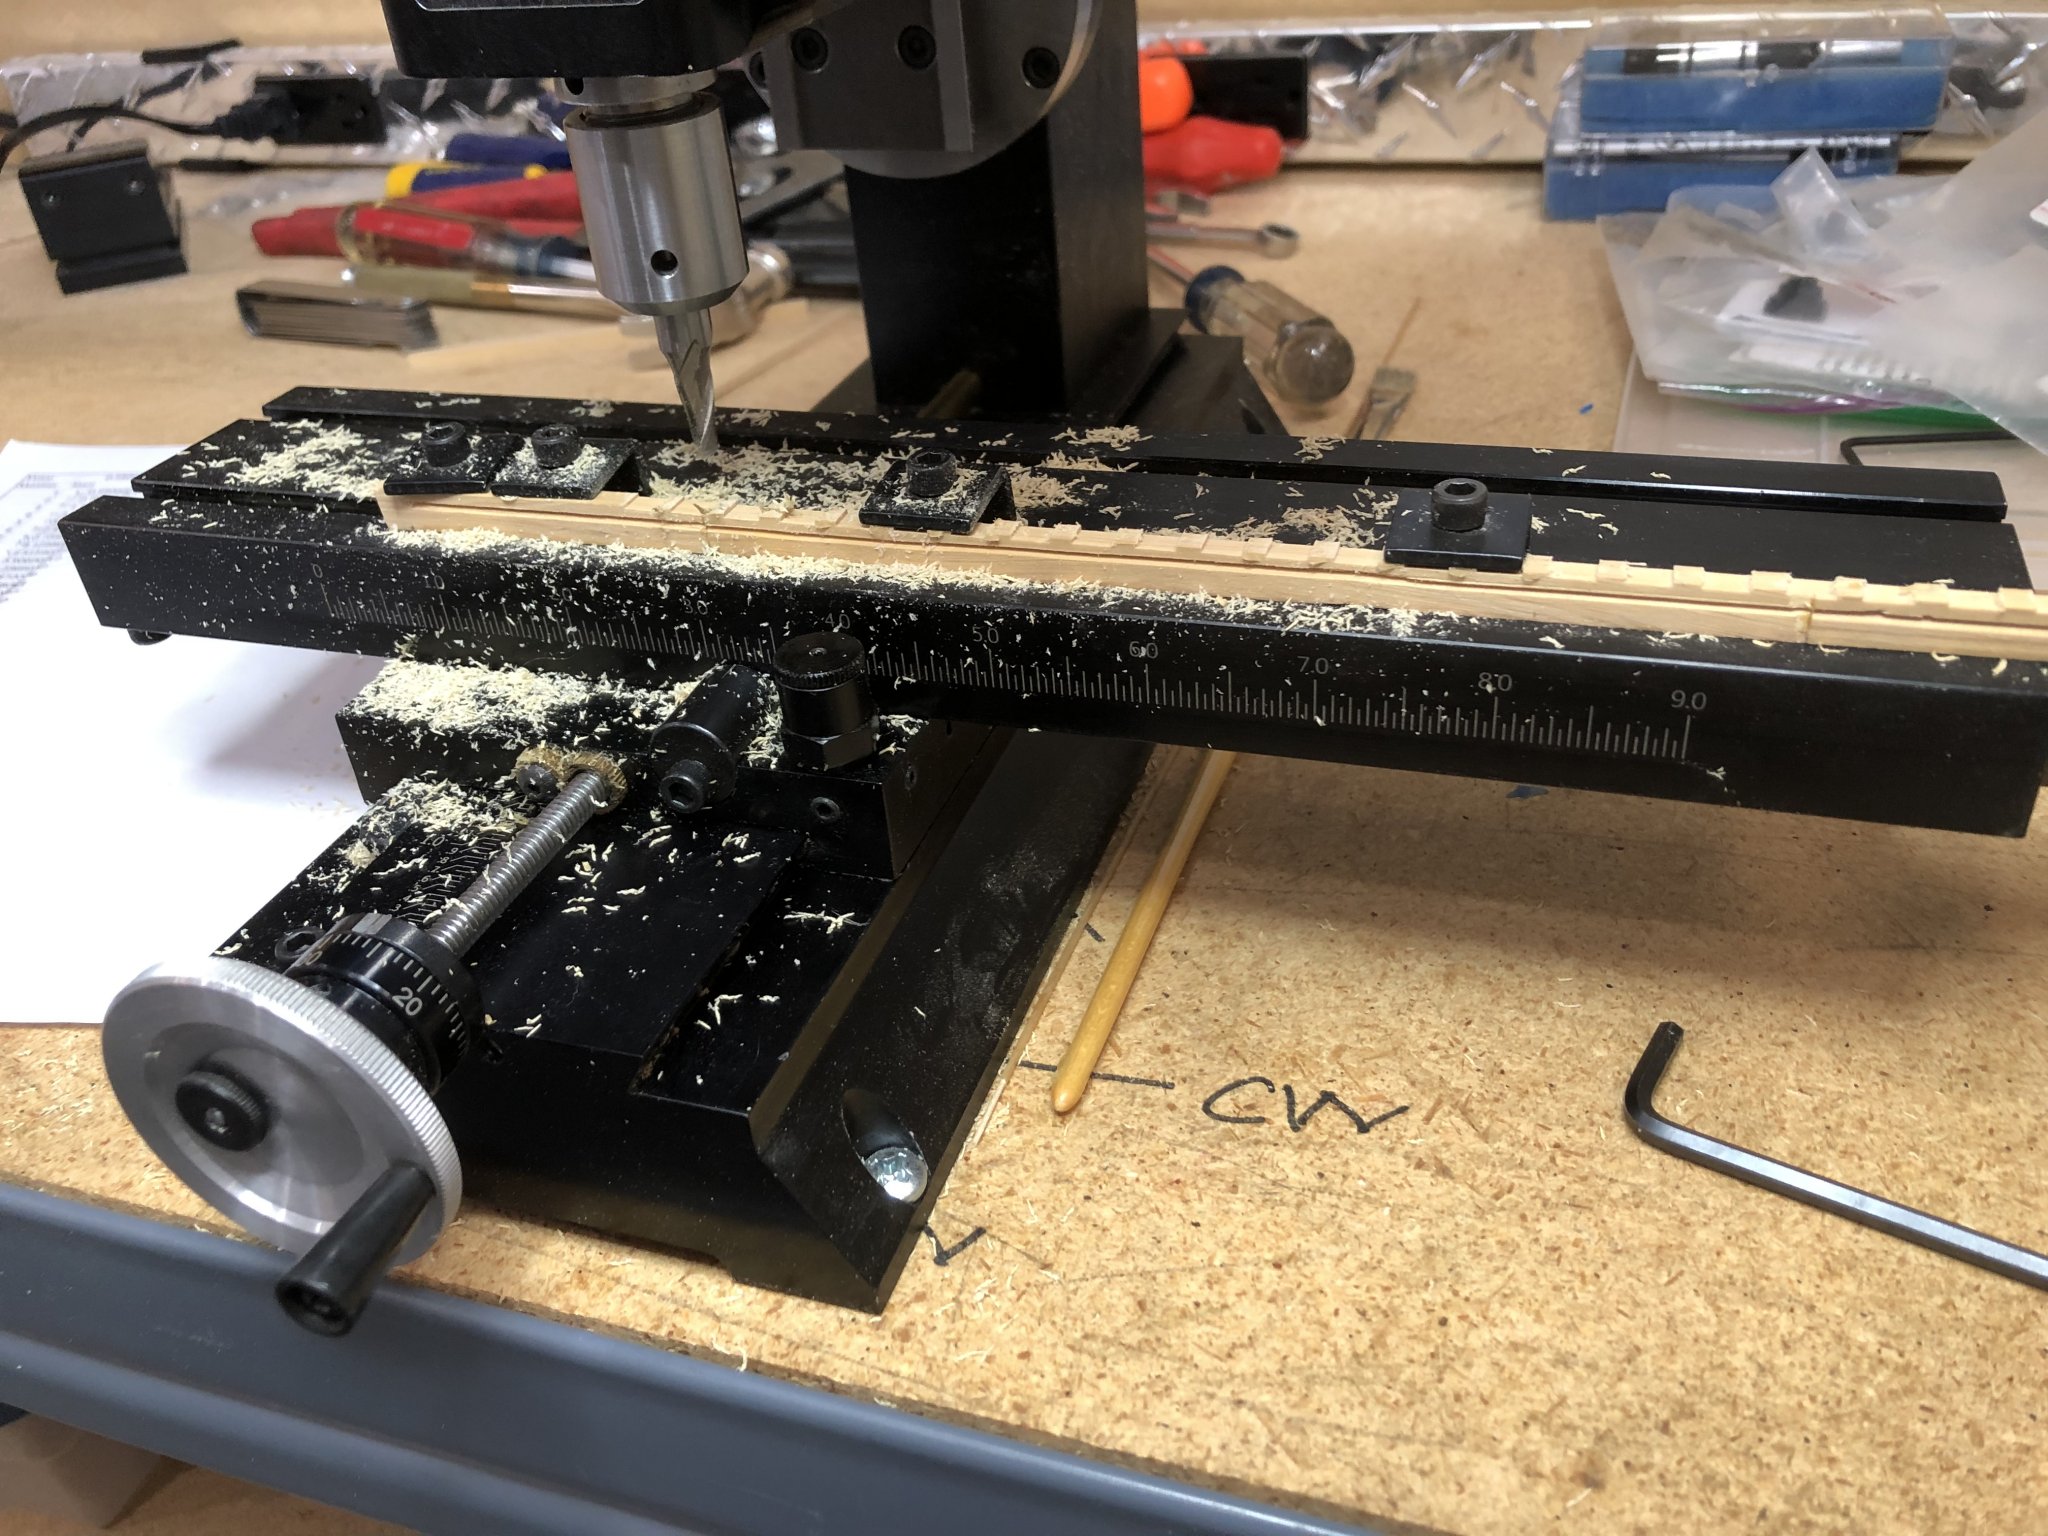
I made the keel in three pieces as per the monograph and cut the rabbit on each section before making the scarfs. I made the scarf by cutting the rabbit and keel shapes on the back edge of an old backsaw blade.
scrapping the rabbit
before s
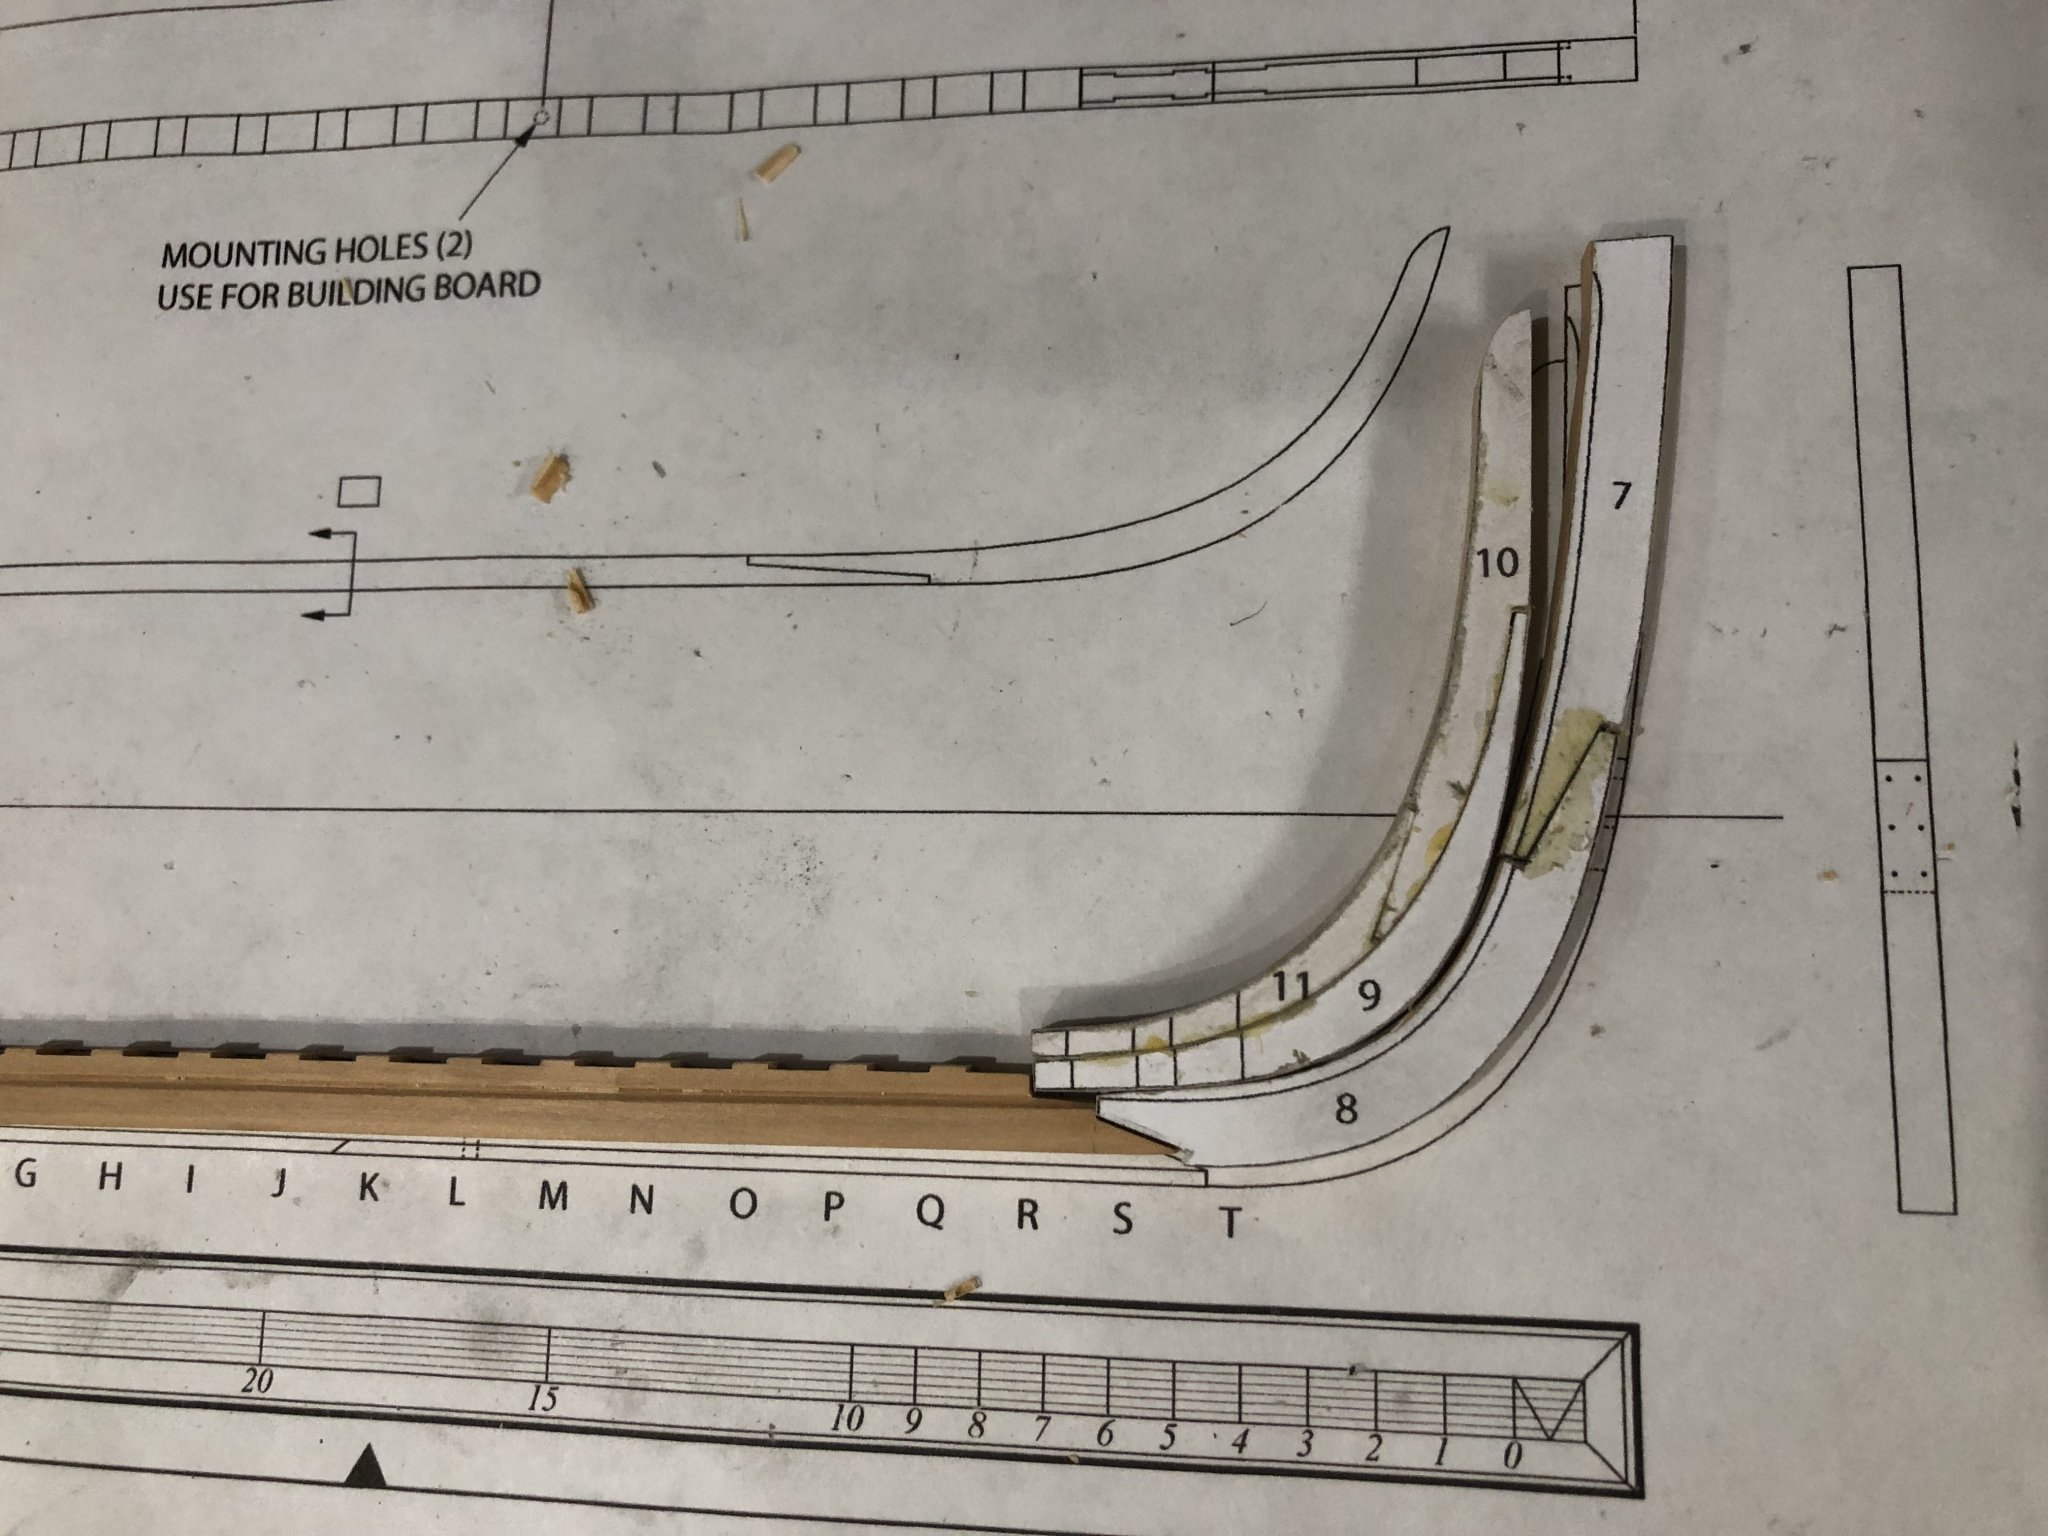
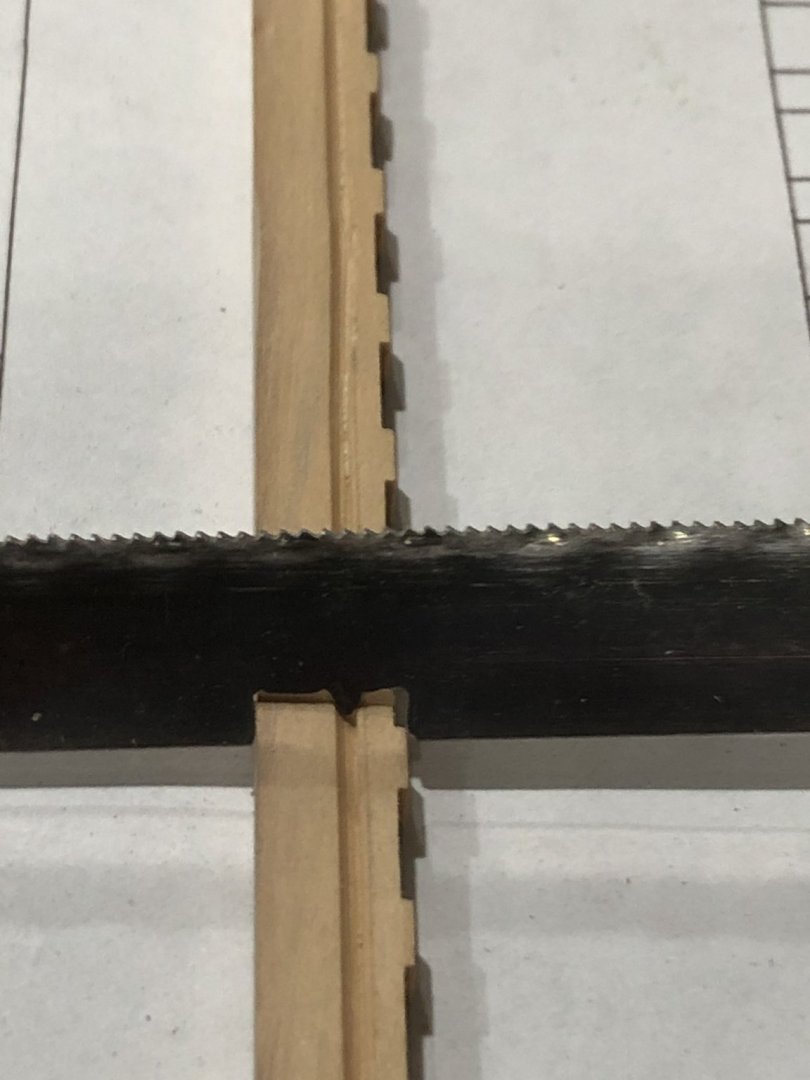 craping the rabbit shape I checked it against the drawing trying to prevent more boo-boo's. So when the pattern was correct a lightly scraped the keel piece to the required depth.
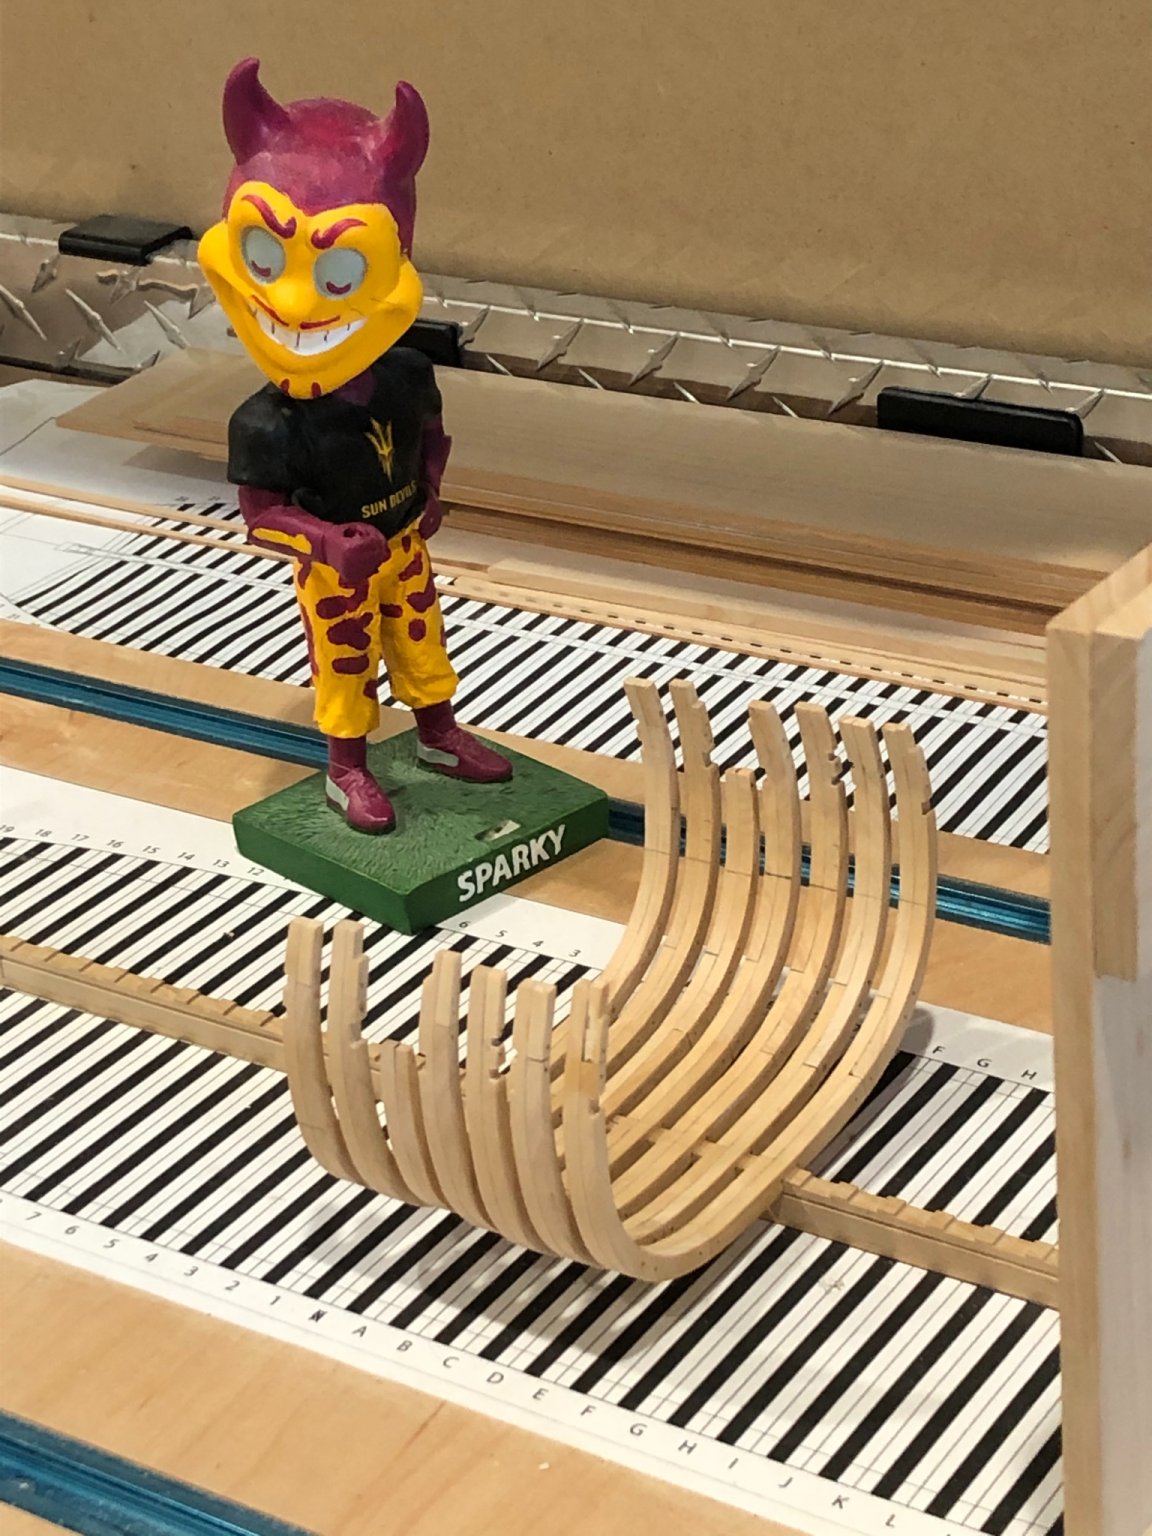
When all three pieces had rabbits it was time to make scarfs to join them together. (wonder of wonders the rabbits aligned) Now on to setting up the mill to cut the frame reliefs, always a tedious error procedure. To keep the reliefs correctly in place I made a spreadsheet that incremented .406 (1/4" frame width and 9/64" space to create the room and space)

Next I cut the stem and stern post parts. No excitement here.
When dry fitting the stem parts I realized that #7 and #8 scarf was not correct, so on the alcohol to get them apart. I spent 3 hours filing the joints until they align with drawing. I'm going to let it set aside for awhile and then check that I've actually got the scarf correct. Scarf joints on curved parts is the most challenging joint i've made to date. Note to self and all very small adjustments make a substantial difference.
Thanks to all for the likes and comments it helps to keep me motivated.
Thats it for the post
Stay well and safe
Will
- garyshipwright, mtaylor, davec and 5 others
-
8
-
Patrick your fixed blocks look great and as to installing them I found it easier to cut the double that the single blocks and you can see on the plans that the double is larger than 1 plank width. I found it best to install my blocks prior to the internal bulwark planking. With the blocks in place I could trim the planks to fit as needed. Just a note about fixed blocks: These blocks were designed and installed with the need to replace worn/broken blocks while at sea, so they should be somewhat loosely fitted. (don't remember where I read about replacing fixed blocks at sea but I think it was in one of Ed Tosti's logs)
Stay Well
Will


US Brig Syren by niwotwill - Model Shipways - scale 1:64 - 2nd wooden kit build & 1st build log
in - Kit build logs for subjects built from 1801 - 1850
Posted
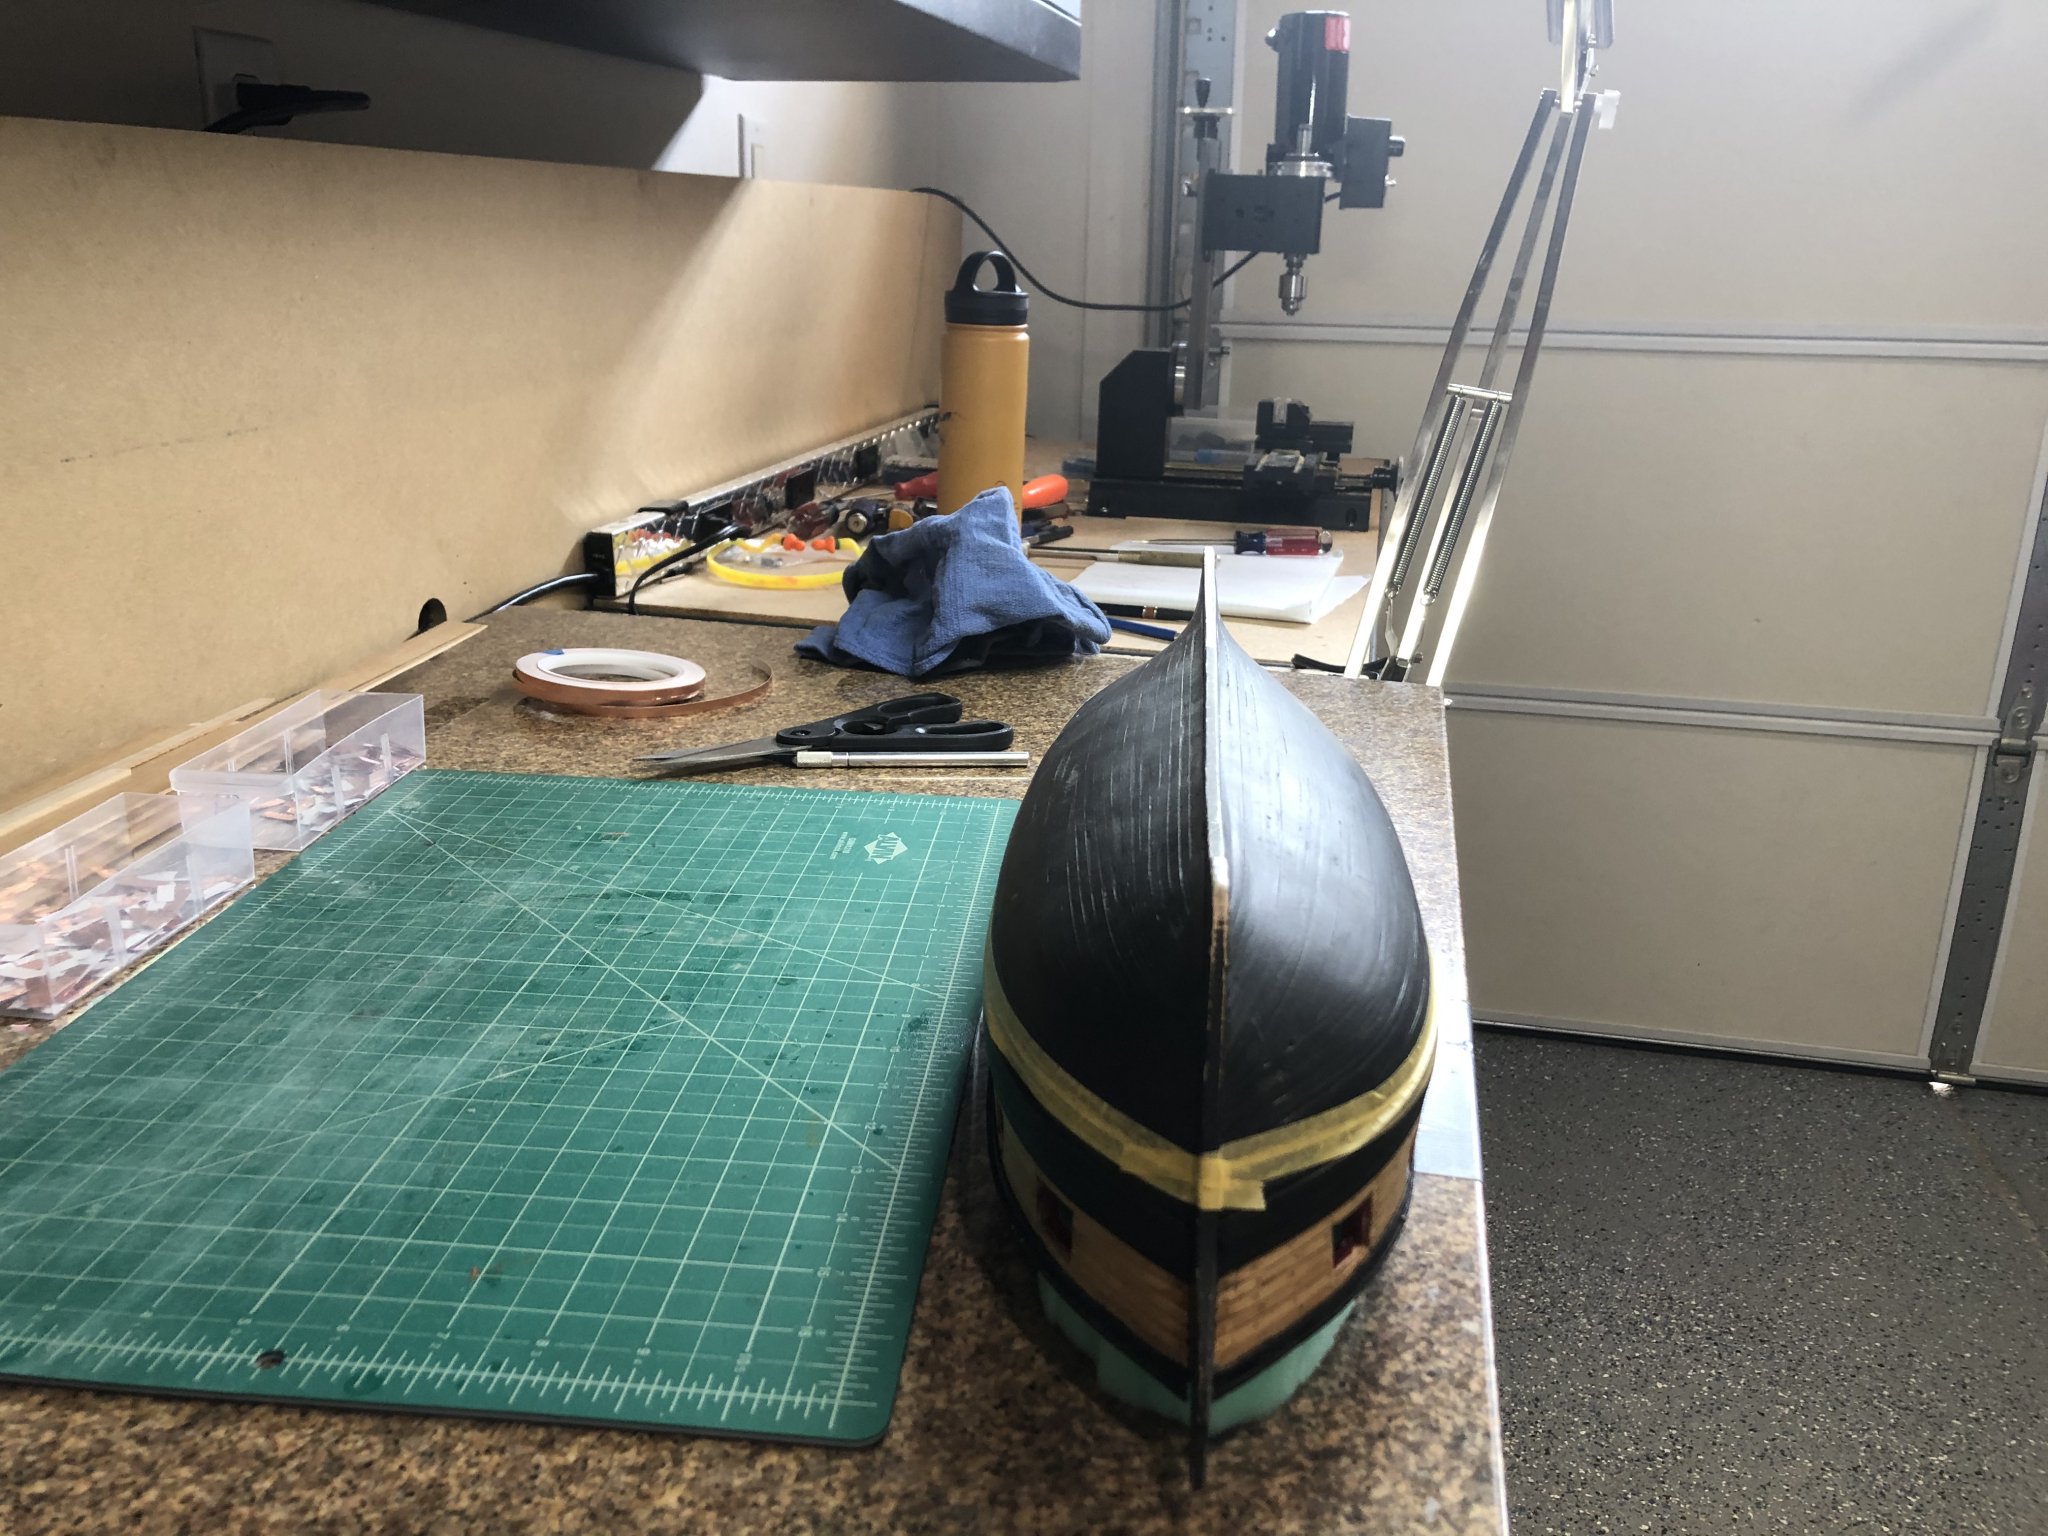
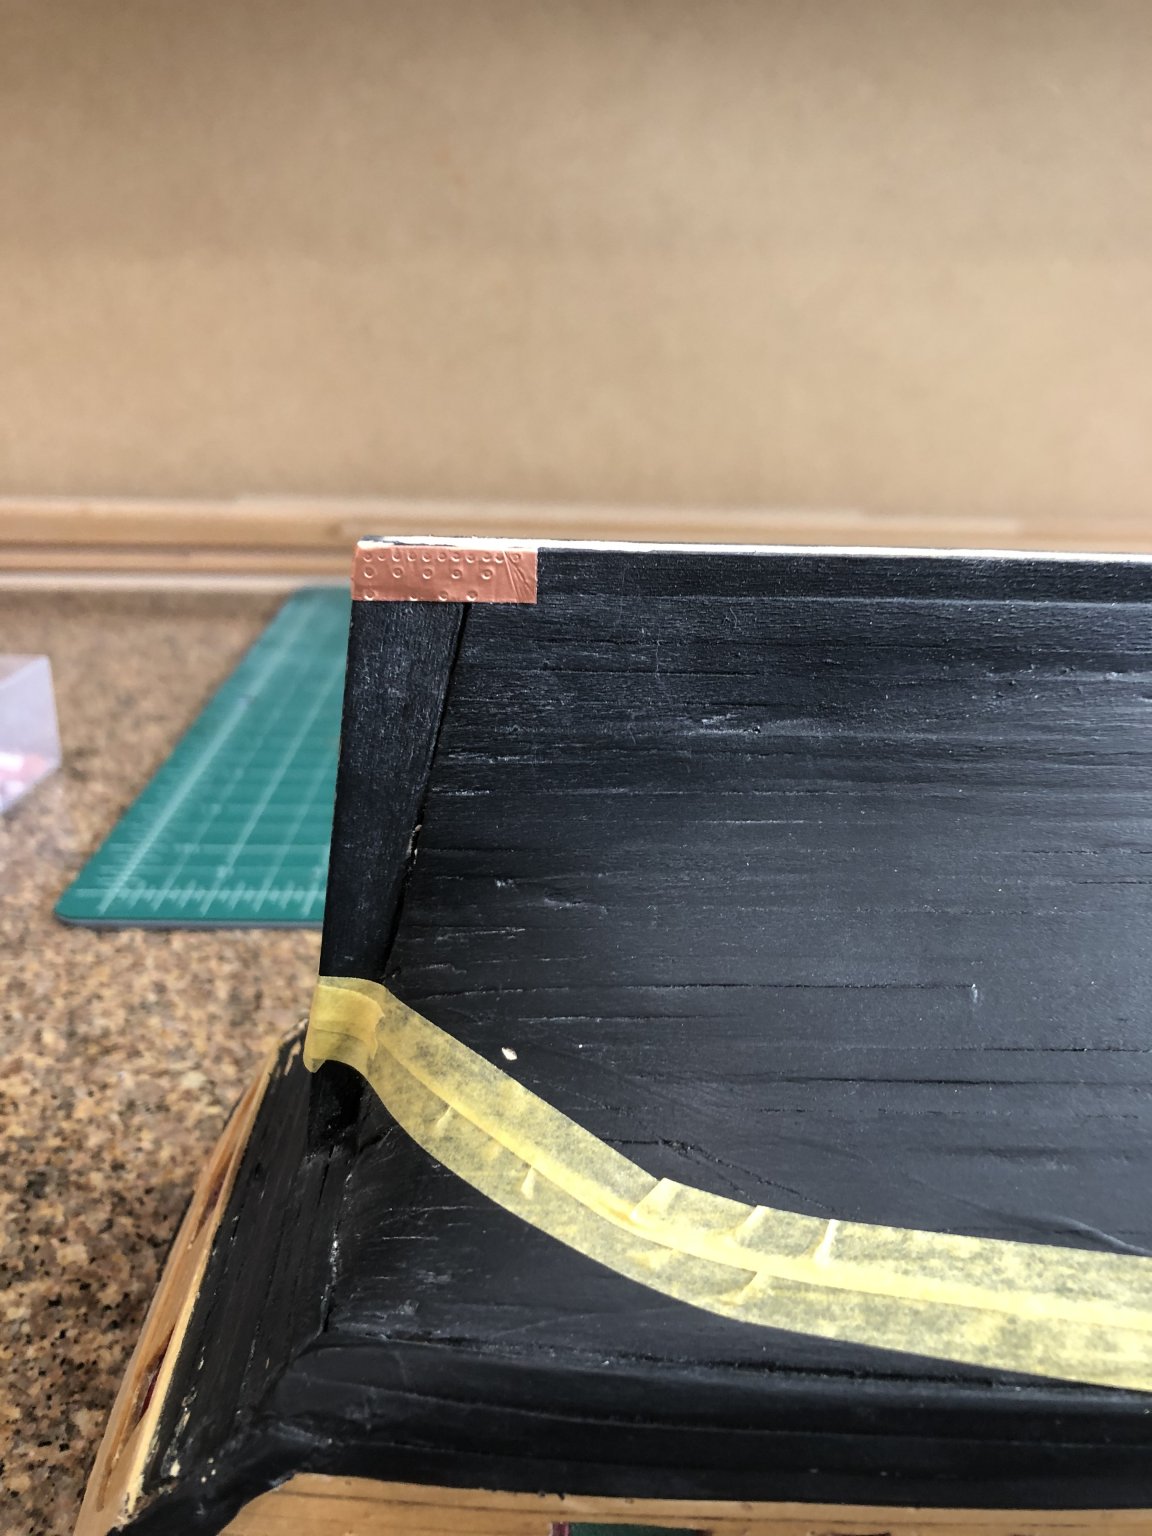
Before starting the cheeks I decided I'd finish the stern galleries. I'm still trying to make my own as others have done, but my skill on carving needs more improvement so I decided to use the cast metal ones until I'm happy with a set of mine. Spent quite a bit of time mixing paint to get a color that closely matches the stained bulwark planking. I got a color that matched but it still didn't look the way I wanted so I started trying to add washes and finally found that a wash of dark oak stain gave me the look and feel I wanted.
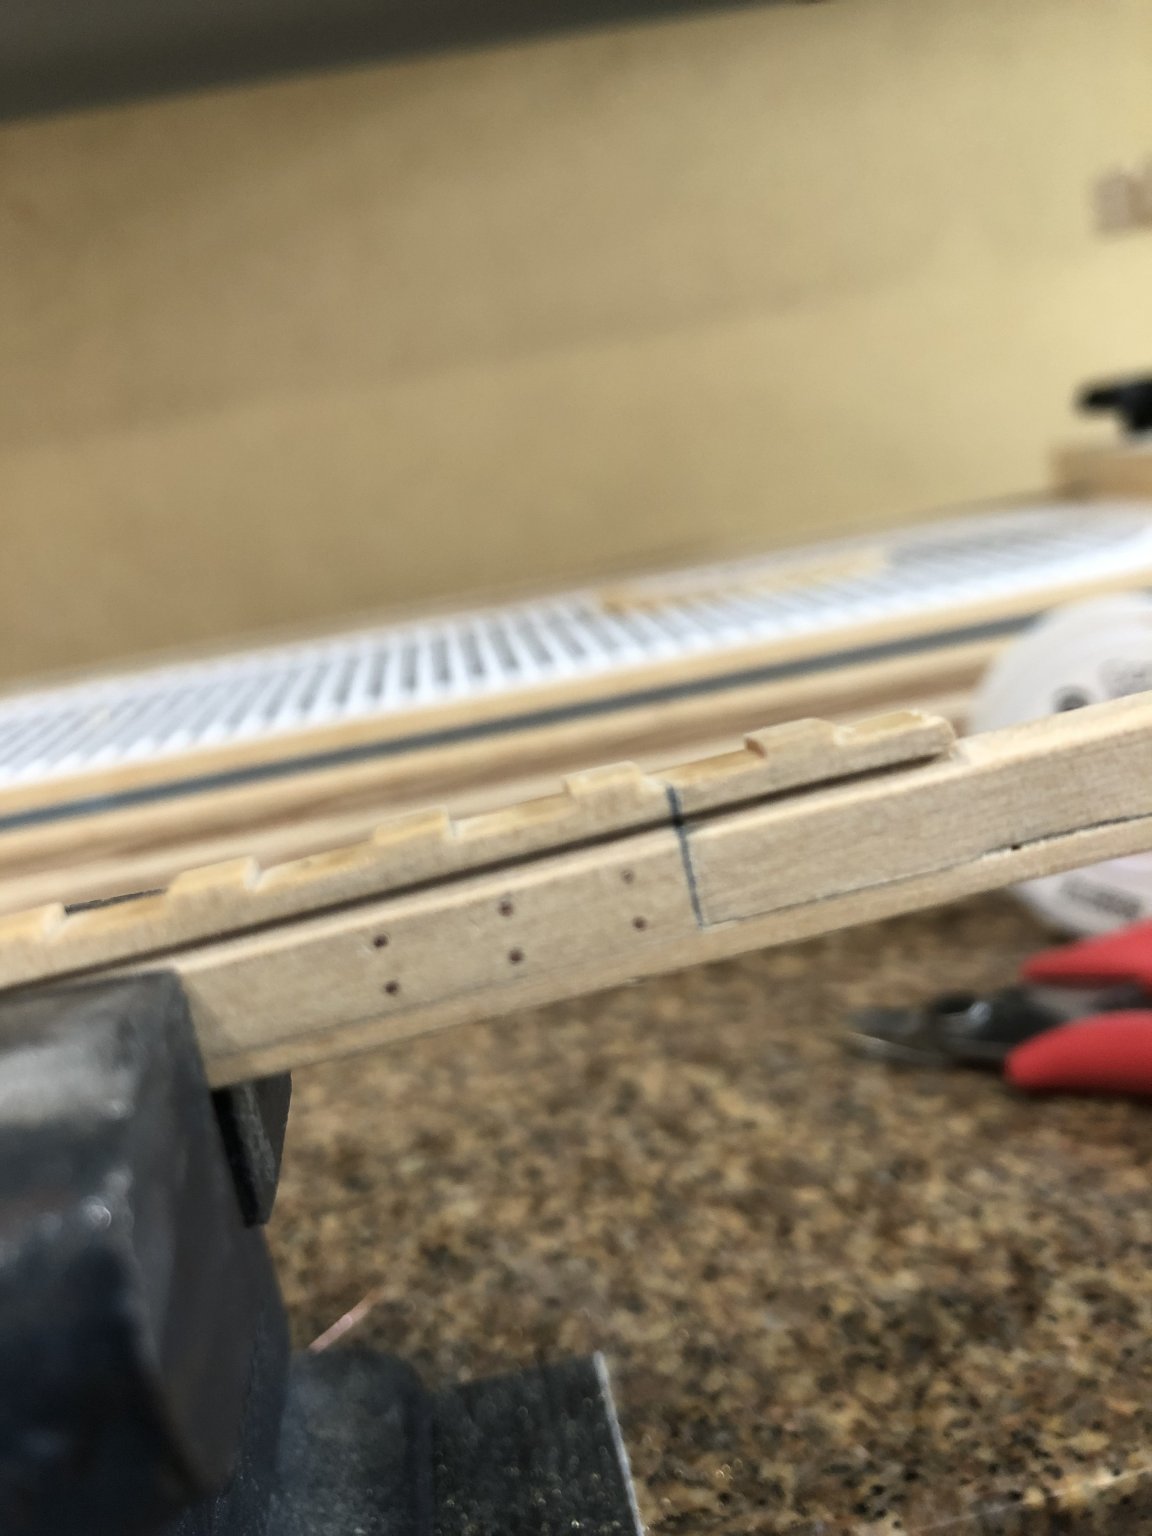
Still delaying the dreaded chapter 10 so I started the longboat. Now that the outside and inside are finished I can start assembling.
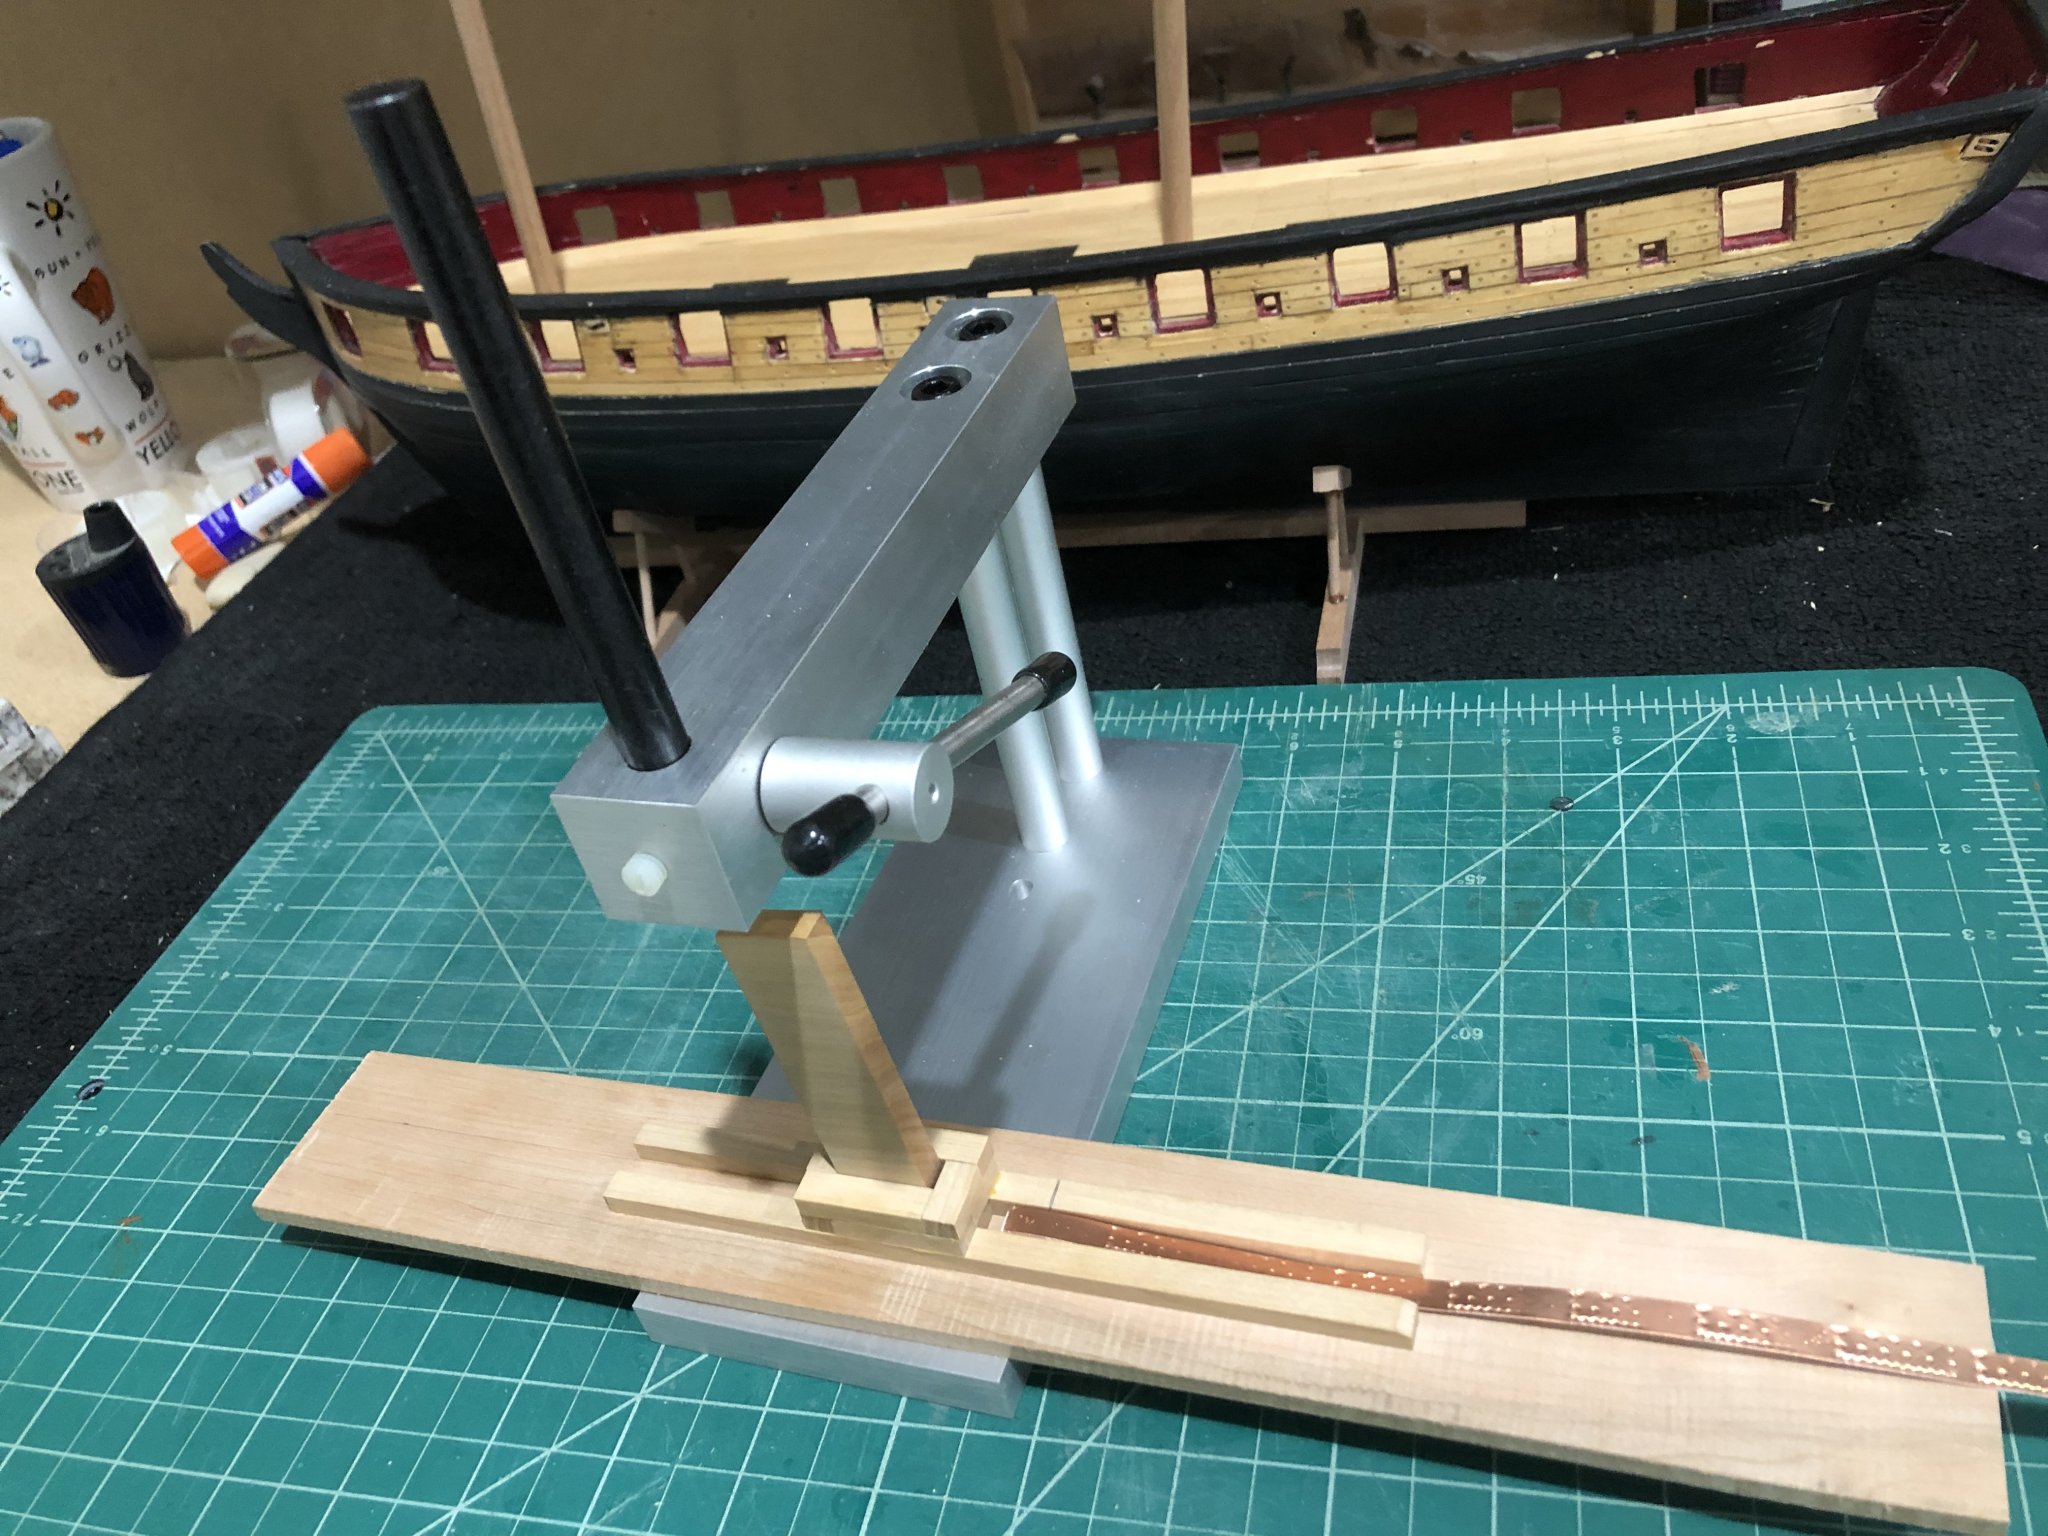
I milled down a piece of Alaskan Yellow Cedar down to 1/32" thick and then ripped 1/32" strips. Stained the strips dark oak stain so they'd have contrast when against the tan of the inside.
That being done I wanted to dress up the mermaid so I cleaned up the casting flash and etc. I painted her flesh body, green fin, blue waist and tiara with yellow hair. It was very garish so I had to do something, ah back to washes. Finally settled on a tan paint & oak stain mixture.
I like the result. Let me know what you think.
I can't put it off any longer so onto the cheeks. Kinda cheeky eh!
Stay and be safe
Will