HOLIDAY DONATION DRIVE - SUPPORT MSW - DO YOUR PART TO KEEP THIS GREAT FORUM GOING! (89 donations so far out of 49,000 members - C'mon guys!)
×


GrandpaPhil
-
Posts
6,139 -
Joined
-
Last visited
Content Type
Profiles
Forums
Gallery
Events
Everything posted by GrandpaPhil
-
Seeking recommendations for next Build
GrandpaPhil replied to Burgundy's topic in Wood ship model kits
Given what you’ve already built, I would say that you could pick any of those models and build them without significant difficulty. I have heard really good things about the Vanguard Models kits. Chris Watton’s work is excellent! I have purchased many of the plans sets that he designed for the Victory Models line belonging to Amati, to include the Revenge that is in my signature line. They are top notch, and his own company, Vanguard Models, takes things even further (although I have not had one of their kits in my possession). From what I have heard and seen on this forum, Vanguard’s kits are second to few. Model Shipways makes decent quality kits. I have built one of their models, the Sultana, and I have a couple of their plans sets, which are very good, although I liked the Rattlesnake plans better than the Essex plans. The Syren looks like a phenomenal kit, and that plans set is on my short list of models to buy the next time I need to get something for myself. The designer is Chuck Passaro, whose work is also excellent! I have no experience with Caldercraft’s kits, but many also like them. -
Welcome!
-
Hello from Christchurch, New Zealand
GrandpaPhil replied to Tillsbury's topic in New member Introductions
Welcome! -
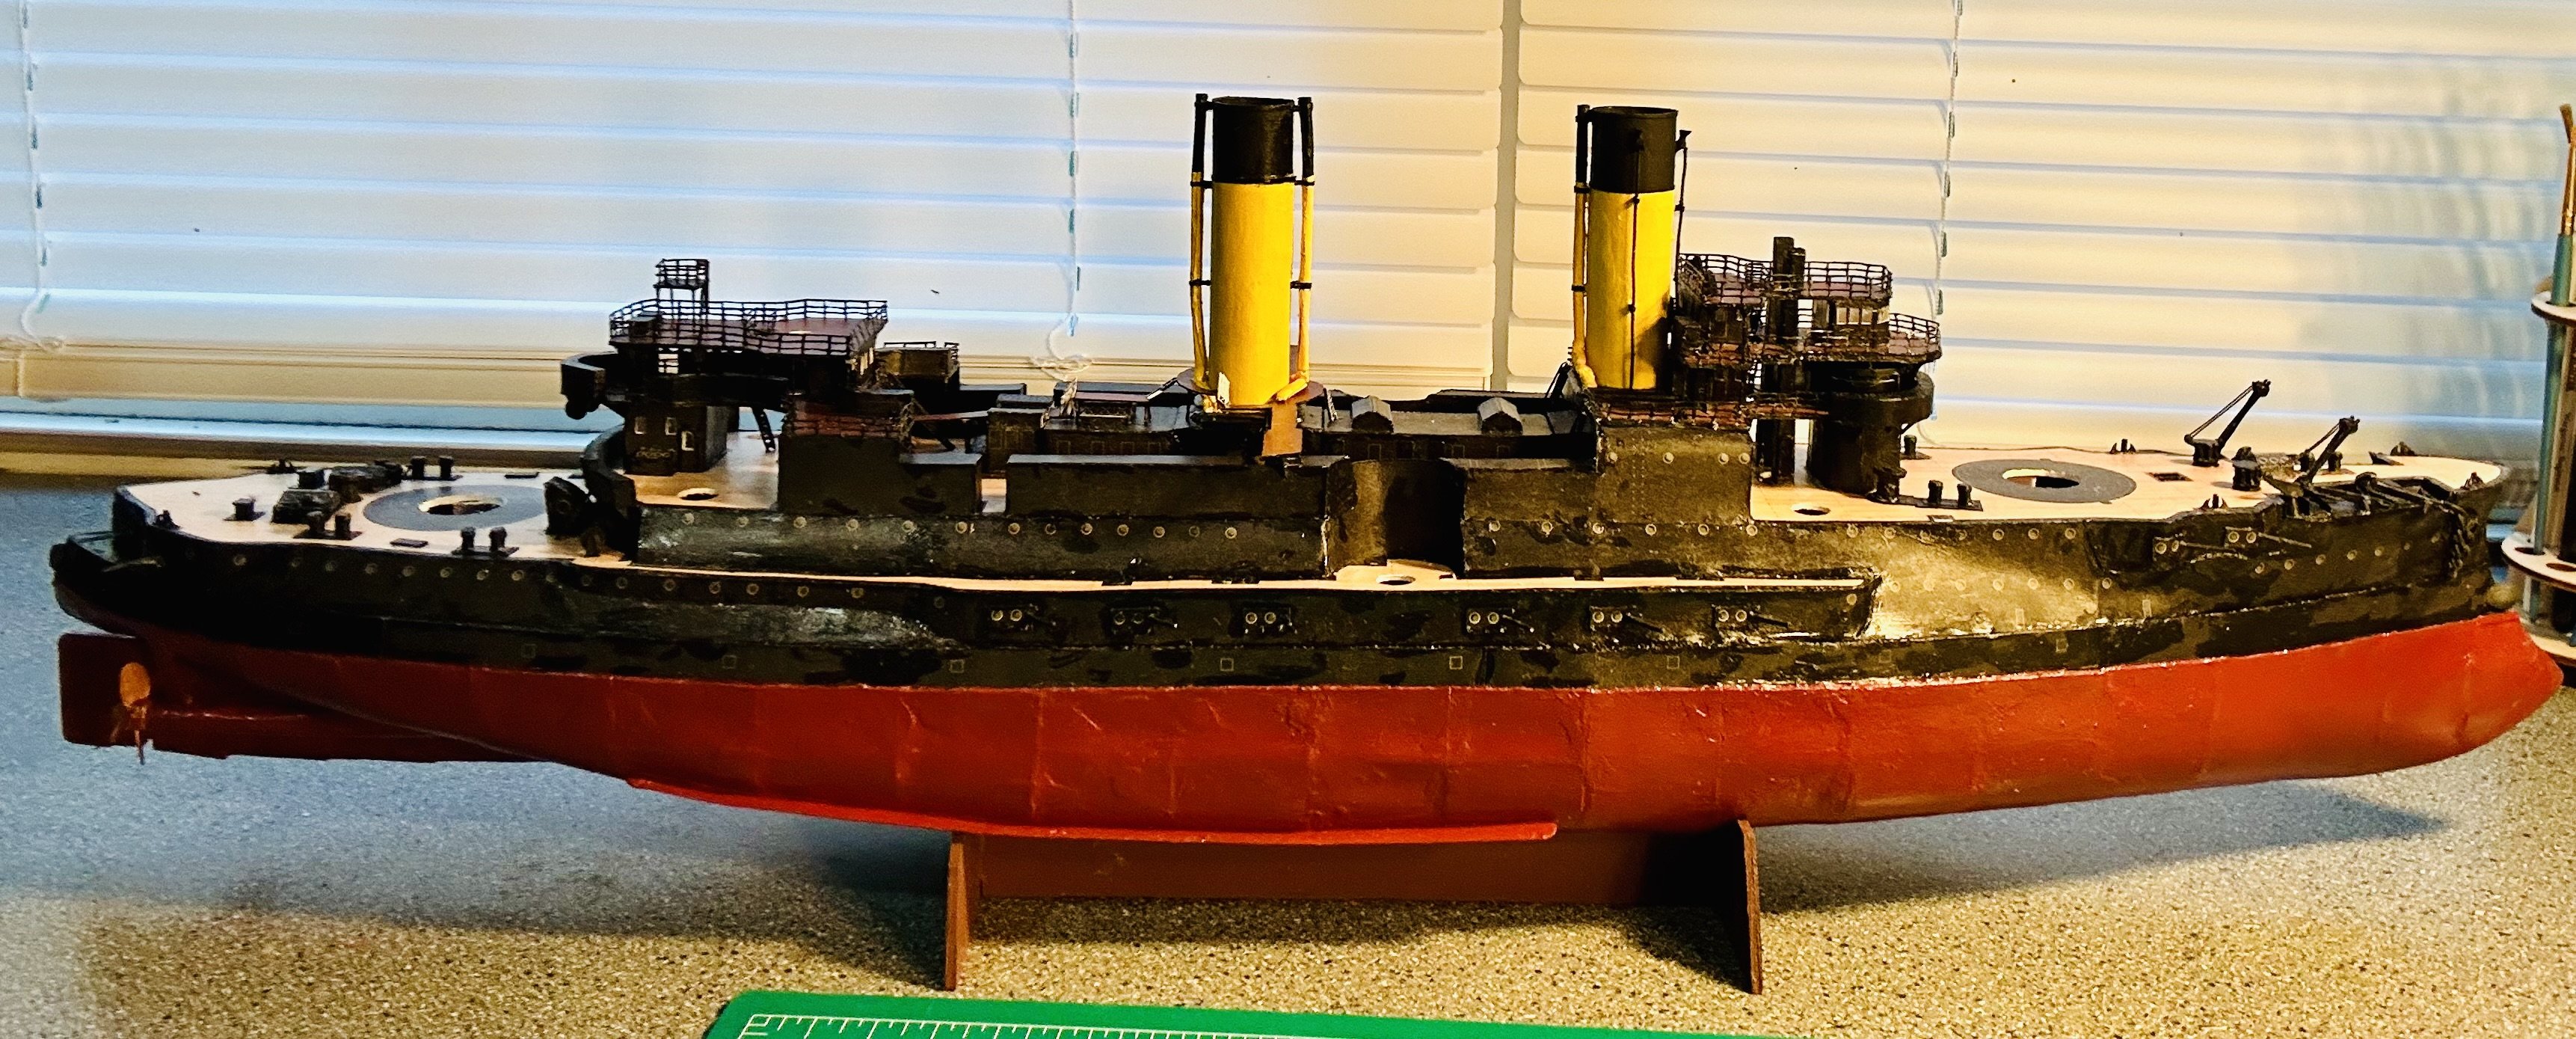
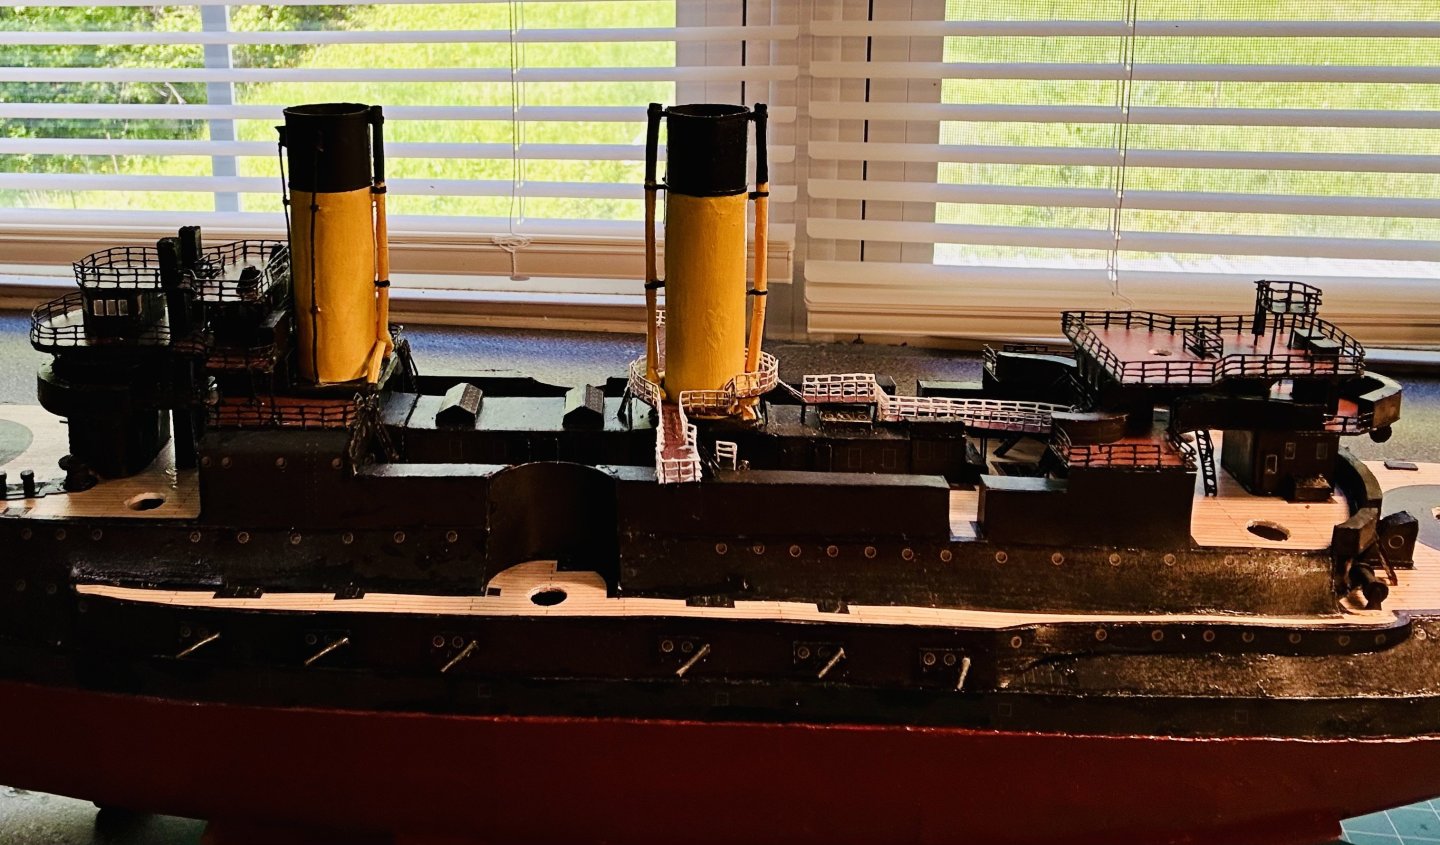
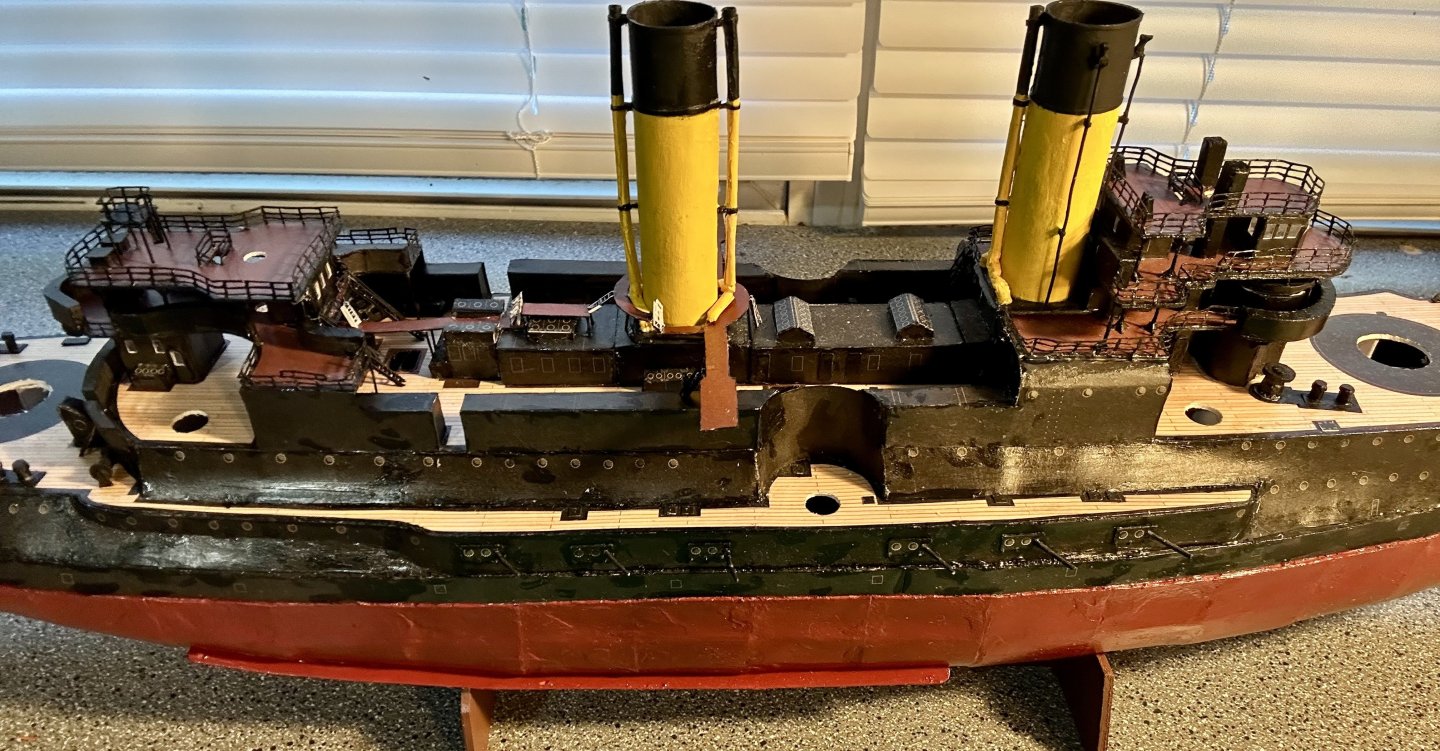
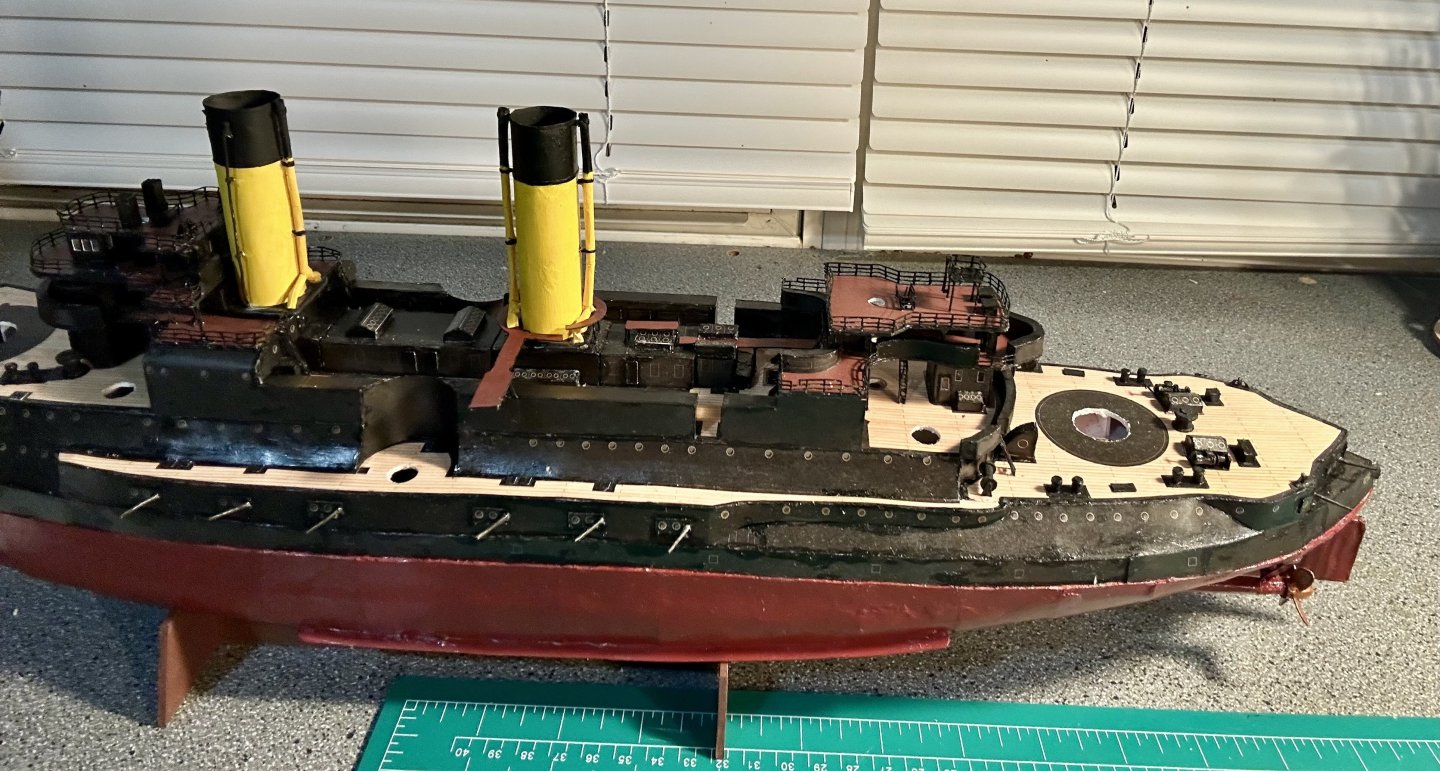
All the railings for the middle bridges are finished and installed: I still need to paint and seal them. Then it will be time for the main guns. The Borodino’s had two double turrets for the primary batteries and six double turrets for the secondary batteries. Once those are in, I’ll get the 47mm guns, the search lights, and the rest of the small inner deck/superstructure fittings, to include the ship’s boats and fit them in place. Then the rest of the outer hull fittings. Then it will be time for masts. All masts will be painted wood, with the rest of the mast fittings in card, much like the Solferino. Sometime in between I need to install a bunch of eyebolts to tie off to on the decks and stacks for the rigging. This ship had a brig rig.

- 288 replies
-
- 10
-

-
- Card
- Pre-Dreadnought
- (and 3 more)
-
Welcome! If you like steampunk and card, I would recommend Orel’s line of kits. They have a phenomenal selection. They are mostly in 1/200 scale.
-
The Iron Duke looks amazing!
-
Welcome!
-
That’s the thing with these pre-dreadnoughts, there are a LOT of small parts. This one has been a learning experience. I still have several more pre-dreadnoughts in my stash that will get built one of these days! Thank you very much! I really like these kits. The level of detail in them is amazing! Working railings, slowly but surely!
- 288 replies
-
- 10
-
-
- Card
- Pre-Dreadnought
- (and 3 more)
-
The planking (and other dimensional wood) provided is typically just stock to cut parts from.
-
Nicely done!
-
Welcome!
-
Welcome!
-
Very nicely done!
-
Mark, The Mosquidobit is looking really good! These schooners make amazing display pieces!
-
Plastic modeling for the complete beginner
GrandpaPhil replied to Ferrus Manus's topic in Plastic model kits
In plastic, I would recommend some of Heller’s simpler plastic ships or boats. Those are what I learned on. If your friend wanted to try a wood model, Midwest’s kits are great learning tools that are cheap and back in production. I learned a lot from building their Sharpie Schooner back in the late 1990’s. -
Congratulations on the finish! Very impressive execution!
- 32 replies
-
- 1
-
-
- St Louis
- 3D Printing
- (and 2 more)
-
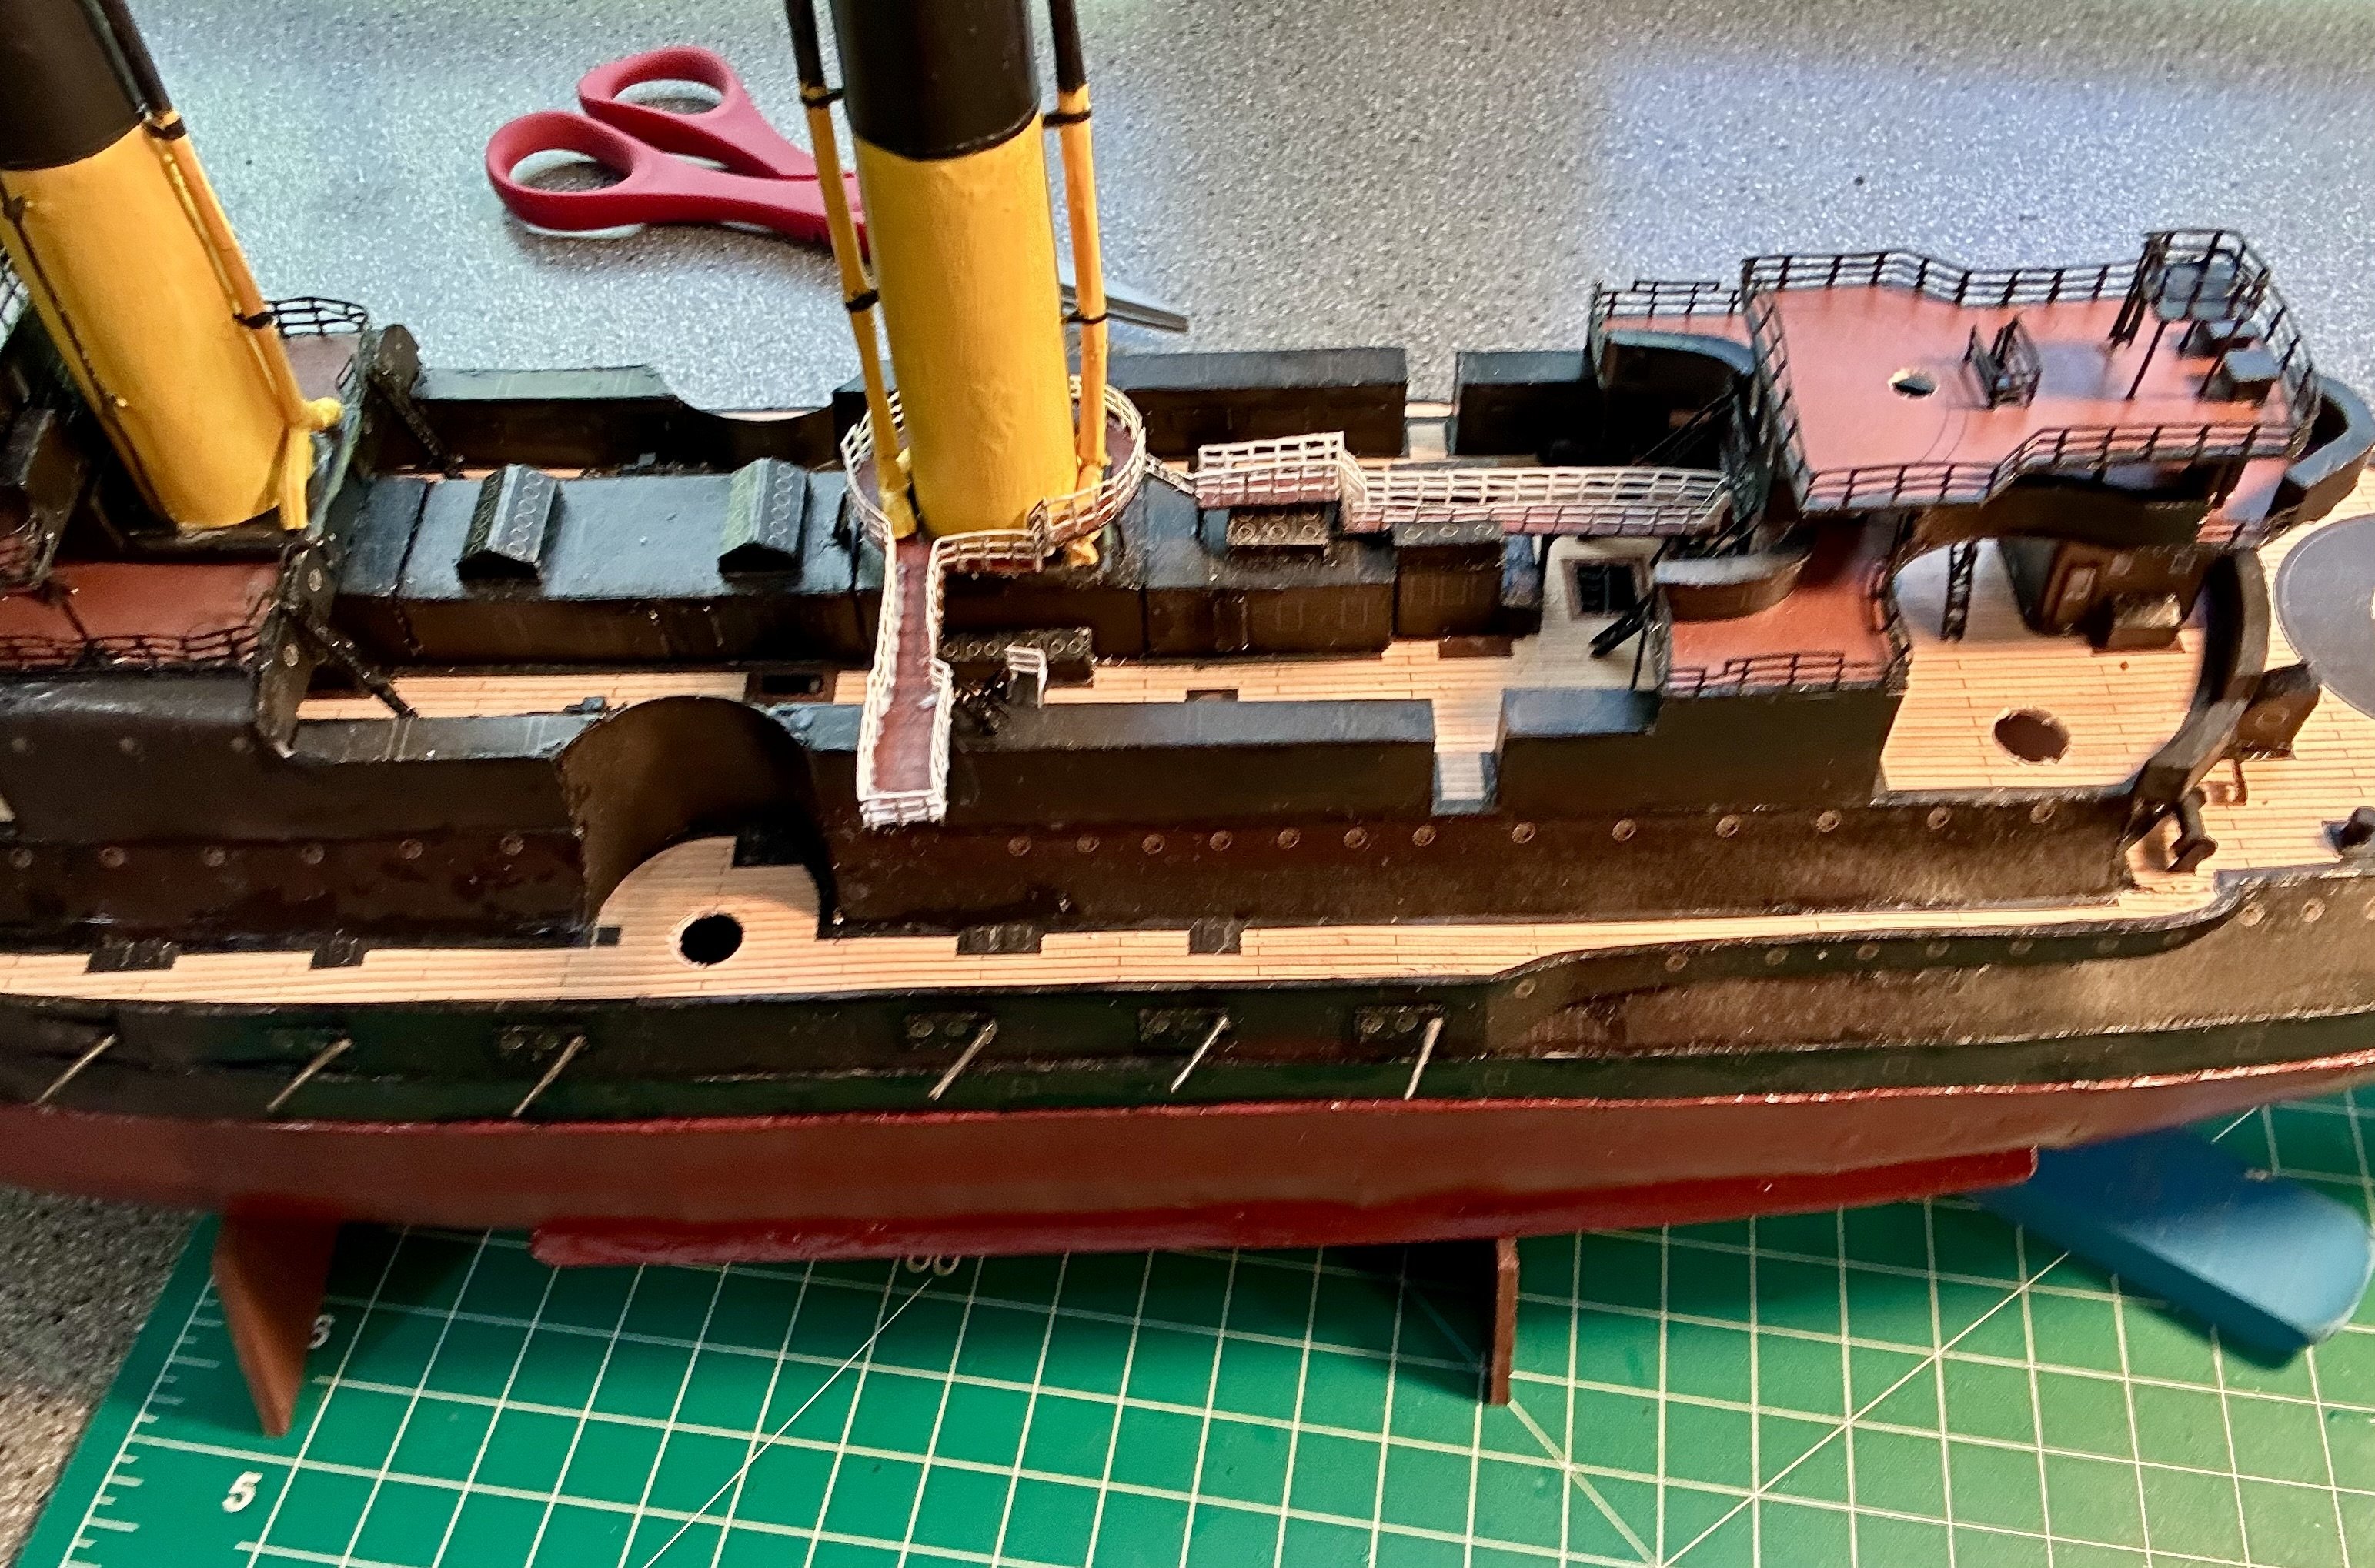
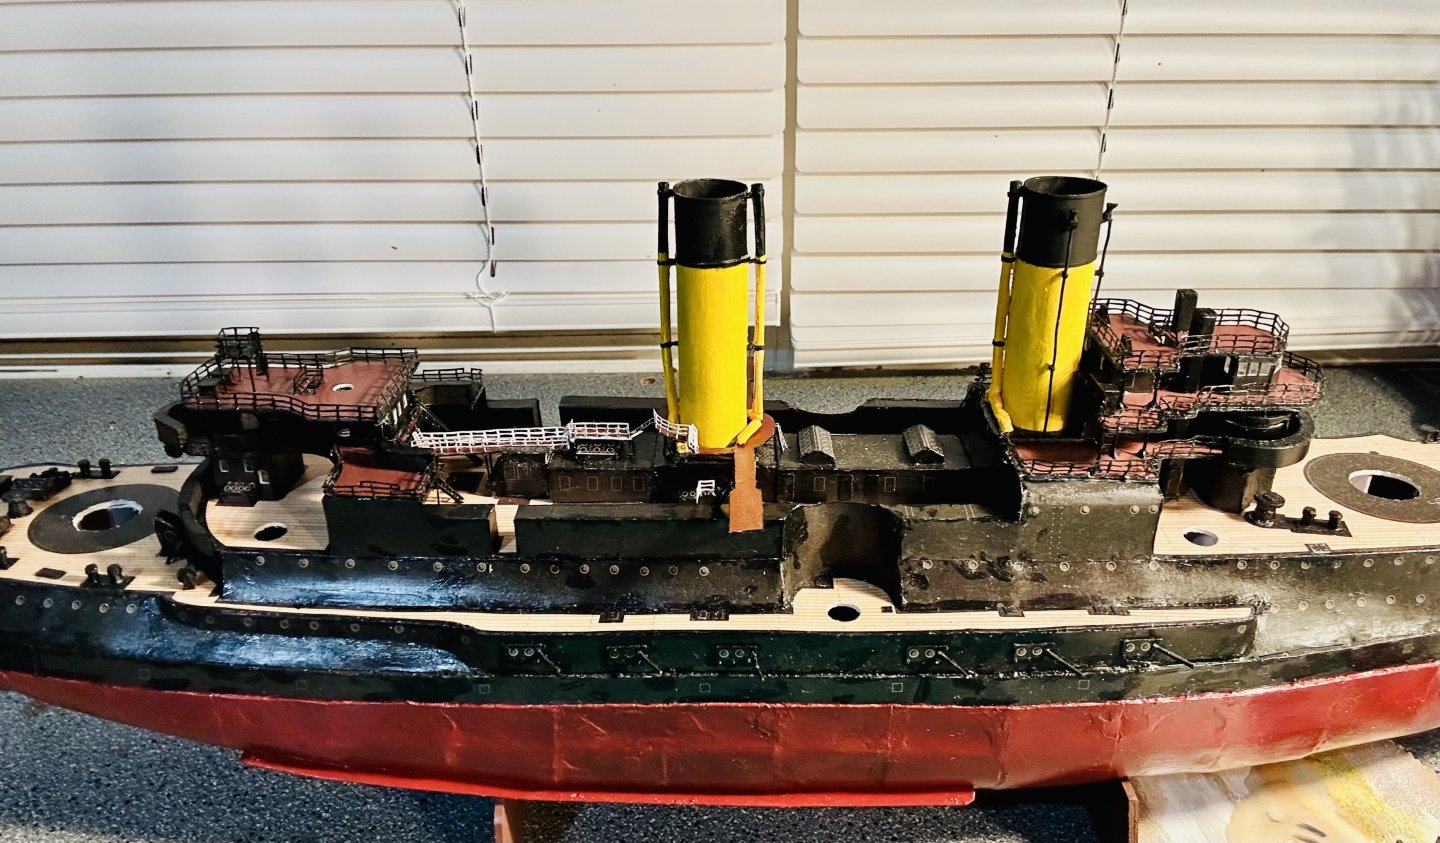
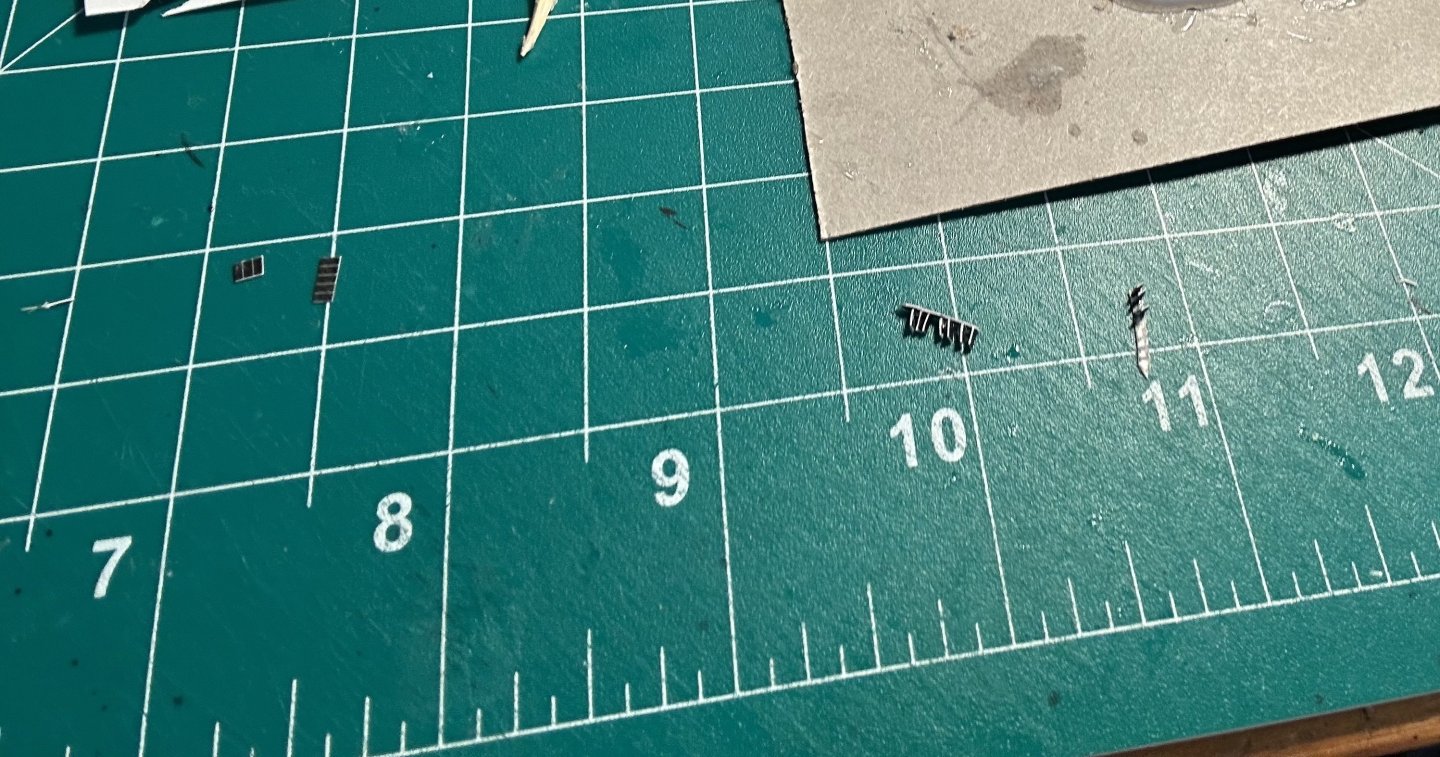
Steve, Lol! Absolutely! Thank you very much! Jan, Thank you very much and absolutely! The funny thing is that I work on a hardwood floor and still manage to lose parts! Lol! Alan, I ended up getting my last ladder for “free”. It was a replacement for one that ended up in “Parts Space” and then turned up after I had already made what I thought was a replacement for the second to last ladder! It ended up being the last ladder! OC, Thank you very much! All ladders for the middle platforms are done and in place: Here’s a side on view of the ship! And now for more railings!

- 288 replies
-
- 15
-
-

-
- Card
- Pre-Dreadnought
- (and 3 more)
-
Sorry to hear about that OC!
-
Greetings from the Bluegrass!
GrandpaPhil replied to queen_of_raptors's topic in New member Introductions
Welcome! -
Yes, I was going to get rid of the Victory and decided to hold onto it for a while. Maybe one day I’ll change my mind and decide to finish the model.
-
Are you planning on using the sails that came with the kit, or just making your own? I have had really good luck in the past with sewing them out of linen.
- 46 replies
-
- 1
-
-
- Golden Hind
- airfix
- (and 2 more)
-
Steam Dredge by Crow River Products in 1:48 scale
GrandpaPhil replied to Keith Black's topic in Plastic model kits
Very cool! -
Mark, Thank you very much! Yes, she is looking like a battleship now! I have the middle platforms made and installed. I am taking a step back. I lost a ladder. It went flying and disappeared into lost part space so I am scratch building another one. I am sure that the other ladder will appear in plain sight tomorrow, long after I make the replacement!
- 288 replies
-
- 11
-
-
-
- Card
- Pre-Dreadnought
- (and 3 more)