


Valeriy V
-
Posts
917 -
Joined
-
Last visited
Content Type
Profiles
Forums
Gallery
Events
Posts posted by Valeriy V
-
-
3 hours ago, Mirabell61 said:
splended work Valeriy,
its a beautiful hull, will you imitate the riveting and do plating ?
Nils
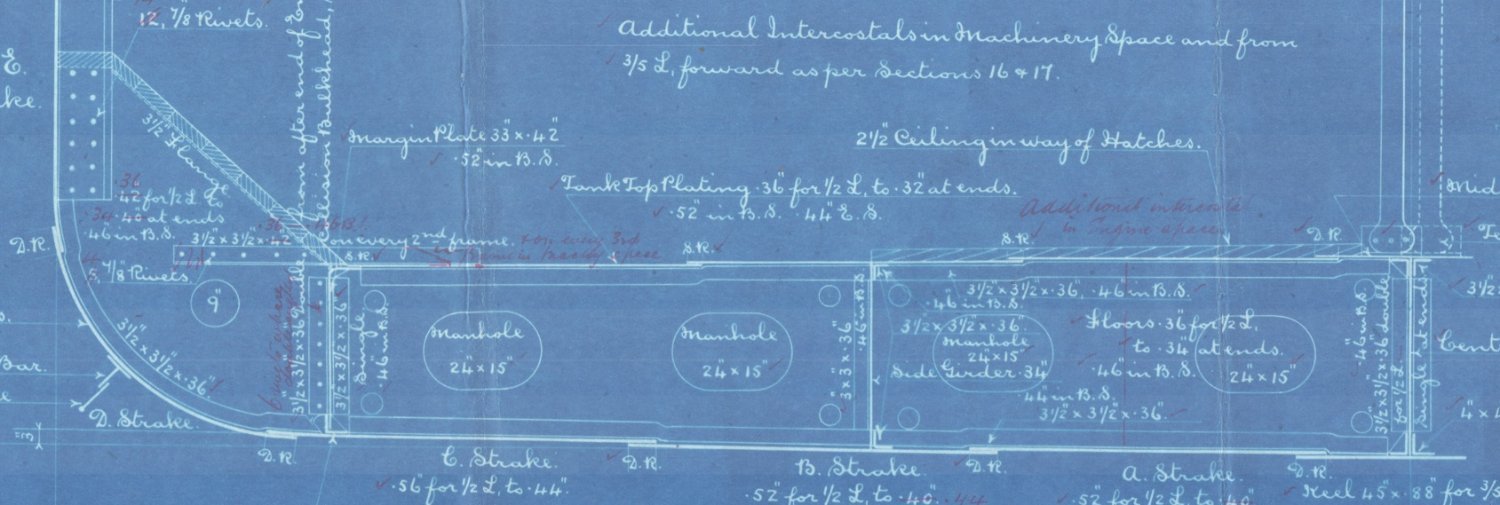
For rivet head size calculations I show the German Lloyd chart. Circled in blue is the thickness of the cooable panel sheet that I choose. Green color is the required rivet diameter.
As a result of a simple calculation, I get the dimensions of the rivet head for my model on a scale of 1:100 - diameter 0.3 mm and height 0.15 mm.
Even if I can make such small details on the model, after covering with primer and paint they will simply visually disappear.
Therefore, it makes no sense to show rivets on this model.")
But the belts of the outer hull plating sheets will be shown.
")

- Canute, Mirabell61, GrandpaPhil and 3 others
-
 6
6
-
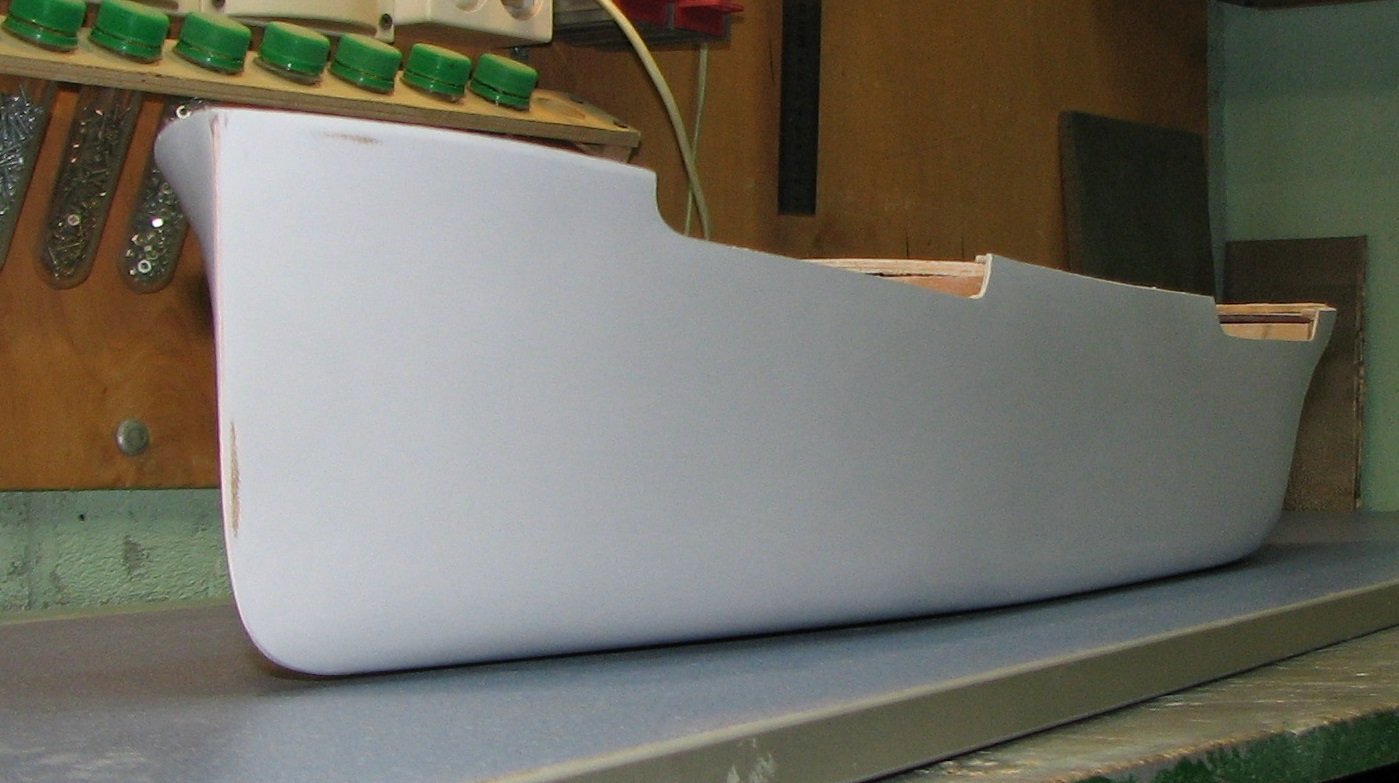
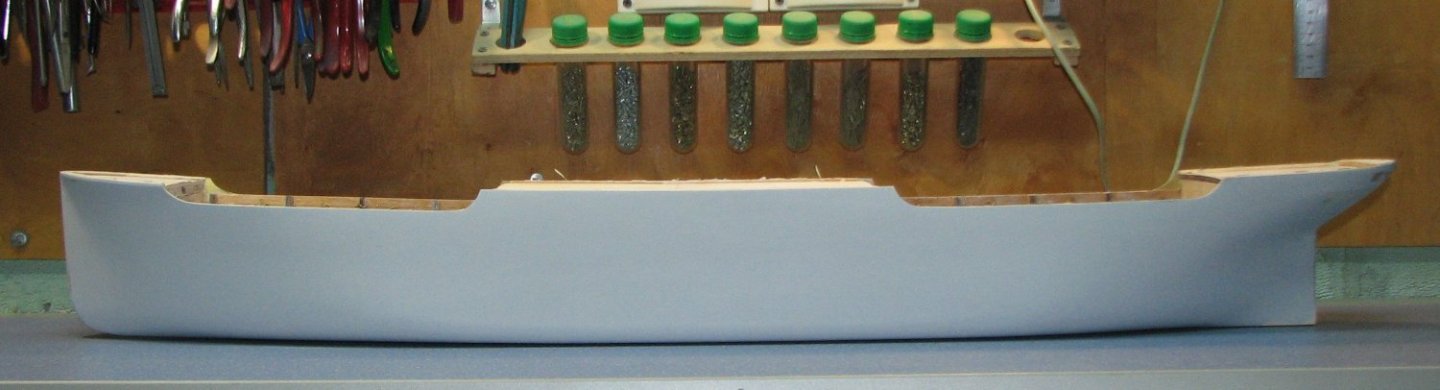
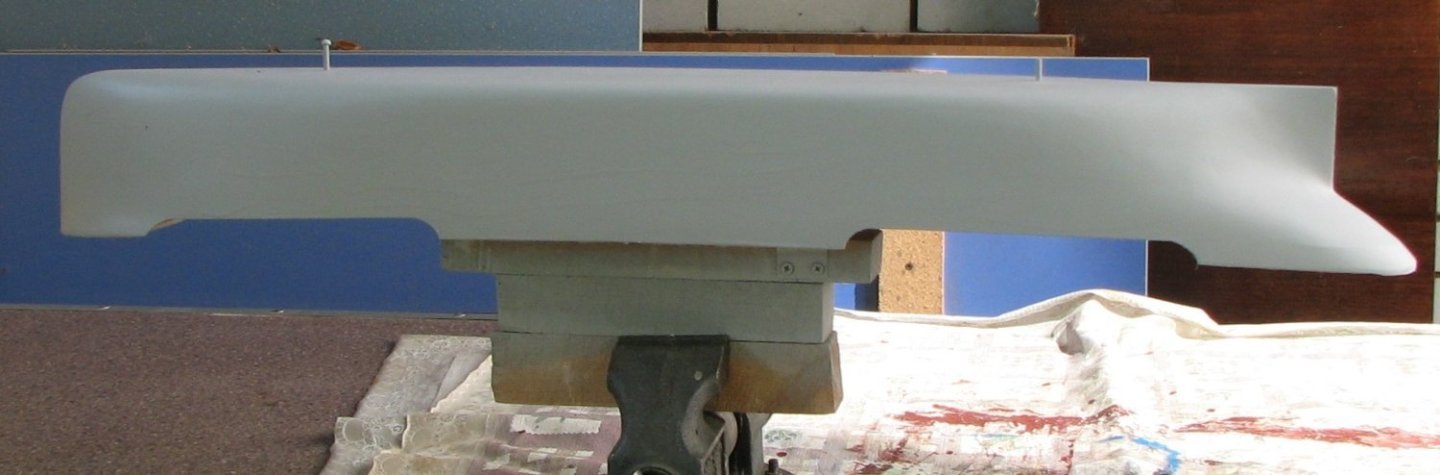
It looks more interesting from the nasal angles.
- wefalck, Paul Le Wol, Mirabell61 and 11 others
-
12
-
 2
2
-
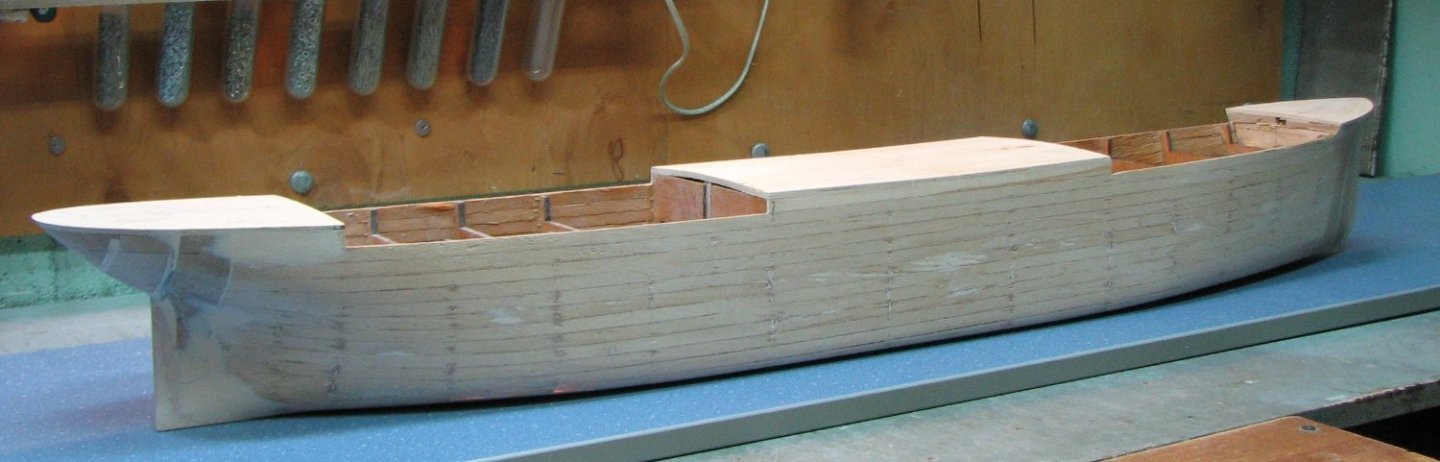
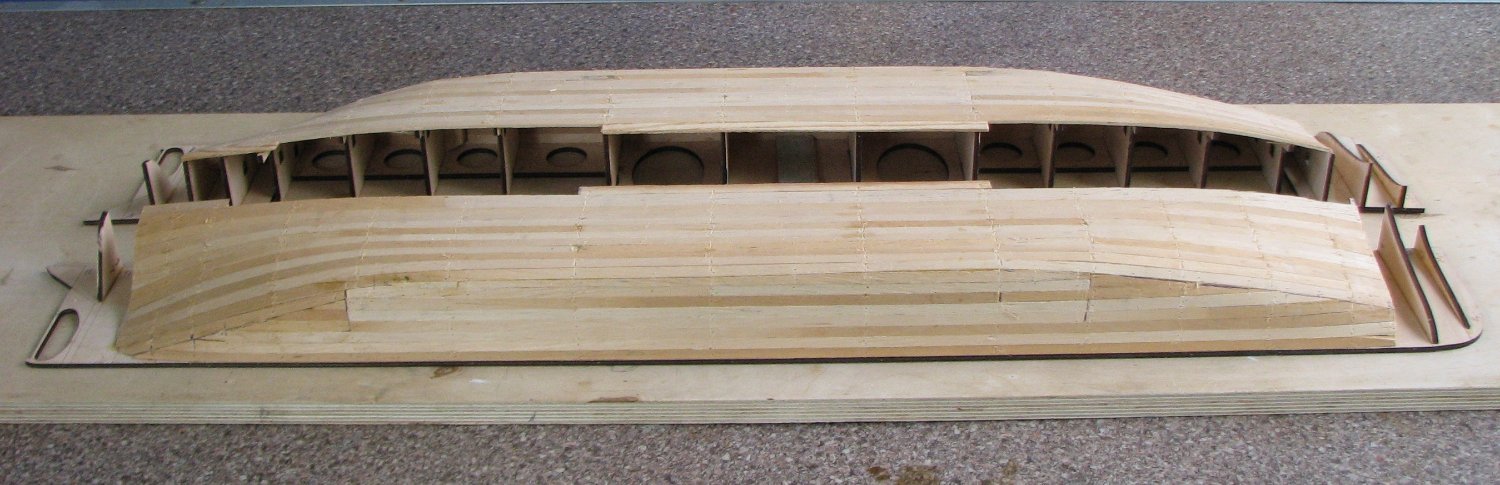
Then I sand the hull and bring it to this look.
- mtaylor, wefalck, Keith Black and 5 others
-
8
-
After the epoxy resin has dried, I cover the hull with liquid automotive putty using a spray gun.
- Canute, KORTES, Keith Black and 4 others
-
7
-
The hull of the model is covered with fiberglass with epoxy resin.

- davyboy, Mirabell61, KeithAug and 10 others
-
13
-
10 hours ago, FlyingFish said:
I'm astonished at your productivity Valeriy - a testament to your skills. So much to learn...
Thanks Andy!
All these photos show a process that lasted approximately two and a half months.- Ras Ambrioso, Keith Black, Canute and 1 other
-
4
-
21 minutes ago, Mirabell61 said:
Hi Valeriy,
I like the way and methode you tackle the hull-building.
BTW why was this ship chosen for order, does your customer have a special relation to it ?
When I built my steamship "Heinrich Kayser" my grandfather in 1922 was the captain in command when it foundered in the north Atlantic without a trace, and I had to do a lot of research for building the model.
Nils
Hello Nils!
You have glorious maritime roots and it's an interesting story!
The customer of Blagoev’s model is collecting his collection dedicated to the participation of the USSR in the Spanish Civil War.
- FlyingFish, yvesvidal, mtaylor and 6 others
-
9
-
27 minutes ago, wefalck said:
A quick technical question: why did you put the brass 'bulwark' on top of the wood? I thought this kind of inserts were used in areas of open bulwarks in order to get a (nearly) right thickness of materials. Will you eventually remove the wood from behind the brass?
Yes that's right!
Brass is much closer to the scale thickness of the bulwark. After covering the model's hull with a layer of fiberglass, the wooden strips will be removed from the inside of the bulwark. -
22 minutes ago, Dr PR said:
Another interesting build Valeriy!
When you "soaked" the hull with liquid epoxy, did you cover the inside and outside of the planking, or just the outside? I have used liquid epoxy "paint" on the inside of the planking. It soaks into the cracks between planks, and between the planks and bulkheads. The result is a very solid hull that will not develop cracks between the planks.
Thanks Phil!
I impregnated the hull of the model with liquid resin only inside. It makes no sense to do this outside, since there will be fiberglass with the same epoxy resin.
- Canute, Mirabell61, druxey and 5 others
-
8
-
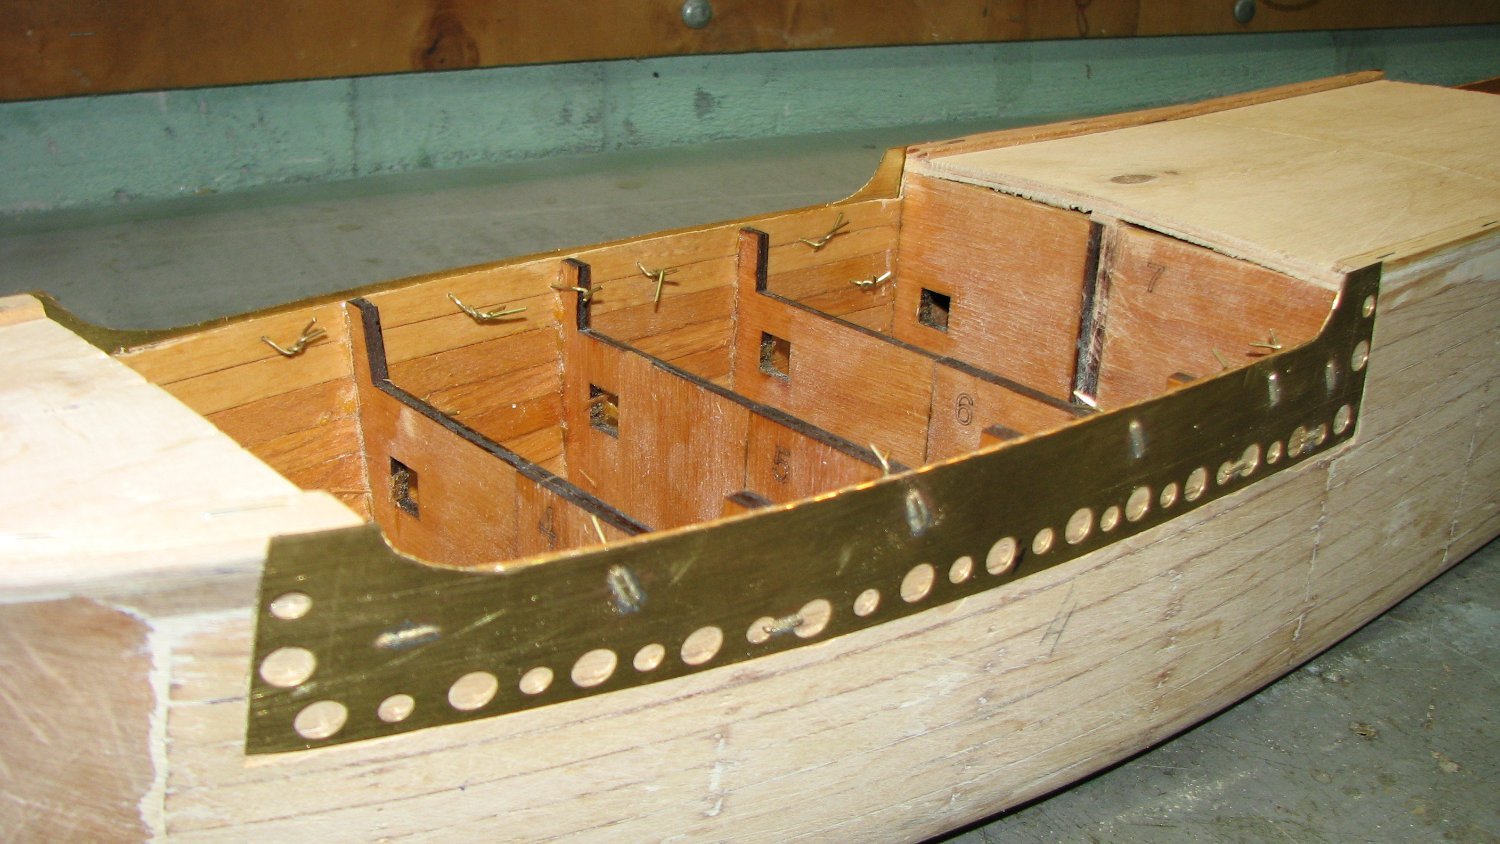
Brass inserts were made into the hull of the model for the bulwarks.
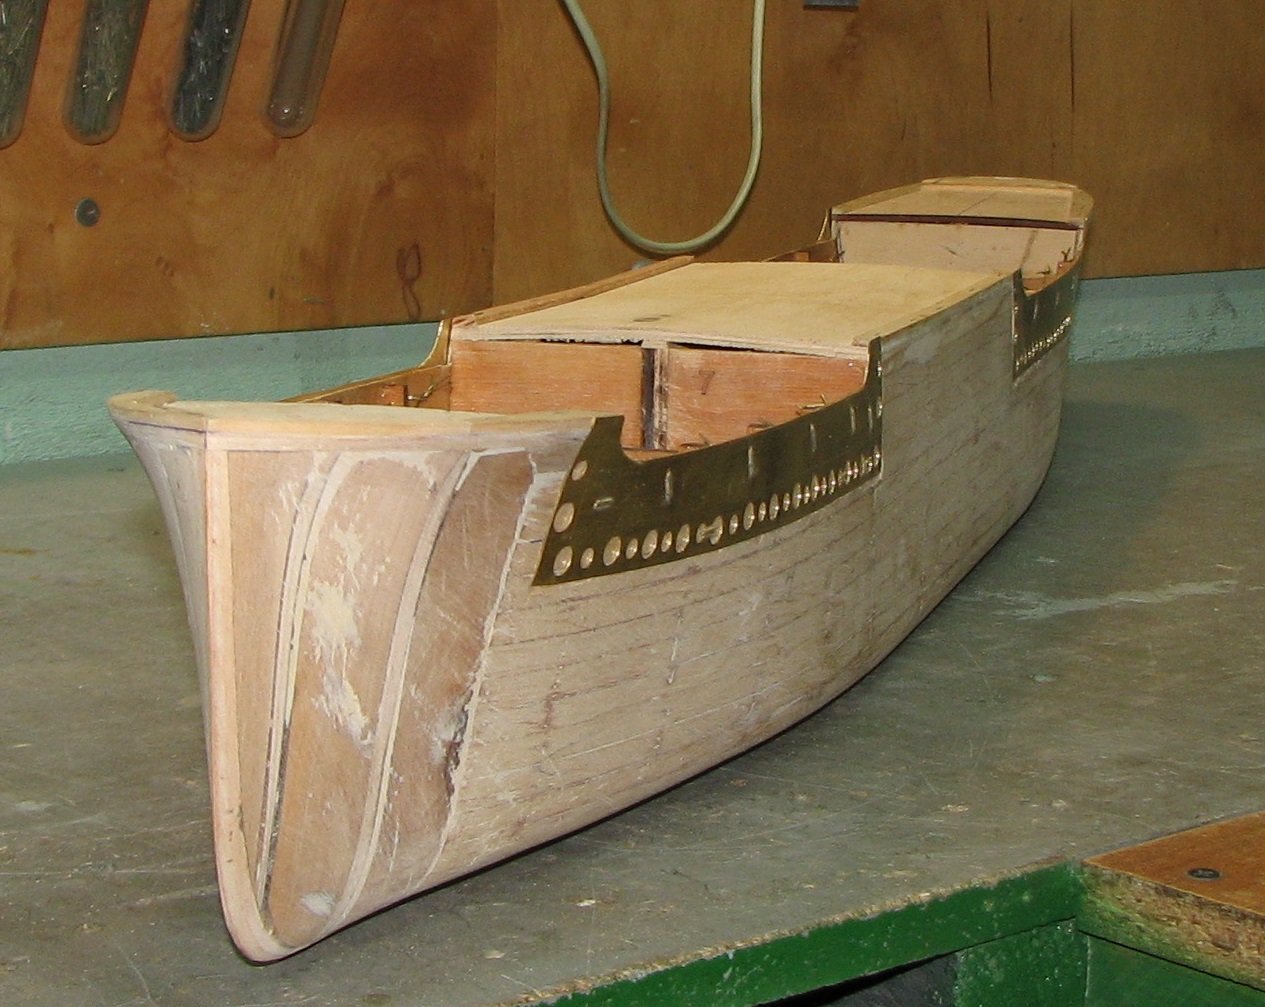

- GrandpaPhil, davyboy, ccoyle and 12 others
-
15
-
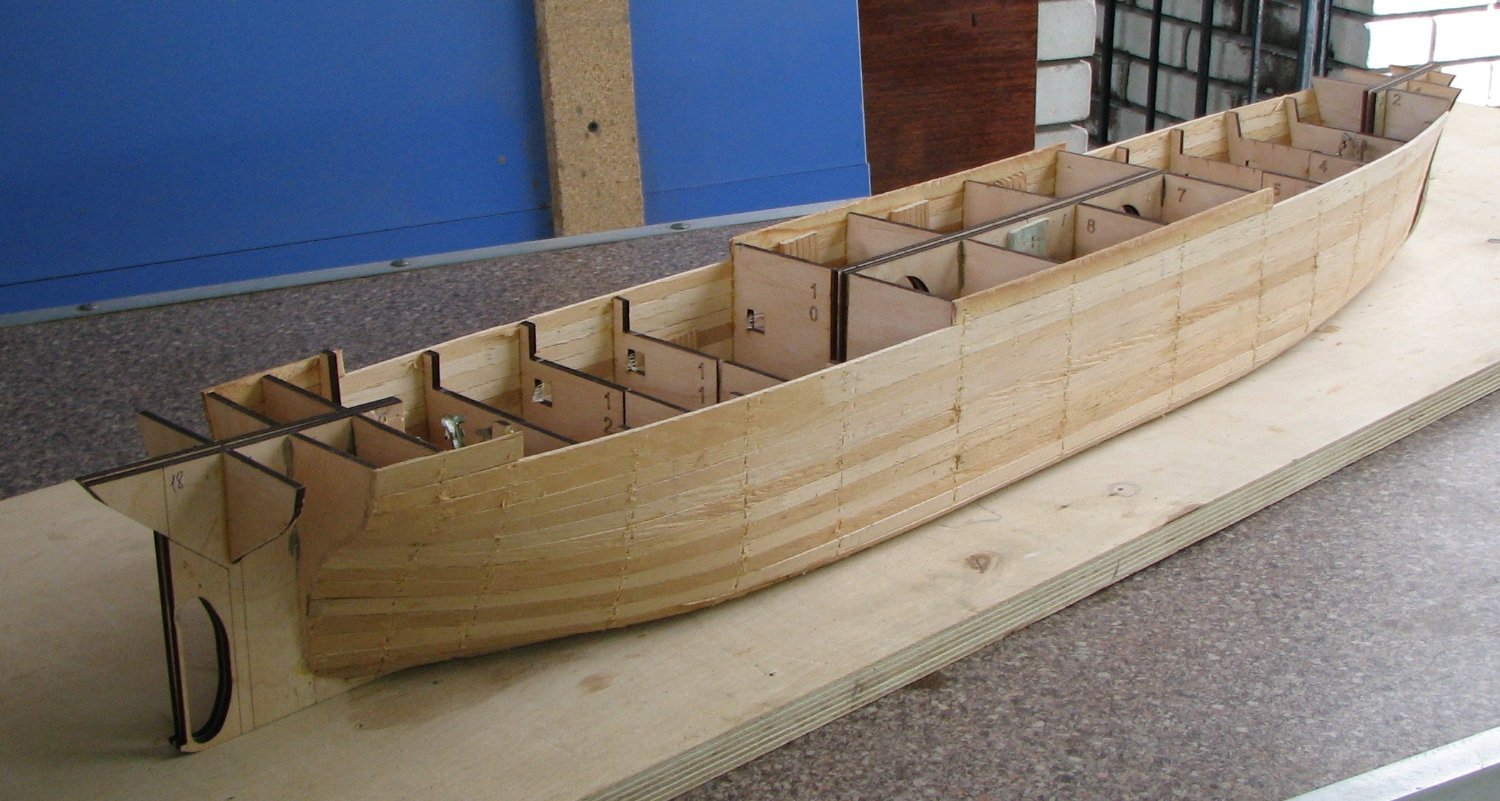
The wooden lining of the model hull is sanded.
- Rudolf, KORTES, Ras Ambrioso and 8 others
-
11
-
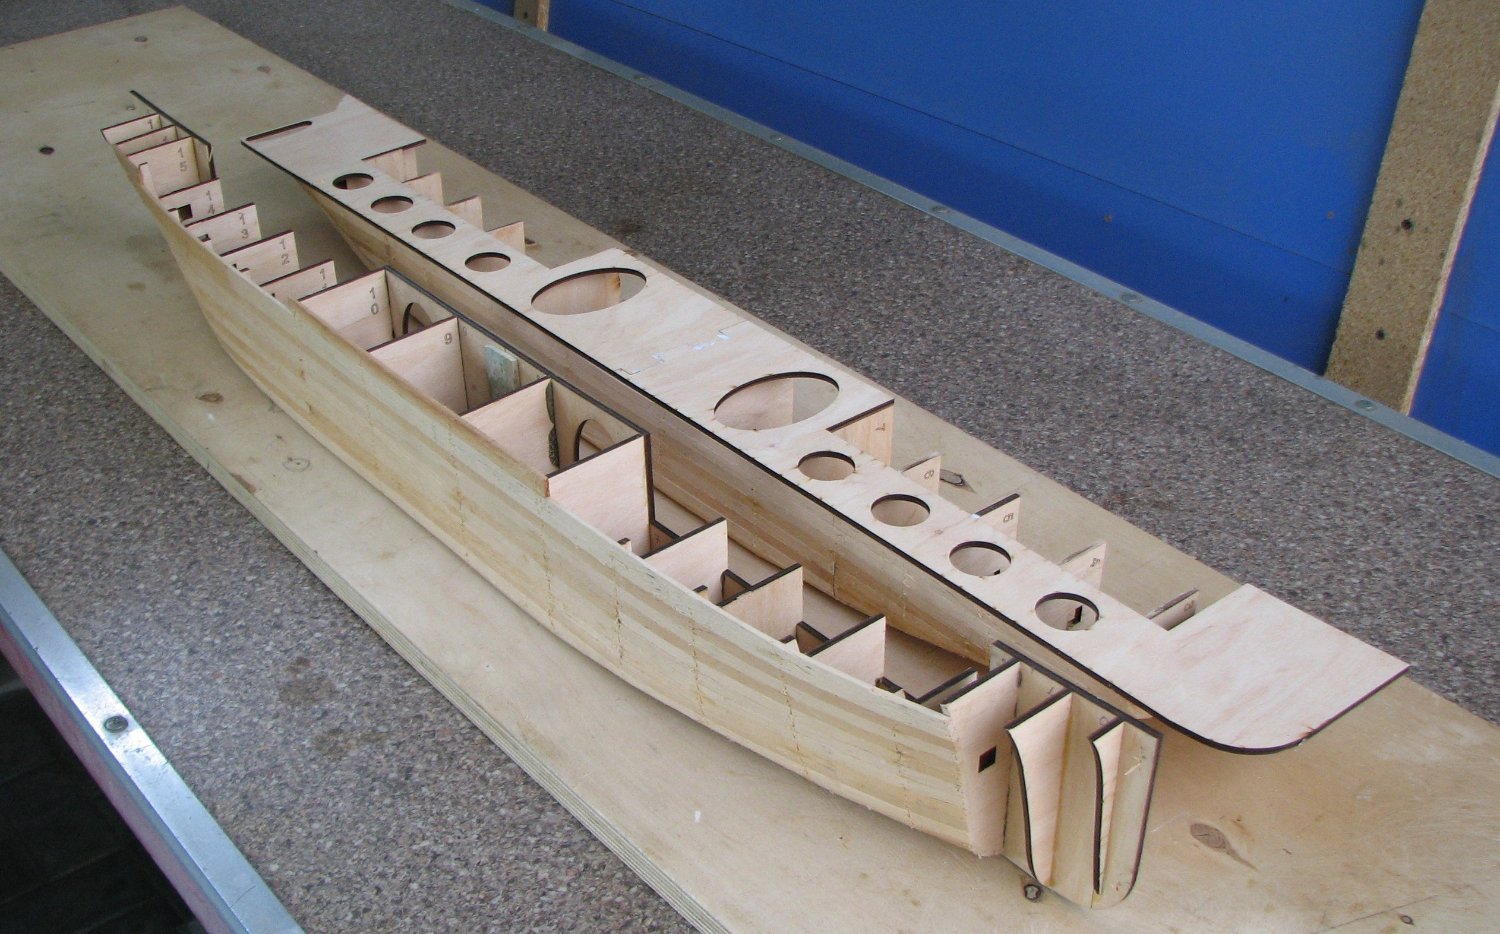
The model supports will be attached as shown in the drawing.
They will be similar to those shown in the photo, but only much smaller.


- wefalck, Mirabell61, Ras Ambrioso and 15 others
-
18
-
1 hour ago, Mirabell61 said:
Hi Valeriy,
I suppose it will be a stand model afterwards. If so, how do you fasten the pedestals of the stand ?
will you build a flat bottom or will a minimum of the keeline stand out ?
Nils
Hello Nils!
This ship has a horizontal keel. Only the thickness of the sheathing sheet will appear on the model.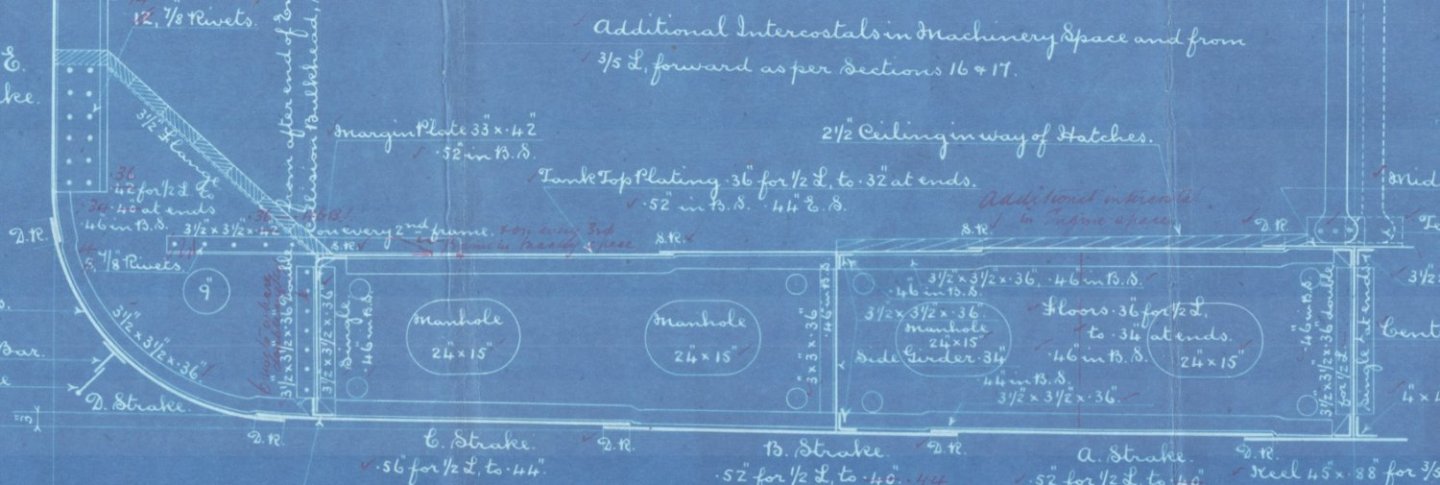
- Canute, druxey, Ras Ambrioso and 4 others
-
7
-
-
12 hours ago, Roger Pellett said:
Hi Valeriy,
I always look forward to your posts as they show that you are able to still lead a somewhat normal life during these difficult times. It’s also great to see another steam merchant vessel under construction. I build my models as two half models too. This method ensures an accurate hull.
Roger
Thank you Roger!
Everything is fine with me and I continue my story about Blagoev’s hull.
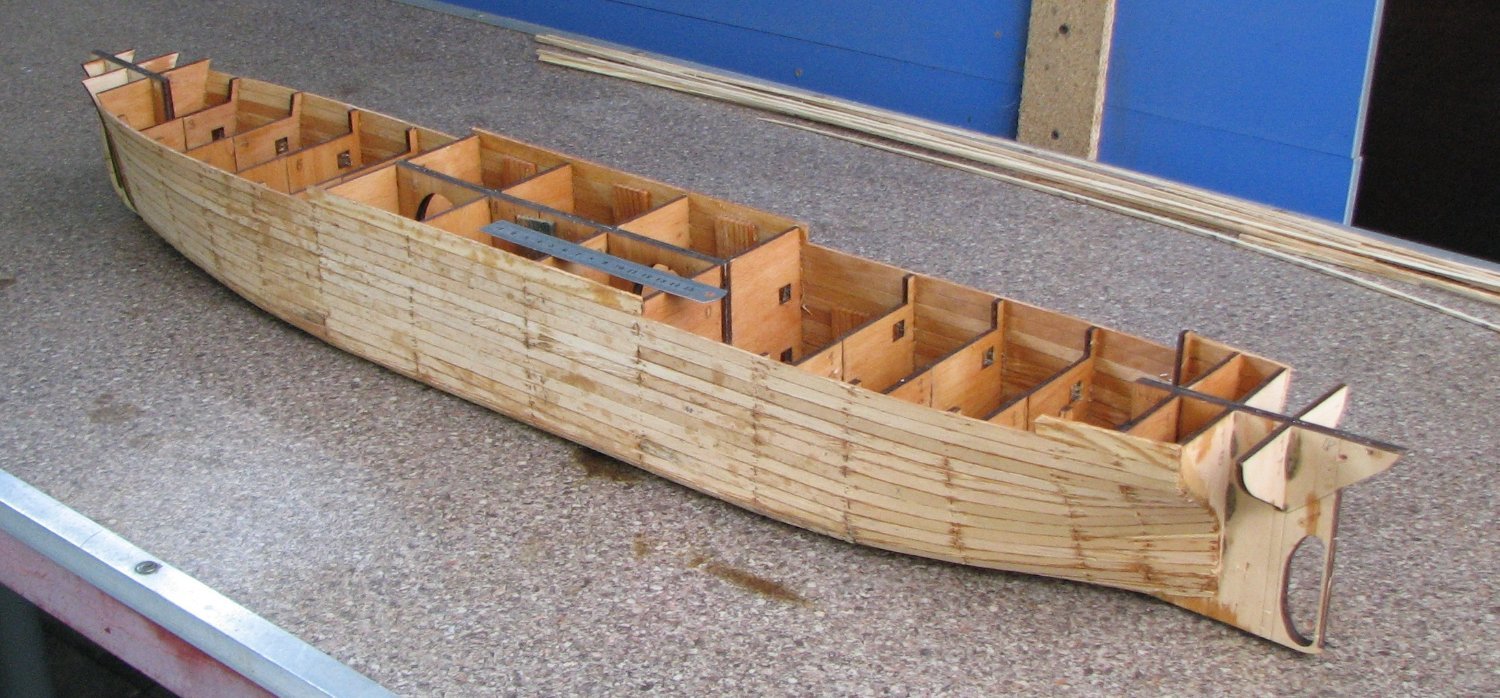
The model hull is fully assembled...

-
1 hour ago, Mirabell61 said:
Hello Valeriy
that looks like a very promissing project. Did you lasercut the parts yourself ?
It looks so good as if it were a kit.
It`s a nice scale and the building methode looks very smart, I`ll certainly be watching your progress
Nils
Thank you, Nils!
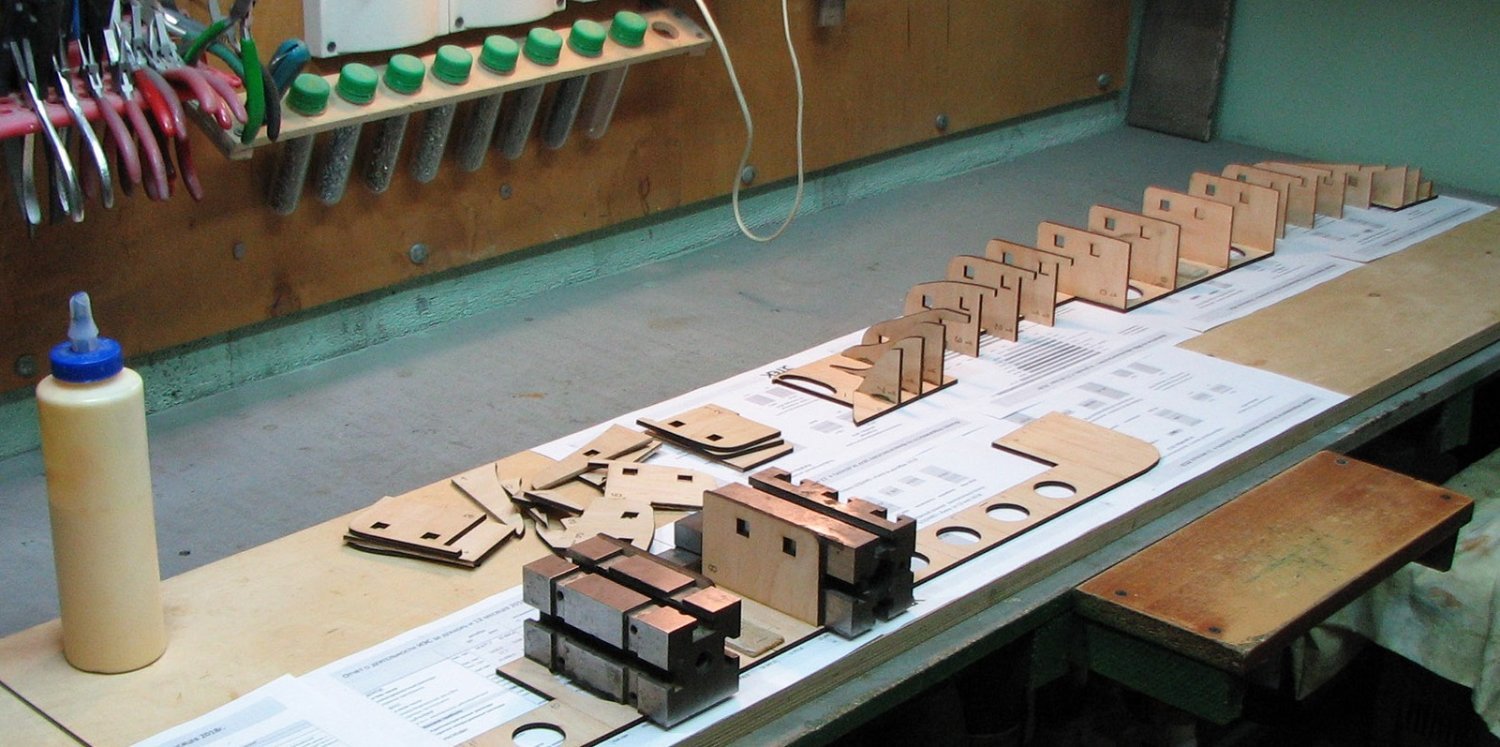
I don’t have a laser cutting machine, so I ordered laser cutting. This is not an expensive operation.
But I developed a drawing in vectors for laser cutting of plywood.
- cotrecerf, Mirabell61, yvesvidal and 8 others
-
11
-
1 hour ago, yvesvidal said:
Nobody will complain about that!! Bring it on !!!
Thank you, Yves!
1 hour ago, yvesvidal said:Process made famous by Billing Boats, who was the first commercial company to propose that way of building hulls.
Unfortunately, I don't know anything about Billing Boats. But I think that this is the simplest and most reliable method for constructing a model hull.
I build all the hulls of my models using this method, including the Varyag.
- Keith Black, yvesvidal, druxey and 4 others
-
7
-
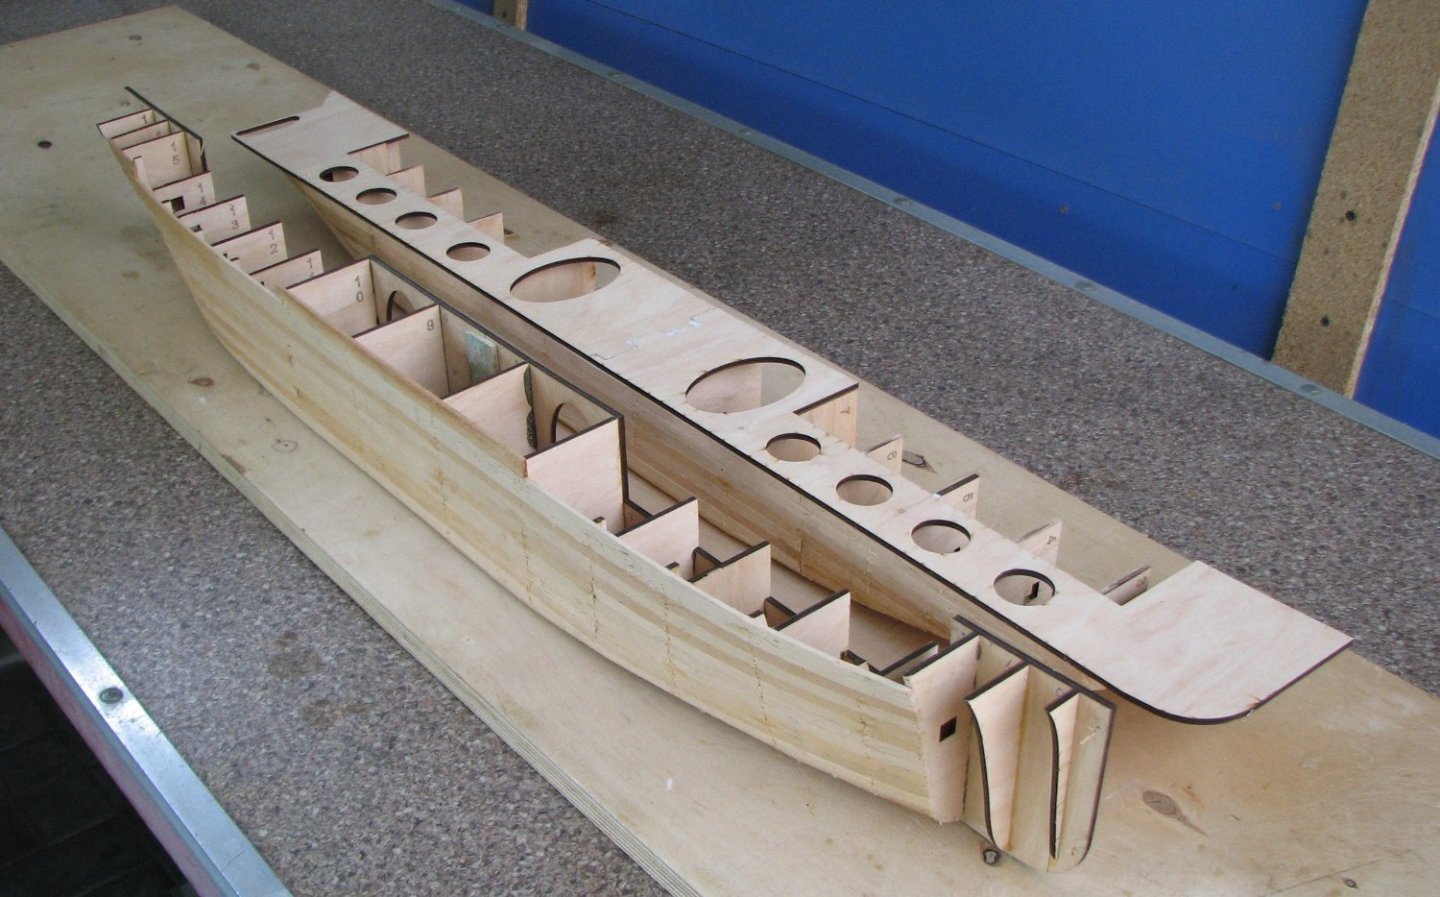
The photo shows the process of assembling the hull.
- Mirabell61, GrandpaPhil, mtaylor and 11 others
-
14
-
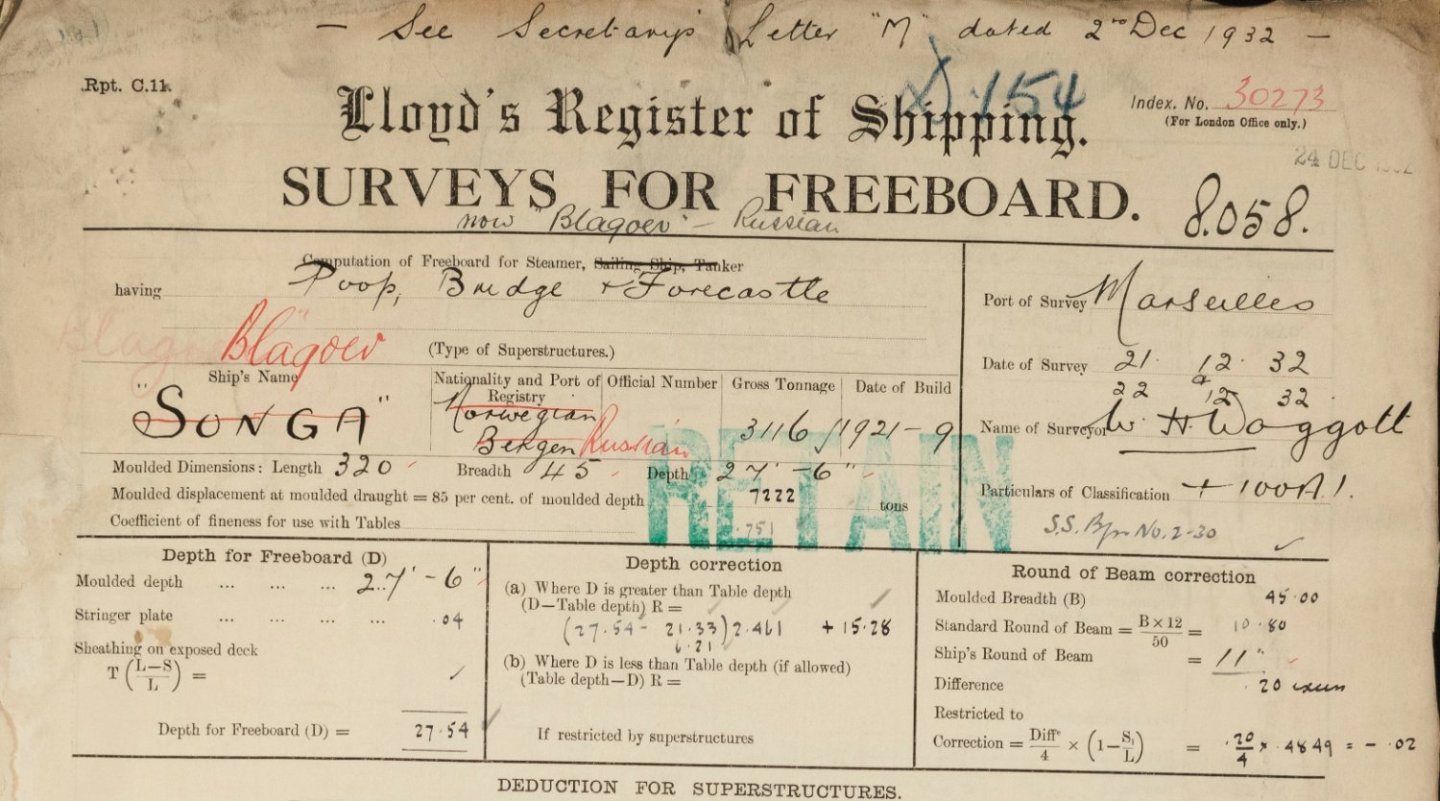
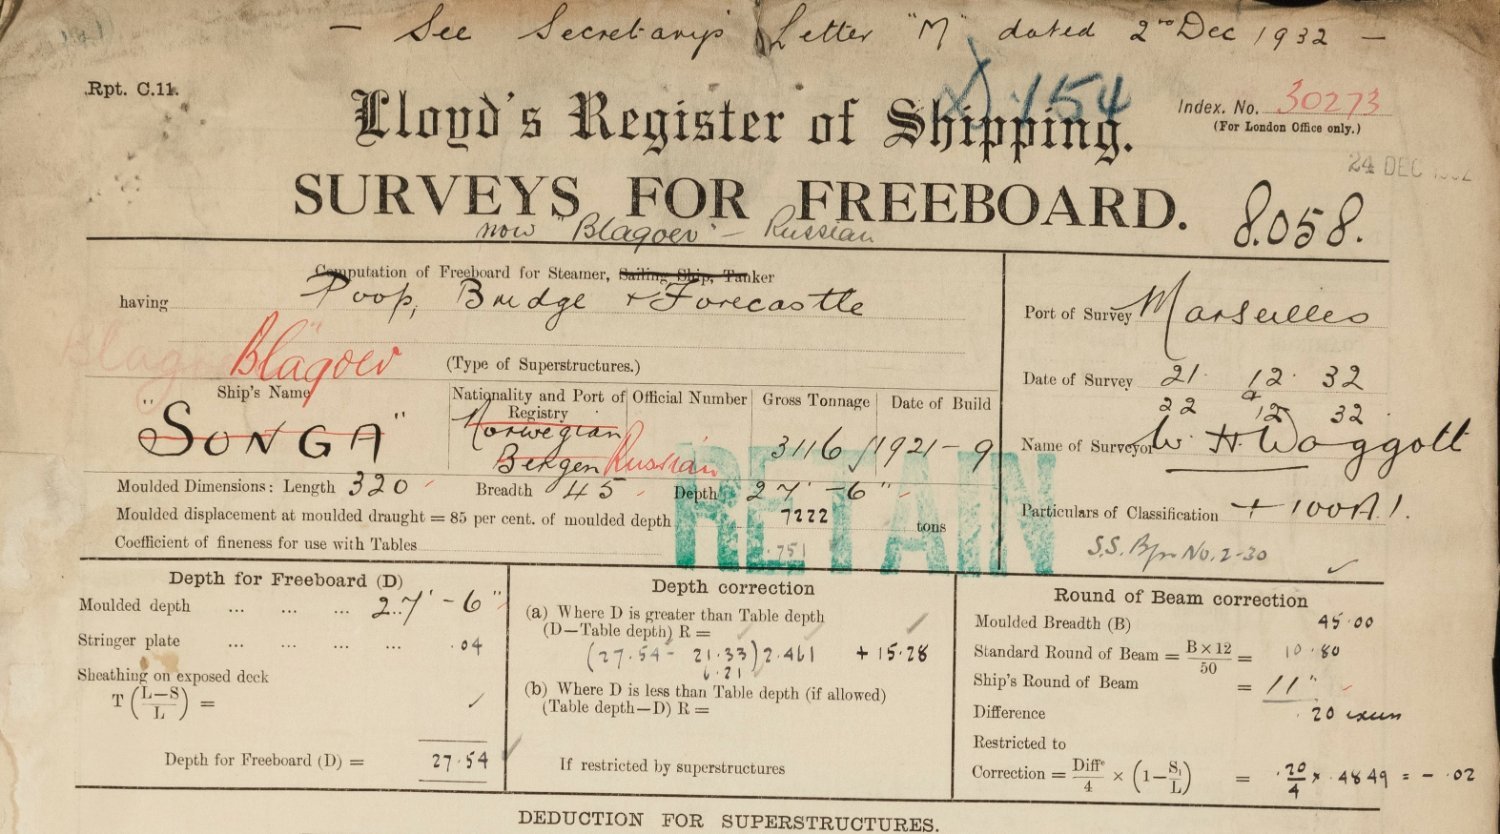
Thanks to Lloyd's archive, good drawings of the ship's hull have been preserved. Based on these drawings, I developed a drawing of the model body and began its construction.

- KORTES, GrandpaPhil, Keith Black and 10 others
-
13
-
A brief description of ss Blagoev can be found here
https://skipshistorie.net/Bergen/BRG223LorentzWHansen/Tekster/BRG22319210100000 SONGA.htm
-
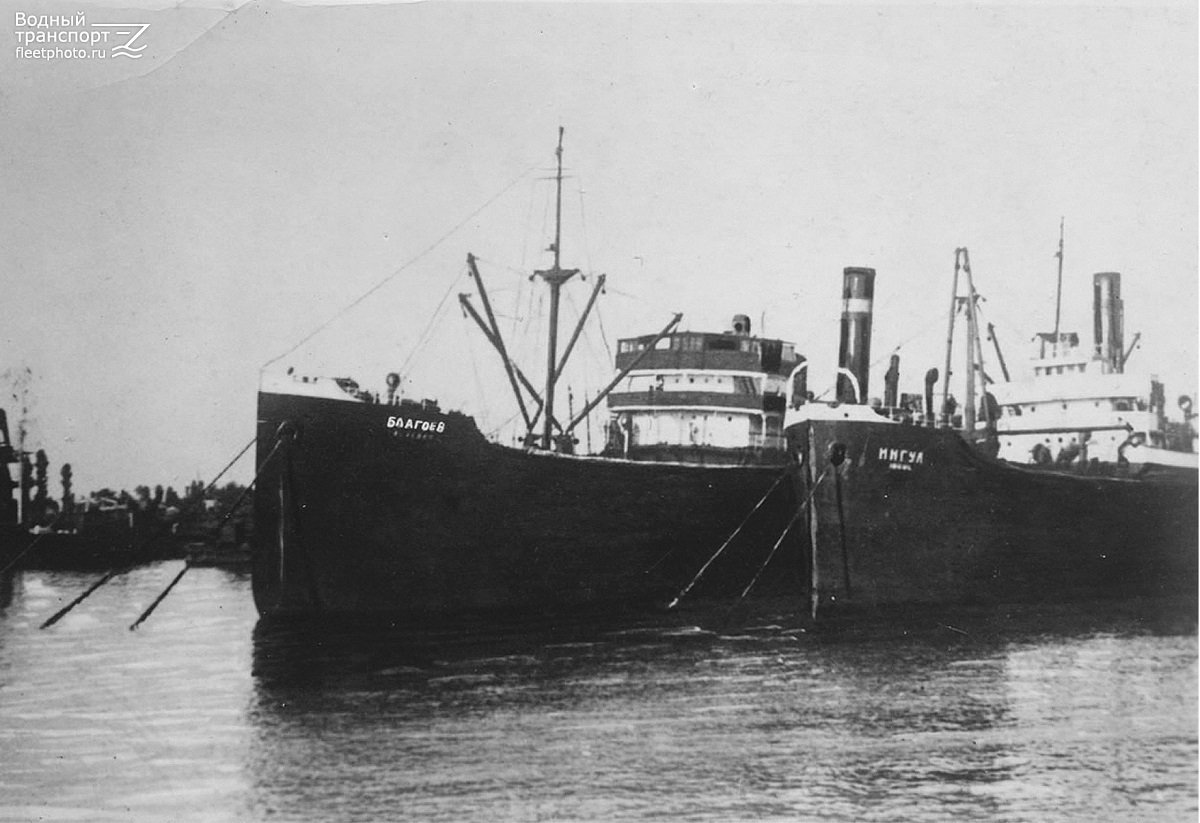
SS Blagoev.
Key dates from the life of the ship:
- built 1921 under the name Songa , Armstrong, Whitworth & Co. Ltd, High Walker Yard, Newcastle, England
- sold in 1935 to the USSR and received the name Blagoev
- during the Spanish Civil War, the ship carried military supplies for the Republicans
- during the last voyage from Odessa ( march 9, 1937 ) the ship was sunk by an Italian submarine LUGI SETTEMBRINI
- Ras Ambrioso, bruce d, druxey and 6 others
-
9
-
-
-


SS Blagoev ex-Songa 1921 by Valeriy V - scale 1:100 - Soviet Union
in - Build logs for subjects built 1901 - Present Day
Posted
Avoiding wrinkles is not difficult:
1) I make cuts in the fiberglass fabric as shown in the photo along the green lines before applying the resin
2) after applying the resin in small portions, I smooth it along with the fiberglass with a soft rubber spatula
3) in case the resin polymerizes too quickly, I have a construction hair dryer nearby with which I can heat the desired area of the resin and fiberglass to liquefy it