


VTHokiEE
-
Posts
1,528 -
Joined
-
Last visited
Content Type
Profiles
Forums
Gallery
Events
Everything posted by VTHokiEE
-
 Looking good, I think it'll be a good choice to dial down those two lighter strips. Take a look at the top rail and try to make certain that it doesn't cover the hole for the lower hole for the bowsprit ring (I almost covered mine up).
 -
I'm kicking myself this morning. I was working on the anchors - I had puddening (I'm not certain if there is a best method here just trying to duplicate what I have seen others do) on the ring but I was having a few issues adding the seizing. In the process I realized that I needed to solder the brass ring I made together (I originally thought that I could avoid this and simply keep the ends together but I bent them apart adding the seizing and the puddening started coming off). You can probably see where this is going, but in the process of soldering the ring I accidentally burned the stock - I tried scrapping the char off but that was unsuccessful. I think I'm going to try to scratch build the stocks (hopefully the drawings in the AotS Alert) will help me here, wish me luck.
- 436 replies
-
- 2
-

-
- vanguard models
- alert
- (and 1 more)
-
I don’t have significant experience with painting but the Humbrol paints that I’m currently trying have variation in thickness between colors. I have heard Admiralty paints may have better coverage though (?).
- 87 replies
-
- 2
-

-
- bluejacket shipcrafters
- red baron
- (and 3 more)
-
I used the edge bending method for my second planking on my Alert; I’d recommend it.
-
Looking really nice! What brand of paints?
- 87 replies
-
- 1
-
-
- bluejacket shipcrafters
- red baron
- (and 3 more)
-
Thank you! I'm following your log as well - it sounds like you have a very interesting vision and I'm excited to see it all come together.
- 436 replies
-
- 1
-
-
- vanguard models
- alert
- (and 1 more)
-
I love this era of history and am quite excited to watch your build progress!
-
Of course you were right; I had uploaded the image twice - silly me 😳. Fixed now.
- 436 replies
-
- 2
-
-
- vanguard models
- alert
- (and 1 more)
-
I came to the same conclusion, thanks for the confirmation; right now they are off ship and in my parts box for protection until I get towards the end of the build.
- 436 replies
-
- 2
-
-
- vanguard models
- alert
- (and 1 more)
-
Thanks for the tip Derek. Unless I’m going crazy (a distinct possibility) I did use that picture two higher (underneath the smear glue text). At least I see that I used it. Either way, I’m pretending it’s not really there or else I’ll continue editing the post until I delete the thing and start over 😂.
- 436 replies
-
- 1
-
-
- vanguard models
- alert
- (and 1 more)
-
Newbie needing model recommendations
VTHokiEE replied to JonSnow's topic in New member Introductions
Are you okay with a sailboat (no guns)? If so I might recommend searching eBay for a Midwest kit like the Sharpie Schooner or other Midwest kits as a relatively easy entry. Alternatively if you like the look of a working boat and are up for the challenge of planking then maybe take a look at Vanguard models Fifie or Zulu model. If you are thinking about a warship then there are many options but I would recommend sticking to a single masted vessel. -
Ah I see the fairing now. I’m thinking that you’re at the beginning of the build and you may regret not pulling these planks off, ordering some new ones and try your hand at tapering (spiking) them. I think that it’s going to be tricky to fill though gaps on a single planked hull. I read many documents on planking, watched some videos and then had a disaster on my first go through. I removed it (with great sadness and frustration, I had some sleepless nights thinking that I would never get it right) and tried again (you can see what happened to me in my build log if you’re interested). I’m glad that I took the time to redo though because I’m getting close to 10 months of work on my model and I would be disappointed with myself if I hadn’t. If you are set on pushing forward I would heavily consider painting the hull as it can disguise and filler you end up needing.
- 16 replies
-
- 3
-
-
- Golden Hind
- Constructo
- (and 1 more)
-
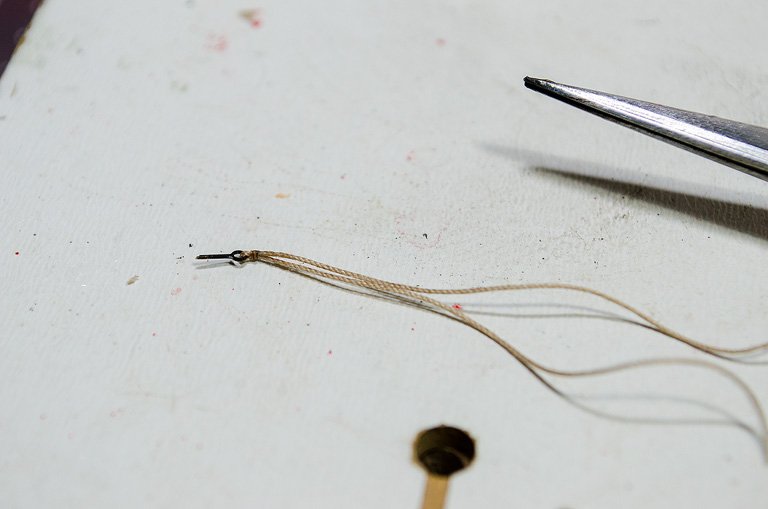
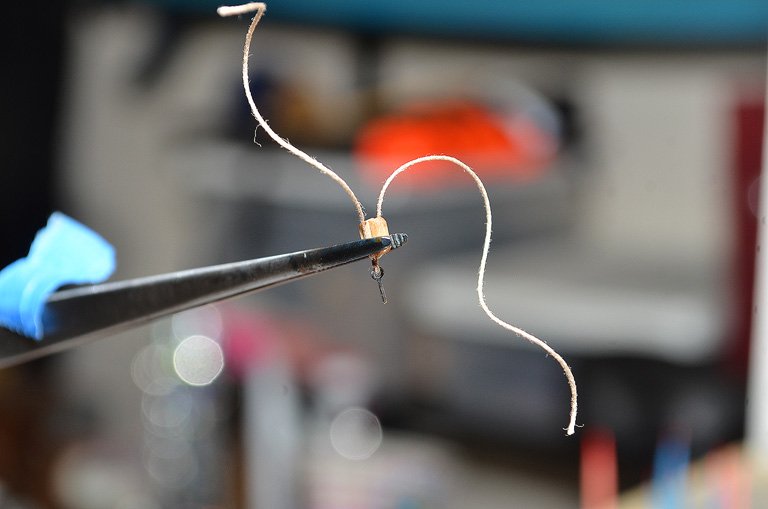
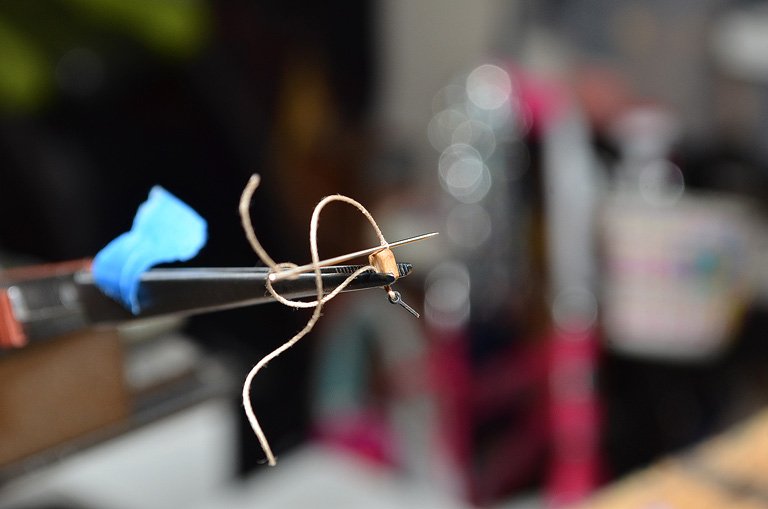
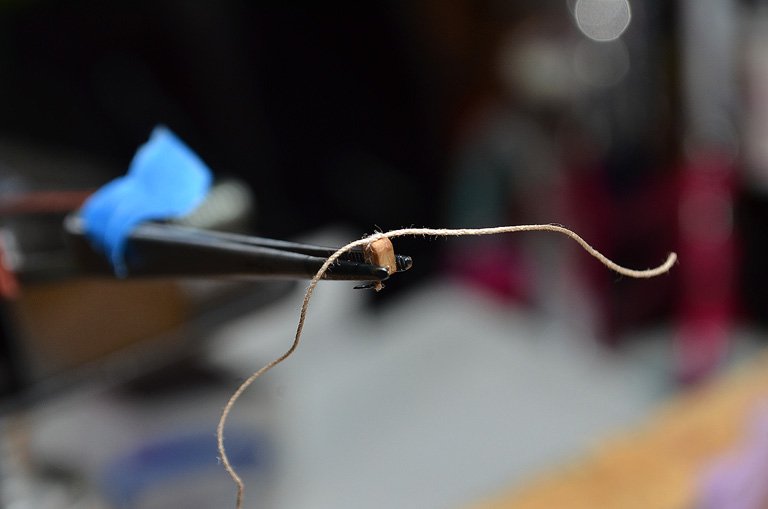
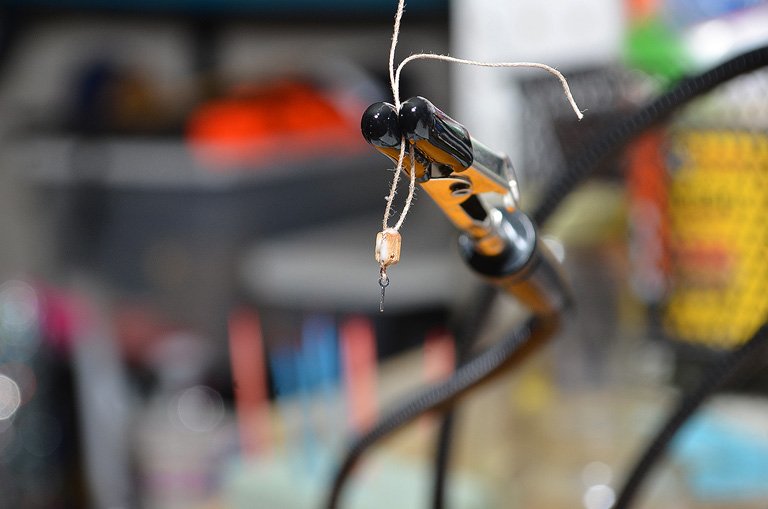
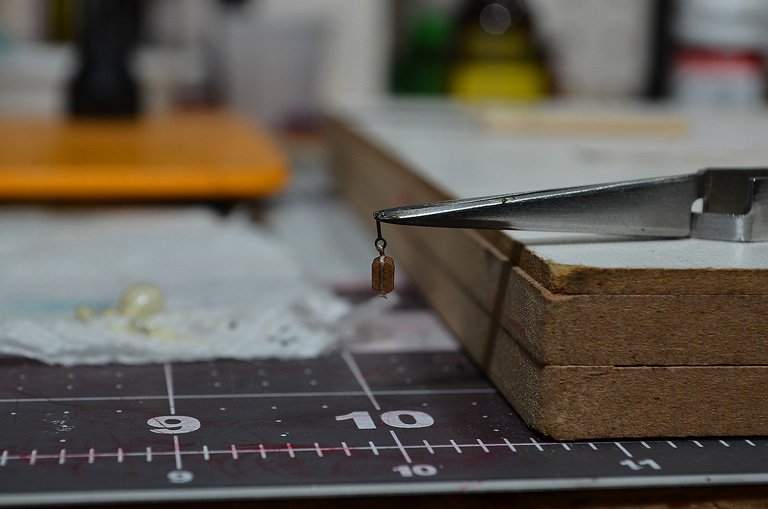
Thank you! I've been a little remiss in showing any how-to in this build (mainly because I felt that some of the other referenced builds detailed great how-to and I didn't think it necessary to restate what they wrote). However, I've started rigging some blocks and thought that I would detail my process here in case it helps someone in the future. First, I seize the rope to an eye-bolt. For these 3mm blocks I am currently using 0.018 rope from Syren. (I have realized that I'm almost all out. I did buy a rope rocket, but I haven't tackled that project yet.) Next I secure the rope around the block in tweezers. Now I thread a needle onto one side of the rope and pierce it between the strands of the other rope as close as I can to the corner of the block and pull it through. I then switch the needle to the other rope and do the same procedure in the opposite direction and pull the lines tight to the block. Now I smear white glue on the rope and let it dry. Finally trim the line and there is your block. I imagine there are many other ways (and probably better ways) but so far I'm pretty happy with this method and hopefully it helps.
- 436 replies
-
- 9
-
-
- vanguard models
- alert
- (and 1 more)
-
These really are beautiful builds; I wonder how well they hold up in brackish water? Haha this made me laugh out loud because I think tugboats are really neat 😂, not beautiful like these though.
-
Oh no, this was in reference to uss frolick who tried to post some Flickr links but they got jumbled up in the copy/paste. I pulled the links out so you could see the images from Flickr but I couldn’t get the link to the Flickr user page who the links came from to work.
-
I think I fixed your links: https://live.staticflickr.com/65535/50440982983_554872ab82_b.jpg https://live.staticflickr.com/65535/50440987603_bfb3e7ffa6_k.jpg https://live.staticflickr.com/65535/50441685021_ea2c812f62_h.jpg EDIT: Unfortunately I can't seem to get the link for the original poster's page up for their credit though.
-
Looking through the planks I think that I still see all the laser char on the bulkheads. Did you fair them? The planks also look like they could have been tapered more at the bow.
- 16 replies
-
- 1
-
-
- Golden Hind
- Constructo
- (and 1 more)
-
Thank you! I used Humbrol #25 Blue, Humbrol #24 Trainer Yellow, Humbrol #60 Scarlet. The manual also specified a Humbrol Satin Black (#85) which I used (with the intent that a matte clear spray would be used) but I think I would try a matte black next time. Ha! Mine might be worse I'm surprised that I haven't broken anything yet. I think it is quite smart to pull them off for now (they are loose enough to spin) but I wonder if I really need to glue them down later. Of course if the model is in a case no one is going to be able to move them so I think I'm talking myself into gluing them down at the end.
- 436 replies
-
- 1
-
-
- vanguard models
- alert
- (and 1 more)
-
Things are coming along very nicely; I have one comment that I hate to point out, but the swivel guns look like they are upside down (or at least the handles). I have an off brand quad hands that I have been using a lot as well, very nice addition.
- 164 replies
-
- 3
-
-
- vanguard models
- flirt
- (and 1 more)
-
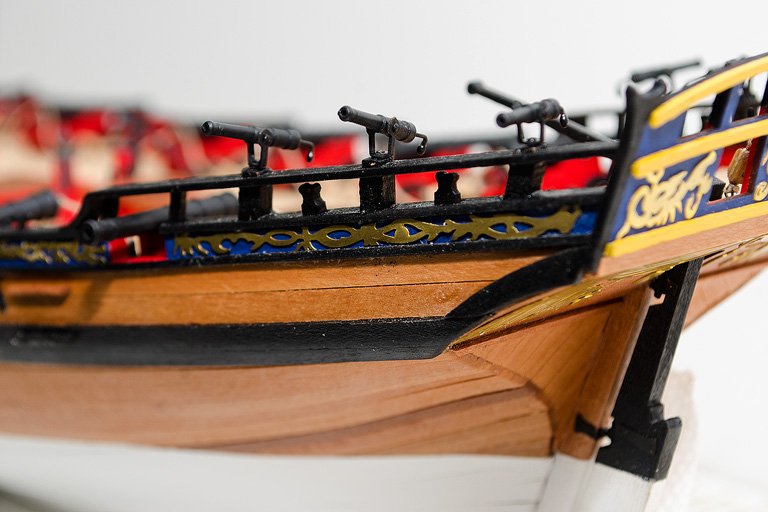
Swivel guns ready for action. There is a little pin that extends into the pillar that holds them in place but I haven't glued them down. I enjoy that they can rotate; but I'm going to kick myself if I lose one later so I'm torn between leaving them as is or gluing them in place; any thoughts?

- 436 replies
-
- 11
-
-
- vanguard models
- alert
- (and 1 more)
-
Very exciting! Ask them either a build log or in the appropriate category (https://modelshipworld.com/forum/12-shop-notes-ship-modeling-tips-techniques-and-research/) You may not get enough visibility if you ask them here.
-
Welcome aboard! I would say no; I think that looks like a great kit choice and there are a lot of logs on here to look at for help. Good luck and have fun!
-
This looks really cool! I’m really interested in how this turns out
-
This looks really awesome! Someday I think I’d like to do a battle station like this. Very nicely done!
-
Looking very good! One potential thought is that you could split the strands of the breeching line with a needle and slide it over the back to give it a false splice (I saw the style on several logs and adopted it for my current build).
