HOLIDAY DONATION DRIVE - SUPPORT MSW - DO YOUR PART TO KEEP THIS GREAT FORUM GOING! (Only 75 donations so far out of 49,000 members - C'mon guys!)
×

Rob S
-
Posts
339 -
Joined
-
Last visited
Content Type
Profiles
Forums
Gallery
Events
Everything posted by Rob S
-
 Thank you Henrik. My grate pieces look the same but are very brittle, which makes it difficult to shape them after assembly and glue.
 -
Thanks for the insight David! I’ll take a look.
-
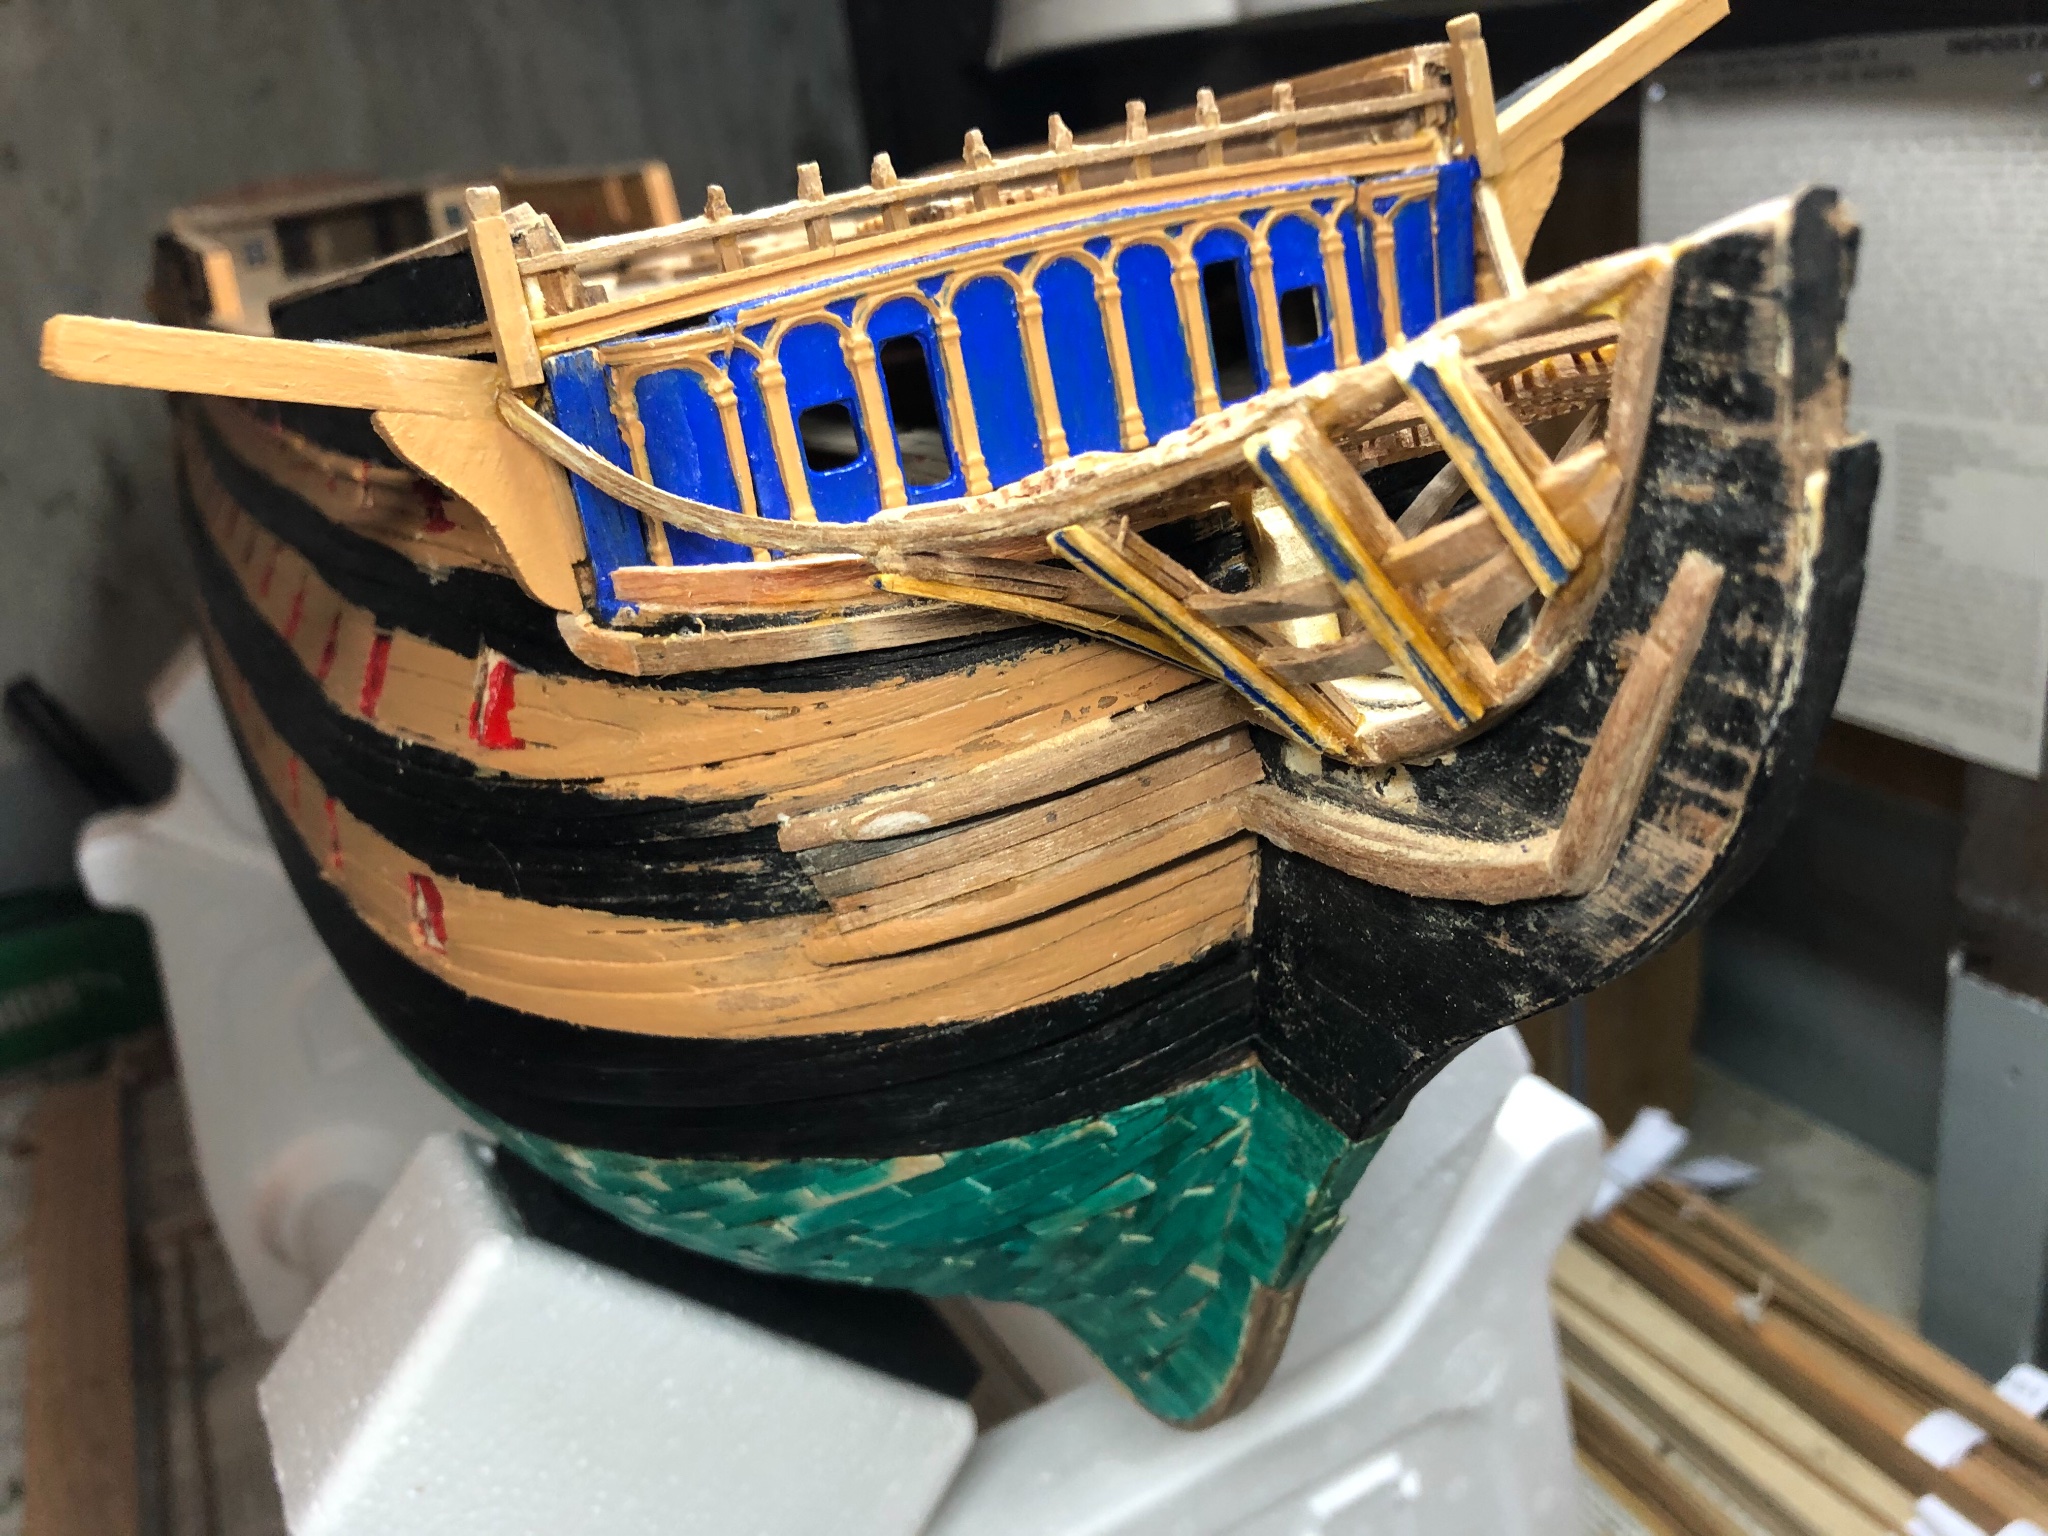
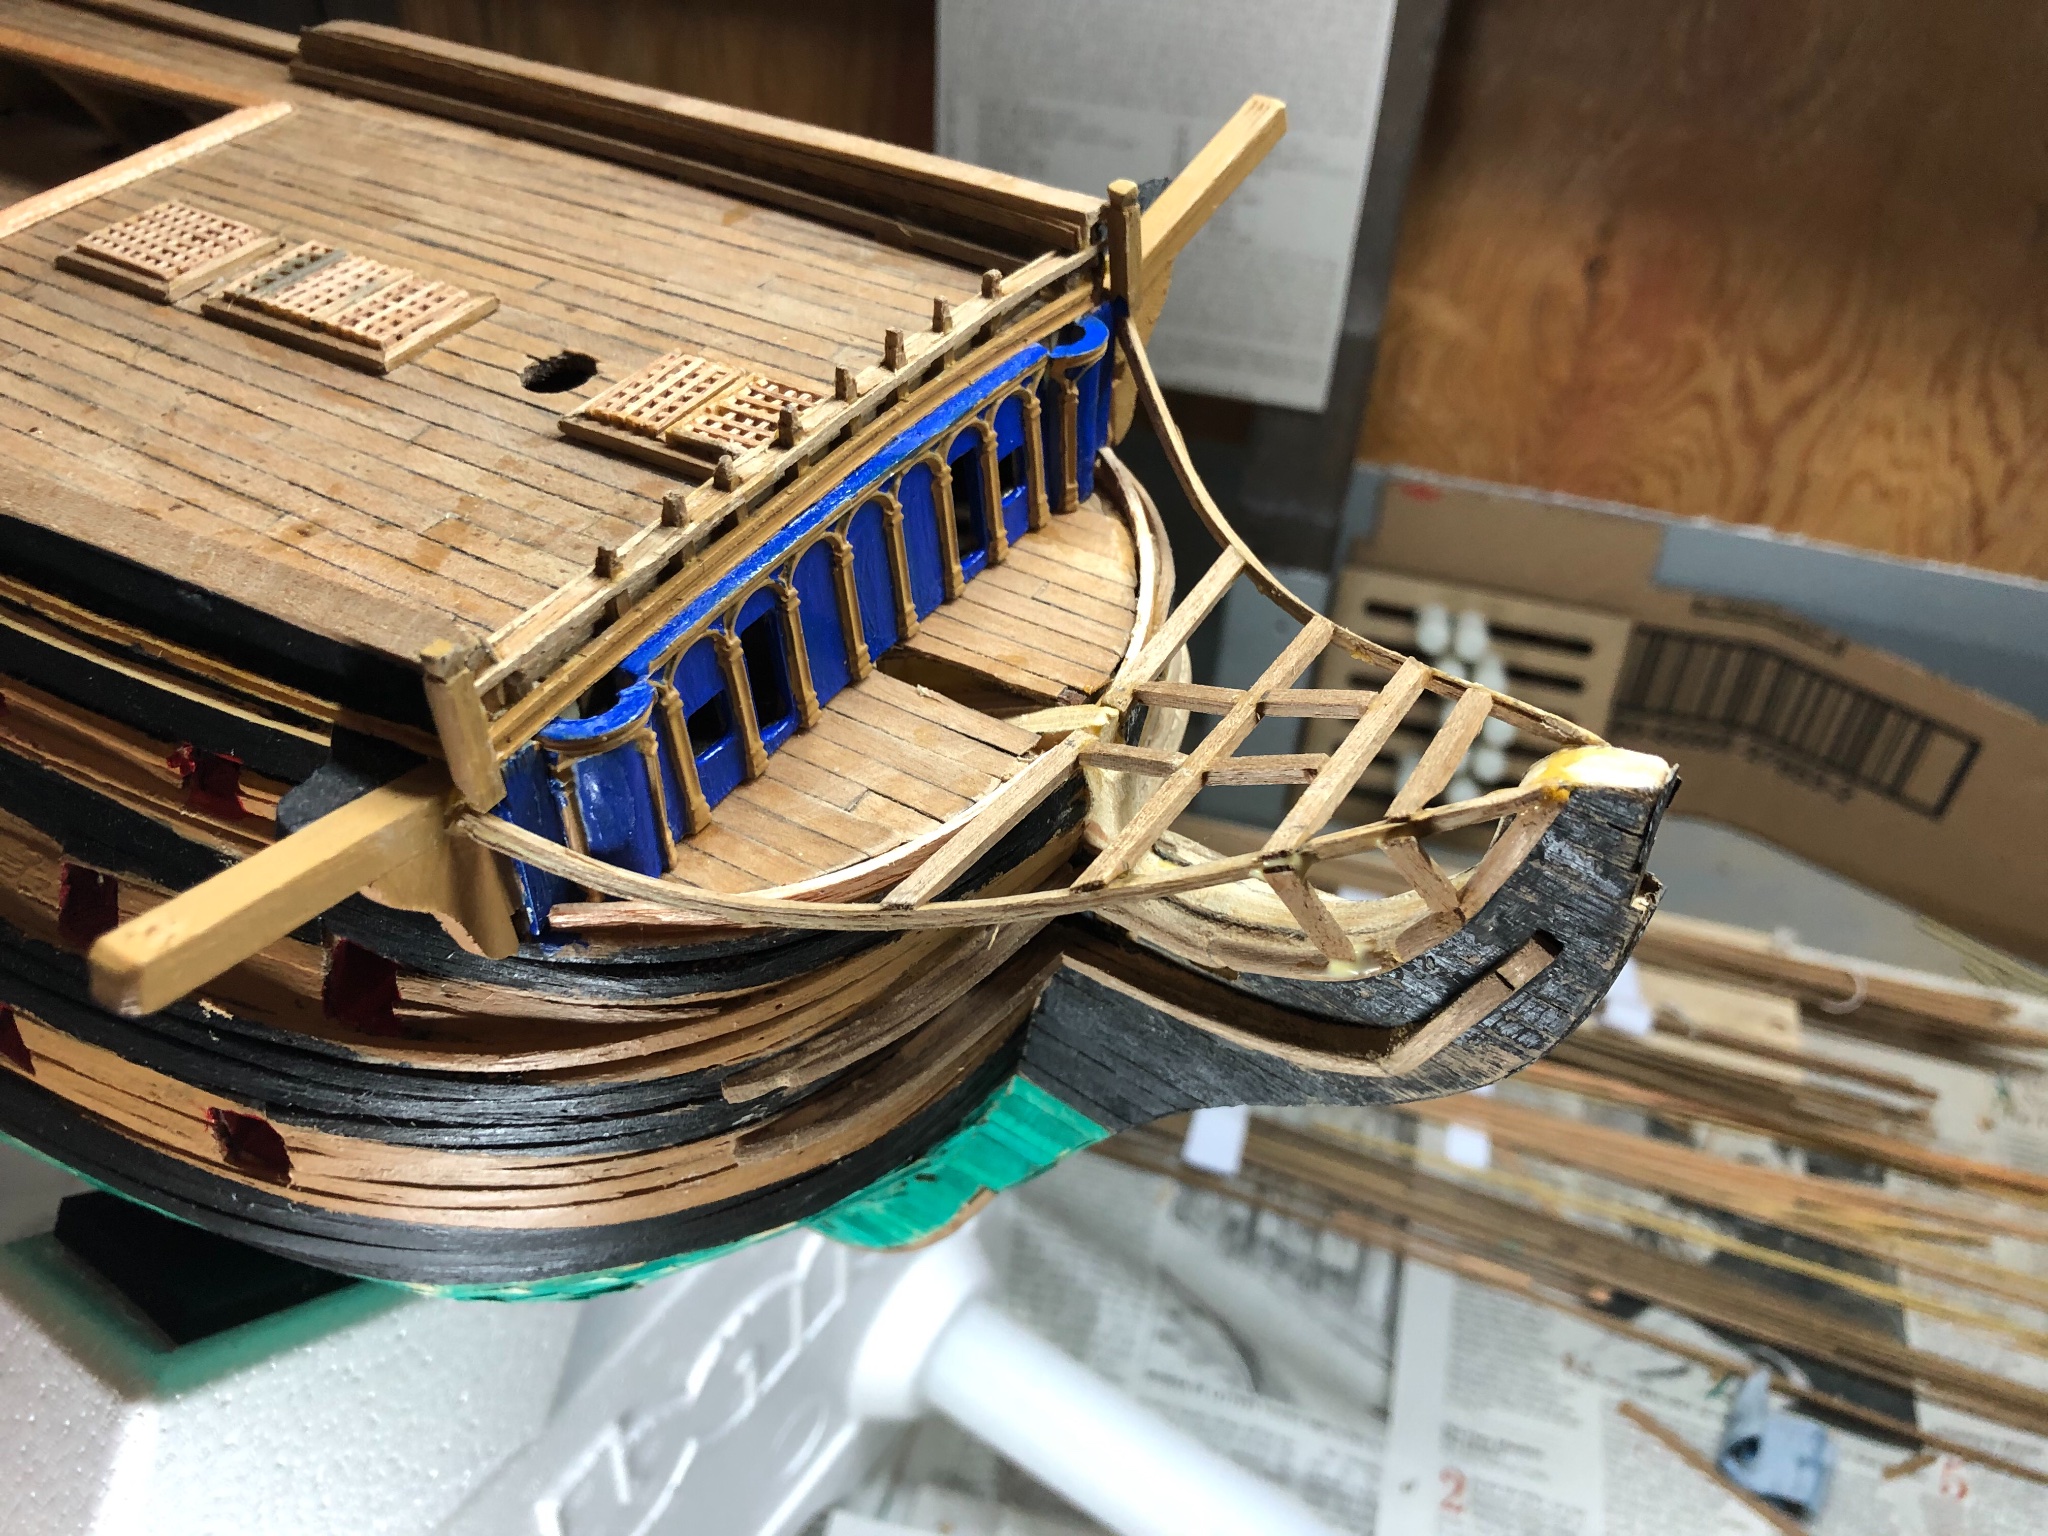
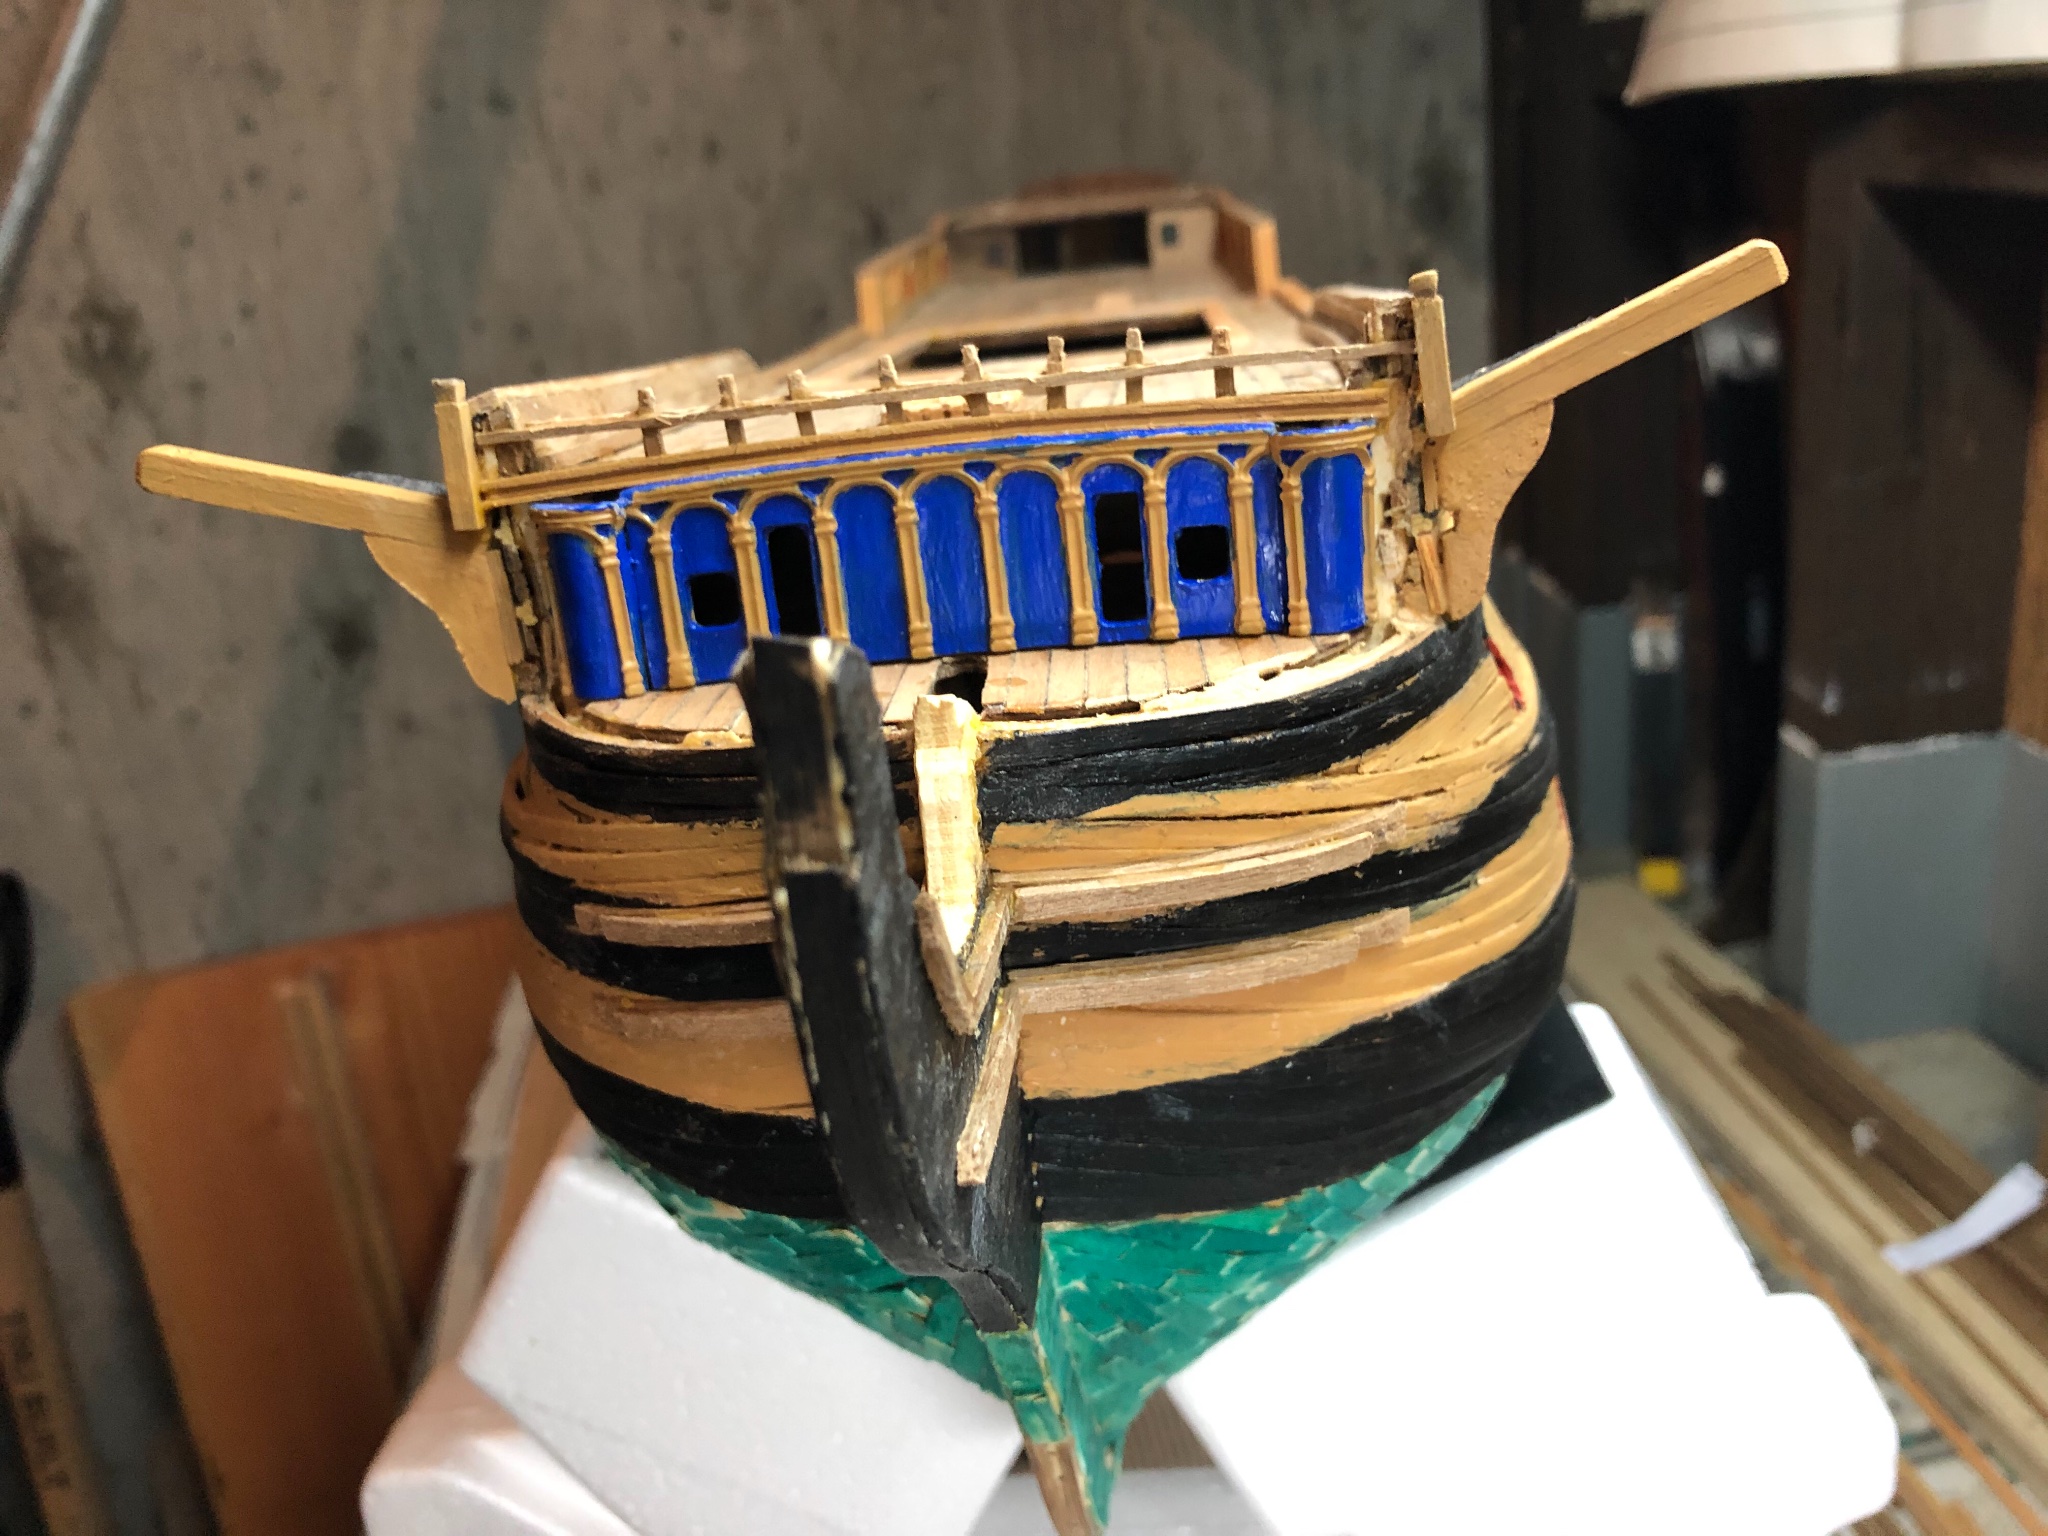
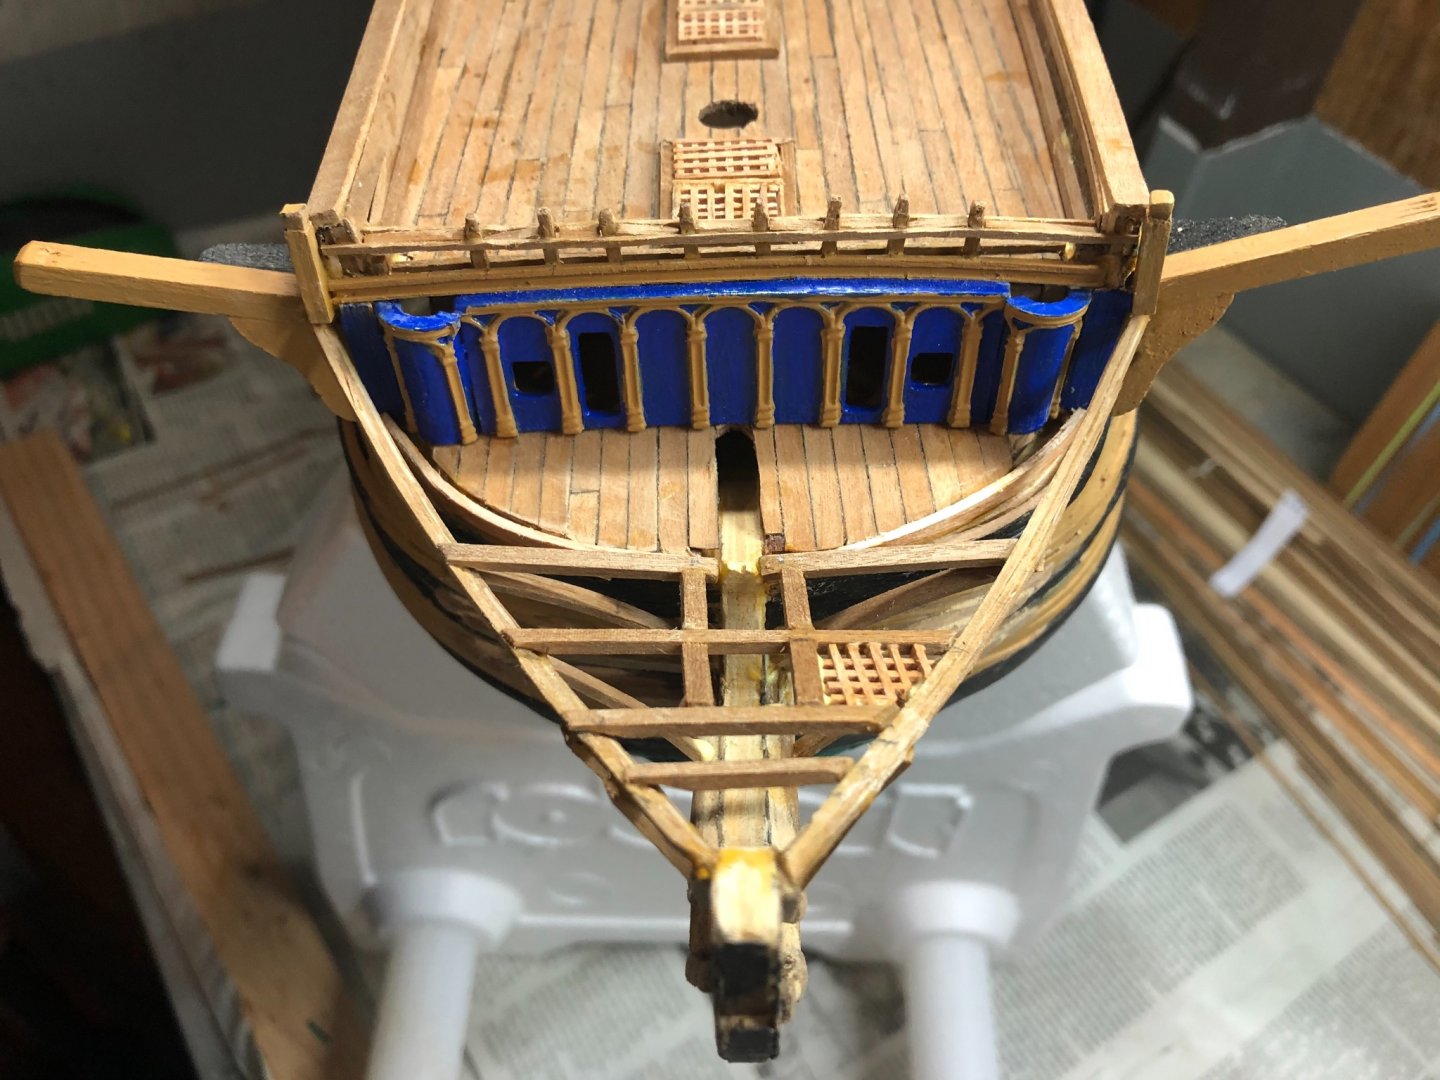
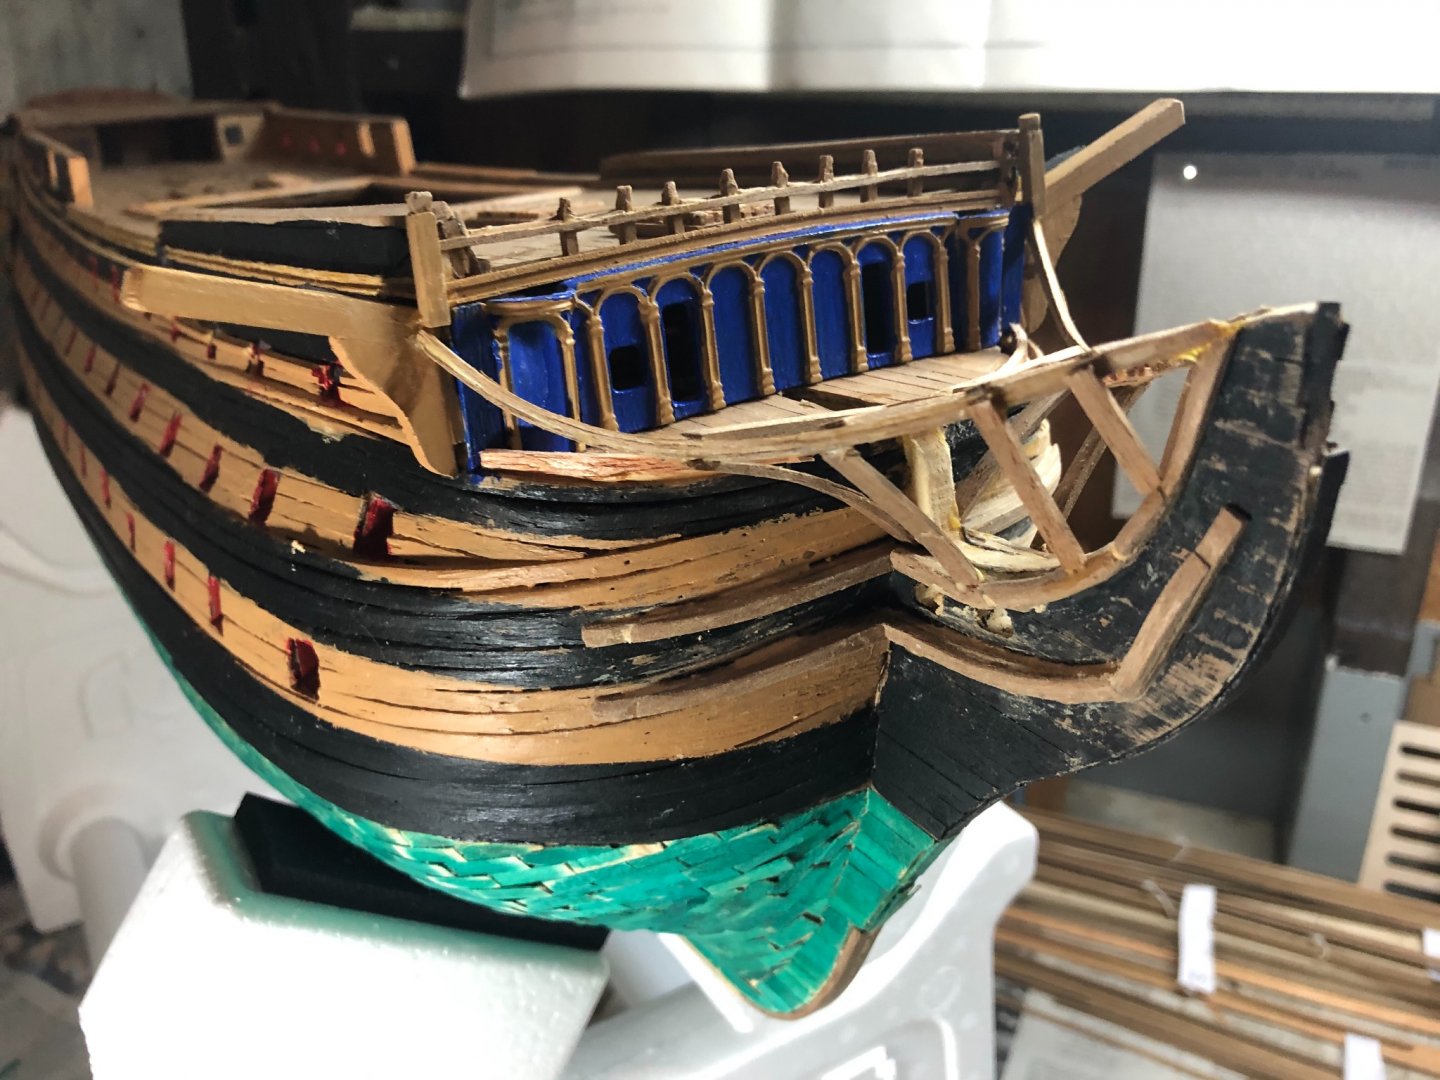
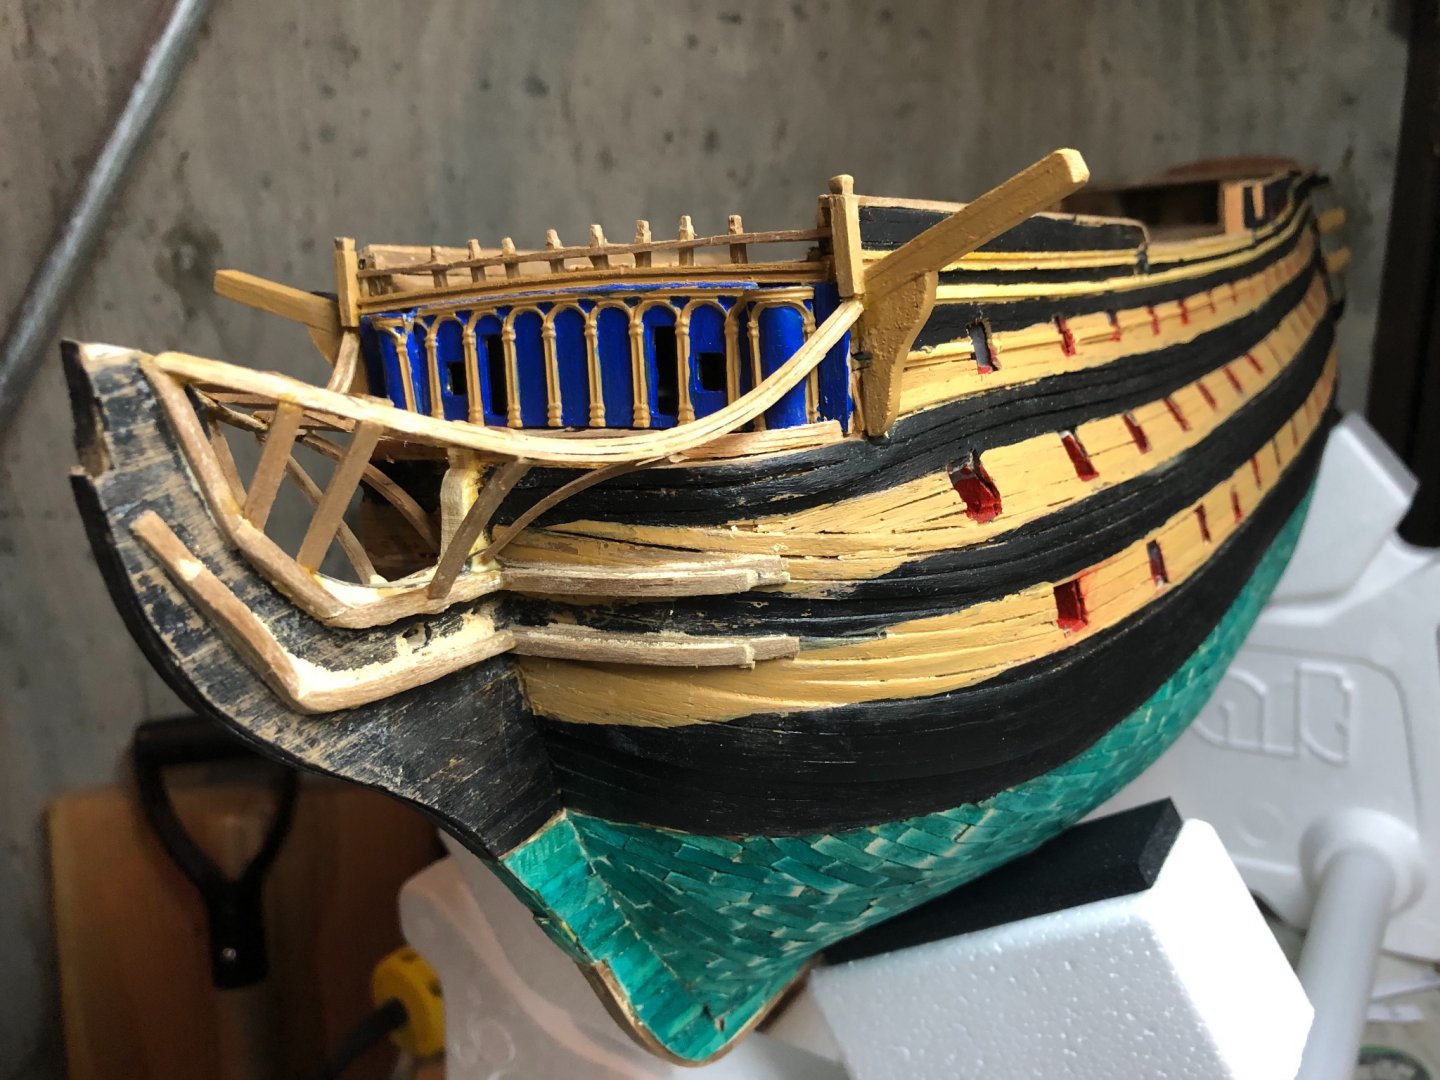
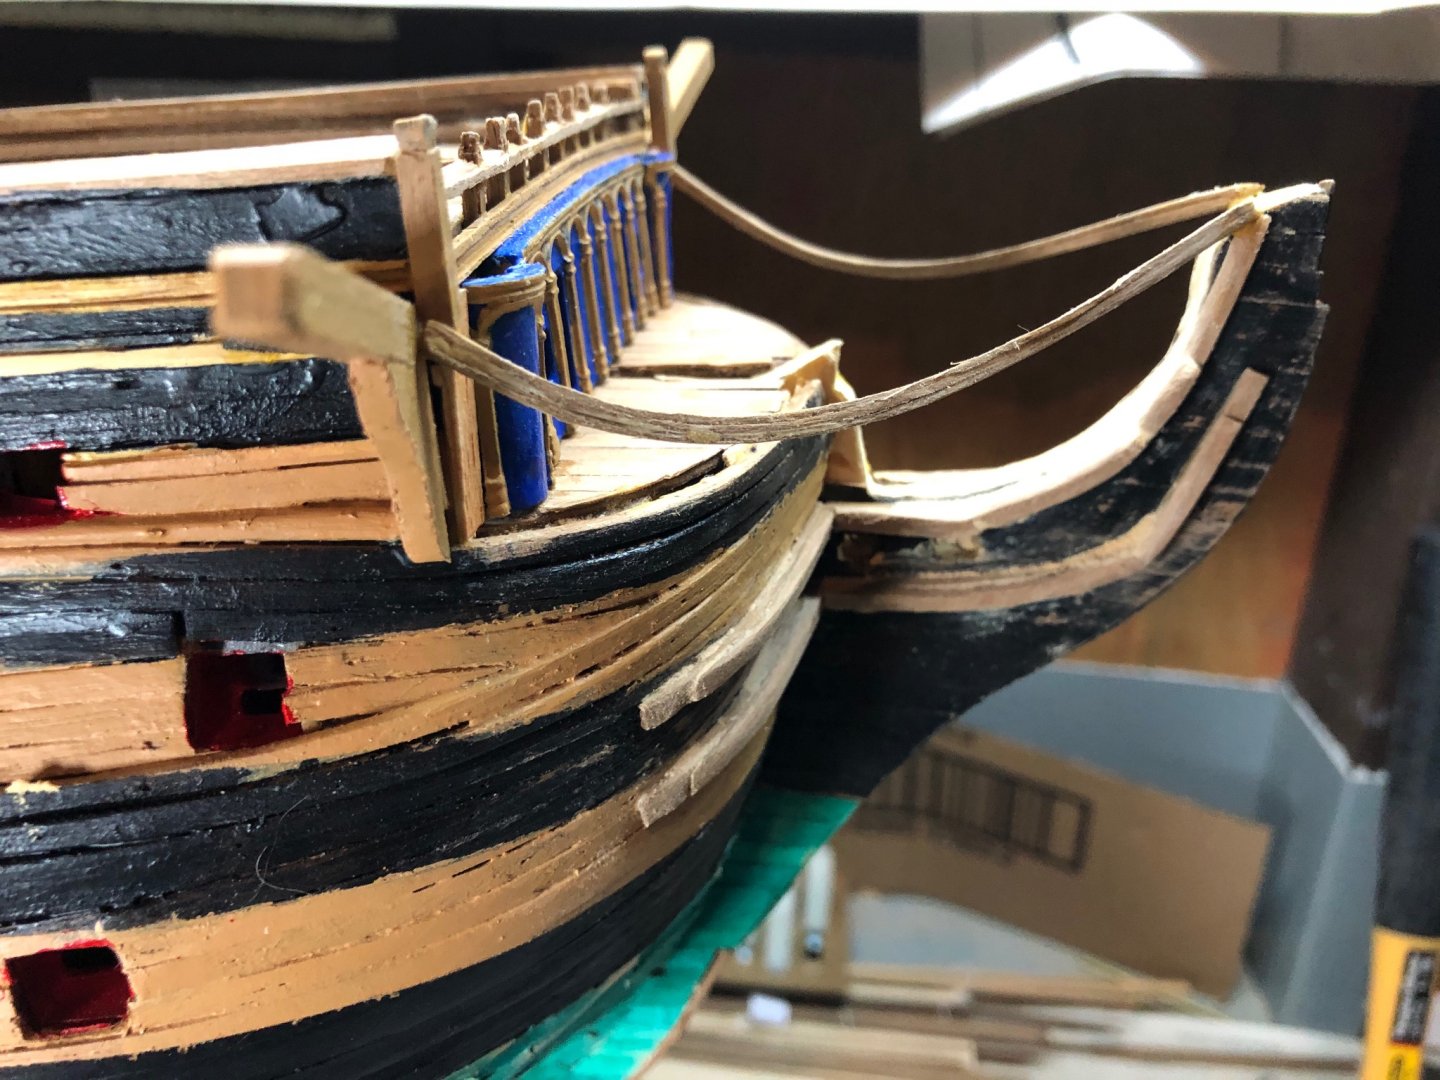
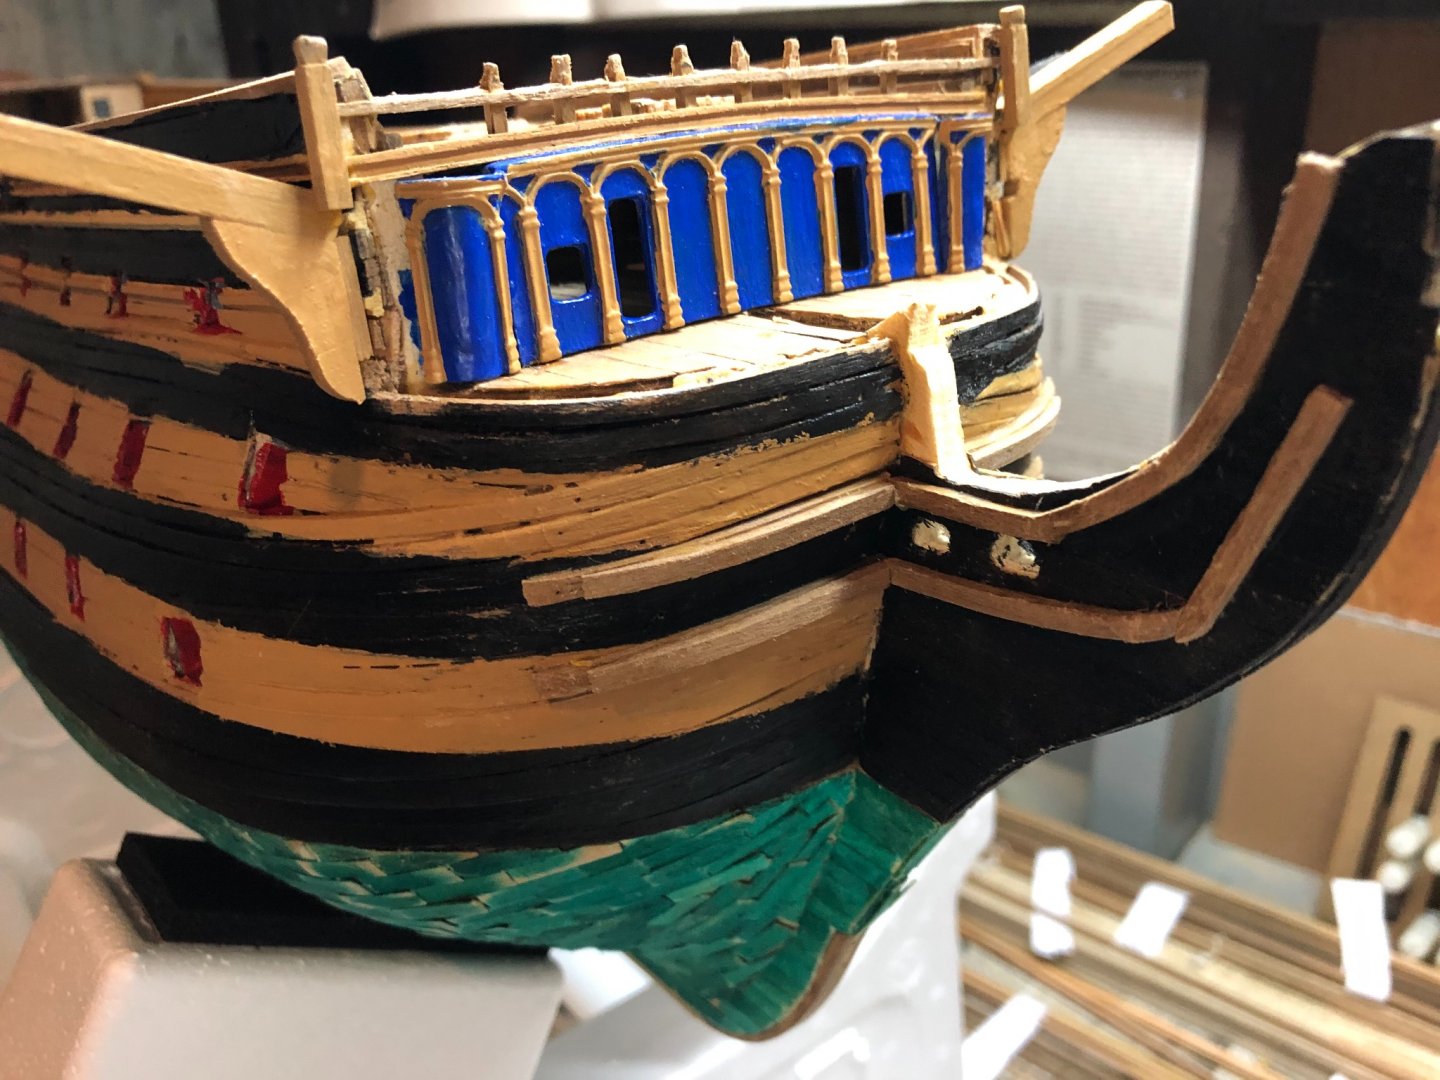
Starboard side ‘roughly’ completed. Need to correct the forward rails extension over the main rail.

-
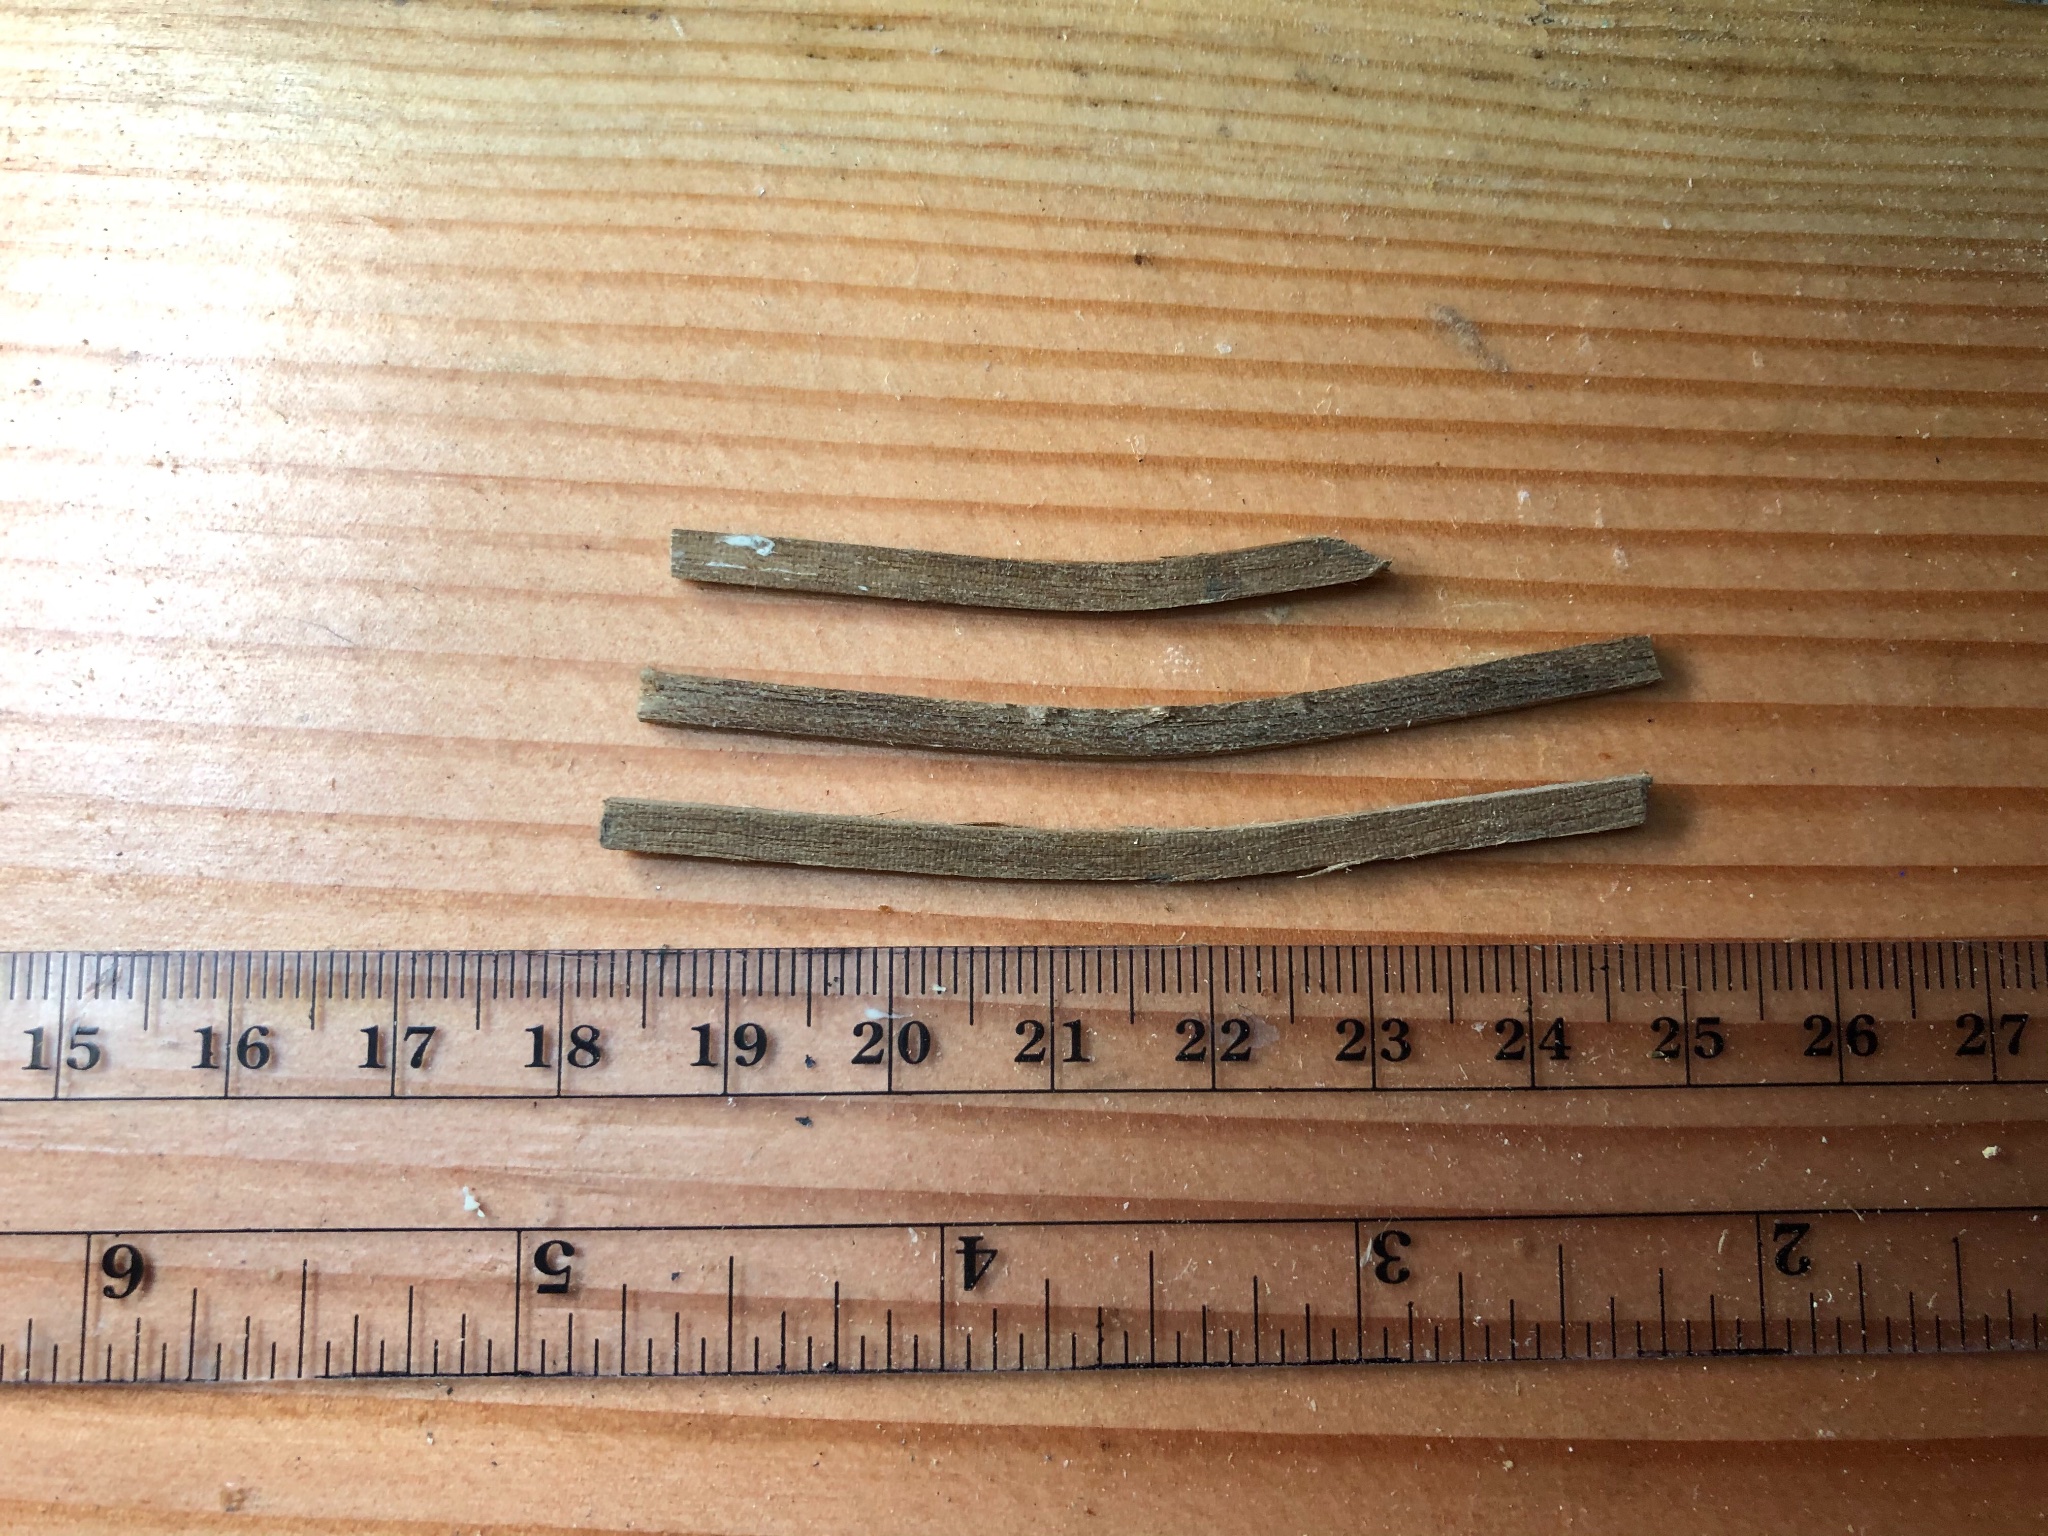
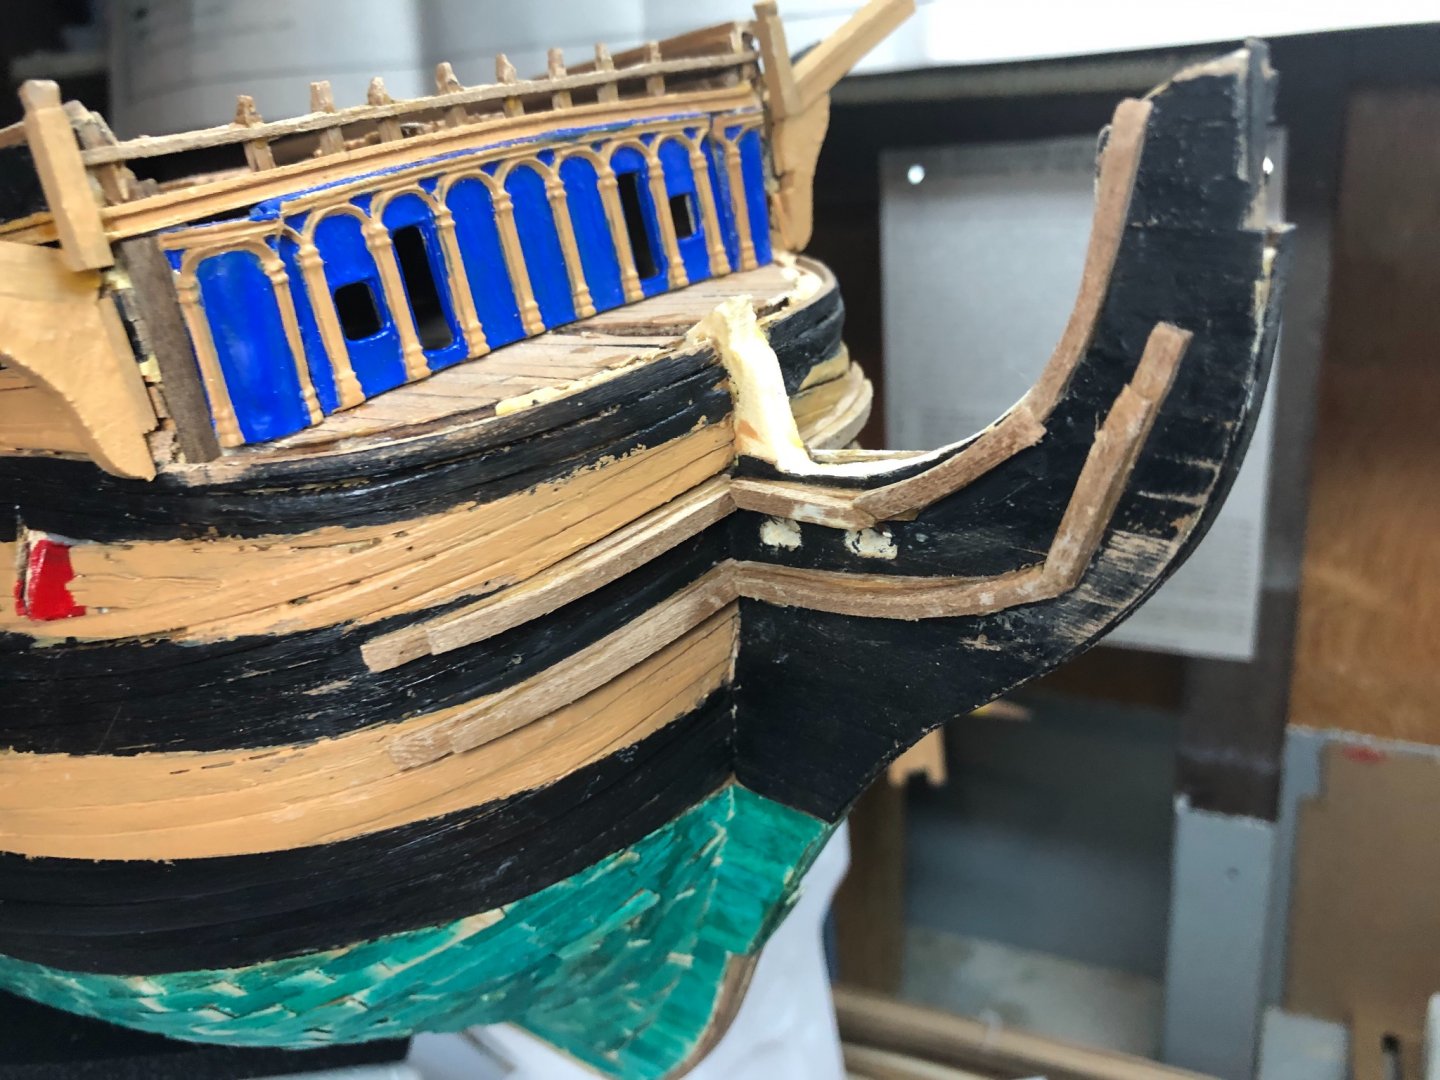
Henrik - I just noticed the nice bend in your bow cheek in the picture above. It appears to be shaped laterally. Did you shape the cheeks? If so, what is your secret? Every time I attempt to shape my walnut laths (2mm wide) laterally, the wood cracks even after prolonged immersion in water. I also see your grates look pristine. Any tips you want to share about assembling/glueing/tailoring them? My grates are brittle and don’t stay together very well. Thanks! BTW, I just came across your Hood build; very nice work! Rob S
-
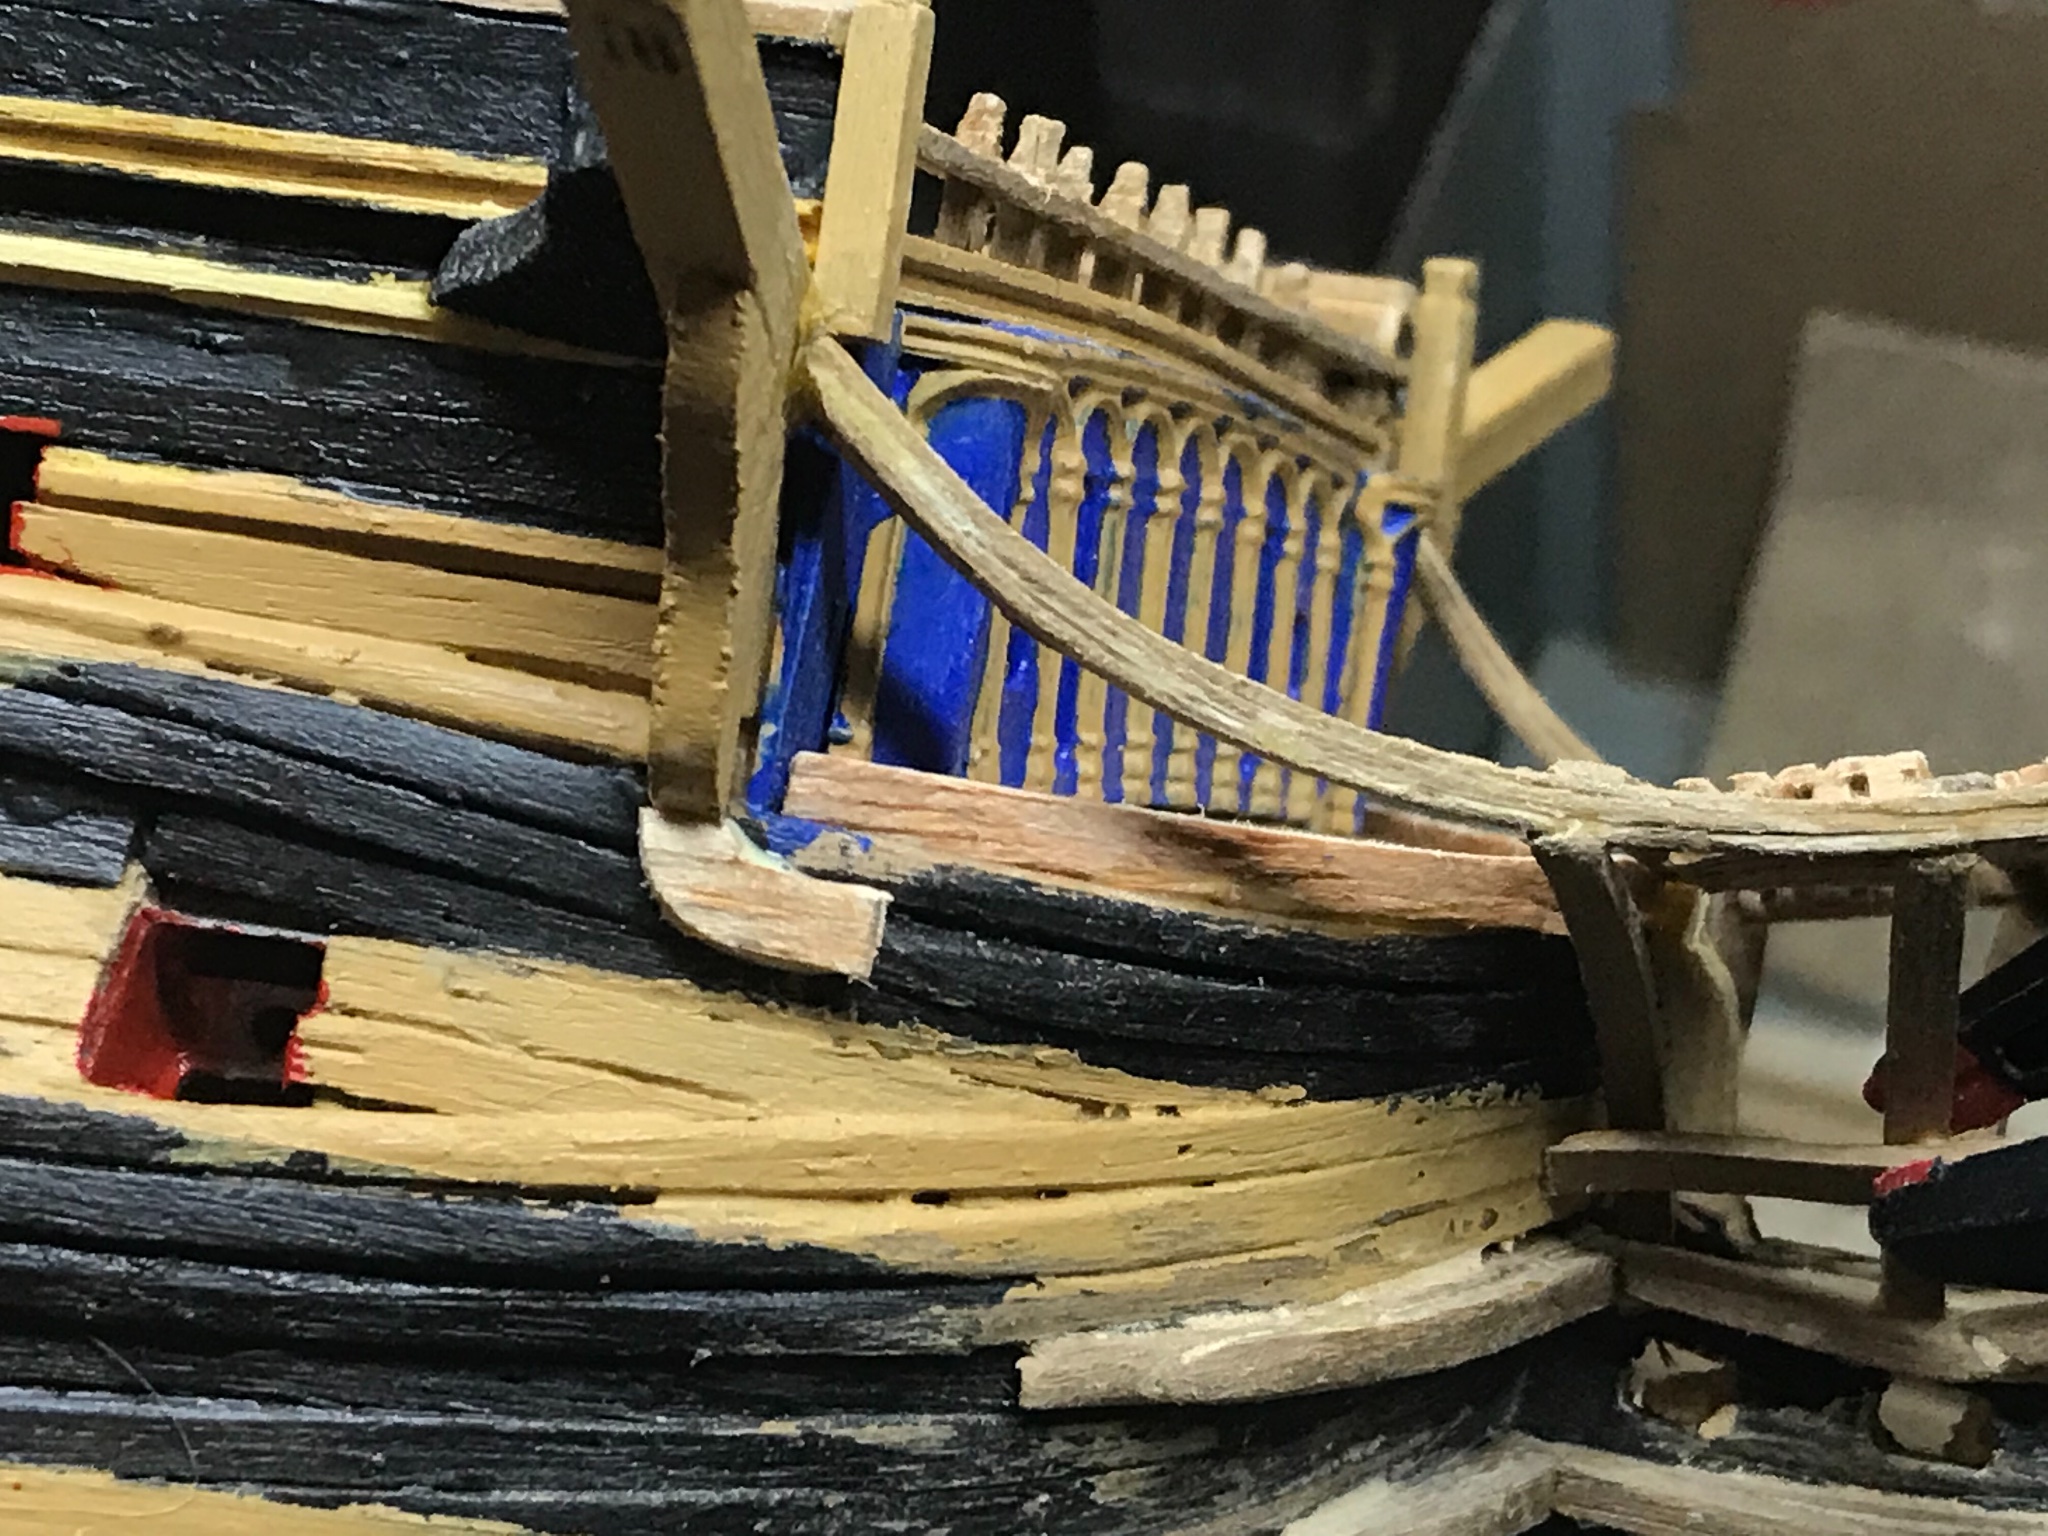
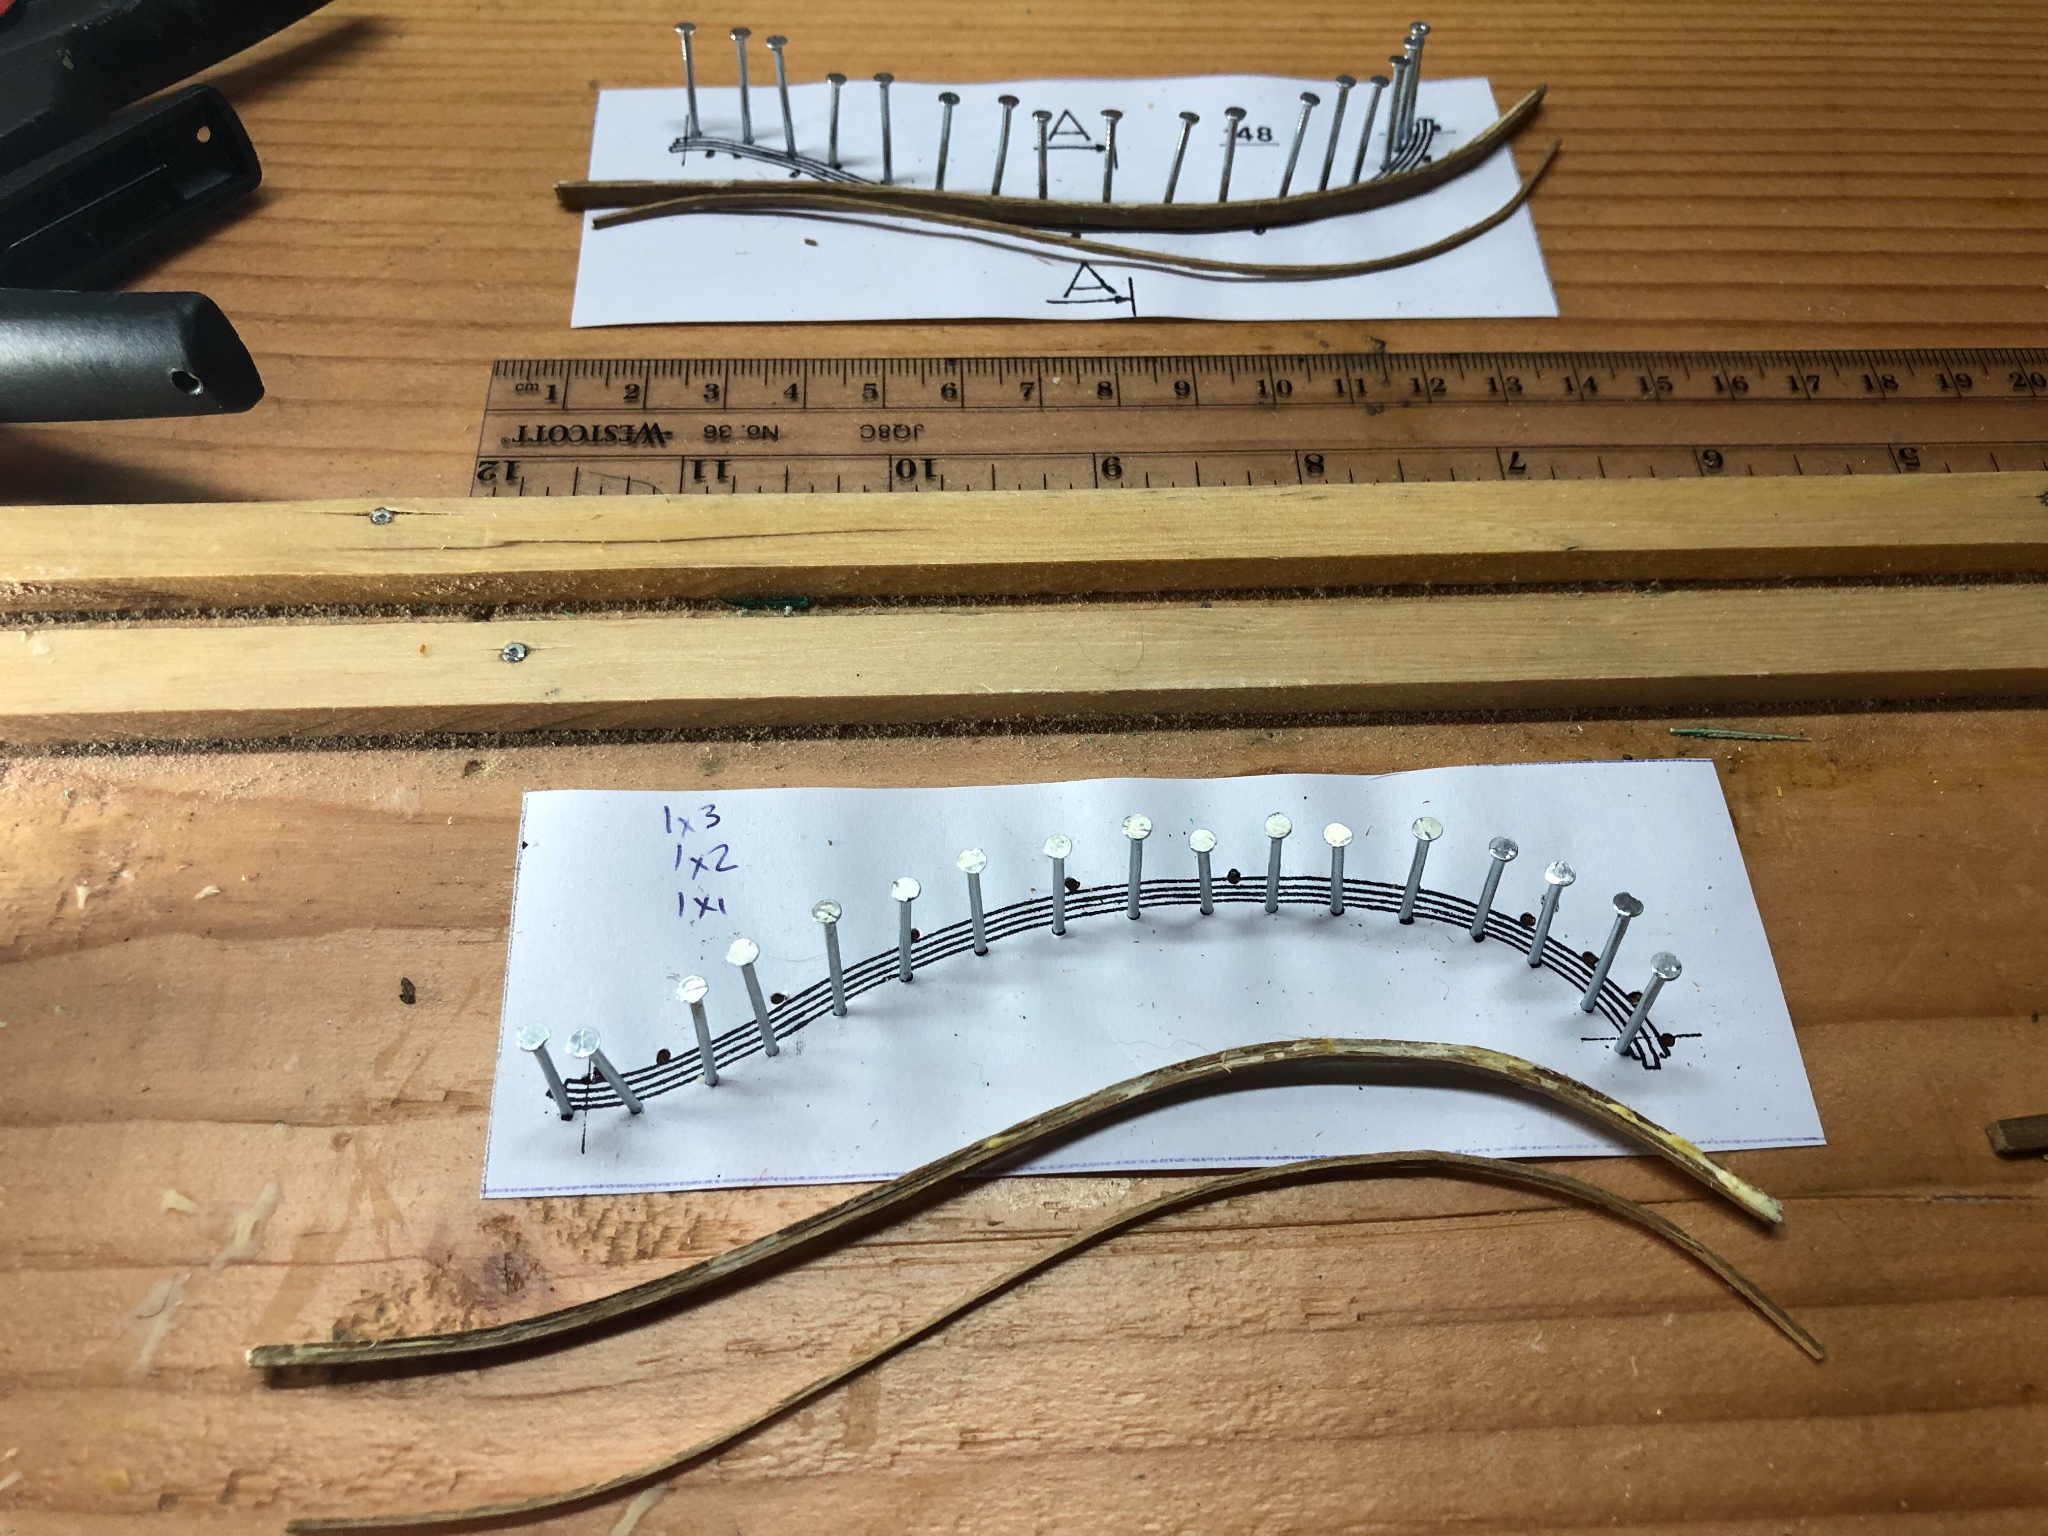
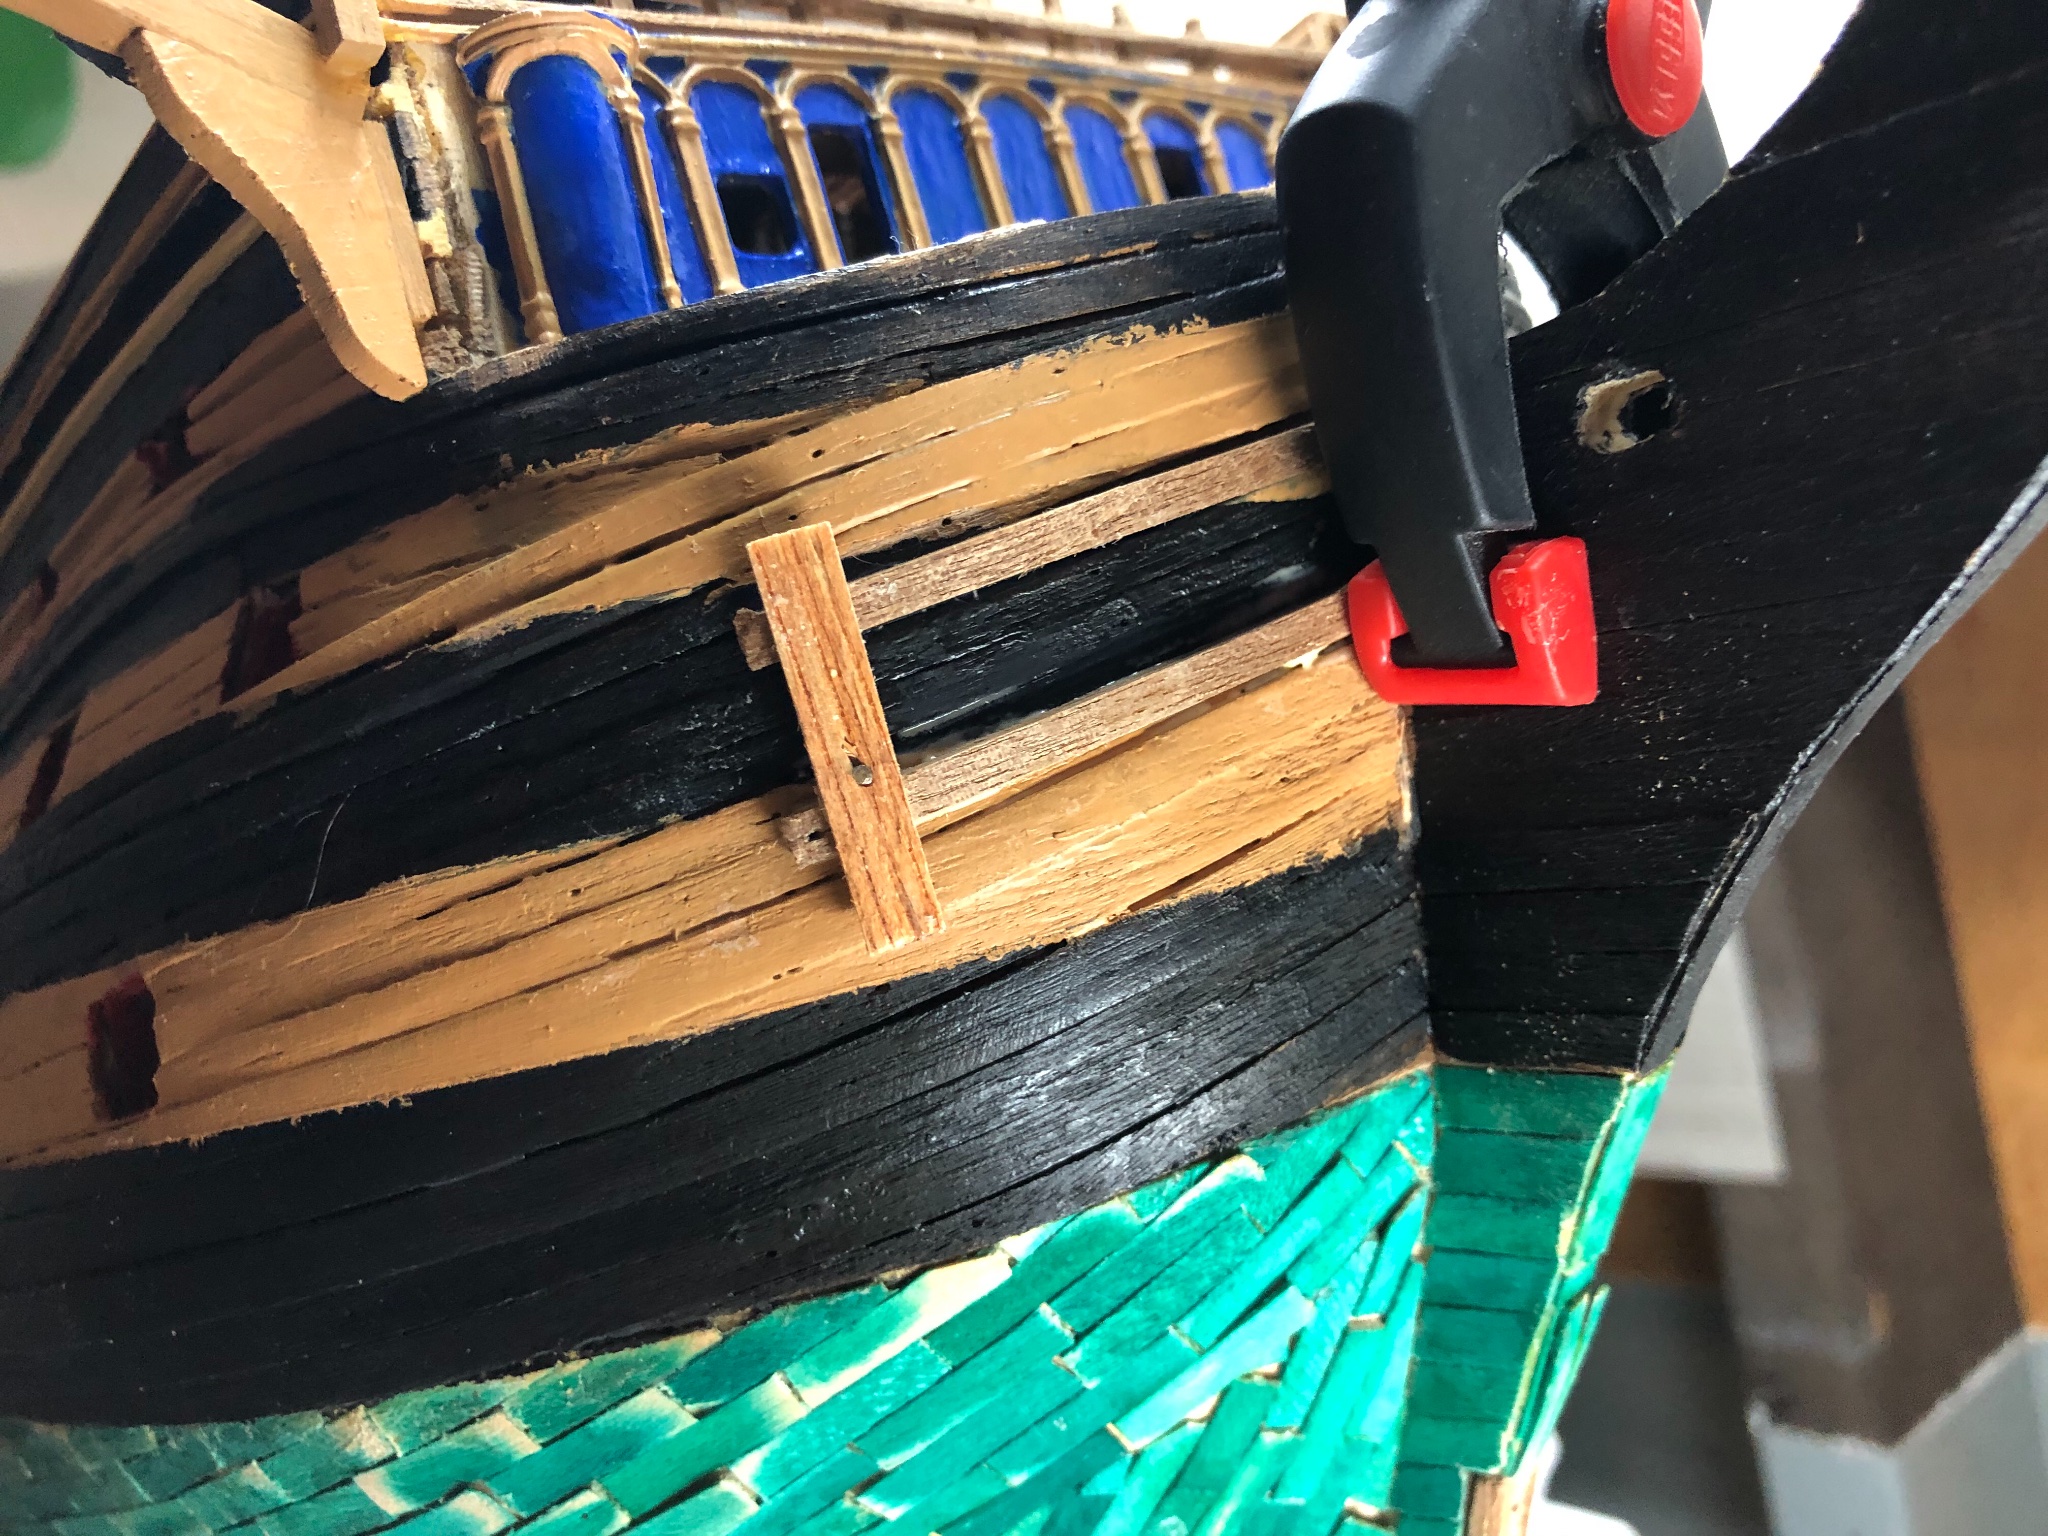
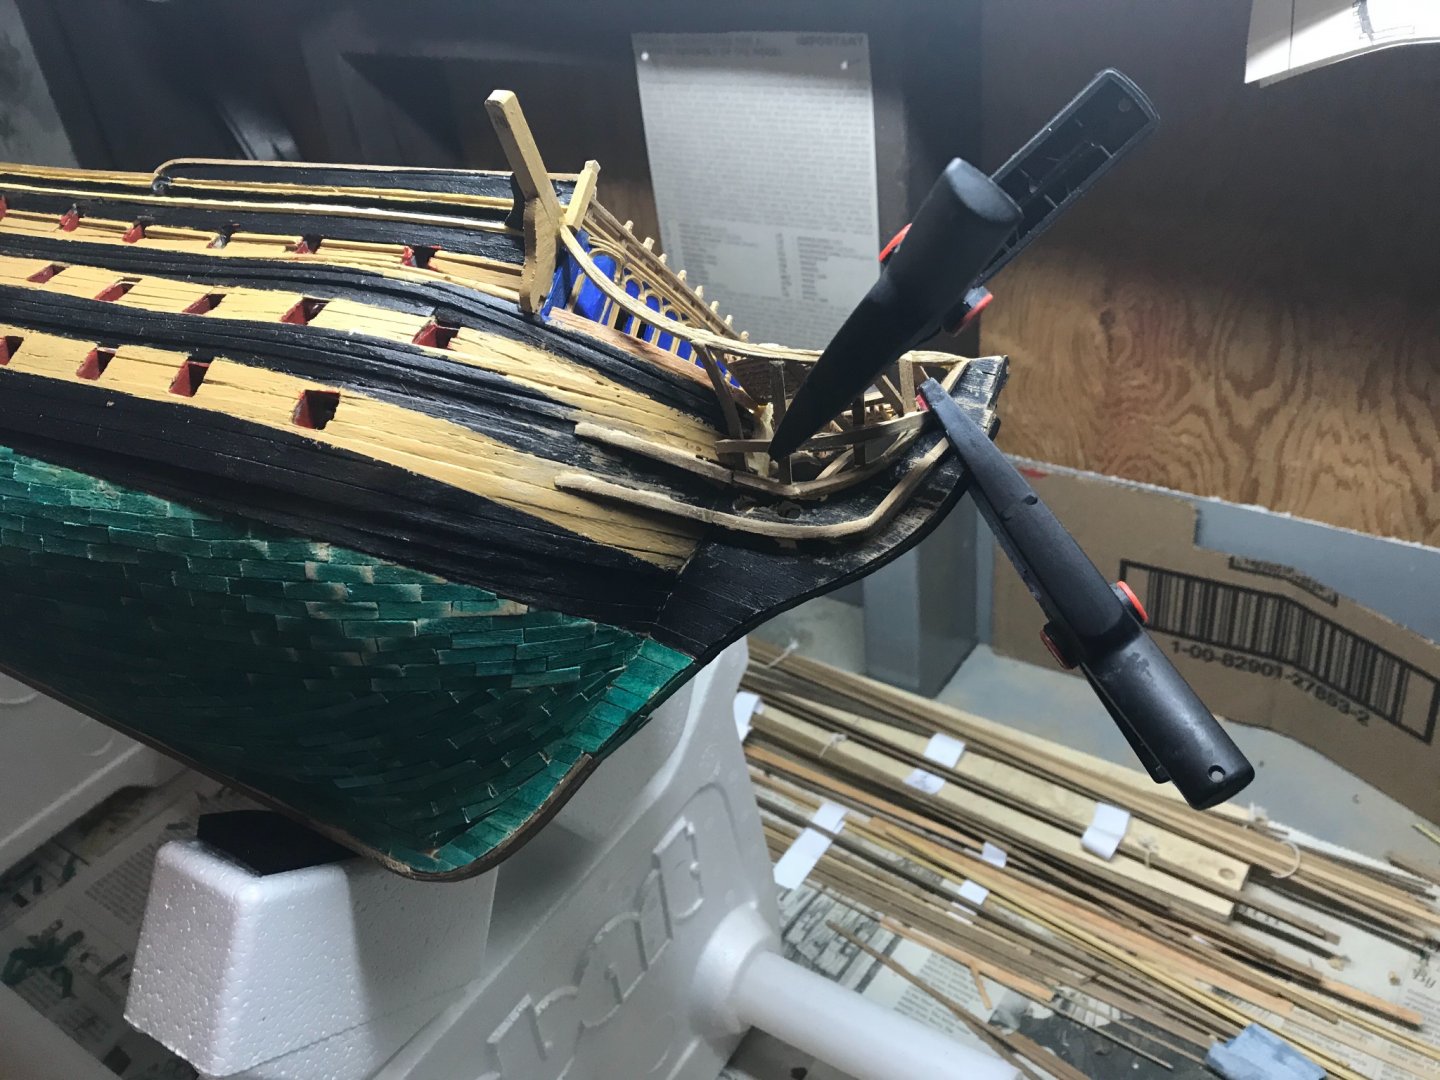
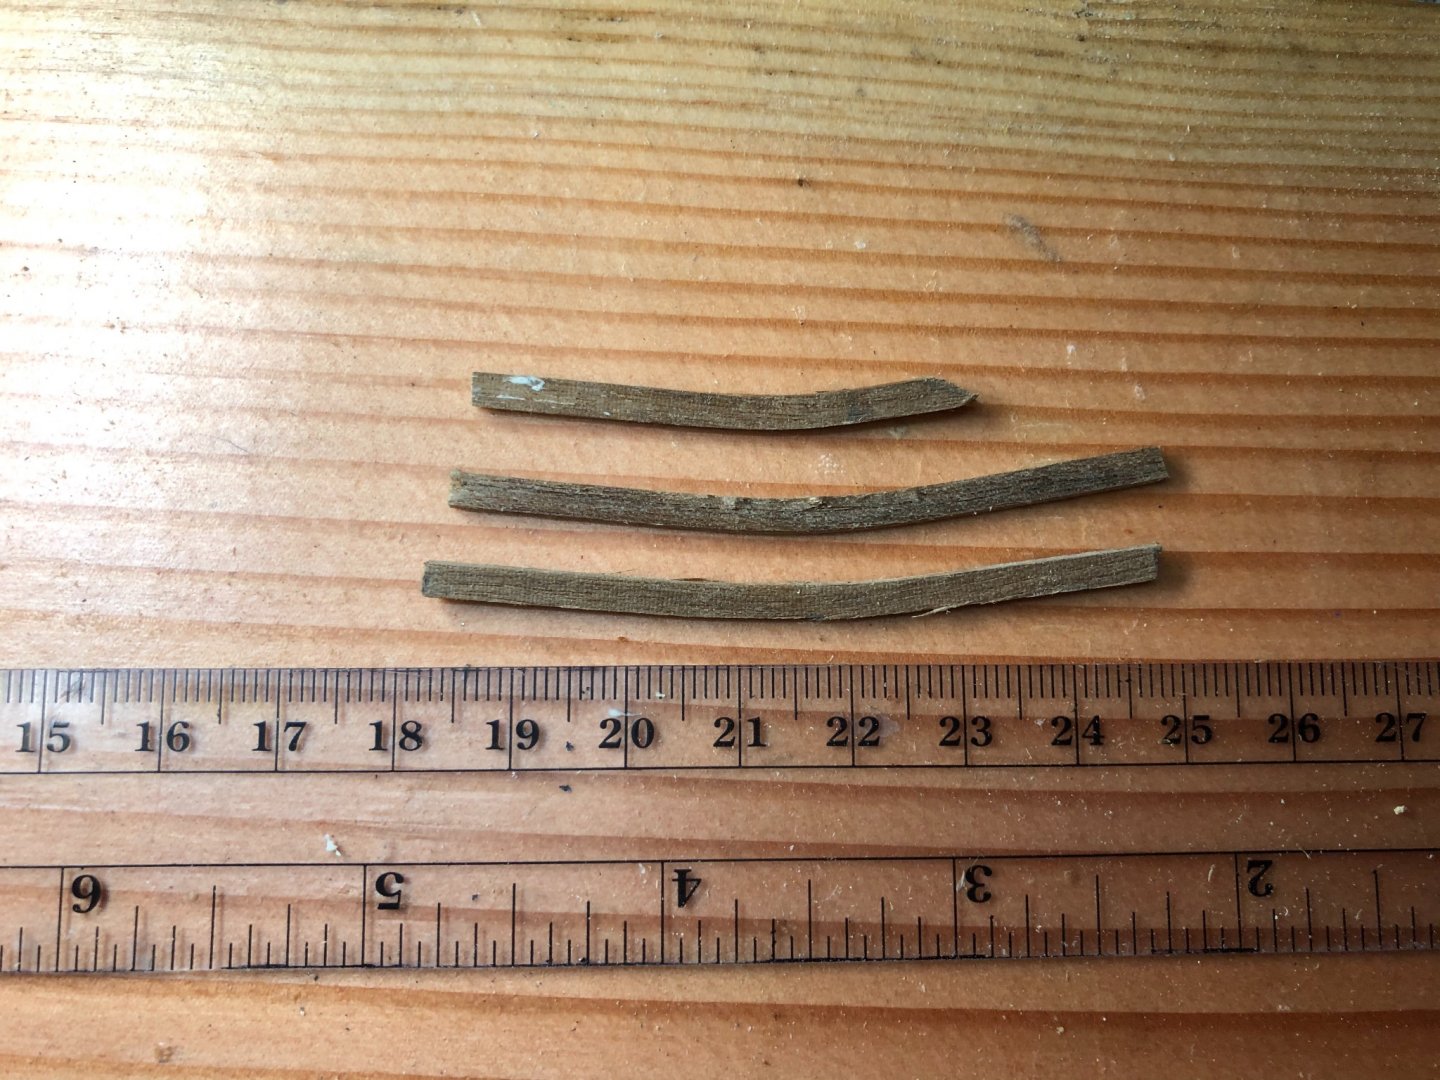
Continuing to assemble the bow finishing elements. Still can’t adequately bend the 1.5mm x 3mm walnut laths laterally without breaking them. This is after a 2 day soak and using an electric plank bender (see earlier section in my log if interested). I’ve come up with a non elegant, but working solution using a 5mm plank and cutting it down to 3mm and manually adding the curve. The original, unbendable walnut lath on top, the replacement 5mm lime lath (left over planking) and cut out/modified piece. The resultant attached piece is shown (unpainted).

-
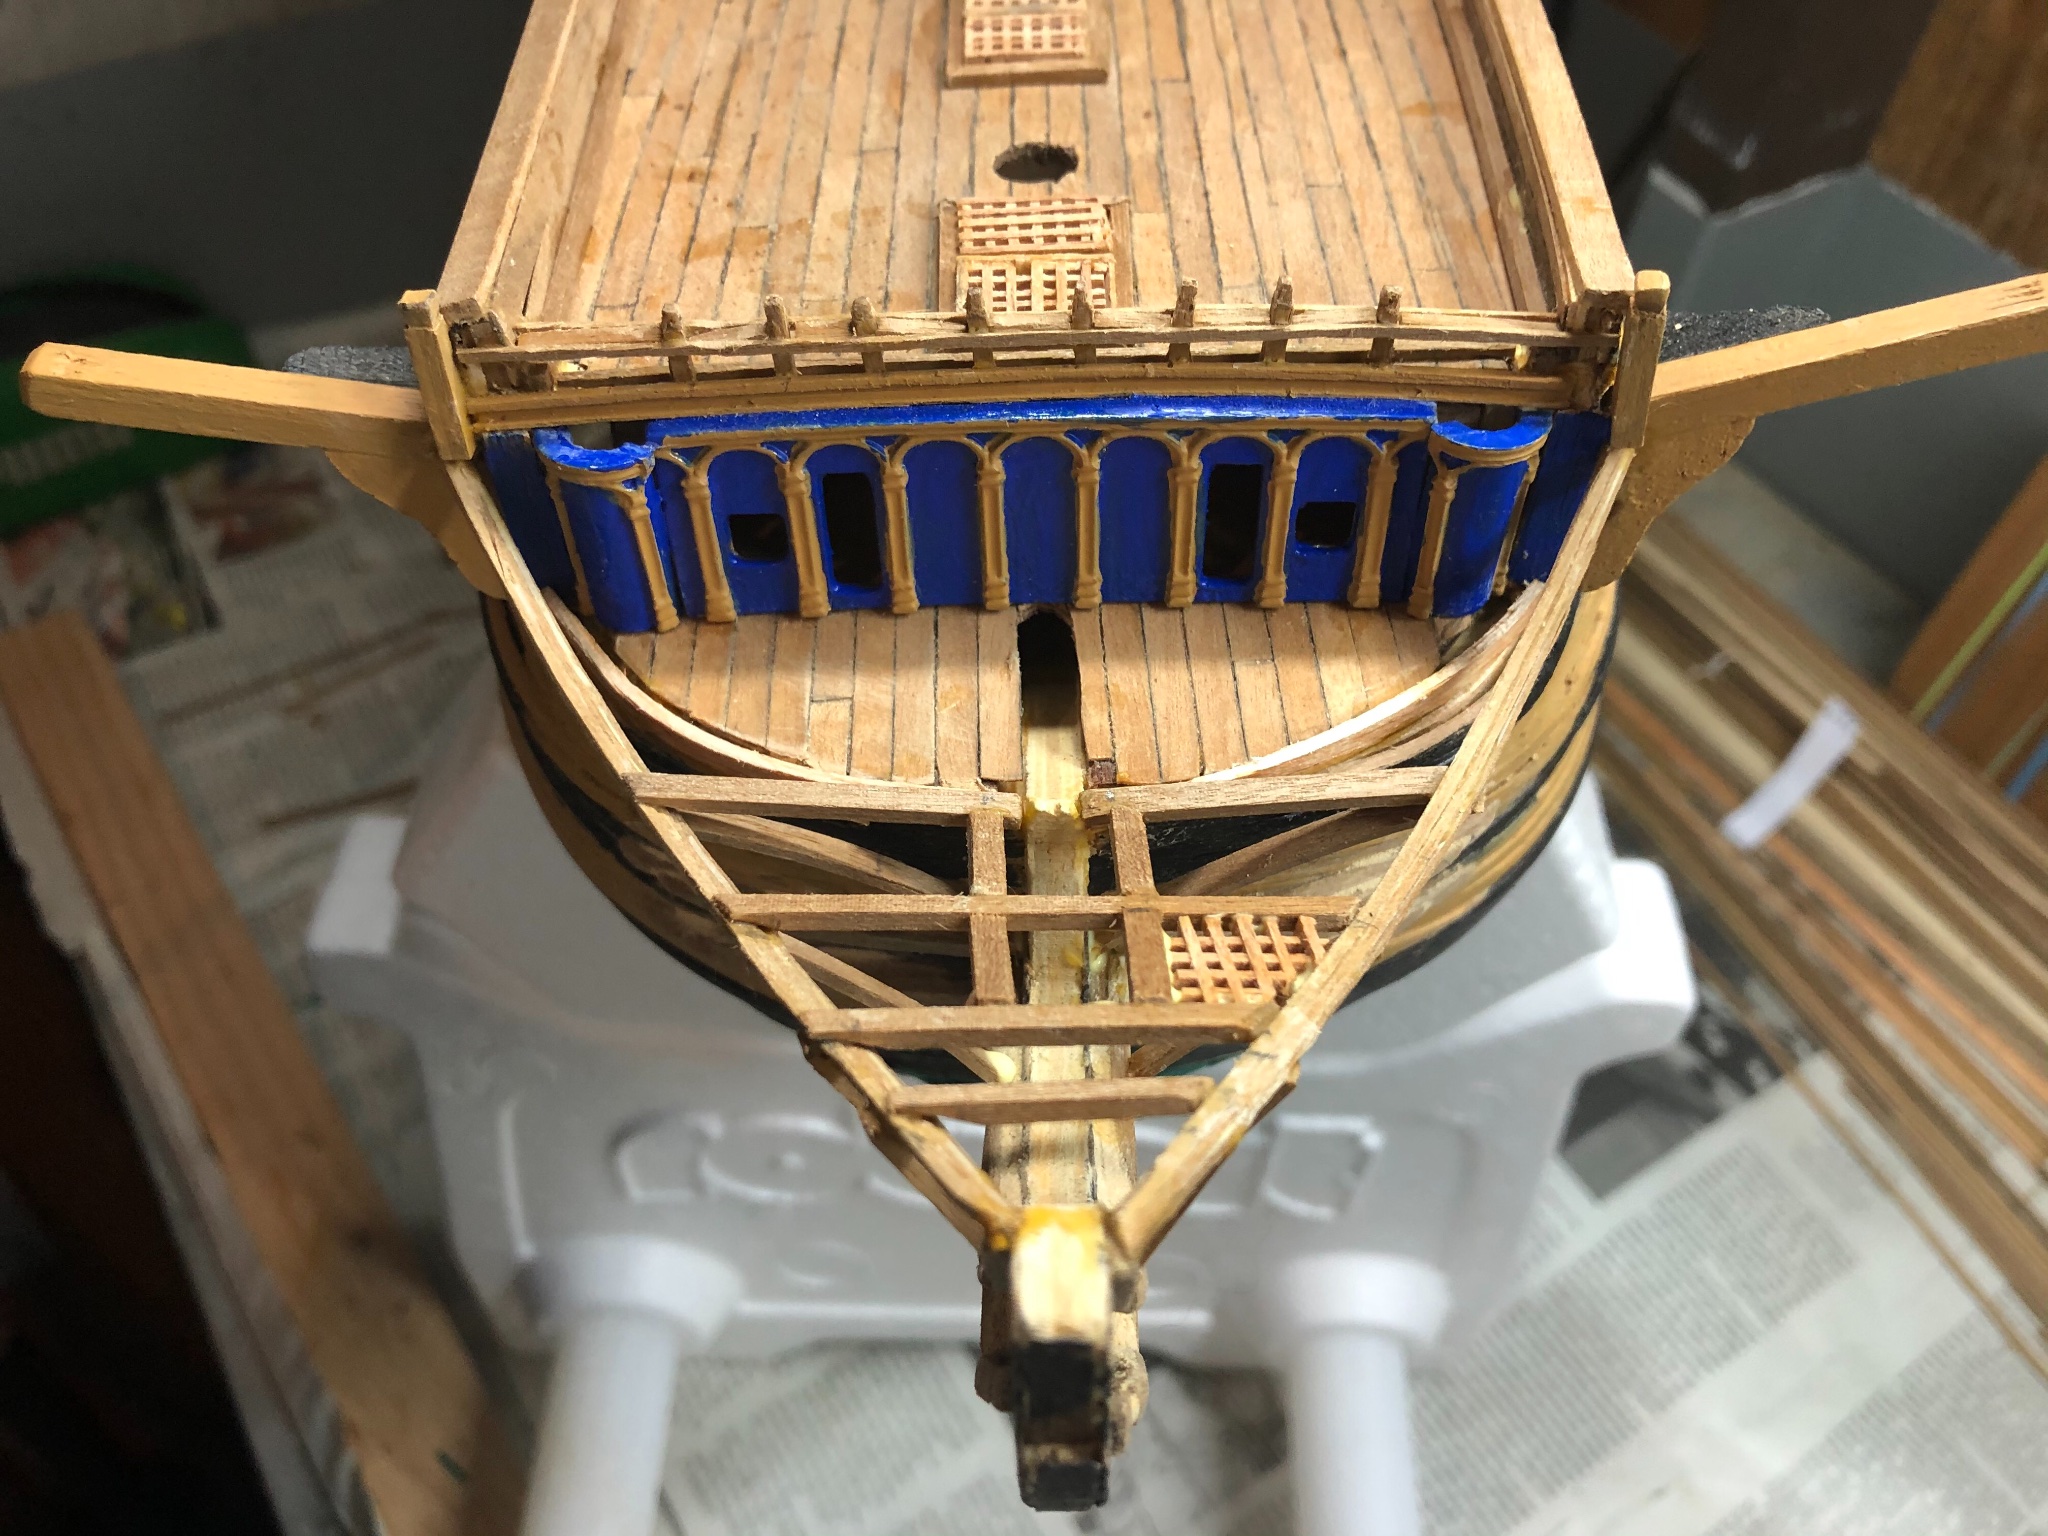
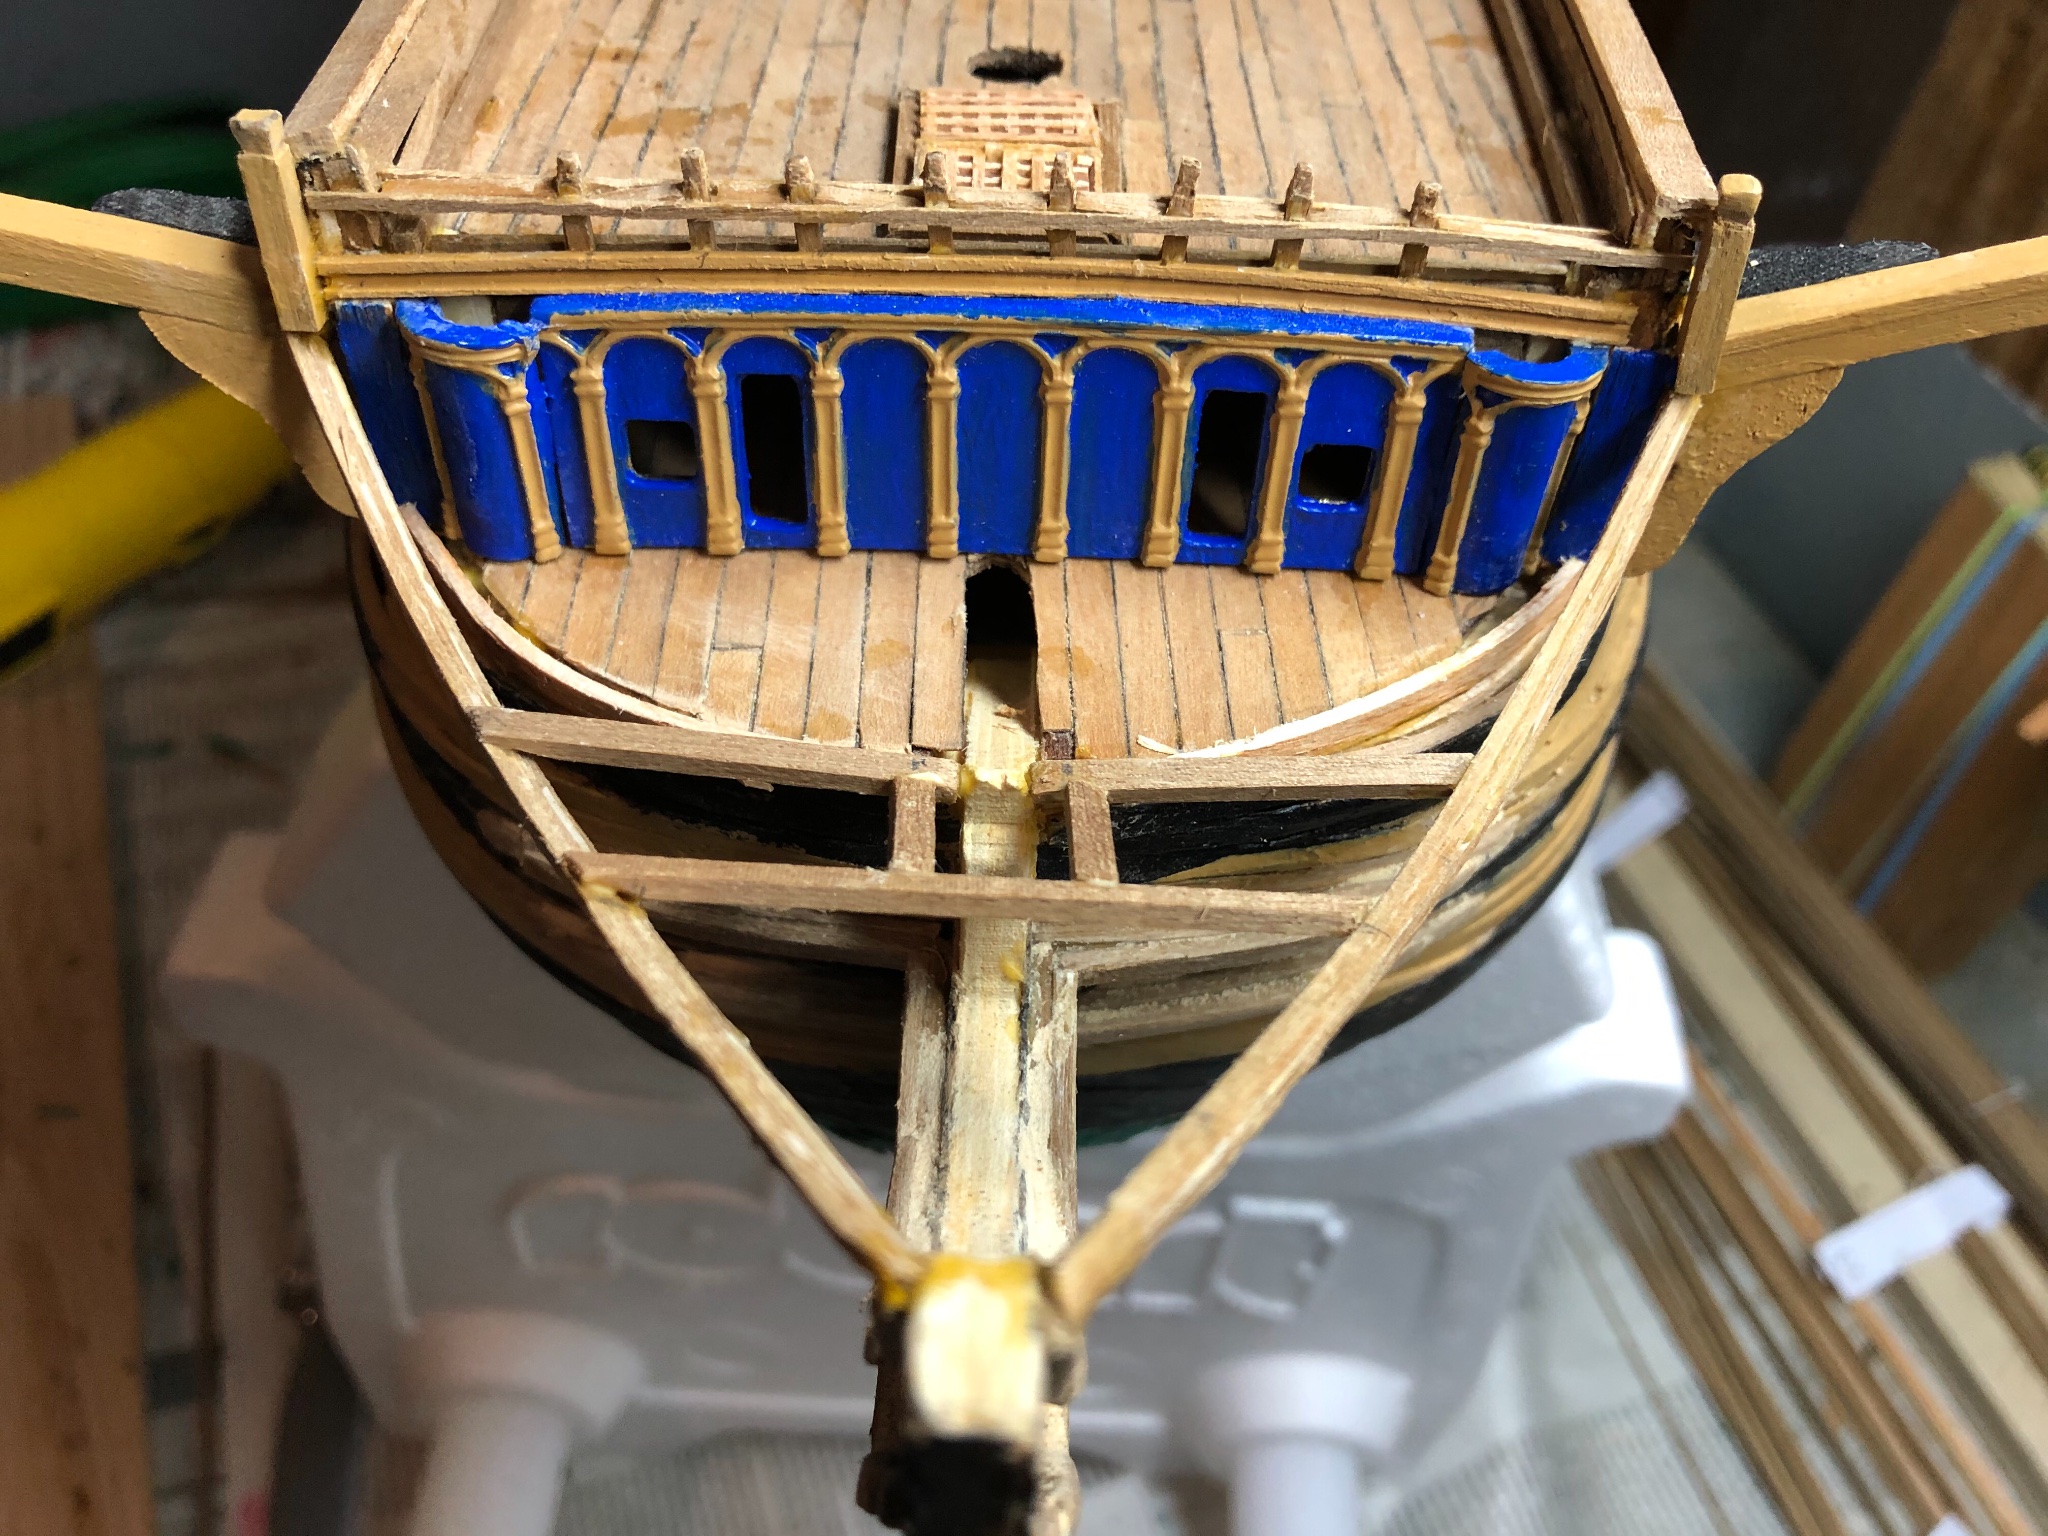
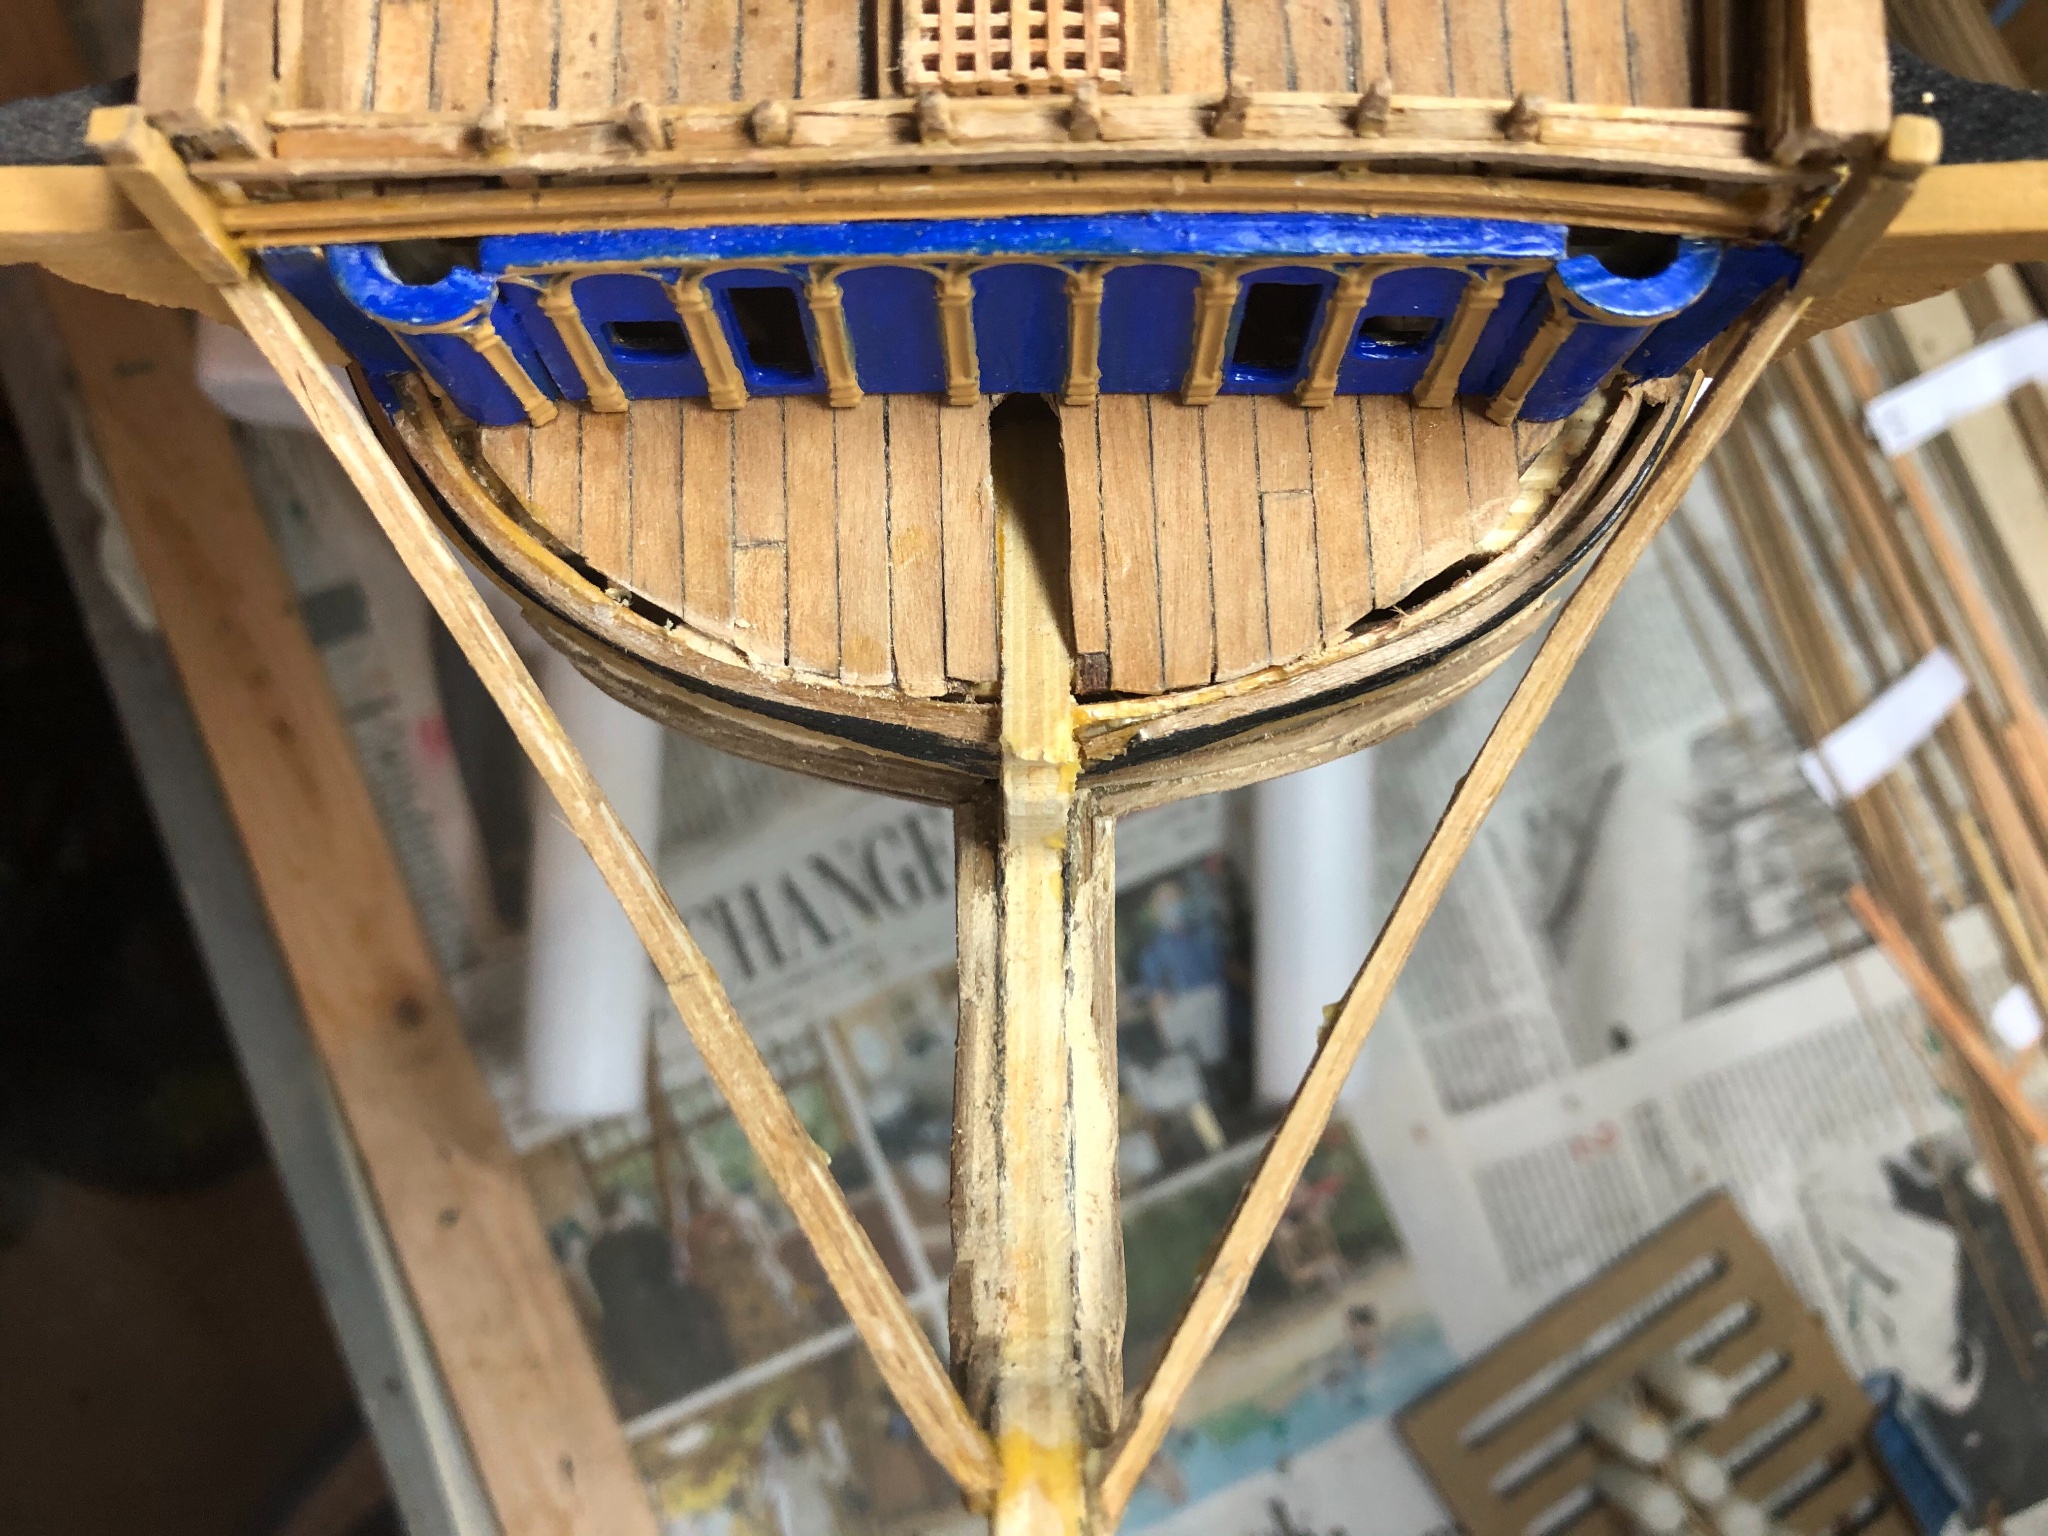
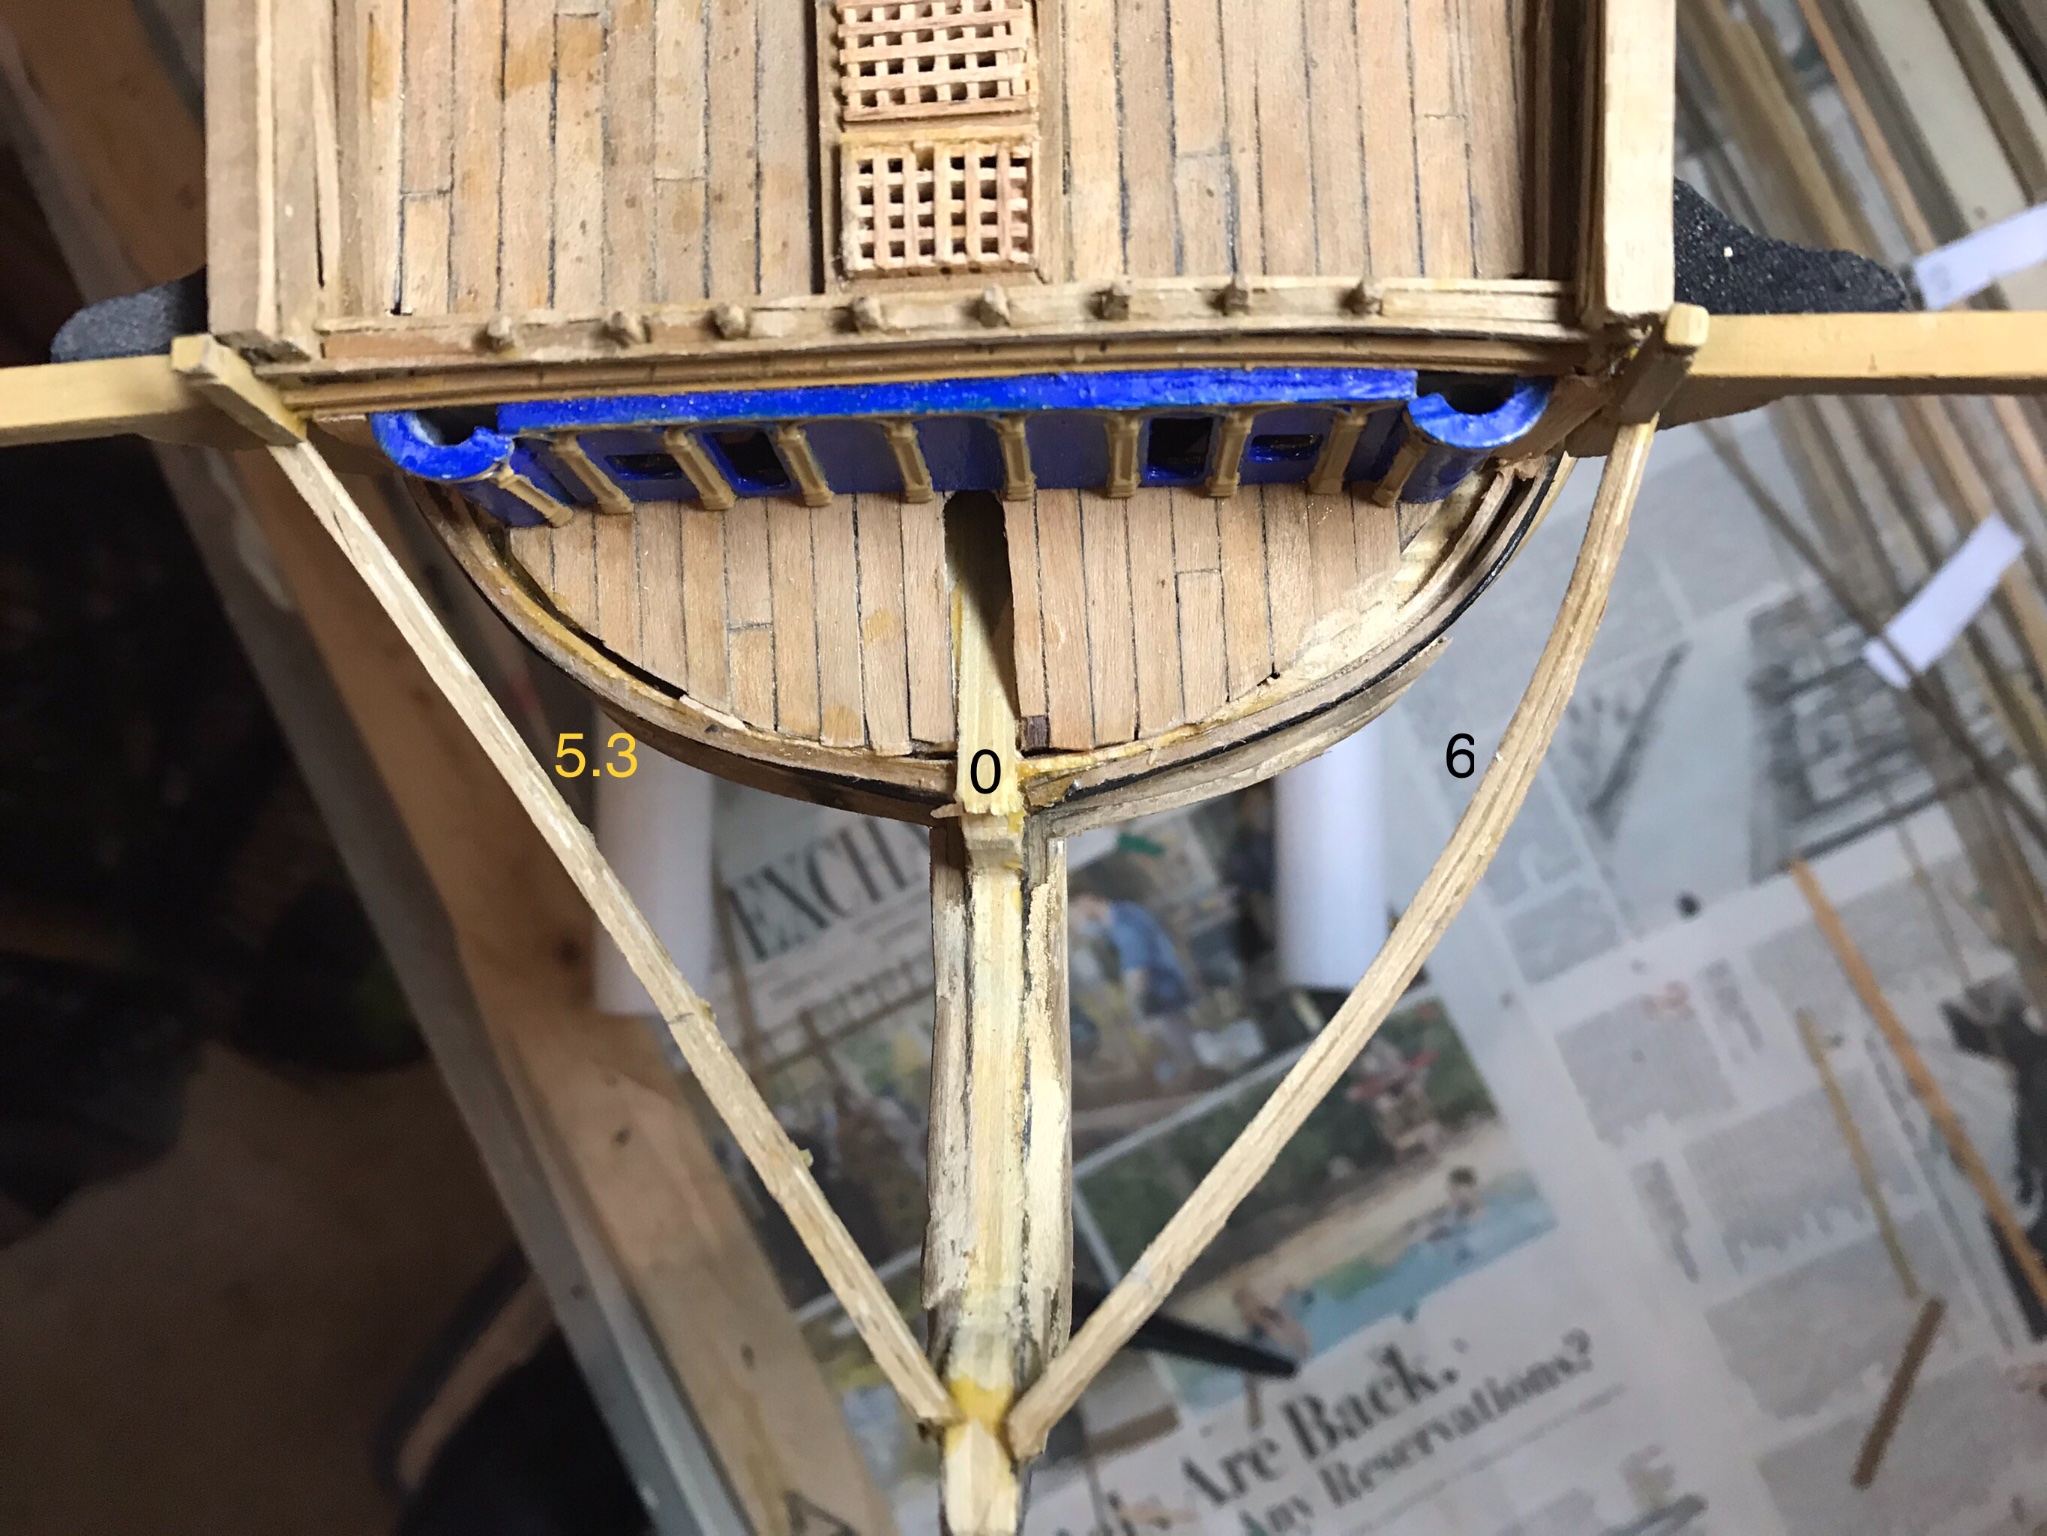
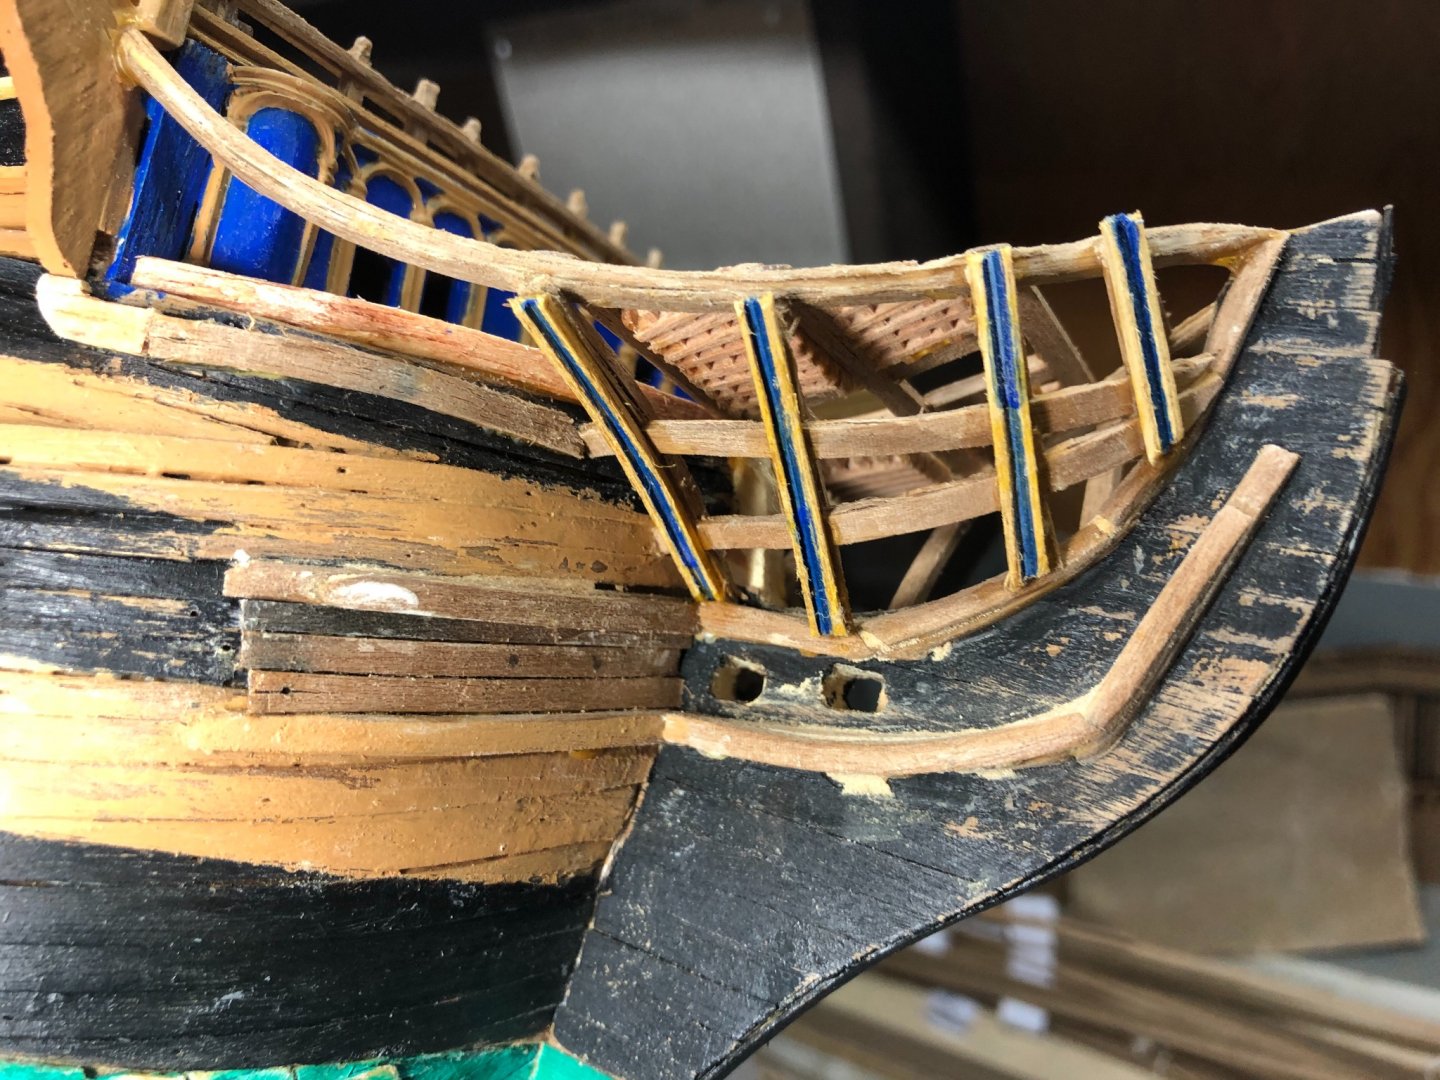
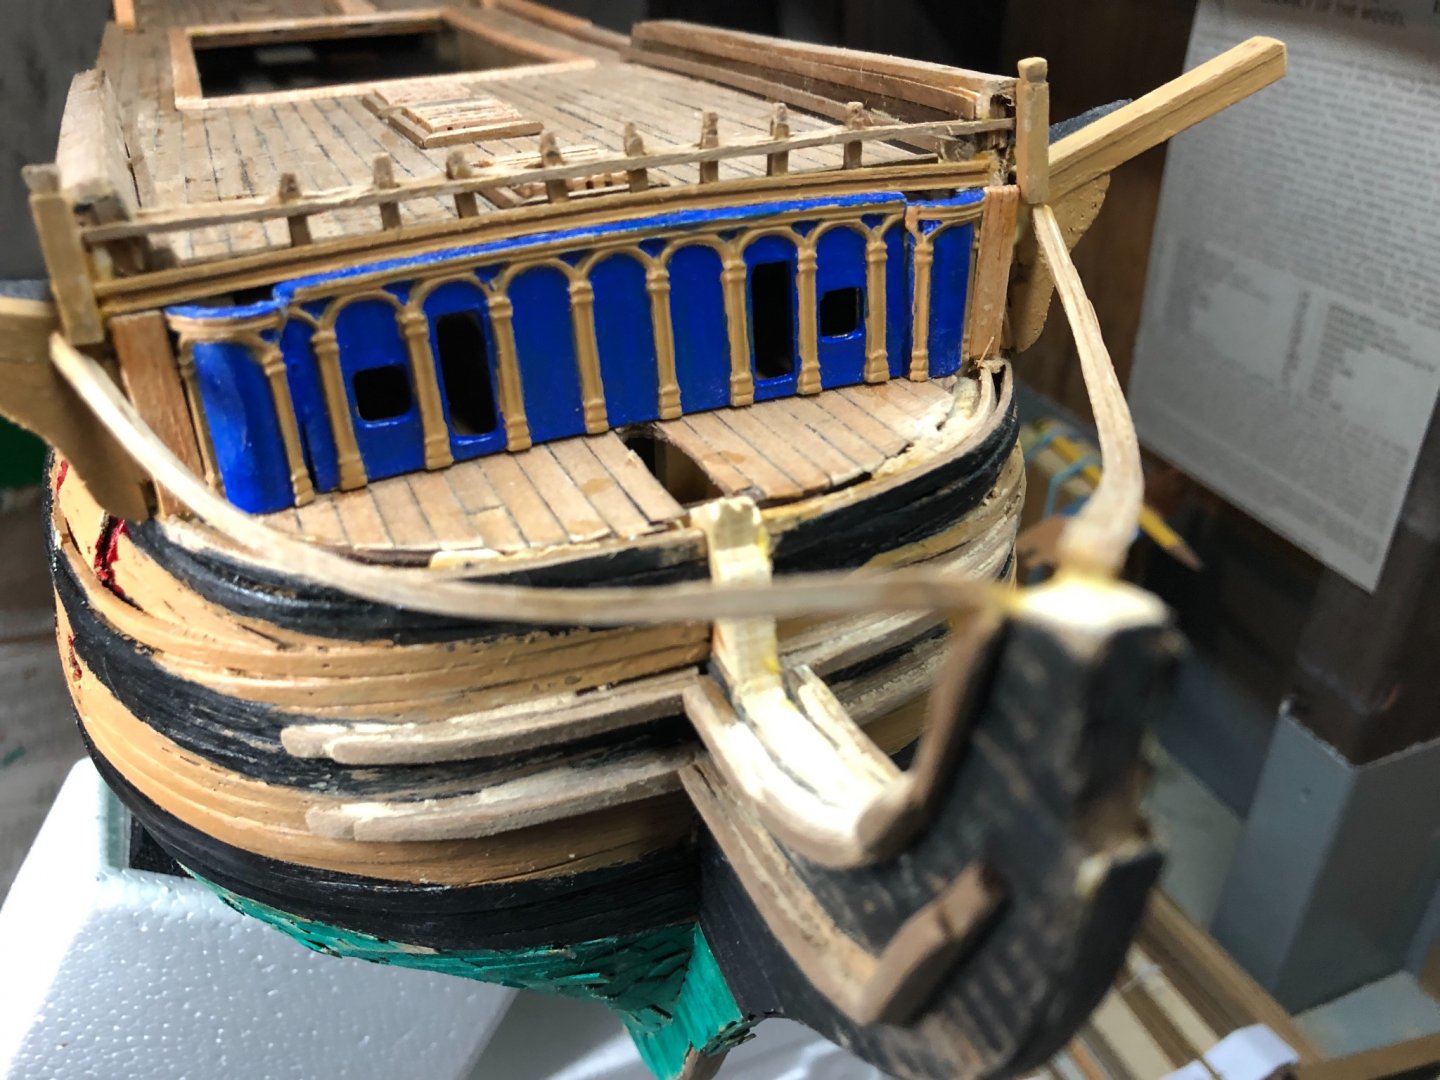
Bow progress as of this morning. Grate work is challenging as they fall apart and need continuing glue application. Especially when shaping them.
-
Thank you for the examples Gregory. In my opinion this is a better option for displaying by taking up less room but still looks good. The bow work is coming along and looking better, in my opinion.

-
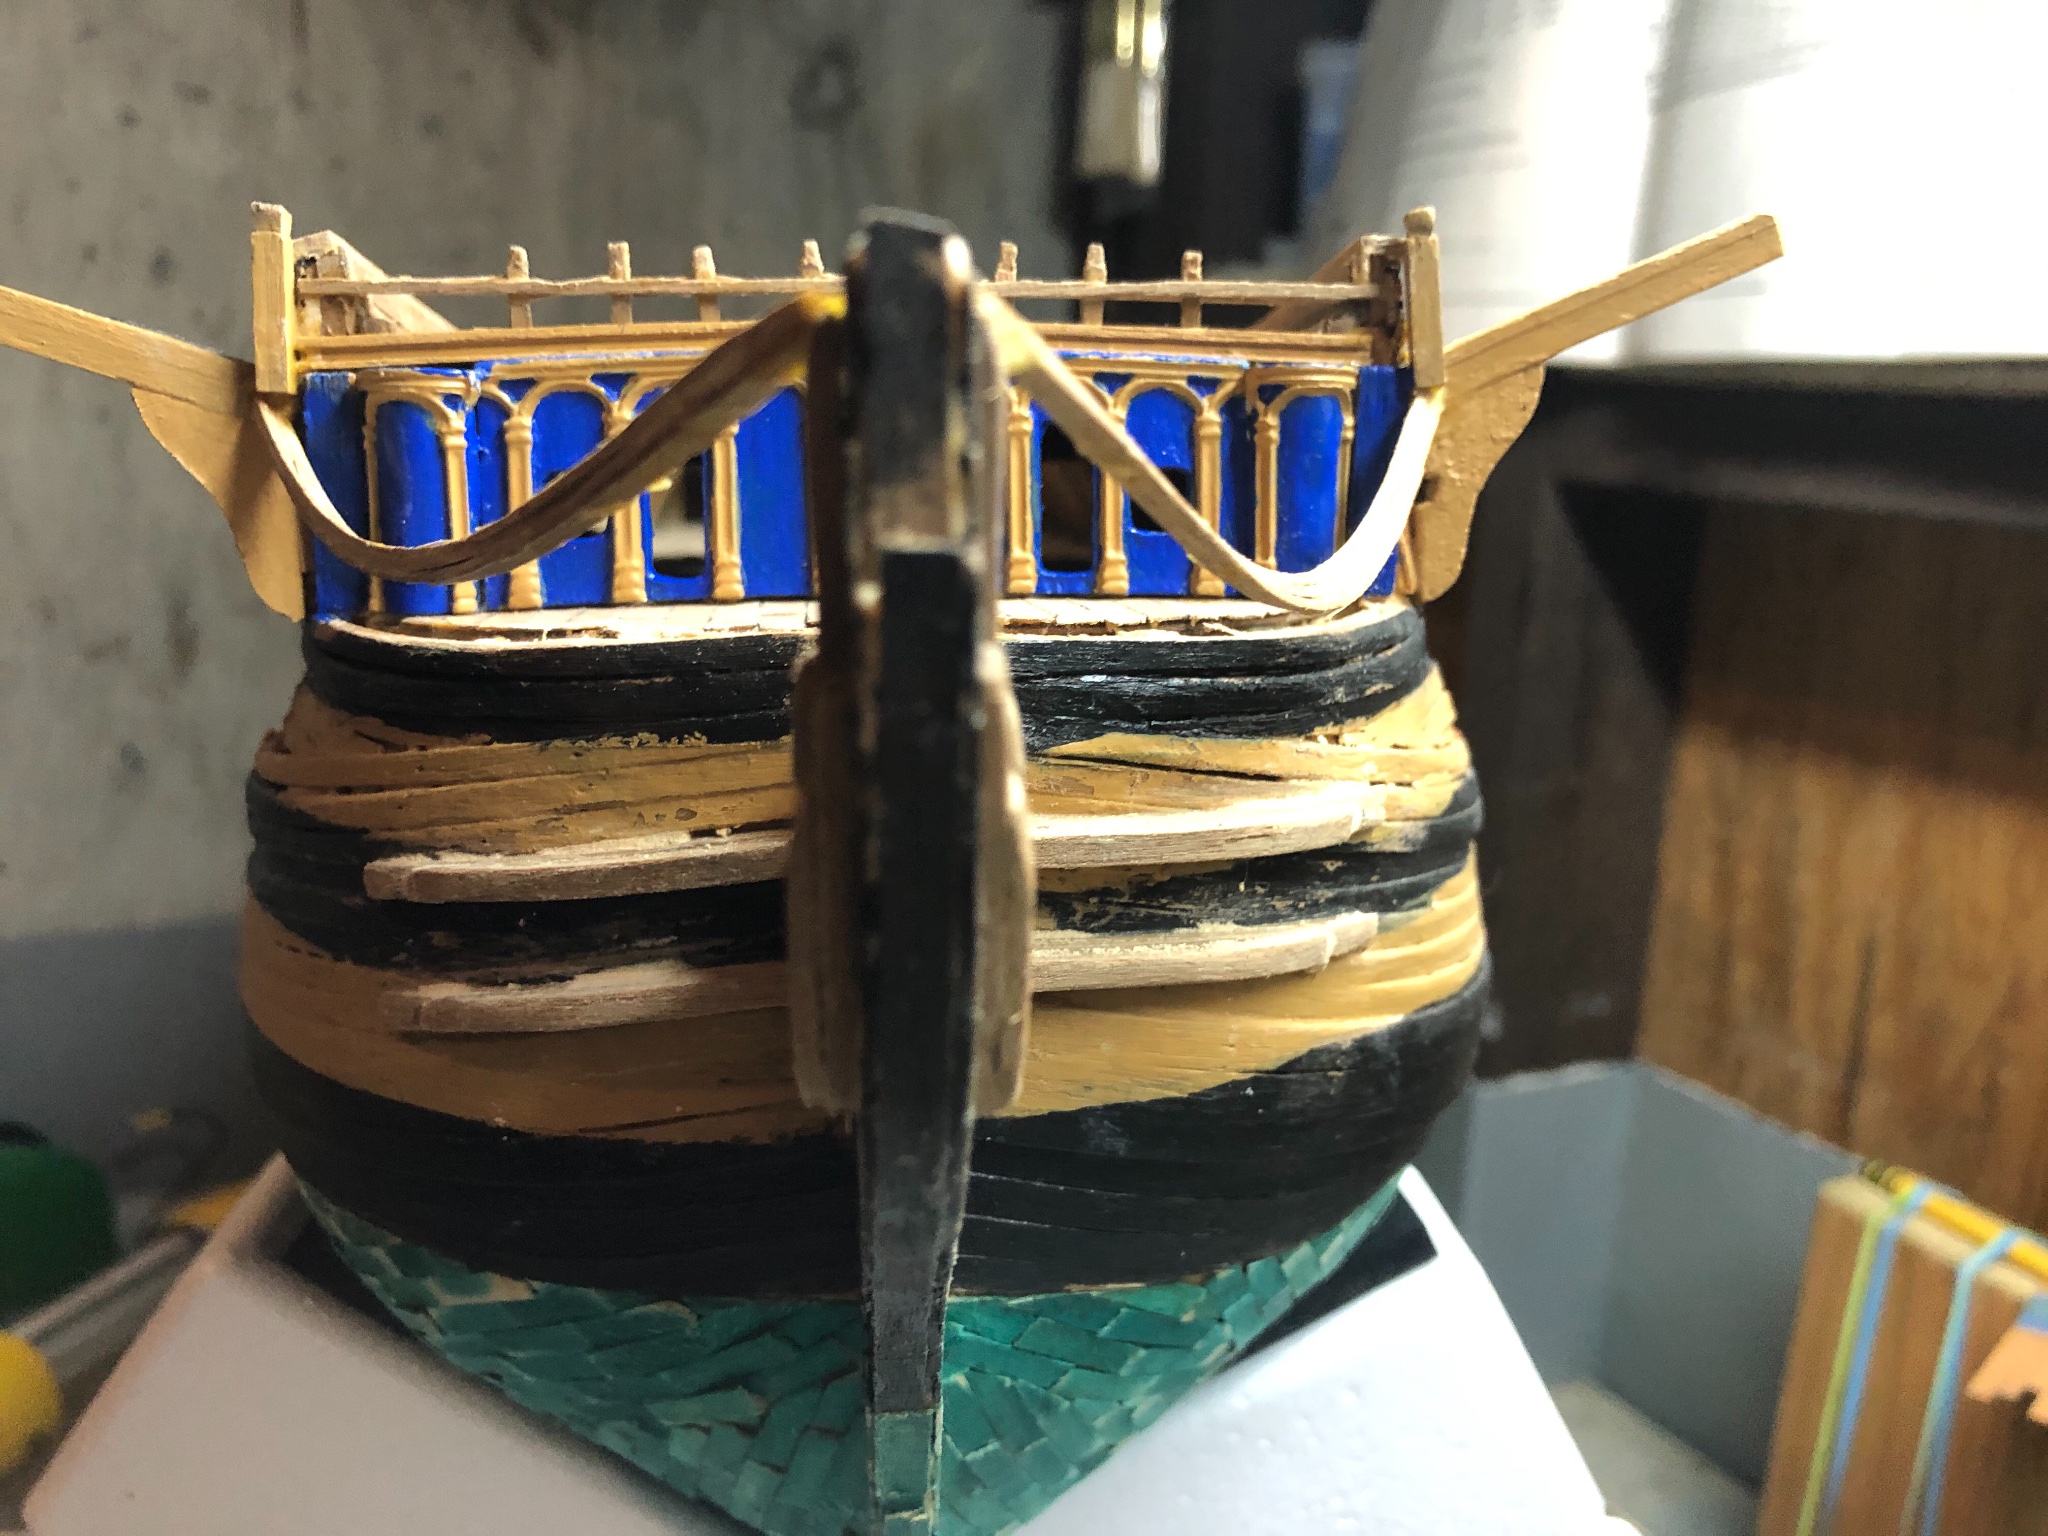
Here is the first step back. Symmetry is much better looking down, however the port main rail ‘bow’ appears more significant. This may be OK... depending.


-
Thanks Gregory; appreciate the advice. However, I’m planning to finish the model ‘hull down’ per the below picture. Will that still be an issue in this case?
-
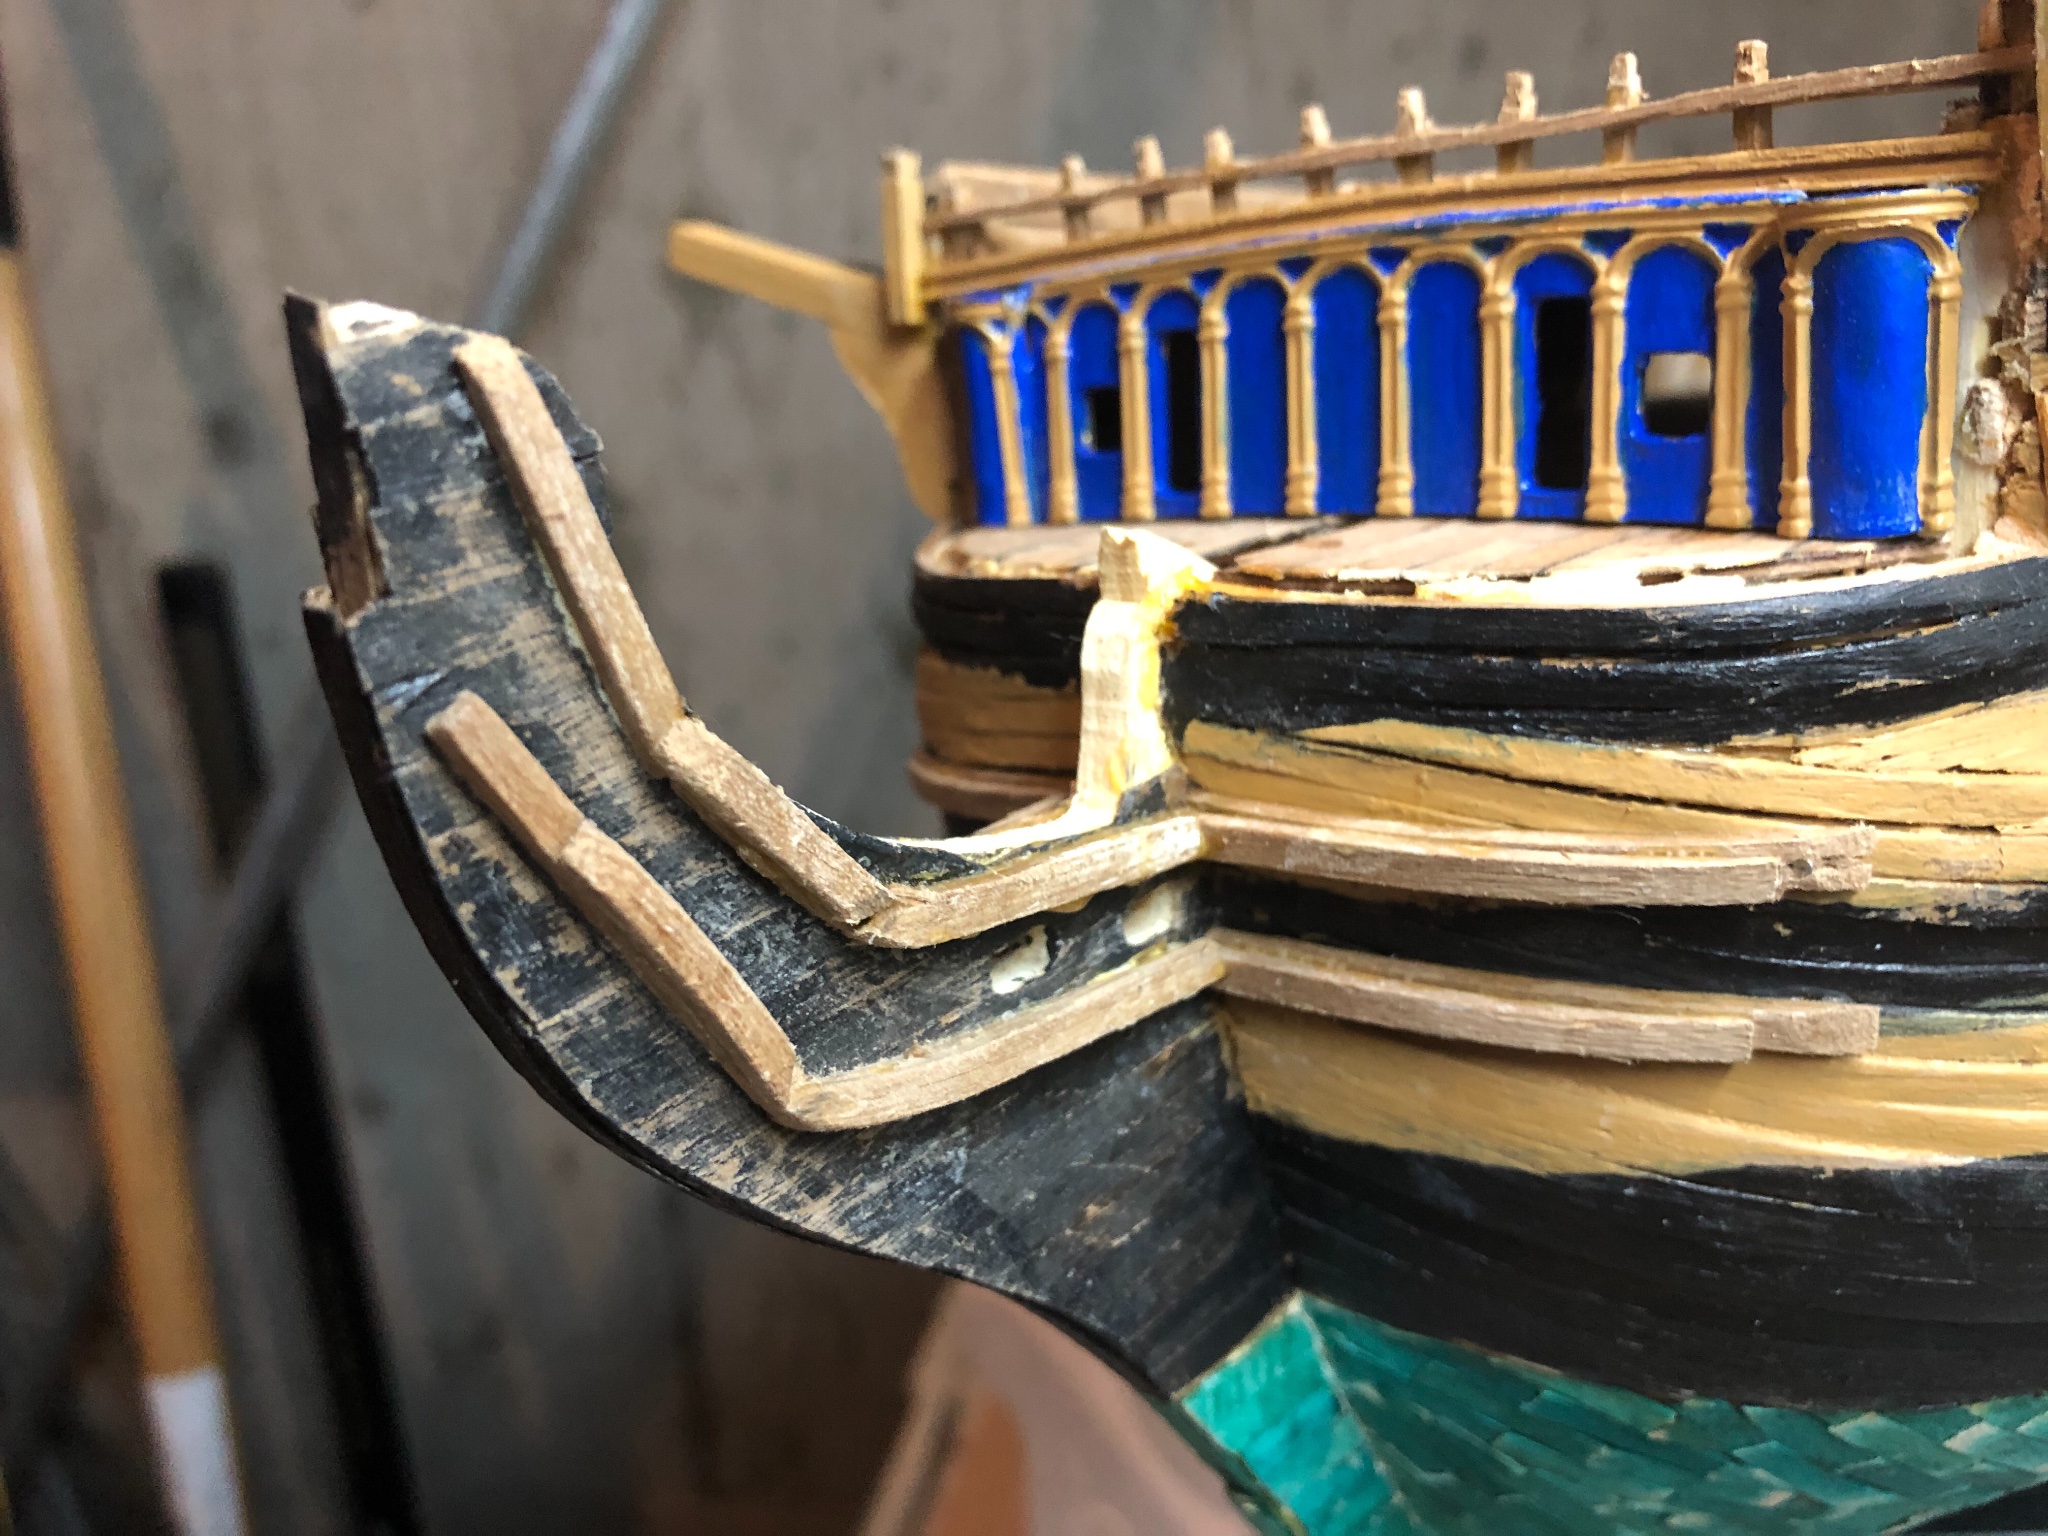
Well, here WAS my bow section.... What a mess. I’ve since dismantled everything on the bow and am starting over including removing the main rails. The dismantling process went well and I’ll be able to reuse most everything. I’ve got some good bow section examples to study further and hopefully I’ll be able to laugh about this debacle later!


-
Diana by Kyak - OcCre - 1/85
Rob S replied to Kyak's topic in - Kit build logs for subjects built from 1751 - 1800
This is a great build for a newbie to planking to see how it’s done. It’s amazing how some modelers make it seem so simple. This log helps one see the process in logical steps. Very nice! -
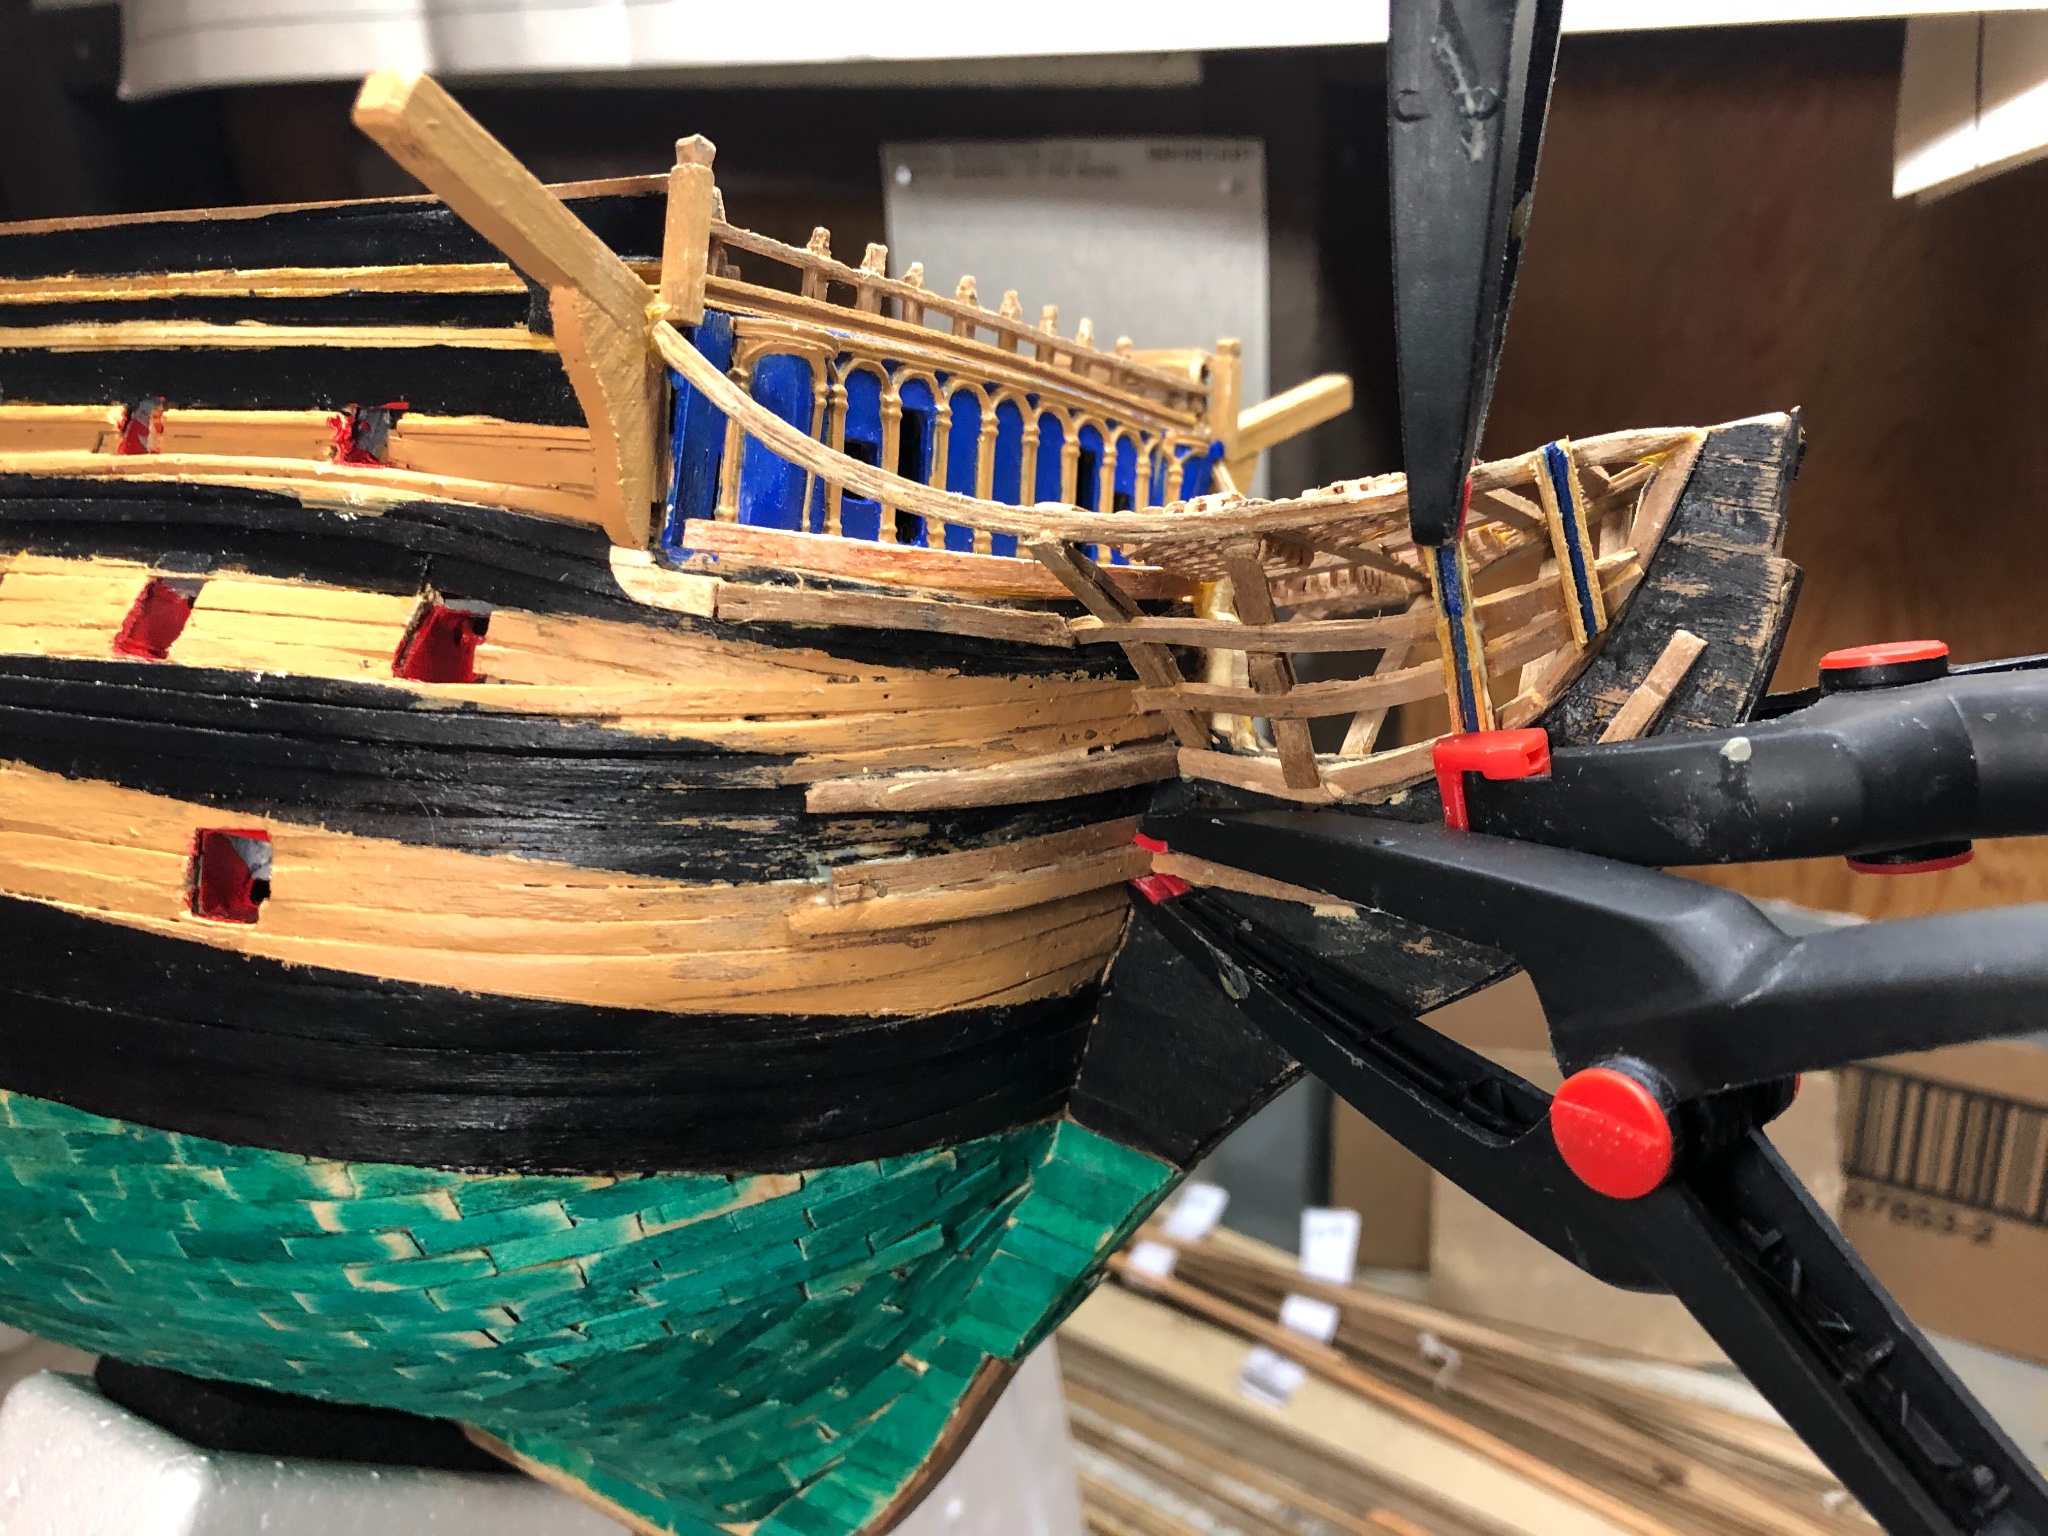
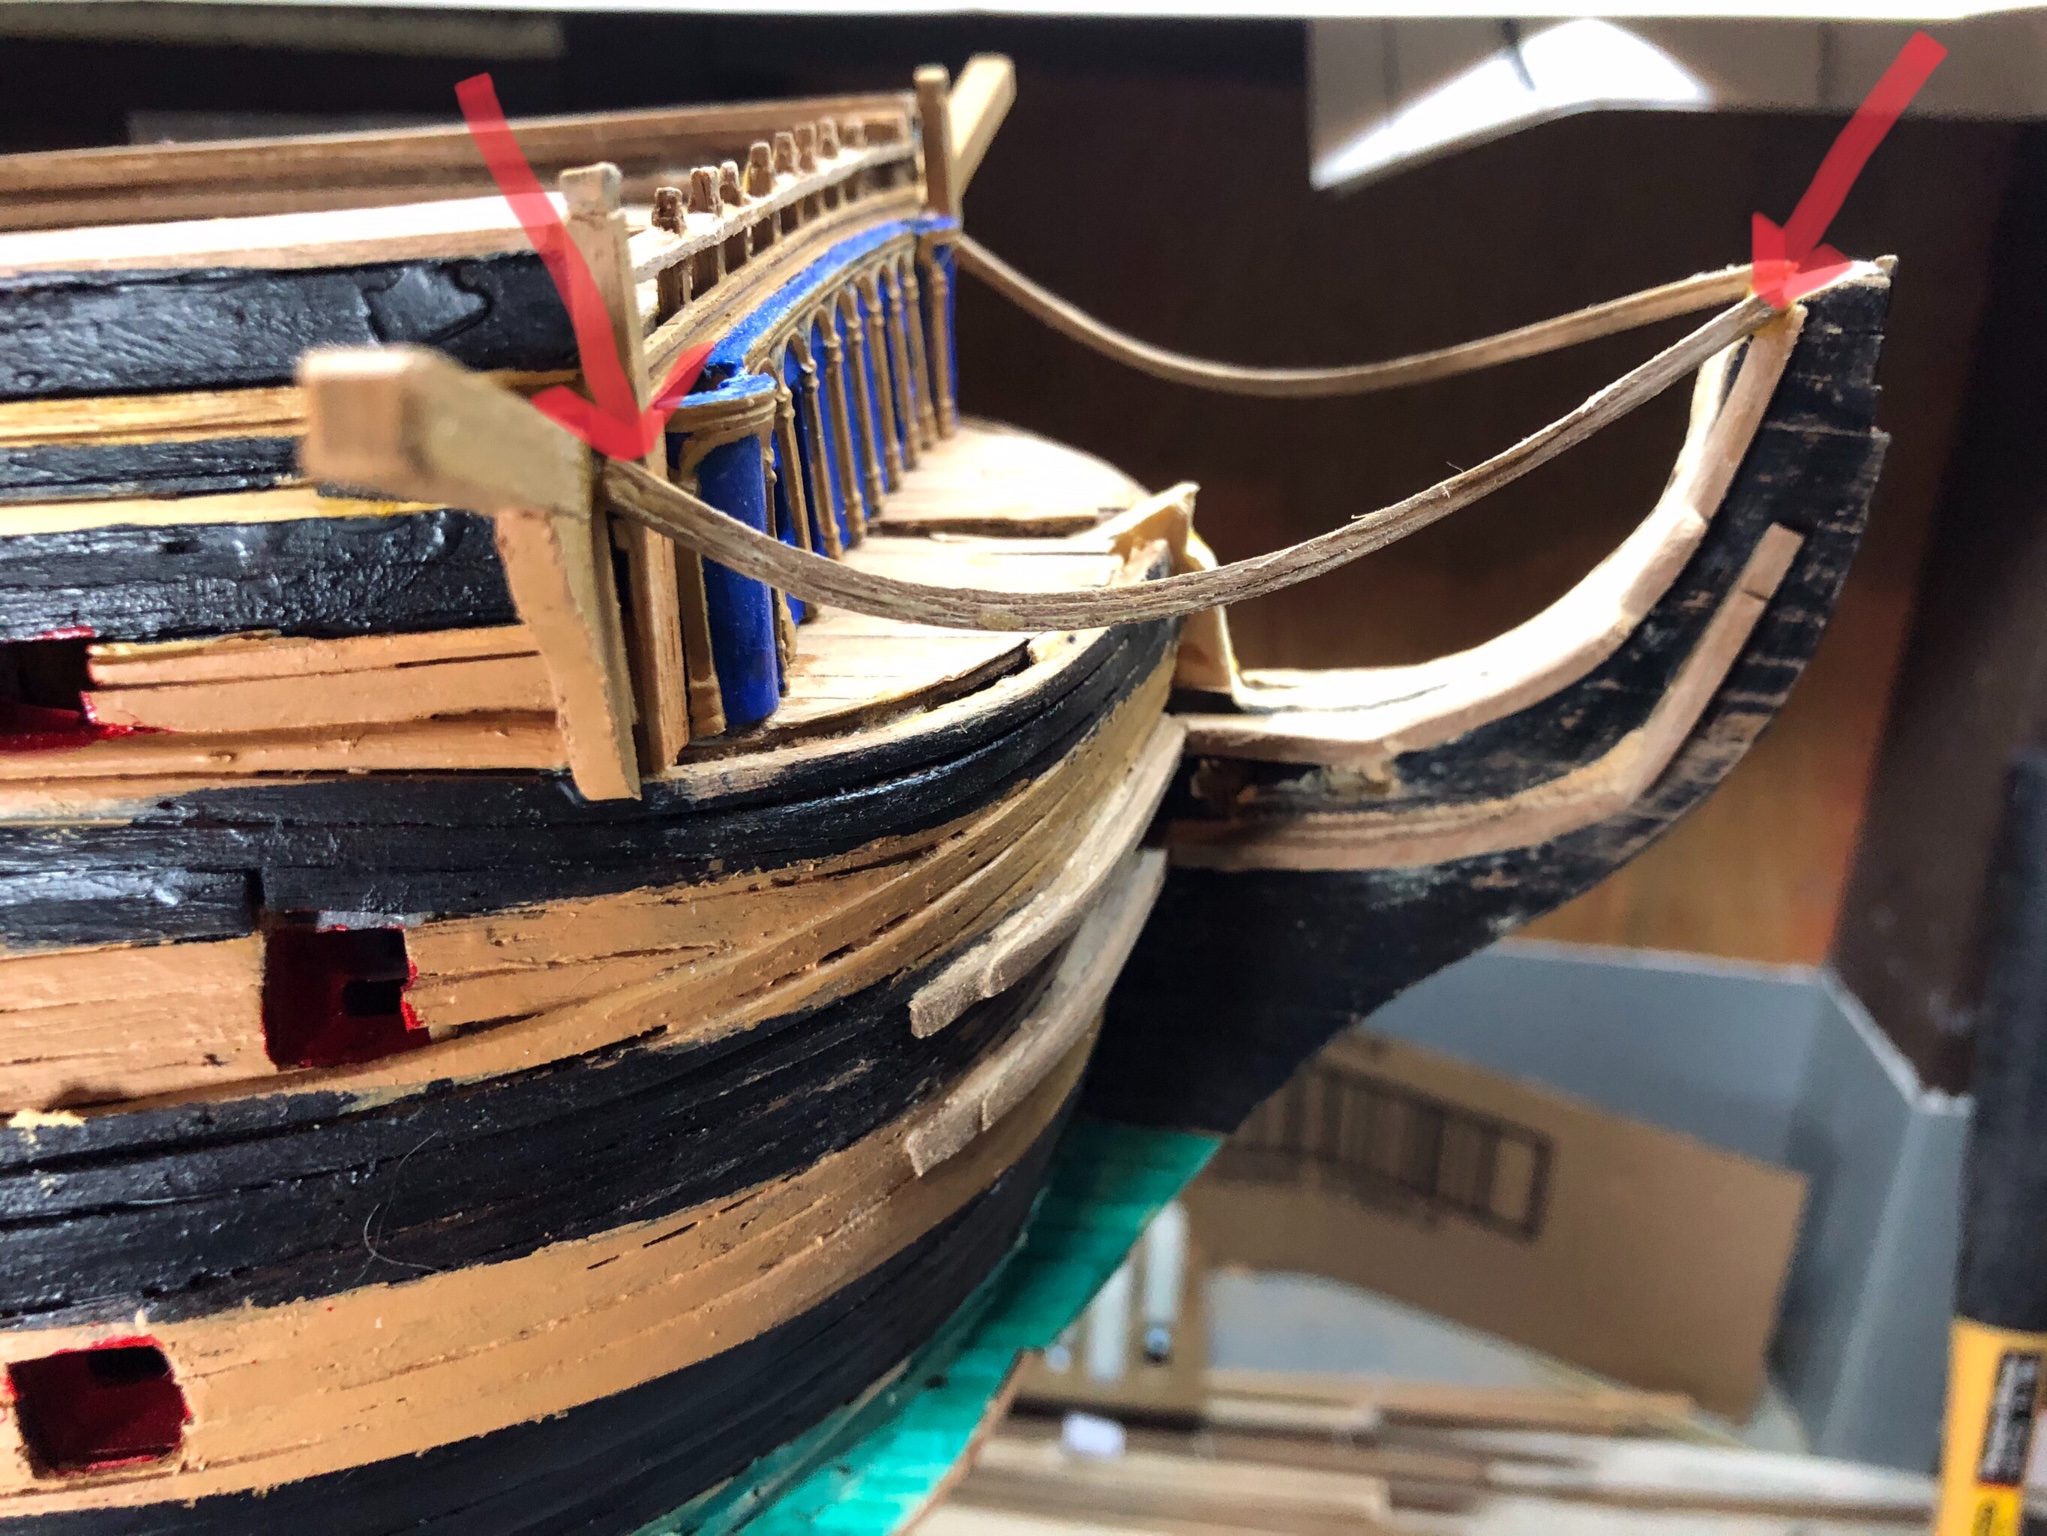
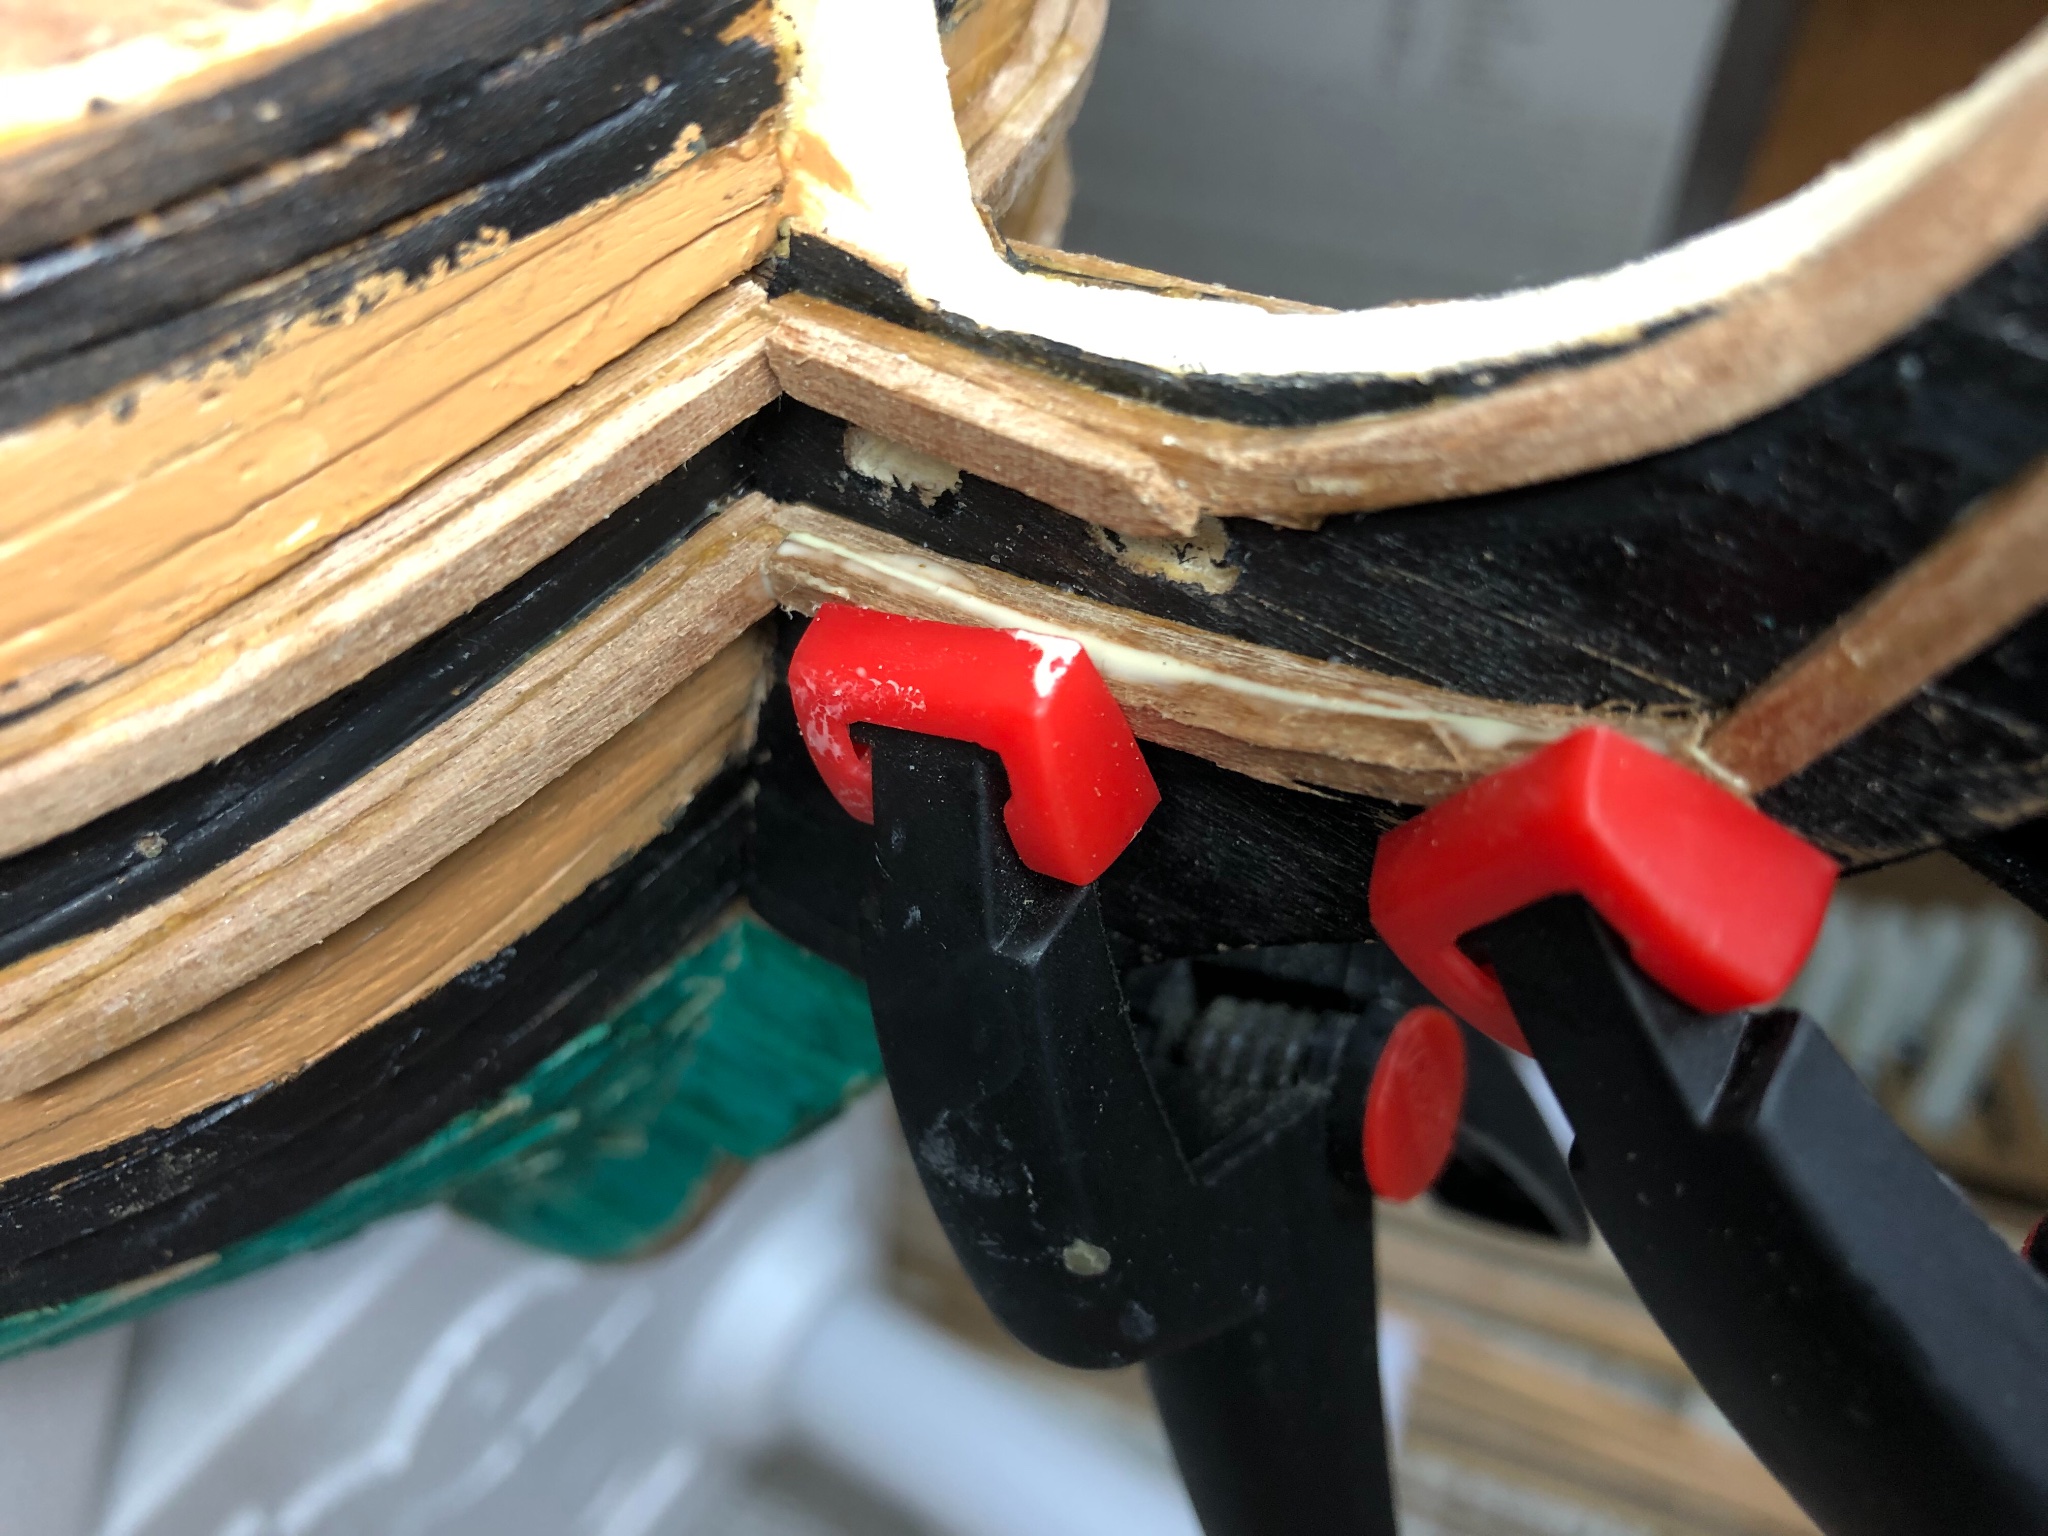
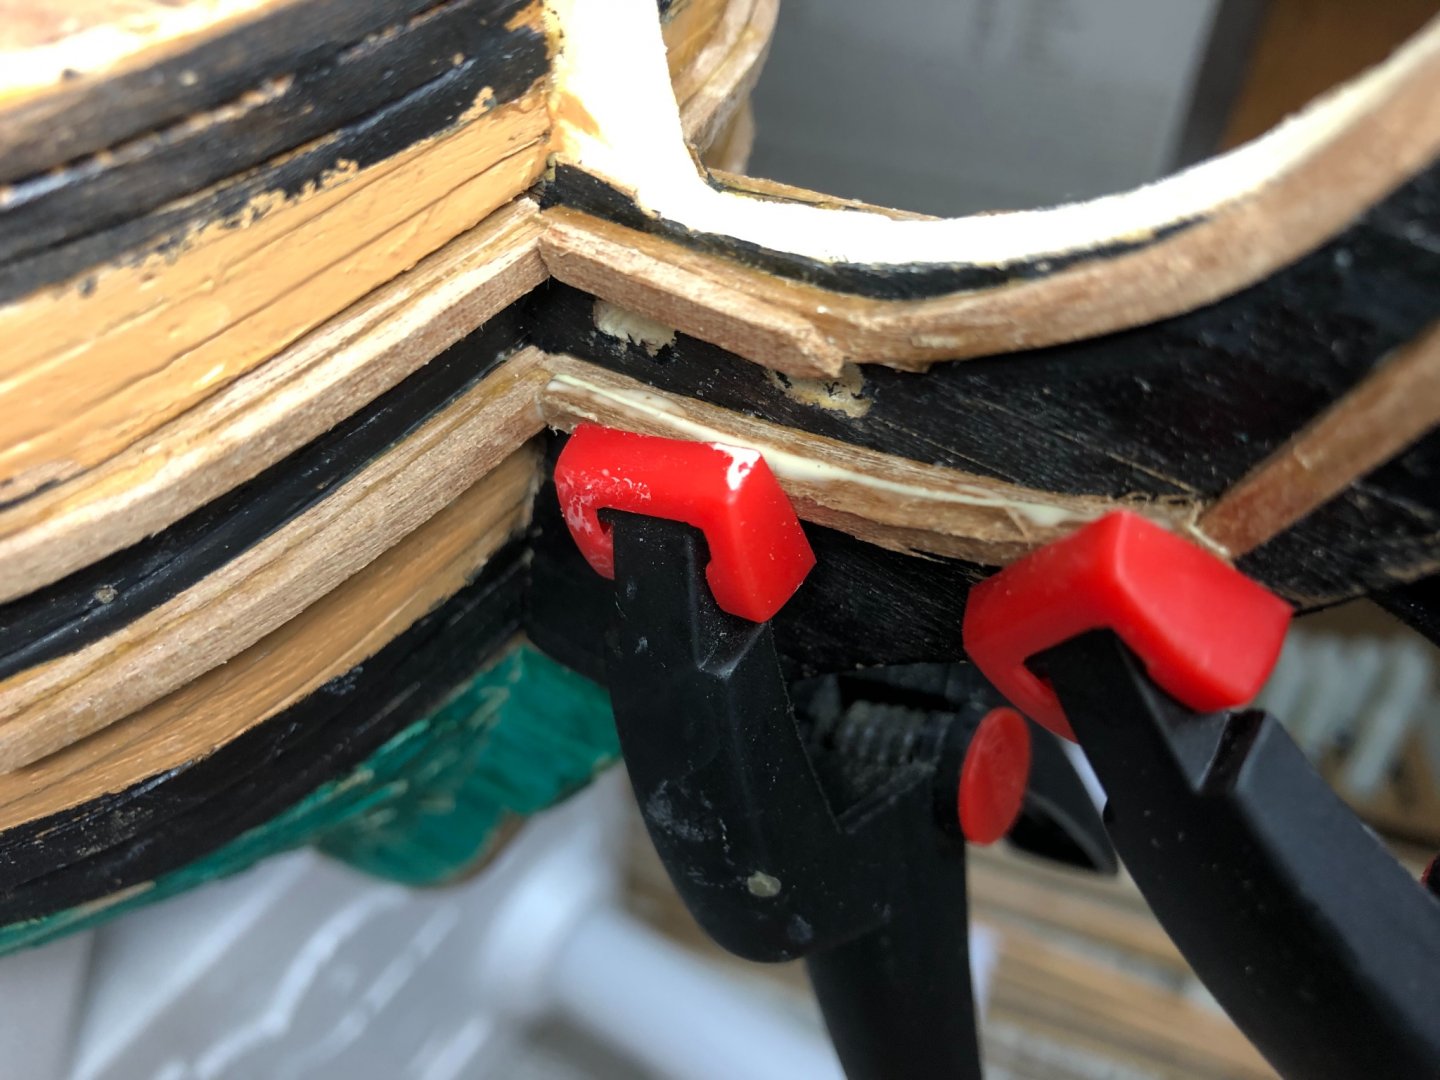
All modelers know that gluing/attaching some ship components are relatively straight forward through the use of ‘classic’ temporary means (e.g., nails, clamps, weights, etc.). What I’d like to know is those little secrets modeler’s use to attach those pesky/difficult items where a classic method isn’t readily appropriate. I’ve attached an example where the main rails on the Mamoli Victory were difficult to attach. You can see in the example by the red arrows the two places where the starboard main rail attaches. The right end simply sets on top of the beak head. However, there was no obvious (at least to me) way to temporarily hold both ends in place while the glue set. I did not have a clamp/area that I thought would hold either end in place. The area was too small for a nail to work. I couldn’t set a weight on top of the beak head to hold the right side in place. I was a bit stymied. Perhaps I just didn’t think it through enough...... In this case I ended up lodging a small screw driver in the bow area to hold the left end up while the right side simply sat on a bubble of glue. Very precarious and unstable. However, in this case it worked. Not the ideal way to get the job done. Are there other difficult to attach elements/components in your ship build(s) that required some out of the box thinking to temporarily hold the piece in place while the glue set?

-
Main rails installed. What a time attempting to secure them in place while the glue dried!?
-
Hey Emmet! Hope you and yours are well. Will you be heading to your summer home soon? Looking forward to you resuming the Vic! Take care. Rob S
-
Here are the BEFORE pictures of the ‘finished’ bow cheeks using what I understand are the Mamoli directions. However, I’ve not added all the layers they suggest as the cheeks would extend 8mm from the bow surface at their widest point. These extend 4mm. Next is to continue sanding, add minimal filler and sand again. Then on to the main rails.

-
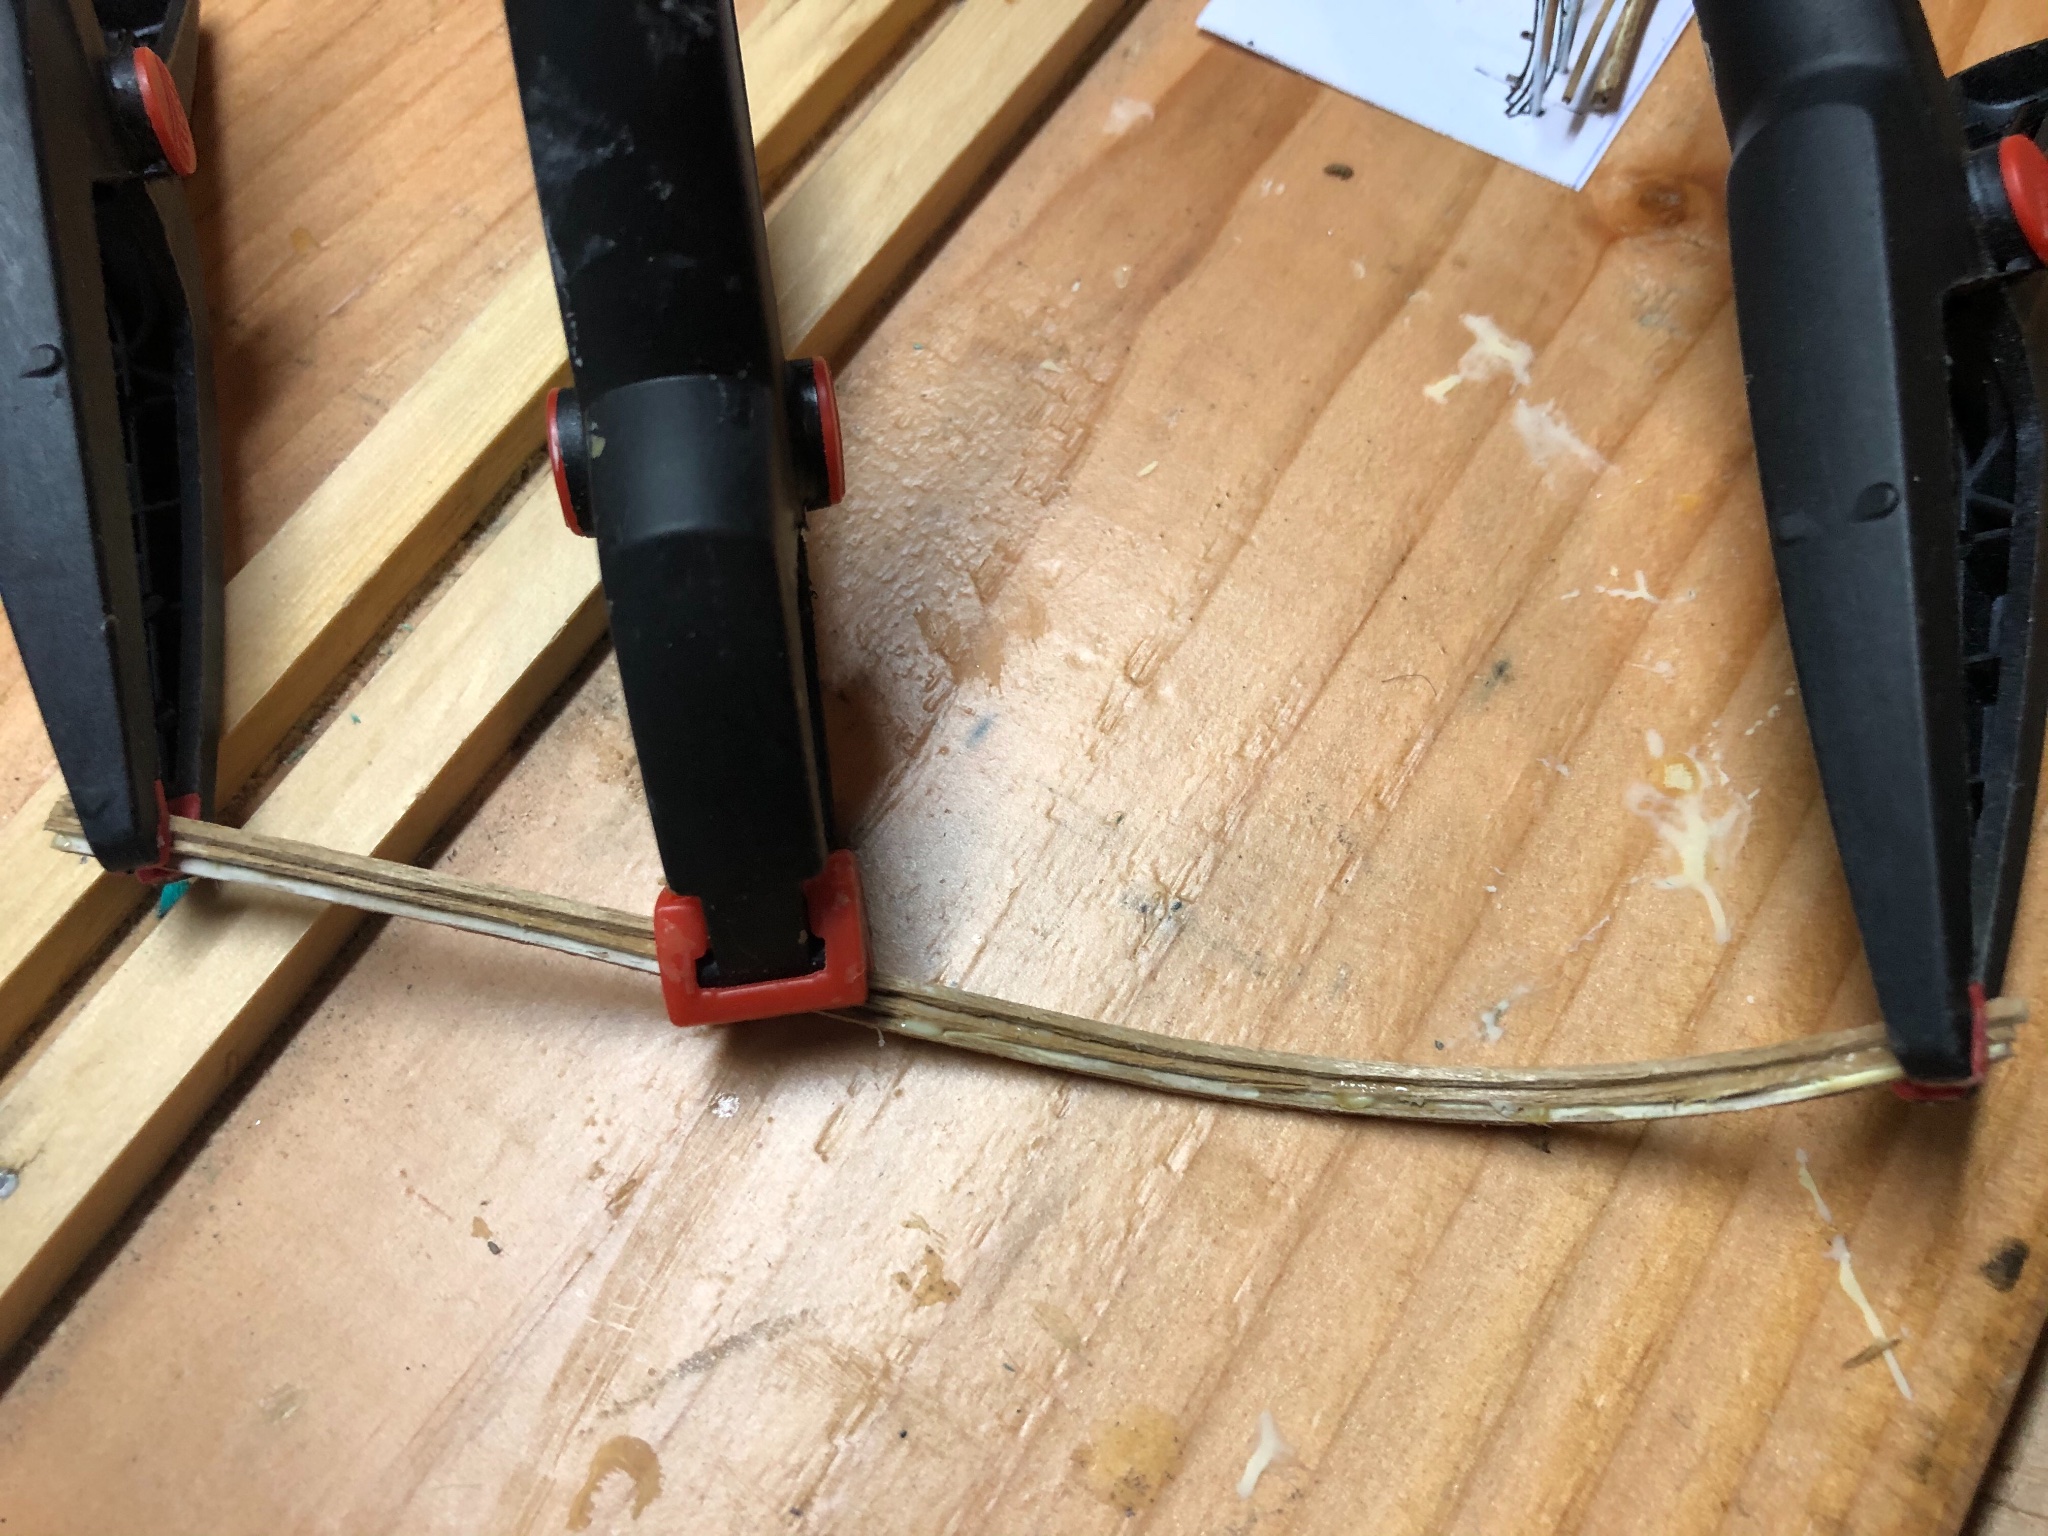
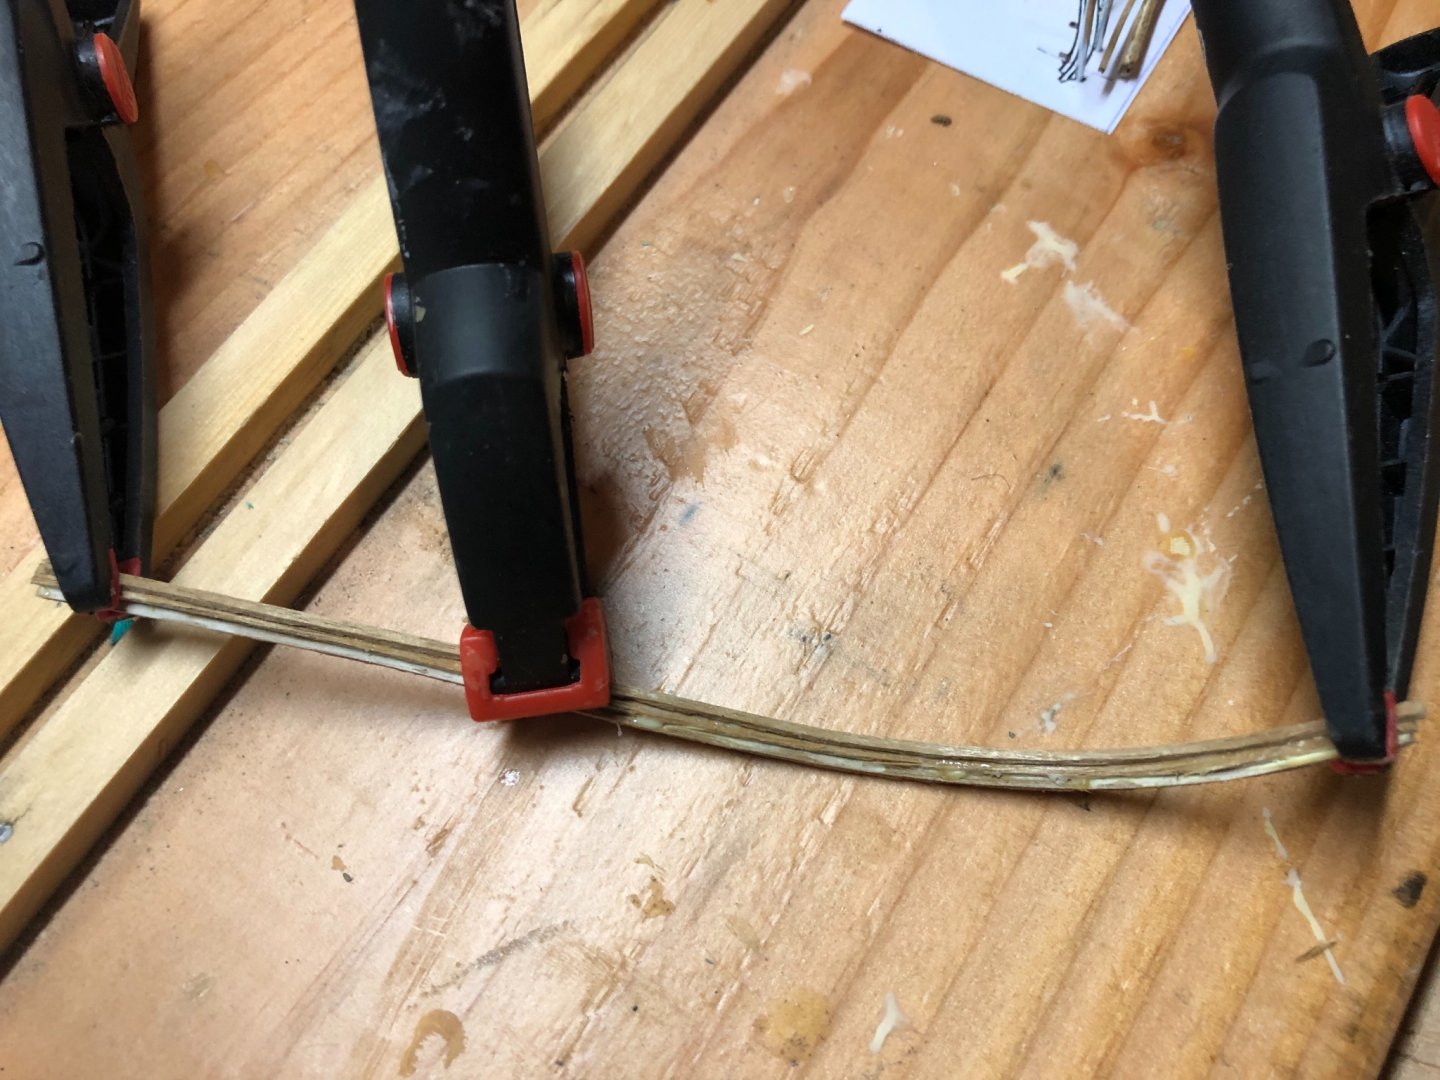
Still working the bow cheek build up. I’ve had trouble shaping the 2mm x 3mm walnut laths ‘against the grain’ and after looking in the forum help section was able to find a topic addressing this. While the wood demonstrated seemed to be a little less wide, there were some good suggestions. I actually boiled some water and put the walnut pieces in for about 10 minutes and was able to get a better bend with my shaping iron. You can see pictures below. I’ll resume the cheek build up in the next few days. I’m also working to chamfer the main rails created with the Mamoli jig. They were shaped, dried and then glued together. It’s not too easy holding these down, but slowly am able to take the edges off.
-
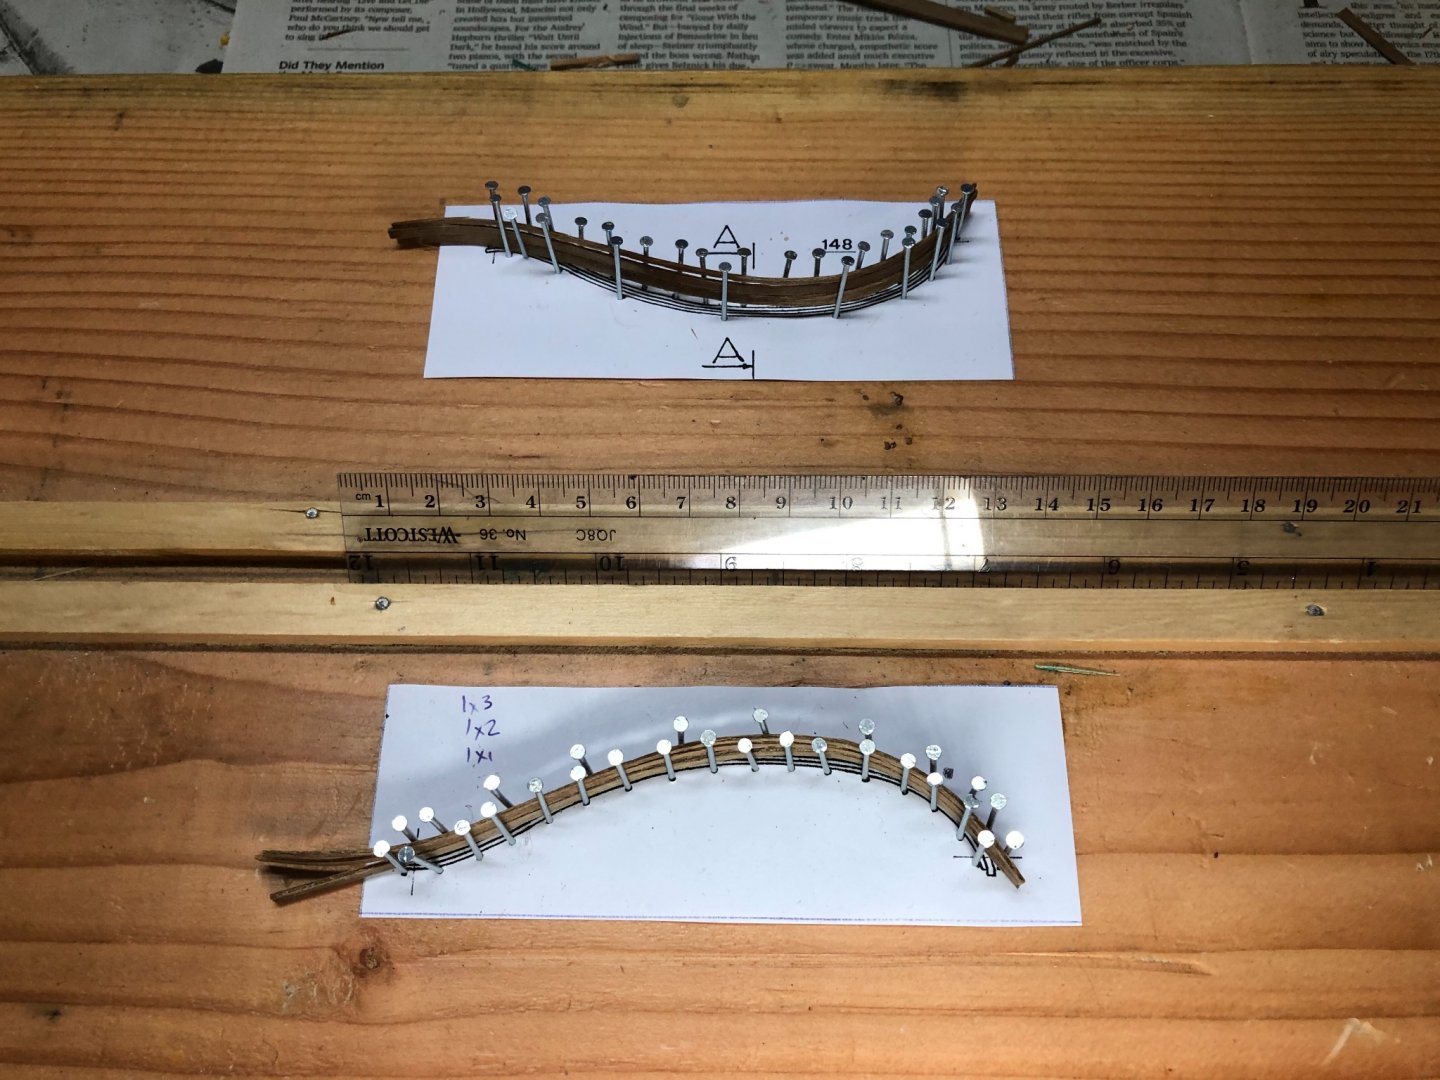
Initial results were positive from the jig above. Now assembling the rail elements before the chamfer process.

-
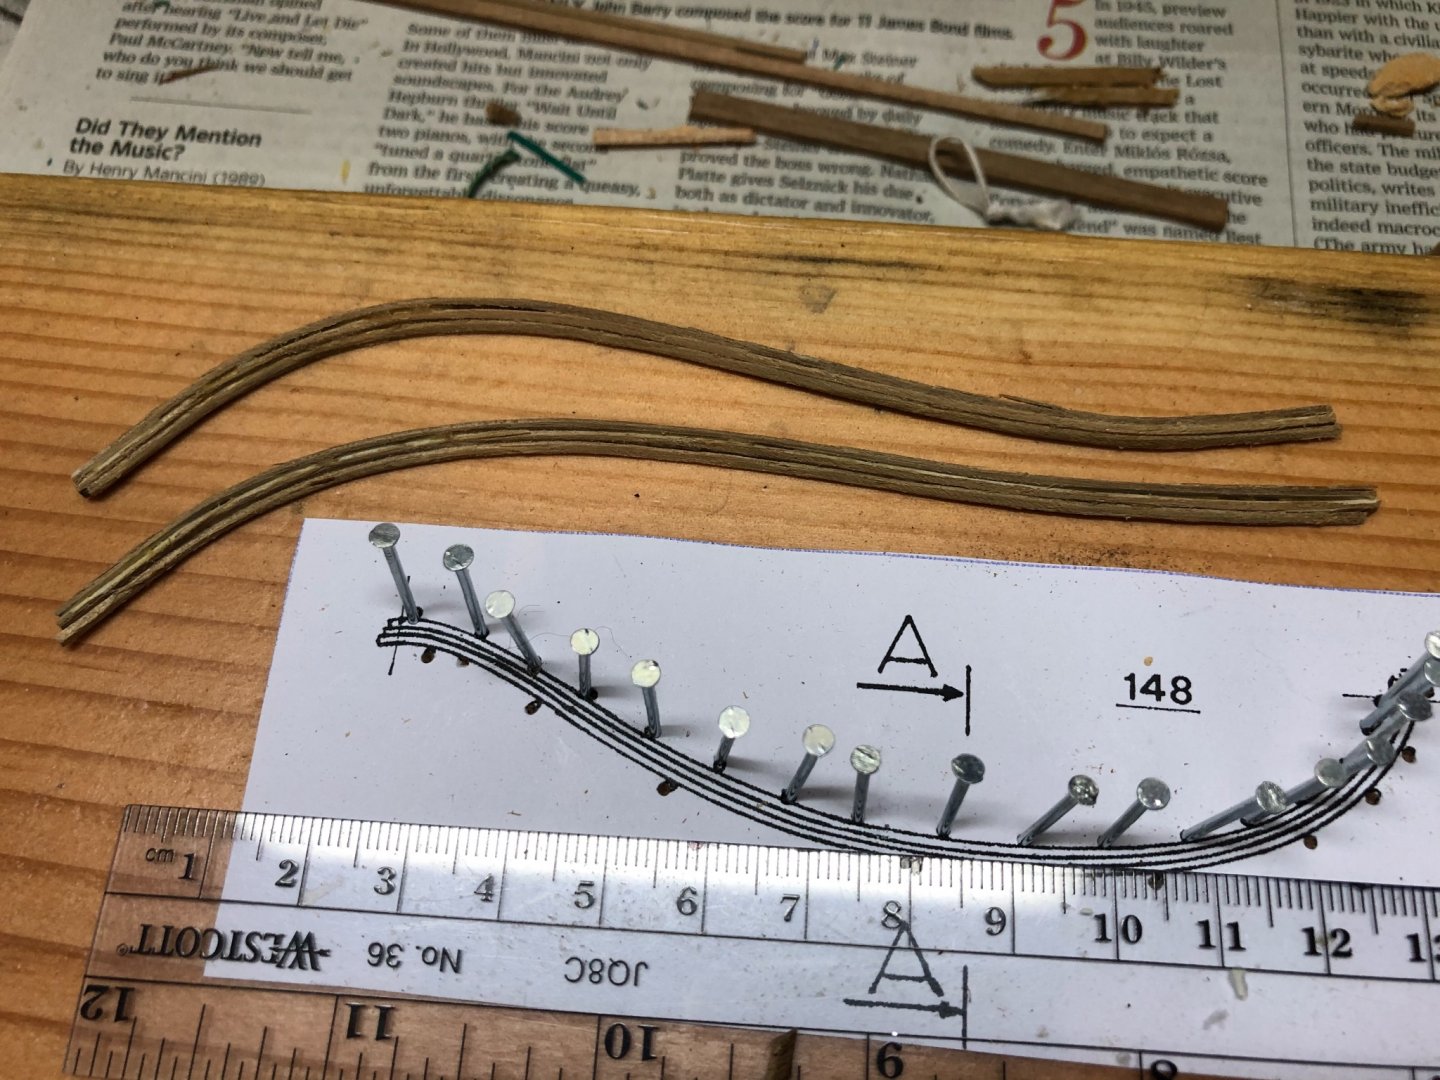
While awaiting laths to dry to continue building up the bow cheeks, I built the Mamoli jig for shaping the bow main rails. These laths are 1mmx1mm, 1mmx2mm and 1mmx3mm, shaped, glued together and then edges chamfered. Next, look up ‘chamfer’.
-
Hi Henrik! Yes, correct. The Mamoli instructions call for an approach of building them up, layer by layer. No pre cut pieces I’m afraid. Hope you are well and thanks for asking:)
-
She’s shaping up nicely!
-
Still working to build up the bow cheeks.. Slow going. I still haven’t found a good way to shape the walnut along the 2mm edge without breaking the wood. This is where my lack of experience working with wood is really obvious. However, I’ll continue look for a better way to shape these laths.

-
Building up the bow cheeks using 2mm x 3mm walnut laths per the instructions. The 3mm wide portion of the laths is glued to the surface. These size strips are difficult to shape, particularly along the 2mm side. I’ve left these planks (2) to soak now for over a day after attempting to shape the first two with mixed results. These small walnut pieces will be built up and then shaped to form the upper and lower cheeks. Here is the starboard side progress. I’ve used a clamp to secure one side and had to nail a small piece of wood down to hold the other side down. It takes time because I have to wait for each strip to dry which in this time of year takes a day.