cog
-
Posts
8,764 -
Joined
Content Type
Profiles
Forums
Gallery
Events
Everything posted by cog
-
 Ken you have to be more clear for a dumb foreigner with limited knowledge of what you are throwing out here
 -
For your next build ... than you have it ready for use , wouldn't want to have it go to waste now!
-
Easy for you Aussies to say, but in Europe we do not have that much head room ... Nice solution to a "tiny" problem. So if you take off the masts anyway, you are finished now ?
-
Light grey ...?
-
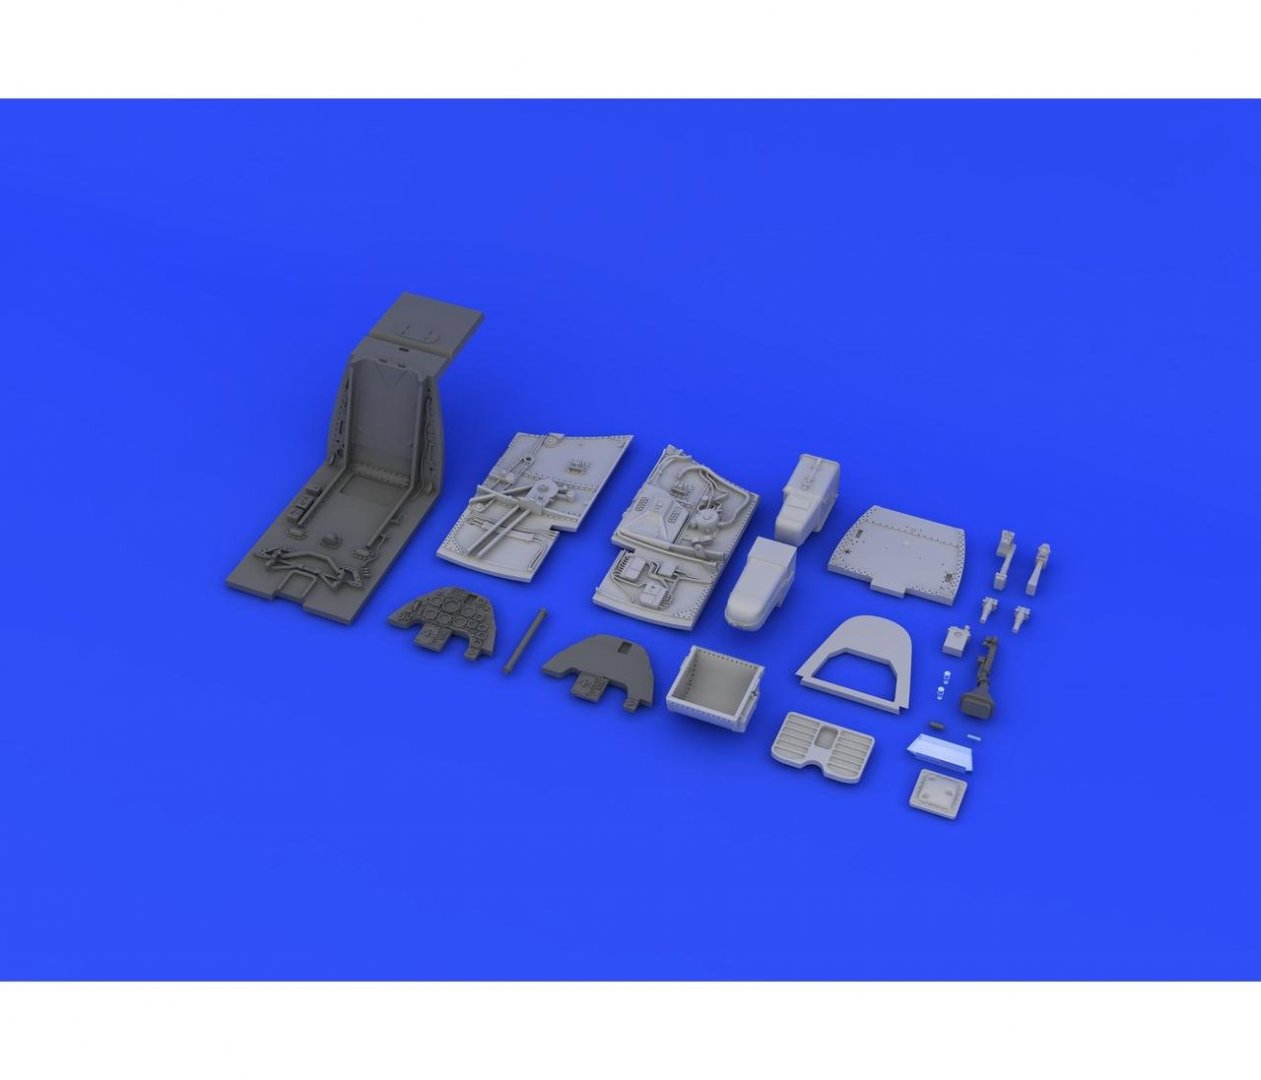
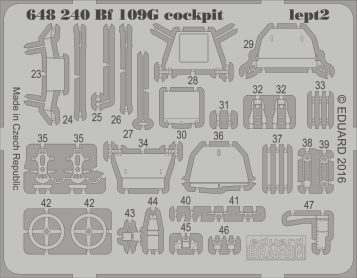
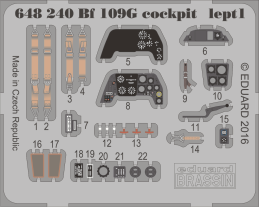
You give me to much credit Lou, thank you Hello Assat, thank you for your praise. It is all Eduard. They have "Brassin" kits which you can use to enhance your - mostly - airplane kits, and these are full of detail. A combination of resin, plastic, and PE (both metal and brass). Have a look at their BRASSIN kits As for tutorials, I am still learning, but this bloke does make nice tutorials PLASMO
-
Fortunately I'm colour blind, so you can paint it any which way you want
-
Thanks OC. Need to get my bearings back on building to get that big German b....... out of it's mothballs. I think these small and quick builds might just do the trick.
-
Thanks Denis, I'm waiting for an engine same scale. Wonder how that will be.
-
Revell Tie fighter - 1:110 by Fnick (Finished)
cog replied to fnick's topic in Non-ship/categorised builds
As long as the boxes do not hit the table, there isn't anything to build Nick, don't mention it. Currently testing Mr Paint both enamels and acrylics. I really like the enamels for airbrushing. -
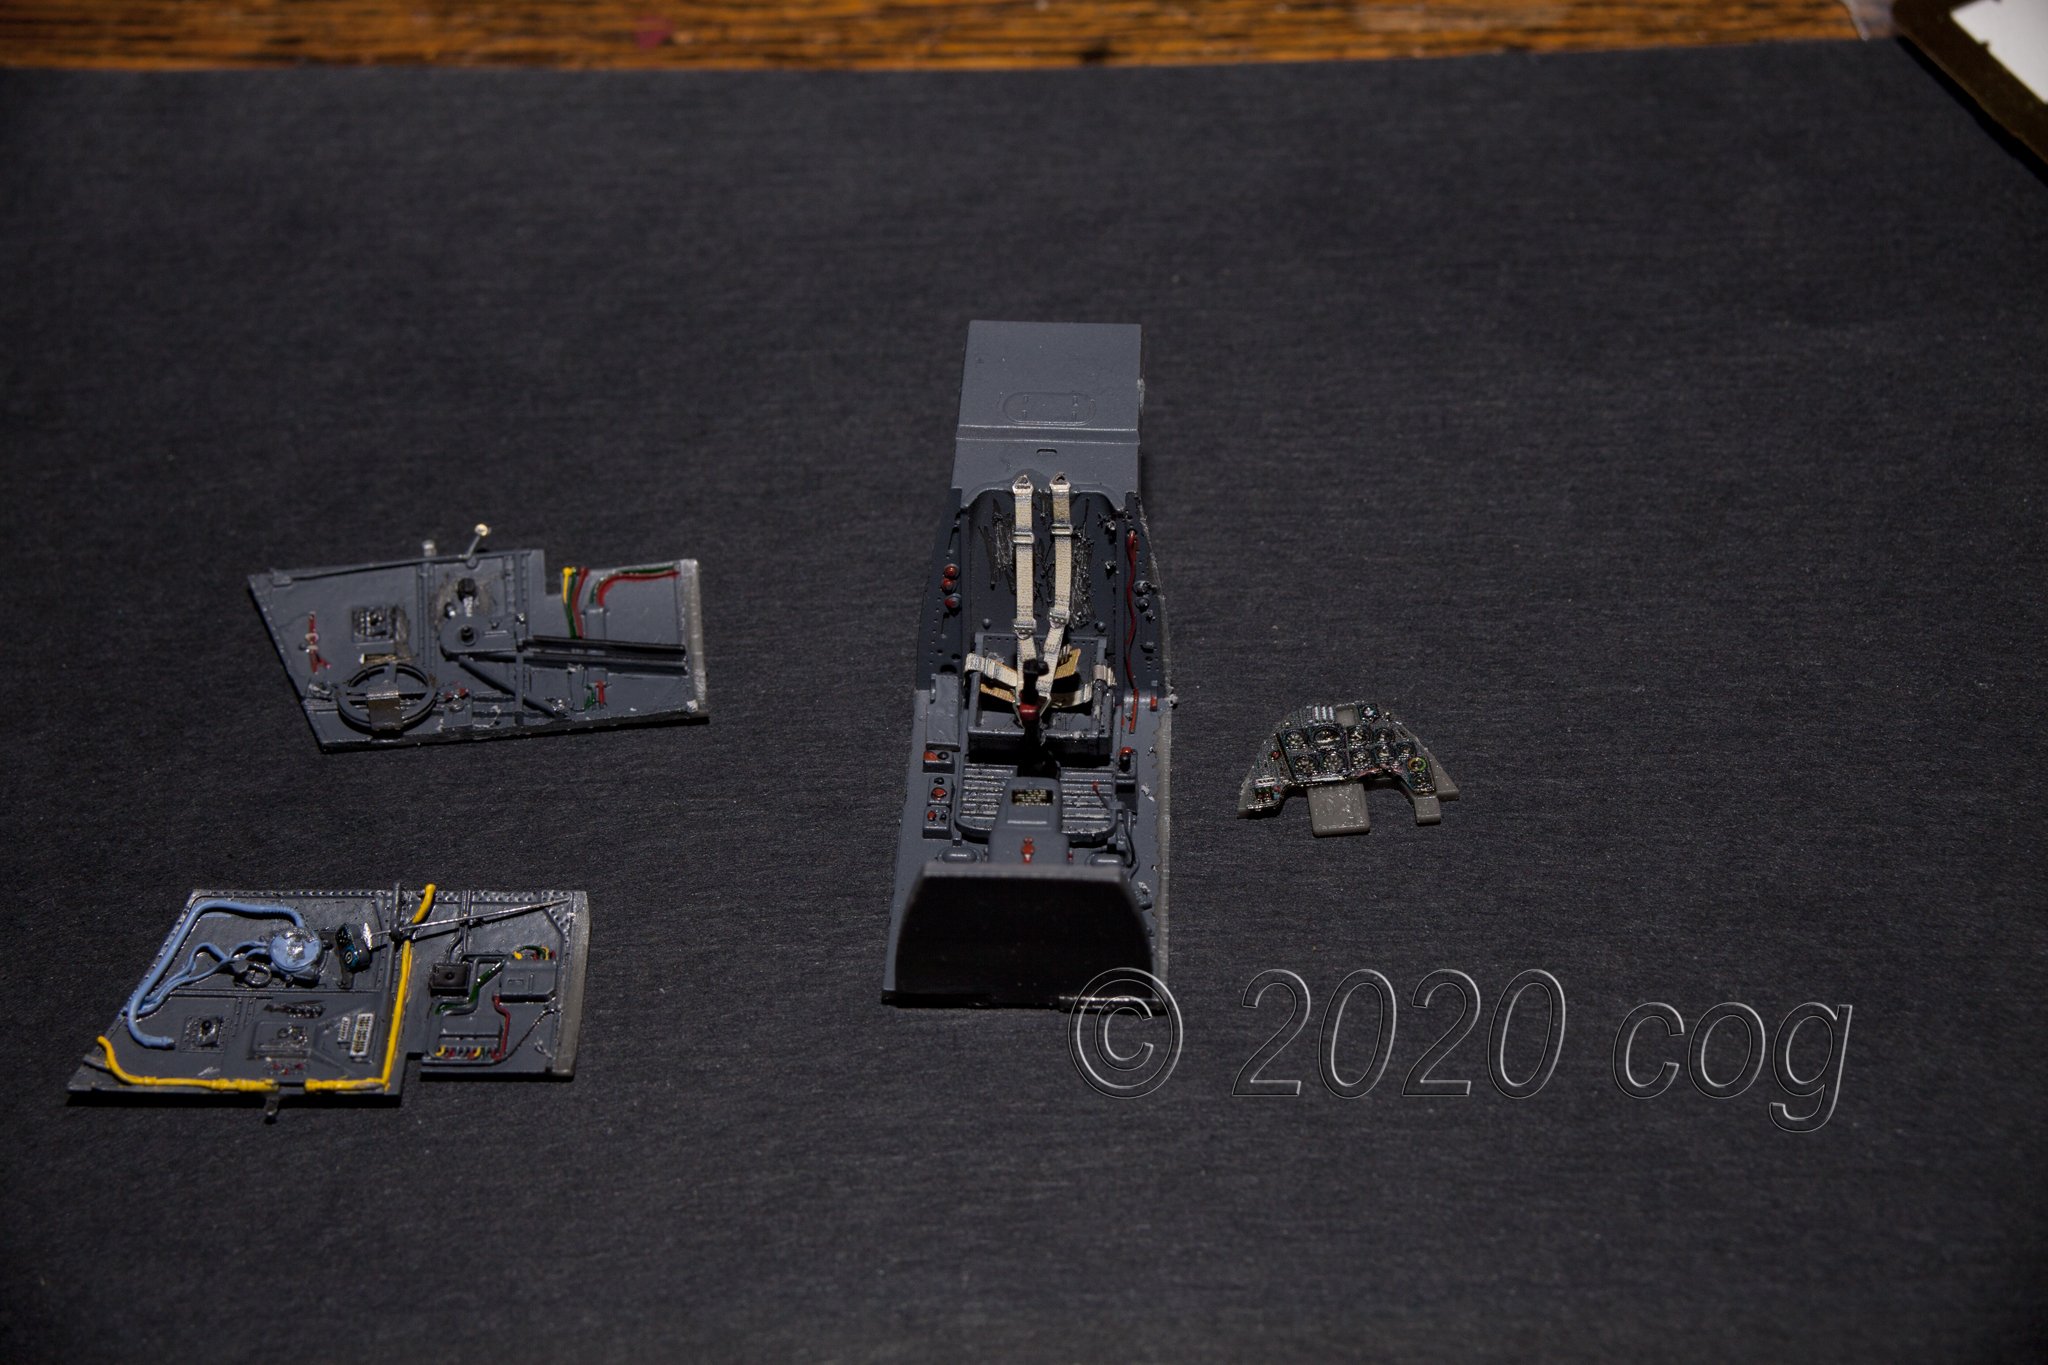
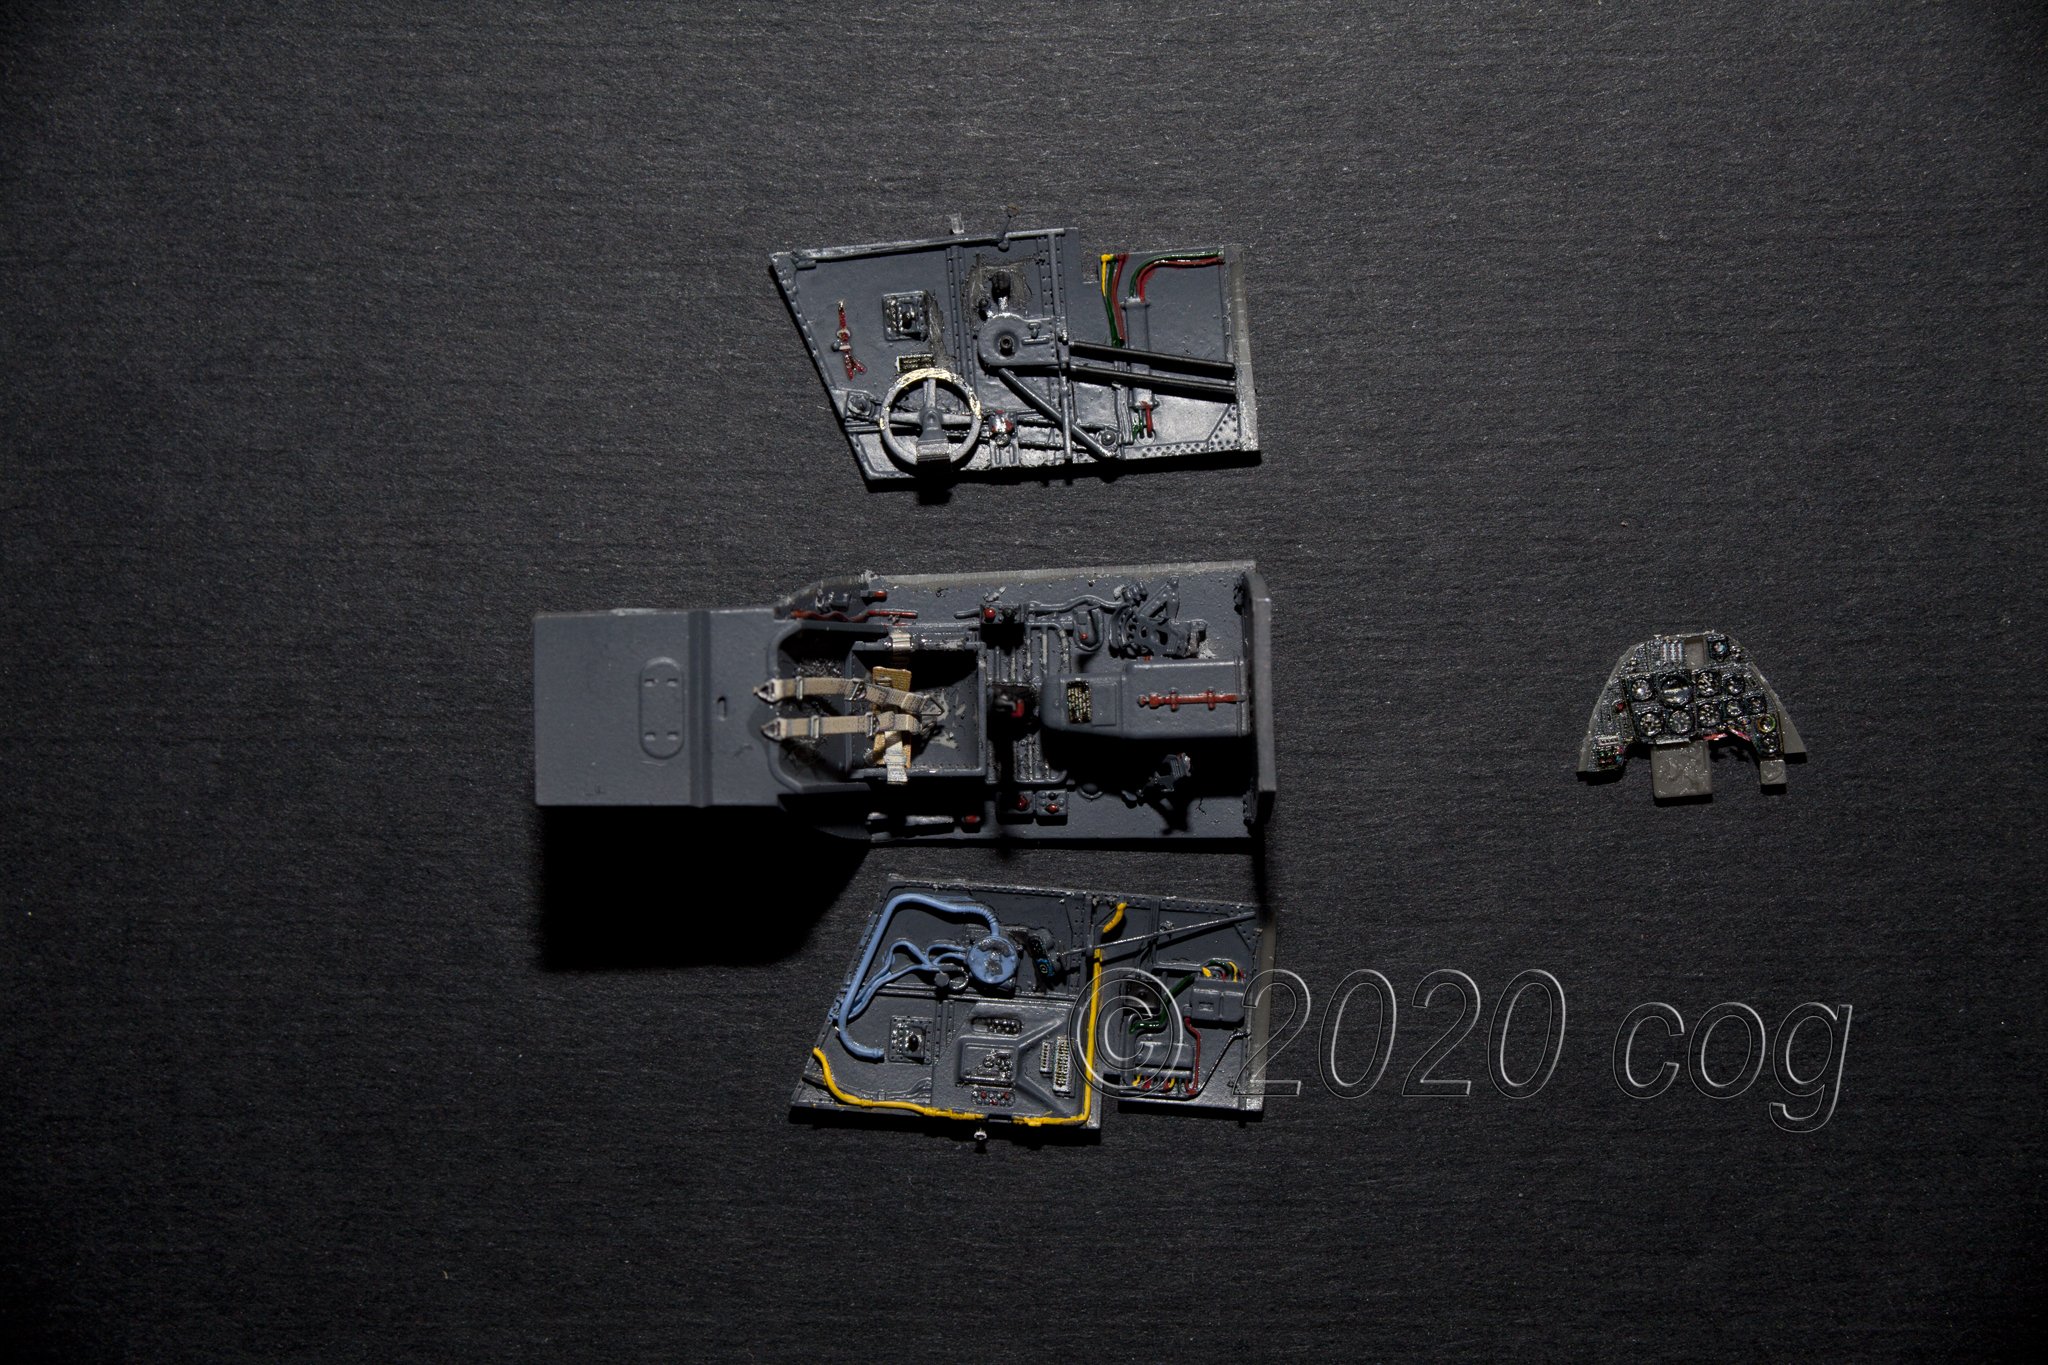
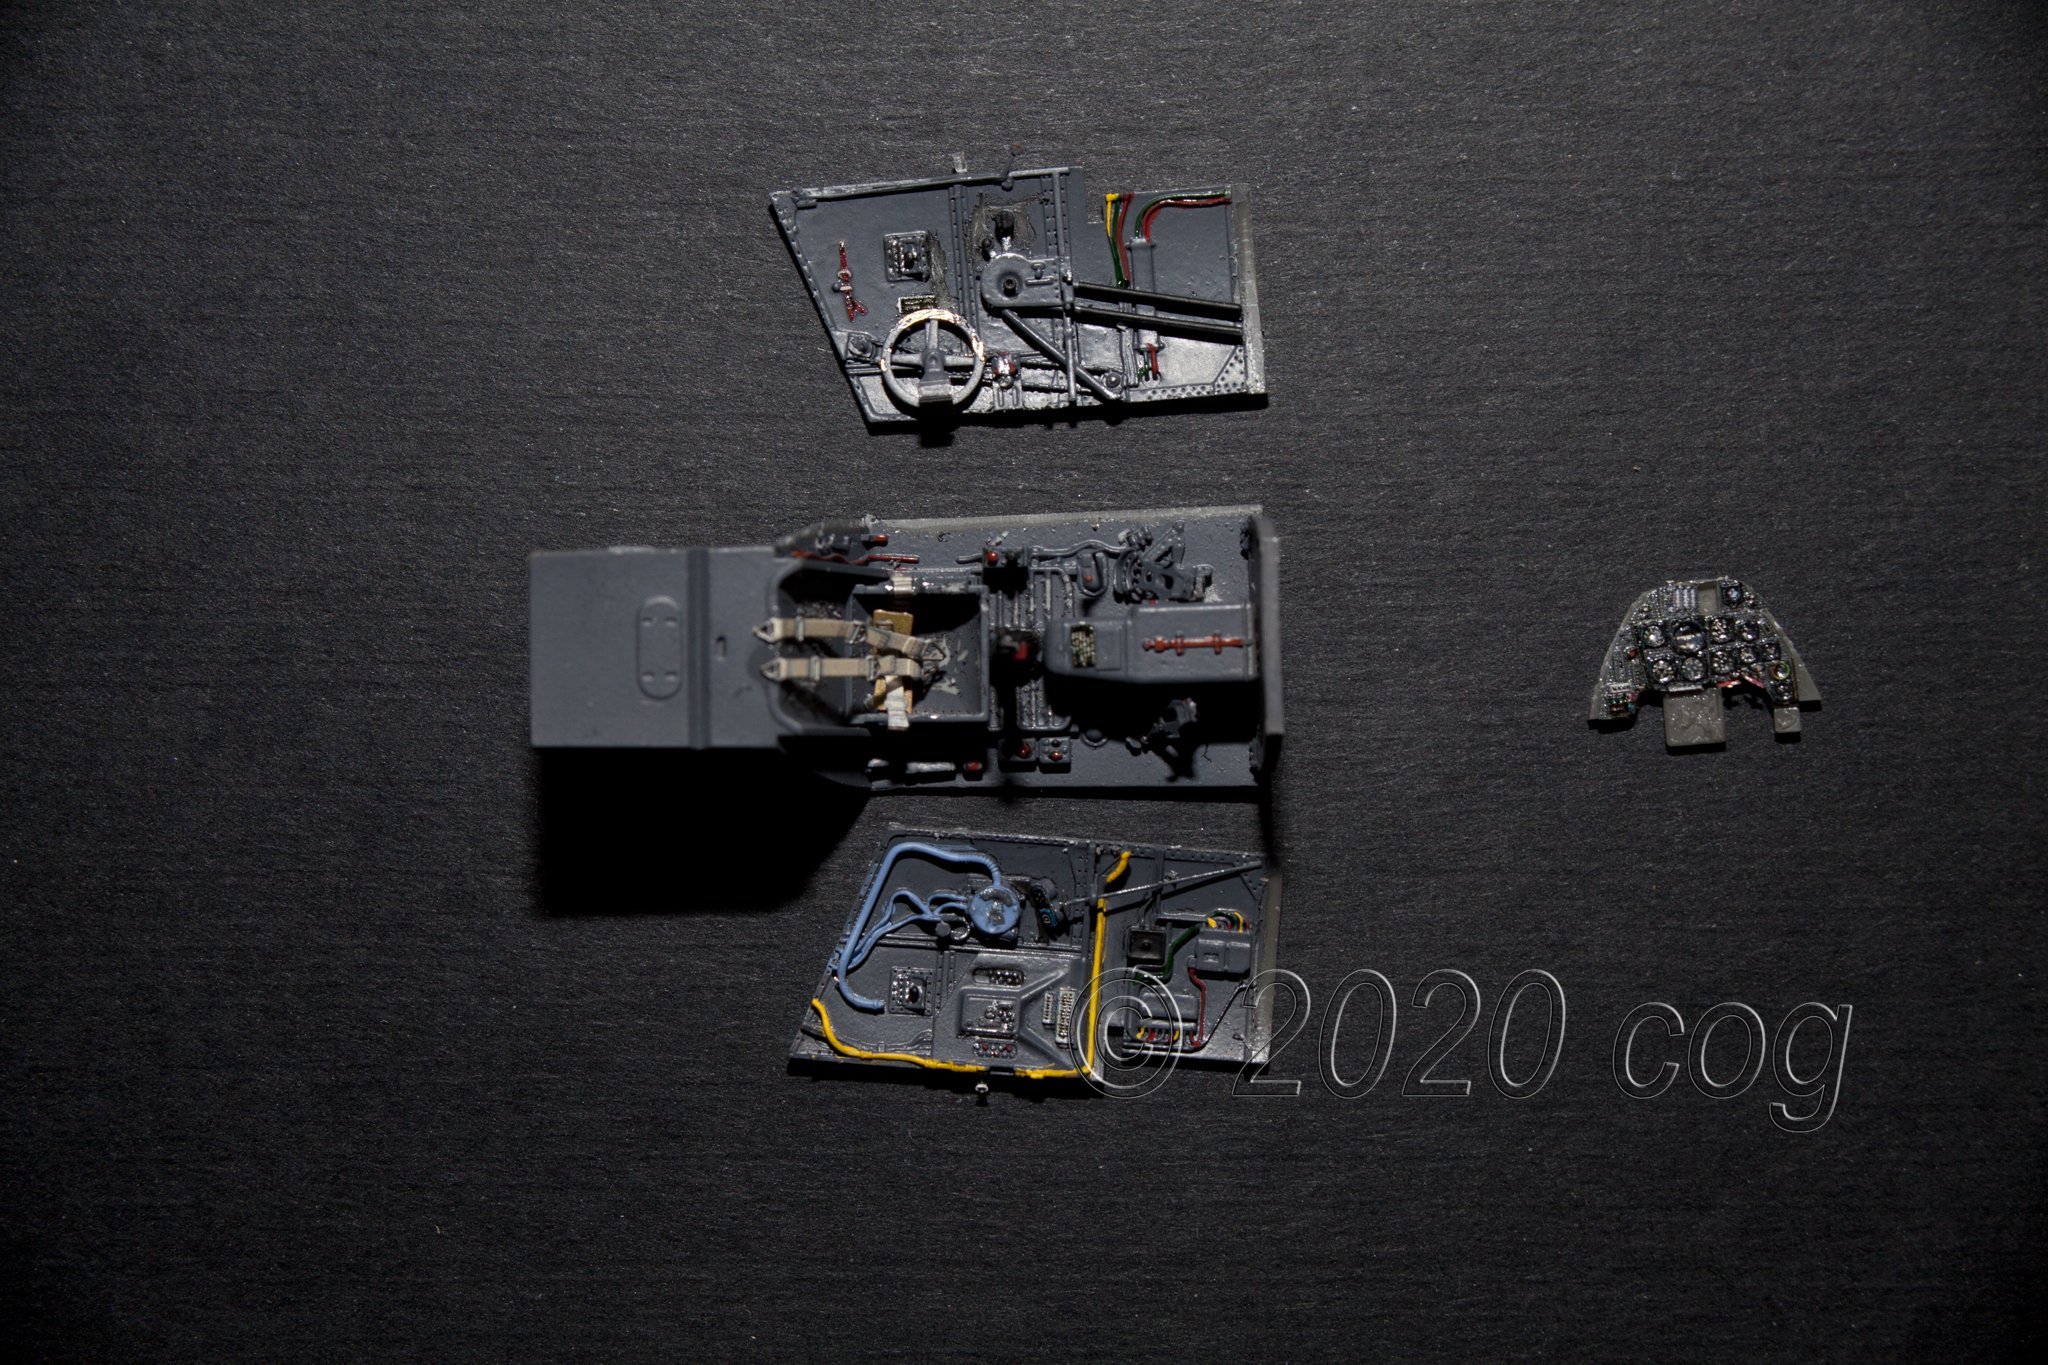
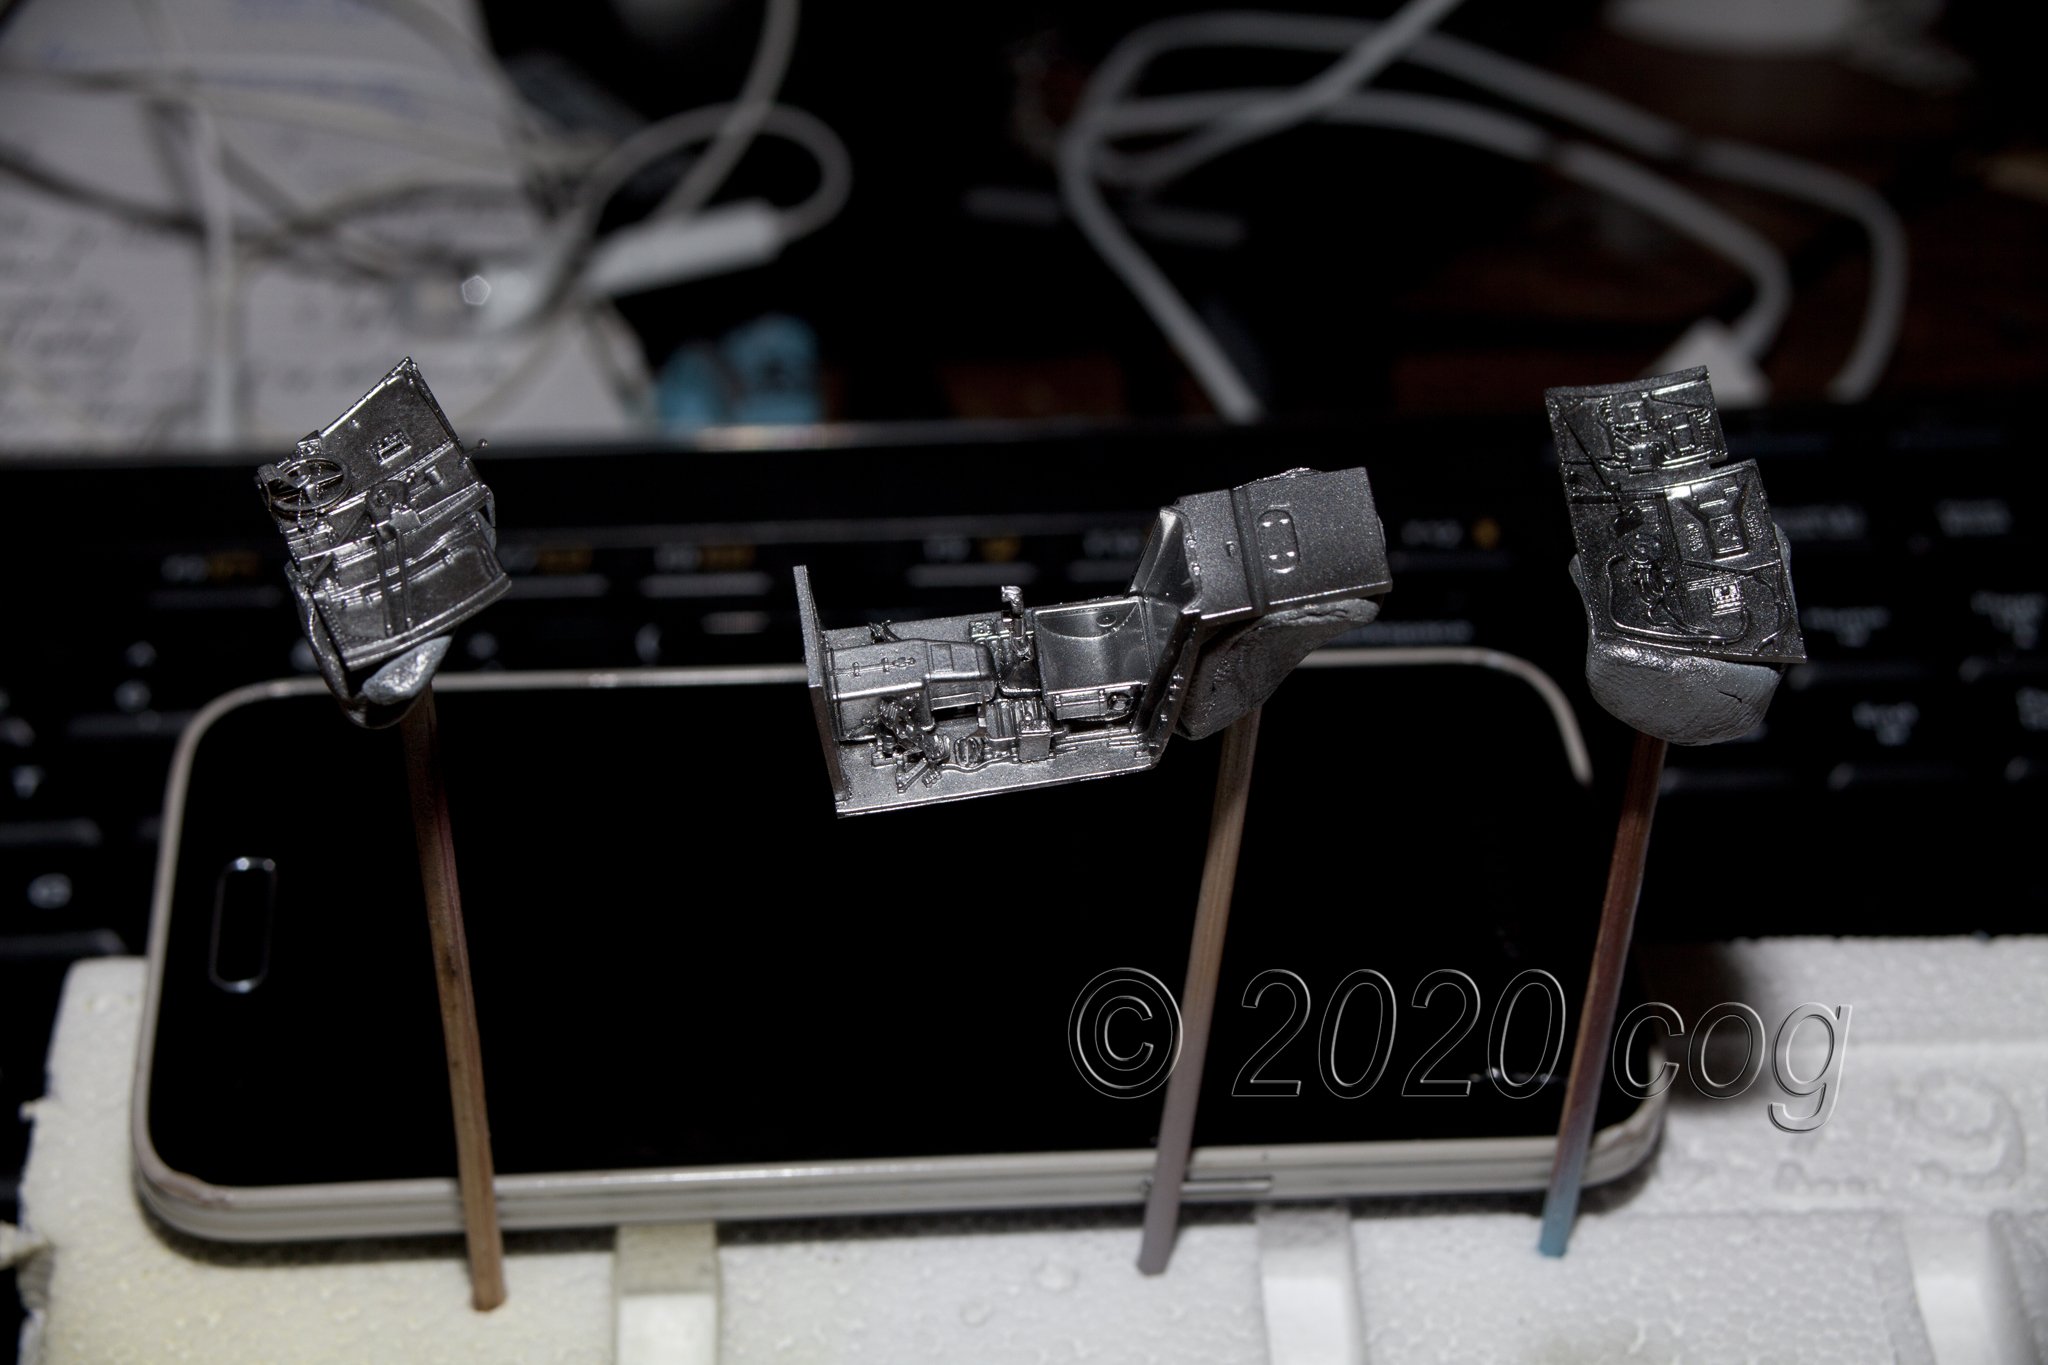
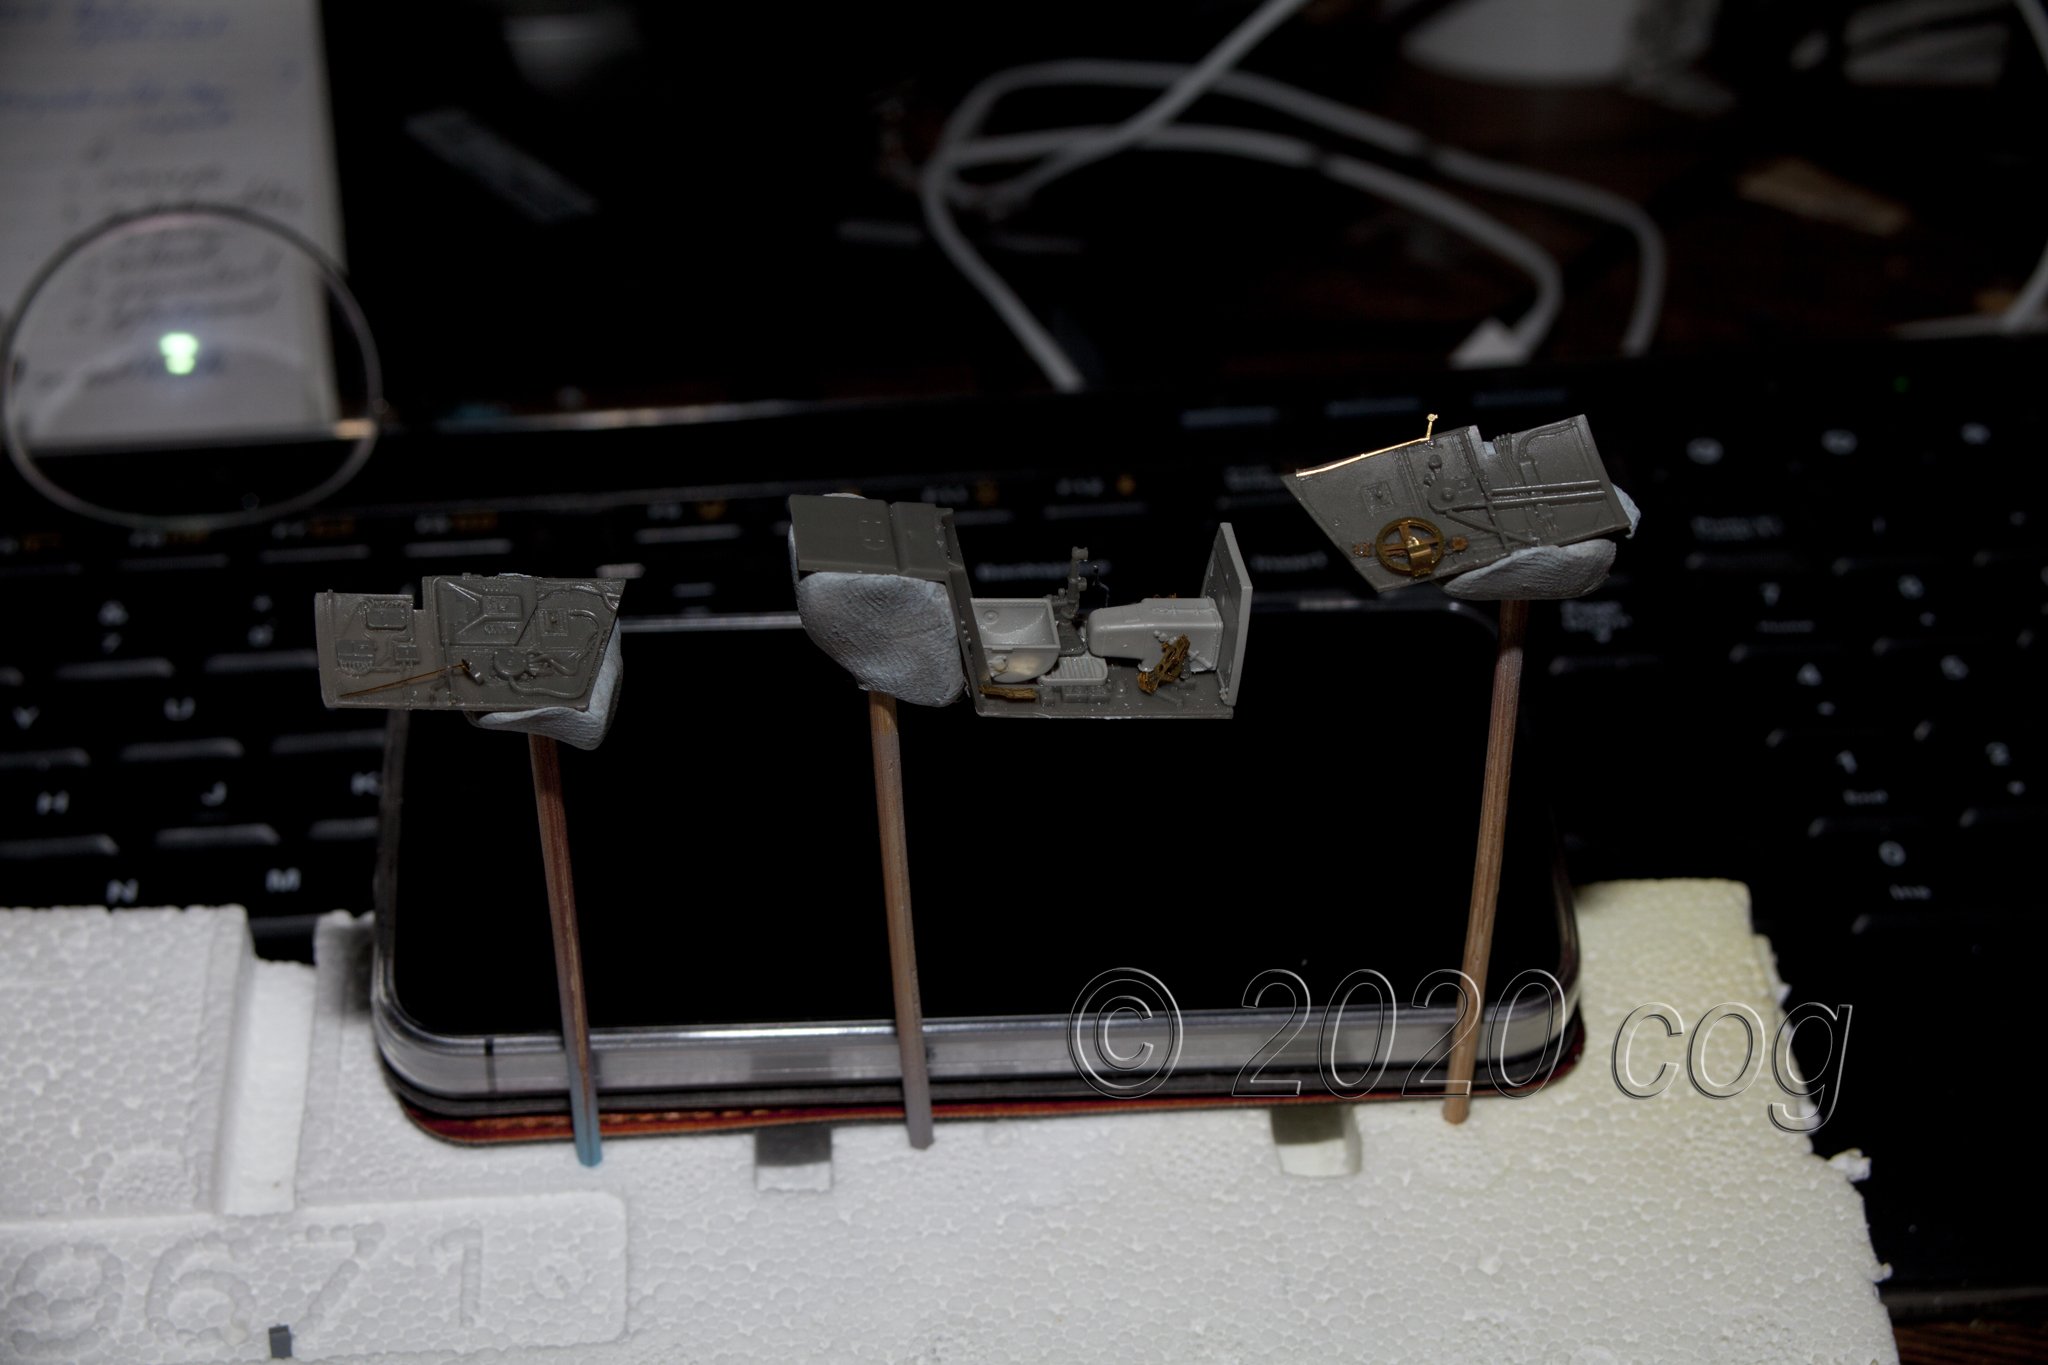
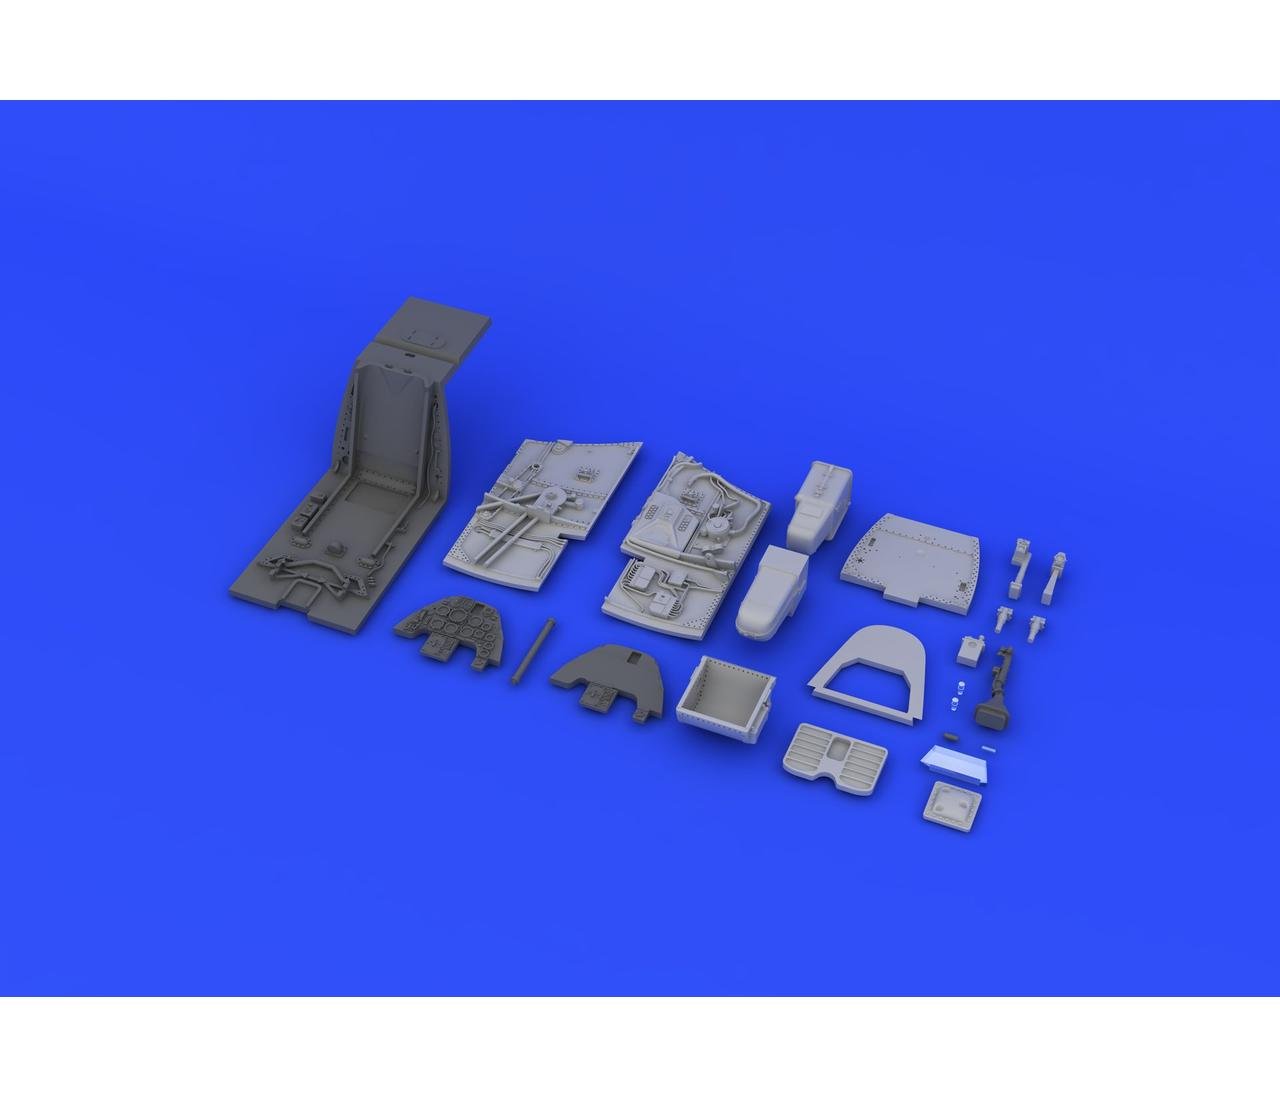
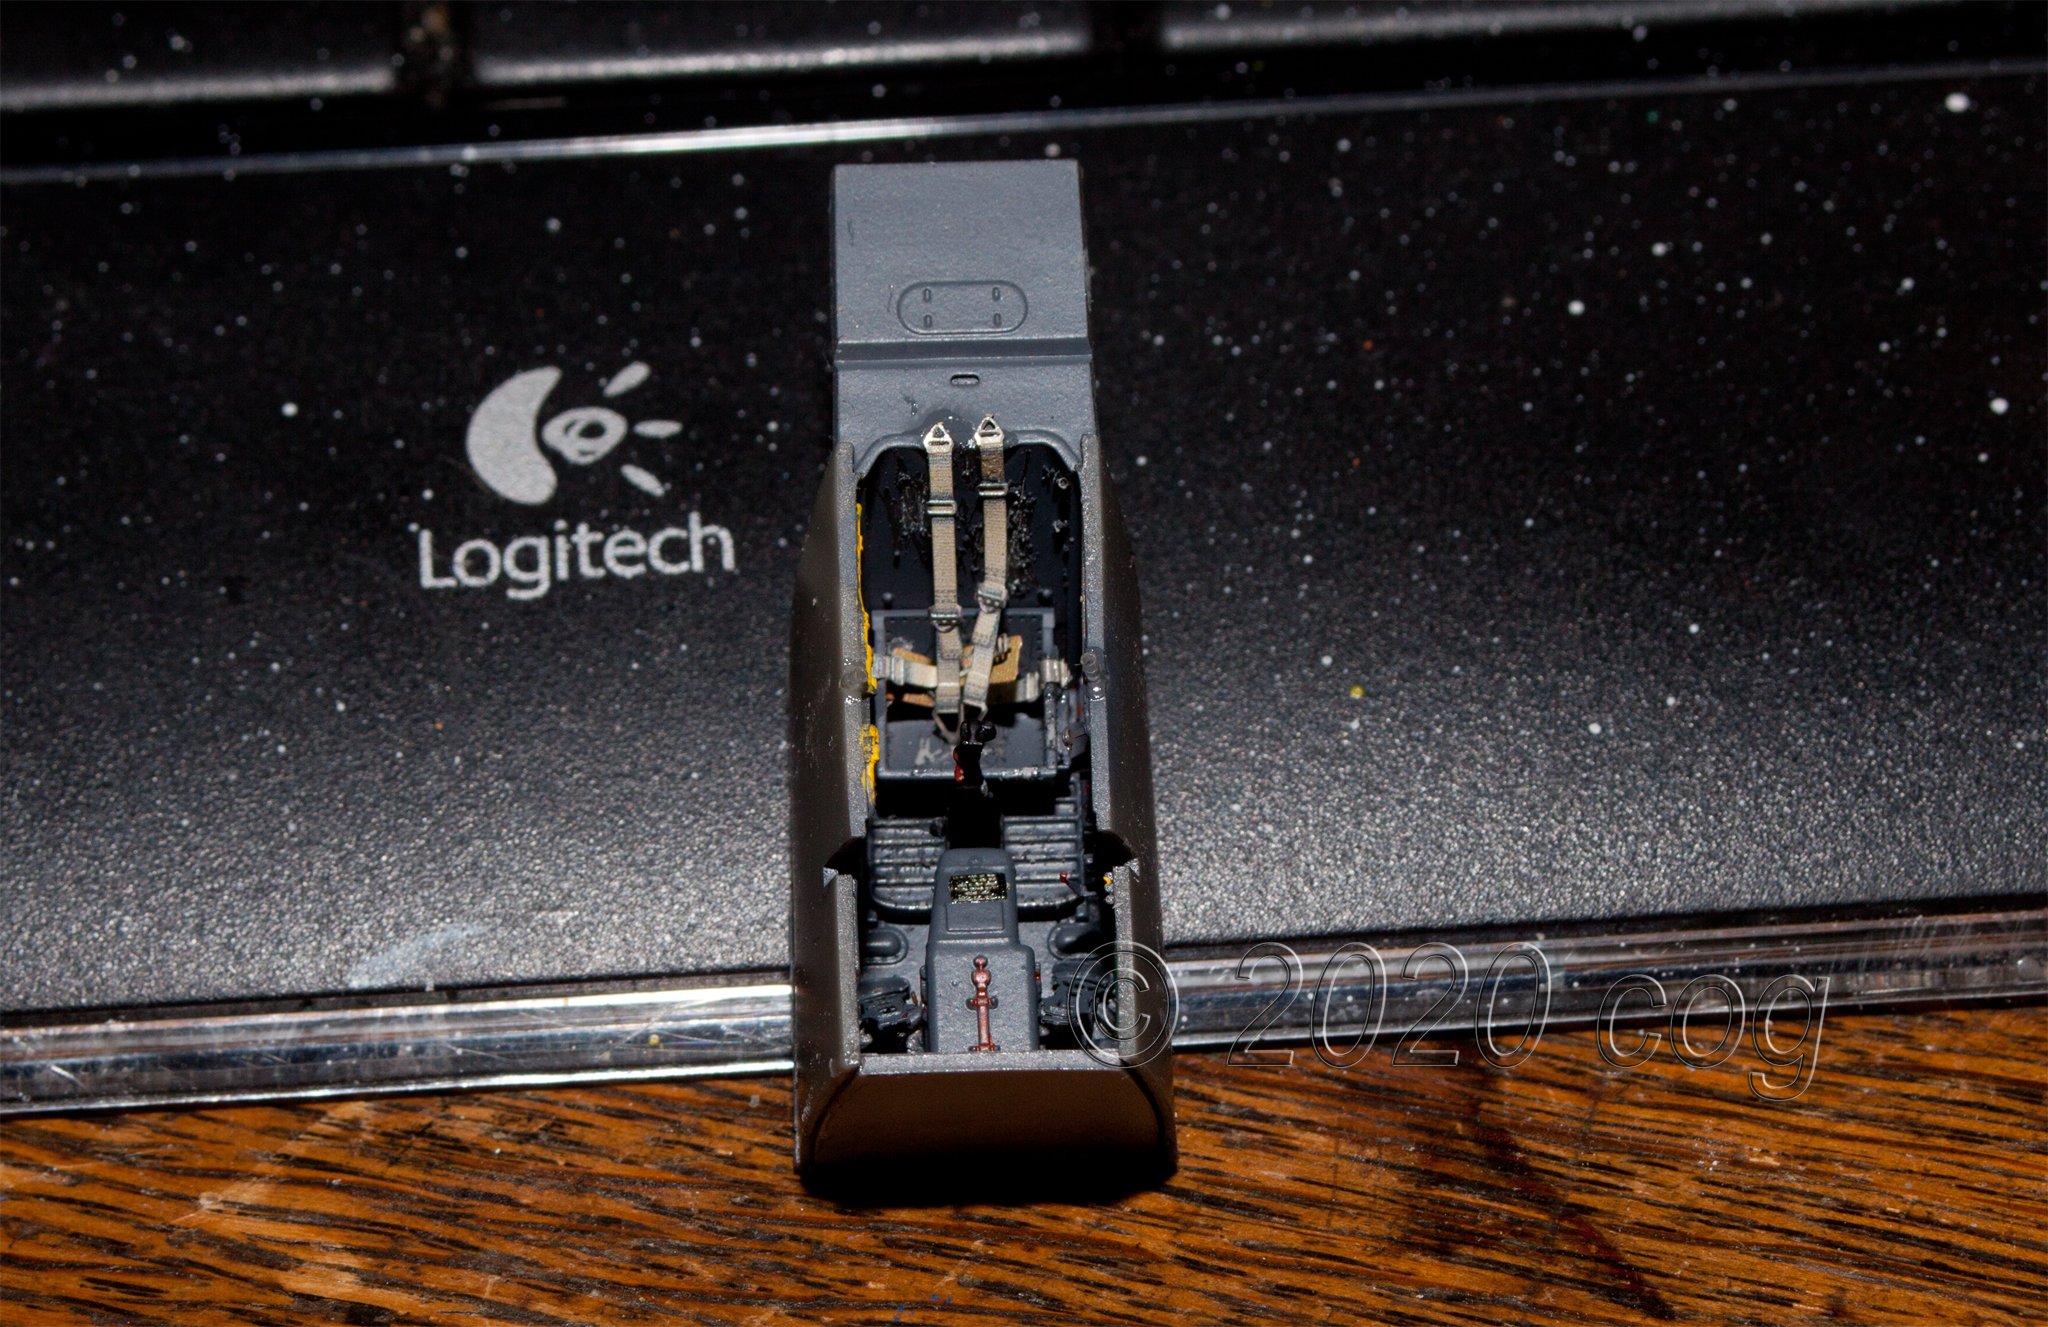
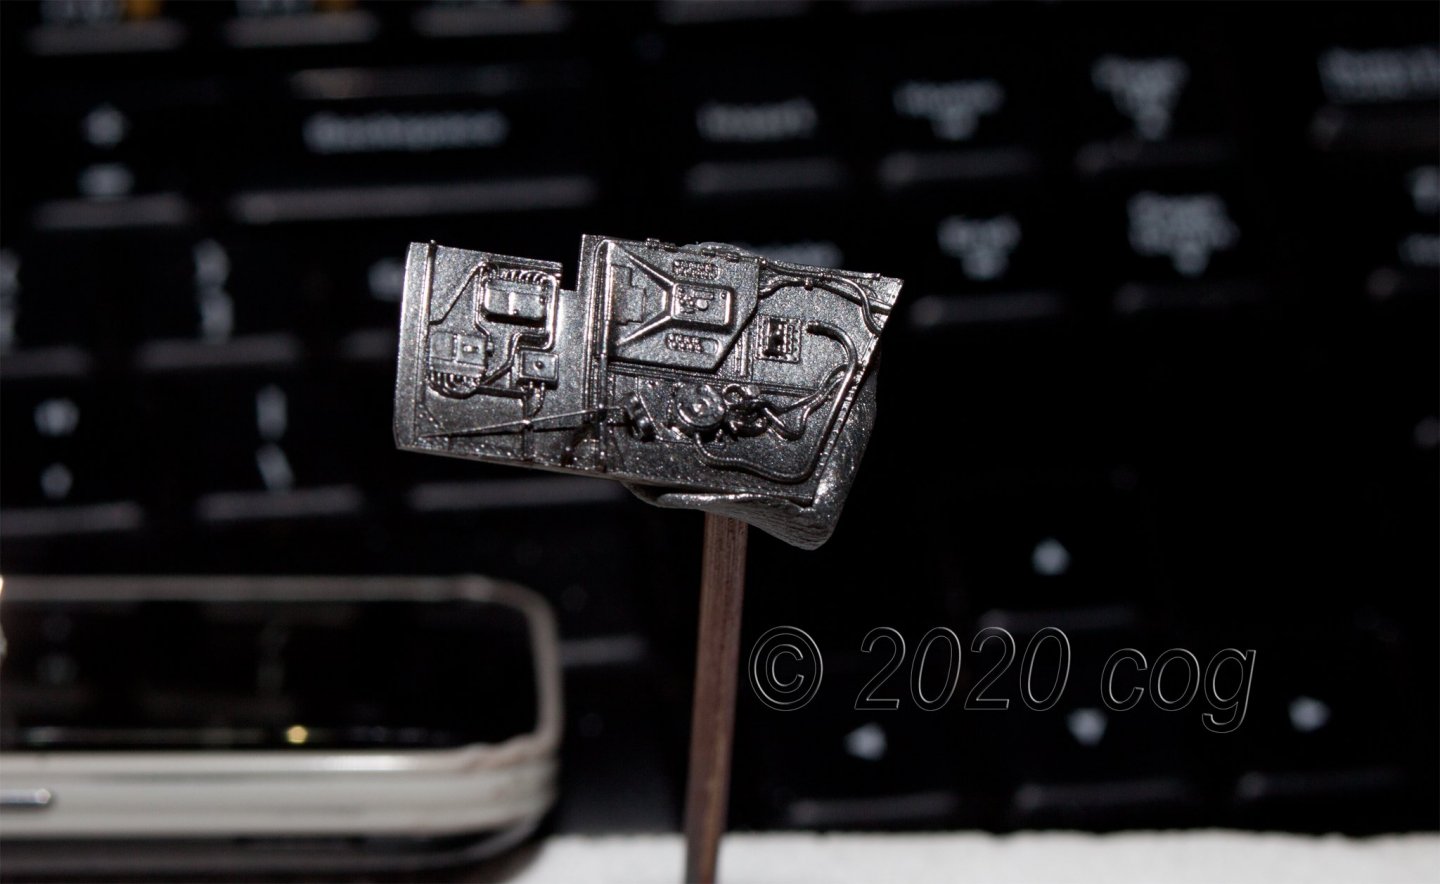
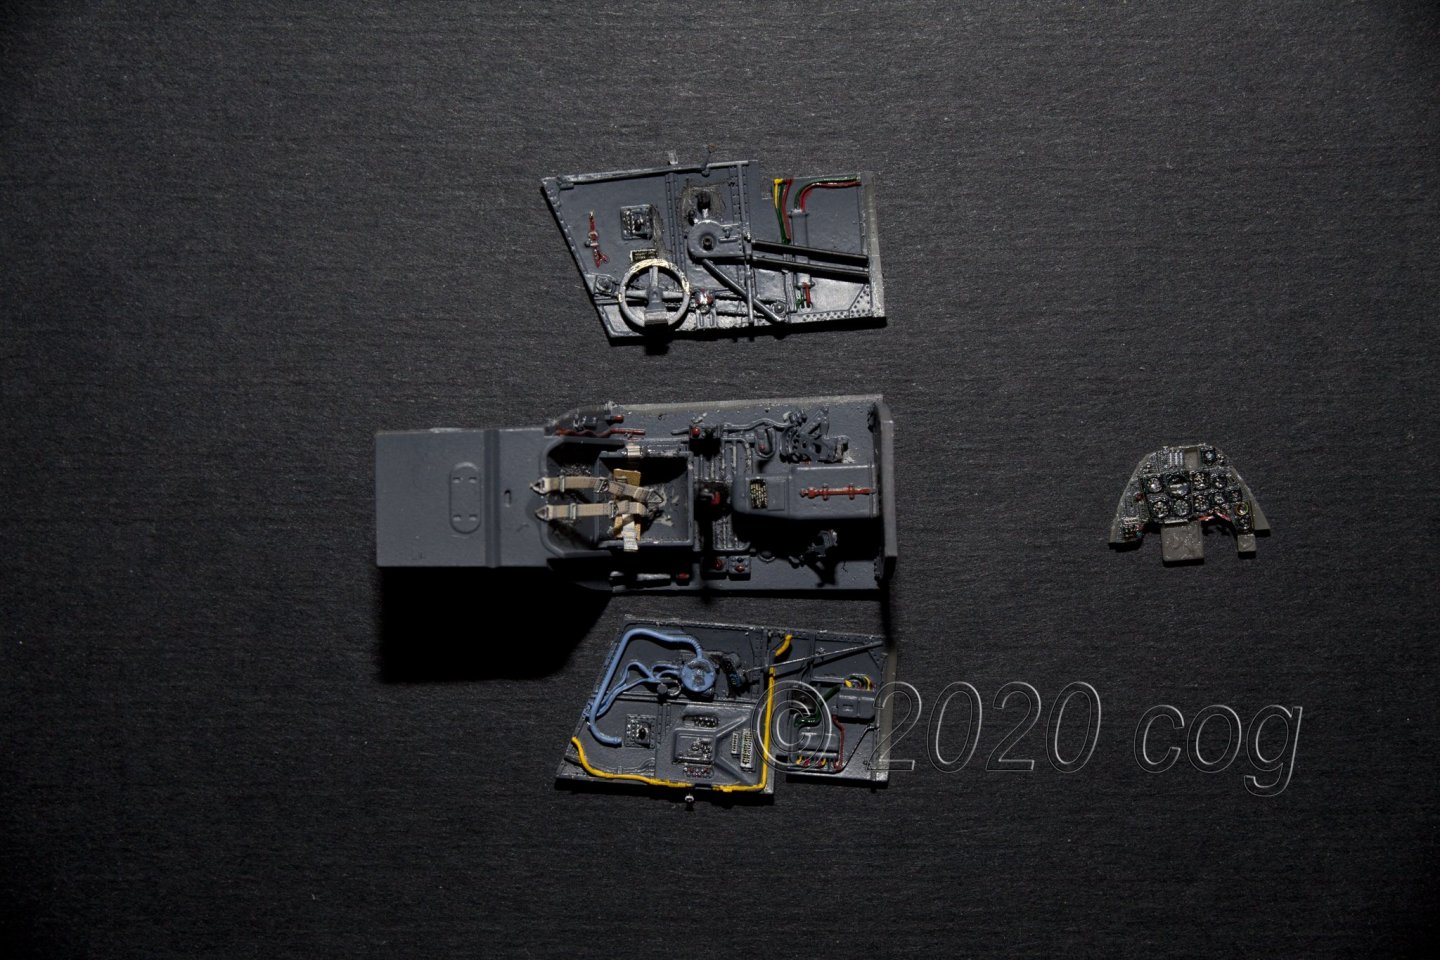
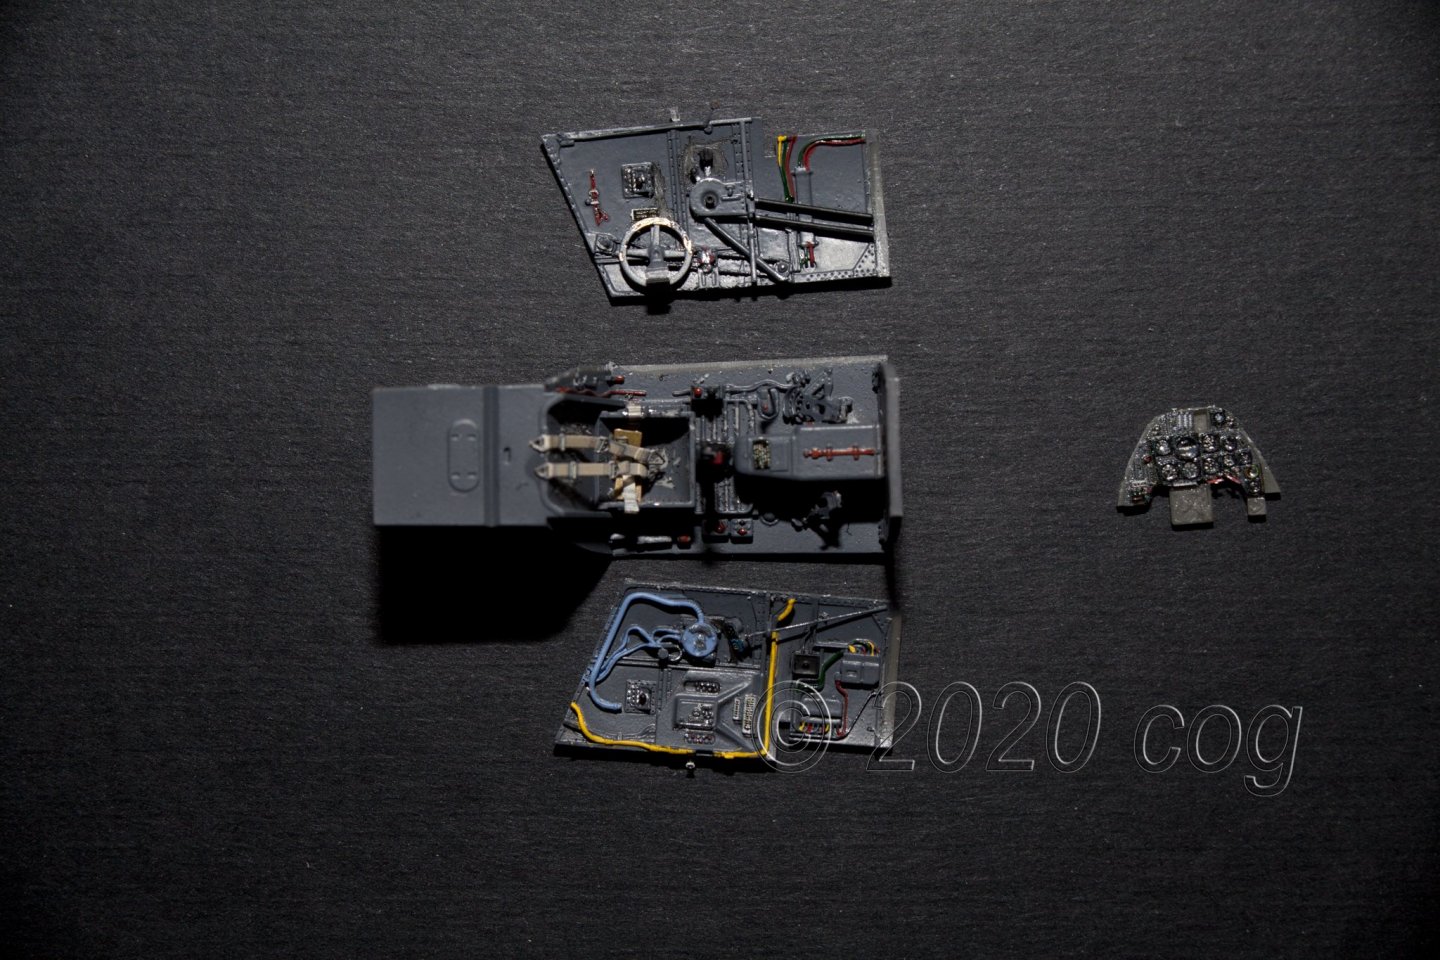
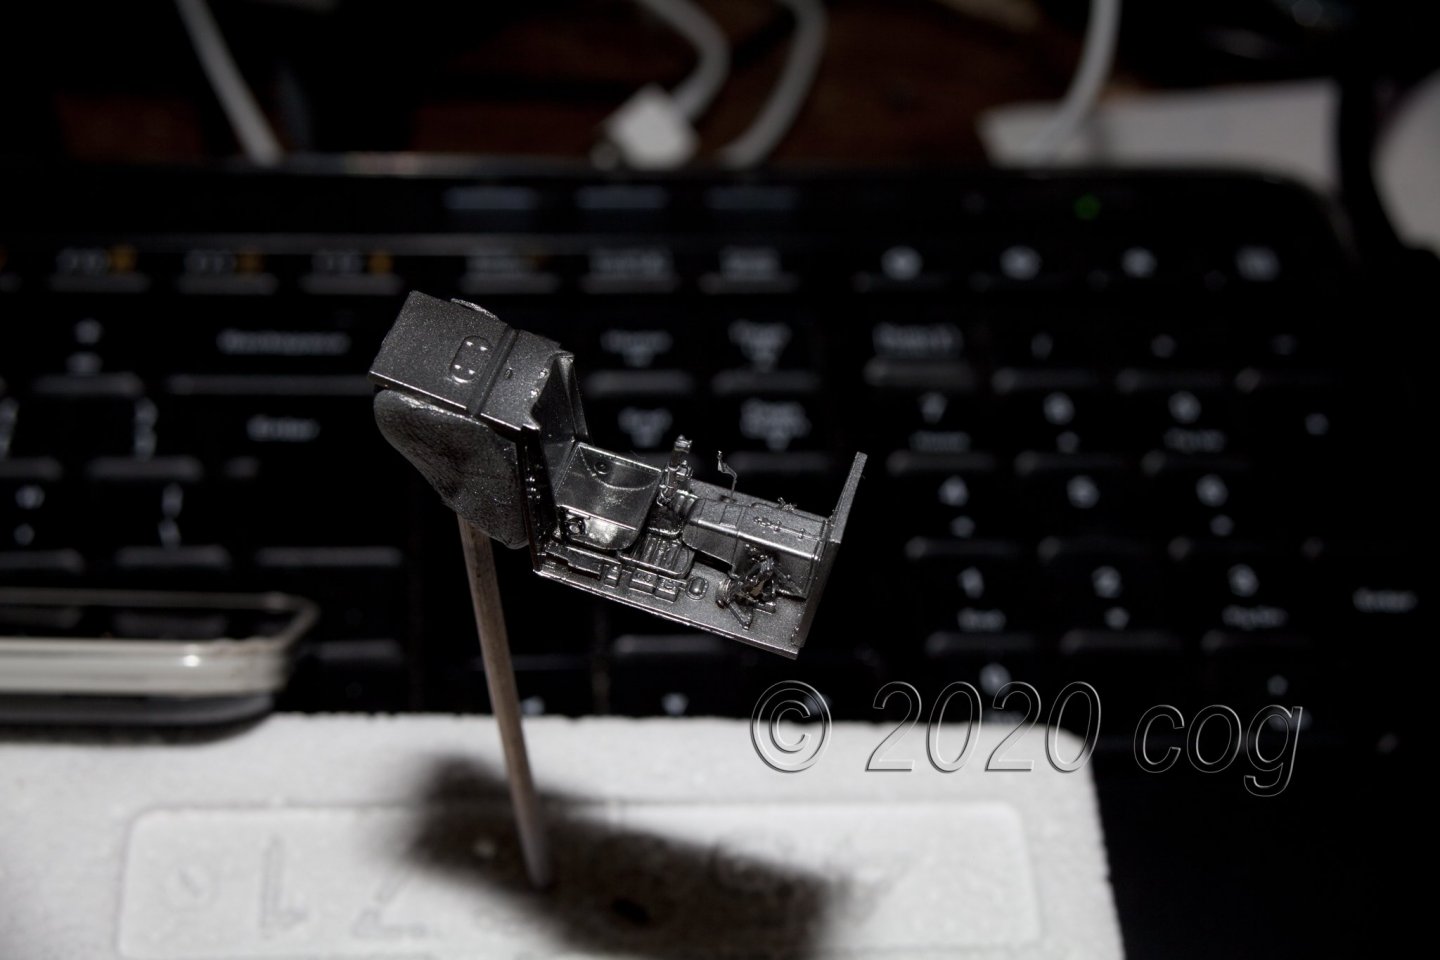
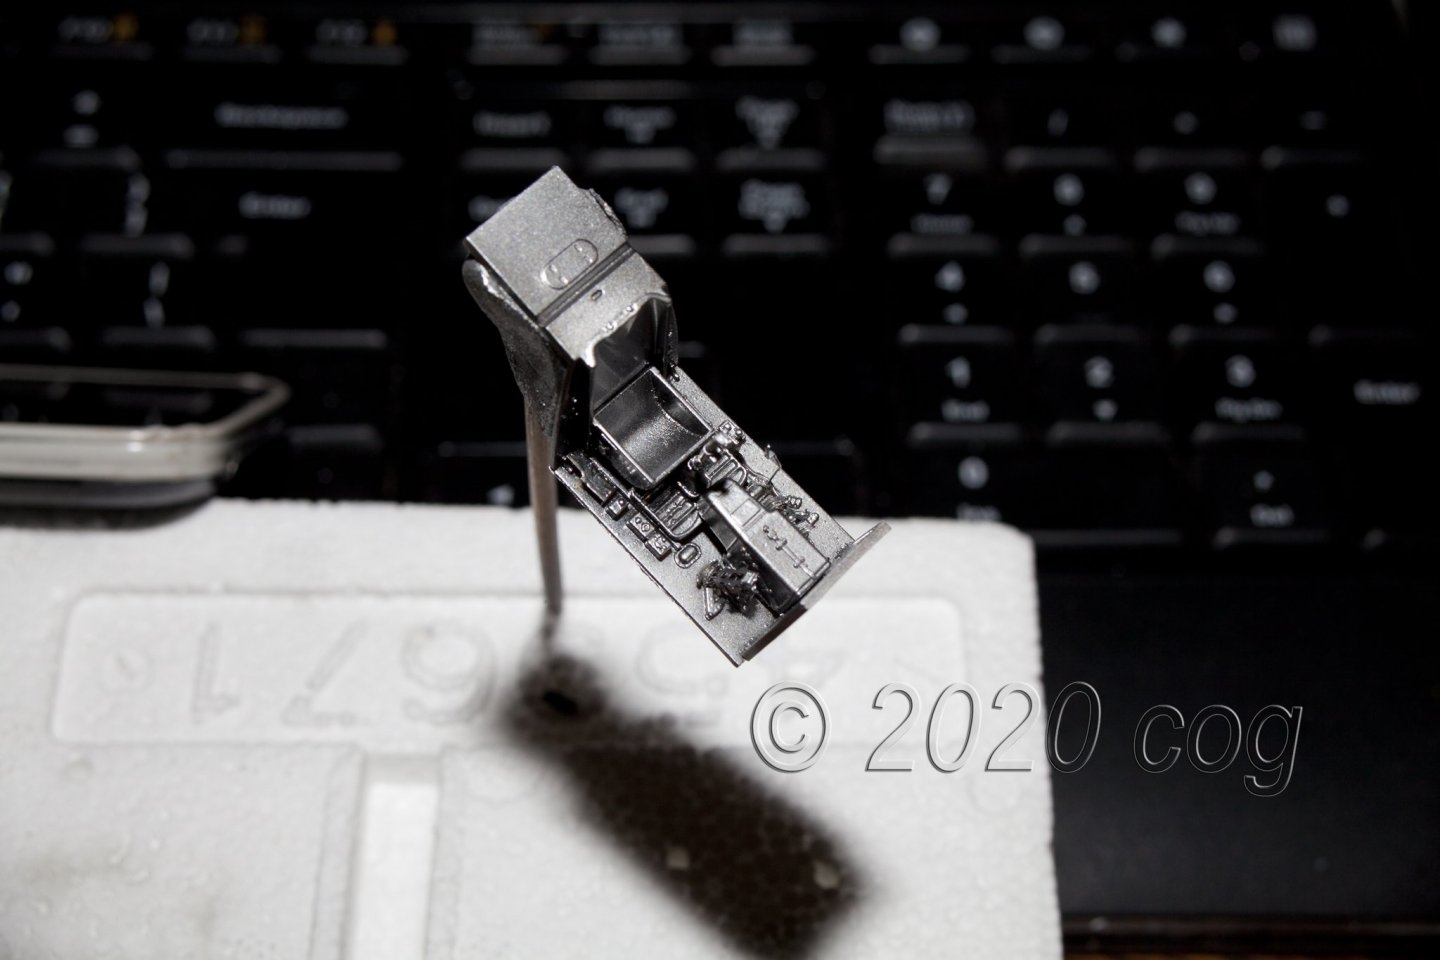
Since I have little time, I left my SMS Seydlitz in her mothballs and picked up this little build. The only thing I can say: "it is small!!!" and it is almost finished before you start it Resin and PE ready for painting Base coat "Black base" with chrome - both AK extreme metal colours - enamels Base colour is RLM 66 some details filled in with colours, and metal PE which has been prepainted - Vallejo acrylics - added a bit of wear and tear Getting the PE, resin, and plastic fitted took the better part of an eveing, painting took in all about 1.5 - 2 hours. Quite a fun model to build despite it's size, lot's of detail on the resin parts too Cheers


- 30 replies
-
- 13
-

-
Got the same one somewhere in my stash. Looking good OC. I'll follow along, and see what surprises this kit has in store for the ignorant builder
-
Must be (getting) old and senile, besides I wouldn't know what marriage is like, so I keep on asking What's the ratio thinner:primer you use? 1:1 , 2:1 , 3:2 ... I find the Primer quite thick, and have already slightly diluted it for brushing
-
HMCSS Victoria 1855 by BANYAN - 1:72
cog replied to BANYAN's topic in - Build logs for subjects built 1851 - 1900
Wow- 1,013 replies
-
- 4
-
-
- gun dispatch vessel
- victoria
- (and 2 more)
-
Tamiya primer? I have not found anything adherent enough to stick to PE but rattle can primer. Either Tamiya or Vallejo. The bottled Vallejo primer is a no go on PE. Bold move
-
Revell Tie fighter - 1:110 by Fnick (Finished)
cog replied to fnick's topic in Non-ship/categorised builds
Nope, he thinks everybody is like him Fnick, I used Vallejo rattlecan lacquers for the destroyers I have built, and for a BF 109G I used AK from a bottle, because I didn't have any satin left in a can. In the end it all boils down to preference. P.s. I didn't like Valleyo bottled lacquers for use in an airbrush, with a conventional brush it worked as expected -
Forgot to ask previously: Red base coat when chipping to make it look like rust? I presume these were in the after market set. The kit's booms were probably to weak to keep the net up ...
-
Must be the light in your house !!!
-
Odd, it looks like you have to set it "colder" when your red is going towards orange. Maybe play with it a bit. Or just leave it at it, and don't be bothered by Ken nattering about orange
-
Ken is right, it tends to go to orange, hardly fire engine red, Jack (I have just recalibrated my monitor - 4K) Nice build by the way. Something not so violent ...! It could be the setting of your camera ... white balance ...