HOLIDAY DONATION DRIVE - SUPPORT MSW - DO YOUR PART TO KEEP THIS GREAT FORUM GOING! (Only 24 donations so far out of 49,000 members - C'mon guys!)
×


capnharv2
-
Posts
725 -
Joined
-
Last visited
Content Type
Profiles
Forums
Gallery
Events
Everything posted by capnharv2
-
 Crackers, Beethoven is excellent, but I'd prefer Mendelssohn's Scottish Synphony. Can't go wrong with the Brandenburg Concerti or Handel's Water Music either. If I were building more modern warships (especially WW2) i'd go with Richard Roger's music from "Victory at Sea". But to each their own. Glad to see a build log of the Gorch Fock in the works. Thanks, Harvey
 -
If you start spraying with paint cans, one useful device is somethin called a "can gun". I basically slips over the top of the open spray can and remotely activiates the spray button. Some people have had great results with it, others, not so much. They run about 4-5 dollars at the hardware store. I like them-they seem to help the spray stay more uniform when it comes out. And, I assume you've heard/read about the turning the spary can upside down when you're done, and spraying till only clear propellant comes out. That, and a wipe down of the nozzle with paint thinner, should give you a fresh start on your next spray job. Could you post a pic of the Testor's paint pen? I believe I've seen it, but would like to see it again. BTW, great job on the white stripe! Looks good an crisp! Thanks, Harvey
- 47 replies
-
- 1
-

-
- constitution
- revell
- (and 1 more)
-
Well Floyd, sometimes you gotta take things into your own hands . . . Harvey
-
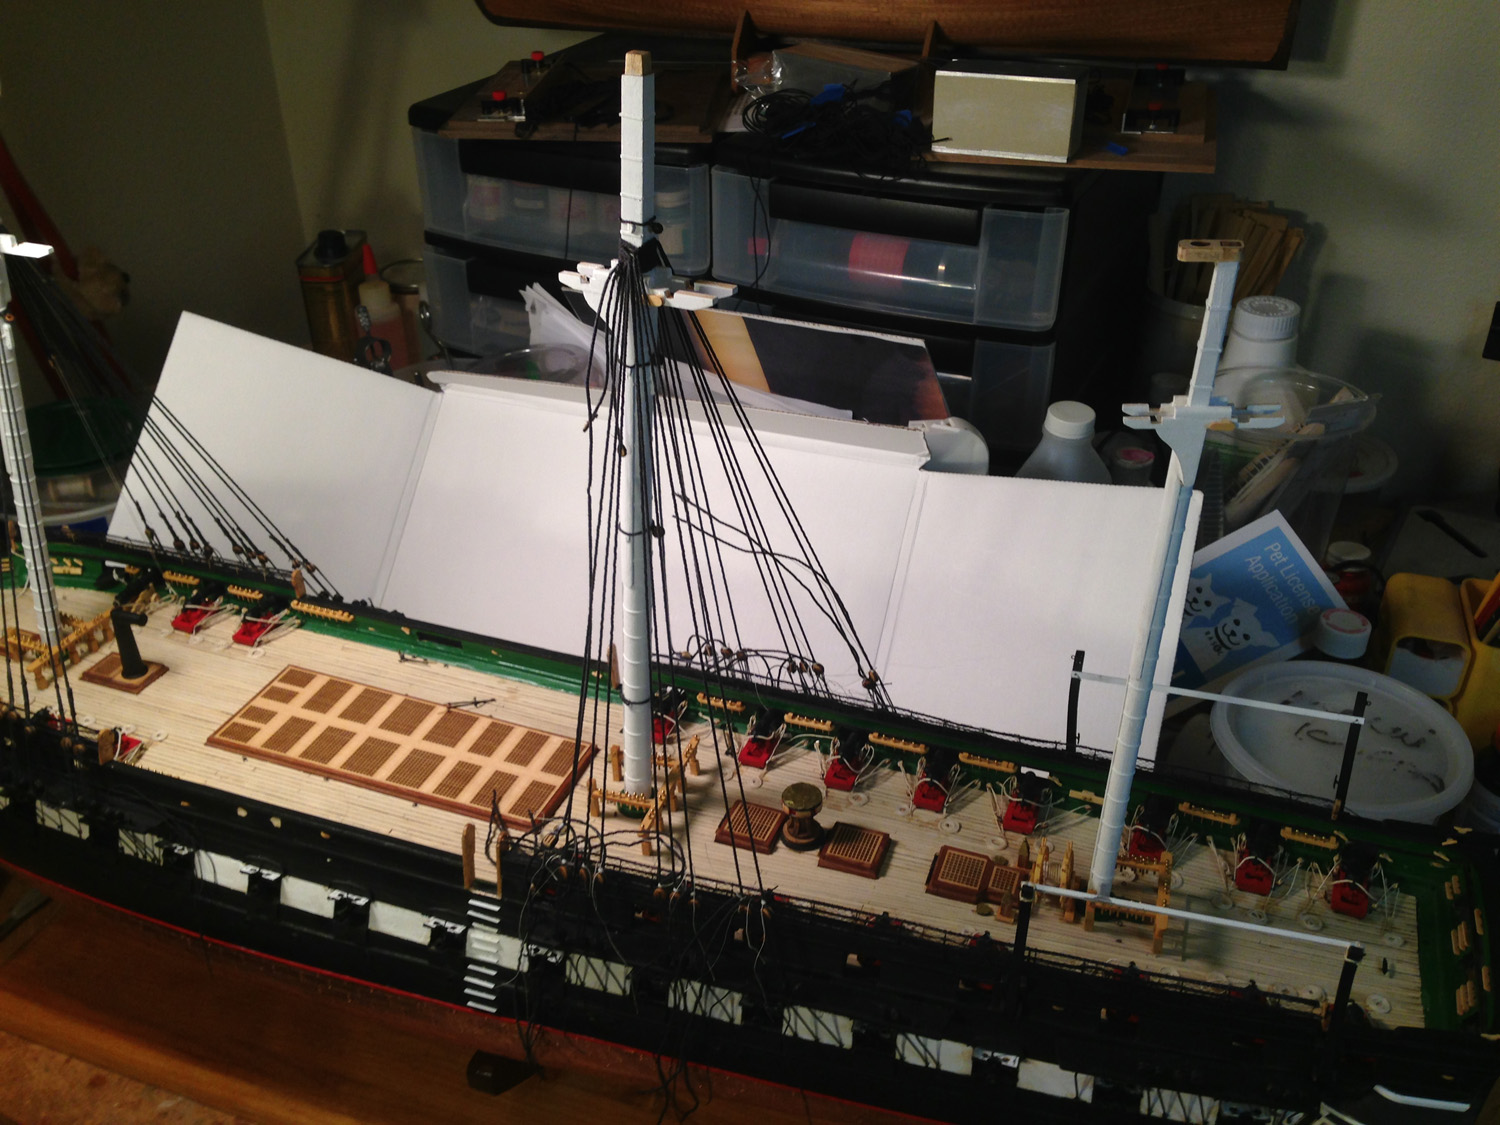
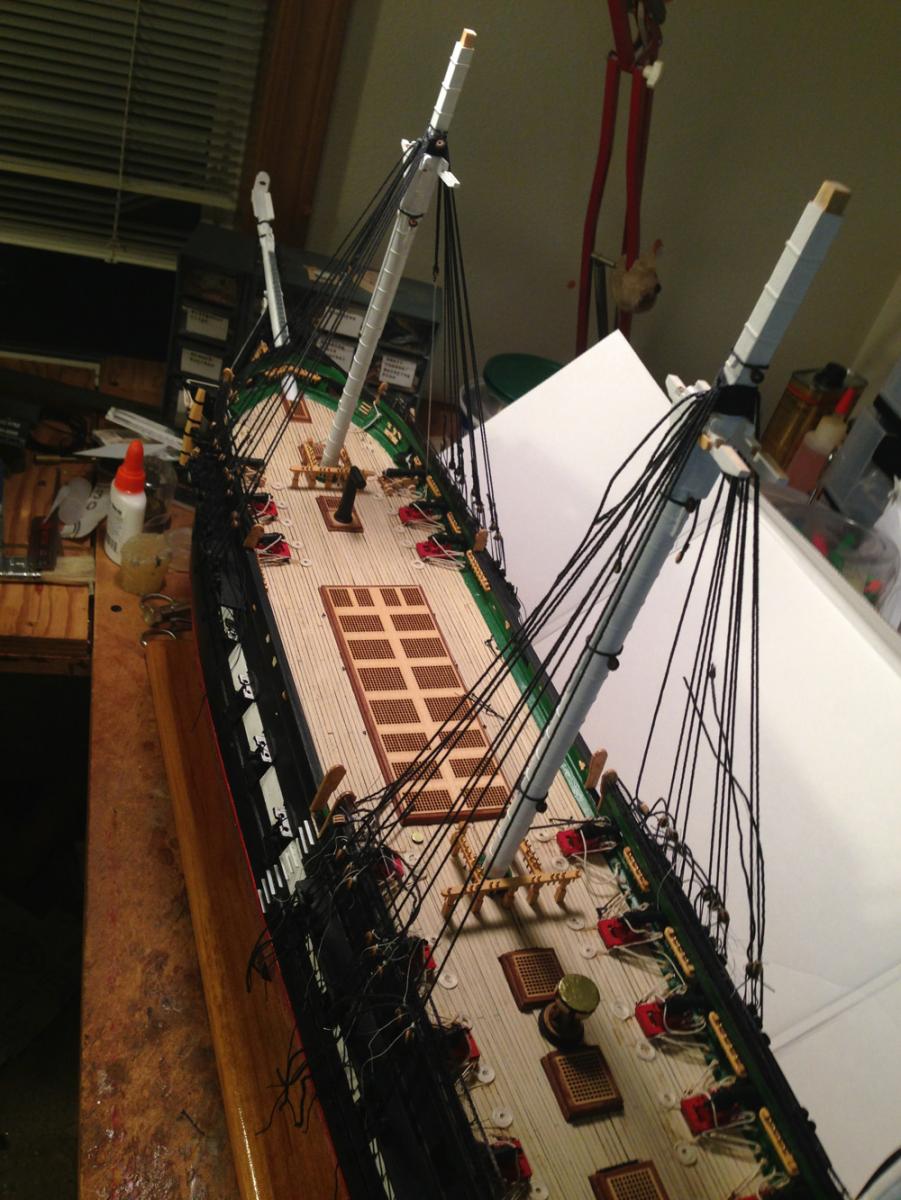
Thanks CaptainSteve. I blame the photographer (Mike Graff is an excellent photographer) Sometimes, the stars just line up right and I can get a little work done. My wife went to bed early tonight, and the cats didn't come down to help, so I was able to start putting the mainmast shrouds on: And I realized that when I posted the photos from the other day, I didn't include an overall view of the foremast shrouds: With a little luck (and a quiet house) I should be able to start trimming the mainmast shrouds. Thanks, Harvey


-
Kimberley, You're at a point that we've all been at (and will be again every time we work on our models)-how good is good enough? I'm afraid you're the only person who can answer that. We can all see every error we make on our models-every slip of the paintbrush, every knot that doesn't look correct, every piece we install-we can second guess ourselves forever. Ask any of the "experts" here-for every model they've made that we see as perfect in every way, they see imperfections and dozens of things that they would love to do over. And the truth is-almost everybody will see what you've done and think it's fantastic. I suggest you look at your progress in this light-is my desire for perfection getting in the way of my enjoyment of building ship models? If it is, it's probably time to move on to the next step and call what you've done "good enough". Another thought-you can look at the instructions and work on some other aspect of the model-the deck, the cannon, the ship's boats, the spars-we all need a change of pace when we've hit a roadblock. Sometimes working on something else helps-sometimes, stepping away from it for couple of days helps. Also, remember that the work that you're doing now, regardless of how you feel about it, is experience that you will use on your next model-and the one after that. We start out knowing very little and add to our knowledge every time we work on our models. I don't know if I answered your question or not, but I hope this helps. And please keep asking quesitons! You've got the largest group of knowledgeable ship modelers in the world here-and we all want to help. Thanks, Harvey
- 47 replies
-
- 3
-
-
- constitution
- revell
- (and 1 more)
-
Dullcote-you should be able to get it at a hobby shop (it's made by Testor's) Tamiya tape-your local hobby shop should carry it, but I've haven't had as much luck. I suspect online hobby shops carry it. And Bill is correct about taking more than one coat. Lighter colors are always harder to get good coverage on a dark base. That's another reason many clean the plastic and coat it with primer. It gives you something lighter to start with (as well as a better surface for paint to adhere to). It's not unusual to need to put 3-4-5 coats of white over a darker surface. Just make sure the coats are thin coats of white (thin as in thickness of the paint layer, not thin as in lots of thinner in the paint). It's a constant battle to get enough paint on to cover the base color but not so much as to cover up the detail. Thanks, Harvey
-
Andy, Thanks for the note on the Dullcote. I hadn't thought of that, but I like it better than paint. Harvey
- 47 replies
-
- 1
-
-
- constitution
- revell
- (and 1 more)
-
Glad to see it has fine feed in the Z axis Jay. I wish my Unimat mill had that (I can buy one on e-bay, but they get insane prices for them). Looks like a fun and useful tool. I'm sure you'll have a good time with it. Thanks, Harvey
-
Looks really good! And the work space doesn't look that crowded-compared to mine. As an interesting aside, I was going thru some old boxes this weekend, and found a brochure from the Pride of Baltimore 1 (from 1983) whe she visited Seattle. If I ever get my workroom cleaned up, I know I have plans for POB 1-if I can find them. I'd love to make a Pride 1 and Pride 2(I have the Pride 2 kit) and put them rafted together in a diorama. I hope I live long enough to do that. Thanks again, Harvey
-
Thanks Dave. Once I figured out how to use the ropewalk and how to get the size line I needed, it was fun and easy. I was pleased that I even made the correct diameter 3 strand for the deadeye lanyards. I've also borrowed Floyd's serving machine, so I can serve the standing rigging that needs it. I was going to tie off mainmast deadeyes tonight, but I think I'll wait till tomorrow. I've got some other (non-boat) things to do tonight. Hope to see you and next month's meeting! Harvey
-
Kimberly, I have 2 painting suggestions (not that I know anything about painting. . .) 1) When you apply the masking tape, press down firmly on the edge. Assuming you're painting the white stripe, paint the edges of the masking tape black (like the rest of the hull). That will help keep the white from seeping under the tape. One warning-if you leave the tape on too long, it may take some of the white with it. I suggest leaving the tape on till the paint sets up, but remove it while the paint is tacky. 2) When I have trouble painting between the lines (or painting scrollwork), I take an X-acto knife blade and try to gently scratch the errant paint off (when dry). Your mileage may vary, but these have worked for me several times. Hope that helps, Thanks, Harvey
- 47 replies
-
- 1
-
-
- constitution
- revell
- (and 1 more)
-
Here we go again with another infrequent and random update . . . The shrouds on the lower foremast are on, but not tightened. I want to wait at least until I get some of the stays on before I fix them for good: Photos courtesy of Mike Graff. Tonight I made up the mainmast lower shrouds. I like the way they lay at the masthead-enough that I'm considering re-doing the foremast. I decided to leave the boarding pikes off the masts, at least for now. I feel that they will be another thing for lines to snag on when rigging at the base of the mast. I may add them later-we'll see. Contrary to popular belief, I'm enjoying working on the standing rigging. It hasn't been too hard yet, and I'm trying to think things thru before I do something stupid. Thanks for looking in. Harvey

-
Jay, Ed Tosti talks about making his own chisels in his book (possibly here too). Regarding sharpening, I've tried all sorts of sharpening jigs. But I'm cheap and lazy, and I prefer a sheet of 600 grit sandpaper glued to a sheet of plate glass. I use that method all the time with pretty good results. I've tried sharpening gouges that way, but they are trickier. If I can shave the back of my hand with it, it's good enough for me. But then, your mileage may vary . . . Thanks, Harvey
-
Nils, I've been looking at your build log for some time now. I have to say your metalwork is astounding! I love seeing your updates. If you haven't seen it a good book on the loss of the Pamir (and a few others) is Tall Ship Down by Daniel Parrott. I apologize if it sounds like I'm trying to sell the book (I'm not) but I find it to be very well written by somebody who knows something about tall ships (Parrott was skipper of Pride of Baltimore 2 for several years). I love your build and pictures. Working with metal is something I've never been able to do. Thanks, Harvey
-
Looks good Russ!
-
Sounds like a good excuse to make room for more tools!
-
Jay, Are furled sails any easier to work on than flying sails? Harvey
- 732 replies
-
- 1
-
-
- constitution
- model shipways
- (and 1 more)
-
CapnSteve, Looks like you'll have lots of fun. It is a little different building a larger scale, but you can really add detail-including some glossed over by the kit. Regarding the planking joints, I suspect the planks are butted against each other with butt blocks backing up the joint. We have a replica of one of the HMS Discovery's launches where we keep our boat (it's about 30' long). I'll be down there Sunday to go sailng, and will take a look. Granted, it is a replica, but it's probably built similar to the original. I'll let you know. Thanks, Harvey
- 625 replies
-
- 1
-
-
- bounty launch
- model shipways
- (and 1 more)
-
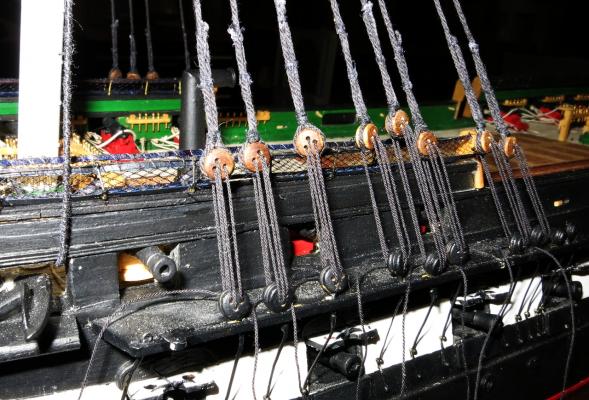
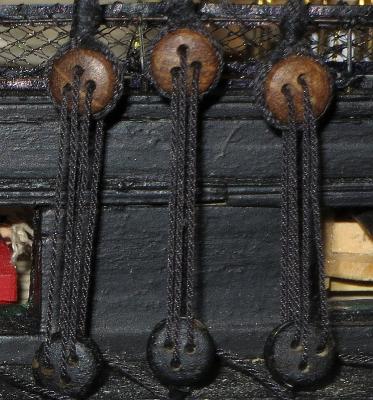
It's interesting to take a different approach because we assume something won't work-and then does. I still think your approach of leaving the lower shrouds off until later makes sense. And yes, those rails by the bulwarks are a bear to get to, no matter what. One thing that I've found over the course of a few models is to make sure the pin rails and fif rails are well attached. I can't count the number of times I've put a little tension on a line going to a pin rail or fife rail and have the whole thing come off-with about 6-8 other lines I had already belayed . But, we learn. And we share. And that's one of the things that makes this site so great-learning the "how to do its" from others, as well as the "how not to do it" from others. Thanks, Harvey
- 732 replies
-
- 2
-
-
- constitution
- model shipways
- (and 1 more)
-
Jay, It's scary, but I actually think I know what you're talking about A really great job on the rigging. It looks great, and your explanations of why you've done things a certain way make a lot of sense. Thanks for your build log. Harvey
- 732 replies
-
- 1
-
-
- constitution
- model shipways
- (and 1 more)
-
Jay, I agree that they look bulky-especially when the plans show them as thin lines. The best proof would be if somebody could take a tape measure to the shrouds themselves. We do have "artisic license" to do what we think is right or looks right. I did that with the thin waterline stripe instead of the wide red stripe on the Constitution as she sits today. It's not accurate but I like it better. Thanks, Harvey
- 732 replies
-
- 1
-
-
- constitution
- model shipways
- (and 1 more)
-
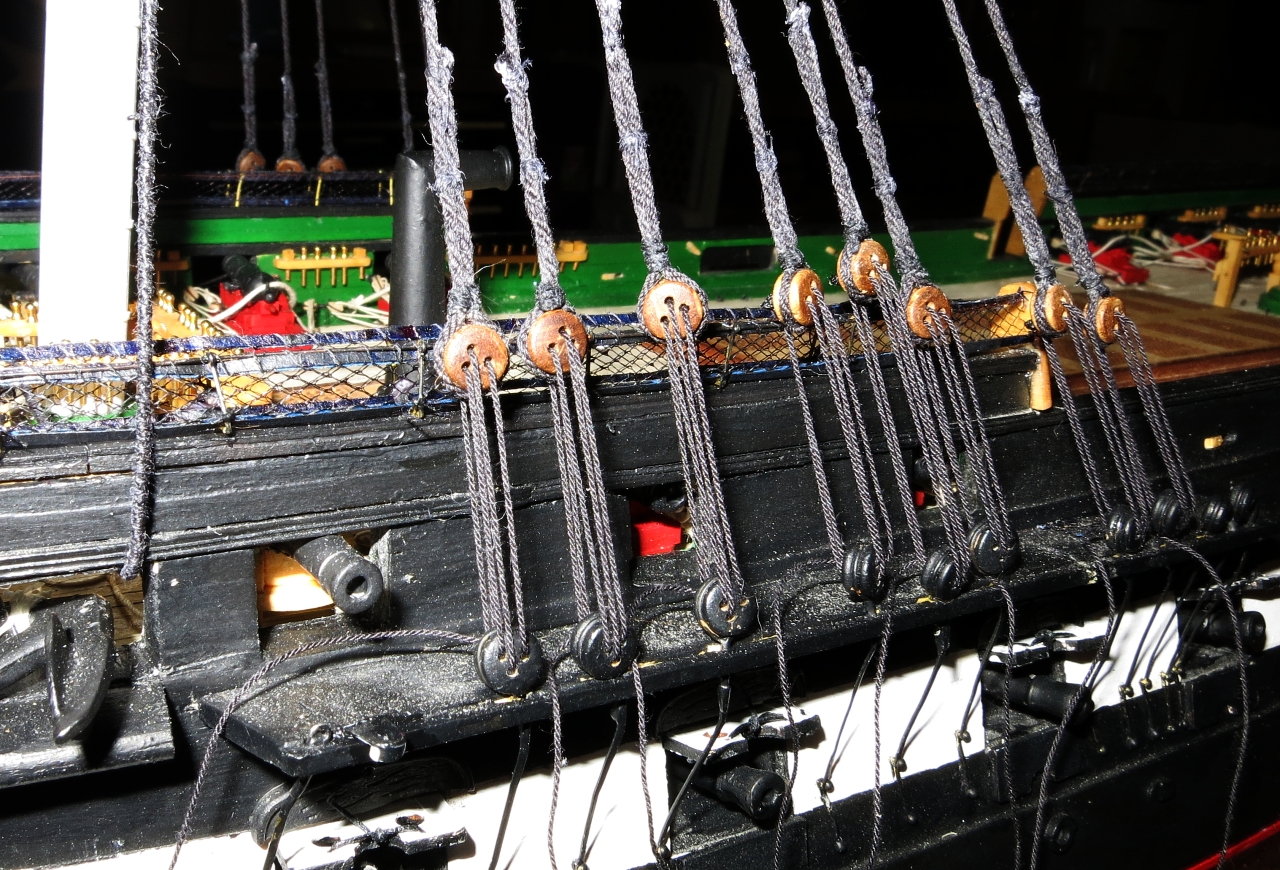
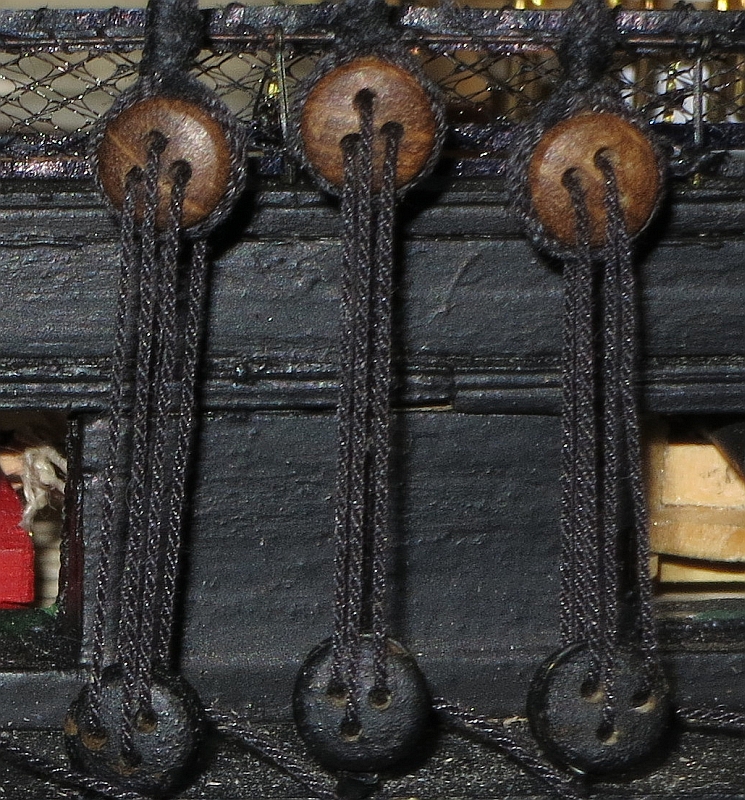
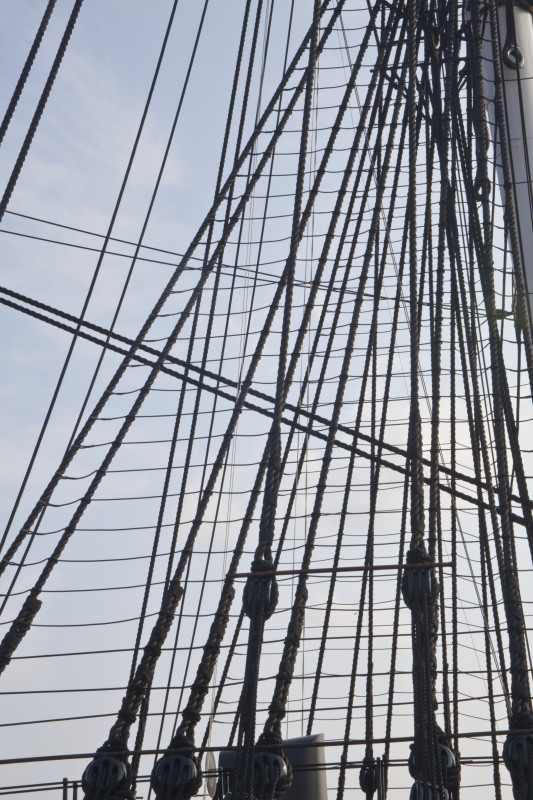
Jay, Your comments got me to looking around (always a big mistake). . . The website below: http://www.maritime.org/conf/conf-otton-mat.htm has a table of line sizes used in the 1992-95 restoration. It list the circumference of the main shrouds as 9", which works out to a little under 3" diameter, or .037/.038 dia on the model. Please check my math and numbers-I make simple mistakes all the time Regarding the seizings used on the shrouds, the line I used for them was way too large. I'll try a smaller line (say 80) to see how that looks. Henry, that's what I remember. I especially remember the frapping turns on the seizing. Just for grins, I added a couple frapping turns to my shroud seizings. Hope that helps. Thanks, Harvey
-
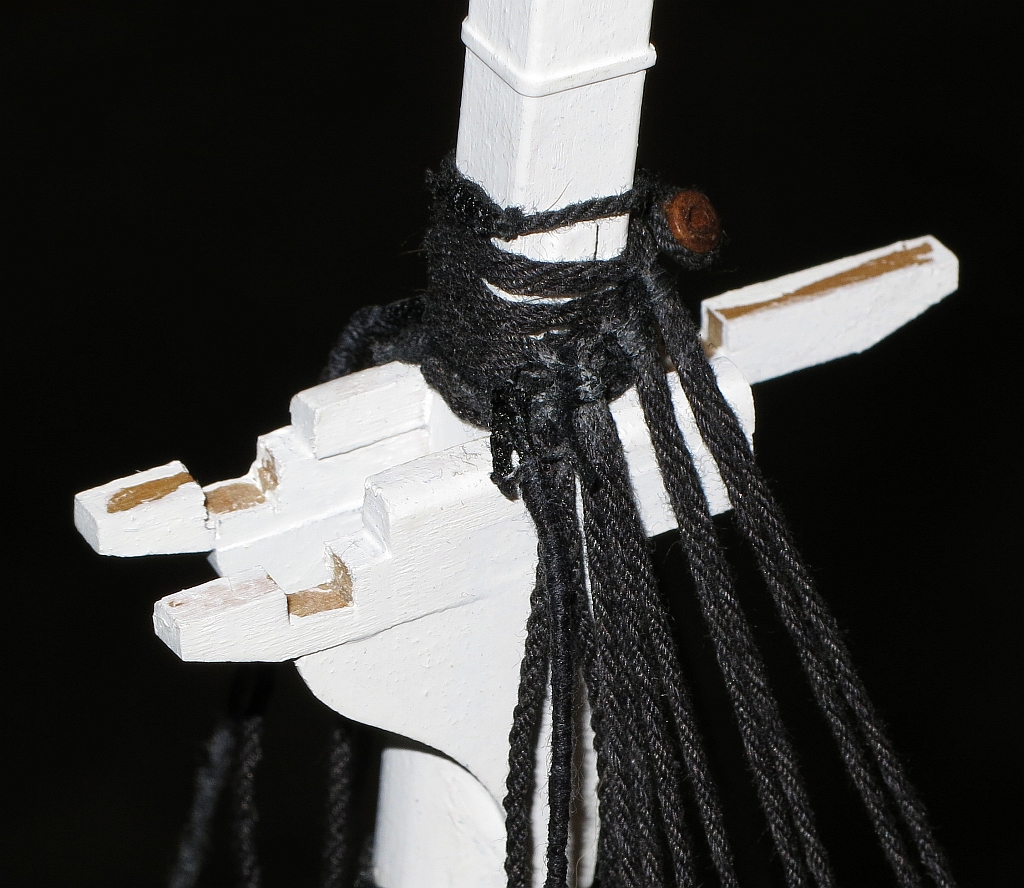
Jay, I thought the shrouds had at least 3 whippings (I beleive they're seizings). This picture implies they have as many as 5 Since I'm starting to rig the shrouds now, this was a very timely question. Hope that helps. Thanks, Harvey

-
Curious about Amati ropewalk
capnharv2 replied to Shamrock's topic in Modeling tools and Workshop Equipment
Well Floyd, I, for one, am still happy with the Club's purchase. One potential problem with the Amati ropewalk (and please correct me if I'm wrong Chuck) is that it's probably a little flimsy to pass from person to person to use(I don't know-I haven't seen the Amati ropewalk other than Chuck's pictures). I like the rigidity of Jim's ropewalk, and the fact that I can't screw it up and break something. OTOH, the simplest solution is like you said-buy it. But for now, I'm having fun spinning yarns Thanks, Harvey