capnharv2
-
Posts
727 -
Joined
-
Last visited
Content Type
Profiles
Forums
Gallery
Events
Everything posted by capnharv2
-
 Bill, If your computer is simlar to mine, ctrl-i gives you italics. You can see it highlighted in the menu just above where you type. Also, ctrl-B gives you bold text. Add xtrl-i and you get bold italics! Add ctrl-u and you get underlined bold italics. I apologize. I was having fun and got carried away !!! Thanks, Harvey BTW, that happens to me a lot-our cats love to walk on my keyboard
 -
Rigging Tension-how do you do it?
capnharv2 replied to capnharv2's topic in Masting, rigging and sails
Jerry, I've been able to get over an octave range on topmast shrouds Thanks, Harvey -
Rigging Tension-how do you do it?
capnharv2 replied to capnharv2's topic in Masting, rigging and sails
John, I know it's mainly a judgement call. I was wondering if anybody had any specifics. Jerry, I agree that temperature and humidity make a big difference. The type of line does too (linen, silk, cotton, polyester, nylon). The scale of the model, i.e., spar size and line size also make a difference. I'm thinking of a couple different things here. One is tight enough that it "twangs" like a guitar string. On a small model you probably can't achieve that, but it might make sense on a 1:24 RC sailboat. The other is a tensiometer used in rigging airplane flight control cables. But that is tension in hundreds of pounds. However, it is a way to measure tension. Like I said, I'm curious what you do. Thanks! Harvey -
This subject has kind of come up previously, but I wanted to ask it a different way. When tightening the standing rigging (just before tying if off permanently), what methods do you use to determine if it's tight enough or too tight? We know (on standing rigging) that you don't want the line to be slack, but not tight enough to bend things out of alignment. Still, that leaves a pretty large range of tensions. So what do you do to determine your standing rigging is tight enough? Thanks, Harvey
-
Hi Waitoa, Glad to see you here and posting your build log. For many years I would get demotivated when I would hit a building snag or something I did 15 steps prior came back to bite me. I gradually learned to accept some of my errors, and correct others. I've looked at building ship models as a learning experience, and you don't learn unless you make mistakes. I've also learned to live with some bulding errors because I'll remember that error on my next build. And half the time I actually remember Looks good! Thanks, Harvey
-
My goodness Tim, that looks great! Harvey
-
Henry, Do you do the political re-enactment too? "Well, Virginia got funding this month and we didn't, so we'll have to put off installing the cant frames 'til next month. At least we've got a lock on the copper for plating. . ." Thanks, Harvey
-
I bought it when it came out, and I couldn't put it down. As Phil said, it was interesting to read about the wheeling and dealing behind getting these ships designed, built, launched and commisioned. I hate to say it, but it seems that there's not much difference betwen politics then and politics now. Excellent book. Thanks, Harvey
-
Looks good Rich. You're doing what I did on my Connie's hammock netting. I tied them top and bottom at each hammock crane. It's tedious, but the results look great. Thanks, Harvey
- 1,756 replies
-
- 2
-

-
- constitution
- constructo
- (and 1 more)
-
Thank you for sharing with us Danny. I always find something new, useful and innovative when I visit you build log. Harvey
-
Hi Rob, I just stumbled onto this build log now. Like you, I "inherited" a Sergal Victory, not quite as far along as yours. Mine is still 10-15 years away-I've got the Connie, Elsie, Flying Cloud and Longboat to finish first. Plus, my wife wants me to do the Agamemnon next, so it will be a while. Something I'm trying to figure out from your log-are you correcting the kit per AOTS and Caldercraft plans, or are you using the kit as a starting point and building everthing from scratch? Regardless, you're doing a great job. It will be an inspiration when I start on mine. Thanks, Harvey
-
Cutty Sark by NenadM
capnharv2 replied to NenadM's topic in - Build logs for subjects built 1851 - 1900
Johnroy, Your best bet for additional copper plates is to cut them from a roll of copper tape. You should be able to get it from Michaels or some place like that. I got mine on-line at http://www.anythinginstainedglass.com/metals/foil.html You can find the width you need and cut it to the length you want. If you want to show nailhead details, you can get a pounce wheel from Micromark and emboss them. Hope that helps. Thanks, Harvey -
Rich, There's an entire thread devoted to the subject http://modelshipworld.com/index.php/topic/1310-making-rope-coils/?hl=+rope%20+coils Funny, I tried a couple different methods on my Connie, and I ended up Flemishing them down like full size line. I guess I was lucky . . . Thanks, Harvey
-
Thanks so much Ray! I like that so much that I may redo the fore and main stays on my Connie. Harvey
- 536 replies
-
- 1
-
-
- diana
- caldercraft
- (and 1 more)
-
Ray, Your Burton Pendants look really good! I have a couple of questions about your eye splices. Do you splice them as a normal eye splice or seize them and then serve over it? Also, how do you do the serving of the eye? Serve, then splice or splice, then serve by hand (I haven't figured out how to use the serving machine inside the eye)? One last question-how do you keep your served lines so straight? Mine often twist and turn and have kinks in them after I finish serving. I wish I had room/time to do HMS Diana. You've done a superb job. Thanks, Harvey
- 536 replies
-
- 2
-
-
- diana
- caldercraft
- (and 1 more)
-
My goodness Pete! That is excellent work-and a beautiful boat
- 220 replies
-
- 1
-
-
- finished
- volvo open 70
- (and 1 more)
-
Michael, "To be clear I am talking about the model and not a full size boat. I have no knowledge of full size furlers." Thanks so much for the clarification. Often, discussions like this cross over from model to real thing and back. And I, for one, become easily confused which one we're talking about. Harvey
- 220 replies
-
- 1
-
-
- finished
- volvo open 70
- (and 1 more)
-
Hans, Aren't there 2 headsail furlers on some boats to do just that (raise one, then drop the other)? Thanks, Harvey
- 220 replies
-
- 1
-
-
- finished
- volvo open 70
- (and 1 more)
-
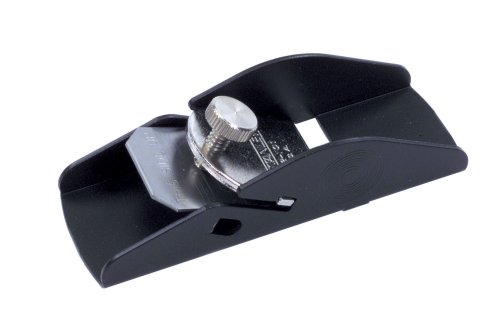
My preferred tool for shaping planks is a small hand plane. I get too many bumps and gouges in the plank edge if I use anything else. This one is about $7.00 on Amazon Hope that helps. Thanks, Harvey
-
Are you asking about how roller reefing works on a big boat, or on a model? Here's a link that shows some of what's done http://sailing.about.com/od/learntosail/ss/rollerfurlingjib.htm and here: http://www.myboatsgear.com/roller-furling-systems On a smaller boat like ours, the jib is tied to the drum on the end of the boatsprit and a swivel hoisted on the jib halyard. To open, pull on the jib sheet and ease the furling line (they wrap the opposite direction on the drum and sail, so pulling on one line will cause the other to come out) On larger boats (and somebody correct me if I'm wrong), there's a metal track from the drum to the masthead swivel. This track has a groove in it (similar to the groove on the mainmast). The jib is hoisted with a halyard, and the jib luff is slid into the groove. Once it's up, and the sheets attached, pulling on the furling line (and easing the jib sheets) will wrap the jib around the metal track. Pulling on the jib sheet (and easing the furling line) will unwrap the sail. If you want to change from, say, a jib to a gennaker), you leave the jib unfurled, pull in out of its track at the foot (but above the furling drum), take you jib sheets off, unshackle the halyard, and re-attach the halyard to the Gennaker. Attach the sheets and hoist away. Now you have a larger headsail that you can still furl, or replace it with a different headsail. I understand that one of the advantages of this system (as opposed to the one we use) is that you always have a well shaped headsail luff, which really improves windward performance (probably better than a hanked on jib). Our jib is essentially set flying, so our luff really bends to leeward and hurts windward performance. But the boat design is from 1890, so it's not going to be a fast boat regardless of what we do. And if everybody understood all this, or I'm wrong in my explanation, I apologize for wasting everyody's time. Thanks, Harvey
- 220 replies
-
- 1
-
-
- finished
- volvo open 70
- (and 1 more)
-
Michael, Thanks for those videos. The thing I dislike about RC sailboats is the "scale" effect. Most of the RC boats that I've seen don't look right to me under sail. The boat looks great, but the waves and water look out of scale. These models don't seem to suffer nearly as much. And before anybody thinks I'm disparaging RC boats, I have the utmost admiration and respect for RC boaters and the incredible work they do. I used to have an RC sailboat, and I occasionally go to the Steel, Chapman & Hutchinson site and drool over their HMS Surprise. I'm only saying that RC boats, at this time in my life, aren't my cup of tea. Maybe they will be next year. Thanks, Harvey
- 220 replies
-
- 1
-
-
- finished
- volvo open 70
- (and 1 more)
-
Toni, Your work is truly inspiring. Thanks, Harvey
-
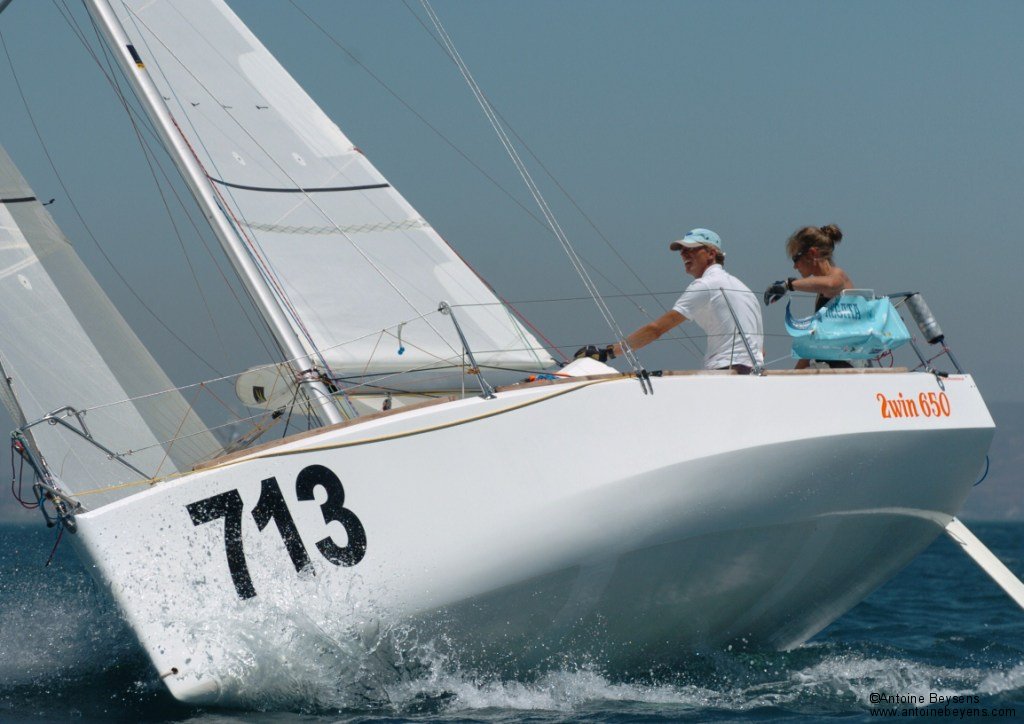
Thanks Hans. I admire these boats (and their crew) from a distance. I'll stick with my old gaffer (Friendship Sloop). But for grins, I Googled Mini Transat 650 so I have an idea what you've been sailing. Looks fast to me! Thanks again, Harvey

- 220 replies
-
- 3
-
-
- finished
- volvo open 70
- (and 1 more)
-
Hans, Thank you for your explanation, although I have to admit, it will take me some time to comprehend it all. I hope you don't mind if I throw out a few questions and assumptions to get on the correct track. I'm used to thinking of chines as a (kind of) stability point at a certain angle of heel. In the case of an El Toro dinghy (which I used to sail) and a Star (which I haven't sailed much), the heeling angle when the boat is on its chine is a more stable point than most heeling angles. Is that correct? I also remember that increased heeling angles (on displacement racing hulls) provides a longer waterline, which increases hull speed (which is why I thought racing sailboats of the 20's and 30's had such long overhangs). But waterline length on a planing hull doesn't help (IIRC), because you want to minimize wetted area. I looked up some of the measurements of the Open 70's. I see the beam is 5.7m. If I understand correctly, is the basic hull design much wider than this, but surfaces are created to cut the beam to 5.7m, thus creating the chine? Please note that I'm not an NA or Marine Engineer, but I've been fascinated with sailing hull design for a long time. Generally, I know just enough to be dangerous Thanks, Harvey
- 220 replies
-
- 1
-
-
- finished
- volvo open 70
- (and 1 more)
-
Pete, Looks good! One thing I'm surprised by is the hard chine on the hull. I had always thought the hull was completely round. I'm curious what the hard chine does. Additional stability (along with daggerboard) when heeled? I'm also curious what the optimum heel angle is for speed when sailing close hauled. Perhaps the chine adds to WL length at optimum heel angle. Thanks! Harvey
- 220 replies
-
- 1
-
-
- finished
- volvo open 70
- (and 1 more)