

.JPG.57a378a2fb5032f11af5def7ae16c0b2.JPG)
Retired guy
-
Posts
561 -
Joined
-
Last visited
Content Type
Profiles
Forums
Gallery
Events
Posts posted by Retired guy
-
-
50 minutes ago, jgplarnold said:
Thanks for the research and information. At 20.5 links per inch the real life chain links would be around 3 inches which seems about right. Trouble is though that look so small at scale 1:60.
Have you noticed if the original Bluenose has davits for the anchor chain? I could not tell in all the videos I viewed although most if not all were during races when I believe anchors were not in place (although would they also have removed the davits I wonder).
Yes she did have davits, would they have removed for races, I am sure they would have.

These Davits I made for my build
Another picture of the chain
Regards
Richard
-
On 1/29/2023 at 3:14 PM, jgplarnold said:
Thanks. I found a great movie of the original Bluenose and I not only noticed there are no cowl vents on the deck (surely they are only necessary when there are engines below deck) but also the chain plates do NOT extend down the sides of the hull as they do on the Billings kit. It's a real pity that kit manufacturers can't get the detail correct as even just getting such small parts correct is NOT difficult. I really thought that I was getting a true to form model kit. I mean without research I would never have known and really did expect such a detailed kit to be correct.
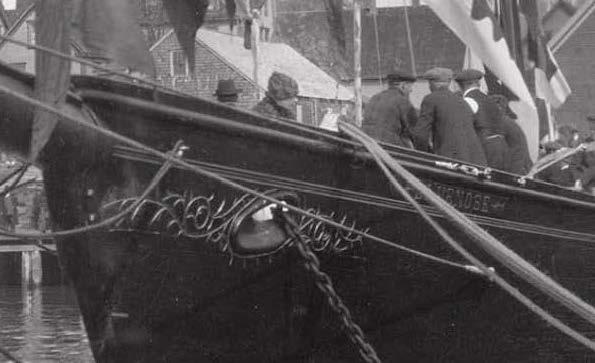
Regarding saying that the chain plates don't go down the side of the hull, they do but they are flush with the hull (found this out by a good person on this site) see picture below you can see them quite clearly.
Regards
Richard
-
On 1/20/2023 at 2:11 AM, jgplarnold said:
Just wondering what size links would be in a real anchor chain for a schooner such as the Bluenose.
I need to purchase some scale brass chain to suit a 1:60 model and not sure if 10 links or 15 links per inch would be more appropriate. 10 links per inch would be a 6 inch long link in full size and 15 links around 4 inch long links. Would the links in the full size anchor chain be 4 inches or 6 inches long?
The actual boat is 258 tonnes with a length of 143 feet.
I have searched the internet but cannot find any information. I just want to try and keep the model looking 'natural'.
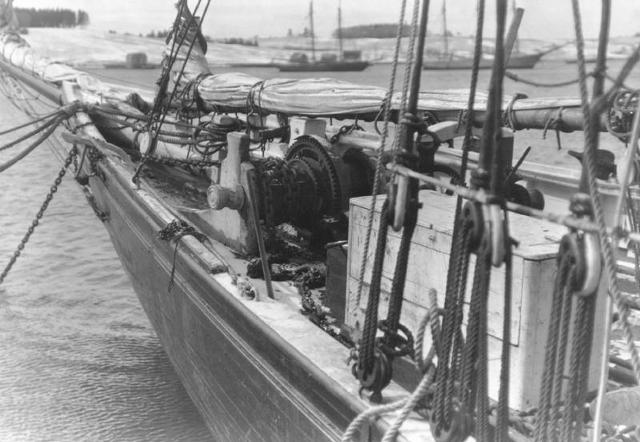
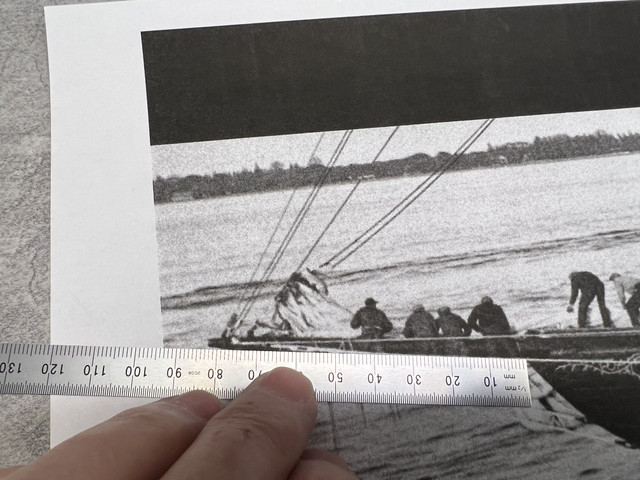
Looking on the web found this picture, which shows the chain you are asking about, I took this picture and printed it down to the dimension of the Bluenose I am building which is Model Shipways #2130 scale 3/16"= 1'-0" (1:64)
I took the dimension of just the bowsprit sticking out of the boat, and it was around 83mm.
Using some chain I bought from Clover House I think the chain to use is 20.5 links per inch

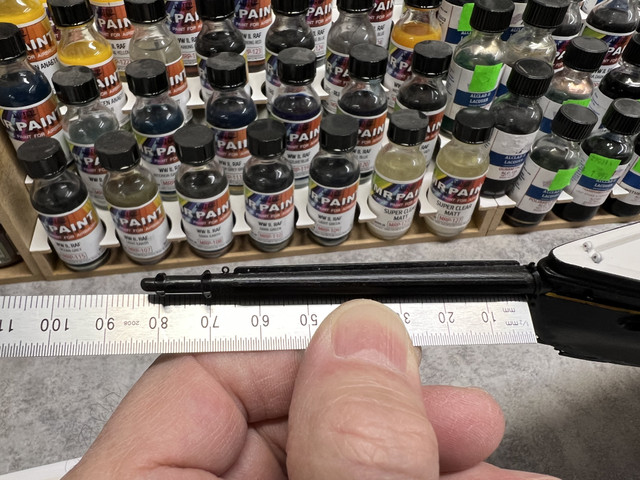
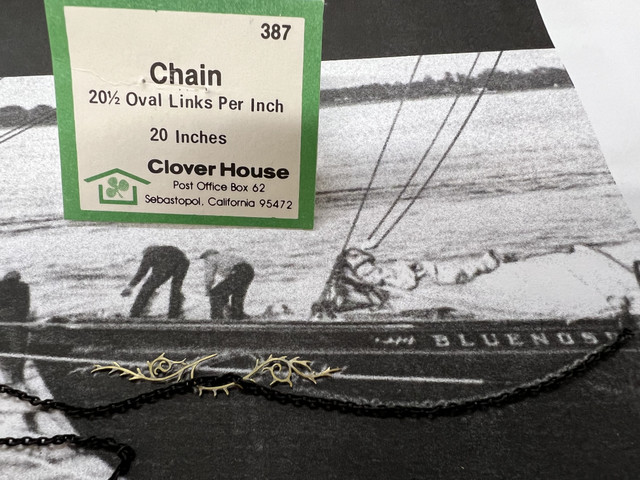
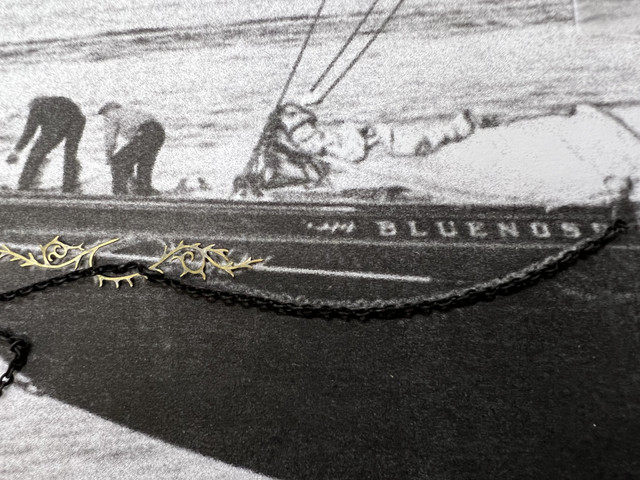
Hope this helps
Regards
Richard
-
Hi Mr Von regarding what to use to clean brass before you blacken, look on the back of bottle there it tells you what you can use either, degreaser or denatured alcohol.

I have had great success with Isopropyl Alcohol 99%, I put some in a small ice cream cup (you can use anything) just enough so that it covers what you are going to blacken.


I keep the parts in the alcohol for a couple of minutes, then take out and put them on a clean dry paper towel, (I use blue workshop paper towel) dry pieces then I put them on a piece of small hard plastic sheet. Using a cotton bud I dip that into the Casey Brass Black bottle and cover all piece I want to blacken. I leave this for 1 minute in the solution, from there I put them in a cup of water, again I leave around a minute.
Then they go back on the paper towel and I dry them off after this I use clean small cotton buds to polish each piece.
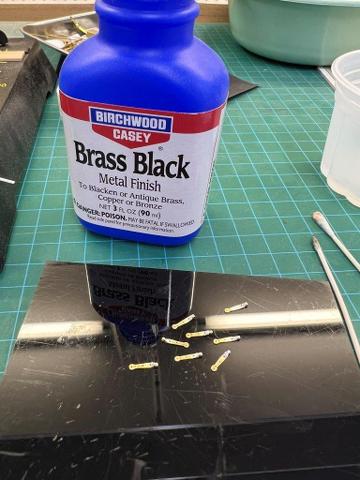


Doing it this way I have never had flaking, here are some samples.


Hope this helps.
Regards
Richard
-
Three cheers for the admiral,
 the net fits like a glove very well done to the both of you.
Regards
Richard
- mbp521, KeithAug, FlyingFish and 3 others
-
 6
6
-
Just one outstanding model Keith just love all the detail you have put into her.
Hope you have a great Christmas and New year
Regards
Richard
- Keith Black, KeithAug, mtaylor and 2 others
-
5
-
-
 You have nailed it Keith
Regards
Richard
- mtaylor, KeithAug and Keith Black
-
3
-
-
Beautiful work Robert
Regards
Richard
-
-
Isn't it a brilliant feeling when you have worked out how you where going to make, then make said item and then install onto the build, and what you have done
looks absolutely perfect and all looks to scale Keith.
Regards
Richard
- Keith Black, mbp521, michael mott and 3 others
-
6
-
Hi Dave nice to see you back on the Bluenose,
Tricky little parts aren't they, I still got to make a load of shackles for mine.
Regards
Richard
-
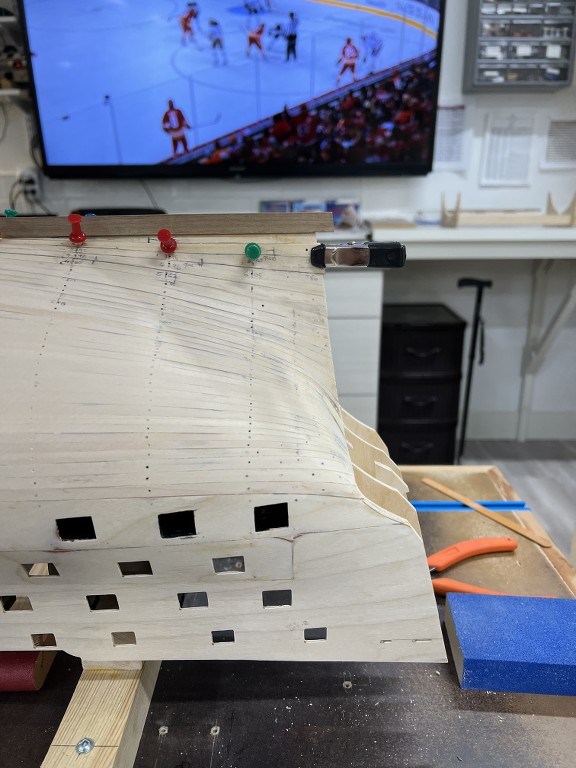
Hi Tim your Bluenose is coming along brilliantly, but I have one comment, your last picture looks as if the back end of the stern block is not faired totally to the bulkheads
Here is a picture to what I mean, hope I am wrong.
If this is the case your planking will not sit right.
Regards
Richard
-
On 8/30/2022 at 7:03 PM, Arthur Goulart said:
Too slowly, Richard 😆. I'm really struggling to find the time to work on her, but so far, I'm happy with how it's coming along. I'm modifying the the kit pieces so they are more accurate to plans, and I'm improving on its construction method, for instance, I'm making the keel/stem as separate pieces, to be fitted down the line, once the planking is already finished. I'll be posting it all on my thread, but none of it is yet finished, so...
Will look forward to seeing your progress 👍
Regards
Richard
-
On 8/21/2022 at 2:11 PM, Dave_E said:
Ok, I’ll bite. What is the wife going to be doing on 3 lower tables while your ship building on some higher ones? At the same time?
She does cross stitching and embroidery, sometimes paints etc etc she likes to watch the hockey as well.On 8/28/2022 at 11:58 AM, FriedClams said:Good to see an update on your Bluenose Richard - really very nice furniture/cabin work. Love your shop. With a frig and a cot, there'd be no reason to ever leave.
Gary
Hi Gary just very small updates but hope to have some parts painted and installed in the next update, love the shop as well do use it every day did put a fridge in it so that I could store CA glue, this keeps it from going hard, cot for the wife 😳😳😂🤣Regards
Richard
- Nirvana and FriedClams
-
2
-
-
1 hour ago, Spaceman said:
Druxey and Retired guy many thanks for your quick responses. There is a great picture in Bugler of the Diamond plugs (Plate 37) - I don't really want to copy & display here as there may be copyright infringements - but this shows both the plugs and a couple missing in both Oak & Fir planking as described by Druxey. I'll have to make a trip and try to find this area of planking on the middle gun deck and see how it looks in real life. In the plate it sits somewhat in the middle of my two examples. Nothing like as obvious as the caulked lower deck but also not as seamless as the 'modern' refit on the quarter deck which is probably in parts due to enhancements in tools as well as being different timber.
Regards
Malcolm
Do have the Bugler book and all the drawings and have seen that diamond shape in it, if you do find it on the deck try and take a good picture 👍Regards
Richard
-
Hi Michael, sorry for being so tardy in keeping up with your build, so now all caught up with all your brilliant kit bashing added lots of likes, don't you just love scratch work I find it so exhilarating.
Like your new gratings and I think you should change the Bowsprit but I know you will because
")
Regards
Richard
-
Hi Malcolm,
Use to live 35 mins away in Poole before coming to Canada, and have been on the Victory many times and would agree about no treenails in deck, all you see is the plug which is made from the same wood as deck so in 1/72 scale you would have to have a .017" or #78 or #77 drill bit but as you say its the choice of the builder.
REgards
Richard
- mtaylor, Keith Black and Spaceman
-
3
-
On 8/17/2022 at 4:39 AM, wool132 said:
Wow! What a shop!!
Jonathan
Thanks Jonathan its what I wanted in retirement
On 8/17/2022 at 7:29 AM, Arthur Goulart said:You love to see it, Retired guy's Bluenose update.
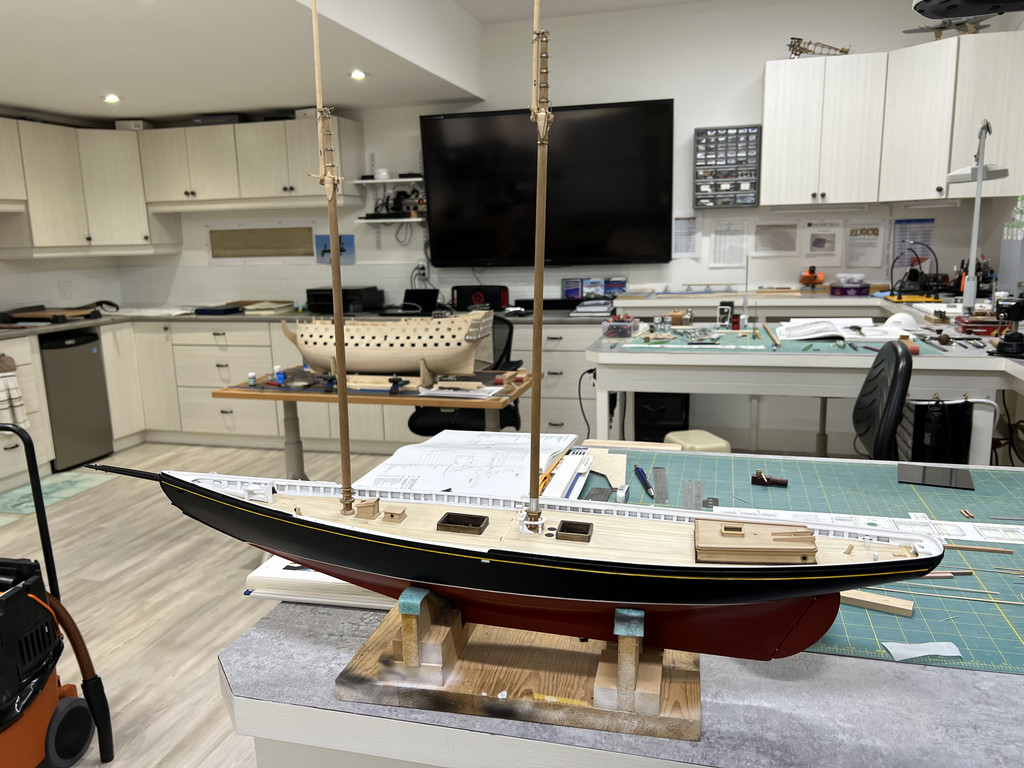
I take it the other ship you're distracted with is the chomky fella there on the background, Mrs. Victory?
Hi Arthur how's the Bluenose coming along, and yes you are correct this is Mrs Victory have had since 2004 but been working on and off for the last couple of years.
 On 8/17/2022 at 7:57 AM, Dave_E said:
The modeling is top notch, but the background is such a distraction. 😆
Thanks for you kind comment and the background gives me great viewing for hockey games 😁
 On 8/17/2022 at 8:42 AM, BenD said:
@Retired guy That's no mere workshop... That's a ship modelers laboratory. Just a little envious over here 😅
The Bluenose is looking really good.
Hi Ben it took me until I was 61 to build the shop how I wanted you saw what I started with.
Thanks for your kind comment regarding the Bluenose its coming along.
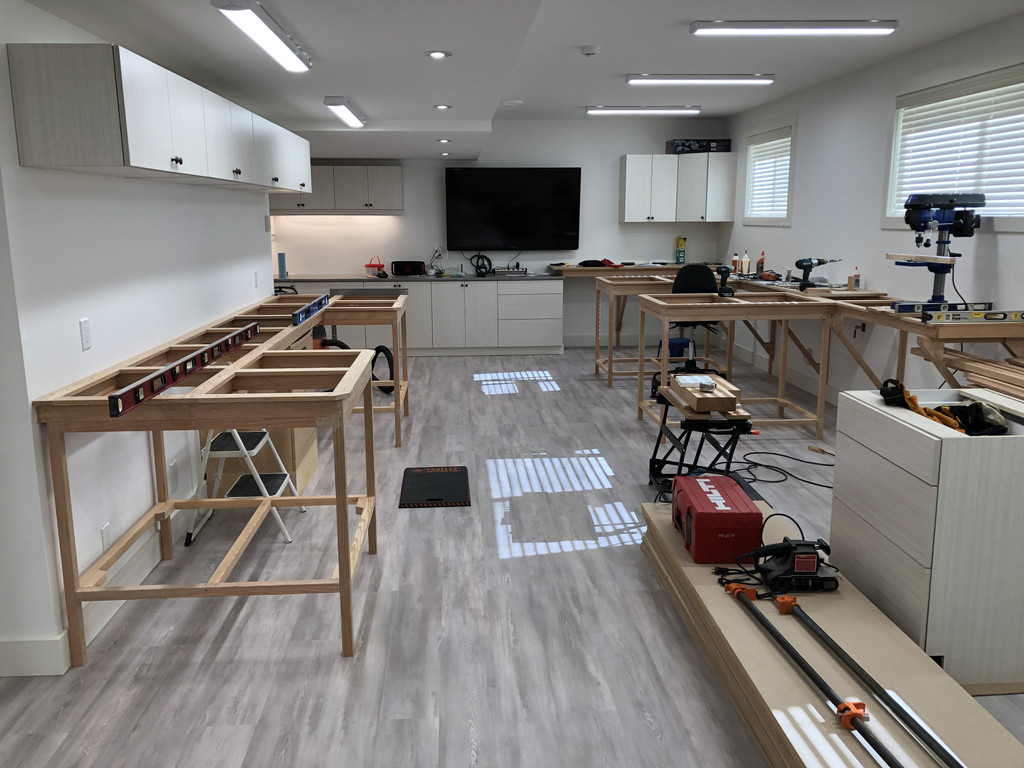
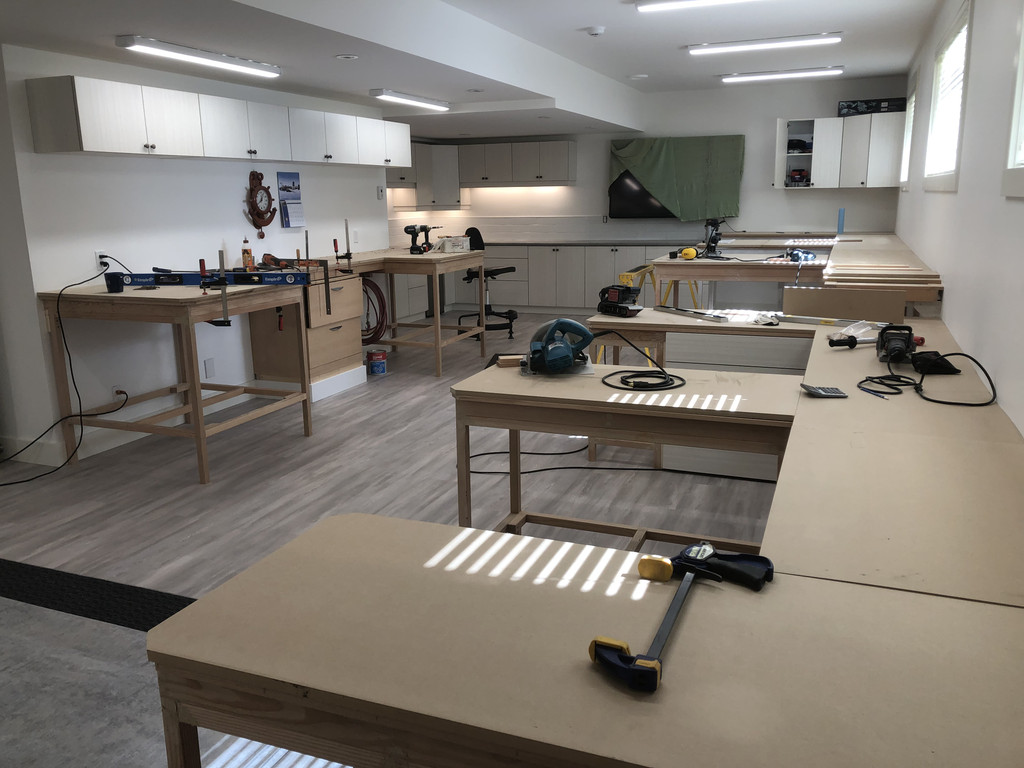
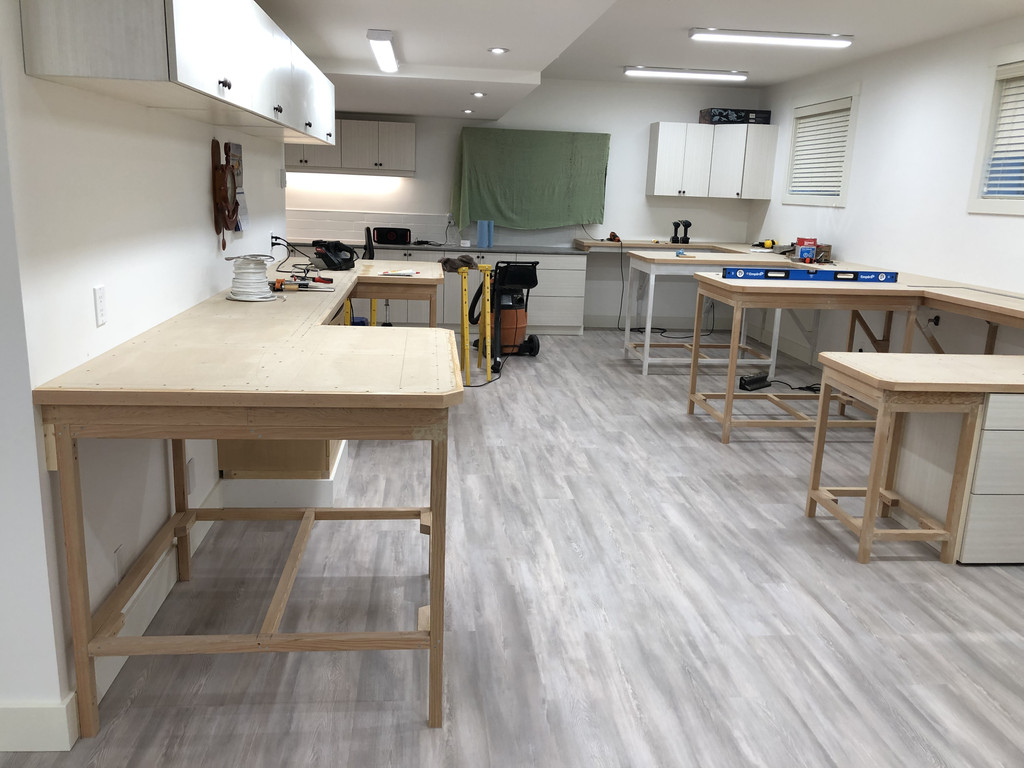
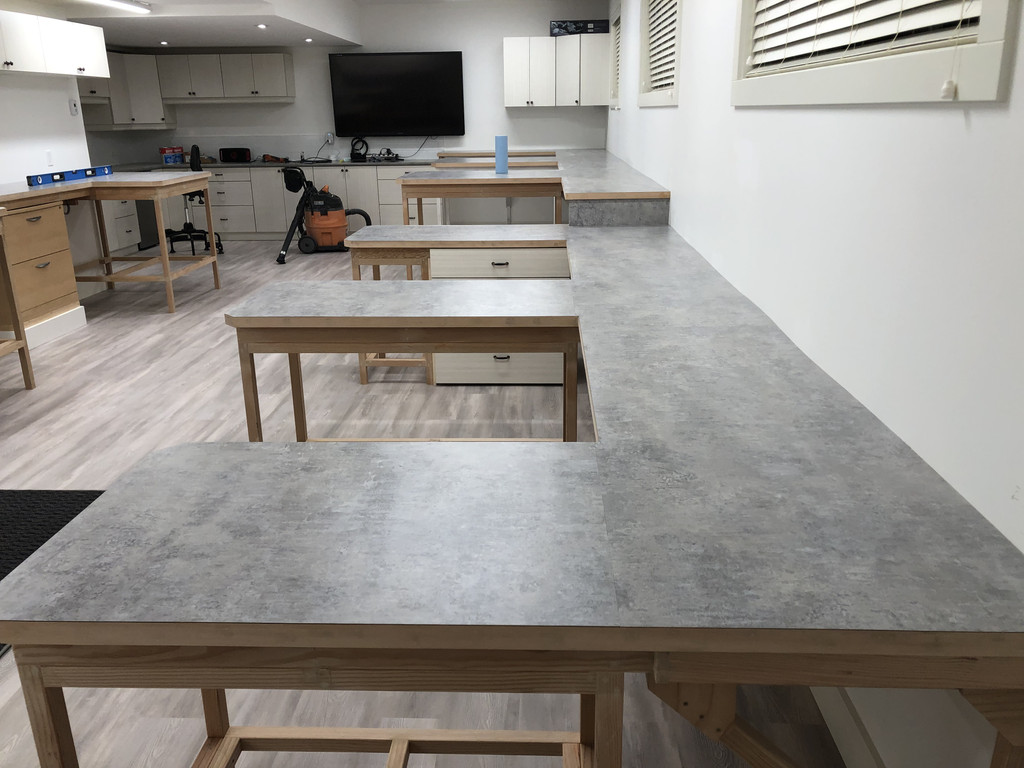
The lower tables are for my wife, made all mine 40" high it was a lot of fun building the room.
Will need to either buy some rope or make it myself, do have Chucks rope walker but I do see your rope and wow that does look go.
I bought rope from Morope back in 2004 so will look at that first but do want the best when time comes to do rigging on the Bluenose.
Do apricate all the comments and also for all who hit the like button thank you.
Regards
Richard
-
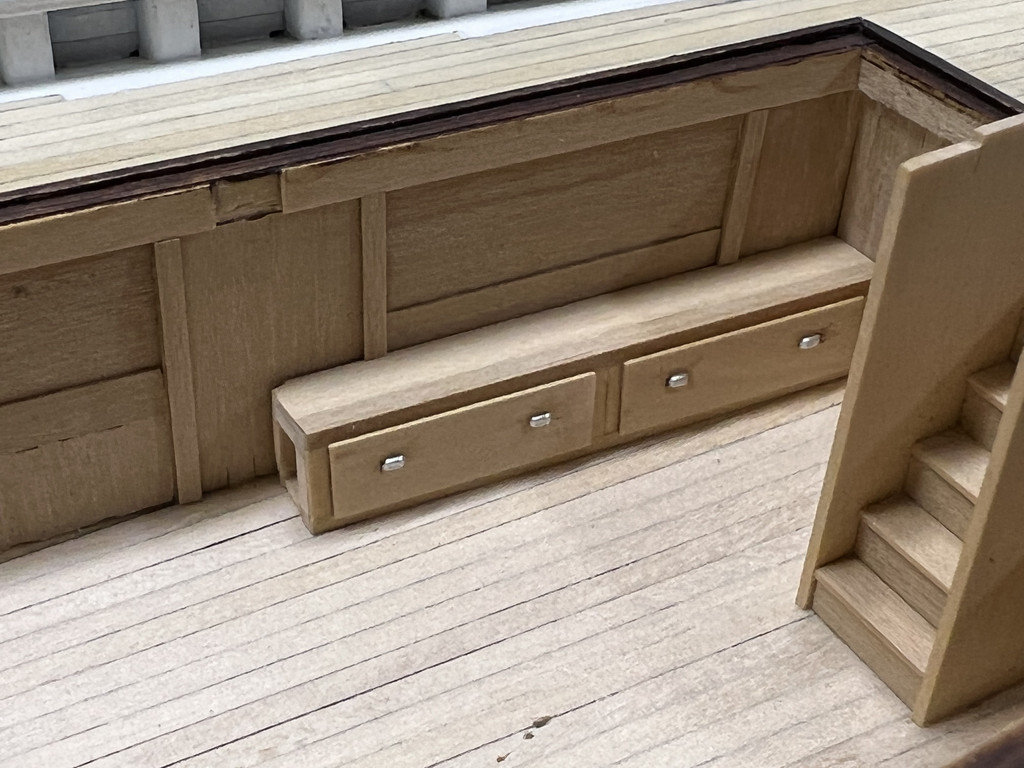
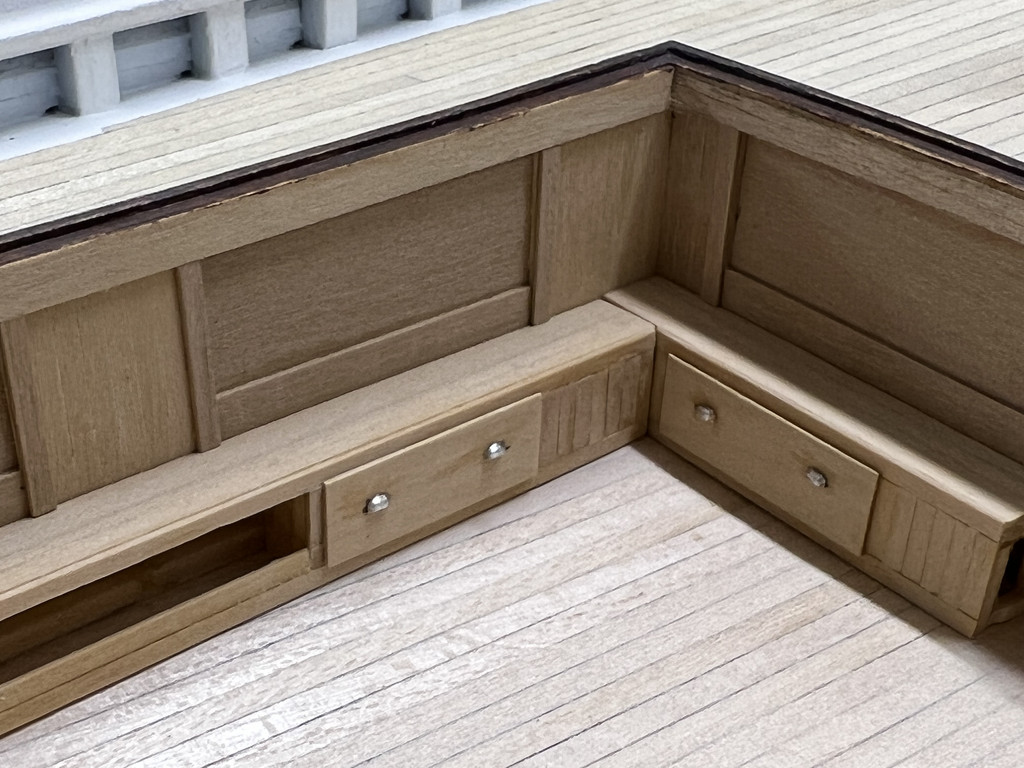
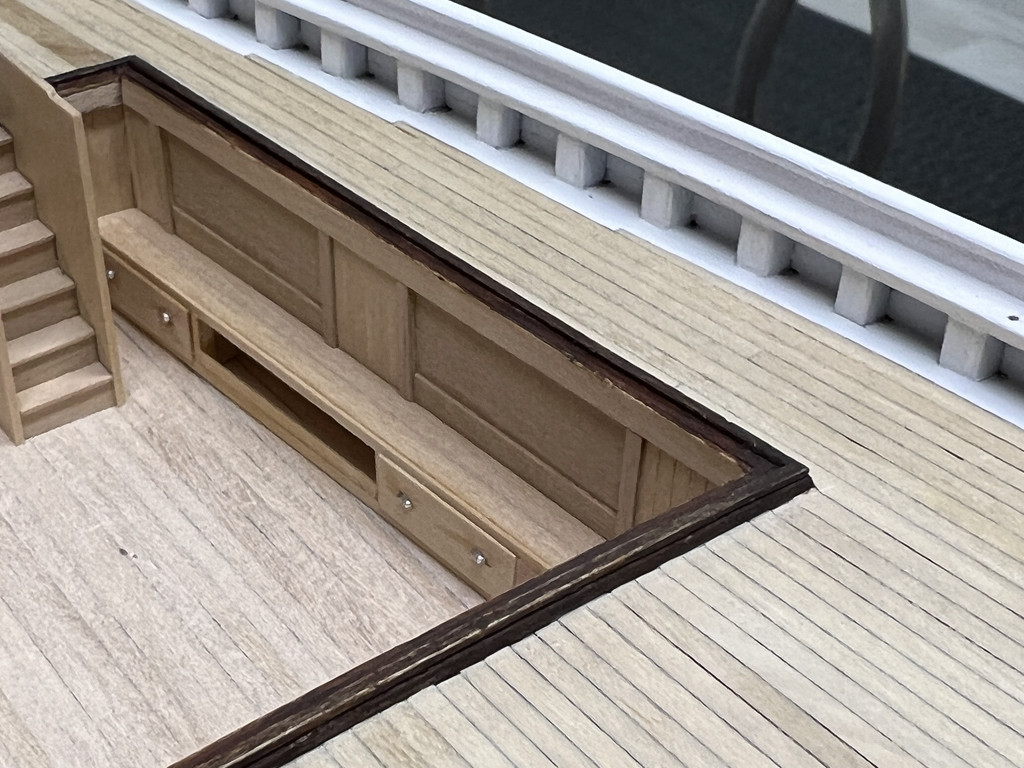
Have done a very small update, added the draw handles and made the captains door
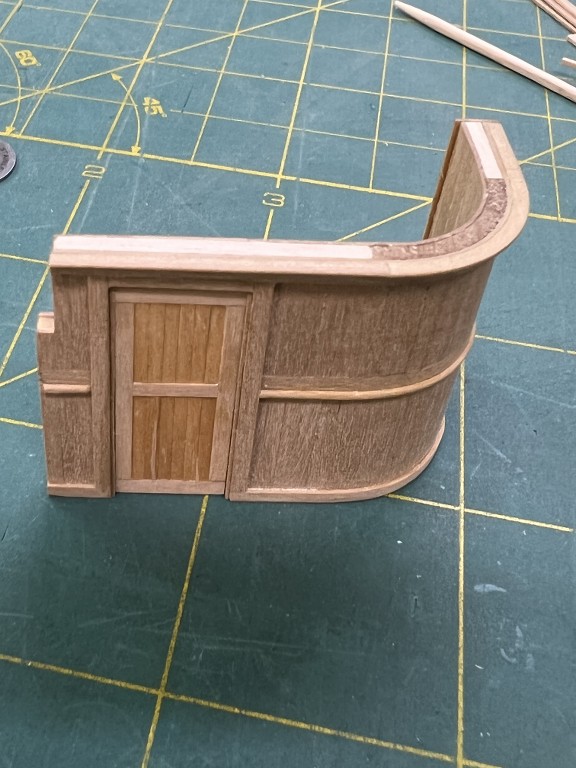
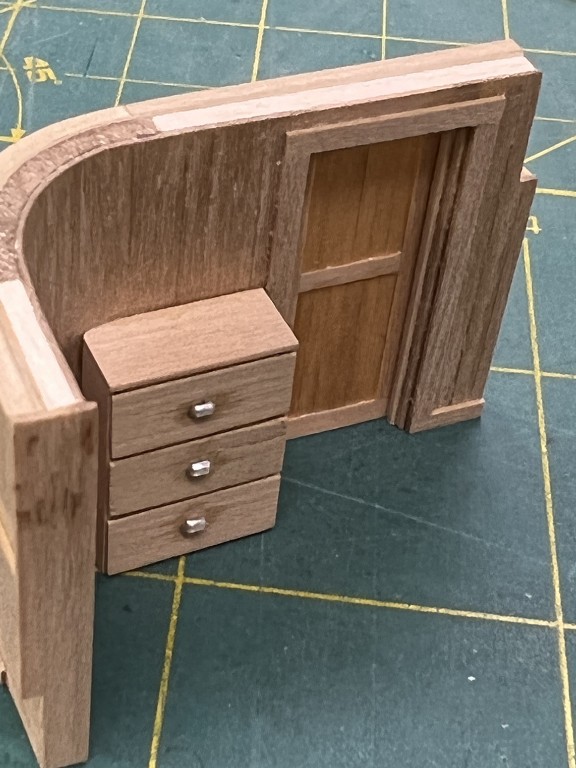
Have been a bit distracted with another ship

Until next time
Regards
Richard
- Rik Thistle, Jeff preisler, KeithAug and 14 others
-
10
-
 7
7
-
On 8/9/2022 at 5:47 PM, jhaactofbield said:
You are bringing a fresh and inspiring take on an already beautiful vessel.
I hope to achieve the level of confidence and skill you display!
Bravo!Thanks for kind comment and looking in on my build and as you say it is a beautiful vessel.
Regarding achieving the level of confidence and skill it just takes practice, practice and more practice and lots of patience.
Regards
Richard
-
On 8/14/2022 at 1:18 PM, Fubarelf said:
This will be my first attempt at a full wooden ship build. I have built several plastic model ships (Constitution, Cutty Sark and Charles Morgan, all by Revell) and R/C model airplanes but, this will definitely be a test of skill and patience. I started by building the NRG half hull to get some experience with planking. That went pretty well and I learned a lot!
I have always wanted to build a model of the Bluenose, as I am from Canada and have been fascinated by this ship for as long as I can remember. I took the opportunity to dig in deeper to its history by reading Bluenose by Brian and Phil Blackman and A Race For Sailors by Keith McLaren. This ship has a fascinating story and, unfortunately, a sad ending for such an icon of maritime history.
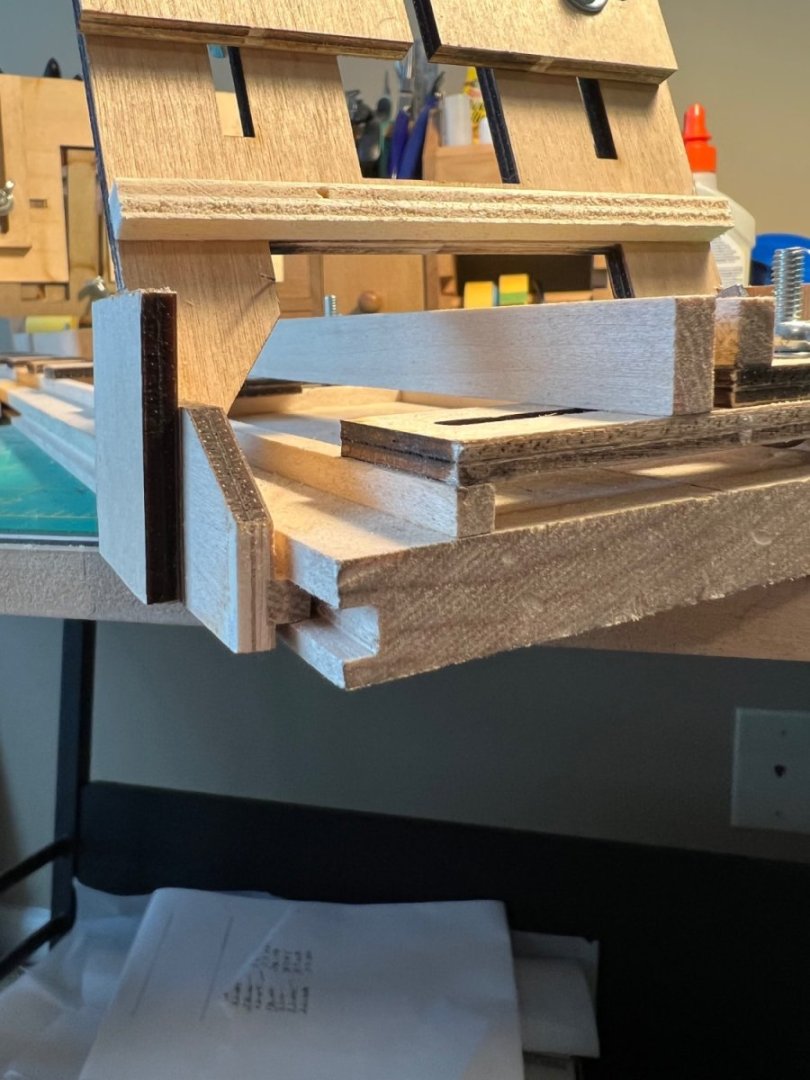
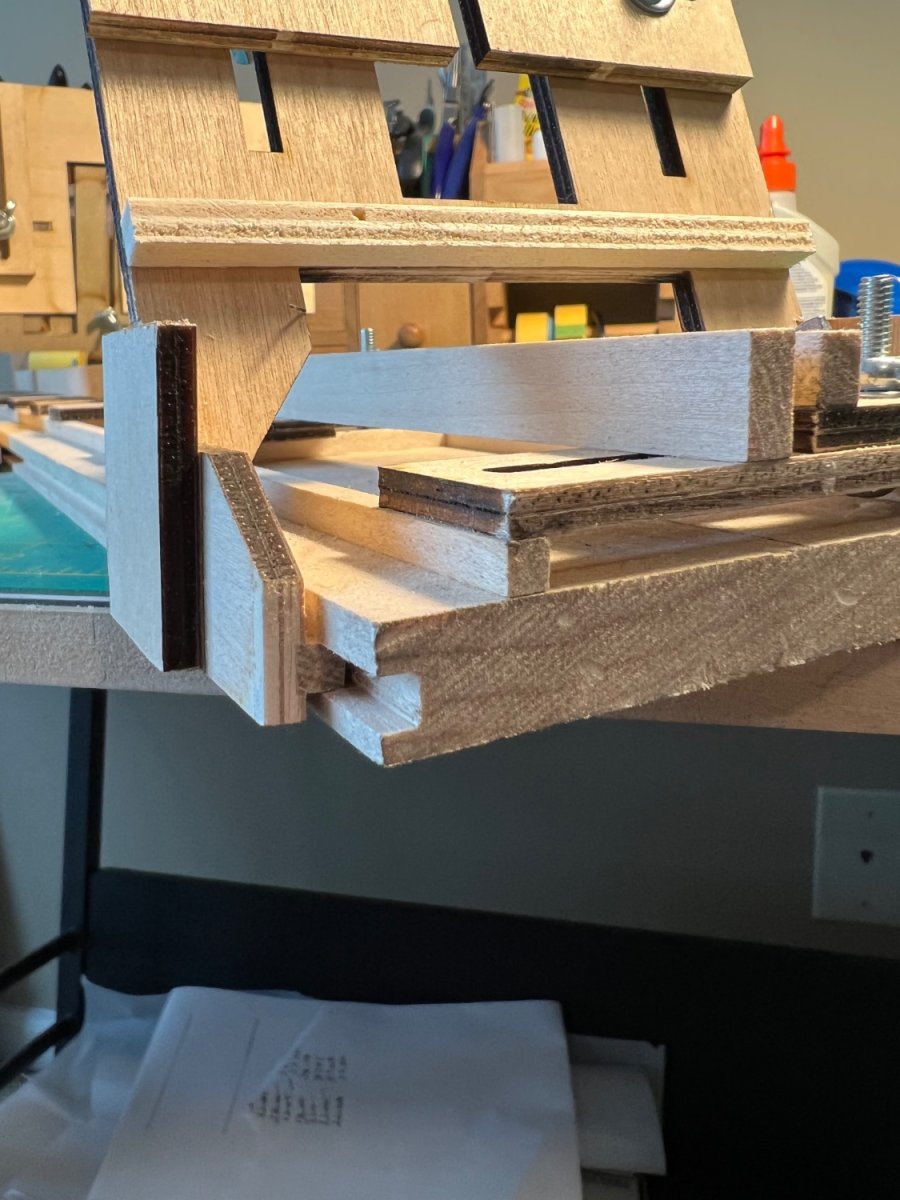
I purchased the Fair-A-Frame from Model Shipways, as it looked to be the best way to hold the keel while I worked on bulkheads and everything on the deck (and I was able to get it on sale!). I modified it based on the changes that @Retired guy made prior to his Bluenose build. This is definitely an improvement to the unit and really locks in the jigs that slide along the base.
I have been procrastinating since finishing the Half Hull, mostly because I am a bit intimidated with this build. Reading through the forums, there are so many talented folks and high quality builds of this model. Time to get under way and I hope that I can do it justice.
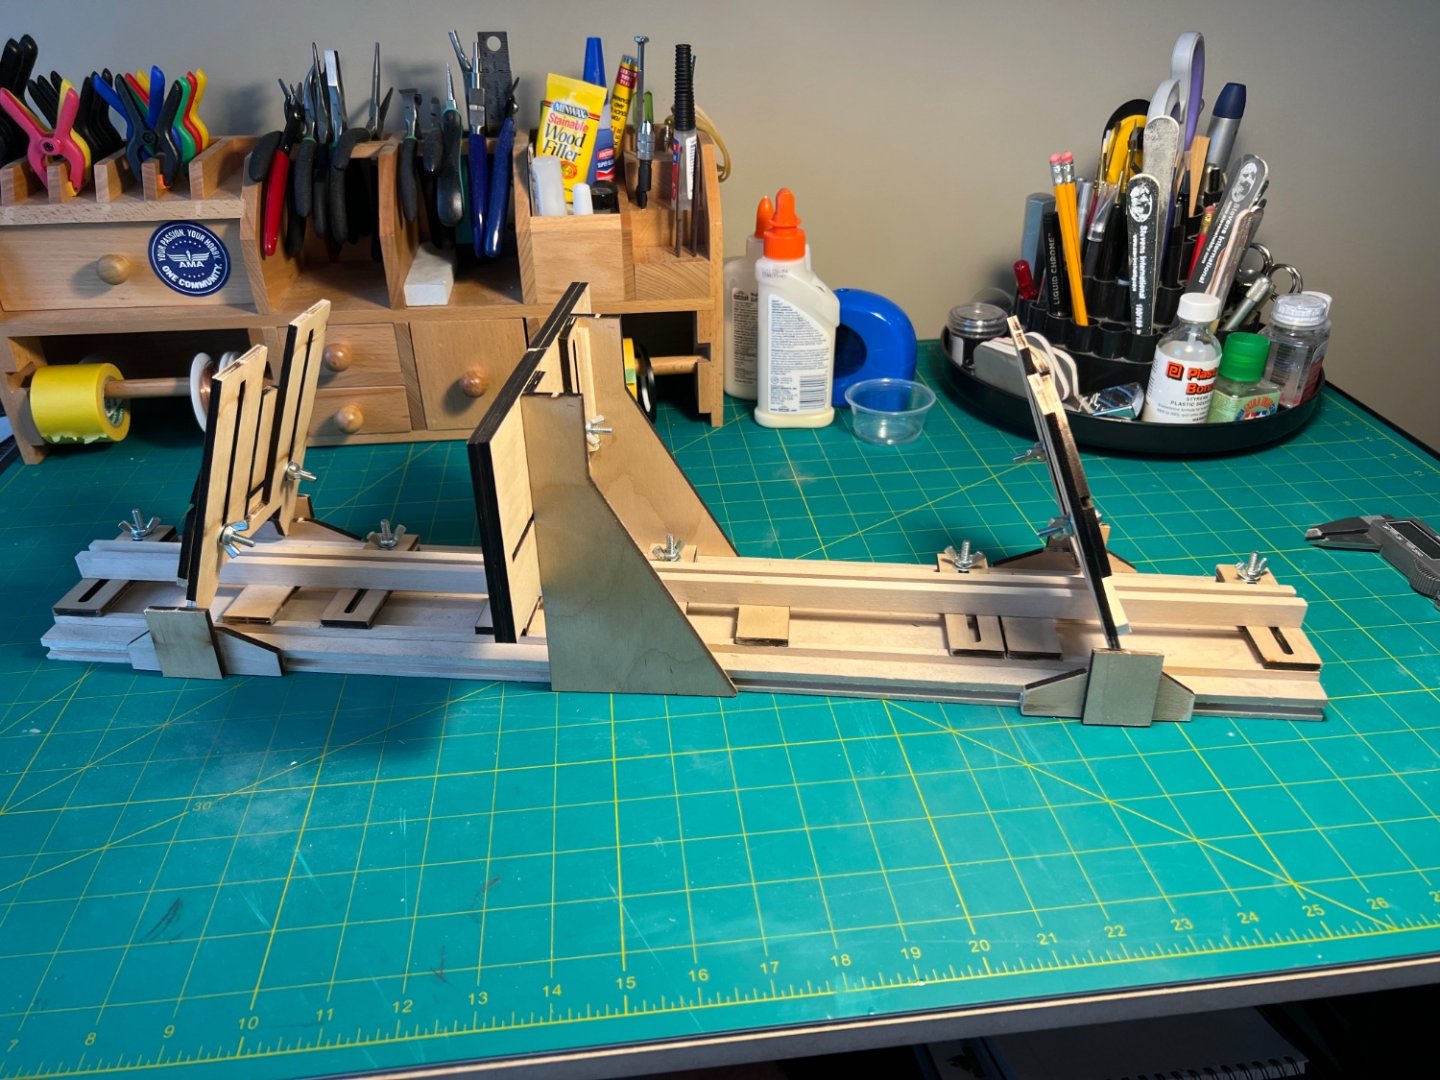
Nice start Tim, and glad you found the modification to the fair a frame it was not going to work to well without it, I see you added a strengthener which makes perfect sense.
It was a sad ending to a beautiful ship.
Don't be to intimidated with this build it does turn out to be one nice looking model, but I would say just follow the instruction manual .
Regards
Richard


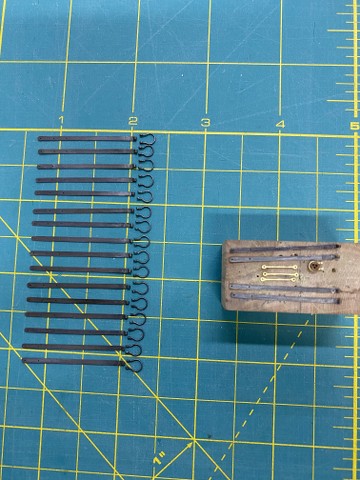
Split ring making process
in Metal Work, Soldering and Metal Fittings
Posted · Edited by Retired guy
Hi Dave,
I make all my split rings, eye bolts from brass, have a wide thickness ranging from .011" all the way up to .062" , bought the smaller lot from Clover House.
These are the tools I use
Using .014" brass wire (1/72 scale ) to make a 3 1/2" x 2 1/2" ring in full size
Frist measure the round nose pliers to find 1mm then bend
Then cut the straight part using the flat side of the cutter
Use the round pliers again to make it round and just go over a bit
Then use the flat pliers to hold ring and use the flat side of the cutter to cut right next to the cut you had done
Once cut use the flat nose pliers and to flatten
For the eye bolt you bend the ring instead of cutting
These don't take long at all and they are ready to solder or what ever.
Hope this helps.
Regards
Richard