

.JPG.57a378a2fb5032f11af5def7ae16c0b2.JPG)
Retired guy
-
Posts
561 -
Joined
-
Last visited
Content Type
Profiles
Forums
Gallery
Events
Posts posted by Retired guy
-
-
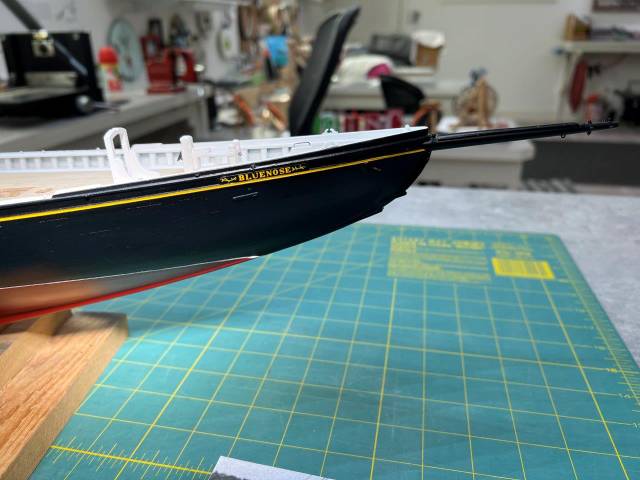
Been working on the Victory and kept looking over at the Bluenose and felt it was well due for an update, 1y 2m since last one 🤔
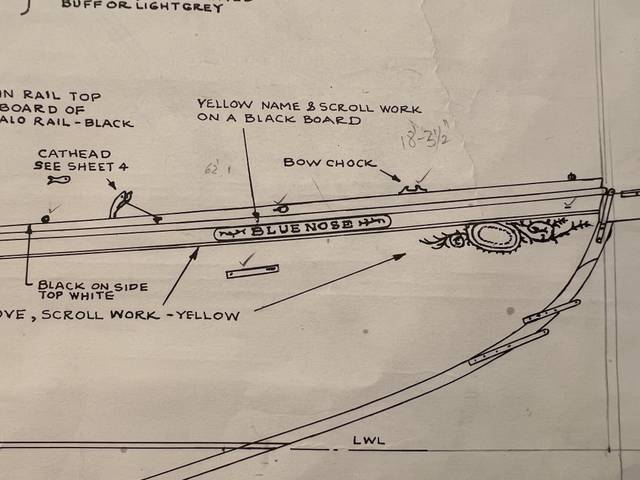
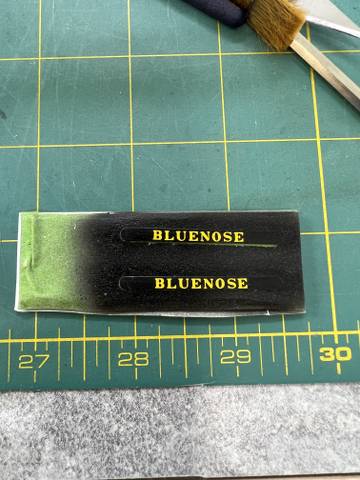
So thought I would start with getting the name and scroll work on a black board, used Clover House dry transfers, Railroad Roman Condensed Bold - yellow which I think was the closest to the drawing. Scroll work I hand painted, do think I should have left a bit more space between letters or letters could have been smaller.
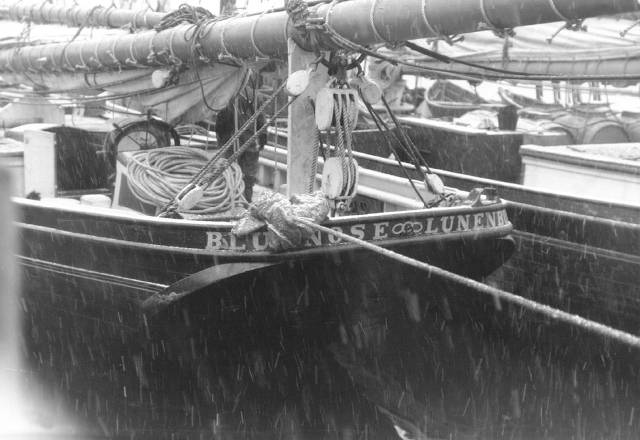
Now the stern name plate was white, did try dry transfers but failed miserably, so started to make a decal, used word to make this but had quite a few rejects.
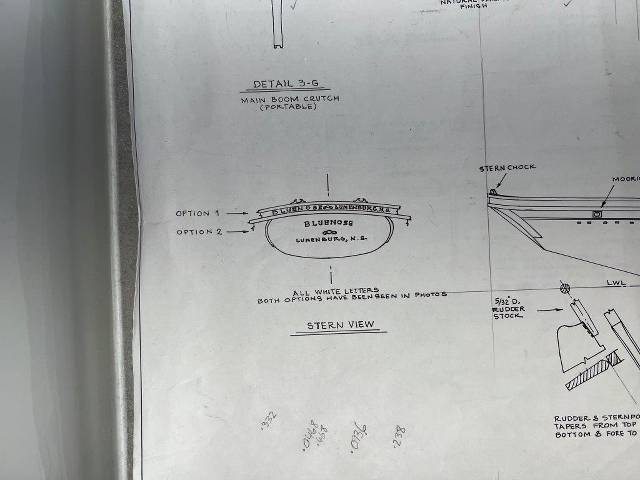
Tried Inkjet printing first, printing was fine used Experts Choice white decal film for inkjet, then followed the instructions to cover the decal with Microscale Liquid Decal film then let it dry for a couple of days.
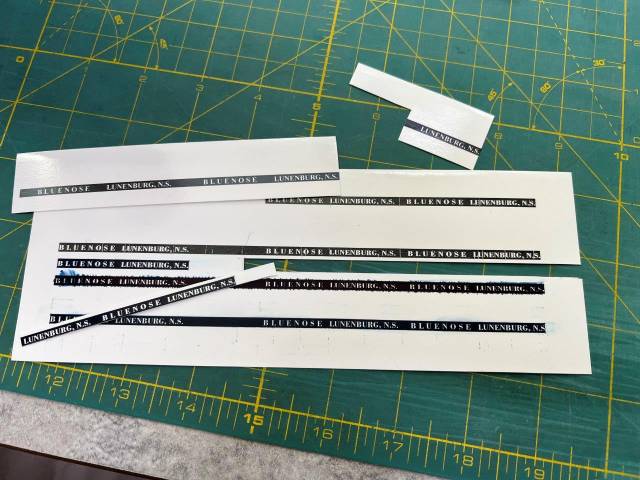
Then went to put decal on the model once I left in water for 45 seconds the ink just peel off the decal leaving more of a white space, so kept trying and could not get it to work (this was the first time making decals) so went on you-tube and one guy was saying you should use a Laser printer, so went and bought a laser printer then had to get white decal film for laser printer.
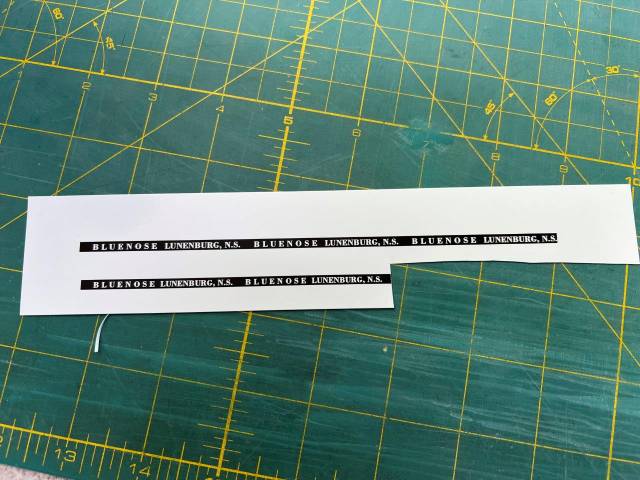
So for me this worked yeah

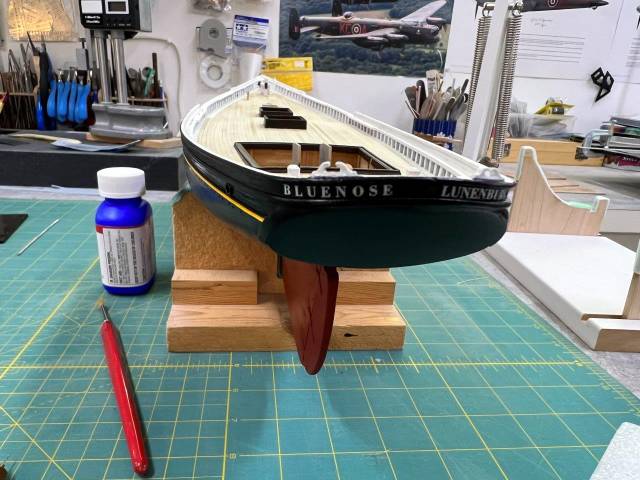
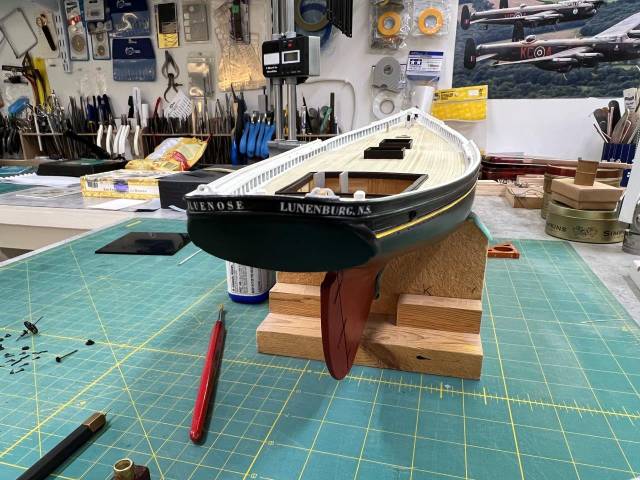
The three white rings to be done later.
To be continued.
Regards
Richard
- FriedClams, bhermann, Rik Thistle and 5 others
-
 8
8
-
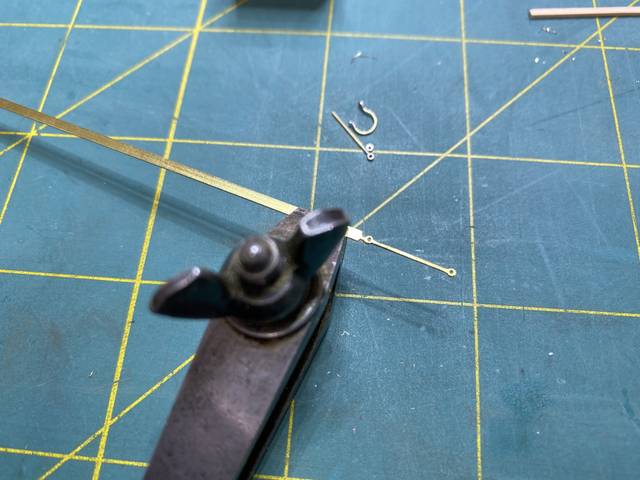
4 hours ago, wefalck said:
Does this mean that you filed to shape each individual link? I also noticed in your building log, that you shaped by filing the straps for the dead-eyes. Do you use some kind of template (like the file-buttons of ancient mechanics) or is it all free-hand? How do you hold these tiny and narrow parts during filing?
Hi Wefalck,
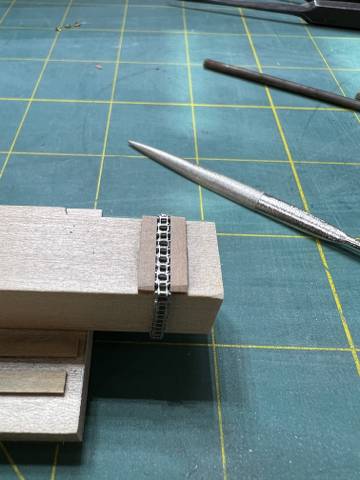
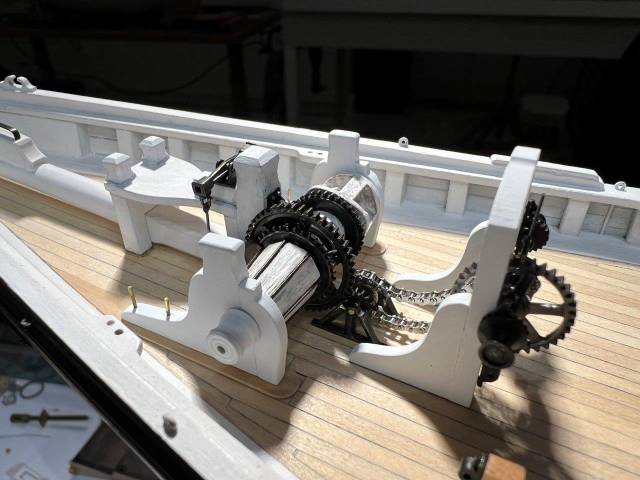
No did not file each link just removed about .007" each side by holding chain in a jig, it did make a difference.
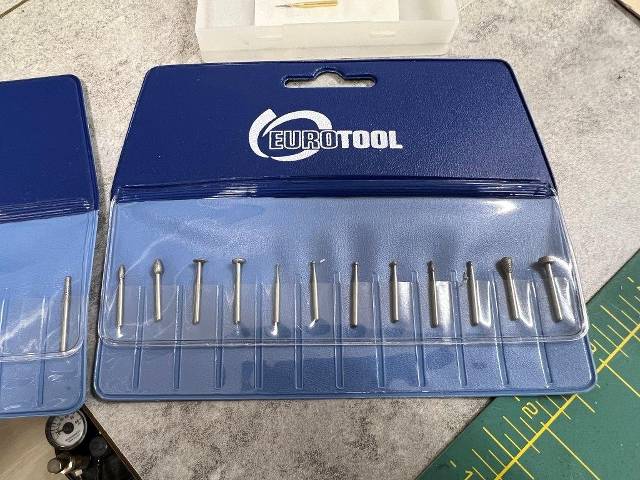
Regarding straps for deadeyes, these were made one by one first drill the holes using a jig I made, then I marked the shape with a pencil then used my Turbo Carver with a diamond bit I removed by eye free hand to my pencil mark, did not remove a small bit so that I could finish off final shape with file, again free hand.
Best regards
Richard
- mtaylor, wefalck and Keith Black
-
2
-
 1
1
-
-
11 hours ago, wefalck said:
That looks like an excellent model - could you post please a link to your building log? Somehow, I didn't manage to find it ...
Hi Wefaick
Not sure how to link my build but if you go to page 10 and look down 3 or 4 wip you will find mine, do have to do an update.
Regards
Richard
- mtaylor and Keith Black
-
2
-
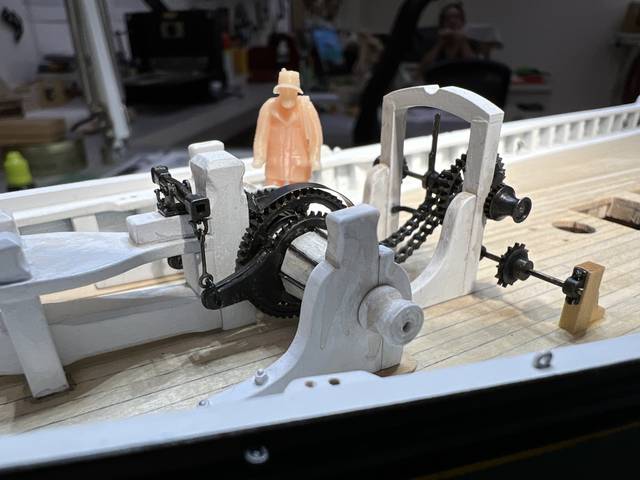
On 11/2/2023 at 7:04 PM, Keith Black said:
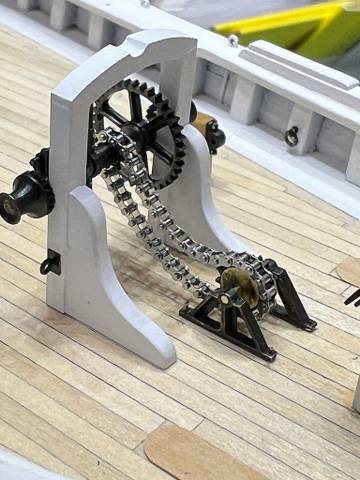
i think it looks pretty dang close. IMHO blackening the chain would make it appear smaller and fit in with the gears.
Hi Keith now have painted the chain but before I did I filed the chain down a bit and now it looks a lot better.
Best regards
Richard
-
On 11/4/2023 at 6:53 AM, amateur said:
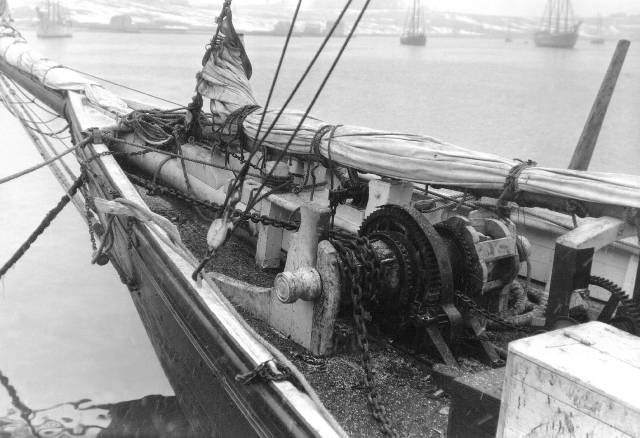
I think the size is correct, but the original had a slightly orher design, making it look smaller. I found another photo of the chain (nova scotia archives)
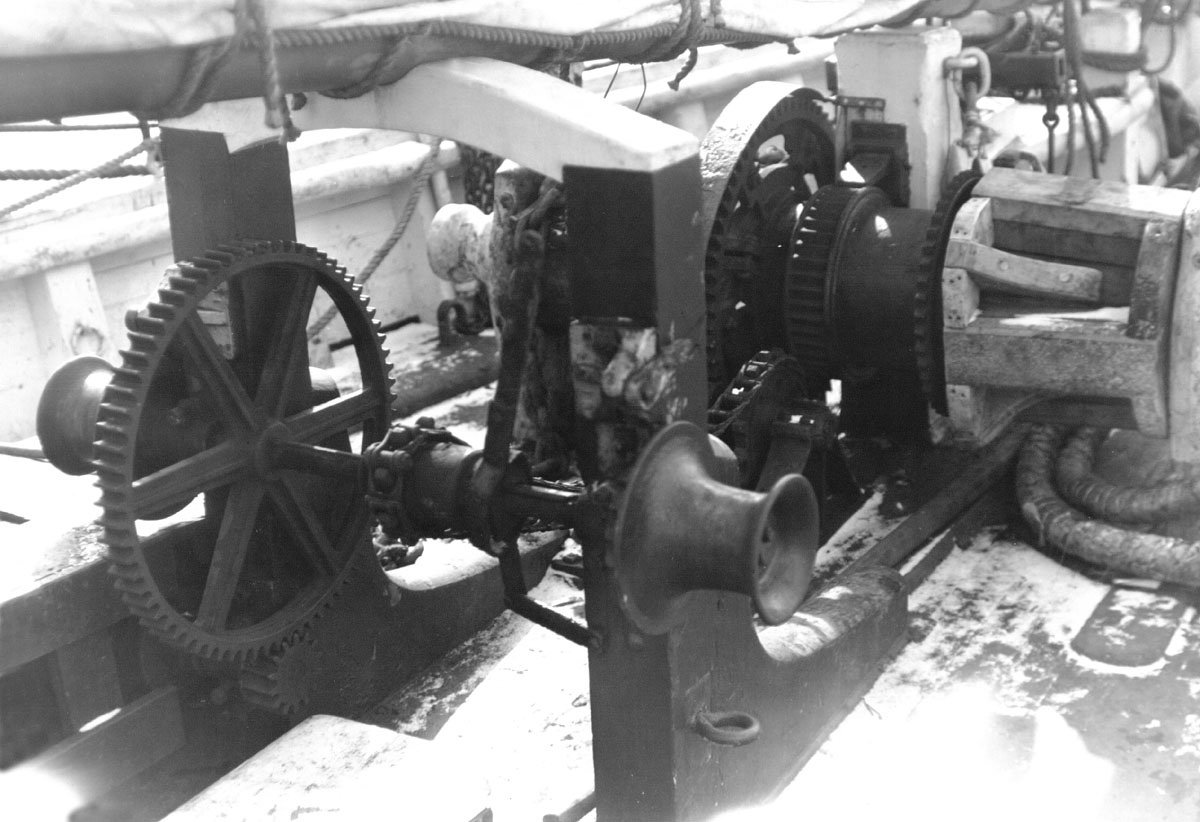
Hi Jan, do have this picture and got the chain to look a little like it now.
Regards
Richard
- Keith Black and mtaylor
-
2
-
-
10 hours ago, Bob Cleek said:
Ditto t what Keith just wrote. It looks great to me!
7 hours ago, Mirabell61 said:very nice work Richard
Nils
Thanks a lot Bob and Nils I will update my blog once I paint it.
Regards
Richard
- mtaylor, Keith Black and Bob Cleek
-
3
-
14 hours ago, Keith Black said:
i think it looks pretty dang close. IMHO blackening the chain would make it appear smaller and fit in with the gears.
Thanks Keith will paint the chain and give some weathering and will see if will appear smaller.
Regards
Richard
- Keith Black and mtaylor
-
2
-
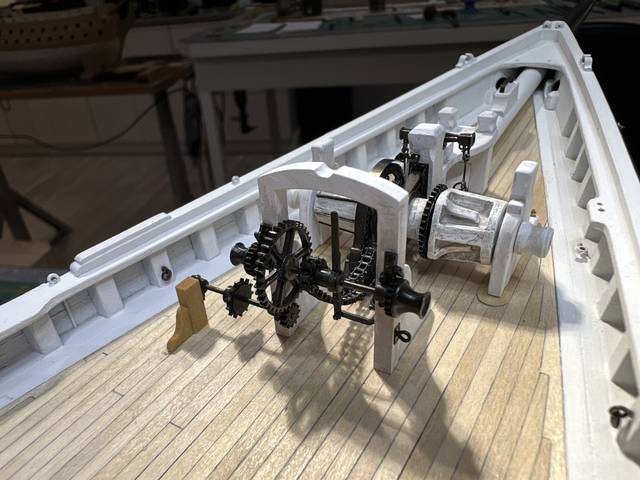
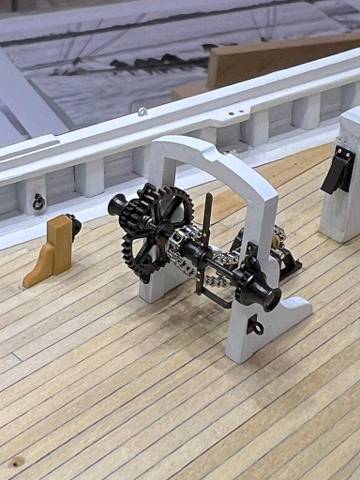
Looking to see if anyone has a drawing, pictures, or better still drawing with dimensions of a Link Belt, which went between sprocket on Boom Crutch to counter shaft stand sprocket on Bluenose 1920
On my WIP here on MSW, back in May 2020 I machined the sprockets and then in post 205 I said I made sprockets to fit a 1/12 scale motor bike chain, well have mounted it now and I think it looks to big, so thinking do I build the Link Belt 🤔
Regards
Richard
- Mirabell61, allanyed, Keith Black and 1 other
-
4
-
One heck of a model Robert, brilliantly done 👍
Regards
Richard
-
Good job Tim 👍
Regards
Richard
-
On 8/22/2023 at 4:00 AM, iMustBeCrazy said:
Even then there wouldn't be much showing unless you turned it upside down.
Just noticed the British version is a slightly different shape and only about 5/8" thick:
Hi Craig now we have trucks with eight bolt holes 🤔
Regards
Richard
- mtaylor, thibaultron and Keith Black
-
3
-
On 8/17/2023 at 5:14 AM, Morgan said:
Also see the attached the drawing of the Venerable from 1799, again single piece trucks.
On 8/17/2023 at 5:14 AM, Morgan said: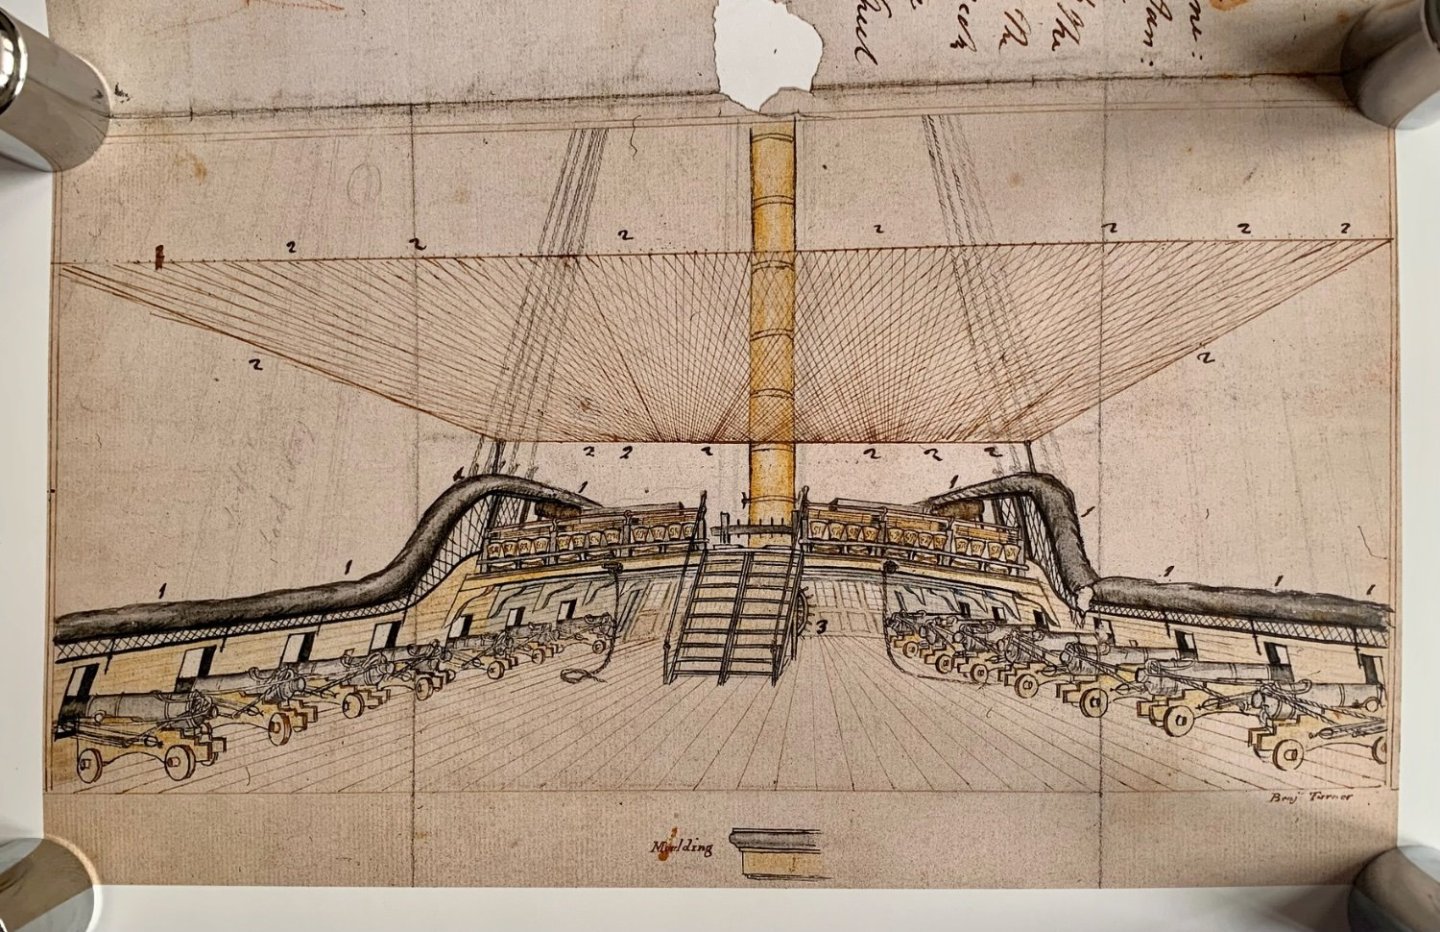
Good drawing Gary thanks for sharing, but look where the guns are, not in the middle of gun port?
Regards
Richard
- thibaultron and Keith Black
-
2
-
Hi Allan,
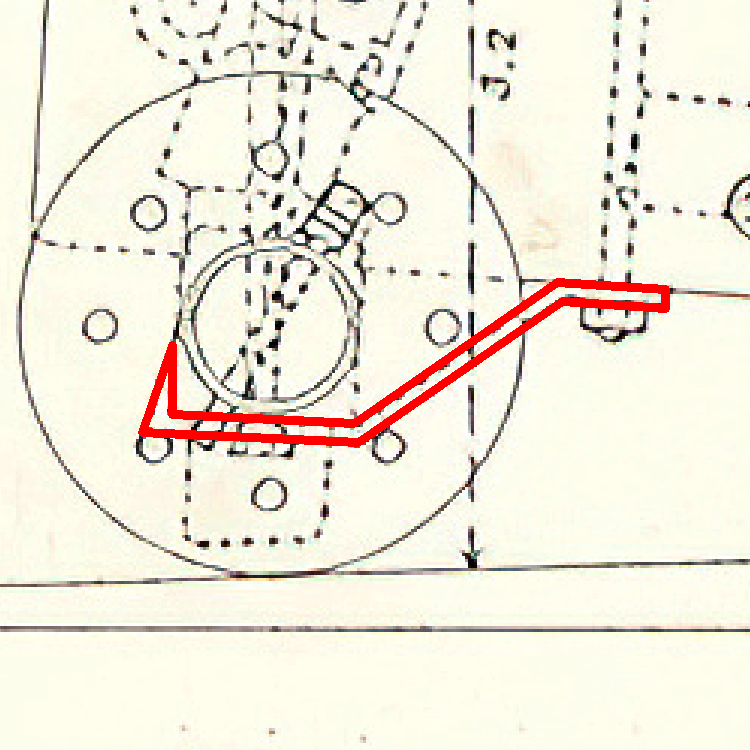
From the A.R. Bugler book, the trucks 18" dia and 16" dia were made from two pieces of 3" thk cross-grained curly English Elm, turned on a lathe then bolted together with six iron clench bolts so that the grain ran right angle to the other.
Regards
Richard
- thibaultron, mtaylor and Keith Black
-
3
-
Very nice model Richard, that last picture is brilliant.
Regards
Richard
- Egilman, FriedClams, mtaylor and 1 other
-
4
-
-
On 5/5/2023 at 10:20 PM, DaveBaxt said:
Thank you Richard for adding those drawings of the Victory and it has definately throws a new light on the subject and is interesting in the least.Are those drawings supplied by Caldercraft or there from another source? I have a copy of the AOTS Diana and this is what I am currently building. This also depicts the guns in a similar position to your drawings. I think this is why I asked the original question. I too am no expert but perhaps it depends upon the size of the vessel and their associated guns. For what it is worth your model looks fantastic and the presentation does not look out of place. Because of the slope and curve of the hull height wise , what do the Victory guns look like head on, does it change the perspective at all? Just a thought.
Best regards Dave
Hi Dave sorry for my late reply to your questions,
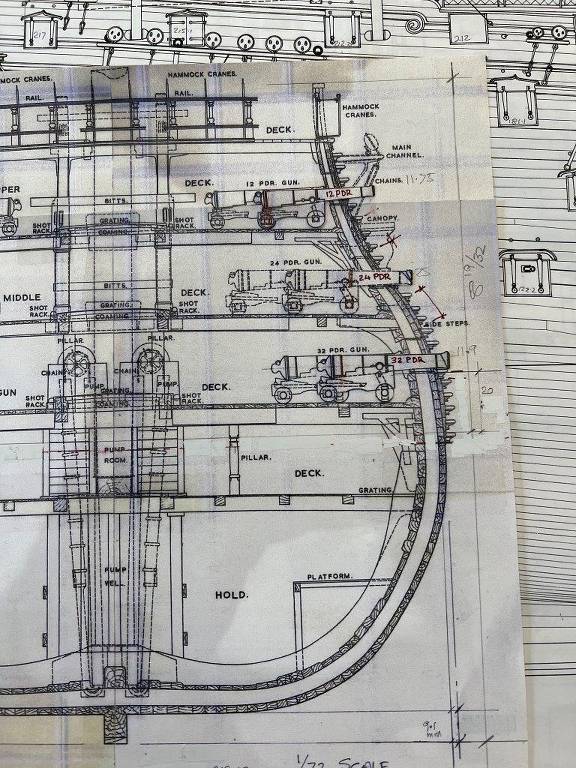
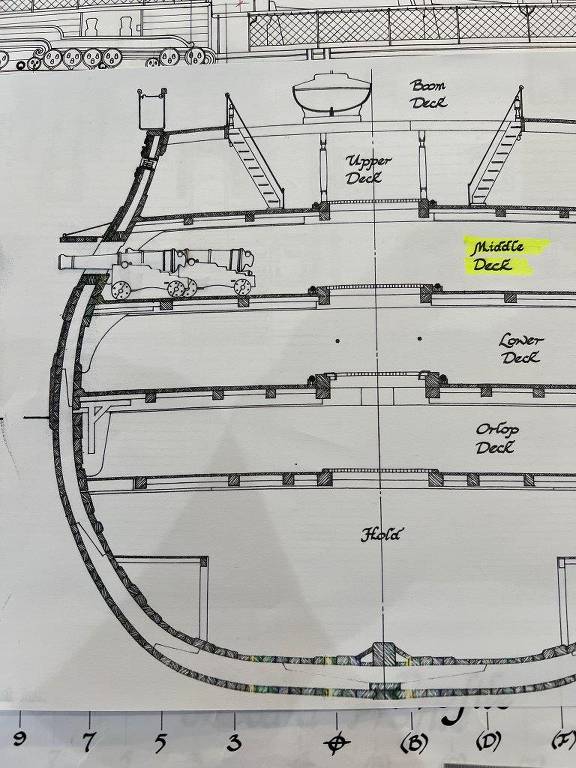
The drawings are not supplied by Caldercraft, Bugler drawings and his book I won on ebay back in 2004 and John McKay drawings I bought from John this February.
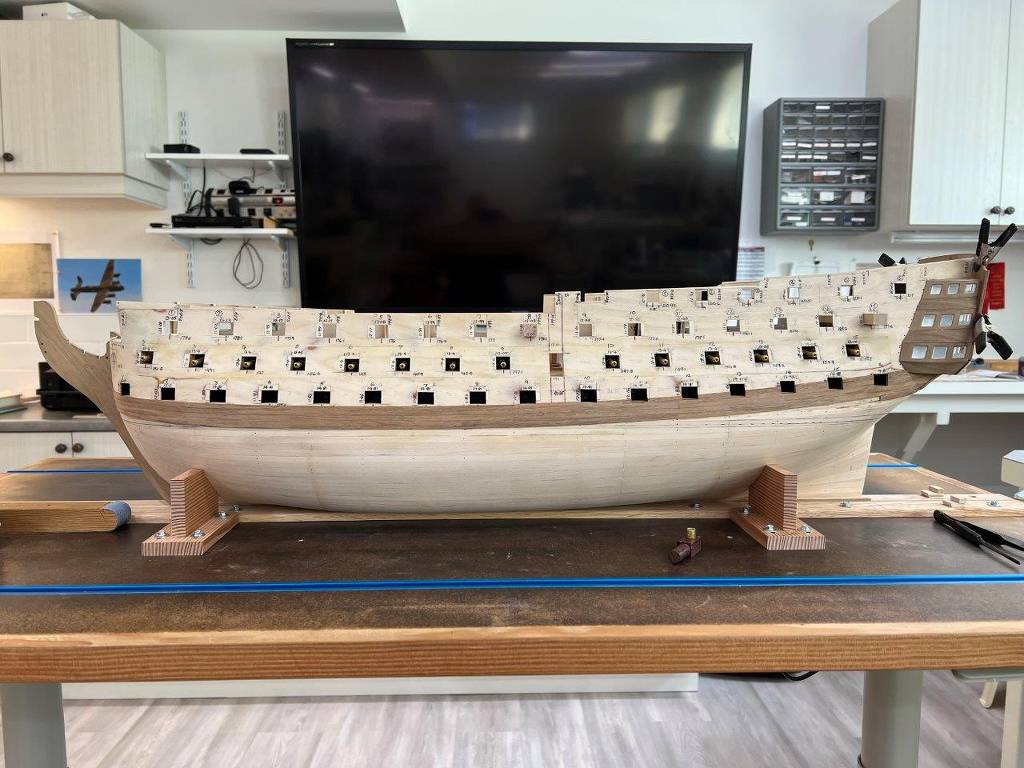
Here is the side view looking head on to give you this perspective.

Regards
Richard
- BLACK VIKING and mtaylor
-
2
-
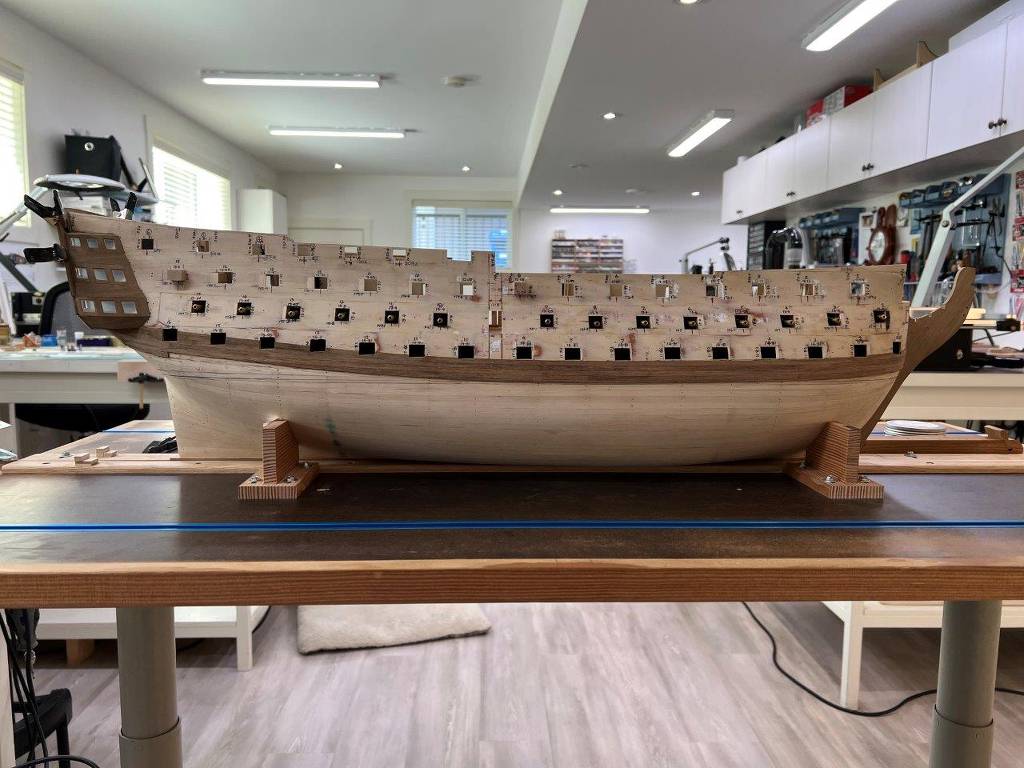
Hi Dave, regarding your question "Are the Gun barrels to sit centrally within the gun ports when models are presented" I think you might have to find cross section drawing of your ship you are building, because I am building the HMS Victory by Caldercraft and in the instructions it says to put gun barrels in the center of gun port, but looking at cross section drawings of the Victory, by Bugler and John Mckay you will see they are not in the middle.

This is how my model will be shown
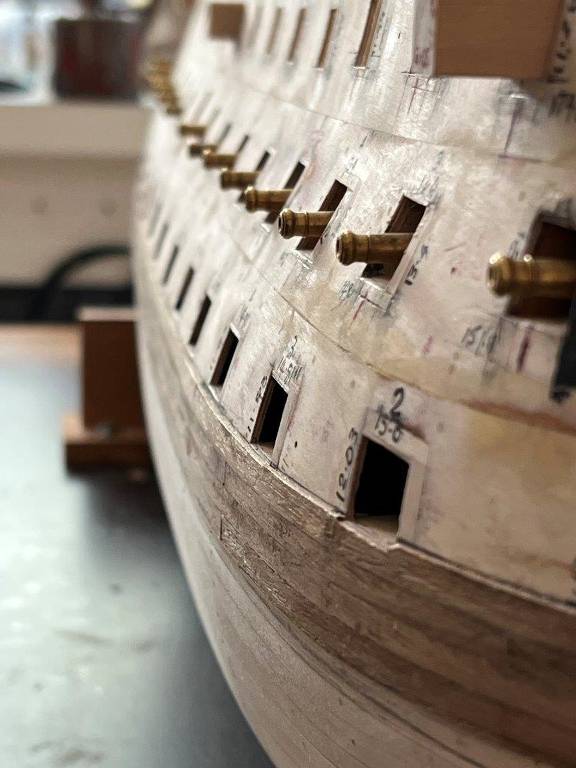
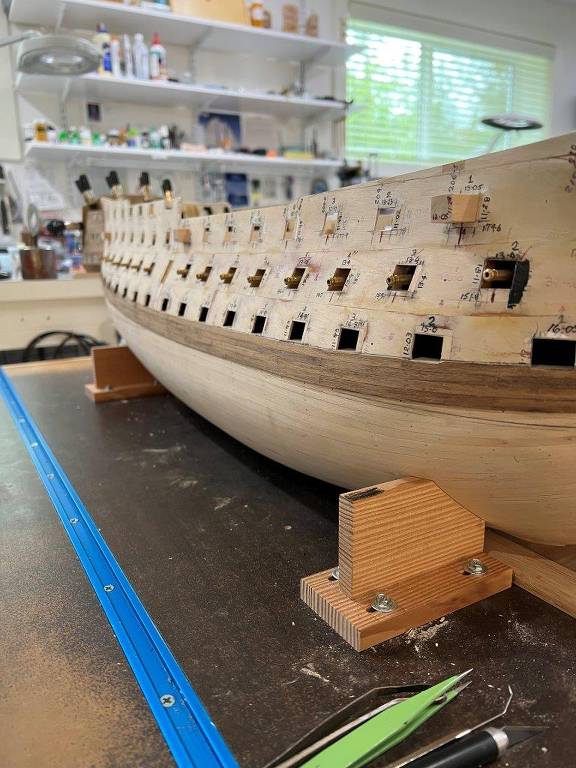
I am not an expert on this subject so I could be wrong.
Regards
Richard
- DaveBaxt, thibaultron, Ondras71 and 2 others
-
5
-
This will be a joy to follow Gary.
Regards
Richard
- mtaylor, FriedClams, Keith Black and 1 other
-
3
-
 1
1
-
Beautiful, brilliant, fantastic Keith, I could go on and on, a big thanks for showing how you made all your parts they are just outstanding.

Will look forward to your next endeavor.
Regards
Richard
- mbp521, FriedClams, KeithAug and 2 others
-
5
-
-
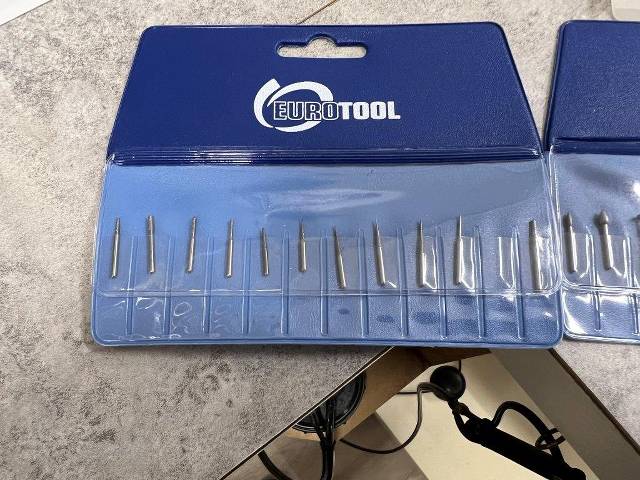
17 hours ago, allanyed said:
Do you know if they make it in smaller diameters? 0.011 is too large for some rings for scales of 1:64 or smaller. Copper comes in smaller sizes and is easy to solder (soft or silver bearing) and can be blackened with liver of sulfur or painted once cleaned up.
Allan
Forgot I have .010" brass as well, at 1/64 it would be just over 5/8 dia, if I needed anything smaller I would just use some brass wire from a very small electrical cable.
Regards
Richard
-

Cangarda 1901 by KeithAug - Scale 1:24 - Steam Yacht
in - Build logs for subjects built 1901 - Present Day
Posted
This is going to be another very interesting build to follow along Keith, just looking at all the parts in the engine room , also hope you have a quick recovery on your eye surgery 👍
Regards
Richard