realworkingsailor
-
Posts
3,274 -
Joined
-
Last visited
Content Type
Profiles
Forums
Gallery
Events
Everything posted by realworkingsailor
-
 Looking forward to this one. I've been contemplating this ship for some time. Can't wait to see you start putting her together. Andy
 -
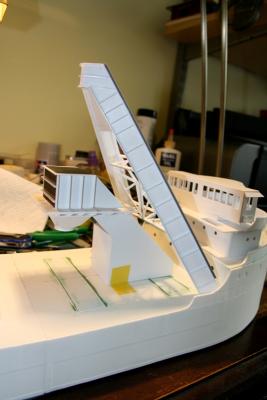
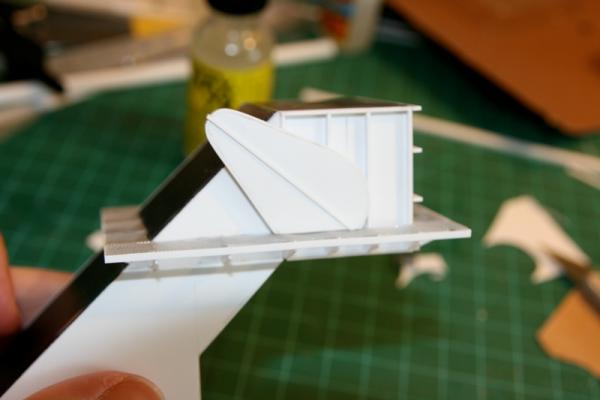
A few days and some more progress... Finally started work on the unloading boom. A very large structure fabricated all out of angle iron (or in my case styrene angle stock of varying sizes). Drawing this thing out proved the easier of the two steps. Working from photorgaphs I was able to figure out approximate ratios and based on a length that appeared visually correct on the model, I could get something that looked right. Now it is simply (hah!) a matter of cutting, measuring and glueing parts based on my drawing....... this may take a while............ Andy


- 382 replies
-
- 12
-

-
- stadacona
- sylvan scale models
- (and 1 more)
-
Your work looks great so far. As for your blocks, I might suggest trying Chuck's. They are so much more refined than the kit supplied, and they'll go a long way to improving the overall look. I've done the same for my Pegasus build (not for my canons unfortunately, not available at the time). Andy
-
She looks really good Augie, you've done a great job. Andy
- 2,191 replies
-
- 1
-
-
- confederacy
- Model Shipways
- (and 1 more)
-
Daniel and Sherry, glad to have those kinds of responses from you. Nice to know I've hit the nail on the head and created something immediately recognizable to anyone who's worked in the industry. Augie and Popeye, I've ordered to better brass mesh to replace the aluminium mush (yes I meant to spell it that way). No big deal really, I needed to order some other detail parts at the same time anyway. Andy
- 382 replies
-
- 4
-
-
- stadacona
- sylvan scale models
- (and 1 more)
-
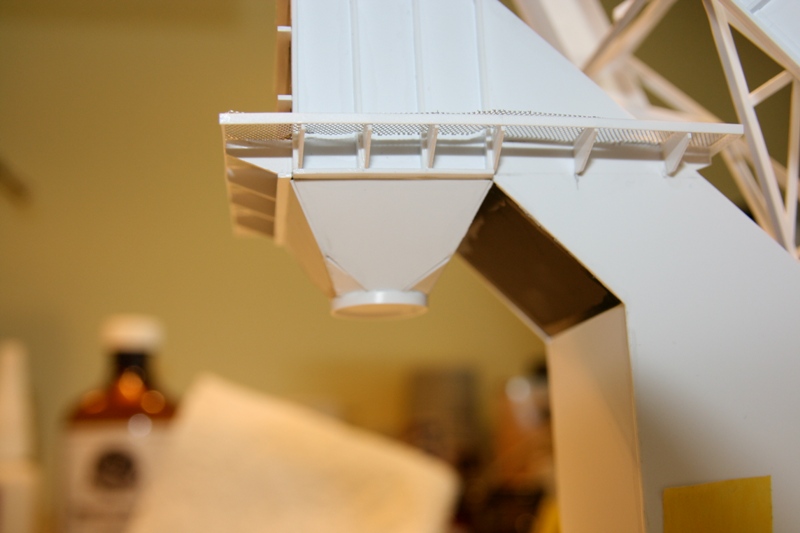
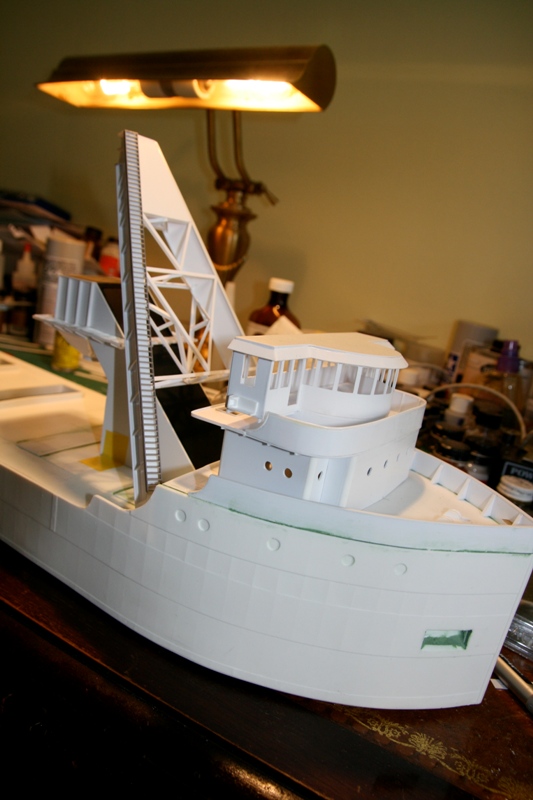
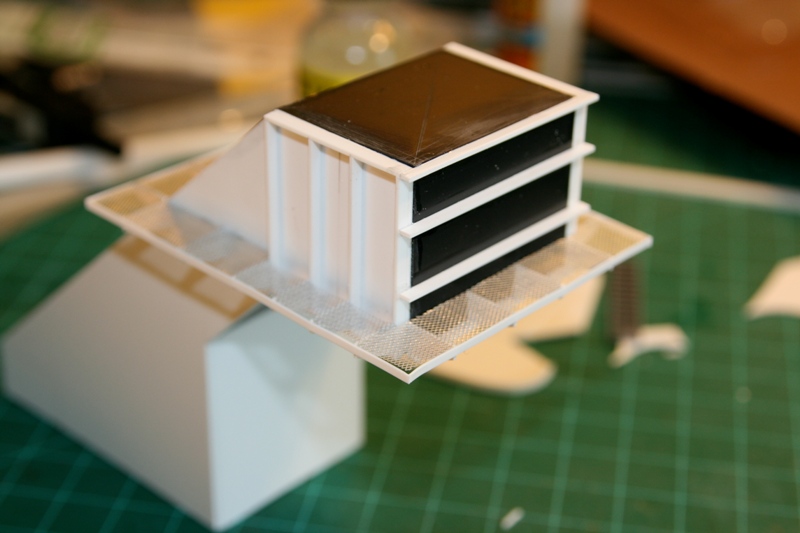
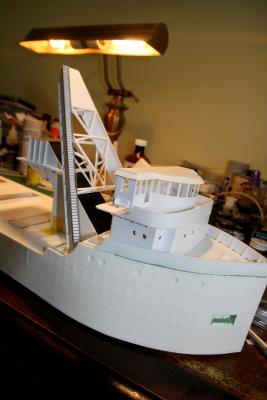
Carrying on work on the loop belt casing. Went to work on the boom feed hopper. A fun little bit of architecture. You can see in the second photo just how bad the aluminium mesh really is. It's just too soft to be used in this way. Not that I really need and excuse to head down to the hobby shop today.... The bottom of the hopper has a rotating chute that feeds the boom belt. I have to have a close look at contemporary examples to see how this arrangement allowed for the change of the boom belt angle as the boom was topped up or down. Nowadays it's a complex goose neck arrangement that does away with the chute altogether. Anyway, everything is pictured in situ. A nice summary of progress to date. Andy

- 382 replies
-
- 17
-
-
- stadacona
- sylvan scale models
- (and 1 more)
-
The seaway is most assuredly closed for the season. I chose my photographic angles carefully, that and with a soft focus on a mesh surface... So it may not be as visible to everyone, but the catwalk is quite wavy.... And really starting to bug me.... Andy
- 382 replies
-
- 1
-
-
- stadacona
- sylvan scale models
- (and 1 more)
-
Just to keep everyone informed of the slow pace of construction. Still working some things out on the unloading boom, so in the mean time I've been doing some detailing of the loop belt casing. The top section had all it's framework on the outside. As this section was basically a large hopper where the loop belt discharged, having framework inside would have hampered the flow of cargo. There is a catwalk all the way around the outside. I've used some aluminium mesh, but I think I'm going to replace it with brass mess, as the aluminium is a bit too soft and buckles too easily during handling. I've also made the chain drive covers. Their final position will be dictated by the drive motor and upper platform, yet to be built/installed. Modern belt drive is done with hydraulic "soft start" torque converters, rather than chain drives. Much less maintenance, and far fewer moving parts. So work continues on. Andy

- 382 replies
-
- 6
-
-
- stadacona
- sylvan scale models
- (and 1 more)
-
Looks great, but you should bring the loop of the stay down over the shrouds, so it rests as much as possible on the cross tree bolster. Andy
- 800 replies
-
- 2
-
-
- snake
- caldercraft
- (and 1 more)
-
HMS Royal Charles, or Naseby ?
-
So that's what that loud noise was.... Ouch...That stinks... Hope you manage an effective fix... Otherwise I'd go with what BE said and rebuild the thing. Andy
-
Best of luck on your new endeavour. I'll be following along. Andy
-
You'd probably be OK with a NiOSH paper dust mask. They are designed to keep out most dry dust particulate. For liquid vapours you would need a respirator with replaceable staged filters. Andy
-
It's funny.... When you think about the bigger picture, "common sense" isn't really that common... I think a better phrase should be "I take all proper precautions as required". Andy
-
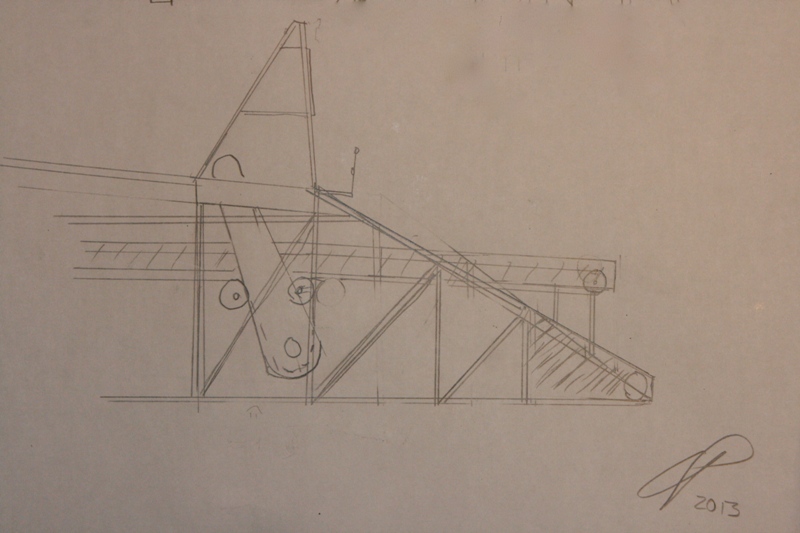
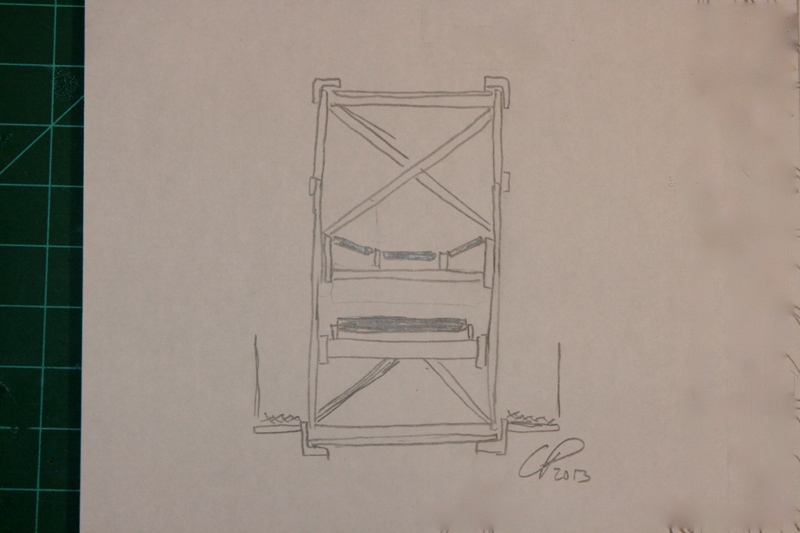
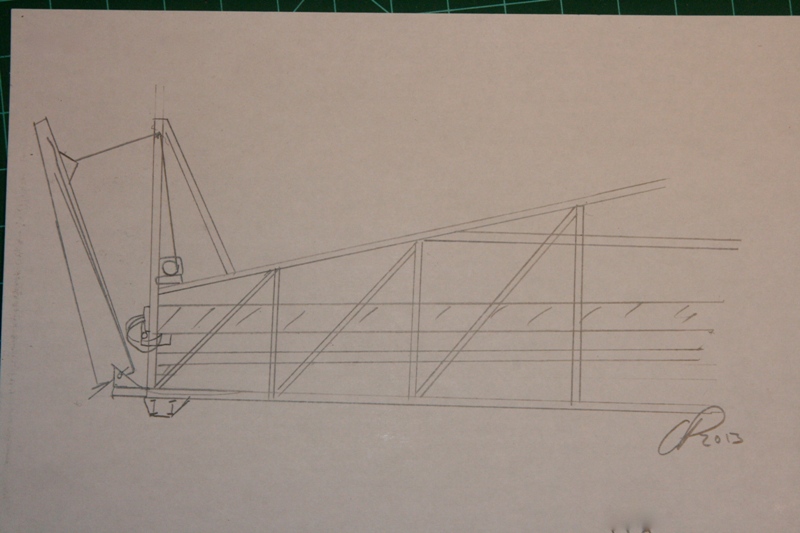
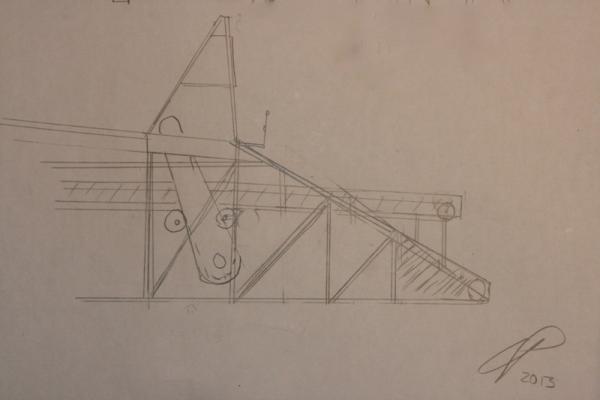
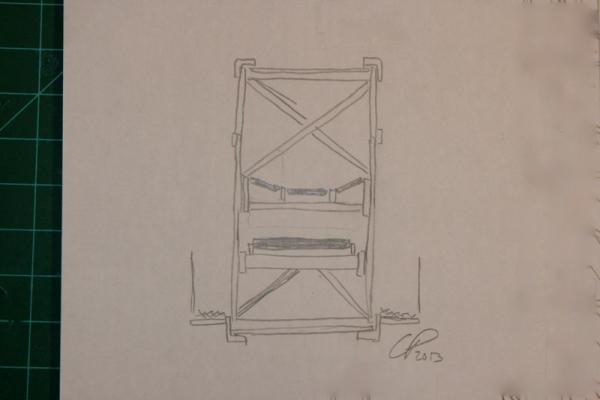
So as I said previously, the new year would find me busy drafting the unloading boom. Before the holidays, I had started some preliminary sketch work. Working as best I could from photographs, trying to figure out the basic construction and arrangements. I've just got a few sketches so far, none of them to scale. These will form my basic references for later scale drawings. There is still a lot of fine tuning and revisions to be done.... and more photgraphs to study. One of the bigger challenges is figuring out the boom belt drive pulley/tensionner arrangement. Anyway.... that's about where things stand at the moment... all pencil work for the time being. When I get bored... I guess I could work on finishing the hull too.... that might help things a bit as well... Andy

- 382 replies
-
- 5
-
-
- stadacona
- sylvan scale models
- (and 1 more)
-
Mark, I had already done so several months ago: http://modelshipworld.com/index.php?/topic/3473-the-nautical-mind/ Andy
-
Nice work. Paint looks crisp, neat and even. Are you going to paint some of the upper works or just keep them natural? (And Happy New Year to you as well) Andy
- 2,191 replies
-
- 1
-
-
- confederacy
- Model Shipways
- (and 1 more)
-
Nah, unfortunately, too modern. I was hoping to get home tomorrow evening, but the way things are going with the ice.... That is looking overly optimistic.... Andy
-
So.... It was a bit of a failed restart. I got called down to Montreal yesterday evening to take one more ship up the river. This is a bit of a last minute thing since ships have to be clear of the Montreal-Lake Ontario section of the Seaway by 23:59 Dec 30..... Maybe I'll get going on my build "next year" Andy
- 382 replies
-
- 1
-
-
- stadacona
- sylvan scale models
- (and 1 more)
-
Just to let everyone know, power was restored sometime after 9pm Christmas Day. The house is slowly warming back up. Everyone is safe, and this will have been a Christmas to remember. The shipyard will be reopening soon. Thank you all for your concerns, and well wishes. And the turkey was delicious too Andy
- 382 replies
-
- 8
-
-
- stadacona
- sylvan scale models
- (and 1 more)
-
The shipyard remains temporarily shut down. We're just over 24 hours without power, with no prospect of when it may return. The neighbourhood looks like a war zone. Thankfully we're all OK, we have heat from our gas fireplace, and running hot and cold water. What a winter. Andy
-
Gypsum is a "fun" cargo to carry in a self unloader. It's dusty, it has wicked hangups in the holds, arches over the gates, it's a b!+ch to shovel, and a freight train makes less noise than gypsum running through unloading gear.... Another reason to keep to the flat backs... Andy
-
Judging by the style of hatch covers, that's a model of a Panamax sized self unloader. A bit too big for the lakes, but possibly quite active on the east or west coasts. That's also a modern styl self unloader, loop belt and tubular steel boom, and hydraulic luff and slew. Any idea when the model was originally built? (Better yet when the prototype was?) Andy
-
Like I said... Some sort of masochistic bent.....
-
I'm probably going to start by first building the bottom framework. I will then have to add all the conveyor paraphernalia (rollers, roller cradles, return rollers, etc). After that is installed, I plan on building up the boom as a series of cross sections, finally being tied together at the top with the longitudinals. After that, there's the boom drive motors to add, the topping lift sheaves, walkways, and all remaining "steel" work. After paint I plan on adding a conveyor of some sort. After Christmas I'll be able to concentrate more on drafting this whole thing out properly. My construction plan may change a few times yet before then. Andy
- 382 replies
-
- 2
-
-
- stadacona
- sylvan scale models
- (and 1 more)