Mirabell61
-
Posts
7,418 -
Joined
-
Last visited
Content Type
Profiles
Forums
Gallery
Events
Everything posted by Mirabell61
-
 I like your companionway with doors and slide cover G.L. What have you been using for the resembled dark caulking lines on deck, are those black card stipes ? Nils
 -
Jack, interesting build, nice and clean assembled, well done.... also the ships boats are lovely Nils
- 190 replies
-
- 1
-

-
- ragusian
- marisstella
- (and 1 more)
-
Many thanks Piet, in case you may be interested, and not looking only for a kit,...... I saw they also have a plan of one or two Zuiderzee-botters on that Dutch site, perhaps you know it already... http://www.modelbouwtekeningen.nl/nvm-1003003a-zuiderzee-botter.html For the Chebec sweeps I believe they were relatively heavy indeed, as they needed to withstand best possible propulsion, when the crew navigated the ship swiftly into resp. out of battle range in calm seas, and the larger squarerigger vessels usualy had much more fire power Nils
- 692 replies
-
- 1
-
-
- eagle of algier
- chebec
- (and 2 more)
-
beautiful work Ken, Nils
-
Wunderbare Arbeit Hartmut ! awesome Statenjacht model. lovely passengers, resp. crew.... Nils
-
Thank you for that special input Antony, much appreciated, very interesting read, and the red sail equiped Chebec (out of the first enclosed link) I know already from the web it is showing many insperational details in the pic gallery Nils
- 692 replies
-
- 2
-
-
- eagle of algier
- chebec
- (and 2 more)
-
Hi Antony, Thanks very much, I`m also very curious already, and will be looking forward to your comments on the plan set in due time.... Nils
- 692 replies
-
- 3
-
-
- eagle of algier
- chebec
- (and 2 more)
-
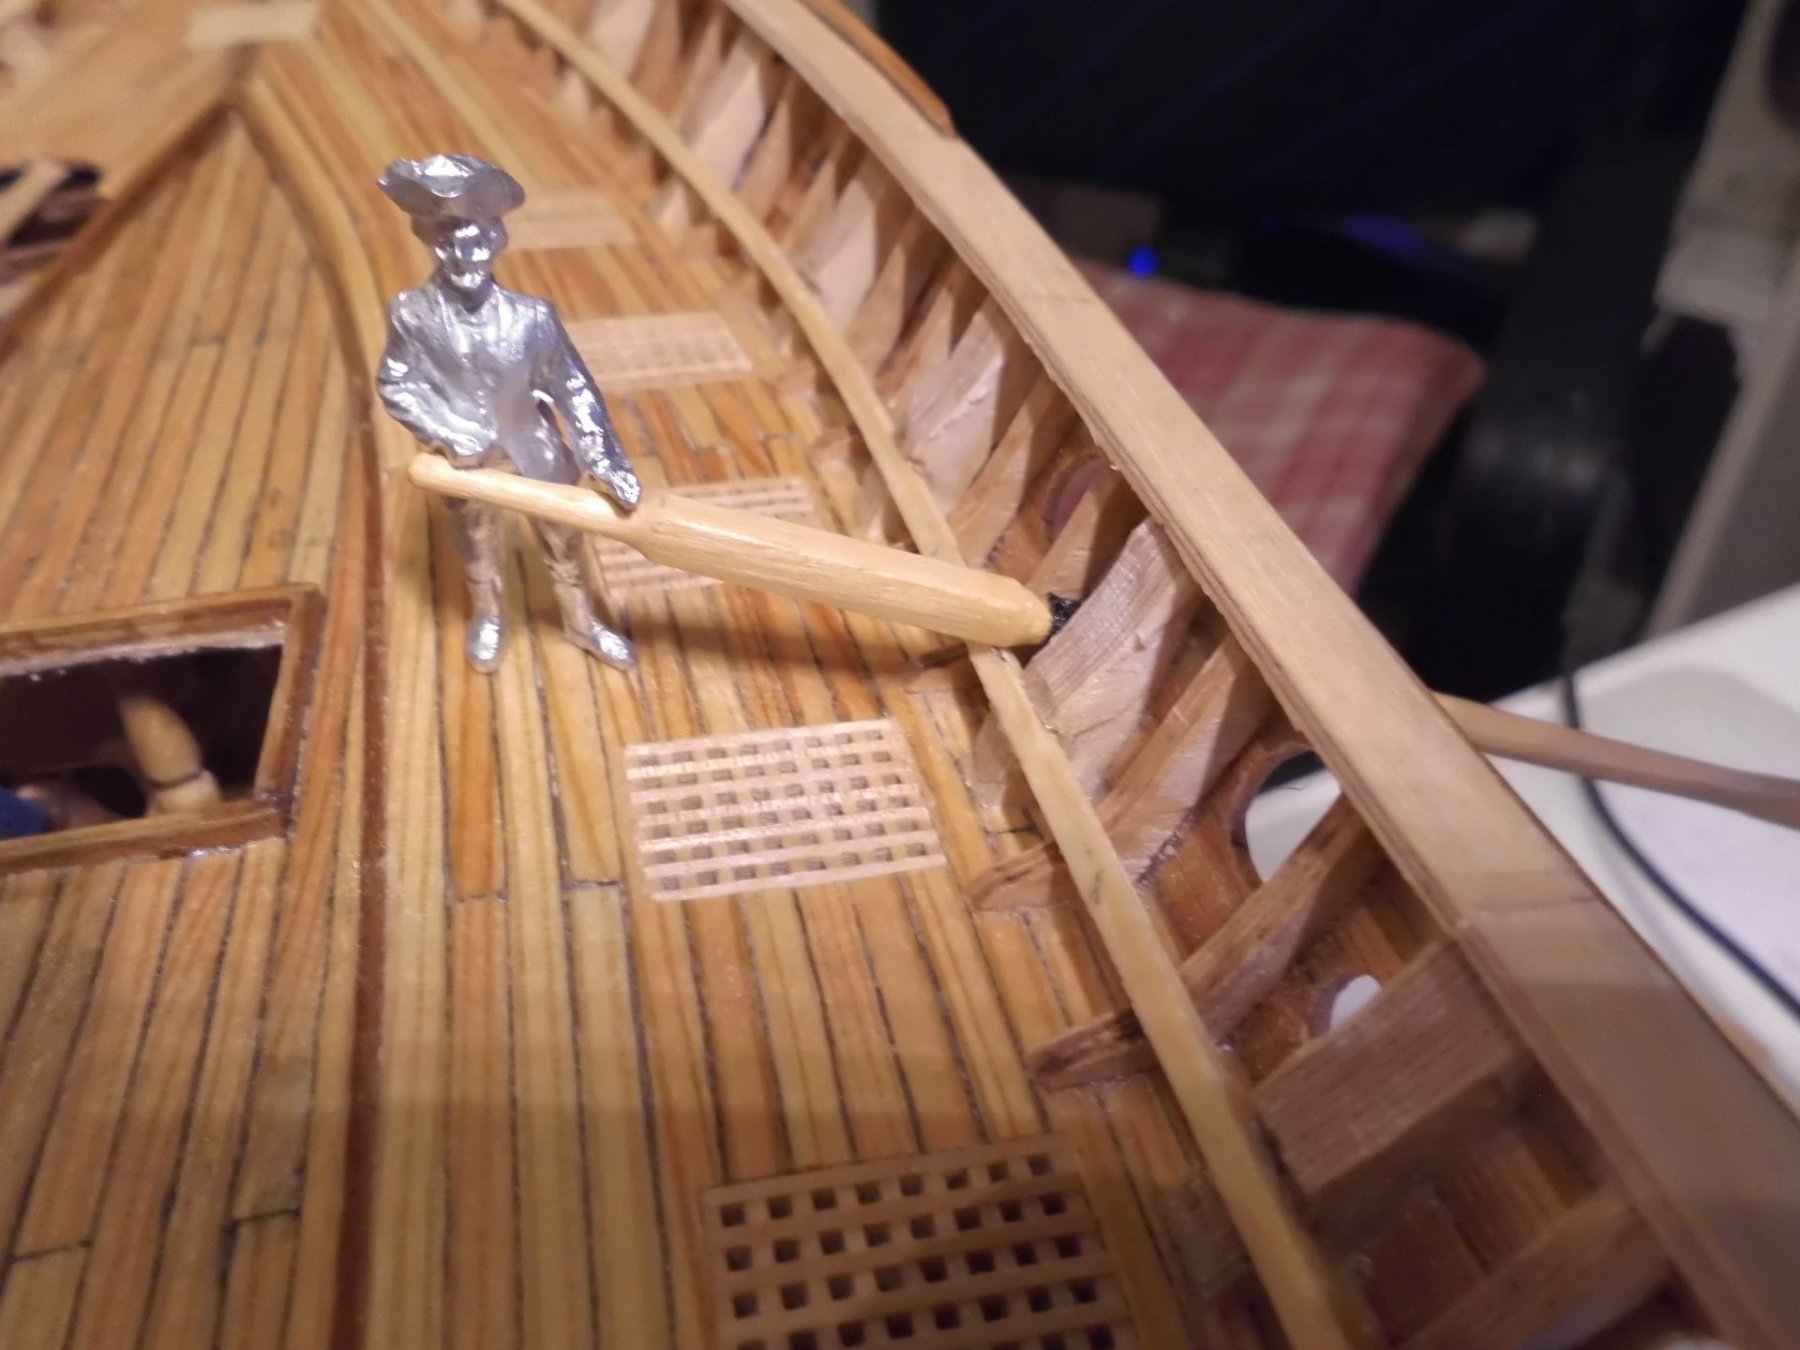
Hi Antony, The oarholes in the bulwark are large enough to slip the blade through, but unfortunately I ca`nt tell if perhaps two men were necessary to operate the sweep... the sweep is a bit counter balanced by the solid square section part. Would appreciate if anyone of the fellow builders would be able to answer that more precisely... For building the junk I have`nt ordered from that source yet. I presume that they are trustworthy, have`nt found anything negative about that site to date. Yes, the price is quite an investion to face, but I hope its worth it, as I found no such alternative yet.... Nils
- 692 replies
-
- 3
-
-
- eagle of algier
- chebec
- (and 2 more)
-
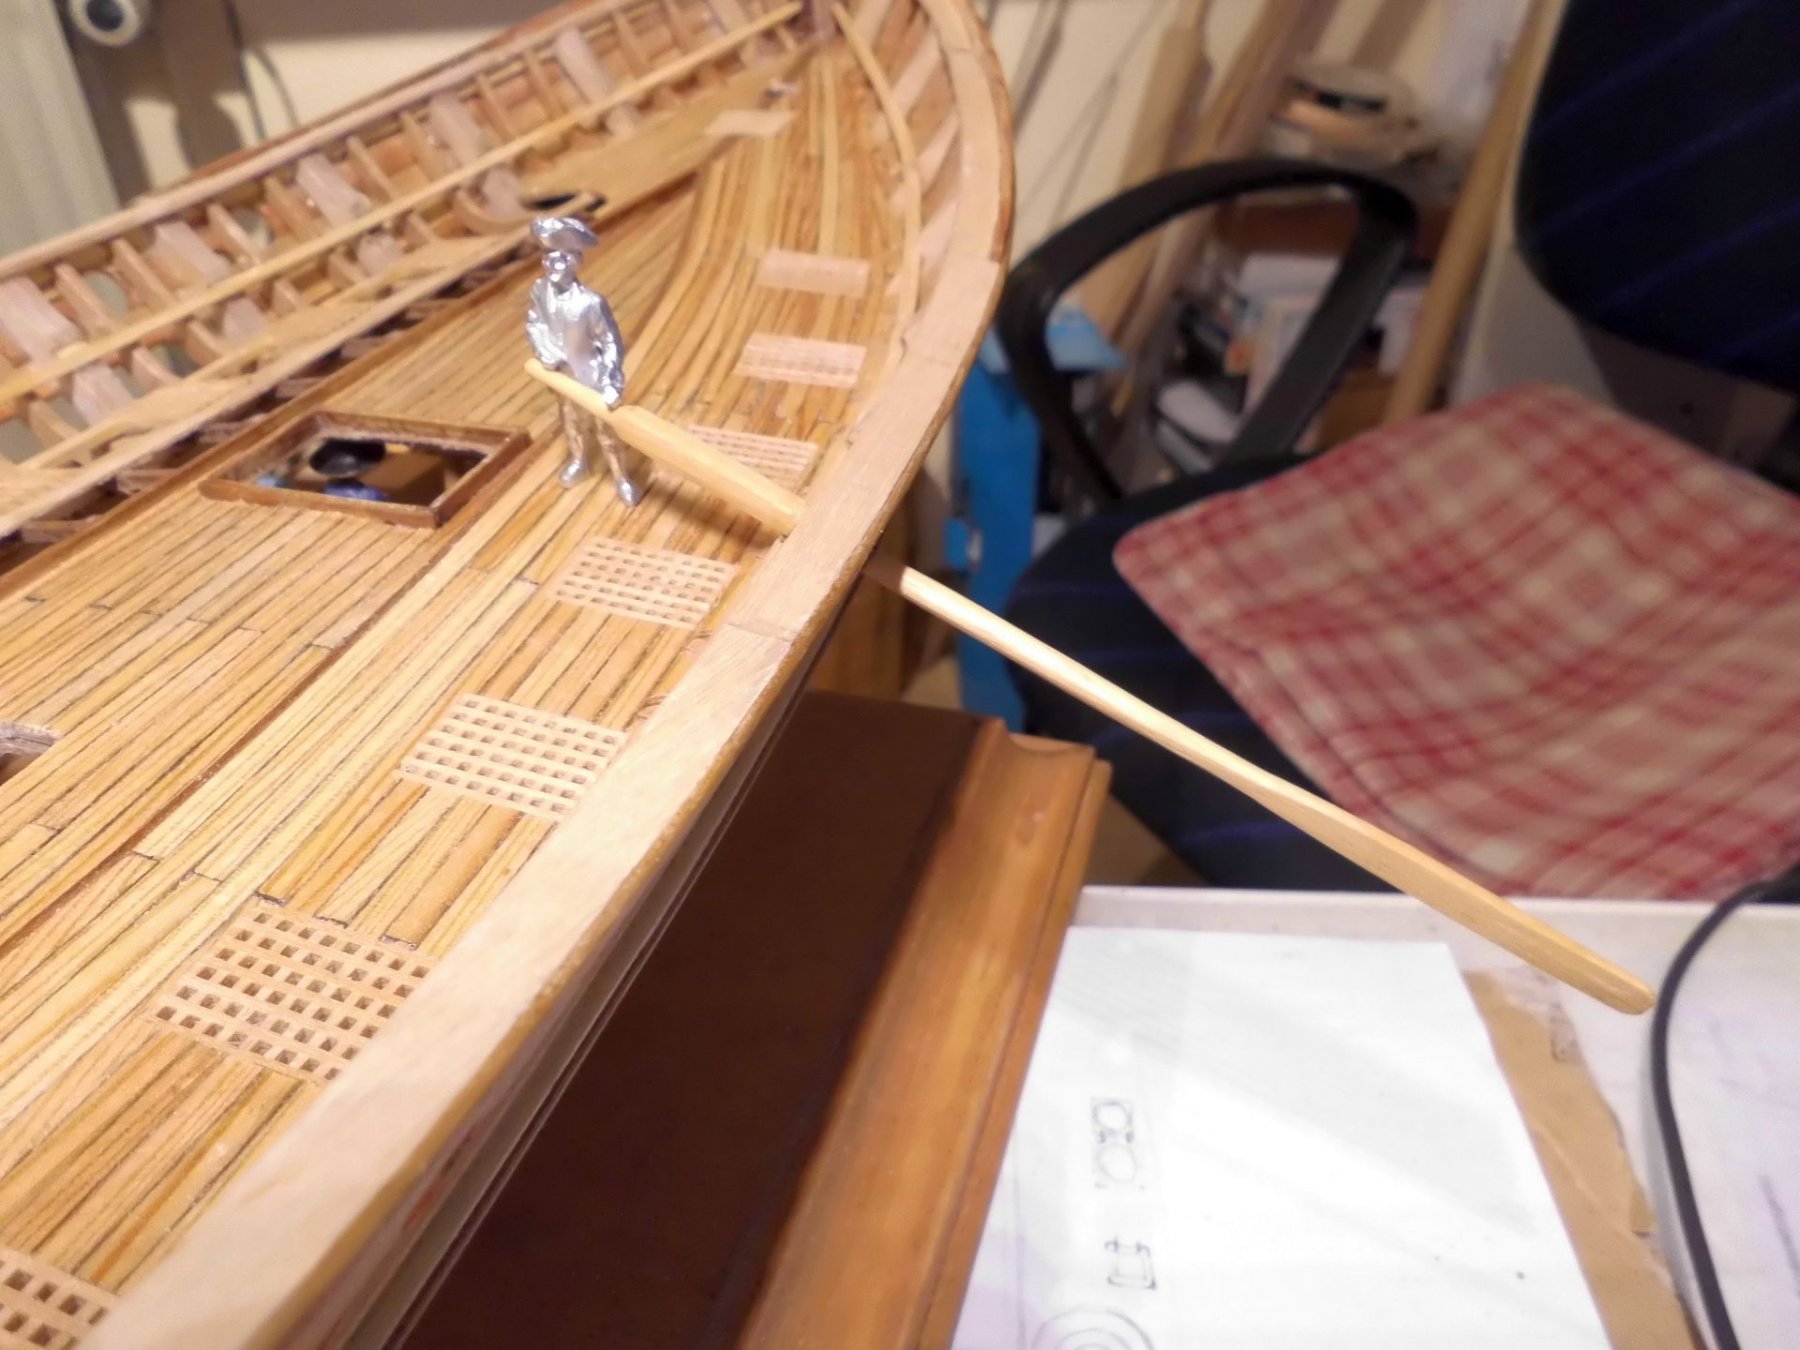
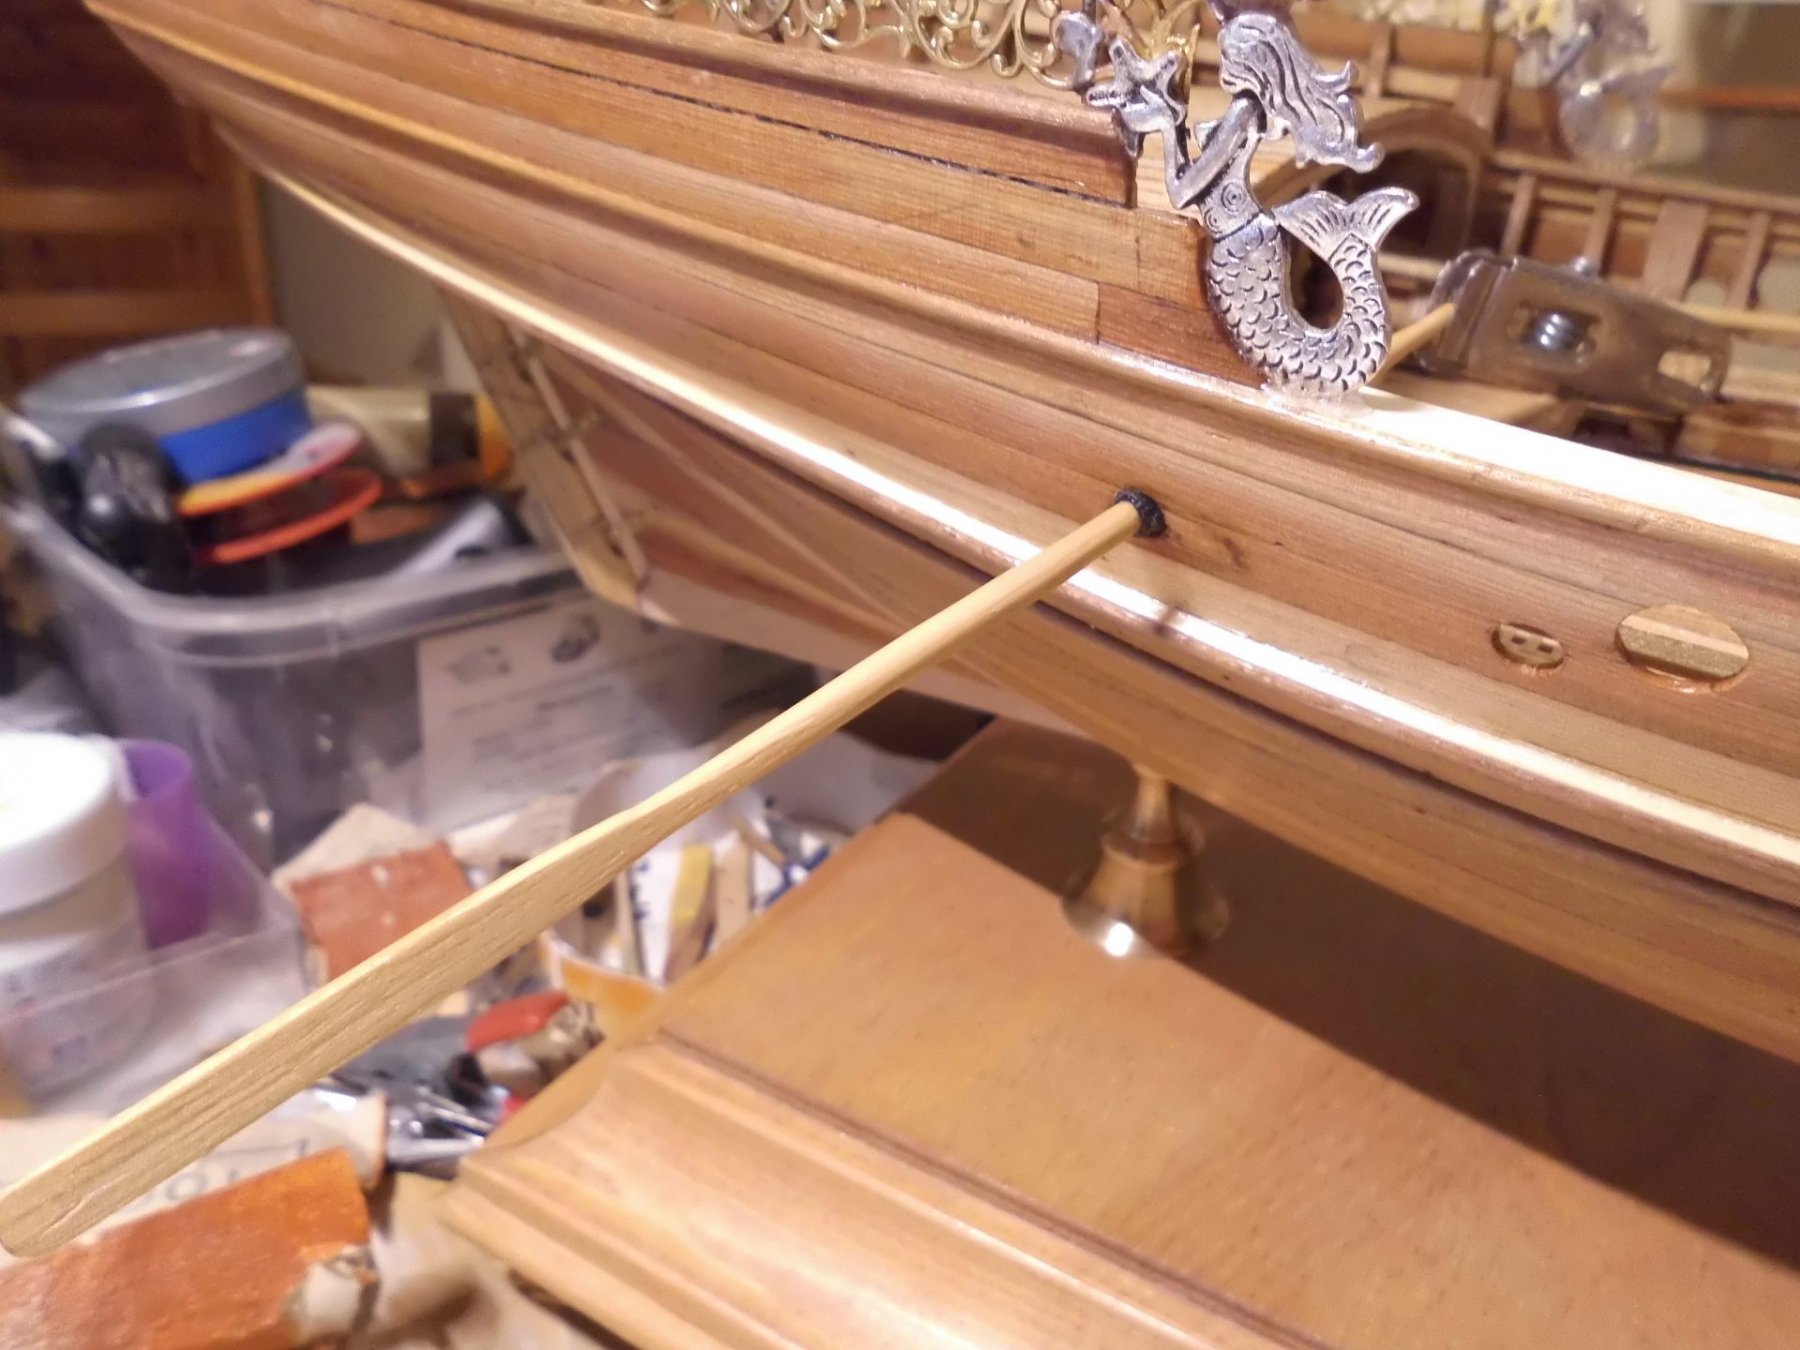
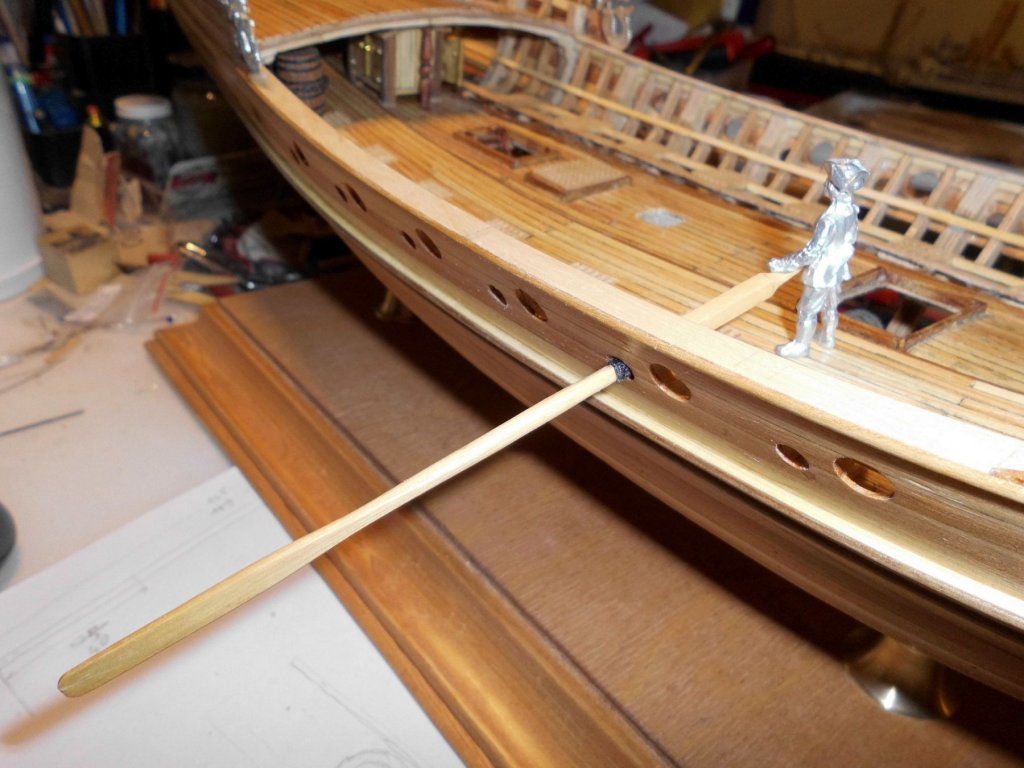
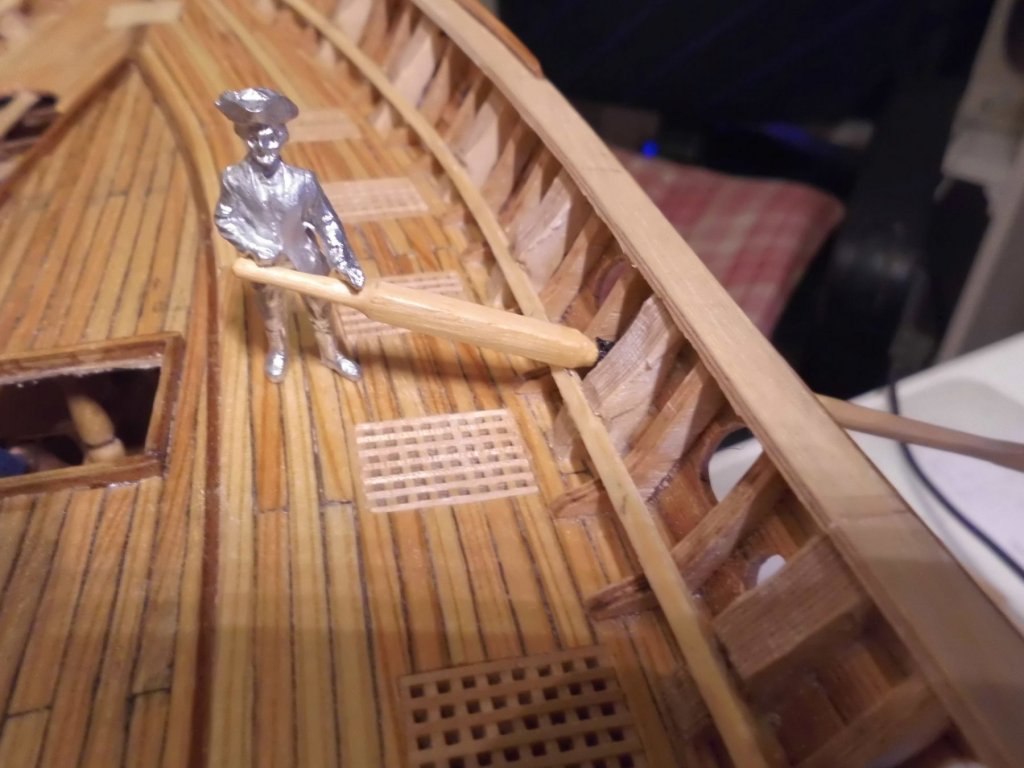
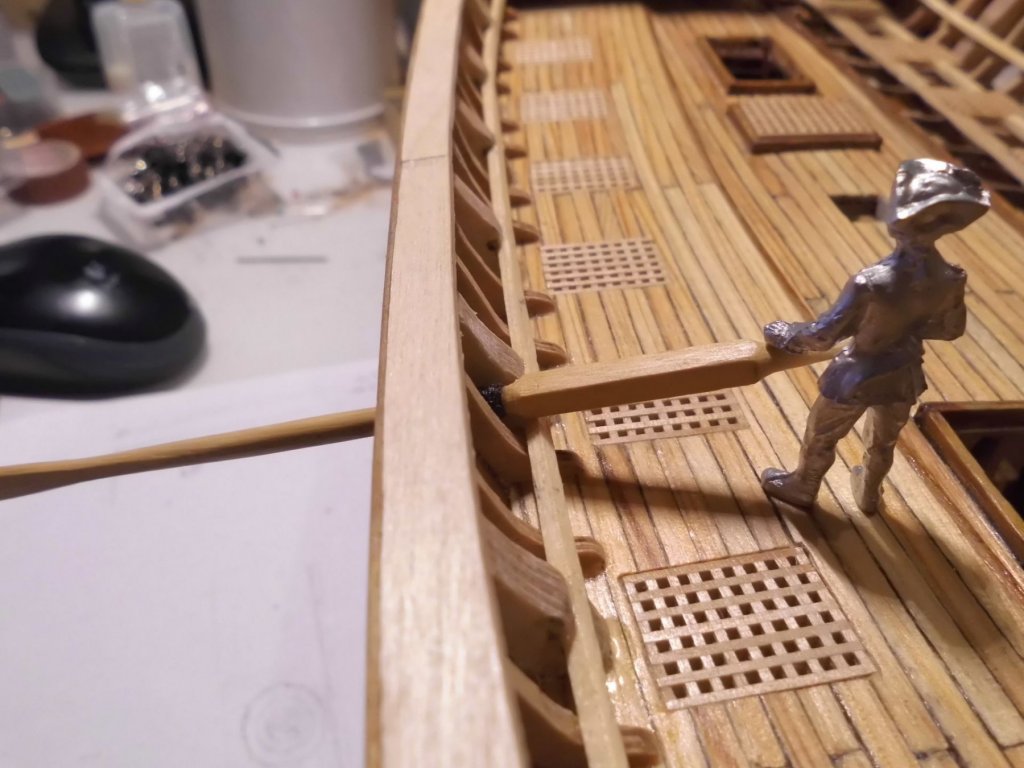
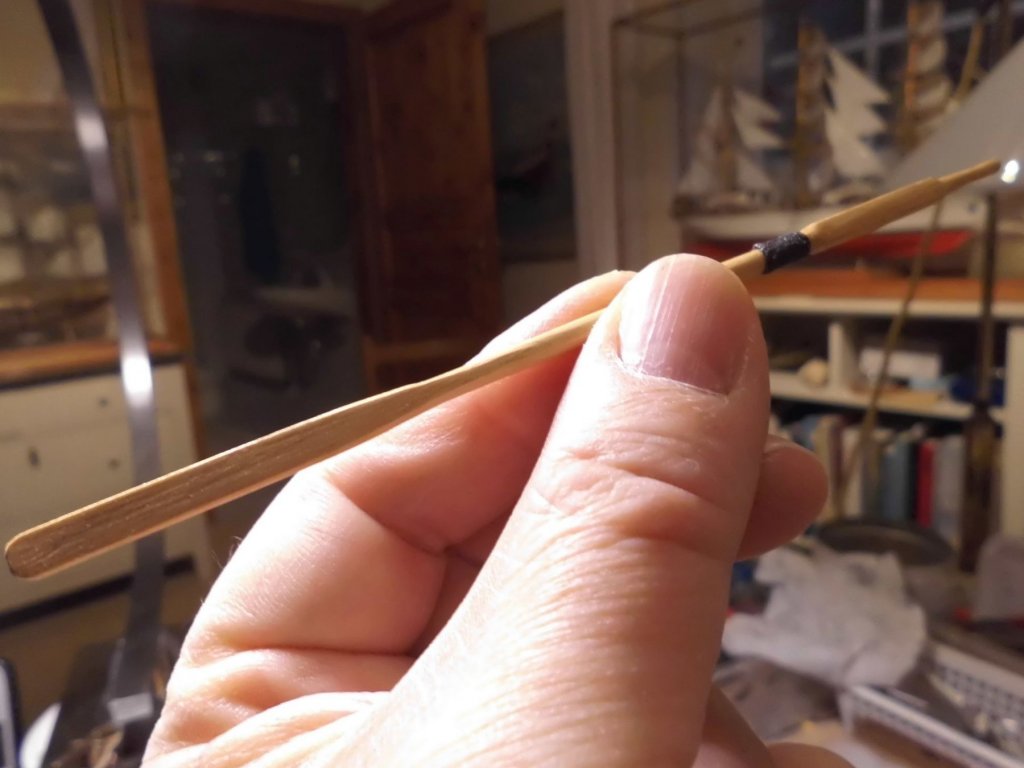
Update :... made a trial 143 mm long (upfront) 1:48 sweep from bamboo wood, in order to determine size and length as well as position in the bulwark, where all the oar ports meanwhile had been cut into... Nils there are 9 sweep ports on each side... the pivot point is the bulwark itself, whereby the inside rail supports for hight and angle, when the blade is submerged hight of the tin figure is 35 mm its all from one piece of bamboo rod the thin black serving line coil protects the pivot bearing point in the bulwark...


- 692 replies
-
- 16
-
-
- eagle of algier
- chebec
- (and 2 more)
-
Cutty Sark by NenadM
Mirabell61 replied to NenadM's topic in - Build logs for subjects built 1851 - 1900
Happy new year Nenad, nice to see you posting again...., lovely little clinkered gig Nils- 4,152 replies
-
- 4
-
-
- cutty sark
- tehnodidakta
- (and 1 more)
-
Right, and thanks Antony, I have a bunch of ideas still to integrate into my version. Momentarily I`m doing some trials with a set of sweeps, that will pass through the oar ports (as demo) in the stb. bulwark, but only on one side. BTW, as you showed interest for a nice trade junk build, I have this link of a seagoing Hainan junk model of 1834 for you that I found on the web some days ago. Its built exactly from the plans I am going for, I find it looks awesome and so well built..., trust you shall like it as well... http://www.modelships.de/seagoing-junk/seagoing-junk.htm Nils
- 692 replies
-
- 3
-
-
- eagle of algier
- chebec
- (and 2 more)
-
Hi Denis, thanks for your kind appreciation... Nils
- 692 replies
-
- 4
-
-
- eagle of algier
- chebec
- (and 2 more)
-
very nicely built model Hartmut, I like your self built blocks.... Nils
-
Hi Padua, welcome to MSW, enjoy your stay,...... we all wish you pleasant exchange on the forum and certainly would like to see you share one of your next models with us... Nils
-
awesome work Johann ! Nils
-
welcome on board Zappto, thanks for looking in and enjoy the ride... Nils
- 692 replies
-
- 3
-
-
- eagle of algier
- chebec
- (and 2 more)
-
Thanks very much for your nice comment Jesse, Nils
- 692 replies
-
- 3
-
-
- eagle of algier
- chebec
- (and 2 more)
-
Moxis, Wow ! the deck looks great. also I love the cabin sides with those beautiful door lock plates, hinges, handles and even the keyholes, wonderful work.... Nils
-
Thank you very much Christos, Piet and Antony, for your kind appreciations... Also many thanks to the "likes" for clicking on... Christos, I searched at Ebay for a 3D size suitable necklace-charme that could fit either in right or left mode.... Piet, no "antique sawing" in this case, I was happy that I need`nt do any carving on it... Antony, thanks for your kind words, I`m glad you like it... Basically its still after the enlarged Amati plan, but with individual fitting out and some changes... Nils
- 692 replies
-
- 4
-
-
- eagle of algier
- chebec
- (and 2 more)
-
Thanks for your nice comment Keith, am pleased you like the detail.... Nils
- 692 replies
-
- 4
-
-
- eagle of algier
- chebec
- (and 2 more)
-
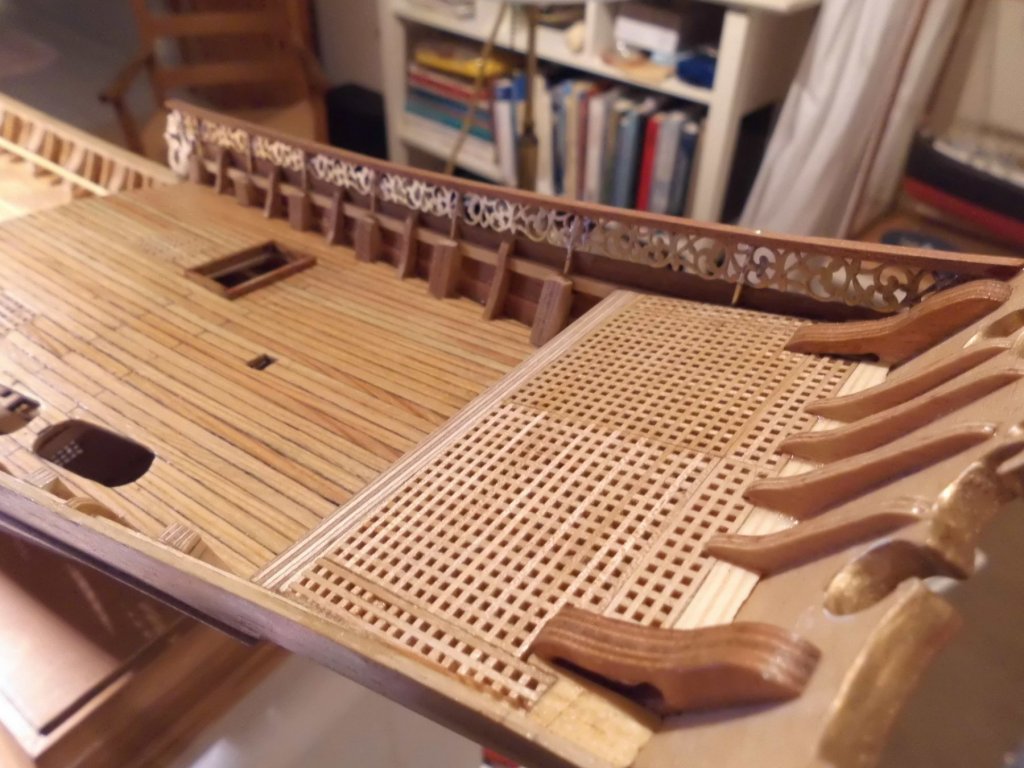
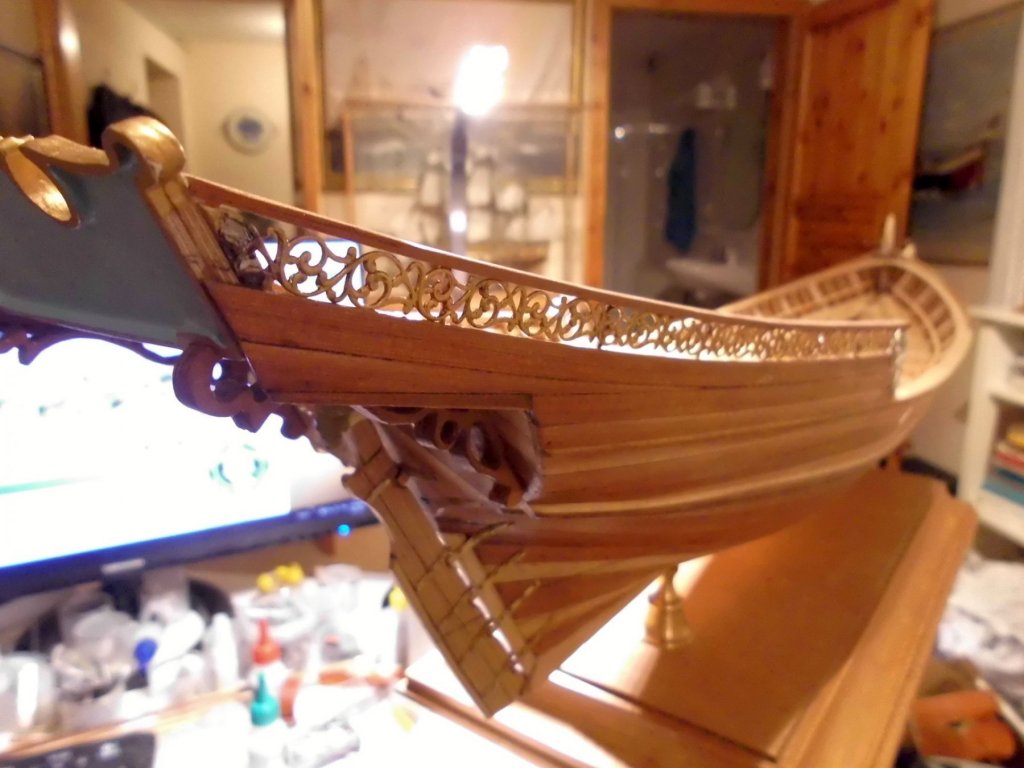
Update :... fitted decore fries and handrail on the stb. poop deck. The solution with the soldered brass pins works out quite well.... Also fitted a handrail all around the gun deck Nils the mermaid is holding a starfish in hands. What looks like she is having two horns are the remains of the charms hanging / holding loop. I use this for fastening the top to the cap rail...., providing more stiffnesss


- 692 replies
-
- 18
-
-
- eagle of algier
- chebec
- (and 2 more)
-
Awesome work Bob !, That "Halifax of yours is a very nicely built model..... Nils
- 682 replies
-
- 3
-
-
- halifax
- lumberyard
- (and 1 more)
-
Fantastic work Danny, you must already be familiar with every detail of the former actual ship, when doing such detailed and awesome modeling..... Nils