

bolin
-
Posts
482 -
Joined
-
Last visited
Content Type
Profiles
Forums
Gallery
Events
Posts posted by bolin
-
-
Thank you all for the likes and the nice comments!
-
Many small things has been done since the last update.
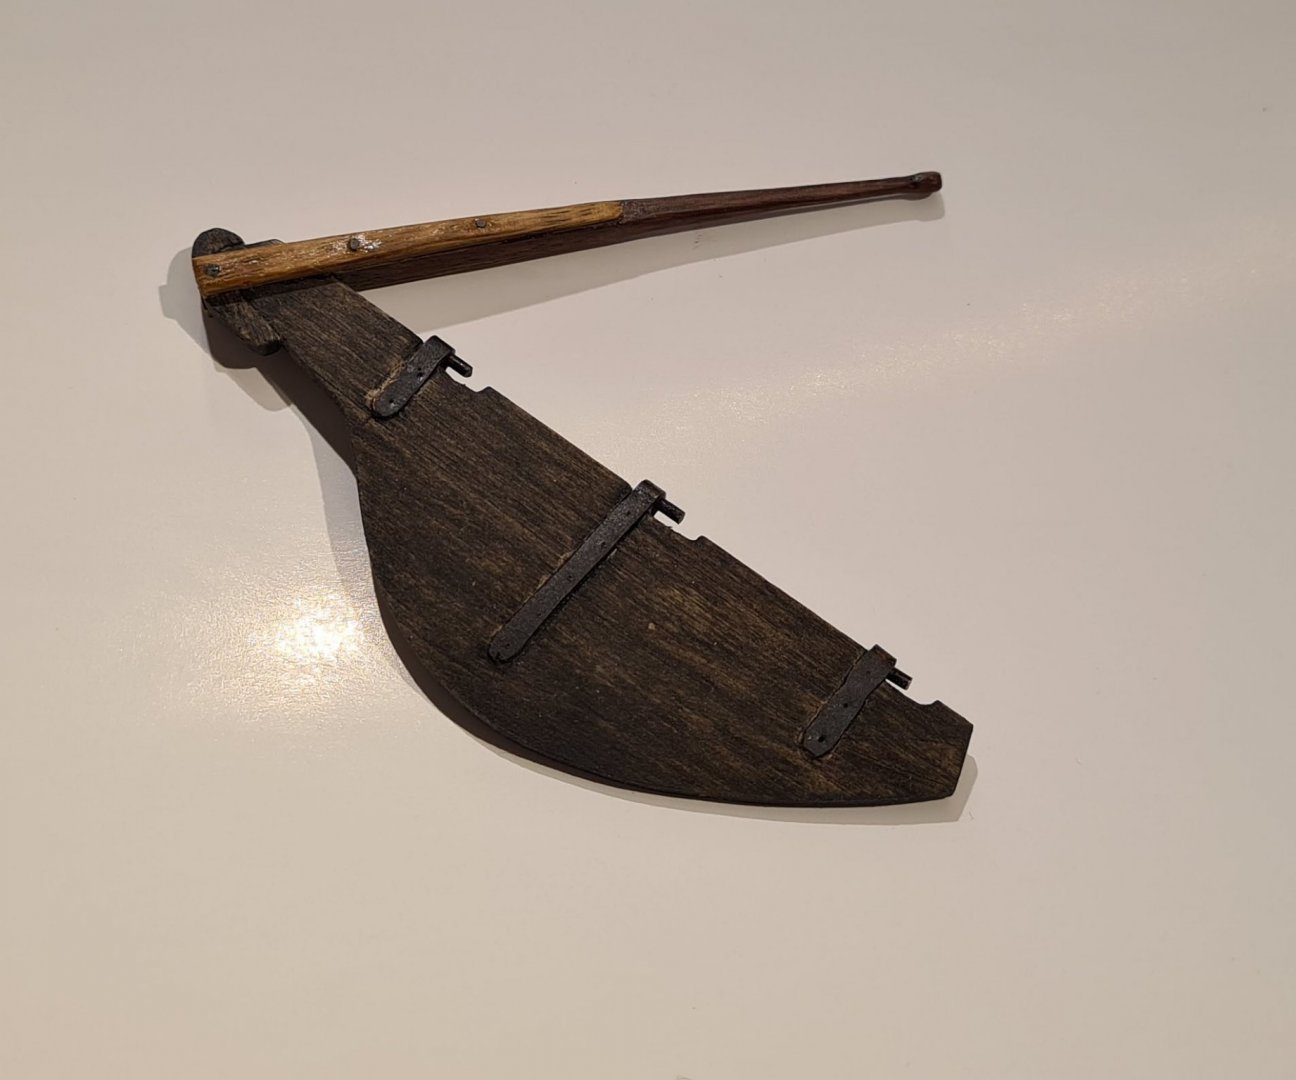
The rudder has been completed. The tiller is made of walnut rather than lime. I was afraid that the lime would have been to soft.
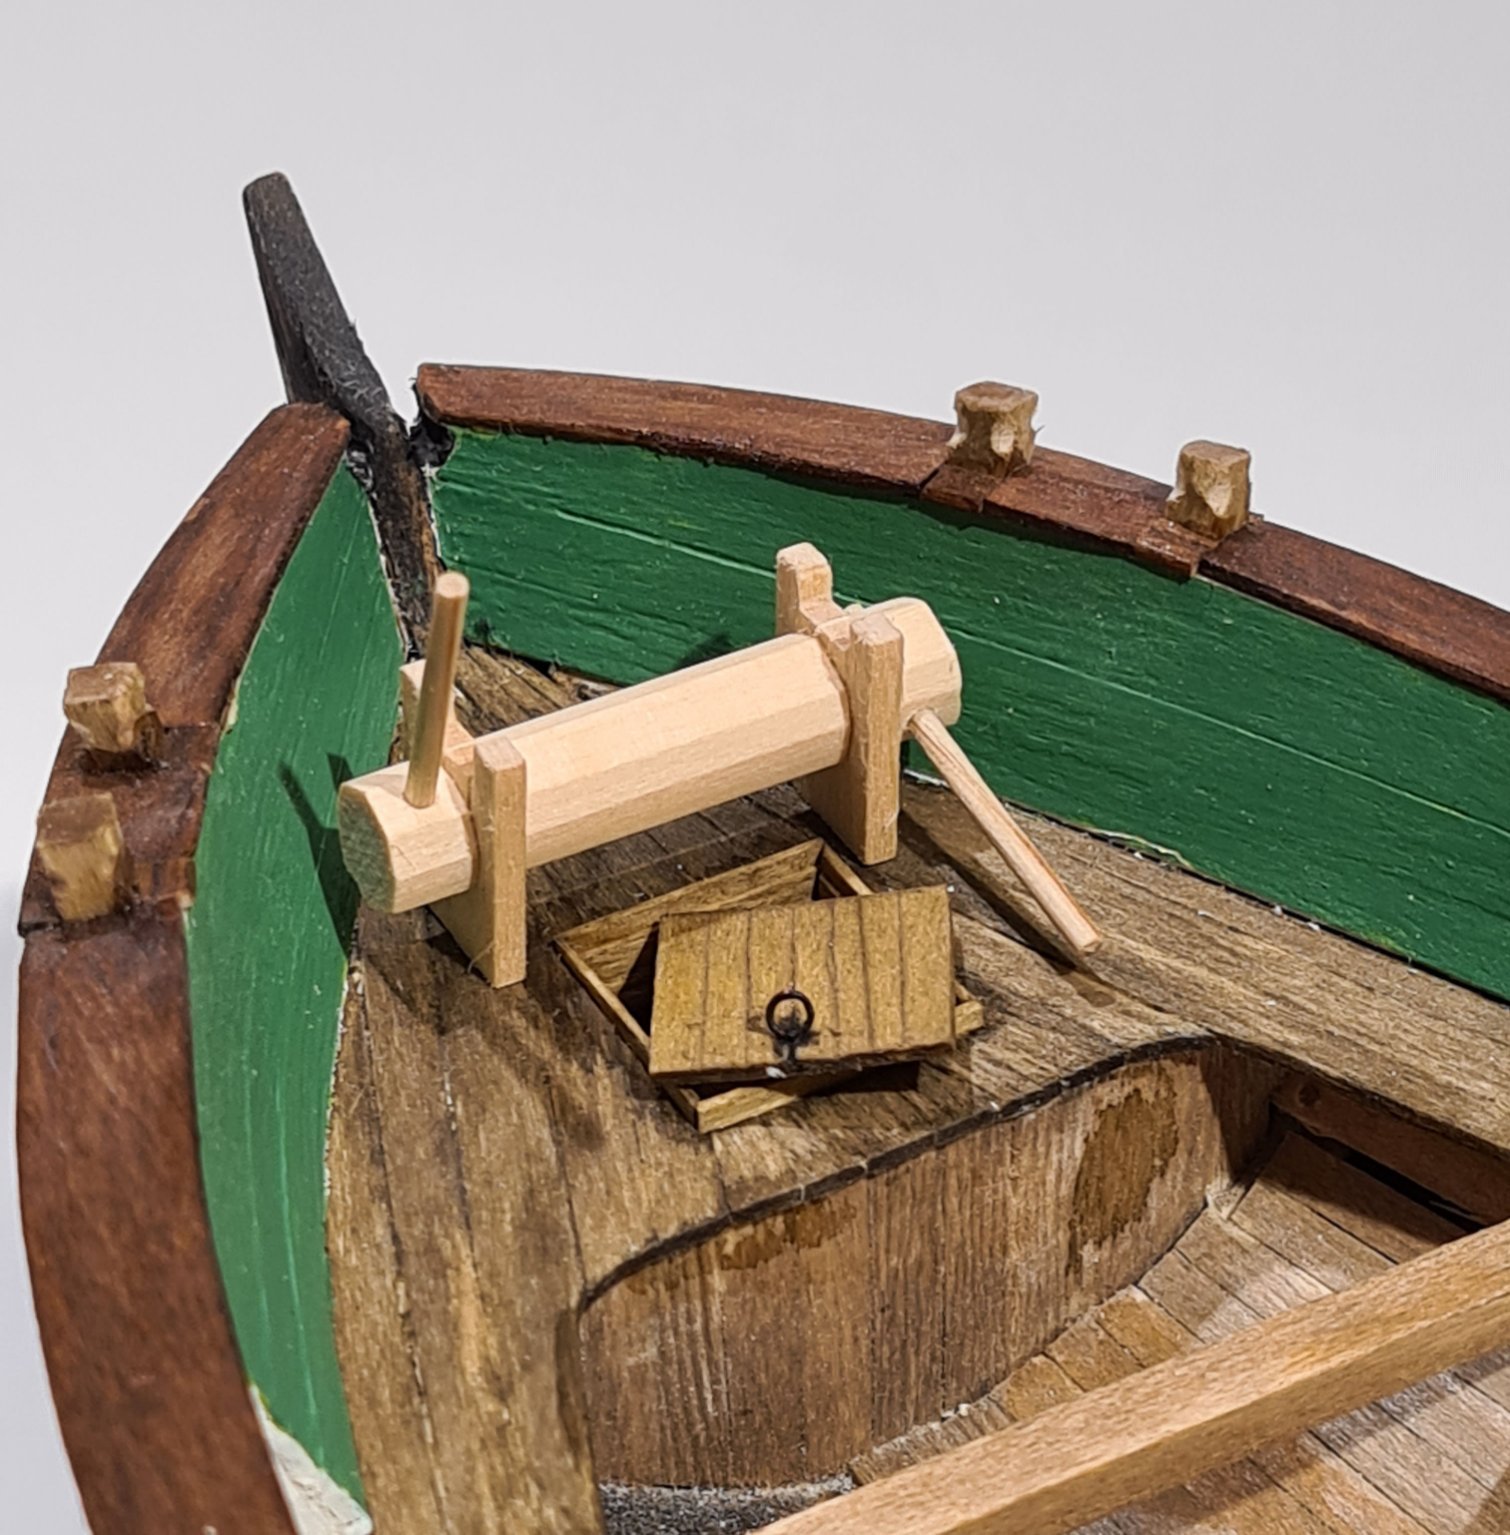
I have also made the pump. This is of a very simple type, just a simple handle to pull. It is placed where the skipper can work it while also handling the sails and rudder.

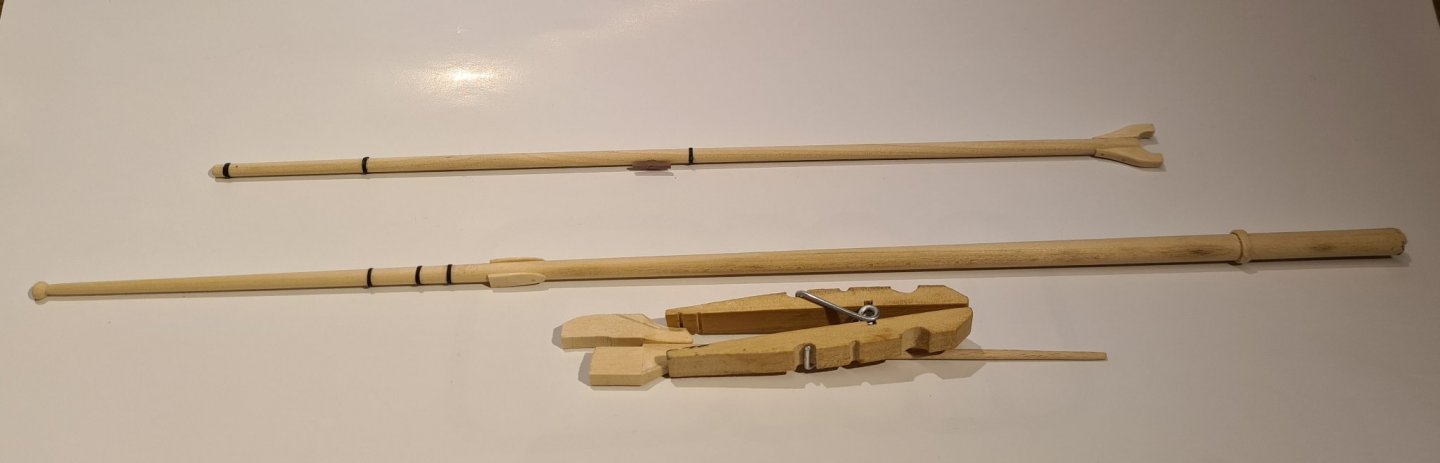
I have also started the mast, boom and gaff.
Before I install the mast and rig the lines and sail I will make the stand. For this I plan to use supports in plexiglass which will sit on a bottom plate of oak.

-
-
Its time for another update.
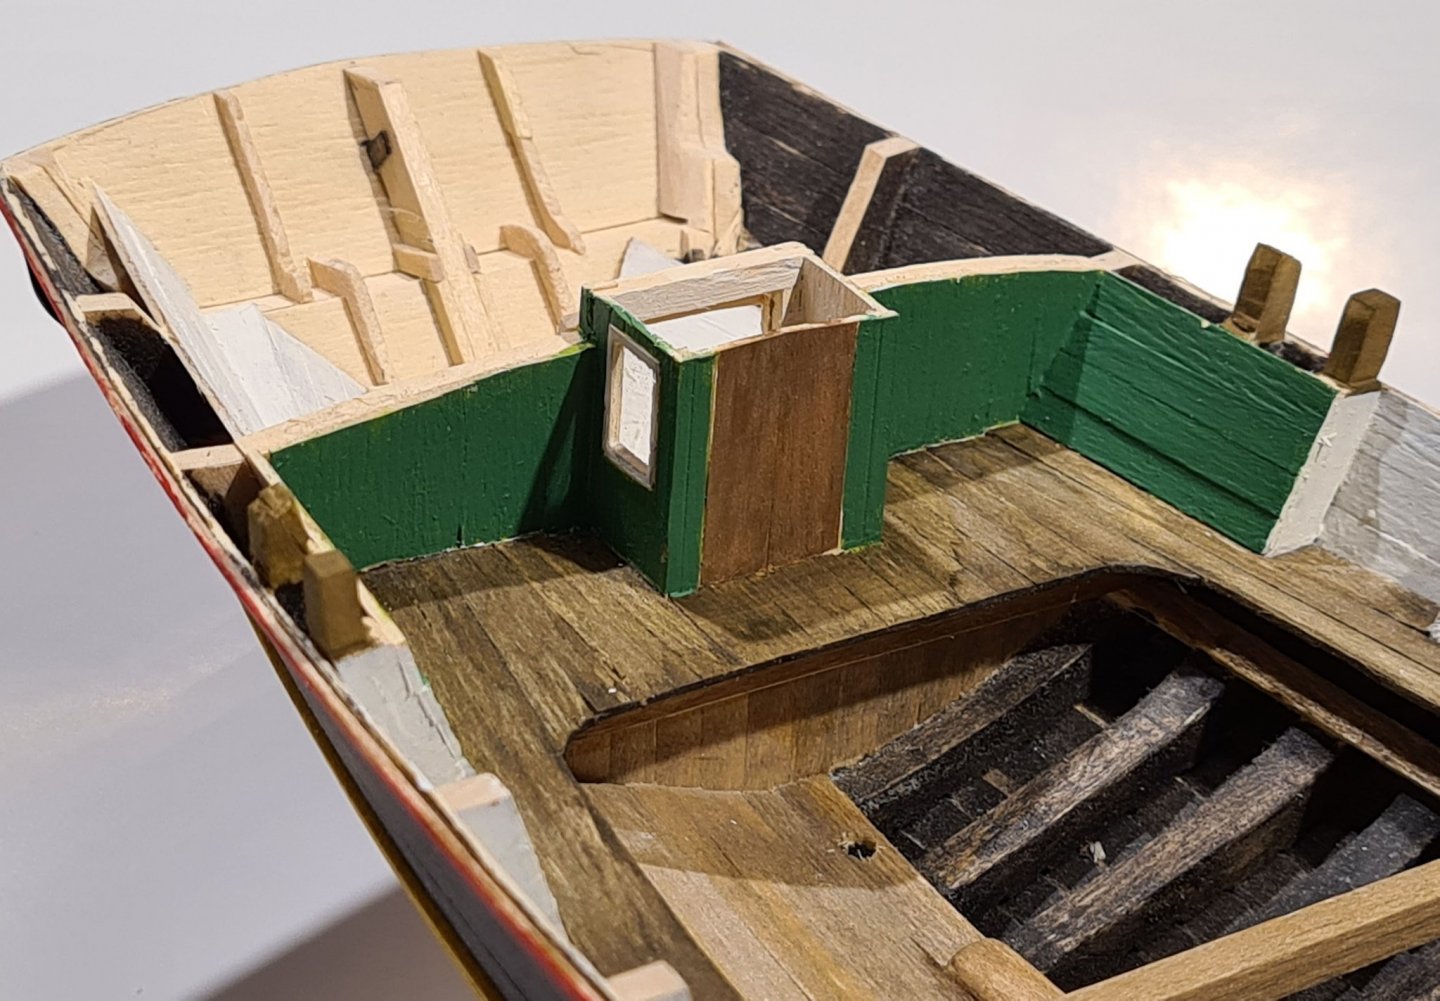
The cabin is complete with beds for the skipper and his mate. The bed cloth is made from painted silk span. It has been draped around a mattress made from a piece of lime wood.


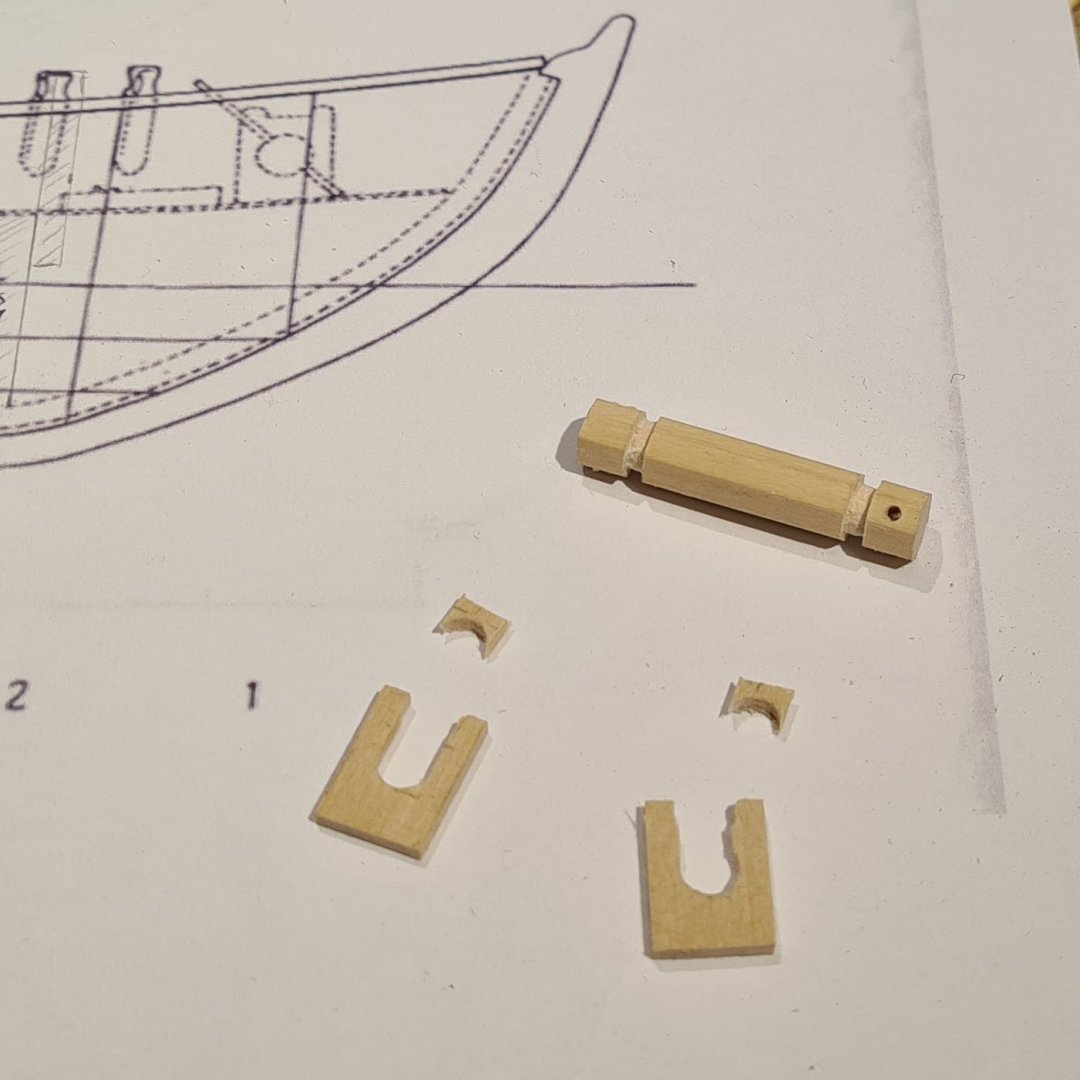
I have also built a windlass.

- wefalck, GrandpaPhil, Tony Hunt and 4 others
-
 7
7
-
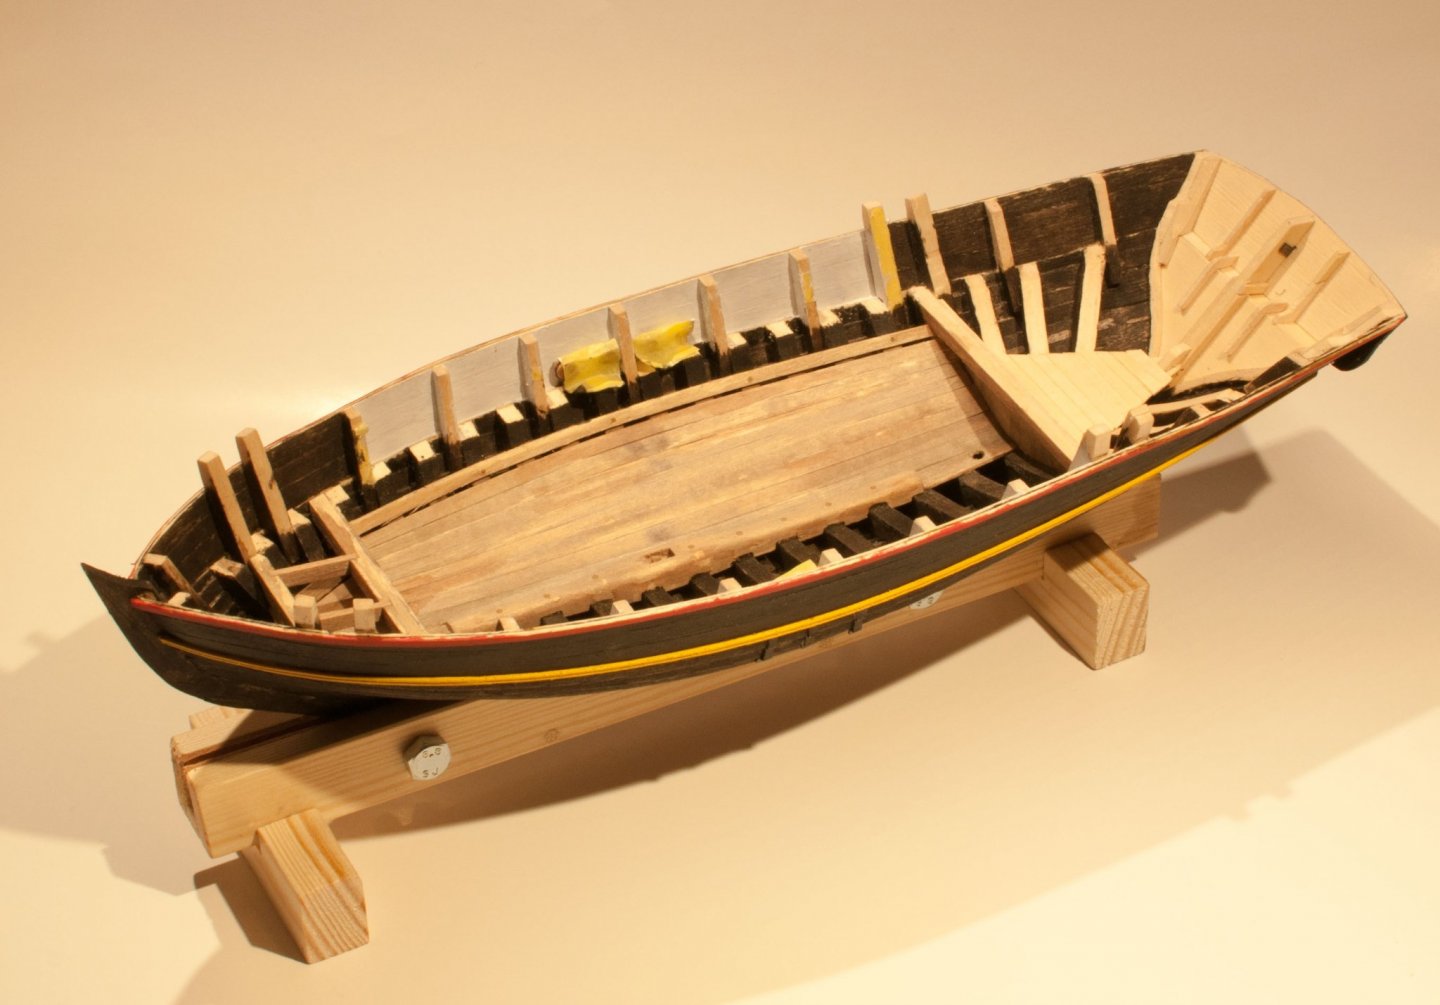
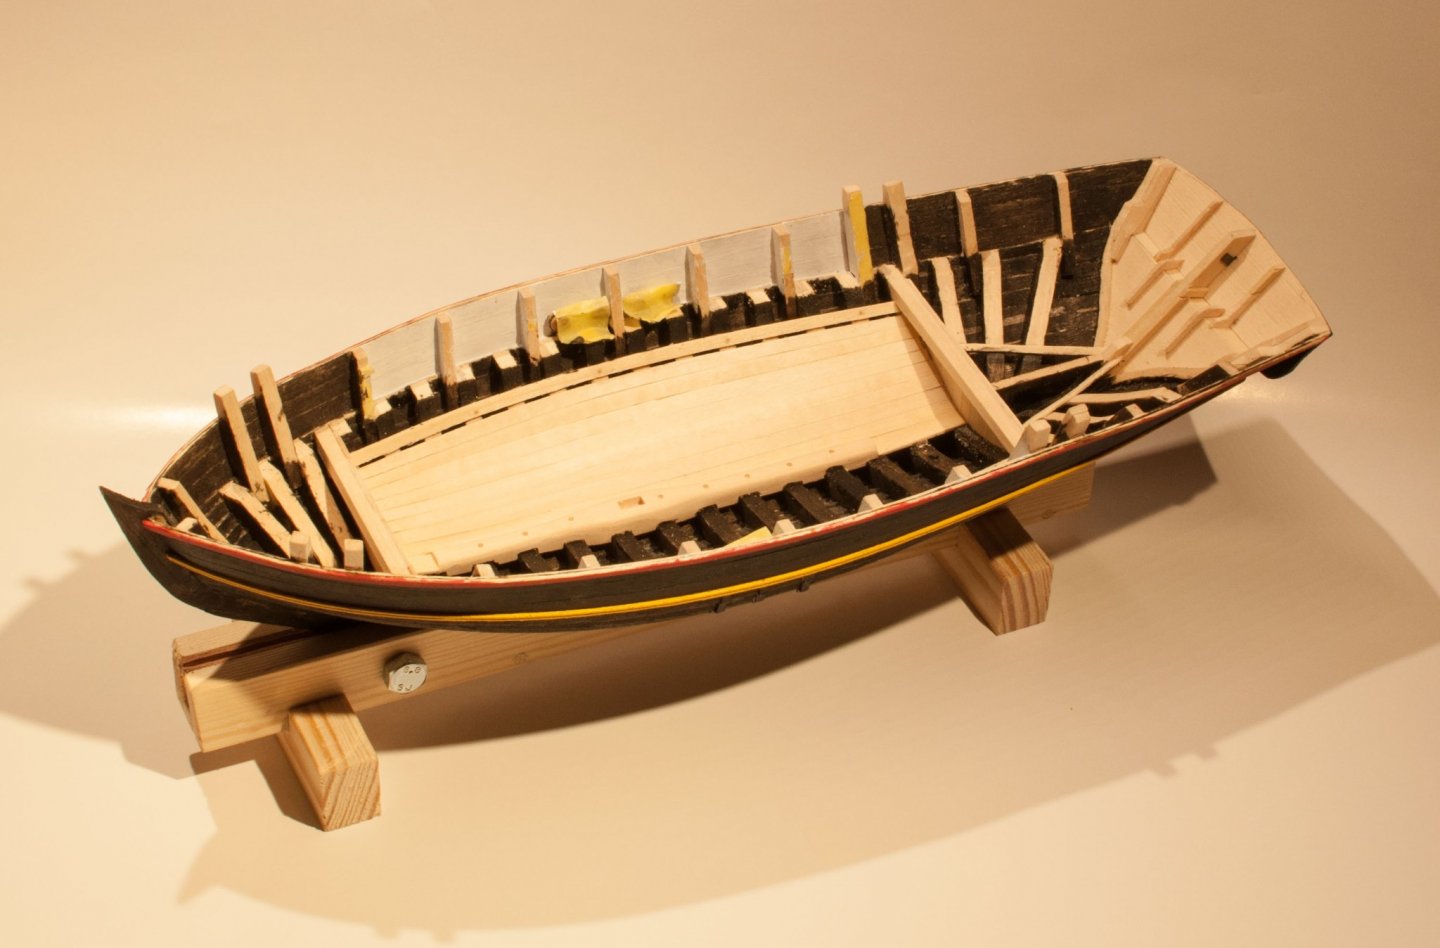
The deck has been stained to give it a worn and aged look.
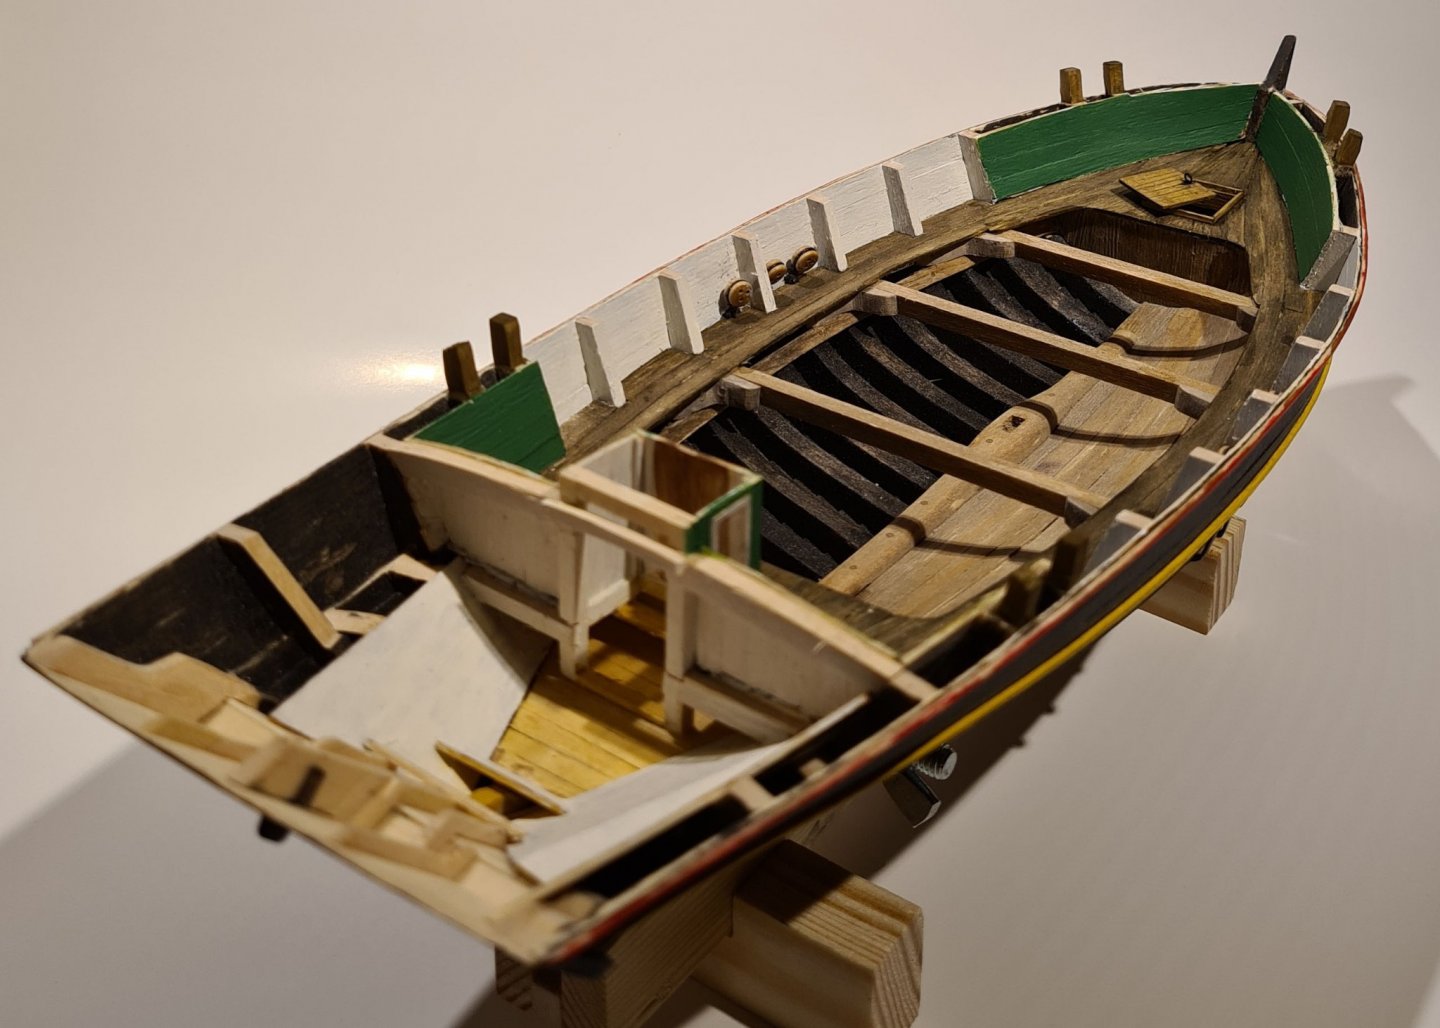
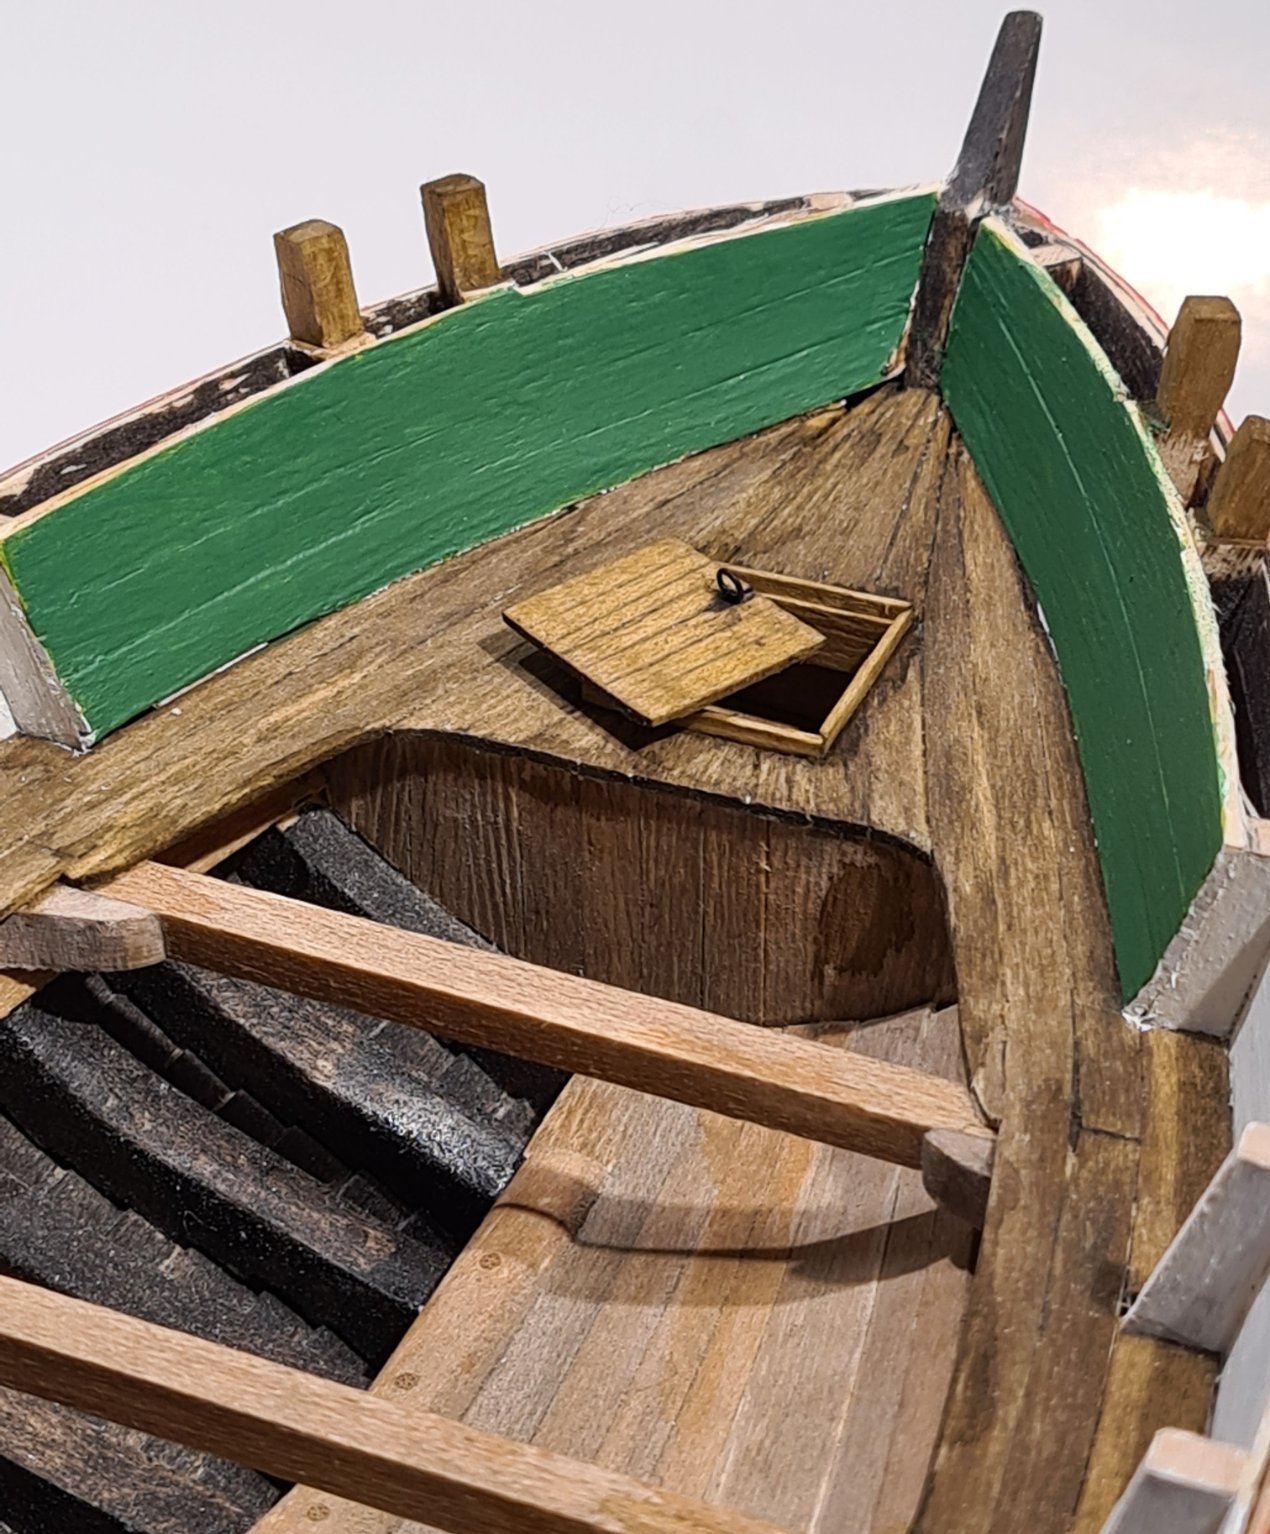
I have also planked the insides of the bulwarks in the bow, and have painted it green. The green color is supposed to be traditional. The small hold in the bow has been given a coming and a hatch. The ring is 0.3 mm copper wire which has been painted. A loop of sewing thread through a hole in the hatch holds the ring in place.

The forward bulkhead of the cabin has been installed and painted.
- druxey, Tony Hunt, chris watton and 5 others
-
8
-
22 hours ago, Cpt_Haddock said:
I also need to make a show case - what type of glass (thickness) did you end up with?
I used acrylic glass (plexiglass) 3mm thick. I used ordinary hand tools to cut it: a Japanese type saw and a plane to smooth the edges afterwards.
The frame was made from 10 by 10 mm ribs, and the slots for the panes where cut using a hand held router.
-
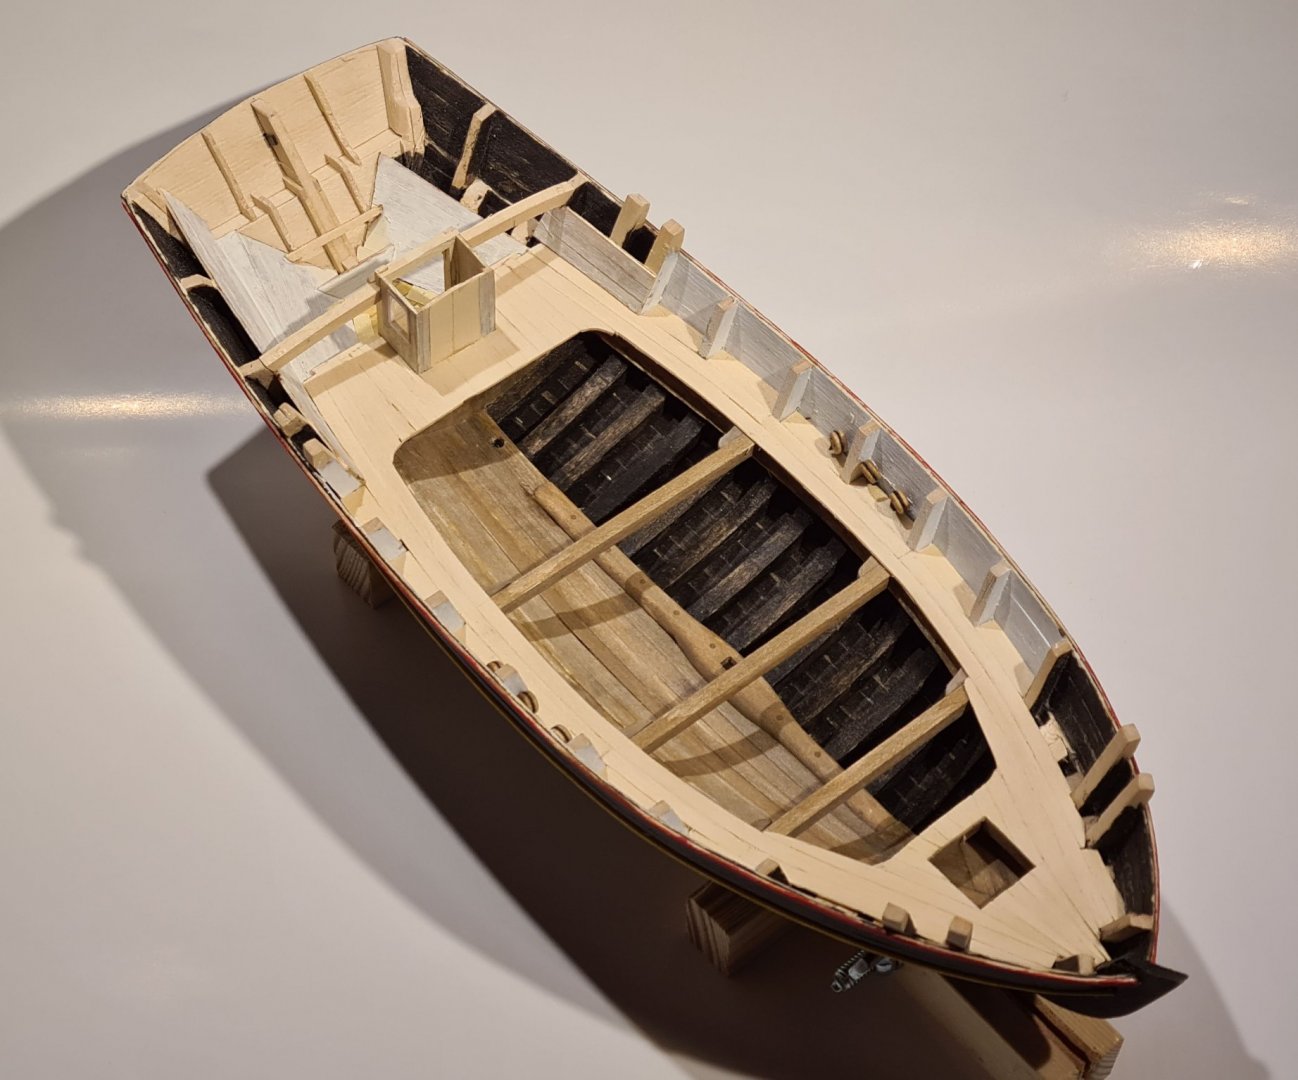
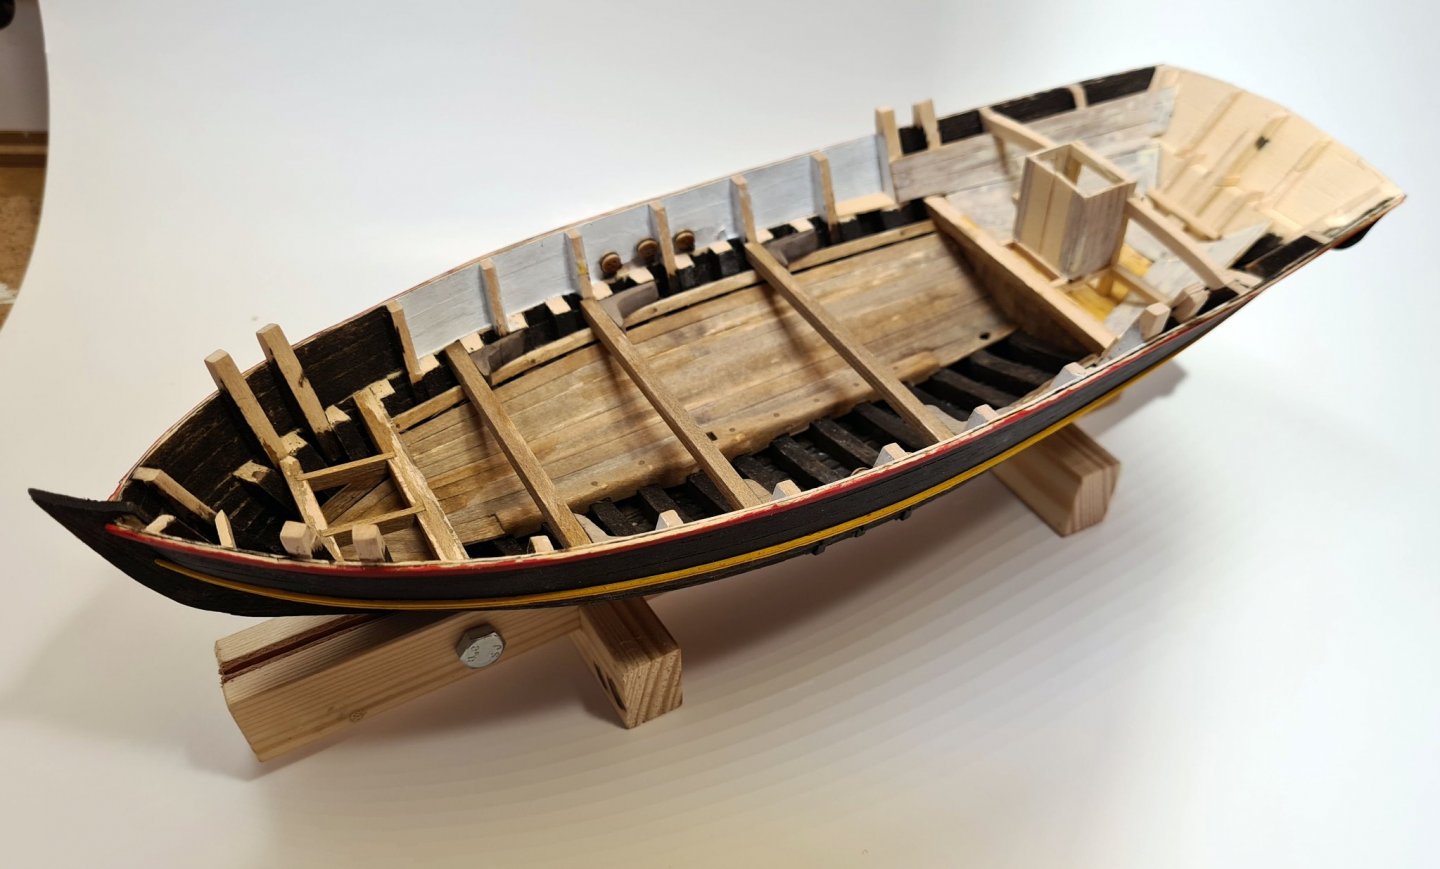
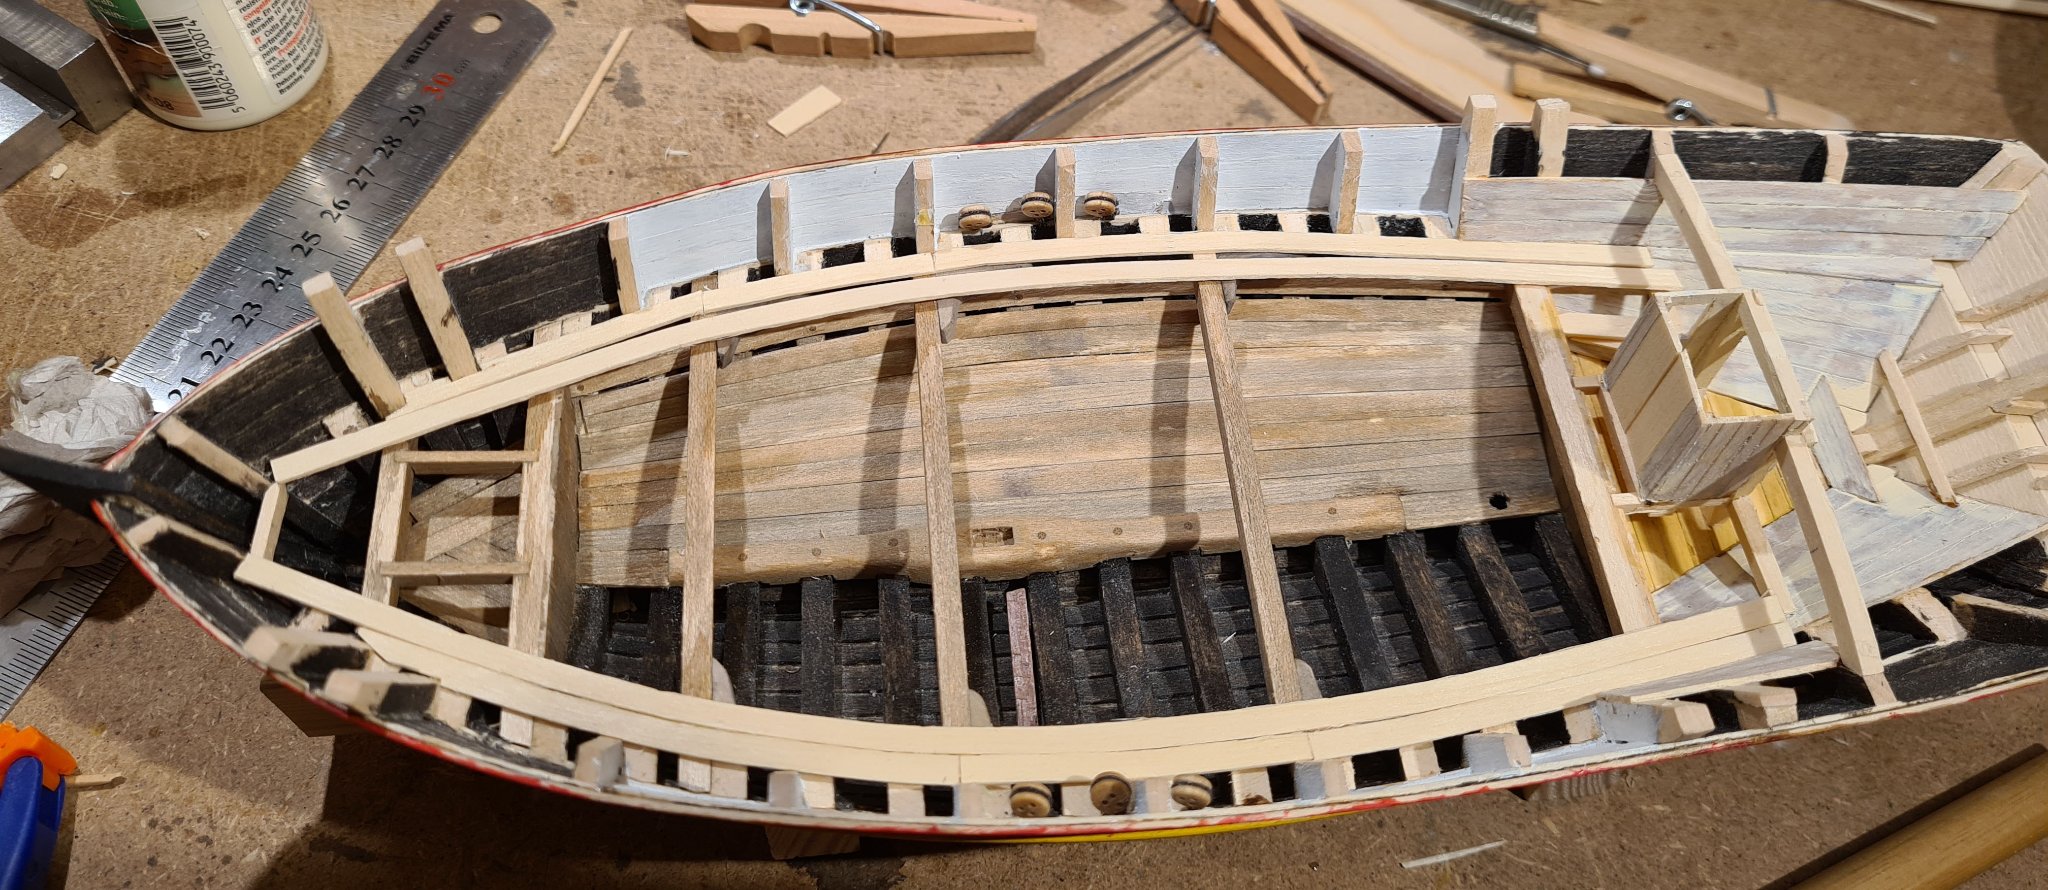
With the cross beams as support I have continued with the deck.
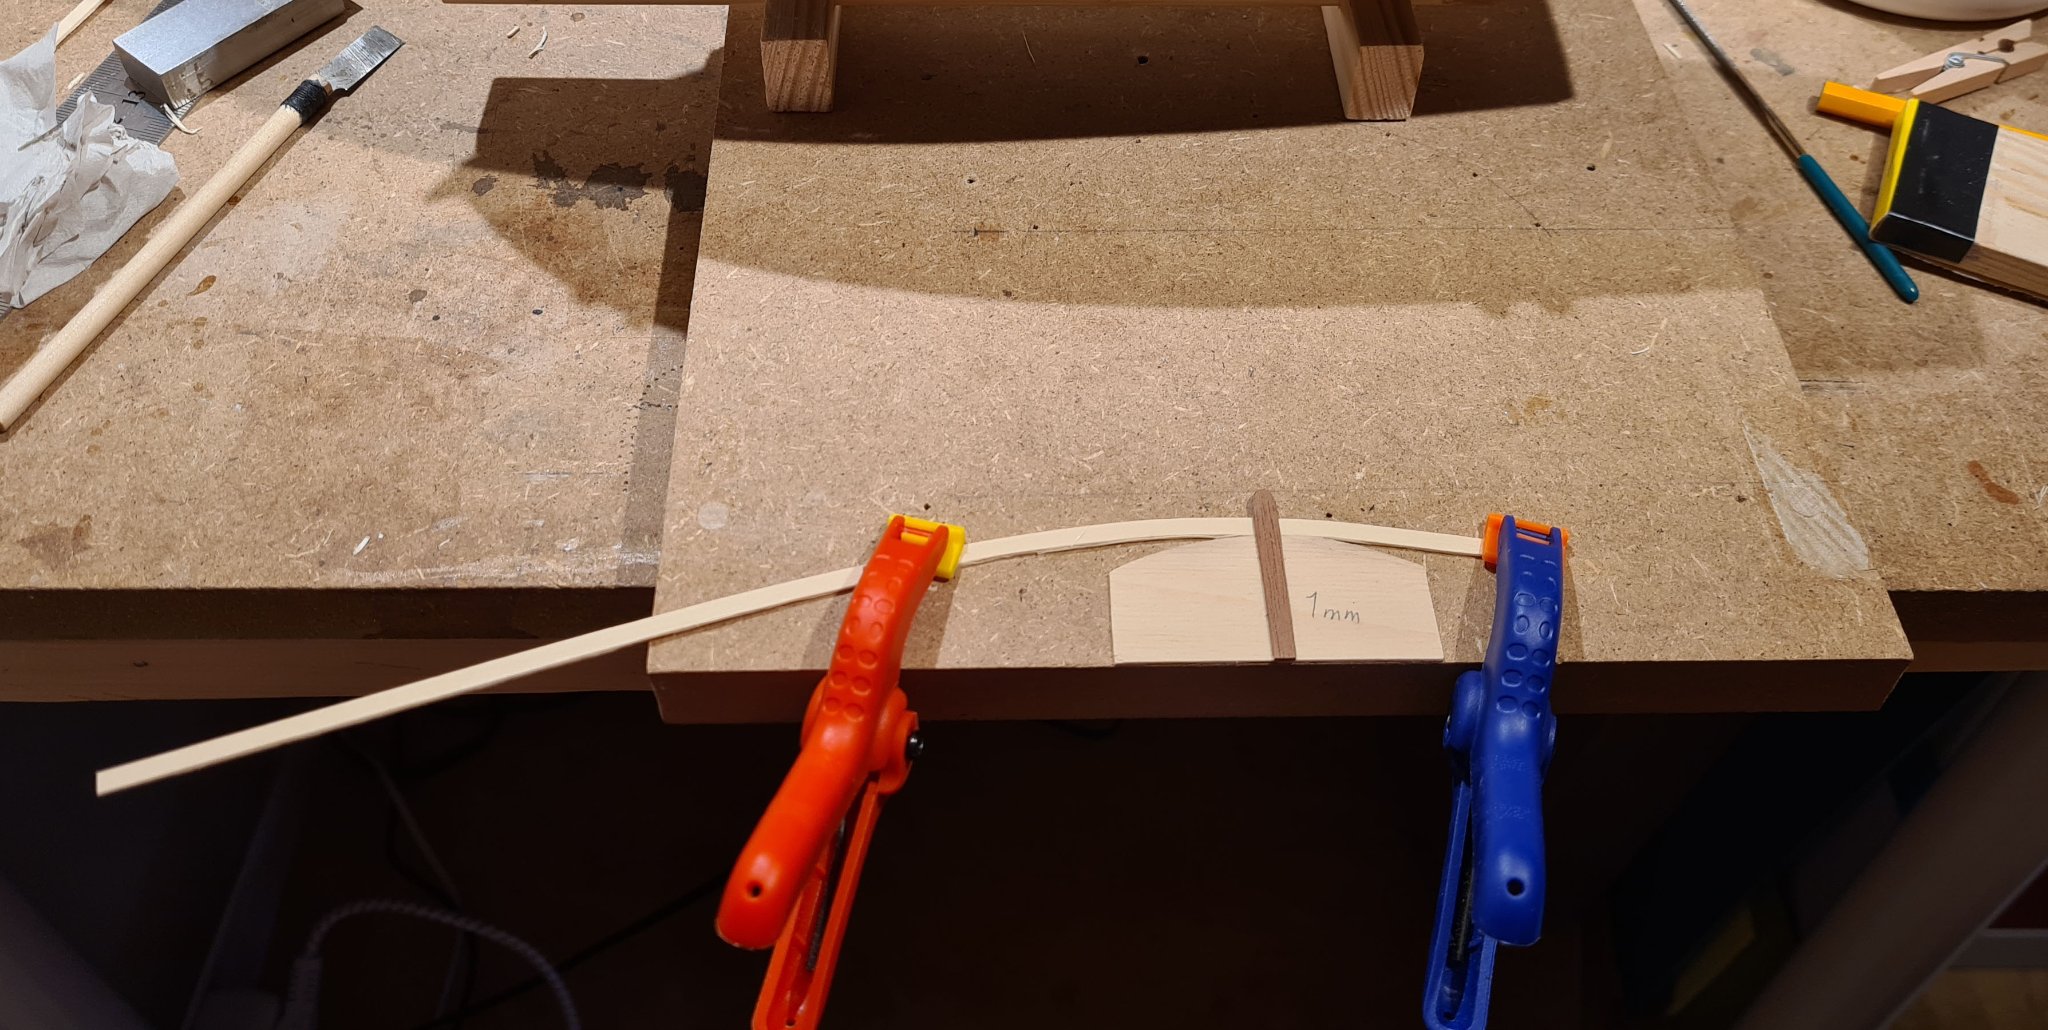
Most of the hold is open with only narrow planks along the sides for walking on. These planks where edge bent using a jig and a small traveling iron.

It took several steps until the strips could fit the full length of the sides.

The rest of the deck consists of many small pieces that where individually fitted.
-
I return to this model now that my Medieval long ship is finished.
The cross beams and supporting knees has been installed, and a bit more of the cabin structure has been added.
- GrandpaPhil, druxey, Tony Hunt and 3 others
-
6
-
Thank you all for the kind words.
I think that what I mostly feel now is satisfaction. Satisfaction that the model turned out the way it did and that I was able to complete it. I will now finish my Sloop from Roslagen. That one I started before this, with the more or less explicit intent to use it as practice for clinker hull and scratch building. I think it was a necessary step in practicing my skills to be able to complete this, which was the one I wanted to build.
- Cathead, mtaylor and Mark Pearse
-
3
-
I would suggest not to stack anything in the middle on top of the thwarts. The area around the mast needs to be free when handling the sail, and its quite dangerous to have something that you could stumble on when doing so. If you are not readying for a immediate fight, the shields could probably be stored below the deck. Food and other necessities stored in water tight barrels under the deck would be likely, as would having the midships area under the thwarts filled with packets in oil cloth as you have proposed.
- Cathead, FriedClams, mbp521 and 1 other
-
4
-
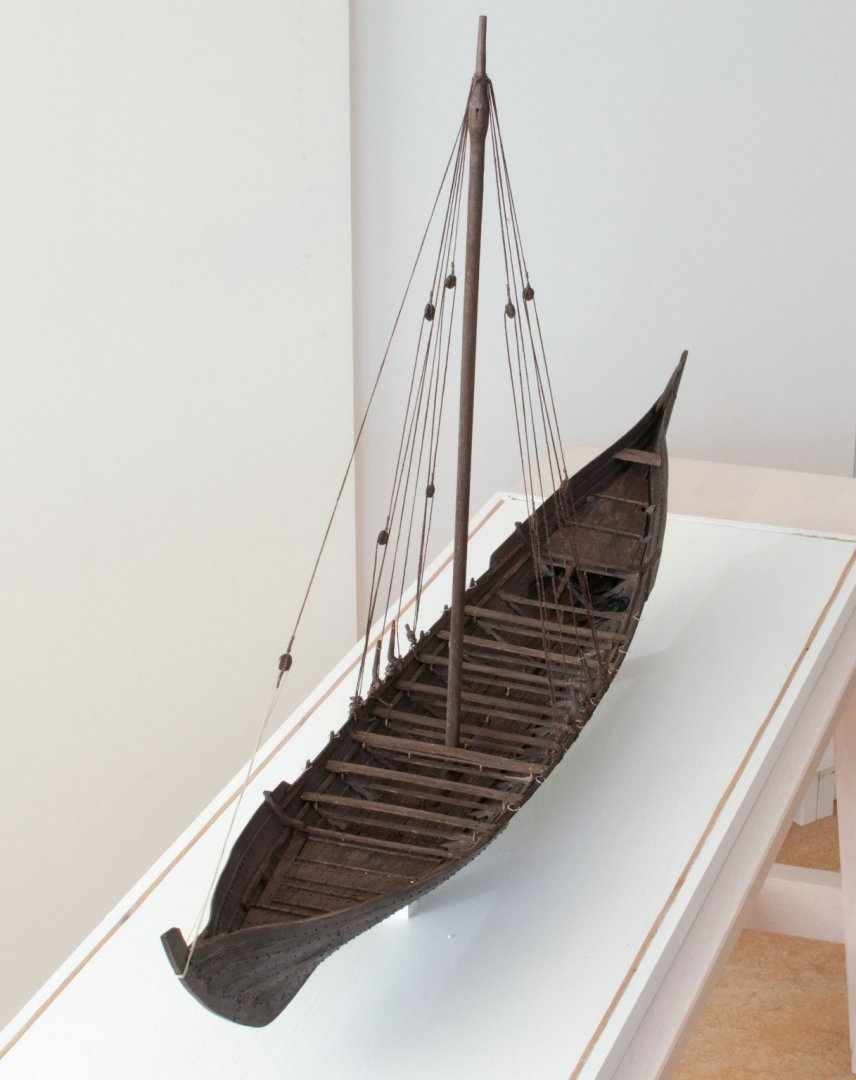
By this post I declare the model of the reconstruction Helga Holm of the ship 5 in the archeological excavations at the Helgeands islet finished.
It has been a very enjoyable, albeit at time tedious, journey. And I'm quite happy with the result.

Thank you everyone who has followed, commented and supported with advice and encouragement. You have been a great help.
- mtaylor, GrandpaPhil, Wintergreen and 15 others
-
13
-
 4
4
-
 1
1
-
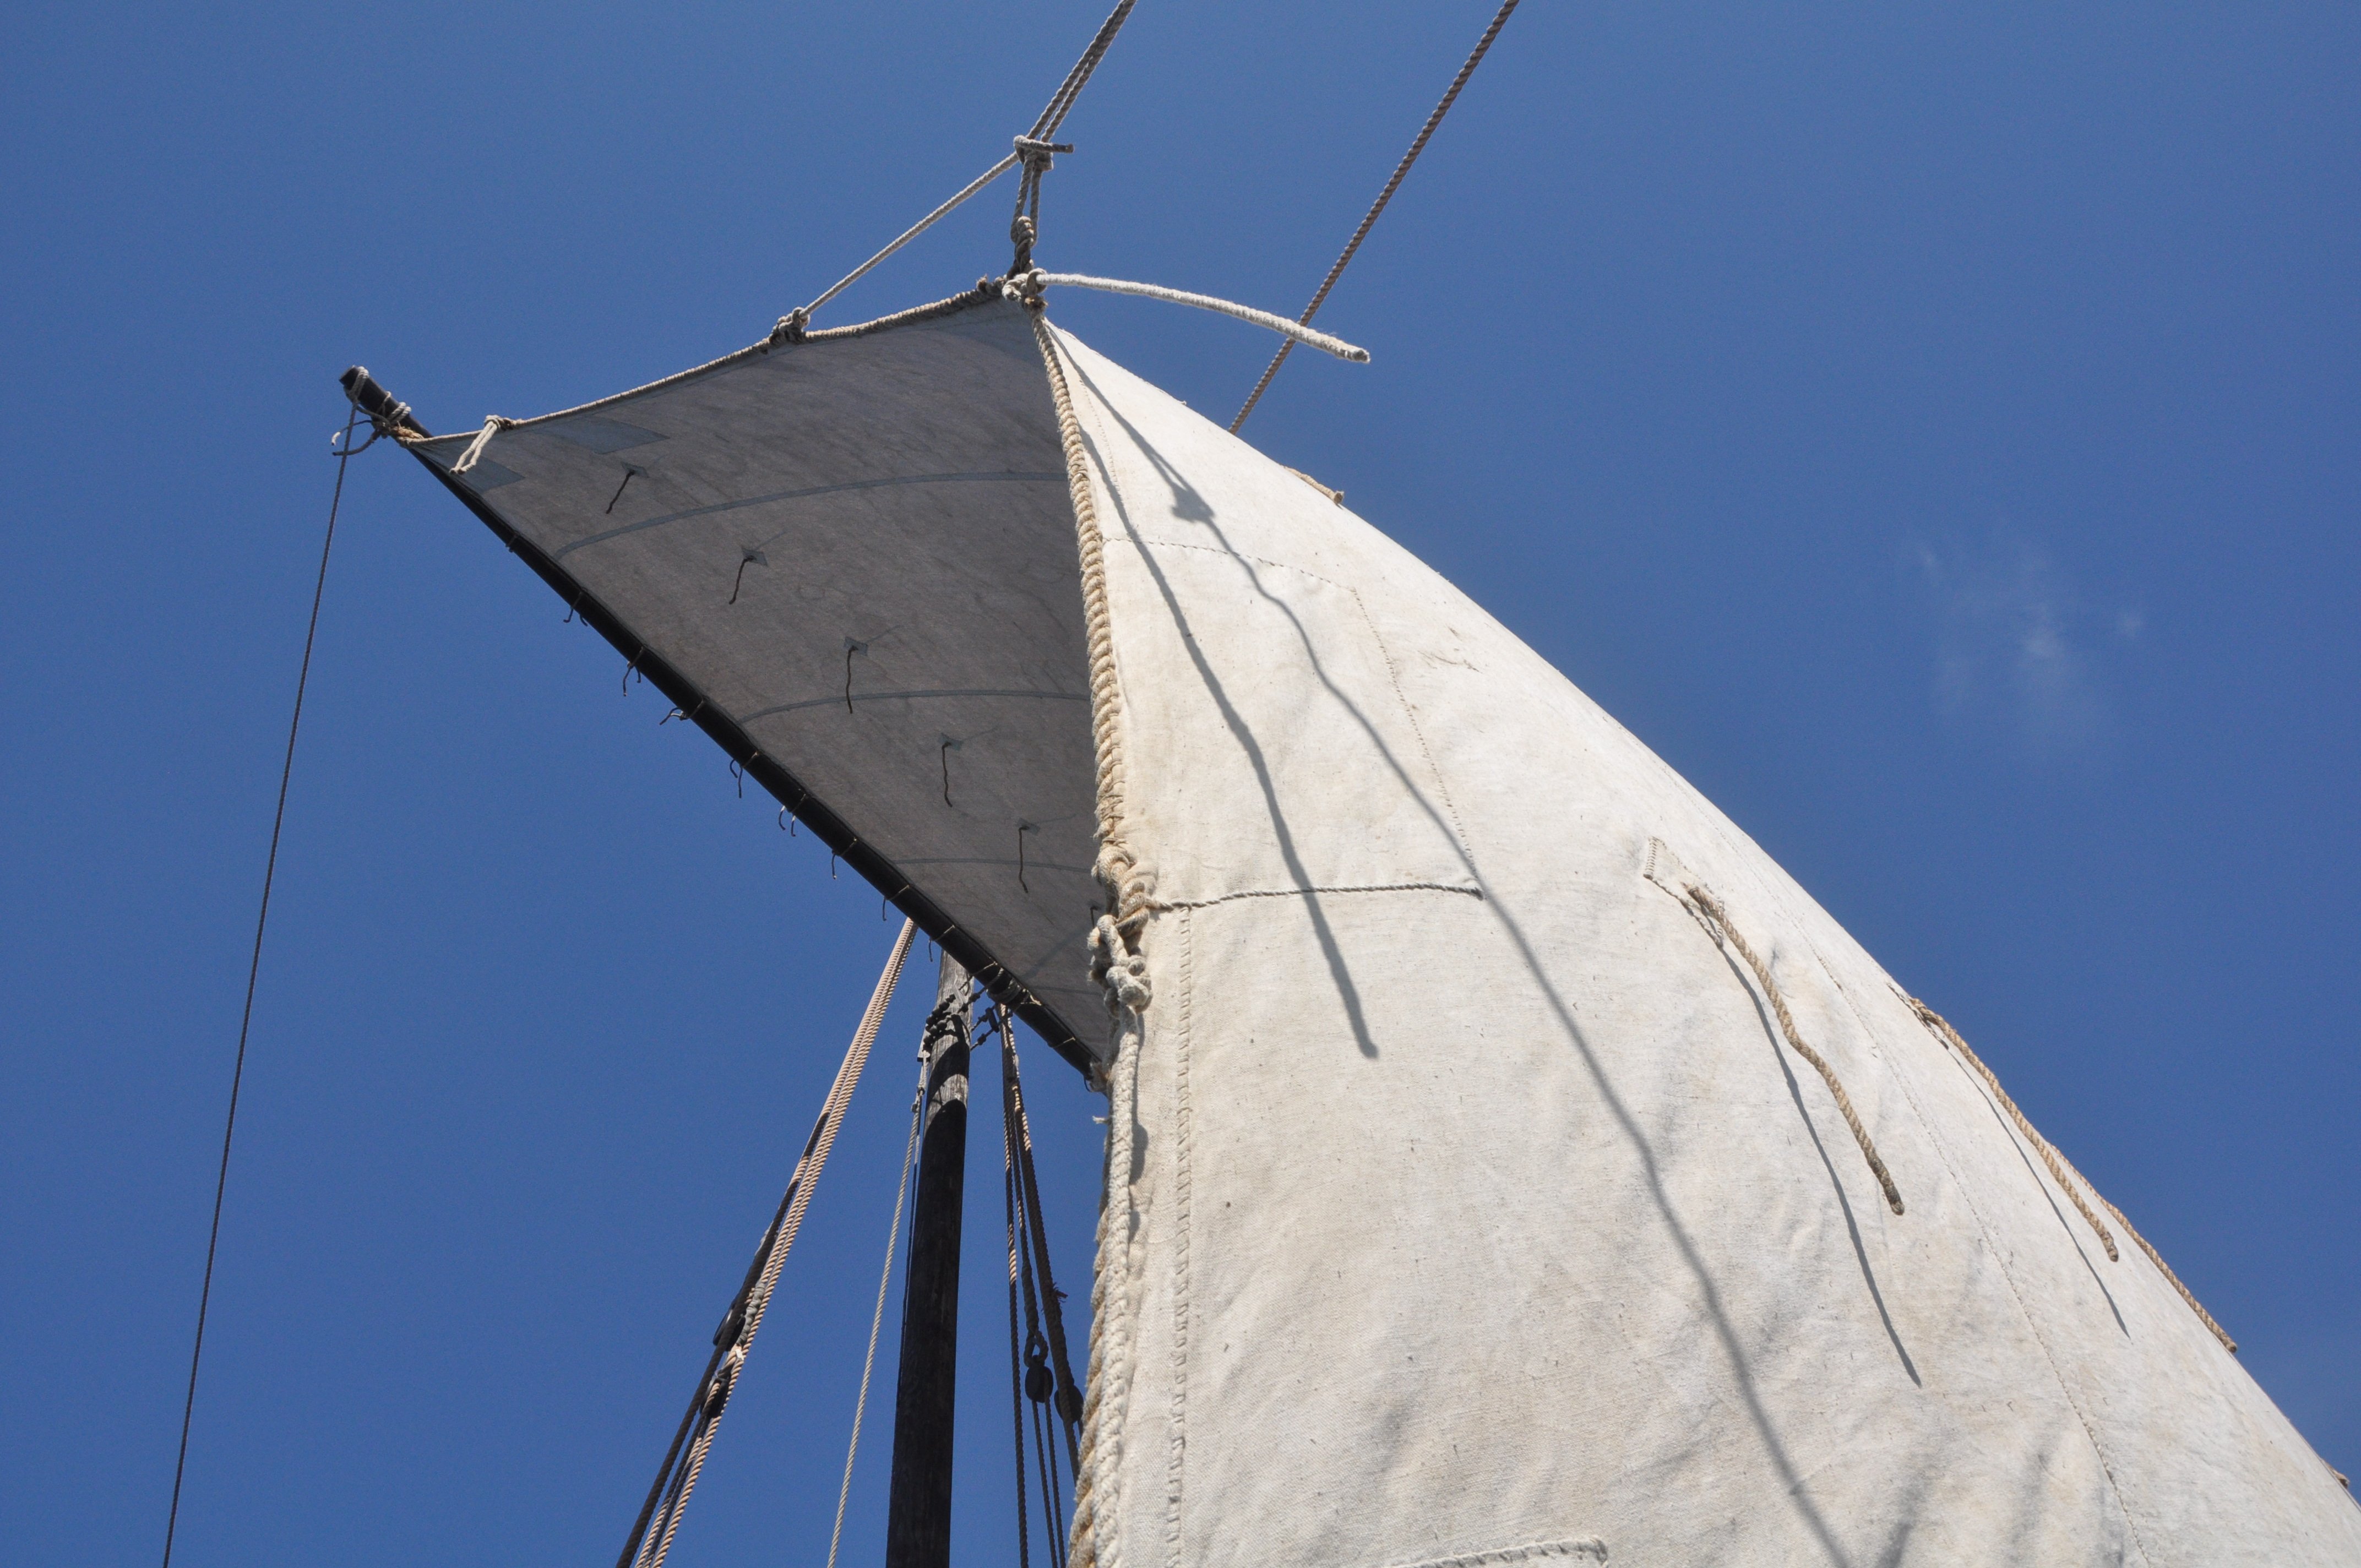
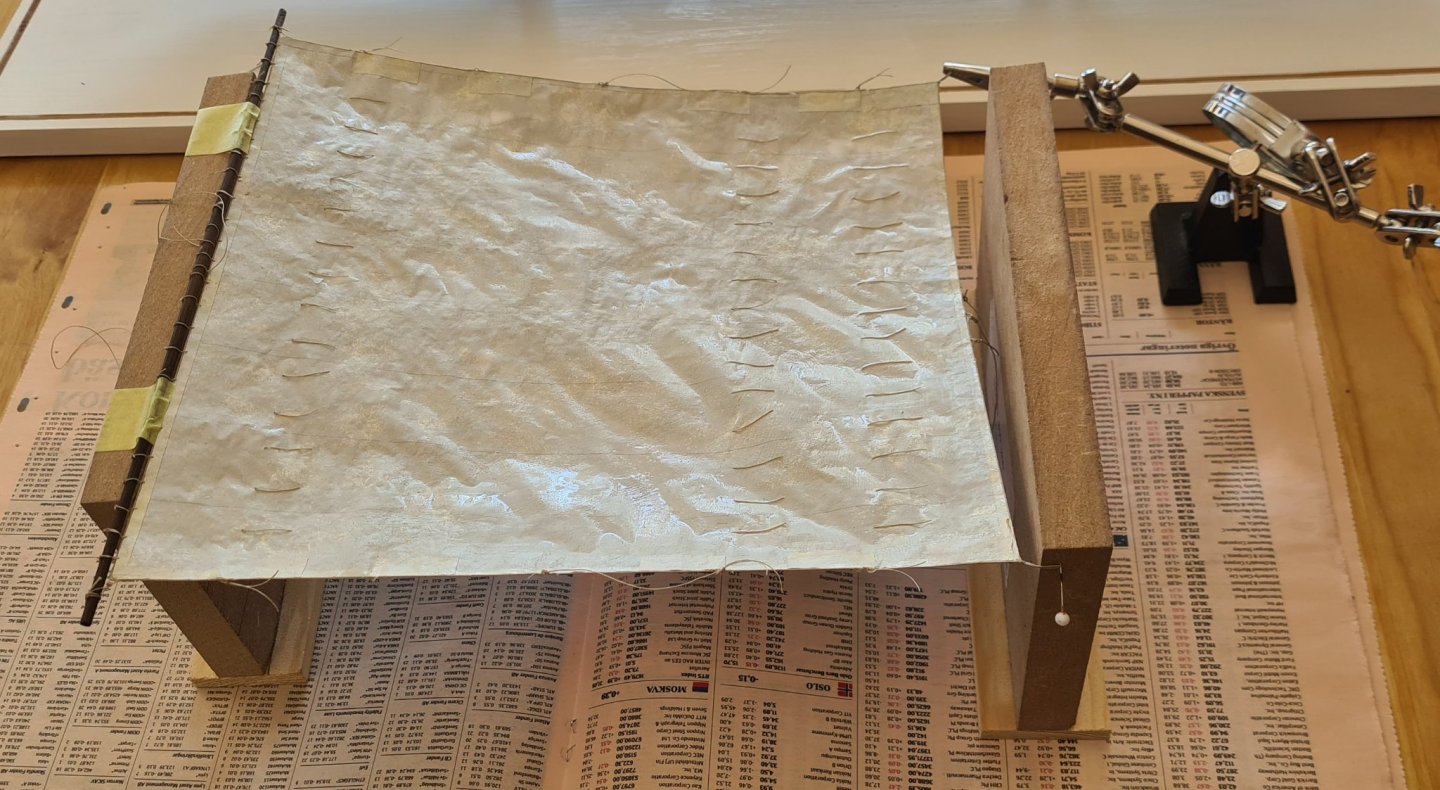
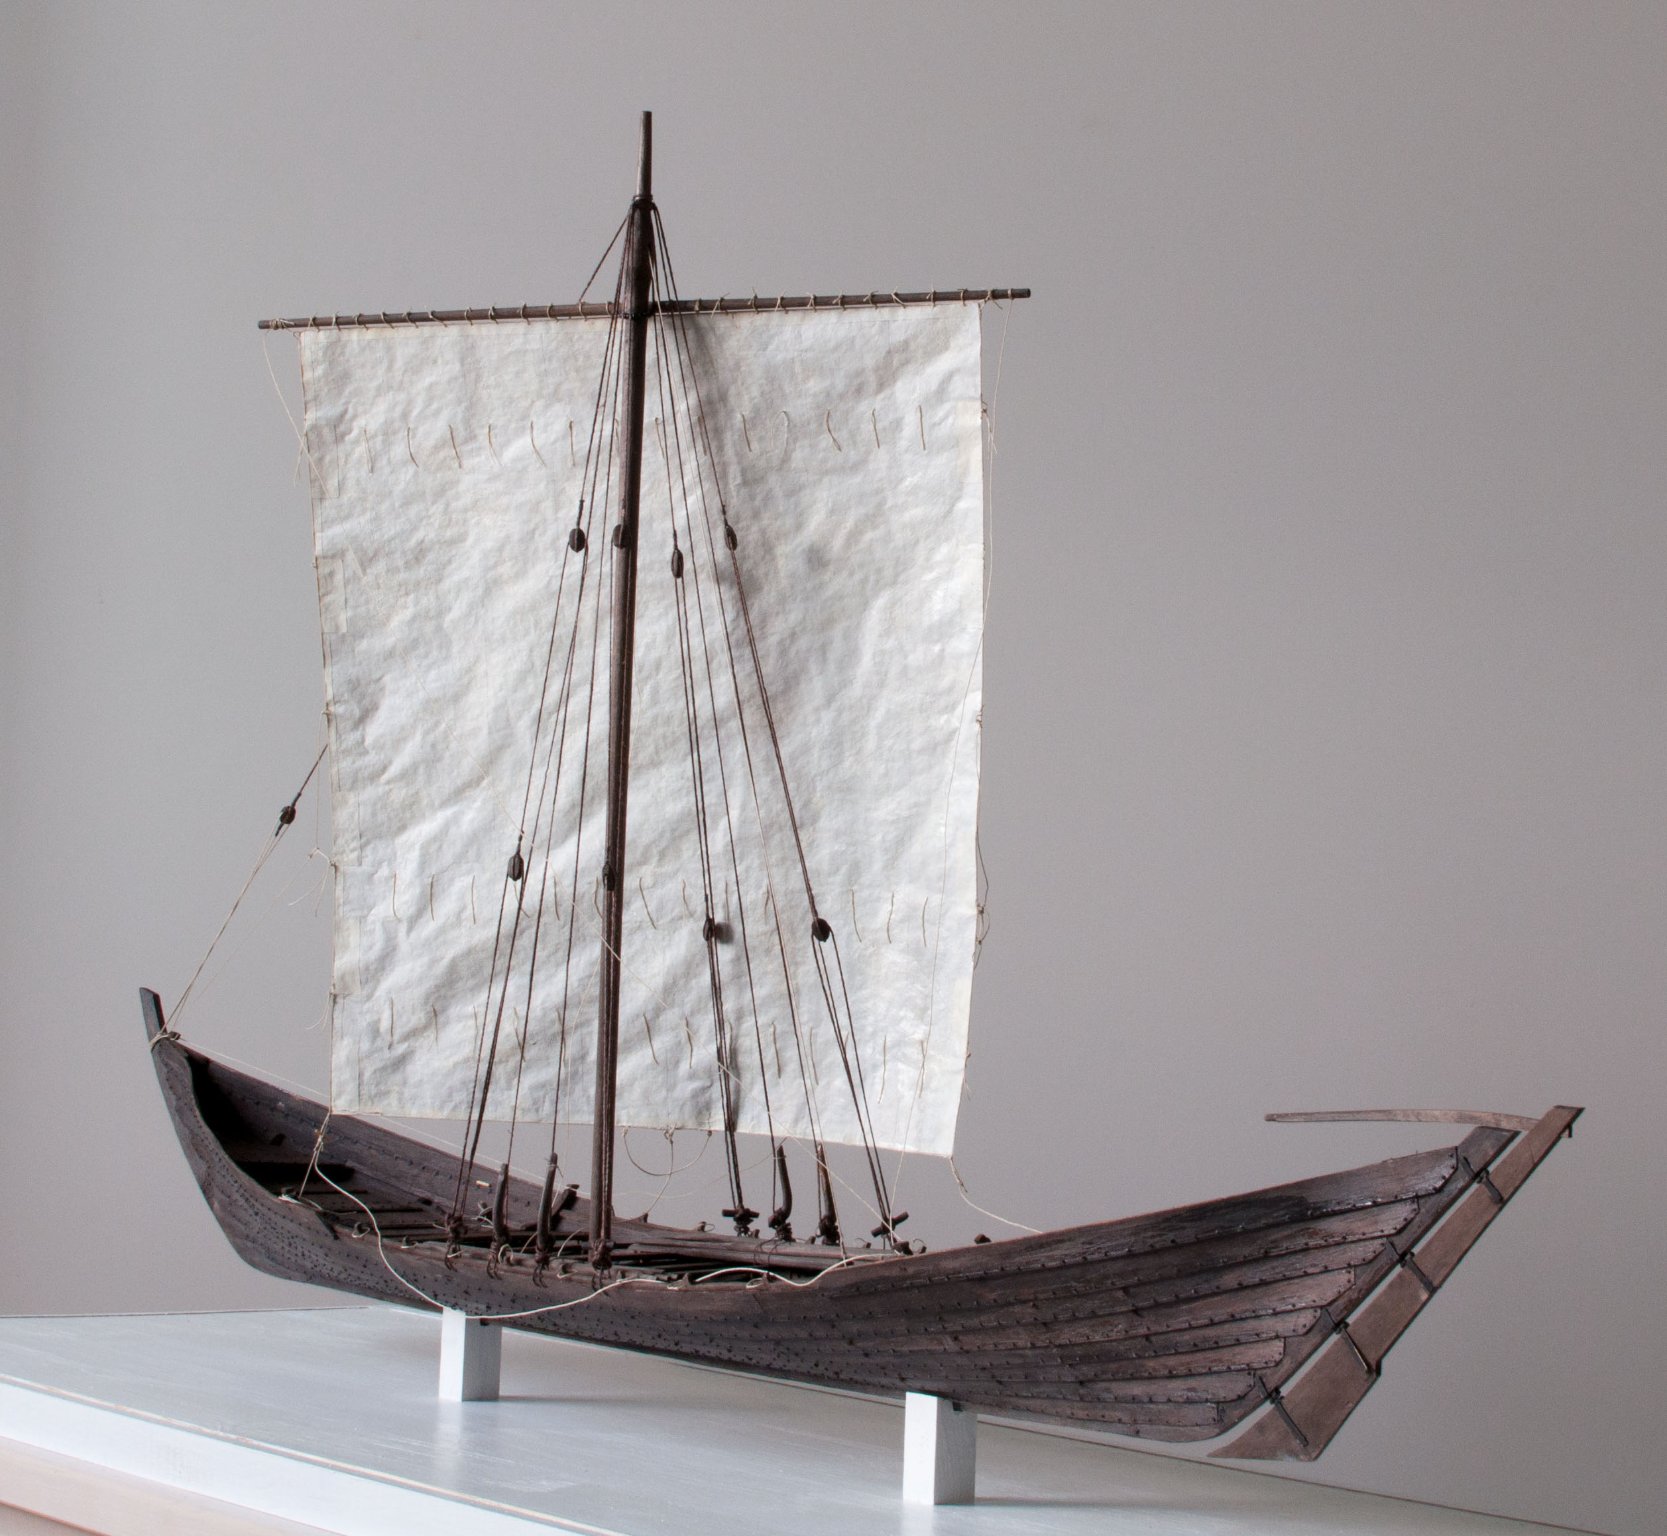
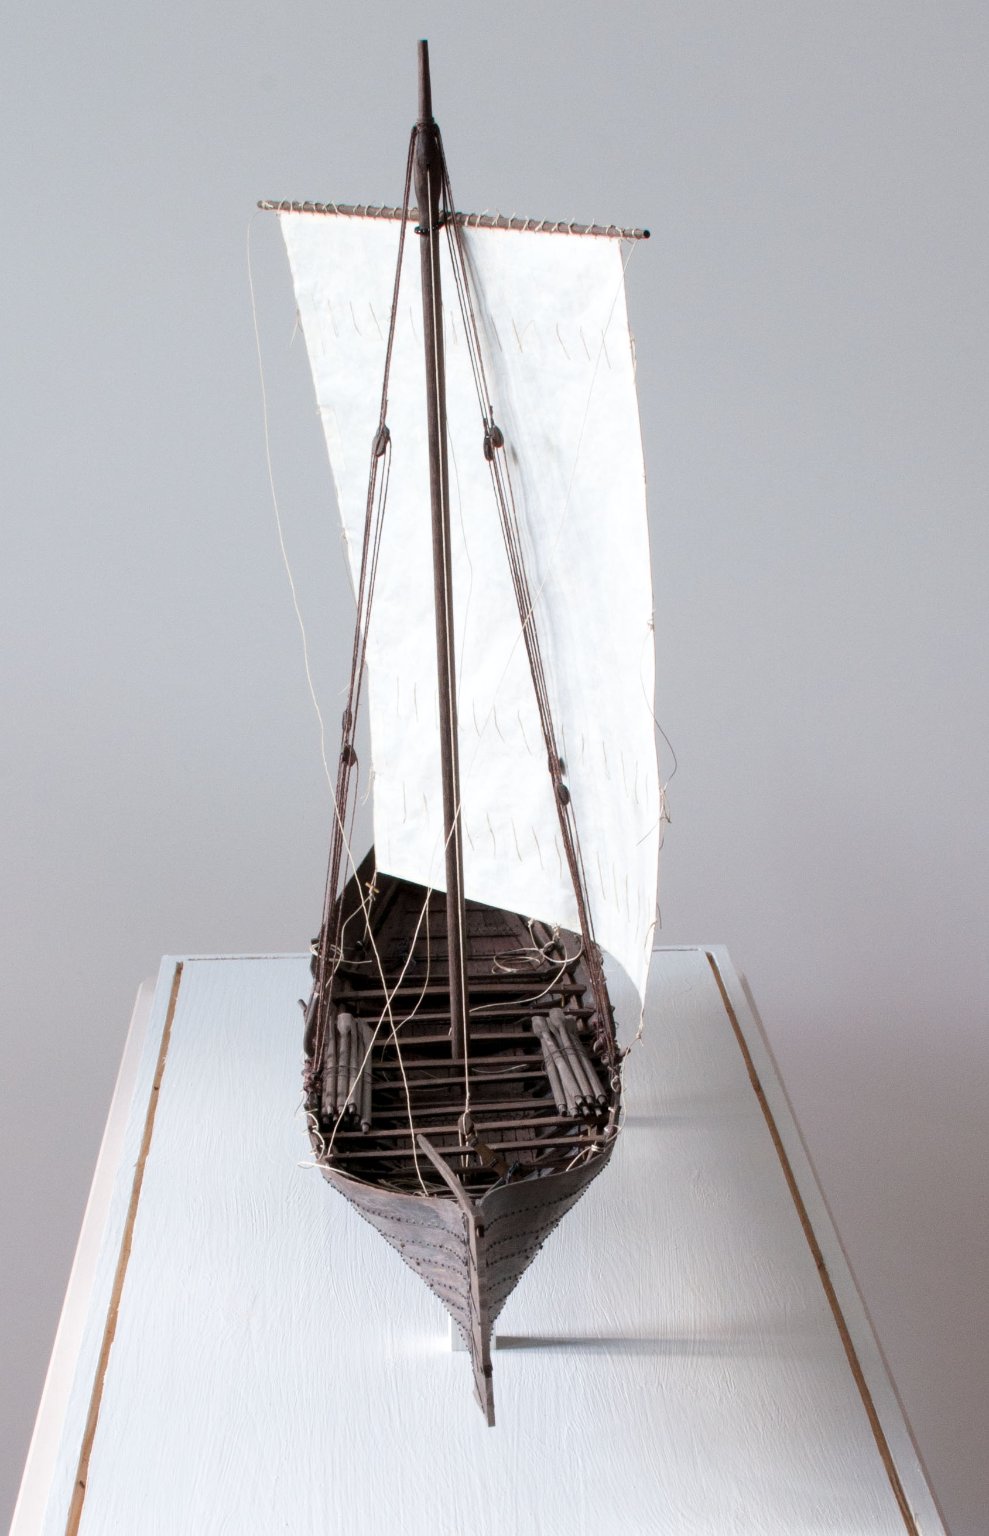
All the lines and reef points has been added to the sail.
To shape the sail I have rigged it up and painted diluted PVA glue that hopefully will dry to a ok shape. The wrinkles should also smooth out as the sail dries.
- mtaylor, GrandpaPhil, Mark Pearse and 5 others
-
8
-
Roger, thanks for sharing your tips regarding paper sails. If my current sail doesn’t turn out satisfactory I will use your tips for the next try.
- Roger Pellett, Cathead and mtaylor
-
3
-
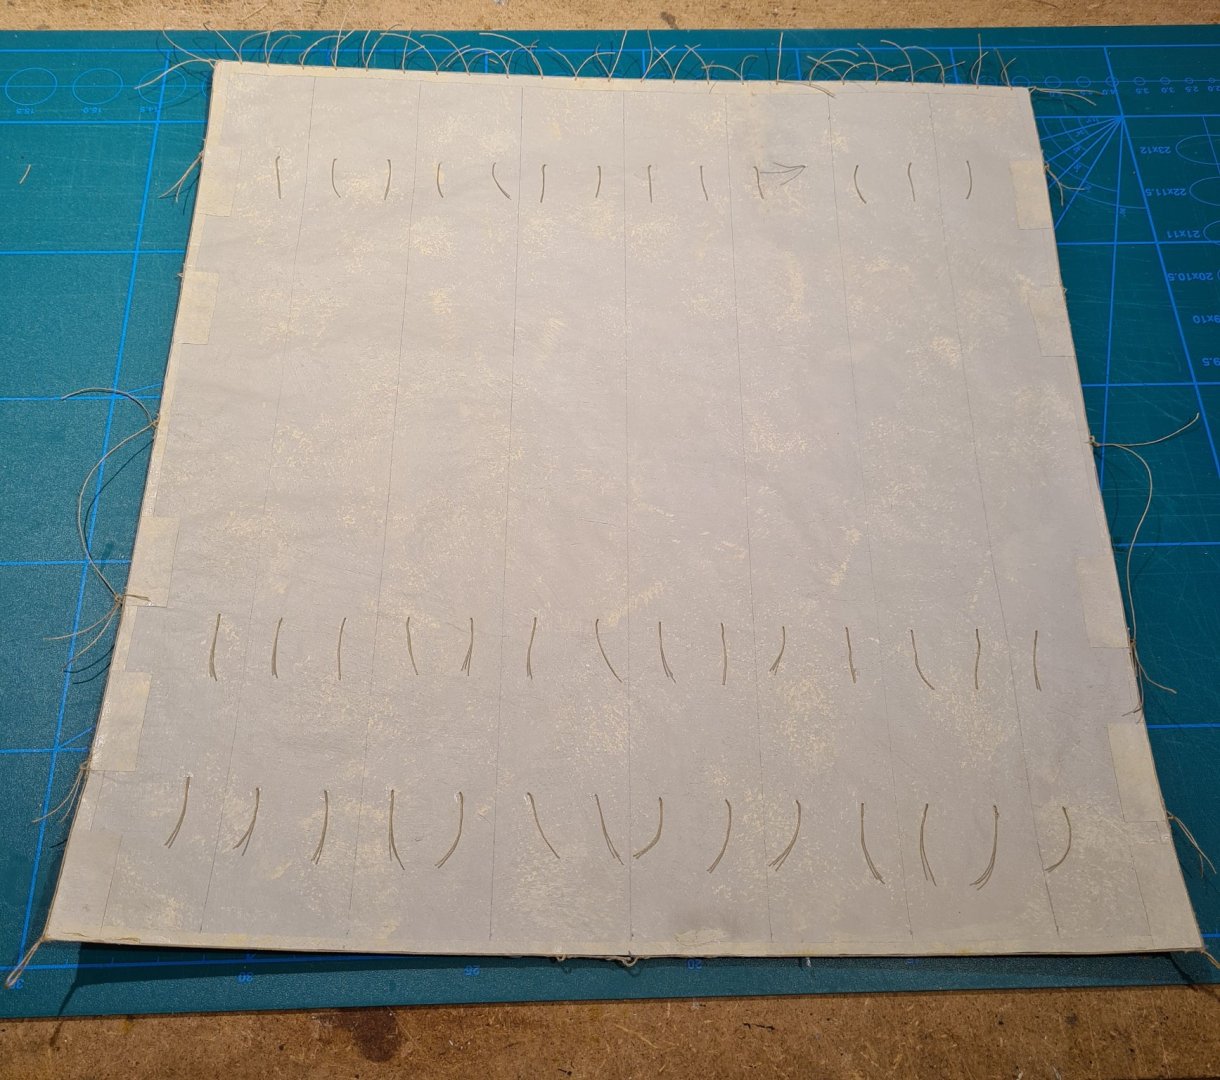
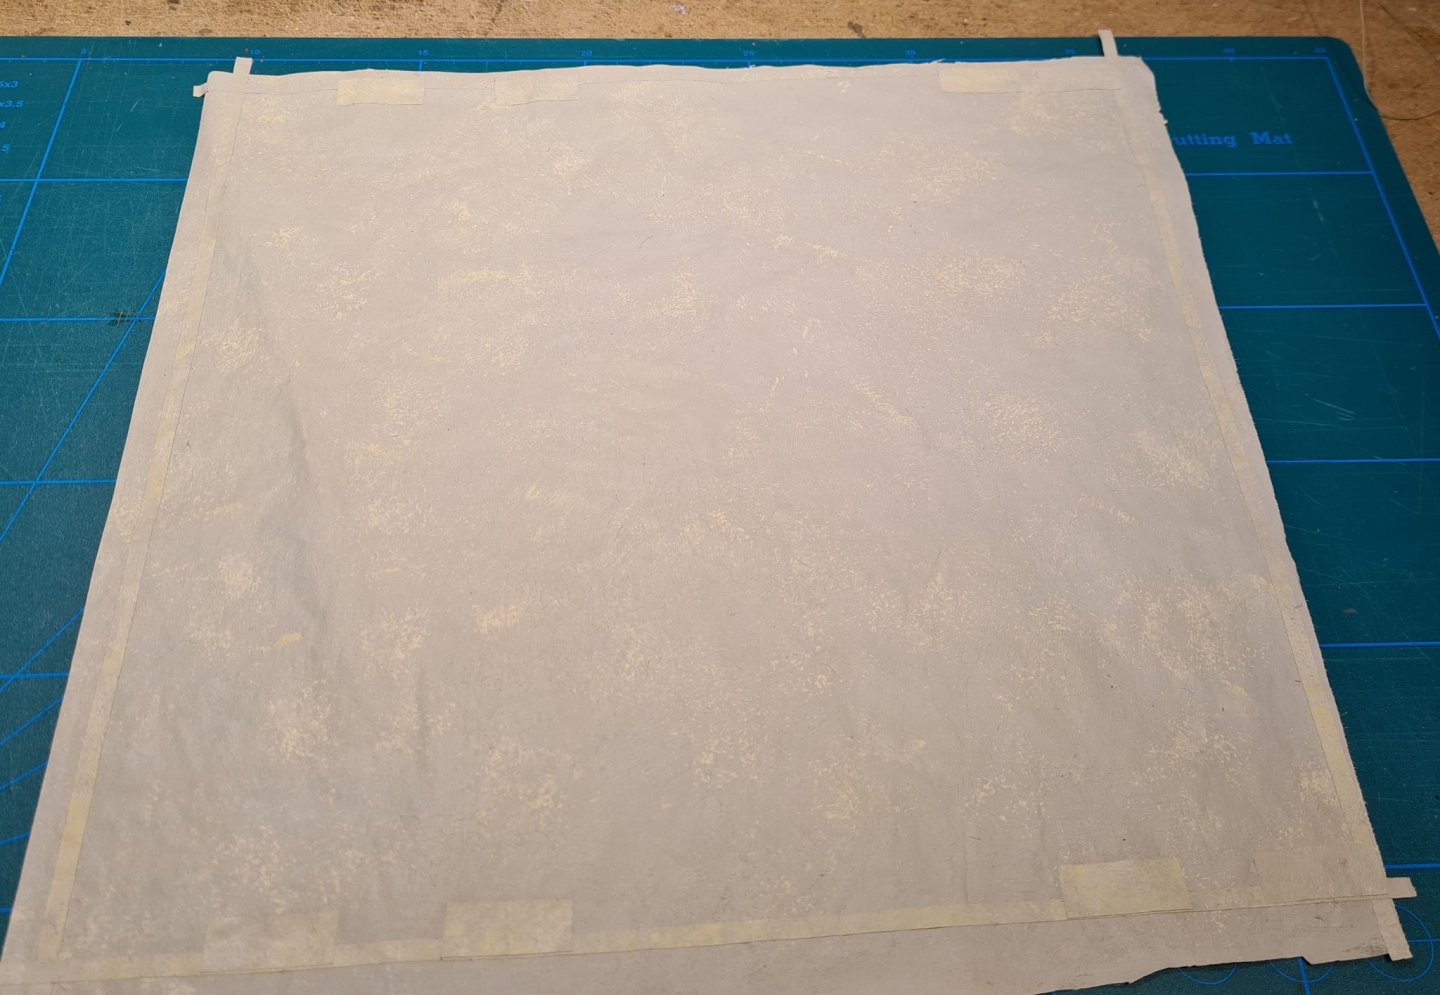
I'm working on the sail. I have decided to try making it of thin paper that is painted with acrylic for a strength and color.
I have tried several different papers, with different results. From left to right in the picture below: Pattern making paper for sewing (I have a life time supply), silk span, rice paper.
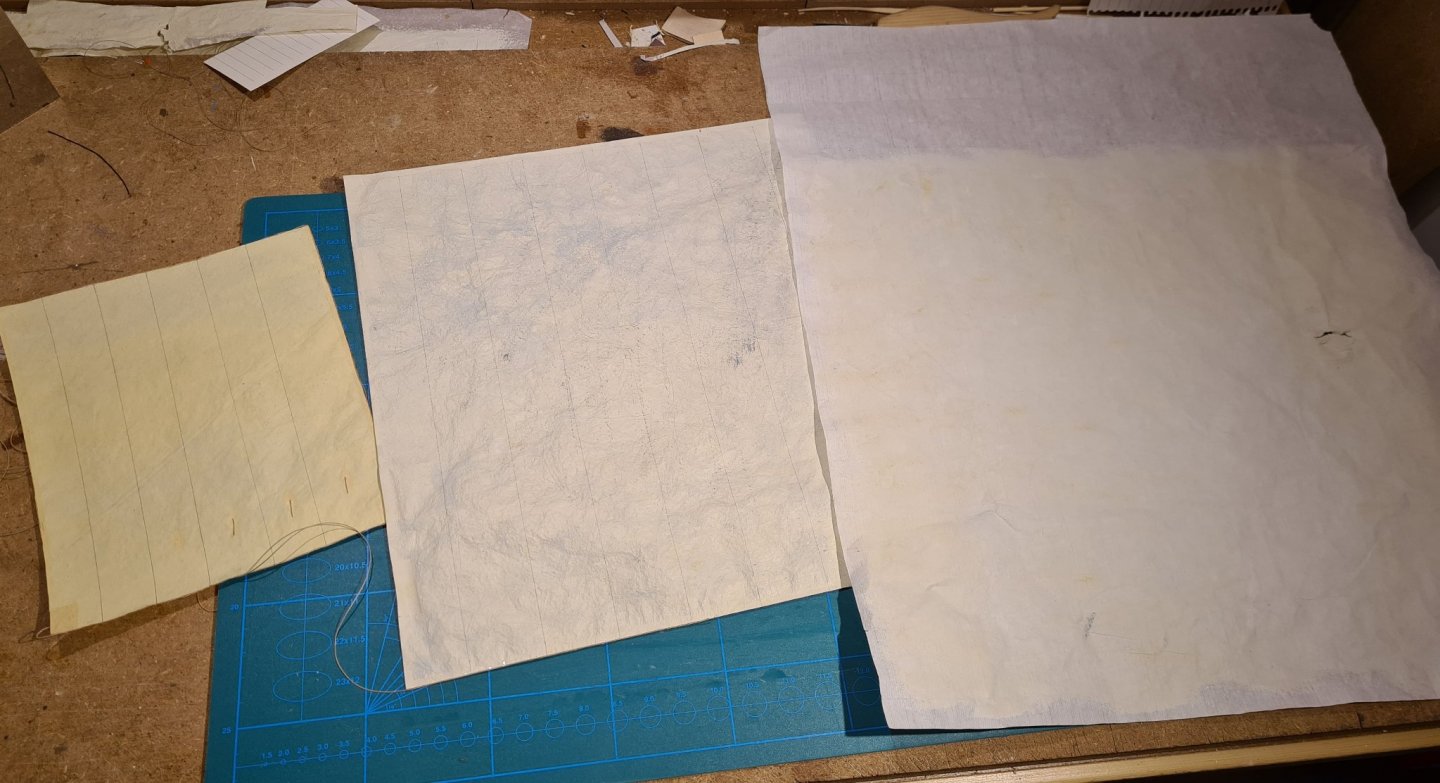
Of these the pattern making paper looked best. The silk span wrinkled to easily, and the rice paper was to easy to damage.
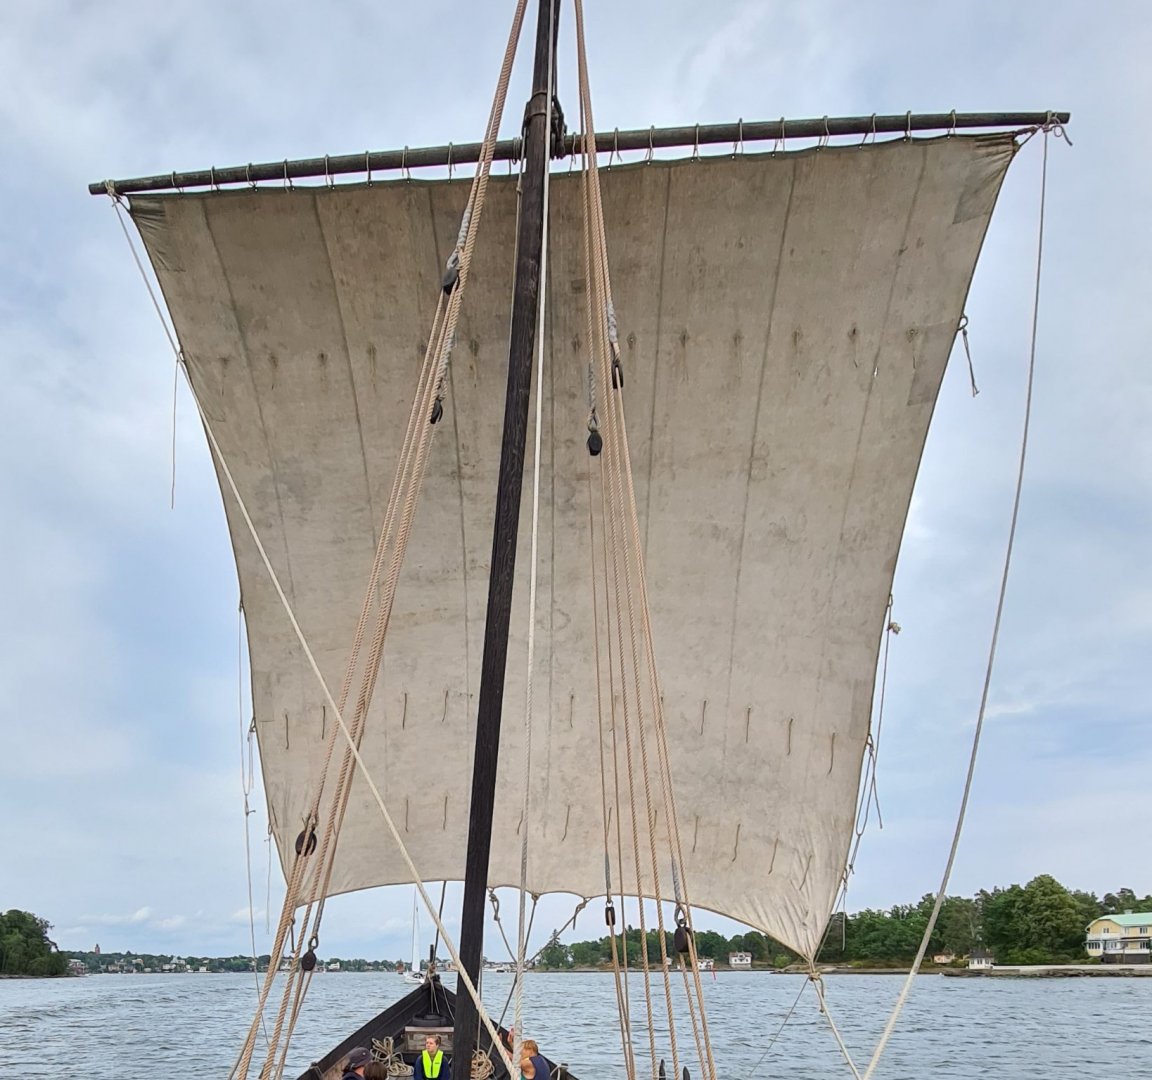
I'm looking for a worn look on the sail, similar to this.
And this is so far as I have come.
- mtaylor, GrandpaPhil, Cathead and 4 others
-
7
-
-
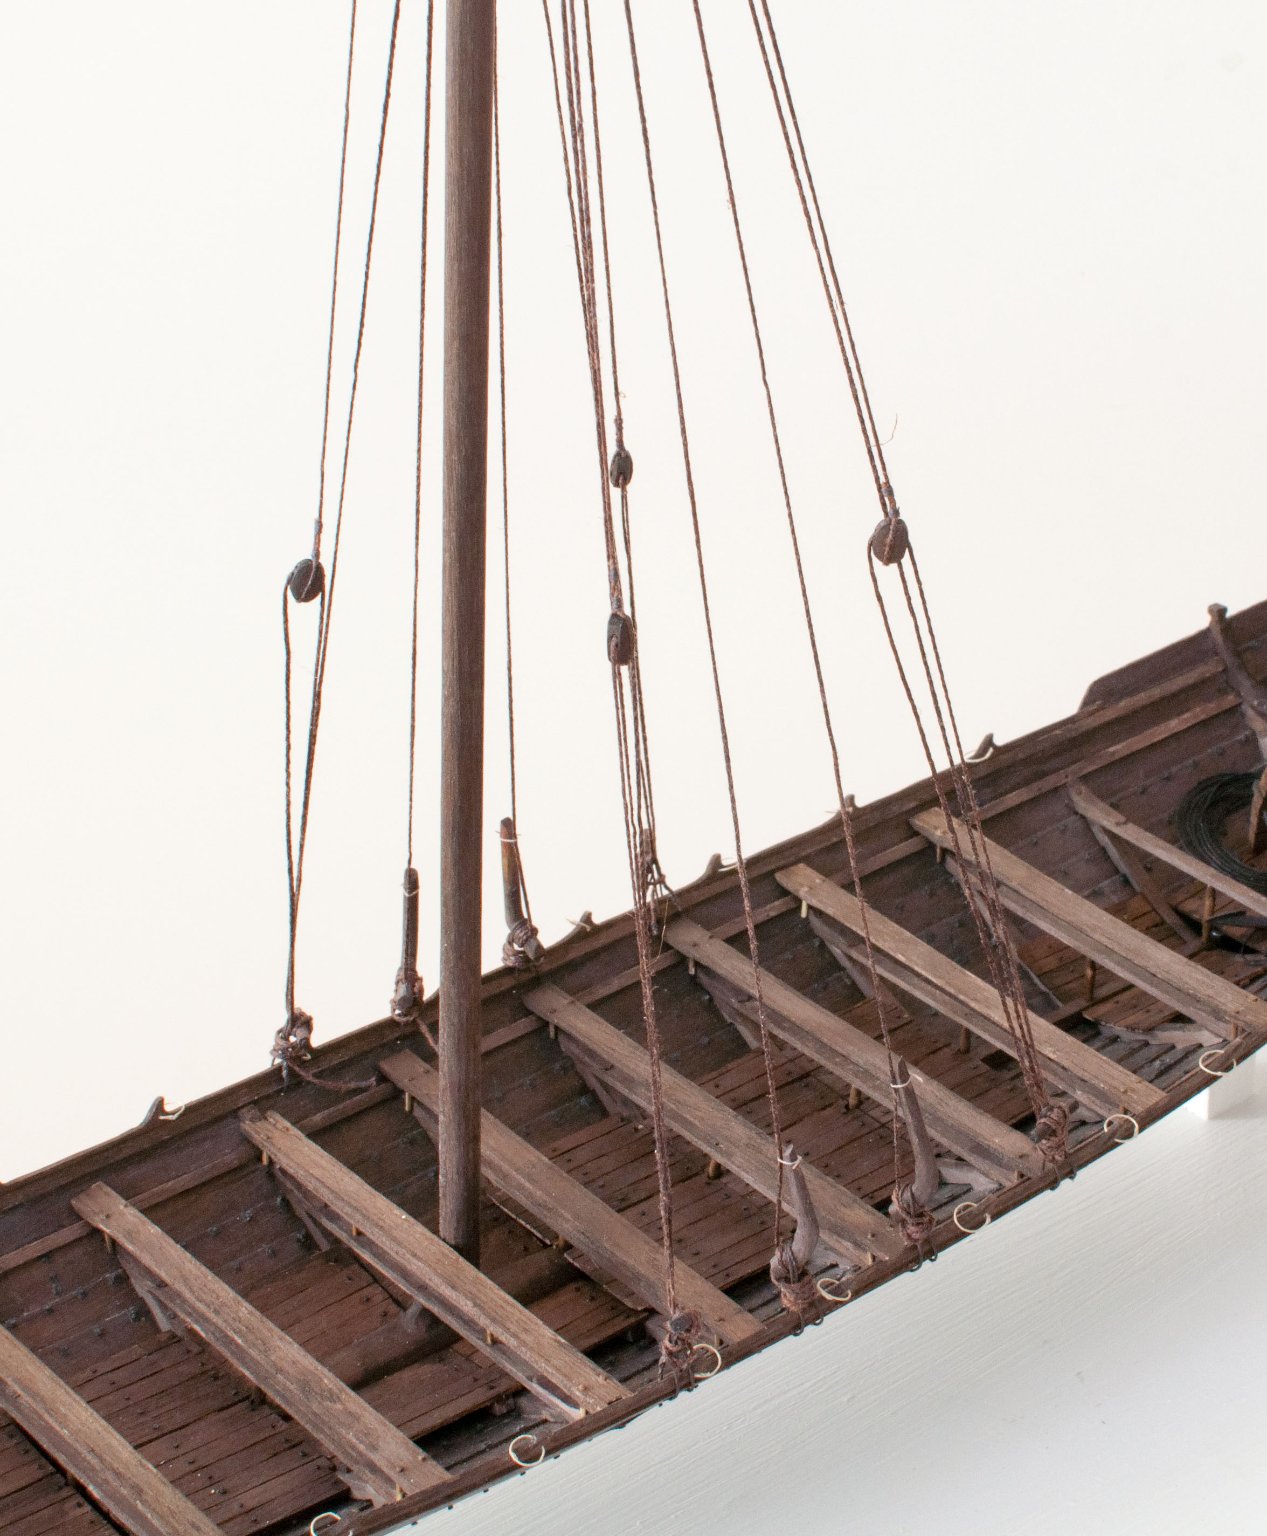
... and with the case I can mount the model on its final stand and start rigging it. Most of the details for the rigging was already ready, so it was not so many hours work. (This rig is not very complicated 😀)
Some of the lines need to be tightened a bit, but otherwise I'm happy with the result.
In the end I decided to do the shrouds in the same way as on the reconstruction. It uses a combination of "shroud needles" and blocks for adjusting the tension.

The anchor is made from wood and paper and is placed in the aft. This is from the practice that we follow on the reconstruction. Anchoring is always done with the stem towards a steep cliff with the anchor some boat lengths straight out. So the anchor is handled from the aft deck.
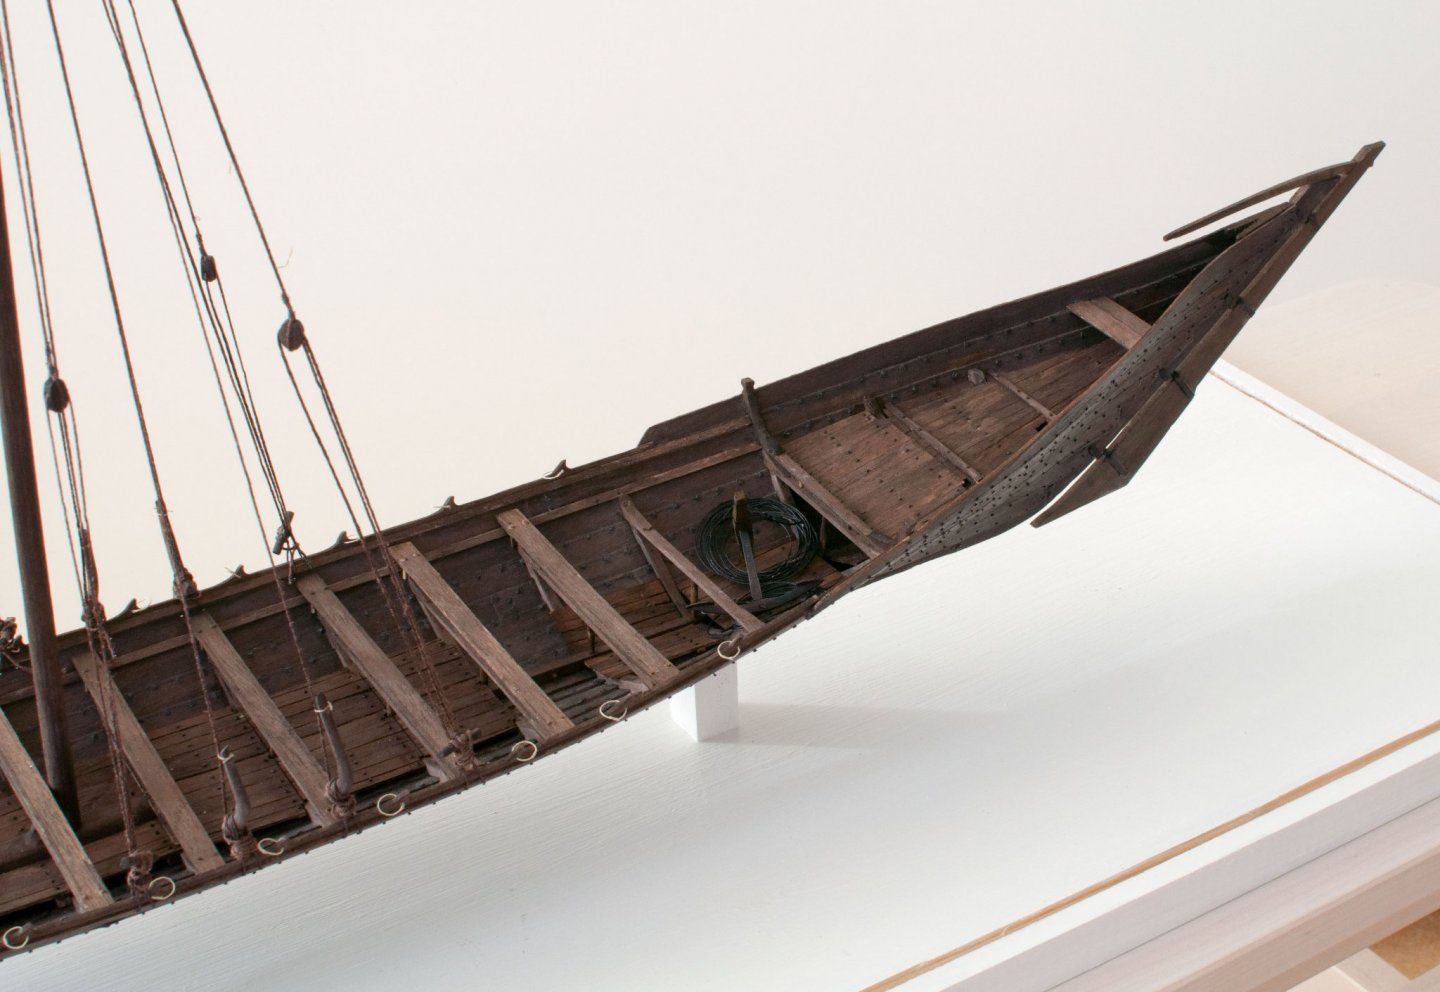
The next step will be sail and the running rigging.
Cheers
-
Thanks @vaddoc!
My best guess as to why the sides are so low is that it gives the rowers better angle towards the water for the oars. I don't think that cargo handling was a major concern. The hull shape is so narrow that cargo transport was probably not the reason for building the original. It is more likely that it had some patrol or defense role.
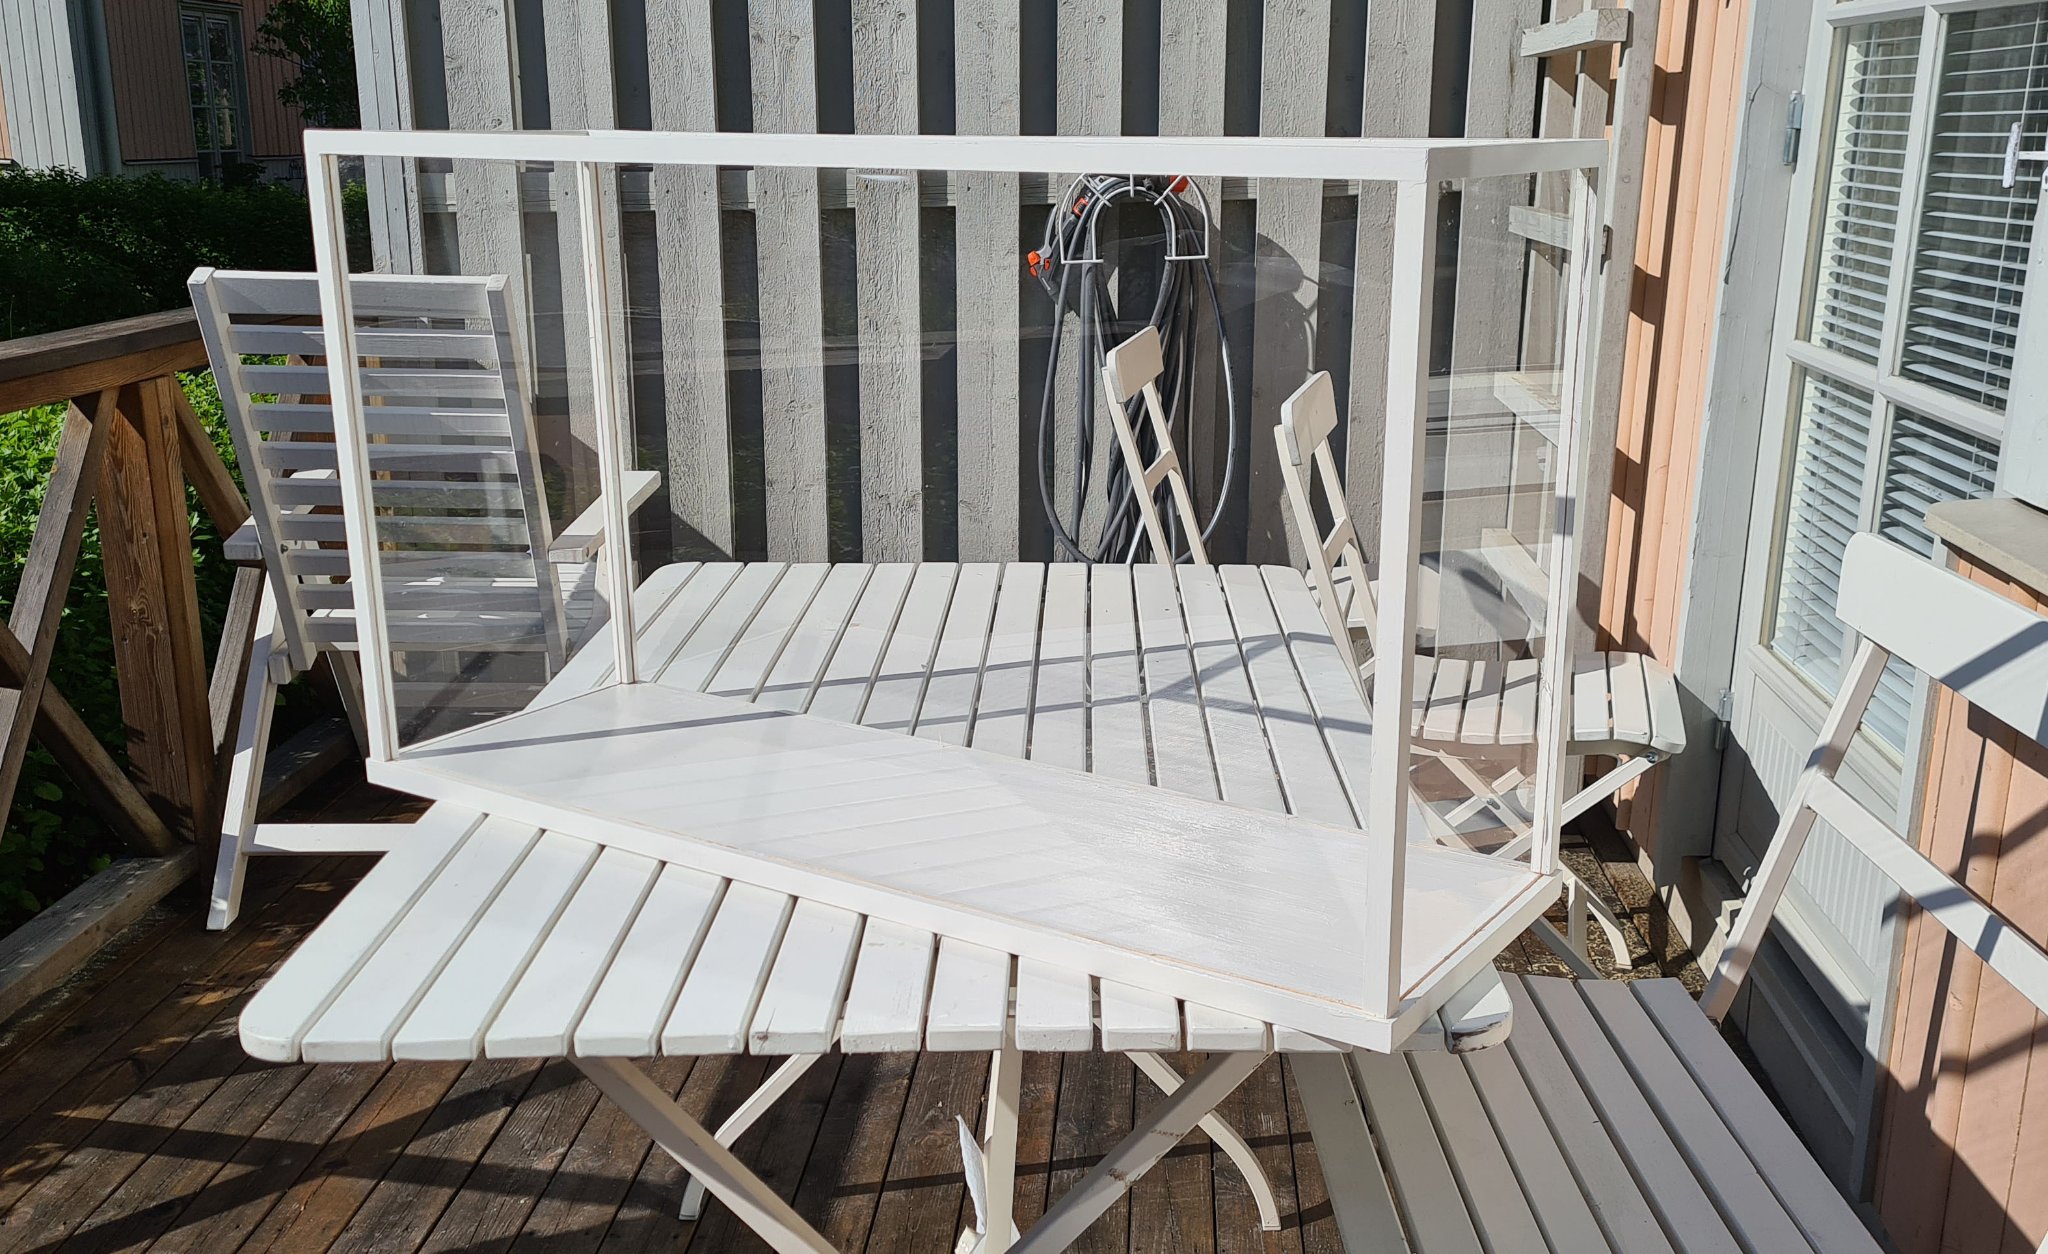
The building has been paused while I have built a case. Finally it is ready!

My first idea was to stain the wood to give it a aged look. But then I thought that the model, with its dark brown color, would stand out more against a slightly off-white backdrop.
Cheers
- mtaylor, Cathead, GrandpaPhil and 4 others
-
7
-
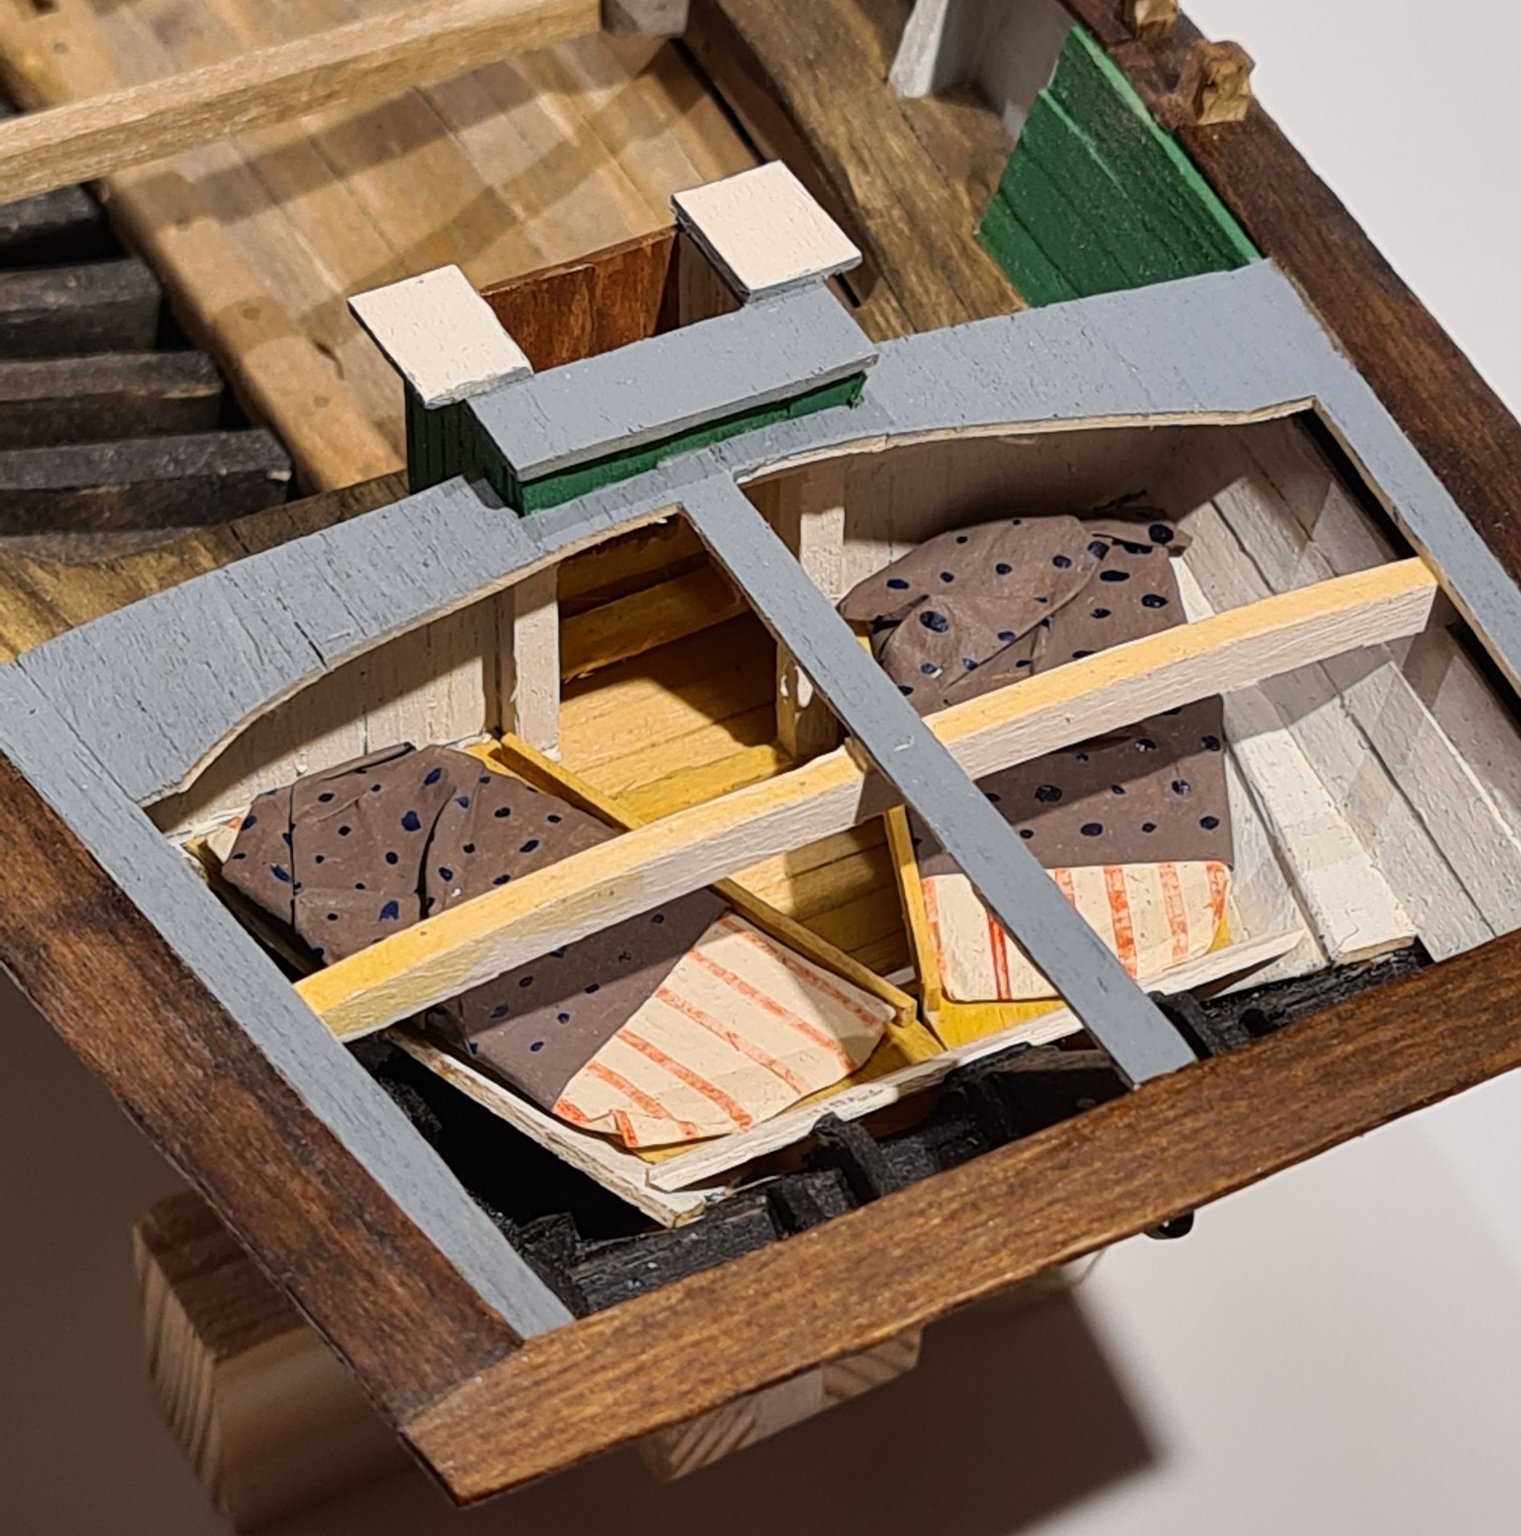
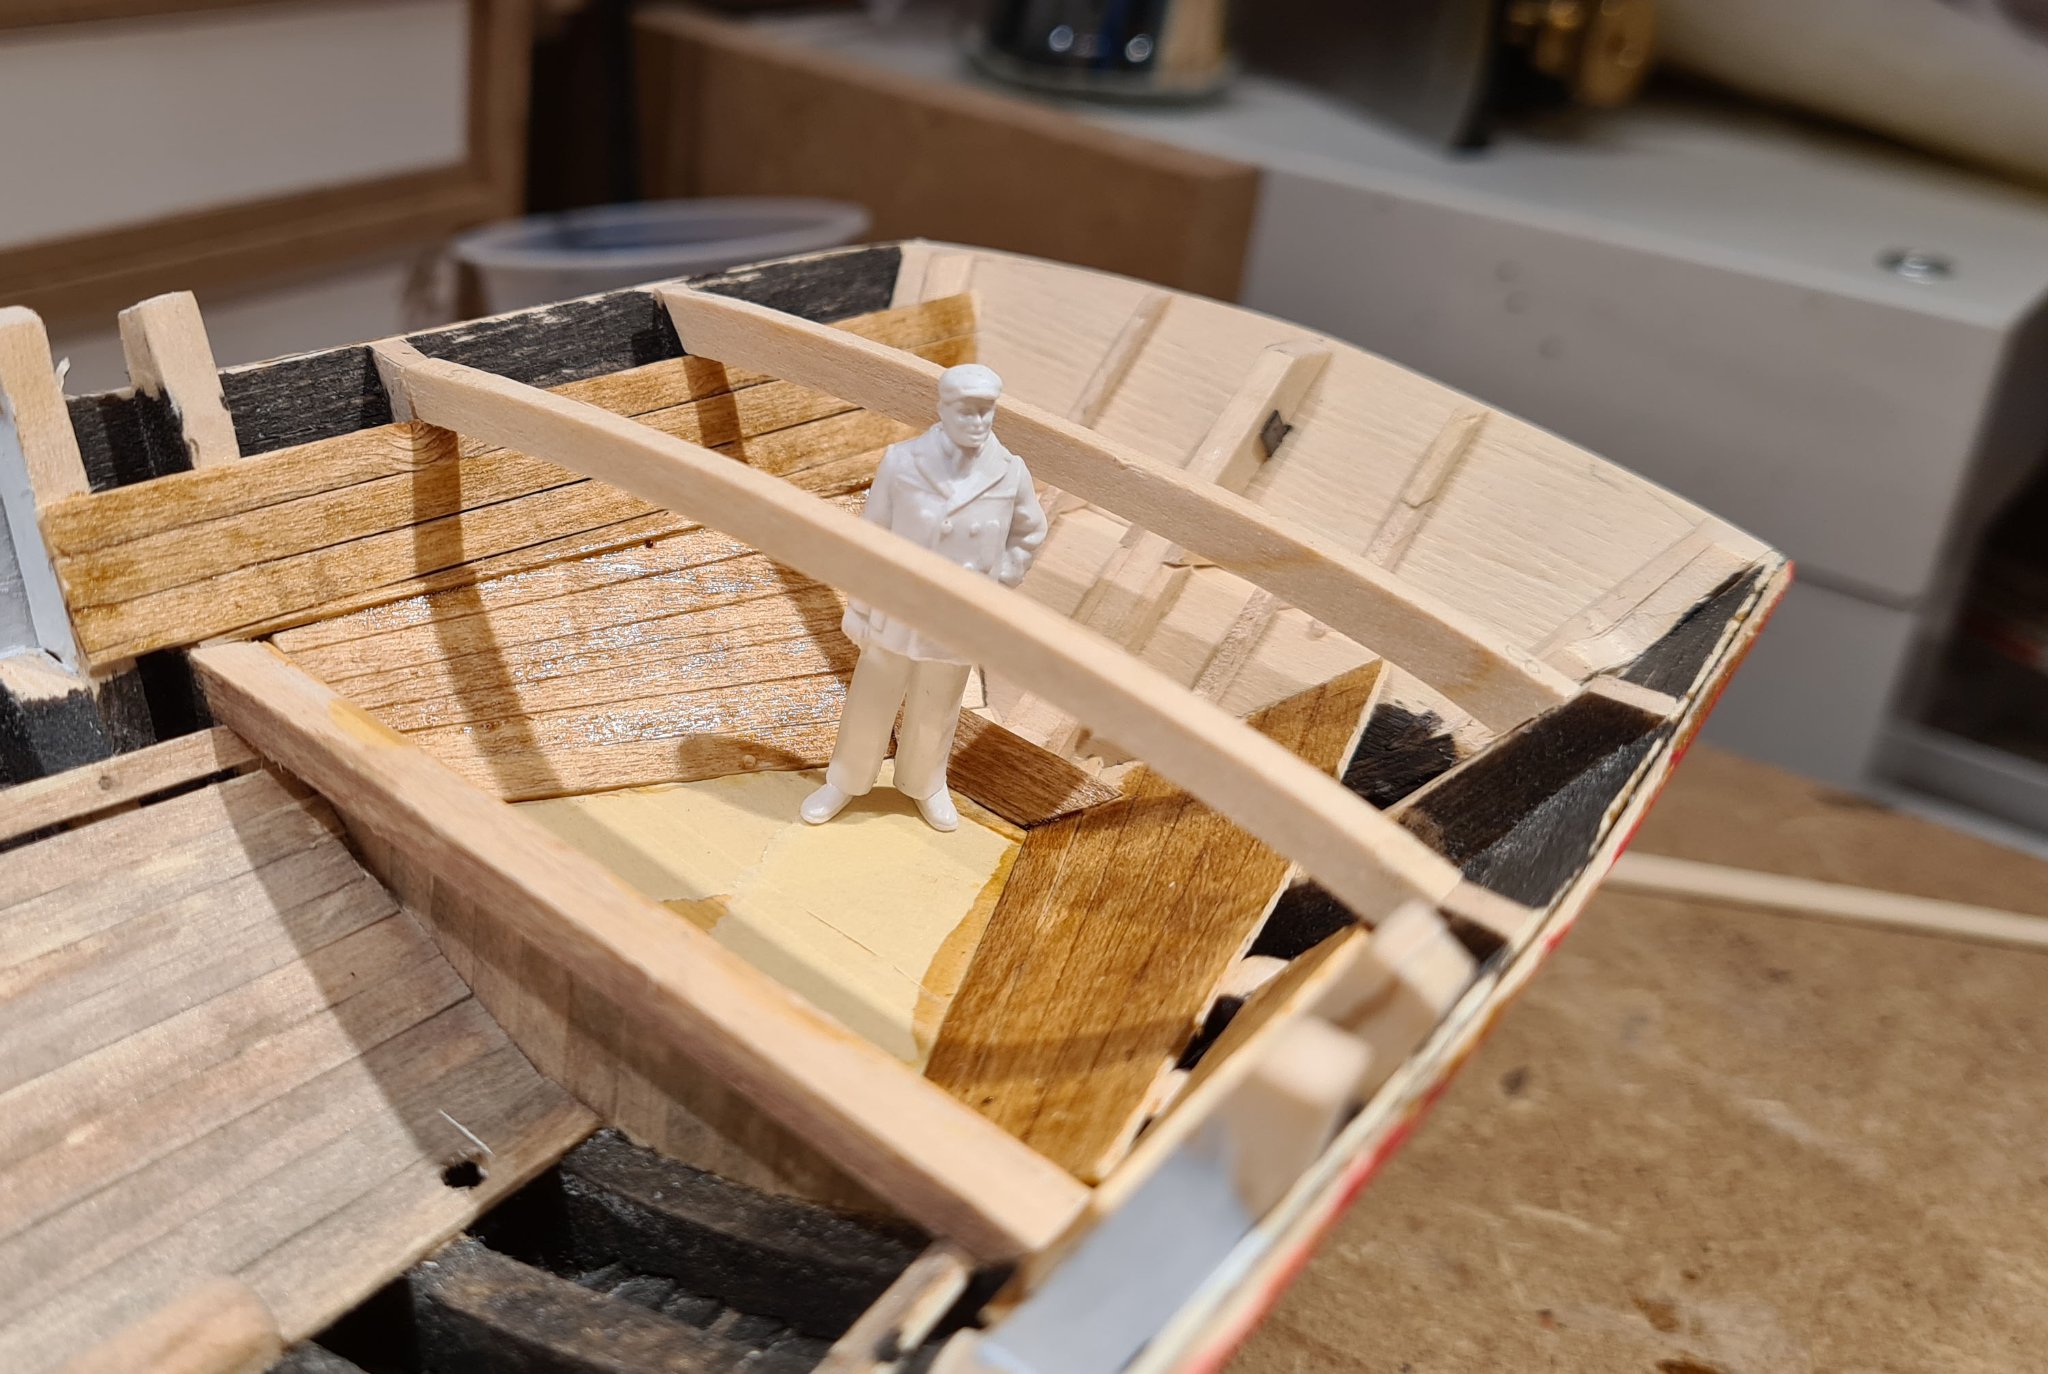
The skipper is inspecting the cabin in his new ship.

- GrandpaPhil, Wintergreen, Tony Hunt and 3 others
-
6
-
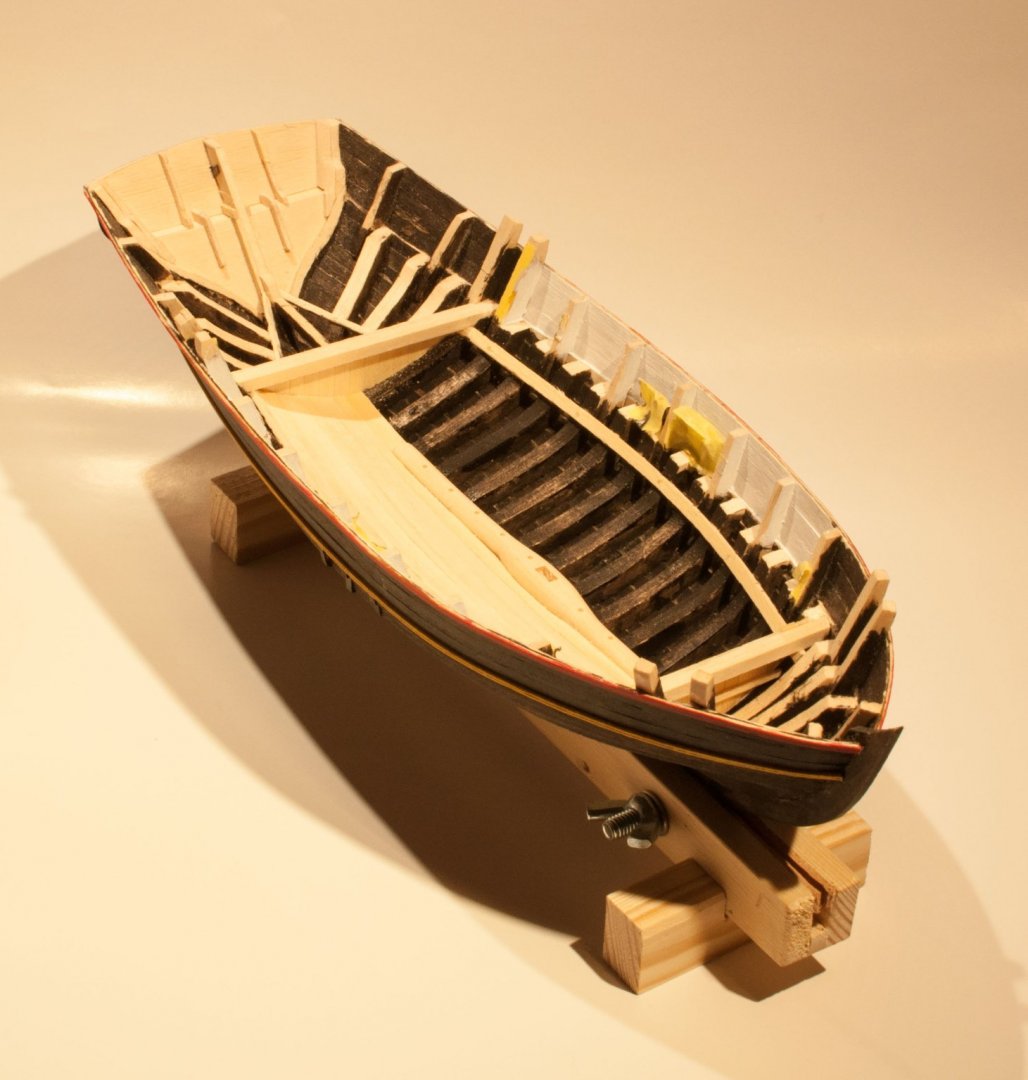
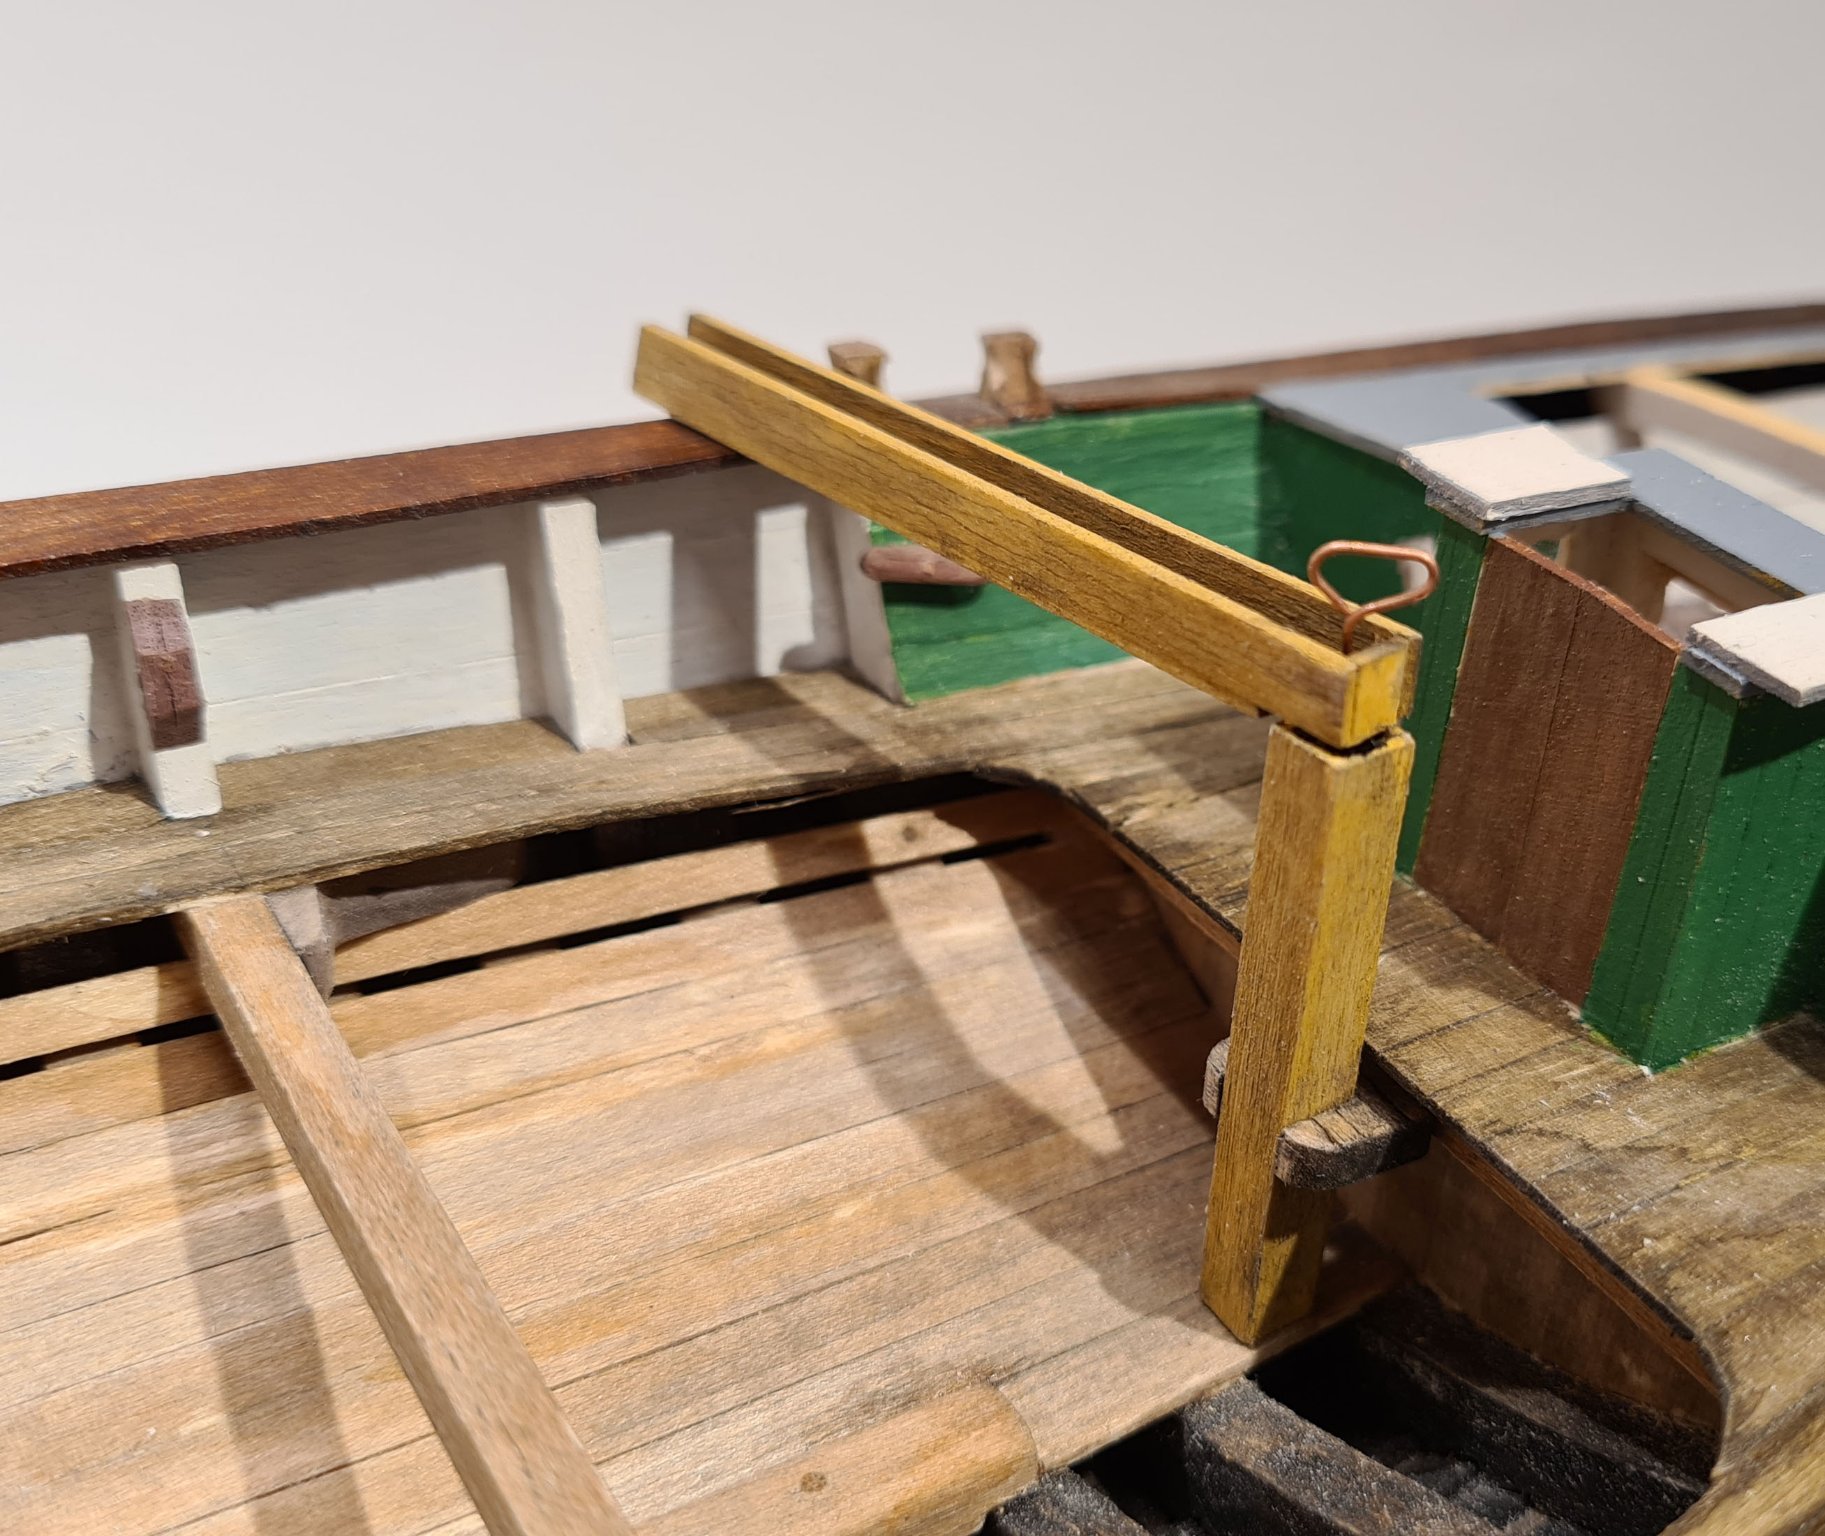
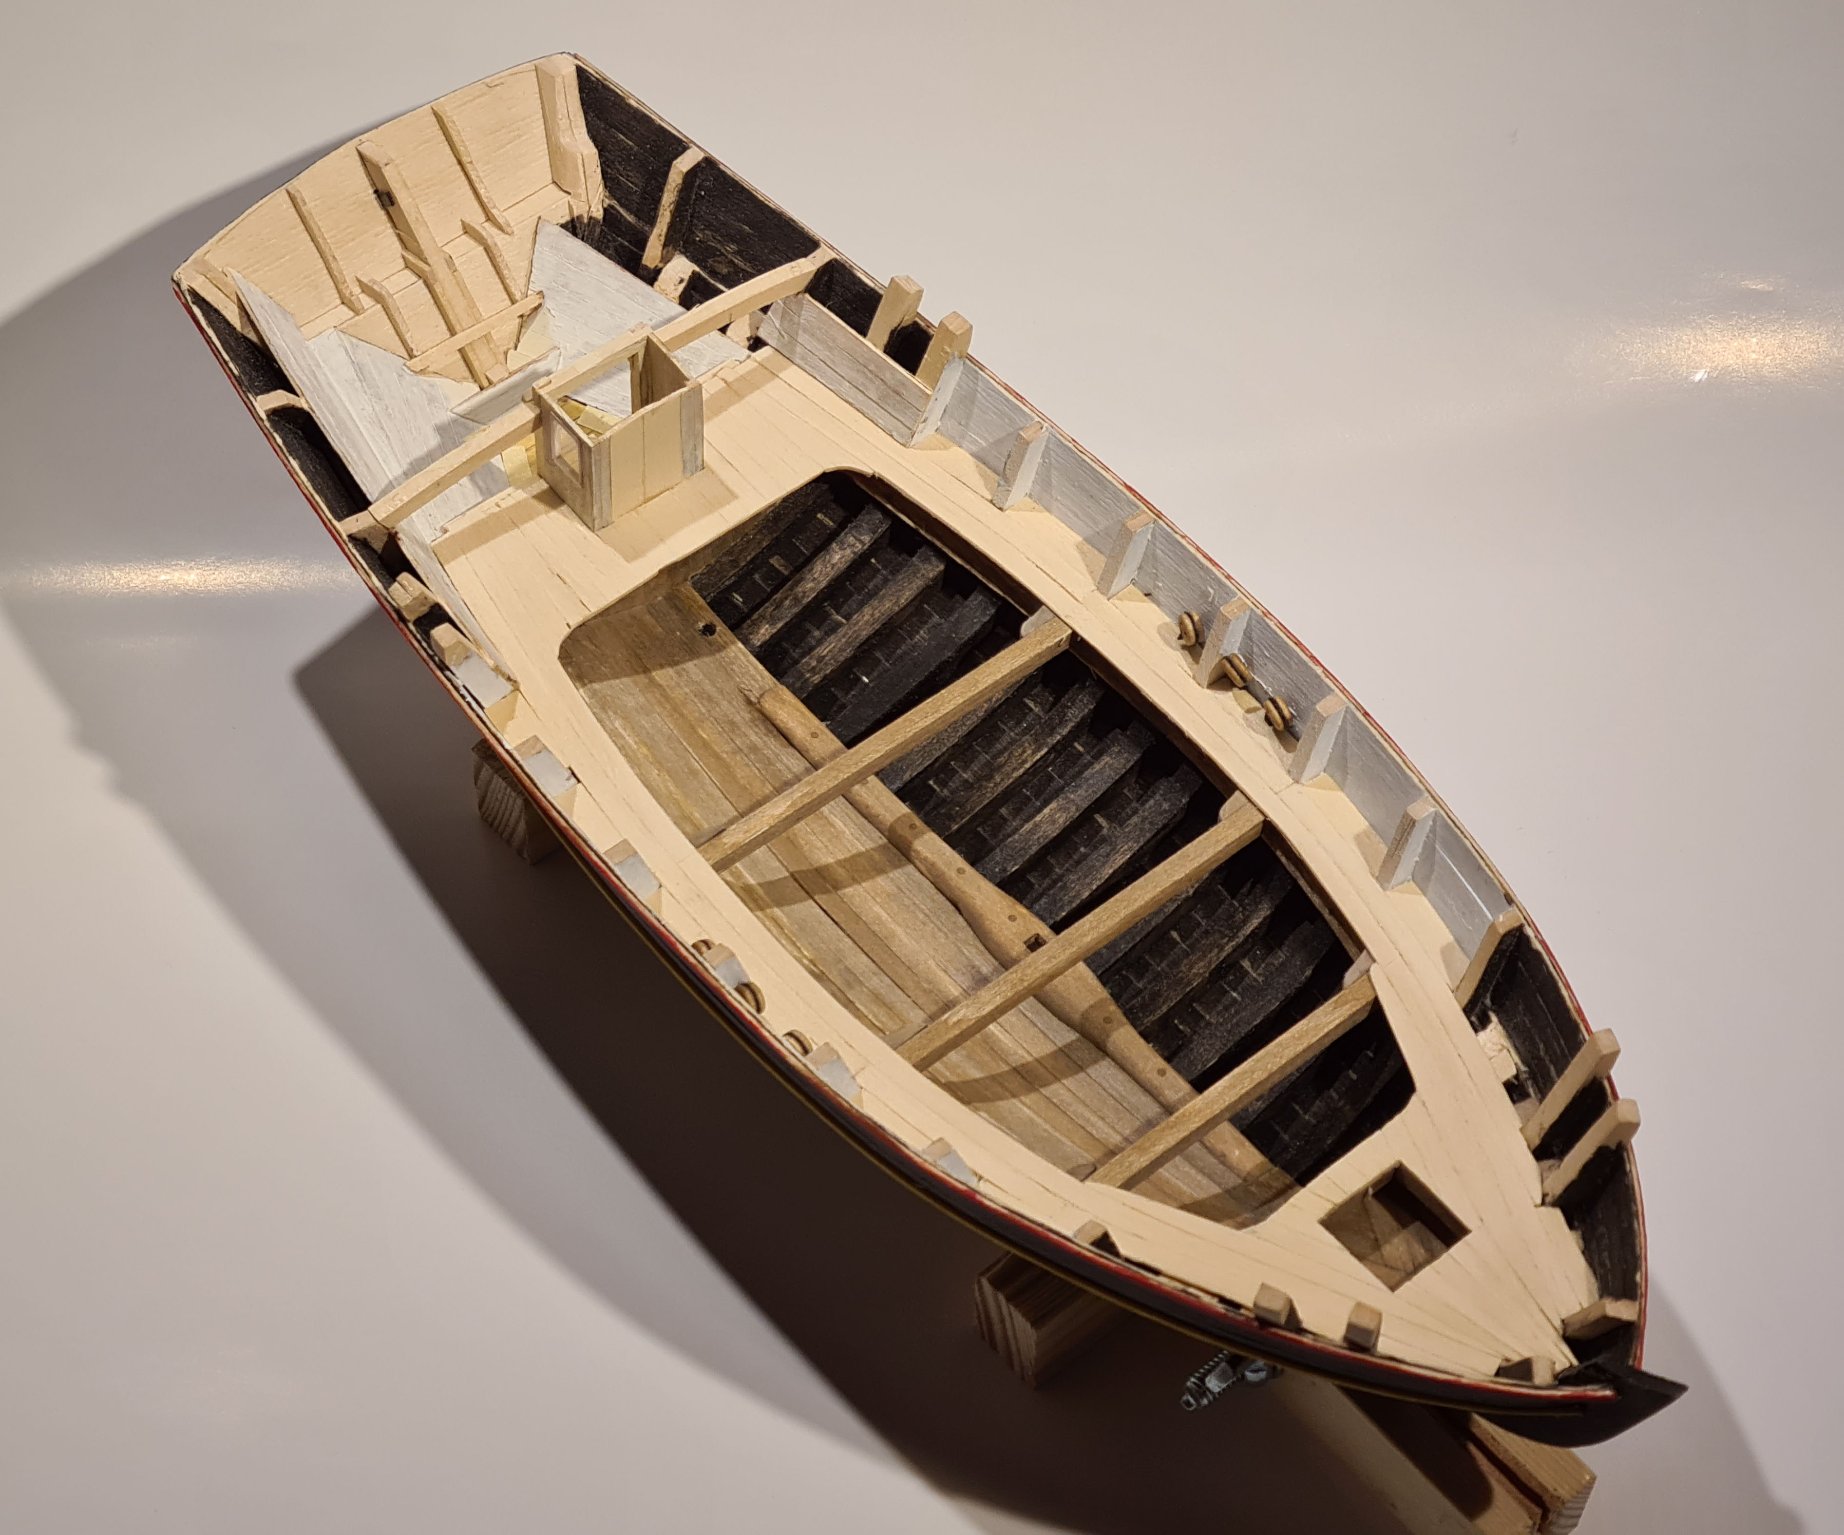
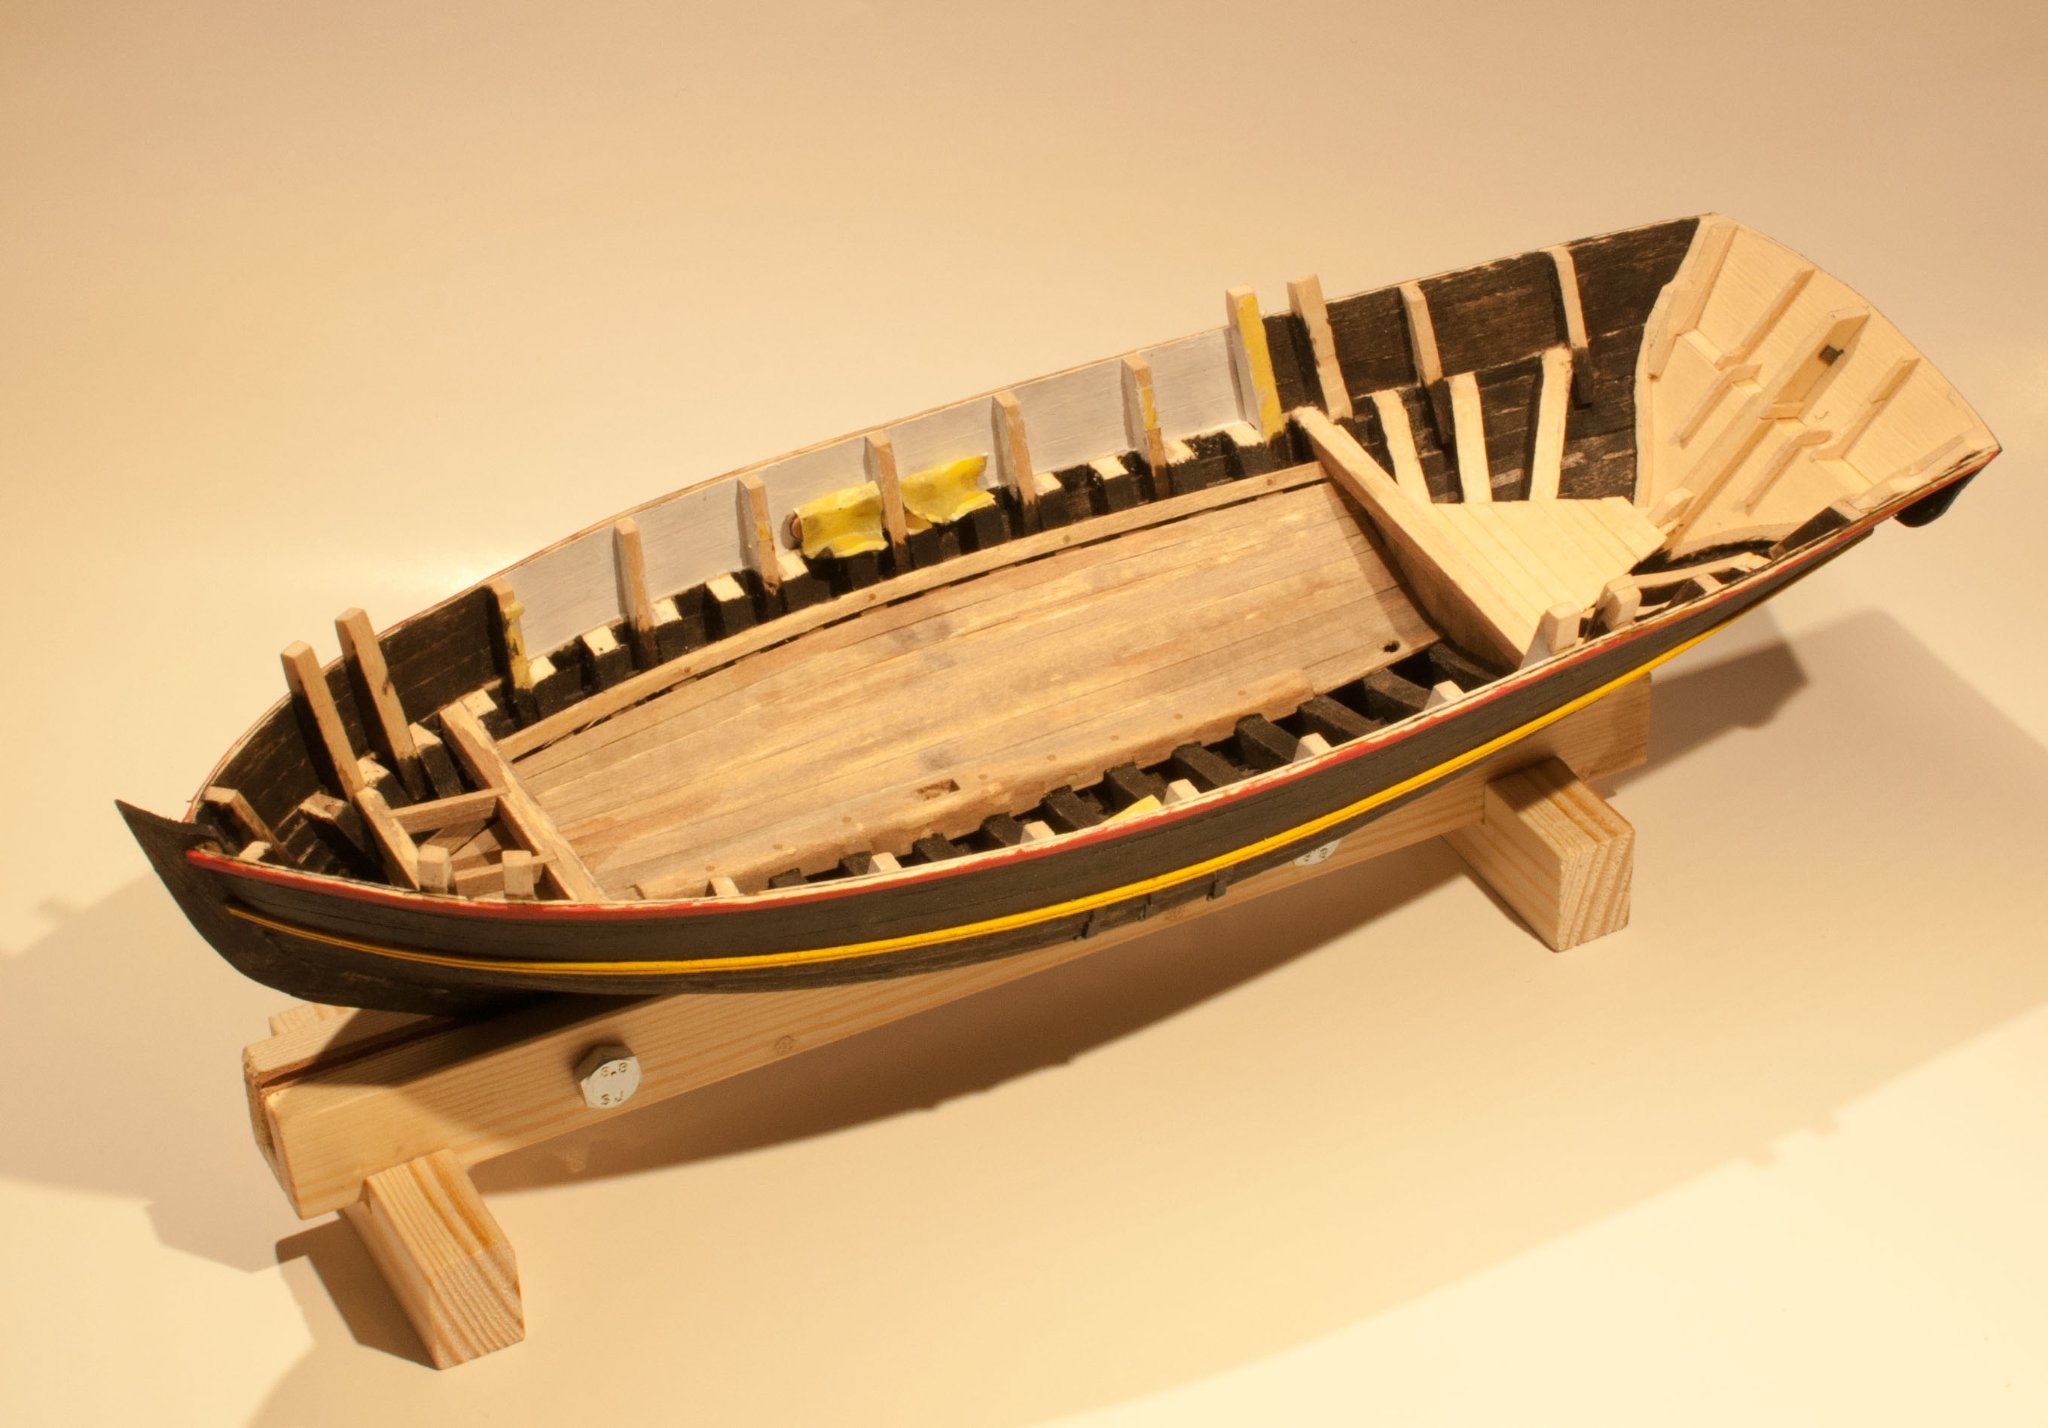
Today I have installed a floor below the hatch in the fore deck, and have installed the support beams for the hatch.
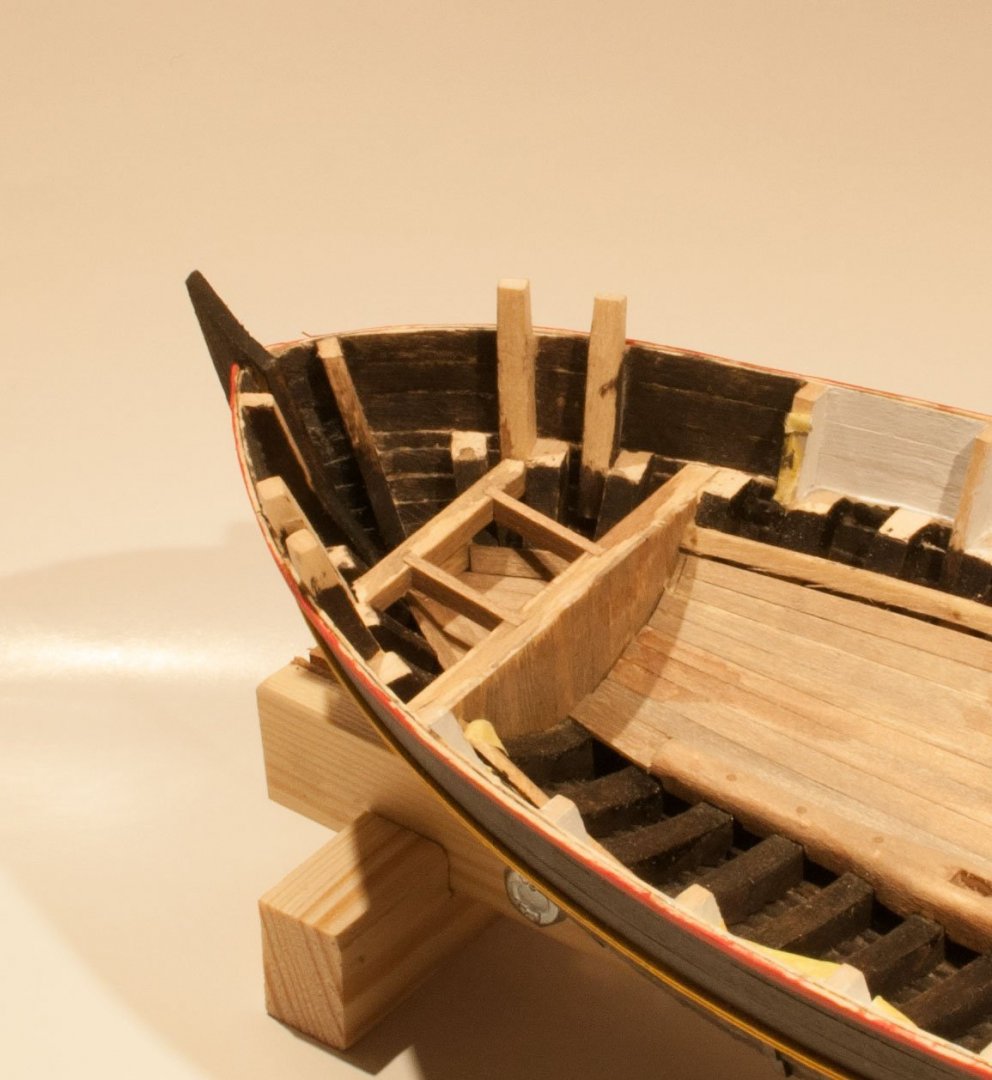
The ceiling planks have been treated with a mix of vinegar and steel wool, which gives it a silver grey/brown tone. It is still not as dark as I would like. Maybe I will darken it further with stain. The effect I'm seeking is a worn and weathered look. At least one of my sources say that the holds where not treated with tar, but instead oiled.
I have also installed floor board in the cabin area, and will continue with ceiling planks.
- G.L., Wintergreen, wefalck and 2 others
-
5
-
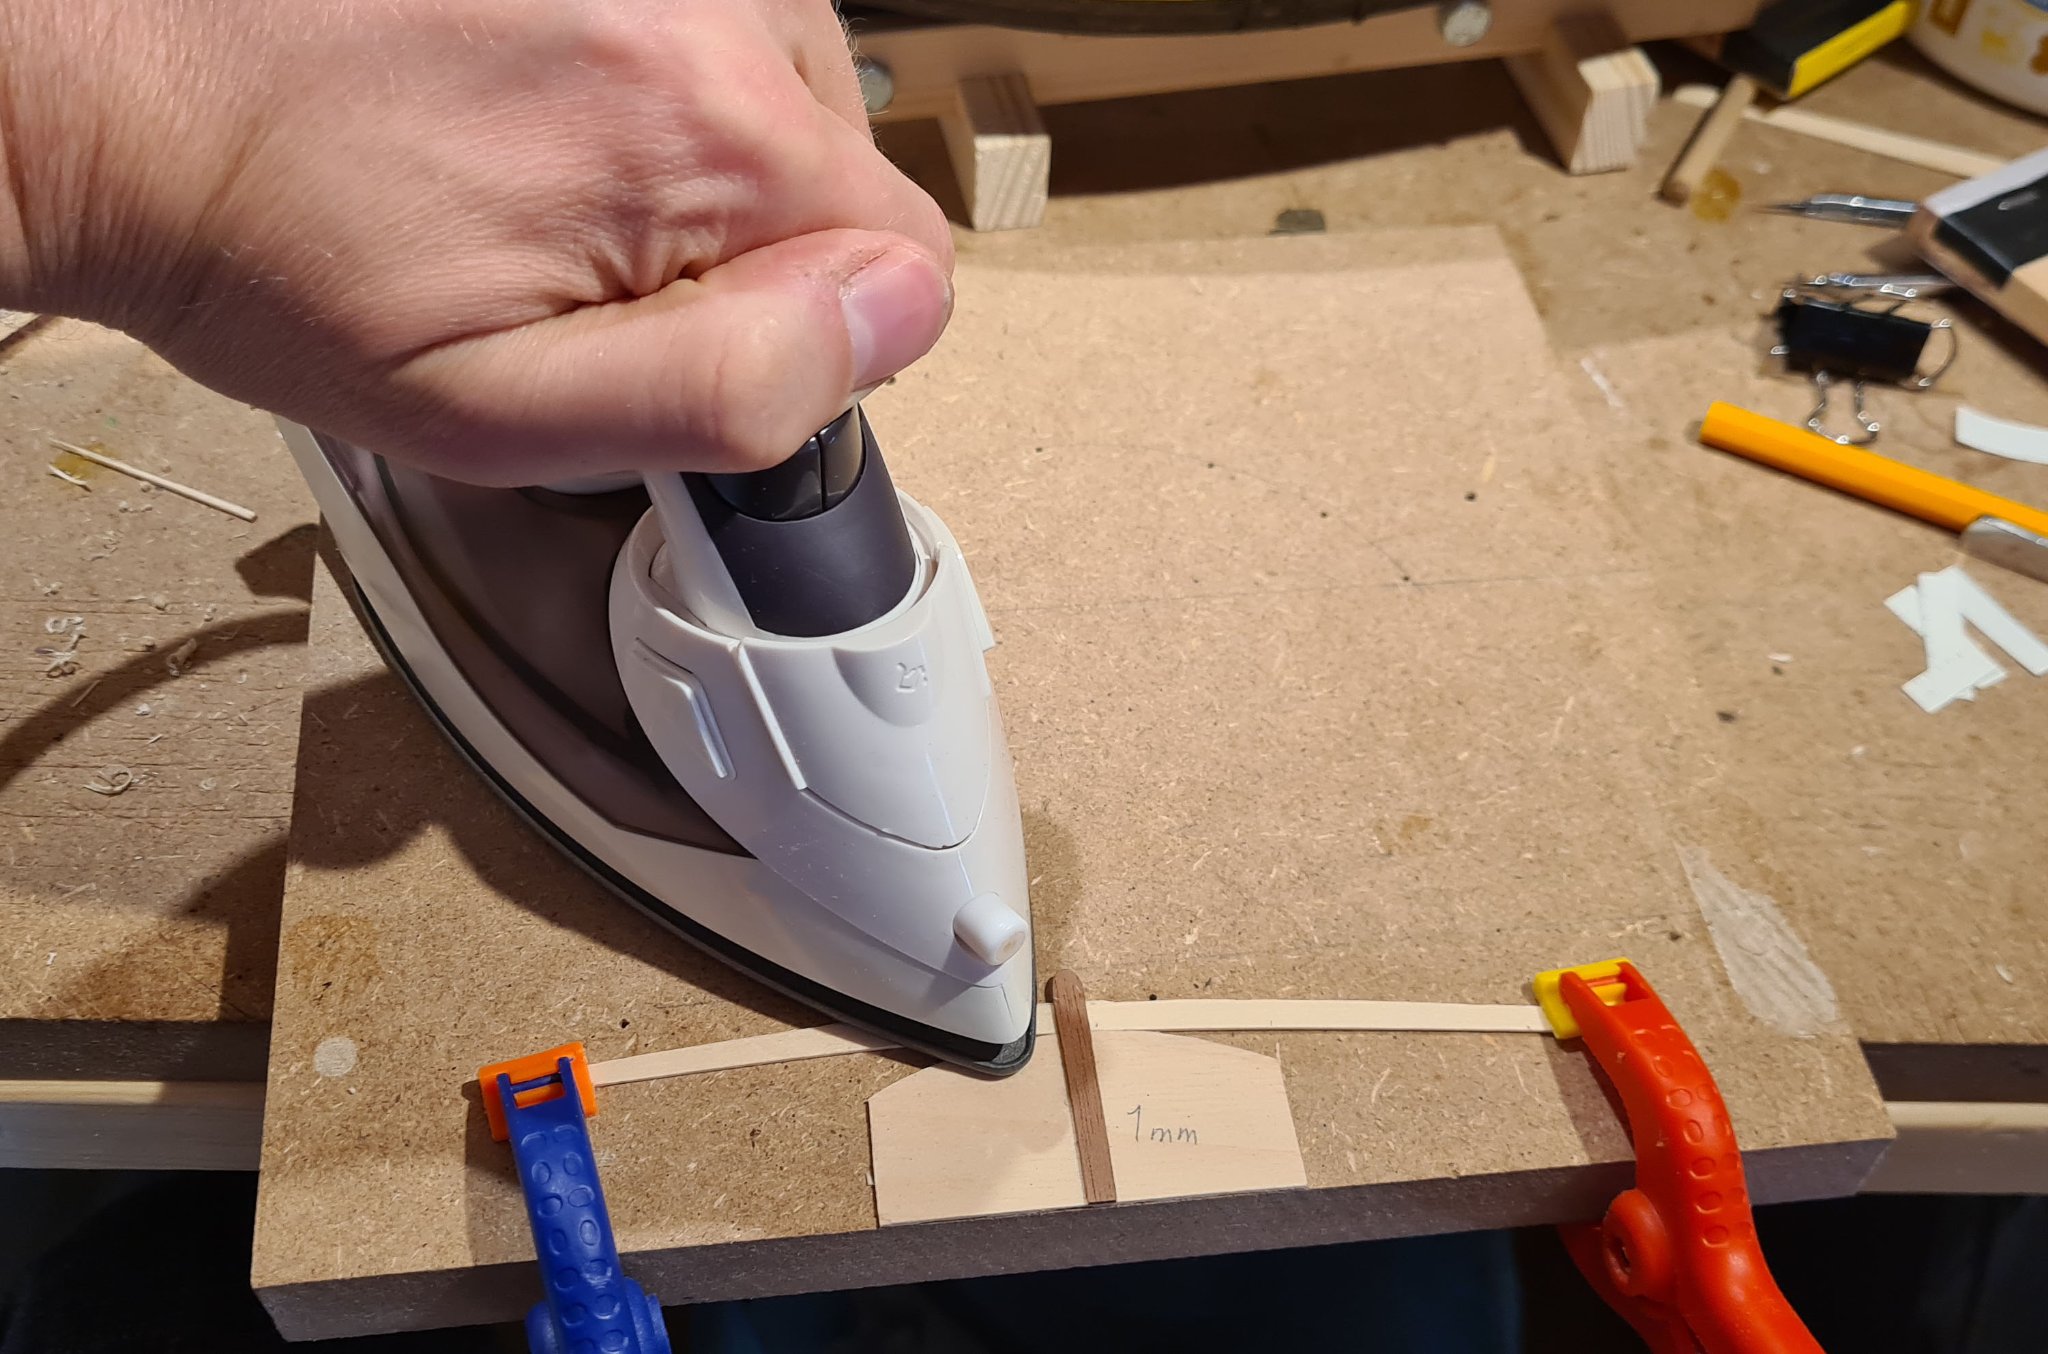
I put a drop of water using my finger on the wood before ironing. No water in the iron.
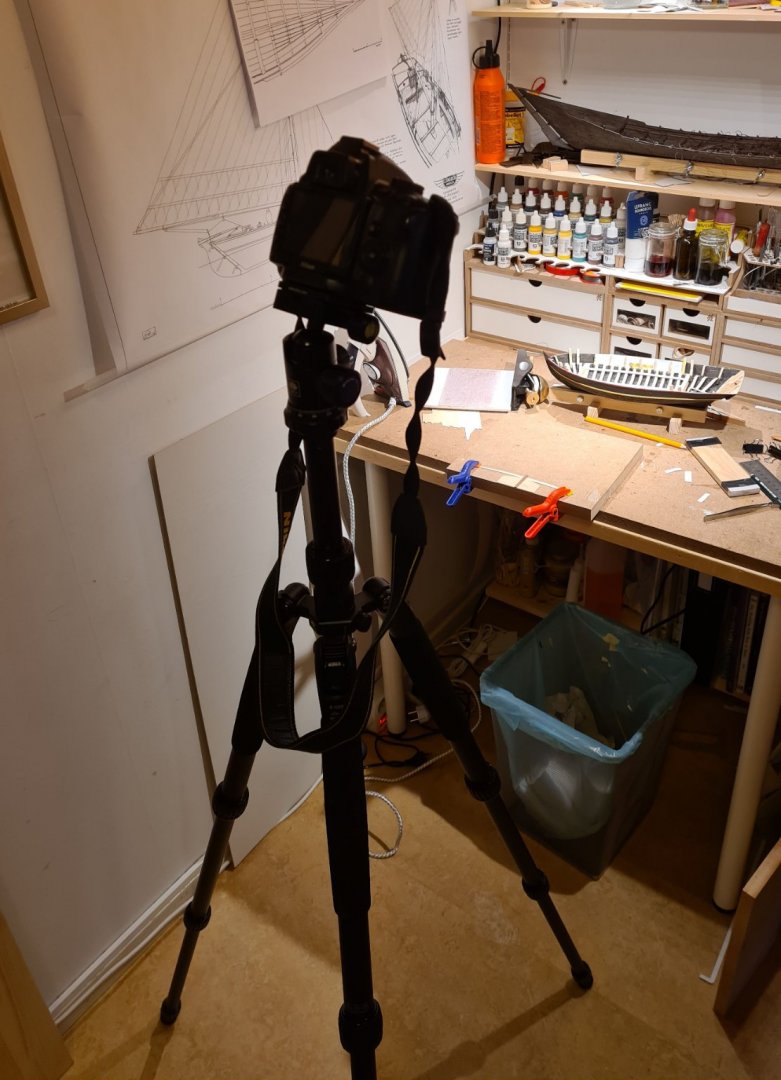
I have a D5000. Nothing fancy and some years old, but I have far from mastered its capabilities, so have no ambition to upgrade. The tripod is from Sirui. I was looking for cheaper options, but found it discounted by 40%. It seemed to be a good deal, even if it was above my initial budget. I’m really happy with it.
-
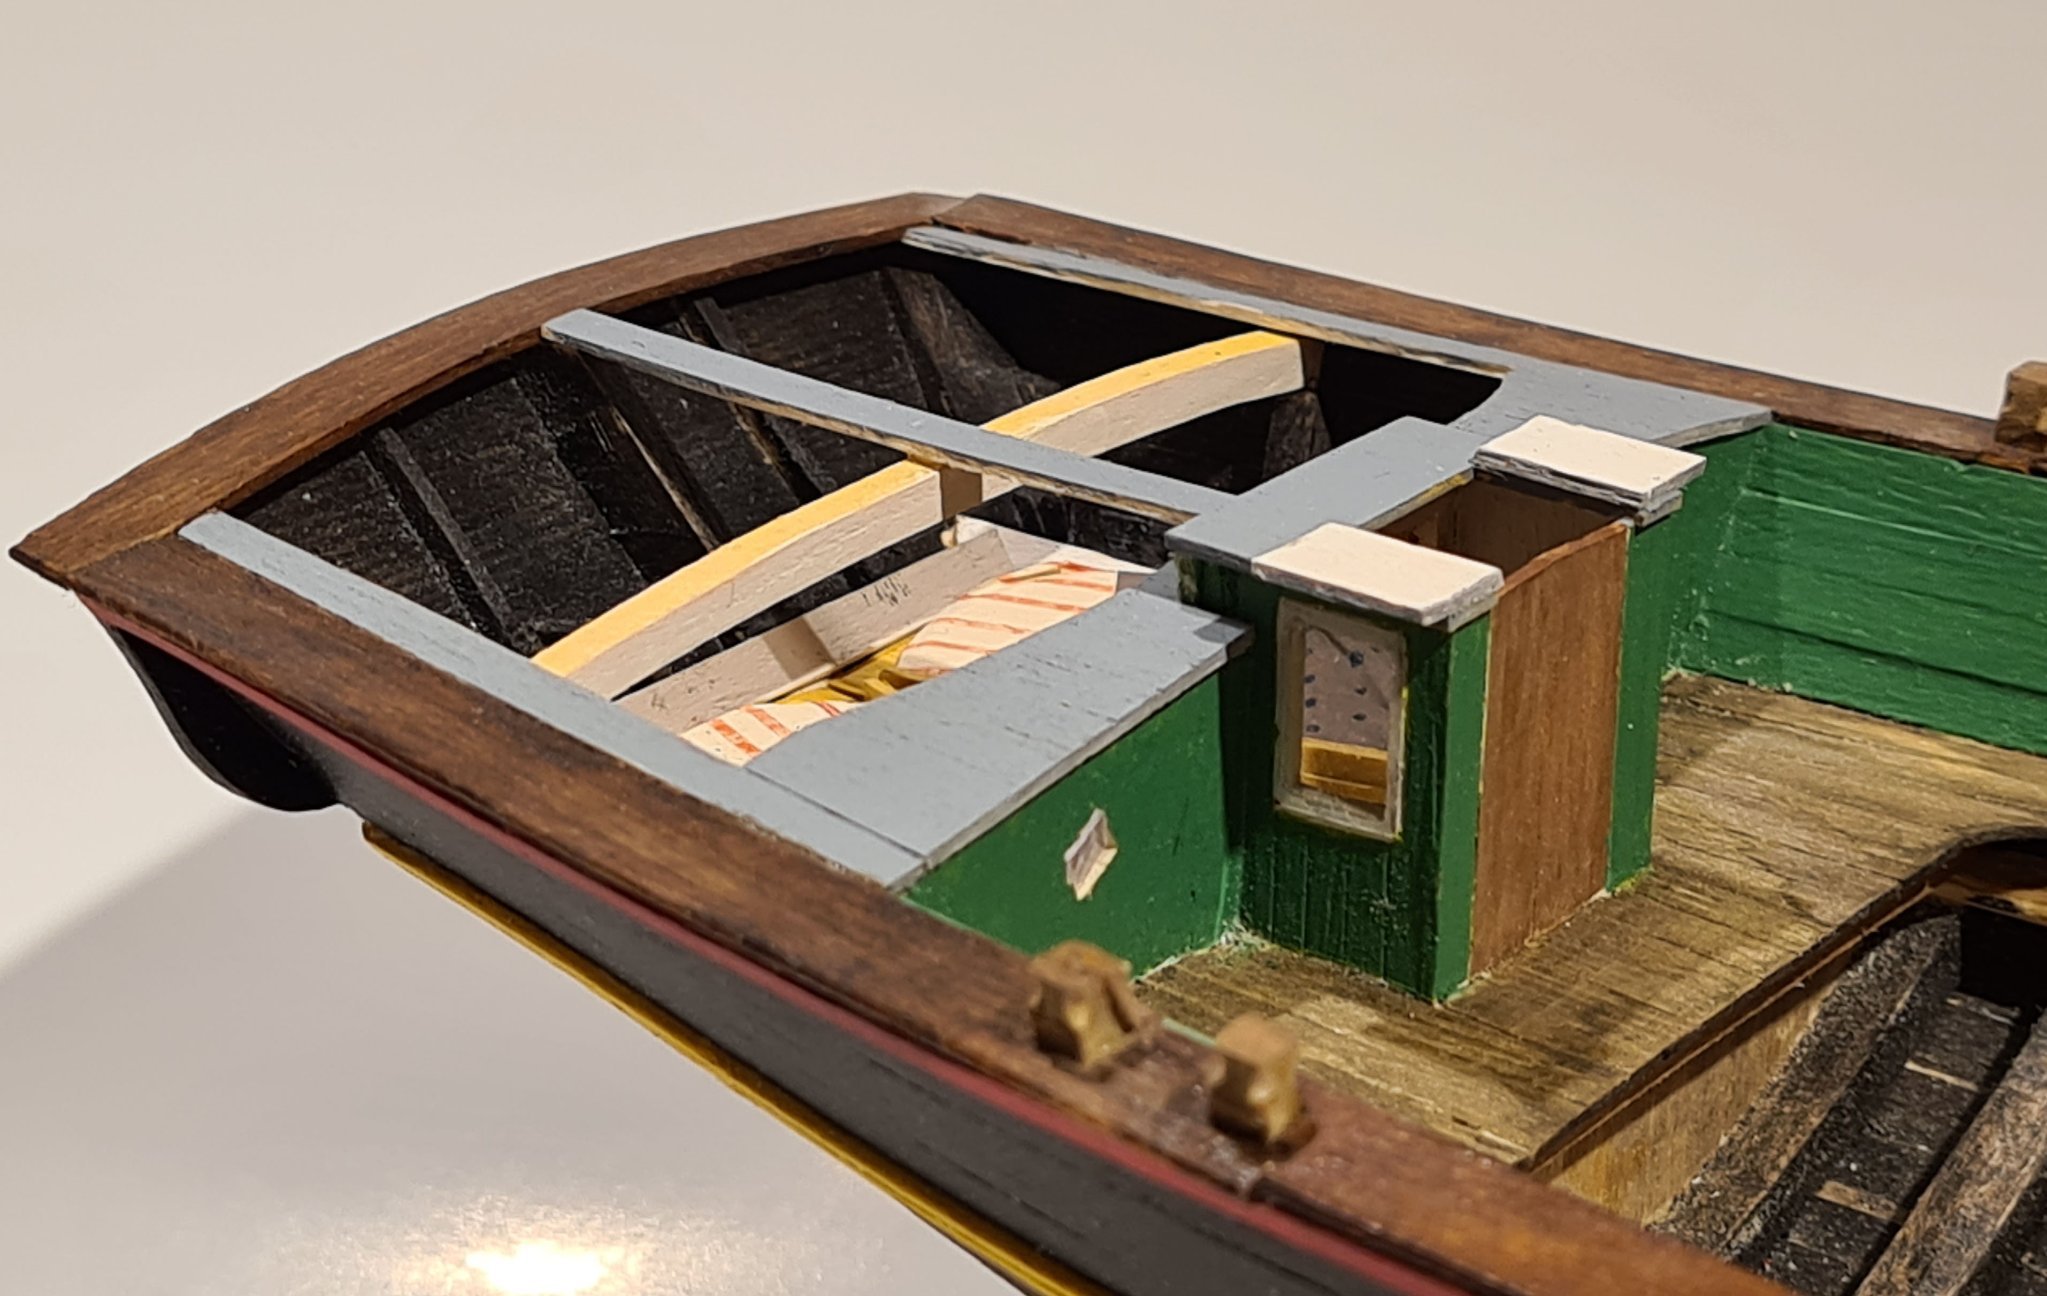
I have now built the fore and aft bulkheads in the hold, and have added ceiling planks to the starboard side. The port side I will leave unplanked to make the frames visible.
For these shots I have used my new tripod. I bought it partly in a hope to improve my model photos. I still have a lot to learn, about lighting, depth of focus etc etc.
For the ceiling planks I tried edge bending using a traveling iron for the first time. It worked really well and improved both the speed and result of the planking.

-
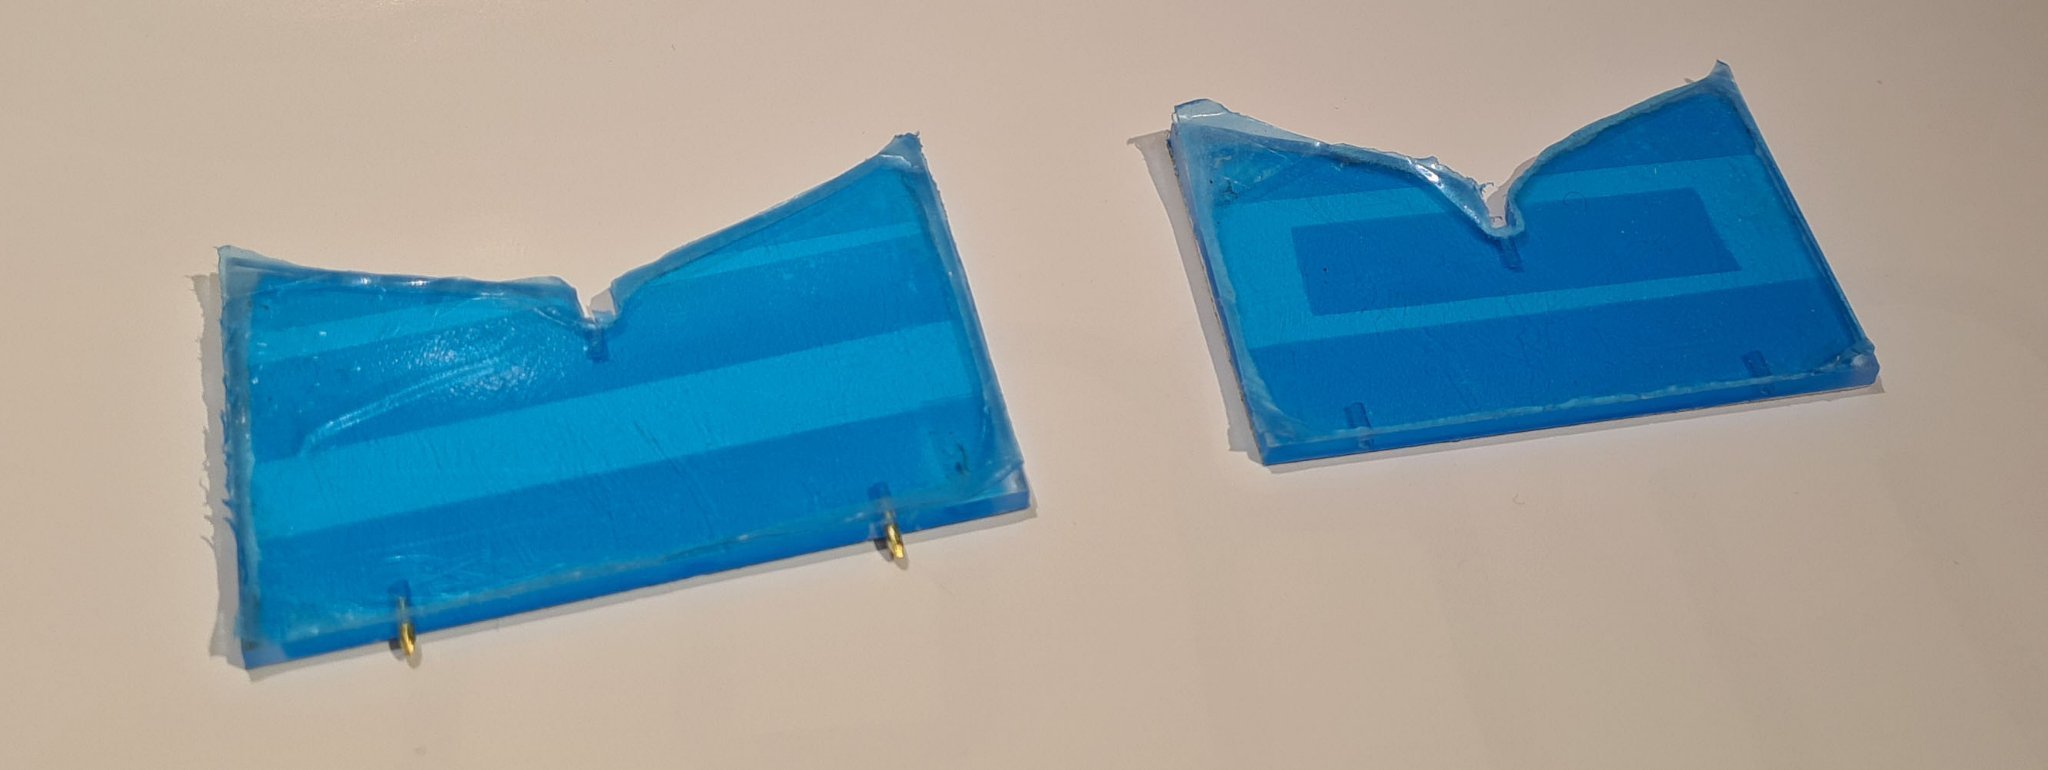
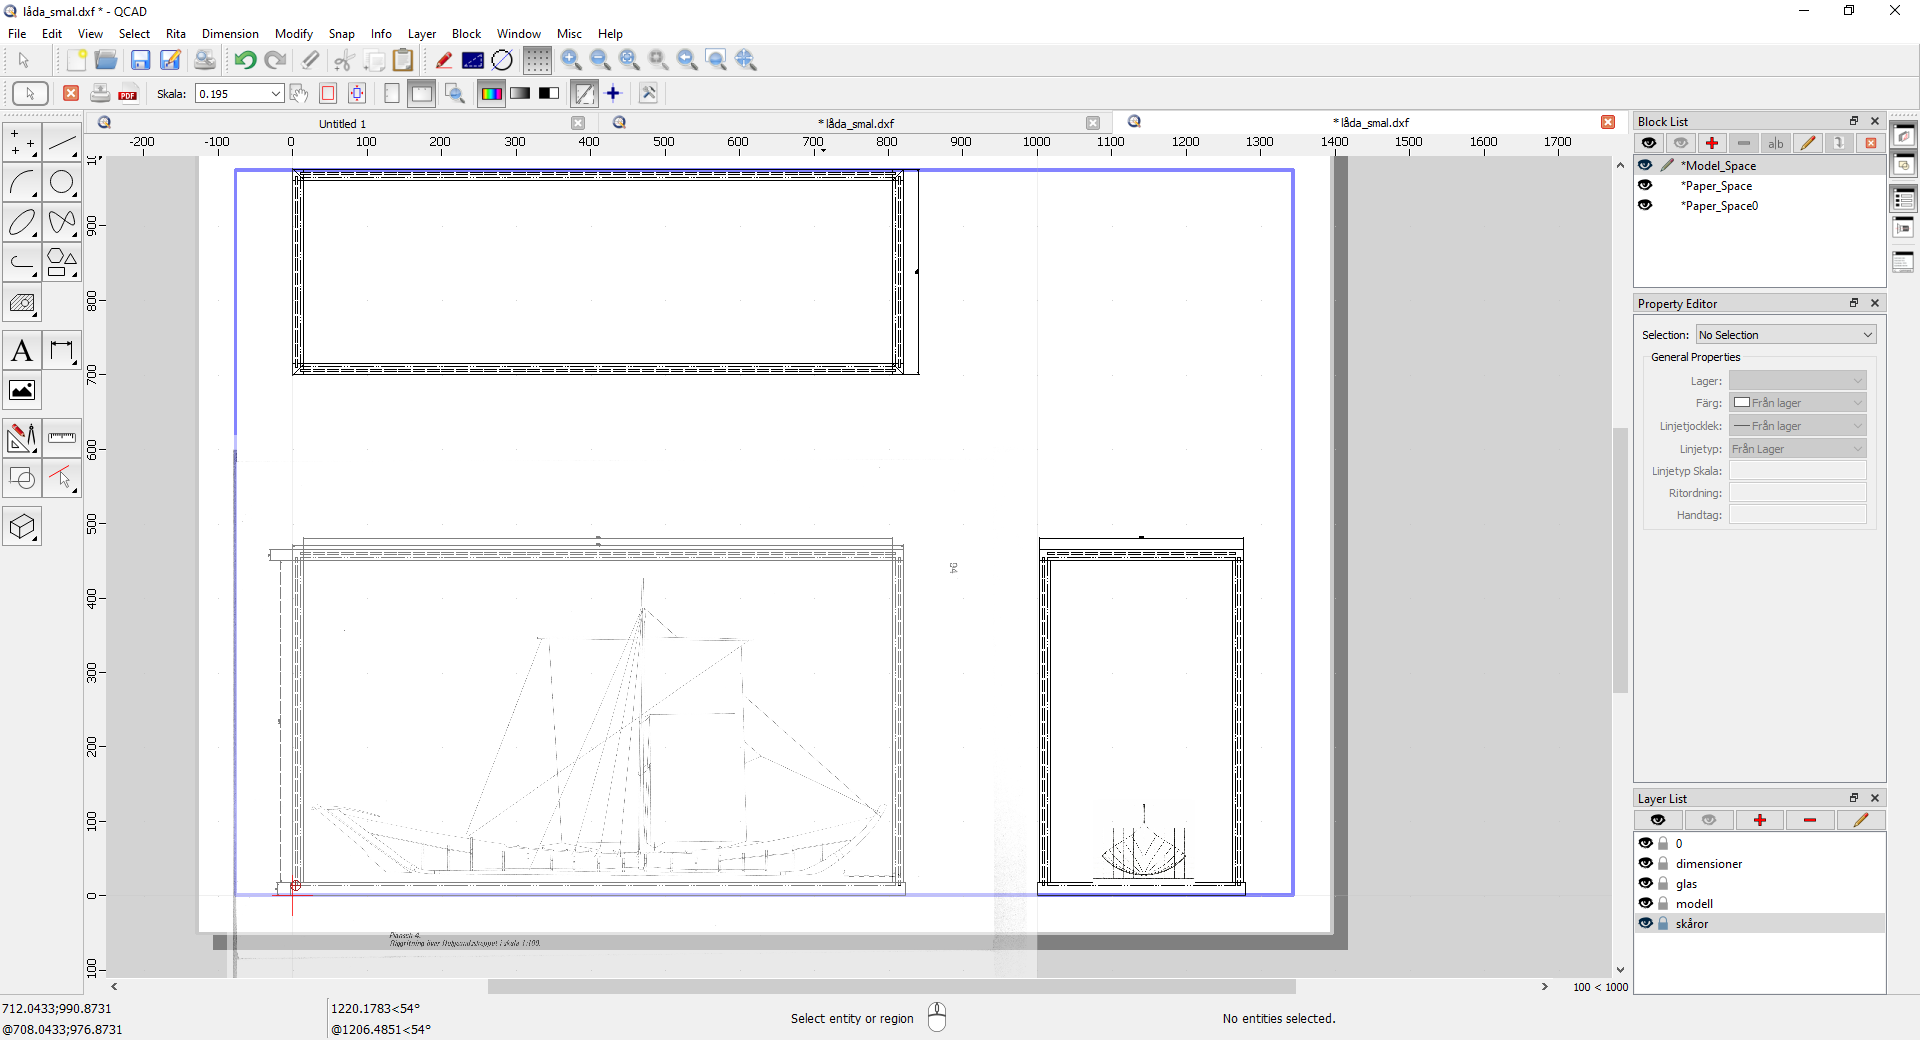
Before I continue with the rigging I need to mount the model on its final base. After considering different options I have bought material for a case with wooden frame and acrylic glass panes.
As a bit of practice I made a drawing in a free CAD program (QCAD). I have limited experience with similar programs, but felt that this one was easy to use. At least on the basic level of drawing a box. I could of course have used pen and paper for this, but I have some future projects planned where I think that a CAD program will be useful. So I took the opportunity to practice.

- GrandpaPhil, CiscoH, Mark Pearse and 4 others
-
7
-
I like what you have done with the hatches.
I remember not using the thread from the kit, very loosely spun and bad looking. I had some black linen thread which I used instead.
-
Very nice. Your build log will be of great value and inspiration when I get to building my DoK kit.
- chris watton and Glenn-UK
-
1
-
1


Sloop from Roslagen by bolin - FINISHED - 1:50
in - Build logs for subjects built 1851 - 1900
Posted
I have continued with the stand and case.
The boom is extremely long on these boats. So the hull needs to be placed quite a bit forward on the base.
The case is now complete. It's made from 3 mm plexi glass. The base is oak with a coat of oil.
I choose to glue it with UV hardening glue. Unfortunatly it was a bit hard to control the amount from the tube, so there are some drops here and there. I hope that when the model is in there, they will not be as apparent as they are in a picture in out door light.