

bolin
-
Posts
479 -
Joined
-
Last visited
Content Type
Profiles
Forums
Gallery
Events
Posts posted by bolin
-
-
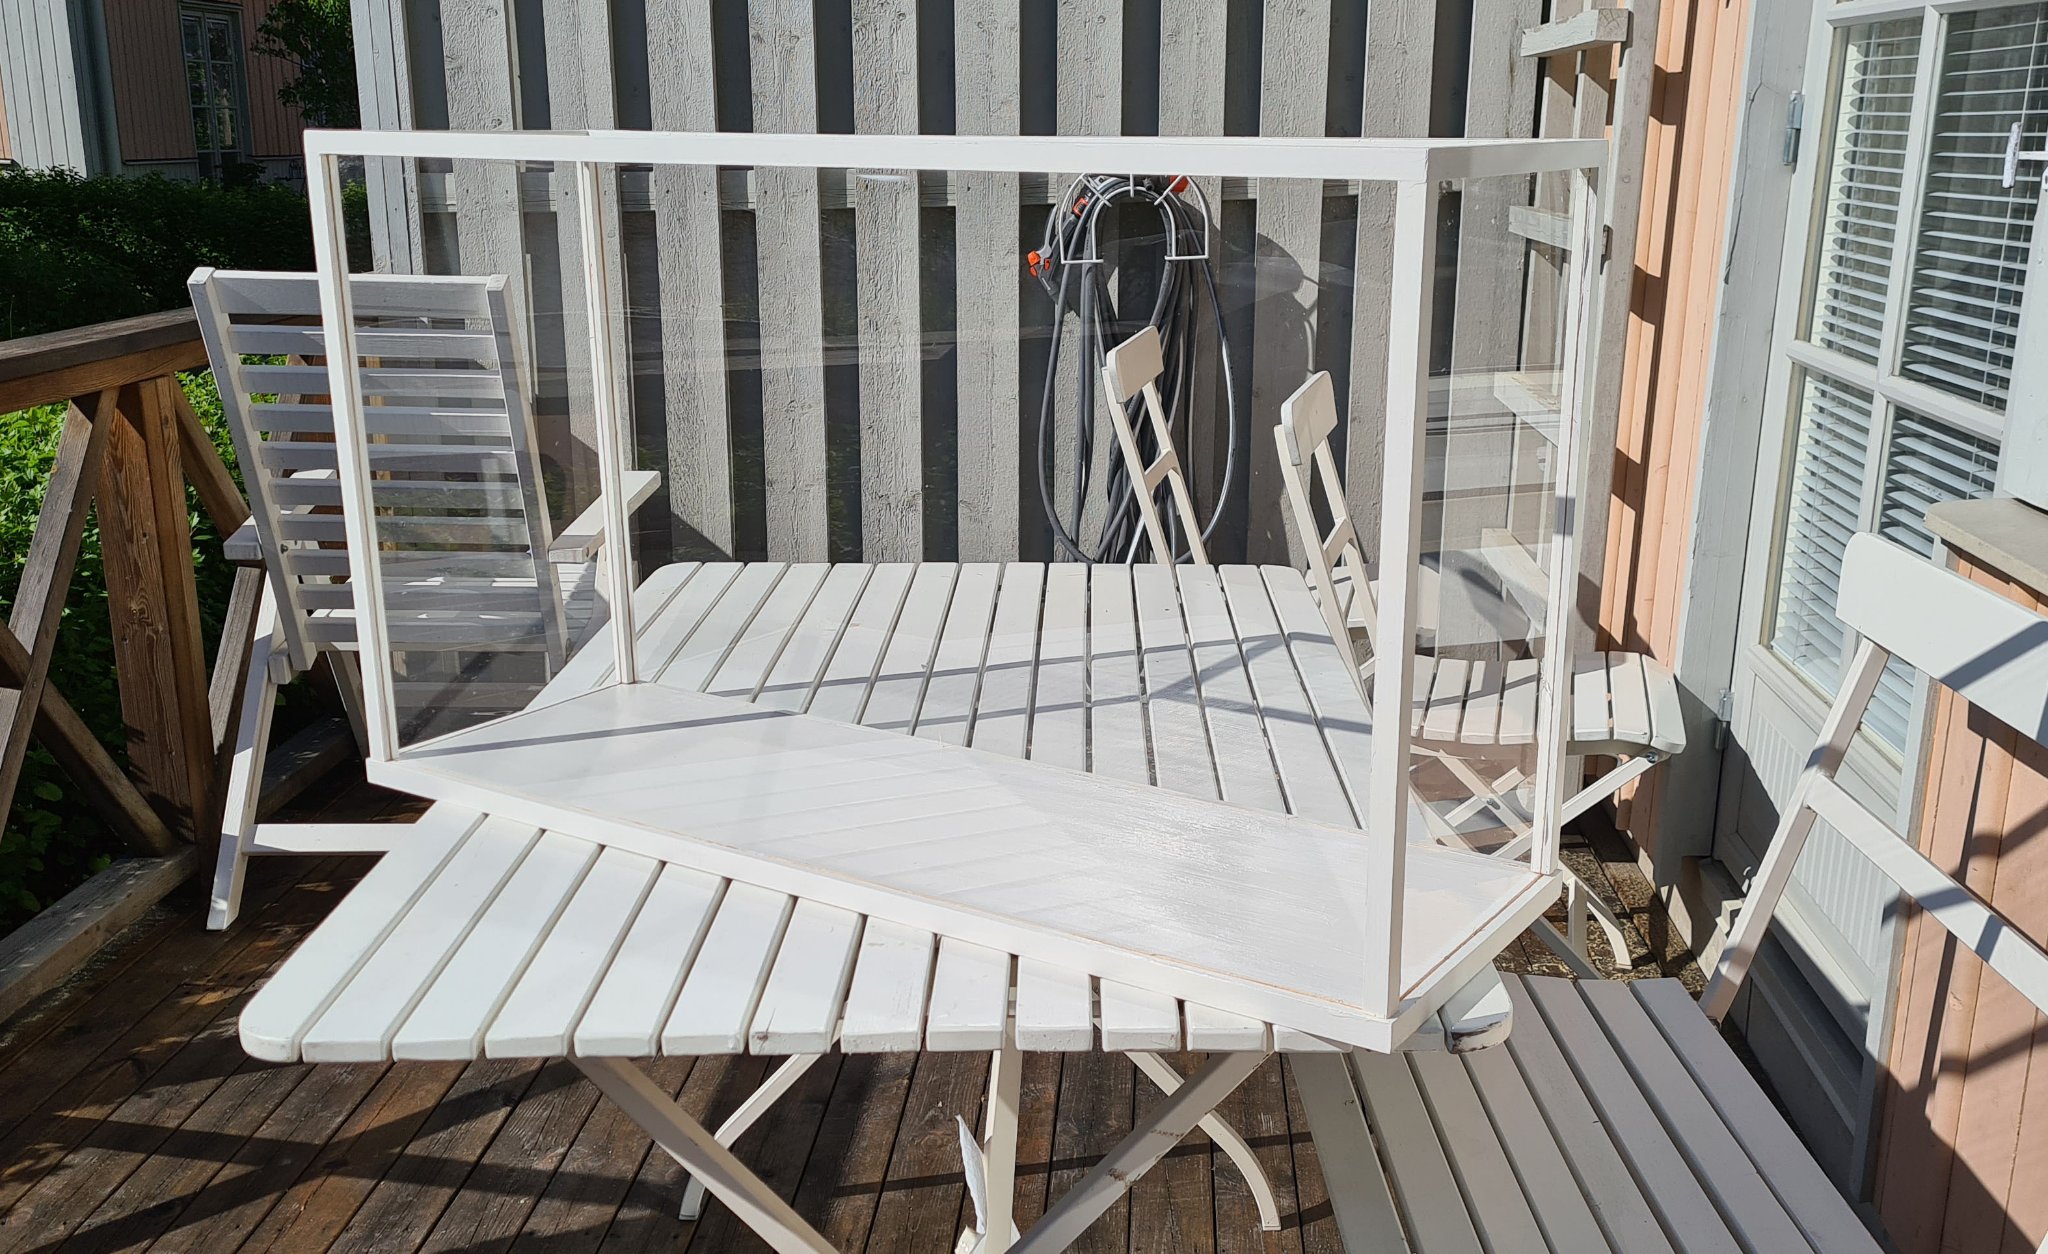
I recently built display cases for three of my models. First I got a quote from a local glazier that usually made display cases for shops etc. It was not too expensive, so I will keep that as an option for the future. But I wanted a challenge to make it myself.
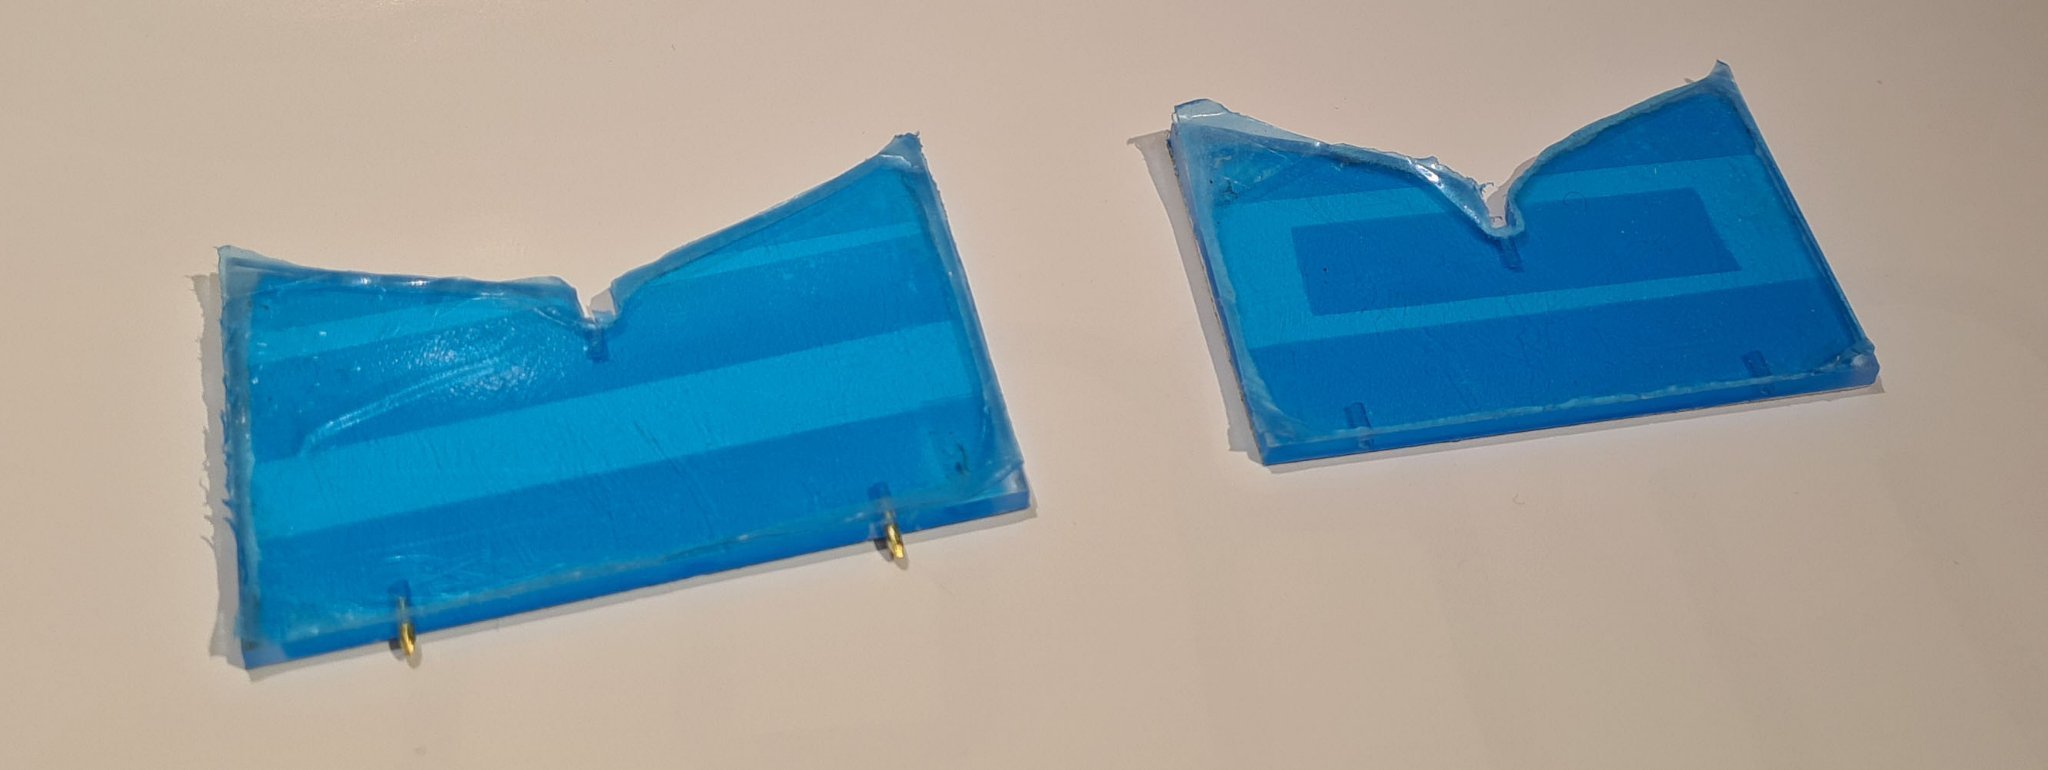
The first case had a frame in which I slotted panes of plexiglass.

The second one was also made from plexiglass, but this time I used UV hardening glue to join the sides. The problem with this method was to get the glue only where it should go. Some blotches are visible in the corners.
The tools I used where simple. A straight edge and Japanese type hand saw to cut the panes. A hand held router to cut the slots and the form the base.
-
Yes, she certainly had a long and varied life. I will only be able to represent her at one point in time.
As mentioned, I plan to model her as close as I can to what she would have looked when built. This means that I will deviate from the kit in several areas.
Hull
The basic shape of the hull I will keep as it is. There is no indication that she was altered significantly in that regard. I will however fill in the cut-out for the propeller in the dead wood area, as she originally had no motor. Furthermore, I don't have any other source of the hull shape than what the kit provides.
I will however reinforce the hull and add fillers in the bow to make the planking easier.
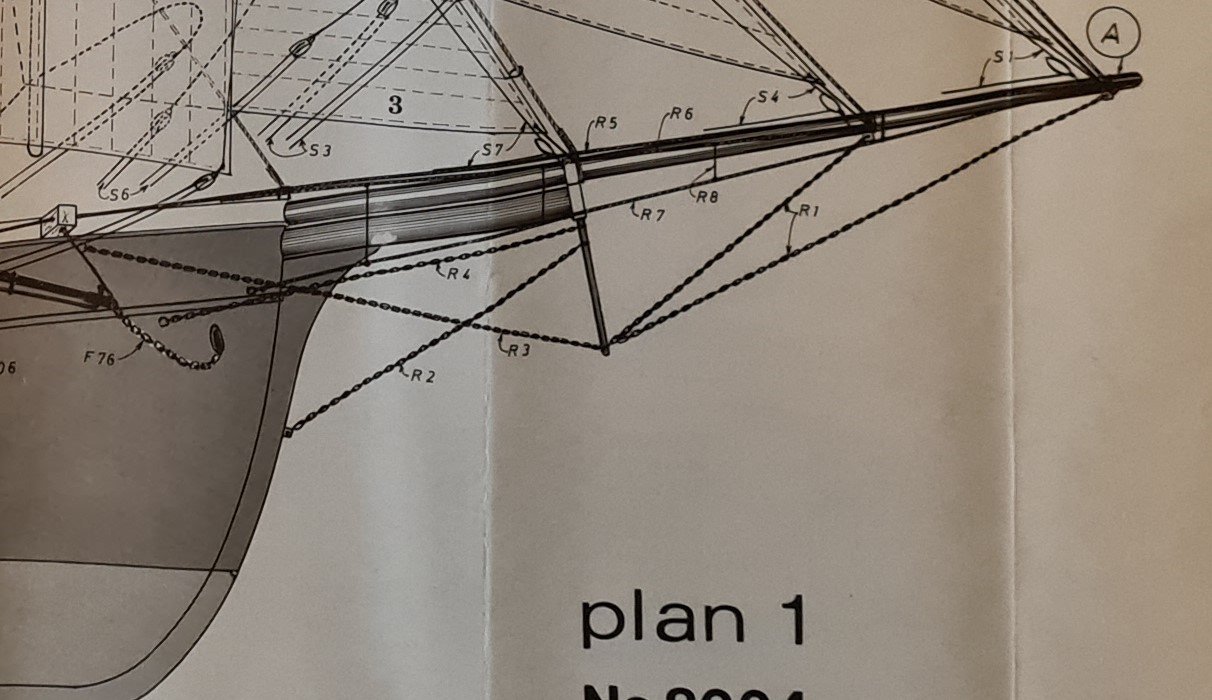
Bow
The shape of the stem and the bowsprit of the kit does not fit with the older photos. Originally, she had a single spar bowsprit and the stem did not widen to support it.
Aft
This part does not seem to have been modified during the years. The transom and davits for the lifeboat seem to have been the same from the start. I will however replace the plastic lifeboat from the kit.
Deck houses and hatches
Originally there seem to have only been a low cabin in the aft and a small kitchen just aft of the foremast. I have not found any pictures that clearly show the hatches. The picture from Uppsala in the previous post show a main hatch, but the coaming looks too high, so it's probably not original.
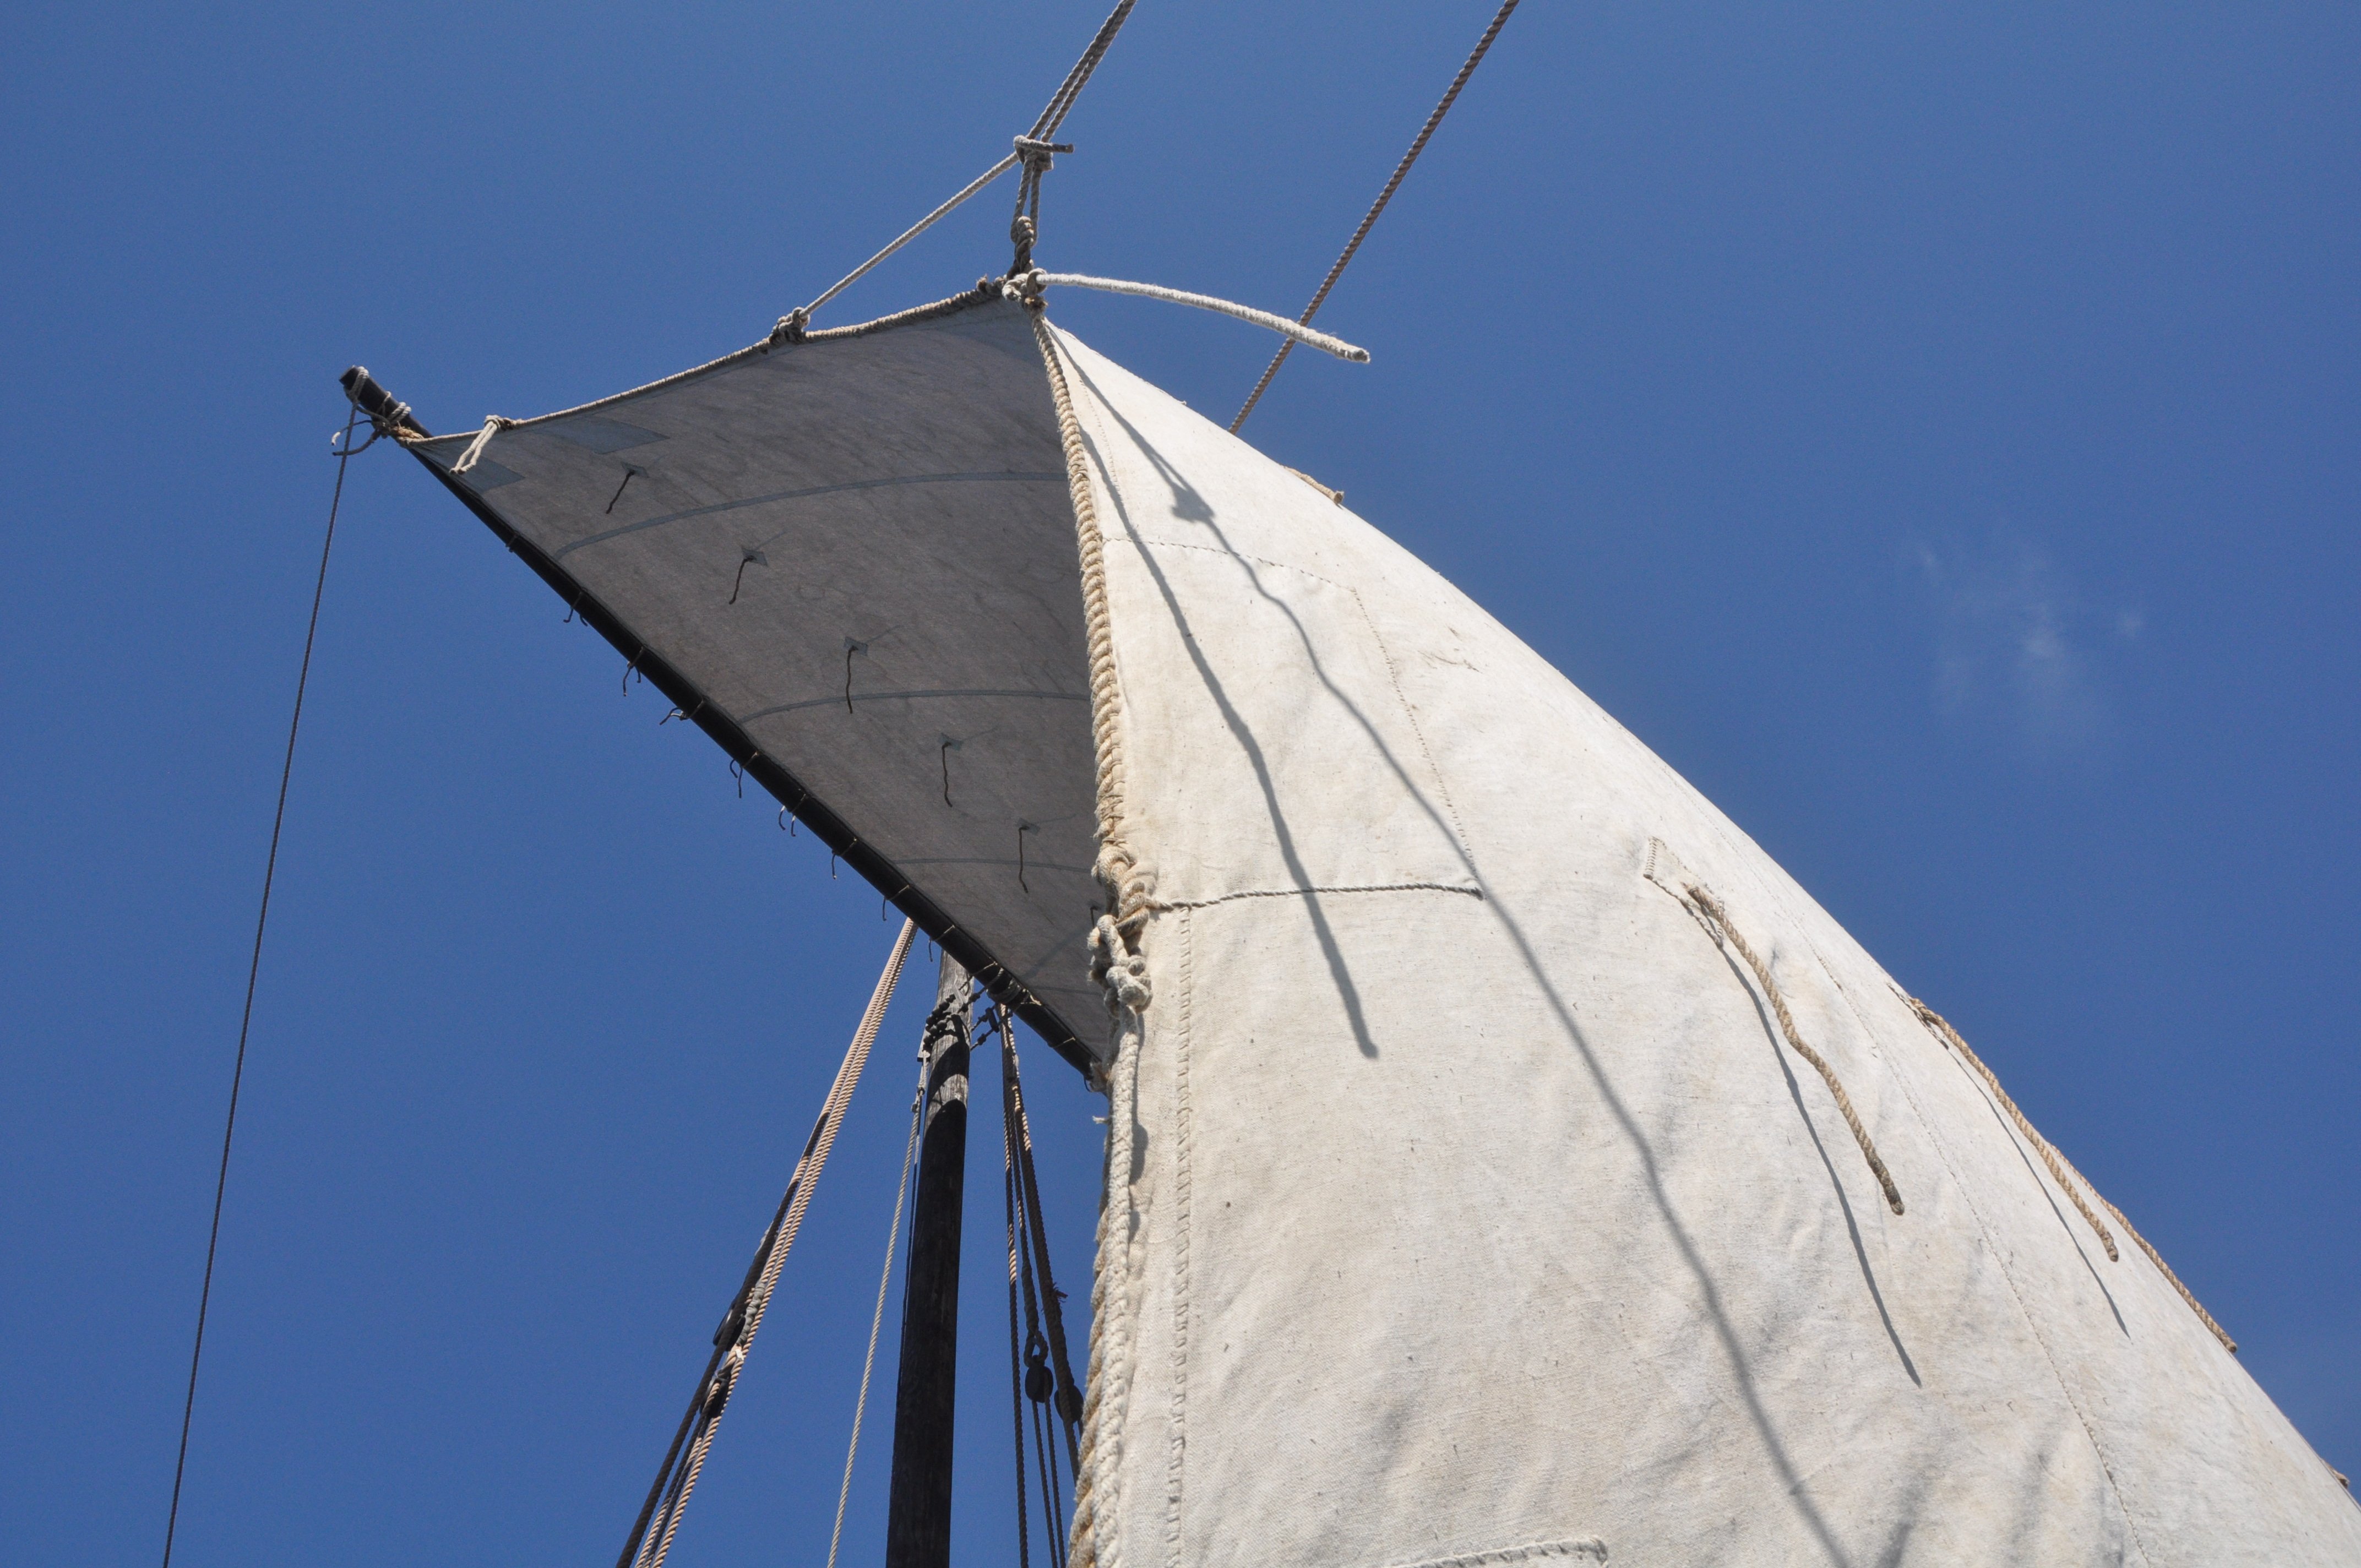
Rig
The rig is of course the largest difference between the kit version and how she was originally built. When I measure in the photos I have concluded that the masts does not even stand in the same places. The mizzen has been moved forward a bit.
For the running rig, I will have to reconstruct that from general principles, none of the pictures I have shows enough details. Since I got the kit, the rigging of schooners has been a theme for my research and gathering of nautical information. One of the best sources I have found is Underhills "Masting and Rigging: The Clipper Ship and Ocean Carrier", but there are others.
With all these changes, I will not have much help from the build instructions or plans in the kit. I will probably not use so much of the wood and fittings in the kit either. The quality is just not good enough. So, apart from the bulkheads that determines the hull shape, this will be mostly a scratch build.
-
Continuing the history of Meta.
From 1927 to 1944 she stays at Stocken. She keeps on sailing as a cargo ship carrying things like sawn planks, timber, stone, coal, etc. All rather bulky and cheap material that doesn't perish if the ship is a bit slow.
In 1944, she is sold to Byxelkrok on the Swedish island Öland in the Baltic. There she continues as a cargo ship. After a few years, in 1948, a new stronger motor is installed. At the same time, the top mast seem to have been removed. There is a sketch from 1949 (which I cannot upload due to copyright restrictions) showing a new cabin, no top masts and a removed gaff on the mizzen mast.
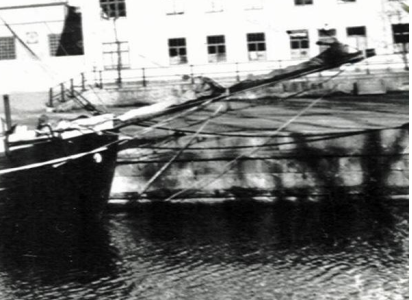
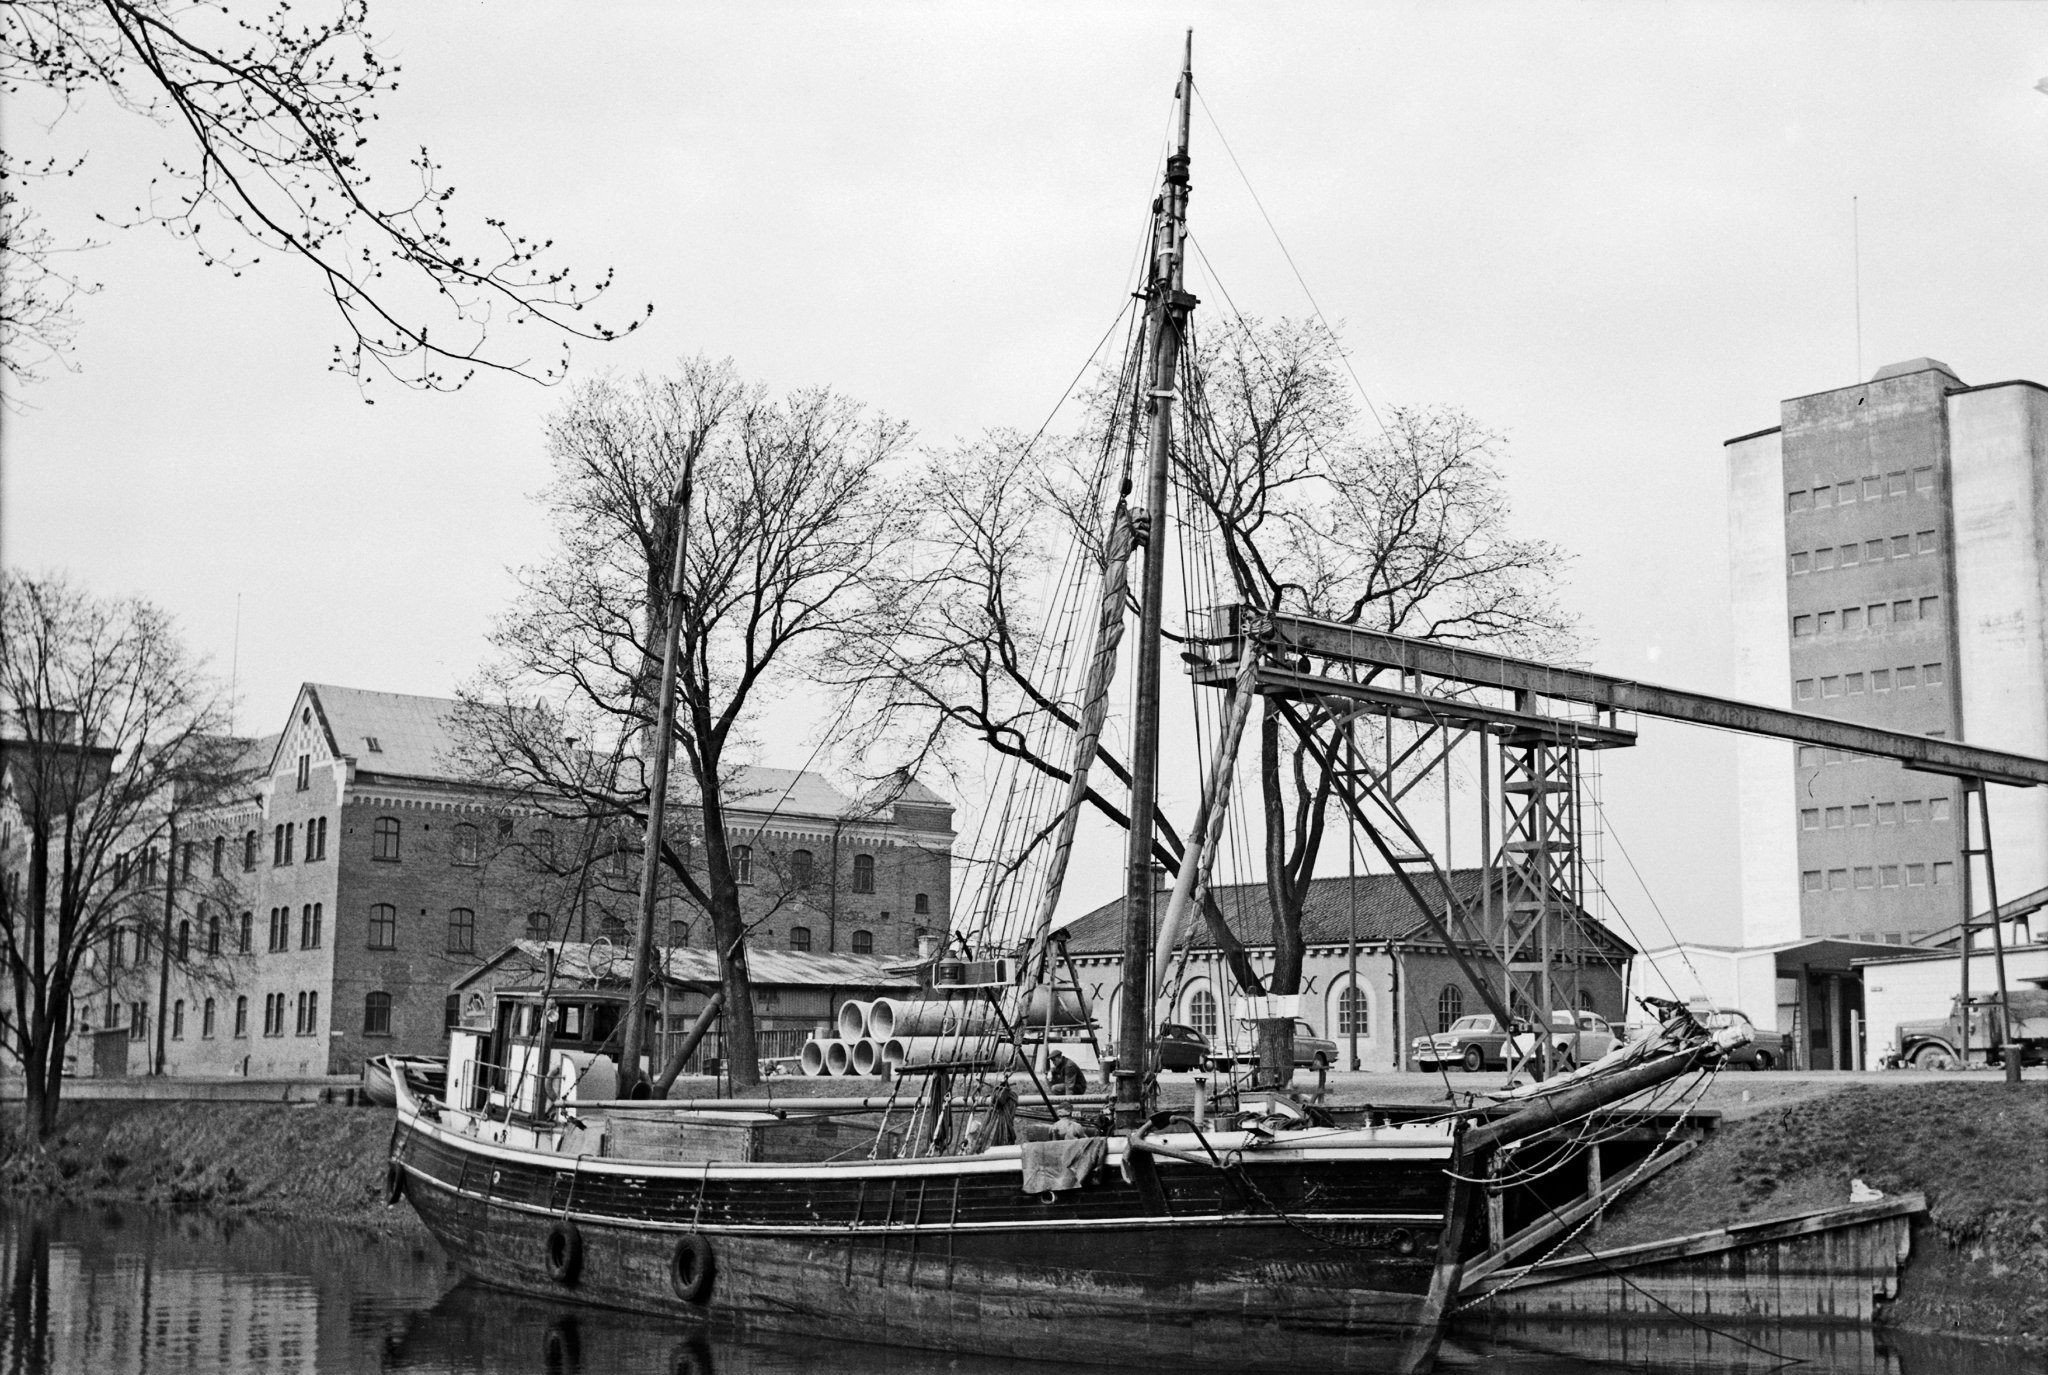
In the middle of the 1950s the main mast is removed, and the bowsprit is shortened. She still carries cargo. Below she is pictured on the Fyris stream in Uppsala (Swededn) unloading grain to the mill. Judging by the cars in the background, the picture is from the late 50s or very first year of the 60s

In 1963 Meta eventually gives up the cargo trade. She is bought by a pair of art school students. They converted here to an art studio and an art gallery.
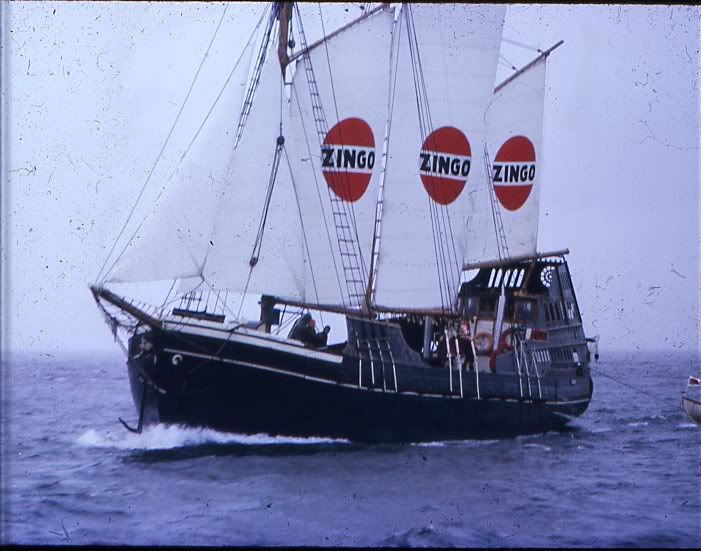
In 1965 or 66 she is outfitted as a "pirate" ship in a marketing campaign for a new soft drink.
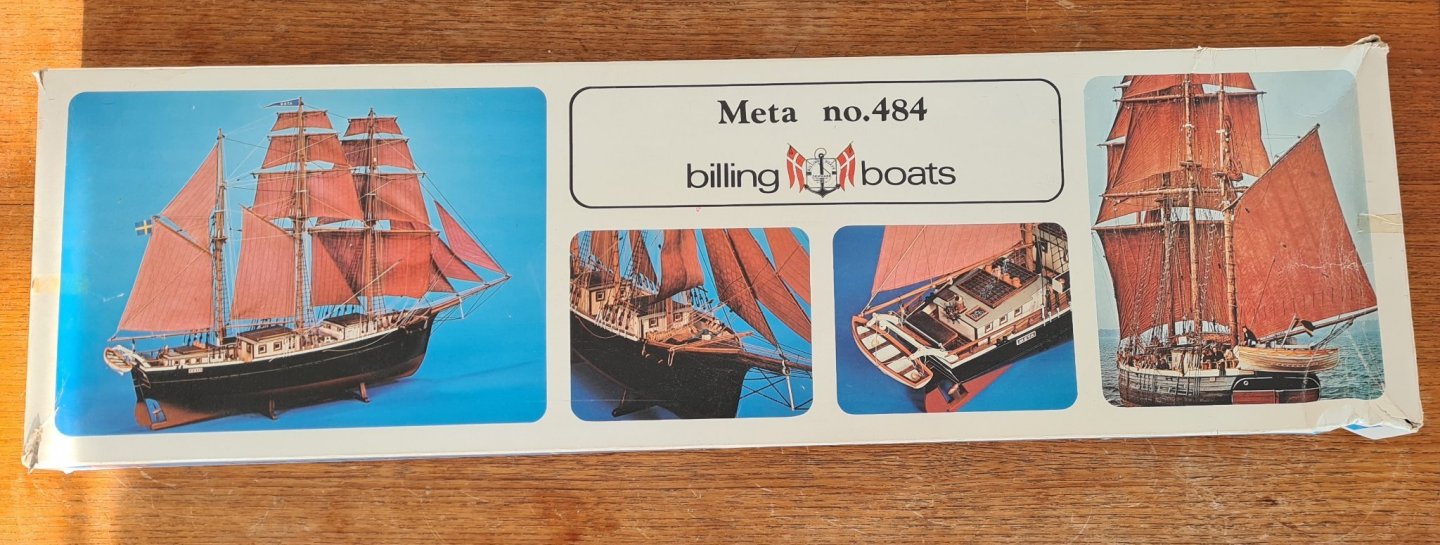
A few years later, she is rebuilt for the role as "Charlotta of Carlshamn" in the filming of the Swedish novel "The emigrants". This is when she is given the jackass barque rig that is shown on the kit box art. In this form she starred in a couple of other films during the early 1970s, for example a less known version of Treasure Island by Orson Welles.
In the middle of the 70s she moves to the Mediterranean where she starts doing tourist charter trips, as shown here. And during a storm in December 1977 of the Greek island of Kelfonia she went under.
Since this last information is included in the build instruction in the kit, and the man I got it from had it in 1979, I conclude that the kit was introduced in 1978.
In a following post, I will outline what modifications I plan to do in the kit.
-
Chris, you are more than welcome to join.
As promised, I will start with a brief history of Meta.
Meta was built in 1915 in Barth, Germany (between Stralsund and Rostock on the Baltic coast). She was originally delivered to a captain of the same town. Later she sailed from what was then the German town Stettin (now Szczecin in Poland). In 1925 she was sold to Denmark, where she stayed until 1927.
Meta was built in oak and was rigged with a fore-and-aft schooner rig. By this, she was one of the last pure sailing working ships. This is the same time as three-island tramp steamers were taking over most of the sea trade, and large ocean liners were cruising the high seas. Small working ships like this where delegated short coastal trade and the rig must be as simple as possible to handle by a small crew.
In 1927 Meta was sold to Stocken on the west coast of Sweden. At the same time, the first 40 hp help motor was installed. It is also from this time the first photos I have found comes. Some local enthusiasts from Stocken have put together a brief history of the ship ( http://www.foreningenstocken.se/PDFer/Tremastskonaren-Meta.pdf ). This provides the bulk of the information I have found about her.
The following picture is from that document. It looks like the ship is moving within a harbor without being towed, and there are ripples on the water at the stern that looks to be from a motor. I assume that the photo is from late 1920 to early 1930.
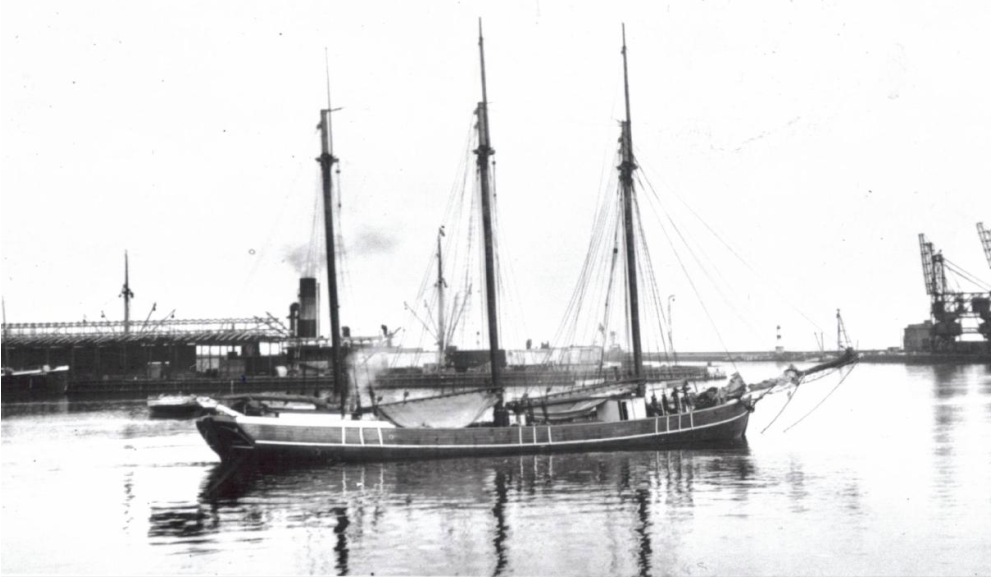
The picture shows several details regarding the original rig and the outfitting on deck. This, and some other pictures from the same document, will be my main source for reconstructing the original look of Meta.
In a future post, I will continue the history of Meta and describe why she got such a strange rig as she has on the box art of the kit.
-
About a year ago, an offer was made on a Swedish model building forum of a barely started model of Billing Boats Meta. At the time, I had just started to work on my Sloop from Roslagen and had begun to read about the costal sailers and small workboats of the late sailing period in the Baltic. I was considering a fore-and-aft schooner as a possible future subject. When I learned that Meta originally had such a rig, I reached out to the man offering the model. As it turned out, he lived just 15 minutes away, and I went over an evening in August last year.
He told me that he had gotten the model in about 79 and had started to build it. But soon he went of to university, and it was abandoned. It had then been sitting in first his parent's house, and then in his own basement. Hopefully waiting to be finished. Now he had sold his house and planned to move to something smaller. Apparently he still felt for the model, as he had kept it all these years, and had now reached out to offer it to someone to complete.
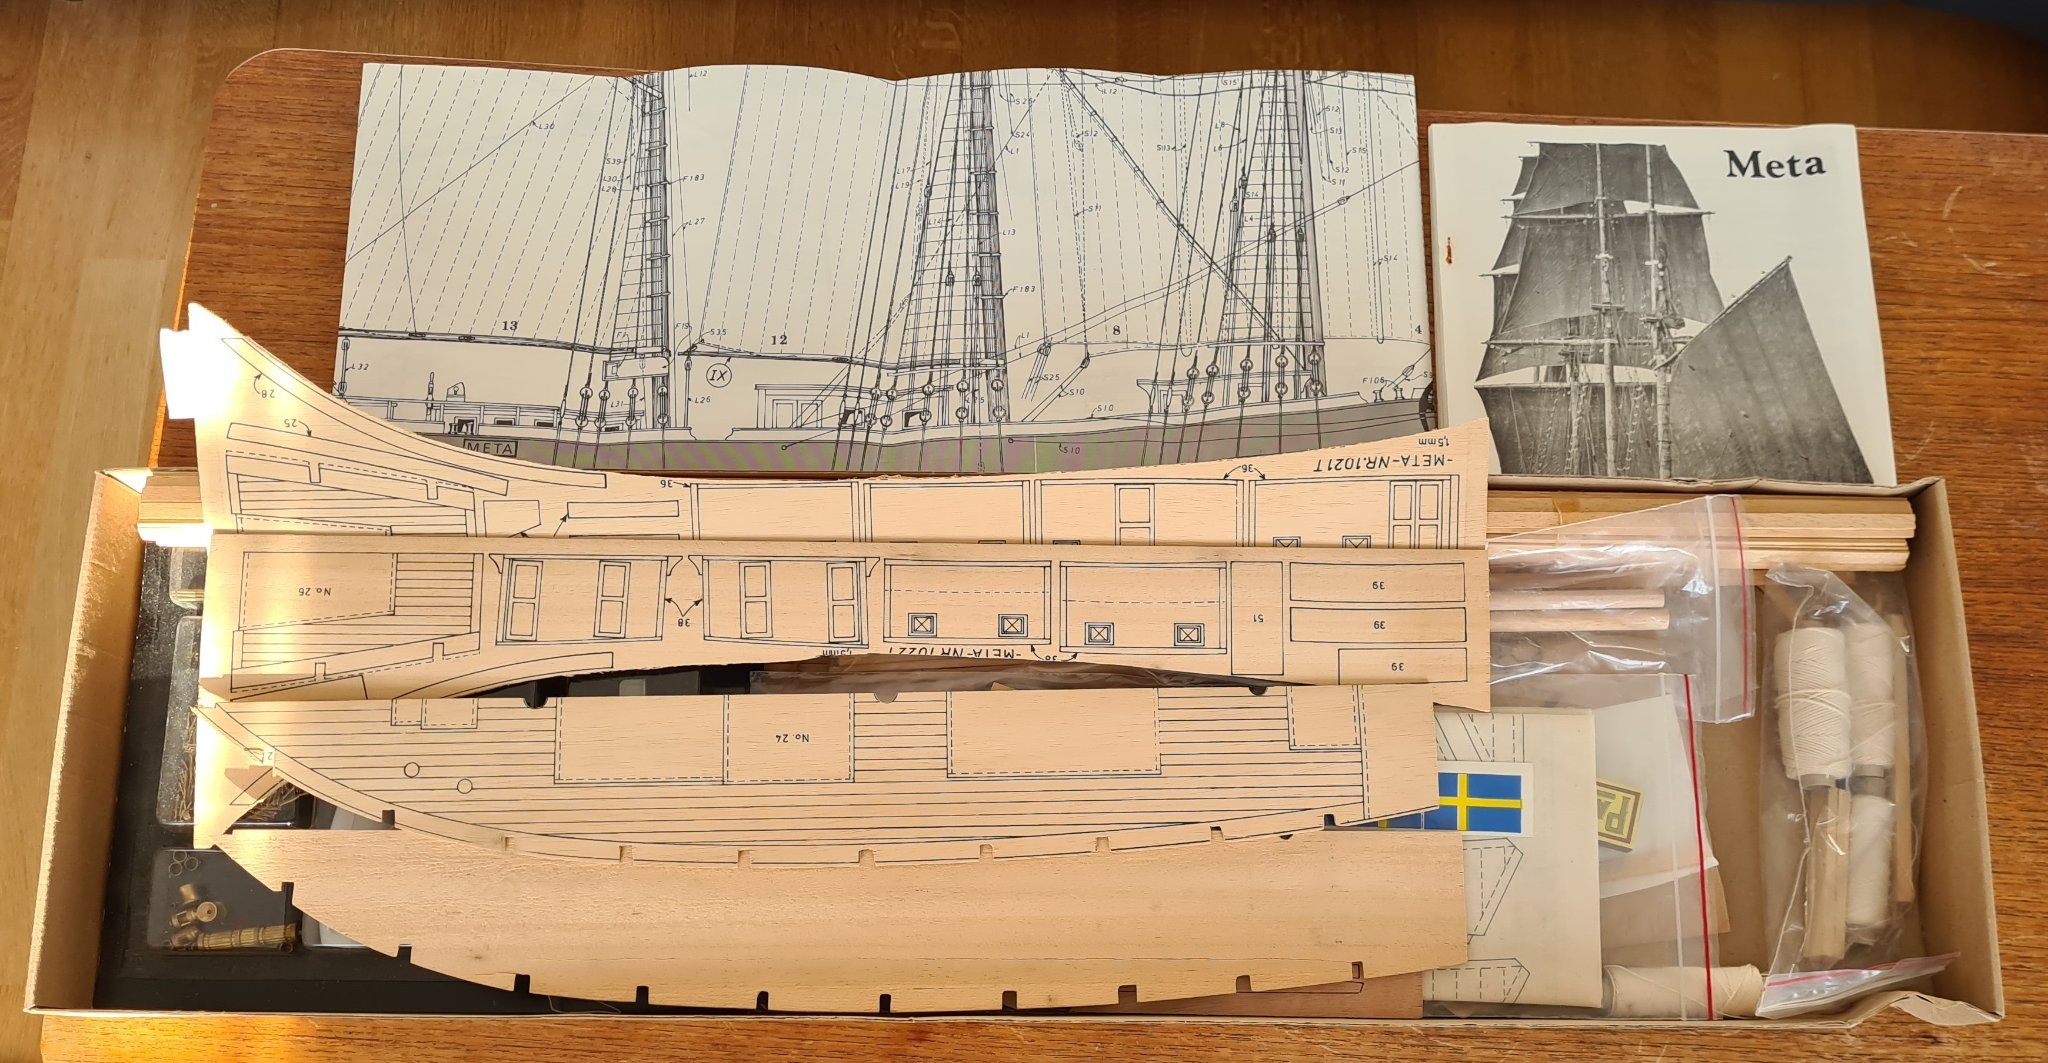
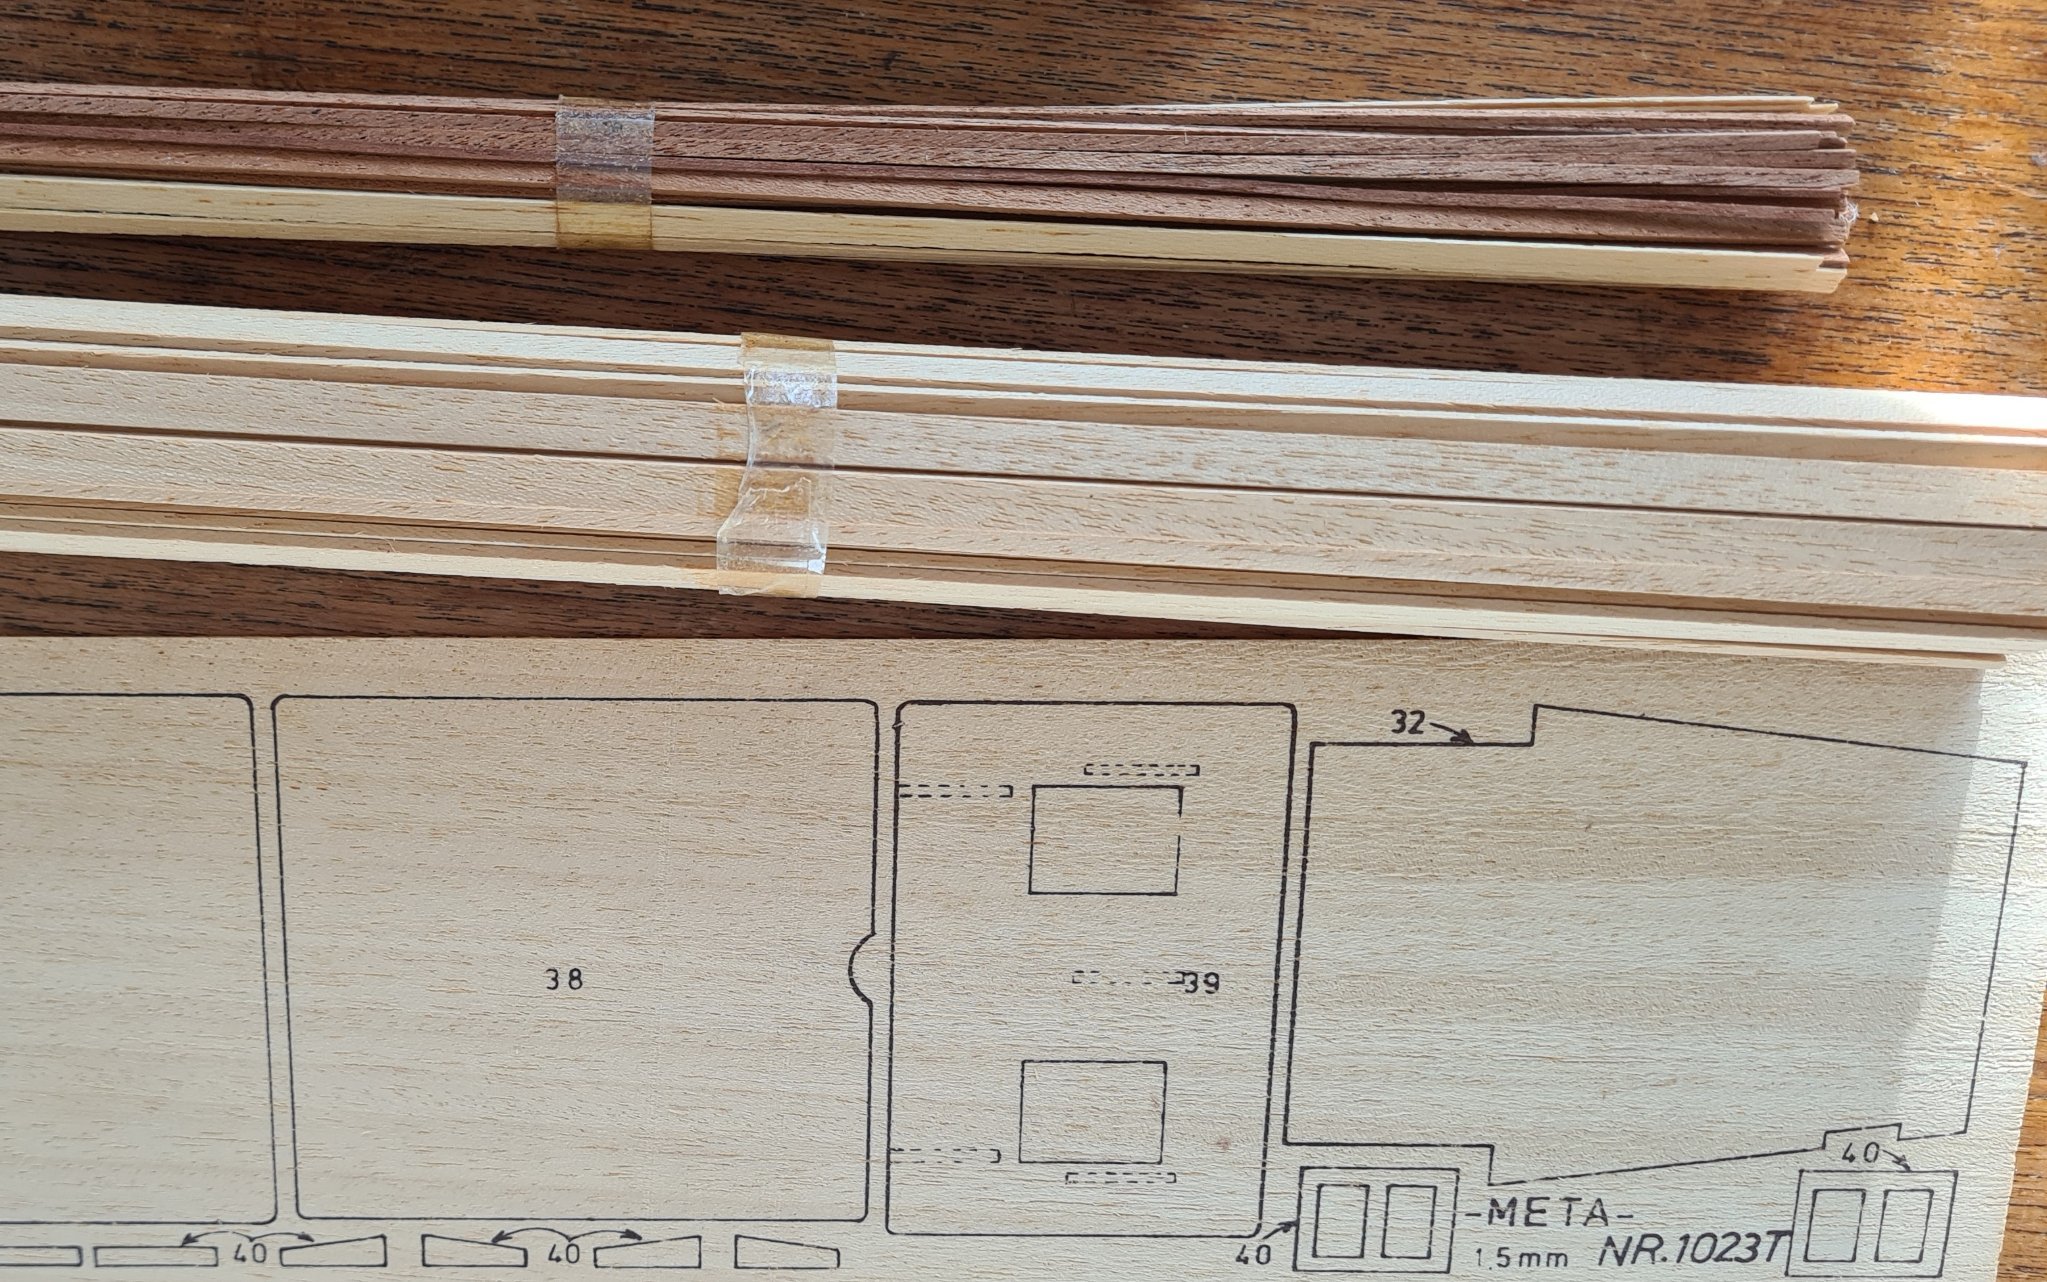
What I got was the box with all material and fittings, and the bulkheads and keel assembled.
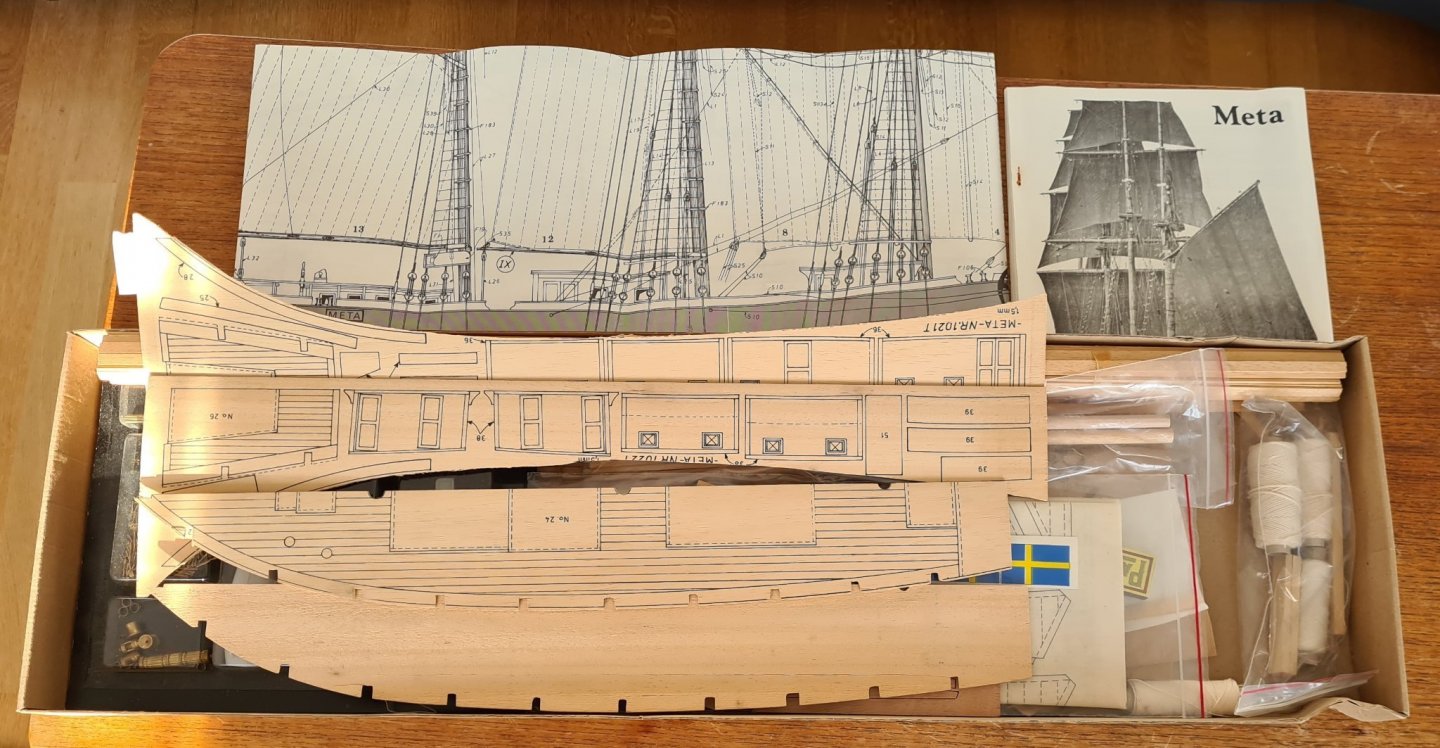
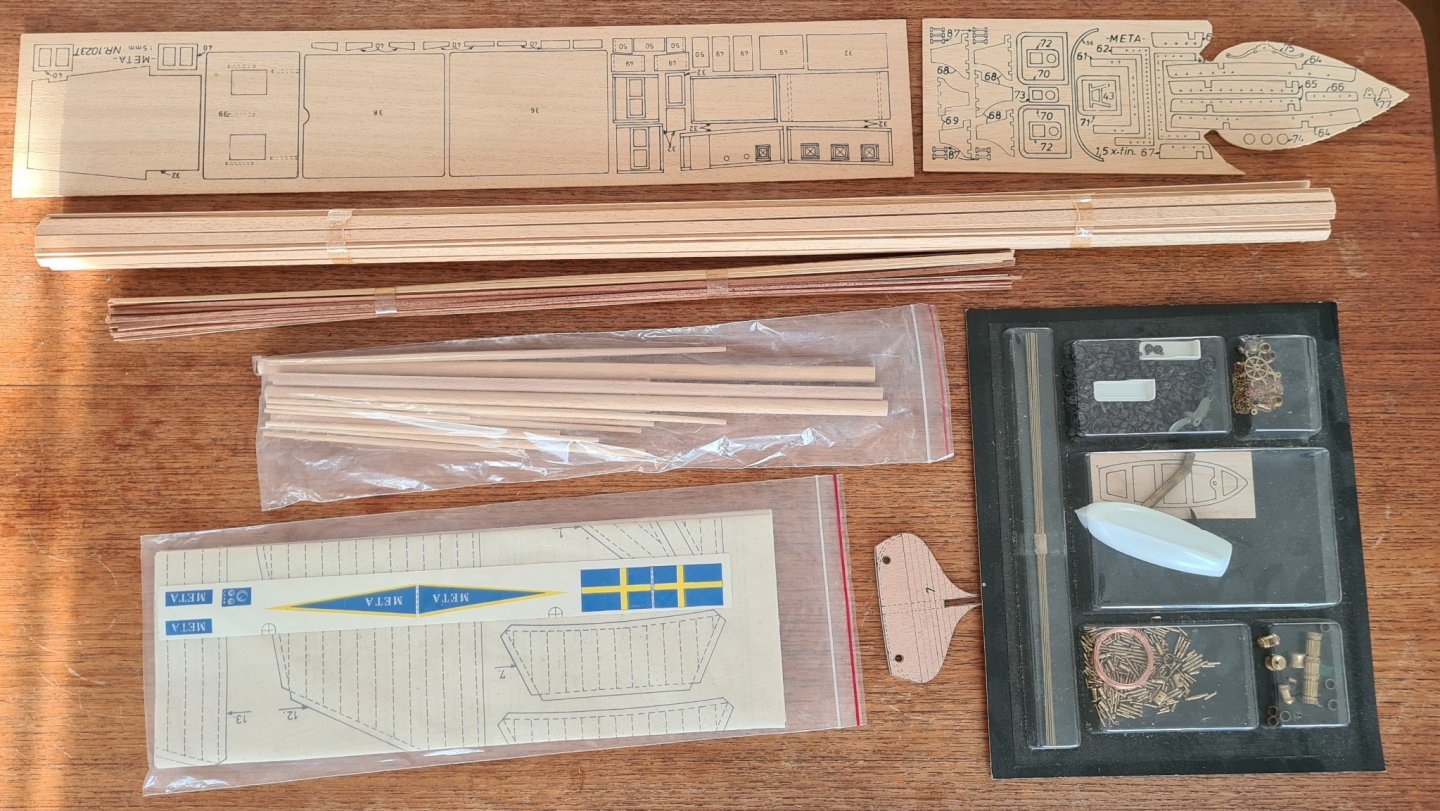

As can be seen from the pictures, this kit was made before the introduction of laser cutting. The paler wood looks like Obeche and the darker strips as Walnut. The pale wood is relatively soft and has quite visible grain, but is otherwise of good quality and clean cut. I plan to replace some, possibly all, of the wood with better quality. The same goes for the fitting, a few pieces looks usable, others must be replaced. The brass belaying pins looks OK, while the plastic blocks and dead eyes are terrible.
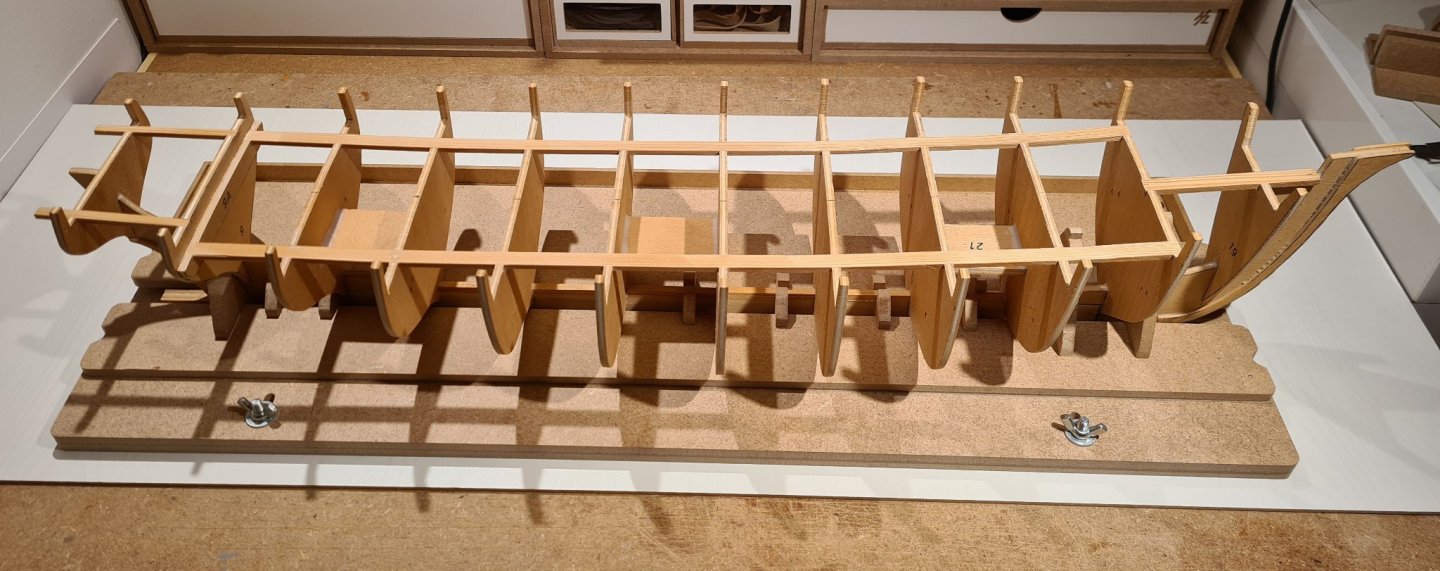
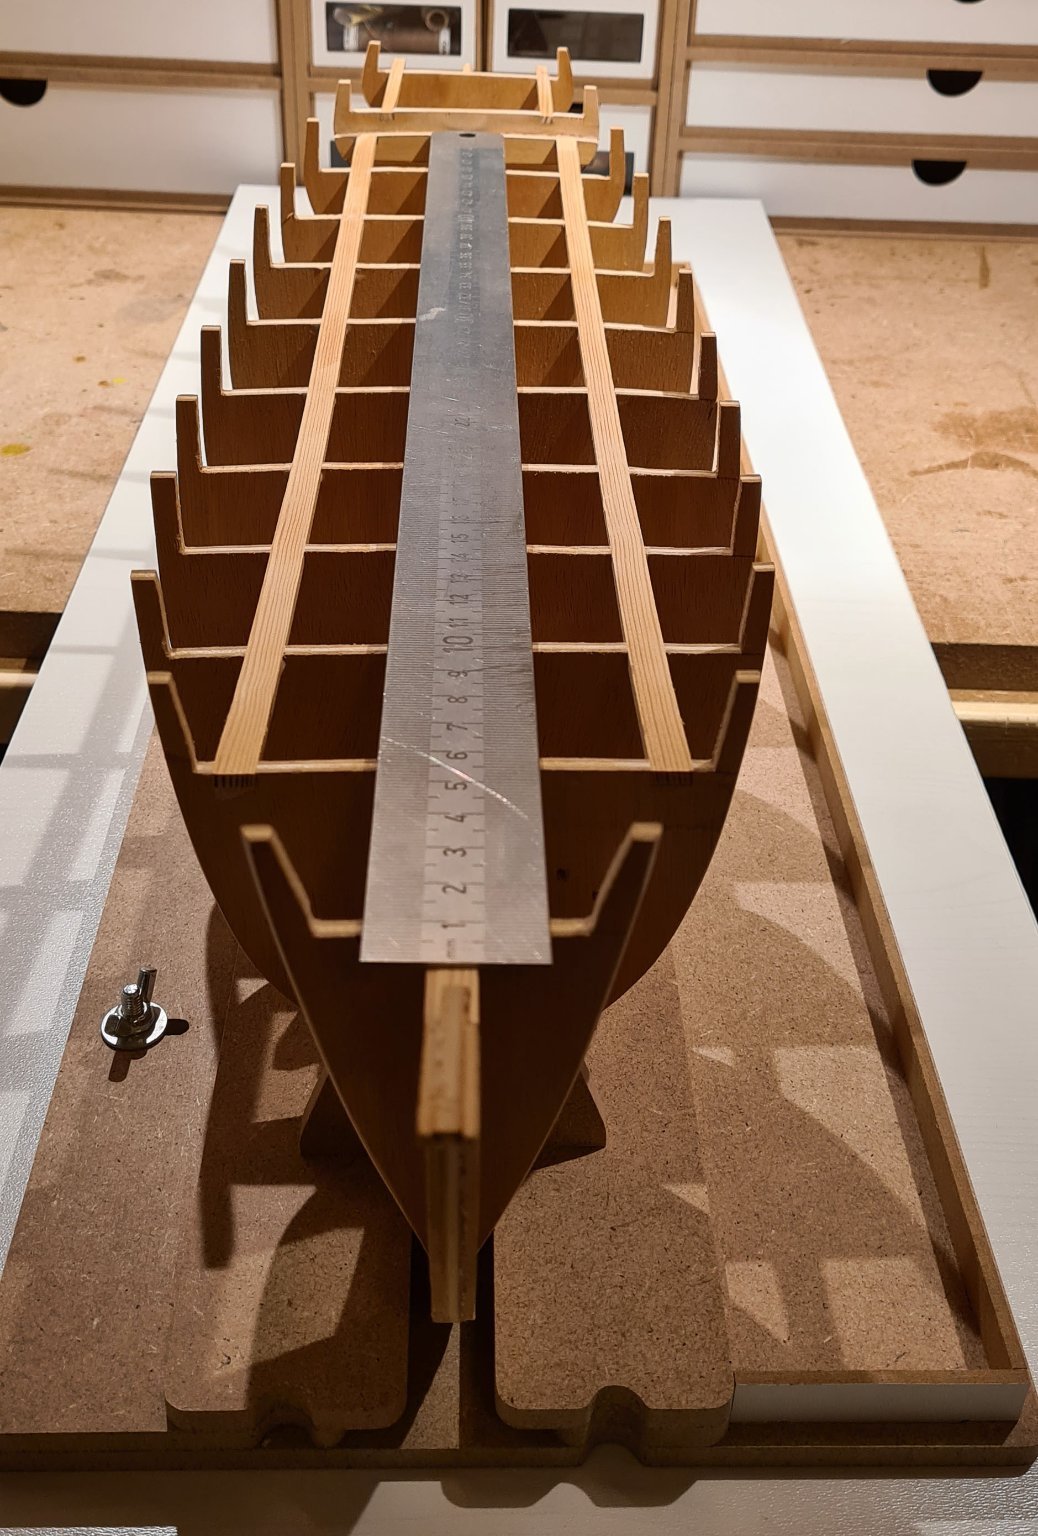
When I got it, the keel and bulkhead assembly was slightly twisted. It might have been assembled such, but I though that it had been lying on the side for many years in a basement. I bought a building slip from Hobbyzone, soaked the assembly and put it to dry for several months while straightened in the building slip.
It did not turn out totally straight, the last bulkhead must have been misaligned when installed. I have not decided if I should disassemble the offending bulkhead, or if I can correct it in place with shims on one side and filing on the other?

My plan is to modify the model to make the model look like the ship was originally built. In a future post I will present what I have found out about so far, and what I plan to modify in the model to get her to look like it.
- Wintergreen, Nirvana, hof00 and 7 others
-
 10
10
-
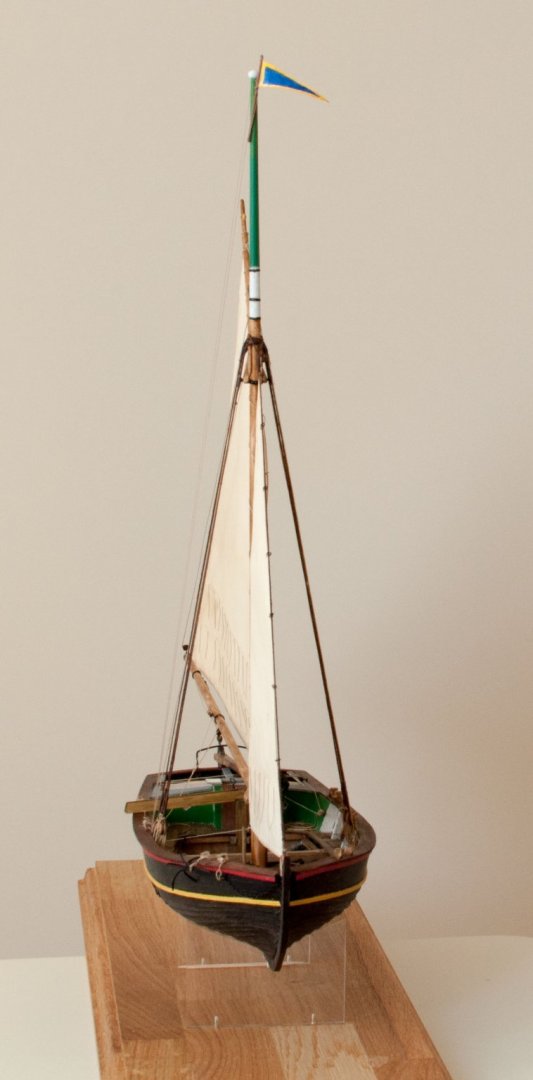
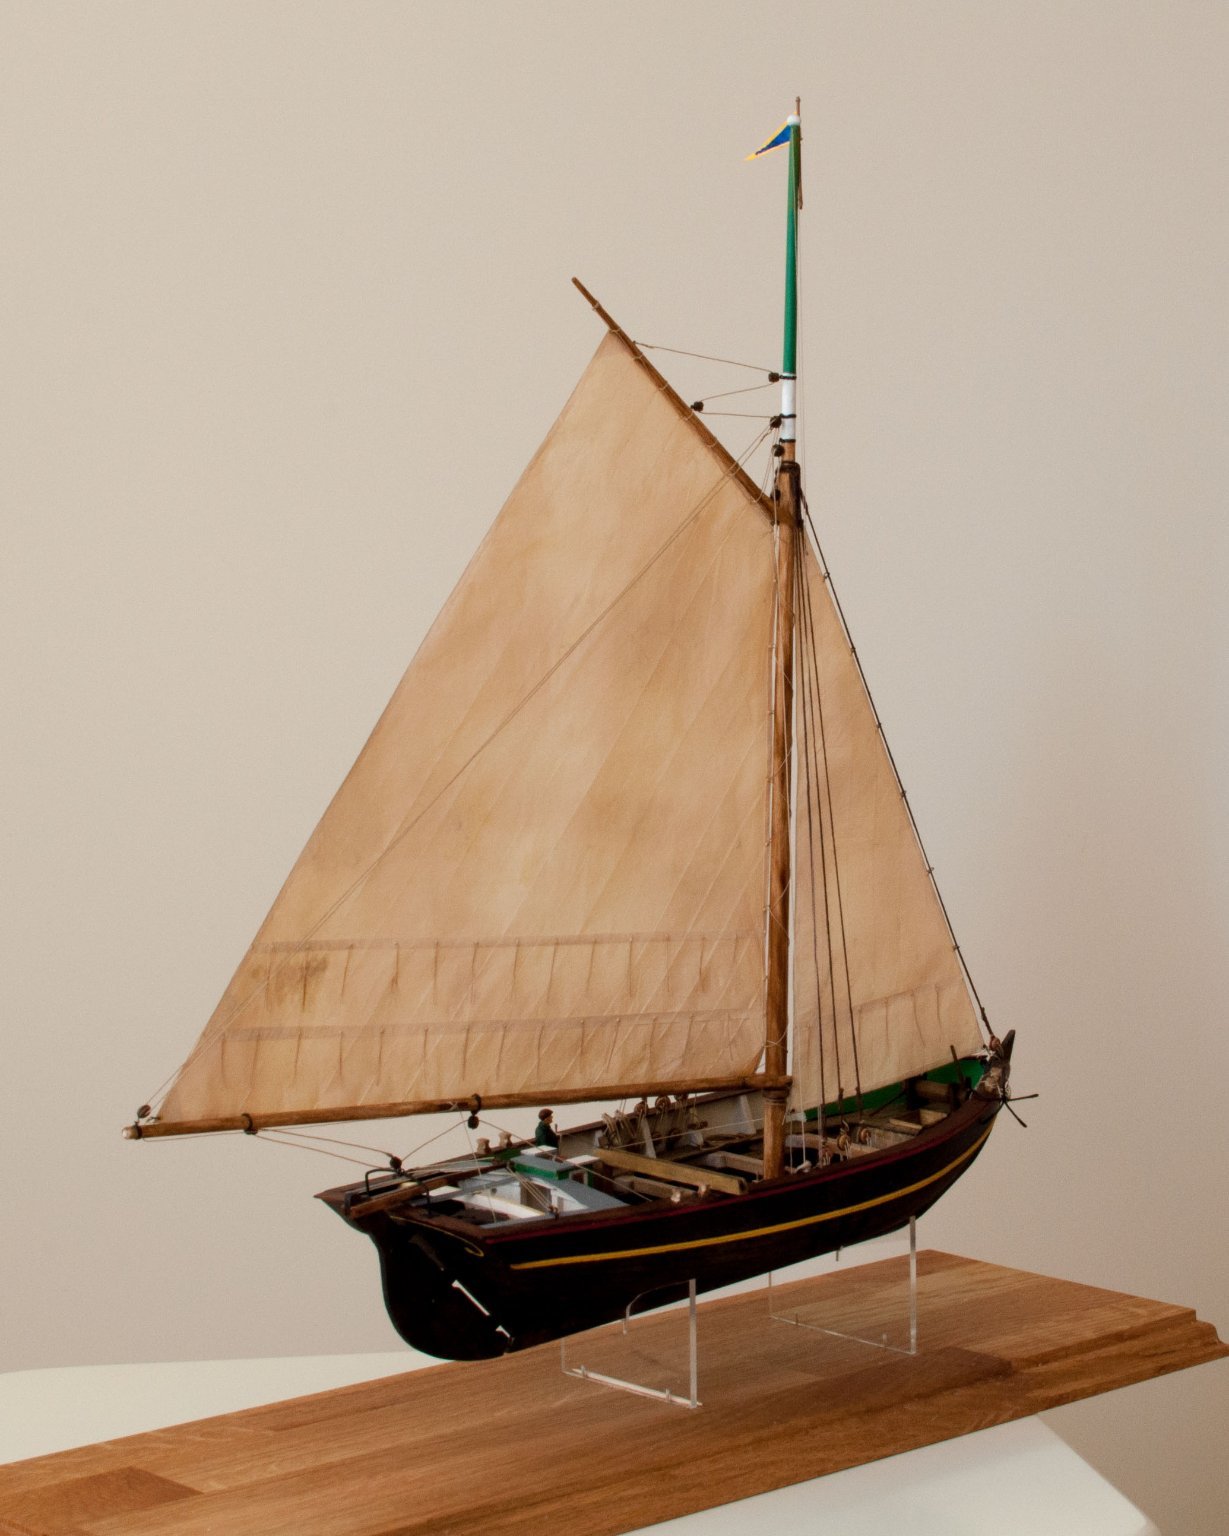
The last piece added, the flag.
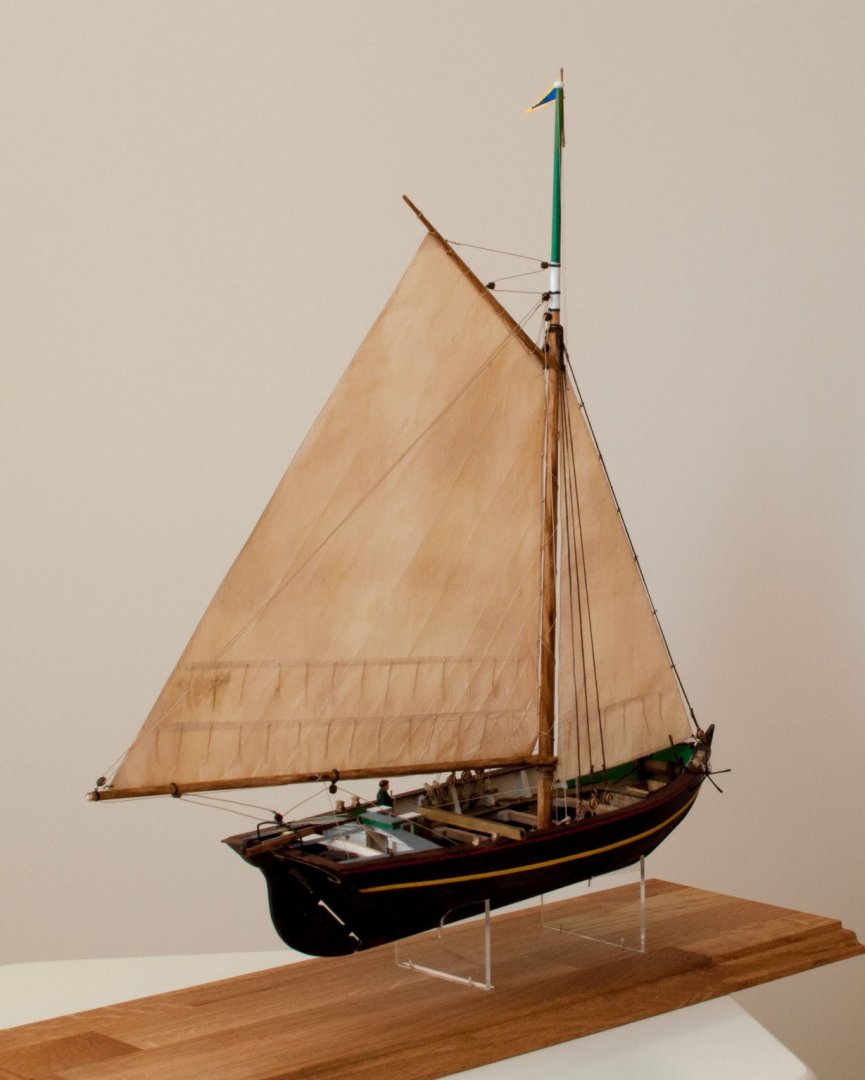
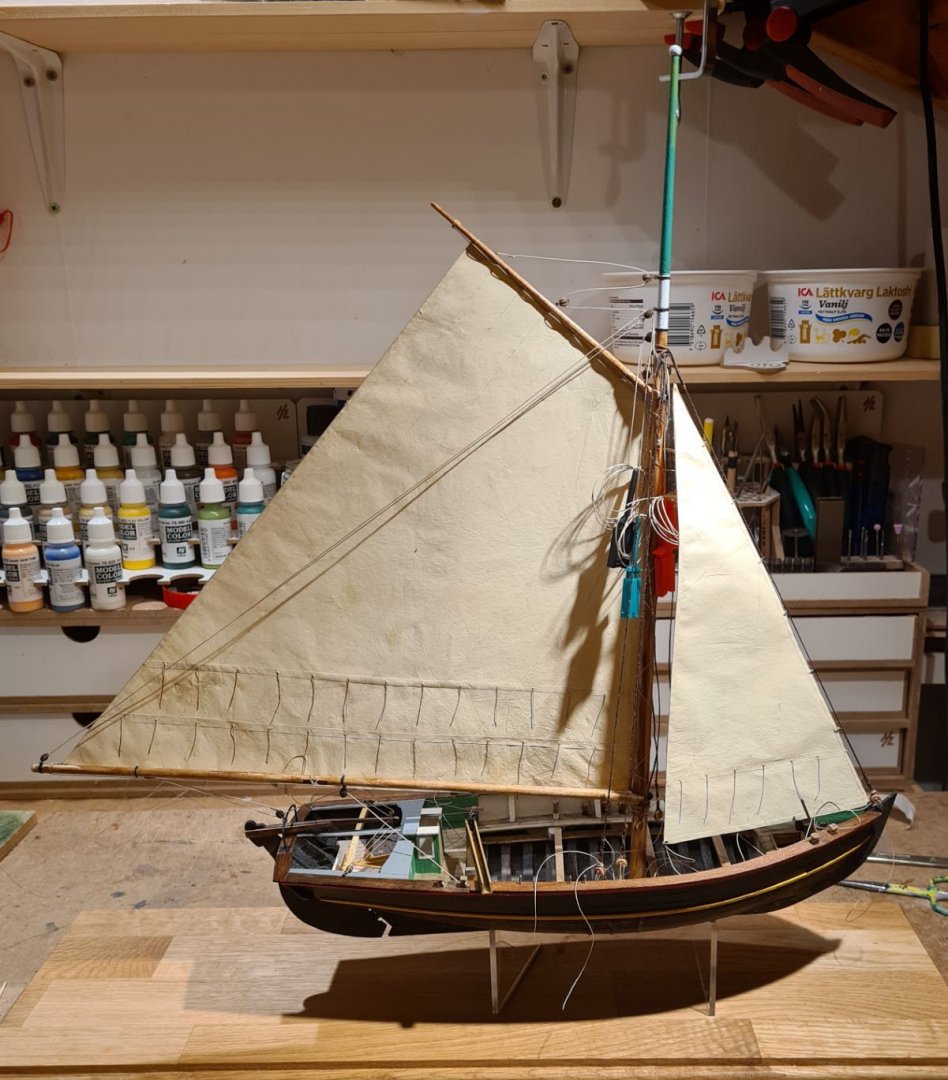
It's been a little over a year in the making, and now it is finished! My sloop from Roslagen.
It started in part as a project to hone my skills in clinker builds, to enable me to build the medieval long-ship. Along the way I have read a lot about these ships and as I learned more I have become more fascinated and interested. The research part of the build has definitely been one of the more rewarding aspects.
I also feel like I have learned a lot as a model builder during this project. Some of the choices I made early on would not be the same today. Primarily, I would not have made the hull from lime wood. I would have used something harder.


-
-
Interesting kit. I have not seen this version before. It looks like it models all the parts in a faithful manner. Many of the currently available kits of viking ships uses a fair bit of exposed plywood etc. This will be interesting to follow.
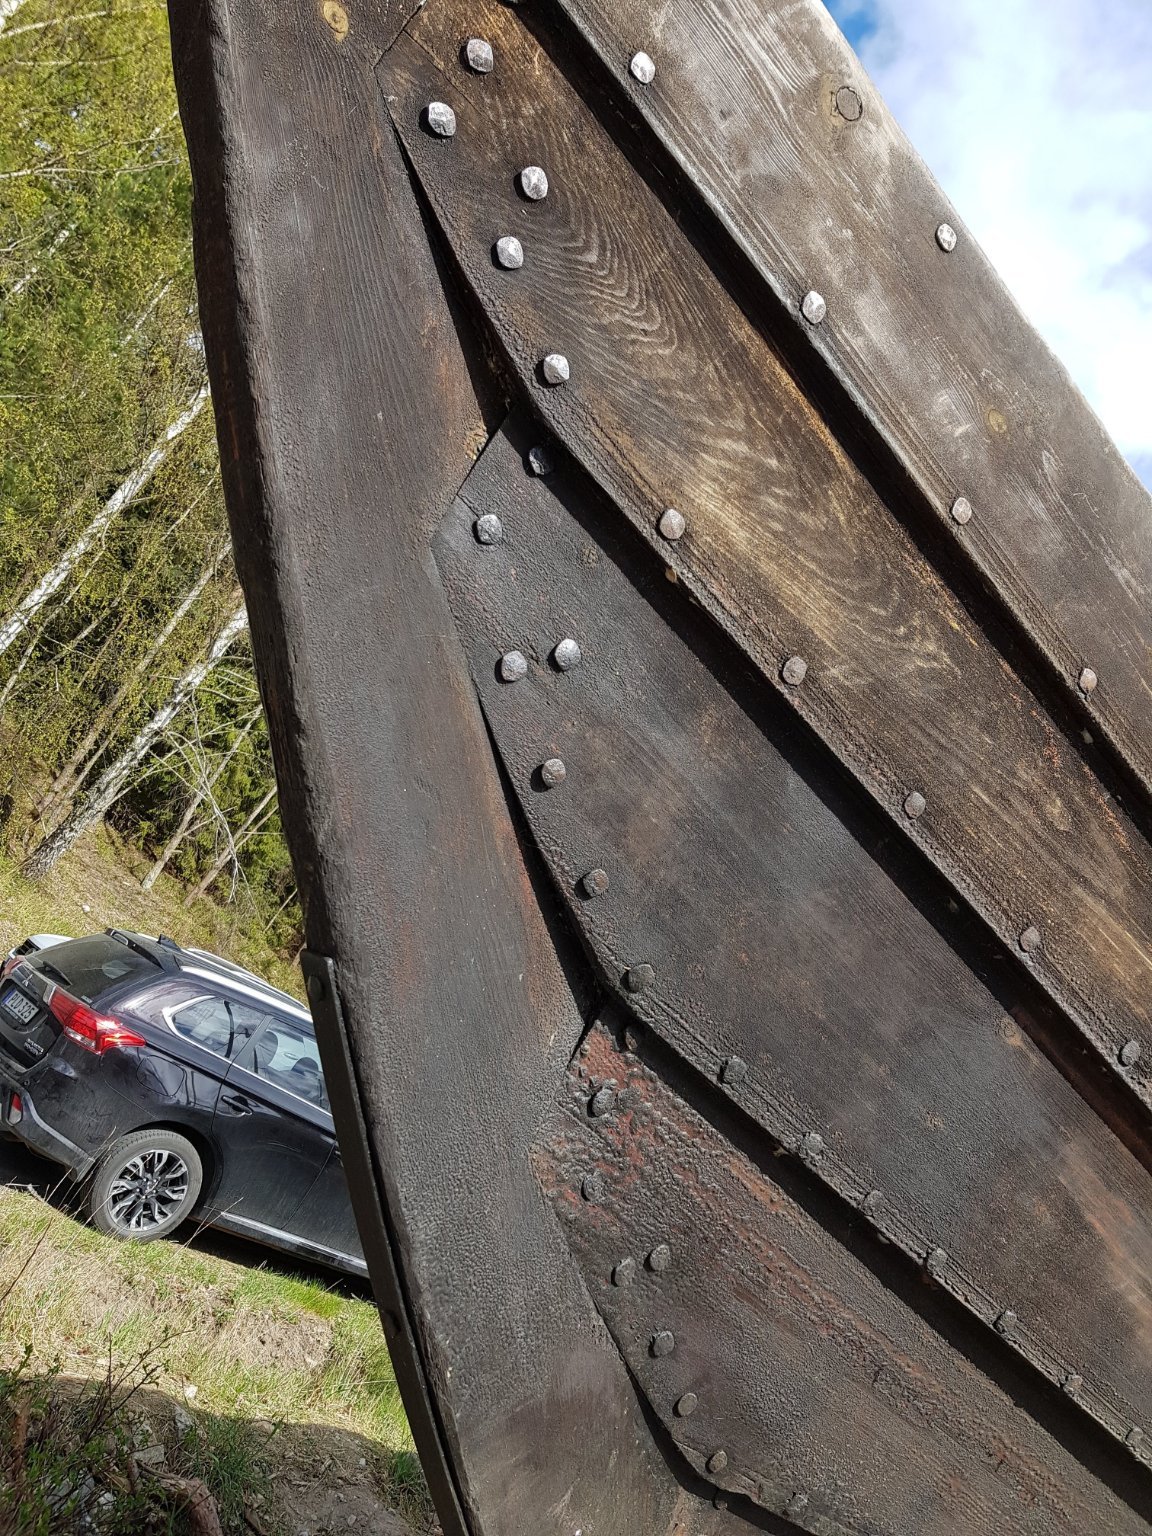
At scale 1:20 it should be possible to model the rivets. I used strands from a dish brush and paper in my 1:30 medieval long-ship (see the link in my signature). The planks are joined to each other using rivets, while the frames are fastened to the hull using tree nails.
- mtaylor, thibaultron and Cathead
-
3
-
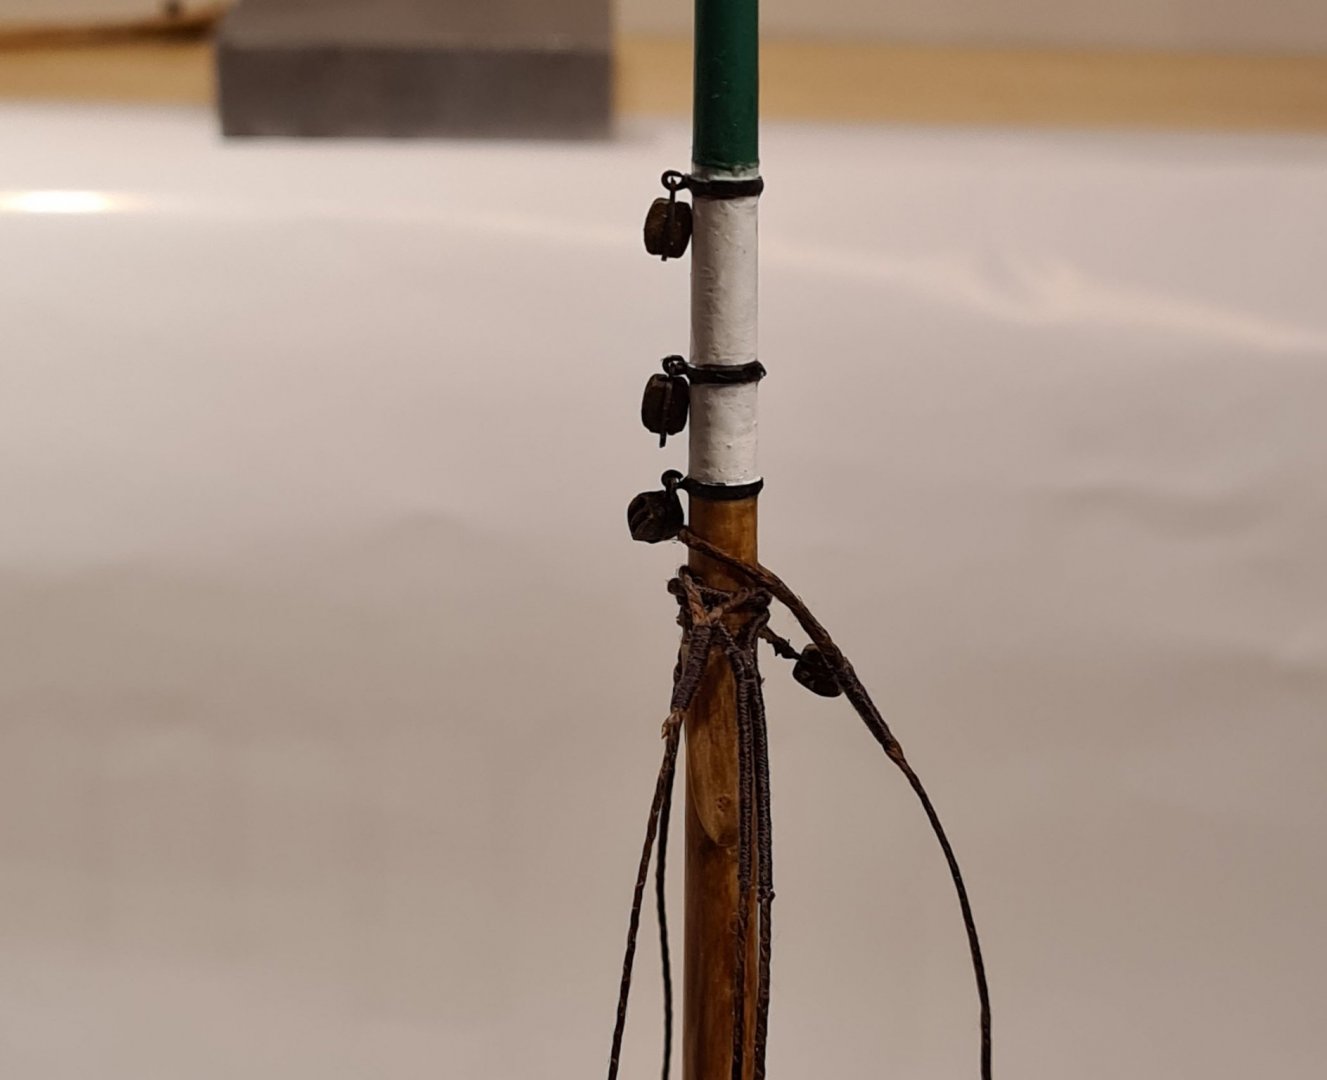
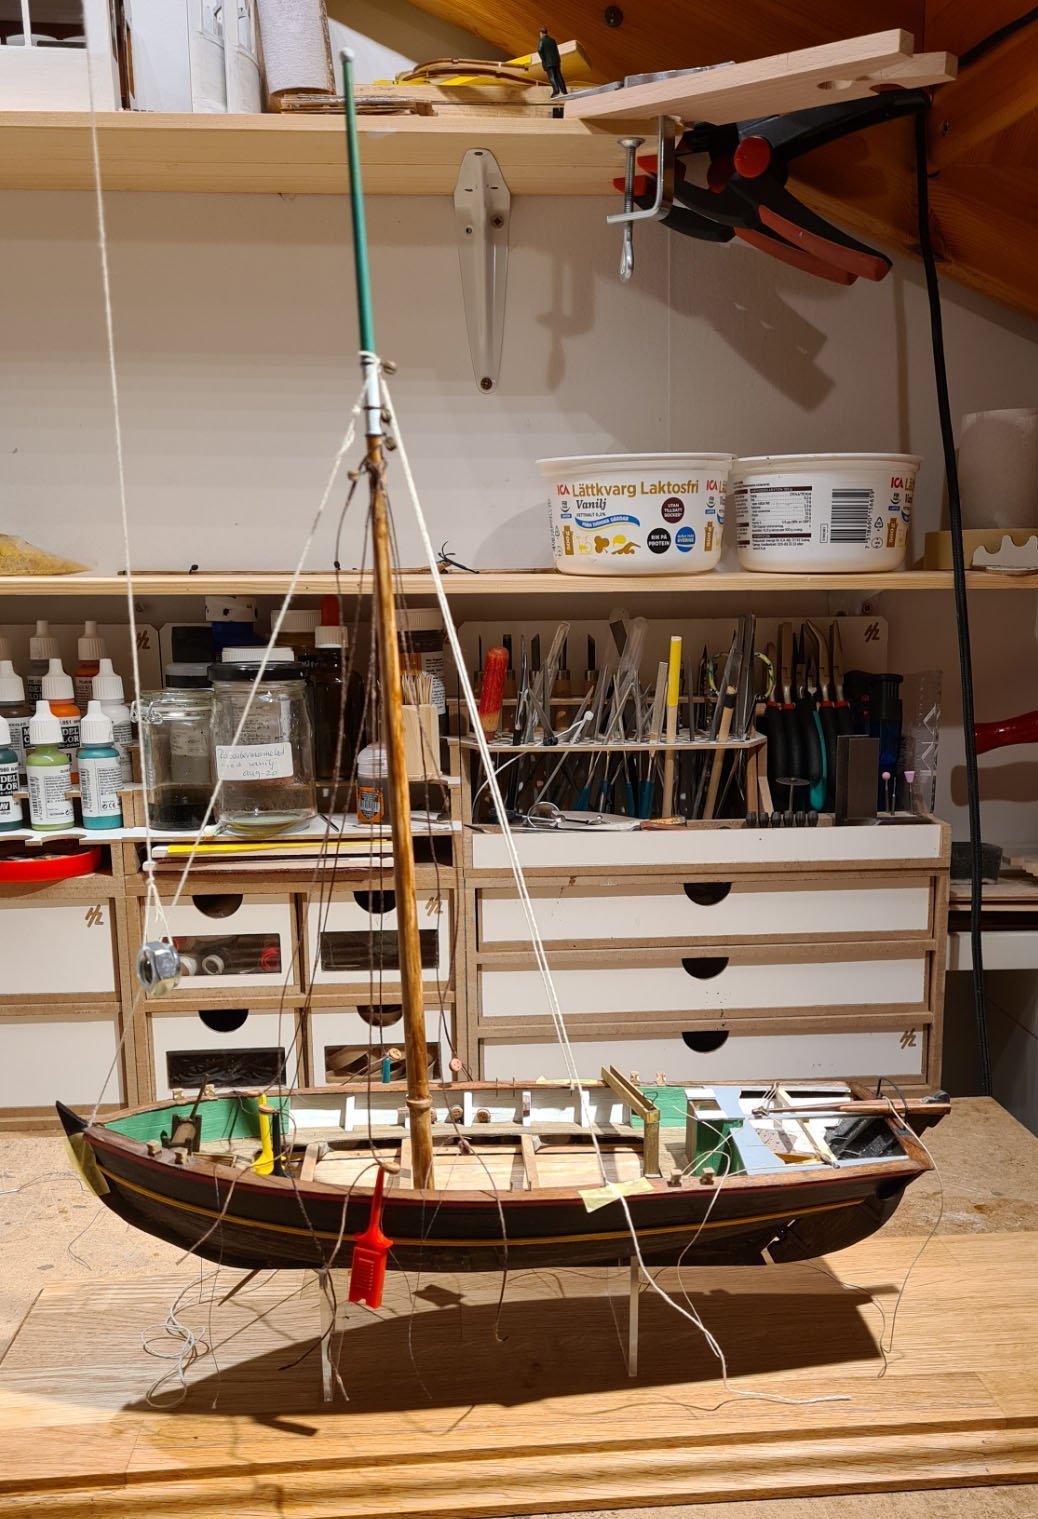
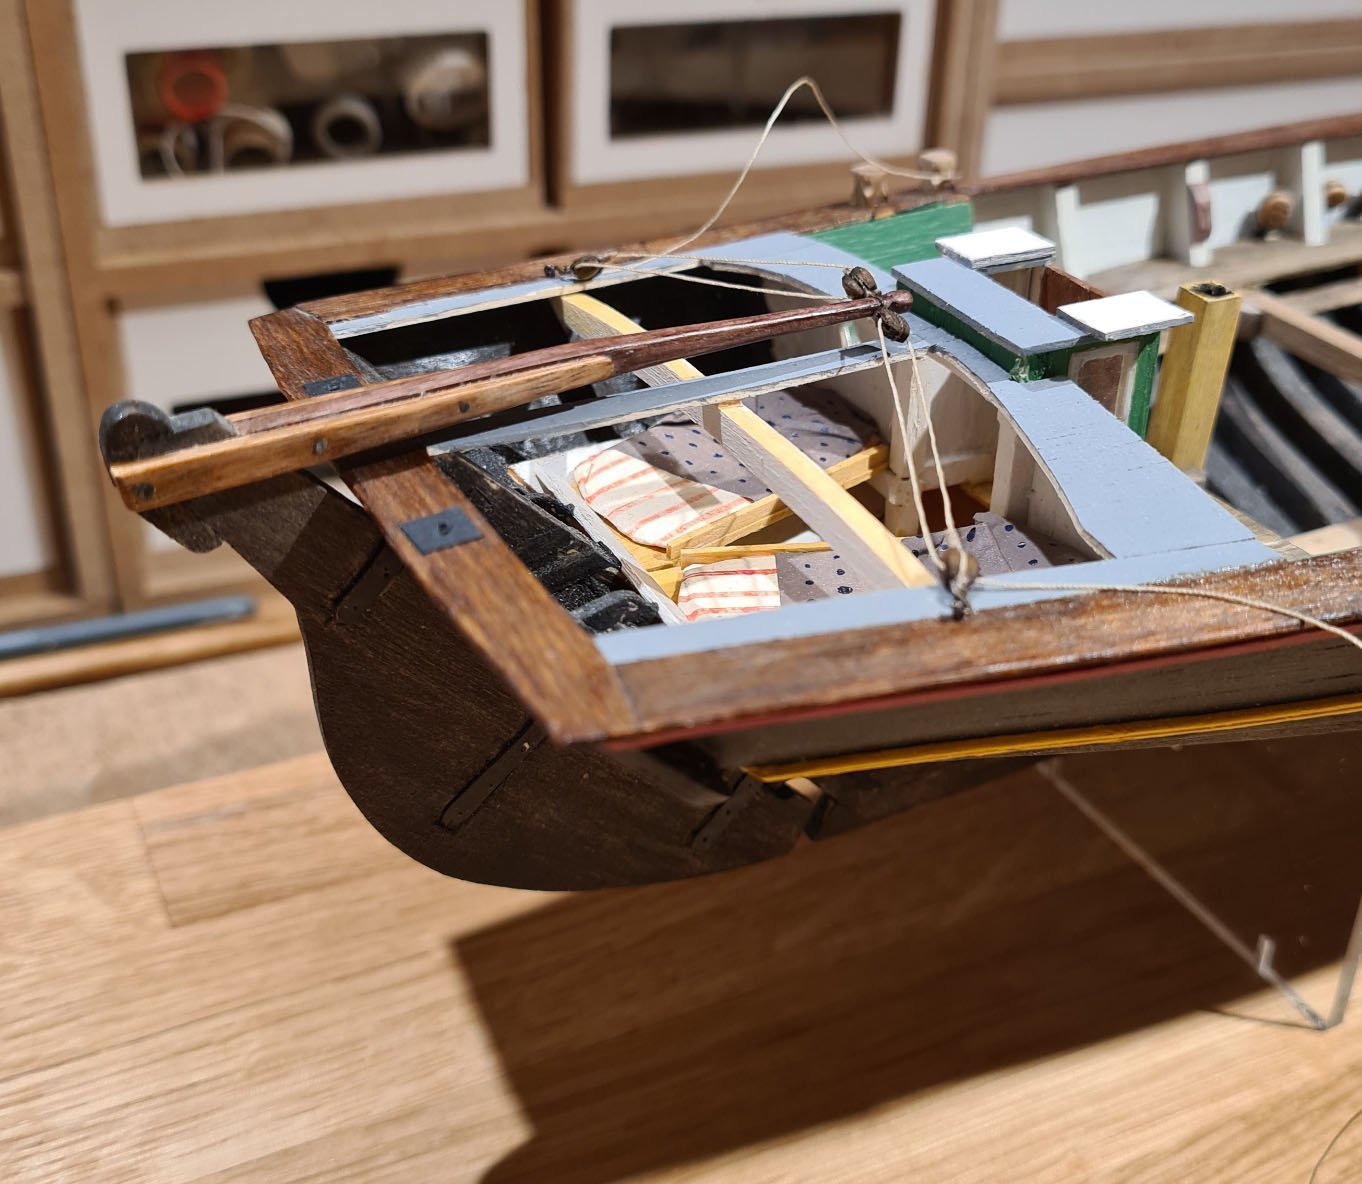
After a fair bit of thinking and planning the best order to rig the ship I have decided to most of it off board.
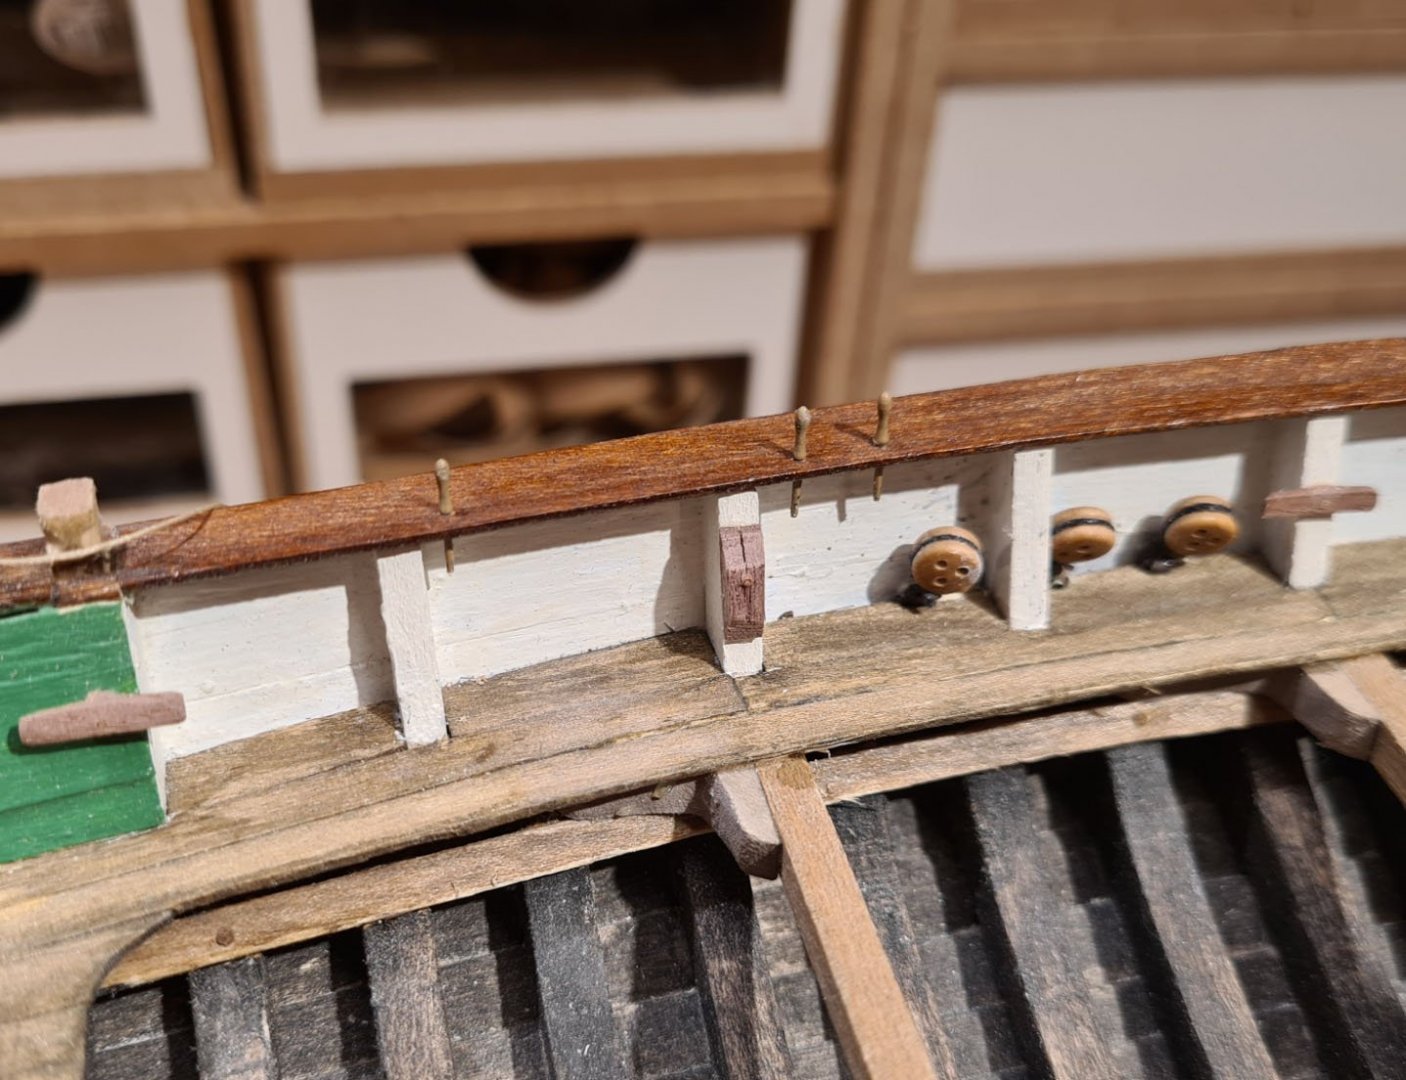
In preparation of that I temporarily stepped the mast so that I could tie the dead eyes with the correct length of shroud. As can be seen on the photo, the rake of the mast is forward. This would somewhat compensate for the unbalanced sail plan.
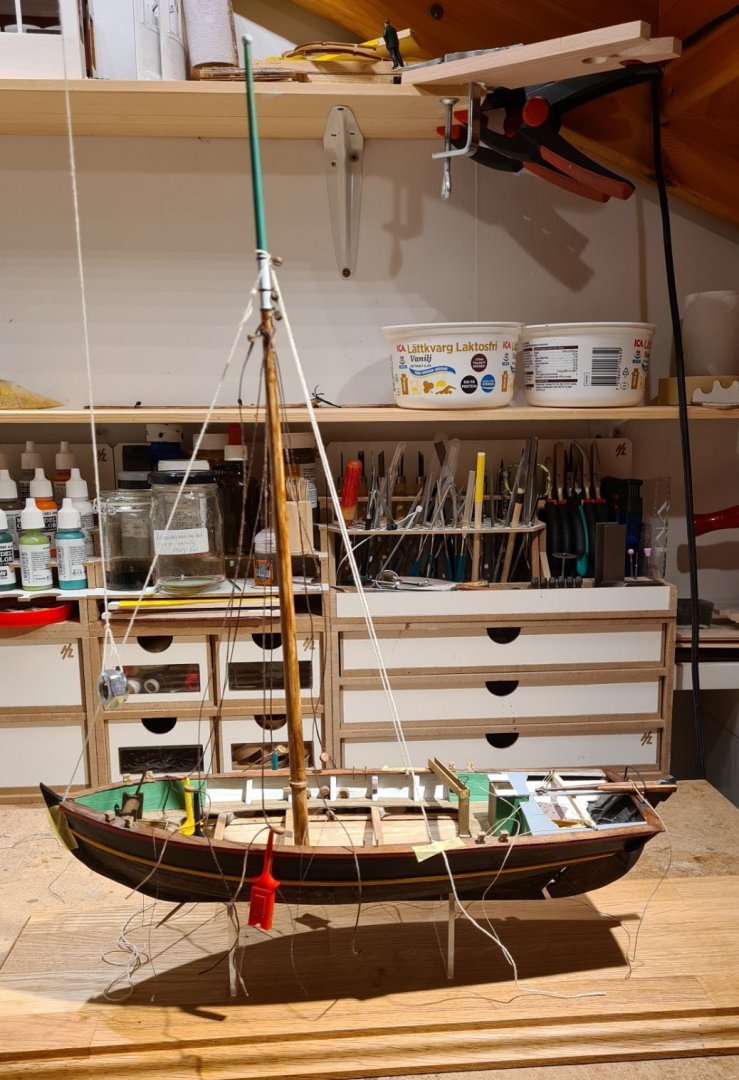
The fore stay dead eye could not be tied while the mast was stepped. The stay needs to be threaded through the hanks that has already been tied to the sail before that.
The main sail has been tied to the gaff and mast, and the running rigging has been installed.
And with the fully rigged mast, I can start to tie down the lanyards and adjust the position of the mast.
- Siggi52, Wintergreen, Mark Pearse and 3 others
-
6
-
On my medieval long-ship I made the planking overlapping all the way into the stem and stern.
.thumb.jpg.4f8875853ed5796e3c37a7168e4eff58.jpg)
This is how it is made on the reconstruction which I based the model on.

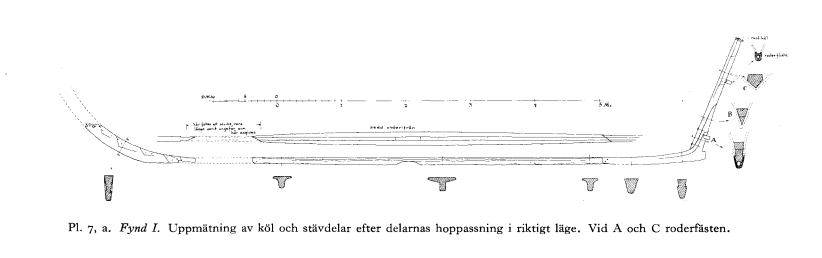
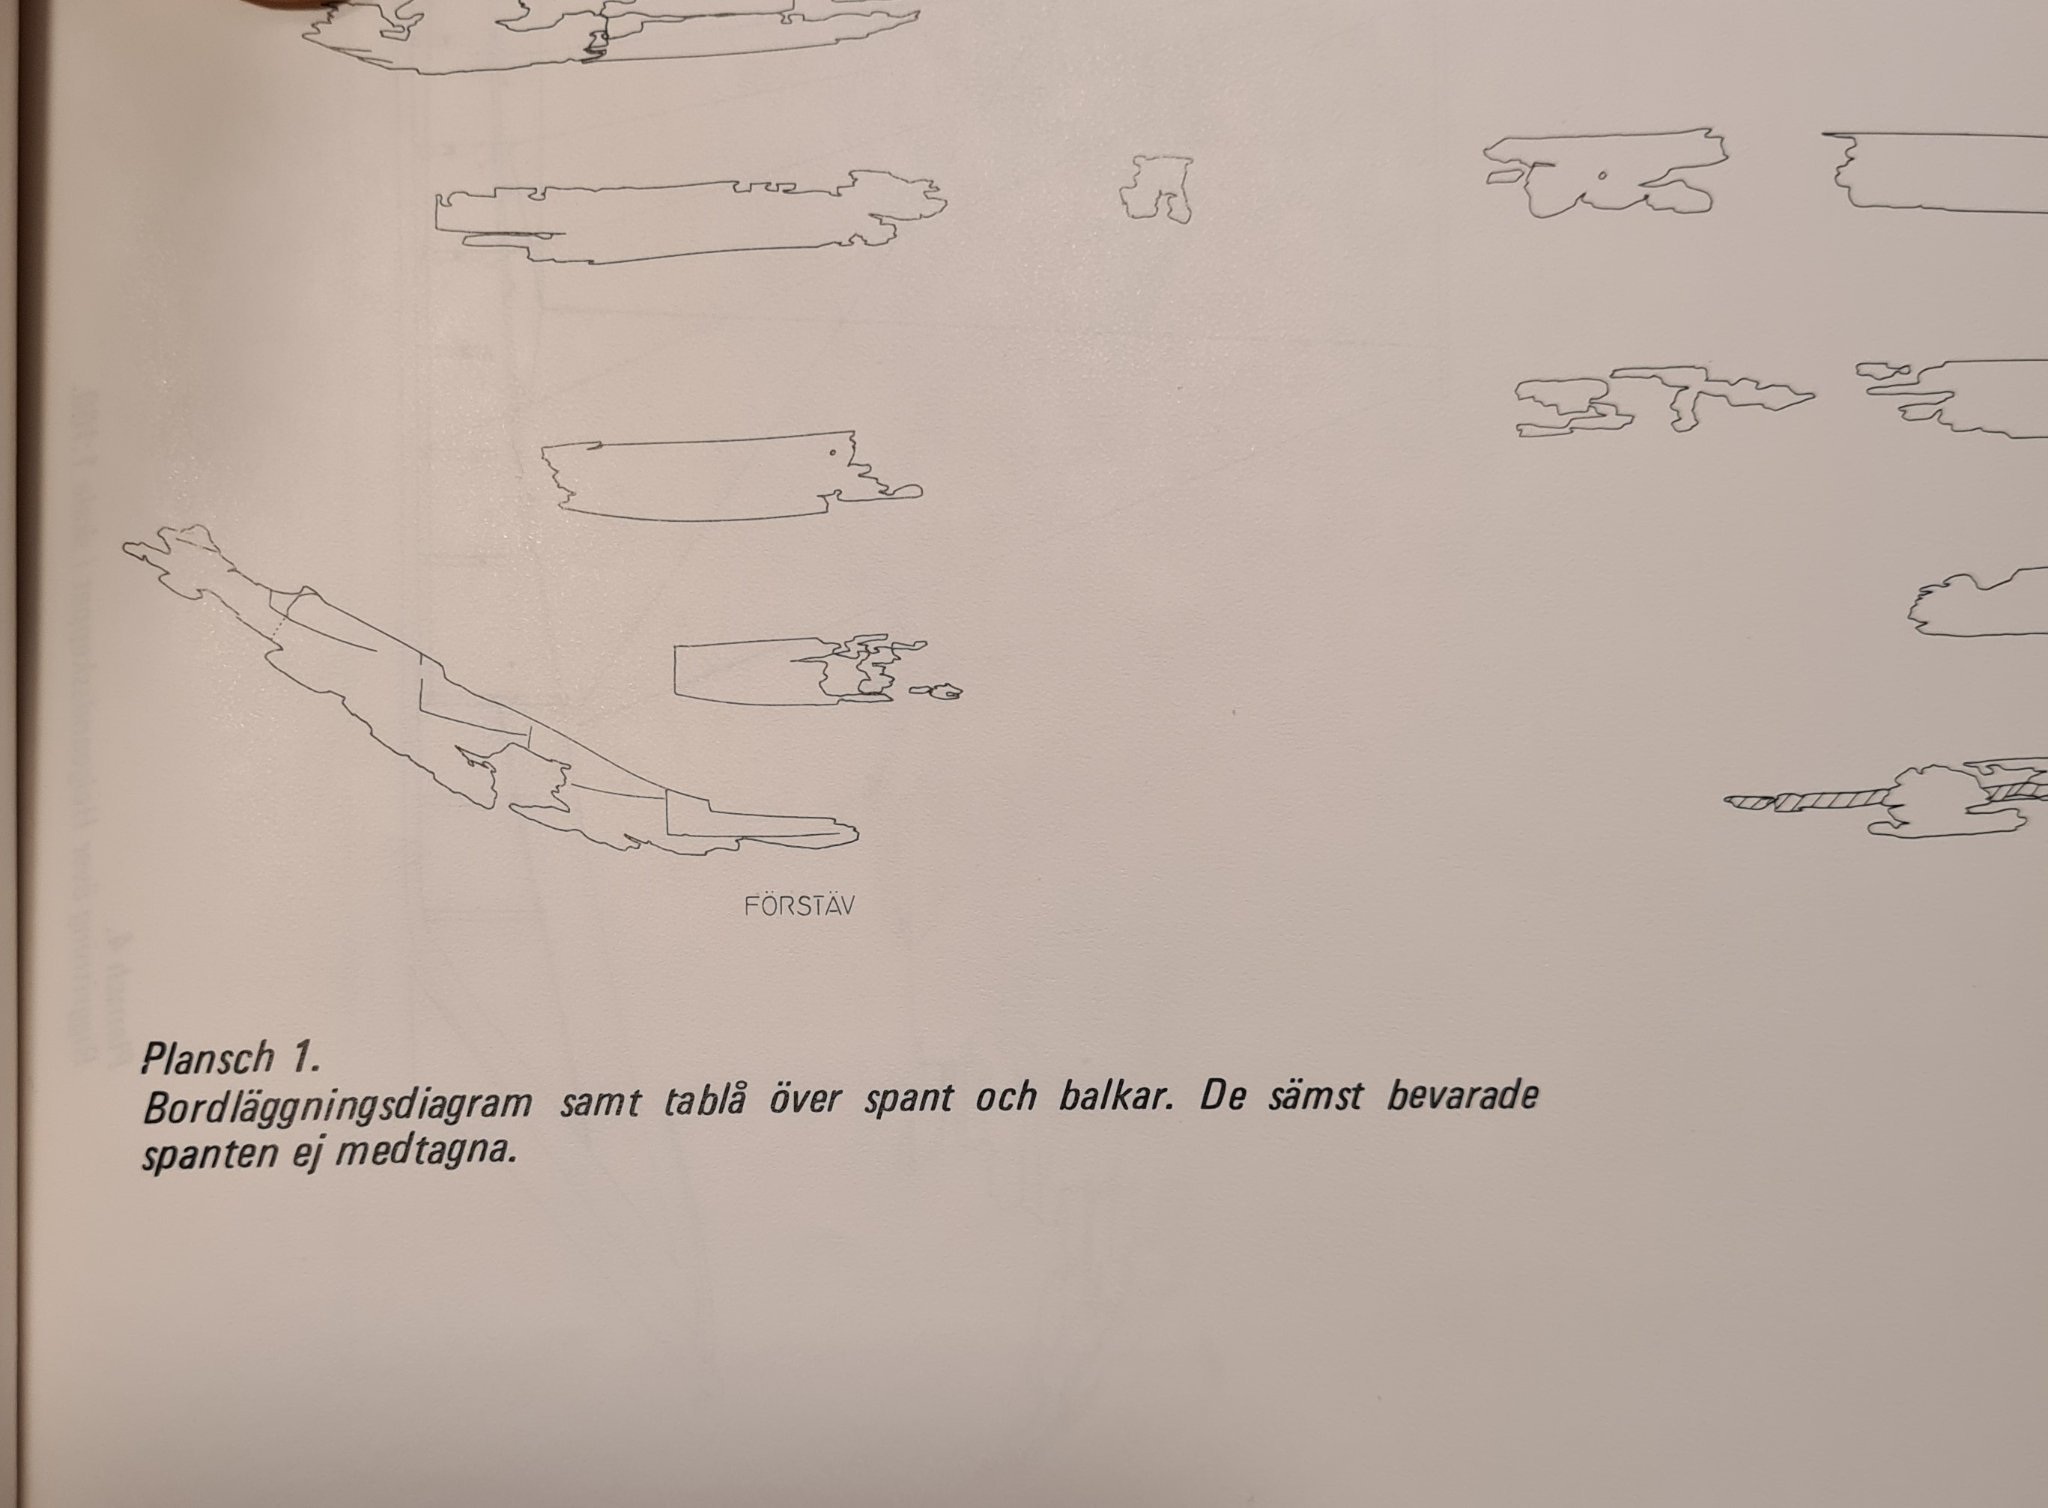
The archeological find that the reconstruction is based on did only have a small piece of the stem left. However, the "stepped" rabbet is visible.
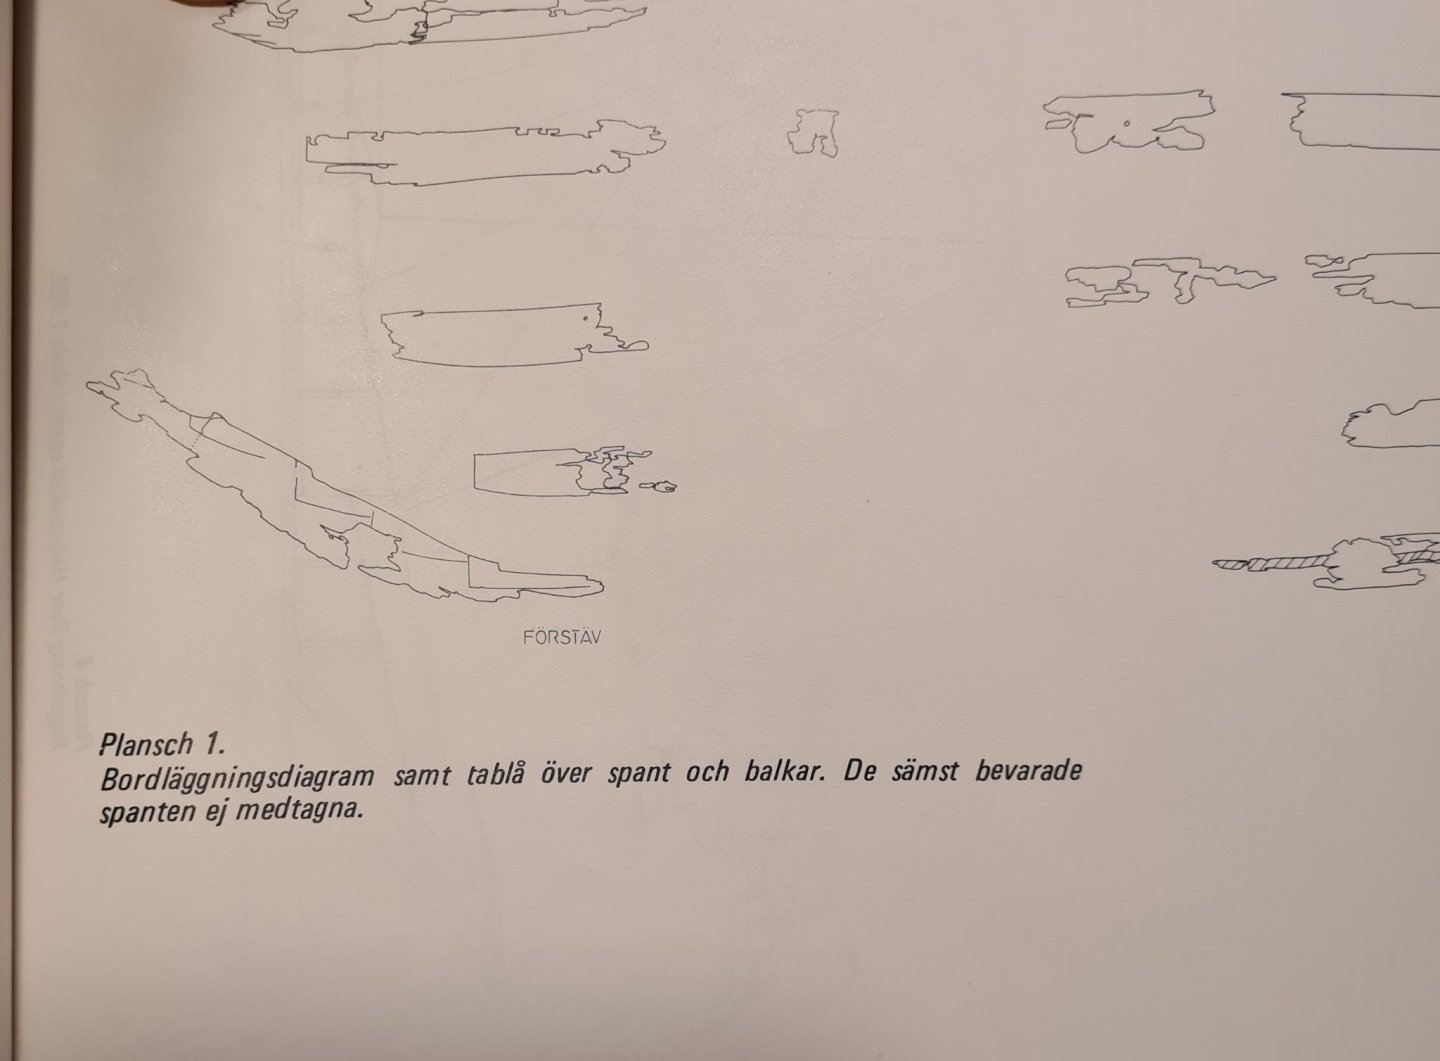
The same type of rabbet can be found in the Kalmar boat I from the middle of the 13th century.
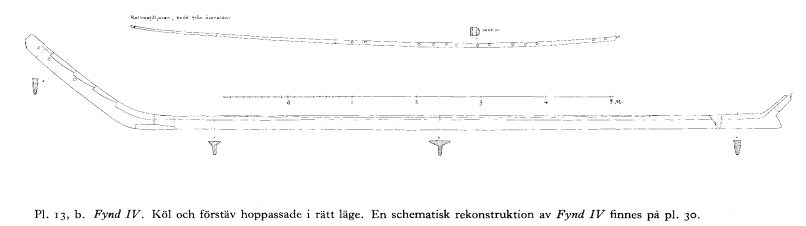
Boat IV from the same site shows a similar rabbet. The date for this boat is more uncertain, but 15th century seems to fit the evidence best.
-
-
Welcome to the MSW.
Looking forward to see you sharing your progress.
- mtaylor and Keith Black
-
2
-
I agree that the burnt sienna looks quite good. It resembles oak in color.
I’m certainly no expert in Ancient Greek ships, but I do remember from the Iliad that the ships where often referred to as “tarred”. This would mean a dark almost black brown color.
- Danstream, Louie da fly and Torbogdan
-
3
-
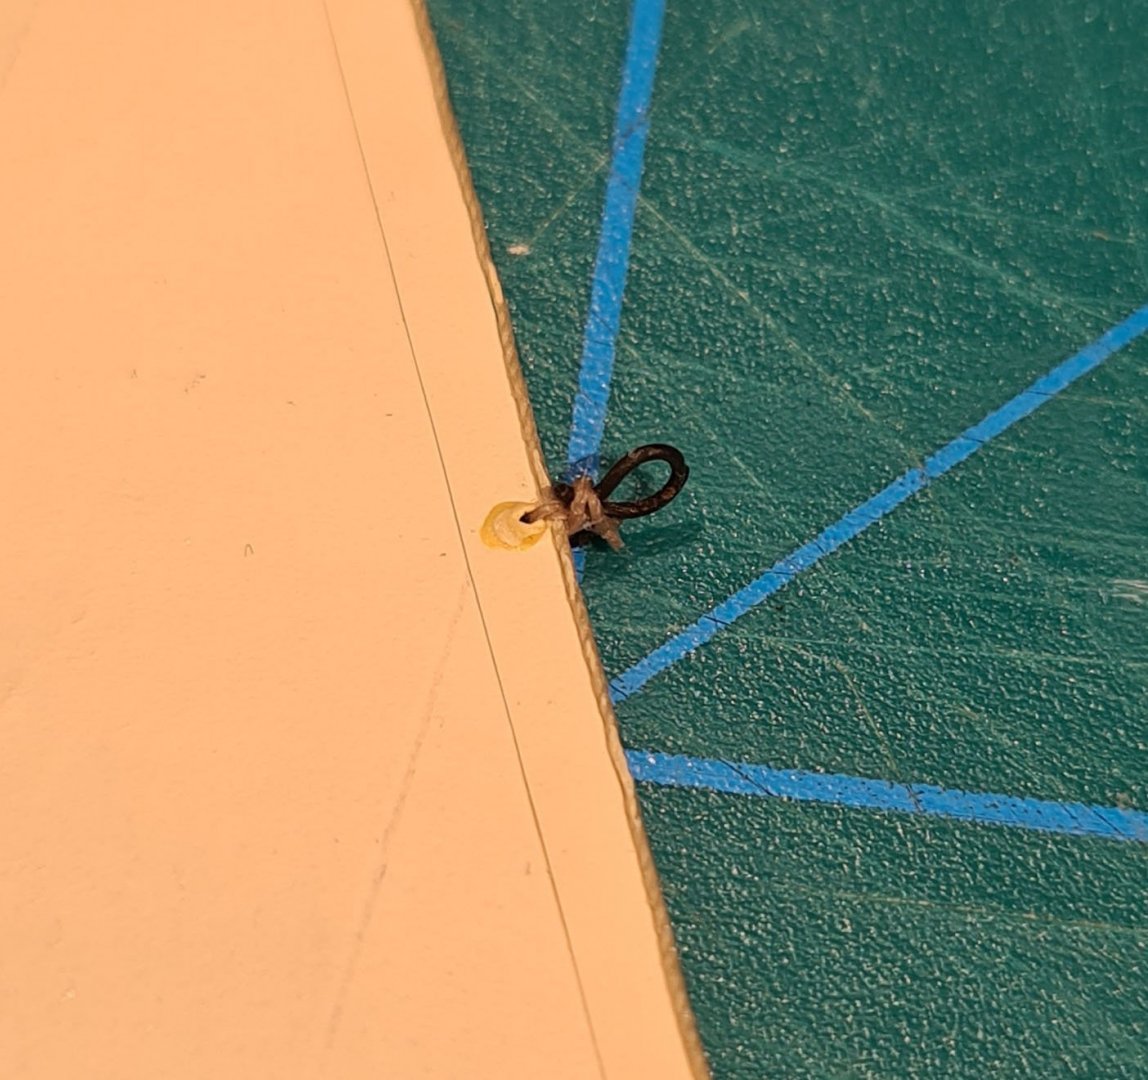
I have secured the knots on the hanks with diluted PVA glue as druxey suggests. I'm still a bit worried that the "hooks" at the end of the hanks are not bent enough, and that the line could glide of when I start to rig. We will see. I did not consider the need, or possibility, of reversible knots using a solvent-based varnish as wefalk suggests. Currently I only have very dark shellac at home, but have ordered some de-waxed bleached flakes that should arrive in a few days. I will need to experiment some when I get it.
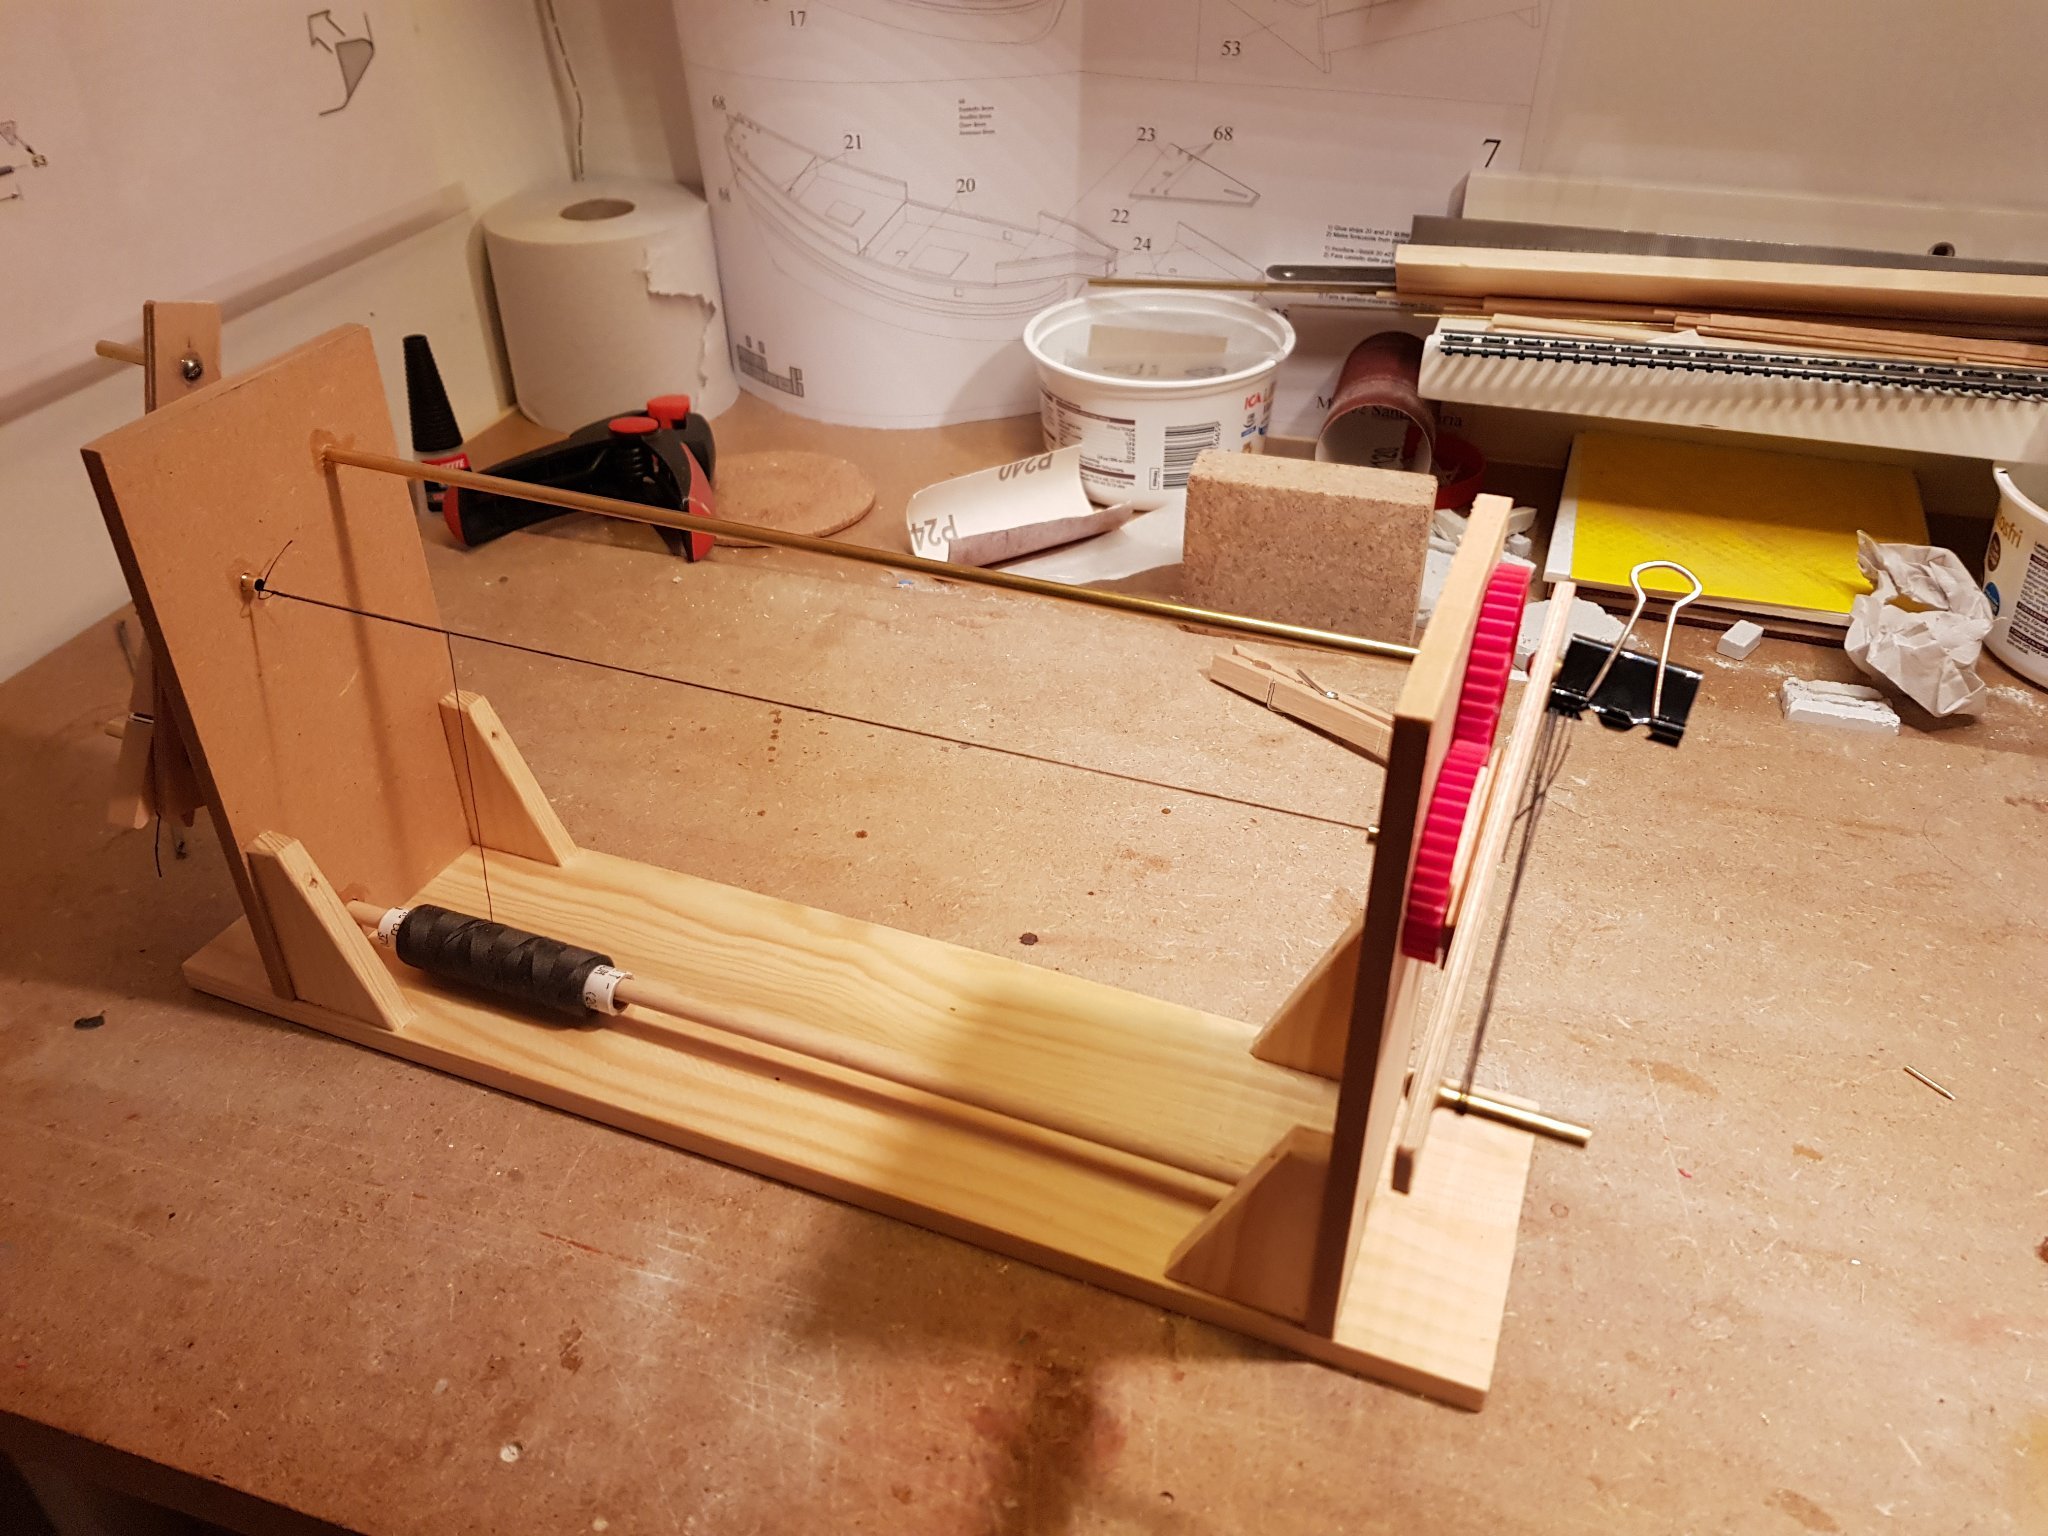
Thanks for the tip about a serving mallet. It's fascinating that the full scale methods often works when building in miniature scales. I will try to improve my current serving machine before I build a new one, but I was very close to press the "order" button for new cog wheels yesterday... And archjofo's log indeed gives a lot of ideas on how to build a better serving machine. Thanks for the tip.
Mark, yes there are cleats on the side of the mast, for the shrouds to pull up against.
- mtaylor, Mark Pearse and druxey
-
3
-
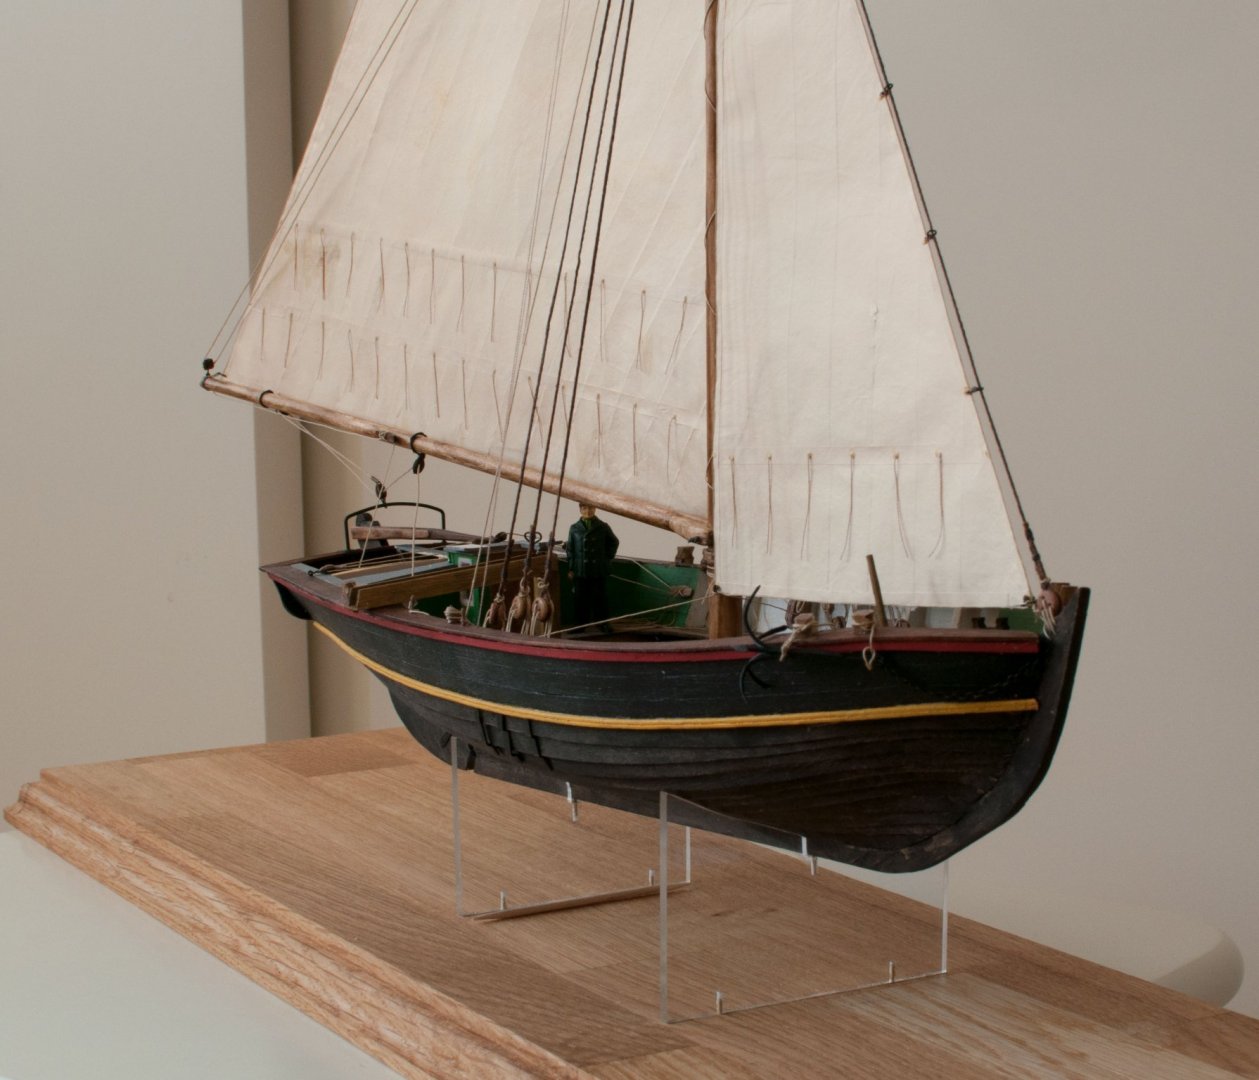
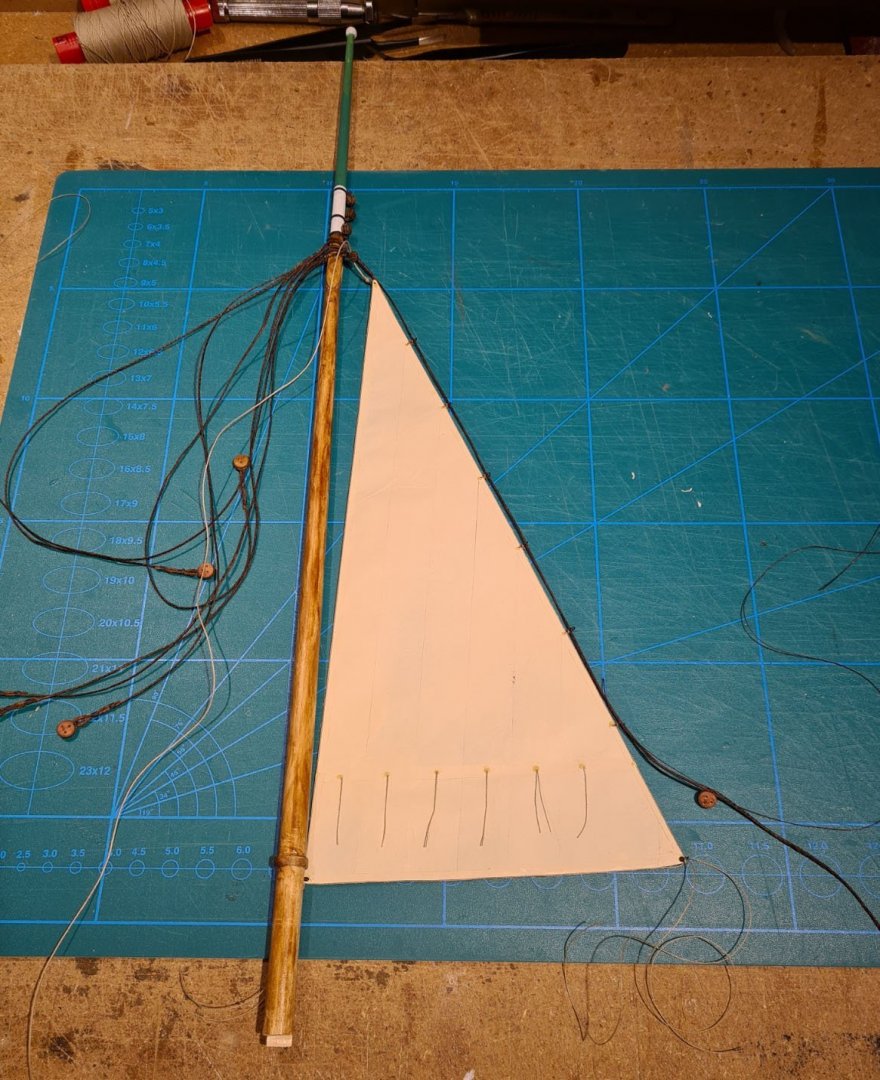
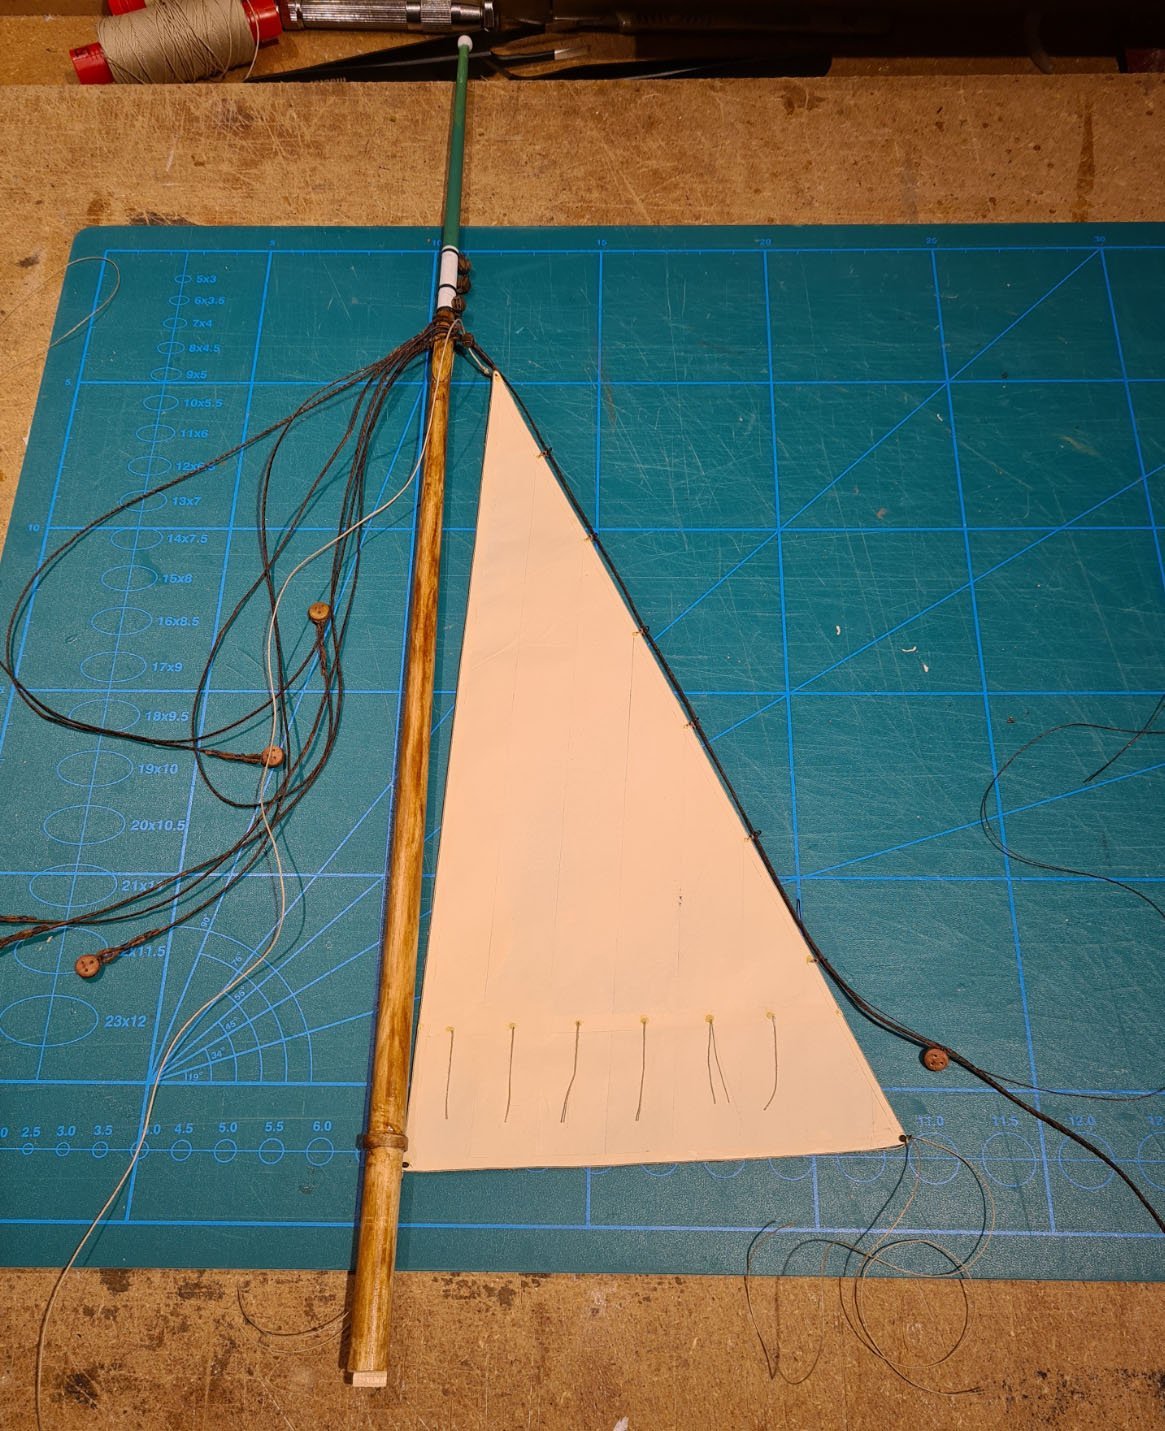
I managed to make hanks and attach them to the stay sail without too much trouble. I just hope that they will not come loose when I start the rigging.
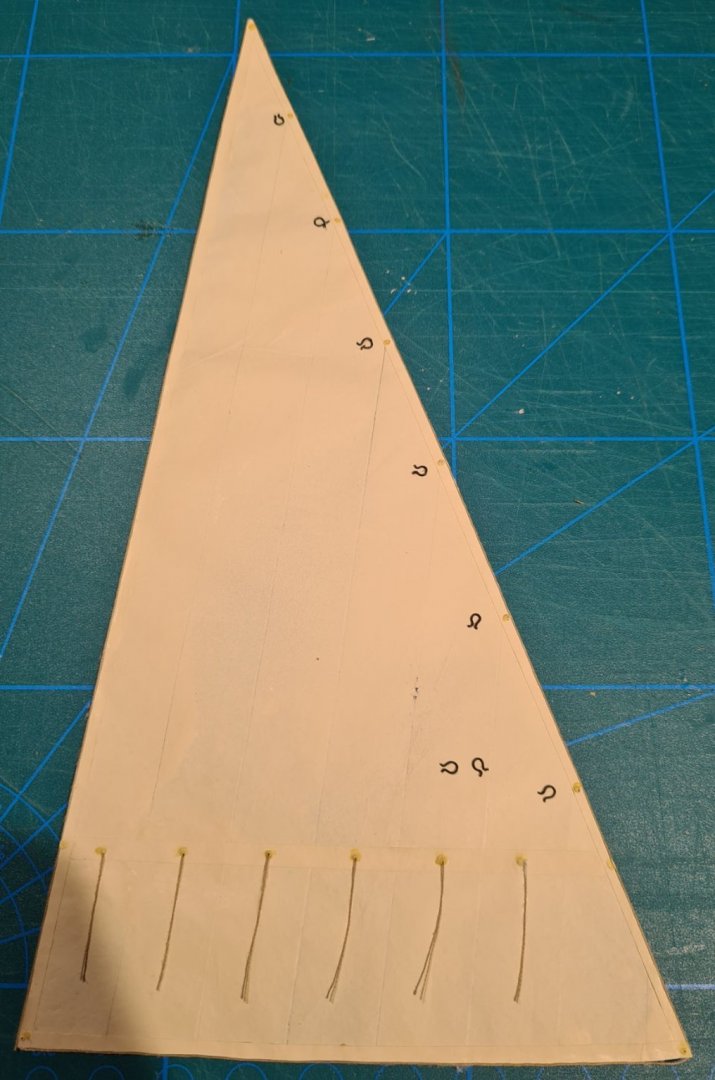
After that, I have continued with the rigging. The shrouds and stays are waxed linen thread, which I had at hand.
I used my homemade serving machine, but gave up after I had served the shrouds. It either needs to be rebuilt or written of as a failure and replaced by a sturdier one. The main problem is to keep the tension in the line. The sides are too weak, so they flex inward.

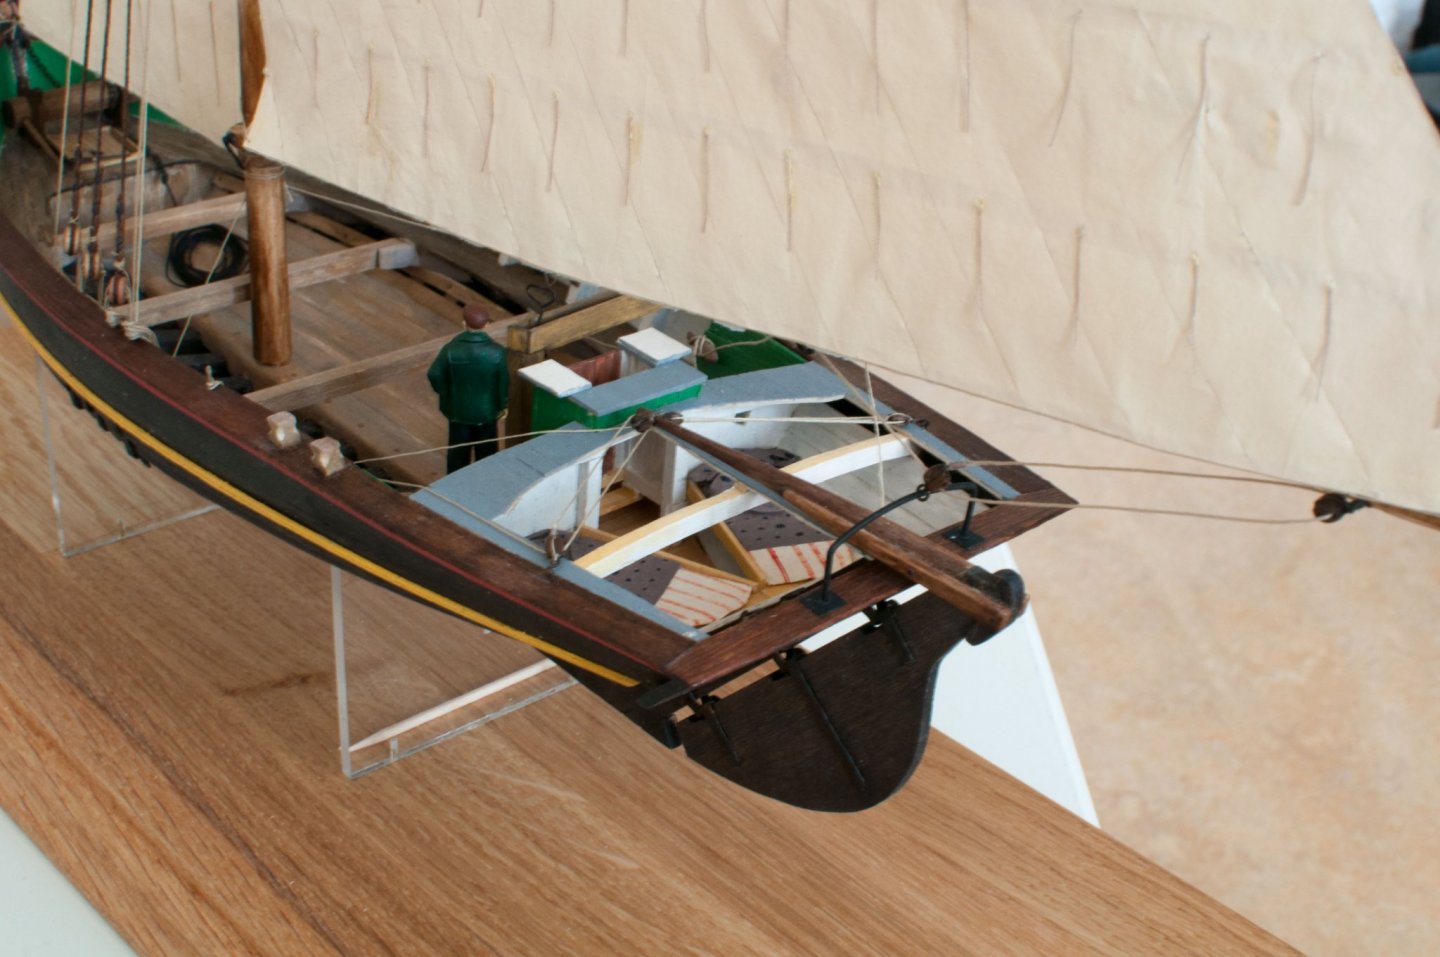
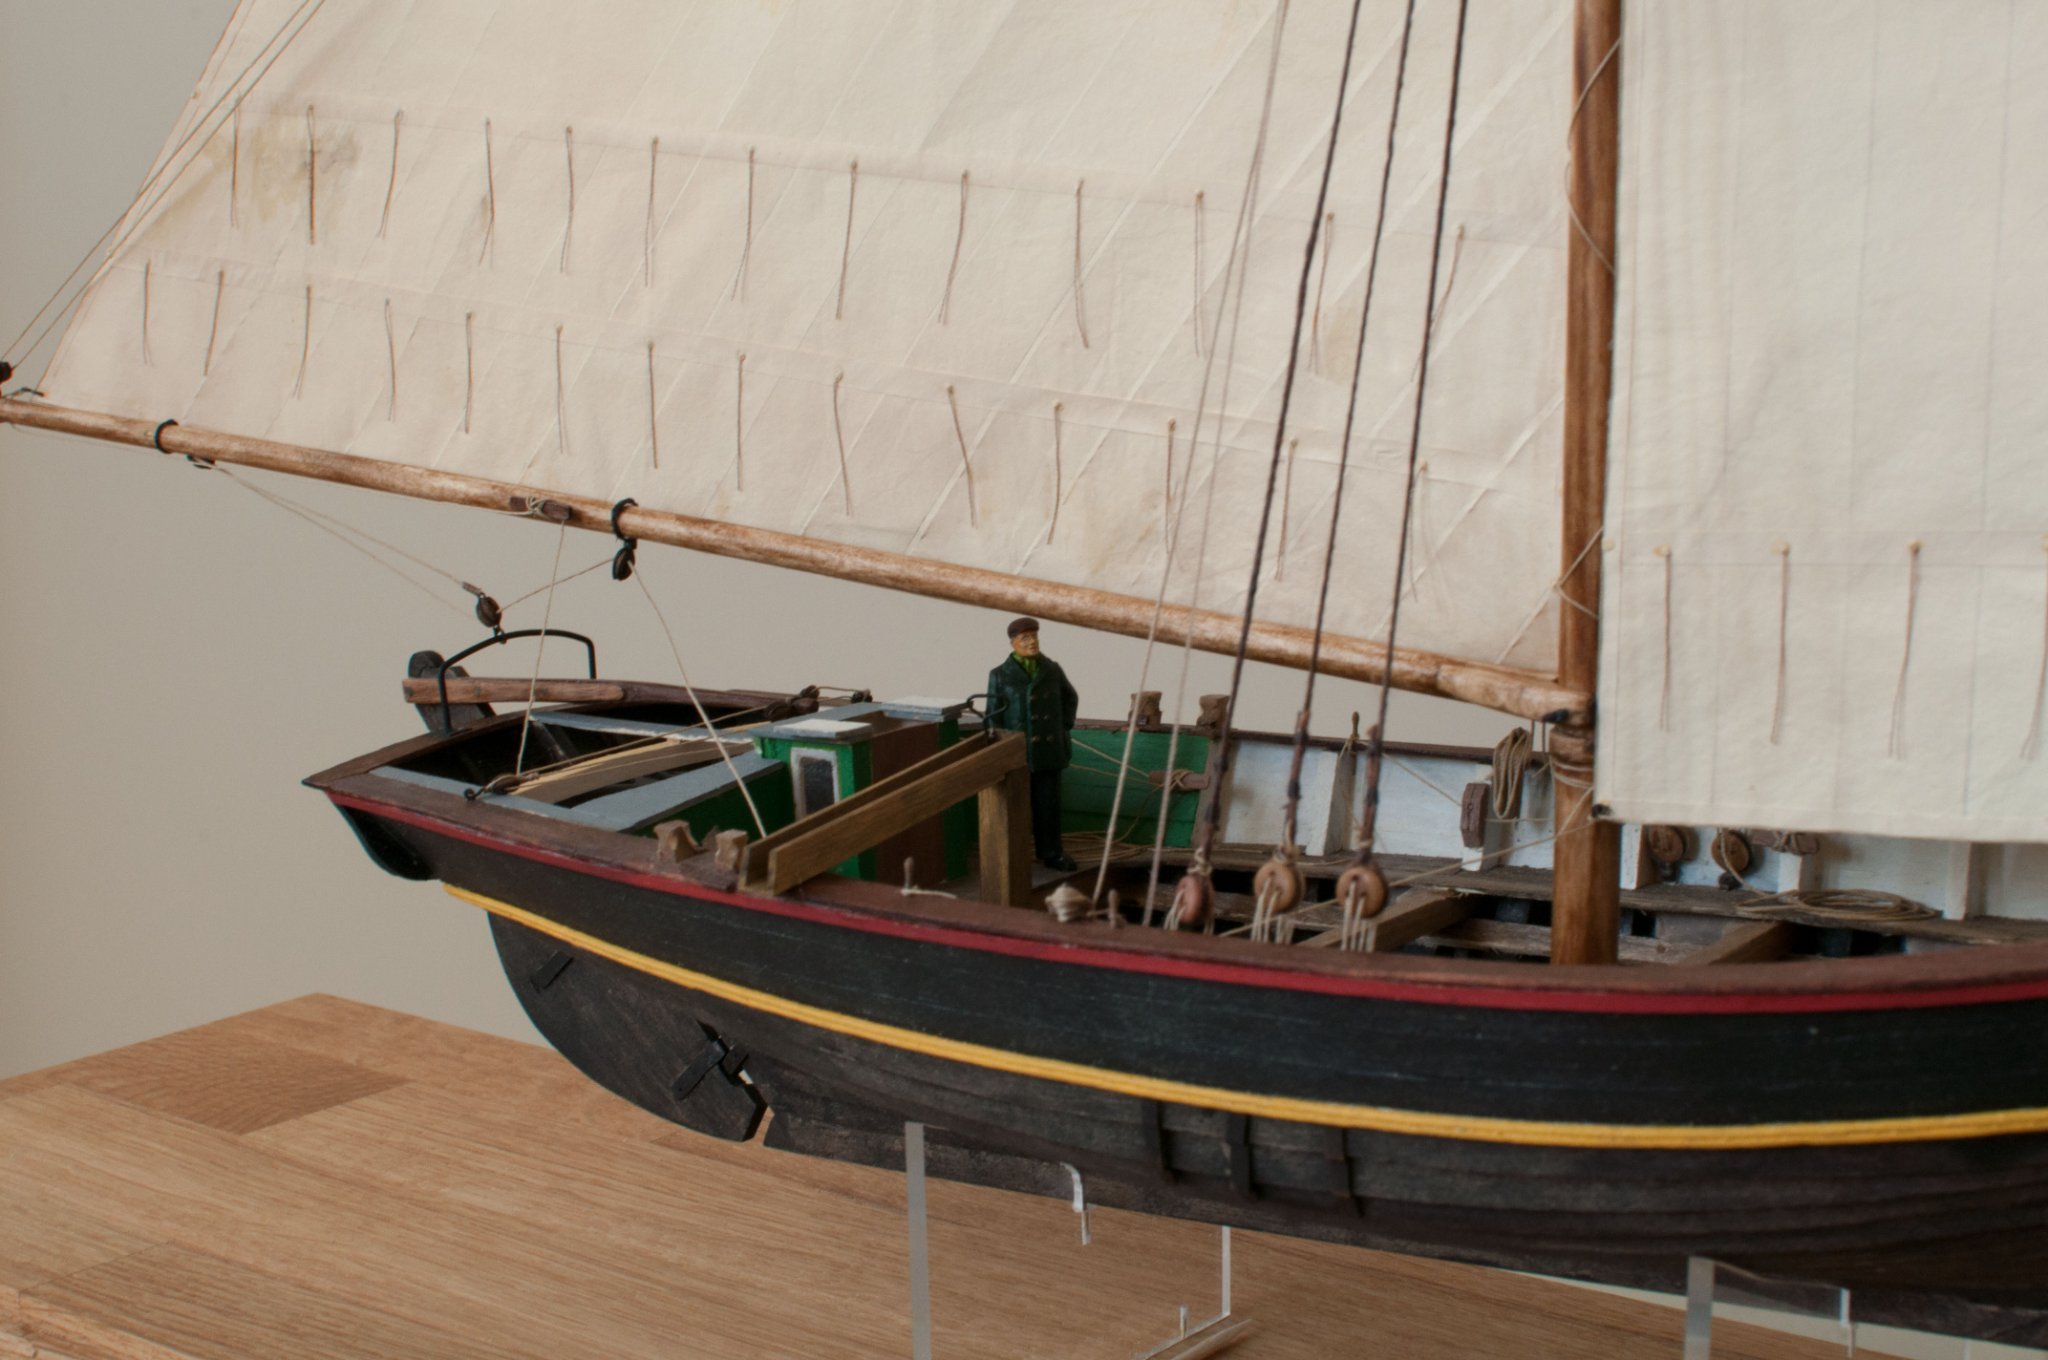
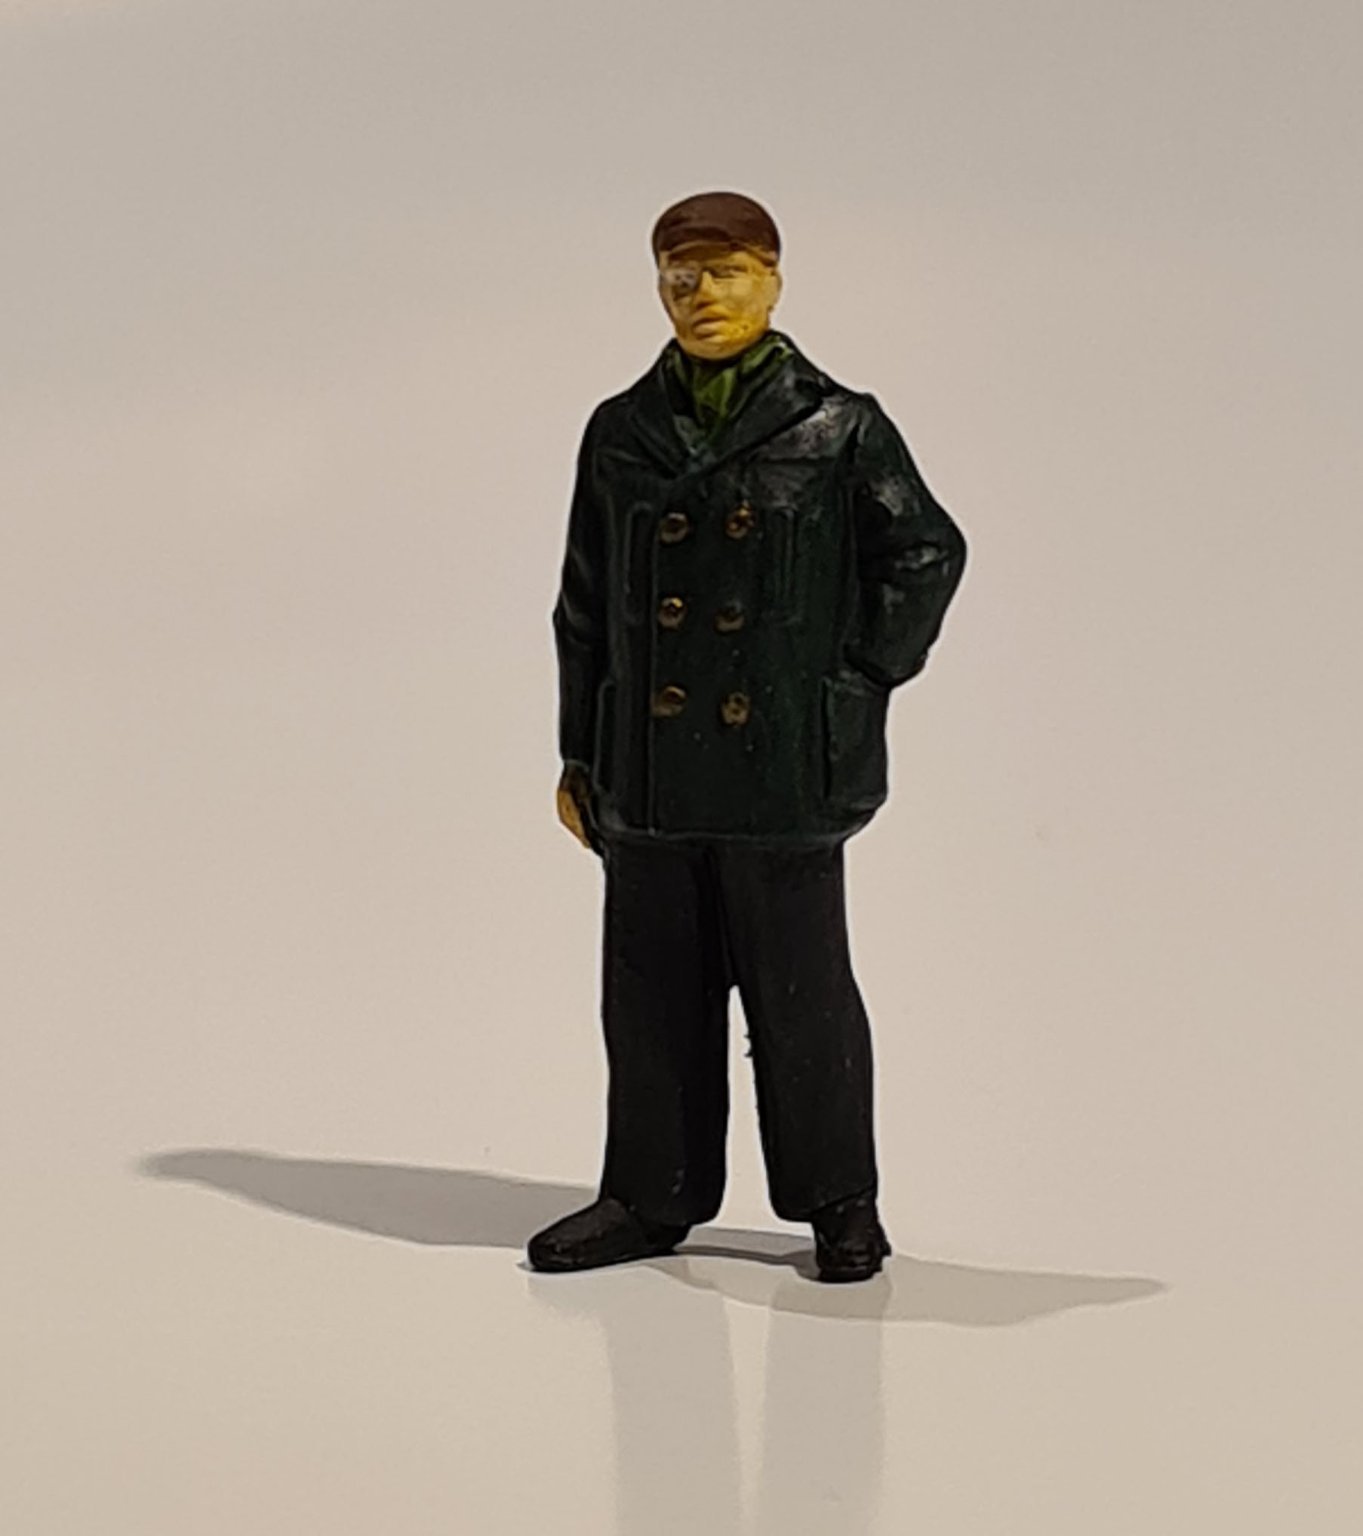
The skipper has also been painted and is now ready to get onboard his new ship. He's from a set of figures by Preiser.

-
-
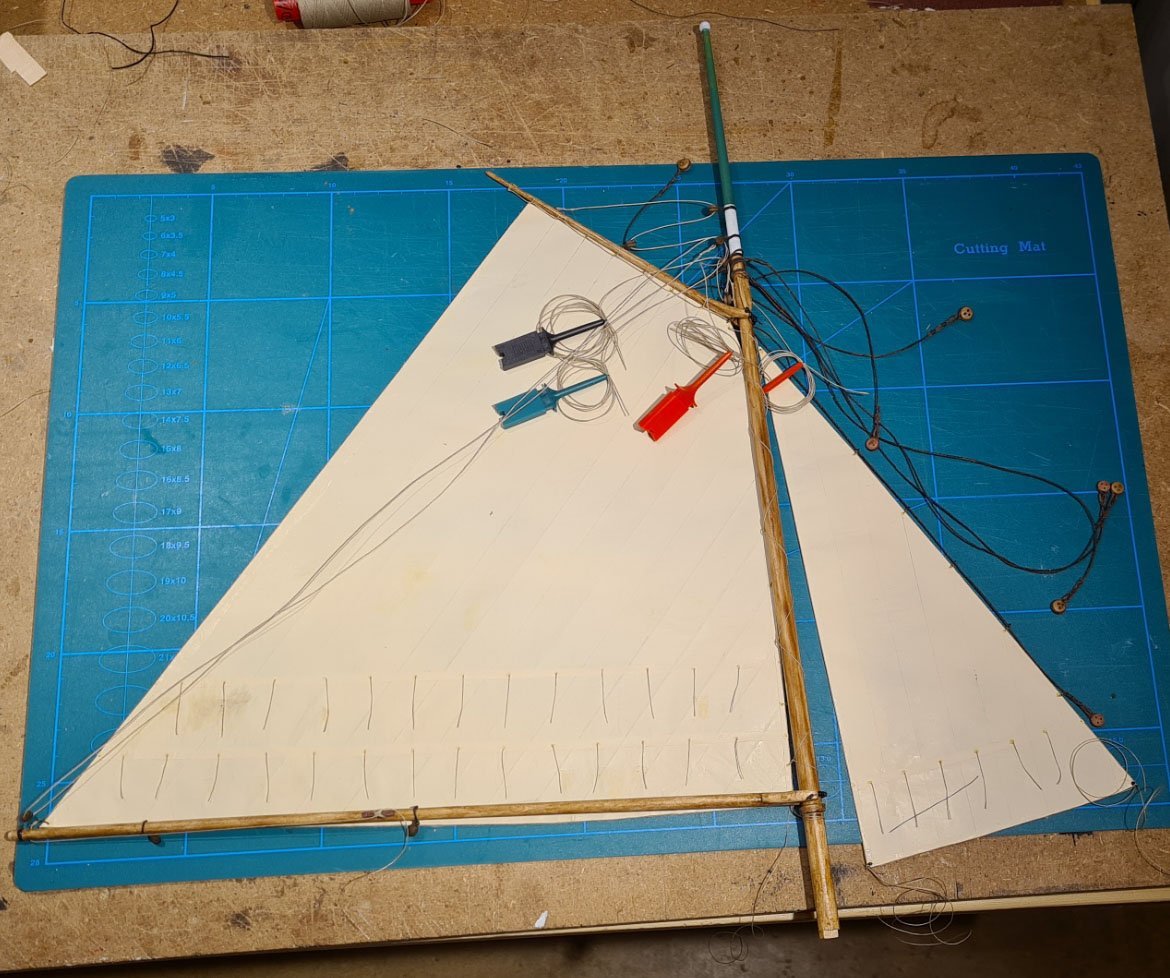
The sails are coming along nicely.
I have glued a bolt rope around the edge using PVA glue. Now I'm working on the reef points.
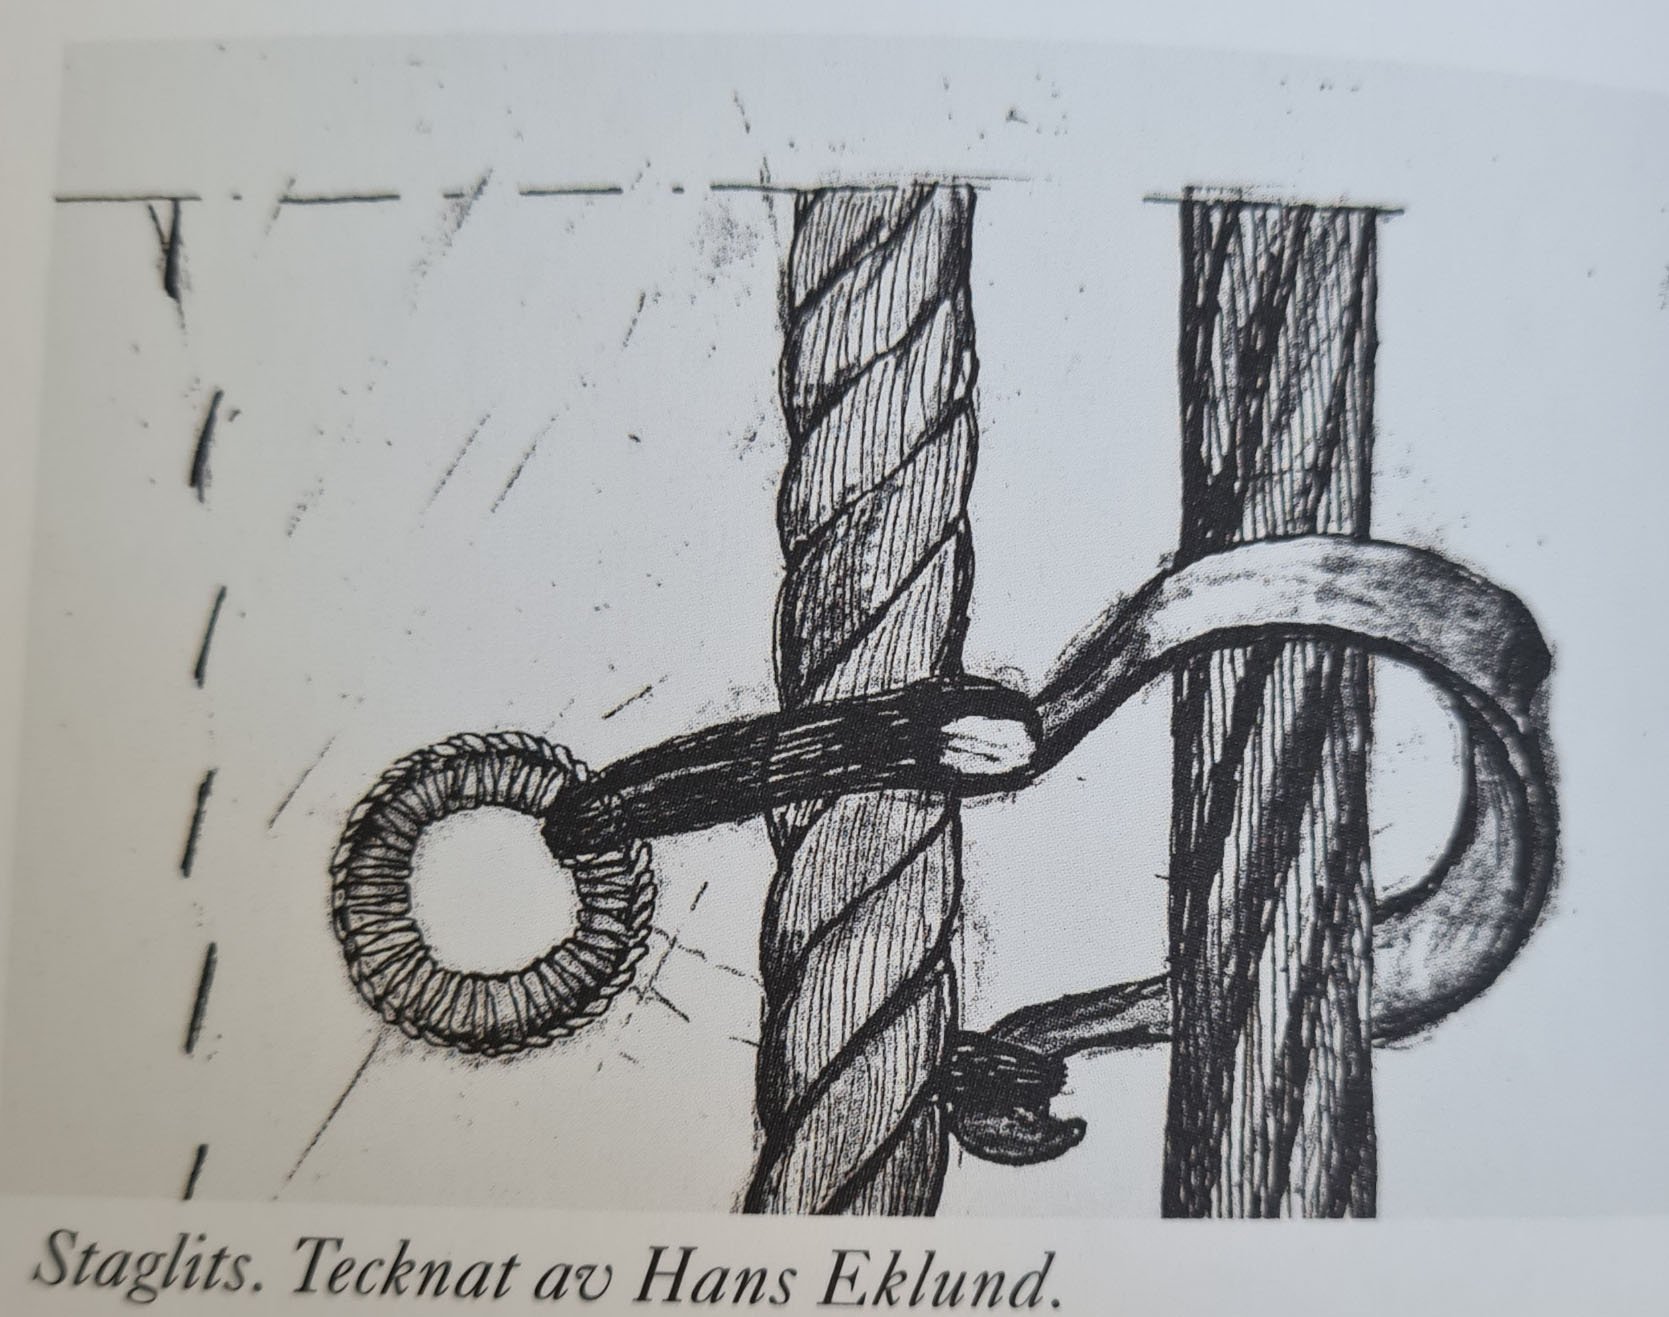
The next challenge will be the hanks for the stay sail. As far as I can tell, they should be ordinary omega shaped ones tied to the sail.
-
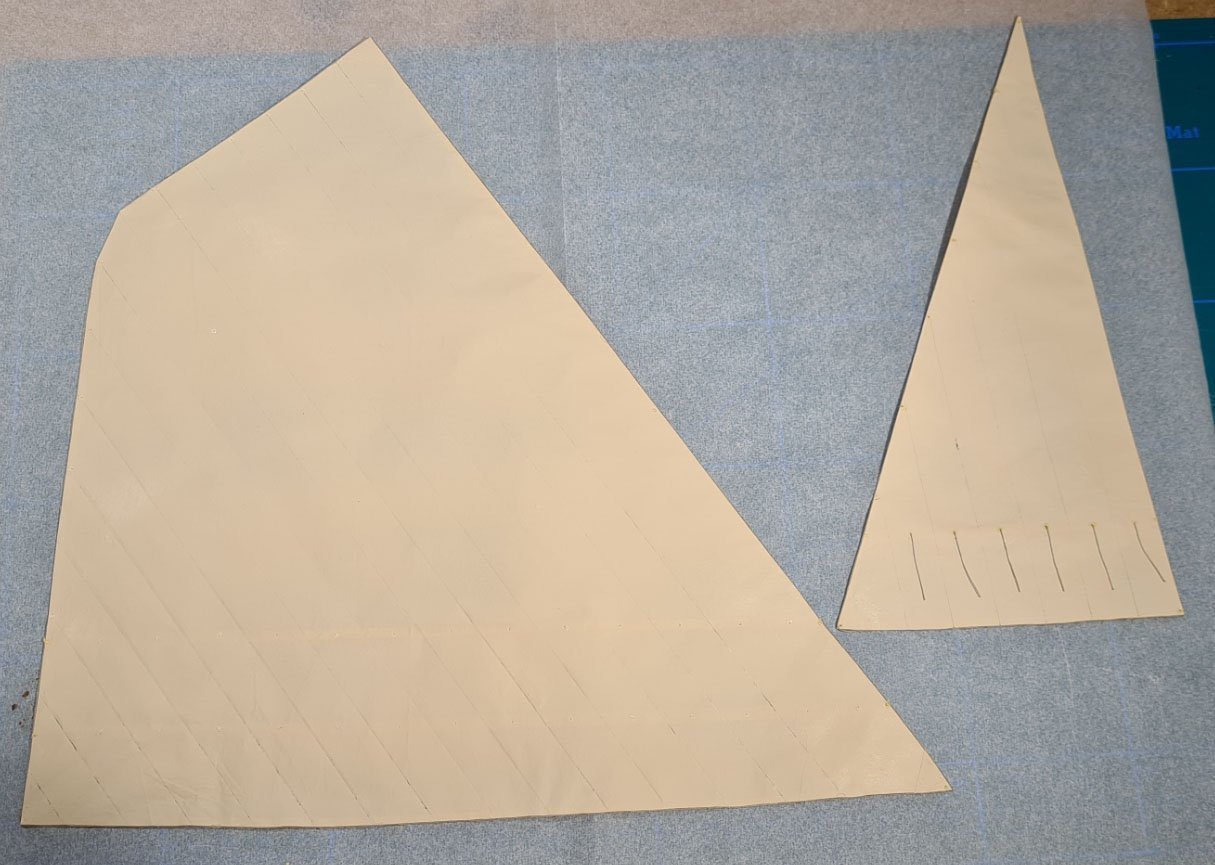
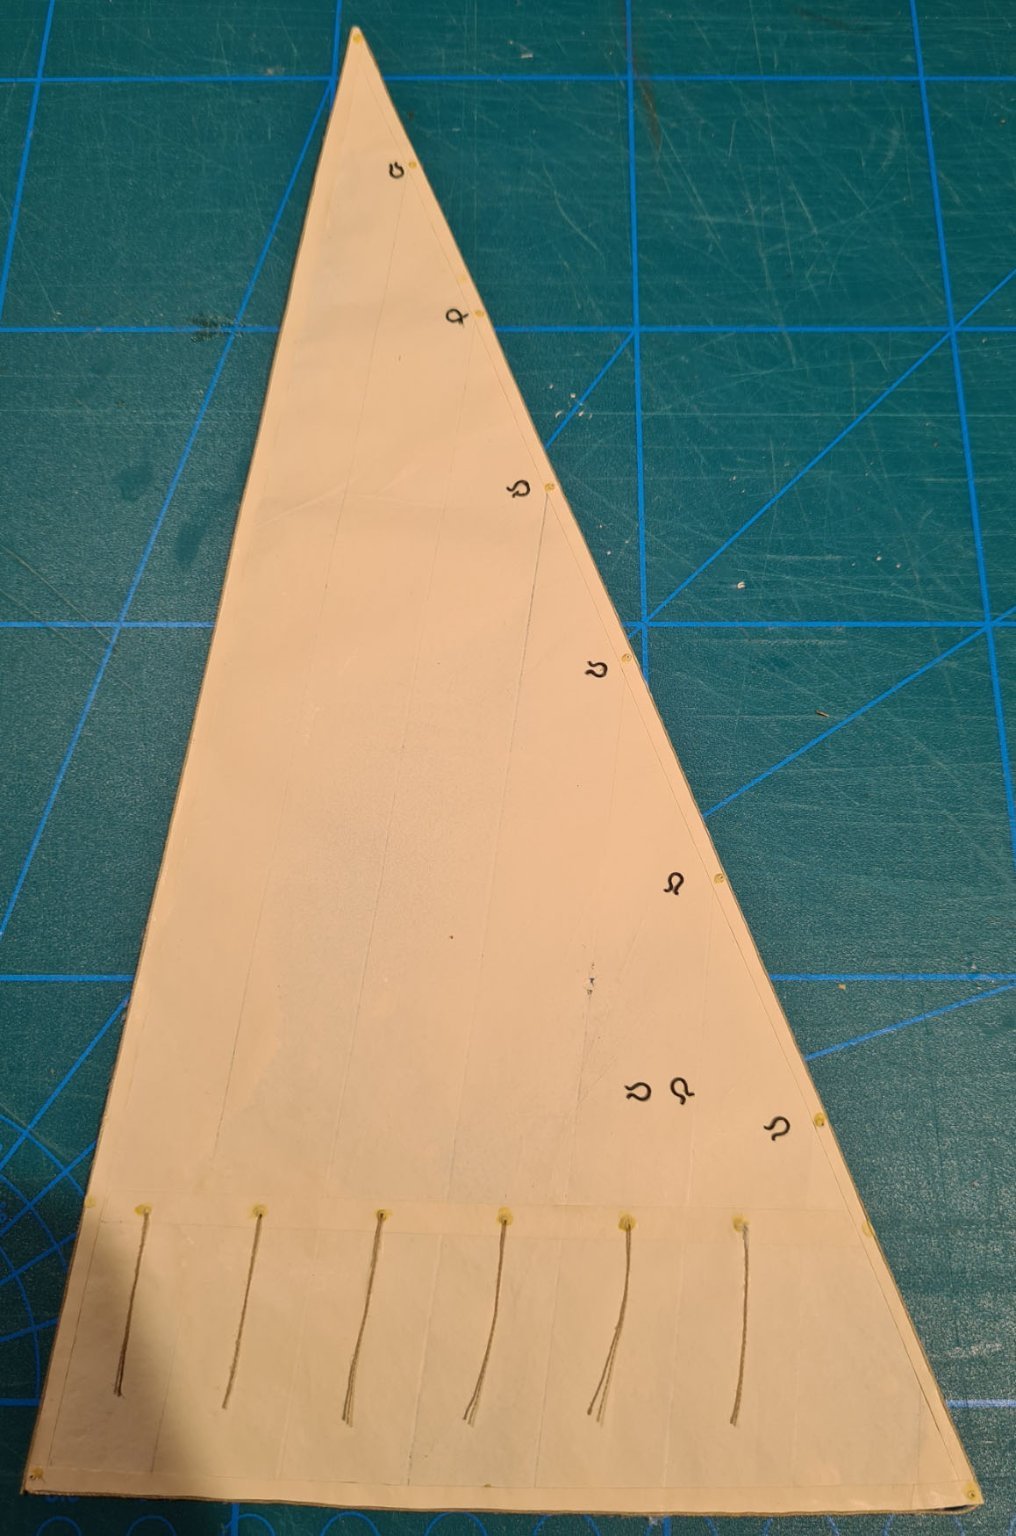
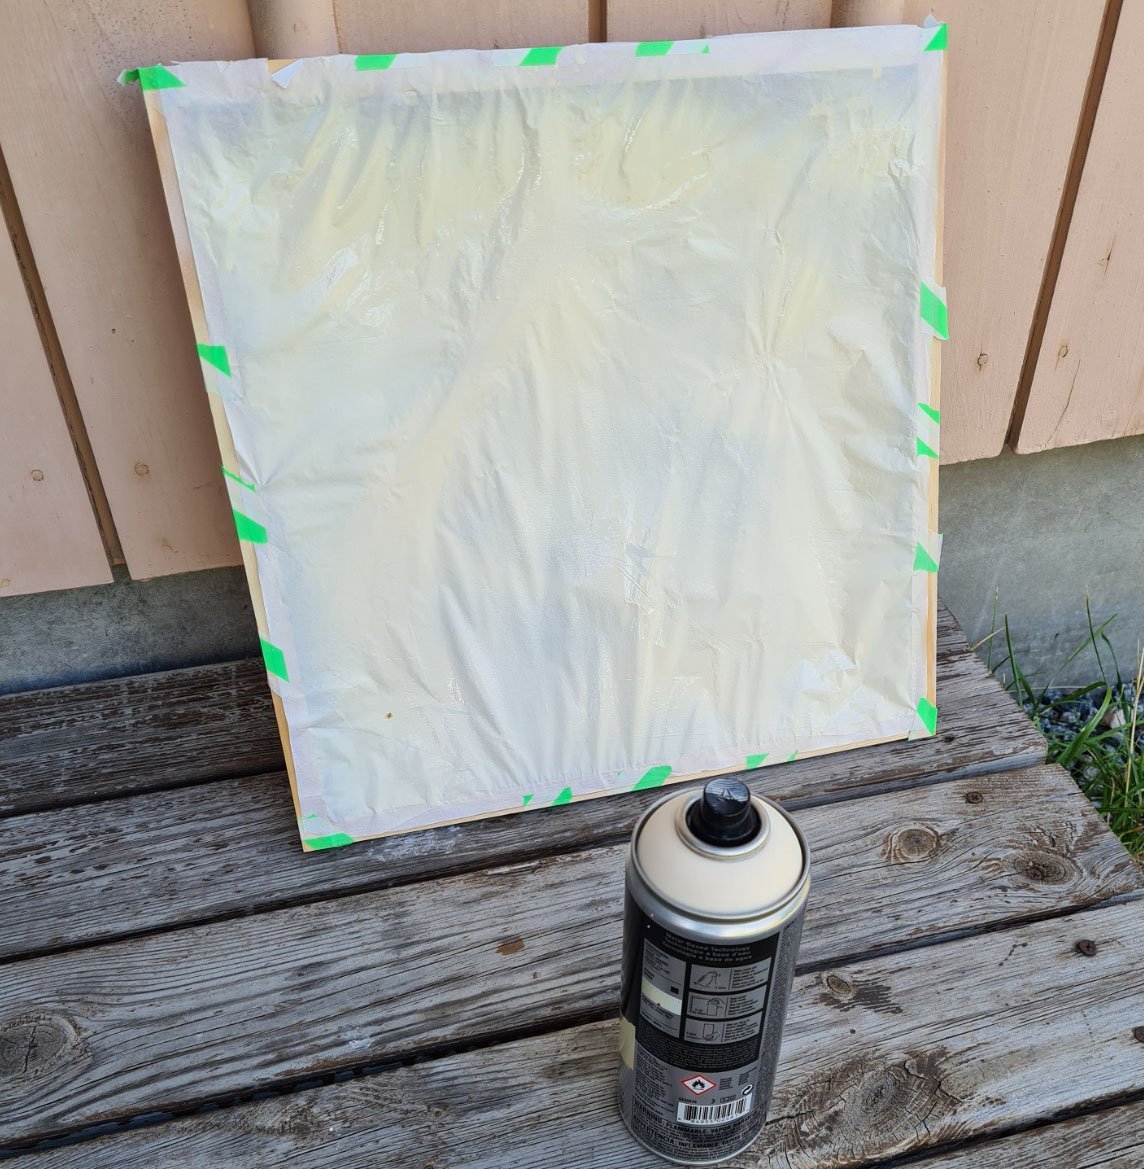
I have now started with the sails.
I plan to use paper. It is taped to a frame and I use a spray can with parchment colored acrylic paint. When the paper dries, it shrinks and becomes flat. I have previously tried to use a roller to paint paper for sails, but it was messy, and it was hard to get rid of the wrinkles.

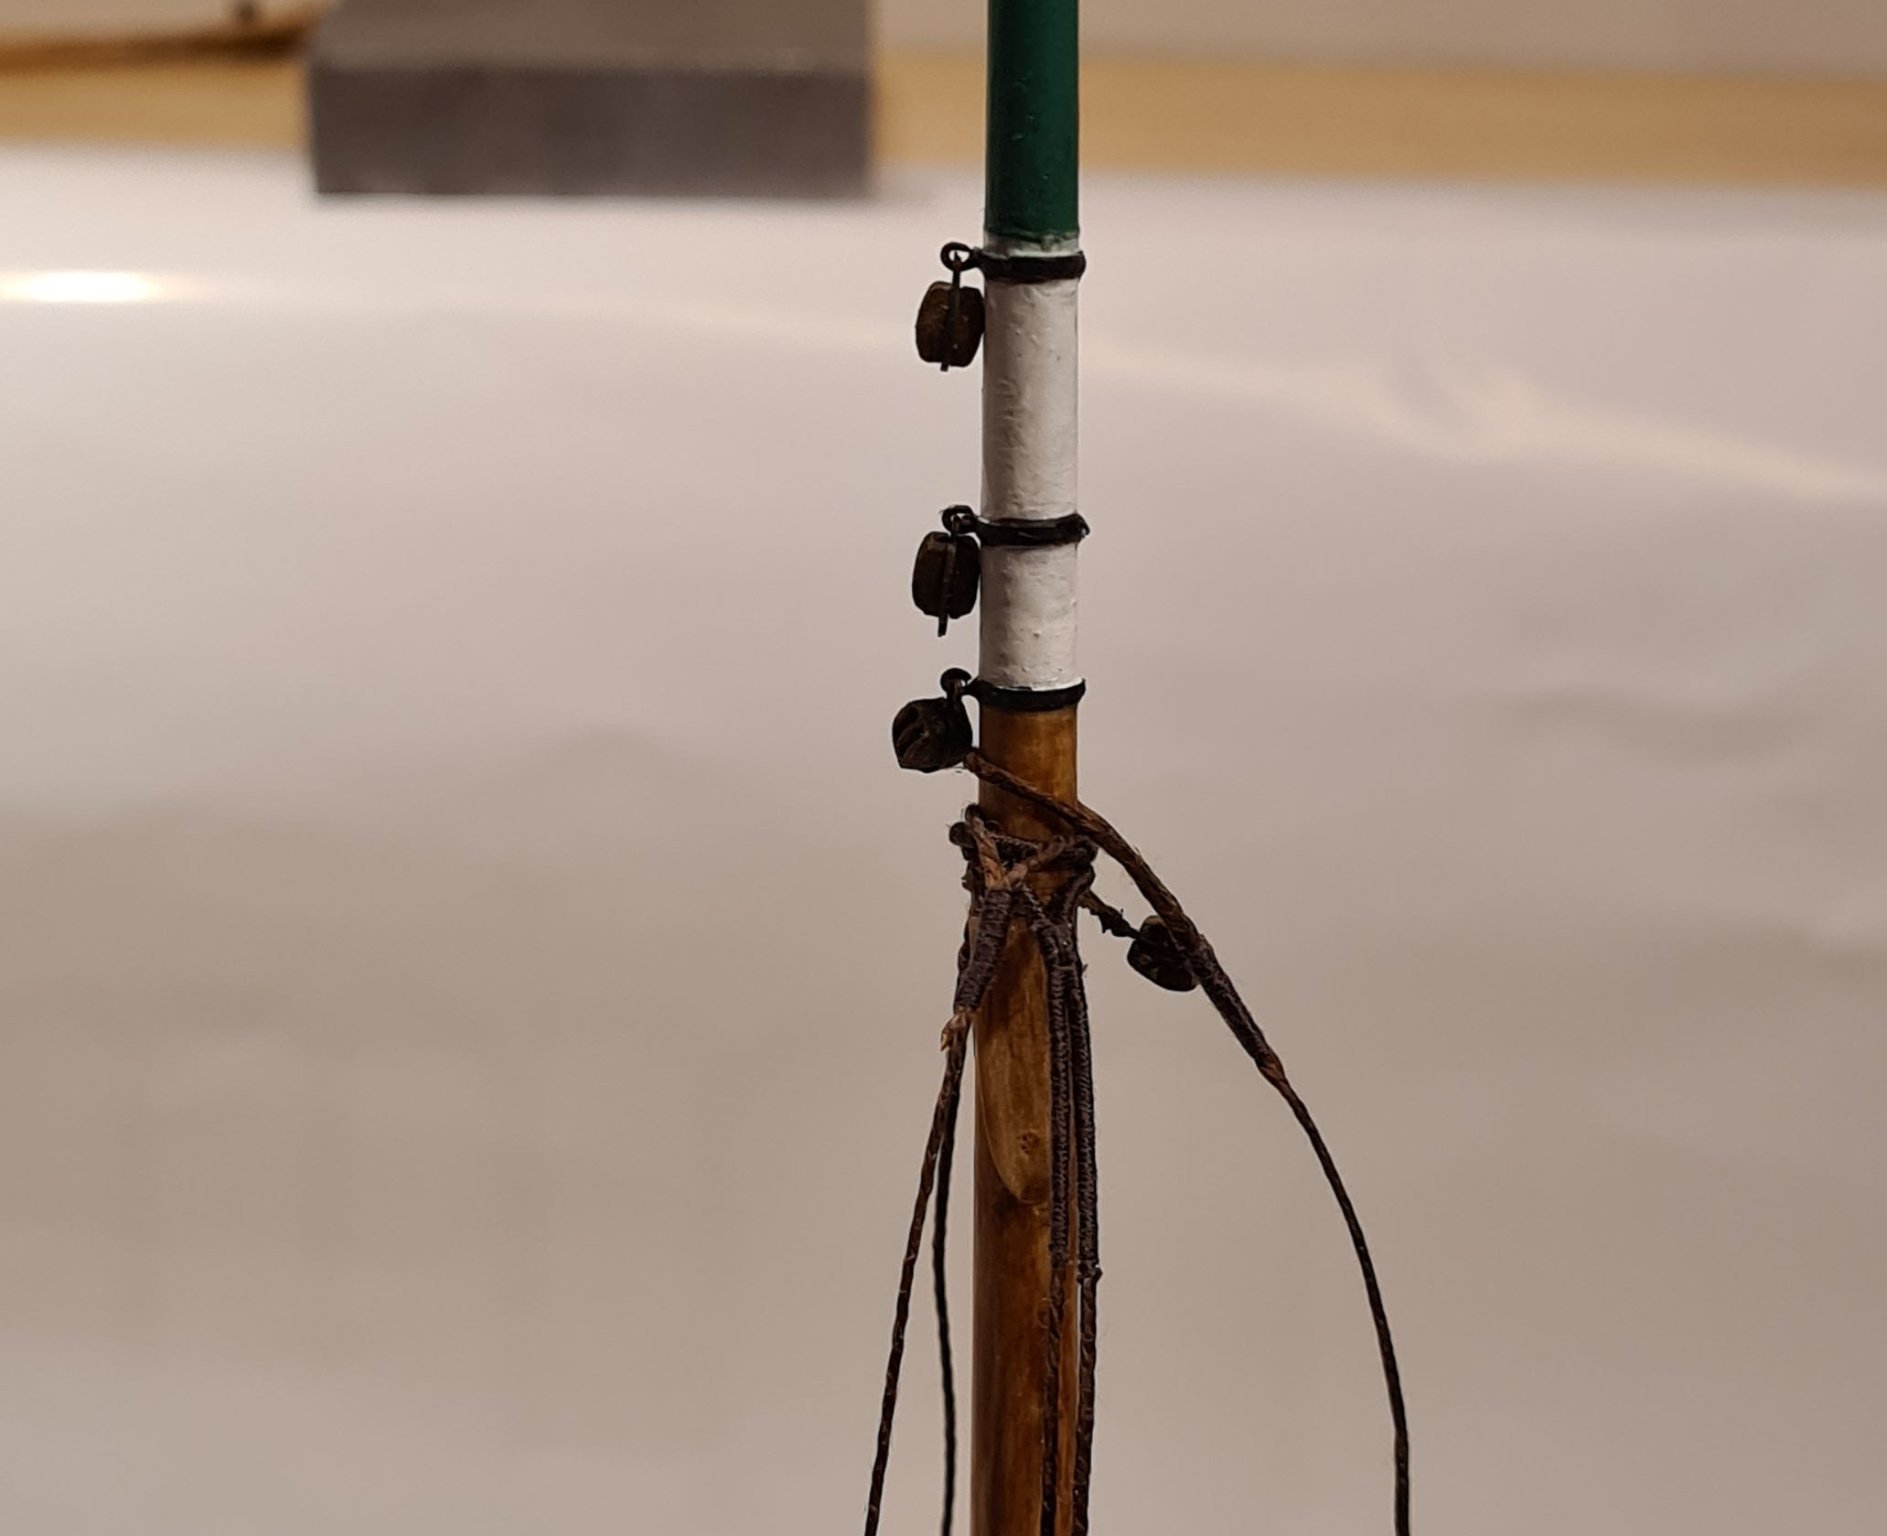
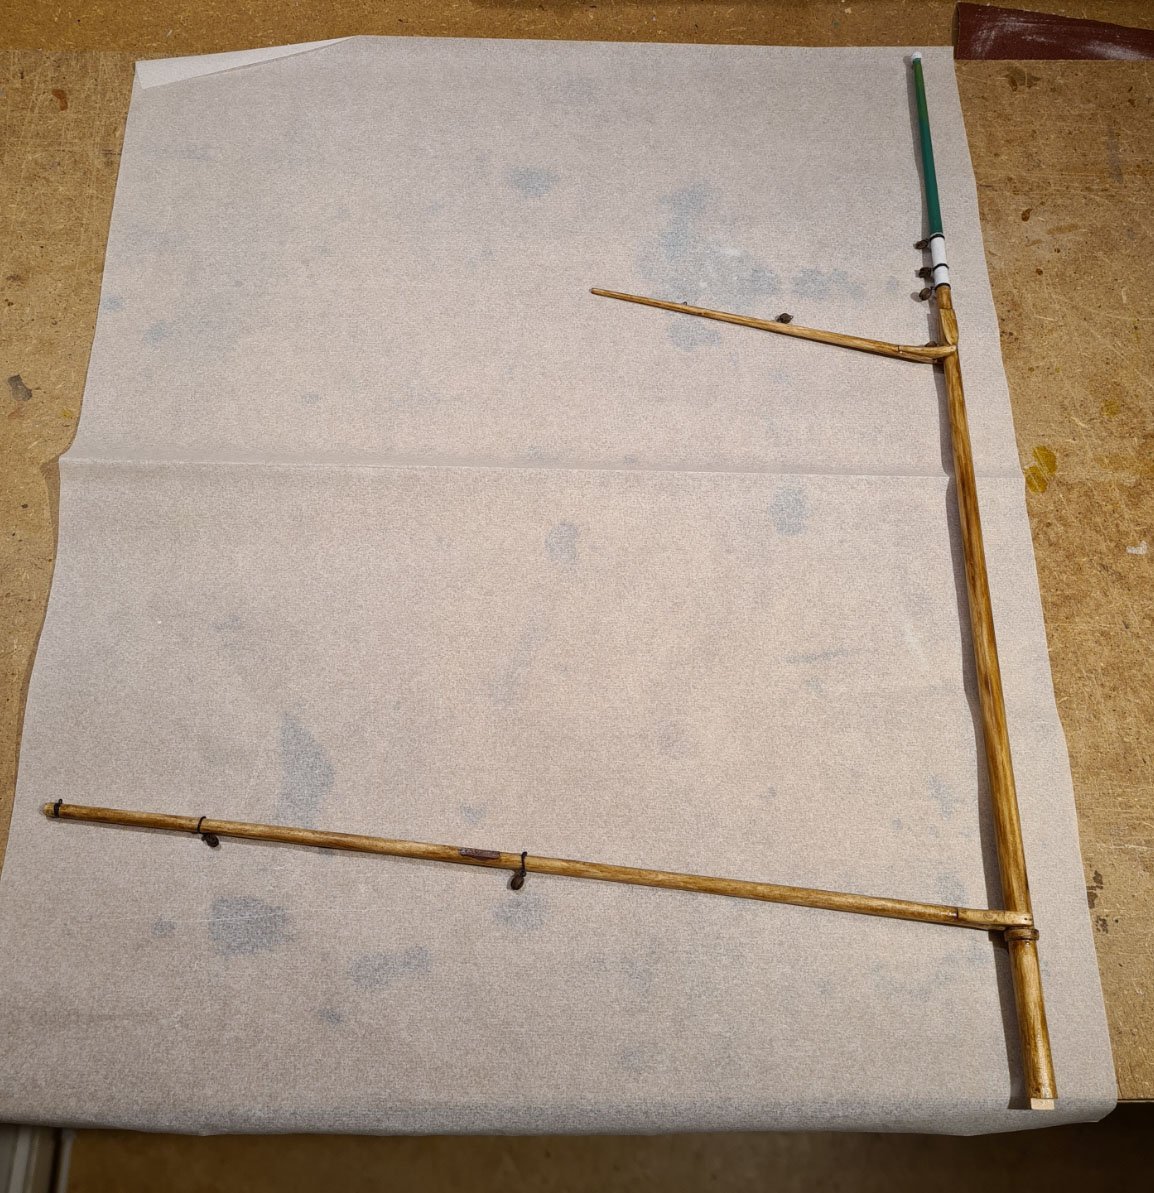
The mast, boom and gaff has got the blocks attached. The mast top has also been painted in traditional colors. The green top and white band seem to have been rather common for these ships.
- mtaylor, wefalck, GrandpaPhil and 3 others
-
6
-
-
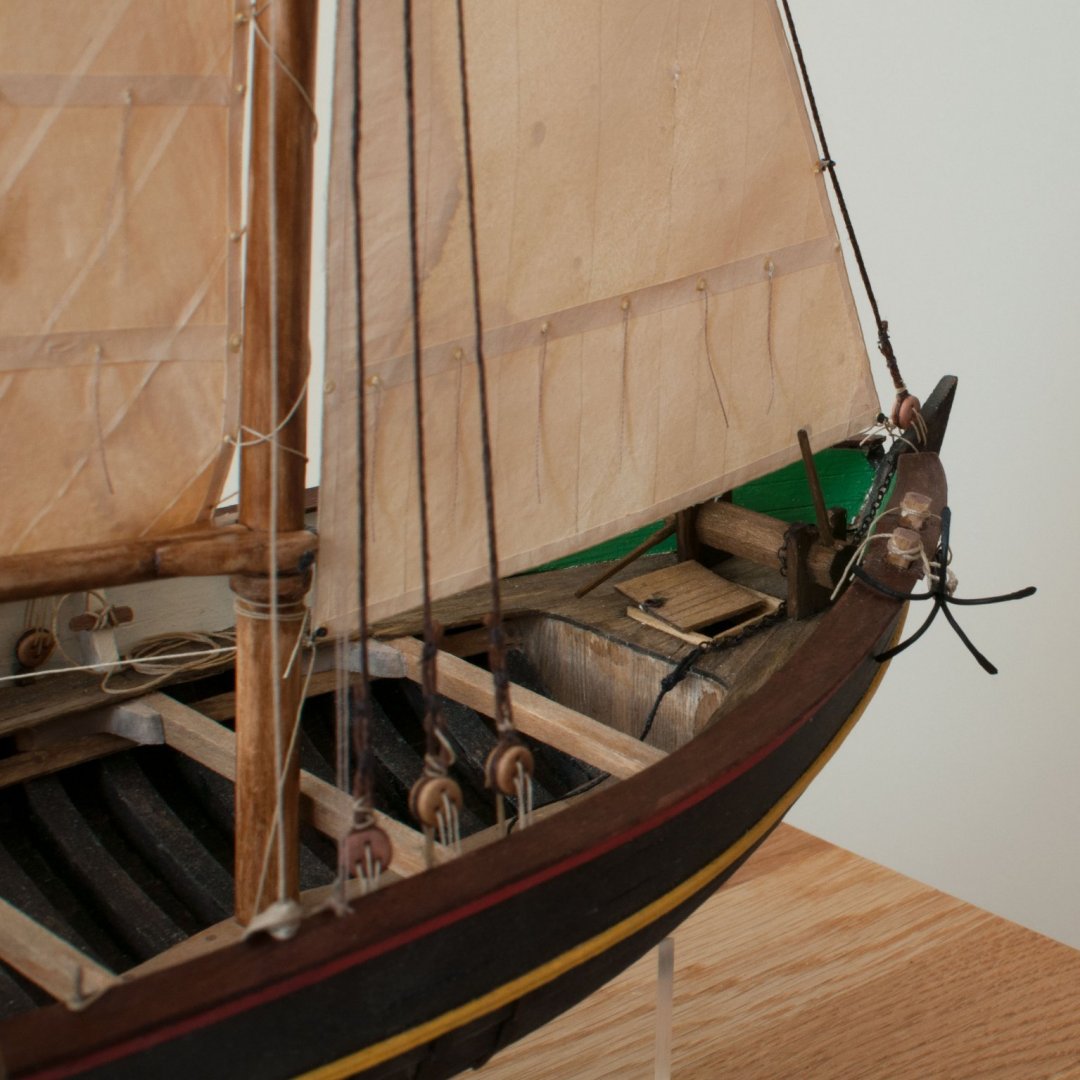
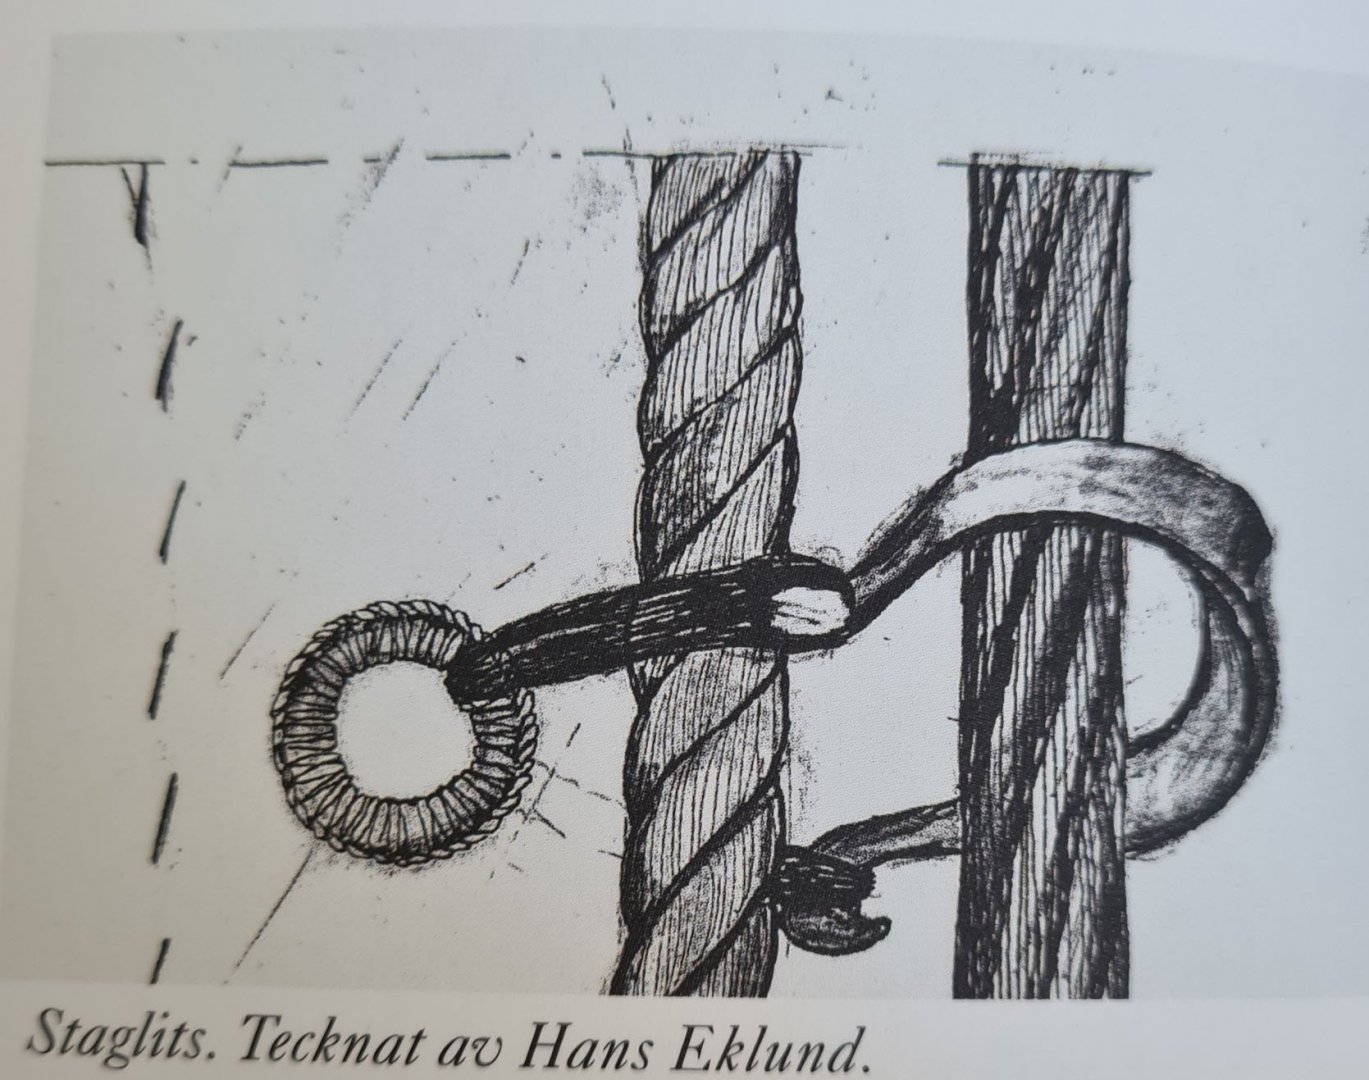
I short visit to the smithy, and we have an anchor. The parts are soldered together from brass wire.
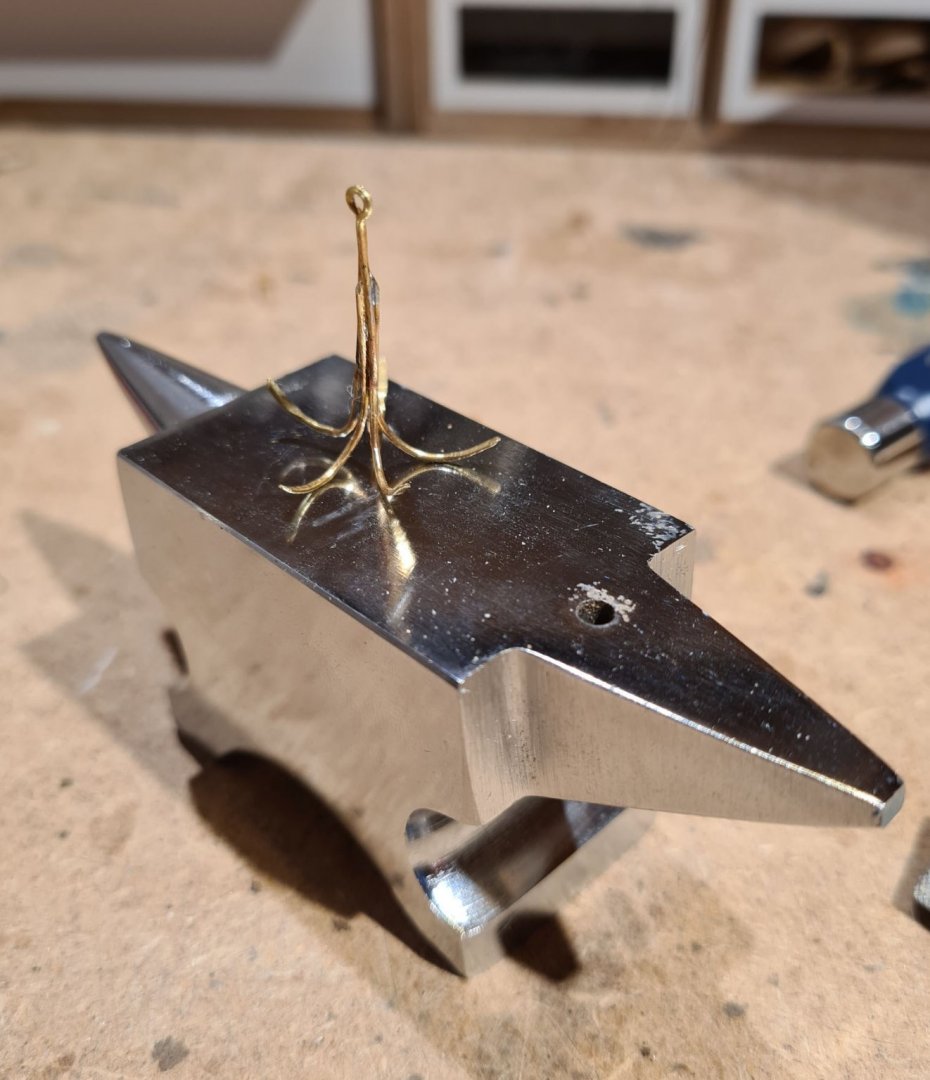
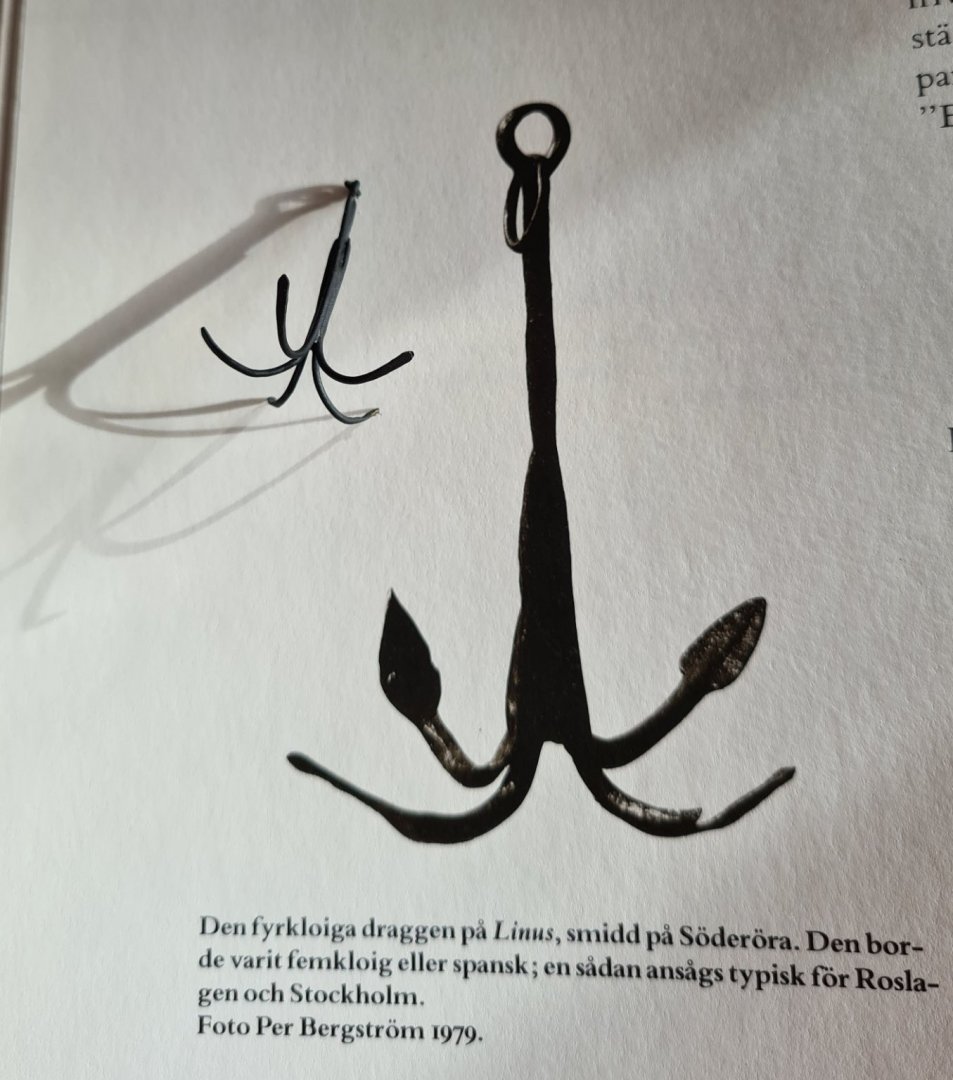
The traditional type of anchors for the Stockholm archipelago is said to be grapnel anchors with five tines. I'm not sure if that is true, especially not for the later era of these ships. Most pictures and models I have seen shows a common stock anchor, in particular those with foldable stocks.
However, since my model is of a smaller type, and is from the later part of the 19th century rather than early 20th, I decided on the grapnel type. Maybe the grapnel type was also easier to make in the local smithies in the archipelago?
-
The first step in rigging is the rudder. The rudder is rather large compared to the length of the water line. So I think that the blocks are needed to handle force on the relatively short tiller.

The blocks I got from HiSModel in the Czech Republic. The ones I got are in beech, which I have then stained to get a tarred look. The quality of these blocks are definitely comparable to the ones I have previously bought from Vanguard Models.
From the same source I got brass belaying pins. These I have first blackened, and the painted.
- Mark Pearse, GrandpaPhil, Tony Hunt and 4 others
-
7
-
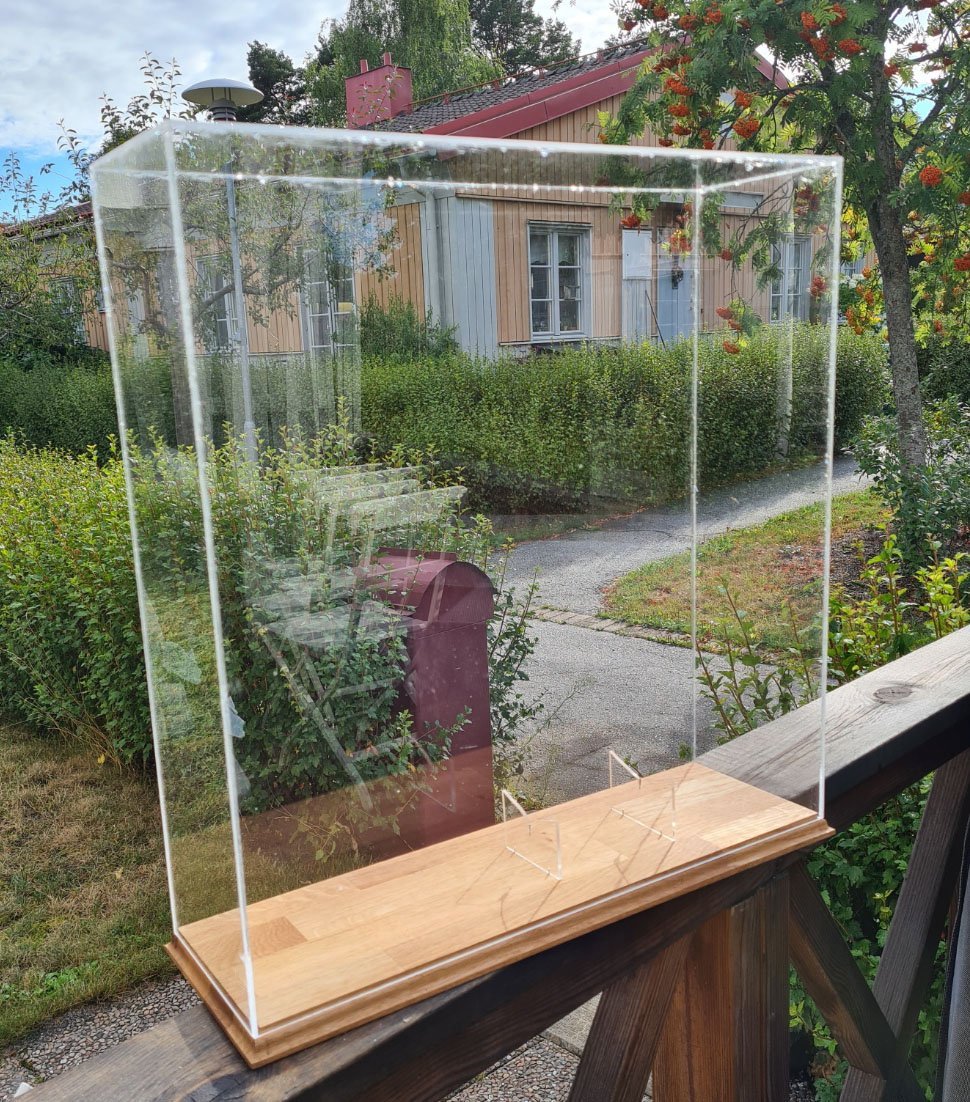
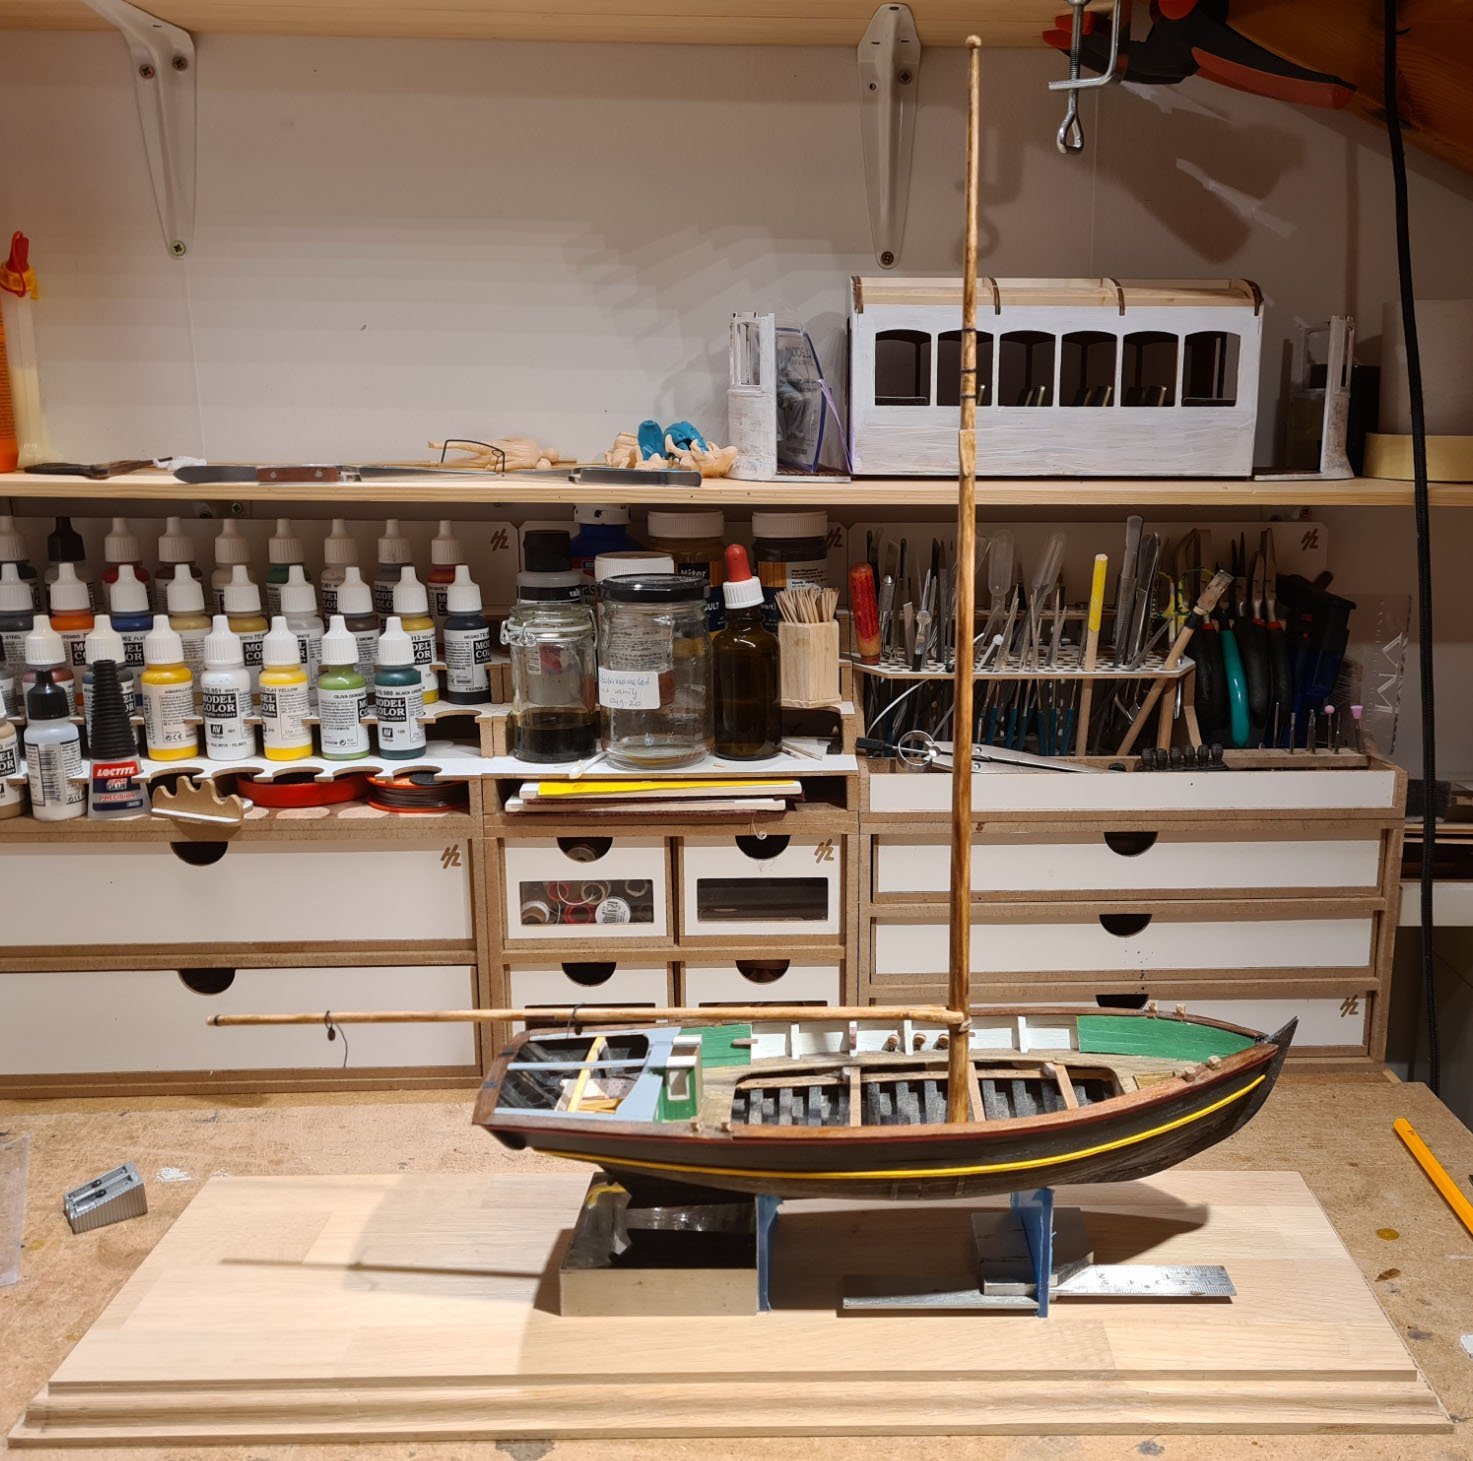
I have continued with the stand and case.
The boom is extremely long on these boats. So the hull needs to be placed quite a bit forward on the base.
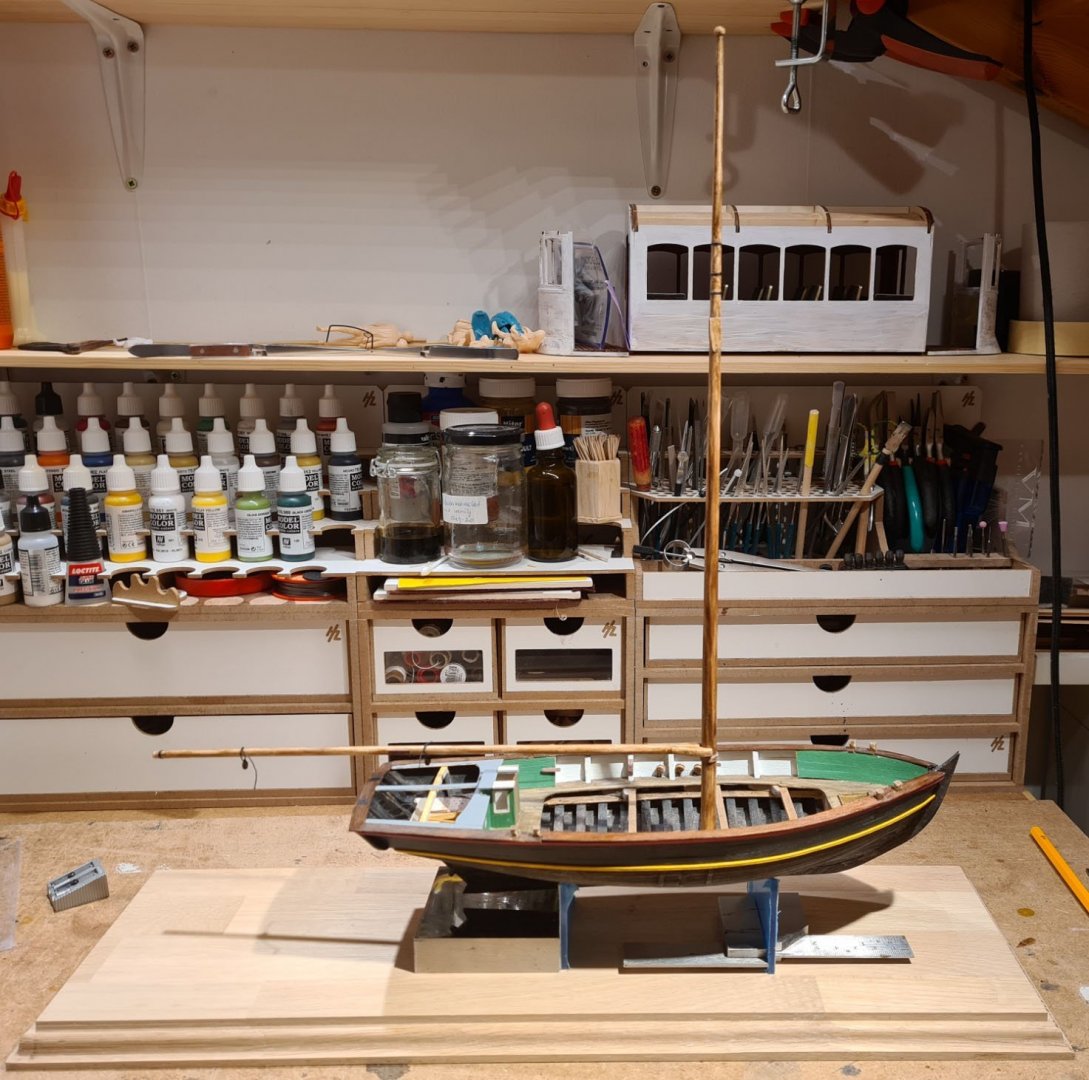
The case is now complete. It's made from 3 mm plexi glass. The base is oak with a coat of oil.
I choose to glue it with UV hardening glue. Unfortunatly it was a bit hard to control the amount from the tube, so there are some drops here and there. I hope that when the model is in there, they will not be as apparent as they are in a picture in out door light.
- Mark Pearse, G.L., Wintergreen and 6 others
-
9
-
Thank you all for the likes and the nice comments!
-
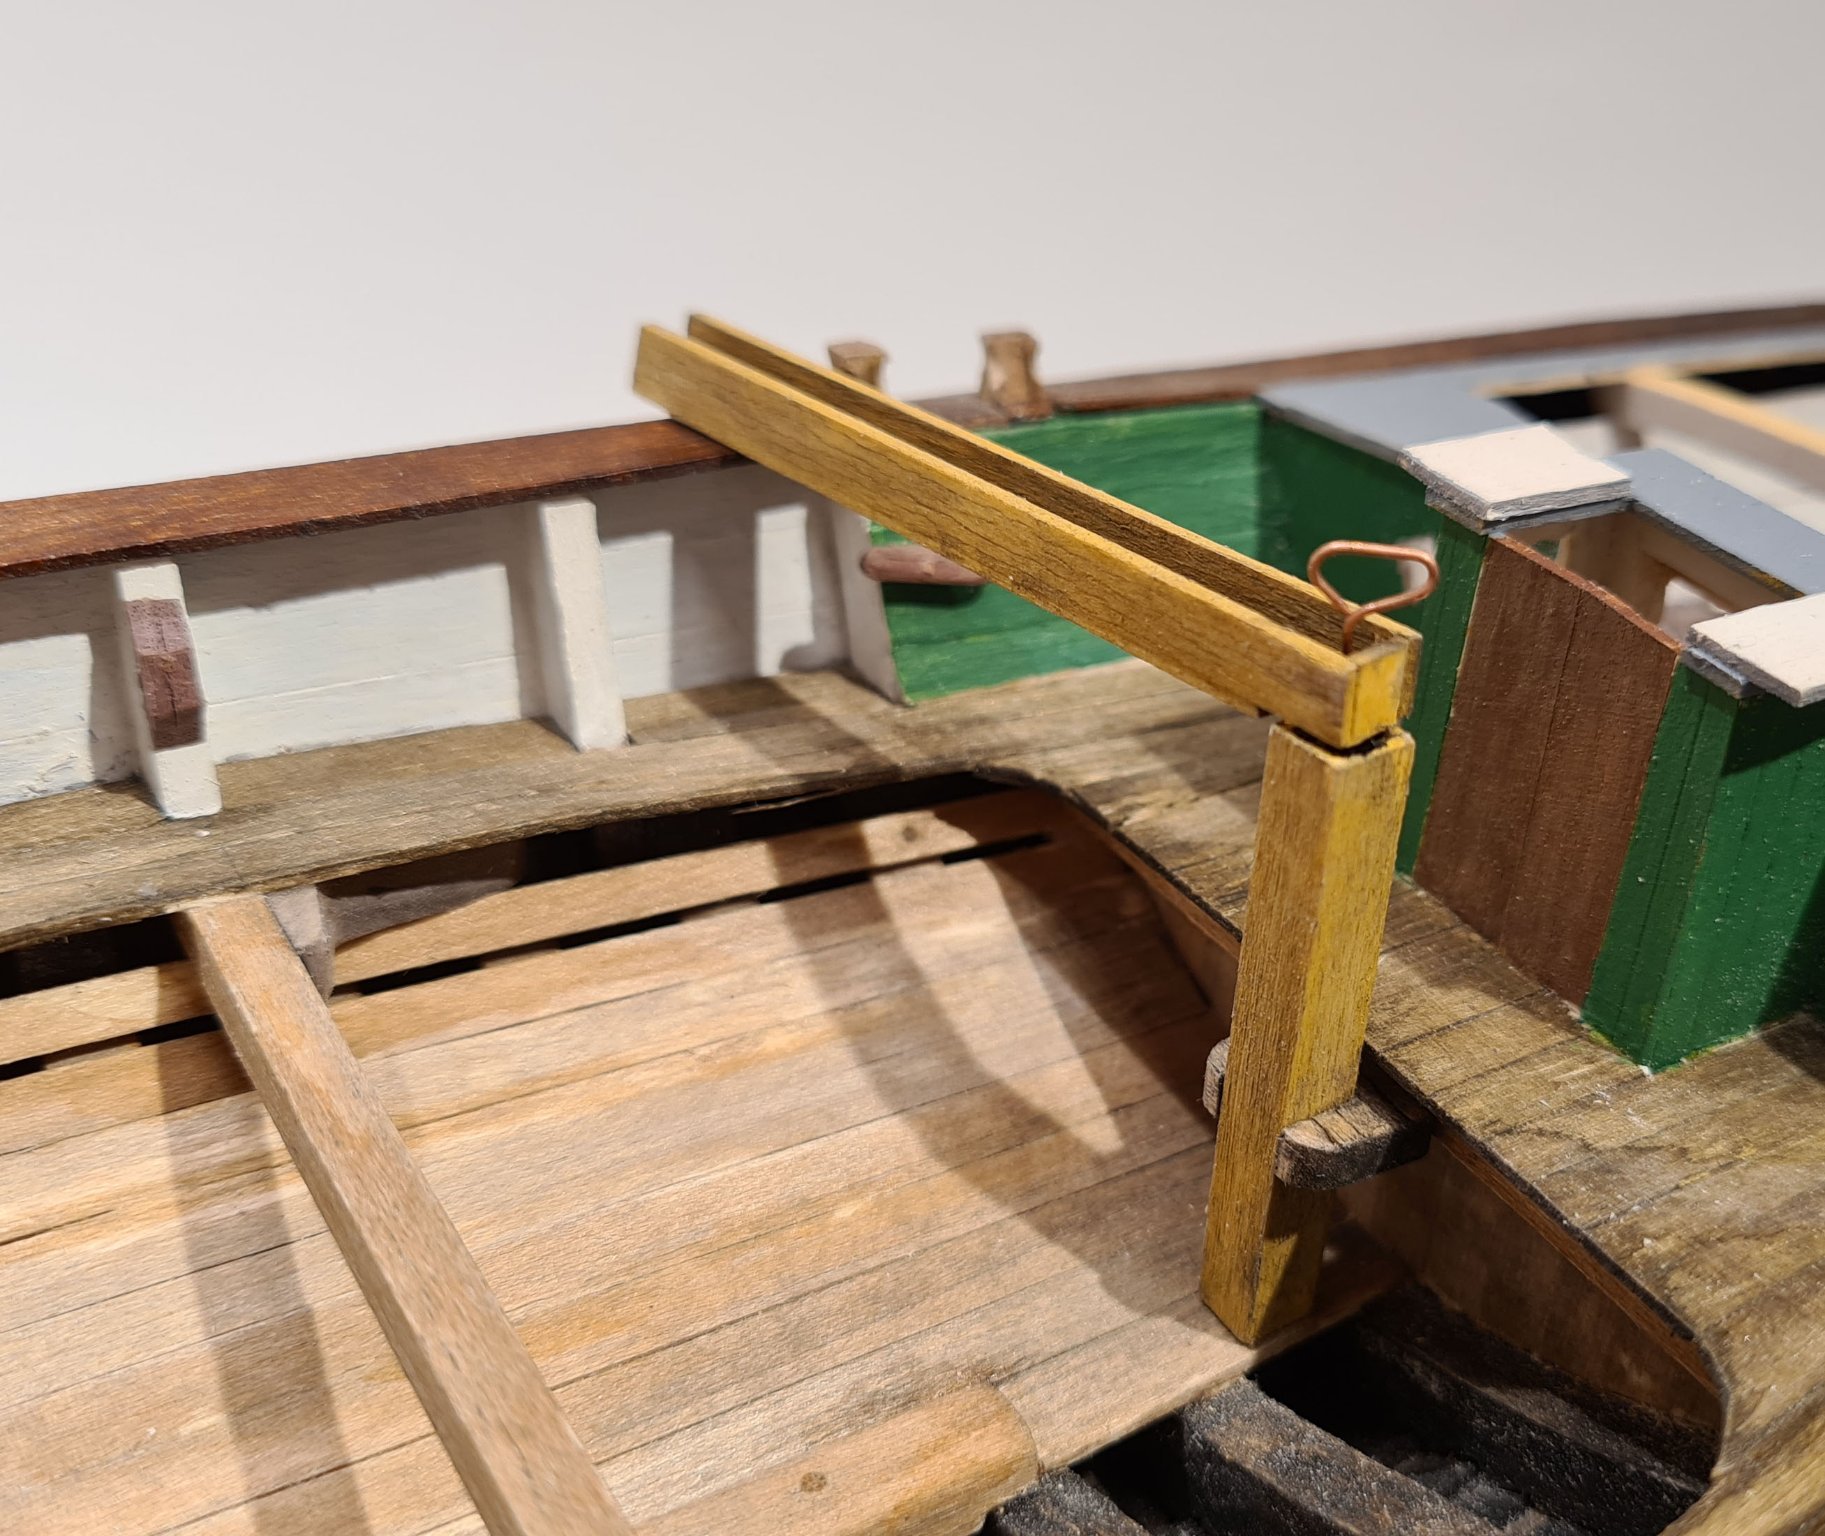
Many small things has been done since the last update.
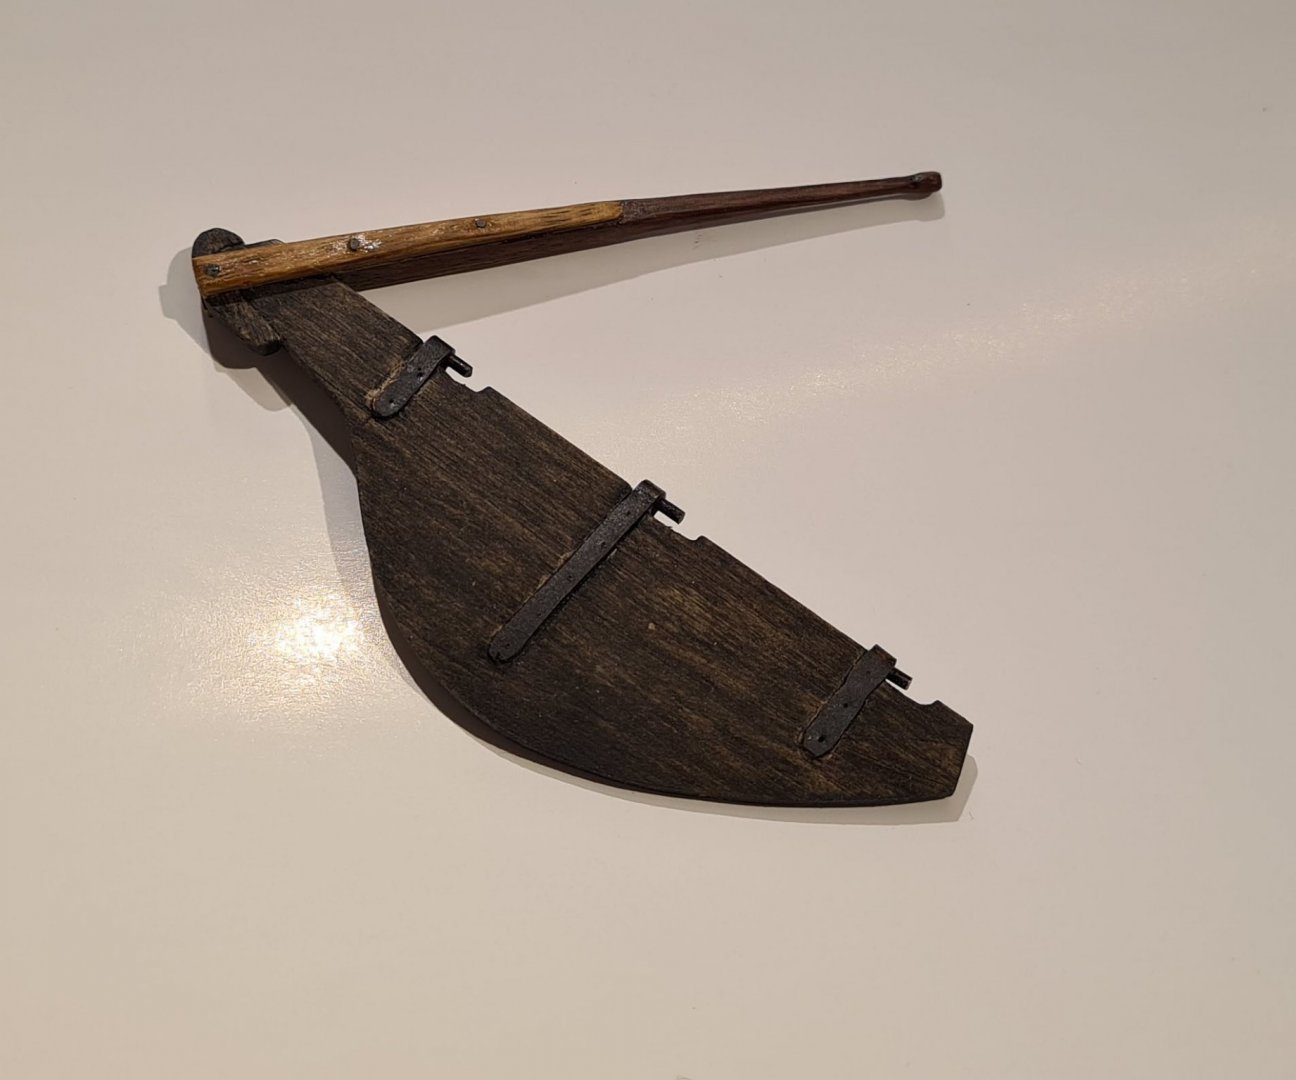
The rudder has been completed. The tiller is made of walnut rather than lime. I was afraid that the lime would have been to soft.
I have also made the pump. This is of a very simple type, just a simple handle to pull. It is placed where the skipper can work it while also handling the sails and rudder.

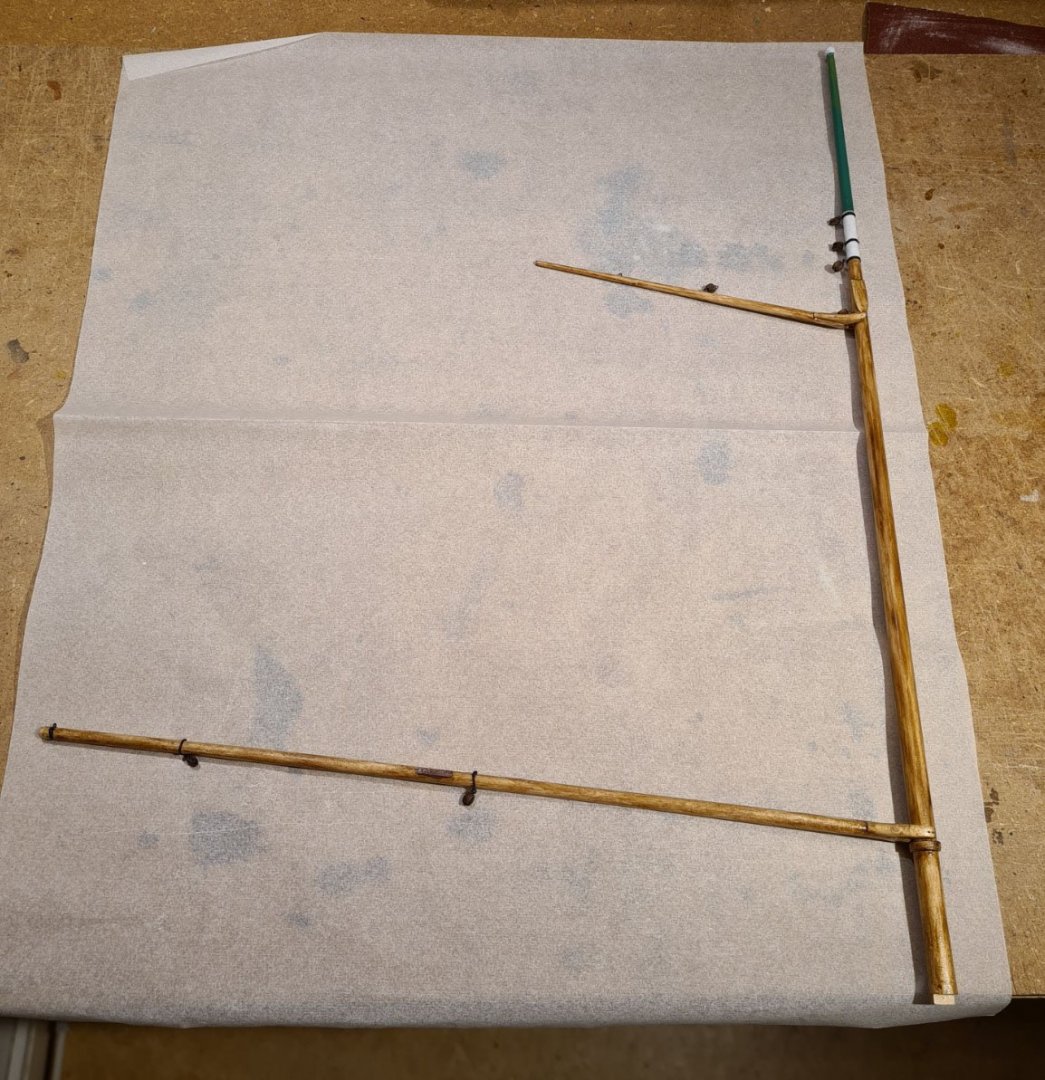
I have also started the mast, boom and gaff.
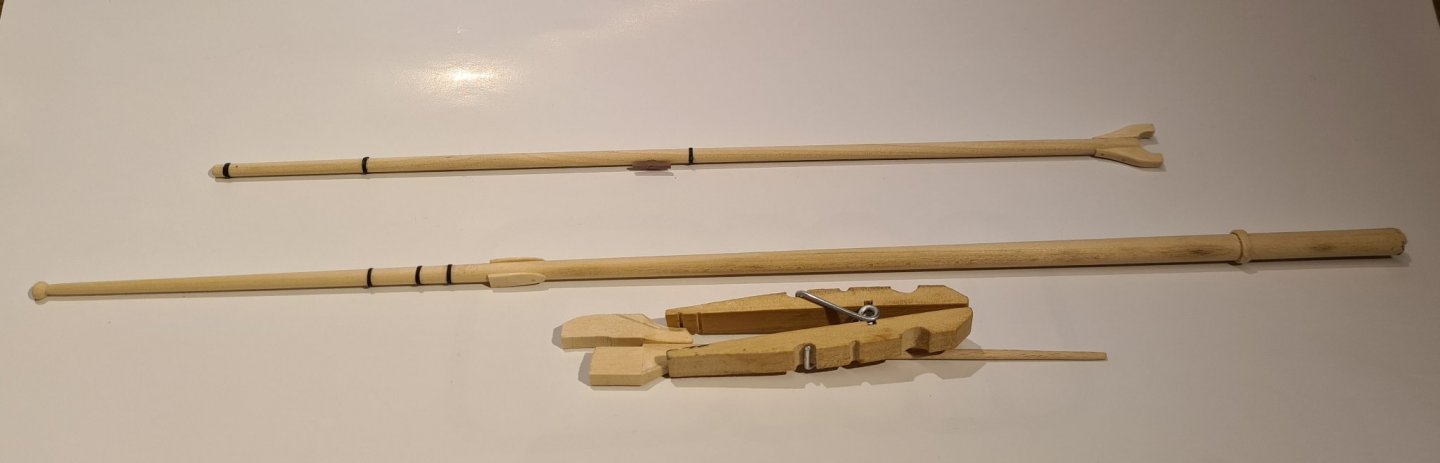
Before I install the mast and rig the lines and sail I will make the stand. For this I plan to use supports in plexiglass which will sit on a bottom plate of oak.


.jpg.419bea073bf83c53c64298f6920585be.jpg)


Meta by bolin - Billing Boats - 1:40 - original fore-and-aft schooner rig
in - Kit build logs for subjects built from 1901 - Present Day
Posted
The first thing I have started with is to reinforce the hull structure by adding supports between all the bulk heads. This should prevent it from twisting back after I have corrected it, and give a more solid foundation for the planking.
I have also prepared and adjusted the positions and rake of the masts. It's easier to do this now, before planking and deck is added. The mizzen mast is moved a bit aft after I have measured its relative position in the photos.