HOLIDAY DONATION DRIVE - SUPPORT MSW - DO YOUR PART TO KEEP THIS GREAT FORUM GOING! (Only 36 donations so far out of 49,000 members - C'mon guys!)
×


John Ruy
-
Posts
1,568 -
Joined
-
Last visited
Content Type
Profiles
Forums
Gallery
Events
Everything posted by John Ruy
-
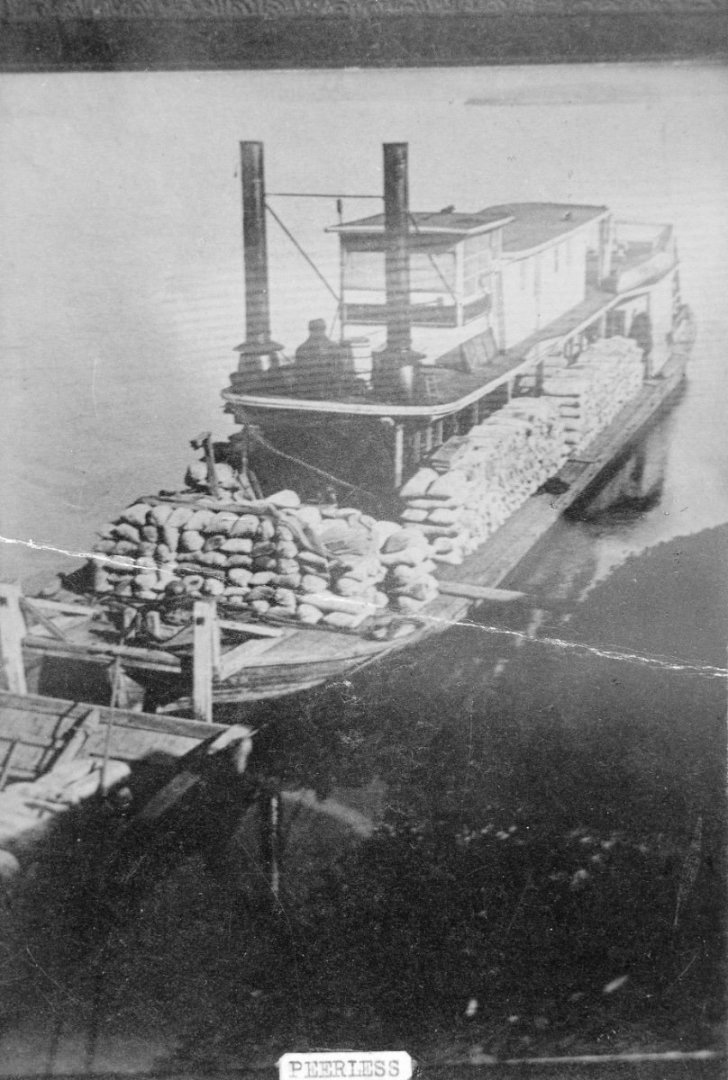
 Eric, I think you are on to something. On my R.E.Lee, I painted the planking to look water proofed and to hide the plywood grain. If you use a covering (i.e. silk span) to mimic painted canvas you can hide the plywood grain without having to plank the boiler deck. The photos you have of the Peerless appear to show that deck coated as such. Sounds like a great idea.
 -
agreed… additionally as I tend to chose less tall ships I personally am headed to more miniature scale ships. I am currently working on a vintage Red Jacket and am using the Bluejacket plans at 1/2 scale. The smaller scale tall ships meet my shelf requirements.
-
Thank you… I simply found an image on the internet and reduced it on my color/printer for the compass. Used white glue to place and arylic clear semi glass to cover the paper compass. Good luck with your build the instruction book is excellent, I learned a lot building that particular model. BTW… Do you have a build log? John
-
The CA Thayer has my vote. I have been looking this one for a long time. 1/8” = 1’ would be nice. 😊
-
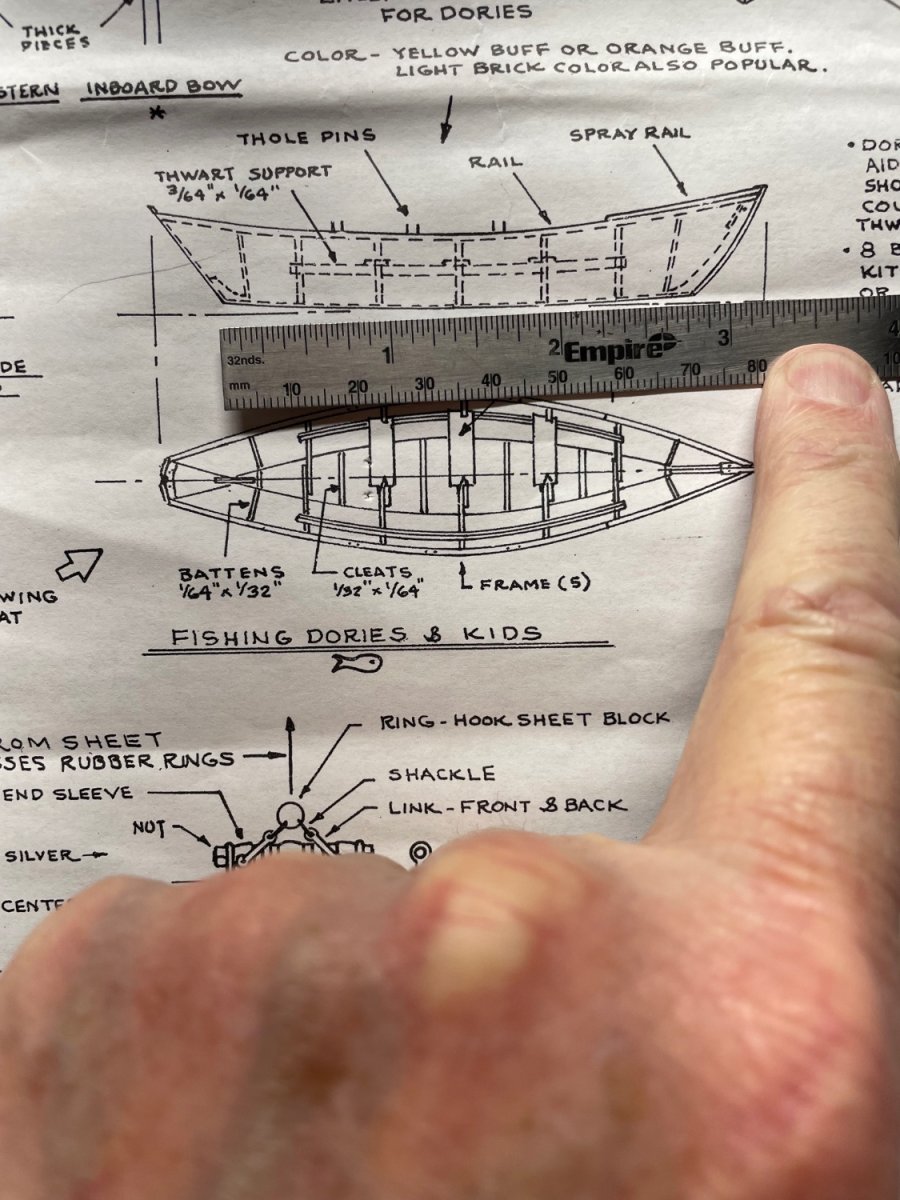
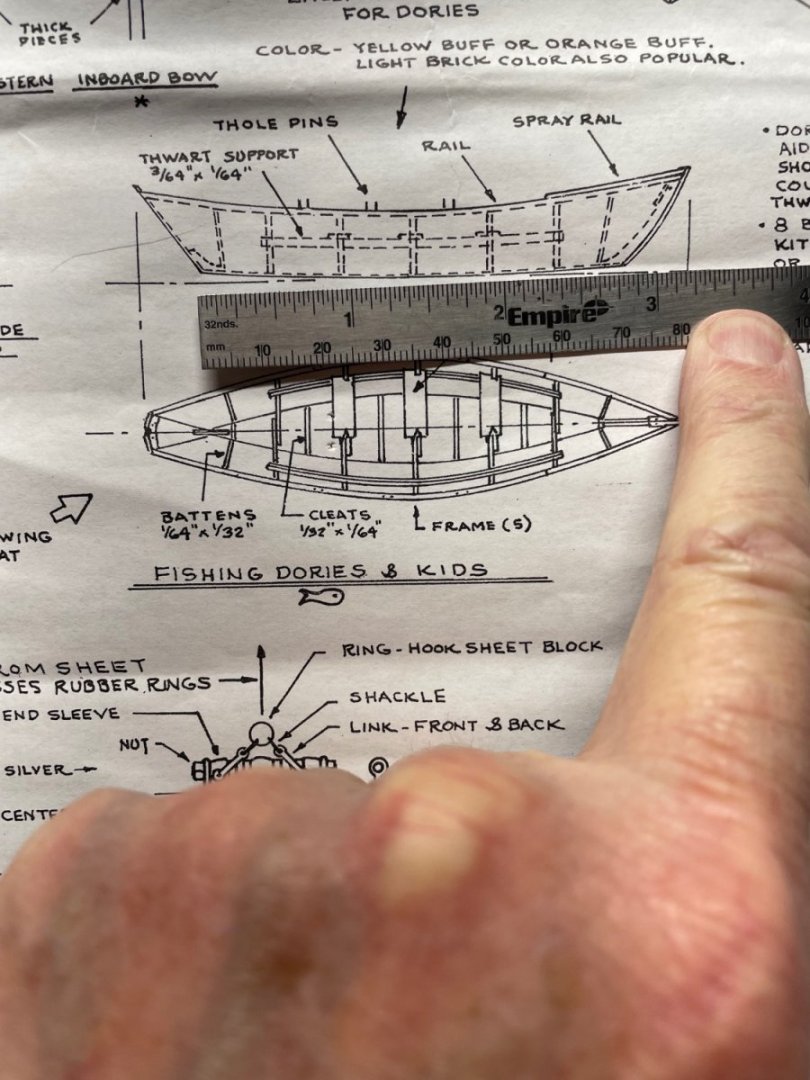
Could the issue be as simple as measuring the bottom of the Dory rather than the rail stem to stern? Measuring the bottom at 2.75 inches and dividing that by .1875 (3/16” = 1’) I get 14.66666 Feet as the length of the Dory as drawn. Just a thought…
-
Eric, I was born in Quincy Illinois and lived in the country NE of there. I was raised there 1953 and left there when I graduated high school 1971. I certainly remember the Lock and Dams. Your explanation on no ice flows makes sense, not that my family would venture over to see them if they were there. 😆 Great info on navigation of the Missouri River. 👍
-
Thanks Ron… I’m plugging along, rat lines are one of my least favorite tasks. They just seem to take forever. Very tedious! 😜 The half hitch is much simpler than the clove hitch and the knot is smaller. As you said, the glue holds it in place. Maybe it’s “inspired laziness” as Nic puts it. 😆 It is much easier and the deference is not noticeable.
- 282 replies
-
- 1
-

-
- Bluenose
- Model Shipways
- (and 1 more)
-
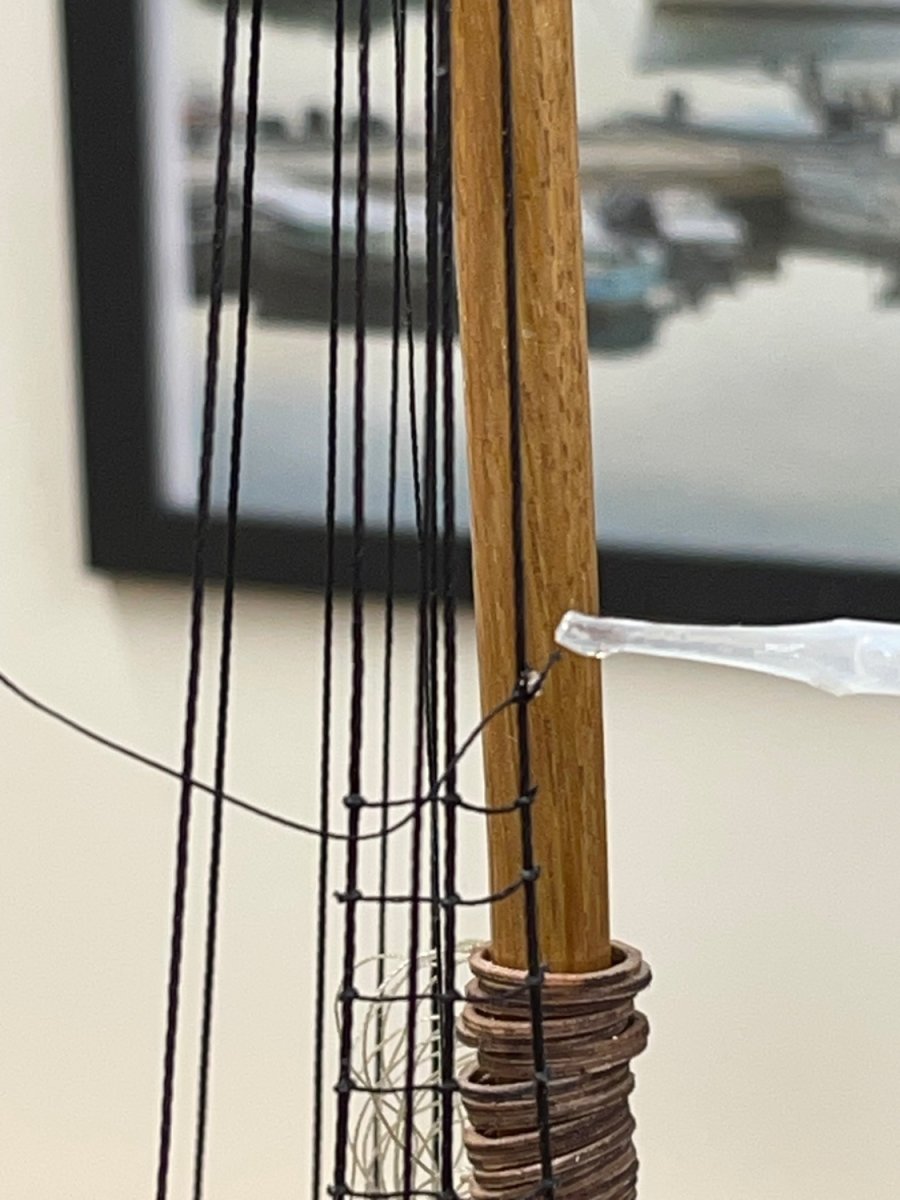
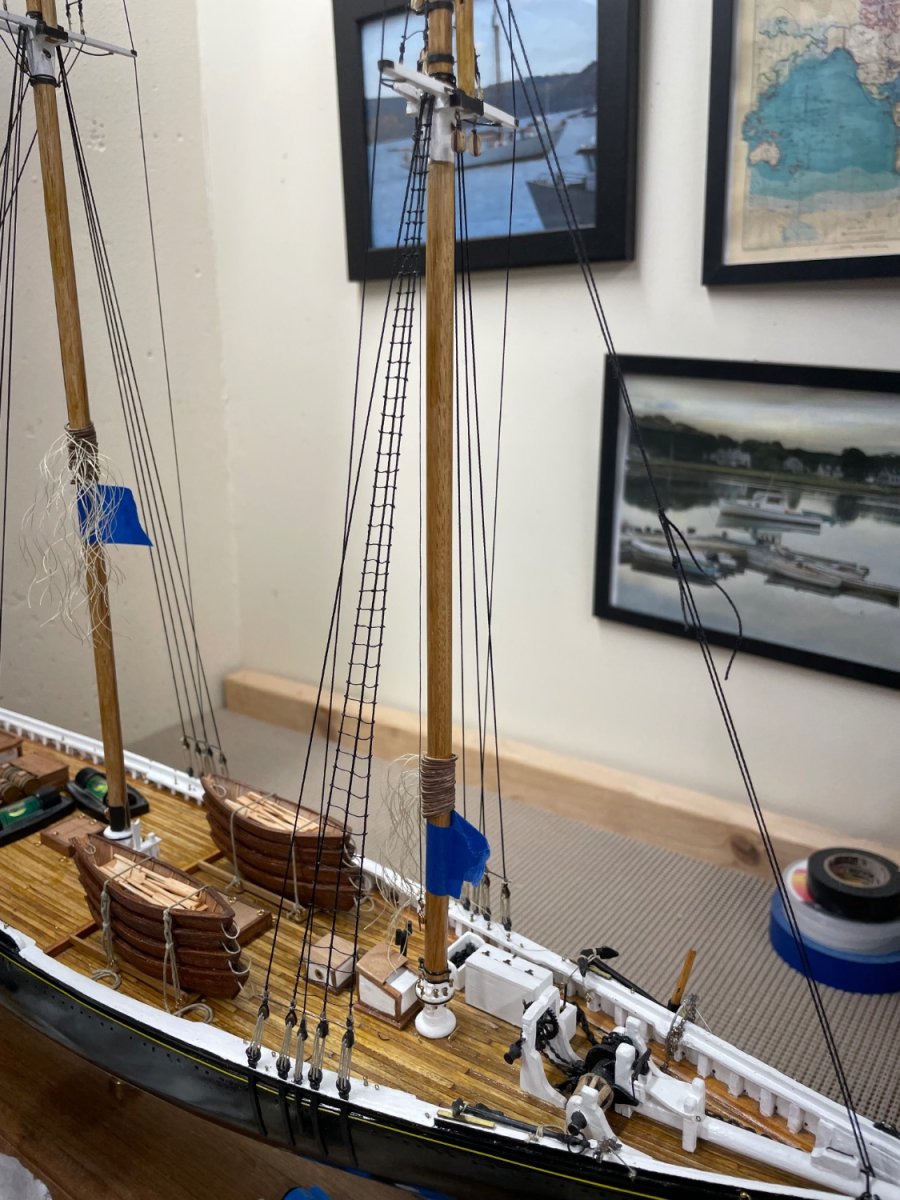
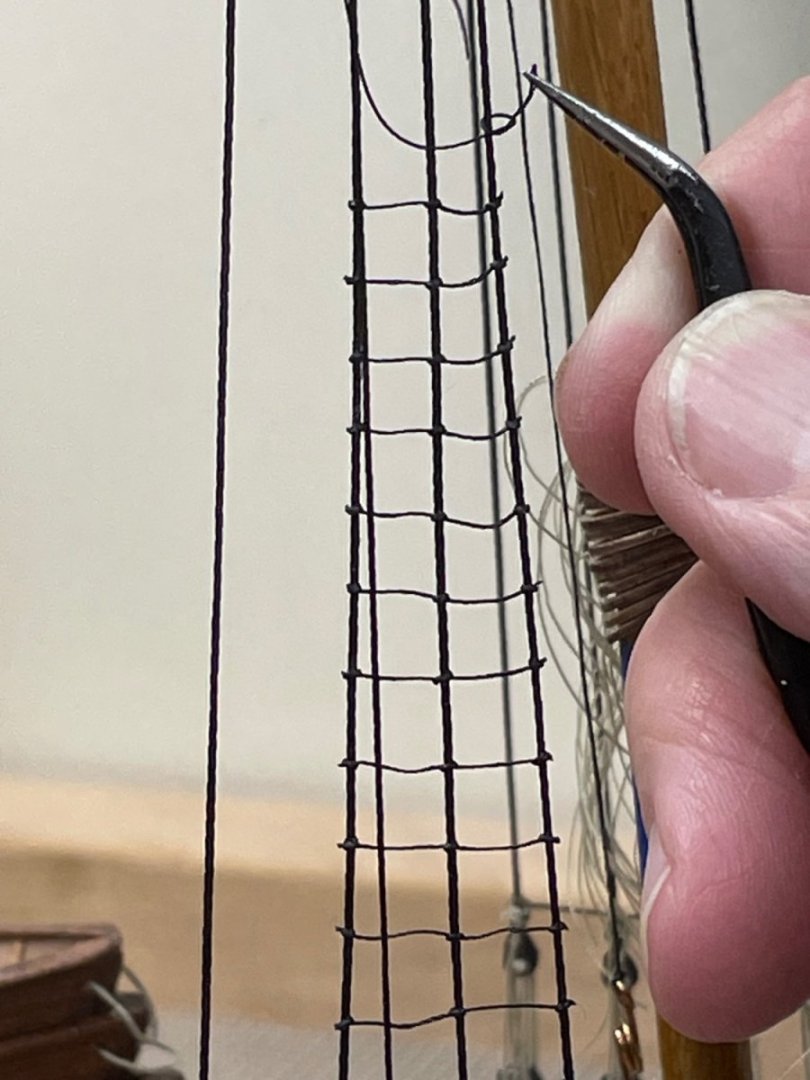
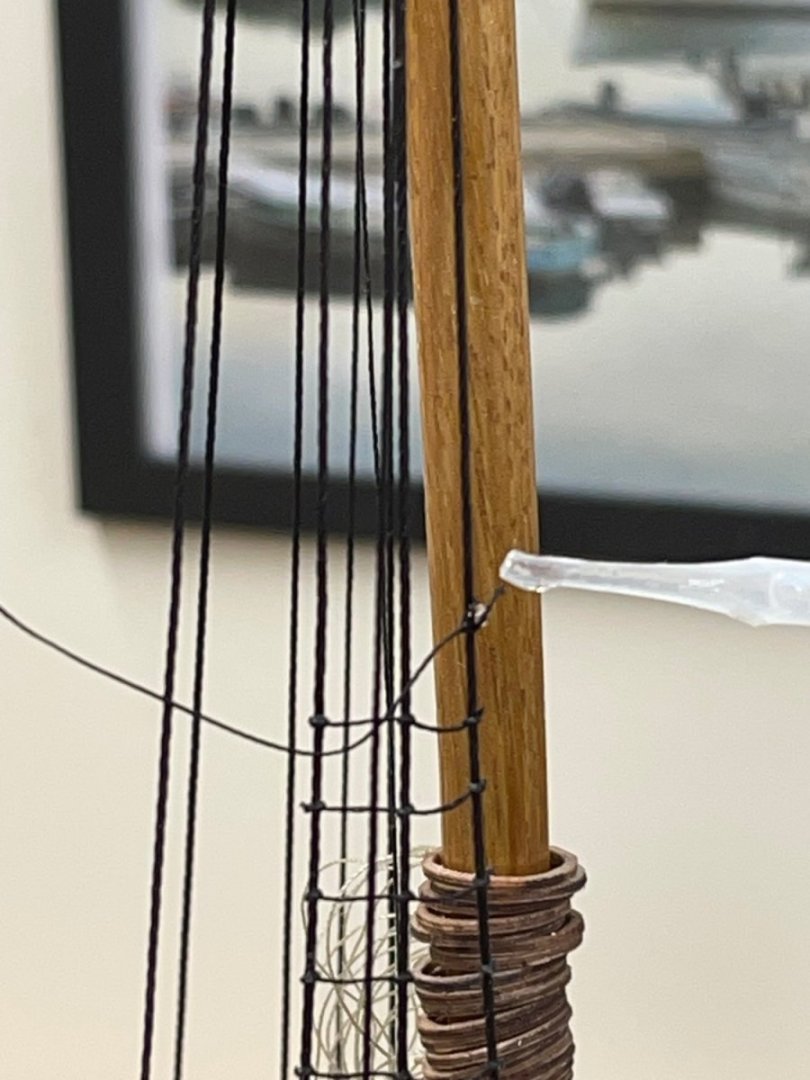
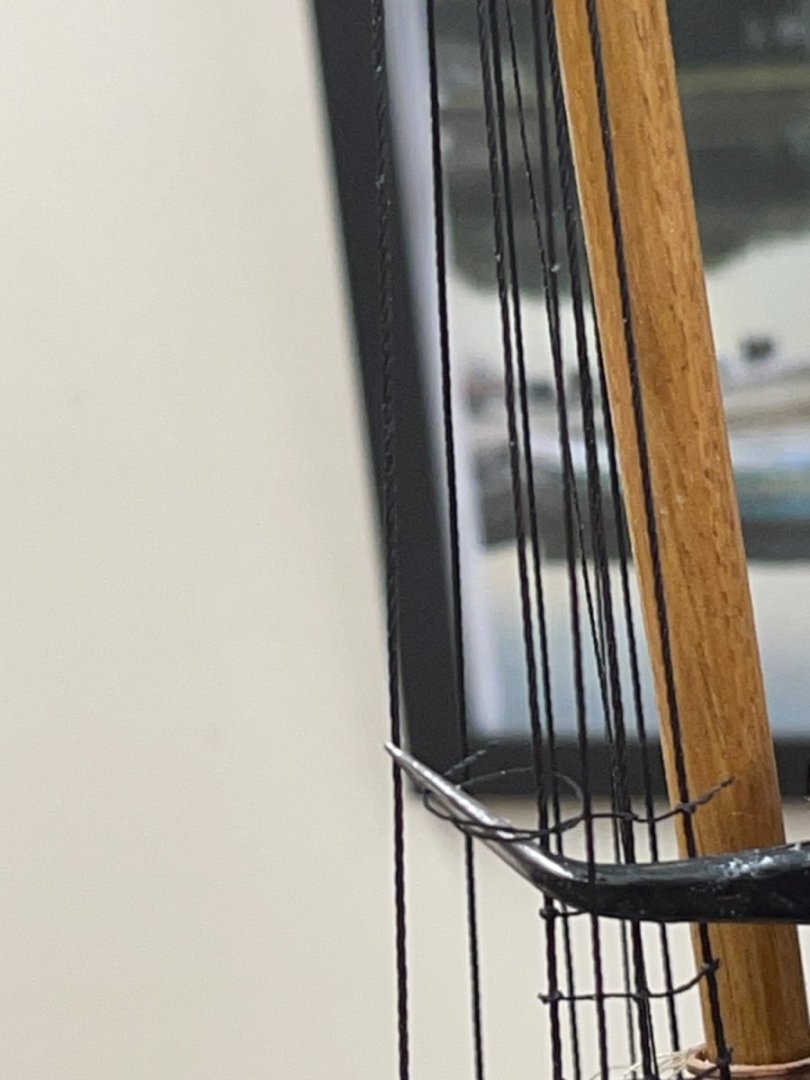
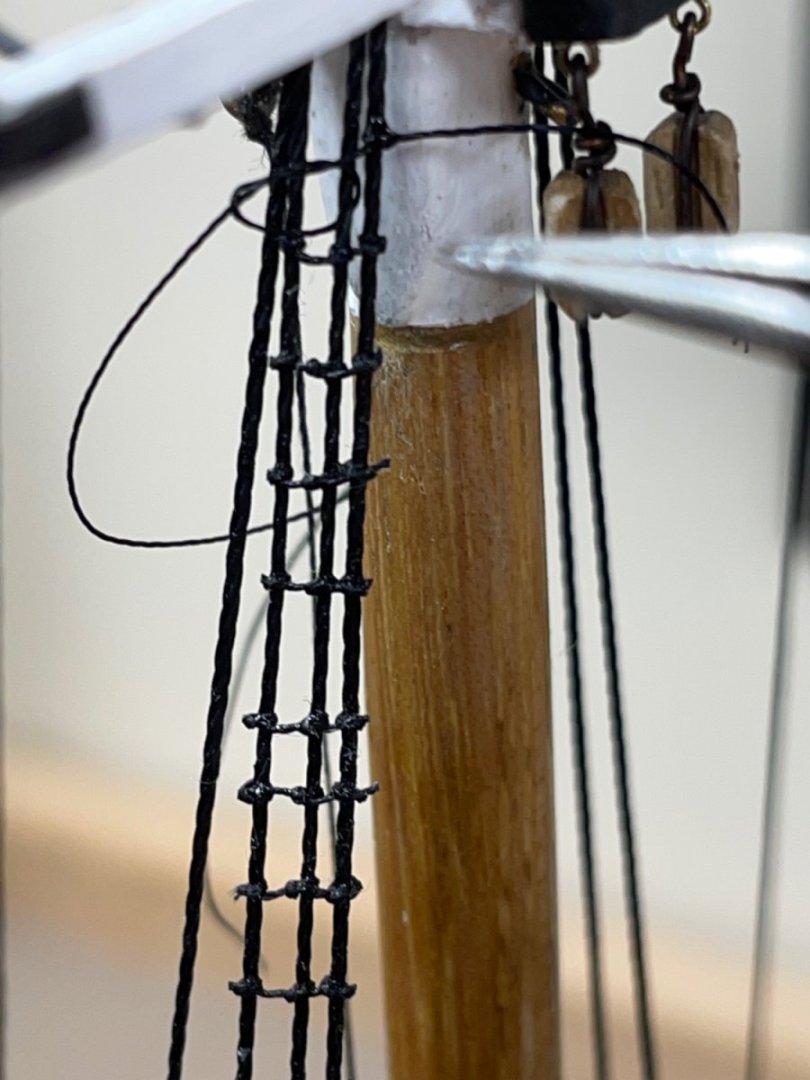
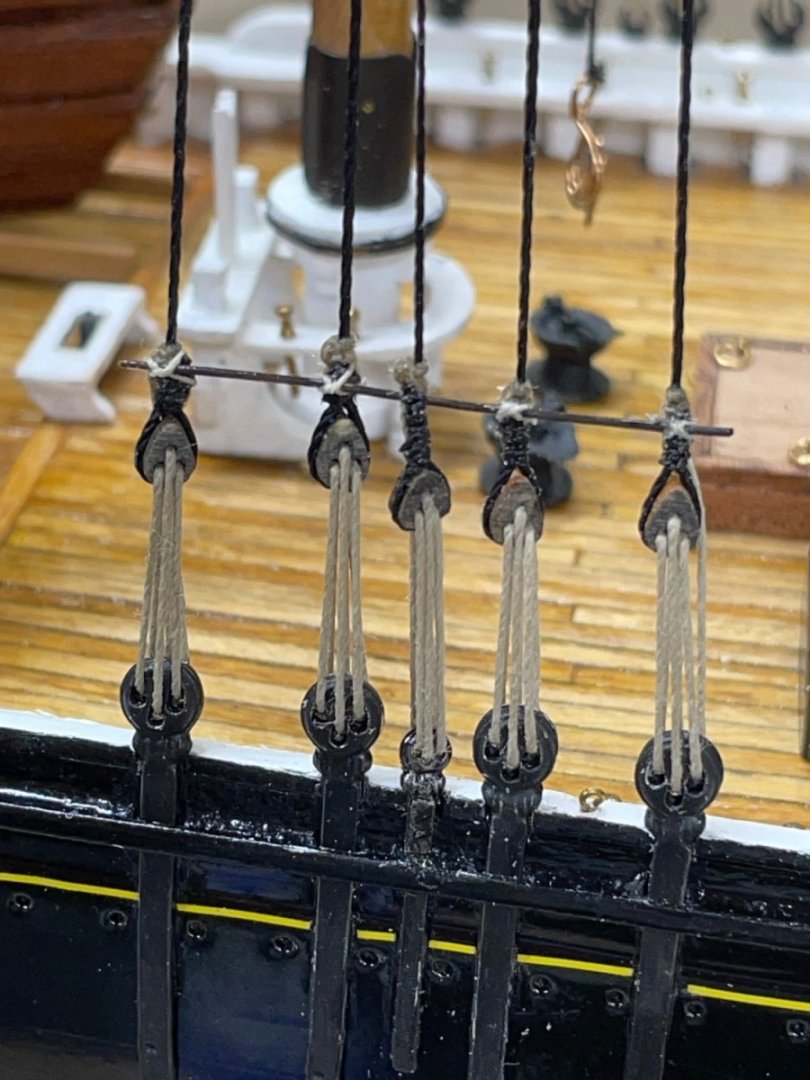
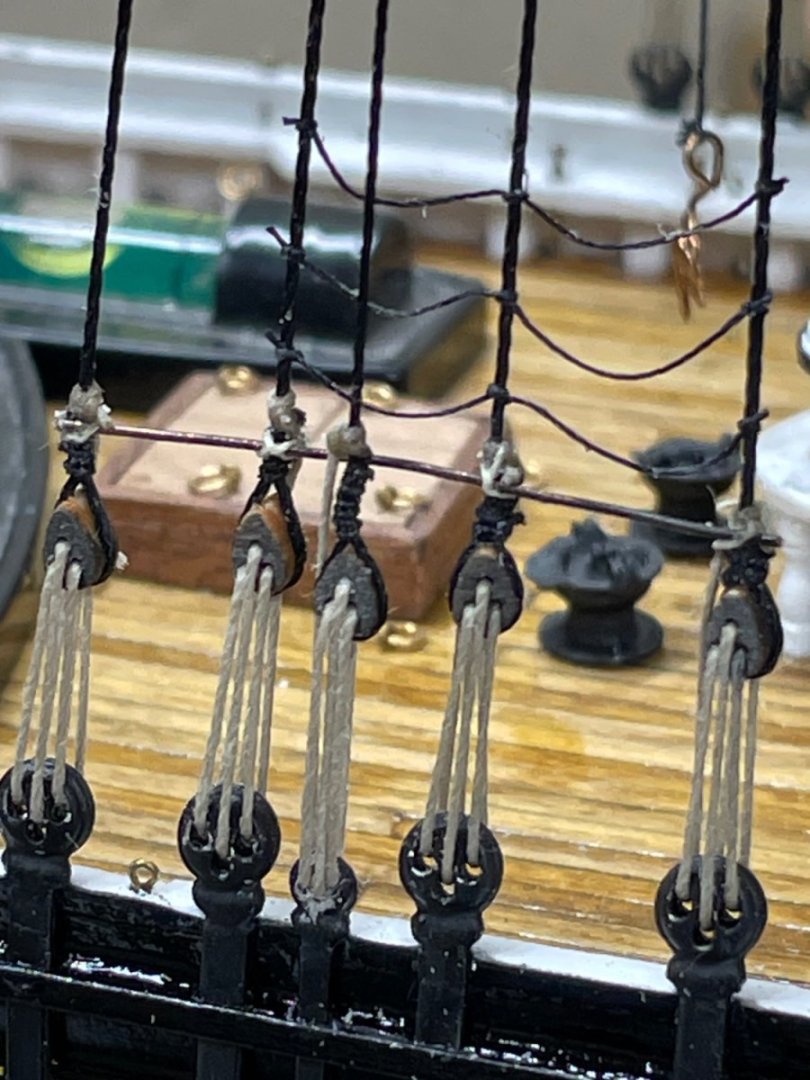
Rat Lines continued… I chose to place the rat lines across three of the four shroud lines. Each rat line starts with a half hitch on the first line. I then verify the distance. (5-6 mm) I then place a tiny drop of CA glue on the half hitch knot. Using a paper towel I immediately wick of the excess glue. I then complete the series of two more knots across the shroud. We fast forward to the top, where it really gets tough. 😬 I use nail clippers to trim each line, taking care not to clip the shroud. There are Fifty rat lines per shroud, that’s 100 tails to clip. Four sets of shrouds means I will have 400 clippings to clip on 200 rat lines. But who’s counting? 😆 1 of 4 should completed… Onwards 🍻


- 282 replies
-
- 3
-
-
- Bluenose
- Model Shipways
- (and 1 more)
-
Very interesting Eric. Although I grew up in Illinois just 200 miles north of St Louis and 20 miles east of the Mississippi, I don’t recall going out to see the ice flows. Thanks for sharing… John
-
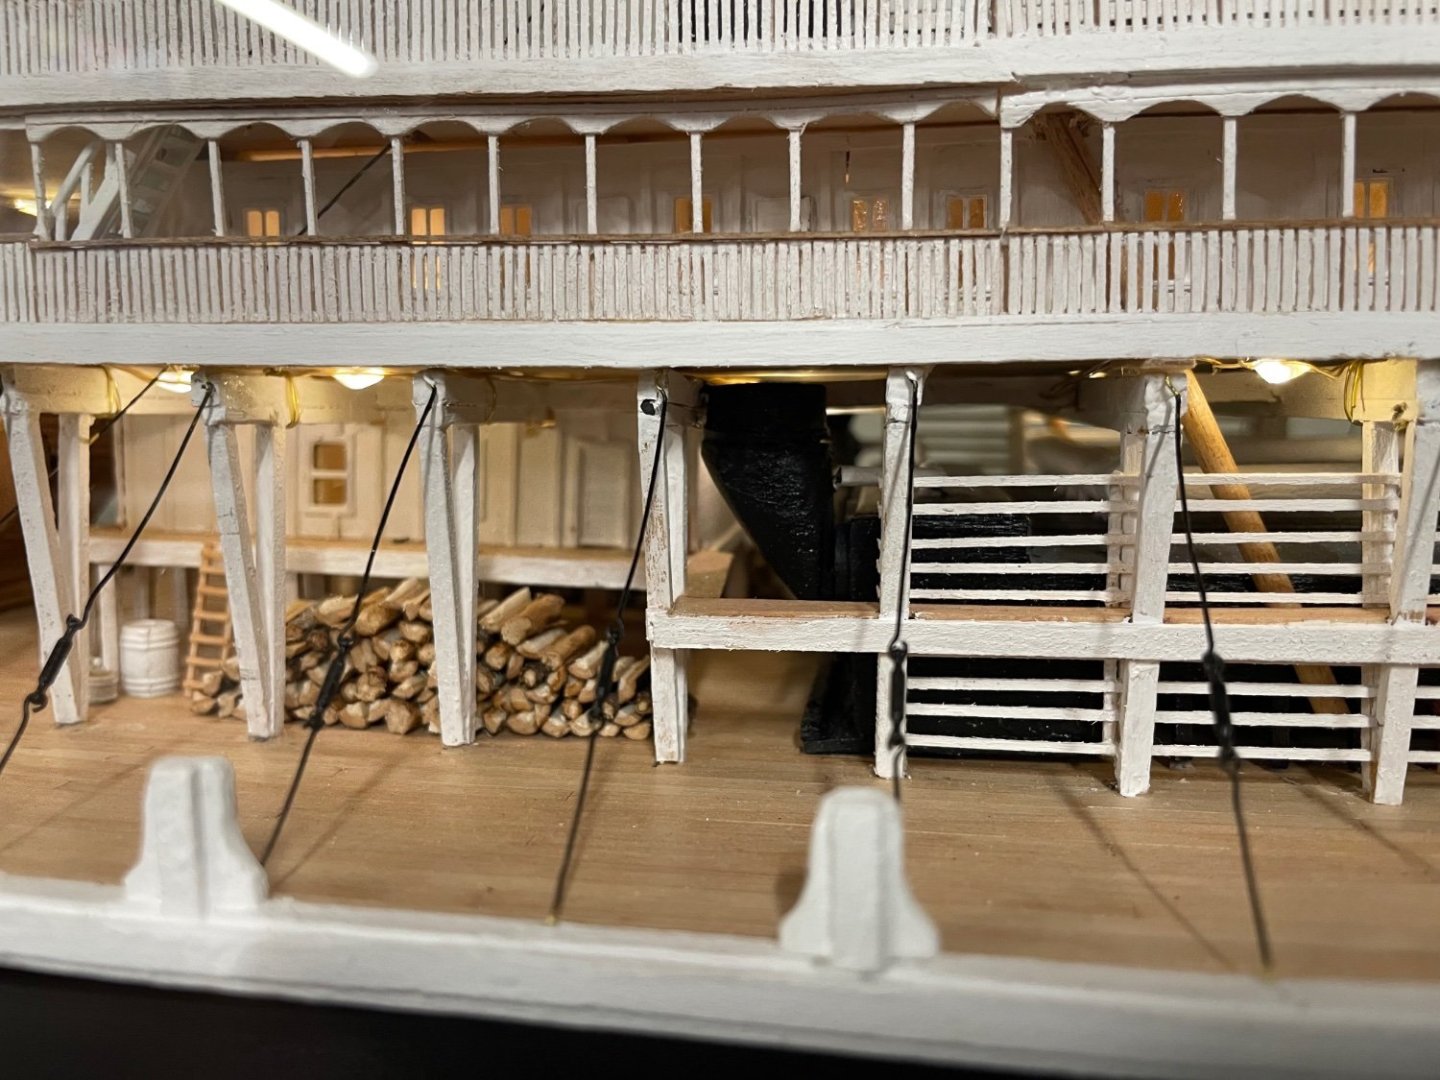
I agree… They would not want the fuel source to get wet. Although, I don’t believe coal would saturate with water the way wood could. They probably would stack the coal sacks under the decking to protect them from weather. They would also need a back stop to shovel against. I also agree with you on adding anything not verified. When in doubt, leave it out. Omission of the coal sacks and coal on the deck to be shoveled is a much cleaner presentation and authentic. That’s why I didn’t add coal sacks or live stock to the Robert E Lee, although both would have been there.
-
Worked for me your photo must have a high resolution. Mabe one of the moderators @mtaylor can help you. 🤔
-
Try editing your photo before uploading it. I have had to crop my profile photo to get it to upload. John
-
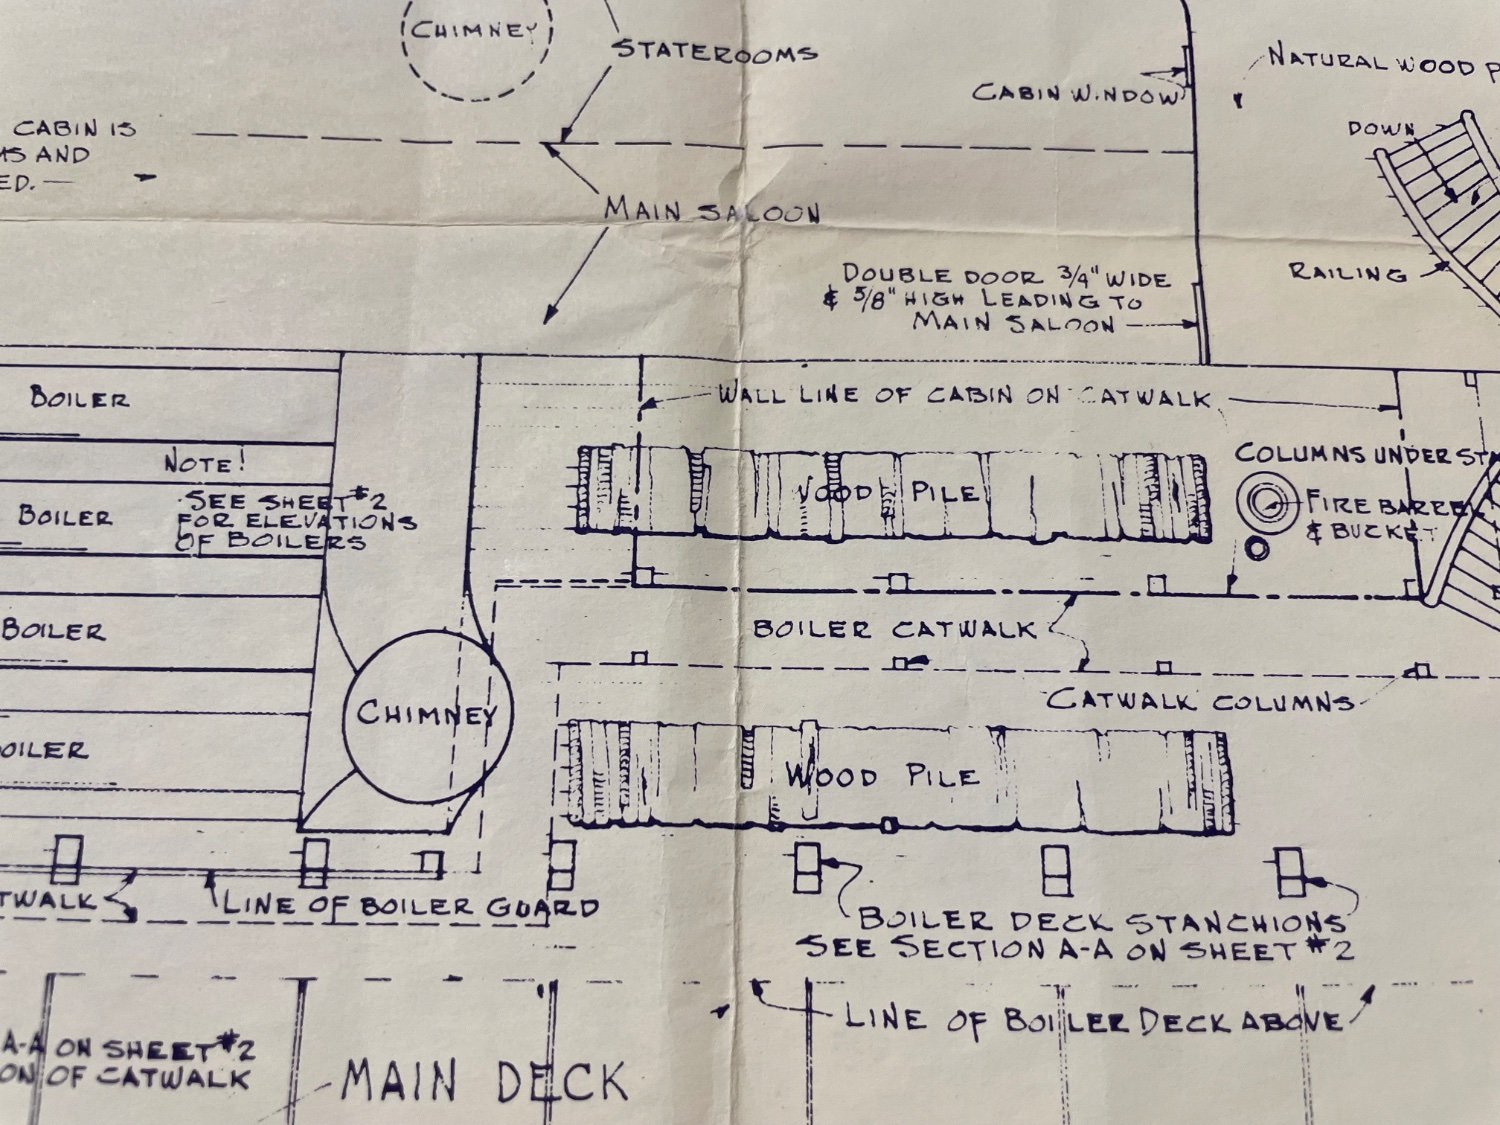
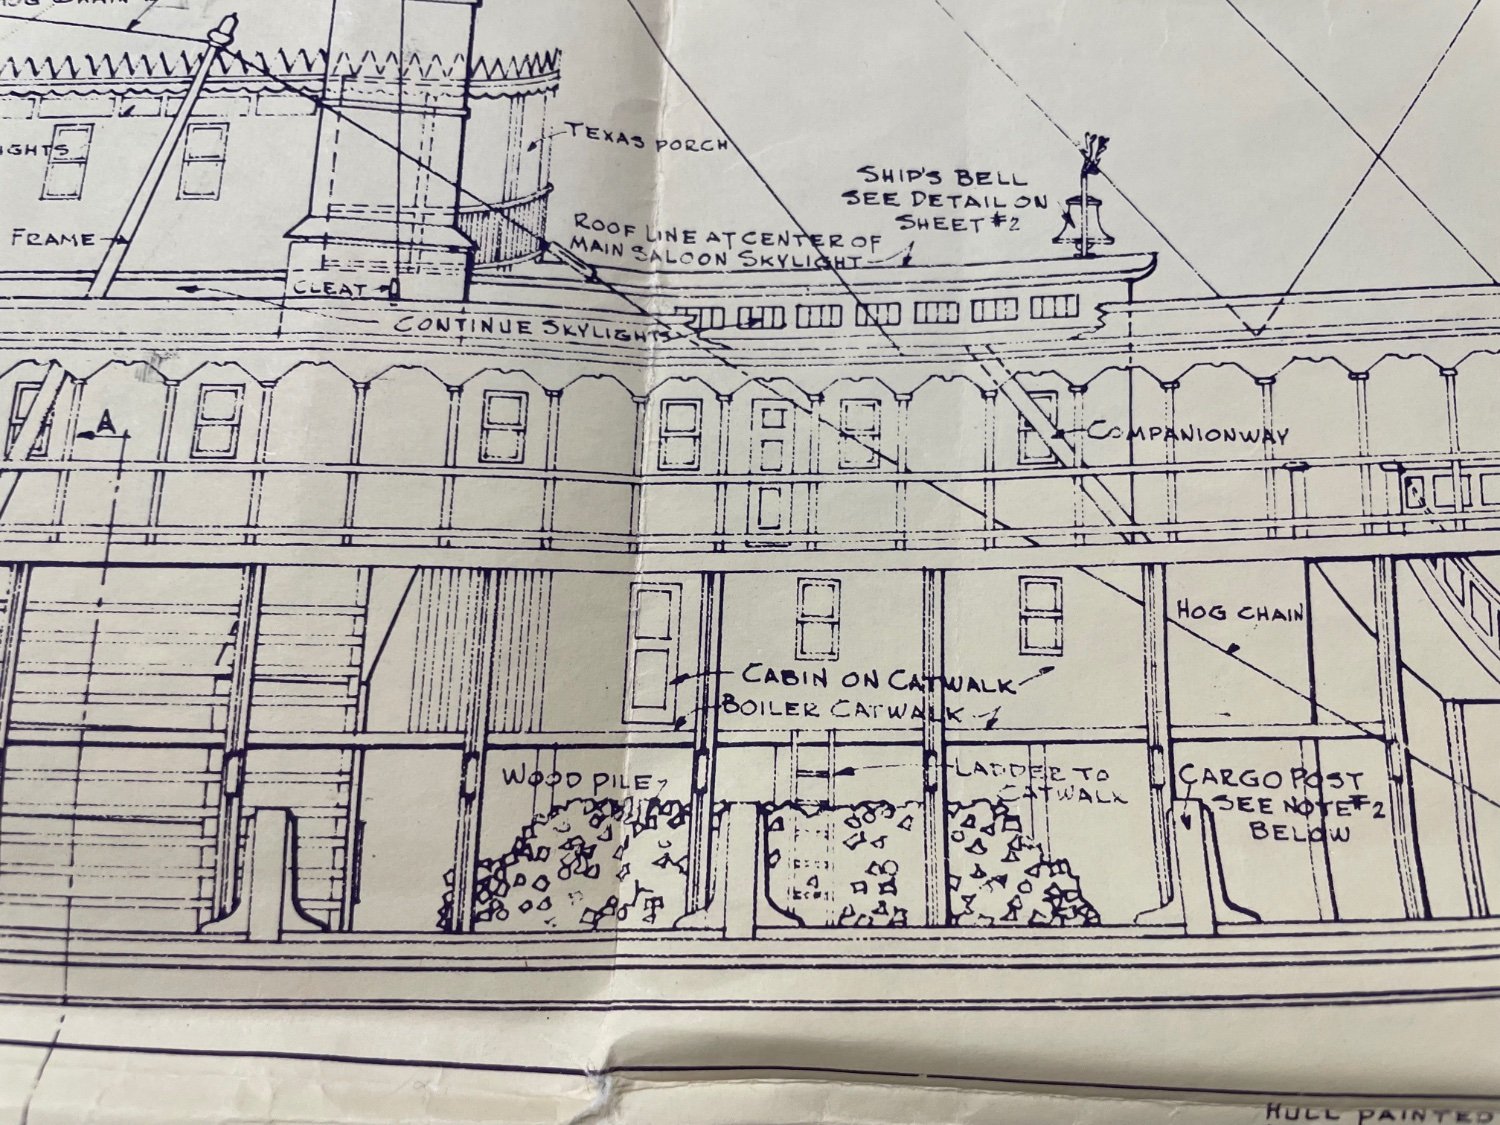
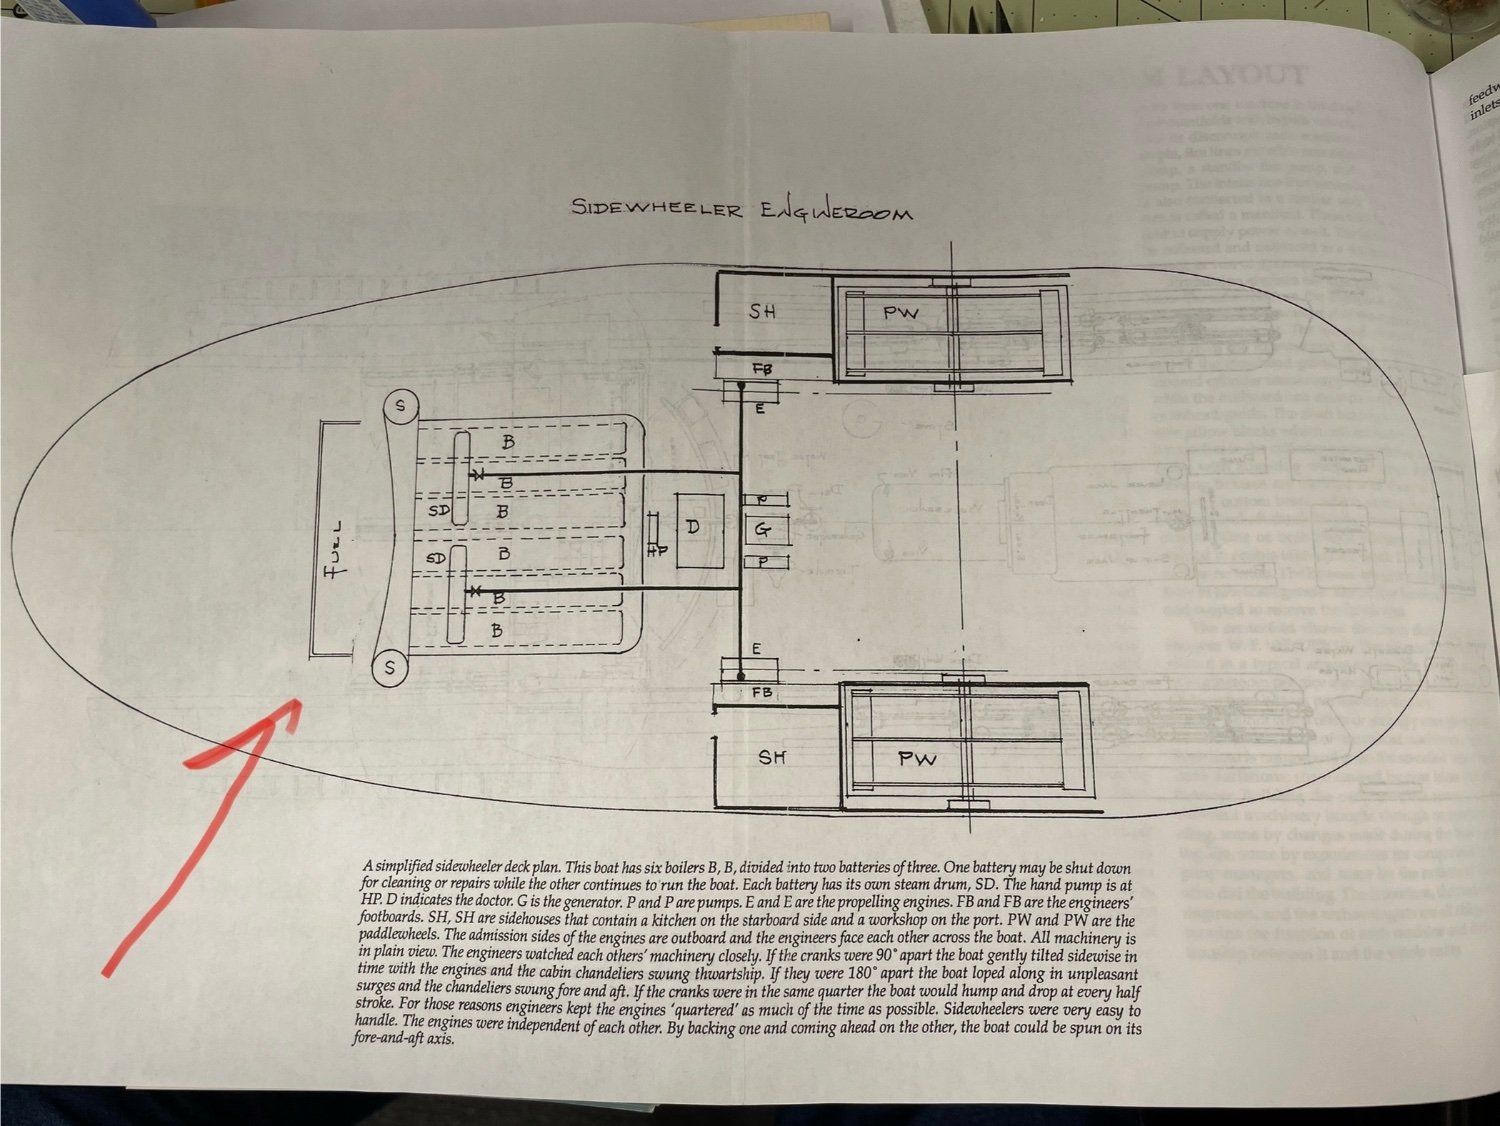
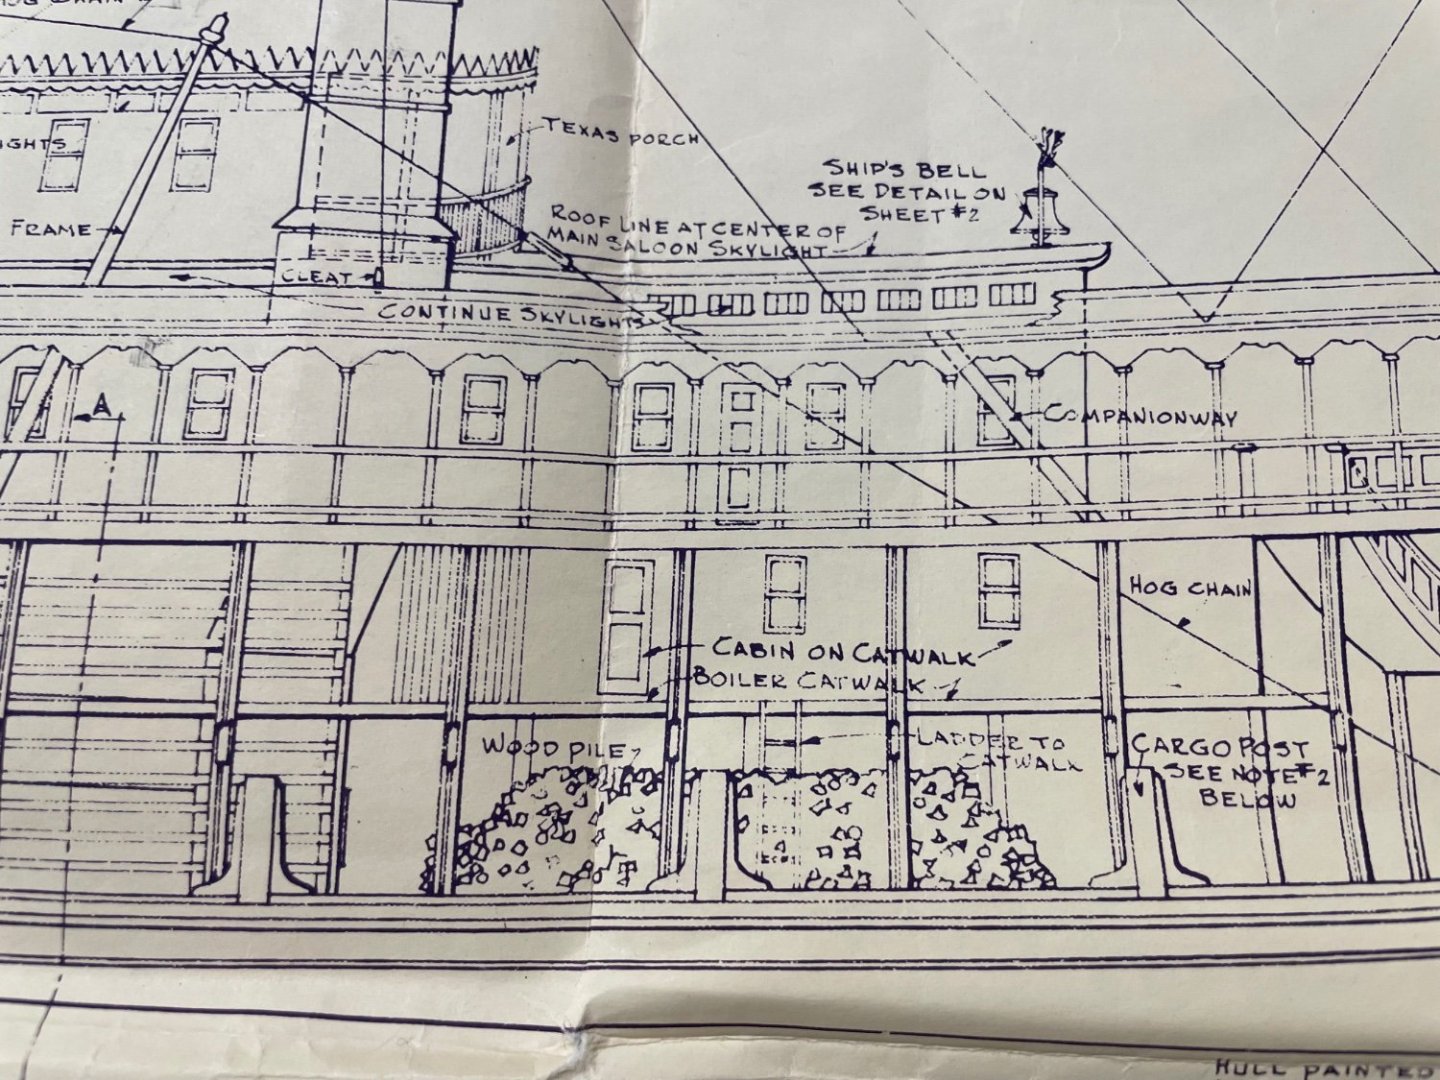
Eric, When I was modeling the Robert E Lee, I built up the engine room and had to research the details because the plans did not show the engine room layout. With that research I acquired a copy of Alan Bates Engineroom Cyclopedium. The following diagram comes from this book… This is a generic engine room layout that shows the fuel simply stowed just forward of the fire box. This gave the crew easy access to feed these furnaces. Additionally, the following is from my Robert E Lee blue prints. These blue prints show wood piles on the deck directly in front of the fire boxes. The above photo shows how I stored the fire wood on the deck. The only difference in our two river boats is the Robert E Lee had a forward cabin over this storage space. Does “Fire Hazard” come to mind? Notice the white “fire” barrel to the left by the ladder going up to the cabin. 😆 I further verified this practice when I read the book, The Great American Steamboat Race by Benton Rain Patterson. In it Patterson described in detail the operation of these massive steam engines. Crews fed fuel to the boilers constantly, refueling at most stops along the way. Fuel was loaded by hand (wood or coal) the coal being in sacks and stacked on the deck for easy access to shovel into the firebox. I think your photo shows an area in front of the boiler for the fuel to be stored right there on the deck in the open. Well, there’s my 2 cents. In my opinion stacks of wood would look better on your fore deck. Although you could get coal sacks from model railroading suppliers. I made my wood from twigs in the back yard. 😆 I hope this is helpful. Your work looks great, good decision to move forward and not sweat the details. Cheers🍻


-
Wonderful build Eric. I just came across it and am caught up, excellent and very interesting research. 🧐 I’ll pull up a chair and join you on this journey. John
-
Thank you Ron… I think the same, until I work on a solid hull. The carving is so much harder to make smooth. 😆
- 282 replies
-
- 2
-
-
- Bluenose
- Model Shipways
- (and 1 more)
-
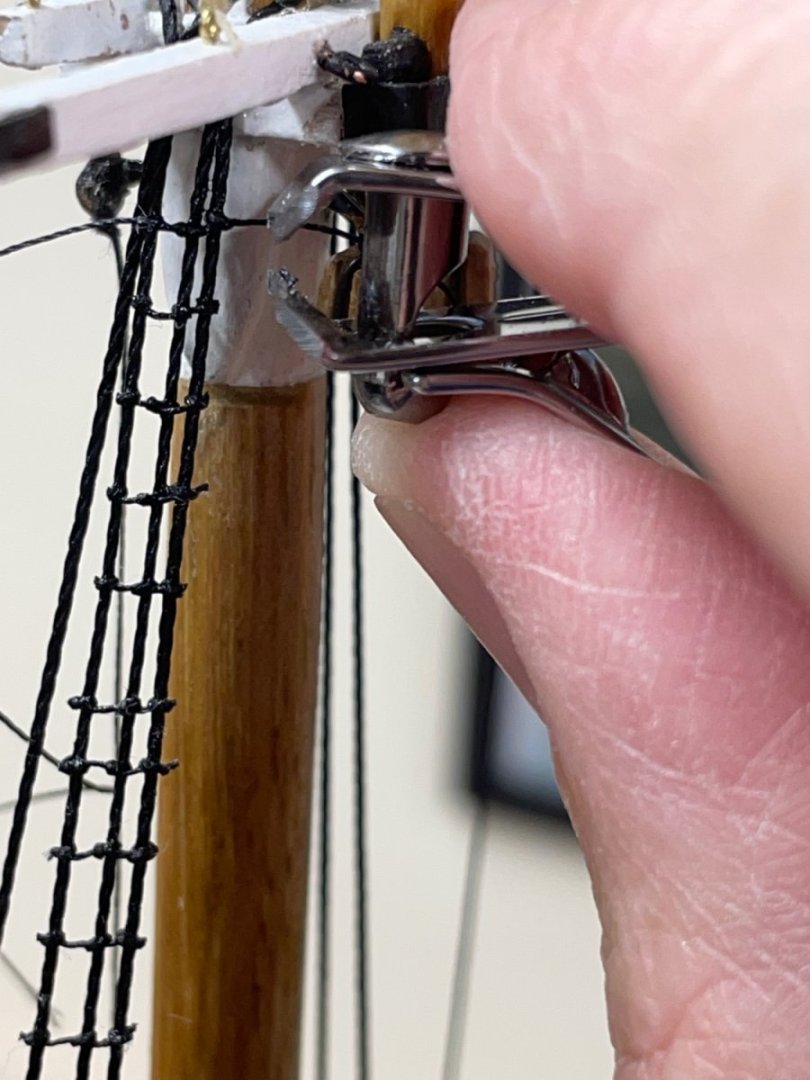
Rat lines continued… OK, I’ve decided not to let OCD get the best of me and let well enough alone on the deadeyes. I did start over on the rat lines. Onwards … Cheers 🍻
- 282 replies
-
- 12
-
-
- Bluenose
- Model Shipways
- (and 1 more)
-
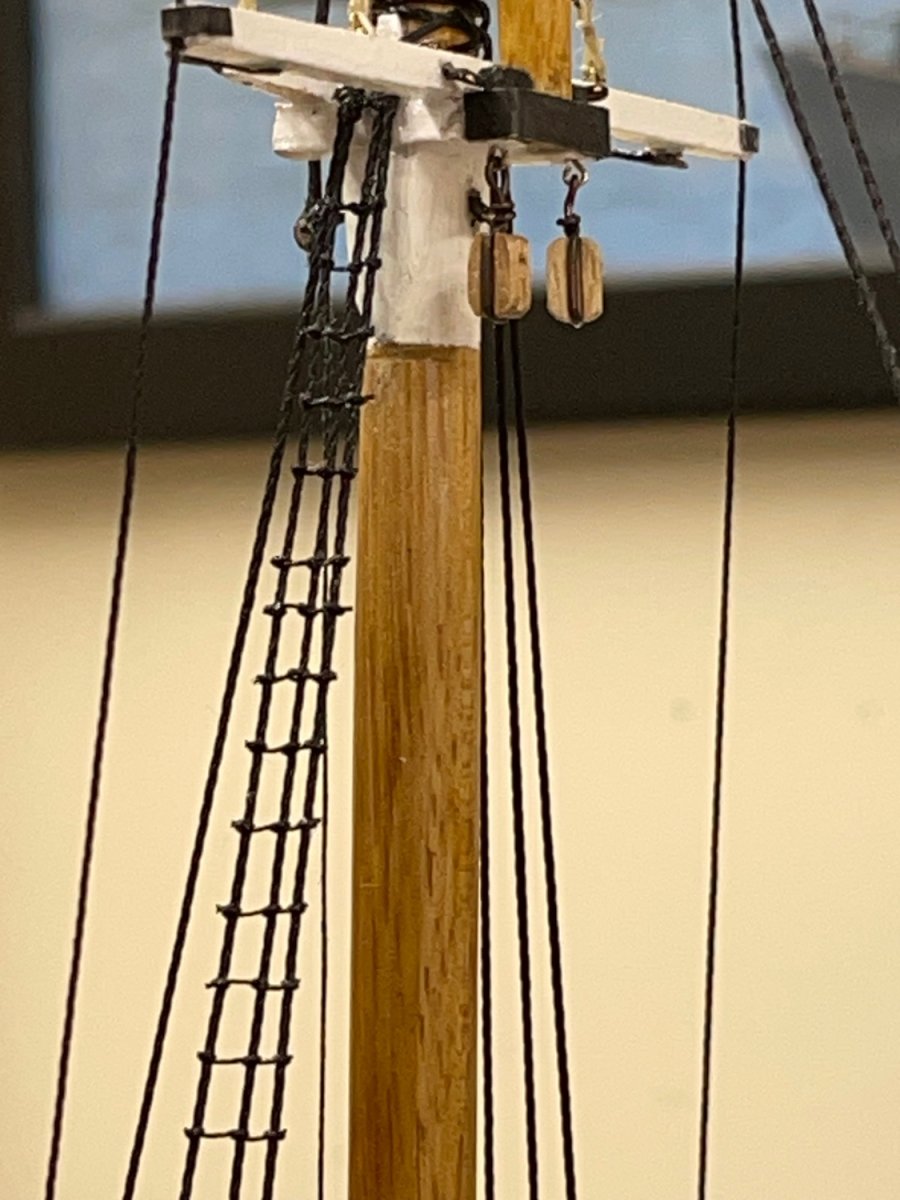
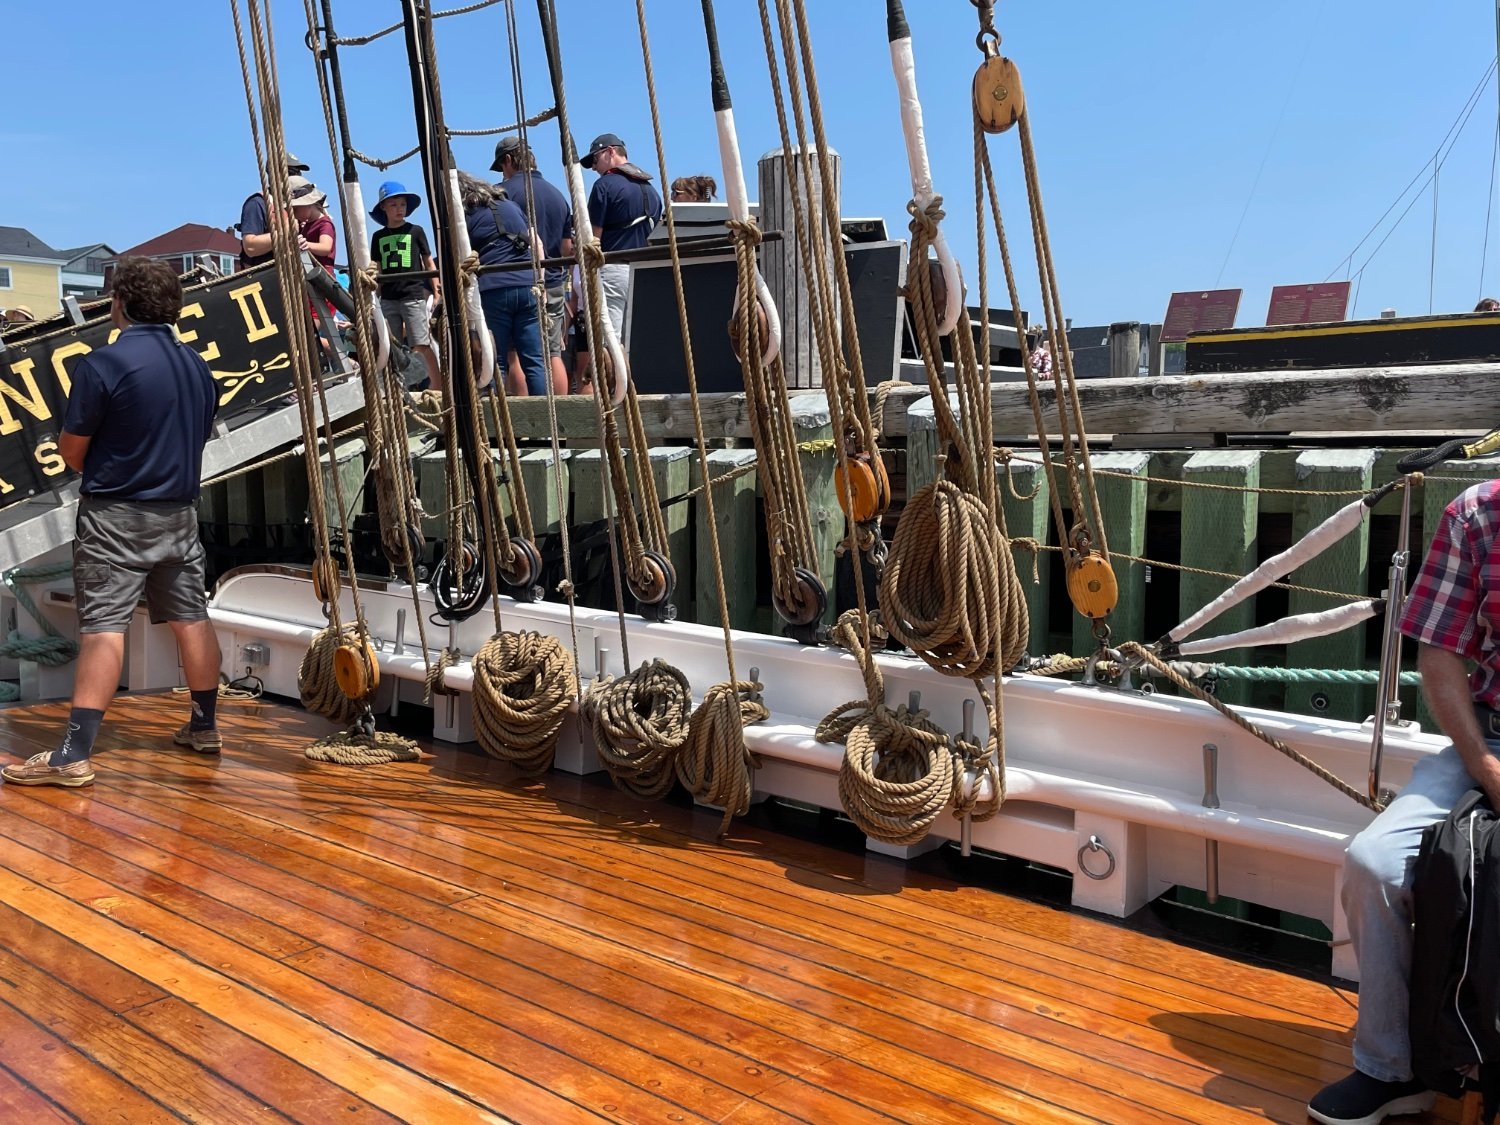
Thanks Alan for the kudos… I’m thinking I may have oversized the lower deadeyes and am considering a redo. Your thoughts… Thanks Here is a couple of photos from the original Bluenose and the replica Bluenose II…

- 282 replies
-
- 3
-
-
- Bluenose
- Model Shipways
- (and 1 more)
-
Yes… the naval hood looks great. However, have you found any references of this feature being on the Red Jacket? I have not. I would like to be as accurate as I can to her launch in 1853. That’s why I’m using the Bluejacket plans vs the Marine Model Company’s Plans. John
-
Thanks Rob, Sounds like an interesting feature/detail to add. Can you give me some references, such as links to where I can get drawings or at least detailed descriptions. I haven’t found the feature on the Red Jacket. Thanks John
-
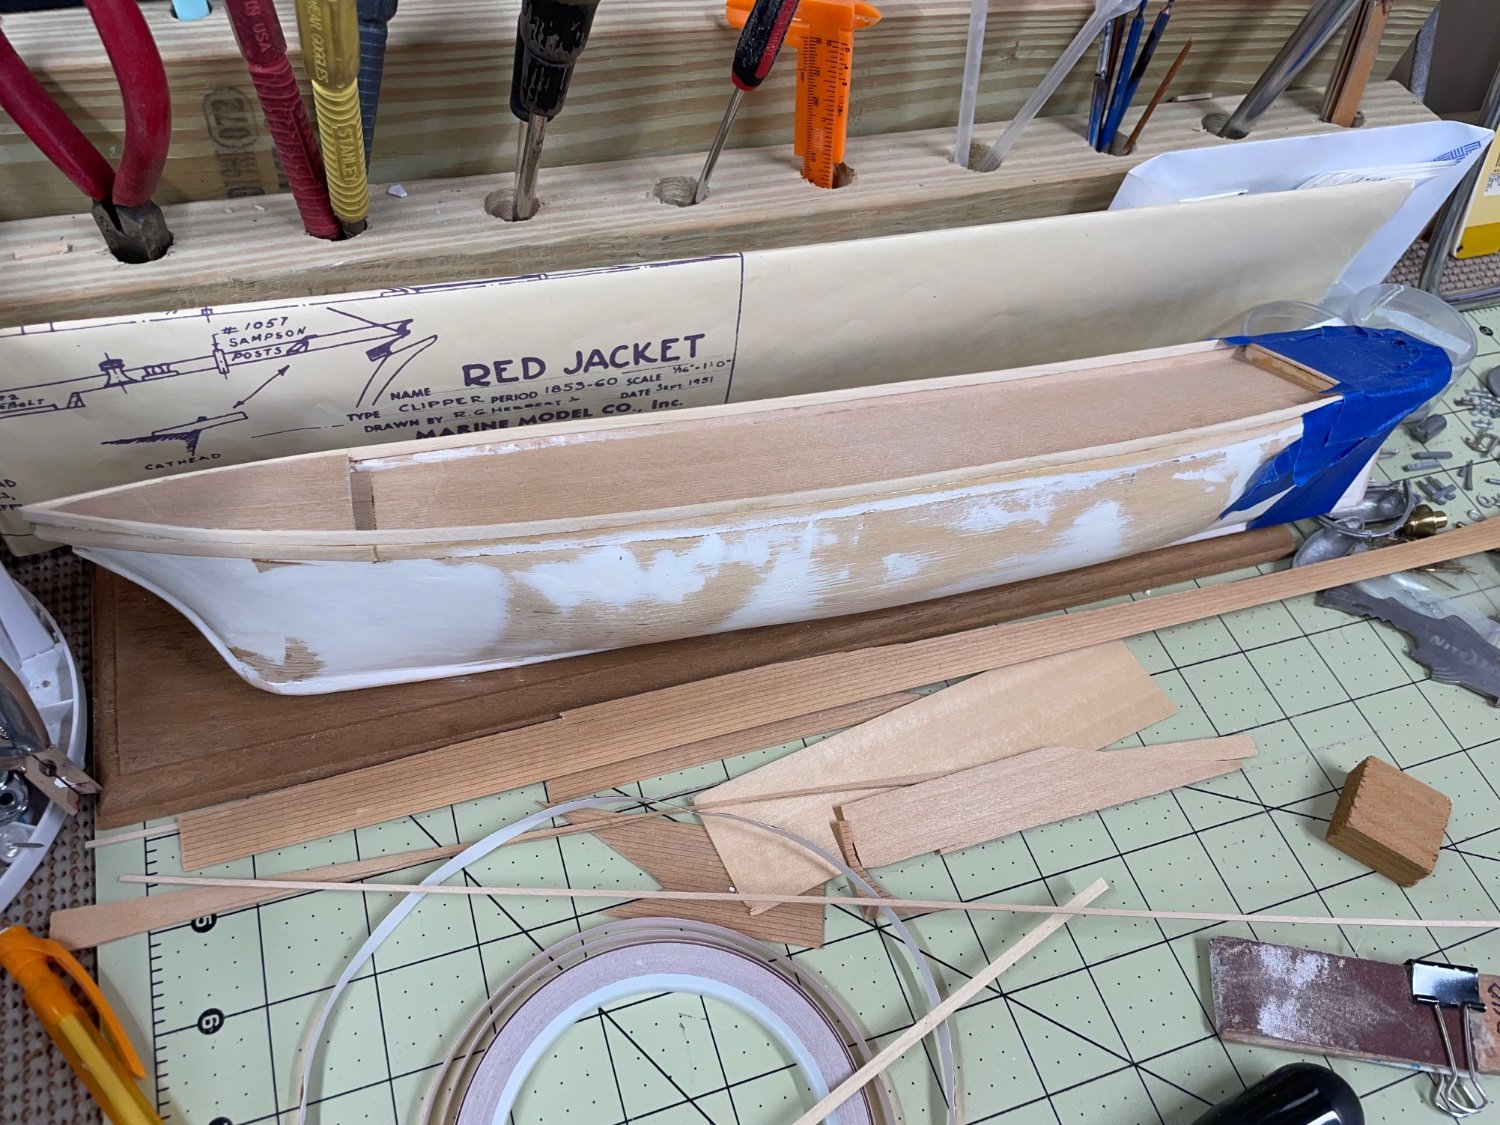
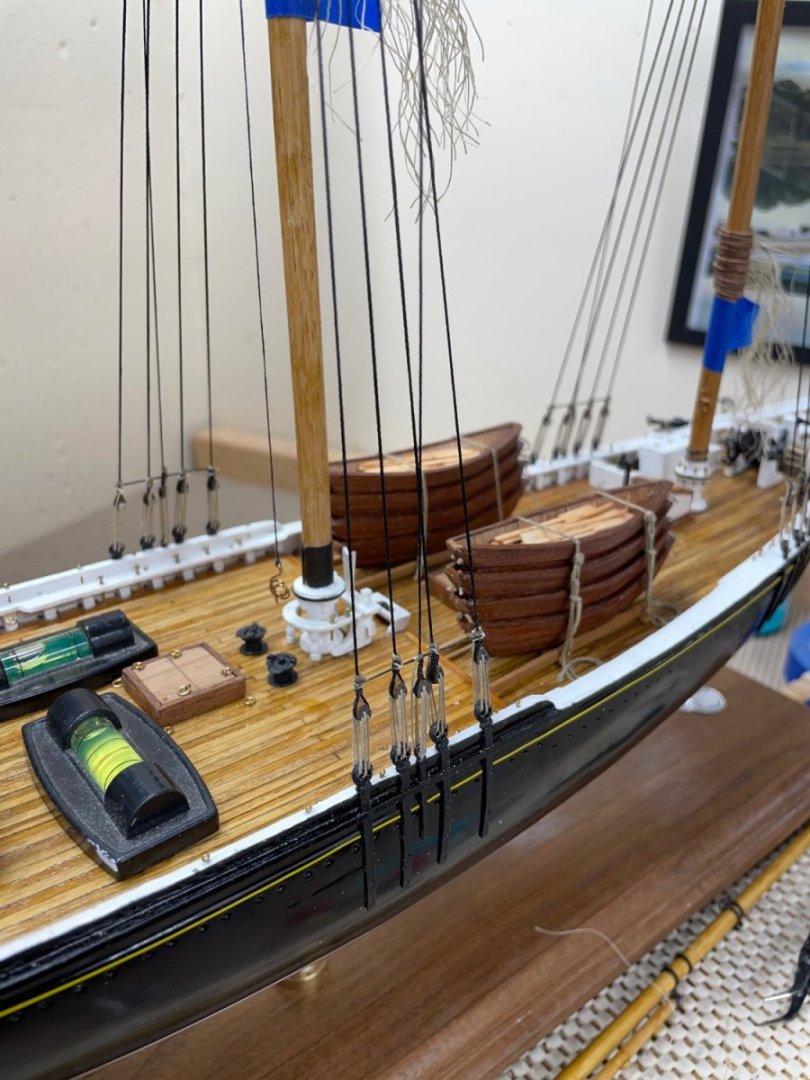
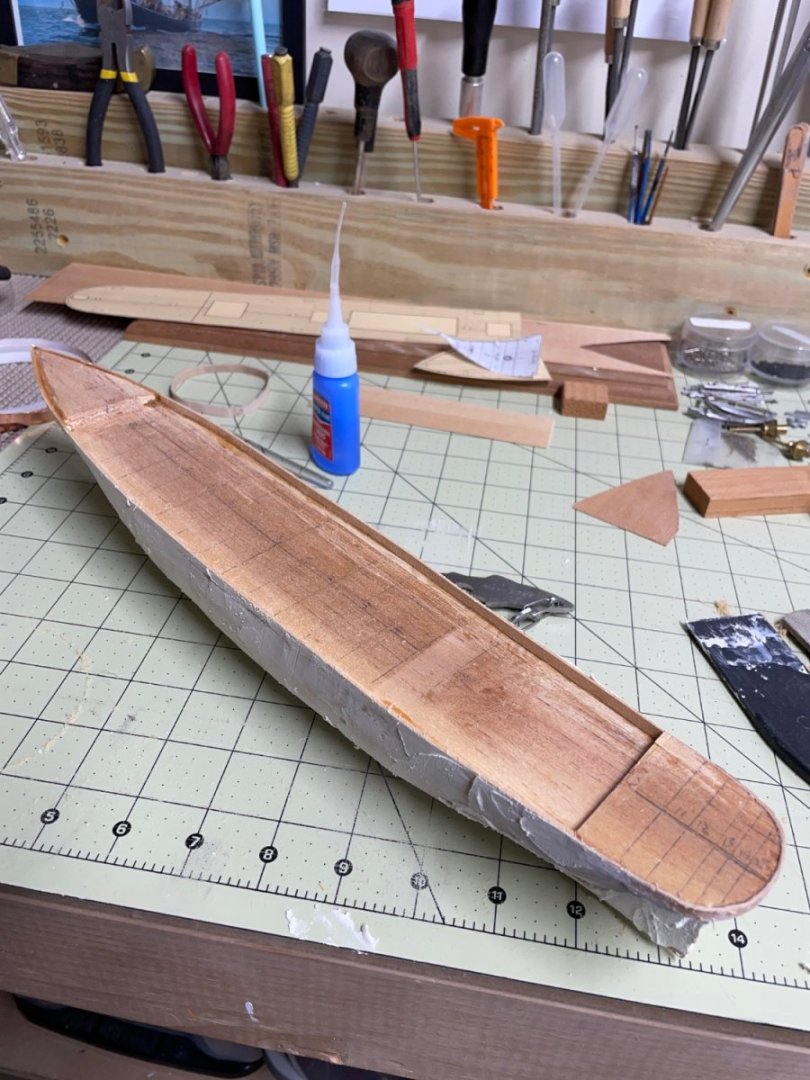
Scribed Decking… I added decking, kit supplied scribed deck material. I can now build up the bulwarks then finish filling and sanding the hull. Steady as she goes… Cheers 🍻
- 165 replies
-
- 6
-
-
- Red Jacket
- Marine Model Company
- (and 2 more)
-
Yes she is… I hope I can do her justice at this scale. Lots of great ships built here in Maine. 👍
- 165 replies
-
- 1
-
-
- Red Jacket
- Marine Model Company
- (and 2 more)
-
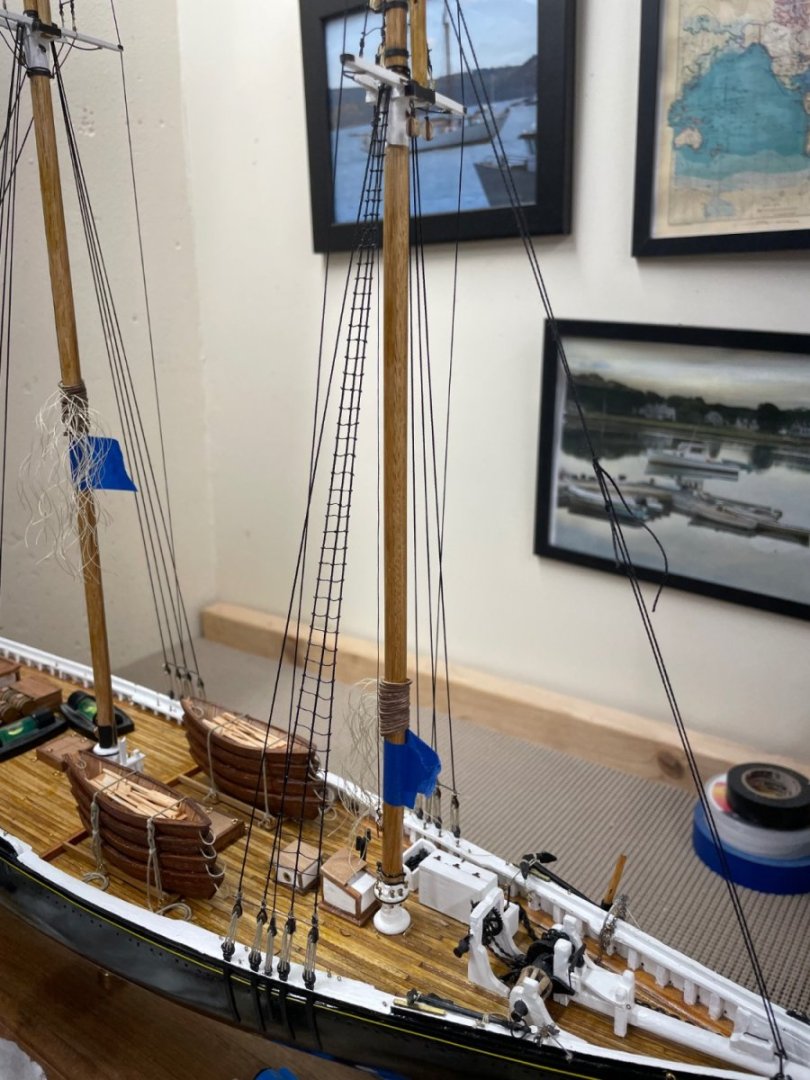
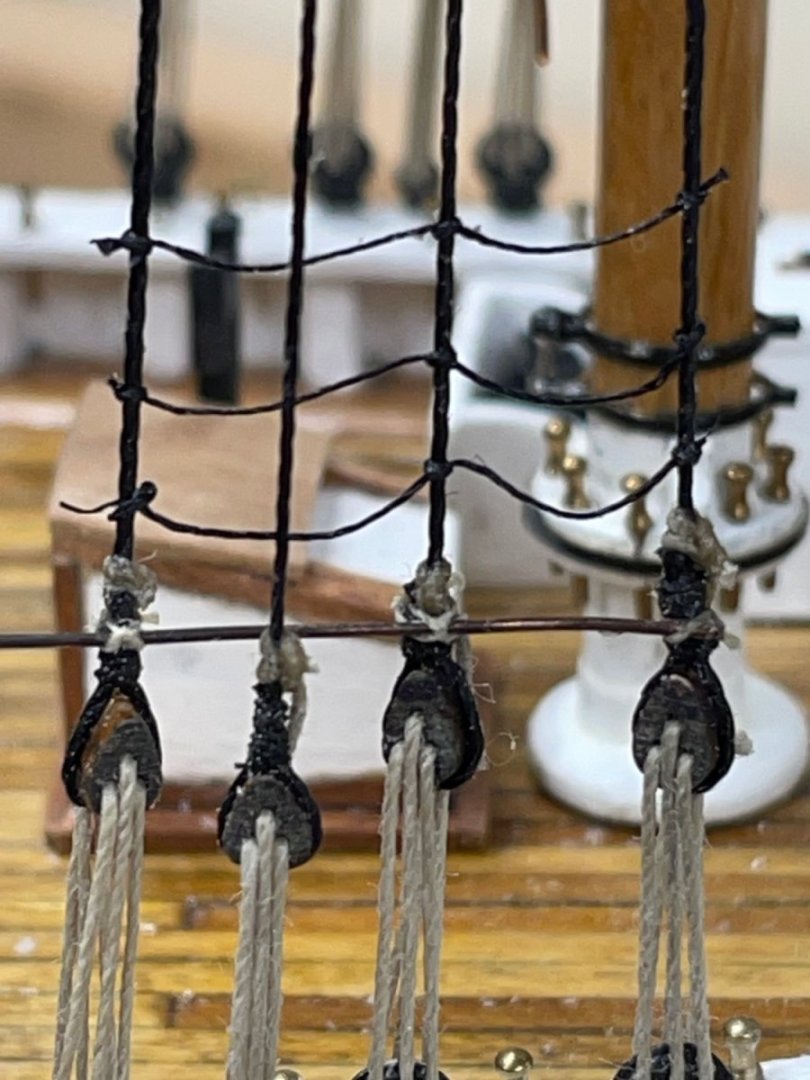
Rat Lines… Sheer Poles made from blackened copper wire… Started the Rat lines last night, but I think I need to tighten these a bit. 😆 Cheers 🍻
- 282 replies
-
- 10
-
-
- Bluenose
- Model Shipways
- (and 1 more)
-
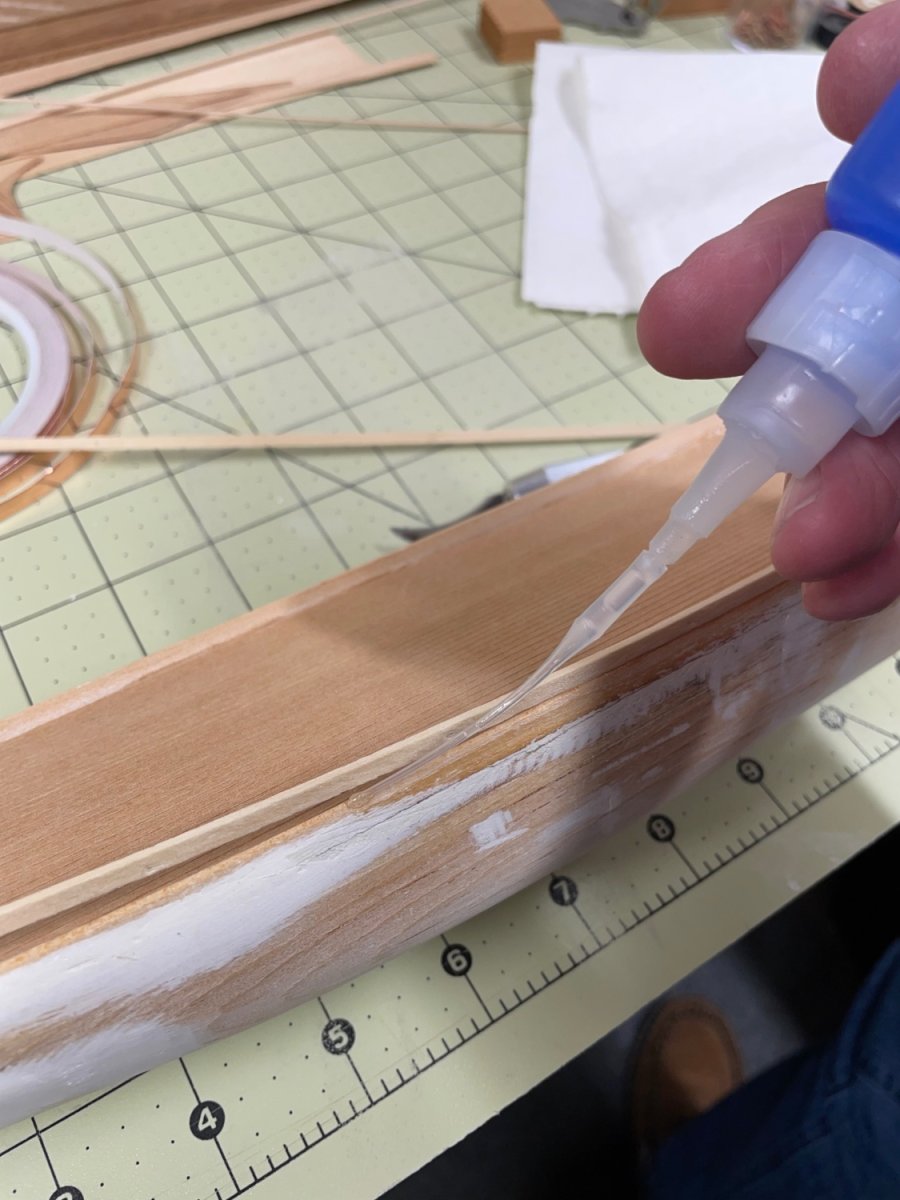
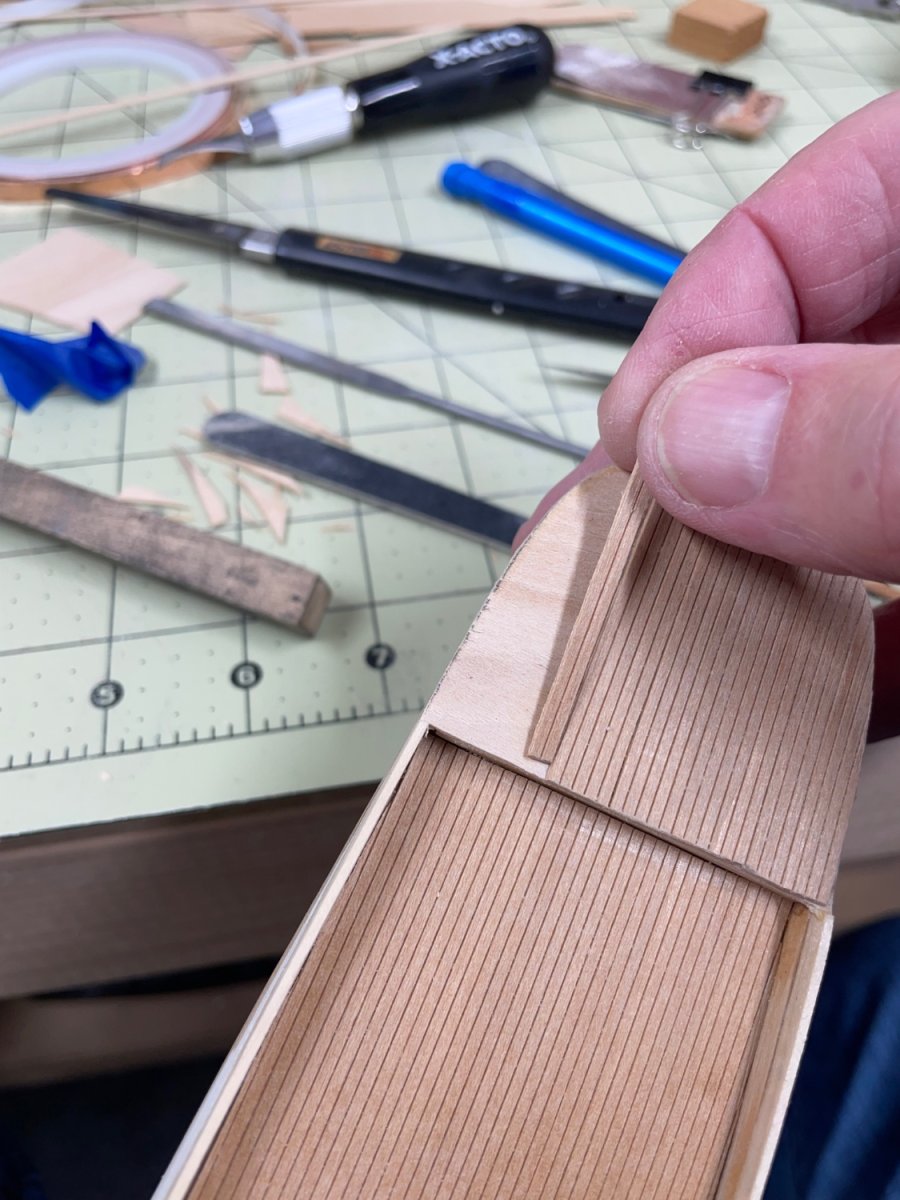
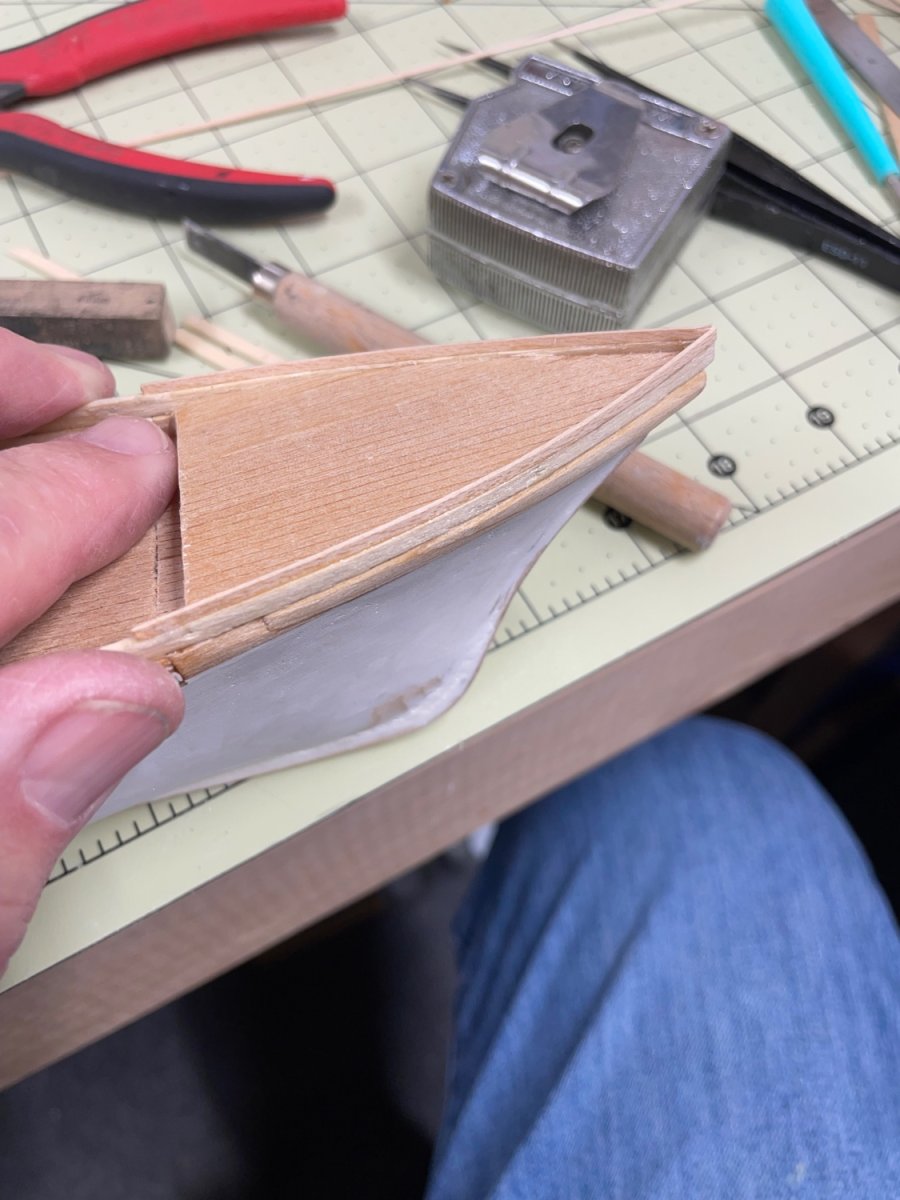
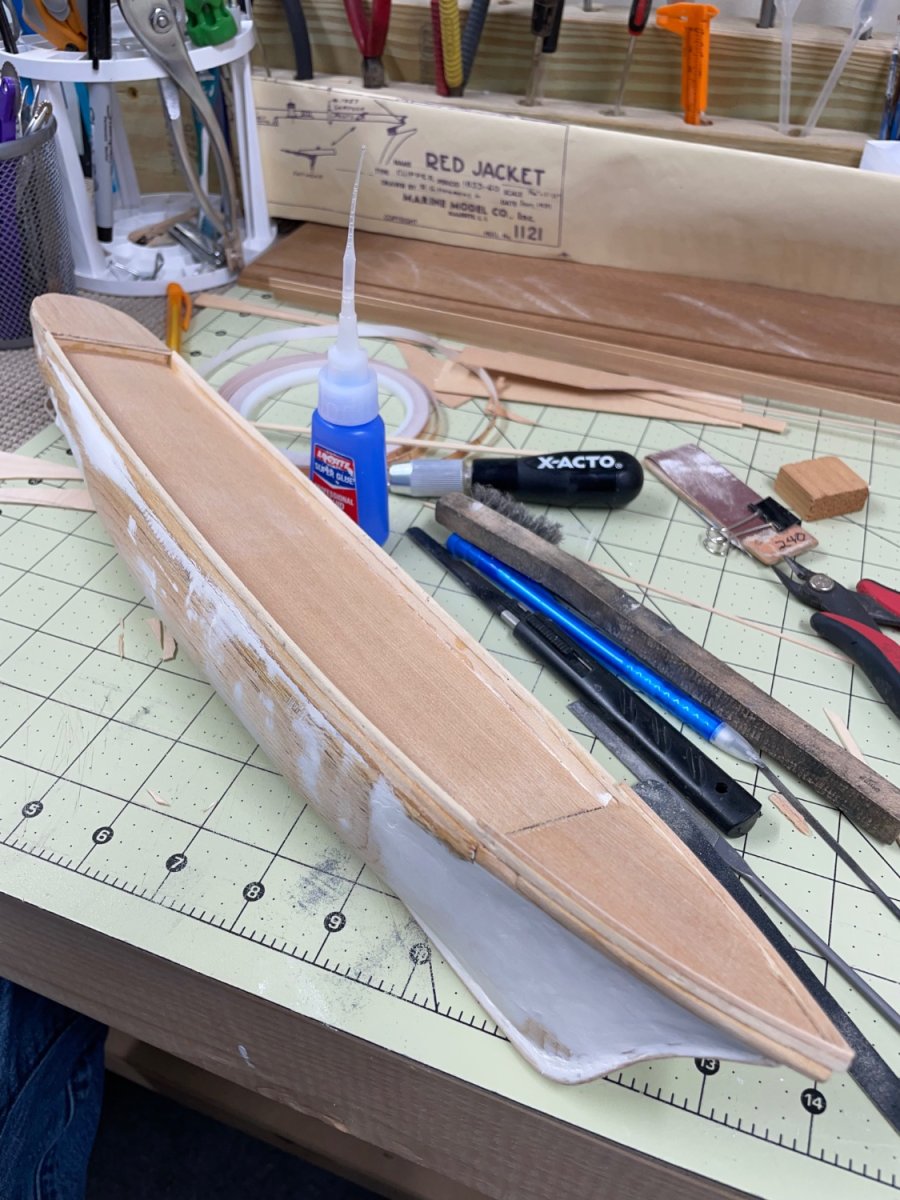
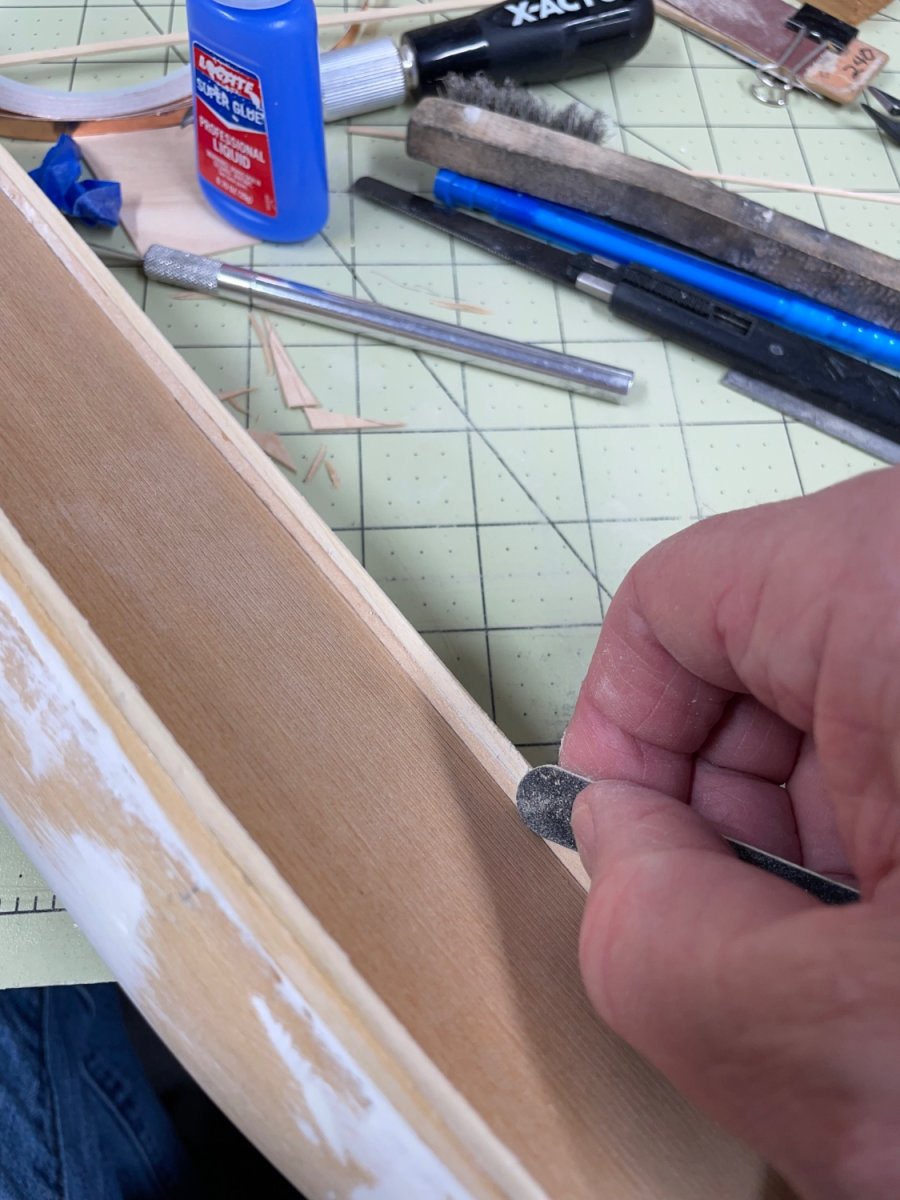
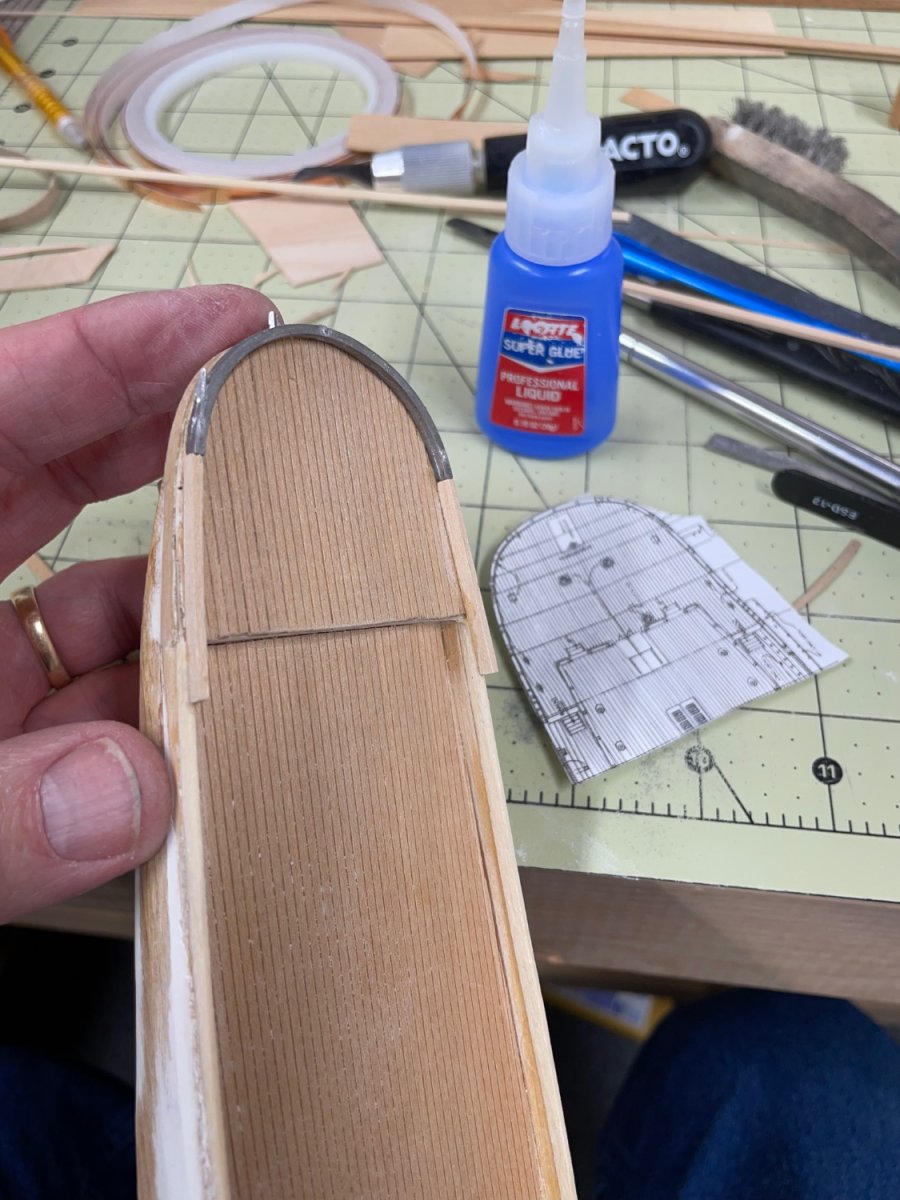
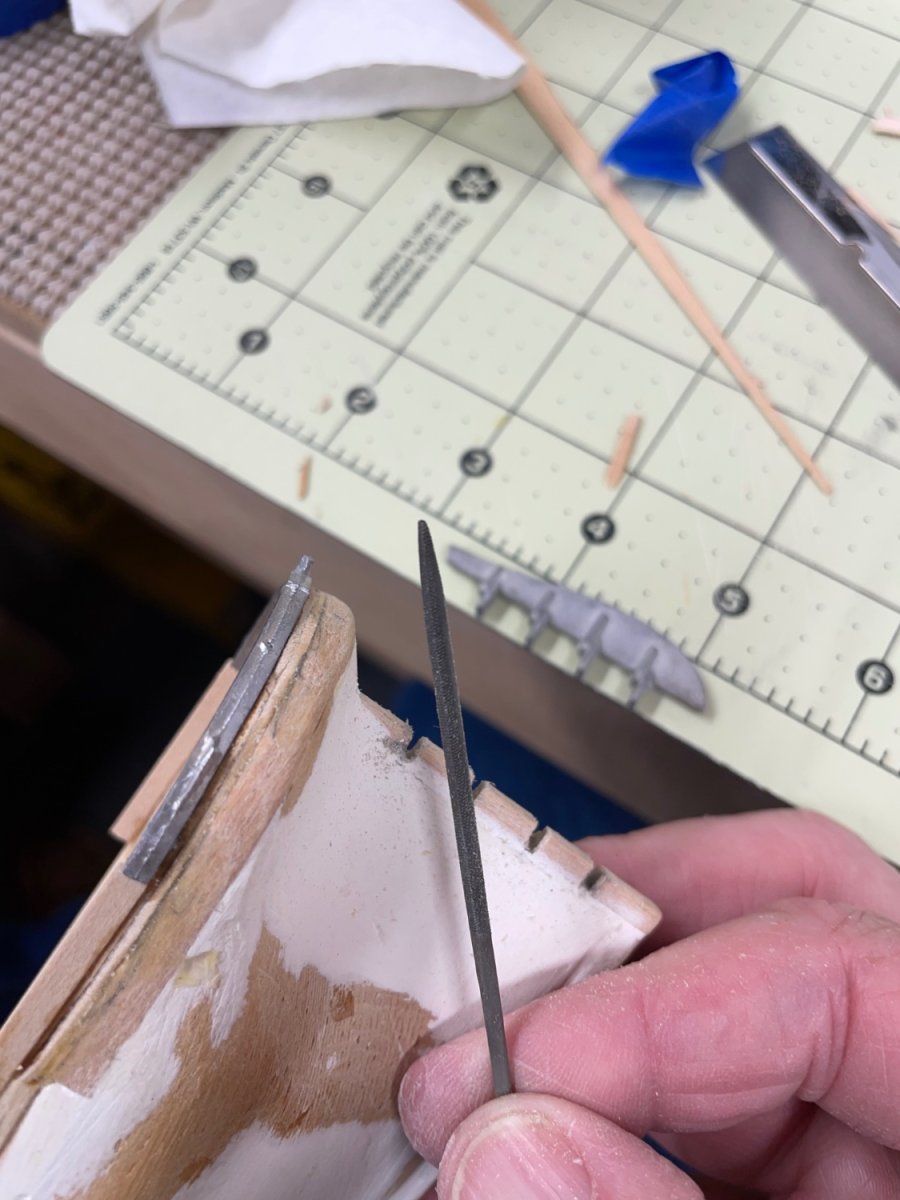
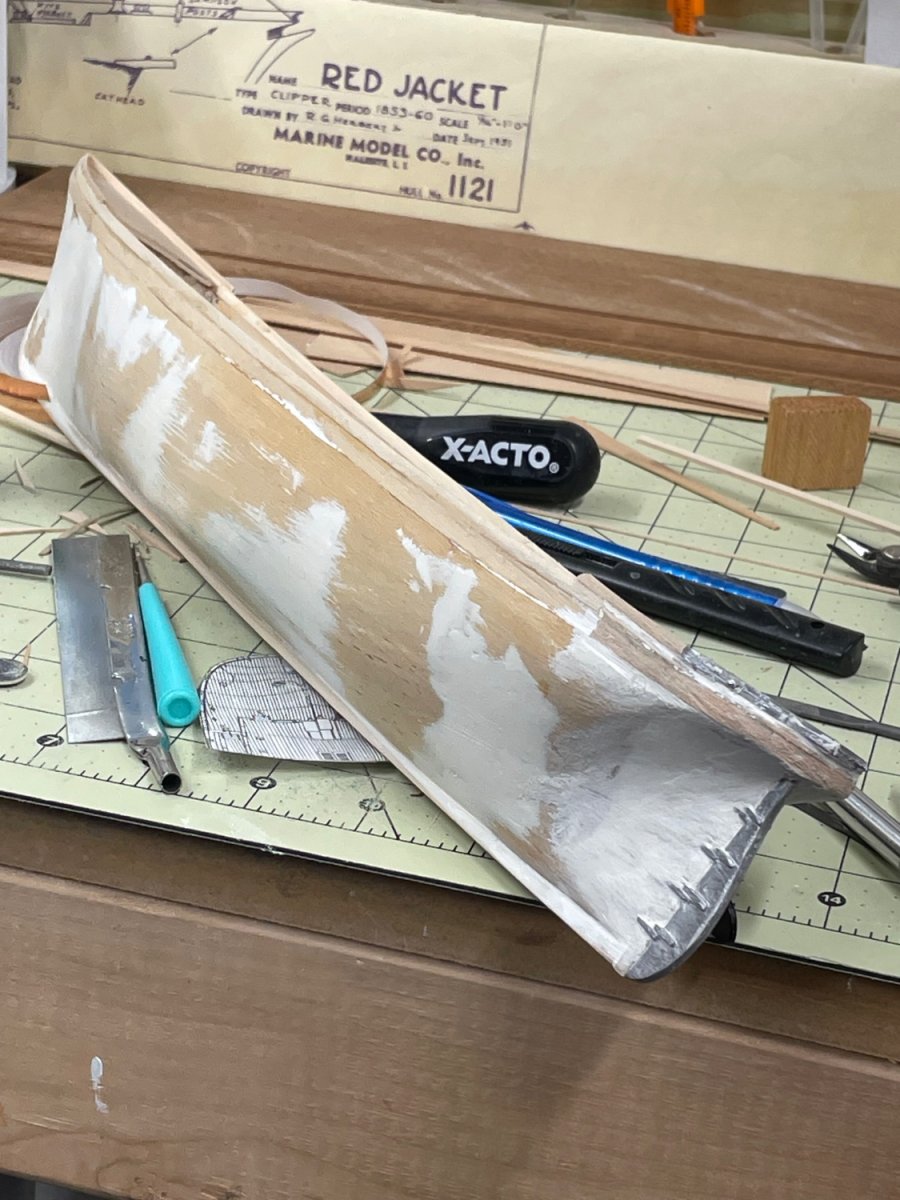
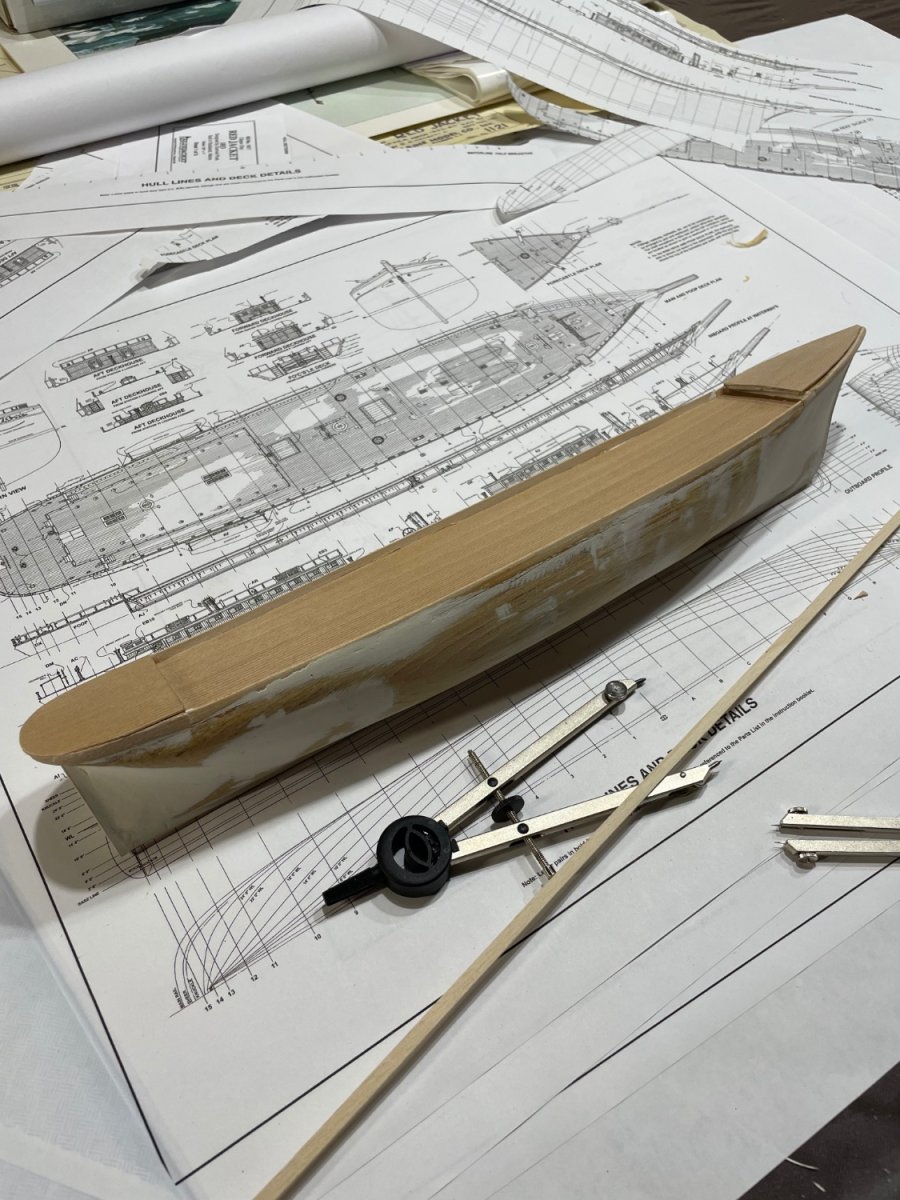
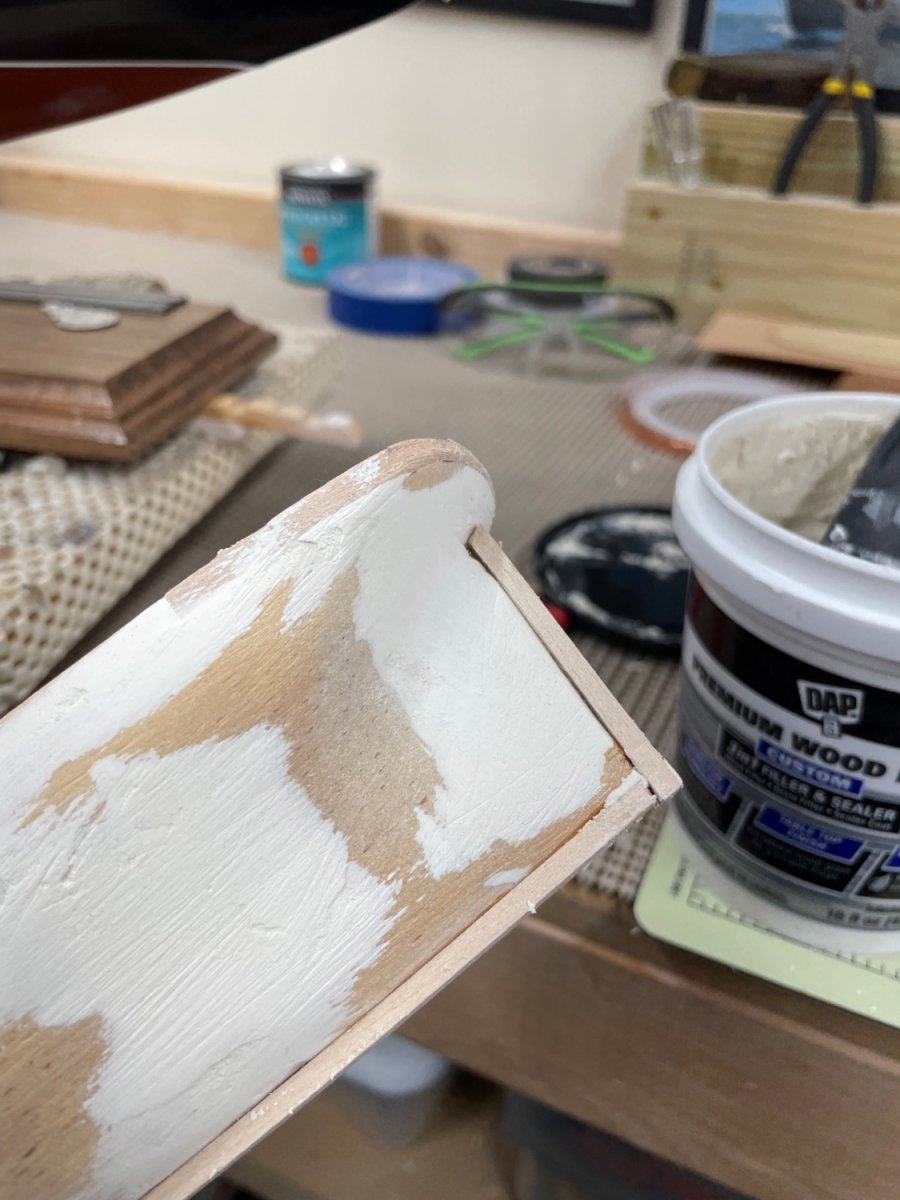
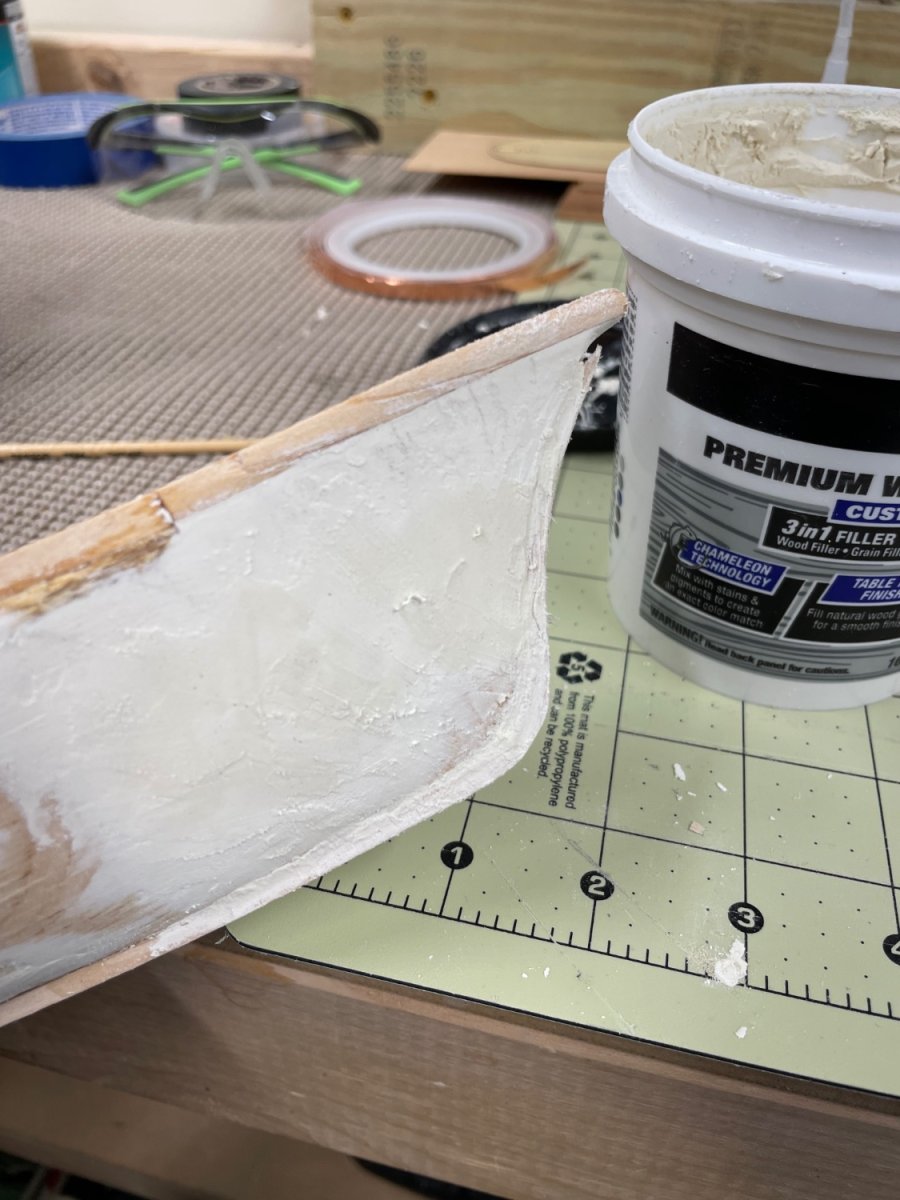
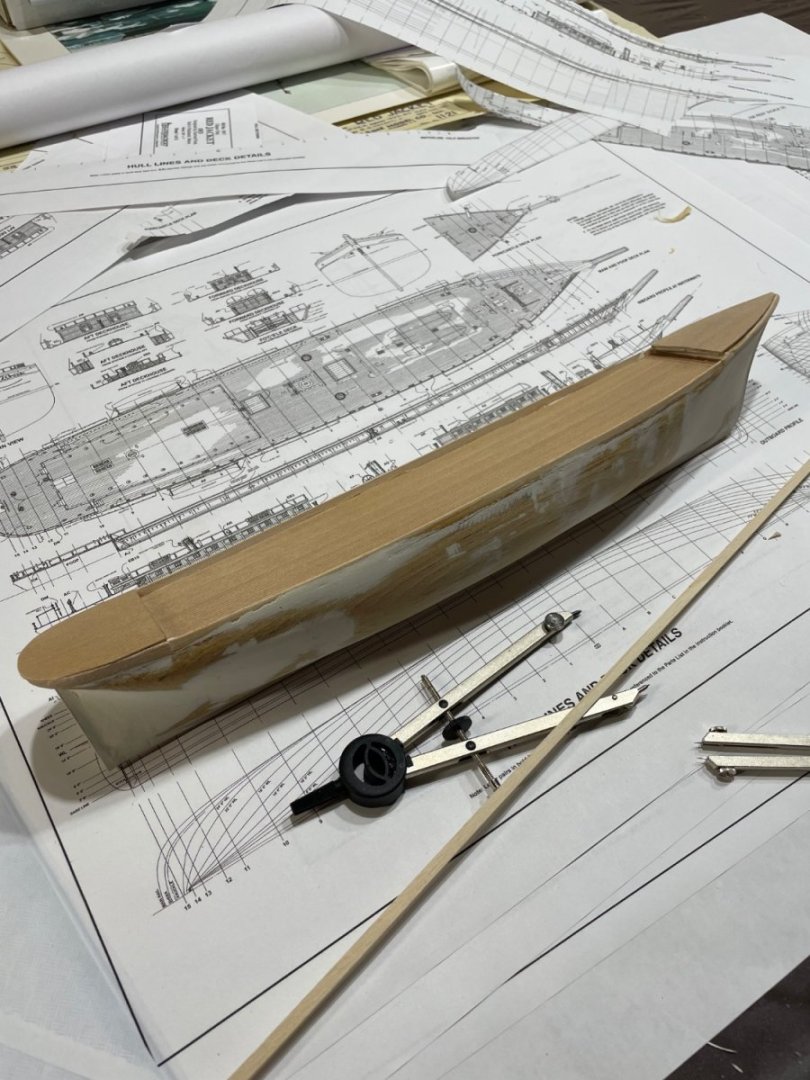
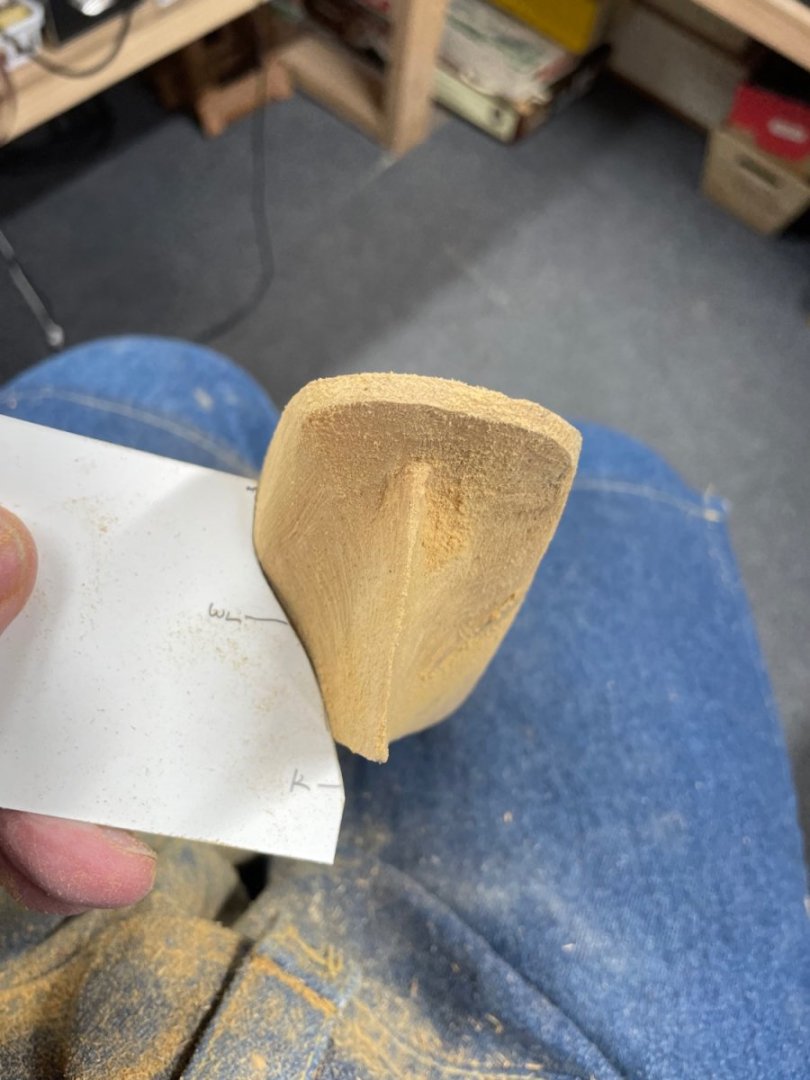
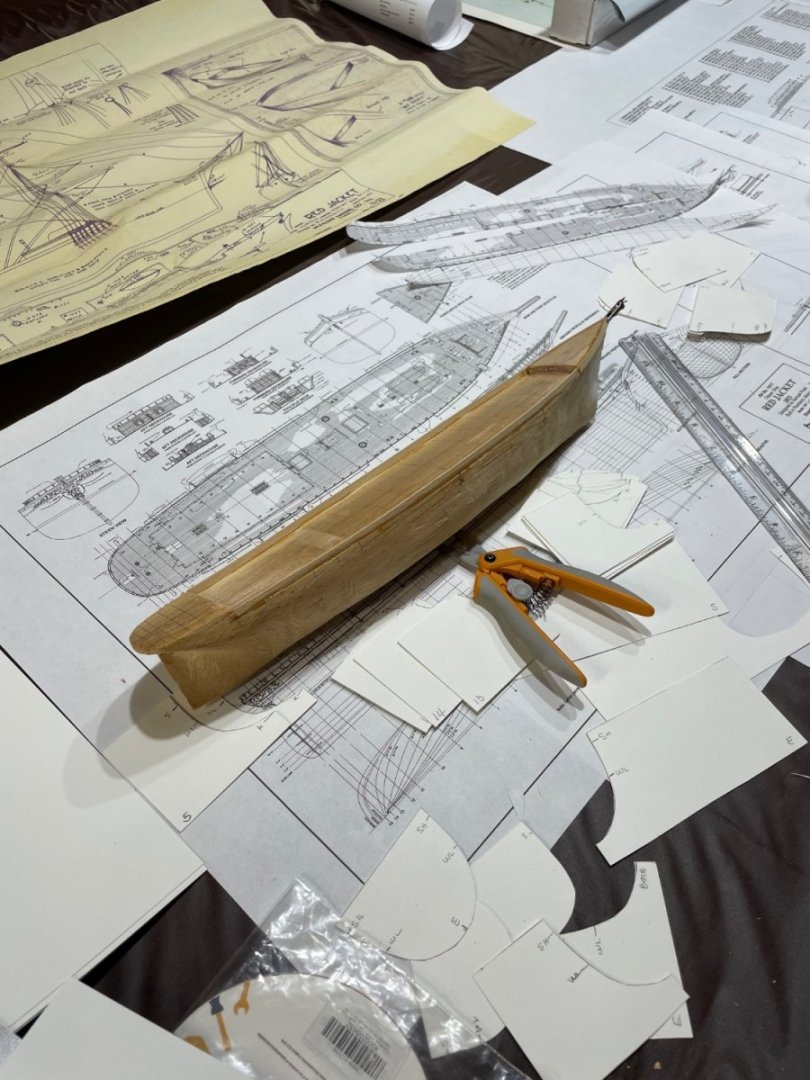
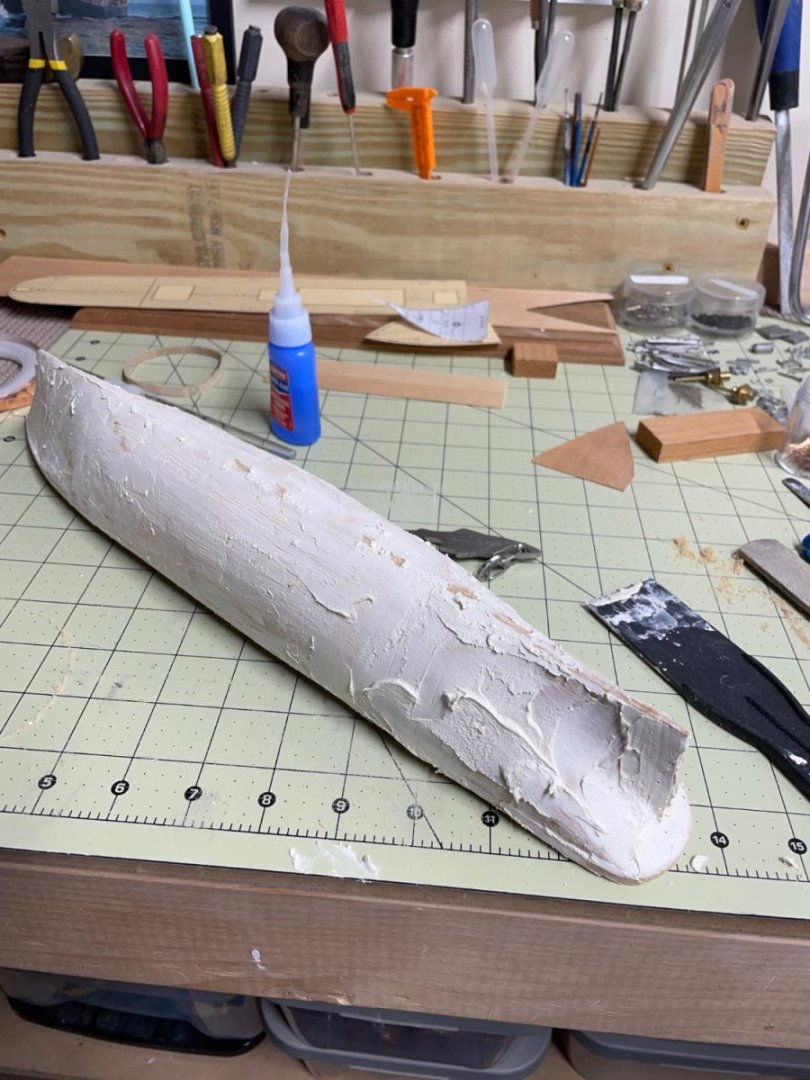
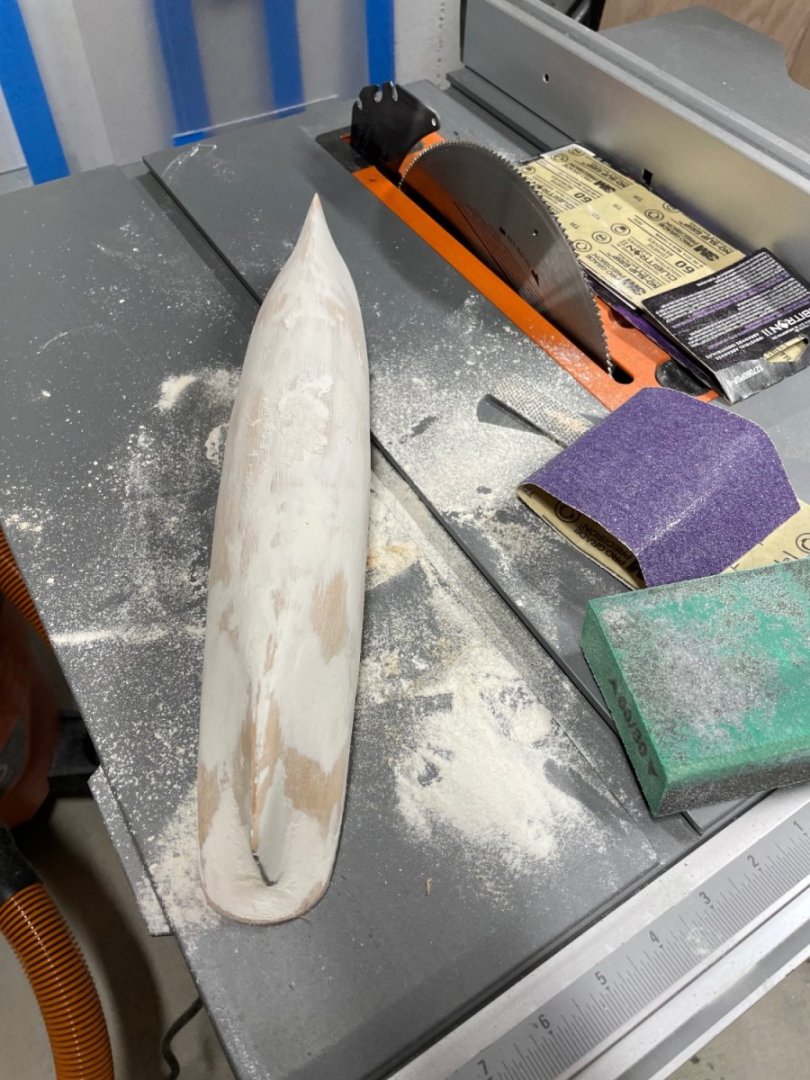
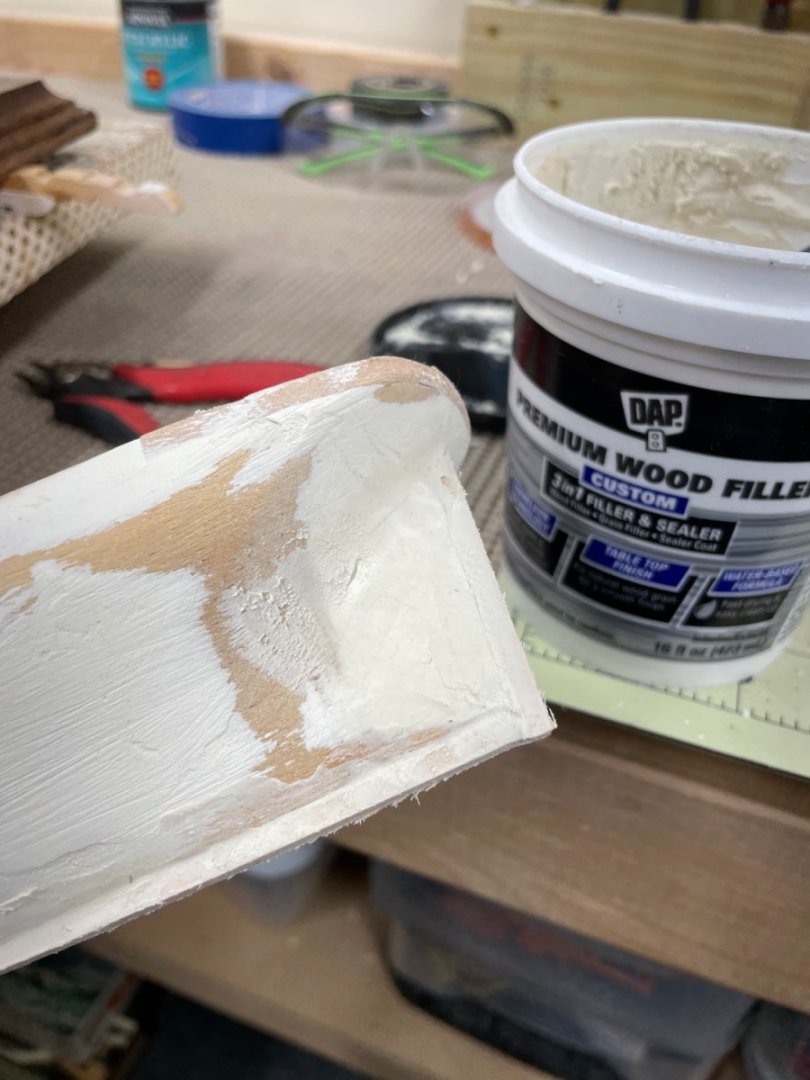
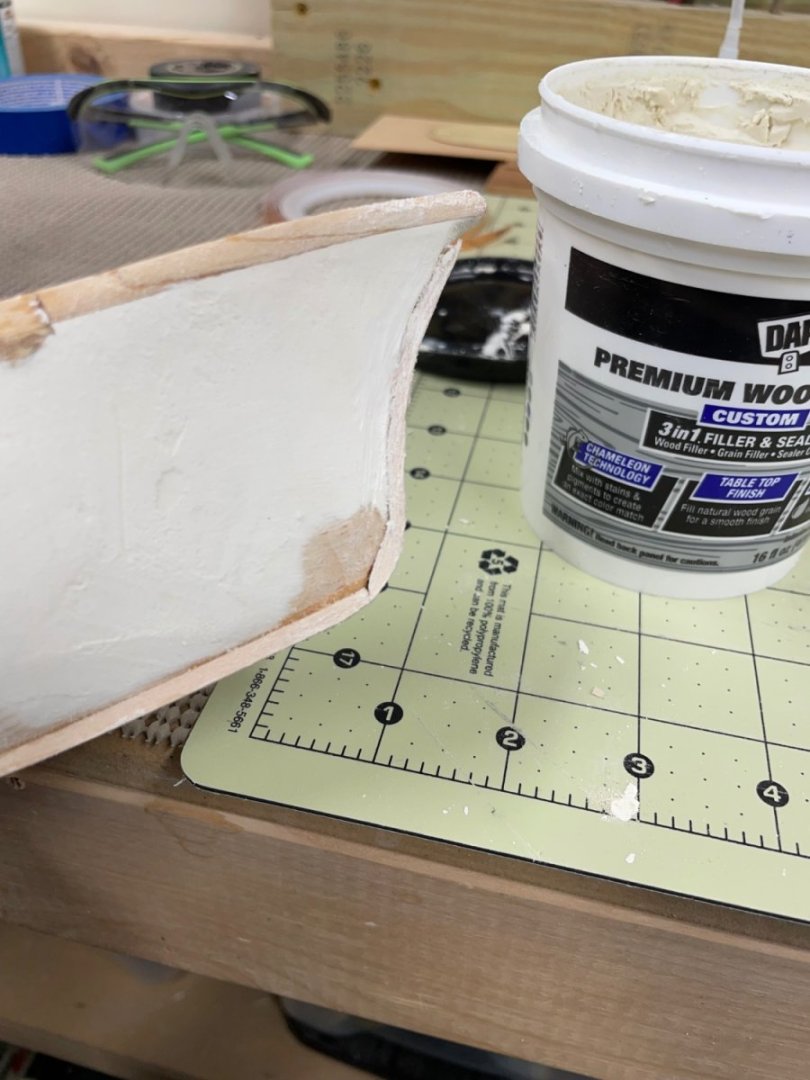
Shaping the Hull continues… Carved out mid-ship aft… Bulwark added… Using wood filler to refine the rough shape… Adding the Keel and Stern Post… Adding the Stem Post… She is coming along nicely… Lots of fill and sanding left to do, we’ll get there. Cheers 🍻


- 165 replies
-
- 9
-
-
- Red Jacket
- Marine Model Company
- (and 2 more)
-
What do you do with your unusable rigging line?
John Ruy replied to capnharv2's topic in Masting, rigging and sails
eBay? You have a lot of less discerning builders out there. They would buy it up at half the price of the good stuff. I would if I didn’t have boxes full my self. 👍