

PJG
-
Posts
117 -
Joined
-
Last visited
Content Type
Profiles
Forums
Gallery
Events
Posts posted by PJG
-
-
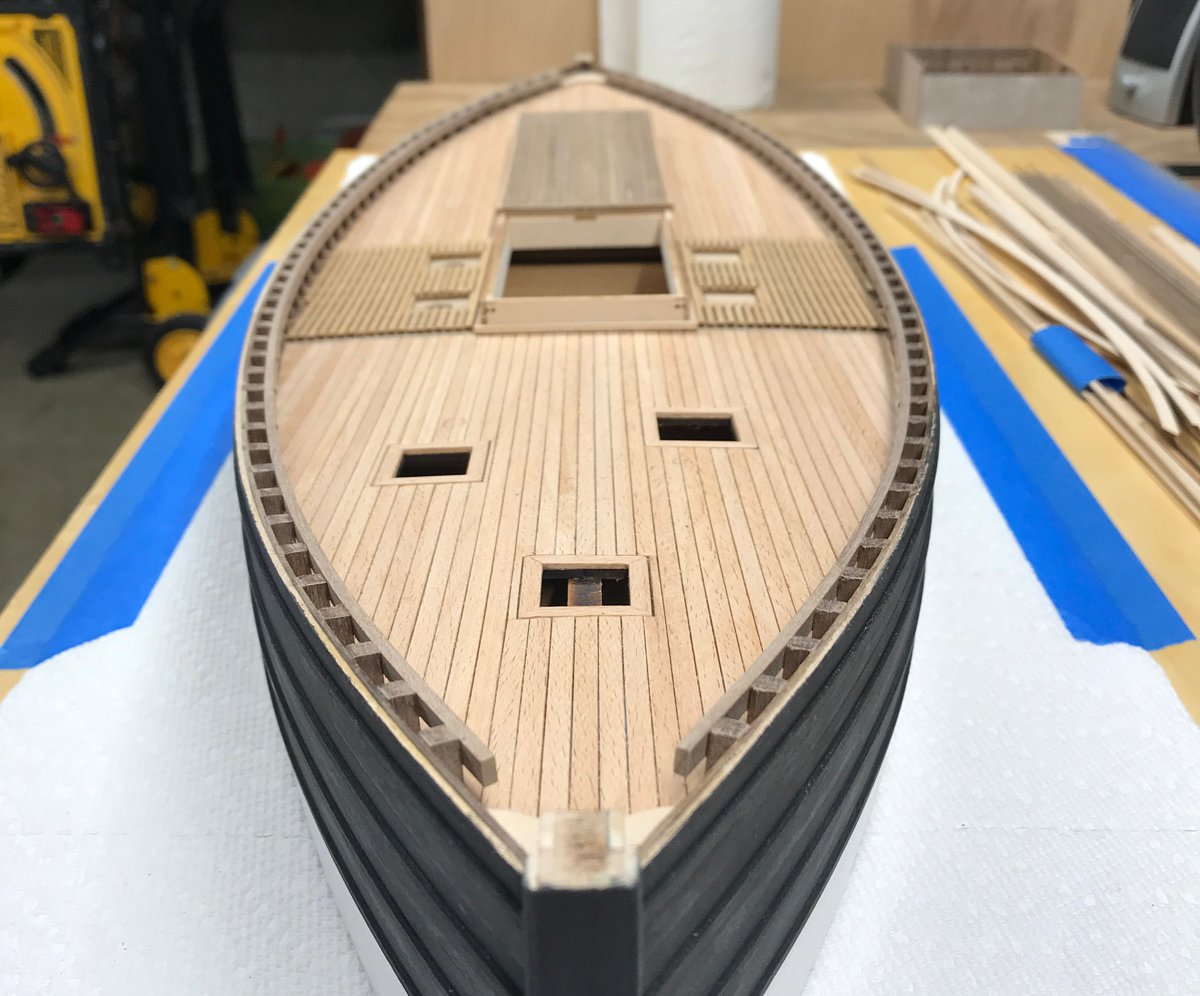
I had planned to display the forward companion way closed and show the small amount of below deck detail that would be visible through the warp room hatch. Instead, I've got myself into something much more interesting (for me, at least). If you're going to show a little detail, why not go all the way? So, I decided to build out the entire forward cabin.
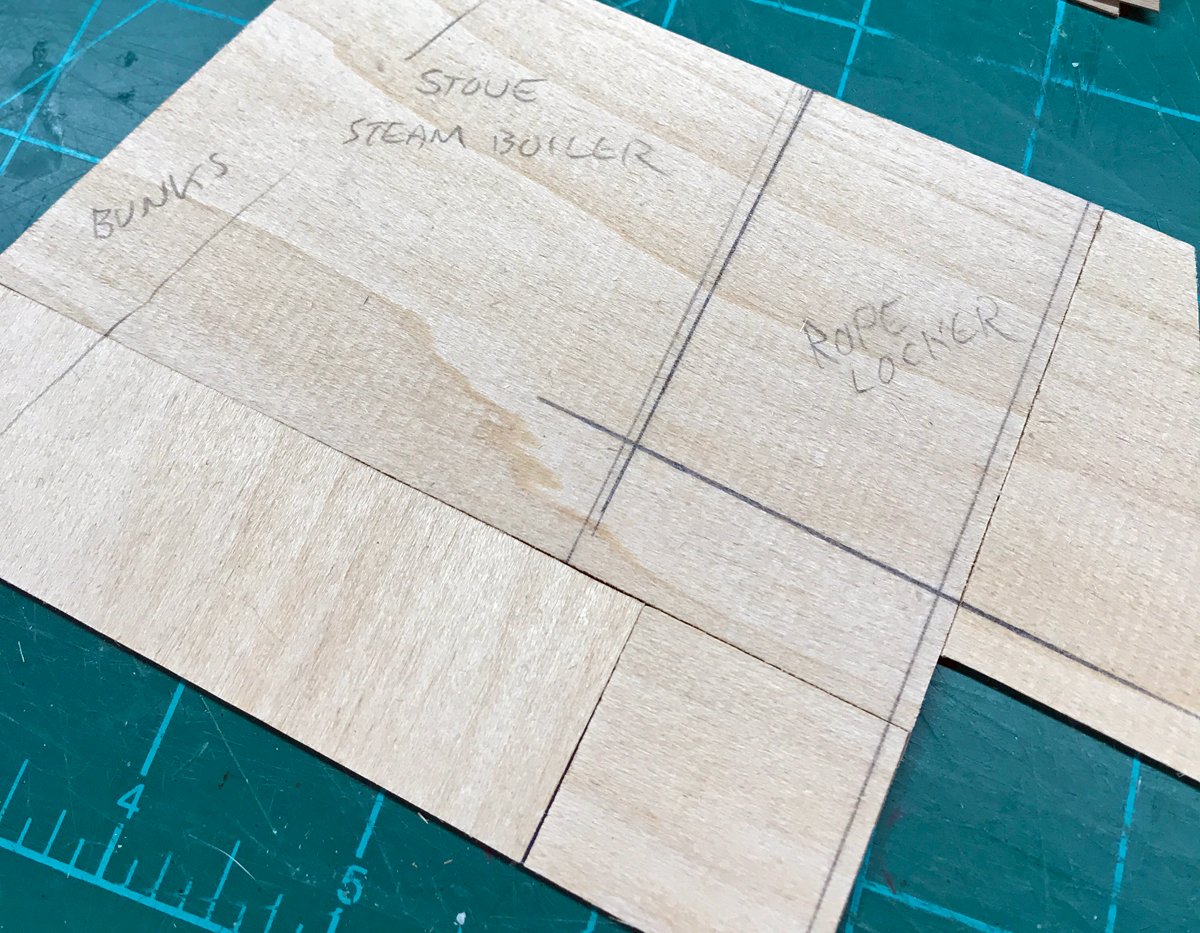
Starting off with my precision map of where things are going to be 😂

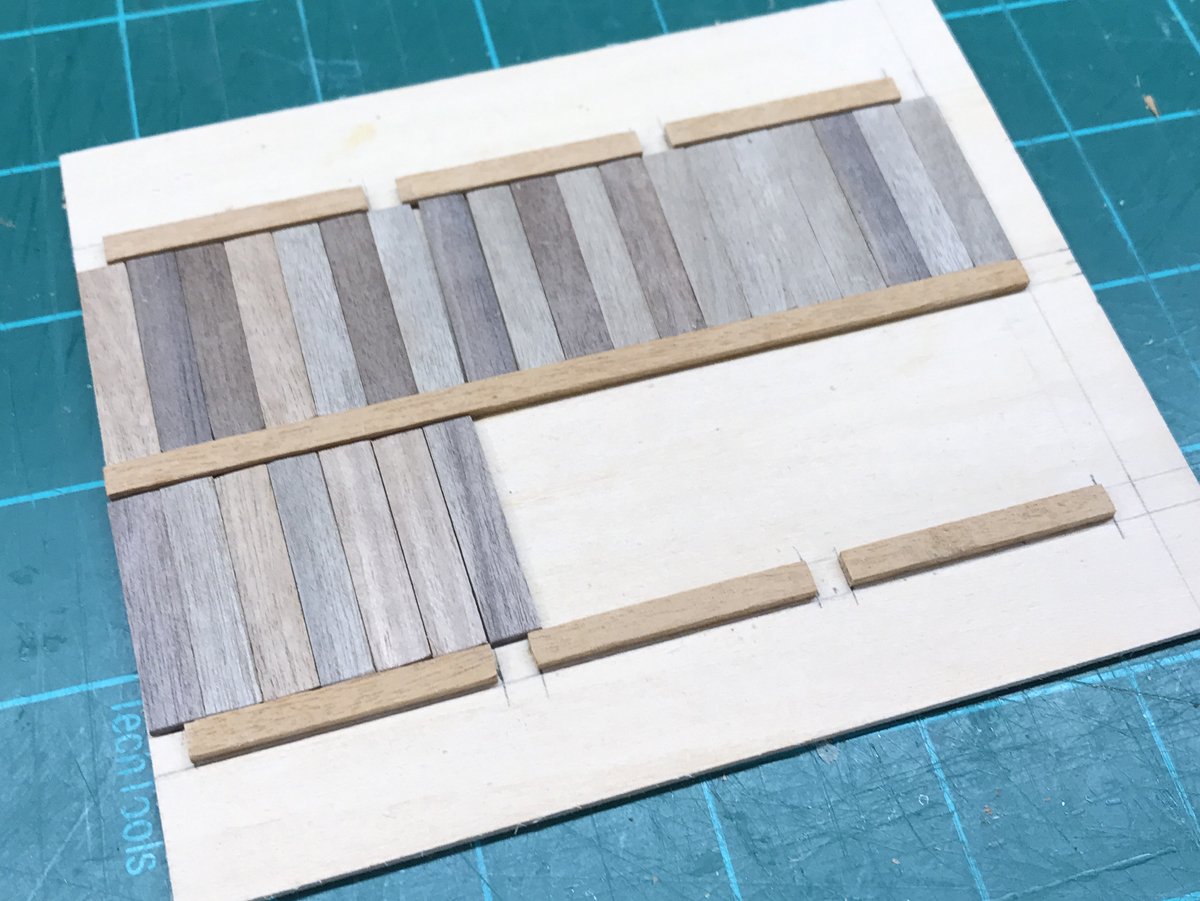
Staring off with the warp room floor.
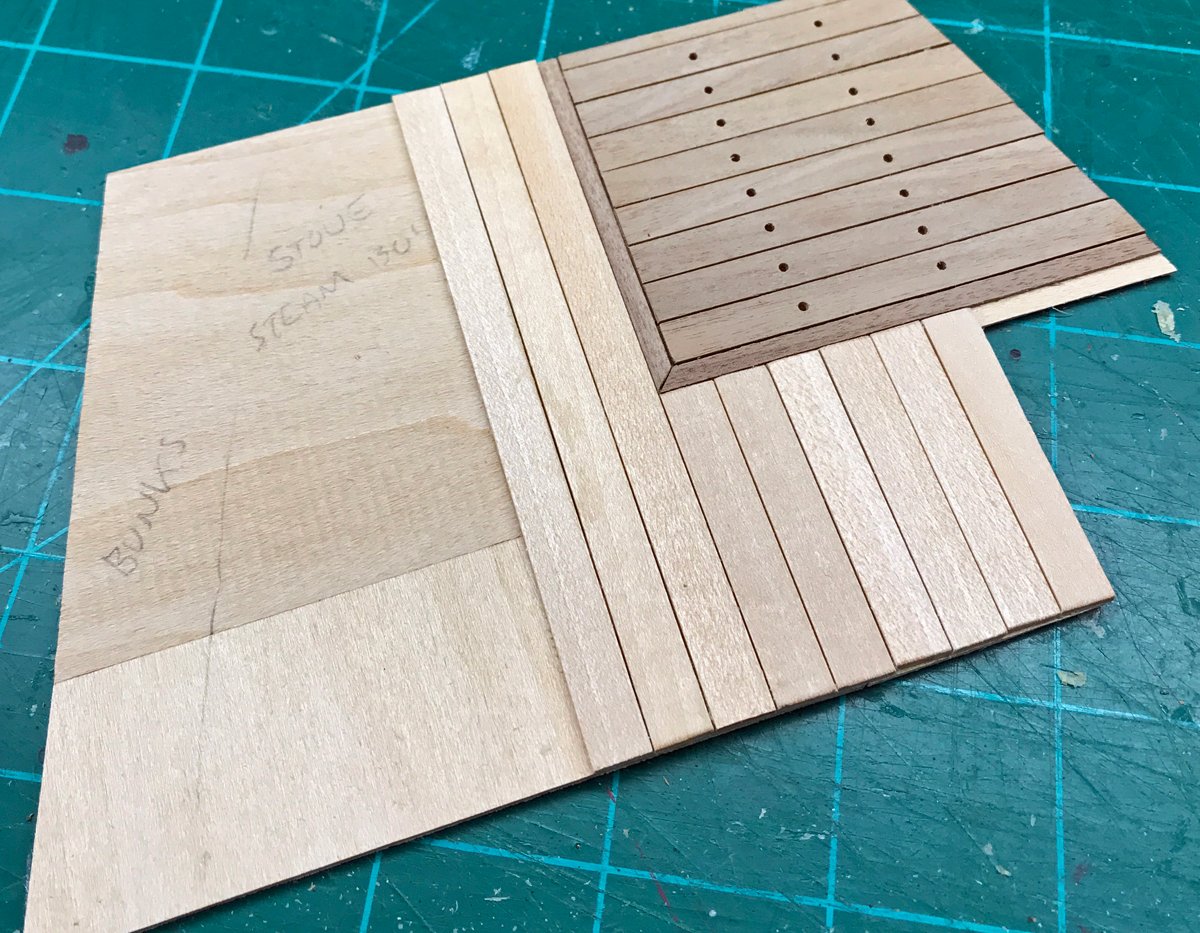
I have no evidence that the warp room floor was drilled for drainage on the actual boat but given that up to a mile of soggy rope was deposited there when the nets were hauled, I'm comfortable making the leap of faith.

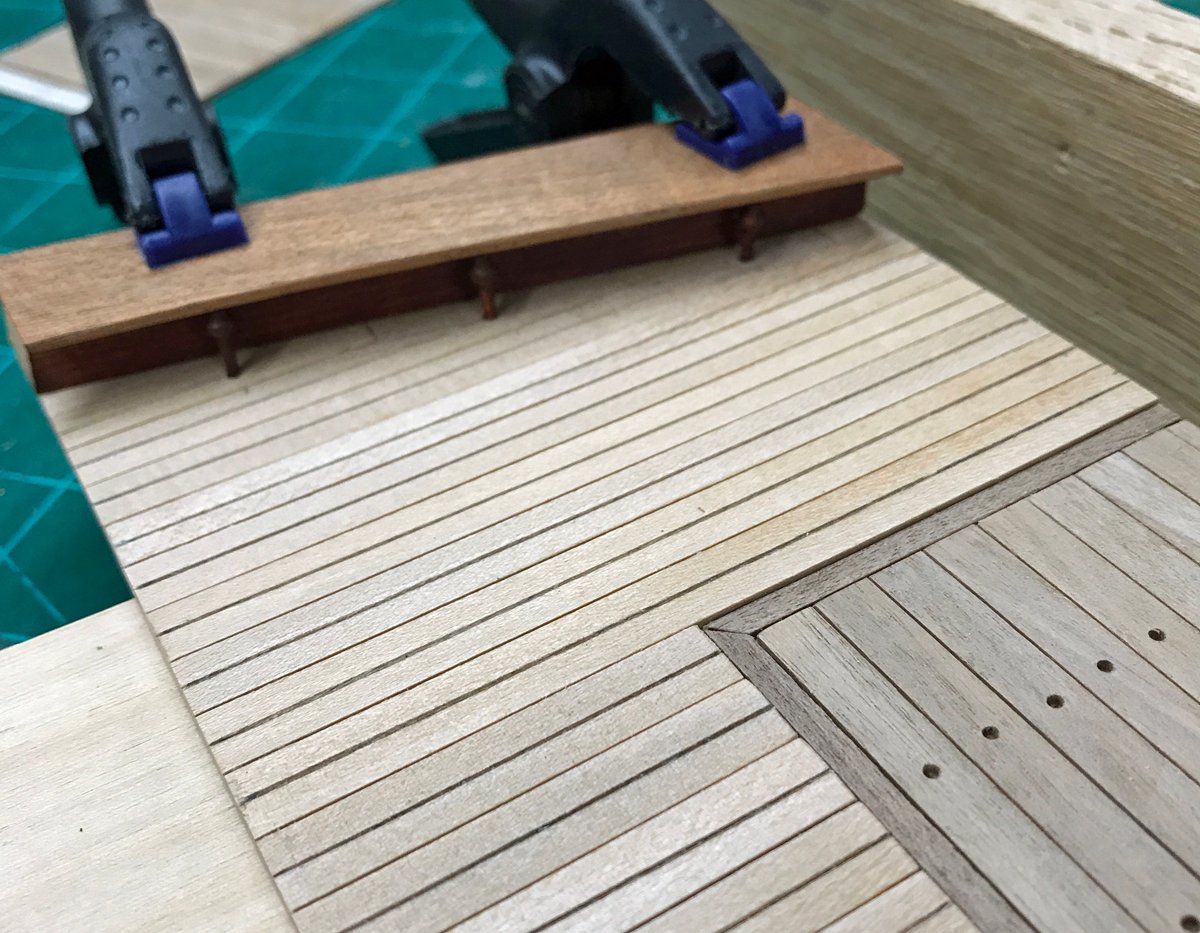
I didn't have enough material to match the topside deck so I used some of the sub-planking material provided in the kit to create a similar look.
The cabin wall was done with walnut strip.
This is entirely guess-work as to how exactly the bunks should be laid out but given that they'll barely be visible through the forward hatch, I'm not overly concerned. This is also why I'll never build a famous/known ship...I have a really hard time following the instructions!

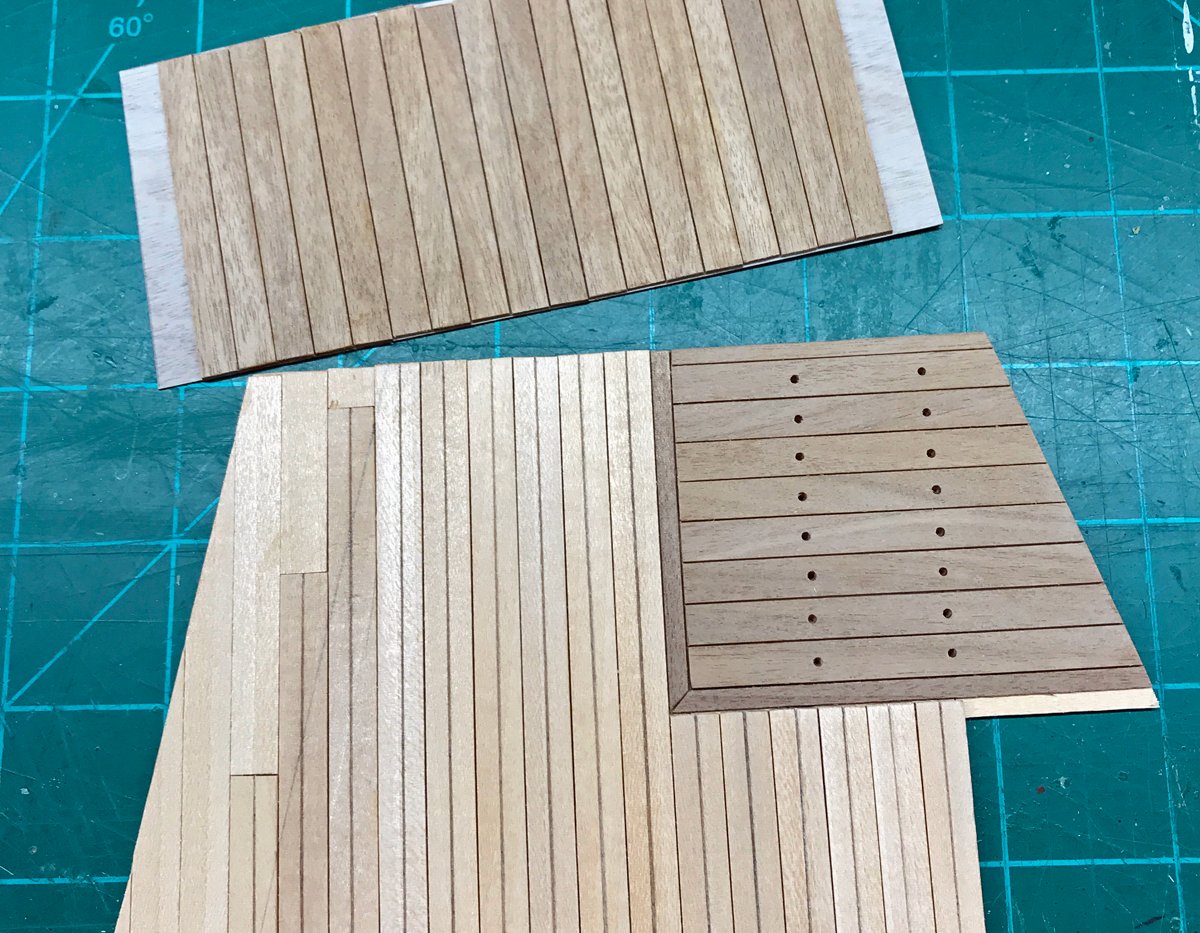
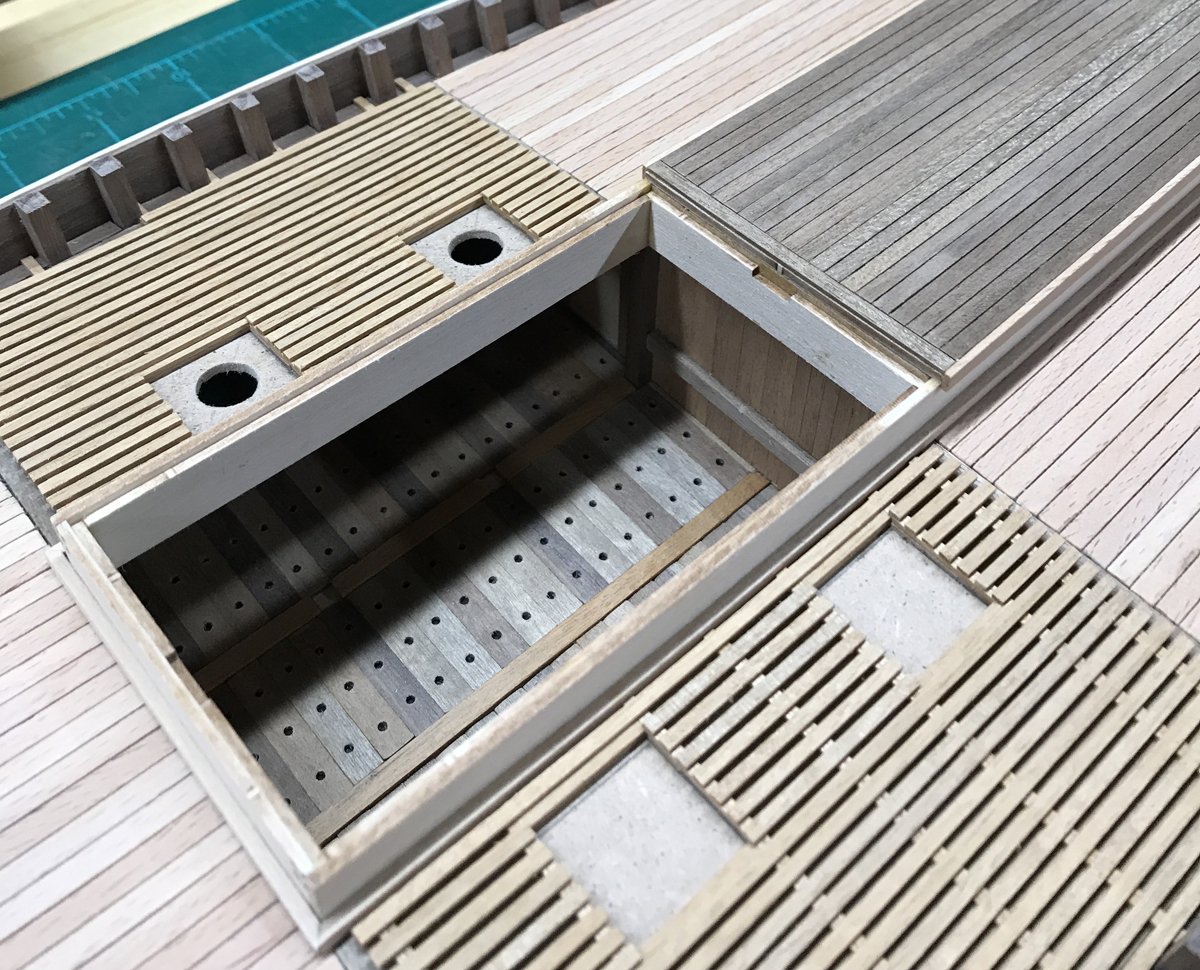
In addition to my speculative warp room floor, I also decided to make the walls "ventilated". The coal bunker (top right) will be visible through the scuttle hatch on deck.
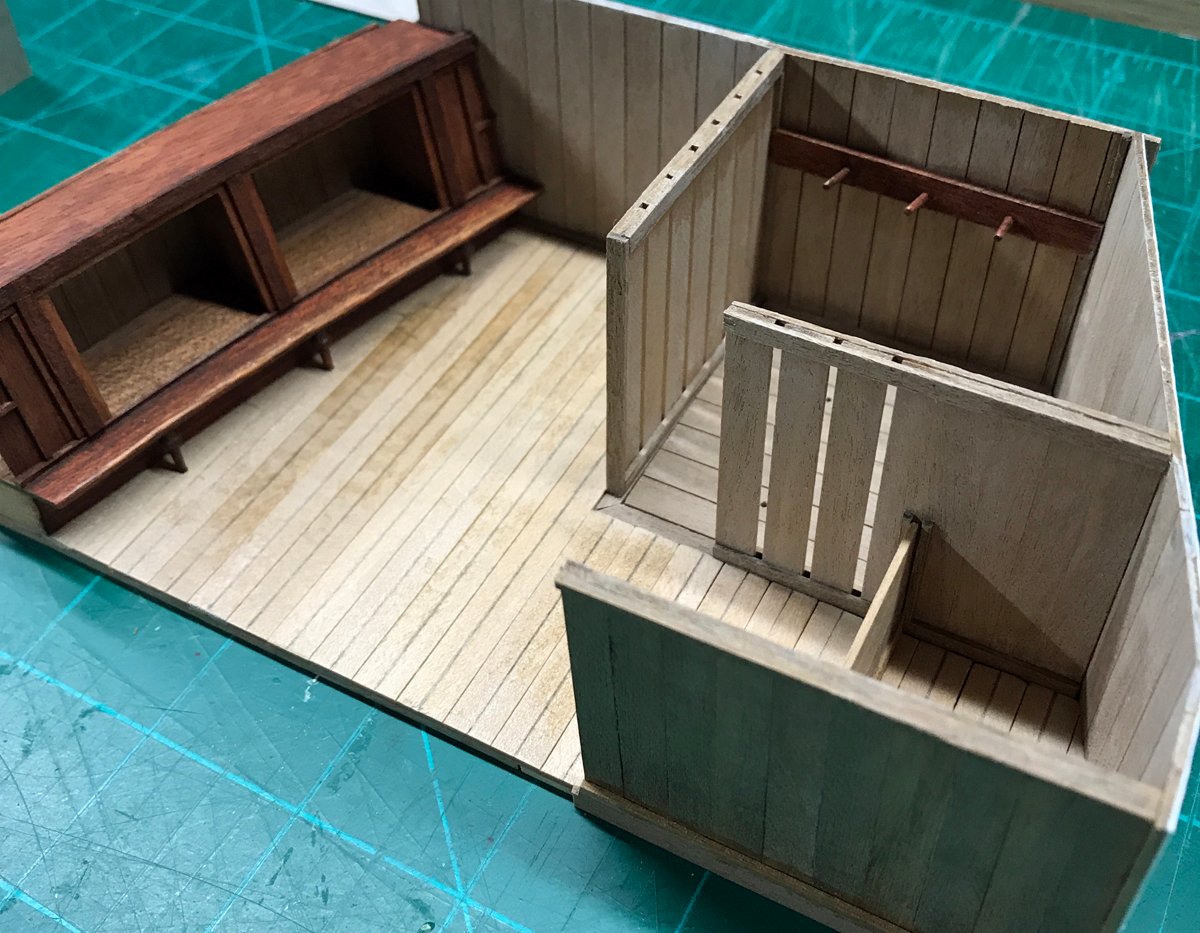
There are still a lot of details to be added to this mini-build. The boiler that powers the steam capstan and cooking stove will be fairly visible through the forward hatch so those will need to be fabricated next. I'm considering adding light below deck as well so planning for that will be necessary.
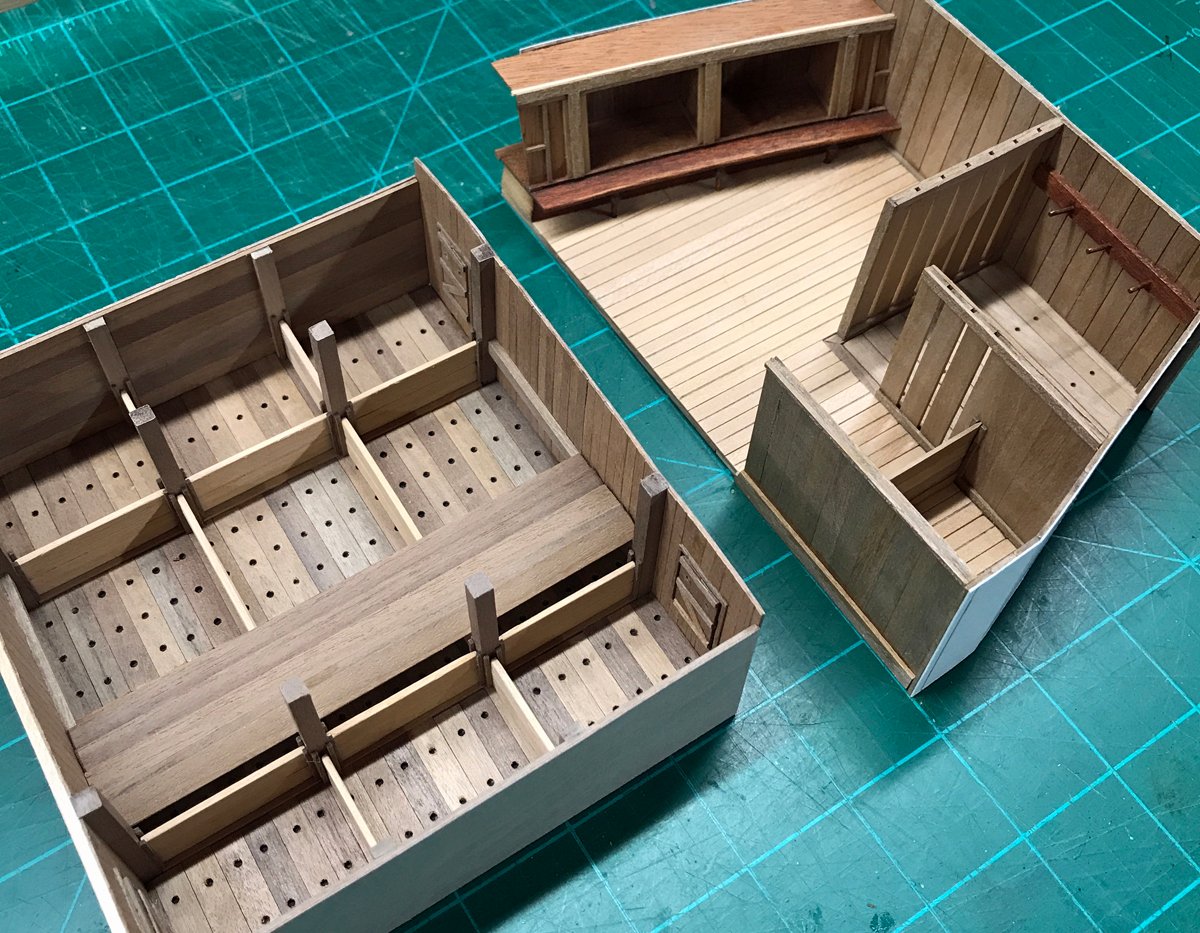
The fish hold and forward cabin...eventually I should probably get back to working on the kit itself!
- VTHokiEE, chris watton, PeteB and 5 others
-
 8
8
-
12 hours ago, bebopsteve said:
My Fifie kit was lacking enough 1x4mm deck planking to finish. Anybody else have this problem?
Hi Steve...my kit did have enough but not much to spare. Did you use the 1x4 strip to plank the areas on either side of the fish hold where the raised sections are added? I used walnut there so that might be the difference.
-
19 hours ago, Mike_In_RI said:
Are you using a sealer on the basswood or going straight on top with the color?
Hi Mike...I'm just applying paint directly to the untreated basswood where I've used it. The paint seems to do a reasonably decent job at tamping down the dreaded basswood "fuzz".
-
5 hours ago, bebopsteve said:
The trim going around the super structure.. What size is that? I didn't notice it in plans.
Thanks Steve...the trim around the superstructure isn't in the plans. The decking on the superstructure isn't in the plans either but given the large scale of this kit I'm adding detail where I think it will improve the overall look of my build. I also thought adding some structural detail would allow me to make the paint scheme a little more interesting. I used scrap I had available from other projects for my trim pieces...I would guess it's roughly 1 x 3 mm.
-
A little more scratch building on the deckhouse superstructure. As I mentioned in the previous post, I would be repositioning the rear companion way and enlarging it to match the forward version. Leaving it in the open position to show the detail below turned out to be a more time-consuming endeavor than I had planned (surprise! 😂).
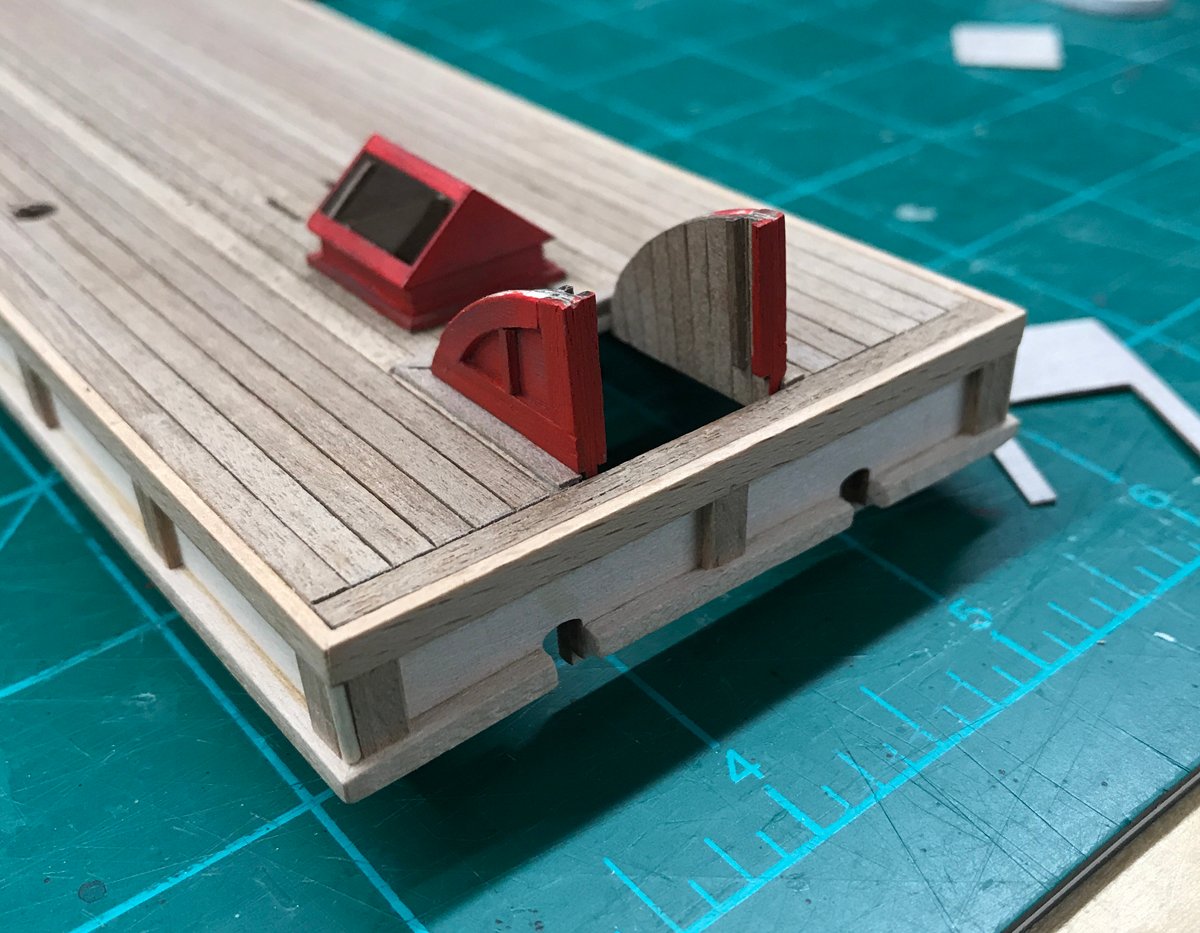

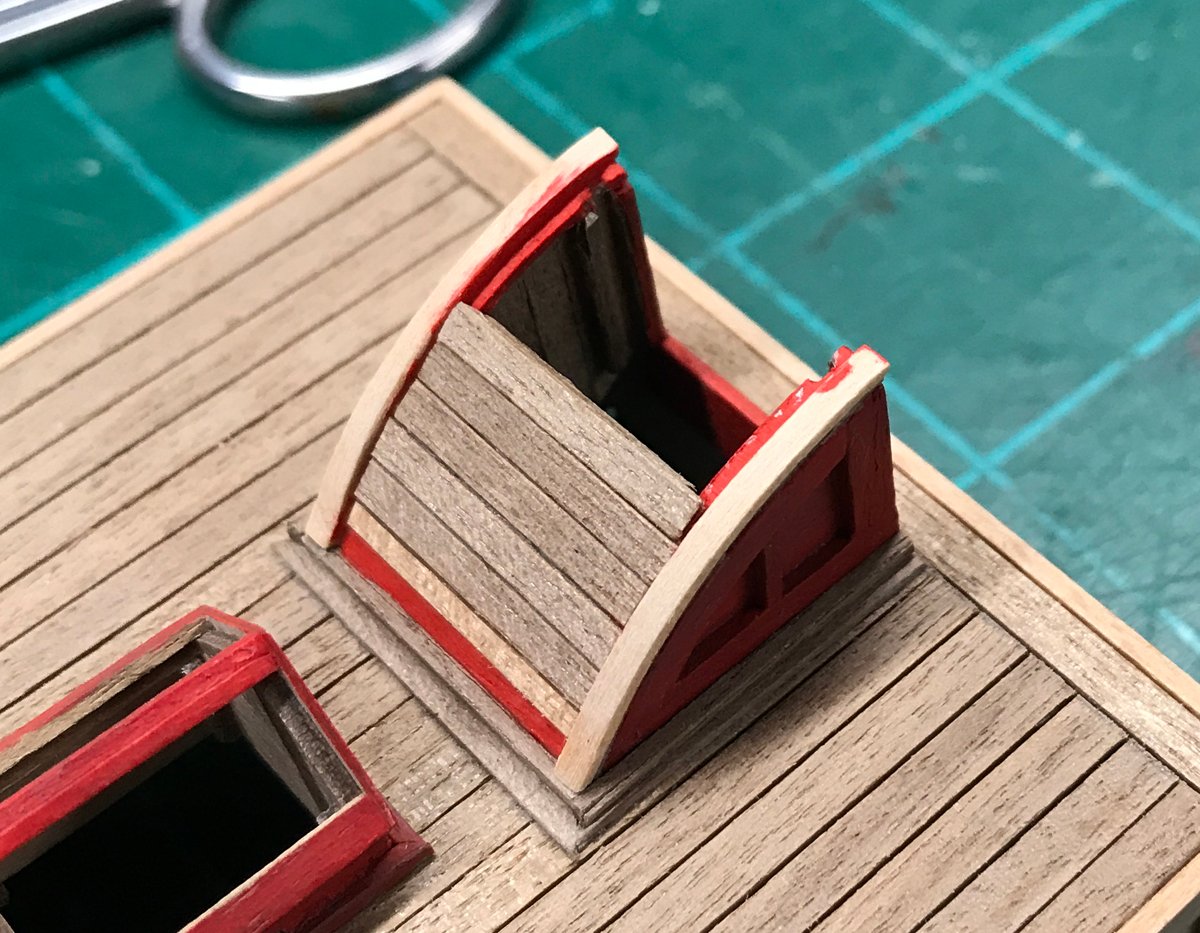
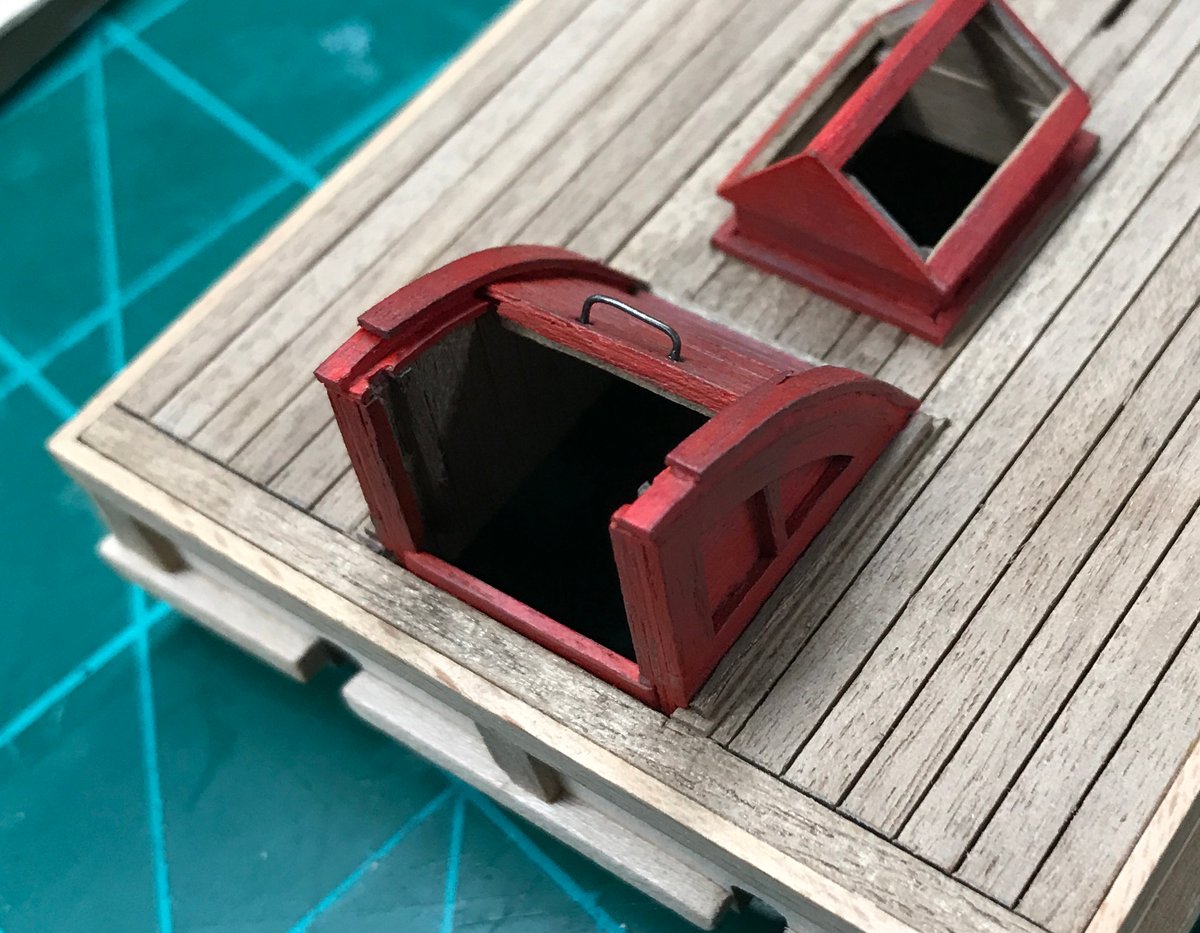
I opted to make a more utilitarian iron handle on the roll-top cover rather than use the brass photo etch part provided in the kit. It seems to fit better with the overall look I'm going for.
I also added a little more color and subtle weathering to get a feel for the overall color scheme.
-
Thanks guys...it's good to be working on the project again.
On 1/4/2021 at 4:50 PM, bebopsteve said:Looks Great! Did you hand brush hull with acrylic? I am doing the timberheads just like you did and Love the results! Lol I am actually referring to Your pictures more than the actual instructions!!! Thanks!!!
Hi Steve...yes, I did use acrylics on the hull. It has the look of an opaque stain which is fine given that I plan to add quite a bit of weathering later on. I'm glad my build log is helpful for your project...it's a fun, well-designed kit with lots of opportunities to make it your own!
-
So I'm finally back on the job after an unexpectedly long hiatus with other projects and life in general.
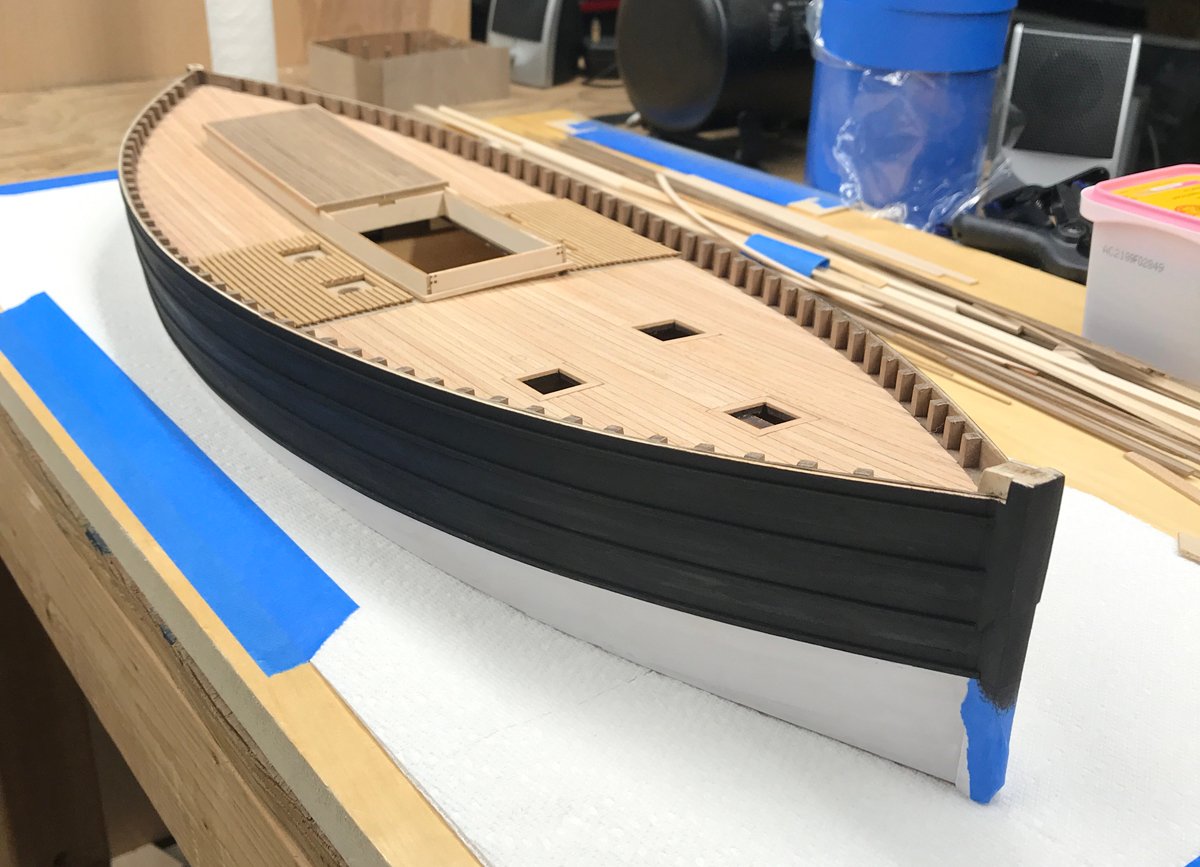
A base coat of paint has been added after getting the rub-rails installed and cleaning up the the stem and stern posts. My overall color scheme will be be black, white and red. I'm not overly worried about a perfect paint job as this fifie will be showing the scars of a well-used work boat.
The inner rail that runs the full length of the timber heads needs to be nailed (pilot holes recommended) at every other post as well as glued. There isn't enough material to do full runs on this piece so a splice is necessary somewhere along the way. Mine is at the 5th post from the bow. I reversed it for the other side.
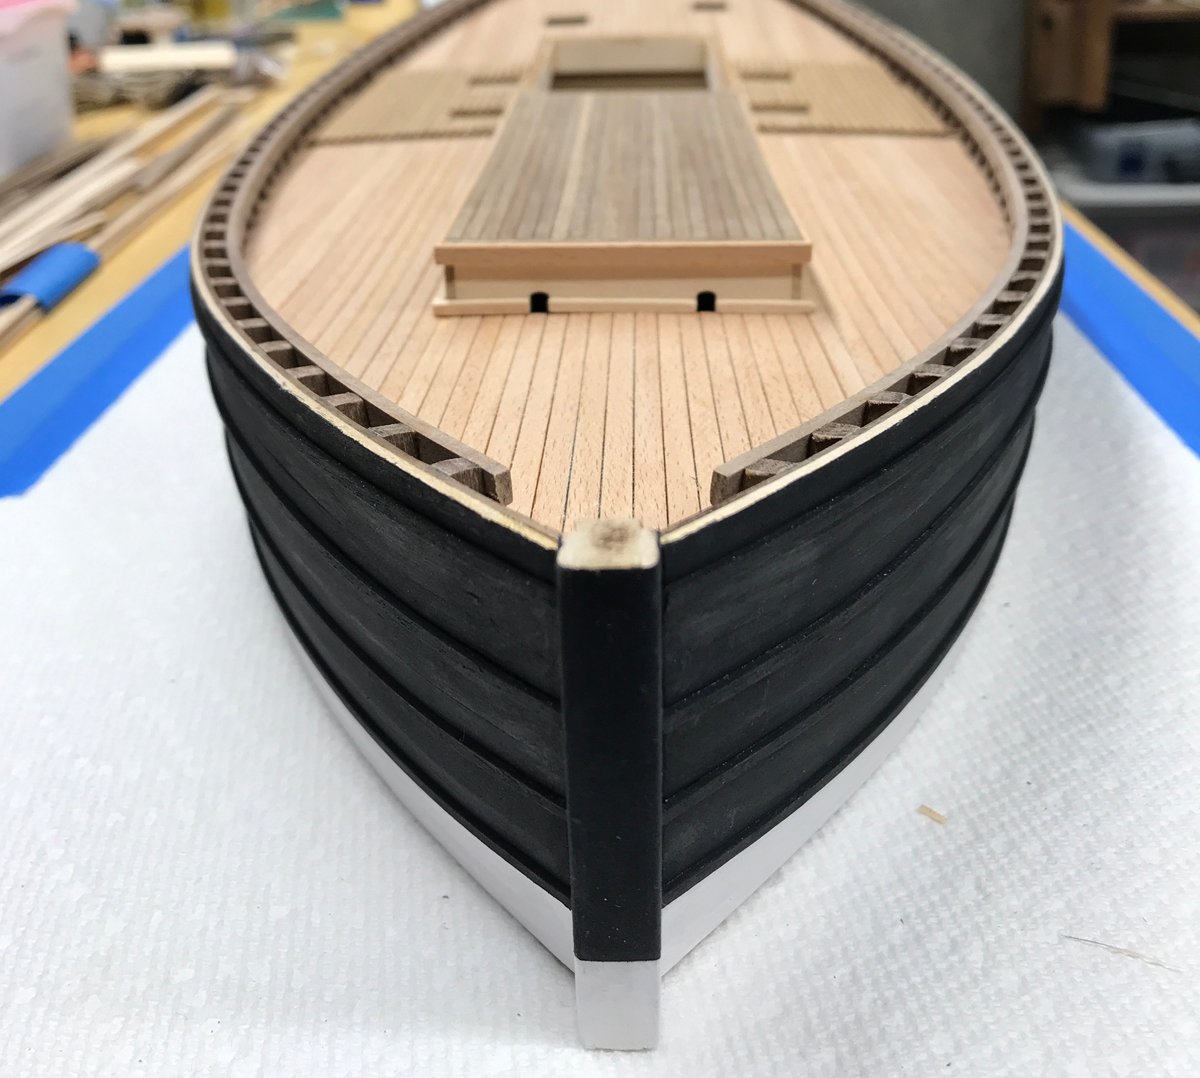
The full run from bow and stern.
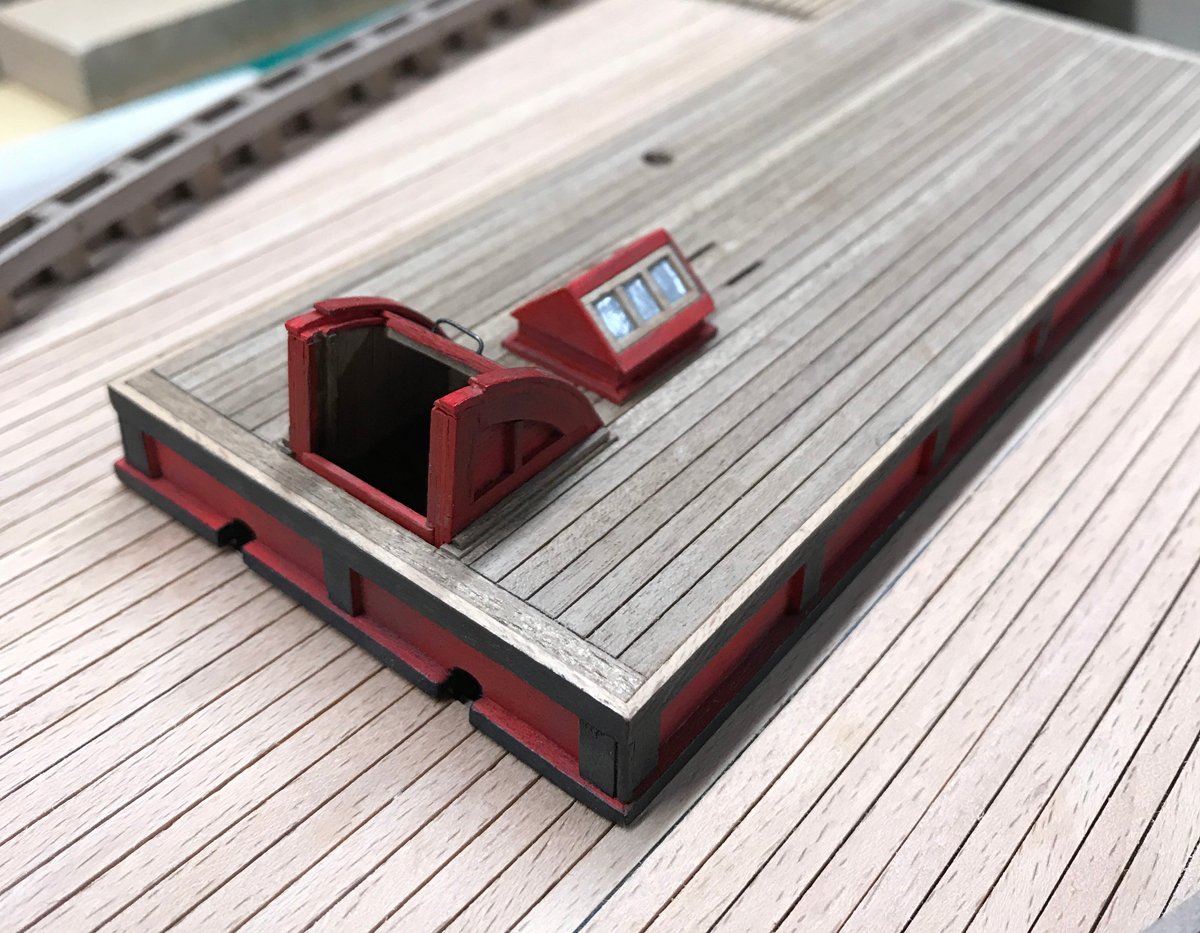
Next I tackled more of the scratch-built detail that will be visible through open hatches. This is the passageway behind the pilot house that appears to access the engine room (or at least where the engine lived). I made some modifications to the size and placement of this hatch given how much smaller it is than the version on the forward deck in the plans. The instructions call for this opening to be very small (compared to the forward hatch) and offset from the centerline which seems to put it in conflict with where one of the two rudder control chains run out to the stern. Regardless, I wanted to make this area more visible and these adjustments made that possible and solved the chain issue to my liking.
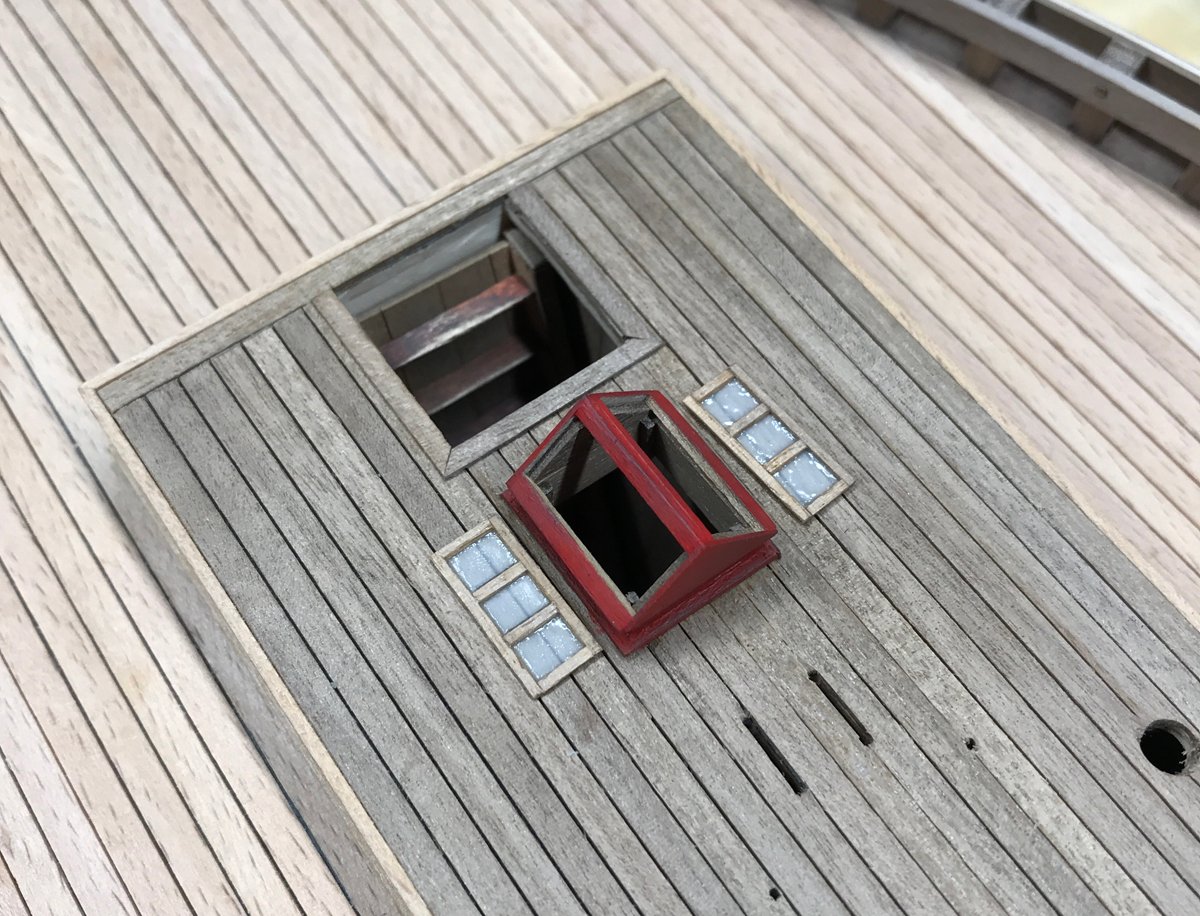
I also opted to add detail to the deckhouse superstructure and scratch-build the light in front of the hatch. I plan to have the sashes hinged at the top (or at least appear to be) and open for my final display. When the companionway is installed over the hatch I want to get as much light down there as I can. I also introduced a little of the red I'll be using to get a feel for how it's going to look.
- Helge Hafstad, Rik Thistle, BobG and 7 others
-
10
-
17 hours ago, bebopsteve said:
The spacers you used between the timberheads. Did you use extra you had or trim the kit supplied wood?
Hi Steve...I cut up a couple strips of the walnut that was provided with the kit for the second layer of planking. I single-planked my hull because it will only be visible above the water line and painted. I'm also using the walnut for scratch-built interior features (fish hold, etc.)...it's really nice stuff and there's a lot of it.
-
47 minutes ago, BigDan said:
Sorry for the intrusion that got you so upset. It was my first time posting something on MSW and I hadn't figured out how it all worked. Again I apologize, I am slowly getting the hang of it. Thank you to the administrator for sorting it out by "splitting" away my post from PJG's.
No apology necessary Dan...there's a bit of a learning curve to using the forum that's completely understandable. As James said, your build deserves its own space and can be referenced in the proper context there.
- Rik Thistle and BobG
-
2
-
-
You know you haven't been keeping up on your build when you return to find that someone else's model has taken over your log 😂😮!
Not that I don't think BigDan did a great job on his Fifie (I do), I'm just not sure the middle of my build log is the right place for it.
-
-
-
4 hours ago, clearway said:
on deck the catch was deposited in the "pound"
Thank you Keith, this is very helpful. On the kit plans, the planks used to divide the topside deck areas on either side of the hold are referred to as "pond boards". In my overly literal brain, I convinced myself that these areas must have held water somehow for some reason and tried my best to confirm this via research. Now that I've been relieved of that silly misconception, I can give Google a rest for a while. I'm guessing Amati just dropped the U in pound somewhere along the line.
5 hours ago, clearway said:I was born in the mid 60's to a fisherman father so was walking around on the old wooden fishing boats from the age of around three!
That sounds like a wonderful experience and yet another reason why this is such a great forum. There's almost always someone around with real expertise willing to offer a helping hand. It's greatly appreciated!
Patrick
- clearway, Rik Thistle and BobG
-
3
-
13 hours ago, James H said:
Those little fish look great! I'd be real happy wit those.
Thanks James...I think they'll be ok once I have detail and weathering going on in the hold and on deck.
1 hour ago, clearway said:nice work, normally on small fishing vessels like this the catch is sorted into wooden fish crates on deck then stored in the hold and covered with ice (depending on which point in history you are modelling) have also seen some catches stored in wicker baskets on old photos, but when i was on fishing boats the boring old plastic baskets and fishboxes had taken over.
Thanks for the helpful info Clearway. I believe this boat would have been active sometime just before and after the turn of the 20th century, say 1890-1910ish? From what I've been able to dig up on this particular type of vessel, the hold could be divided up into compartments at the captain's discretion with boards that fit between the posts below deck. I attempted to model that as best I could without specific plans. I have seen references to the wicker baskets that were used to haul the fish from the hold to the dock (Blue Ensign made these for his 1/64 Vanguard Fifie) and I plan to try my hand at a few of those myself.
-
My bench time on the actual boat has been hard to come by the last couple of weeks but I have been plugging away a little at a time on the tedious side-project of making miniature herring. I created a master template for the largest fish (just shy of .5" at 1/32 scale) using Adobe Illustrator and fed the .svg file to my Cricut die-cutting machine to test materials. Paper didn't hold up well to the cutting process so I opted for a more vellum-like material I use for frosted windows on my miniature building projects. This material held paint much better than the paper at this size as well. Once I was satisfied with the material, I created 2 more slightly smaller versions of the template to avoid too much uniformity across the board. In the end I cut somewhere around 400 of these guys thinking that would be more than enough. The jury is still out on that.
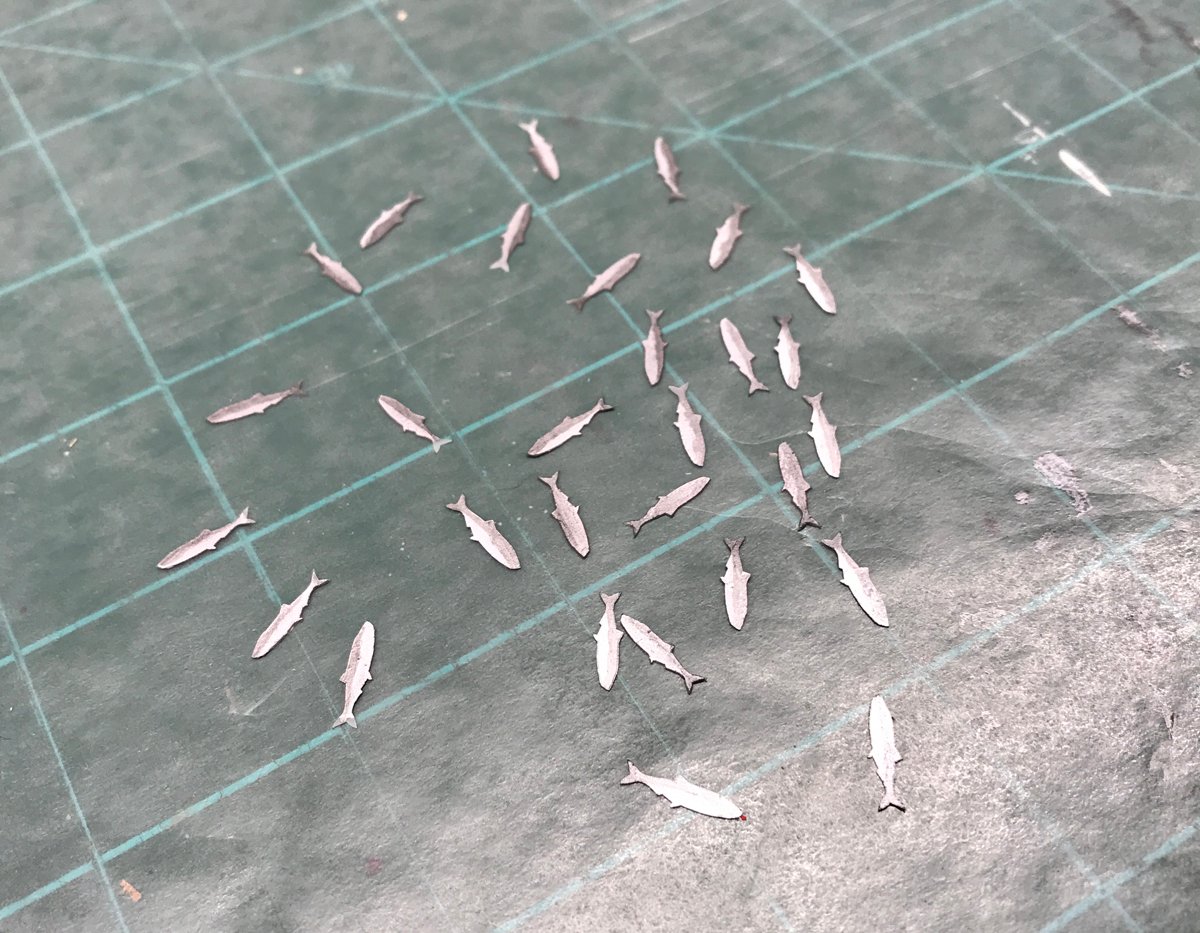
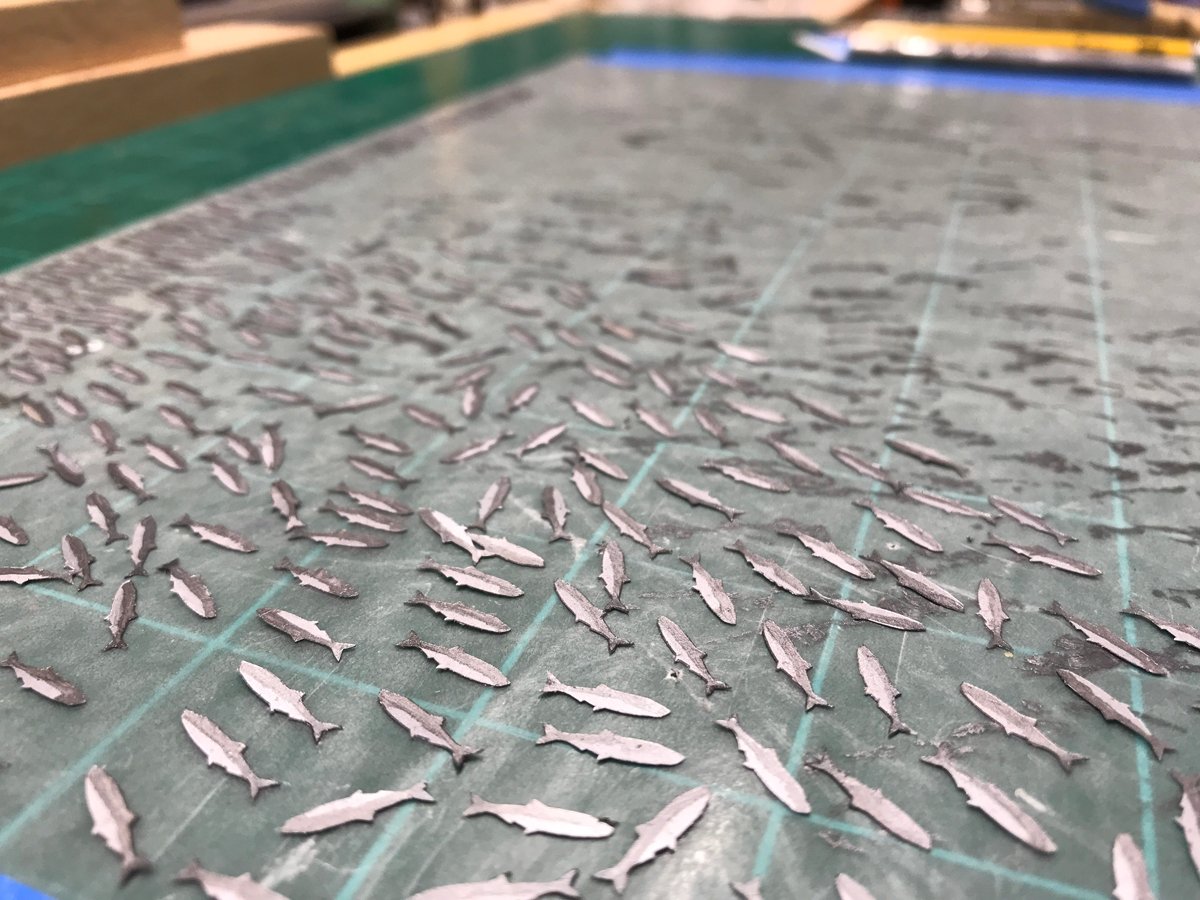
My photos don't do justice to the metallic look of the painted fish...they actually shimmer quite nicely when viewed from the distance a person is likely to view the finished model.
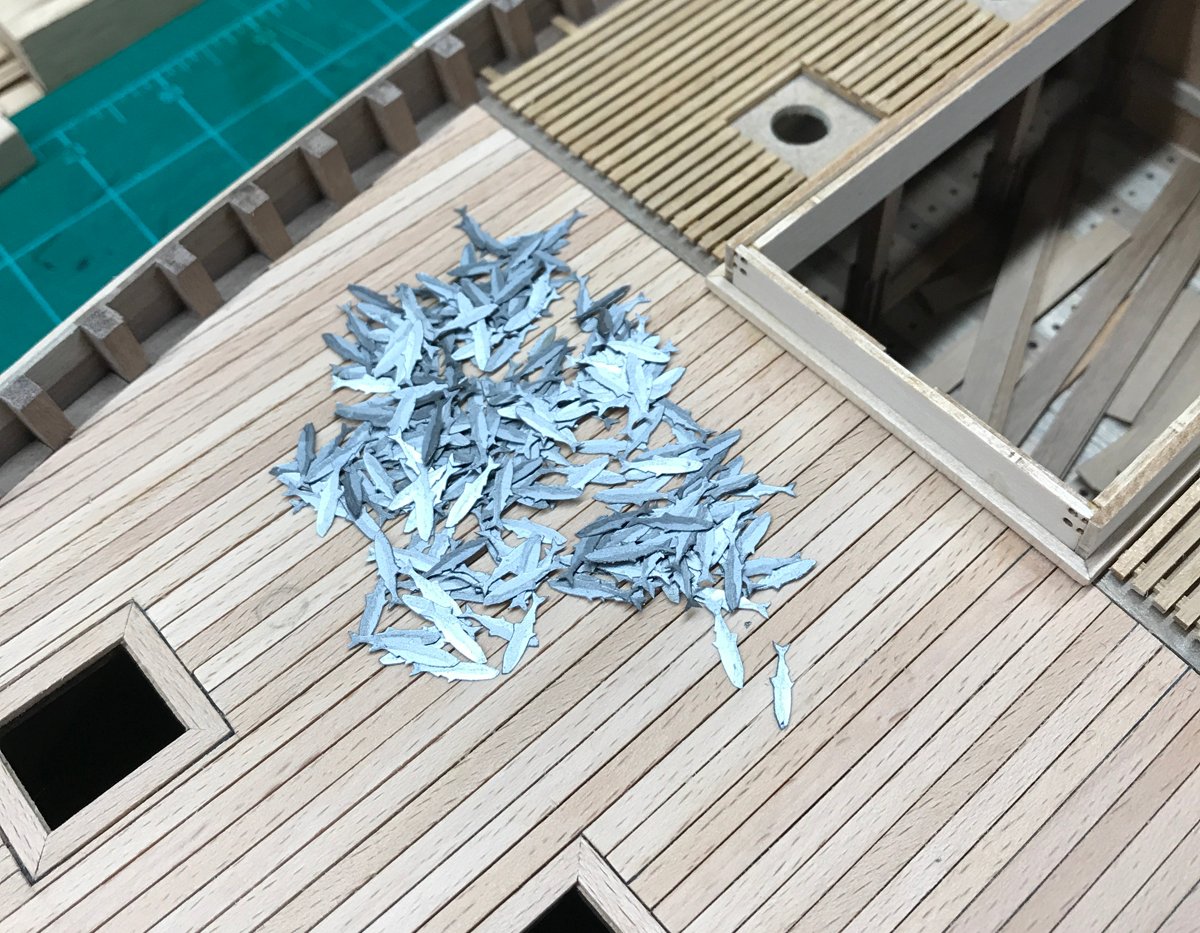
Some fish will be scattered around on deck and stuck in the nets while most will be in the hold under the net drying boards. It's a lot of work for such a small detail but ultimately I think it will be a nice touch. Now back to actually building the boat!
-
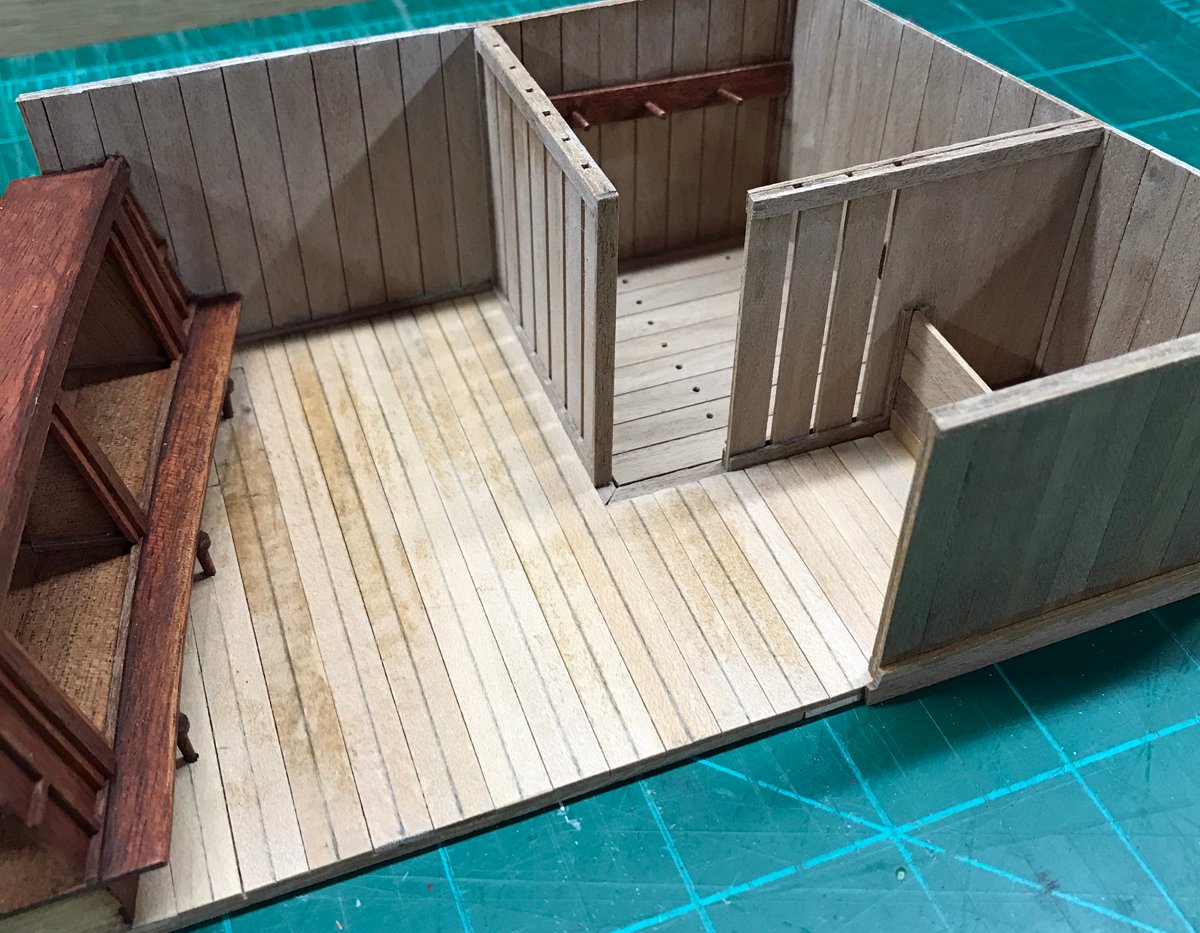
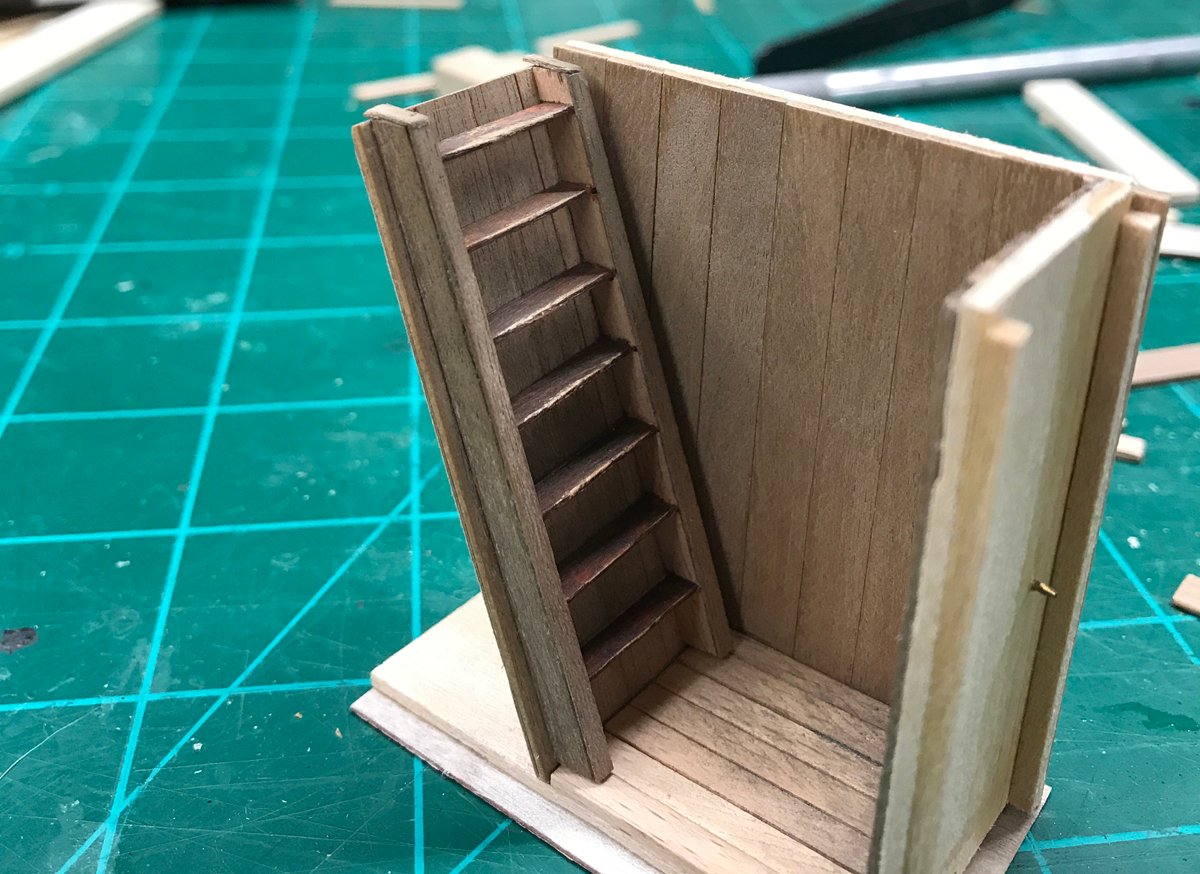
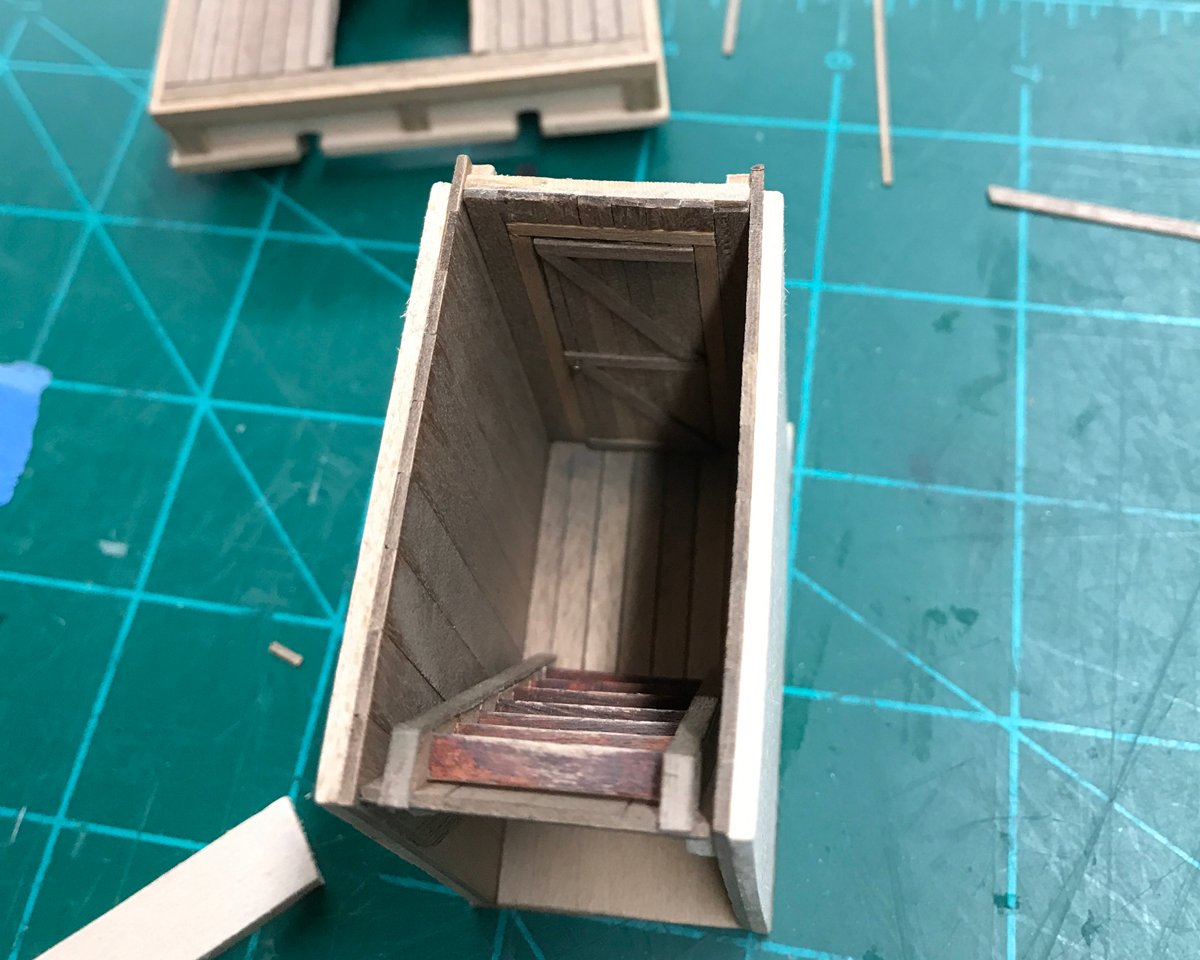
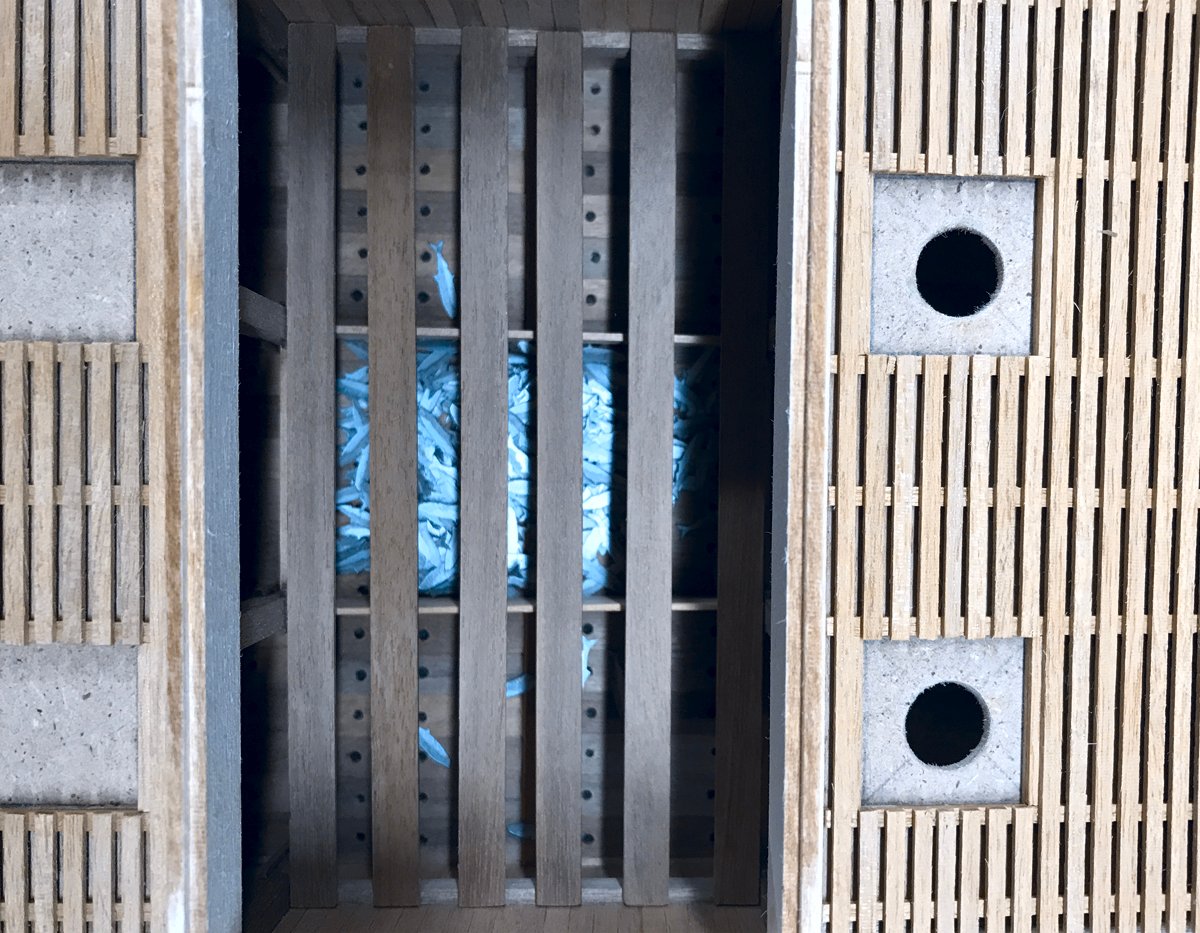
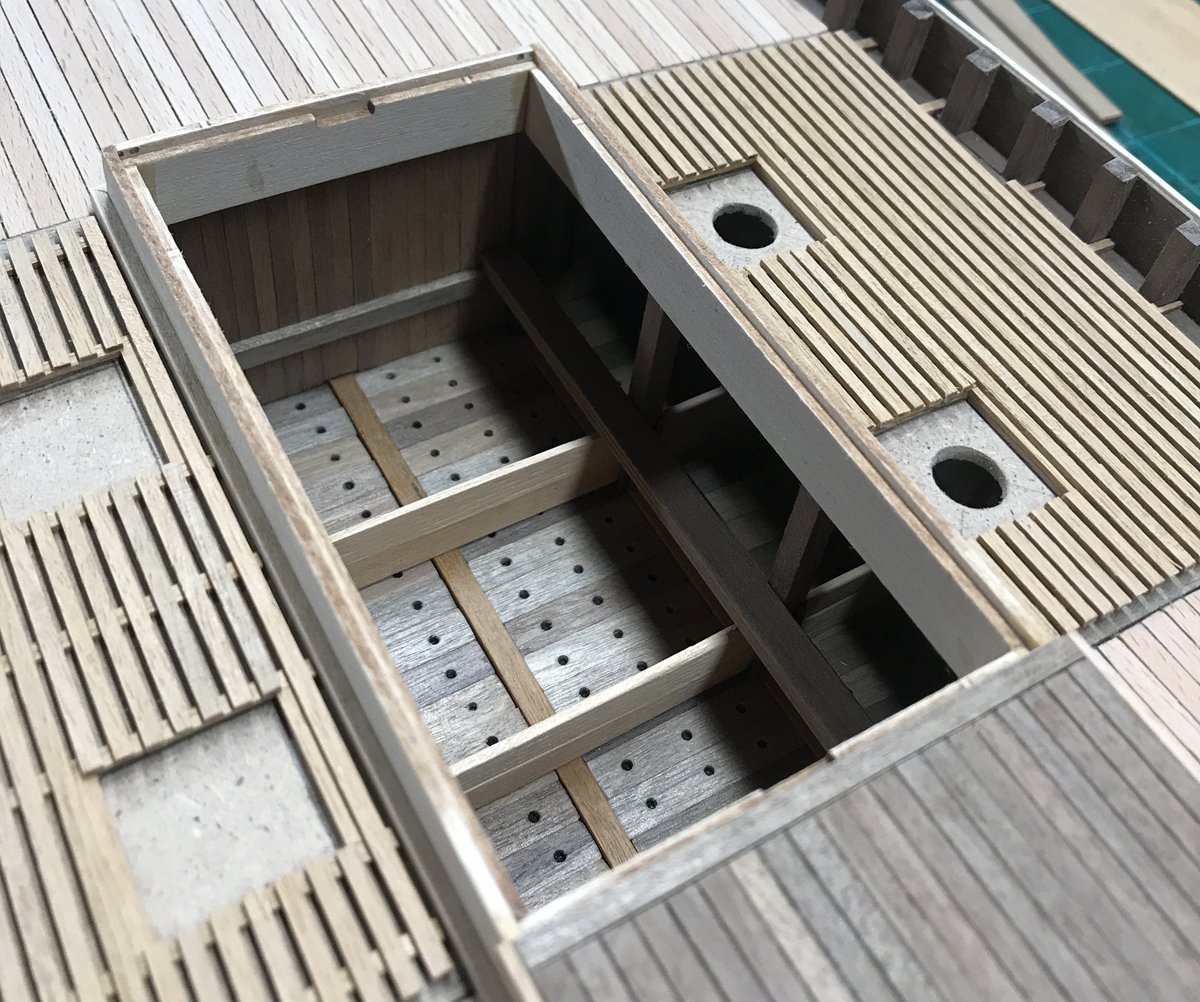
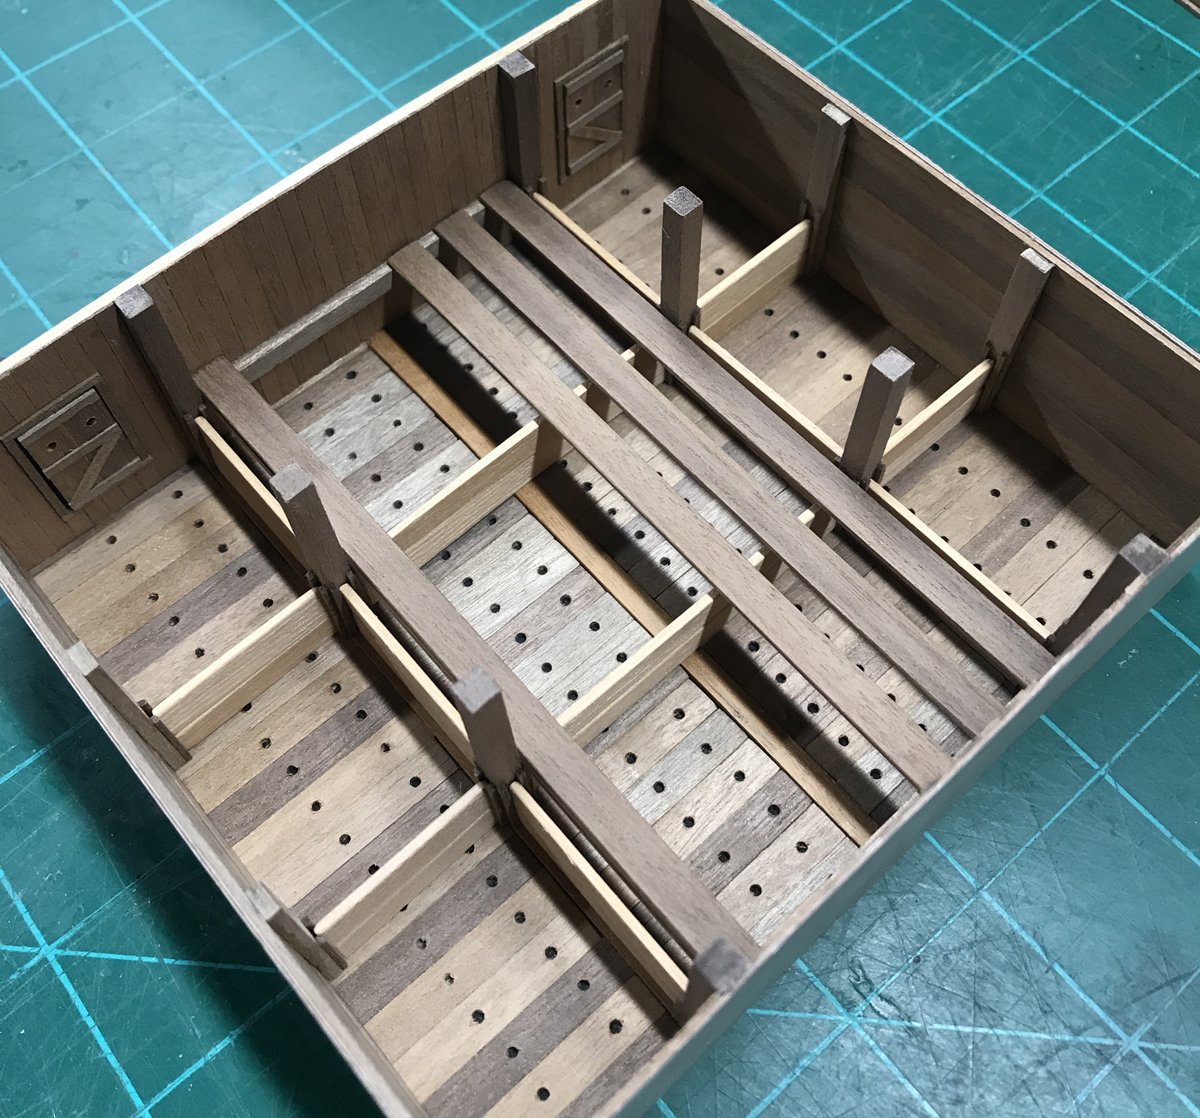
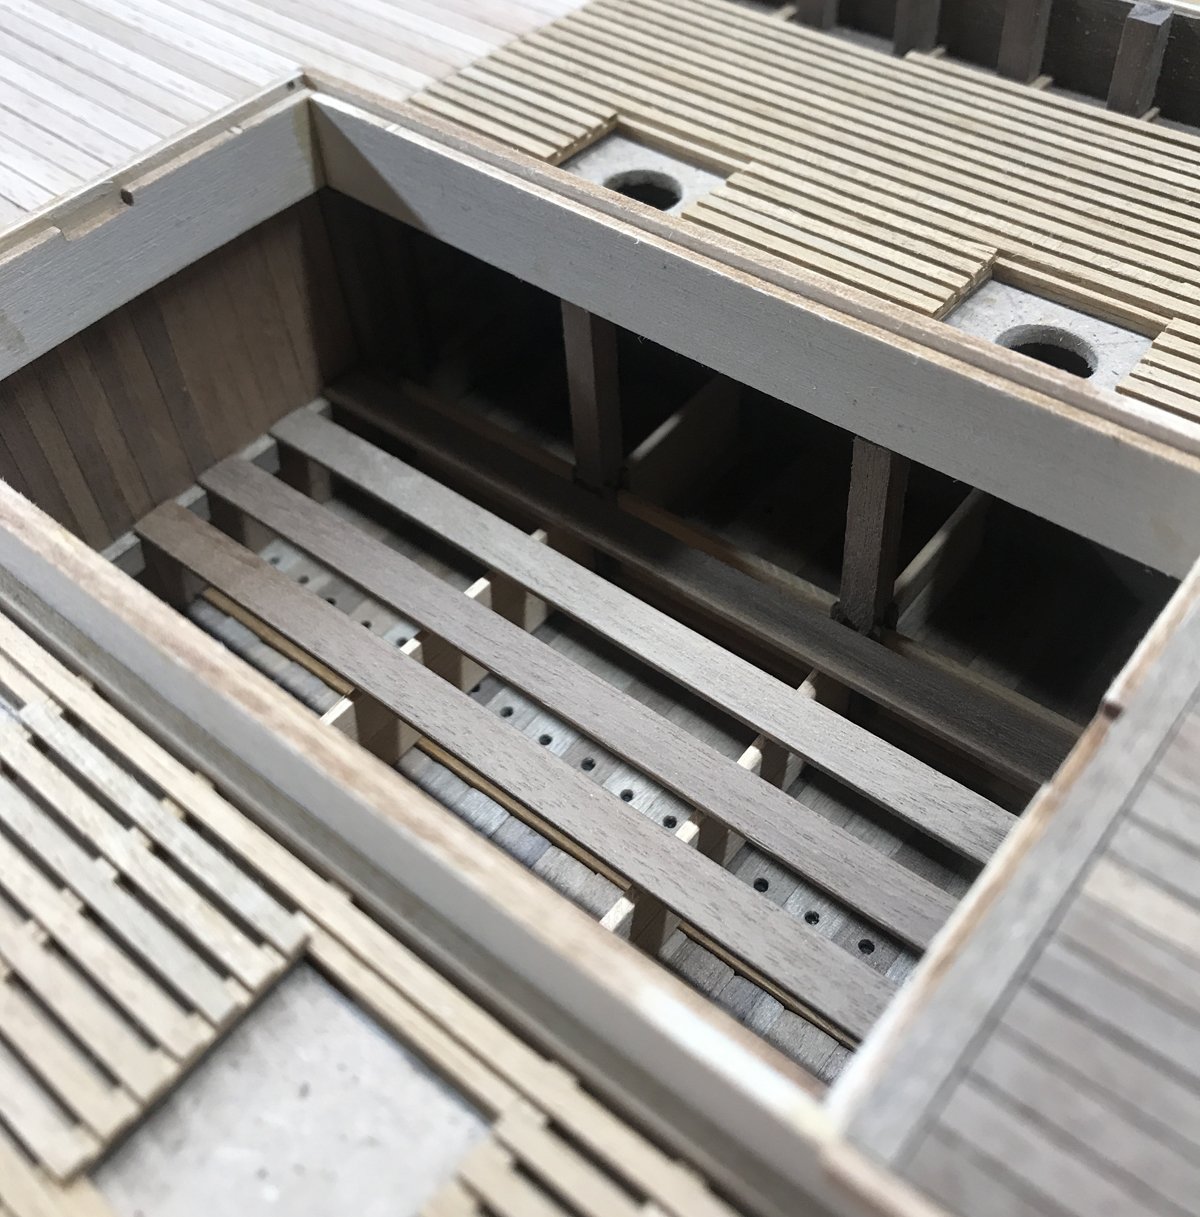
A little more progress to report despite the obligatory to-do list of early Fall weekend chores here in upstate New York. The mini-model of the hold is mostly complete now. I intend to add details here and there where necessary depending how everything looks when all the stuff that lives down there is added later on. I'm still on the fence as to whether I'll be adding light below deck and how far I'll take detailing this area. The rope room is a must but I'm not sure if my "people" hatches will be open.

The hold can be divided into various compartments depending on how the captain sees fit to arrange his catch. The nets are stored on the planks above to dry while excess water from both drains through the holes in the the floor to the bilge. The shutters covering my speculative hatches/passageways are also speculative.

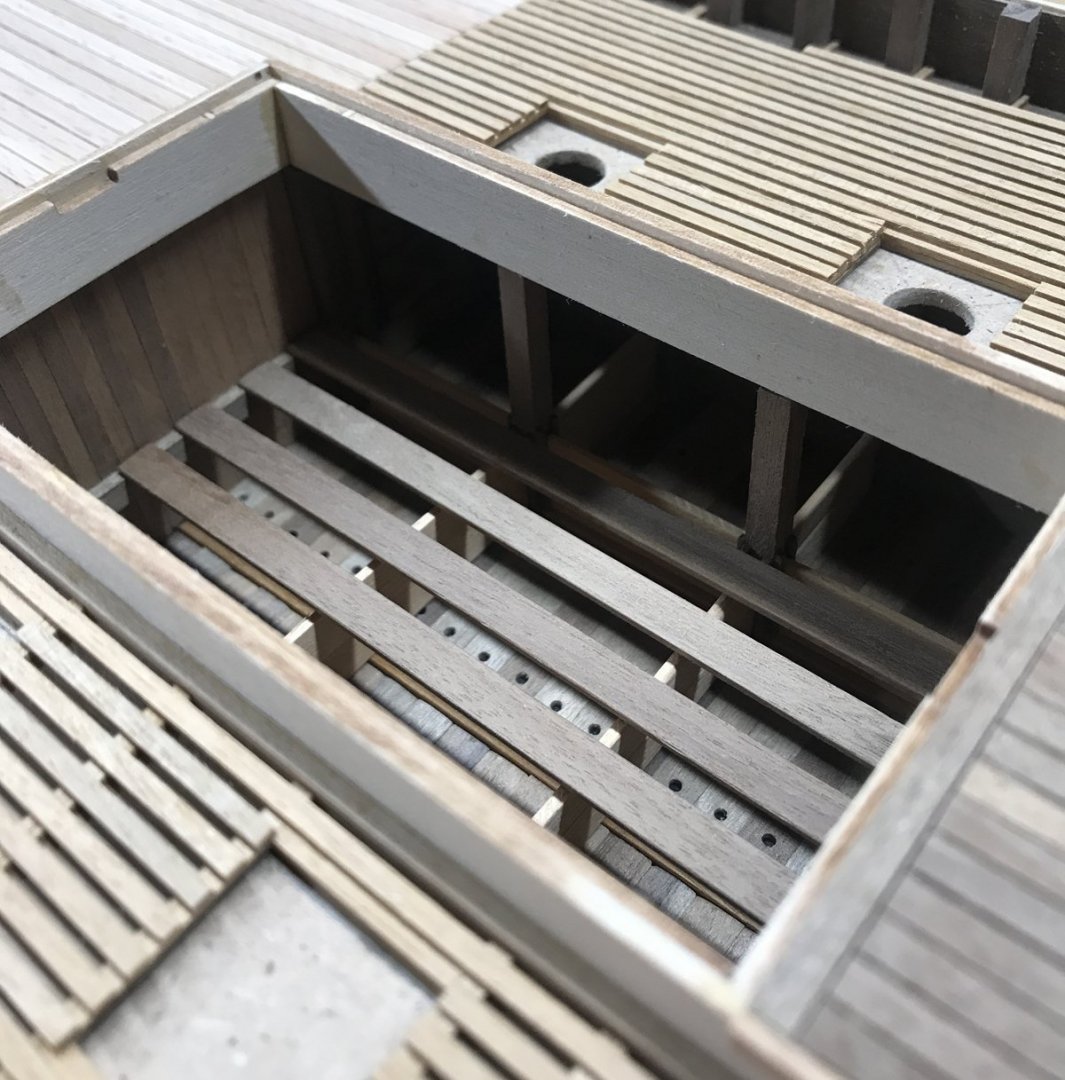
The hold fits nicely (despite my best efforts to screw it up) in the hull and will be added permanently later on.
- Moab, yvesvidal, Rik Thistle and 5 others
-
8
-
On 9/16/2020 at 12:57 AM, bebopsteve said:
Excellent work!! I ordered the Fifie a few days ago and looking forward to the build! I am getting some great ideas and tips from your build, so thank you for posting the great pictures! Now I have a mentor for my build!!!
Thanks Steve...I’m glad you’re following along. It’s a nice kit that I think you’ll enjoy. I’m looking forward to seeing how other builders tackle this kit!
23 hours ago, Kevin said:just seen your work on MSW Faceboook, well done
5 hours ago, mugje said:I found it also by that, amazing work so far PJG!
Thanks guys! I wasn’t aware there was a MSW Facebook page! I’m one of the 5 people on earth that doesn’t have a FB account 😂🤦🏻♂️
- Ronald-V, Ryland Craze and bebopsteve
-
3
-
Thanks guys, as always for the encouraging comments!
On 9/15/2020 at 2:27 AM, James H said:Maybe I missed something, but how are you making those planks look so weathered? I really like that appearance.
James...I'm using some of the walnut that was intended for the second layer of hull planking (there's a lot of it) but made sure to select the most diverse strips I could find so each board wasn't identical to its neighbor. I'm guessing these boards probably got beaten up and replaced quite often. I also found that flipping over boards from the same strip created a nice variety. With a very light sanding and a subtle whitewash (acrylic paint thinned to maybe 10% opacity) the results seemed reasonably believable. I'll be adding some "fishy" grime as well when the hold is fully assembled and detailed.
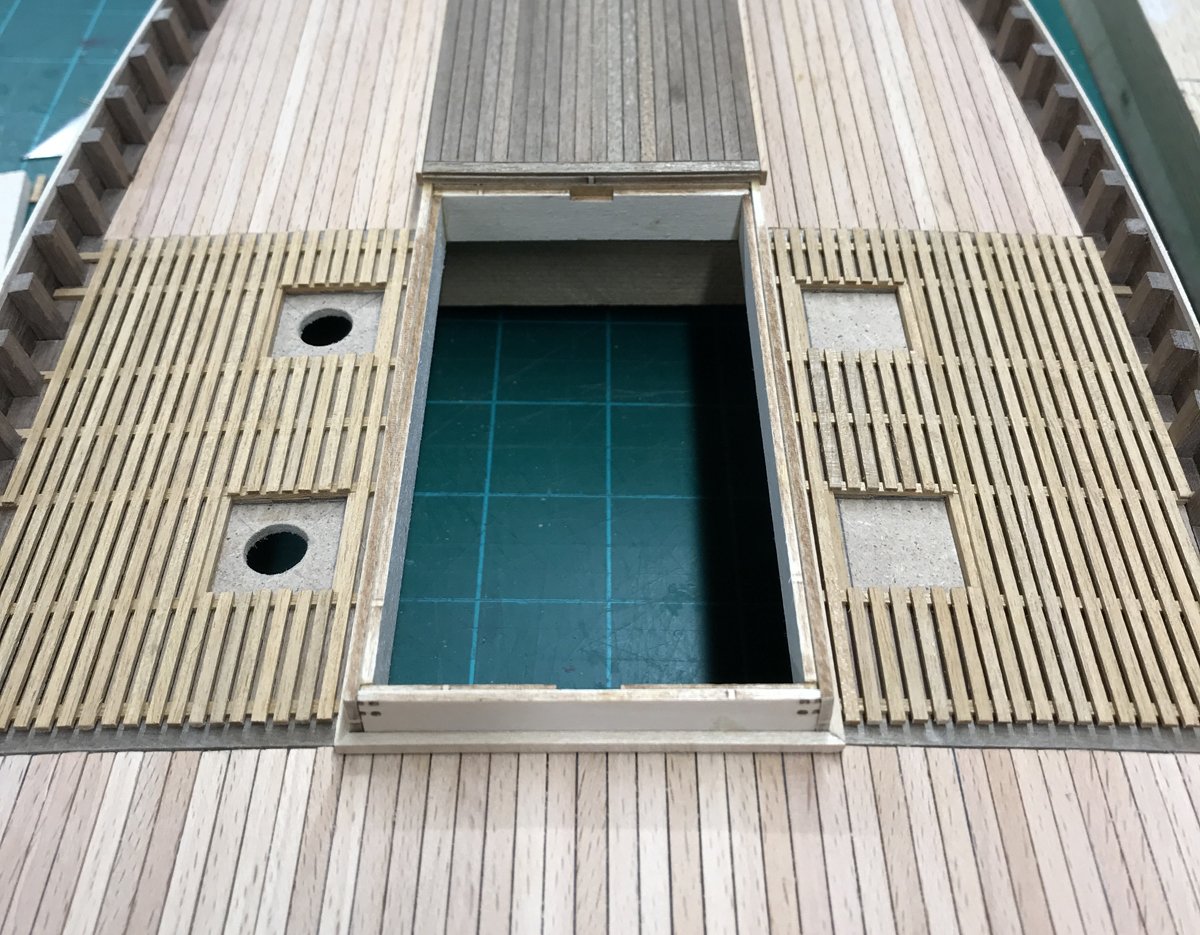
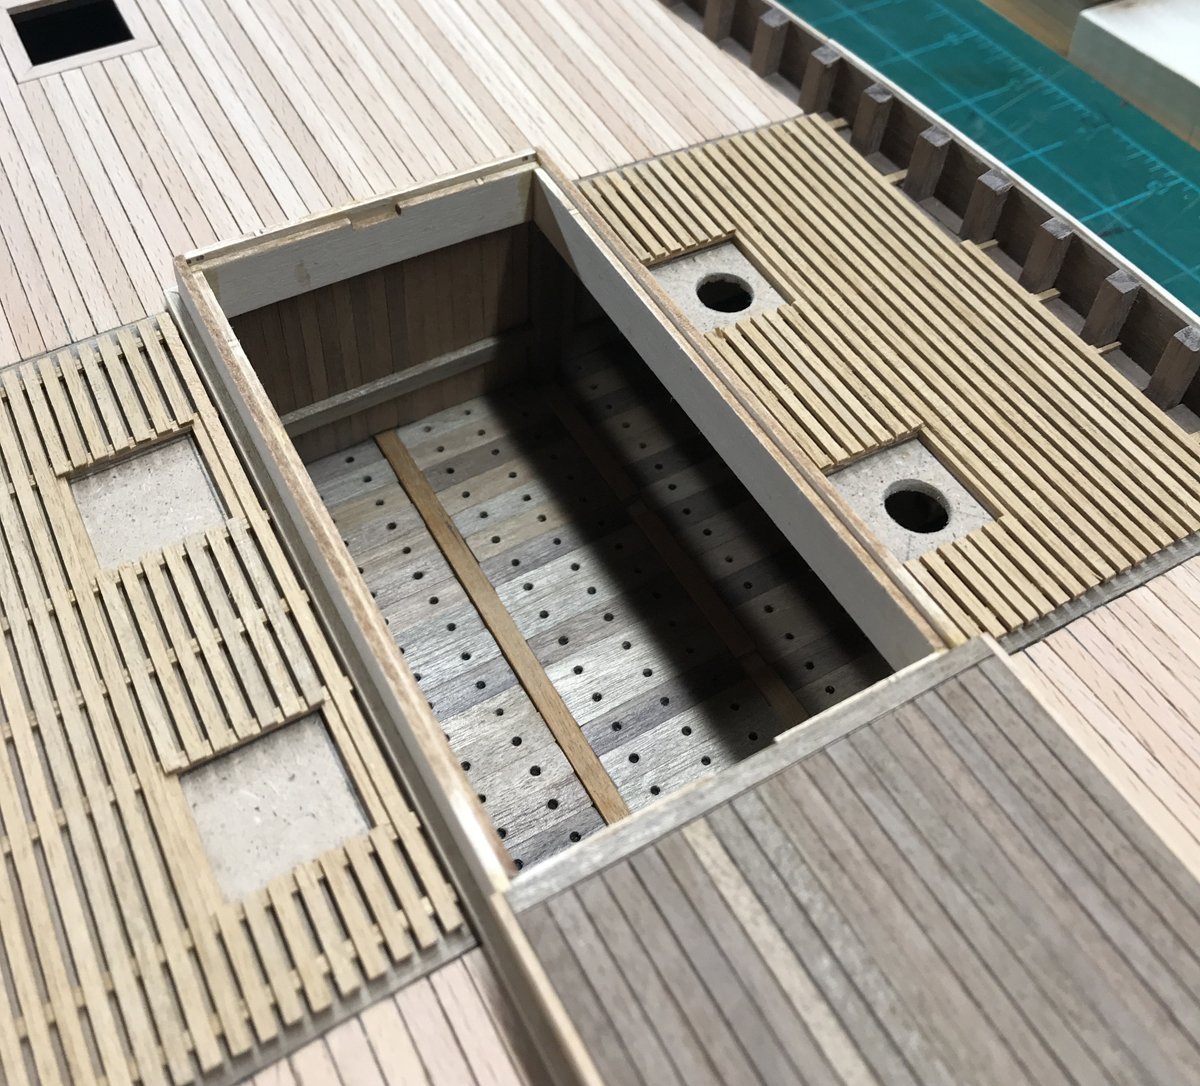
Speaking of the hold...I probably should have pointed out that I'm actually building it outside the hull and will install it permanently later as a mini-model of its own. It's one of the very few advantages of cutting your boat in half...there's plenty of access from below! I'll also need to fabricate a rope room given that that hatch will be wide open on my build.
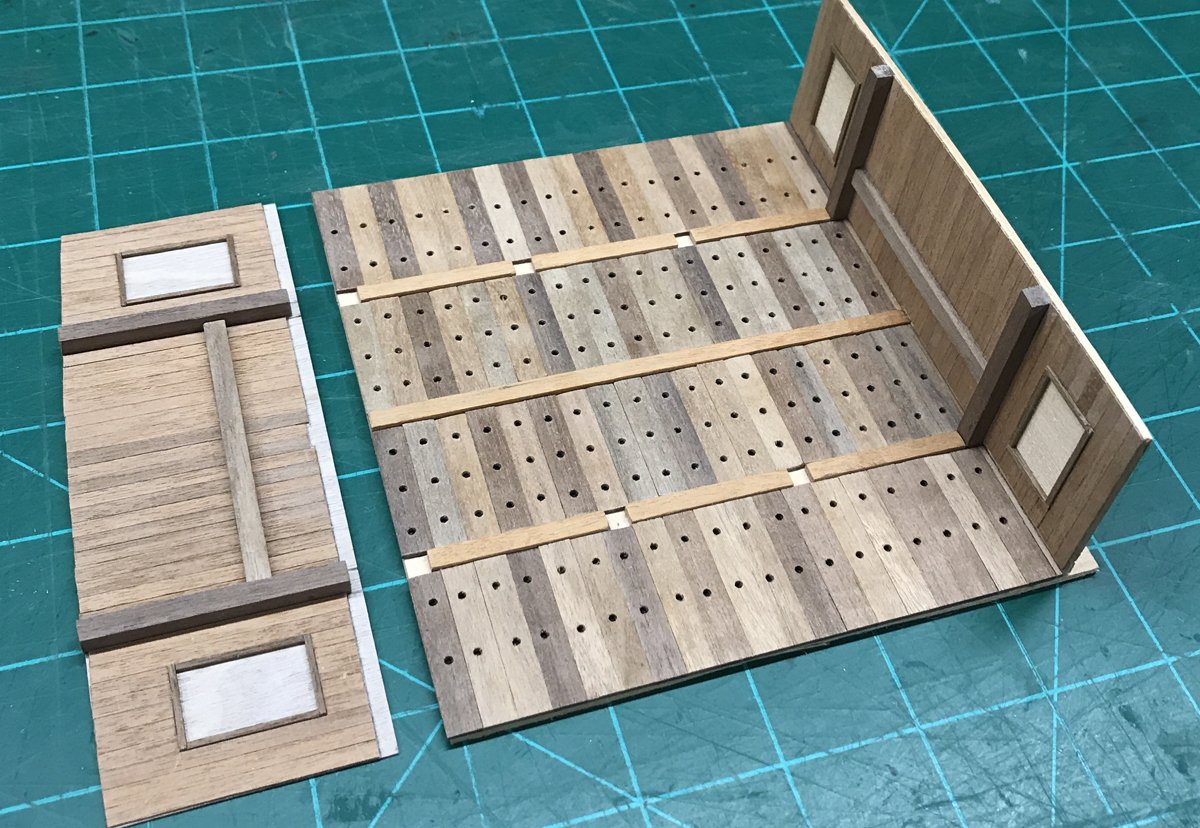
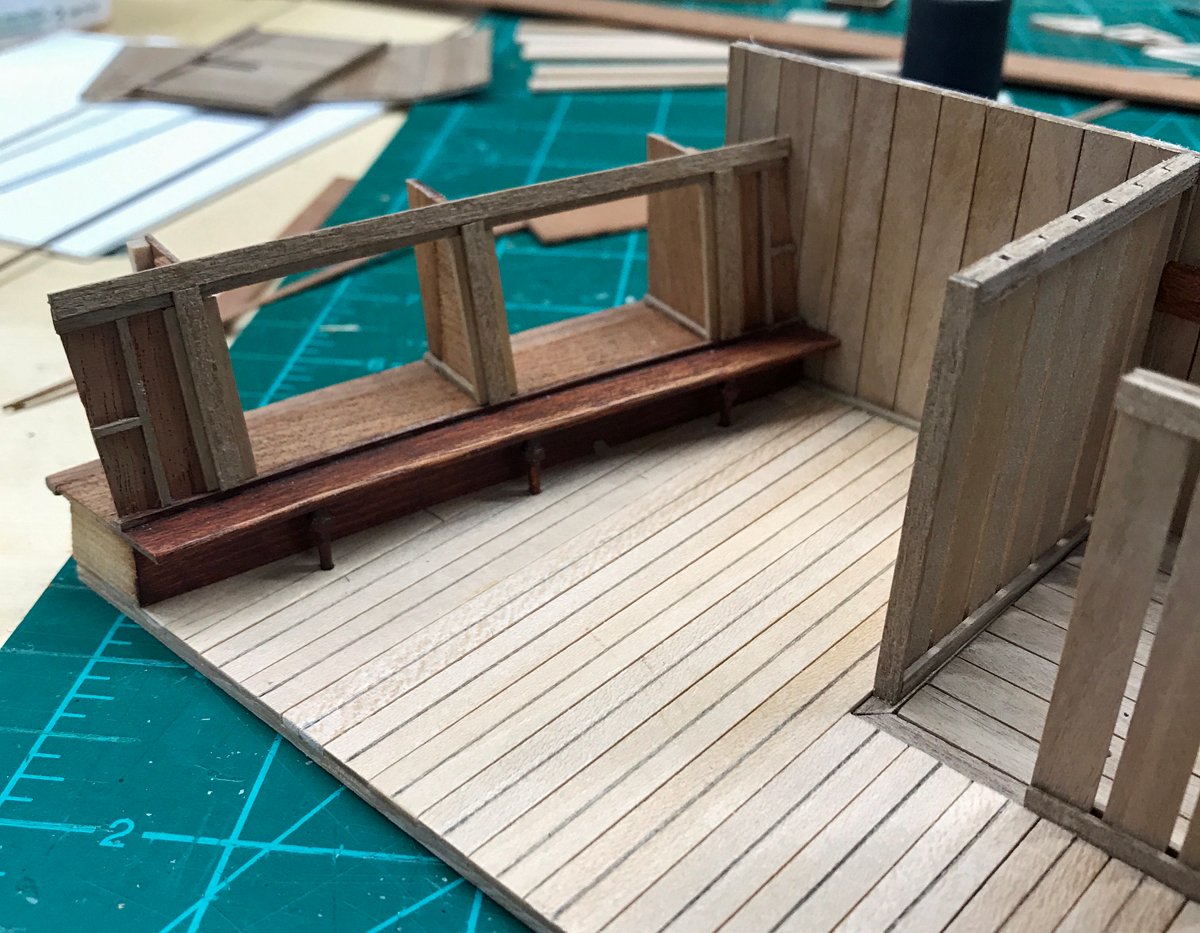
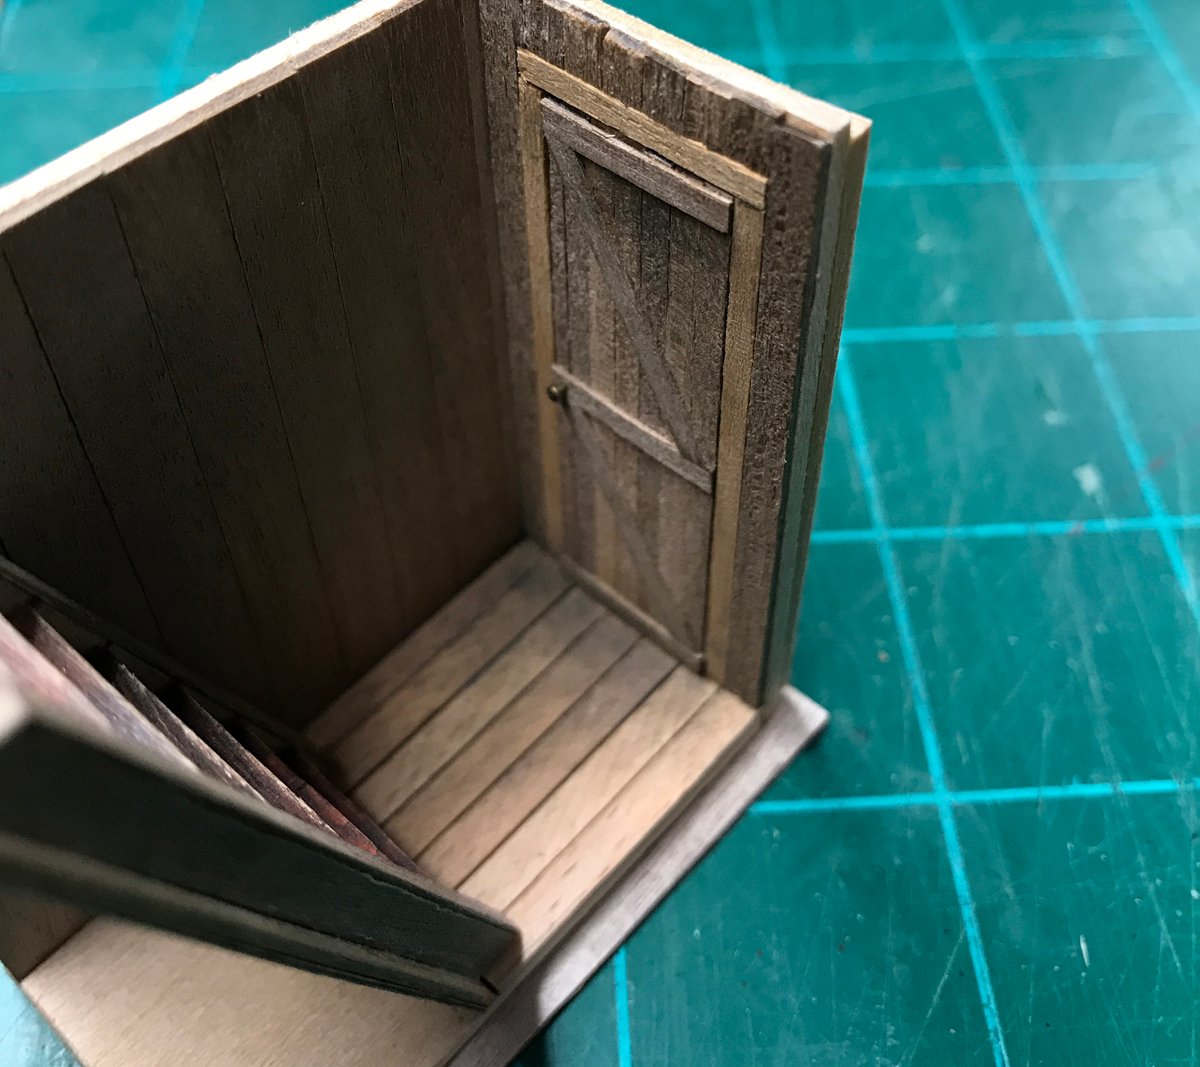
I've also added these entirely speculative ventilation "windows/passages" that would allow our intrepid crew to pass from one end of the boat to the other without having to venture out into that nasty North Sea weather. They'll be covered by board and batten shutters. I may leave one ajar to give a little glimpse into the cabin. Again, this area will be so cluttered with gear and fish I doubt any of it will be visible.
- JpR62, yvesvidal, chris watton and 5 others
-
8
-
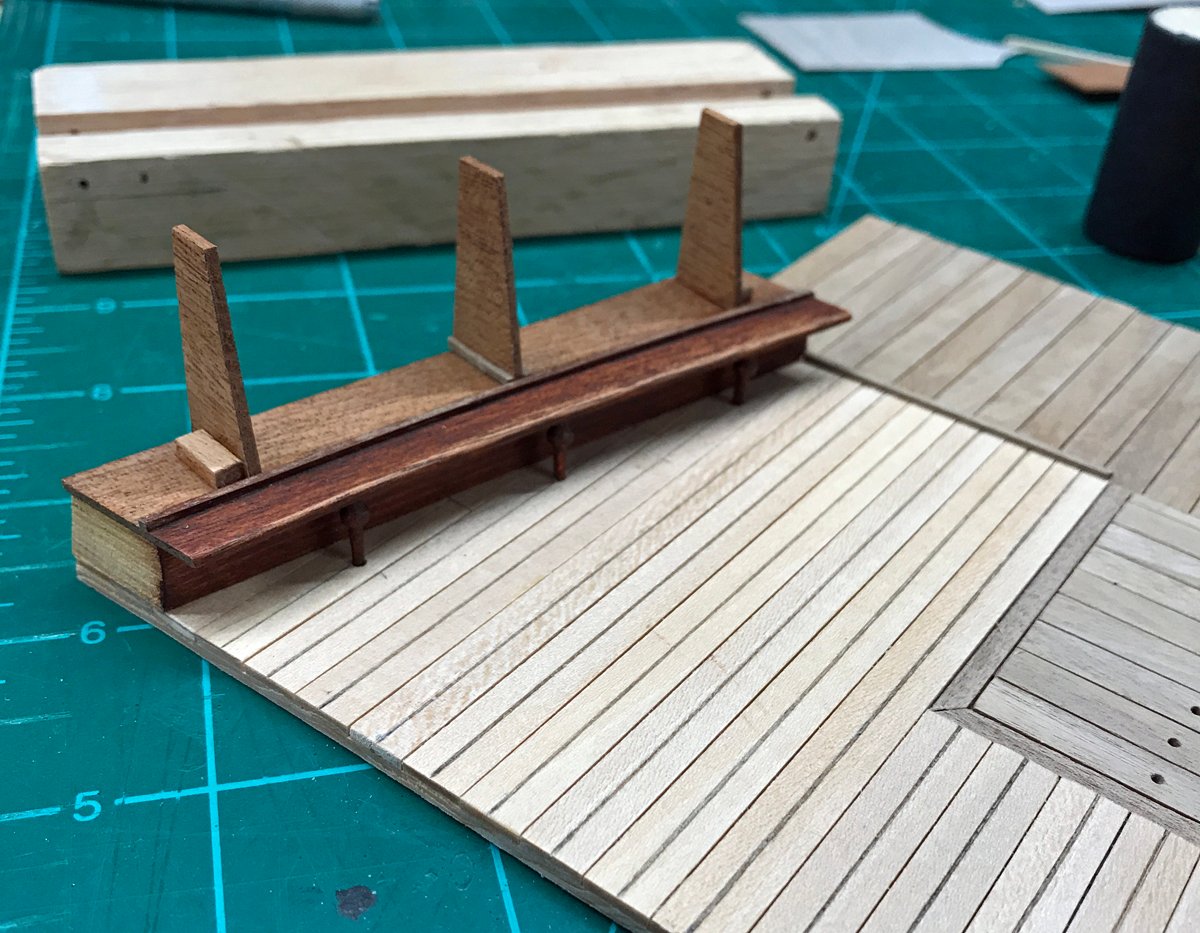
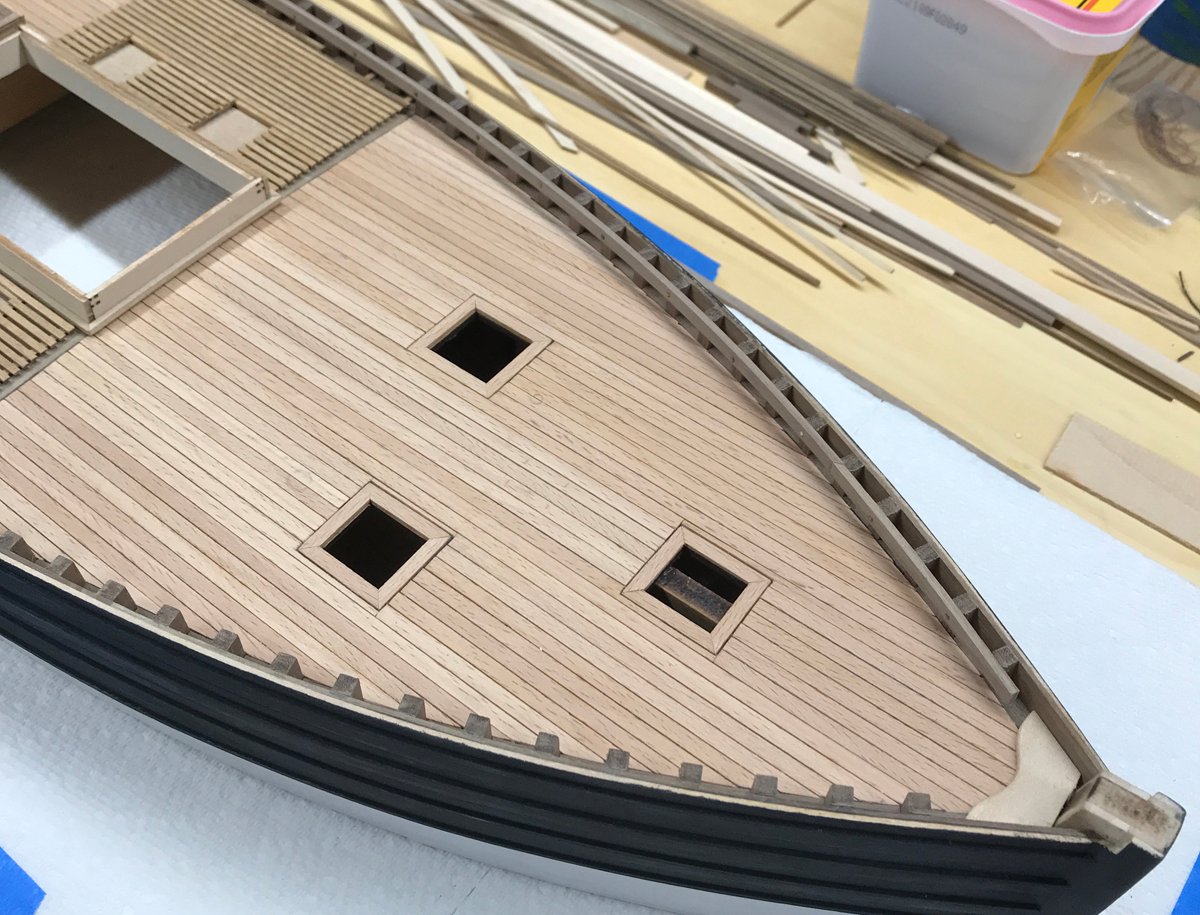
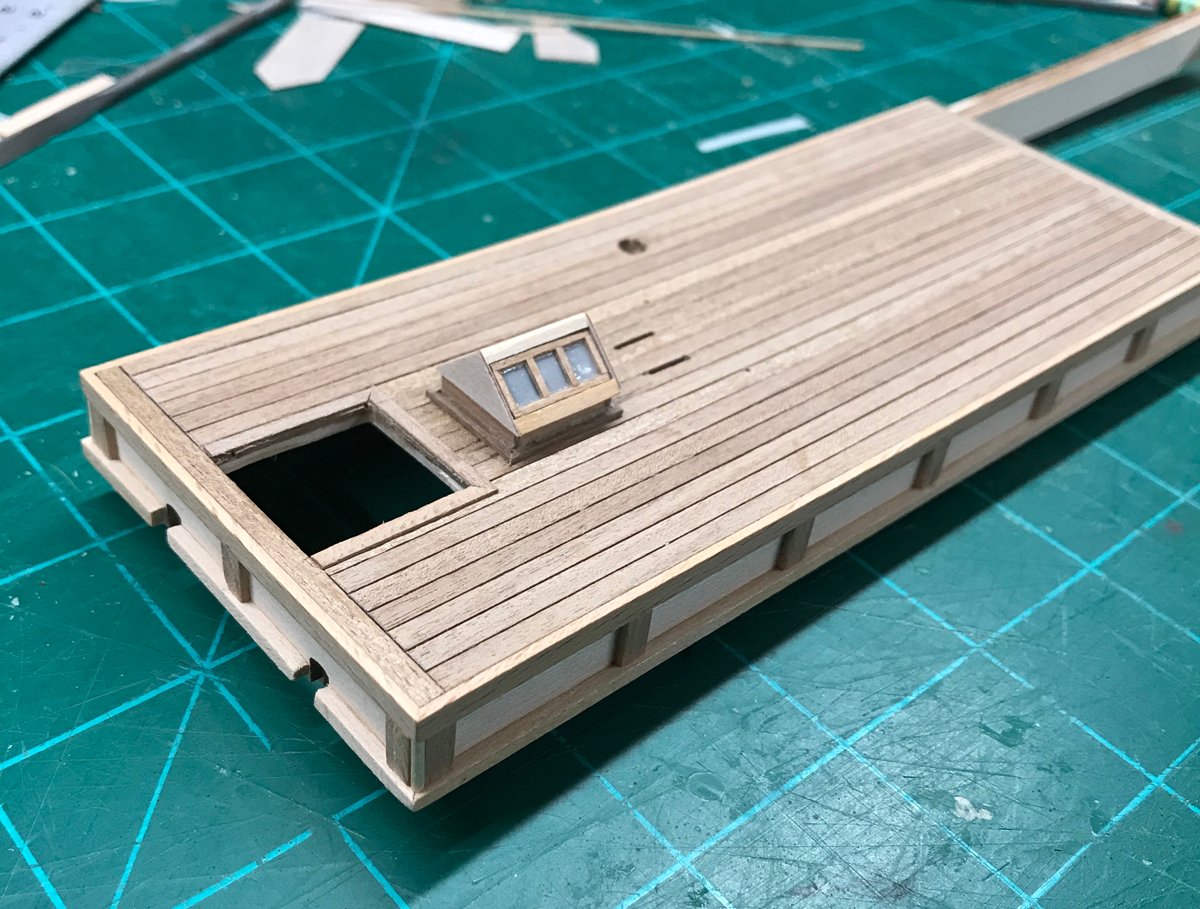
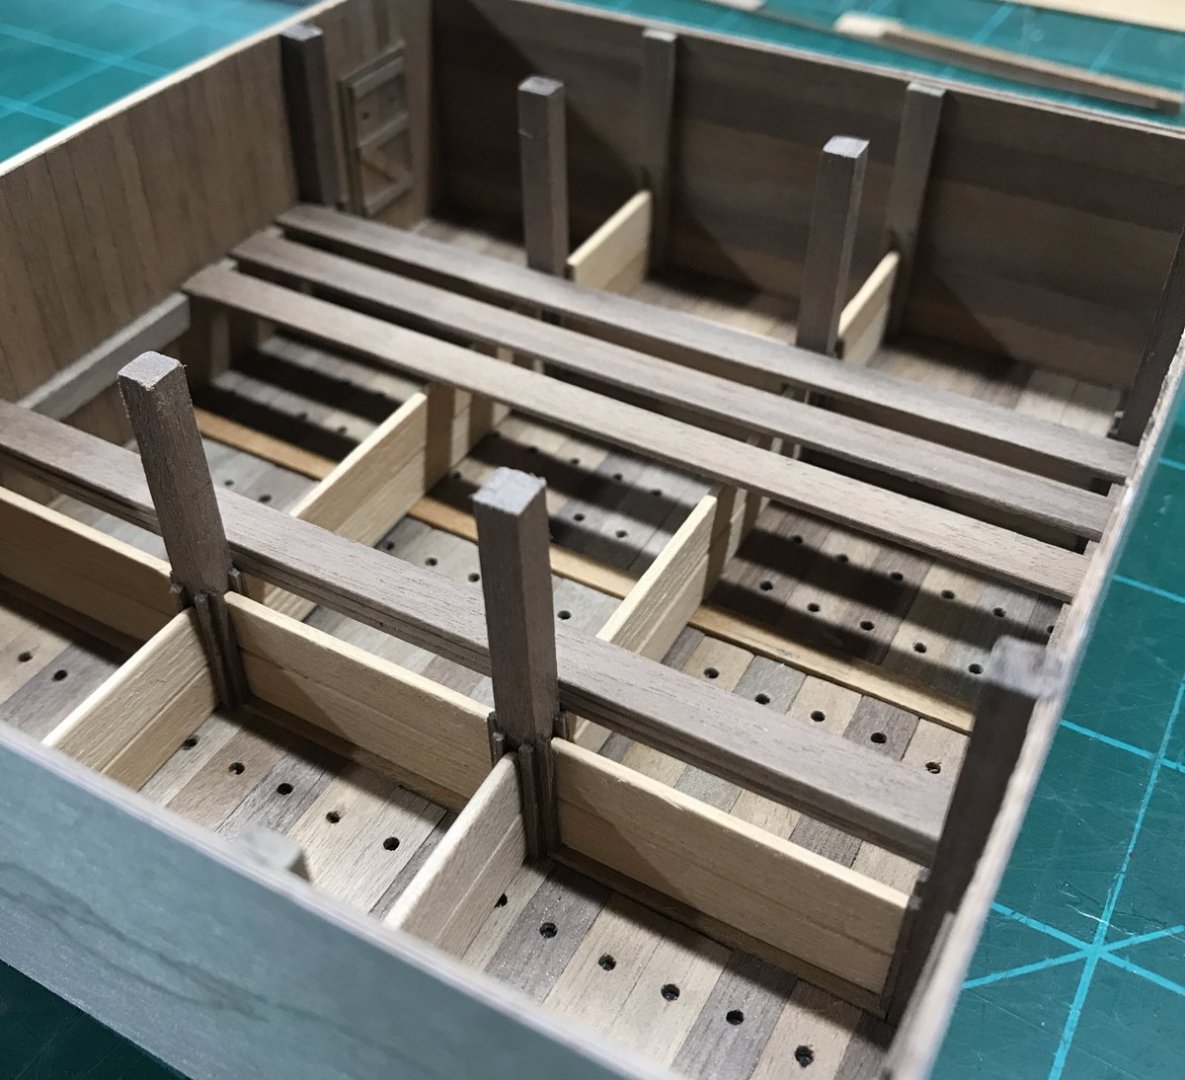
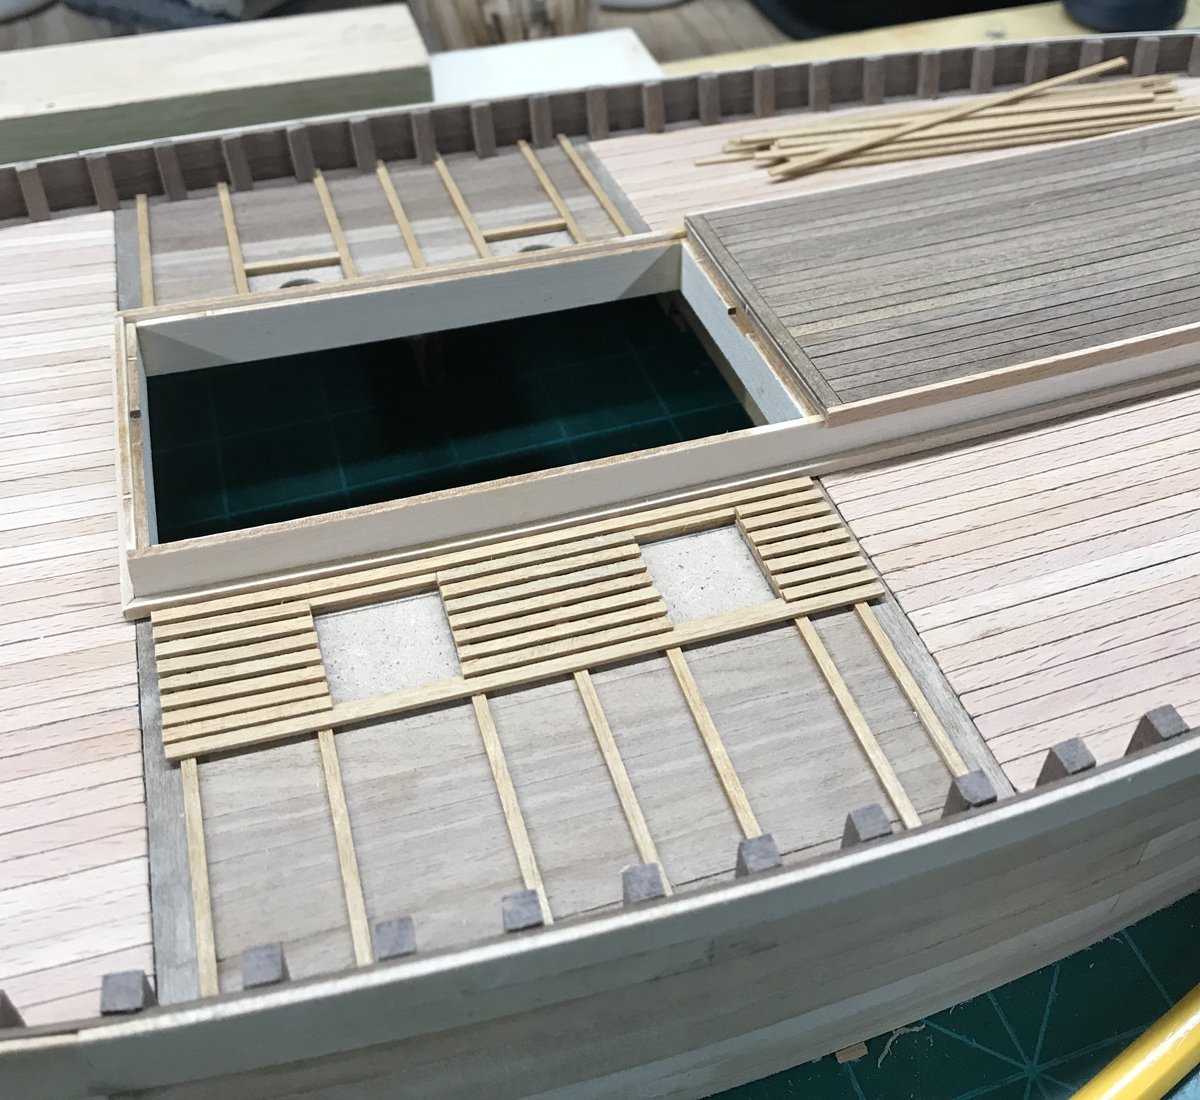
A little more progress to report on the "fish pond" area of the deck and the interior of the hold. Thanks to the helpful links Blue Ensign included in his Zulu (Vanguard) build
I'm able to make some educated guesses as to what the hold of my fifie might look like. Most of this area will be cluttered with fish and nets but I'd like to make my interior details as plausible as possible without the benefit of actual plans.
So the first step was to build out the secondary decking on either side of the hold.

Sub frames installed.

Secondary decking complete.
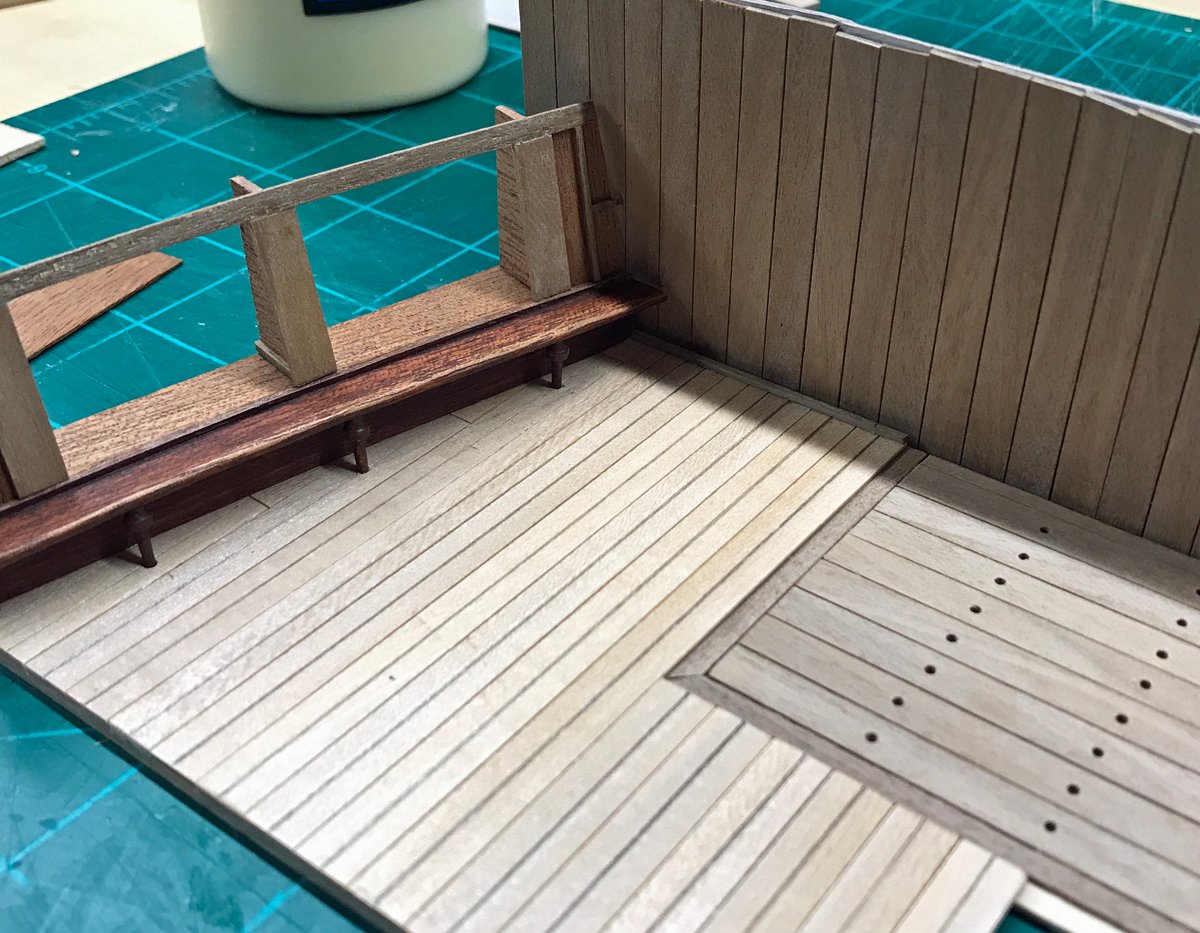
On to the hold interior details...
Laying out the floor of the hold.
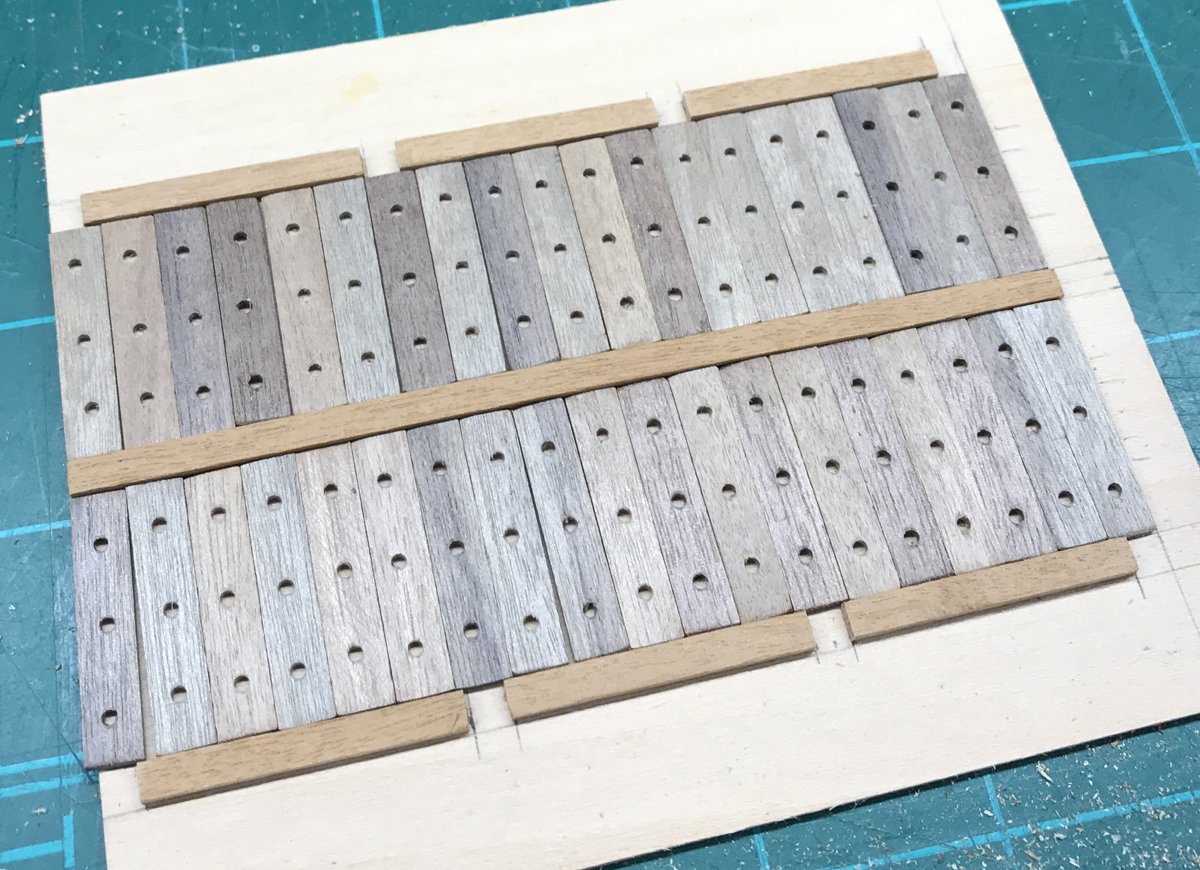
Lots of small drainage holes drilled...
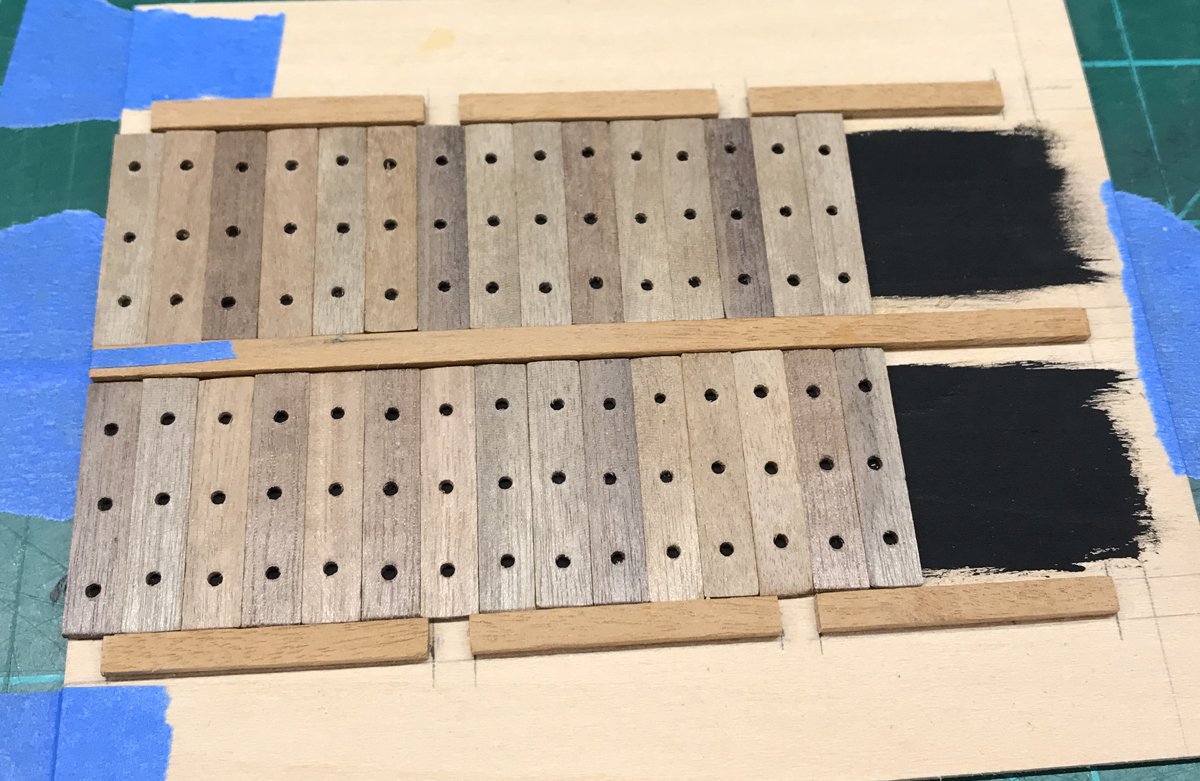
I added black paint under these boards to help create the illusion of the bilge underneath.

With the fish hold bulkheads installed I tested the fit of the floor before tackling the rest of the details. There's still a lot of work to do in this area but the basics are in place.
- Ronald-V, michael mott, Richard44 and 6 others
-
9
-
1 hour ago, hollowneck said:
"PJG", which is yours?
I’m the New Bedford Whaleboat in June. Again, really surprised to be ncluded.
- hollowneck, ferretmary1 and Cathead
-
3
-
Nobody was more surprised than me to have my build included here...looks like a very nice publication!
- ferretmary1, MEDDO, mtaylor and 2 others
-
5
-
3 minutes ago, BobG said:
I like way you simulated the deck caulking. It looks great. What size and type of thread did you use?
Thanks Bob...I wish I could give you specifics on the thread but unfortunately I don't have them. I can say, however, that it was nothing fancy...just the common stuff (cotton I'm guessing) you'd find in a sewing kit.
-


Fifie by PJG - Amati - 1:32 - Scottish Motor Fishing Vessel
in - Kit build logs for subjects built from 1901 - Present Day
Posted
Thanks guys, as always, the positive feedback is very much appreciated!
I definitely know more about these boats than I did when I started my build and have learned a lot from Blue Ensign's build logs for both Vanguard fifie/zulu kits. Both are far better researched than mine and well worth a visit. I've included a link to what I consider a pretty clear/interesting description of how this type of fishing (drifting for herring) was done and the boats that were used to do it. Hopefully you'll find it as useful as I did!
https://electricscotland.com/lossiemouth/boats/fisher07.pdf