HOLIDAY DONATION DRIVE - SUPPORT MSW - DO YOUR PART TO KEEP THIS GREAT FORUM GOING! (Only 36 donations so far out of 49,000 members - C'mon guys!)
×

Rik Thistle
-
Posts
864 -
Joined
-
Last visited
Content Type
Profiles
Forums
Gallery
Events
Everything posted by Rik Thistle
-
 Chris has advised me the Master Shipwright Flirt comes with sufficient eyebolts and blocks to do the full rigging on the cannons (Right Option). Edit: So... I guess rigging the cannons is next on the To Do list 😉 I had previously glued the cannons in place with PVA but I really need them loose to do the rope work. Fortunately they are coming free with some light persuasion. Richard
 -
Pete, Thanks for the pics. Your cannons looks fine. I'm now building the masts and will ponder what to to with my cannons before the deck gets too busy when the masts + their rigging are fitted. Richard
-
The next stage is to add the internal frames They look spot-on...much better than my chunkier, straight things which were added after the flooring was done. Can I ask what thickness of wood you used that allowed the frames to closely follow the curvature of the inside of the planking? Richard
- 70 replies
-
- 1
-

-
- 22ft Yawl
- Vanguard Models
- (and 2 more)
-
Thunder, Chris suggests two options...the simpler one on the left, or the one on the right. If the one on the Right is chosen then two eyelets each side must be used. However the cannon build instructions only show one eyelet each side which is how I have build my cannons. The diagram at post #47 shows two eyelets each side. So I would now have to add an extra eyelet for the Right option. Delf's Speedy (sister ship to Flirt) build has gone with the Right option so I will study tomorrow how he did this - I'm away from the shipyard at the moment Thanks for the heads-up on the blocks...I hadn't thought about that. Richard
-
Have you looked at Delf's Speedy build? Yes, Delf has done the full cannon rigging...thanks... #296 https://modelshipworld.com/topic/22783-hms-speedy-by-delf-vanguard-models-scale-164-master-shipwright-edition/page/10/ I'll study that tomorrow.
-
Law enforcement buildings, jails, gallows, cemeteries ... in that order 😉
-
Finally, this is a you tube video that I think is fantastic and explains the process in a very simple way. https://www.youtube.com/watch?v=BpI7B43KA3I That really was a fantastic video. Great to watch a craftsman at work. The amount of thought and effort that goes into producing and fitting one plank is highly impressive. I liked his comment that he starts all his planking from the bottom upwards whereas shipyards working to a timescale plank from the top and bottom, both sides ie four planking teams. Thanks, Richard
-
Yes, they are a bit flat but at viewing distance they'll do. Thanks for the 'Make eyebolts' link. Richard
-
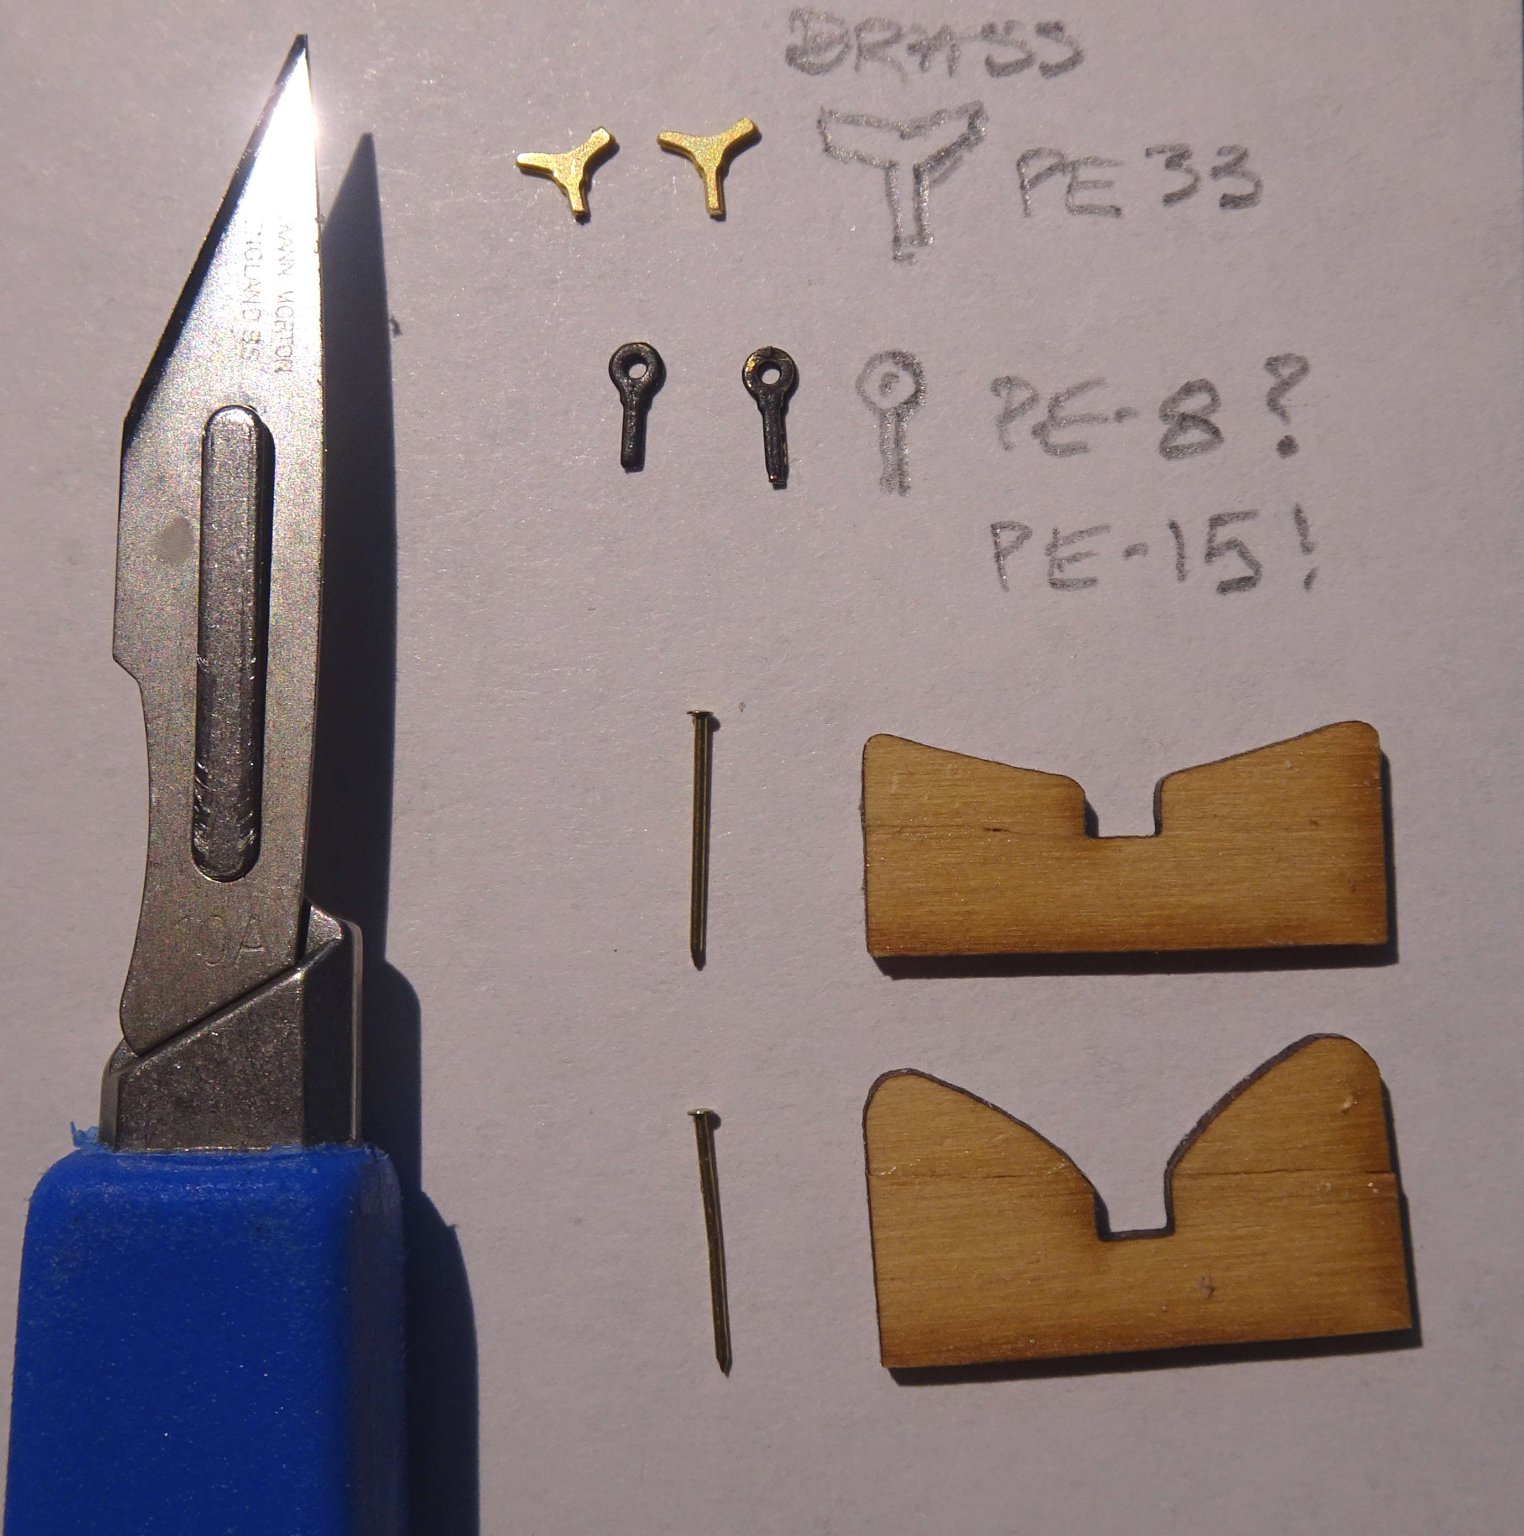
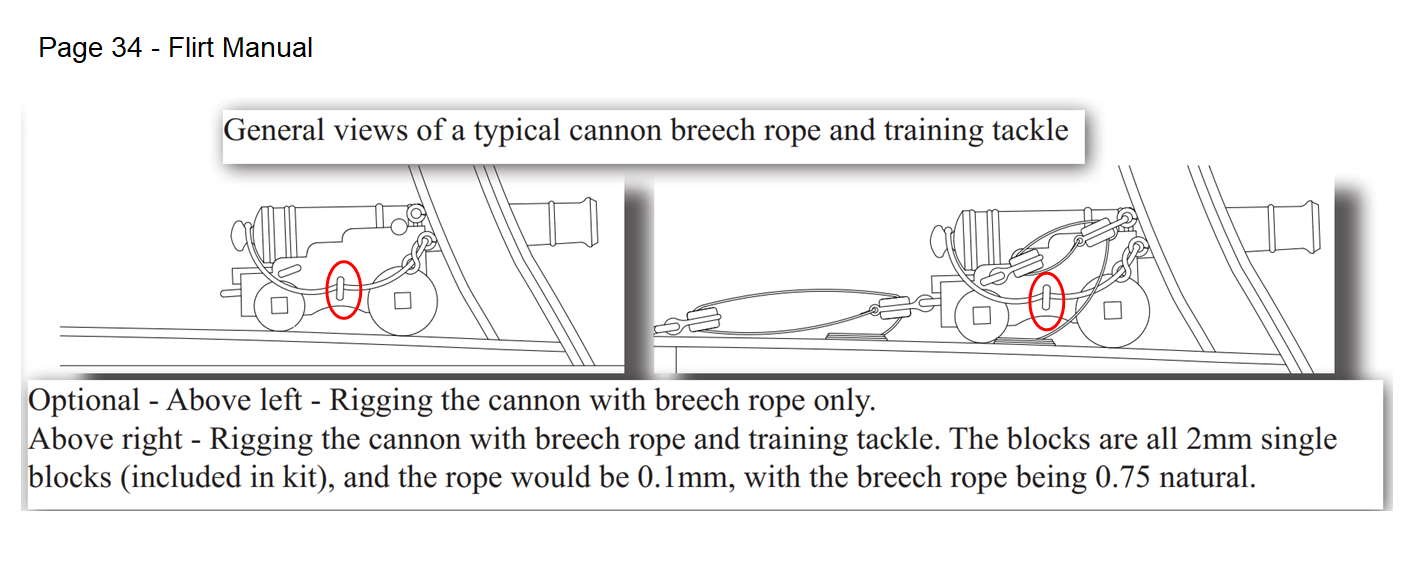
Hi Glenn, Yes, the diagrams are those of 'general views of typical ...rope...tackle'. And it's down to me to adapt those views to suit the Flirt cannons. I was wondering if anyone had actually done the Right Option and had any insights, and could advise if were there sufficient eyebolts (PE-15) included in the kit to do that Right Option. The kit comes with 145x so I wondered if that included 28x for the Right Option? I suppose I can go through the instructions looking for all the places where PE-15 is used on Flirt and see if there remains a spare 28 off eyebolts for the cannons (Right Option). Regards, Richard
-
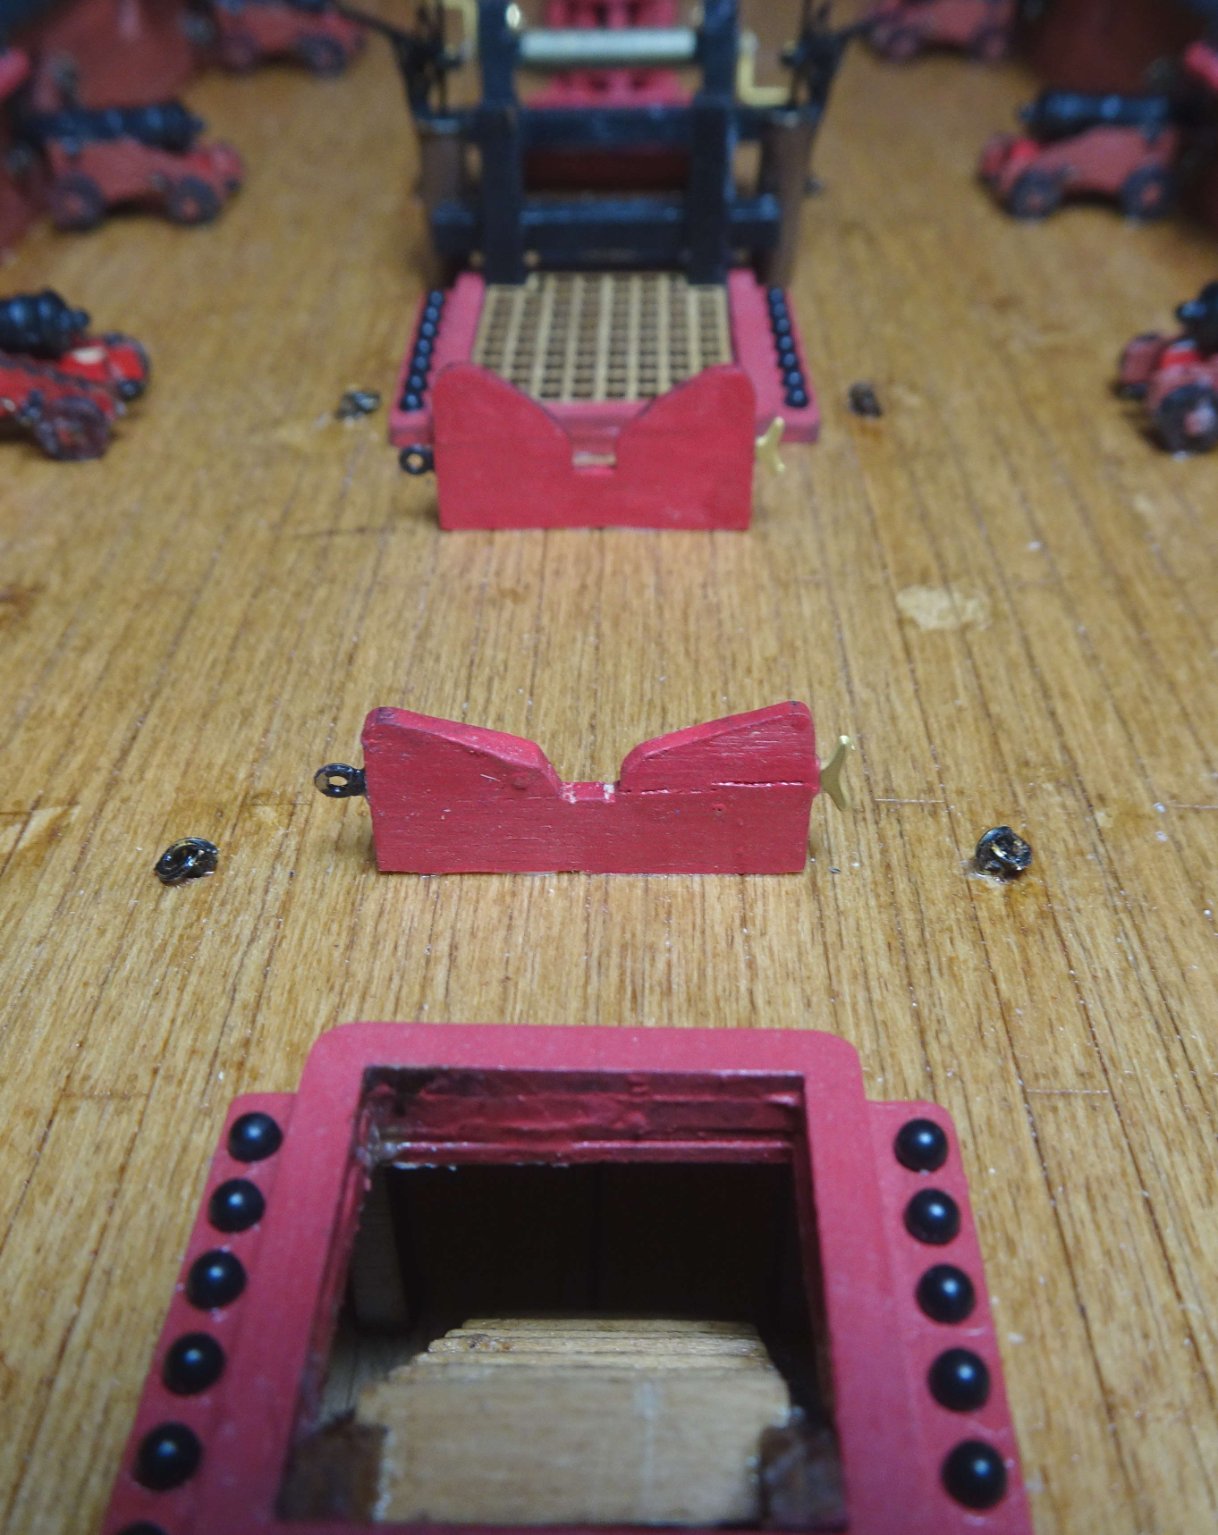
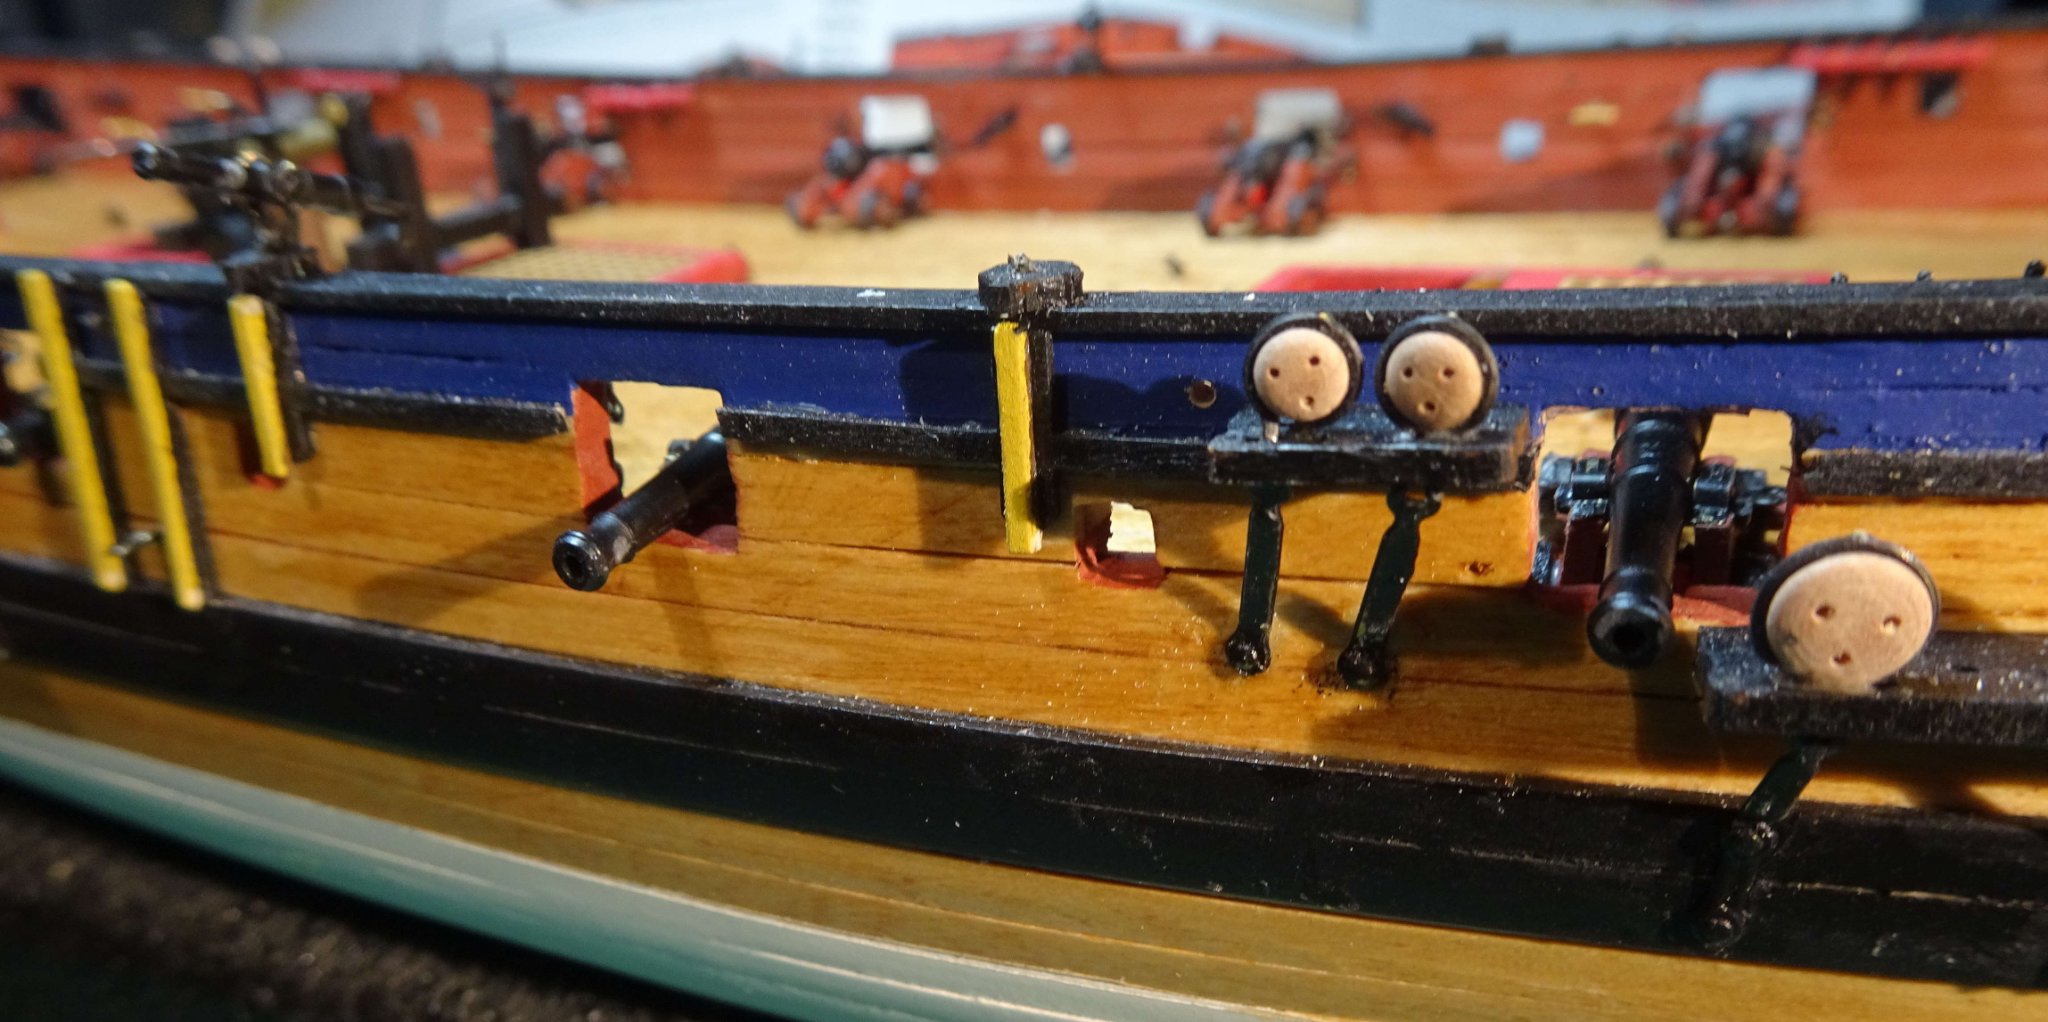
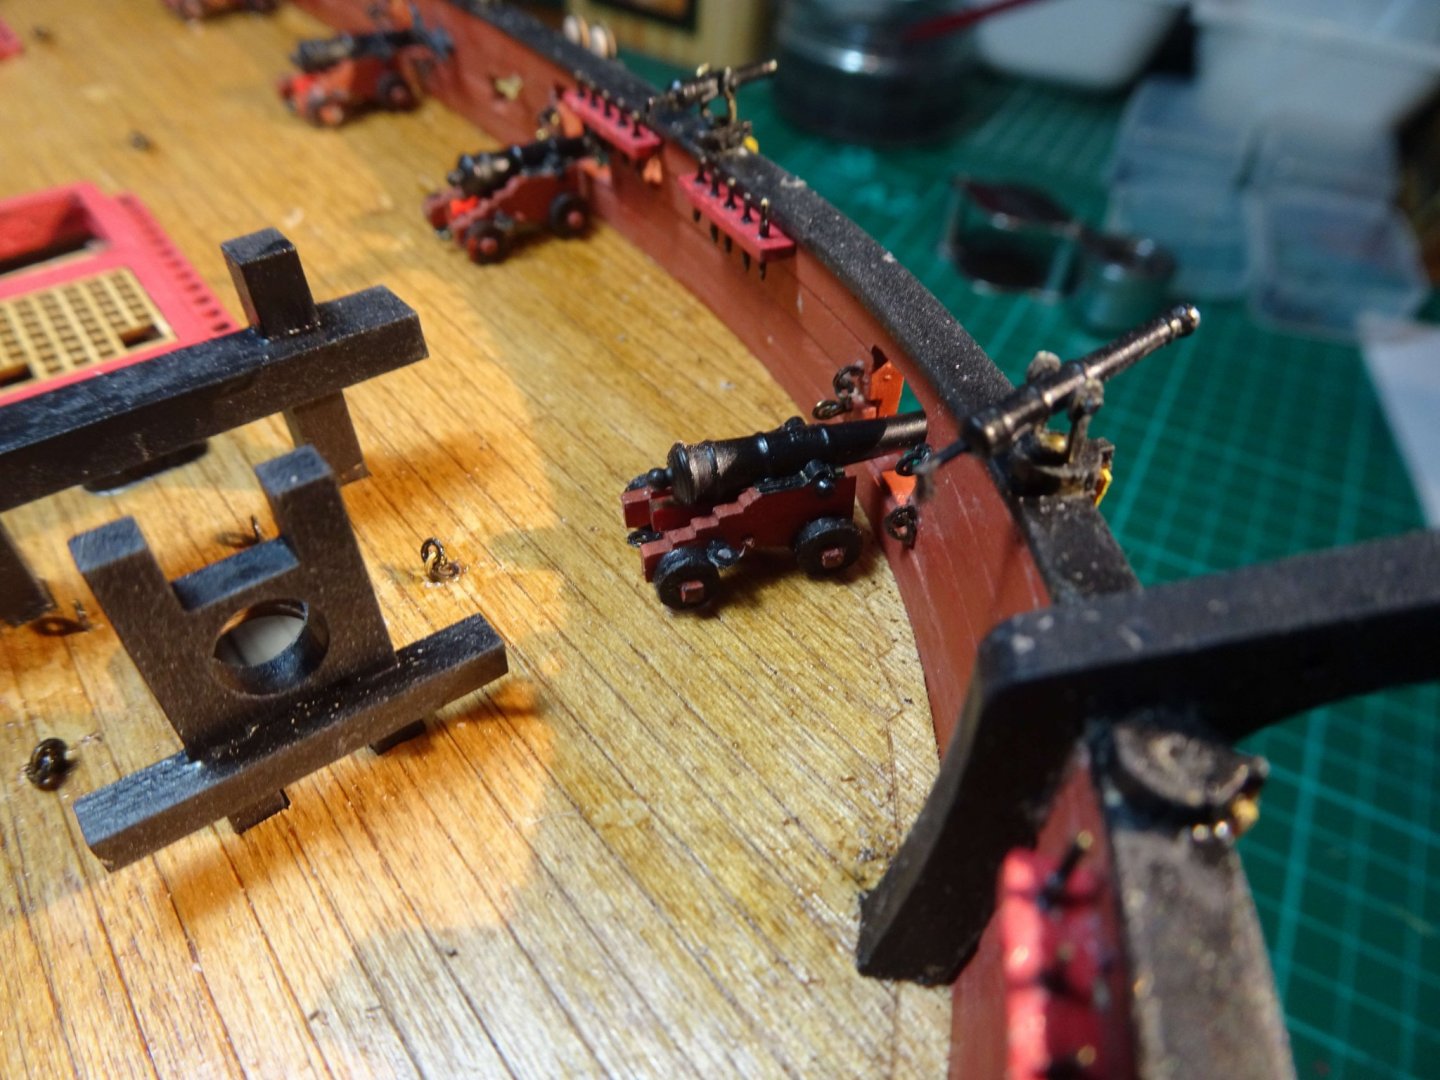
A question on Flirt's cannon ropes.... The manual shows two methods of rigging the cannons. Both methods rely on the Closed Eyebolts (part PE-15...145 off supplied in the kit) being fitted, circled in red below. However this red eyebolt is not shown in the general cannon instructions in the manual. In that location there is the Traverse Bolt (PE-22). I can ignore the red eyebolt if I go with the Left Option below, but I'd like to try my hand at the Right Option. Question - If I do go with the Right Option are there enough spare Closed Eyebolts already supplied in the kit to fit out 14 cannons ie 28 spare eyebolts? If 'yes', it would mean drilling 28x holes for the eyebolts close to the Traverse Bolts...perfectly doable, I imagine. Thanks, Richard
-
Mike, This recent thread has some useful information. It shows 9 min stop motion video of how a ship kit is built... 'ropes' start appearing at about 4.55 mins in ... ... and on YouTube.... https://www.youtube.com/watch?v=2SuPPsyck2M It;s a great watch, and a superbly made video. Richard
-
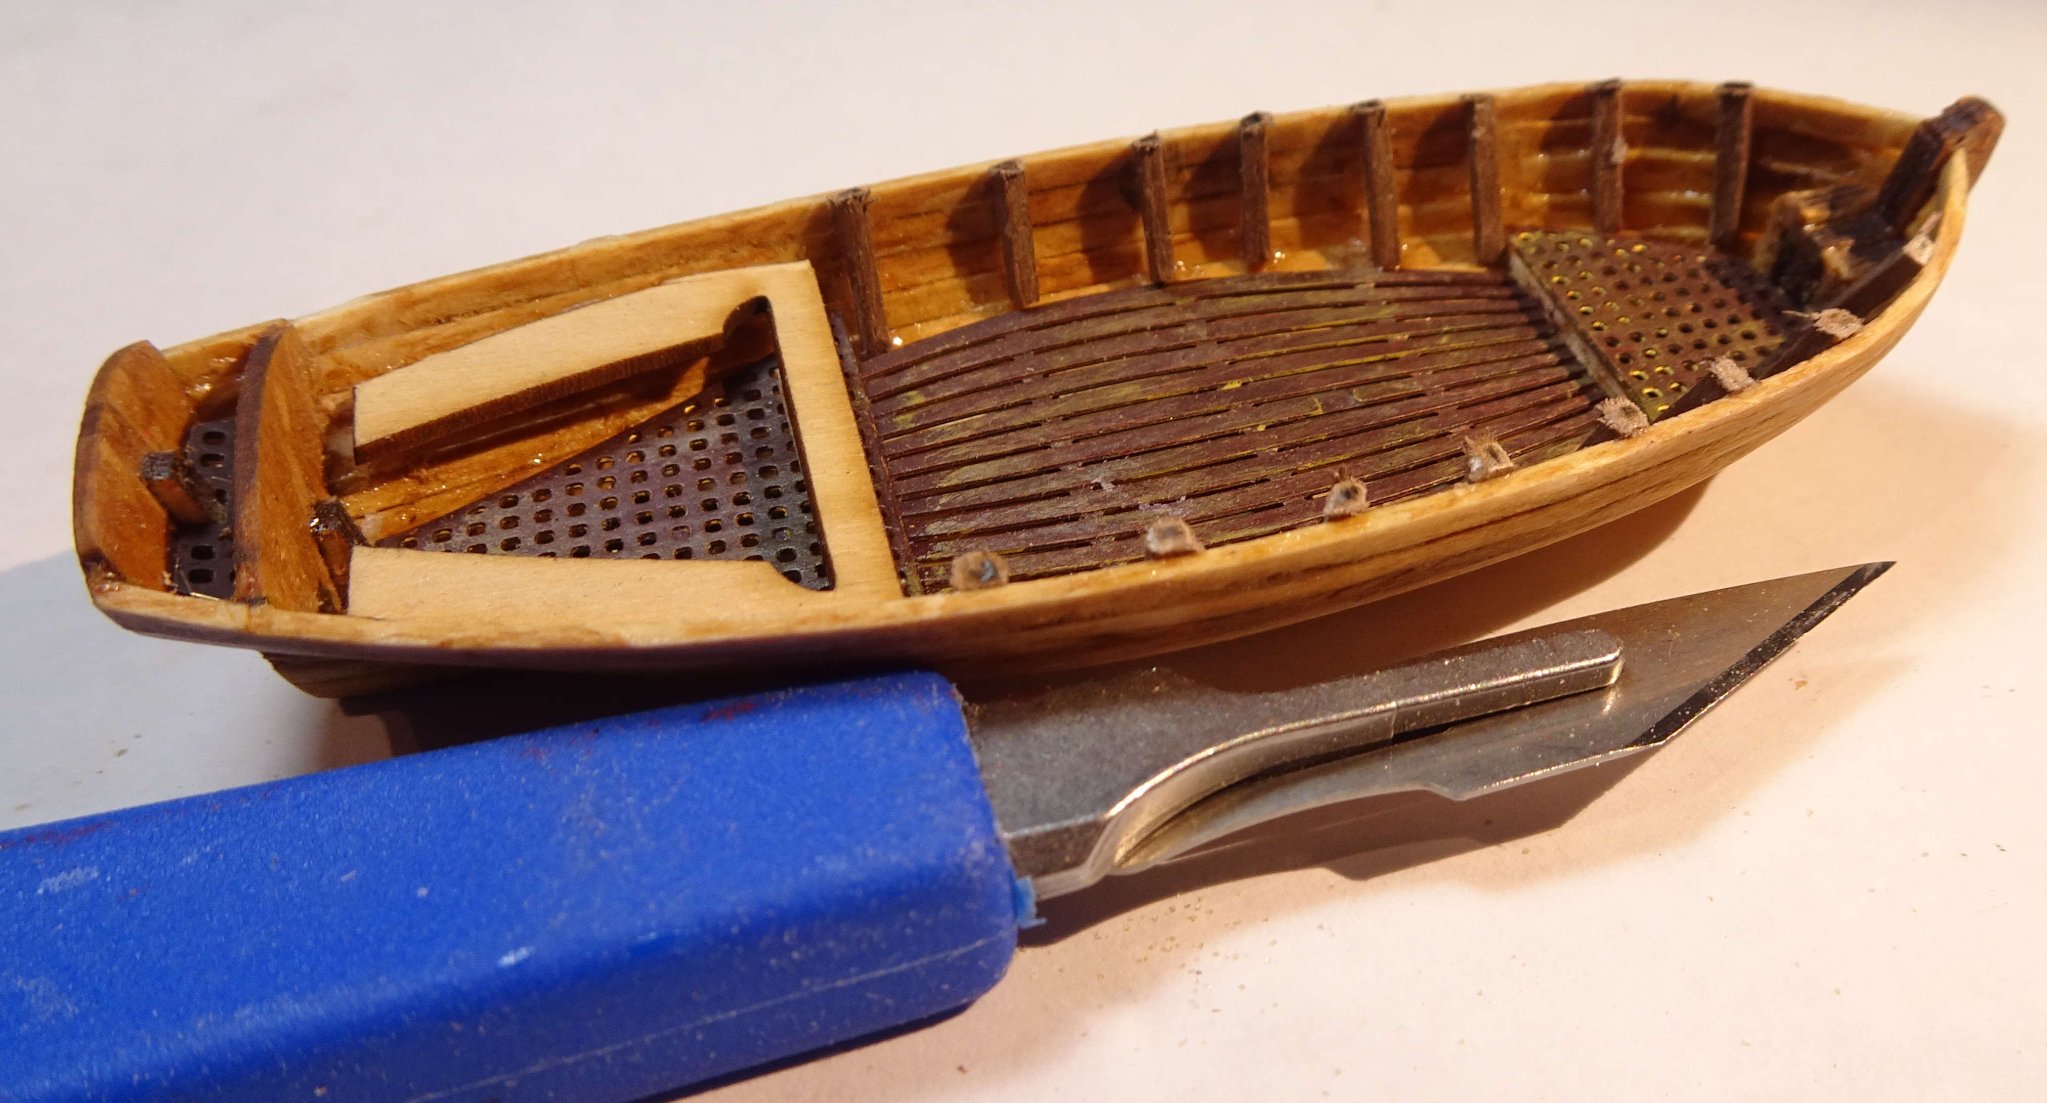
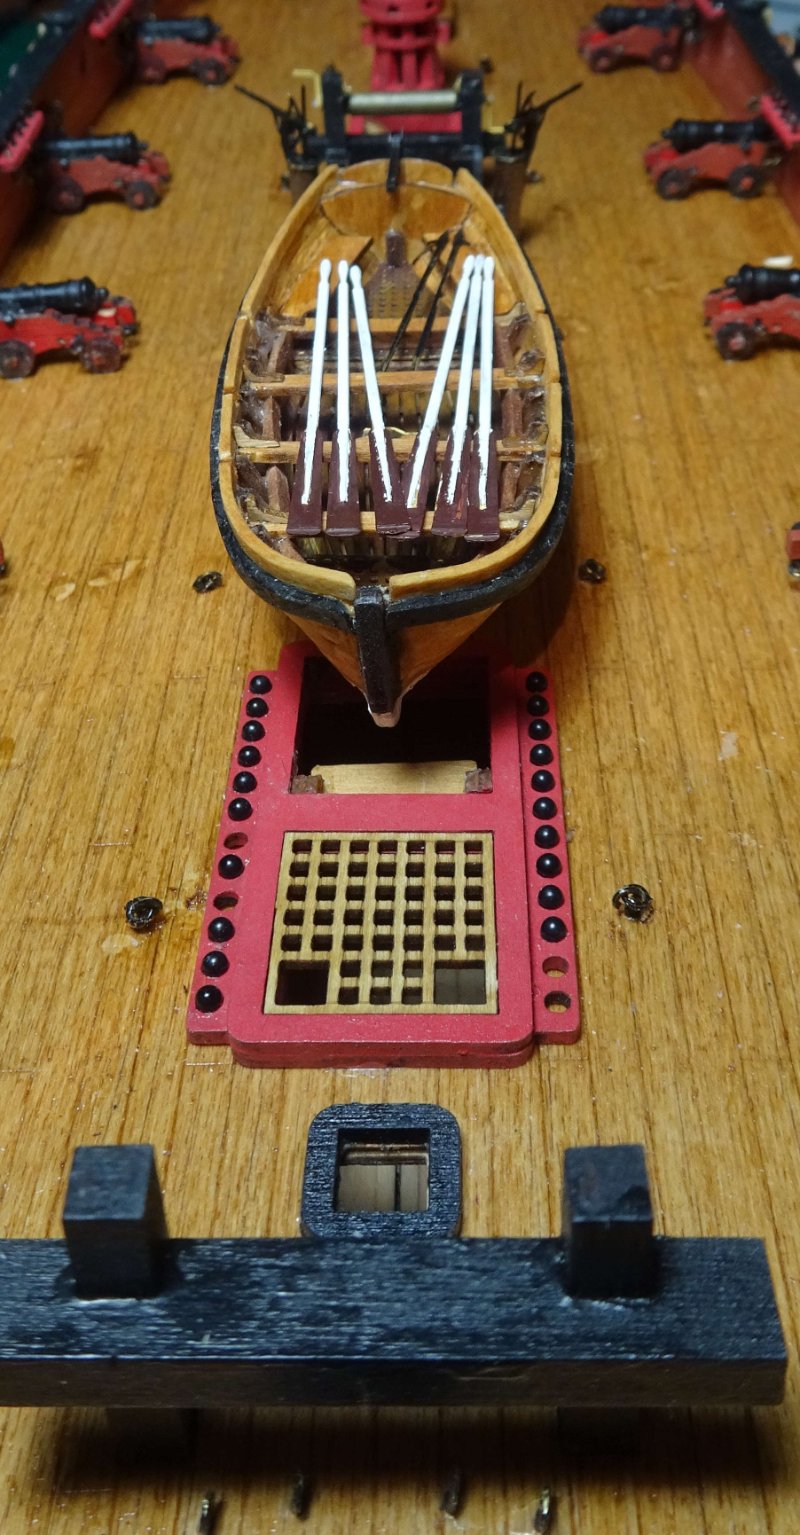
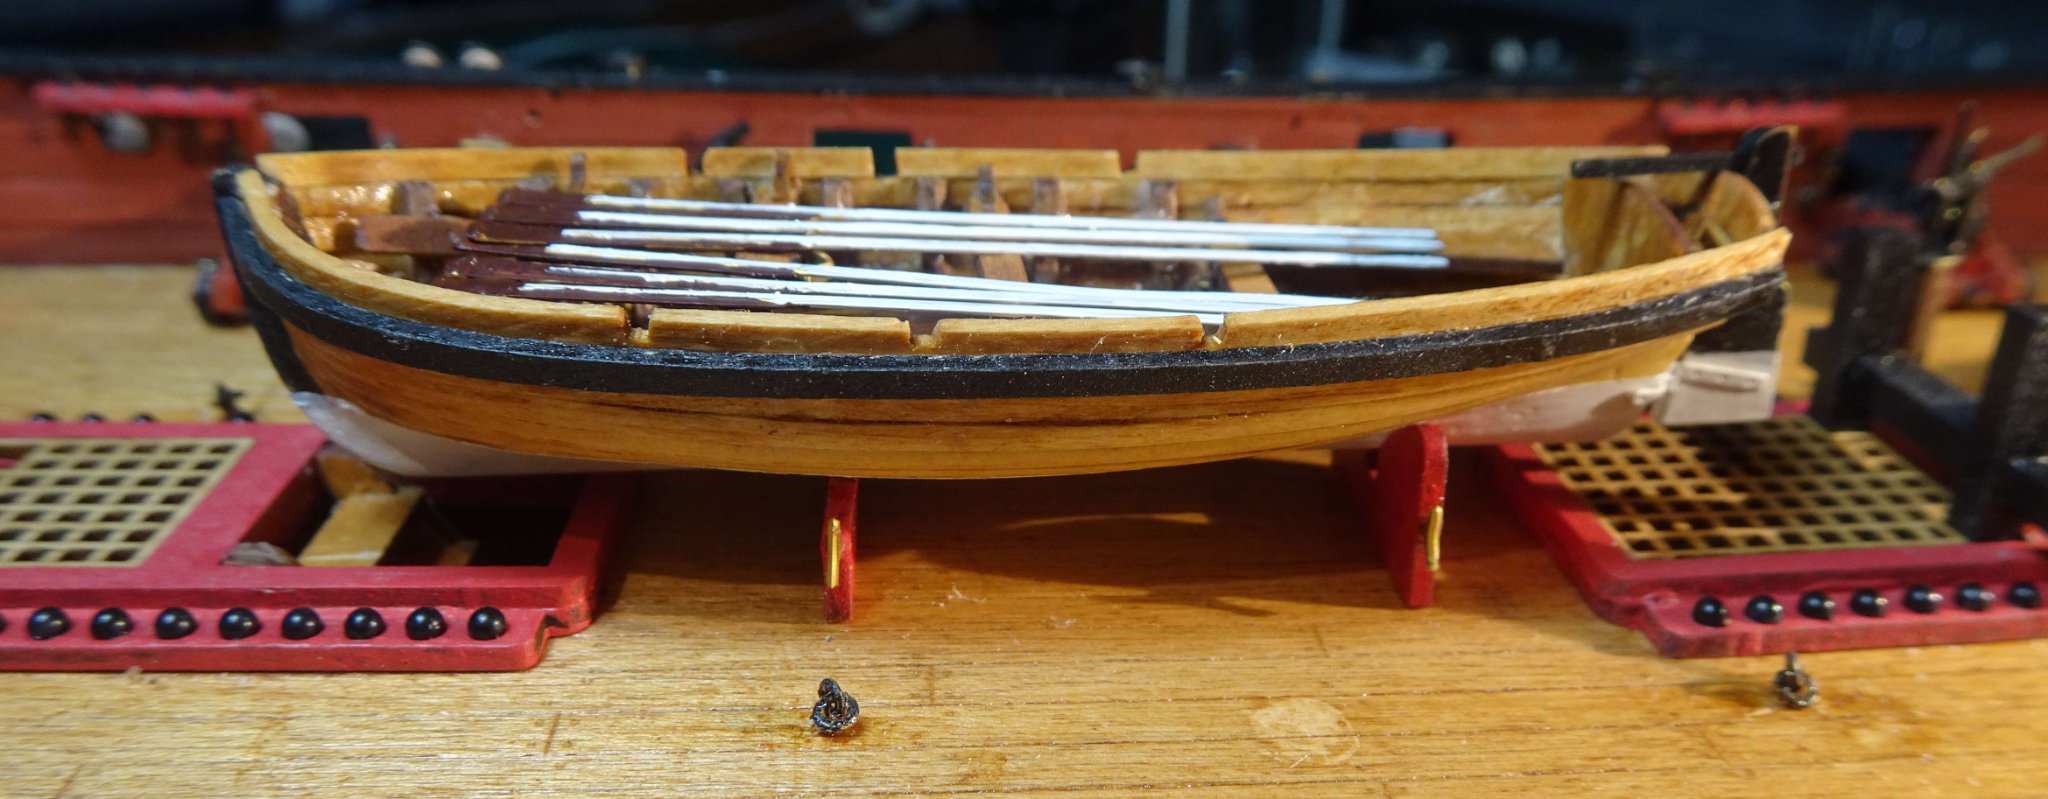
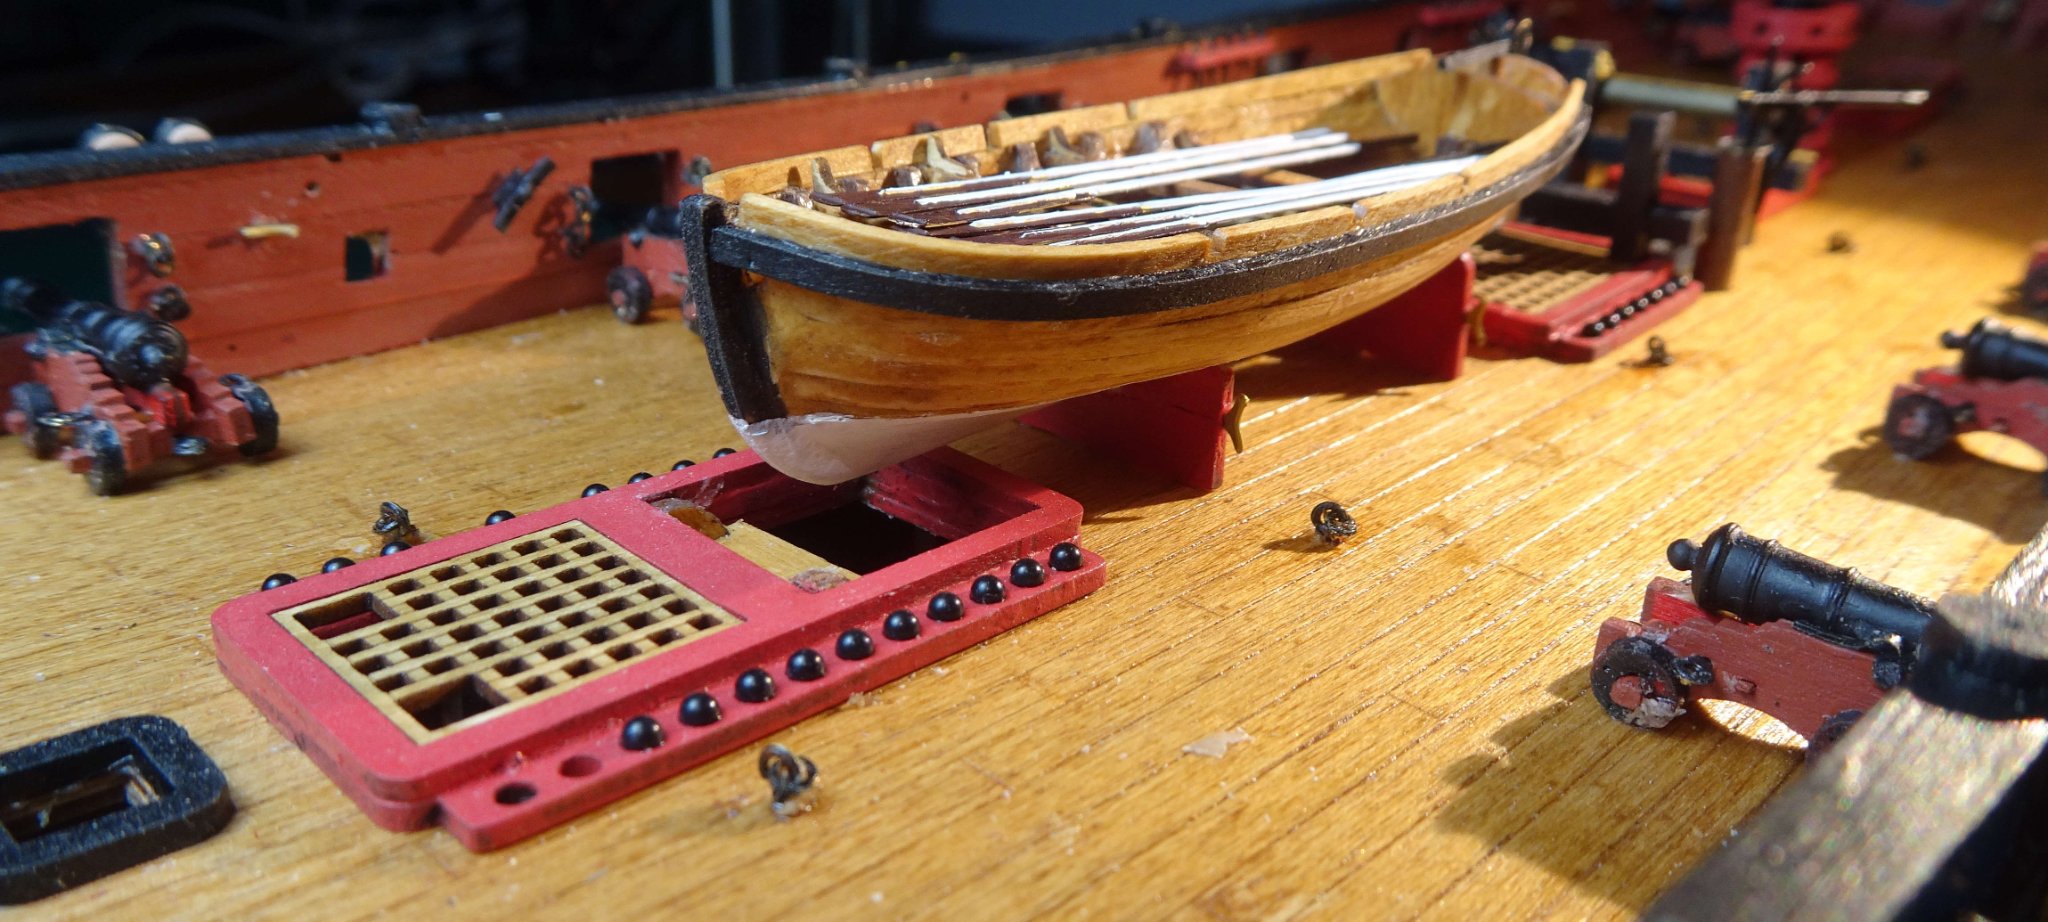
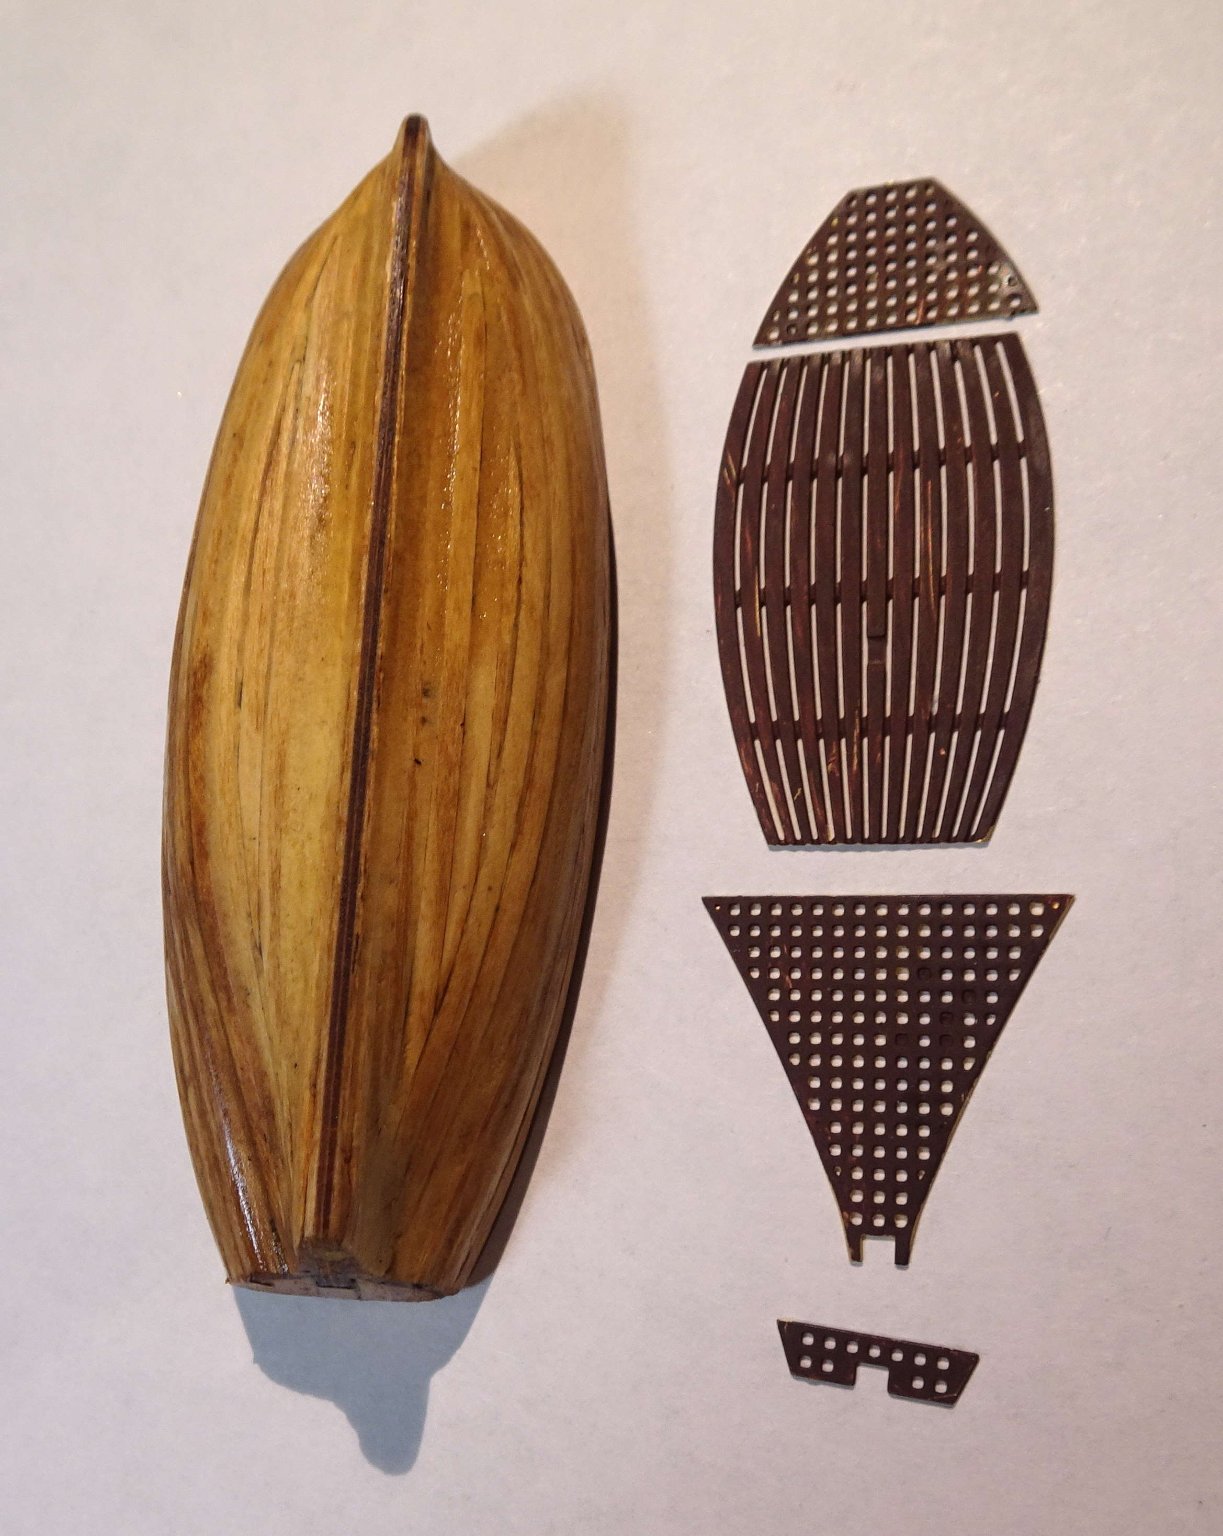
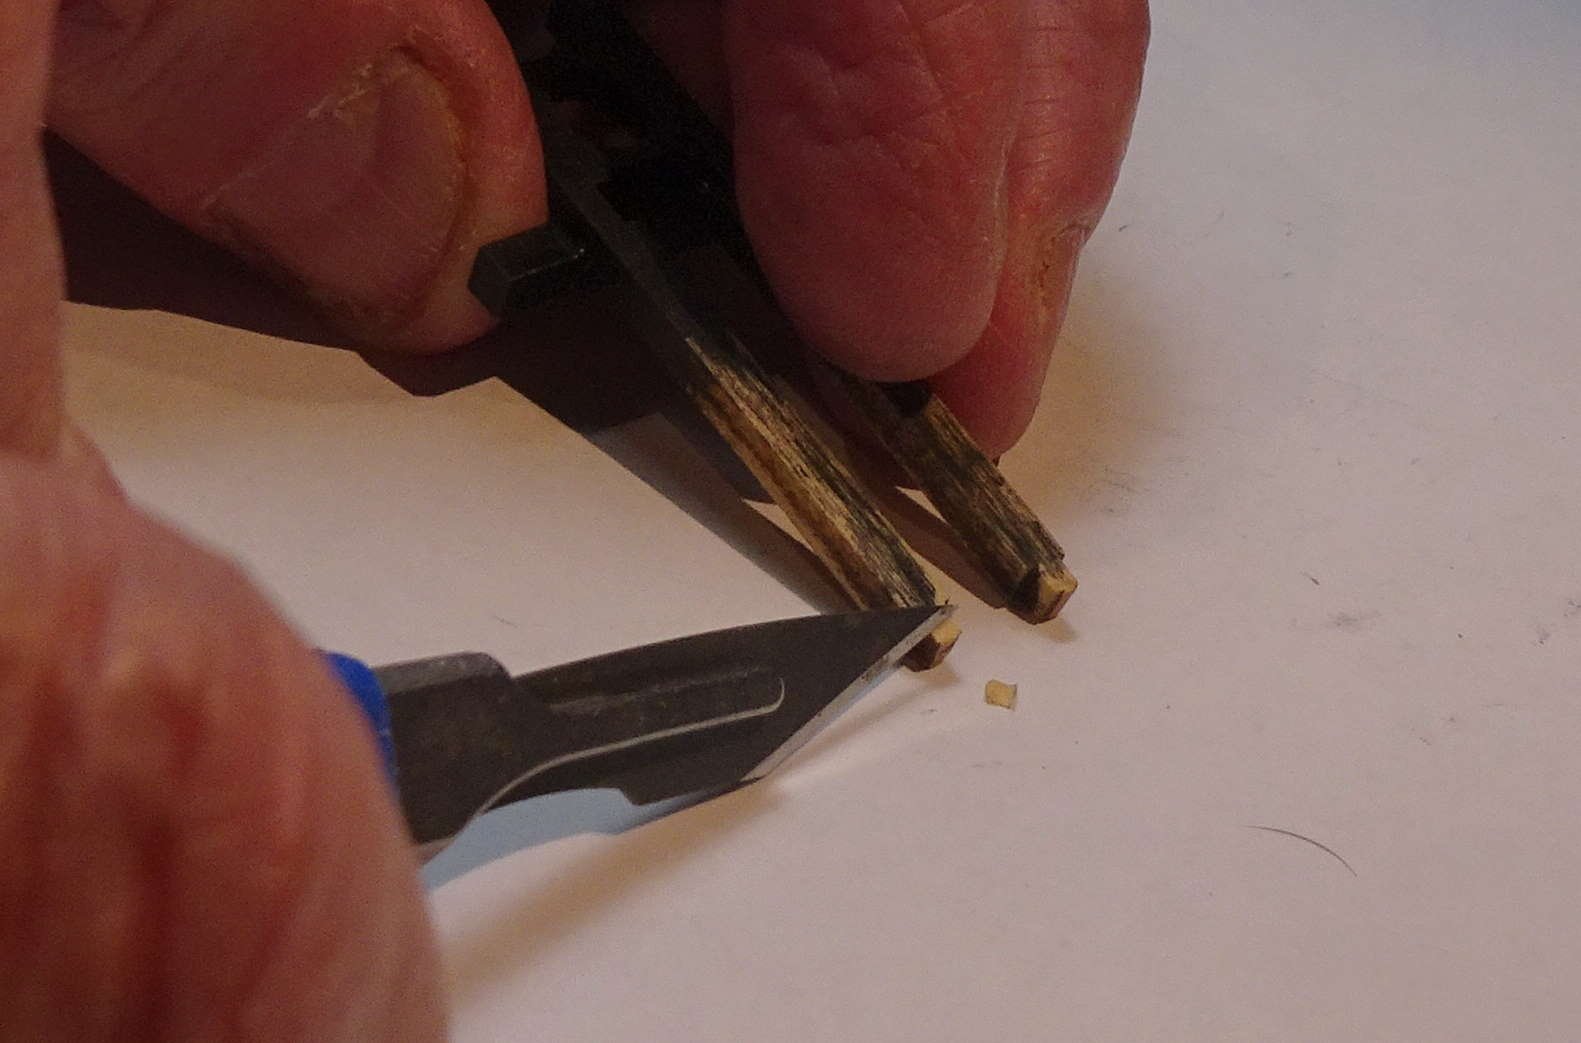
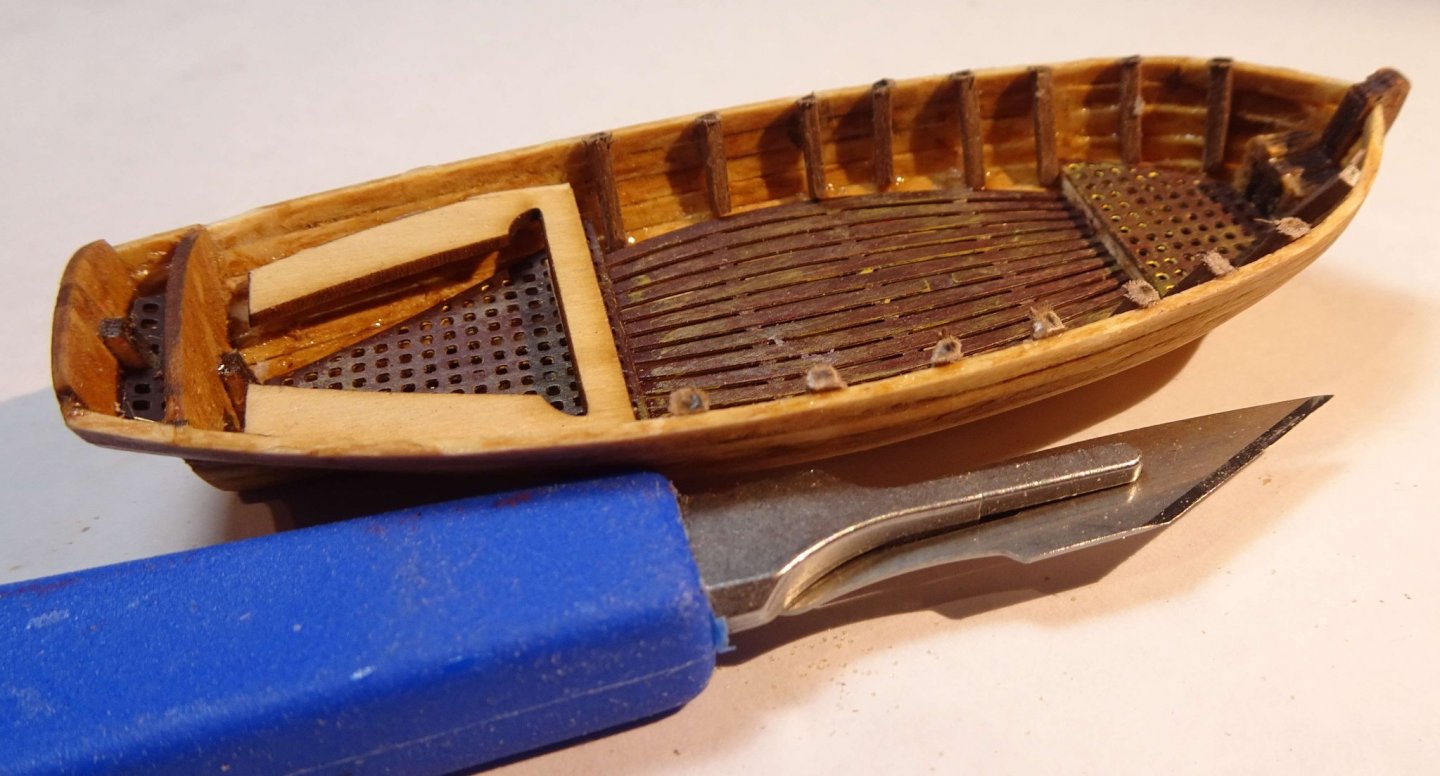
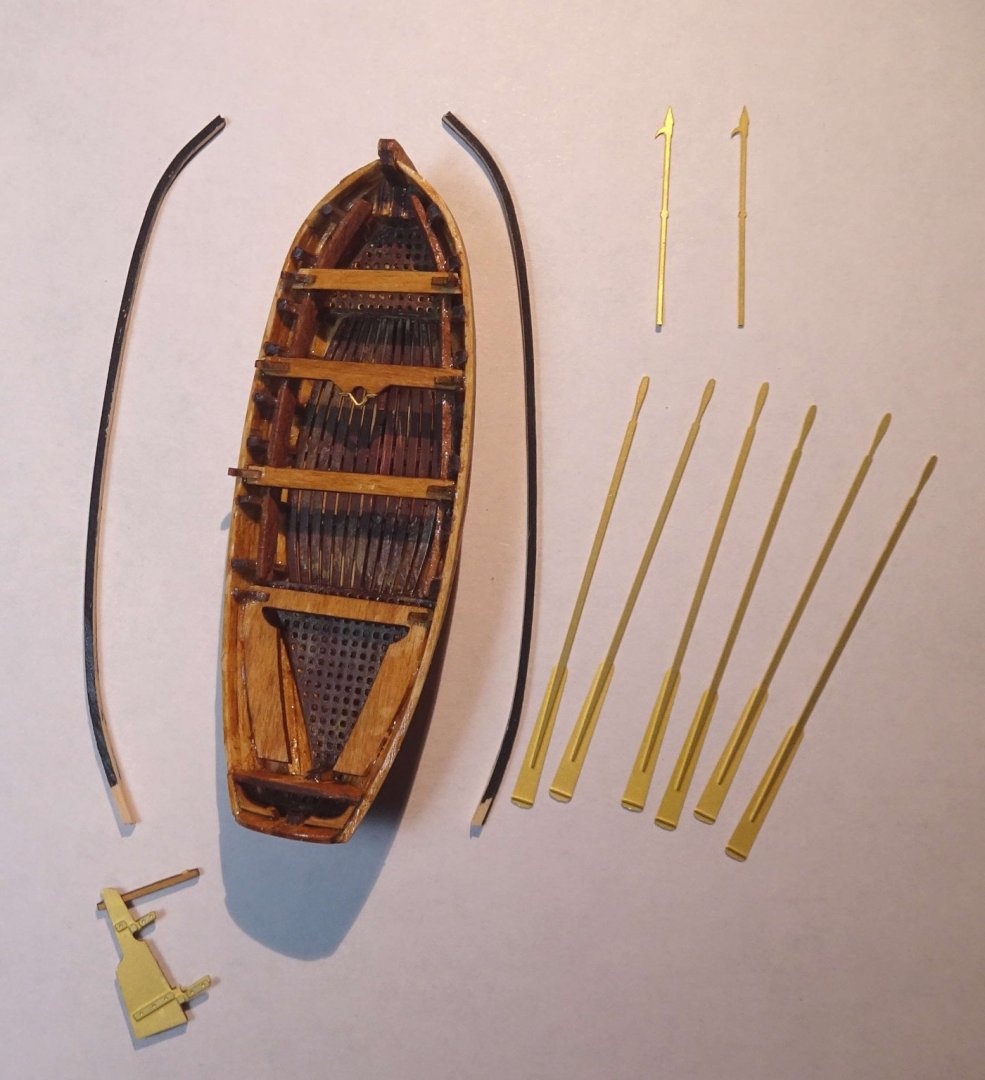
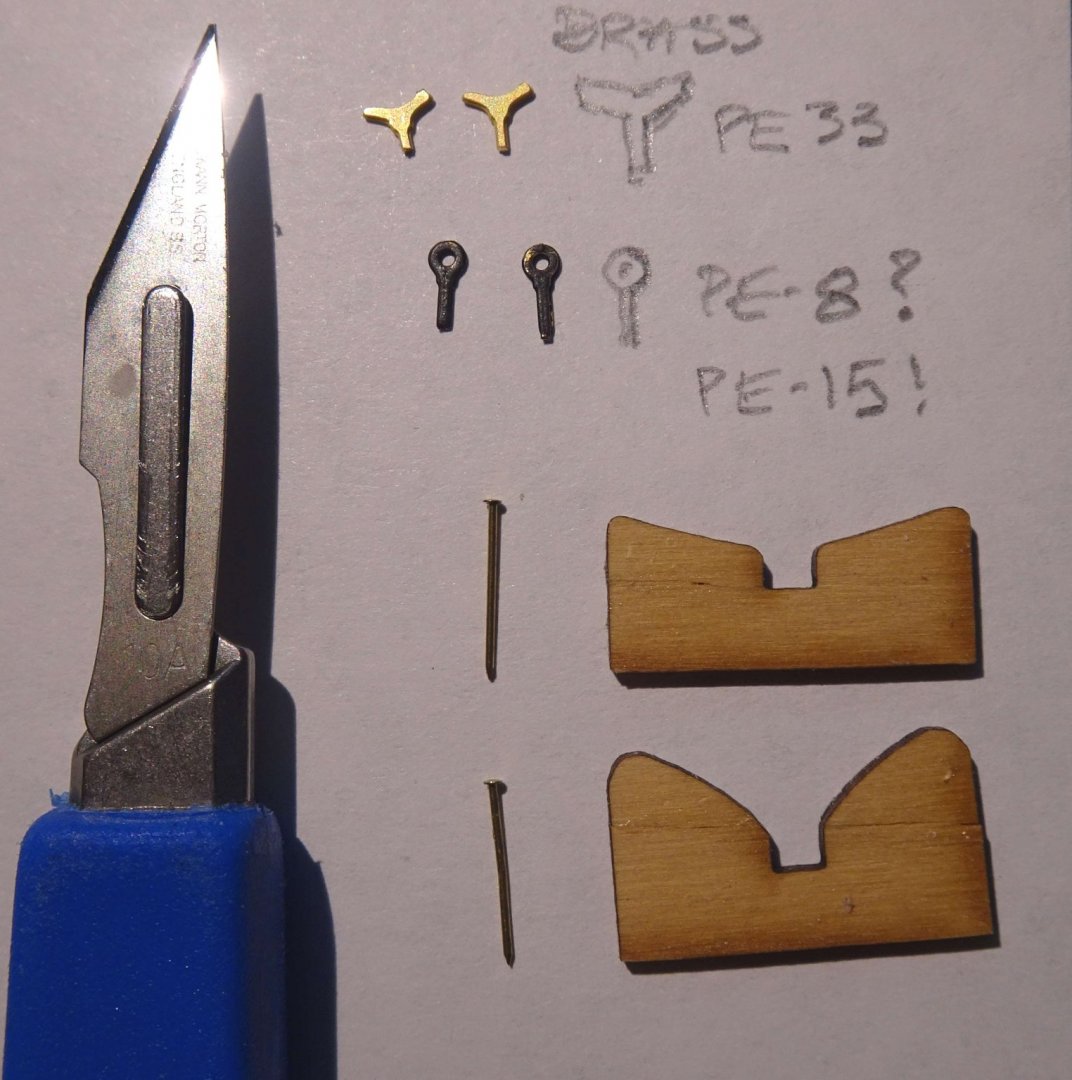
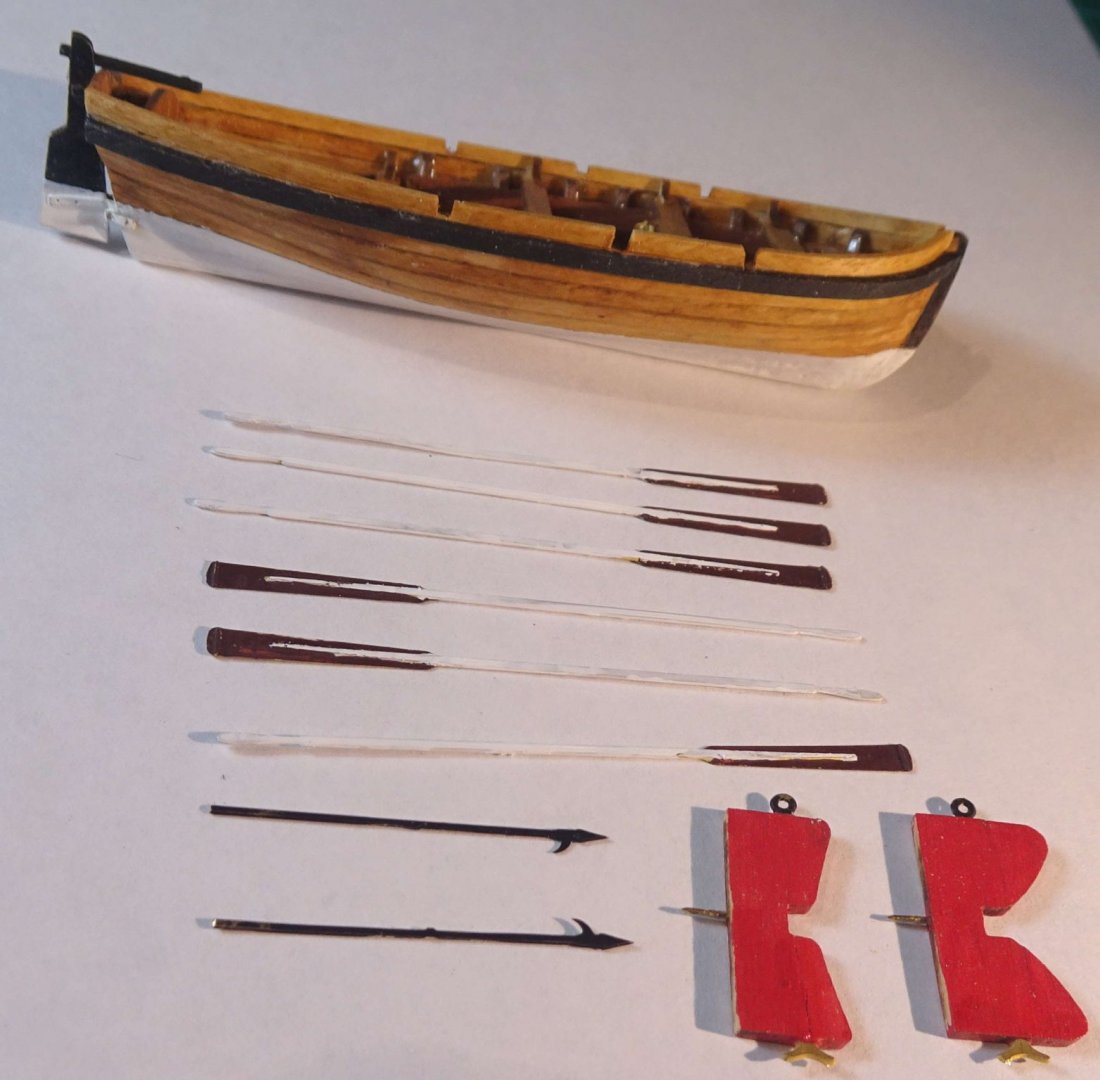
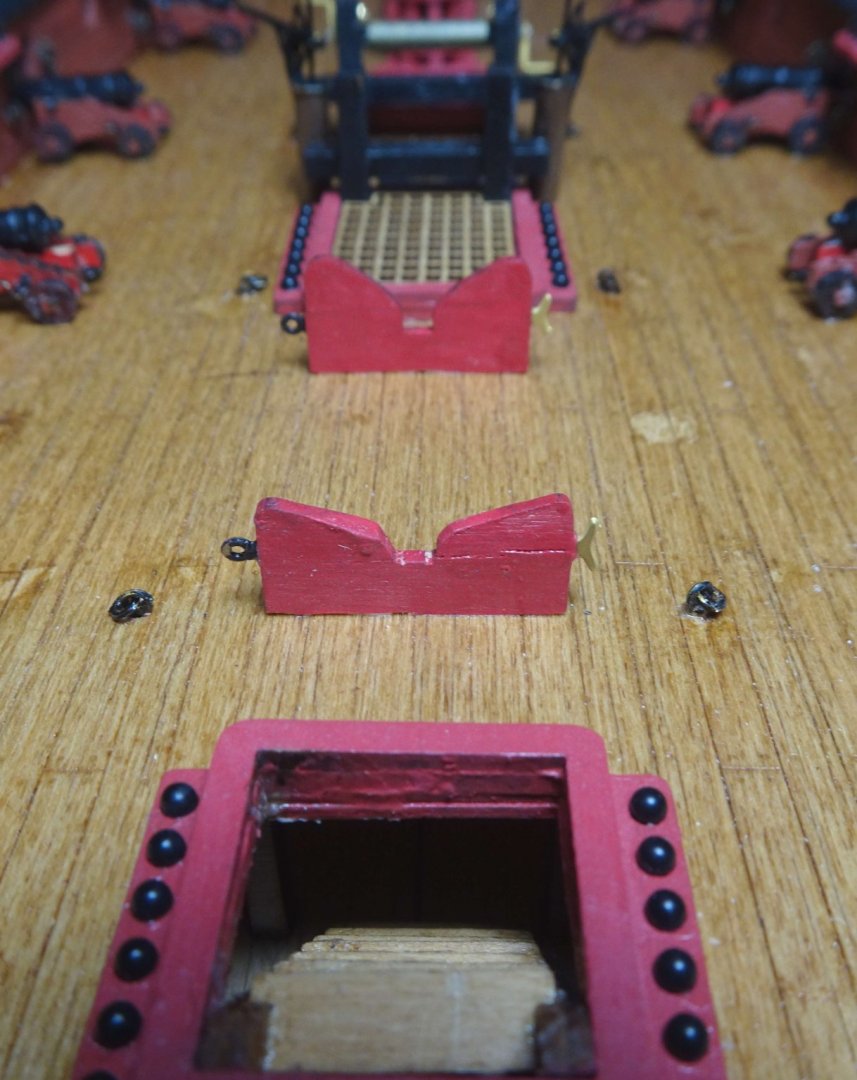
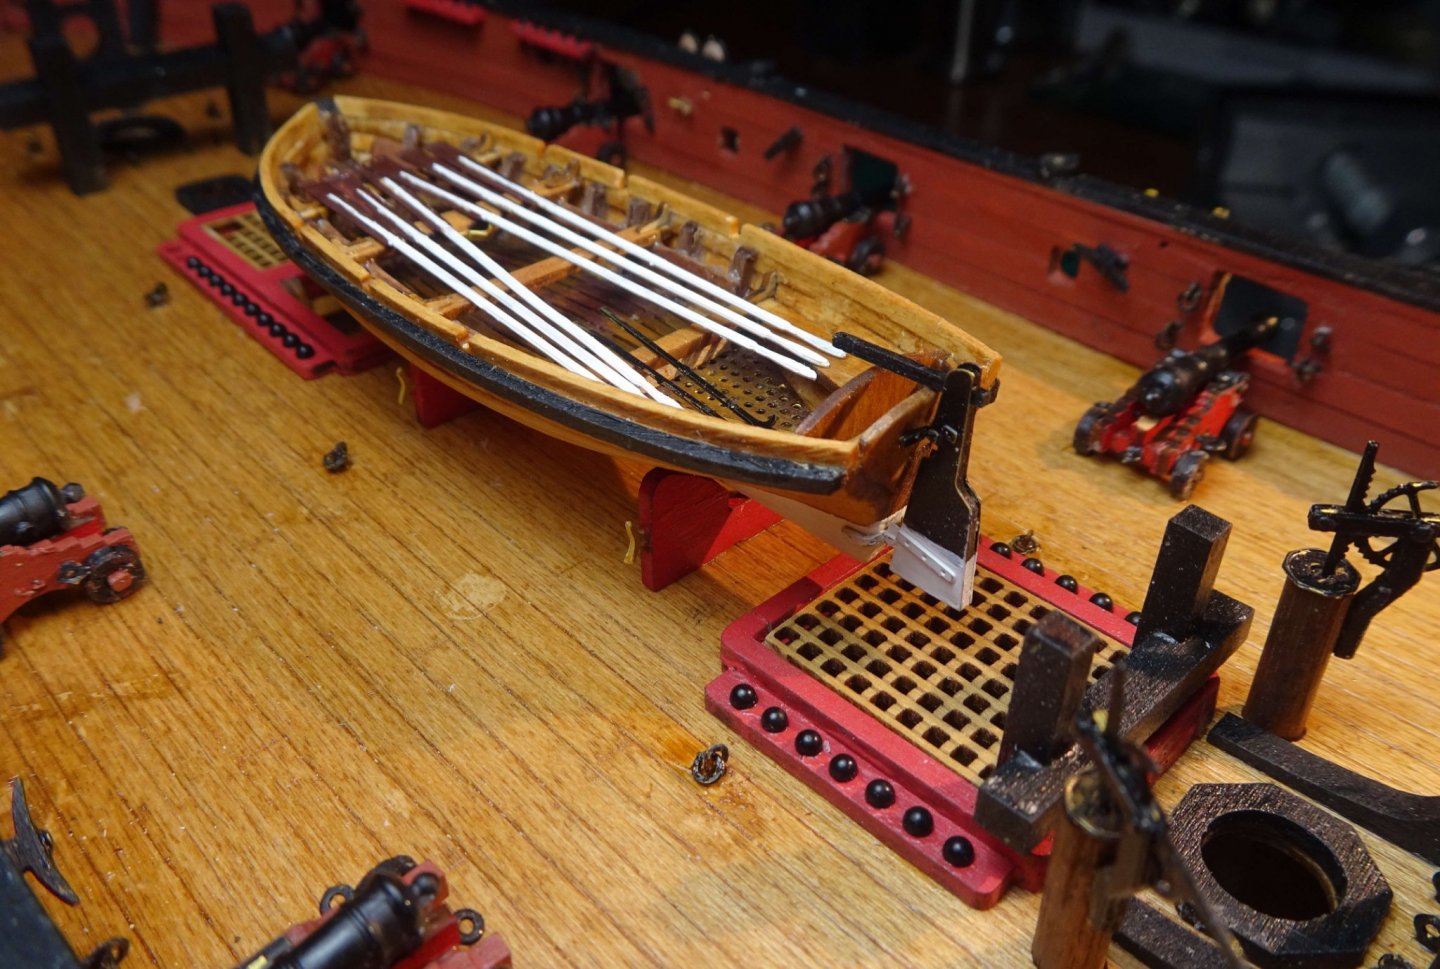
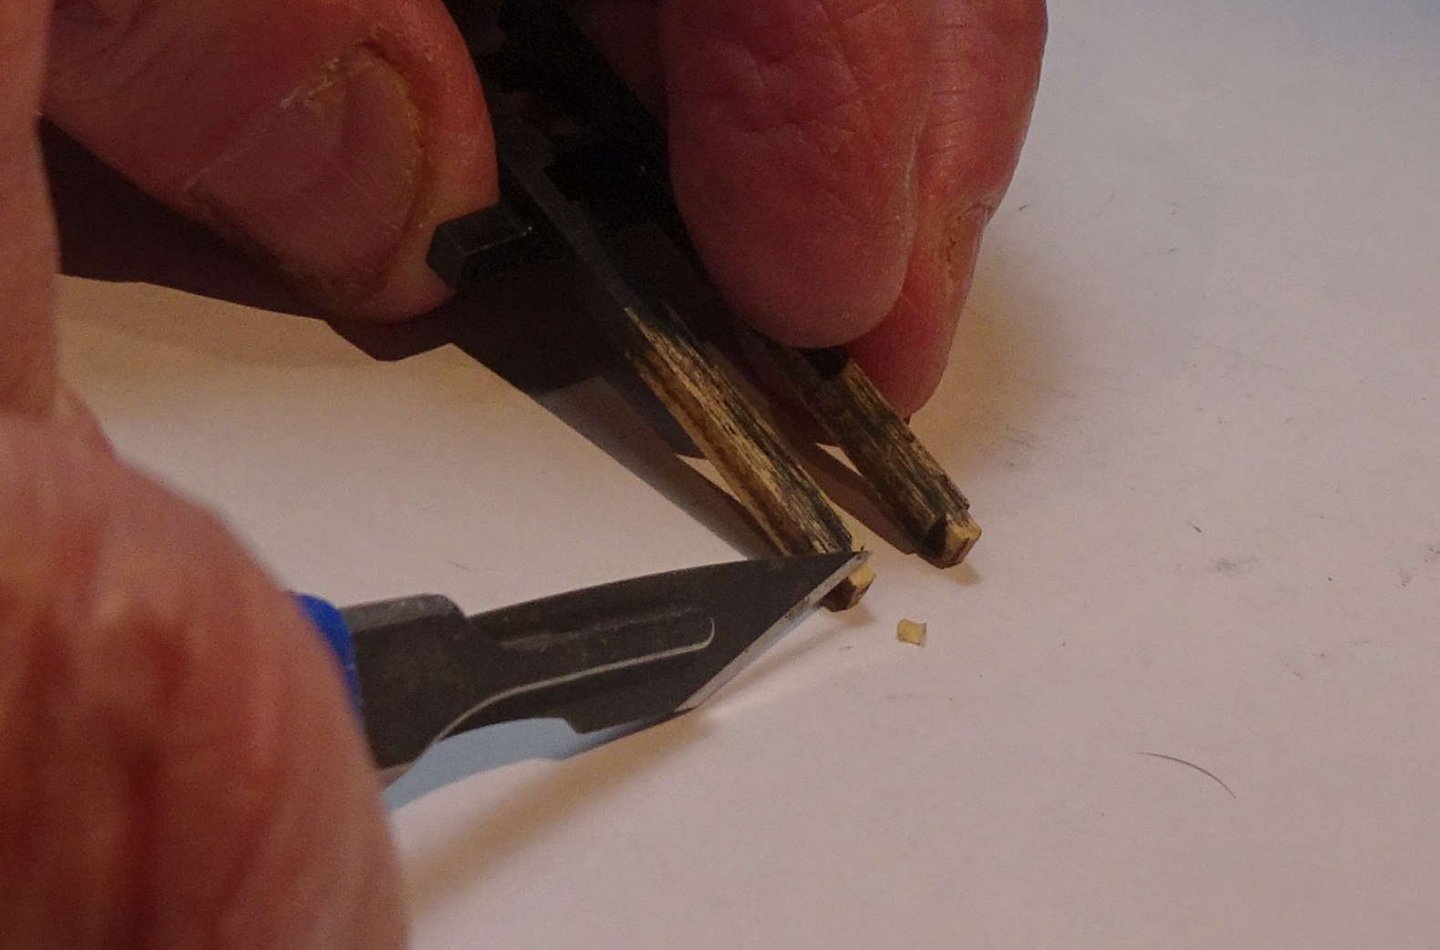
Hi all, Flirt's 18' Cutter /contd. Below - Floor gratings painted muddy brown and fitted. Then the Rear Seat - this snapped in a couple of places and was reinforced by using some brass sheet from the kit. Also a 1.5mm thick piece of wood was glued under the front of the seat to help support it. The internal ribs were fitted and trimmed down using a mini-Dremel circular saw. Black planks bent and painted. Also brass parts removed from sheet. Rudders parts glued together. Holding the Inside Rails in position whilst the glue dried. The clamps have sharp teeth but they were all I could find that fitted into the small spaces available. However, after removal there was no teeth marking on the wood from the clamps. Preparing the Cradles. I didn't paint the brass Cleats brass just to add a bit of colour variation. Note: The closed Eyebolt is, I believe, part PE 15. Hull painted white. Rudder painted white and black and CA'd in place. Oars etc also prepared. Cradles fitted to the deck. I slightly curved the underside to follow the deck curvature. And the boat in place. I wonder how they get down the stairs without bumping their heads?...but I suppose you bump your head only once and you quickly learn to lean out of the way next time. Side view. I think I'll revisit the painting on the oars...the paint job is a bit scrappy and I've just bought some very fine paint brushes which should allow me to make the paint lines a bit neater, he says. I won't tie down the boat for the moment since I am unsure if I will need that space free when it comes to the rigging. So the boat goes in to cold storage for now. Rear view of the boat, From a distance she looks fine....quite a long distance actually. Building the boat was fun but challenging. And really is a mini-project in it's own right. Next on the agenda is starting work on the Masts, Yards and Rigging. The first two are in my happy zone but the rigging is a bit like Kryptonite to me. Ah well, it's what I signed up for so can't complain too loudly 😉 I might also have a look at what rigging is required for the cannons and get that out of the way first...decisions., decisions. OK, time for a coffee, decision made! Regards, Richard


-
Erik, Doing the reefing ties is a chore...they seem to be never ending when you are doing them ...but the end result is very worthwhile...they somehow bring the sails to life. Your sails deserve it 😉 The colour of the reefing ties wants to be light enough to be noticable but not too bright....the ones I've seen in old pics seem to have a 'weathered' colour (not surprisingly, I guess). And using white glue to coax them into a flat but realistic pattern is a good idea. Richard
- 222 replies
-
- 1
-
-
- First Build
- Lady Isabella
- (and 2 more)
-
I'll have another look at James' waterline pic, thanks. I've brush painted the waterline already but can easily modify it if it's wildly out, but it looks good enough particularly as the boat is mounted with the hull facing downwards on the ship. My sister and niece both work for the NHS and had their first jags a few weeks ago...side effects nothing worse than the flu jab eg mildly sore arm. In Scotland there are plenty enough vaccines to go around, but deploying the vaccines seems to be causing a bit of a backlog. My jag will probably be March time. Richard
-
Ras, Much appreciated. Lady Eleanor was a pleasure to work on and it's a good thing that model manufaturers and builders keep their memories alive, as do the communities and families associated with the industry. There are many excellent builds of Fifies, Zulus, Irish Hookers etc on this website that provide very useful insights into the kits and their assembly, and also how to do top level 'bashing'. You will thoroughly enjoy your Fifie build...no doubt about that...and you can add your own touches, tweaks and additions to your build to make it even more memorable. The only downer about the Fifie build is that one day you will finish it ;-)....but the silver lining is that there are many other similar vessels to then tackle. Regards, Richard
-
Planking these bijou models is time consuming... In fact, building these little boats is a whole lot more complex than first impressions may hint at. Your planking is looking very smooth...my Flirt boat's planking is a bit more rough and ready but still seems to require just as much preparation, bending, shaping etc as larger kits do. These kits are an enjoyable challenge, even though some parts have to handled with (very soft) kid gloves due to their fragility. Richard
- 70 replies
-
- 2
-
-
- 22ft Yawl
- Vanguard Models
- (and 2 more)
-
James, Great pictues as usual. I've heard Sarah Connor is heading towards your house to stop the Terminator build being fully completed. Get your house security system upgraded ASAP, but don't buy a Smart SkyNet brand! Richard
-
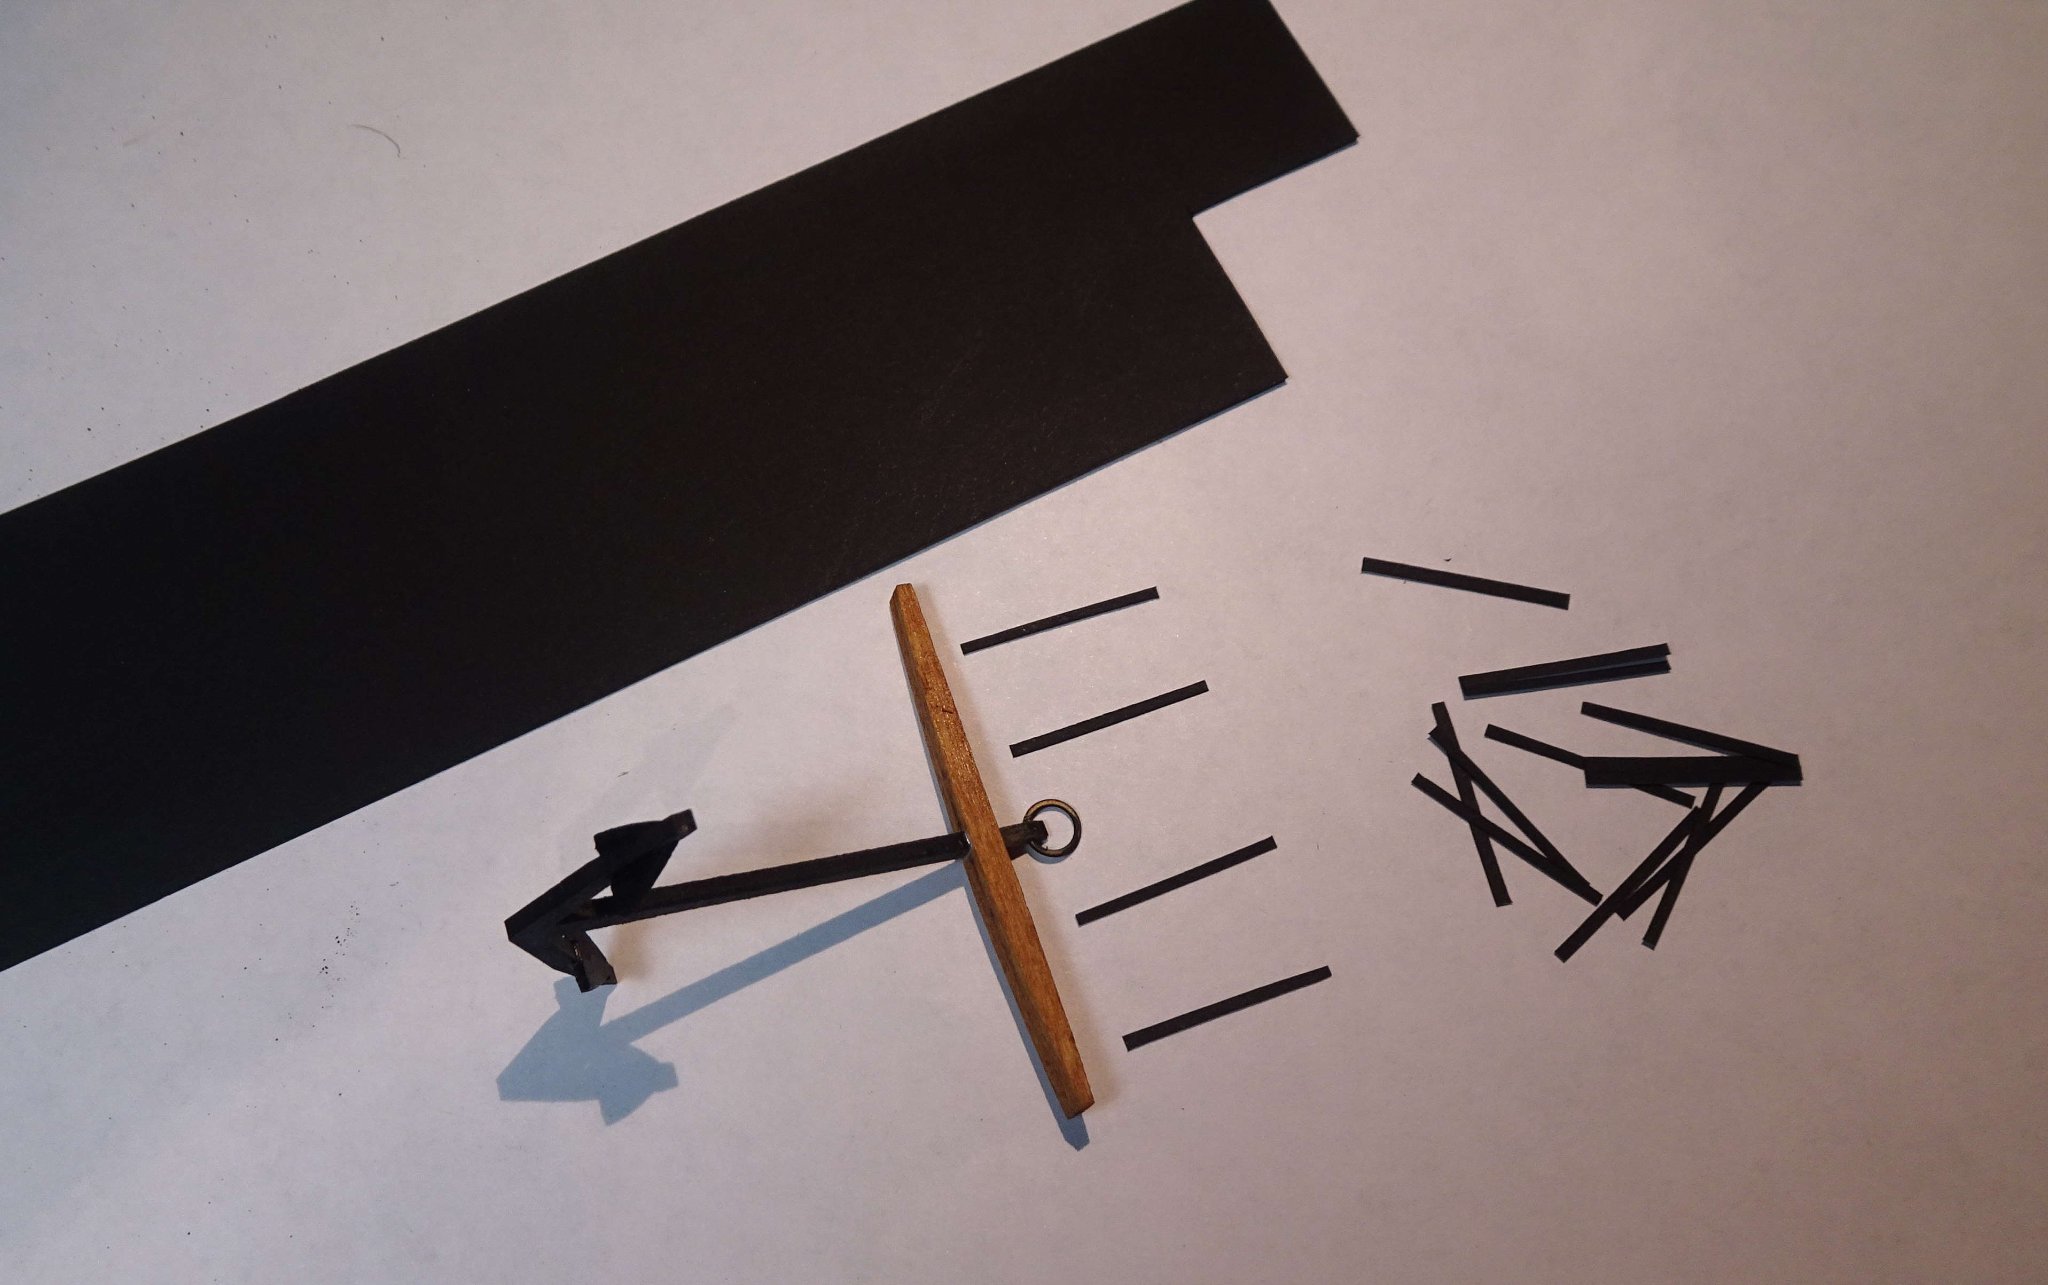
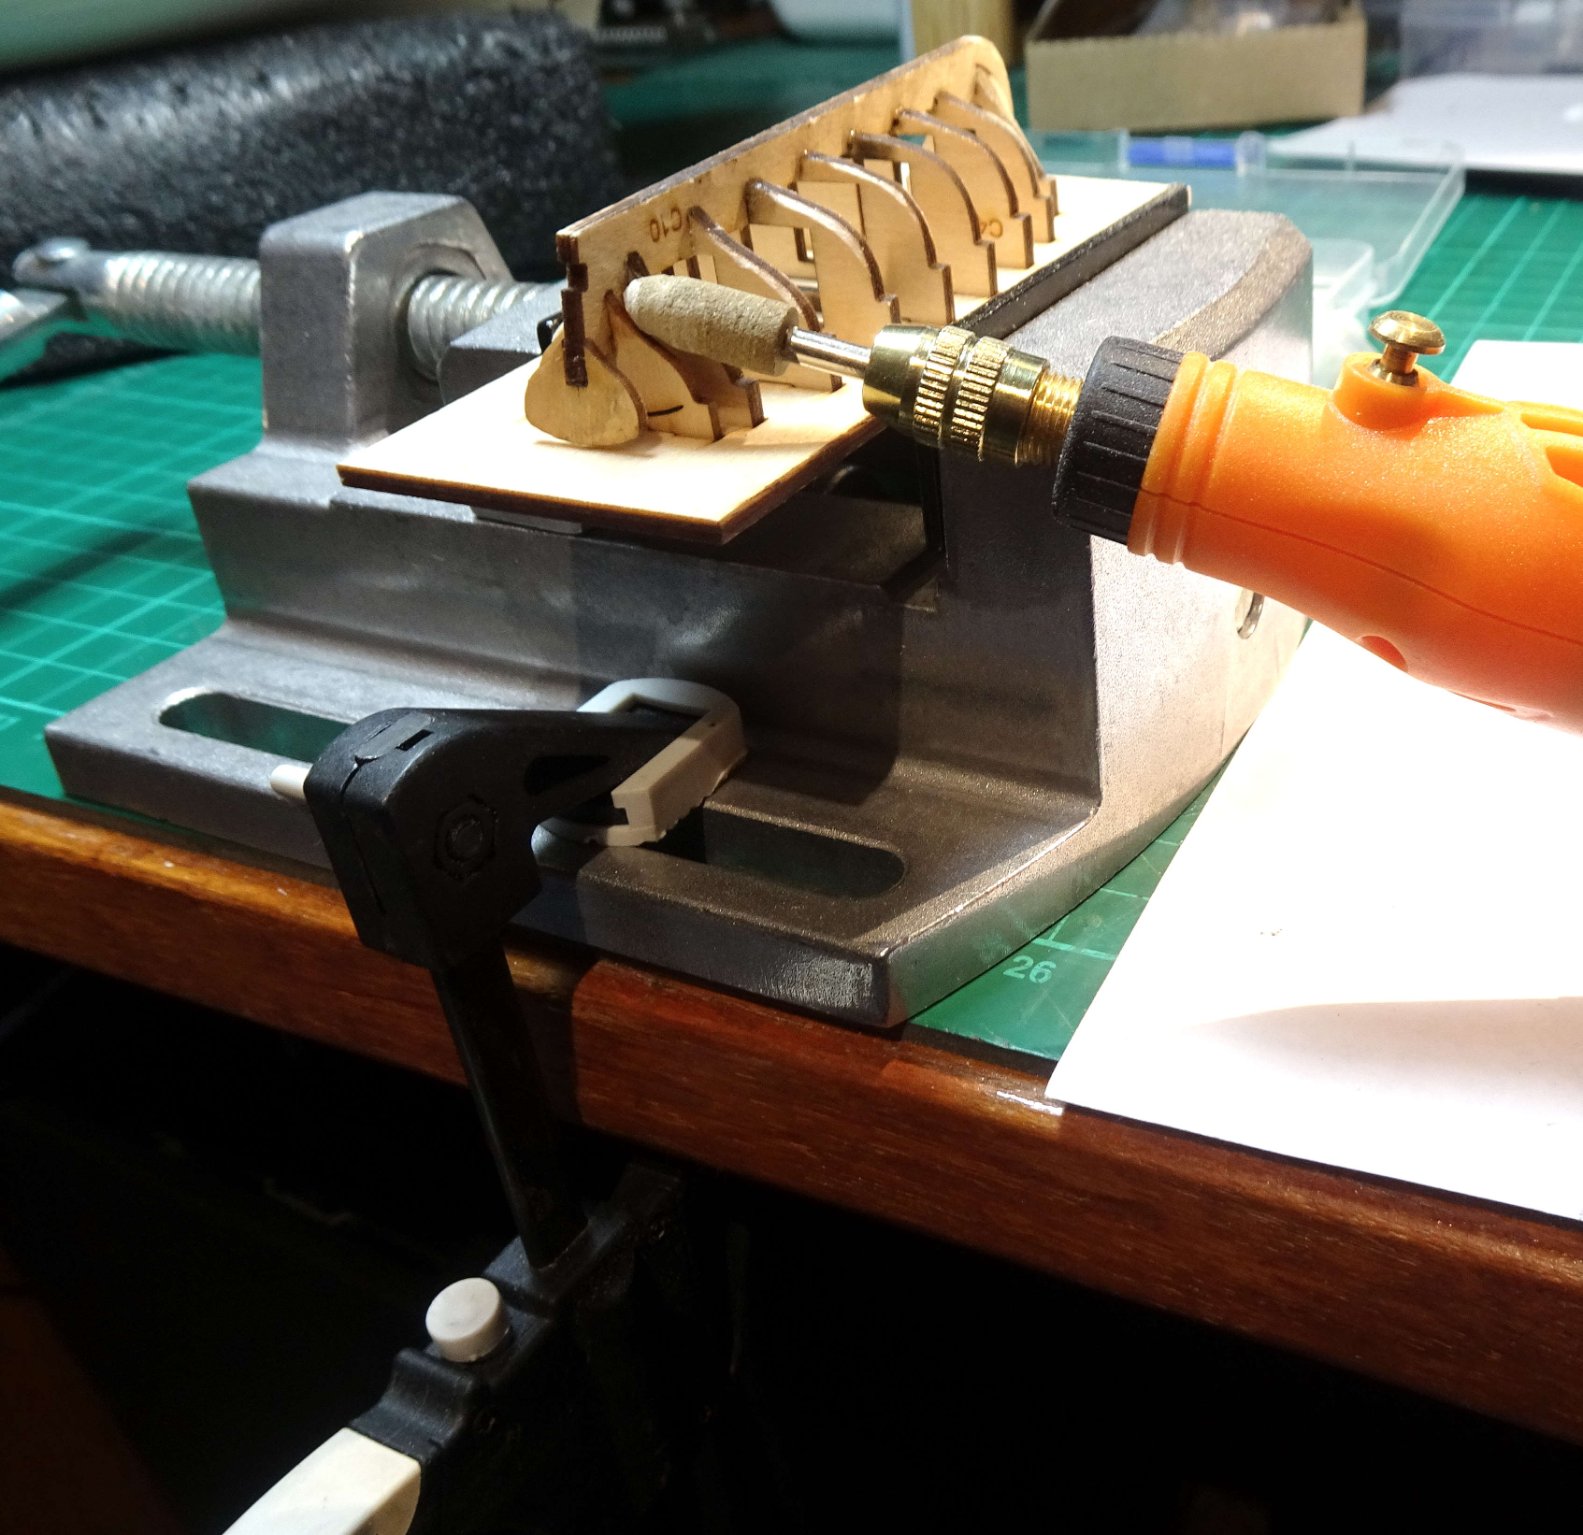
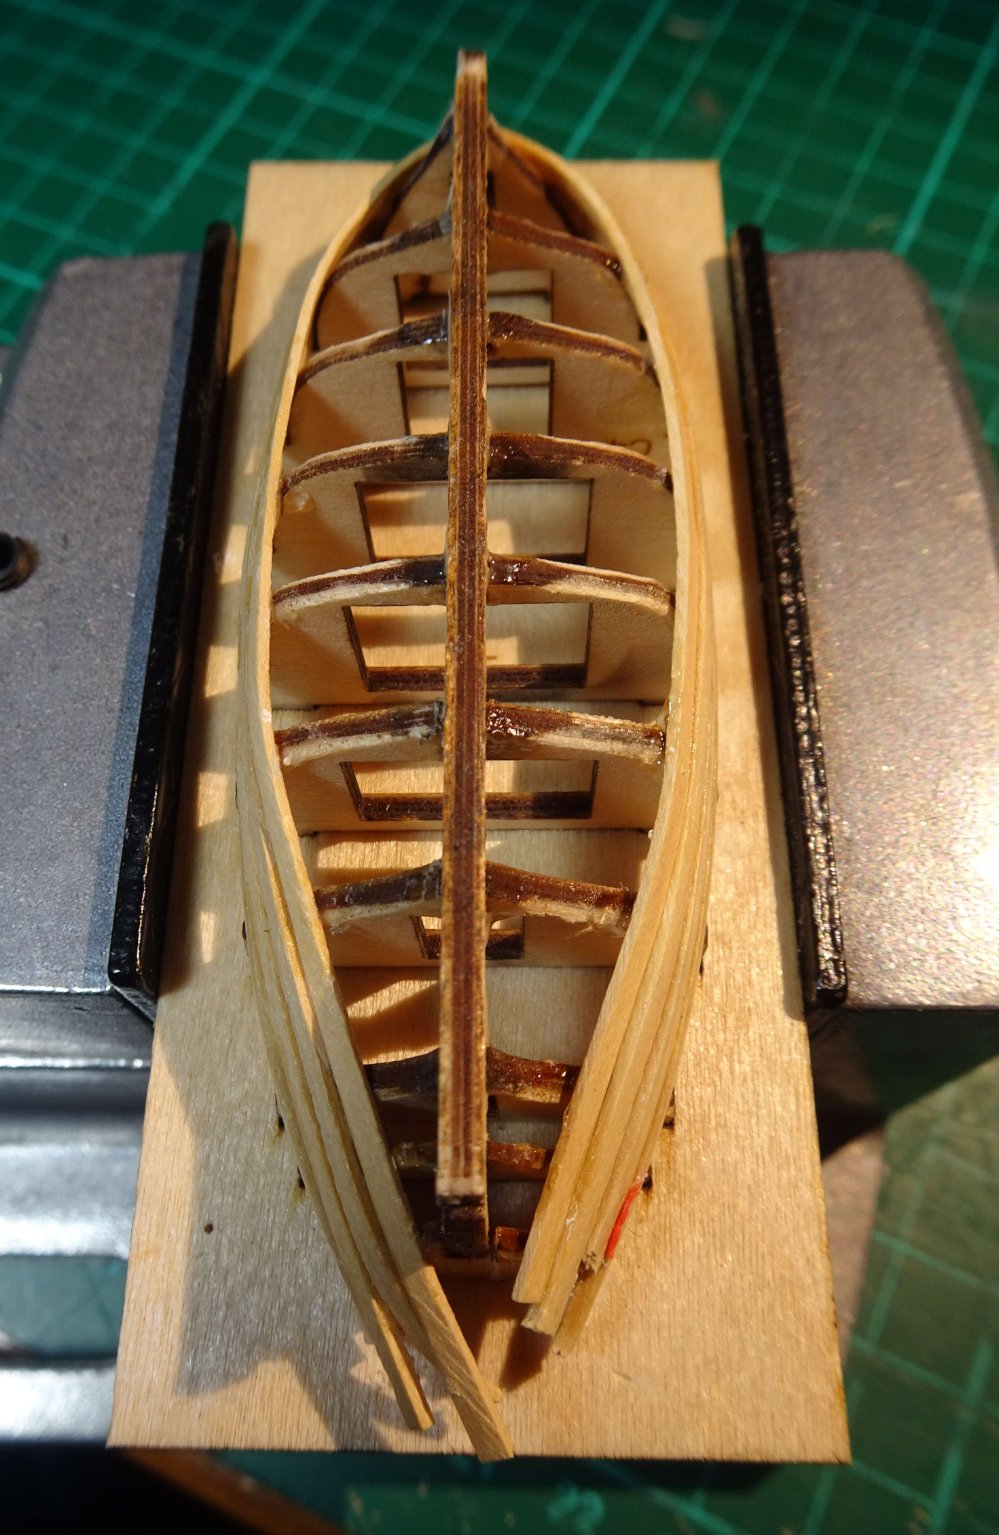
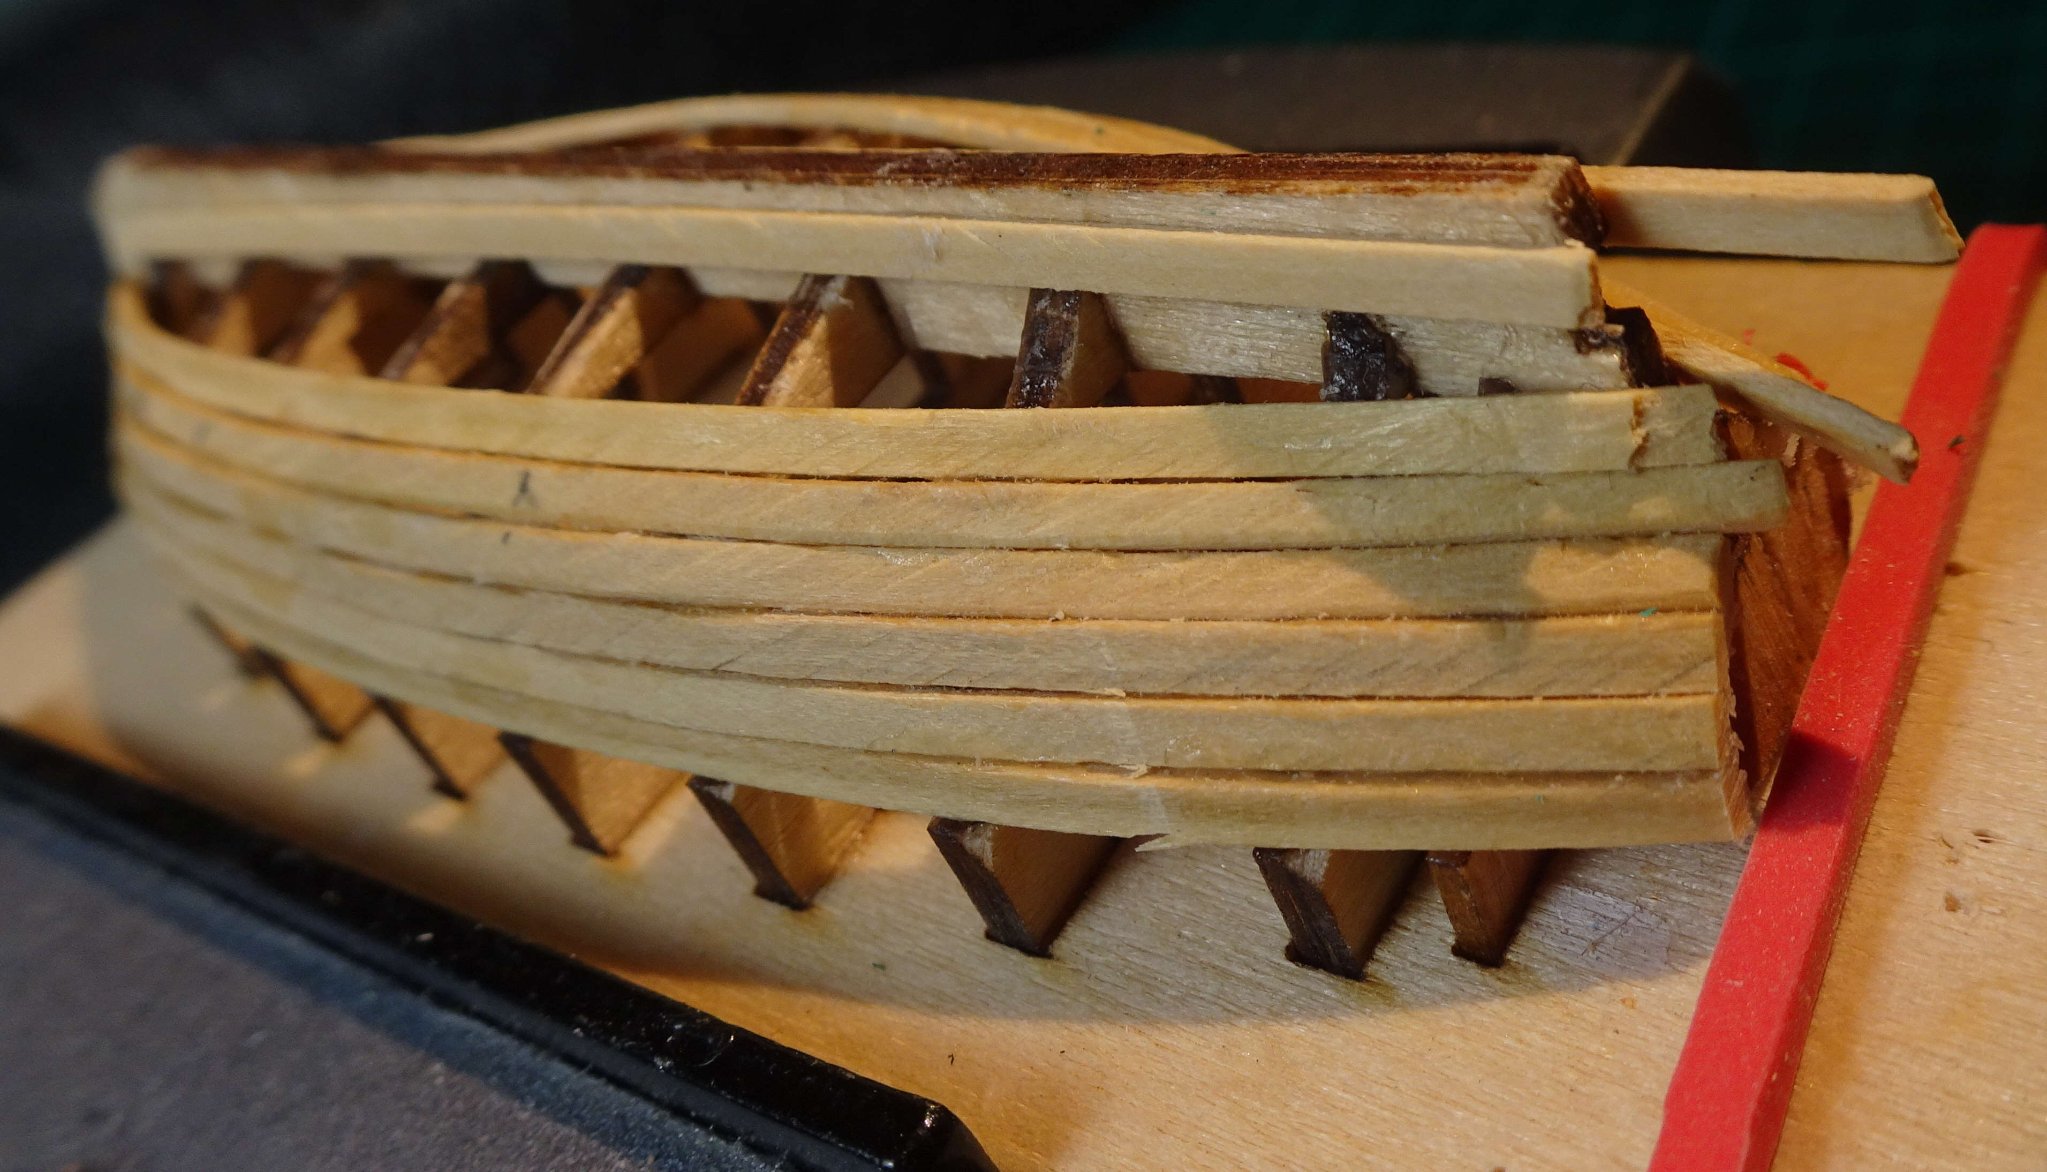
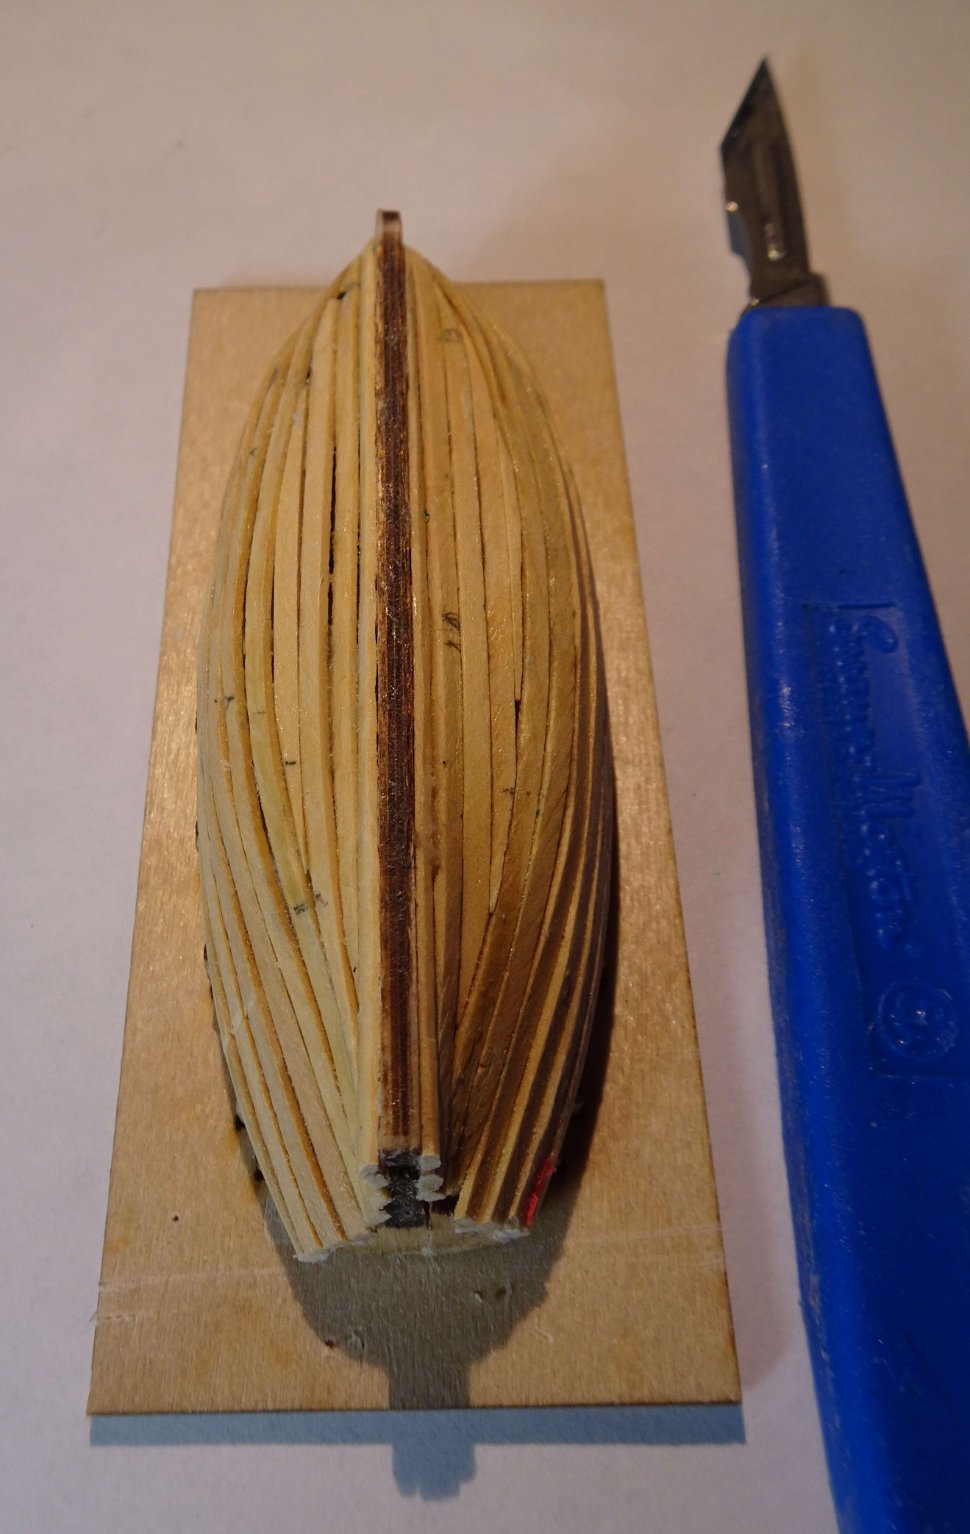
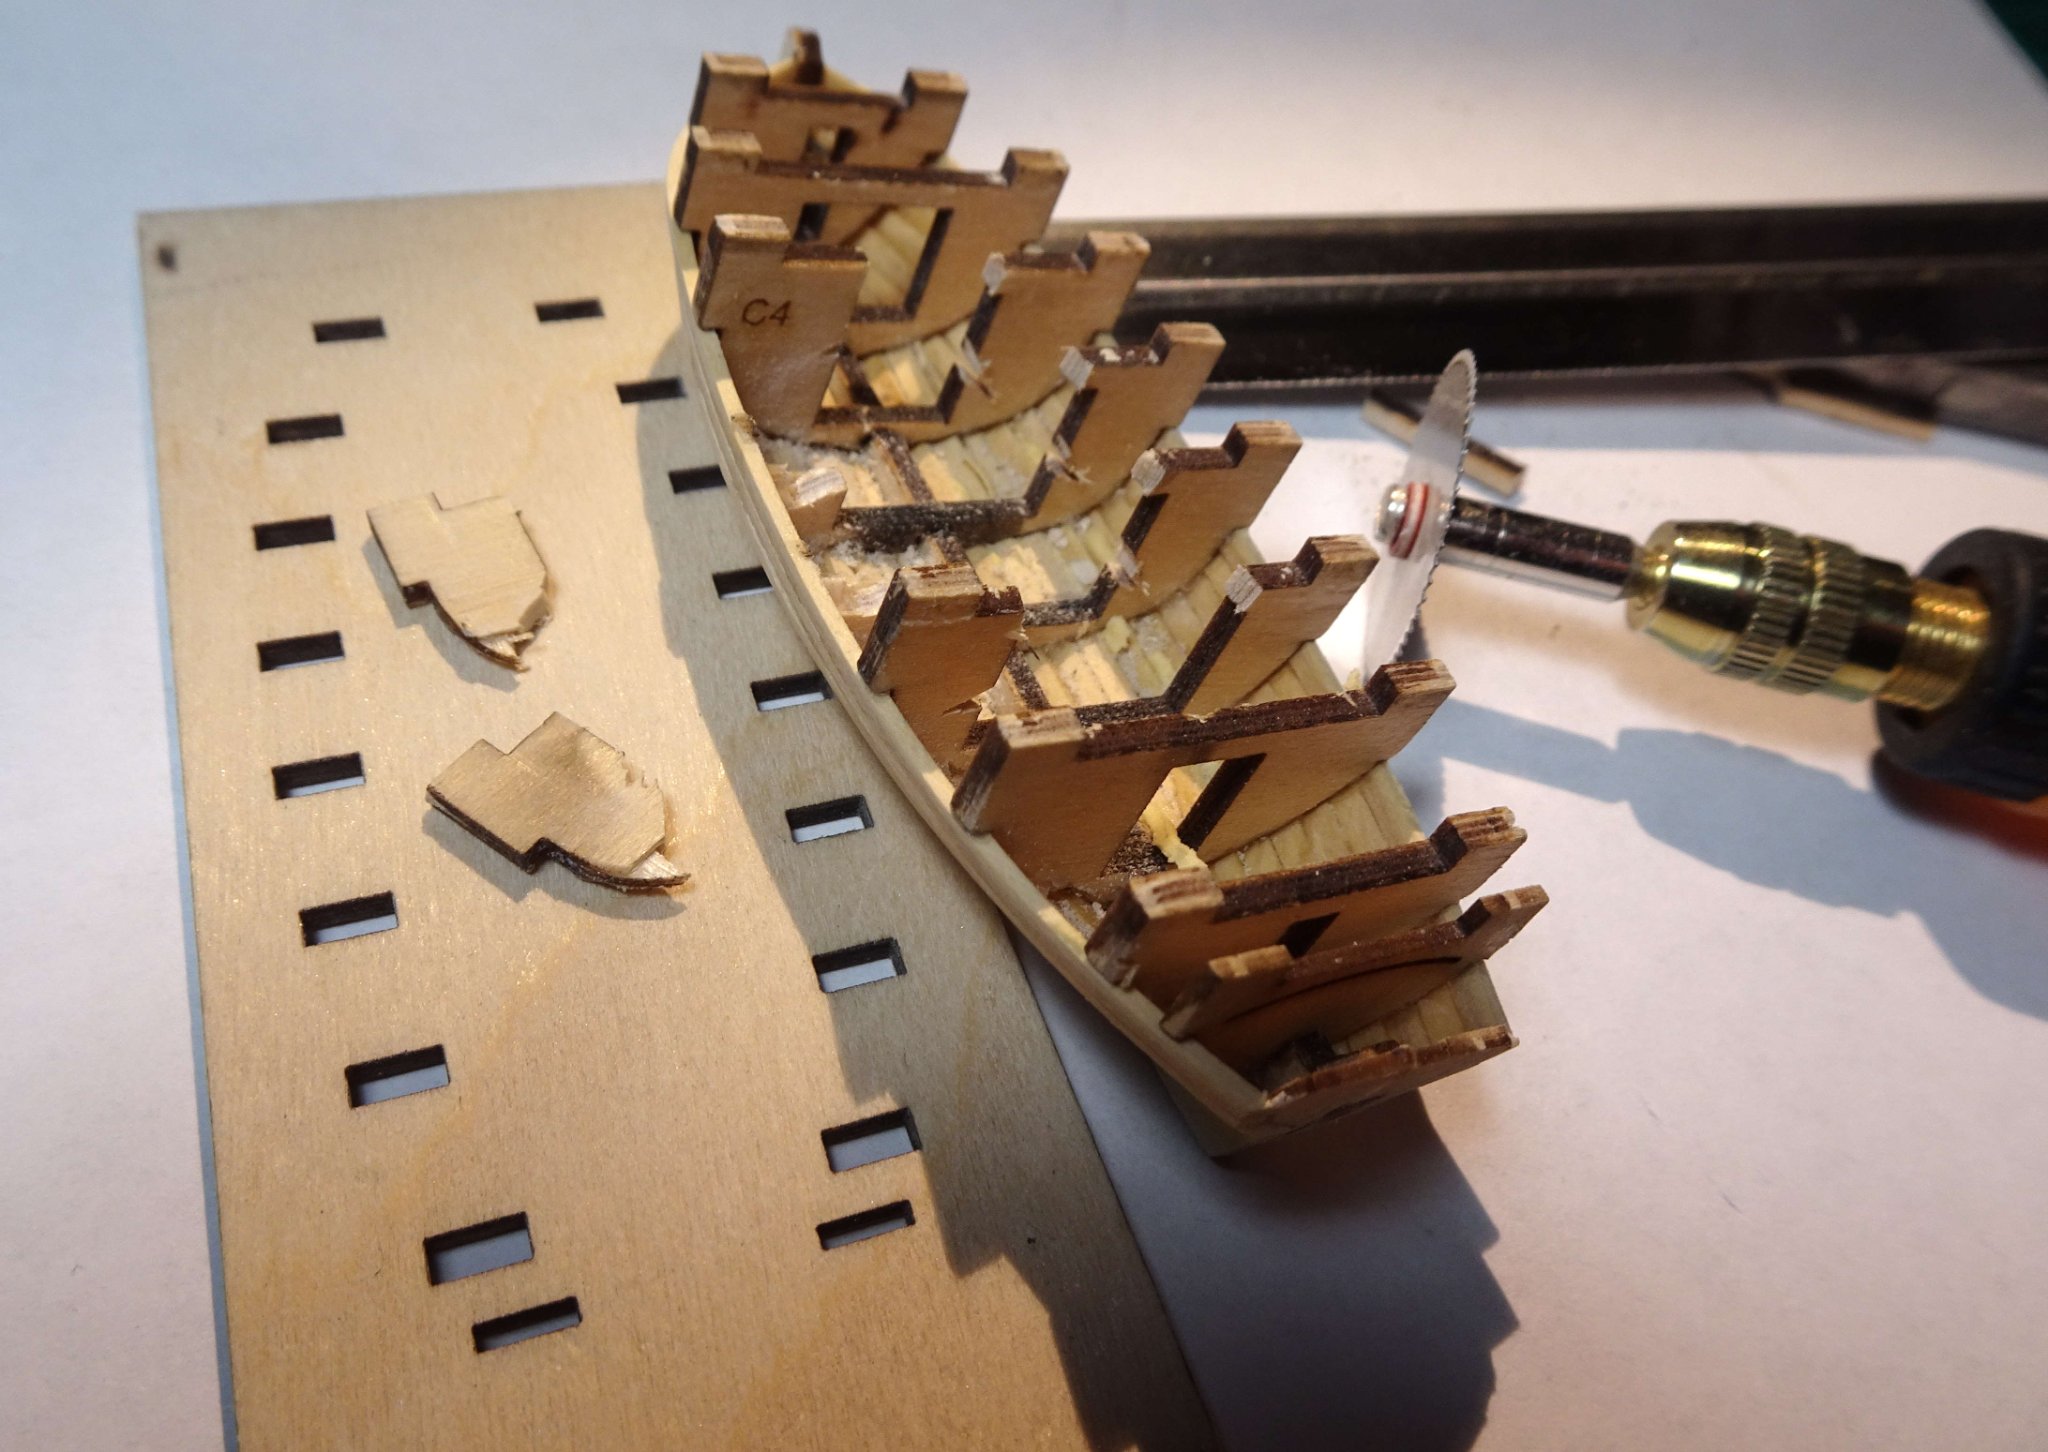
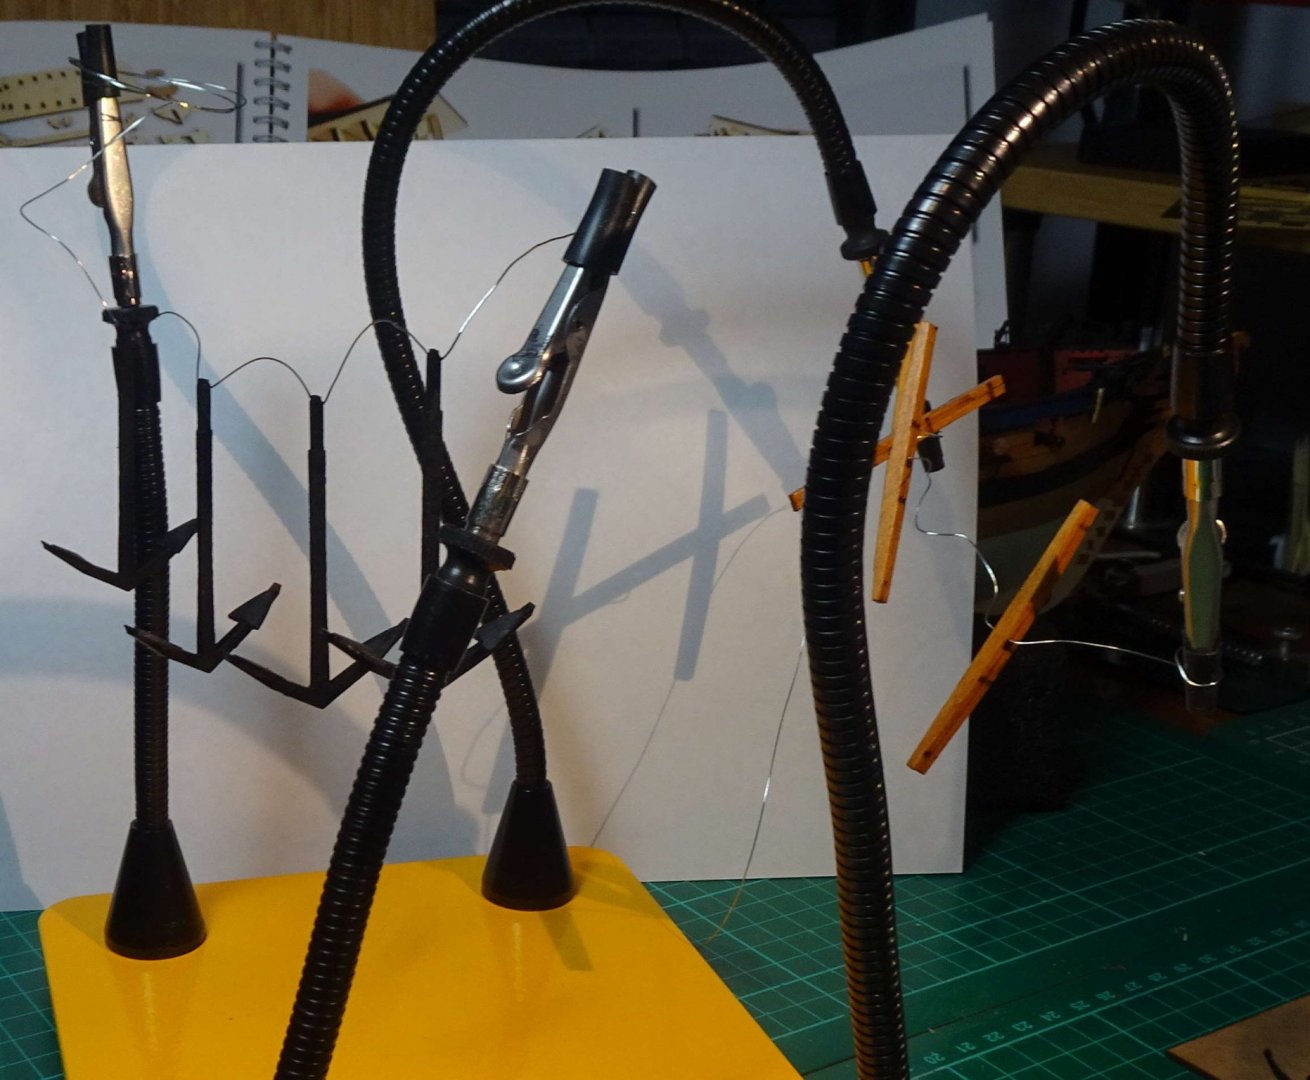
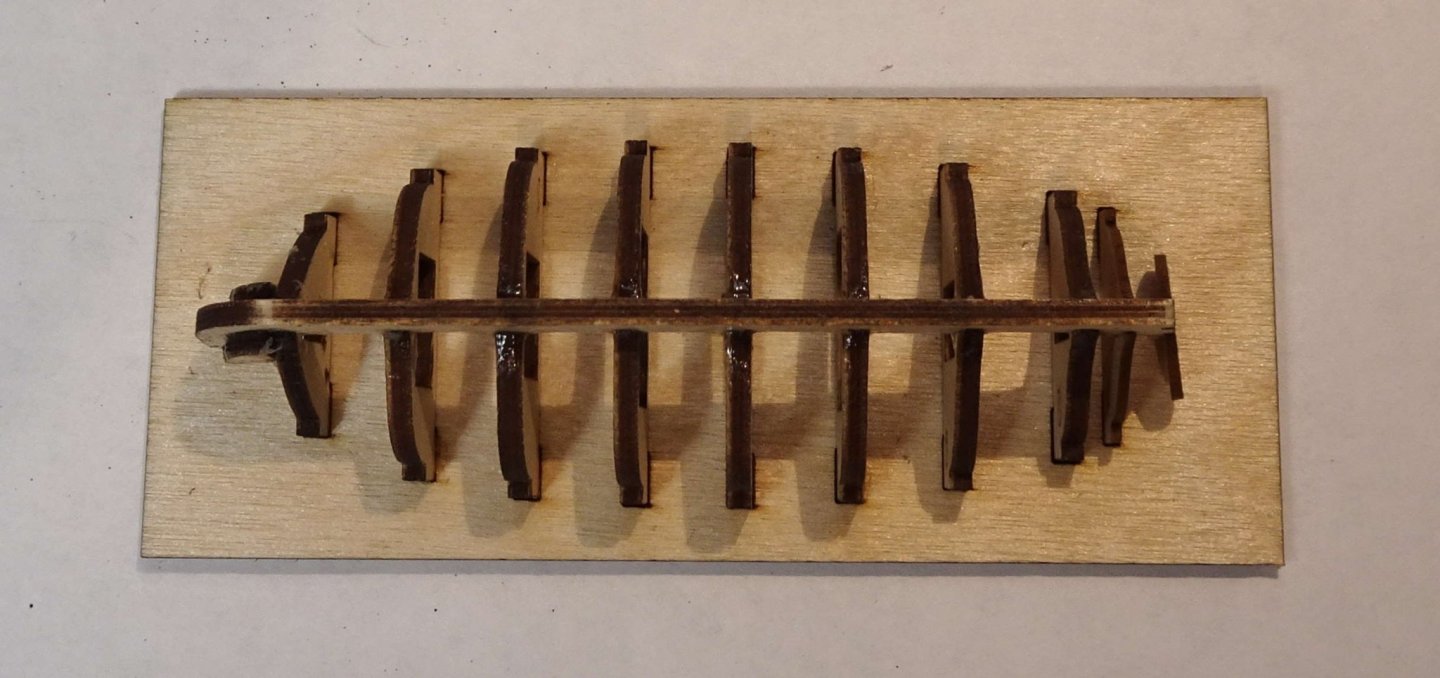
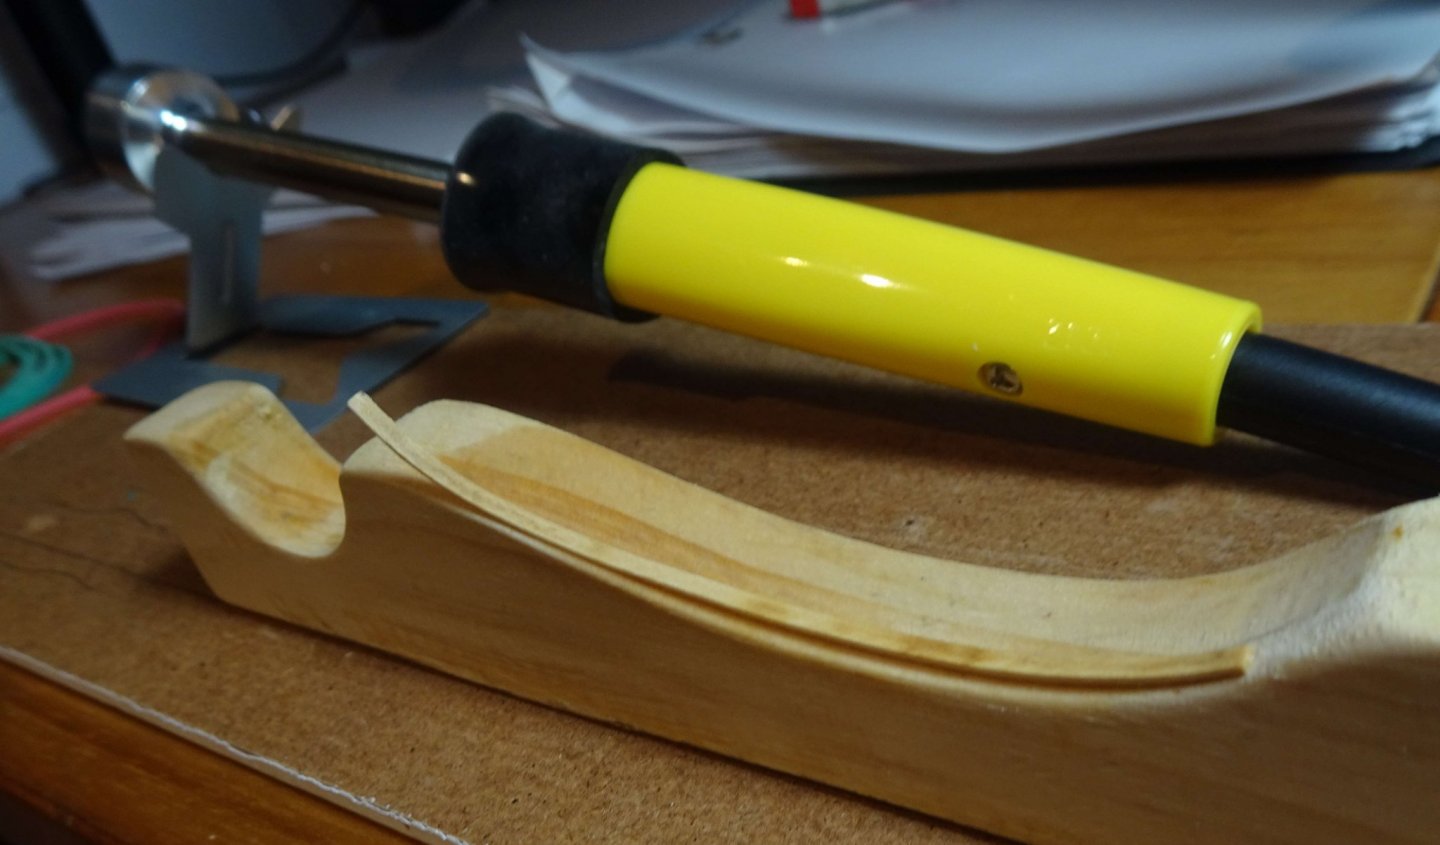
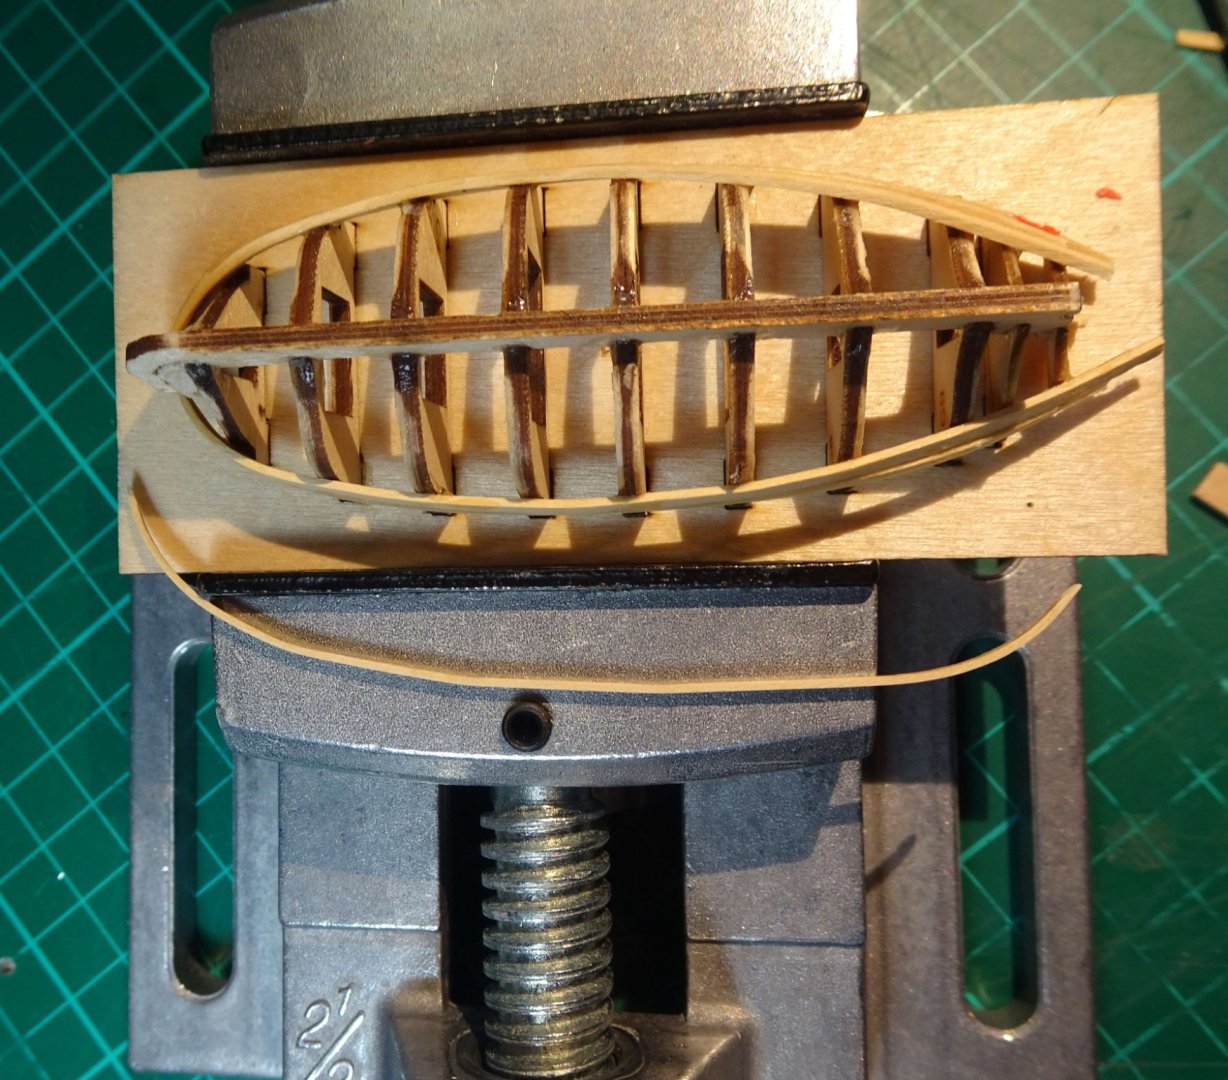
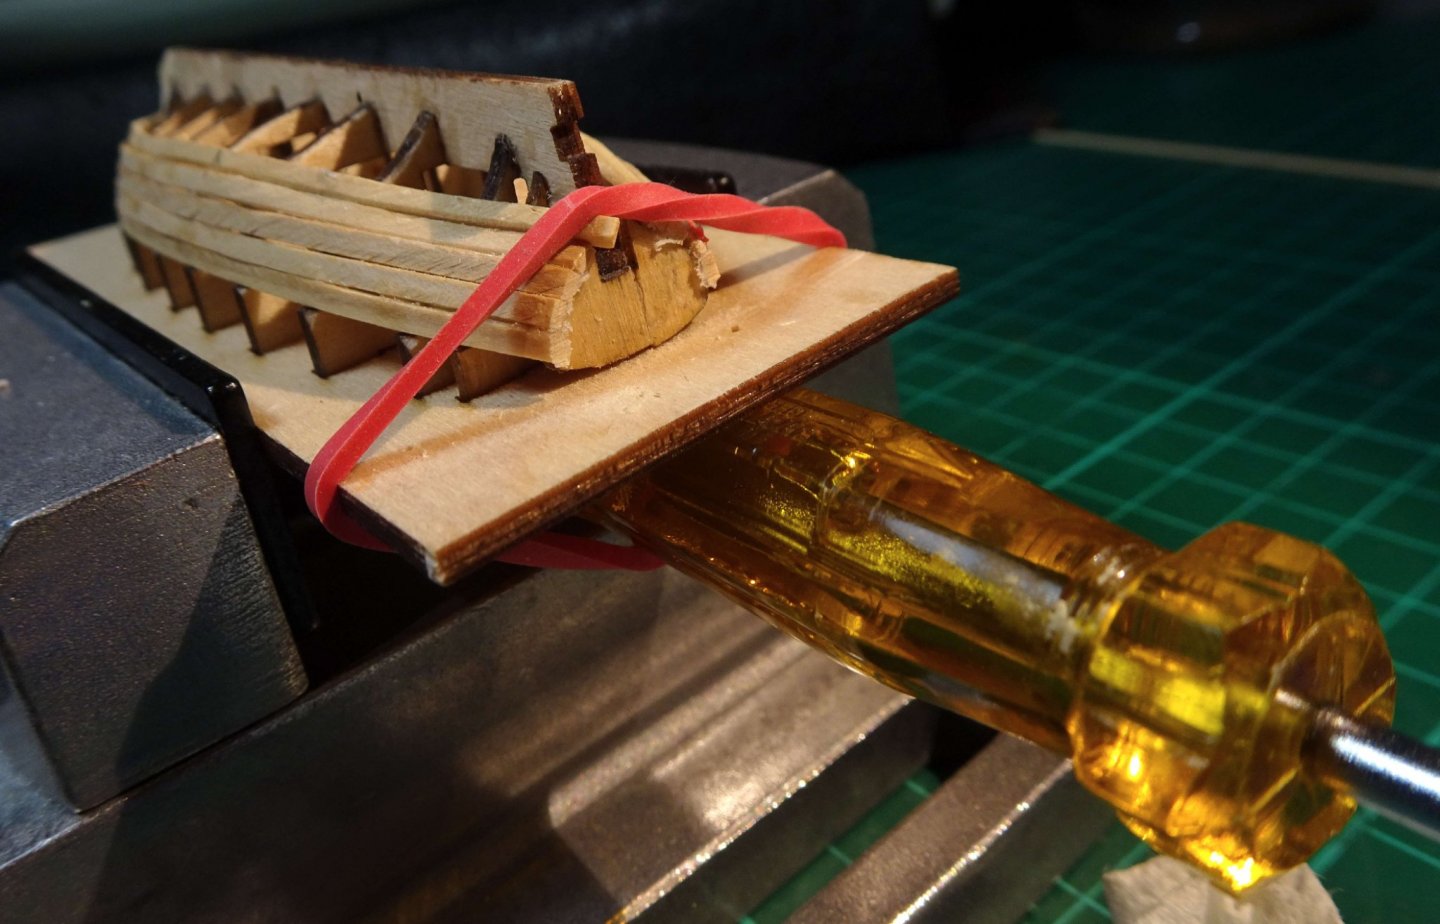
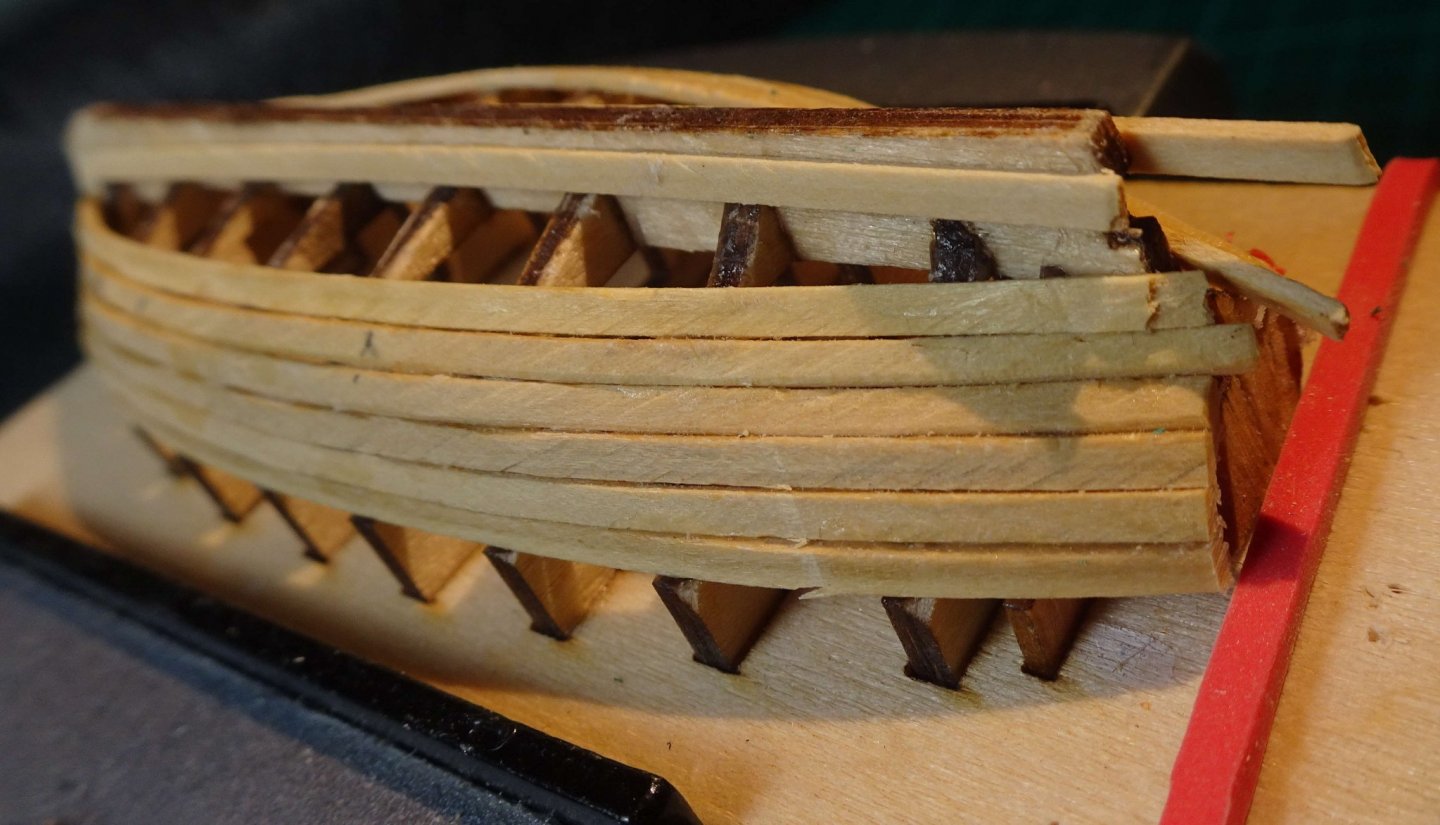
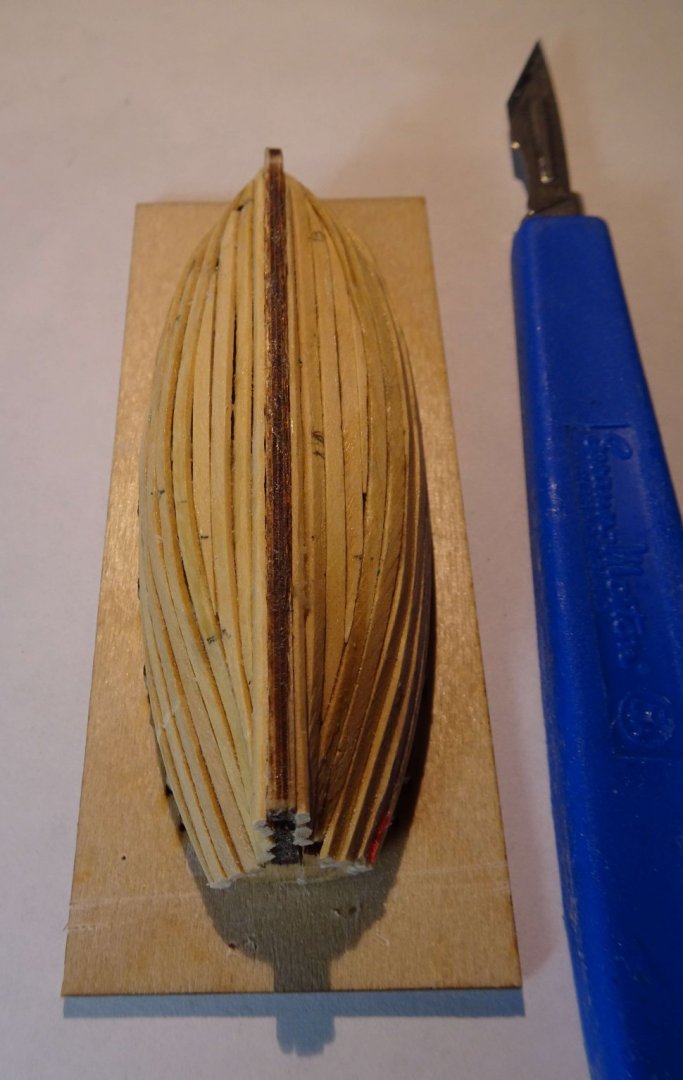
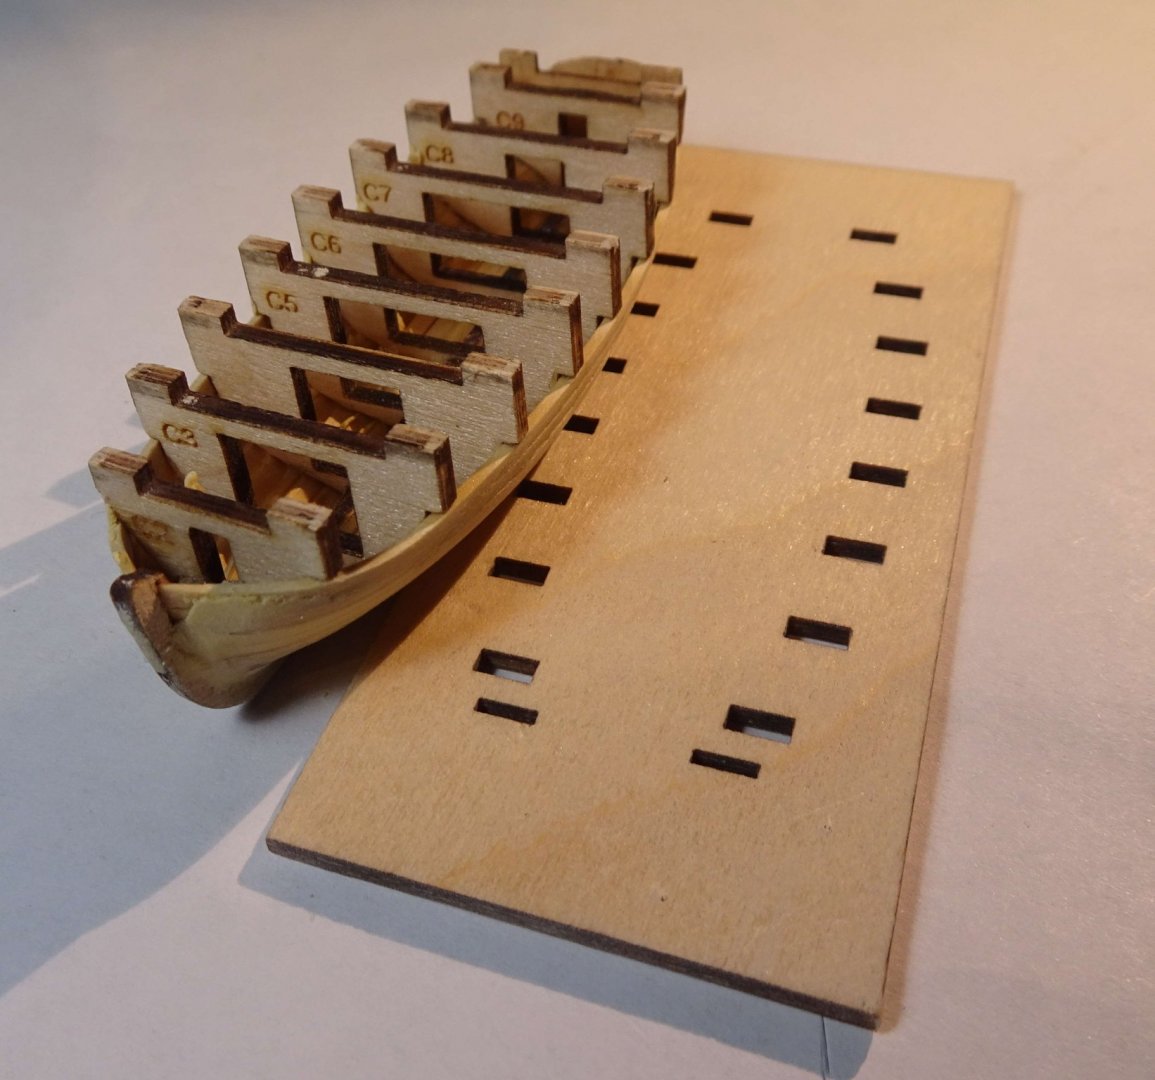
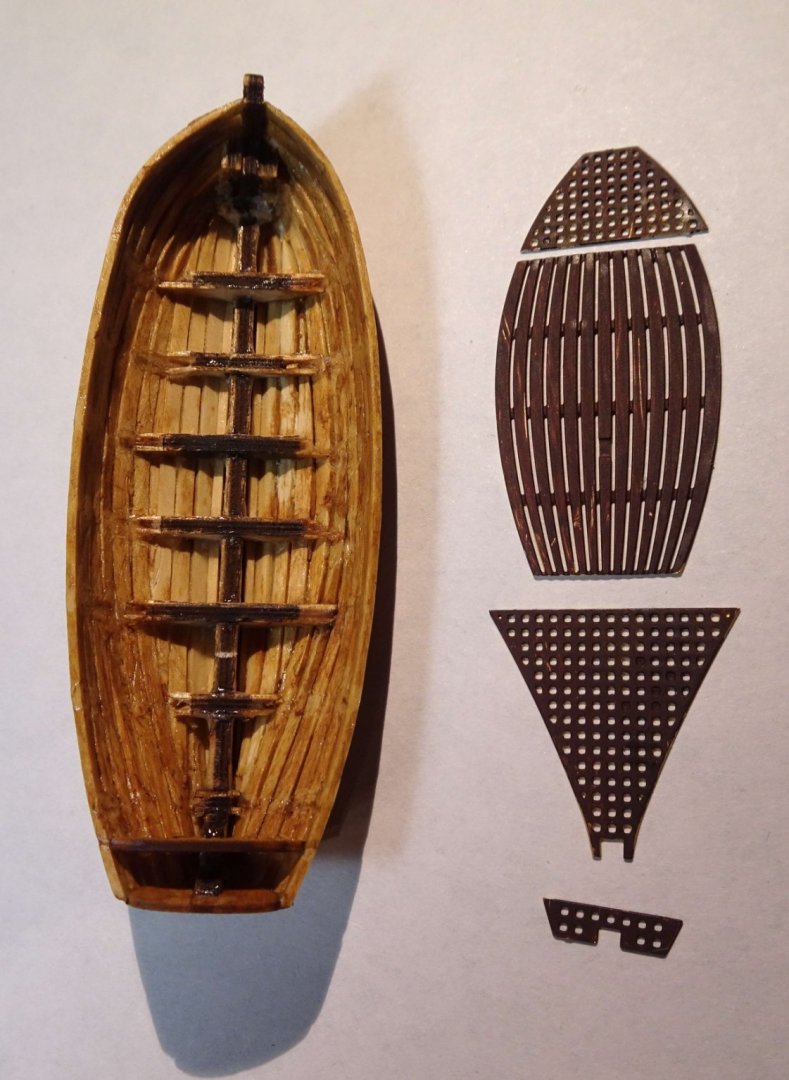
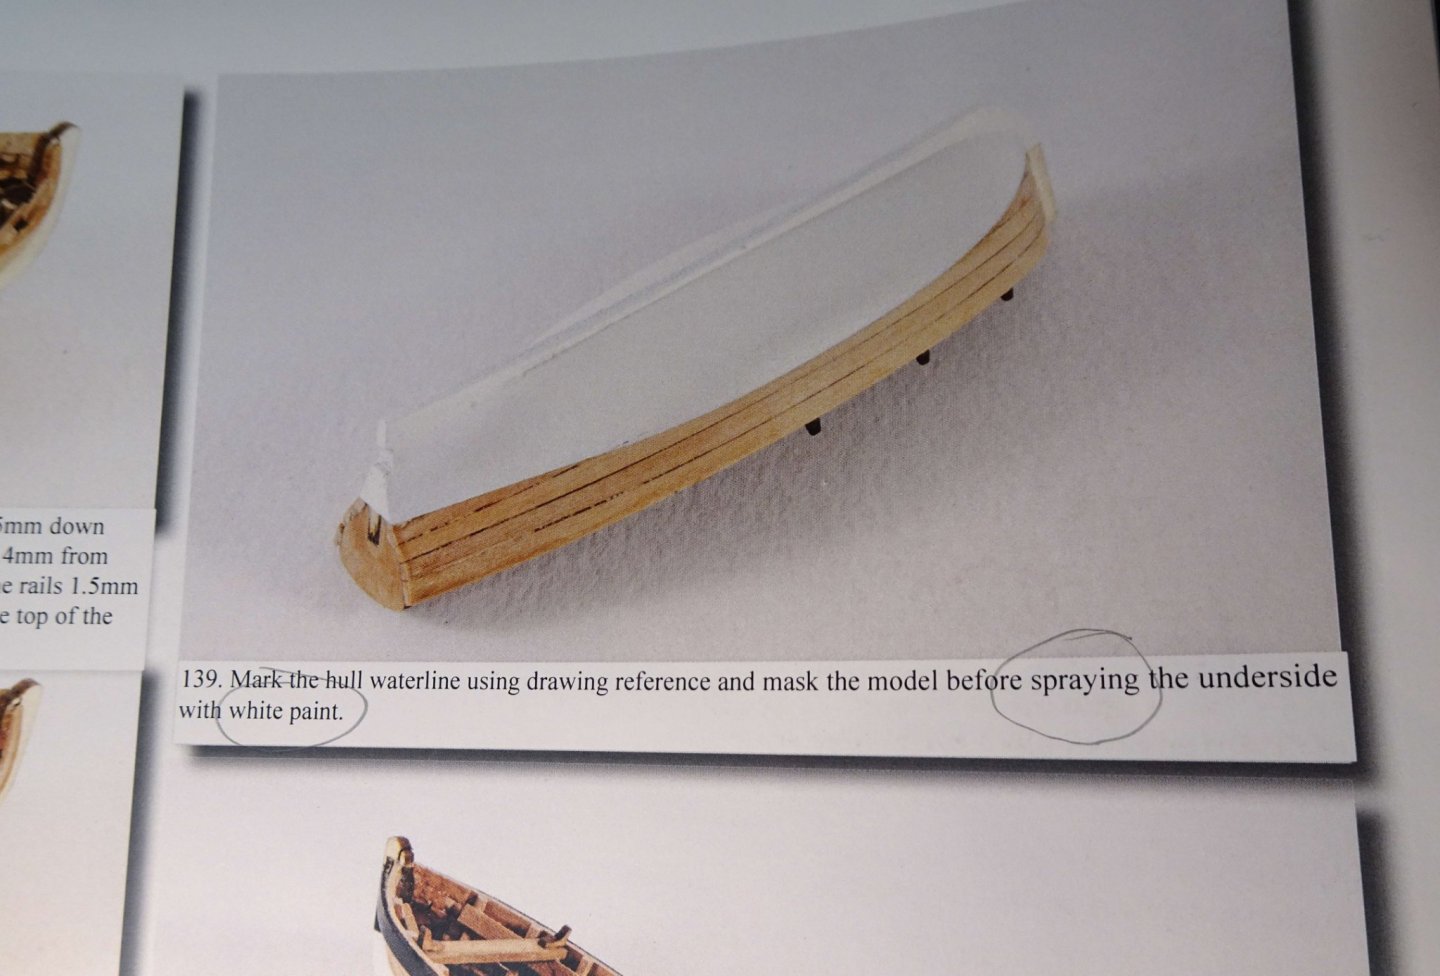
Hi all, This week has been focused on the anchors and the 18' Cutter. The anchor parts were removed from their sheets, glued and then painted black or Danish Oil'ed as applicable. Only issues were that the square hole formed in the glued anchor stock was a very tight fit on the anchor shank (fixed by using a scalpel to open the hole, and sanding down the shank). Below - anchor parts on the 'drying' rig after painting. Yup, there are too many 'that looks useful - I'll have to buy that' tools shown in the builds! Maybe an image filter that removes 'must buys' from images can be added to the website.... on 2nd thoughts.... better just leave it as it is 😉 Below - anchor sub-assemblies ready. Now creating the iron bands and the assembling the anchors. One of the ring holes snapped off, so it was reglued with the ring still in position (not a lot of meat for regluing but it worked), The ring, sitting in the freshly glued hole was gently moved every 5 mins or so for about 30 mins so that it was not stuck to the glue. Now on to the 18' Cutter. The framework went together easily, although some re-work of the squint stern board was required...darn - don't know how I didn't spot that on initial assembly. Note - the cutter has been glued using only CA...I could not see a way of effectively clamping the parts using PVA. Only 3 (maybe 4) bulkheads had the tiniest dab of CA where the cutter parts met the base. Later on the base detached very easily, but held the cutter parts firmly during assembly. Bevelling: I used a plank to dry lay across the bulkheads to help judge where material needed removing. Most of it was at the bow end. At least half the planks were heat-bent (and twisted) to help them follow the bulkhead line. This was a useful thing to do. I planked in pairs on both sides. The first plank follows the notch on the bulkheads - the notch is a good idea. The bow ends of the planks were all feathered, partly to make them bend easier and also to try to catch into the laser cut gap. Some more planks added. After 4 planks on either side, plank tapering was started. And some form of clamping usually became necessary, even if only fingers for a minute or two. Trying non-finger clamping ideas...I wouldn't say any were 100% successful....so I usually went back to the trusty old fingers...and then rubbed my finger tips on sandpaper to get rid of the dried CA. I can't imagine I have much skin left on my finger tips but the skin seems to grow back overnight 😉 ...magic stuff is skin! Keel planking started. Straighforward. All planking now done. Stealers/infil were added as required. Then some filler and sanding follwed. Cutter frame easily detached from base. The base added great stiffness, even though only a few bulheads were glued to it. Yup, the following is ugly. But it kinda worked. A mini-Dremel with circular saw was used to weaken the frames before twisting them off with small pliers. Where I couldn't 'get in' with the Dremel I weakened the frame by using a scalpel to sculp out weak points. Cutter finish sanded and Danish Oil'ed. And floor gratings painted. As above, but showing inside the cutter. Hmm...the bow looks a little lop sided but as long as it gets the Captain ashore to go where no man has gone before he won't grumble. White painting - Pic 139 mentions 'Mark hull waterline using drawing reference...' ... but I could find no drawing reference? Nearest I could find to a painting 'drawing reference' is the outline shown bottom right of page 46, but no waterline shown. I can make an educated guess as to where the waterline is, but any advice gladly received. I've been following Blue Ensign's Cutter builds .... https://modelshipworld.com/topic/27170-18th-c-ships-boats-by-blue-ensign-–-vanguard-models-164/page/2/ and others' builds, and picked up a lot of useful tips - thanks. These little boats are good mini-projects in their own right, and even as a starter Beginner project. Well, that's it for this week. Still on Lockdown here in Scotland but vaccine letters and vaccines have started to work their way down the age groups. Hopefully those vaccinated don't forget they can still carry the virus on their hands etc....OK, that's my health warning for this week. Stay safe, and enjoy the hobby 😉 Richard


-
a true tanned bark color. Yes, that colour is looking good. Chris supplies well designed sails....and, as you say, the lighter thread does add a bit of interest. The rigging isn't too bad, at least on my Fifie, although the Zulu's is a bit more complex. It's good to have a pleasant hobby to fall back on after busy work days/weeks ... quite relaxing especially in that it takes one's mind completely away from 'other business' 😉 Richard
- 222 replies
-
- 2
-
-
- First Build
- Lady Isabella
- (and 2 more)
-
This is very useful since I am currently about to put the first plank on my Flirt's boat. I had already decided I needed to heat the first plank (and the others) to curve it inwards to meet the rabbet, and also needed to greatly feather the plank end catch onto the rabbet. Should all the planks catch into the laser etched rabbet gap, or is CA glue used to position the plank end adjacent to the rabbet line? Any advice gladly received, Richard PS: I like the two pins at the other end to hold the plank curve. Edit: I've now got the first plank on...CA and a slight wideneing of the laser cut rabbet has done the trick.
- 70 replies
-
- 1
-
-
- 22ft Yawl
- Vanguard Models
- (and 2 more)
-
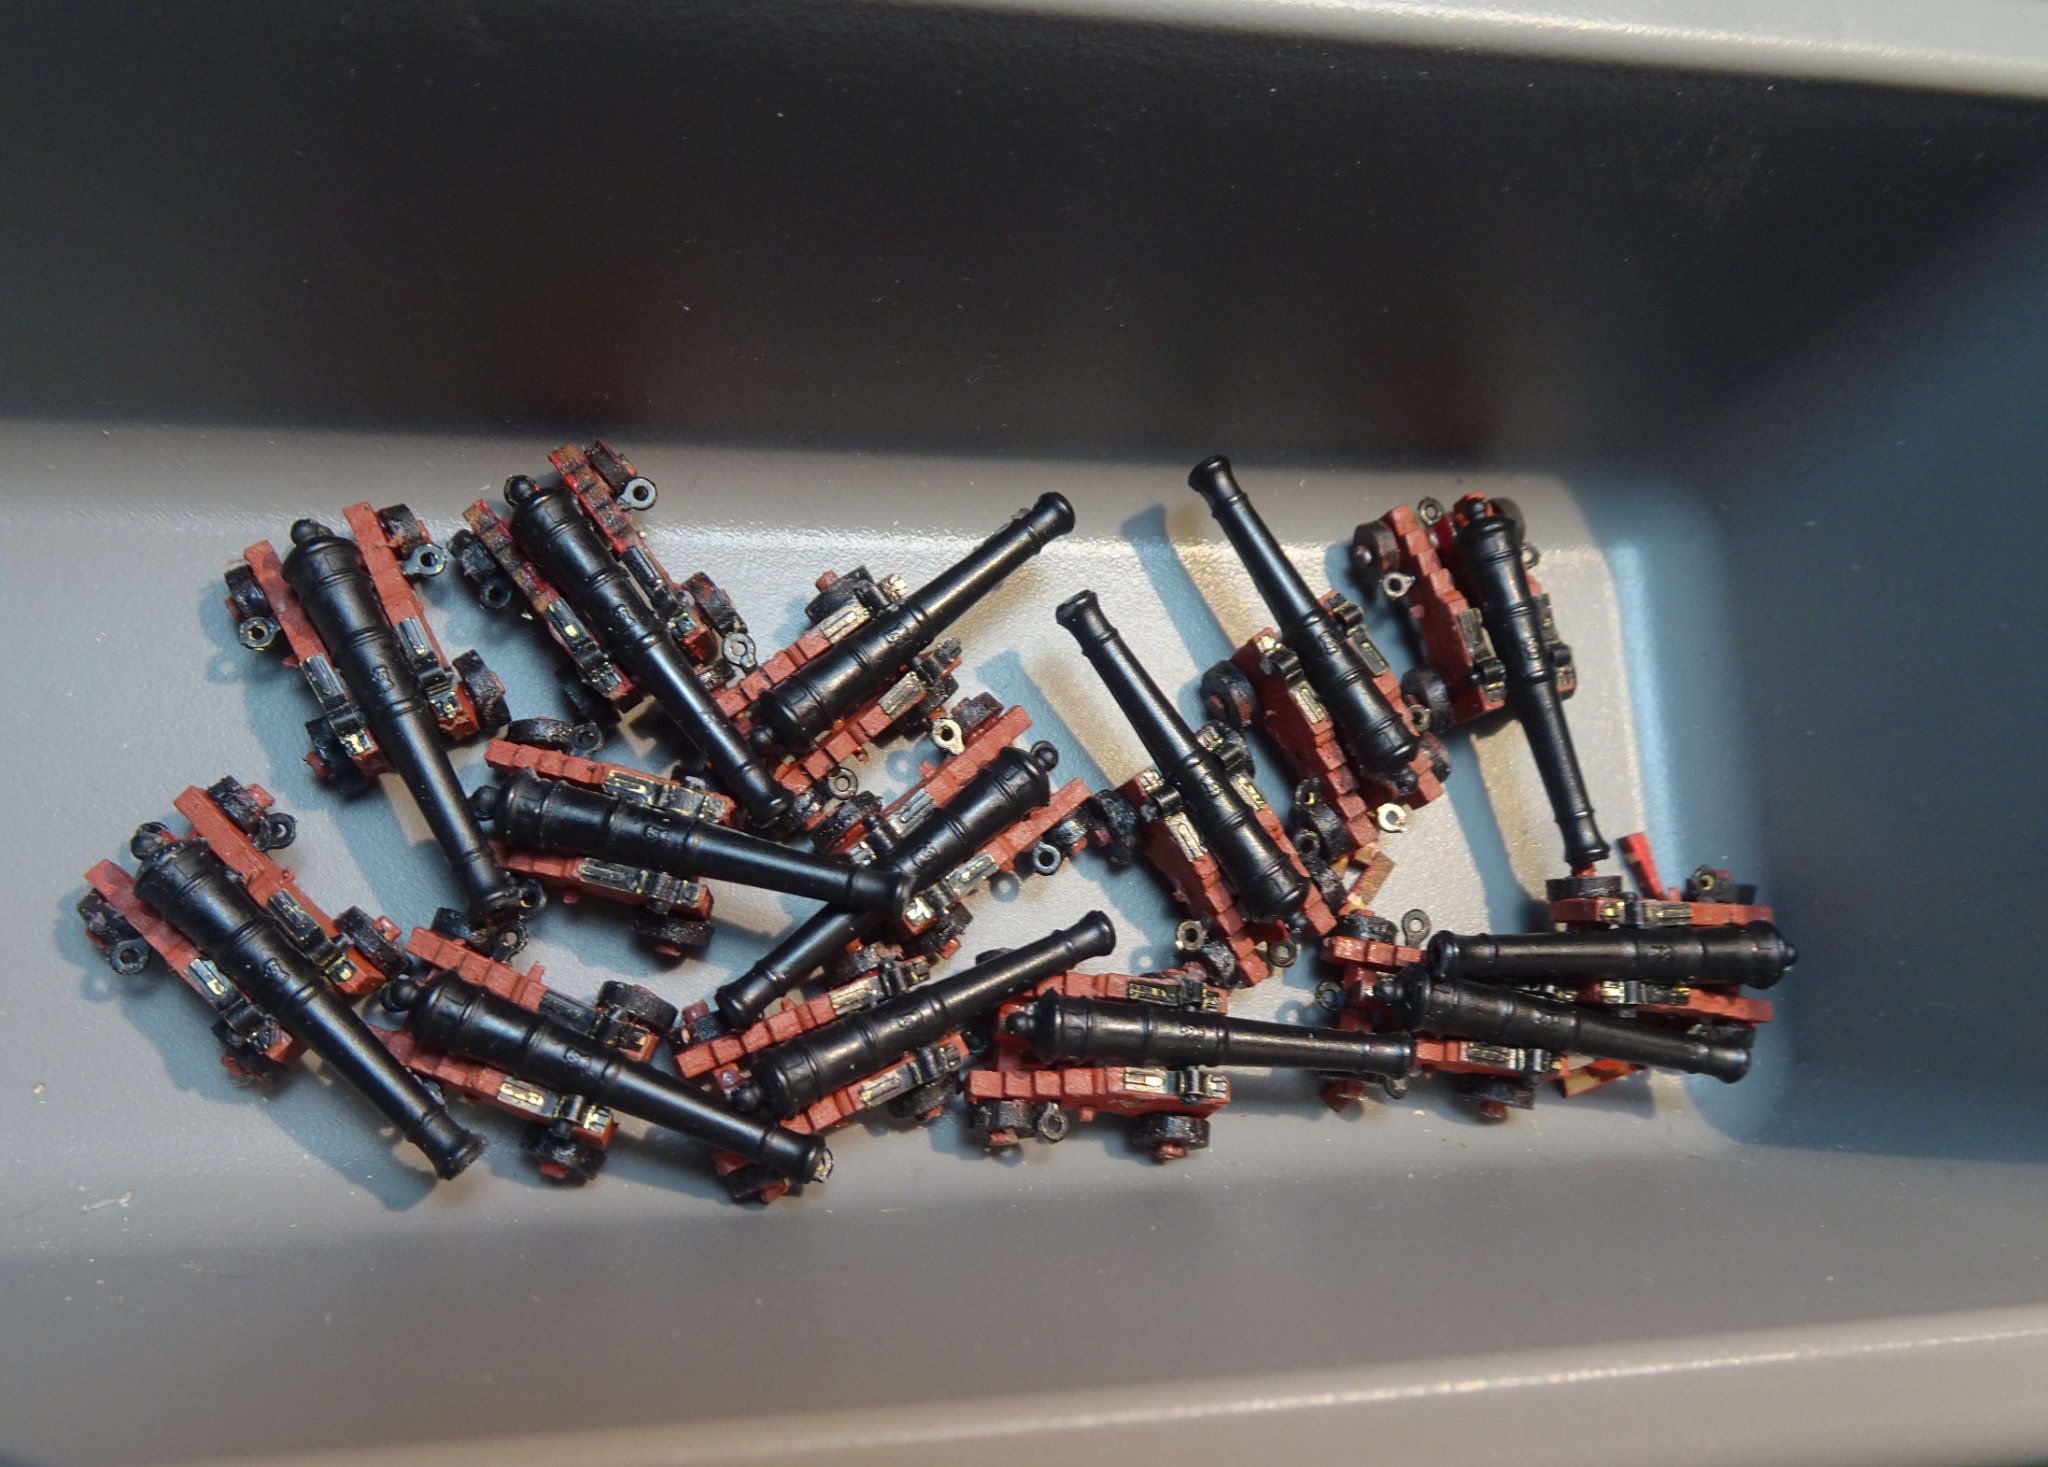
VTHokiEE, I believe there are at least two thicknesses of ropes involved...one to take the recoil and the others to pull the cannon back into the firing position. There may be others....I haven't fully checked yet. The rope restraining hooks are tiny so there will be a lot of fiddly threading of ropes, knots etc...not my strong suit but I need the practice. I had thought about glueing the cannons in place after being roped but I don't know if that would be easier or not. So I'm just following the manual's procedures. My plan is to complete everything shown in the manual. I'm telling myself I've reached the halfway point in the build but really, with all the rigging, seizing etc still to do I suspect I'm being a bit optimistic. Richard
-
small glass bottles Now that you mention it I'm sure I've got a some small glass bottles somewhere around the house/shed..... will search tomorrow. Richard
- 4 replies
-
- 2
-
-
- Flirt
- plasti-kote
- (and 1 more)
-
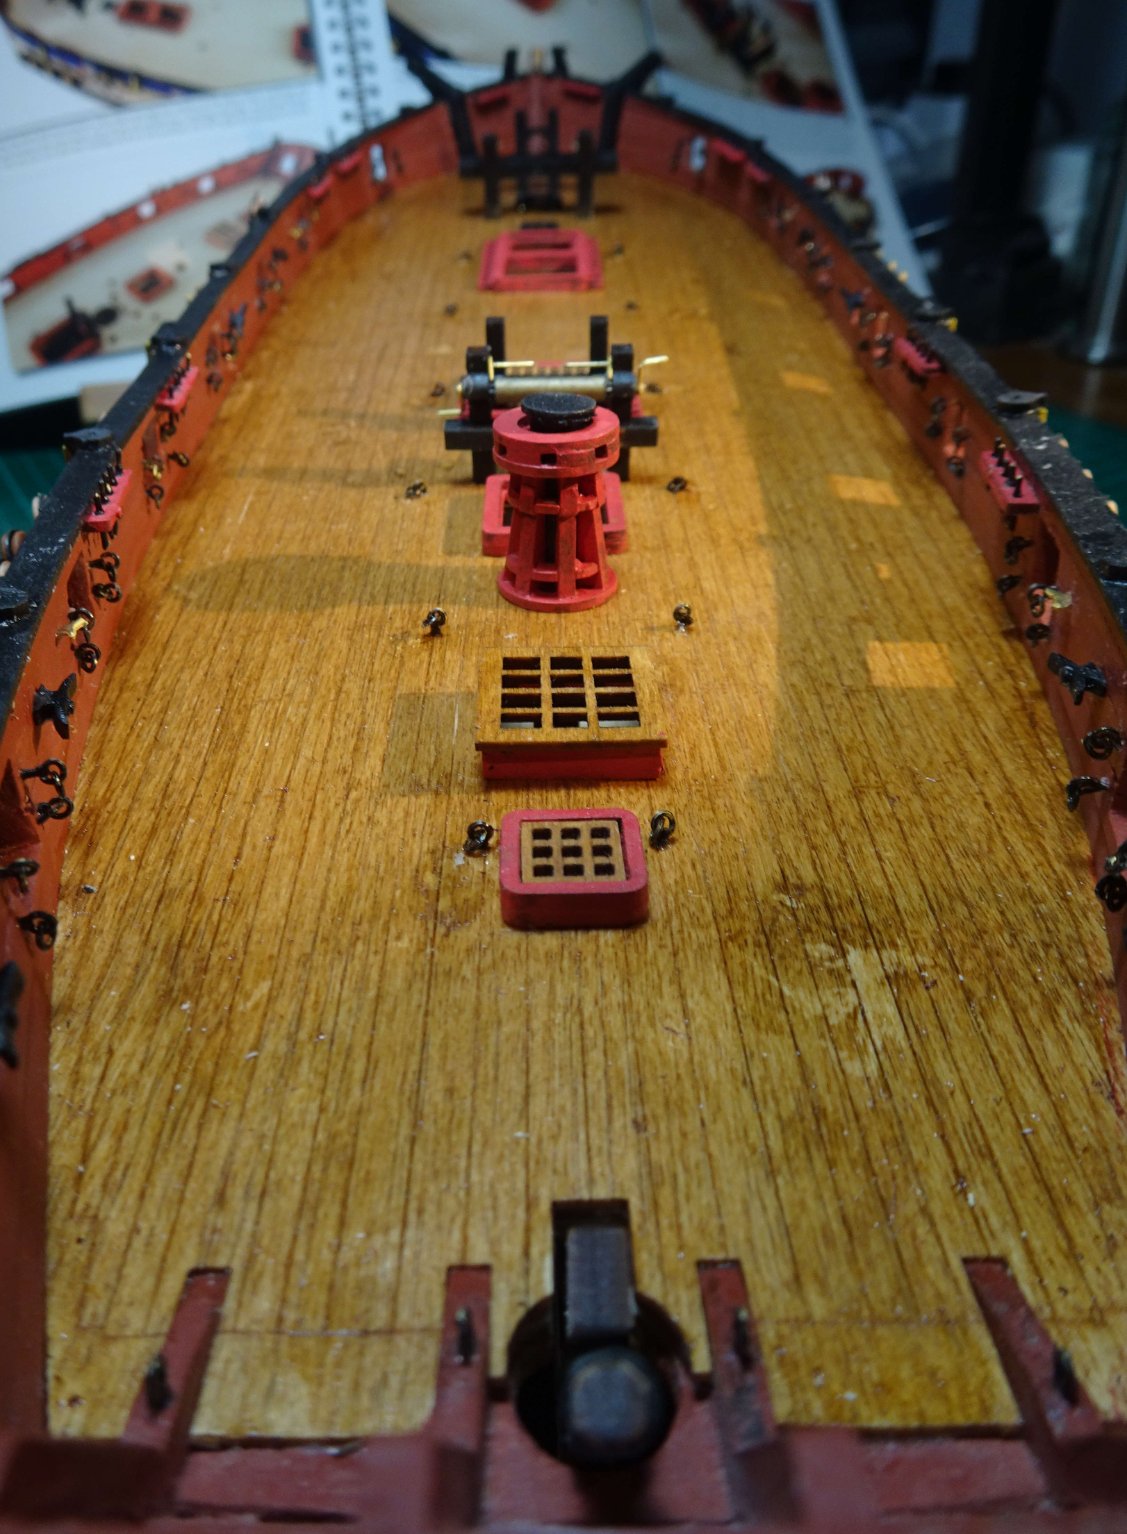
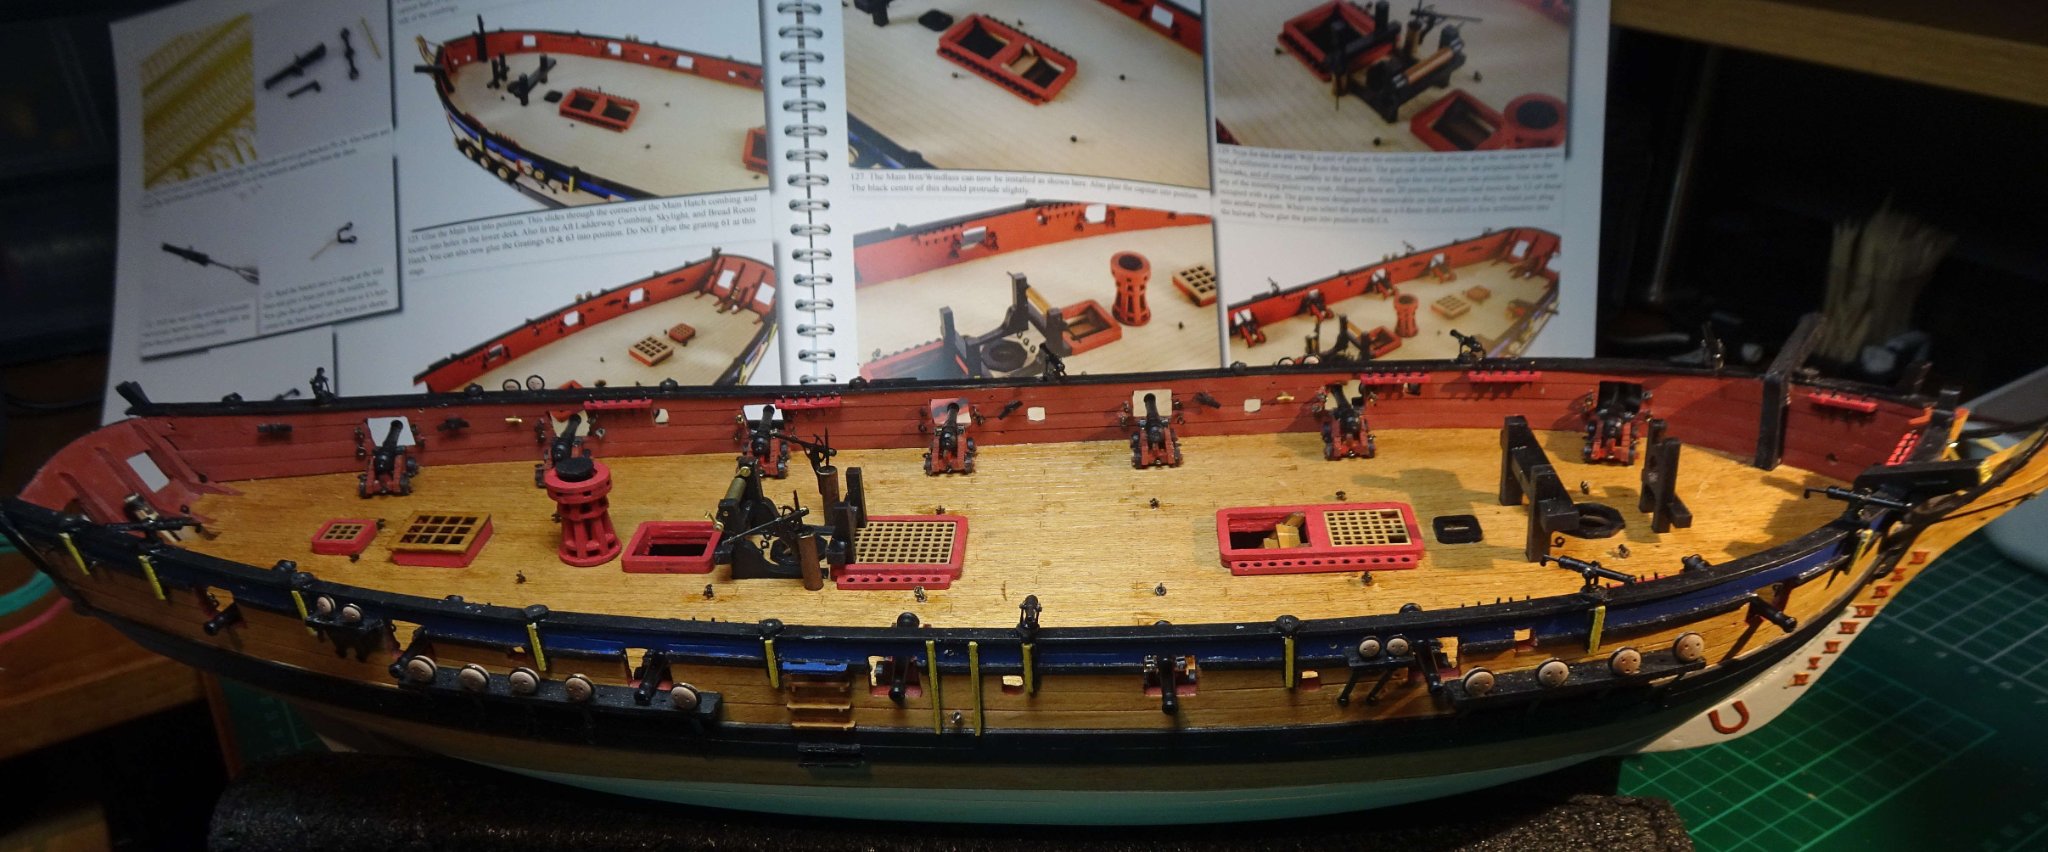
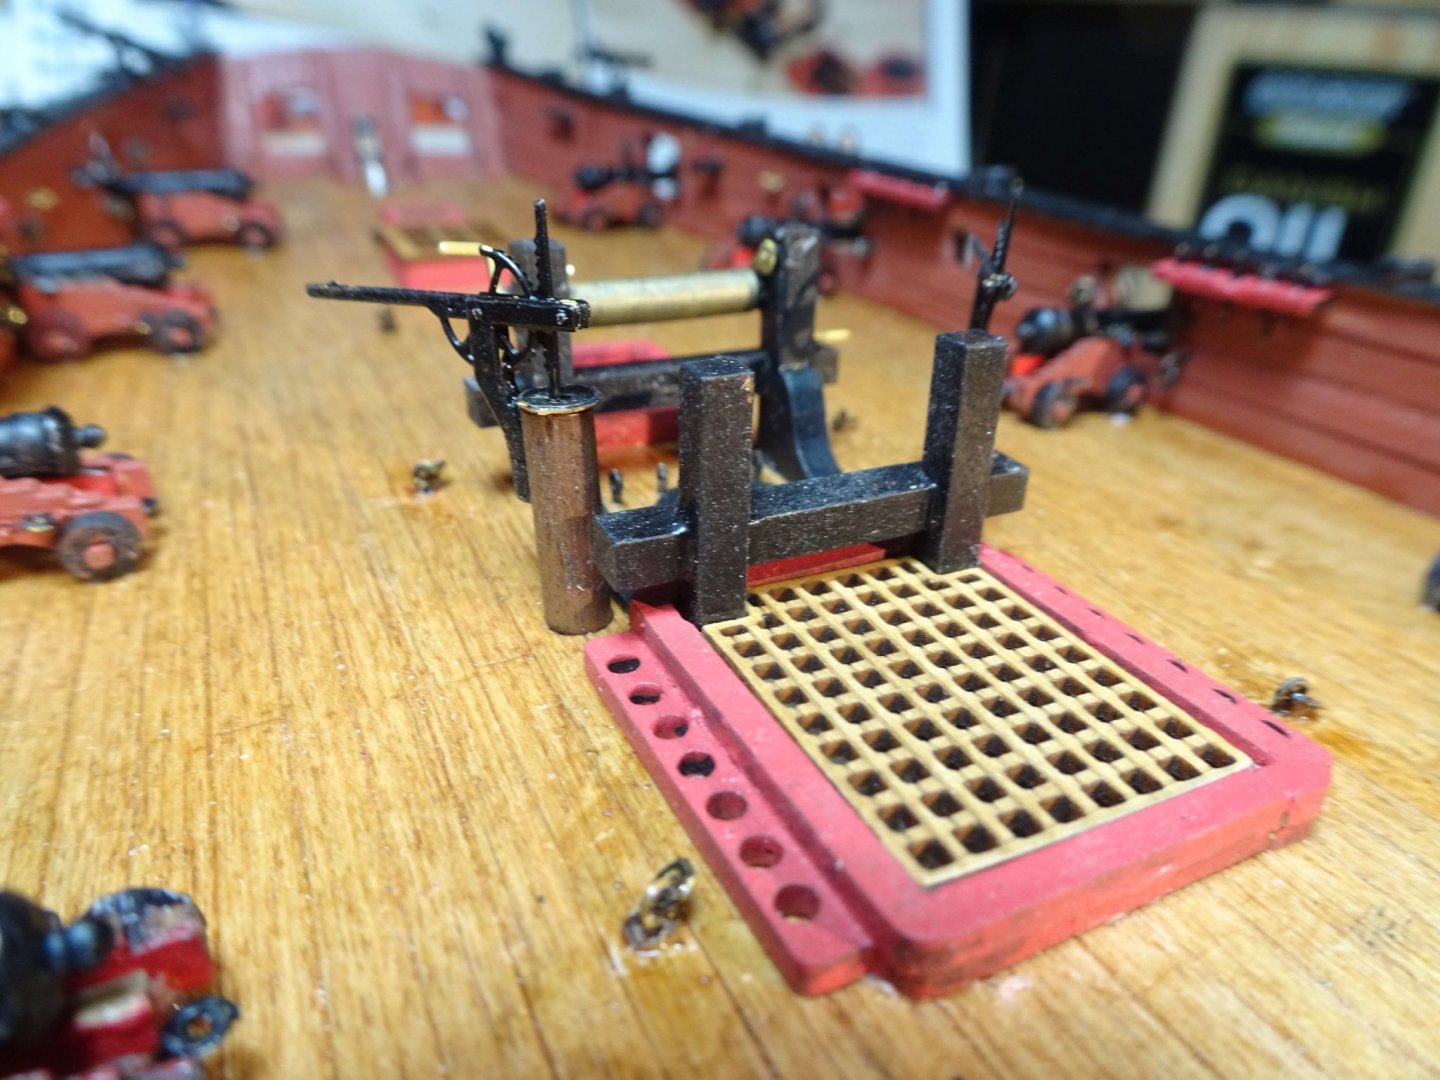
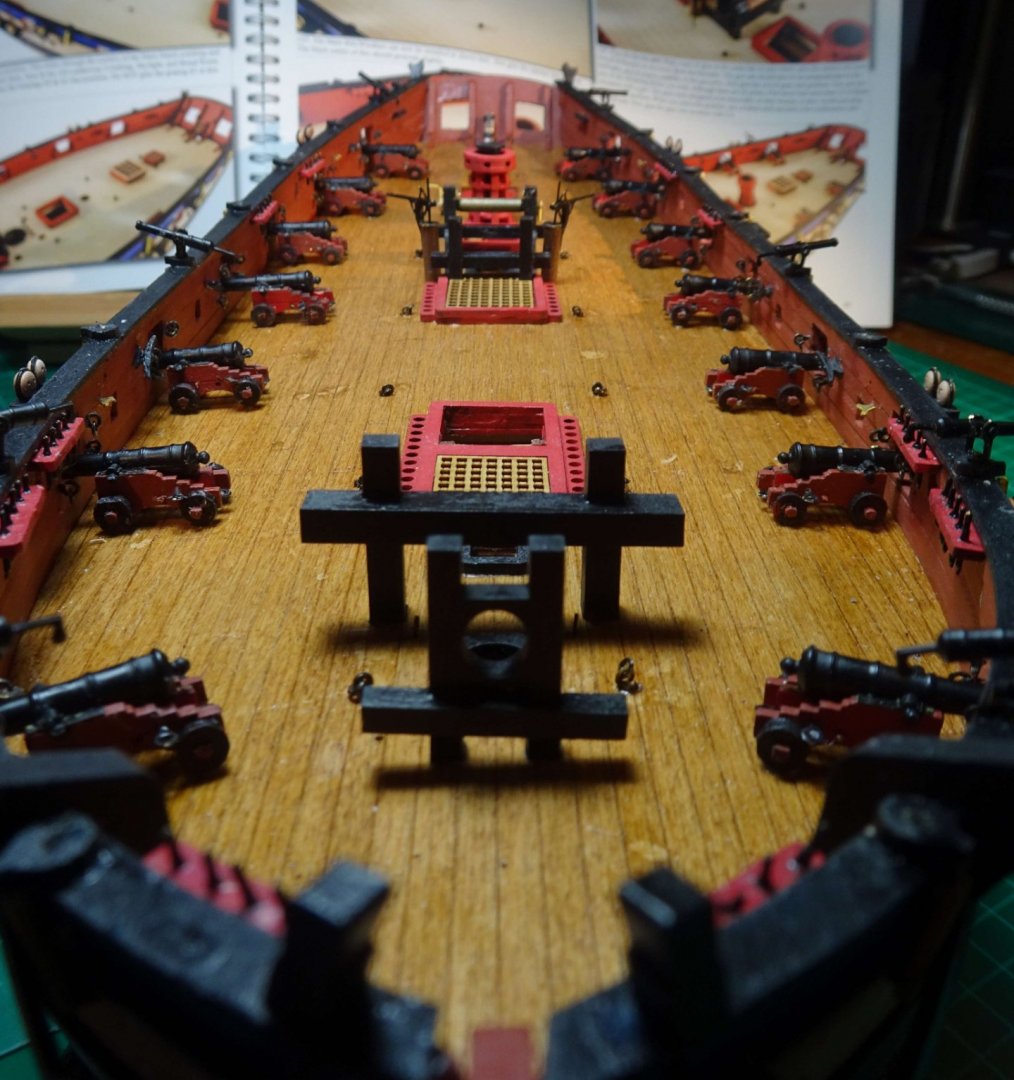
Hi all, Most of the deck fittings have been completed. So here is a brief summary of what happened... Below.... capstan, winch, gratings etc put in to place. The deck has been 'Danish Oiled' to give it as darker more used appearance - as was the bare wood on the outside of the hull. To help the posts find their locating squares on the lower deck the ends of the legs were tapered. That seemed to work quite well. A brood of cannons waiting to flee the nest. After a quick Google I see they are not a brood but a 'stand'. Cannons glued in position awaiting roping. The swivel guns are not glued... they will probably be fitted after all the rigging ect is complete since I feel they are a bit vulnerable to big fingers. Keeping a quiet eye on the stand. Close-up of the winch and pumps (not glued yet - too fragile). Dead eyes and strops all fitted. Looking down the deck. And finally a side view of the mostly complete deck. Still to add the cannon balls, and re-glue a dislodged step. And for the coming week or so the anchors and Cutter. Catch you all soon, Richard


-
B.E. #32... cross grain is probably a contributing factor. I've experienced similar breaks with small cross grain parts in ship kits, and in other items from everday life. The perfect solution is to change everything to a more robust material but that's impractical. I suspect the best fix of a bad bunch is to make the part that breaks out of a tough plastic or a workable metal (that can be correctly painted/coloured) , and also move the 'break point' further down into the part where there is real strength in the wooden item. That means removing 'good' wood till a strong enough joint section is found. The part has already broken twice....and things do come in three's, they say 😉 Richard
- 70 replies
-
- 2
-
-
- 22ft Yawl
- Vanguard Models
- (and 2 more)
-
Thanks Welfalck, Shortly after posting, I actually was seaching the house for a small, sealable container...no luck so far. Maybe I'll clean out an old Humbrol tin with mostly used ancient paint in it. Richard
- 4 replies
-
- 2
-
-
- Flirt
- plasti-kote
- (and 1 more)