


AnobiumPunctatum
-
Posts
1,283 -
Joined
-
Last visited
Content Type
Profiles
Forums
Gallery
Events
Everything posted by AnobiumPunctatum
-
It looks really nice Tony, but I think that the extra toptimbers are not necessary. The boat was klinerbuild. So it is really stabil.
-
Are you shure, that this is your first scracth build? It looks really nice. I love th big scale of your model, which gives you the possibility to show small details.
-
This will be a really wonderful model of an old ship. Do you have Langley also as model in her 30er years appearance?
-
I will start with th MSW capstan project and the Echo cross-section model. Than I will go back to my Triton project,
-
I know, but one step after the other. Before I start with Rhino, I will prcatice with my new toy. For the first steps I use my old 2D CAD.
-
I've done the step in the other direction. I own since a fey days a cnc-mill and now I am saving my money for Rhino. Is it possible that the three views are not really perpendicular to each other? I know the same form my 2D works. The point on the drawings are the same but not the 2D representation of the lines. There are always small differences. It's a problem with using splines.
-
Really nice result in this small scale. The hull is looking great. I would use only color to simulate the nails. You can use a nail of pin for painting. With a little bit of practice you can get a nice result.
-
Kris I can only help by converting in 2D because my 3D skills are minimal. If You work in 2D you can draw this in a similiar manner I use for cant frames. With help of the side view you get the correct legth of every frame. Drawing vertical lines on top view gives you the correct section and stepping line. Mark your buttock lines in the side view. Than draw all lines from all necessary points to an body-master. Orientate a copy of your "body master" that it is perpendicular to the frame in the side view. Now you can draw the lines from the side view to the body-master. Copy all lines in another body-master and rotate them, that everything is perpendicular. Connect all section points and you get the outline shape of the frame (if it inclusive plank thinkness of exclusive depends of your view are showing the outside of the hull or drawn on the frames (as by plans of the NMM). I hope you understand whant I mean. It is more tricky to describe than to draw.
-
Really nice progress, Jorge. But you made a little mistakes by the gun ports. They are not perpendicular. The bottom lid and the top lid are parallel to the gun deck. So you have always a rhomboid. Why do you choose 1/35 and not 1/36 or 1/32? I know the scale from military model building but not from ship modelbuilding
-
Thanks for the info. That's exactly, what I searched. I think I have to practice a little bit more with the search function of the forum
-
I'll get a new tool. To practice I am seraching some the historic (American war of revolutions or later) dimensions of water barrels, barrels for gun pouder, meet and so on. What other other storage for ships are existing. Can smeone help me ? I Like to build some of theses barrels. and other equipement.
-
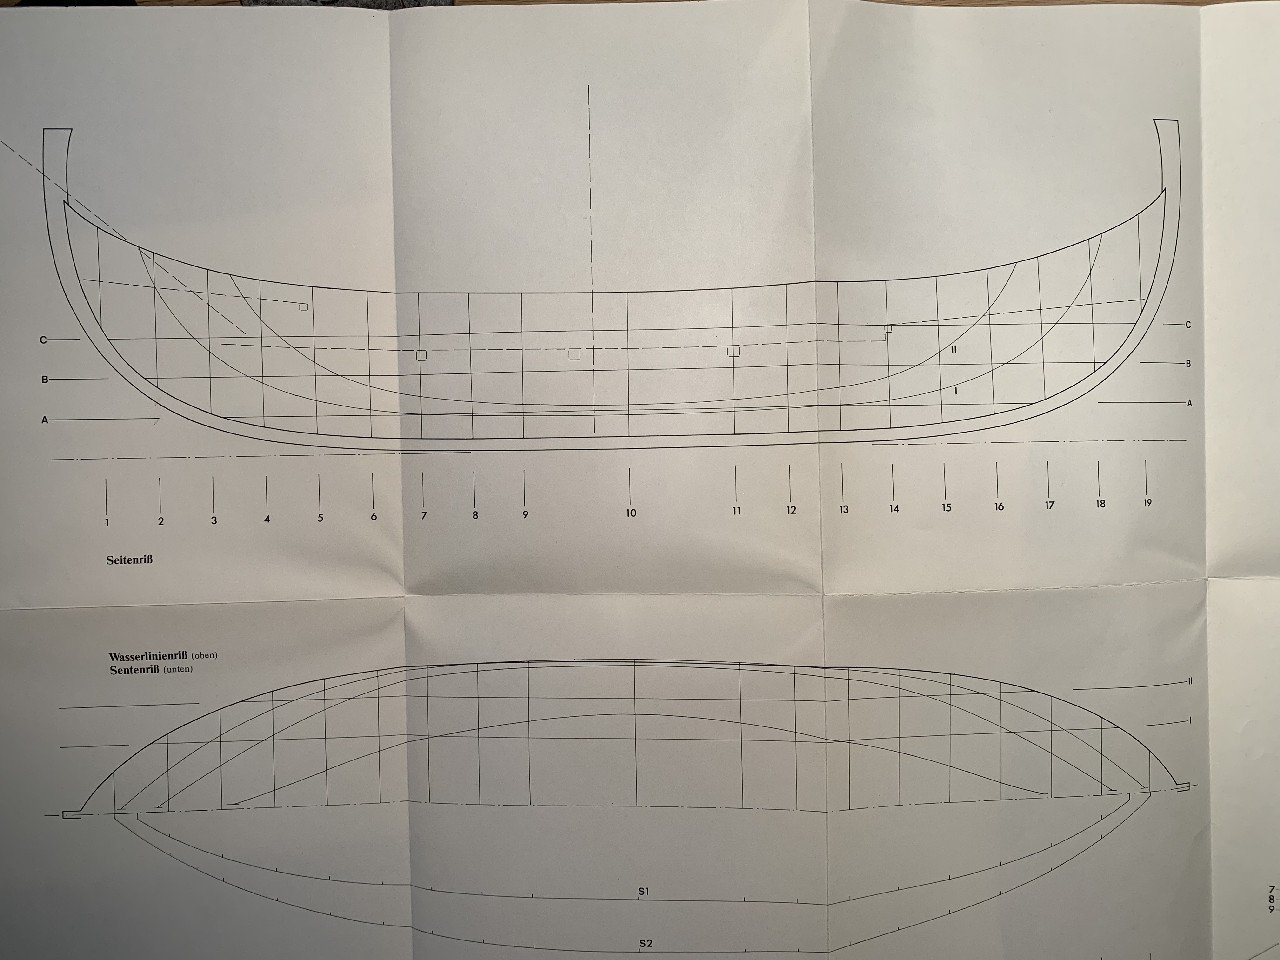
I think I can give you some information about this drawing,. This is a reconstruction drawing of Skuldelev I from 1971. It was as far as I know the base for the presentation of the ship in the musuem. I own a copy of this but there are in the meantime some newer reconstructions which are giving a slightly different hull. But you can build a very nice model with this information. I am searching a reconstruction of the Haithabu knarr and longship. I hoppe to find someday one good drawing. of the find
-
Chuck I didn't read the book for a long time, as far as I remember right, the drawings are showing a prototype for a nef. For a specific model you have to refer to the seals. If you need help by understanding a sentence ask me. For reading the book you can use deepl.com. It's a really good translation program.
-
Thanks for sharing this find. You can be very happy that you can understand what Wiebke writes. I have to use a translator
-
I hope that you will publish your drawings some day. Your Bellona is really a masterpiece
-
Chuck , You could not interpret this really precies from the seals. It could also mean that the shipside is lower. Have a look at the people how big they are. You can develop a possible hull design, which will be mostly the same for every seal. Than you can add the specific detail. Where do you find the right dimensions of such a ship? You choose the big knarrs of the vikings. There are a lot of new findings you can use for the length as basic for such a ship. If they will find a shipwreck of a nef such as the cog of Bremen, we have to learn everything new.
-
I don't understand, what you mean with "stap over". The beams are the deckbeams and the deck planks are sitting on.
-
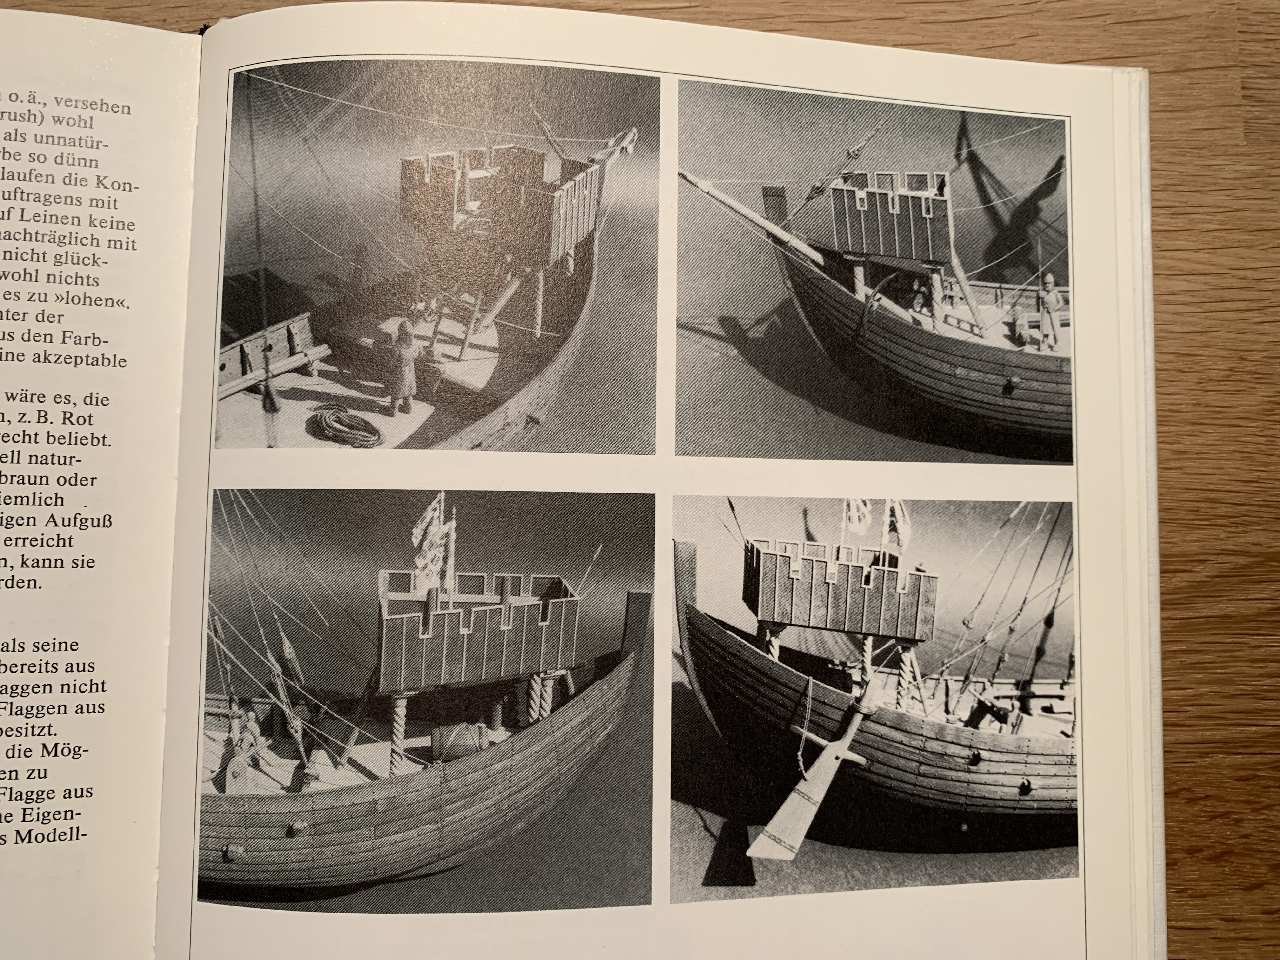
I found time to take some pictures of the model and the lines of the reconstruction from Zimmermann. Hope the pictures are helpful.
-
If you like to build WInchelsea, I would not add a boat, because the seal doesn't show it. Also the Bremer cog shows remoevable planking. I think it was a common way to go into the hull.
-
Hi Chuck, yes it has. The drawings are in scale 1/50. You're welcome to learn a little bit German. A few years ago I had to learn Netherlands for my job. Now I am really happy, that I can read Netherlands books about historic ships. There is a really nice book about the Ijssel Kogge form the 15 th century.
-
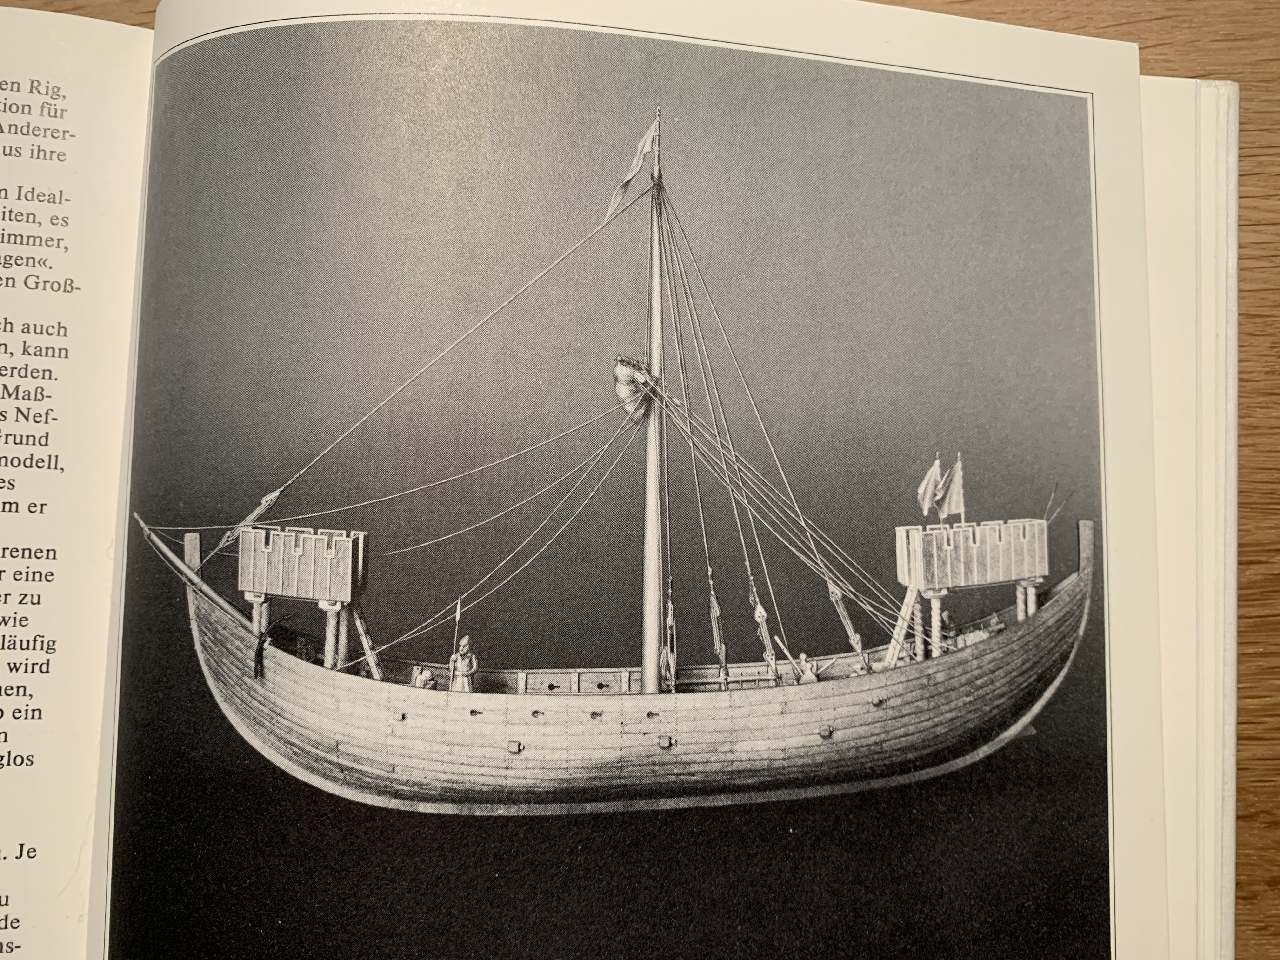
Hi Steven, the model, you show the picture, is not build following the drawings from Zimmermann. The sources for this model are from Jochen v. Fricks "Normannenschiffe", Delius Klasing Verlag. The original book was first published in the GDR but I don't have information when. Here is a link to the website, where the model was published and where I found the Information about the source. If I remember right, Zimmermann shows an other castle. In the weekend I will have a look if I can scan you two fotos from the model Zimmermann has built. I am really interested to yee your progress.

