HOLIDAY DONATION DRIVE - SUPPORT MSW - DO YOUR PART TO KEEP THIS GREAT FORUM GOING! (Only 66 donations so far out of 49,000 members - Can we at least get100? C'mon guys!)
×

Mike_H
-
Posts
243 -
Joined
-
Last visited
Content Type
Profiles
Forums
Gallery
Events
Everything posted by Mike_H
-
HMS Snake by BenD - Caldercraft - 1:64
Mike_H replied to BenD's topic in - Kit build logs for subjects built from 1751 - 1800
Looks very neat and clean, as ever, Ben. (Though I think you mean rudder, not anchor, straps). I've chosen not to install the gunwale rails until all of the deck fittings are in place. In theory this is to enable maximum access, though really it's because I think it will be a pain. It's coming up, though. -
Buying one a month is a good idea, but my real problem is I would need another bench in the shipyard, and the Rear Admiral likes to sleep their every other month. And perhaps more importantly the Admiral thinks it's a bedroom. Best of luck next week.
- 53 replies
-
- 1
-

-
- brig-sloop
- Caldercraft
- (and 2 more)
-
Ah, of course! And having inadvertently sanded the keel on my Snake, giving me grief subsequently, thankyou for the reminder of a lessons I should have learned. And thanks for your filler recipe. M
- 355 replies
-
- 4
-
-
- vanguard models
- Sphinx
- (and 1 more)
-
You make a compelling case for spray paint and masking tape, James. The knock-out argument is how convincing the planking on the main wale looks with such a uniform coat of paint. That and the assembly of the quarter galleries is huge testament to the quality of the kit design. Kudos to you and @chris watton for your respective roles. Some questions: I'm sure this will be clear in the manual, but did you change your mind about masking-off the keel? The photographs shows it masked but then painted. What kind of filler do you use? It looks fine-grained, hard, and buff coloured - all good things but I've not found those properties in one tin or jar.
- 355 replies
-
- 5
-
-
- vanguard models
- Sphinx
- (and 1 more)
-
I should confess I stole that colour scheme from @Beef Wellington...
- 53 replies
-
- 1
-
-
- brig-sloop
- Caldercraft
- (and 2 more)
-
Hi Sjors Thanks so much for the details of the coppering and of your tools. Have you used double-sided tape this way before. I would worry a little that over time the adhesive would go brittle. If not, then this looks like the future to me: quick and clean is what we all aim for. Your list of tools is pretty exactly what I’m thinking about (though that would be news to the admiral!). I’d be tempted by a chop saw, but I’ve not looked much beyond the lathe and bench drill. I think you can get extensions in Australia, and we spend quite a lot of time there when there isn’t a pandemic. Let’s see how many tools I can sneak in the house! Very sorry to hear of your colitis - though glad it’s not too debilitating. Perhaps being off work explains your progress! best wishes Mike
- 53 replies
-
- 1
-
-
- brig-sloop
- Caldercraft
- (and 2 more)
-
Here is very exciting news! It would be a travesty if the range and quality of your products couldn't support two employees, so I sincerely hope this comes to pass, soon.
-
On the basis of the two very small parts I have bought from you, the packing service has been exemplary, so I'm sure you will miss the support. We all will too, that's why there have ben so many expressions of concern! In all seriousness, best wishes to her for a speedy recovery.
-
Good progress Sjors. Double-sided tape is interesting, did you apply it to the hull and then stick on the tiles? On another point, I'm thinking of buying some Proxxon tools, and I can see you have some. What do you recommend? Mike
- 53 replies
-
- 1
-
-
- brig-sloop
- Caldercraft
- (and 2 more)
-
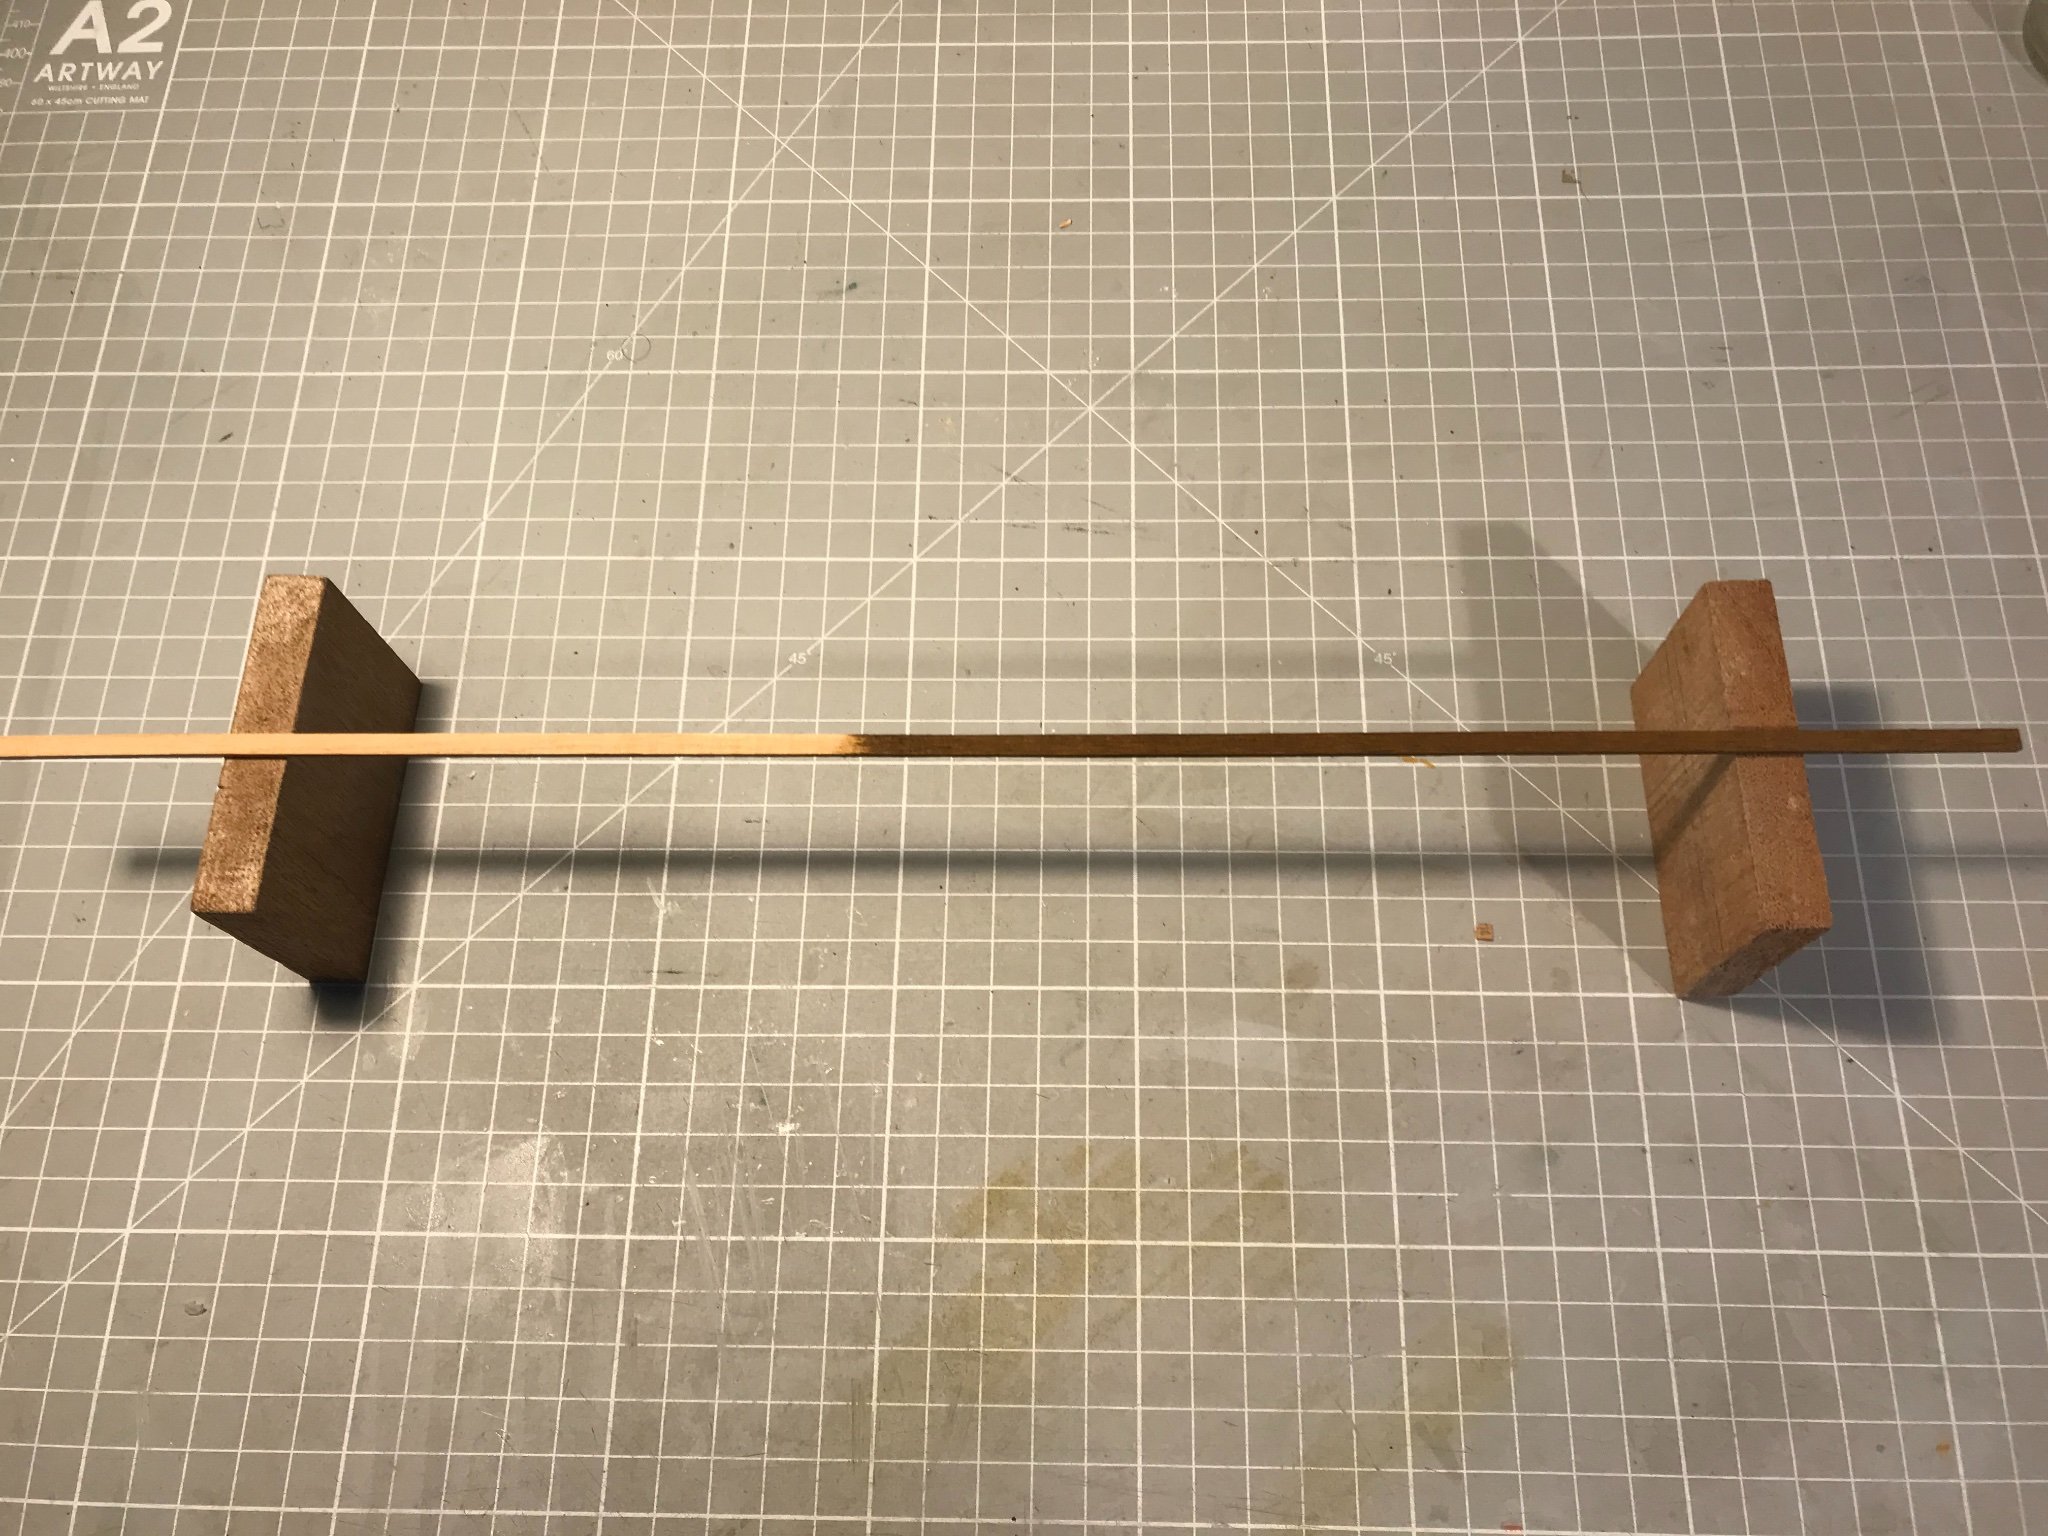
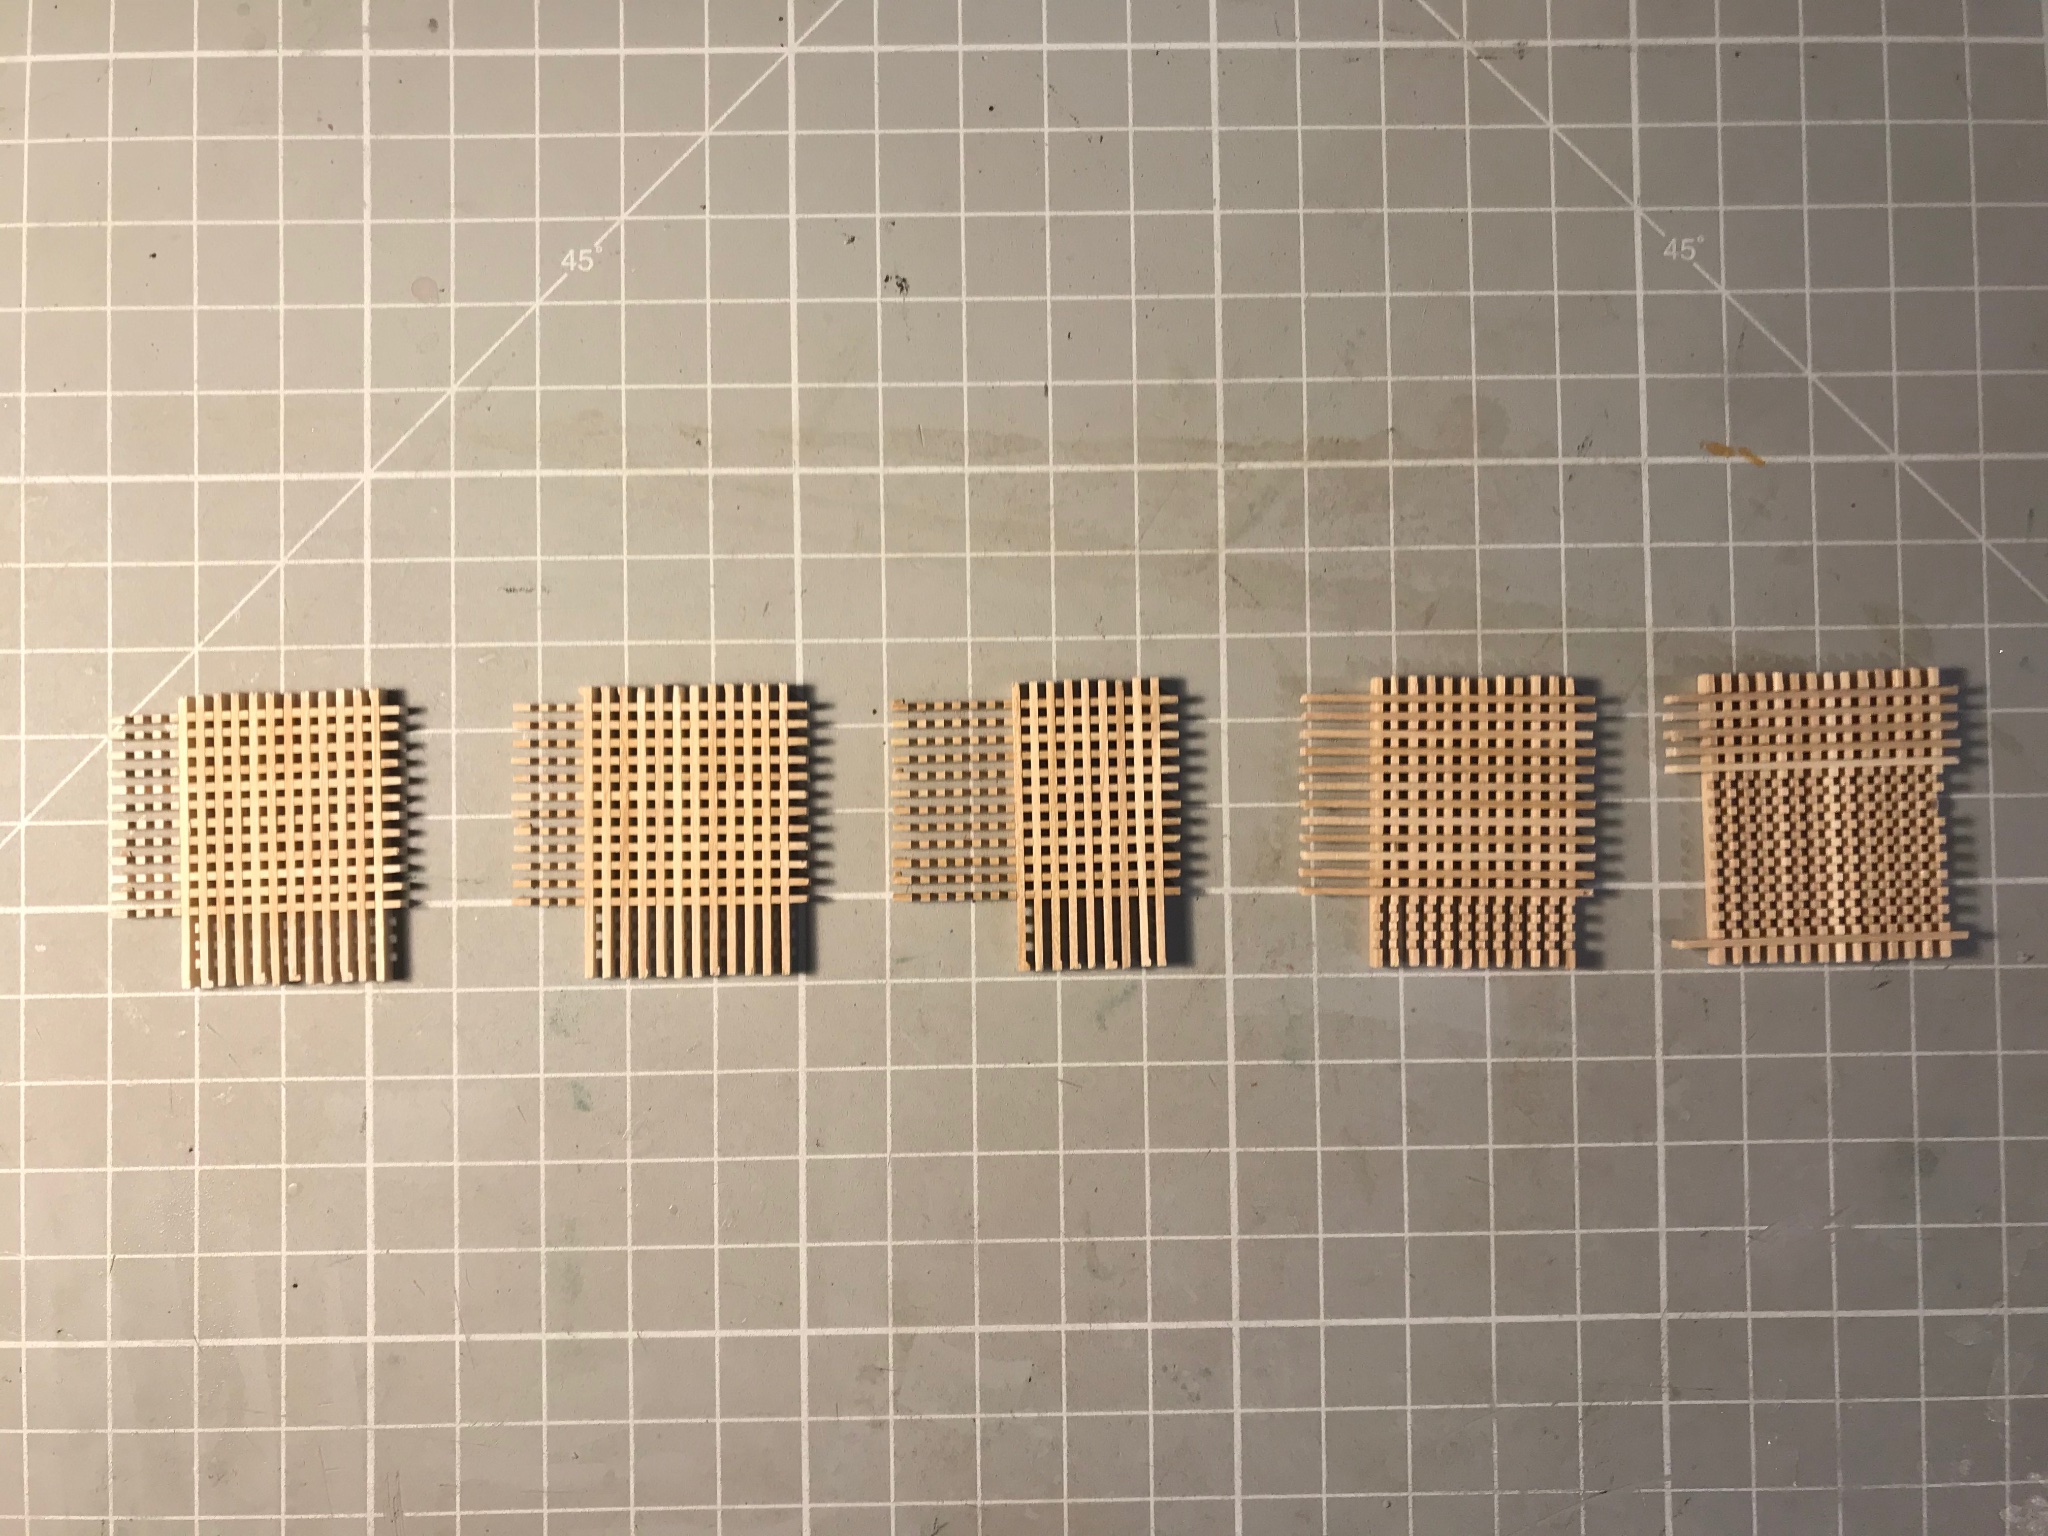
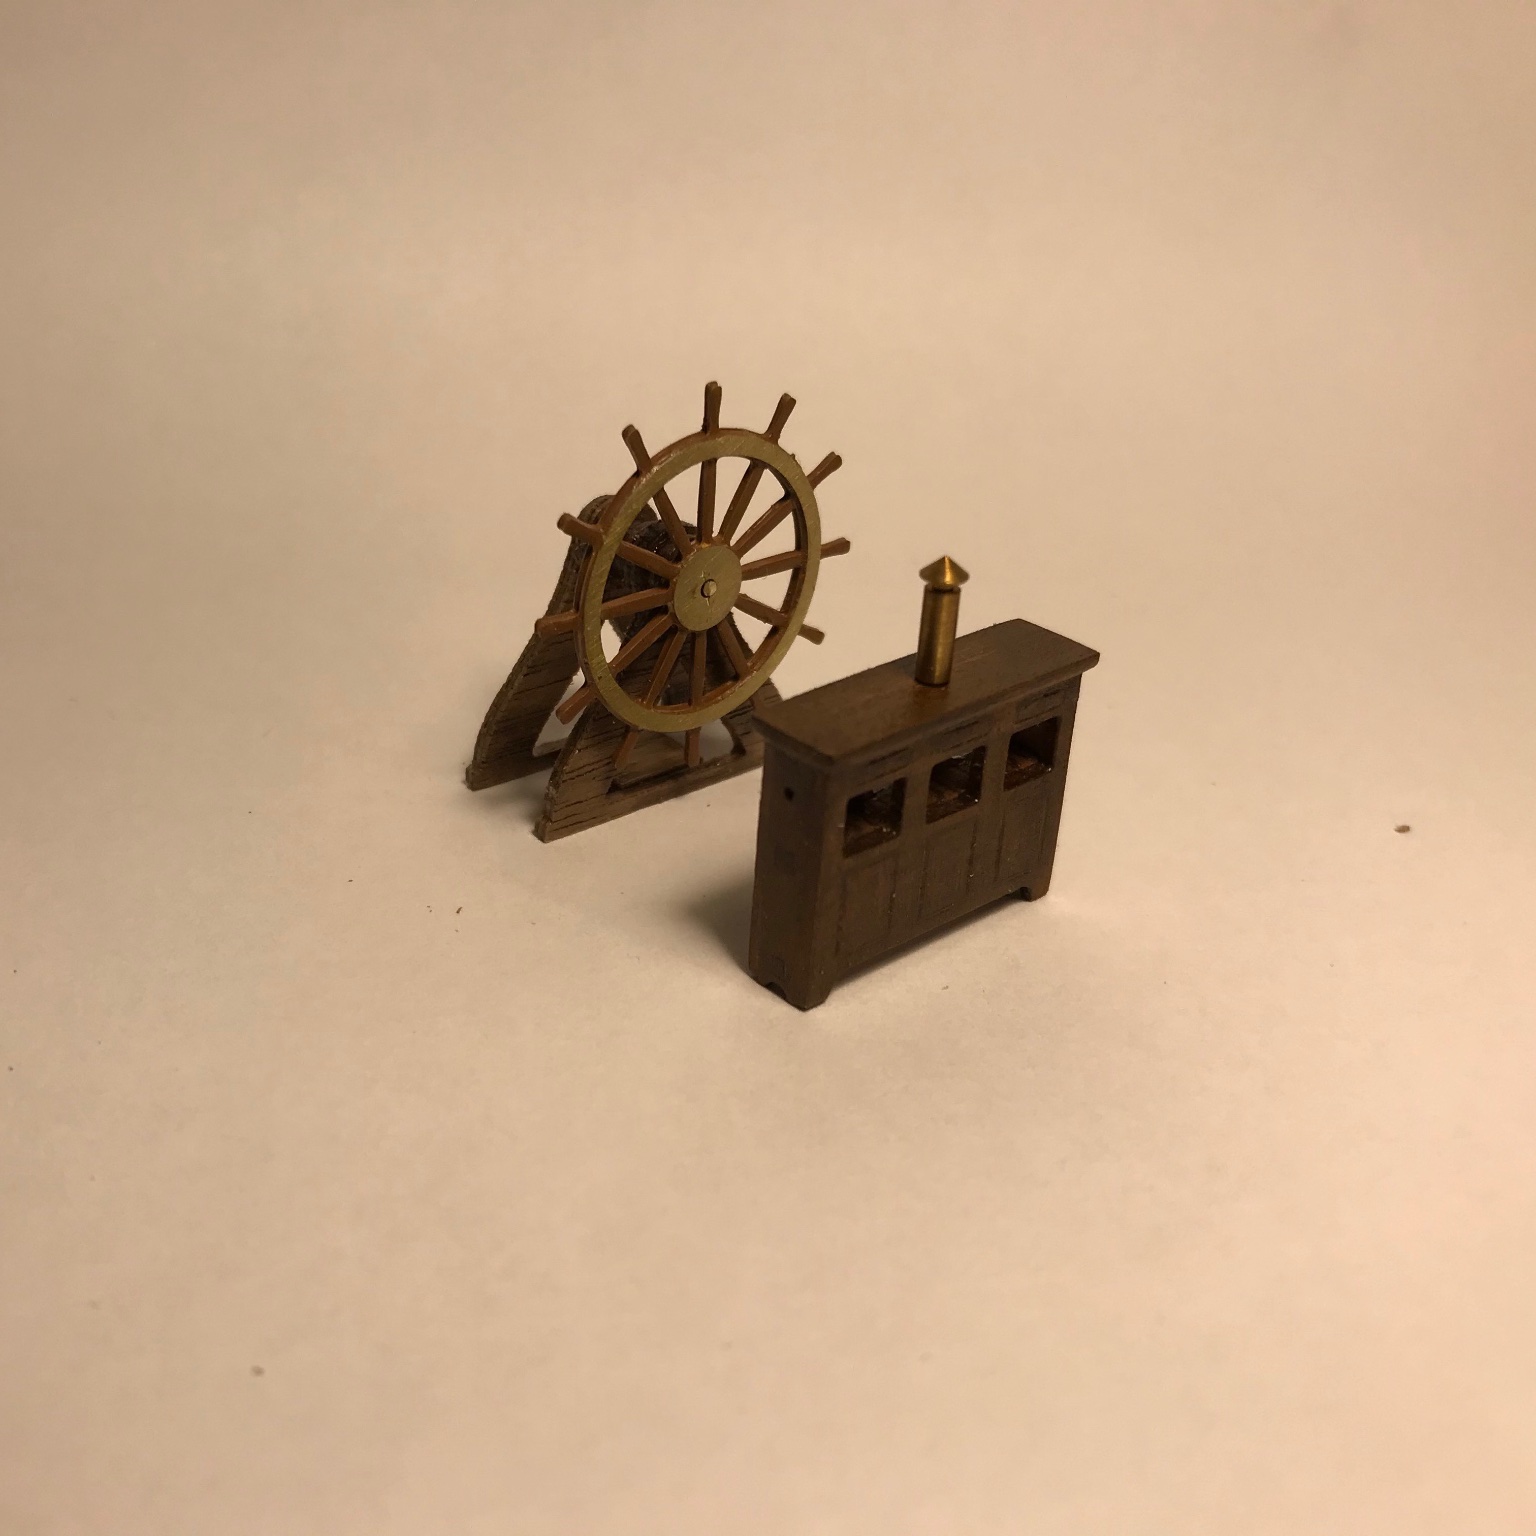
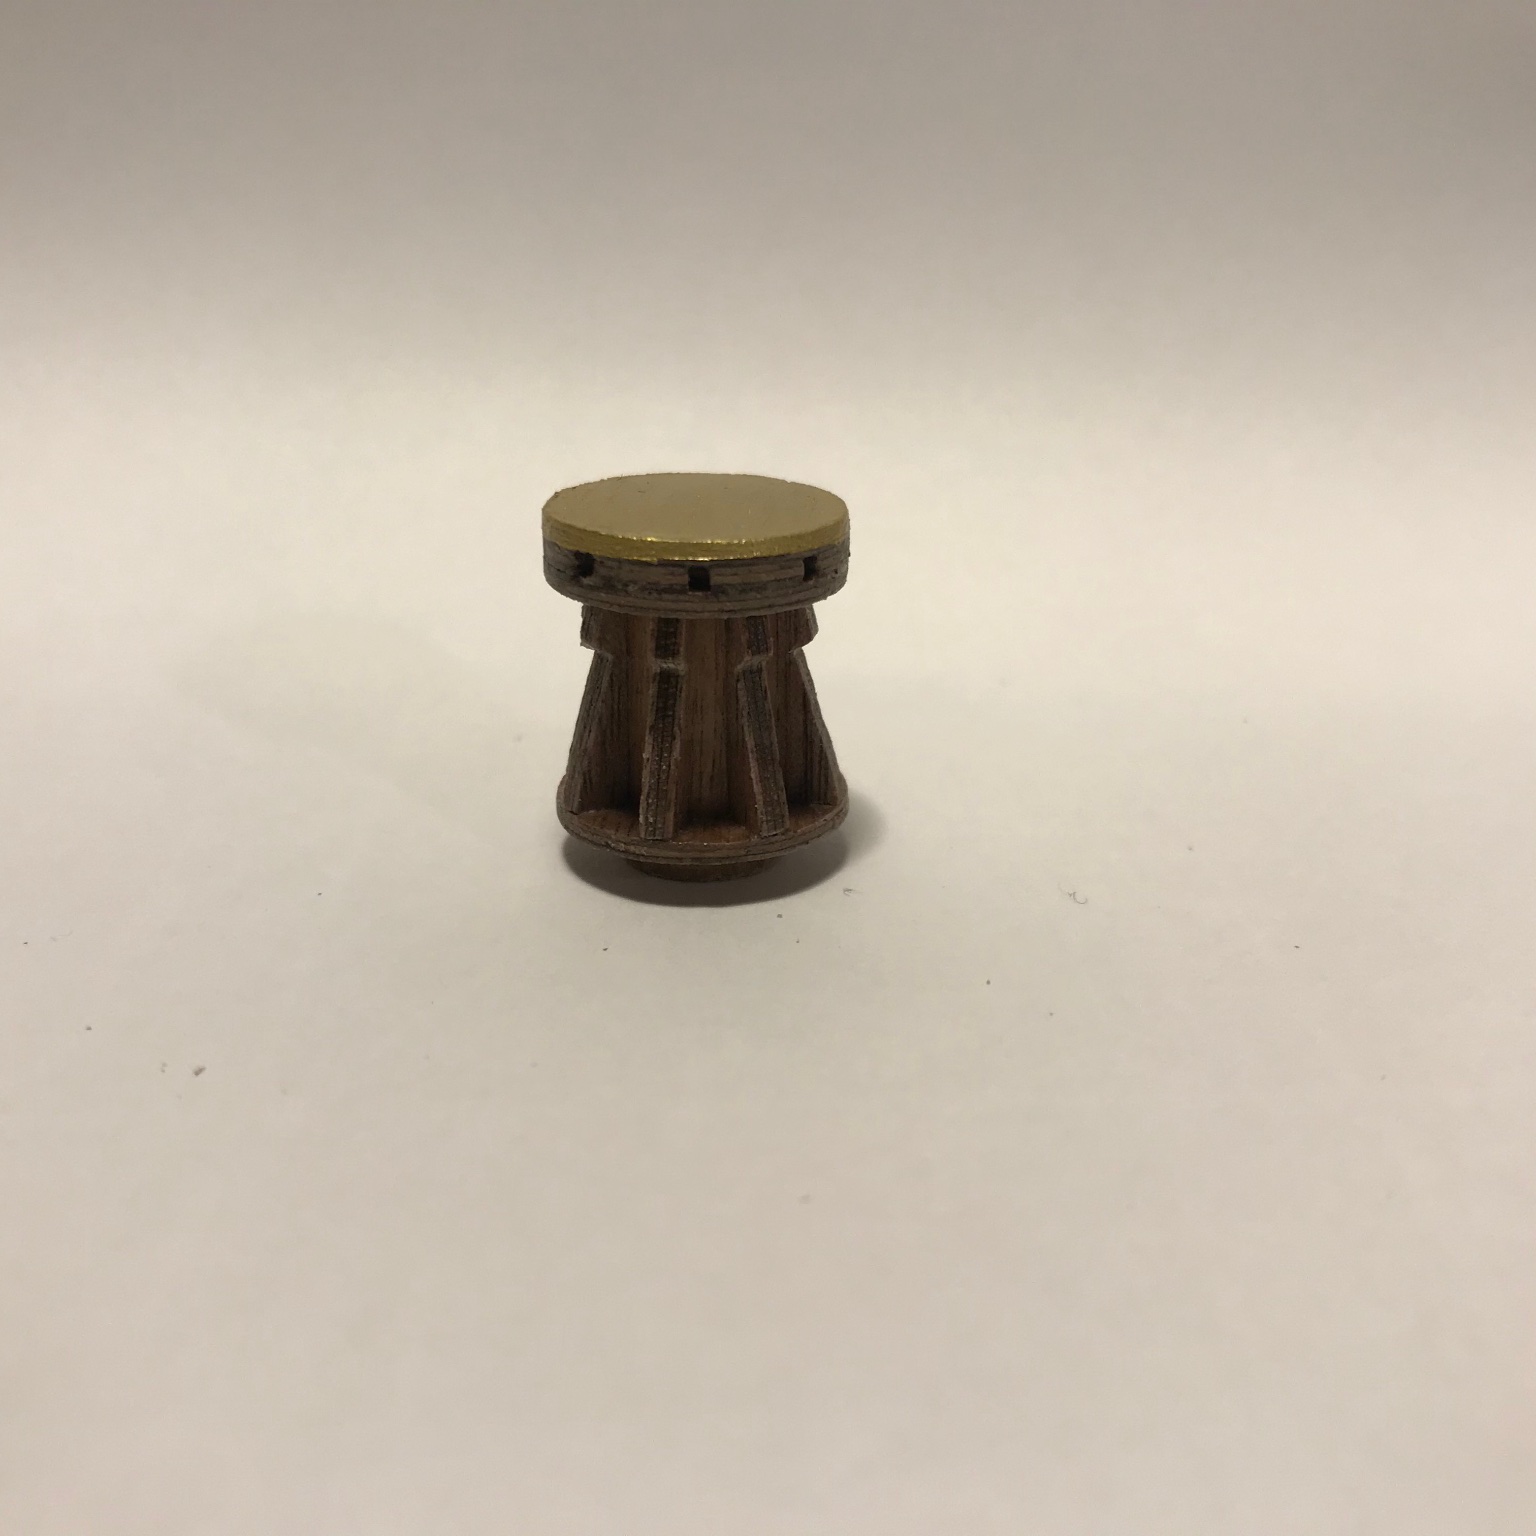
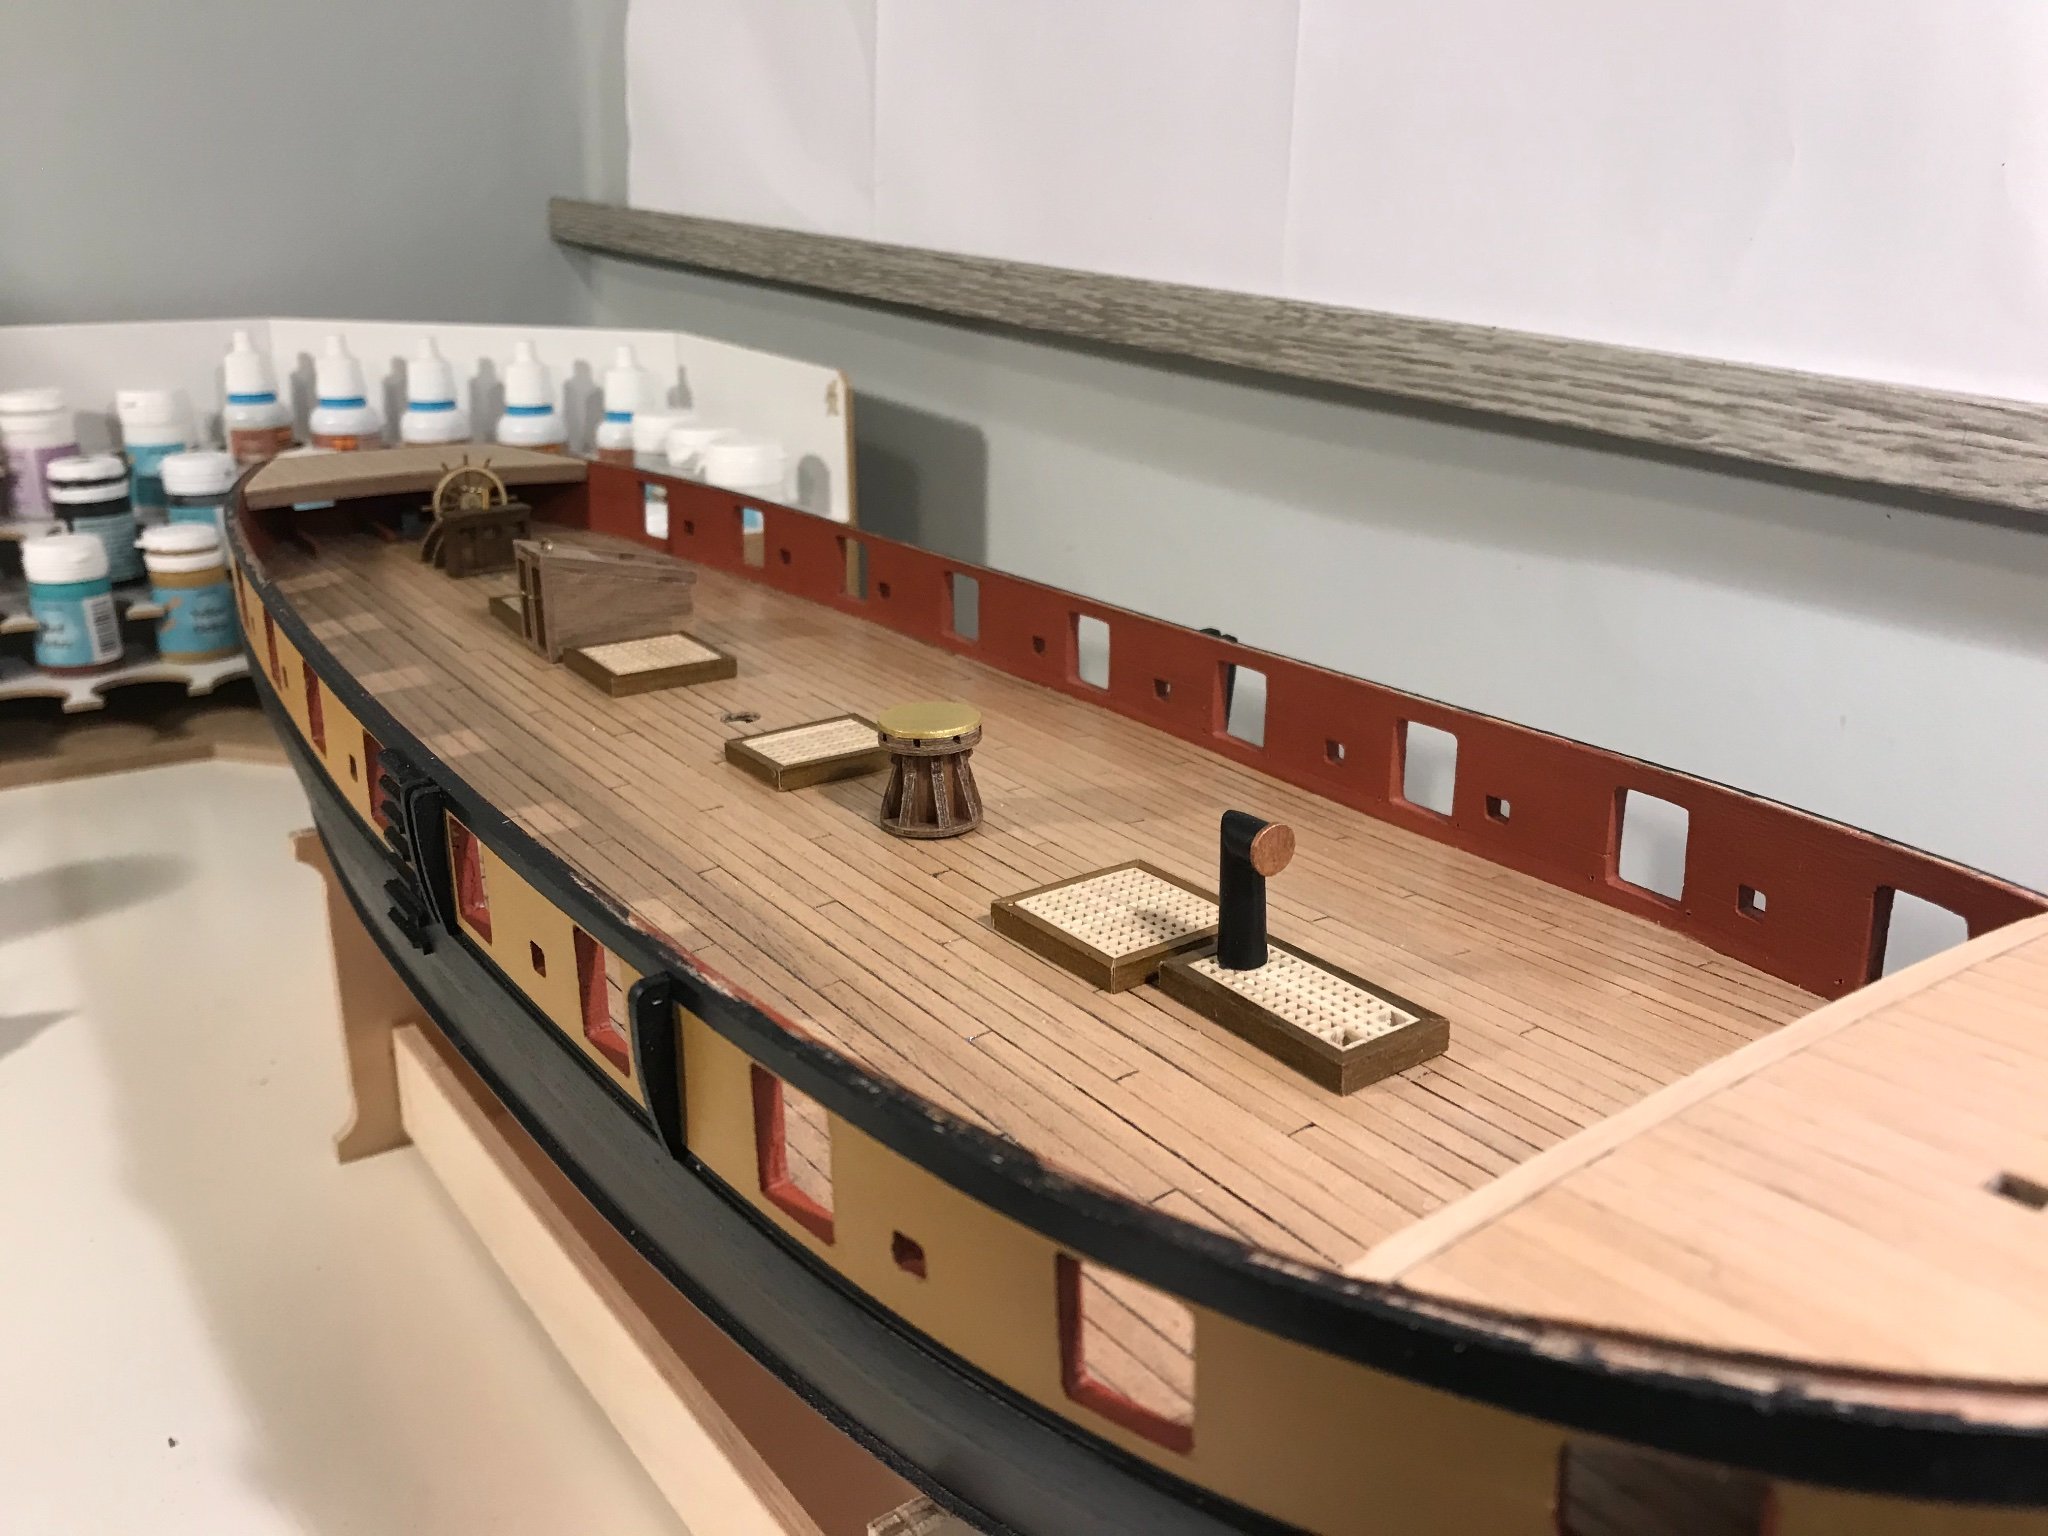
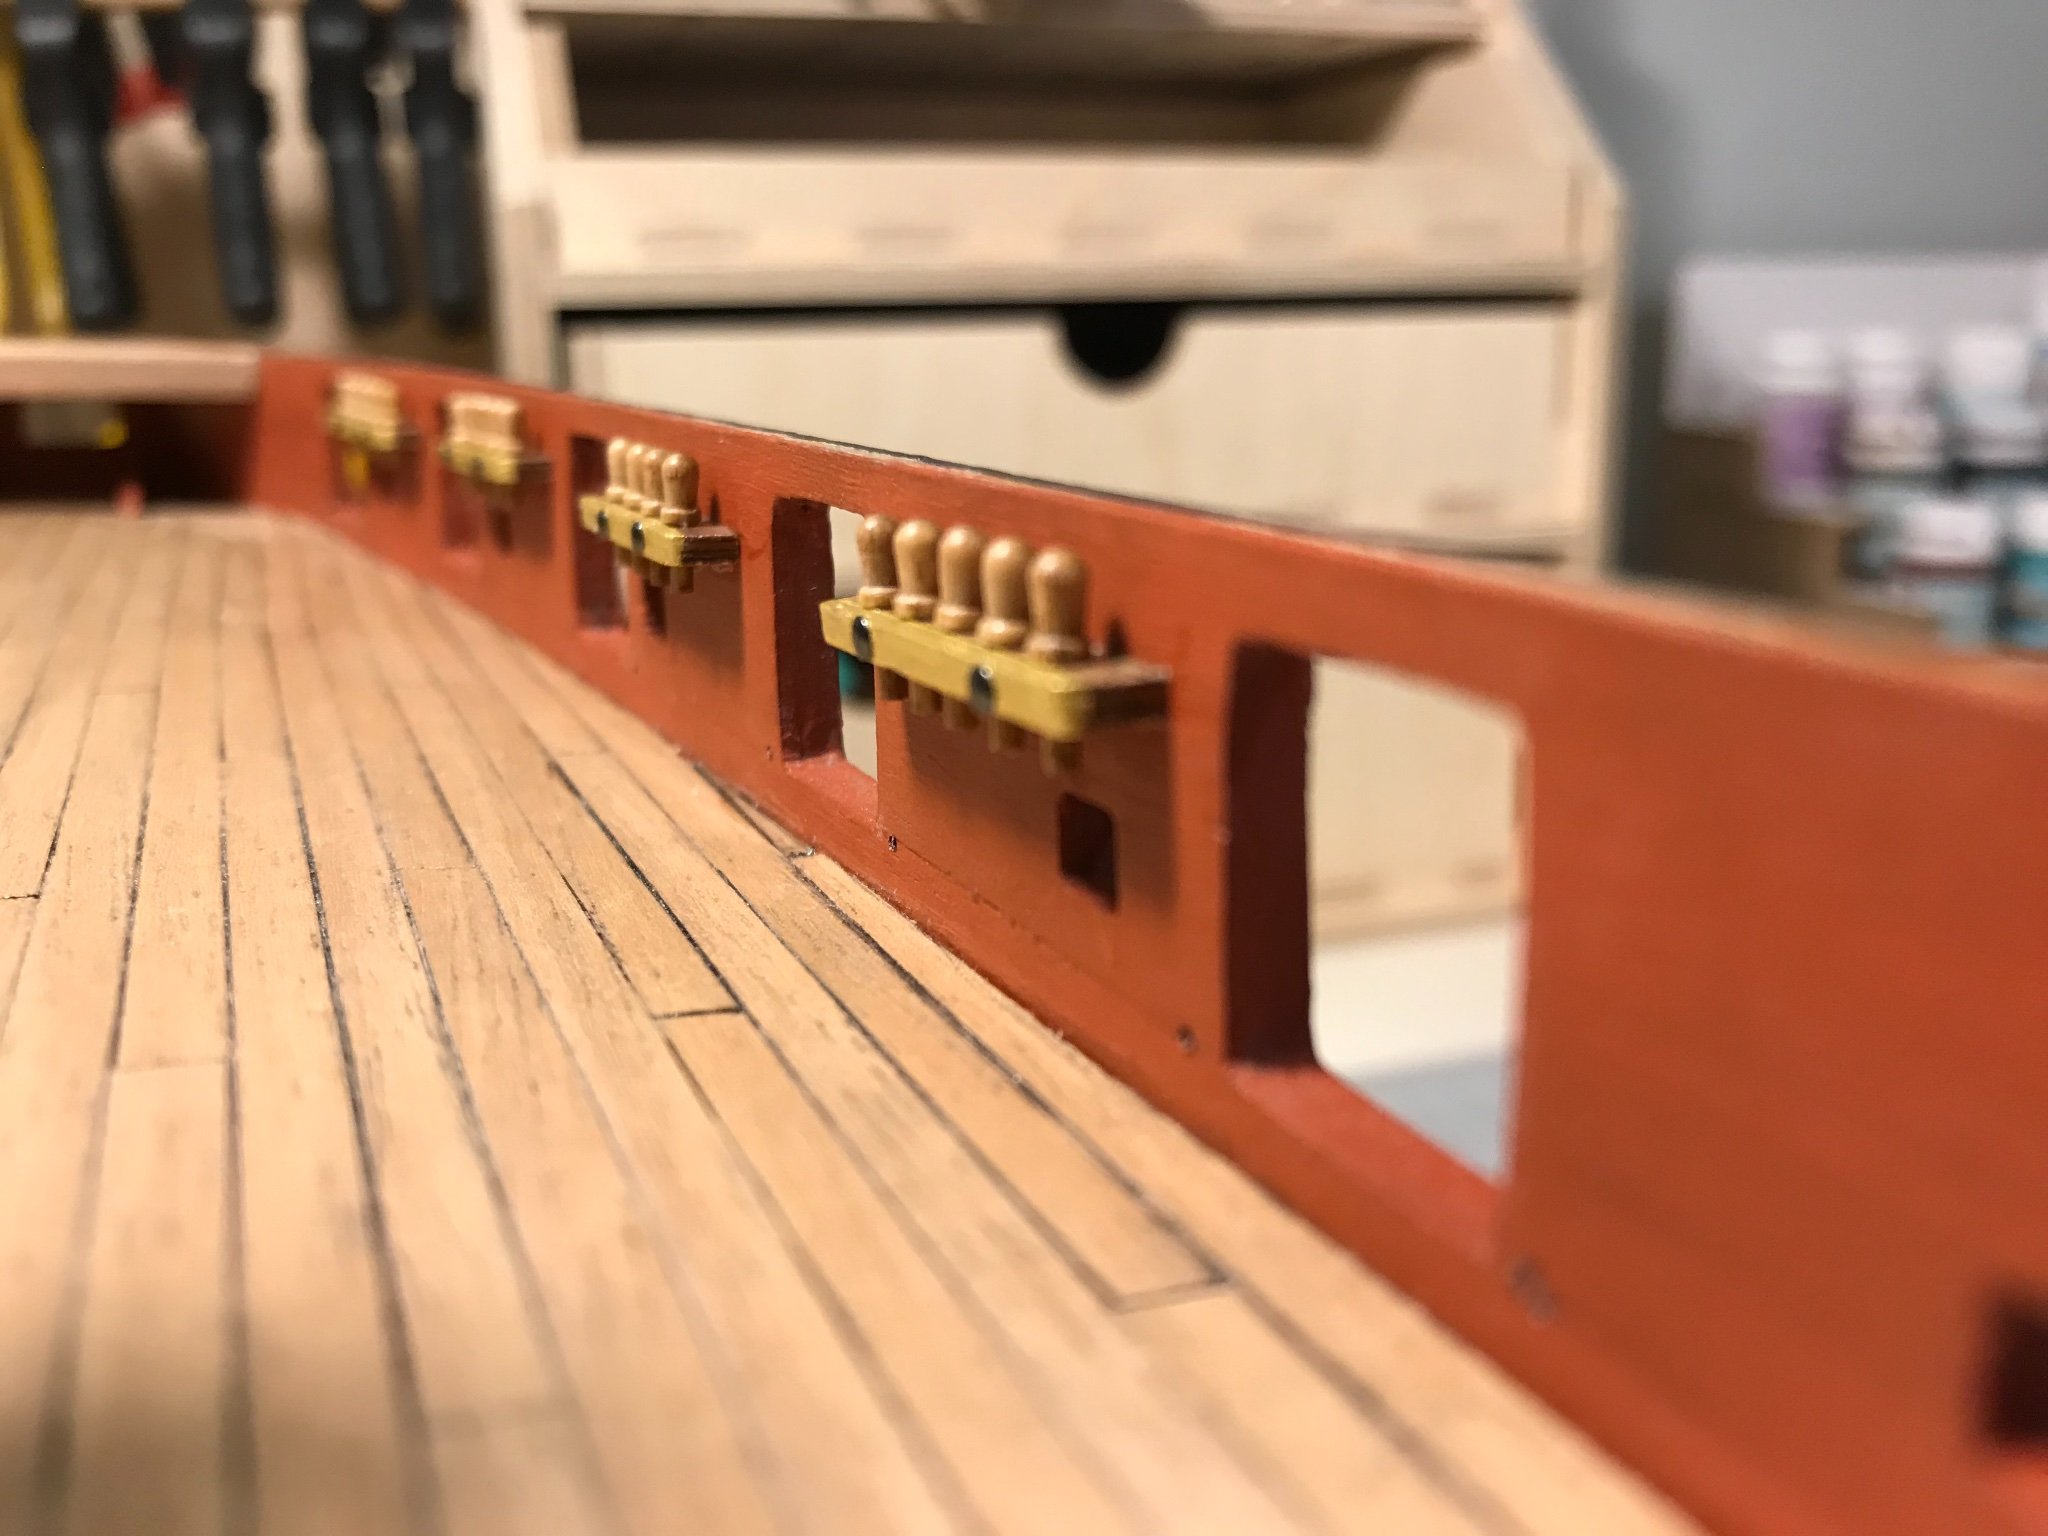
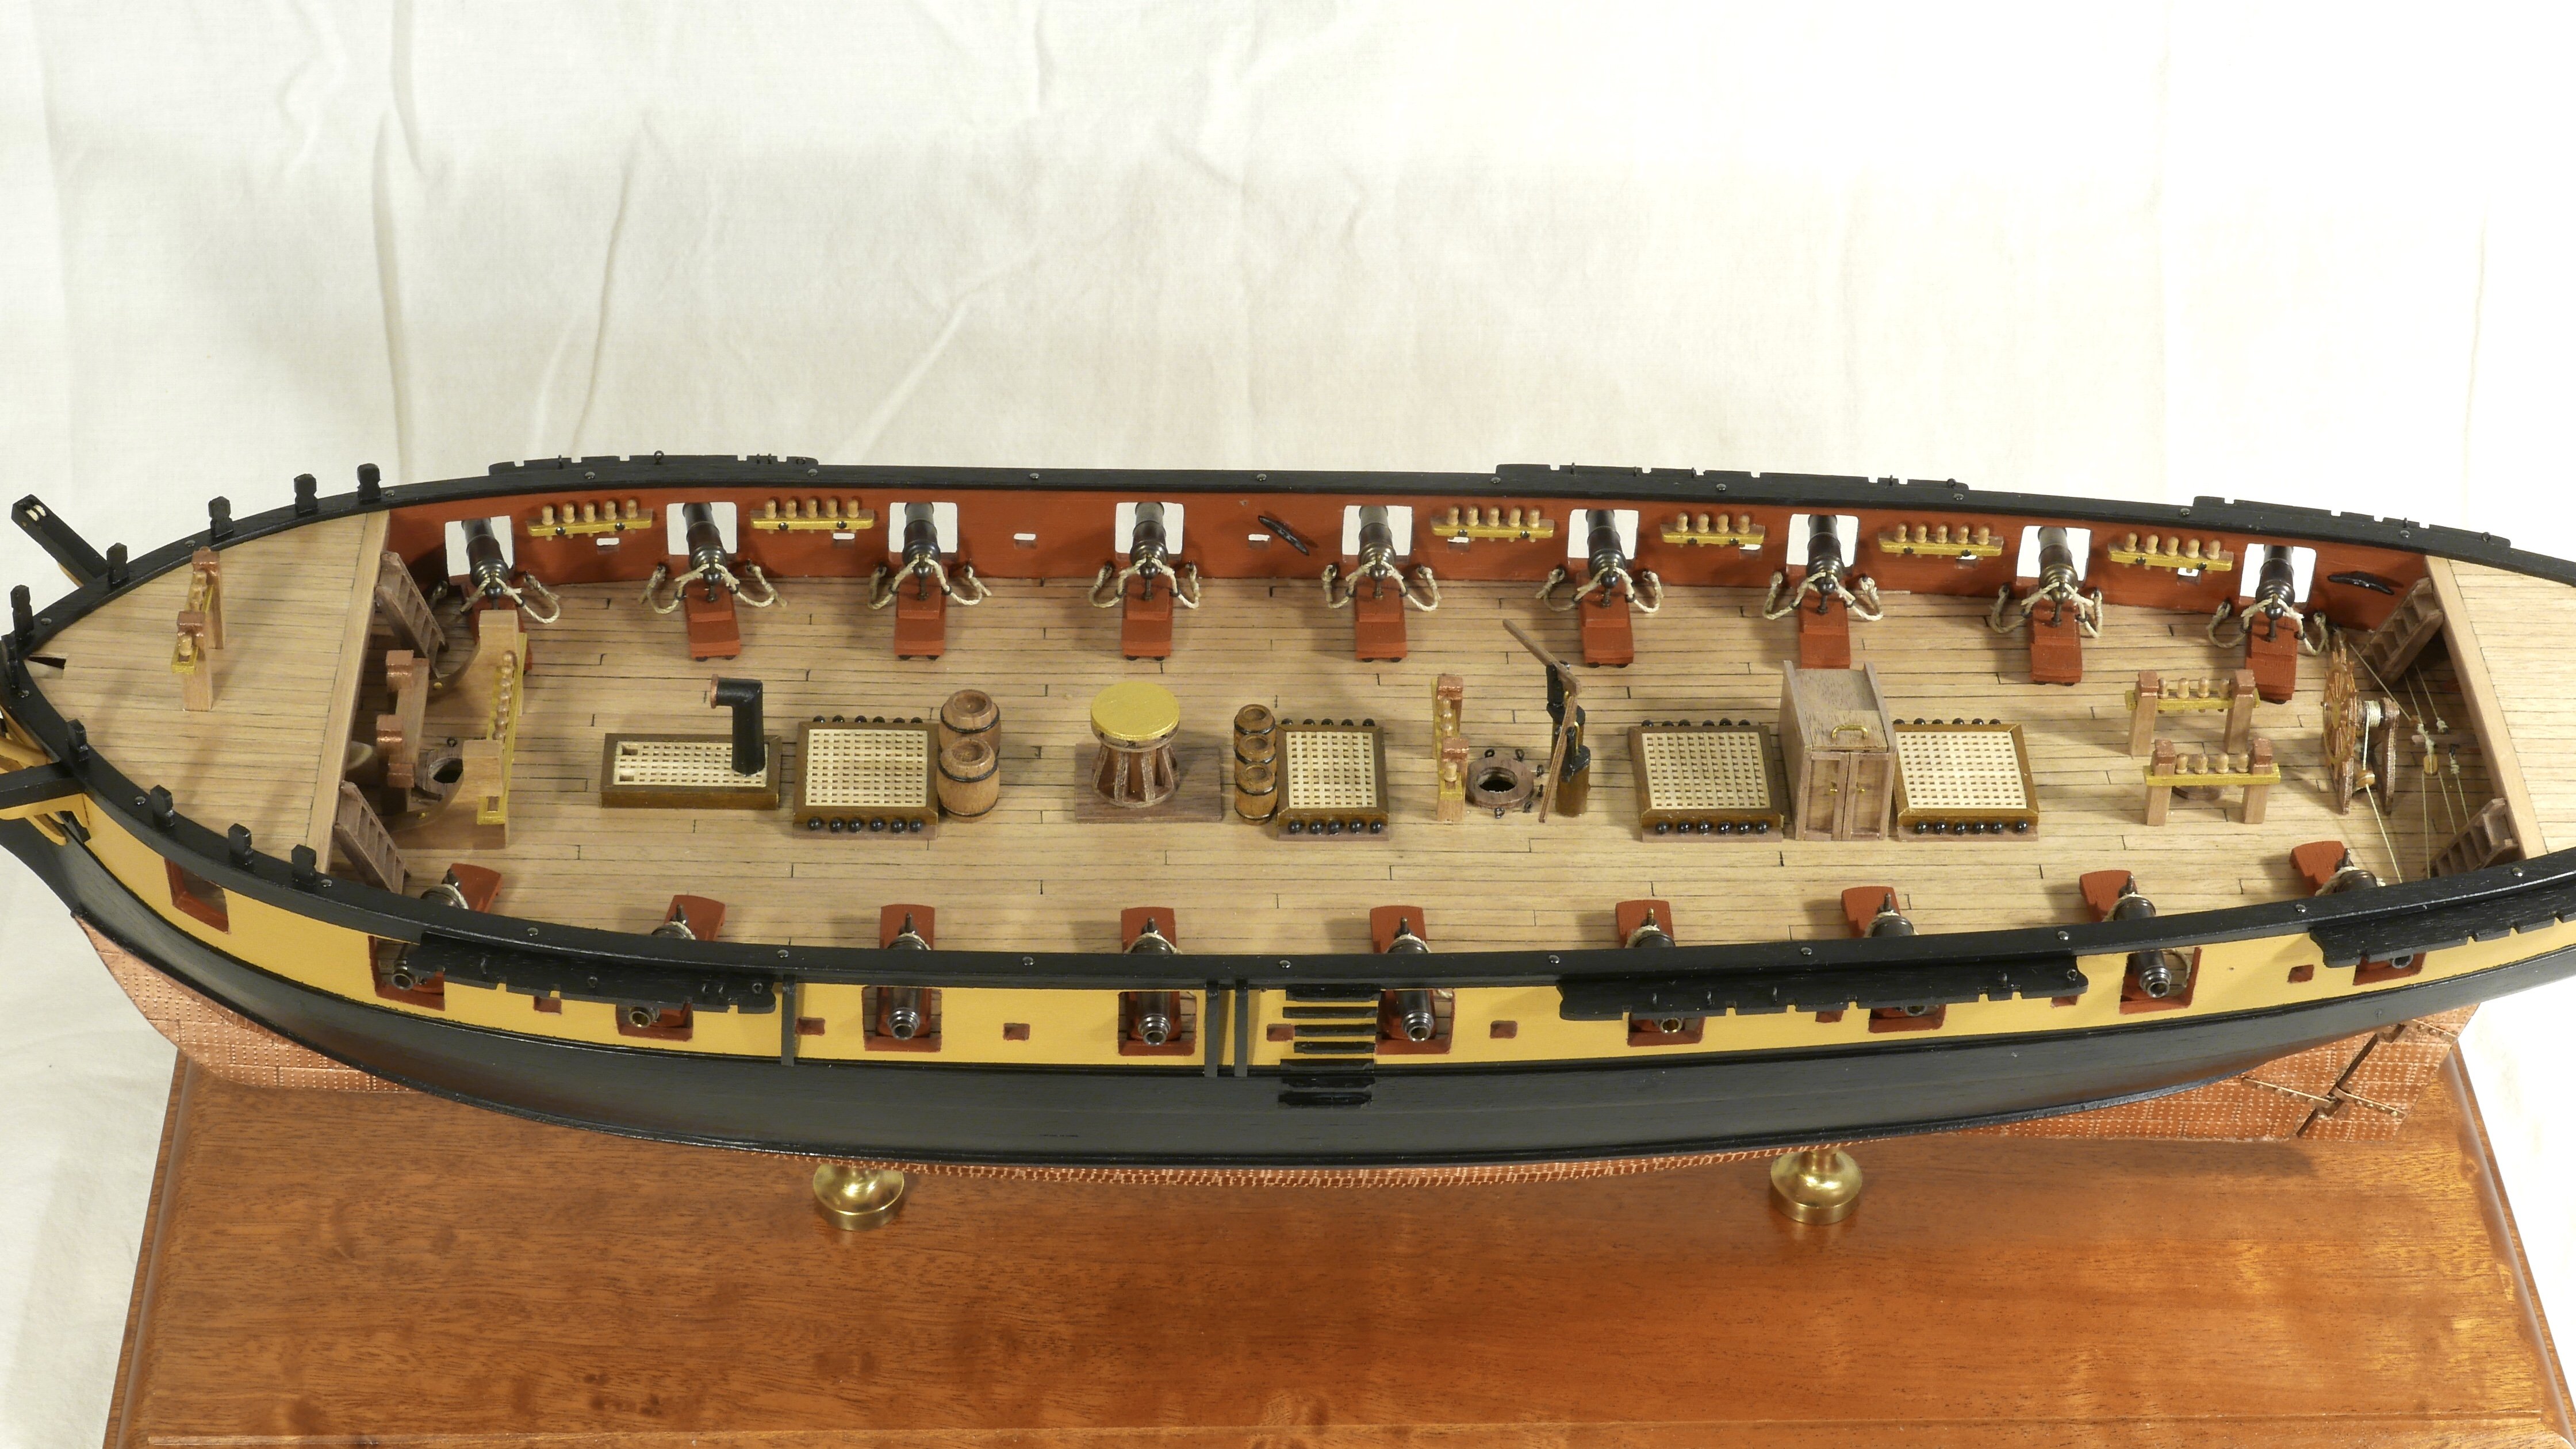
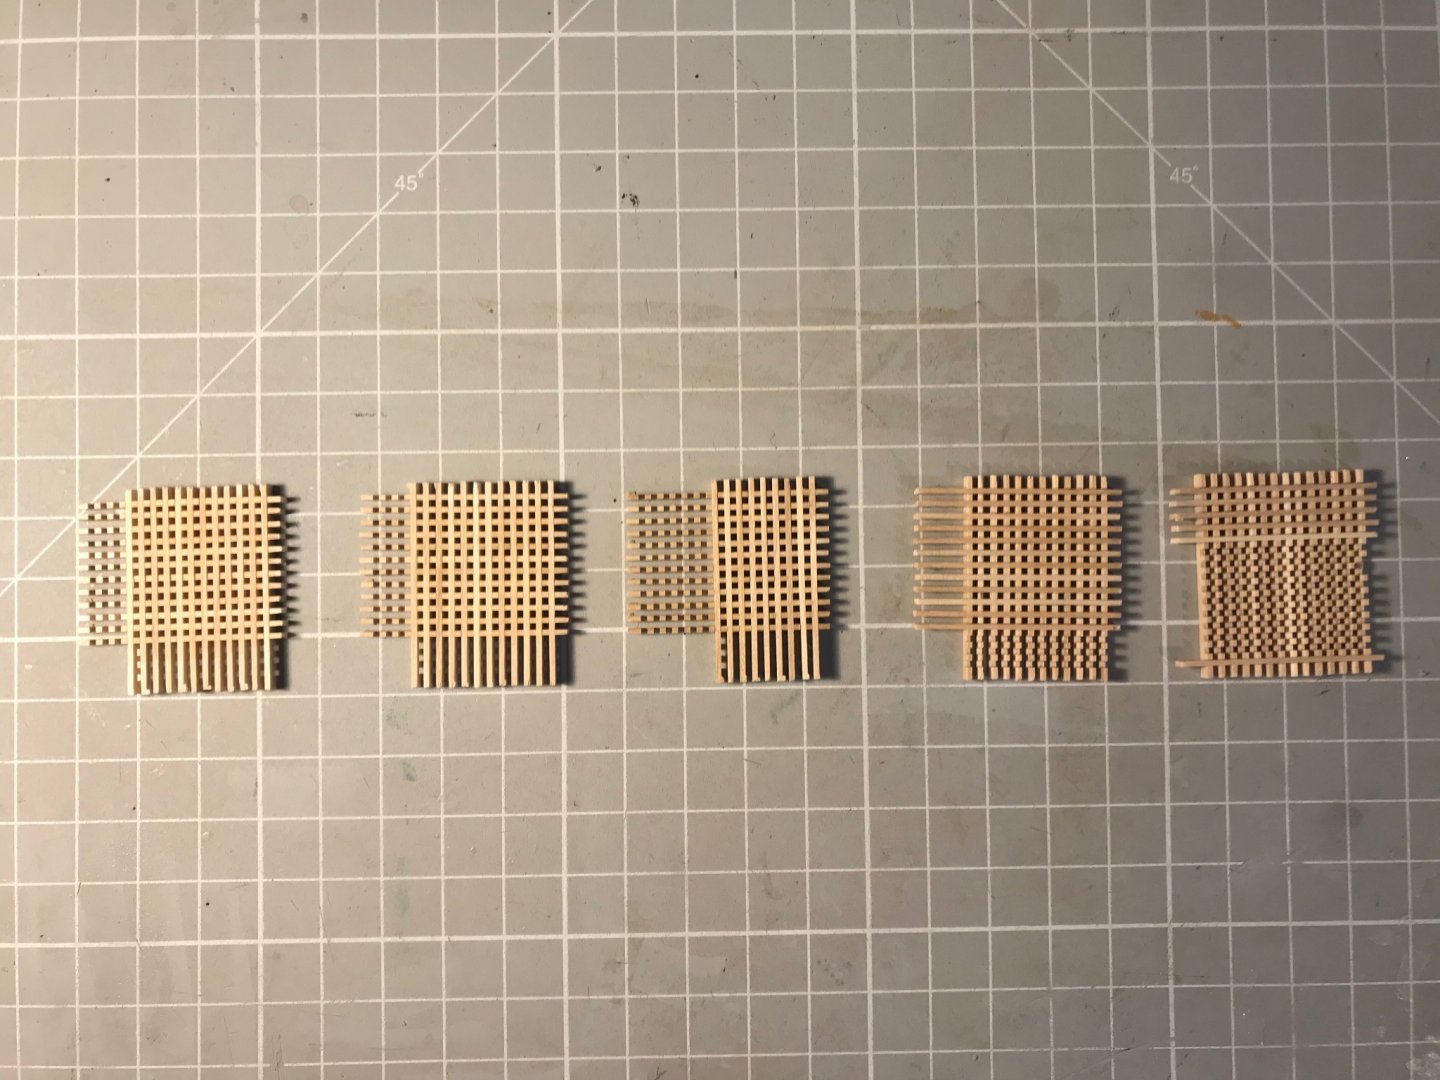
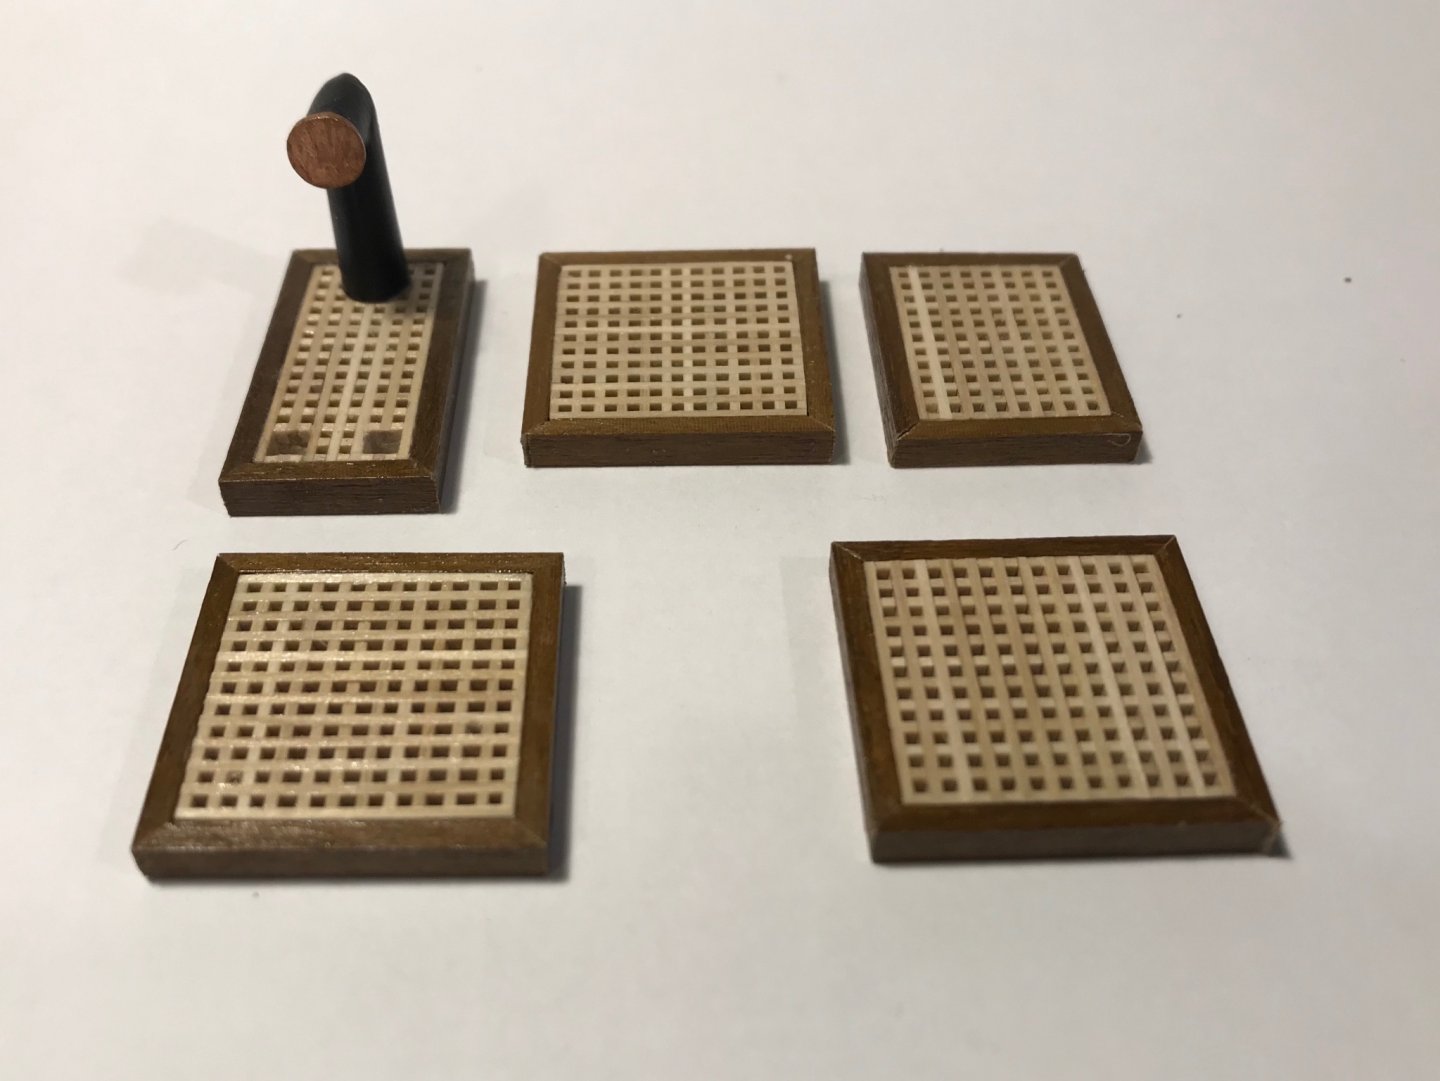
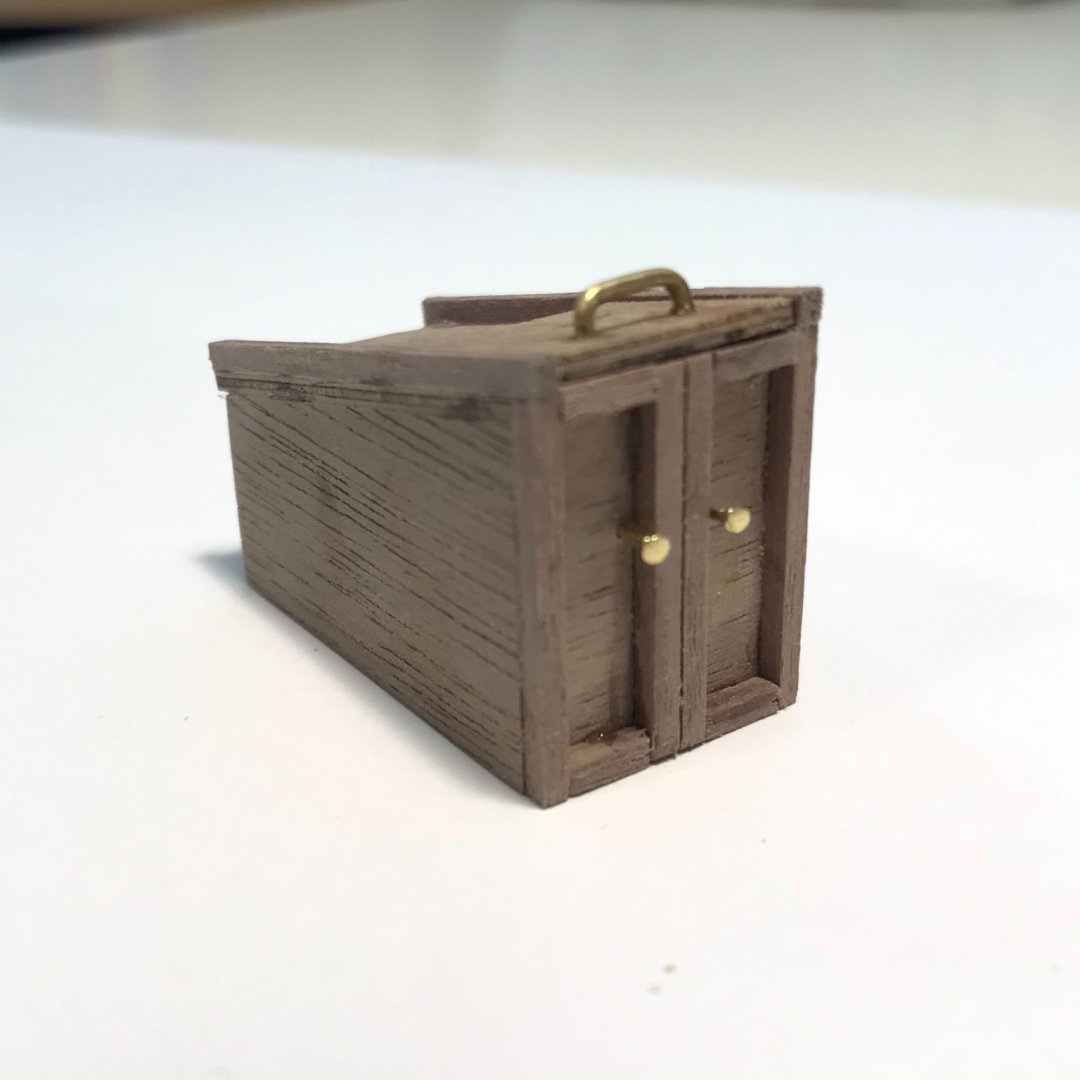
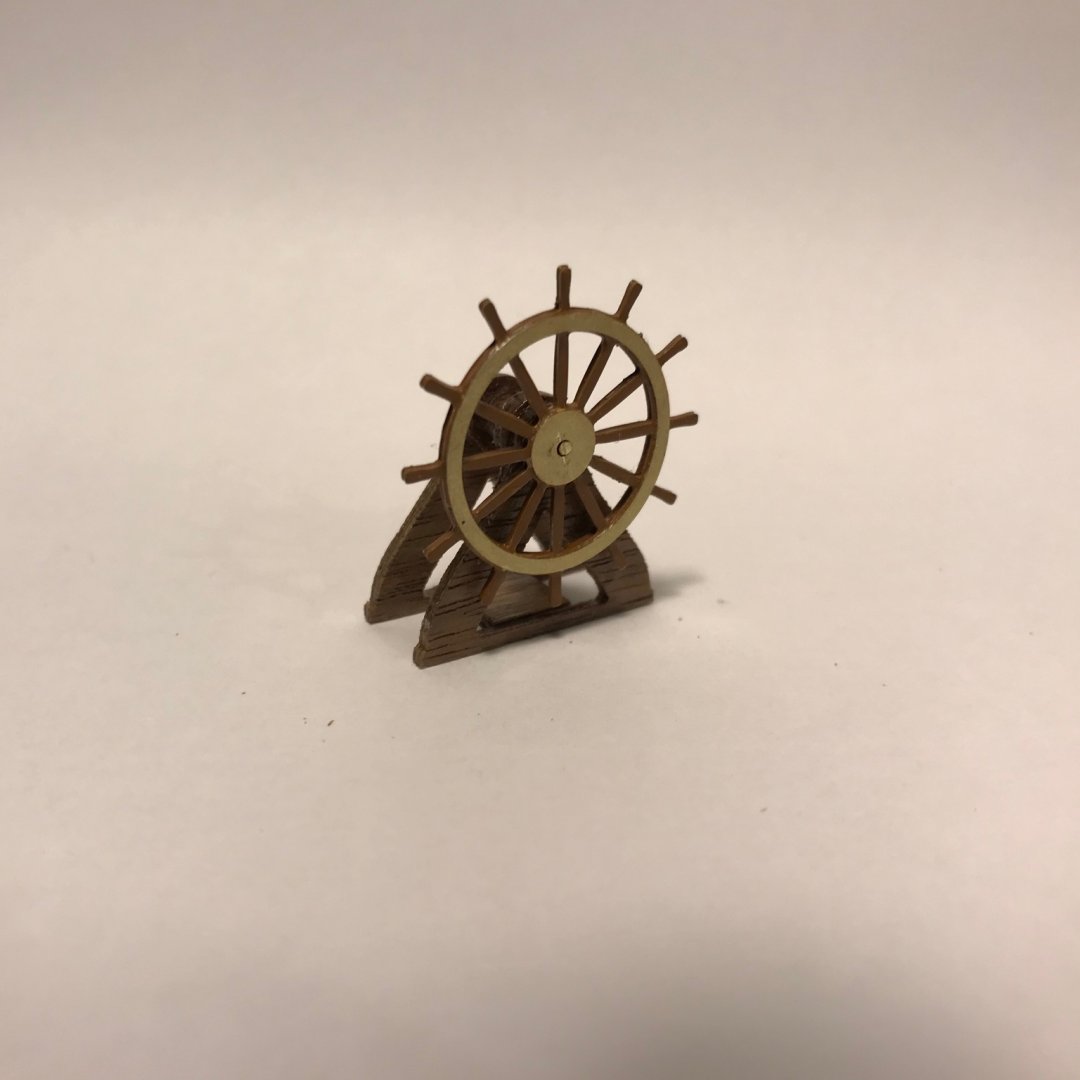
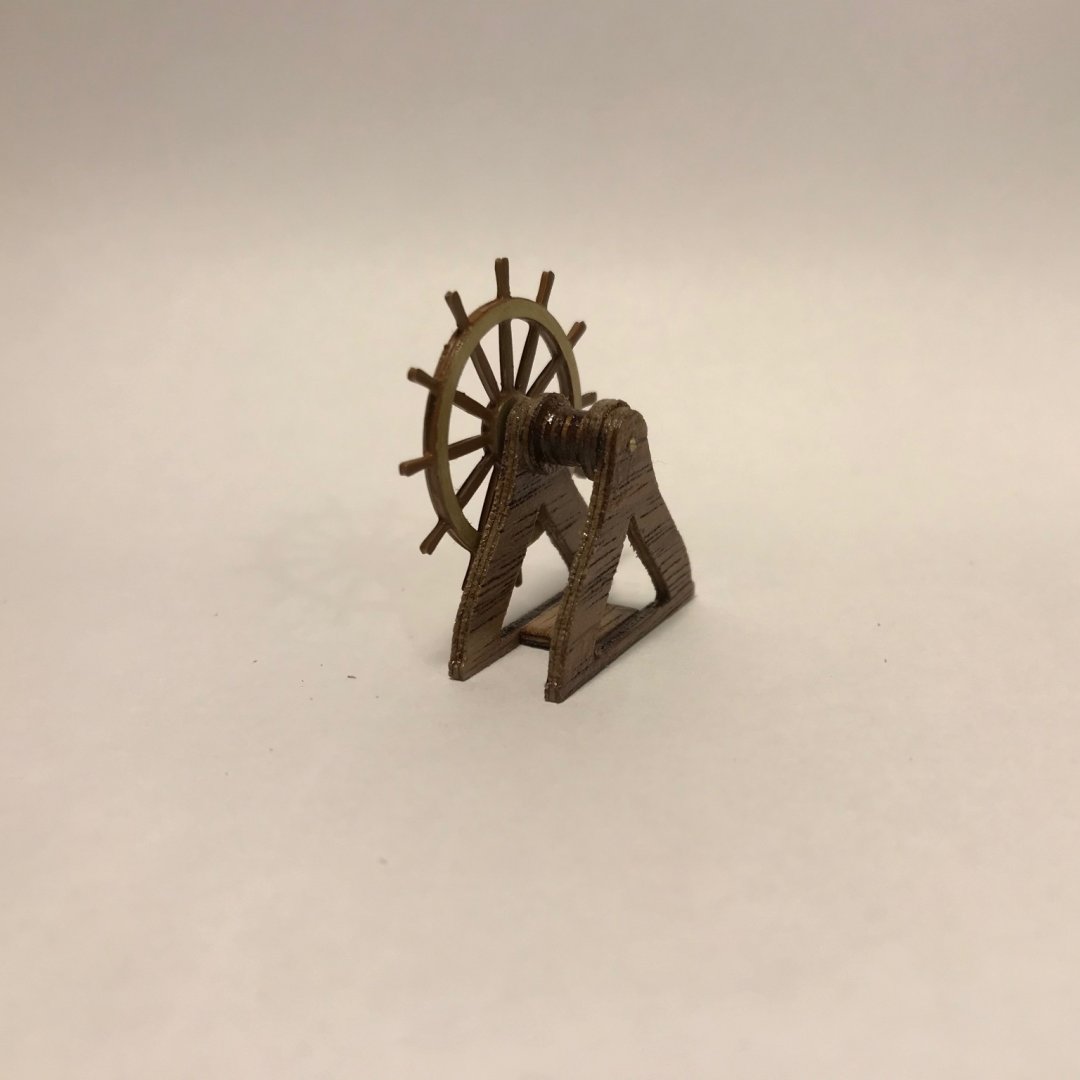
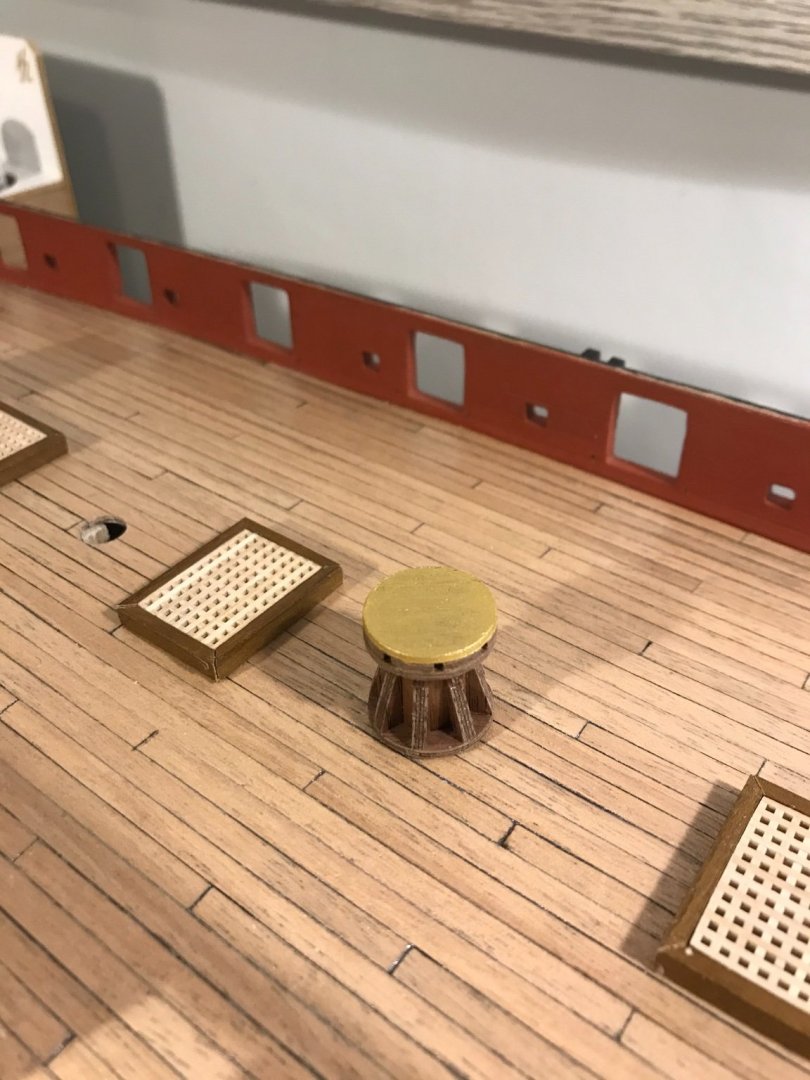
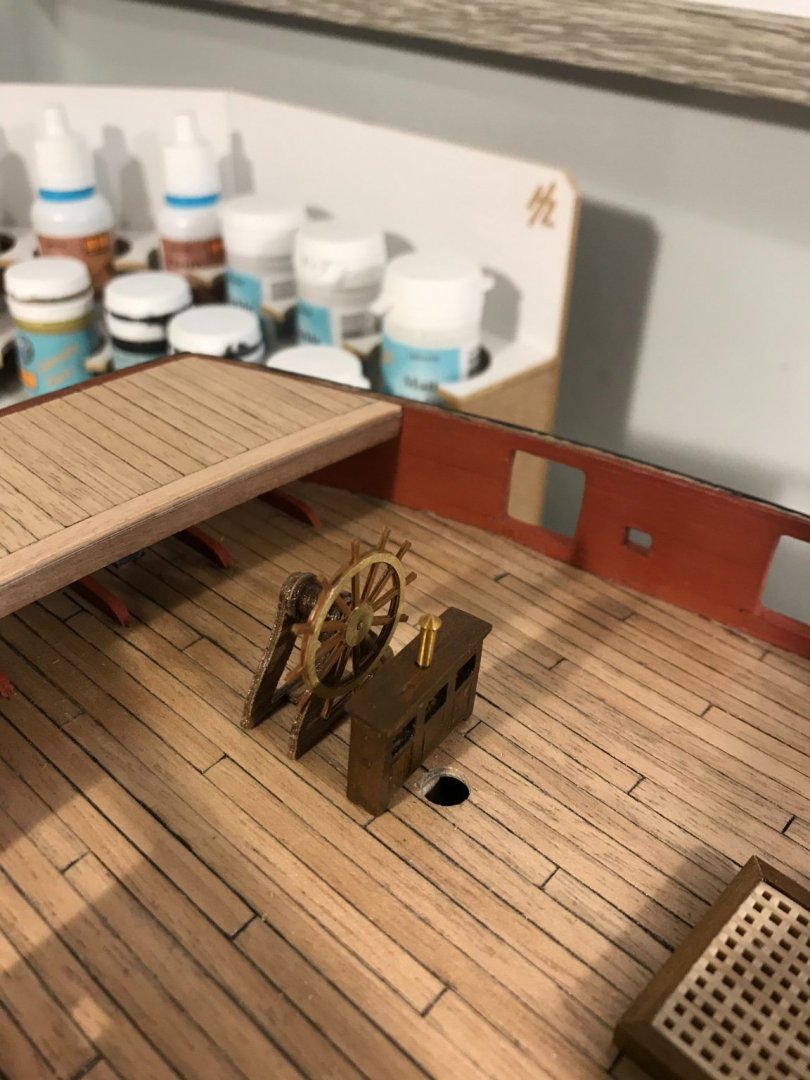
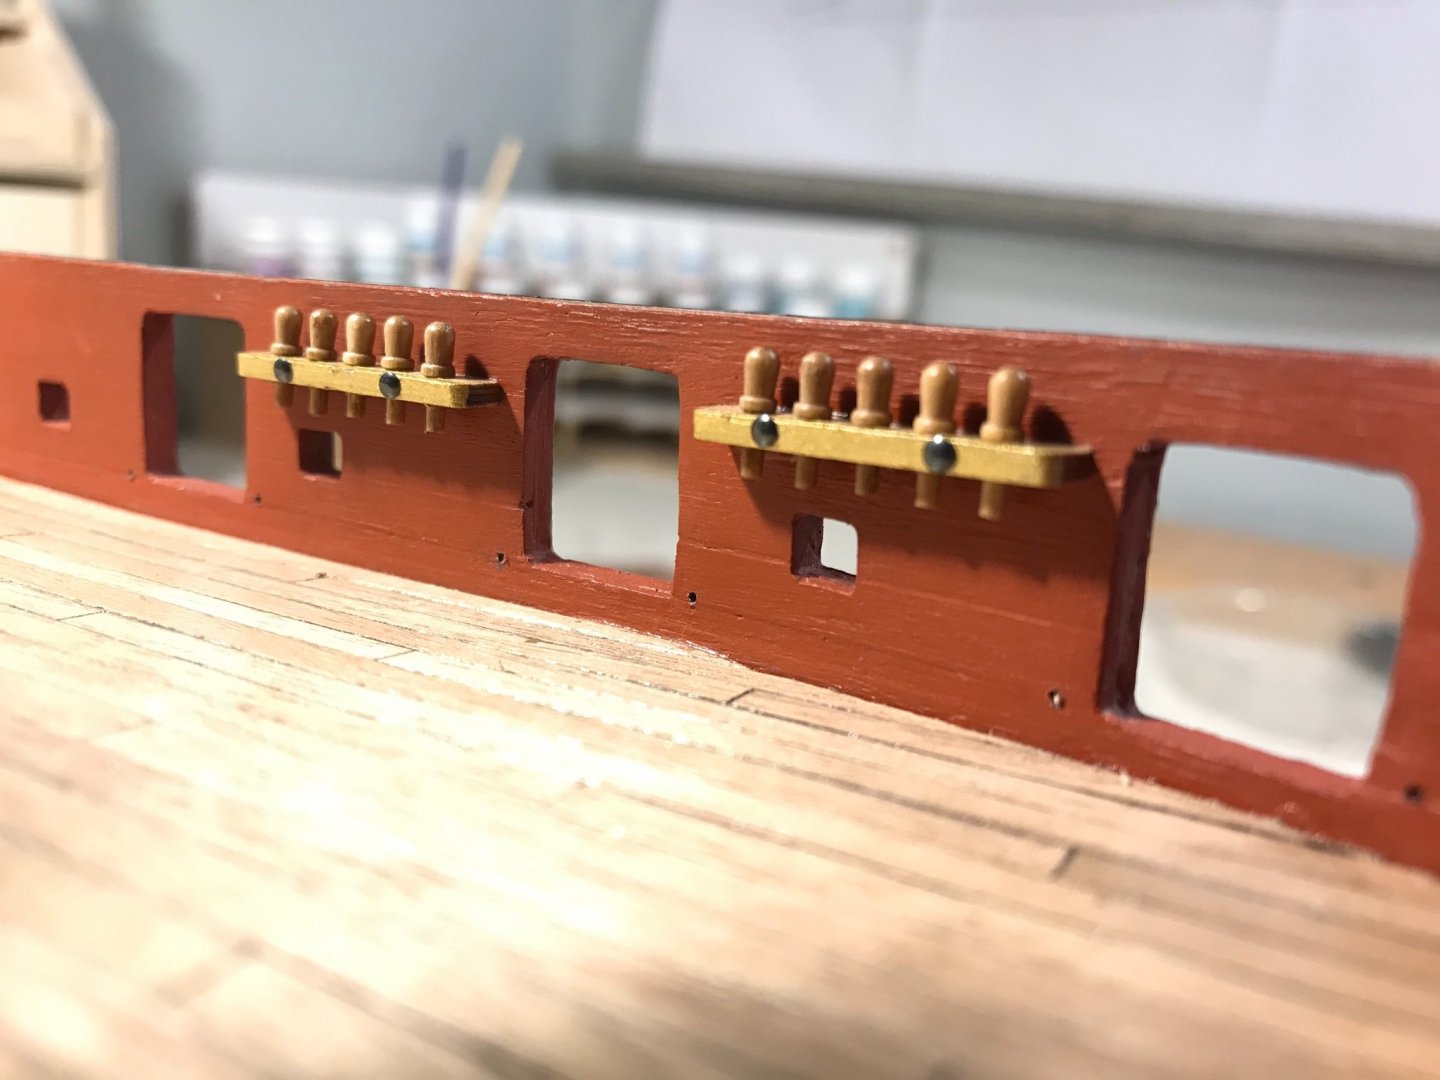
Working on the deck fittings. The gratings were fiddly, but fun. Sadly the supplied walnut strip for the framing was split, and the replacement I ordered was very pale, essentially the same colour as the deck. So I stained it a kind of teak colour, that makes sanding to fit and end-grains difficult, so I mitred the corners. I have also added a galley flue and rearranged the path of the cable. The flue is solid, though, as has been remarked elsewhere, it usually sported a cap when not in use; I imagined my cap being of sheet copper Next, the companionway, wheel, a possible binnacle (from Vanguard Models, badly stained, but a decent colour match) and the capstan. Petrejus tells me that capstan heads were often covered in brass sheet - so mine is painted to look that way. I was not convinced by the PE wheels, or that Snake would have had a double wheel. So I glued the two together, back to back, making something more substantial and also allowing me to paint it and keep a brass hub and rim showing Here they are roughly in place Finally, pinrails and belaying pins installed. Again Petrejus reports that the rails were often edged in brass to protect from wear and add some decoration - so mine are. I read in Steel that belaying pins were 16" long, or 1/4" at 1:64 ie 6mm, so the kit-supplied materials are not ridiculously small, though they are somewhat over diameter. I have seen pictures of pinrails bolted to the bulwarks, so I have borrowed from that by using round-headed black pins instead of hidden wire to give strength.


- 109 replies
-
- 6
-
-
- snake
- caldercraft
- (and 1 more)
-
Stunning as ever. Have missed your work over the last couple of months. Hope you are well, and thanks for sharing. Mike
-
HMS Snake by BenD - Caldercraft - 1:64
Mike_H replied to BenD's topic in - Kit build logs for subjects built from 1751 - 1800
Great to see you back, Ben. Your Snake looks crisp and clean as ever. Mike -
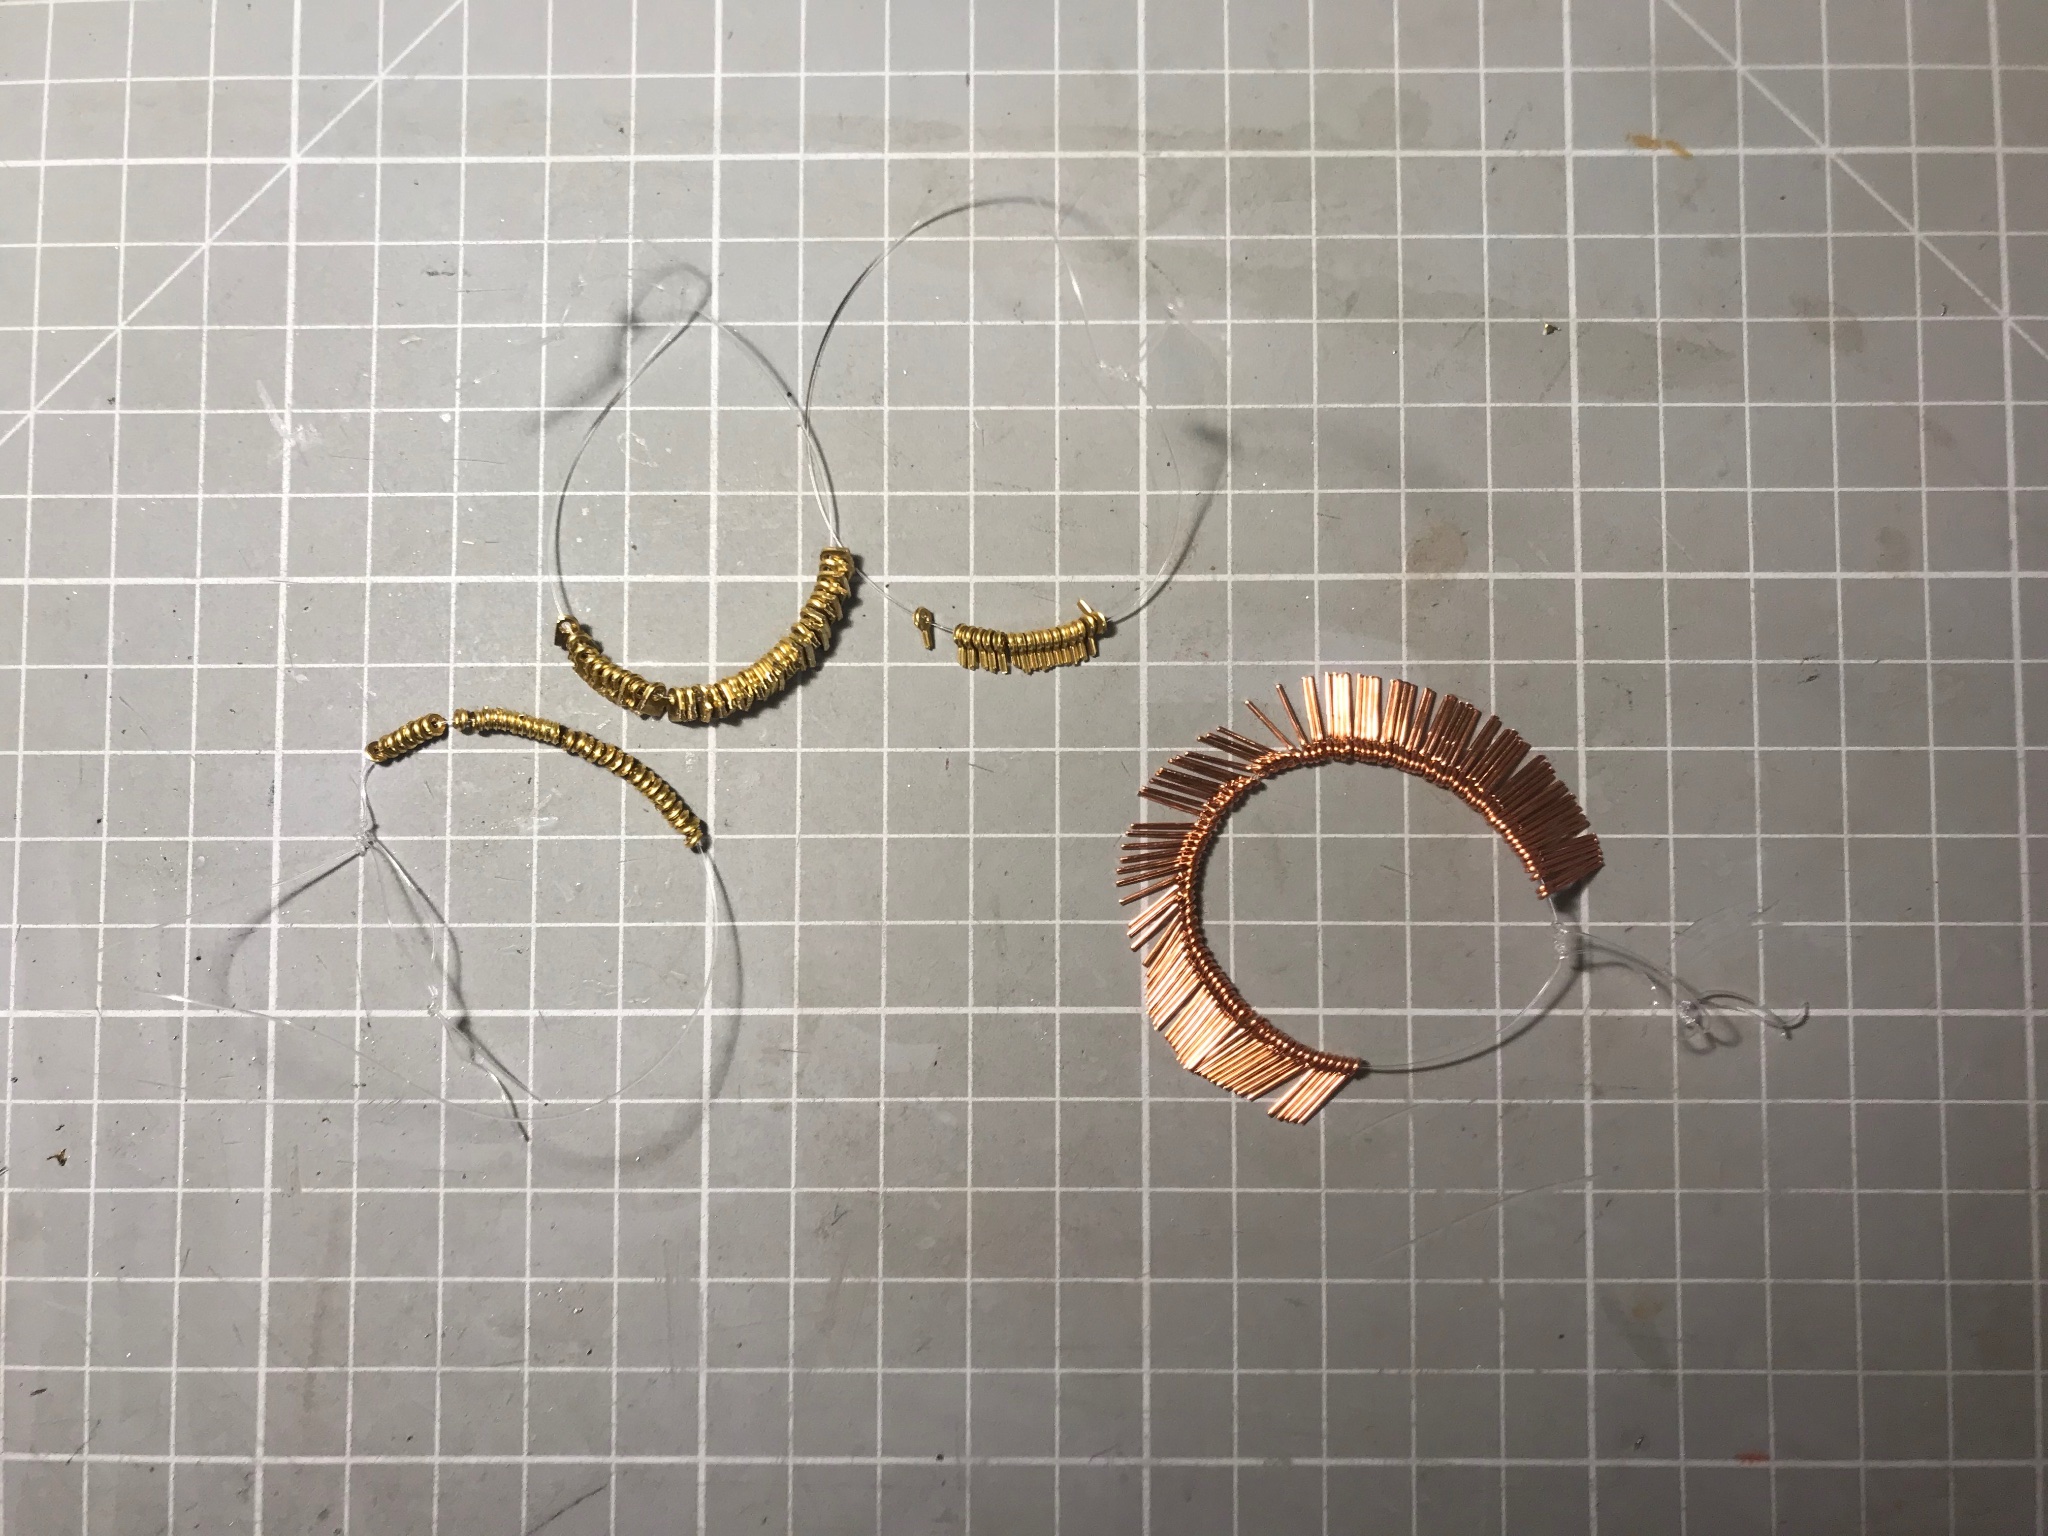
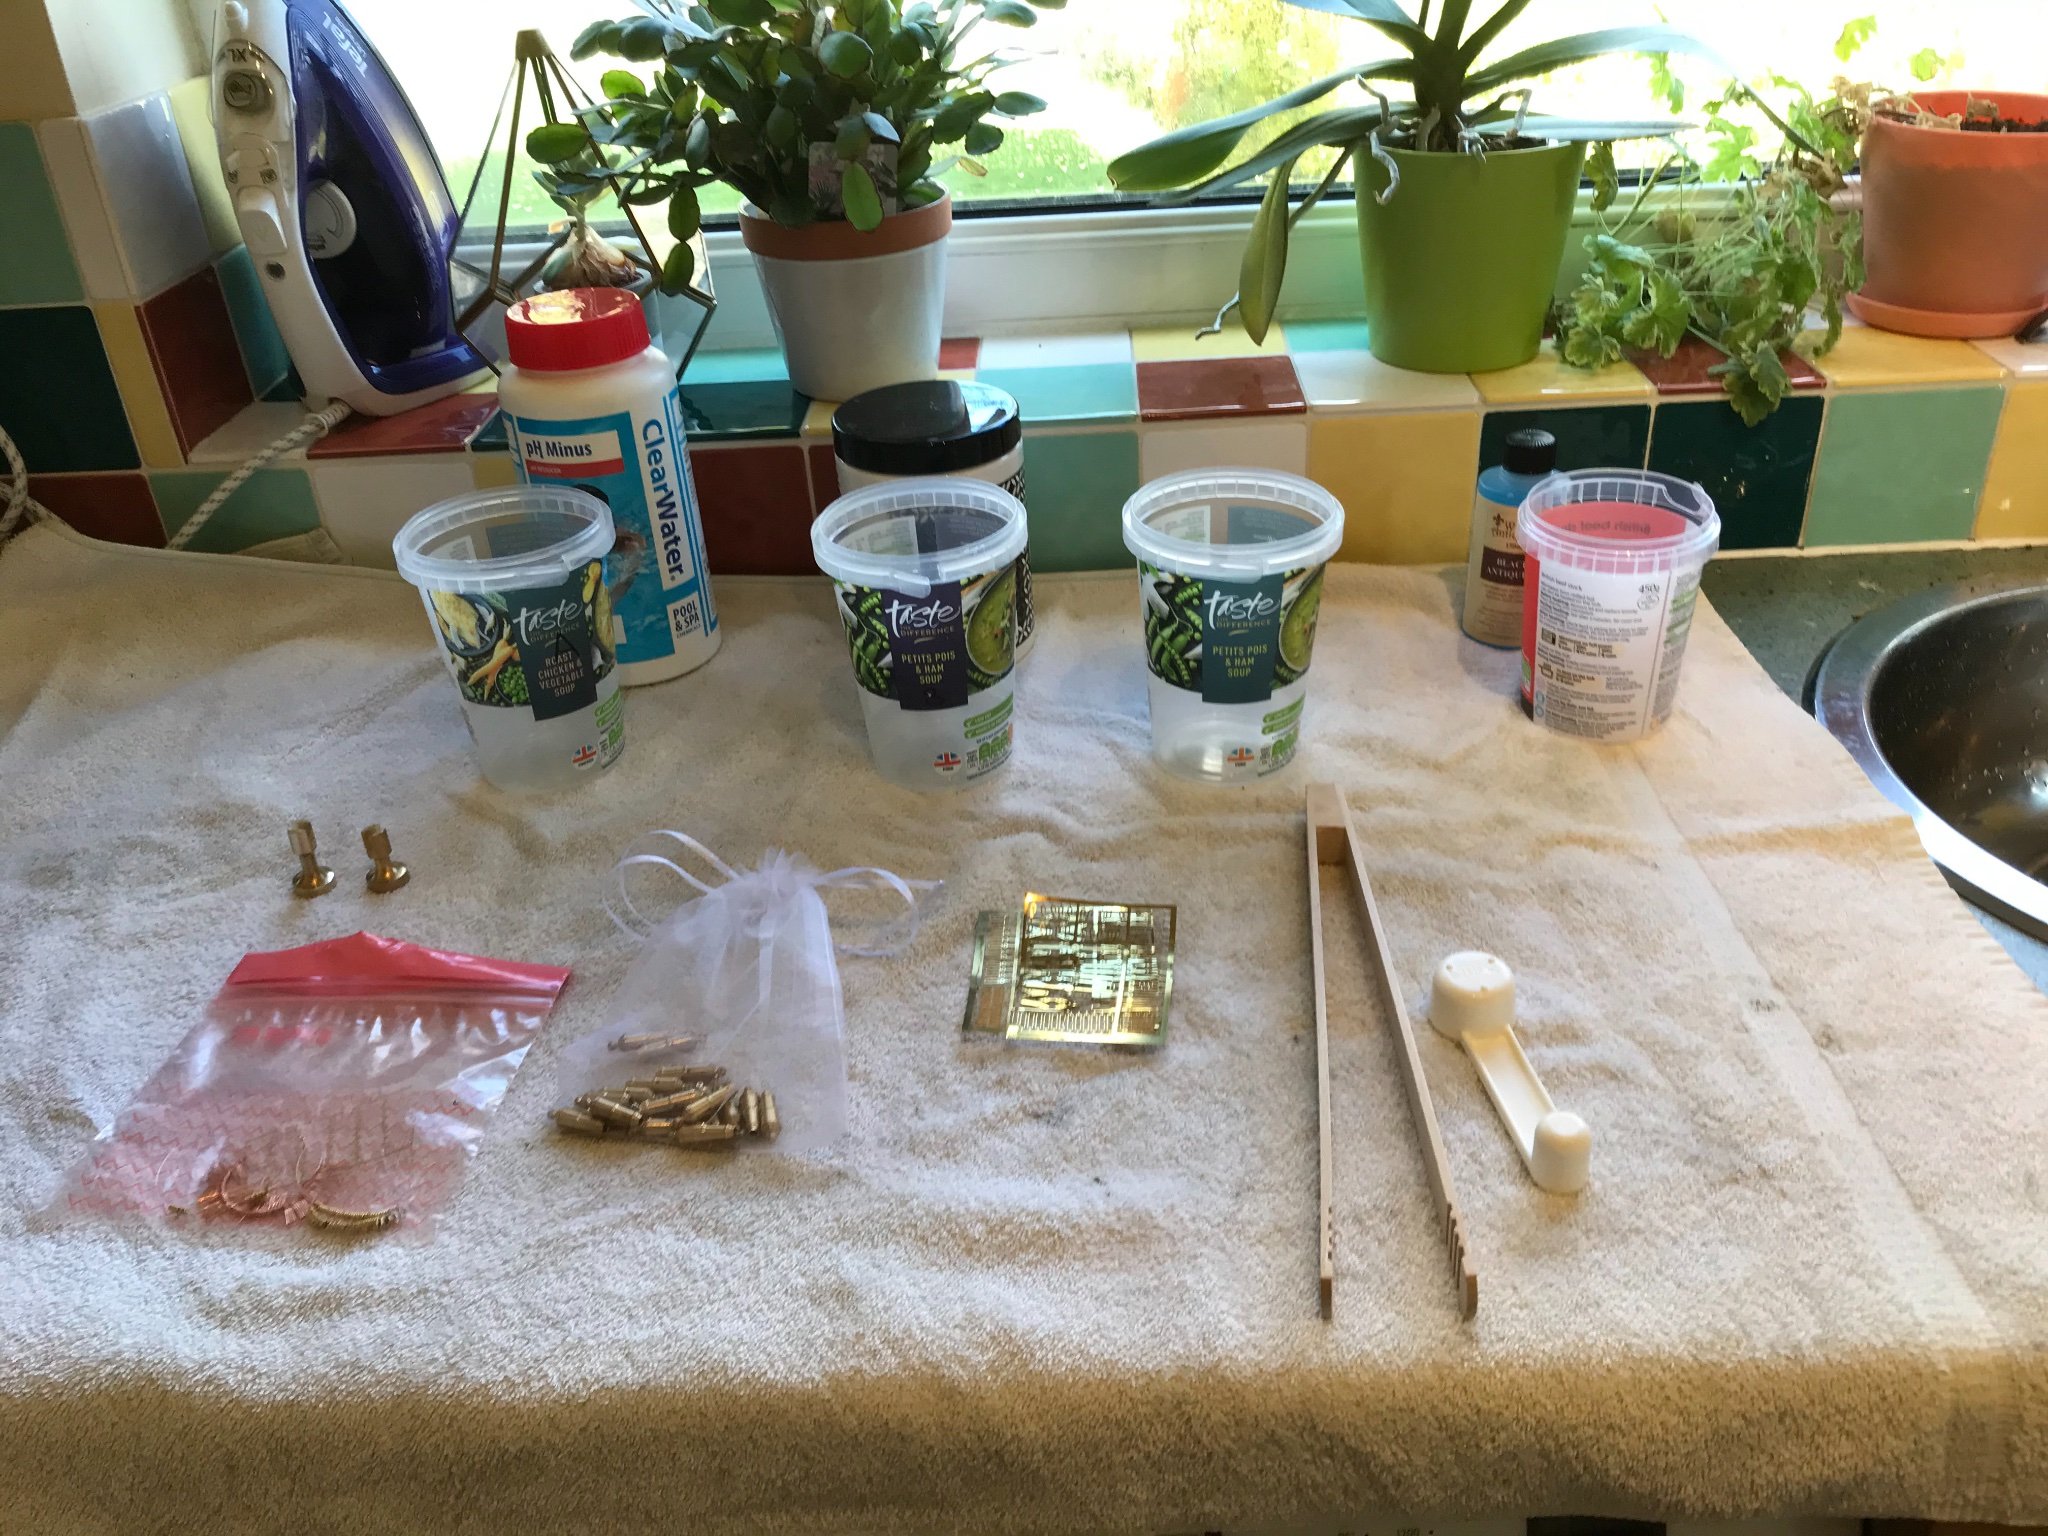
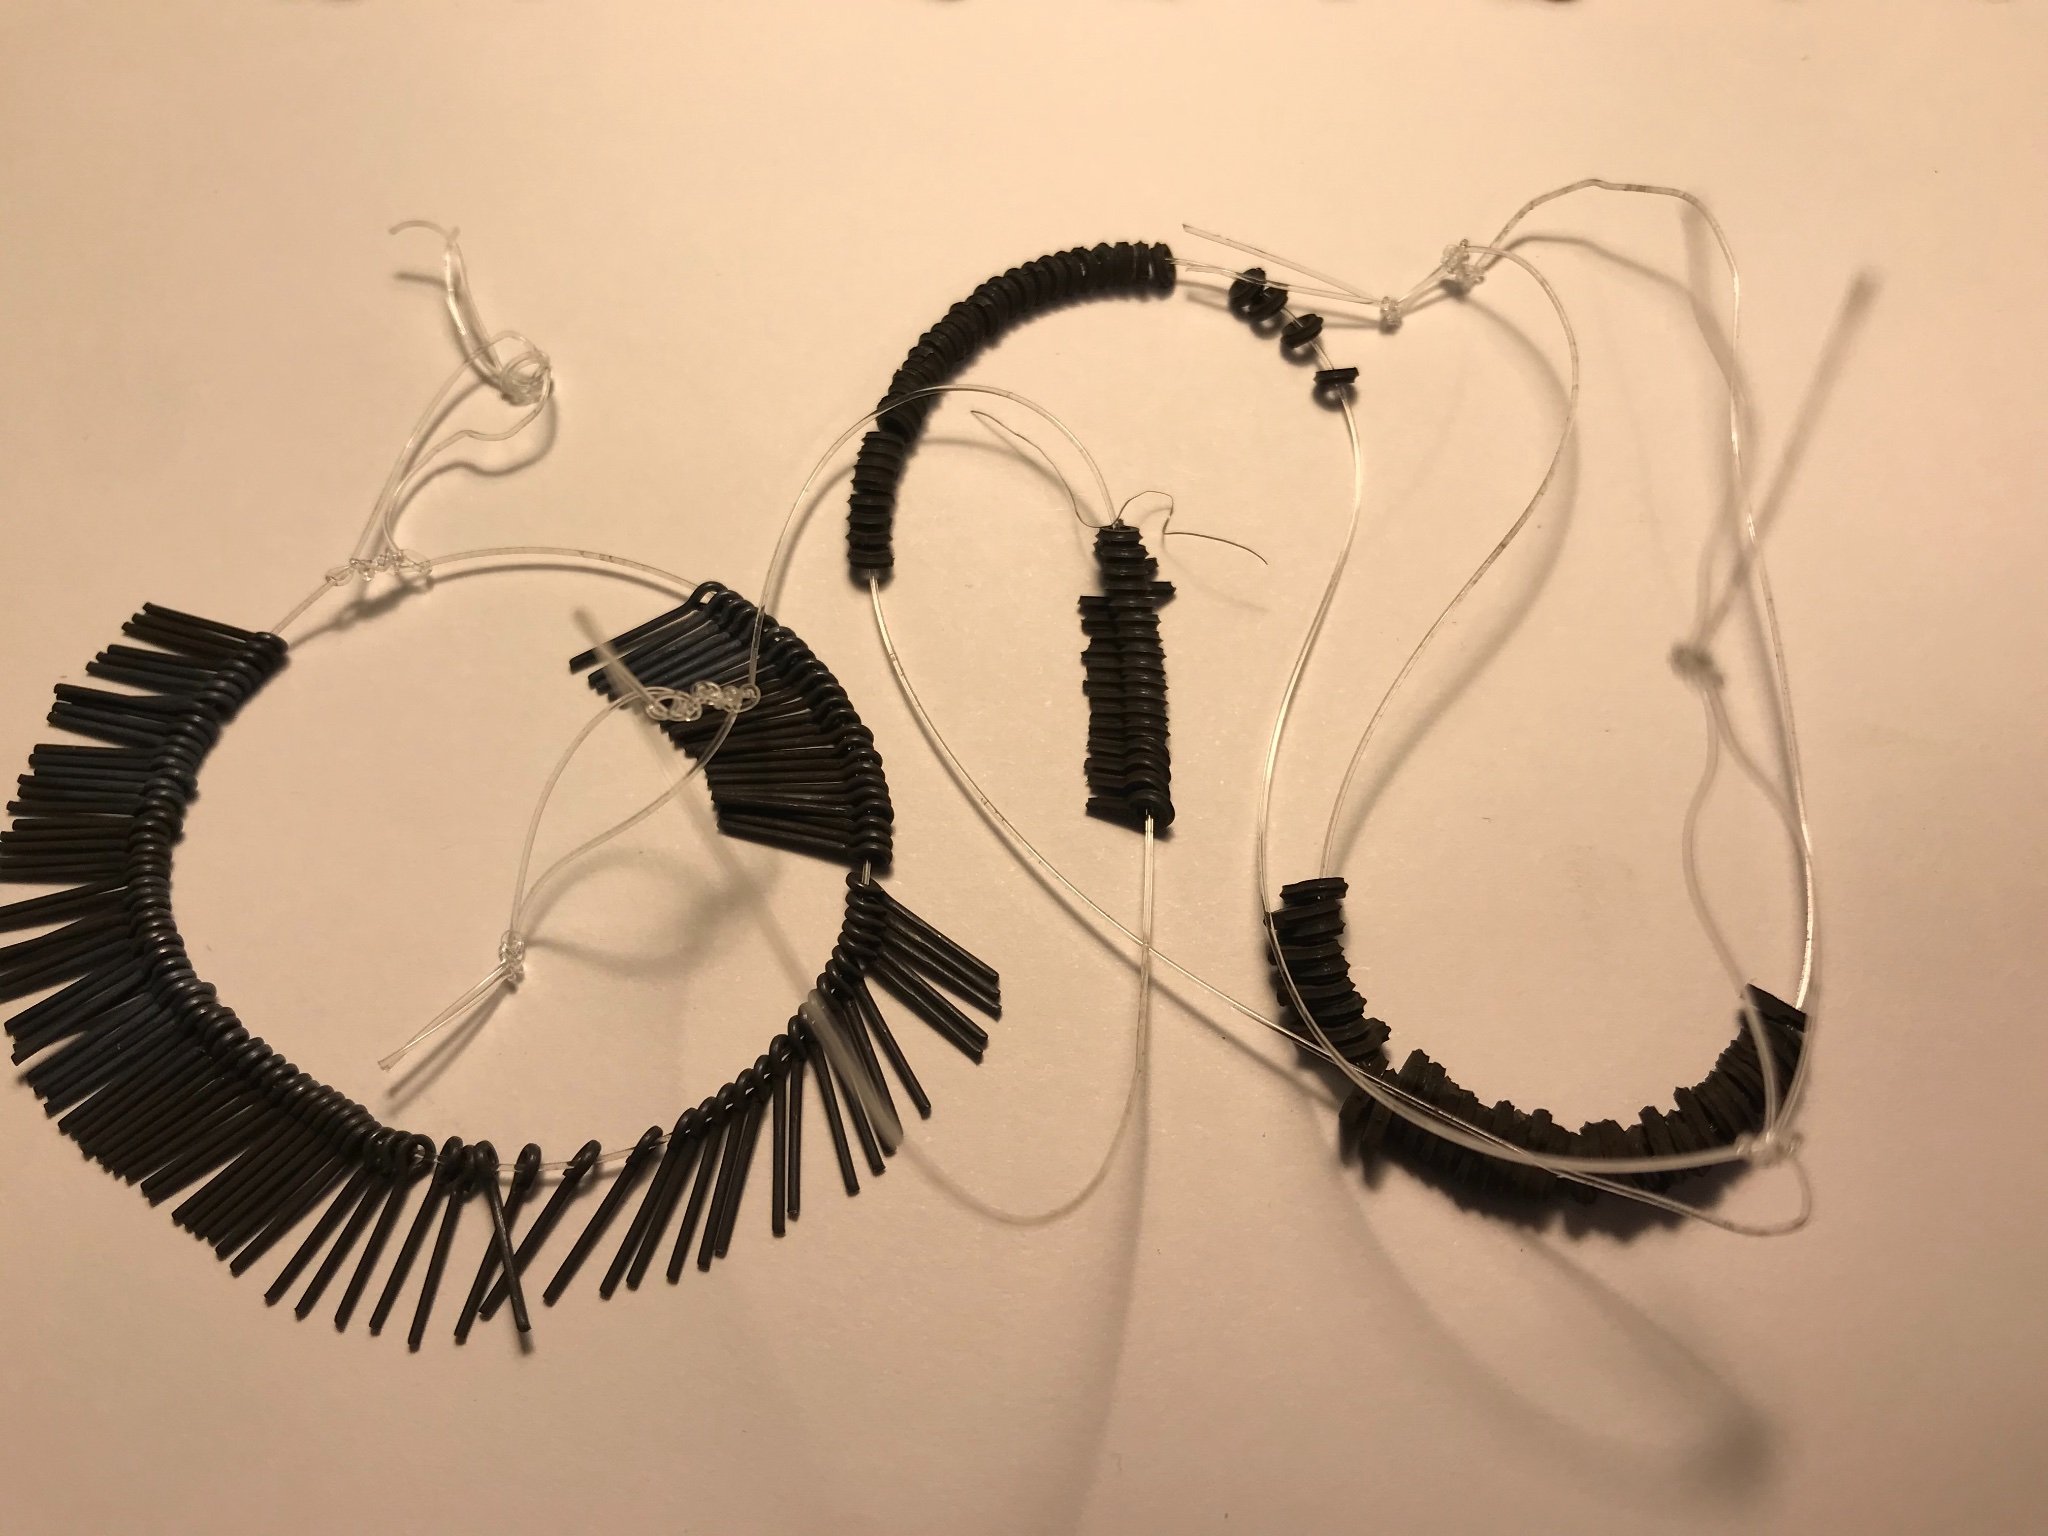
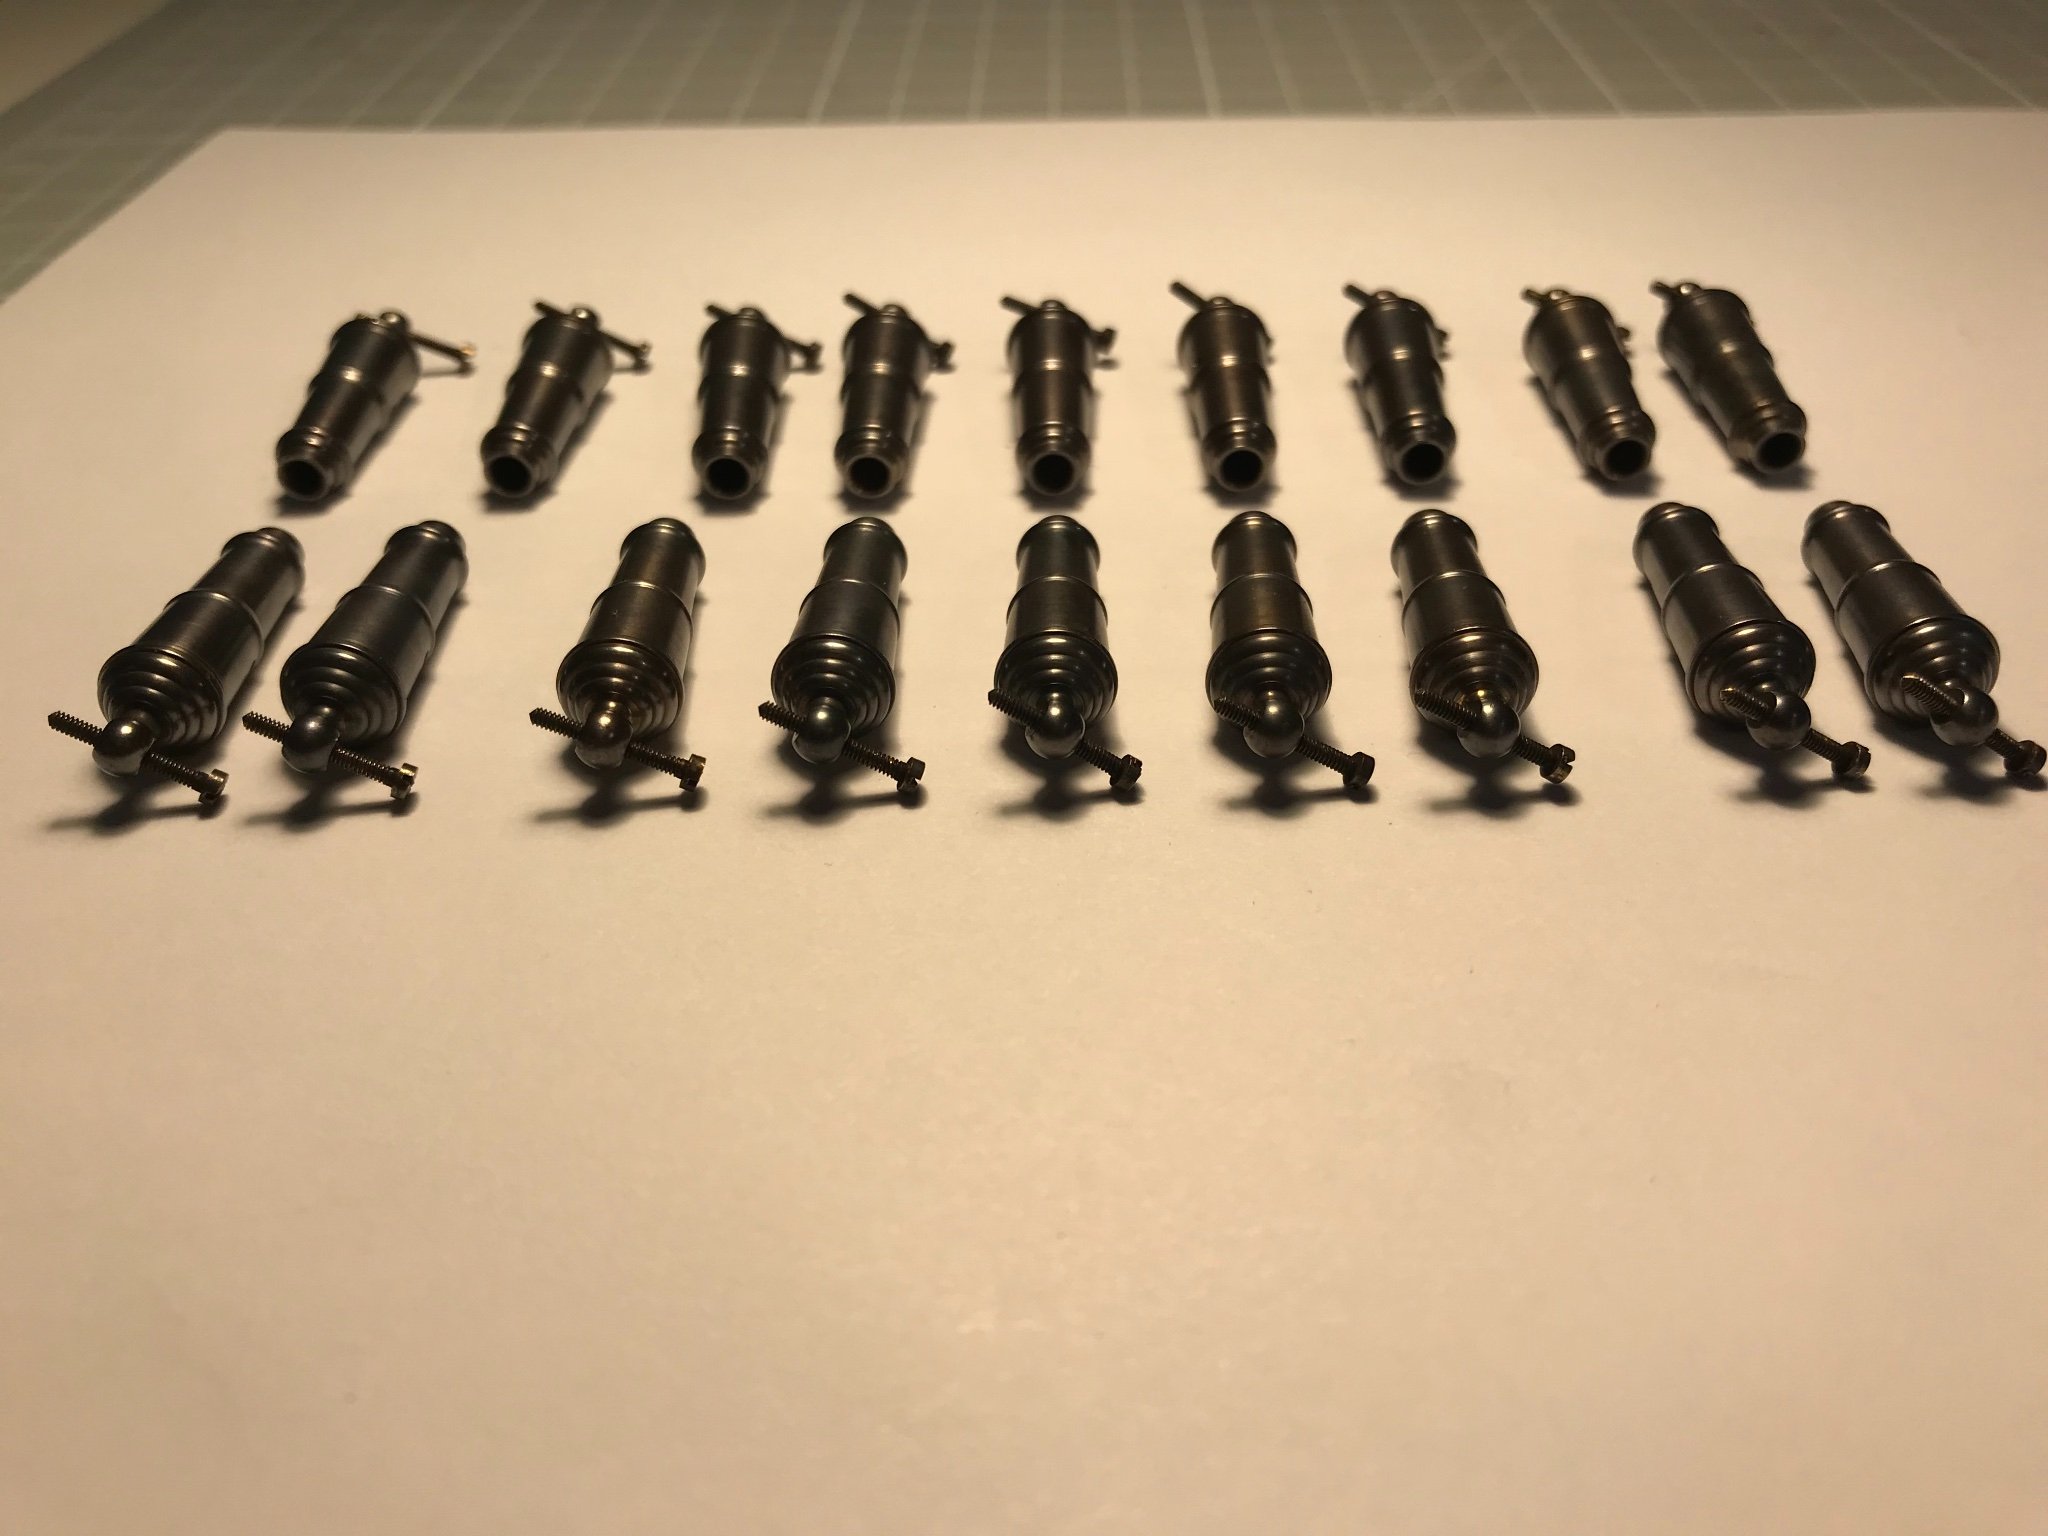
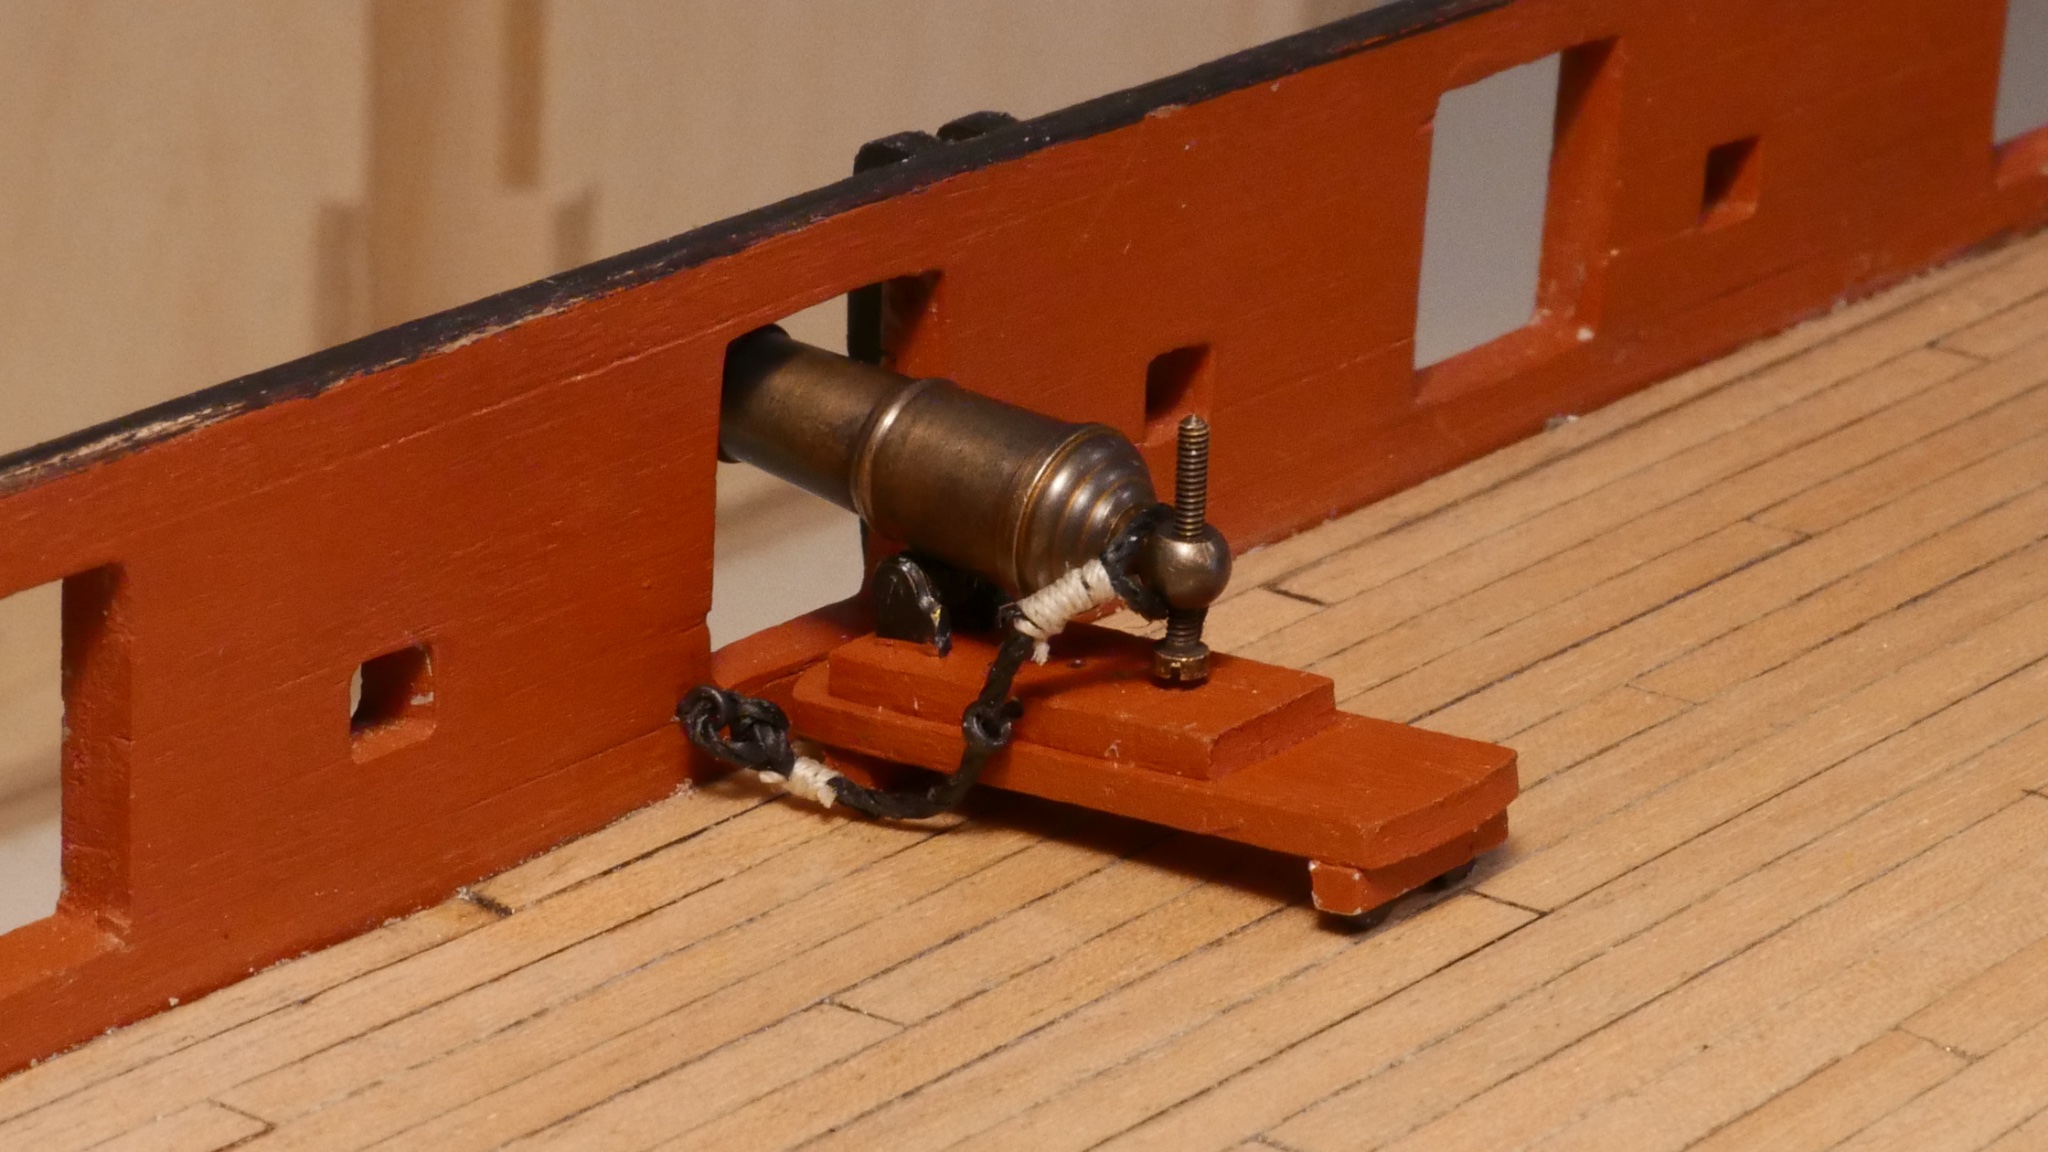
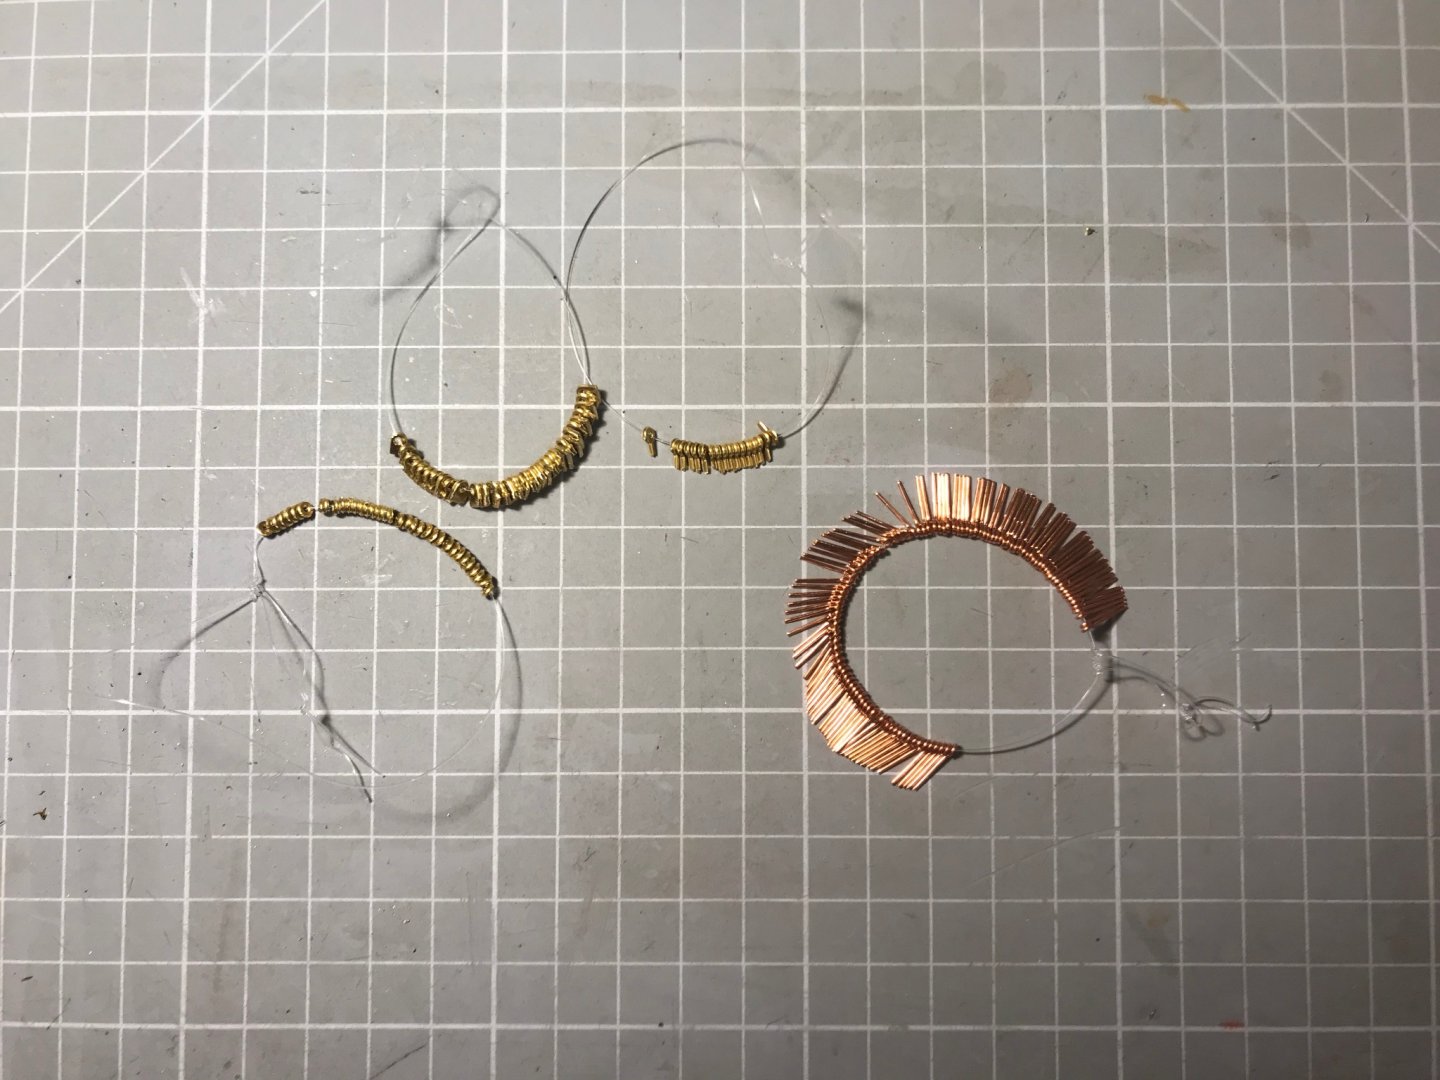
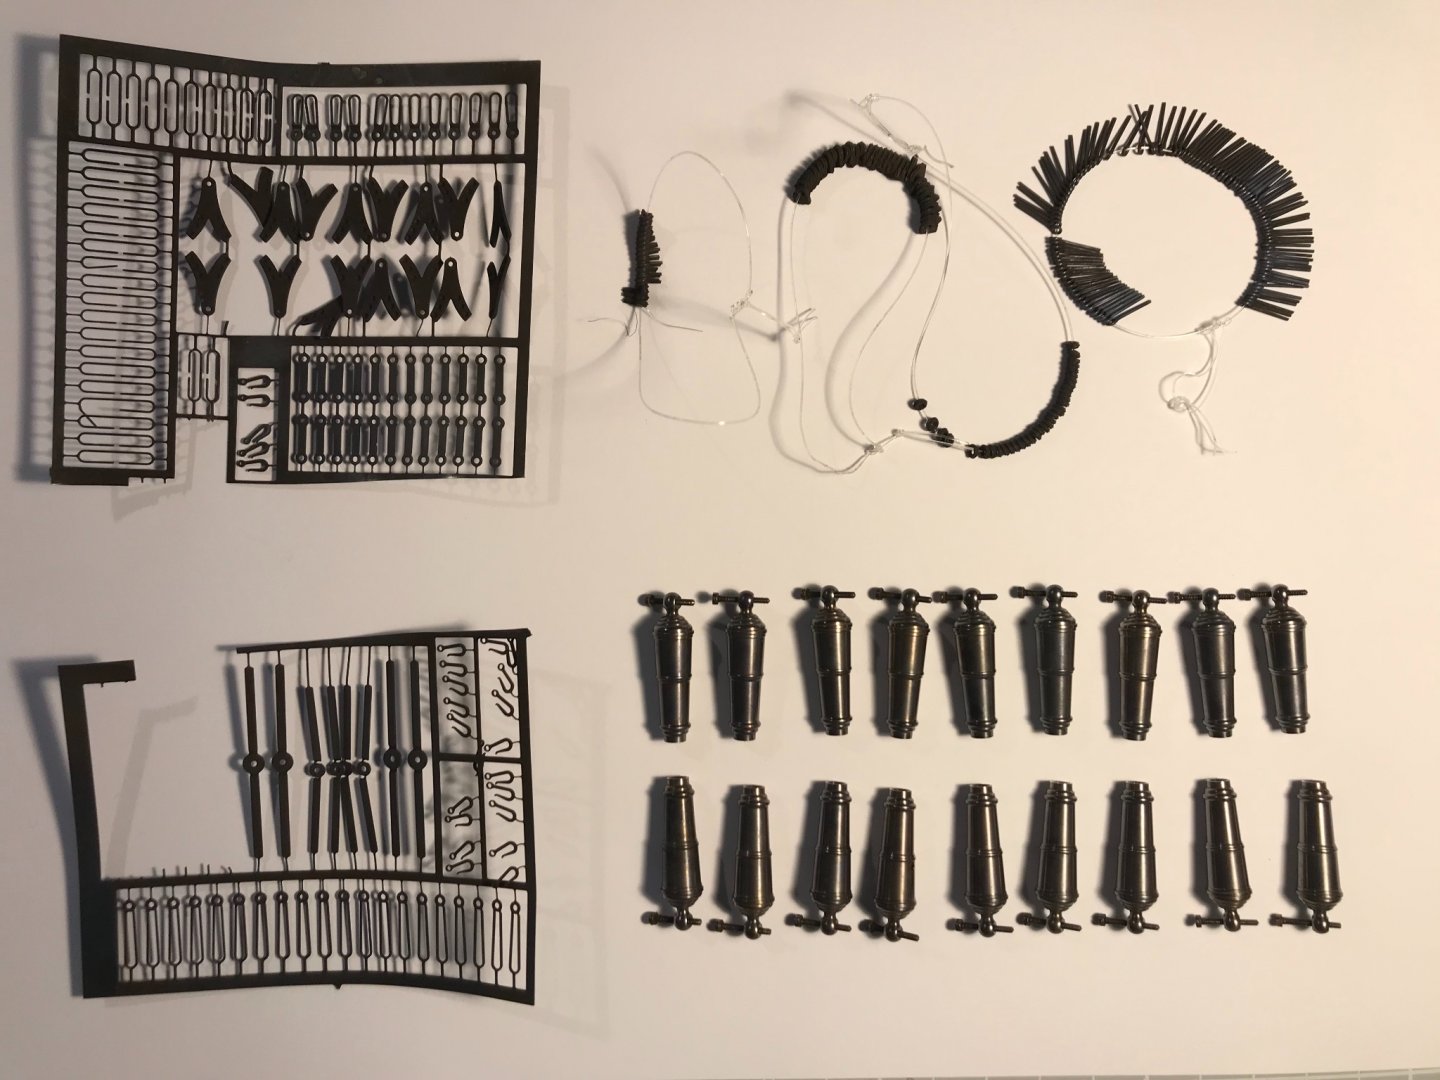
A little bit of blackening. I'm moving onto the deck furniture now, and thought I would start by installing the ringbolts (largely for the guns, but in other places too) while nothing else was in the way. There are 200 of these provided, in nice shiny copper. So that's 200 tiny pieces to be painted black. And there are 4 eyebolts and then 5 little photo-etched (PE) brass pieces for each gun. So the guns alone have 162 tiny pieces to be painted black. I also need to decide what to do with the gun barrels. So I thought I would try some chemical blackening of the kind described here. To stop the small pieces drifting off on their own I tied them onto small loops of fishing line. The supports for the guns need to fit in slots pre-machined in the gun carriages. Joy-oh-joy every piece of brass is alittle over-size so needed to be filed down fore and aft I set up in the laundry. Across the back you can see: (a) pH minus ie sodium hydrogen carbonate, (b) sodium bicarbonate, (c) water and (d) John Wardle black antiquing solution. Across the front: the columns for the display board, the small parts for the guns, the guns themselves, two sheets of PE, a pair of wooden tongs (most metals are a bad idea in one or more of acid/bas/blackening solution), and a measuring spoon (about 3 table spoons - 45 ml - in 250 ml of water is about right for both acid and base. Blackening is a 10-fold dilution) And how did it go? Great at first on the small gun parts: But the guns, no so much: You can just see in the middle one of the guns came out solid black, but most have only a few spots of black acne. This matches the descriptions on the blackening page ,linked above, of lacquer coating on the brass. So after soaking in iso-propanol (acetone is not readily available in the UK, it seems) I scrubbed them with steel wool and gave them some extended acid treatment. After neutralising and washing, I then painted on neat blackener and then dumped them in the dilute solution. For about 15 of the guns the results were good. The others needed a repeat. And here is everything that's fit to show: The PE worked perfectly. The brass columns not at all - including on the parts that had been extensively filed, so not a lacquer problem. This being a selenium solution, that reacts with the copper in the brass (see @bartley's post here) I wonder if this is a particularly low copper brass. I did get a little bit of antiquing, which I think I quite like. As also explained in the links I've given, the blackening is microscopic selenium metal particles that are not chemically bonded in place. I messed around for quite a while exploring rigging options handling one of he guns extensively. As the following shows, it doesn't look so black anymore: I picked the least impressive of the 18, and perhaps bronze would be ok. I will give this one another bath in the solutions. Of the fittings, only the eyebolts in the bulwarks were blackened all the other parts were painted from an earlier mock-up. They look fine to me. The kit recommends 0.75 mm neutral thread, which looked too skimpy. Lavery in "The ship of the line vol 2" quotes 7" circumference for breeching on a 32 lb (long) gun, which would be 0.88 mm diameter at 1:64. I didn't have any 1 mm neutral so tried black for size - I've ordered some 1 mm neutral. Because the cascabel does not have a loop for the breeching (as was quite common with carronades) I'm going to imitate a (ahem) cut splice.


- 109 replies
-
- 5
-
-
- snake
- caldercraft
- (and 1 more)
-
And I this https://www.amazon.co.uk/gp/product/B00KR9IW9U/ref=ppx_yo_dt_b_asin_title_o00_s00?ie=UTF8&psc=1 ditto!
-
Couldn't agree more. Will be hunting down some "matte-finish lacquer-based clear nail top coat".
-
Stunning model. I like to believe the speed and quality of James’ work stems from the quality of Chris’ design - so I too could be this quick. Not (entirely) true, of course. And it’s about the journey anyway. But IWOOT as the kids used to say.
- 355 replies
-
- 5
-
-
- vanguard models
- Sphinx
- (and 1 more)
-
Erik, she’s absolutely beautiful, small wonder you have her on display as people enter the house. I’m impressed by your rope-work and that the nail polish you have used is not obvious at all in the photographs. Would you mind sharing the details of the product you used? The bottle coyly has it back to us in one of the phots, and I can see it’s an OPI product from Coty, and appears to be available in the UK. But that doesn’t narrow it down much! Anyway, well done on the build. Mike
- 222 replies
-
- 1
-
-
- First Build
- Lady Isabella
- (and 2 more)
-
Just did a quick search for Endeavour Longboats, having negleted them since I finished mine. Found yours. Great start, how’s it going? Mike
-
After you insert the photo just hit the return key.
-
Just found this - or rather something you posted elsewhere. Looking though your log brought back great memories of building my version last year - and we are both in Yorkshire! Anyway your work looks very clean and the hull looks very fine. How are you getting on with the rigging? cheers Mike
-
HMS Endeavour's Longboat Rigging
Mike_H replied to Dougal Mack's topic in Masting, rigging and sails
Hi @Dougal Mack. At the end of my build log for Endeavour’s Longboat (link in the sig, below), I took some reasonably high definition photographs that show how I ran the rigging. If you are still looking for guidance that might help. Any other details feel fre to post and tag me,and I’ll see what I can do to help. -
Only just realised that I did not follow this last year - and now it's finished. Lovely job and interesting to see her "nude" that is, un-painted. Just had a pleasant 20 min scrolling through while I waited for a phone call. Great work.
-
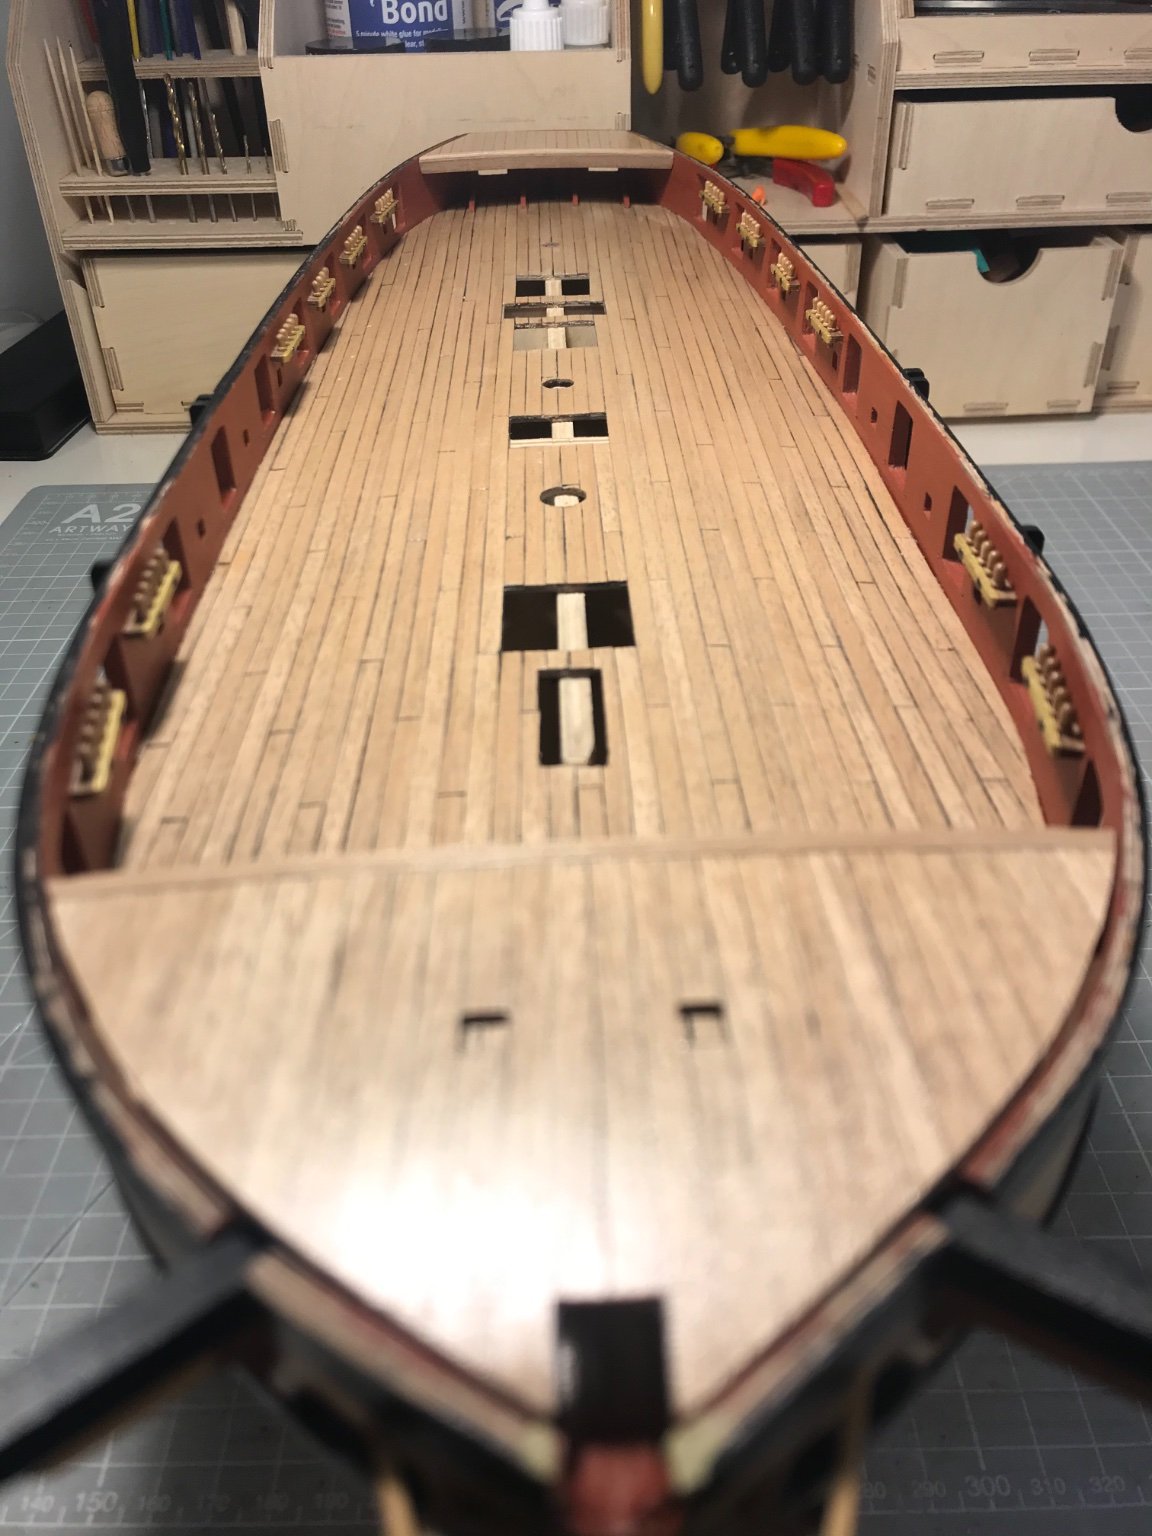
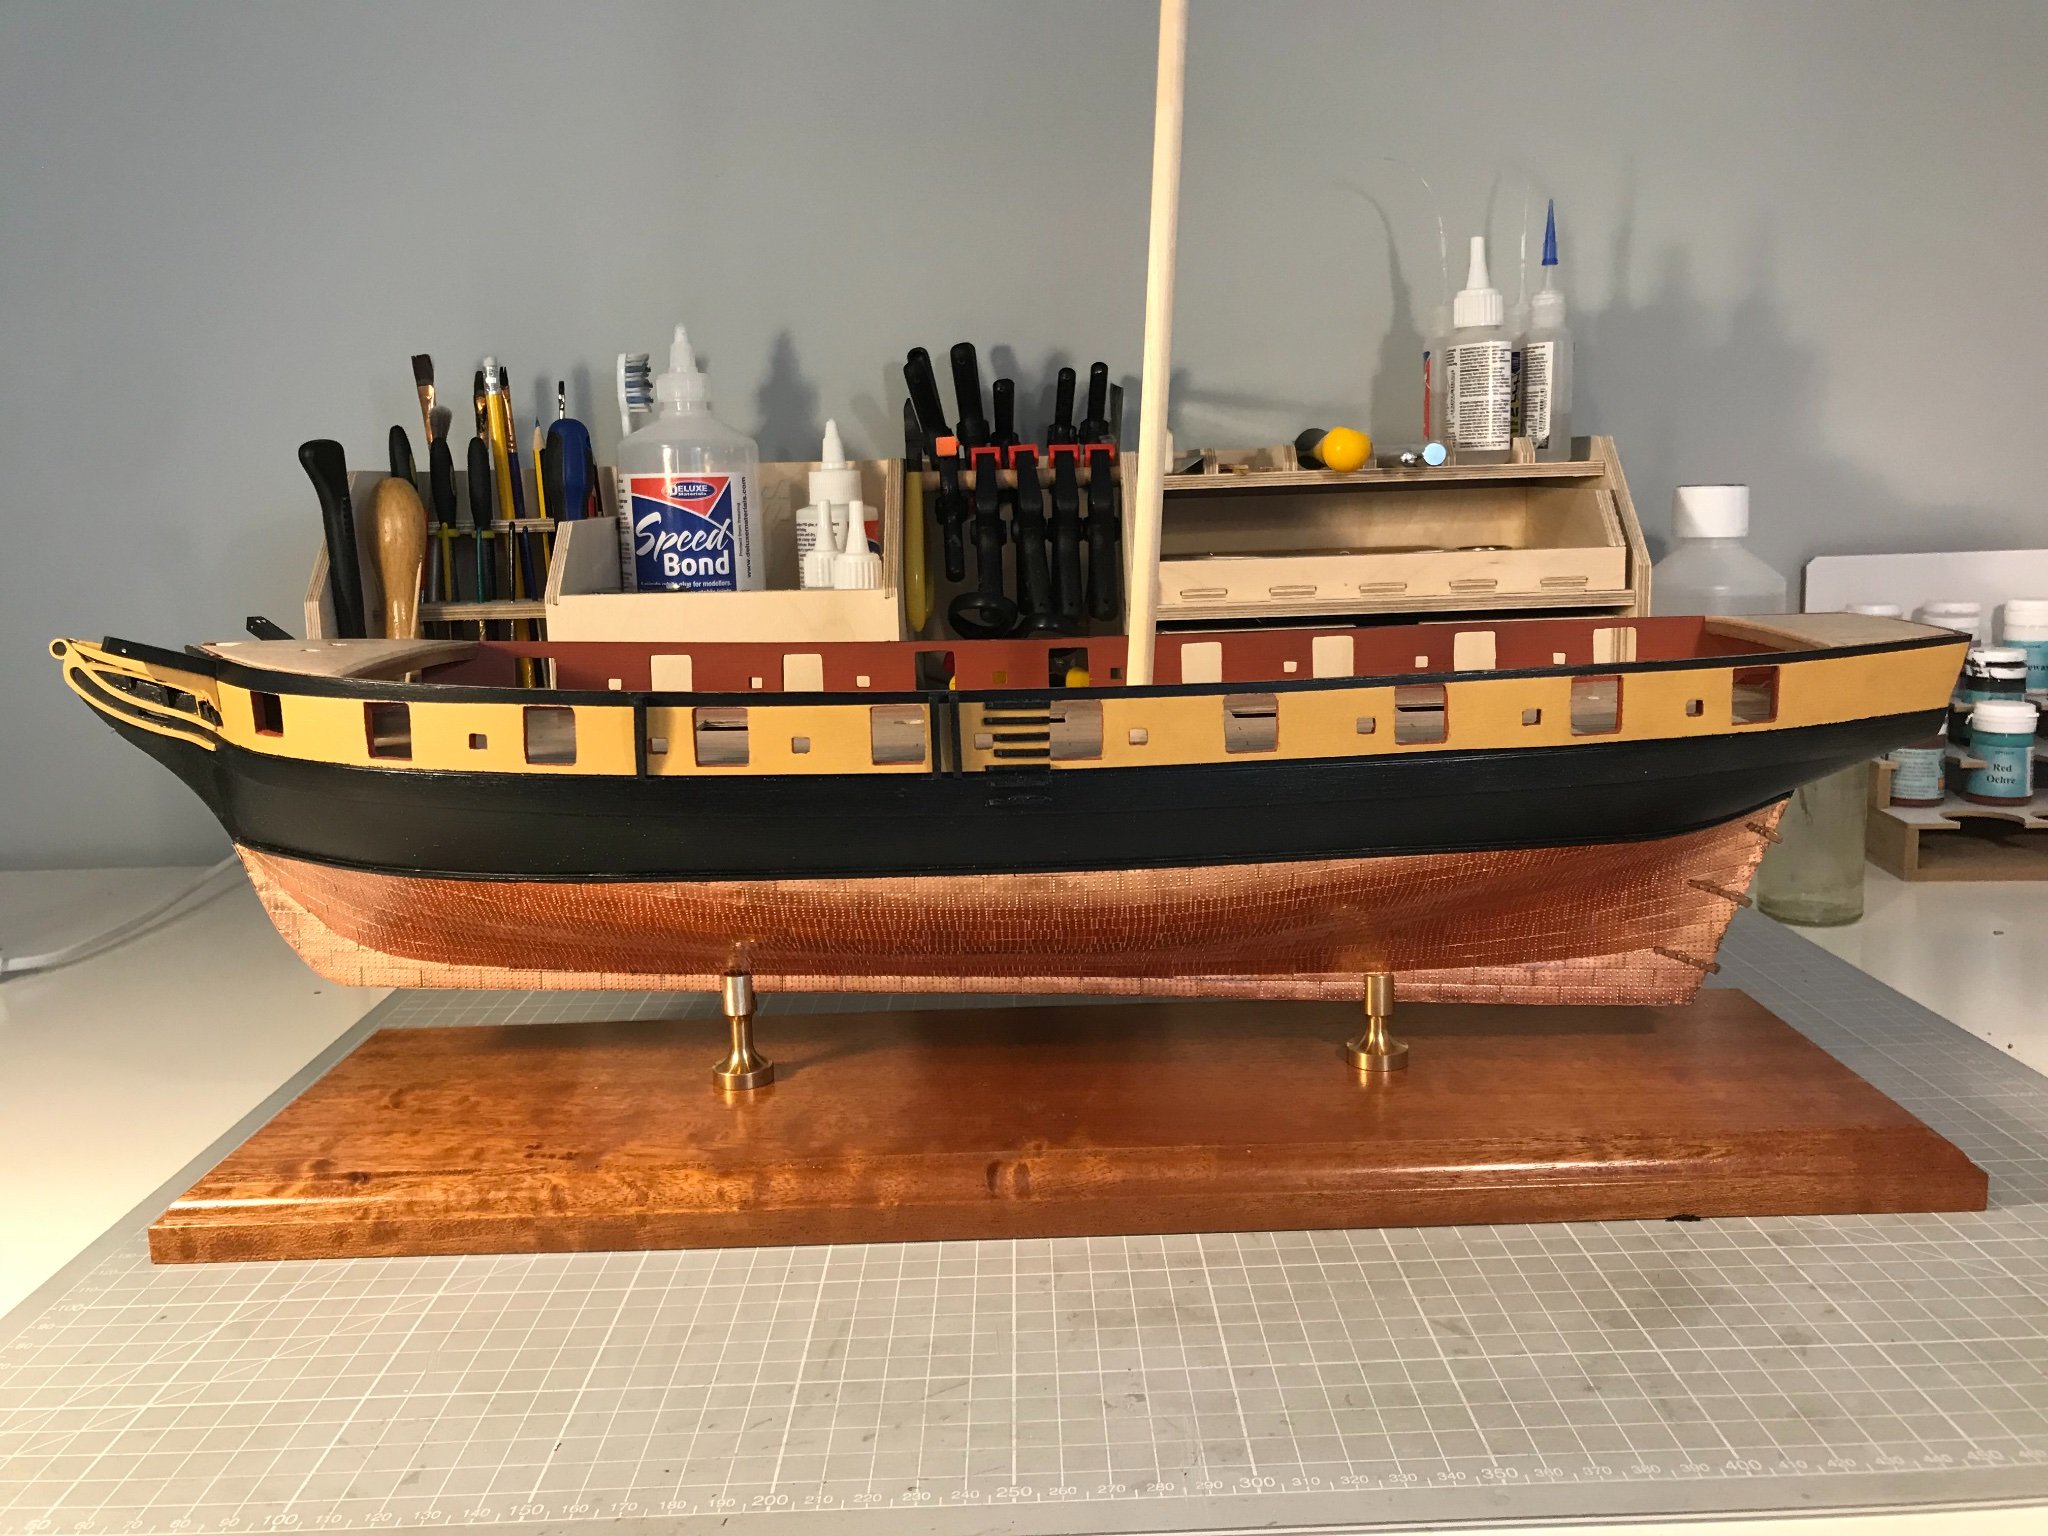
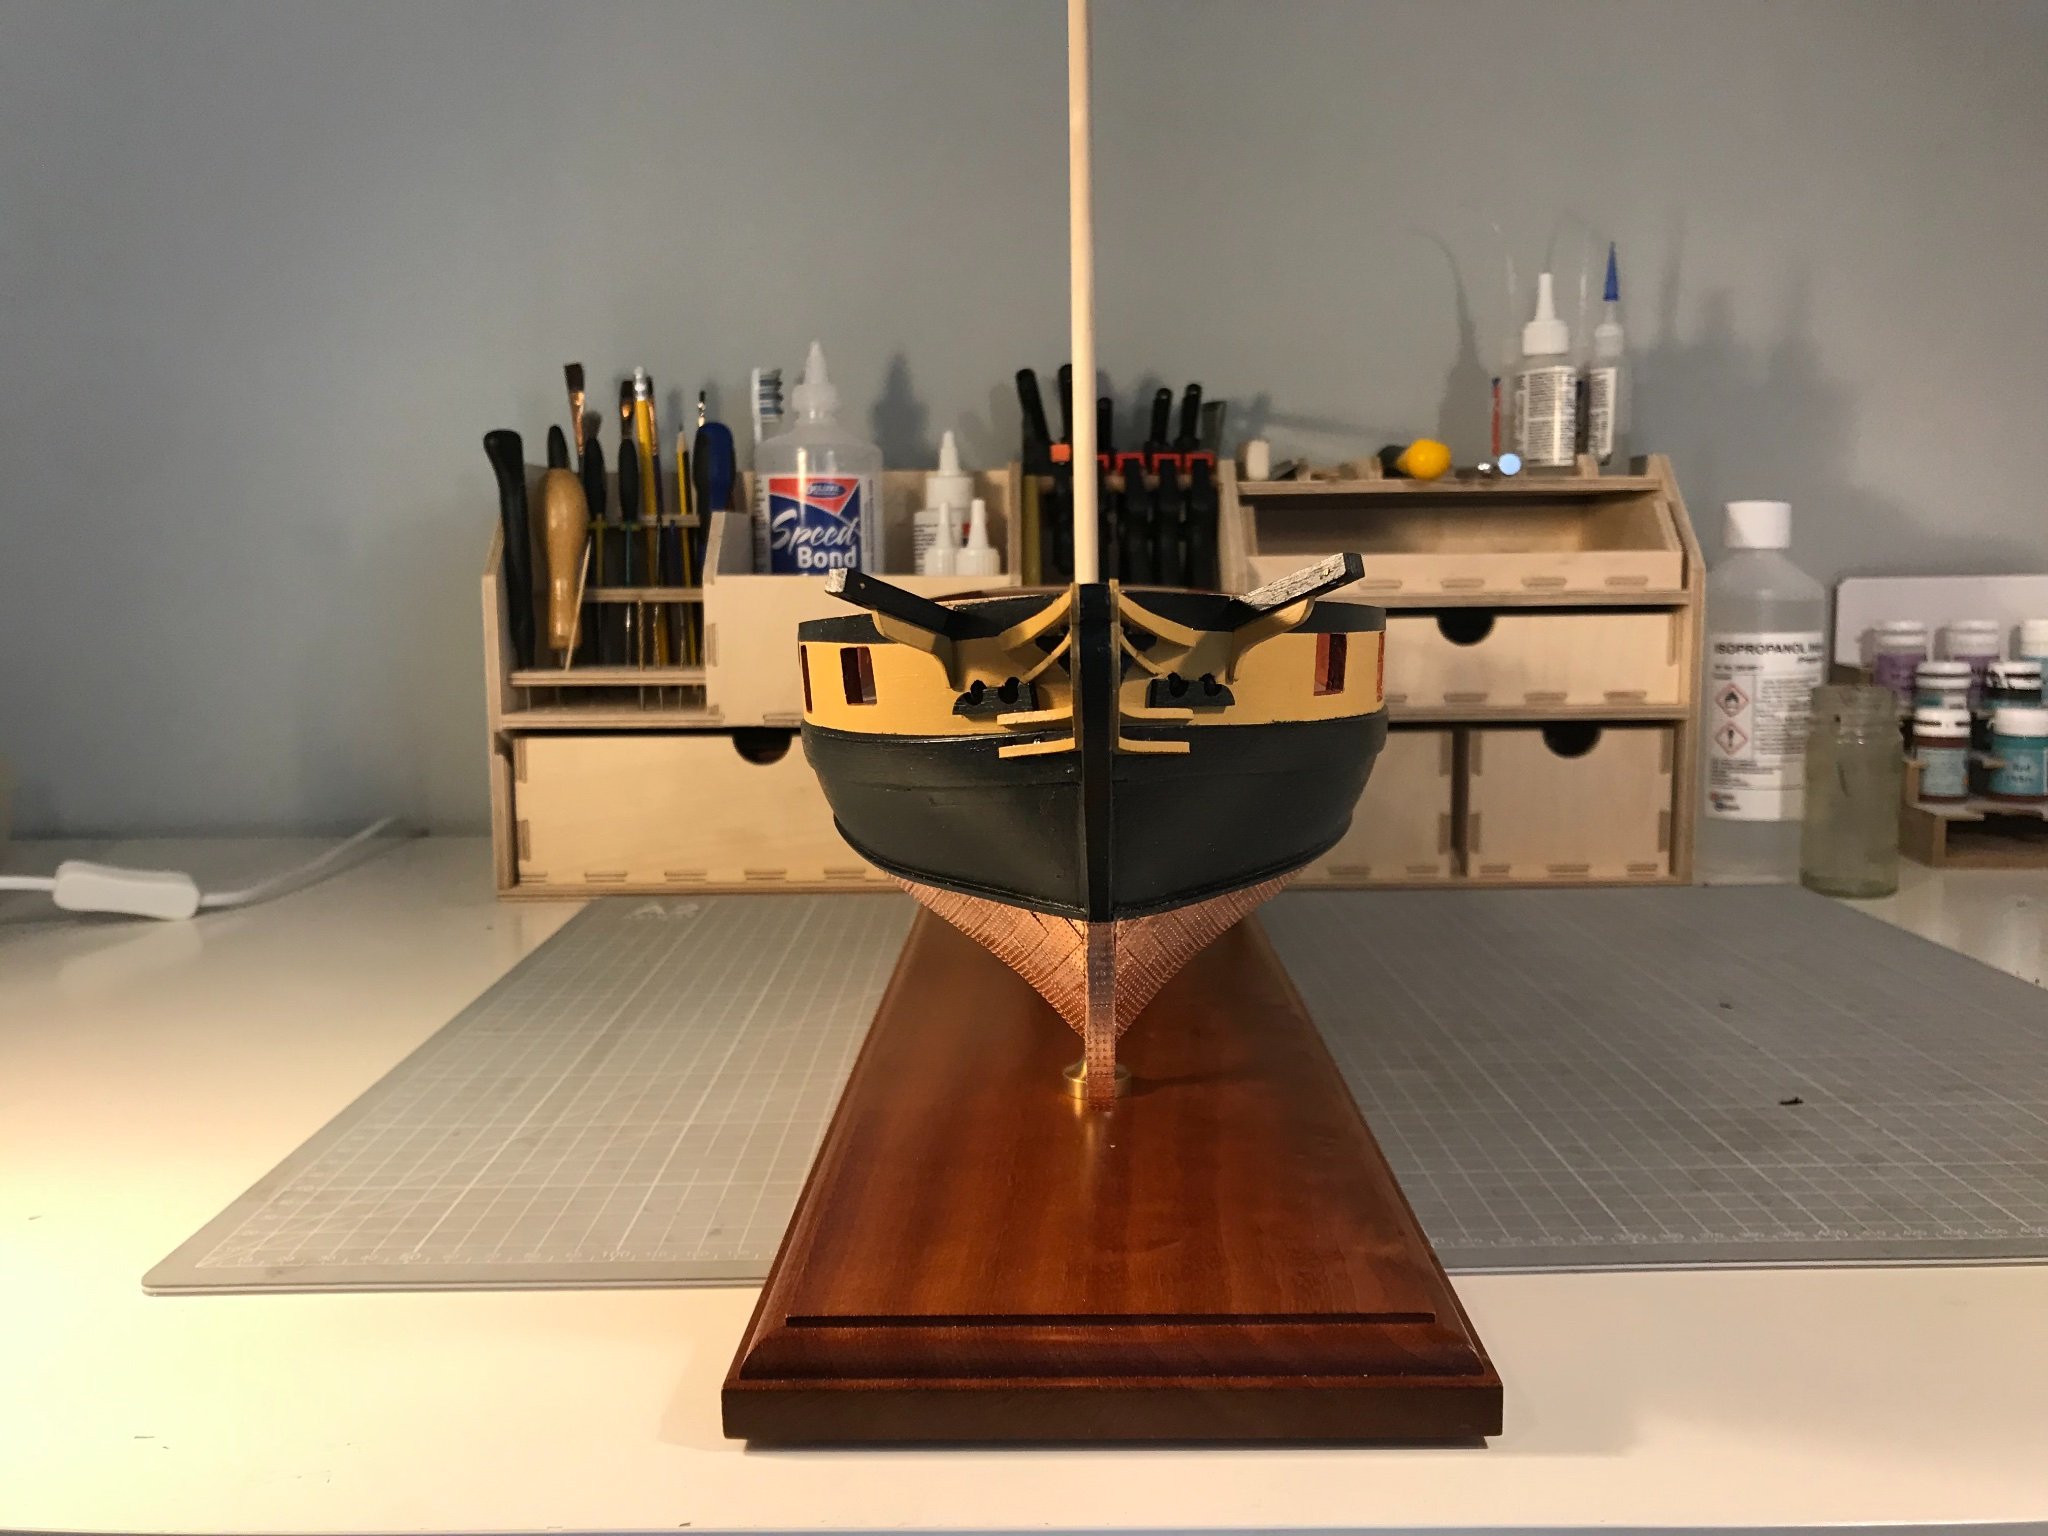
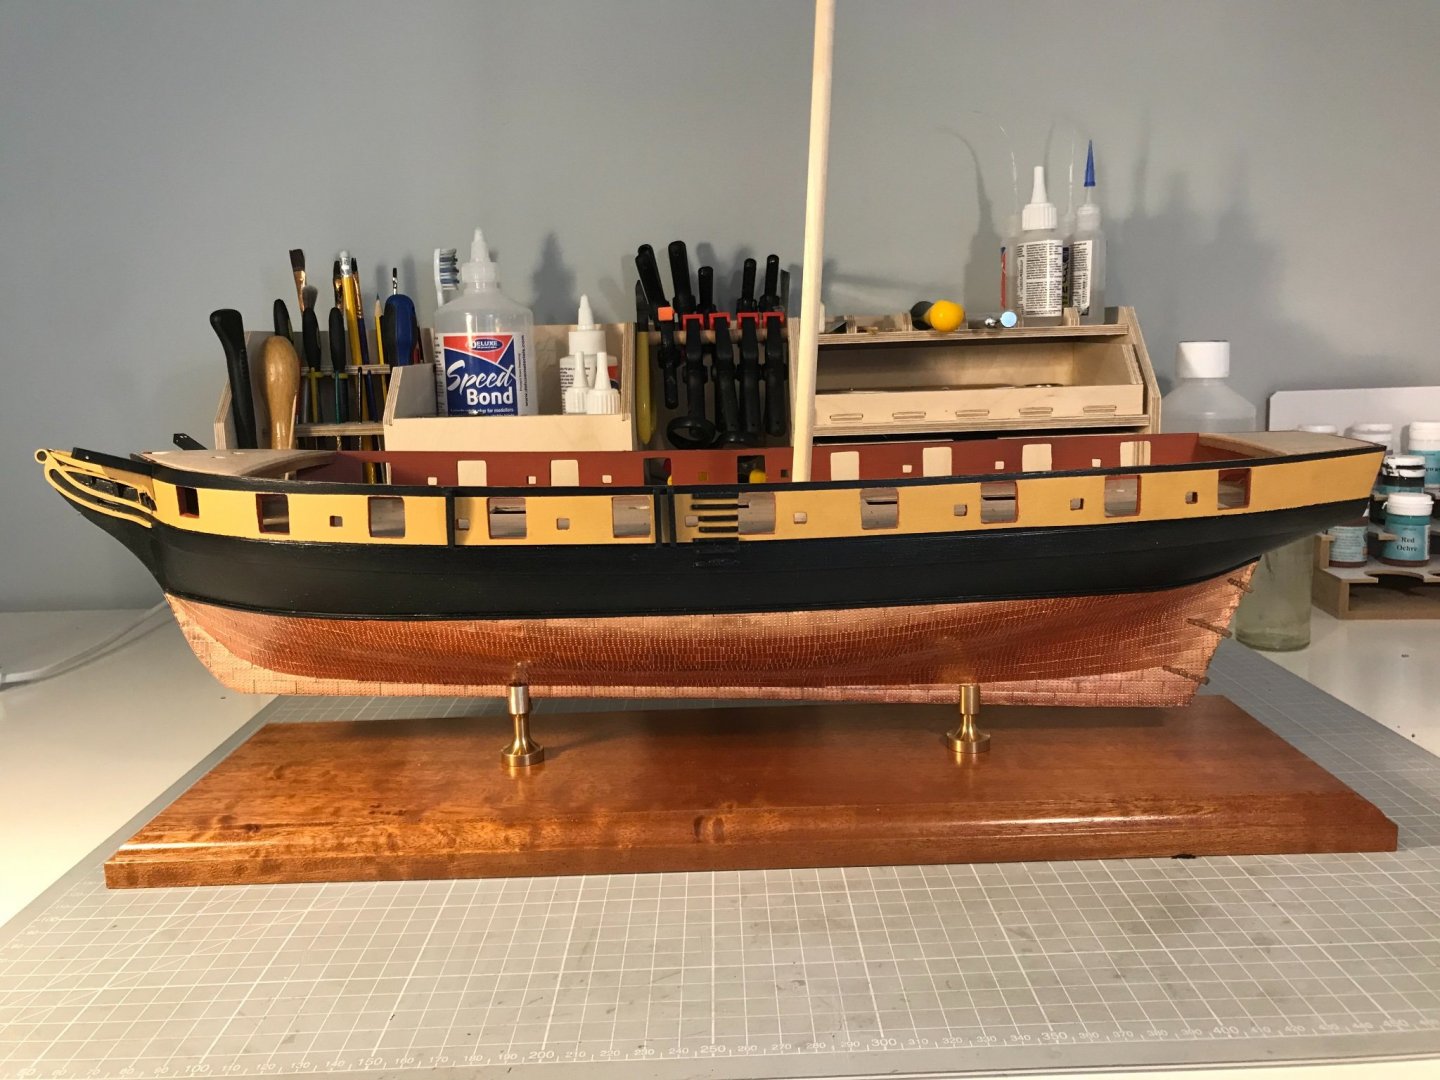
And as a special extra, some months early, I checked the display stand fits. I what to install it permanently at the point when inverting the gull becomes too risky. And as it happens I manage to spring one of the cathead by inverting it to install the bow cheeks. Fixed that with a little thin CA, and can protect them easily enough, so will revert to the cradle until the gunwales are on. But this looks pretty sweet I think: The slots in the columns were just under 5 mm wide, and the copper-coated keel just on 6 mm, so I had to file 1 mm of brass out of the columns. Filing parallel slots with a small file is beyond my skills, but turned out fine, and with a spirit level the pitch of the deck is exactly horizontal at the main mast, and the mast itself (or the place-holder dowel) dead plumb athwart-ships. Those following closely will recall I left two captive nuts under the copper and keel. Two 50 mm bolts come up through the stand and the columns to engage the nuts. Just as sweet as can be.

- 109 replies
-
- 6
-
-
- snake
- caldercraft
- (and 1 more)
-
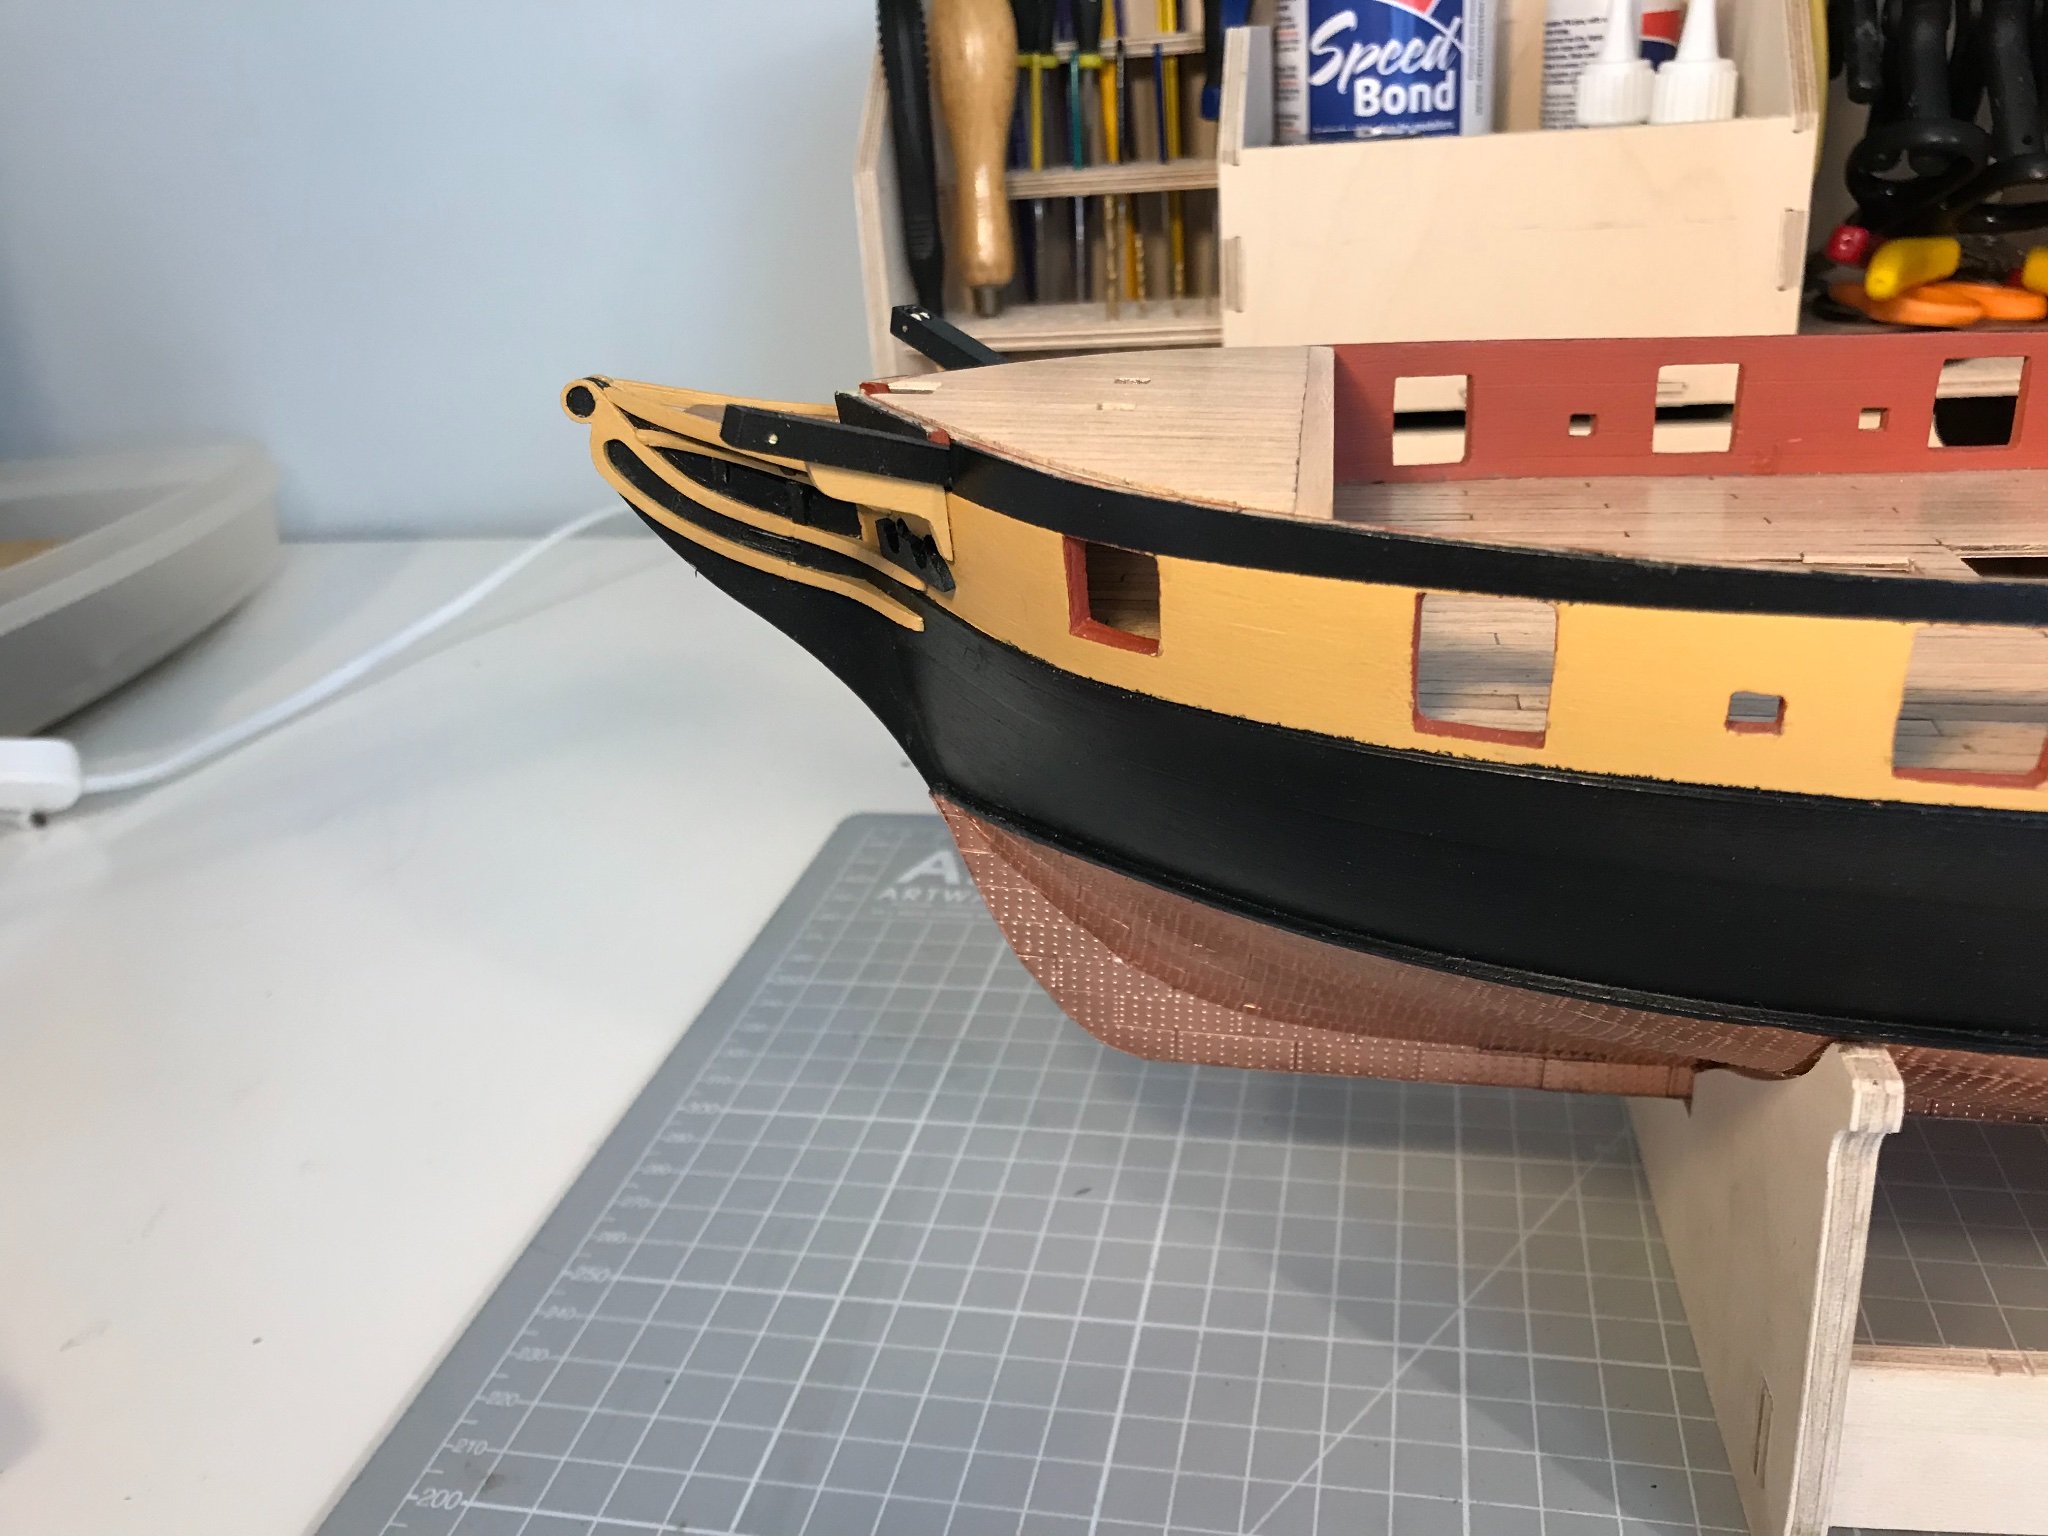
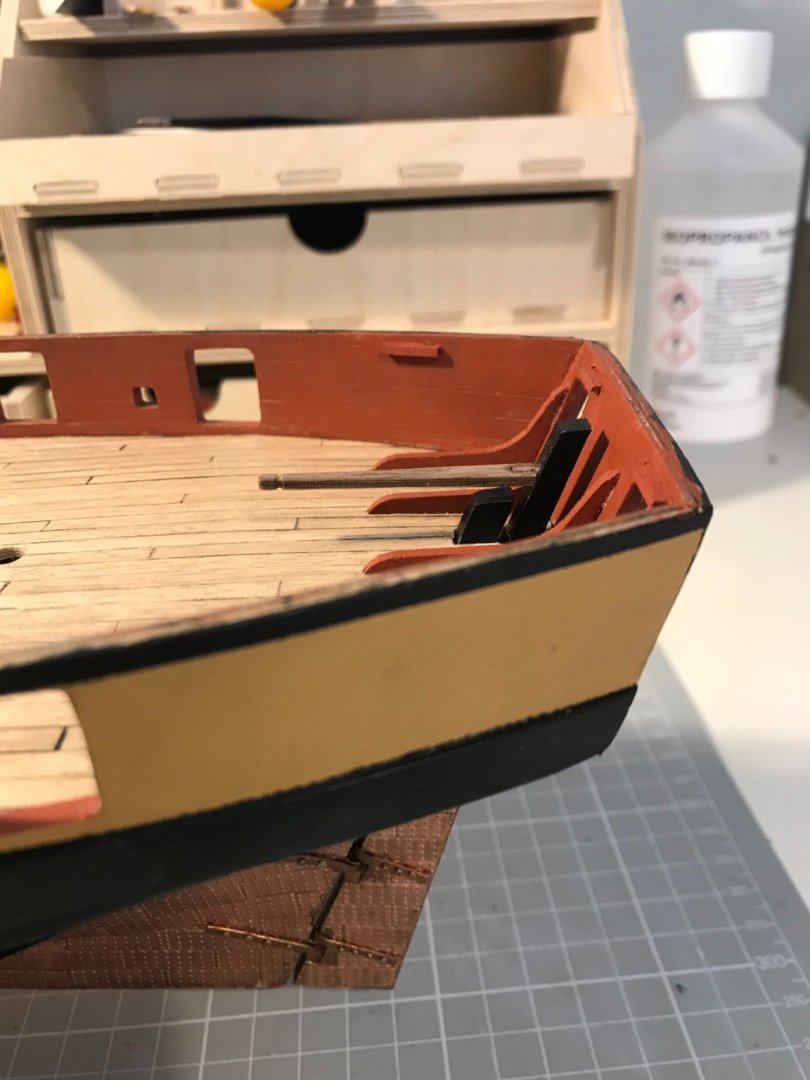
And the third instalment: bow cheeks Not much to it really. Bit of care with the angles to get a good fit.

- 109 replies
-
- 3
-
-
- snake
- caldercraft
- (and 1 more)
-
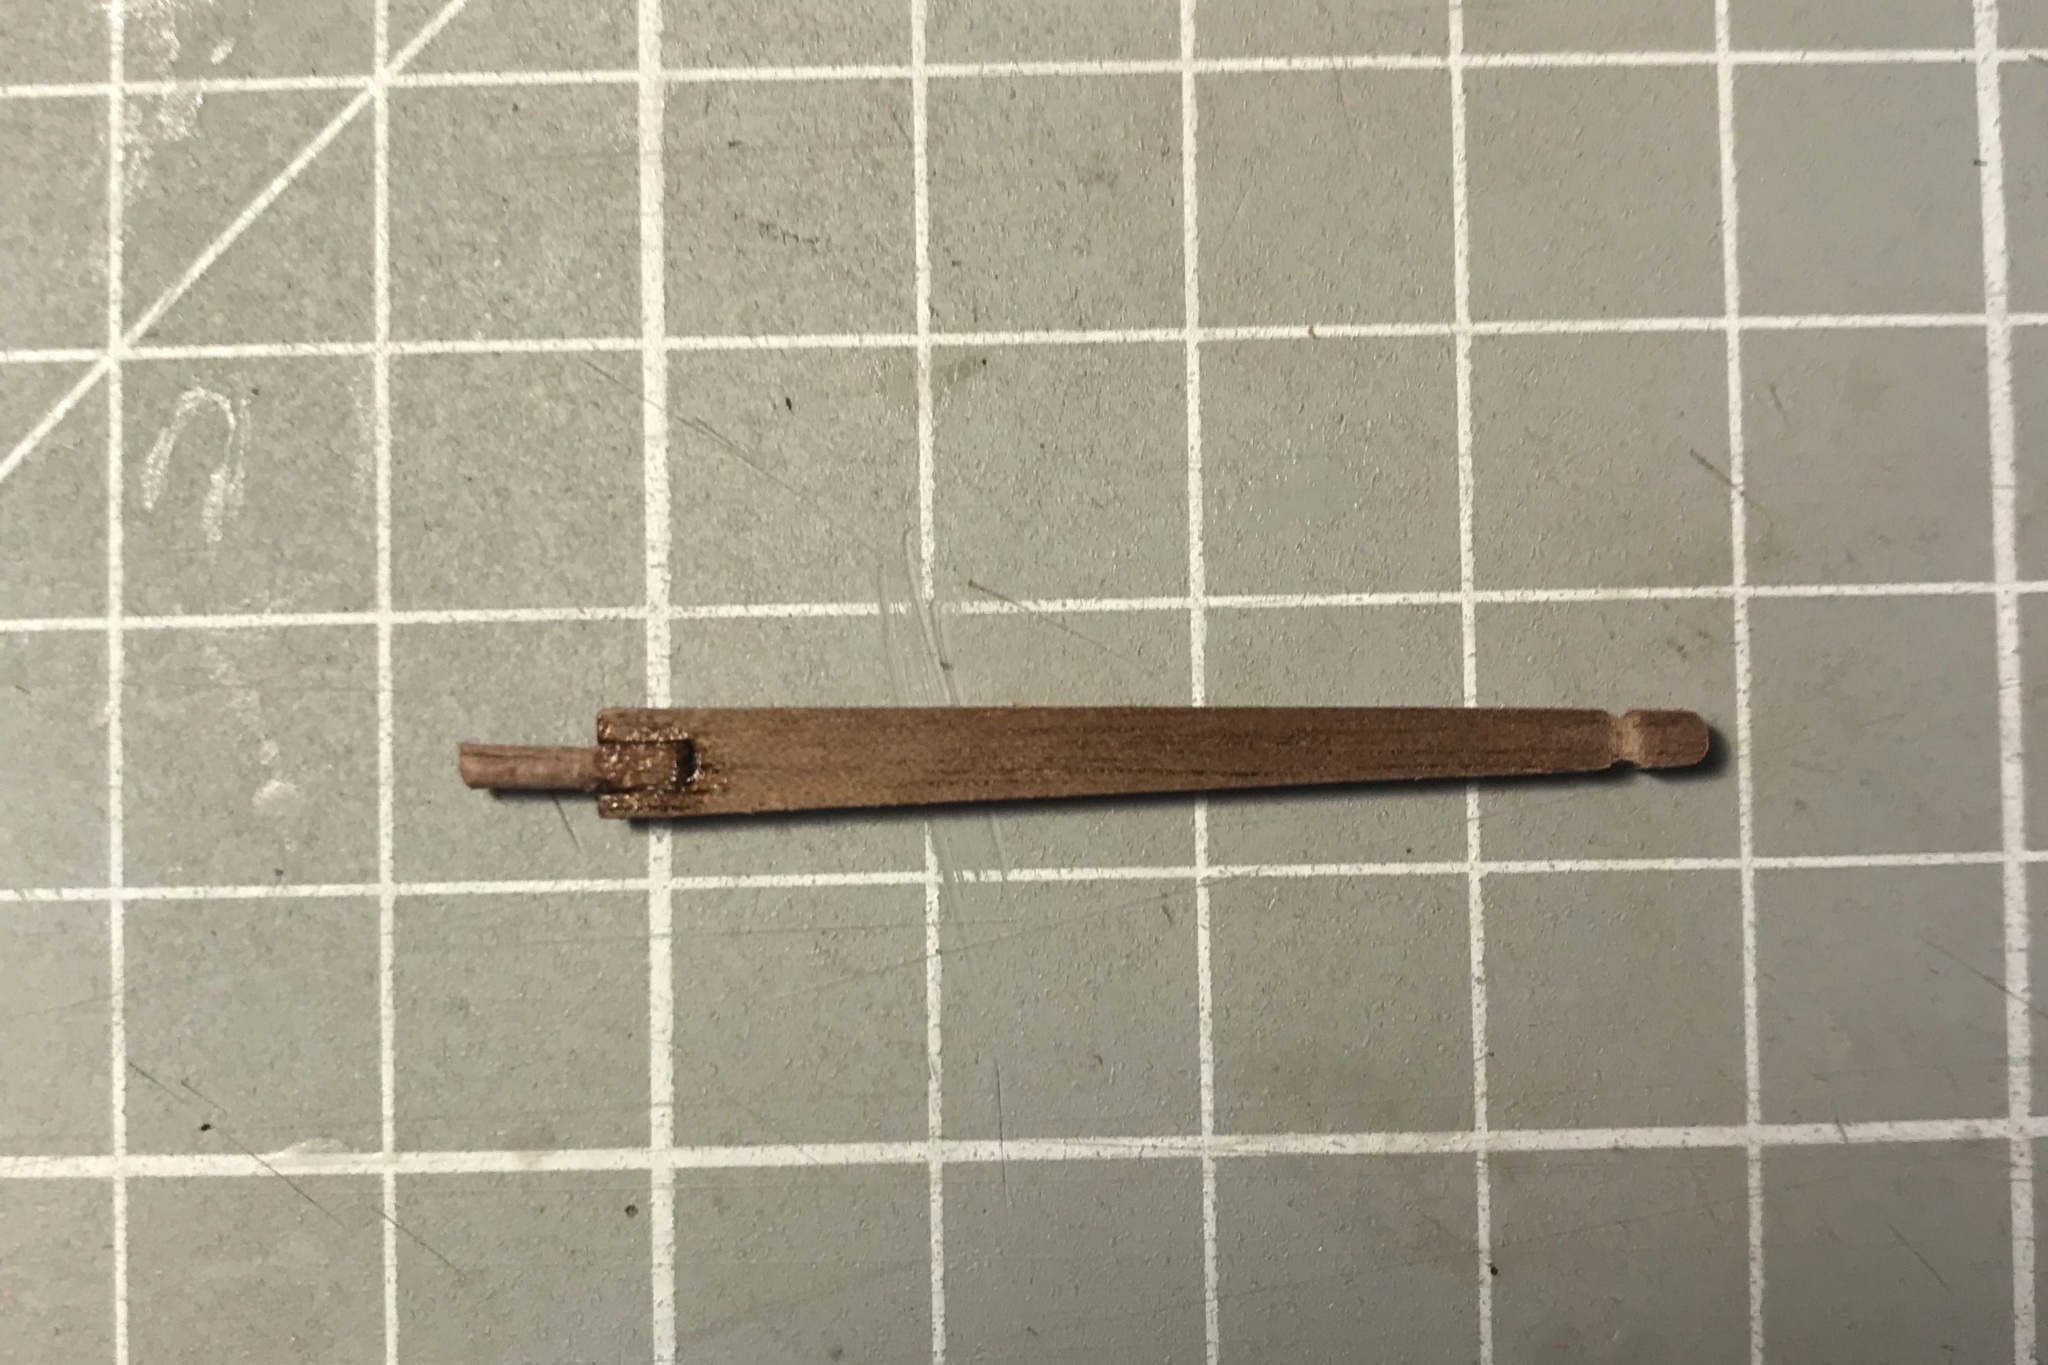
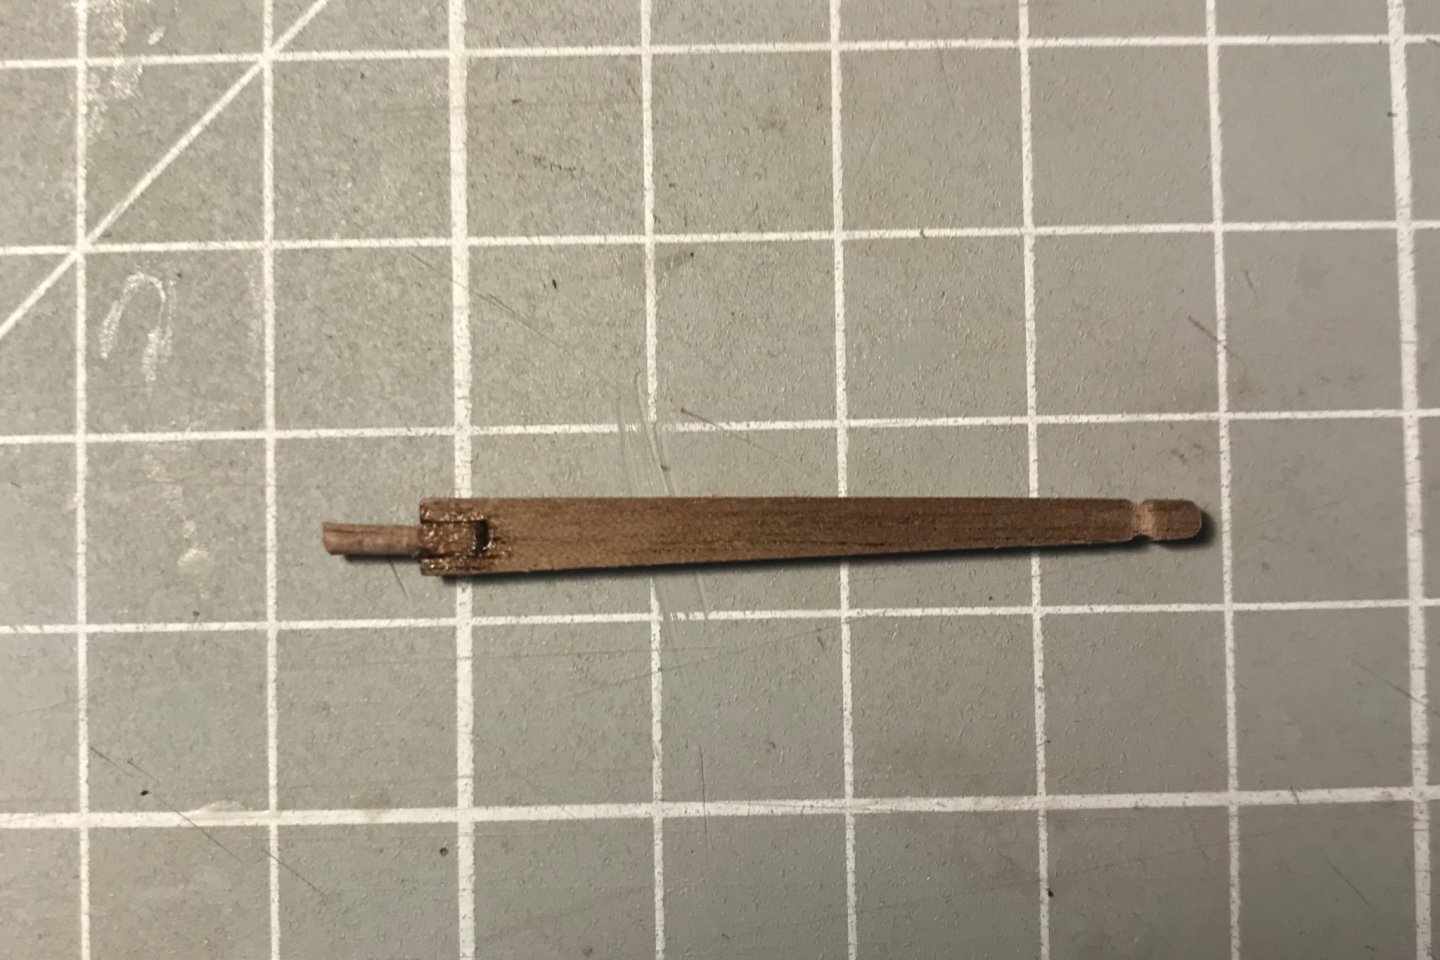
Next - fit the tiller. I deliberately left this until after I had the stern platform assembled to ensure there was no clash. Bit of attention to get the angles right, then I drilled a 1.5 mm hole in the rudder post. In my version of the kit, the tiller is 1.8 mm walnut ply - which does not require pinning with 1 mm wire. However, it presented a problem. To fit to the hole, I rounded off the "spur" removing most of the external ply from it. It then had no strength and "sprung" as I tried to fit it. I spliced in a short length of 1.5x1.5 walnut: I rounded of the external part with a file. Works just fine

- 109 replies
-
- 2
-
-
- snake
- caldercraft
- (and 1 more)