BANYAN
-
Posts
5,941 -
Joined
-
Last visited
Content Type
Profiles
Forums
Gallery
Events
Everything posted by BANYAN
-
 Ah the joys of finding further information; only too familiar with that problem in my build. I also took the same approach; it was the best I had at the time but I have recorded it. The shields are looking great and will add a real 'oomph' to the overall build when they are in place (sorry about the highly technical terminology). cheers Pat
 -
I am sure these 'lads' can wait for a while Nice work on the shields and rough carving. cheers Pat
-
HMCSS Victoria 1855 by BANYAN - 1:72
BANYAN replied to BANYAN's topic in - Build logs for subjects built 1851 - 1900
Thanks Denis; appreciate you looking in and for the encouragement. What are you working on at the moment? I miss you fishing boats cheers Pat- 1,008 replies
-
- 2
-

-
- gun dispatch vessel
- victoria
- (and 2 more)
-
HMCSS Victoria 1855 by BANYAN - 1:72
BANYAN replied to BANYAN's topic in - Build logs for subjects built 1851 - 1900
Thanks for the comments and encouragement Eberhard, Steven and John - much appreciated. cheers Pat- 1,008 replies
-
- 2
-
-
- gun dispatch vessel
- victoria
- (and 2 more)
-
HMCSS Victoria 1855 by BANYAN - 1:72
BANYAN replied to BANYAN's topic in - Build logs for subjects built 1851 - 1900
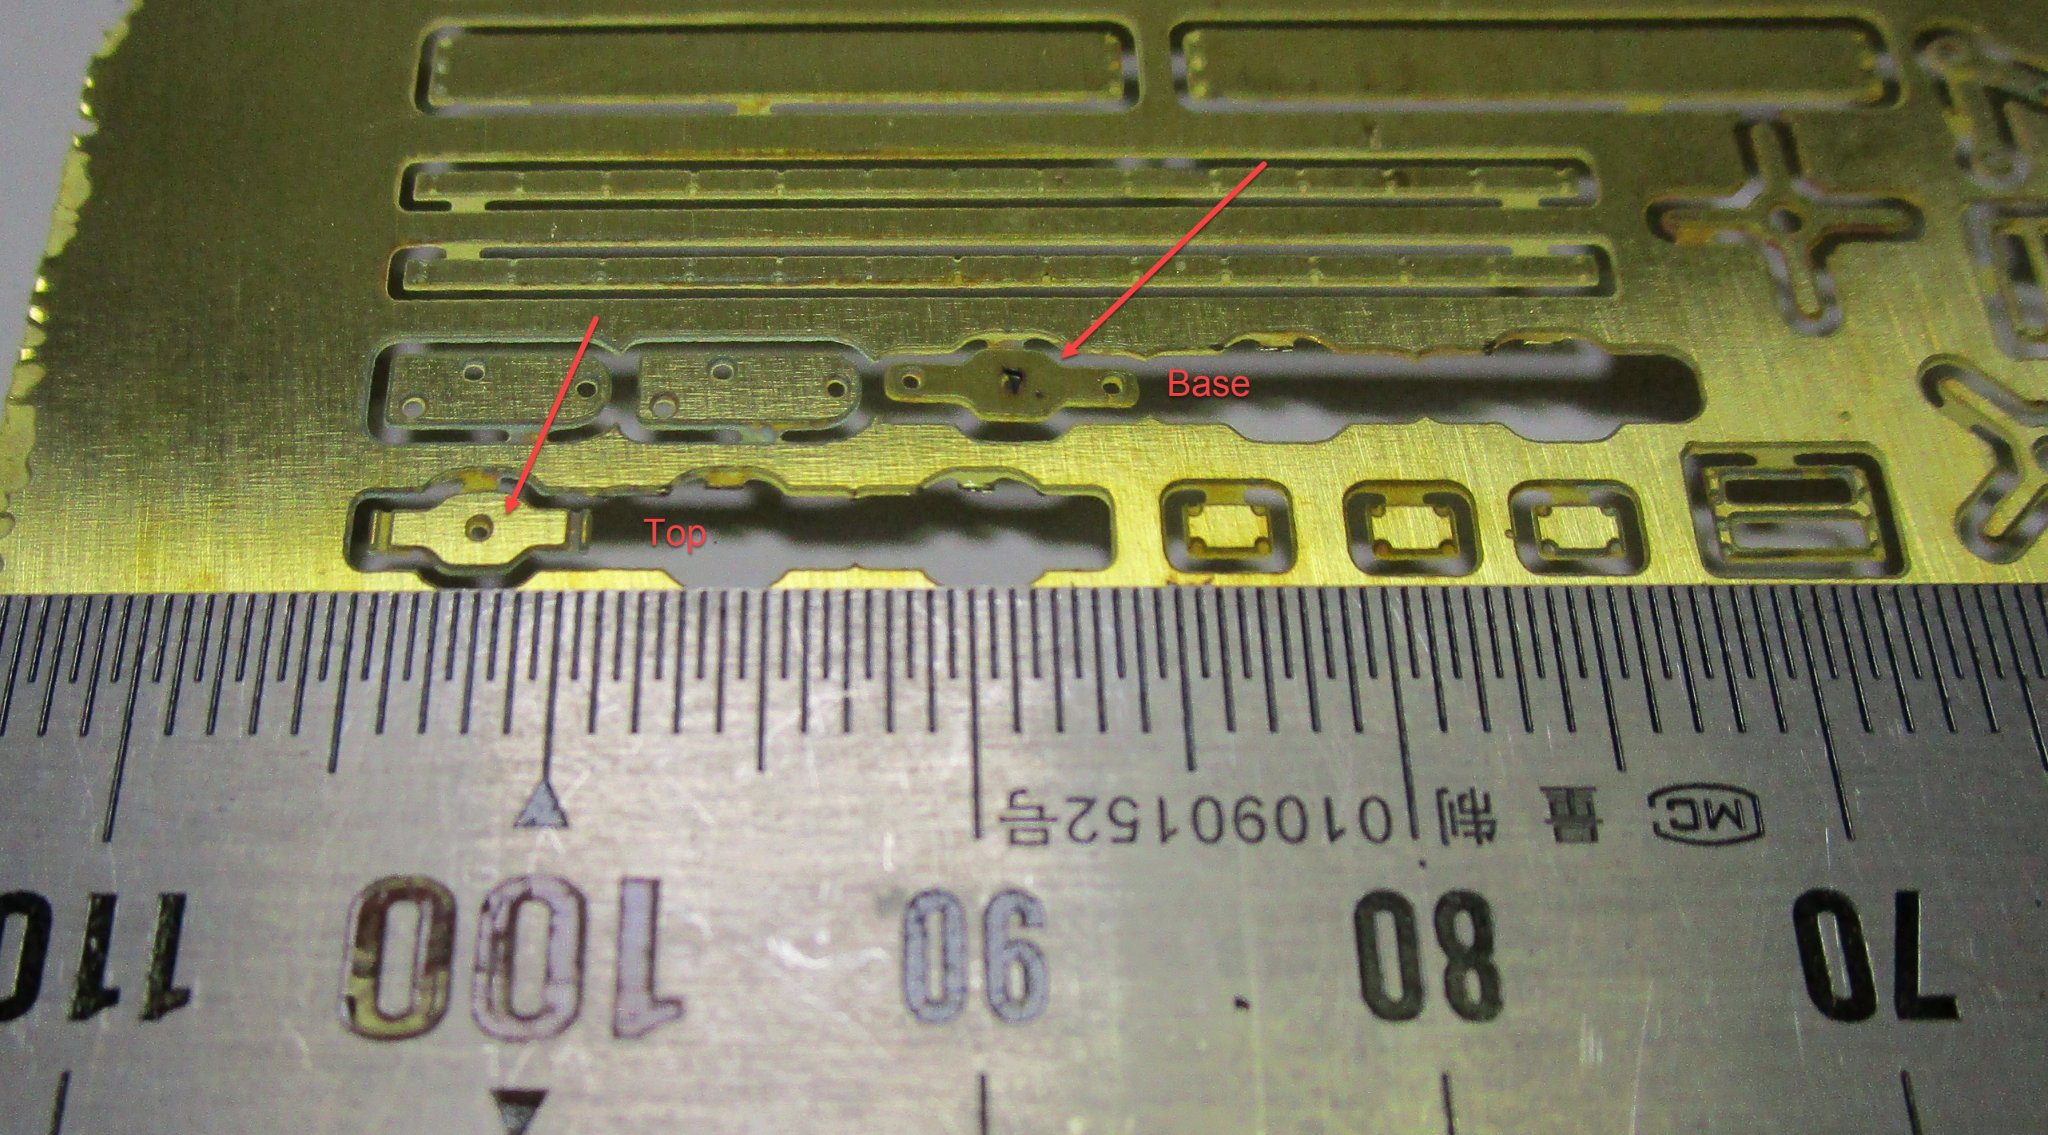
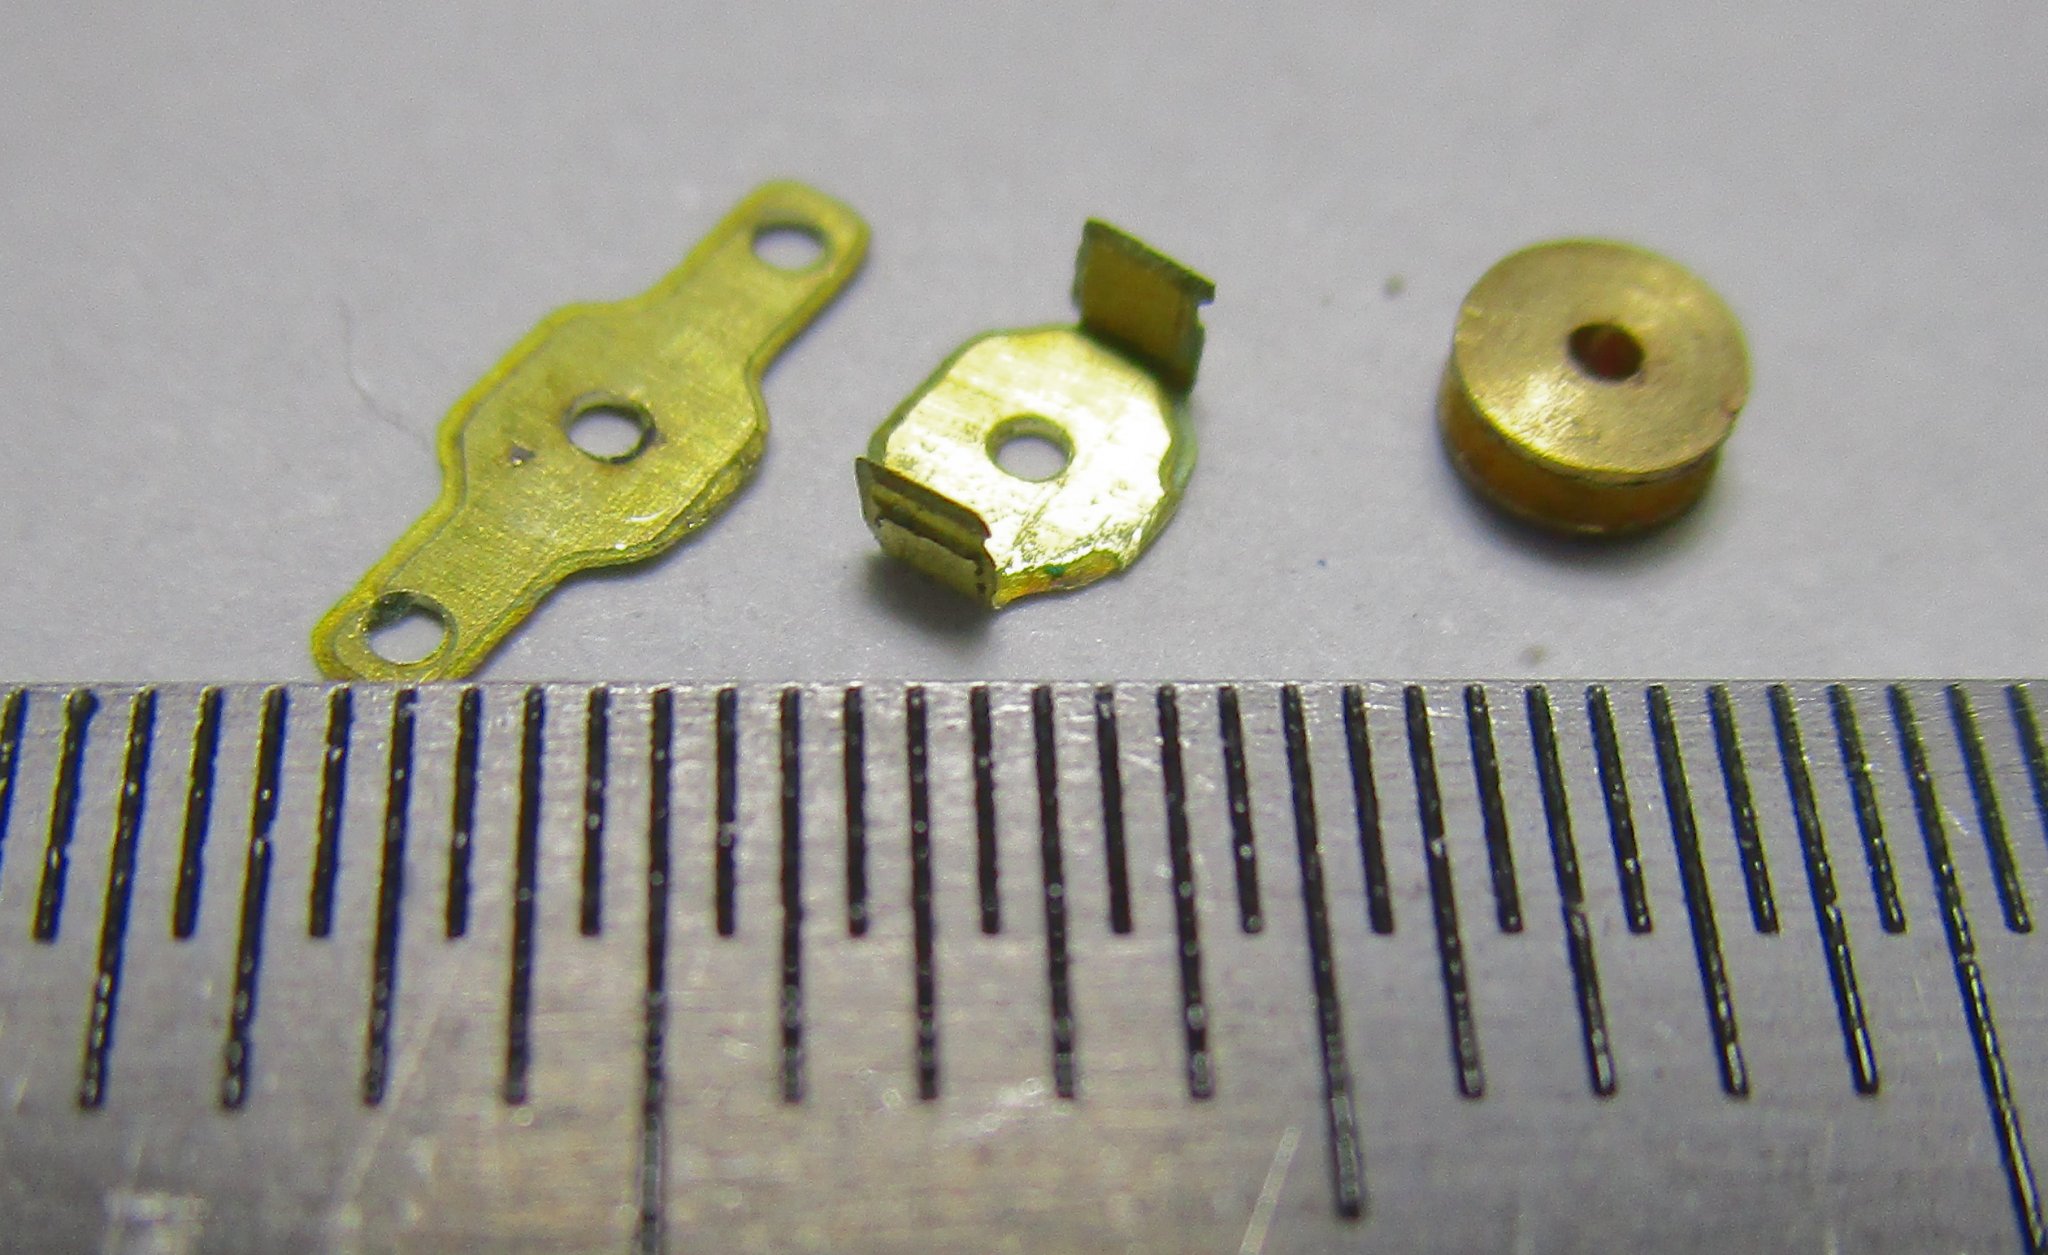
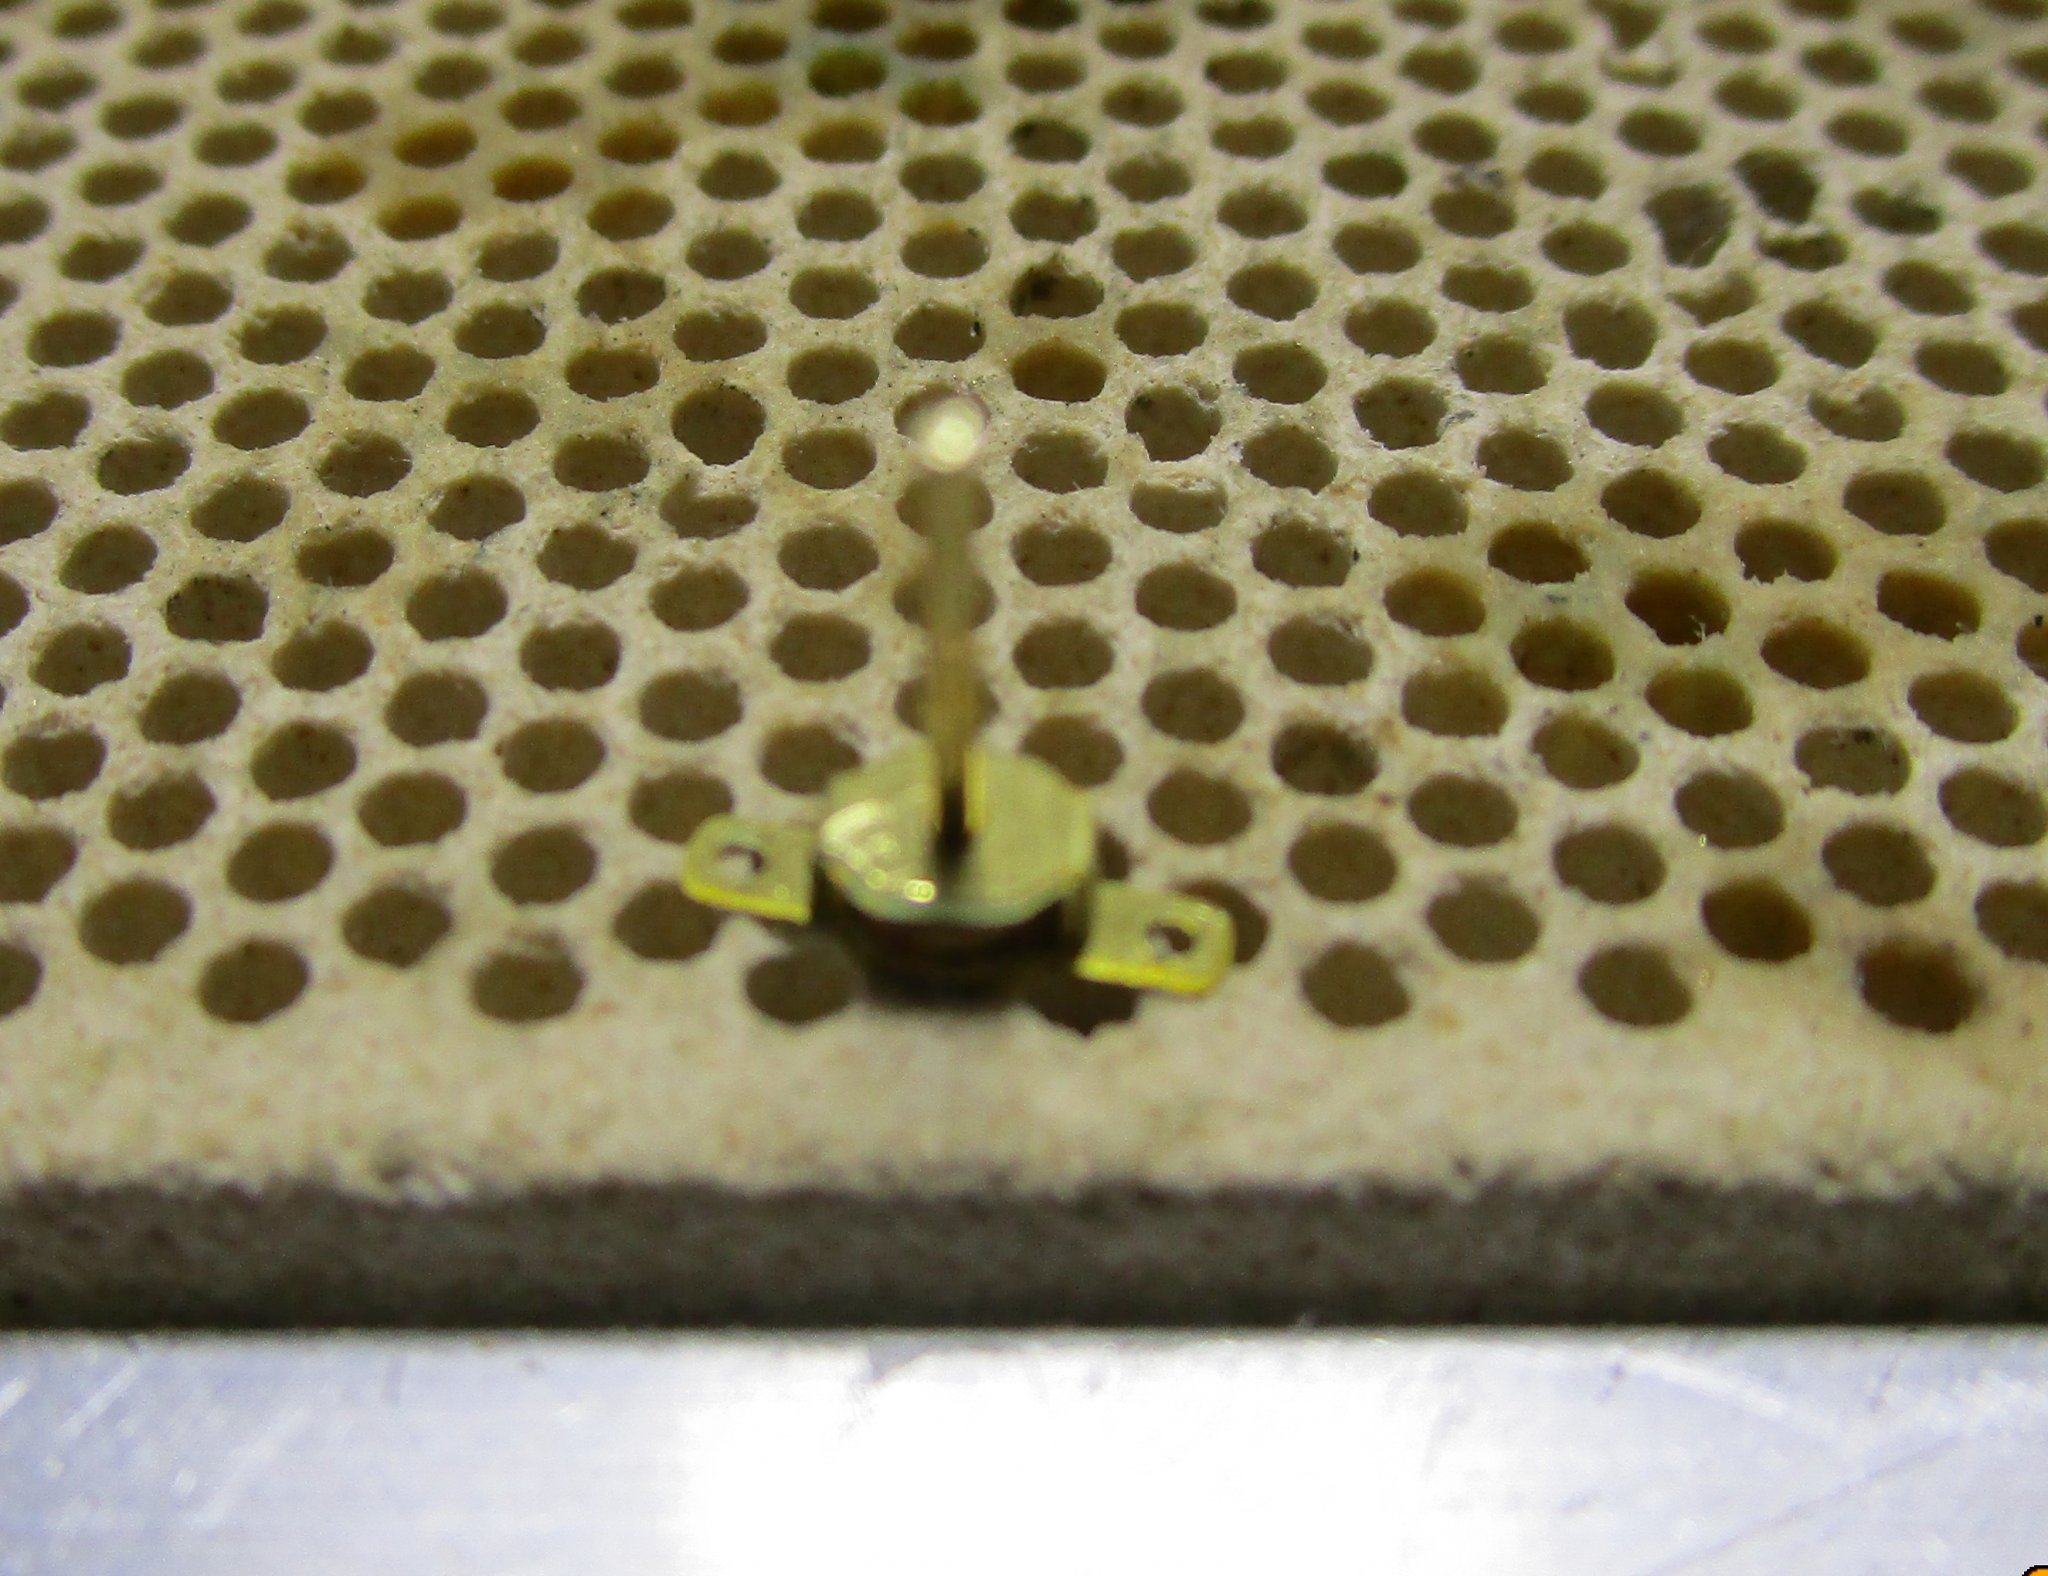
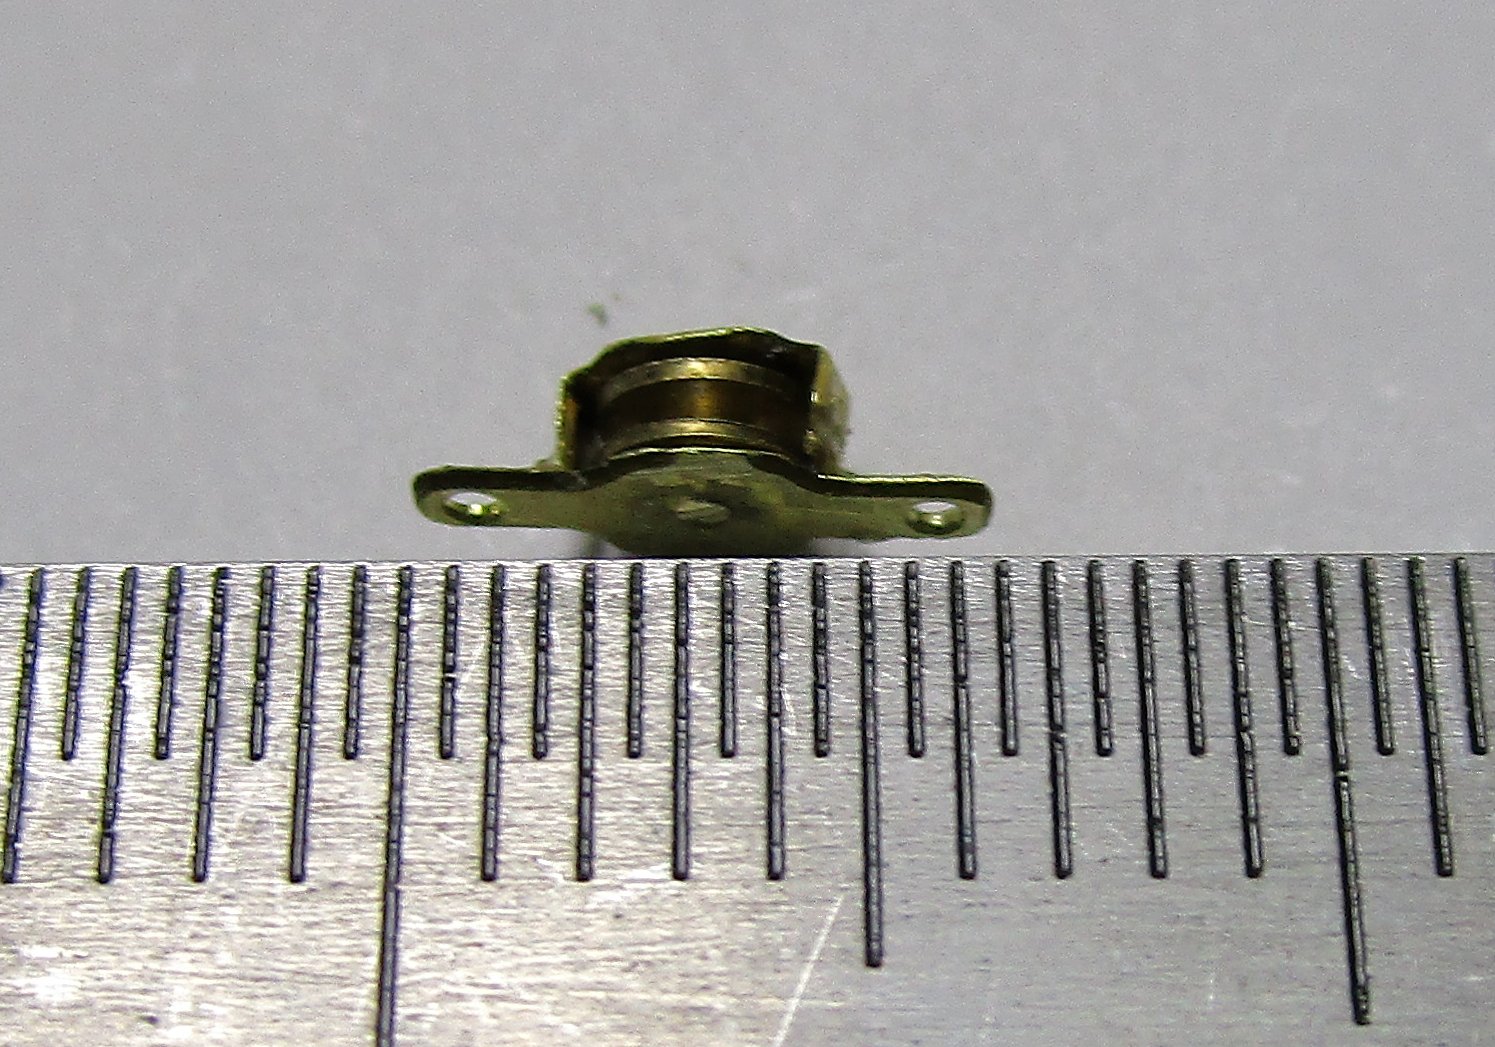
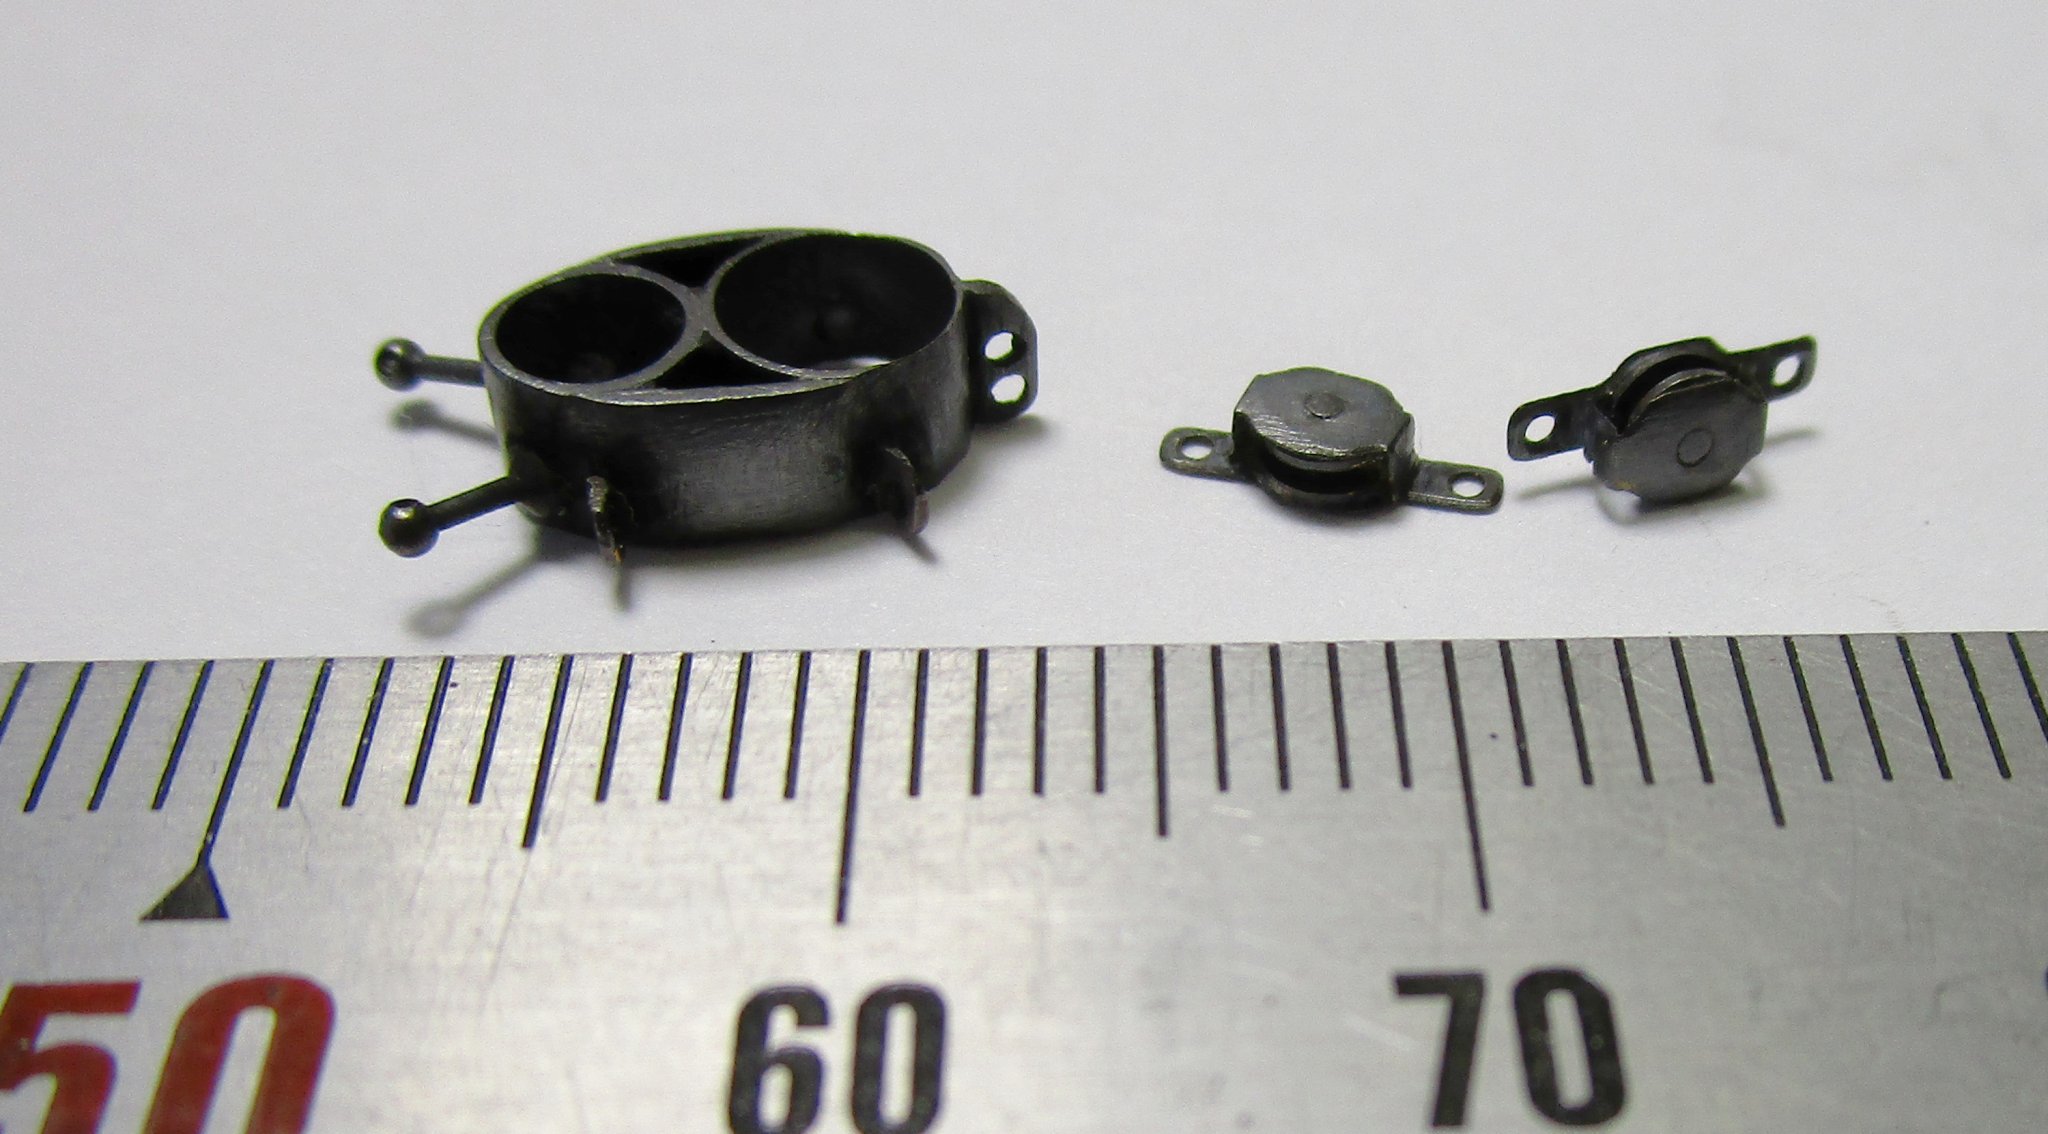
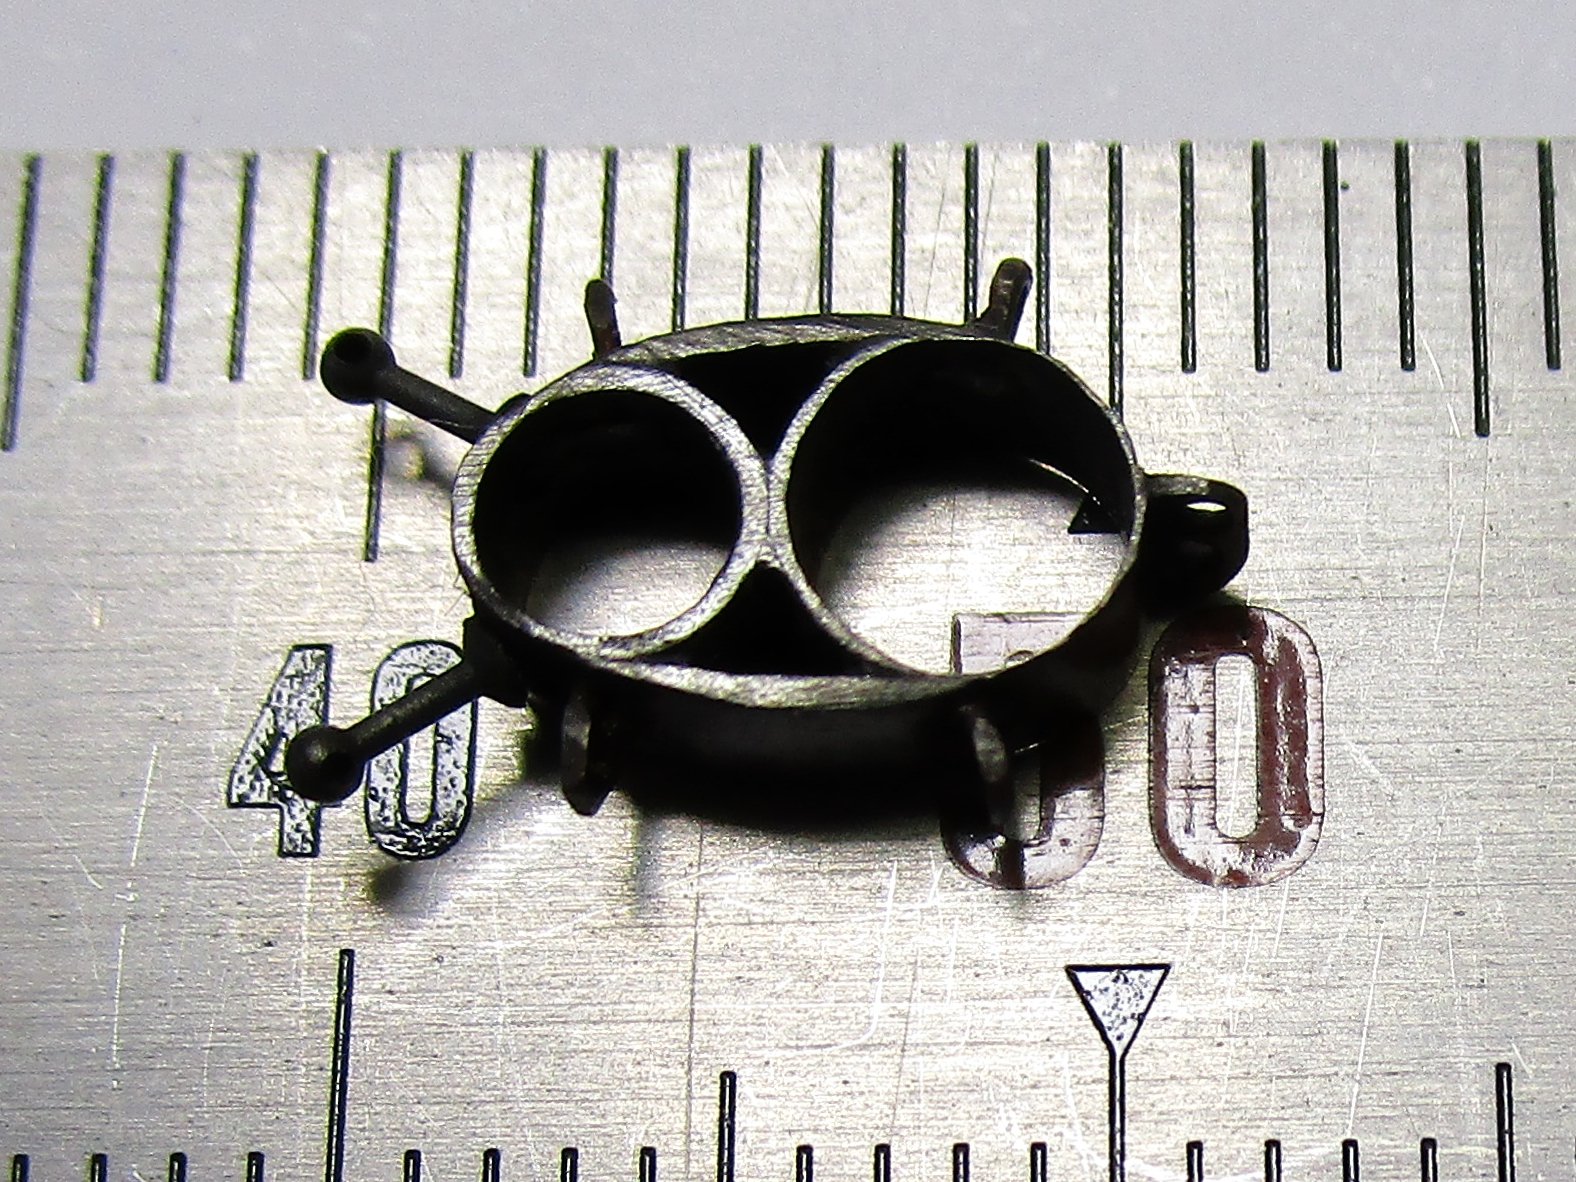
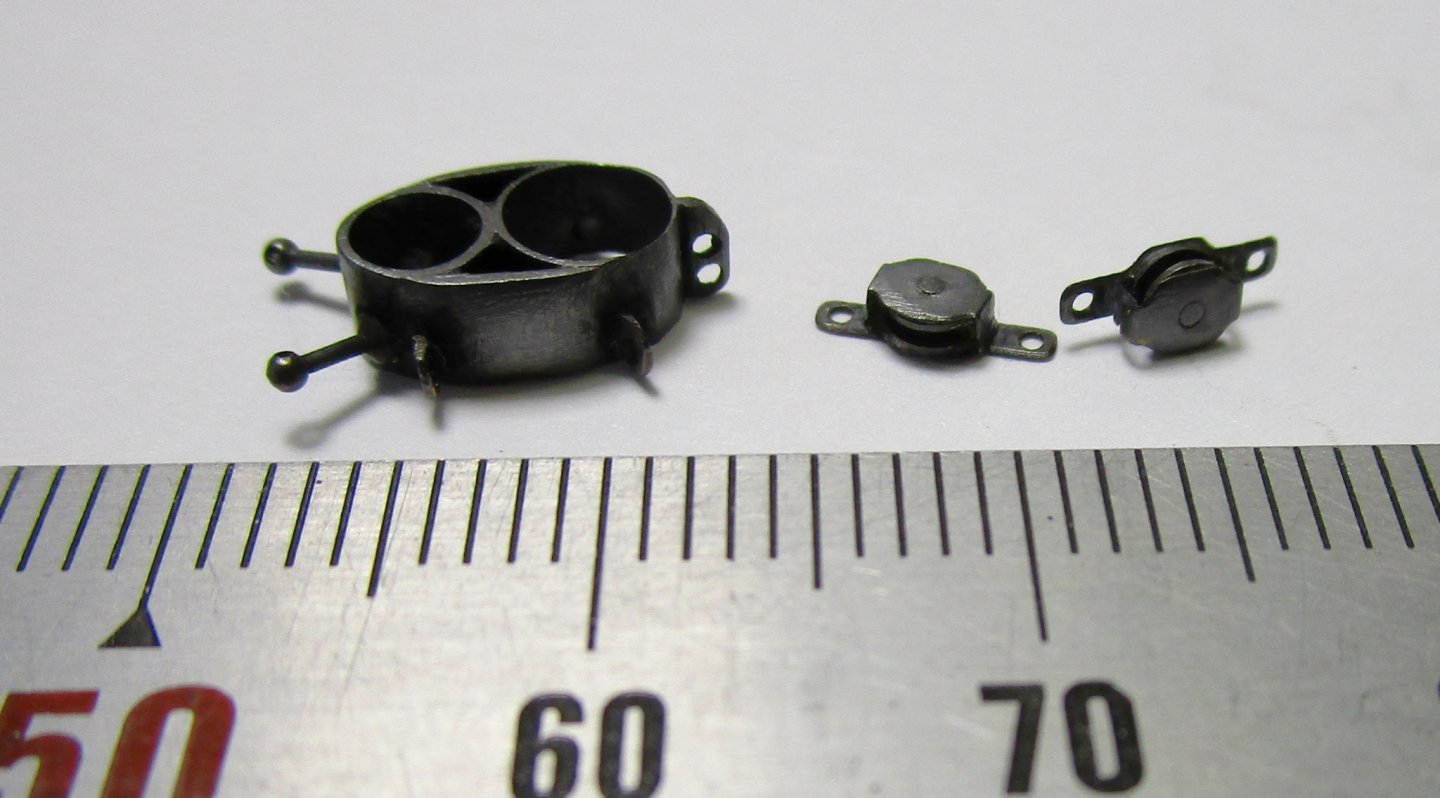
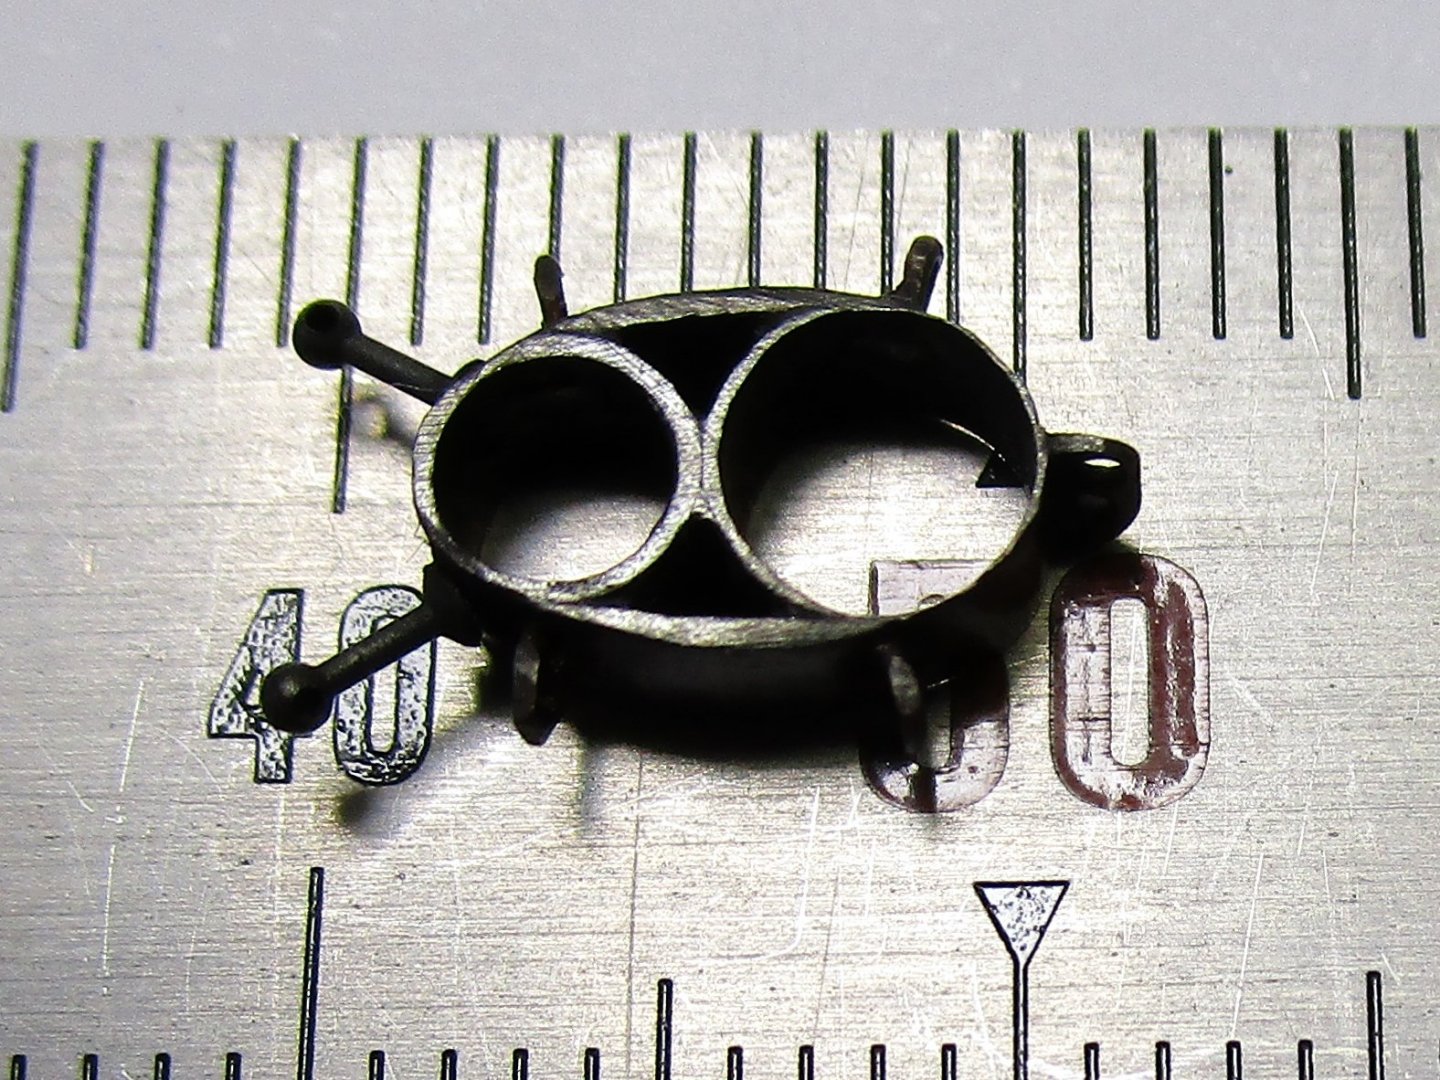
Some further work started as I received the PE I had drawn up, which I then send off to have etched. The sheet is .025mm thick Cheek Blocks - once I have parted the the base (backing) and top piece s off, I give them a touch up with the file. I then drill out/clean up the holes to 0.6 mm diameter, then fold down the side pieces. I then thread the base, sheave and top piece onto some 0.6mm brass wire and place into one of the holes in the soldering jig ready for soldering. Once silver soldered, they need to be cleaned up before blackening. I have also completed the Bowsprit Cap, adding the upper side lugs (for the foot ropes out to the end of the Jibboom) and the horns for the manropes (lead aft to stanchions on the knight heads. The two horns have holes through the knob for the manropes but cannot be seen in the photo. The lower side lugs are for the Bowsprit Guys/shrouds, and the bottom lugs for the martingale (forward hole) and the Bobstay. The start of the process for making this is shown at post #528 earlier on this page. the whole of this assembly has been silver soldered together for strength. Solder was needed for holding the base of the pin in the drilled holes as the depth is only about 0.2 mm and CA would have marred the blackening process. The size of these made polishing the brass very difficult, especially with such thin walls etc; so some scratch/filing marks remain. These are very close up shots, that I have sharpened a bit which enhances the scratches; the marks cannot be seen to the naked eye from about 150mms (6 inches) away. cheers Pat


- 1,008 replies
-
- 12
-
-
- gun dispatch vessel
- victoria
- (and 2 more)
-
HMCSS Victoria 1855 by BANYAN - 1:72
BANYAN replied to BANYAN's topic in - Build logs for subjects built 1851 - 1900
Thanks all for looking in and supportive comments. John, I hadn't thought on that but it is intended to service a special ash wheelbarrow (also to be made) - hence the height Thanks Keith, another option was to mill them from brass round stock (the idea from your marvelous build), but as I had already invested in the after-market pipes, I thought this a better option as my accuracy for both boring out (no reamers yet) and controlling consistent wall thickness is not quite up to par yet . I wasn't worried about using brass washers etc as I will be painting these parts; it was the overall finished effect I need to achieve. Thanks Carl and BW; thanks for the reminder, I do need to do a good overhead and profile shots showing the additional details - I'll do that after fitting the air intakes etc. cheers Pat- 1,008 replies
-
- 4
-
-
- gun dispatch vessel
- victoria
- (and 2 more)
-
Orion, I think investing in the AOTS "Capt Cook's Endeavour' (Used versions available at a very reasonable cost) or Ray Parkin's 'H.M. Bark Endeavour' which is more expensive, will be your best option. Bothe these should provide sufficient detail to make the necessary parts; both have good drawings. The most important thing will be to scale the drawings accordingly (AL kit is 1:60 if I recall). A lateral option may be to look to see if another model maker/production company does a kit at the same scale and you might be able to use their use their stern with some slight modifications? Also, I cannot recall the name now (it was something like Laser O) , but there was someone making the stern facia (decorations etc) which would simplify the project considerably for you. cheers Pat
-
HMCSS Victoria 1855 by BANYAN - 1:72
BANYAN replied to BANYAN's topic in - Build logs for subjects built 1851 - 1900
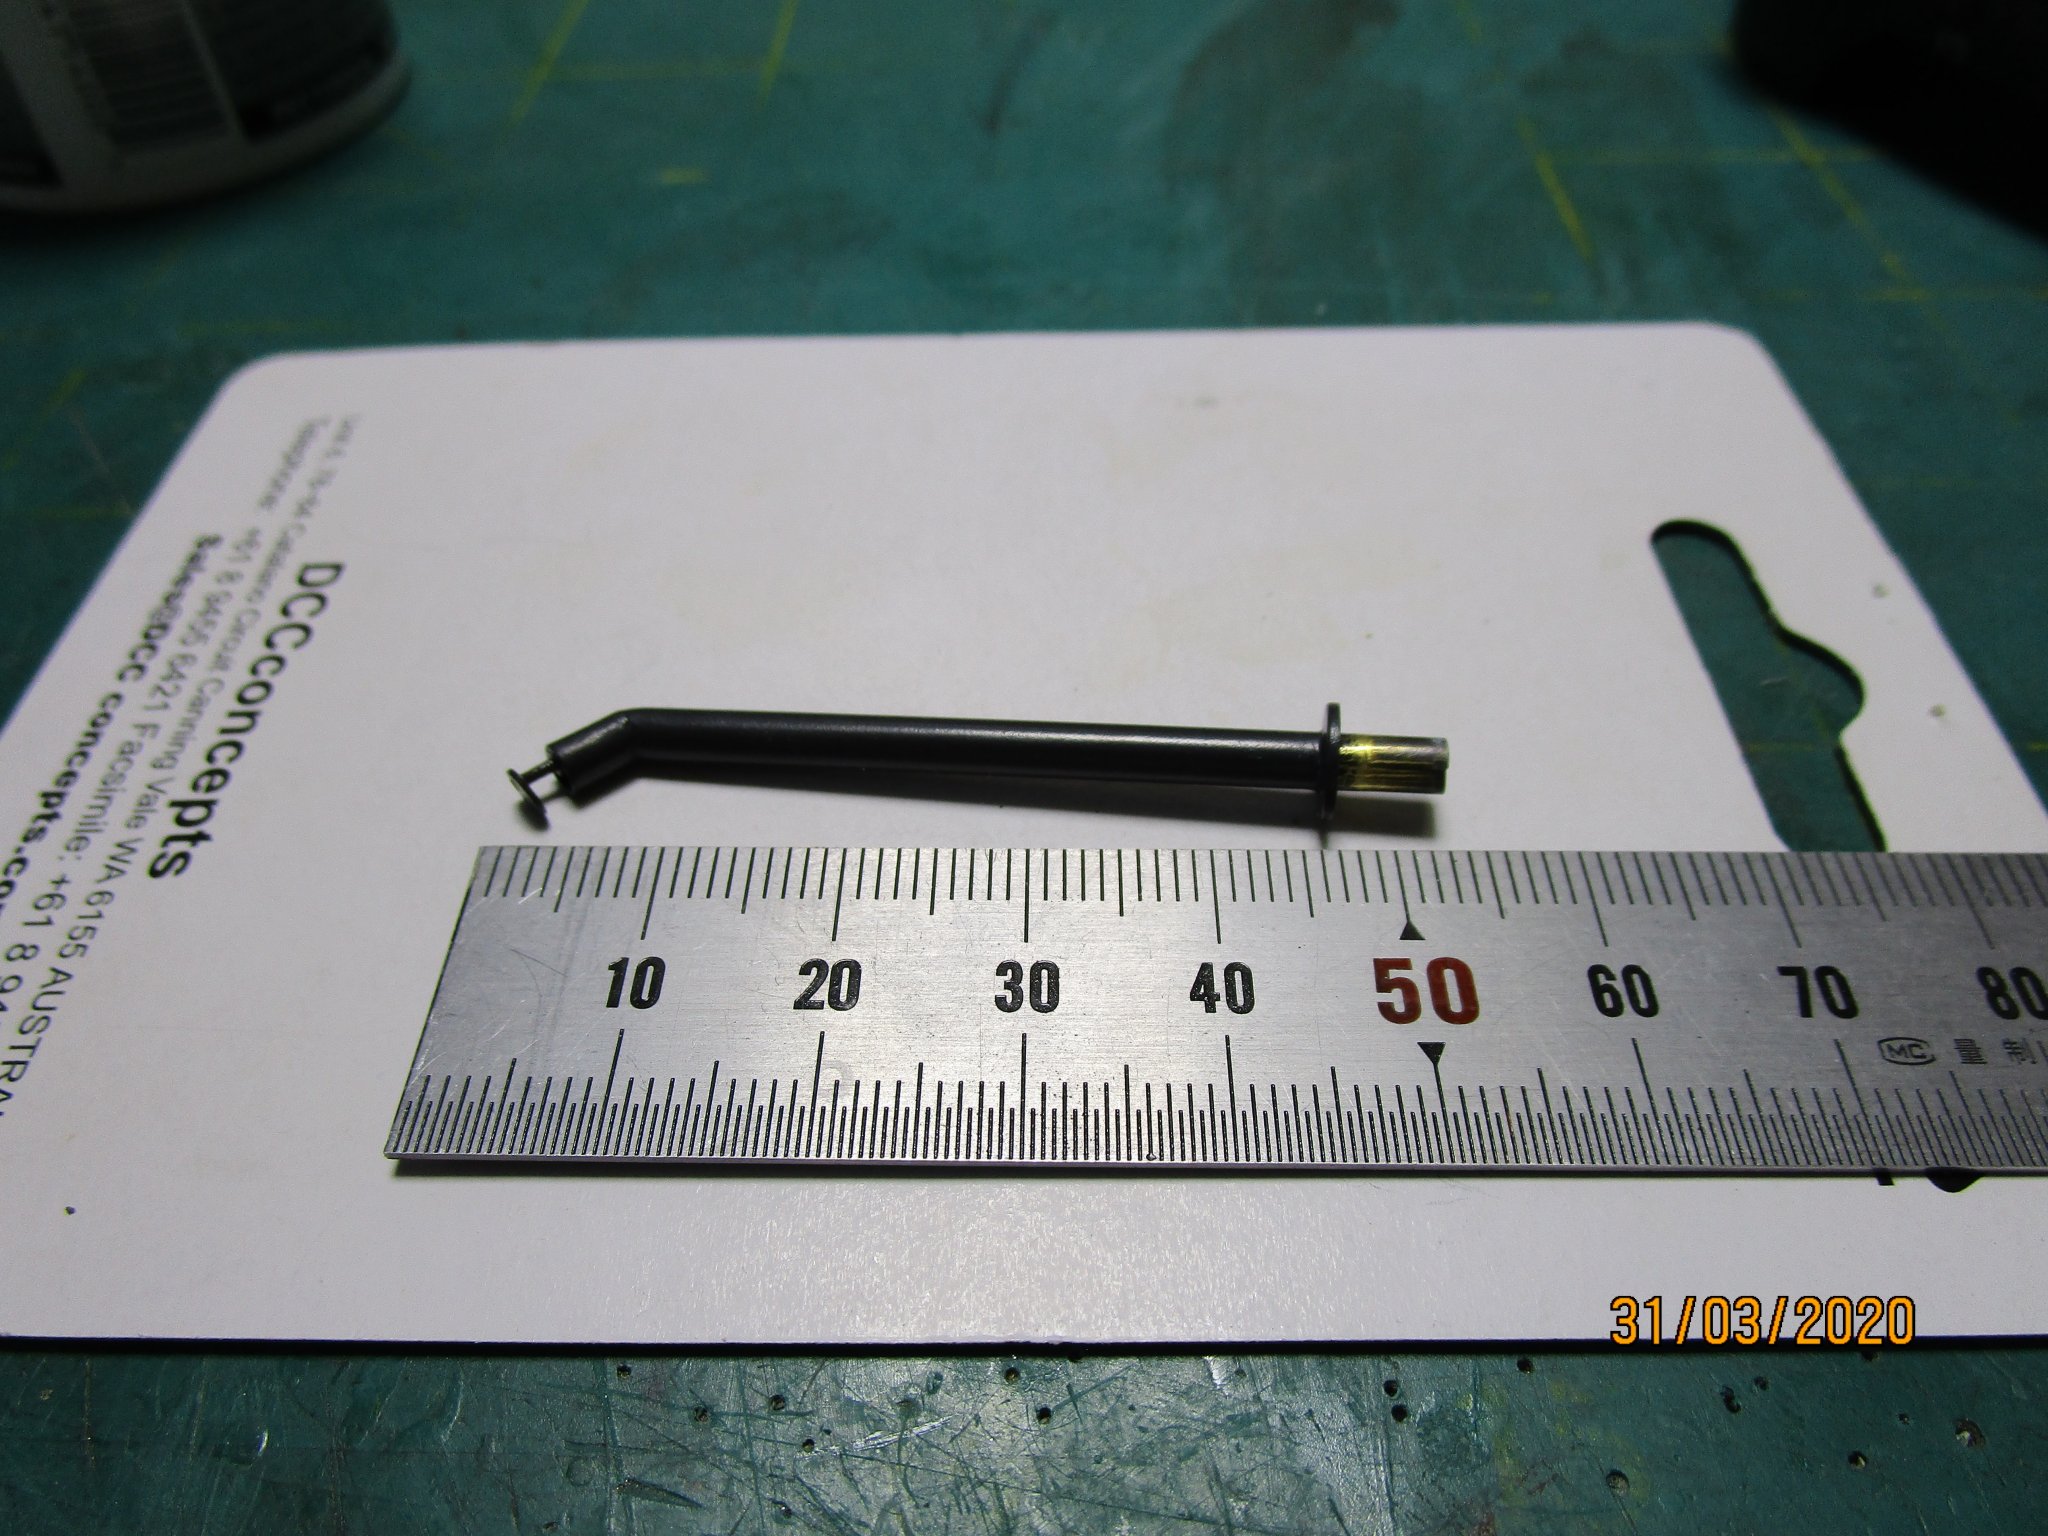
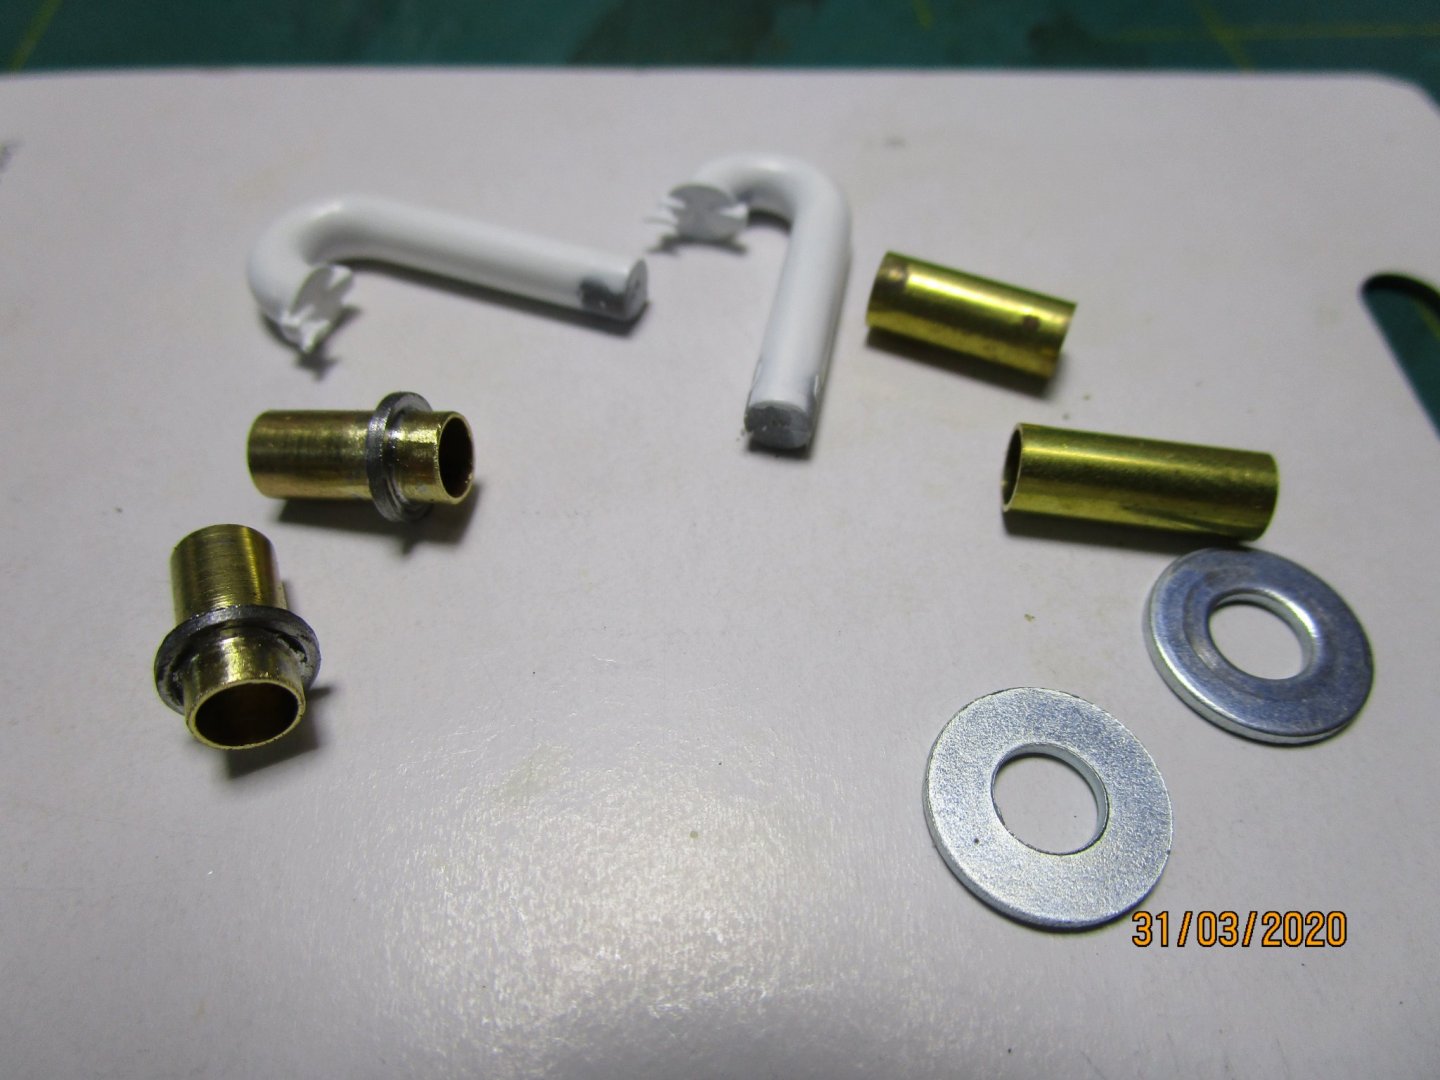
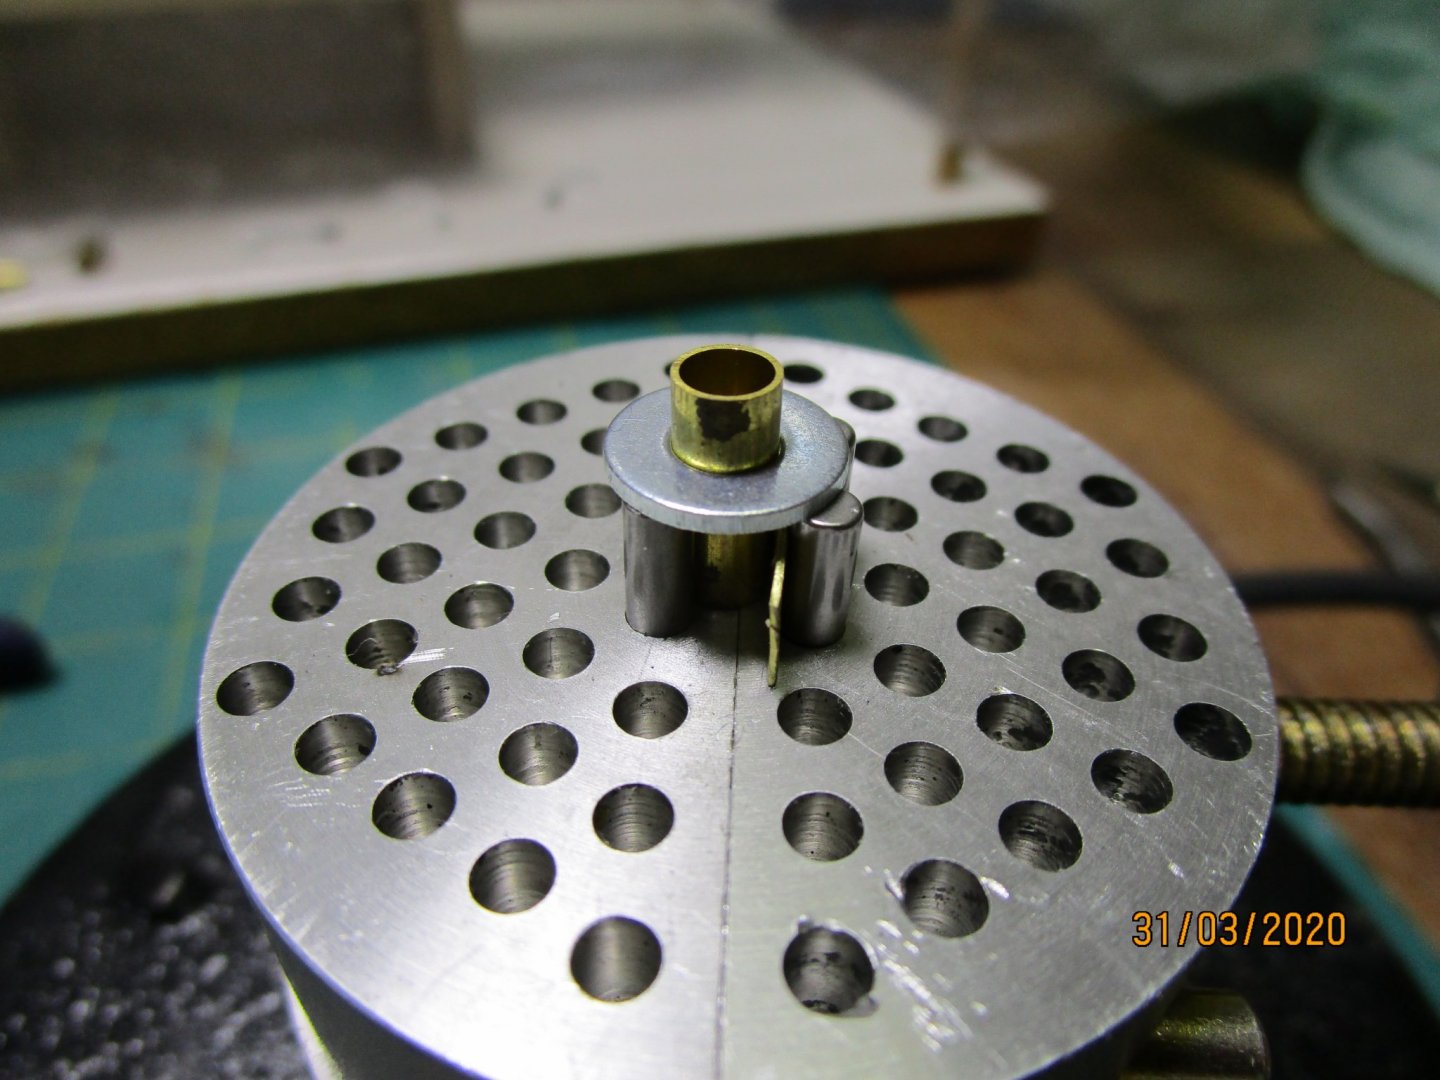
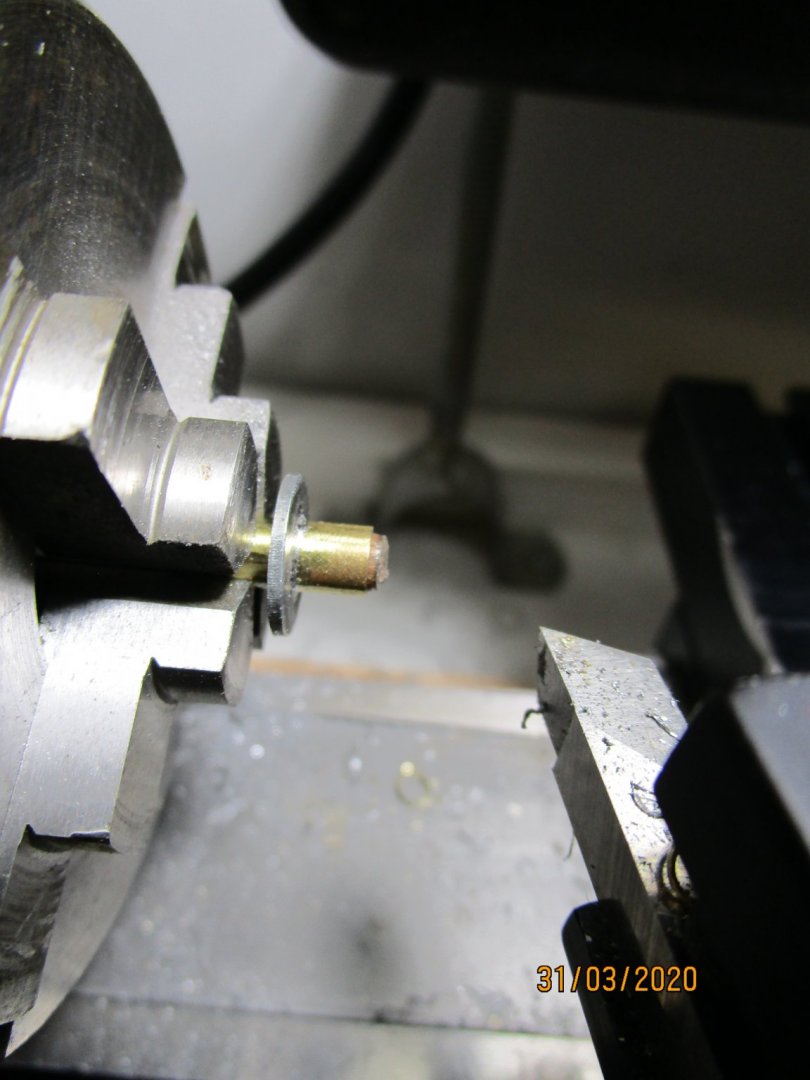
Hi again folks, I have been slowly progressing some more of the metal work. first was the 'charlie noble' for the galley stove, which will be fitted just forward of the forward mast. This was made from 3mm thin walled tubing, filed with a 'V' notch, folded/bent around a flexible internal former, then soldered. A small piece of .6mm ID tube was also soldered into the top of the bent top to accept the rod for the 'sealing/weather flap', this won't be fitted until much of the forward rigging has been completed. It doesn't look it but the bent part is very nicely rounded; just a poor angle I took the shot. Now that I have made some decisions WRT to what 'may have' been fitted to meet the Contract's requirement ' to fit air shoots to the hold'. As this was specified under 'Joiners' Work, I have decided the most likely solution will have been similar to "HMS Warrior" which were formed wooden trunks fitted to the bulkhead, with a bent metal air intake on the upper deck. These will have had vents.outlets at the appropriate points for the Holds and probably fitted with a manually cranked ventilation unit, probably the one designed by Lang (ship's designer) himself based on the one invented by his father ( a copy of a sketch is held by the NMM. This unit drew the air down and also worked as a 'splitter' with separate piping to various storerooms within the forward and after holds. These were usually fitted as pairs so I have decided to fit a pair forward and a pair aft. I am assuming the reason I cannot see one in the photograph of the crew on the after upper deck, is that these intakes were fitted very close to the margin boards close to the bulwark, and as such will have been hidden behind the gun carriage in the photo. I have used a plastic after-market part for the bent pipe, but I am making the base which will be inserted into the deck to hold the upper part. The base has been made using brass thin wall tubing with an ID the same as the OD of the part. To this, I have silver soldered a washer with the right ID to fit the tubing (using my resistance soldering vise) then turned the washer on the lathe to get approximately the right 'flange width and height. The tubing was held in the vise at approximately the correct height while I soldered the washer; but the neck extension was parted while on the lathe to the correct height. Once assembled I think they will look the part. I used an after-market part simply for the sake of speed and because it had the right detail for the securing flap. The photos show the parts, and 2 completed base parts (2 more made since), the soldering vise and set-up, and the unit in the lathe ready to be turned. cheers Pat
- 1,008 replies
-
- 12
-
-
- gun dispatch vessel
- victoria
- (and 2 more)
-
Hi Rob, another late arrival - I have only had a quick look at the log but will spend some more time on it in the coming days. Another nice build and I love the way you display it. cheers Pat
-
I'm late to the party yet again That'll teach me to hang out in the back streets! Great subject matter for this build Greg; should be another beauty. Geez that PE is nice, I would love to know how they do it so cleanly. I am seriously thinking of taking this (PE) up so that I can do more detail in my builds a little more cheaply. Ok, I'll get back in the peanut gallery now. cheers Pat
-
Some nice details there; she's coming along very nicely. cheers Pat
- 599 replies
-
- 3
-
-
- sidewheeler
- arabia
- (and 4 more)
-
Help with soldering
BANYAN replied to Kevin Kenny's topic in Metal Work, Soldering and Metal Fittings
Hi Eberhard; agree on the high prices. One small point is that while the vise looks like the standard jeweler's/engraver's one, it is fitted with a lead at the base such that the vise head becomes one path (ground) of the two electrodes when energized. This does not detract from the pricing issue (probably as a result that nowhere near as many units as a standard electrical soldering station are sold). I also have found that I very rarely use it and prefer my own soldering jig. The rest of the unit, while expensive has proven its worth to me in that once I learned to control the power for the job at hand, it has saved me a lot of costs in wasted time and parts. Dr PR - WRT probes, I have used a single probe hundreds of times with no tip or other breakages, all it does is get shorter with use; must have been a bad lot? I do however, every so often give the tips a bit of a clean to remove some of the carbon buildup. I bought a package of replacement probes at time of purchase to save on future shipping costs, but I doubt I will ever use them all Never know though. cheers Pat -
Compass
BANYAN replied to Minnang's topic in Discussion for a Ship's Deck Furniture, Guns, boats and other Fittings
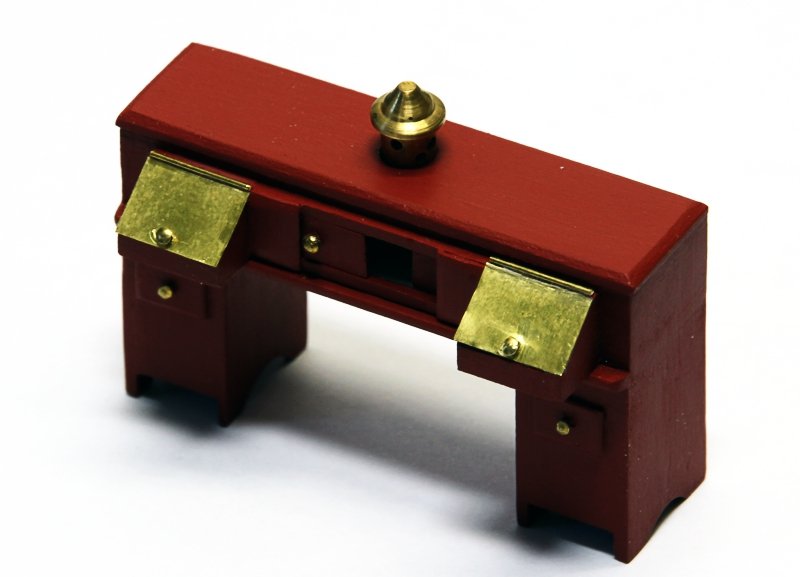
This the binnacle I built for my Endeavor (1770); this solution puts the binnacle over the skylight, with a compass either side, to allow for the helmsman to steer depending on where the wind was from. The binnacle is unlikely to go over a companion as the crew need to enter/leave via the companion hatch. However it could back into the other side and would therefore be a small construction. cheers Pat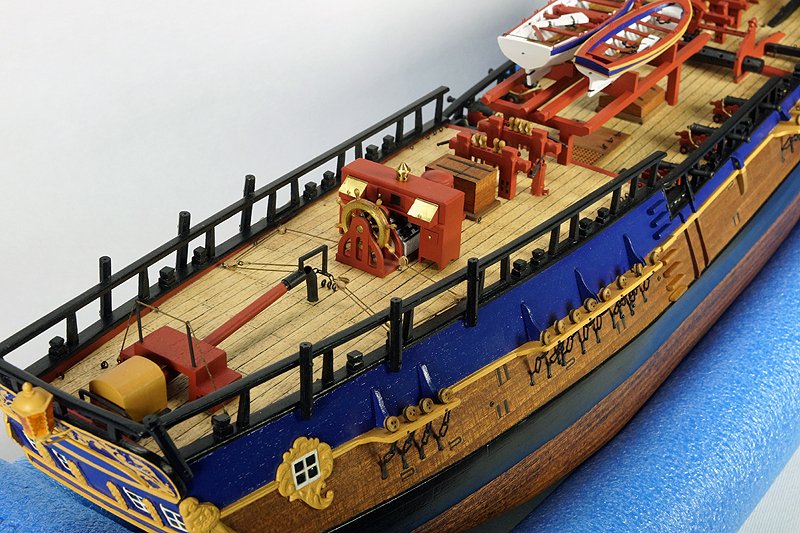
-
A very useful tool; you don't happen to have a local manufacturer that would do these on a 'limited' production run for you do you? Some very clever ideas you have developed in this jig - thanks for sharing. cheers Pat
-
Oh come on now; you have to have a team of elves out the back doing this? Truely beautiful detail; you are a master craftsman - I think any cabinet maker would be proud of those furniture items, yet alone these being at scale! Is that small vise / gripper you show at post #67, 7 down a purchased item? With your skills, you probably made this? It looks a very handy tool/accessory. If you made this would you please show some other shots of it? DSC01115.JPG.62923c7e9edf6173126b42106c0c3069.jfif cheers Pat
-
When you finish this model Keith I am going to make a copy of the log and edit to my own needs as an exampler of how to do it right! Many thanks for continuing to show your techniques in such great detail. Oh, and probably no need to say, but exquisite detail. cheers Pat
-
Kudos and congrats Rob; stunning model and very nicely displayed. You have done a great job on her; now I need to get off my butt and get more done on the Victoria. cheers Pat
- 1,208 replies
-
- 1
-
-
- great republic
- clipper
- (and 1 more)
-
Slow but steady? More like an Olympic paced sprint Steven (oh sorry that has been postponed hasn't it) Some great progress you are making - the model is really looking good. cheers Pat
-
If an uneven set of shrouds (say 5 shrouds per side - 2 pairs and a single) the last leg (sometimes called a Swifter) had an eye or Cont splice in the middle of the length, which is sufficient to be passed around the deadeye either side and seized back on itself), with the eye passed over the masthead. The first /leading leg of each shroud set was usually served all the way down to minimize wear-and-tare from the sails/bolt ropes rubbing on them. The pairs were rigged as described by Dave. So, for this example, you would have two pairs of shrouds per side, each pair would have been doubled and throat seized around the mast head, a single leg with the Cont splice (middled) was passed over the mashead as the after shroud legs. The ratlin' was then applied depending on the period in which the ship was built. To get a good fit for the seizing/loop, to keep the seizing close to the masthead, use an off cut of the same diameter dowel placed in a piece of scrap to tie them off the model, then fit the pairs etc in the correct sequence as described by Dave. There are some good tips and videos available in this forum / You Tube etc to show how to do seizings (if you need them). cheers Pat
-
Help with soldering
BANYAN replied to Kevin Kenny's topic in Metal Work, Soldering and Metal Fittings
HI Kevin, Sorry for the delay but the time zones interfere with quick communications; not that it will make much difference as you have realised (due to closures etc). For the same reasons, cost of transport etc, I put together a package I thought I would need. The following are my experiences BUT it all depends on how much you use the unit, and for what purposes. I mostly use it for smaller jobs and use a small torch (hand held) for bigger (not real big) jobs. I have built a special soldering jig for my purposes which comprises a 6 x 4 inch soldering pad (with holes) and a GRS single arm articulated arm and some special hold down fingers (based on the Gerald Wingrove rig). Firstly, I must say that the guys at American Beauty were very helpful in putting together my kit, and also for the one small issue I had. The LED in the on/off switch stopped working, but the unit itself was still functional. I am not an agent etc just a very happy user. Our power supply is 240V which required them to put together a unit that also met our Certifications Standards - no problem for them at all. I opted for the Super Chief kit as the power/resistence range is ideal for our needs; even then I mostly operate with the lowest settings. I have even been able to control the soldering power to the point of safely soldering Photo Etched (PE) parts.. I ordered the unit with the tongs (came as a package - Super Chief) but I rarely use the tongs. I also ordered the hands free vise (product #105V12) - not sure they still sell it as it did not come up in a quick search I did. The truth is I rarely use it as I can do most jobs with a special set of leads I had made up that include an alligator clip on one lead and a single probe on the other. I had two sets done, one with the normal size aligator clip and another with a micro clip (be sure to ask for one with good gripping power/capacity as the small one I ordered initially had no grip at all . Also, be sure to order some additional probes. For those in Australia, "COLTRONICS" (ask for James) in Sydney is the Aussie Agent - very helpful. No association etc, just a happy customer of these products. cheers Pat -
Help with soldering
BANYAN replied to Kevin Kenny's topic in Metal Work, Soldering and Metal Fittings
Hi Kevin, I am a real fan of resistance soldering and I use the Super Chief unit you showed in the video. By dialing down the power/resistance, I am able to achieve some very small soldered joints even close to each other; although, if you can use a heat sink that is better. To do this the most important thing, as with any soldering type, is to develop/use a jig that will hold the items in place while you make the joint. Also, a 'clean' tight joint always works best, but I have managed to gap fill using this method. My preferred method is to put a dab of 'NoKarode' flux between and around the joint and place a small pellet (small piece cut from the wire) of solder on the opposite side of the joint so it flows towards the heat source. I have found that sometimes depending where you place the points of the rod/clip affects this, so sometimes I need to reverse the leads to the unit. I prefer to use a lead with an alligator/crocodile clip on one side as that frees your hands and provides a good contact - American Beauty can make these up for you. I use the single probe lead to then place the point at which I wish to supply heat. For joints closer together I use different melt point solders, as for any other type of soldering. As you can see from the attached, the small eyes and the lug at the base (shown on top) of this bowsprit cap I am assembling, are quite close together and I was able to achieve this with no heat sinks, including soldering the side plates. The piece is still being completed and a bit of clean-up still required. I prefer to use silver solder for its strength and variety of melting points even if there is no real pressure being applied to the joints. I stay away from the premix silver solders and cored rosin solders as I find they leave too much residue which affects the blackening process (even if I pickle) but if you are painting this should not be a problem and will widen the range of melting points for you. I hope this helps? cheers Pat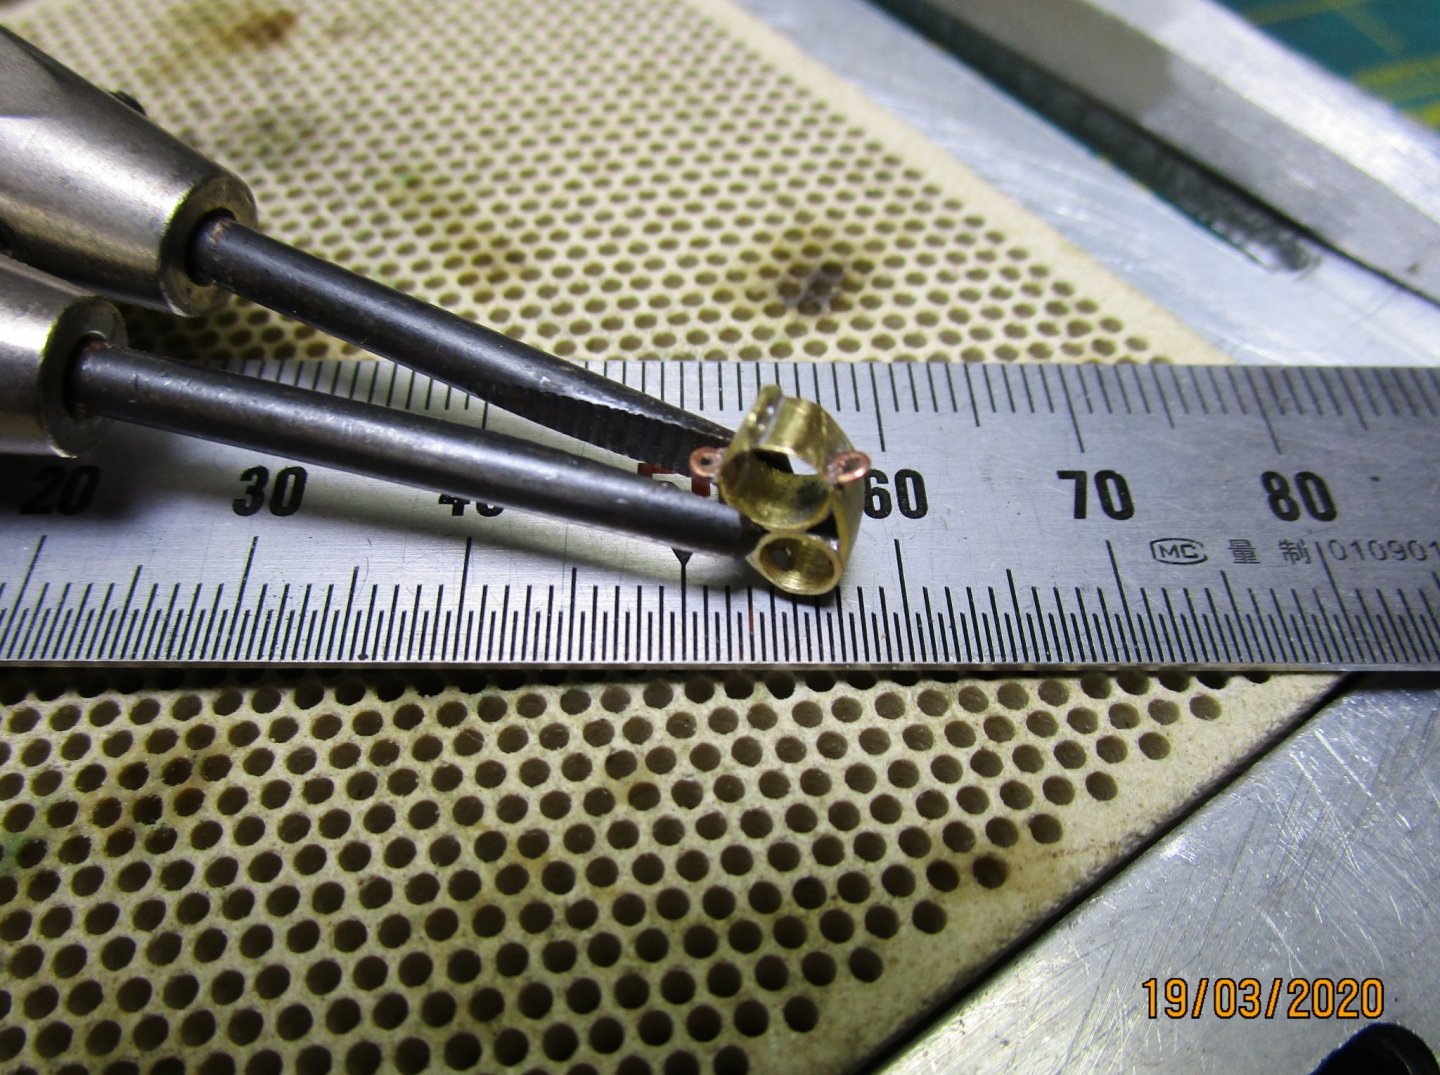
-
I hope you are able to recover your Company after this awful pandemic Hubert. Thanks for explaining the detail and sequence Keith, makes sense once you explained it. Thanks to Eberhard for the additional comment; yes not intuitive but logical (starting to sound like a 'Vulcan' now; no pointy ears last time checked ) cheers Pat