


Theodosius
-
Posts
322 -
Joined
-
Last visited
Content Type
Profiles
Forums
Gallery
Events
Posts posted by Theodosius
-
-
Good job on your first planking! And that 24'ers look massive! I like!
- chris watton, DB789 and AJohnson
-
 3
3
-
-
This looks like a good start! 🙂
-
I am amazed about your rigging! Incredibble for this size!
- Glen McGuire, DB789 and Thukydides
-
2
-
 1
1
-
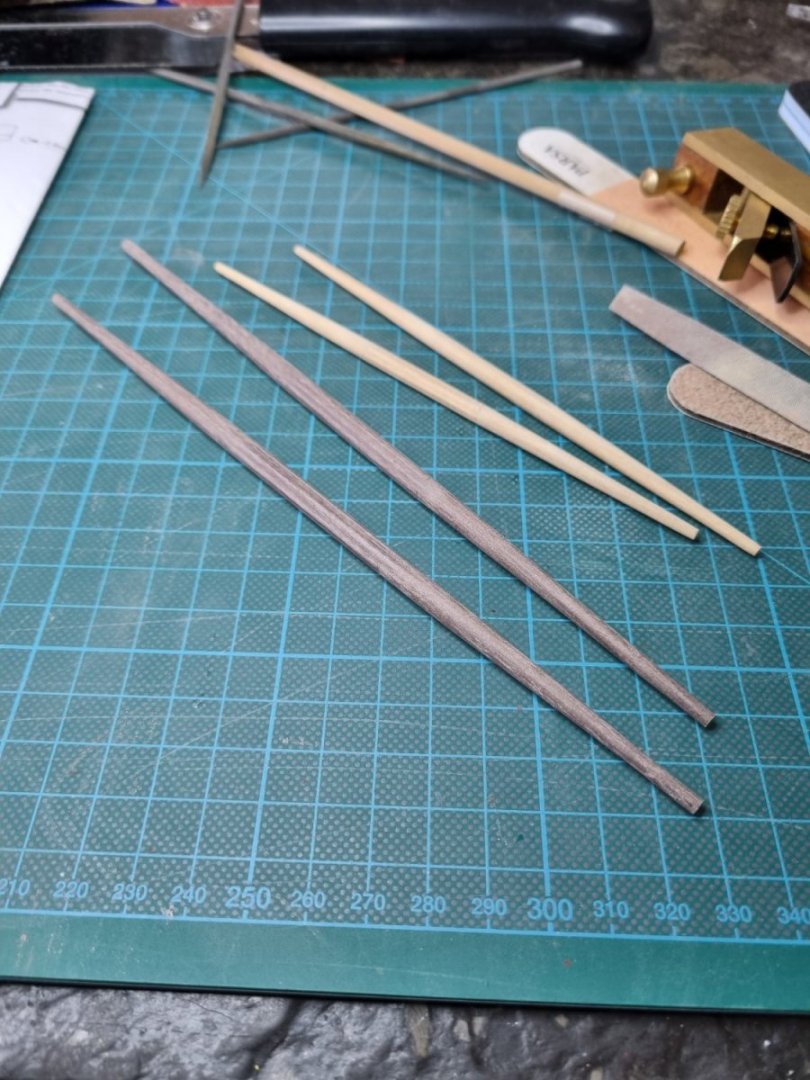
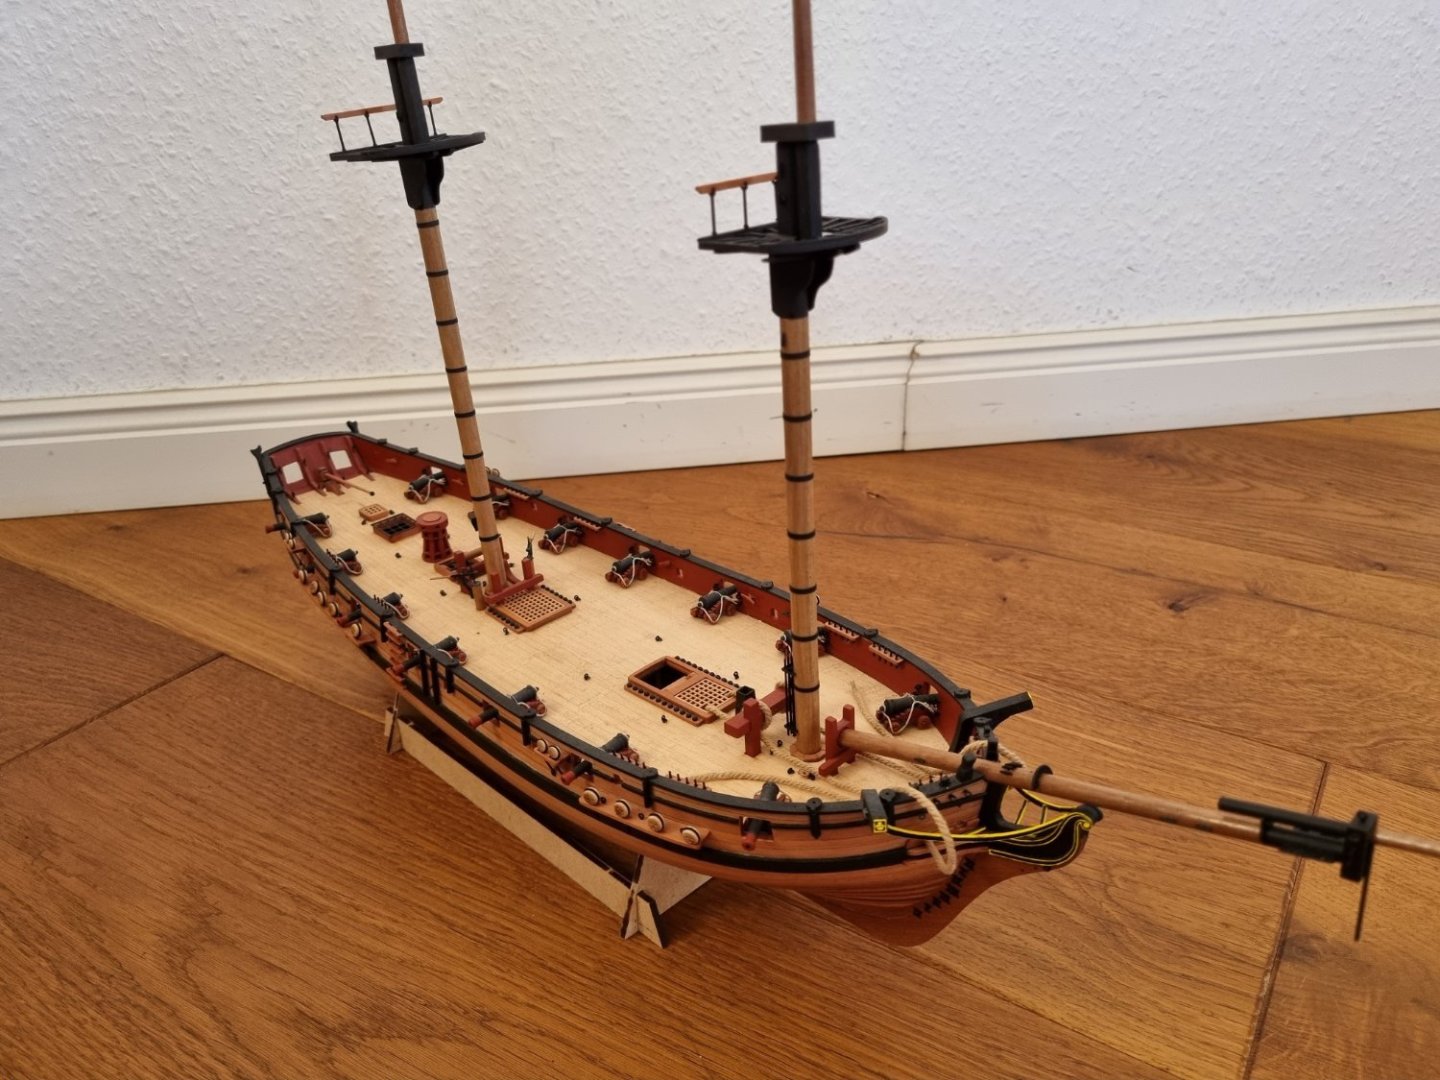
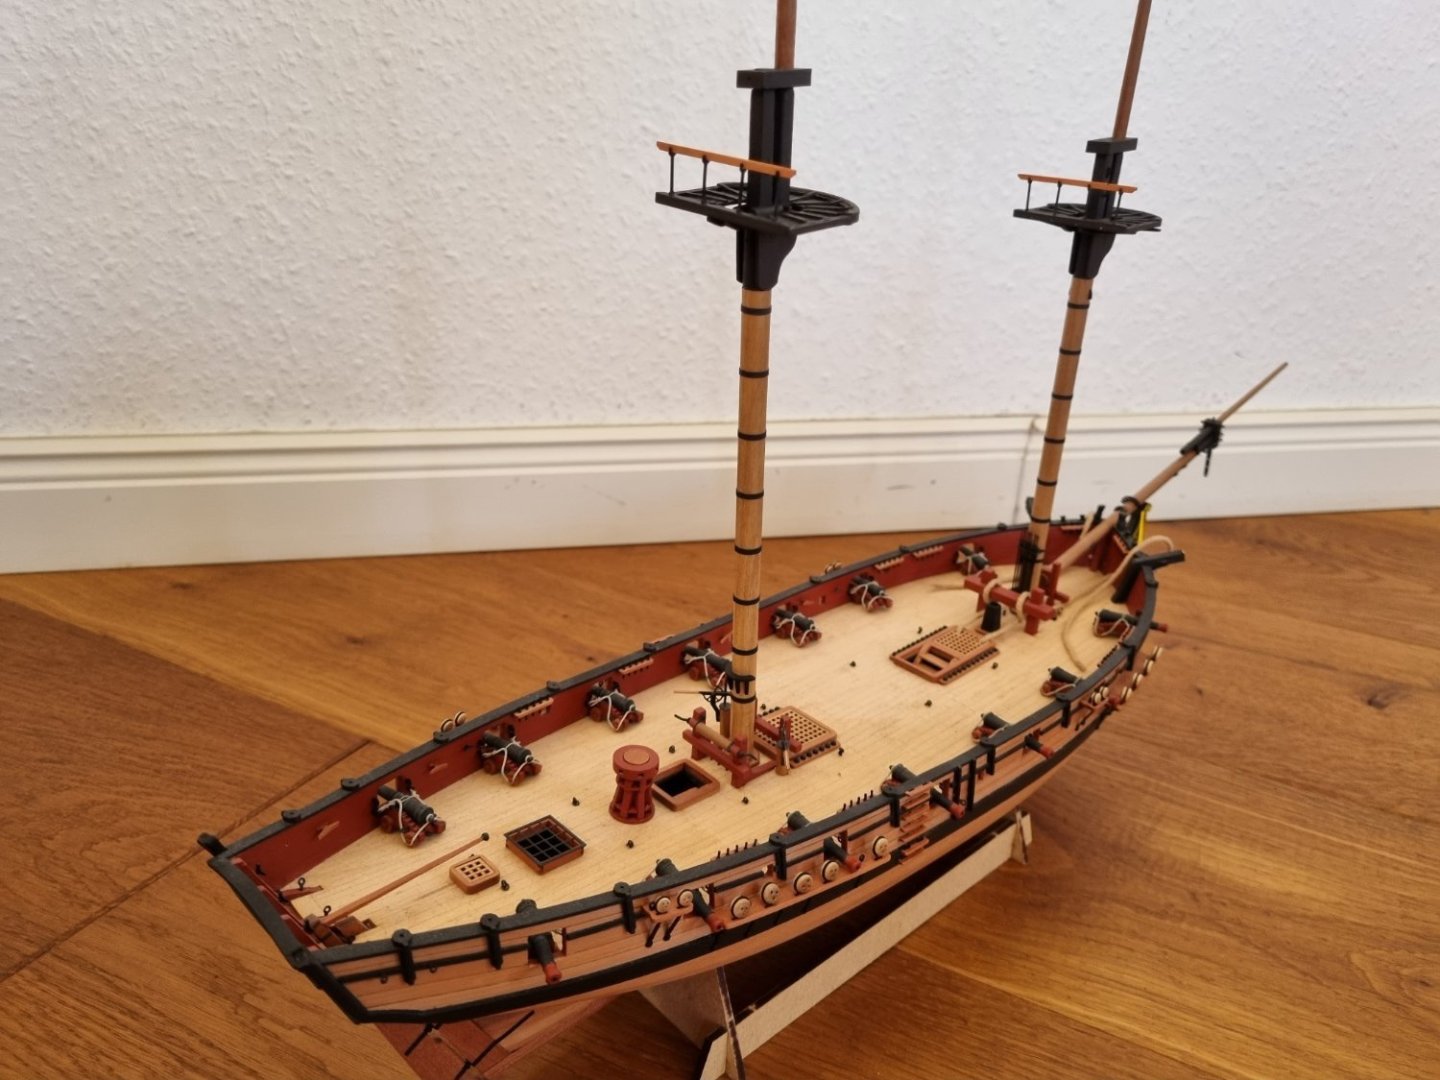
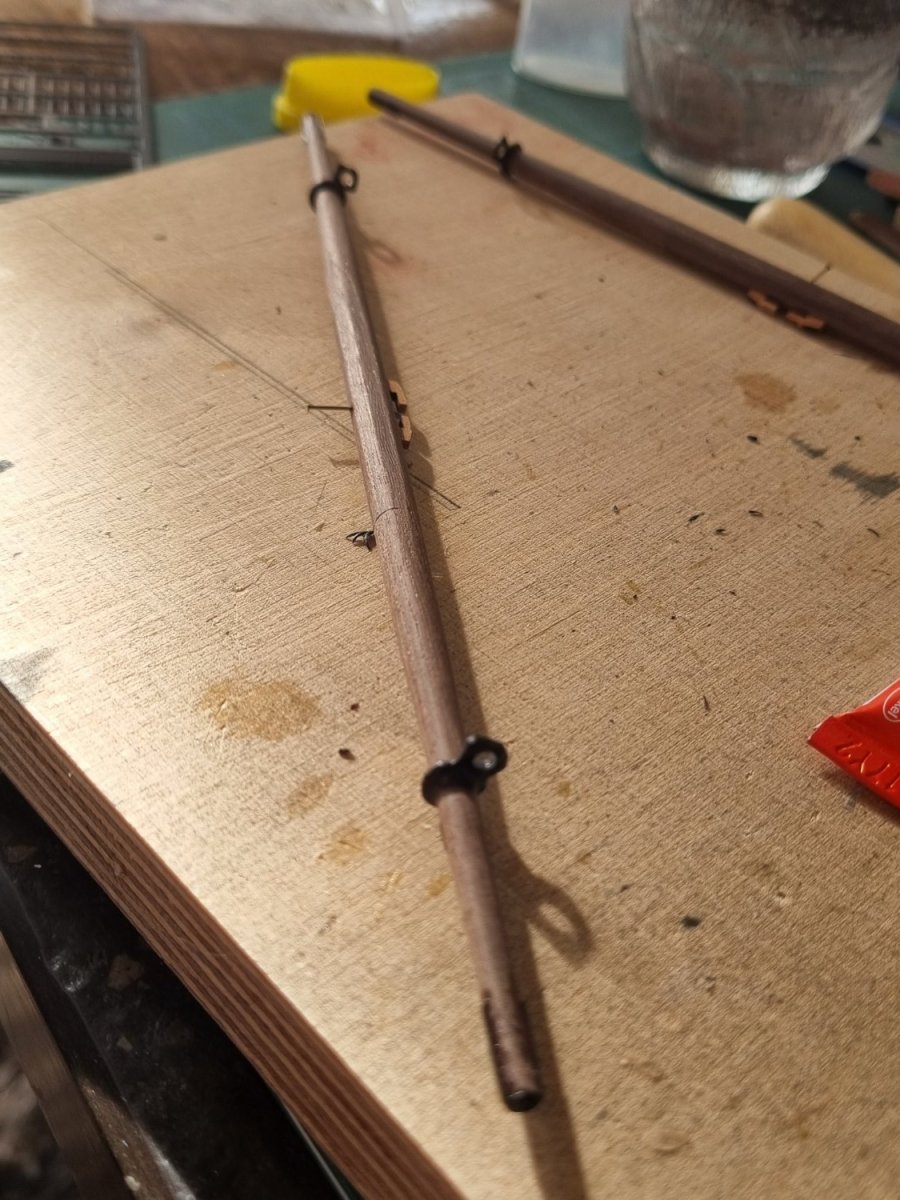
Milestone reached: all the spars are ready from a wood working point of view. That means, the 'building' is finished, but the complete rigging is to do next.
Some inbetweens:
Some spars taperd and the 8-sided, äh, 'things' are worked out:
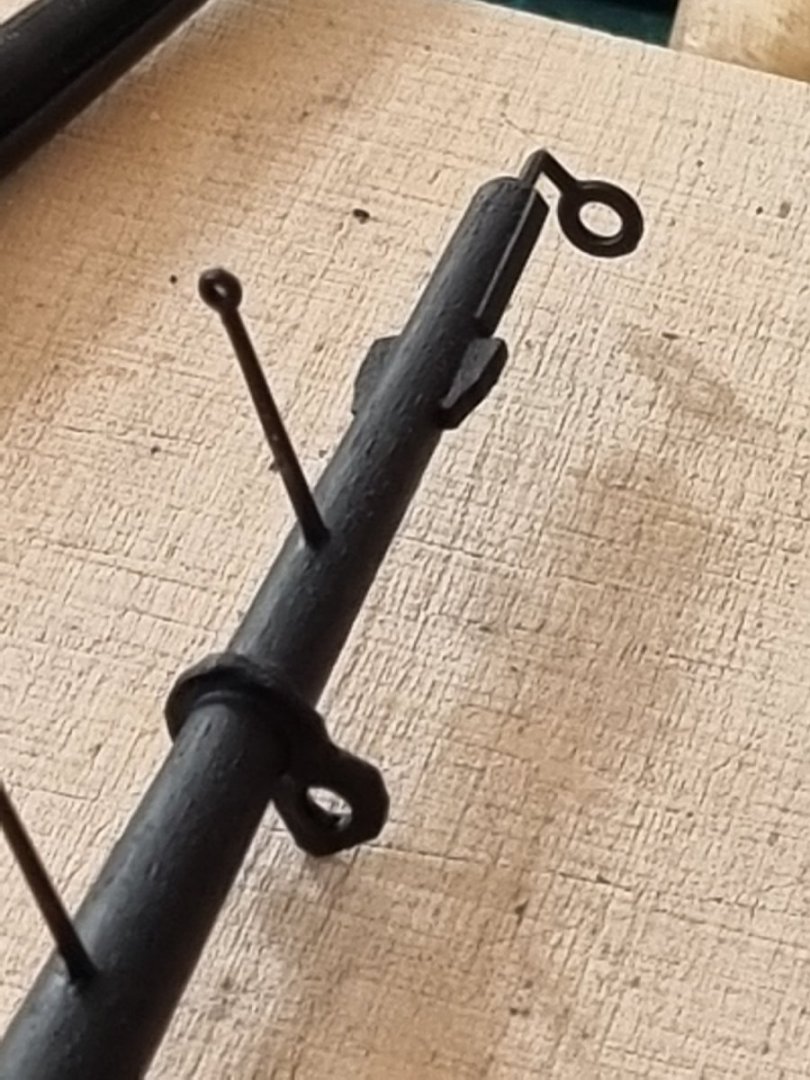
Two points about the next pictures. First, I ran out of PE-cleats(?). A short email dialog with Chris brought clarity to my fault: he very politly pointed out, that the use of pe-parts at this point was overhoult, and I should use the plenty of wooden parts. Damn! The wooden parts looks much better than the pe parts, and I could not figure this out by myself. Only excuse I have is, that in the plan sheets I only found references to the pe and not the wooden parts. Well, to much use of blinkers on my side :-).Second point: I lost one of the holsters for the additional smal spars on top of the main spars. Sorry for my lack of propper nautical terms. I made a new one out of the black paper and stiffen it with ca-glue. It is more bulky than the orginial pe-part, but if you don't know, only on the second view, so I hope I'm ok there.
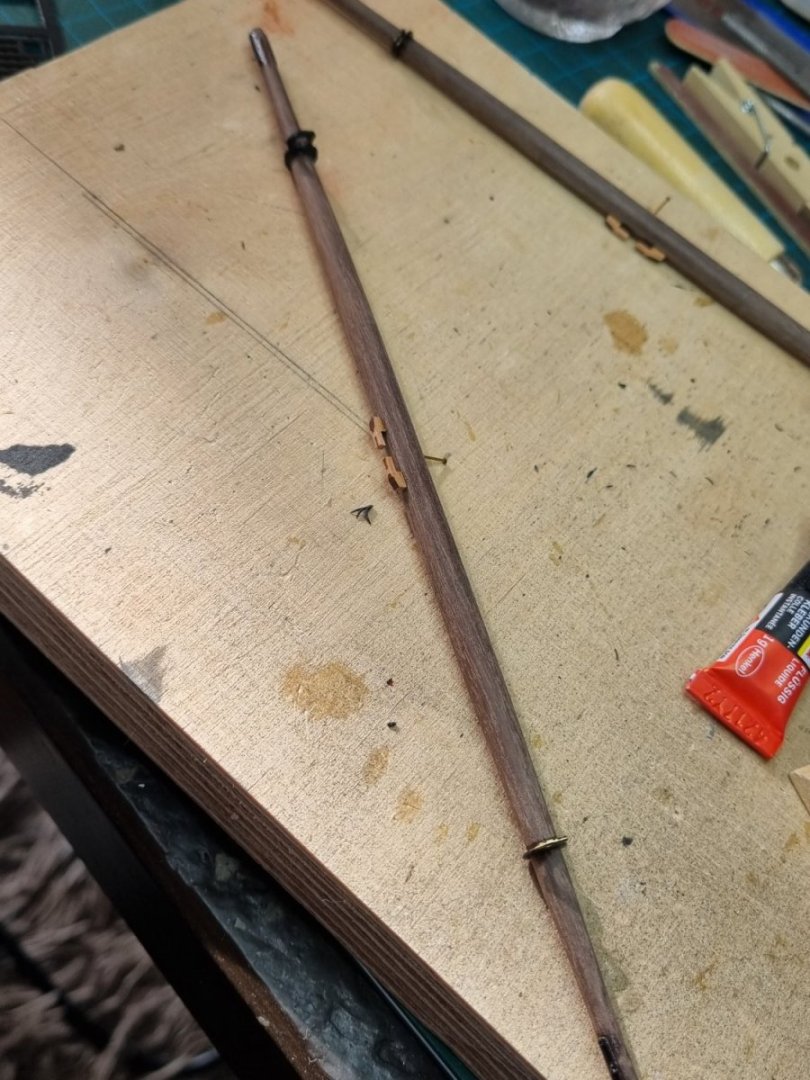
All spars ready for rigging in front of the boat:
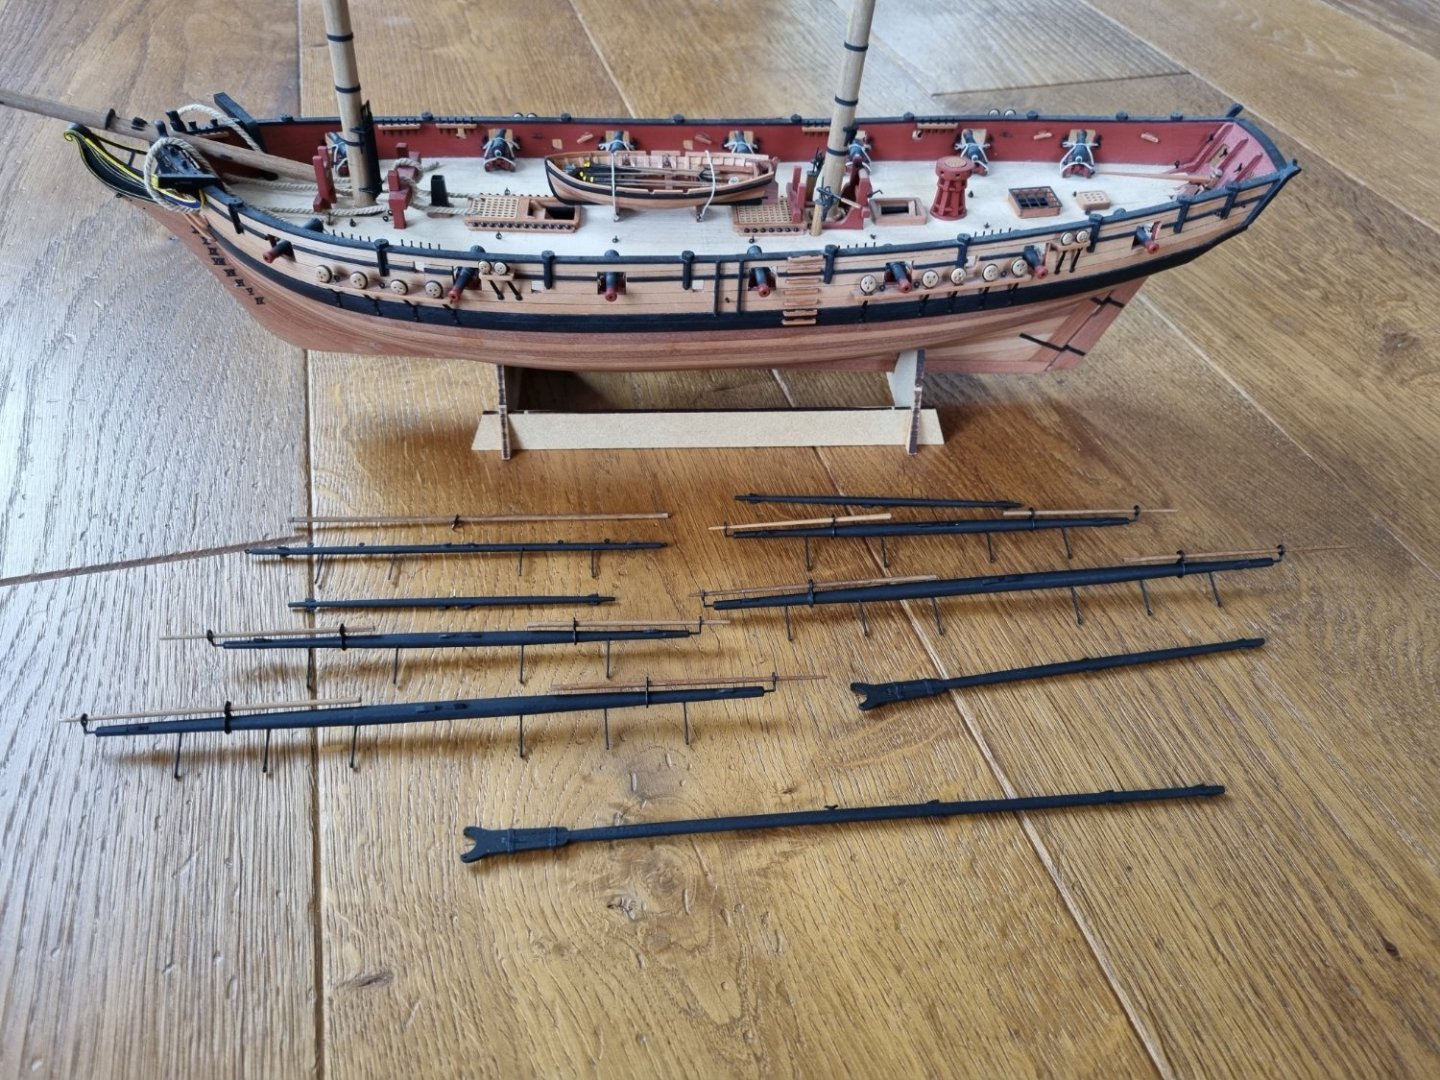
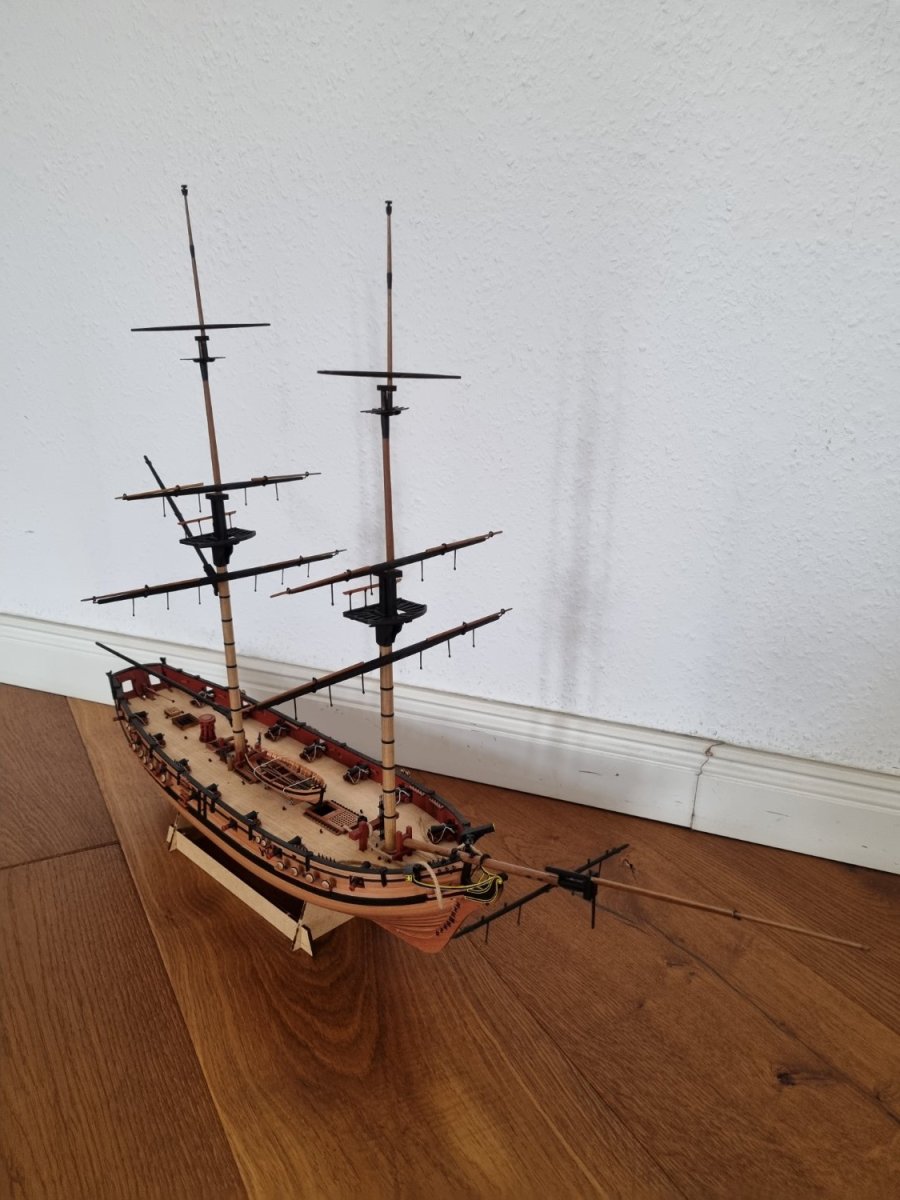
To give me an idea of how it might look in the end, I put all together, but only with the pins and no glue, so all is still wonky: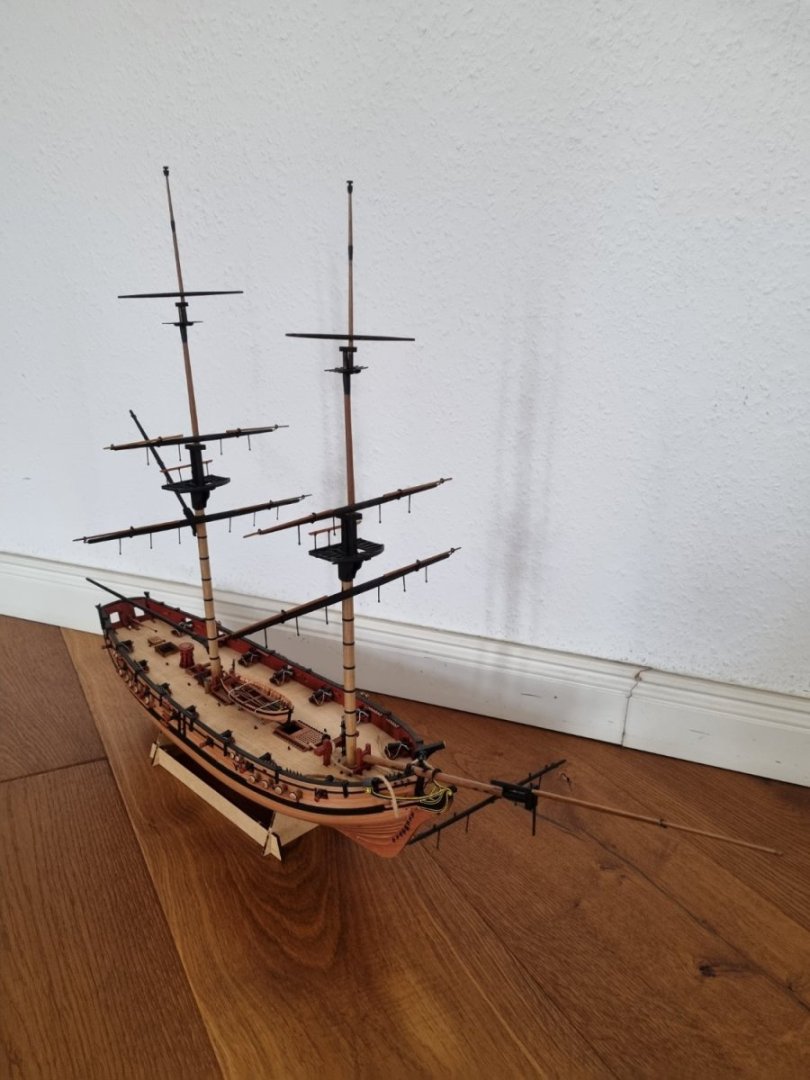

- chris watton, wvdhee, CiscoH and 3 others
-
6
-
-
Thanks for the detailed unboxing and sharing your building experience! Looks good so far, IMO 🙂
-
Missed tha one. Good job! Will follow along! 🙂
- AJohnson and BrochBoating
-
2
-
-
Glad you found out what went wrong! I have such things too, and did'nt fix them, because no one will ever see it. But, I allways want to know what I did wrong, so that in the future I know how to not make the mess again :-).
A pro po again: your model is beautiful just the way it is! 🙂
- mugje and usedtosail
-
2
-
-
Your rigging as good as your painting! Lovely model!
- Glen McGuire, Thukydides and DB789
-
2
-
1
-
-
-
After your great work on the Yawl, may I ask how is it going with your speedy? 🙂
-
@popeye2sea: thank you for this suggestions, I put the books on my 'to search' list! This is the for going into the rabbit hole 🙂
@Bob Cleek: thanks for the links, this youtube videos are very helpfull. Yes, I was lookin for this basic stuff. I'm sure, that will cover most of the needet ones 🙂
-
-
What stains did you use in the end? Now the spars fit well together, IMO!
- mtaylor and Keith Black
-
2
-
Great progress! I like the idear of putting all the shrouds to the masts before the masts came to the ship.
-
-
Hello,
start of the rigging process is now only a vew yards away.
What I need now is an explanation of how to make all the needet basic knots. Best with diagrams and or photos.
Thanks alot for your help!
-
Hi usedtosail,
I'm very sure, that your channels ar'nt too low, but your wales are to high!
You changed it at the back of your model, but now your wales don't run smoth and parales to the sheer line! The first picture from the back of the ship at #64 shoes, that your replaced wales fall down at the end of the ship, but they should have gone up in a smooth line.
You said that you have used the pre-painted marks to place the wales in the correct hight/spot. I'm sure you did that! But than, I'm afraid, you did not place the second plank of the wales UNDER the first one but ON TOP of it. That would explain why you had not enoug room for the fashion peace, it would explain why the top of your wales are only roughly one plank under your gun ports, where there should be a space of something about two planks, and lastly it would explain why the chain plates don't fit as intended.
Well, if you just shortend the now too long chain plates, no one would ever see what happened here 🙂
Beside that, äh, feature, your model looks realy good! Nice fitting colour selection you did there too!
EDIT:
I looked more closely at more of your photos:
#67 (first picture): on the most left gun port there is barly one plank between the underside of the opening and the top of the walel. The second one, ther is room for a good plank. Third: one and a half. Fourth: nearly the needet two ones. Perhaps you just managed to aplly a not wantd extra curve into it.
-
@Thukydides & @KARAVOKIRIS: thank you both for your thumbs up, much appreciated 🙂.
As allways, health status is an issue, but model building helps a lot, at least with the mental health :-).
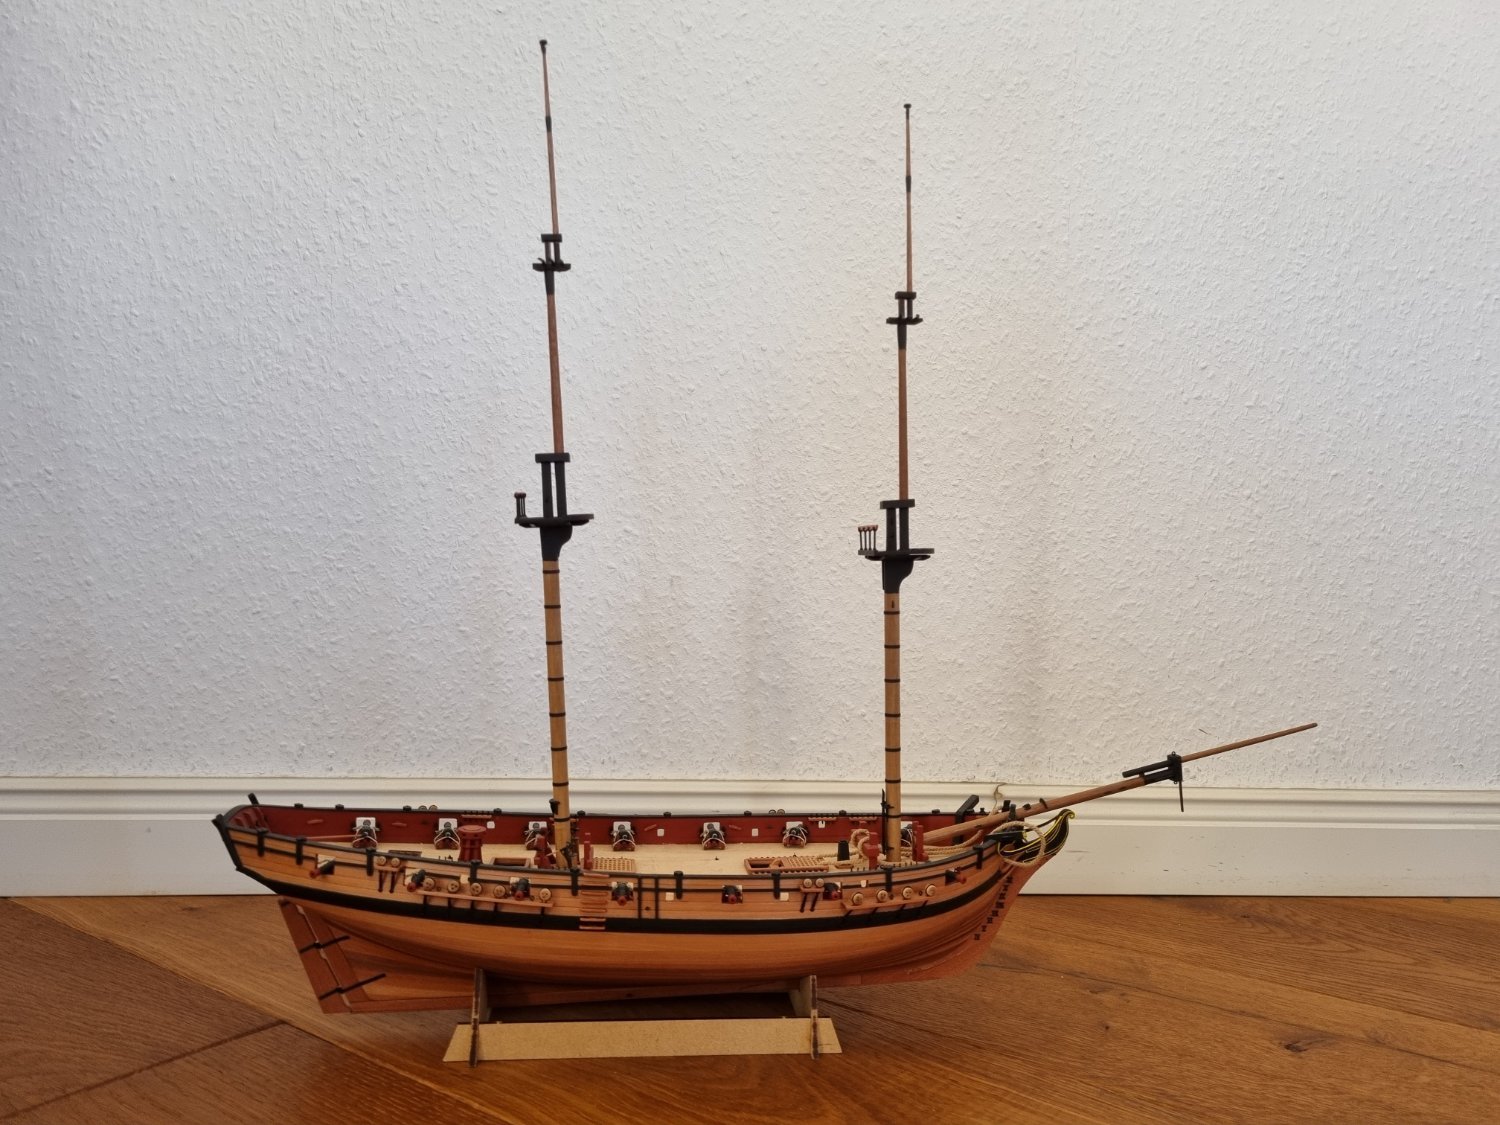
I could sort out my problem with the PROXXON DB250 during the tapering process of the dowels.
So I finished the masts from the woodworking point of view. They may look a bit wonky in the pictures, because there is nothing glued jet, even the plattforms are still loose. I have finished the flying boom, but I might not use it because of display/storage reasons. But this is not finaly decidet jet.

-


Chris Watton and Vanguard Models news and updates Volume 2
in Traders, Dealers, Buying or Selling anything? - Discuss New Products and Ship Model Goodies here as well!!
Posted
When it is grown up, what will it be? 🙂 But it looks very interesting and promising 🙂 Like!