AJohnson
-
Posts
2,053 -
Joined
-
Last visited
Content Type
Profiles
Forums
Gallery
Events
Everything posted by AJohnson
-

Bristol Beaufort by AJohnson - FINISHED - Airfix - 1:72
AJohnson replied to AJohnson's topic in Non-ship/categorised builds
And finally.... I'm also on with this, if anyone would be interested in a log of this and another trip down 'memory' lane?
-
Bristol Beaufort by AJohnson - FINISHED - Airfix - 1:72
AJohnson replied to AJohnson's topic in Non-ship/categorised builds
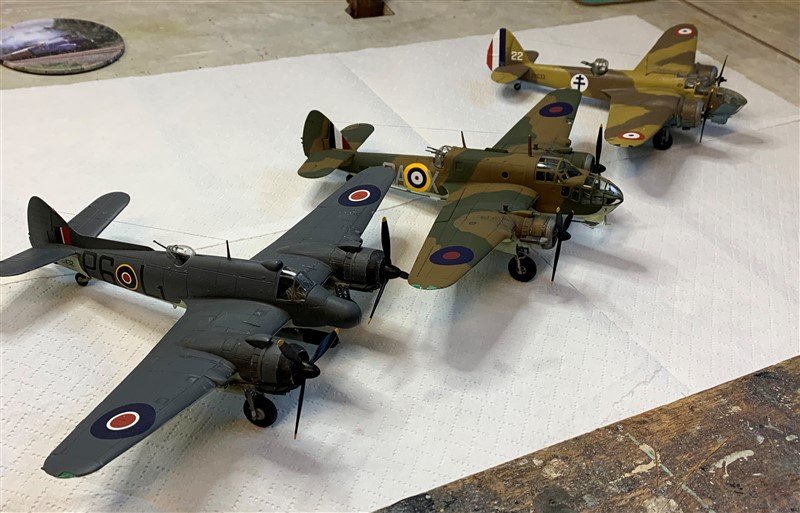
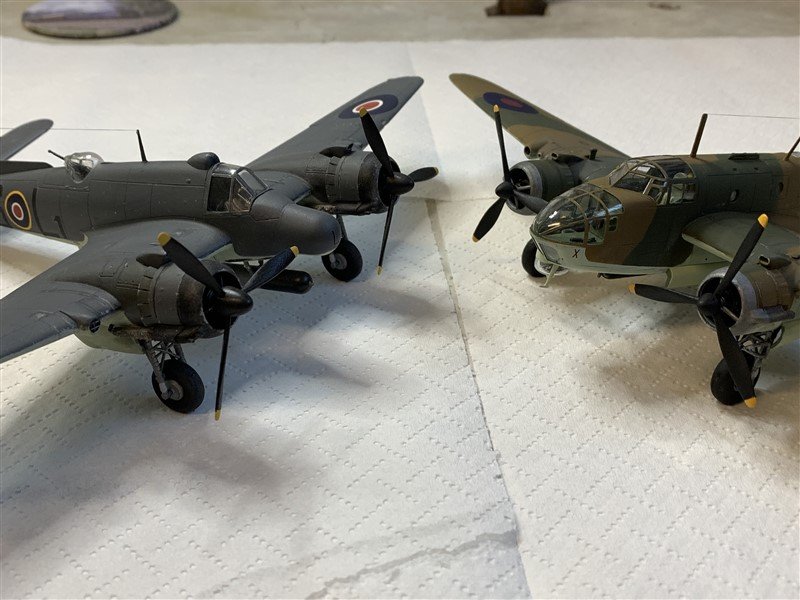
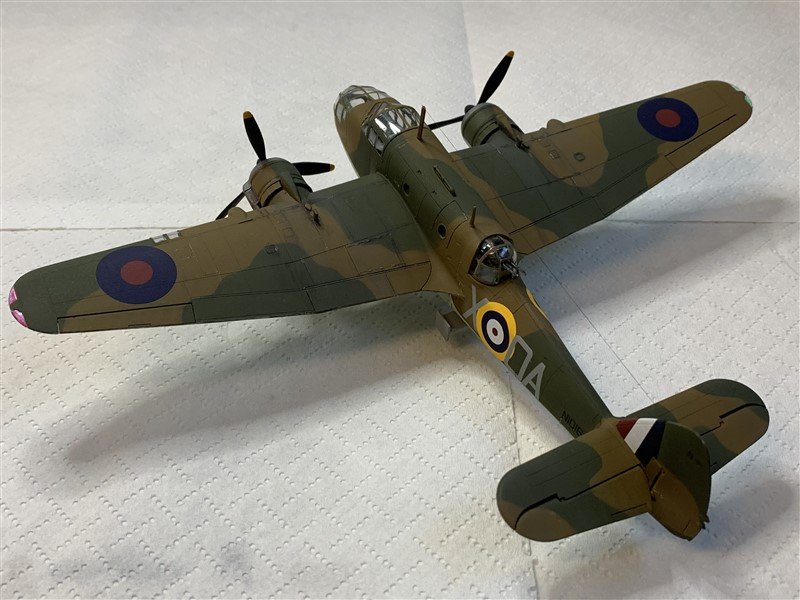
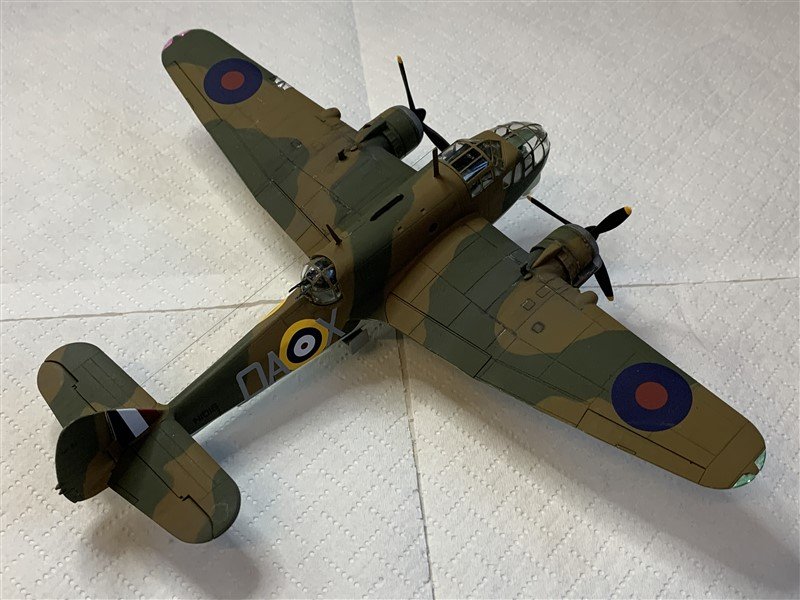
I thought some of you might like a few shots of the recently finished Beaufort compared to other Bristol types from the same stable I have made in recent years. A Blenheim (in French colours - Sacre bleu!) and a Beaufighter; probably the best of the three in terms of war record.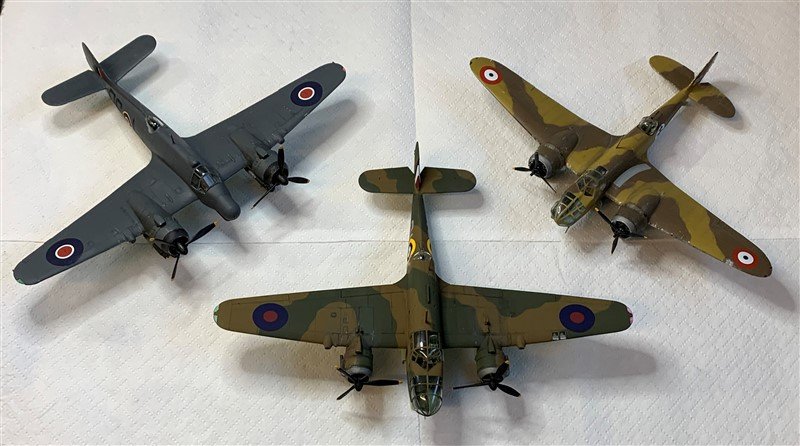
- 42 replies
-
- 11
-

-

-
Bristol Beaufort by AJohnson - FINISHED - Airfix - 1:72
AJohnson replied to AJohnson's topic in Non-ship/categorised builds
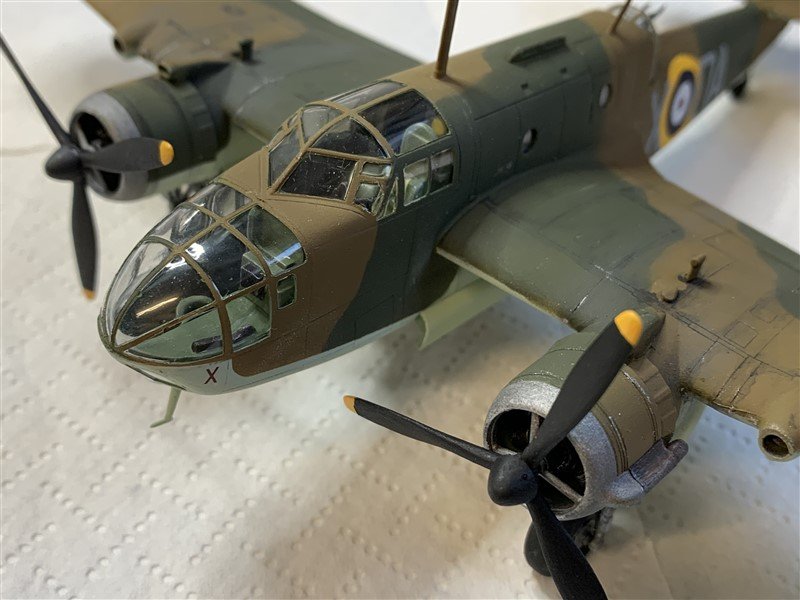
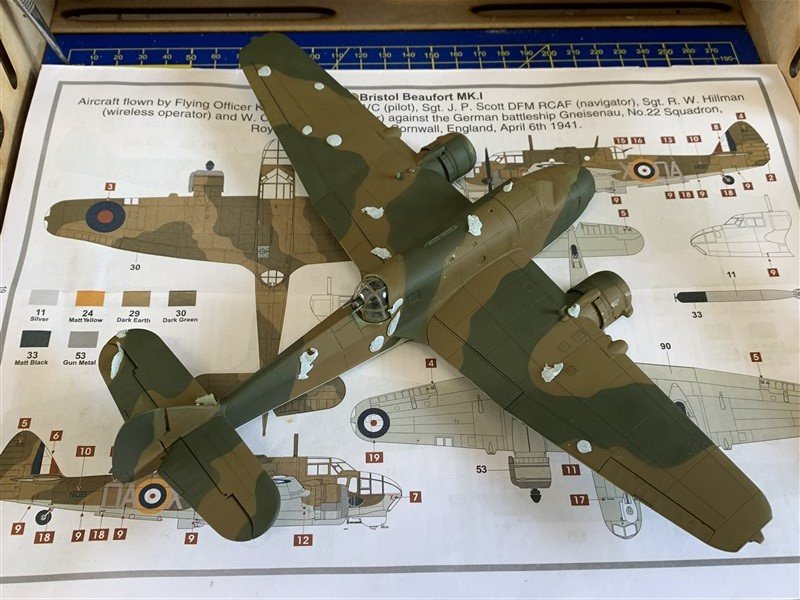
Here we go folks. the final pictures of my Bristol Beaufort. Final notes, the matt coat varnish is from Mig Ammo, I like the flat coat, but it is very fragile, just look at it and it scuffs. Managed to avoid 'silvering' under the fuselage letter codes, which is big 'Win' for me. Some 'losses' as with every build; the canopy is mostly clear, with the odd mark here and there and a mysterious line/crack on the lower starboard side? But overall for a "glasshouse" not too shabby. But most importantly on the prop scale of movability they are a "2" - not blow round ones, but they do freely move by finger prods. 😆 A couple more posts to finish before I mark this one FINISHED. A fun little build and thank you all for following and hope you liked the trip down memory lane, courtesy of good old Airfix!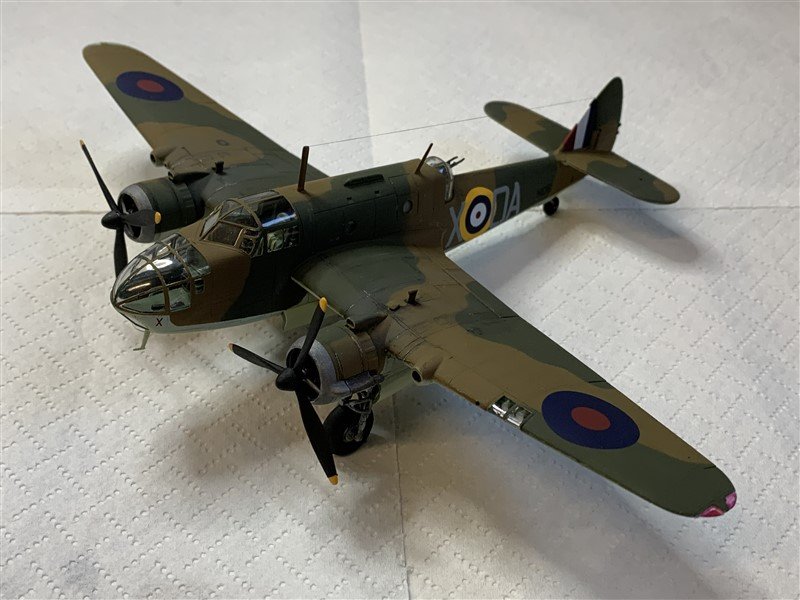


- 42 replies
-
- 10
-
-
-
Hi, glad to see you back in the saddle and hope your health issues don’t keep away further. Take care.
-
Hey Brian, I've just checked and although @Timmo is still active, he does not appear to be following his own build log, so might not have spotted your questions, maybe try PMing him, be a shame for you to miss out on some valuable input from him. Beautiful build and great presentation!
- 366 replies
-
- 1
-
-
- granado
- caldercraft
- (and 1 more)
-
Nice save with making your own pewter parts! Good idea leaving them off until later, I wish I had done that with my Bounty! 😣
-
Bristol Beaufort by AJohnson - FINISHED - Airfix - 1:72
AJohnson replied to AJohnson's topic in Non-ship/categorised builds
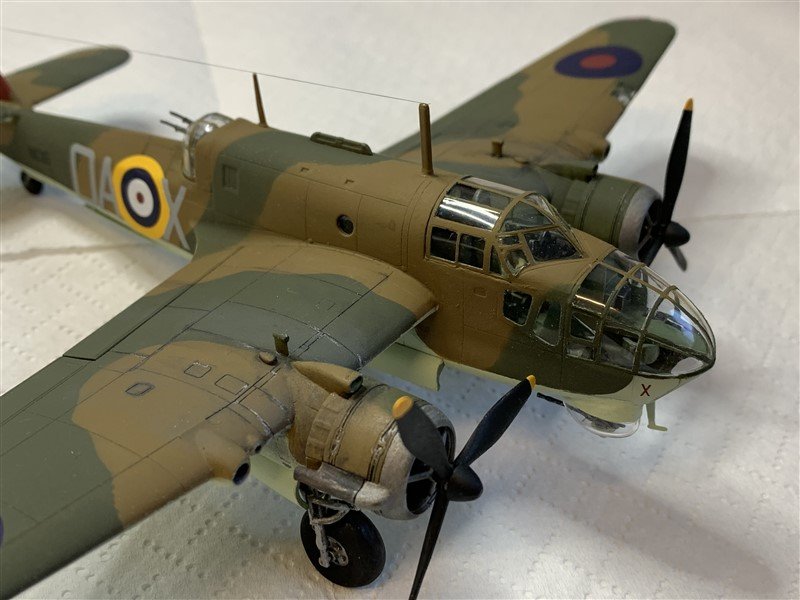
Small update probably the last before the "reveal" - Added the undercarriage, which was a pig to get in and also added the Torpedo/bomb bay door and the Torpedo itself. I've also started a little bit of weathering, but not going mad as 1/72 scale models can look pretty "scruffy" if overdone. Remaining tasks are adding the small glazed nose turret, three little aerials, finish the matt varnish, props and lastly the nerve wracking job of peeling back all the glazing masks to hopefully find a clear cockpit! Thanks for the likes and comments guys! 😁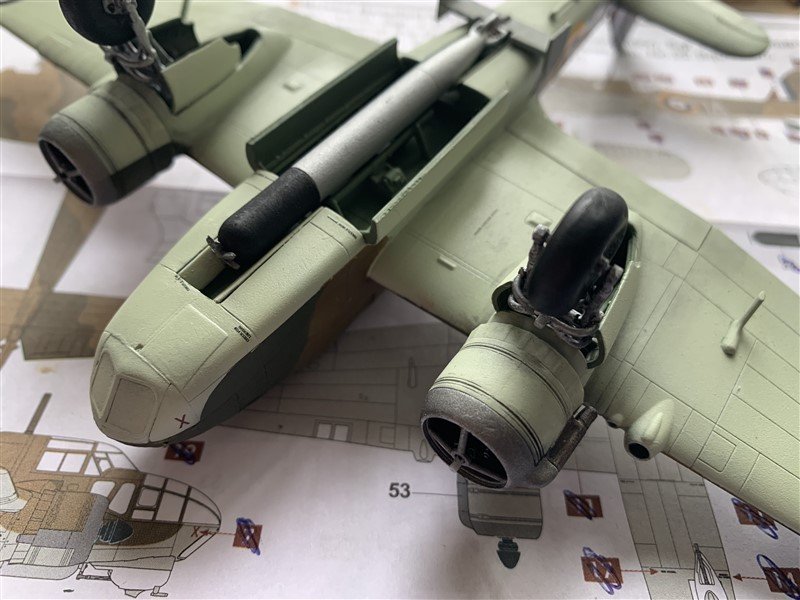
-
Very nice indeed 👏, feeling a bit seasick already looking at that scene! 🤢 pass the bucket!
-
Many years ago I had the Tamiya 1/48 version which was pretty basic. The after market parts will lift your build to a different level, nicely painted engine! 👏
-
Great work Graham, the extra details you are adding are making all the difference. 👏
-
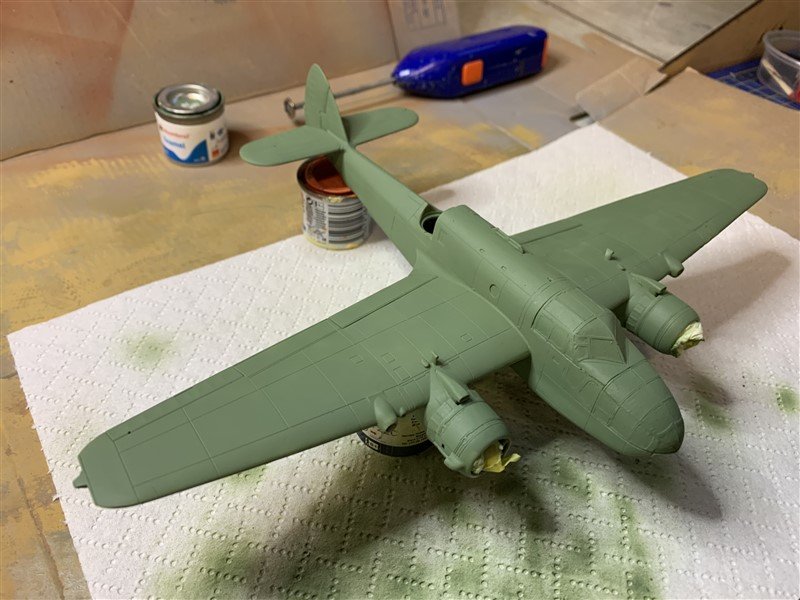
Bristol Beaufort by AJohnson - FINISHED - Airfix - 1:72
AJohnson replied to AJohnson's topic in Non-ship/categorised builds
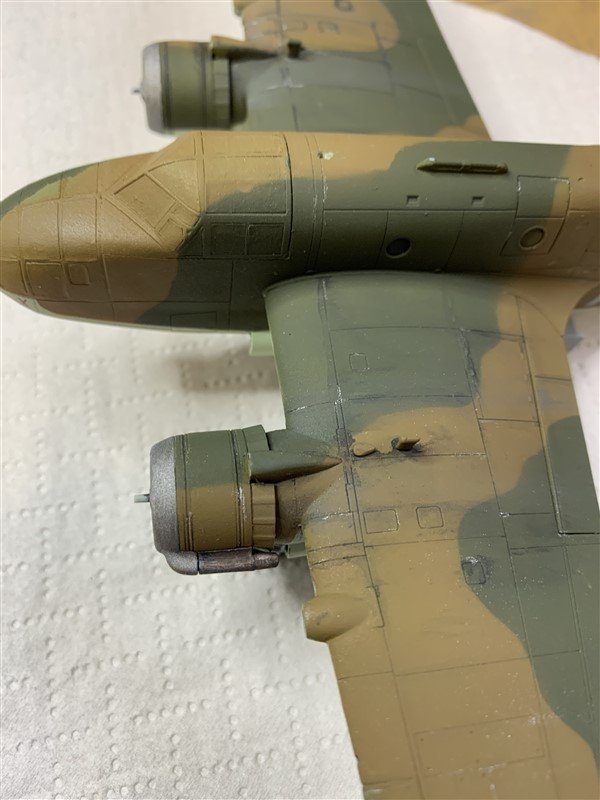
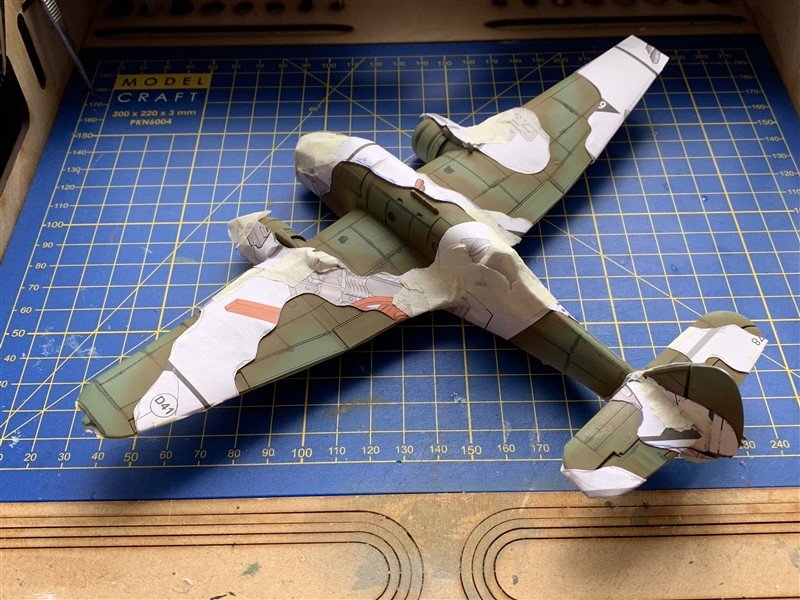
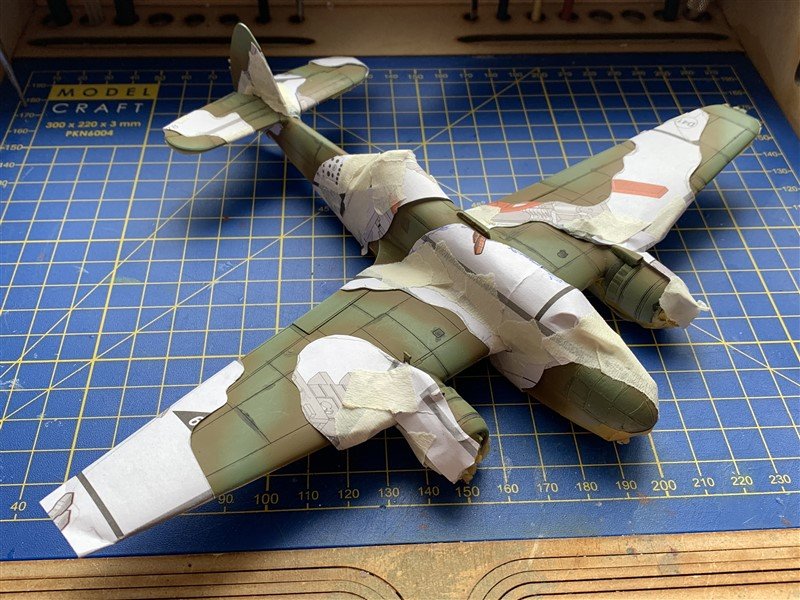
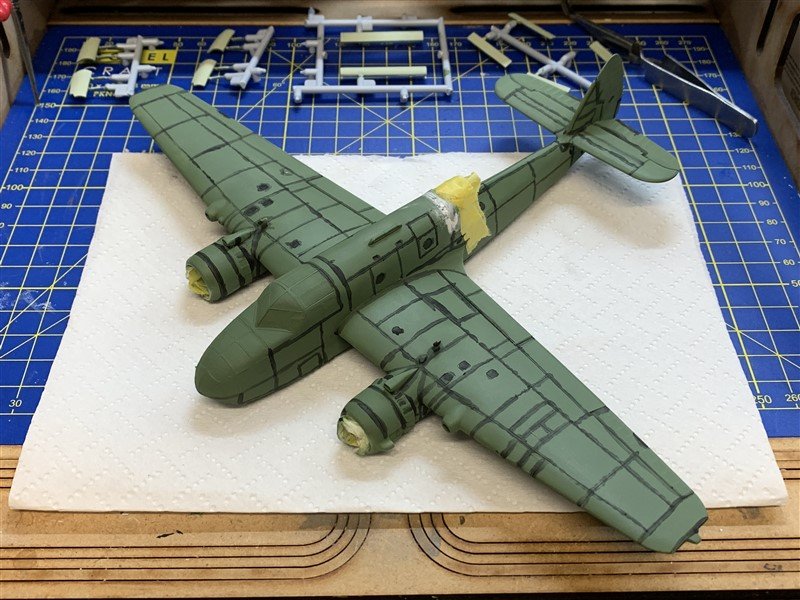
Next batch of pictures are on the airbrushed painting done this weekend. I used "Colourcoats" by Sovereign Paints from here in the UK, I particularly like their Dark Earth / Dark Green, that to my eyes looks pretty close to the RAF camouflage colours. They are enamels, but I have learned to use lower pressures when painting and not blast high pressure aerosols all over the place and into my lungs, so it not that unpleasant and I have plenty of ventilation. A note on the masking, I tend to use paper cut outs that emulates how many (but not all) British aircraft were painted (using large fibre reinforced rubber mats). I have tried to use rolled blu-tack "snakes" to demark the camouflage patterns, but I found it hard to follow the patterns properly and the "feathering" too pronounced, particularly for 1/72 & 1/48 scale aircraft. Sources I have come across state that the ministry standard for even "freehand" spray painted aircraft was a 0.5 inch wide demarcations, so that at 1/72 that would look pretty much a hard line, not fuzzy. My paper masks are held down with little dots of blu-tack to stop the paper flapping about when using the airbrush; the trick with these little dots is patience and let the paint harden before plucking them off with a larger ball of blu-tack, they tend to leave no marks if clean. Thanks for looking in and the likes and stories/memories! 😁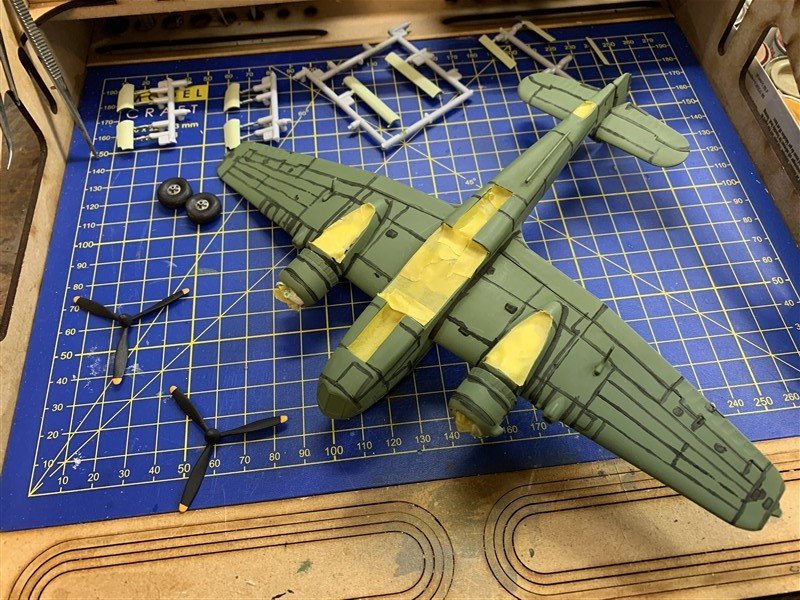

- 42 replies
-
- 10
-
-
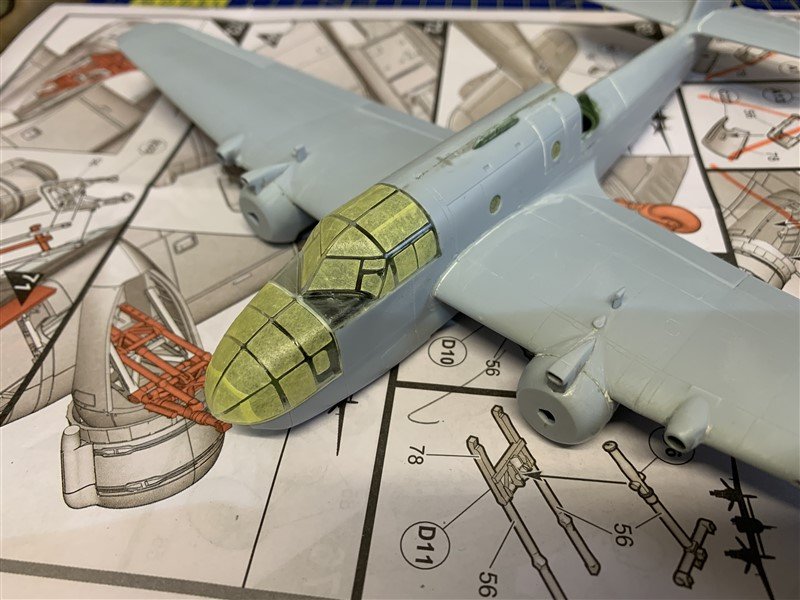
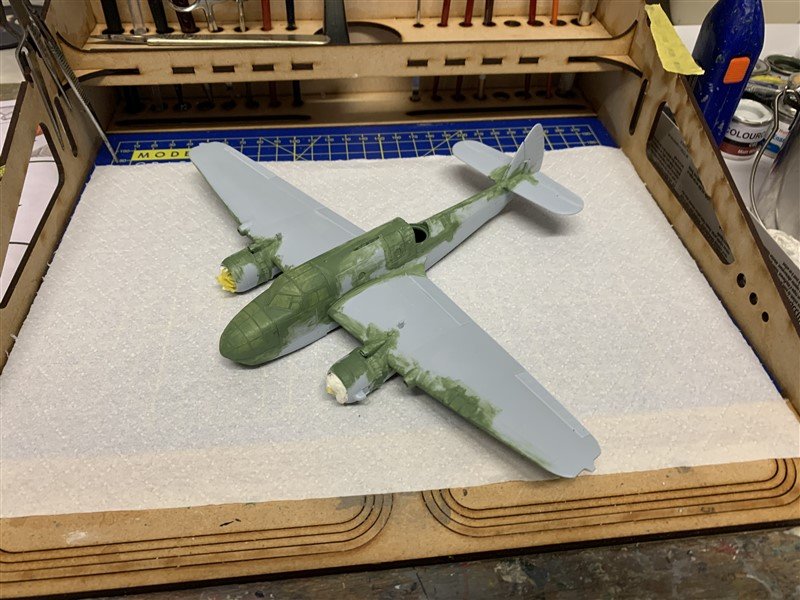
Bristol Beaufort by AJohnson - FINISHED - Airfix - 1:72
AJohnson replied to AJohnson's topic in Non-ship/categorised builds
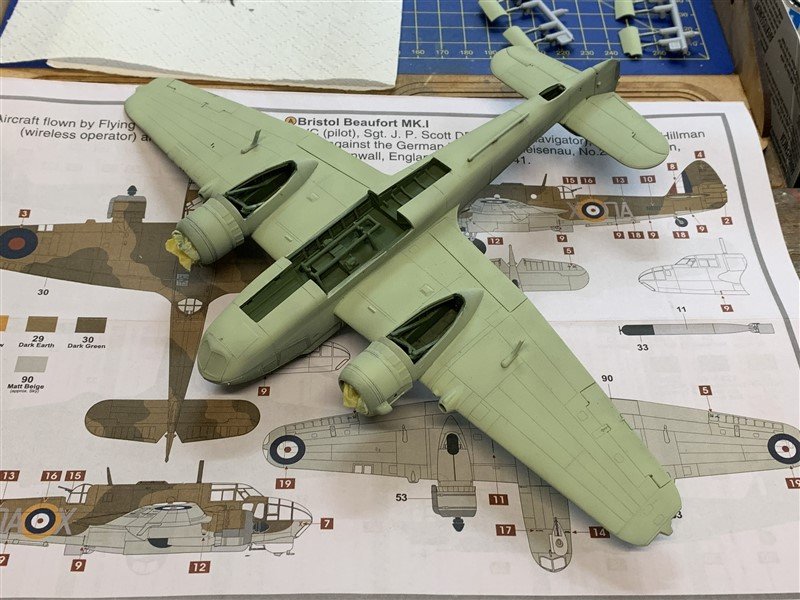
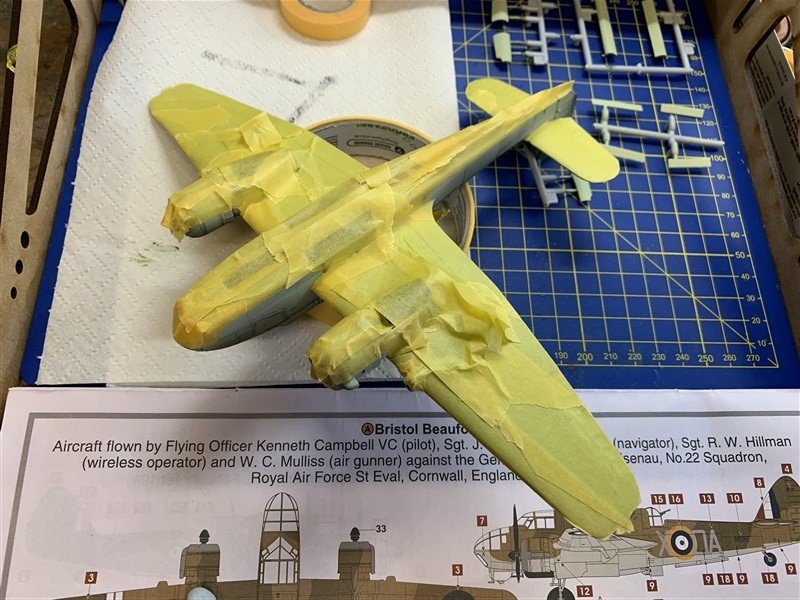
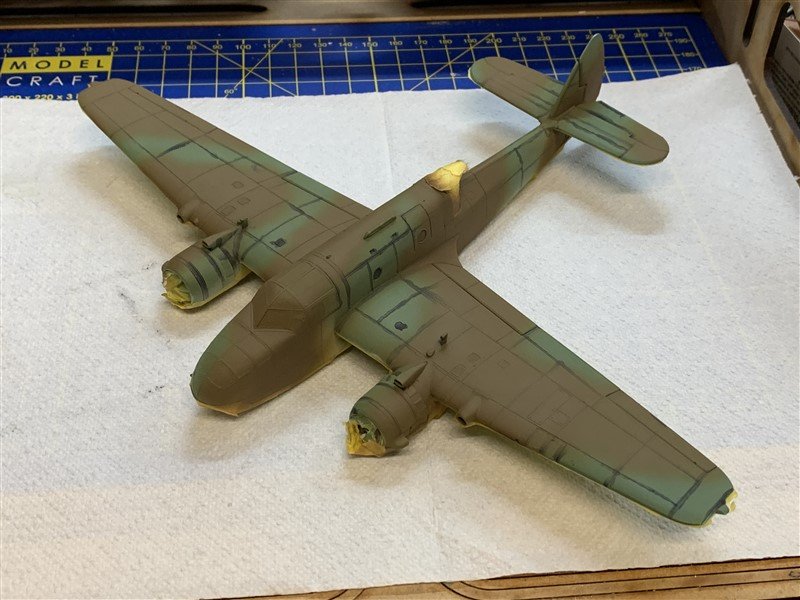
Bulk of the building side of thing about done now. I did buy a set of canopy paint masks for this model. If I'm doing an aircraft with a simple canopy, then I will make my own masks to save a few pennies, but with these "Glasshouse" type canopies with loads a frames it seems a bit of a false economy and usually the results are better also. There was a bit of sanding and filling to do once the first undercoat went on, mostly around the cockpit windows and the rear turret fairing, which I needed to be careful with. Then I pre-shaded the panel lines prior to painting proper.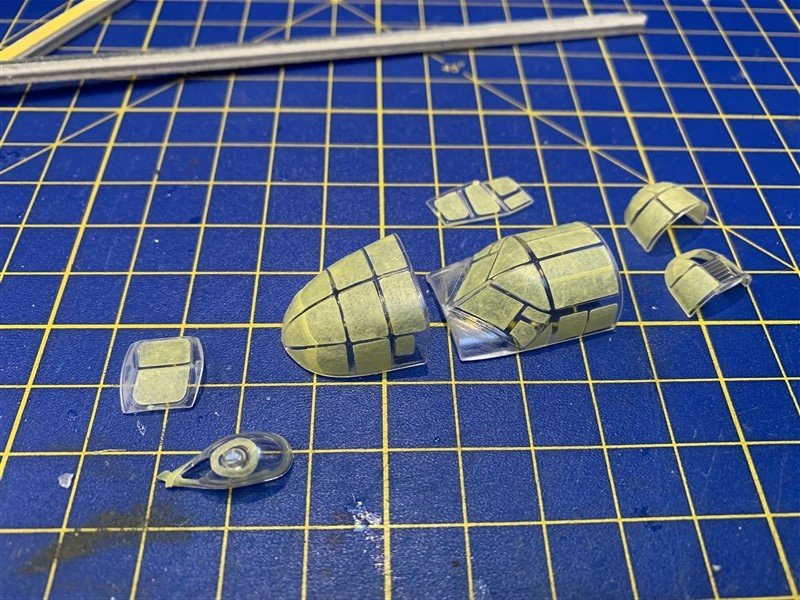

-
F-86F-30 Sabre by Egilman - Kinetic - 1/32nd scale
AJohnson replied to Egilman's topic in Non-ship/categorised builds
That's a nice looking Sabre, really coming together now with the Decals going on.! 👍 -
Bristol Beaufort by AJohnson - FINISHED - Airfix - 1:72
AJohnson replied to AJohnson's topic in Non-ship/categorised builds
Oh , that must have been epic! I am lucky that Knaresborough is on the flight path for the BBMF Lancaster when she goes north each flying display season. Seen her twice this year, once almost overhead! 😀 -
The more I see the, more I want Micheal Caine and Robert Shaw as my wing men! Those naughty Yellow Nose’s! (Apologies to non BB film fan’s!)
-
Bristol Beaufort by AJohnson - FINISHED - Airfix - 1:72
AJohnson replied to AJohnson's topic in Non-ship/categorised builds
Alan, absolutely no apologies needed, your mention of Sunderland bomb racks was an excuse to launch into more reminiscing! 🤣. The new Airfix Lancaster’s are good, I have built a merlin one and want to build a Mk. II (radial Hercules version) to honour the Canadians who flew from a local airbase at Linton-on-Ouse. Please all dive in with the stories, I think the “non-ship” sub-culture of MSW is one of the more relaxed sections. 😀 -
That's what would be my undoing, I'm forever holding things on kits that result in broken/bent/squashed bit! 😏
- 165 replies
-
- 10
-
-
Bristol Beaufort by AJohnson - FINISHED - Airfix - 1:72
AJohnson replied to AJohnson's topic in Non-ship/categorised builds
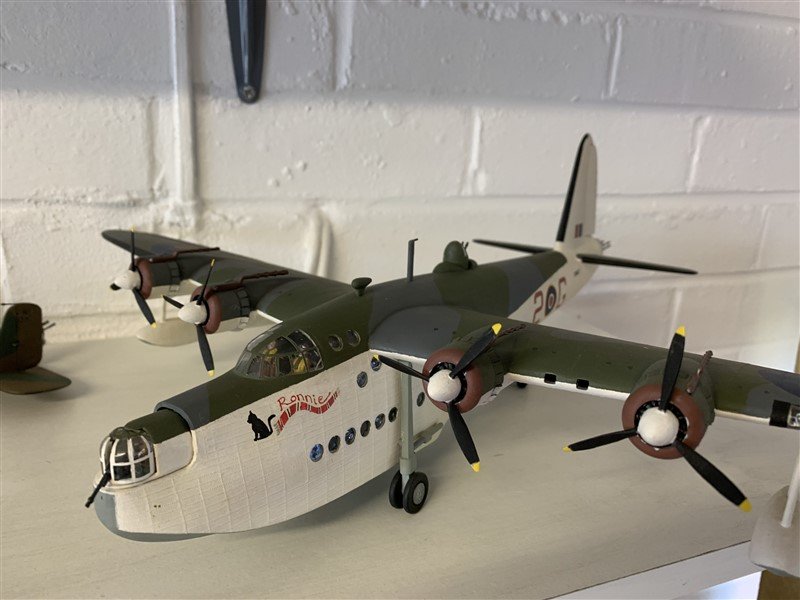
You mean these!? - And no mine don't move either! 😂 This is probably one of the oldest kits in my collection, you can tell as the white has yellowed somewhat. I built it for my late father in law decades ago before the admiral and me were married. There is a little Black Cat I painted on the nose takes a little explaining... Ron was from Sunderland and was a fanatical Sunderland AFC supporter (Football) Their mascot/nickname is the "Black Cats" and their colours are Red, white & Black, so that's why they are on the nose when I gifted him it. When I presented it to him I said "Here Ron, here's a kit that reminds me of you, its a SHORT(s) Sunderland!" - He was about 5'3" - fortunately he took that in good spirits and even mentioned in in his speech at our wedding. 😆 I have now been given it back to be the custodian of, like you say Alan these little bits of wood and plastic we build contain many great memories... 😁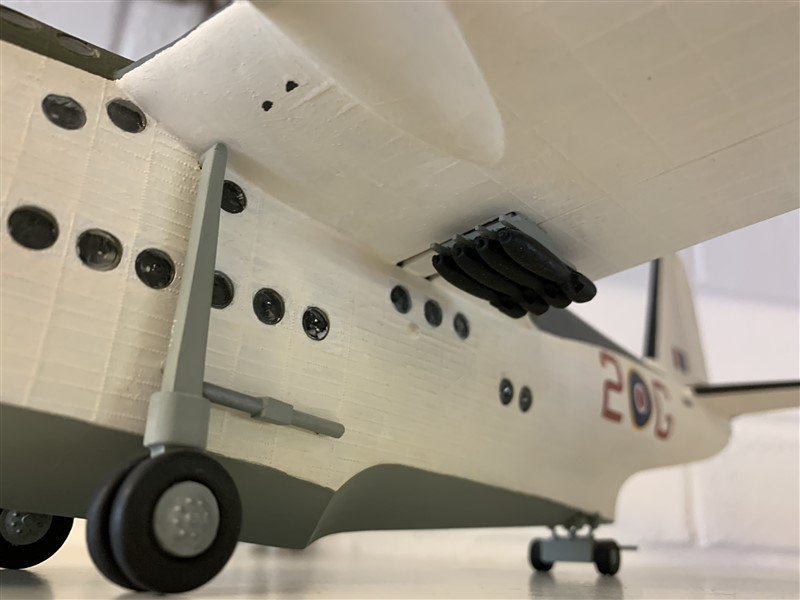
-
Hi Chris, I’ve spotted them all, but only by comparing to my 1/24 Airfix version. Do you have any tips on how you get the card parts to “dome” and do you fill the void underneath each part at all, to stop them crushing flat again?
-
Hola! Welcome to MSW!
-
Bristol Beaufort by AJohnson - FINISHED - Airfix - 1:72
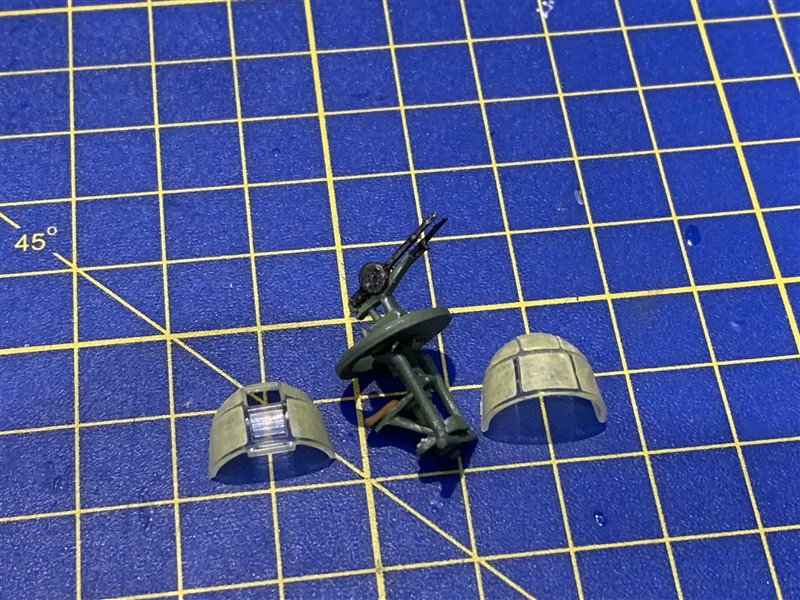
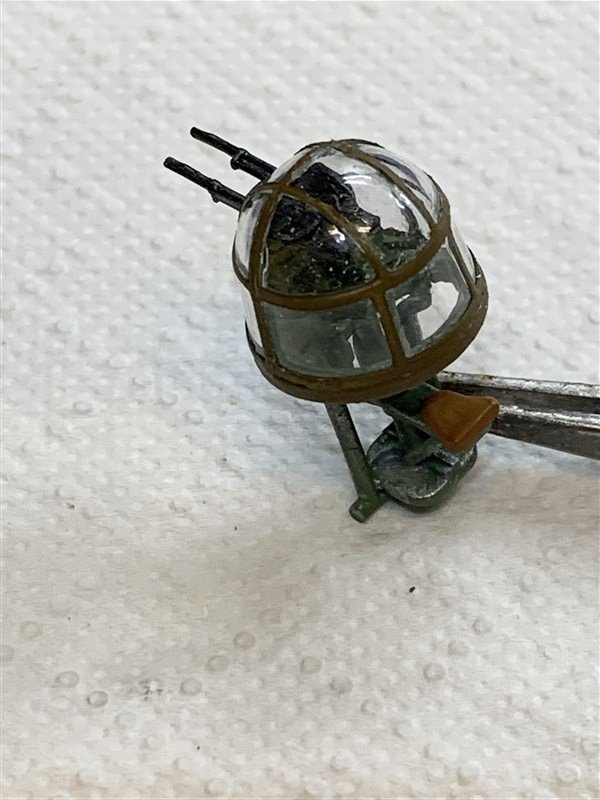
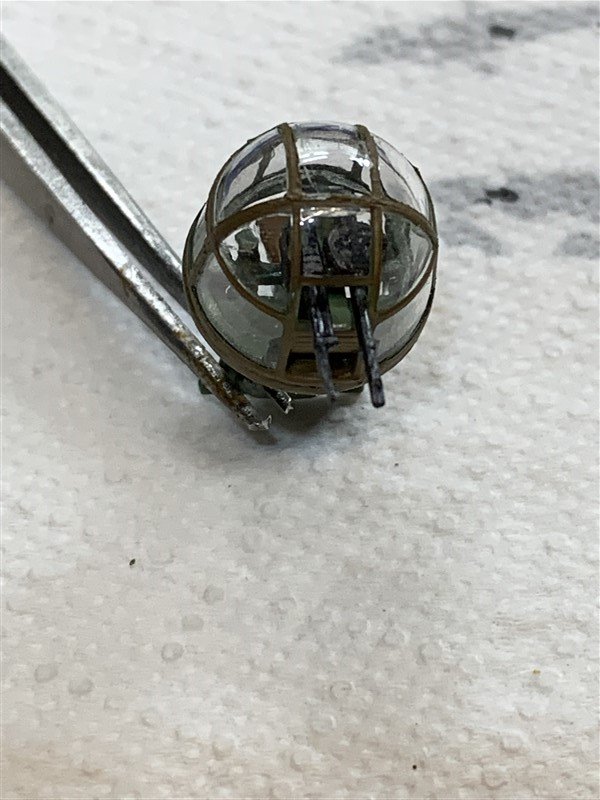
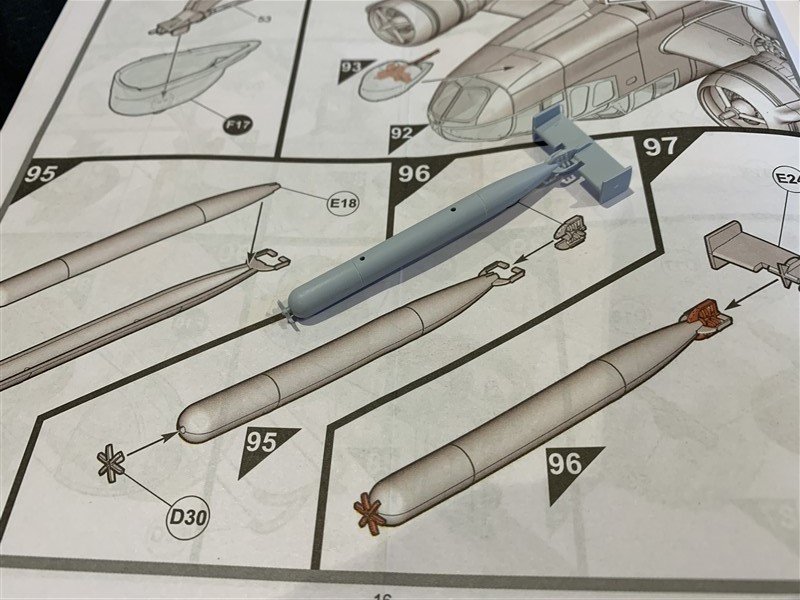
AJohnson replied to AJohnson's topic in Non-ship/categorised builds
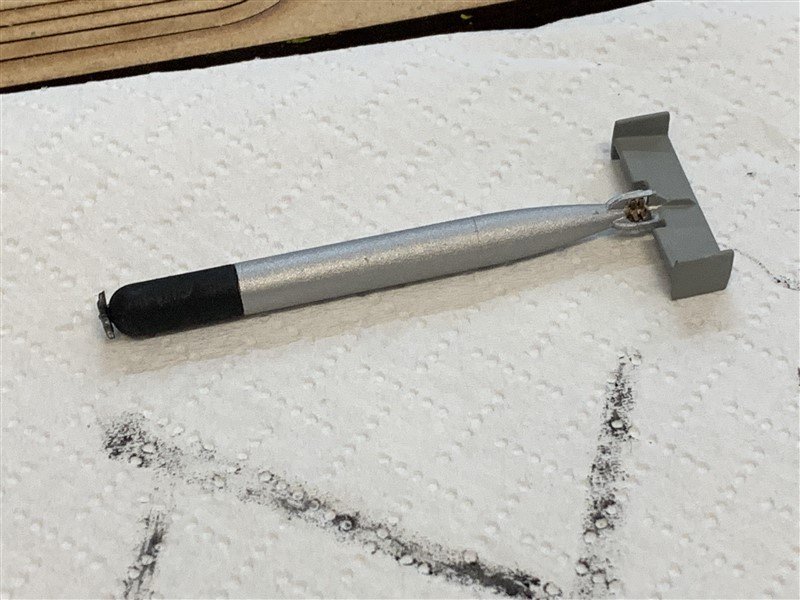
Some small detail parts bringing the build up to date. The "R2D2" looking rear gunner's turret and the "Tin fish" that spoiled Gneisenau's day. Interestingly the two machine guns in the rear turret are mounted with their axis at 90deg. to each other, I assume so they could be mounted closer together to save space. The ammo drums are flat disc types. I'm currently on with filling/sanding the final assembly and priming ready for painting, I will update more when I get chance to download the pictures. Thanks for looking in and the comments/likes. 😄