Thukydides
-
Posts
1,363 -
Joined
-
Last visited
Content Type
Profiles
Forums
Gallery
Events
Everything posted by Thukydides
-
 There is nothing quite like the Himalayas. And it is impossible to understand how awe inspiringly big they are until you have been in them. I find even pictures don't fully capture it. Looks like you had a great time.
 -
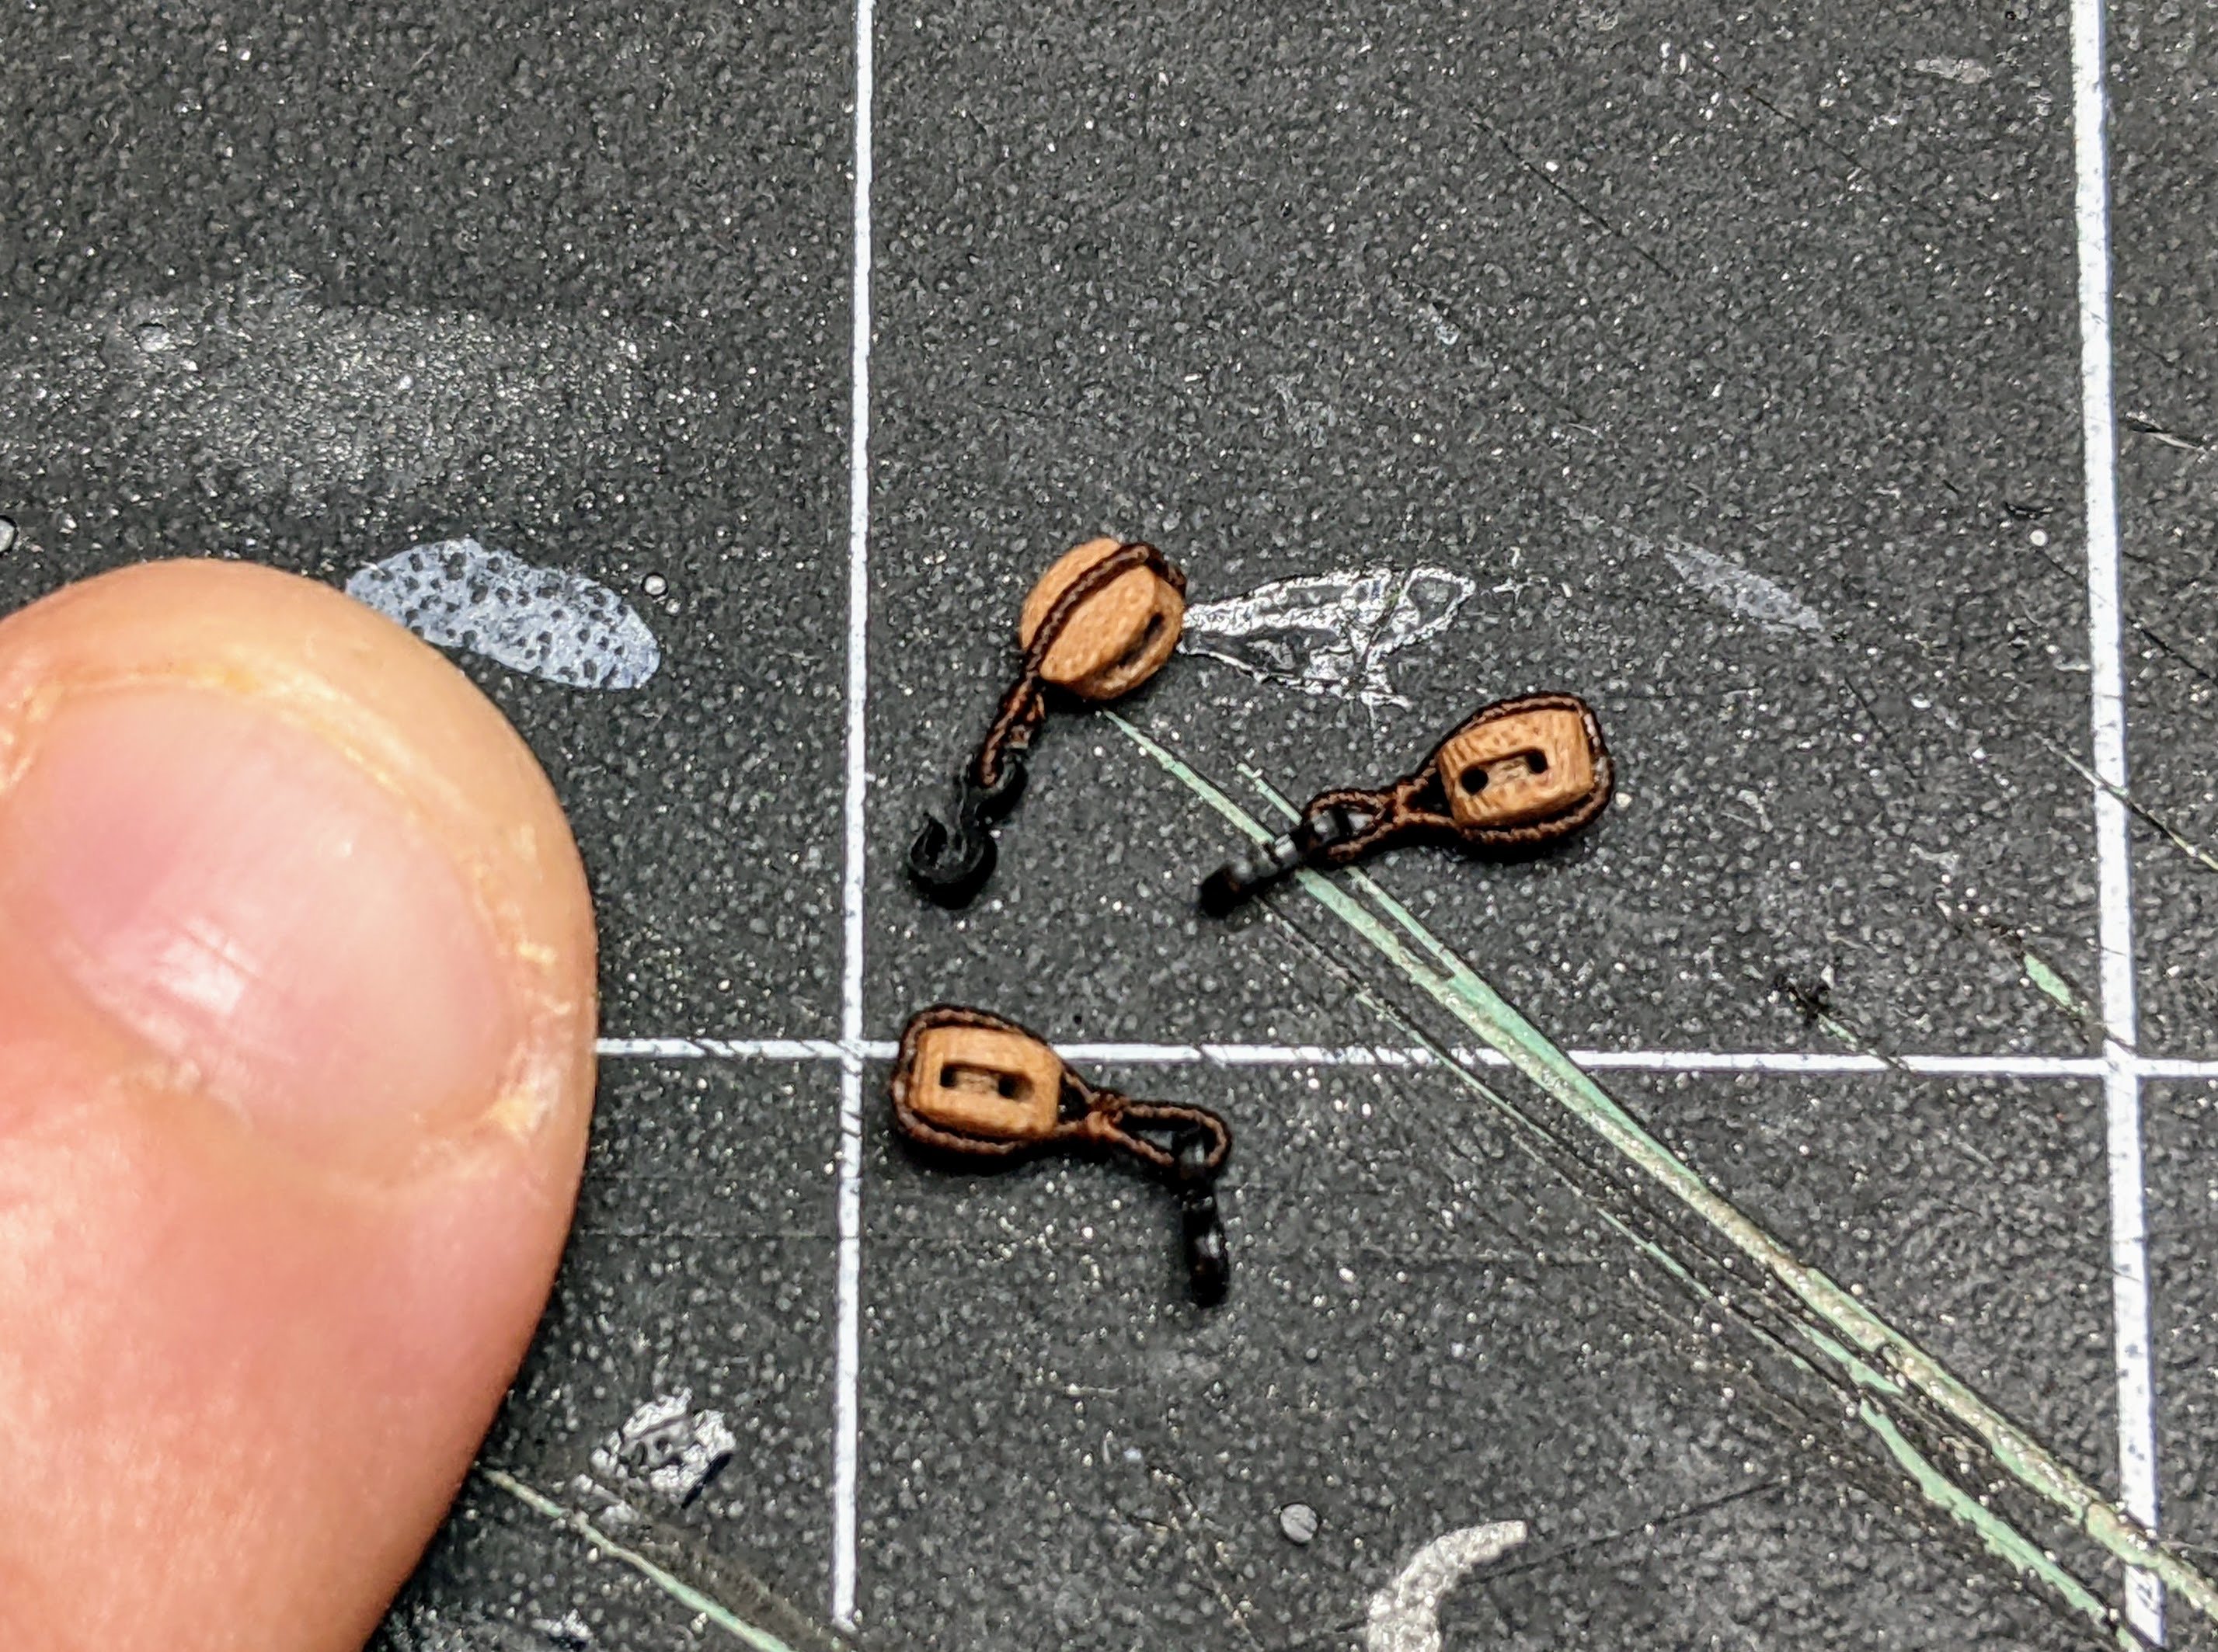
Not an expert by any means, but here would be my interpretation: I would guess a quarter may be referring to a thin single block. According to steel a quarter block (also called thick and thin) was a double block with one sheave thicker than the other. So maybe in this case it is just the thin part. The pins for the blocks were made of wood so an iron pinned one had an iron pin instead of a wooden one. Coaking was the process layering the inside of the sheave with a cylindrical piece of metal into which the pin would be placed. I would guess this was to increase the strength of the block or perhaps to make is spin easier. https://maritime.org/doc/steel/part5.php
-
So this is a pretty complicated question. It sort of depends what you are looking to achieve. However here are a few things that might help you: As others have suggested there are lots of youtube videos aimed at all skill levels. I would suggest searching for "intro to miniature painting" or something similar. Airbrushing is its own thing, with its own set of challenges and skills to learn. You can get smooth transition with no brush strokes with a brush. They are just different tools and mostly airbrushing allows you to save a bit of time if you are trying to do a whole bunch of stuff at once, but there is a significant investment both in money and time to learn how to use them properly. I did a presentations at MSON and MSWWNY talking about how painting can be used to enhance ship models earlier this year, if you are interested send me a PM and I can send you a copy of it. It is aimed at trying to broadly introduce painting to those not so familiar with it. If you are interested in the detailed application of painting to ships there are a lot of logs (particularly in the modern section of the build logs) where people are painting plastic ships. Alternatively if you want to see some up close pictures of painting applied to an 18th century vessel, I cover a bunch of my work and painting philosophy in my Alert log.
-
Those gratings look really good Alan. That is interesting that the orloop gratings were level with the beams. That would imply with planking added they would be essentially indents in the deck. Do you know what this was?
-
As @druxey said read the article. Between that and the videos from Chuck previously linked in the thread they should answer all of your questions. If you need some further discussion of how to fit the garboard plank (the bottom most plank) I discuss my thought process in my alert log from the perspective of a first time builder (log# 12). I also in previous logs show how I line off the alert hull which is a very similar shape to sherbourne.
-
Welcome to MSW. You have picked a nice kit and it looks like things are proceeding smoothly so far. Cutters are fun builds. Enjoy.
-
Good to see you back at it. Do you have any shots of the whole ship you can share to see the overall progress? The planking is looking good.
-
Welcome to msw. I also came from the plastic modeling world. I would encourage you to open a build log so you can document your progress and others can encourage/assist you along the way.
-
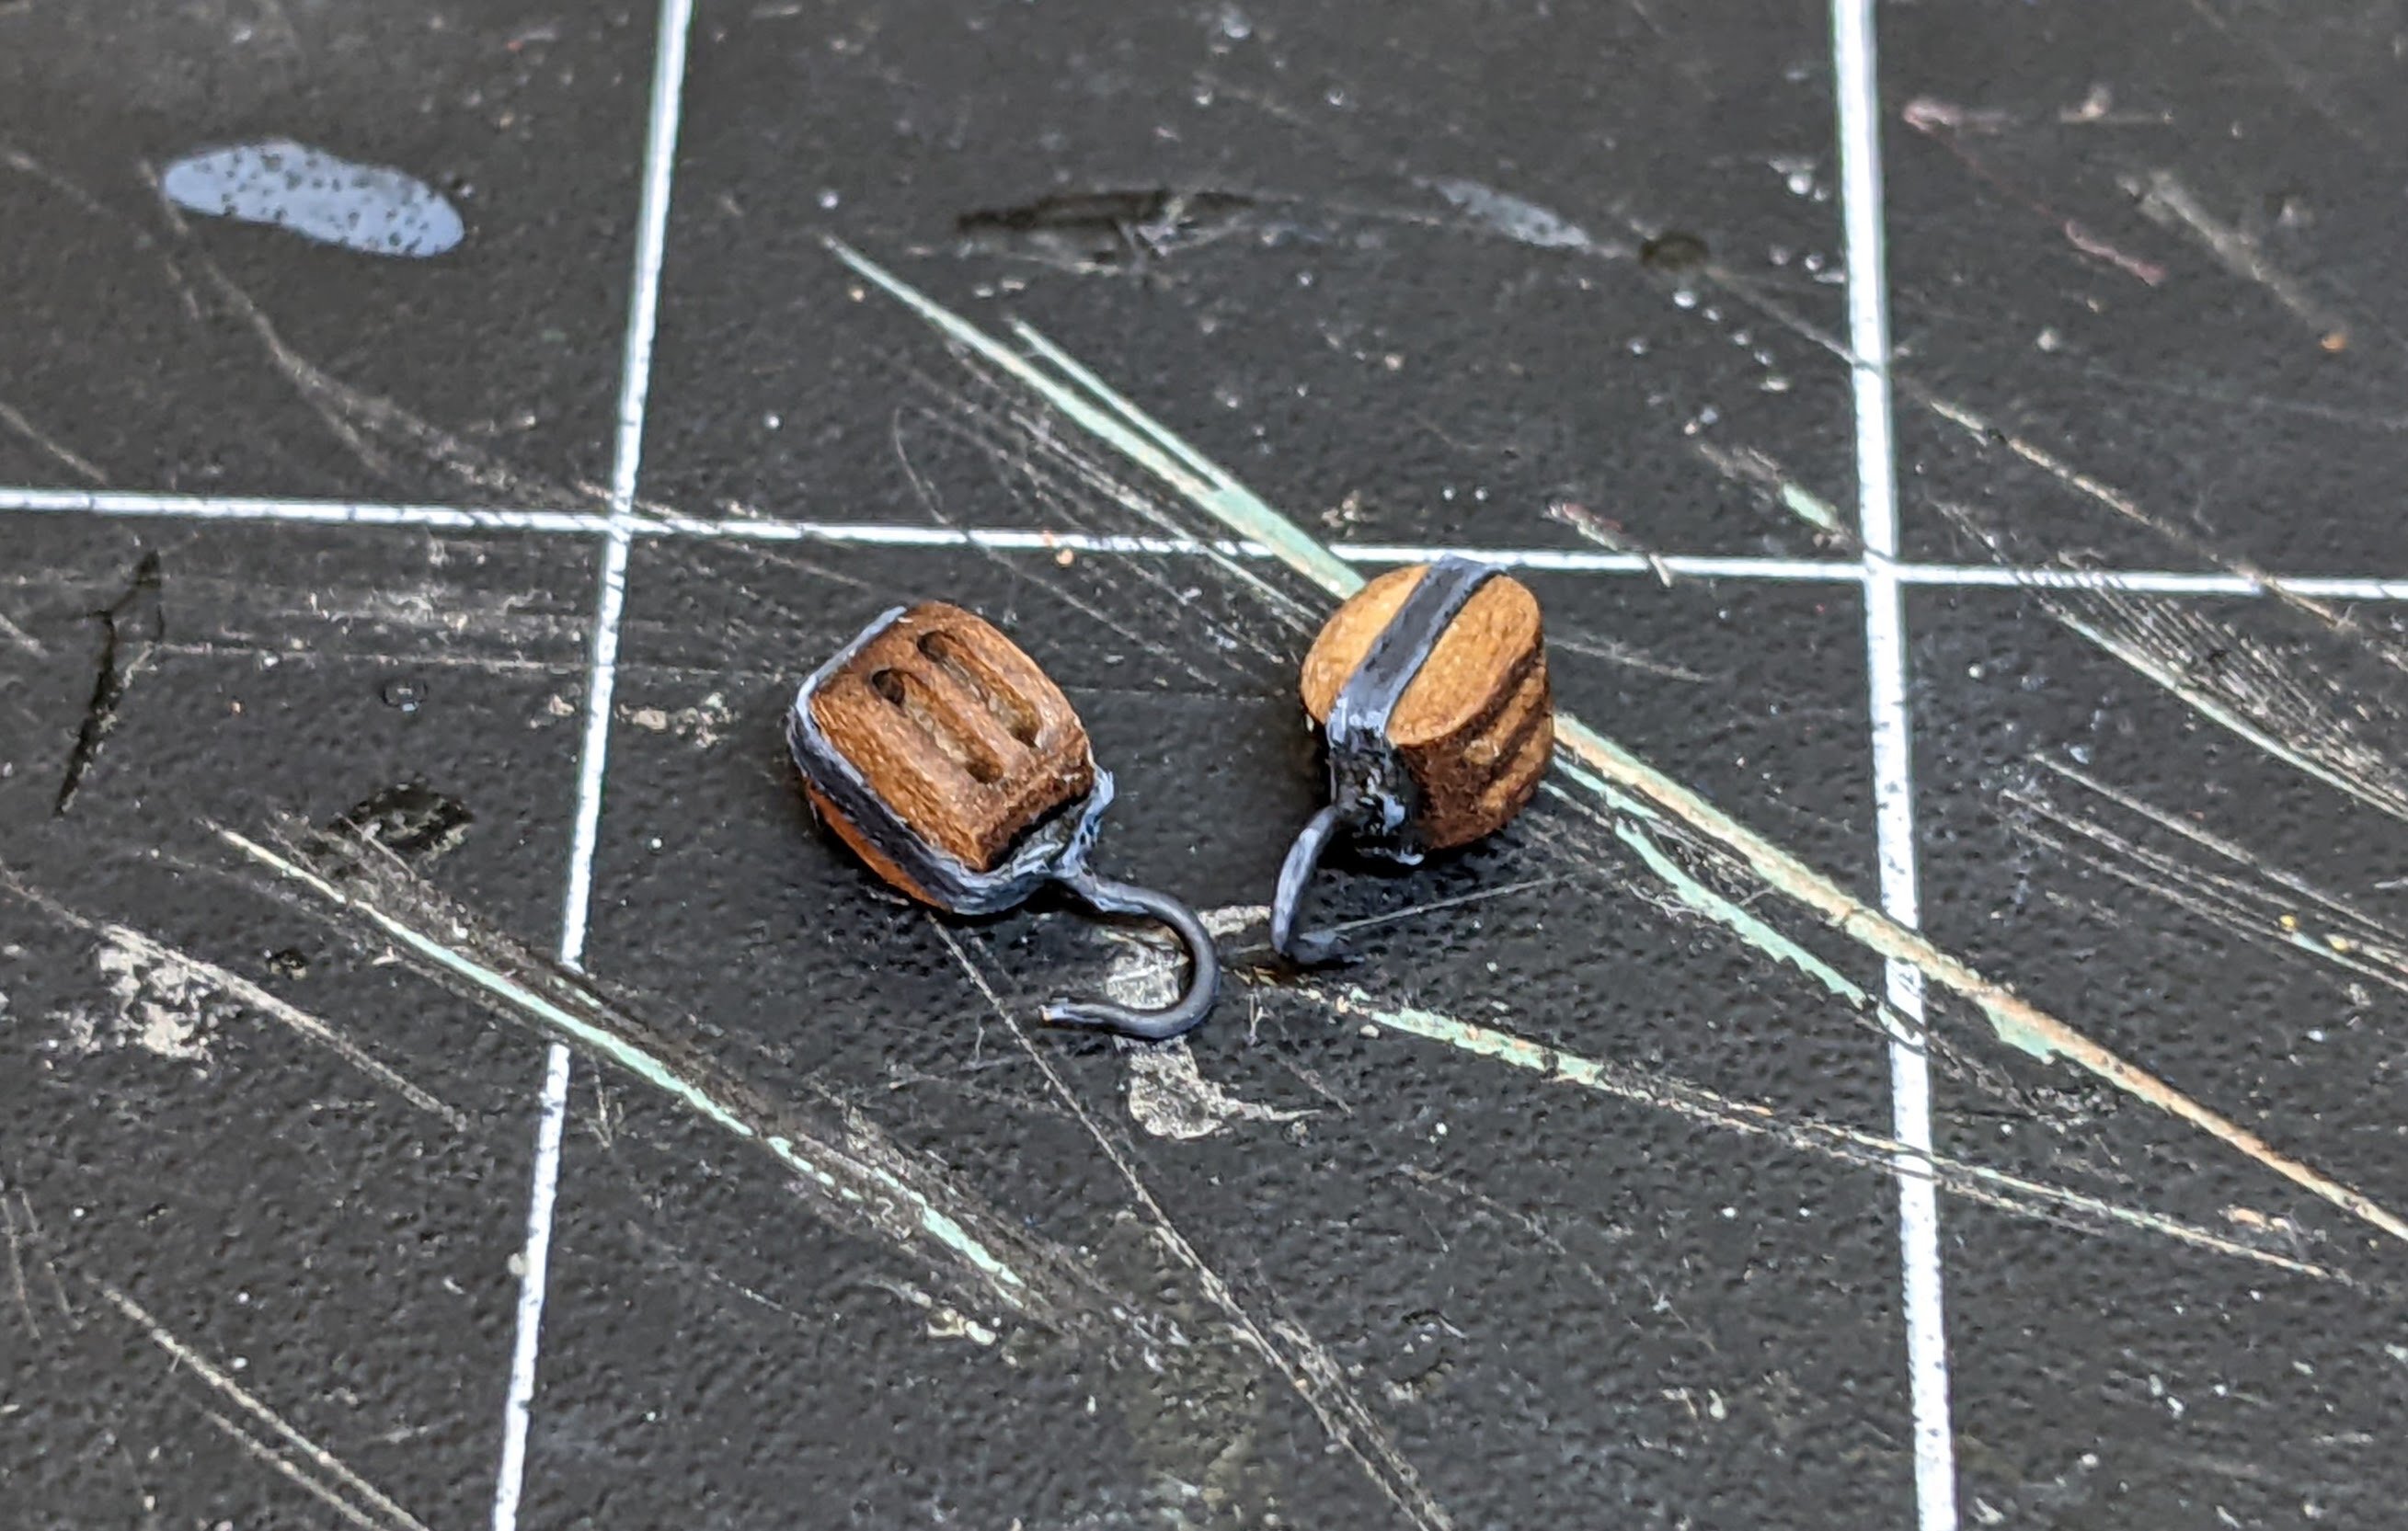
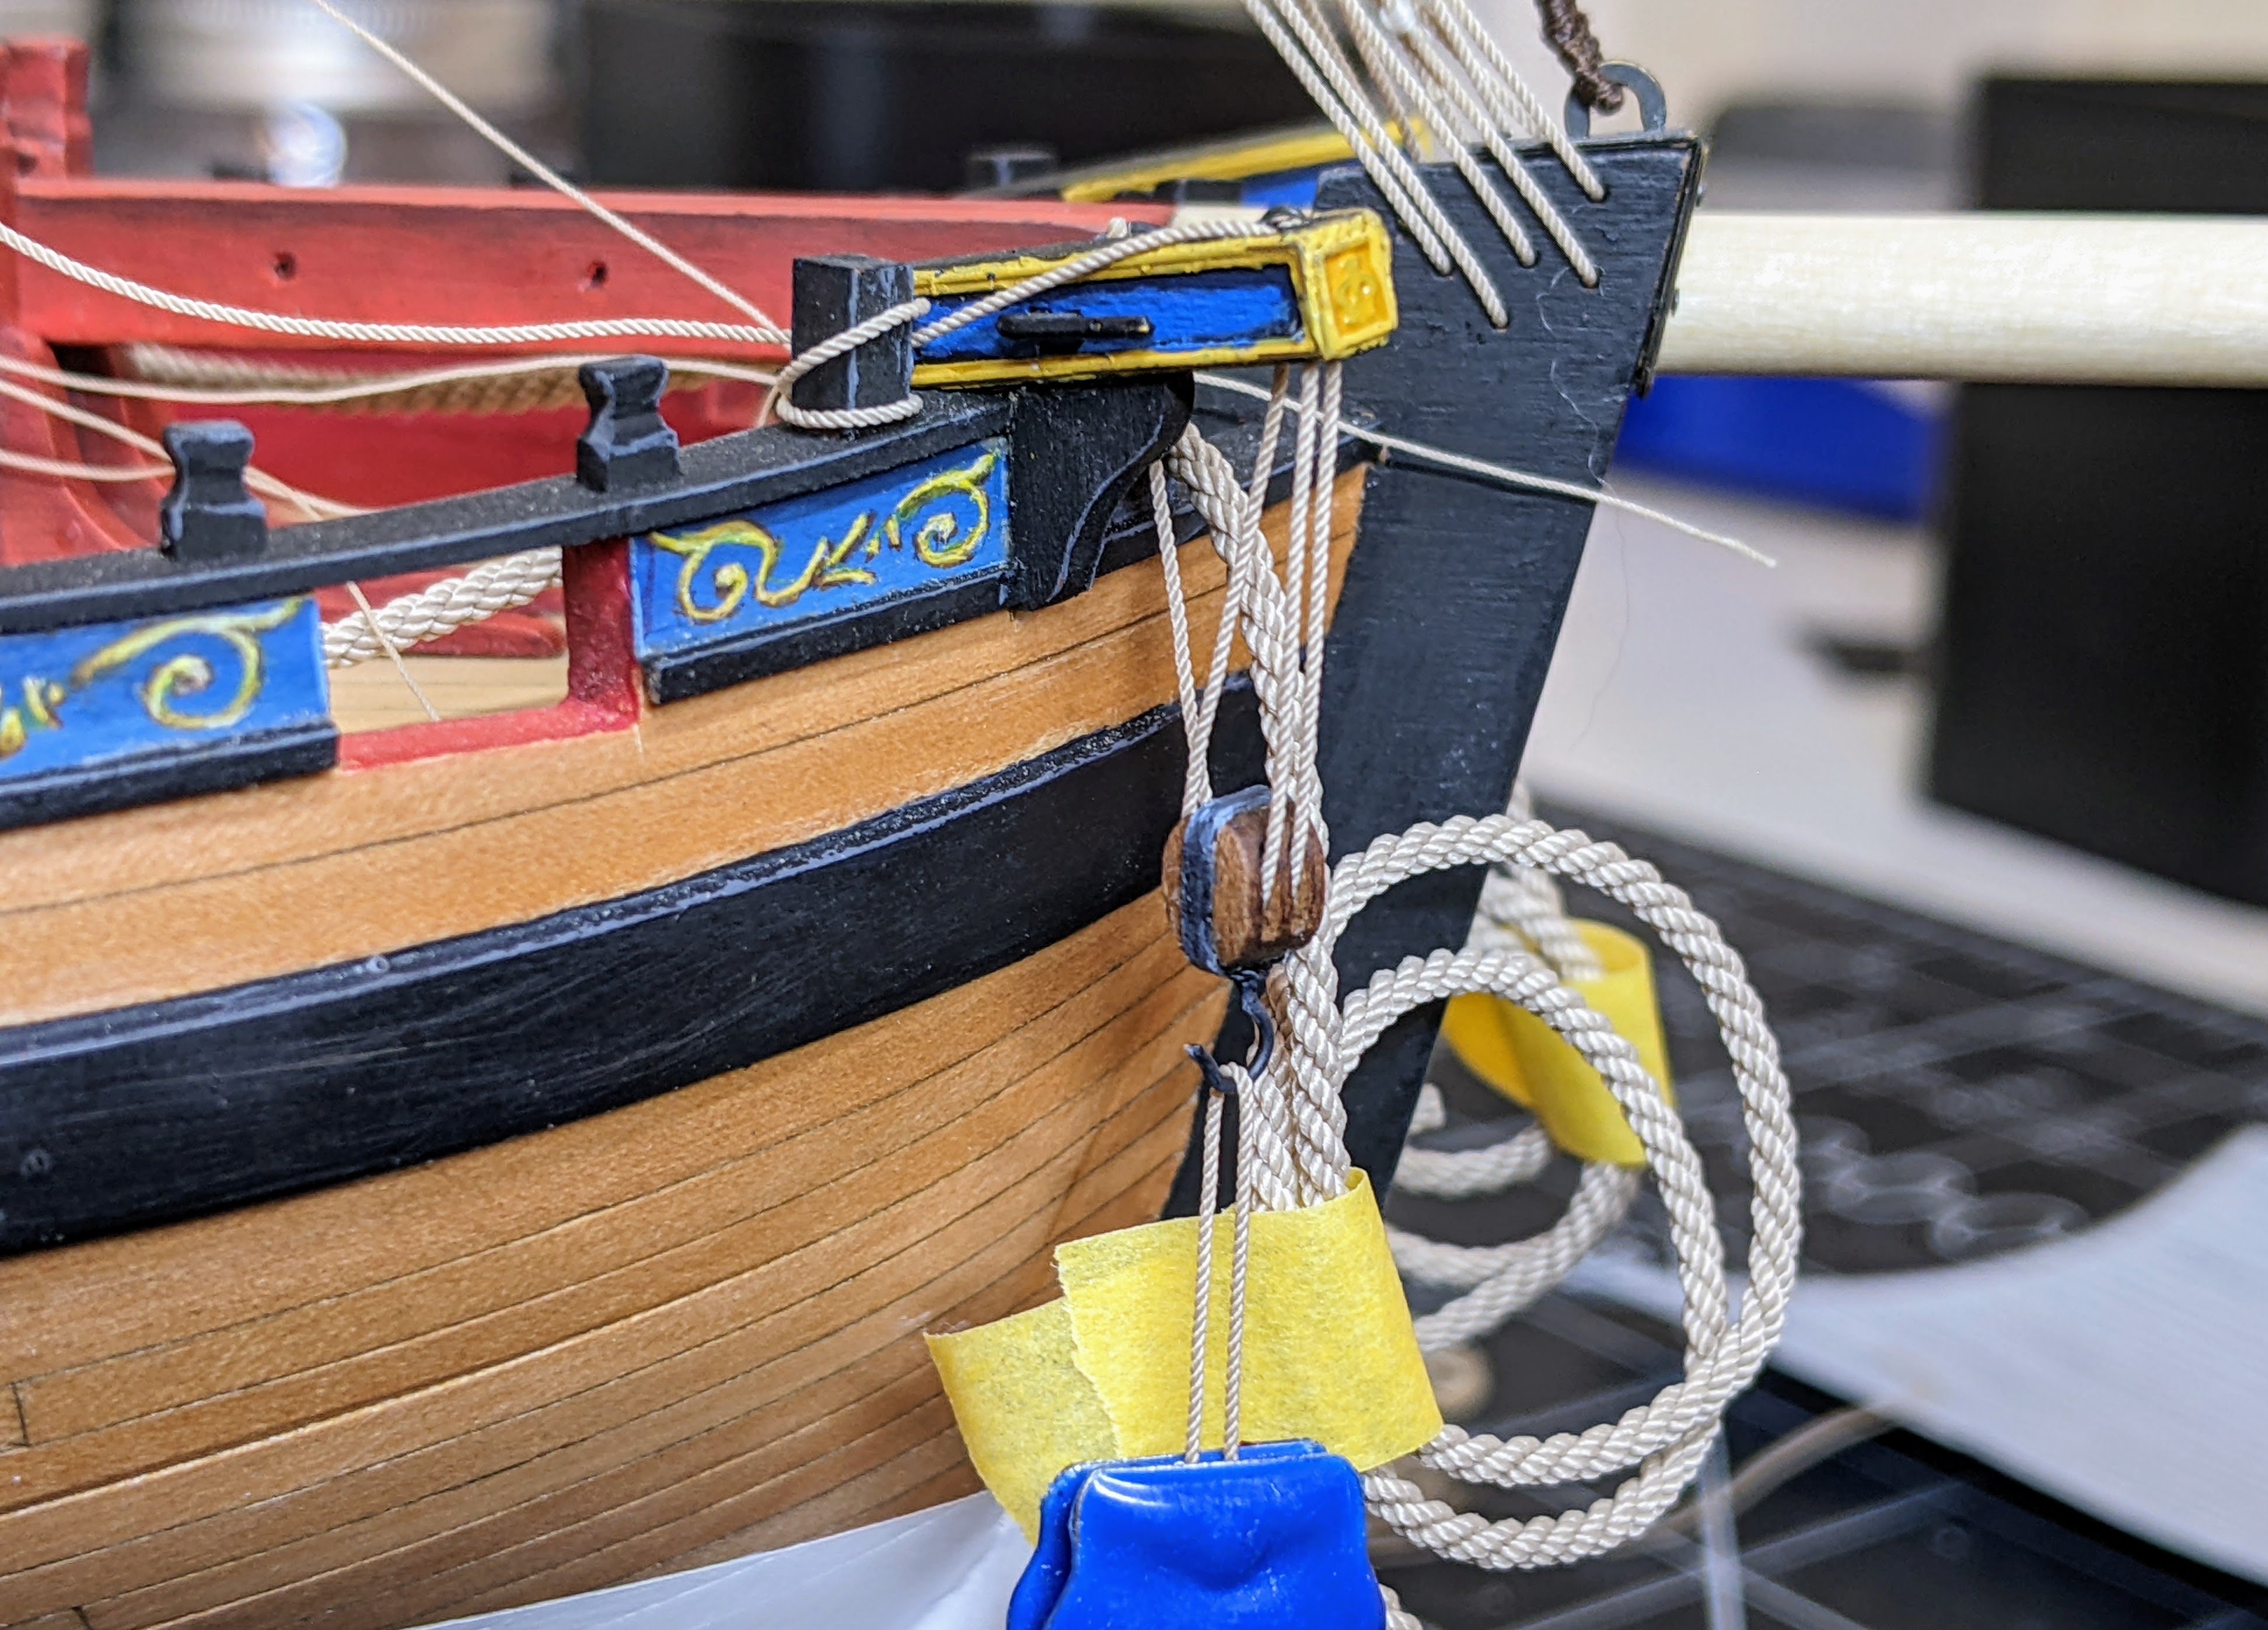
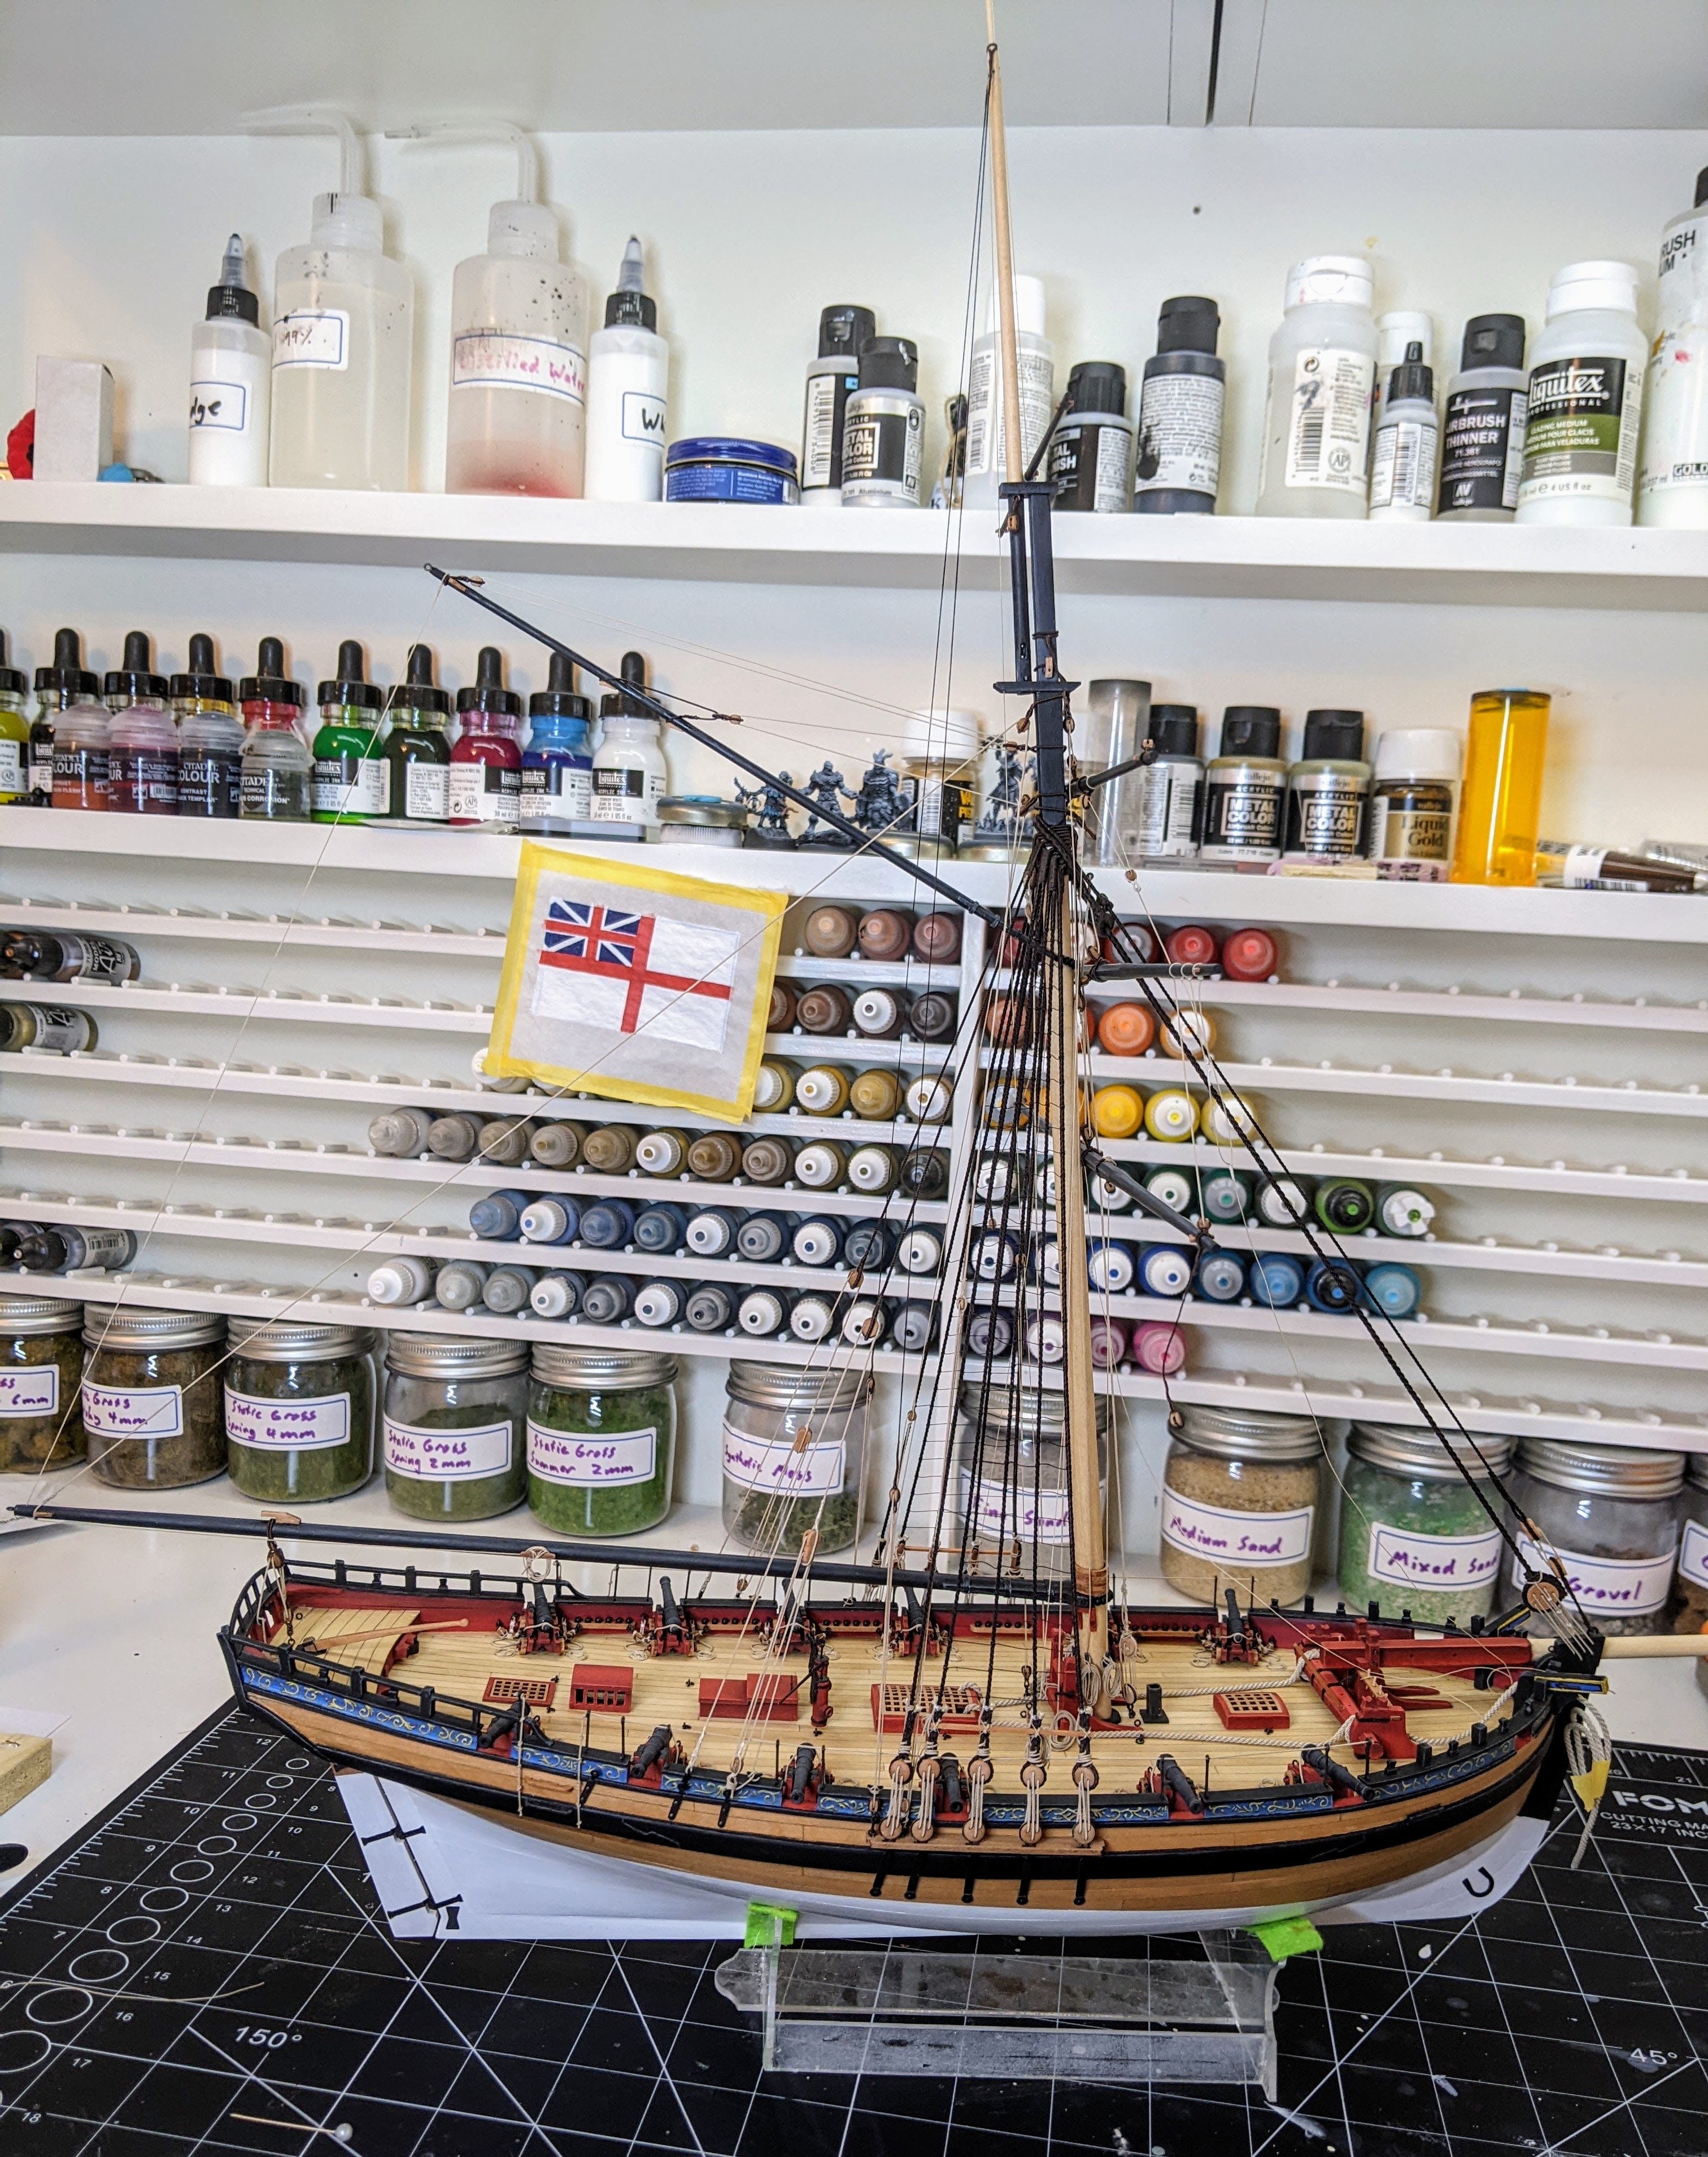
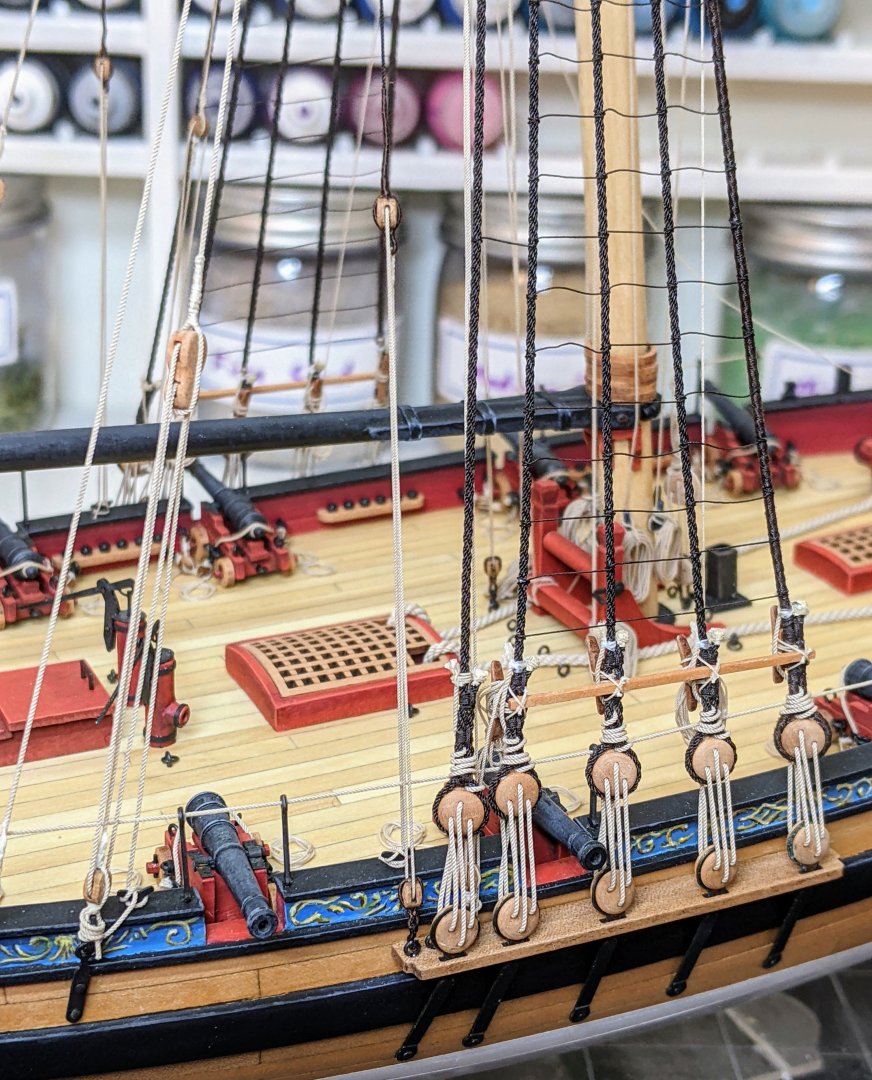
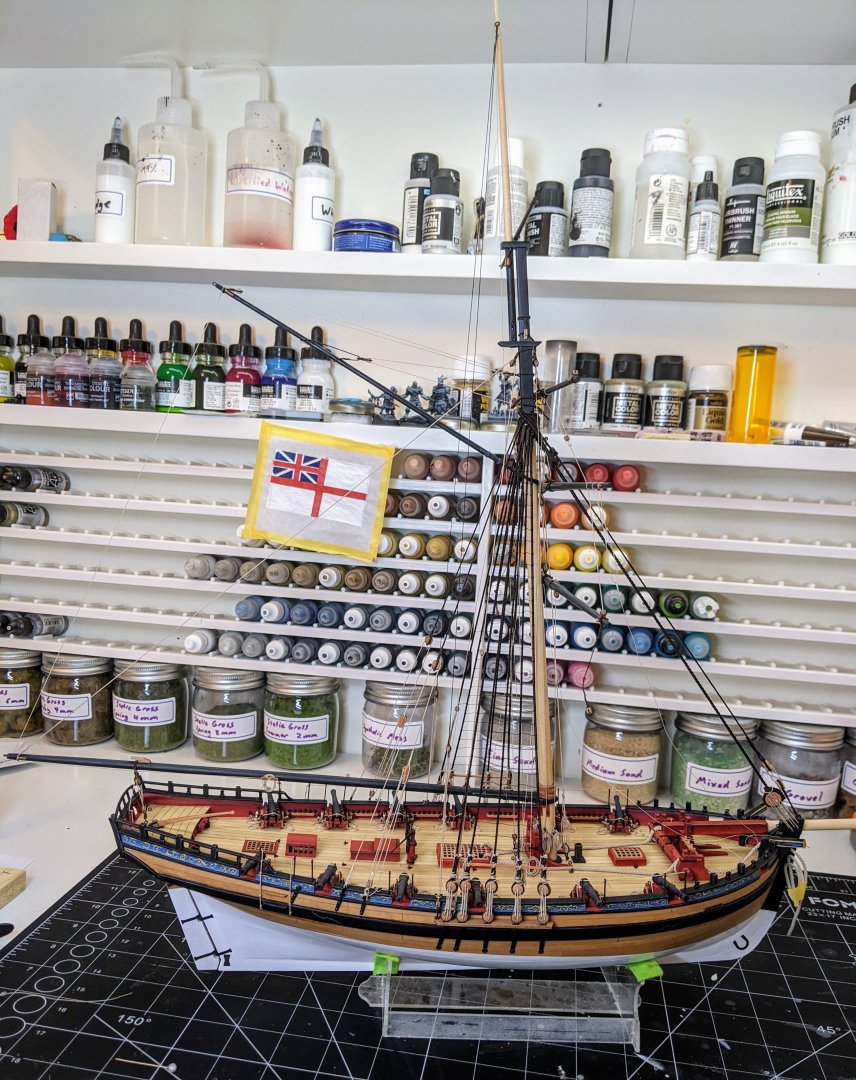
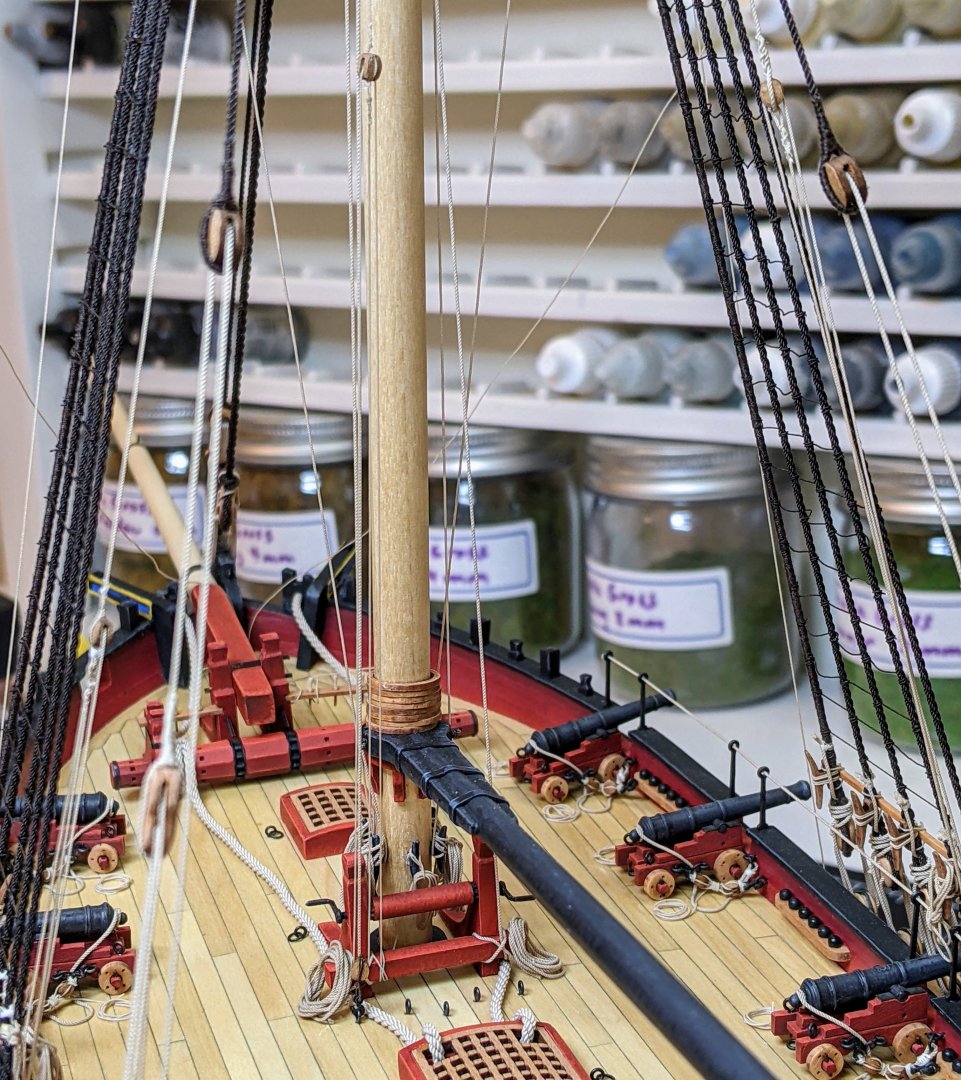
Log #86: The Cat Falls & Topgallant Backstays I continue to pick away at a bunch of outstanding lines and small projects on the model. I tend to work on whatever inspires me in the moment from my list of potential tasks. First up on this list were the topgallant backstays. Now it is not clear to me if these actually would have been fitted on alert and in some logs people have decided to omit them. Steel does include them in the list of ropes, but that is a bit later, but they don’t appear on the hawk and this is another case of Goodwin’s commentary not matching his drawings. In the end I decided to include them as this is the arrangement both the kit plans and Goodwin depict and I have already somewhat committed to following them up to this point. Also I feel the top of the model looks somewhat “naked” if the topgallant stays are not included. Steel calls for 2 in rope which equates to 0.32mm diameter at our scale. I used 0.35mm rope seized with fly tying thread. The kit depicts these stays simply tied on to the channels. Goodwin is not clear on how they are attached. I decided that I would treat them in a similar manner to the running backstays, just hook them onto the channels. I also decided that I would start work on the cat falls. Steel calls for 12in double block which equats to 4.8mm at our scale. I decided to use a 5mm block. To make the blocks I scratch built the hooks using the brass pins from the kit and the iron strapping was done with the black paper in the kit. I then painted all the iron in a similar manner to how I painted the ironwork on the anchor. The rope is stated to be 3in cir, 0.38mm at our scale. However, I decided to round up to 0.45mm for the rope. I felt the 0.35mm rope looked a bit small compared to the 5mm block and I wanted to differentiate these slightly larger ropes from the other smaller ones near them. I have not decided quite yet where to tie off the cat falls so for the moment I have it wrapped around one of the posts for the swivel guns. And here is the current state of affairs (taken before I attached the cat falls).


- 562 replies
-
- 30
-

-

-
- vanguard models
- alert
- (and 2 more)
-
The links work fine for me too except for the 4th one. I would suggest that you probably need to change that one.
-
Great job! She is a beauty. Particularly given you flew through this build :). I am getting close to the 3 year mark on Alert.
- 95 replies
-
- 1
-

-
- flirt
- vanguard models
- (and 1 more)
-
Great job, you are doing very well not just for a first time builder. Are you using polyester or natural rope? For natural fibres pva works really well, but it is less good on polyester. It depends on the rope, but you may want to try a few test versions to see how it holds before attempting it on the model if you have polyester rope. I find matt varnish or diluted fabric glue work better for polyester.
-
I often wish that authors like Lees etc were a bit more explicit about where they get their sources from when they make these sort of statements. It would make it much easier to parse how reliable the statements are if he regularly said "based on Steel" or "based on models viewed", etc... More footnotes equals more good :).
-
Welcome to MSW
-
Thanks BE, yes I did consider going with an aftermarket version, but I thought if I was going to replace them I might as well just draw up scratch ones in cad as then I could get the scale perfect instead pretty much right (I know a bunch of people with 3d printers). In the end I thought this solution was good enough for the current build. @jpalmer1970glad to know I wasn't the only one who had trouble getting the paint to stick. I am going to handle them very carefully from this point on.
- 562 replies
-
- 2
-
-
- vanguard models
- alert
- (and 2 more)
-
You can also find Steel's 1794 book online and transcribed here https://maritime.org/doc/steel/
-
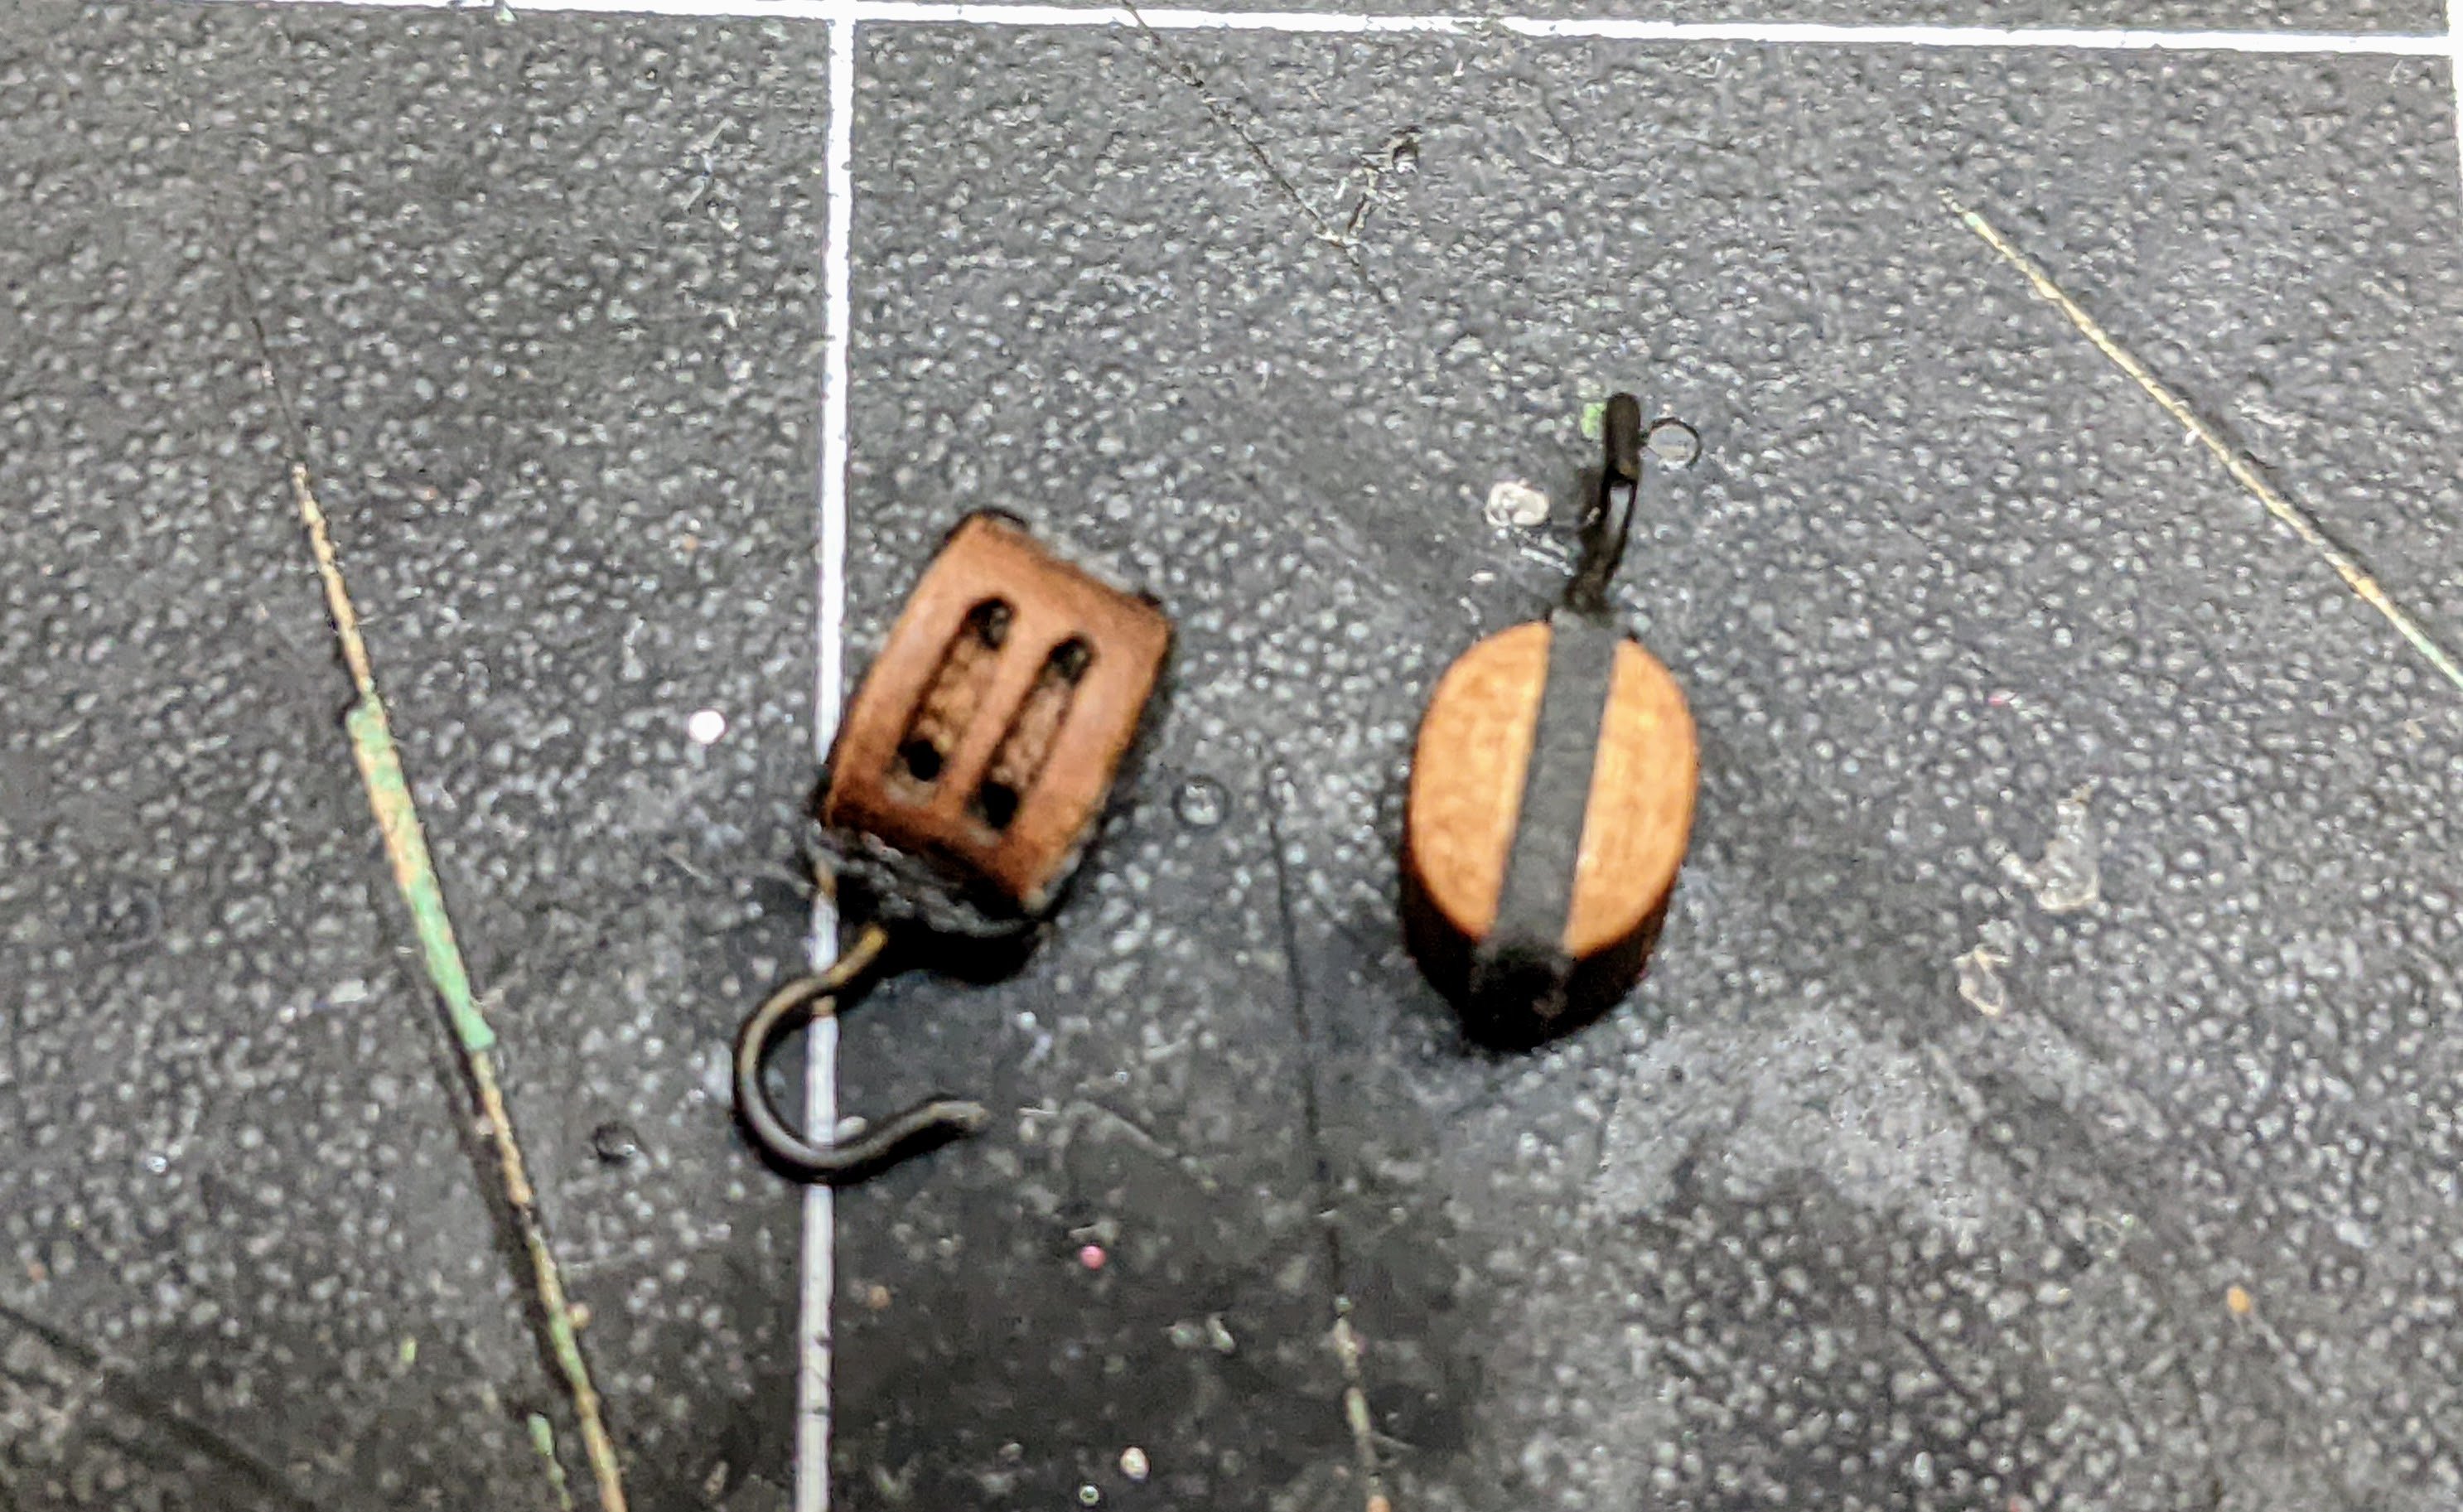
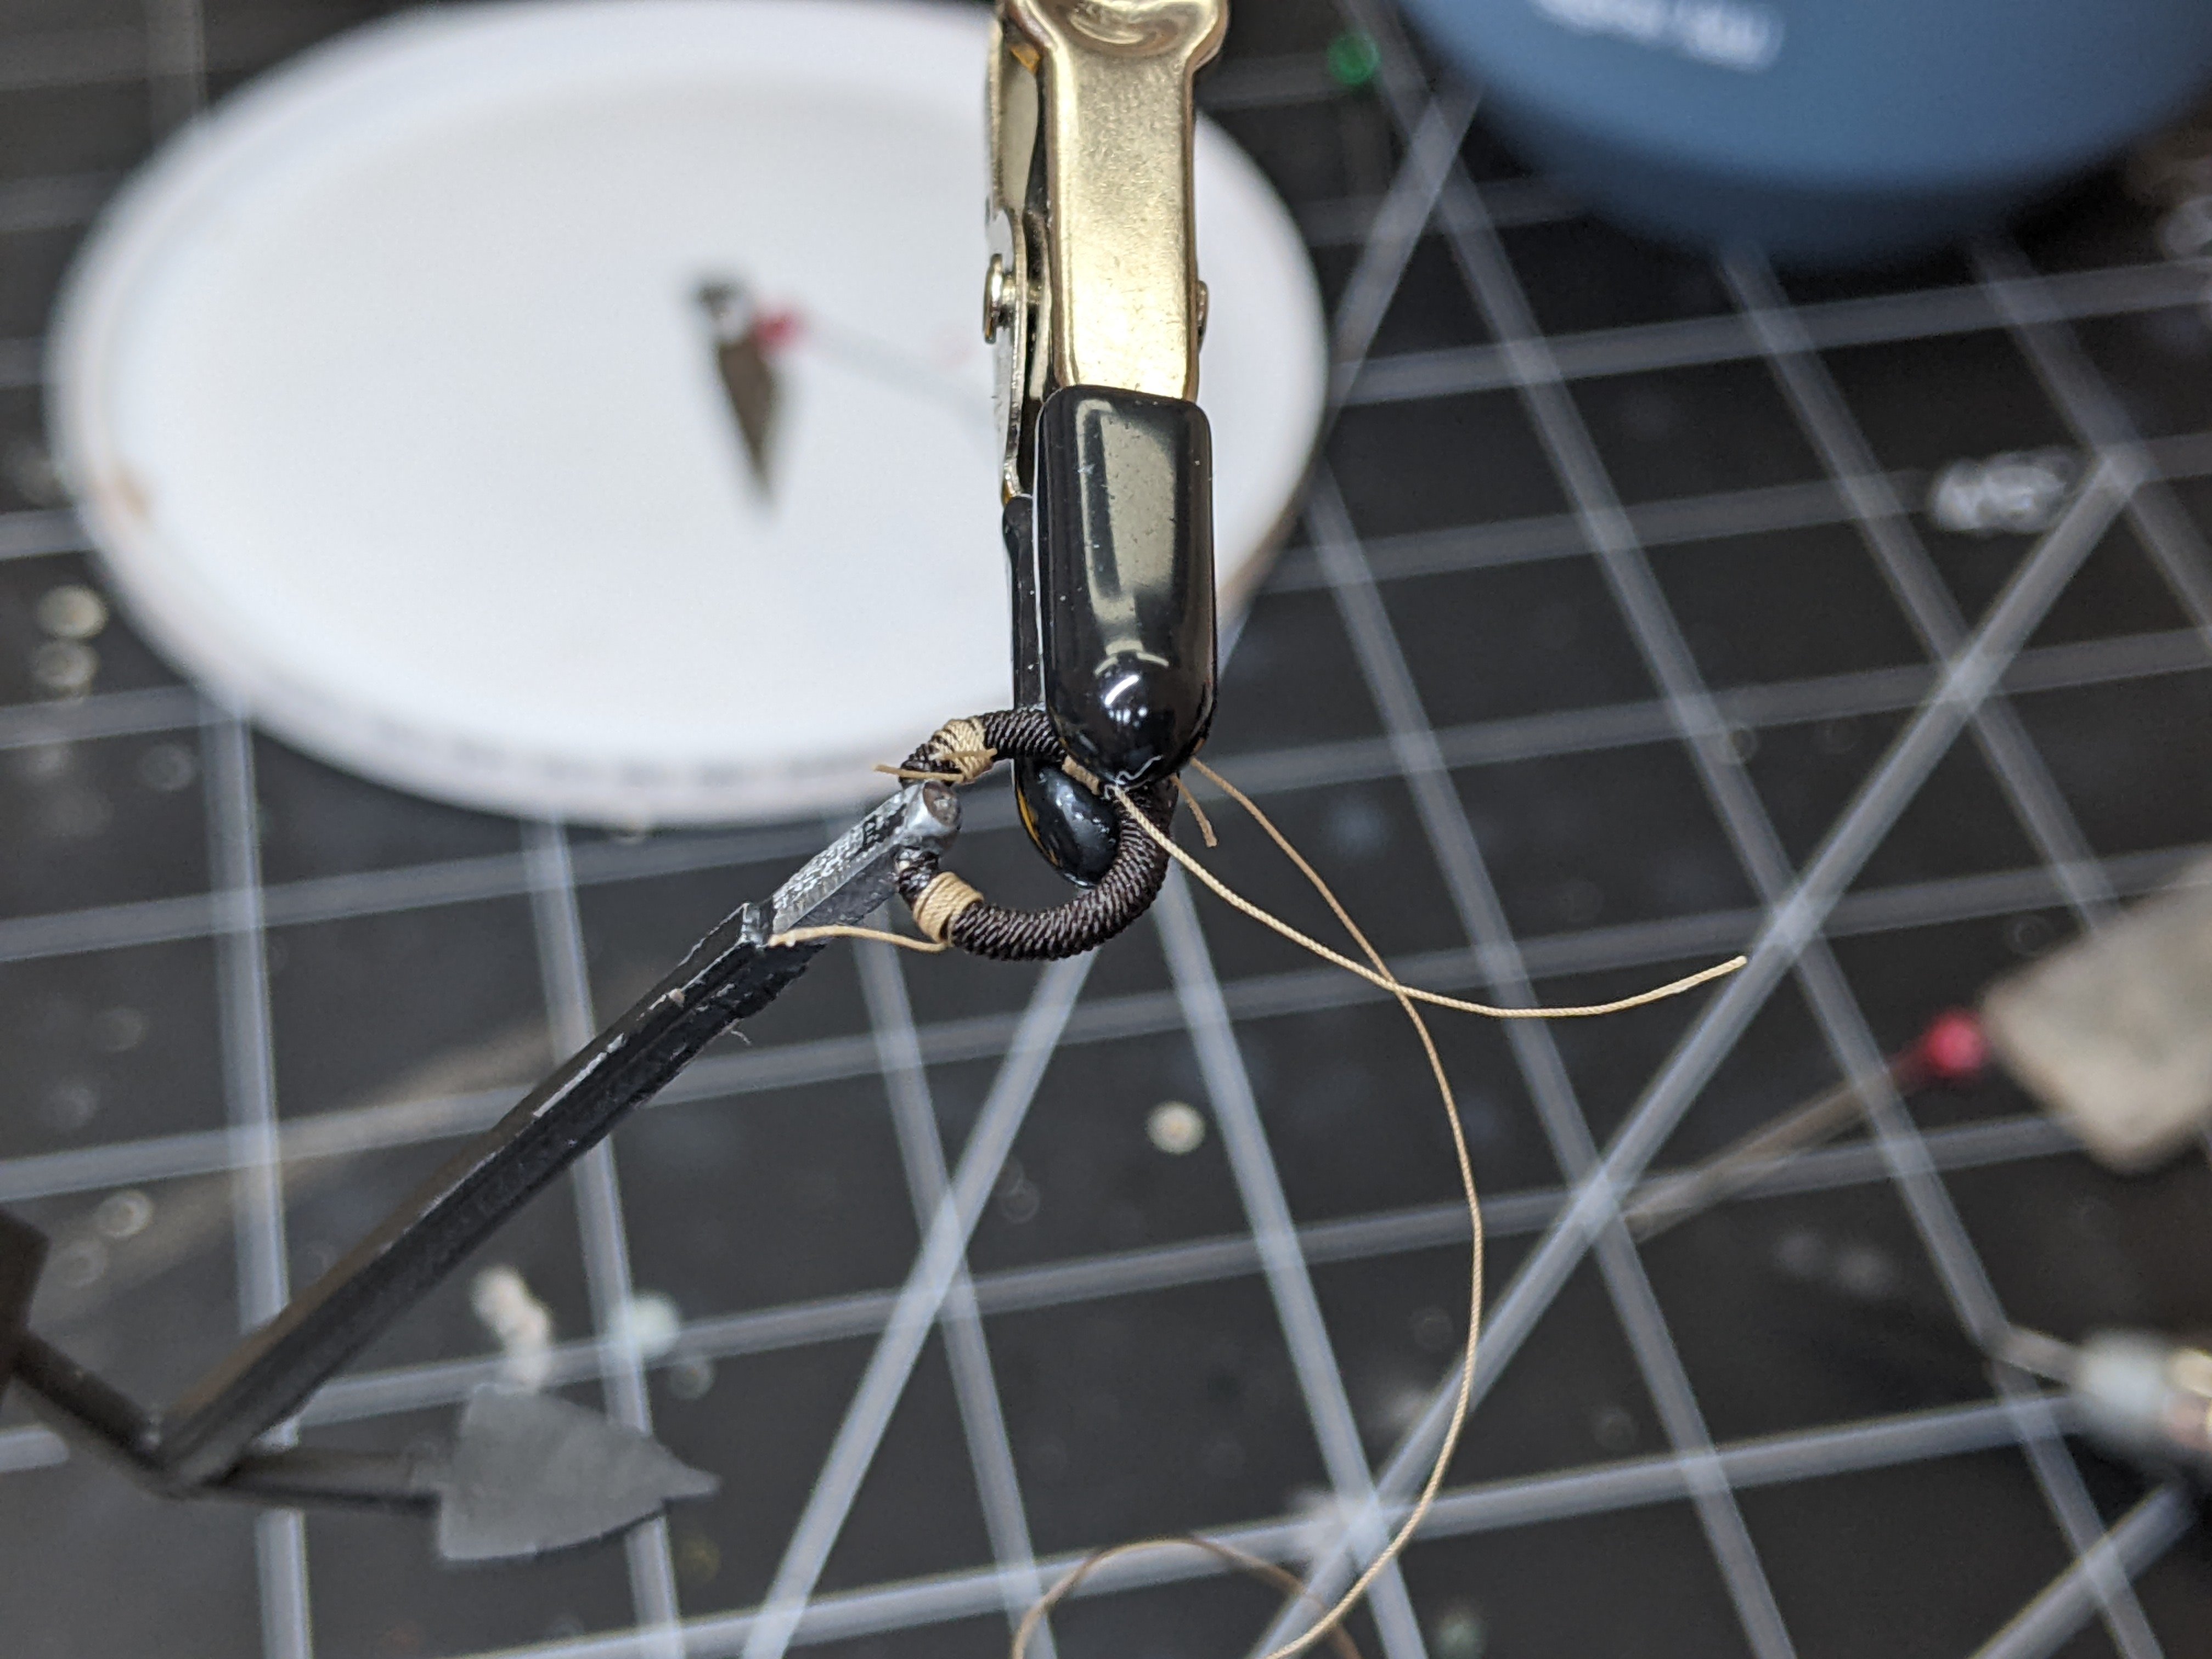
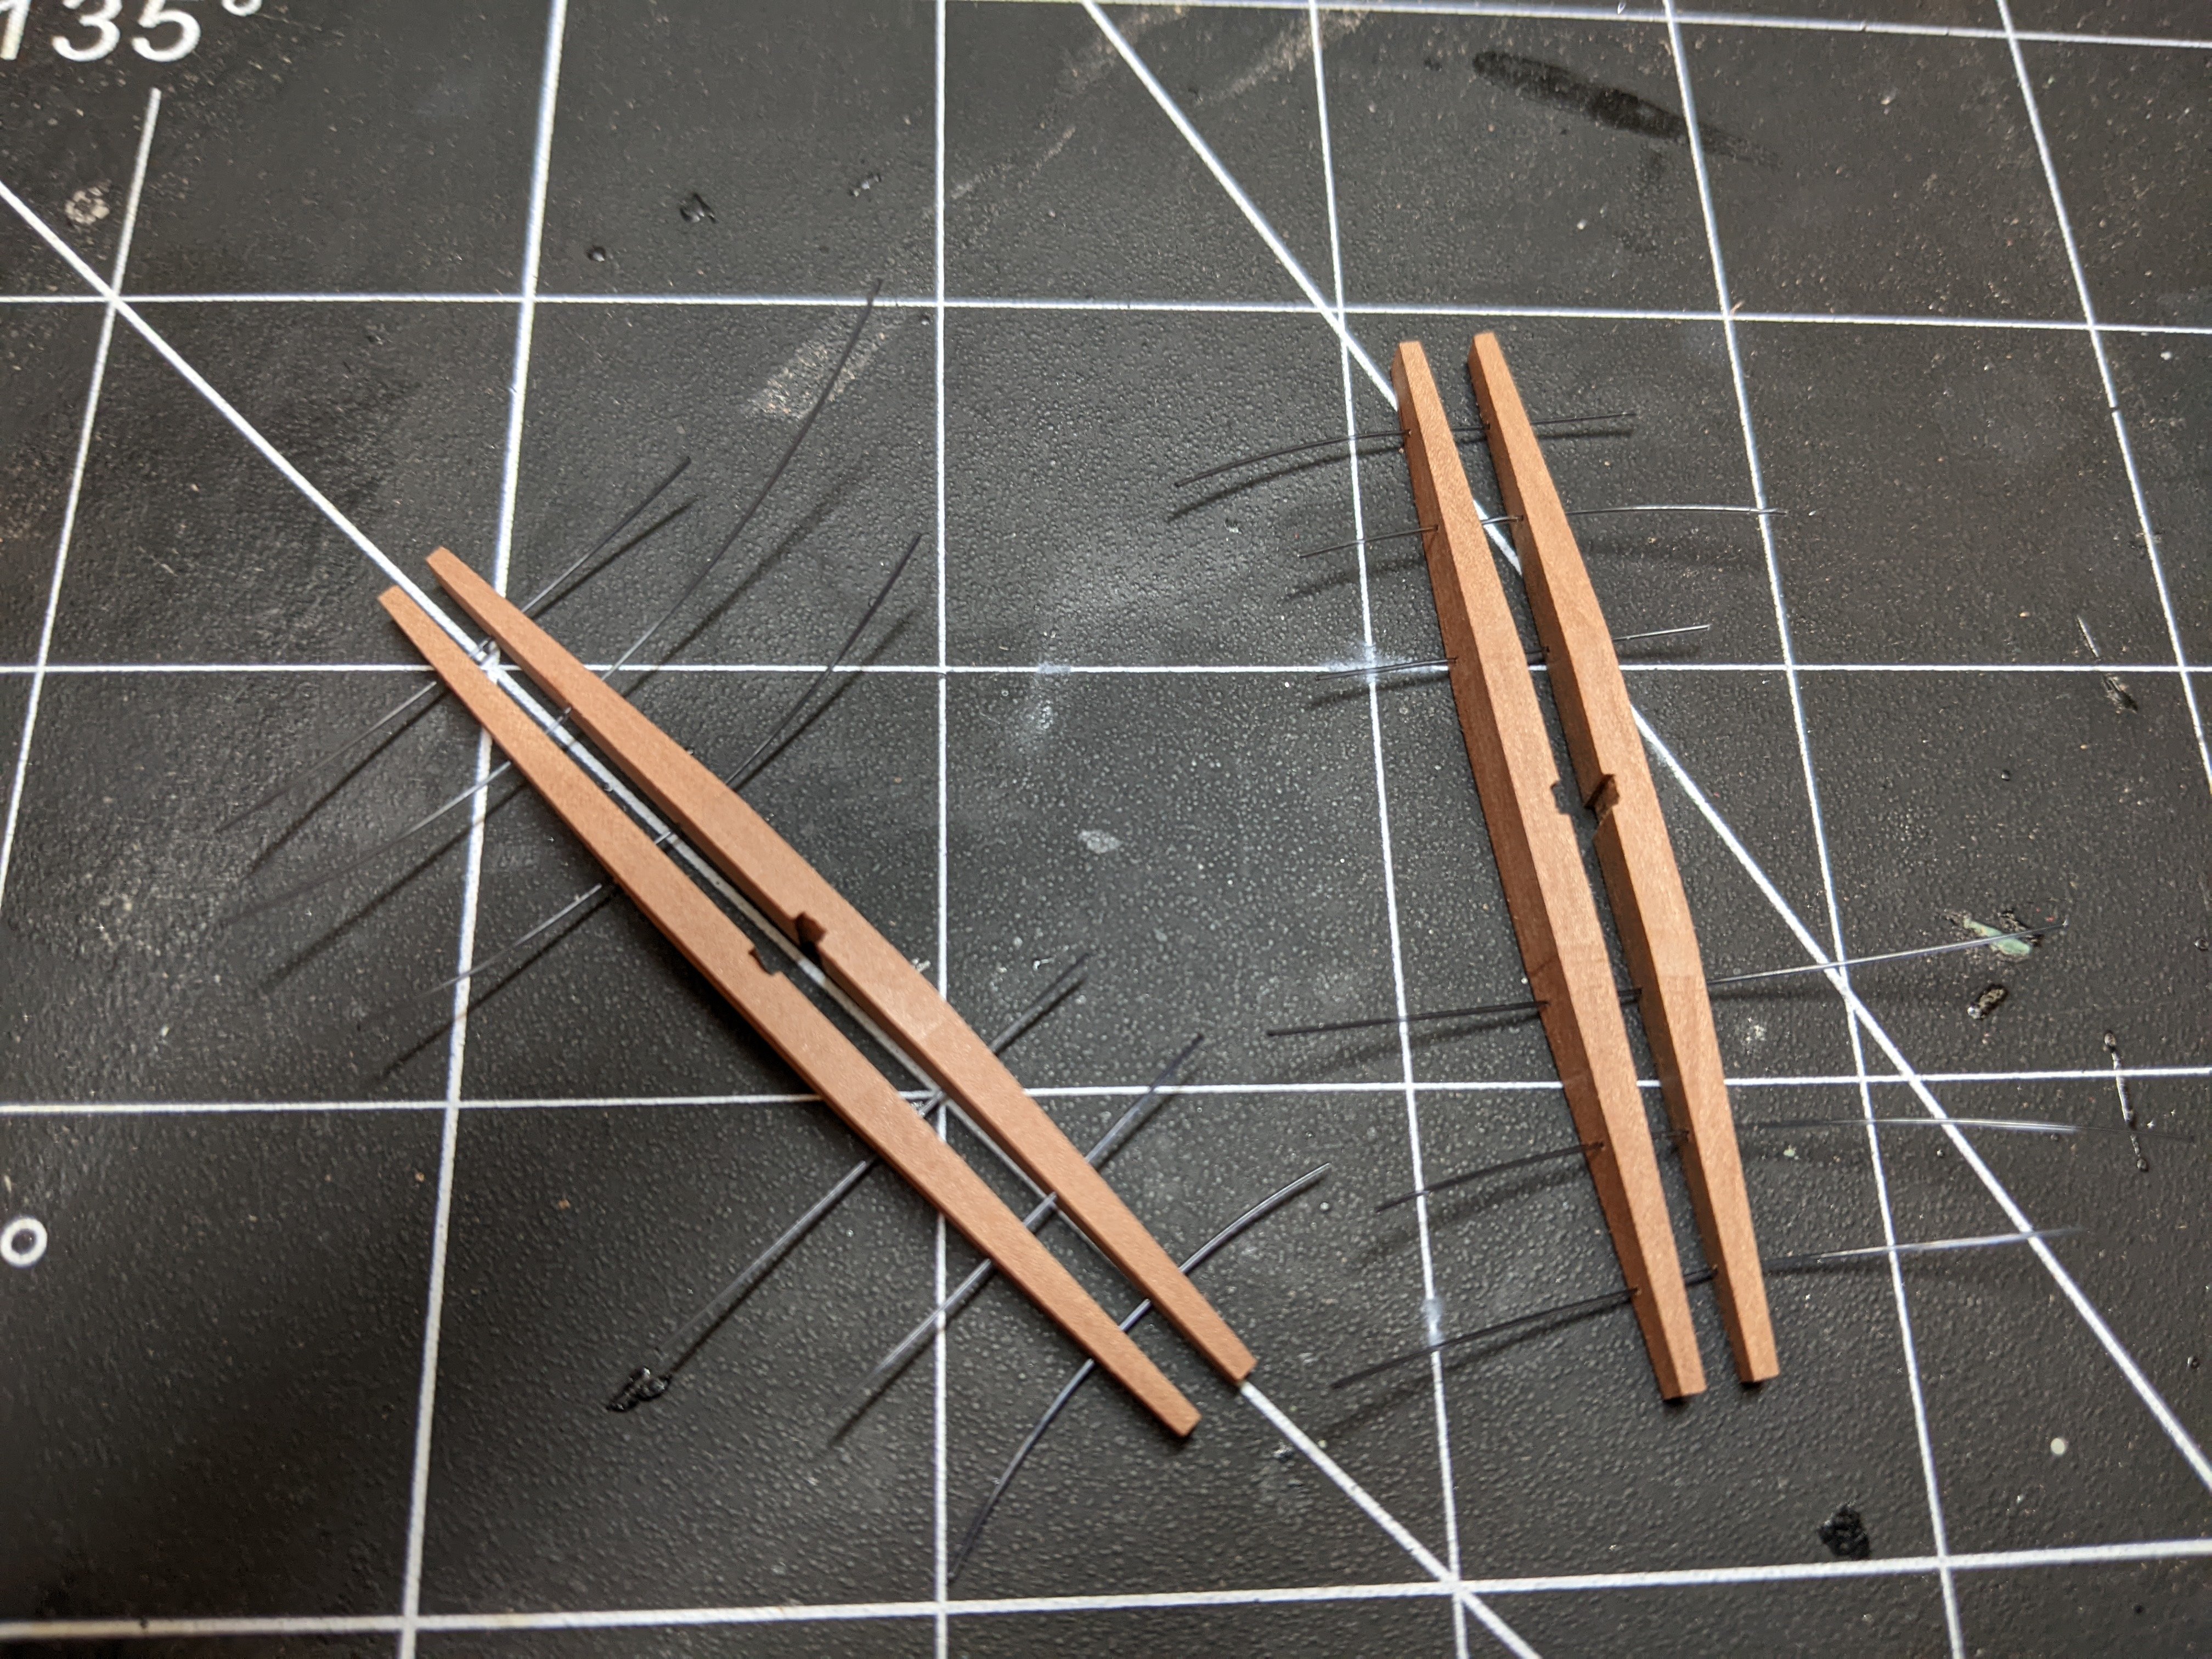
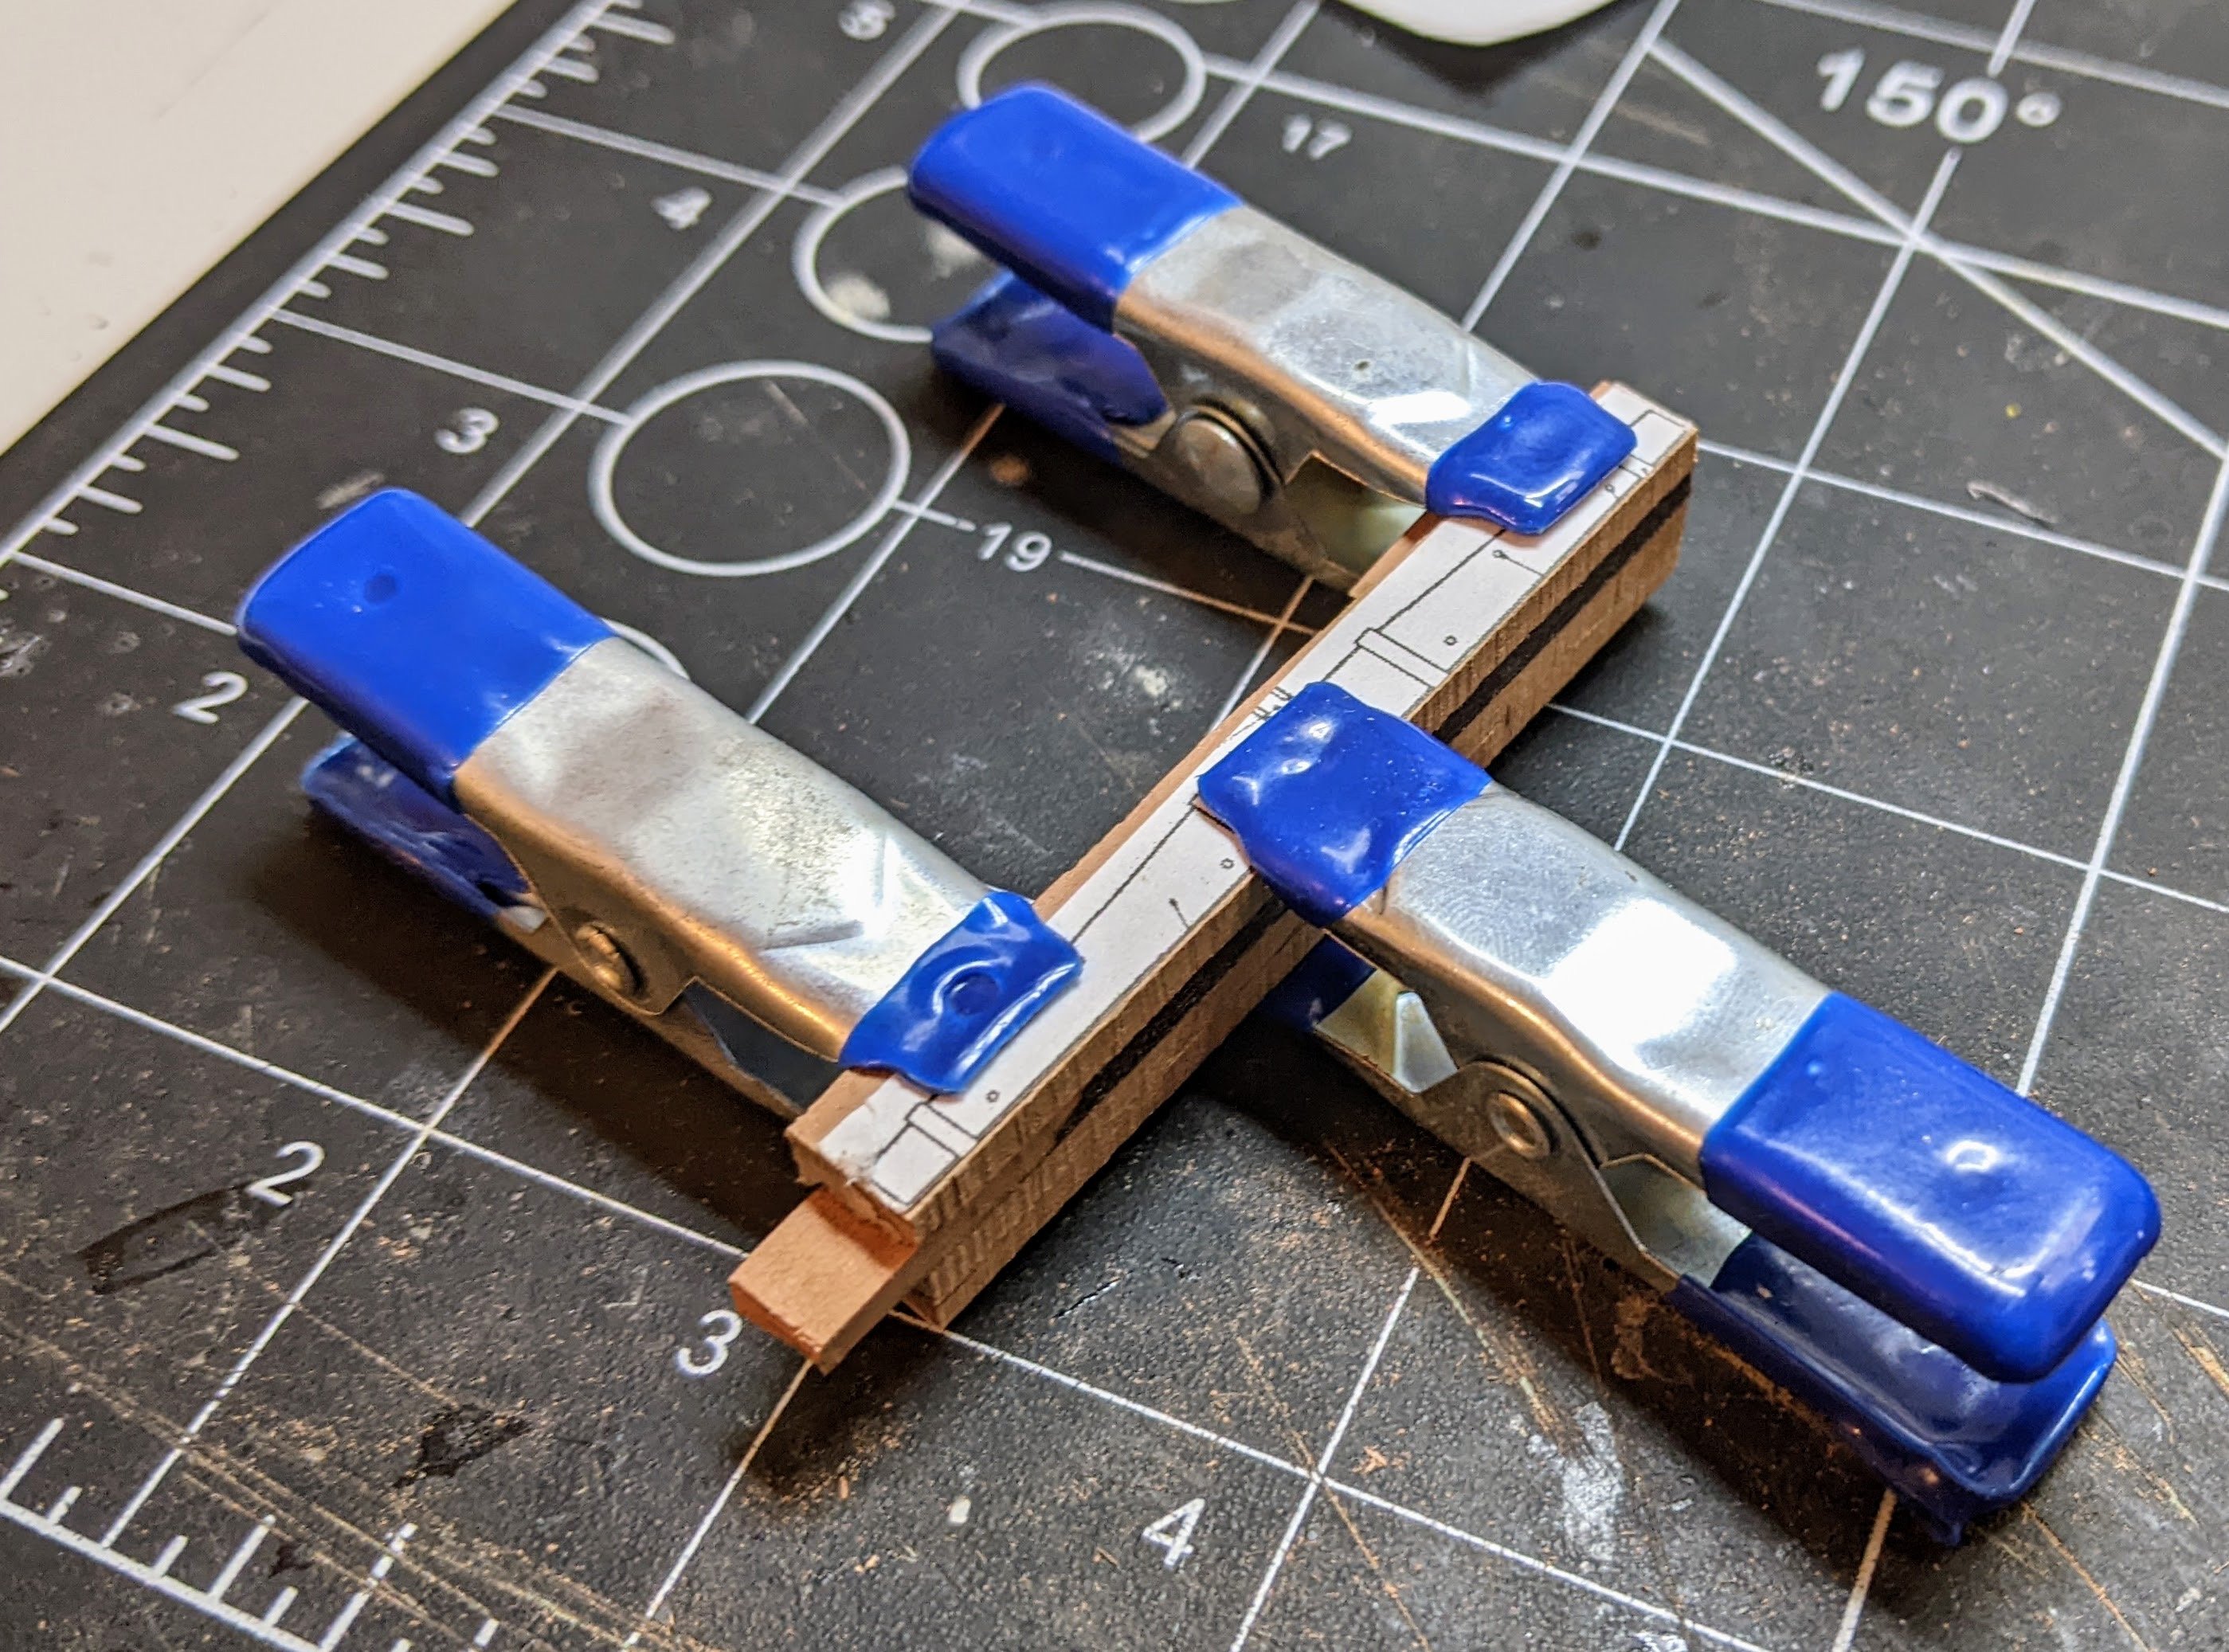
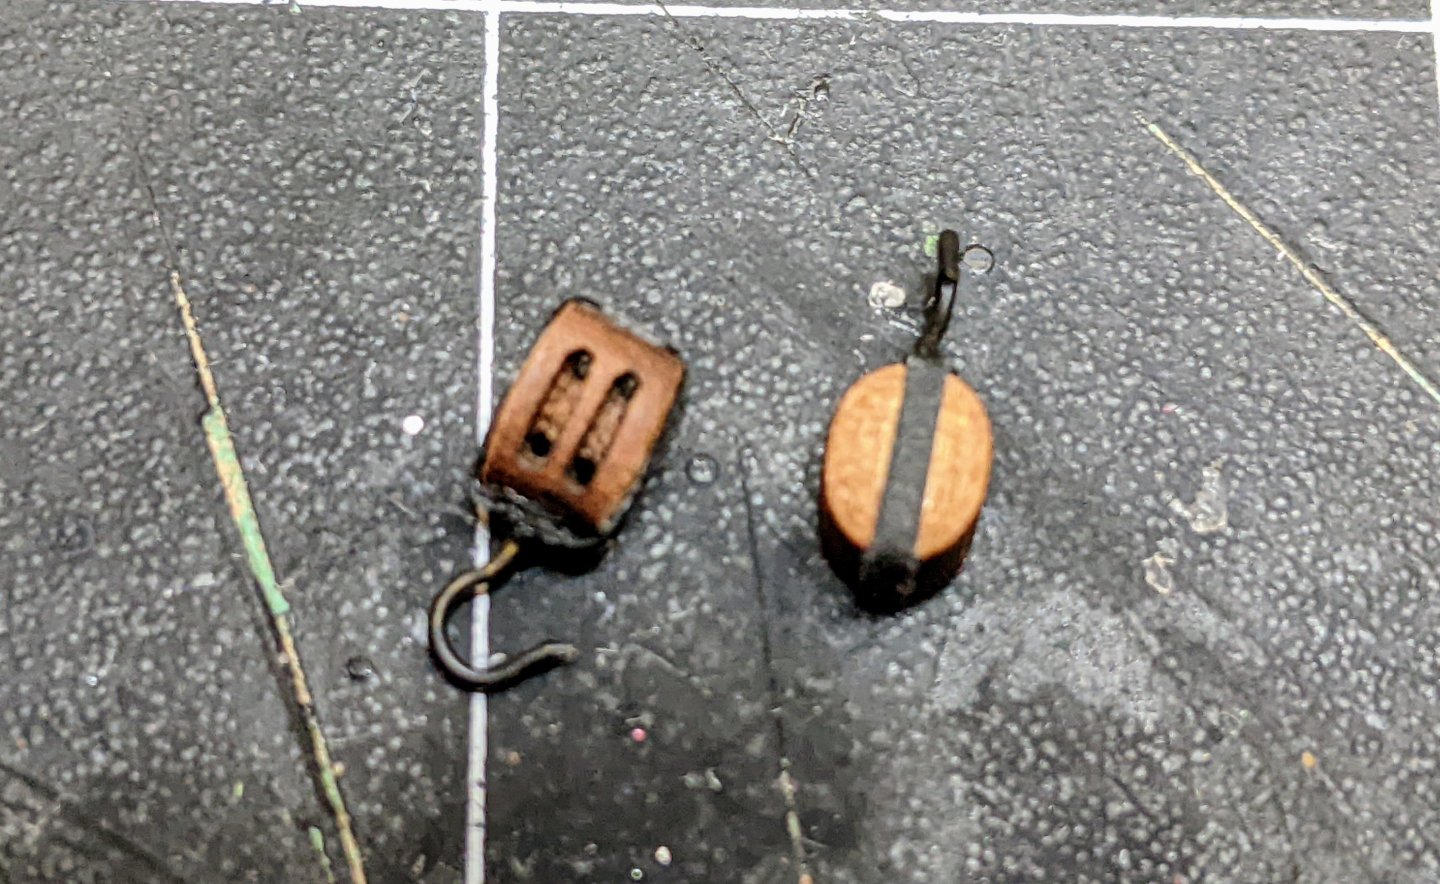
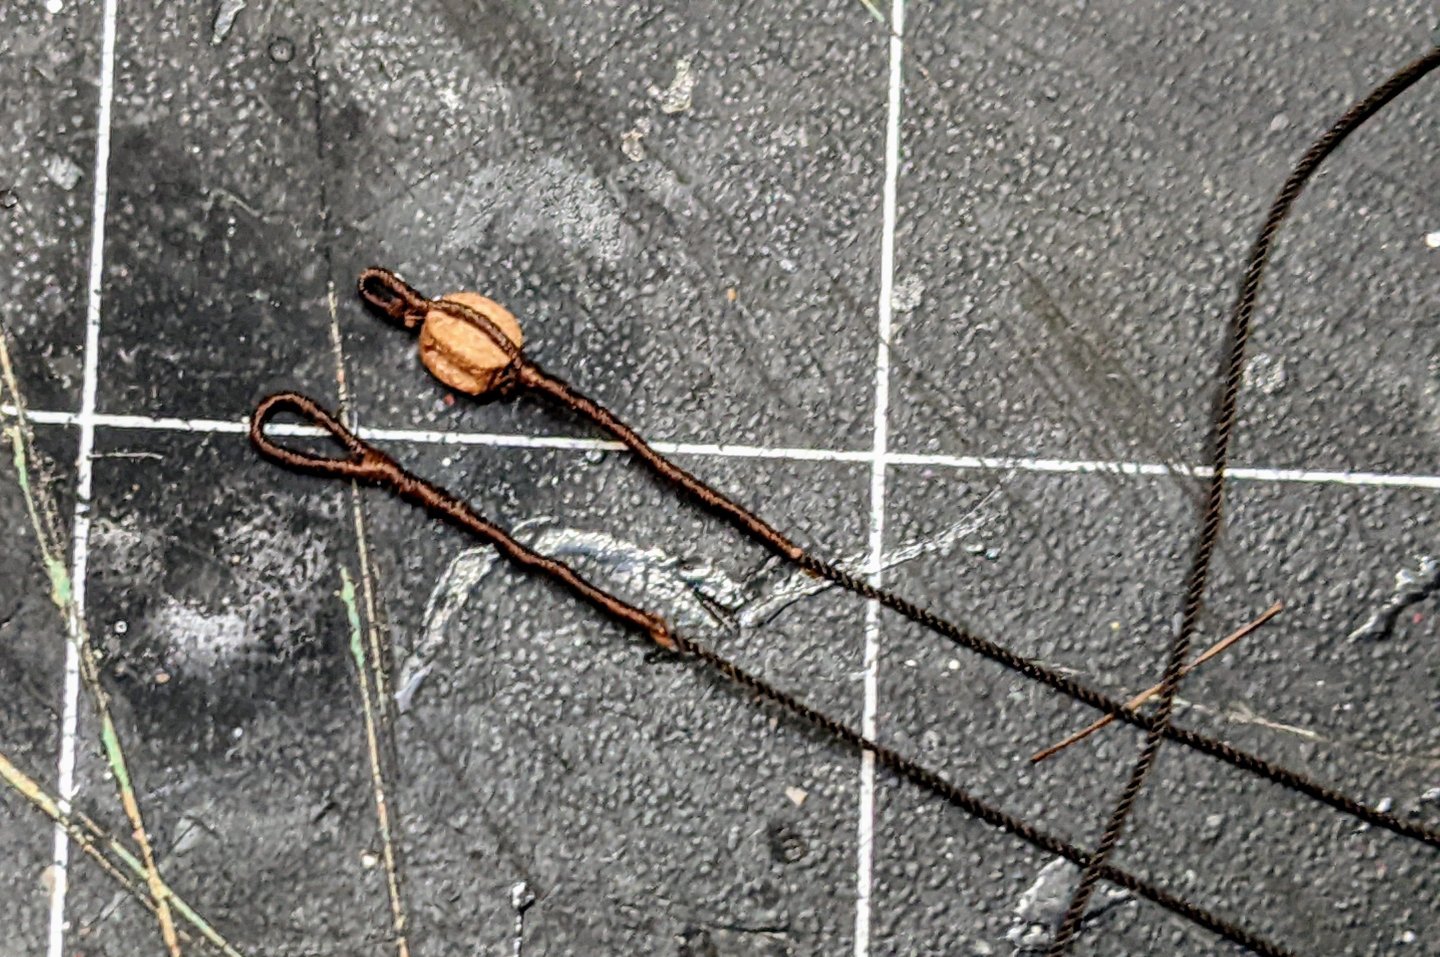
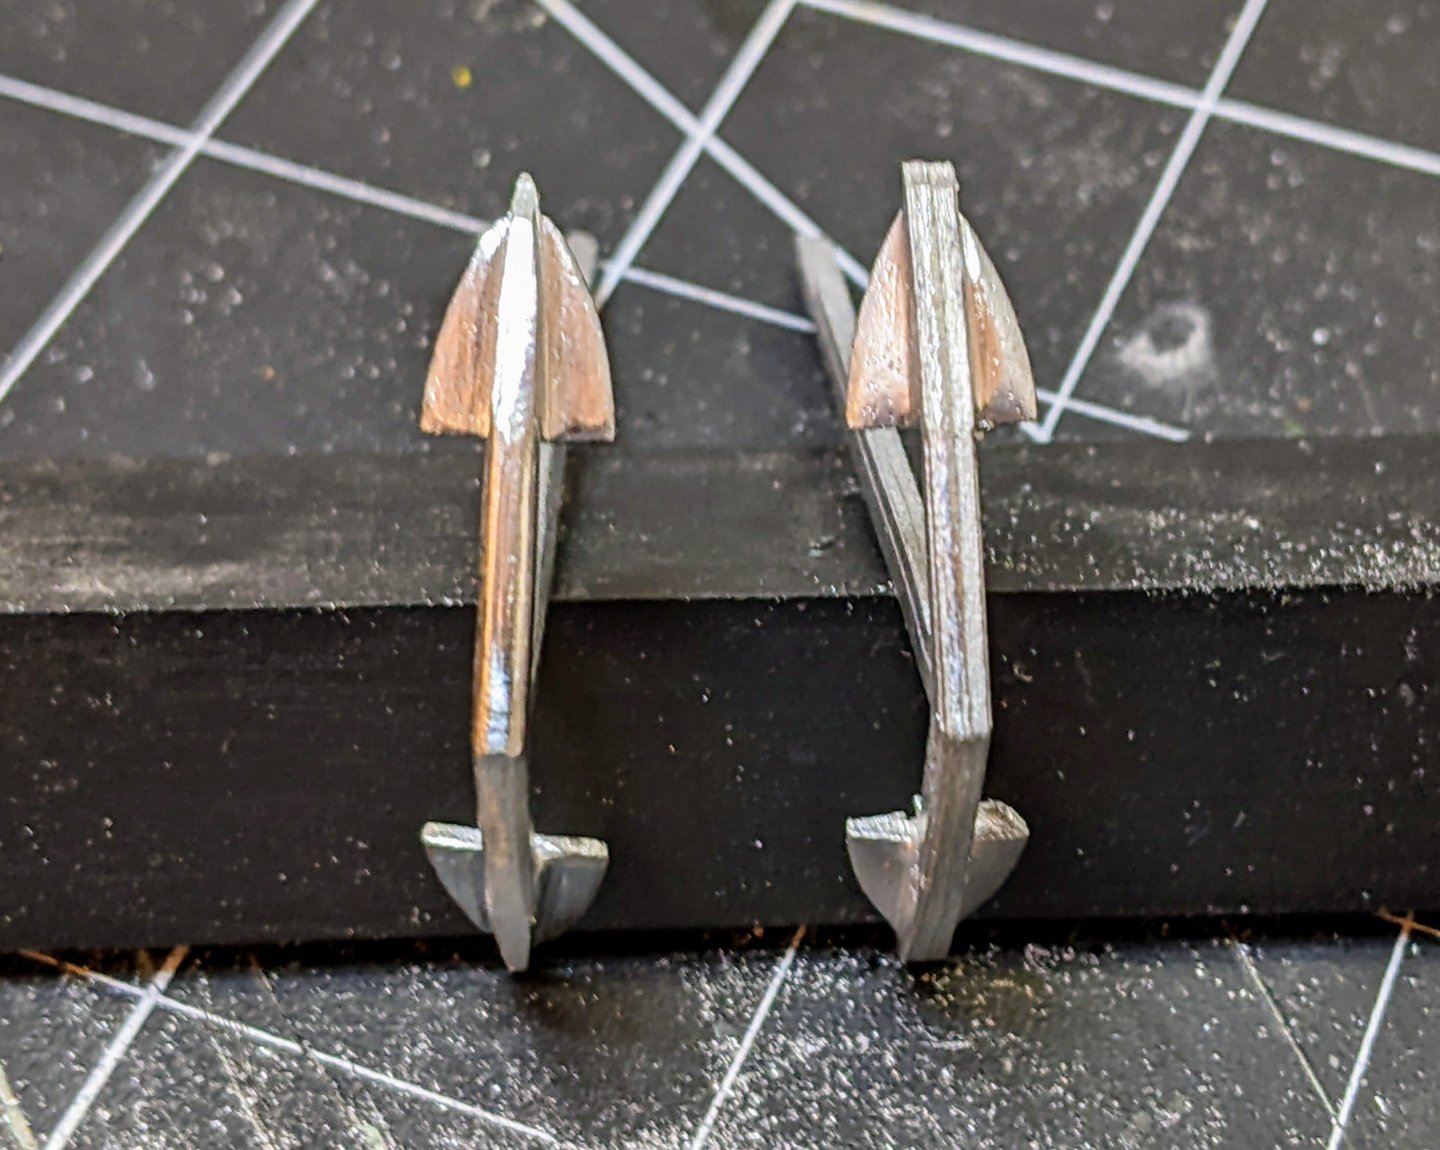
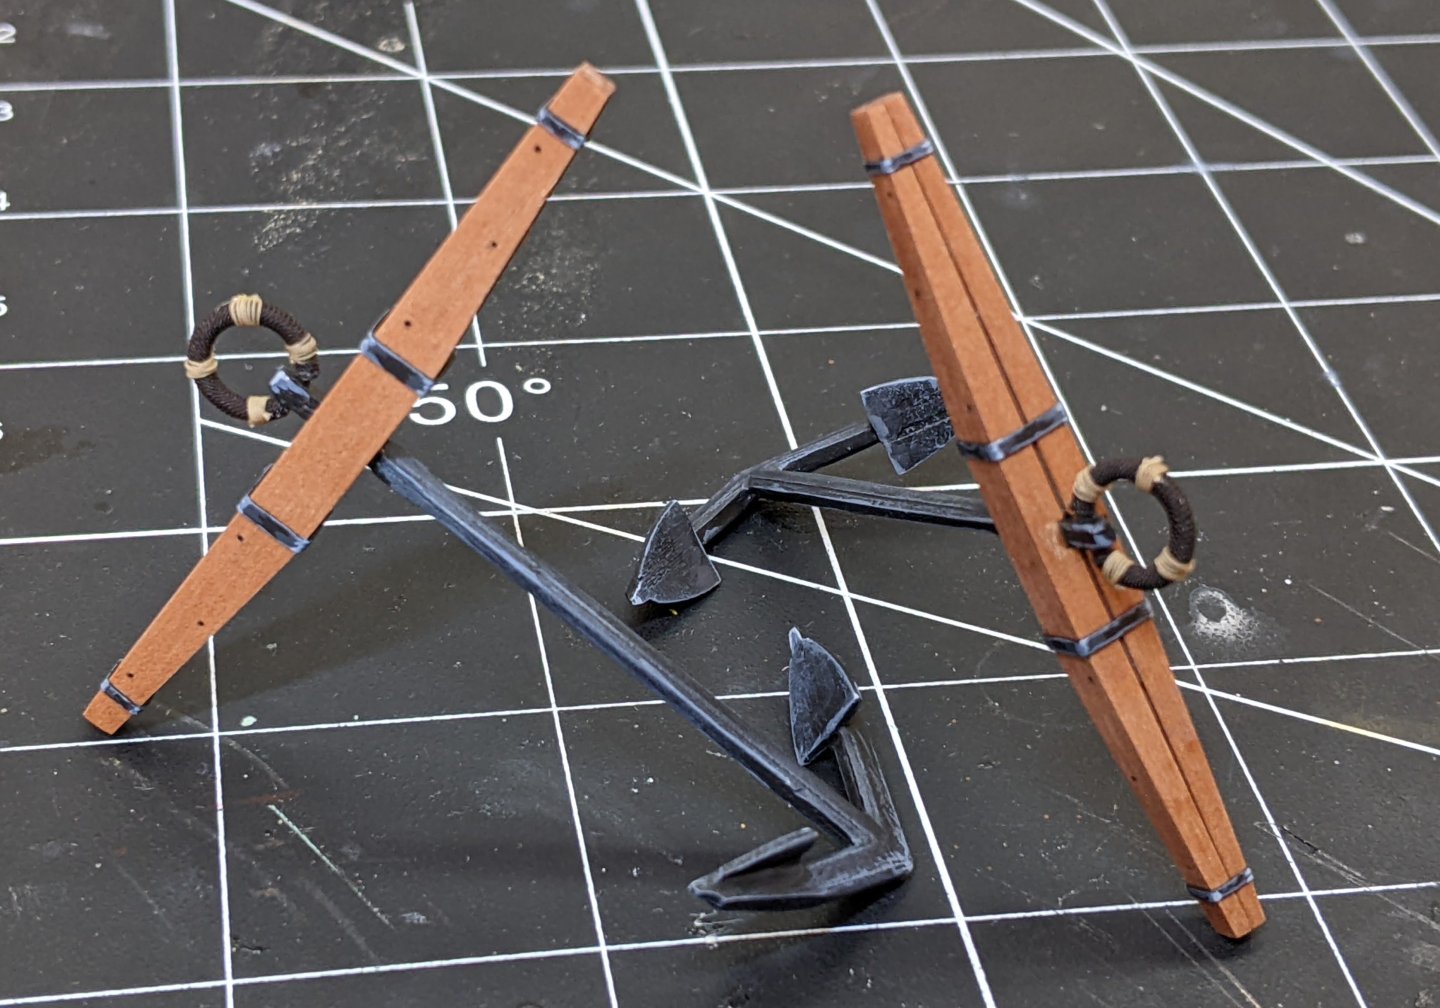
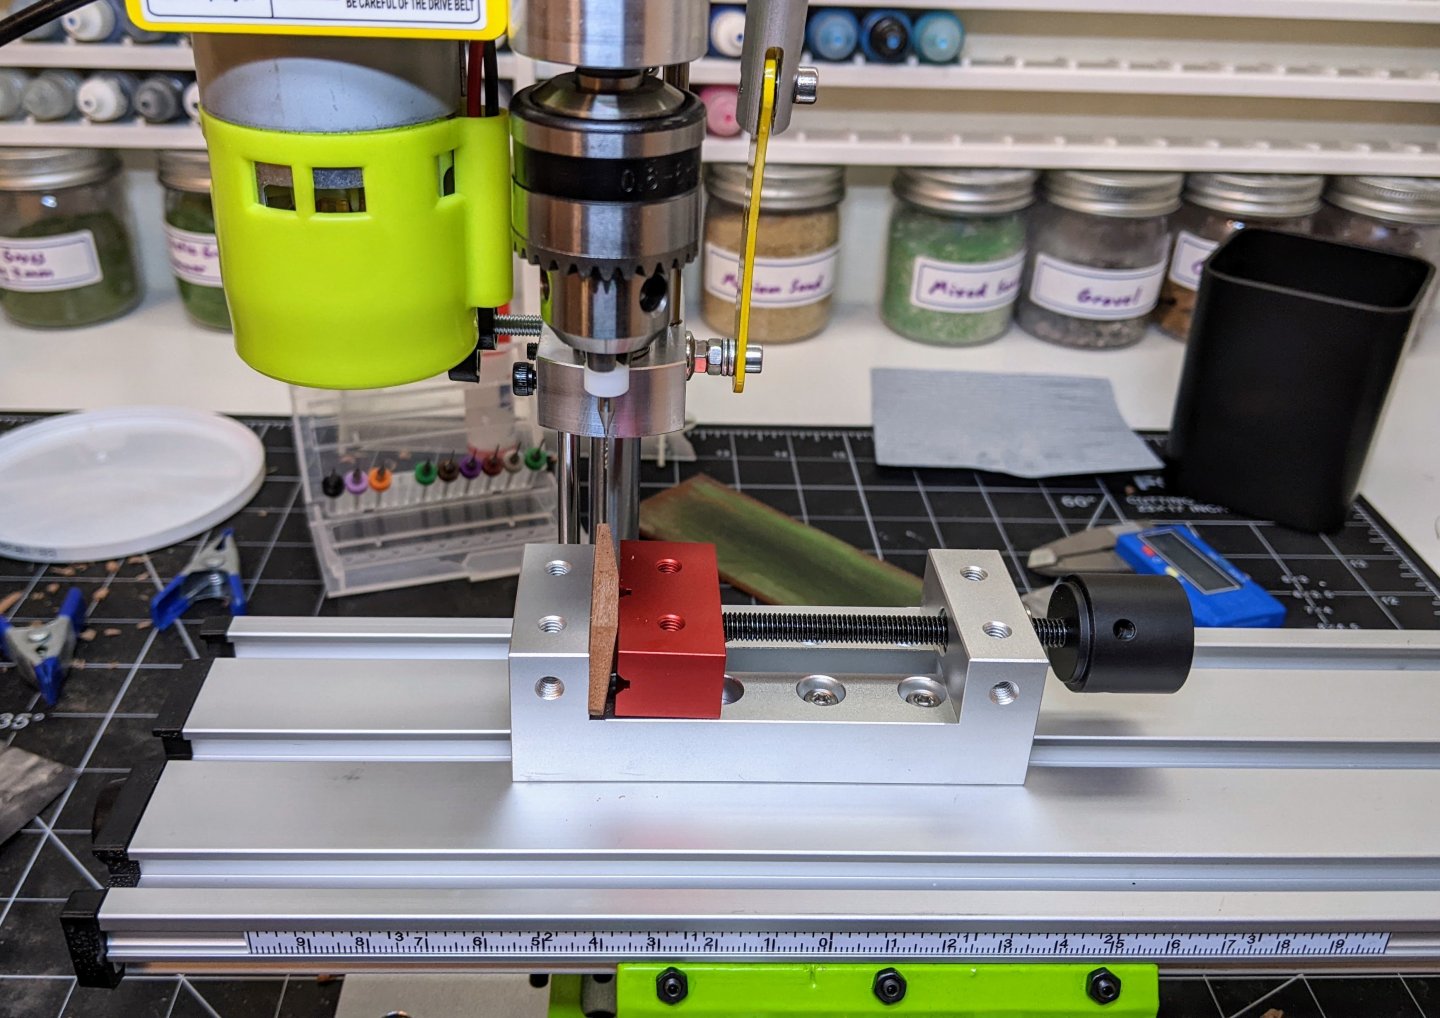
Log #85: The Anchors Thank you to everyone for you kind comments and encouragement. I have spent the past couple weeks making a brief detour from the rigging, but before getting to that I did clean up a few lines. First up were some blocks with hooks for the topgallant backstay tackle and the topgallant yard halyard tackle. I am getting much better at these now I have my process down and can produce them pretty quickly at this point. These ones only took about 15 minutes to make all in. I then secured the topgallant yard halyard using one of these hook blocks and another block attached to the halyard itself. I belayed the falls to the bits and then ran the coil over the nearest cleate. With that out of the way I decided to take a break from rigging and look at the anchors. As I have one of the earlier versions of the alert kit, mine came with the cast metal anchors and I can see why Chris has moved away from these. They are easily one of the weakest parts of the kit. I debated for a while as to whether I should just chuck them and draft and 3d print some new ones, but in the end I decided to try and work with them. As I have previously noted my goal with this build has been to stay pretty close to the kit and I though with a bit of work I could make them look ok. The main problem as you can see from the right hand anchor in the above picture is that they lack detail and the molding process has resulted in some flash and warping. I decided to try and file them down to remove the excess material and make them look closer to how they appear in the illustrations in Steel. I also decided not to use the PE ring from the kit and instead made one out of paper clips which I wrapped around a drill bit to shape them. I then added the puddening to them with 0.35mm brown rope and seized them with 0.2mm beige rope. The seizing rope was a bit too big, but my only other option is the white fly tying thread I have and I thought the contrast would not look right. You can see in the above image one of the biggest problems I struggled with, getting the primer to stick to the anchors. Despite washing and filing most of the surface off of them, I could not get the primer to hold well. Then I was on to the anchor stock. The kit version did not look enough like the real thing so I scratch built some new ones out of the offcuts of the 3mm laser cut sheet. I used the drawing in Goodwin as a template which I photocopied and resized (with some trial and error) and cut them all to the rough shape before carefully planing and sanding them to the correct size. Then I got to test out my recent acquisition of a mini drill press to drill the bolt holes. With the holes drilled I used black monofilament fishing line to represent the bolts. I put these through before glueing the stock to the anchors to make sure I could get them through properly. Once everything was in place I just used a sharp craft knife to cut off the ends. I then added iron straps using shrink tube and painted the straps and the anchors. I will not go into detail on the painting as I have previously described all these techniques when I did the straps on the boom jaws and when I painted the cannons. Here is the final results. In the end I am pretty pleased with how they turned out and they look reasonably like the real thing.


- 562 replies
-
- 30
-
-
-
- vanguard models
- alert
- (and 2 more)
-
Looking very nice. The rigging is my favorite stage (apart from the ratlines) for this reason. You start to see the ship come to life. Every block and line you add makes a difference.
- 152 replies
-
- 3
-
-
- Flirt
- Vanguard Models
- (and 1 more)
-
Blocks: wood, card or 3D resin?
Thukydides replied to georgeband's topic in Masting, rigging and sails
Model shipways also has some new blocks which are made from pear and look quite similar to the ones that Vanguard used to supply. Not as good as the Syren blocks, but they do have the smaller sizes you are looking for. -
The model is looking good Chris.
-
Your rope work is an inspiration Johann.
-
It is not hard to cut the lengths. All you need is a craft knife. and to measure carefully. If you go slowly and carefully you shouldn’t have any problems. As a first time builder I can say I ran into many much harder problems than cutting scale length planks :). I would recommend you plan out the planking pattern and maybe even draw it on the false deck to assist.