


Thukydides
-
Posts
799 -
Joined
-
Last visited
Content Type
Profiles
Forums
Gallery
Events
Posts posted by Thukydides
-
-
Log #83: Tying off the Ropes
Thank you to everyone for looking in and for the encouragement. I always like this stage of the build as the tying off and making rope coils goes very quickly, and so you get lots of visible progress after a long period of preparing the yard off model.
I believe I have shown this before but here is my jig for making the rope coils.
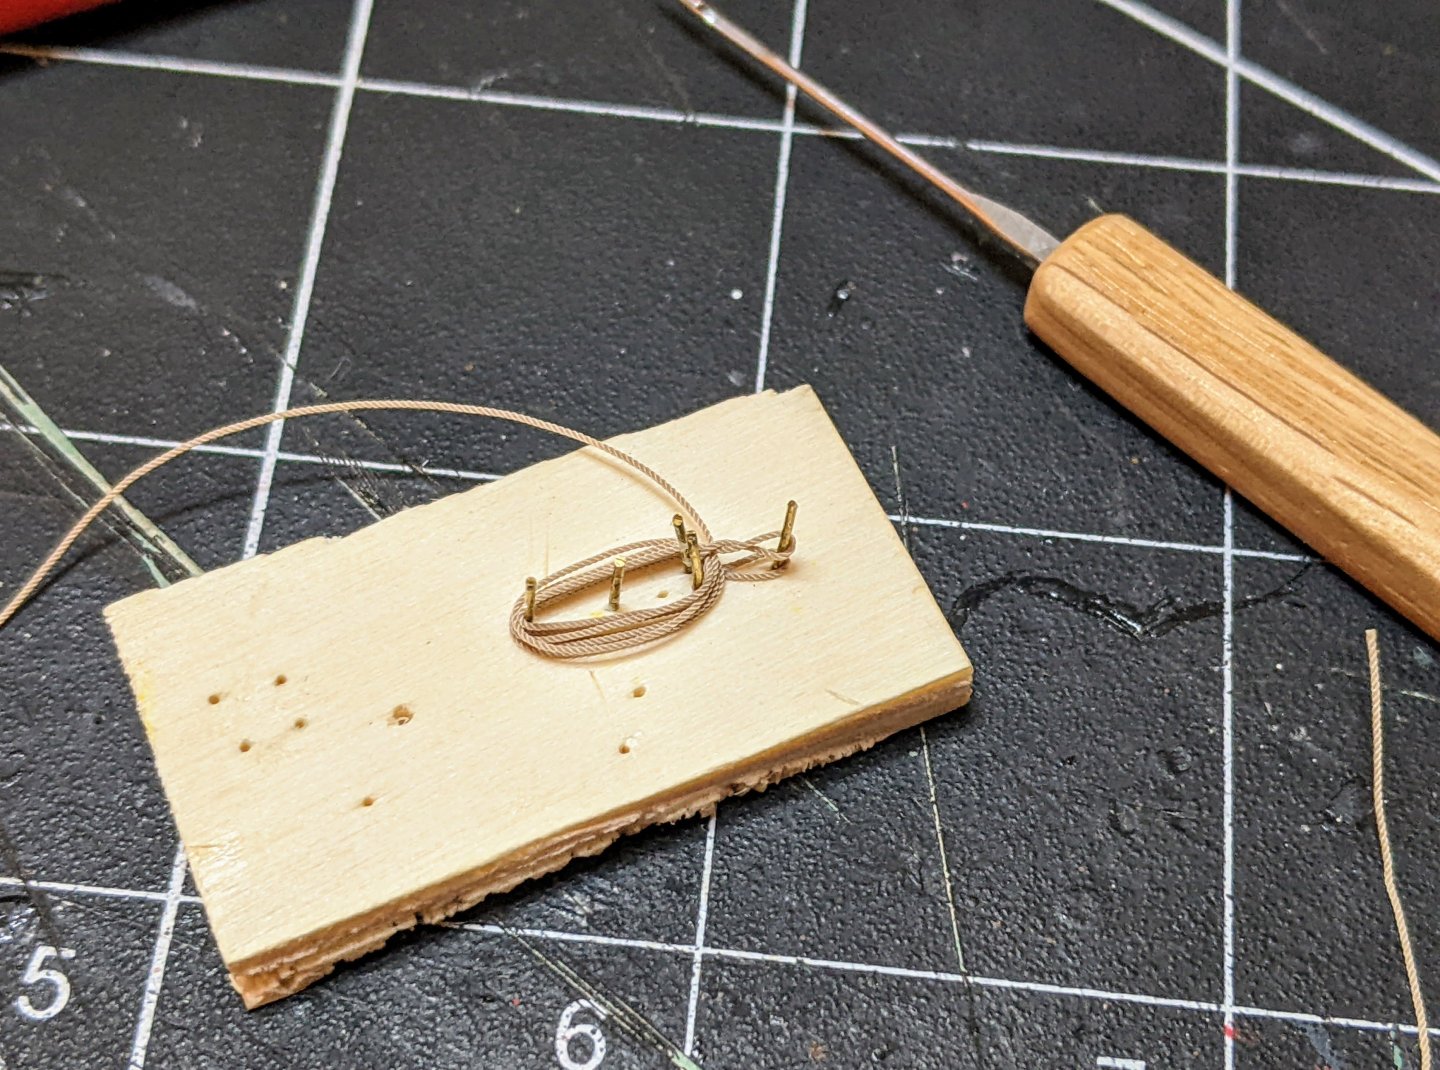
The top loop starts out on the pin that in the picture has nothing on it. Then once I have done a few loops I twist it and fold it over. Then I finish the hank by continuing to loop the rope and insert the end into the gap between the two loops for the cleat.
Once it is done I use a dab of super glue to fix the loops together and the end of the rope in place and then give it a few blasts with the hair dryer to try and get it to stay in shape.
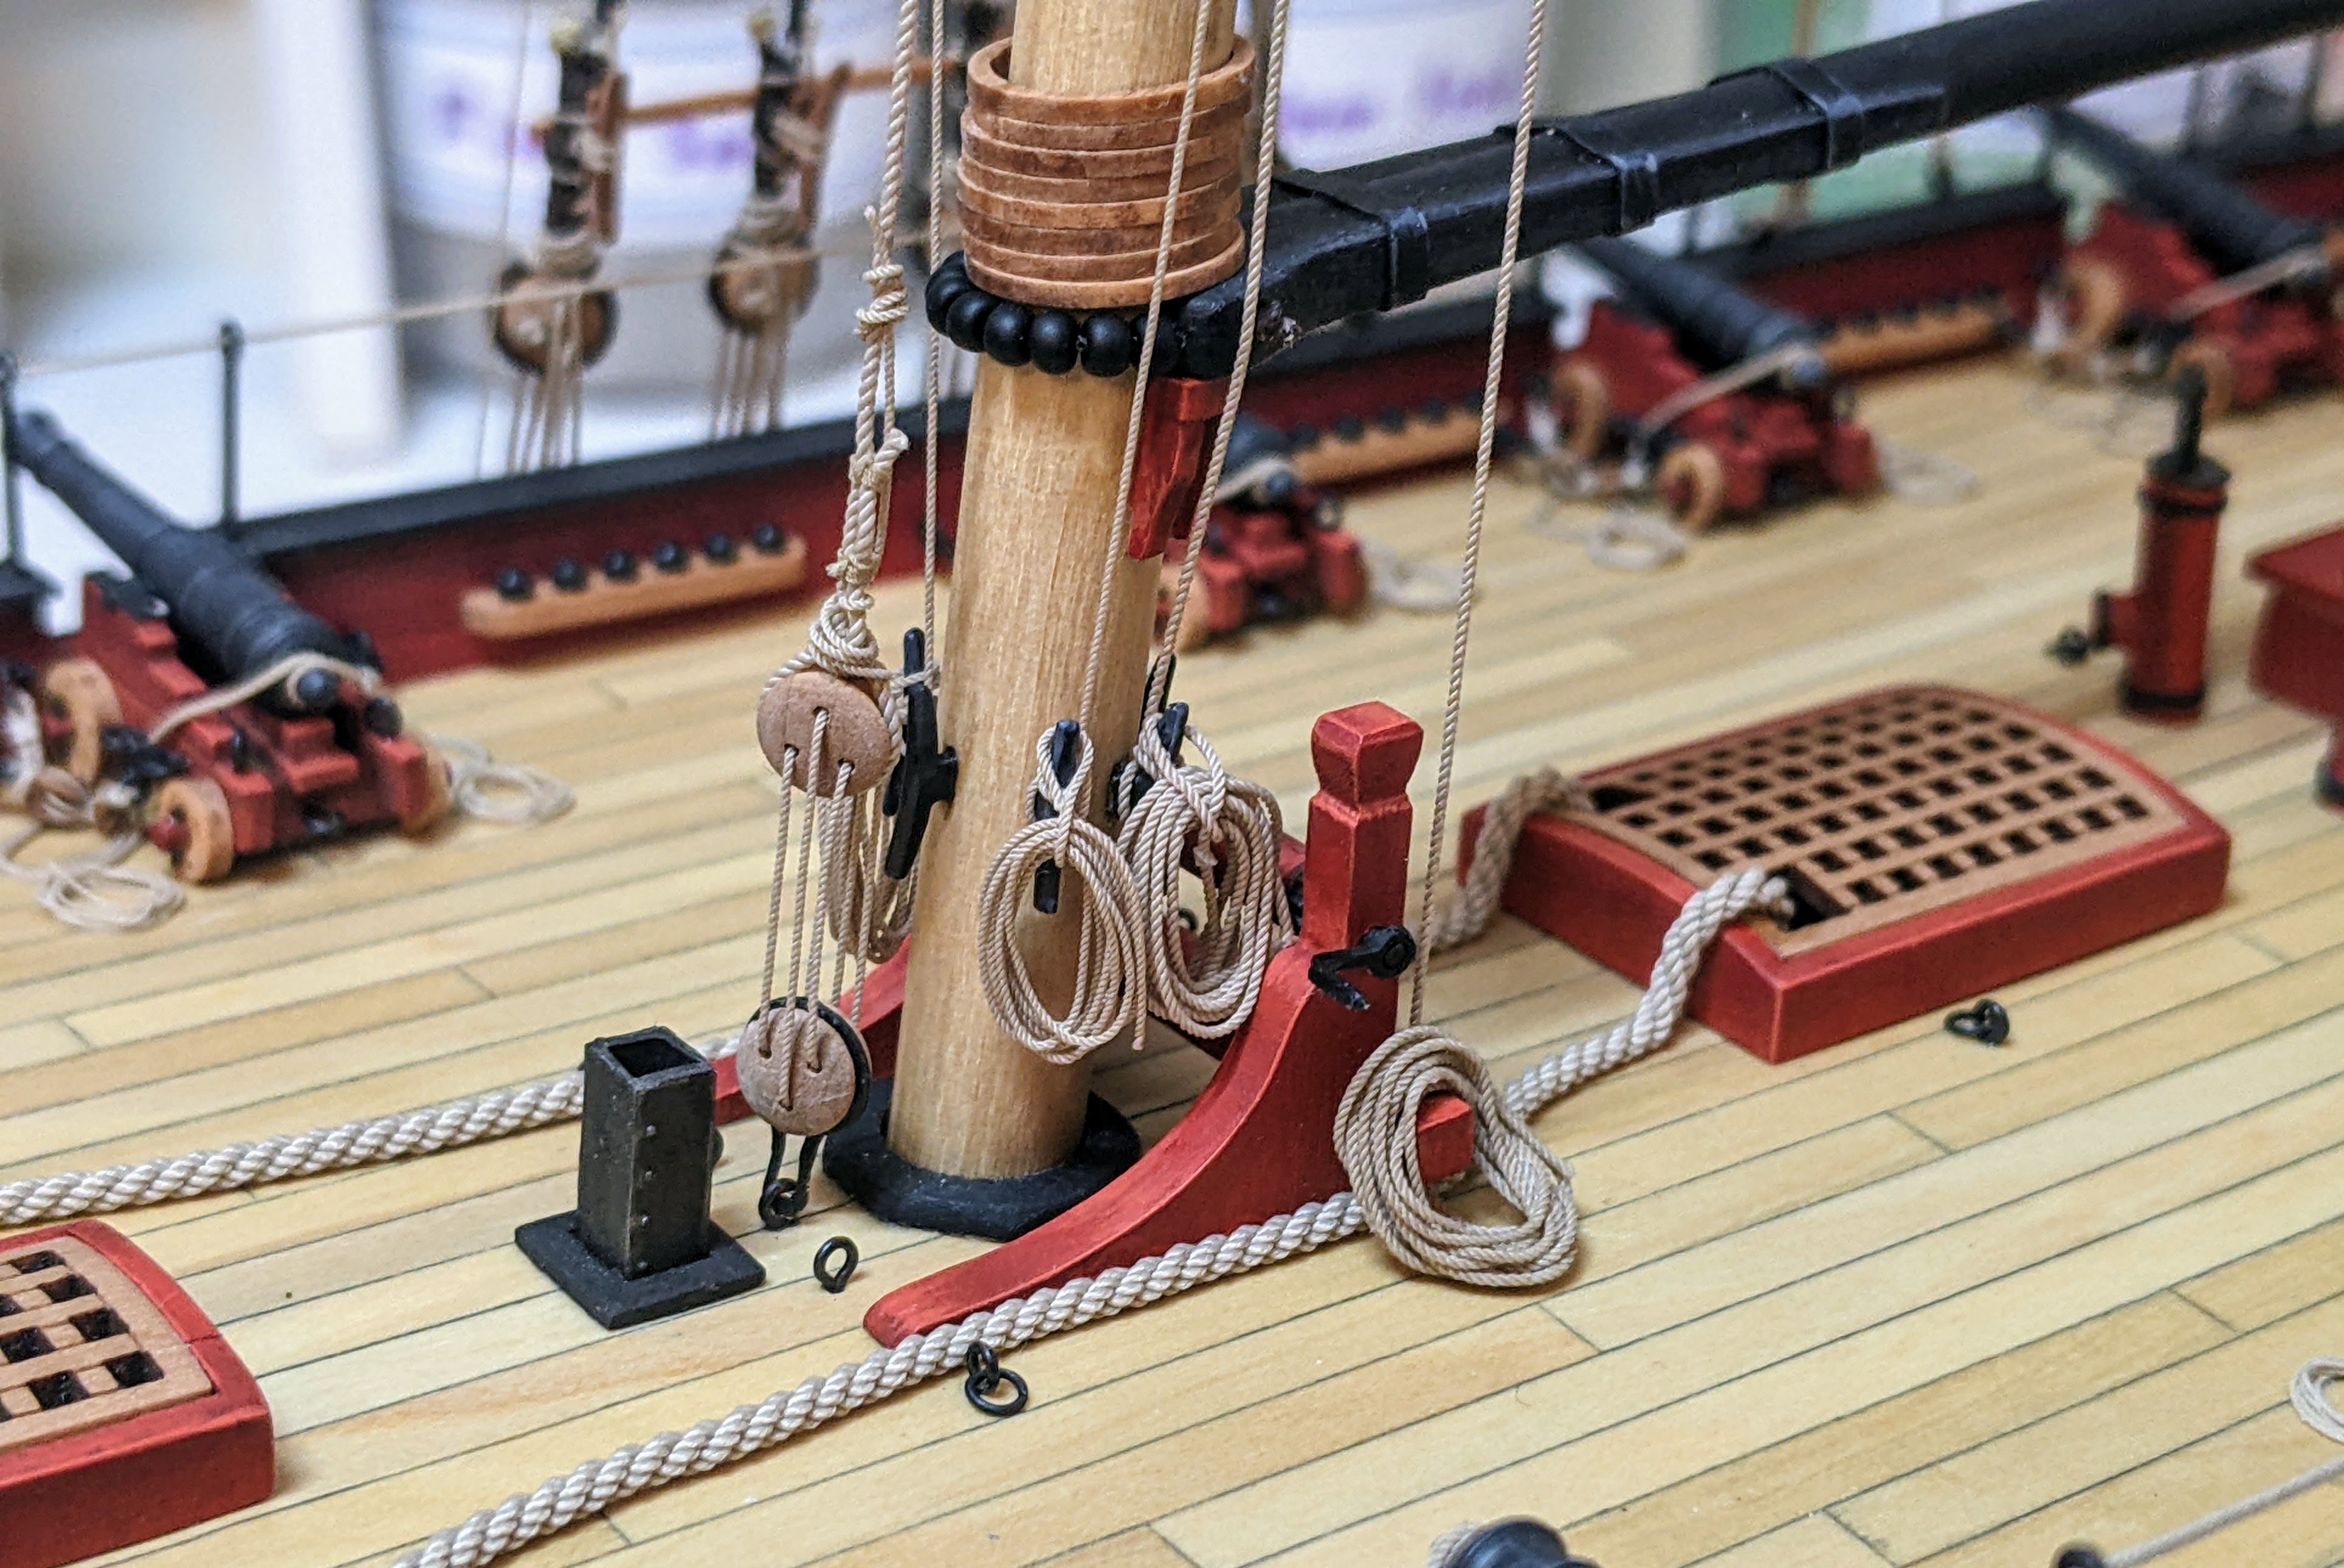
I then slip it onto the cleat and use super glue spots to tack it into place. You can see below I have belayed the topsail lift to the mast cleat on the left and the starboard topsail sheet to the cleat on the right.
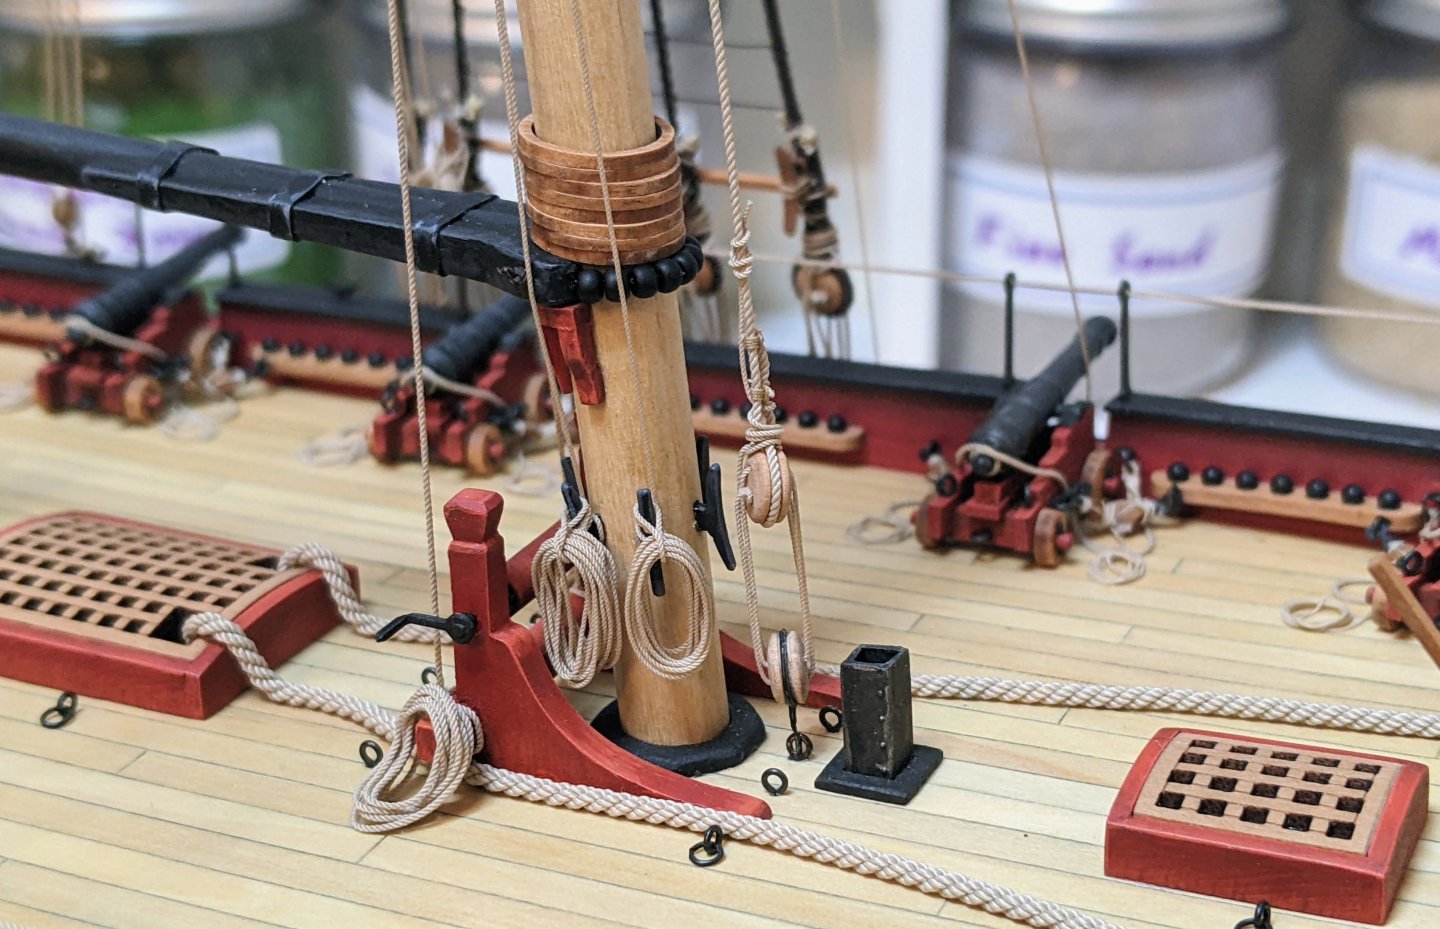
Then the larboard topsail sheet was belayed to the left cleat in the below picture. The right cleat is holding the previously belayed squaresail yard.
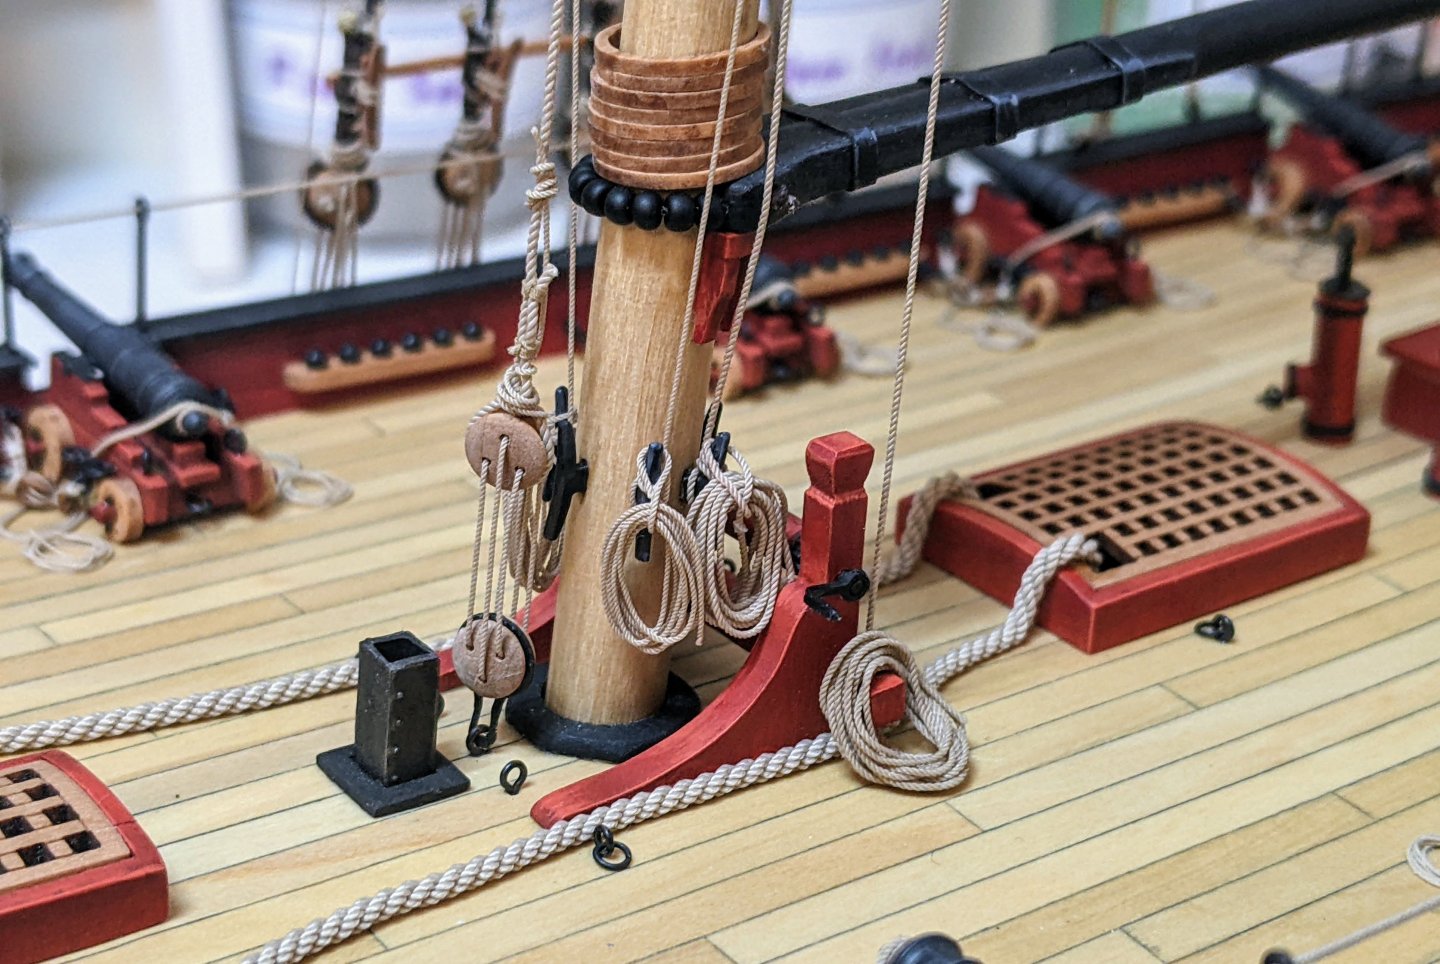
I am going to hold off on belaying the clewlines until I get the topgallant sheet lines in place so I can make sure they avoid each other. Below you can see the current state of affairs.
-
-
Log #82: The Topsail Yard
Following up on the question of what to do with the bowlines I decided to go with the kit arrangement and belayed them to a double block at the bow and then to the pin rack on the windlass.
These are just loosely in place so I can adjust everything once all the yards are fully in place.
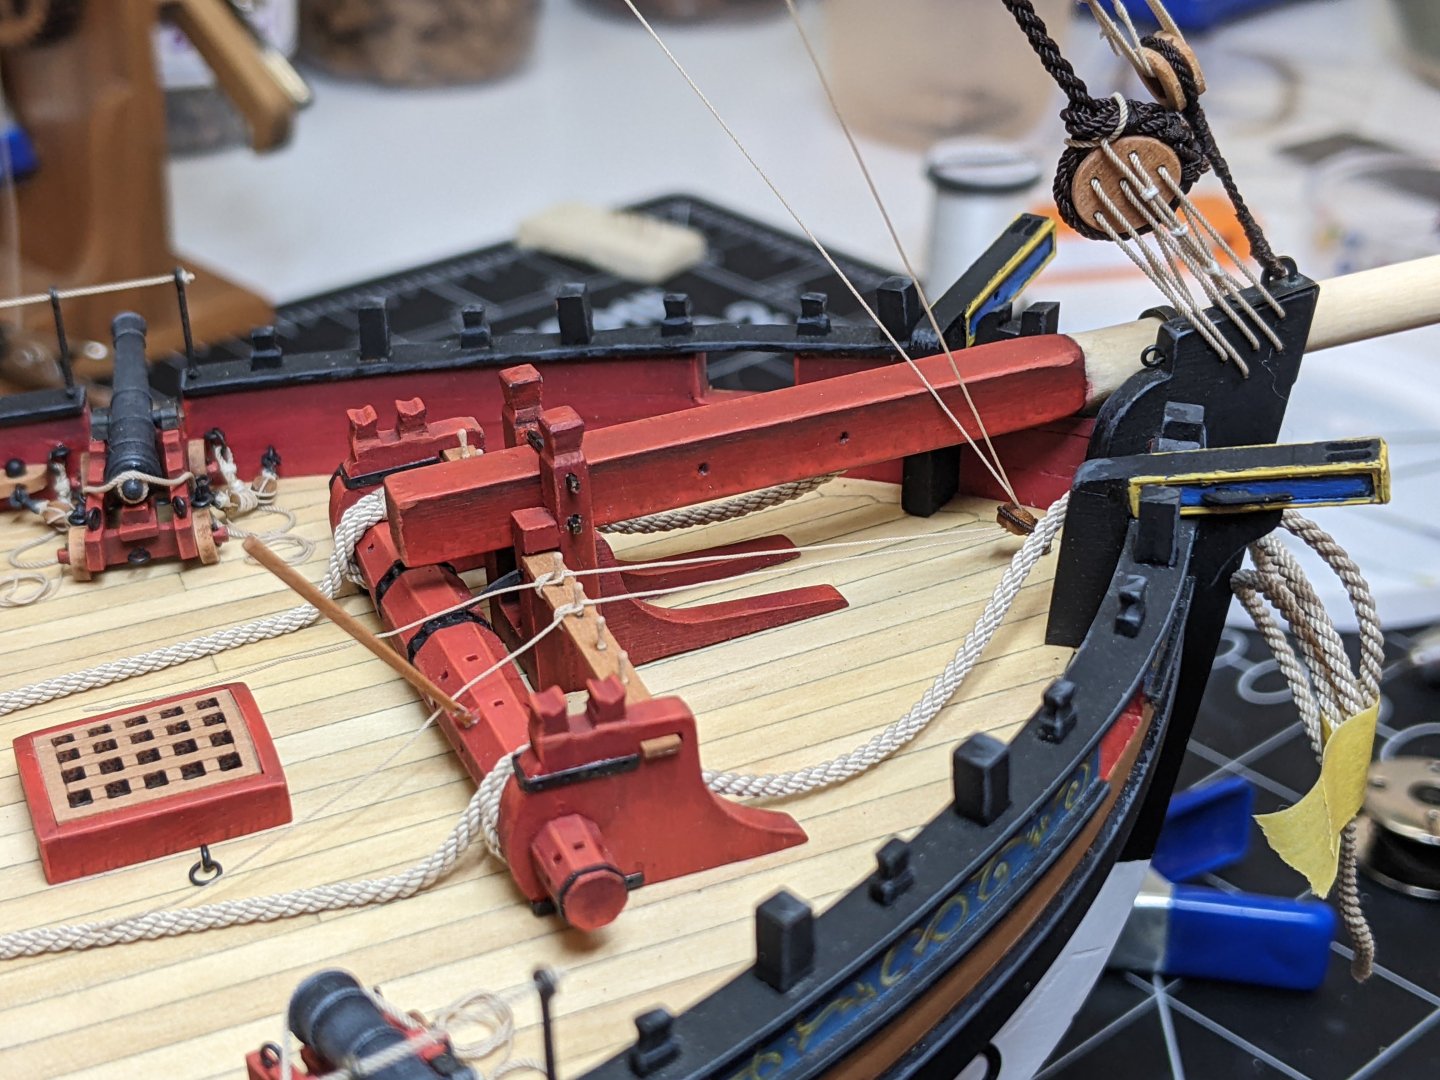
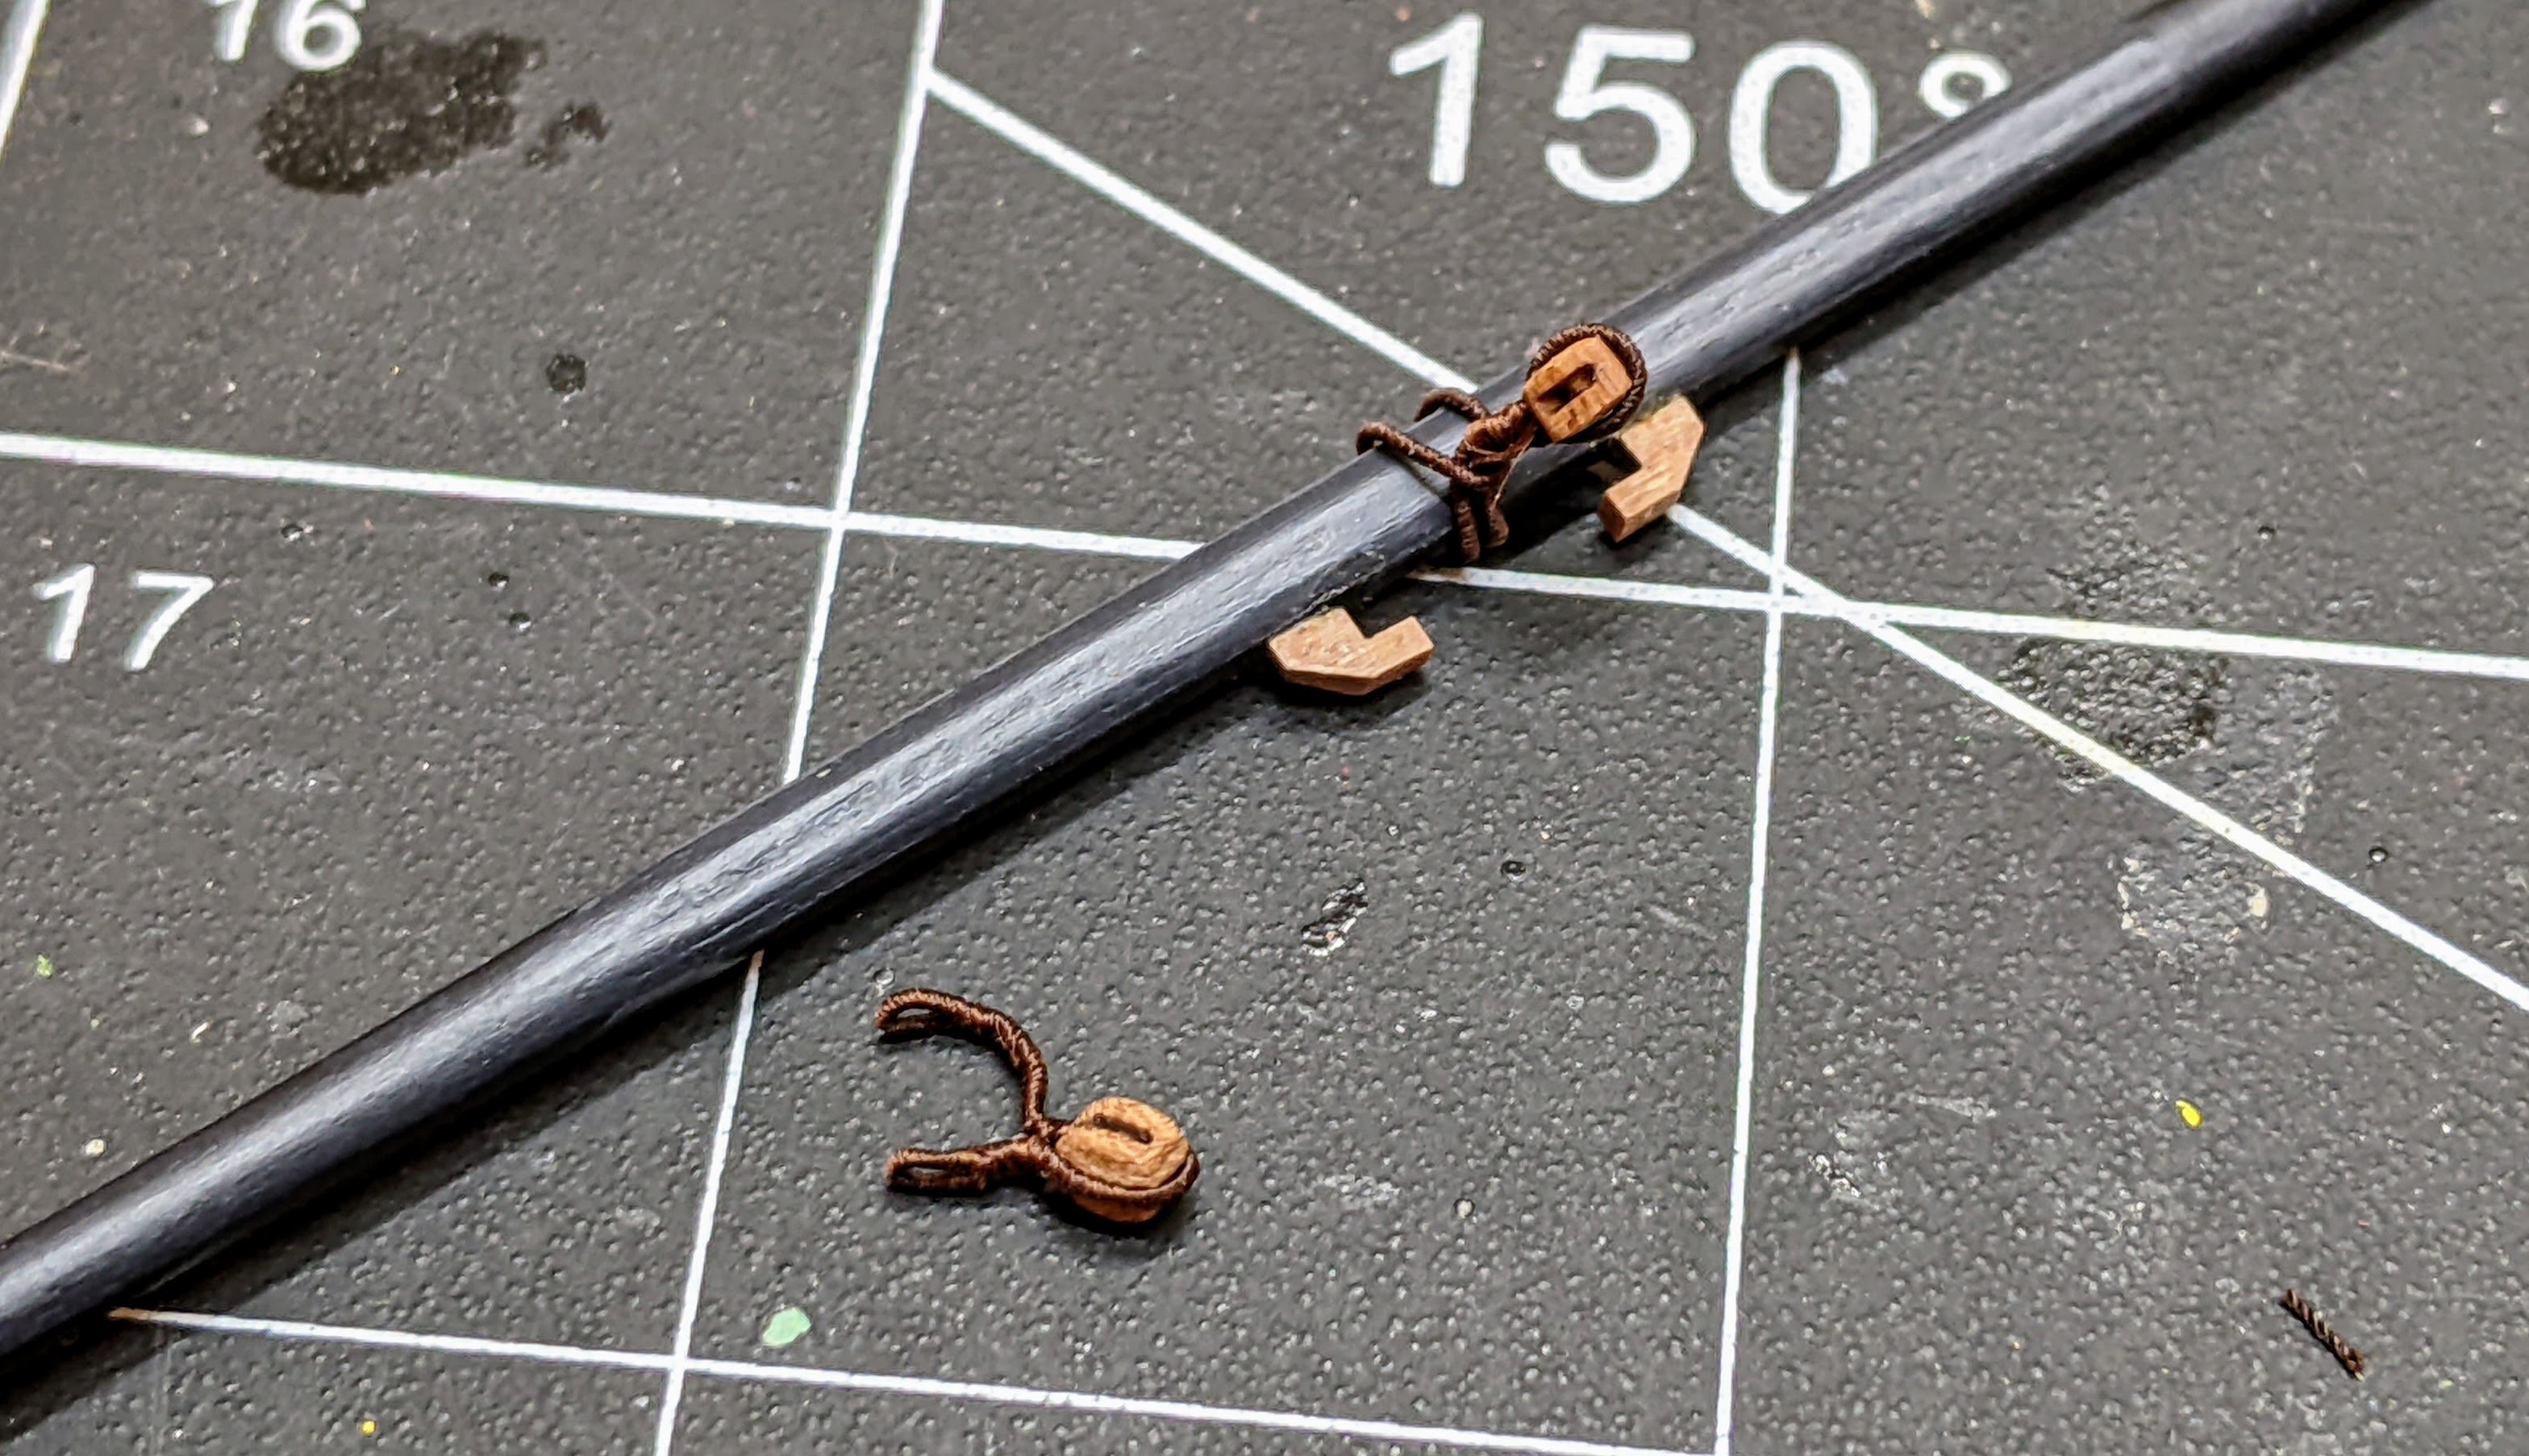
In the meantime I continue to work my way up the mainmast and next up is the topsail yard. This necessitated the stropping of a number of blocks. You can see below my new method for doing this. I simply serve a long length of line, use thin super glue to secure it at the appropriate length and cut to size. I then glue both ends to the back of the block forming the loop.
If I am careful and do a clean cut you can barely see the line and this I have found seems to be the most secure way of doing this.
Once the loop is on the block I can use the serving machine to do the seizing. I have found that I can now make the block right first time as opposed to my older methods which inevitably necessitated a number of remakes.
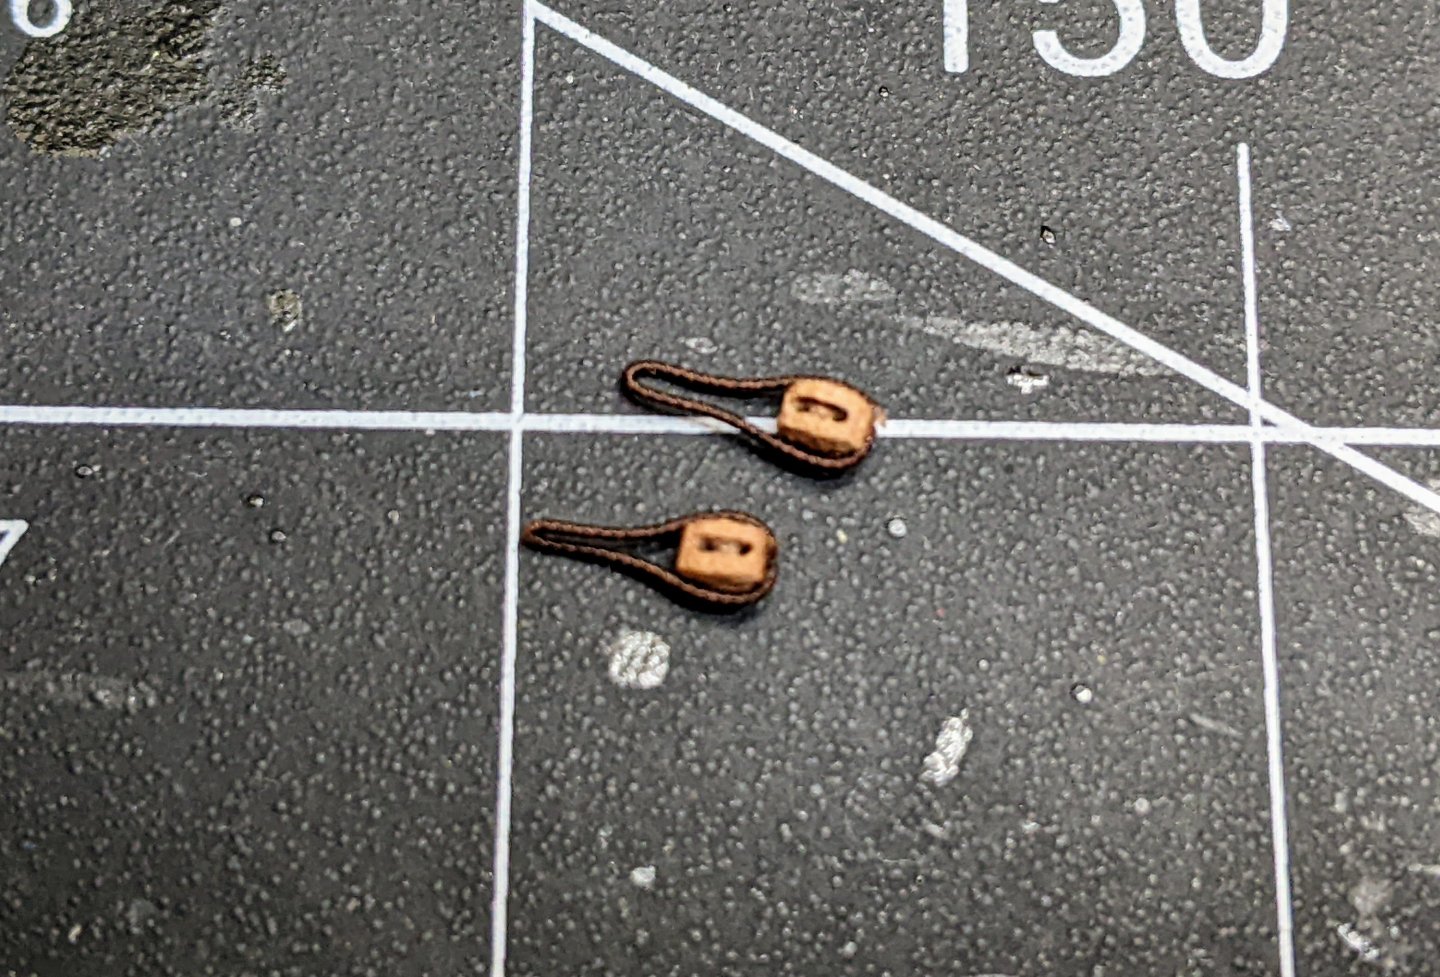
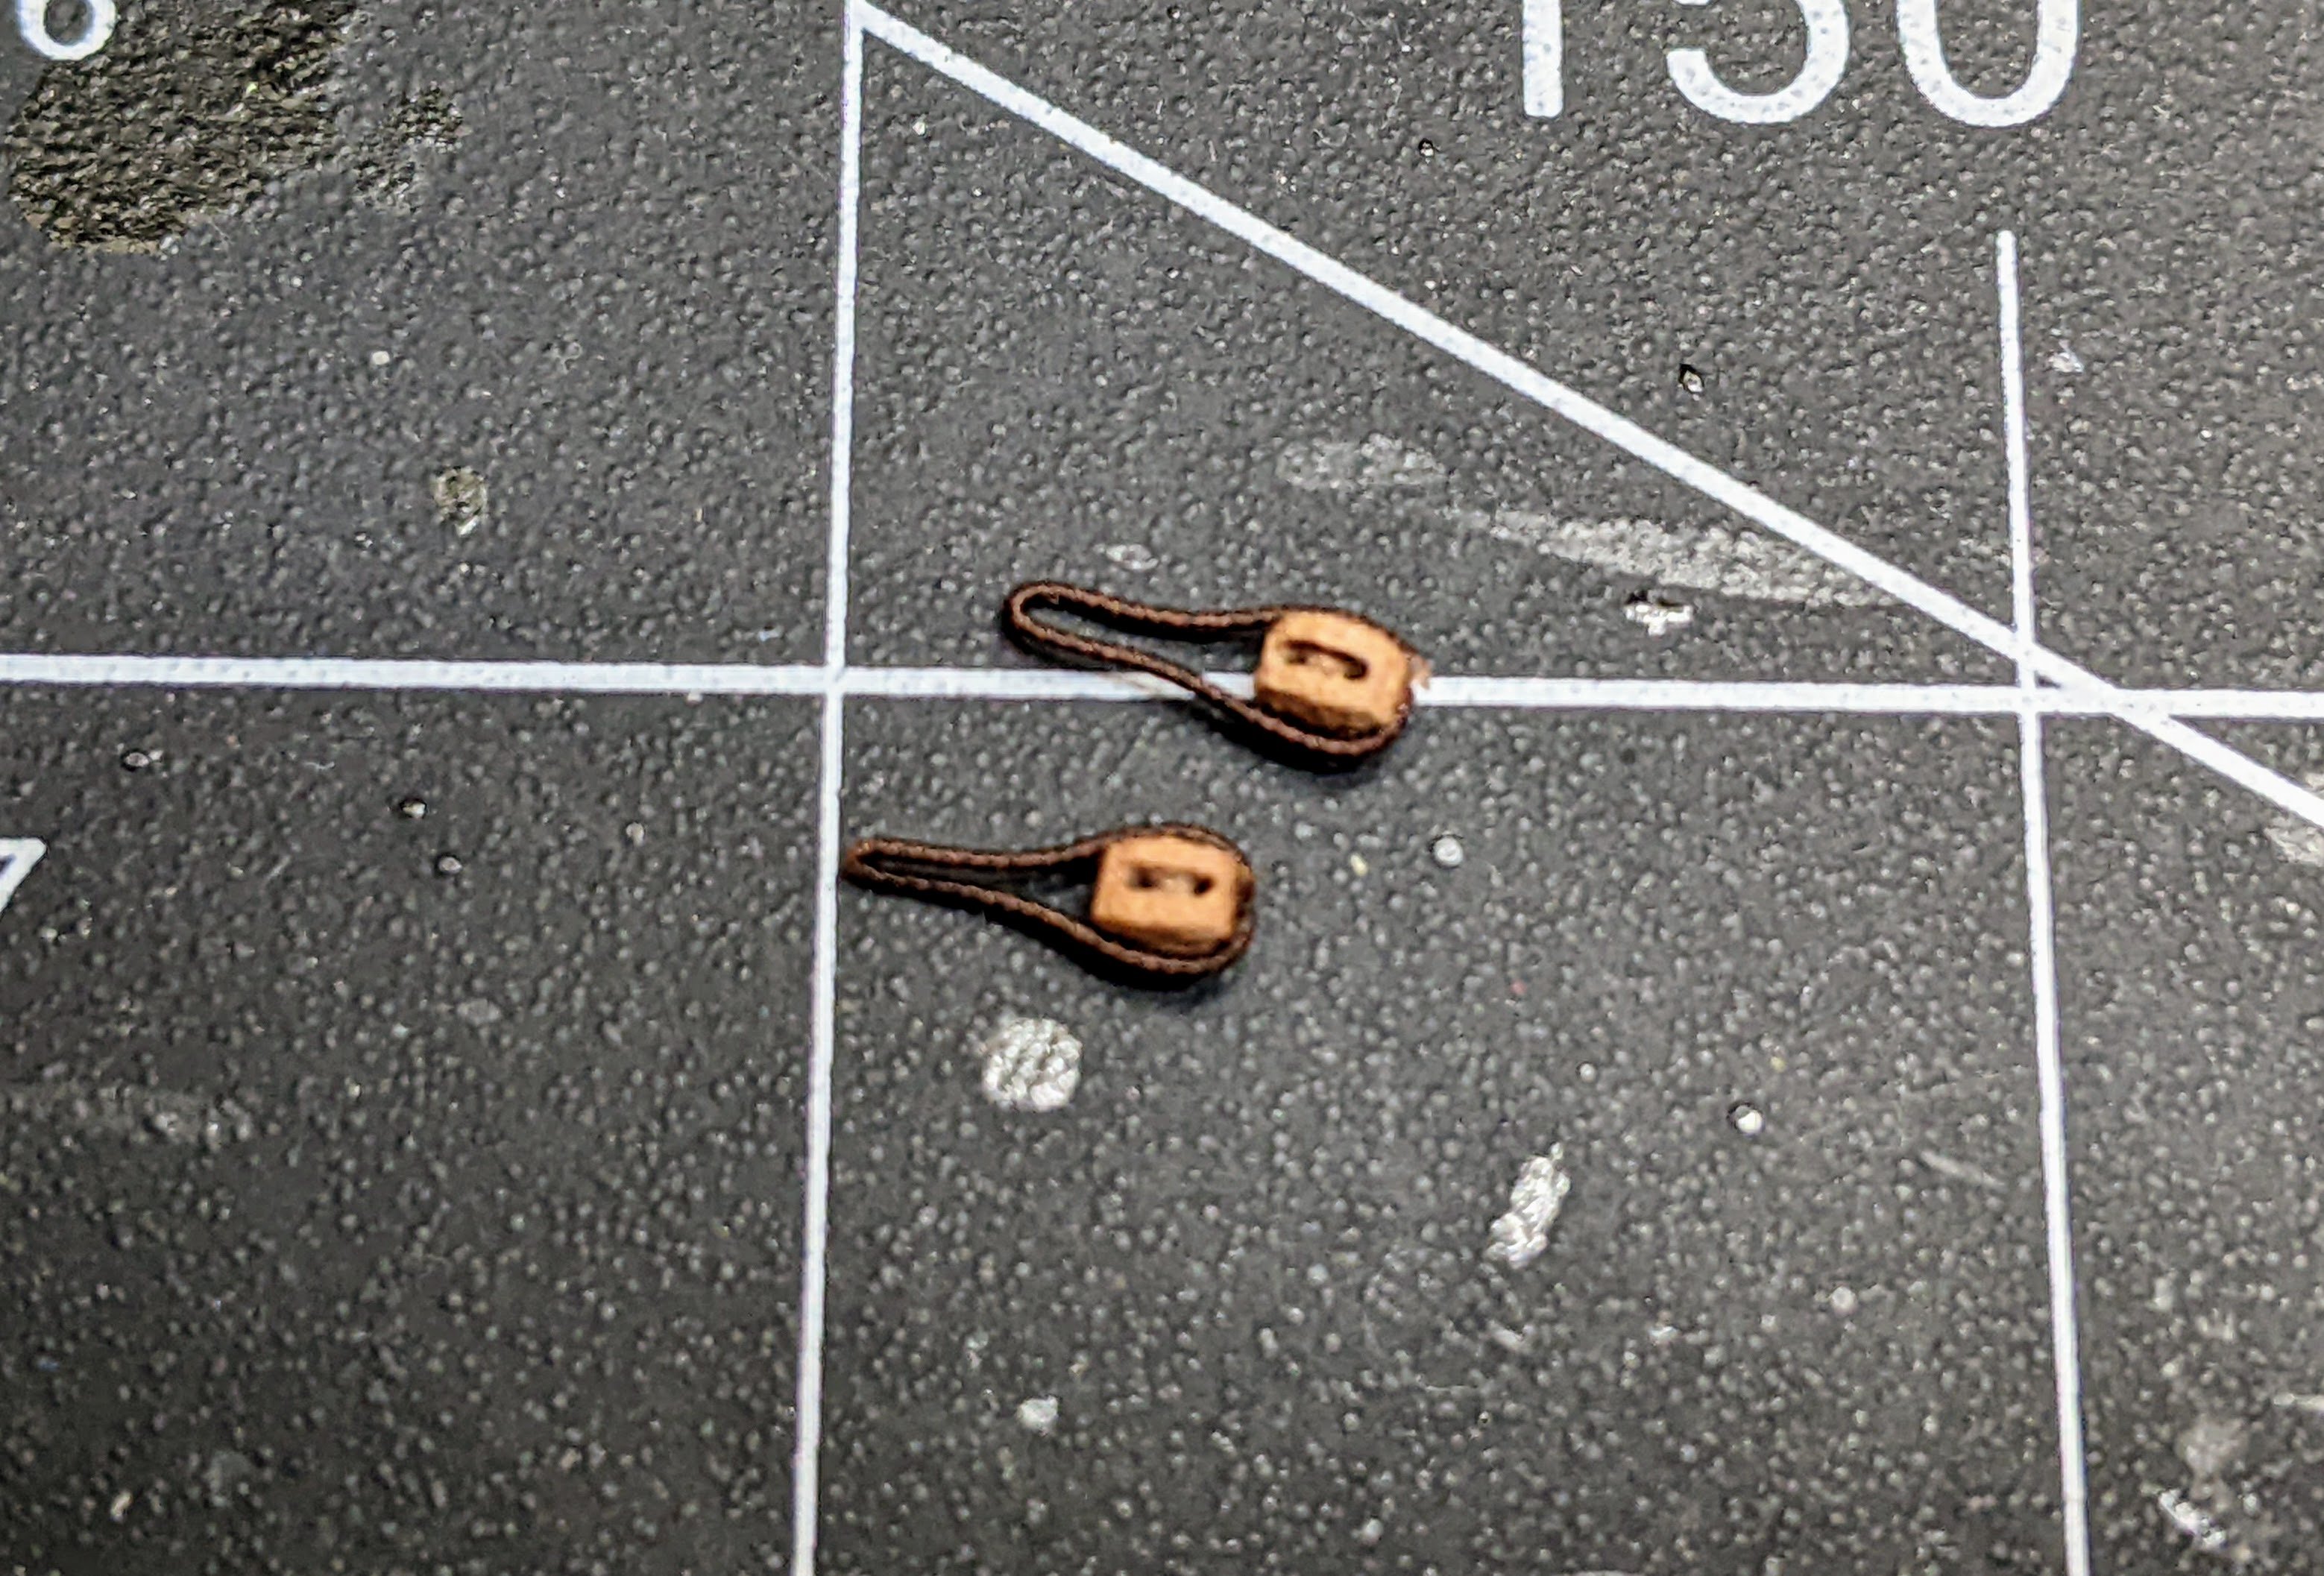
I also made two blocks with eyesplices in the ends to be lashed to the yard.
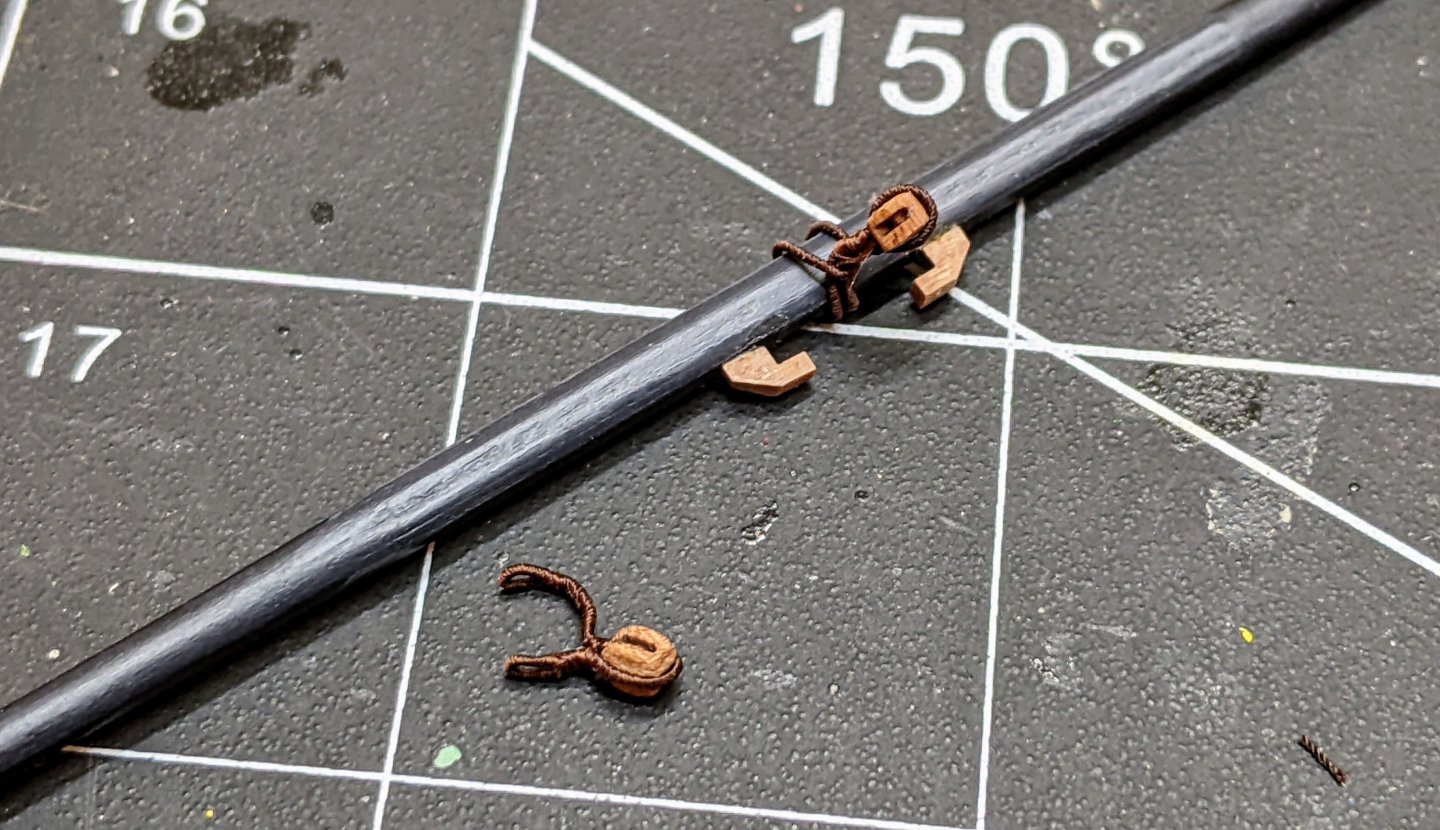
I then lashed them with a rose lashing. Now that I am starting to get the hang of them they are not that hard to do.
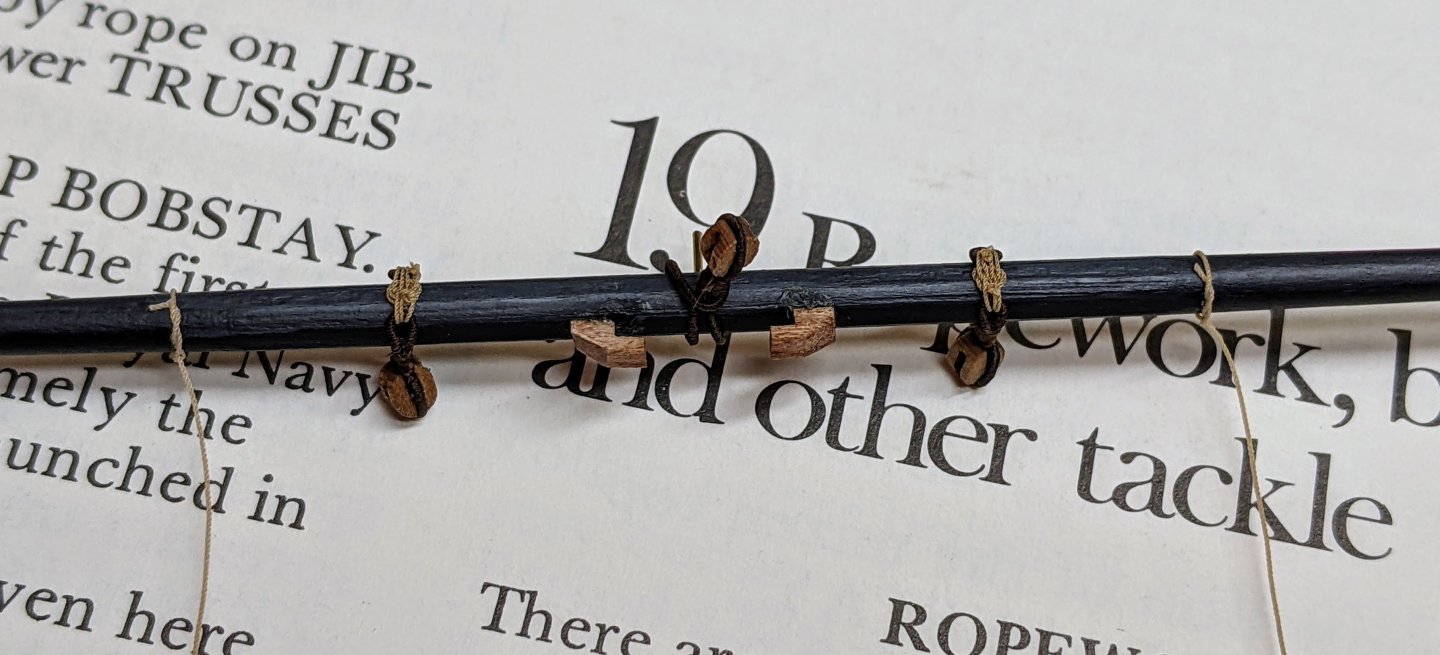
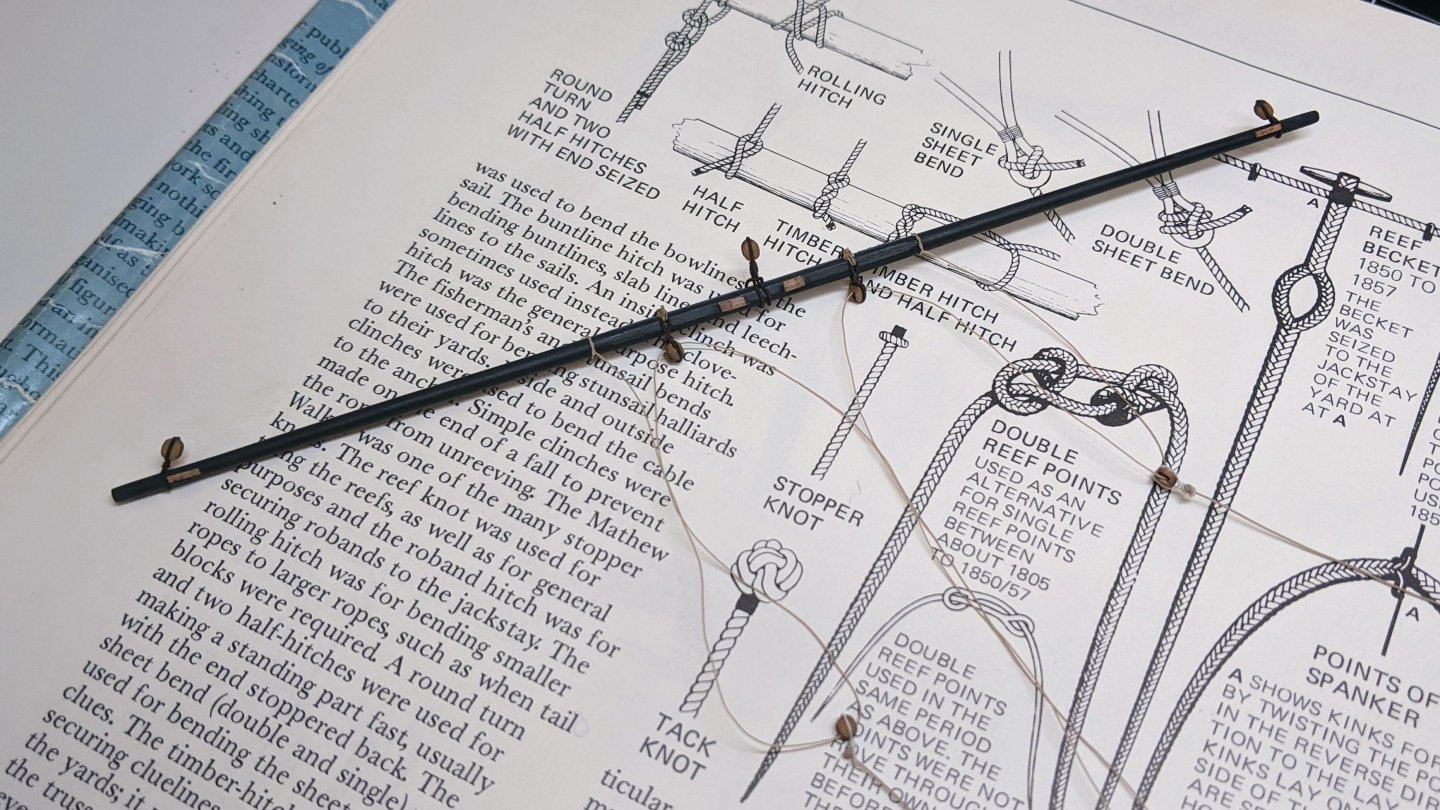
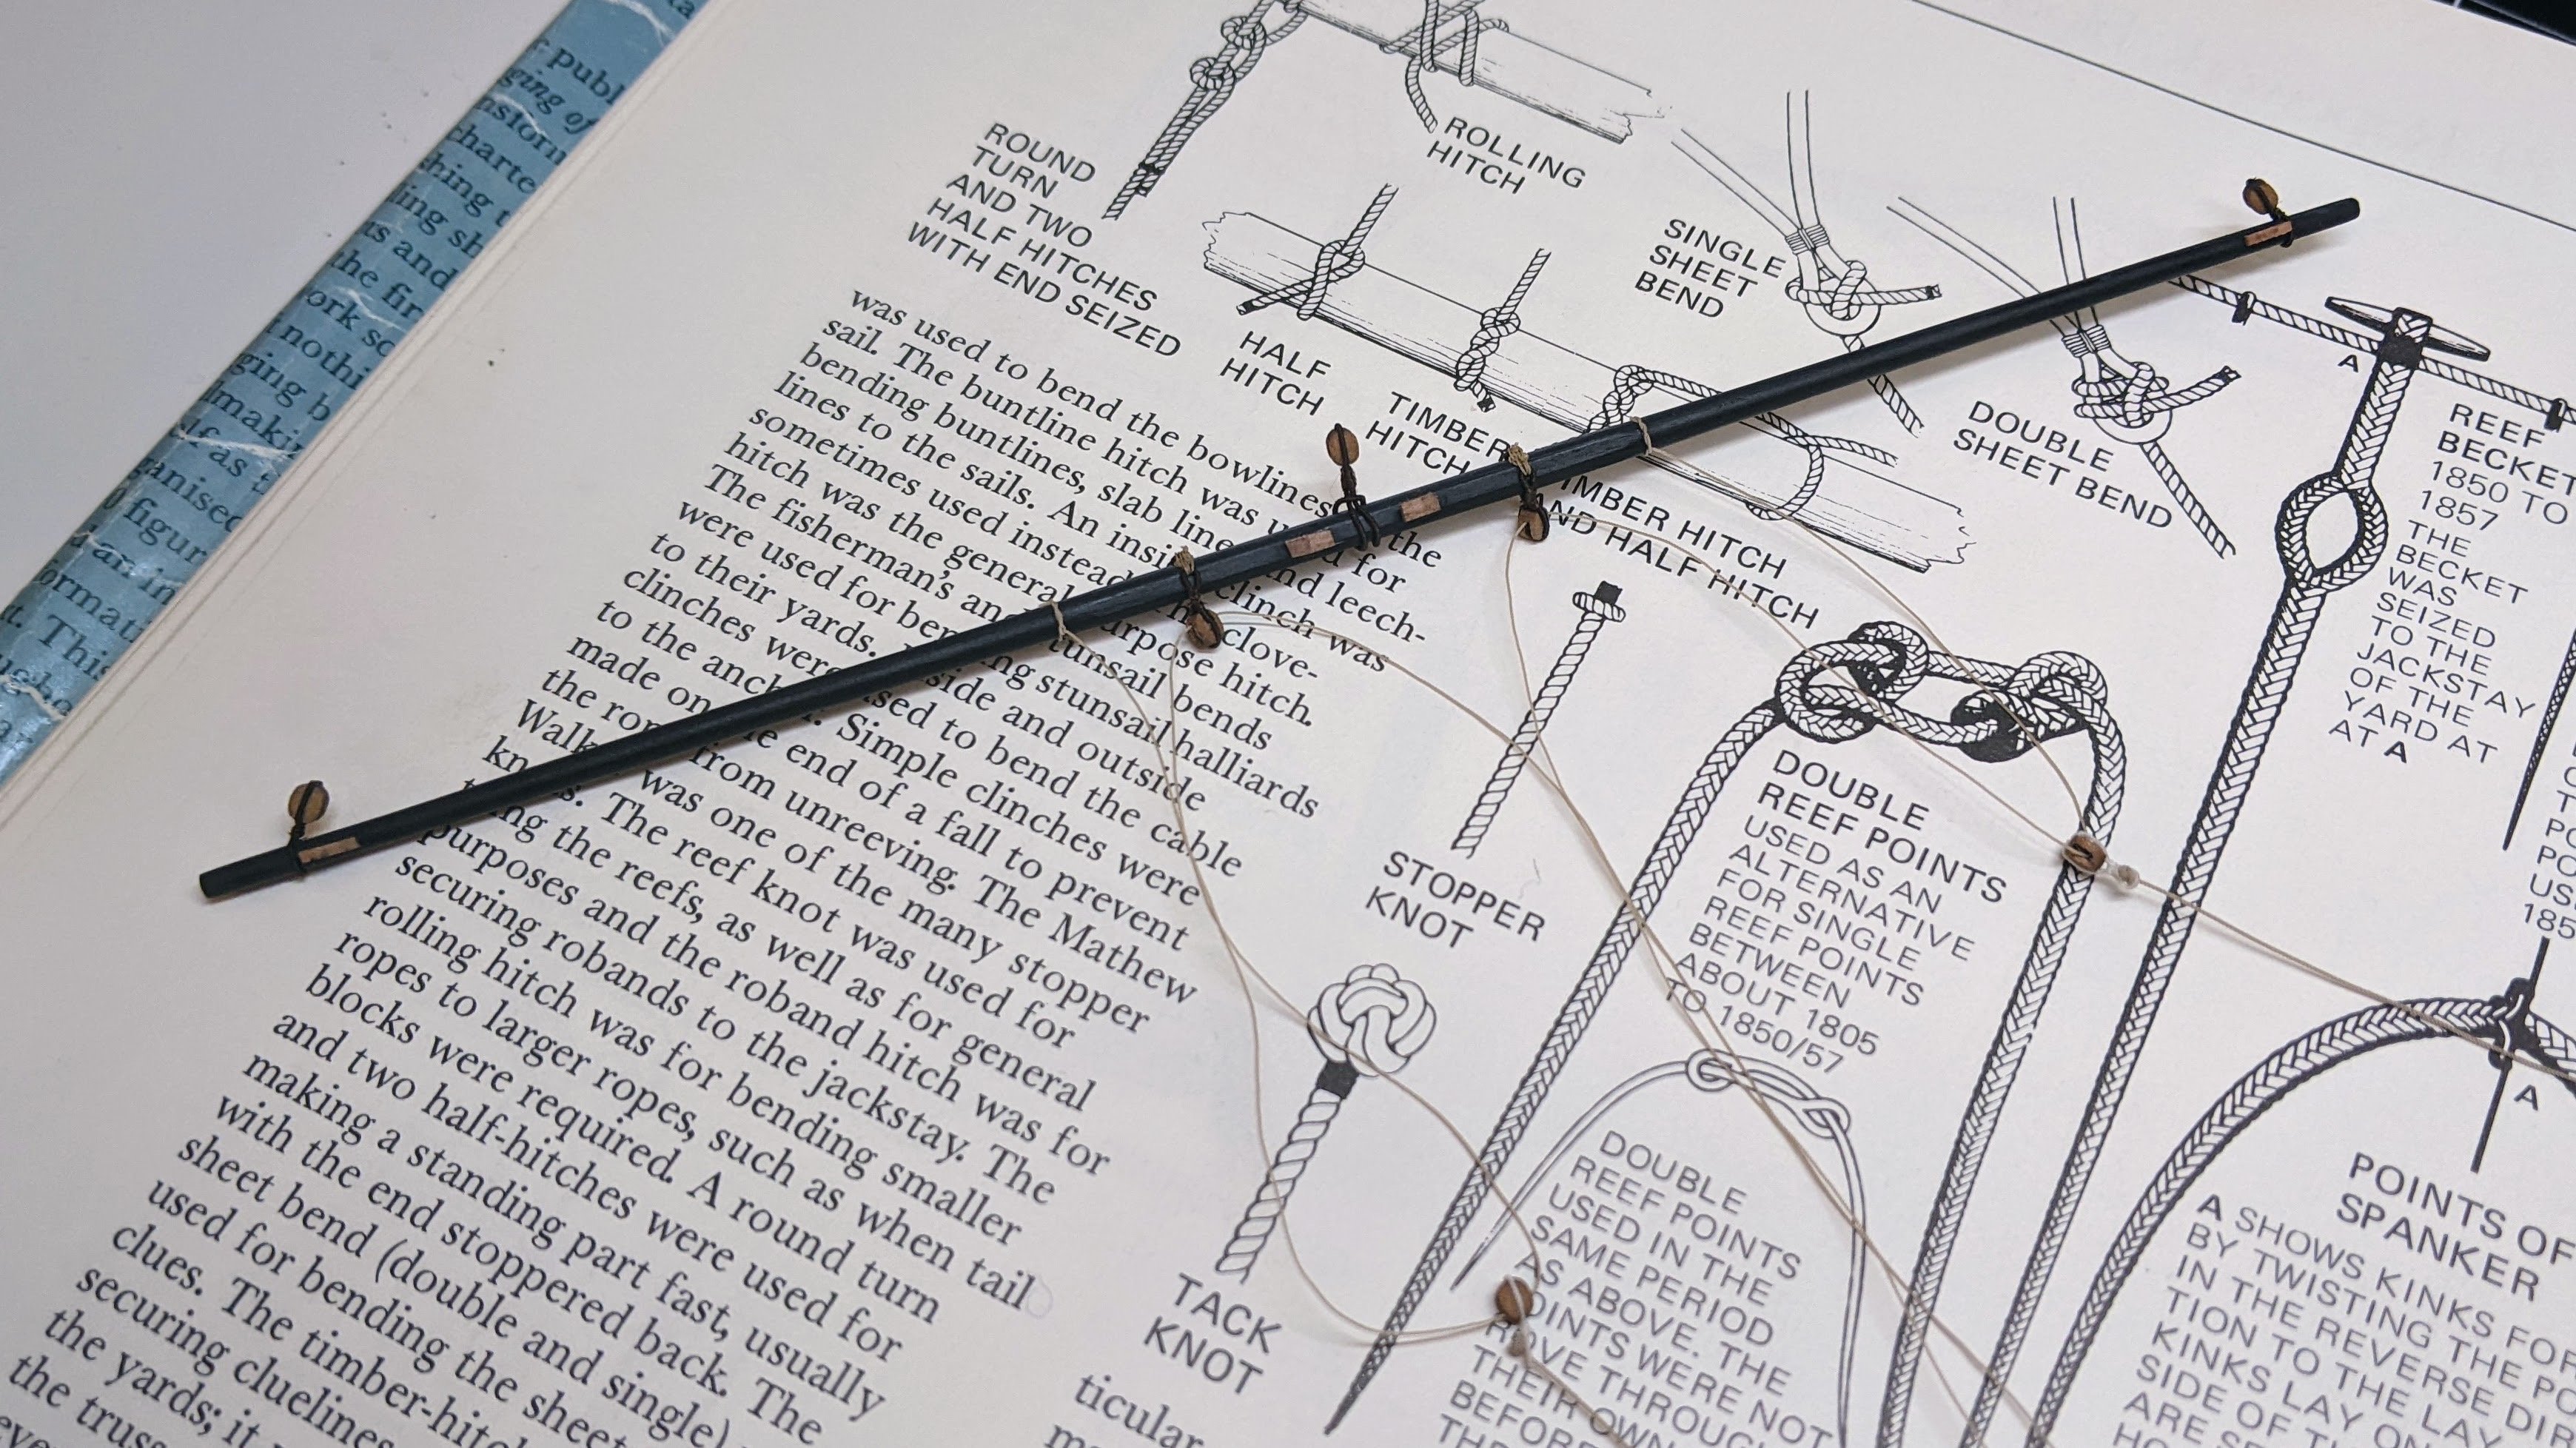
The ends of the clew lines are secured with a timber hitch knot as per Lees. This is much less complicated than the arrangement shown in Goodwin.
And with that the yard was done. For the clewlines I used 0.25mm thread and for the sheets 0.35mm. The blocks were all stropped using 0.35mm line sized with the fly tying line. The rose lashing was done with 0.2mm line as previously described. For the lift I also used 0.35mm line. All of the blocks on the topsail yard were 3mm. Ideally I would have used 2.5mm blocks for the clews, but I didn’t have any so I had to make do with the 3mm ones from the kit.
I decided to hold off on the bowlines for the topsail as I found I can slip the loops on the yard easily and then pull them tight and this way I don’t have to worry about another set of ropes to snag.
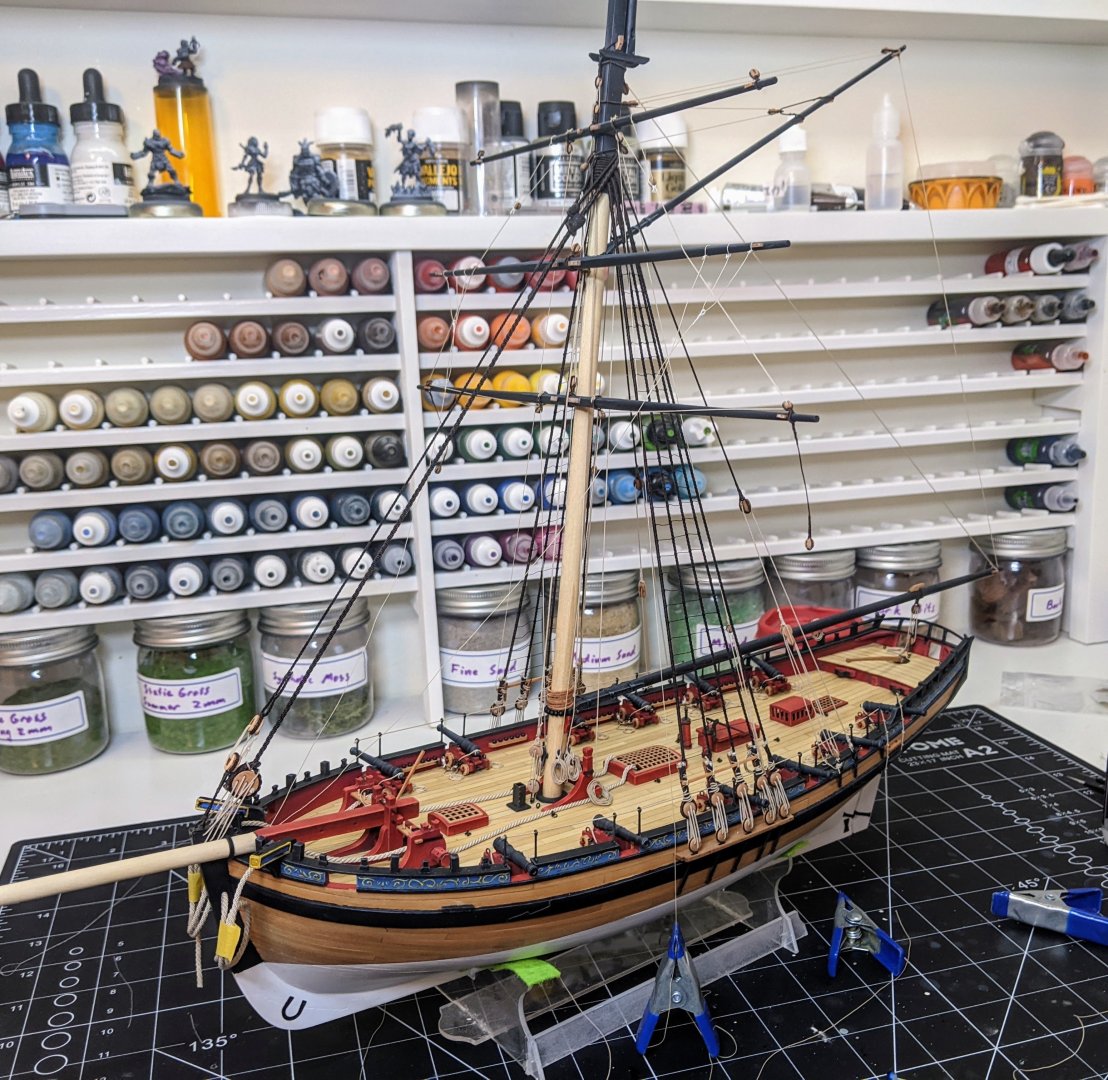
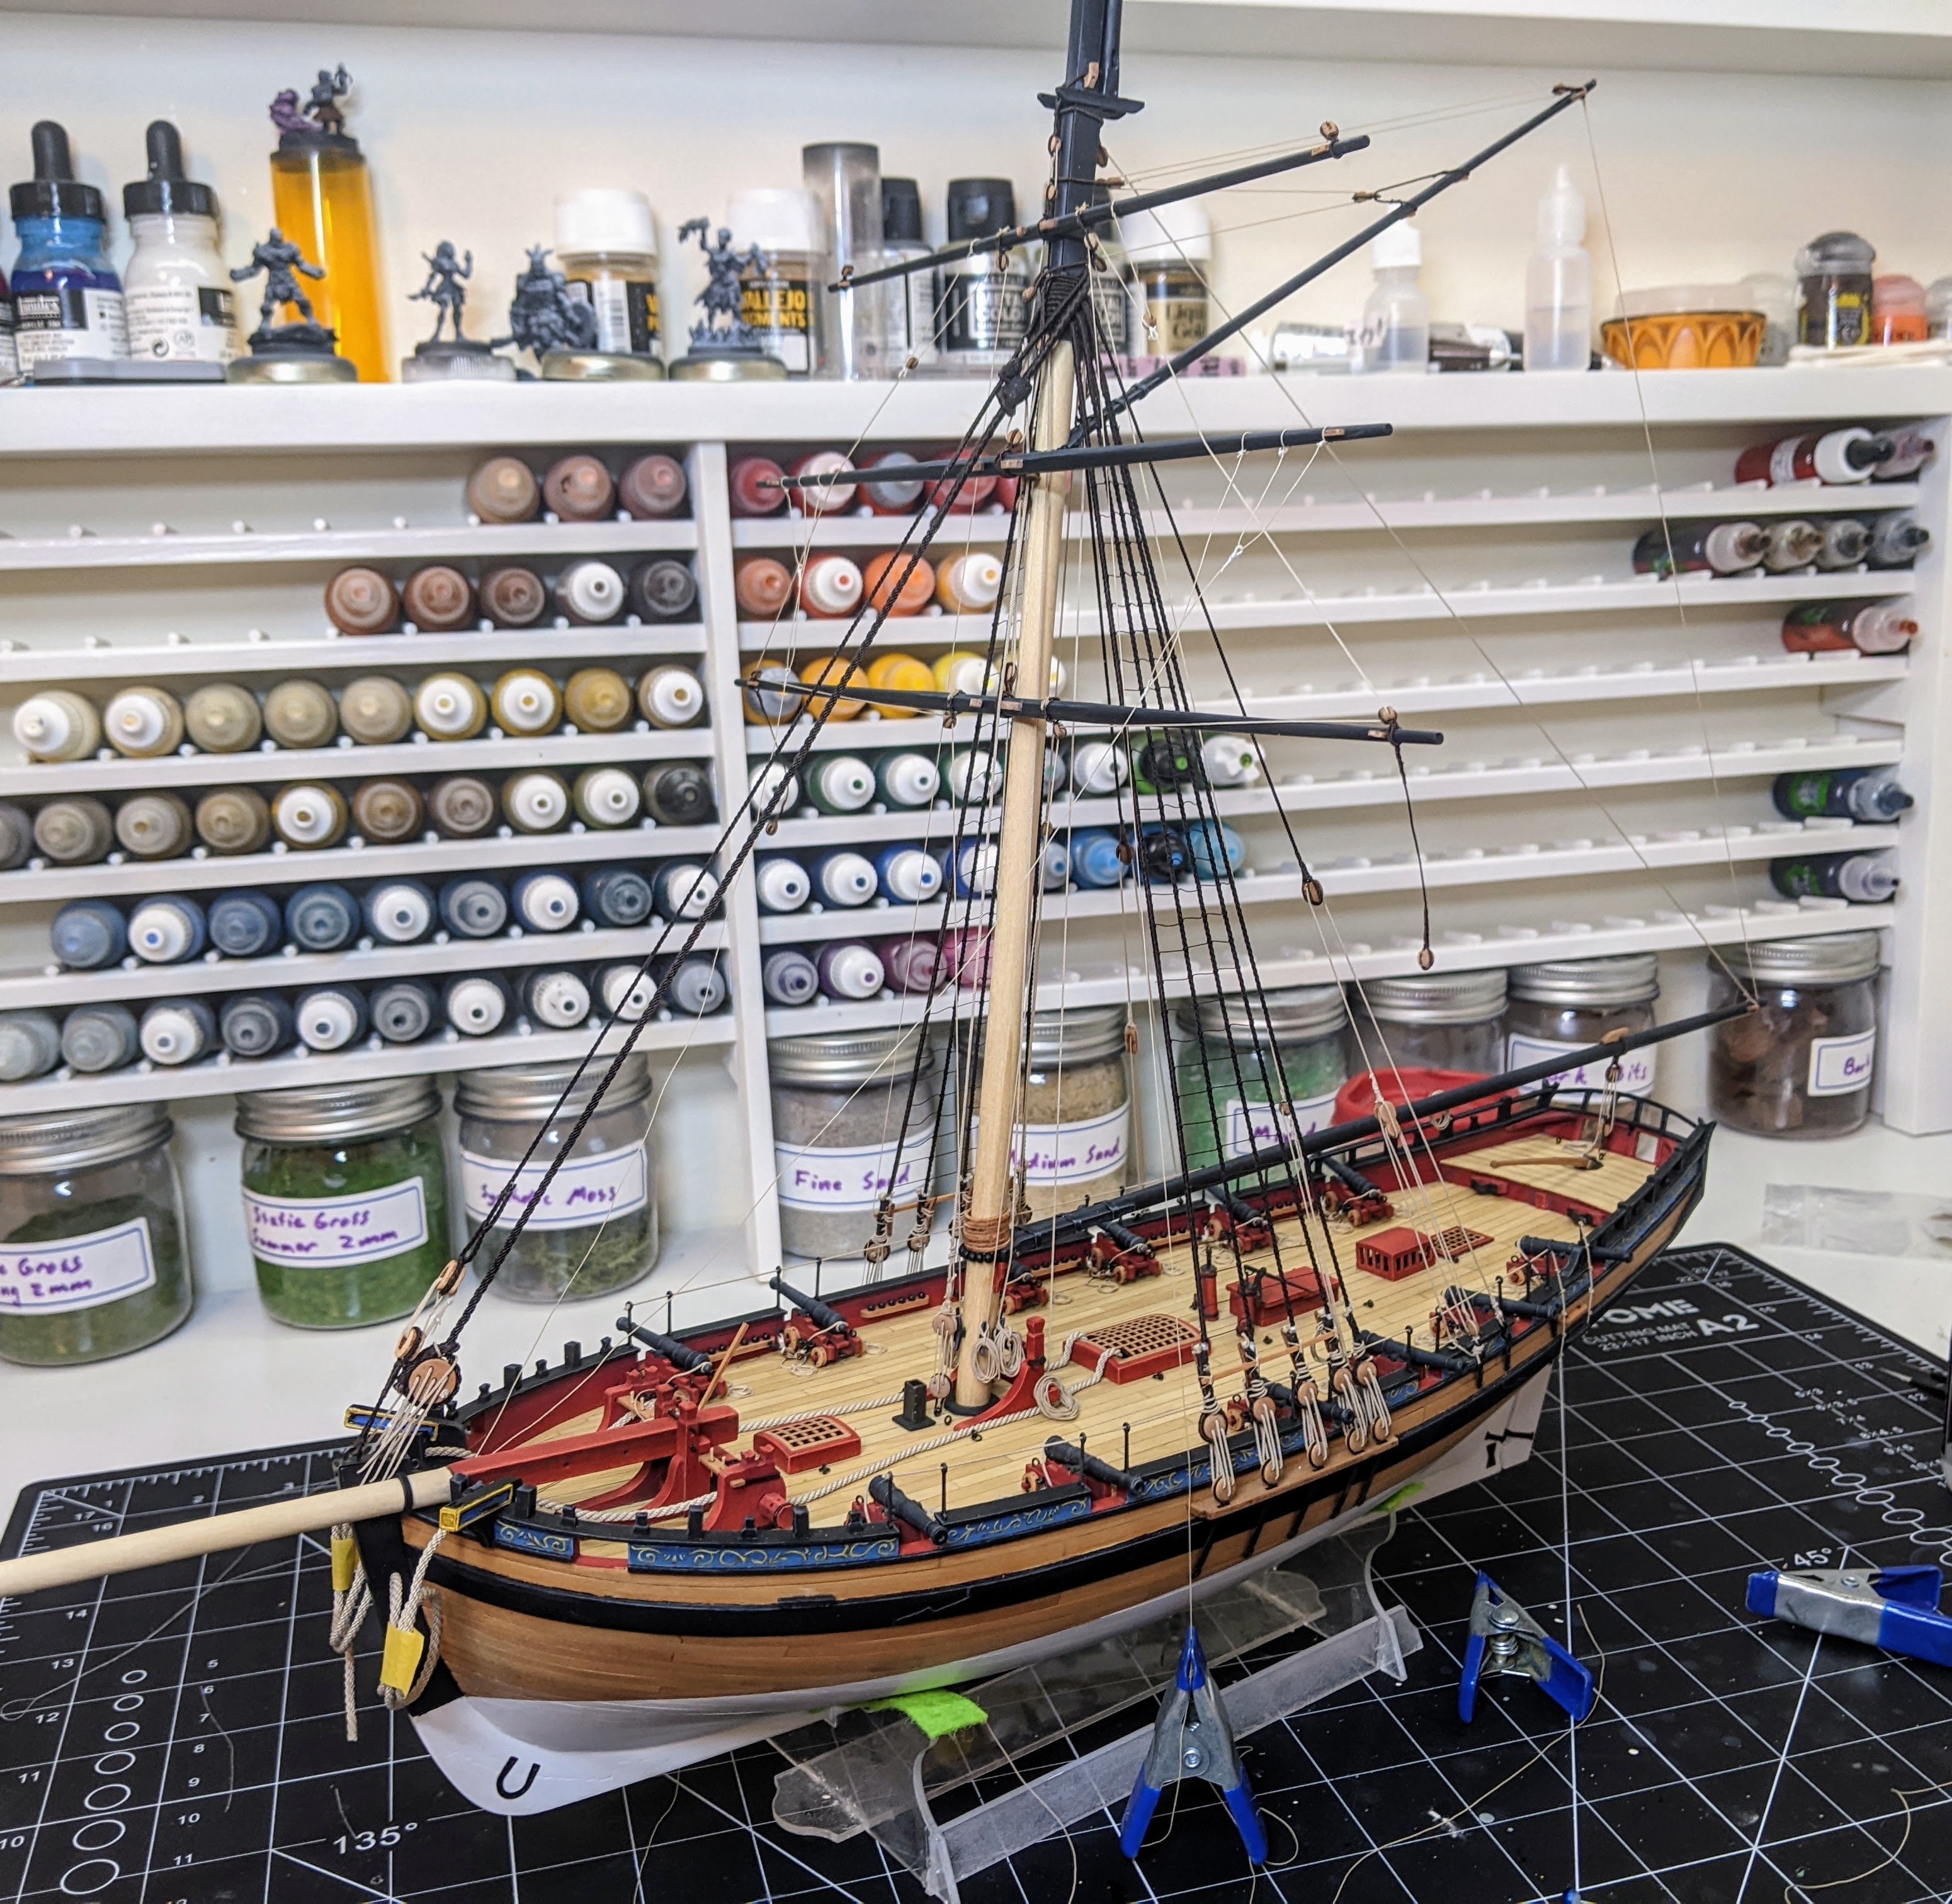
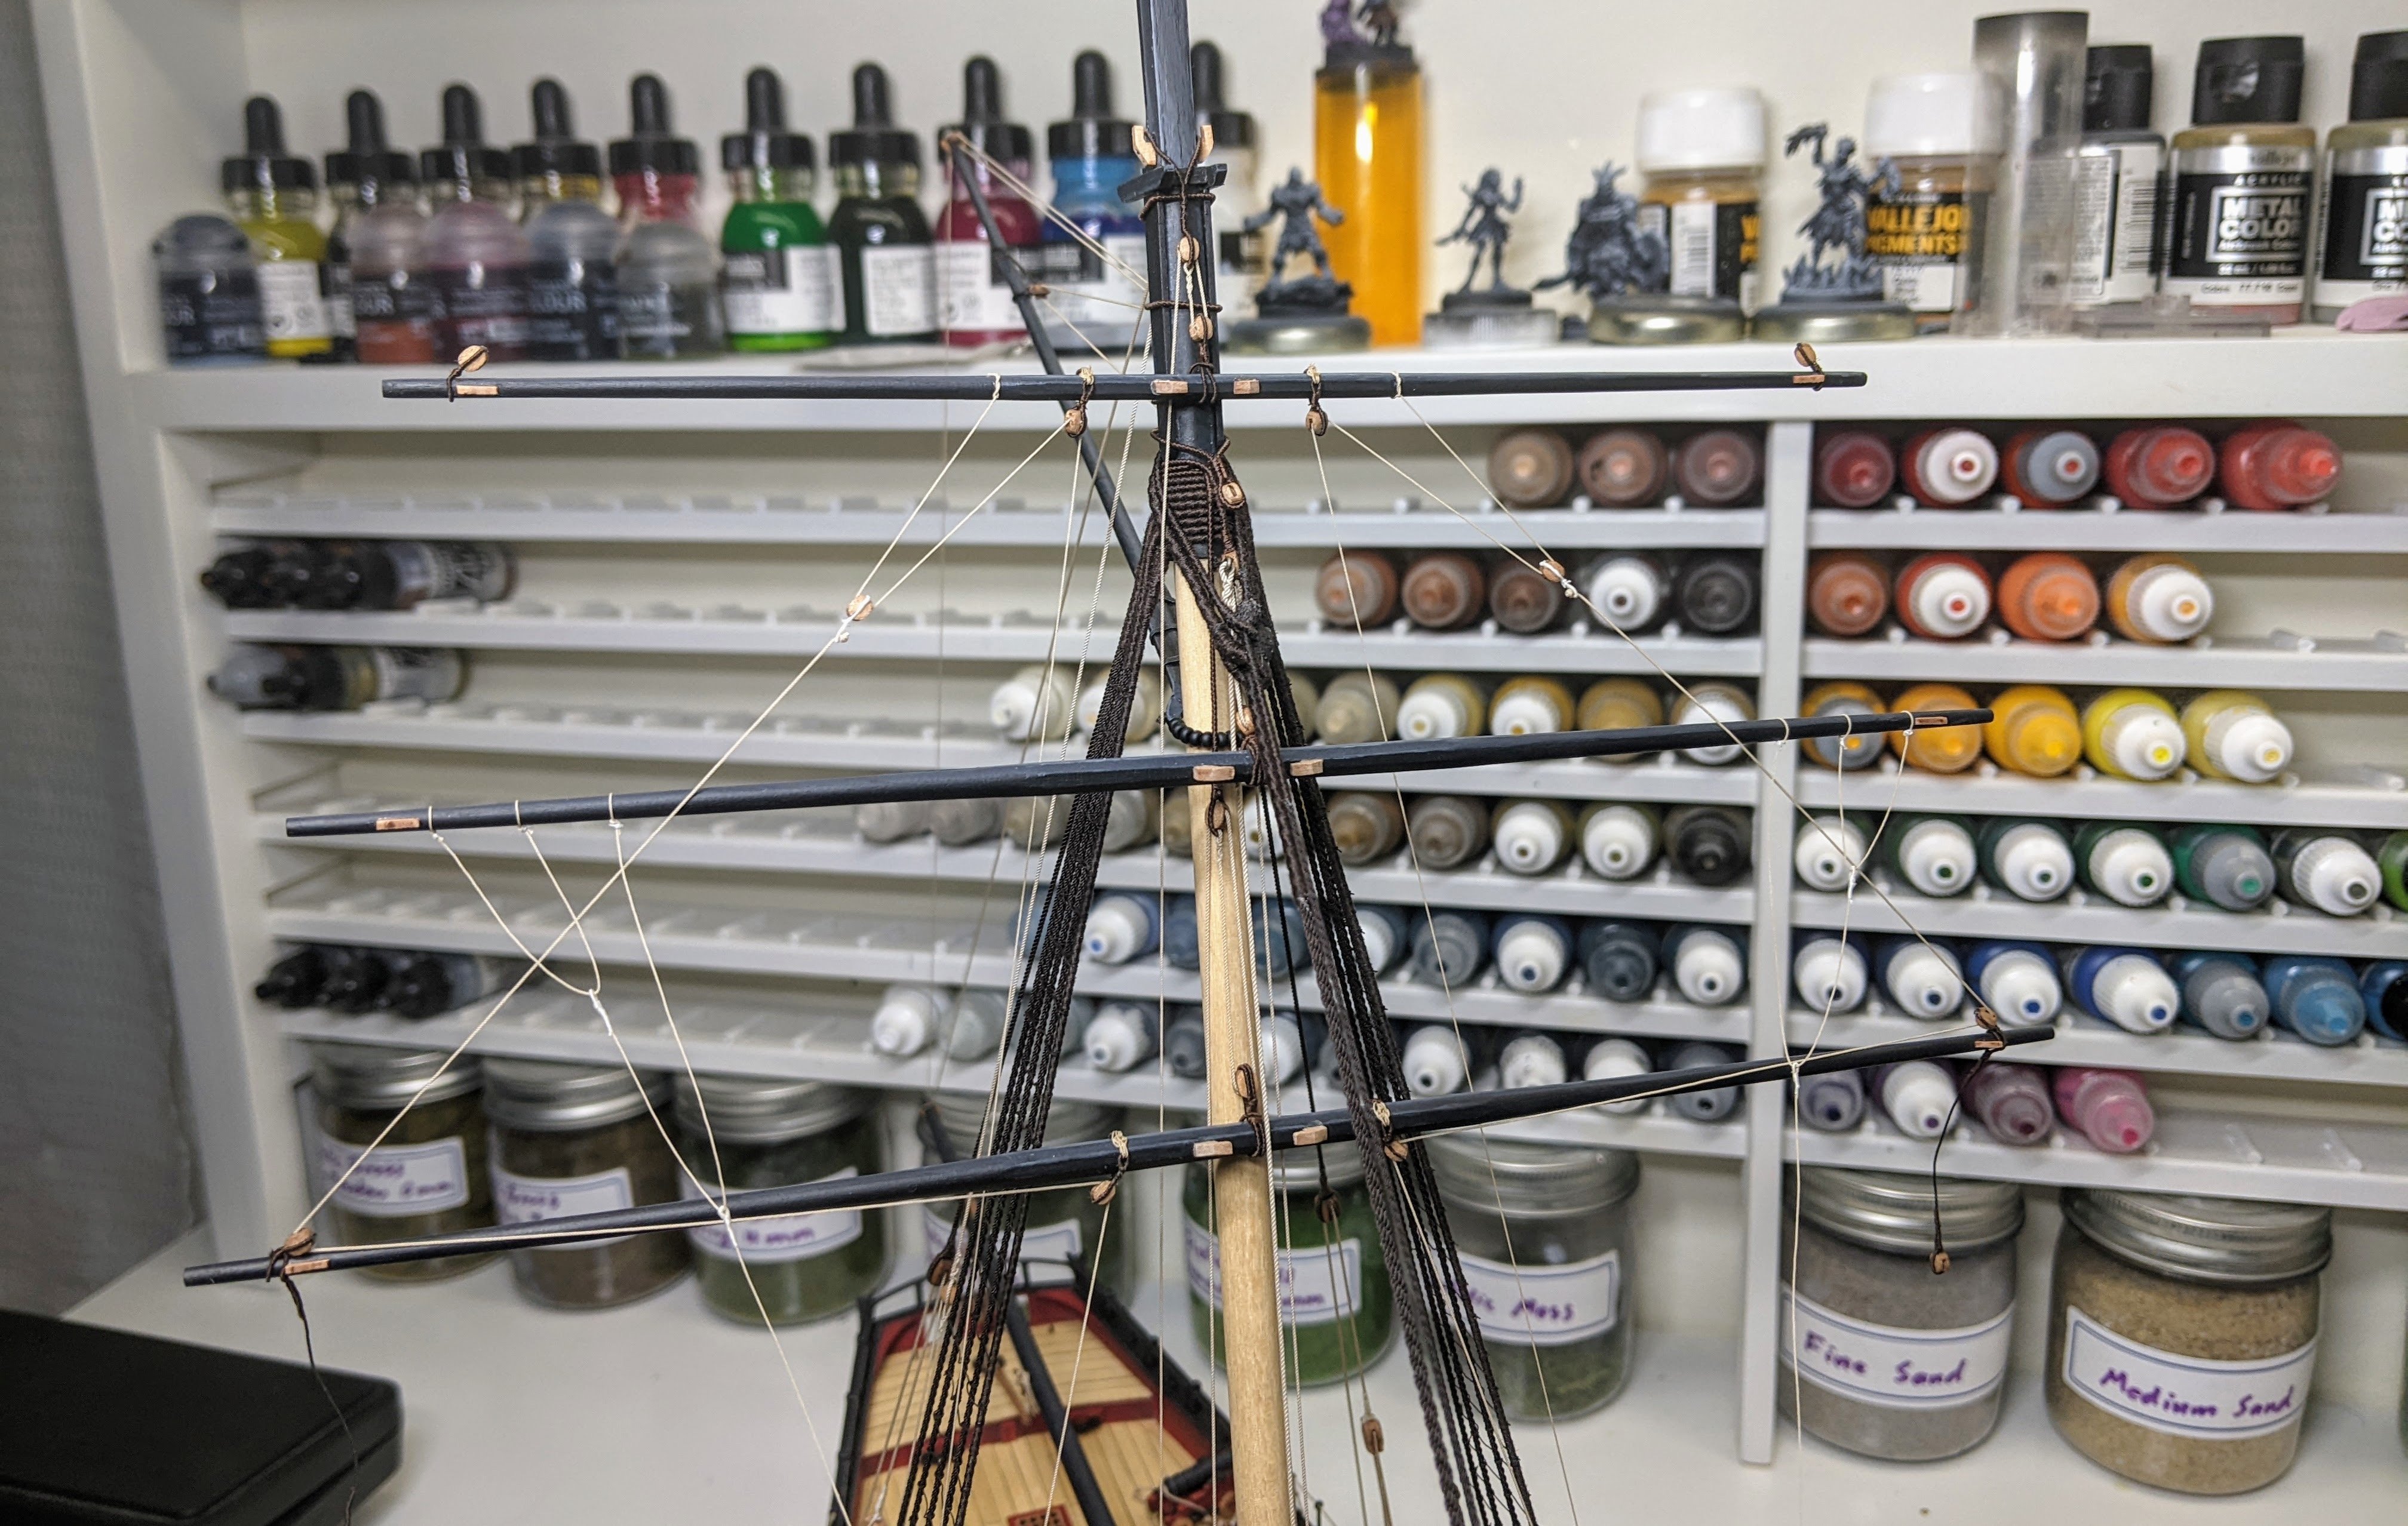
You can see below the yard hanging on the model.
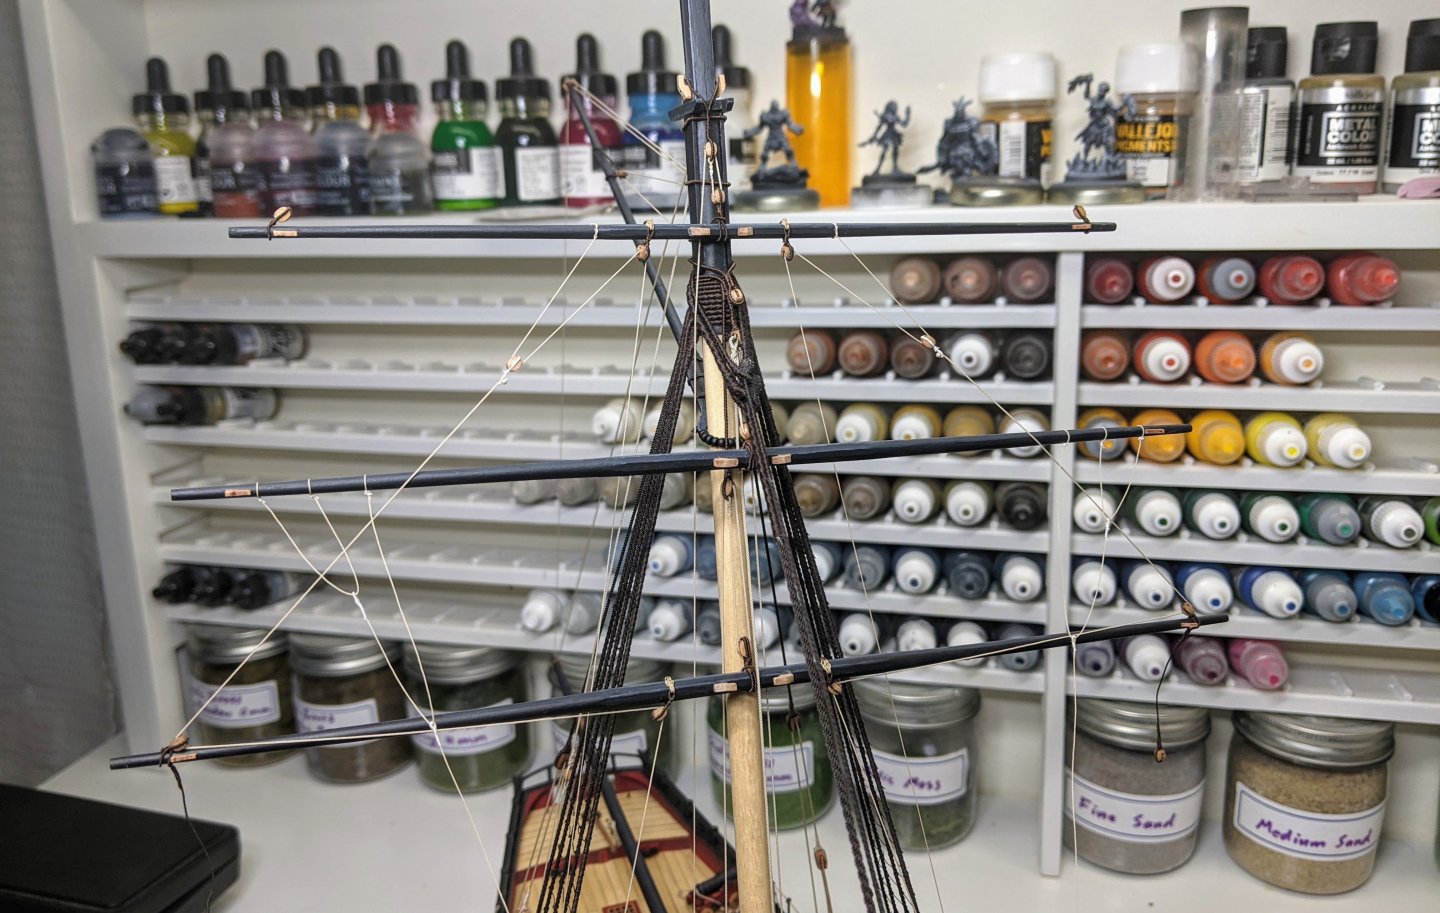
Nothing is permanently secured yet as I have clamps hanging from the falls to make sure everything stretches properly. As is my usual practice I will go back in a few days and start securing the lines one by one. I will discuss where I am belaying everything to at that time.
- rcweir, wvdhee, jpalmer1970 and 14 others
-
 17
17
-
-
-
Looks great. One thing you can experiment with next time is putting even more blue in the shadows. If you look at icebergs in real life they look bluer in the shadowed lower portions and whiter on the top.
-
-
2 hours ago, allanyed said:
Hi Gregory
Yes I am, but as with so many things very few are cast in stone on these ships of old. This is the first document I have seen that specifies other than singles on smaller than 32 pounders so heretofore I had relied on Caruana. The dates are very late in the 18th century so I wonder if this was a time of change for the types of blocks. So many choices. If Caruana missed this one too at least I am in good company. Appreciate your point. 😀
Allan
Caruana does reference ADM 160/150, but it is a fairly large document with many tables that cover the pages. I have had it since late December and I only just noticed these details. The blocks for the guns are hidden in these tables and you have to do a bit of analysis to get the sizes based on seeing what guns and what blocks / breechings / tackles a given rate was assigned. There is no place that lists this size of block for this size of gun.
So you could be right that it represents a change at this point or I could also easily believe that in the many documents he was reading he missed this detail.
- georgeband, allanyed, cotrecerf and 1 other
-
4
-
Your best bet is to just get some milliput or similar epoxy putty and use that to fill the gap. The nice thing about milliput is you can thin it down with isopropyl to create a slury that flows into gaps.
Also can use sprue gue (take some small pieces of sprue, put it in a old plastic glue bottle with plastic glue).
I have used both to great success. In a pinch you can also do the super glue thing.
- Scottish Guy, mtaylor, Keith Black and 2 others
-
5
-
So this is a bit of a dangerous subject with more opinions than their are paint brands, but I will throw in my two cents as someone who has been painting miniatures for almost a decade and has tried many of the paint brands out there.
When it comes to paint for models the most important thing is that it uses a small pigment size. Any of the major brands (Vallejo, citadel, army painter, kimera, two thin coats, P3, AK, etc…) all should do the job. I have never used Tamia so I can’t comment on it. All acrylic paint should be interchangeable, it just depends on which ones you prefer.
So really it comes down to the individual paints. There are variations in thickness, flow, gloss vs matt etc… Much of this is personal preference. I have certain paints that I find are better in different brands.
For example my favourite black is the vallejo model colour one, but I also love citadel’s incubi darkness for darkening red. AK has a really nice flat white, while the citadel one is awful.
When it comes to citadel the main downsides are the price point ($$$$$) and those awful pots they come in (buy some dropper bottles and transfer the paint to them). But that being said at least half my paint collection is citadel because they have some really nice colours (I love their reds).
All paints need to be thinned down (my general rule of thumb is 1 part water to 1 part paint, but it will depend on the brand), you can test this by painting a little on the side of your hand. If you can still see the lines then you are good, if you can’t your paint is too thick.
Also make yourself a wet pallet (google it and thank me later).
-
-
Just now, Glen McGuire said:
What kind of inks are you talking about? Do you have a product name as an example?
I use liquitex:
https://www.liquitex.com/en-ca/products/professional-acrylic-ink-cerulean-blue-hue
But I know some people also like daler rowney.
They are essentially pure pigment, no binder so they go on translucent and are very vibrant. If you have an airbrush they go on really nice through them. But you can also use a brush or mix them with varnish.
-
5 minutes ago, Glen McGuire said:
Yes, Gary. I'm experimenting with adding a touch of Tamiya clear blue to some gloss varnish to see if I can get a good look. The Tamiya clear blue is sort of translucent and I'm hoping it will give me just the slightest hint of blue while maintaining the shine of the gloss varnish. I've got lots of leftover icebergs to play around with!
You could also try inks. They give you very vibrant colours with little coverage.
- Keith Black, Glen McGuire, Canute and 2 others
-
5
-
41 minutes ago, cotrecerf said:
Hello Thukydides,
thanks for your metriculous work; the sizes given for the breechings in your summarizing table are given in inches of circumference, aren't they?
greetings
Joachim
Yes the sizes for both the tackle and the breechings are the circumference in inches. There is some info on the length of the breechings and tackles in some of the tables, but I have not gotten round to trying to reconcile them yet.
-
-
A further updated to this:
I found a really interesting list of blocks used for carronades at the bottom of a table. This table is from 1796 and it shows the number and nature of the blocks for the tackle. Of particular interest is the fact that it appears that 18 and 12 pdr carronades only had one block for their tackle:
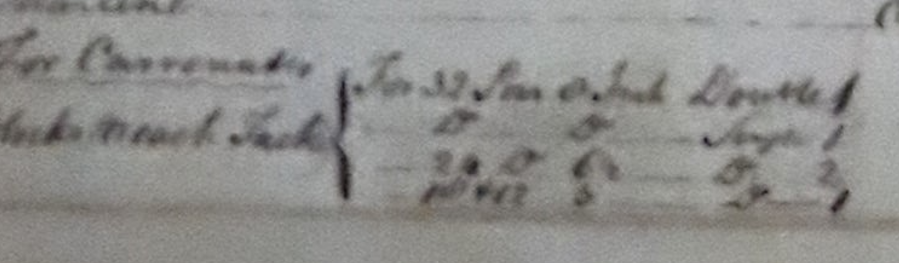
For Carronades
Blocks for each Tackle
{
For 32pr
8 inch
Double
1
Ditto
Ditto
Single
1
24 Ditto
6 ½
Ditto
2
18 & 12
5
Ditto
1
EDIT:
See below for a table summarizing all the info I have found in ADM 160/150 on breechings, blocks and gun tackles per gun. This is a combination of lists from 1794, 1796 and 1798.
Breeching Size (in)
Gun Tackle Size (in)
Blocks (Single)
Blocks (Double)
Size (in)
Number
Size (in)
Number
Guns
32 pdr
7
3
10
2
10
2
24 pdr
6½
3
10
2
10
2
18 pdr
5½
2½
8
2
8
2
12 pdr
5½
2½
8
2
8
2
9 pdr
4½
2
6½
4
6 pdr
4½
2
6½
4
4 pdr
3½
1½
5
4
Carronades
32 pdr
7
2½
8
2
8
2
24 pdr
6½
2
6½
4
18 pdr
5½
1½
5
2
12 pdr
5½
1½
5
2
-
Welcome to MSW Jay.
- Scottish Guy, Keith Black and mtaylor
-
3
-
Congrats on a stunning model.
- Keith Black and mtaylor
-
2
-
Another update, I found another list that I had not previously noticed in the document specifically listing the stores for carronades. Unfortunately the part which lists the breechings appears to be incomplete as it only list the stores for 100 and 90 gun ships. However extrapolating from their carronade armament earlier in the same list we can at least get the sizes for tackles and breechings for 32, 24 and 18pdr carronades.
The list is from 179? (I can’t make out the last number at the moment, my current guess is 1798)
32pdr - 7 in breeching
24pdr - 6 1/2 in breeching
18pdr - 5 1/2 in breeching
Edit: I just noticed that no sizes are given smaller than 5 1/2 in breeching so we could possibly infer that they were used for 12pdr carronades.
See below:

-
15 minutes ago, Gregory said:
Interestingly, the rigged model of Hawke is not showing any bowlines on the square sail (?). I, personally, would be reluctant to model them in the absence of sails.
However, I certainly wouldn't fault you for including them. I think your best guess would be as good as any.
Frankly there are a lot of question marks about the bowlines in general on alert, but as I am not doing sails the general convention is to rig them to the yard the sail would be on.
I am going for a no sails, but as much running rigging as I can possibly include sort of asthetic and they also help to steady the squaresail yard which has very little else bracing it.
As previously noted I am not going to be securing them for a while to allow access so I have lots of time to consider where best to run them to.
Thanks for your input :).
- Glen McGuire, Gregory, jpalmer1970 and 2 others
-
5
-
1 hour ago, Gregory said:
Just looked at my copy, ( Fore and Aft Craft ) and bowlines are not shown.
Were you looking at the photos in front of AOTS? One photo shows bowlines going out to the end of the bowsprit, but of course, we can't see where they lead.
My best guess would be the pin rack in front of the windlass.
Yes AOST.
The bowlines for the topsail go out to the end of the bowsprit and then back to presumably the pin rack. However the bowlines for the squaresail are only shown on p107 with the line terminating on the tip of the cathead.
-
This stage of the build is hard as you do a lot but there is not a lot to show as finished. The more of the rigging you can do off the model the easier it will be and better it will look. It is just hard to resist putting it on the model so you can see progress.
Good work.
- TBlack, Mr Whippy, usedtosail and 1 other
-
4
-
Just now, Gregory said:
Re the bowlines, I can see what Petersson says later, if you don’t get an answer before then.
I never thought to check Petersson, I do have his book.
-
So further to this discussion I am pretty sure the carronade breechings are not included in the above list of breechings. I was in the process of transcribing the list (see below).
100
90
74
64
50
44
38
36
32
28
24
20
18
Sloop
Iron Ordnance with ship carriages complete
32pdr
30
20
20
24
28
26
22
18
30
20
26
20
28
26
12
42
40
22
22
26
9
10
12
10
10
24
22
20
6
6
6
6
4
2
18
4
3
½
12
12
12
12
12
12
12
12
12
12
12
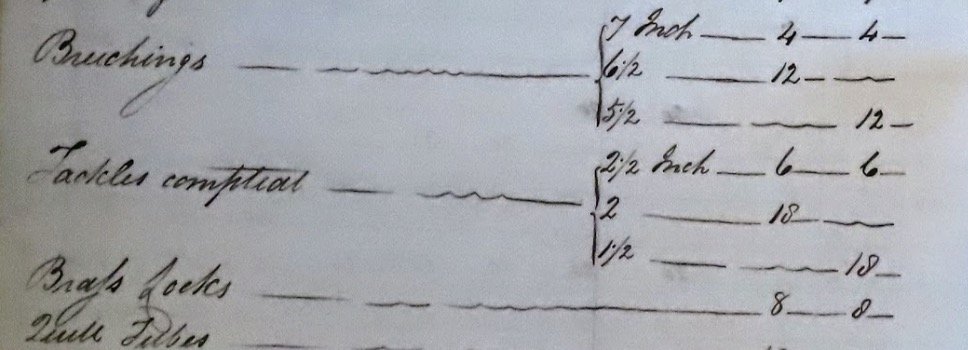
Breechings
7in
60
56
56
6½
42
52
44
5½
63
105
42
39
33
73
42
39
39
4½
27
18
9
9
15
15
9
42
36
30
27
3½
I found when I compared it to the establishment list for armament from the same document that the number of breechings pretty much exactly matches 2x the number of 32pdrs (7in) and 24pdrs (6.5in) and 1.5x all other calibres (18&12pdr 5.5in, 9&6pdr 4.5in). This suggests that they were not taking carronades into account in this list and so we are back to square 1.
I am going to take a closer look at the second list as it differs a little in the number of breechings and see what I can find.


HM Armed Cutter Sherbourne by Pitan - Vanguard Models - 1:64
in - Kit build logs for subjects built from 1751 - 1800
Posted
Nice fix, one of the great things about wood is there is almost always a way to fix just about any problem if you are willing to put in the time.