


Paul Le Wol
-
Posts
489 -
Joined
-
Last visited
Content Type
Profiles
Forums
Gallery
Events
Posts posted by Paul Le Wol
-
-
Hi Chuck, thank you very much. Cheerful has been a very enjoyable experience for me. I was really hoping that you would have developed another vessel similar in size to Cheerful by the time I was finished. I don’t know how you find the time in the day to do everything you do but here’s hoping maybe by next year 😀
- Dave_E and Ryland Craze
-
 2
2
-
Thanks Glenn for your comment and for reminding me about the gallery. I’ll see if I can get the files renamed. Ryland, thanks for your comment. I know how much value I got out of everyone else’s build logs so here’s hoping my next one will be a little more fine tuned. ct mike, Dave_E, Nunnehi(Don), Jean-Paul, DanB, thank you for your great comments. BobG, thank you. I started today setting up a build board for the next build. Time to start thinking about what comes after that. I do find myself looking at a lot of J-Class yachting videos over at the internet.

- JpR62, BobG, Ryland Craze and 2 others
-
5
-
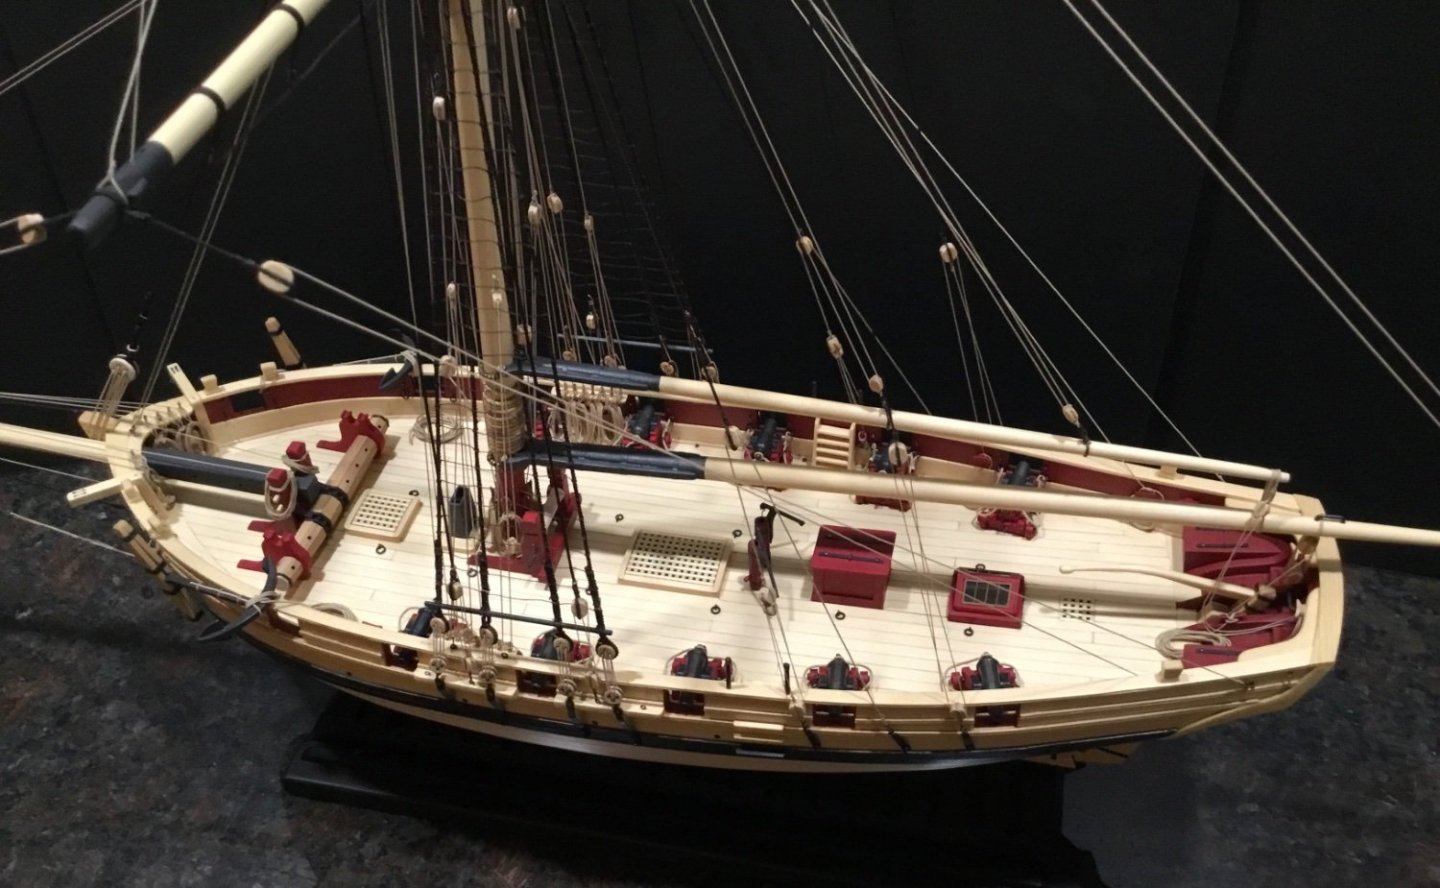
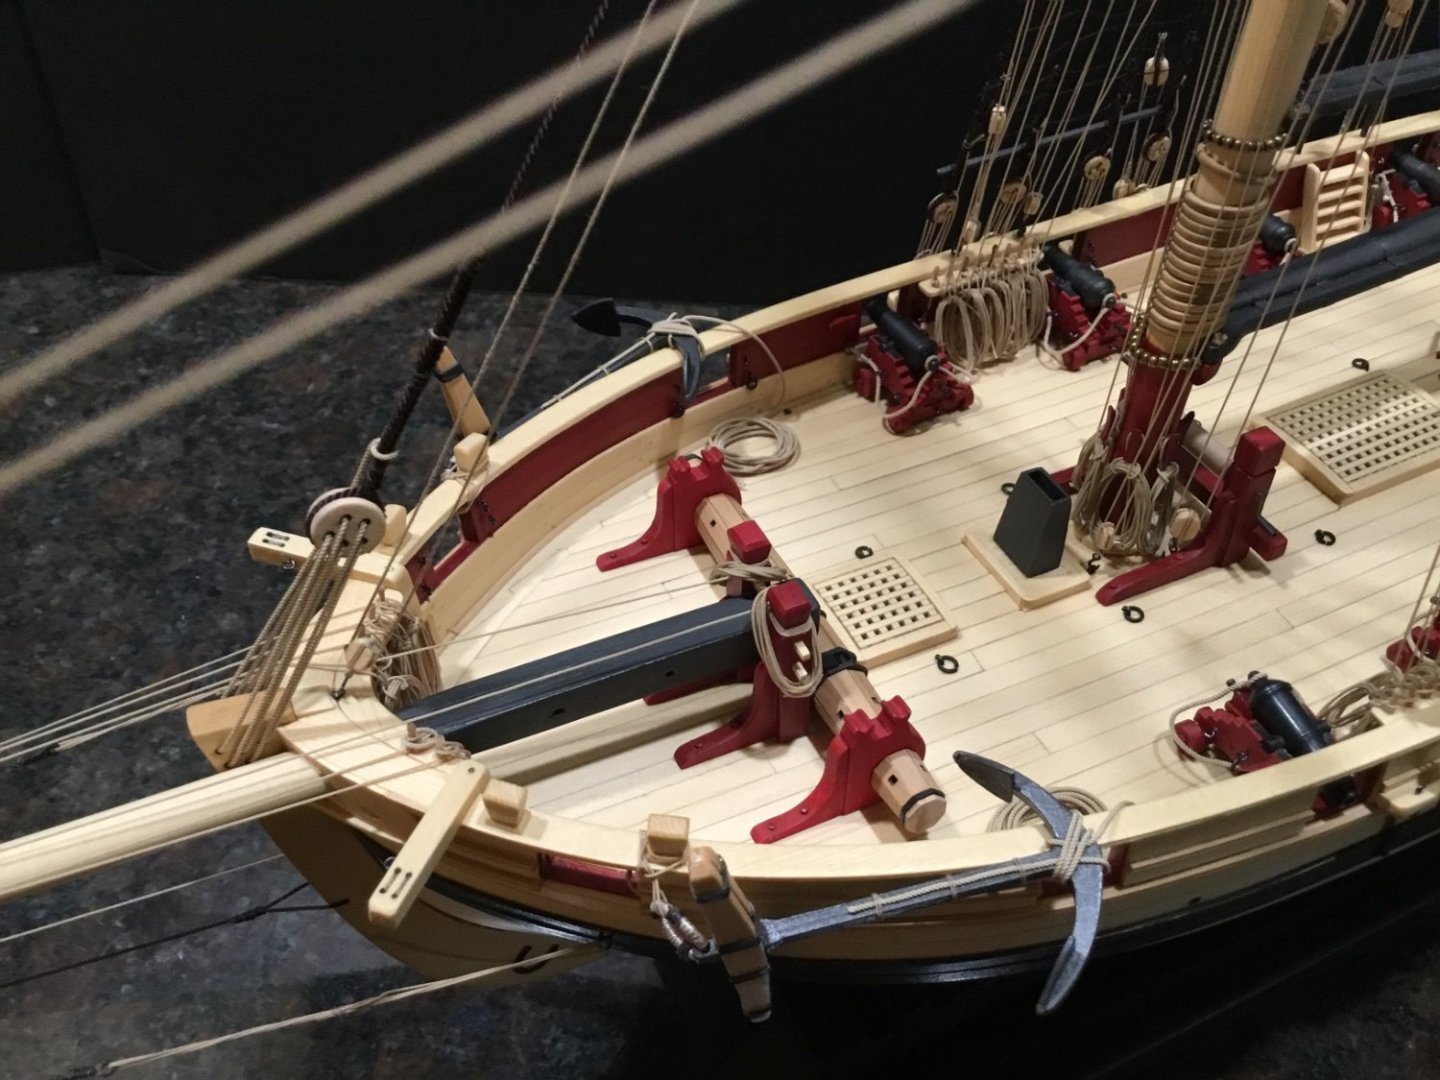
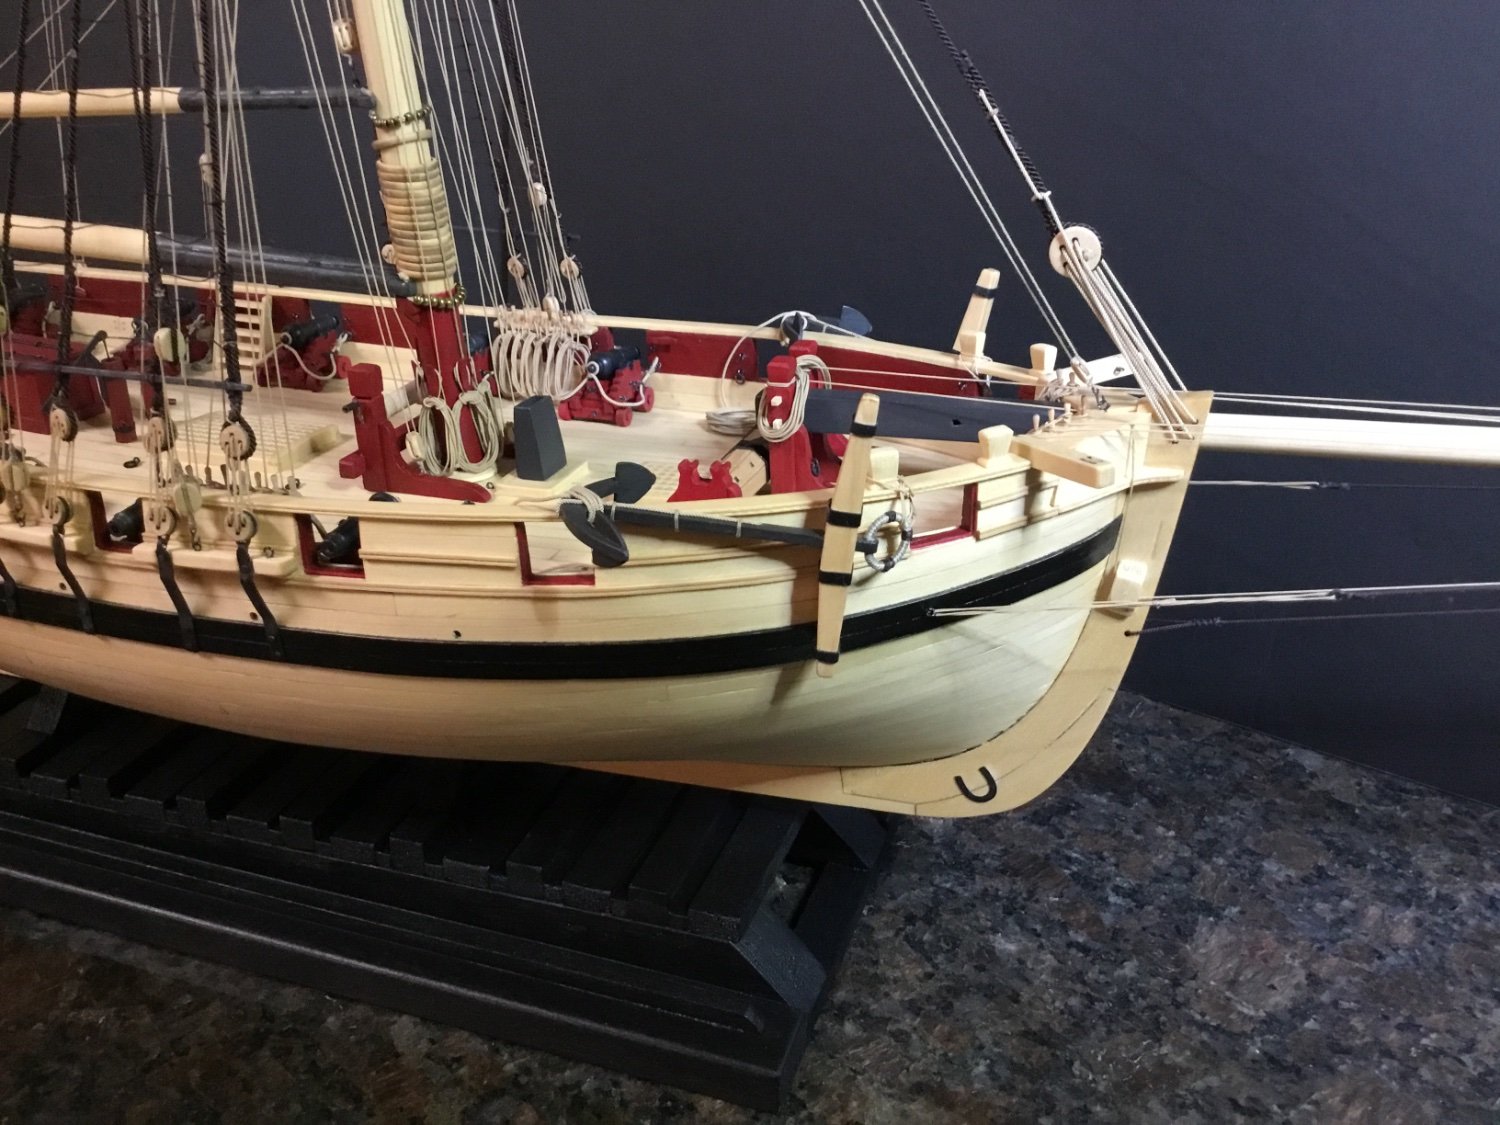
Thank you everyone for your Likes and Comments. You have all been very generous with them and I appreciate that so very much. Dave, by the time I thought about rigging the anchors it was already too late to cut holes in the grating for the rope. It does kind of look sparse at the bow, especially without the cannons. Maybe when it’s time for a refit things can be added 😀
- Ryland Craze and Dave_E
-
2
-
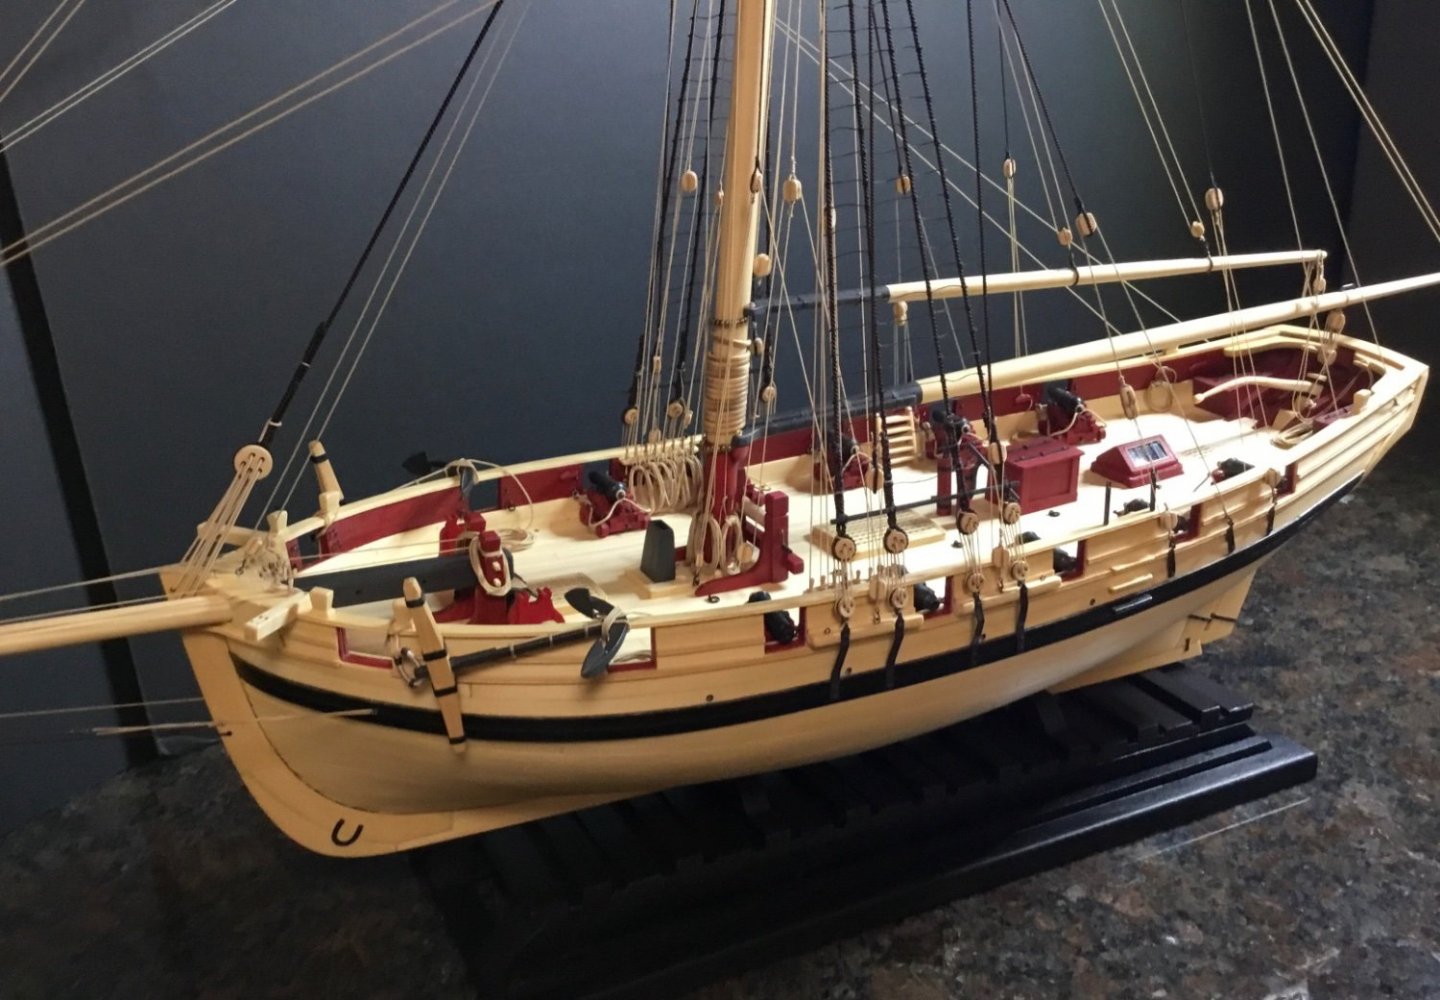
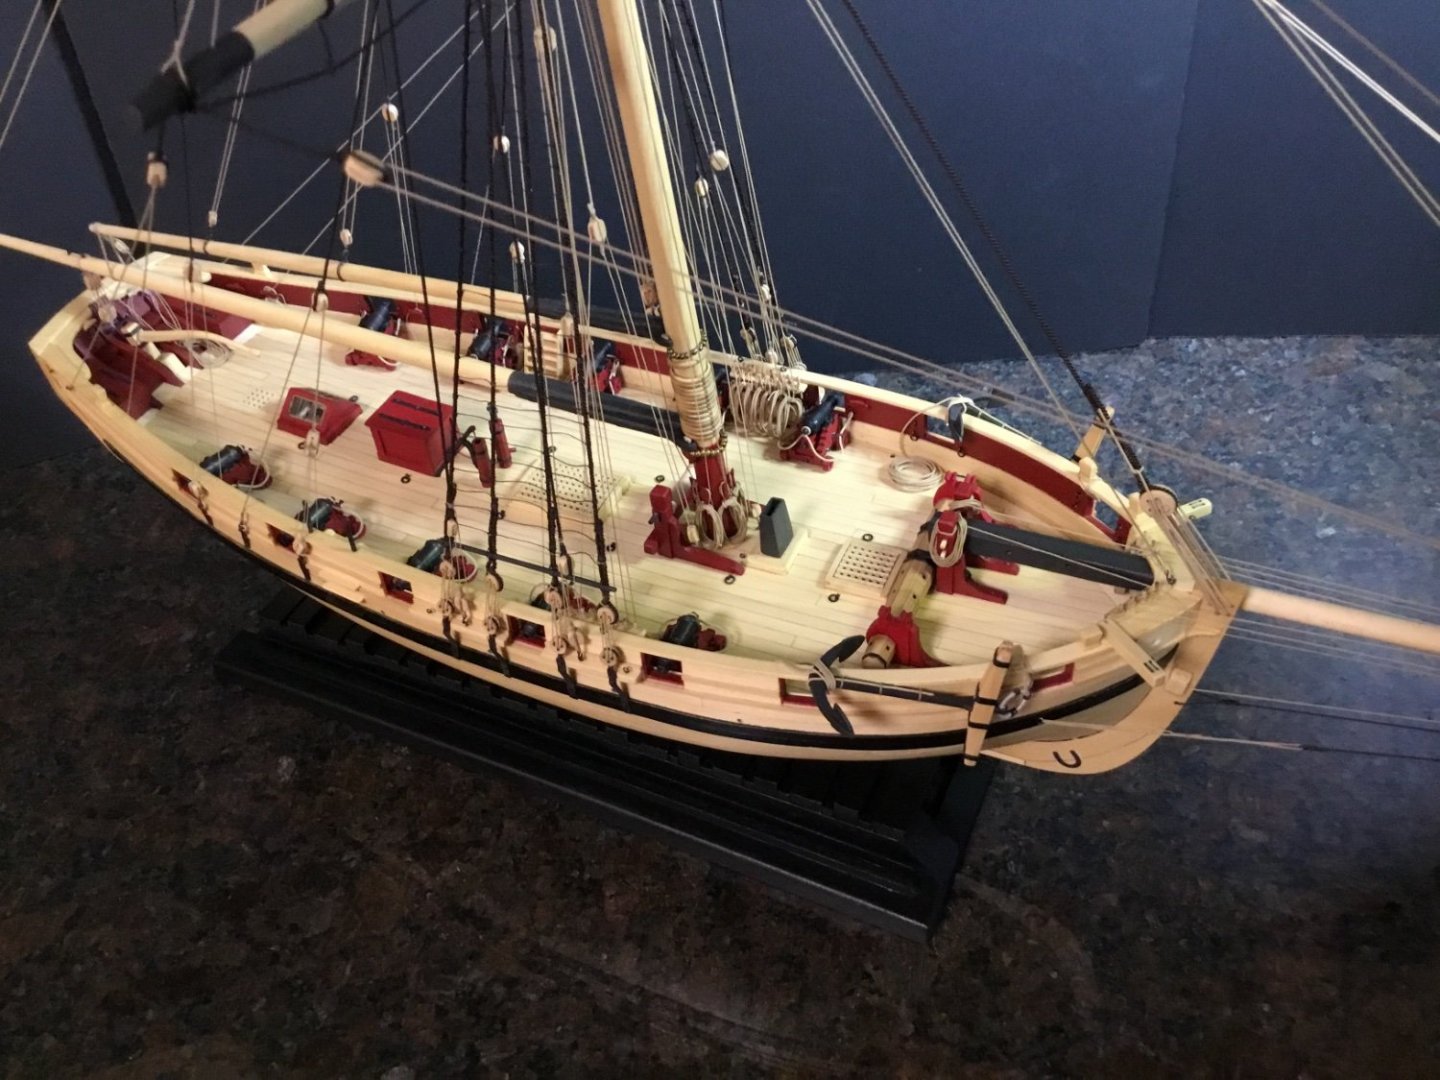
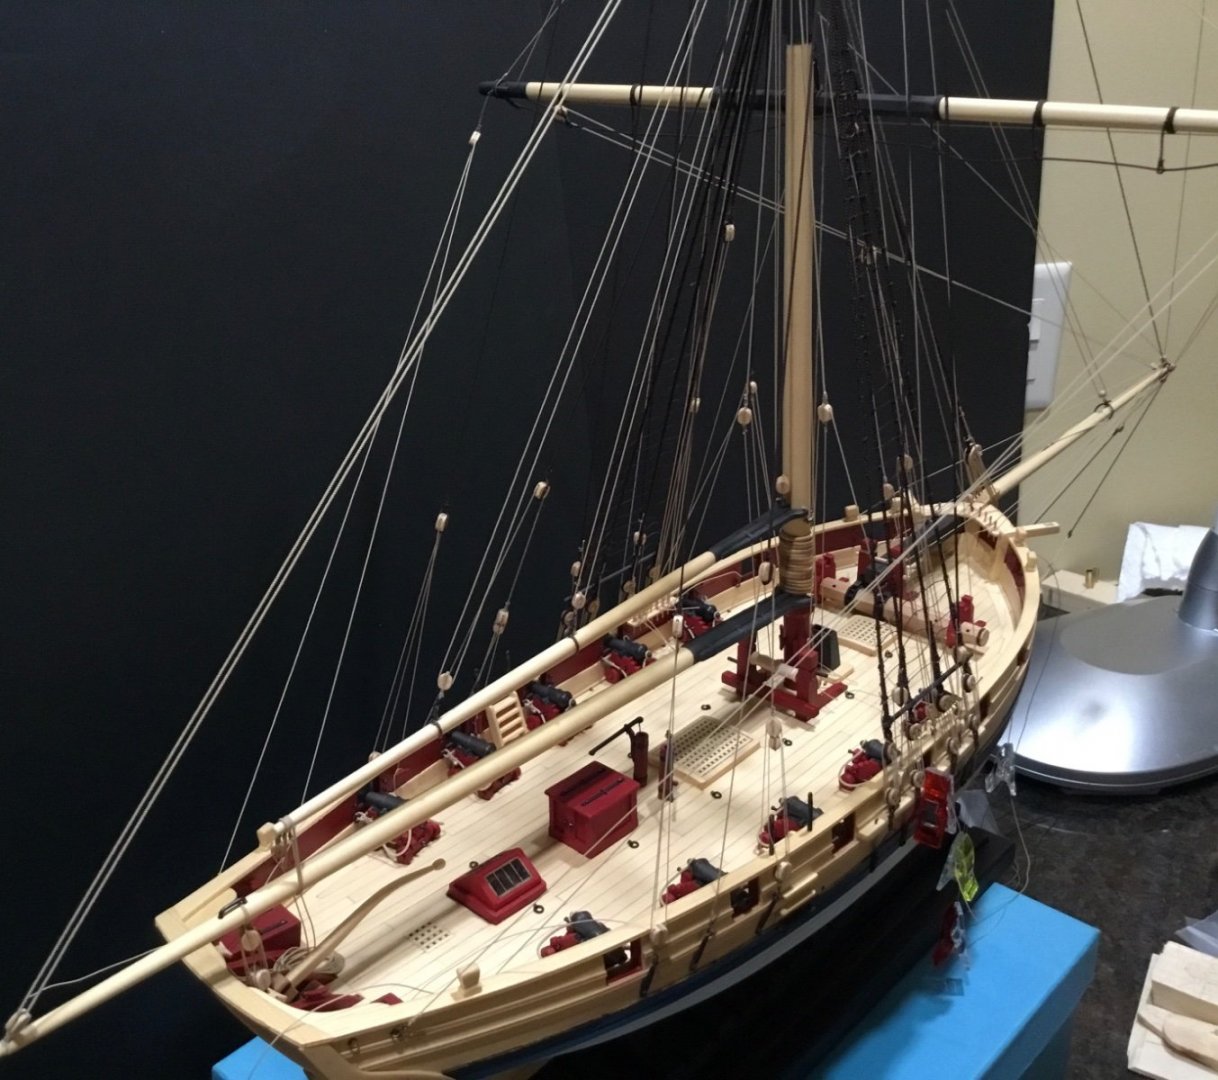
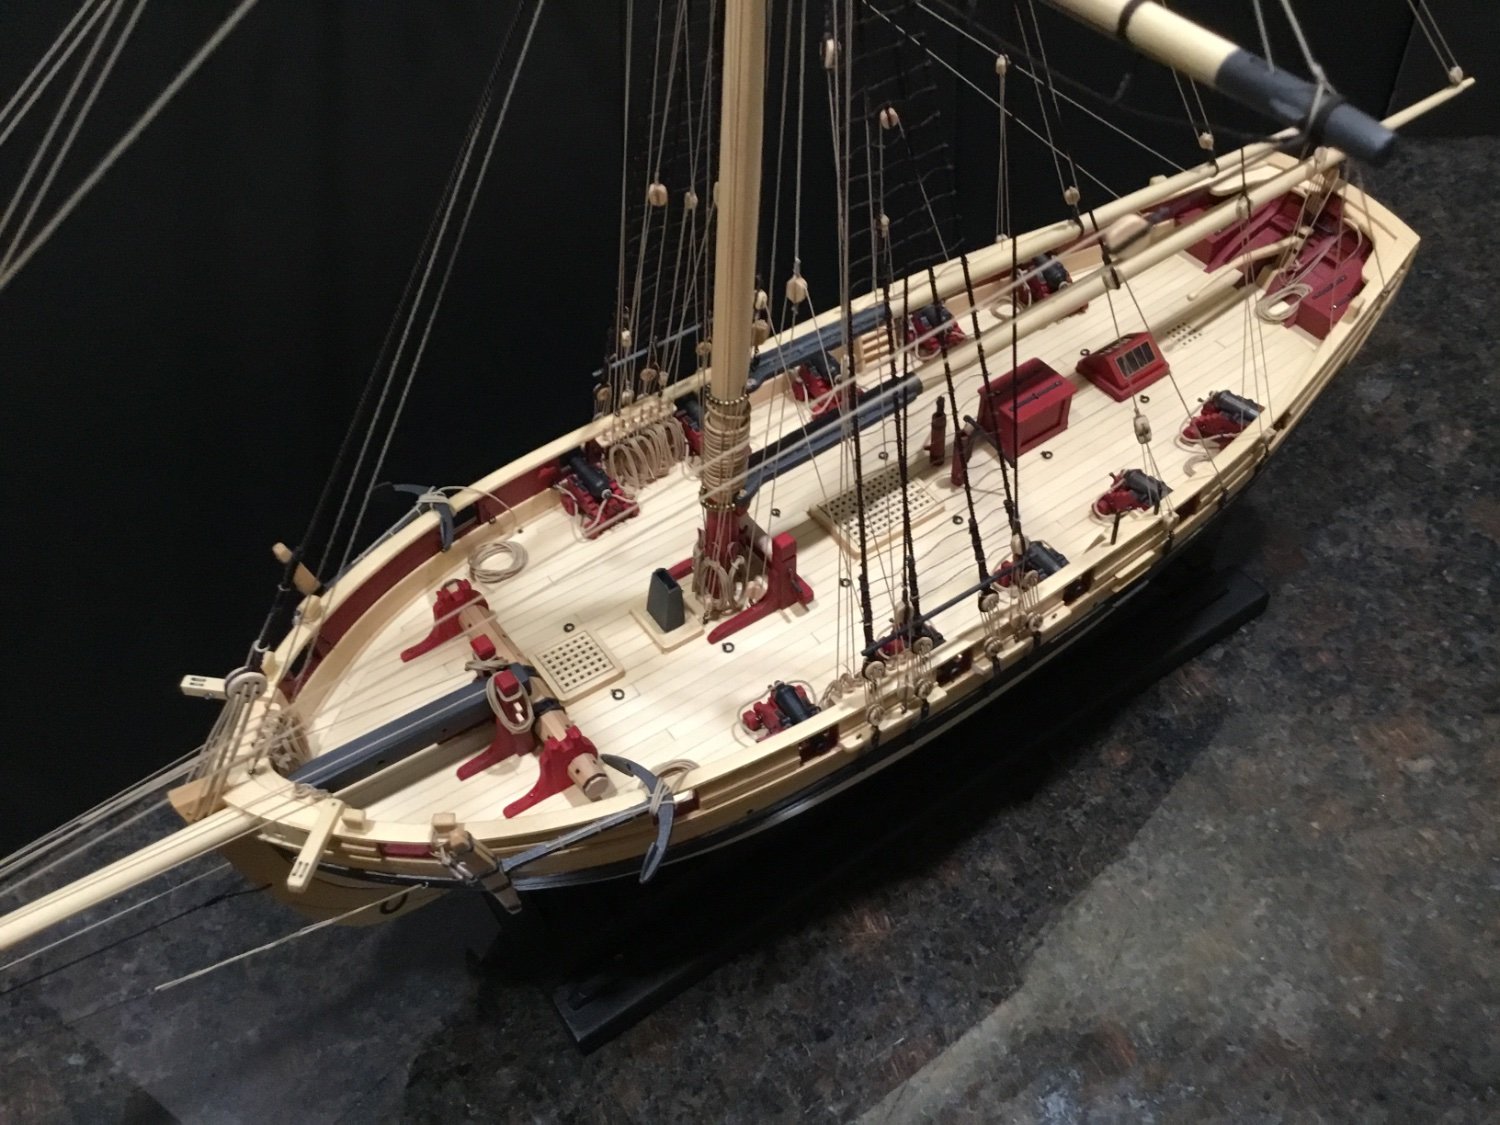
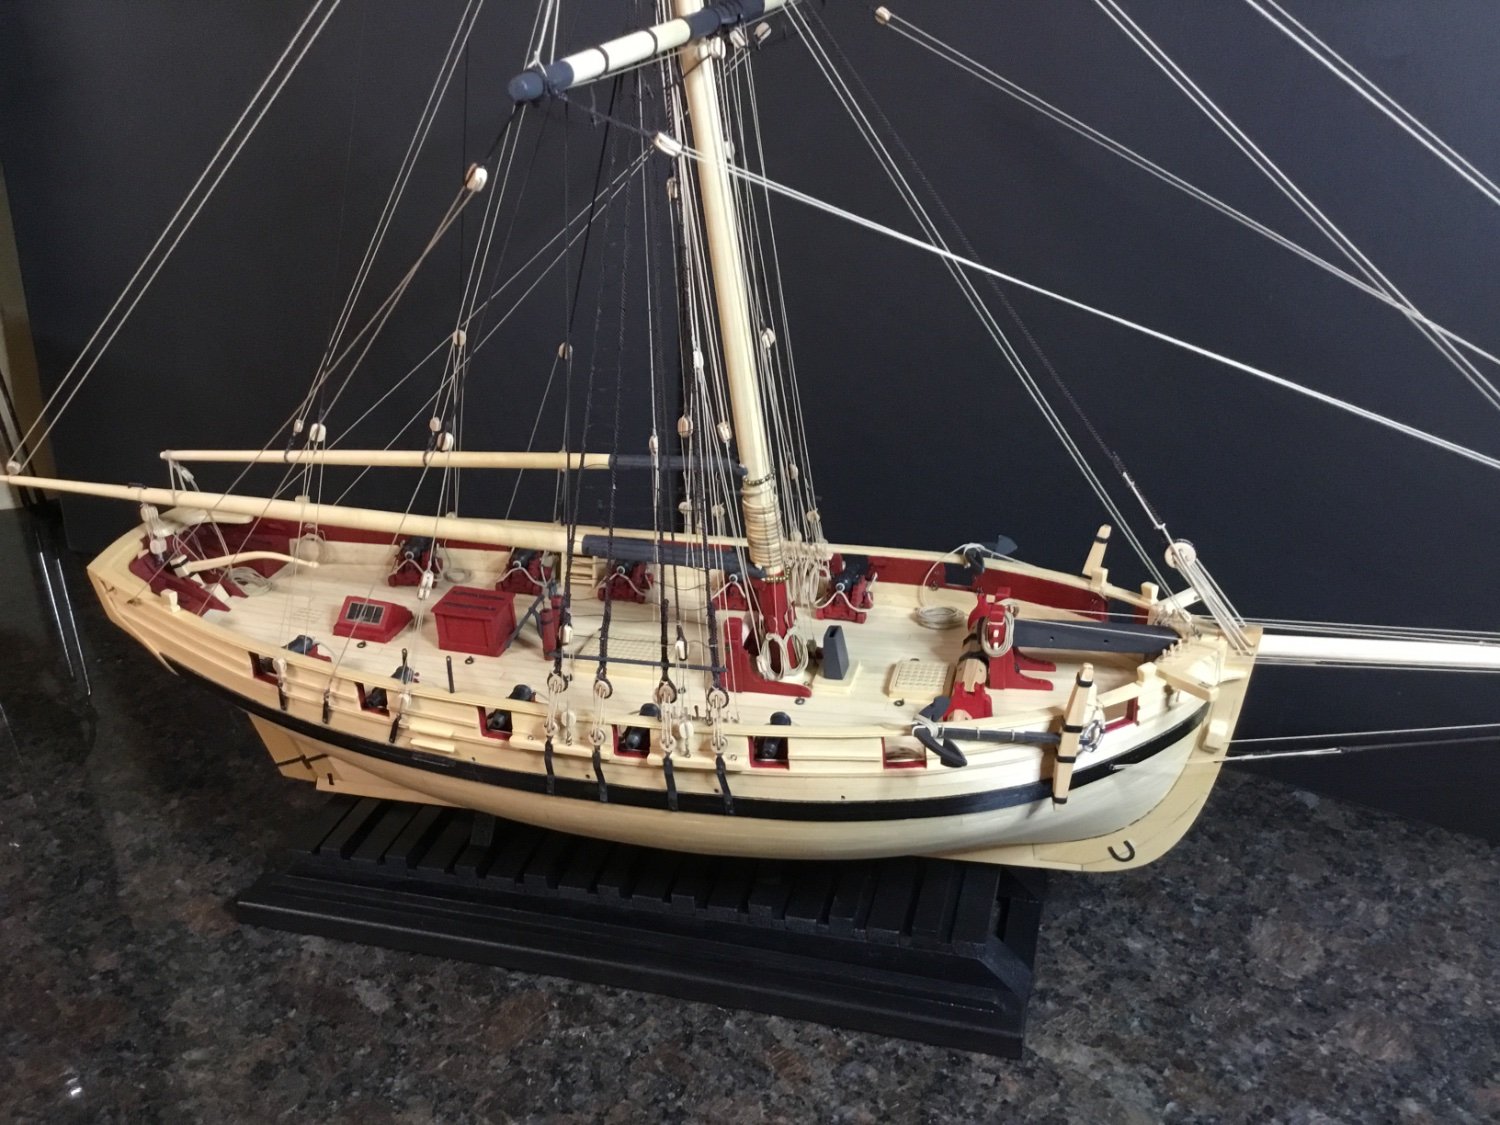
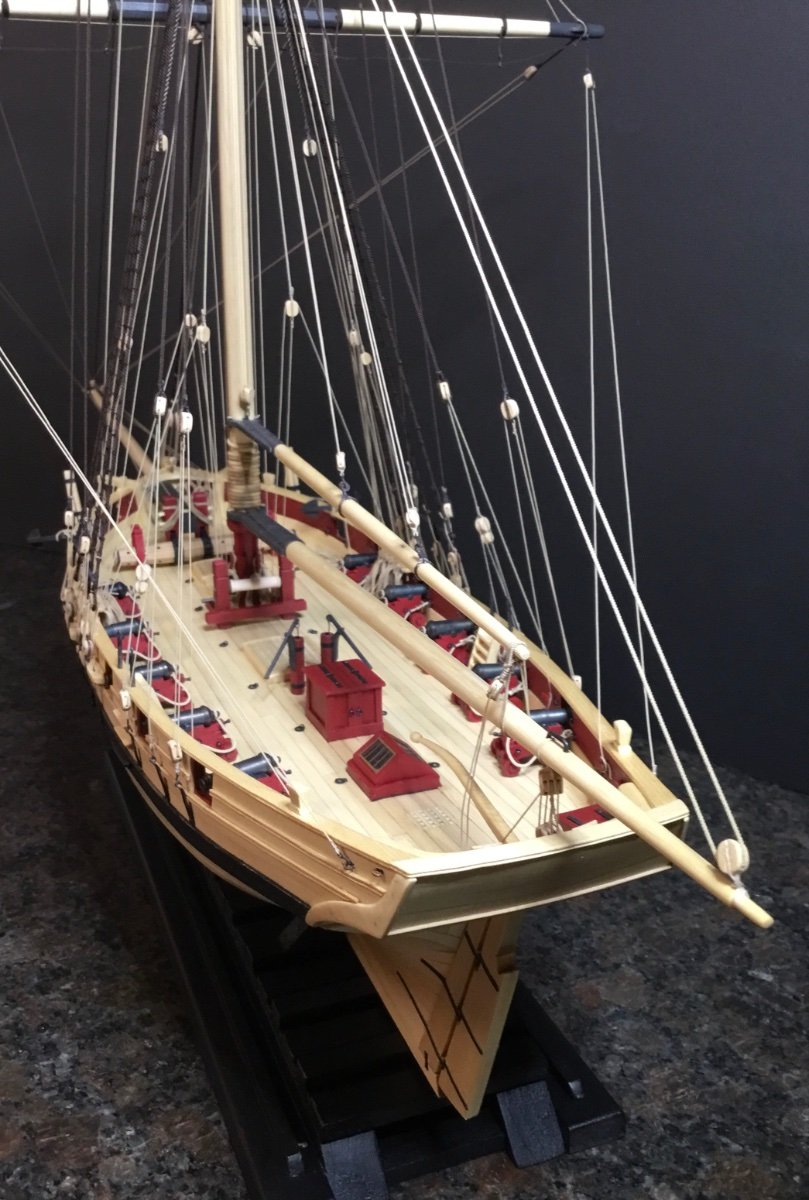
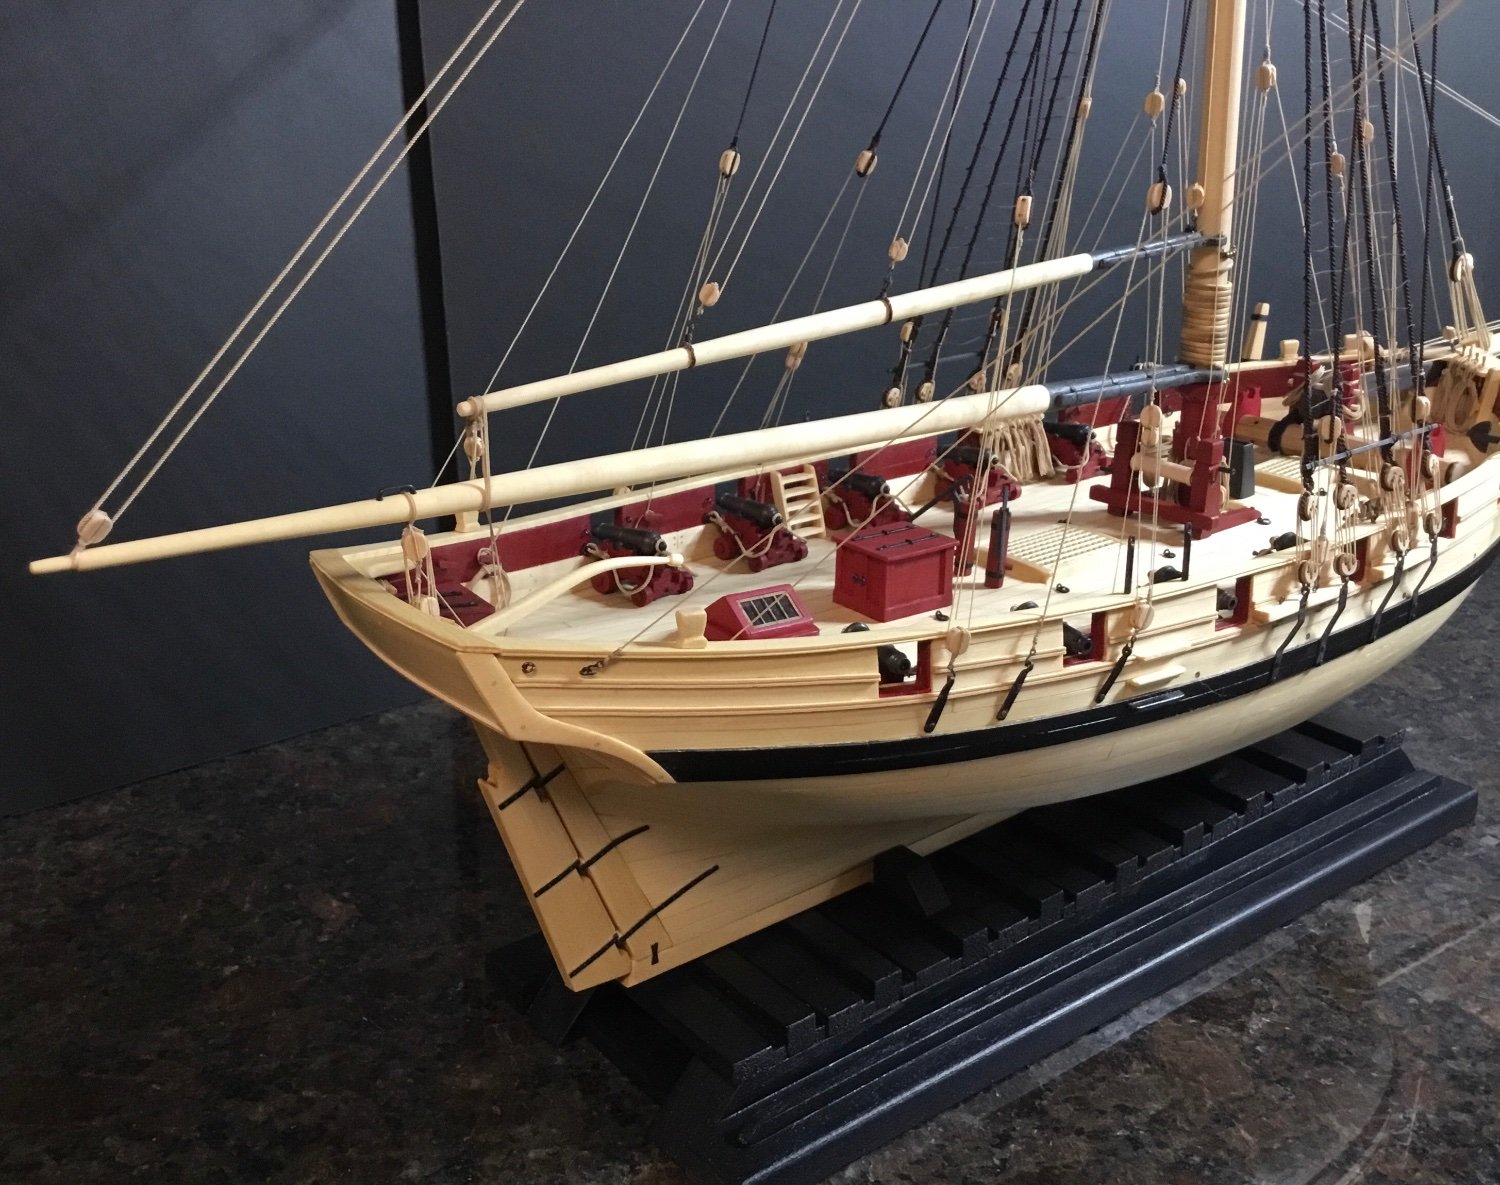
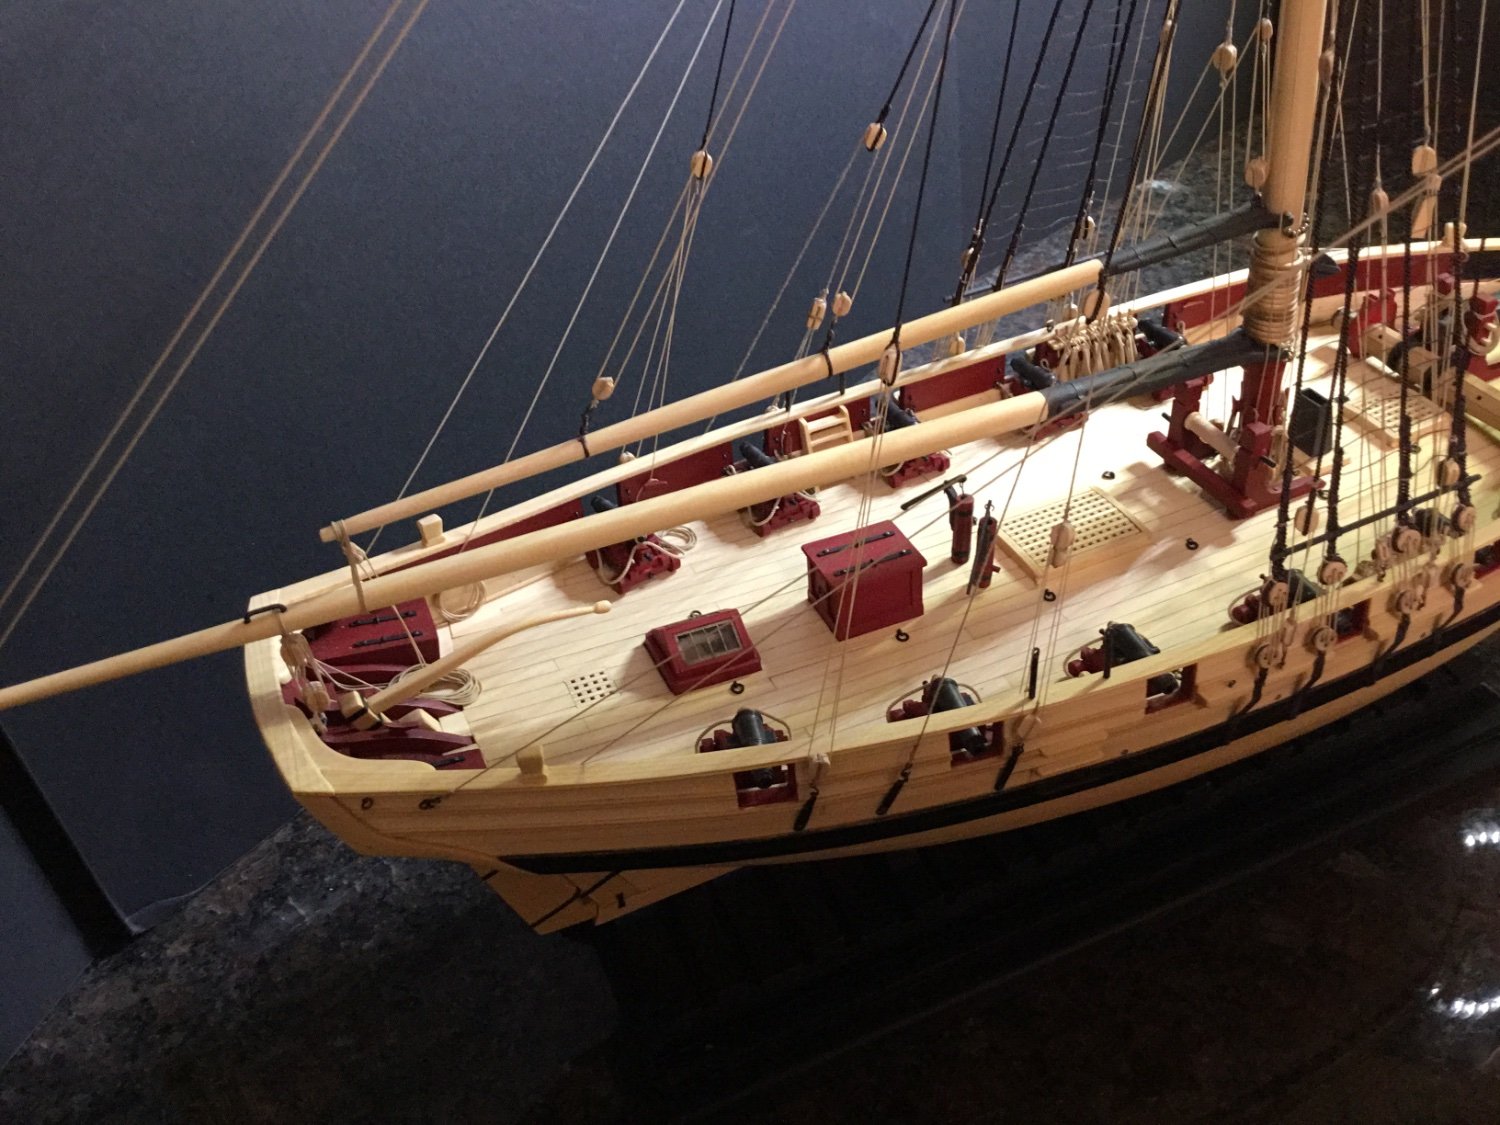
Hi Everyone, today I am declaring that my Cheerful is finished. This build has been a lot of fun and a great learning experience. A big thank you to all of the people who joined me on this journey and to those who have guided me along the way. Hopefully we can do it again one day.


- captain_hook, petervisser, SUBaron and 11 others
-
10
-
 2
2
-
 2
2
-
-
Hi svein erik, I am so sorry to hear of your Mom’s passing. Glad to see you restarting your Cheerful build. Your pup must be all grown up by now
-
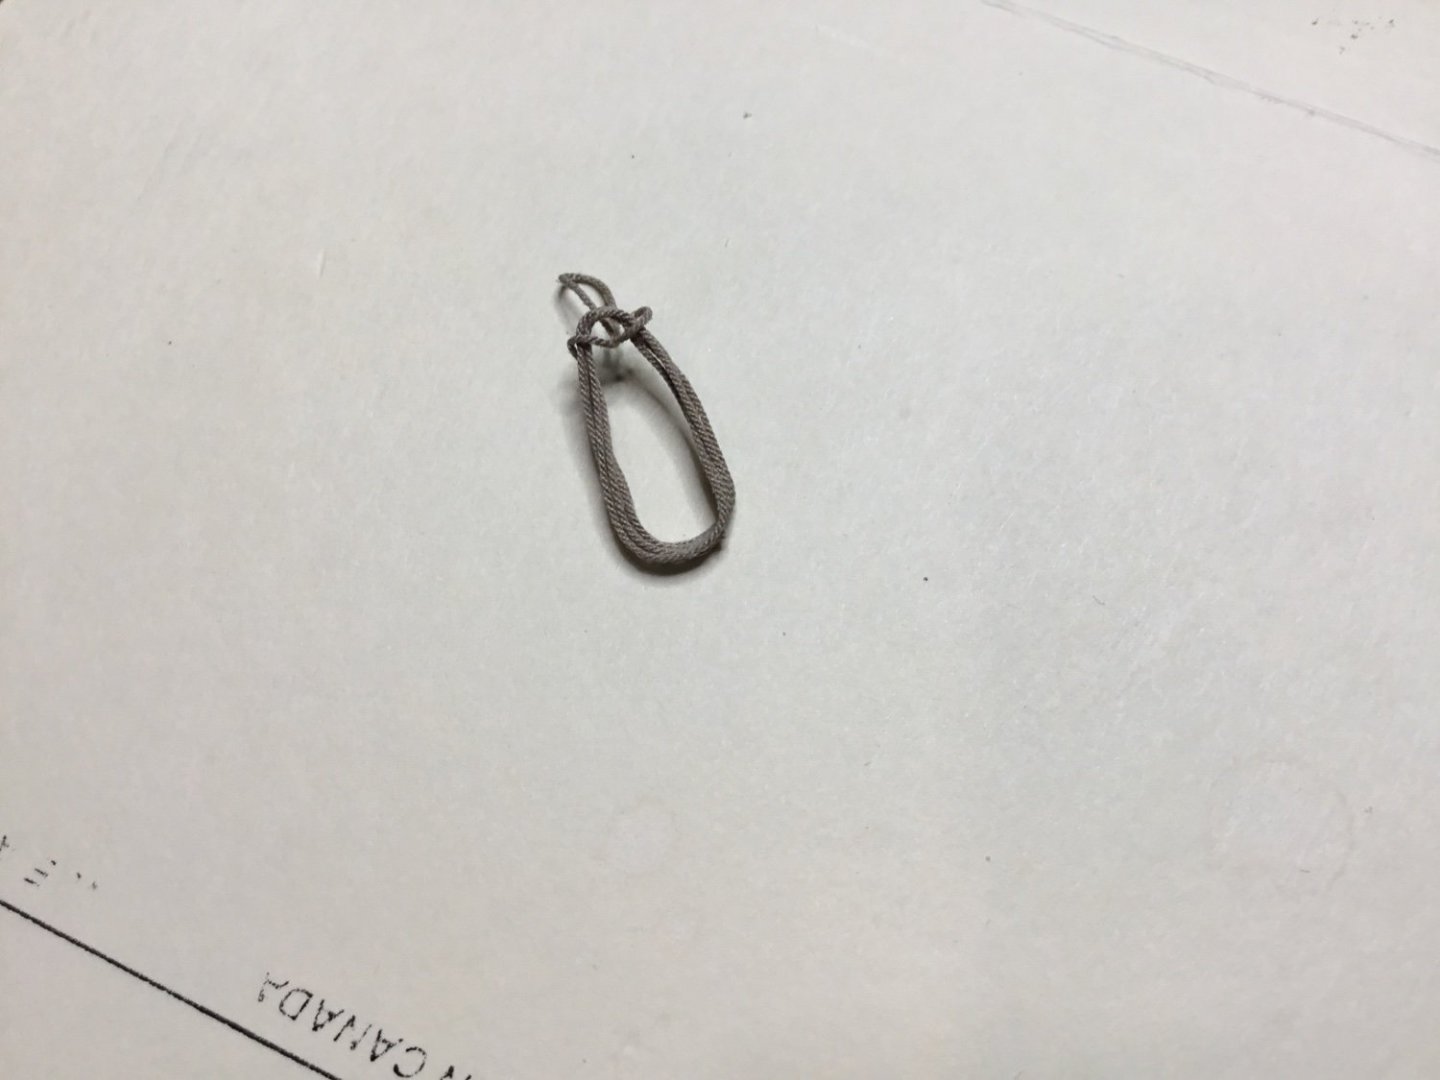
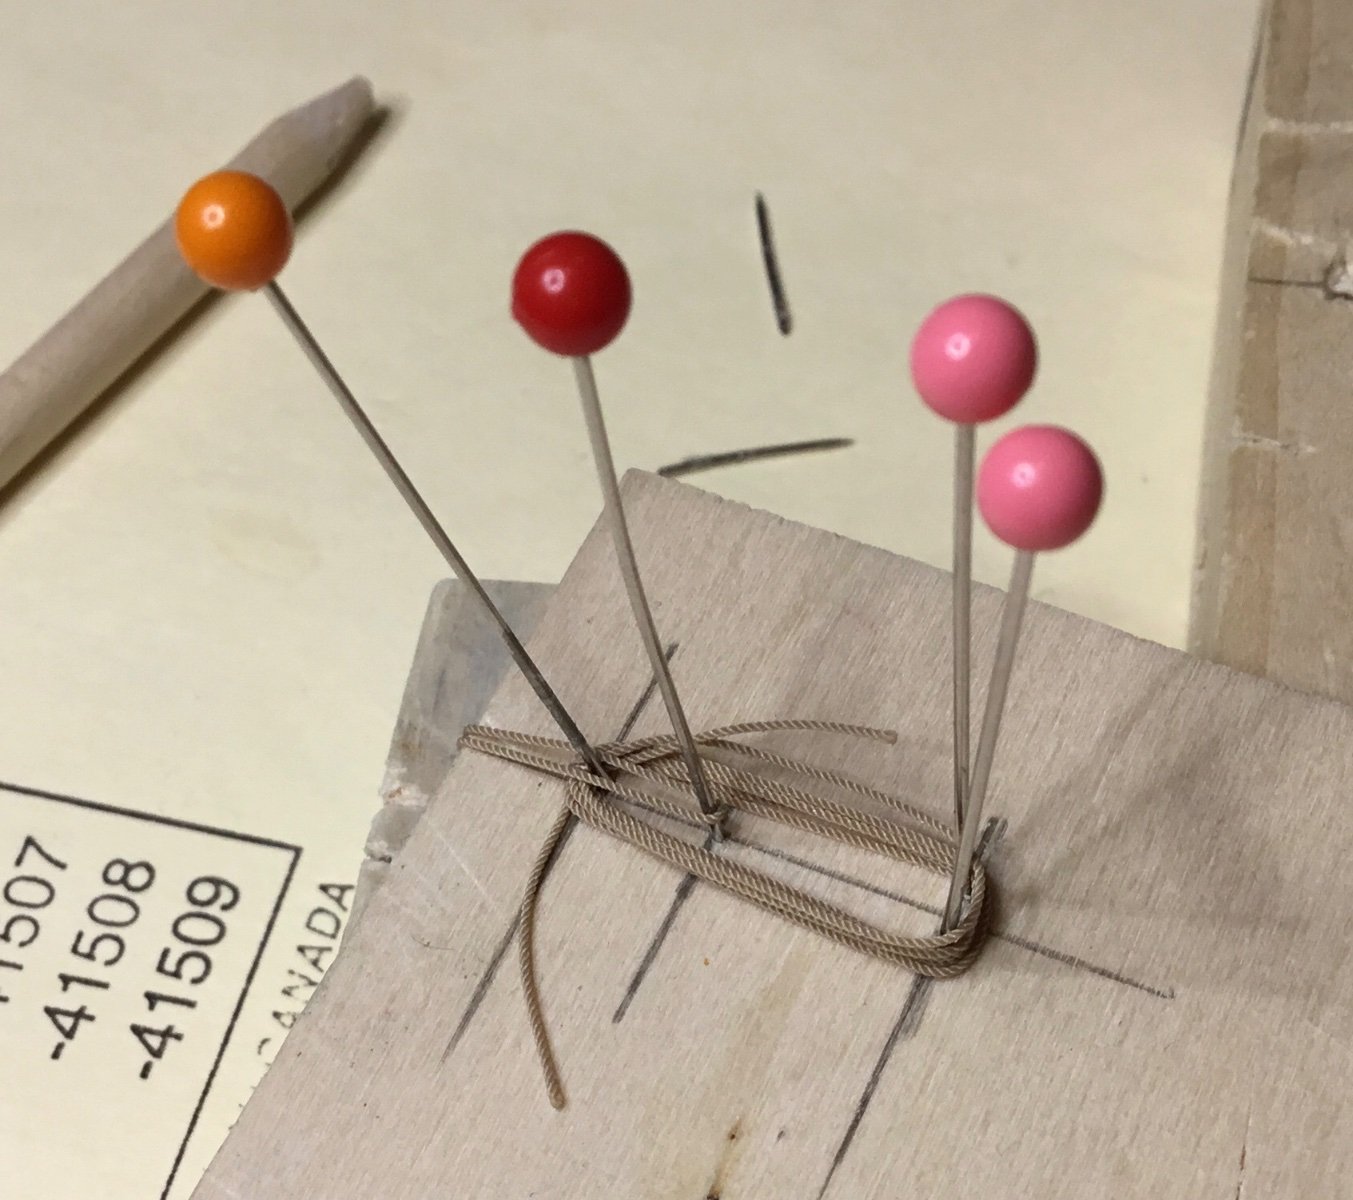
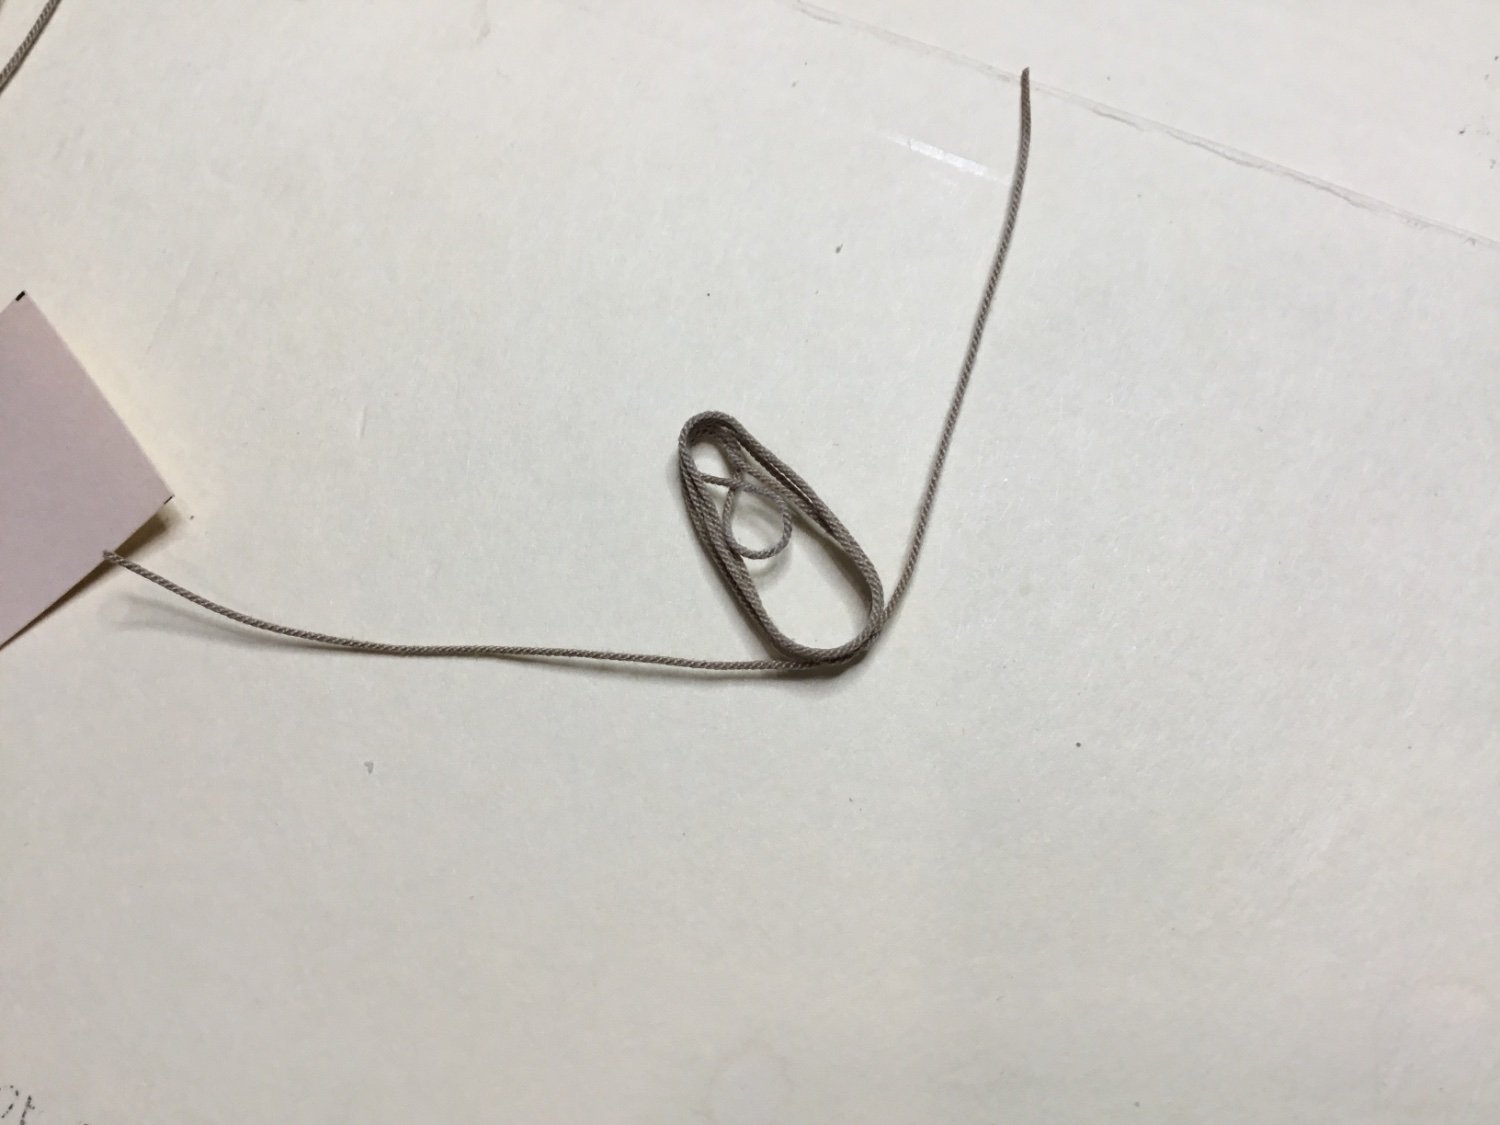
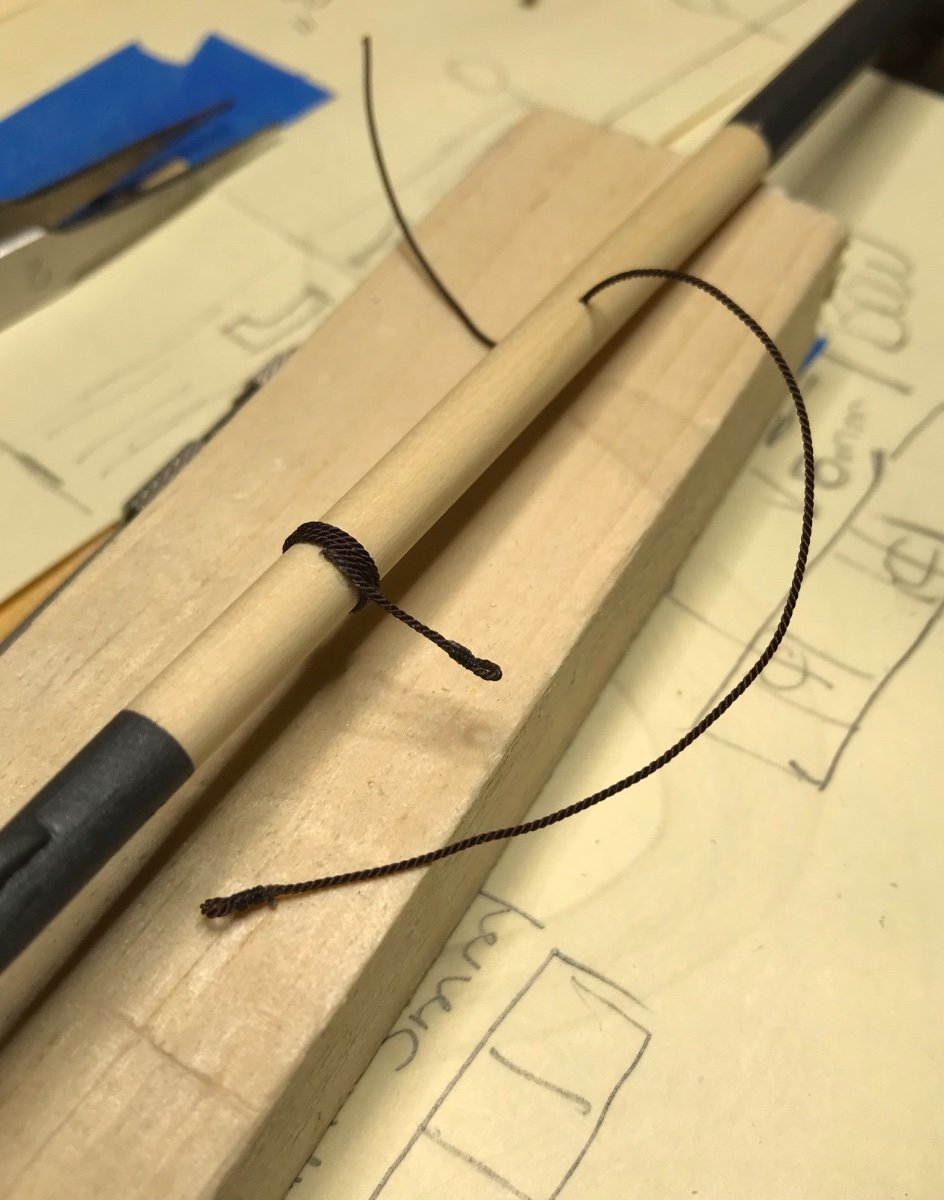
Hi Everyone, I hope everyone is doing fine and thanks to all for the very appreciated Likes. Well another week, another rope coil revision. There can only be so many ways you can make one of these things and I think that I have attempted all of them. Finally settled on this way. Just glued a small loop onto the coil.
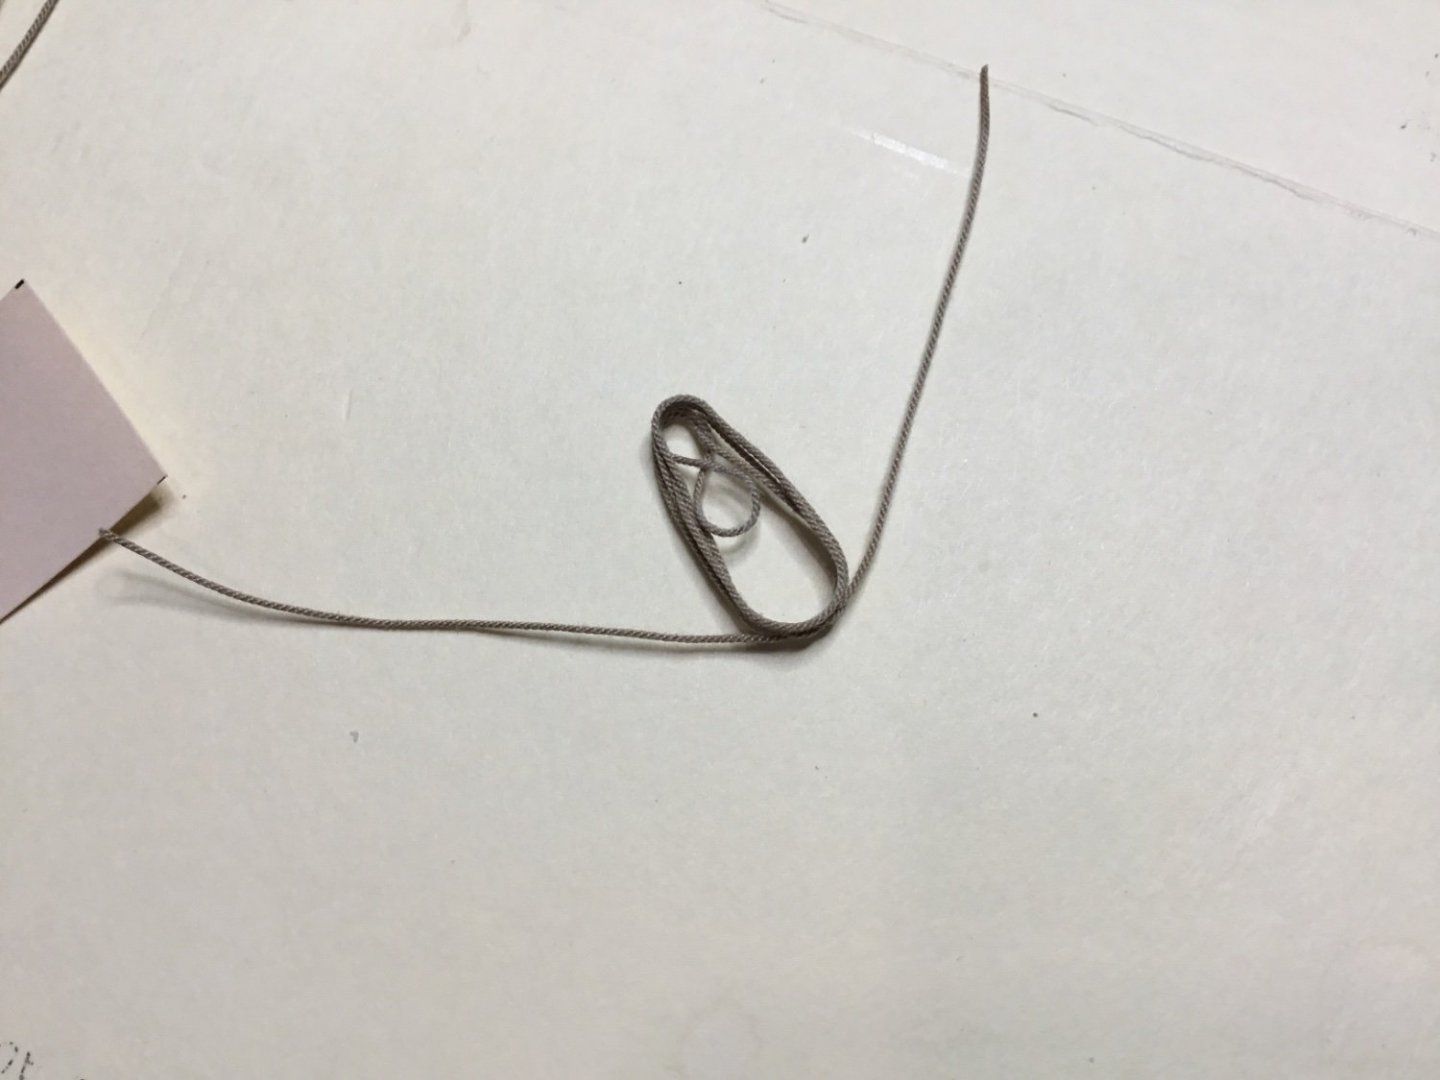
Made the usual coil but tied the top together with cotton thread.

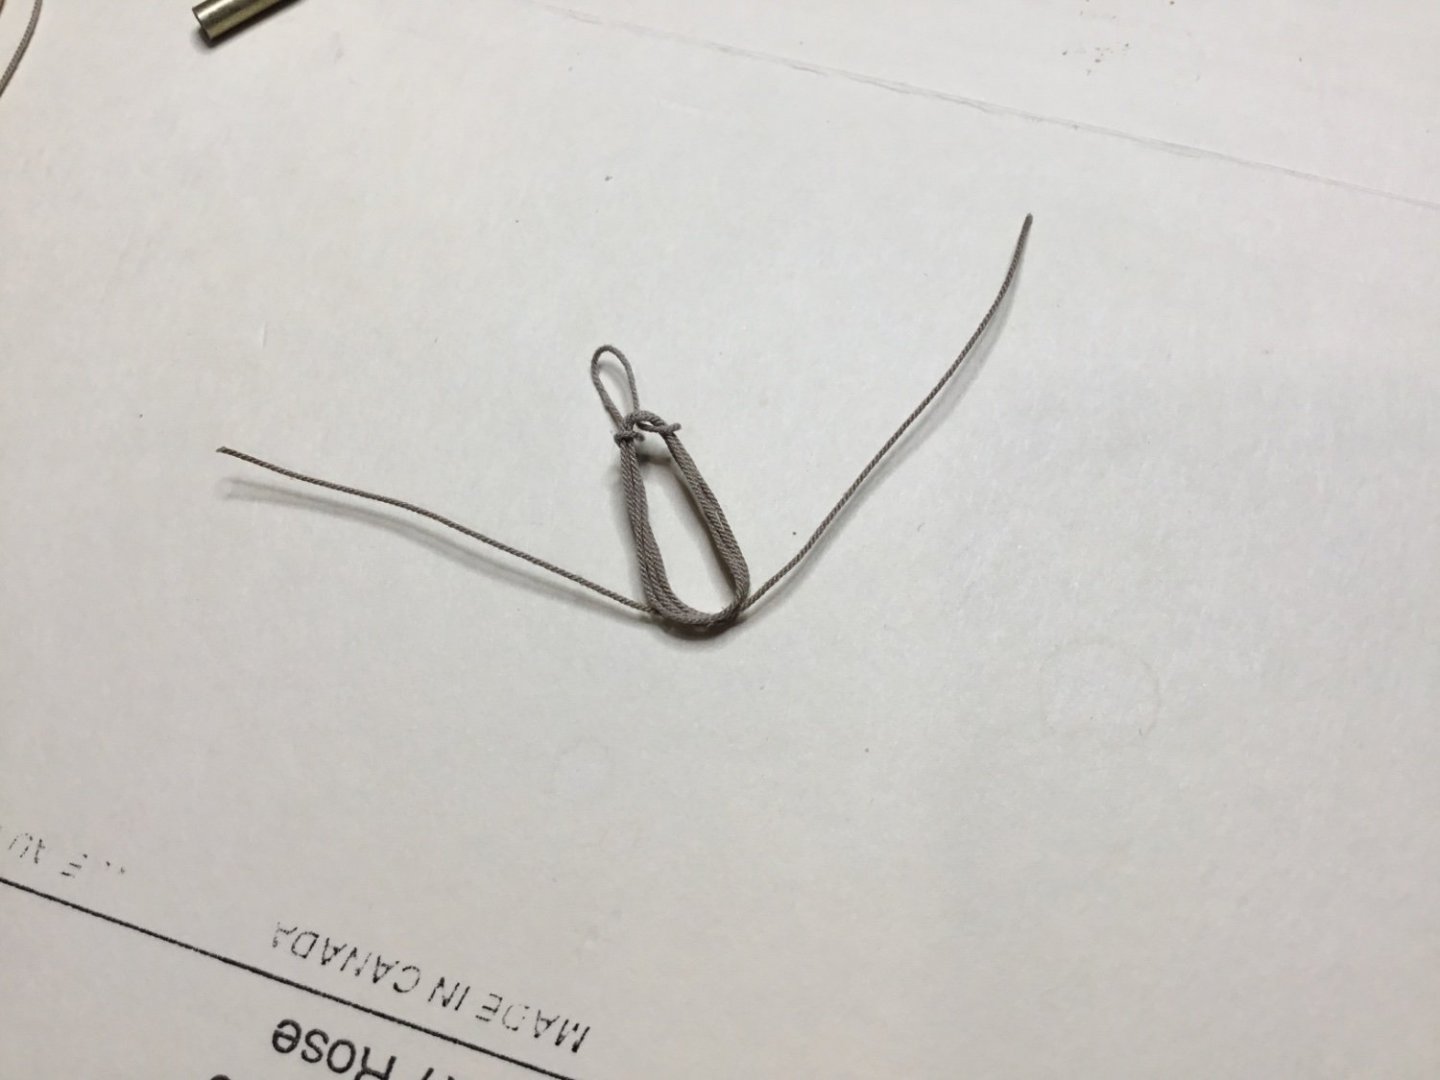
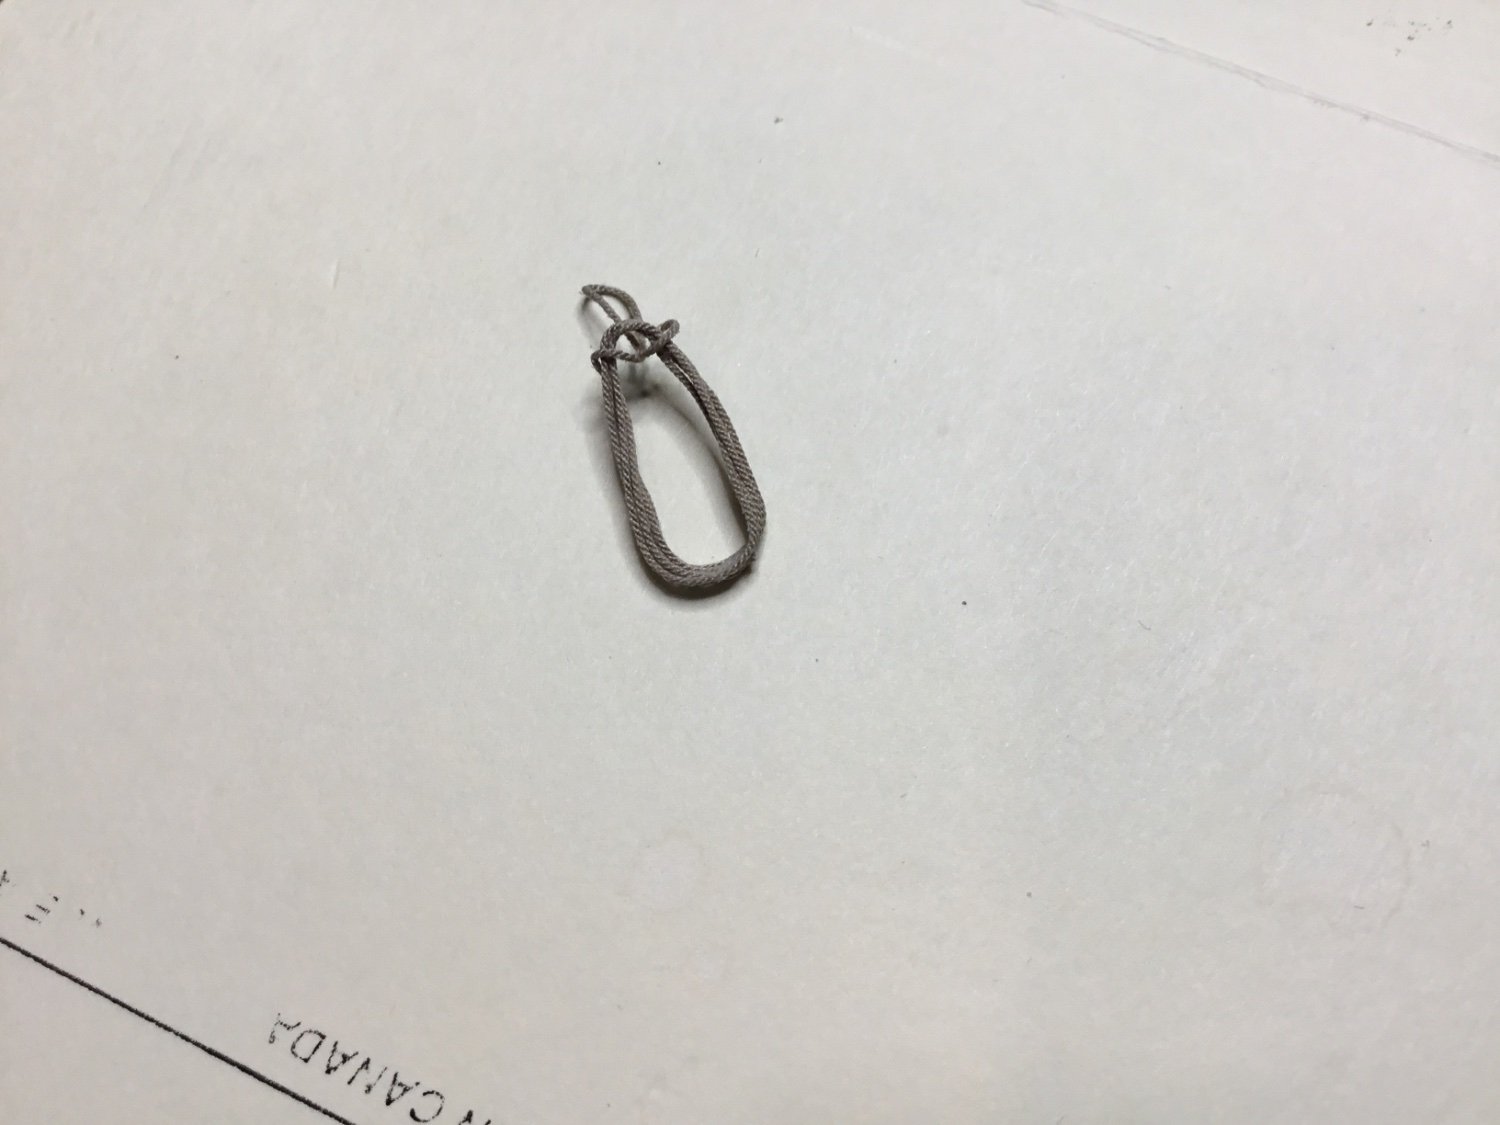
Pinned the coil into another jig and attached a small loop with CA. Just glued it at the orange pin.
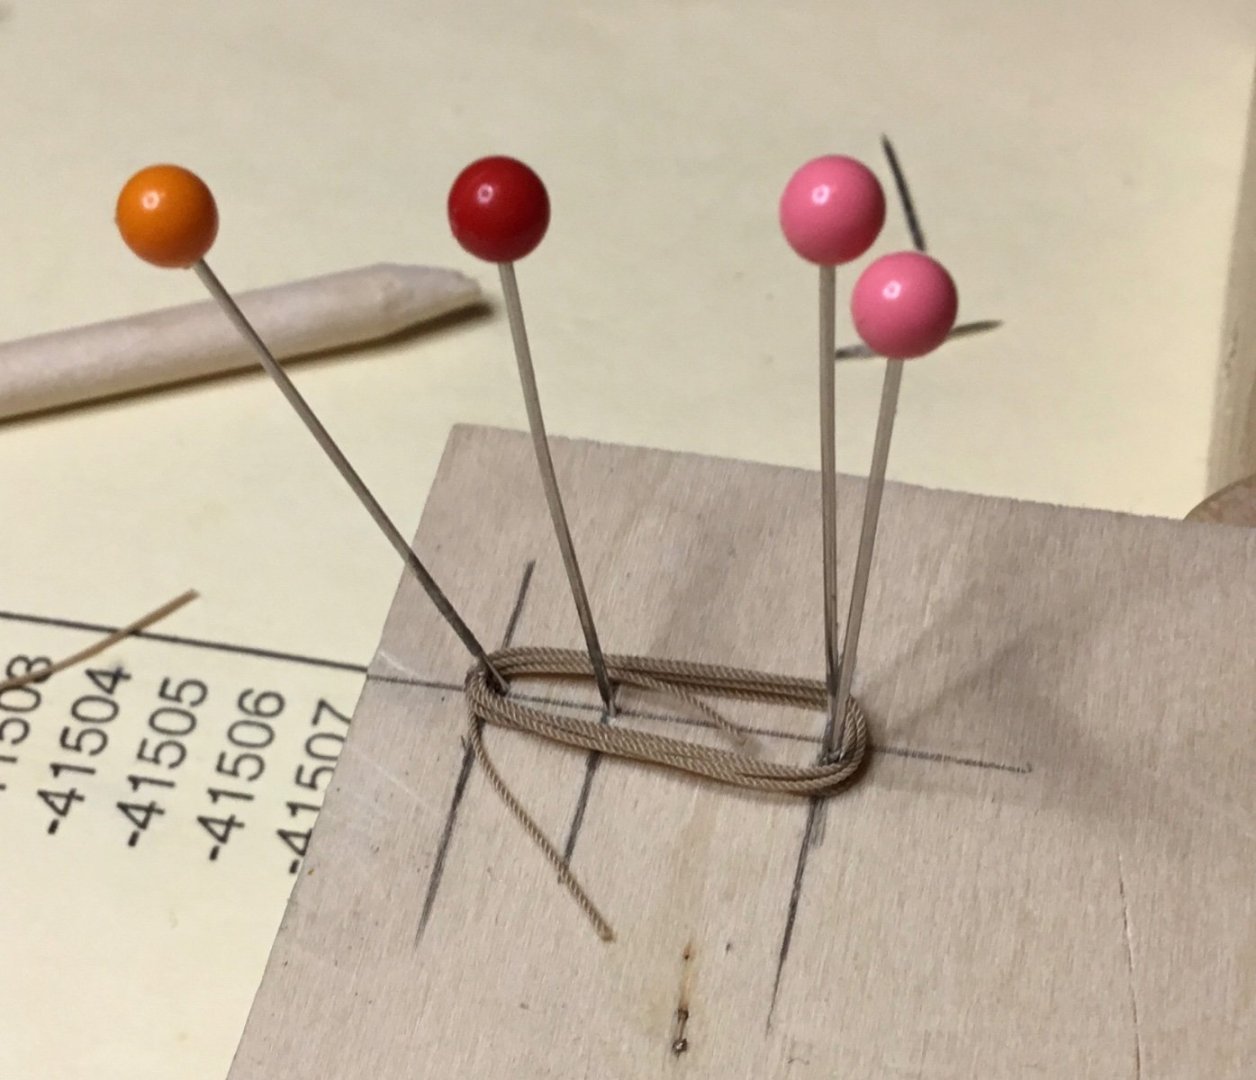
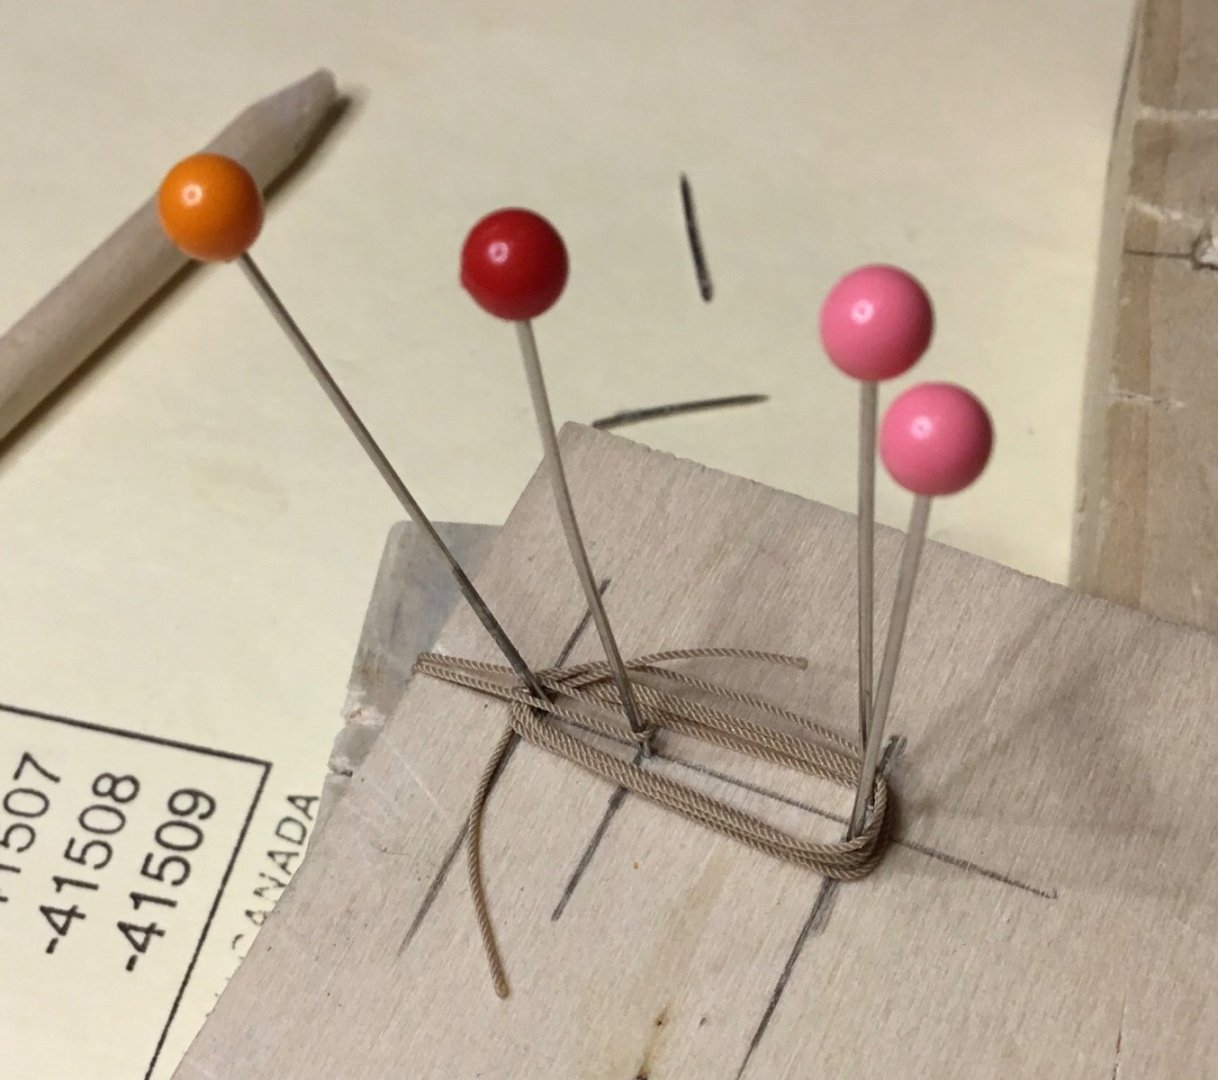
Flipped it over and pinned it into another jig. Washed it with diluted clear acrylic and let it dry in place.
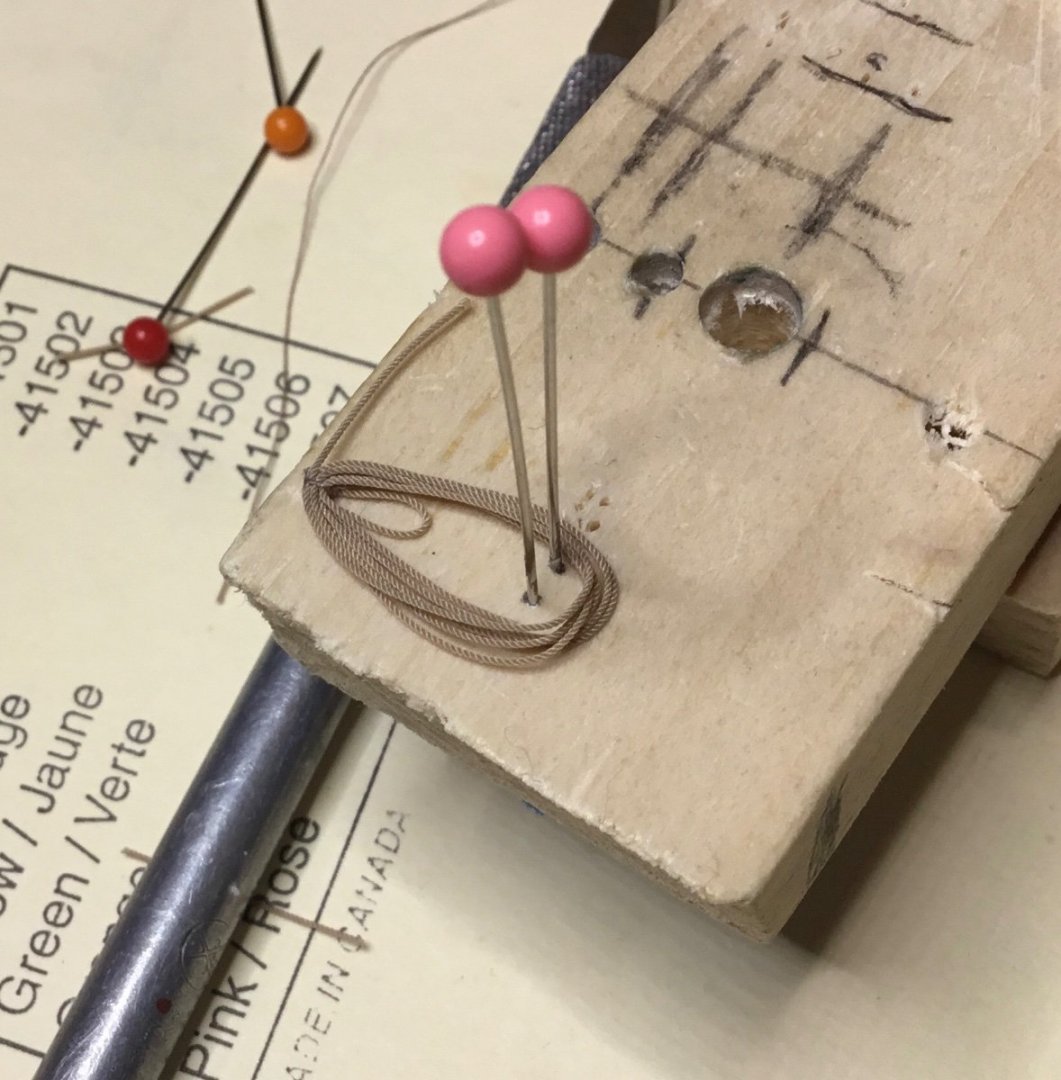
When it was dry (20 minutes) it was mounted with a machine screw weighing it down to give it a bit better shape. Applied more acrylic and removed the screw after everything had dried.
At last count there were ten more to do. The next update will definitely not be about making rope coils.😃
-
Hi Dave, everything is looking great. I would wait a while before mounting the anchors and the rudder.
- Keith Black and Dave_E
-
2
-
-
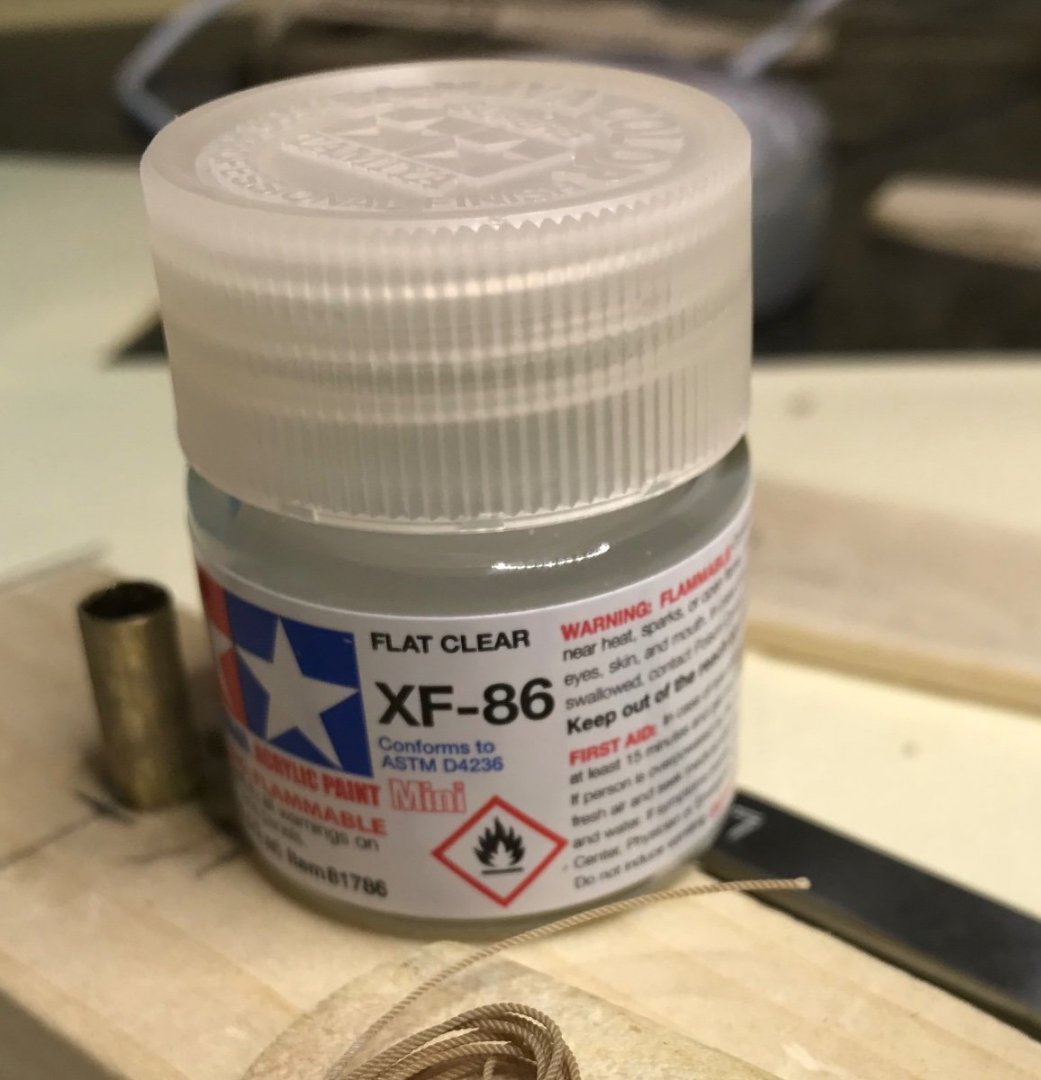
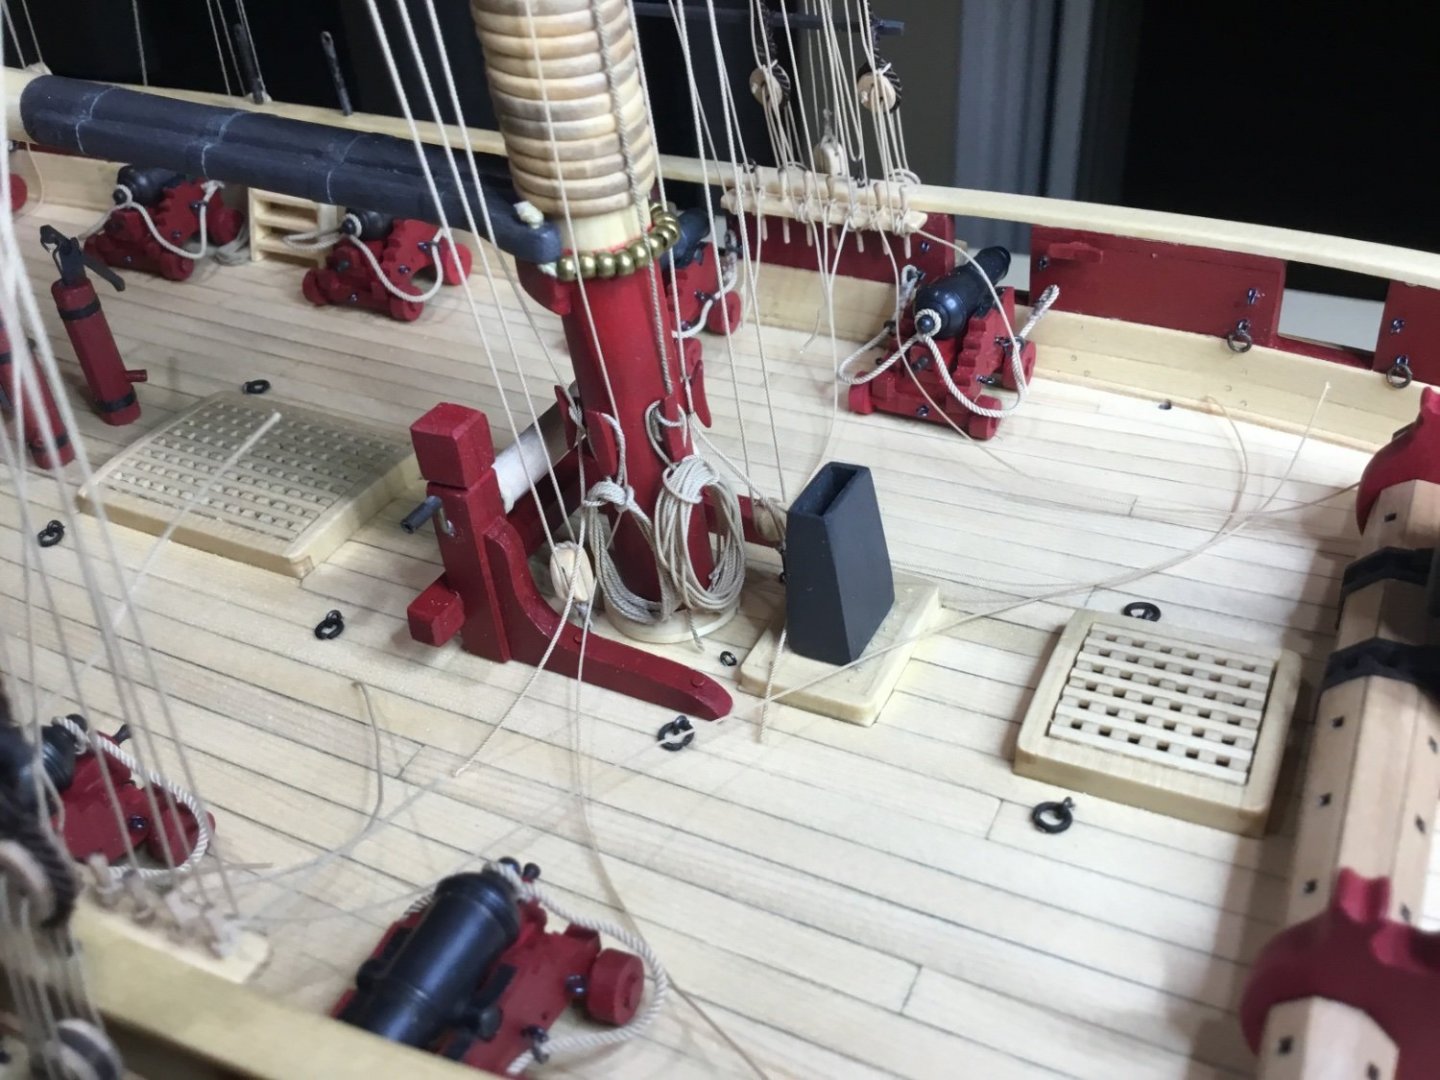
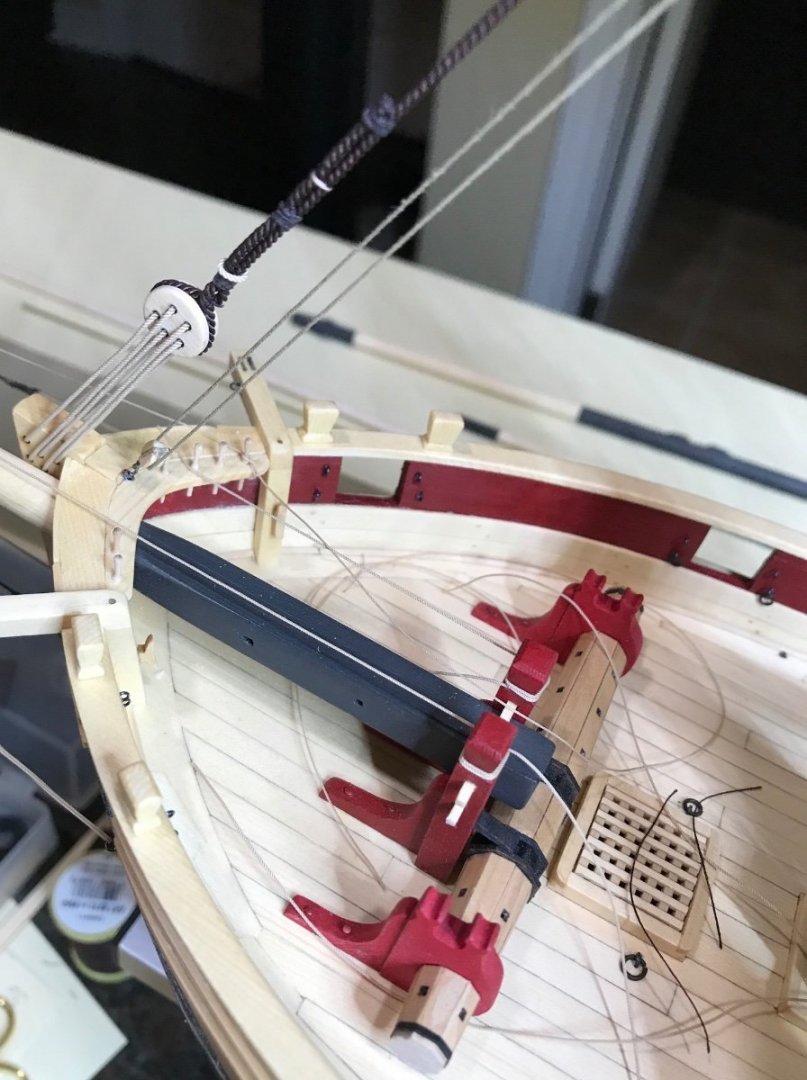
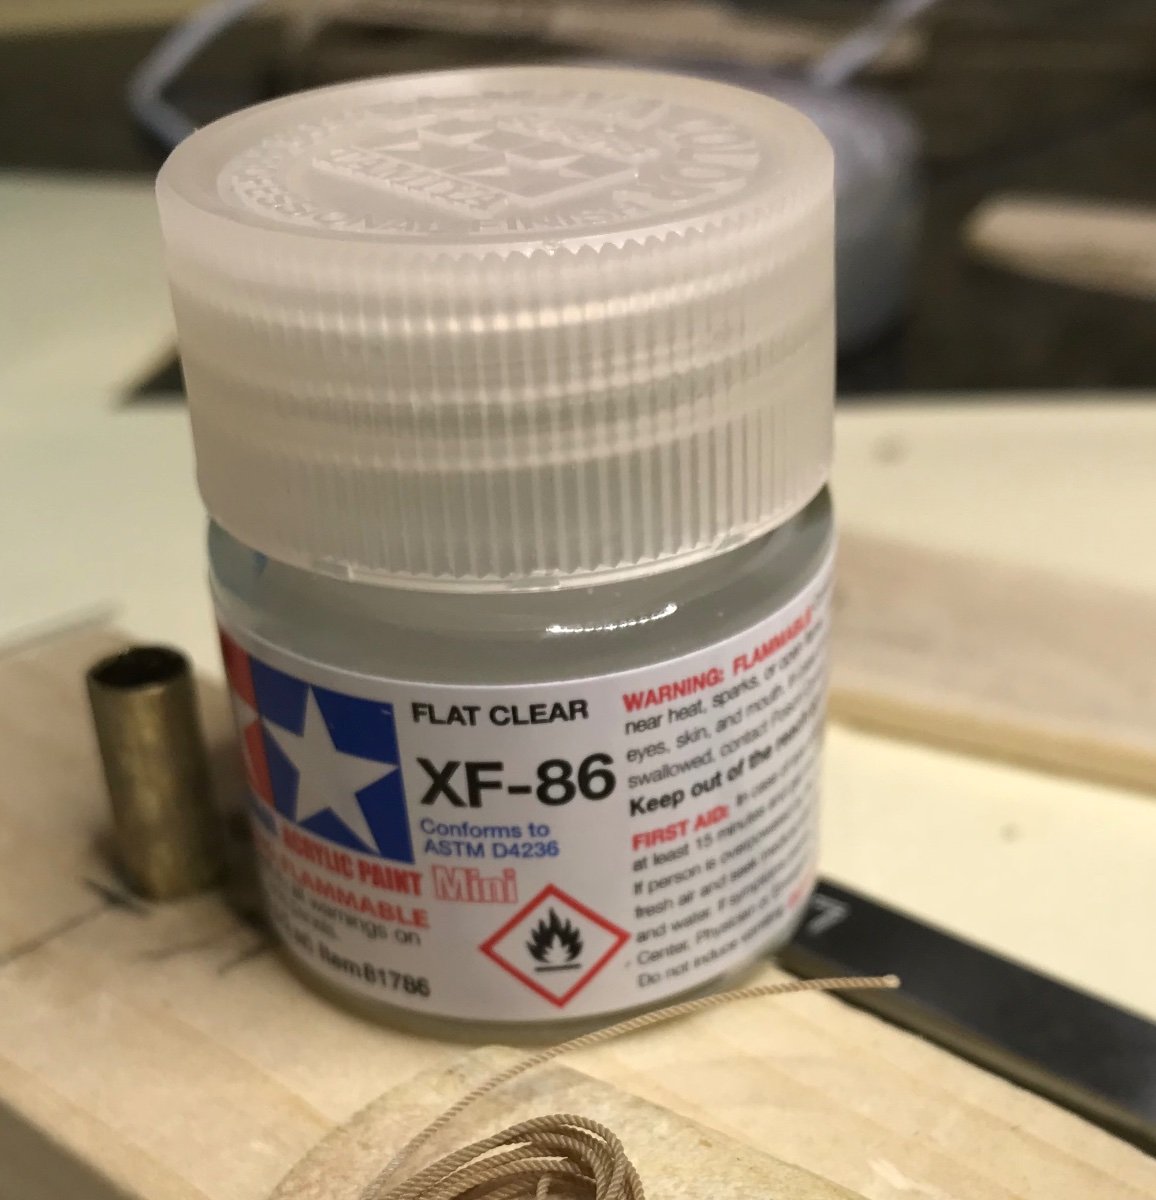
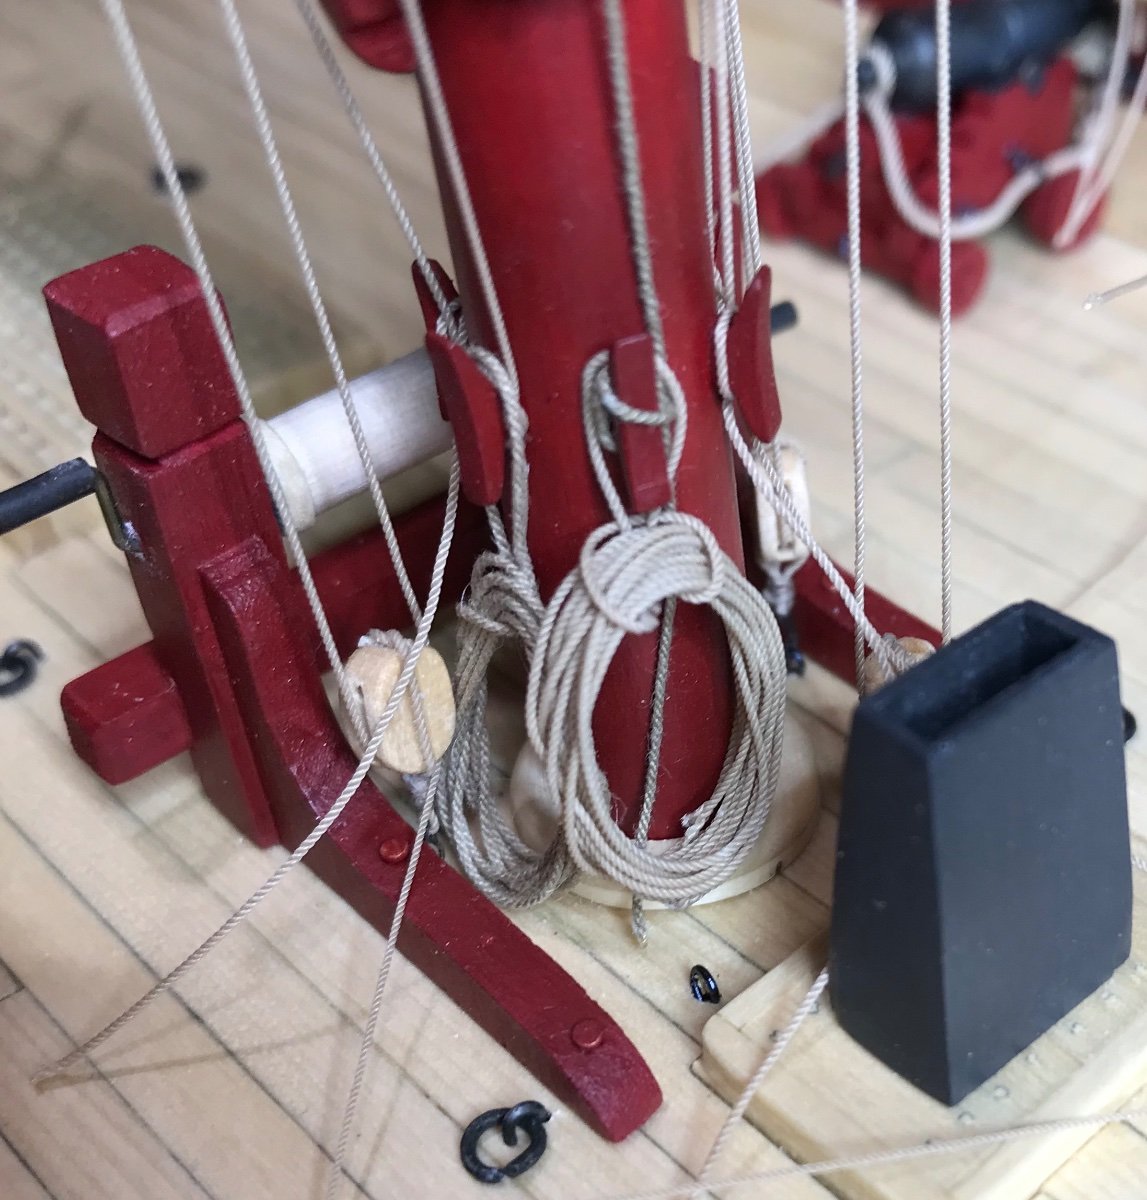
Hello Everyone and thank you for all of your Likes . Just a bit of an update. Firstly, thanks to Glenn Barlow for getting me dialed in to using the clear acrylic instead of diluted pva. Looks and works way better. Picked up some of this at Dundas Valley Hobbies. Never seen so much paint in one place.
Started out by replacing the coils on the bow sprit step. Changed from cotton to polyester rope. The cotton didn’t like the pva or the acrylic.
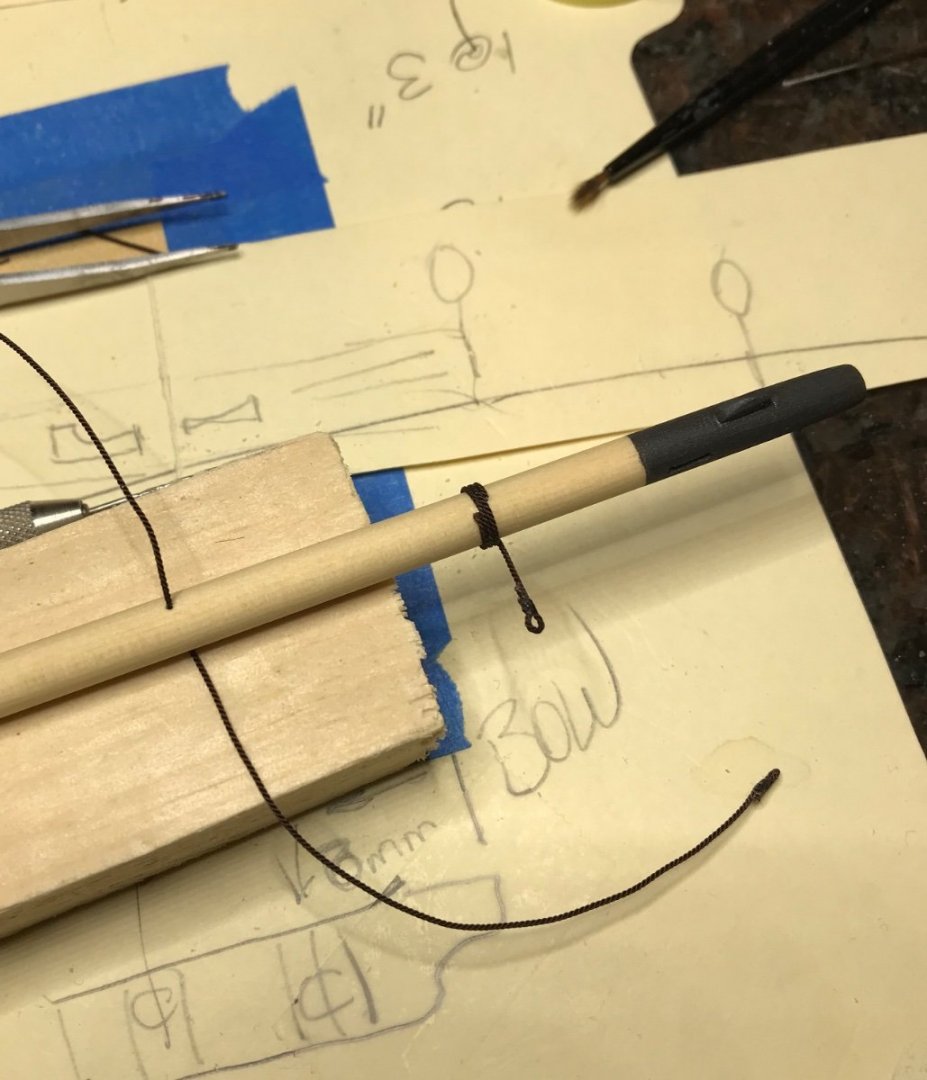
No matter what I tried I couldn’t make it decent looking coil to hang over the cleats and pins. So I gave up on the jig. Made coils the same as on the bow sprit step but made a small loop of rope that is hitched on itself to attach the coil to it’s hanging place.

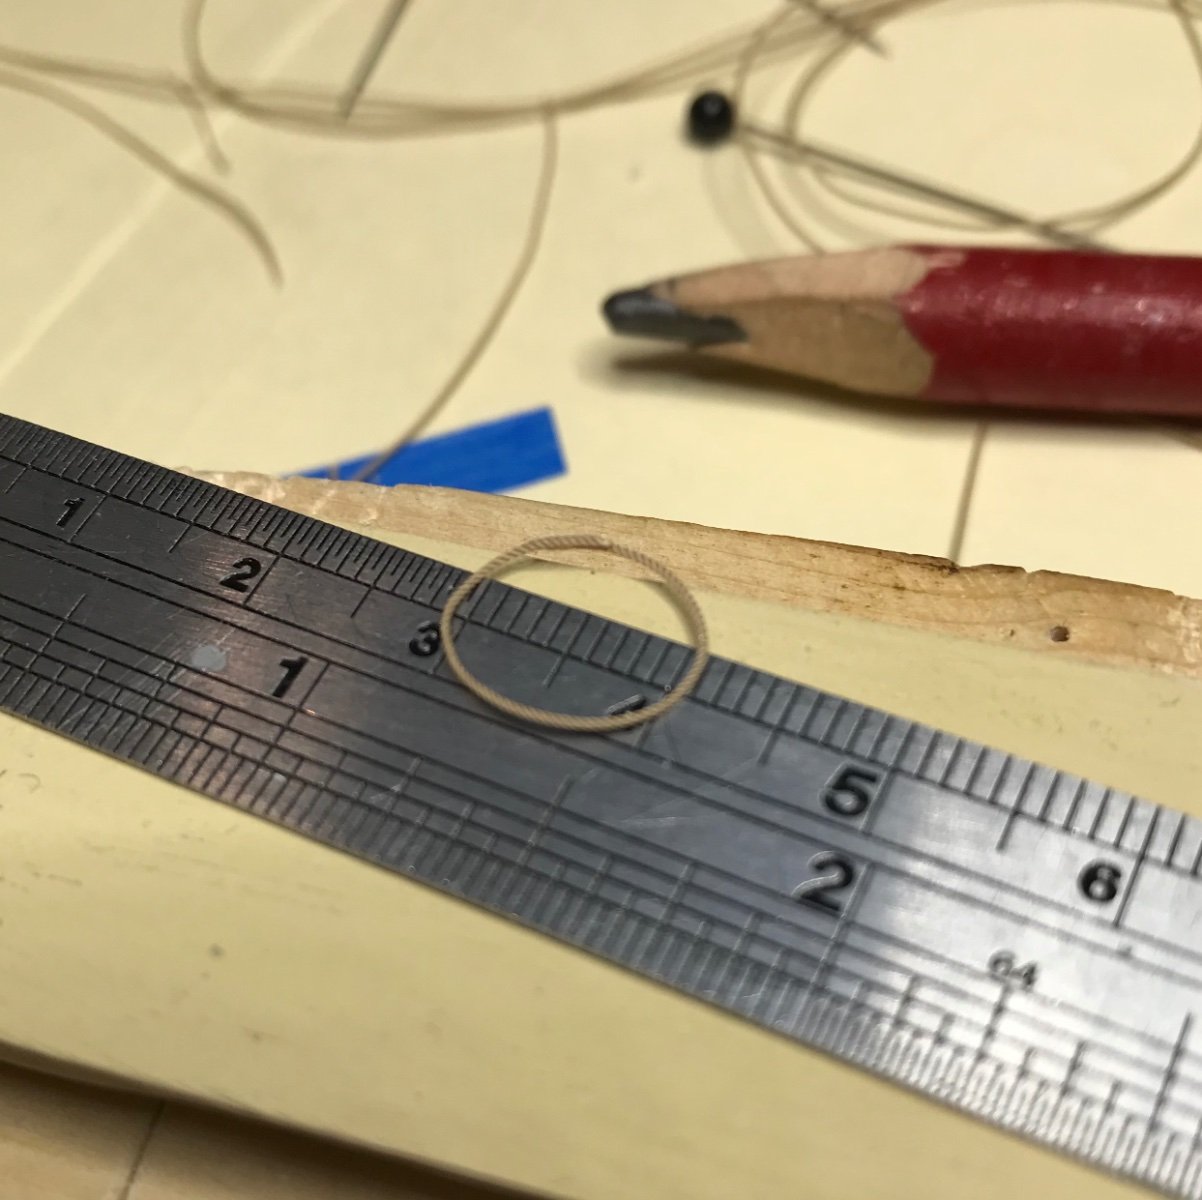
Wrapped the rope around a 3/8” diameter pencil and applied CA to an 1/8” overlap. The joint ends up being behind the coil.

Doesn’t really look like it’s supposed to but I know when I’m whipped 🙂
-
-
-
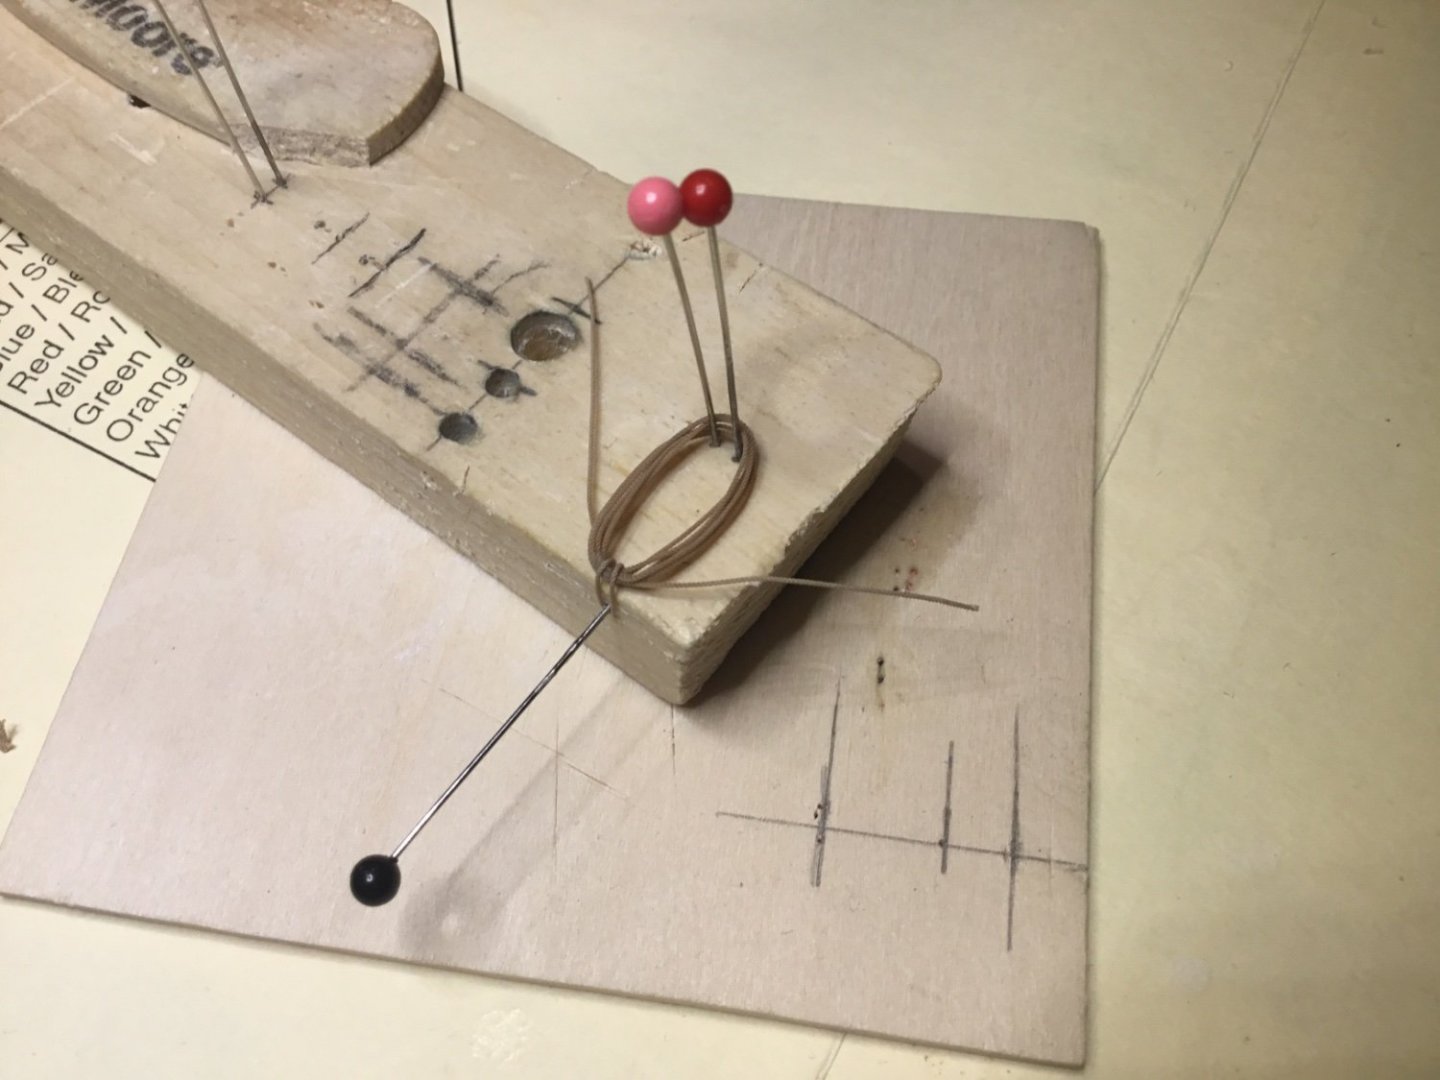
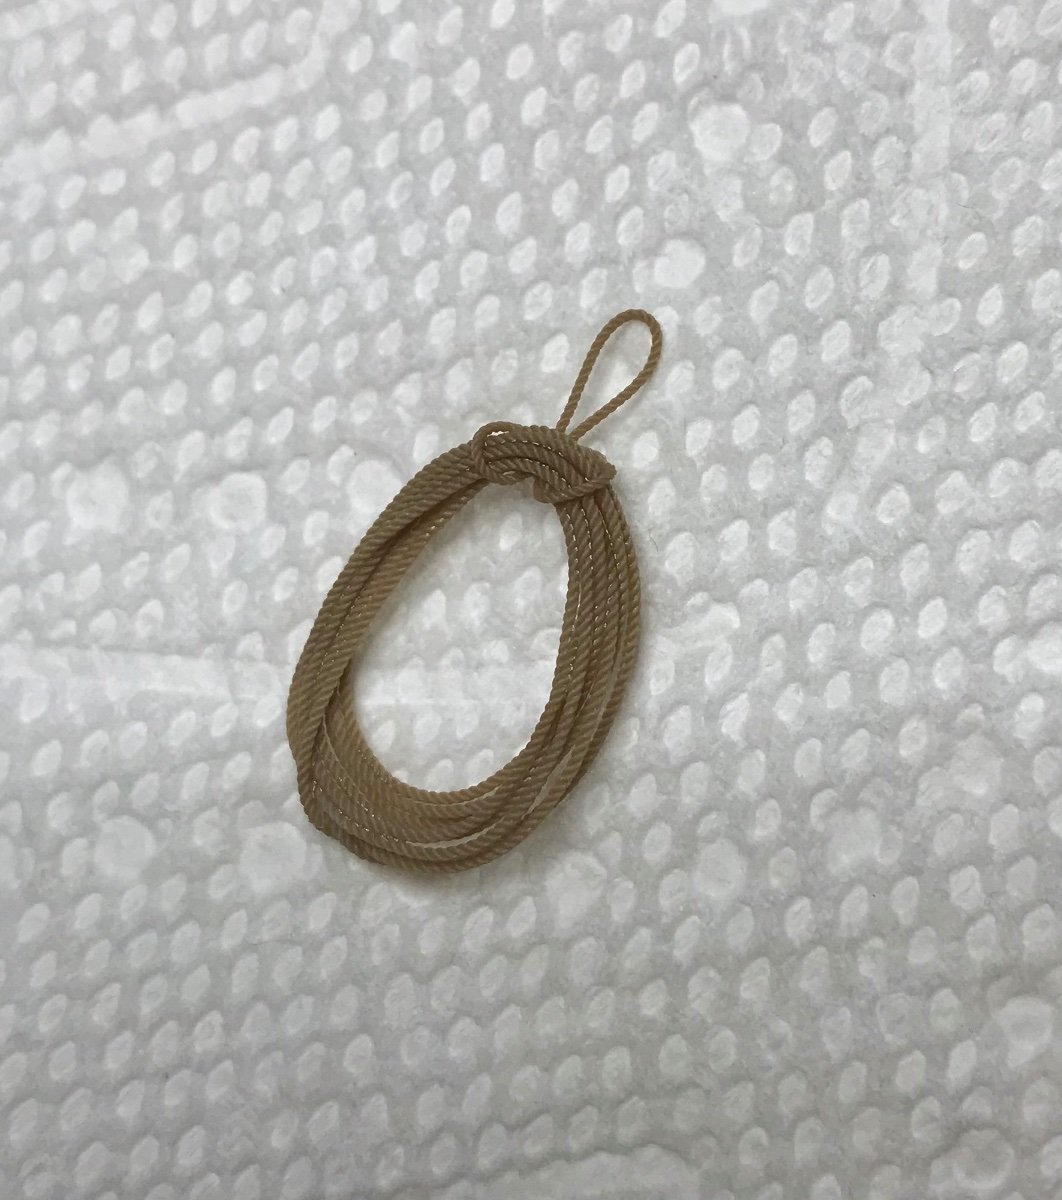
Hey Everyone, decided to make a coil with the cotton rope without using diluted PVA. Used CA on the knot at the bottom and to stick the small loop at the top to the back of the big loop. To me it looks better and is easier to shape. The coil on the left is cotton.

-
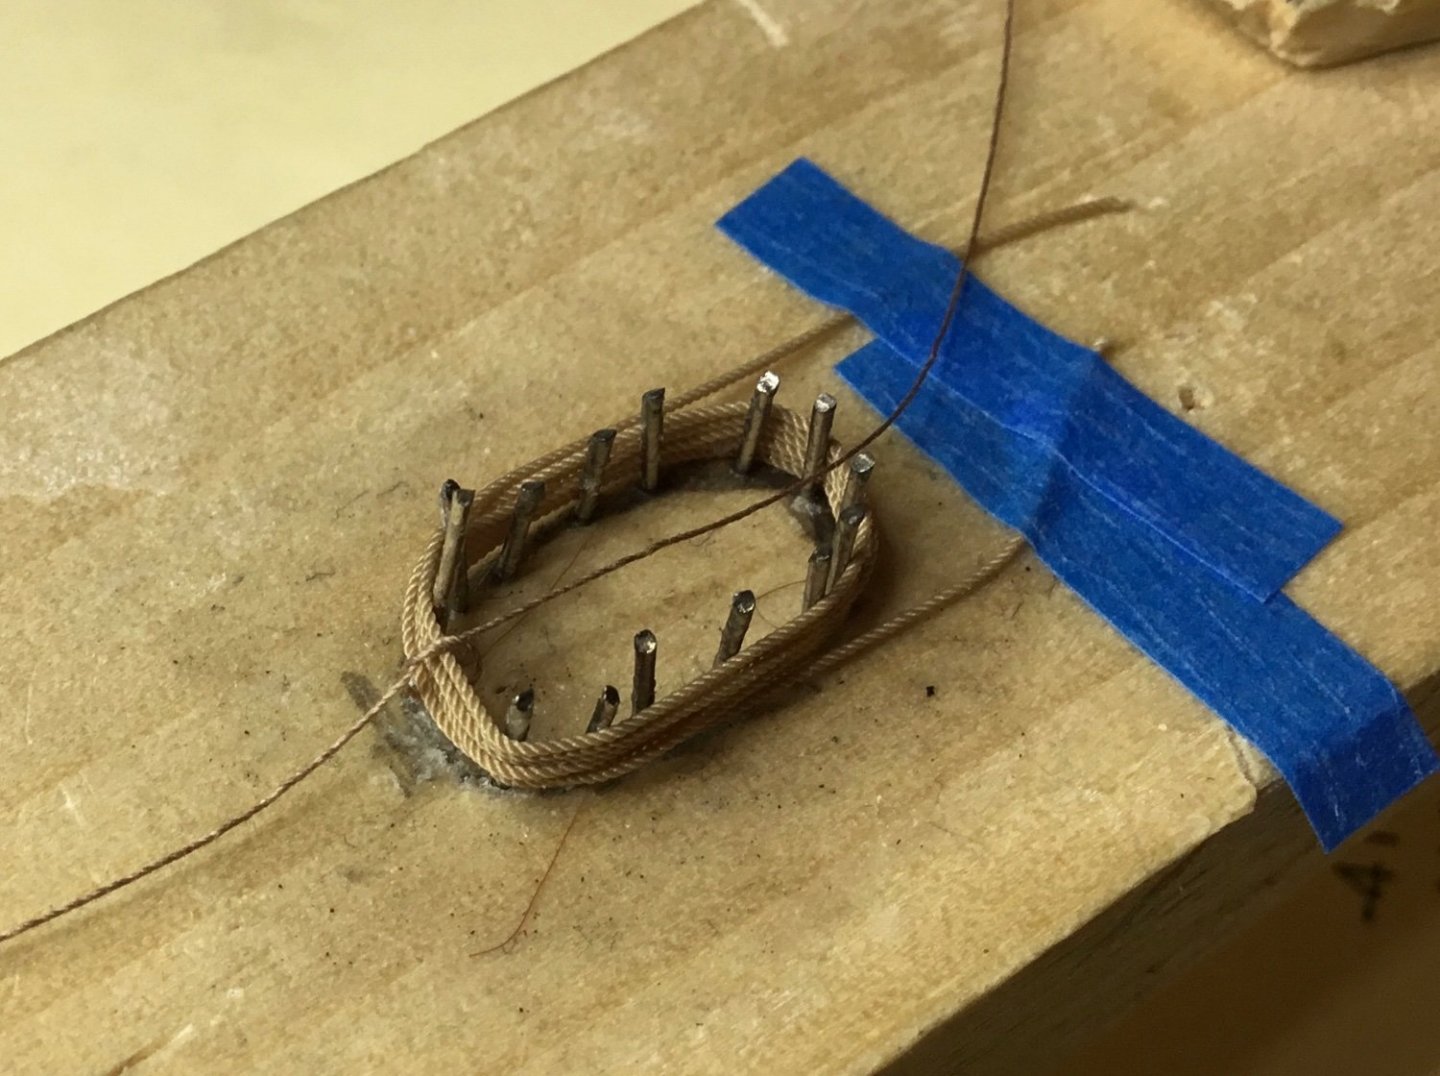
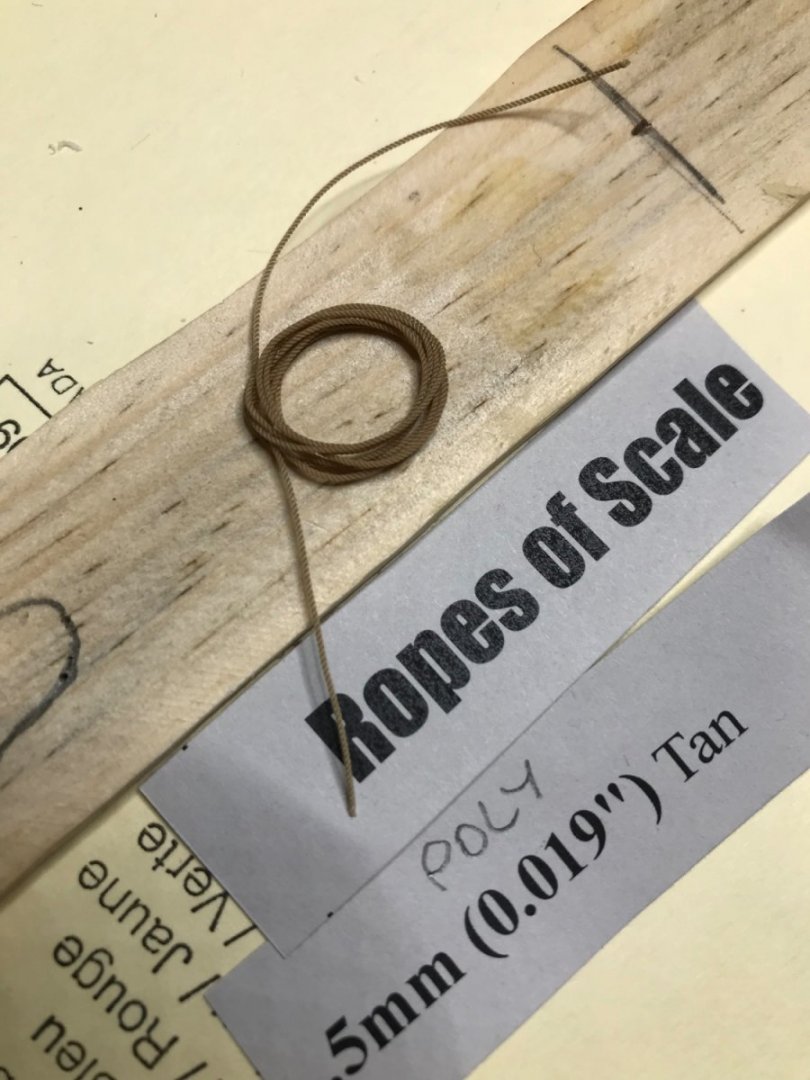
Hi Cisco and Bob, thank you very much for your comments. Cisco, I copied a jig that Glenn used in his Cheerful build. Still trying different configurations. The coil hanging on the mast is from Crafty Sailor. It is 100% polyester. When coated with diluted pva it it kind of behaves but doesn’t really stick together which actually makes it look more realistic. The coil on the bow sprit step is 100% cotton from Ropes of Scale. When coated with diluted pva it really sticks together well but it needs a lot of work to get it sit right. This is the way I seem to be getting along with…..
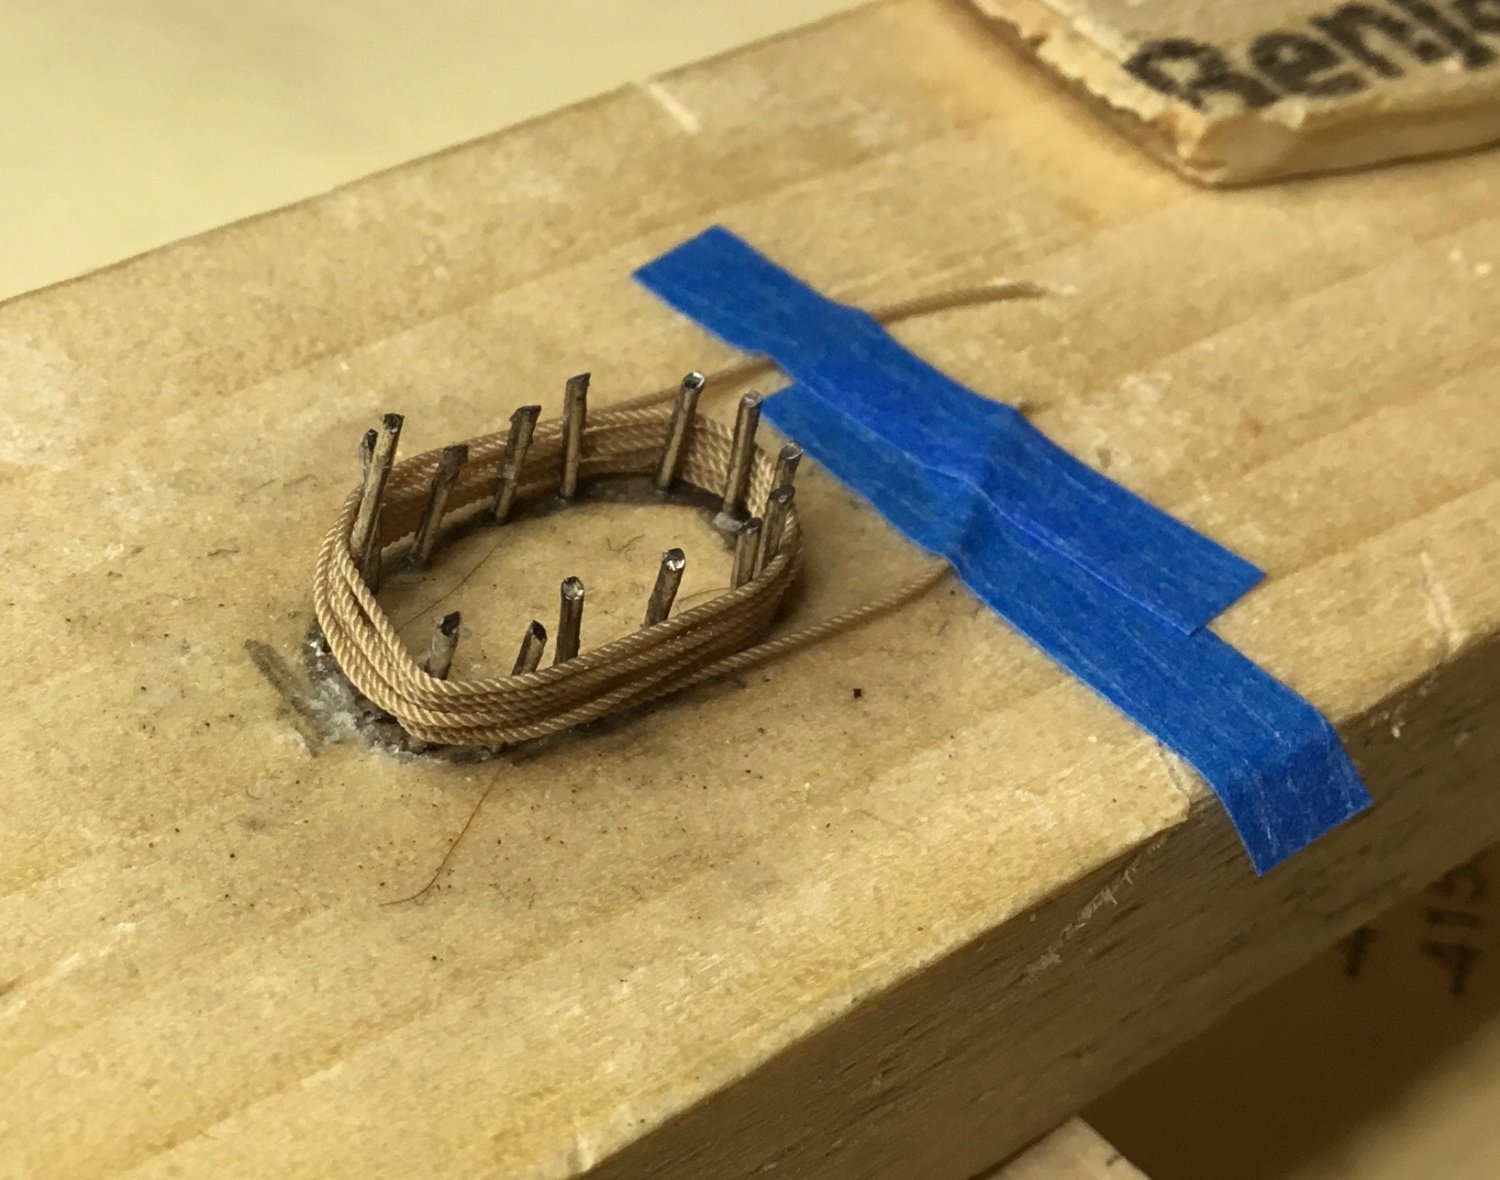
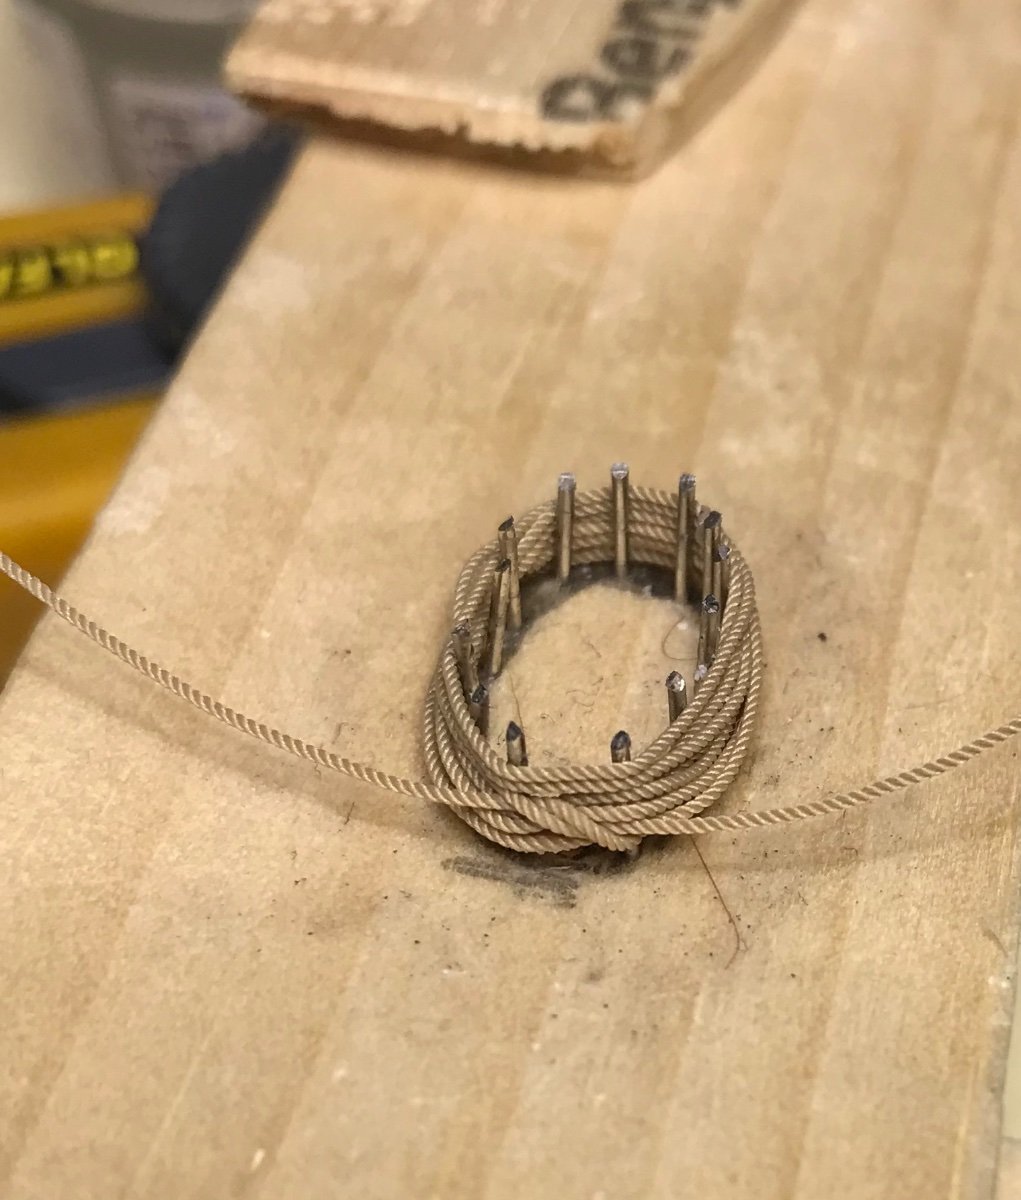
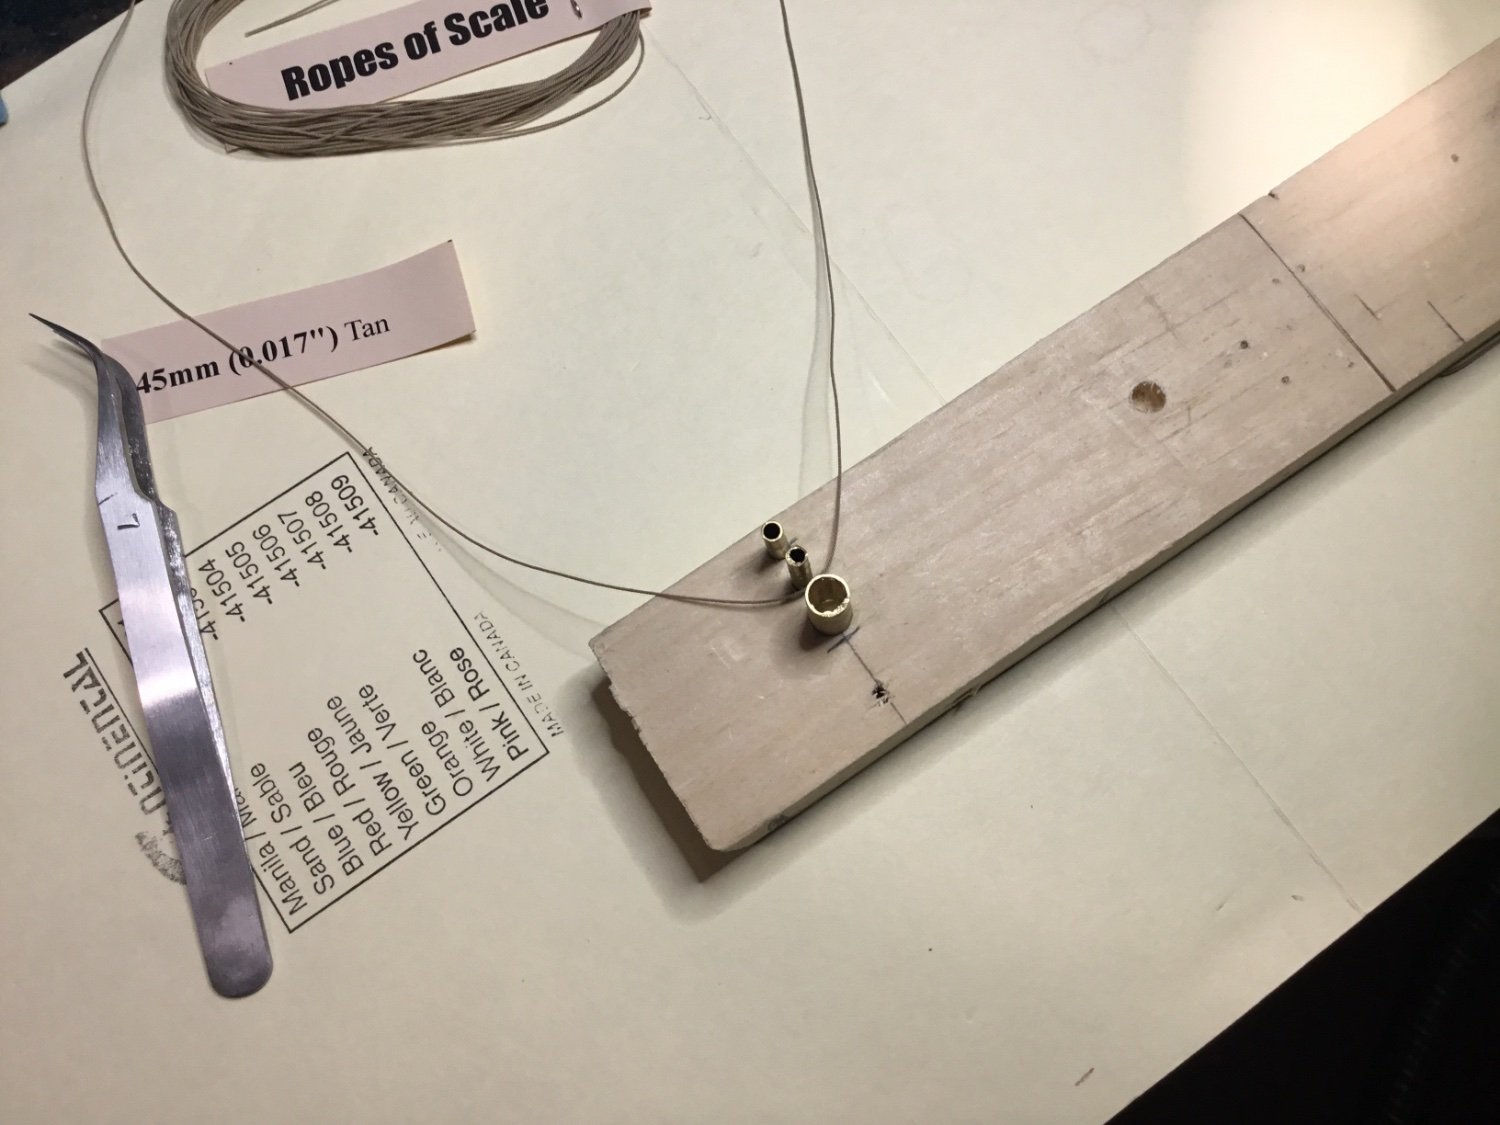
Started in the middle of a piece of 12” rope at the bottom of the center 1/8” tube. Crossed over between the center and top tube.
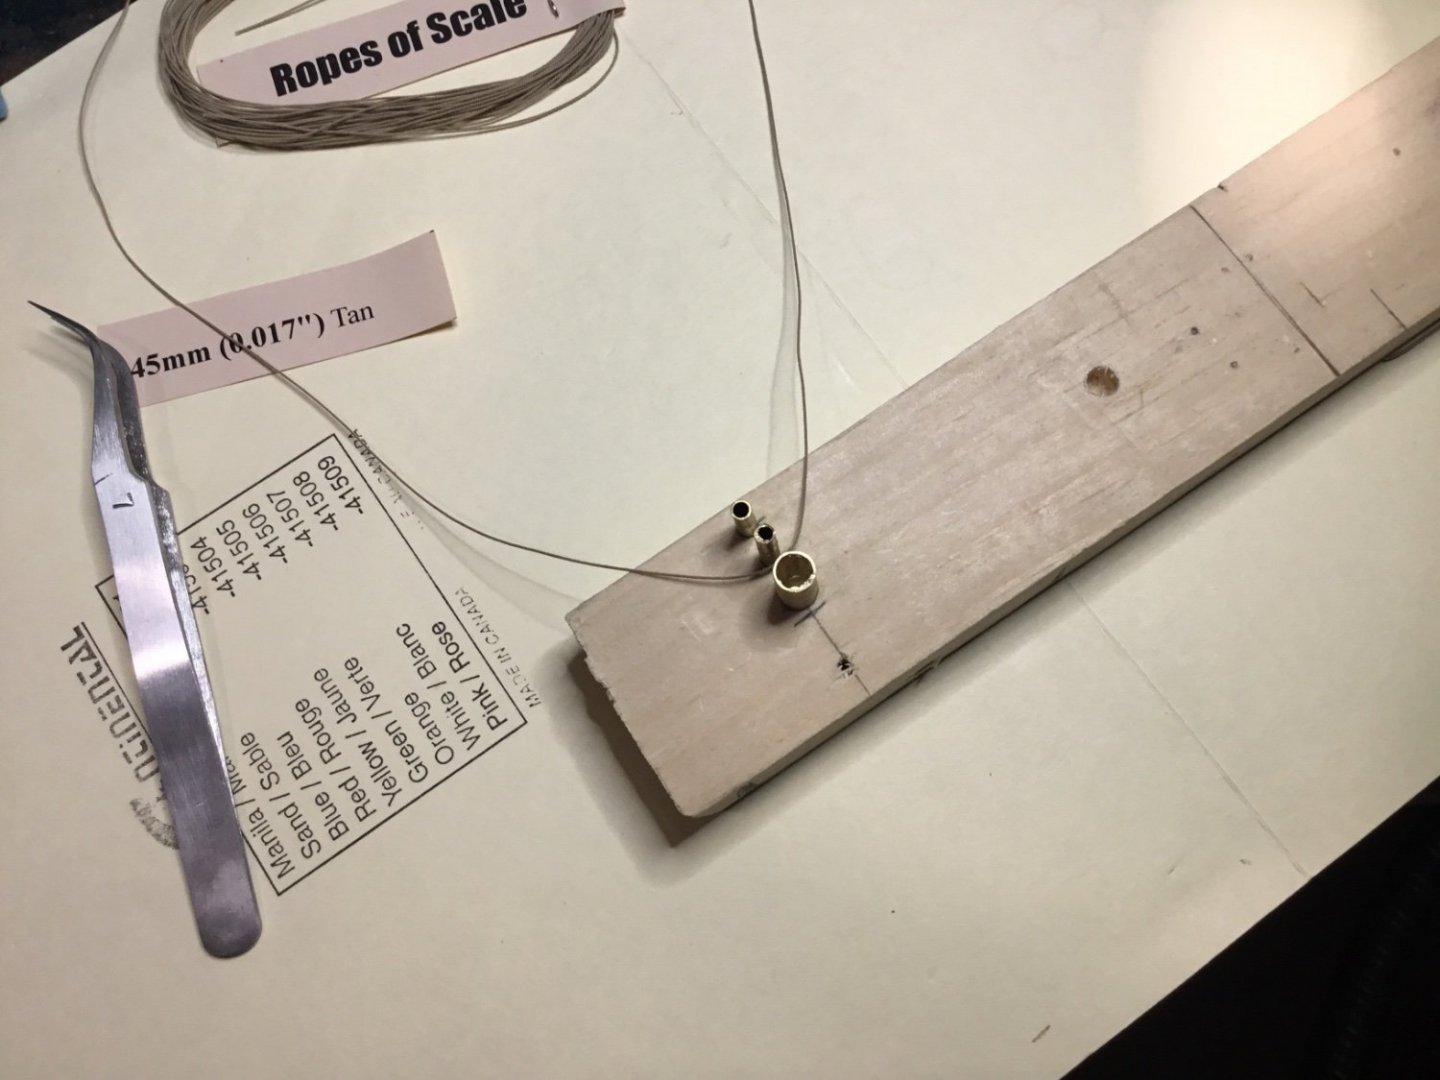

Crossed again on top of the top tube
Wrapped around all of the tubes in opposite directions and put half a square knot at the bottom of the 1/4” tube

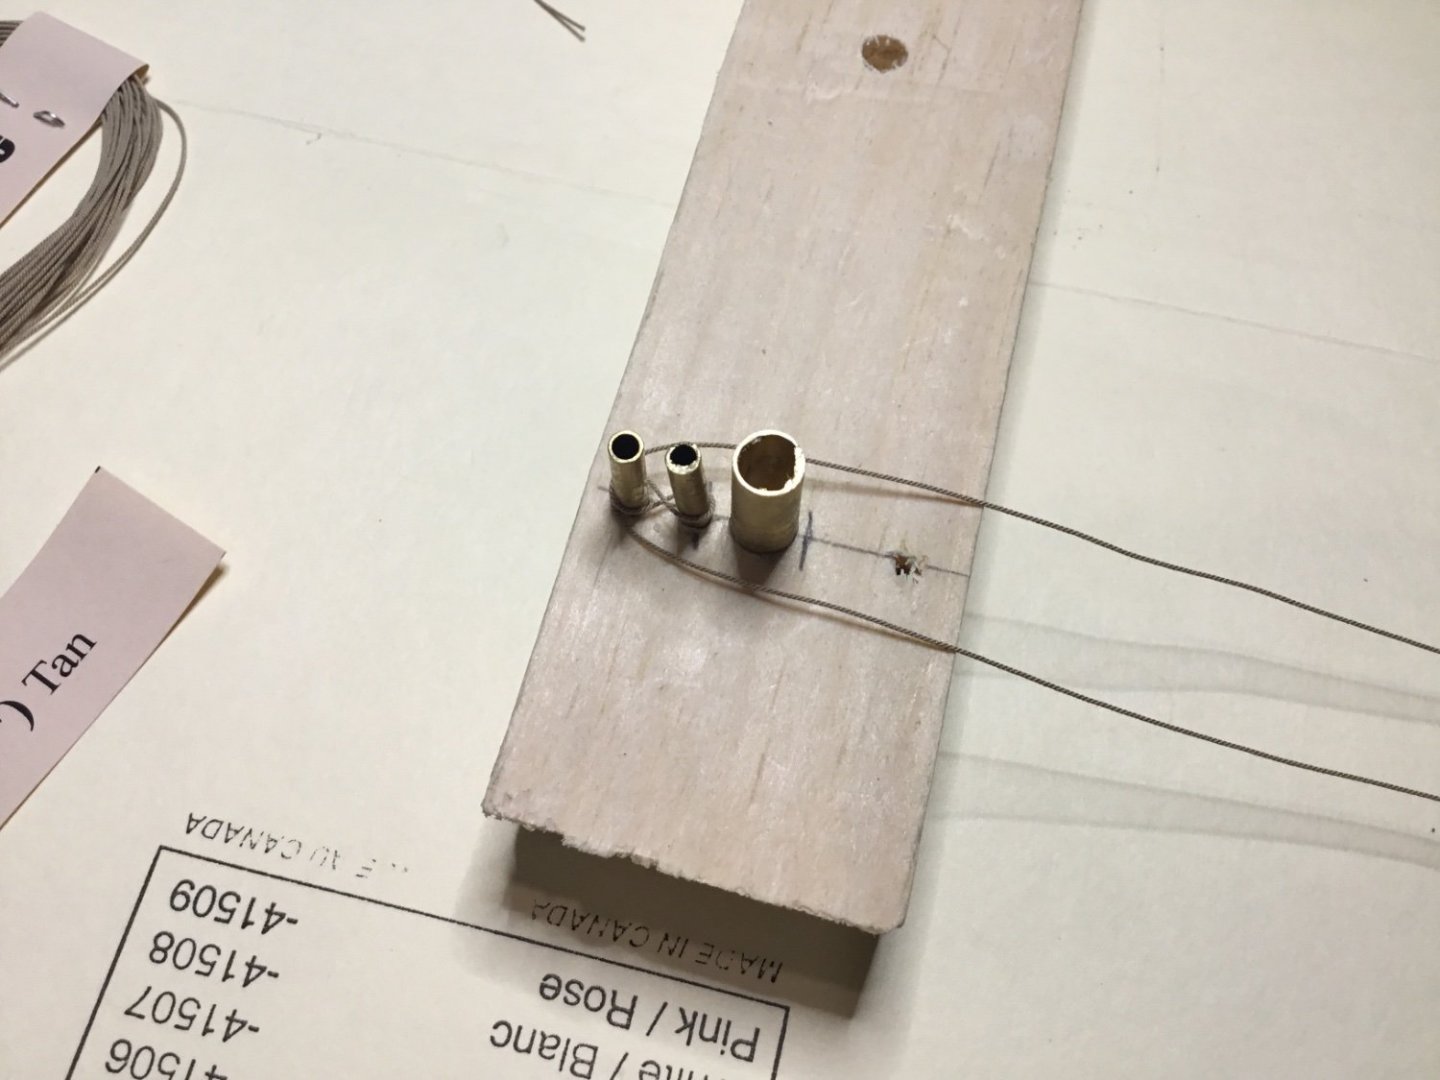
Painted with diluted pva. When dry I put a bit of CA on the knot and cut off the excess.
Wrapped the small loop in the center around the top of the big loop. Gave it a test fit to show the difference between the different ropes
The cotton rope still needs a bit of tweaking.
-
Thank you so much everyone for the Likes. Ian, SUBaron, and Glenn, your comments are appreciated very much. Today I made a couple of rope coils and started taking pictures of them as I went just to see what they actually looked like. Not going to post everyone but it’s amazing how much tweaking they need when you zoom in.

Talk to you soon -
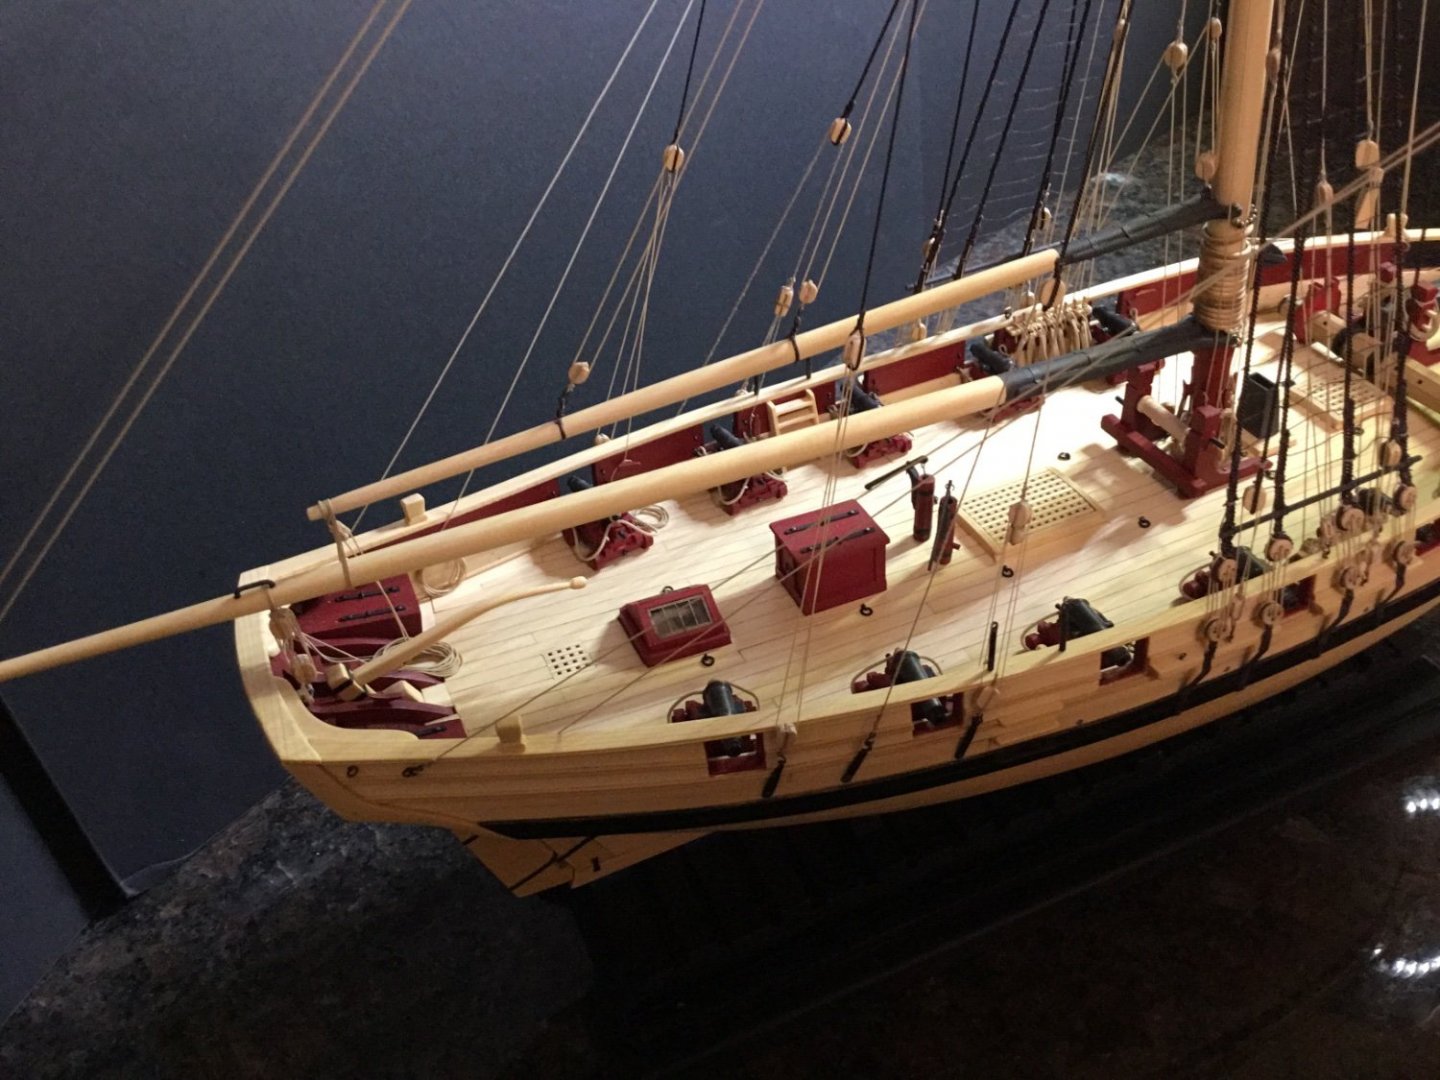
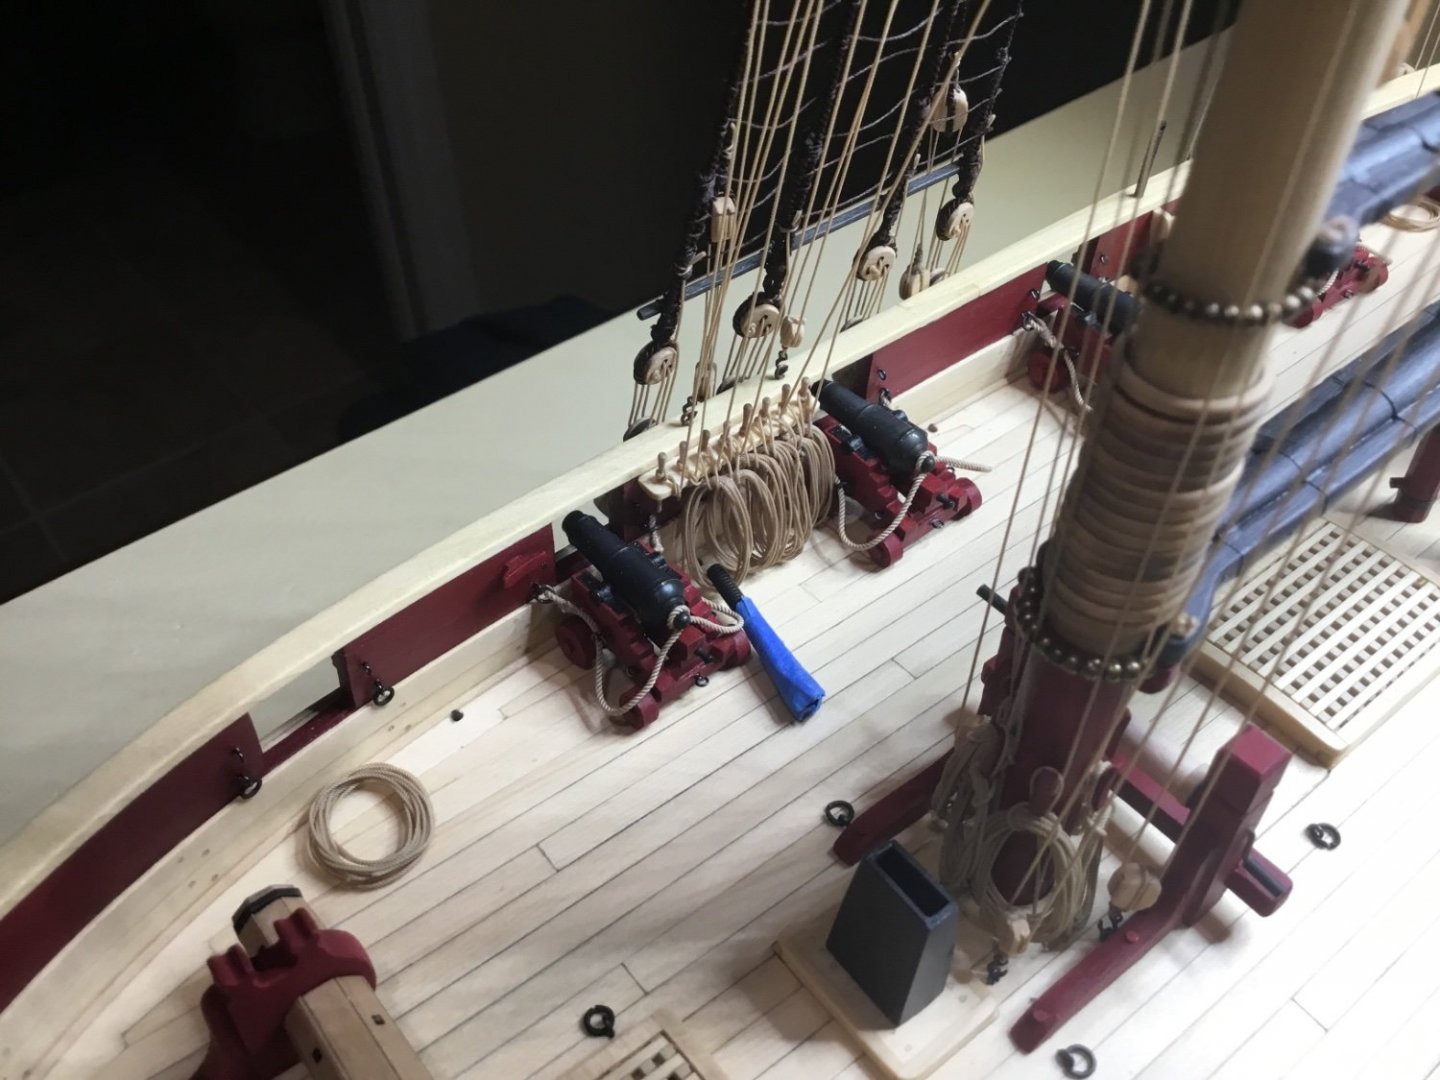
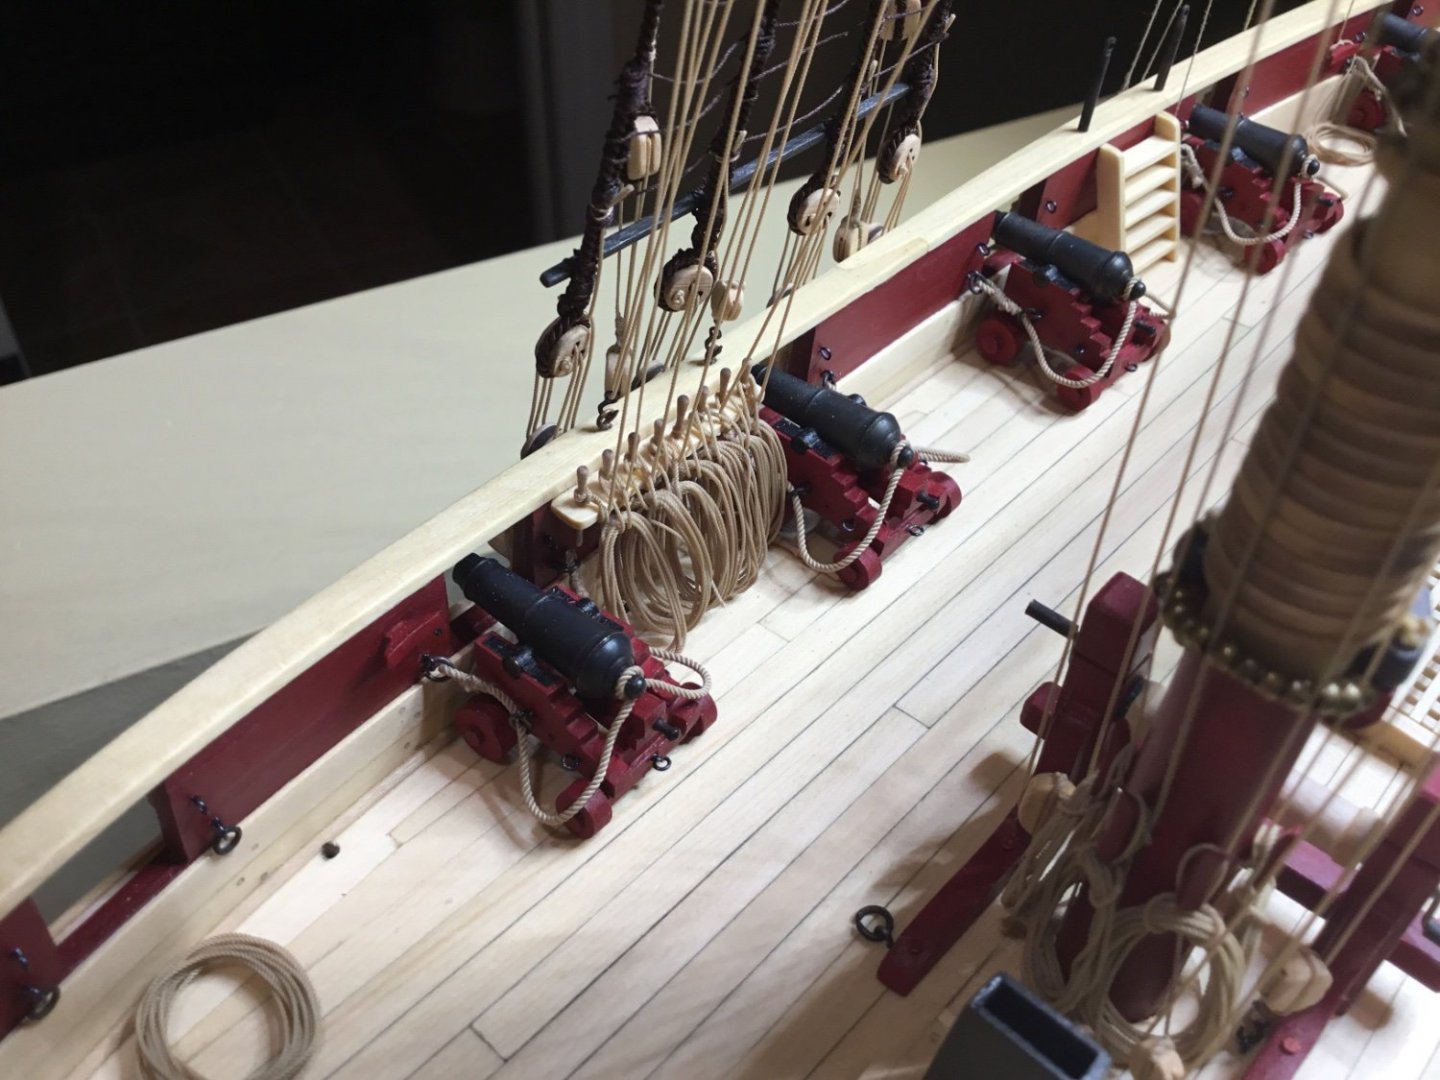
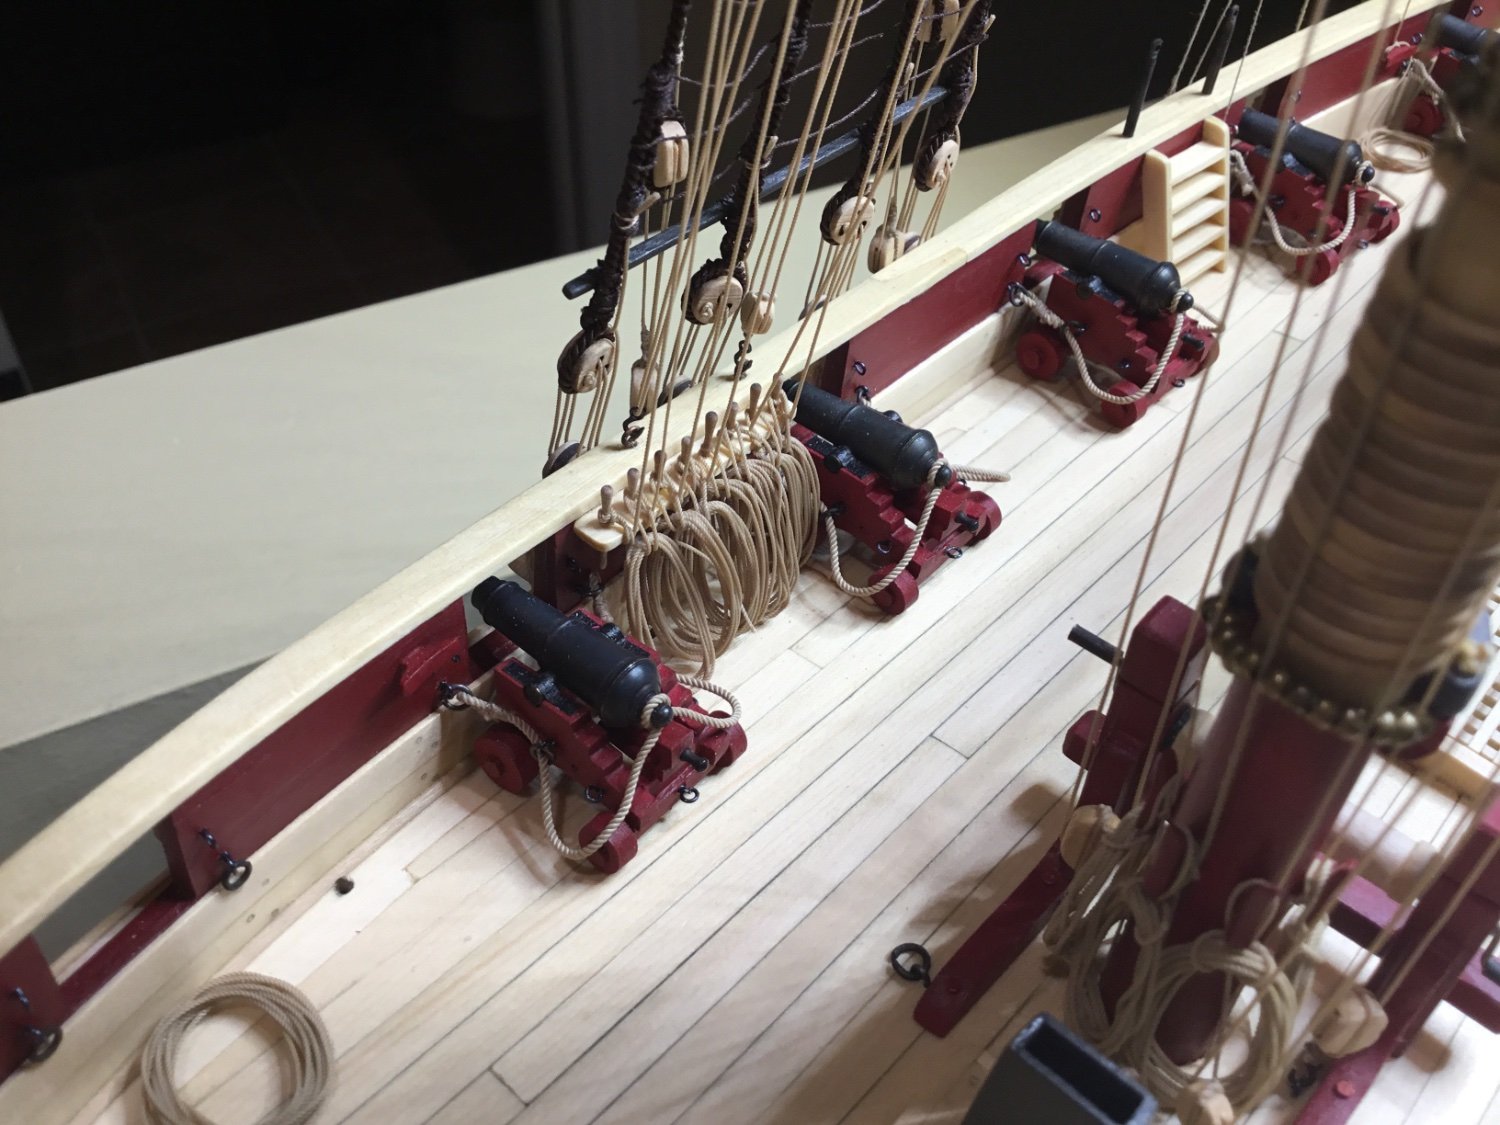
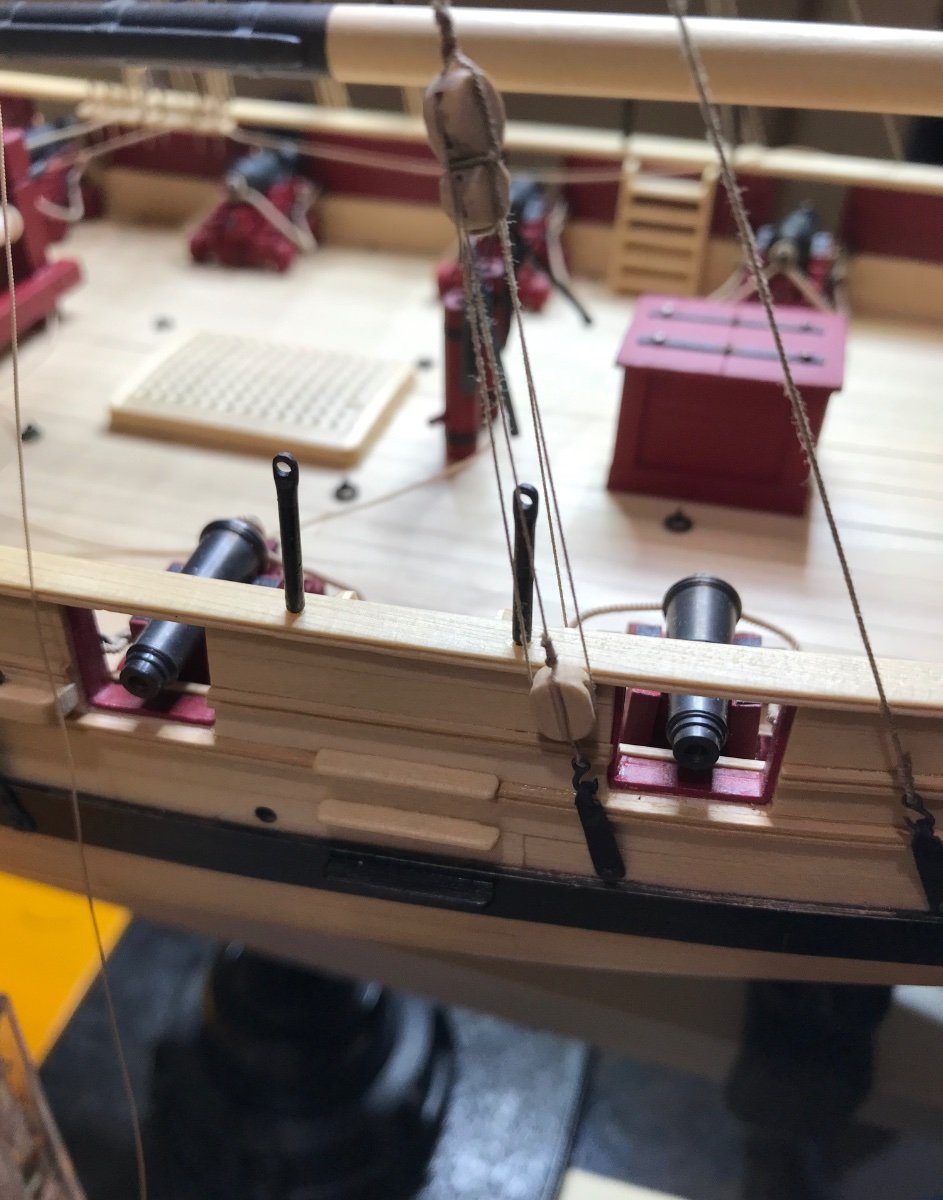
Hi Everyone, thank you very much for the comments and Likes. Just thought I would post a few photos of the rigging. Didn’t want to post too much on this part of the build because other members have documented theirs so well. Only have a few lines to secure and then on to making coils of rope.


See you all next time.
-
-
Hey SUBaron, everything is looking great. Every once in a while I get an uploaded picture that needs rotating. I found that if I delete it, go back to the original (on an iPad) and crop it a bit, then re-upload it, usually it ends up in the correct orientation
- Keith Black, Scotty W and SUBaron
-
2
-
1
-
-
Hi Alan, thank you very much for your comment. Building Cheerful has been a lot of fun and I learned a lot following Chuck’s monograph and videos. I highly recommend this model to anyone wanting to build a good looking, well documented little ship. I have a warm spot in my heart for Billings Boats and last year after seeing Ekis’ beautiful build I picked up a Nordlands Baaden 416. The planking looks like a challenge but I think I’m up for it. Whenever I look at a kit from any manufacturer I always think of what it would look like if it was done with different types of wood. That’s why I think that Syren’s offerings are so appealing. Buy the parts that you need and get a lumber package from your favorite supplier. I don’t have the work space or tools to cut bulkheads and things so this system works for me. Maybe other manufacturers will eventually offer this method as an option.
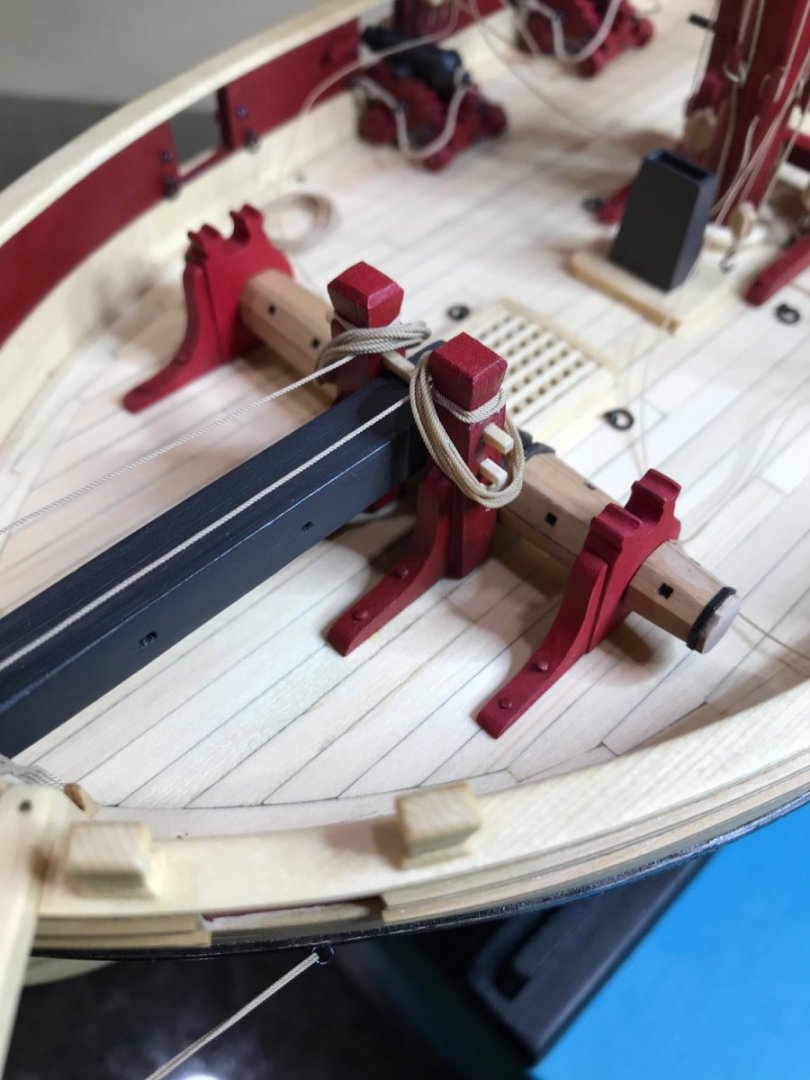
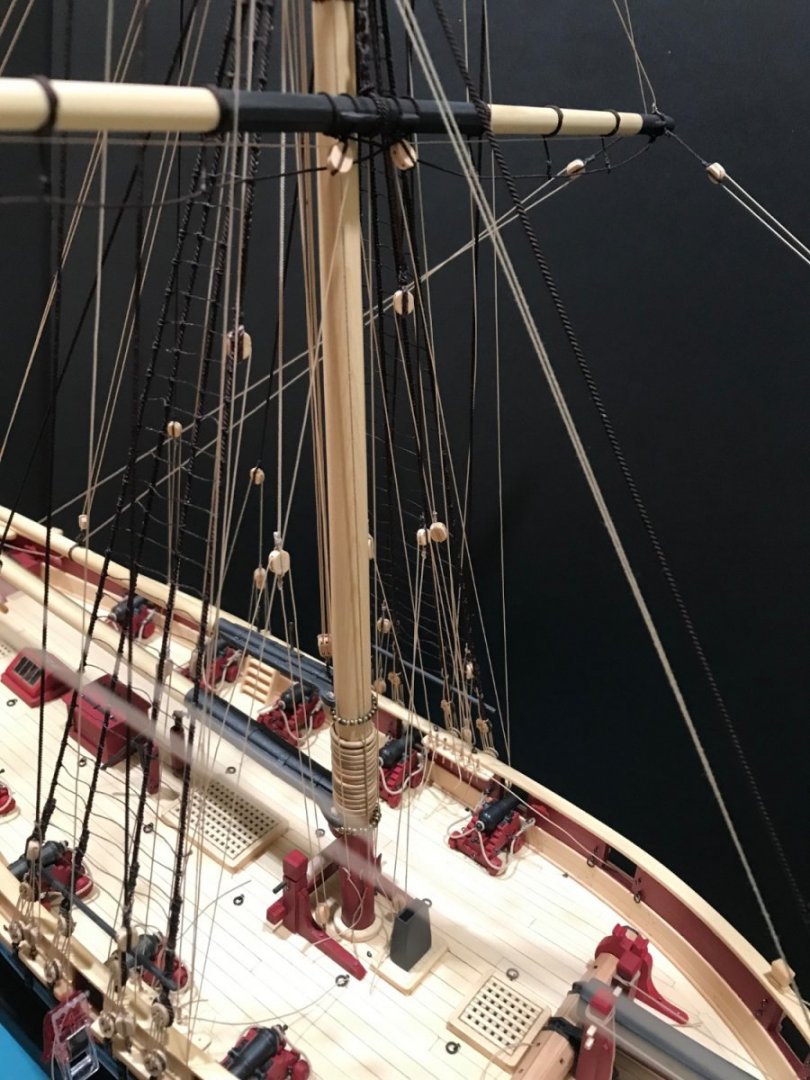
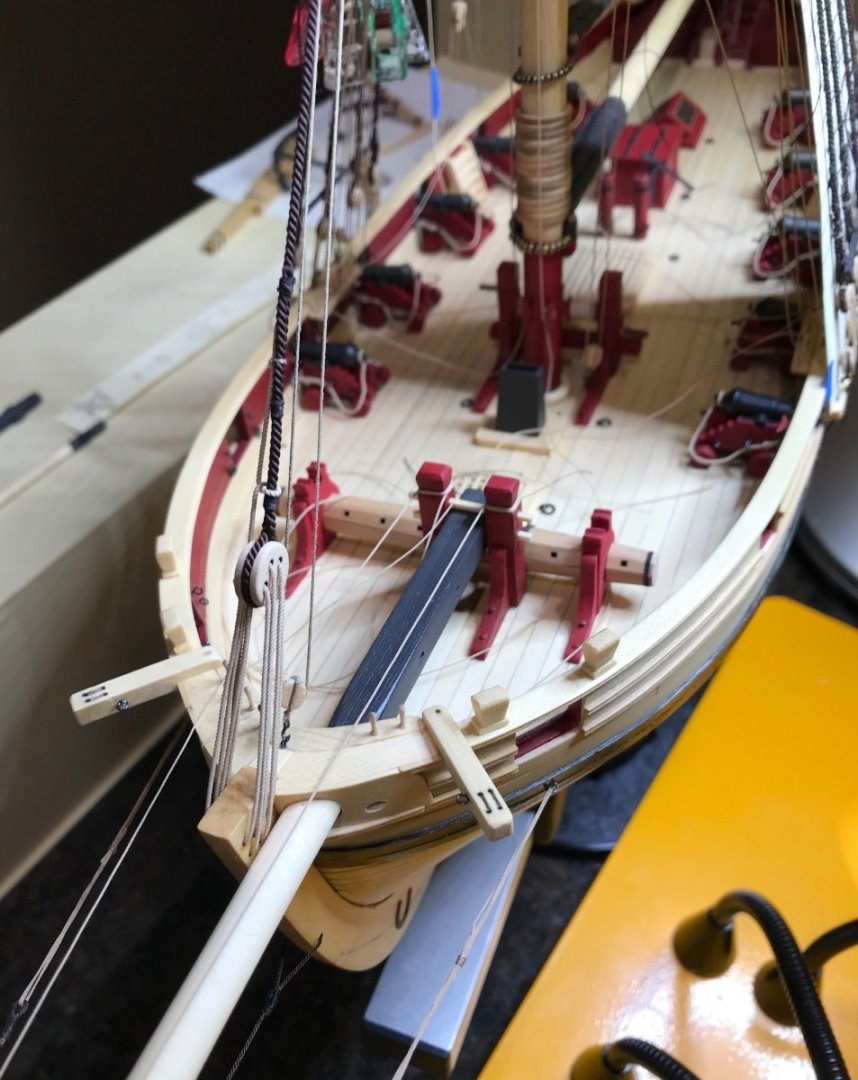
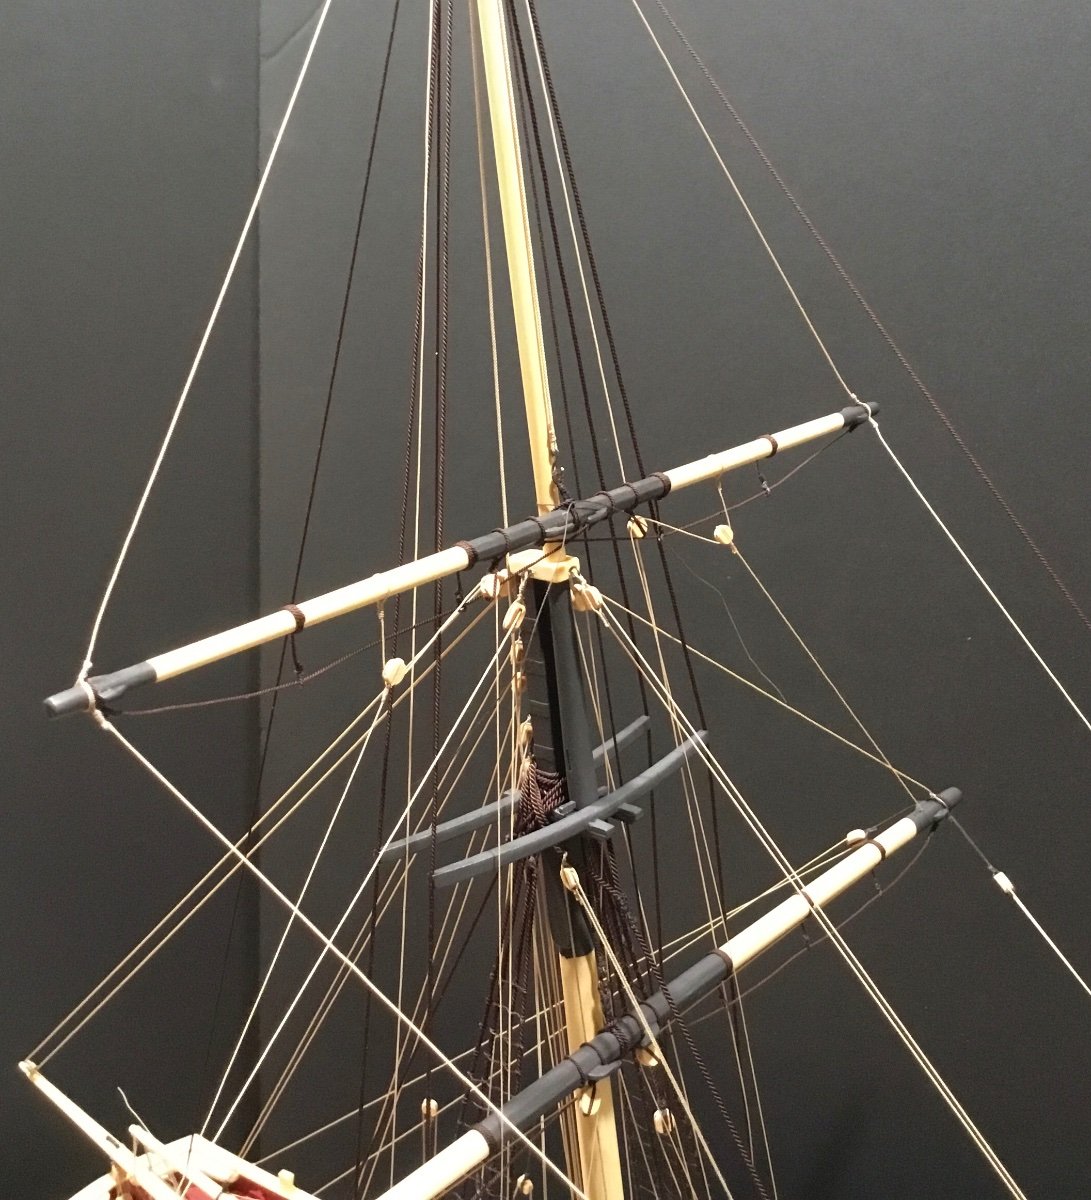
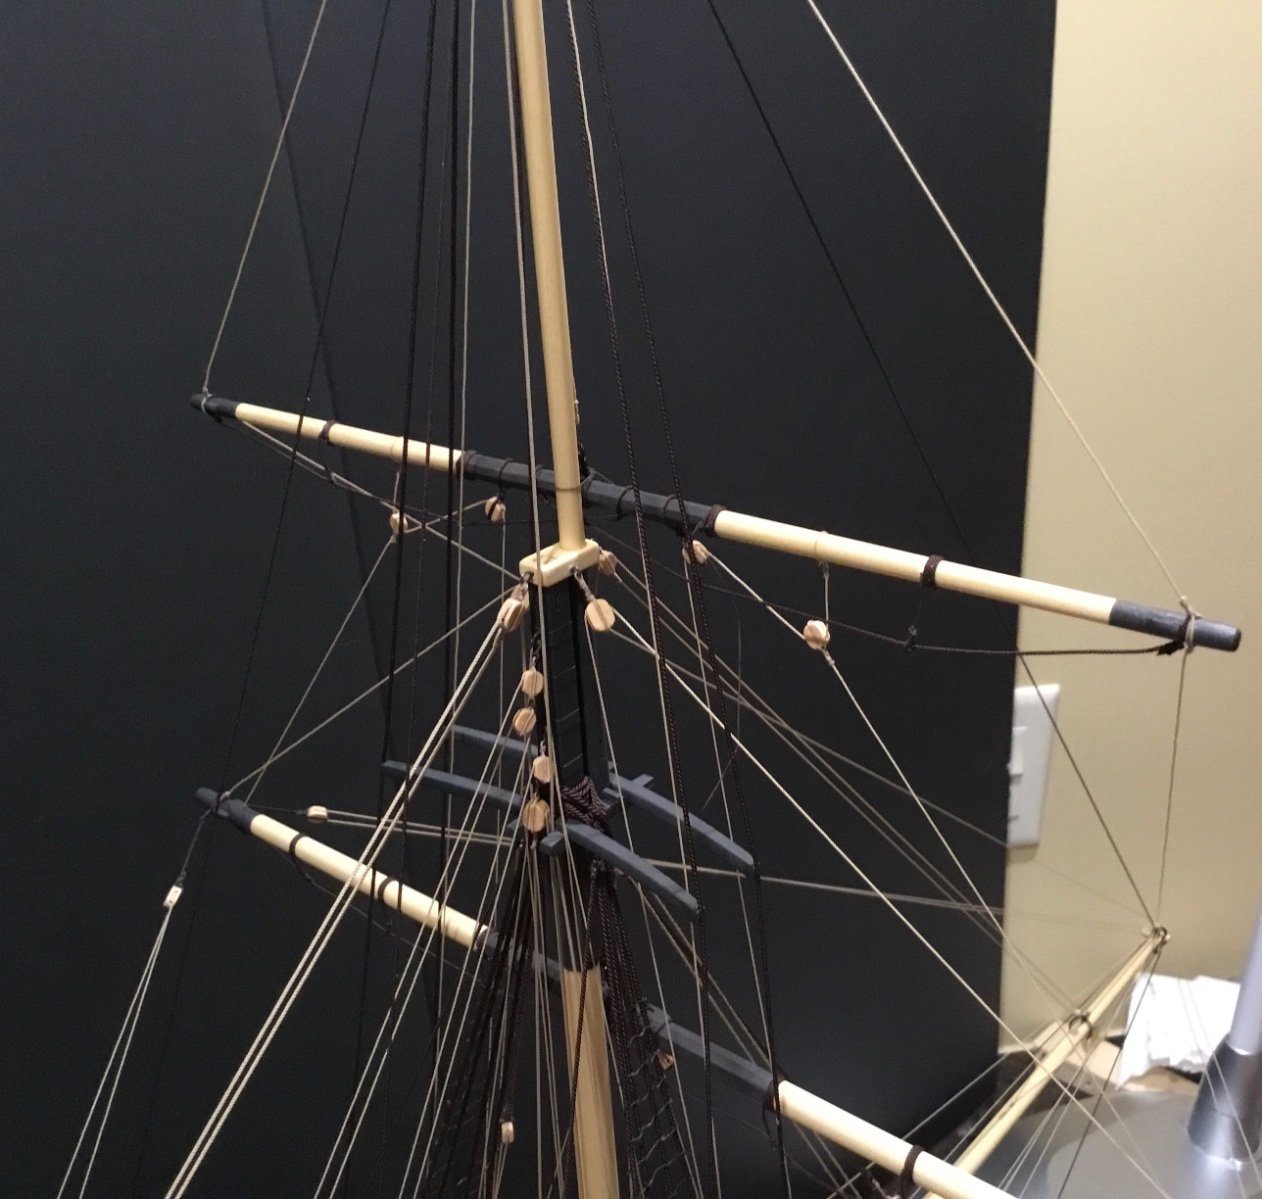
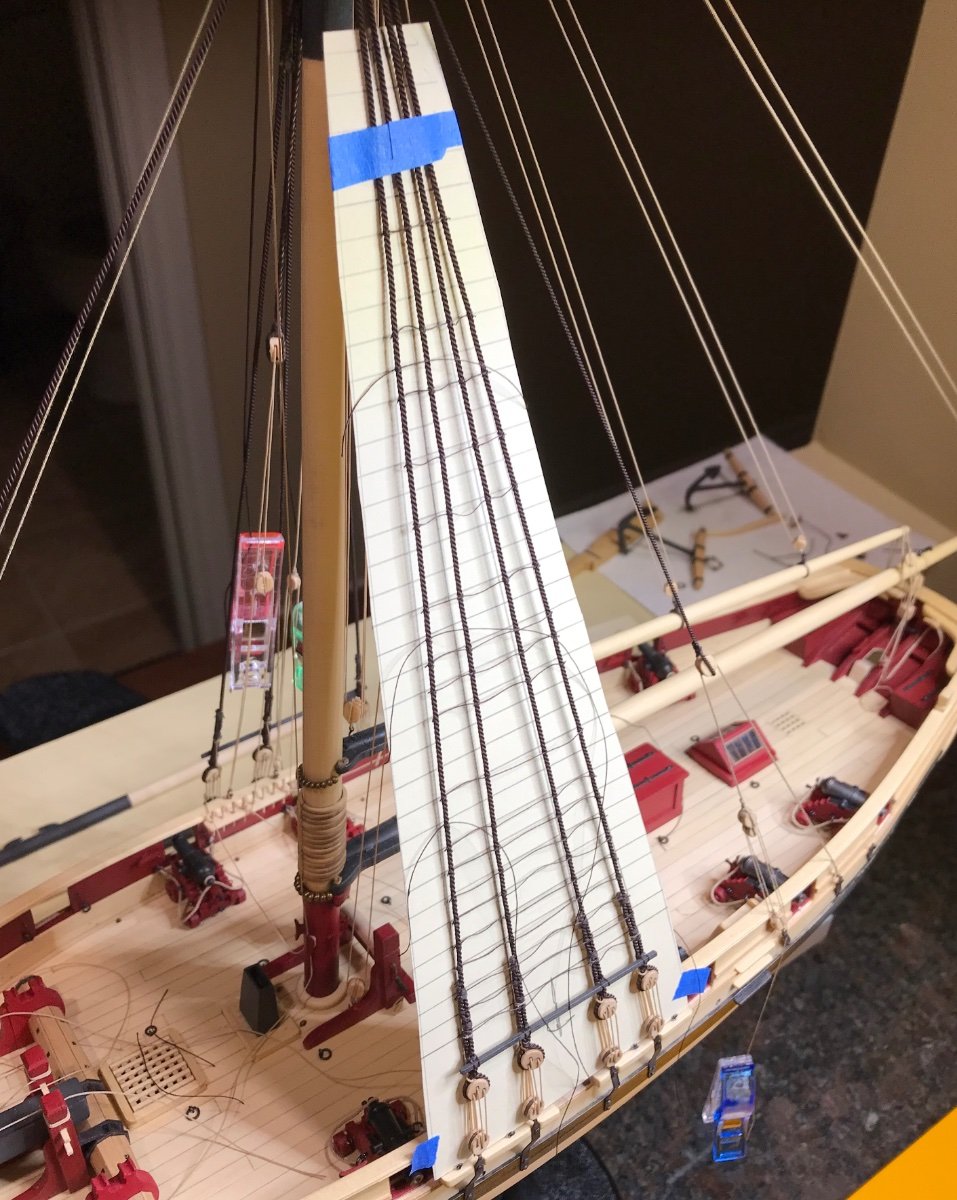
This week was spent rigging the yards. I took the easy way out and drilled holes where the stirrups are mounted. It made it easier for me to make them hang down the same distance. When I look a the photos I realize that more care should have been taken determining where the wraps started and ended but when you stand here looking at it, it’s not that noticeable.

The tiller was mounted and then I made my first rope coil.
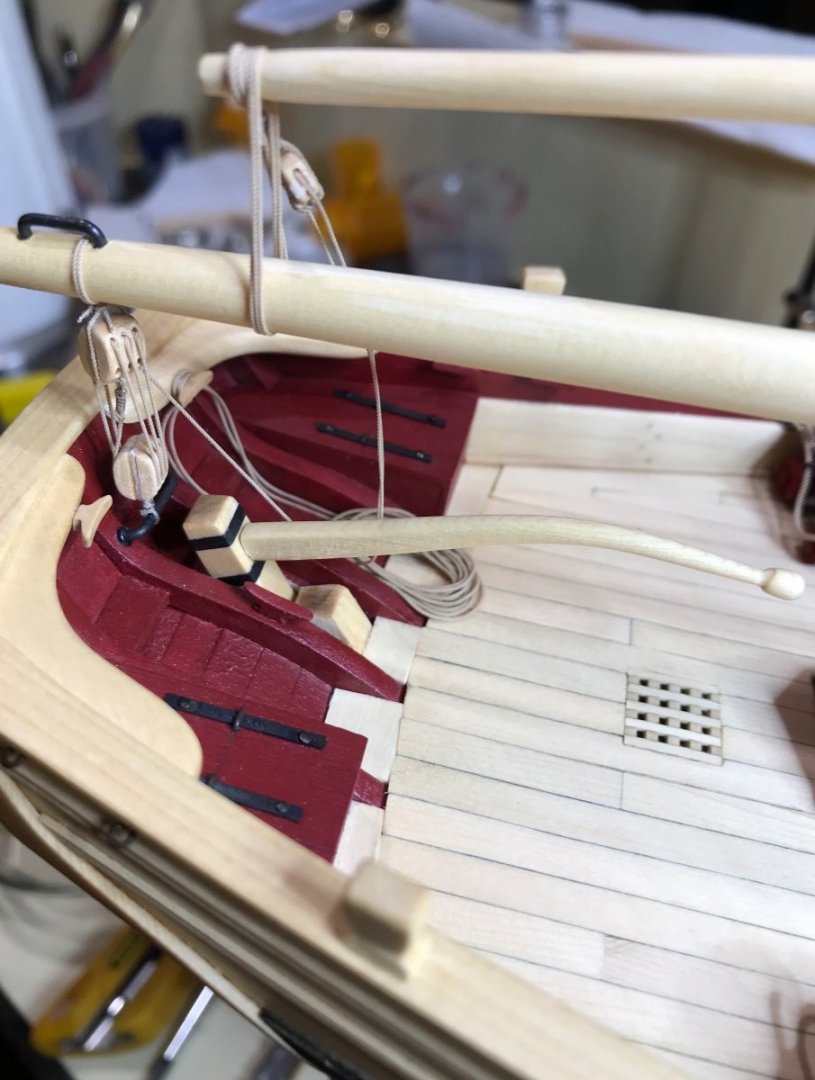
The entryway stanchions are glued in place and now just have to try not to break anything (again).

See you next week
-
Thank you everyone for all of your much appreciated Likes. Glenn and Ian, thank you for your great comments. You know when I started the rigging I thought that I was in the home stretch but not so. It seems to be getting more challenging every day. You really need to be a bit of a gymnast to get to the finish line. ( If gymnasts have finish lines )
- glbarlow, Seventynet and Dave_E
-
3
-
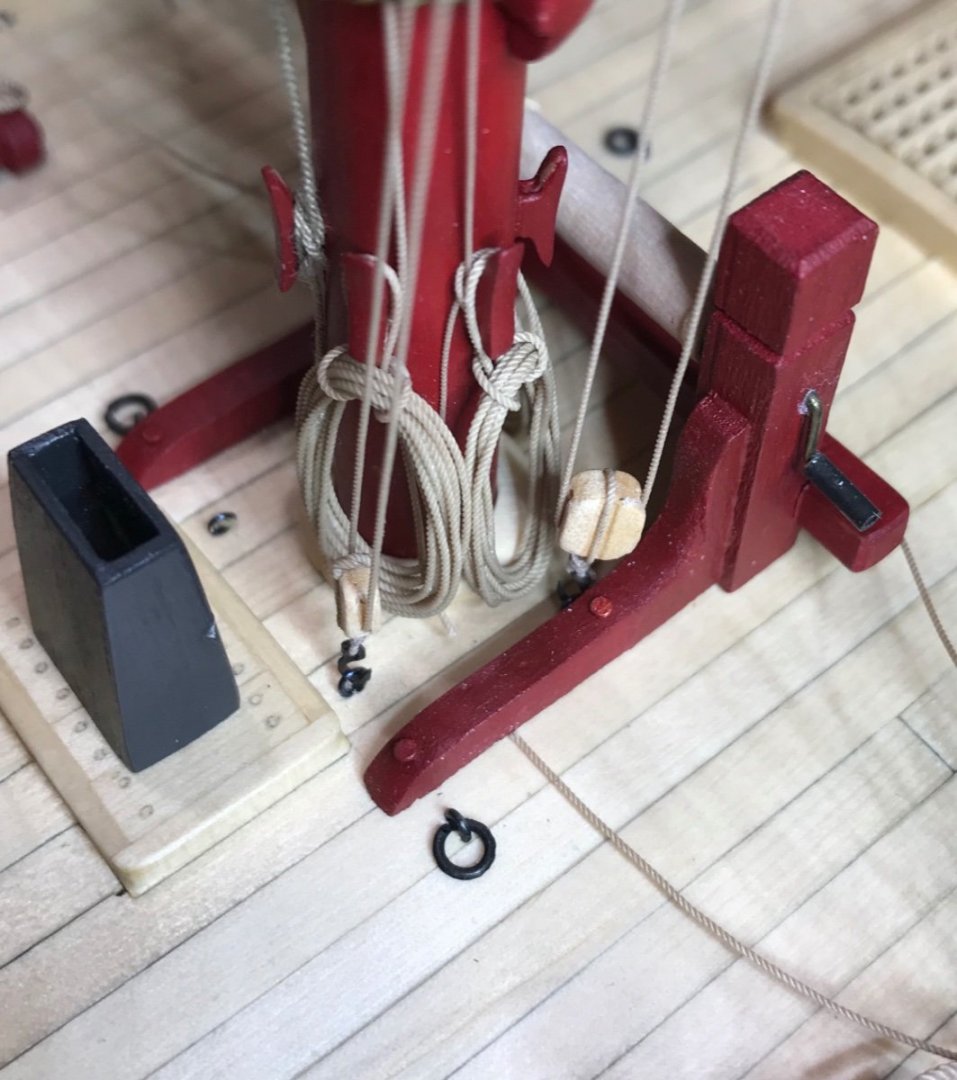
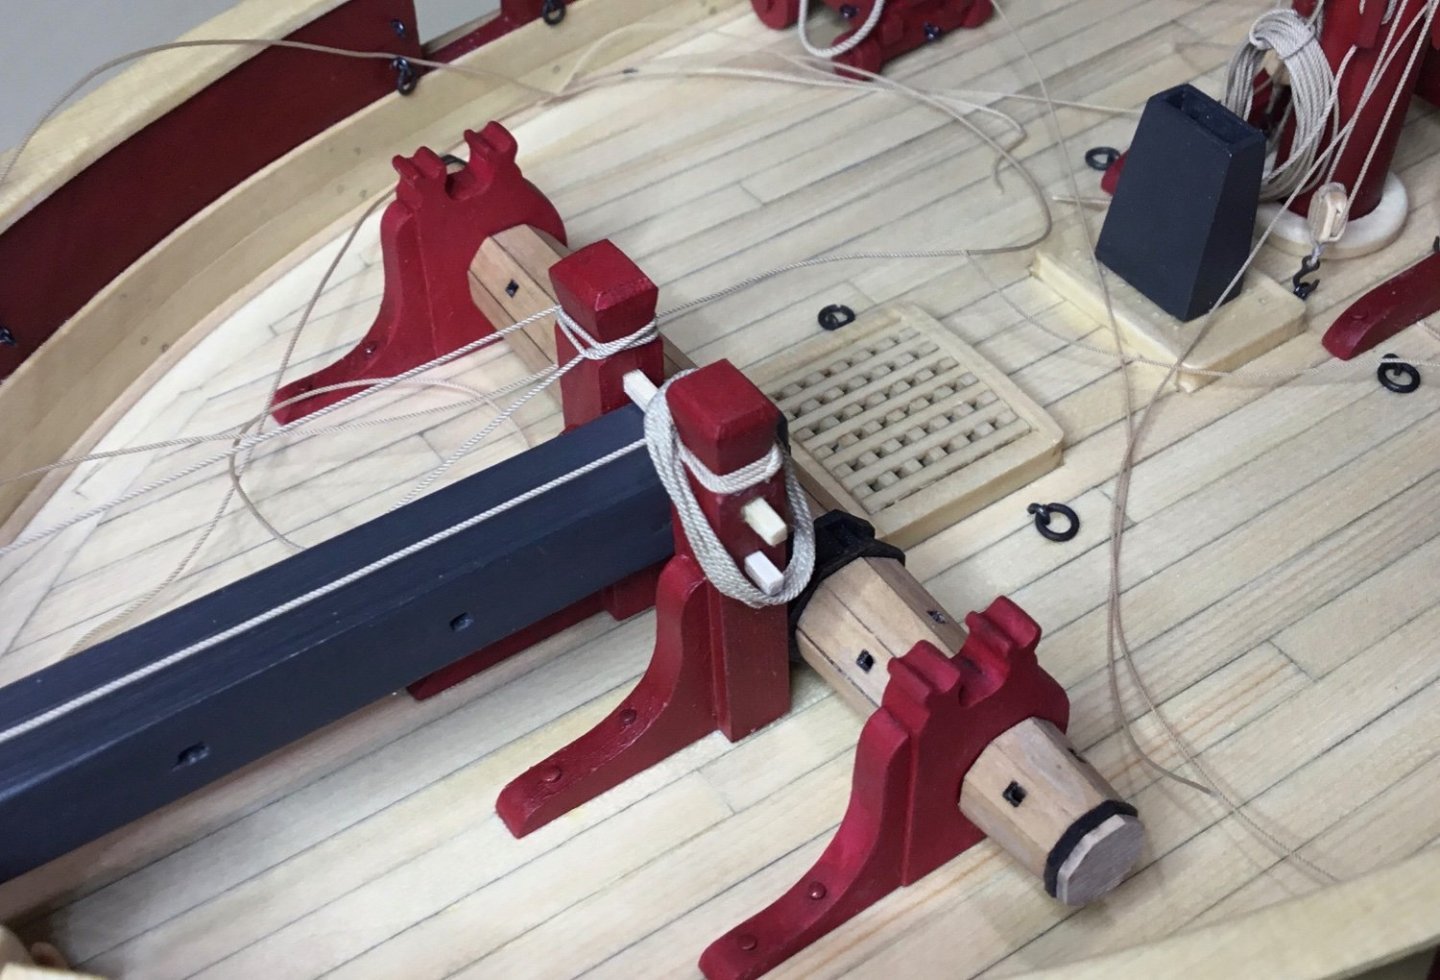
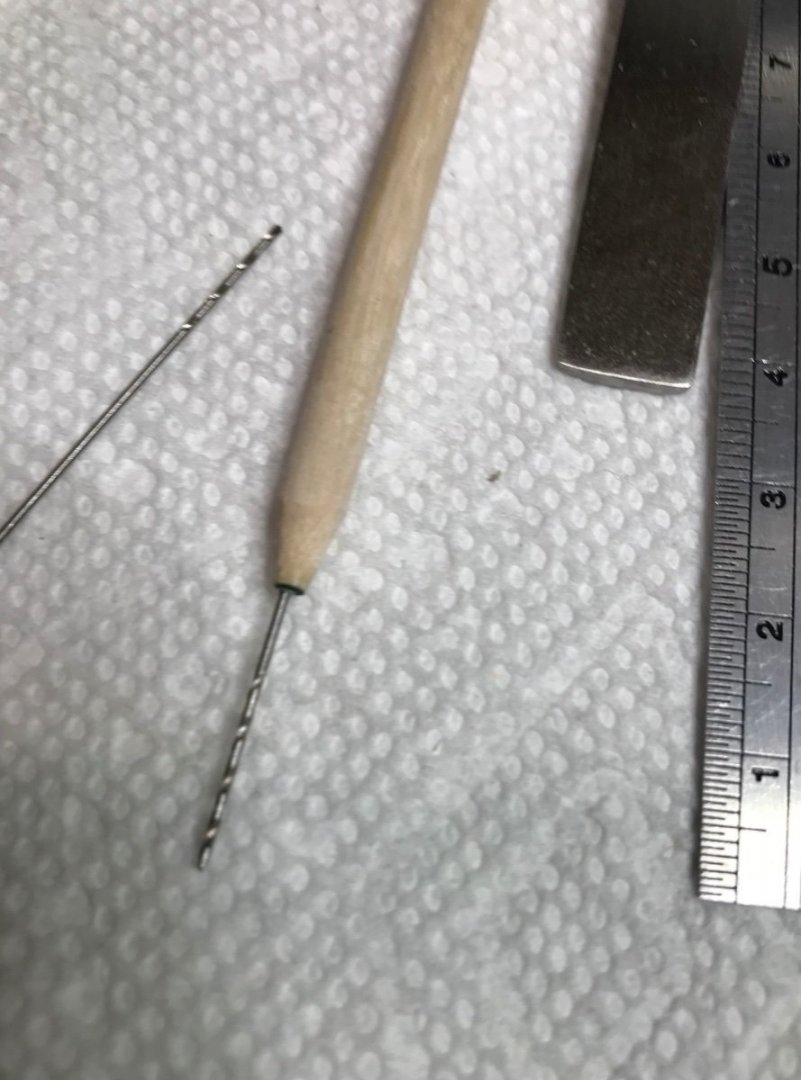
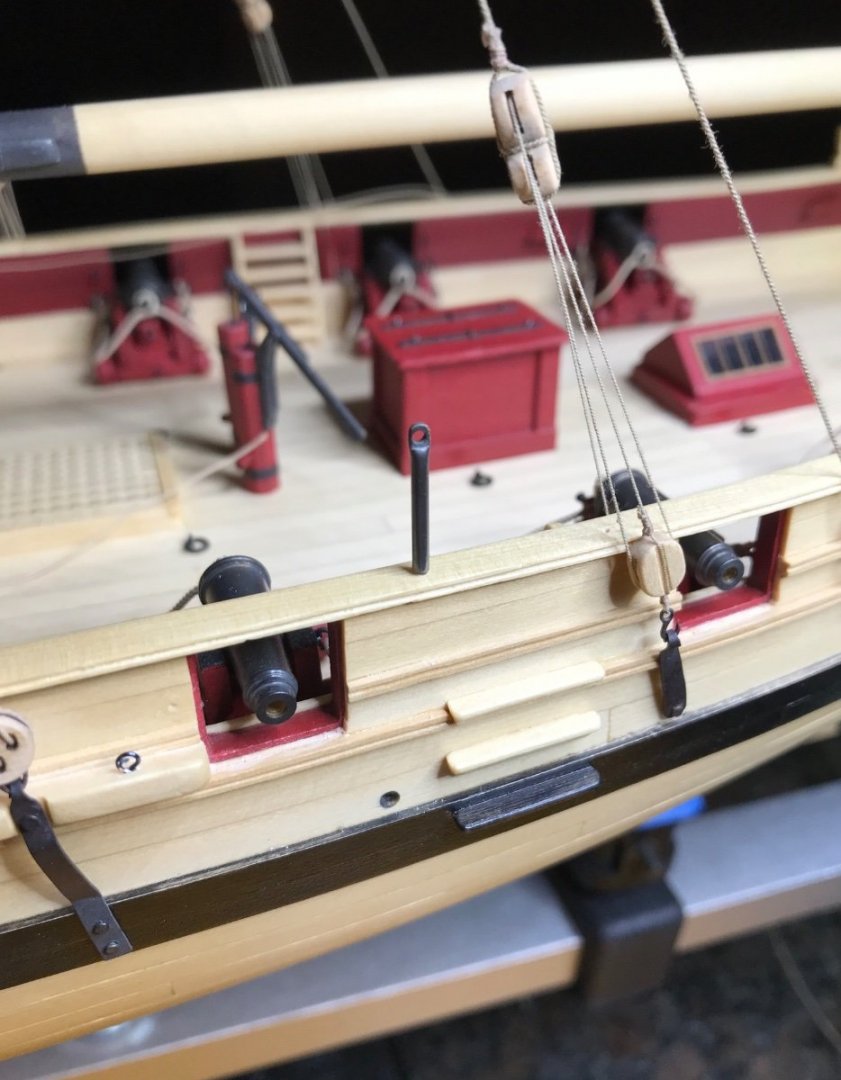
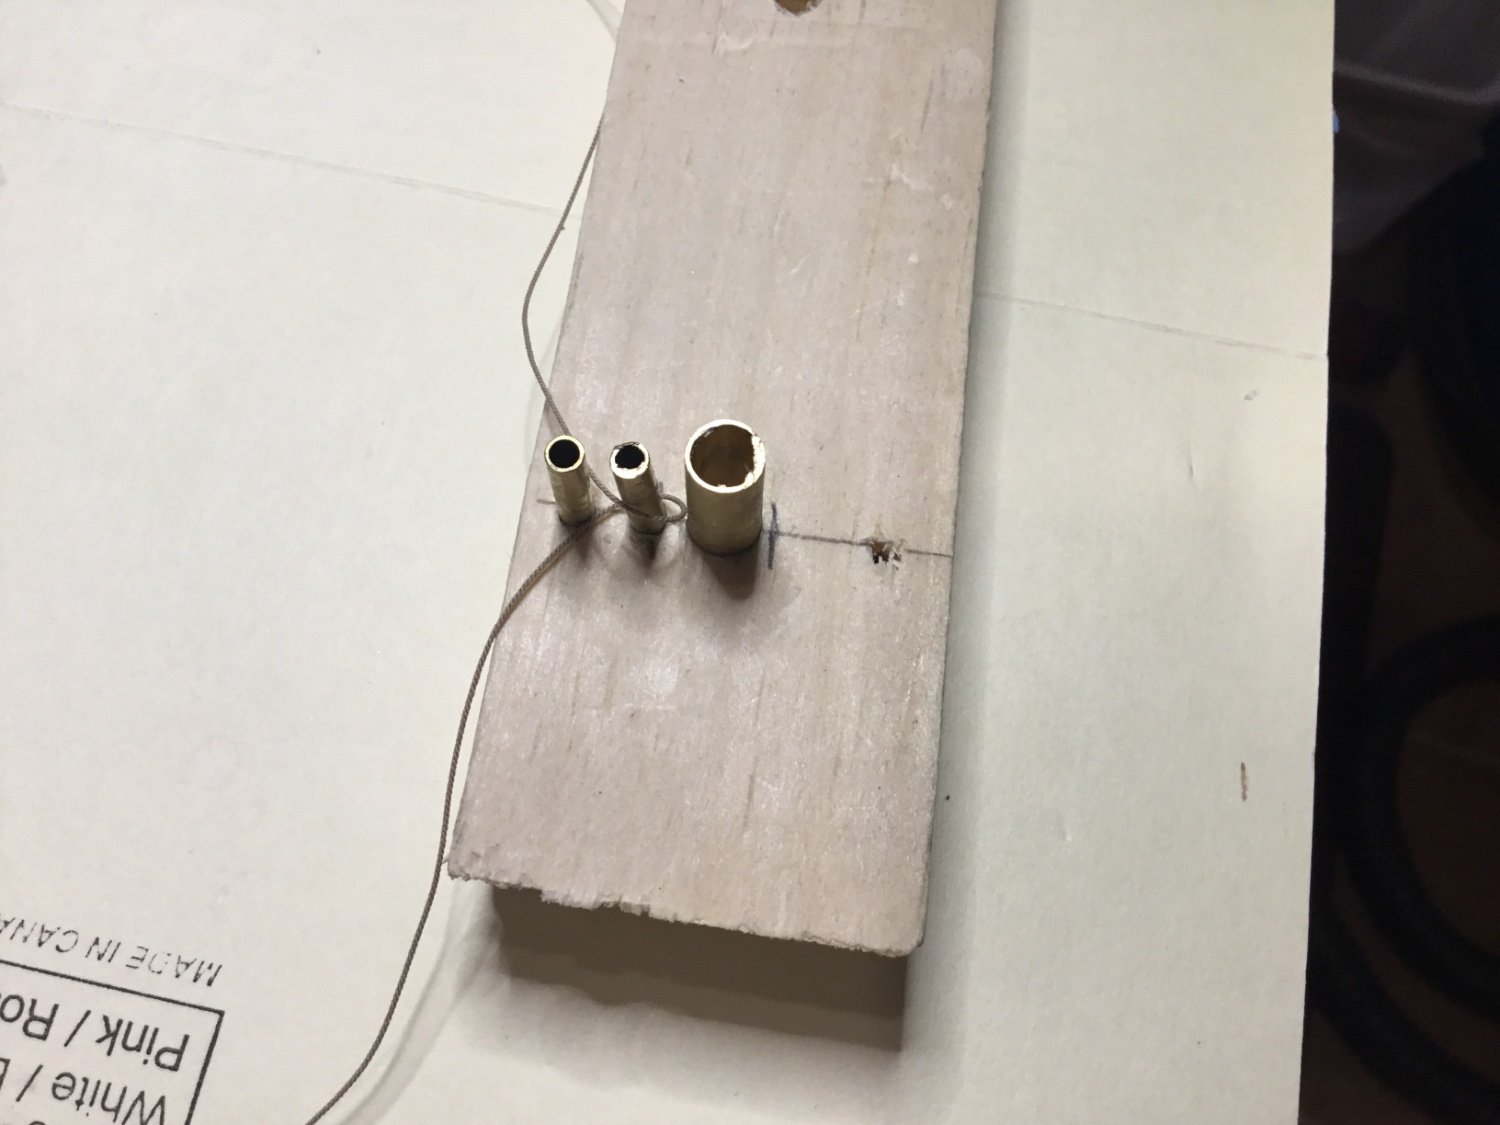
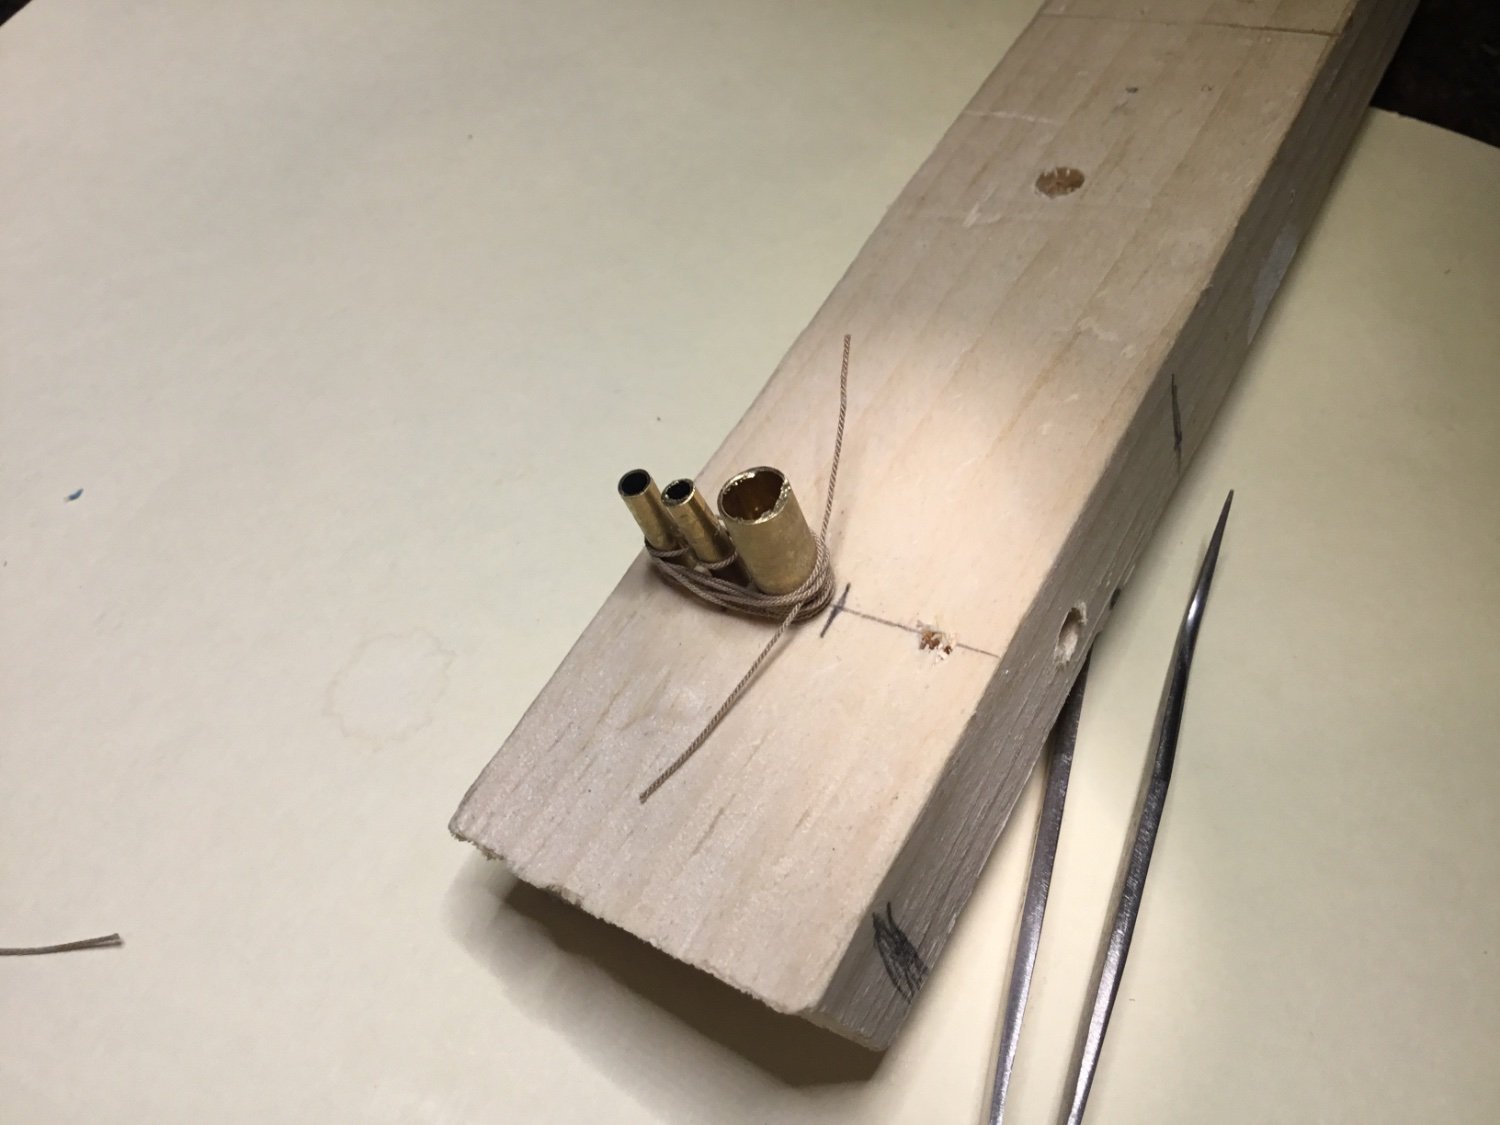
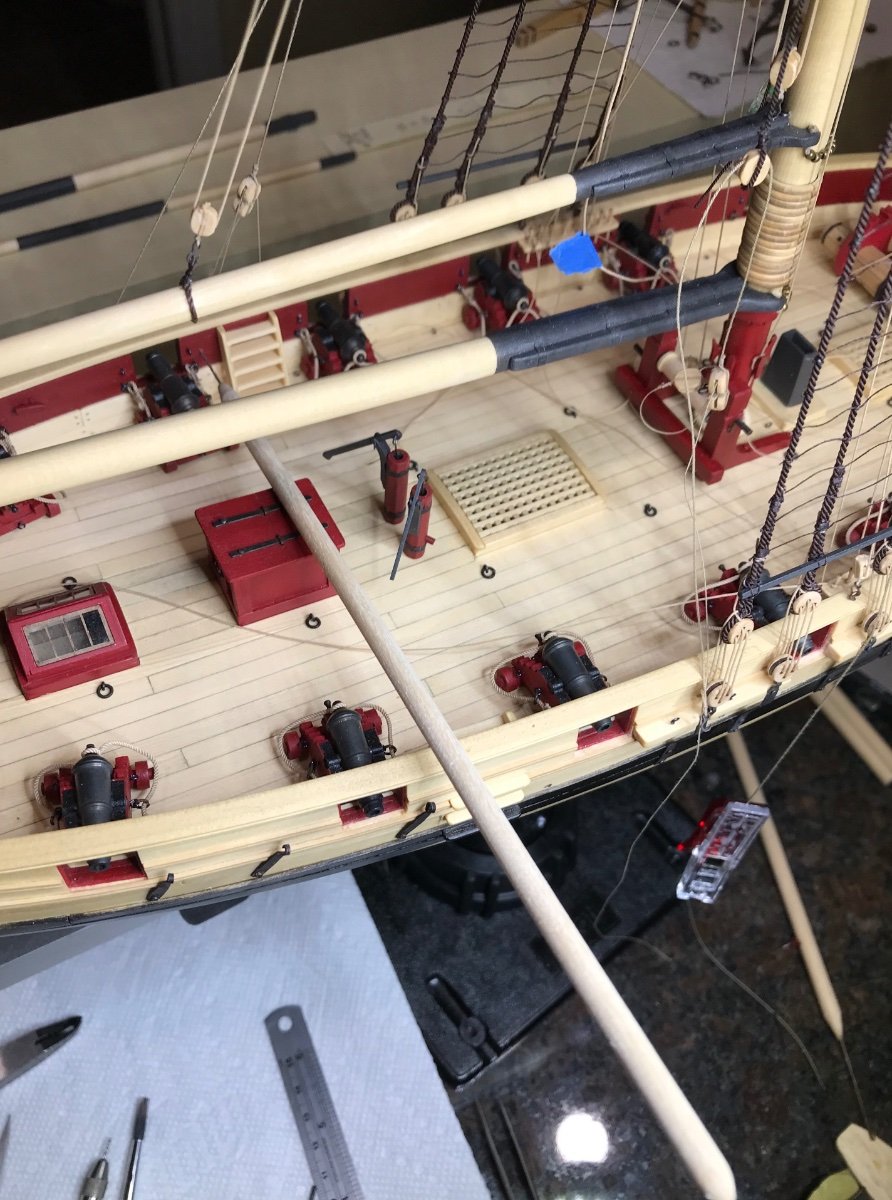
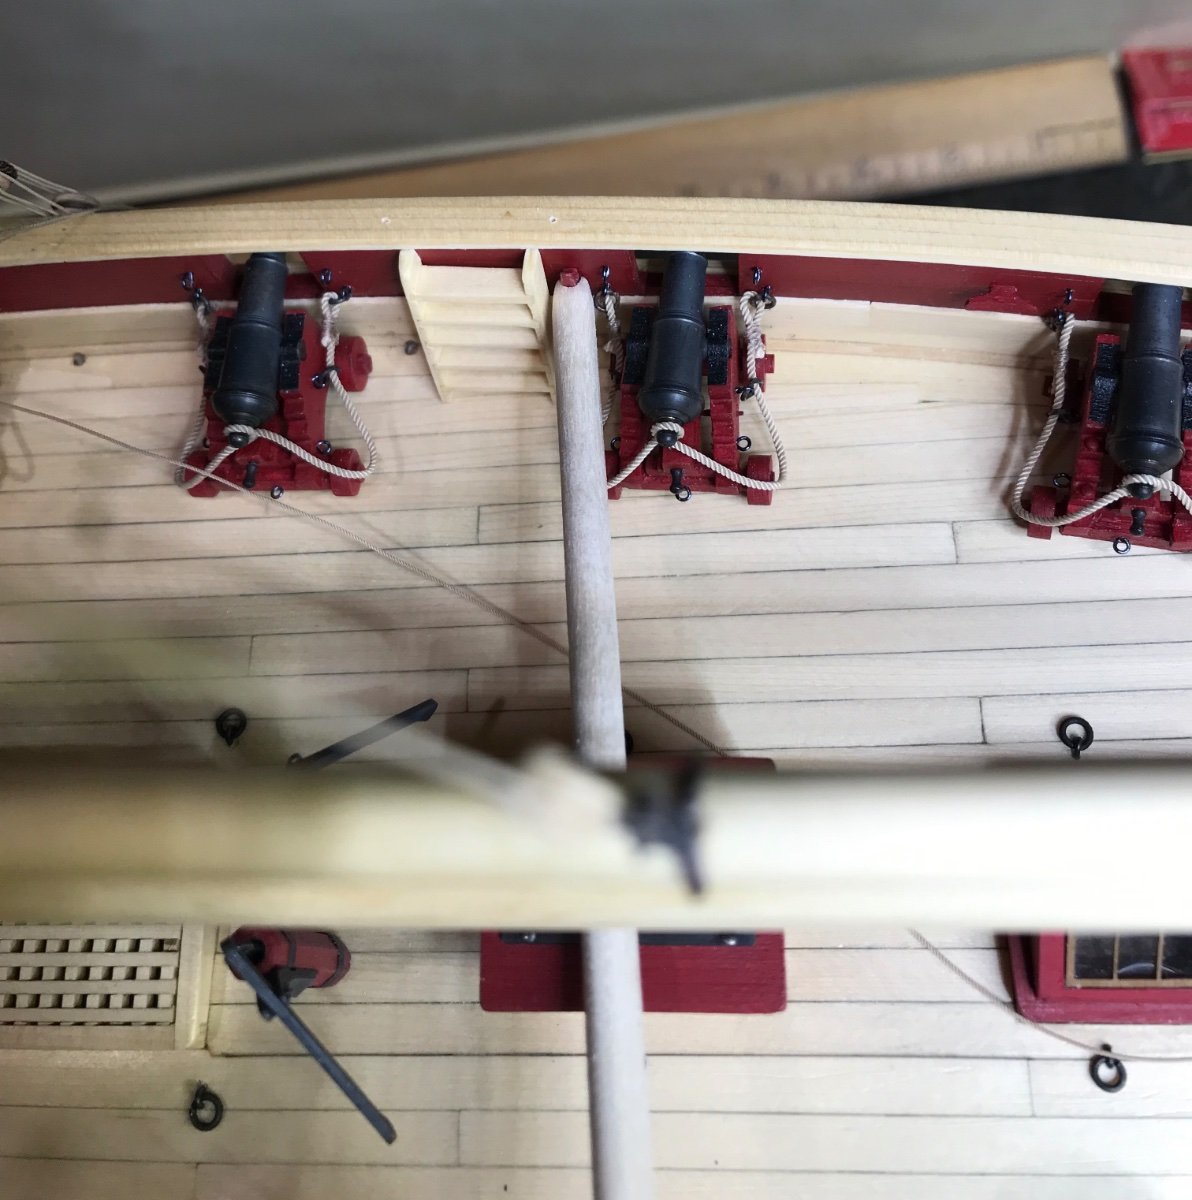
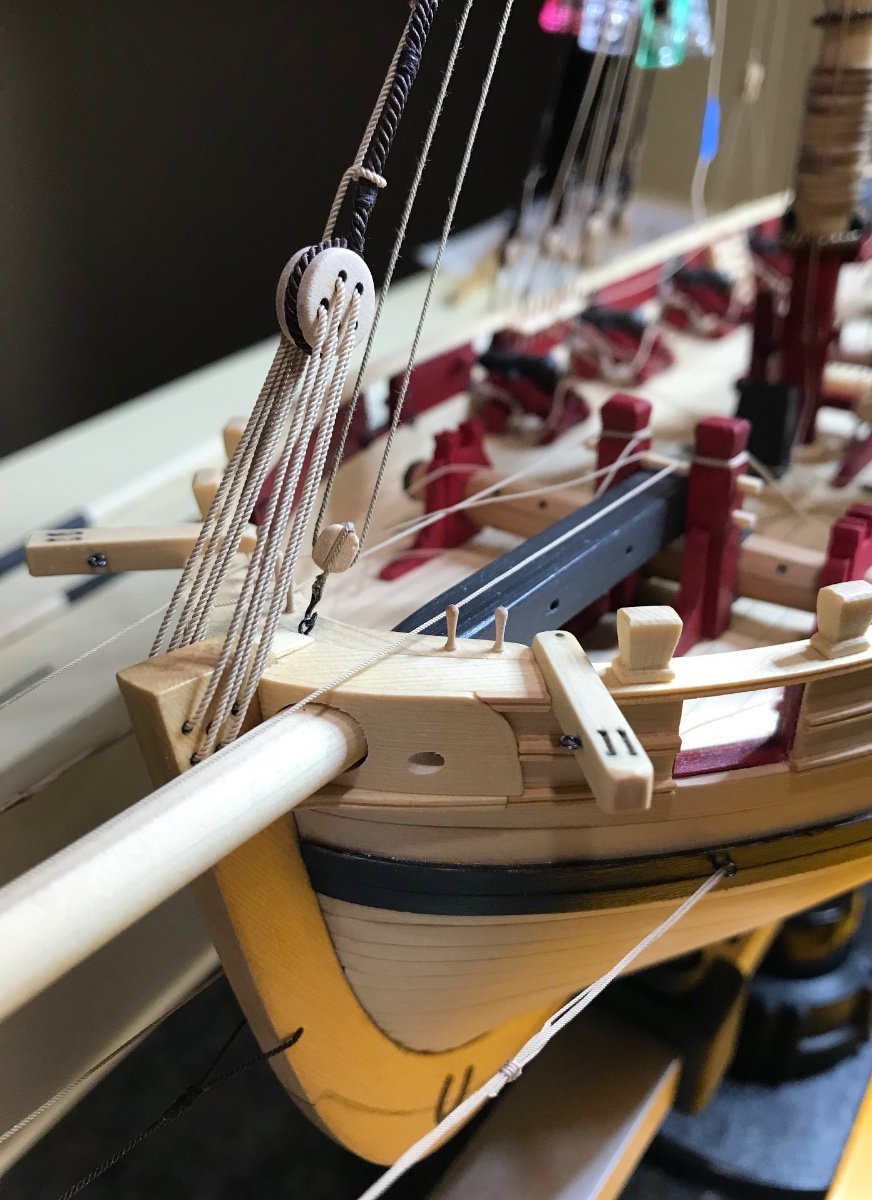
Hello Everyone, I hope you are all well. Many many thanks to everyone for their comments and Likes. Been rigging Cheerful for a couple of weeks now. Just a few photos of the progress. Ran into a couple of glitches along the way. I forgot to install the cleats for the lower back stay tackles so like so many others I had to make a long-reach drill bit holder and an “oops I forgot the cleat” installer. The cleats I had were to big to install horizontally so they went in vertically.

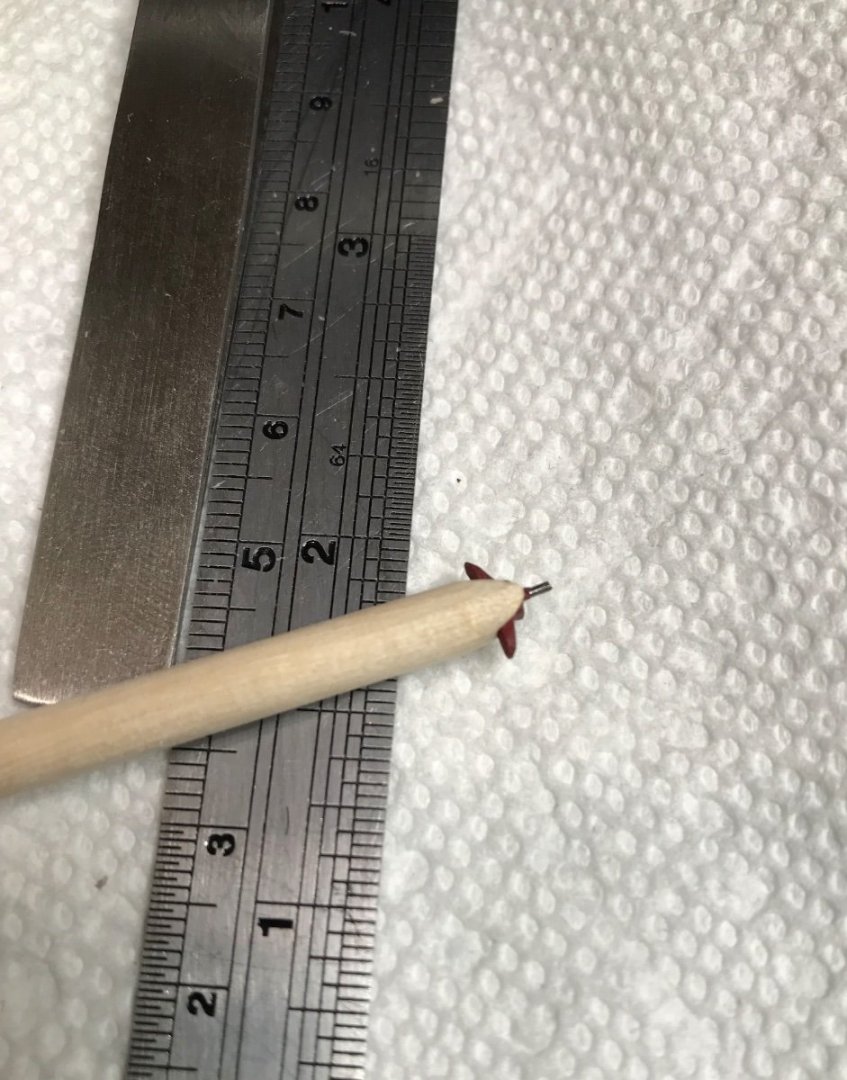

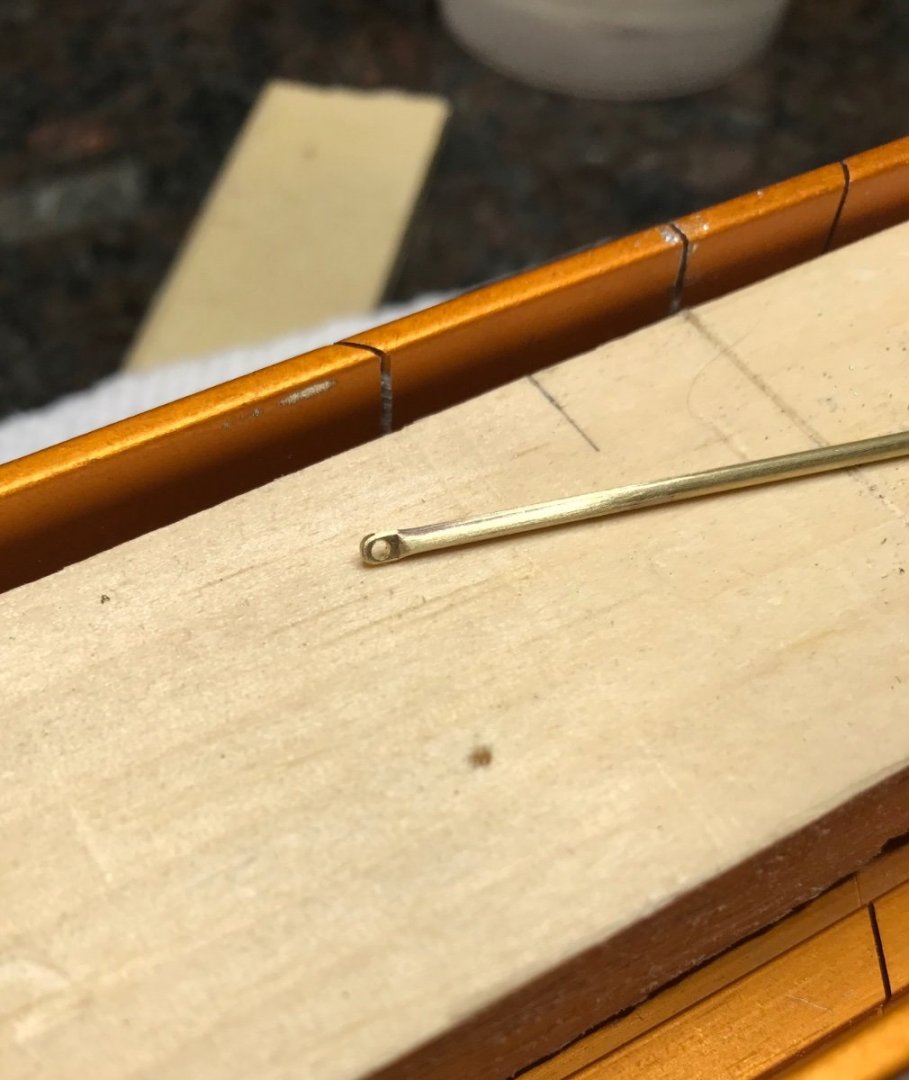
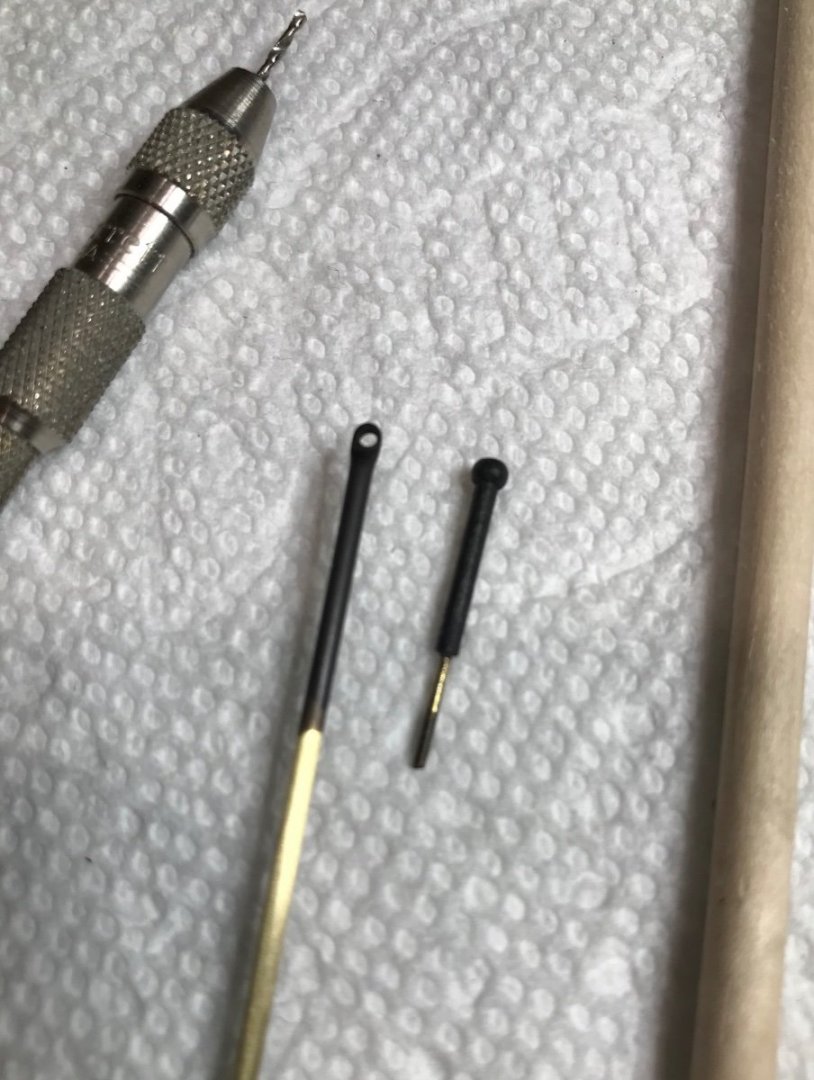
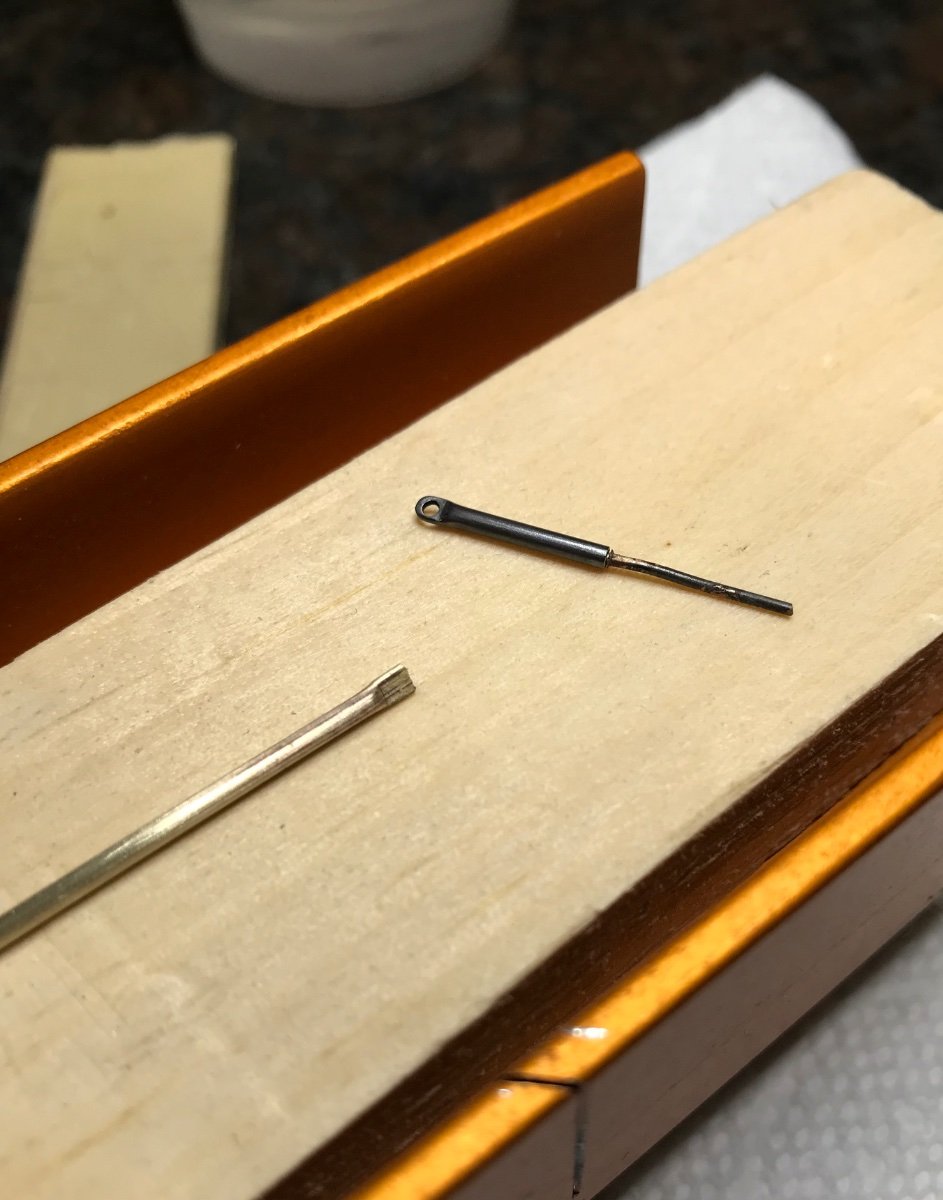
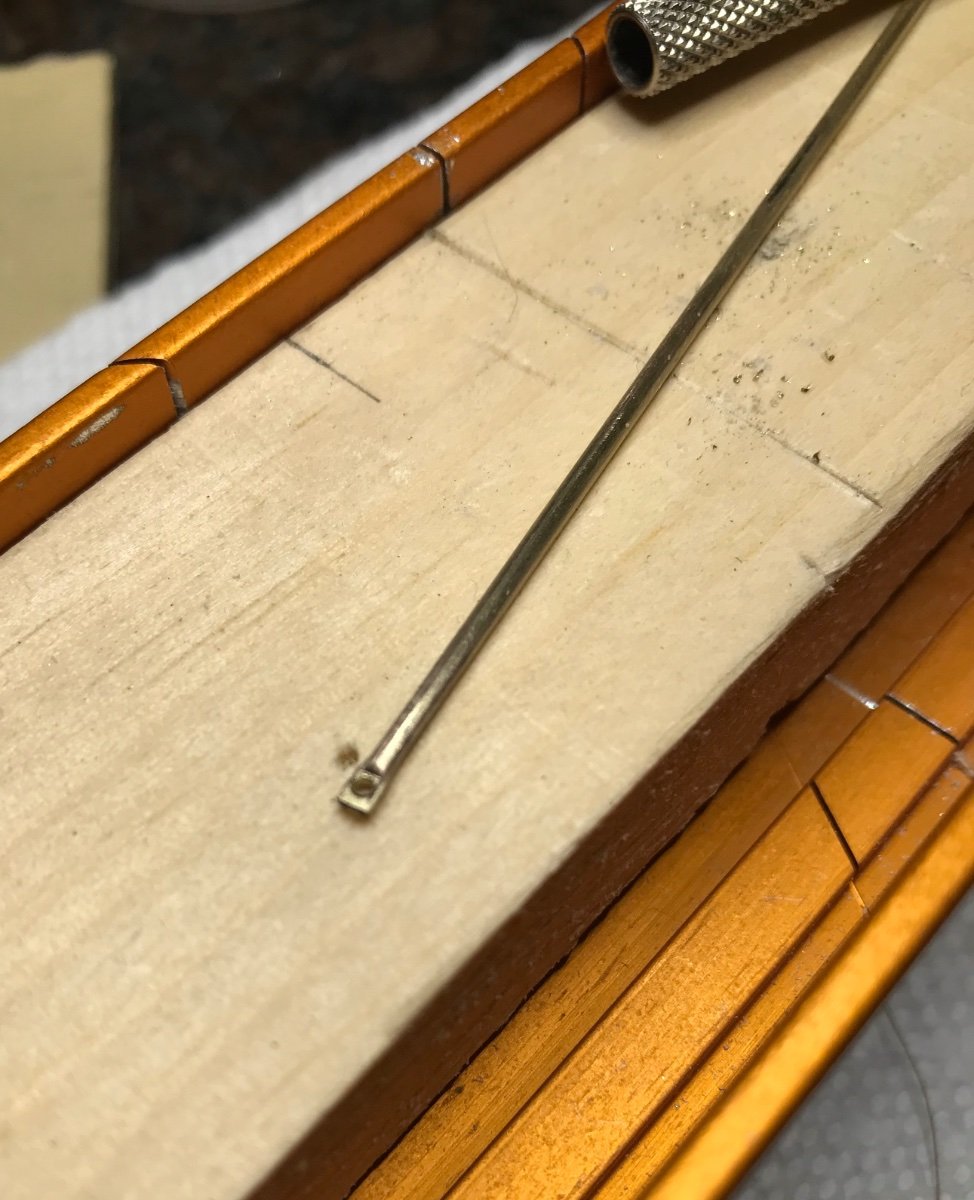
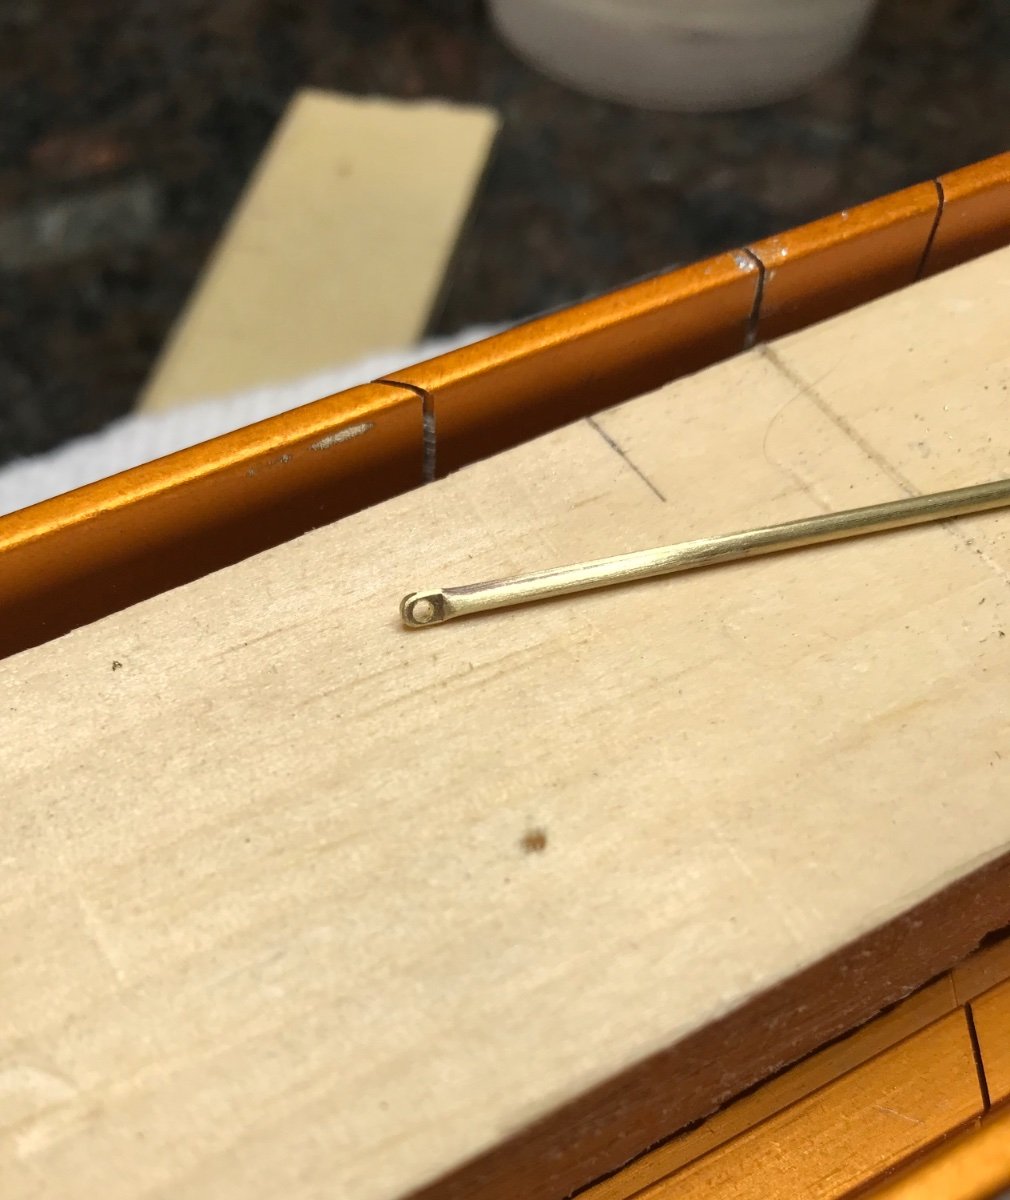
I also decided to remake the entryway stanchions. They seemed to be a bit over sized. Used the same 1/16 inch tubing. Flattened the end and drilled a hole in it. Rounded it off and blackened it. Then gave them a test fit.


Then carried on with more rigging.


I ran out to the Falconet hooks that I have been using so while waiting for my order from Crafty Sailor I will start rigging the yards.
Talk to you soon
-
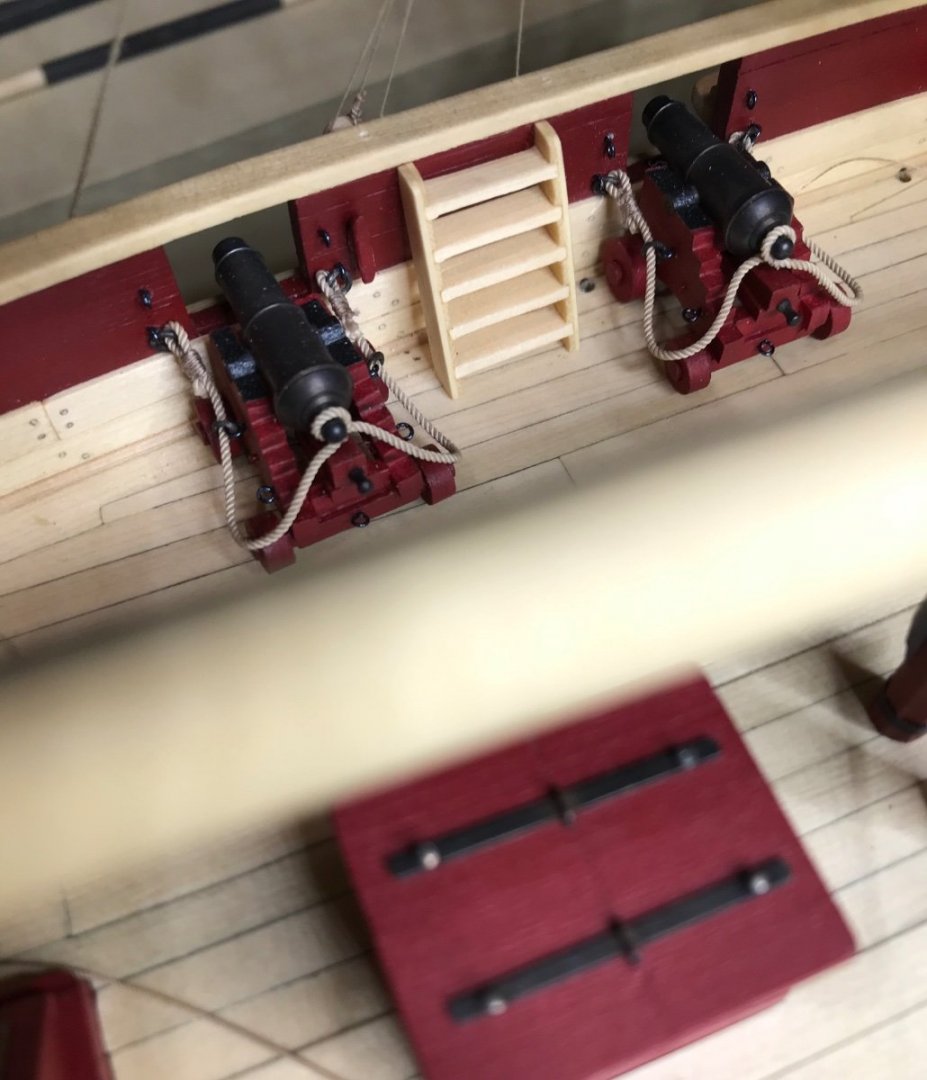
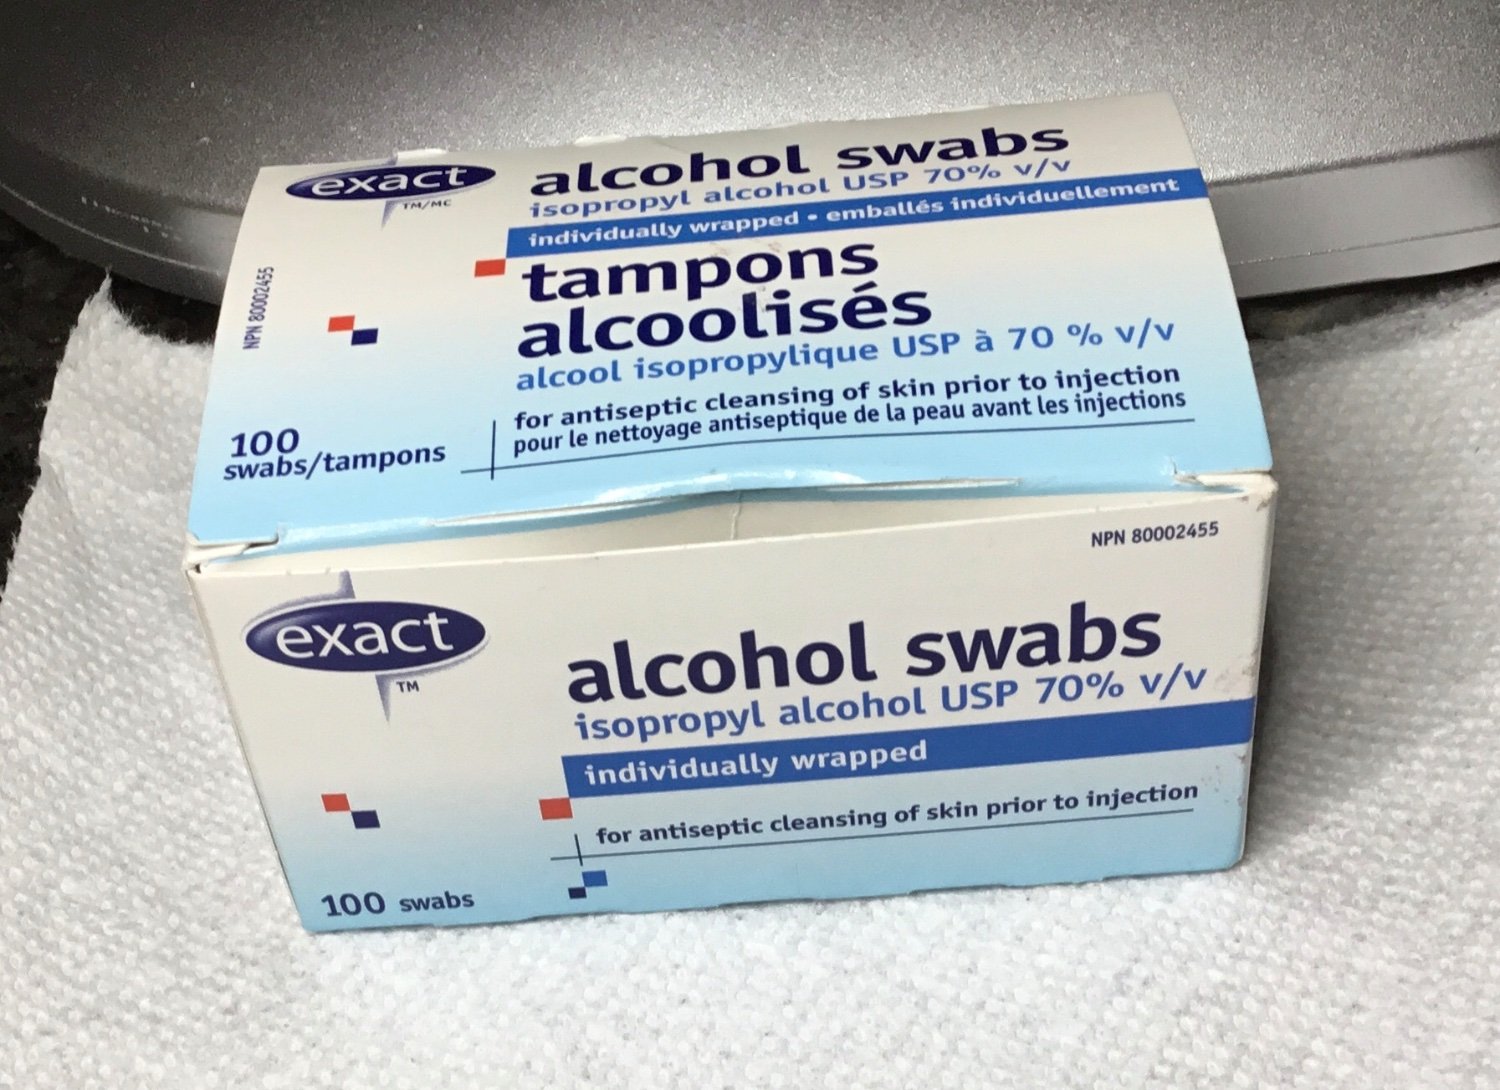
Hi Rid, thanks very much for your comment. The only thing I did with the carronades was clean them with an alcohol wipe (the ones that come in the little envelopes) and then place them directly into the blackener. The blackener that I used for them was made by AK. They came out surprisingly nice . After a bit of buffing they ended up having more of a gun metal look

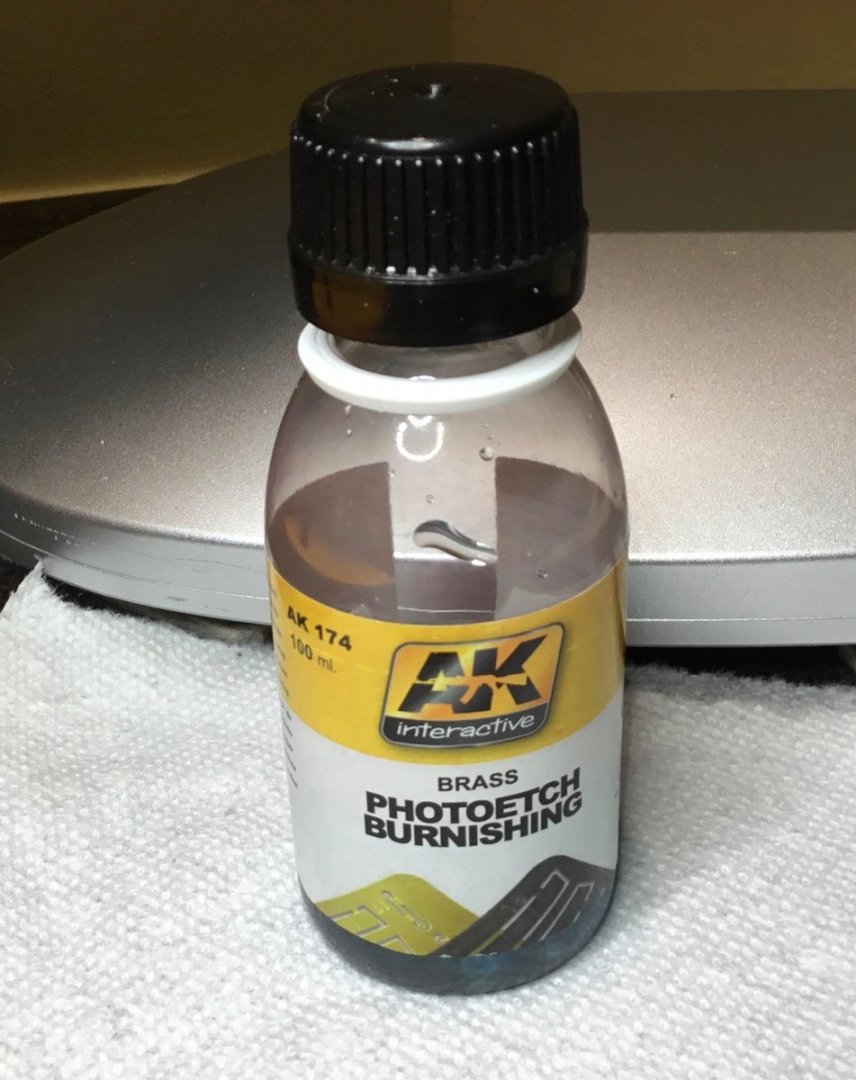
The AK blackener was very expensive. That’s why I ended up using the Novacan for the rest of the build
-


Cheerful 1806 by Paul Le Wol - FINISHED - Syren Ship Model Ship Co. - 1:48 - English cutter
in - Kit build logs for subjects built from 1801 - 1850
Posted
Thanks Ian, it will be good to know that you are there.