


Paul Le Wol
-
Posts
489 -
Joined
-
Last visited
Content Type
Profiles
Forums
Gallery
Events
Posts posted by Paul Le Wol
-
-
Hi Cisco, thank you very much. Billings has this kit listed in their “ Experienced “ category but I think that if someone took their time with getting the planking right it would be a good project for anyone. I have a couple of wonky spots in the hull but overall it came out fairly straight. At 1/20 scale you sure don’t have to worry about tiny parts.
- catopower, Dave_E and Mirabell61
-
 3
3
-
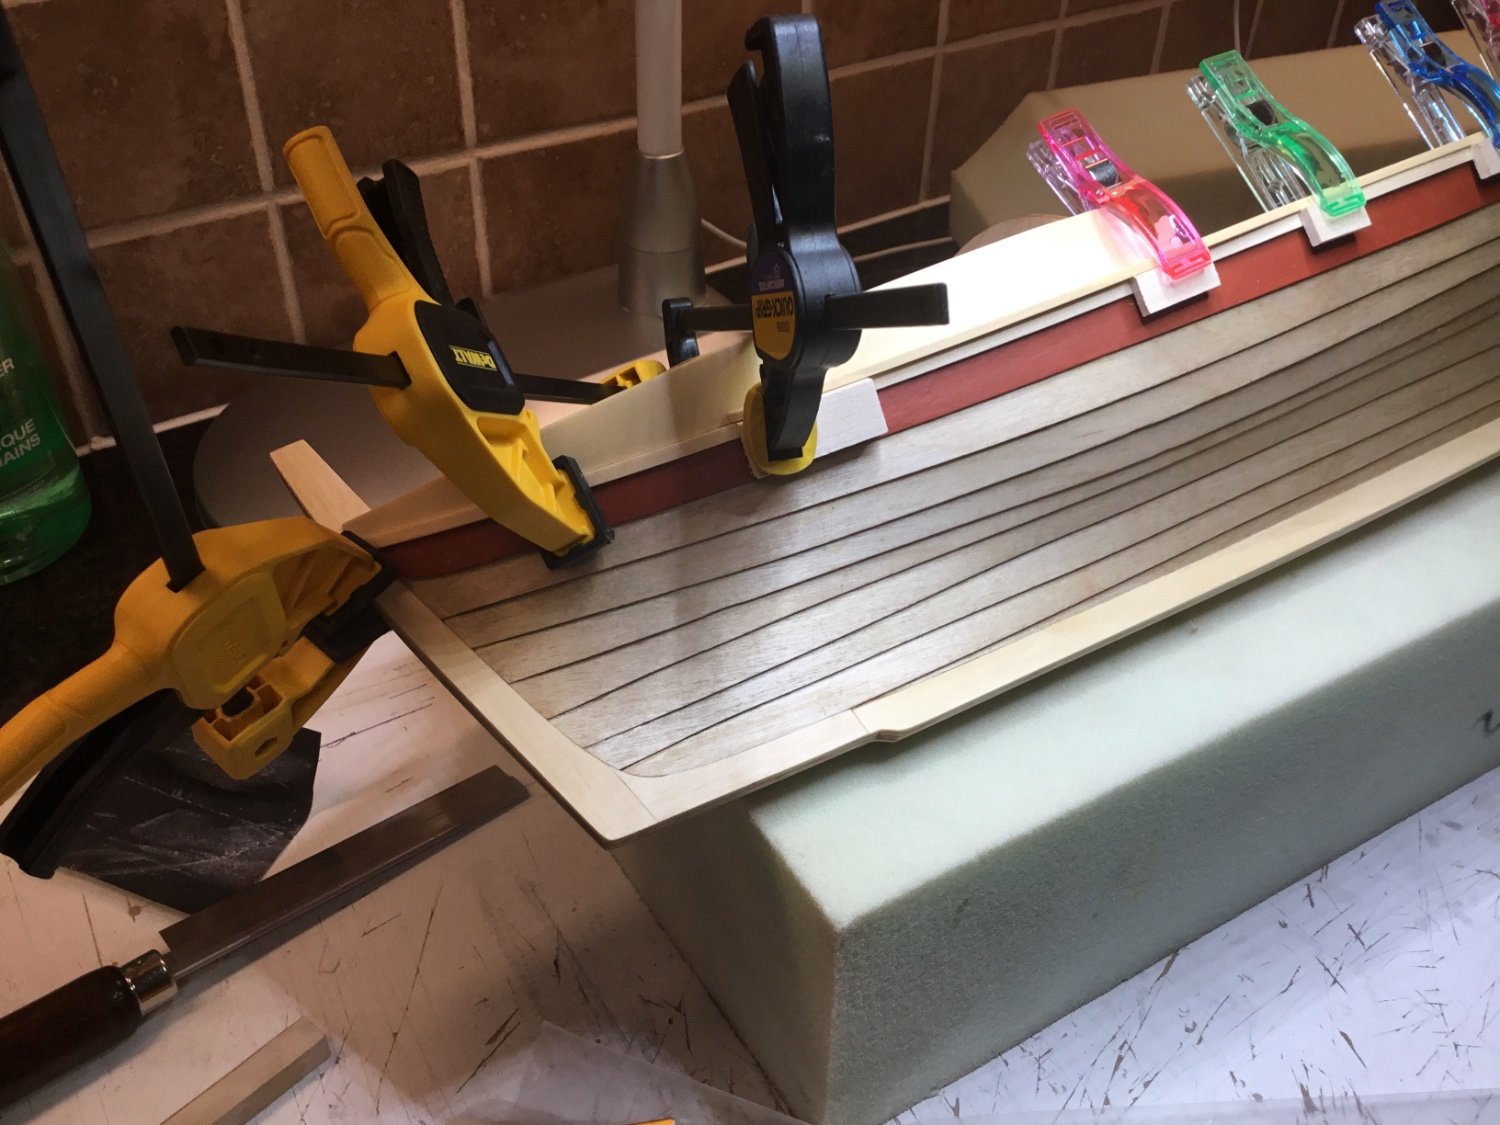
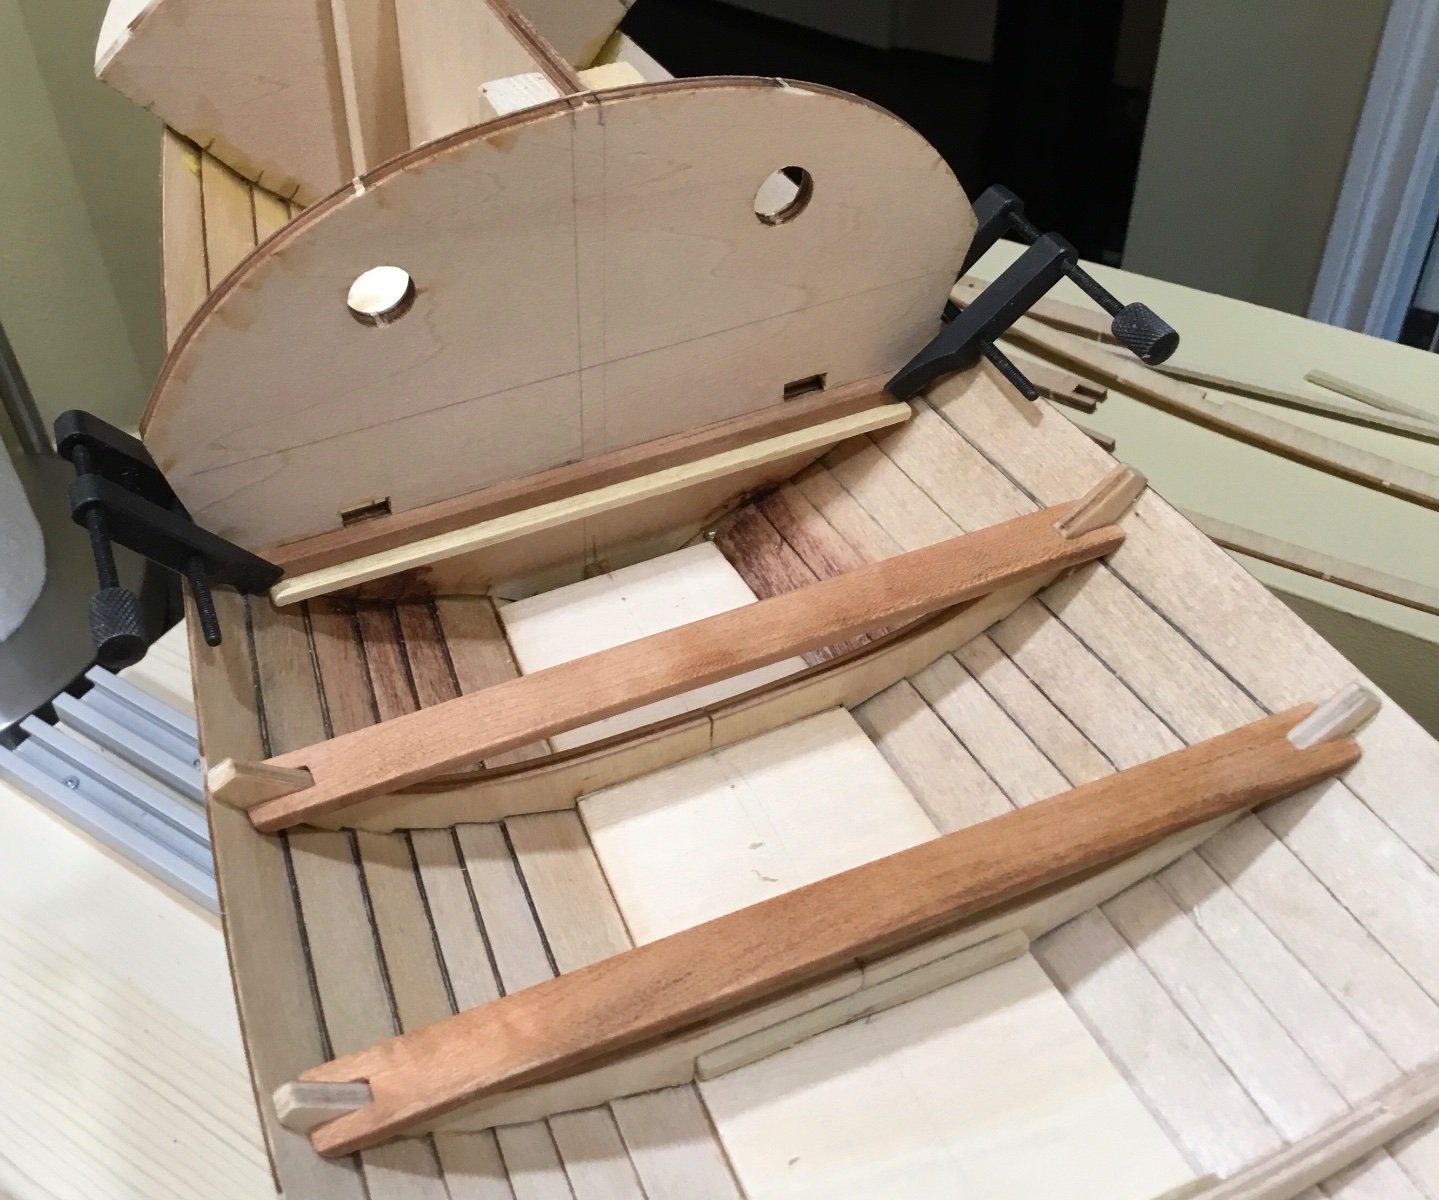
Hello Everyone, there is a bit more progress to show. Thanks to all of you for your comments and Likes. A template of the fore most frame was made so as to figure out where the rails would end.

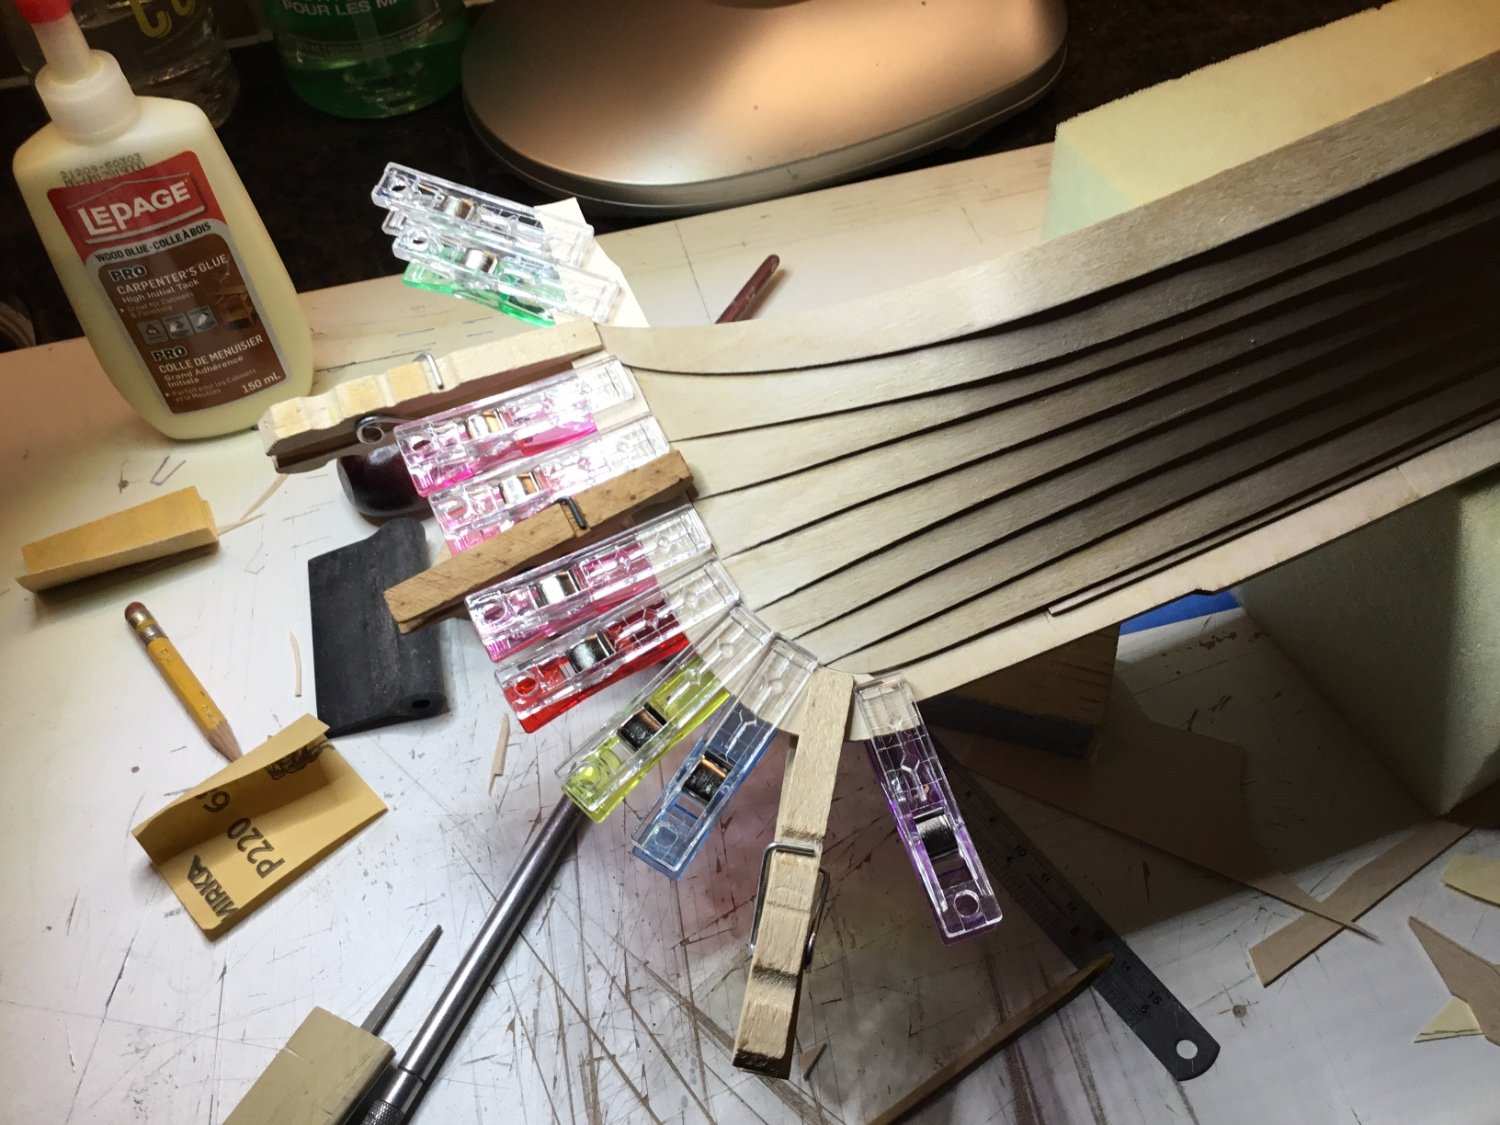
The kit supplied rails where marked, cut and test fitted to the hull. Once they where close they where used as templates to make new rails out of 3/32” AYS.
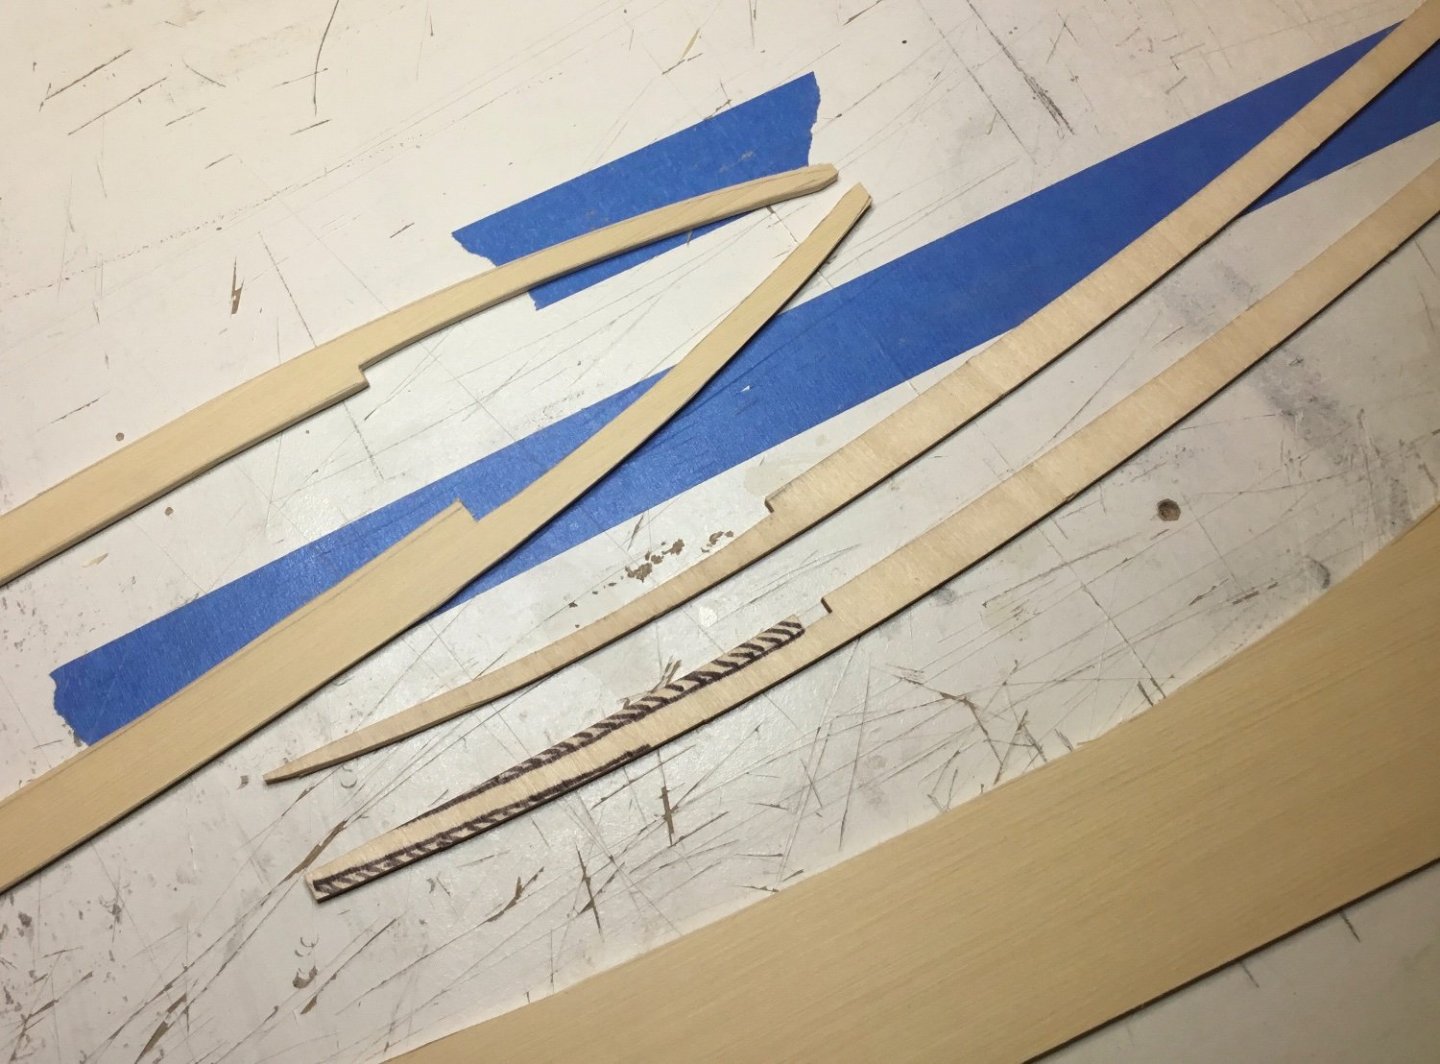

The port and starboard rails from the stern to midship were glued with pva and clamped. They were made extra wide because I thought it would be easier to trim them later than try to make them more accurately.


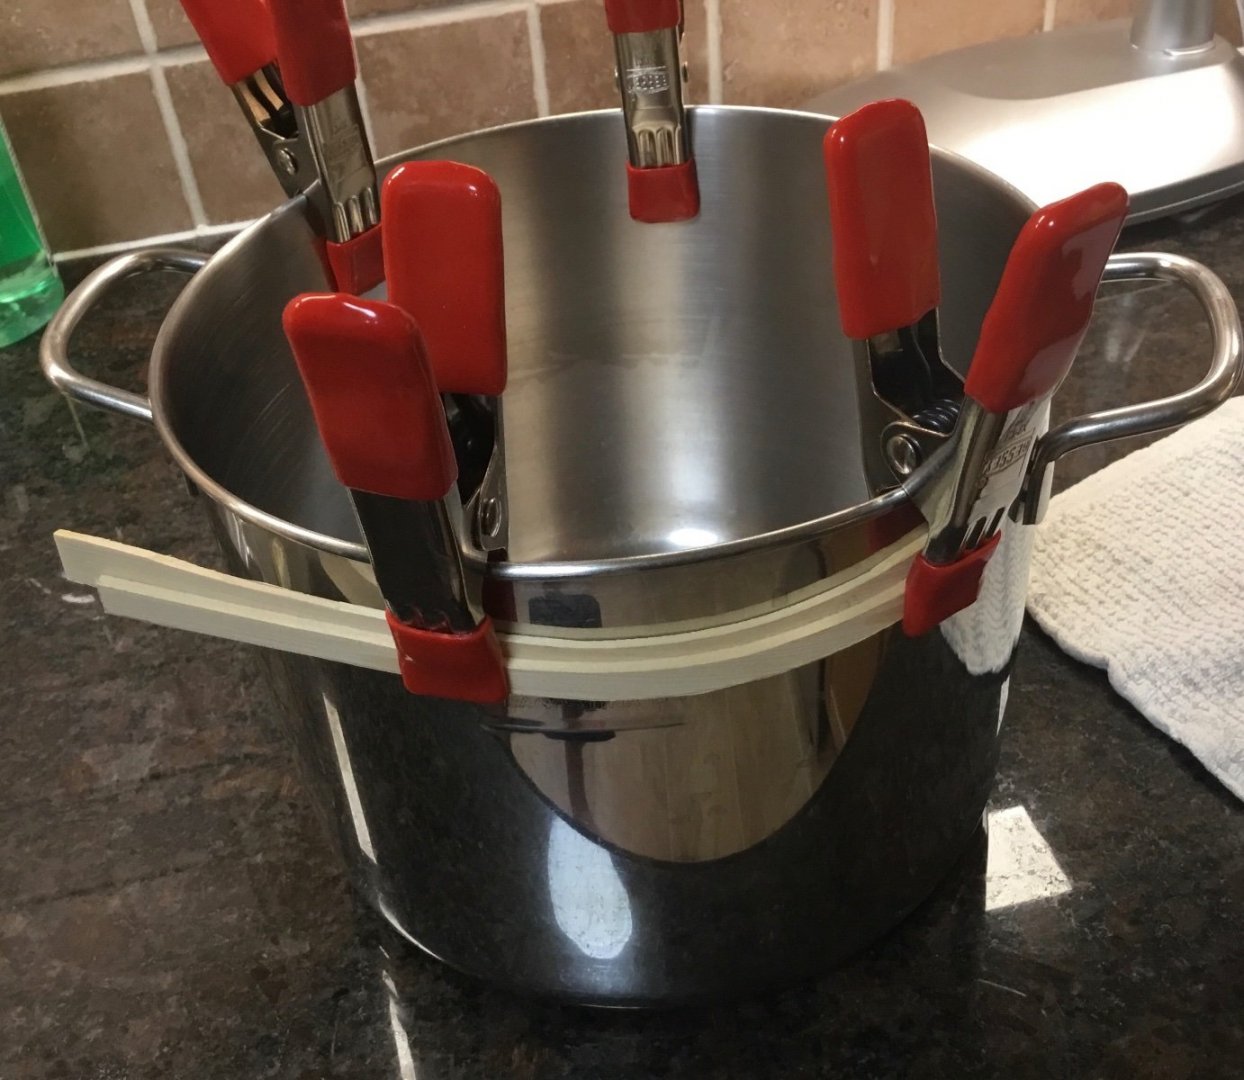
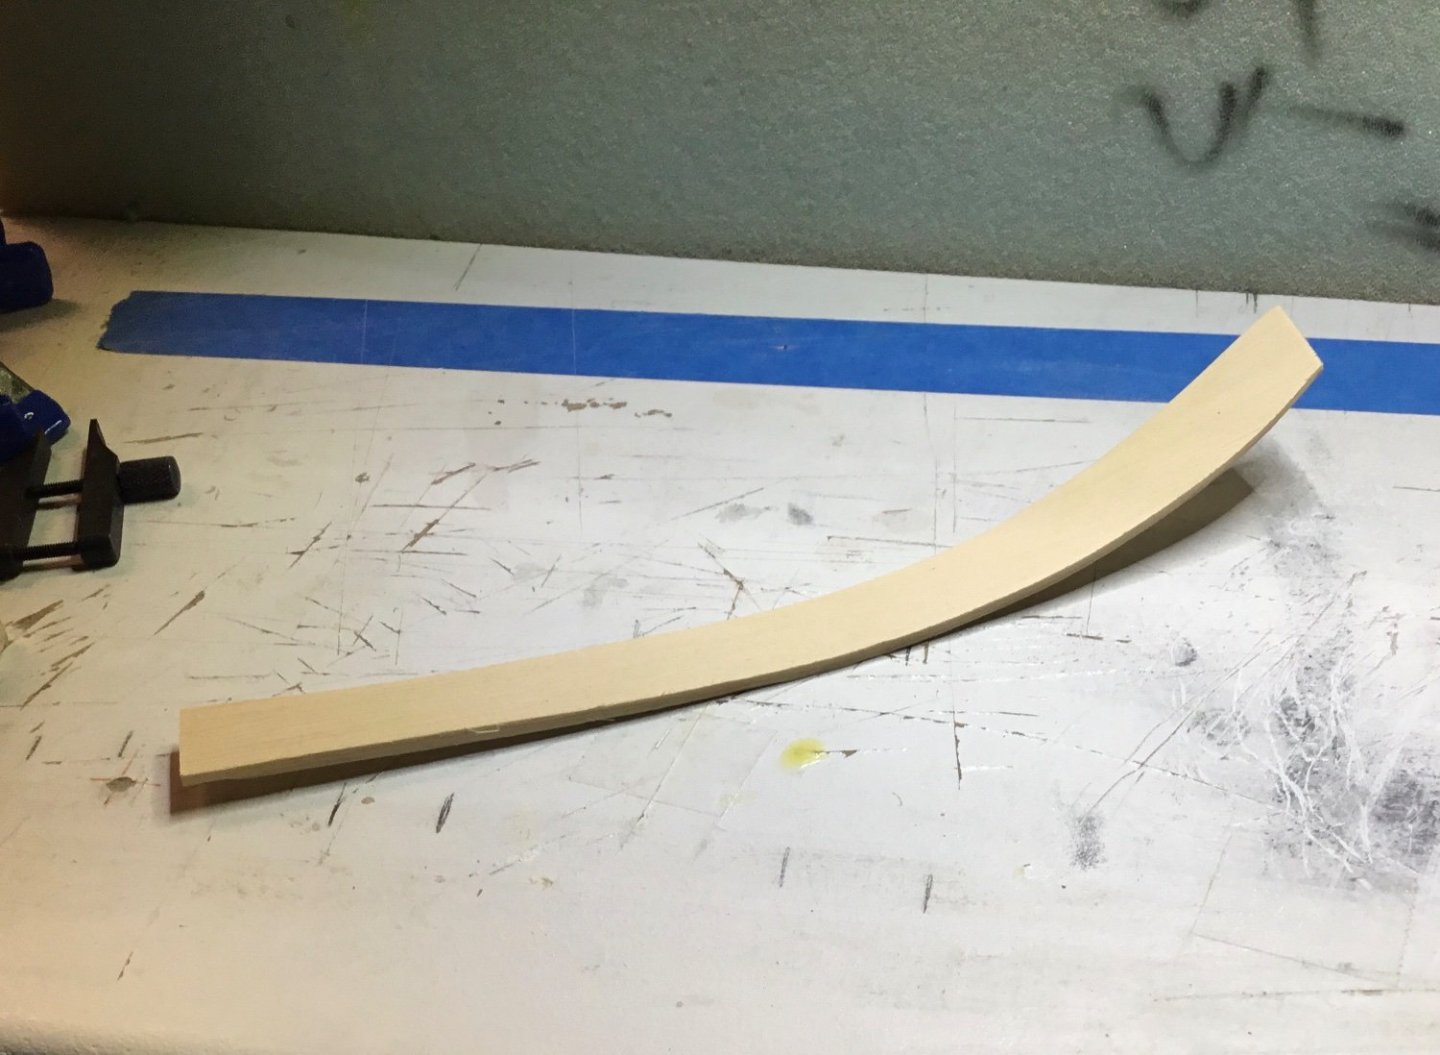
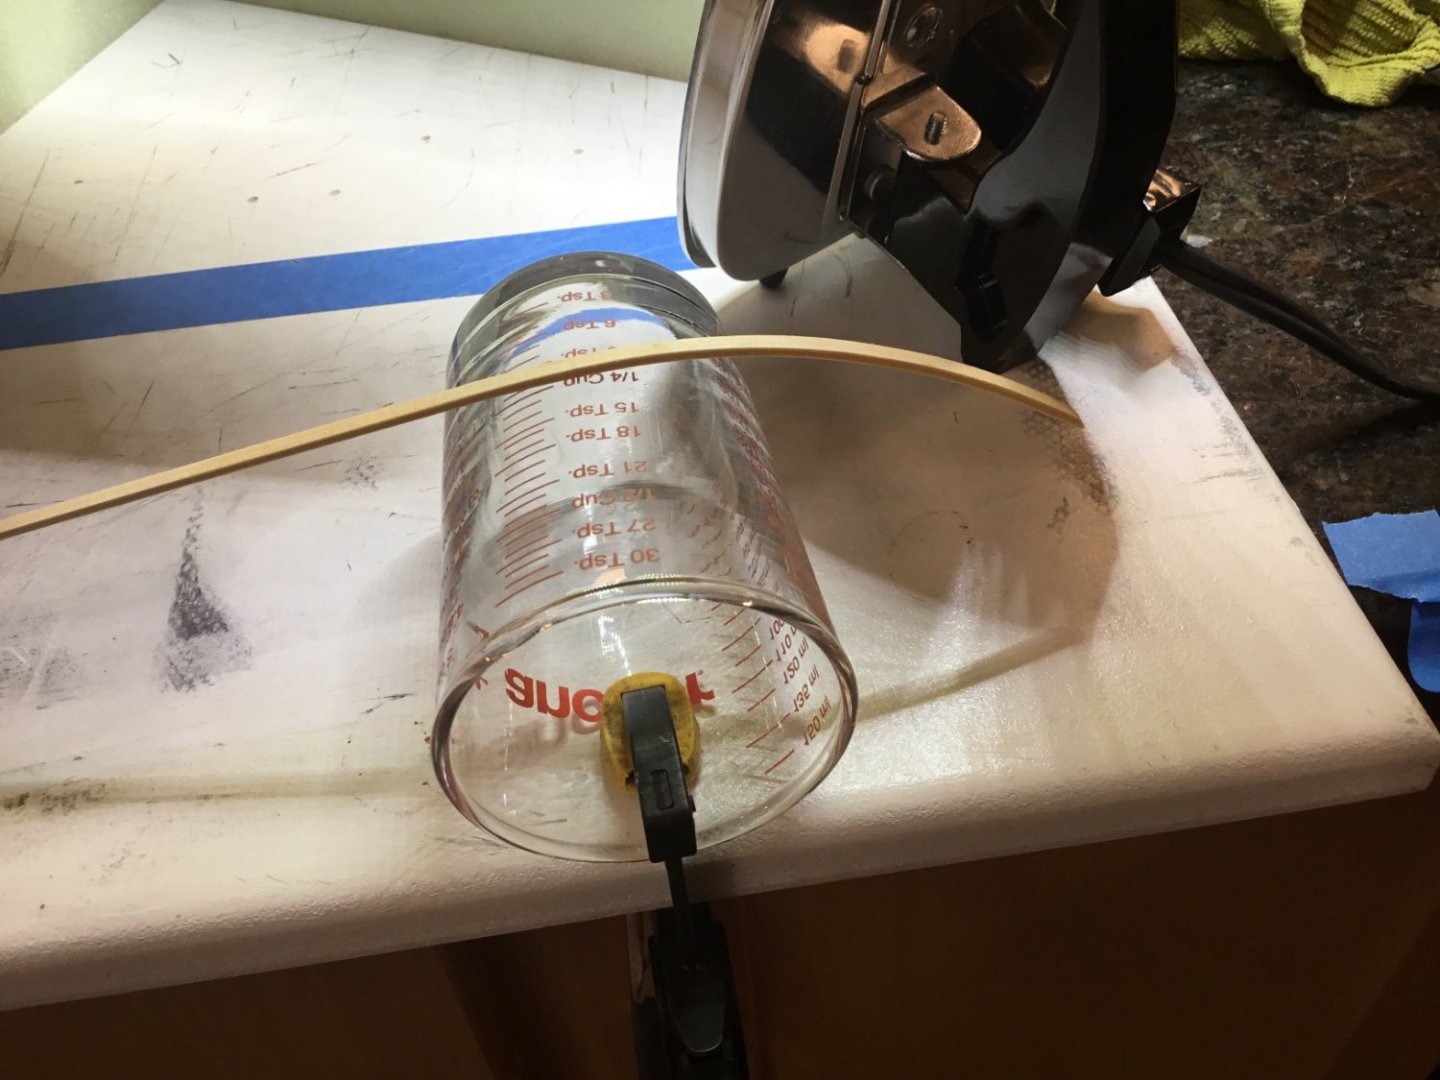
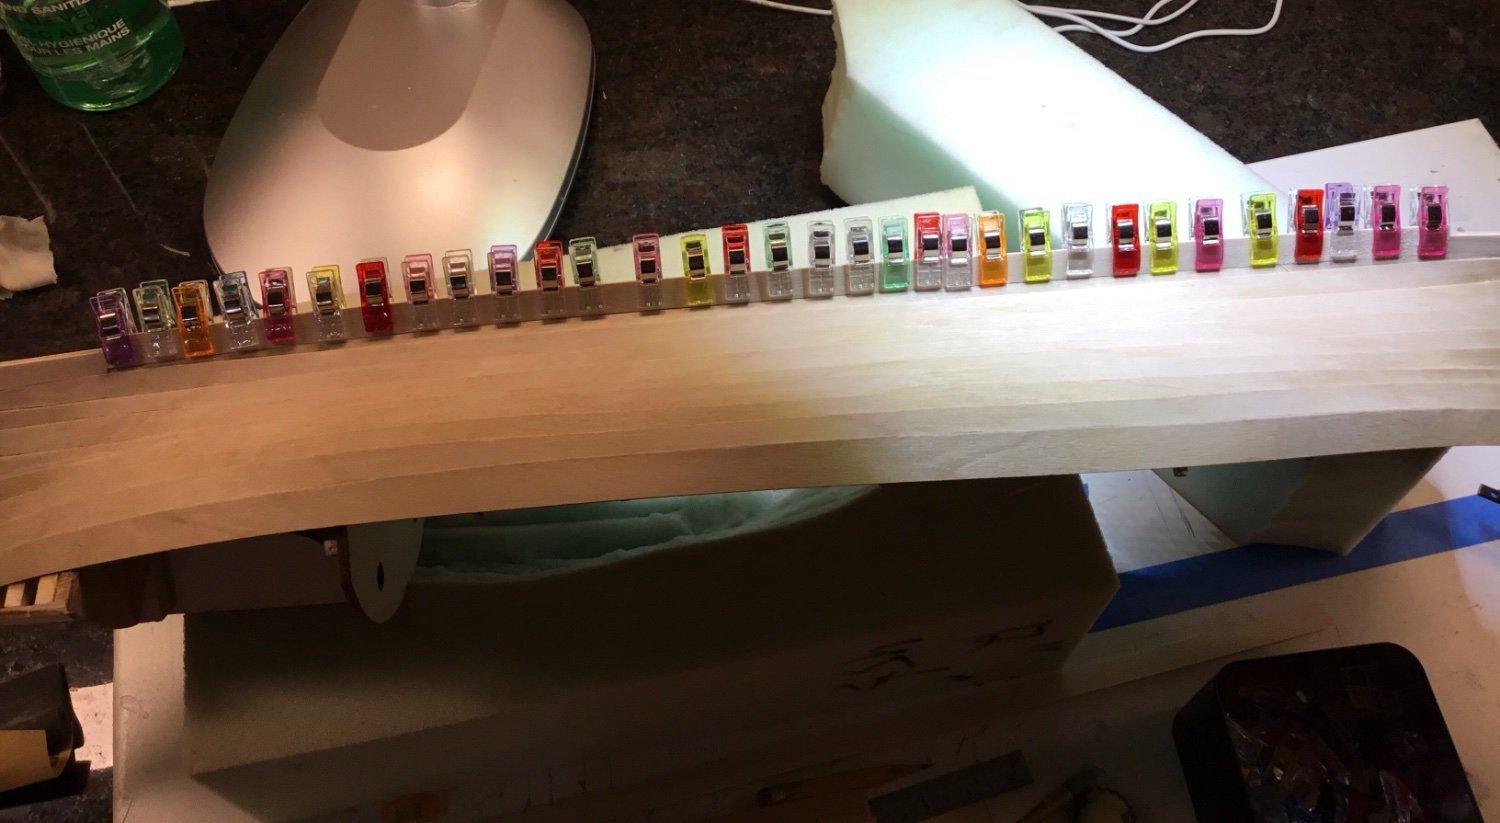
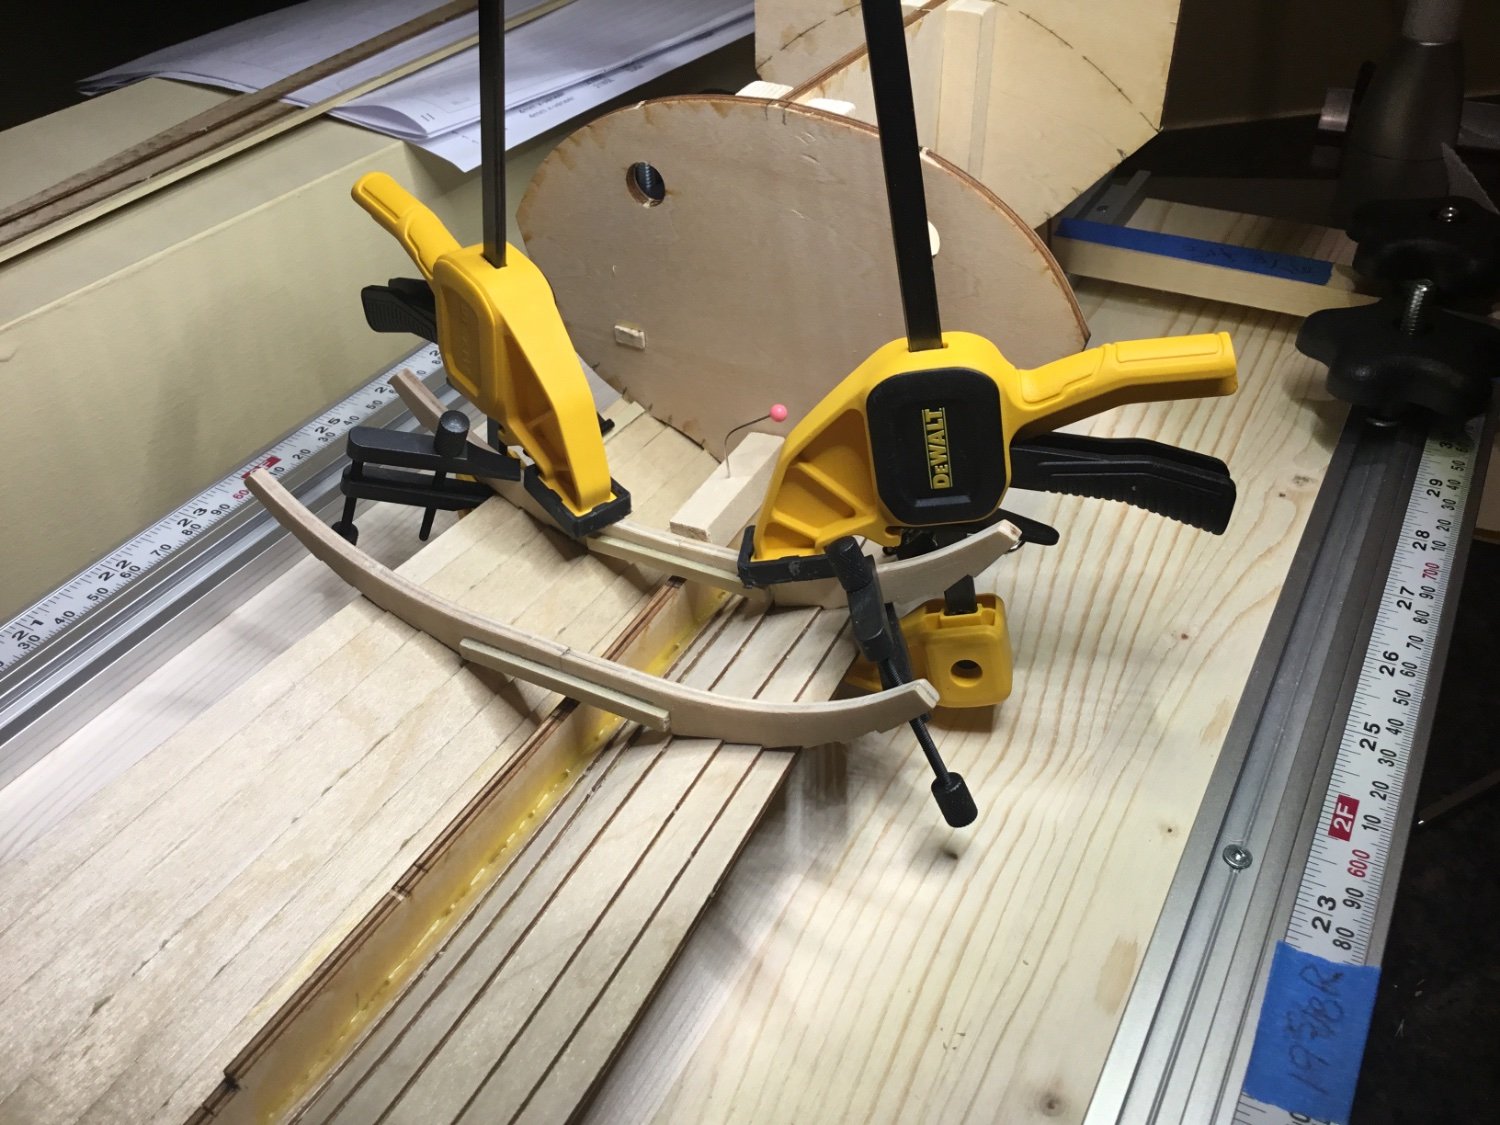
The remainder of the rails up to the last frame before the stem were moistened, heated, clamped to the spaghetti pot and left overnight.
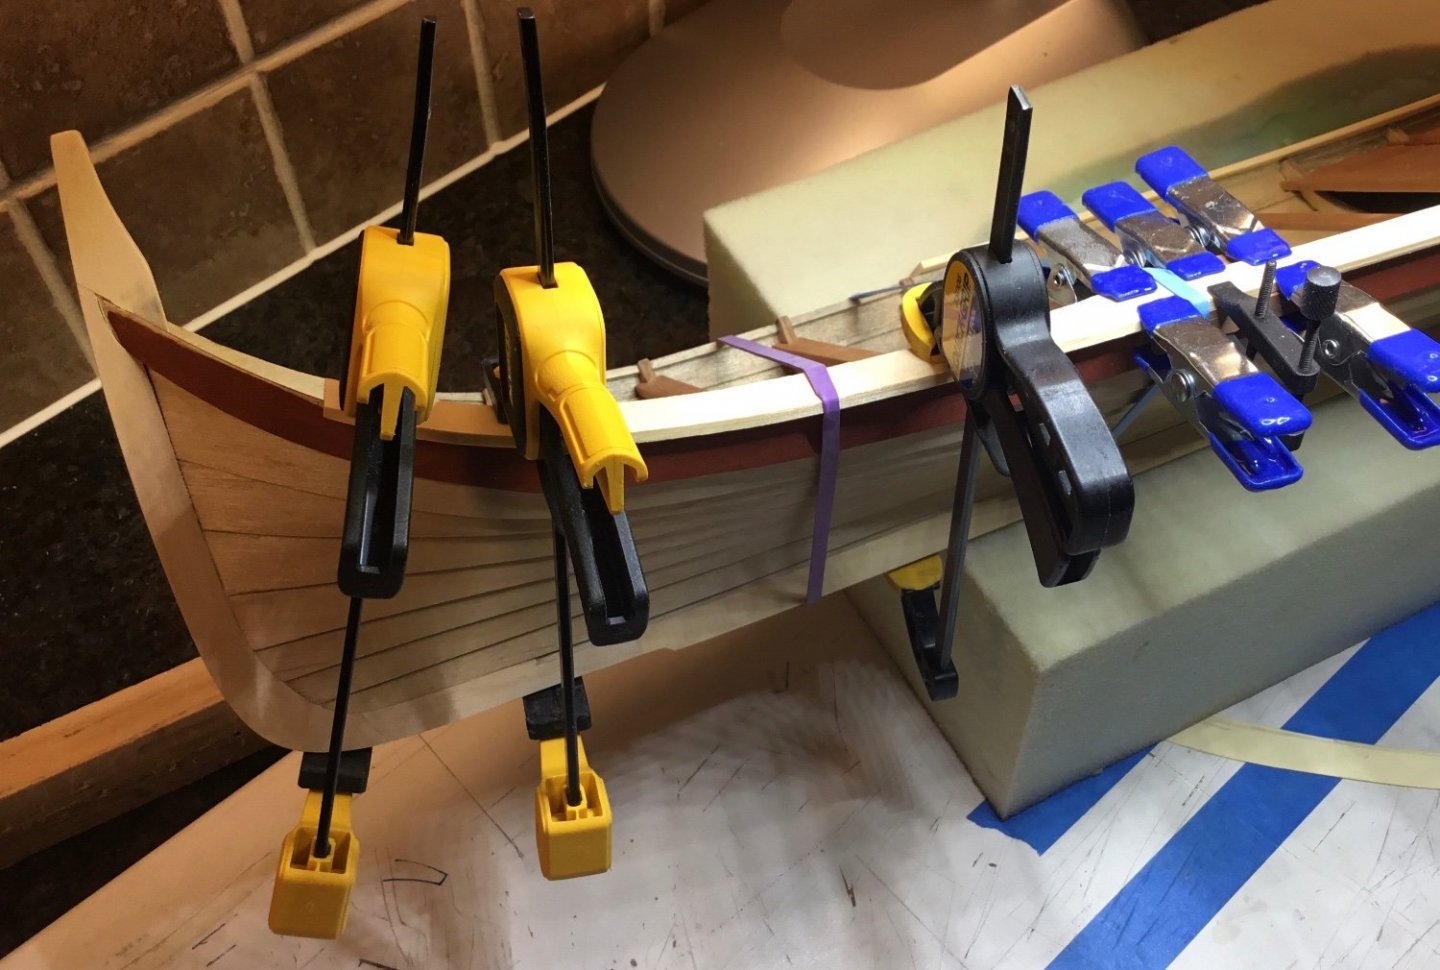
There is a piece of trim that runs under the rail from stem to stern. I used a piece of 1/16”x 1/8” AYS. It had to be shaped at the stern and edge bent at the stem. CA was used at each end and pva was used in between.

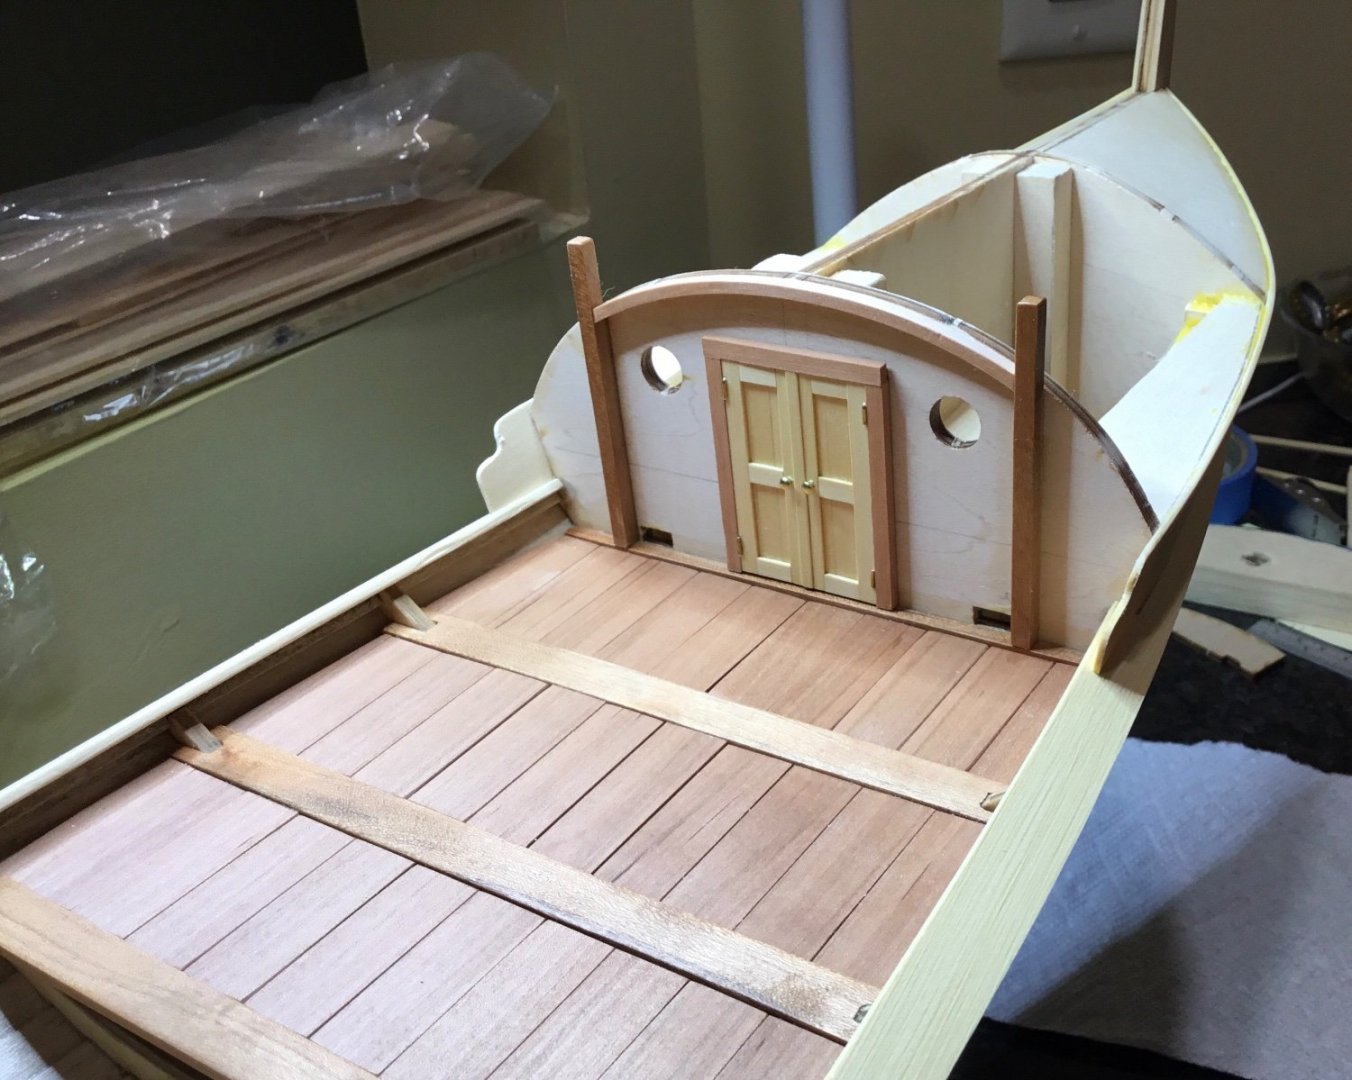
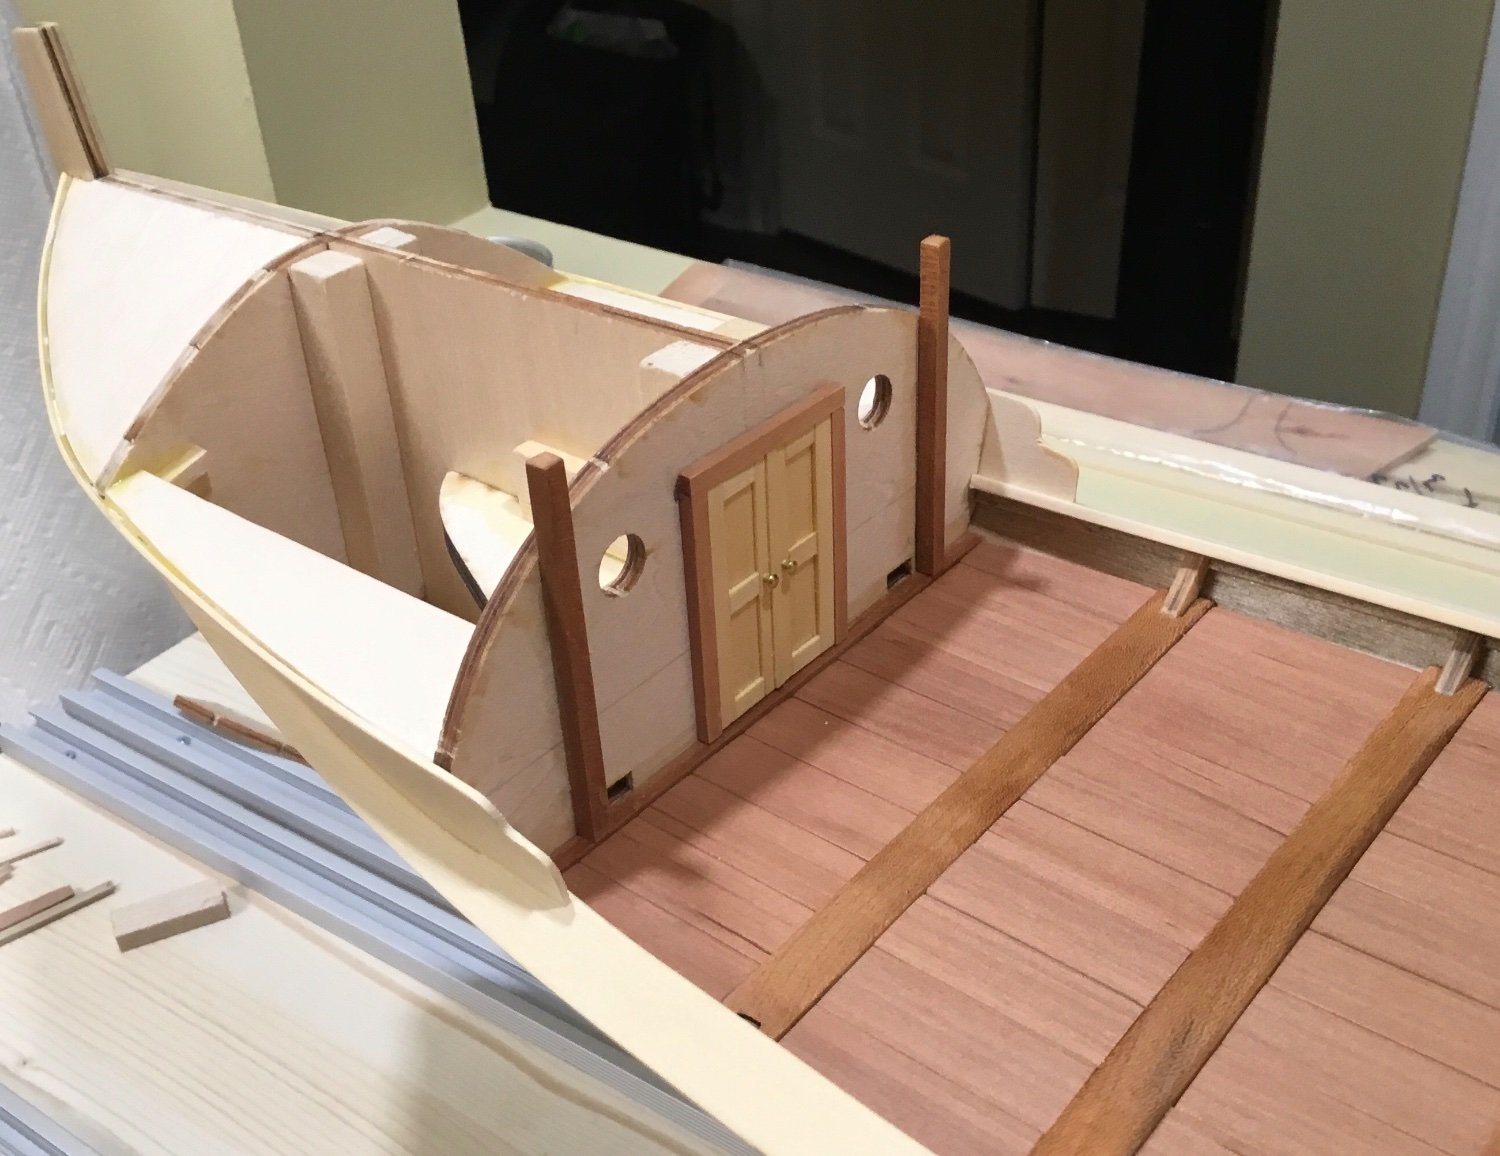
While all this was going on and glue was drying I started on the doors and trim for the front of the cabin.
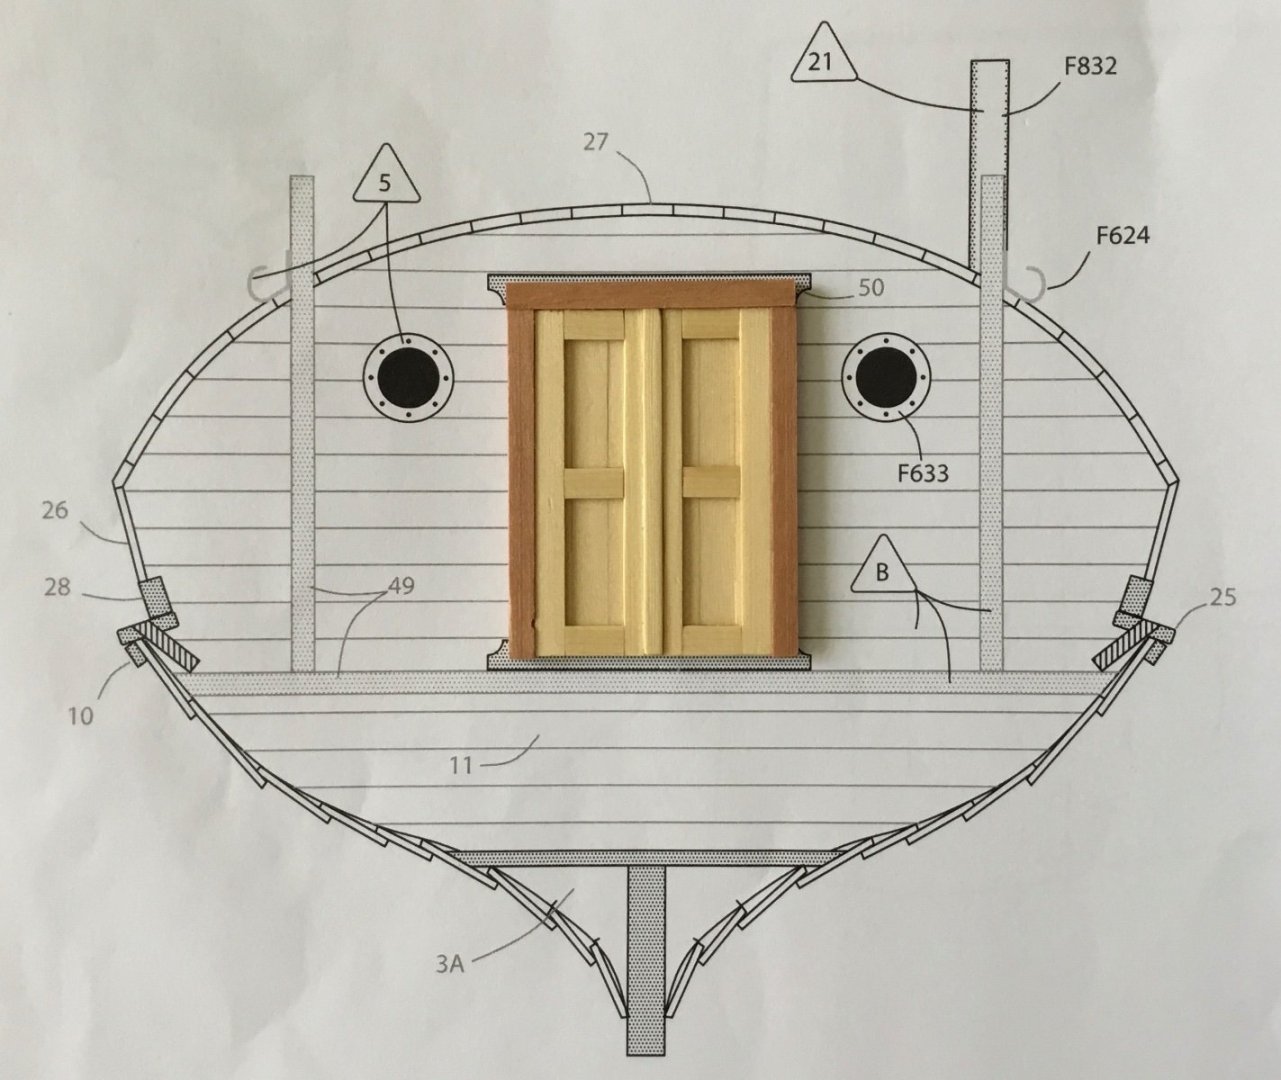
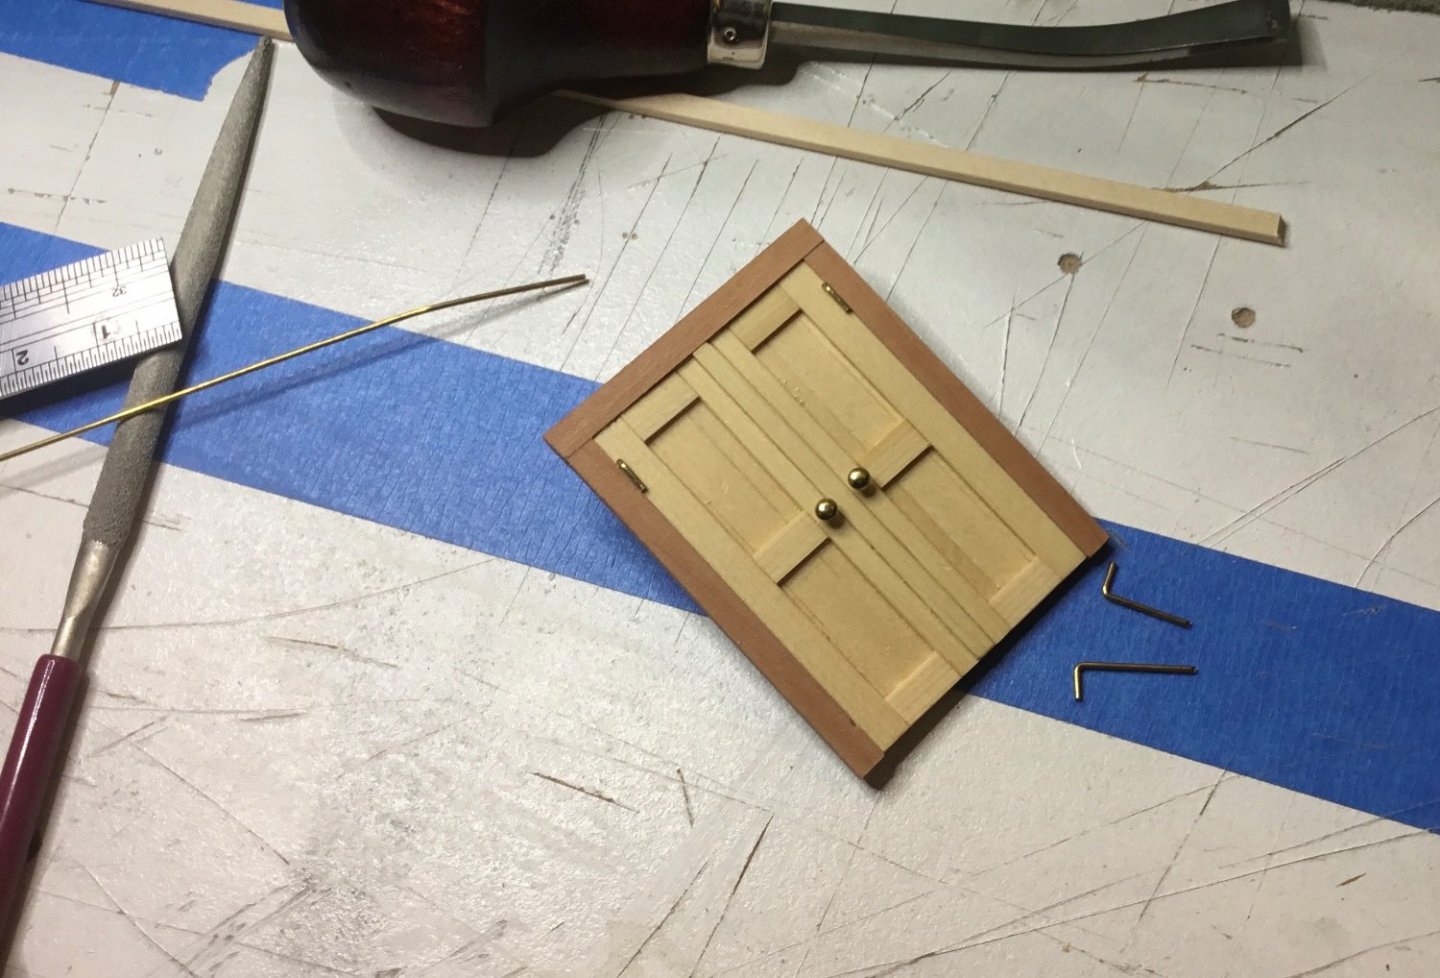

I had some 1/4” x#18 brass escutcheon pins laying around so they became the doorknobs. Now there’s just a whole bunch of planing and sanding to get the rails to the proper width. After that there is another piece of wood that runs along the top of the rail on its inboard edge

- GrandpaPhil, Seventynet, Mirabell61 and 5 others
-
8
-
-
Hi Glomar, I’ve used dry transfer lettering on a couple of boats with good success. I think it was Letraset. Probably all depends on if it comes in the font and size you need.
- mtaylor and thibaultron
-
2
-
Hi Ian, I realize that this doesn’t help your present situation but, whenever I order something from offshore, I try to find a retailer that offers a postal service option for shipping. Say for example USPS. Even if it initially costs more, you won’t be subject to brokerage fees. Occasionally your shipment may get flagged and you will have to pay GST. I’ve only had that happen a few times. At least this has been my experience.
-
-
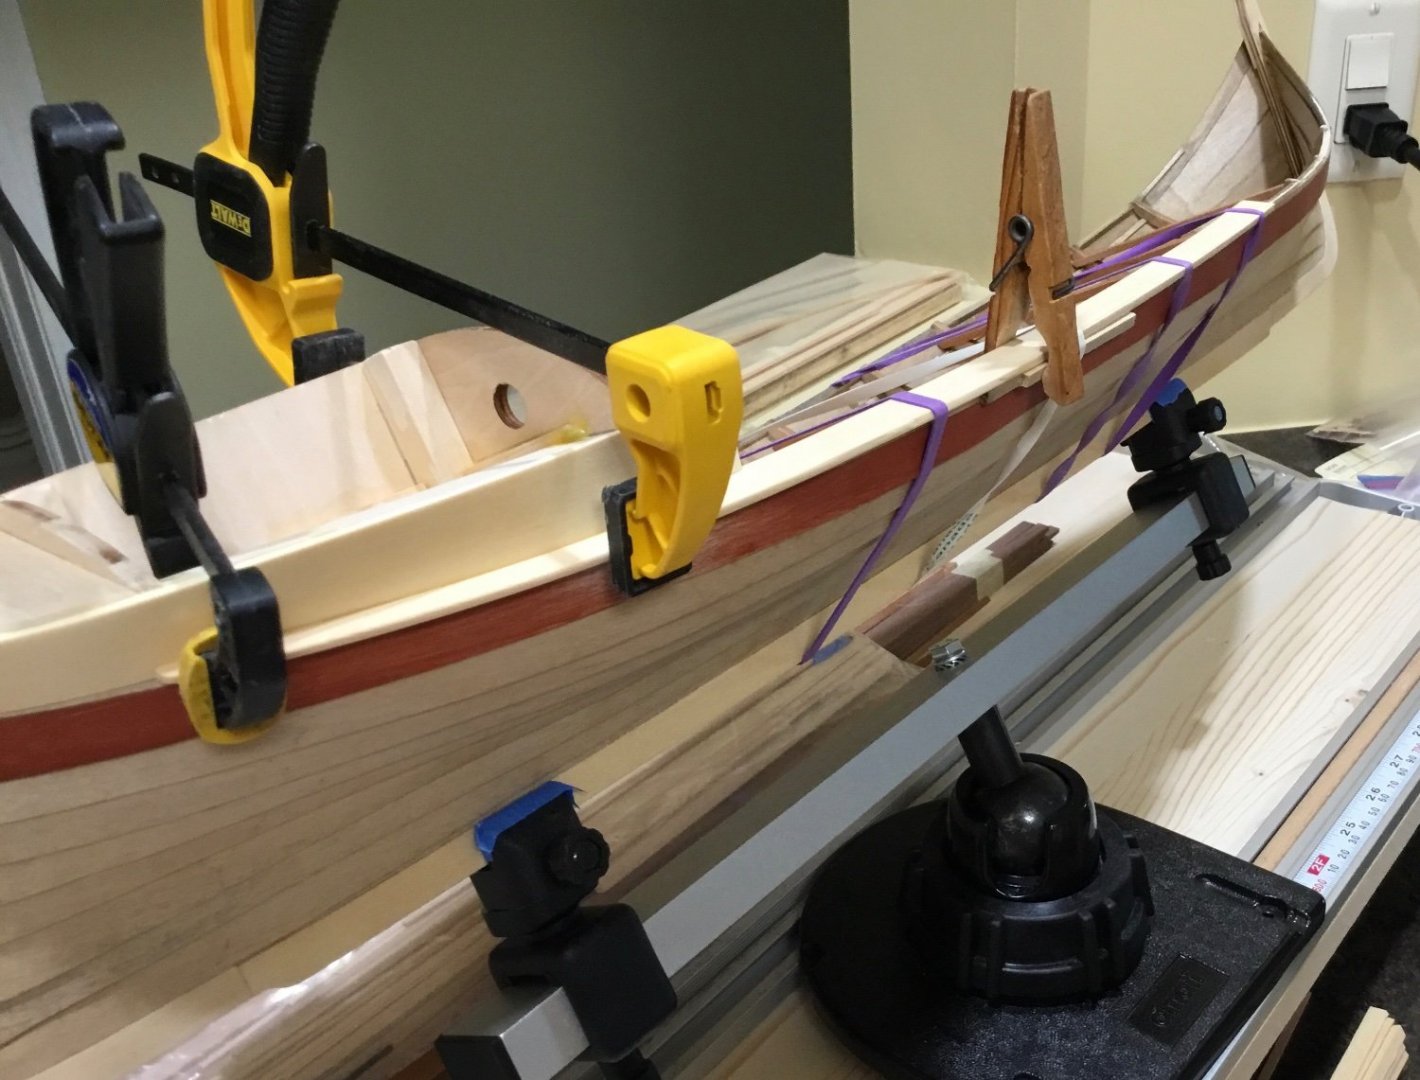
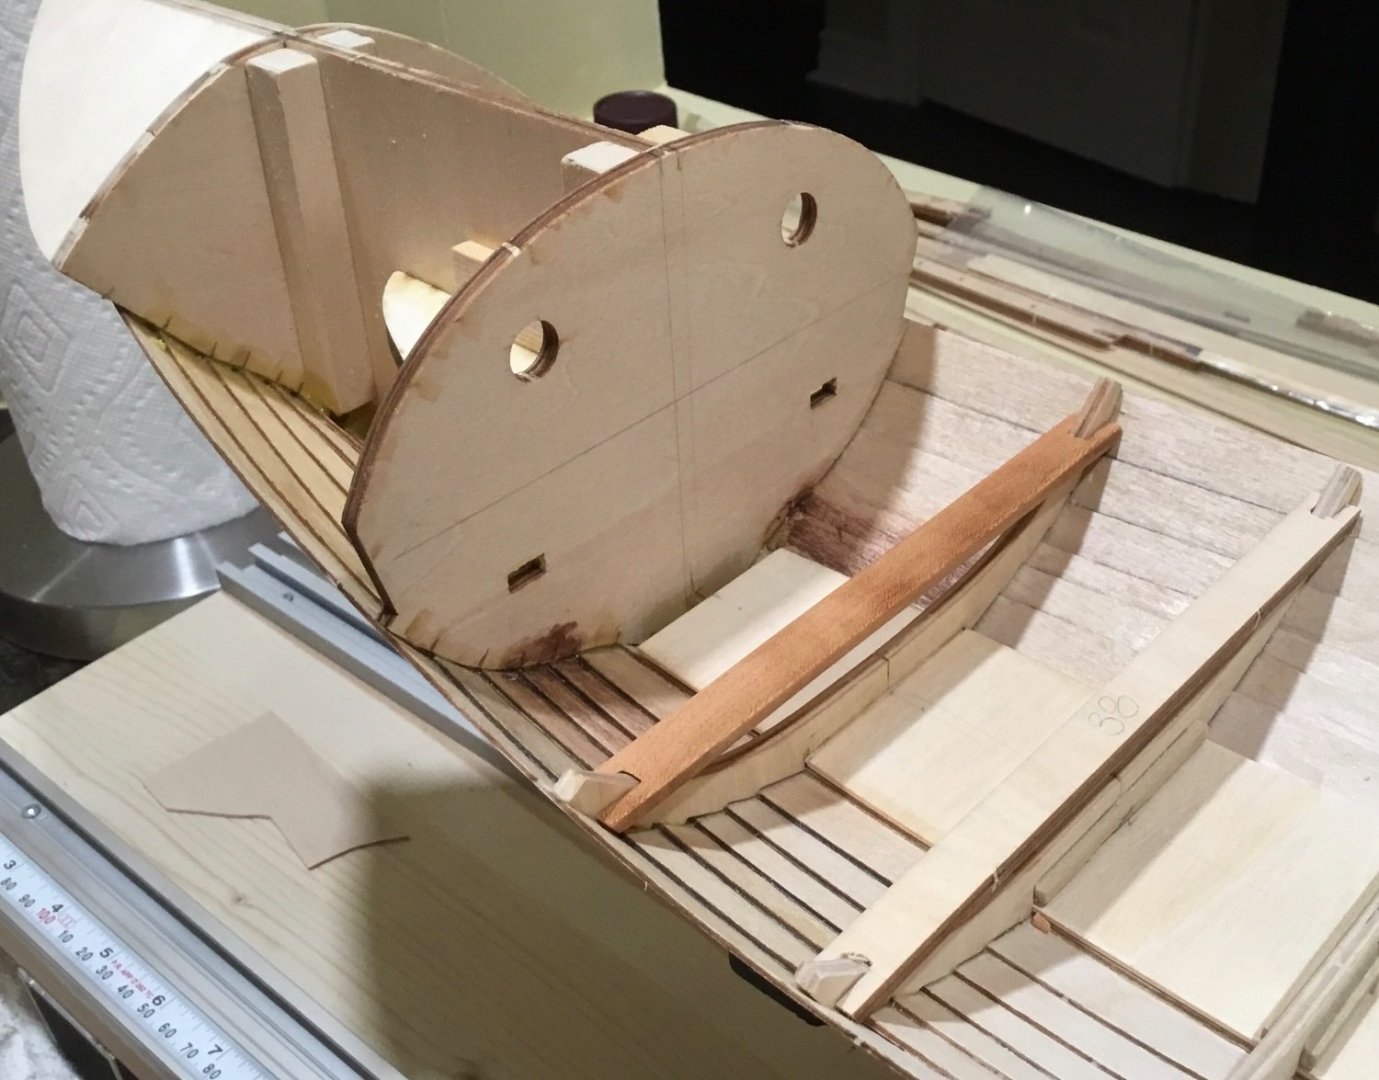
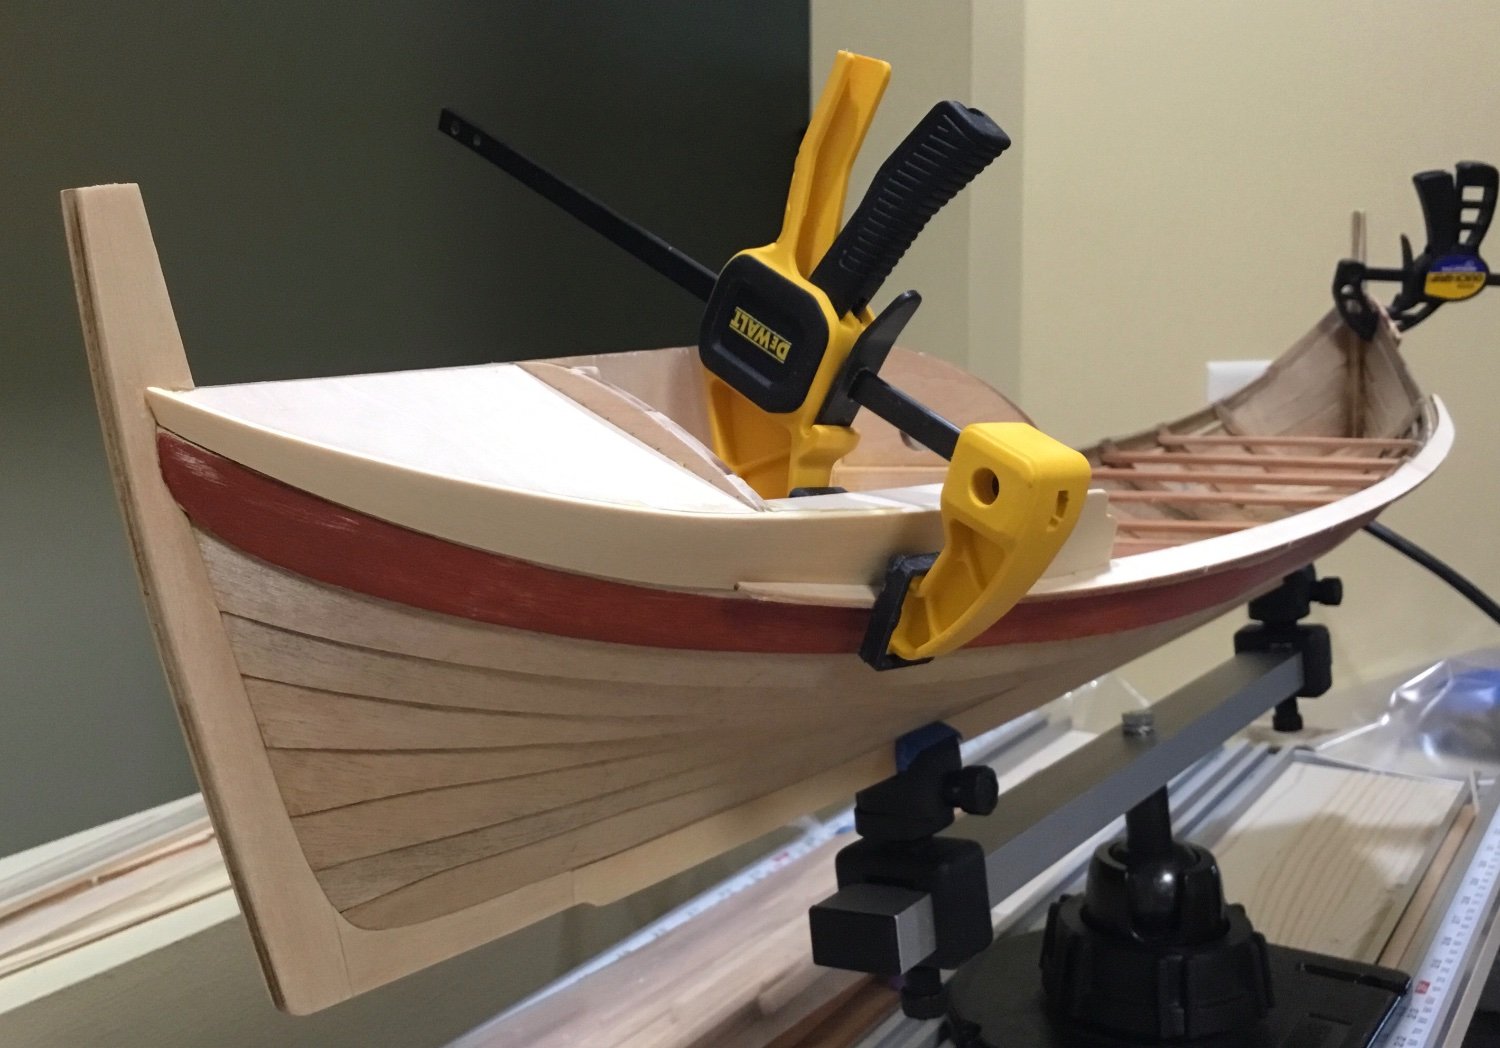
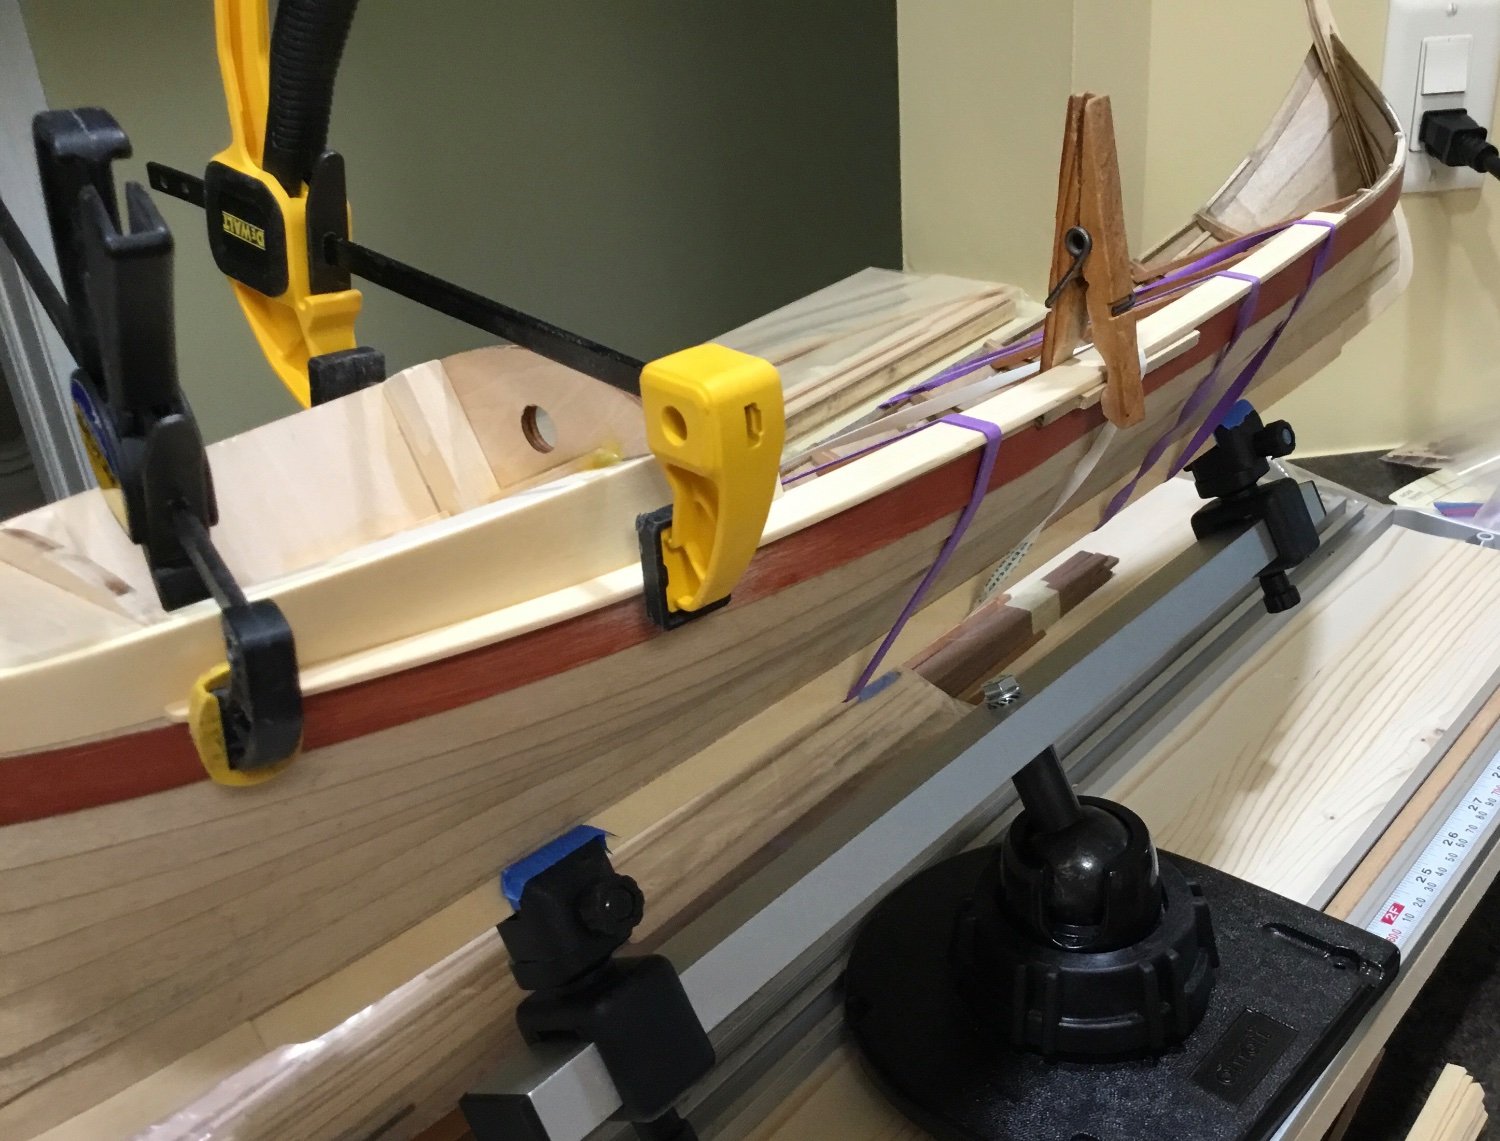
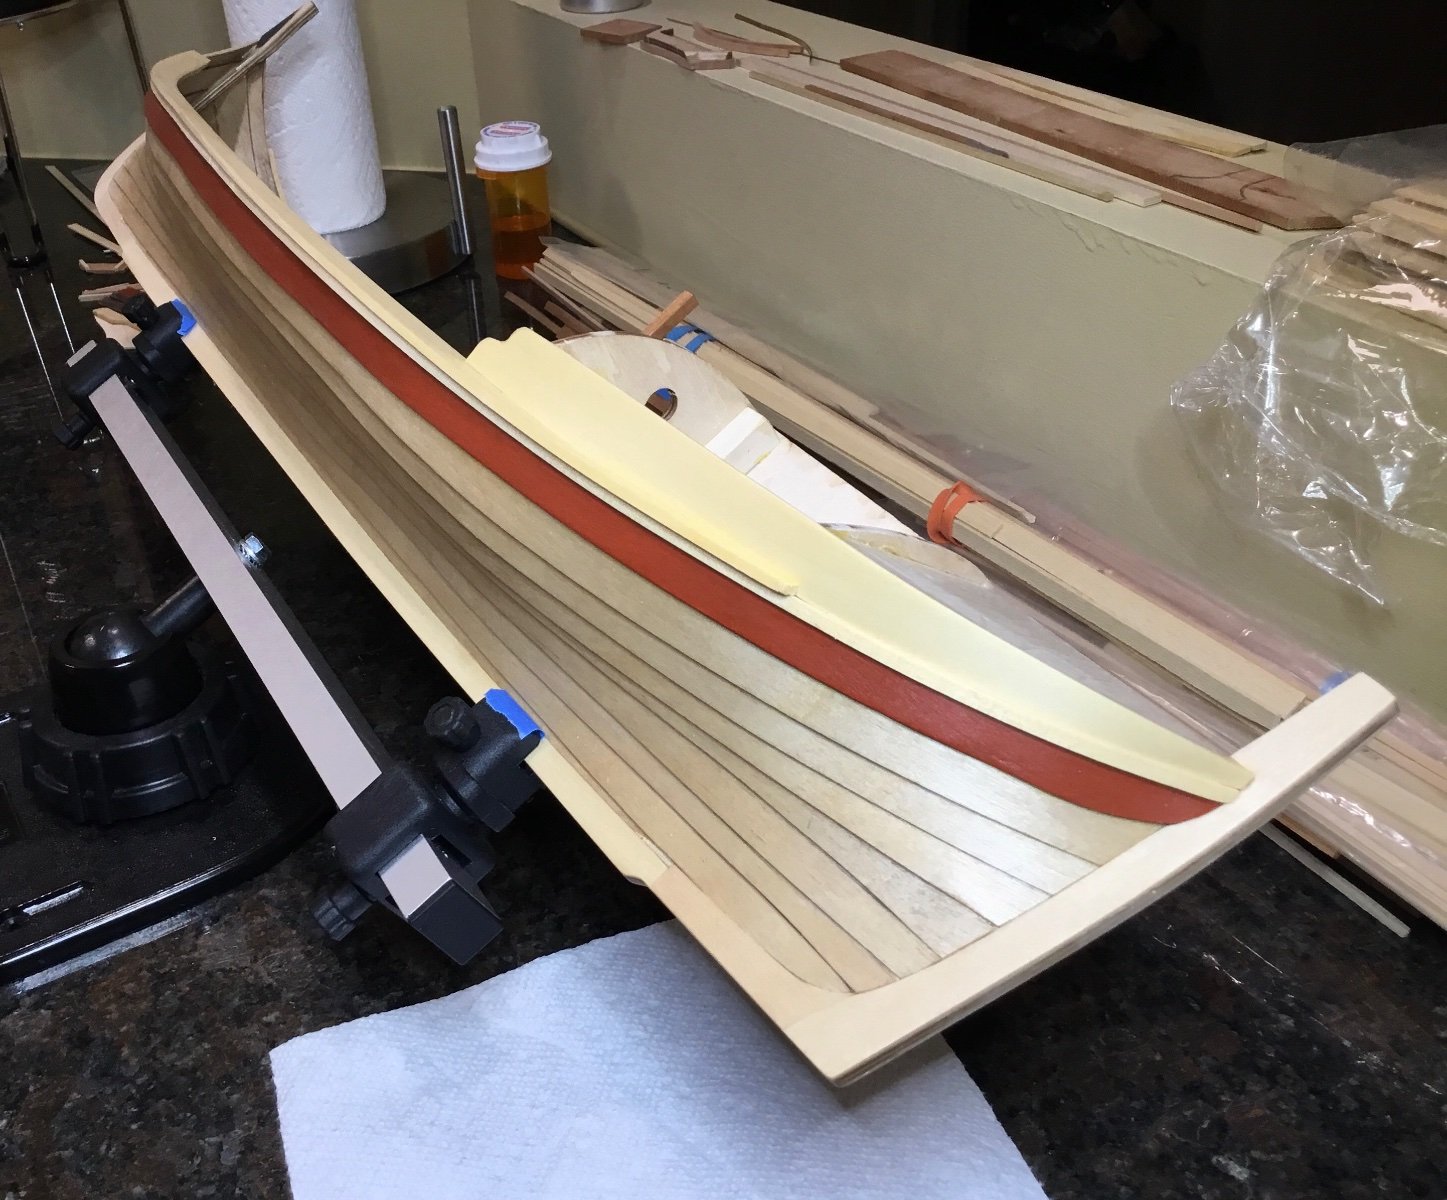
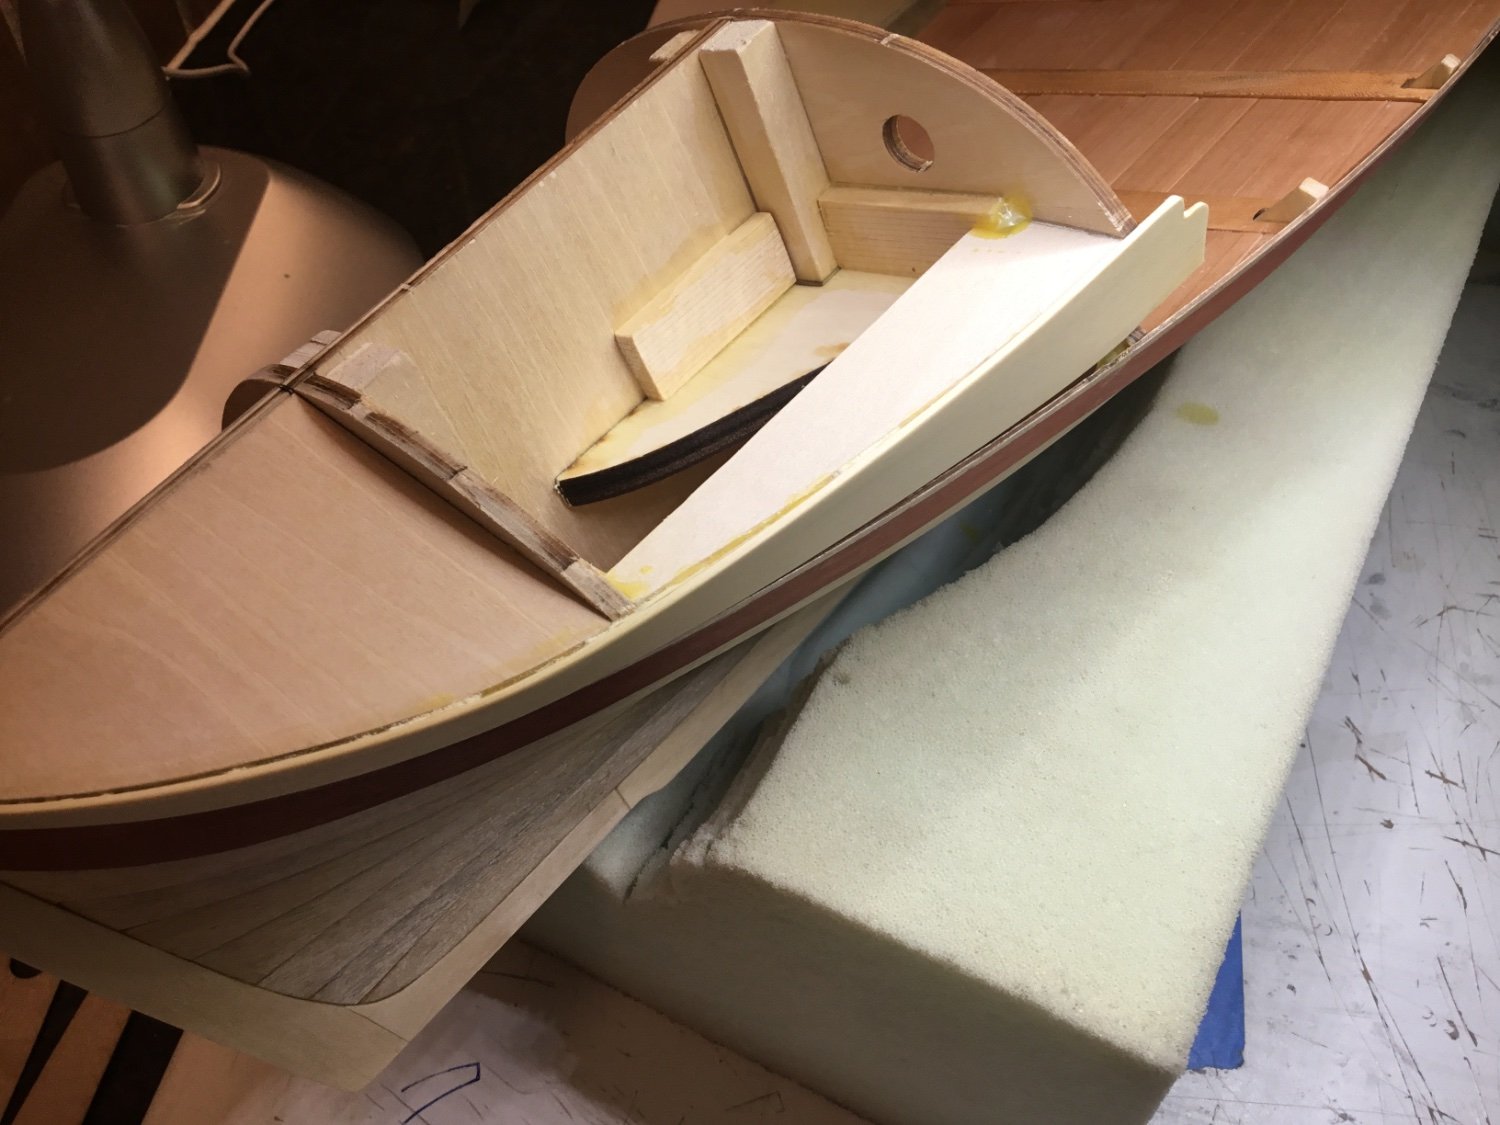
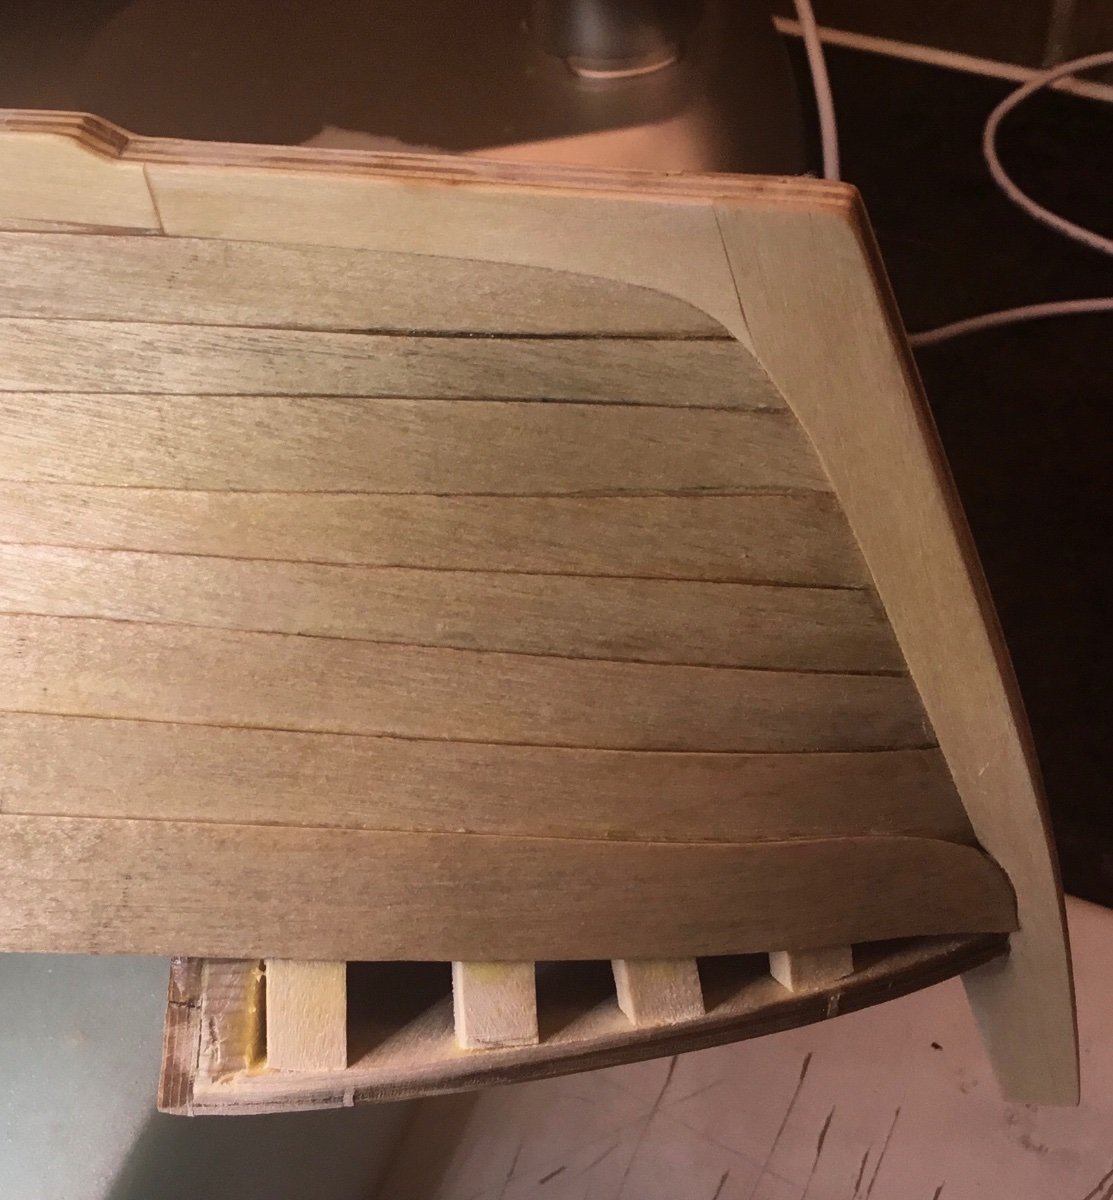
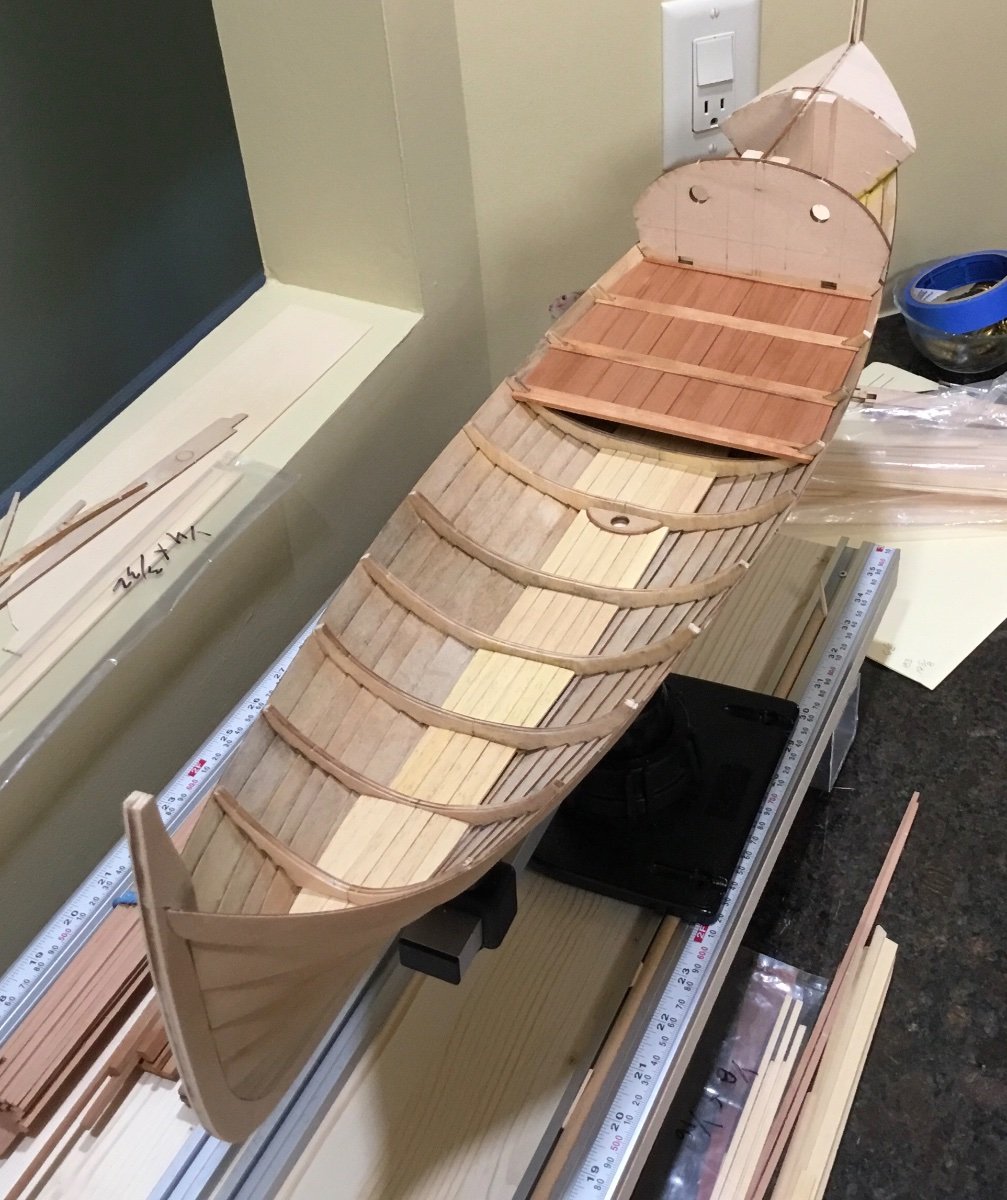
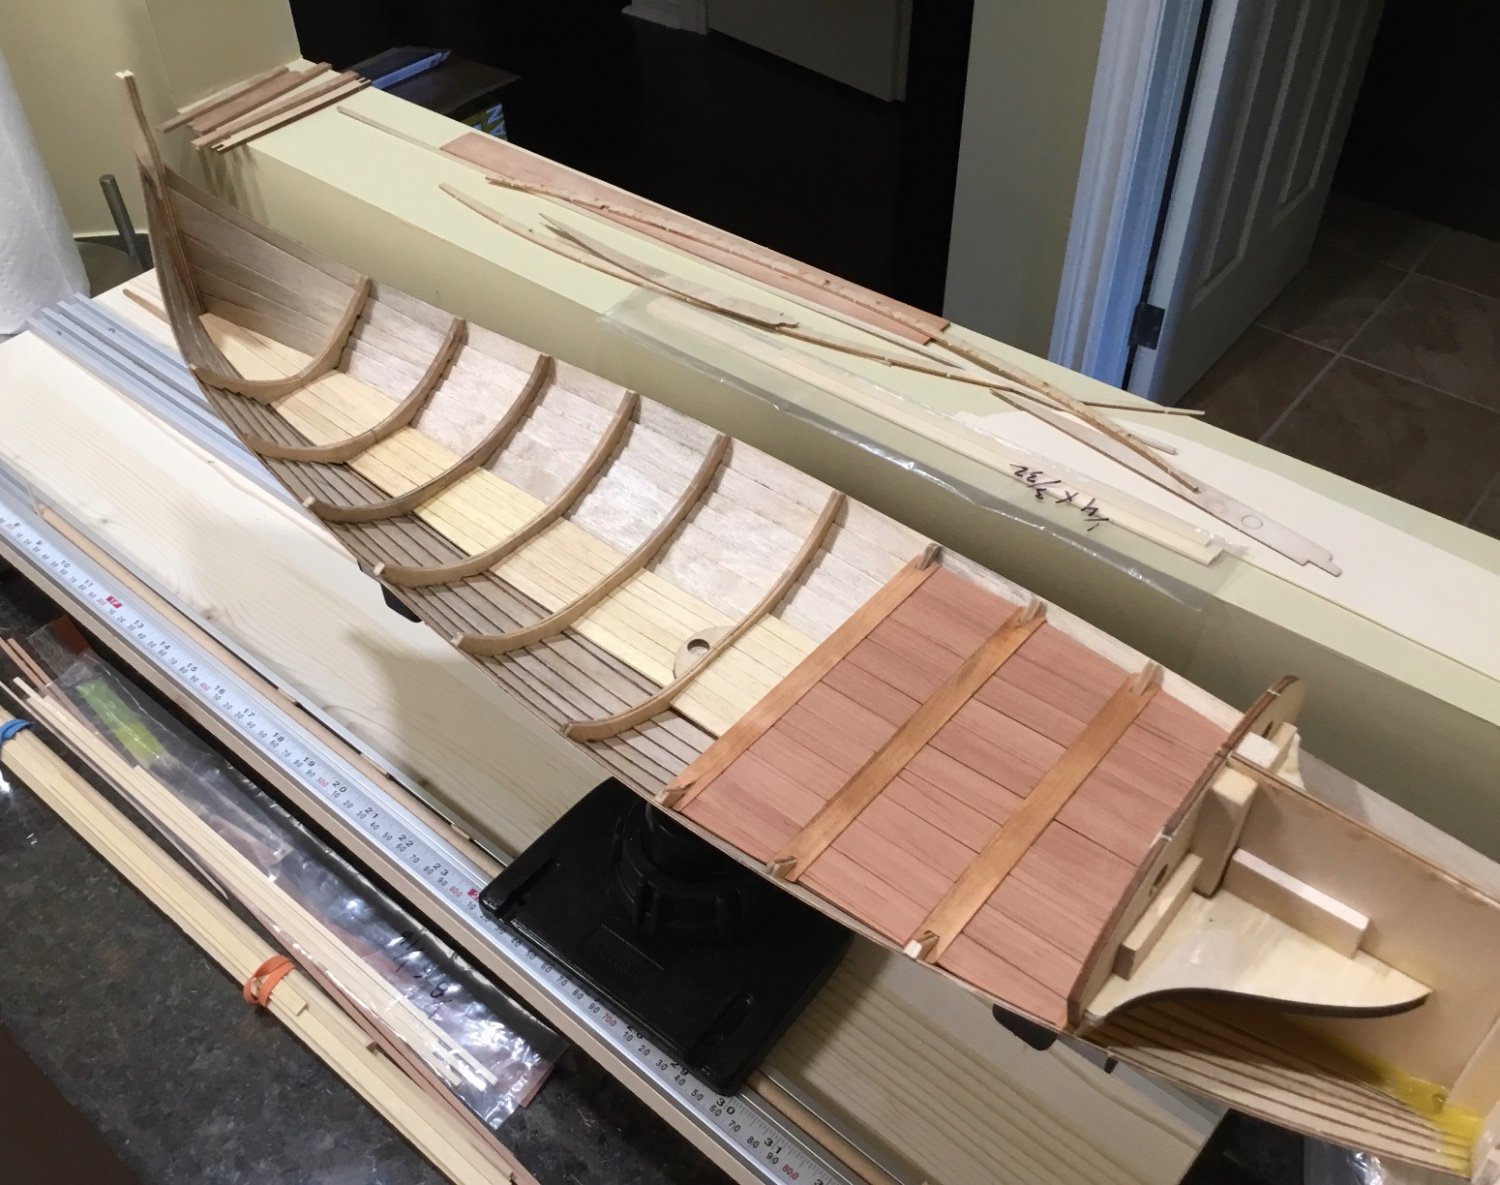
Hi Everyone, thanks for dropping by and many thanks for the Likes. I was going to work on the gunwale rails (Billings calls them rails ) but it seemed to me to be better to attach the side walls of the cabin first. These are the kit supplied rails that taper to an end about half way between the front of the cabin and the stern post.
If you install them first then the cabin wall would have to drop down to the gunwale strake (?) where they end. Thought there would be too much room for error there. I have some AYC left over from my Cheerful build so the plywood cabin walls will be replaced with it. I also broke one of the plywood parts. They are very tender where the porthole is cut in.
The cabin walls curve then twist and then straighten out. At the halfway mark they stop following the planking and head inboard where they attach to the front of the cabin. Some 1/8” basswood parts where made to keep the walls on track.
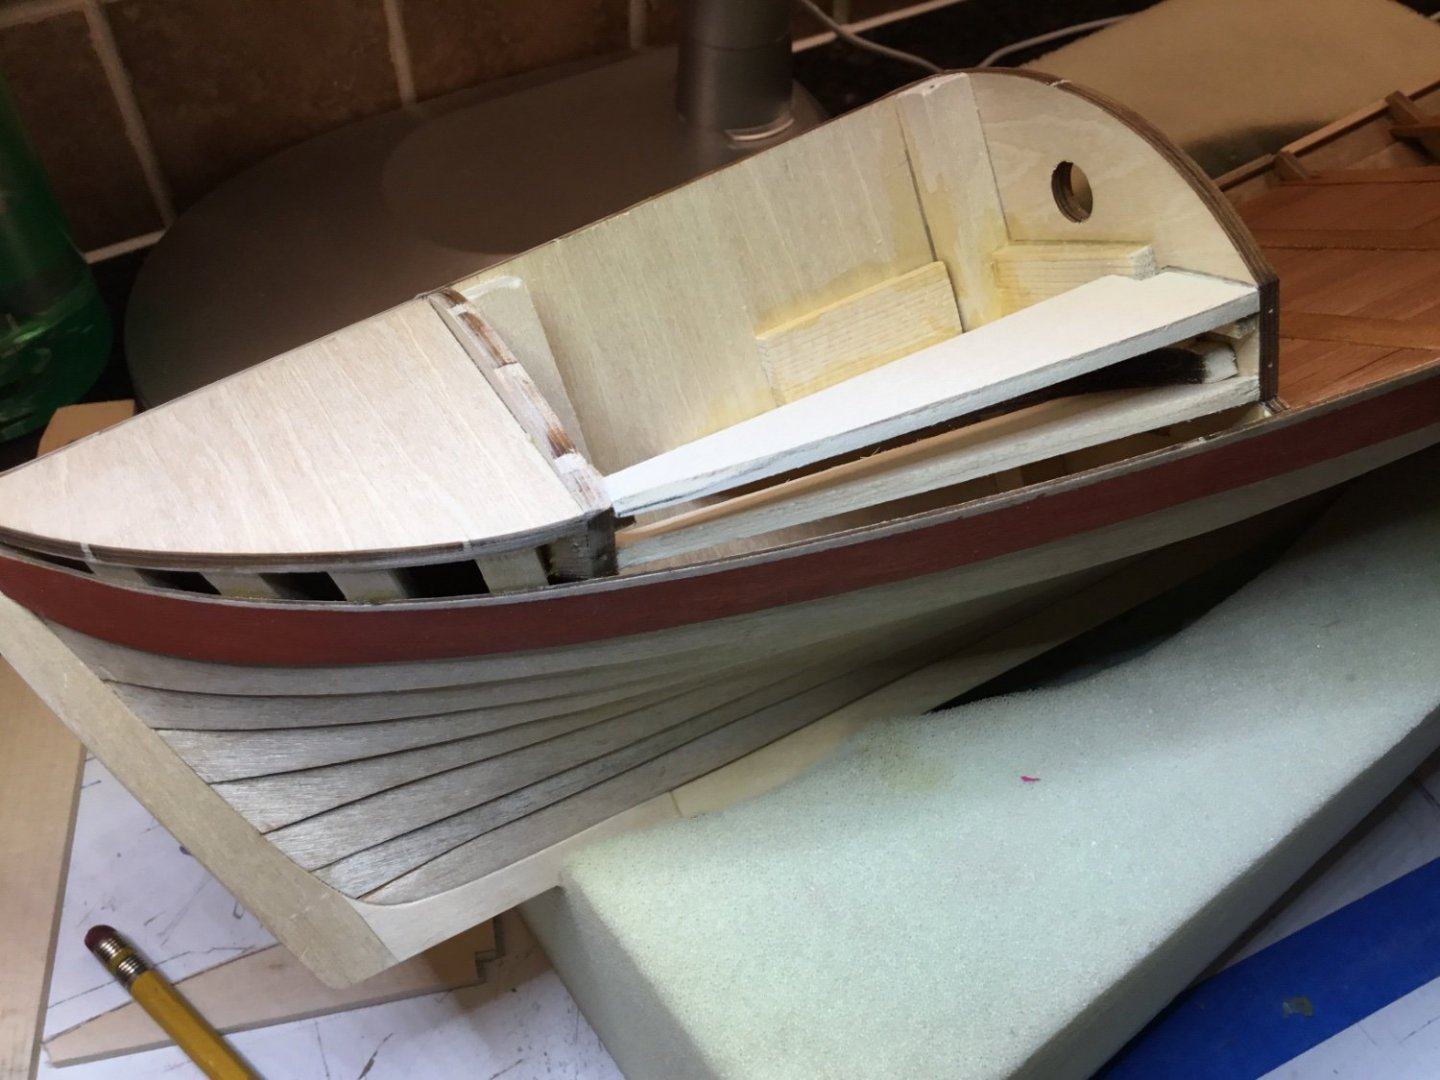
CA was used from the stern post to the first bulkhead and then pva and clamps took over.


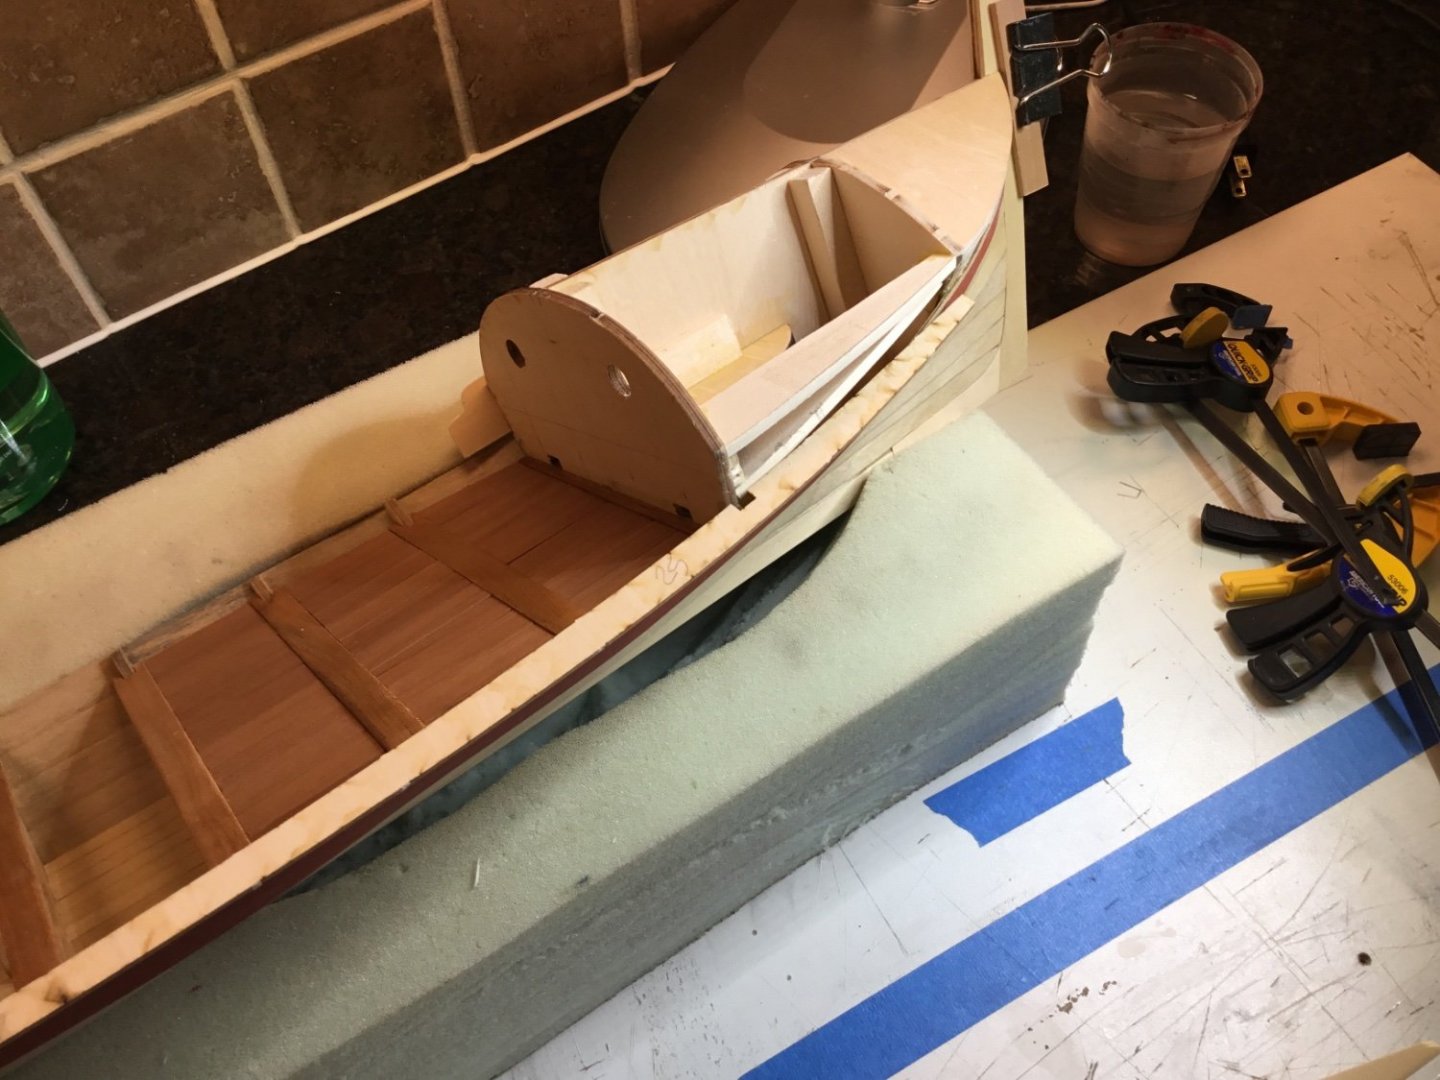
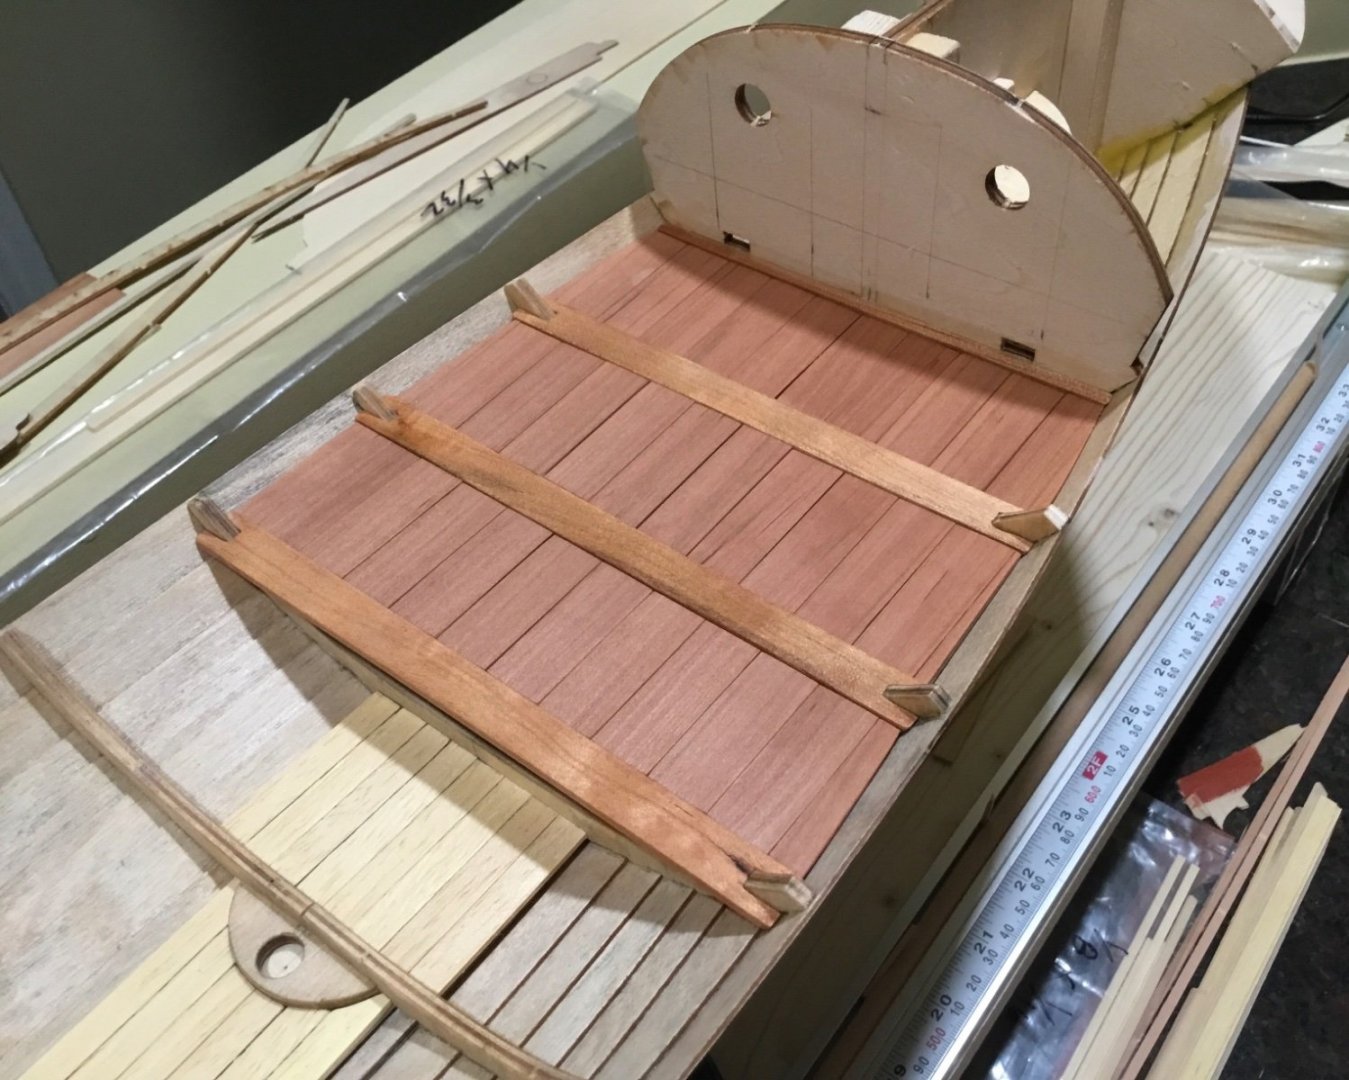
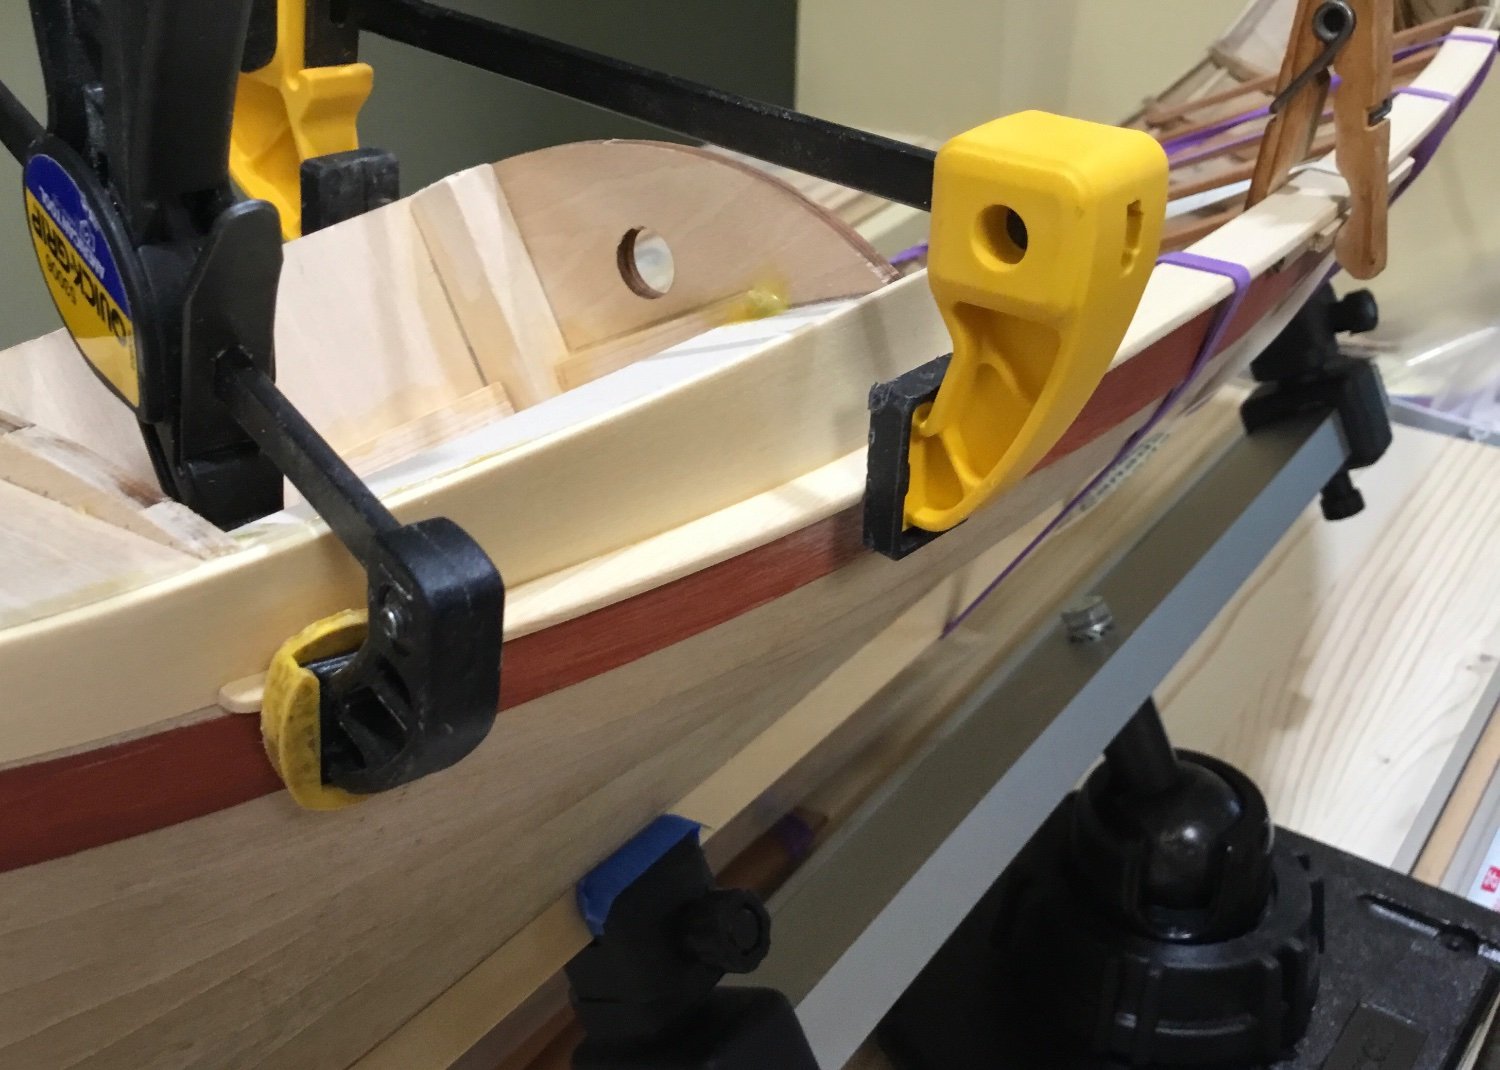
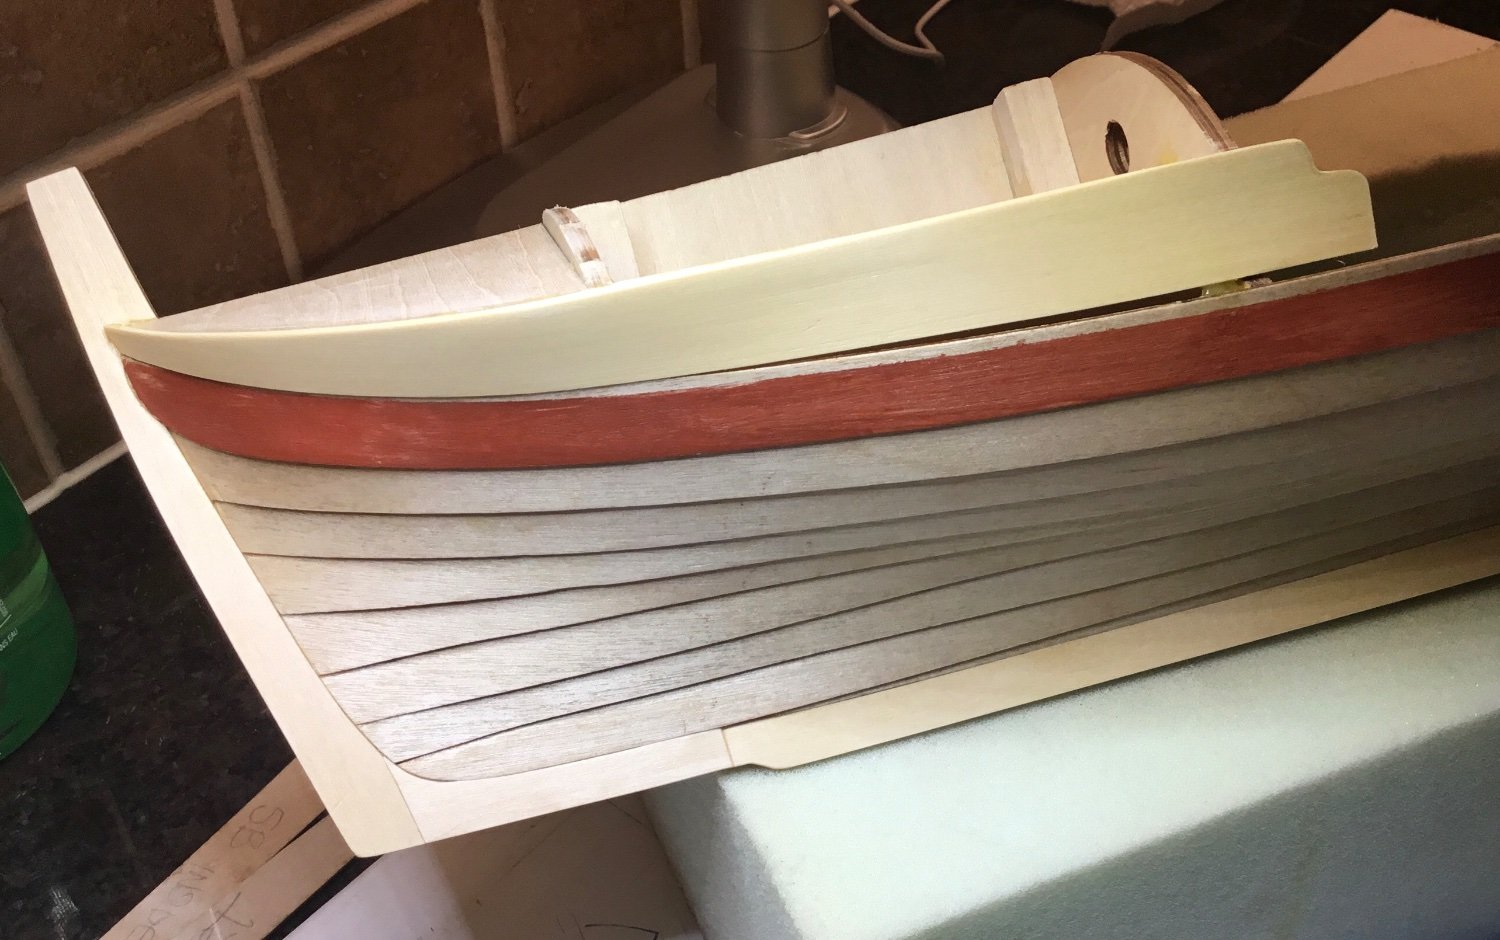
This is her after a first sanding and application of w-o-p. The red oxide is starting to grow on me.


The thwarts have also been finished.

I’ve been adding 1/16” x 1/16” strips of basswood along the top plank to give more gluing surface for the rail. Once they are completed the rails can be worked on.
- Frodo, GrandpaPhil, CiscoH and 7 others
-
10
-
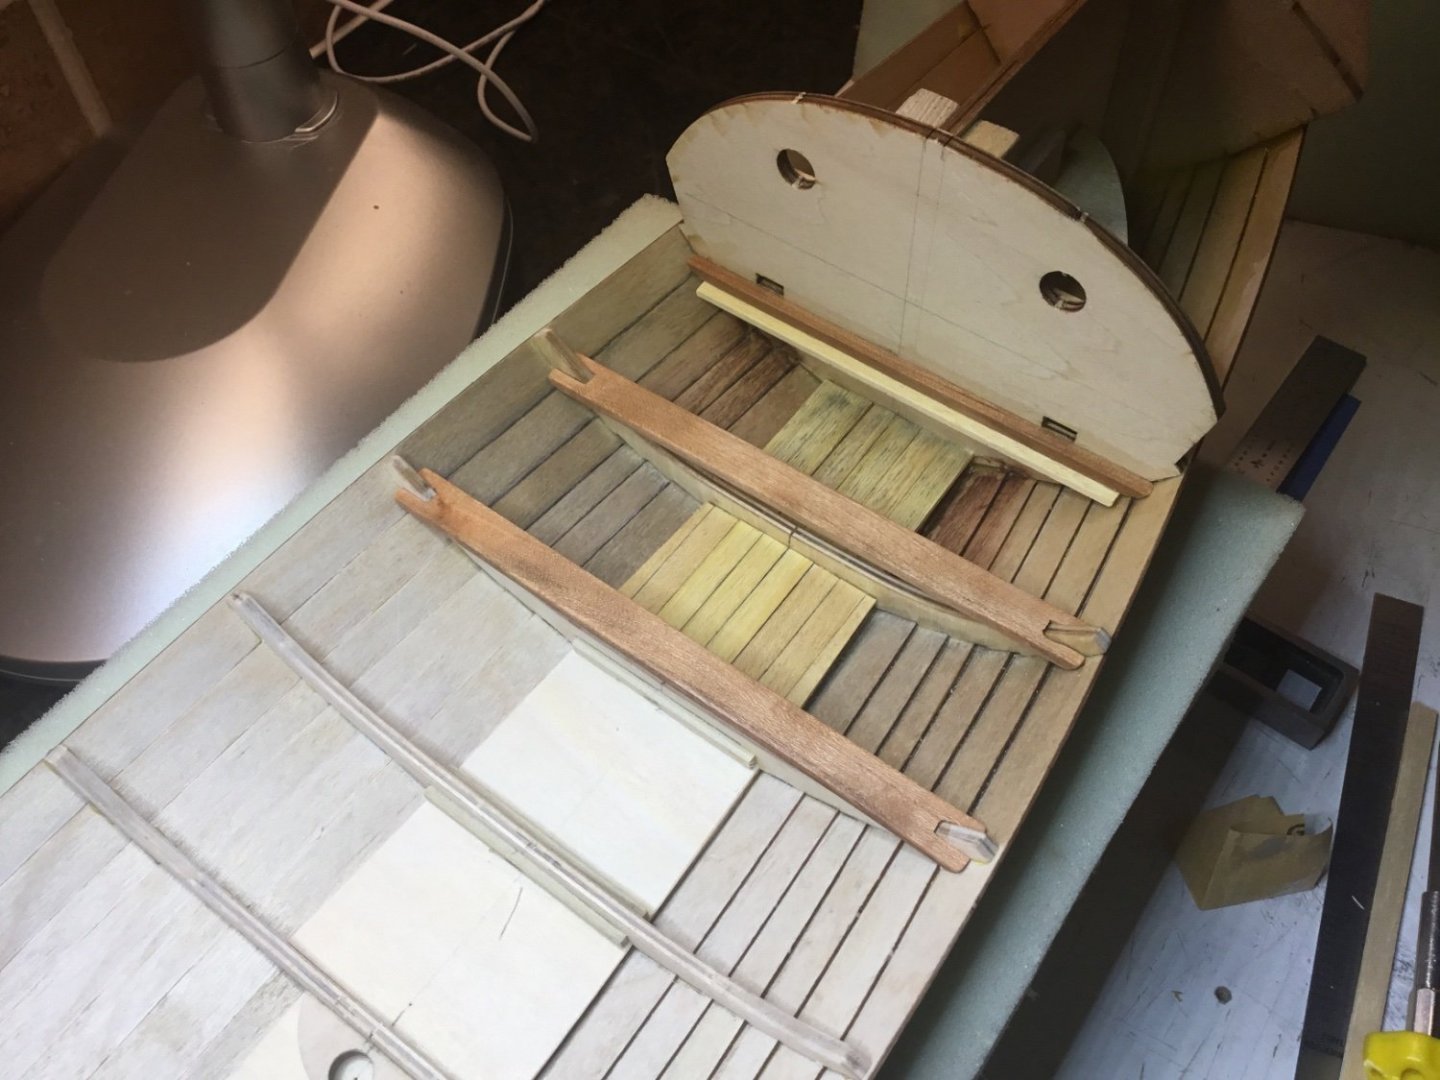
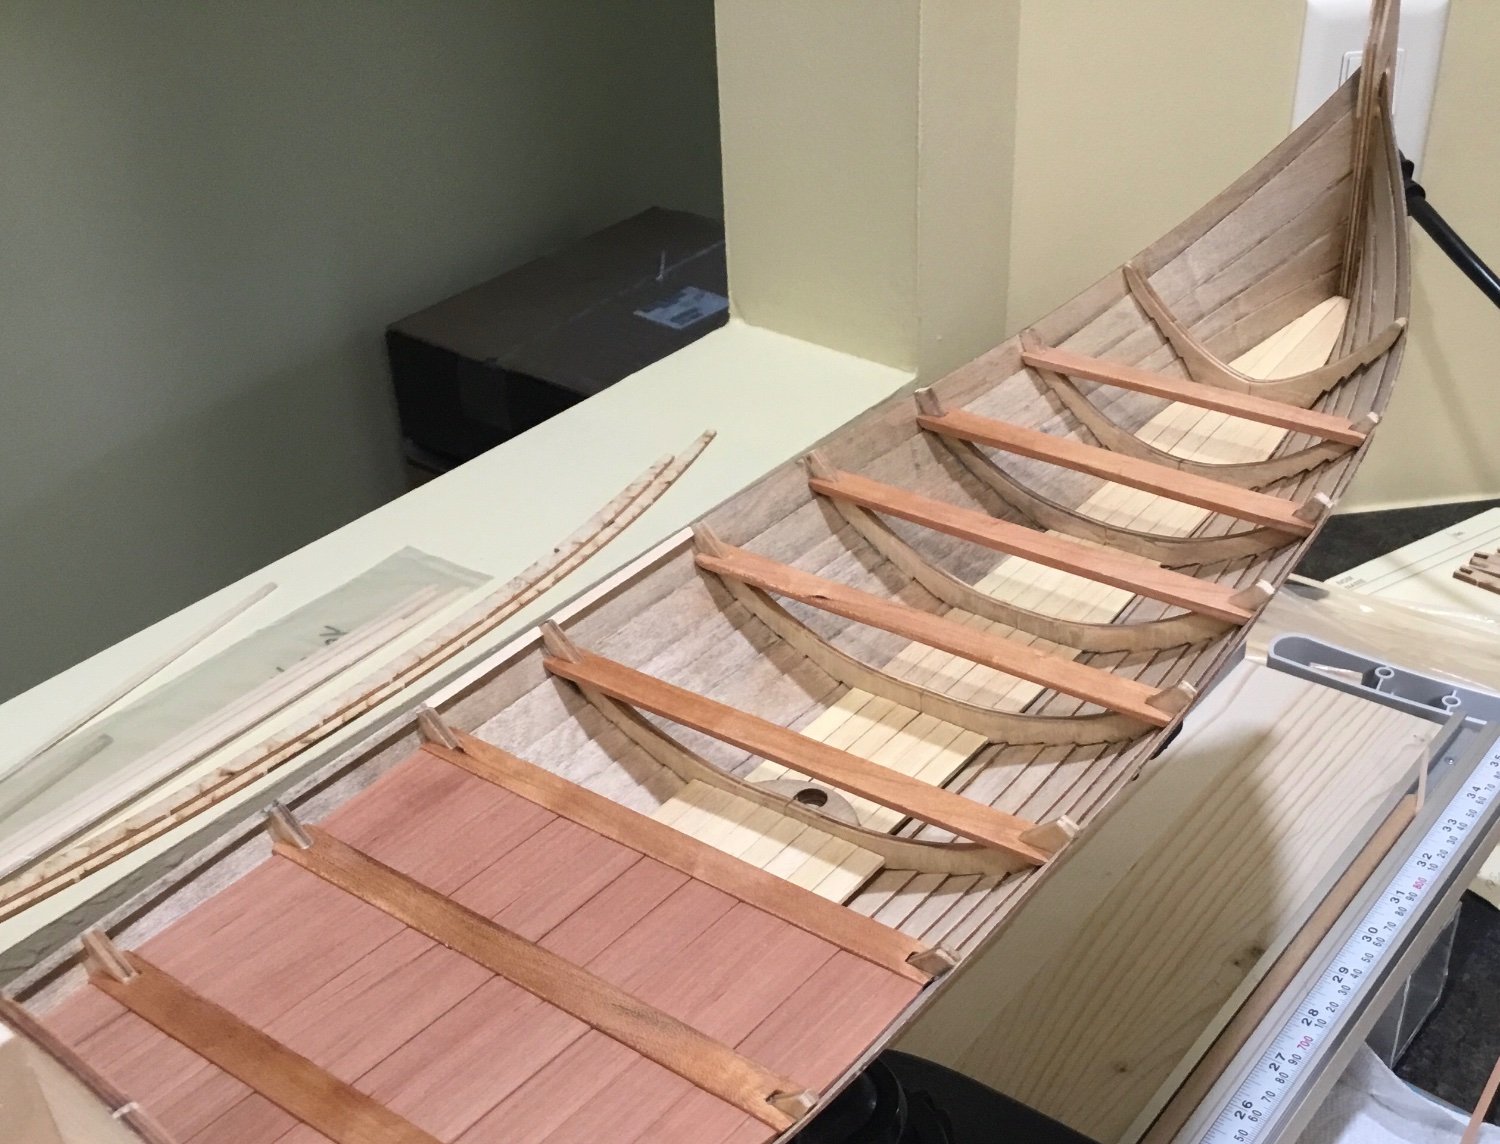
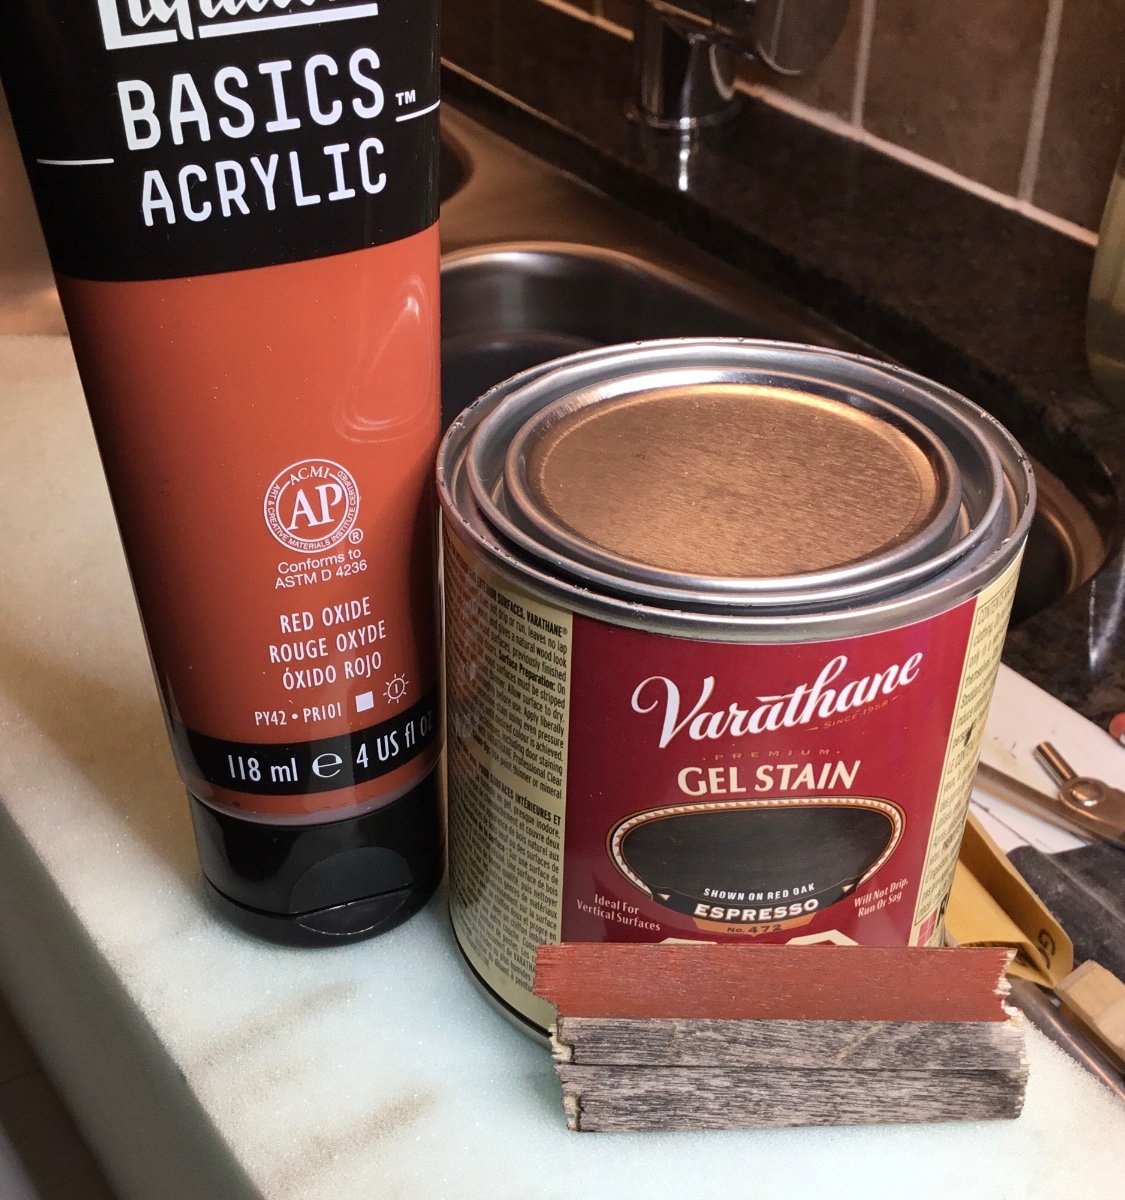
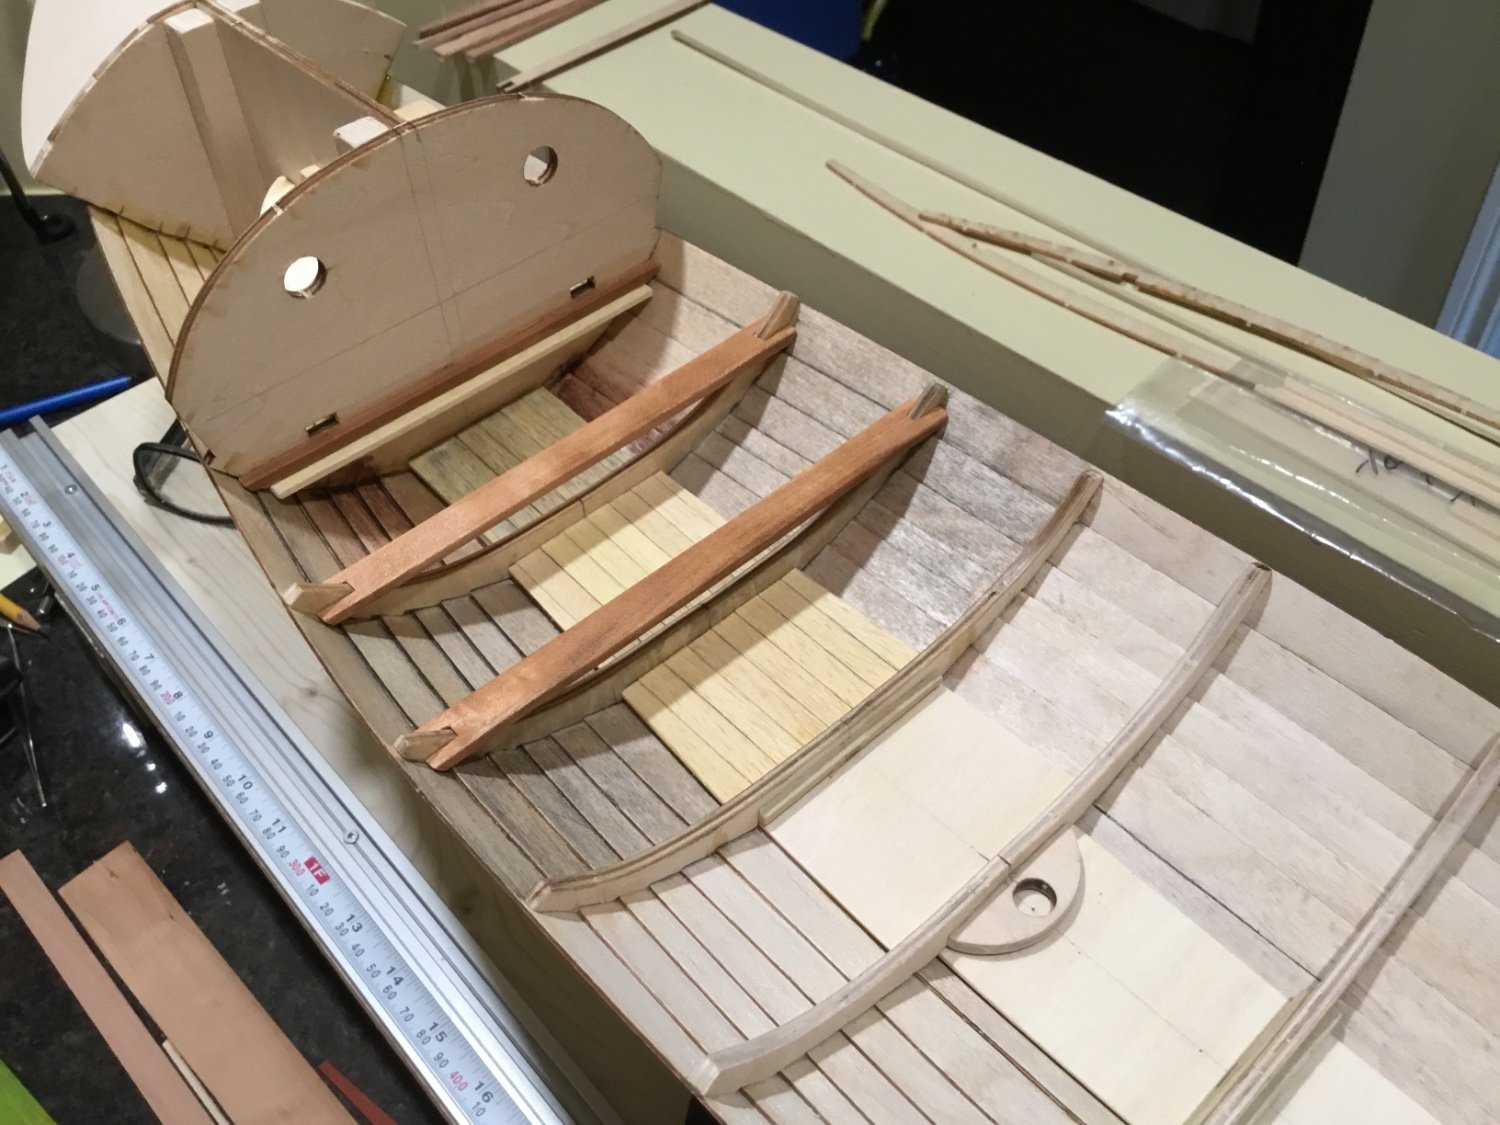
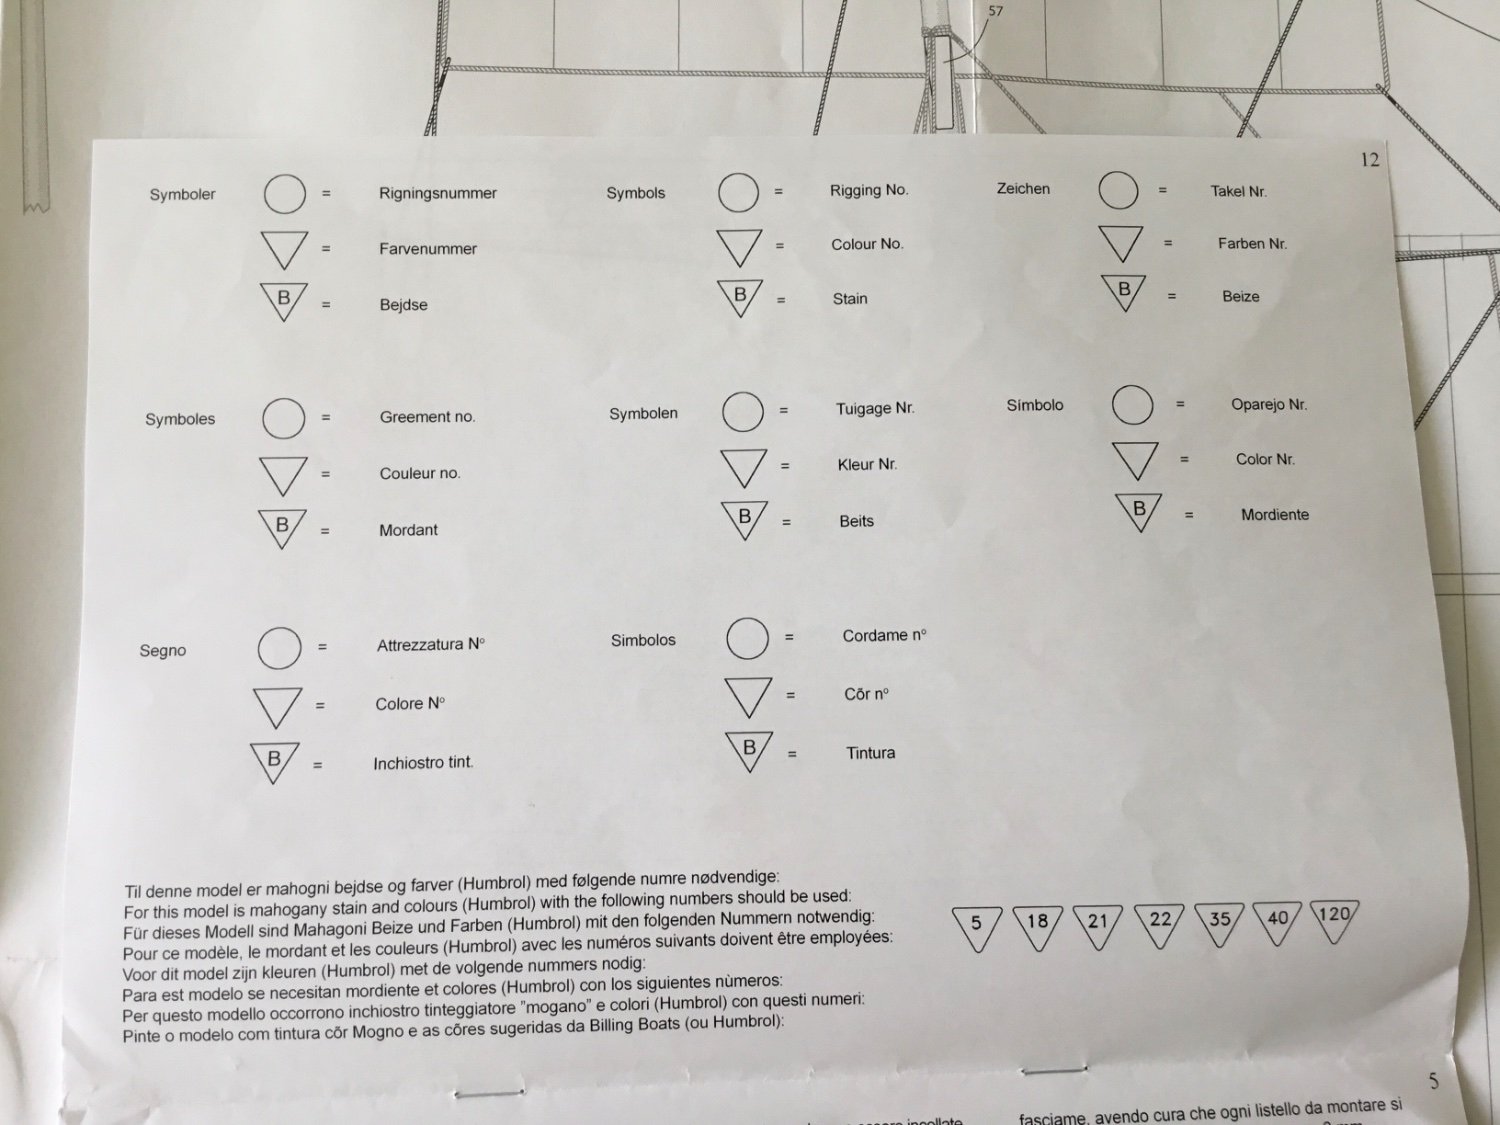
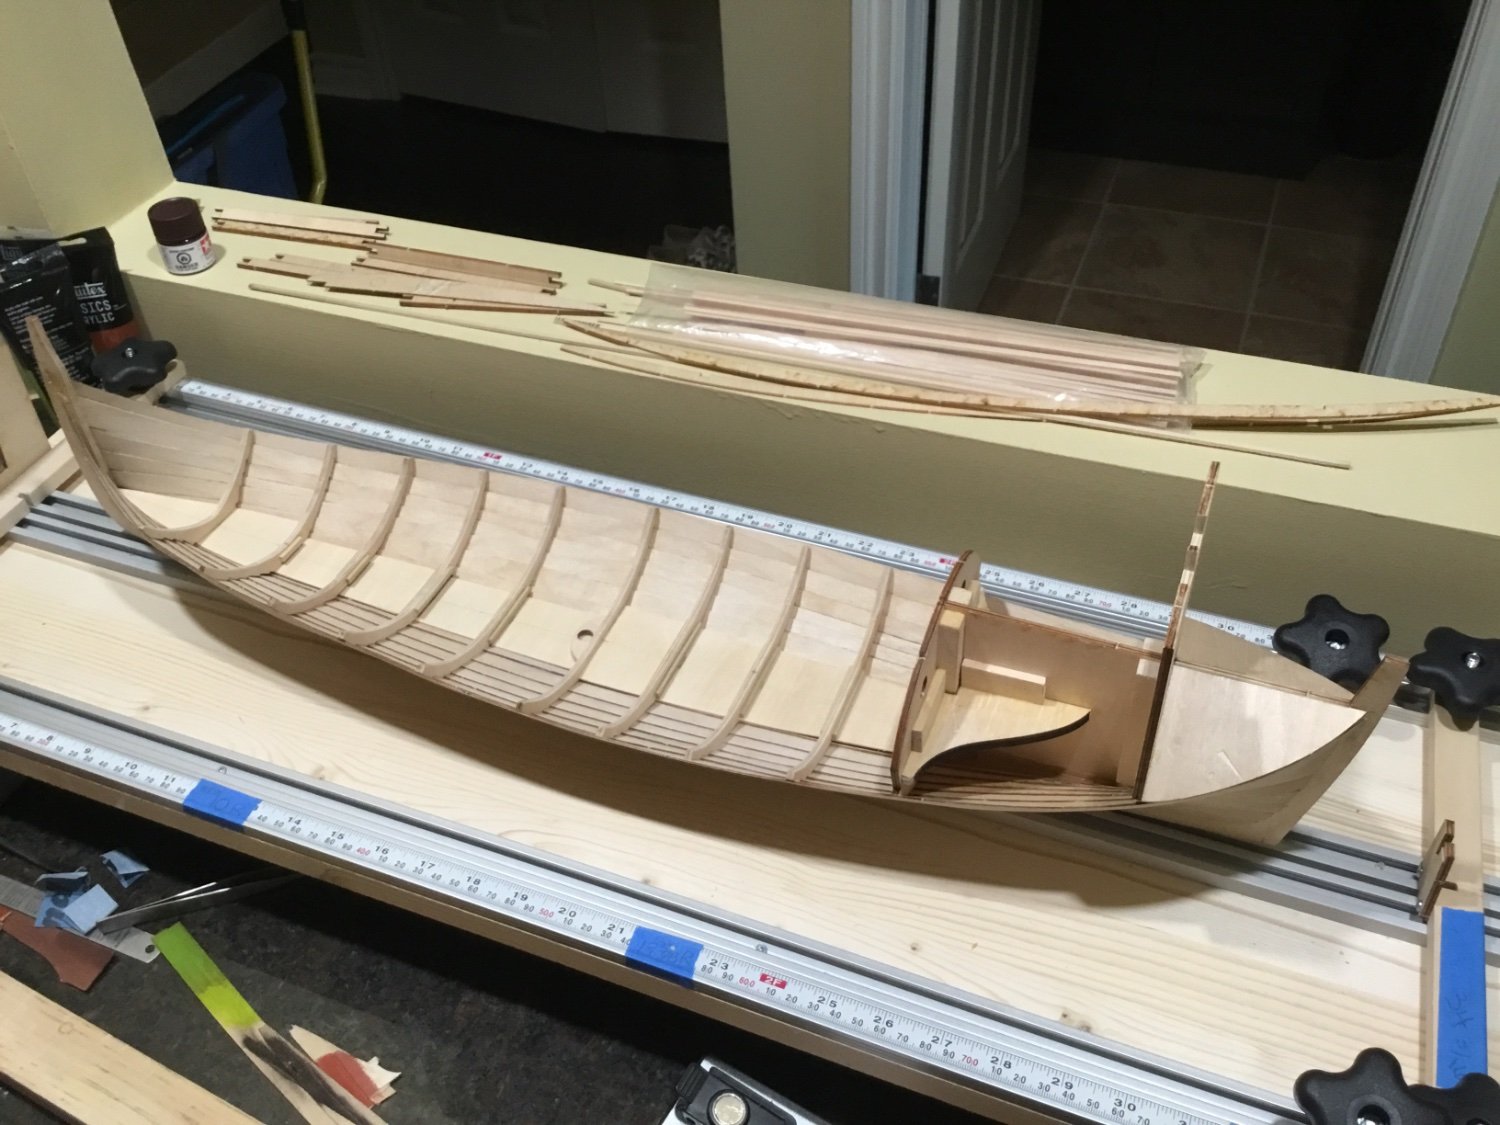
Hi Everyone, thank you for your Likes and Comments. They are always very nice to receive. The veneering of the stem, keel and stern post is finished.


I also spent a bit of time this week testing stain and paint colors.

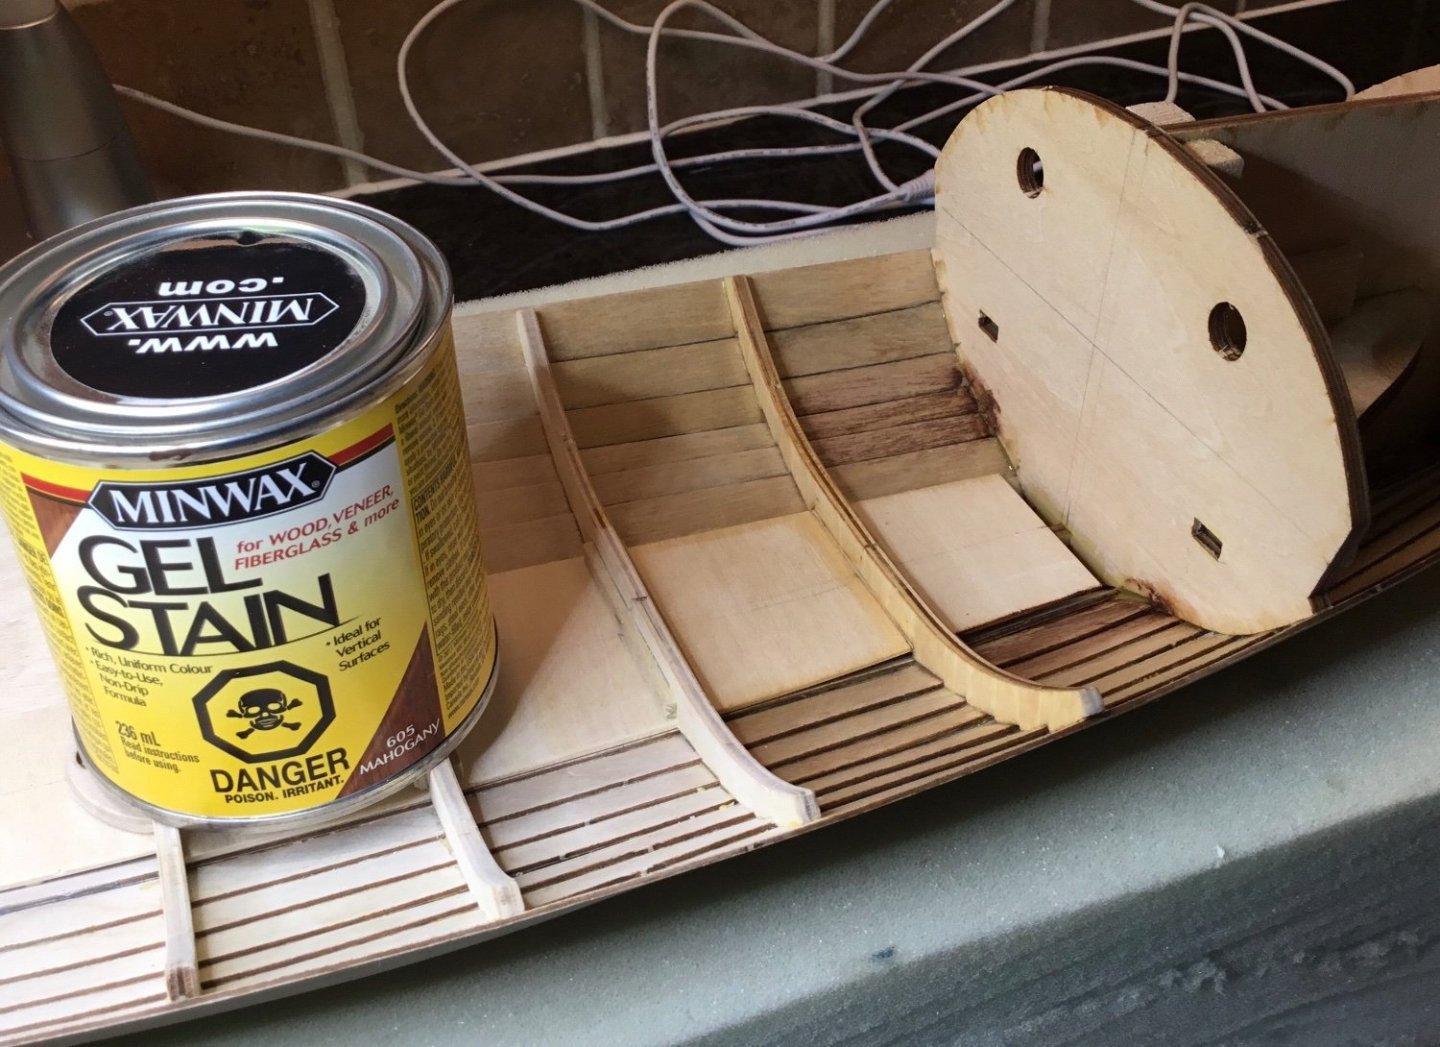
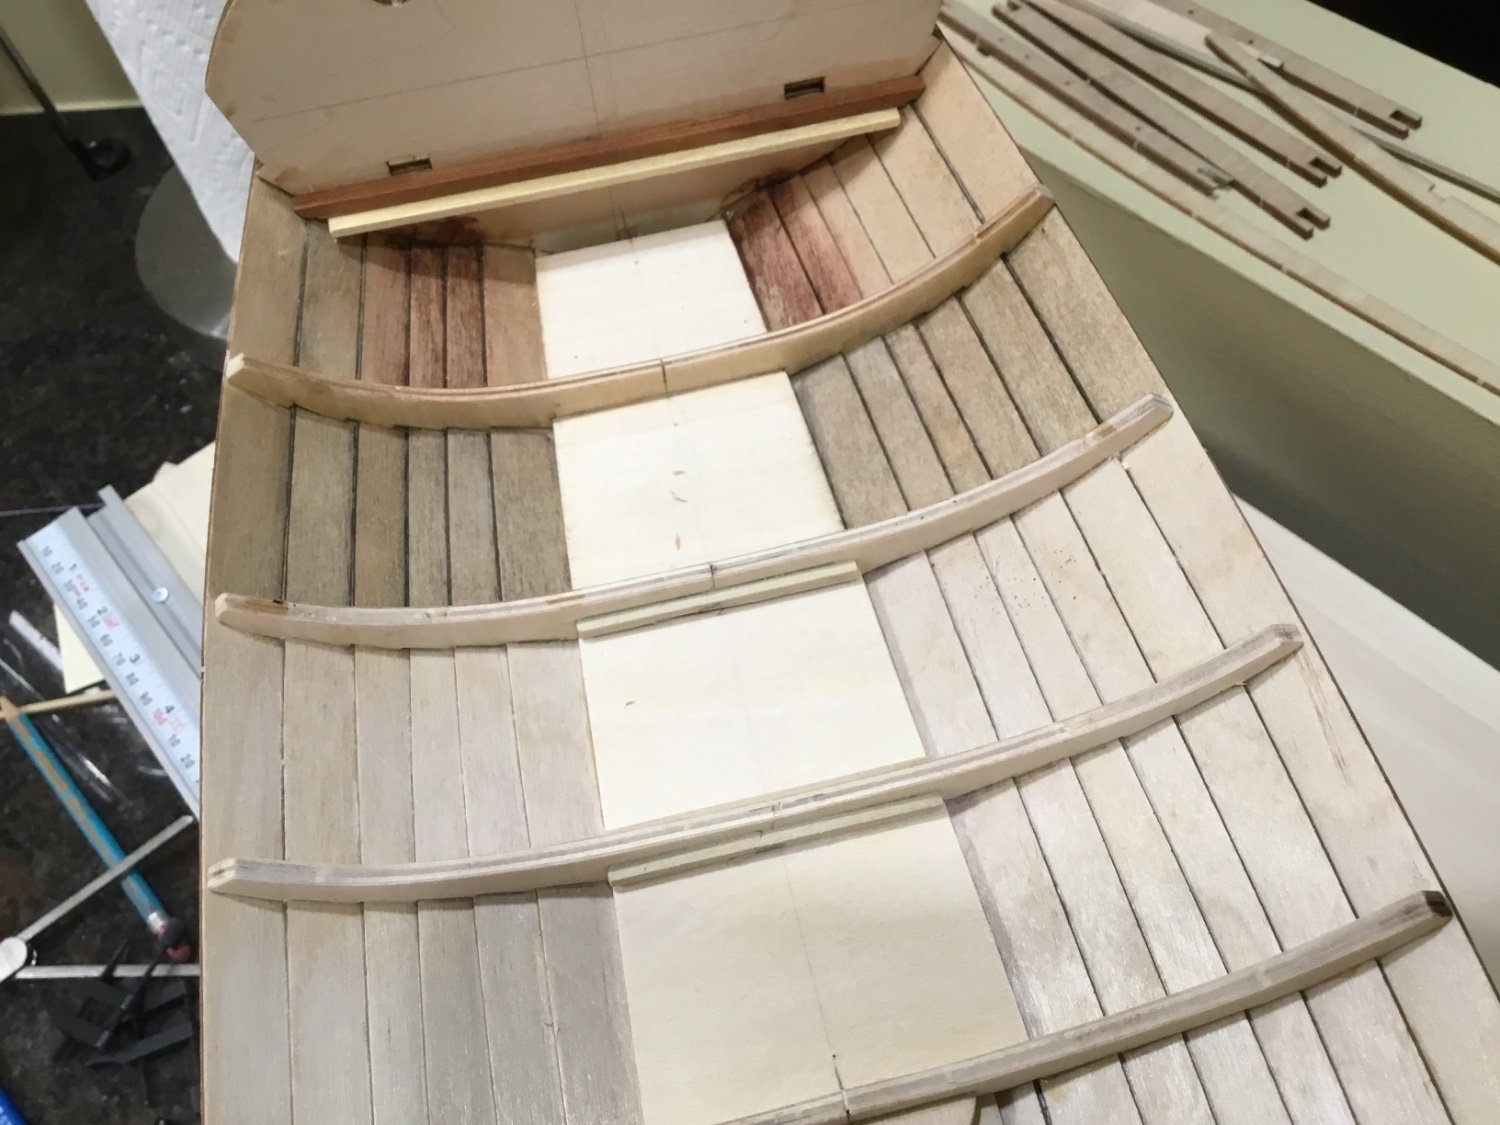
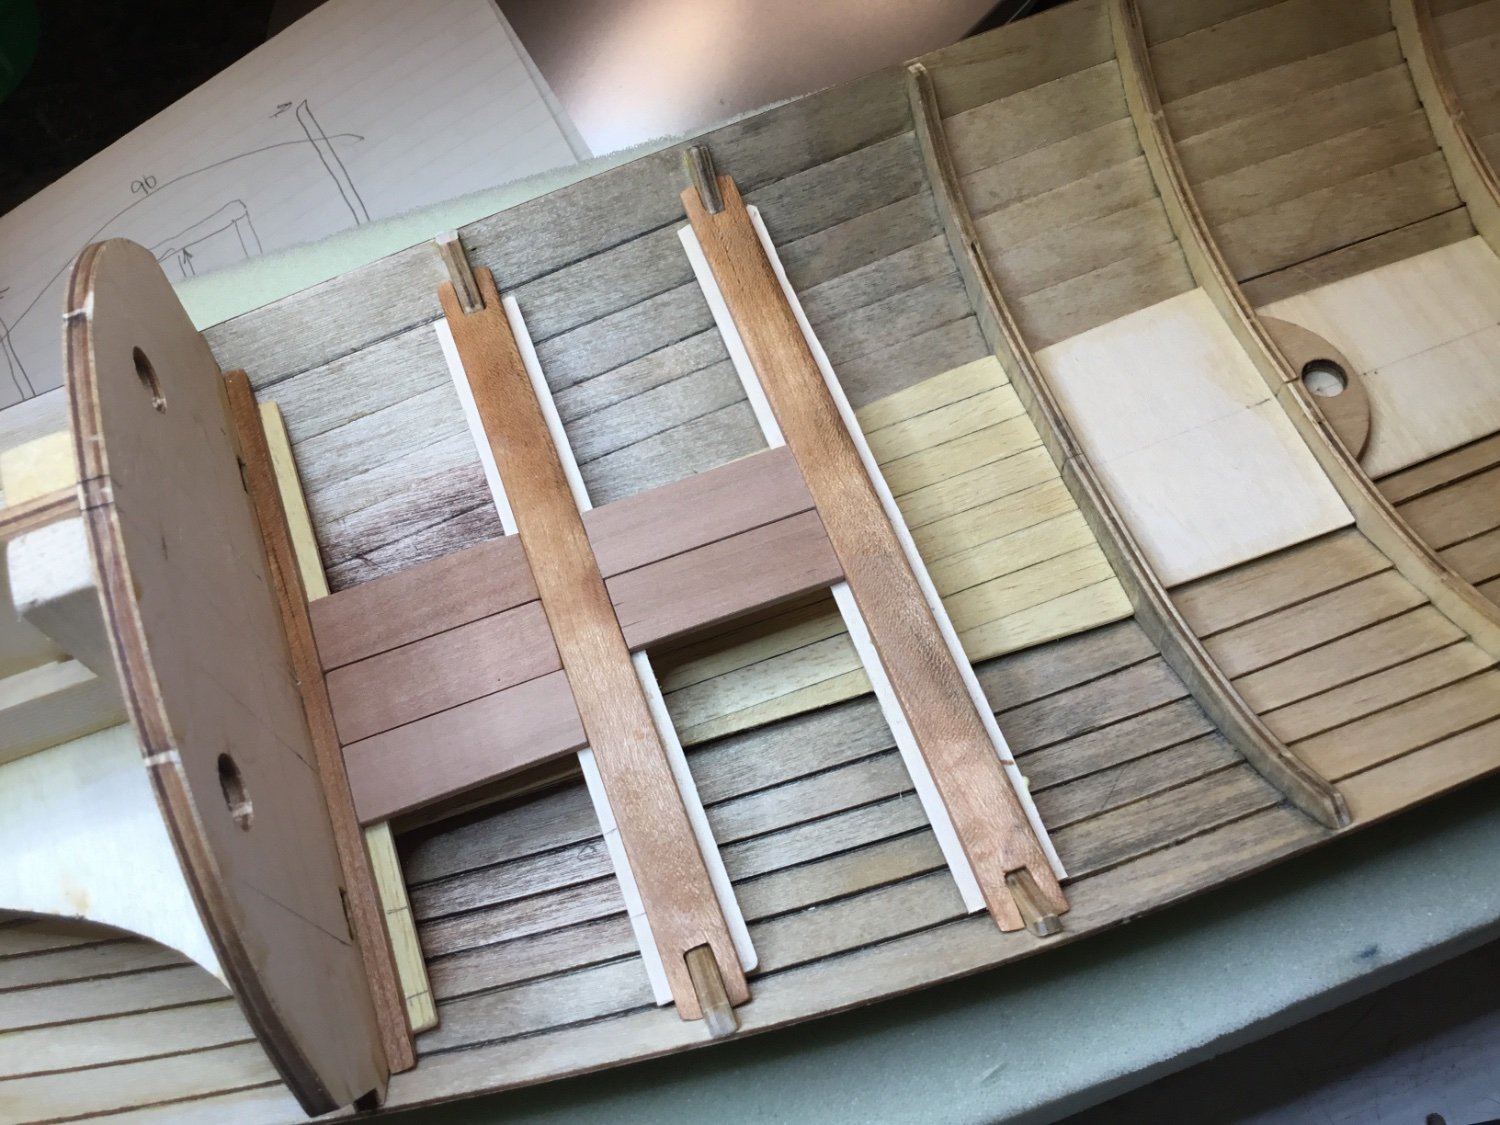
The Varithane Espresso turned out to be more black looking than brown so it may be used for the cabin roof. The Minwax Red Mahogany was tested where it will be covered by the deck. The gel stain didn’t cover all that well and it washed off a bit when applying the wipe on poly over it. I also ran a pencil along the tops of the planks to simulate caulking but didn’t really like that. But when the w-o-p was applied over it the graphite, or whatever they make pencils out of these days, it smeared around giving the planks a weathered kind of mildewed look. Between the next two ribs I grated some HB lead from a mechanical pencil and smooshed it around with w-o-p on a cotton swab.


That turned out pretty good. Kit supplied Obechi is being used for the floor boards to cover the plywood. The instructions say to score and draw lines on the plywood to simulate planks. The Obechi didn’t like the graphite. It has a deep grain in it. Started making thwarts out of pear to replace the plywood kit-supplied parts.


The third test area turned out too dark and blotchy because a second coat was applied before the first one dried. From that point on, the graphite was mixed in a bottle cap with the w-o-p and then applied. The deck boards were made using what I believe is pear also.
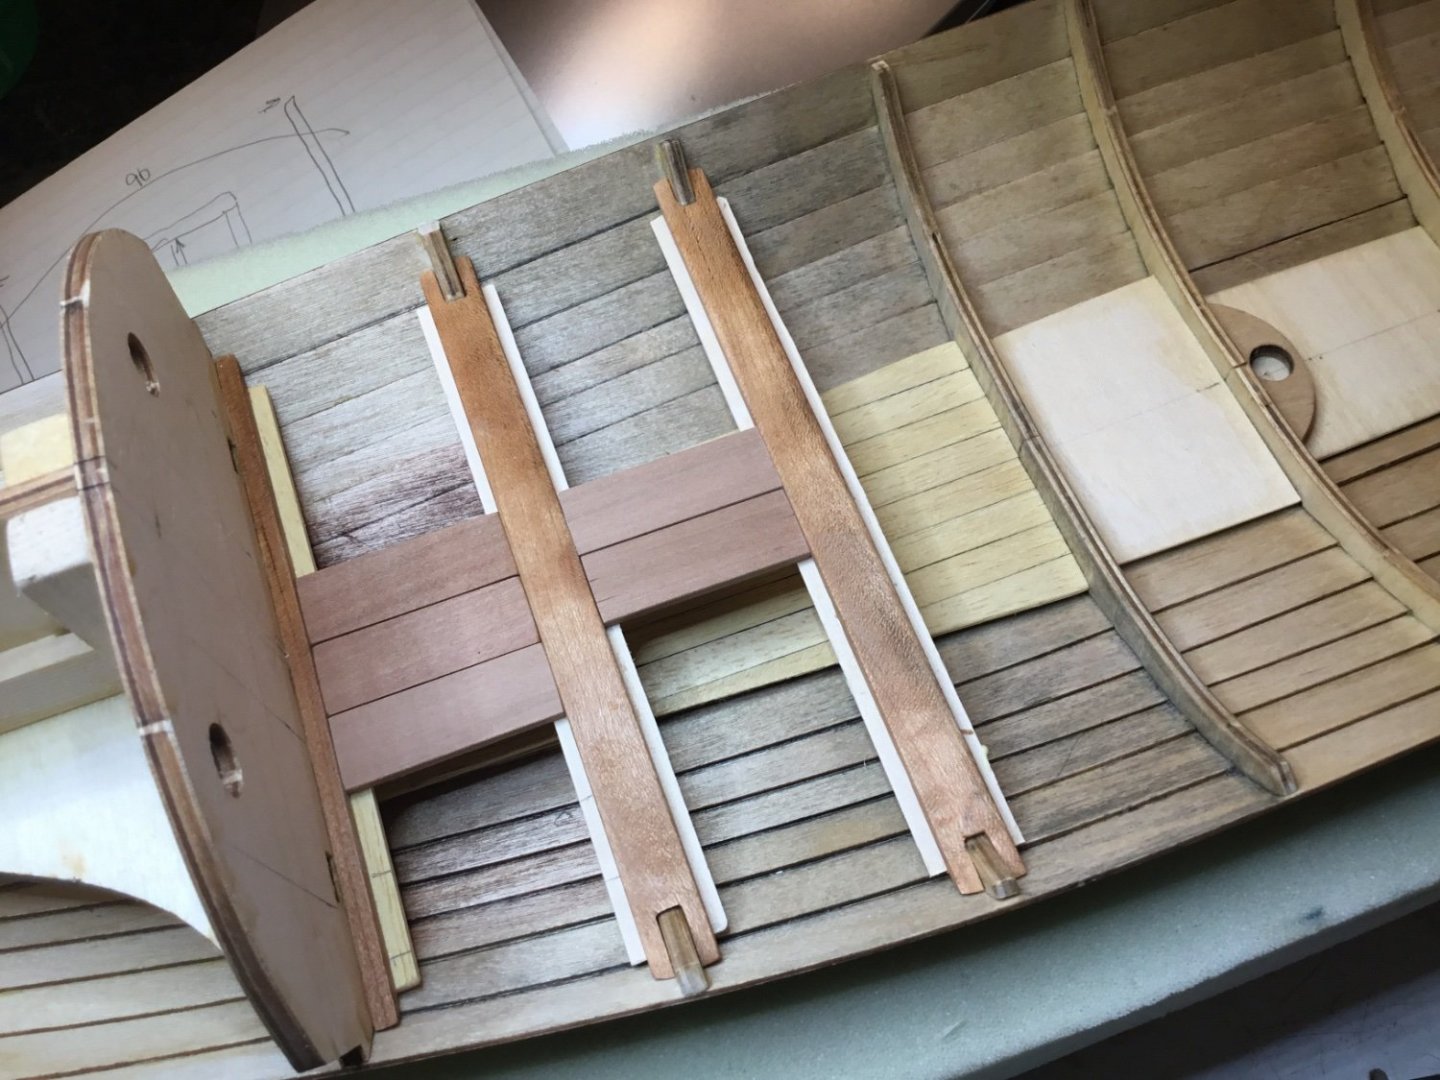
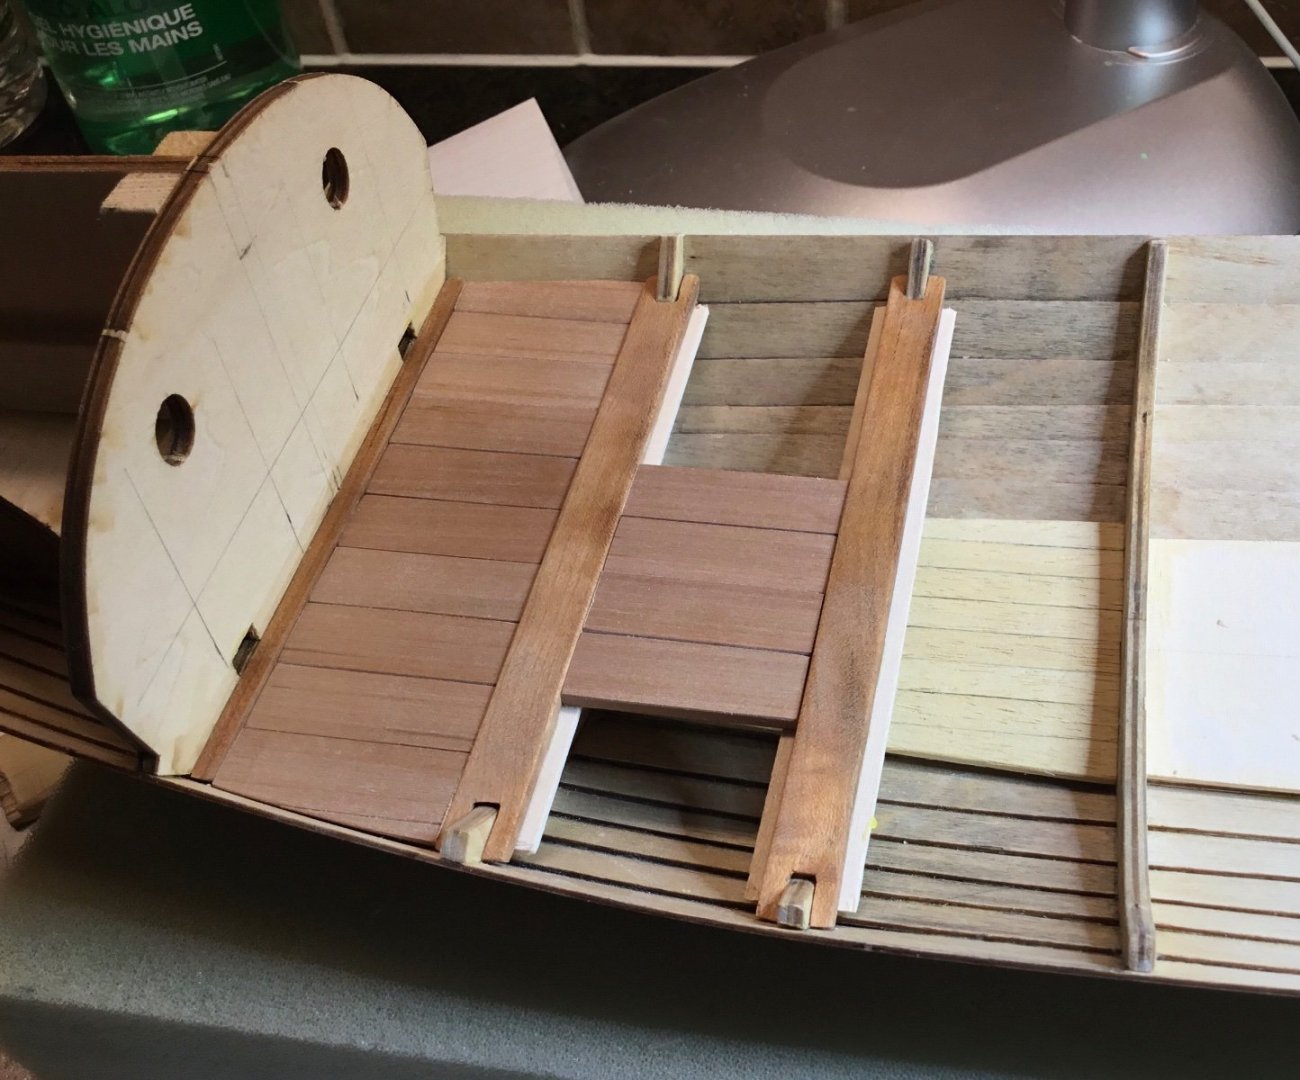
The floor boards were then finished


Next will be making more thwarts and then some work on the gunwales. See you next time.
-
-
-
Hi Everyone, my thanks to all of you for the Likes. Patrick and Ian, thank you so much for the comments. A big storm blew through here yesterday and the power was down for 12 hours so I’m making up for lost time. Had a bit of 1/32” basswood so I started on veneering the stern post.

Have to get over to the hobby store this week to get some more.
- GrandpaPhil, Dave_E, BobG and 3 others
-
6
-
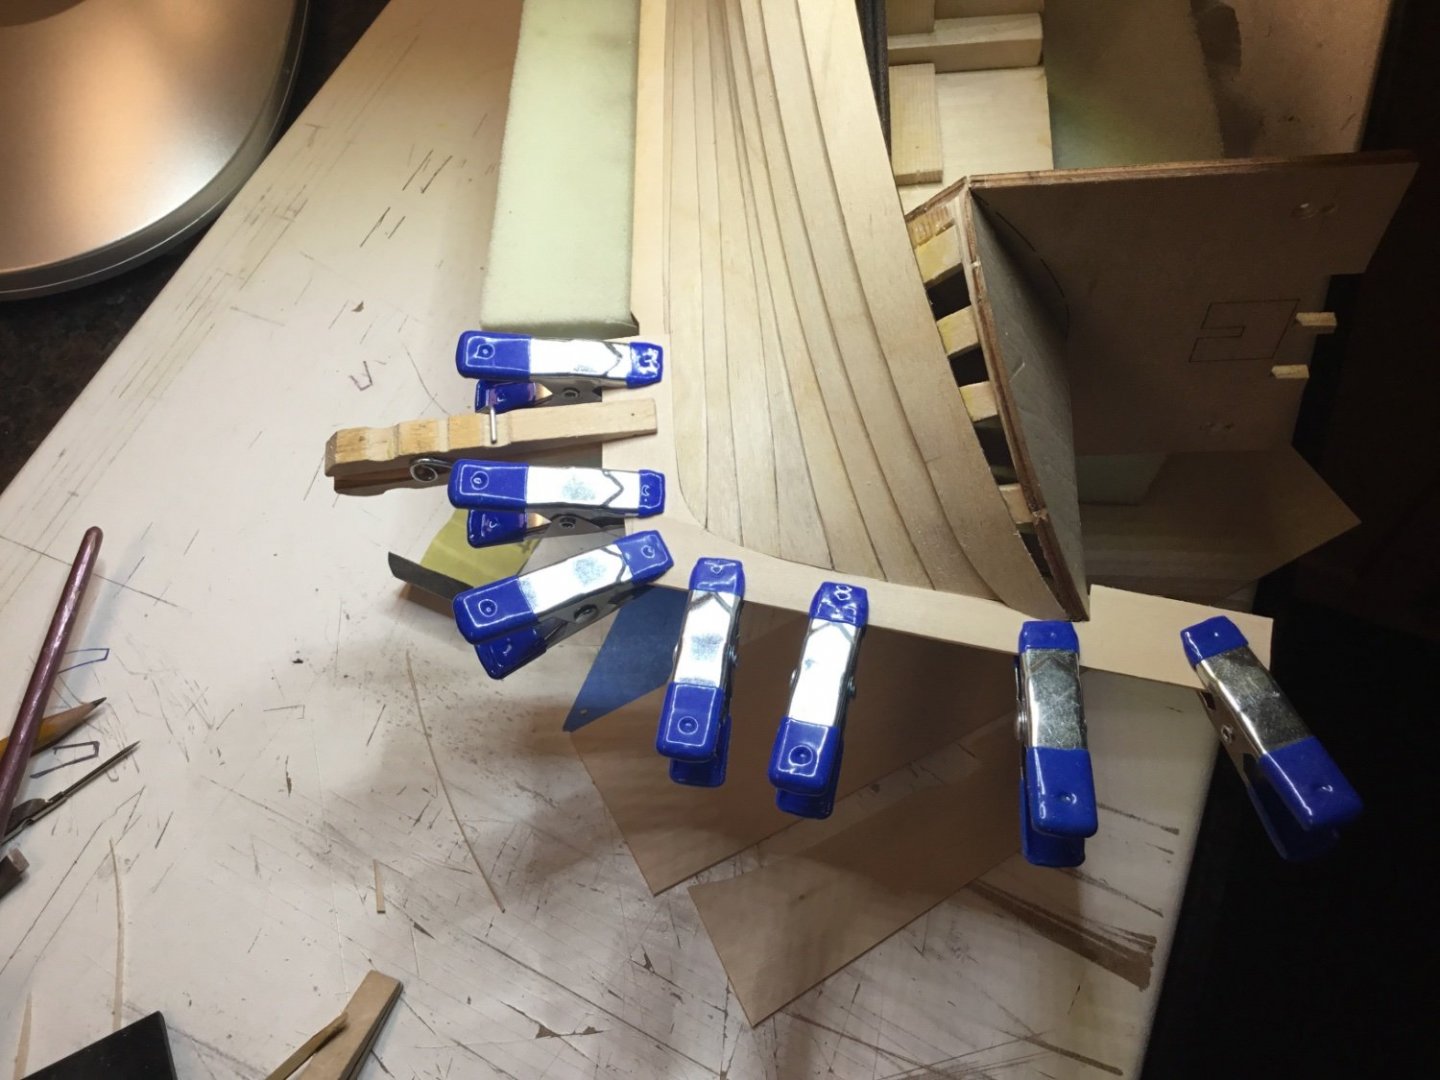
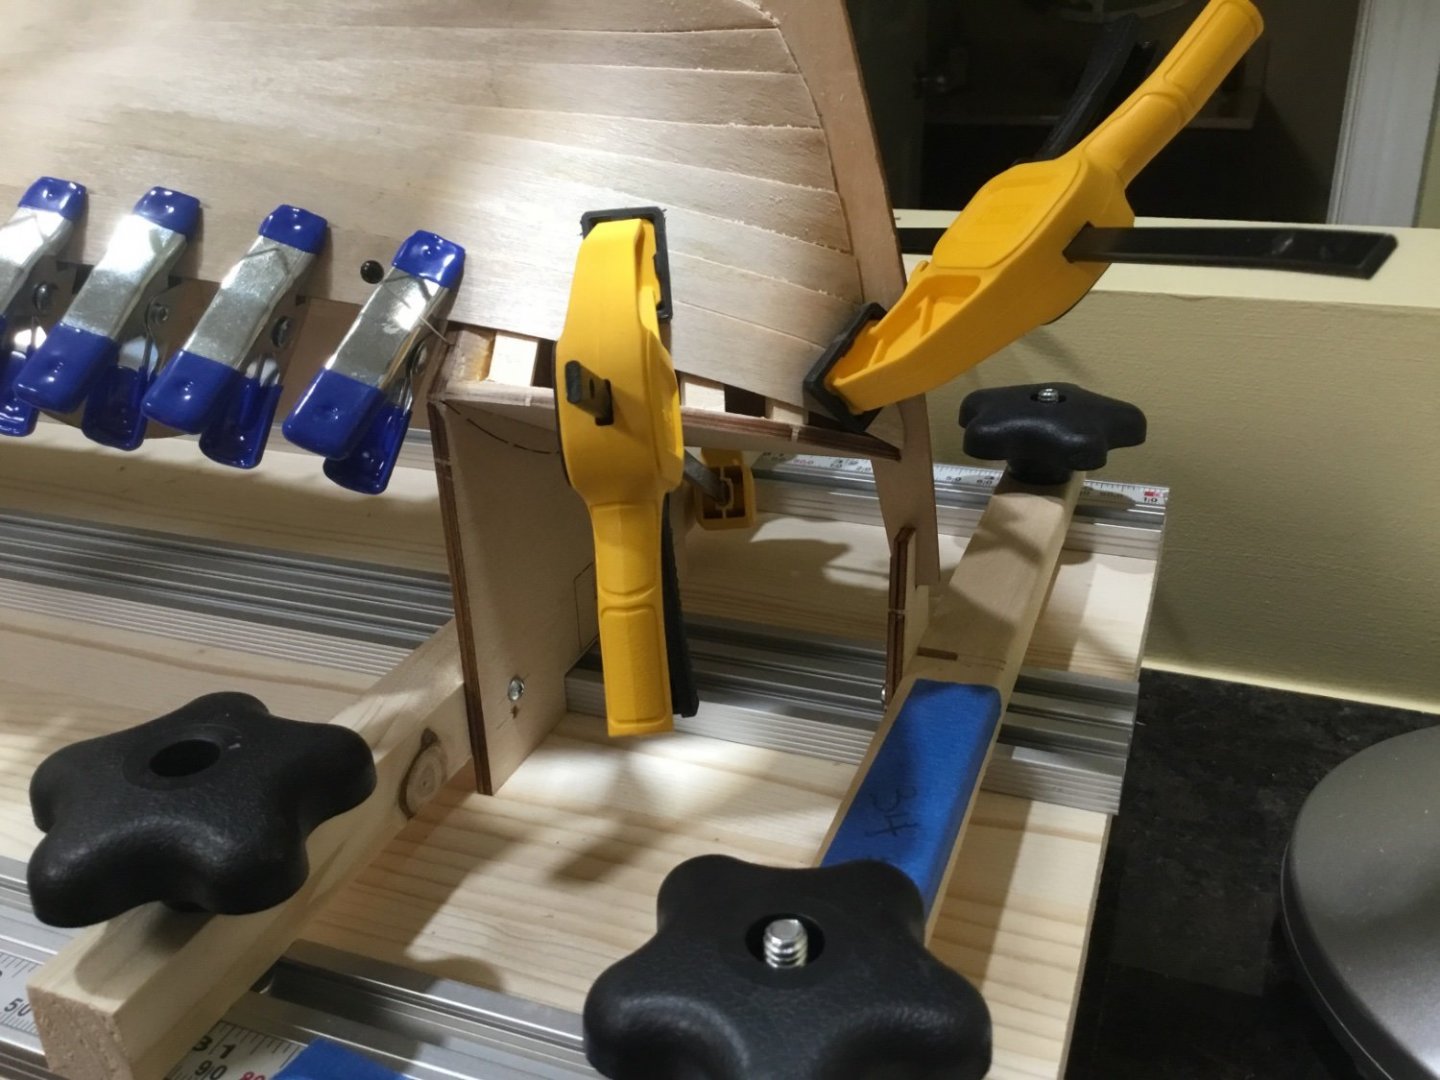
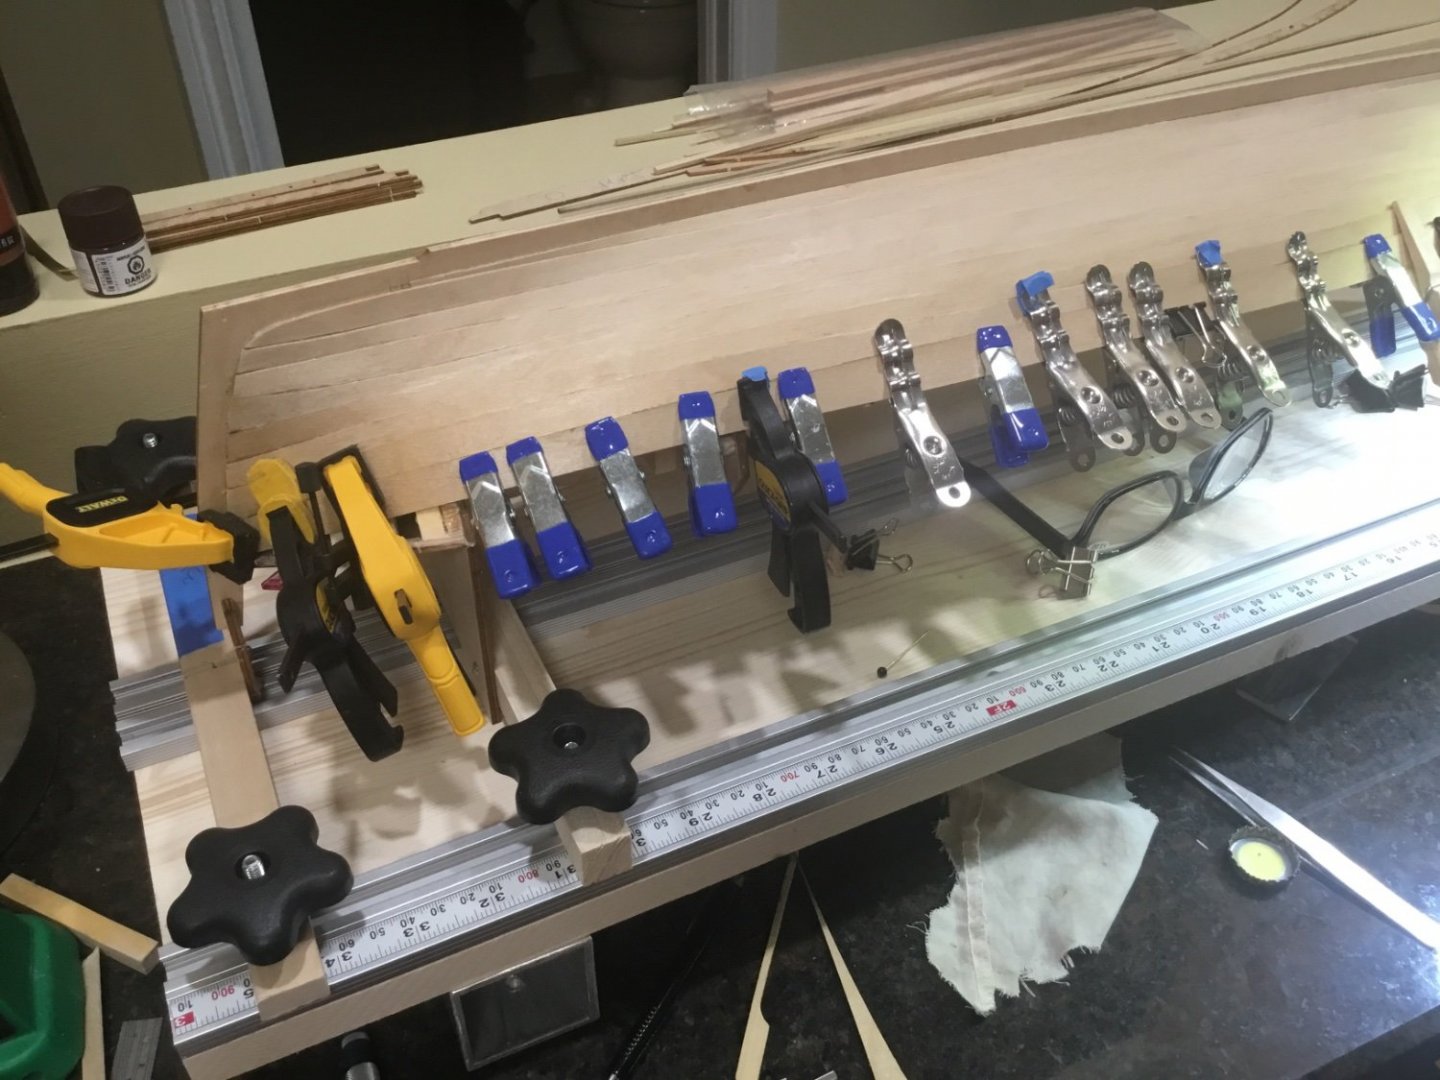
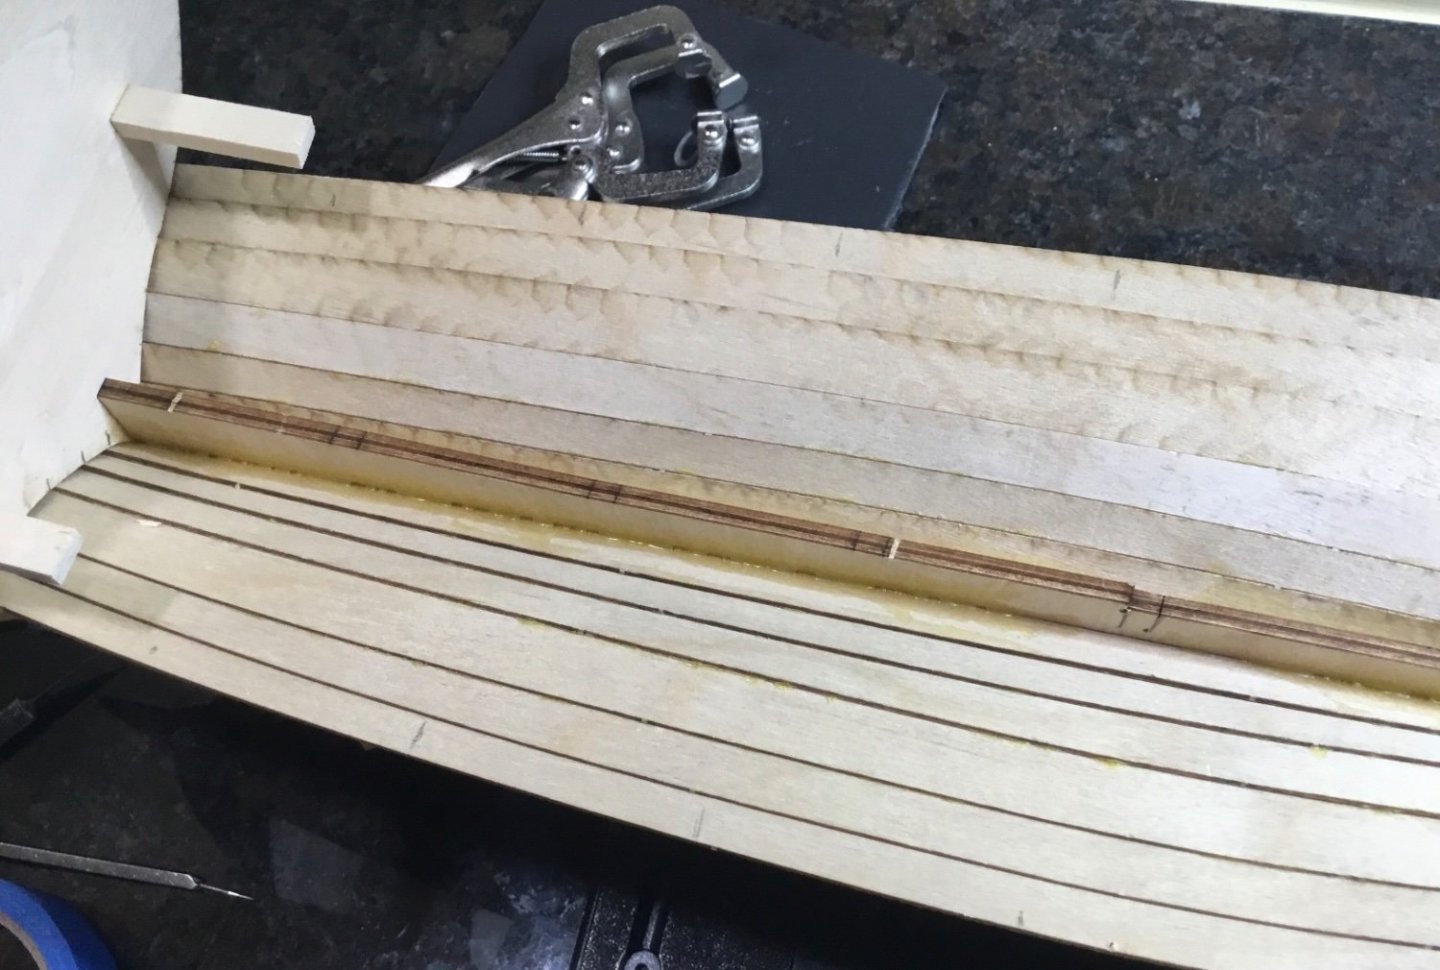
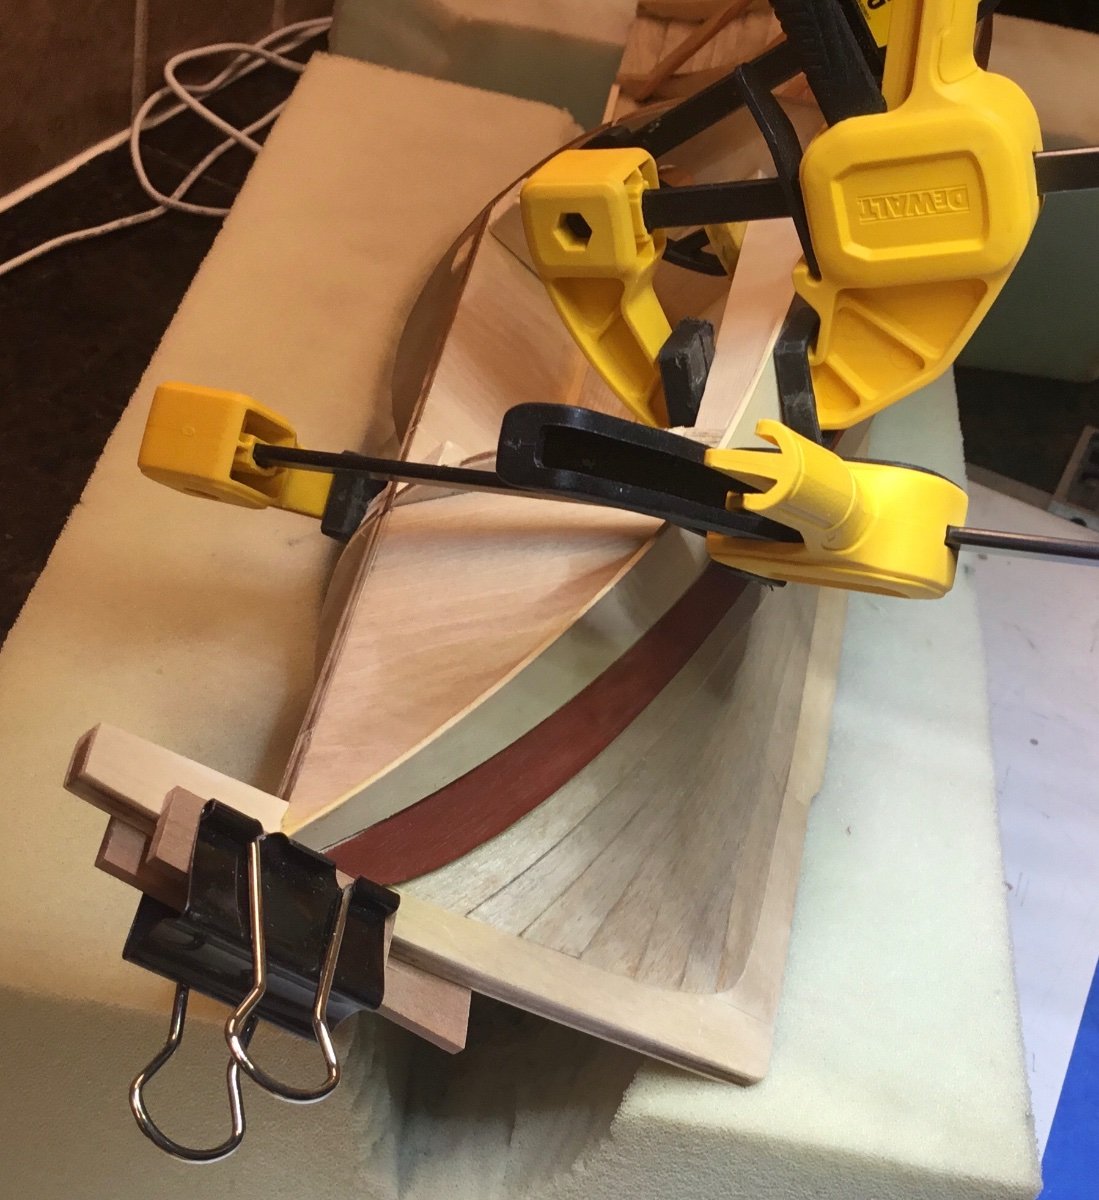
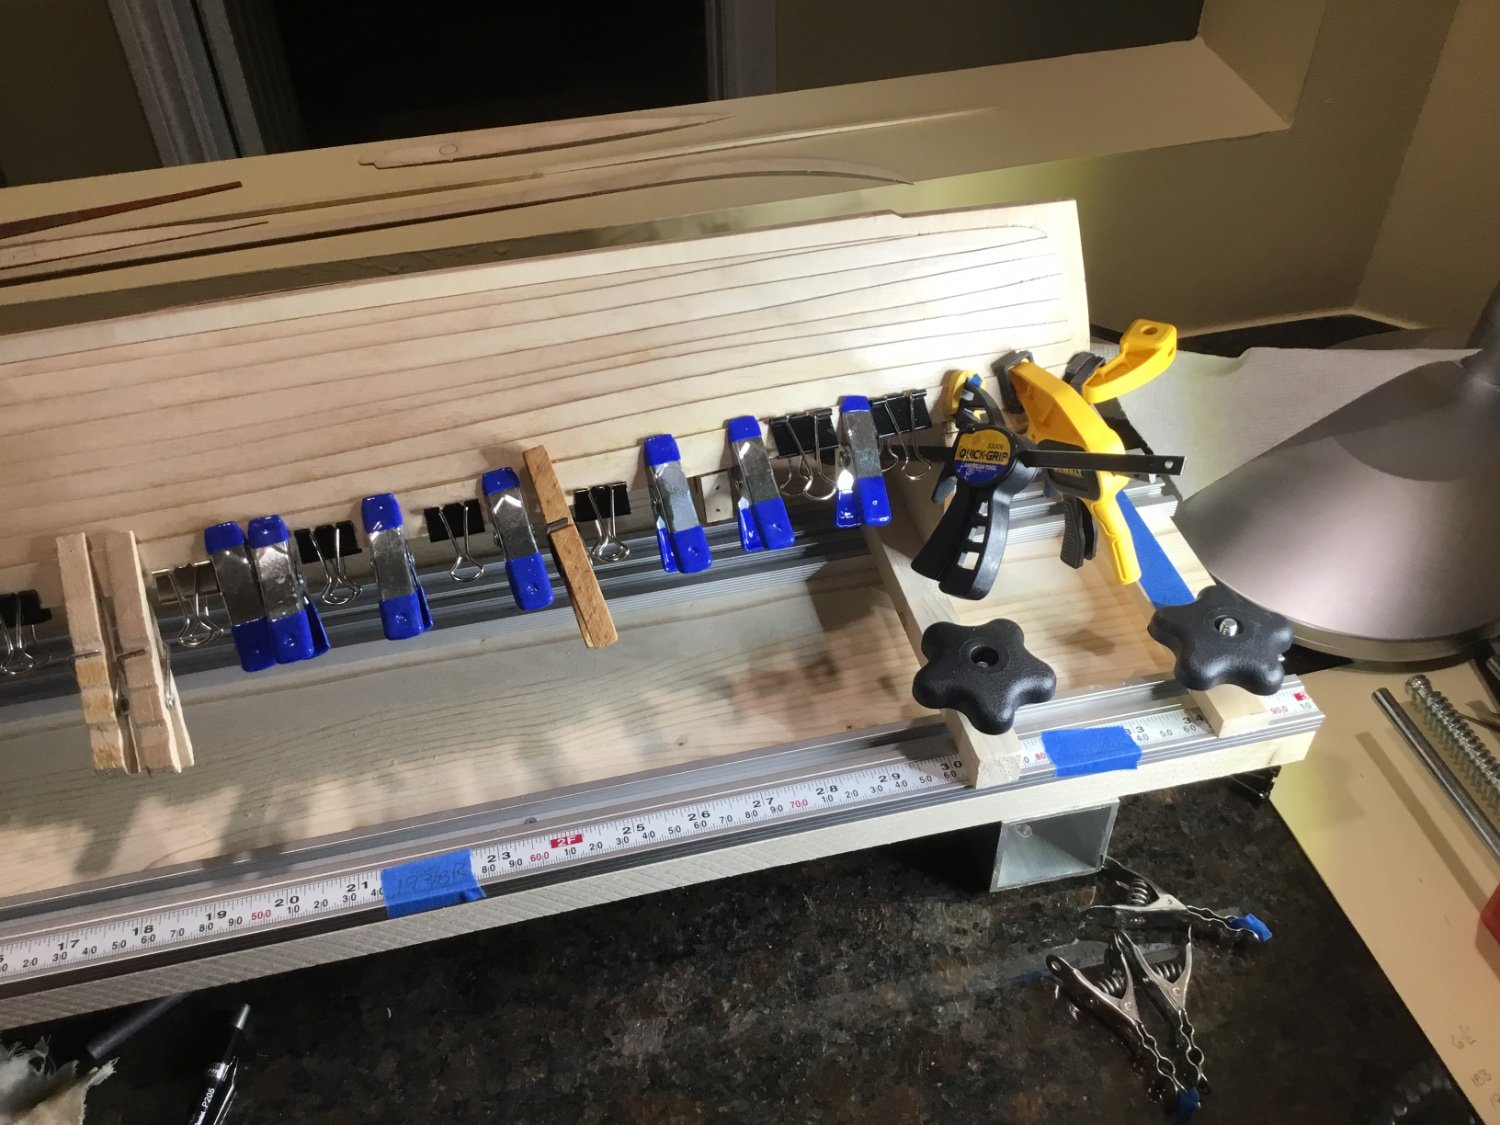
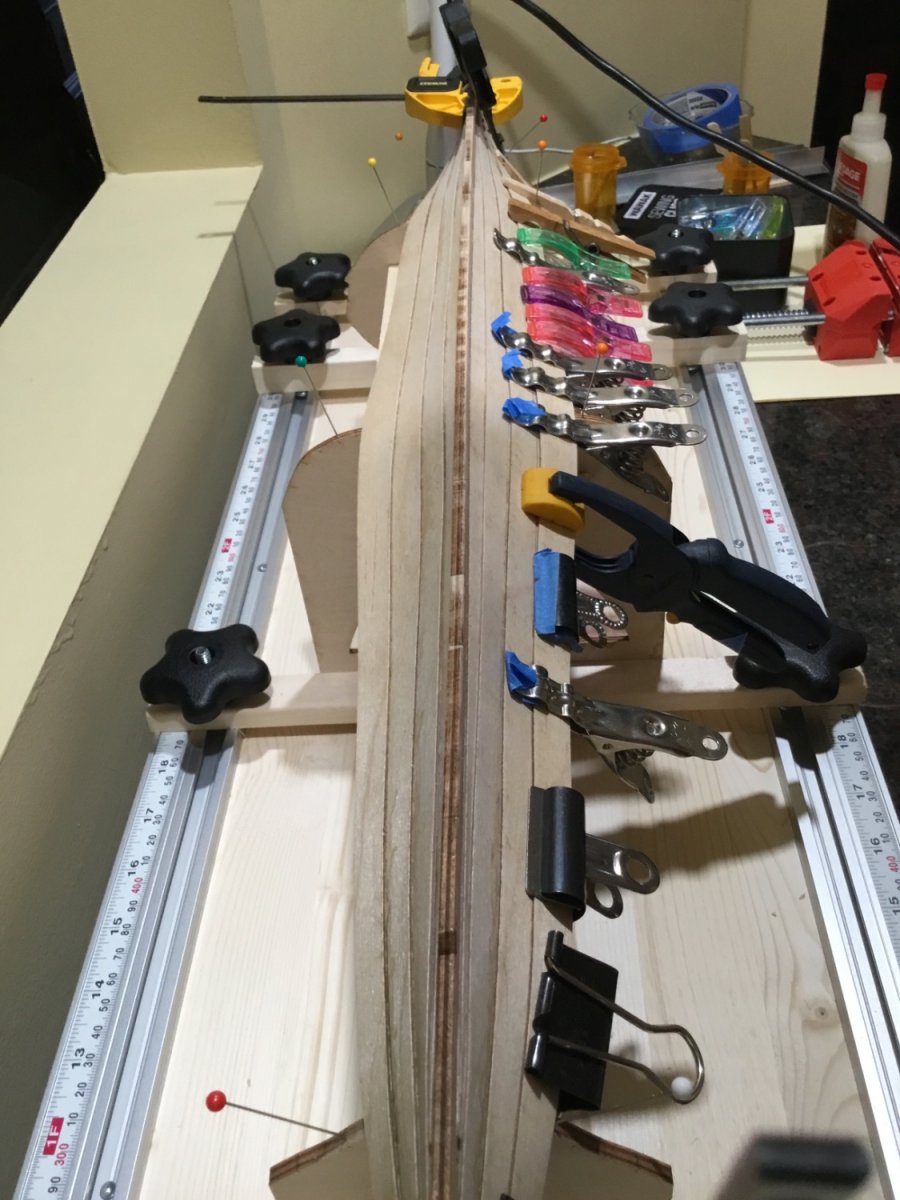
Hello Everyone, I hope you are all enjoying the weekend. Thank you very much for the likes and comments. This week the boat was turned over and planking was resumed. This is a very clamp intensive model. Only been doing one plank a day because of a lack of clamps. Picked up some 2 inch clamps at Princess Auto. Should have bought everyone they had.
_
Added some bracing between the stern post and the bulkhead to keep the planks from cutting across that large space.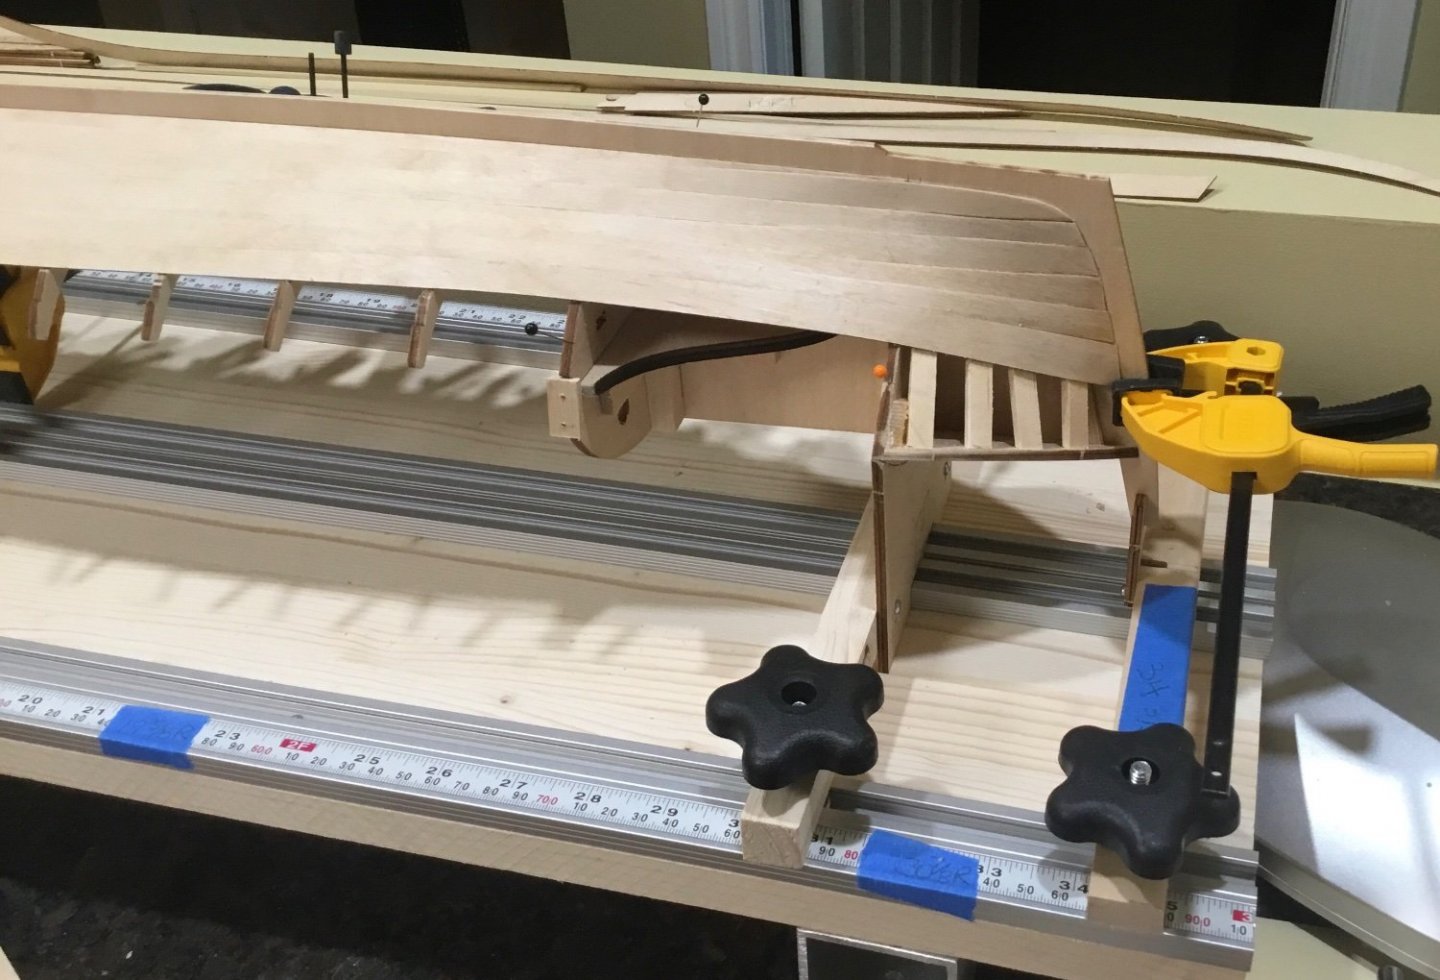
All of the planks except the last ones have gains cut in them at the stern post and the stem. It also helps to keep them positioned correctly when gluing.

All of the planks had to be trimmed a bit so there’s a lot of clamping, test fitting, removing, cutting, clamping…………

And now there are 9 planks on each side. Turned it over and started cleaning up the interior of the hull. Actually it wasn’t all that bad inside. I thought there would be more glue everywhere.
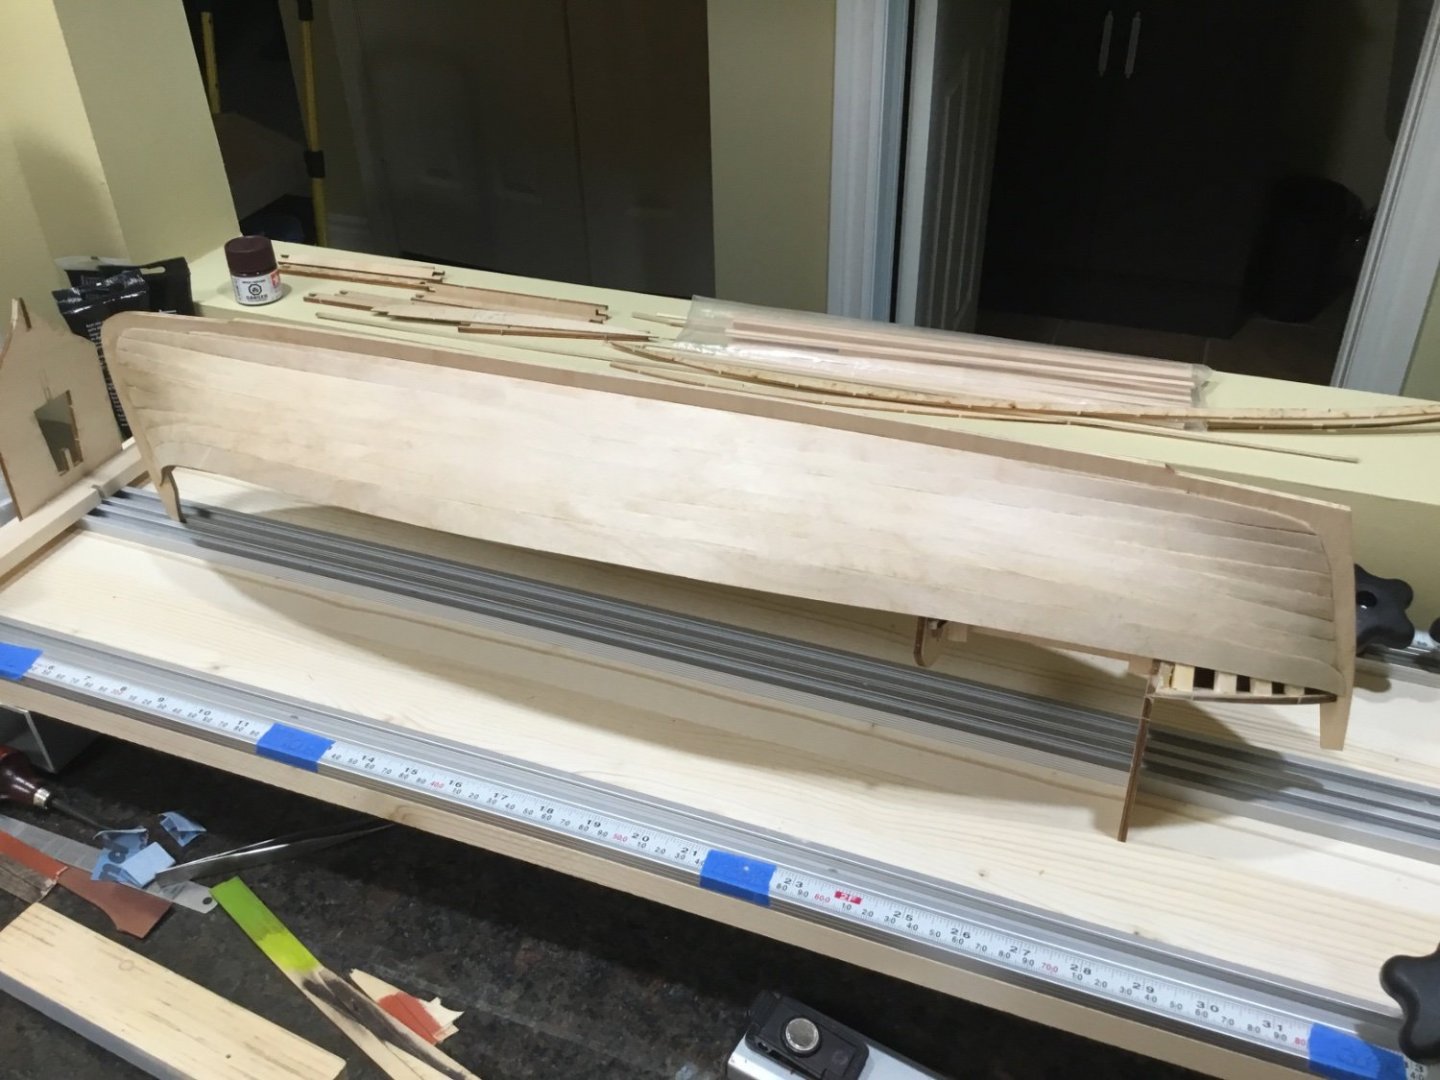
I think the next thing on the agenda is to cover each side of the stem, keel and stern post with 1/32” basswood. Doesn’t really need it but I think it will look better. Also trying to decide what colors to paint her.
Sorry, this photo is out of place.
-
Keith, I am so very sorry to hear of your son’s passing. Losing someone you love so dearly is hard to endure but your faith will keep you strong. My prayers go with you, Paul
- mtaylor, Dave_E and Keith Black
-
2
-
 1
1
-
-
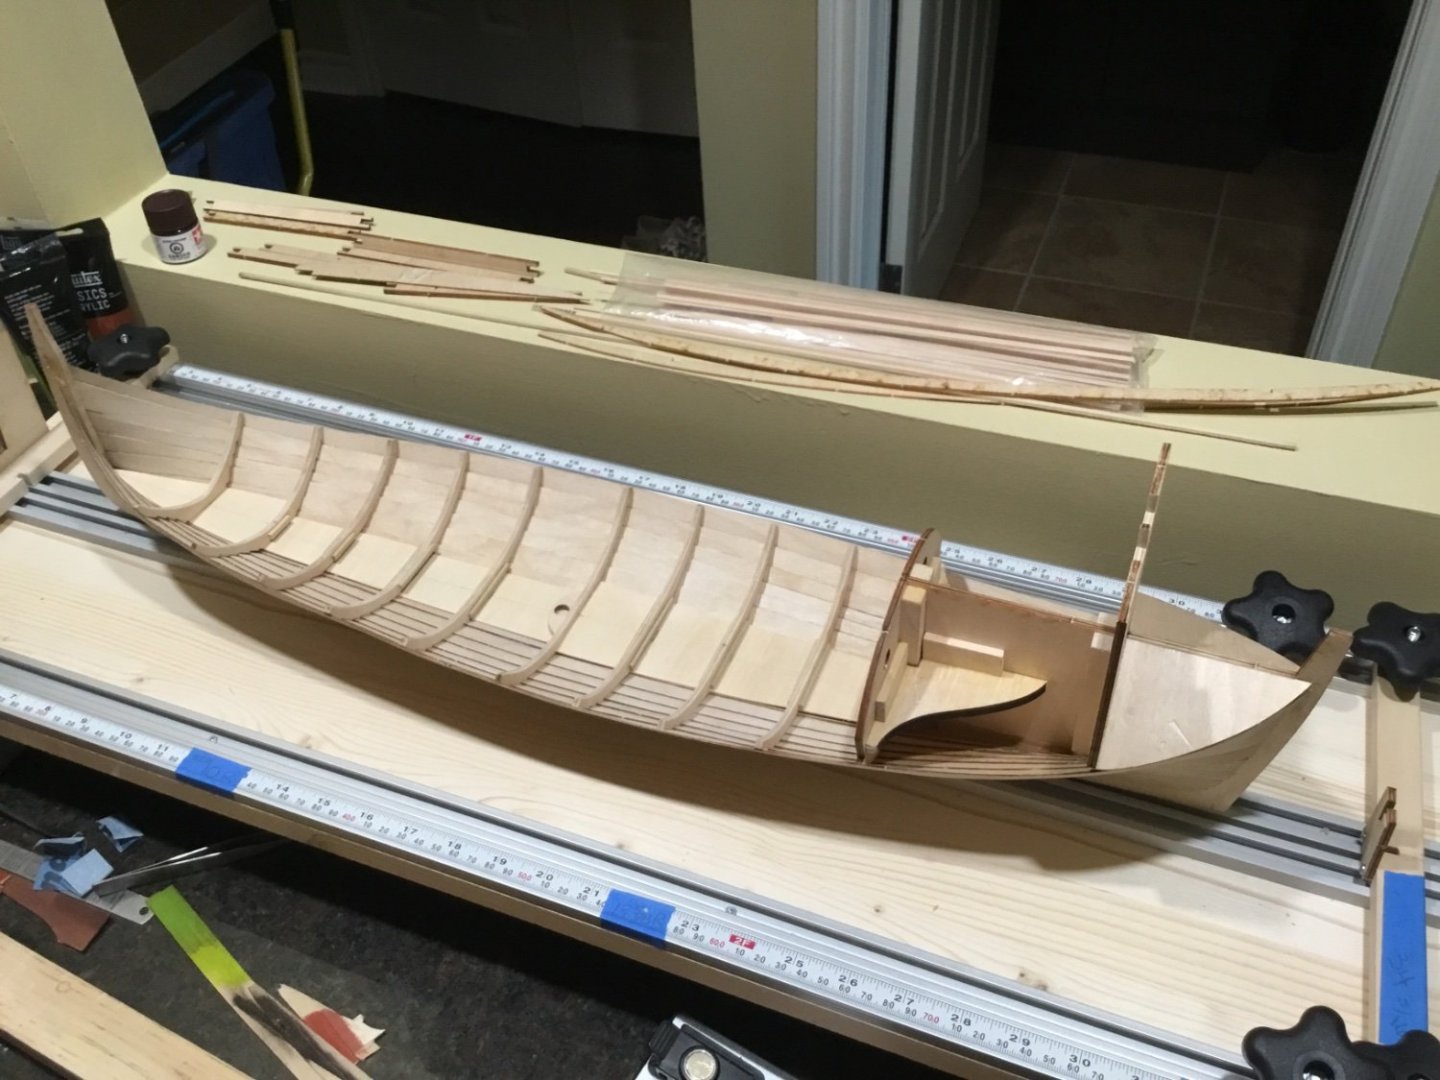
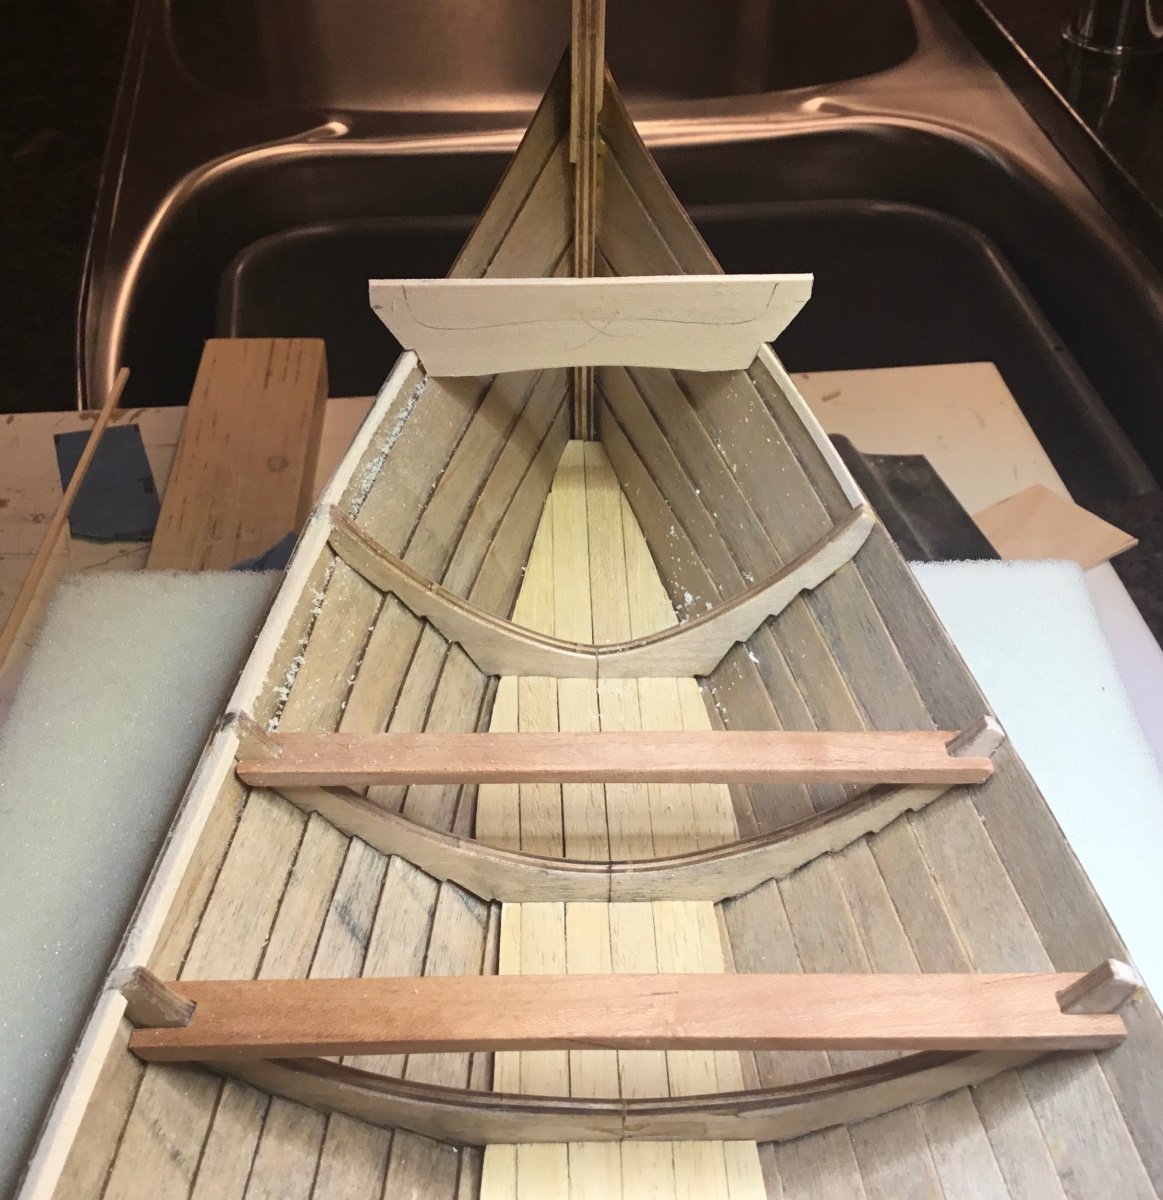
Hi Everyone, thank you for your comments and Likes. The plywood floor and the frames have been completed. Just a few photos to show the process. All of the frames had to be trimmed, filed and/or sanded to match the planking. So lots and lots of test fitting.

Time to turn it over and resume planking.
-
Ian, your Hayling Hoy is looking beautiful. You must be really enjoying this part of the build. The woods are very easy on the eyes. Could look at these pics all day
- mtaylor, Keith Black, billocrates and 2 others
-
5
-
-
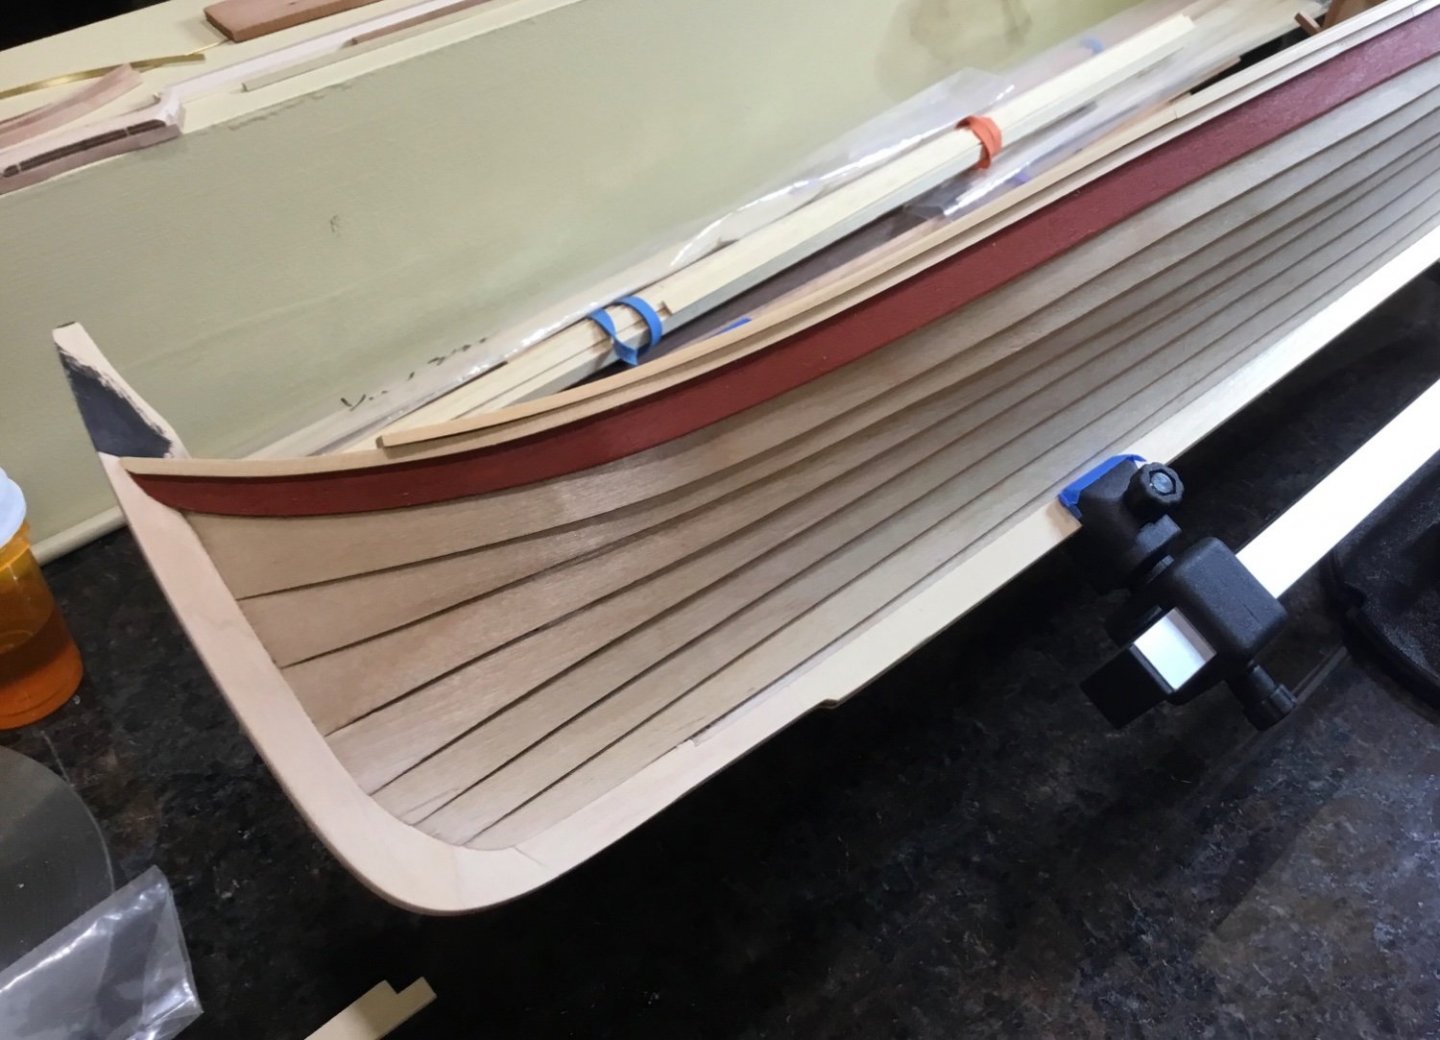
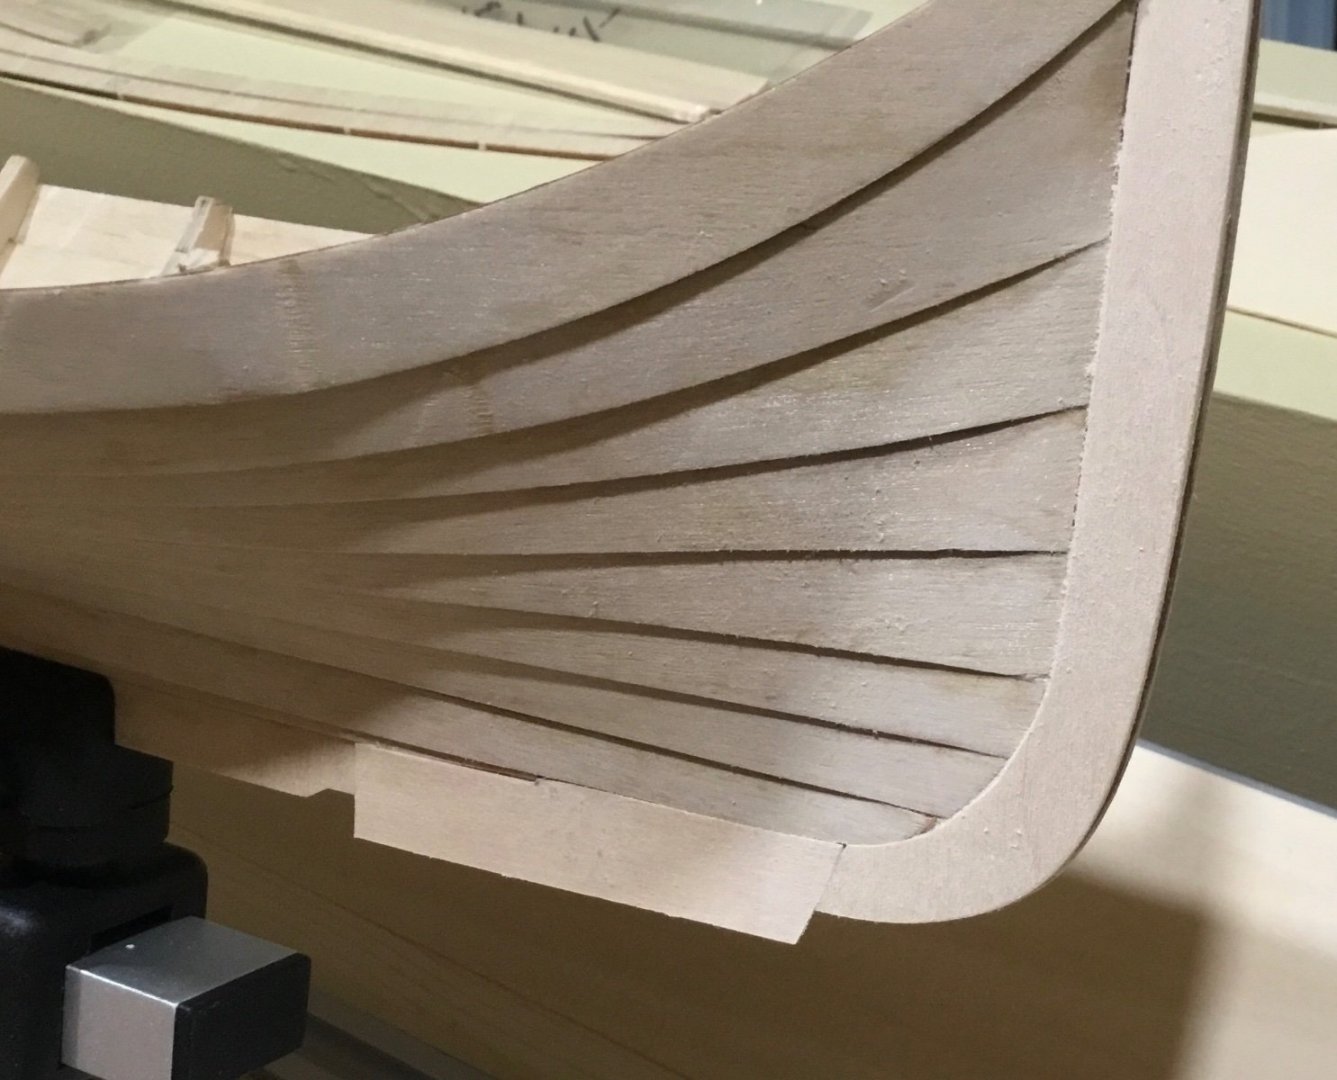
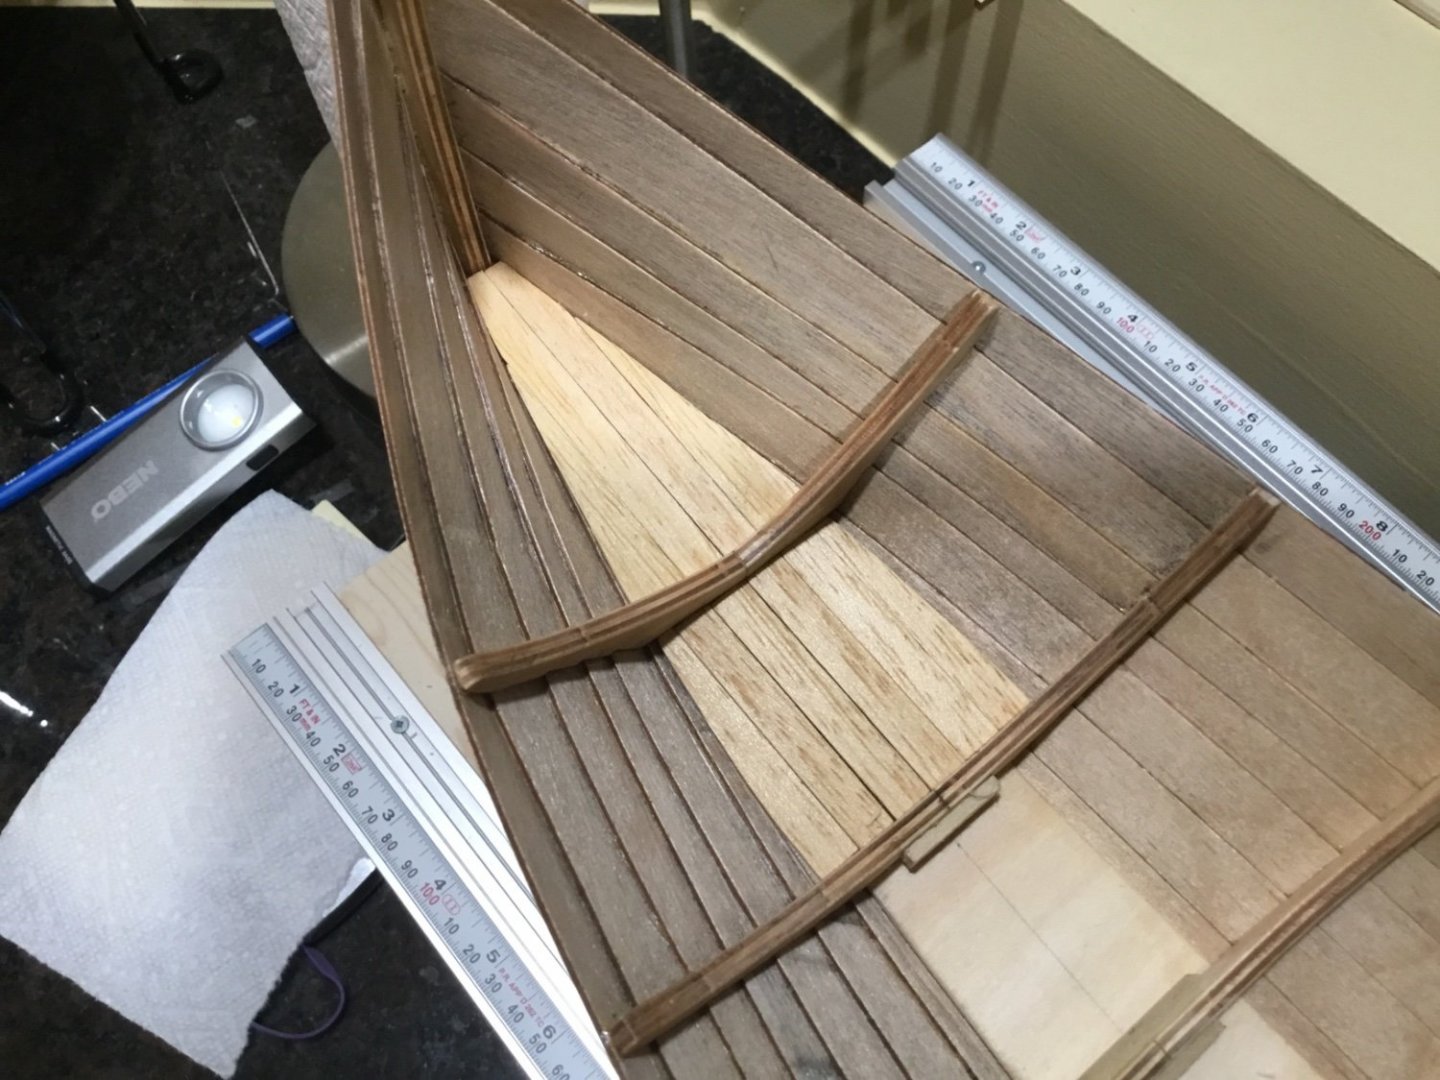
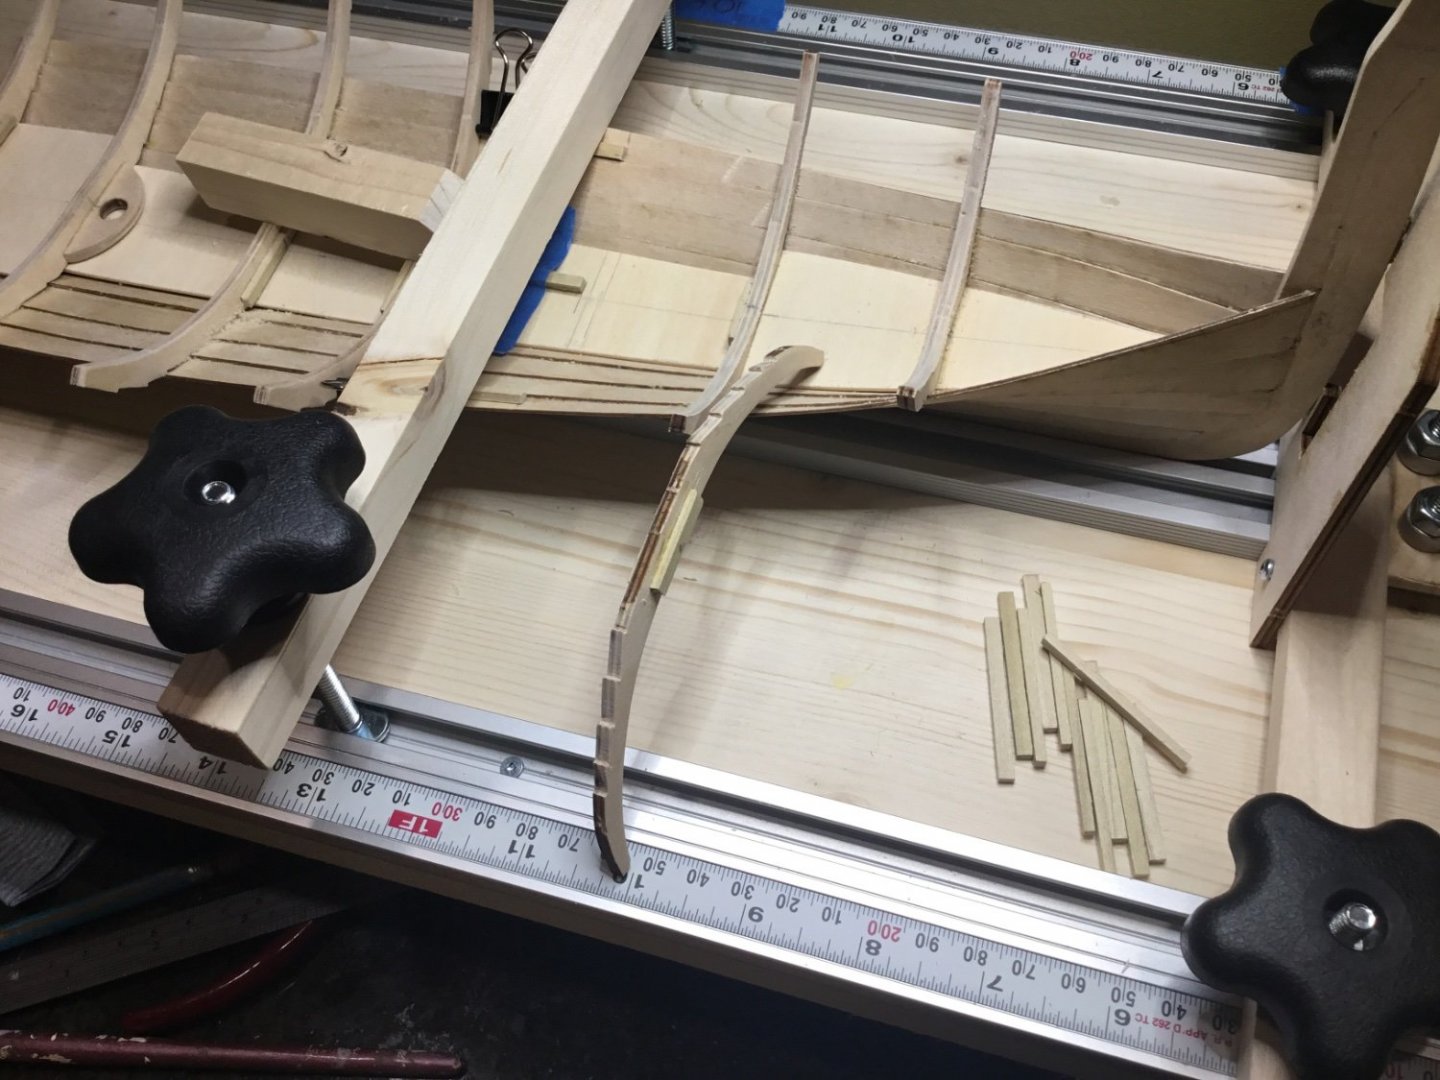
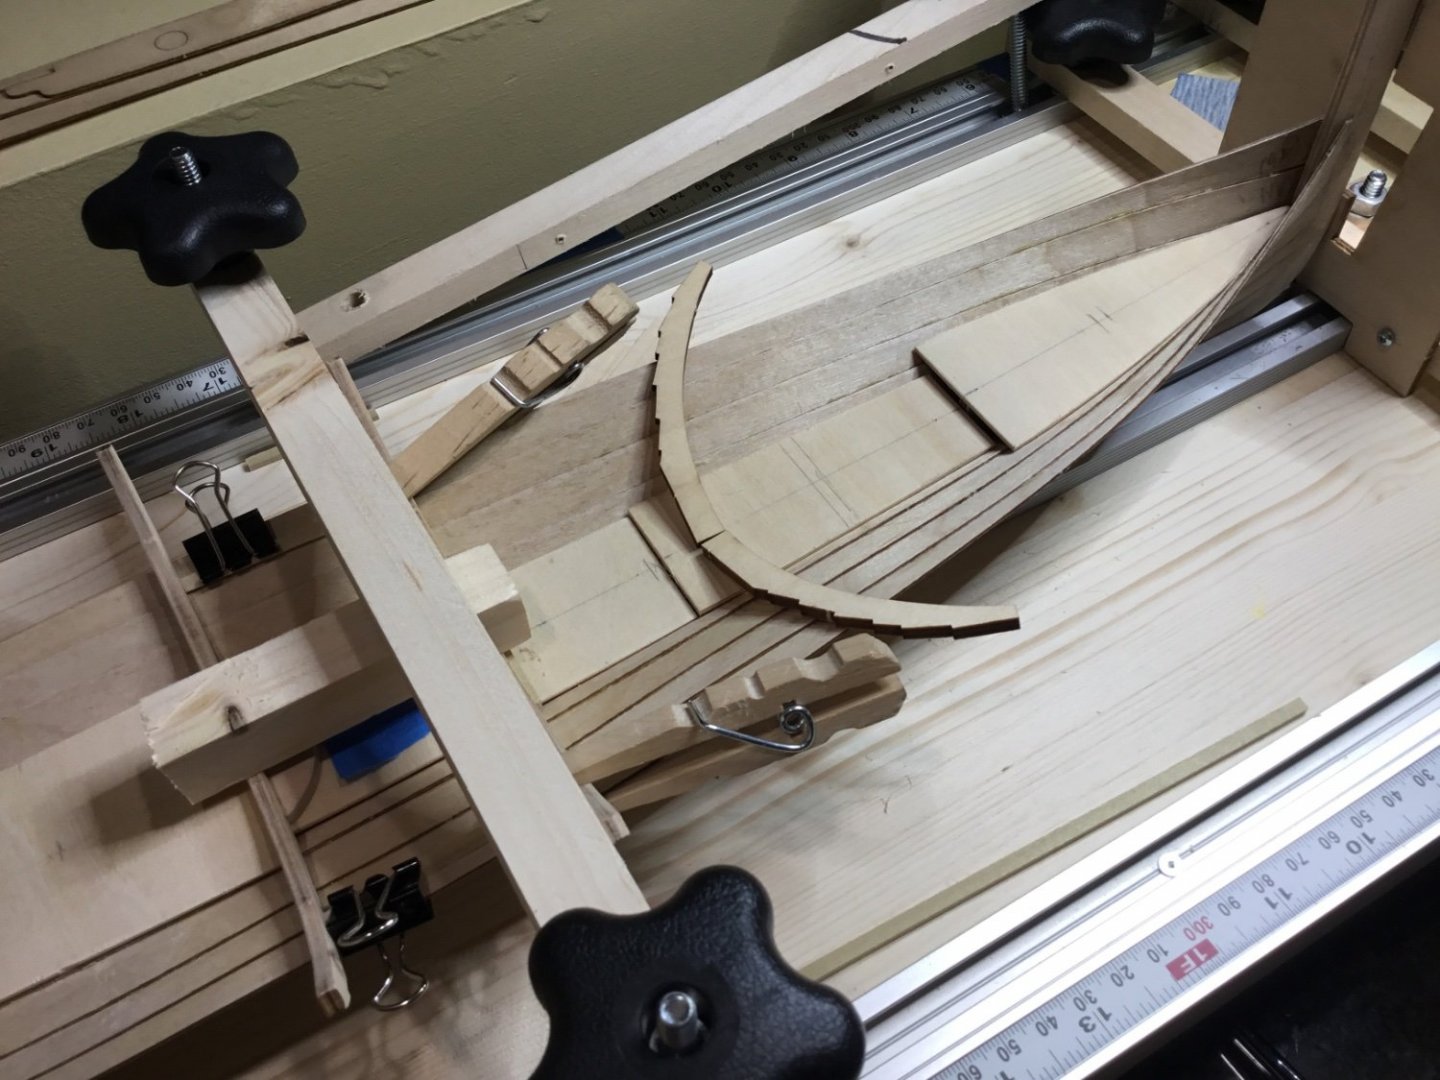
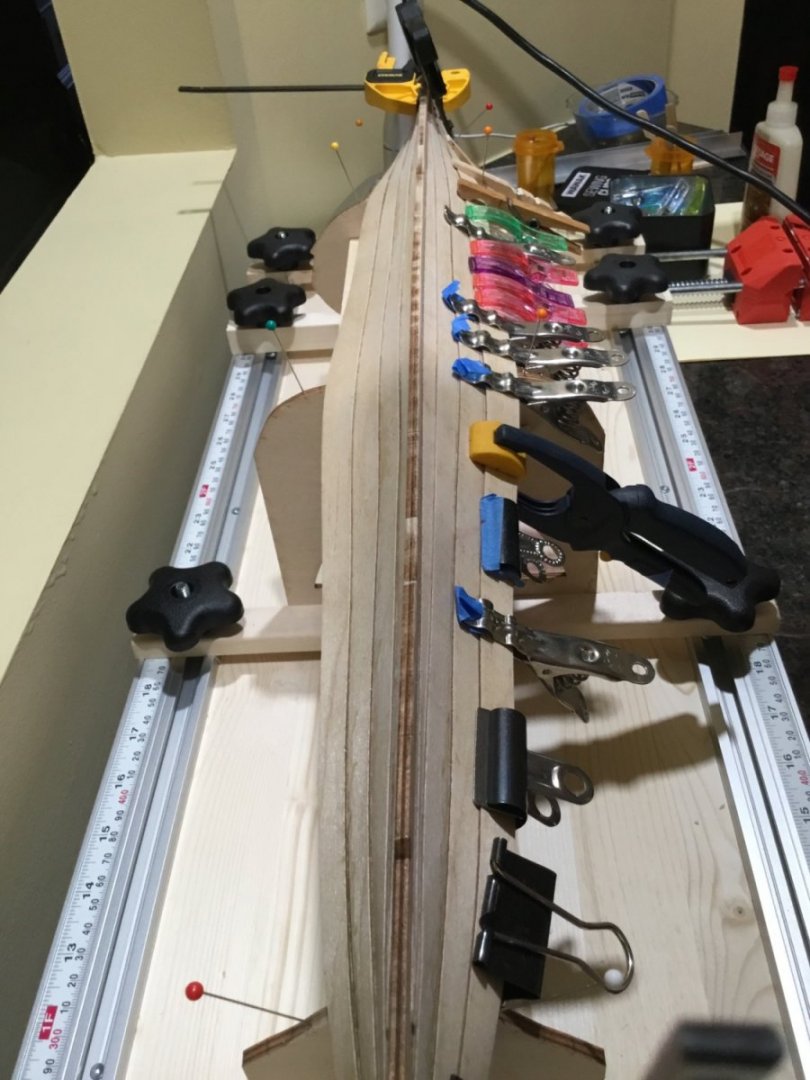
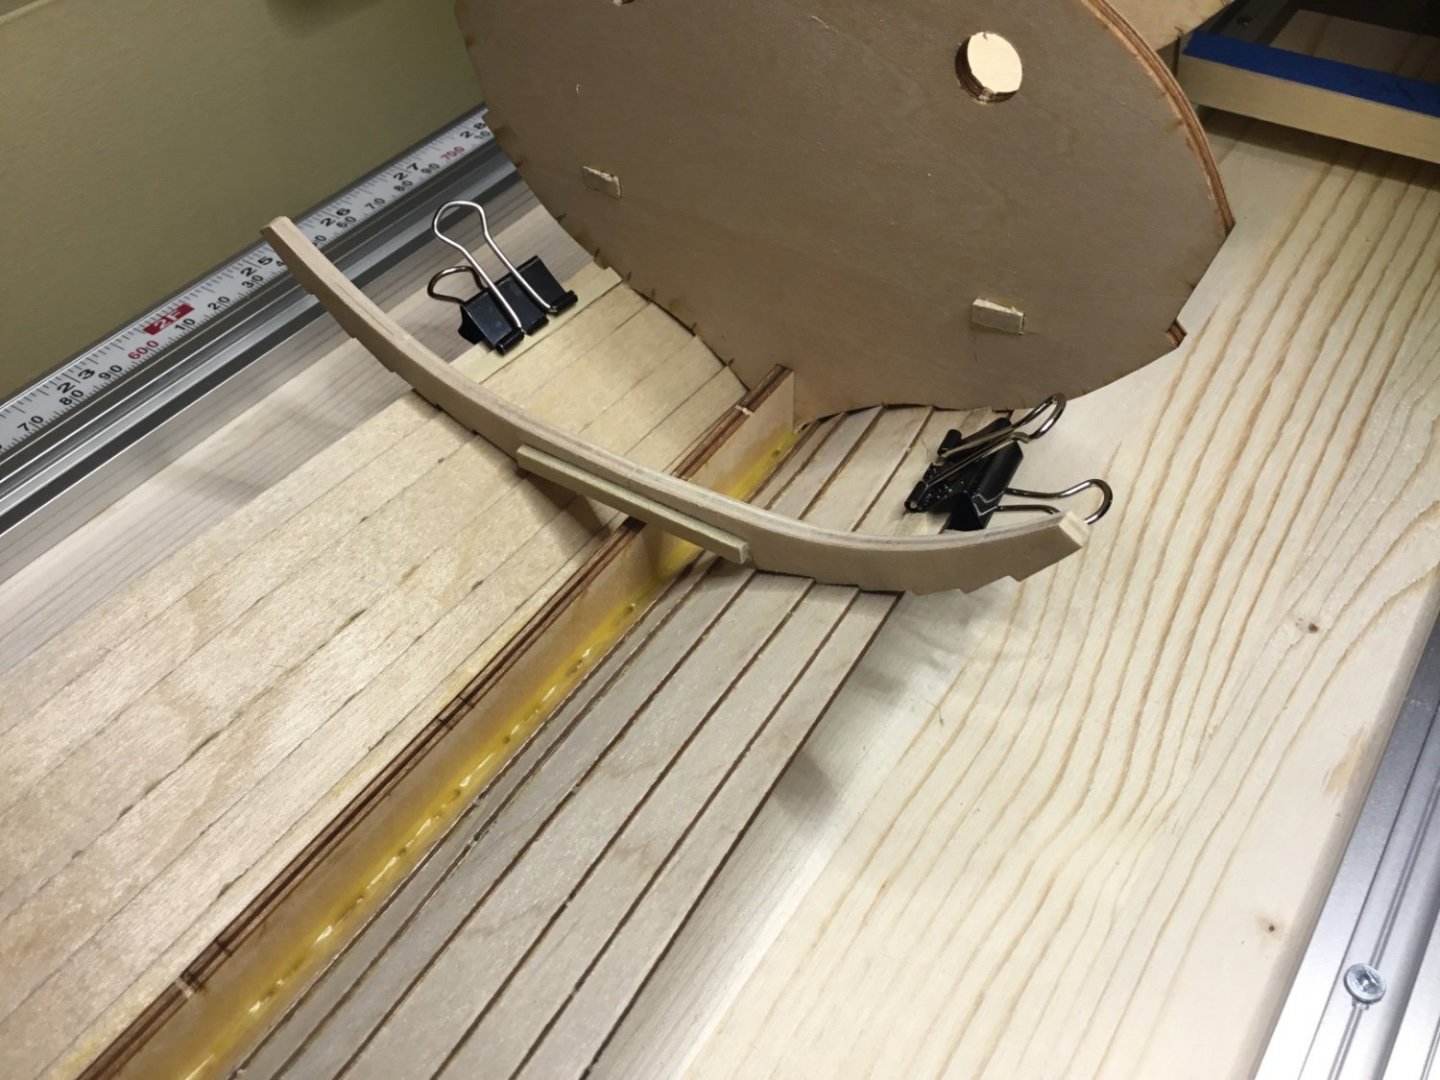
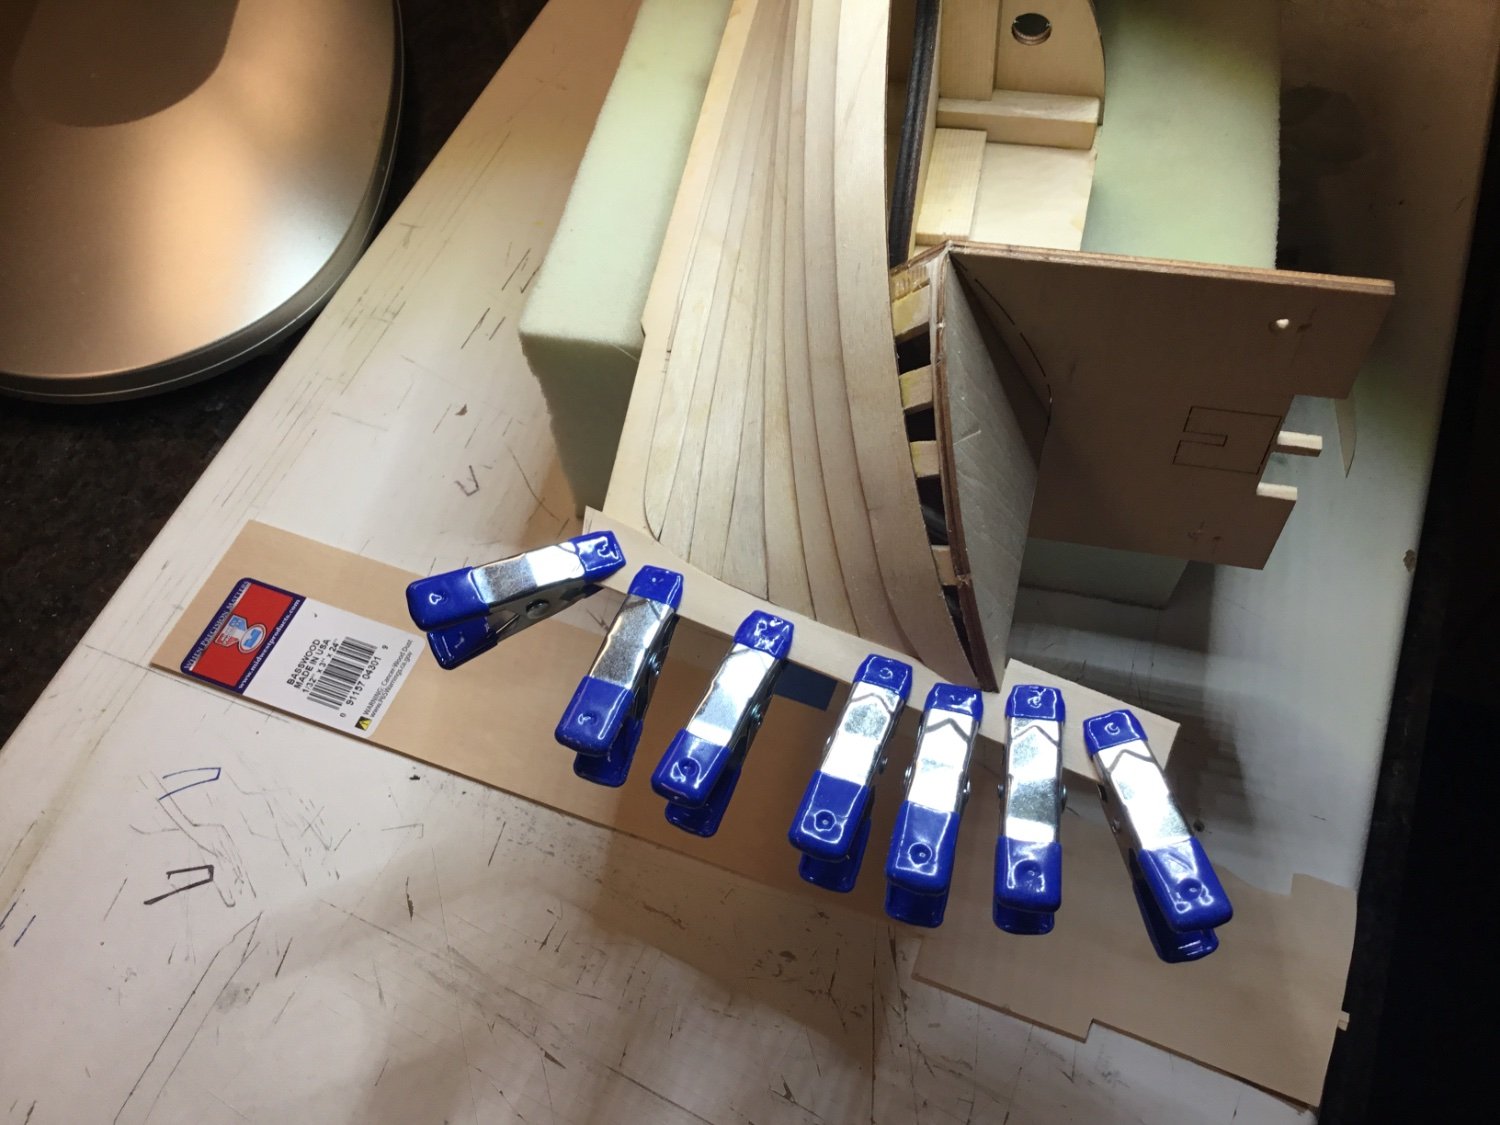
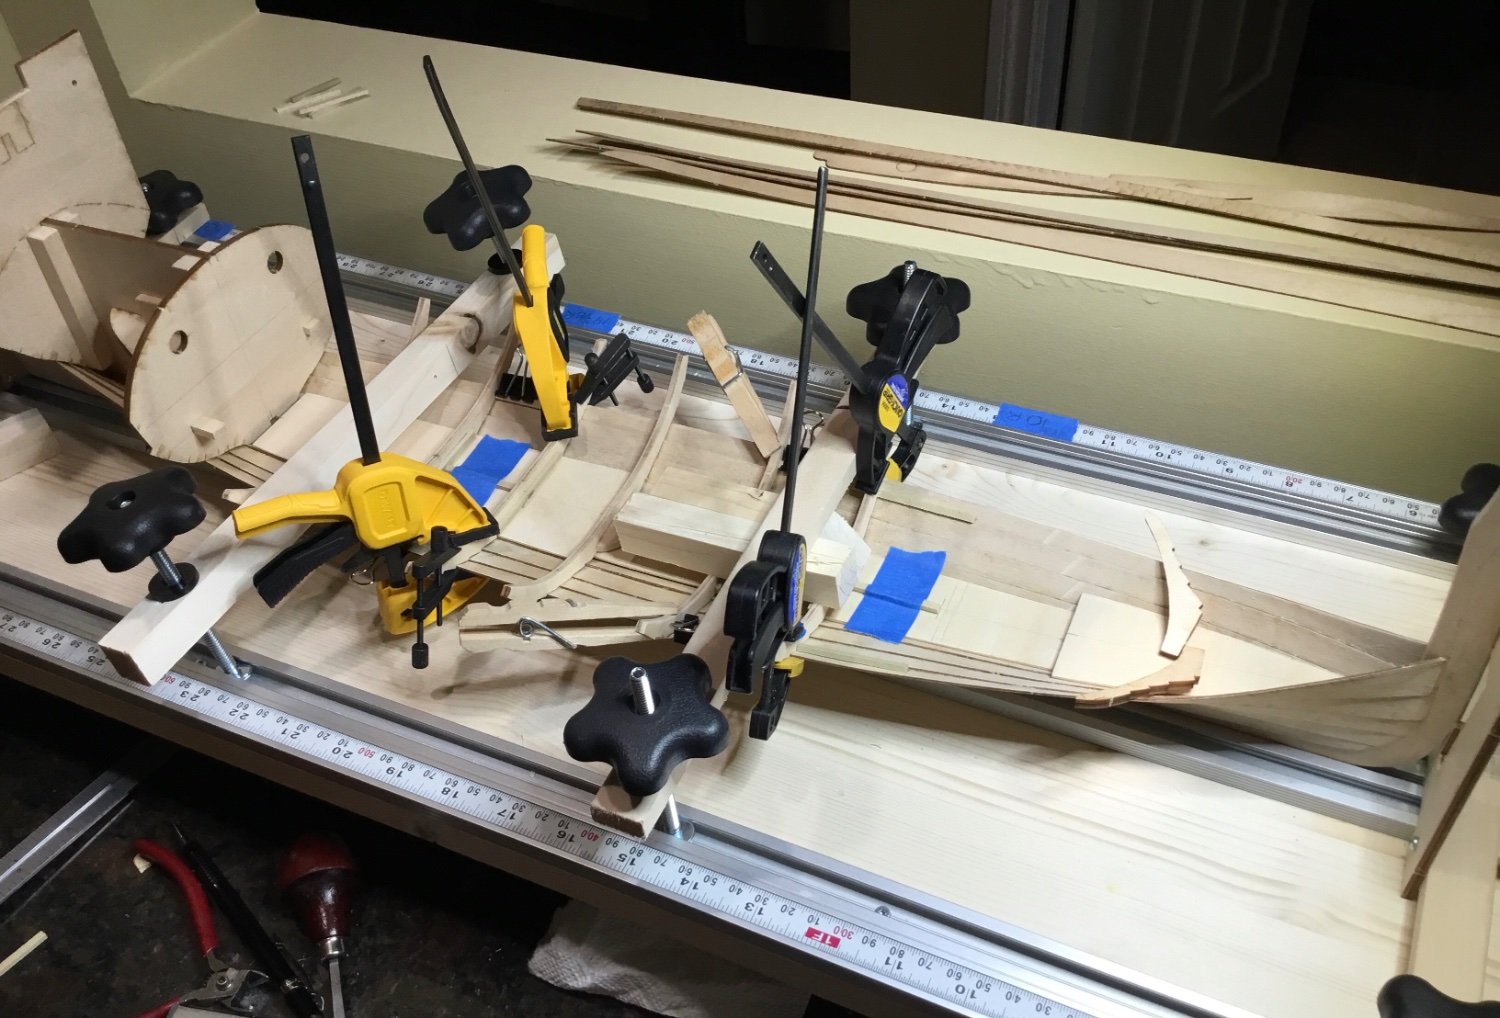
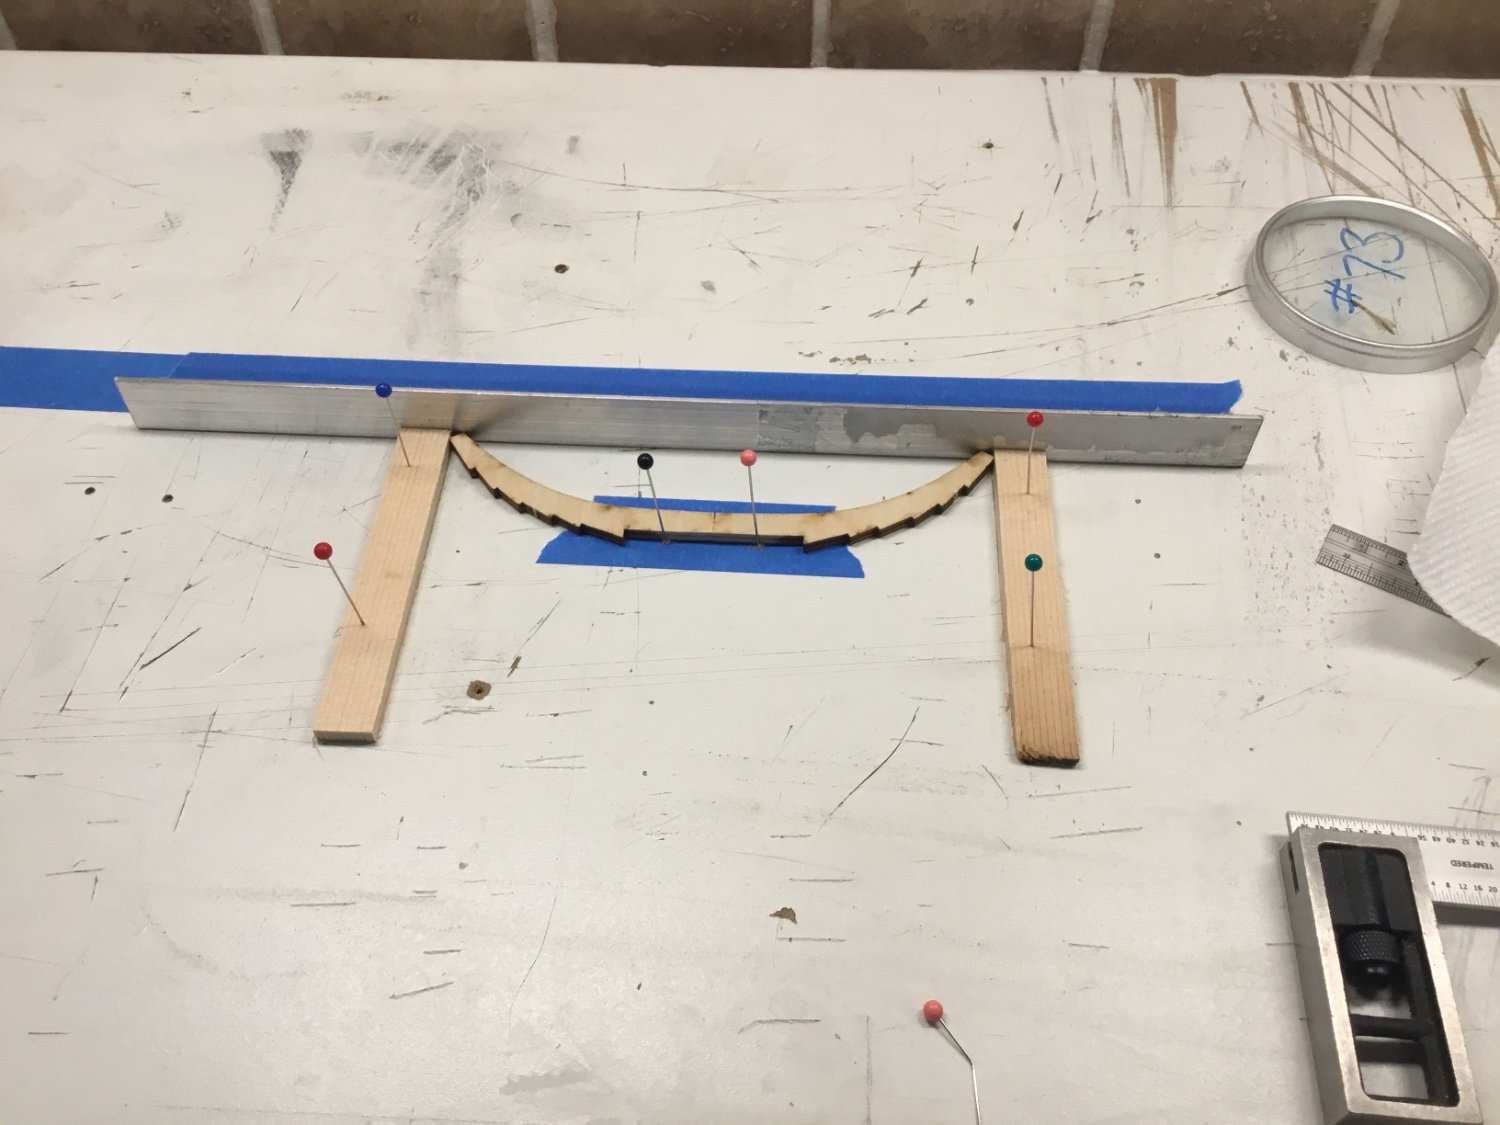
Hey Everyone, thank you for your comments and Likes. Well this Nordland Boat has been kicking my butt for the past week. Started off by trimming and sanding back the frames where they meet the keel.
They now match the line that I transferred to the keel from the drawings. The planks are laser cut 3/64” 3-ply plywood. They are tough as nails.
The garboard plank was glued to the keel using the line as a reference for the bottom of the plank.

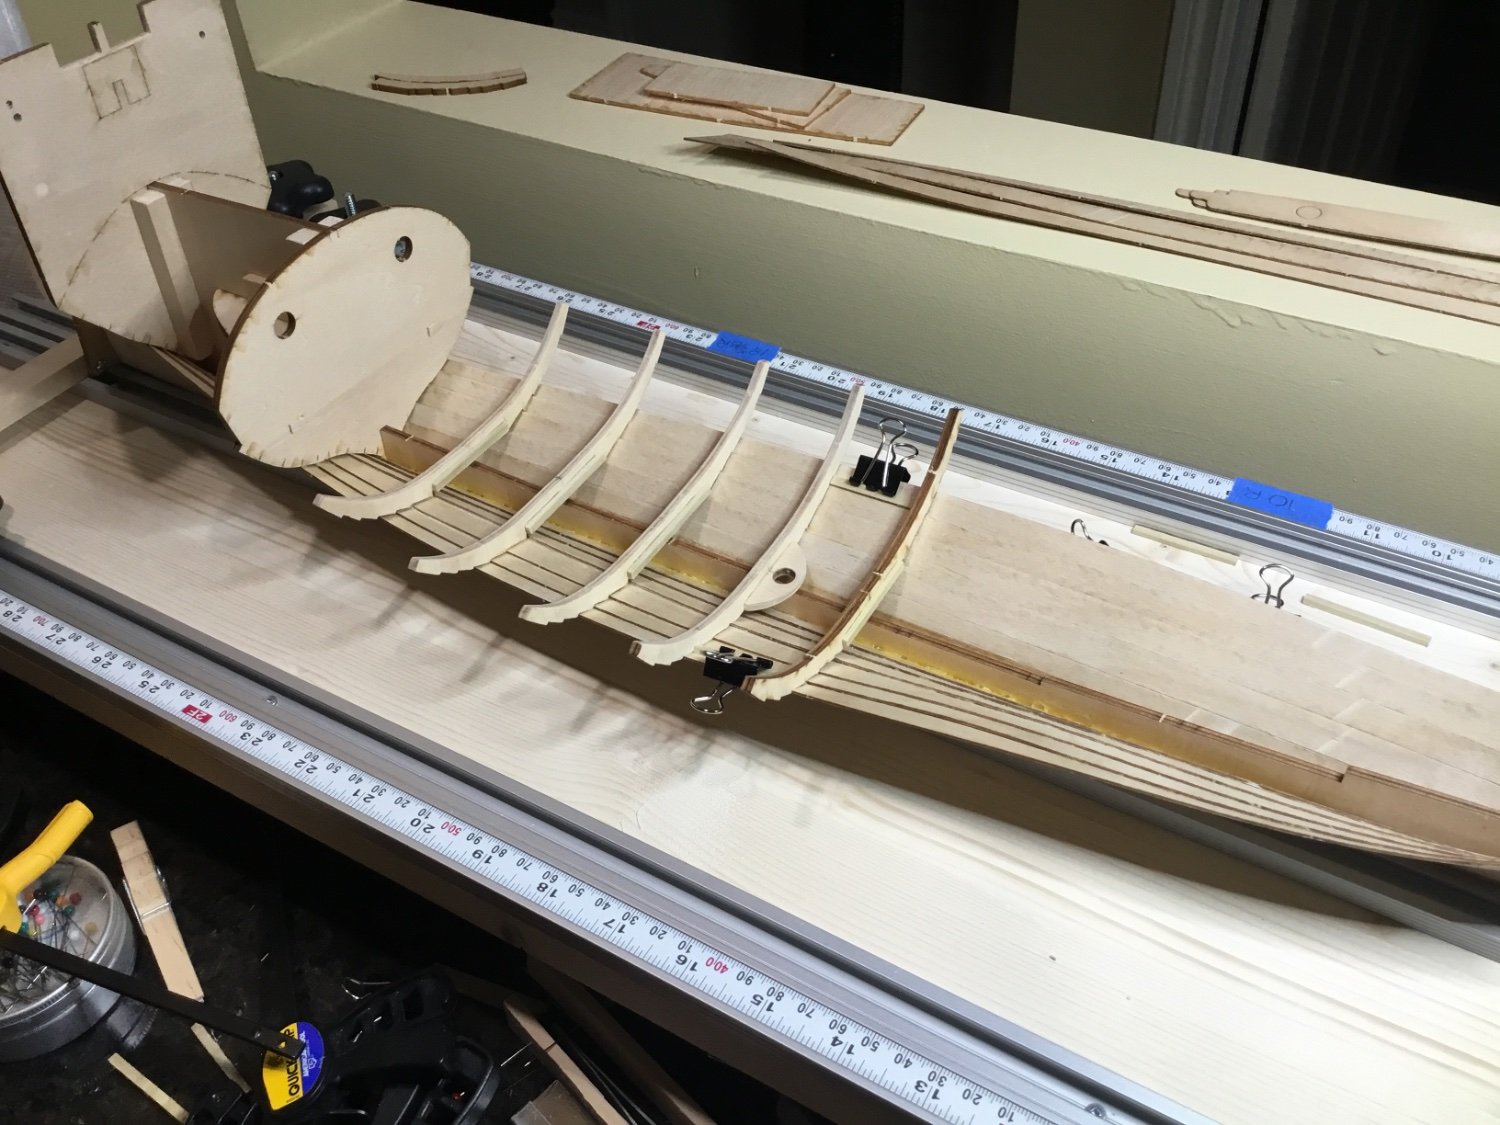
I’m completing both sides before moving to the next plank. There are lines lasered into the frames/bulkheads to show you where the planks should end up. There are also tiny holes lasered into the keel that show where the planks start and end.

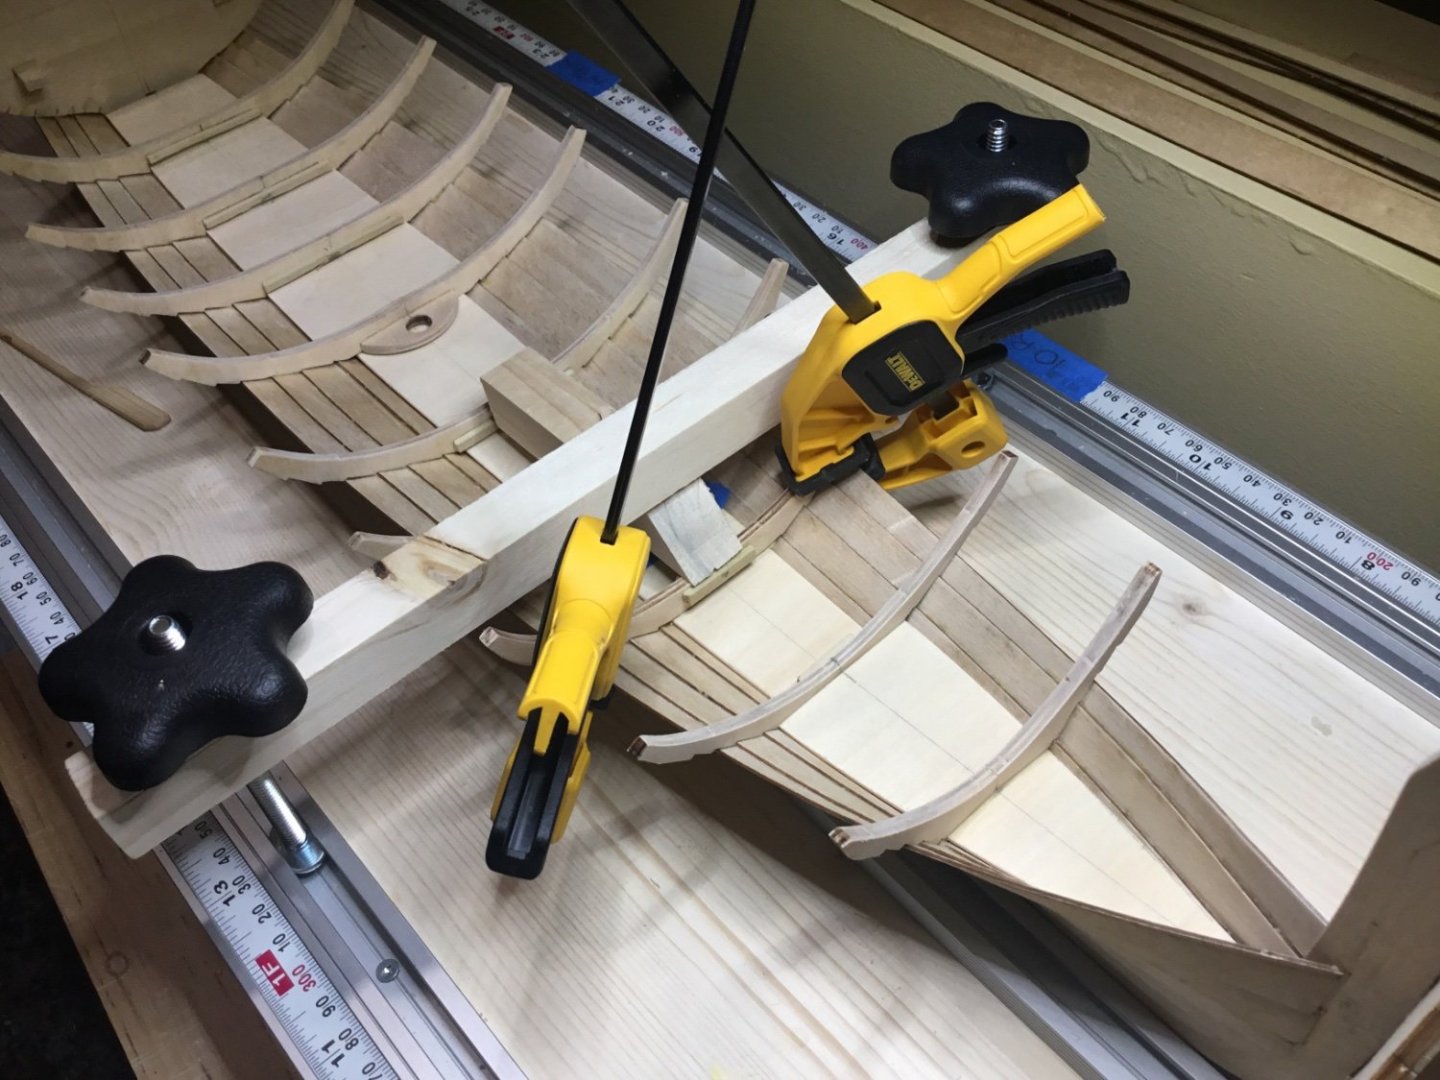
You can see that the second plank did not manage to get to the mark. It was a struggle to meet the line until the fourth plank.
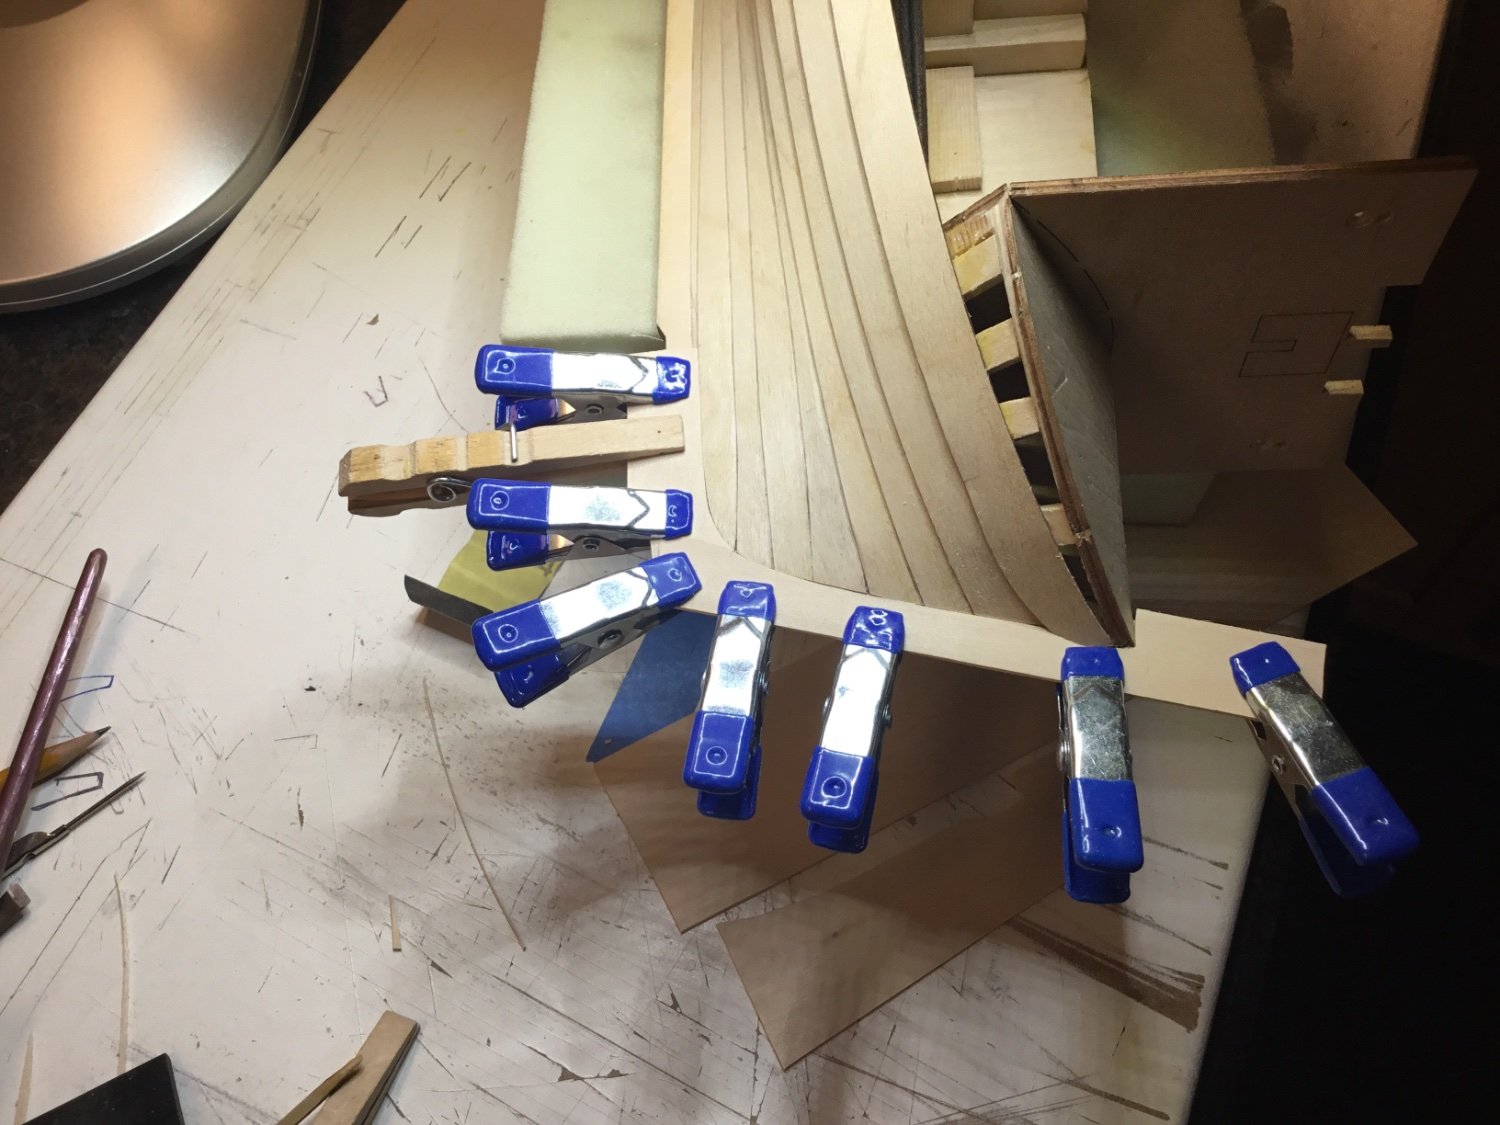
After test fitting the seventh plank I decided to remove the boat from to build board because it didn’t look like it was going well.
She had a bit of a twist to her so back in the build board it went. Laid a bunch of glue along each side of the keel to give it some strength.
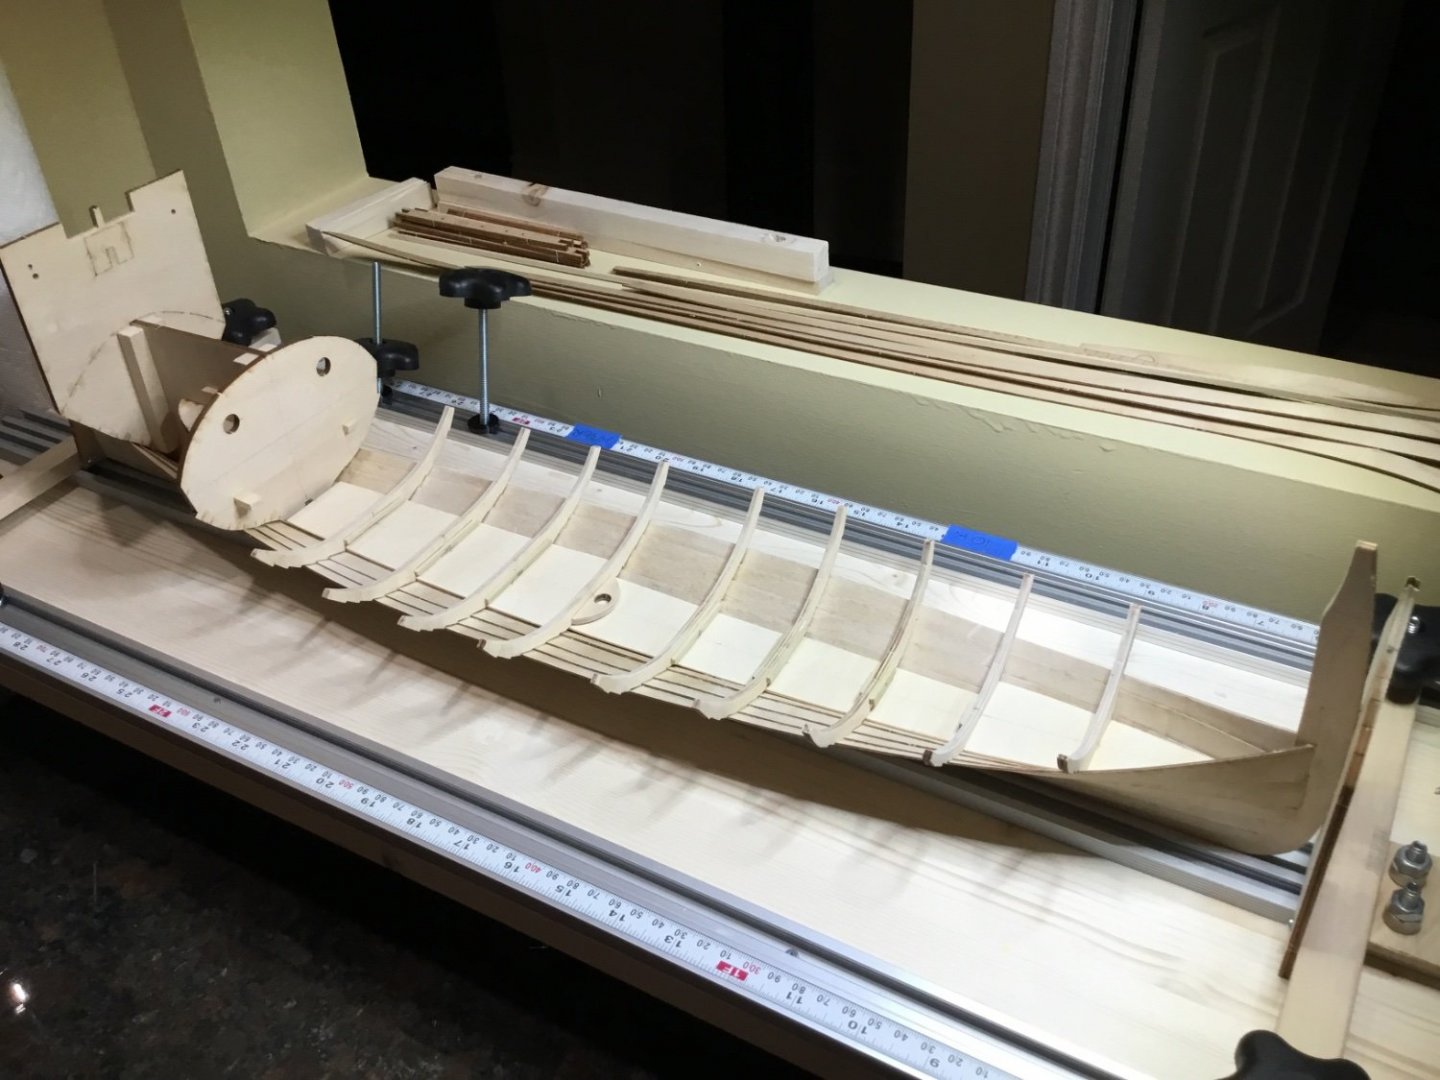
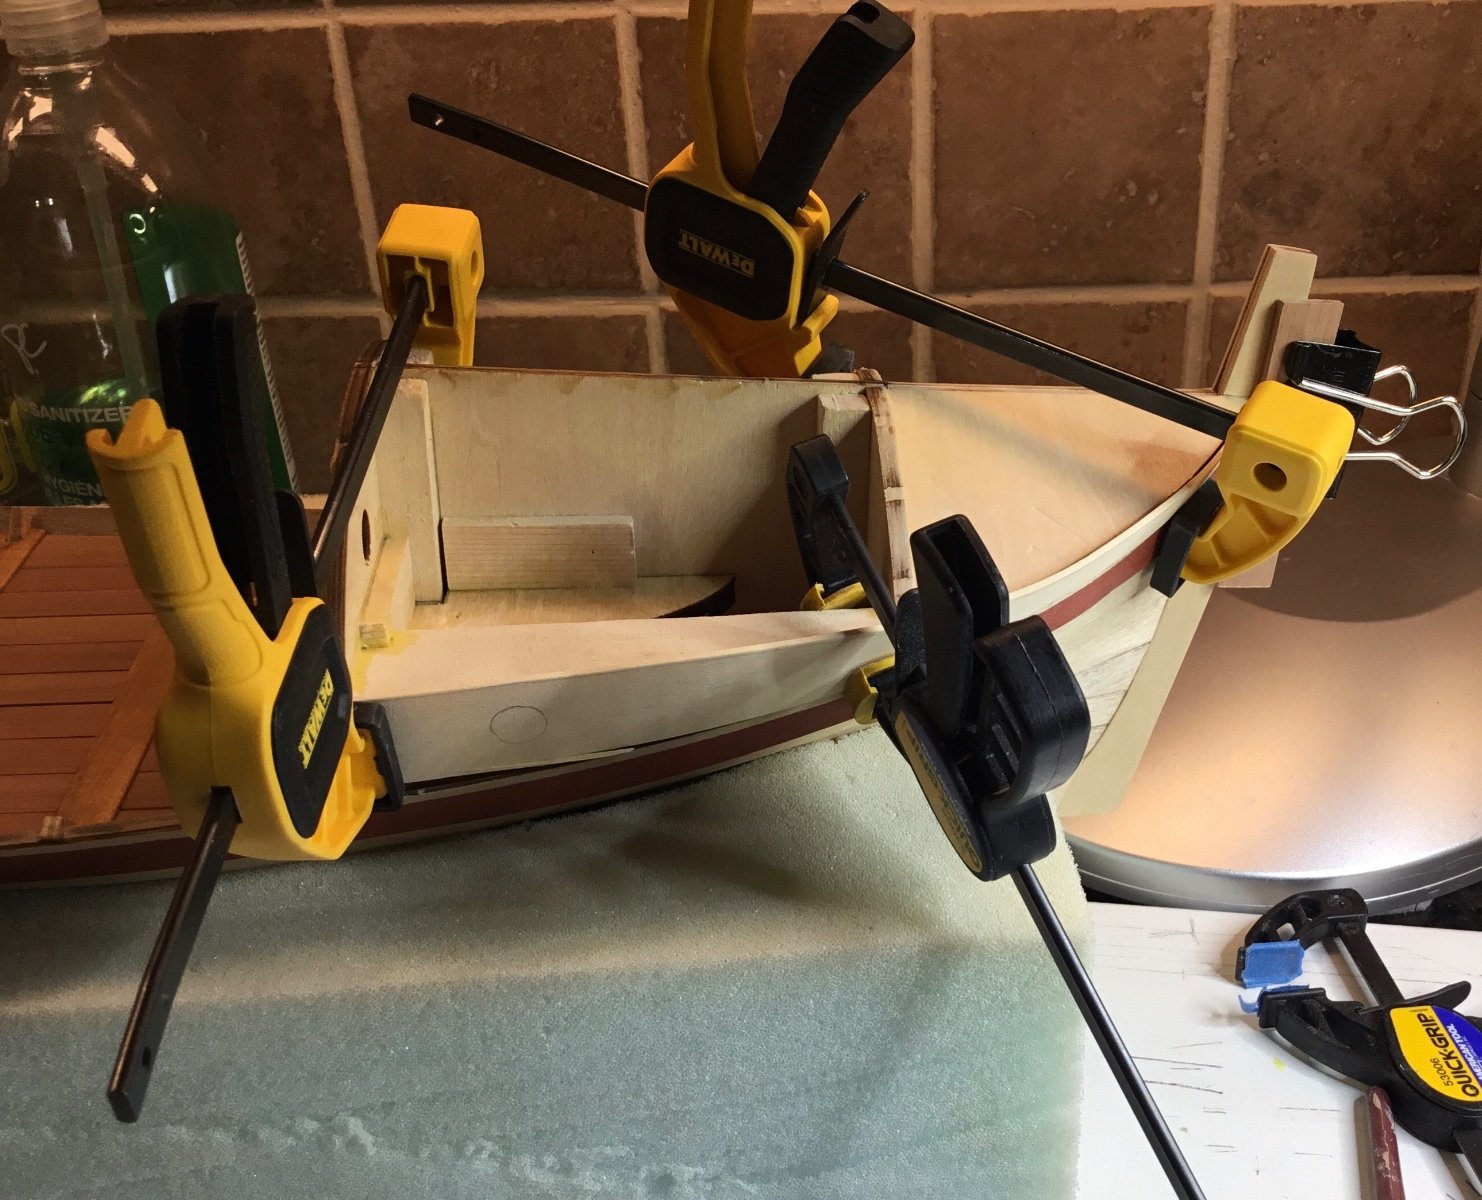
Wanted to see how the frames would fit in the hull at this point so I started assembling frames.
Put scabs on each side to give them some strength.

There are lines etched in the keel that I think are to show where the frames are placed but they don’t match the plans. Going to use them for frame placement.
Temporarily glued four frames to the hull and they fit fairly well with a bit of tweaking.


Figured that was a good test fitting. Removed all of the frames except the one at the mast. There are laser cut plywood pieces that are glued to the keel under the frames and then the frames are glued to them. I am assuming all of this because it doesn’t tell you anywhere that this is what you do. They all need to be cut and shaped to fit. Using the build board to hold them down while gluing.
The plan is to finish the plywood under the frames and then to permanently install the frames. Flip it back over and finish the planking. Thought it would be easier to plank if the frames were there to glue to. Might not be a good plan but we shall see.

-
Hi Dave, if the holes in the pin rack are too big you could try pushing the rope down through the hole and tying it to the rack. Then push the belaying pin into the hole. Hang a coil of on the pin. On a few of mine I found it easier to make a clove hitch and slide it up onto the pin under the rack, tension the line and then put a hitch on the pin above the rack. That area sure is a challenge.
- Dave_E, Keith Black and allanyed
-
1
-
2
-
Hi Glenn, your planking is incredible. In a couple of posts (171 & 194) you have more than one strake going at a time. Are there advantages to this or is it just because she is just so big?
- glbarlow, Dave_E and FrankWouts
-
3
-
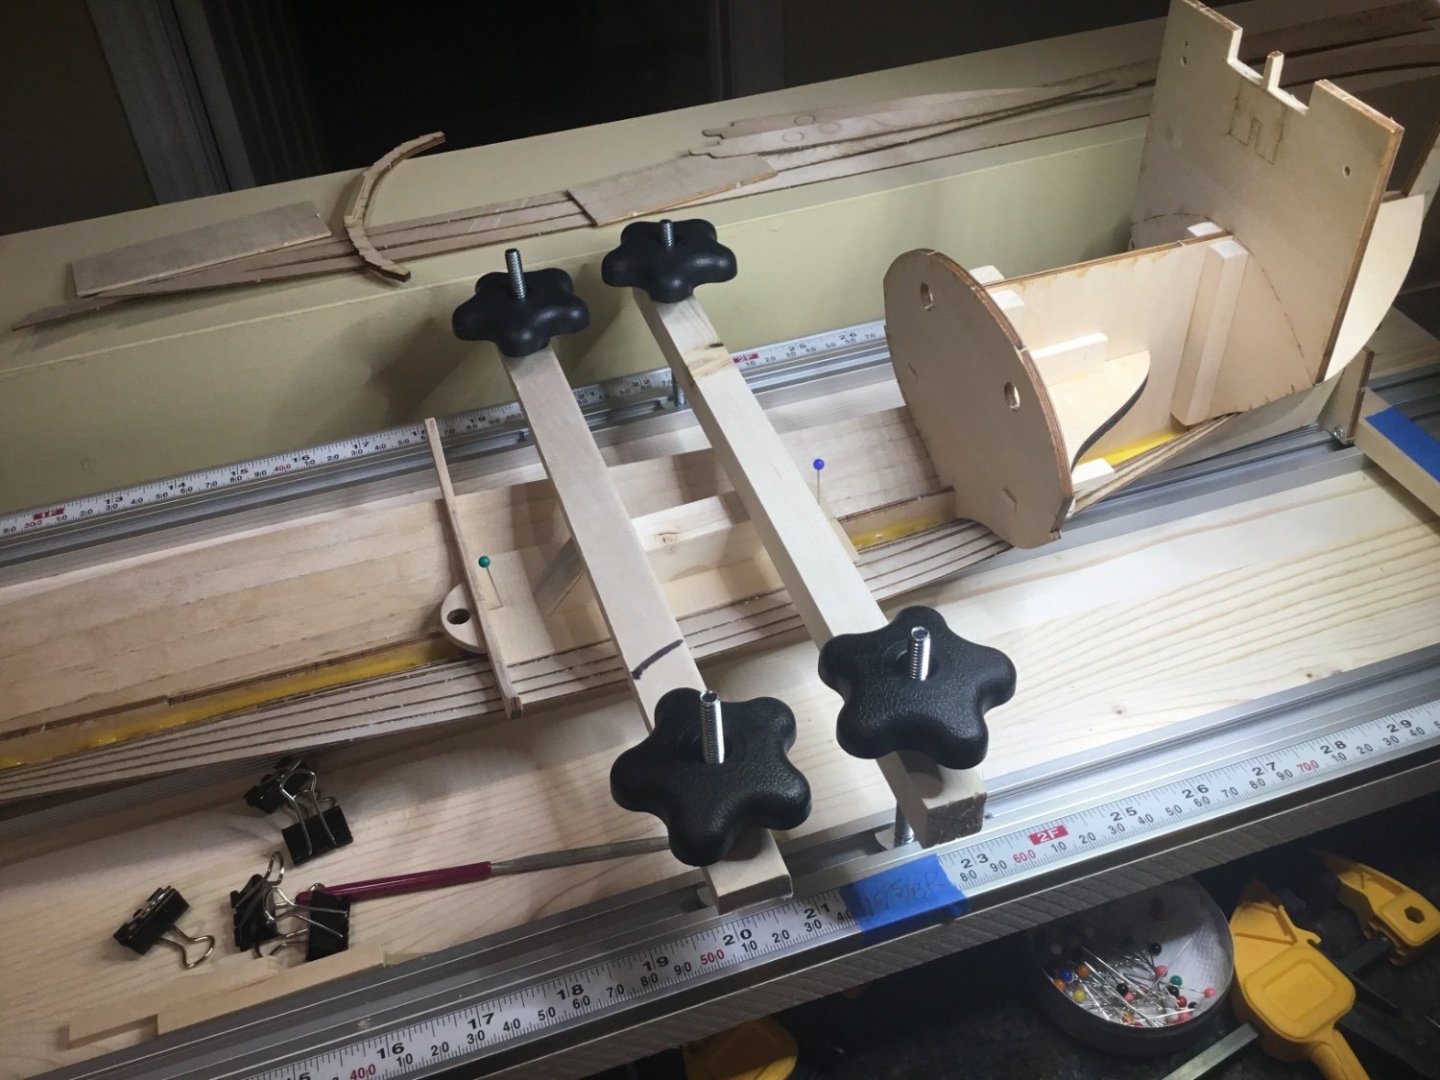
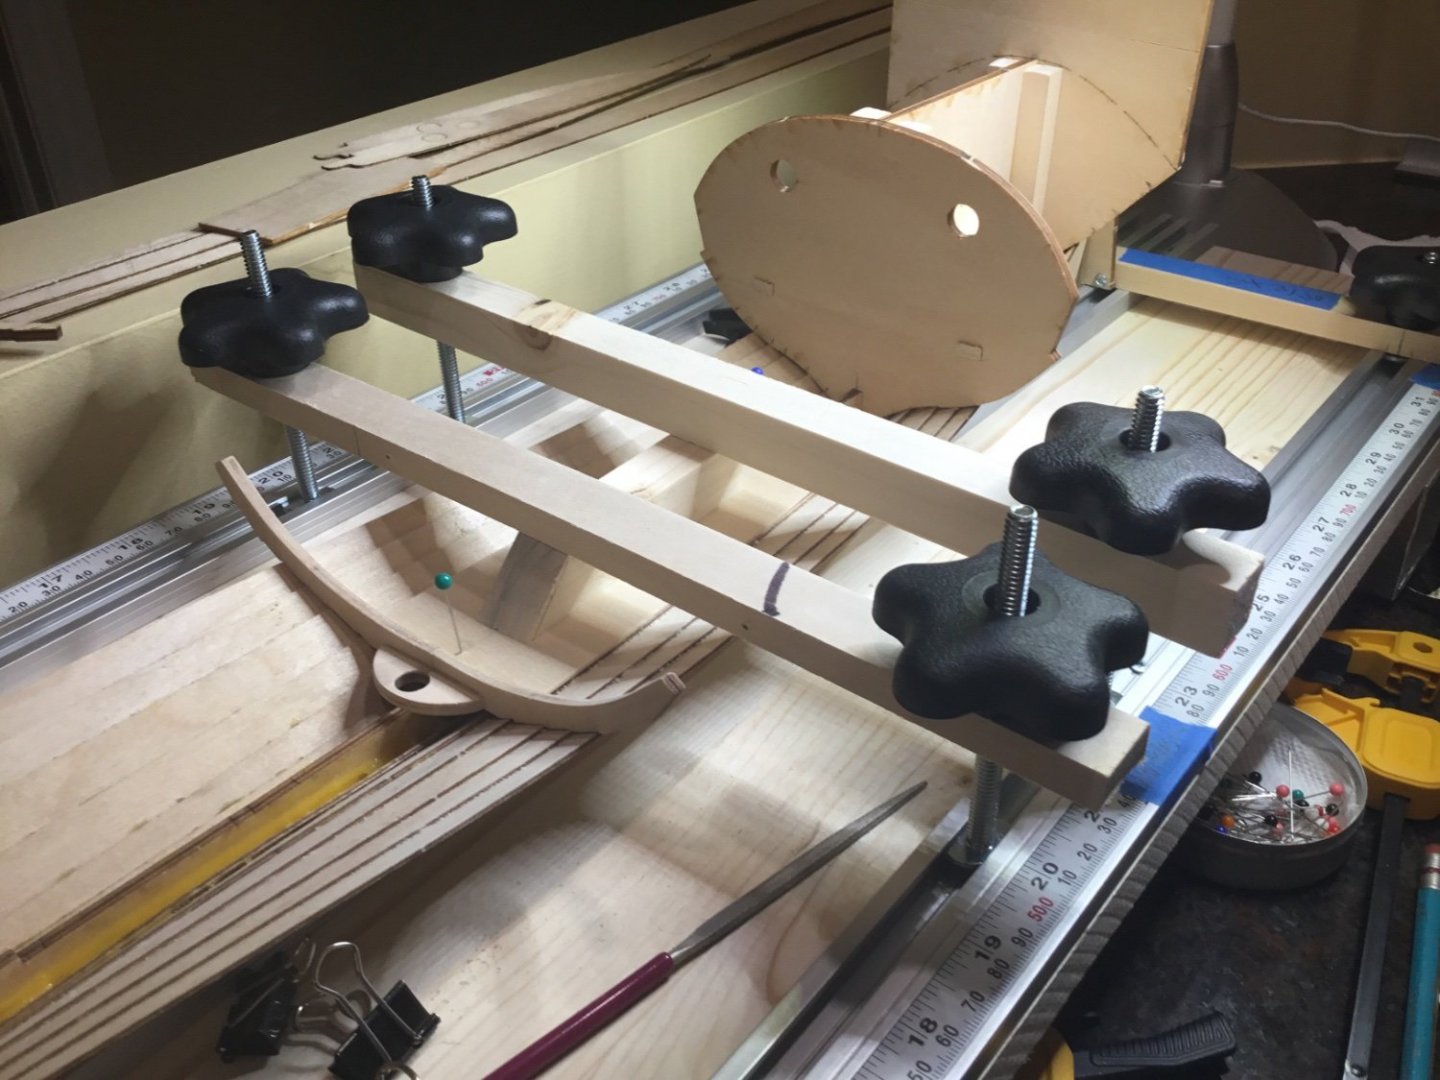
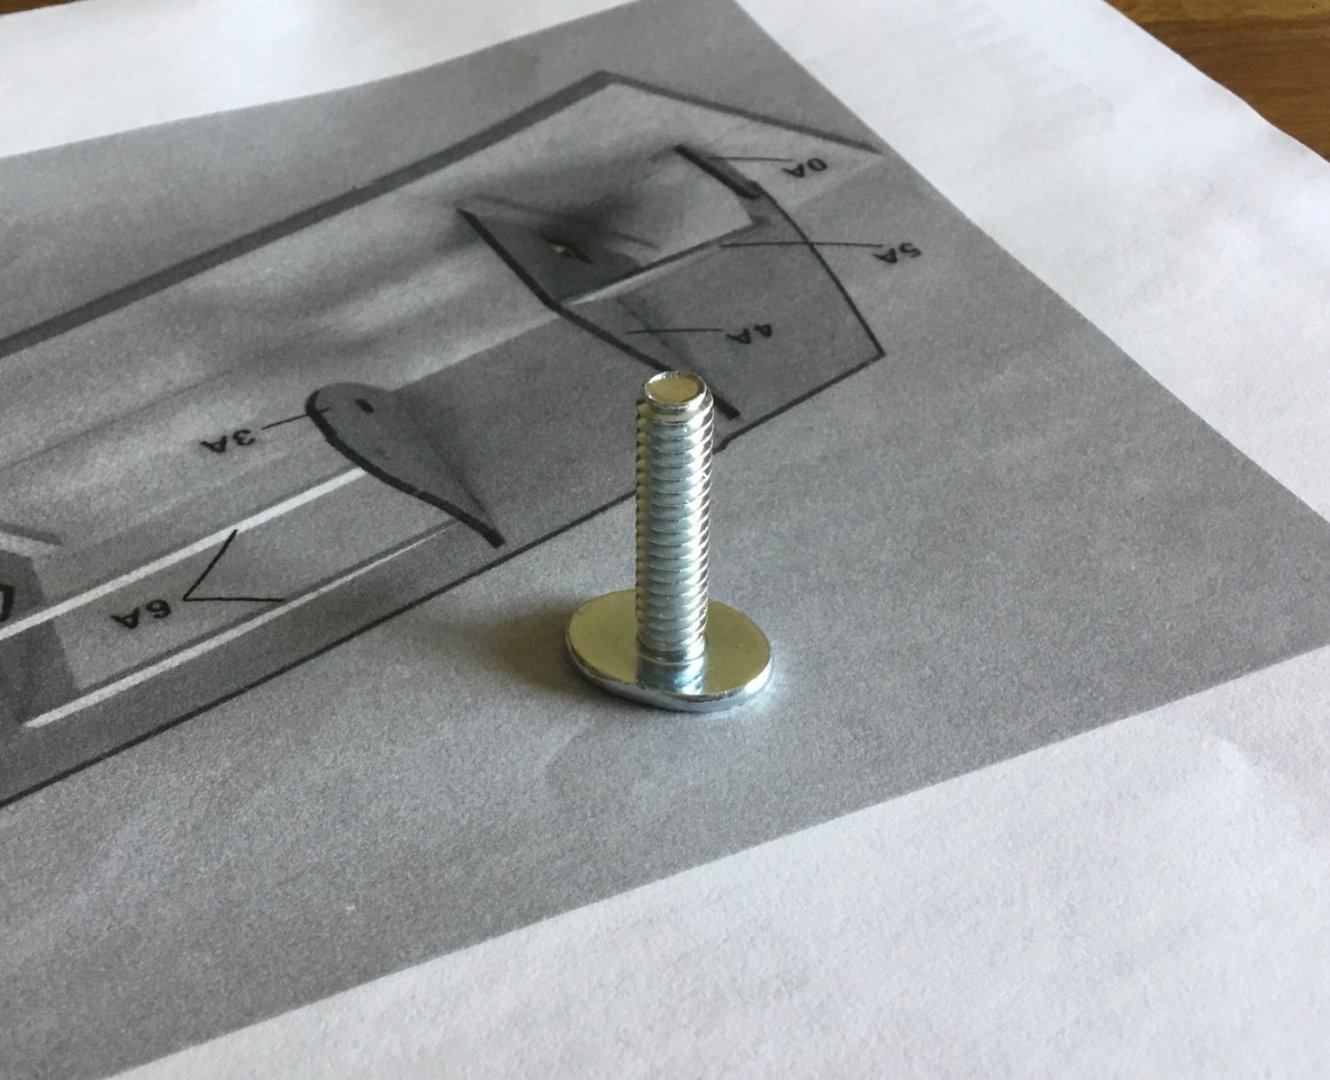
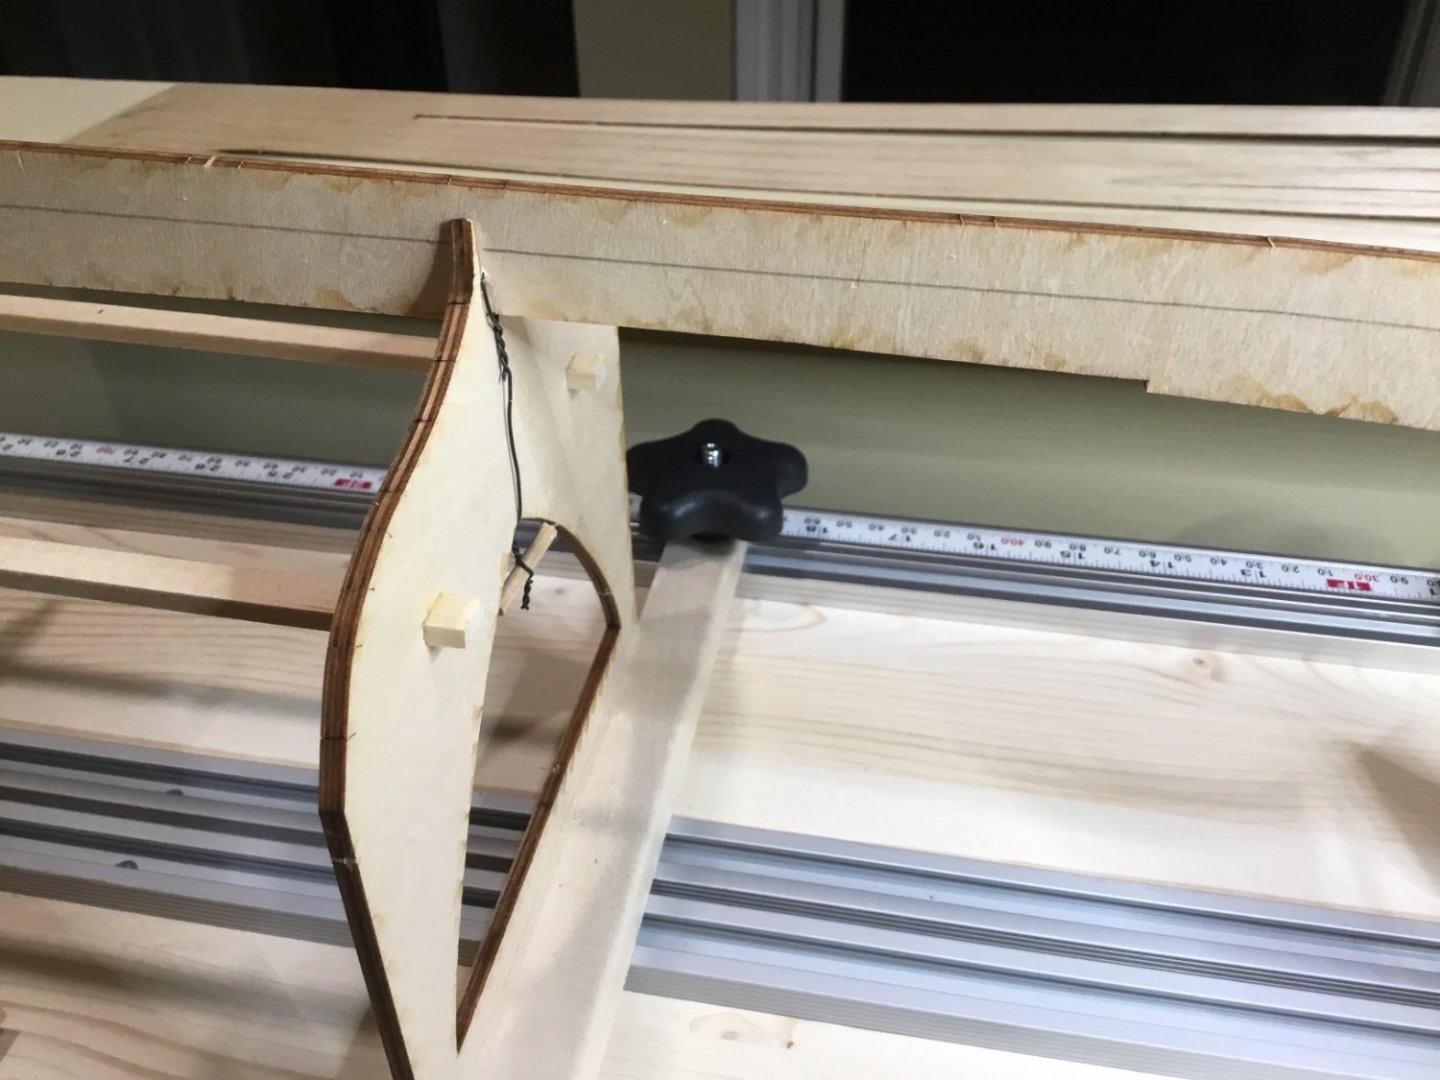
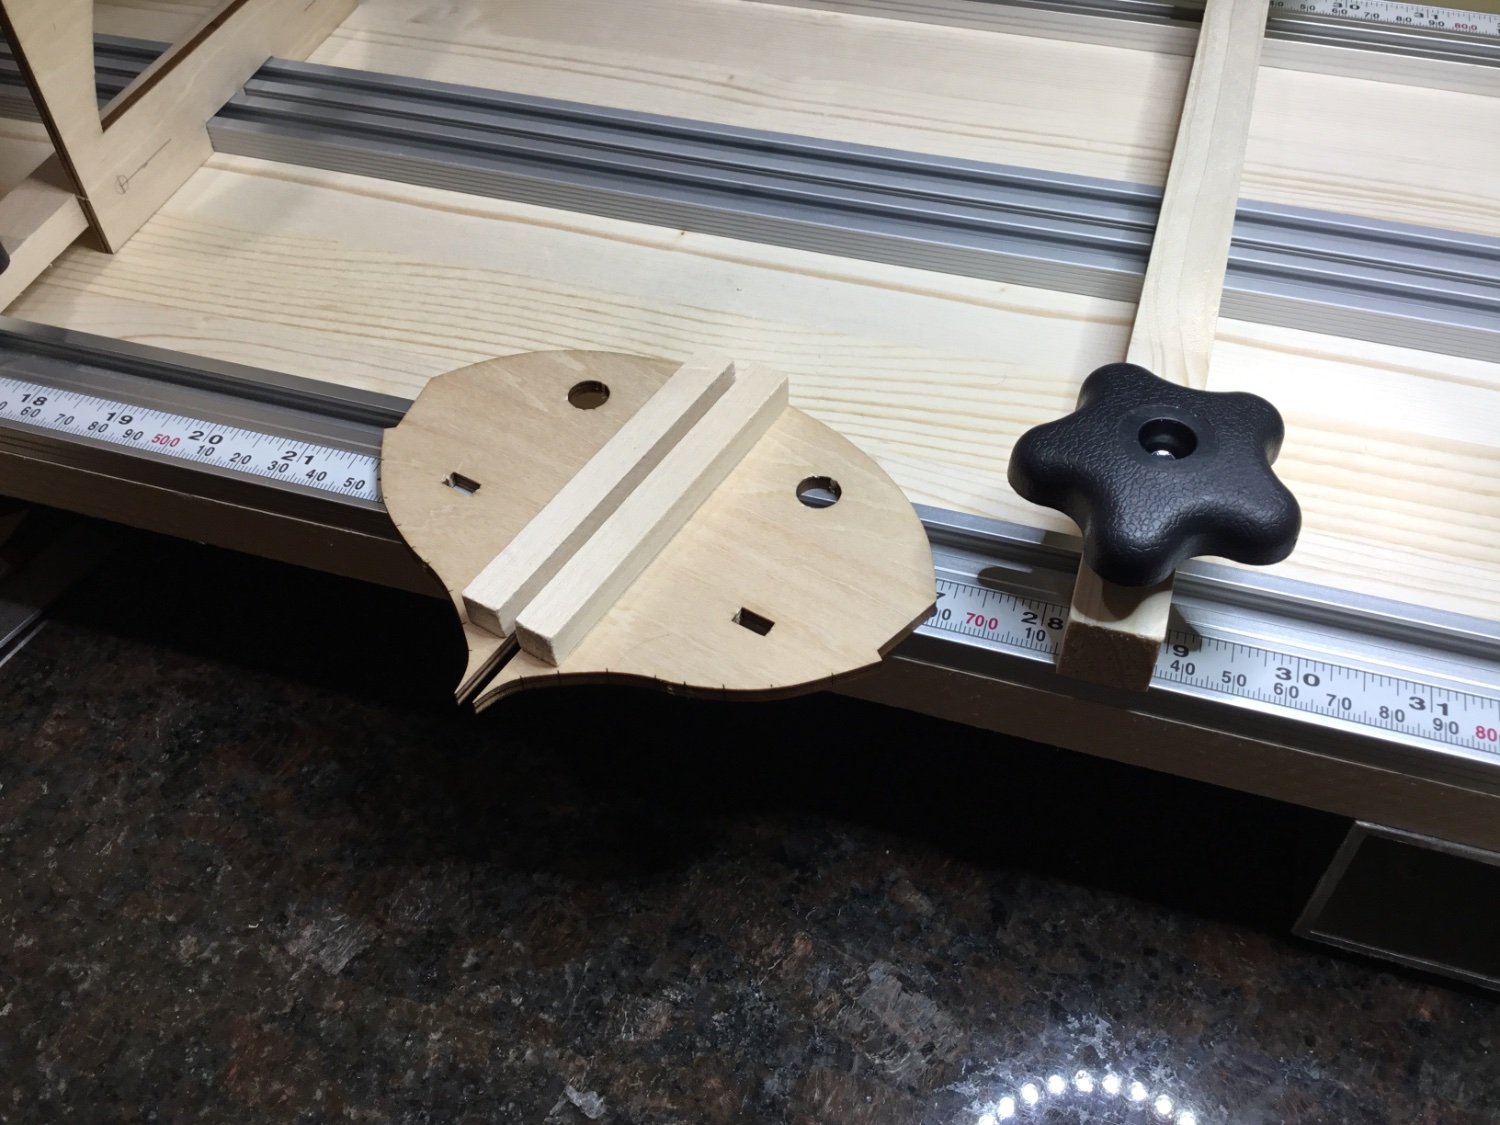
Thanks Todd, the board isn’t really any different than other boards you see on this forum. I like the fact that you can make adjustments when needed to the spacing of the cross pieces. These t-bolts slide inside the track and the knobs have a captured nut inside them. You make the crosspieces out of whatever type and size of material that suits your needs. I guess if you needed more crosspieces closer together you would have to just use a bare nut to secure them. The two center channels were placed 3/16” apart so that the keel can fit in there when the boat gets flipped over. Then you can make brackets to hold the stem and the stern. Everything was screwed to the board using #4x 3/4 “ flat head screws. Countersunk holes were drilled in the channels so that the t-bolt would not contact the head of the screw.
- yvesvidal, Dave_E, GrandpaPhil and 1 other
-
4
-
It’s good to have you along Ian.
- Seventynet and Dave_E
-
2
-
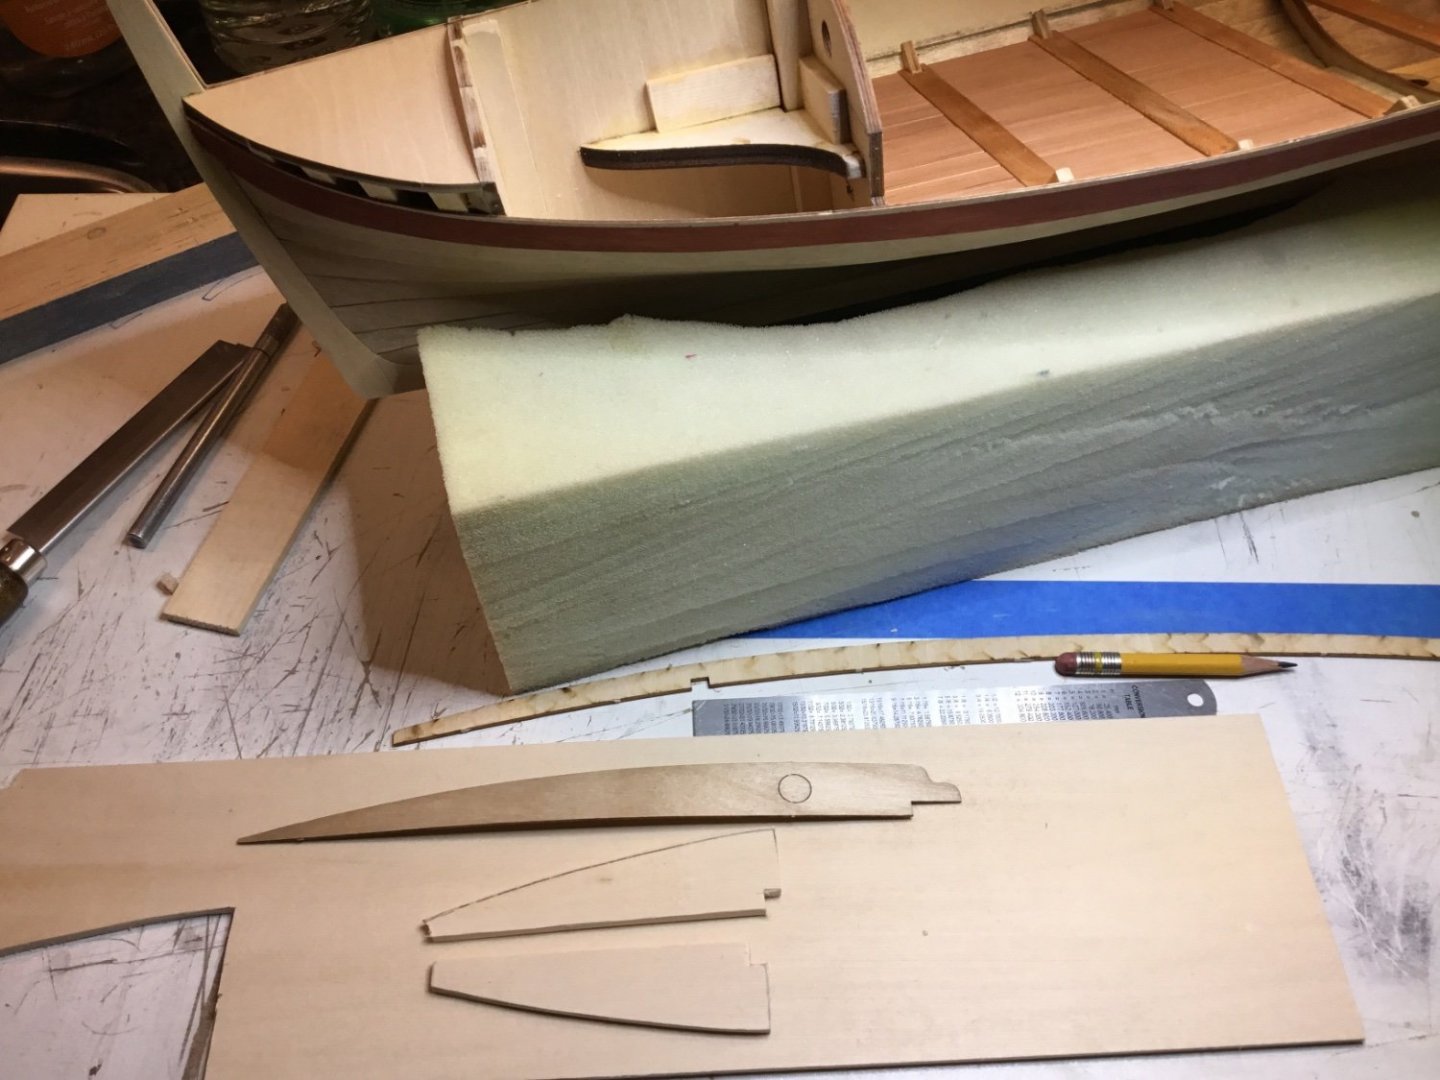
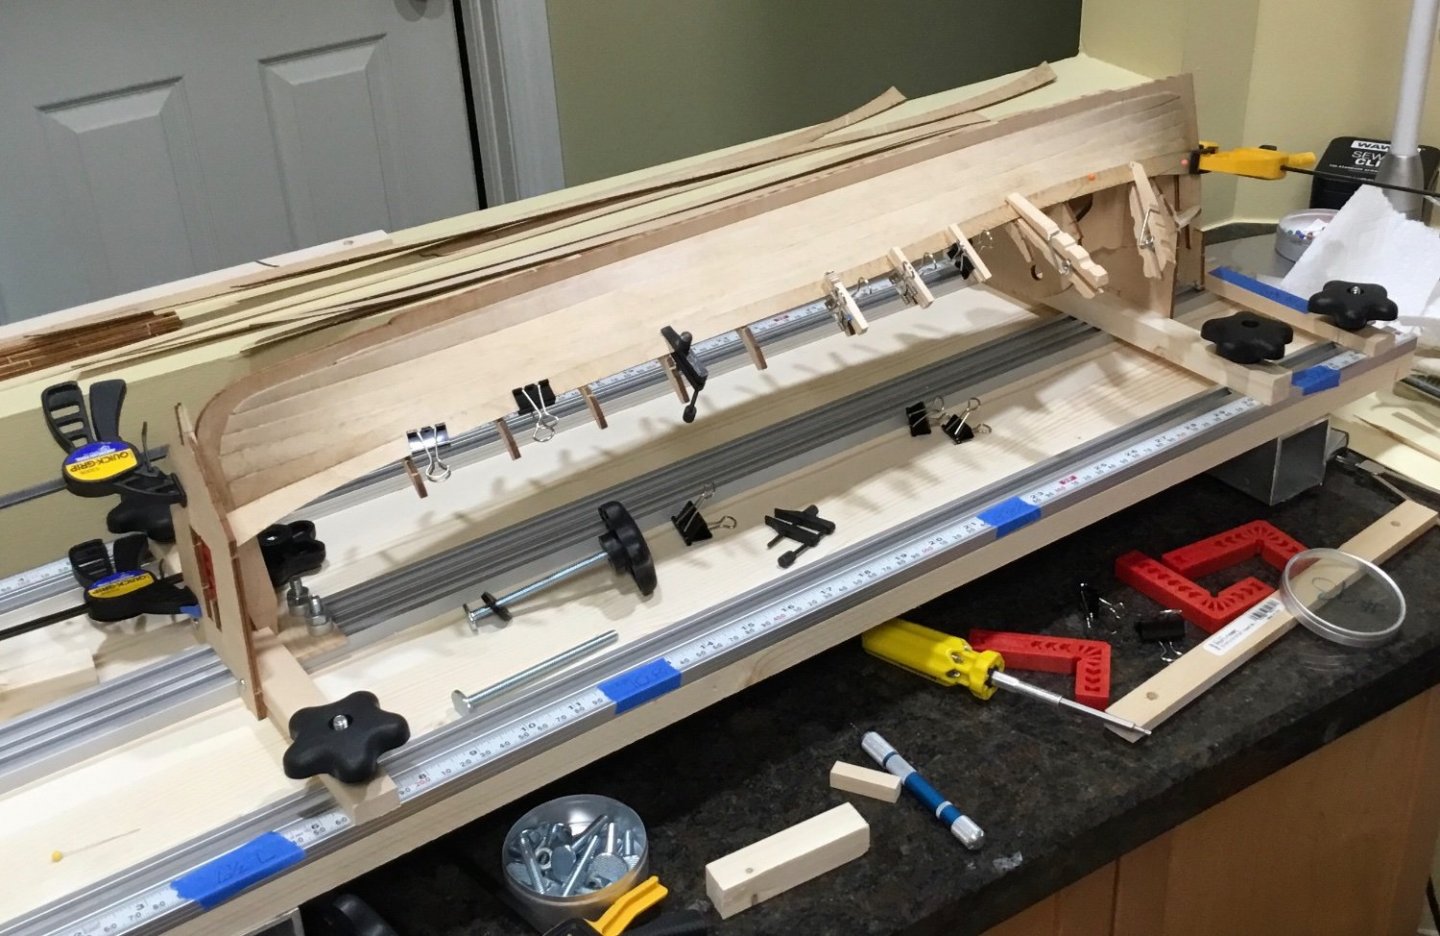
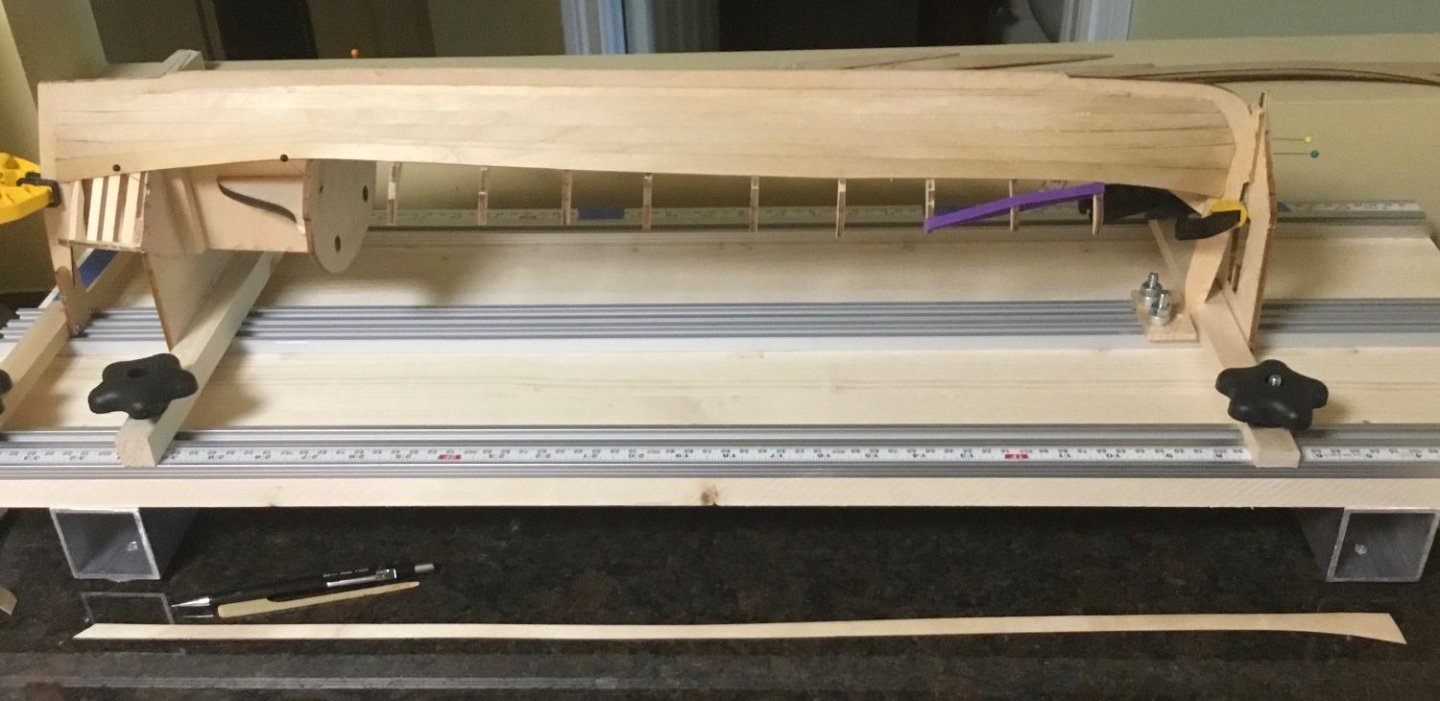
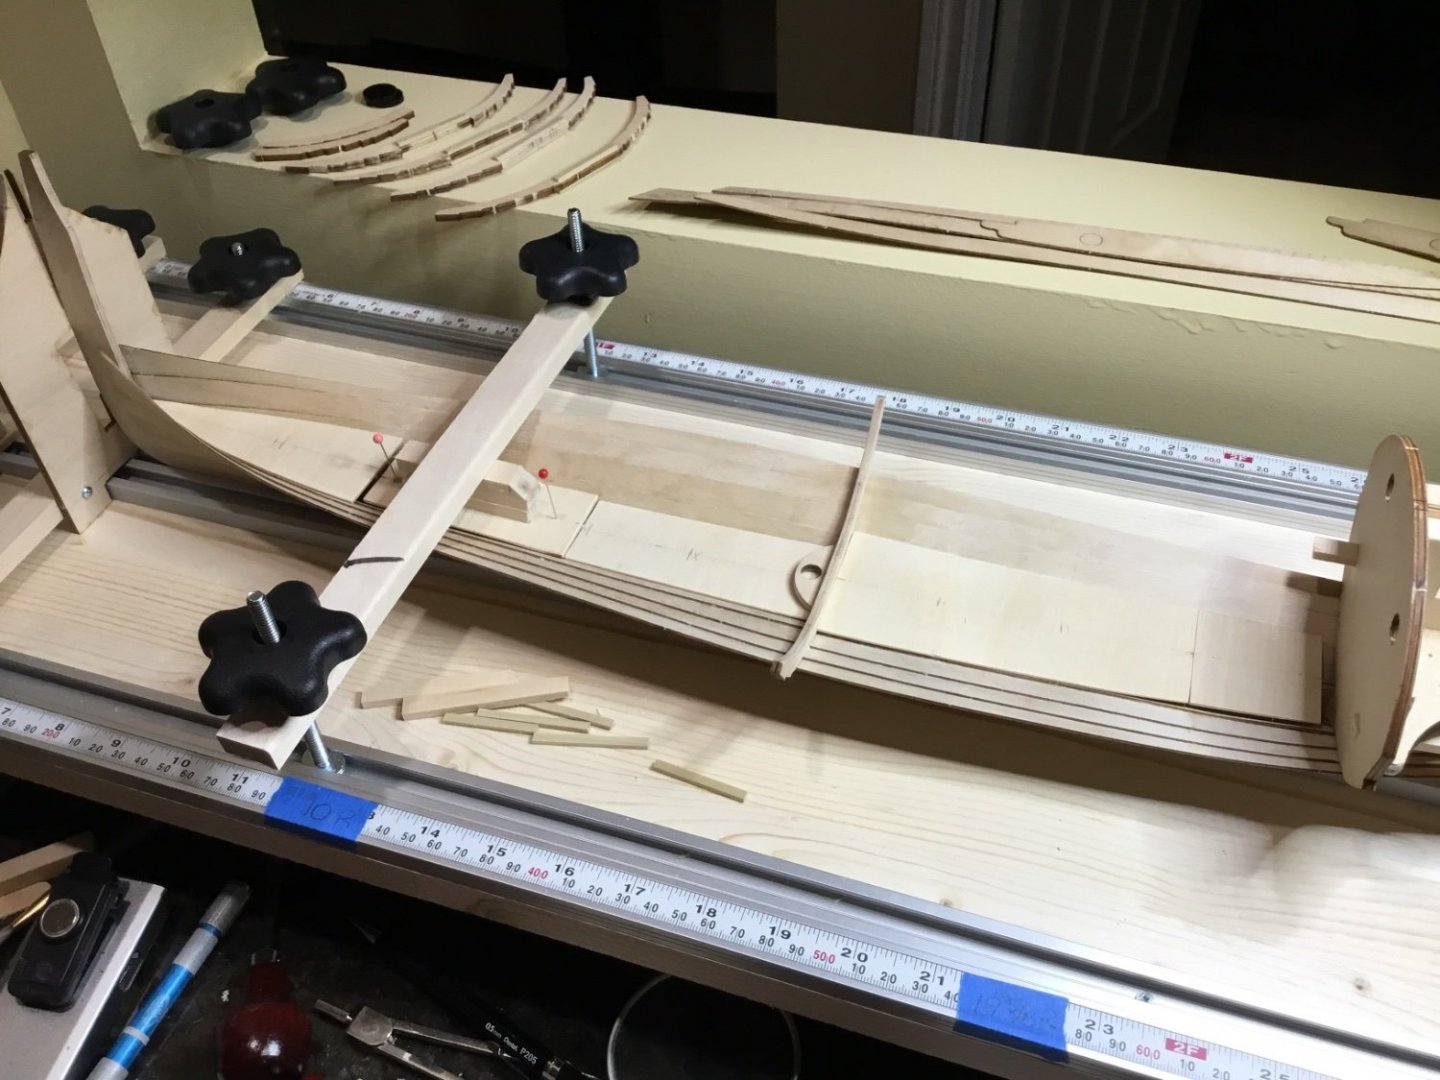
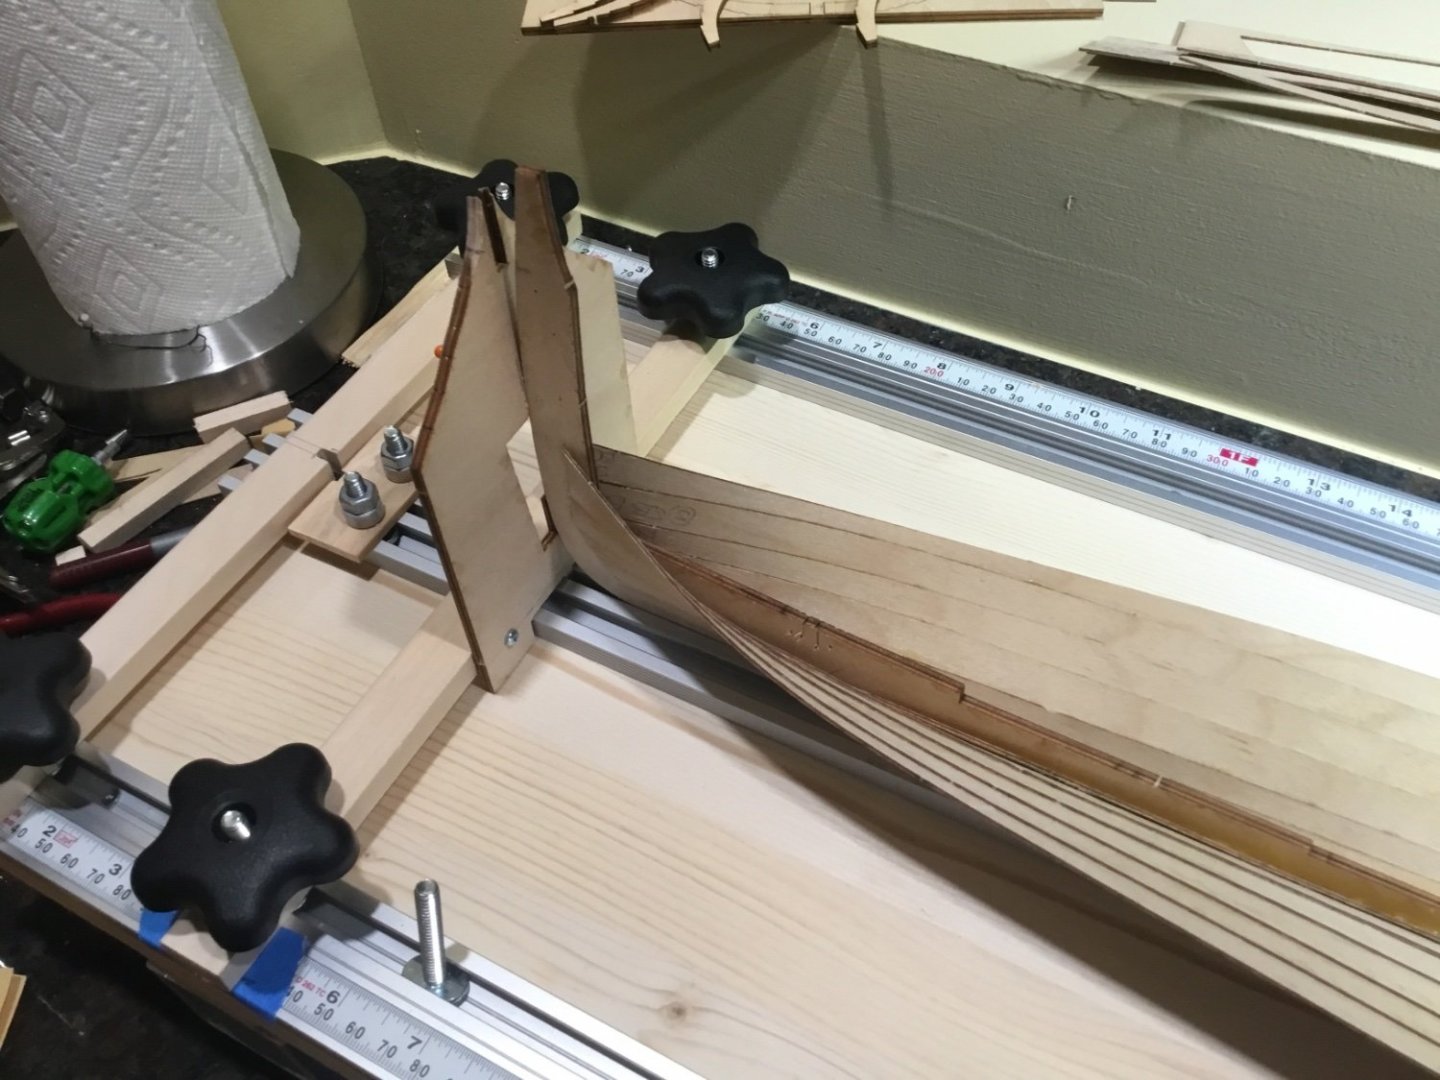
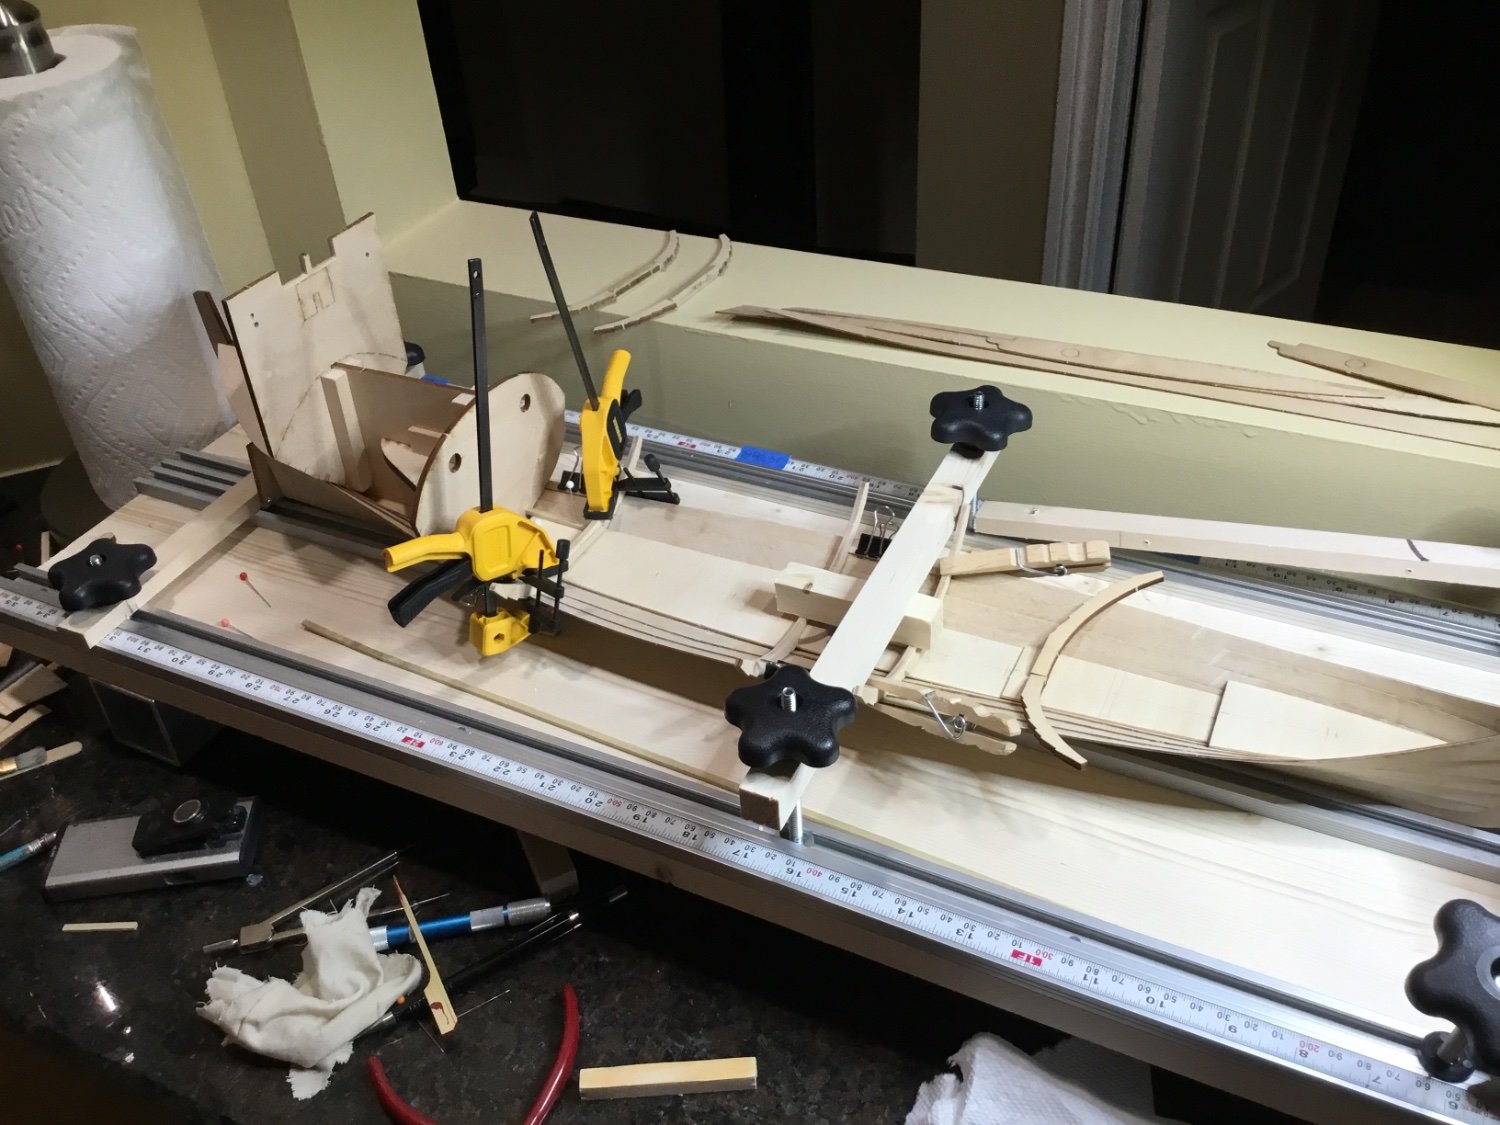
Hi Everyone, I have started my next project. About a year ago when I saw Ekis’ beautiful completed model I decided that I would like to give it a try.
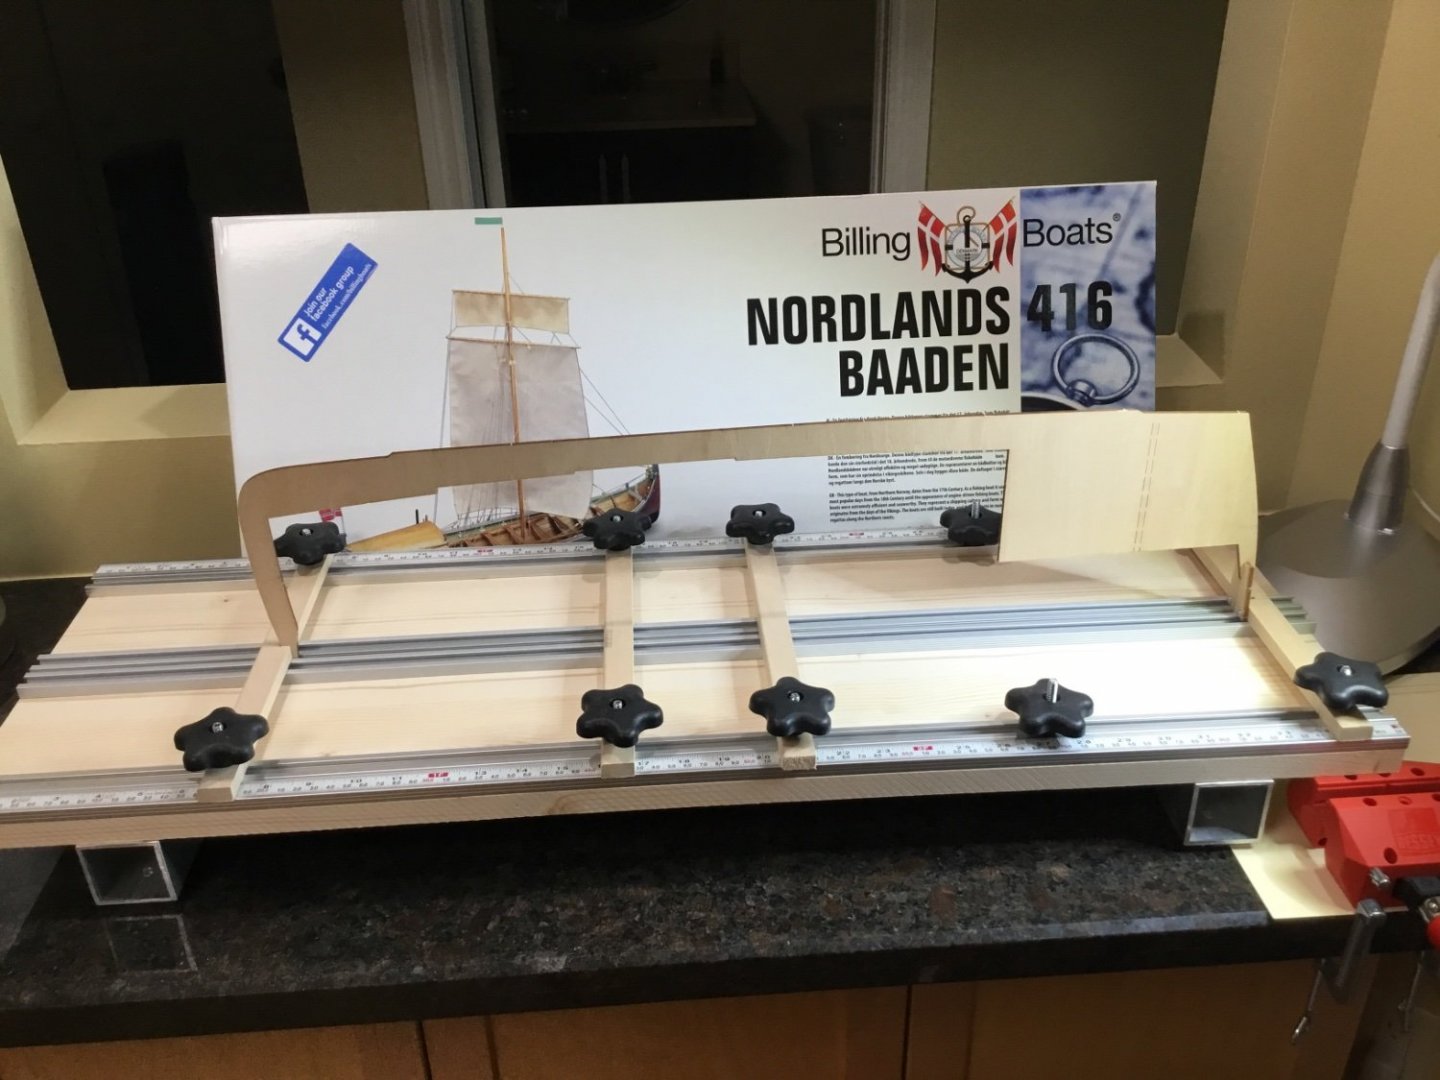
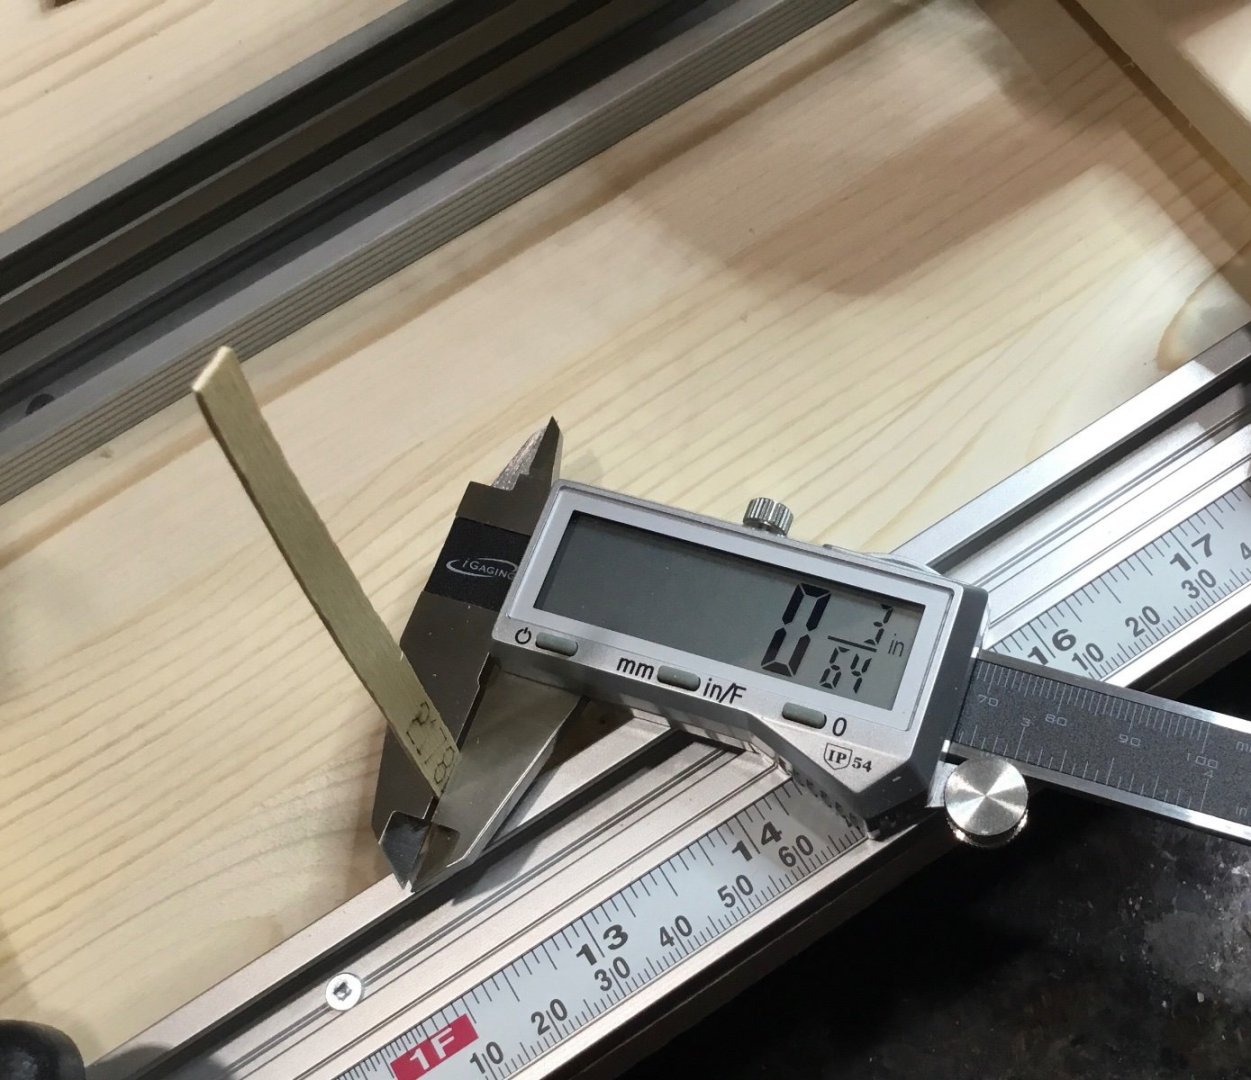
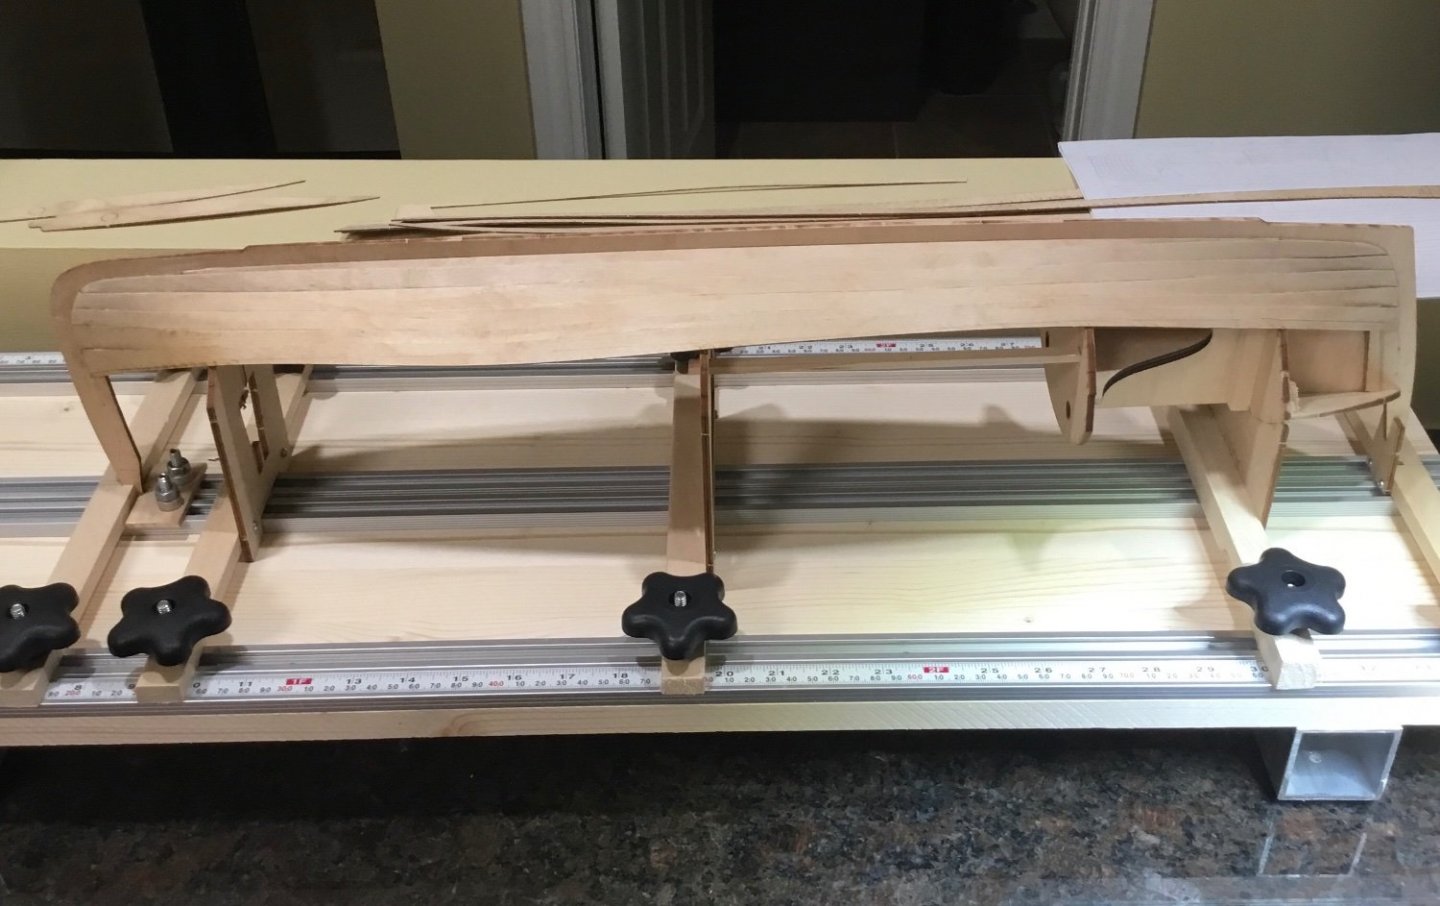
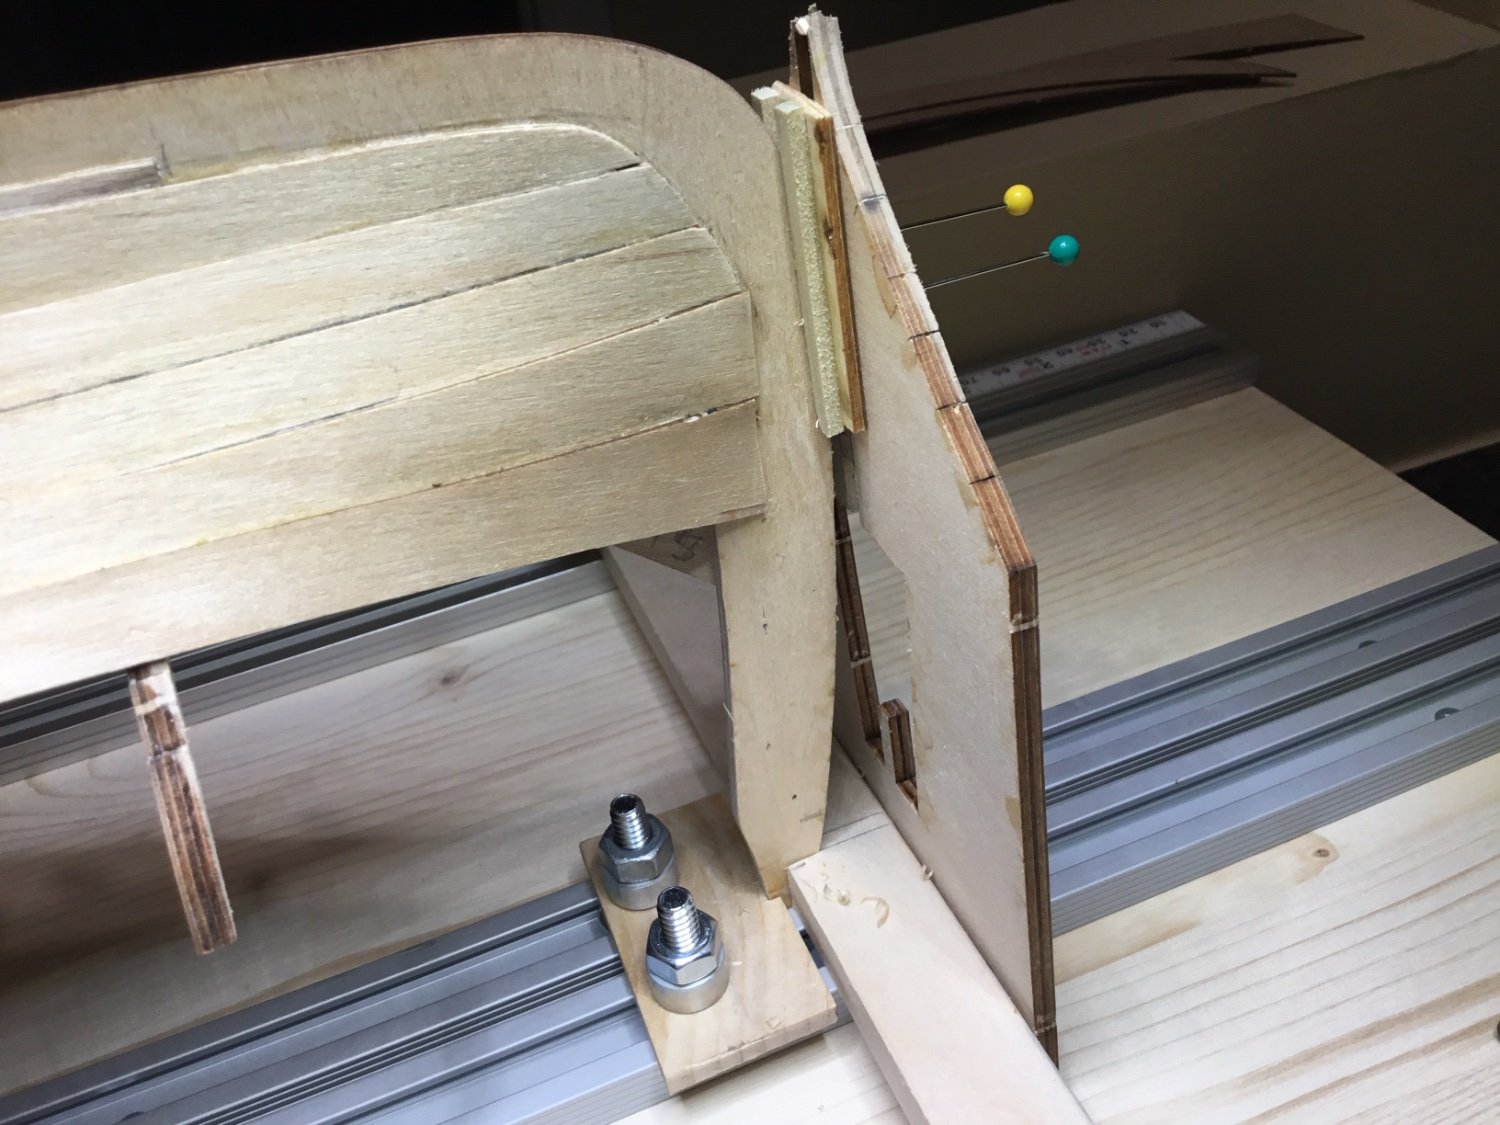
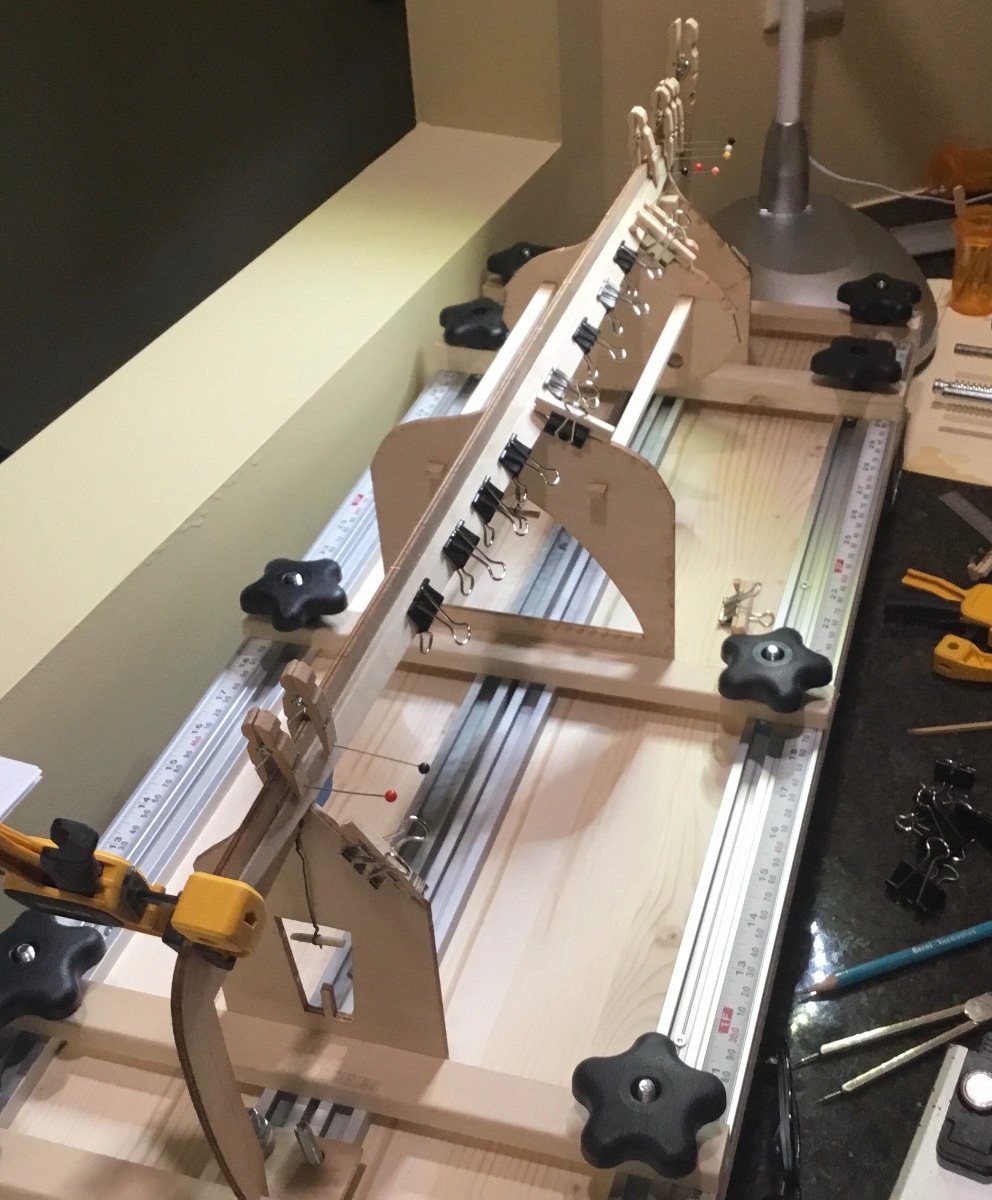
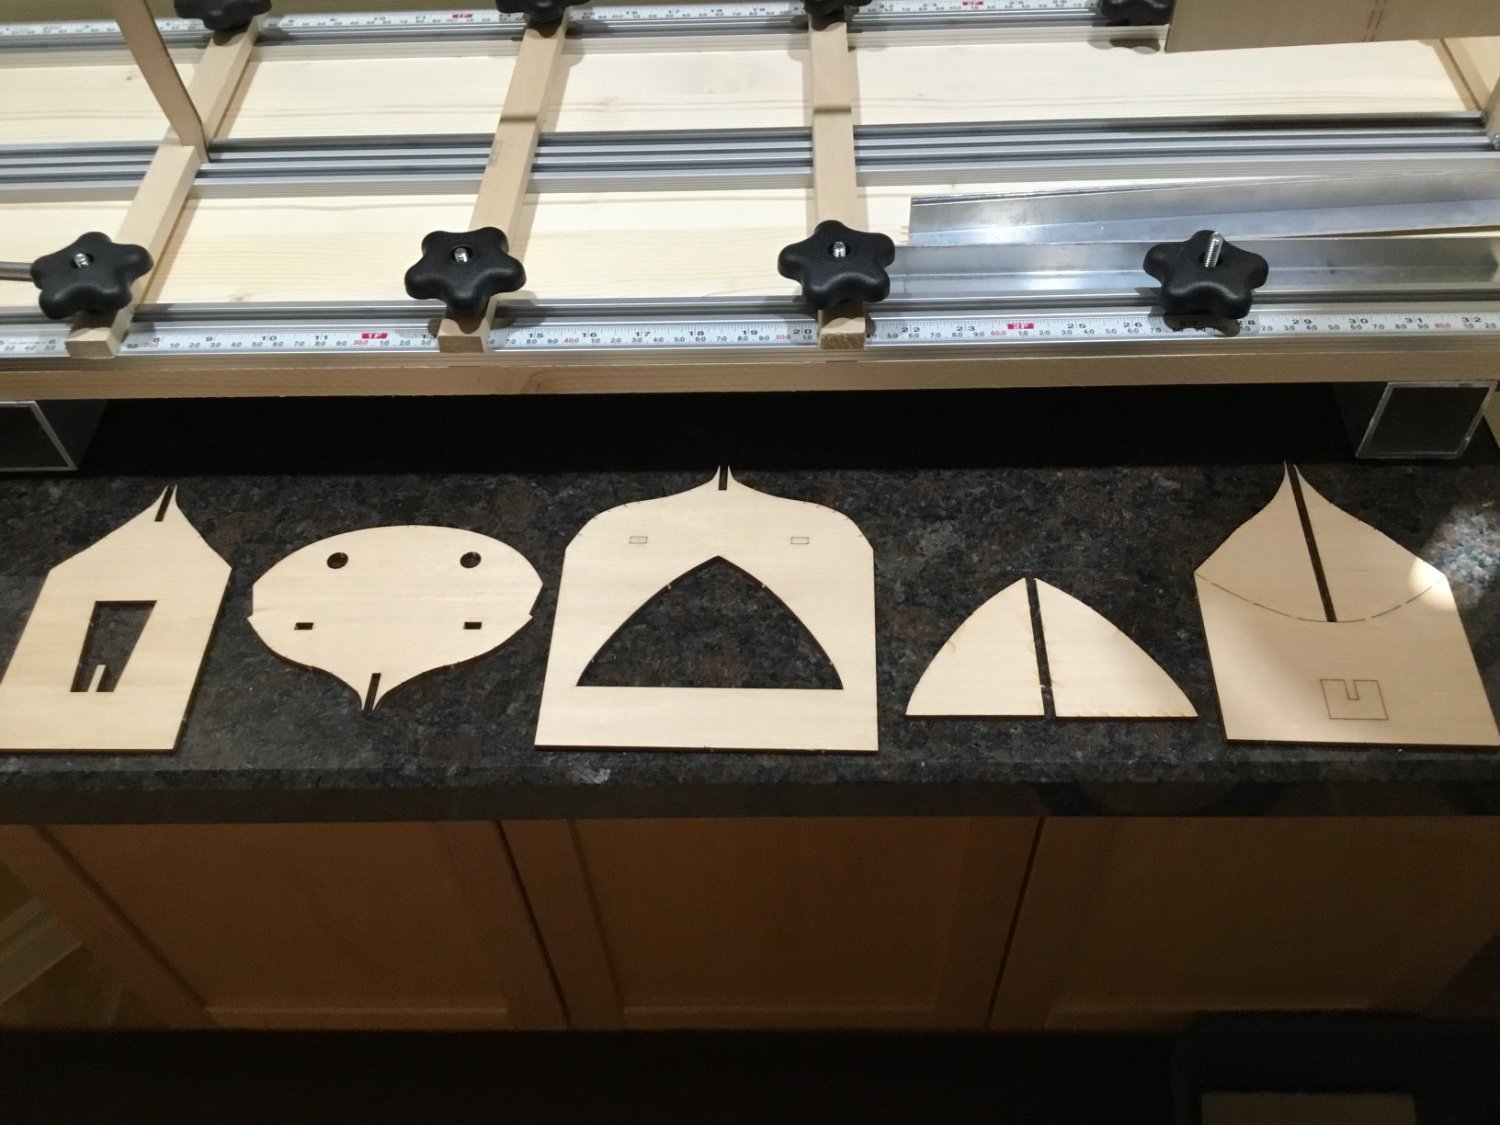
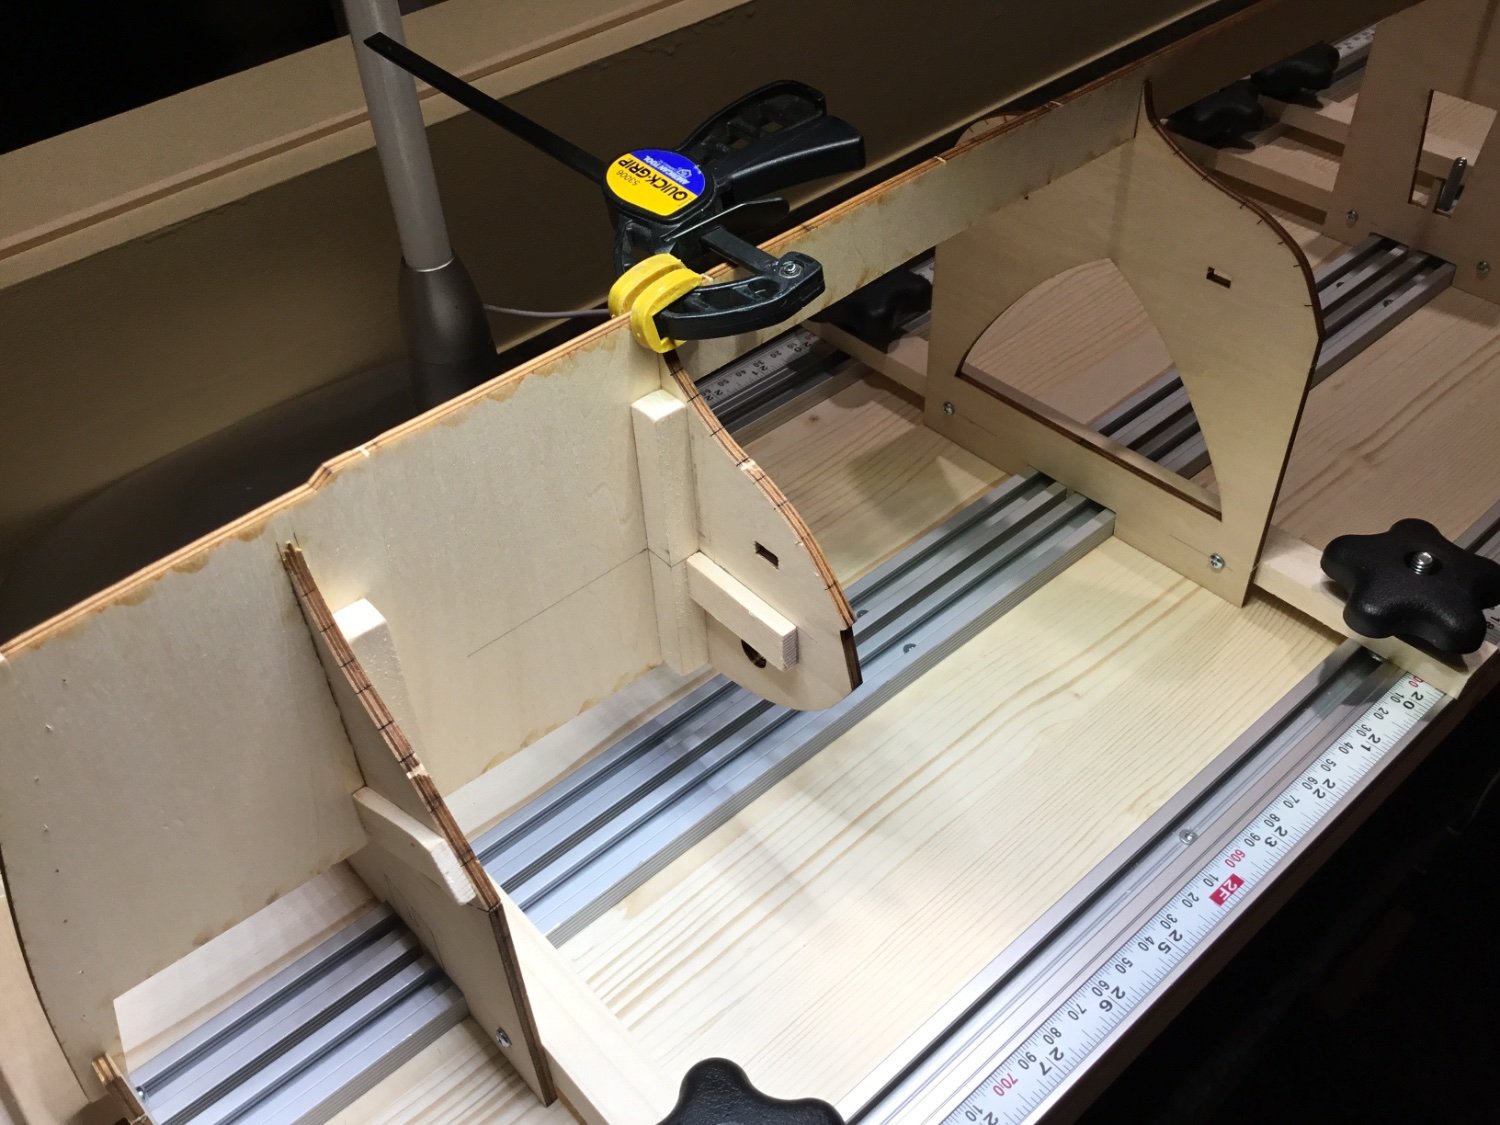
The build board was started about a month ago. Picked up a 12”x 36” pine project panel at Home Depot. It was surprisingly flat and straight. The aluminum T-channel, T-bolts, and knobs are from Lee Valley, the sticky-backed measuring tape is made by Starret and is from Amazon and the 2” aluminum square tube is from Aircraft Spruce. The first thing the directions tell you to do is remove the frames and bulkheads from the carrier sheet and mount them on the build board, then plank the boat. If Billings ever published a recipe book, all of the recipes would say-
Step 1: Put in pot
Step 2: Boil
Step 3: Eat
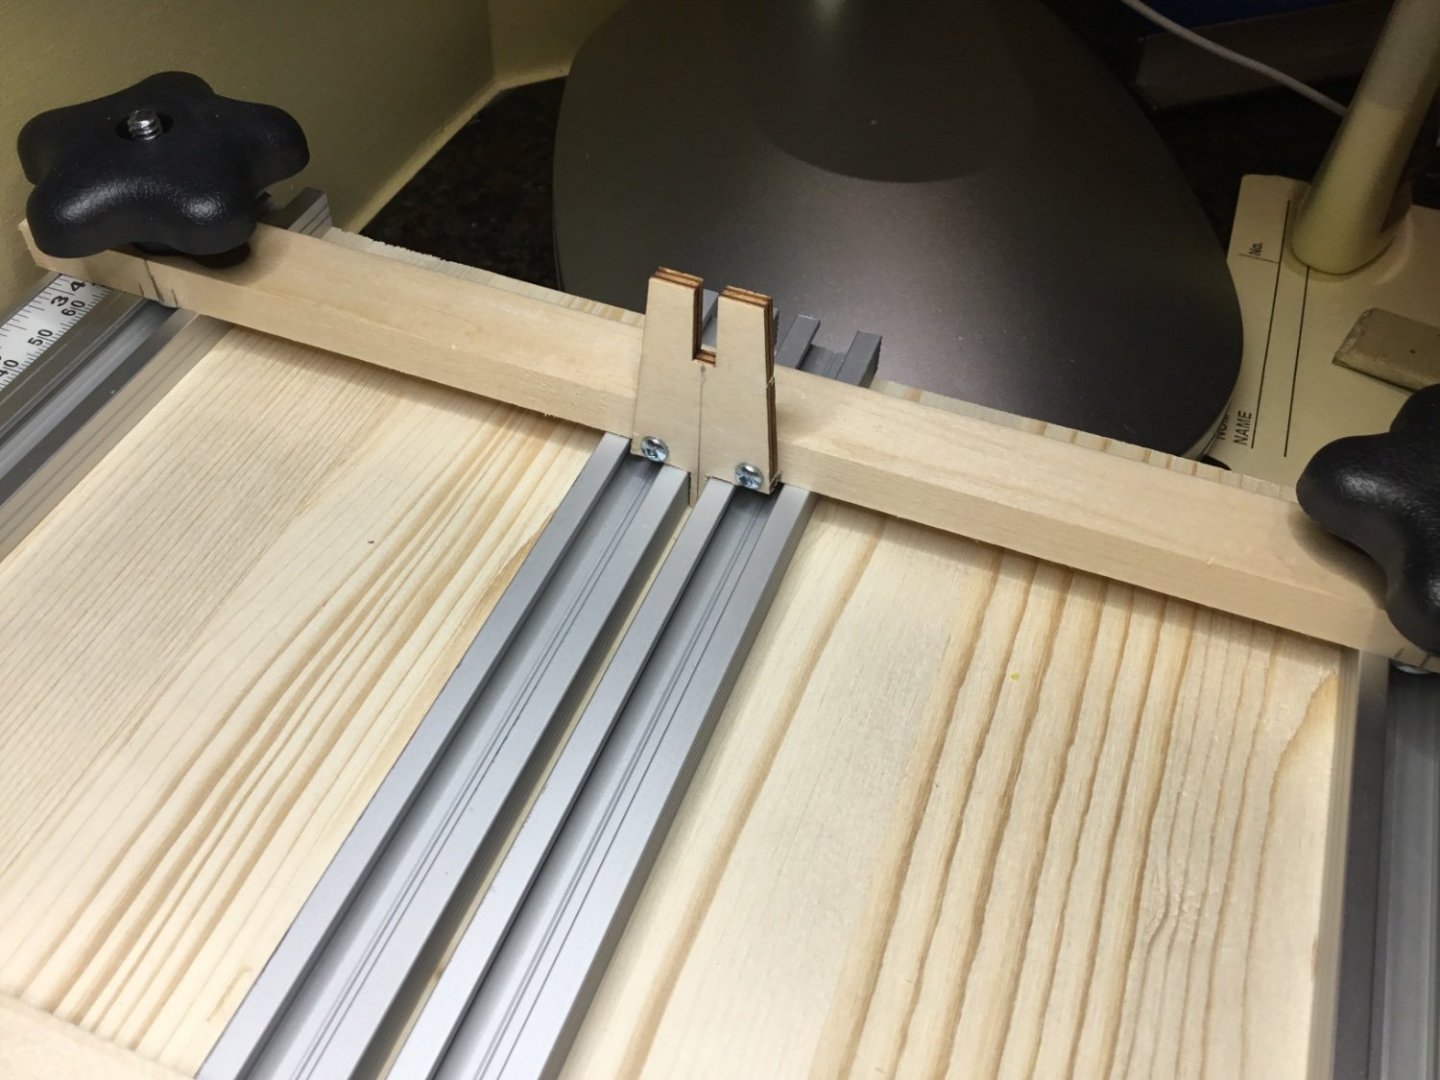
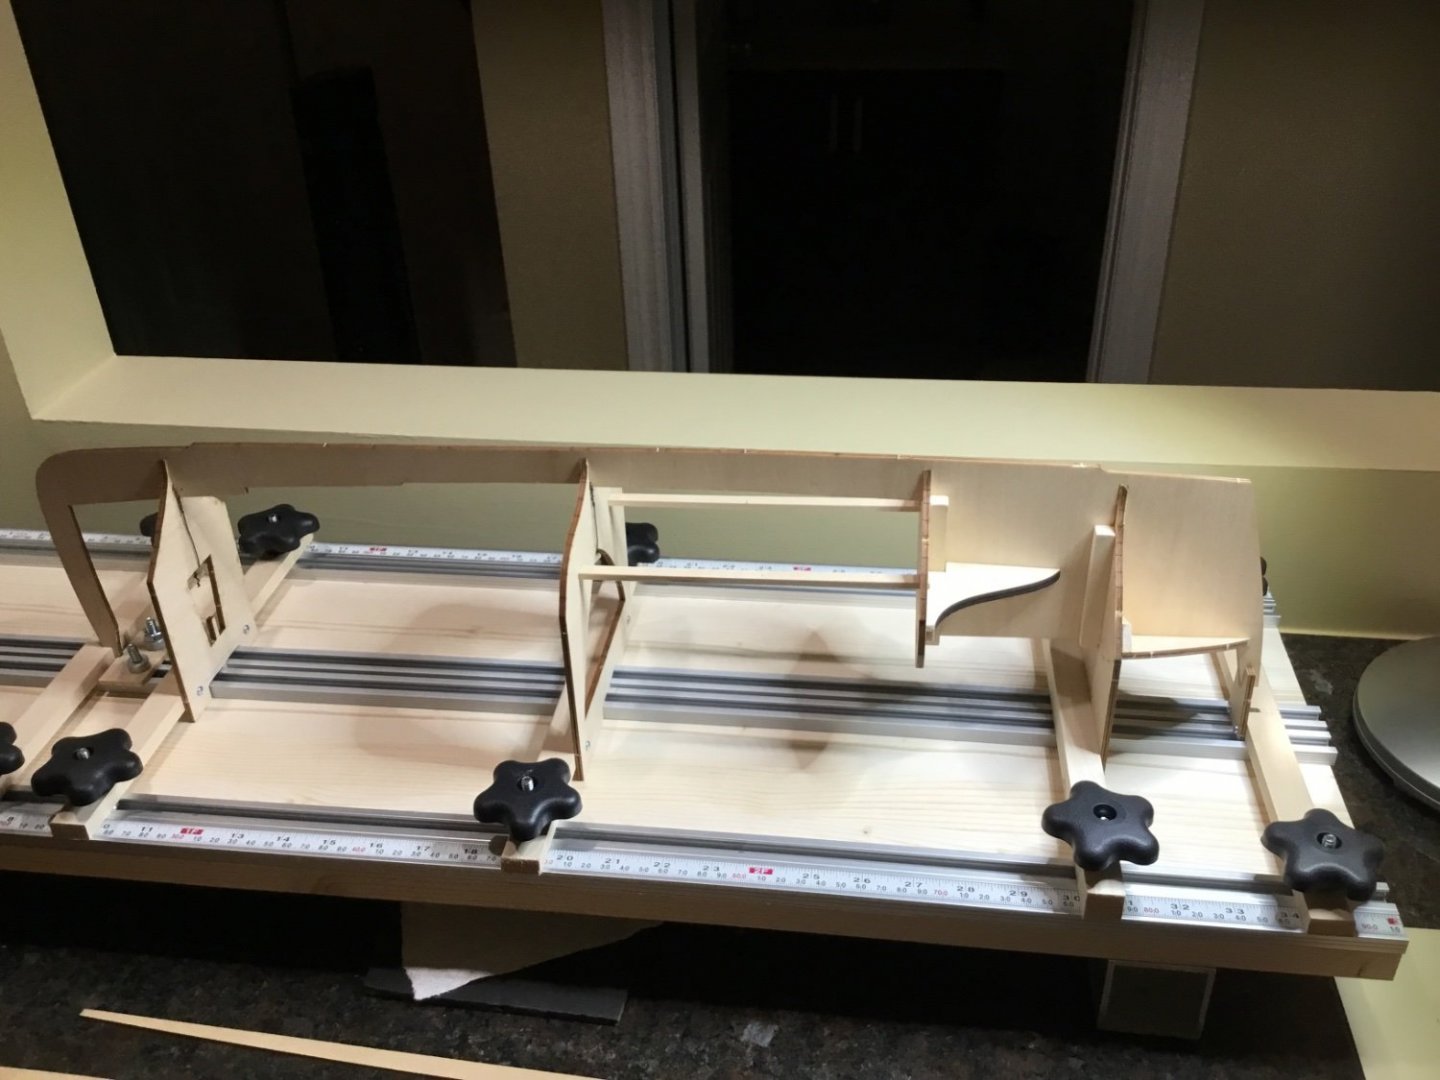
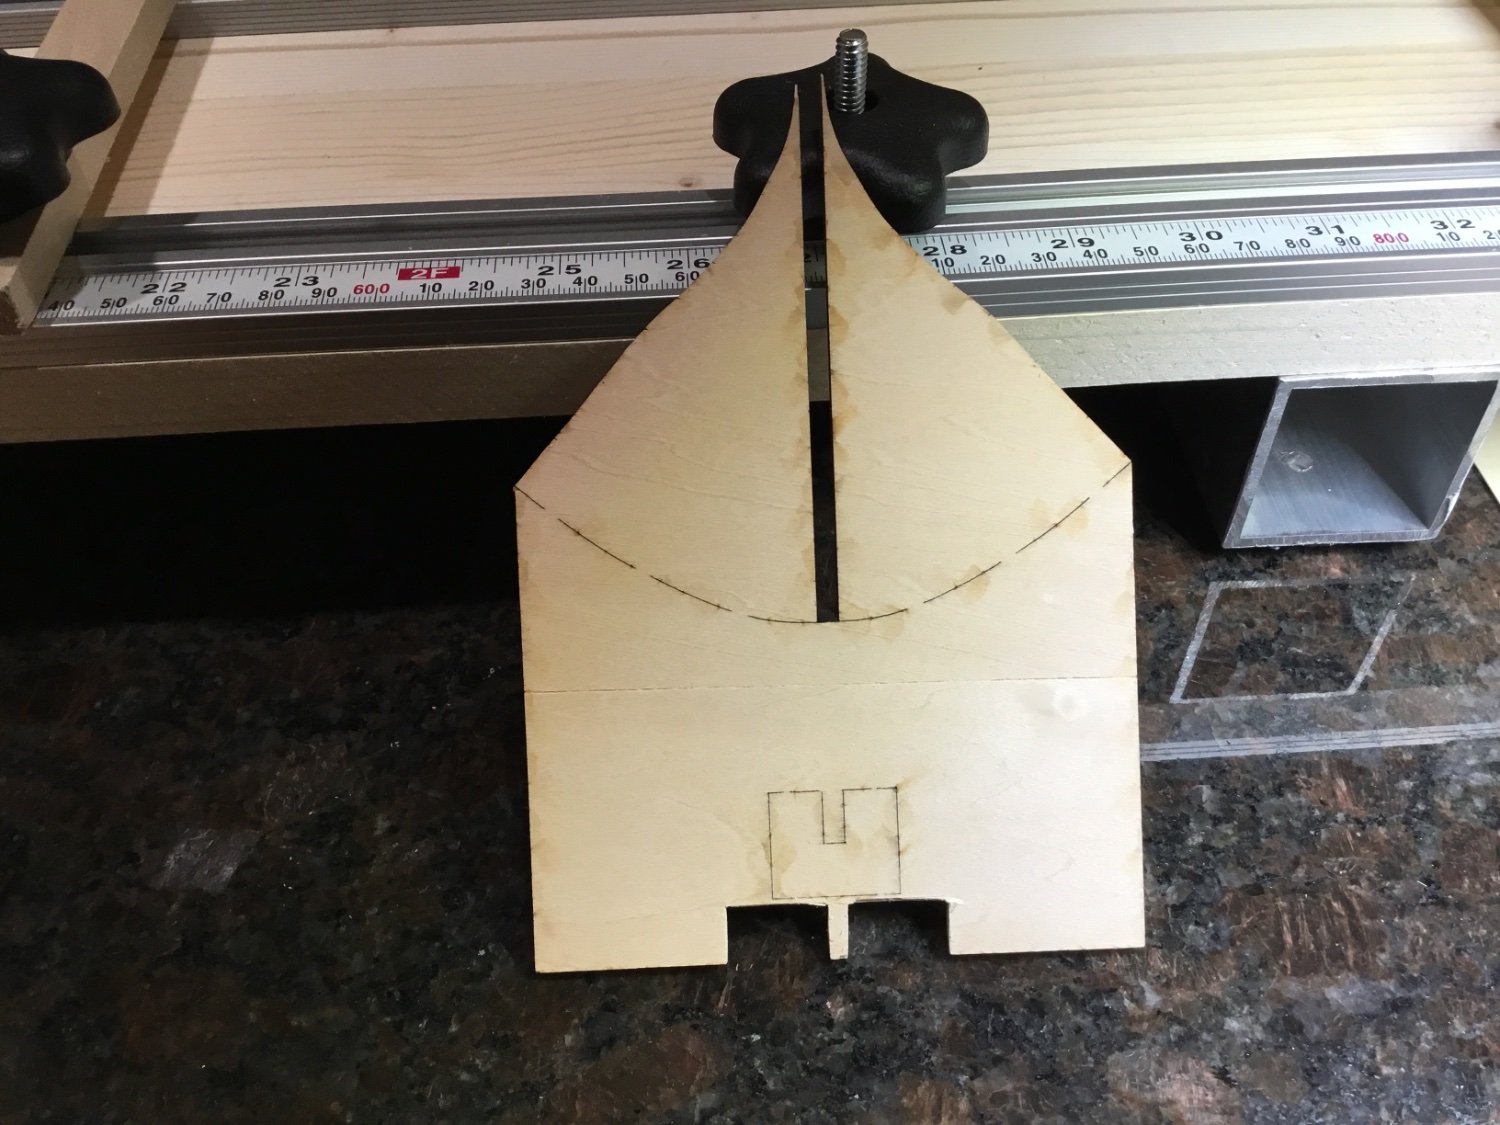
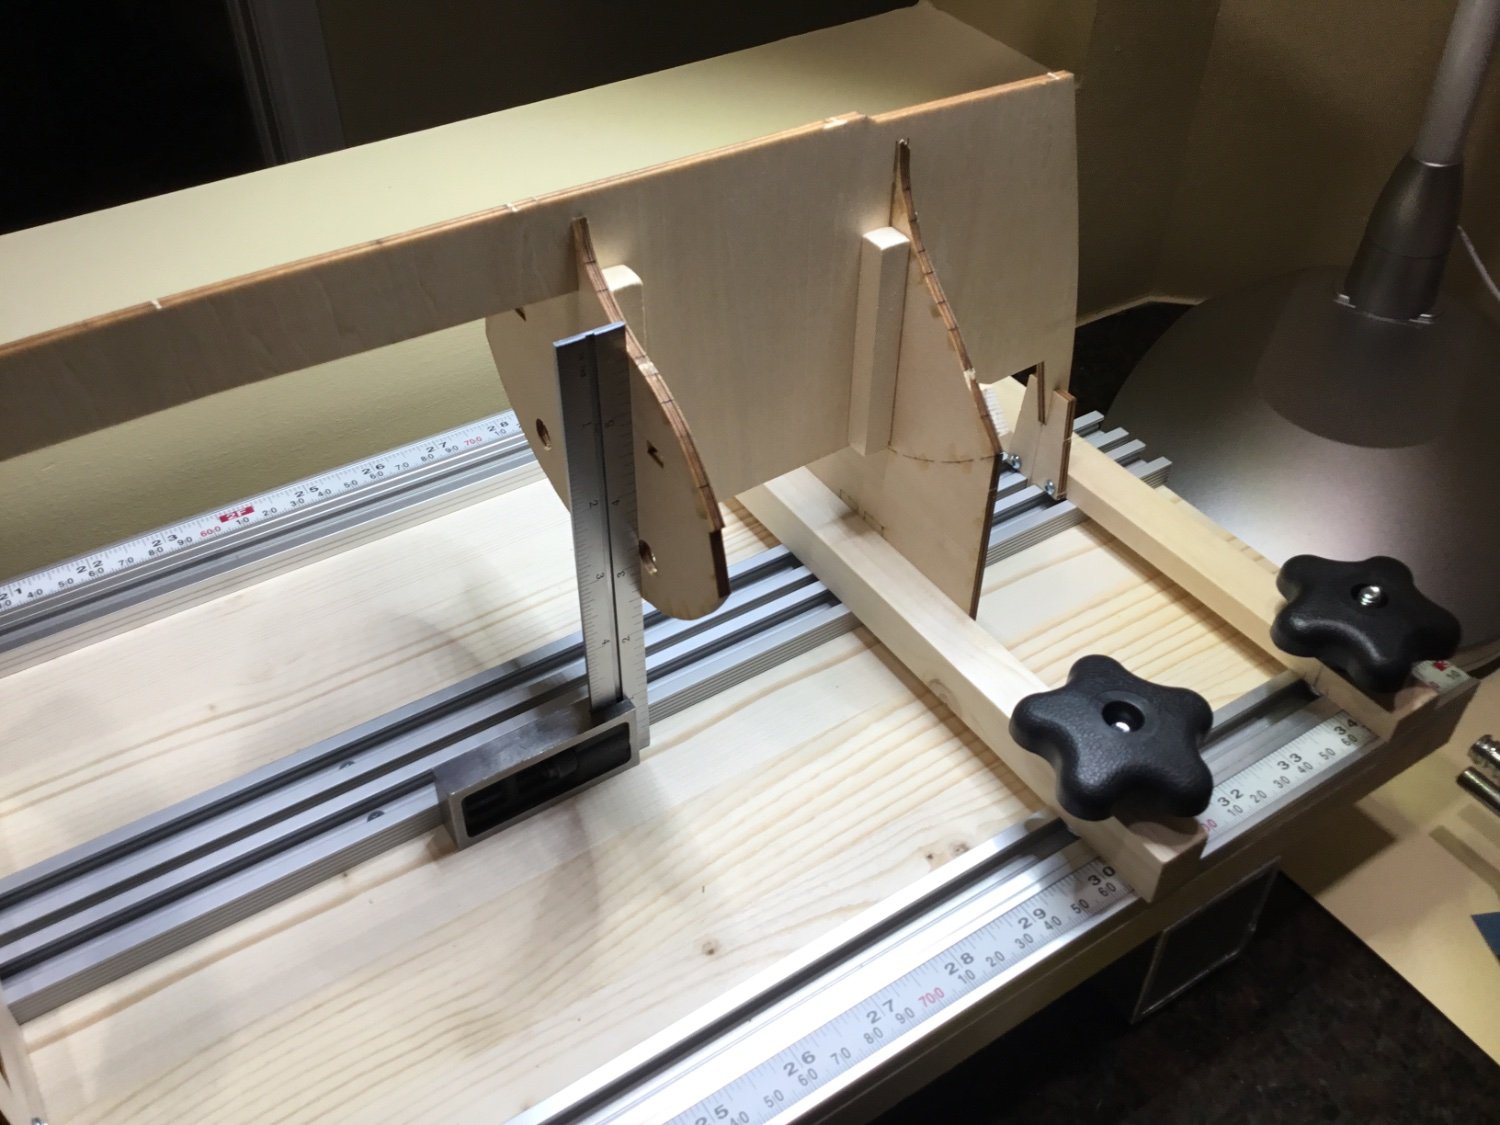
Because the two center channels are proud of the board the frames have to be notched. The notch also keeps the frame centered.
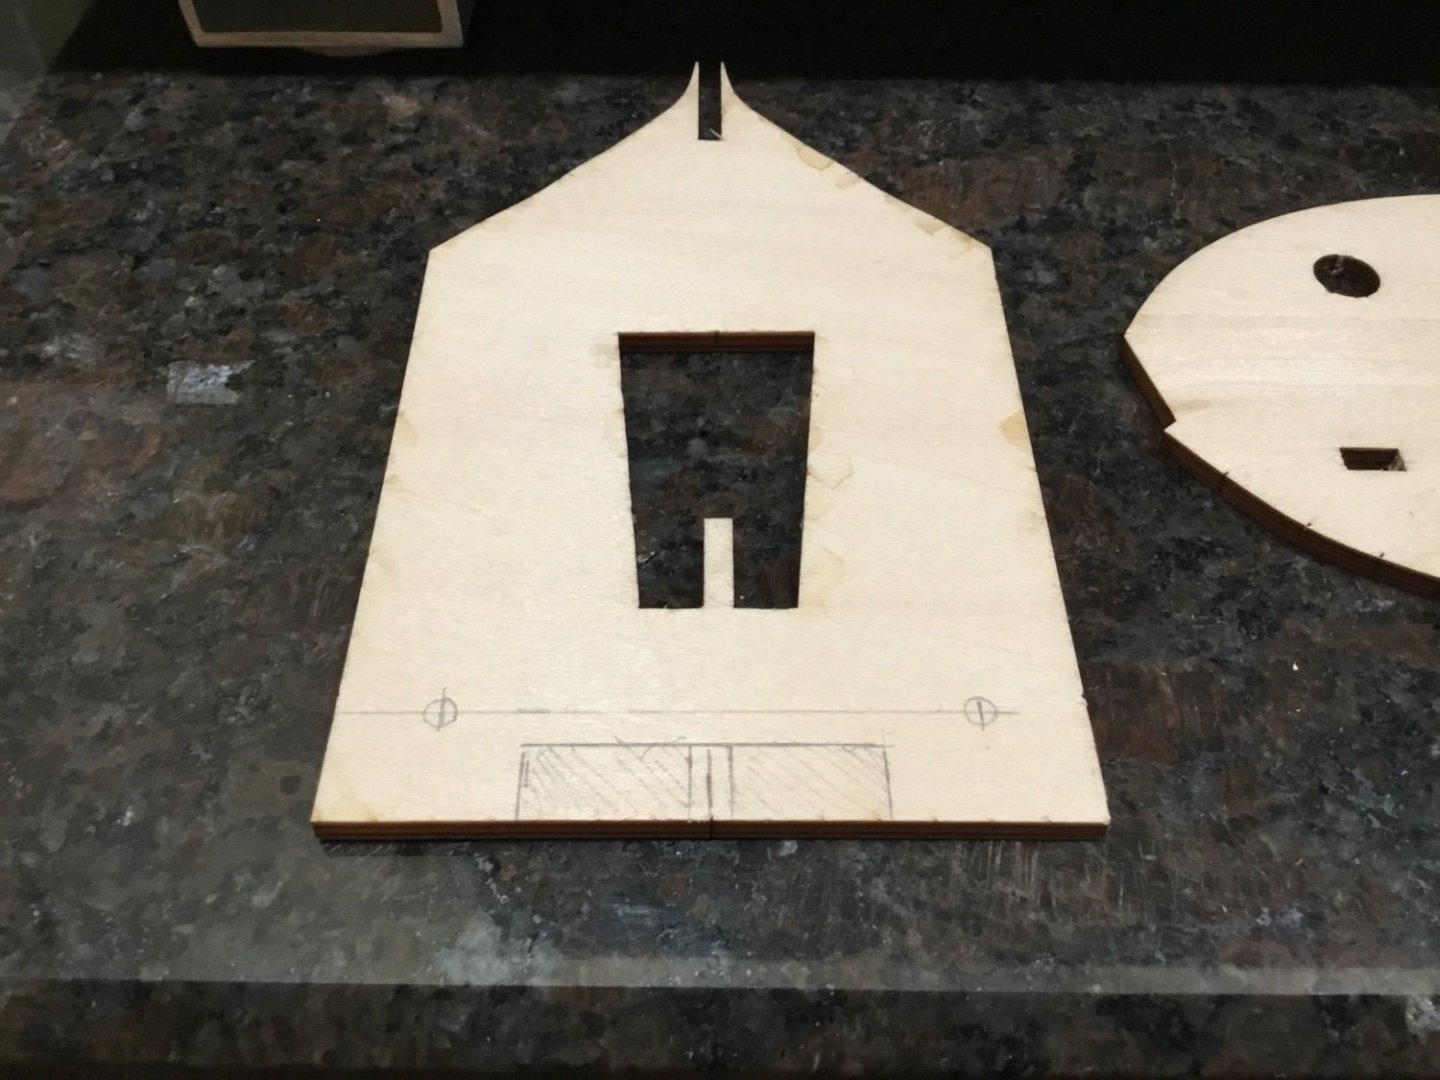

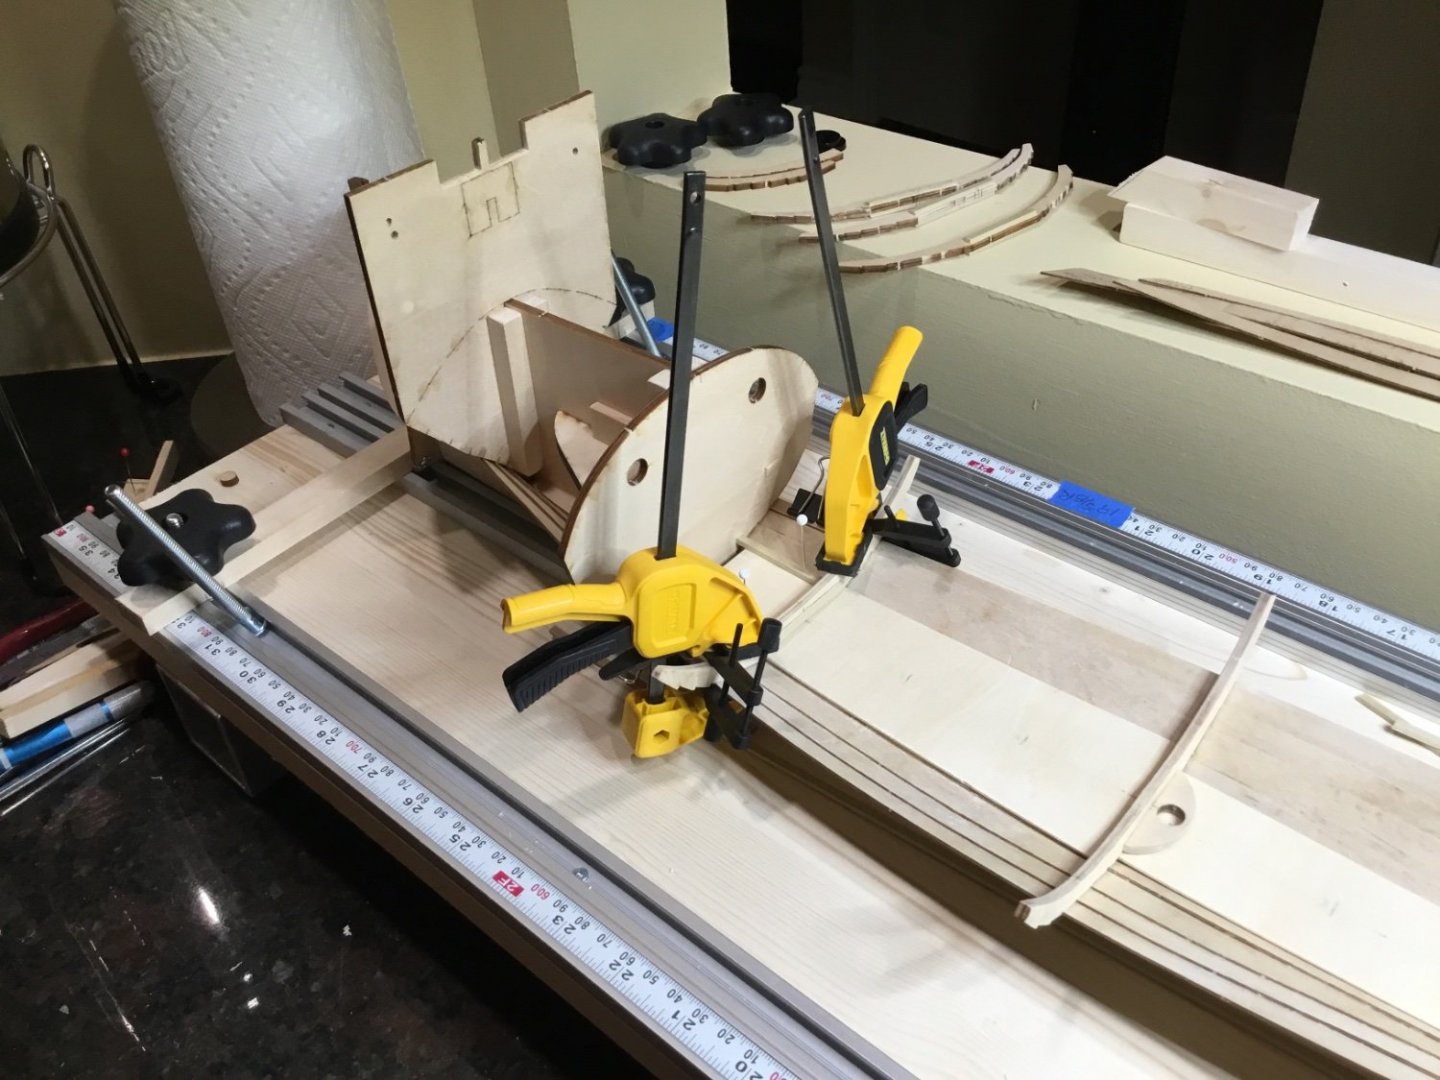
I didn’t need the piece above the notches so it was not removed. Blocks of wood were glued to the various frames to help with the assembly.


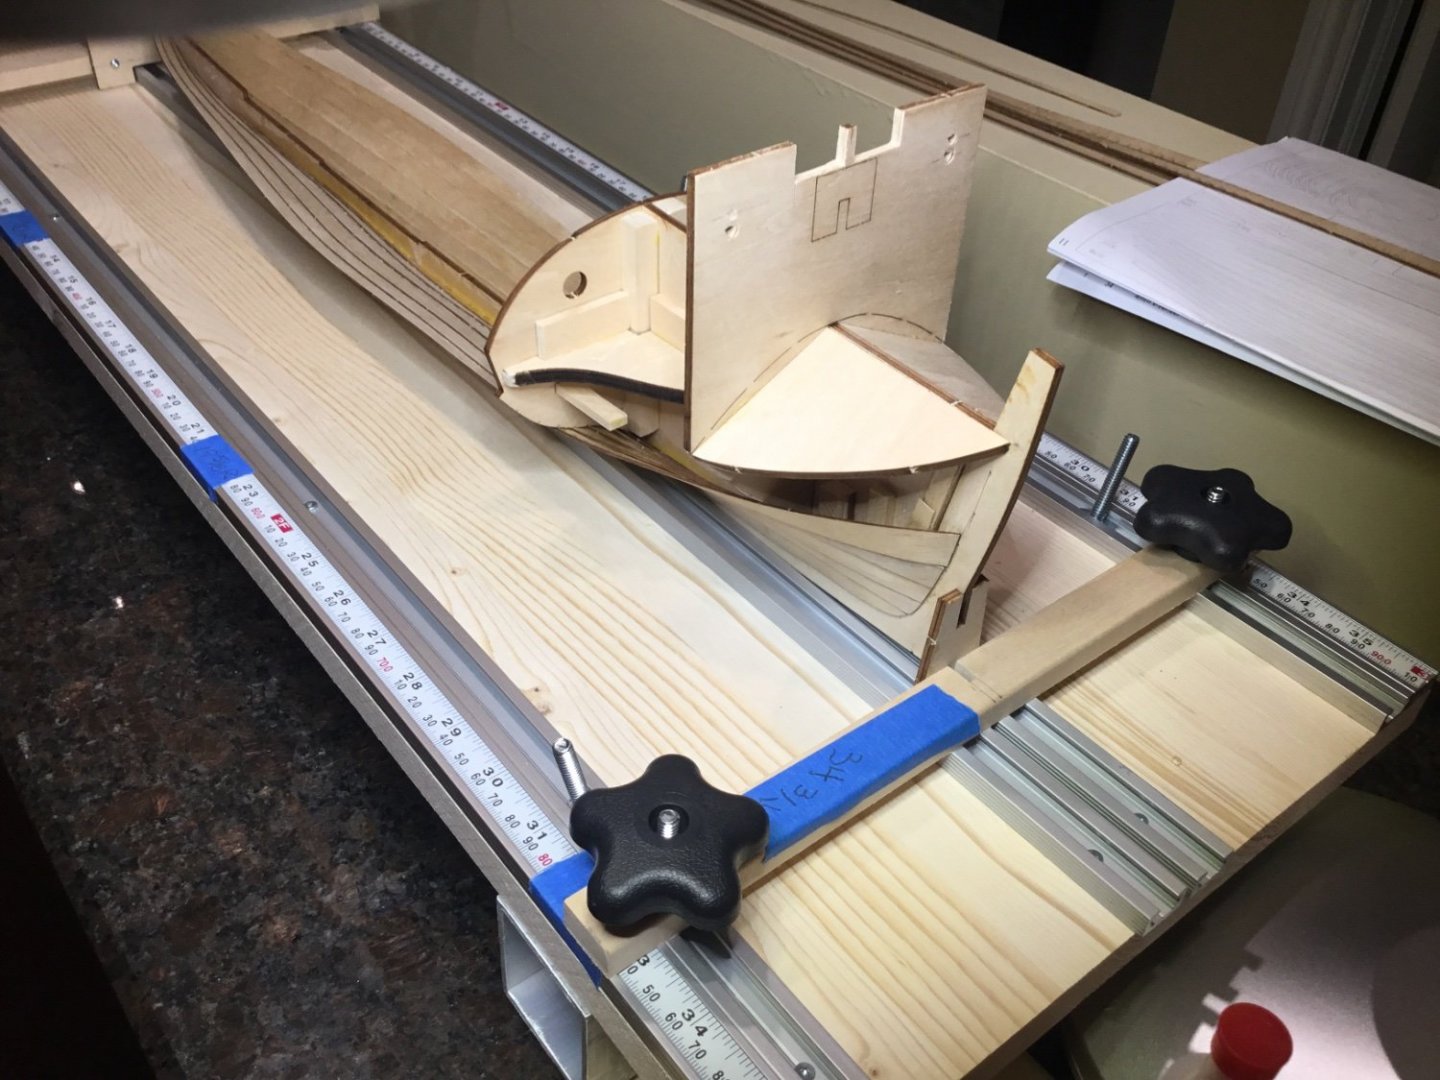
The frames were then screwed to the crosspieces.
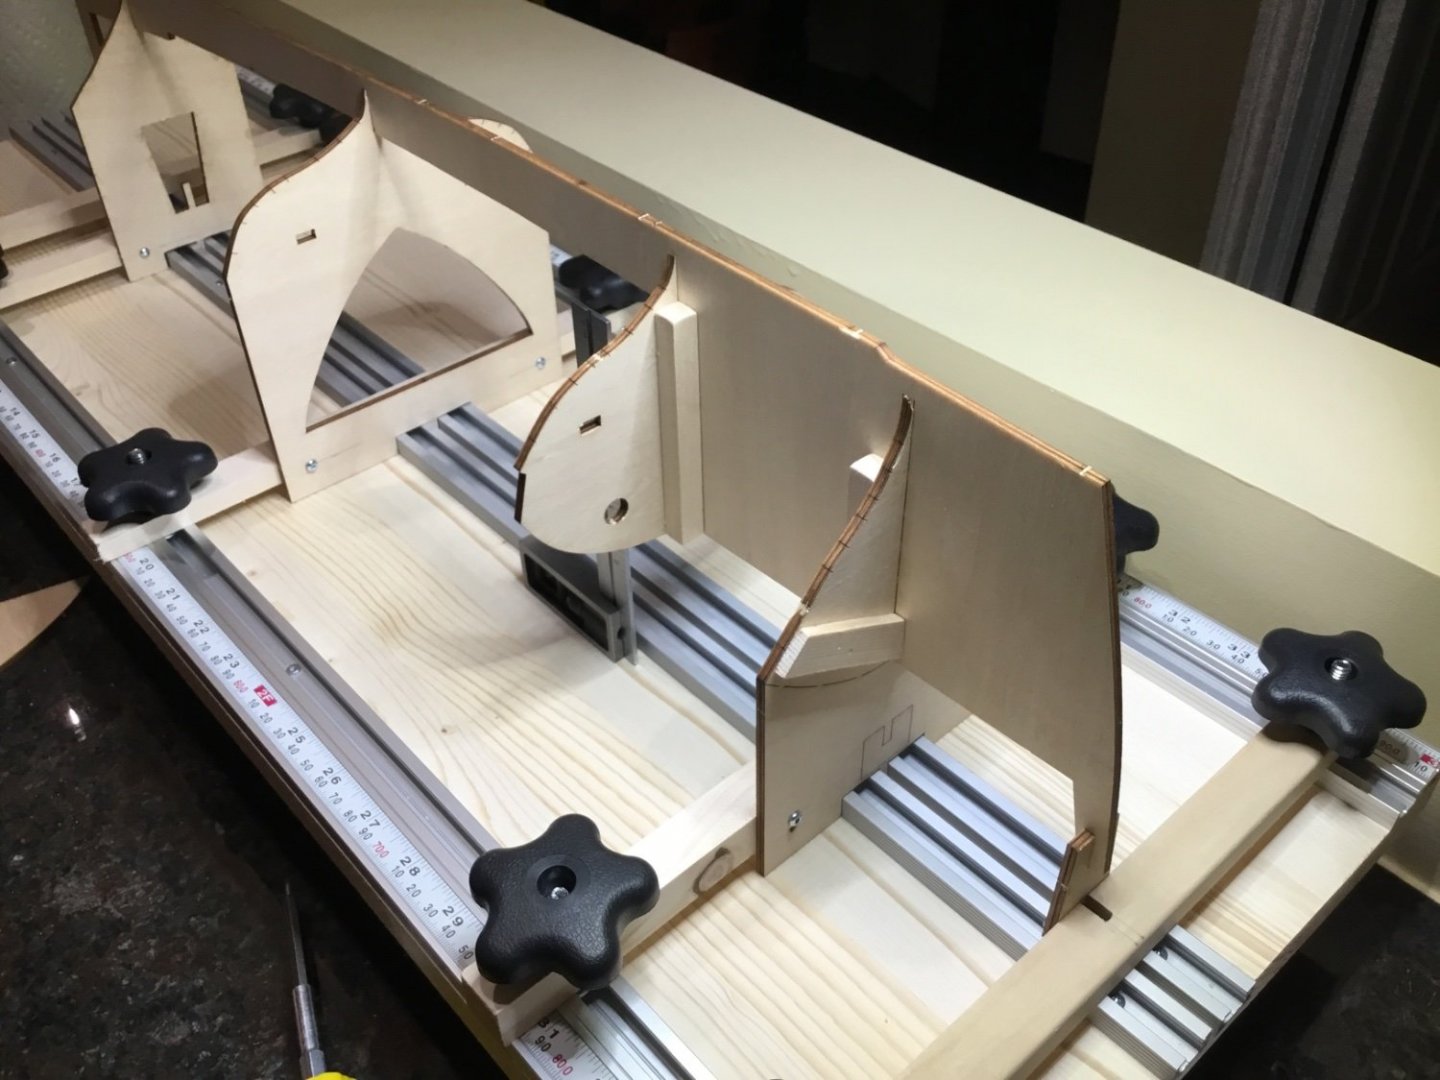


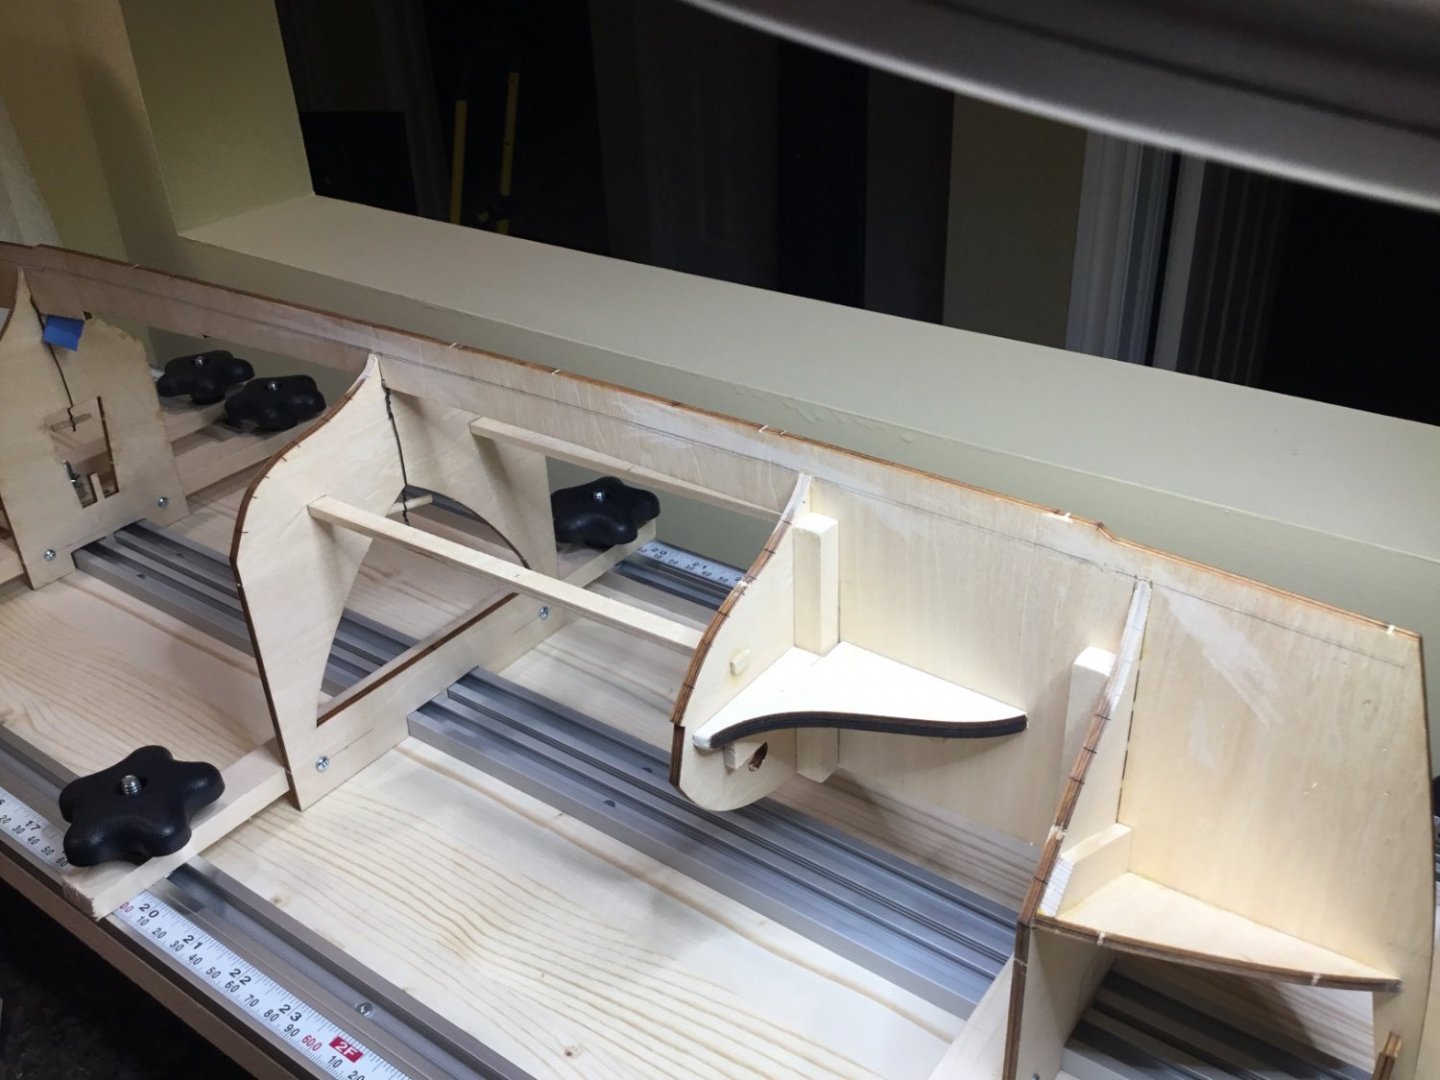
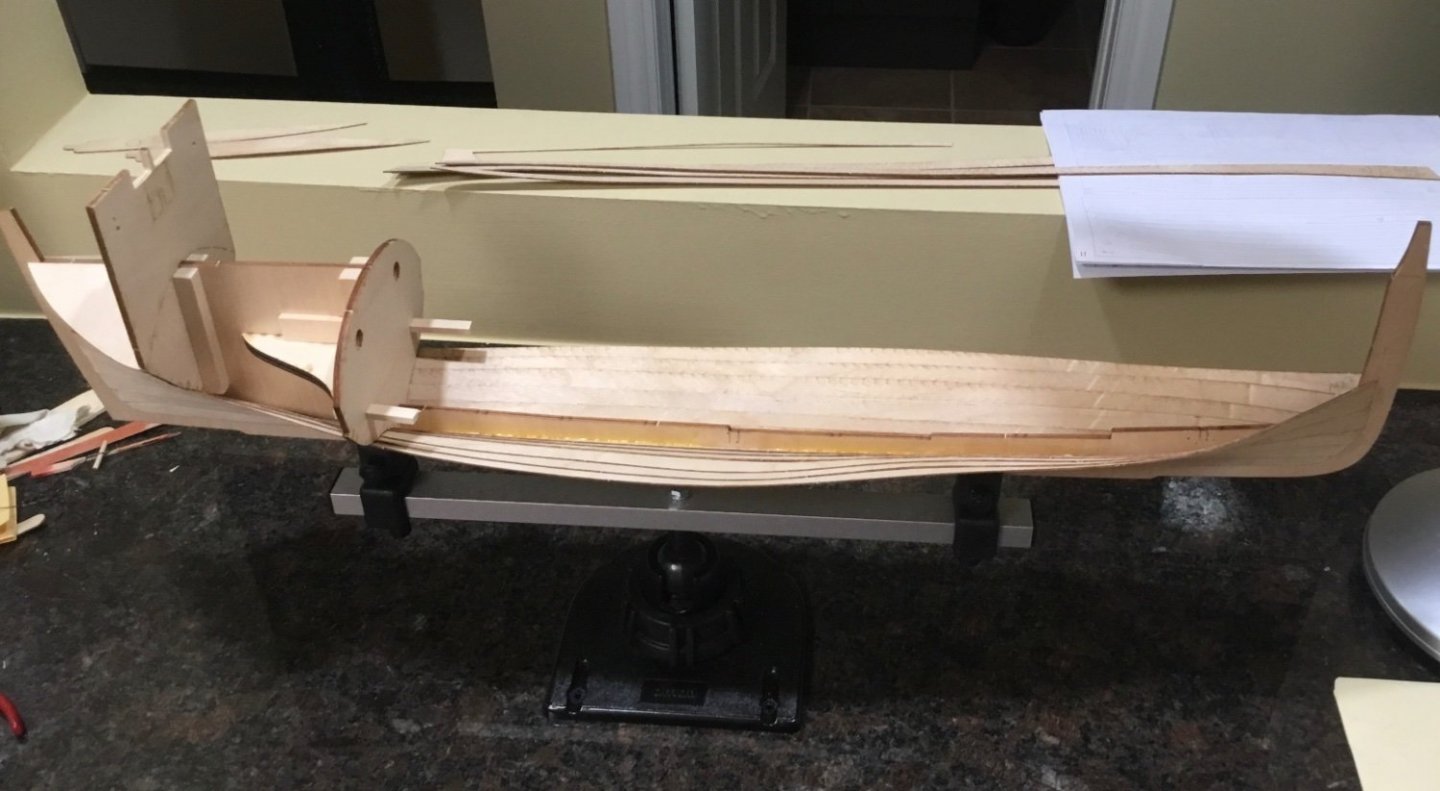
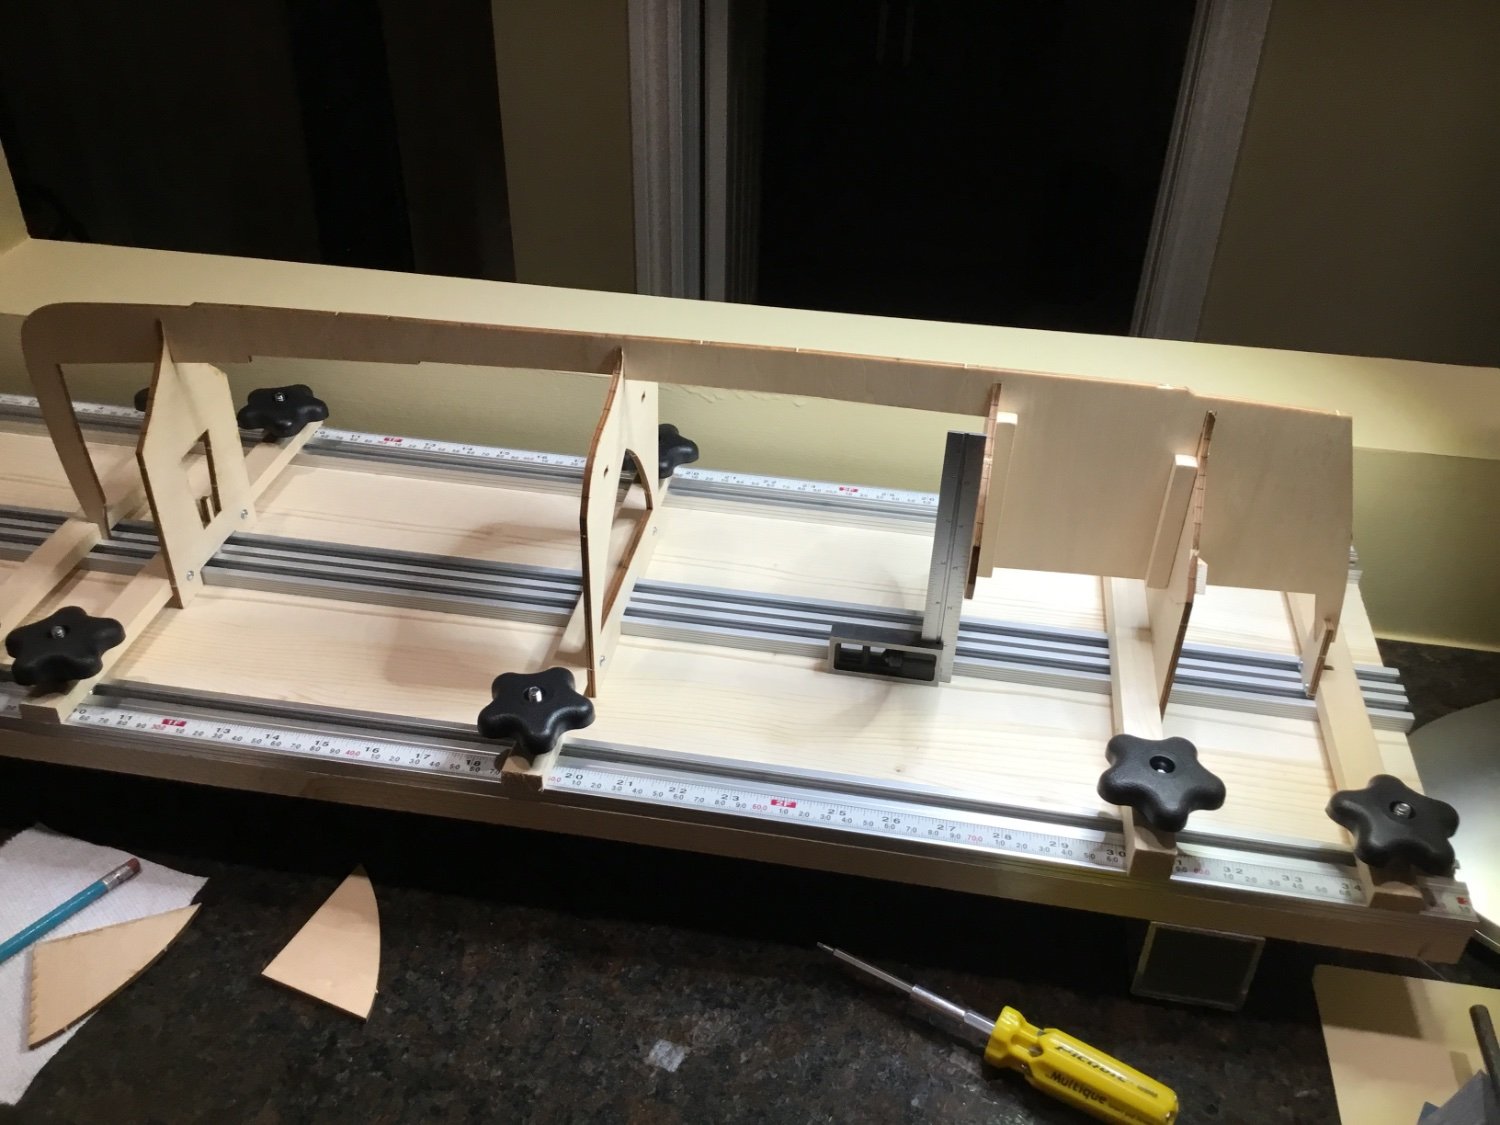
Used some pieces from Cheerful’s carrier sheet to support the front of the cabin.
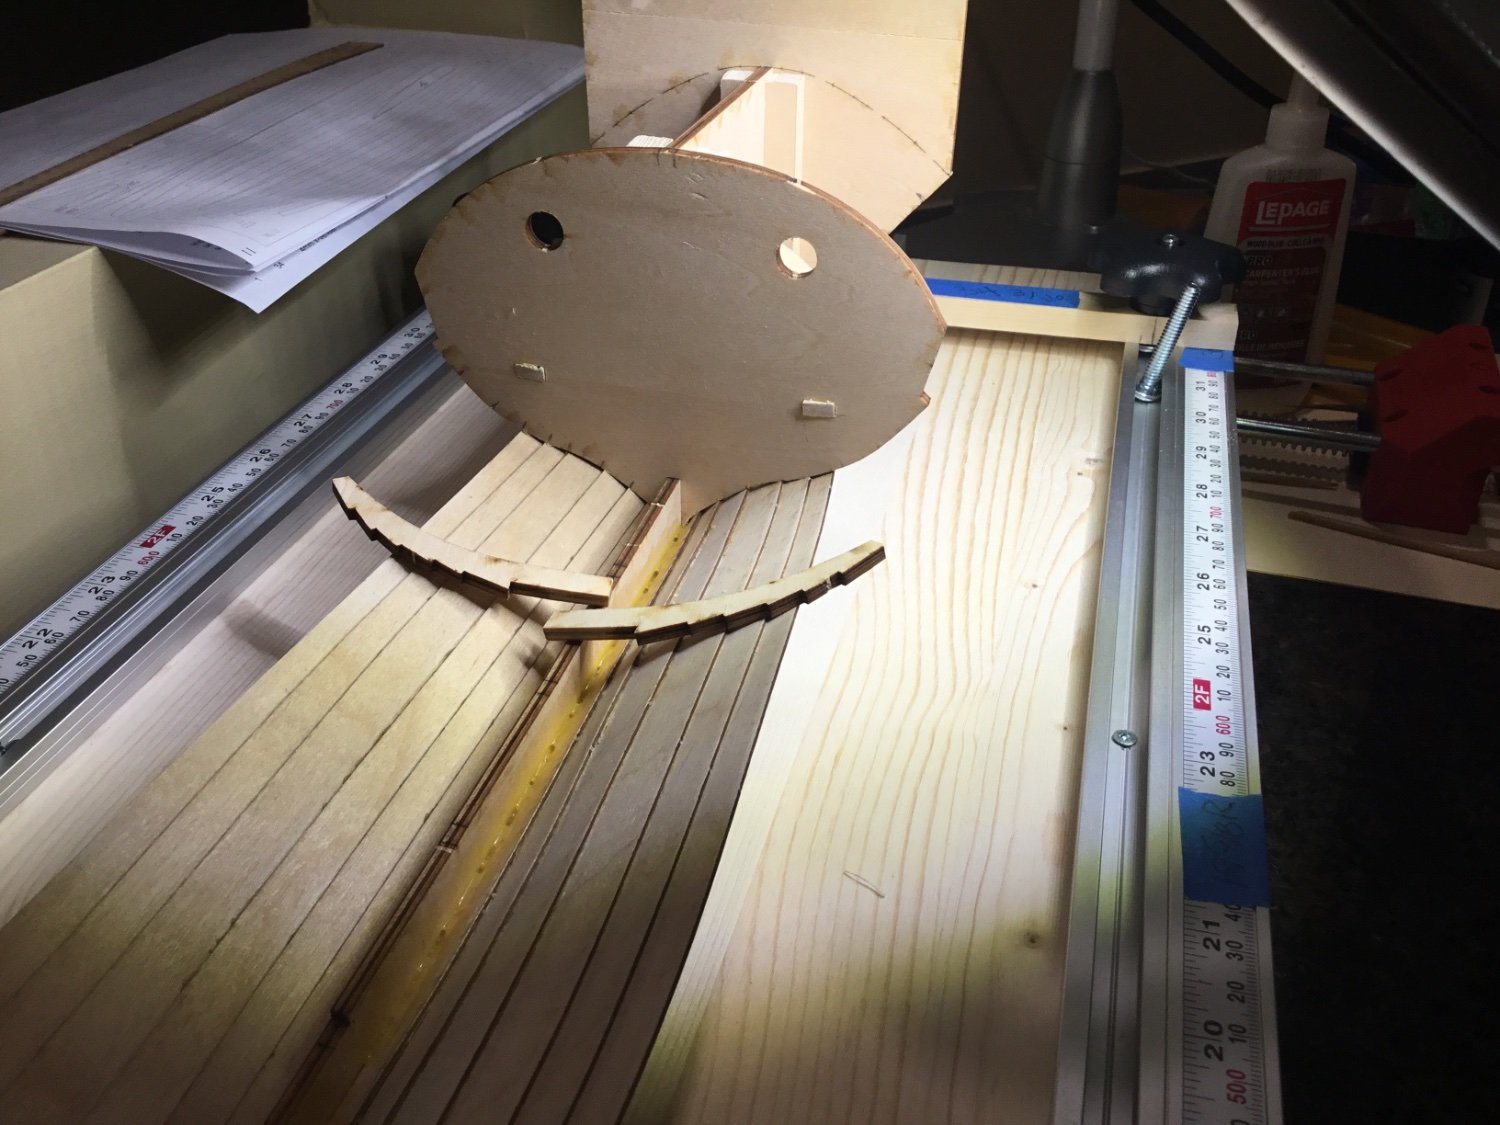
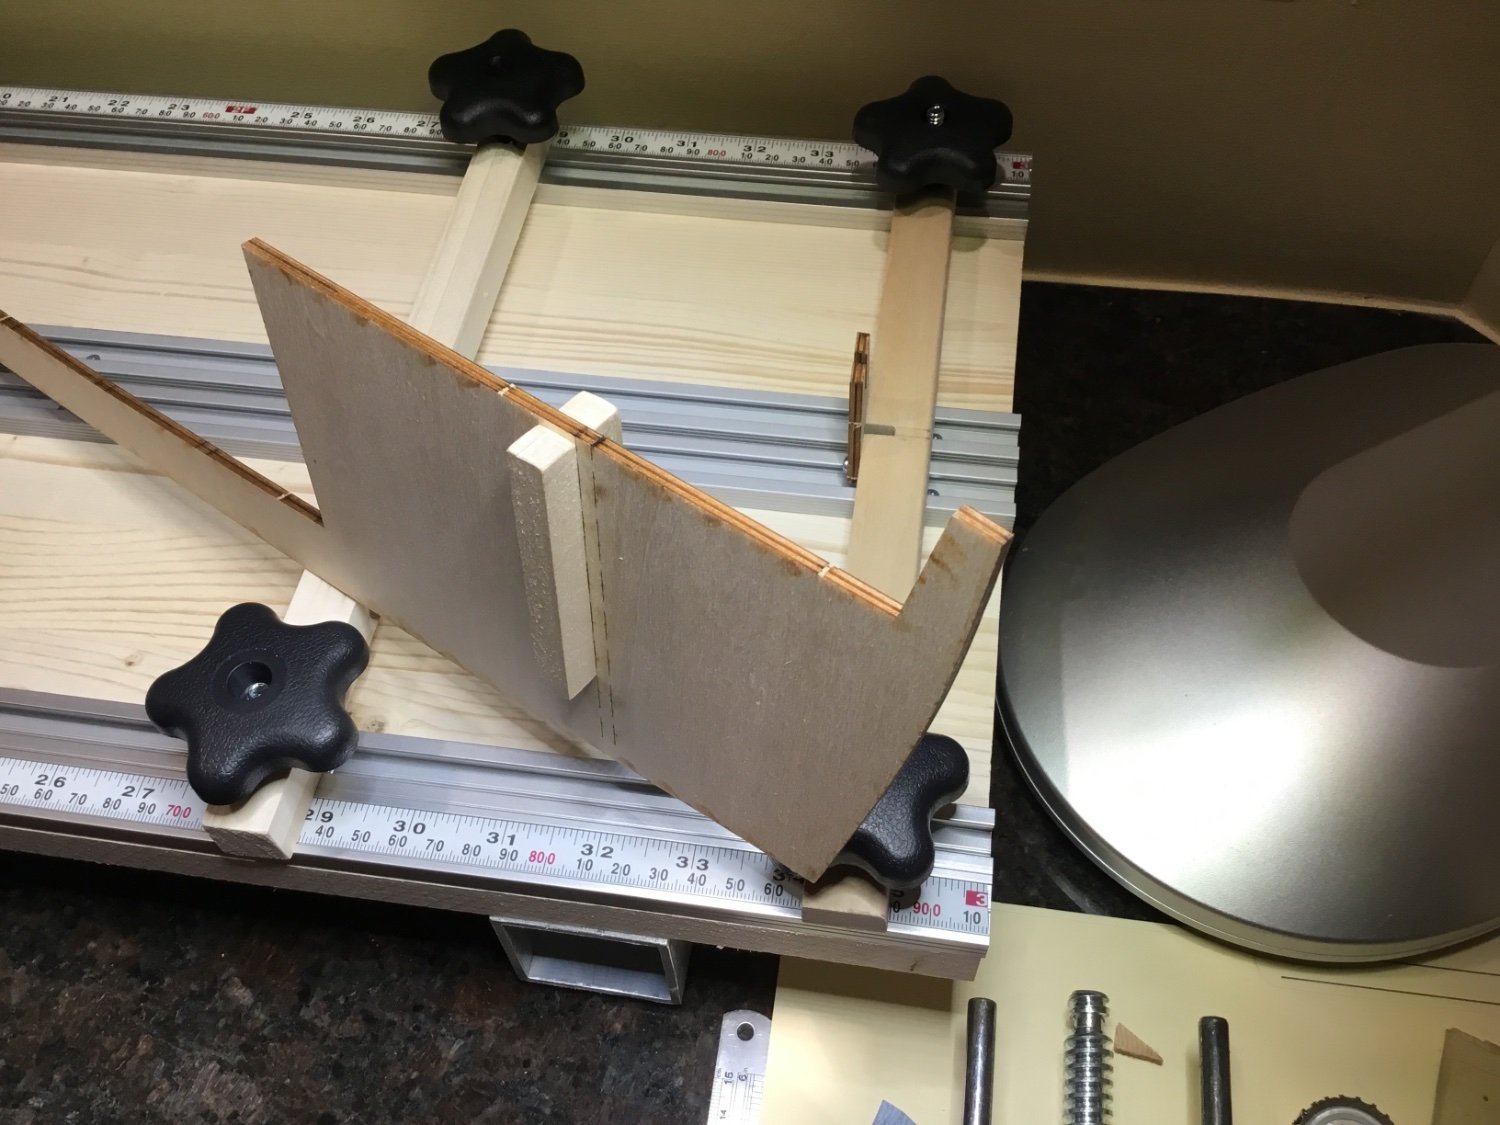
Glued in the kit supplied strips that support the frames.
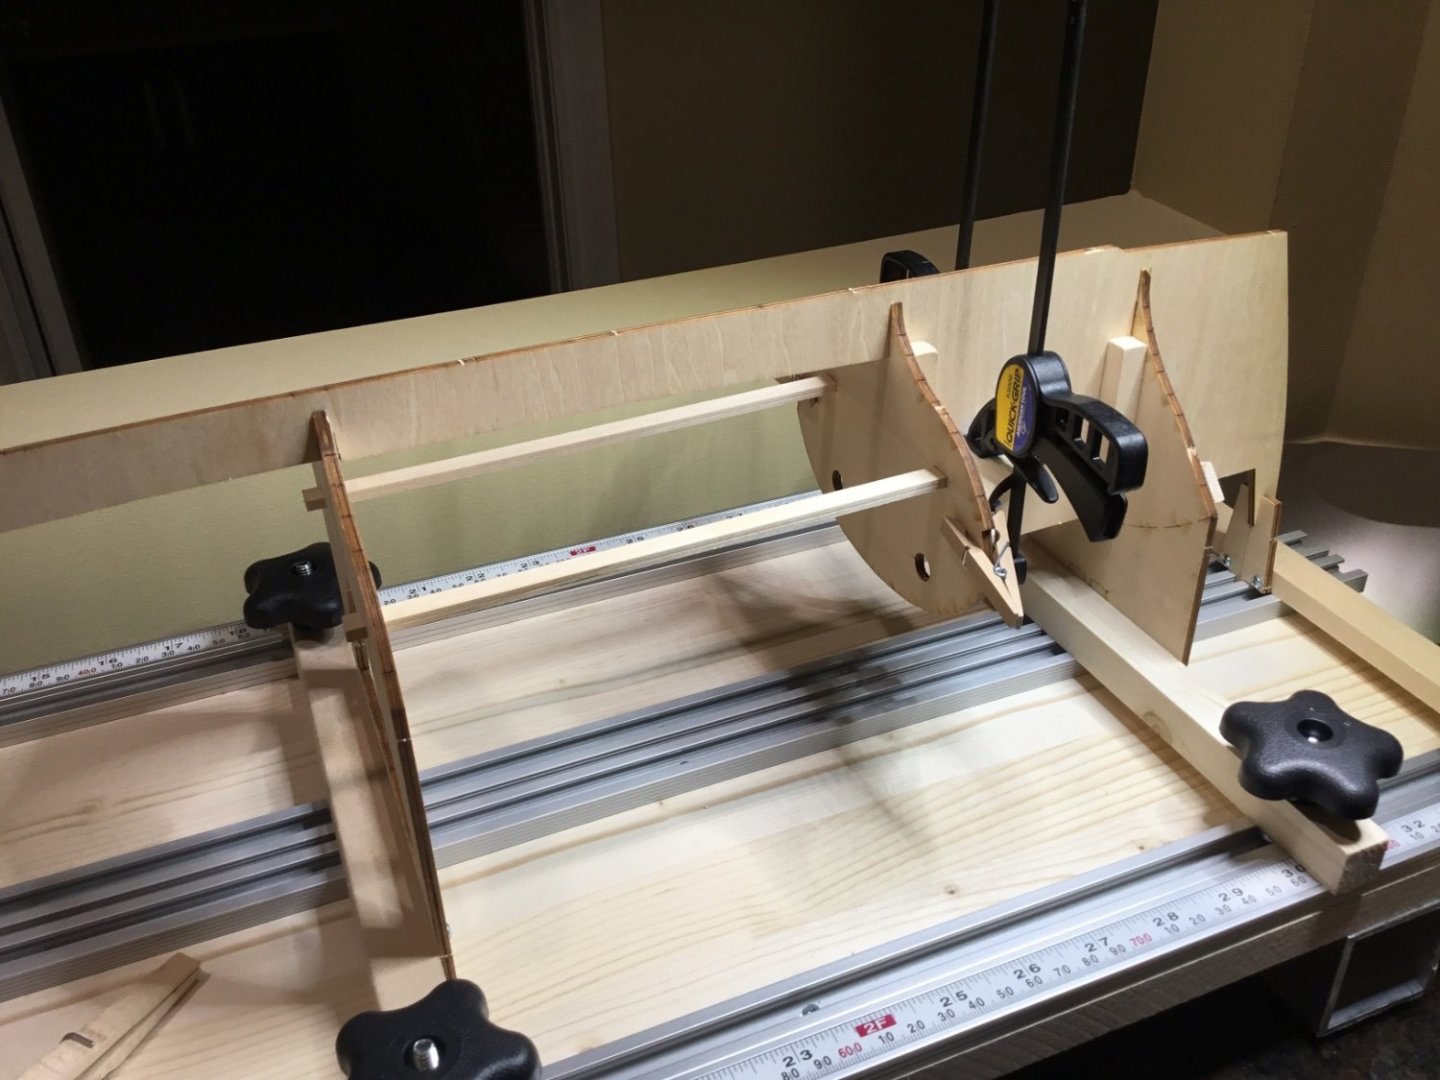
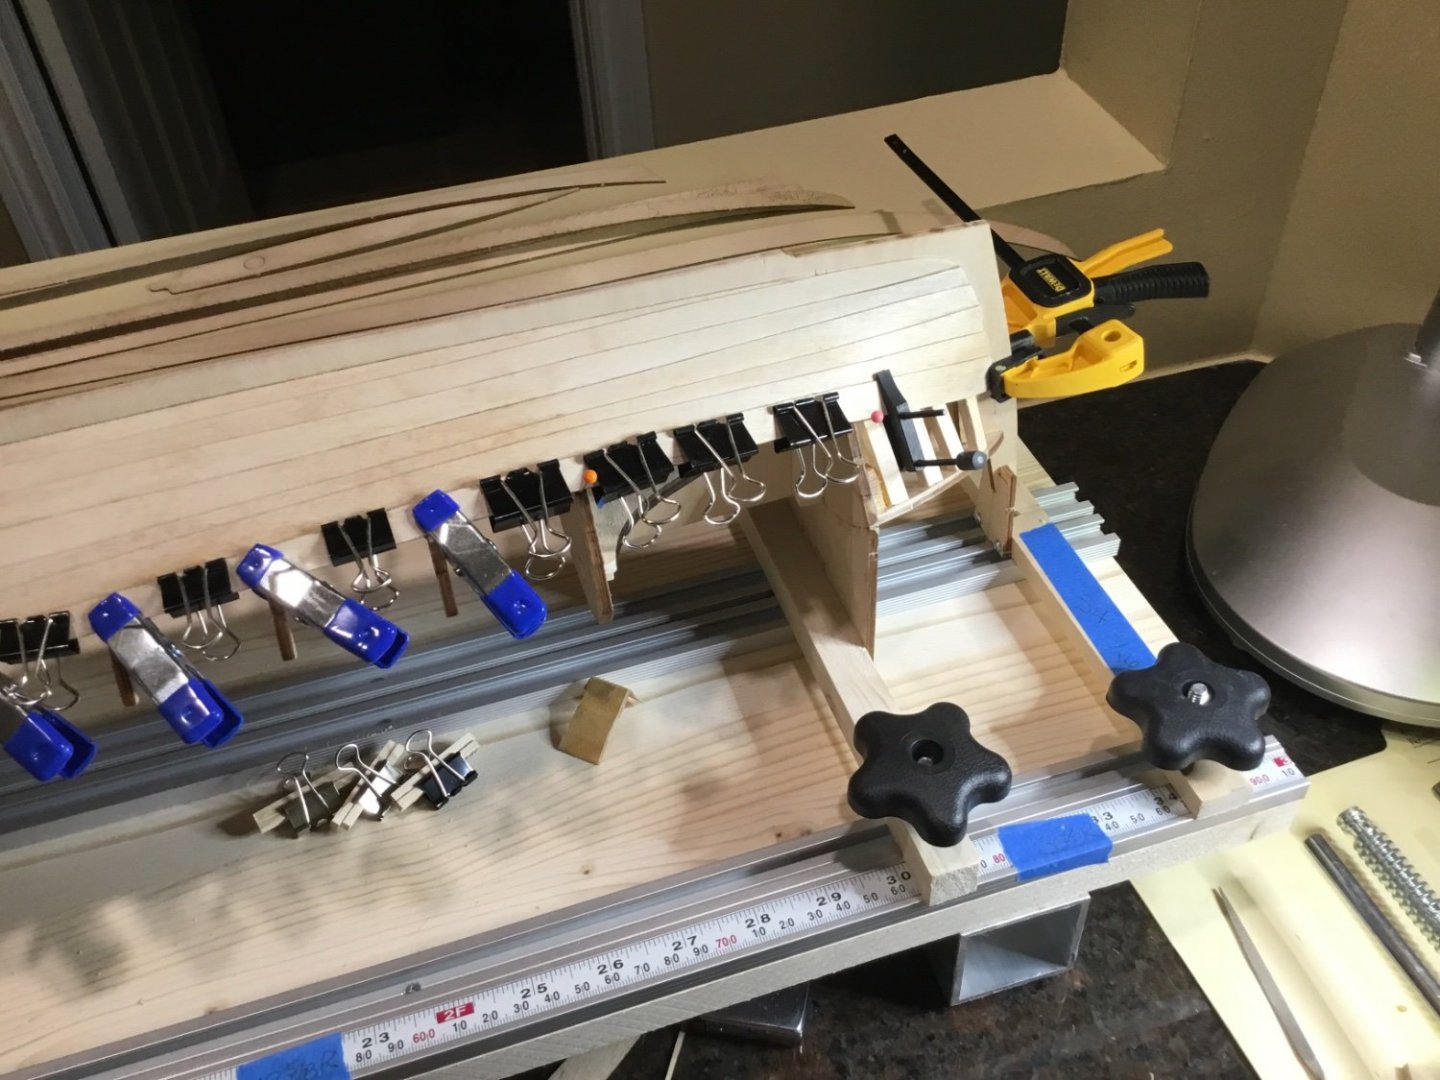
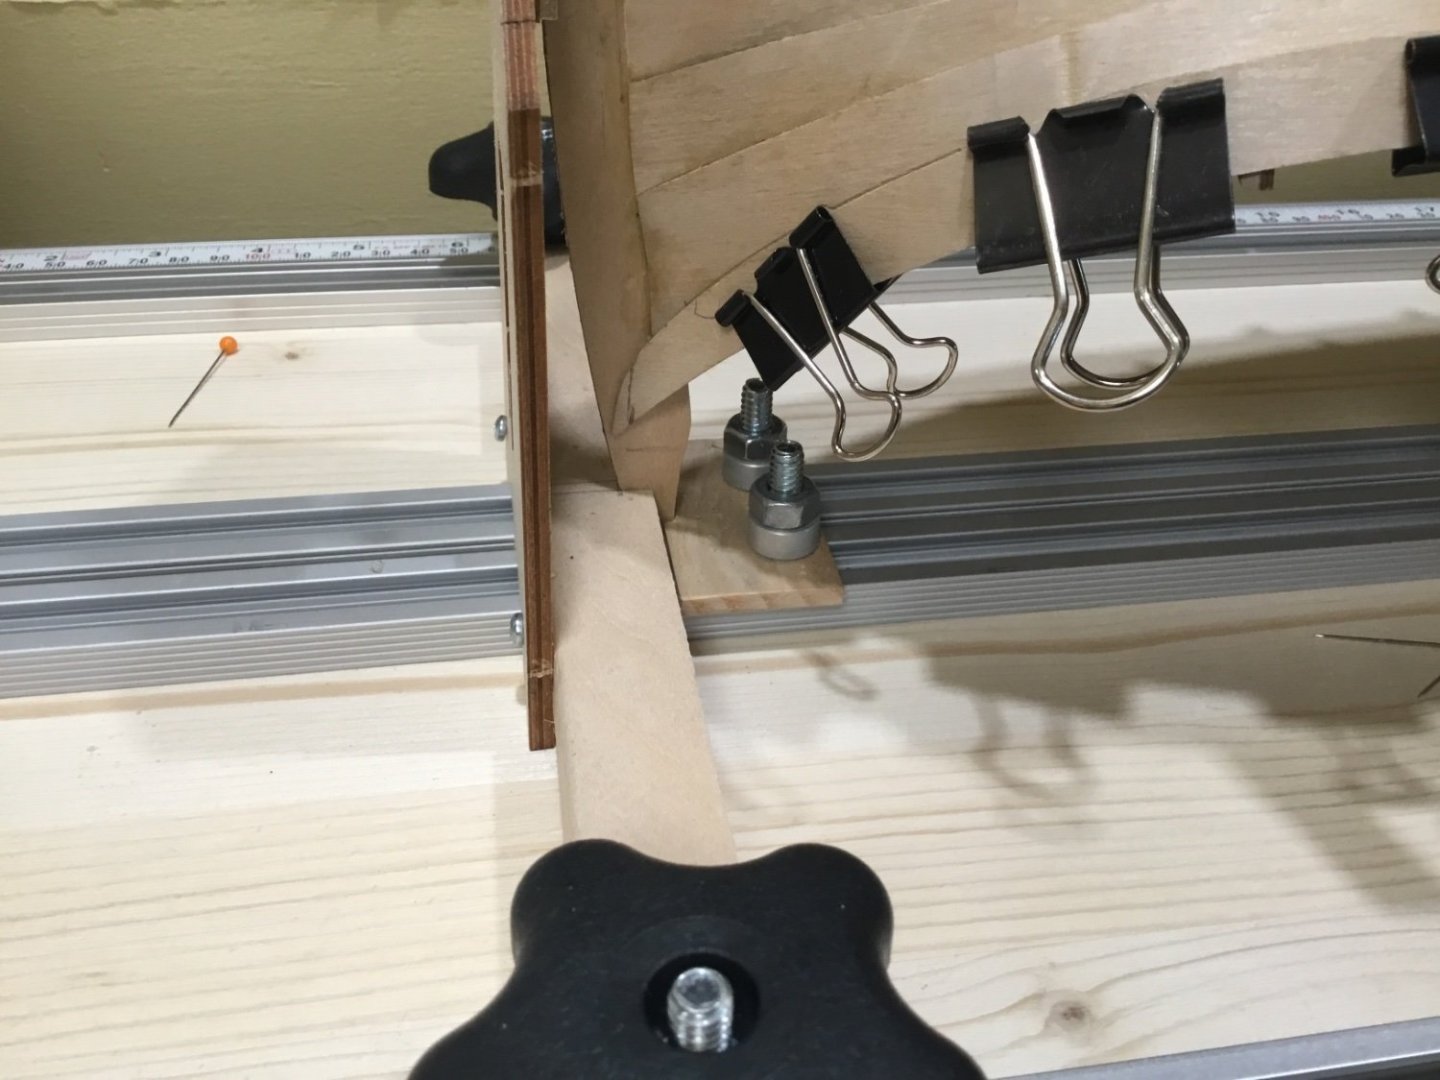
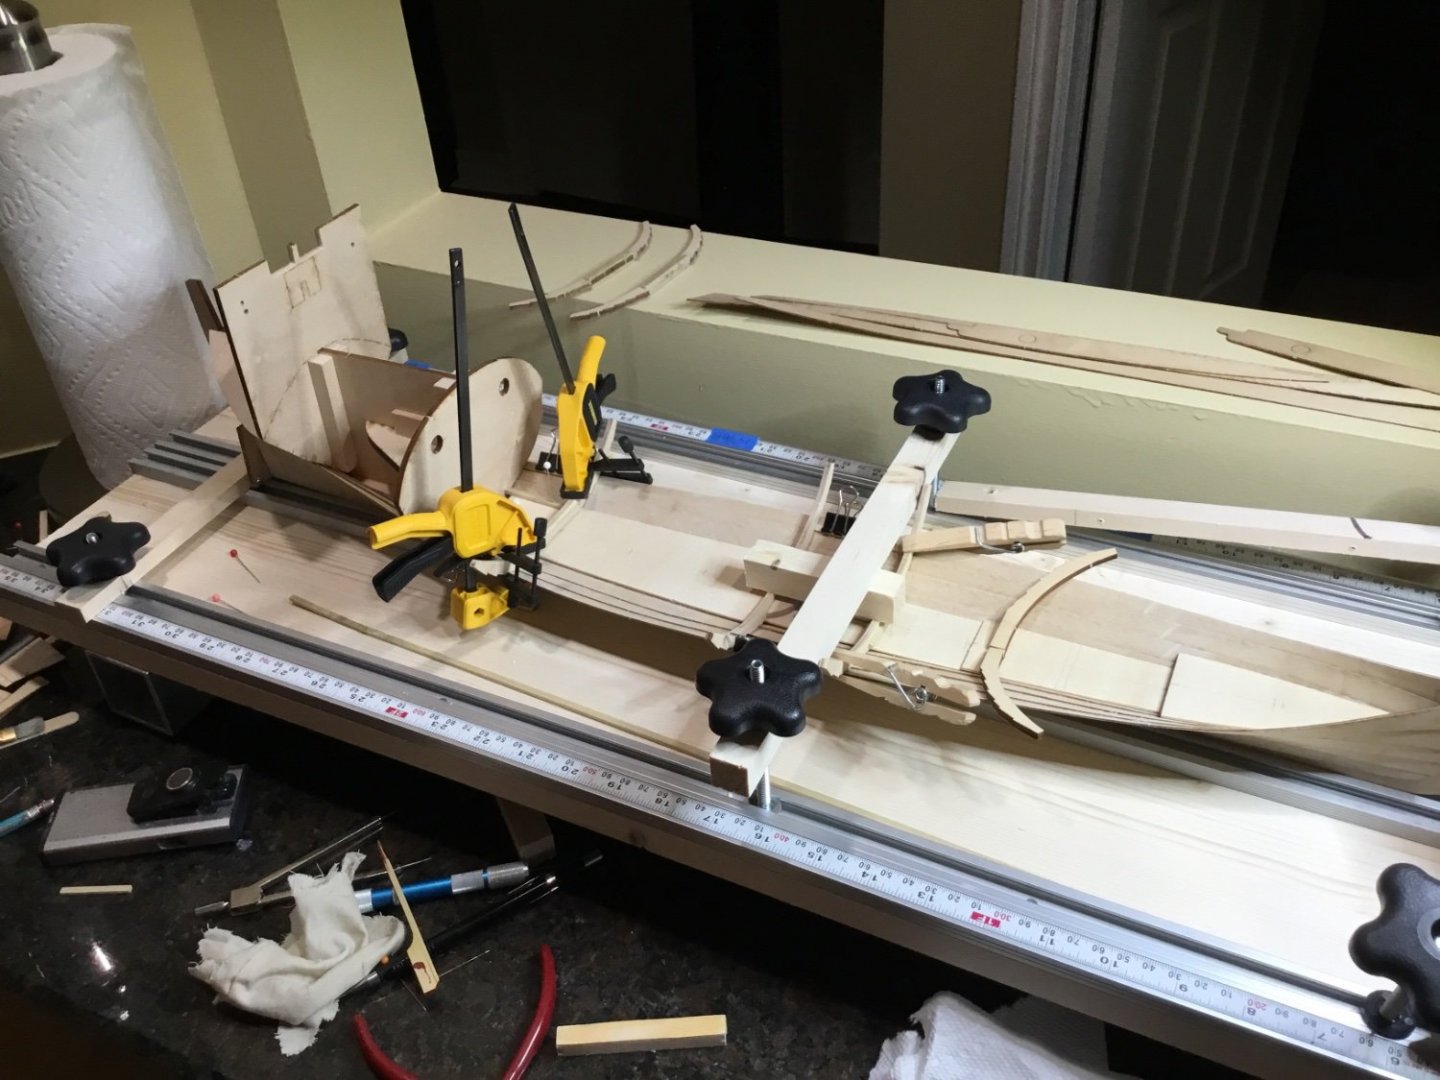
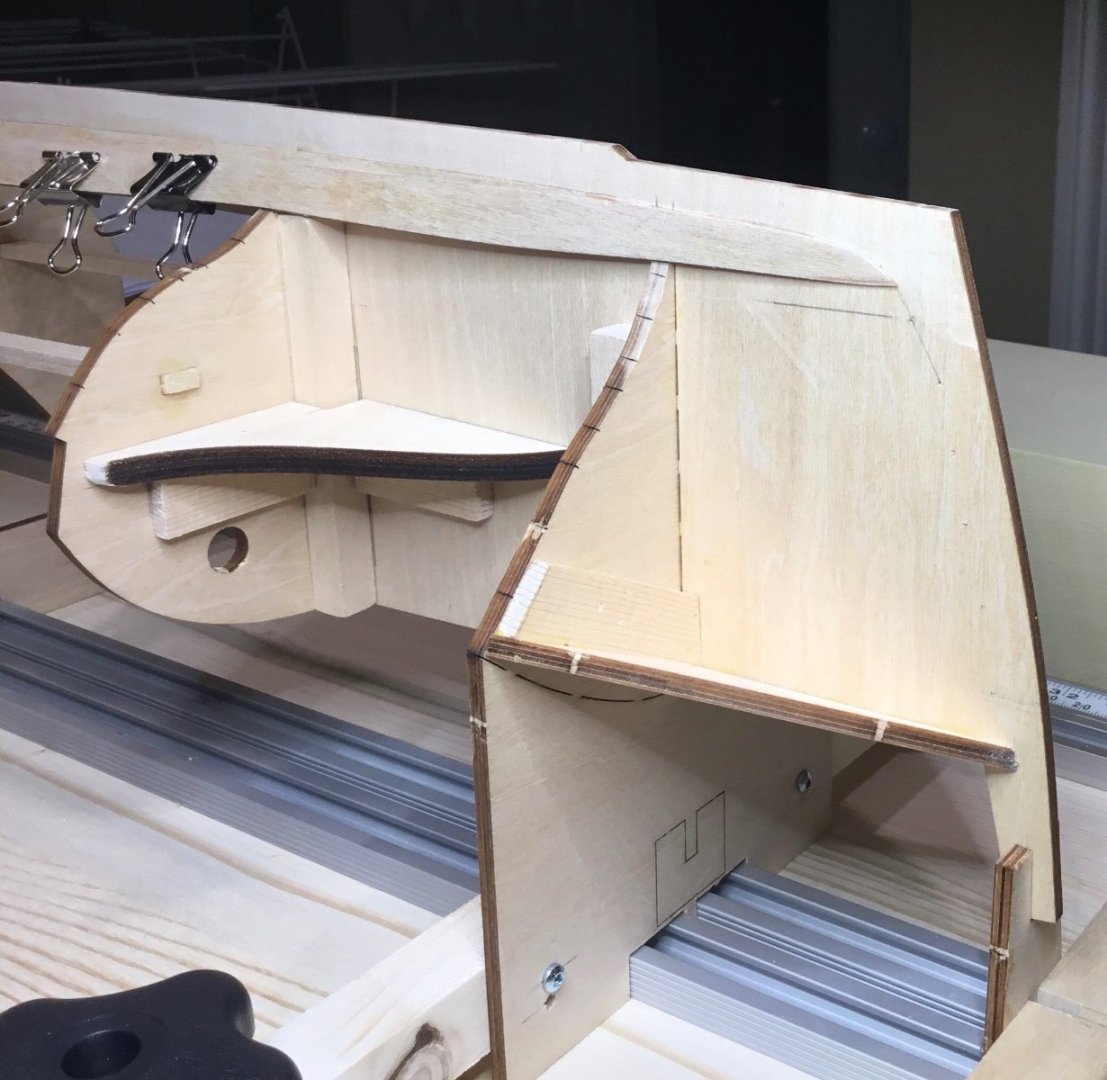
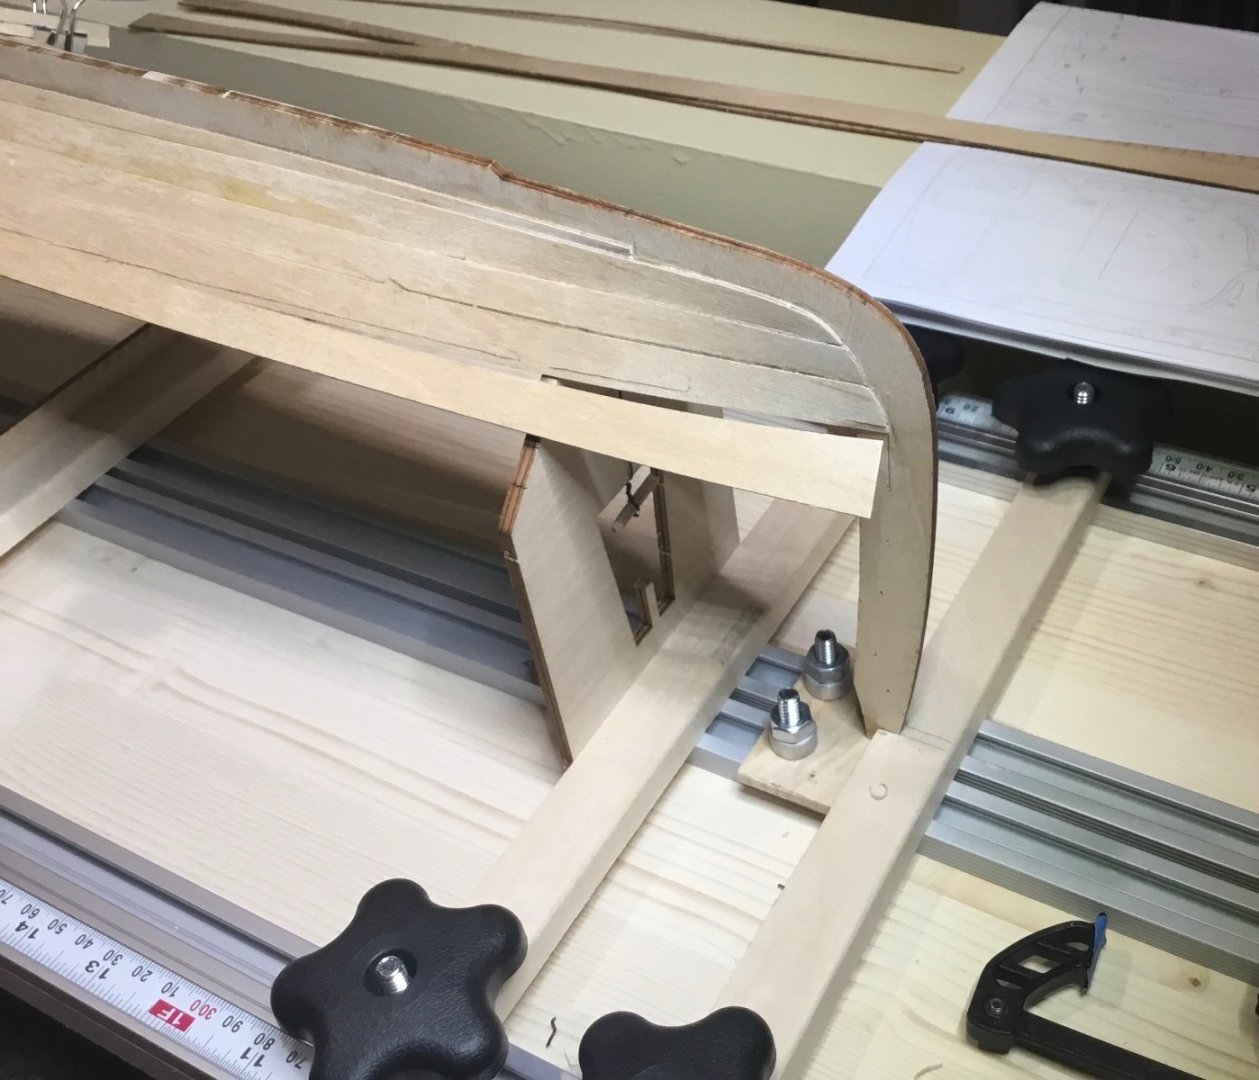
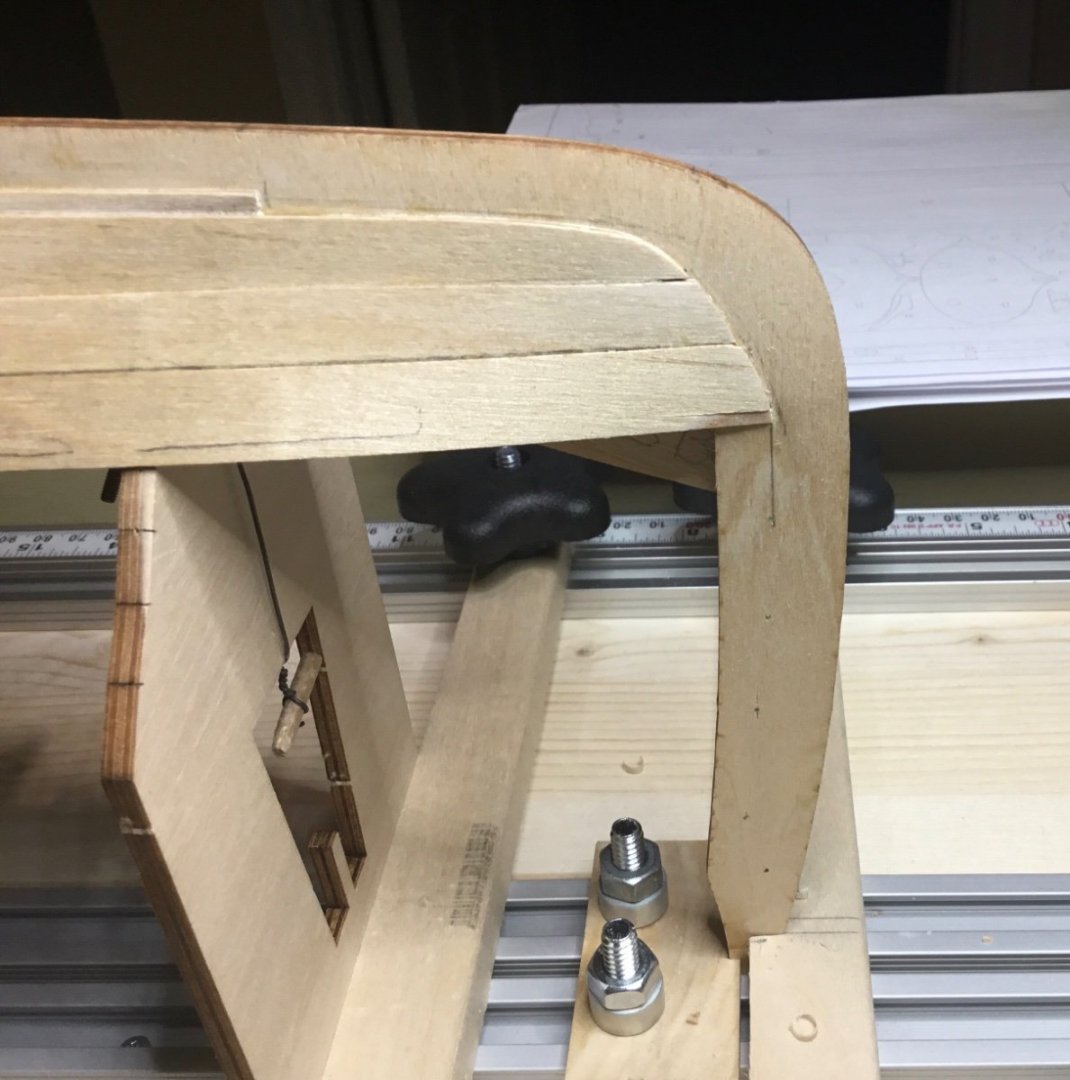
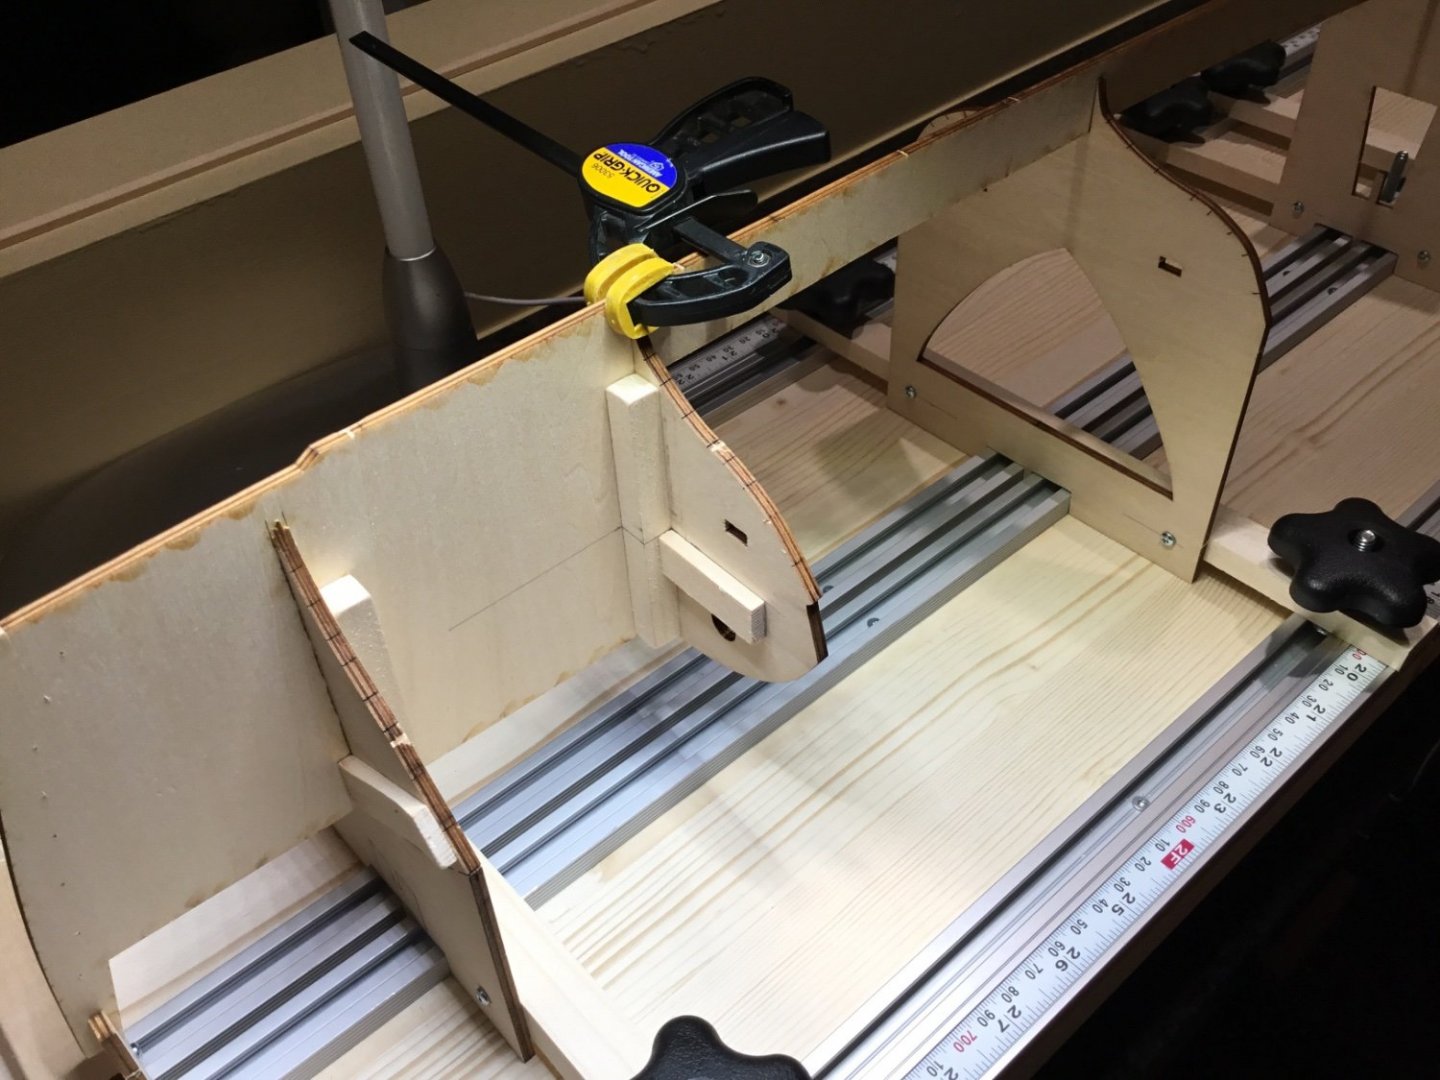
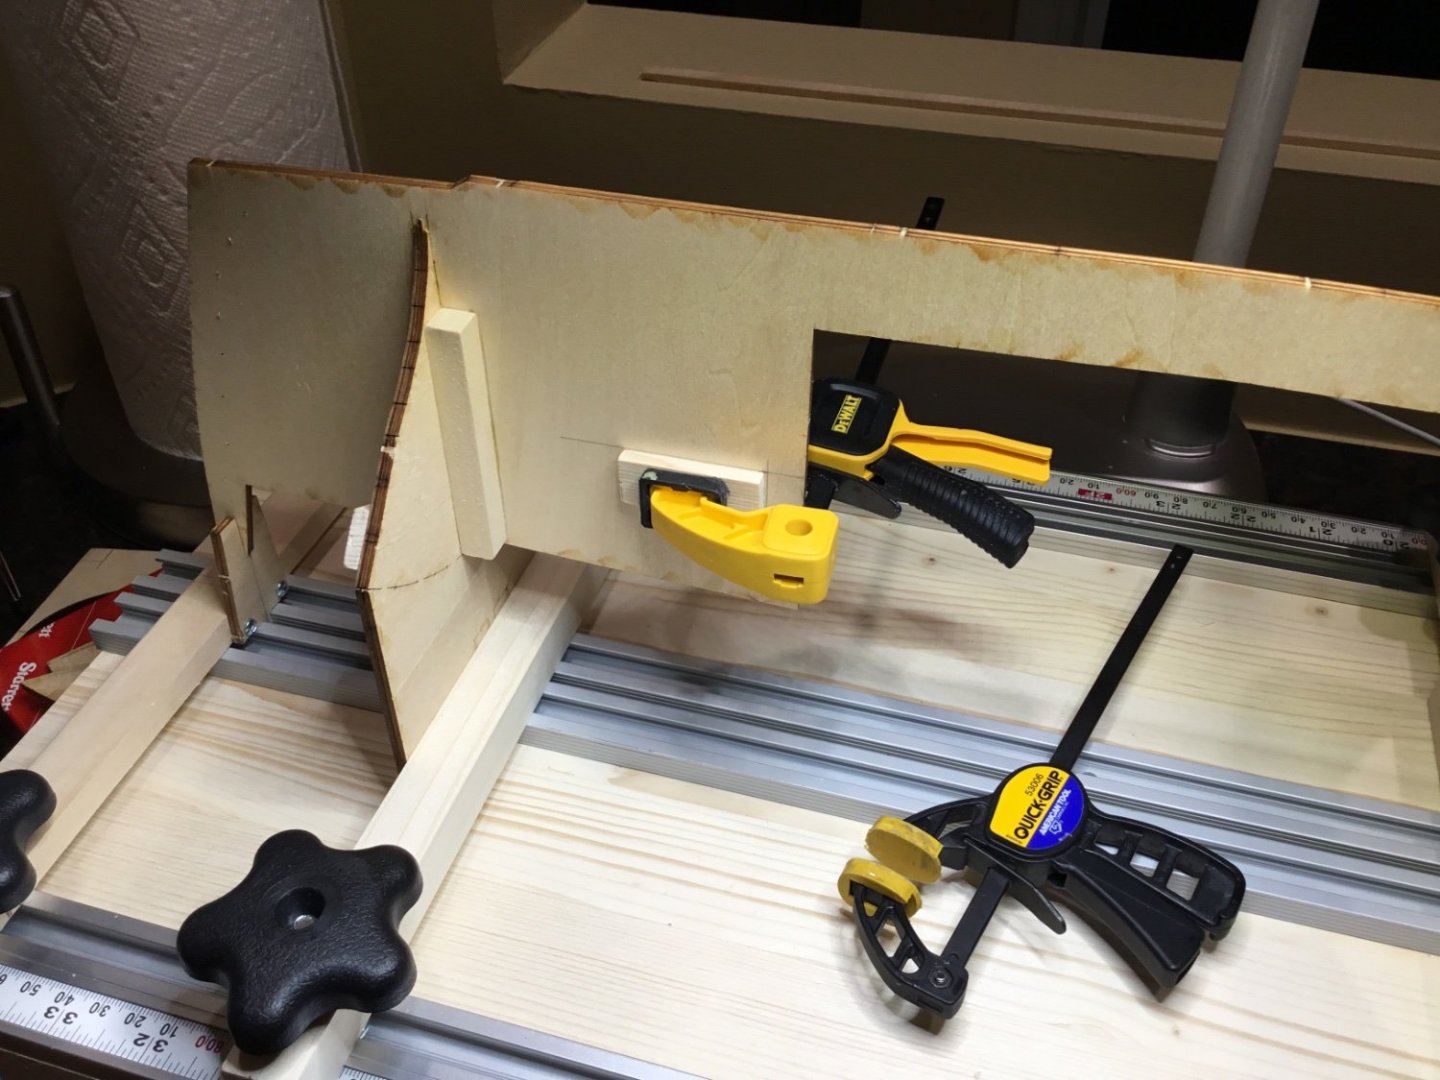
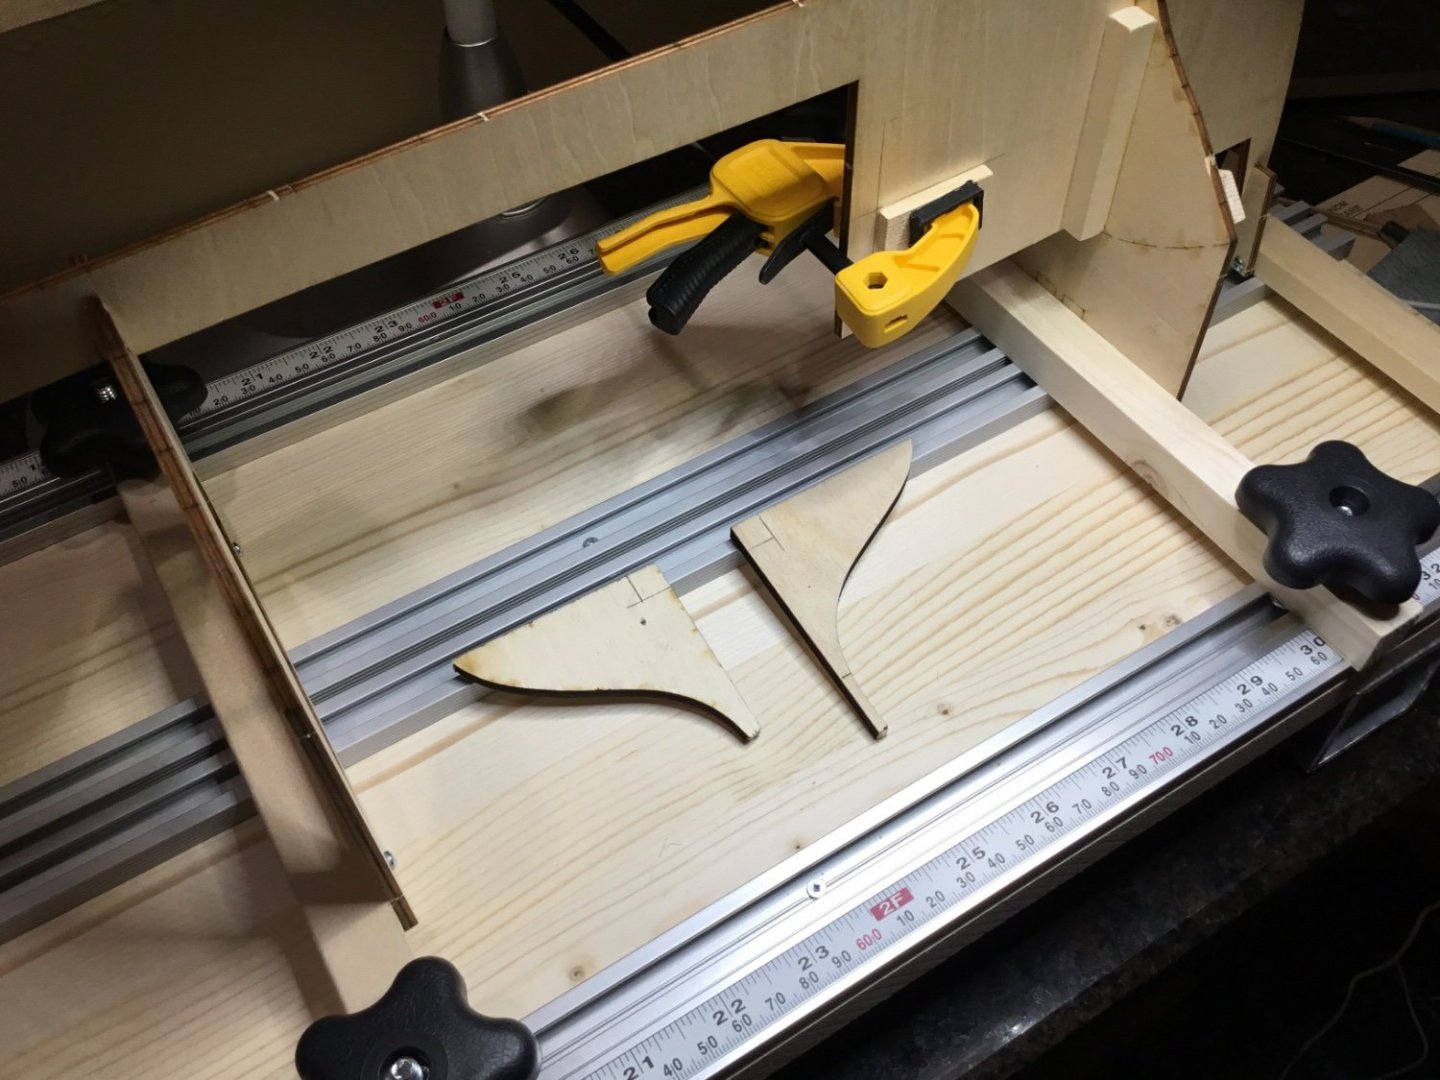
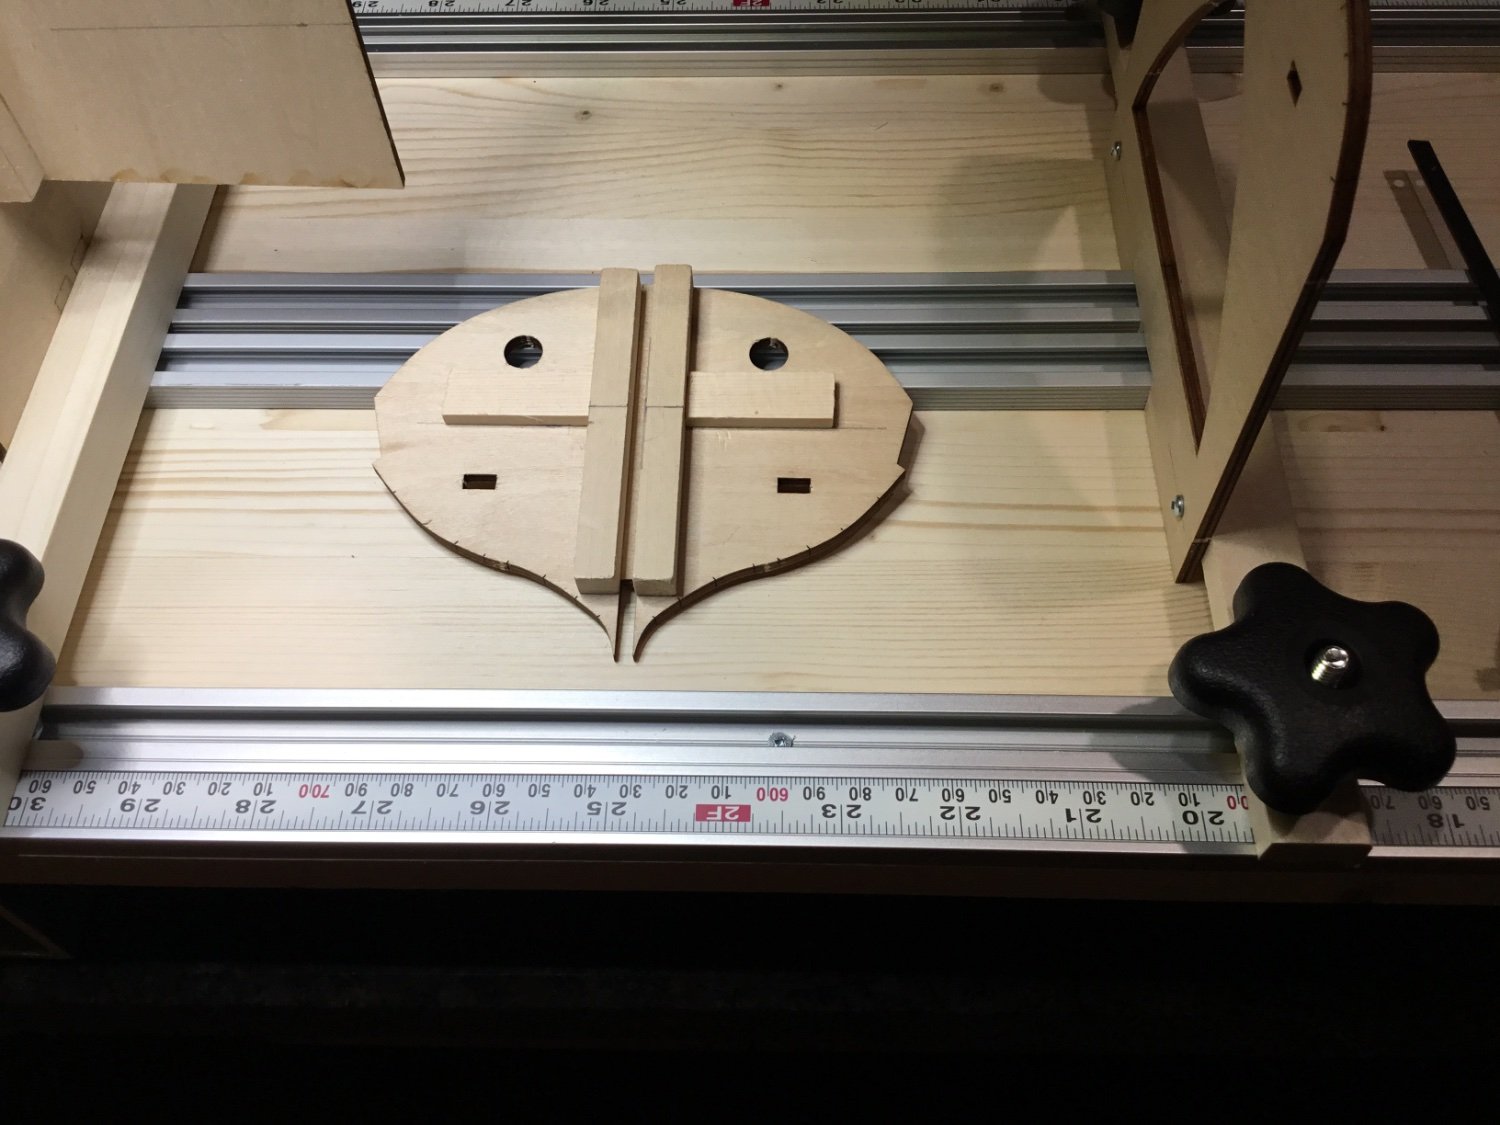
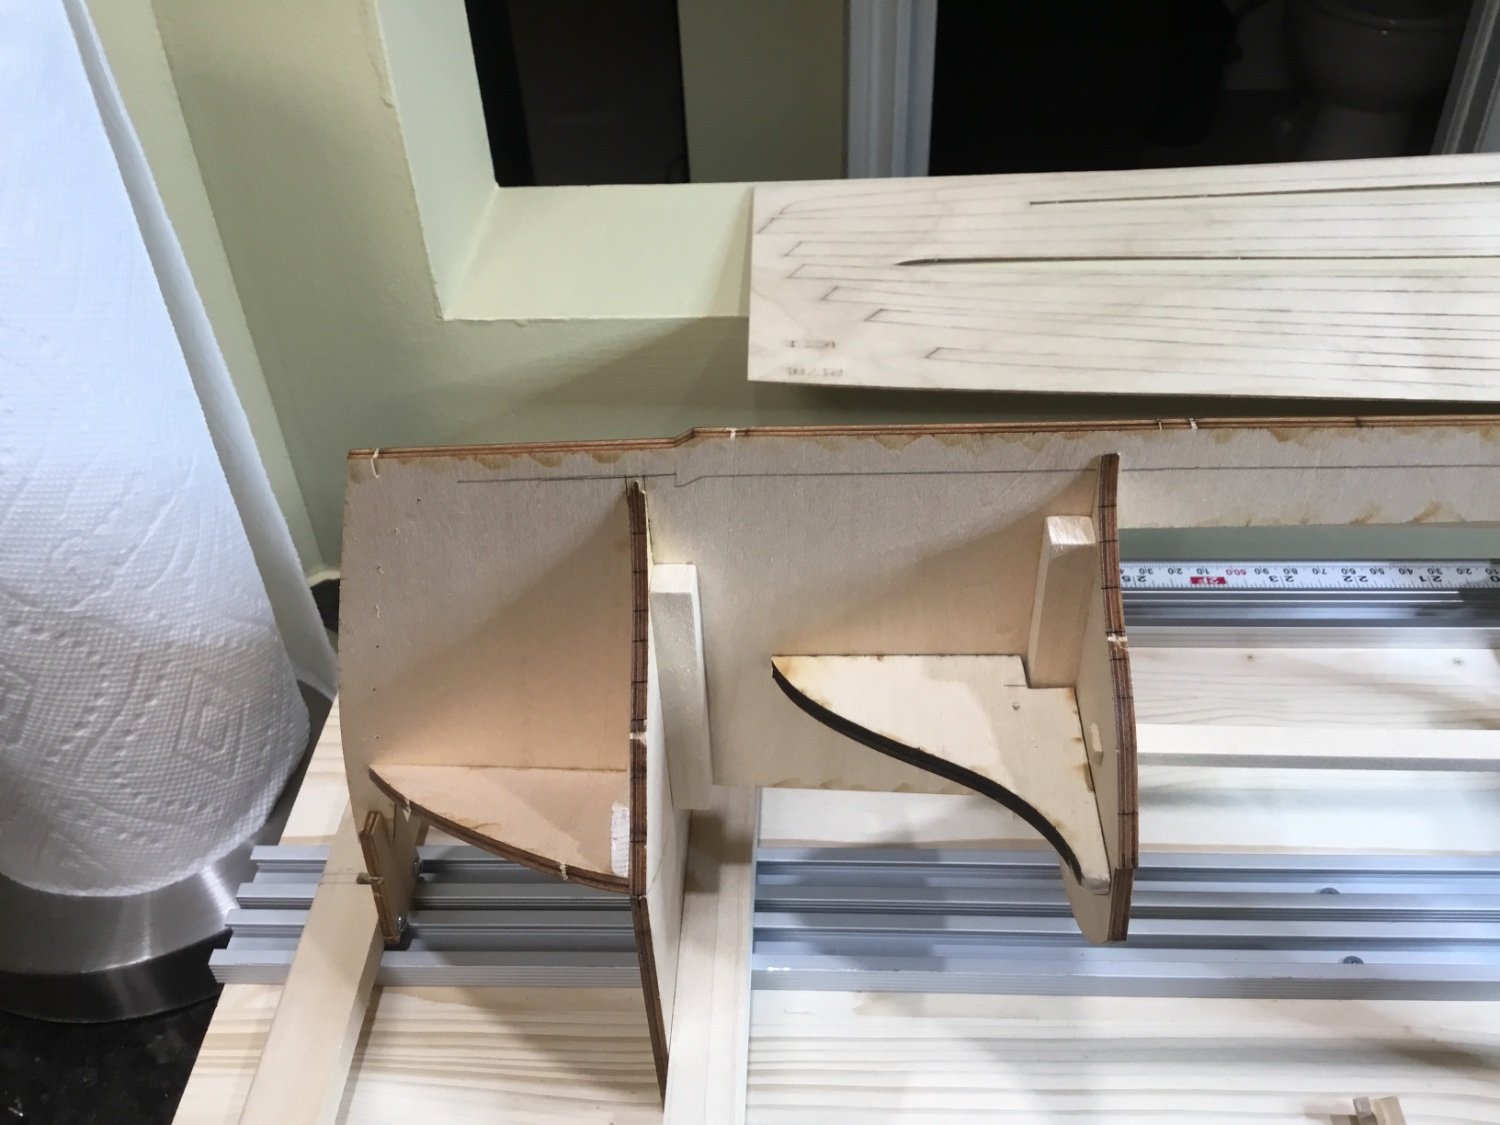
There are two triangular shaped pieces that are glued in at the stern. The side that is glued to the keel/ frame has to be sanded at an angle. Clamped a small piece of wood to the stern post to support these pieces while gluing. It’s difficult to tell if you’ve sanded enough when everything is upside down.
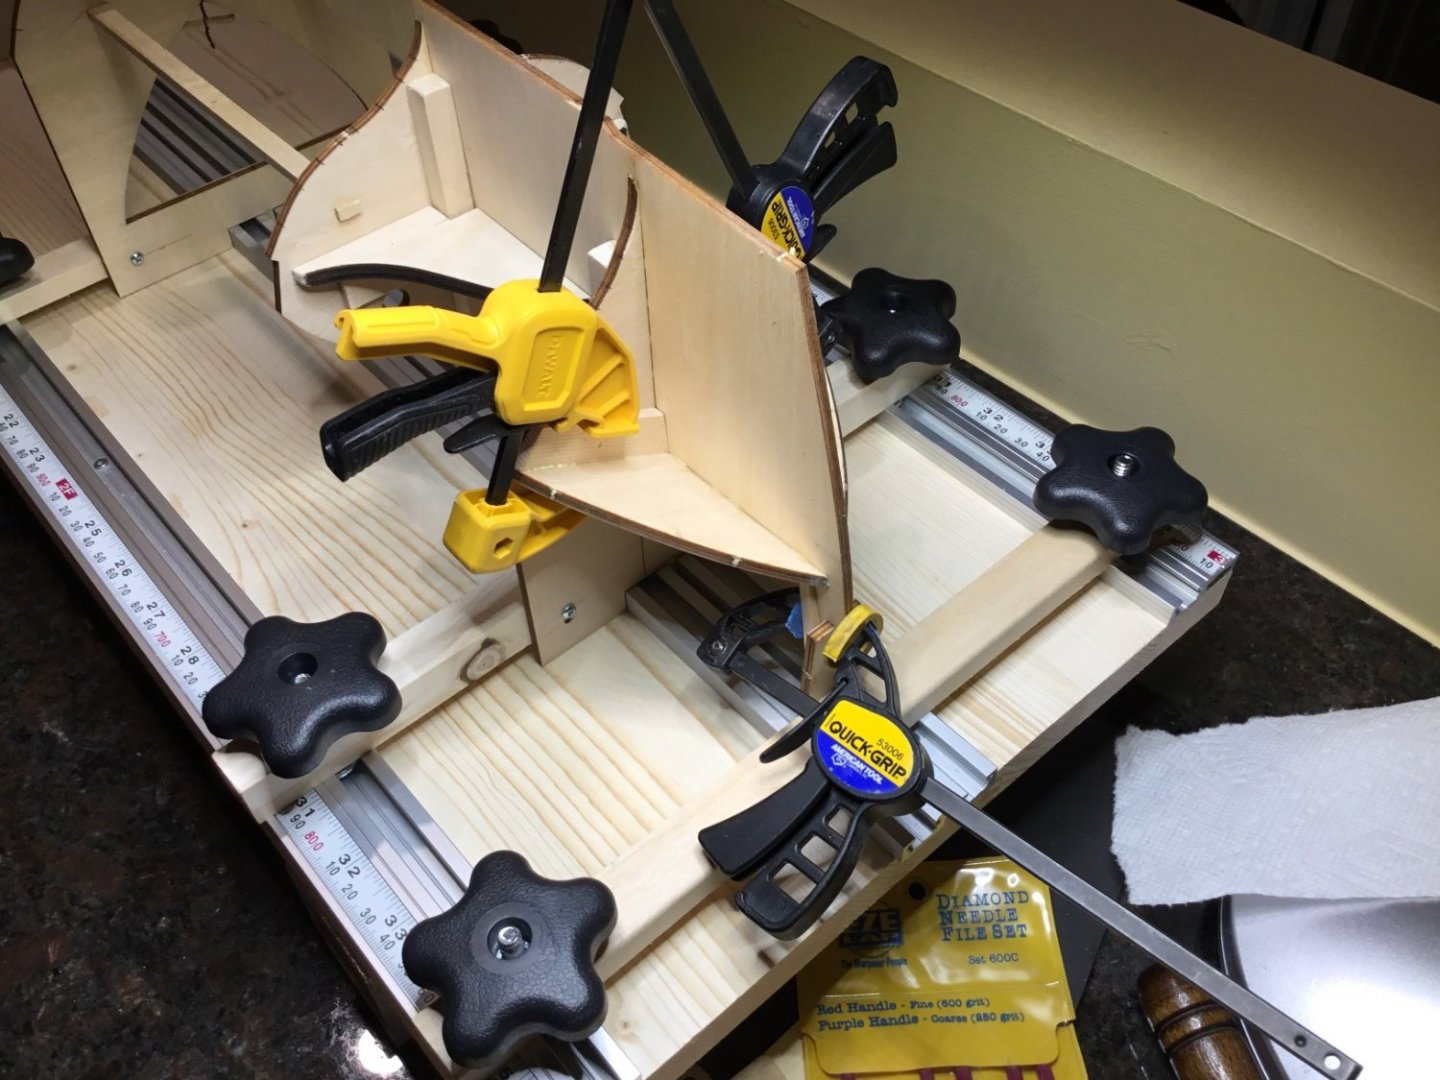

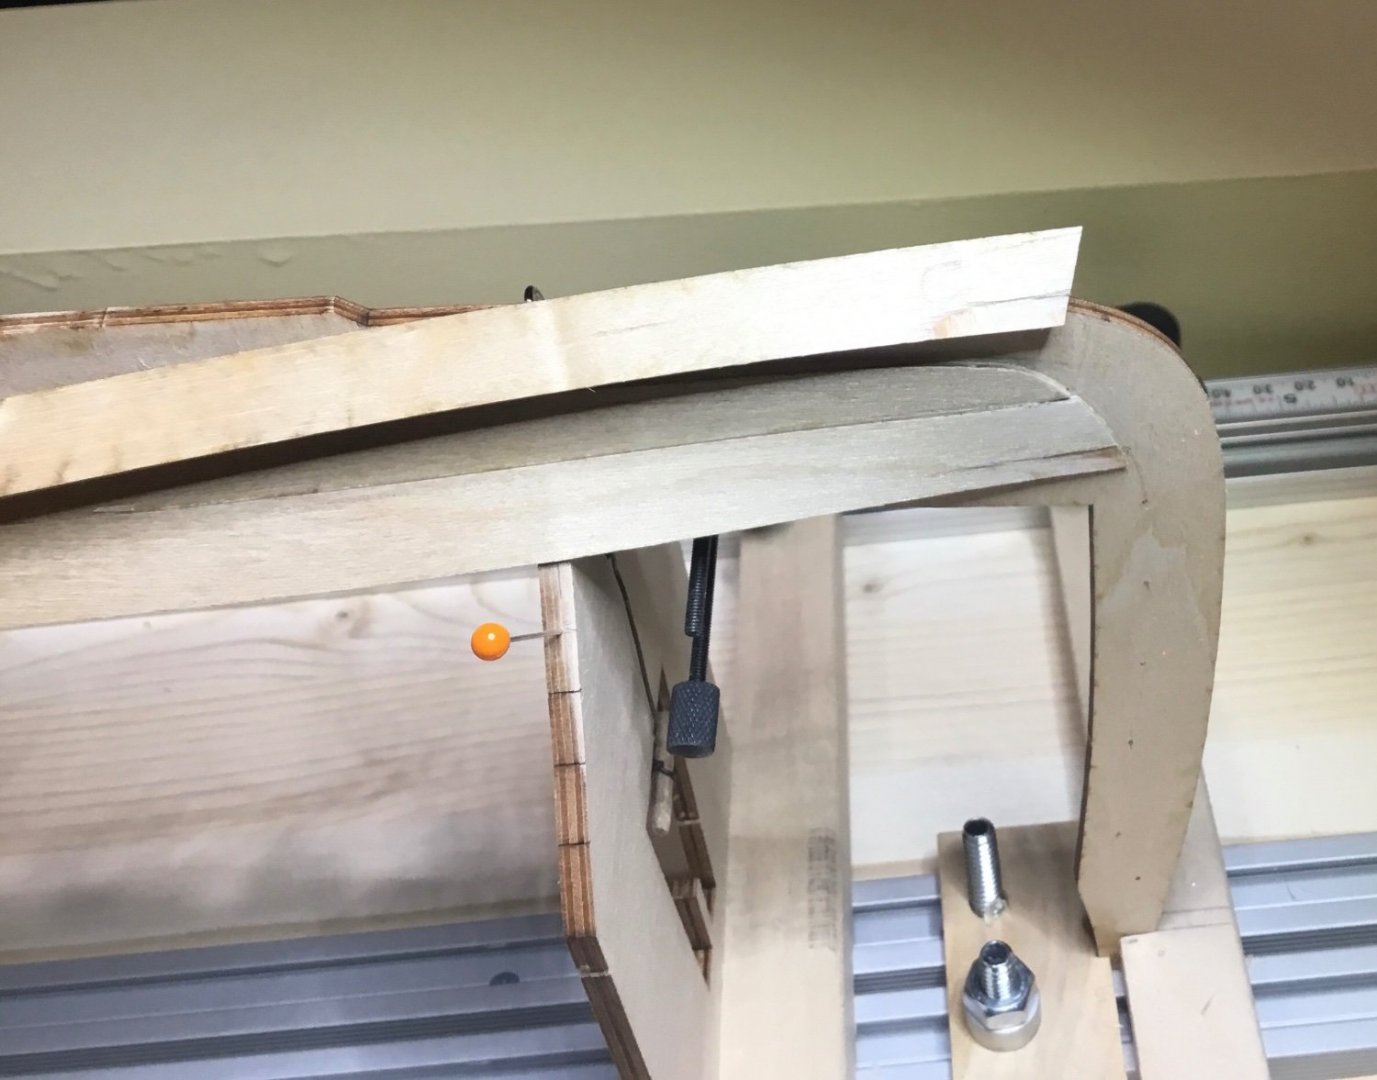
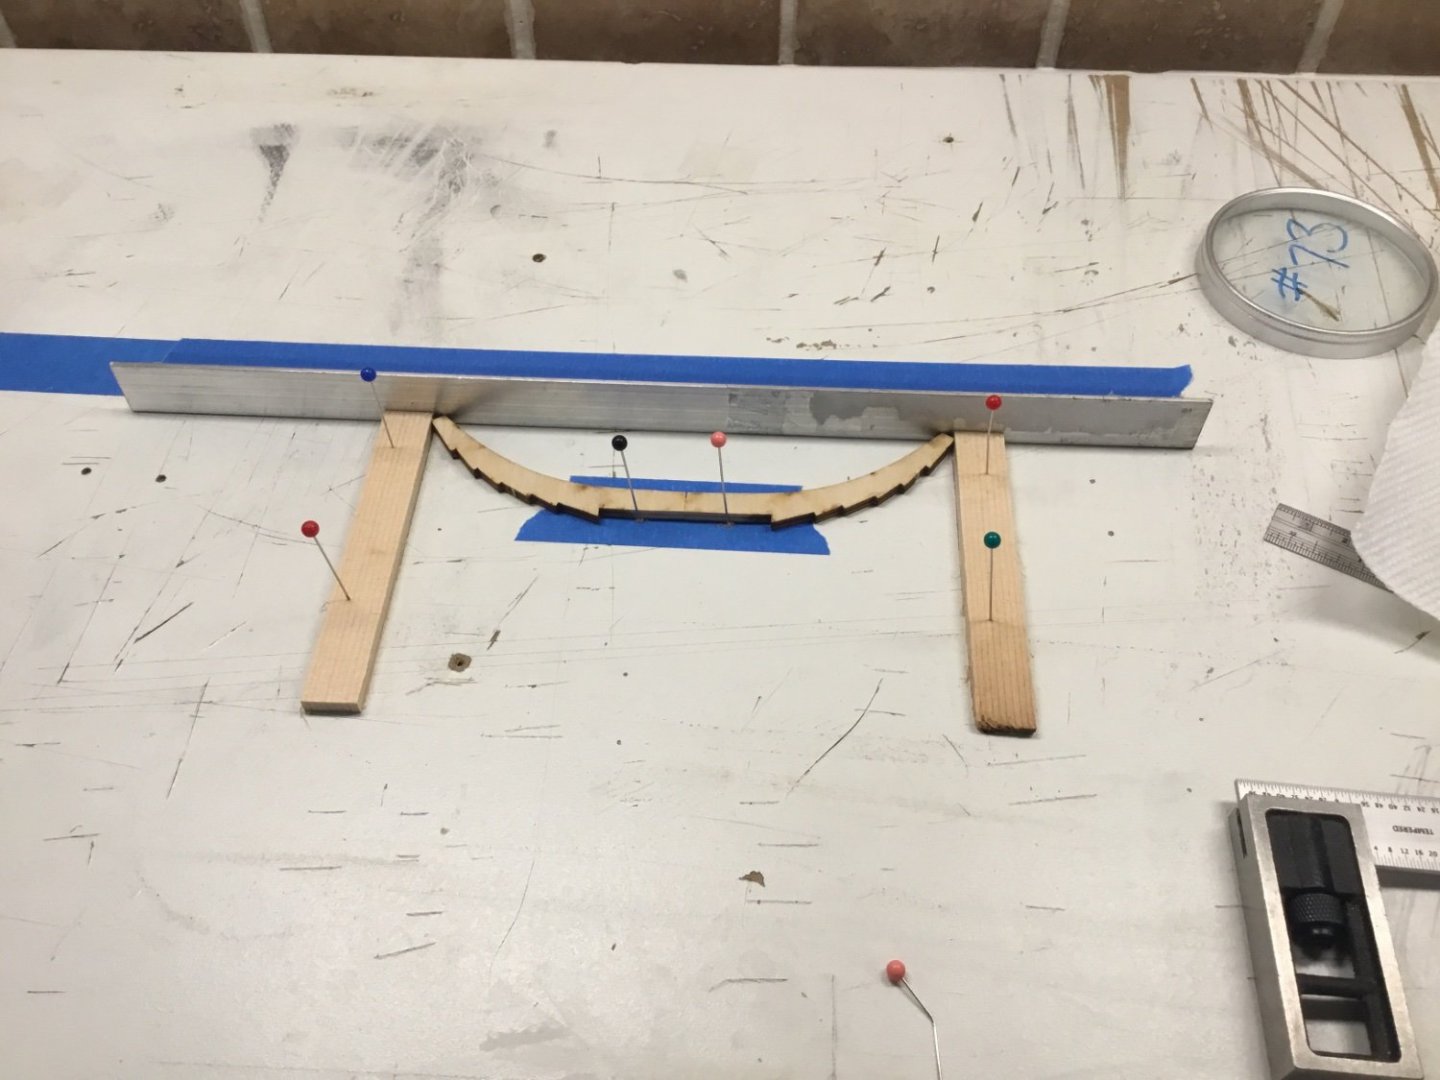
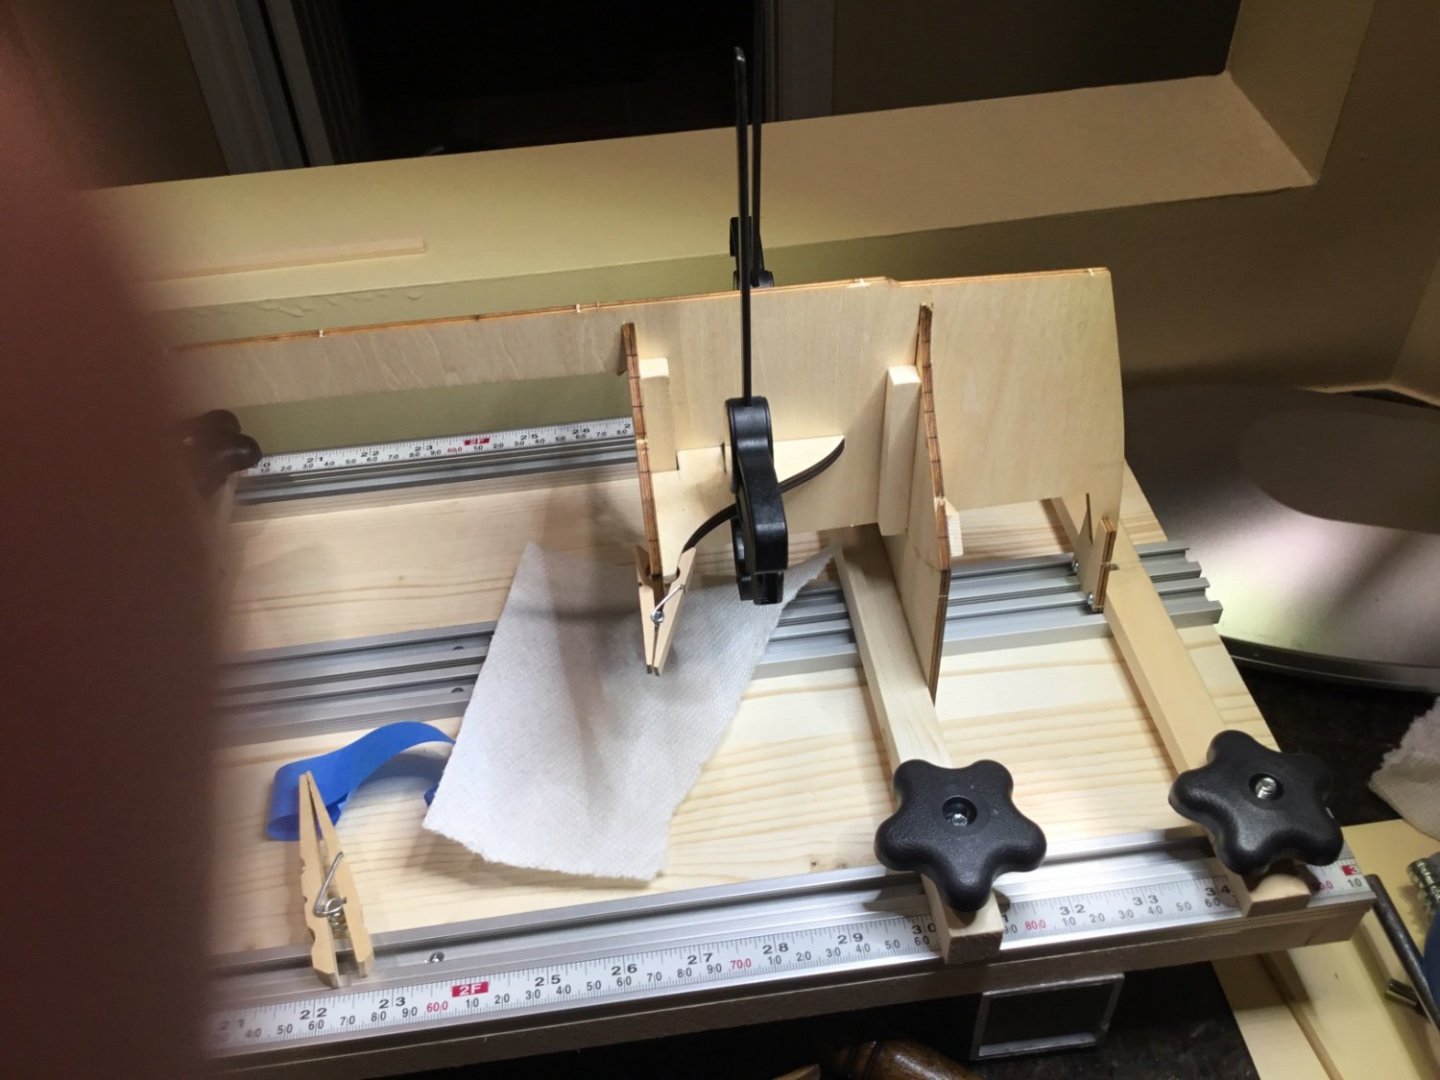
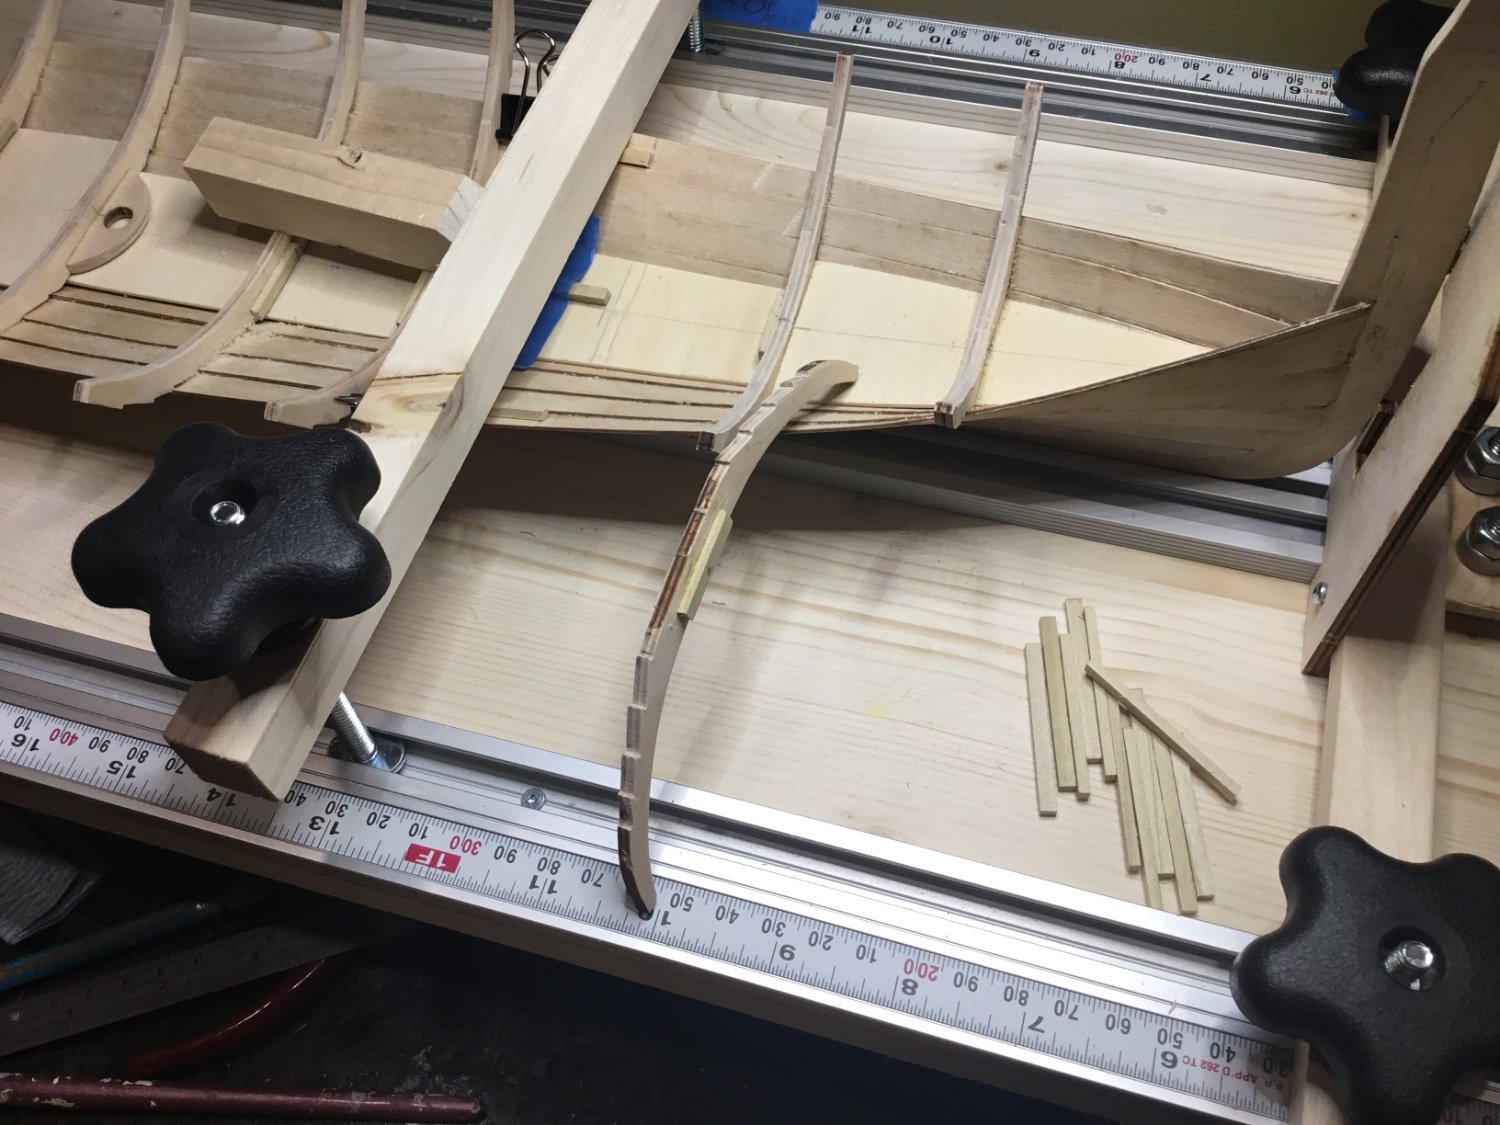
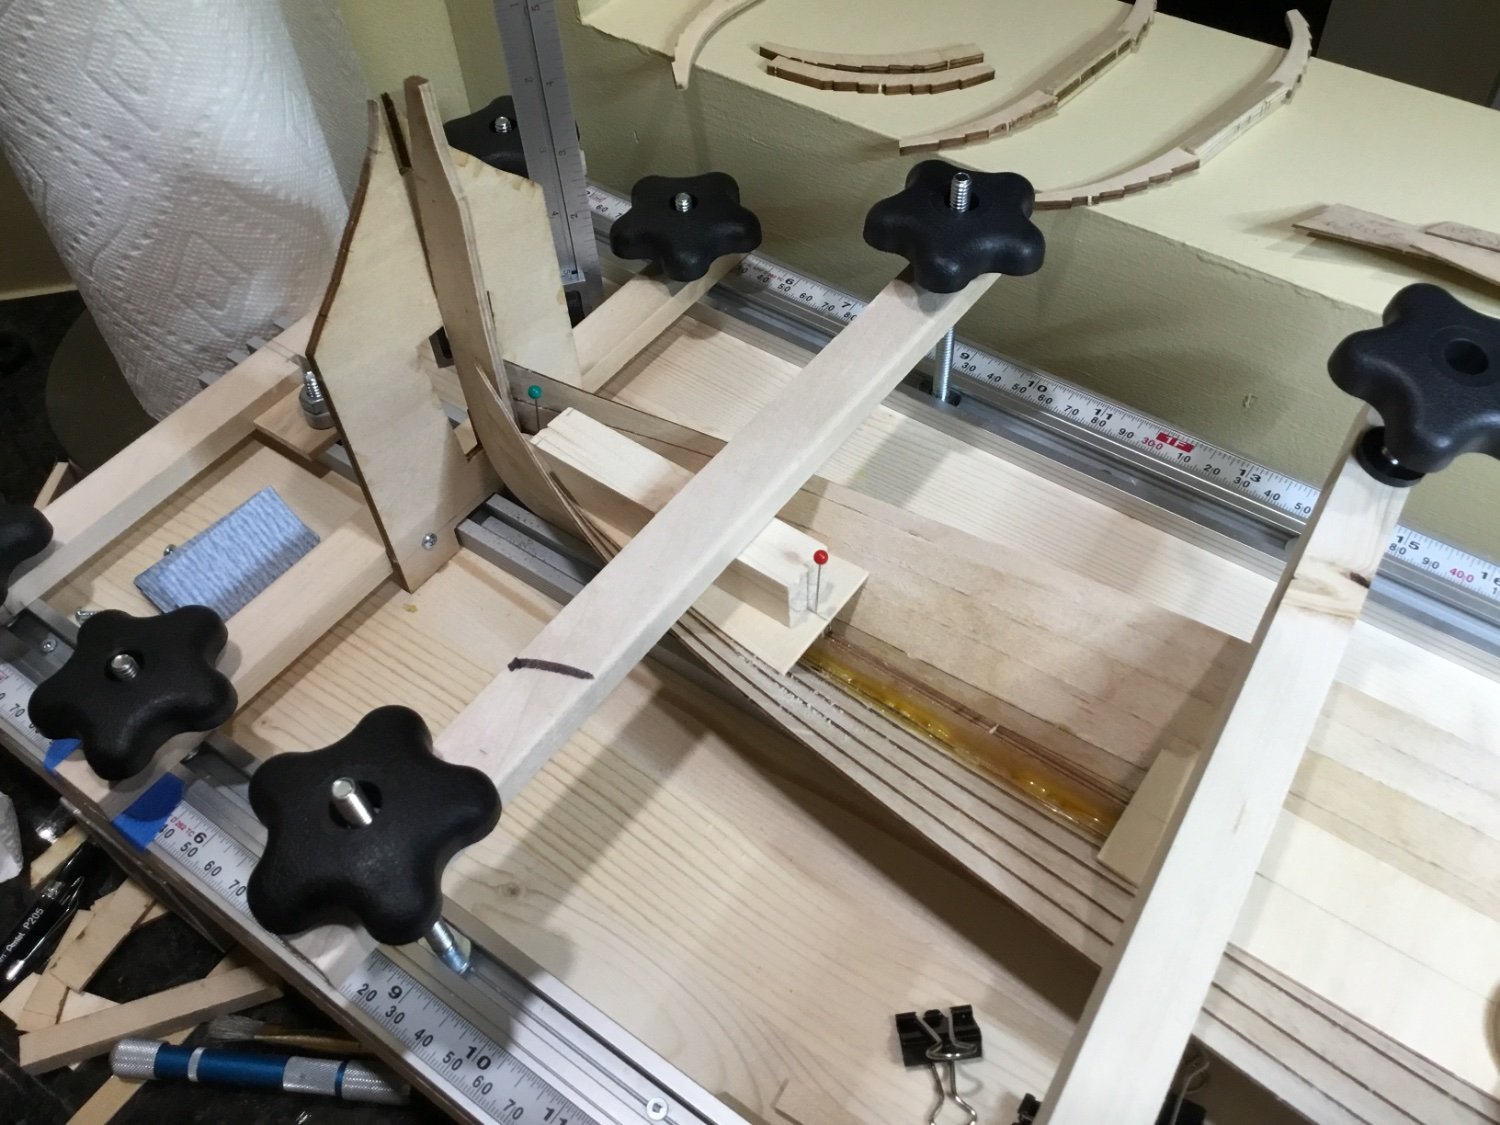
The two frames toward the bow are just for support and nothing is glued to them. To keep them from moving around, the keel was tie wired to them. I transferred a line from the plans to the keel that indicates the bottom of the garboard. As you can see there needs to be some adjustments made to something.
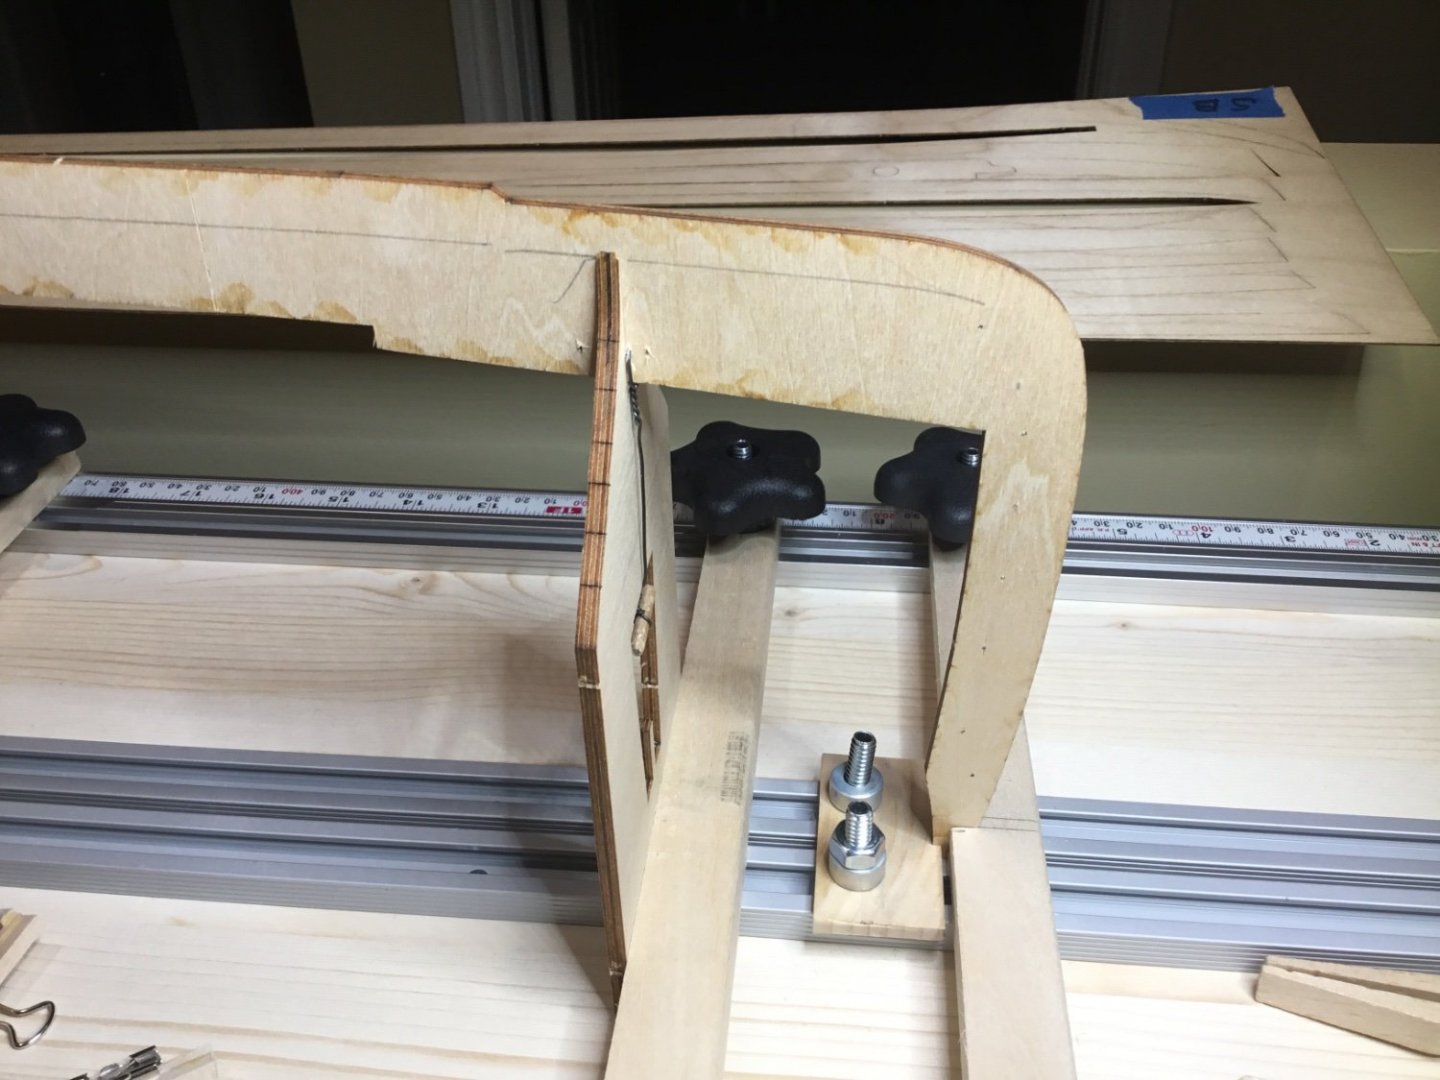
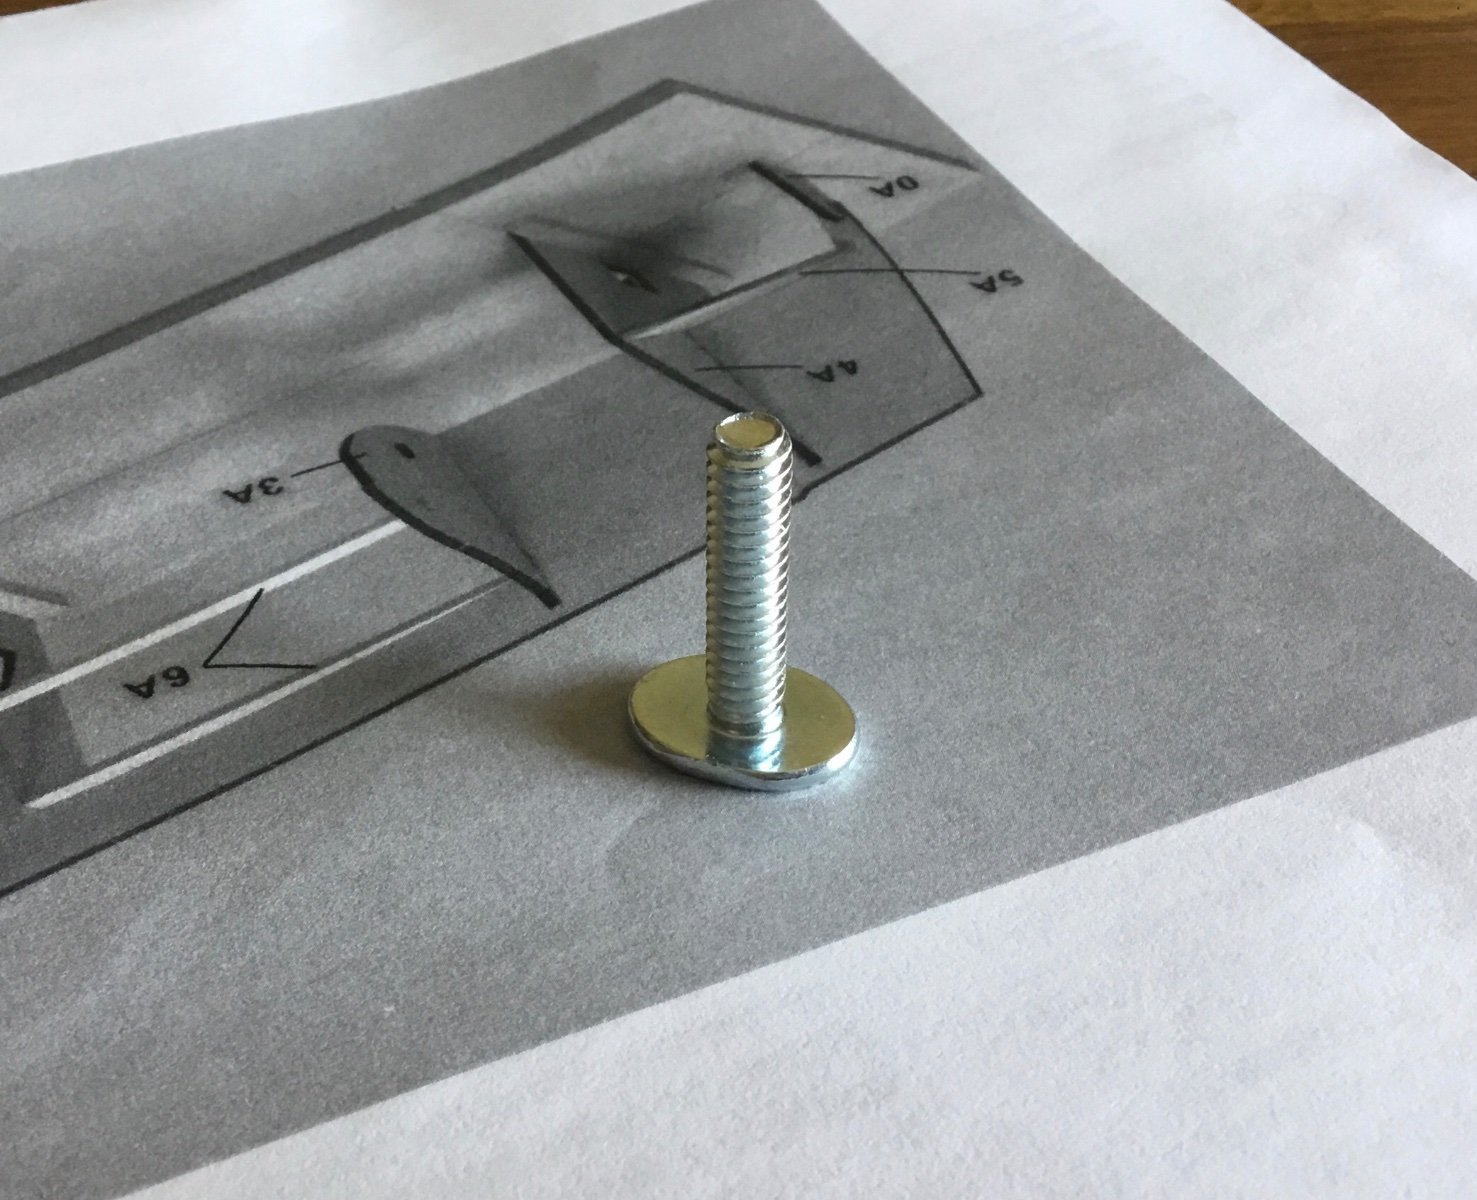
Just need to find one more 1/4-20 nut for the stem clamp. Now it’s ready to plank. Hope to see you all soon.
-
Thank you Chris and Bob, your comments have meant a lot to me. Not quite in the new boat groove yet but I’m getting there 🙂
- Ryland Craze, BobG and Dave_E
-
3


Nordlandsbaaden by Paul Le Wol - FINISHED - Billing Boats - 1/20
in - Kit build logs for subjects built from 1751 - 1800
Posted
Hi Nils, thank you so much. This scale of boat is a lot easier to work on for me. But at 28” x 28” they do take up a lot of room.