


Paul Le Wol
-
Posts
489 -
Joined
-
Last visited
Content Type
Profiles
Forums
Gallery
Events
Posts posted by Paul Le Wol
-
-
Hi Cisco, your AVS is looking great. If you are using the Cheerful monograph as a reference you would now be at Chapter Four where Chuck describes using tick strips and planking fans. I found this method very valuable in obtaining a good result. It really takes the guesswork out of the picture.
-
Hello Grey, the shaking that you are talking about is a well documented phenomenon. As soon as you apply glue to a part, the closer you get to where you are going to stick it, the more your hand will start to shake. You will notice that if you dry fit a part, no shaking. At least that’s been my experience 😀. Enjoying your build very much
- AJohnson, Grey, chris watton and 1 other
-
 4
4
-
Thanks Glenn, I appreciate your comment very much. I have probably seen all of this before somewhere so I can’t really take any credit.🙂
-
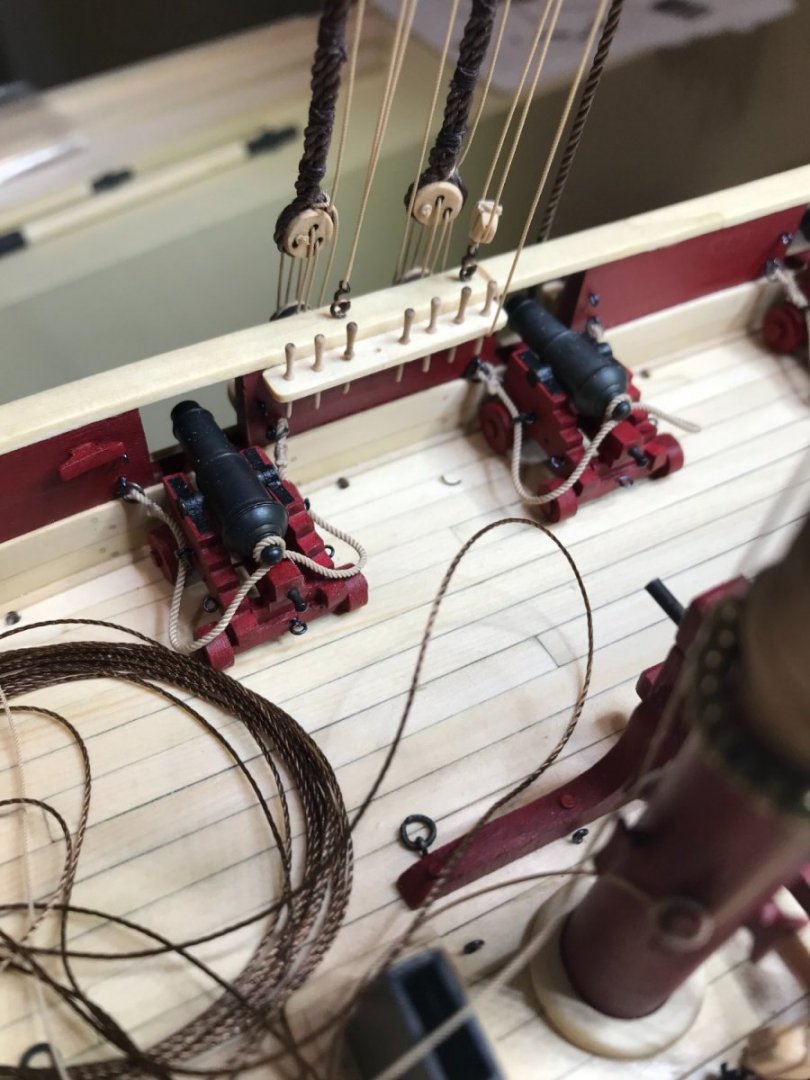
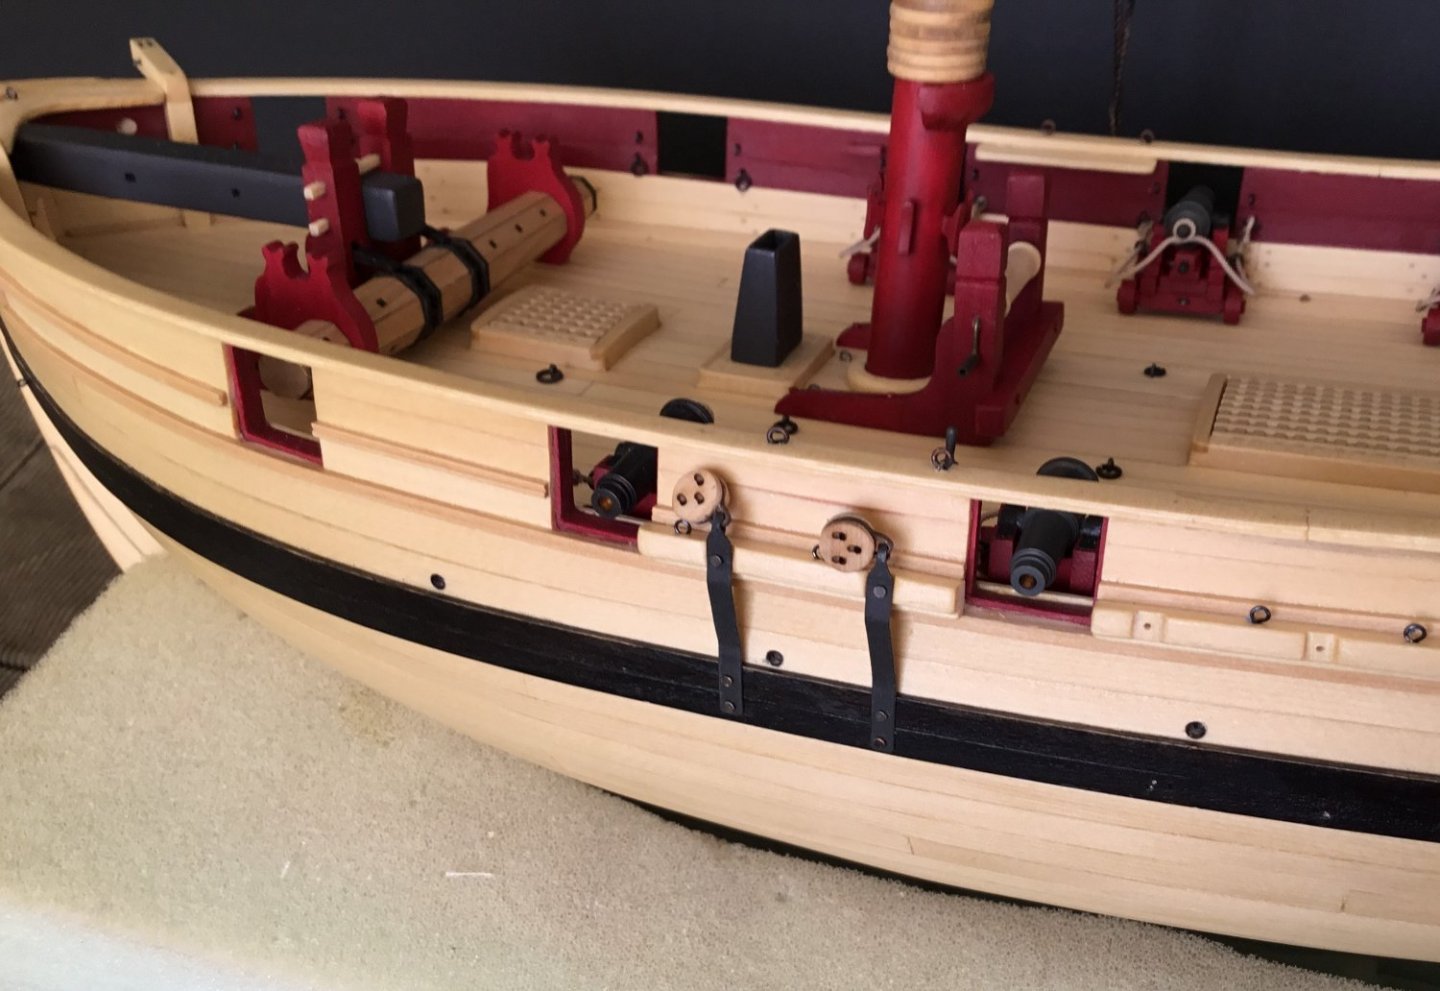
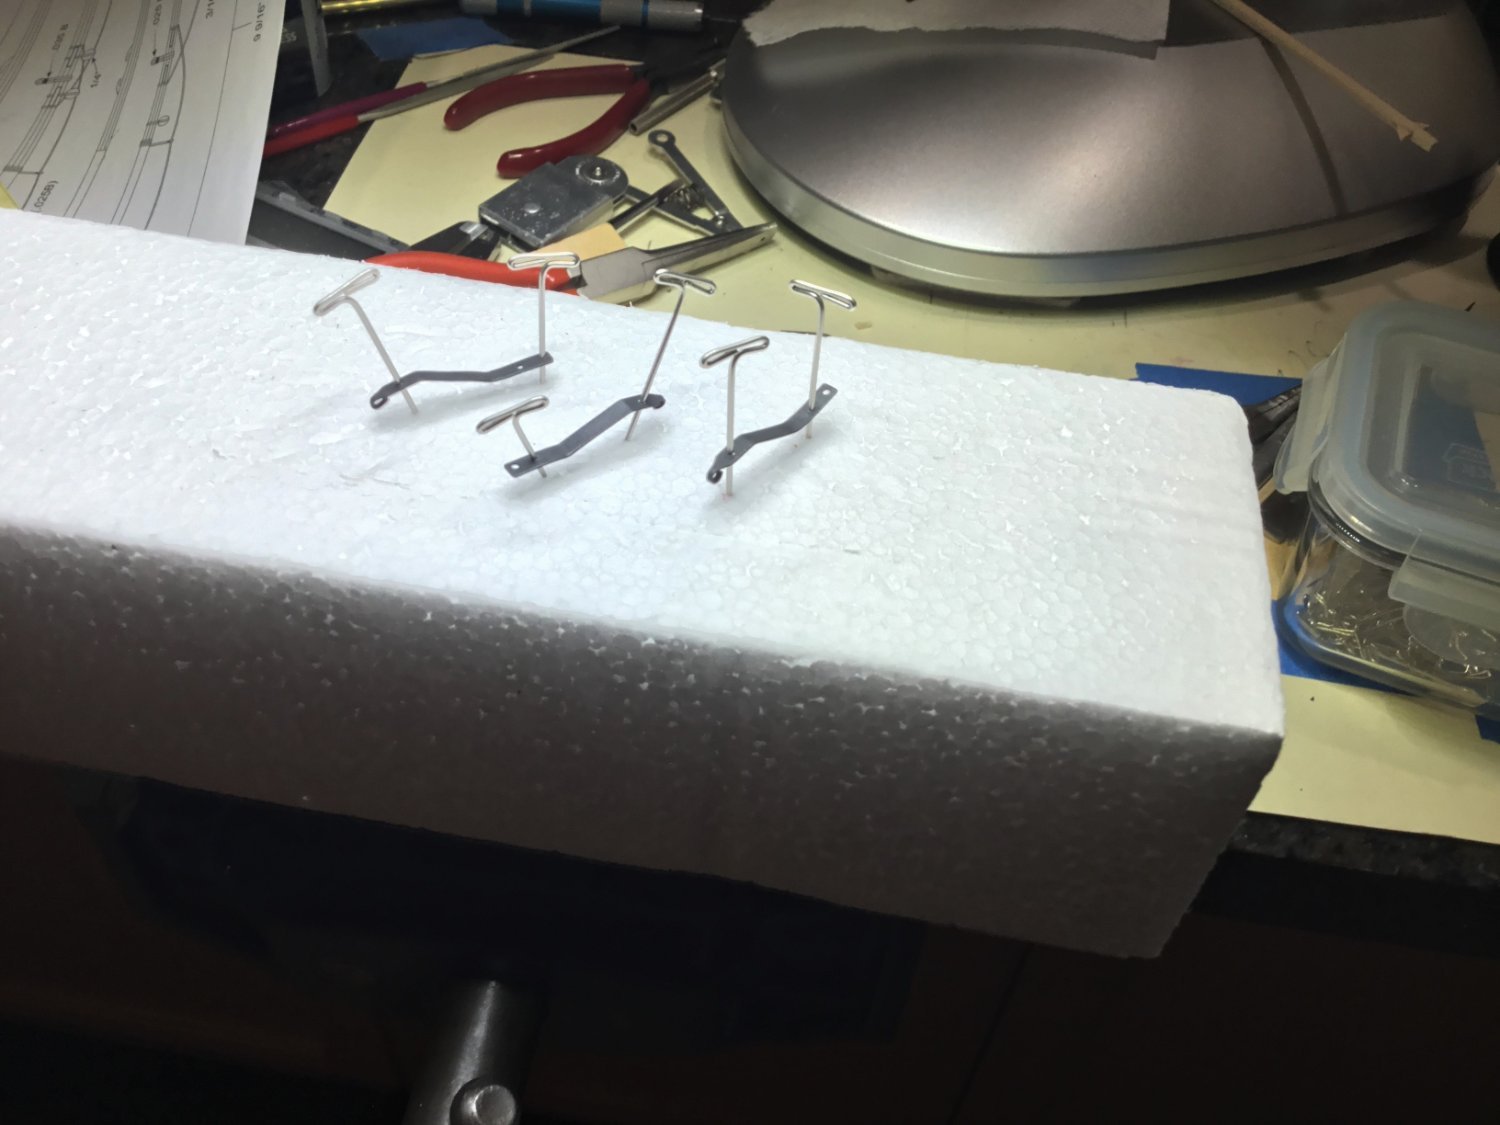
Hello to Everyone, thank you for all of your comments and likes. The timberheads have been made and installed. Filed a profile in a strip of brass and clamped it to each side of a strip of 1/8 x 7/32 inch cedar and then filed away. Pinned and glued them to the cap rail with CA
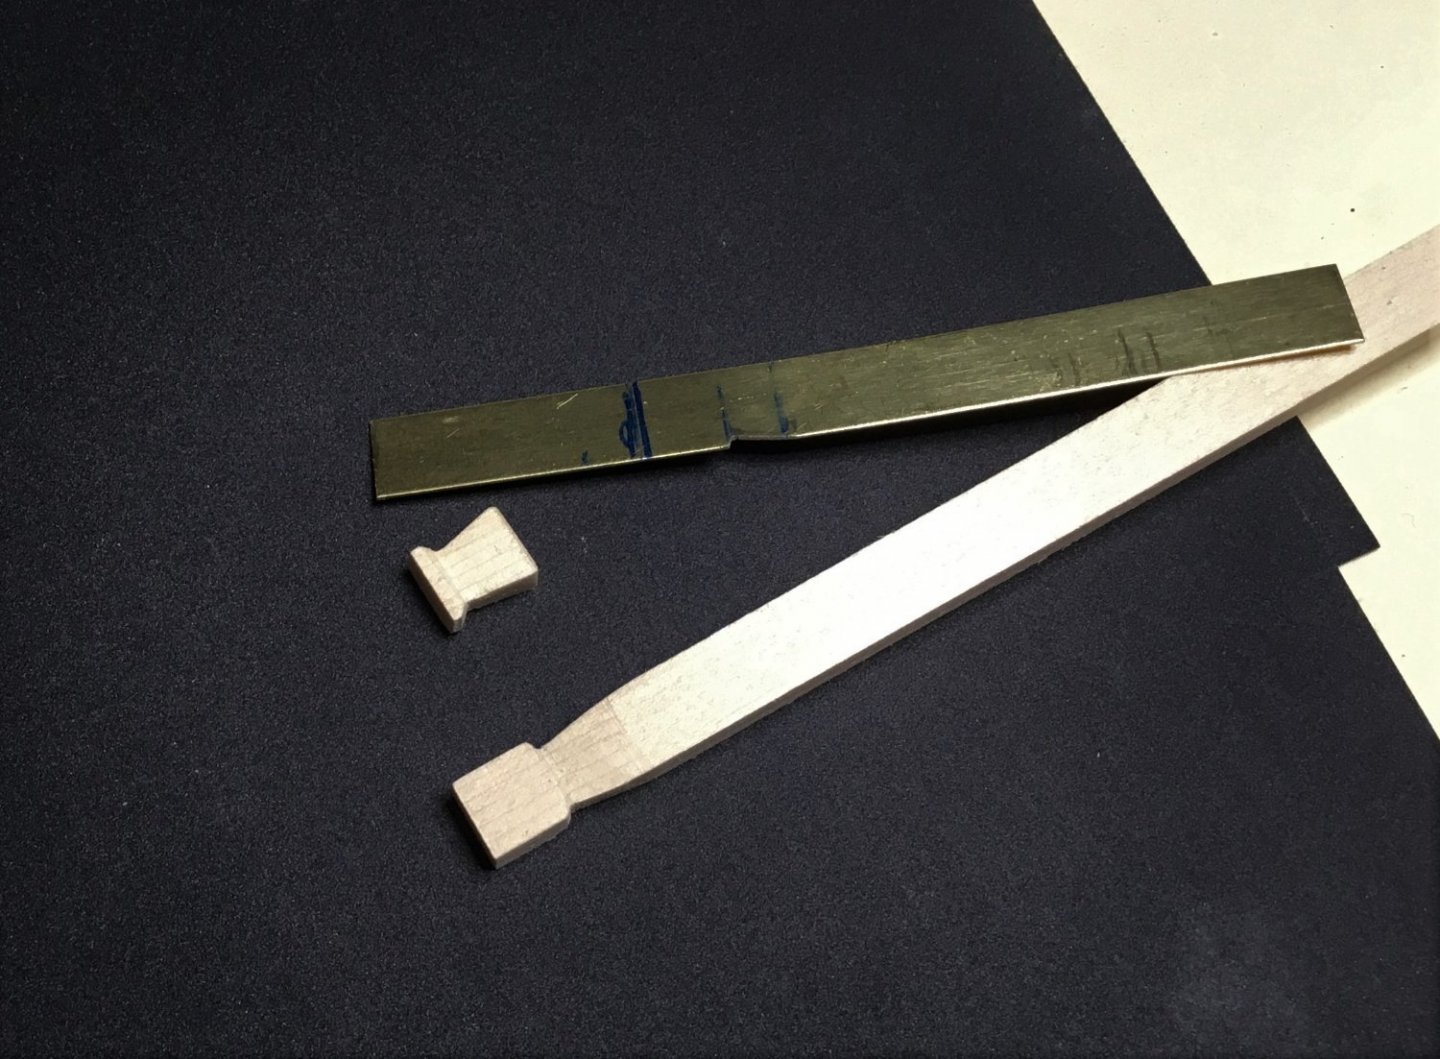
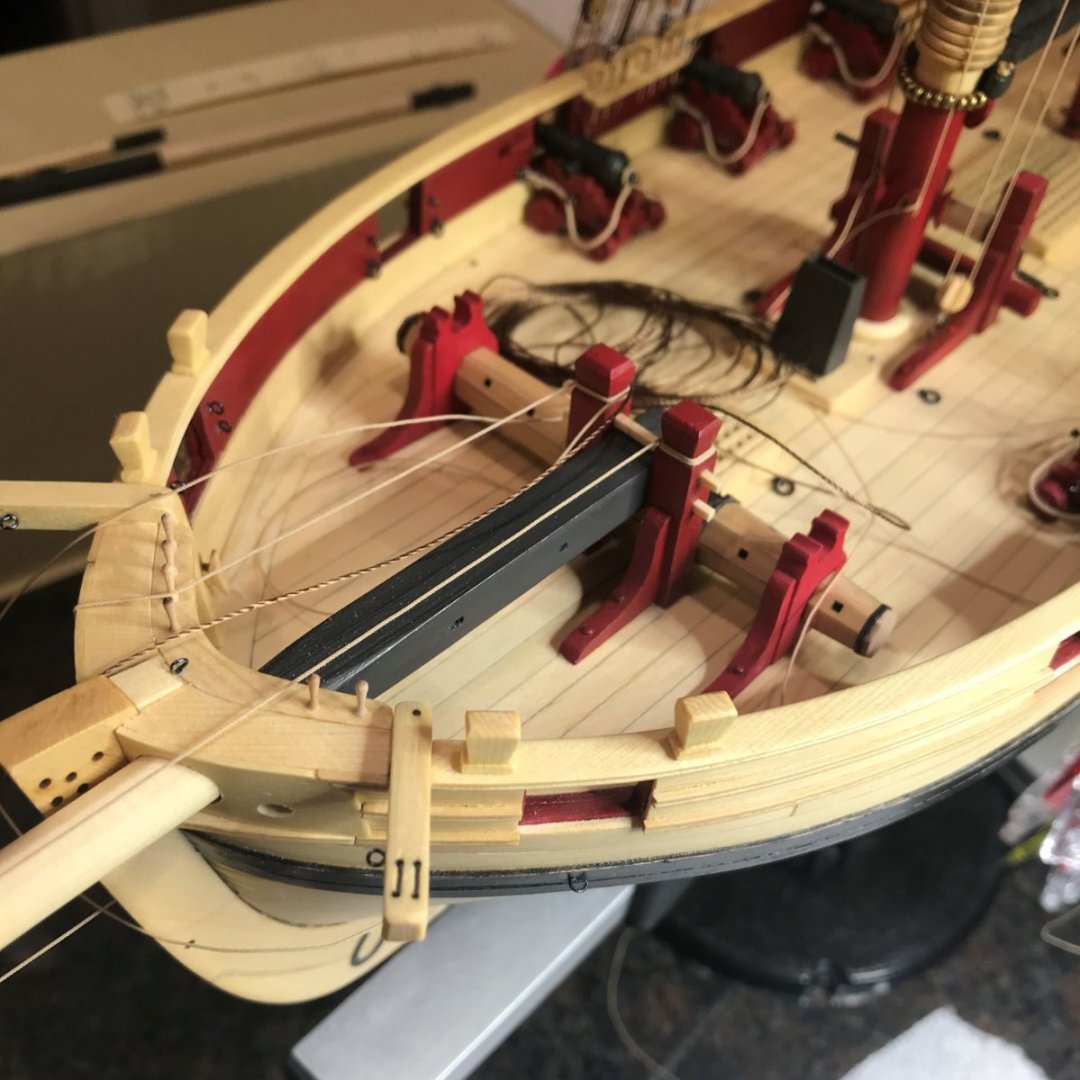
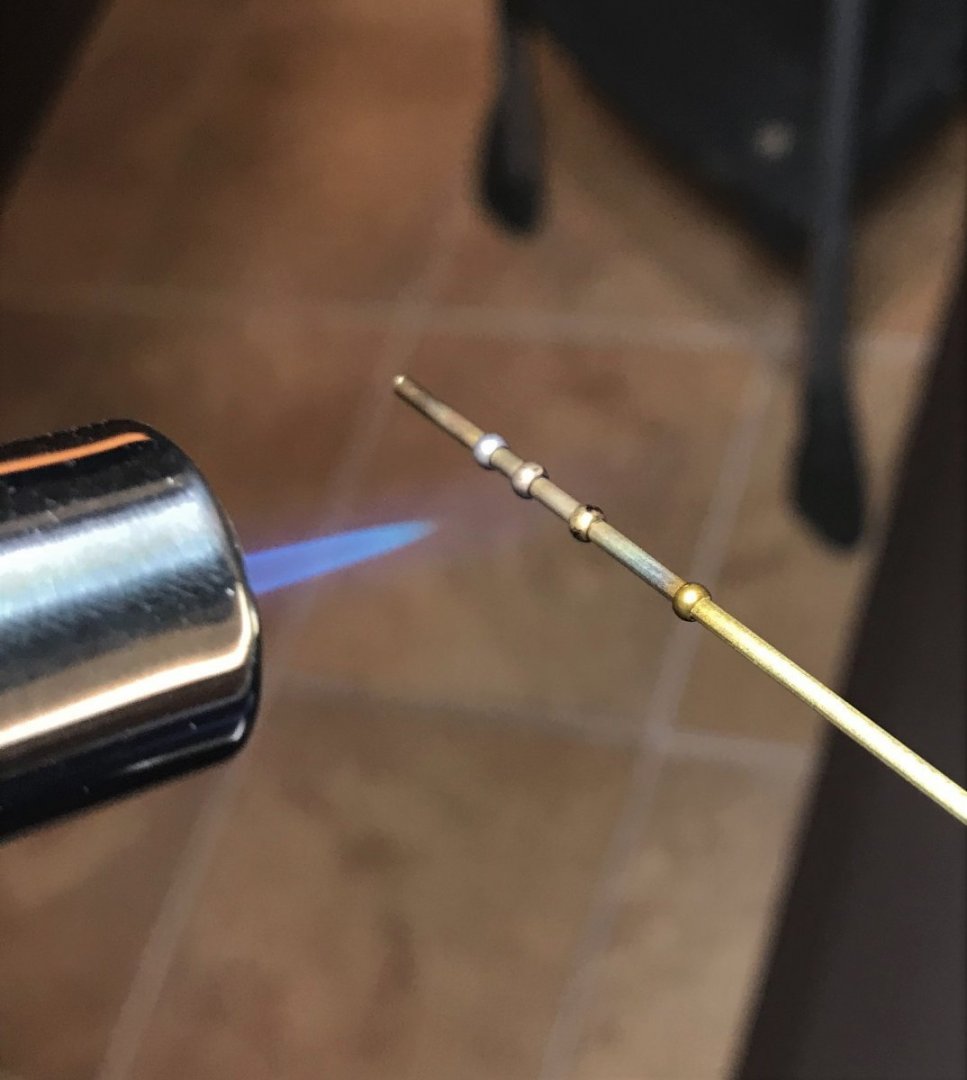
The entry way stanchions were made from 1/16 inch brass tube with 1/32 inch brass rod glued inside of it with CA. Beads were glued to the top end. The coating on the beads was burned off with the butane torch and all of the parts were blackened.

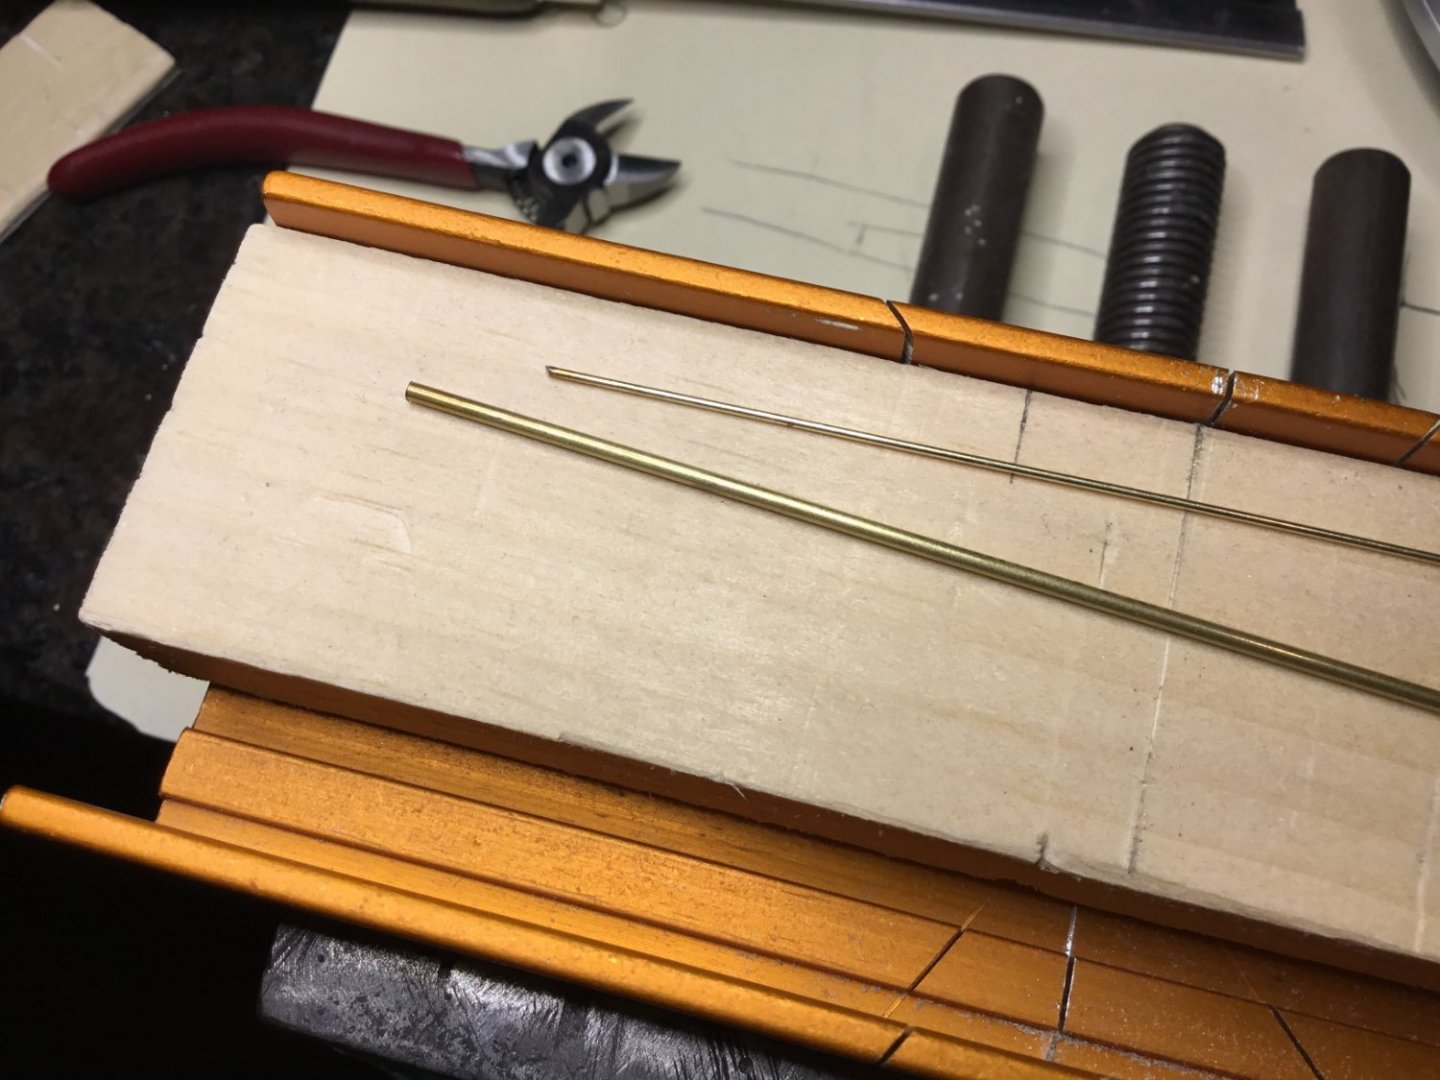
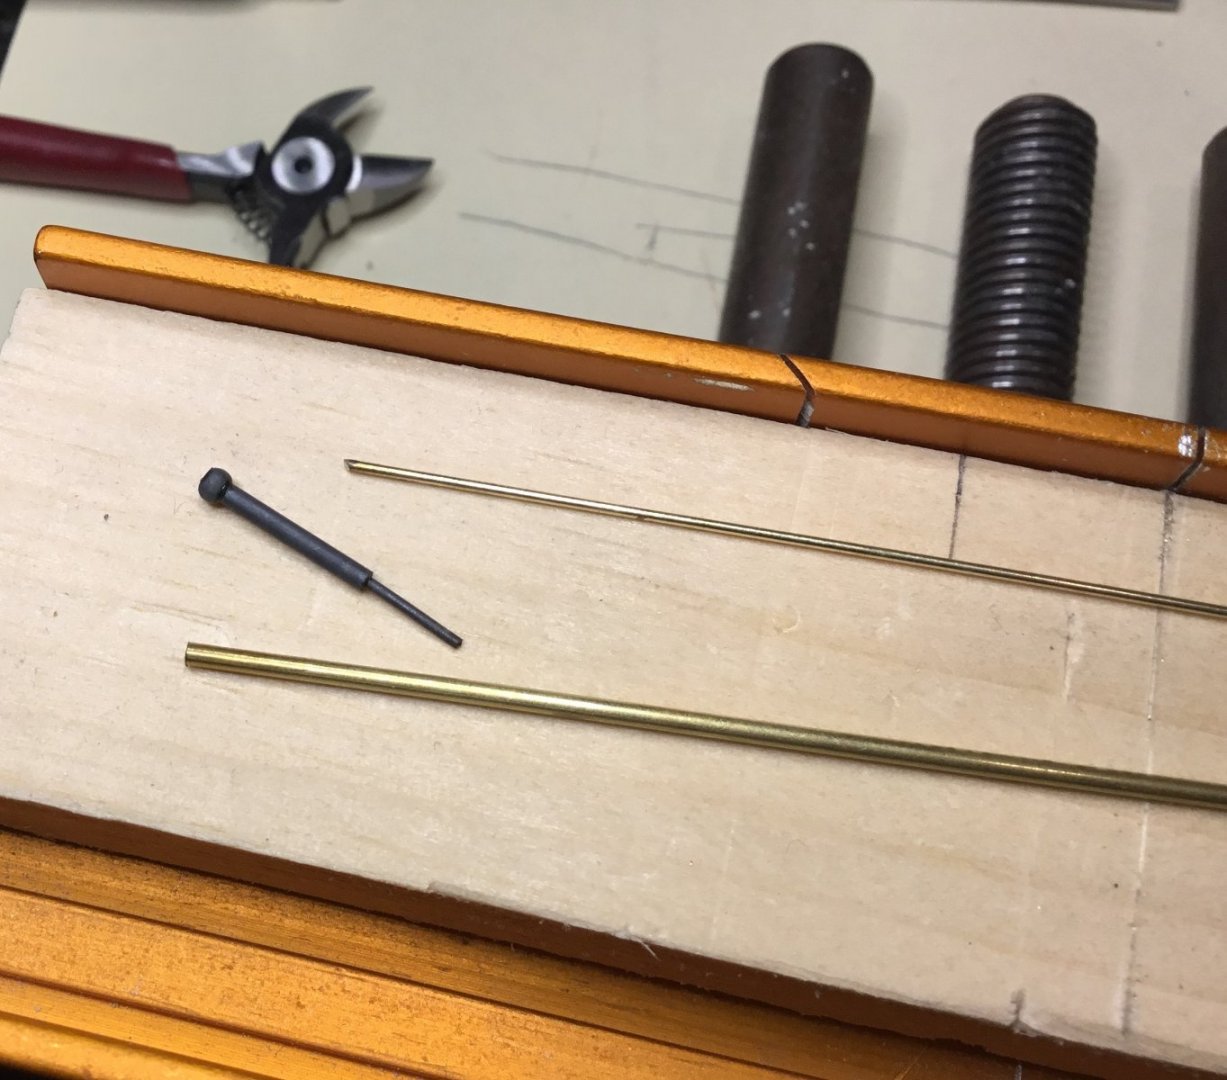
Not going to install them until a bit more rigging is finished. The rigging is still on hold so that's about it until next time....Paul
-
Hey SUBaron, great build log. I like that you’re overcoming the challenges and having fun at the same time. It is going to turn out beautifully.
Paul
- Keith Black, Scotty W and SUBaron
-
3
-
Hi Ian, thank you very much for your generous comment. I have been quietly following all of your build logs for some time now and have been greatly inspired by them. No matter what subject you decide to build it always stands out.
Paul
-
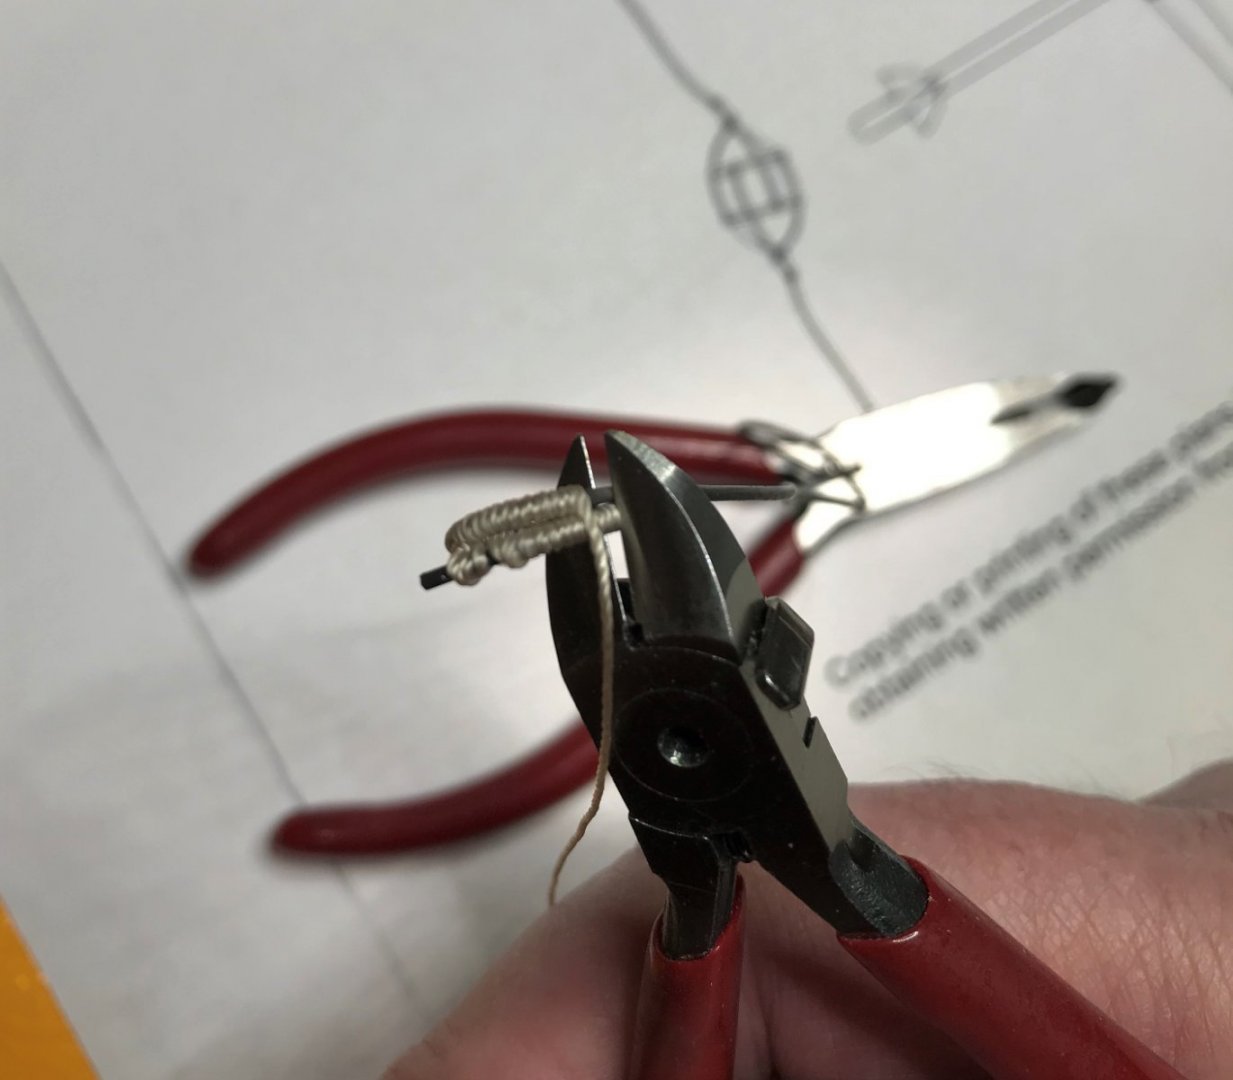
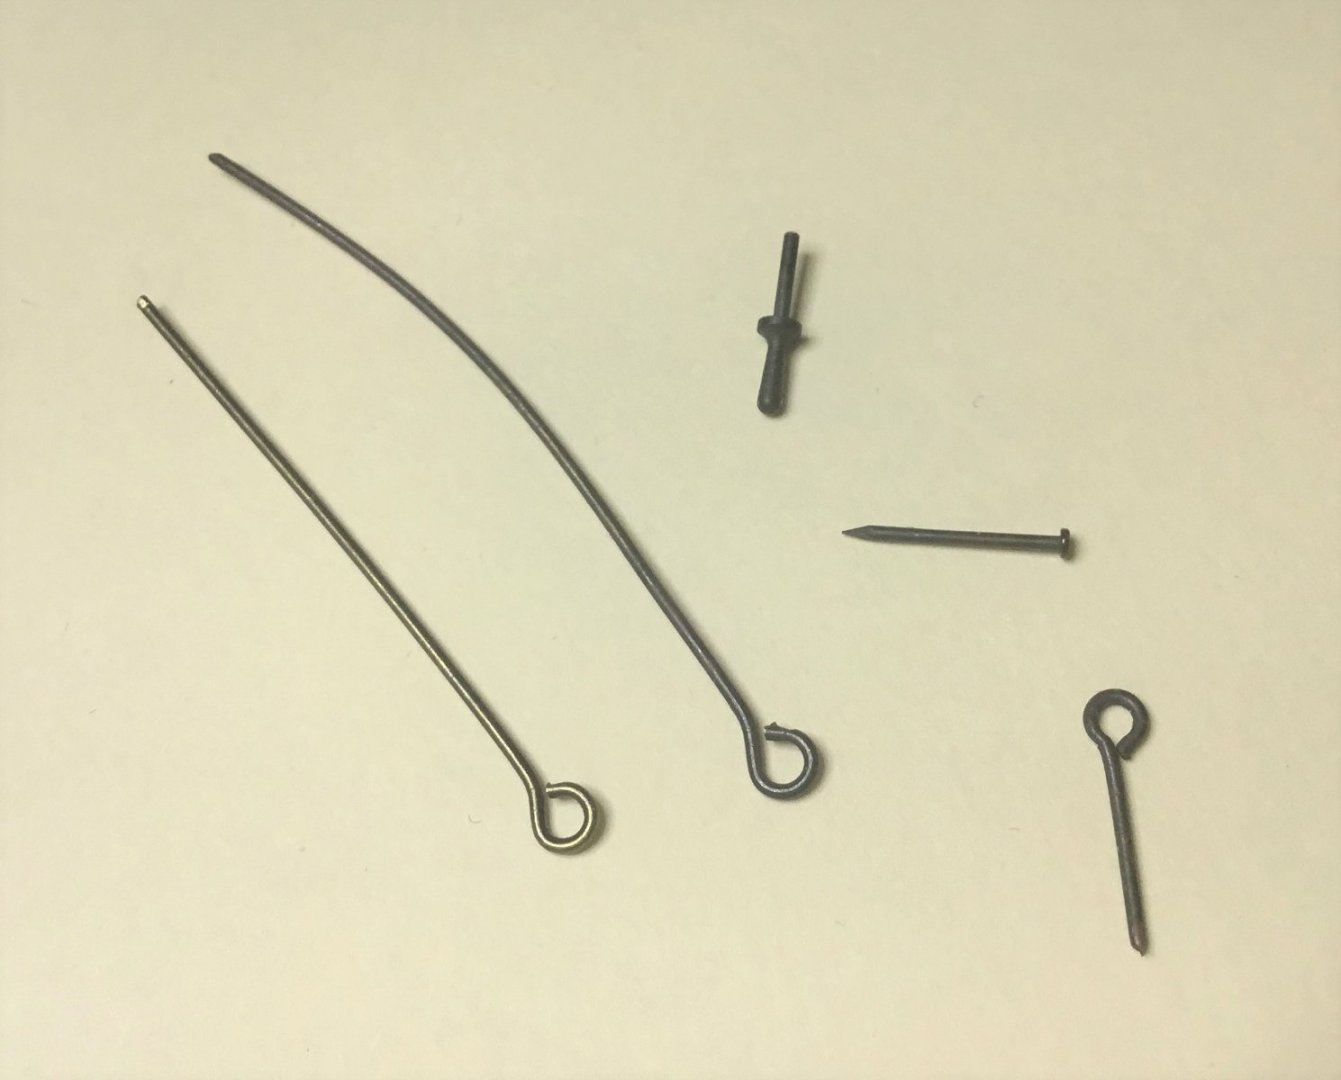
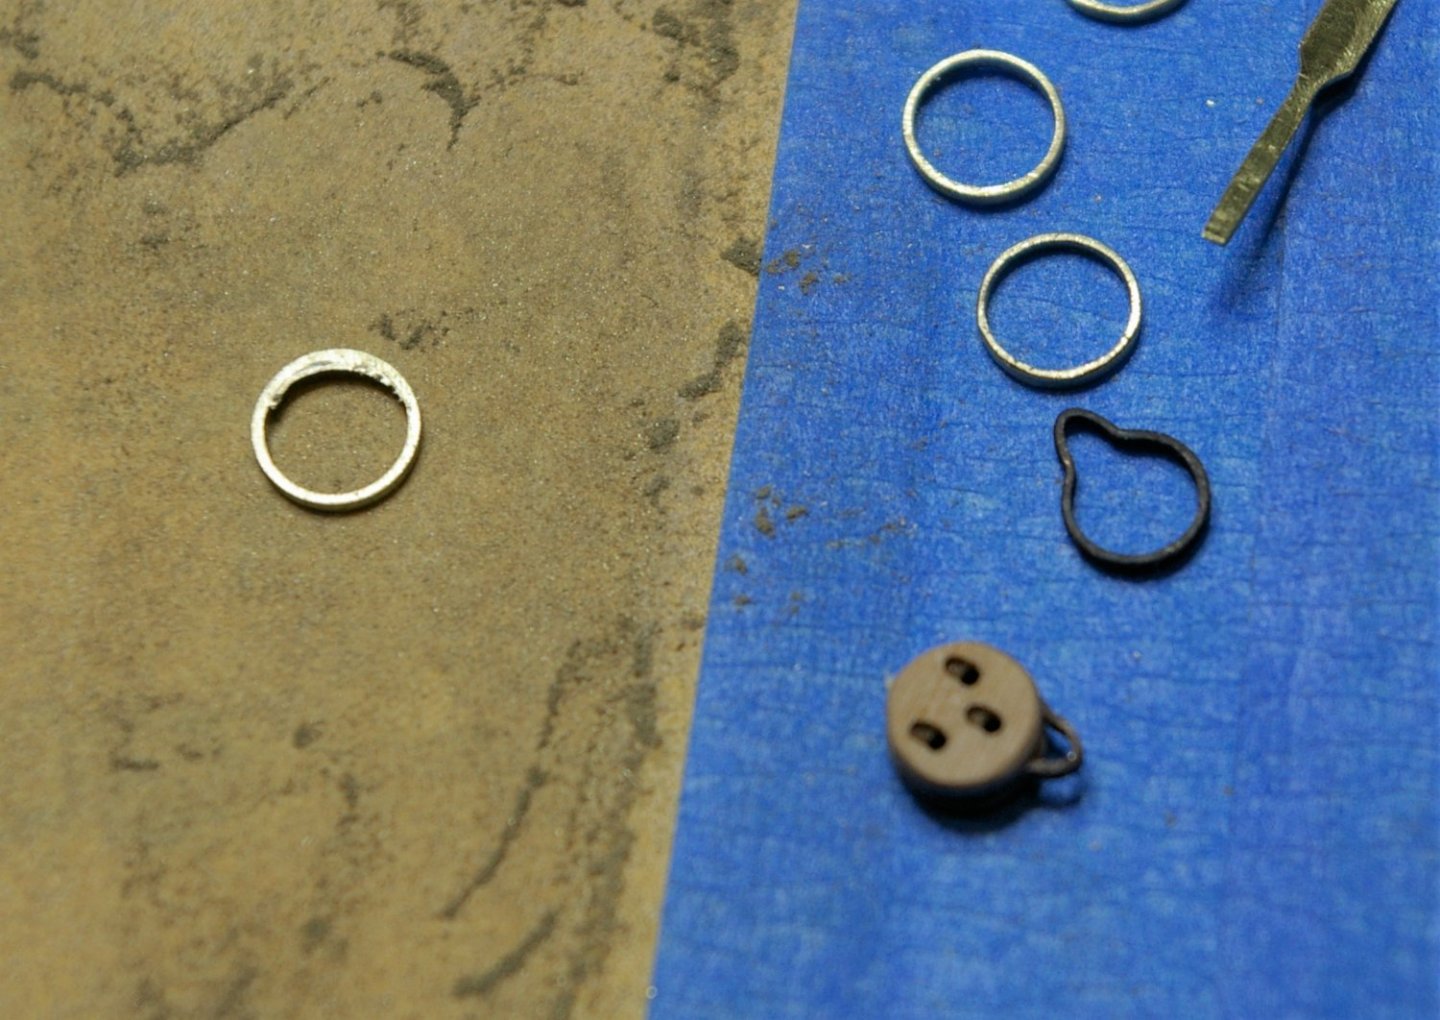
Hello Everyone, many thanks to all of you for your comments and likes. I said I was going to do the timberheads, but I kept hearing the Syren anchor mini kit calling me. After a couple of failed attempts at applying the pudenning to the supplied anchor rings I used the supplied wire for the buoys to make the anchor rings.
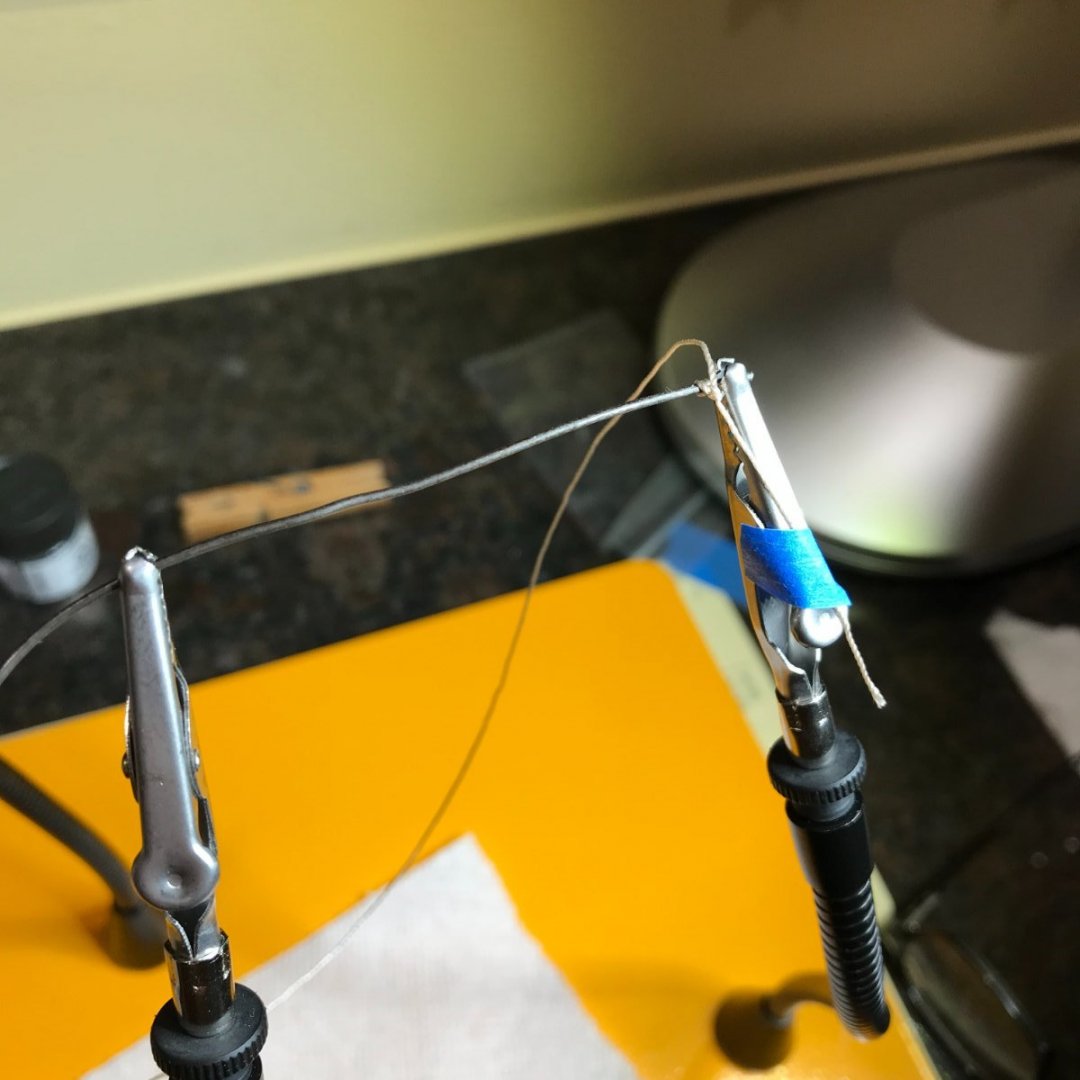
I tied some .018 Griffin rigging line to the wire and then applied CA along the length of the wire that was to be wrapped.
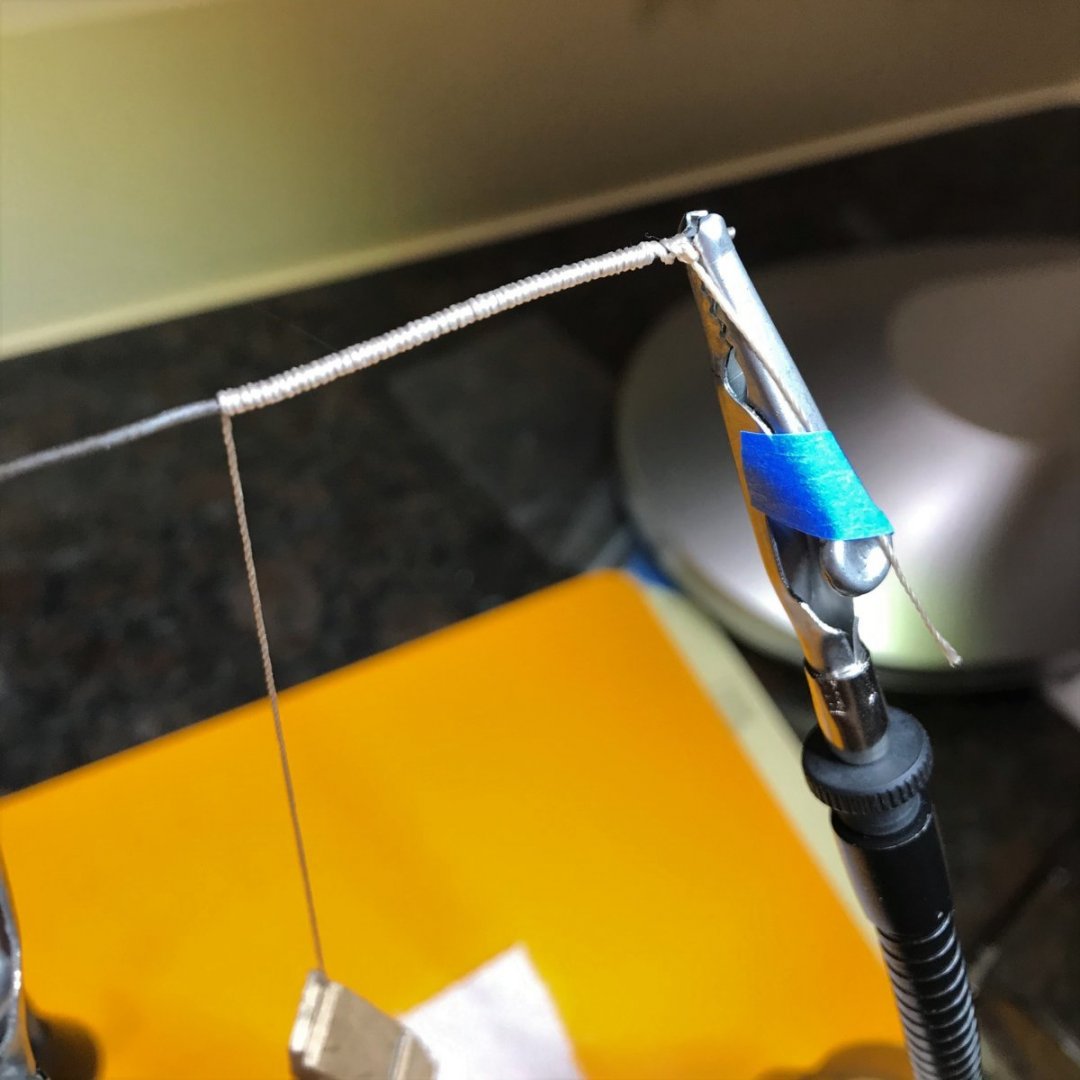
Wrapped the line around the wire. About an inch and a quarter. Wound the wrapped wire around the shaft of an appropriately sized screw driver.
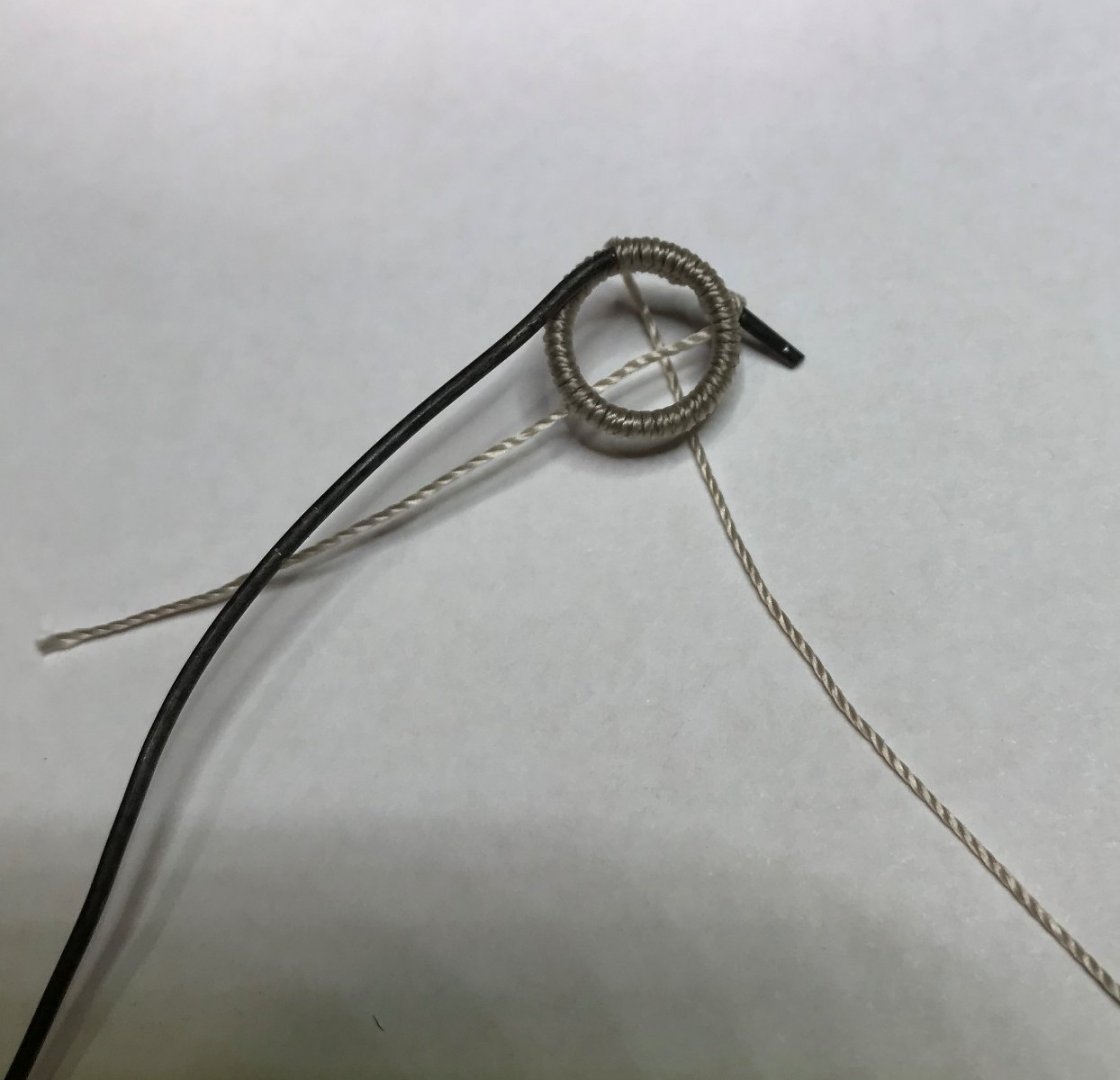
Cut the ring leaving enough bare wire to fit into the hole in the shank of the anchor.
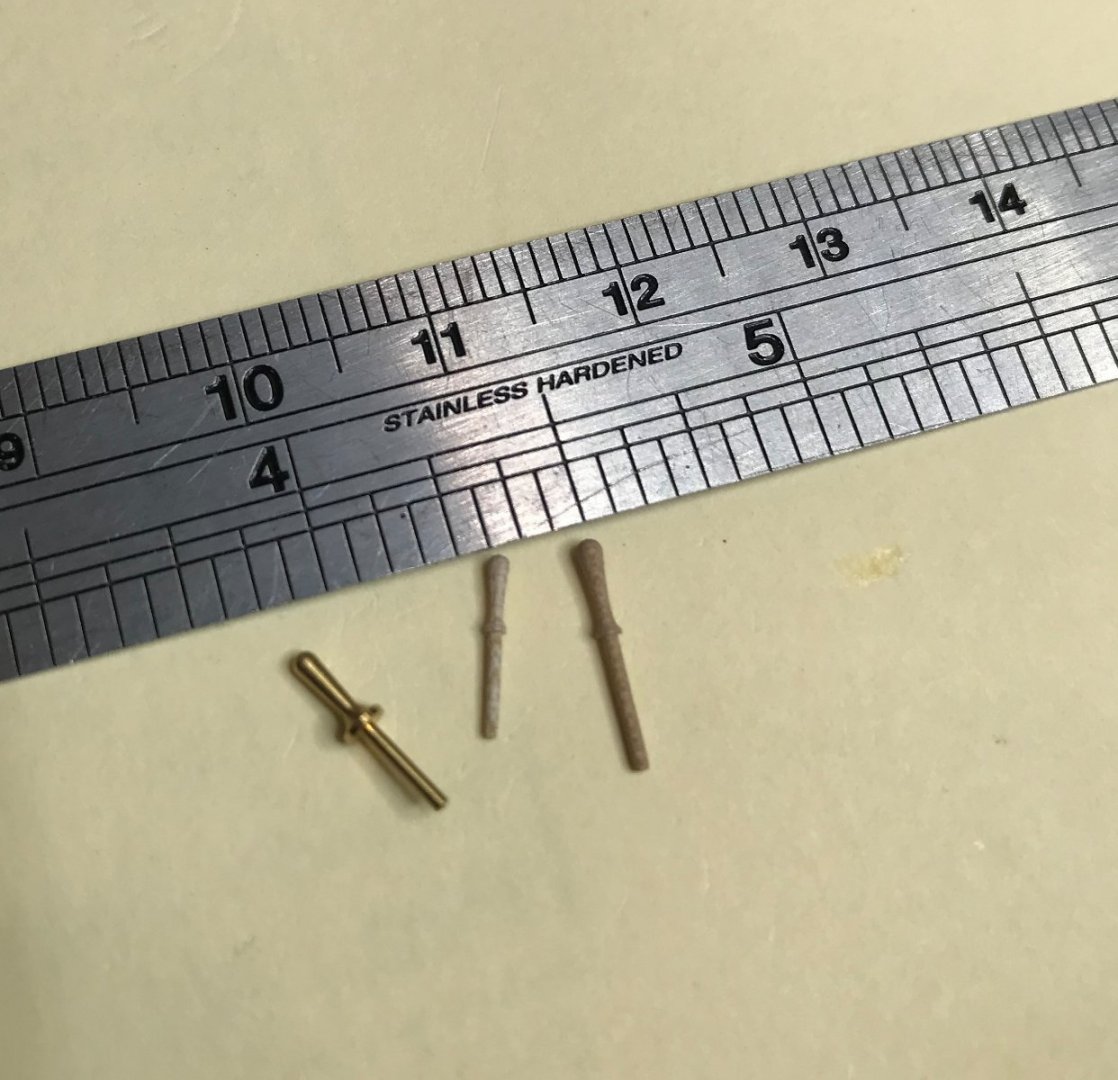
The stock was attached and the ends were drilled and pinned under the outer "iron" bands which were made using heat shrink.
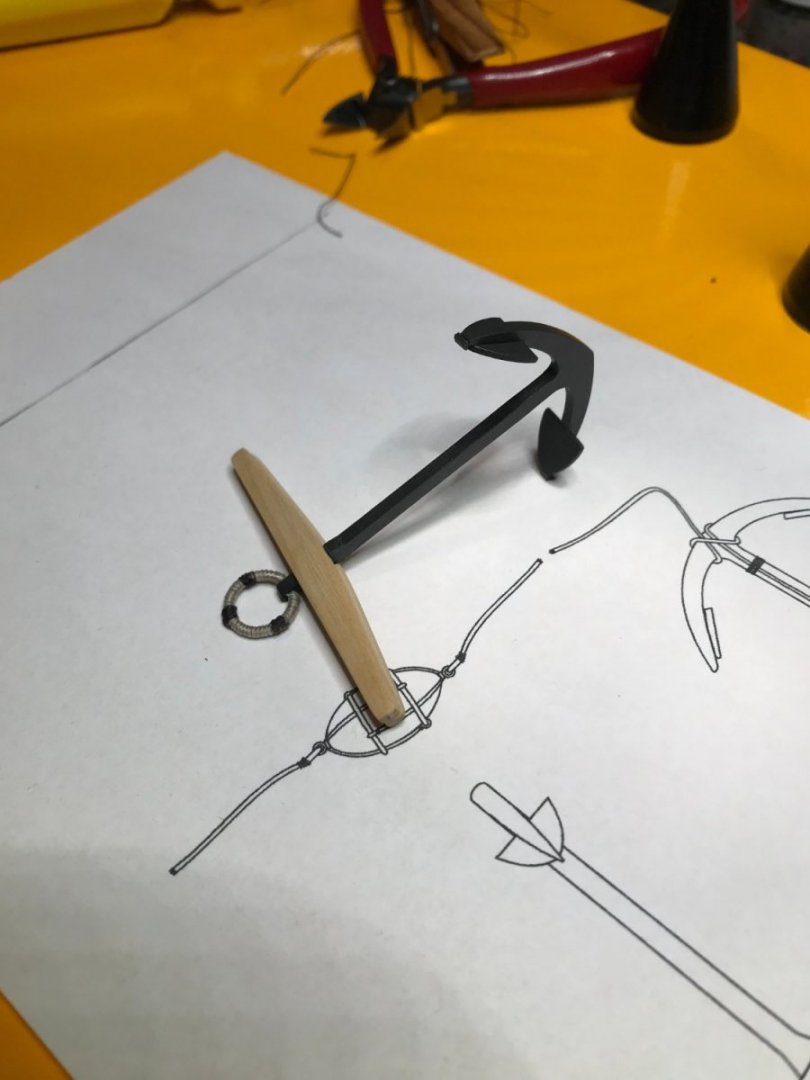
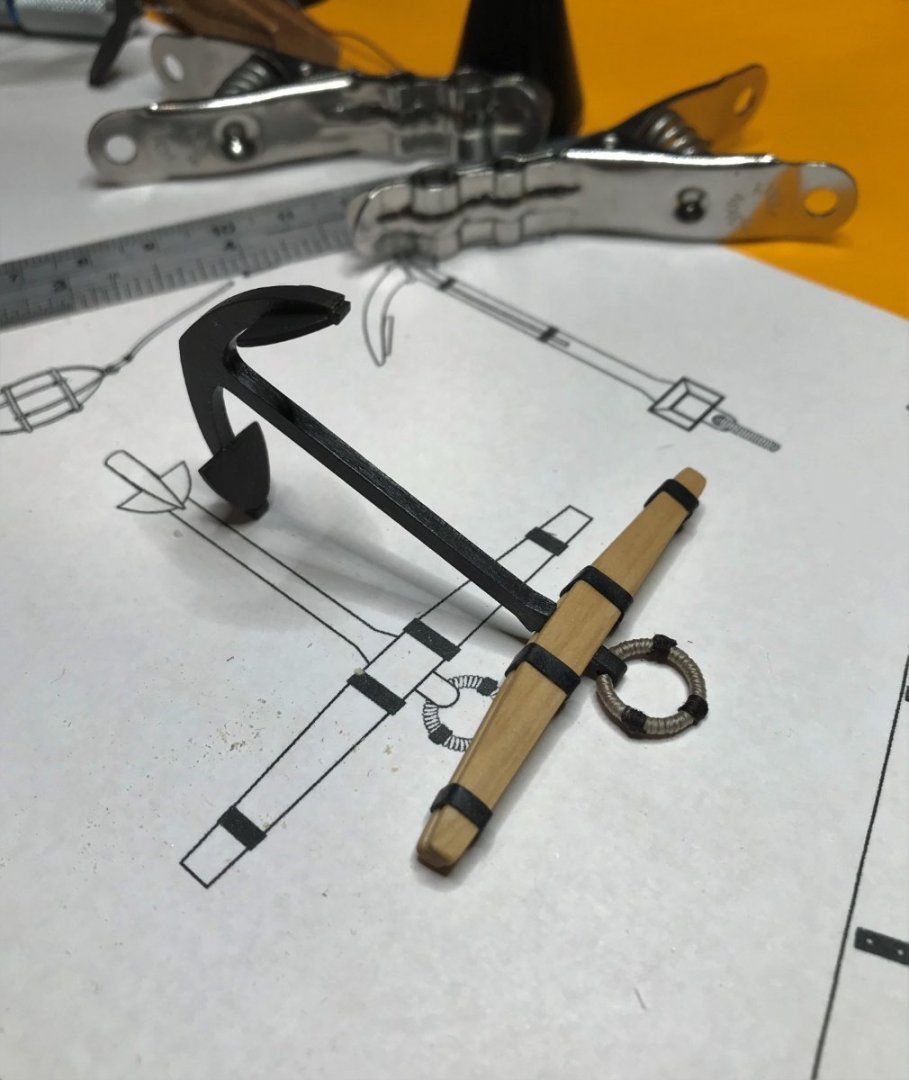
The seizing on the rings was done with 30 wt brown cotton thread and brushed with diluted white glue. I guess the pudenning should have been brown. They are easy enough to take off and put on so maybe if I have nothing going on they can be changed. See you later....Paul
- bruce d, Nunnehi (Don), Seventynet and 5 others
-
8
-
Thanks very much rudybob. I have been enjoying watching your innovative problem solving in your Pinnace build log.
Paul
-
Hey rudybob , I’ve only planked one hull using the tick strips and planking fan but this is the method I used. After putting the marks on the tick strip, I would only transfer one mark to the bulkhead for the next strake. After finishing that strake I would check to see if the tick strip could still be used for the next strake. If it could still be used I would put one more mark on the bulkhead. If the the same tick strip couldn’t be used again because I had not been right on the money with the previous plank, then I would make a new tick strip. By only putting one mark at a time on each bulkhead I wouldn’t have to get rid on a bunch of marks if I messed up. Hope this makes sense.
Paul -
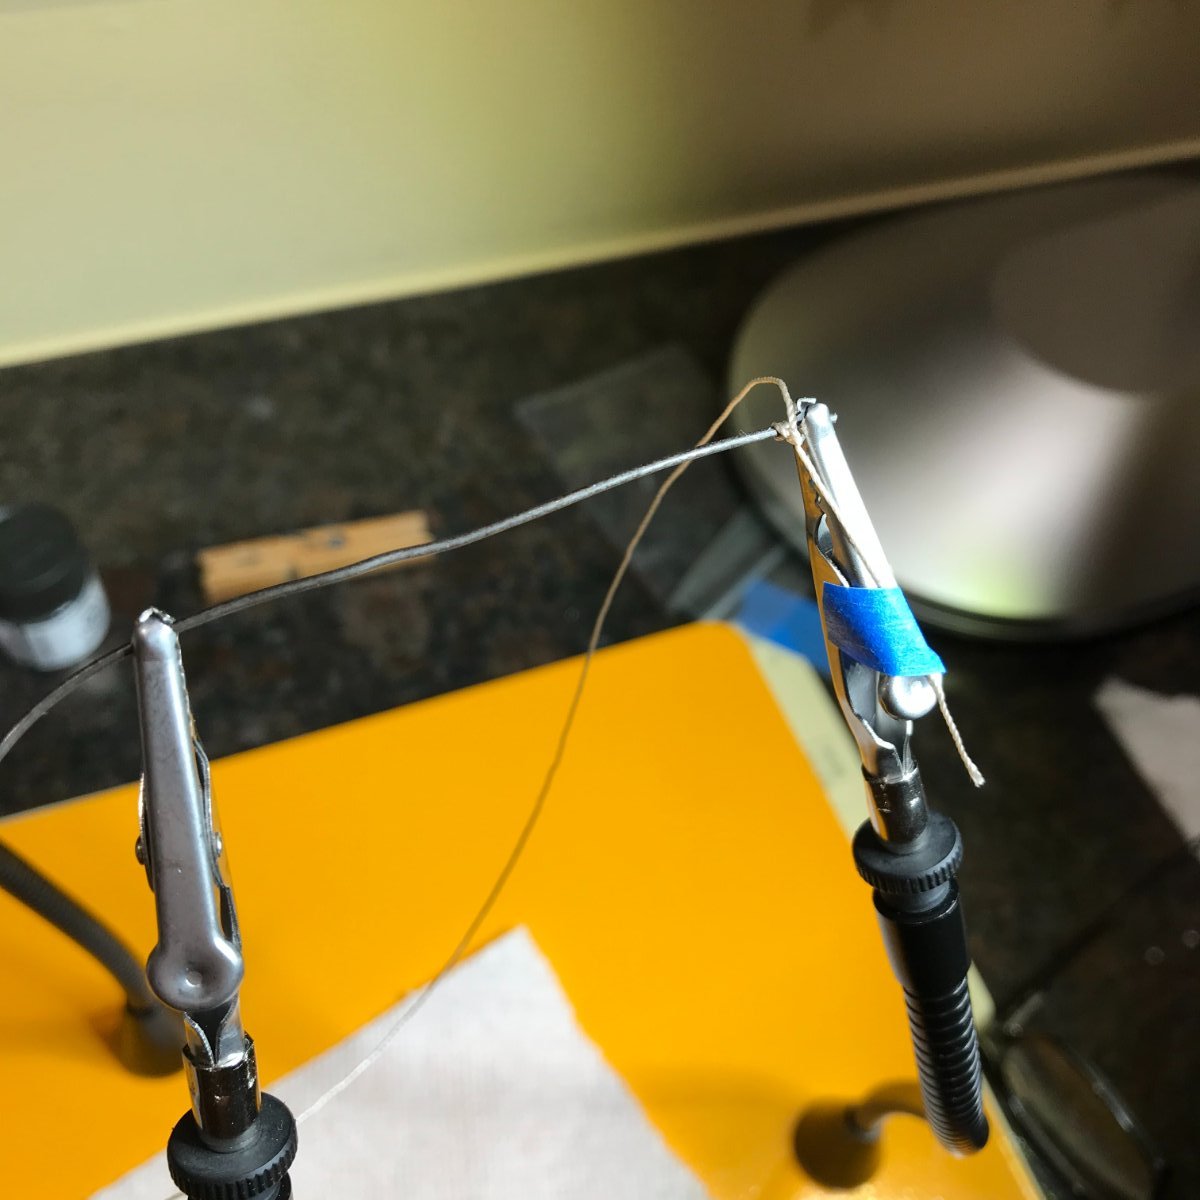
Hello Everyone, I hope you are all well. Thanks very much to All for your comments and Likes. For a couple of weeks now I have been knee deep in rigging. It was going good until I got to the standing rigging and decided to use the brown Griffin rigging line that I had. Going to put it on hold and see about getting some better rope. Griffin line is kind of mushy and just doesn't look good when you seize it. Very disappointing. Other people's mileage may vary but that's just my opinion. When I built my Bluenose, I had bought a book that had lots of photographs of the gaff being lashed to the boom when she was in port. Can't remember the title of the book. The only pictures I have of her were taken just before she left for a new home. Lots of reflections from the glass case.
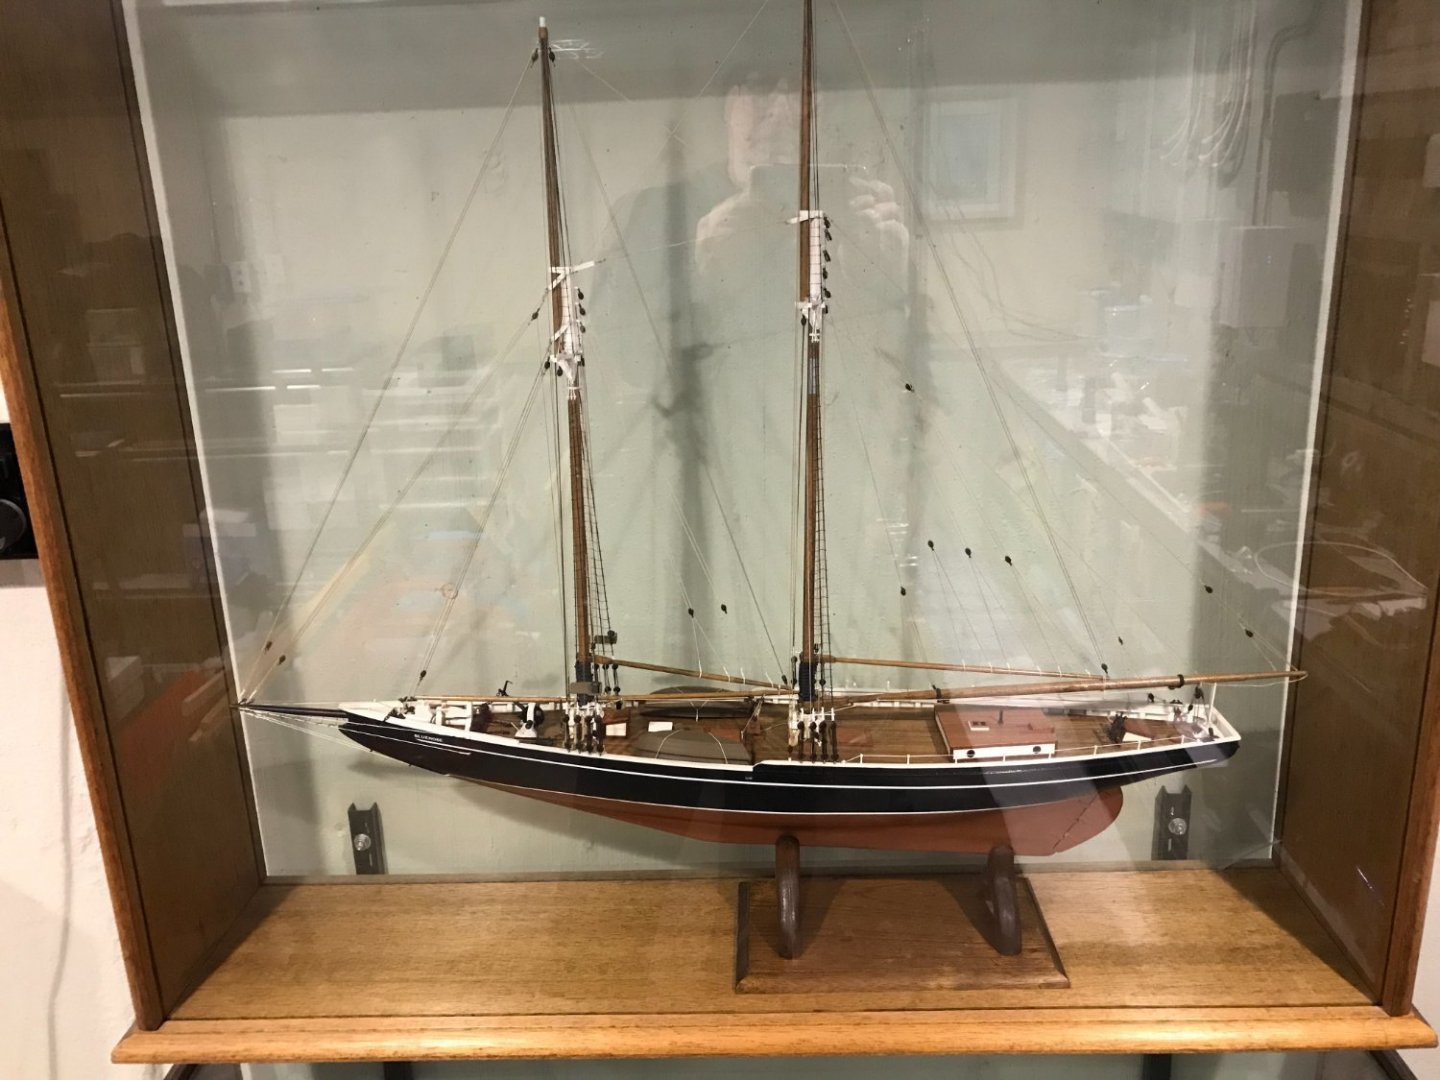

So that is the way I want to rig Cheerful.
Not sure how it was done back in the day so I made a loop on each end of a piece of rope. Slipped one loop over the end of the gaff, wrapped the rope around the boom a couple of times and slipped the other loop onto the end of the gaff. If anyone has any thoughts on how this may have been done I would be more than happy to hear them.

The block for the flag halliard was slid onto the gaff and the rope will probably be coiled on the deck.
I picked up some Falconet 11mm belaying pins because the 9mm Falconet wood pins that I had were very small. Wanted to use wooden pins instead of the brass 9mm pins made by Technell even though the brass pins are very nice.
The 9mm Falconet pin measures more like 8.5mm and the handle of the 11mm Falconet pin is very close to being the same size as the 9mm Technell. The 11mm pins look bigger in the photo than in real life.
While the rigging is on hold I will probably work on the timberheads.
See you next time. Paul
-
-
Thank you so much for your kind words Johann. I hope you are mending well. Paul
-
Hi Gary, I’ve had that happen before on several different sites. Usually because something went wrong during the registration process and when I tried to start over I was told that the email address was already used. I would just make a new email address. You can never have too many. 🙂
Paul
- Keith Black and mtaylor
-
2
-
Hey SteveL, I usually post using a PC but I have made a couple of posts using an iPad.
After typing the text, press Enter a couple of times to move the cursor down to where you want to insert your image(s). Insert image that you uploaded. Press enter again to move cursor down to where you want to add more text or another image.
If you press enter a couple of times between inserting images you will get a space between them and it will be. easier to distinguish between them.
Paul
- Ryland Craze and FrankWouts
-
2
-
Hey Bob, yes it was cherry red and it went straight into the blackener that was cut with water
- Ryland Craze and BobG
-
2
-
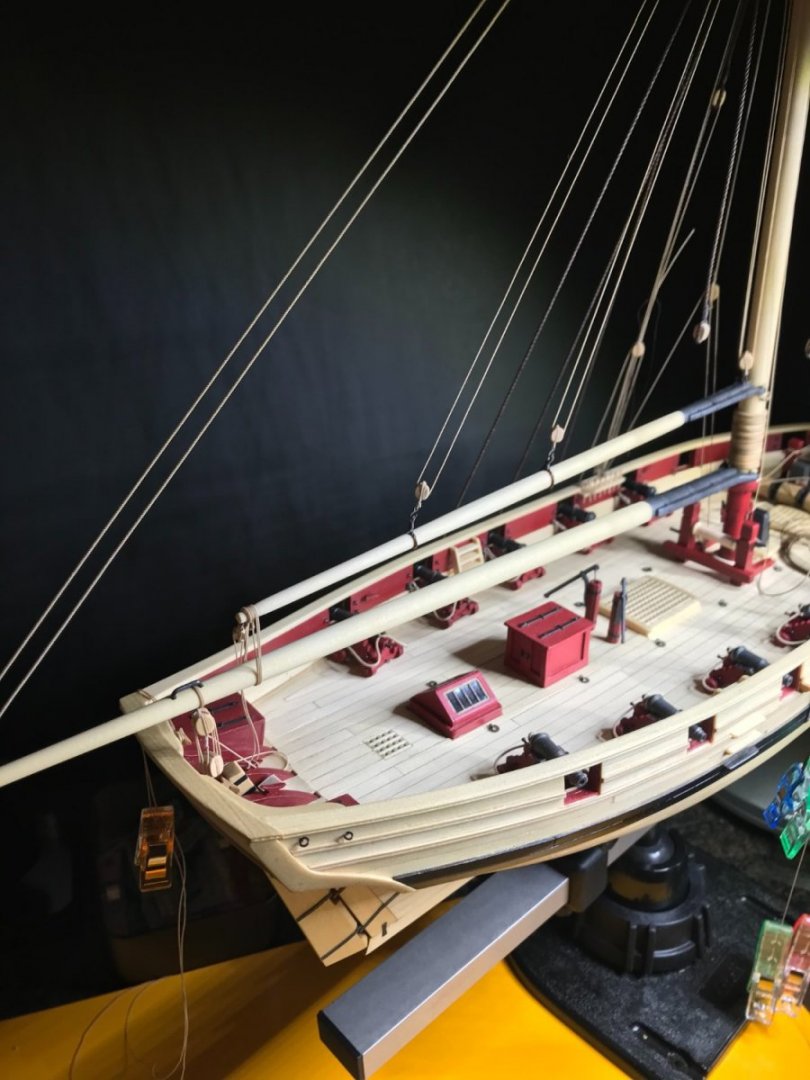
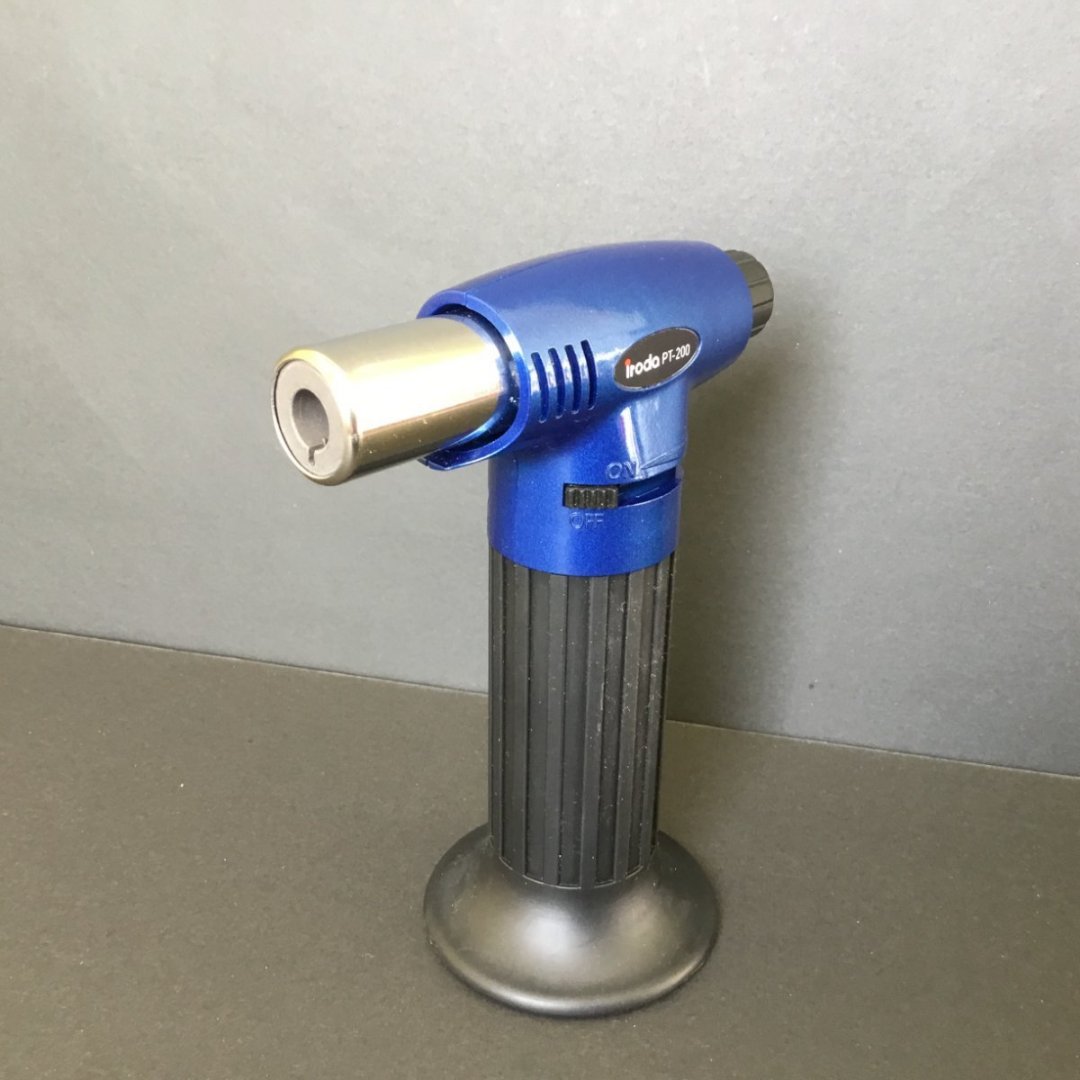
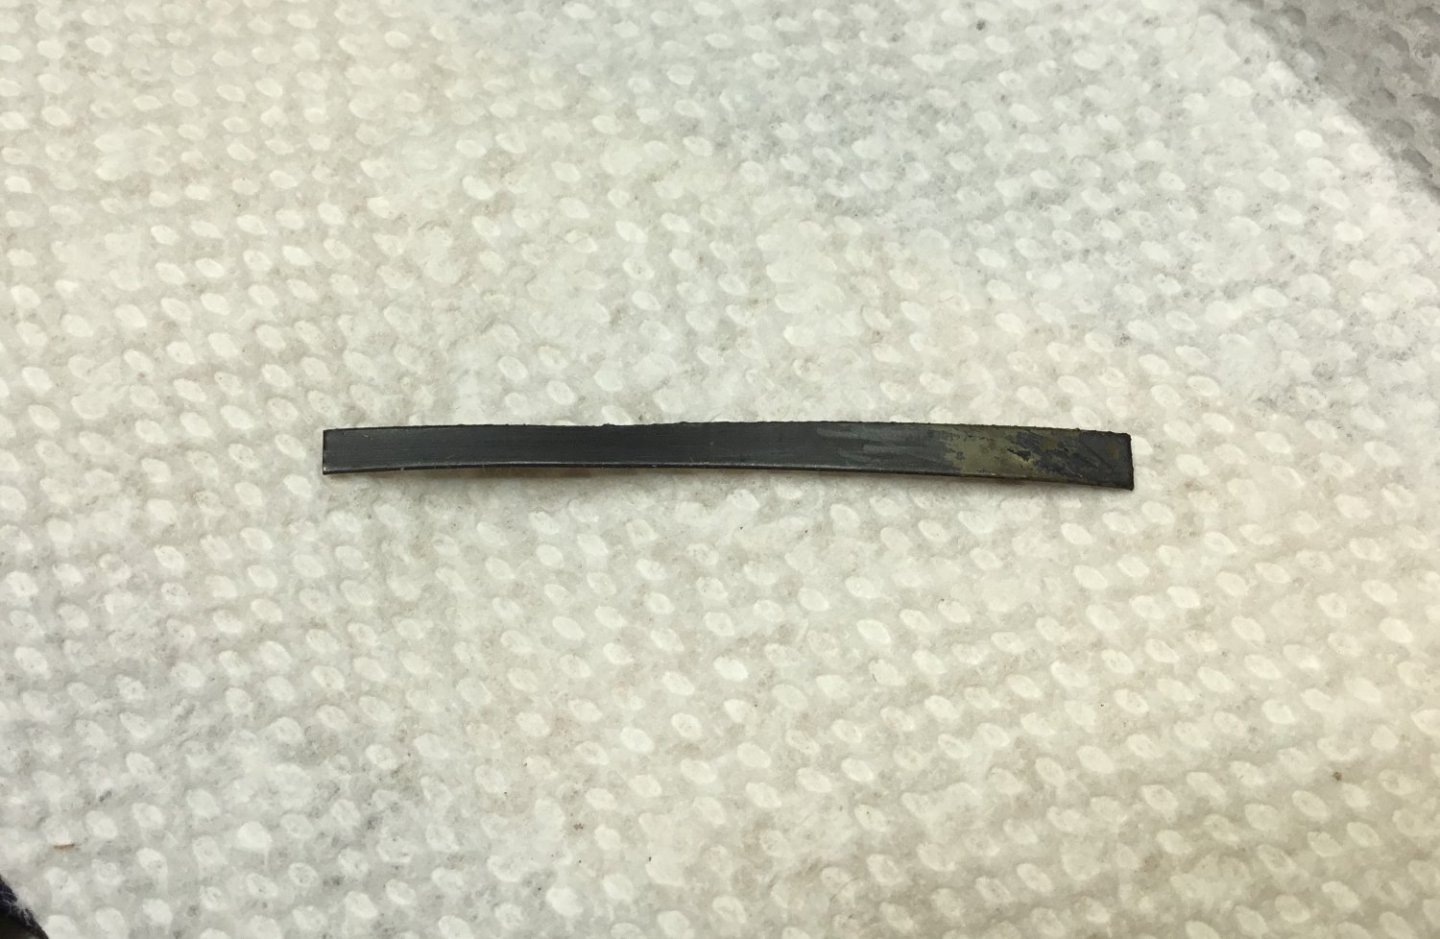
Hello Everyone, thank you all for your great comments and likes. This week I was pecking away at the chain plates busily breaking drill bits on the brass strips. Spent some time reading Moonbug's "A bit of advice" thread and druxey mentioned annealing brass. So I went over to the Canadian Tire and picked up an Iroda mini butane torch. They are usually on sale over there. Had one of the smaller torches that uses a refillable butane lighter but the flimsy trigger mechanism did not last long. This one is a lot better'
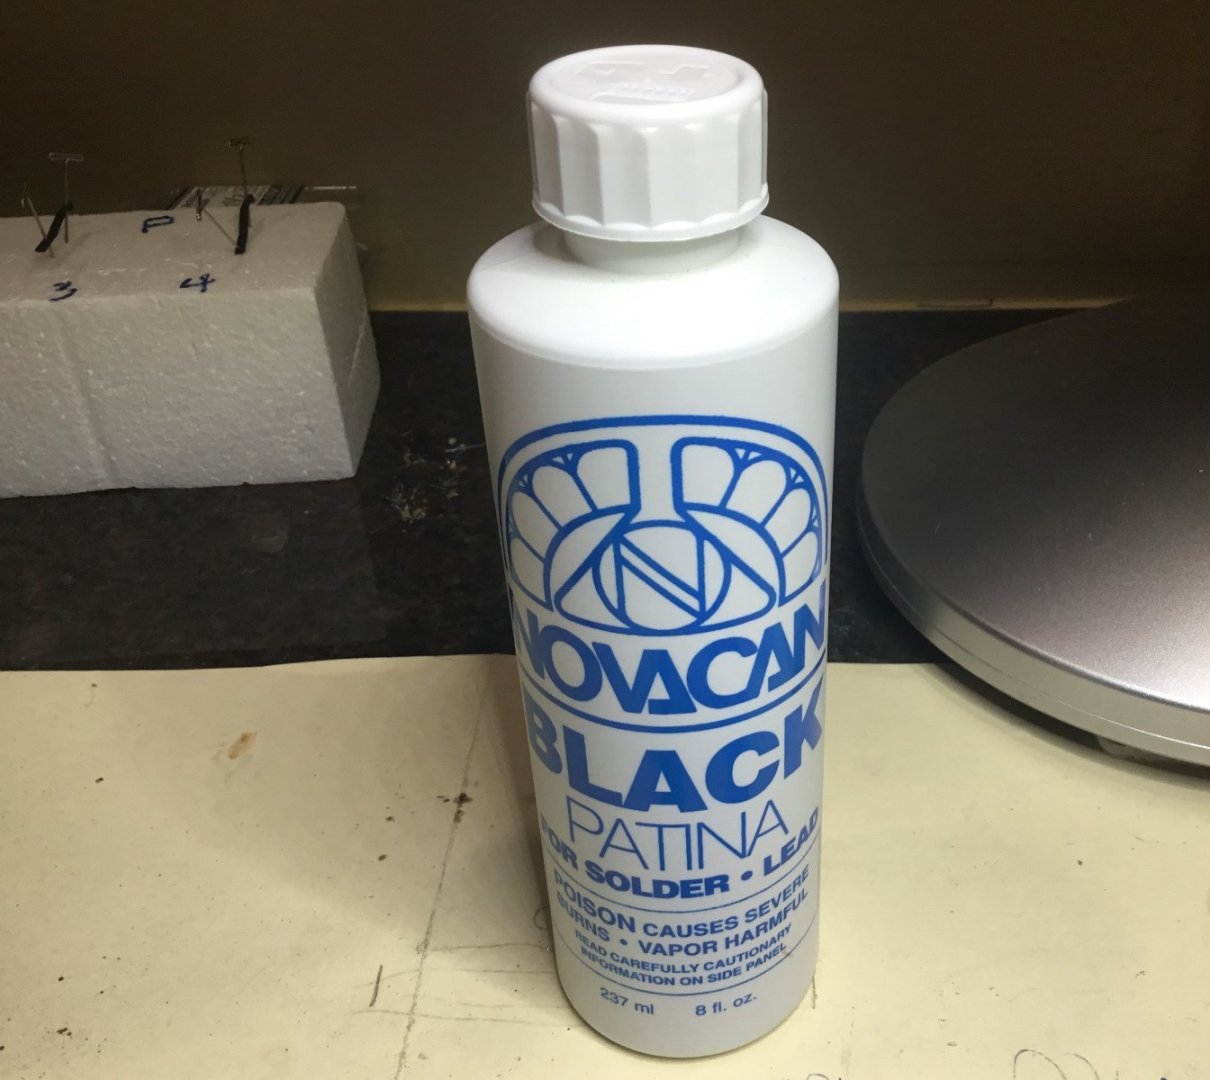
It made a huge difference with the drilling. After the holes were drilled in the chain plates I annealed them again but quenched them in the blackener. The finish is very durable. Been using Novacan blackener for these small parts. Got it in a stained glass shop. The owner of the shop was nice enough to try it on some brass for me before she would let me leave with it.
This brass strip was a test piece. The left side was annealed and quenched in the blackener and the right side was not annealed. Did some other small parts to see how they liked the process.
Still shot the chain plates with dullcote for some added protection.

They are all made. Just have to install them.
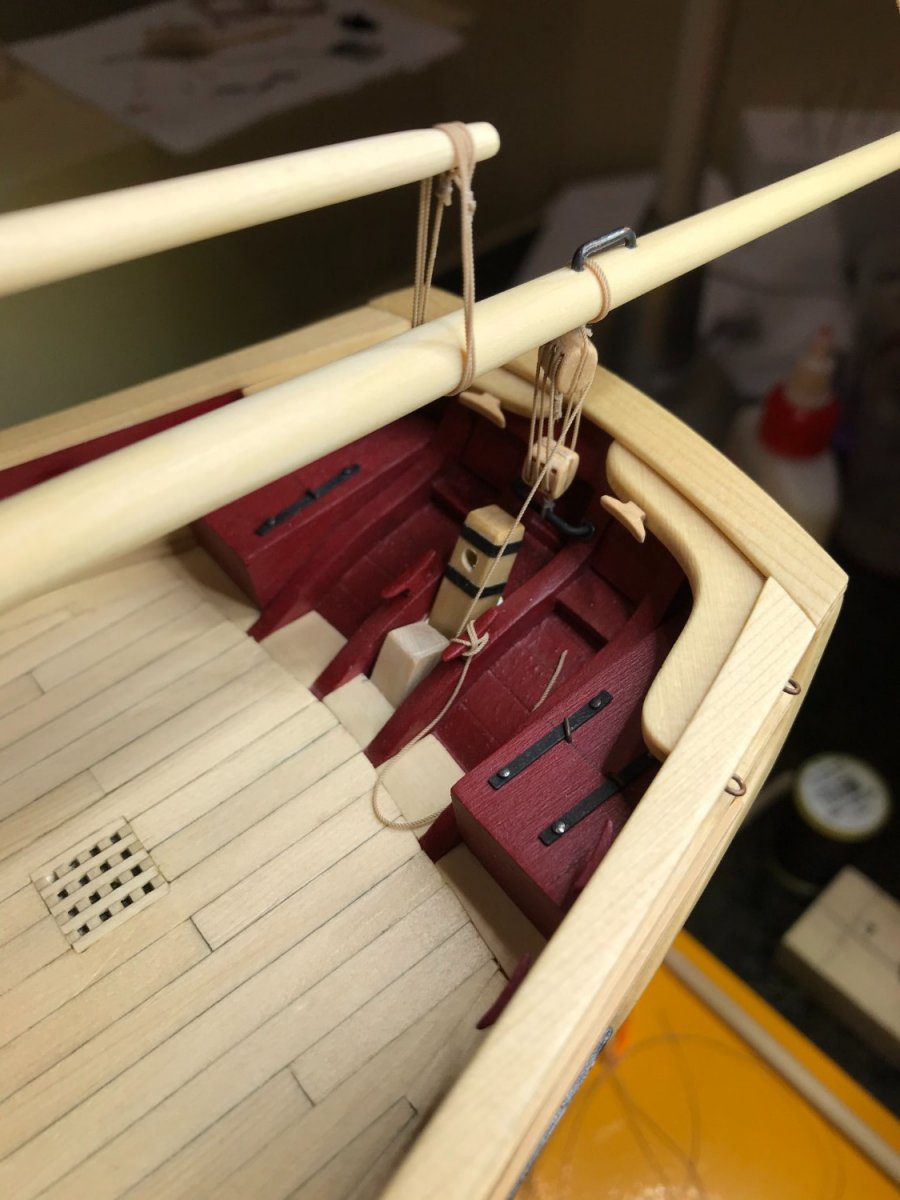
One last thing that was worked on were the cleats(?) in the center of the topsail yard.
.thumb.JPG.4a198fe3dcee6f57b59bfa635045555d.JPG)

Getting very close to rigging. See you next week.....Paul
-
Hey Bob, I think I read somewhere that perfectionists can have fun too. Looking forward to your Flirt build.
Paul
- Dave_E, chris watton, hollowneck and 2 others
-
3
-
 2
2
-
52 minutes ago, hollowneck said:
....a ship builder's PTSD: finishing your model. Pour yourself a wee dram o' scotch and congratulate yourself.
Post-malaise, I run around the block three times and then peer into my stash.
Ron
Hi Ron, thanks very much for your Likes and comments. Even though it has been fun, I think after she has been rigged I am going to have an XXL dram of scotch.
- hollowneck, Ryland Craze and BobG
-
3
-
8 hours ago, glbarlow said:
We’ll that’s a creative approach to those strips, very clever.
6 hours ago, BobG said:Great idea for making those brass rings for stropping the blocks, Paul! The creativity of modelers like you always amaze me.
Gentlemen, thank you very much for your comments. I guess this will work as long as Chuck keeps making his multi-part deadeyes 🙂
- BobG and hollowneck
-
2
-
-
Hello Everyone, hope you are all well. Thank you for all of your great comments and Likes. So appreciated.
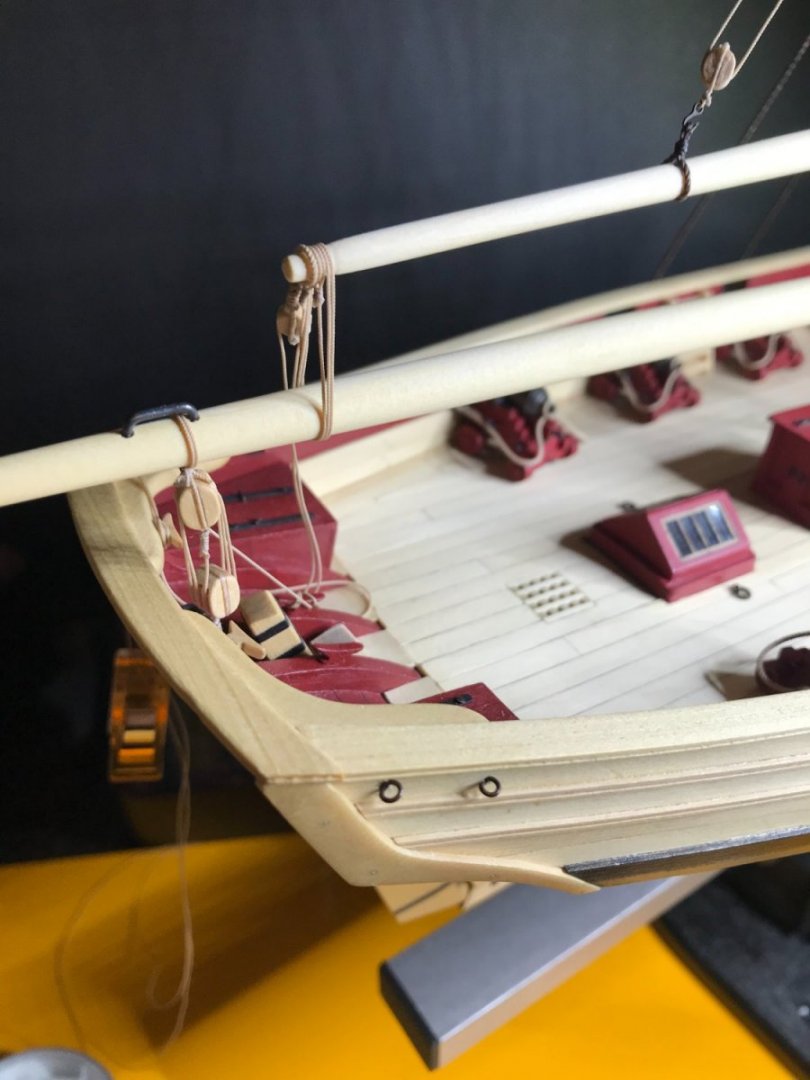
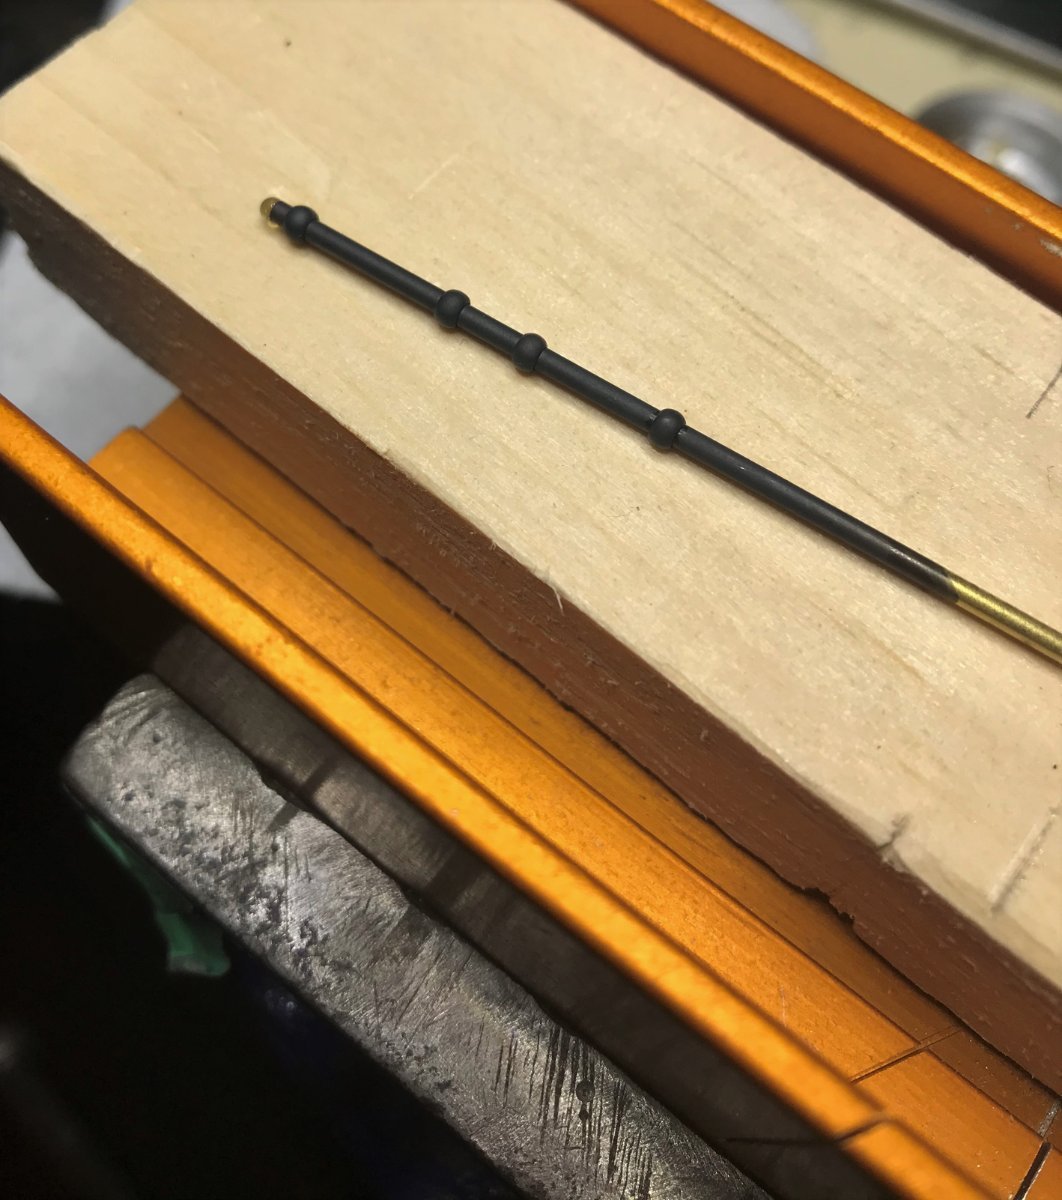
This week was spent focusing on the stropping the deadeyes. Rings about 1/16 inch thick were cut from a 1/4 inch brass tube with 1/64 inch walls.
.thumb.JPG.2372c1d3ccccaa0d860ce7b1773dd7bf.JPG)
After sanding them down to around 1/32 inch they were given a bit of a squeeze to make them oval.
.thumb.JPG.b4eb46096d1ea109a83da2abac7e21fb.JPG)
A #53 drill bit was taped to a 3/16 inch bit and the oval shaped ring was slid over them and crimped with end cutting pliers.
.thumb.JPG.47baa96dc941834aeb4faac035d0d783.JPG)
.thumb.JPG.1162113af110ac32fda85c9dc4610123.JPG)
The Syren deadeyes were then assembled as usual while installing the blackened strop in the process.
.thumb.JPG.eb2ca63420497dac43a8c14921afefbe.JPG)
.JPG.d5f5adb628393bdb72dada5315ad3dee.JPG)
.thumb.JPG.7428537b46f2f655ca2ac9af492be4f0.JPG)
They just need a little more buffing up. Between making deadeyes the boom, gaff, and yards were worked on a bit more.
This week I plan on working on the chain plates. I ordered some Testors Dullcote from Sunward Hobbies to see if it helps make the blackening more durable.
See you next week.....Paul
- Vladimir_Wairoa, Gregory, Ryland Craze and 7 others
-
9
-
 1
1
-
8 hours ago, glbarlow said:
She has really come along nicely. It’s almost disappointing as the finish line looms near, at least it was for me. It was such a fun build.
Thanks very much Glenn. I know the feeling you’re talking about. Funny isn’t it, you’d think it would be the opposite. I guess building anything like this becomes such a big part of our lives.
Paul
- glbarlow, hollowneck and Peterfly
-
3
-
2 hours ago, allanyed said:
Your workmanship is superb and your photos give me renewed faith that a quality kit can be produced thanks to Chuck Passaro's efforts. I hope some of the other kit producers learn something by taking note of the materials used and attention to detail that comes with Syren's offerings.
Allan
Allen, thank you so much for your comment. I could not agree more about Syren products and the amount of work that Chuck has put into them. I also have to acknowledge the fact that even though the monograph is so well done, I still lean heavily on all of the build logs of the members that pioneered the building of this model.
Paul
2 hours ago, hollowneck said:Absolutely beautiful work. I could eat lunch (or dinner) served on that pristine deck!
Someday I just might give it a shot and scratch build something in 1/4" scale.
Ron
Ron, thank you for your generous comments. I’m still laughing about the eating off the deck comment.
Paul
1 hour ago, BobG said:I just found your log and read over it. Beautiful work, Paul!
I have admired this cutter ever since I first saw it quite a few years ago. I'll be following your build now.
Bob, thank you very much. I have the feeling that eventually, there will be a cutter in your future 🙂
Paul
- hollowneck, BobG and Ryland Craze
-
3
-
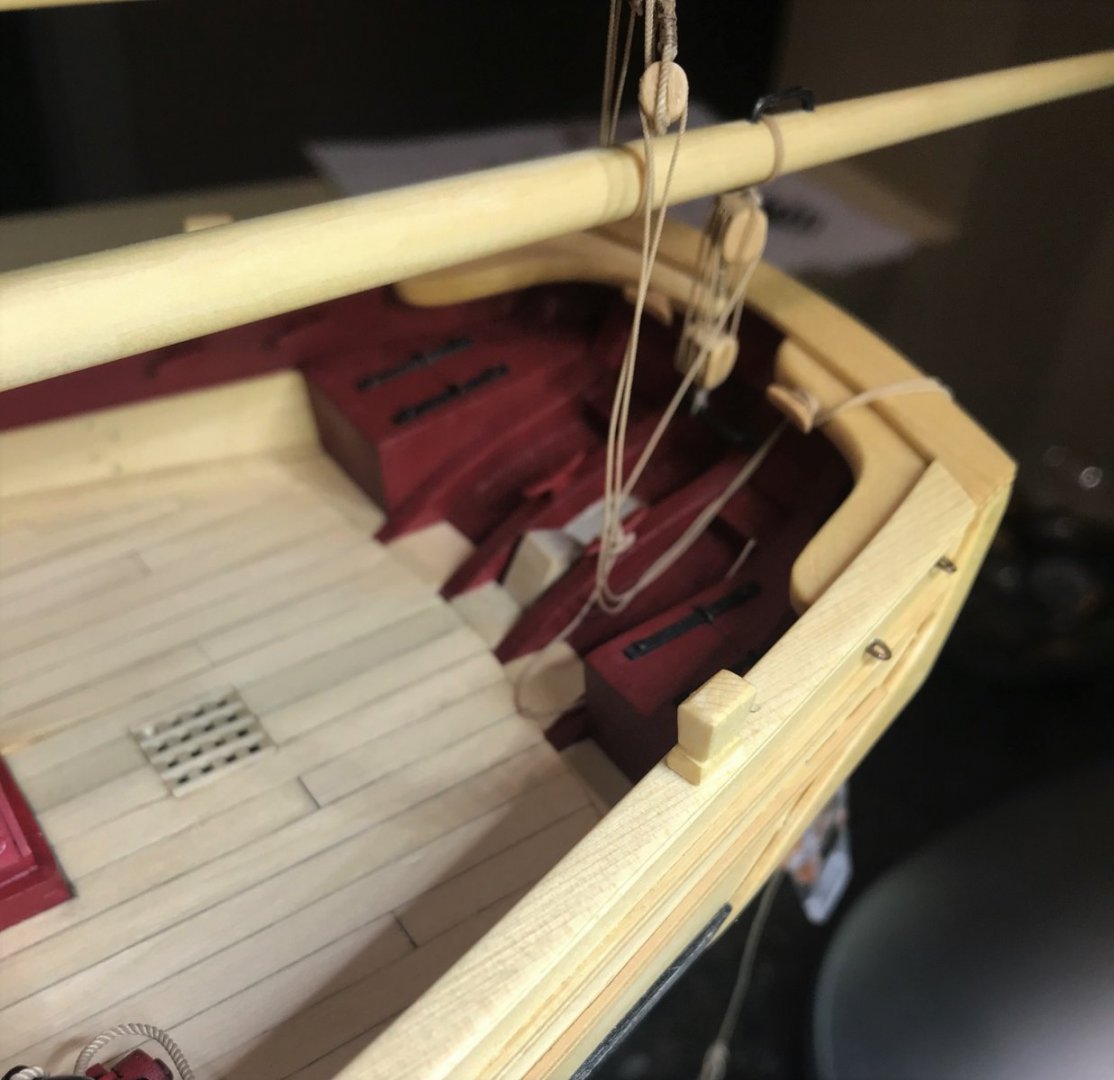
Hello Everyone, thank you for stopping by, commenting and Liking. As usual I've been jumping around all over the place with Cheerful.
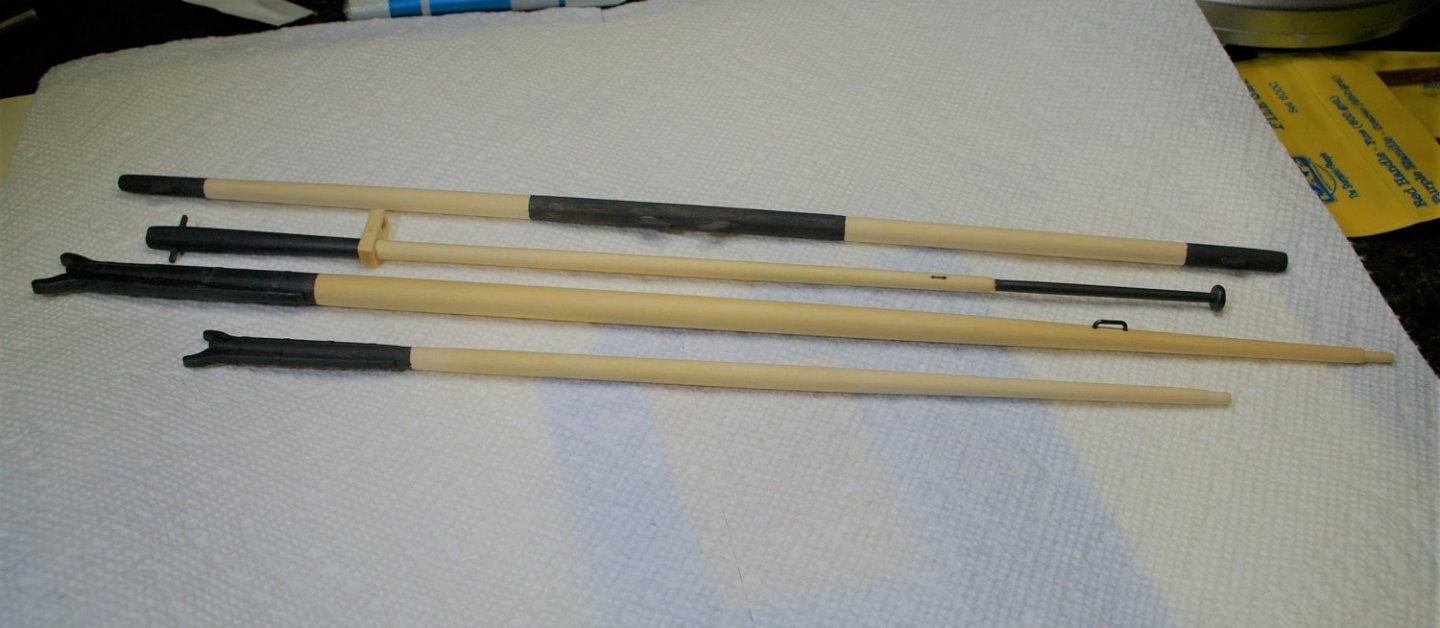
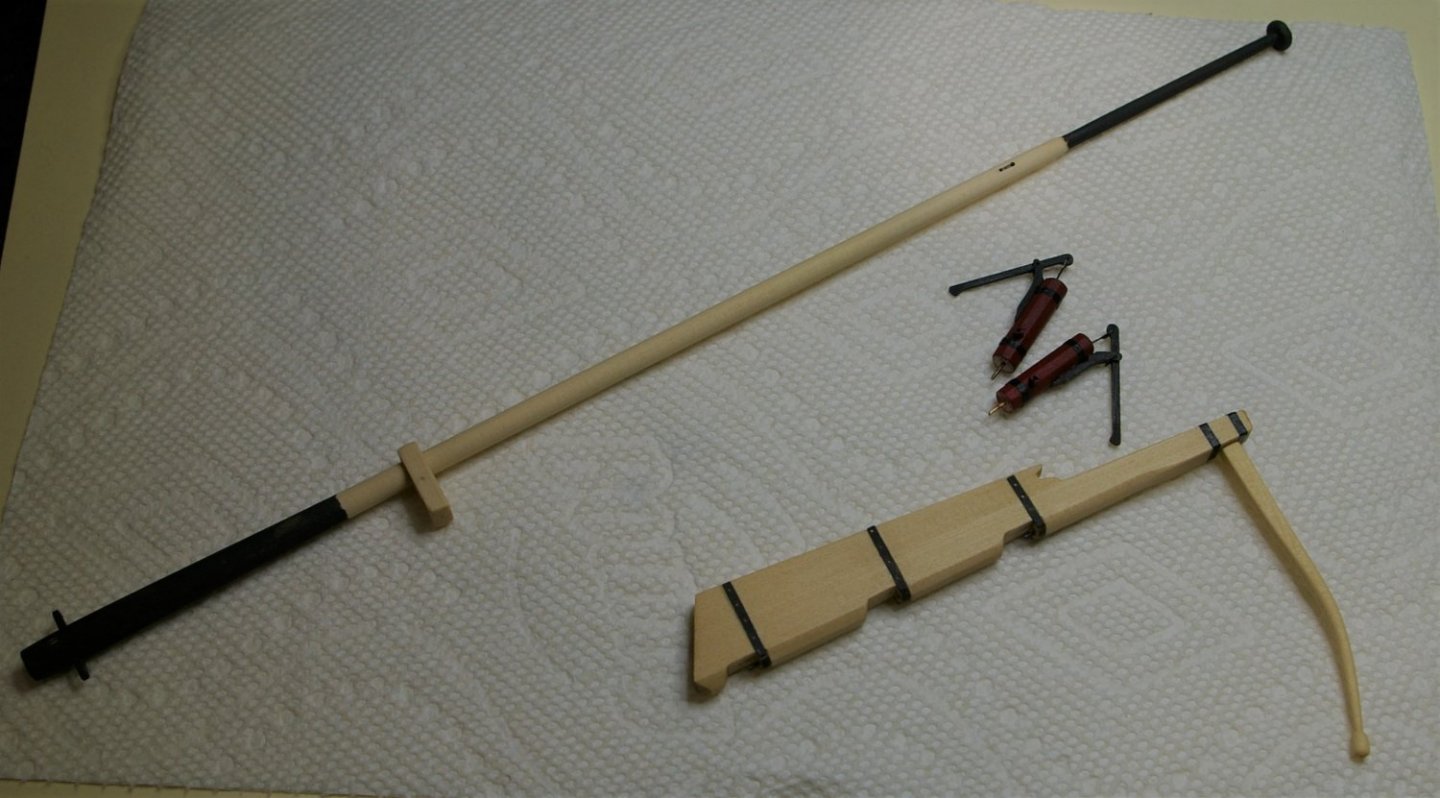
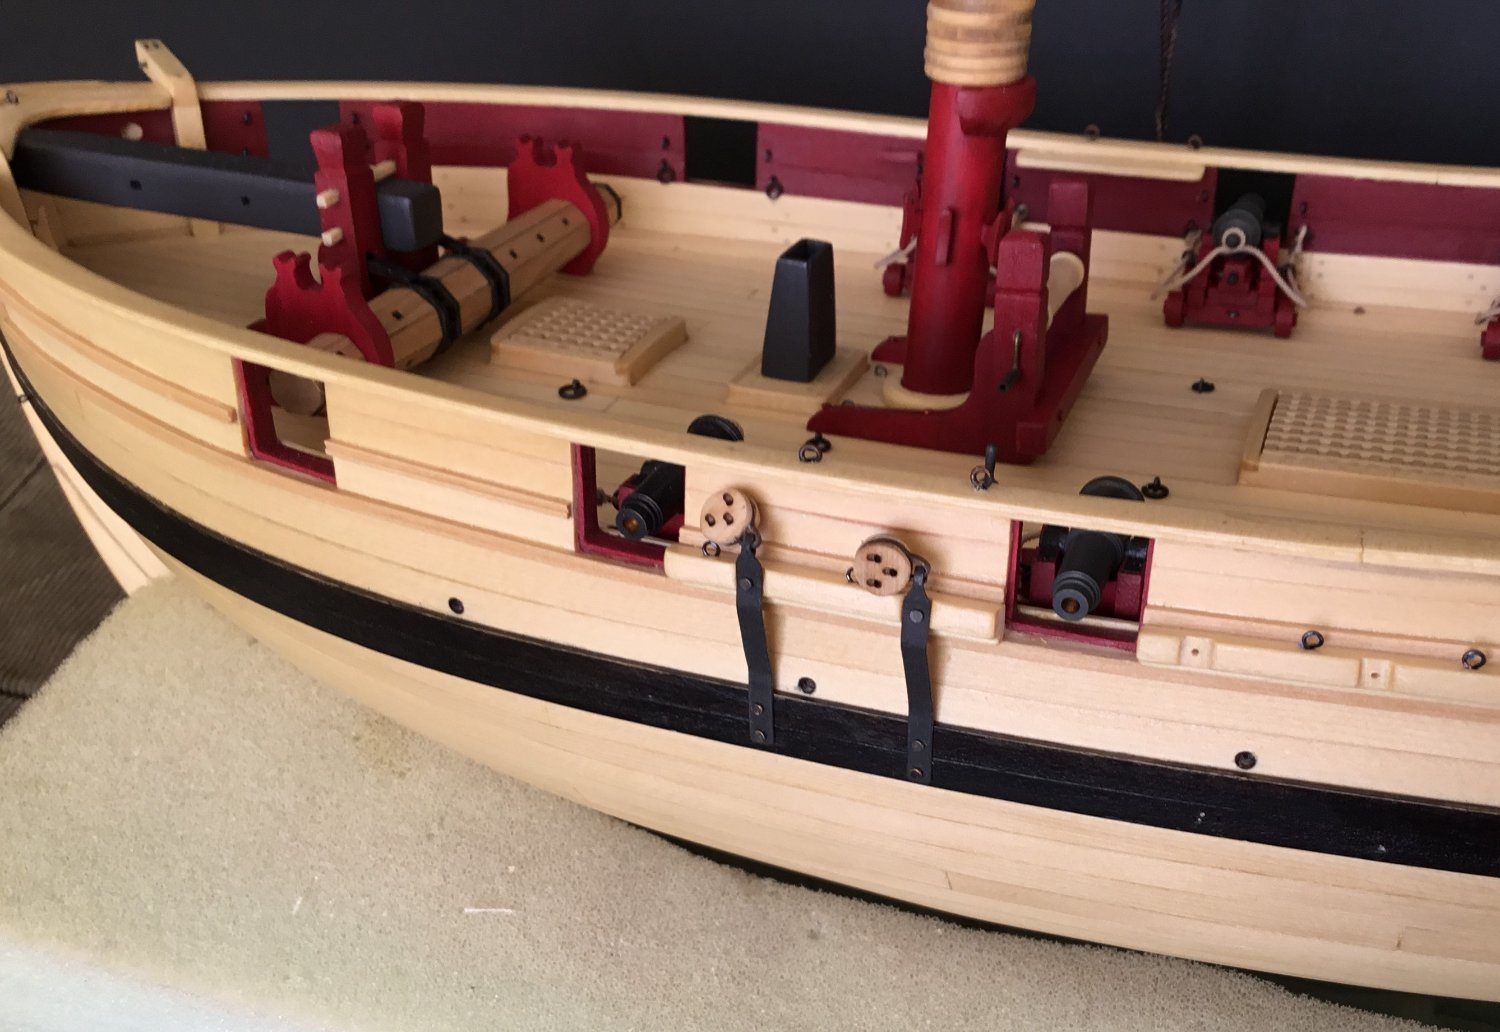
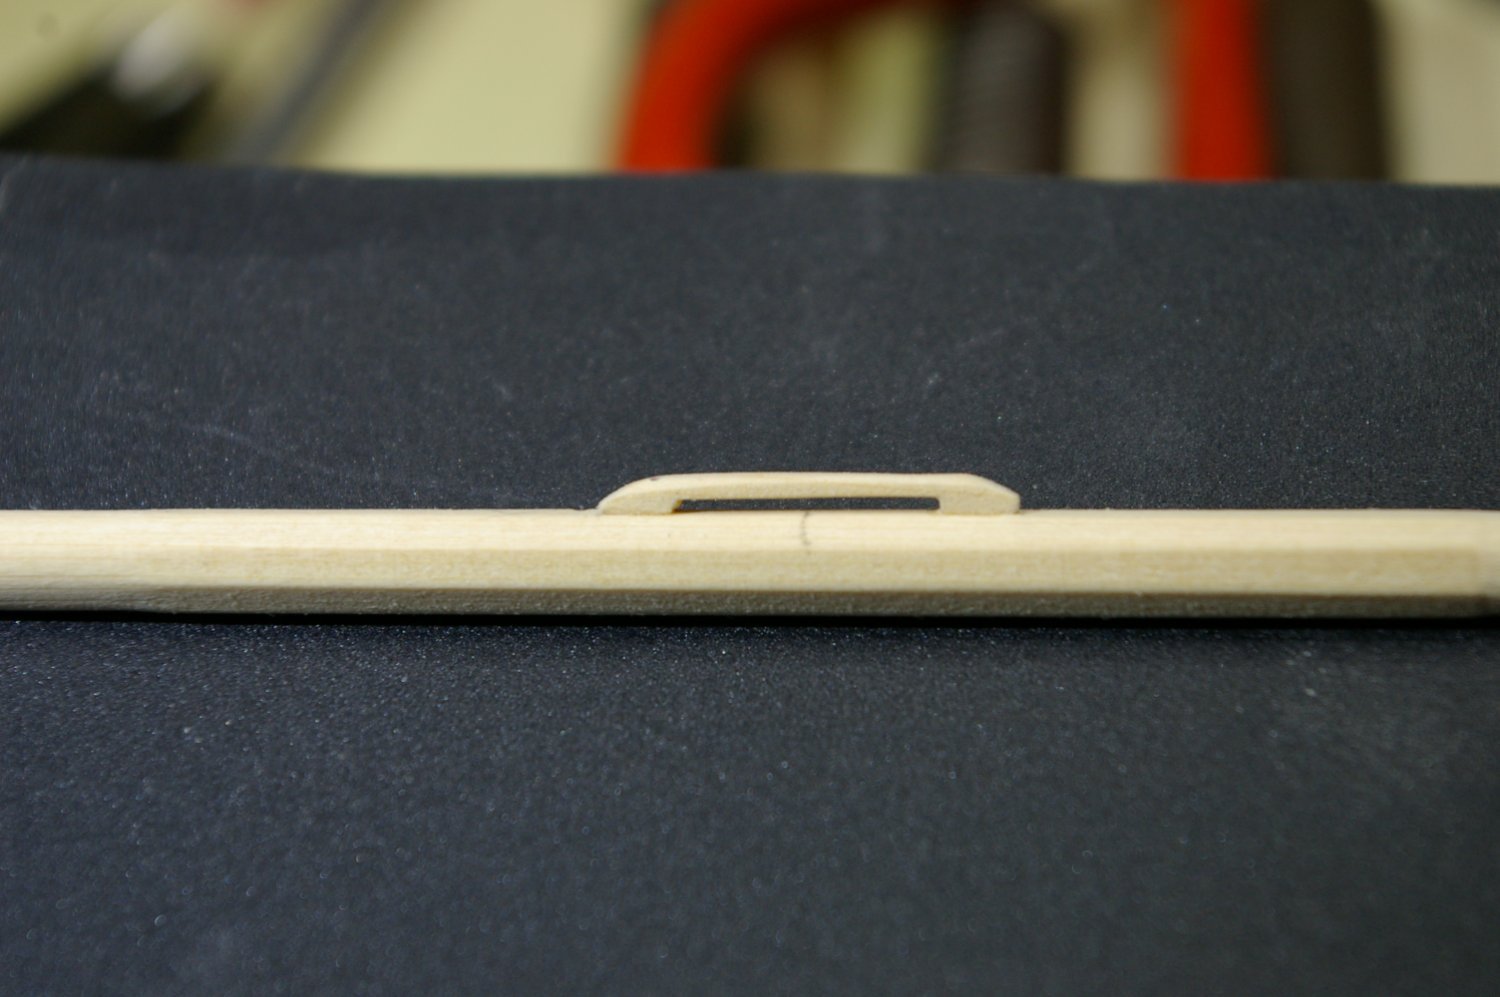
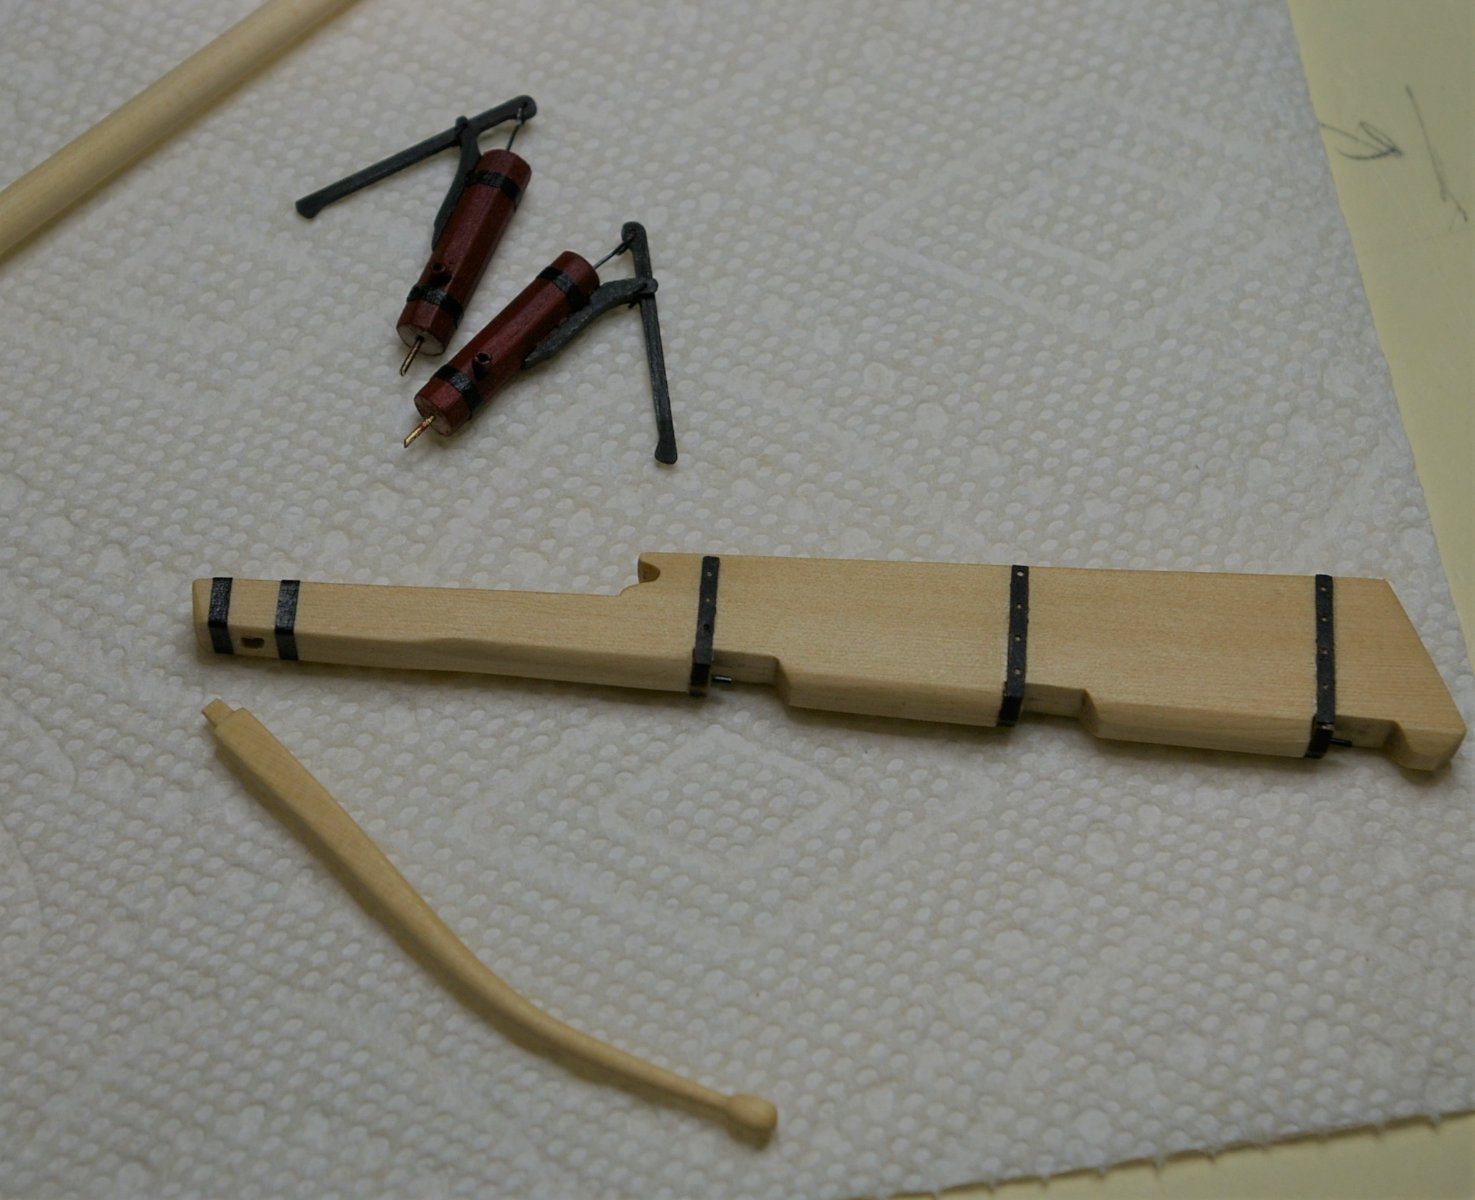
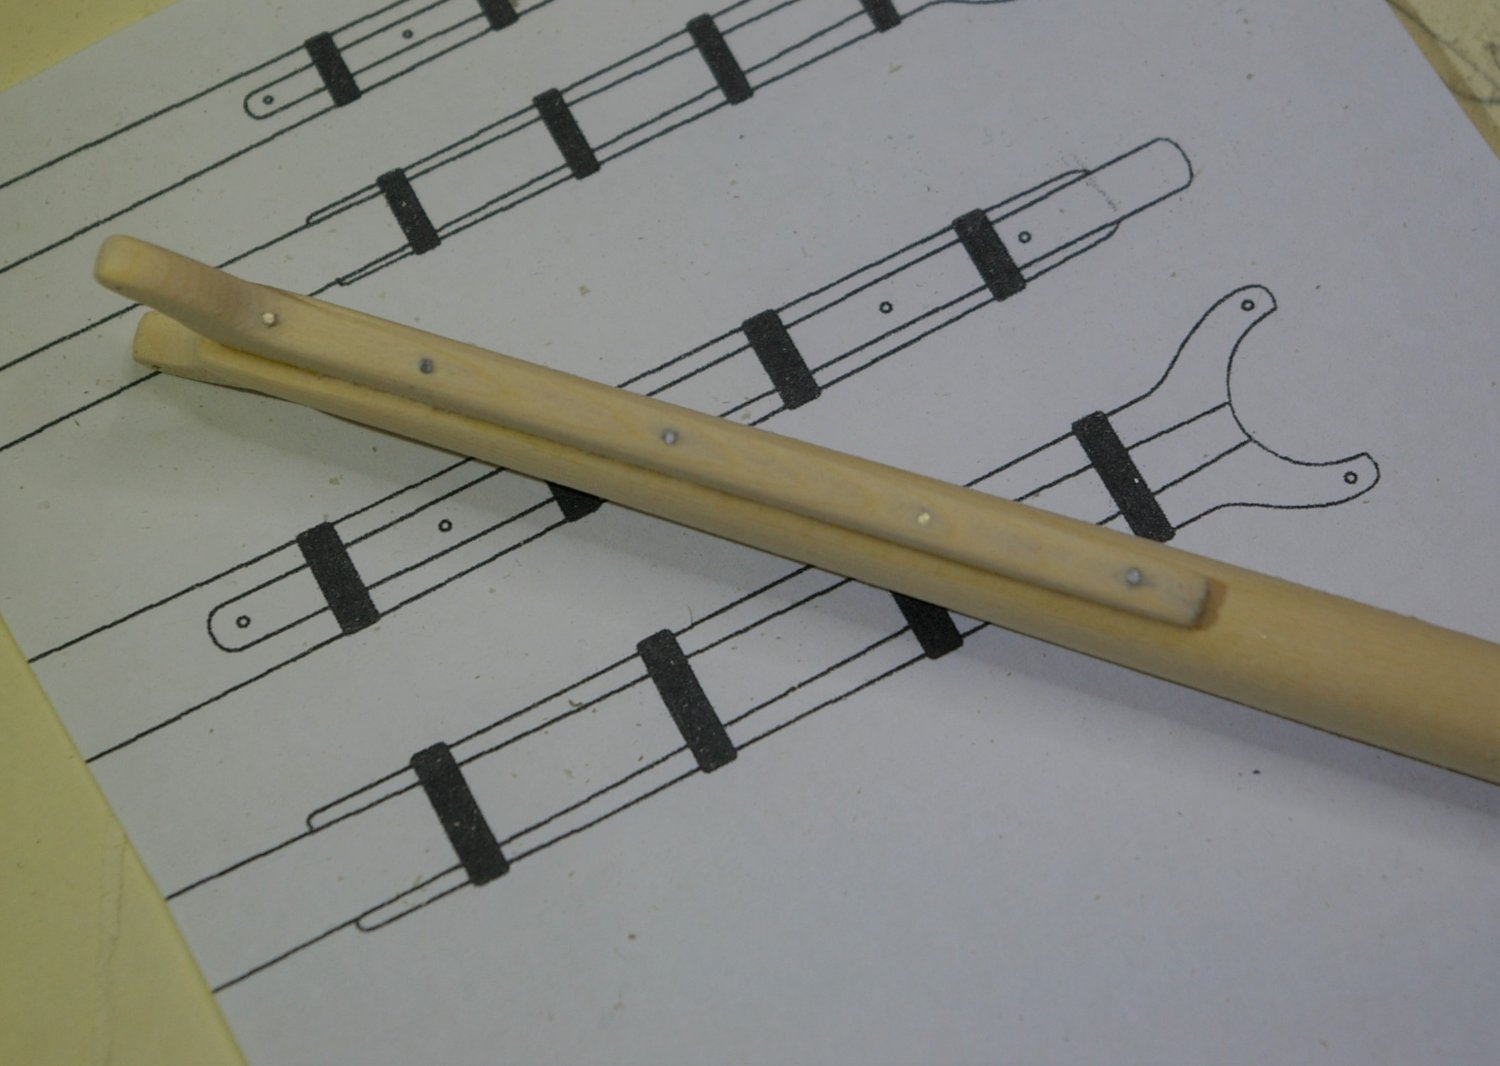
Started the week by finishing the top mast. Used a spare truck from one of the carronade carriages for the mast cap. Painted the appropriate places black. Using Tamiya Dark Iron (X-84). Goes on very smoothly and covers well. Was using Liquitex Basics Ivory Black when painting the wales but it needed/ needs so many coats that I made the switch. Also made the tiller out of 1/8 inch cedar sheet. Not much to see there. Just lots of filing and sanding.

The Elm tree pumps were remade because the iron band I tried to paint on them didn't turn out very well at all. This time I used art tape that was picked up at Staples. One of the motivations for making new pumps was the fact that there was an octagonal offcut just sitting there after shaping the topsail yard.
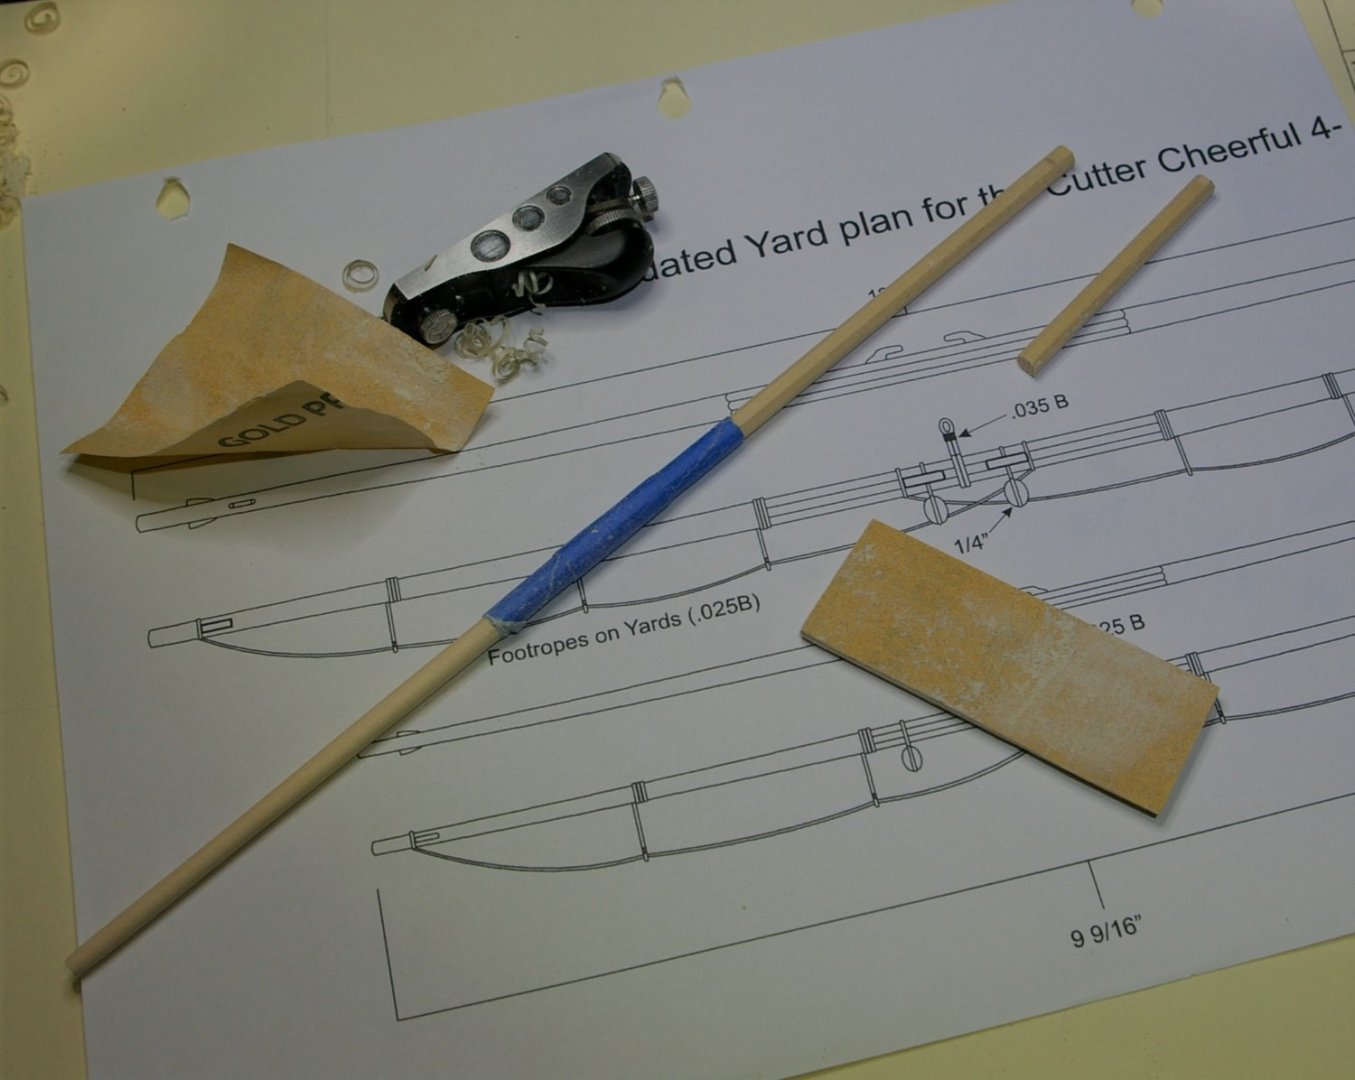
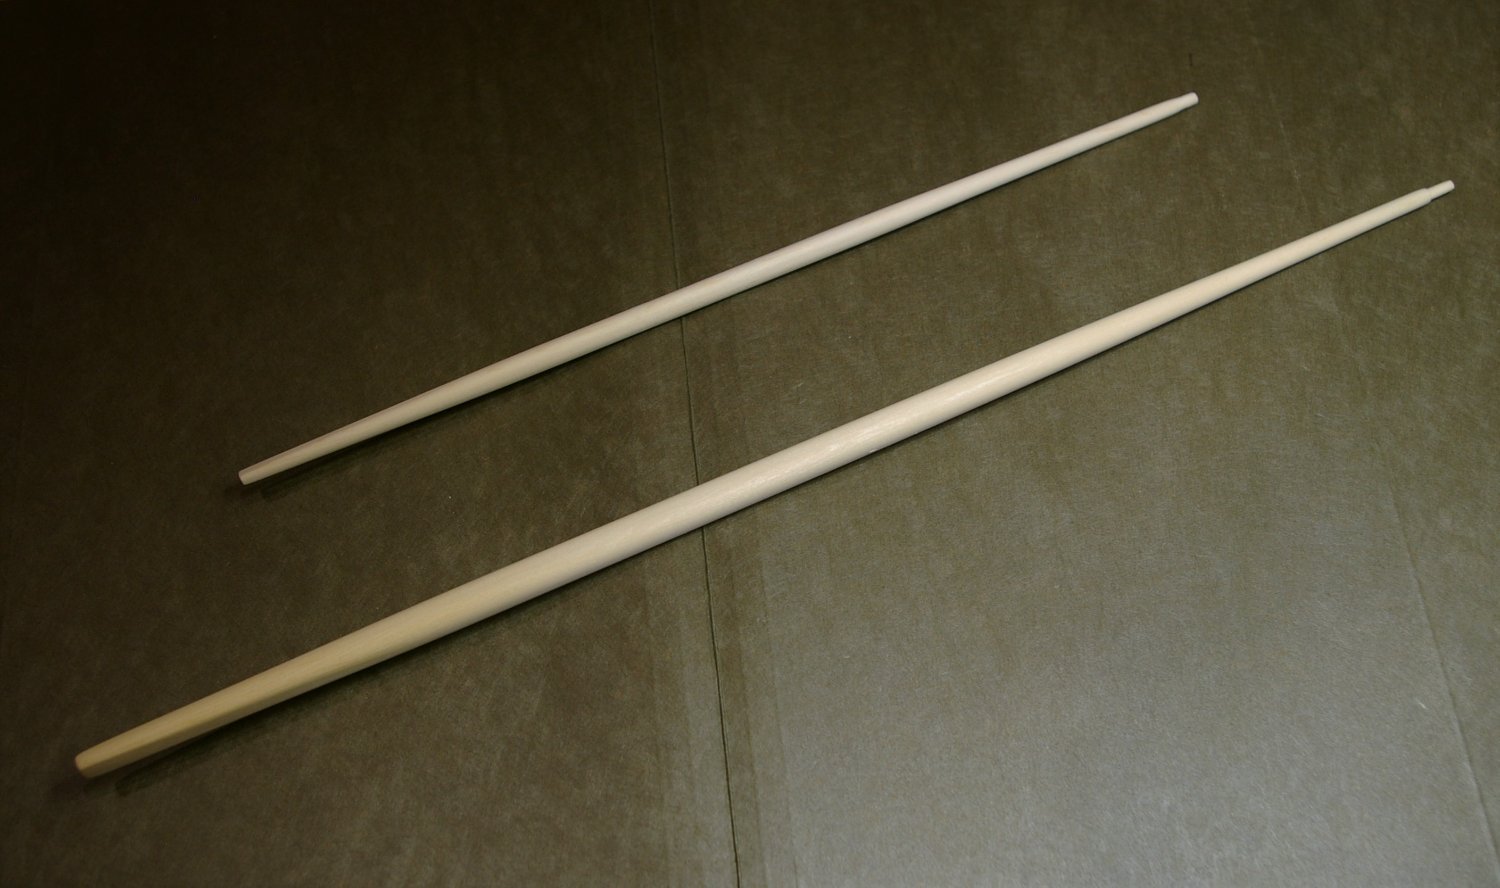
The yards were shaped because I was on a roll after making the boom and the gaff.

The jaws for the boom were cut from 1/8 inch cedar sheet.
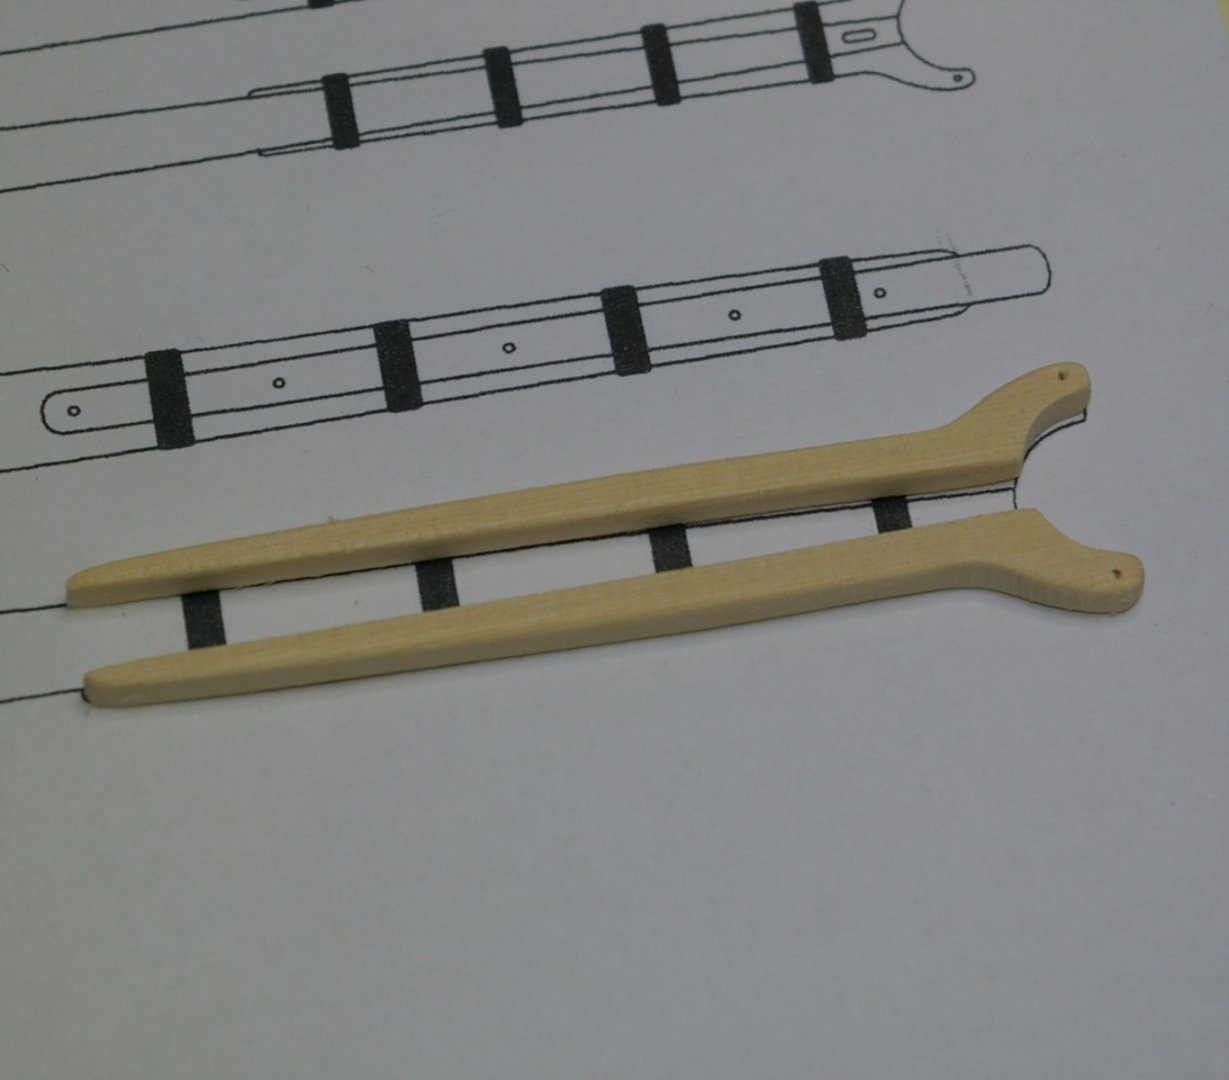
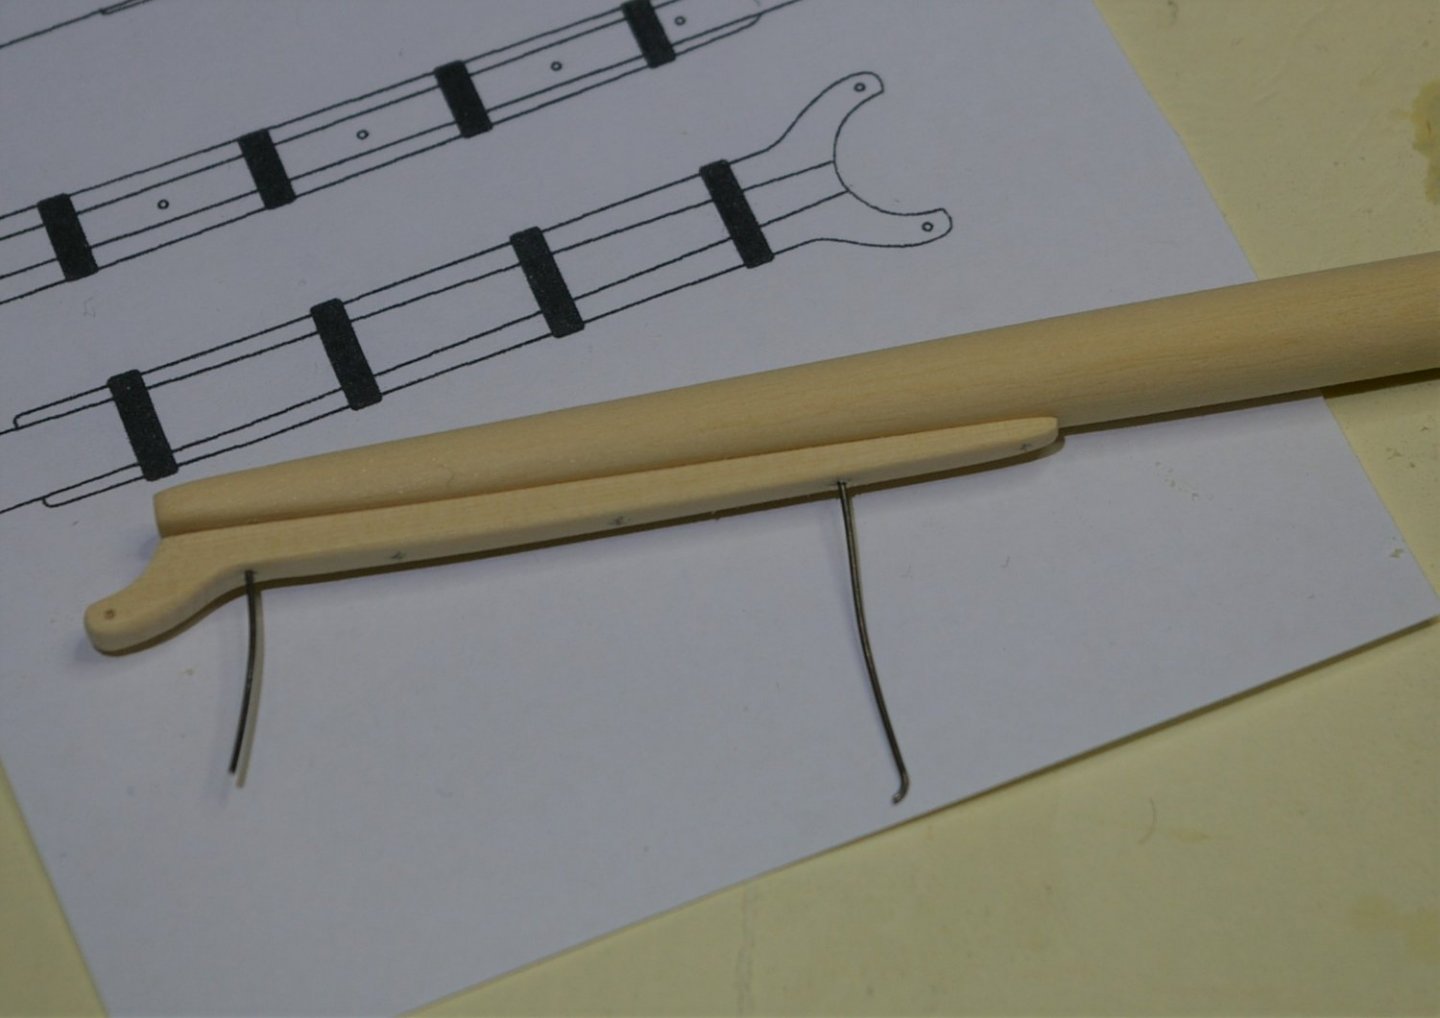


Used a piece of what I believe is #14 copper wire for the ..........horse (?).

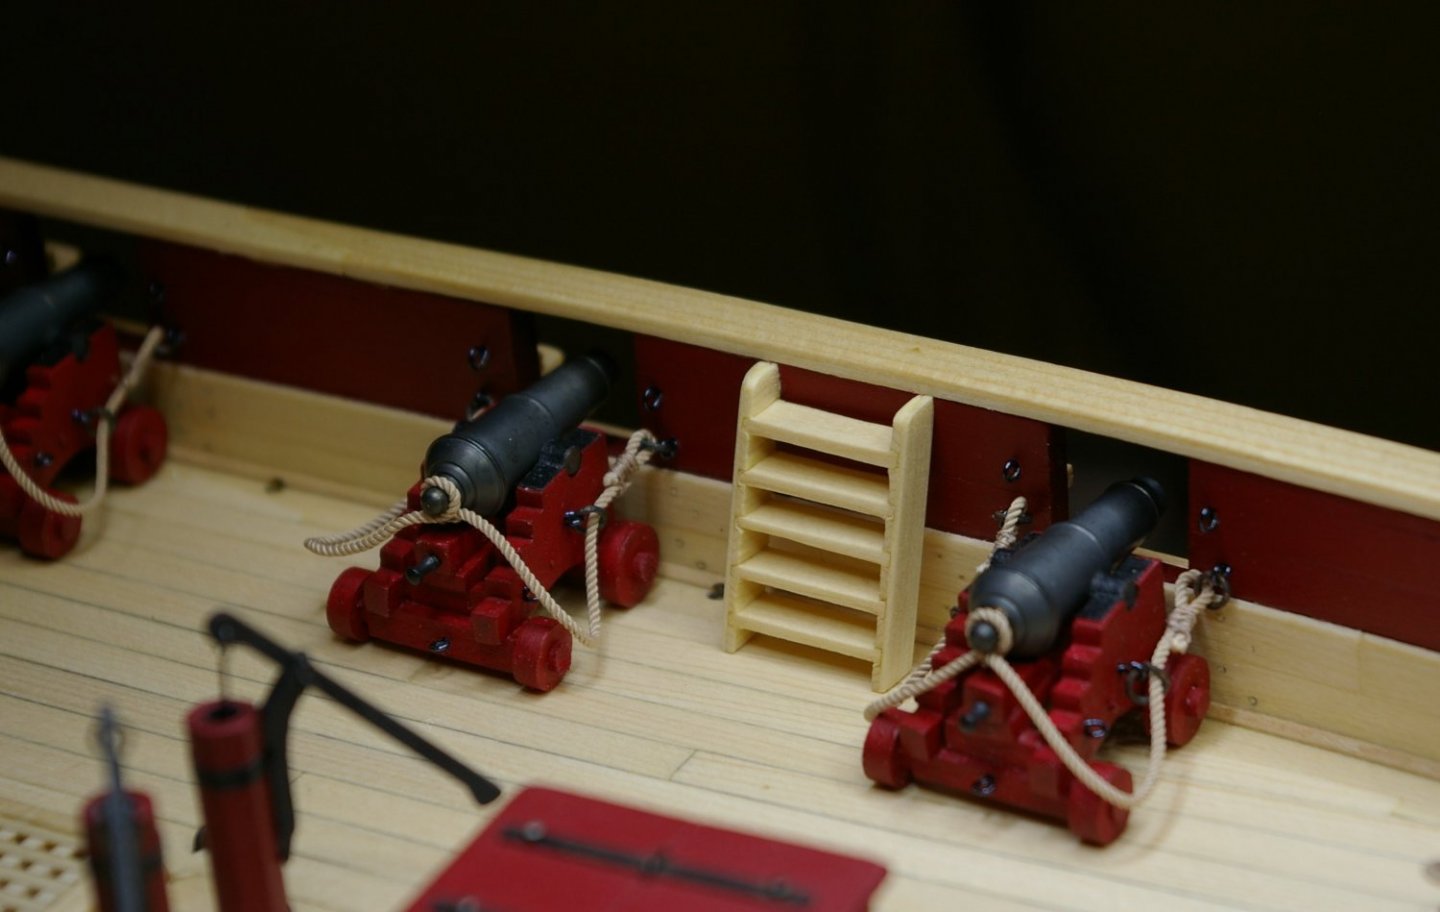
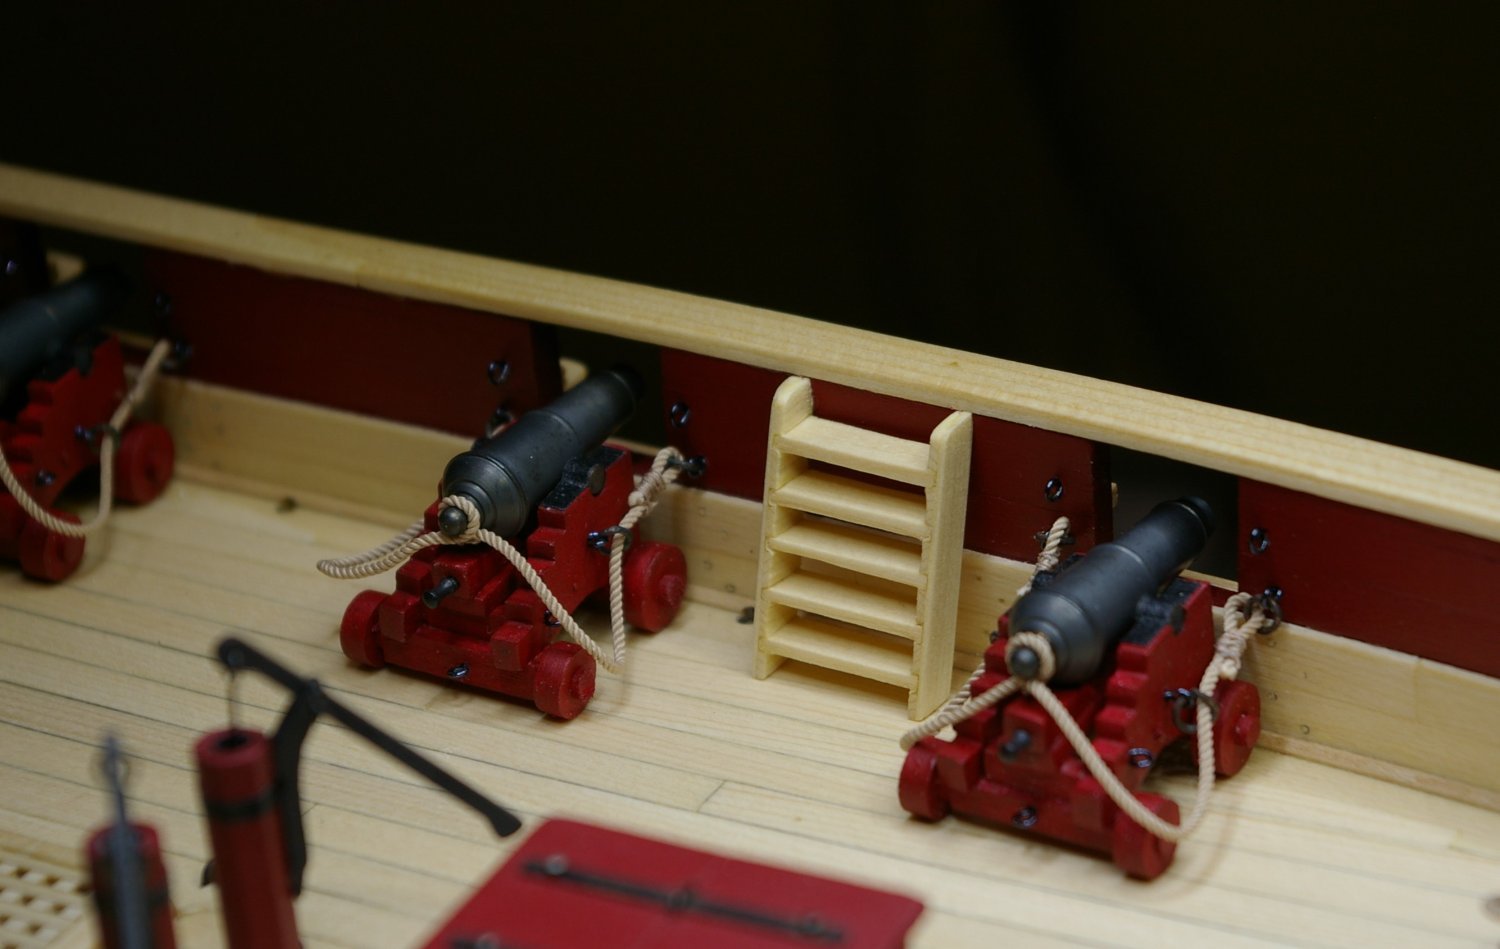
Mounted the pumps and ladders on deck
.thumb.JPG.9f2bb61ee5a4f9495981f271e63685c5.JPG)
Next comes the chainplates and the back stay plates. See you next week.
Paul


.JPG.1d56177a155636030ff8d7f2515ad483.JPG)

.JPG.5ee52a3df878d96a08291094af175ac5.JPG)

.JPG.43316d41c90e62ad24b541c3f20423cf.JPG)
.JPG.de89c3f7c7b747dad7c3a1b86a9a9cef.JPG)
.JPG.a890ed2e55d4de1d0a321a7483bbb78c.JPG)
.JPG.8cb5f6981940949eb1ec769ac377e908.JPG)
.JPG.92ffb035d4499970a27a478b7bf9b406.JPG)


.JPG.9749796f02b3c20b8cf9c86bfd5f6208.JPG)
Cheerful 1806 by Paul Le Wol - FINISHED - Syren Ship Model Ship Co. - 1:48 - English cutter
in - Kit build logs for subjects built from 1801 - 1850
Posted
Allan, thank you for your comments, you are very kind. I was fortunate to have chosen such a well documented subject both by the manufacturer and the community.
My rope order from Crafty Sailor came so rigging has resumed. Very nice rope.
I think the finish is looming on the horizon.