Paul Le Wol
-
Posts
1,060 -
Joined
-
Last visited
Content Type
Profiles
Forums
Gallery
Events
Everything posted by Paul Le Wol
-
Perhaps they were used to ventilate dust and heat to reduce the risk of explosion while the elevator was operating.
- 303 replies
-
- 10
-

-
Wonderful update Gary. I realize that you did it a while ago but I’m still amazed at the effects that you applied to the doghouse and partition wall siding.
-
Eric, this is going to be a great project to follow. Three of my favorite things; boats, trains, and boats with trains! You know it’s funny that I’ve heard that old Taj Mahal song about the Katy hundreds of times but never realized what it was about until after reading your introduction. Looking forward to this.
- 303 replies
-
- 11
-
-
Bryan, congratulations on finishing Le Martegaou. Excellent boat and top notch crew!
- 55 replies
-
- 3
-
-

-
- Le Martegaou
- billing boats
- (and 1 more)
-
Jacques, I’ll miss your extensive research but I look forward to this interesting build. Good luck!
- 139 replies
-
- 1
-
-
- ancre
- Bateau de Lanveoc
- (and 2 more)
-
J, congratulations on completing your Pram. It is beautiful!
- 81 replies
-
- 4
-
-
- Norwegian Sailing Pram
- Model Shipways
- (and 1 more)
-
Bob, I am very sorry to hear this sad news. Take care.
-
Looking beautiful John. I’m pretty sure that directors trump curators 😀 . Have a nice holiday!
-
Wolle, welcome to MSW. I am looking forward to your project!
-
😀 Feels good to be back
-
Thanks so much John!
-
Thanks very much Gary. I like these assembly squares. For plastic they are a lot more rigid than I thought they would be. More Lee Valley stuff
-
Yves, thank you very much for your encouragement! One thing that I forgot to mention was that I had sharpened my math pencil and found that the scale of this model should be 1/72. I like the fact that it’s also easier to say than 1/71.
-
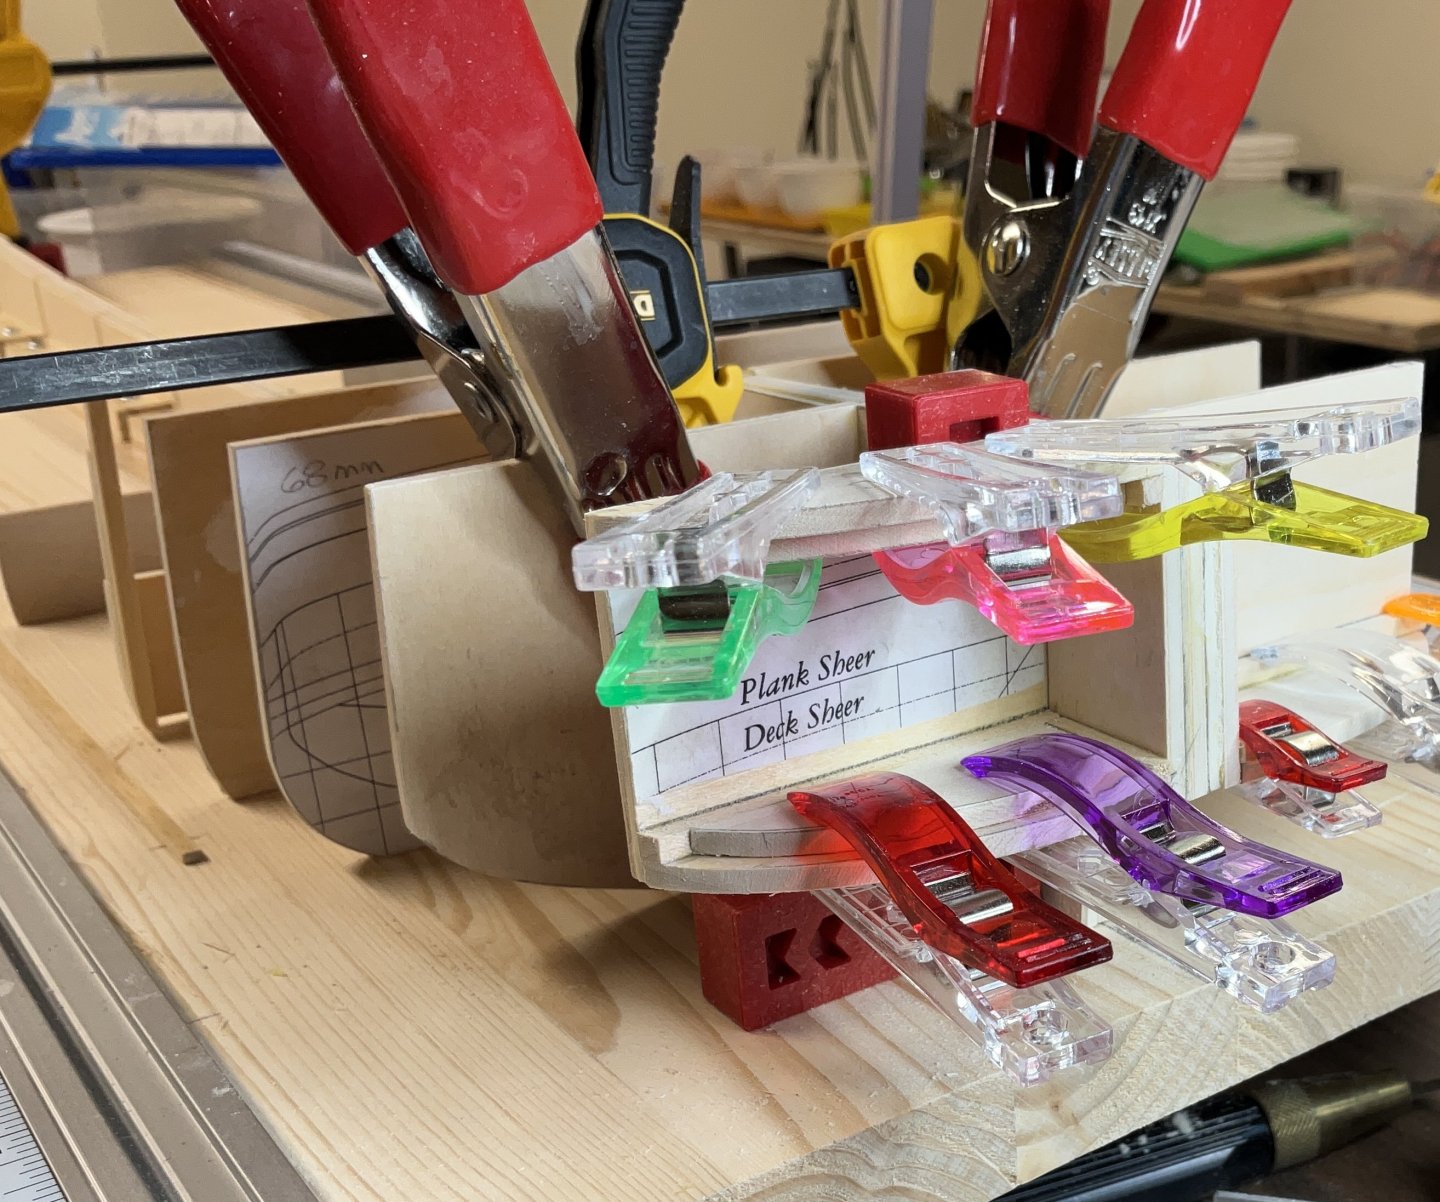
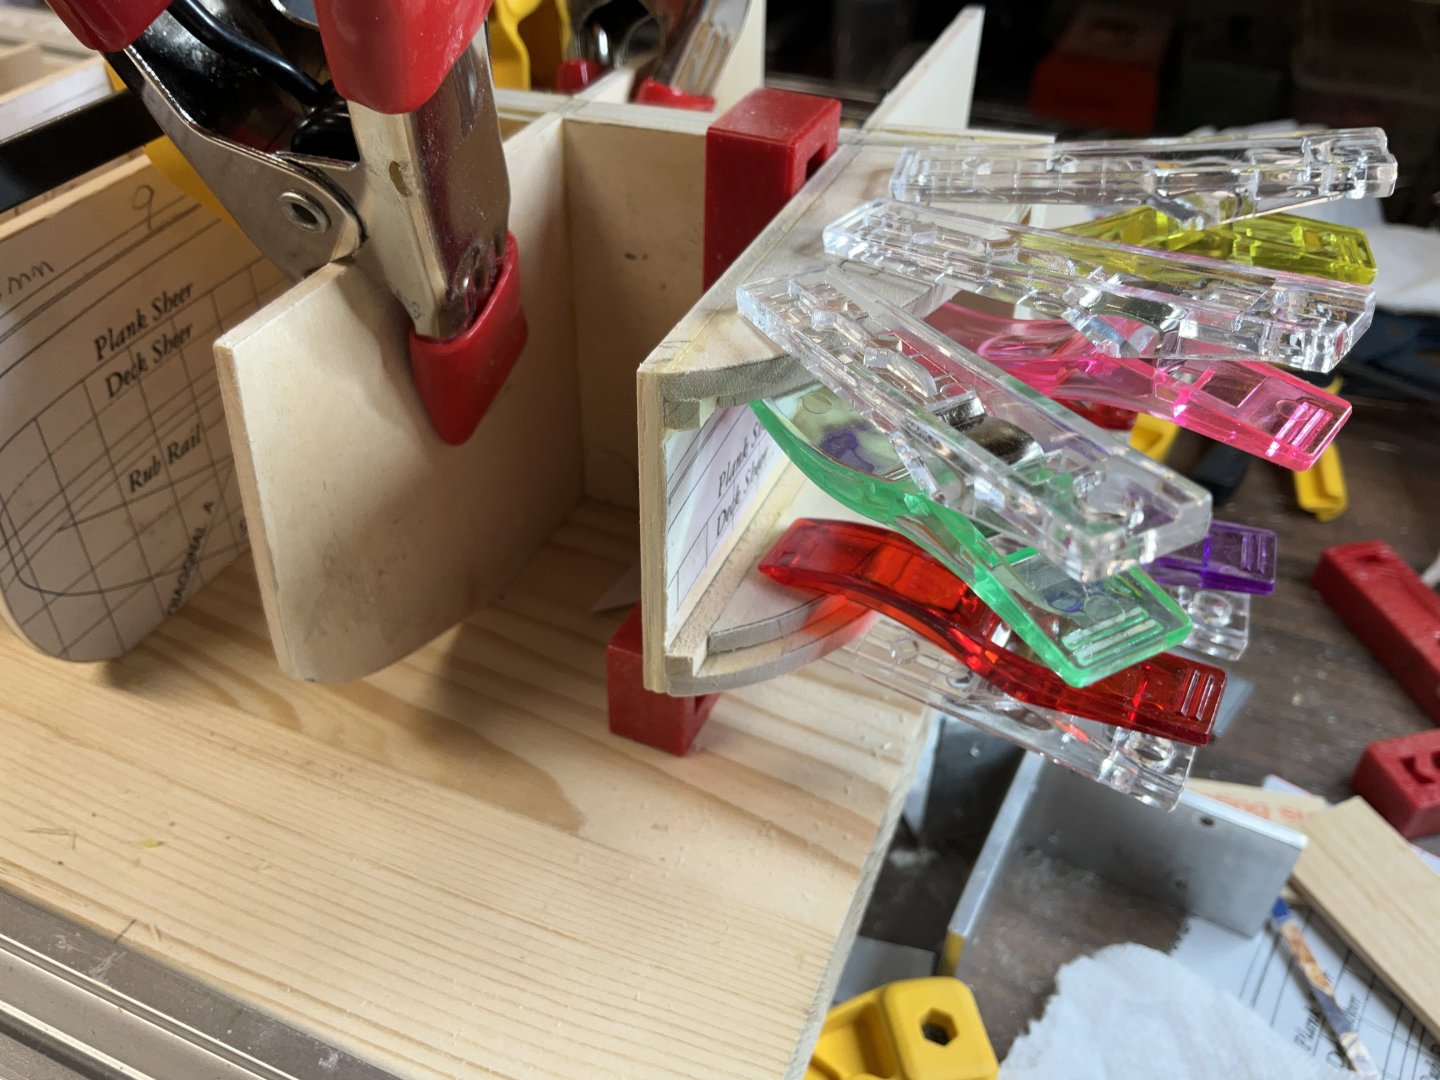
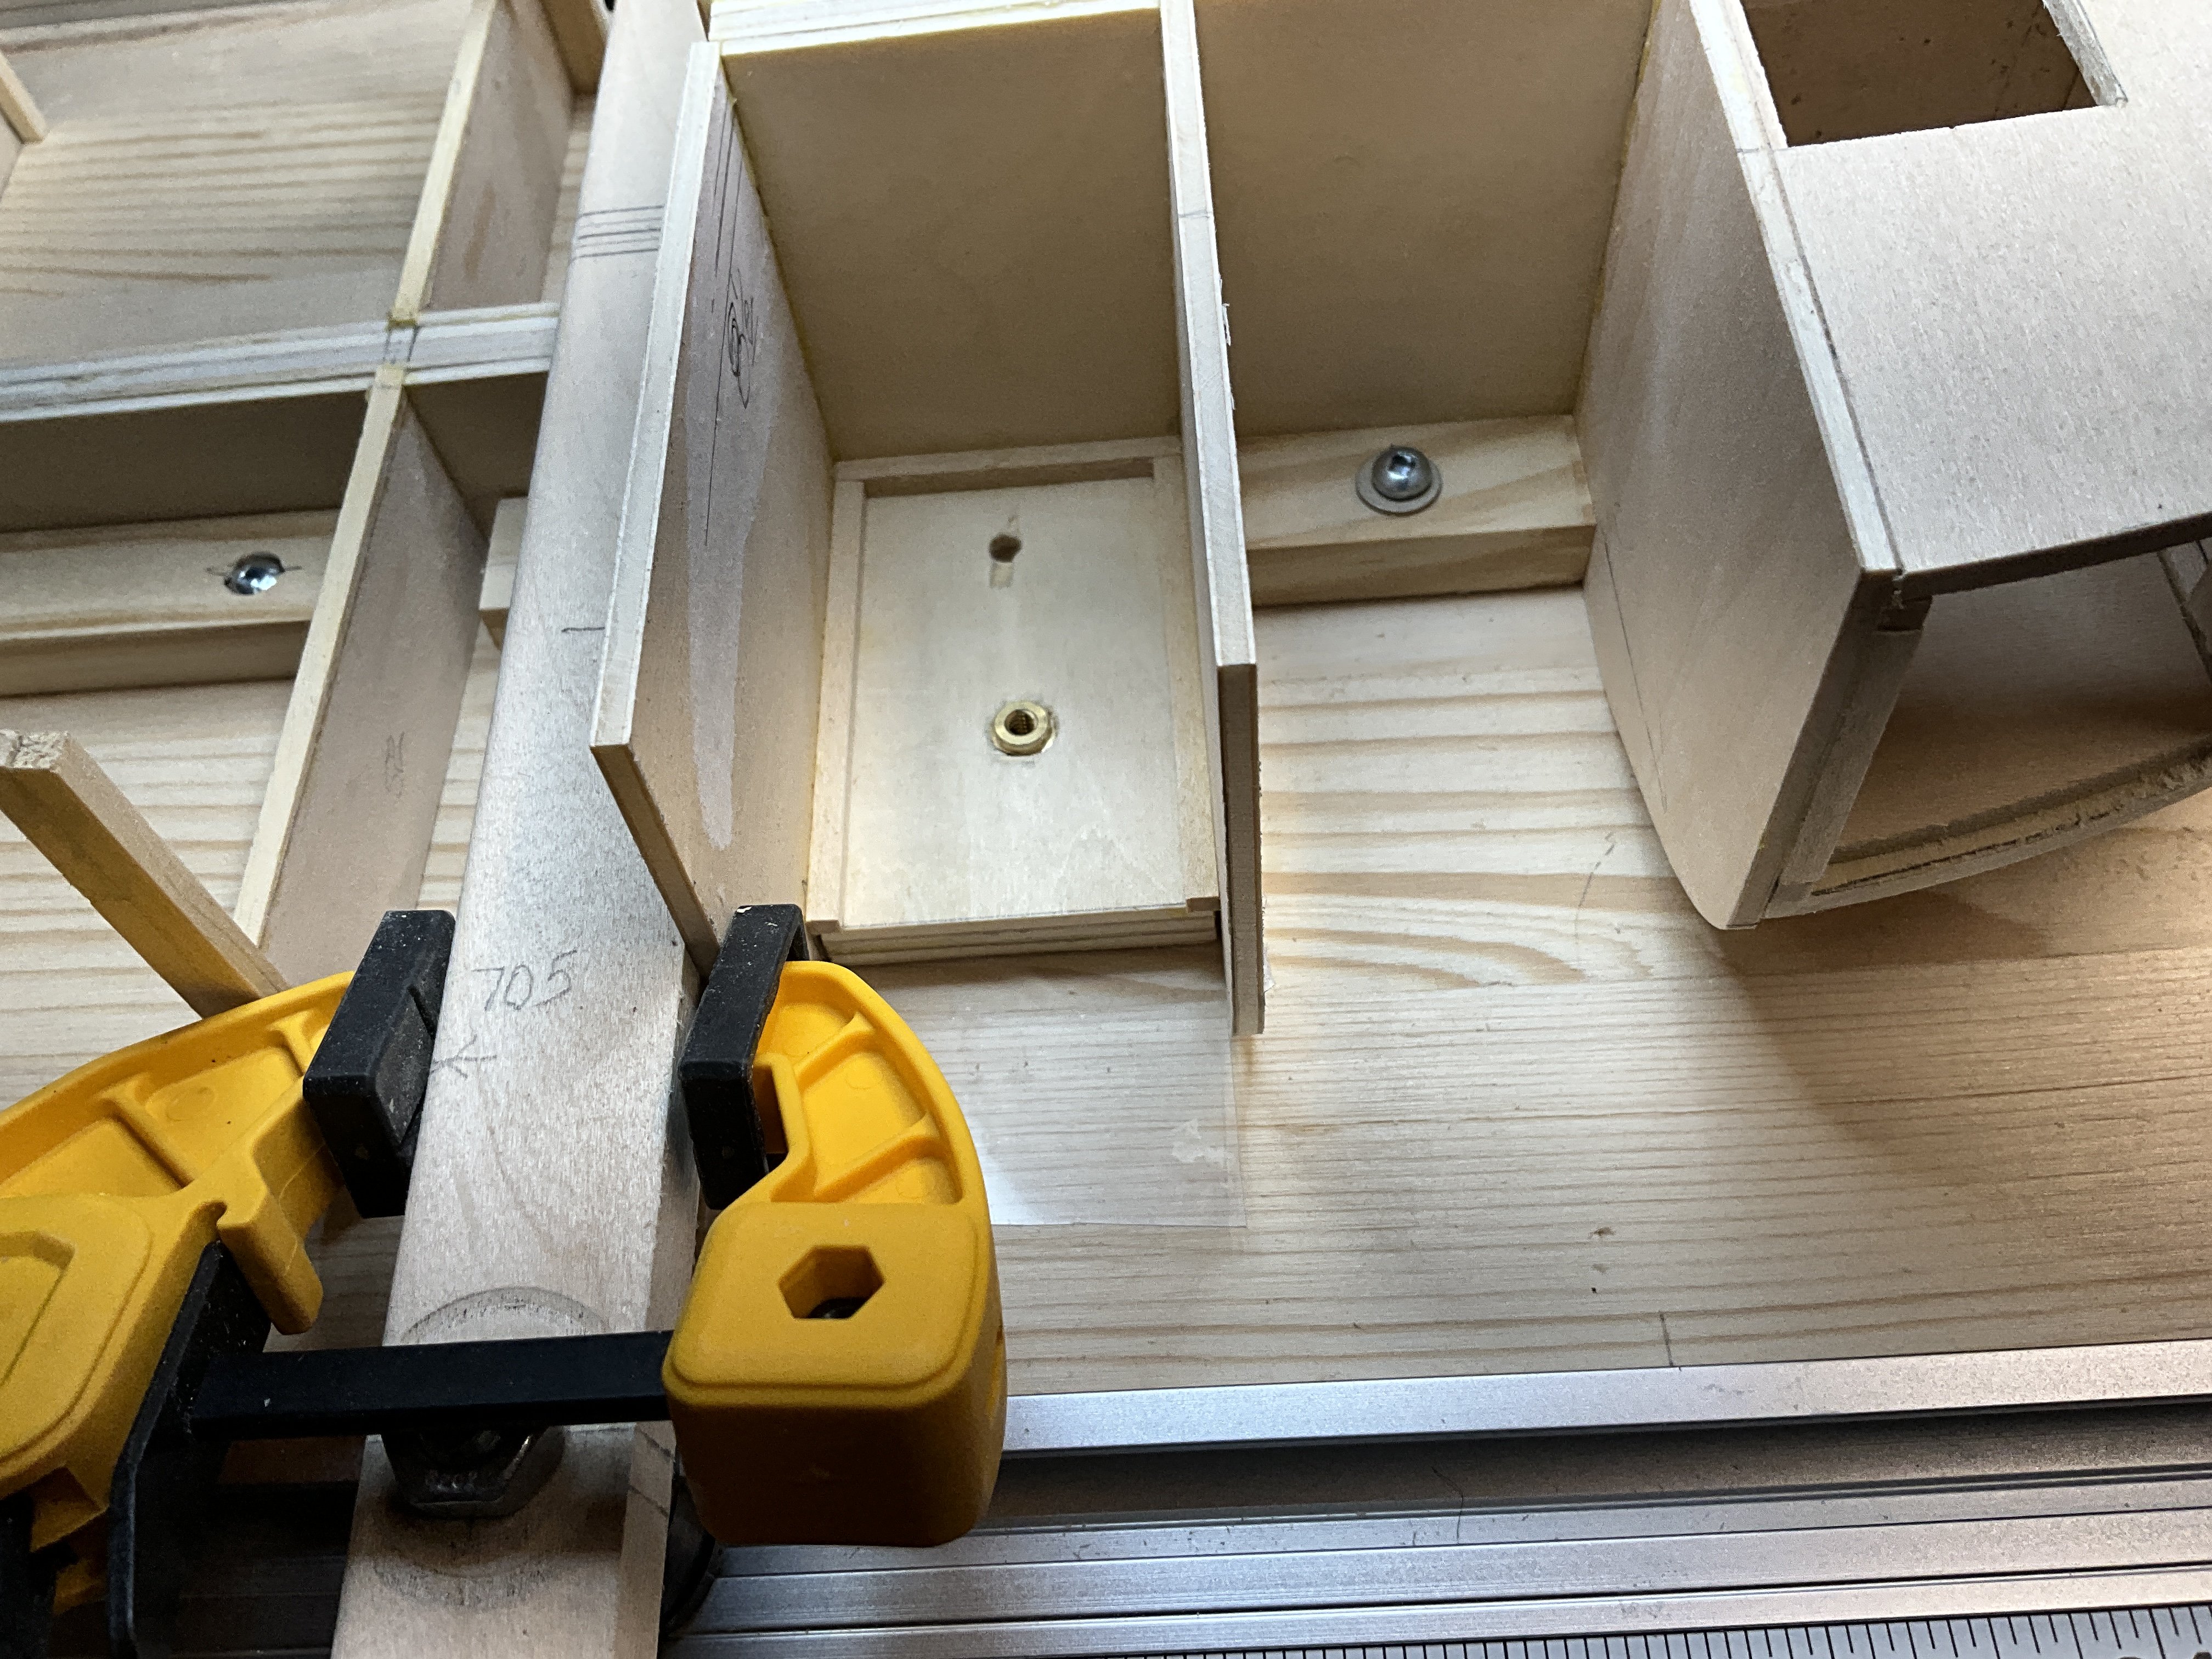
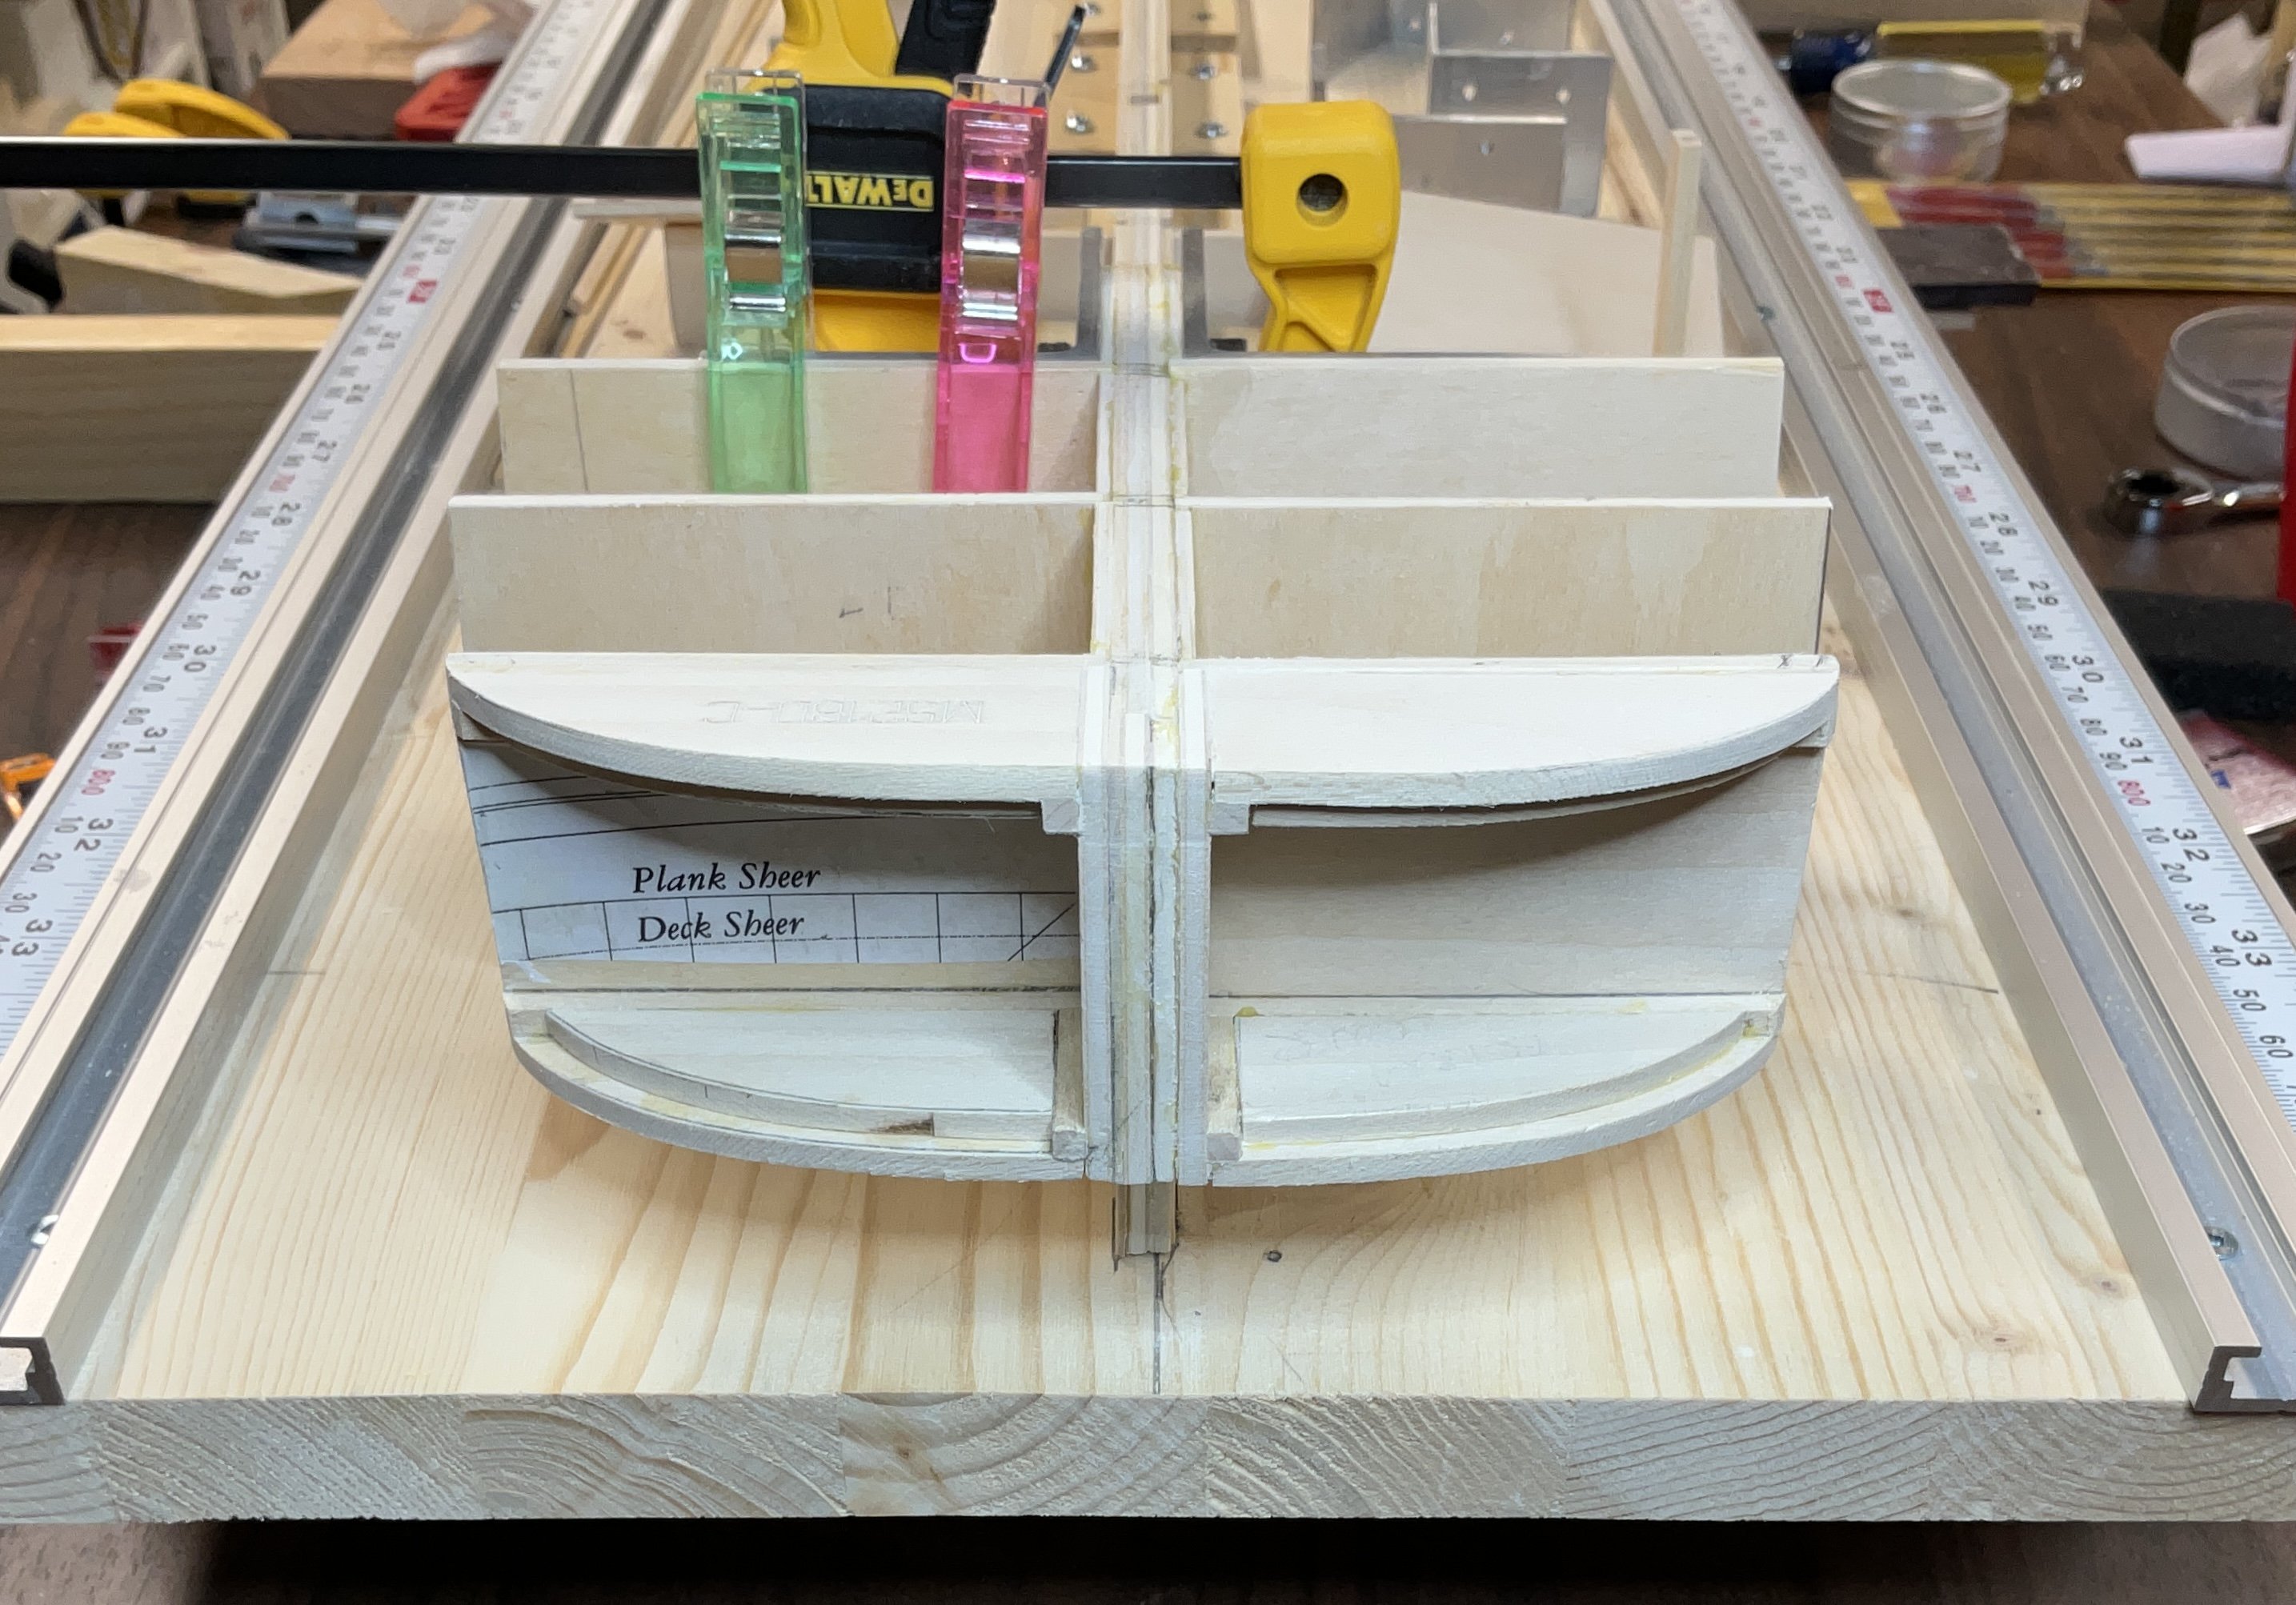
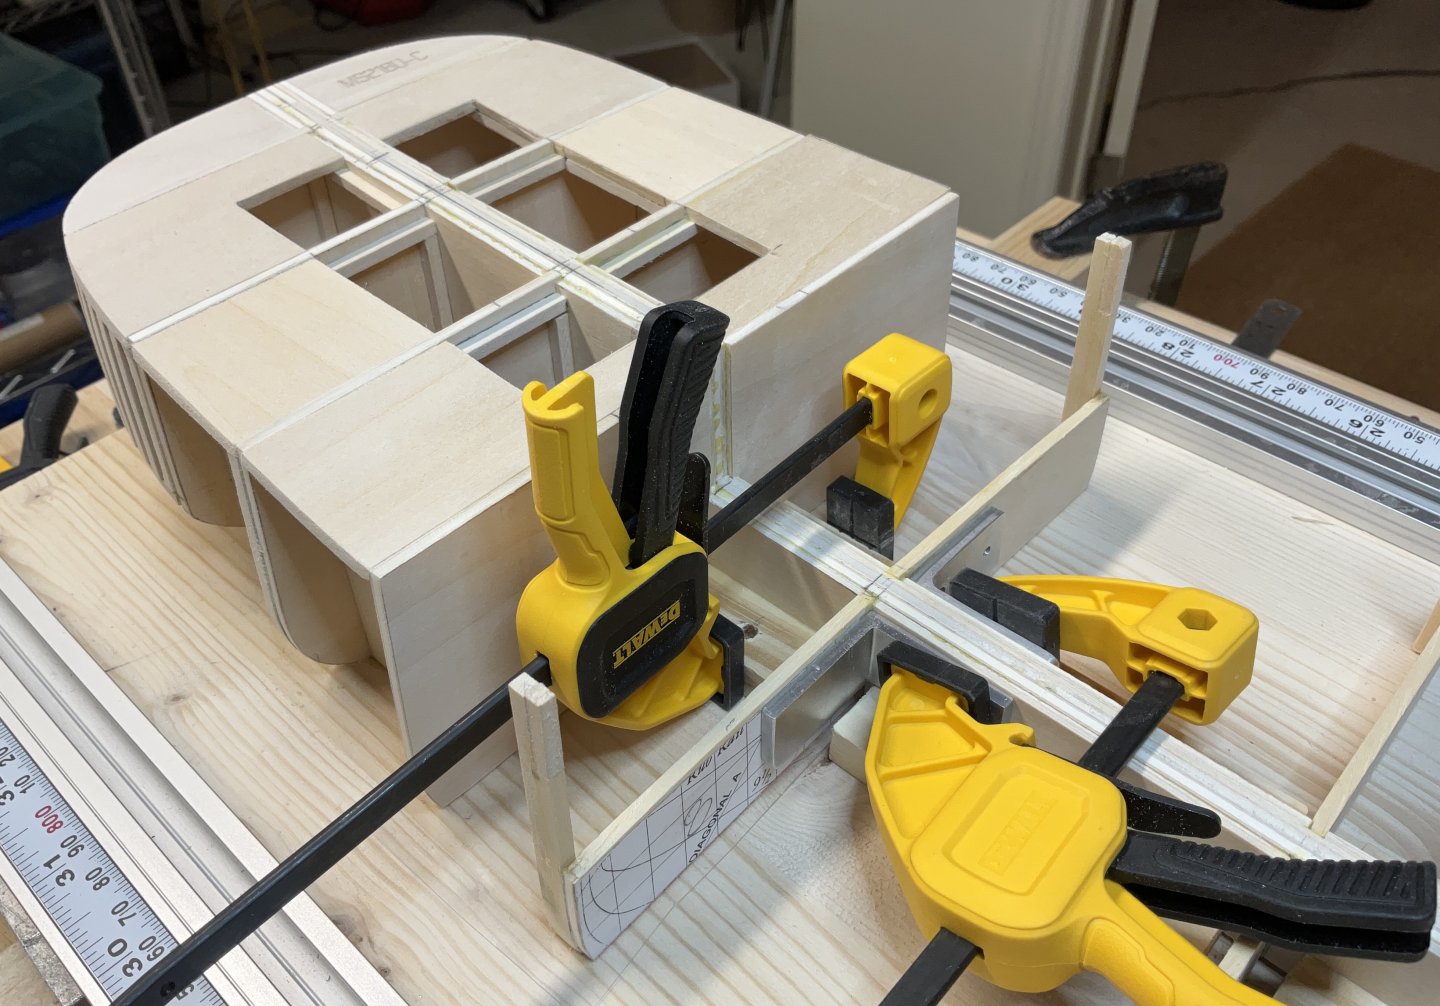
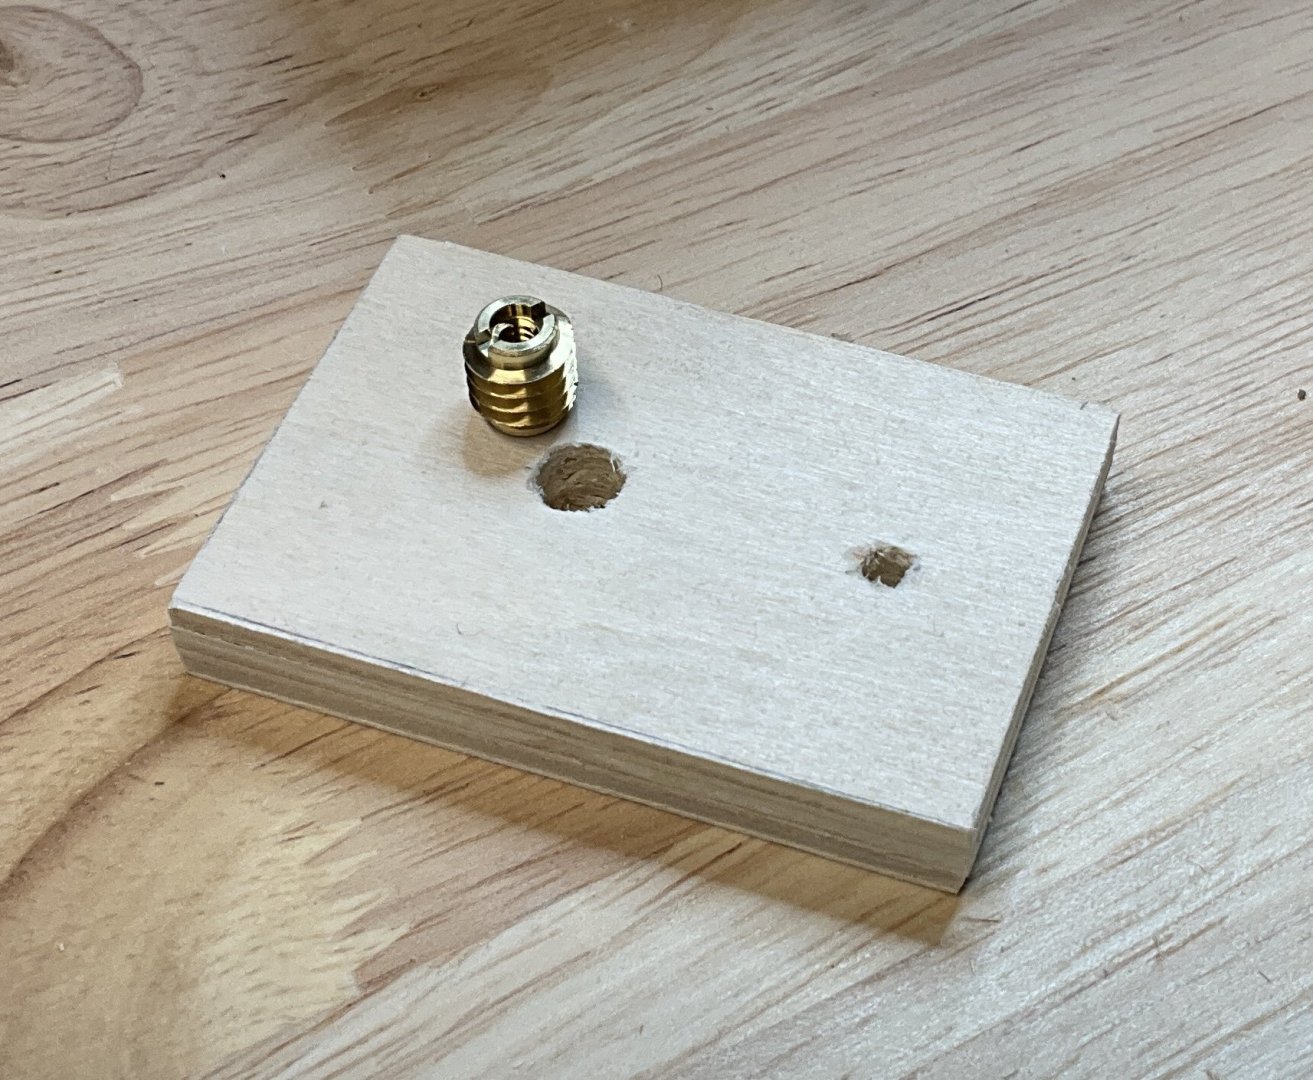
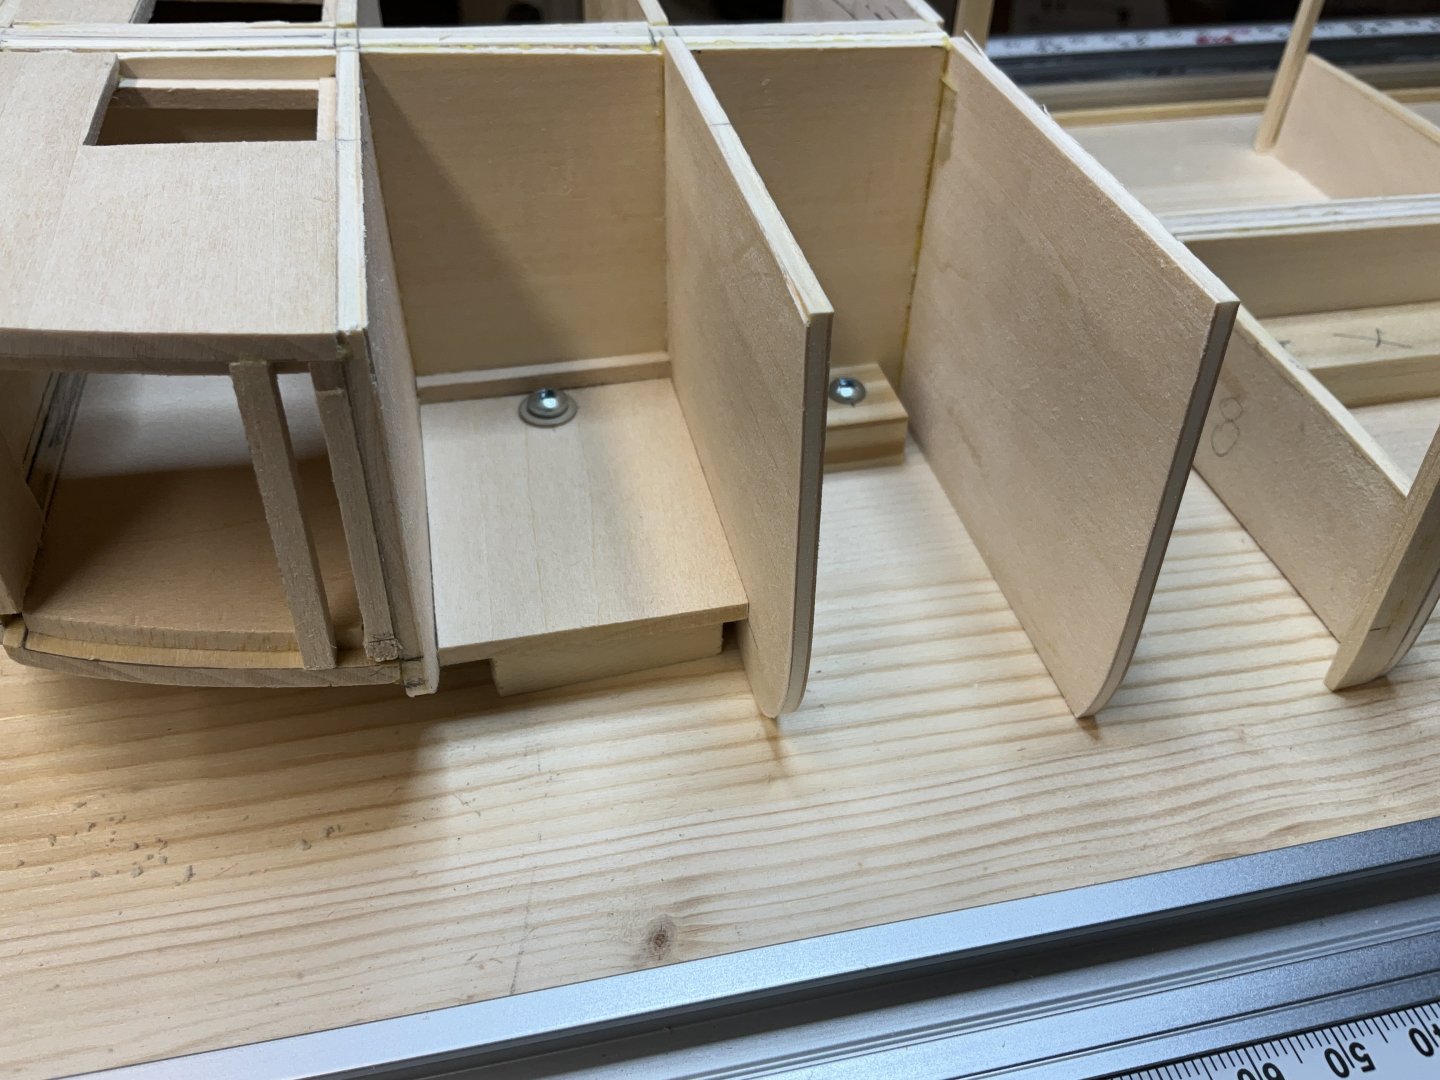
Hi Everyone, hope everyone that got big snow is all dug out. Thank you all for your Comments and Likes. I appreciate them very much. Slowly inching towards the bow with the bulkhead supports. The temporary blocks that align the bulkhead former are being replaced with permanent blocks that are glued in place and once dry are screwed to the build board again. I picked up some 6-32 brass insert nut from Lee Valley. They are mounted in a block which is made from 3 layers of 1/8” basswood plywood. All together there will be six of these blocks to hold the model to its base. These blocks are also used to temporarily hold the model to the build board again. The last bulkhead that extends up to the cabin deck was squared up and braced. Now it’s on to the main deck Fairing has started but still lots to go. Thanks for dropping by and I hope to see you soon.


-
Hi Ross, I haven’t used their cotton for this application so here are three Ropes of Scale .25mm beige cotton clove hitches tied to a length of..9mm dark brown polyester. The beige on brown was for clarity. The one on the left is dry and holds well . The center one has been treated with diluted pva and the right one has been treated with Vallejo Matt Polyurethane Varnish

-
Hi Iro. Beautiful looking work!
-
Great photos Jacques. I think that even a seasoned weathering expert would have a tough time emulating the deck in the last photo!
- 312 replies
-
- 2
-
-
- Chile
- Latin America
- (and 6 more)
-
Hi Iro, welcome to MSW. You are doing a beautiful job with your Charles W Morgan. The last two updates to your build log showed up as Status posts and are not attached to your log. Perhaps you can repost them by replying in the box at the bottom of your log. Good luck with your build!
-
I guess I should have said extend the upper platform to the front of the building.
- 732 replies
-
- 4
-
-
- Lula
- sternwheeler
- (and 1 more)
-
Hi Keith, really enjoying your planning and decision making. Would it be an option if you mounted the steps as in the photo of Lula but extended the upper platform forward a couple of feet so that you are able to walk under them?
- 732 replies
-
- 5
-
-
-
- Lula
- sternwheeler
- (and 1 more)
-
Gary, you did a splendid job of designing these parts. The details really pop.
-
Hi Harvey, thank you for posting your photos. The St Helen’s site must be a fascinating place to visit. It certainly is beautiful there.
-
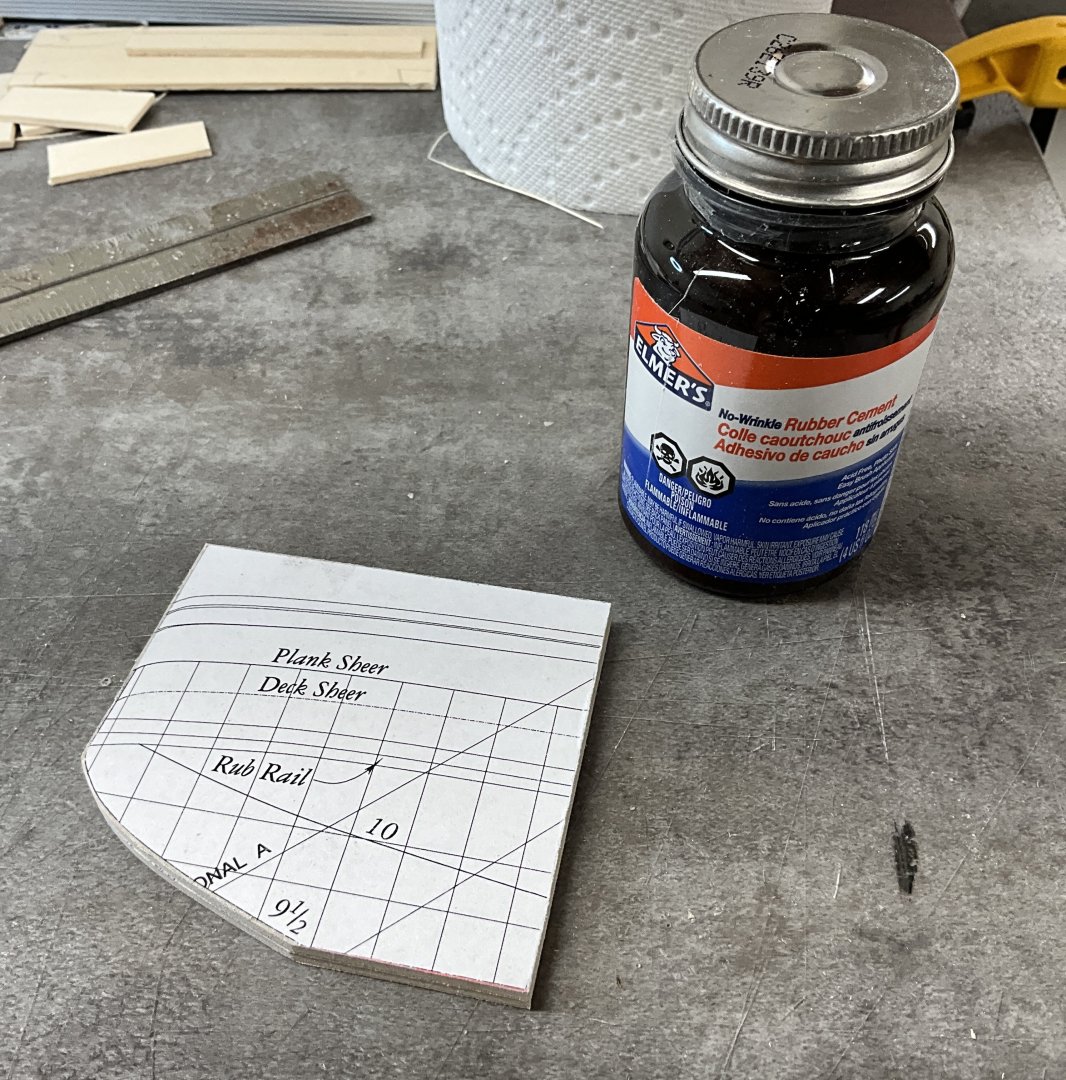
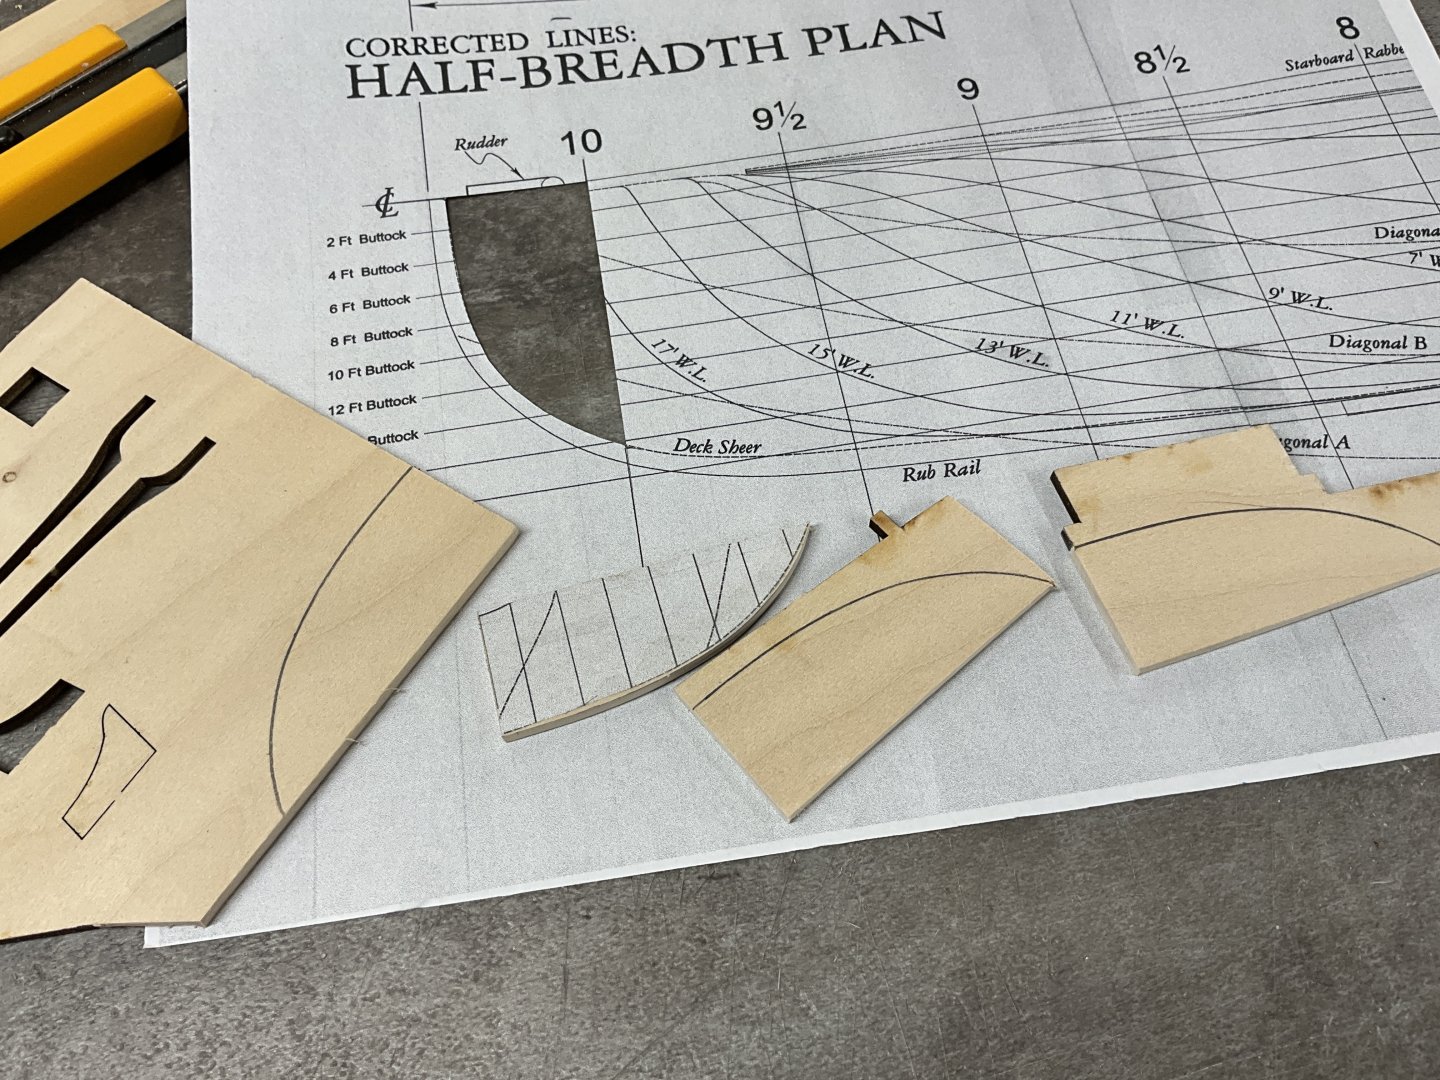
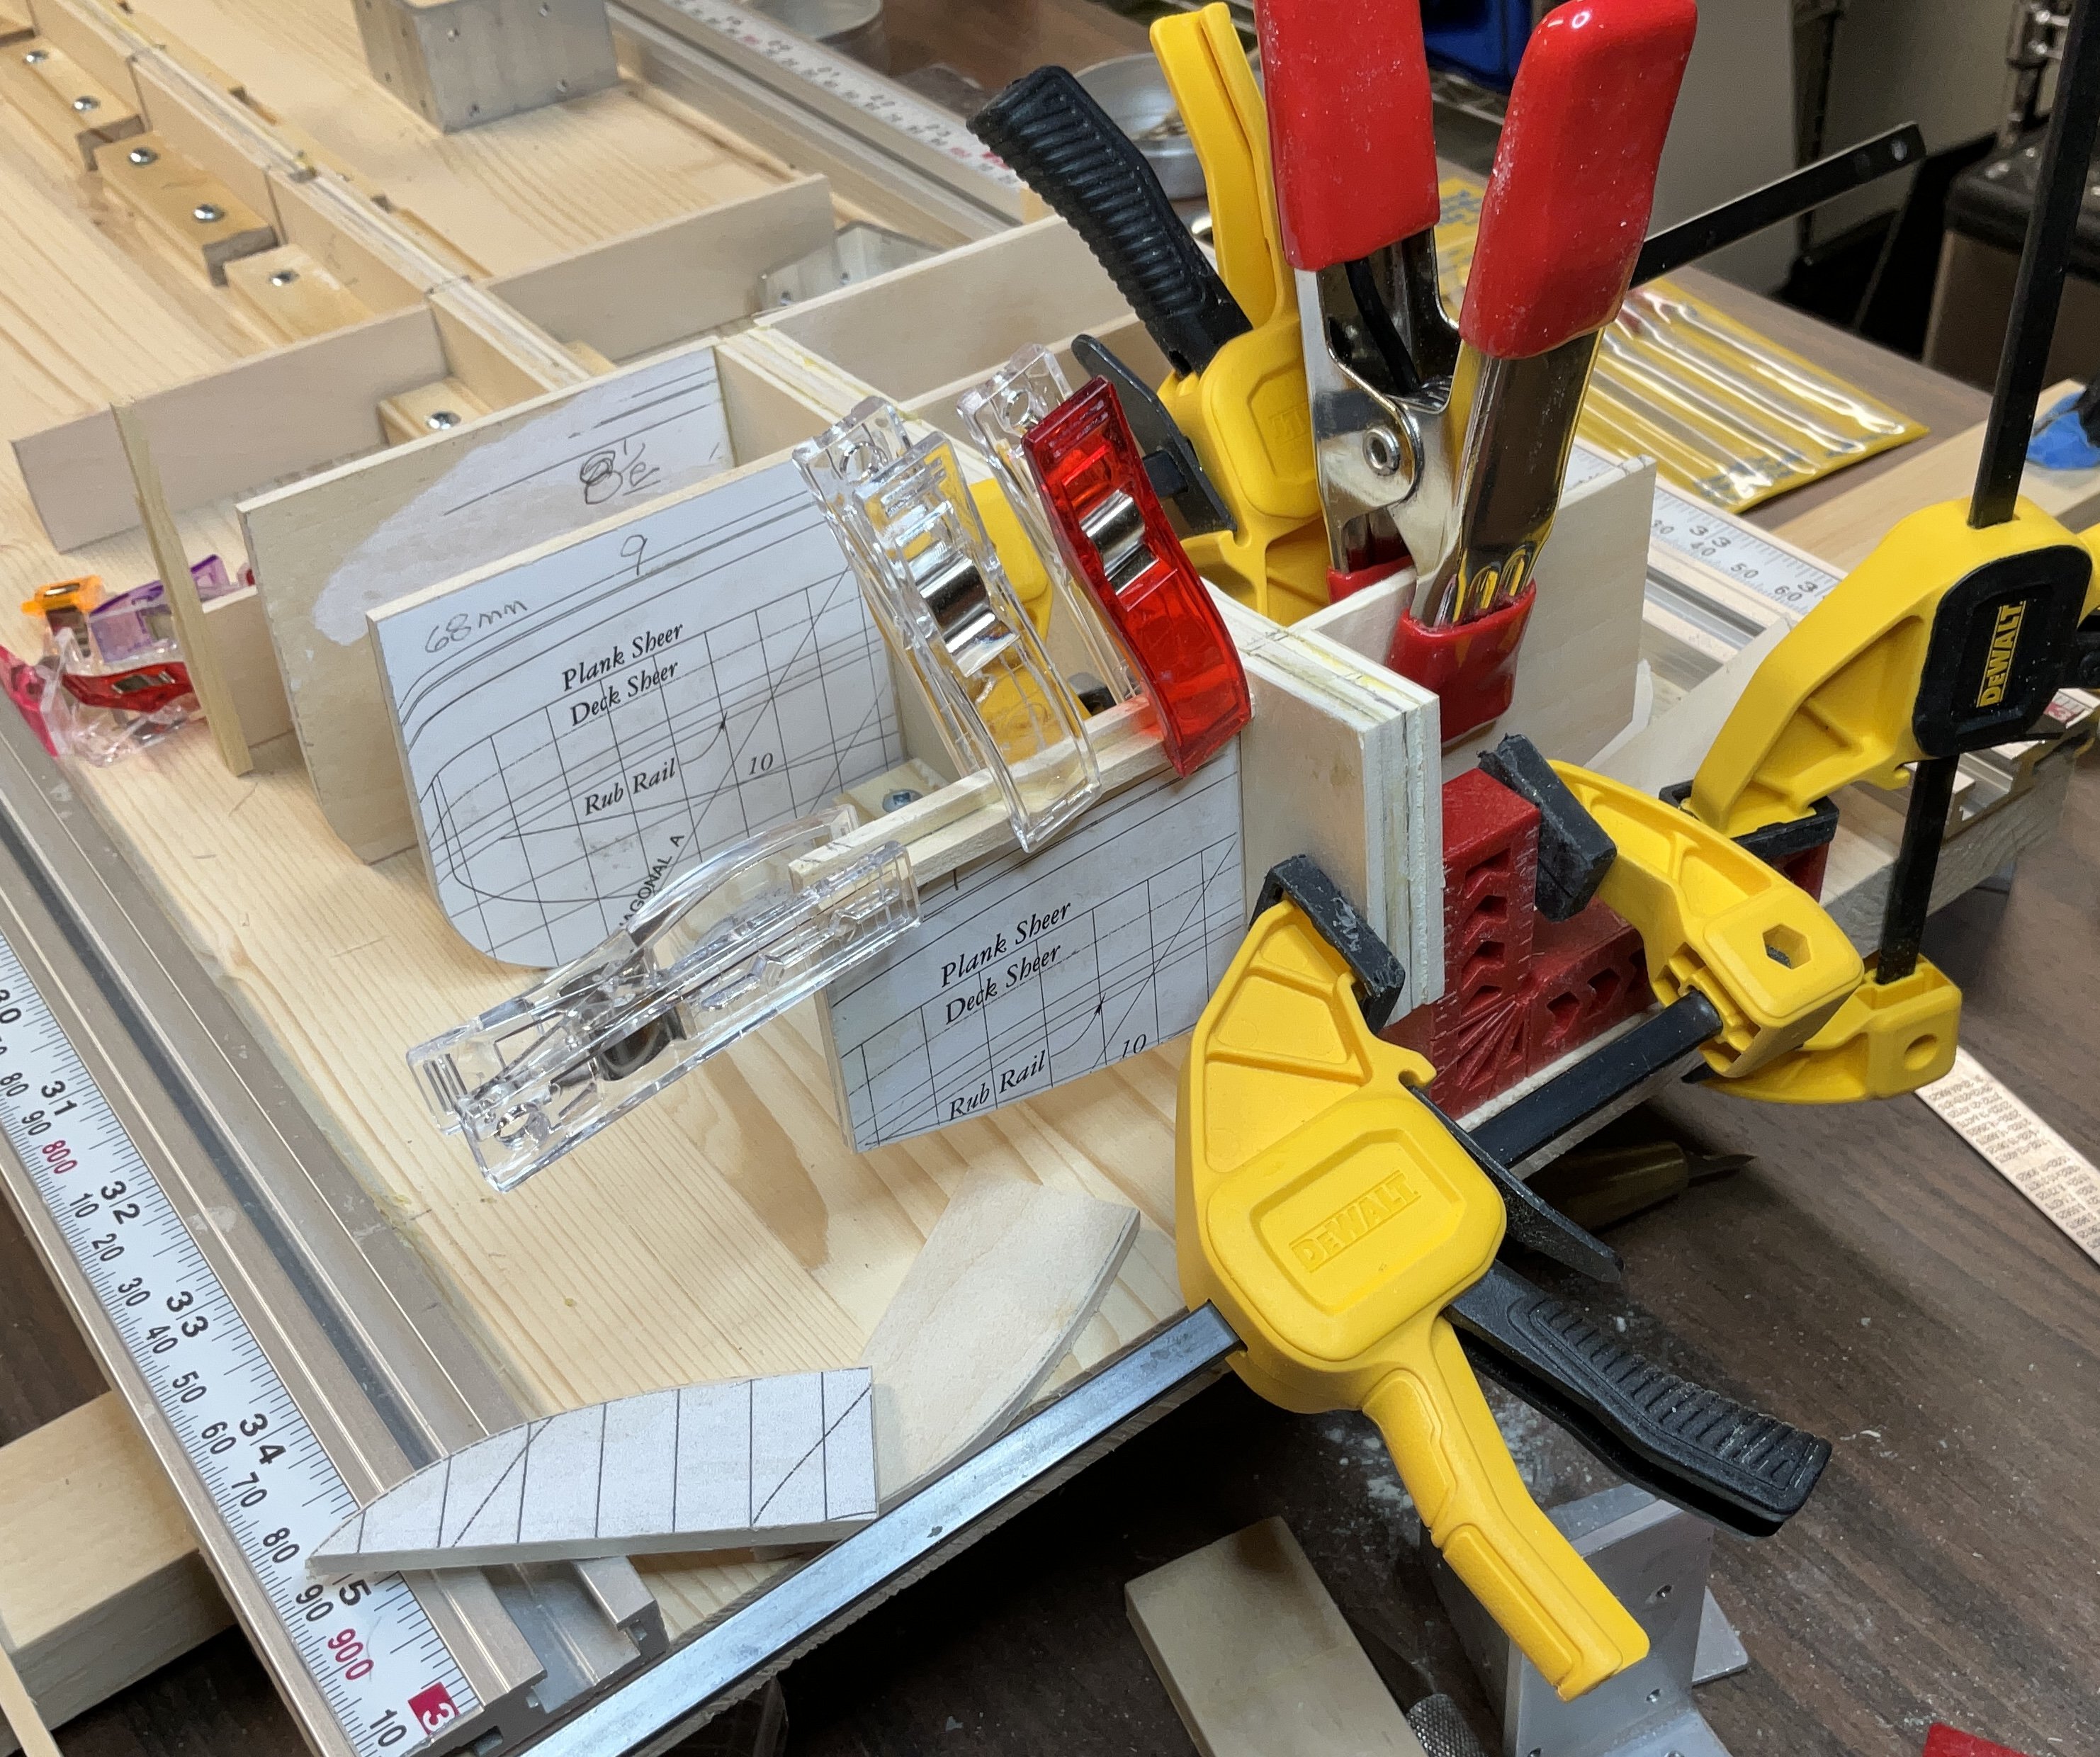
Hi Phil, thank you for the advice. I’ve been using the Elmer’s rubber cement for temporarily sticking the paper to the wood. I’ve only been removing the paper and rubber cement where there wood needs to be glued. As you say it is easy to remove. Been using yellow PVA for gluing the wood. Once the hidden work is finished I’m going to switch to white PVA and/or CA. One drawback to the Elmer’s rubber cement is its odor although that goes away fairly quickly.
-
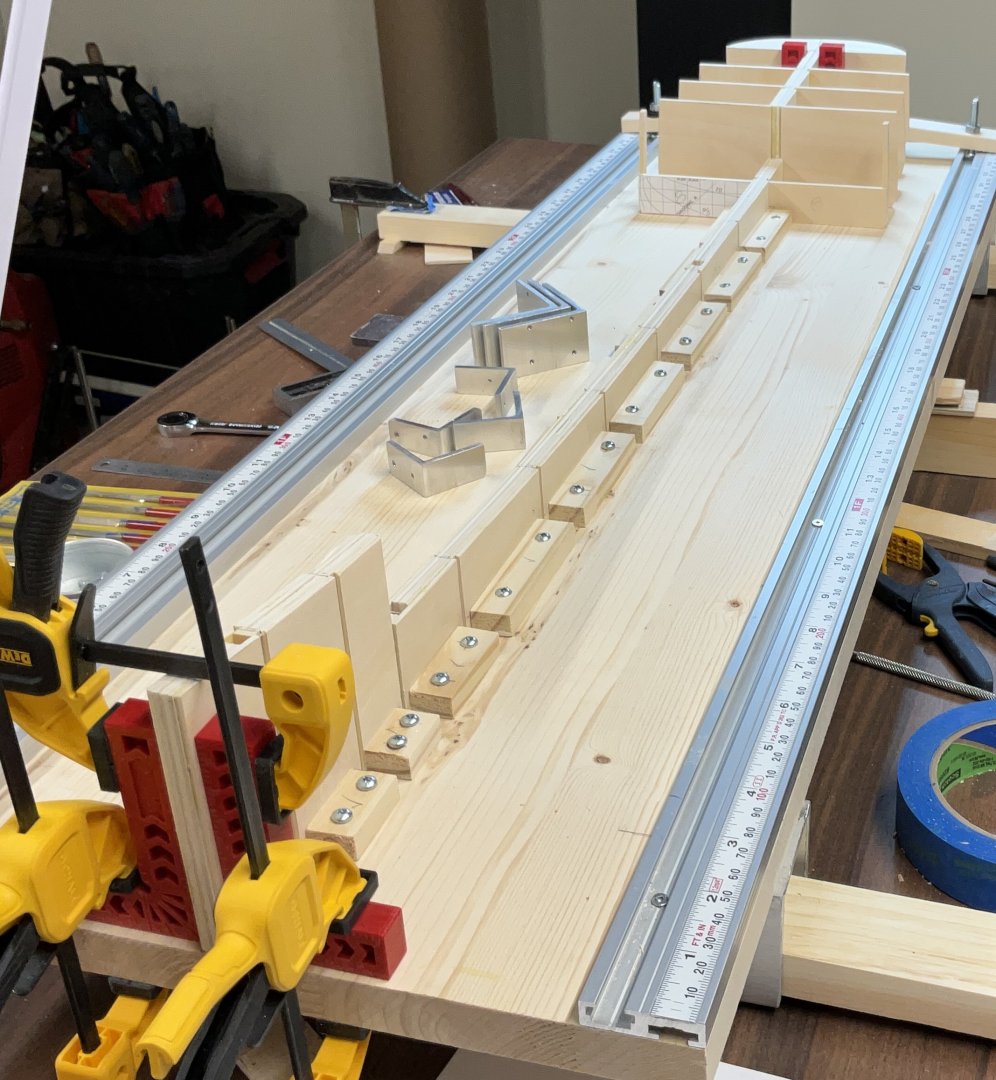
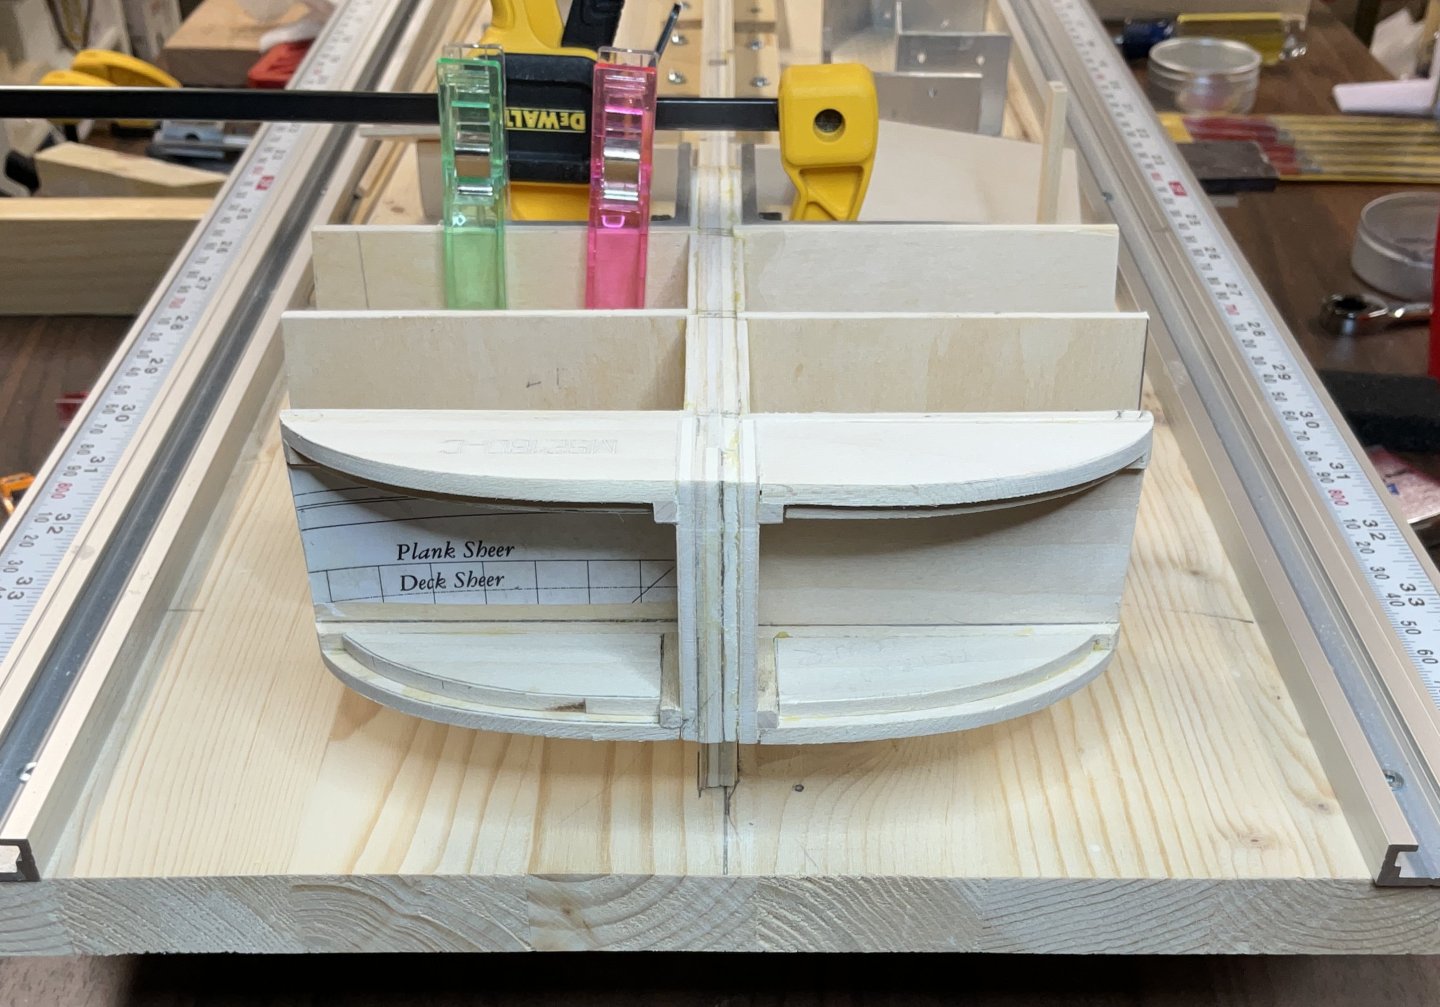
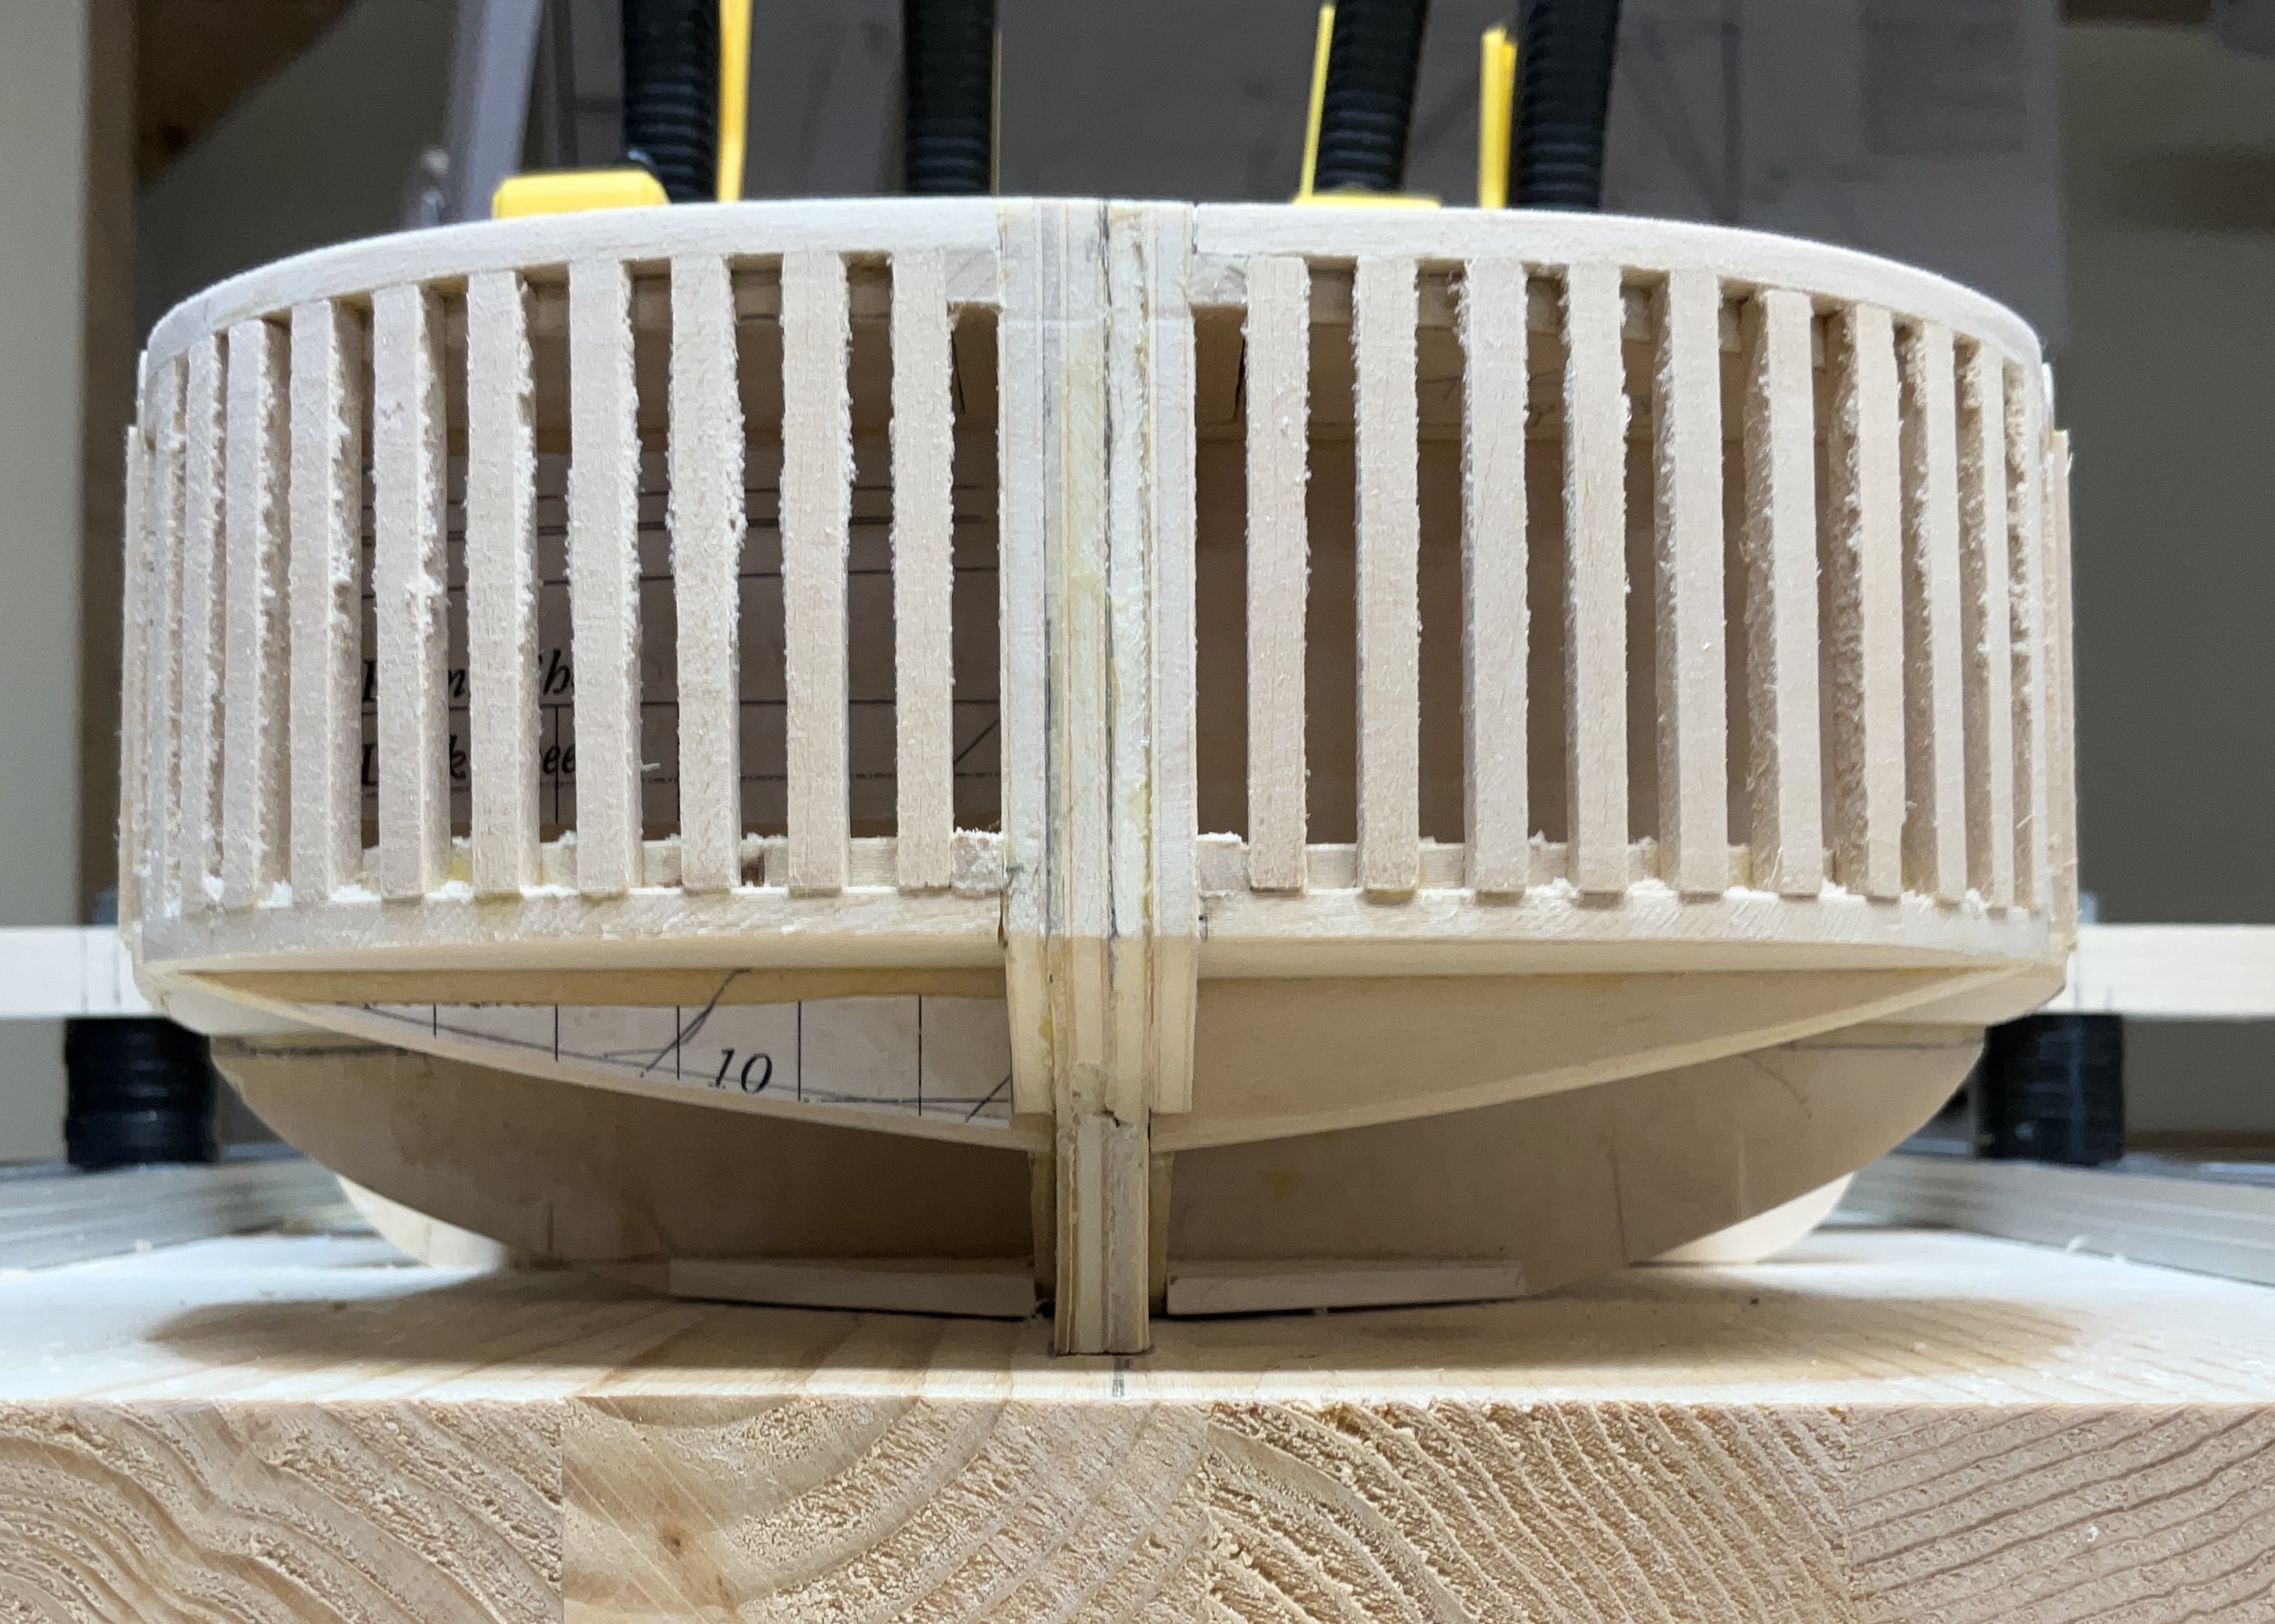
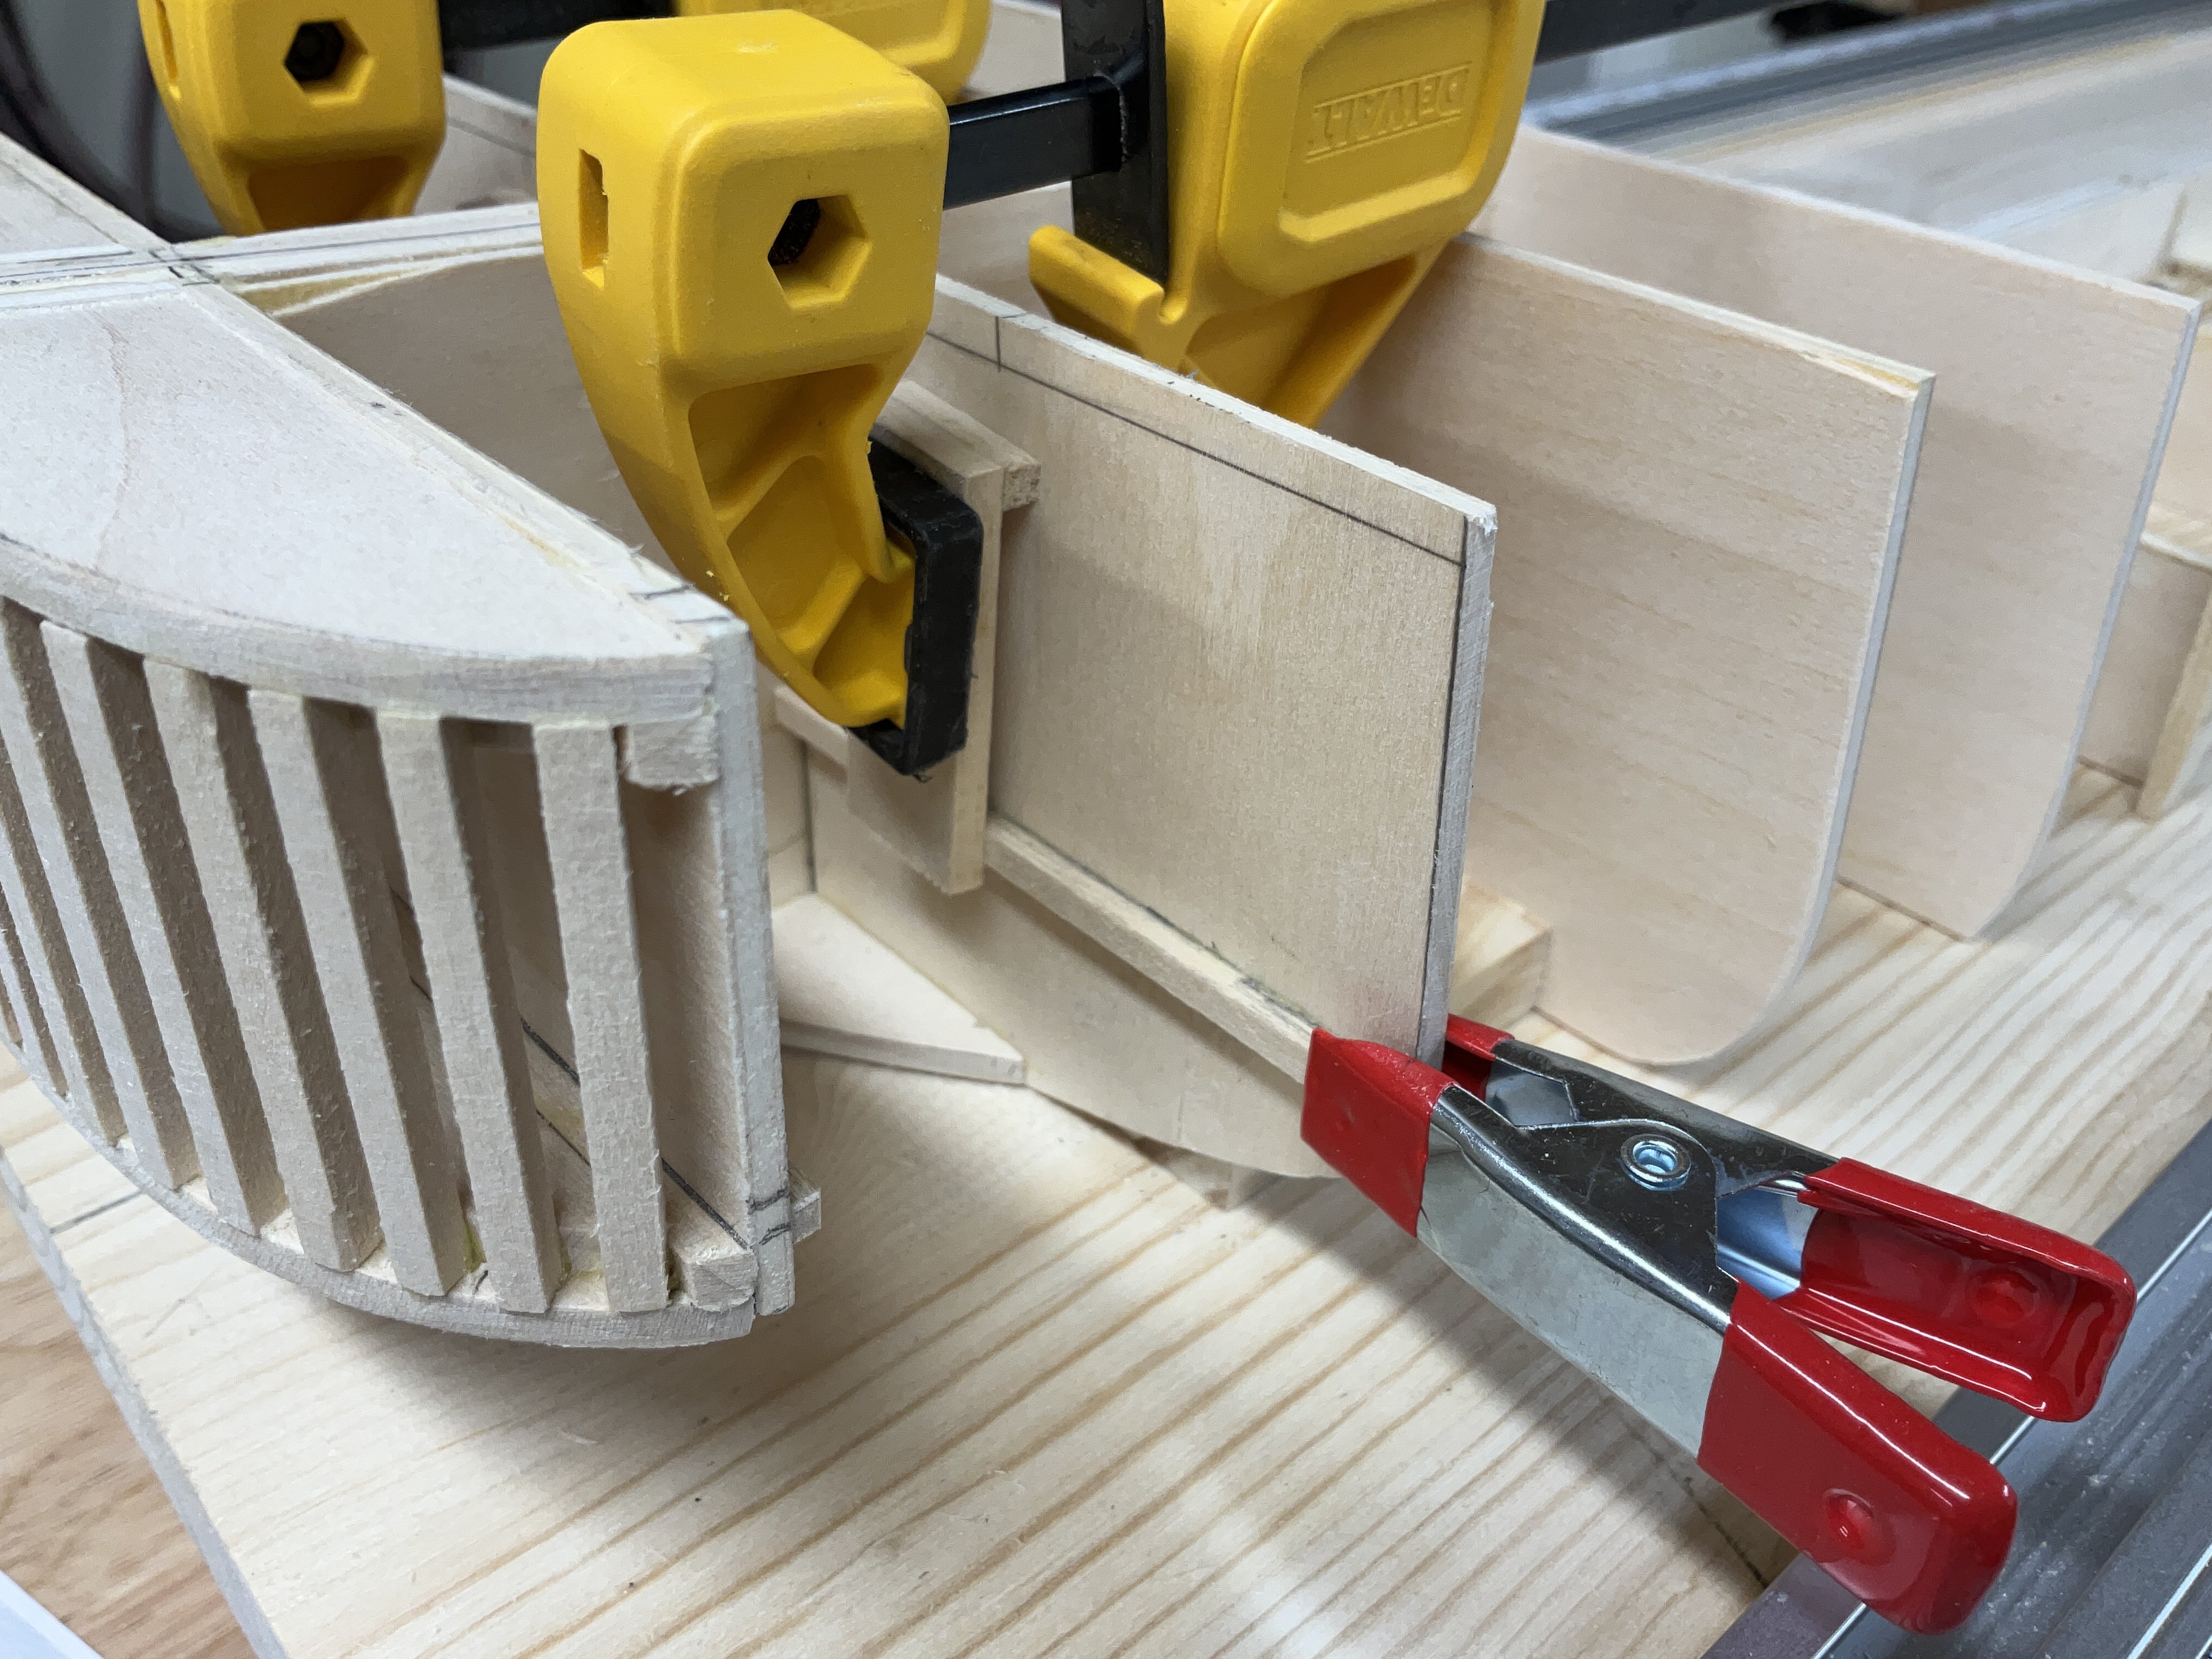
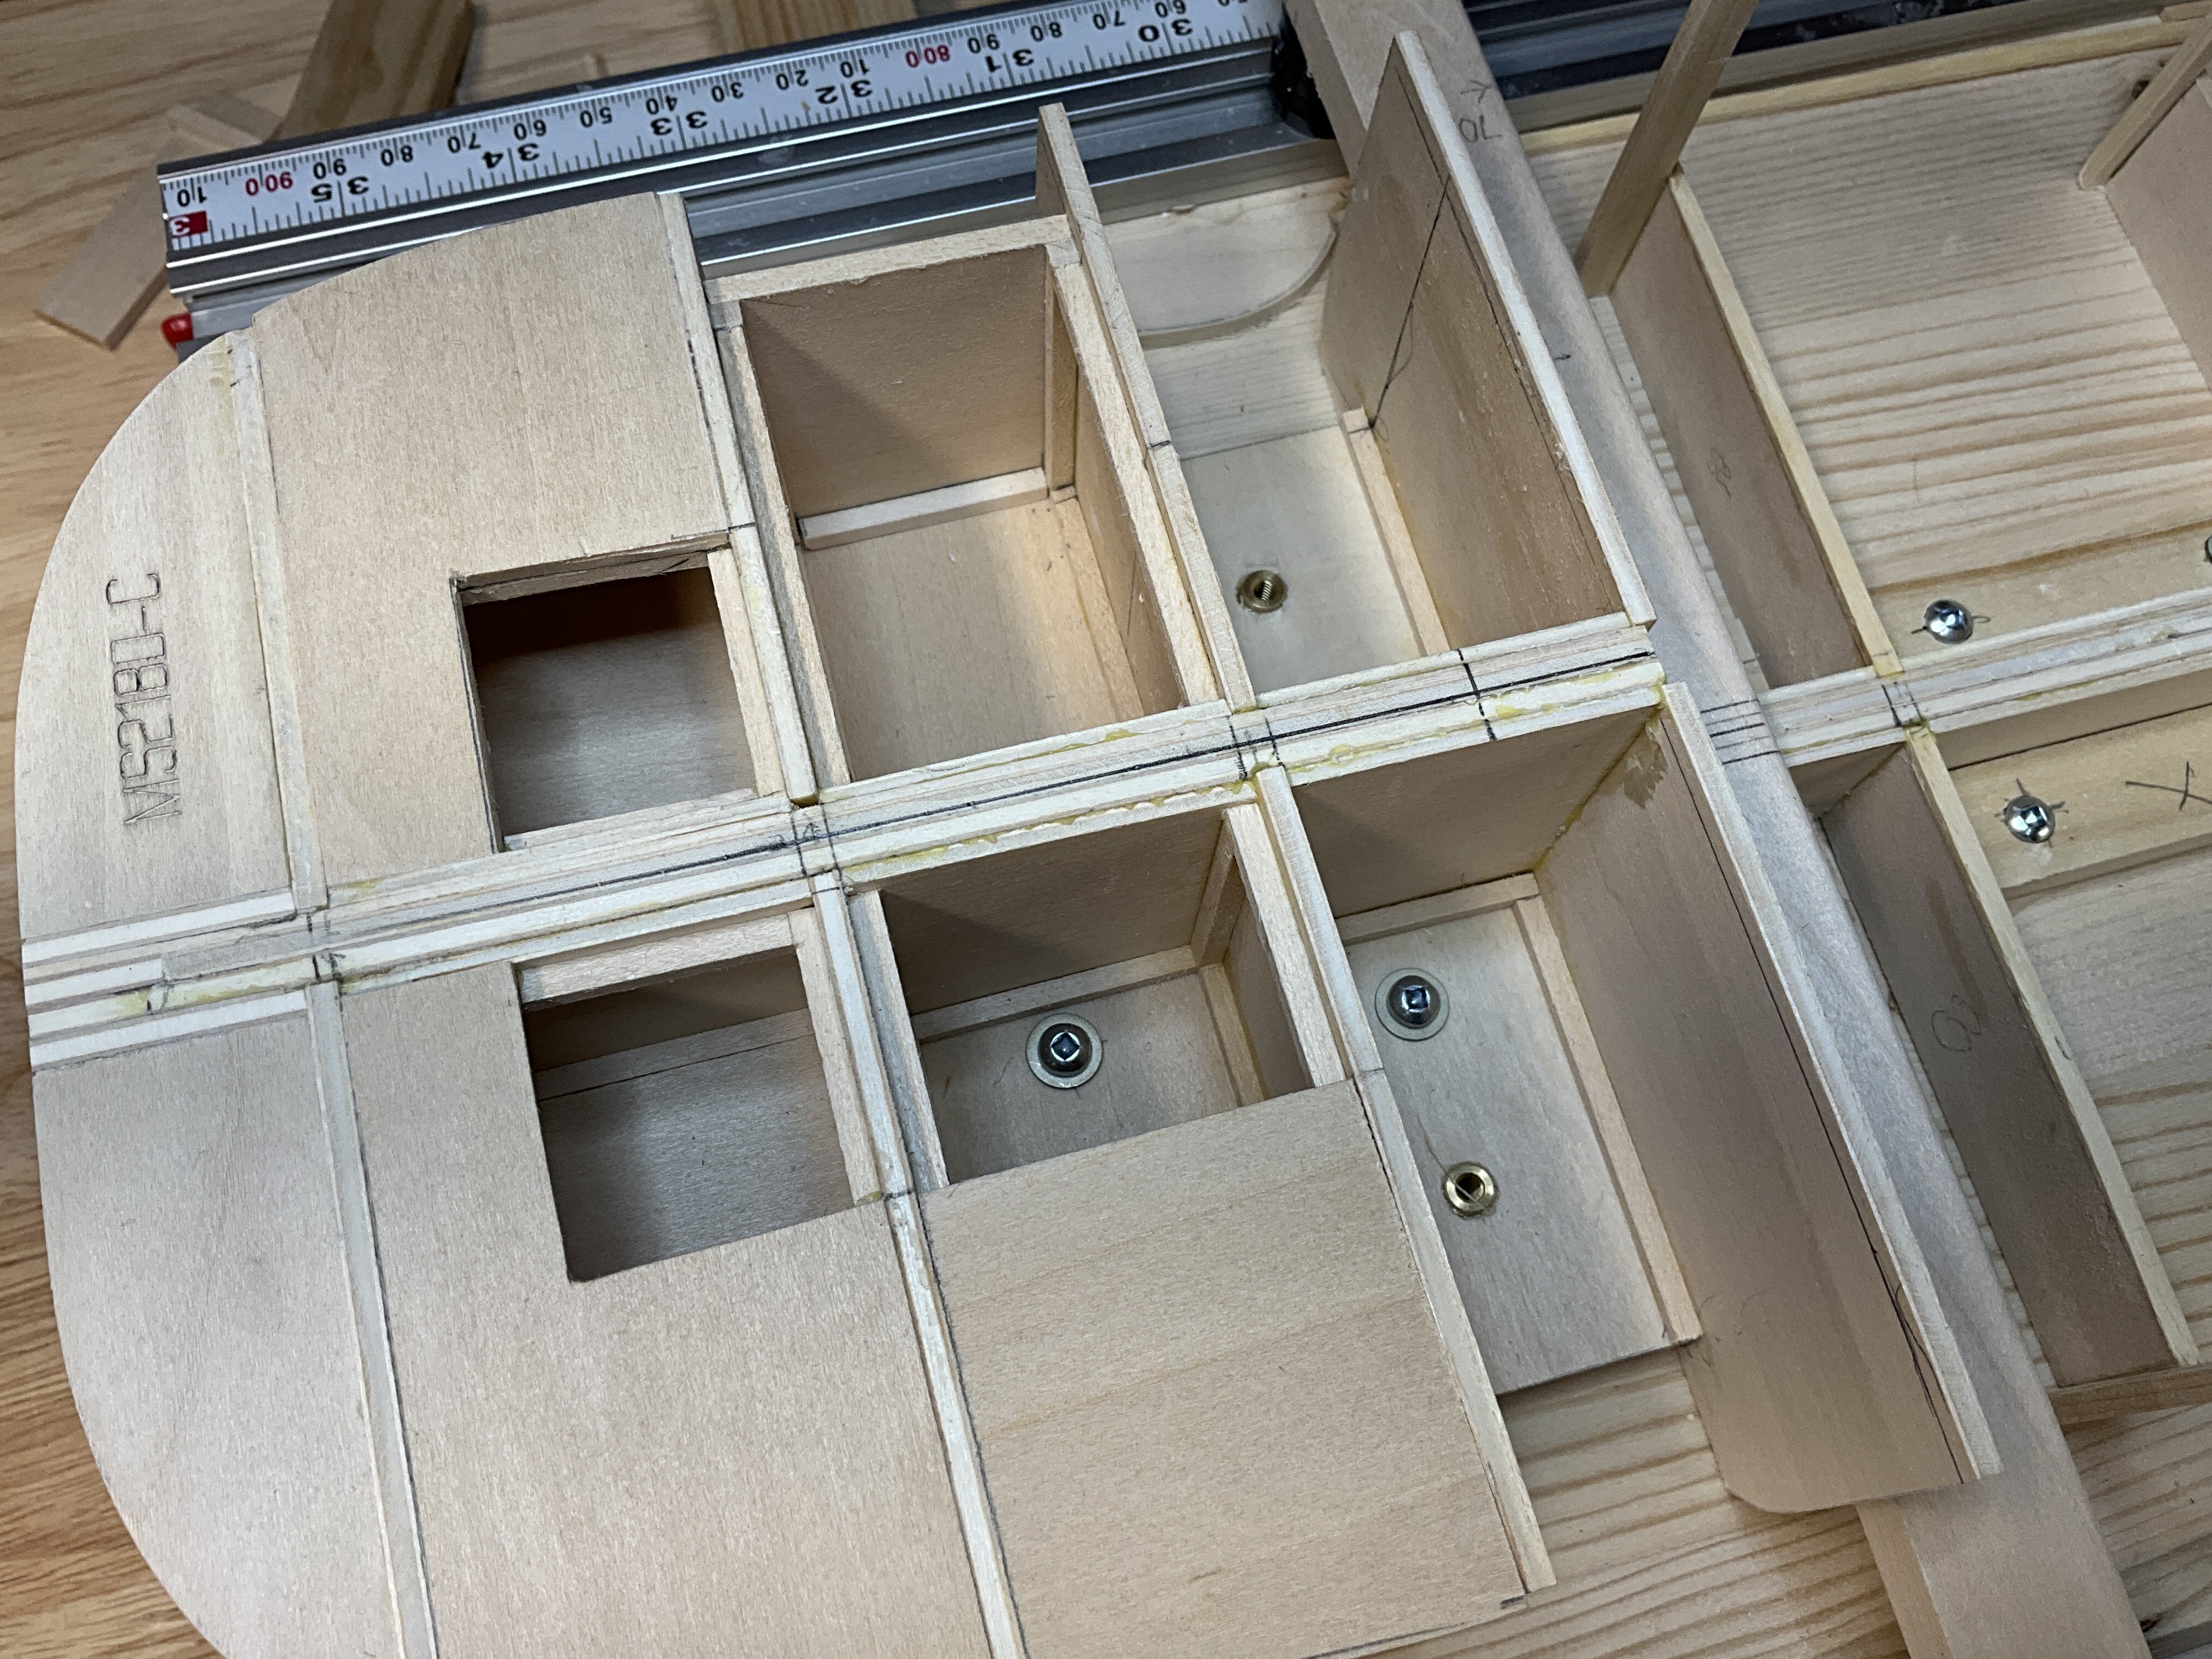
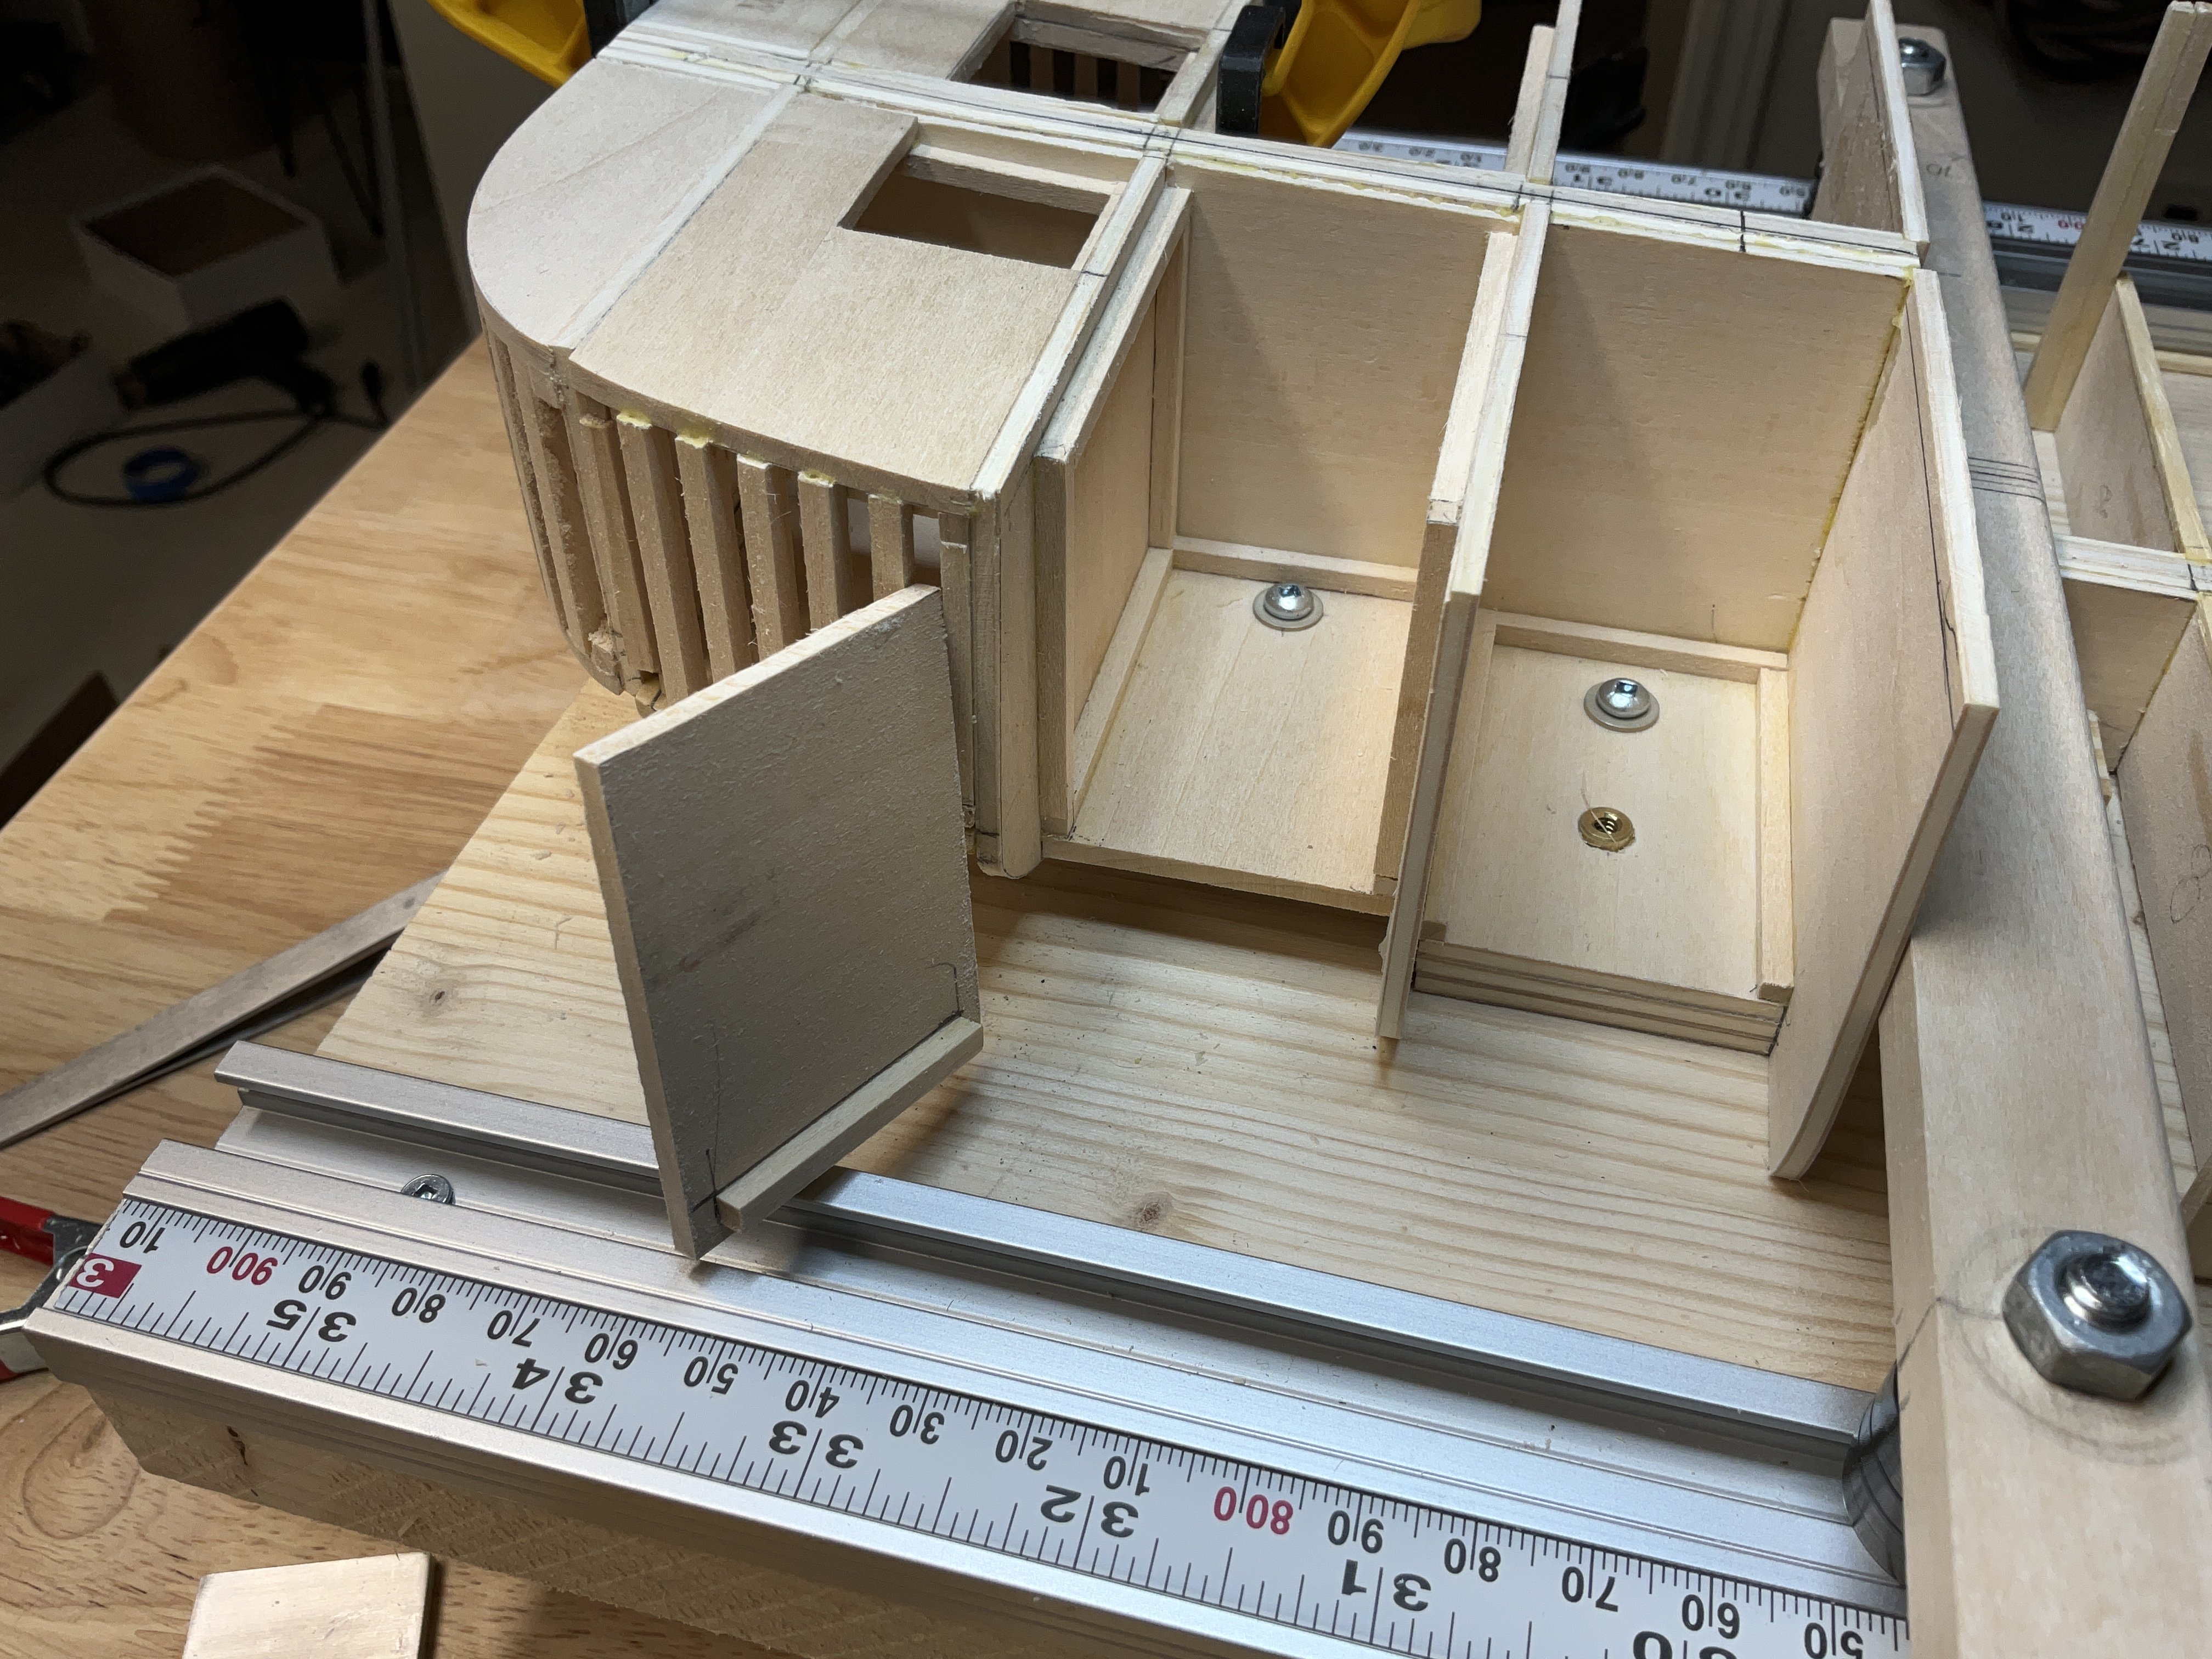
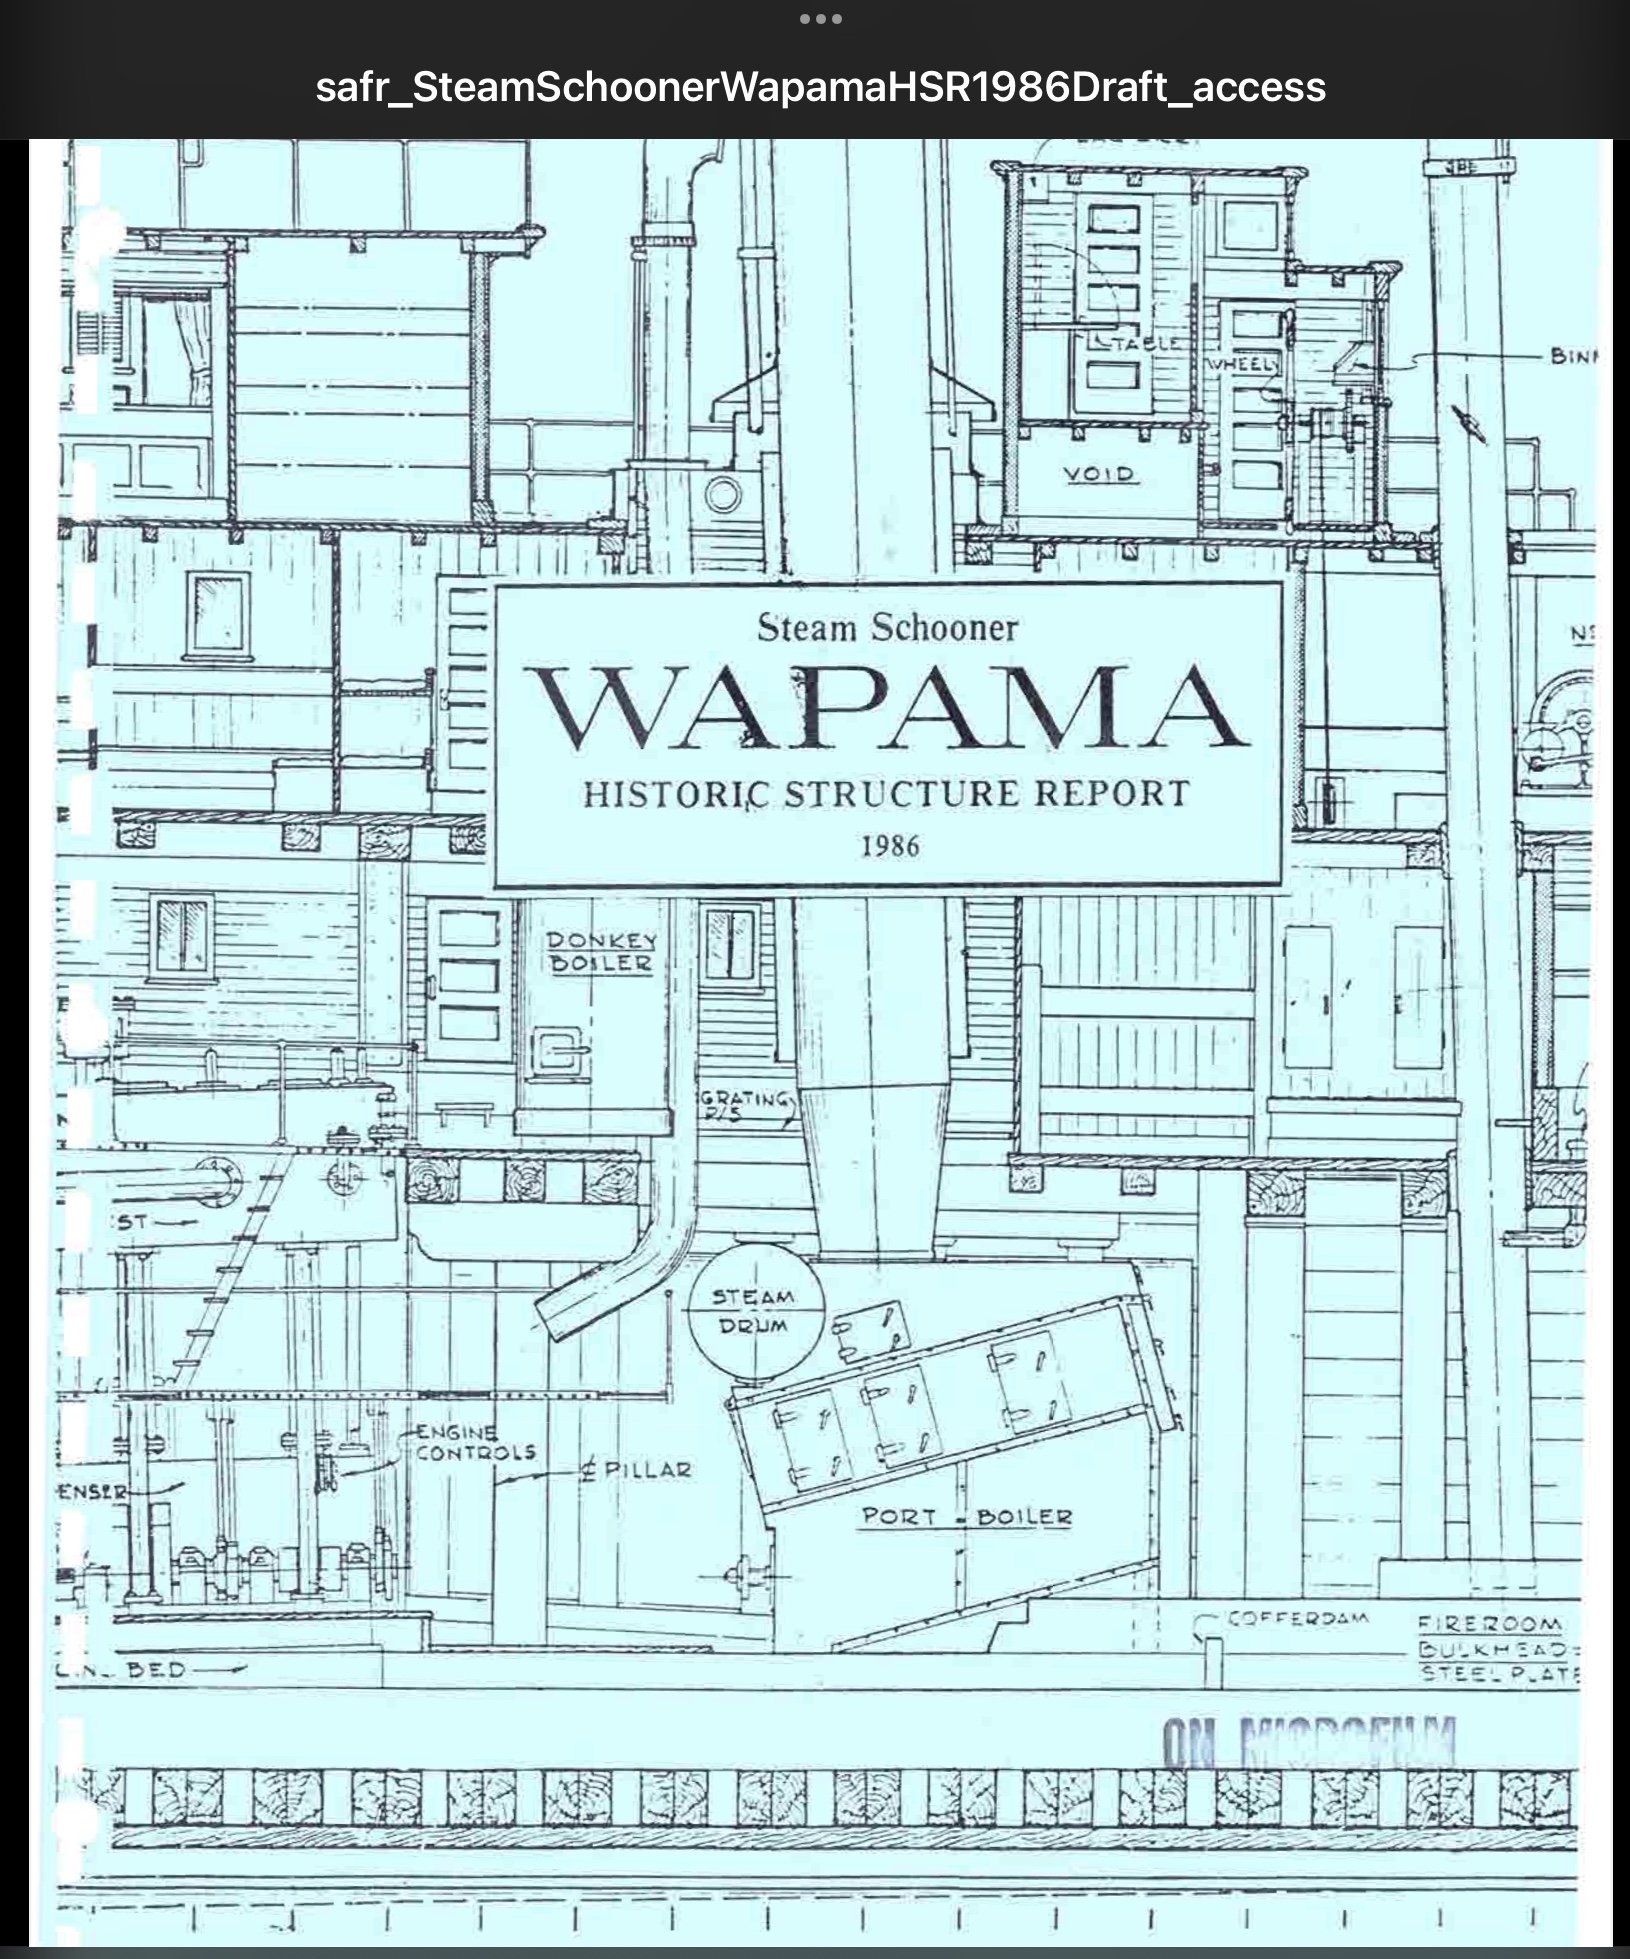
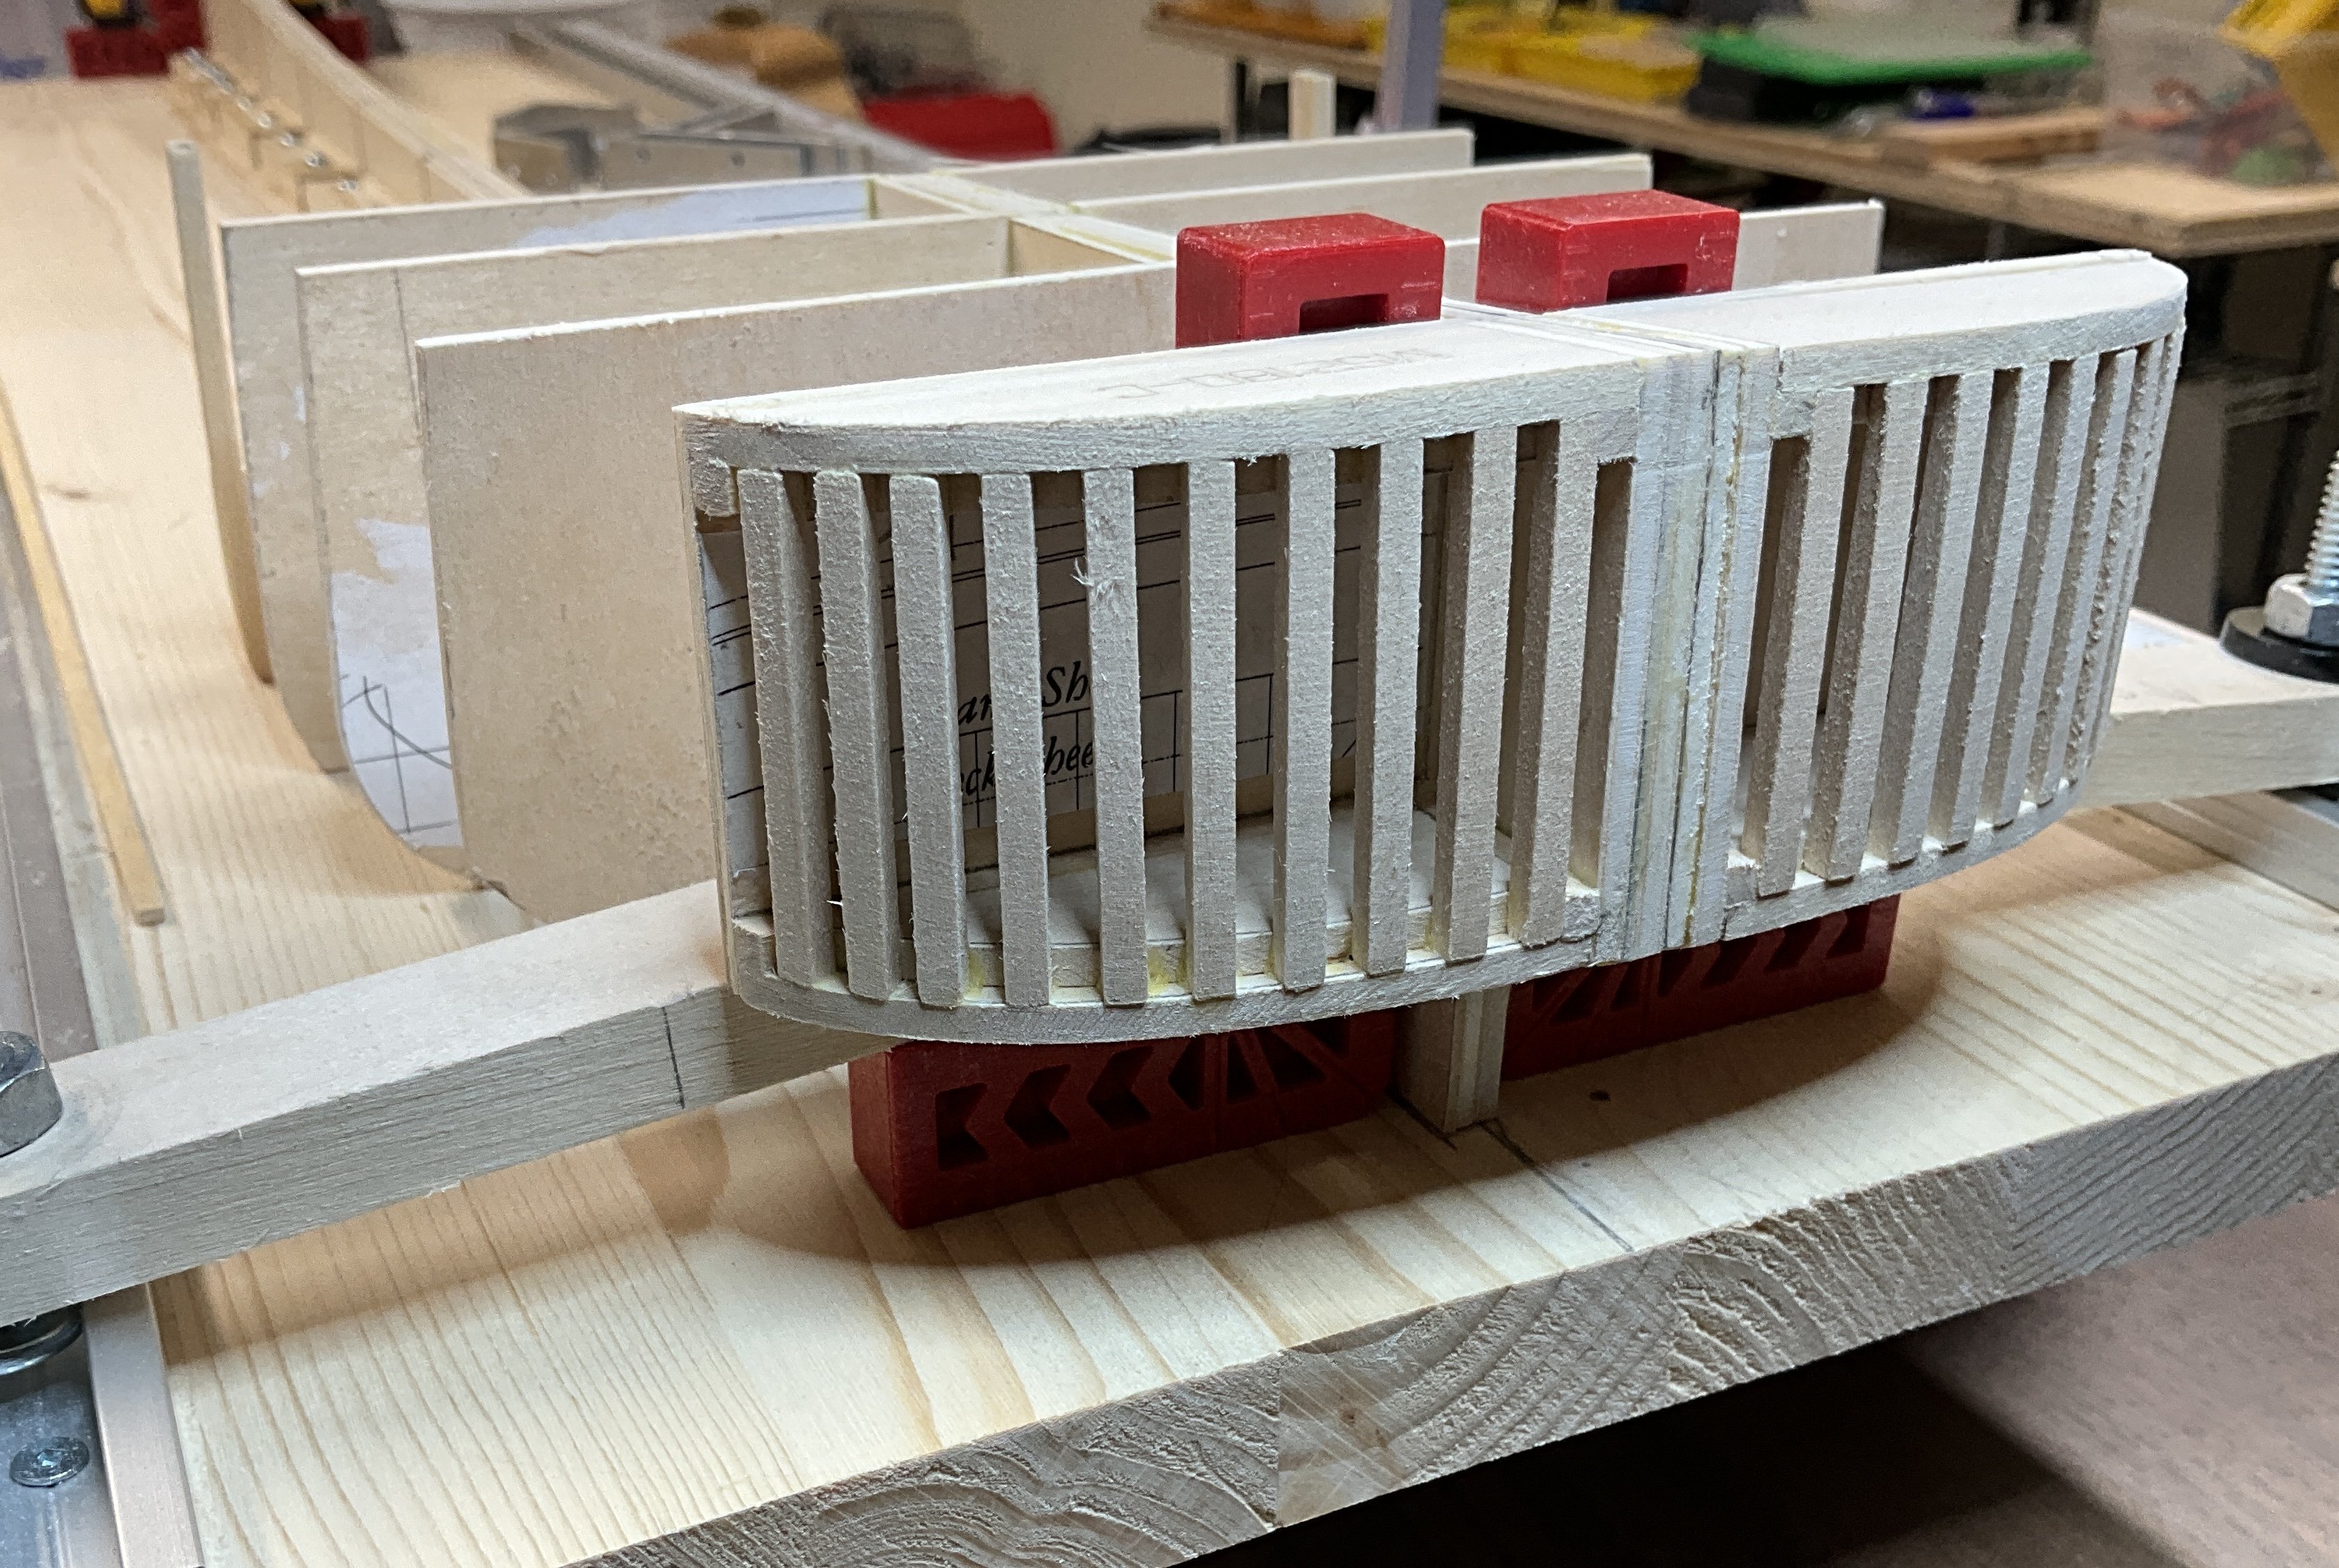
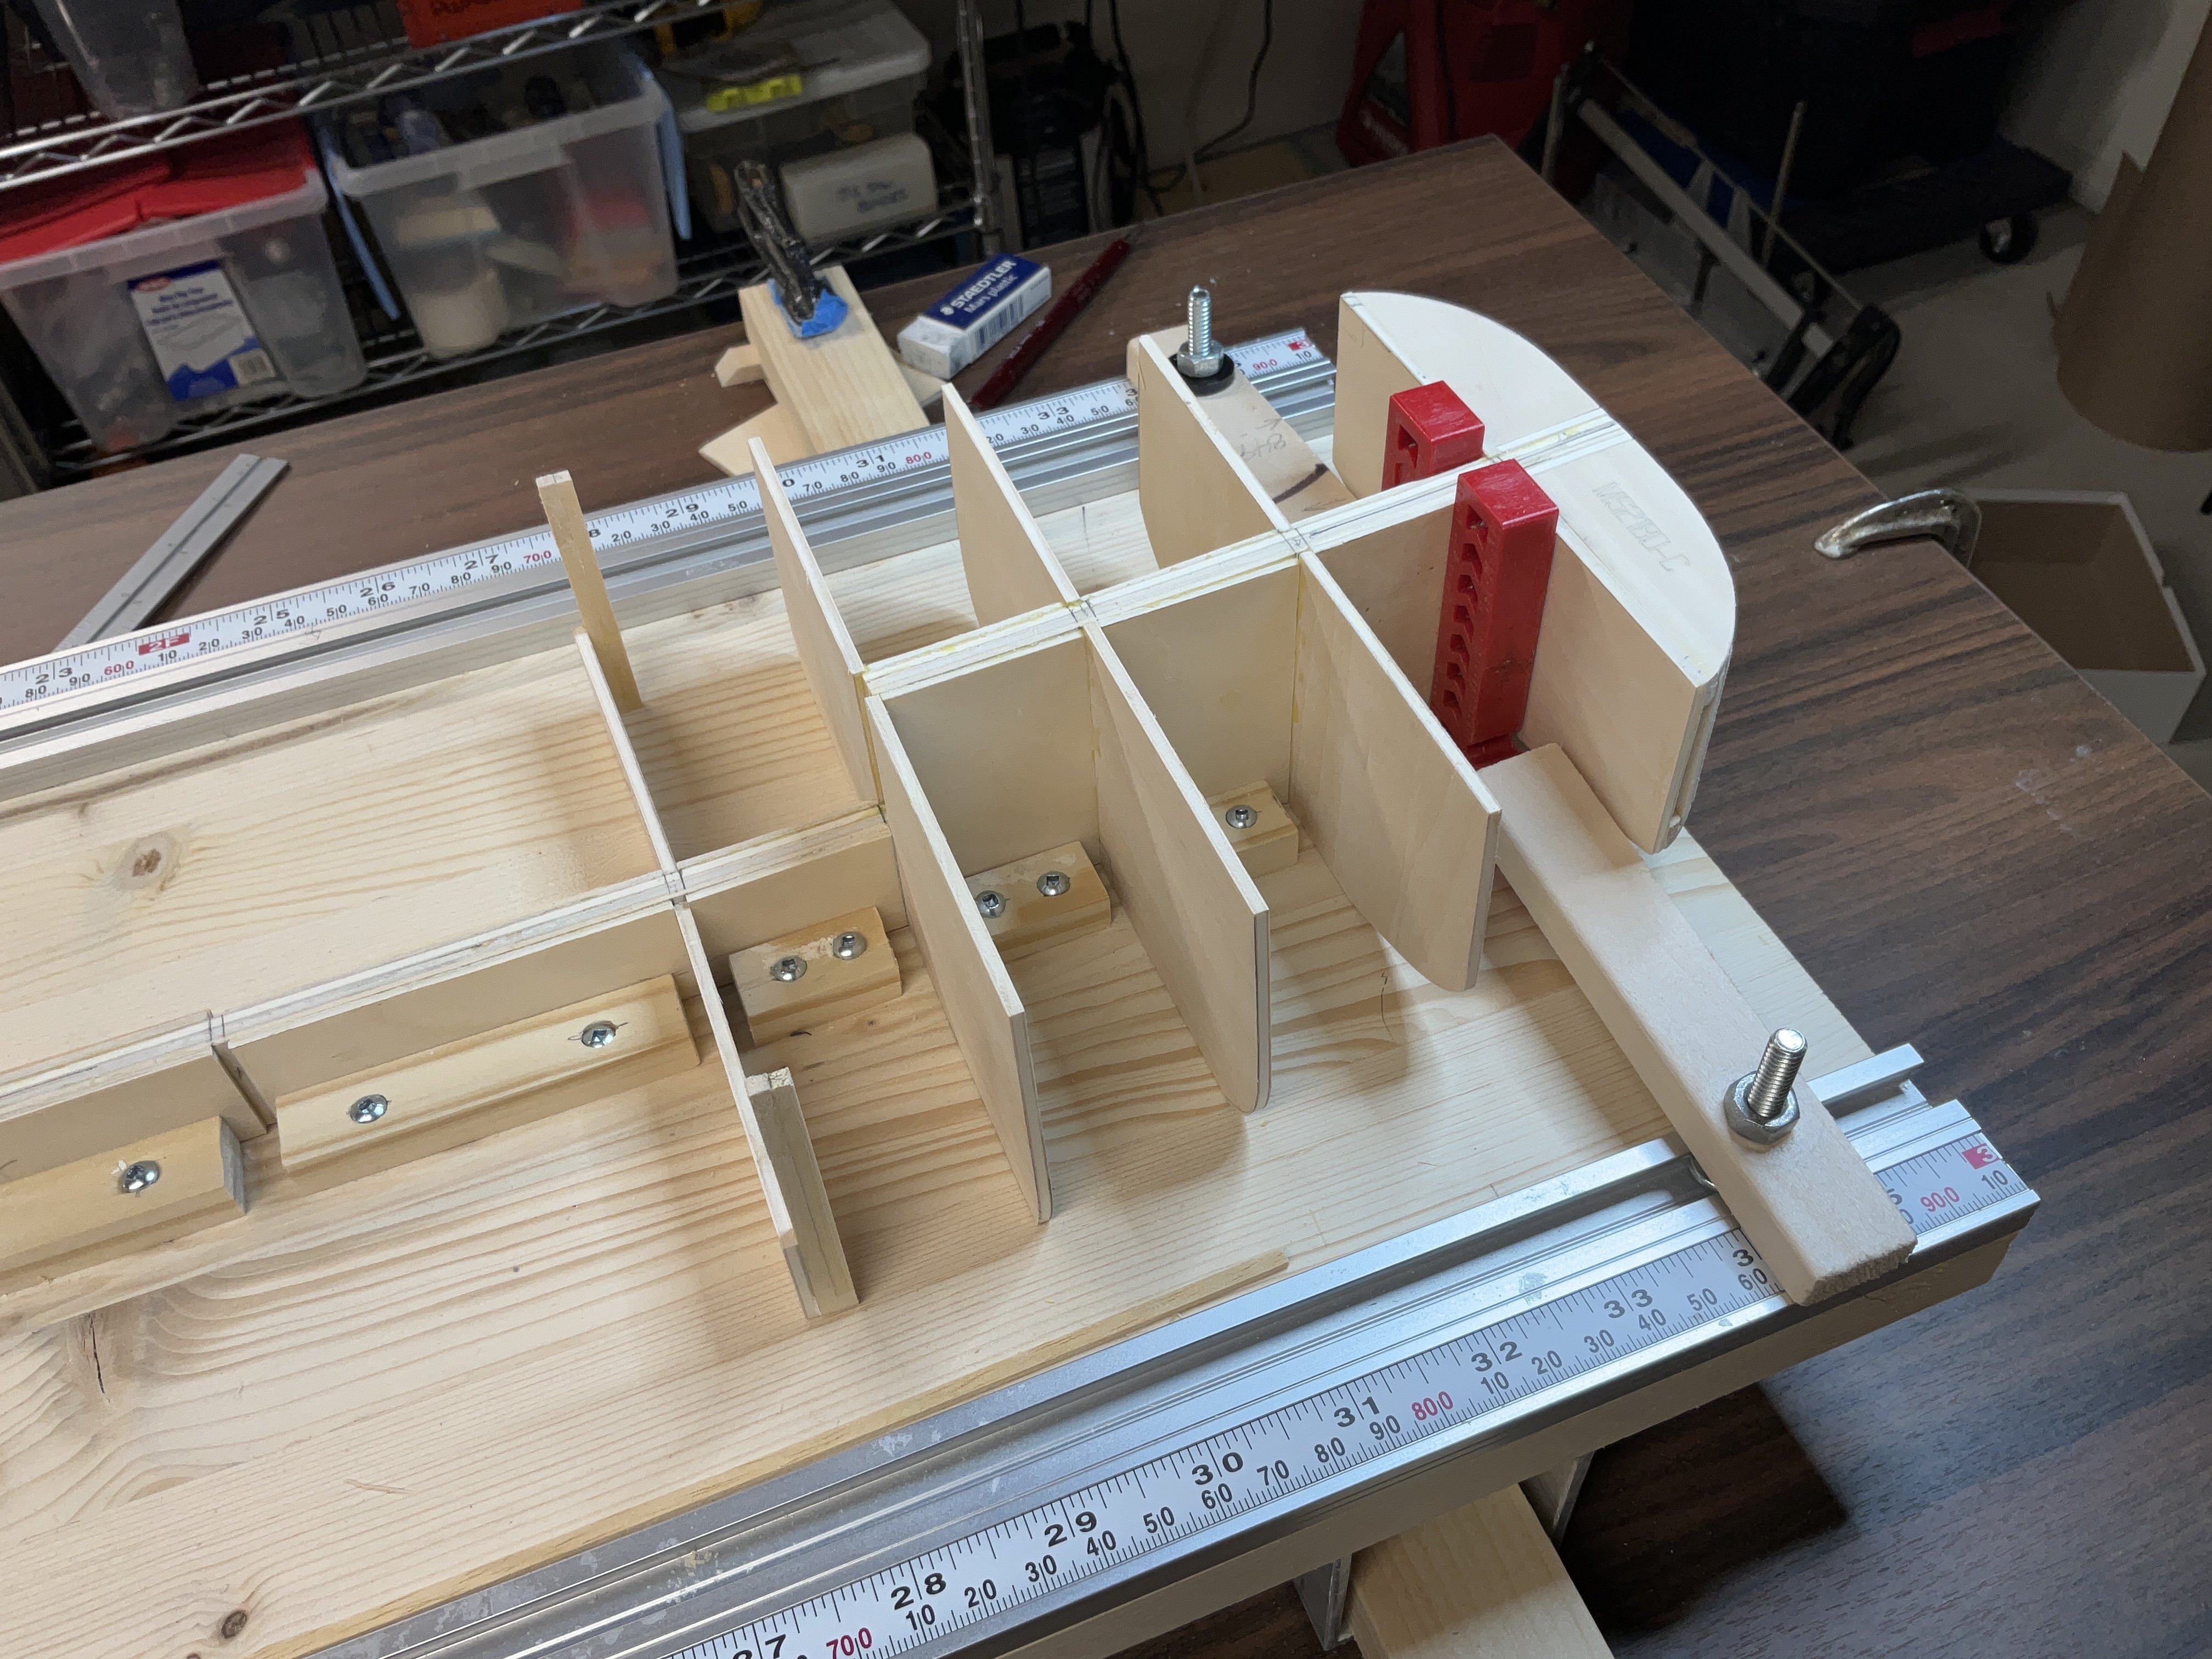
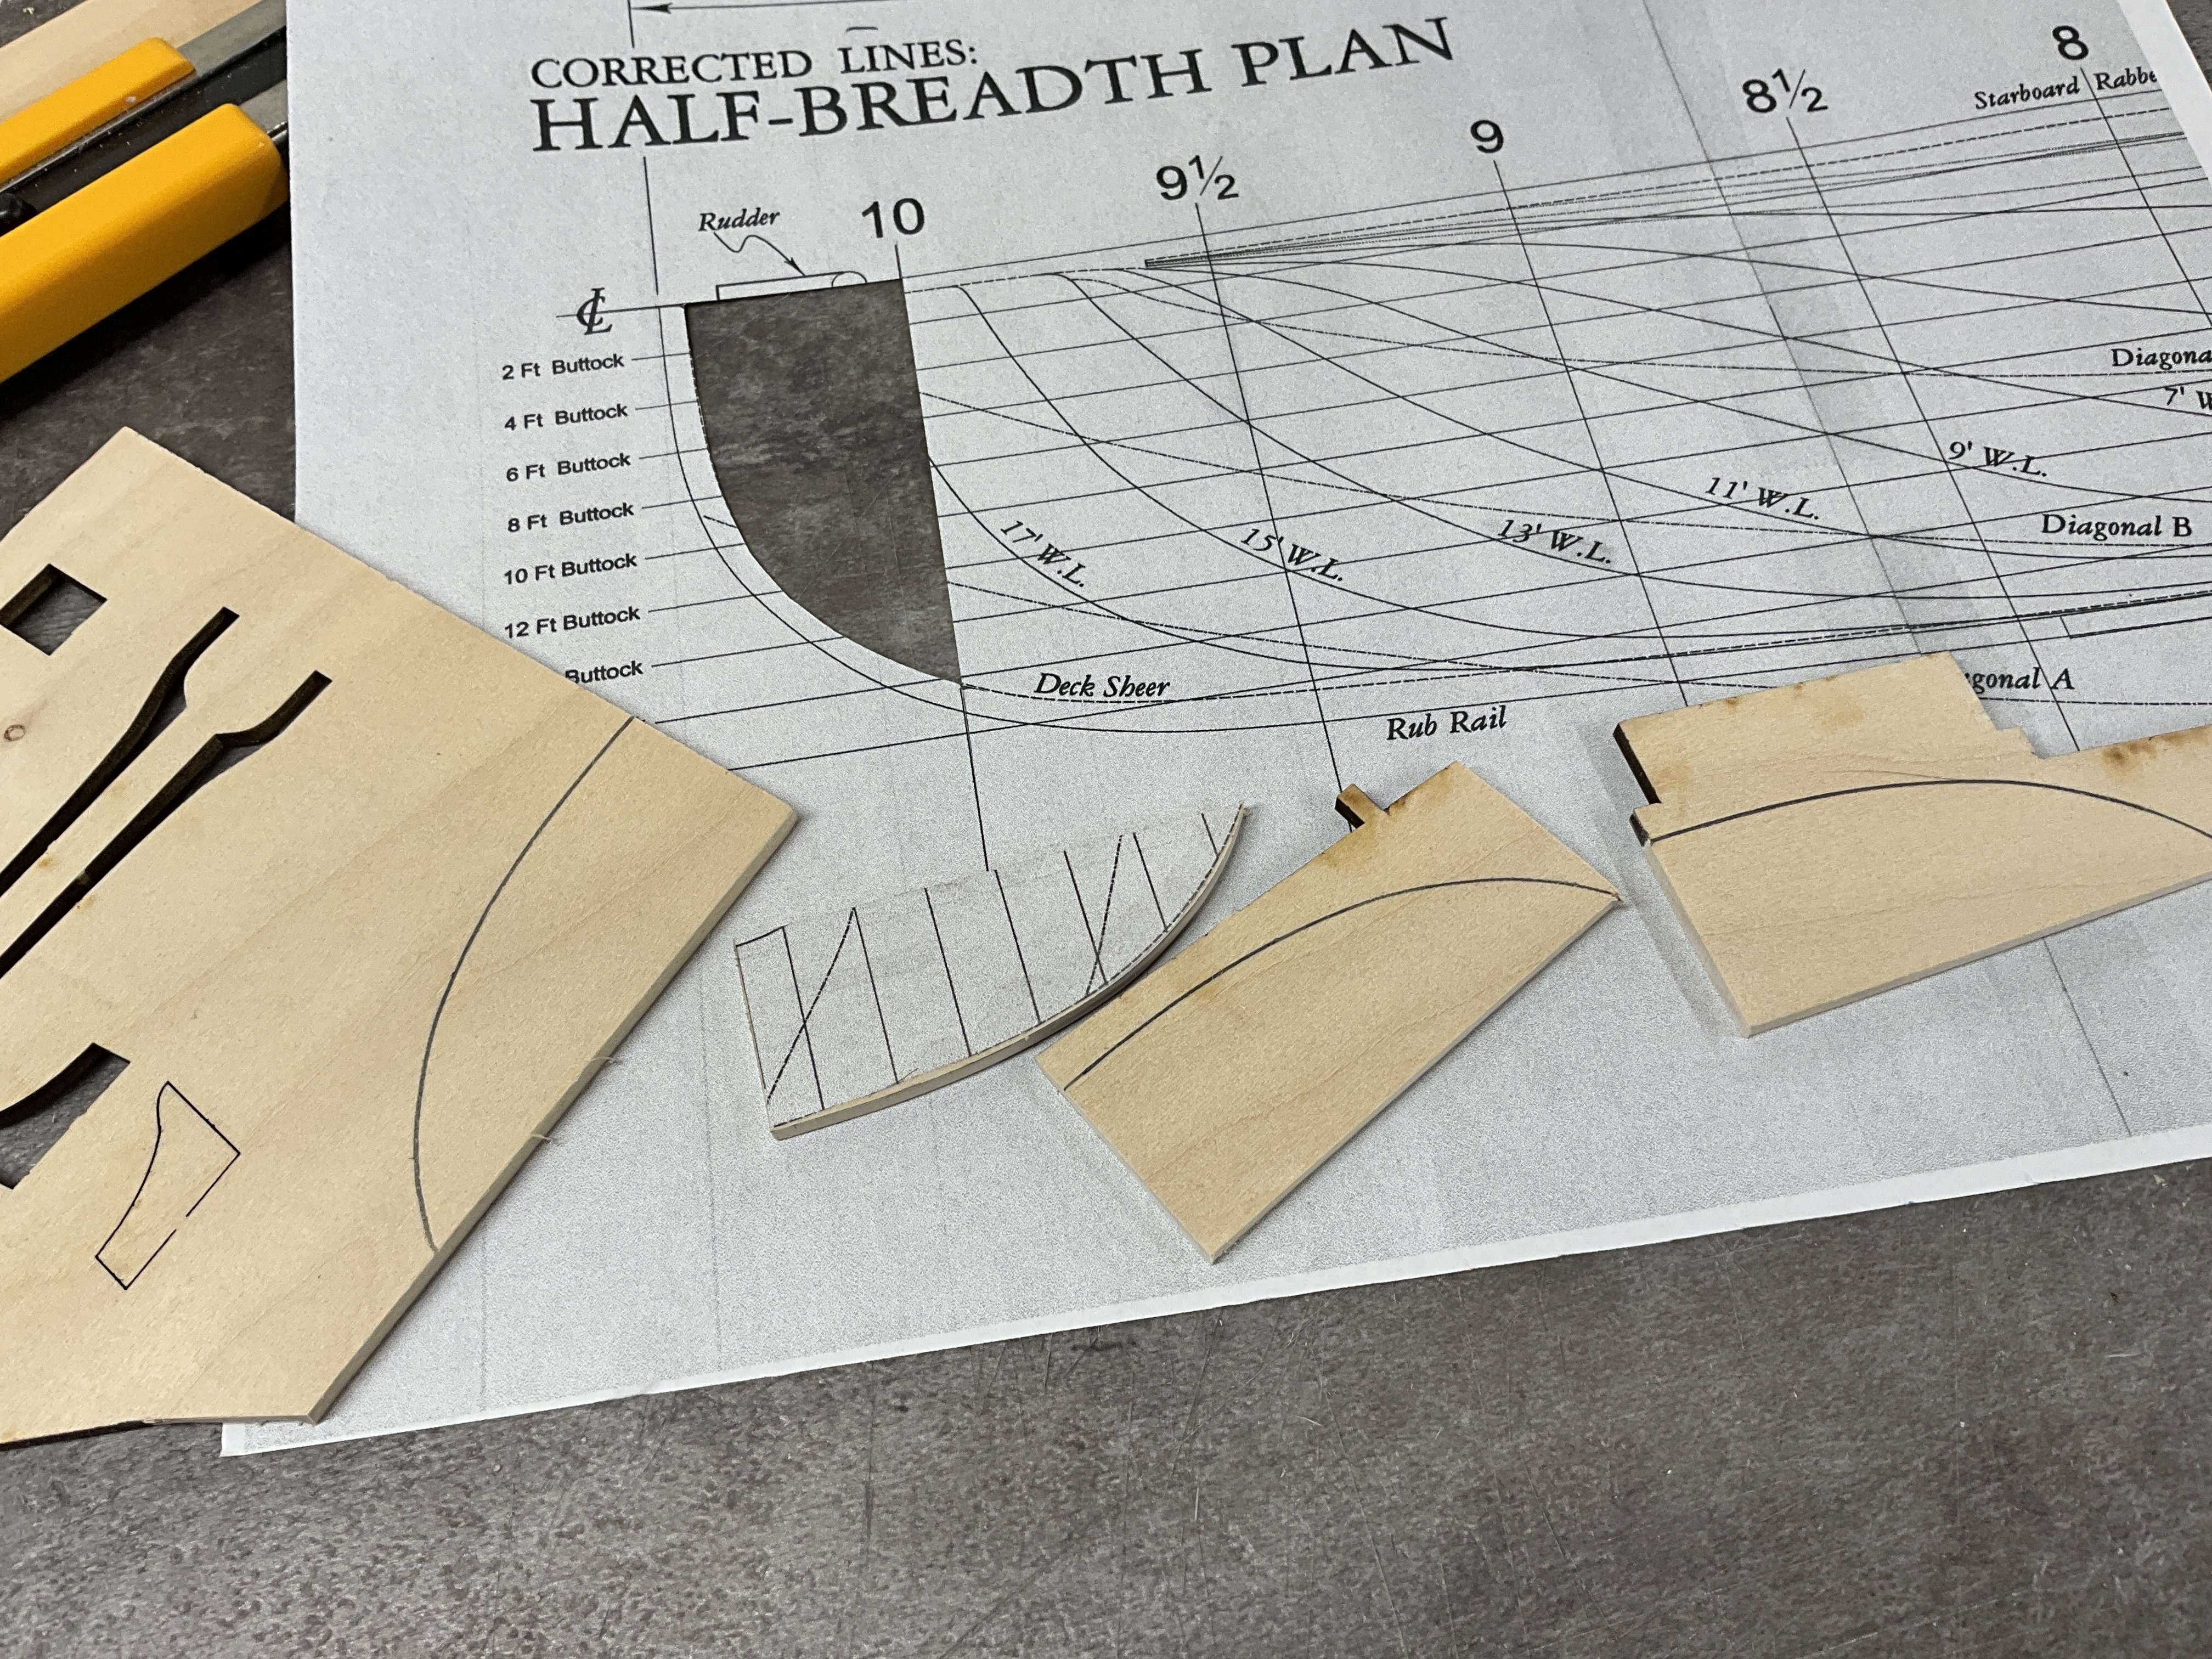
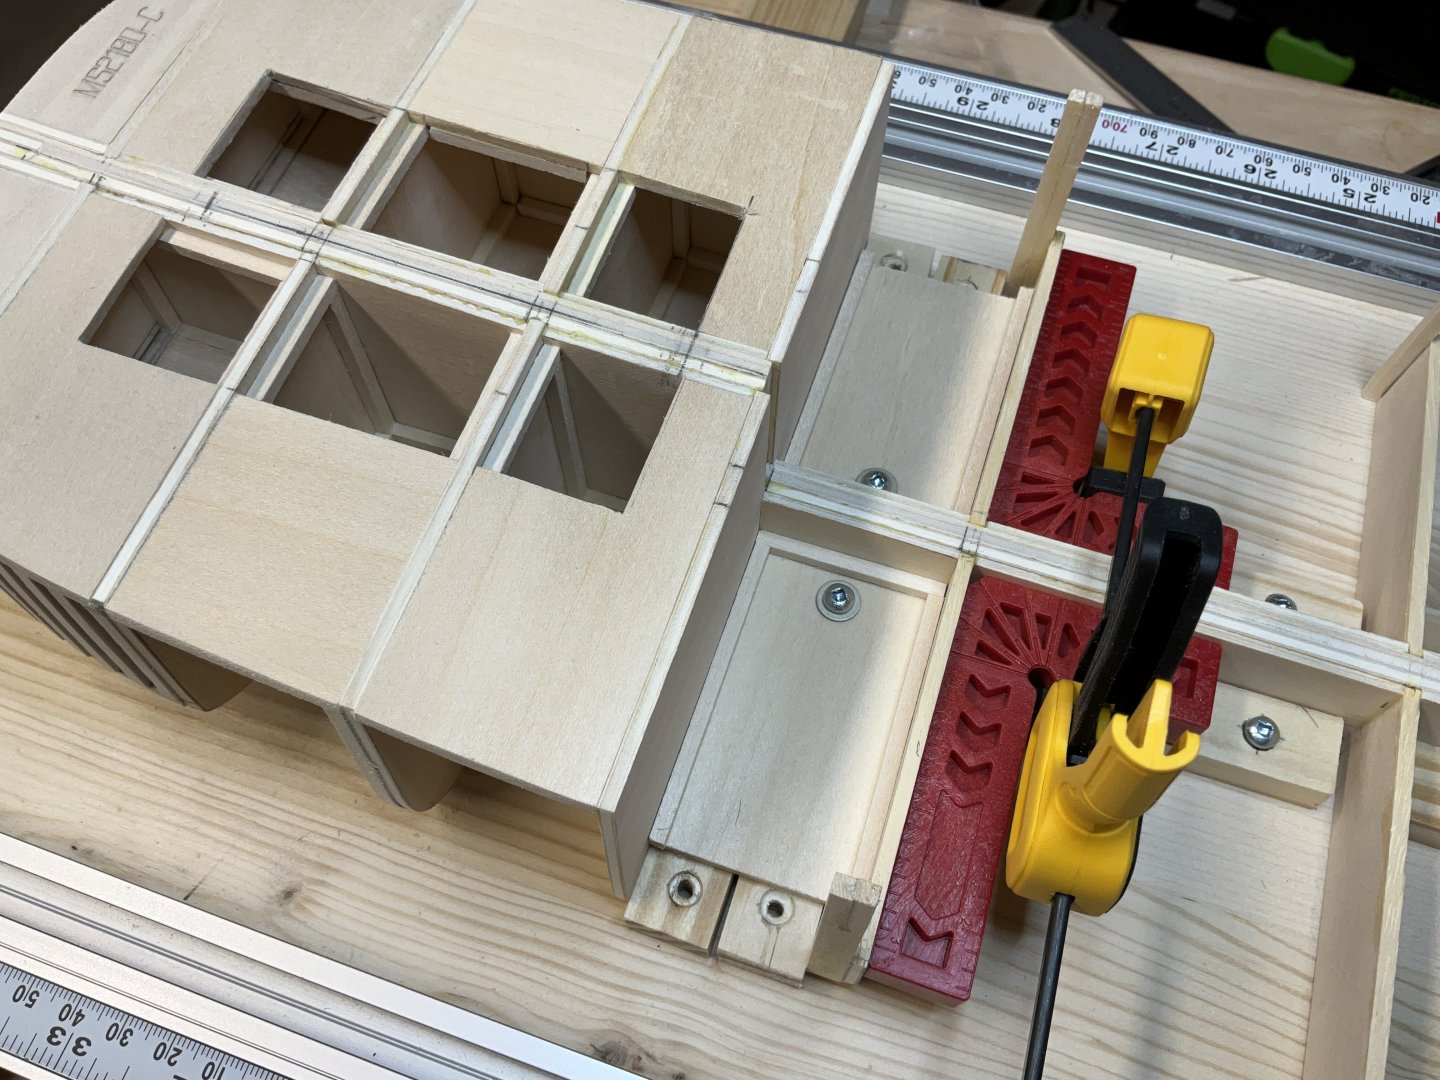
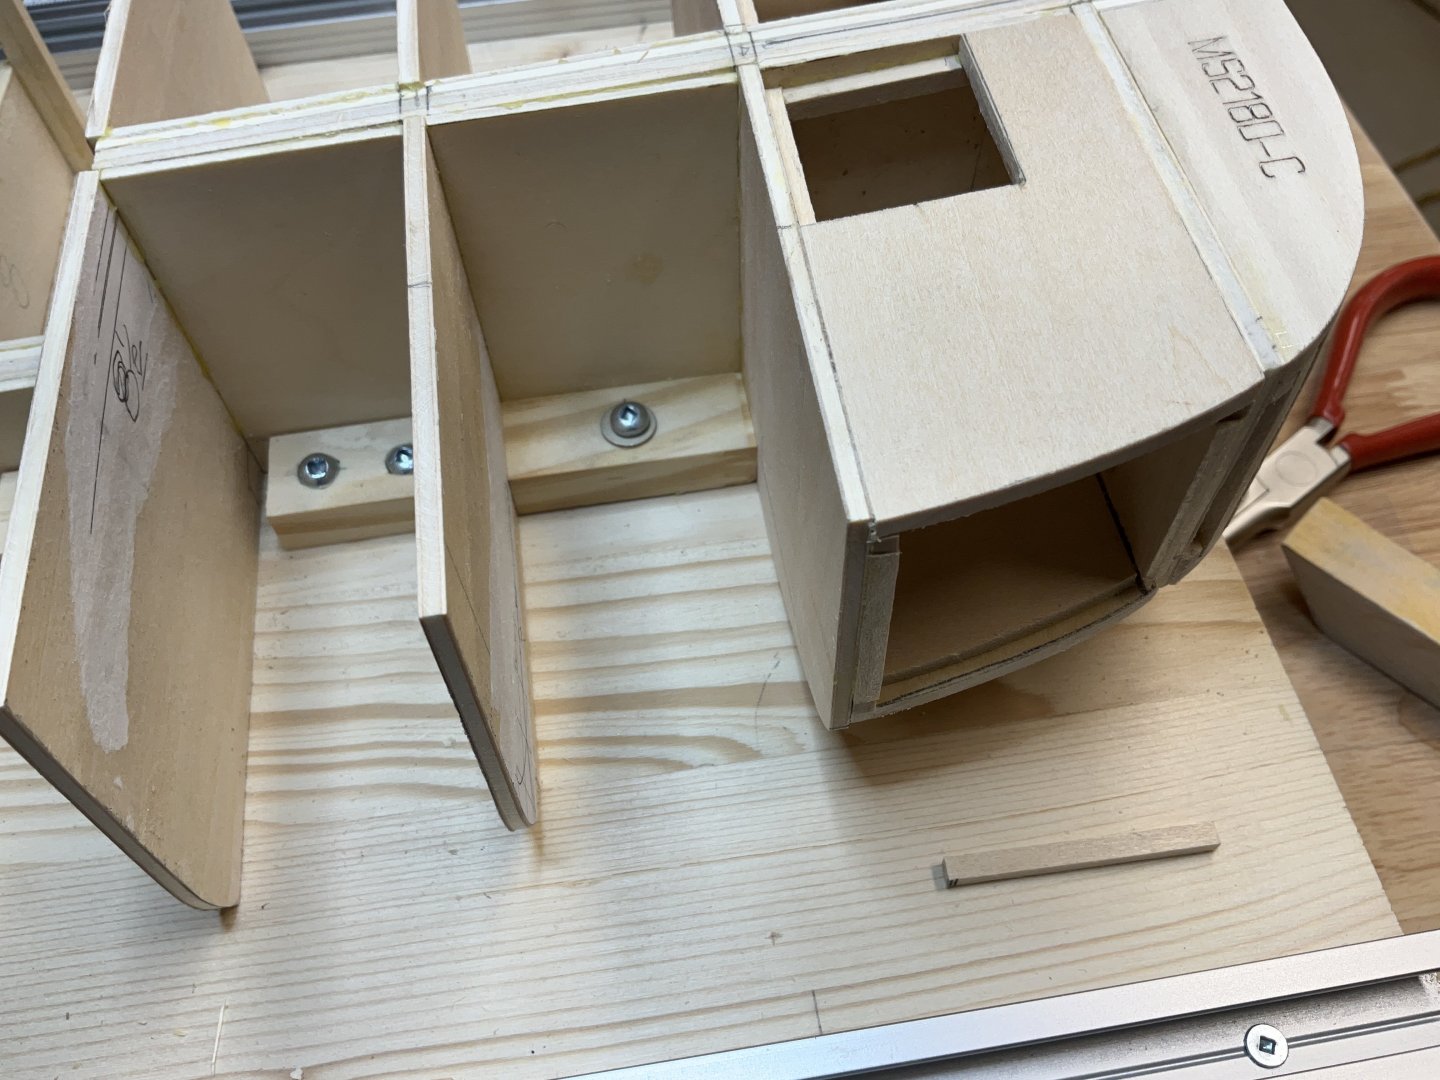
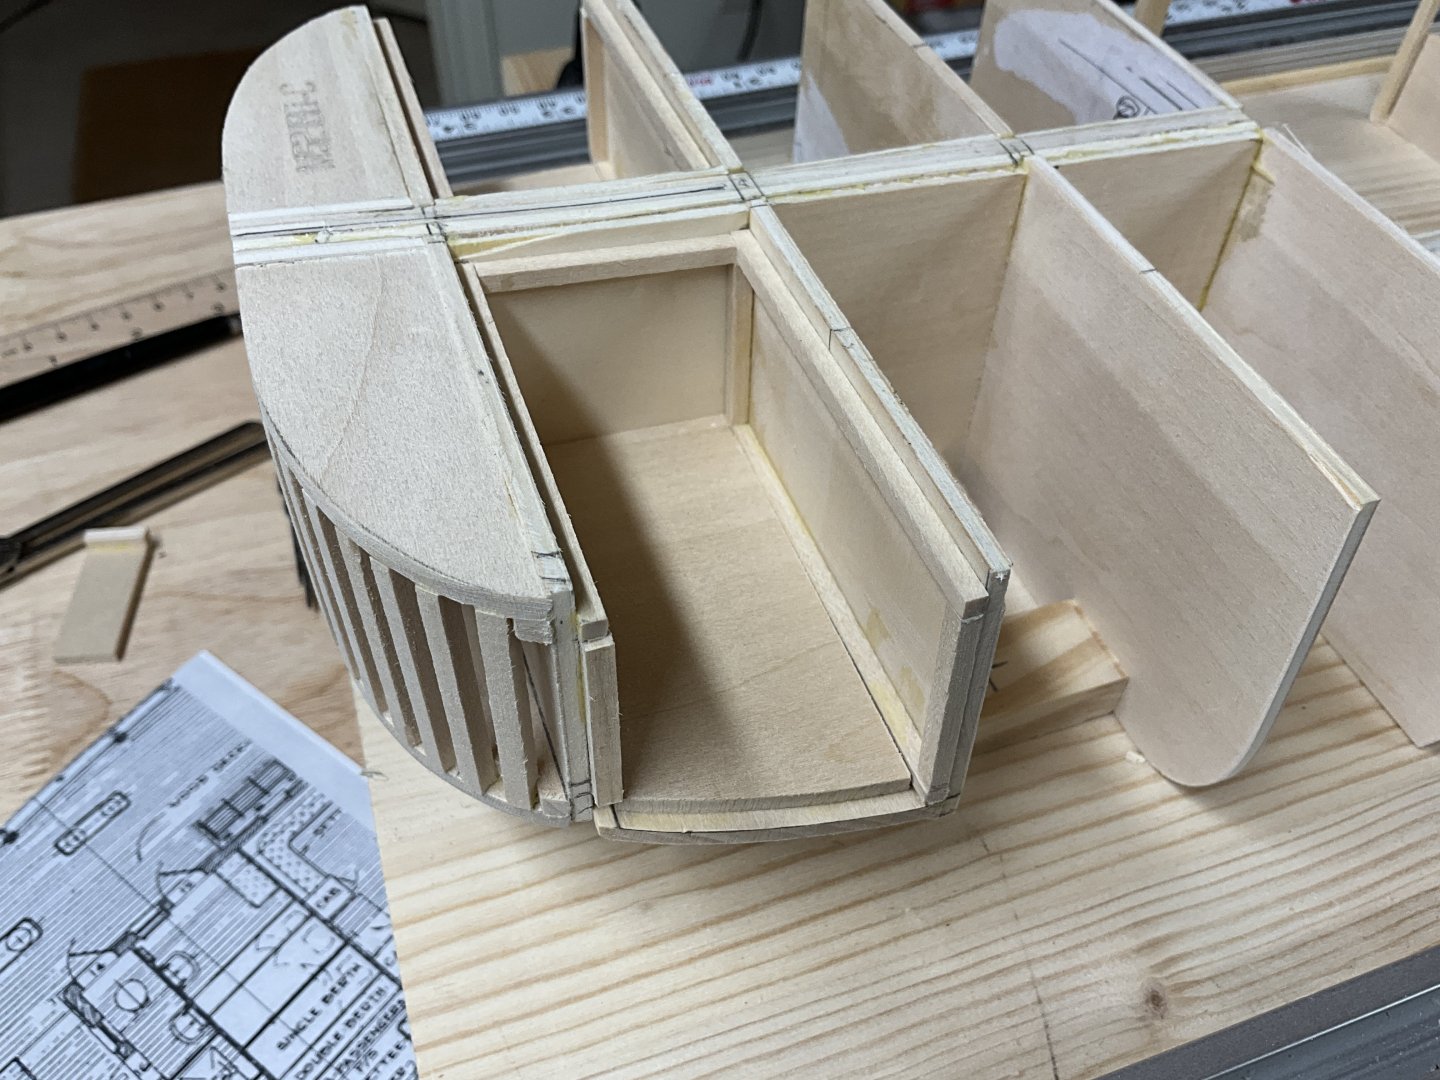
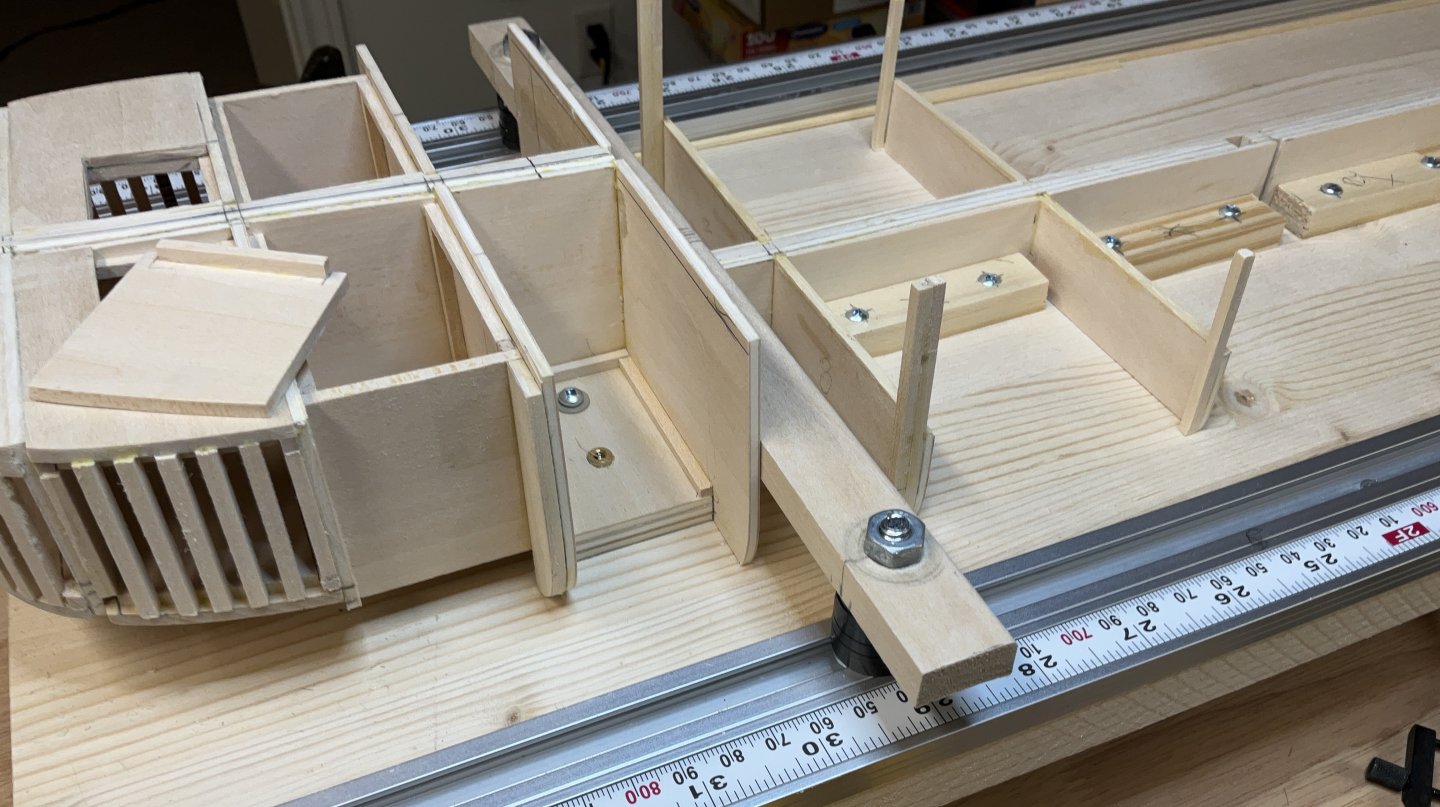
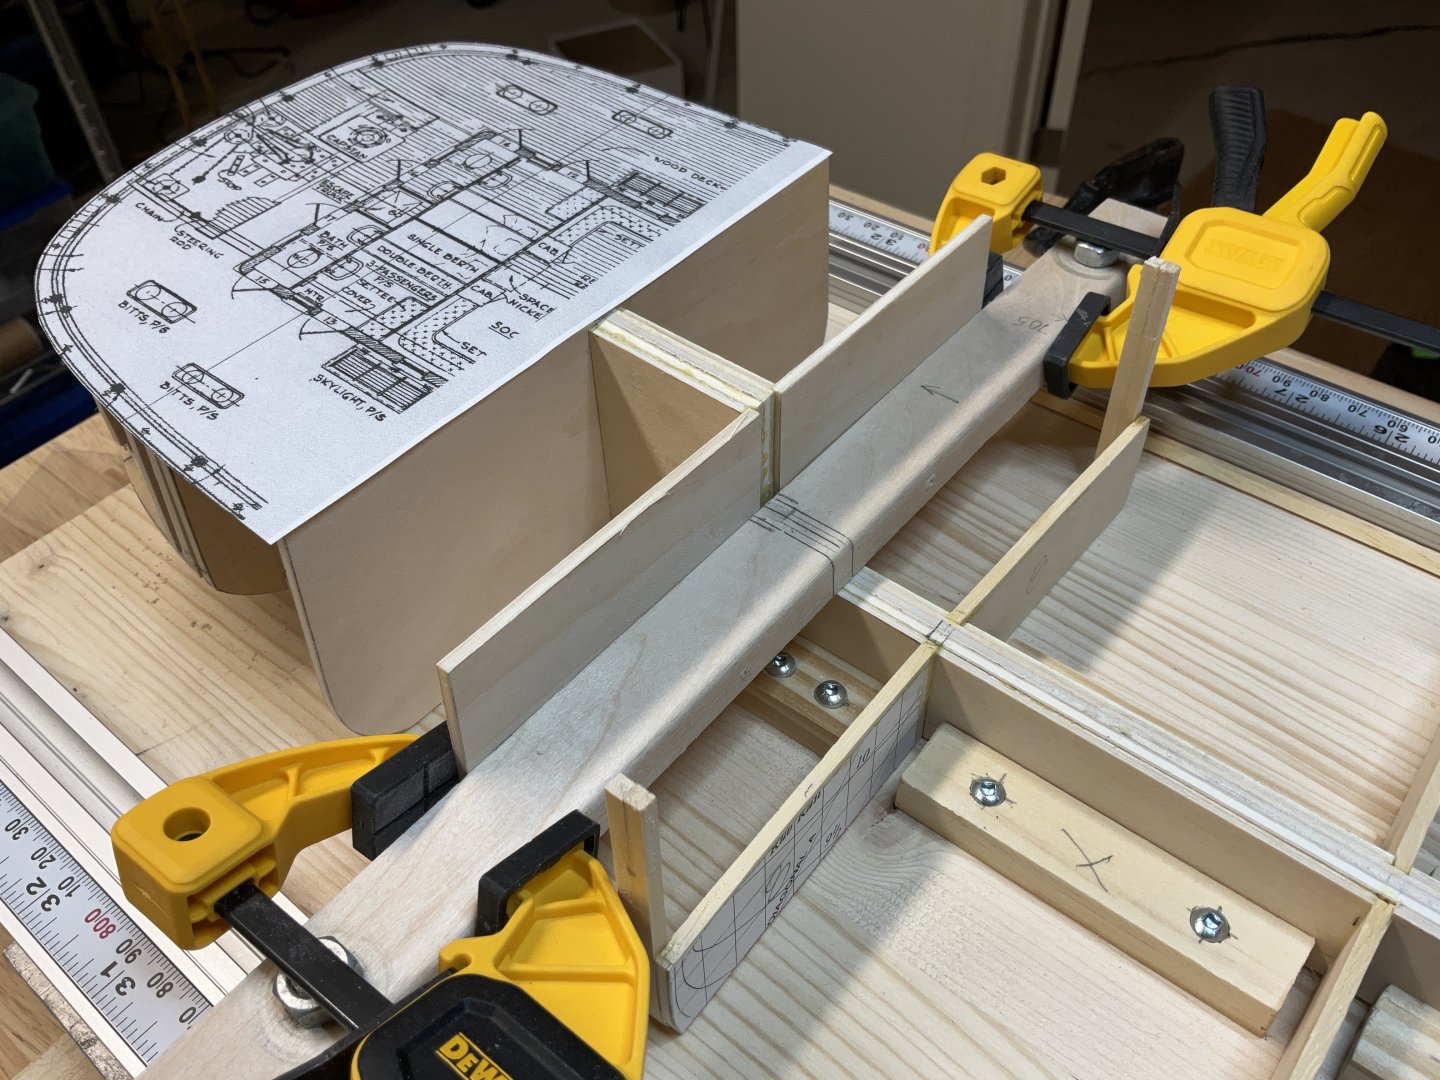
Hi Everyone, I hope you are all well. Thank you for all of your Comments, Likes, and support. I have been reading this report that @bruce d posted a link to in his topic “ 1915 steam schooner Wapama - detailed tech book and plans “. Thank you Bruce. Tons of details! In my opening post it should have been mentioned that the hull of Wapama was built by St Helens Shipbuilding Company in St Helens Oregon and towed by Steam Schooner Multnomah to San Francisco for completion. Work on the bulkheads has begun. They are made from the 1/8” plywood. They will be beefed up with 1/8” basswood later on to give the hull planking more gluing area. I started at the stern because it is the most complex part of the hull and didn’t want to get too far in case it needed some revisions. Left over 1/8” carrier sheets from Model Shipways are being used wherever possible. It is of nice quality. The area aft of the last bulkhead was “caged” with 1/8” x 1/8” basswood strips. The bulkheads that extend up to the cabin deck are all glued in place. The next bulkheads will just go up to the main deck. Thanks for dropping by. Hope to see you soon.