Paul Le Wol
-
Posts
479 -
Joined
-
Last visited
Content Type
Profiles
Forums
Gallery
Events
Everything posted by Paul Le Wol
-
Hi Bob, my parents and in-laws have long passed but I still think of them every day. Those memories are the gift you will receive every day. See you when you get back
-
Rest In Peace Bob, you were and still are an inspiration to all. Your work lives on.
-
Hi Paul, I use an iPad and it works well for me. It has a pretty good camera so you can take a picture, edit it and upload it from the same device. I still don’t get the part about apple being intuitive, but then I don’t seem to understand android either. 😀
-
Jonathan, congratulations on finishing your Lady Eleanor. She is beautiful!
- 15 replies
-
- 1
-

-
- Lady Eleanor
- Vanguard Models
- (and 1 more)
-
Thank you very much No Idea and bobandlucy. There’s a little bit of wonk in her but nothing too serious 😀
- 72 replies
-
- 1
-
-
- Glad Tidings
- Model Shipways
- (and 1 more)
-
Thank you Bob. You are doing a great job on your builds. I enjoy looking at your posts because you are always having so much fun!
- 72 replies
-
- 1
-
-
- Glad Tidings
- Model Shipways
- (and 1 more)
-
Ian and hamilton, thank you very much. The other day I was routing around on the Maine Maritime Museum web site. They have a nice set of plans for the Pinky Schooner Maine that they finished building in 1986. I think that for my next model I would like to try building something like that. A POB model just from a set of plans. So many nice boats out there.
- 72 replies
-
- 1
-
-
- Glad Tidings
- Model Shipways
- (and 1 more)
-
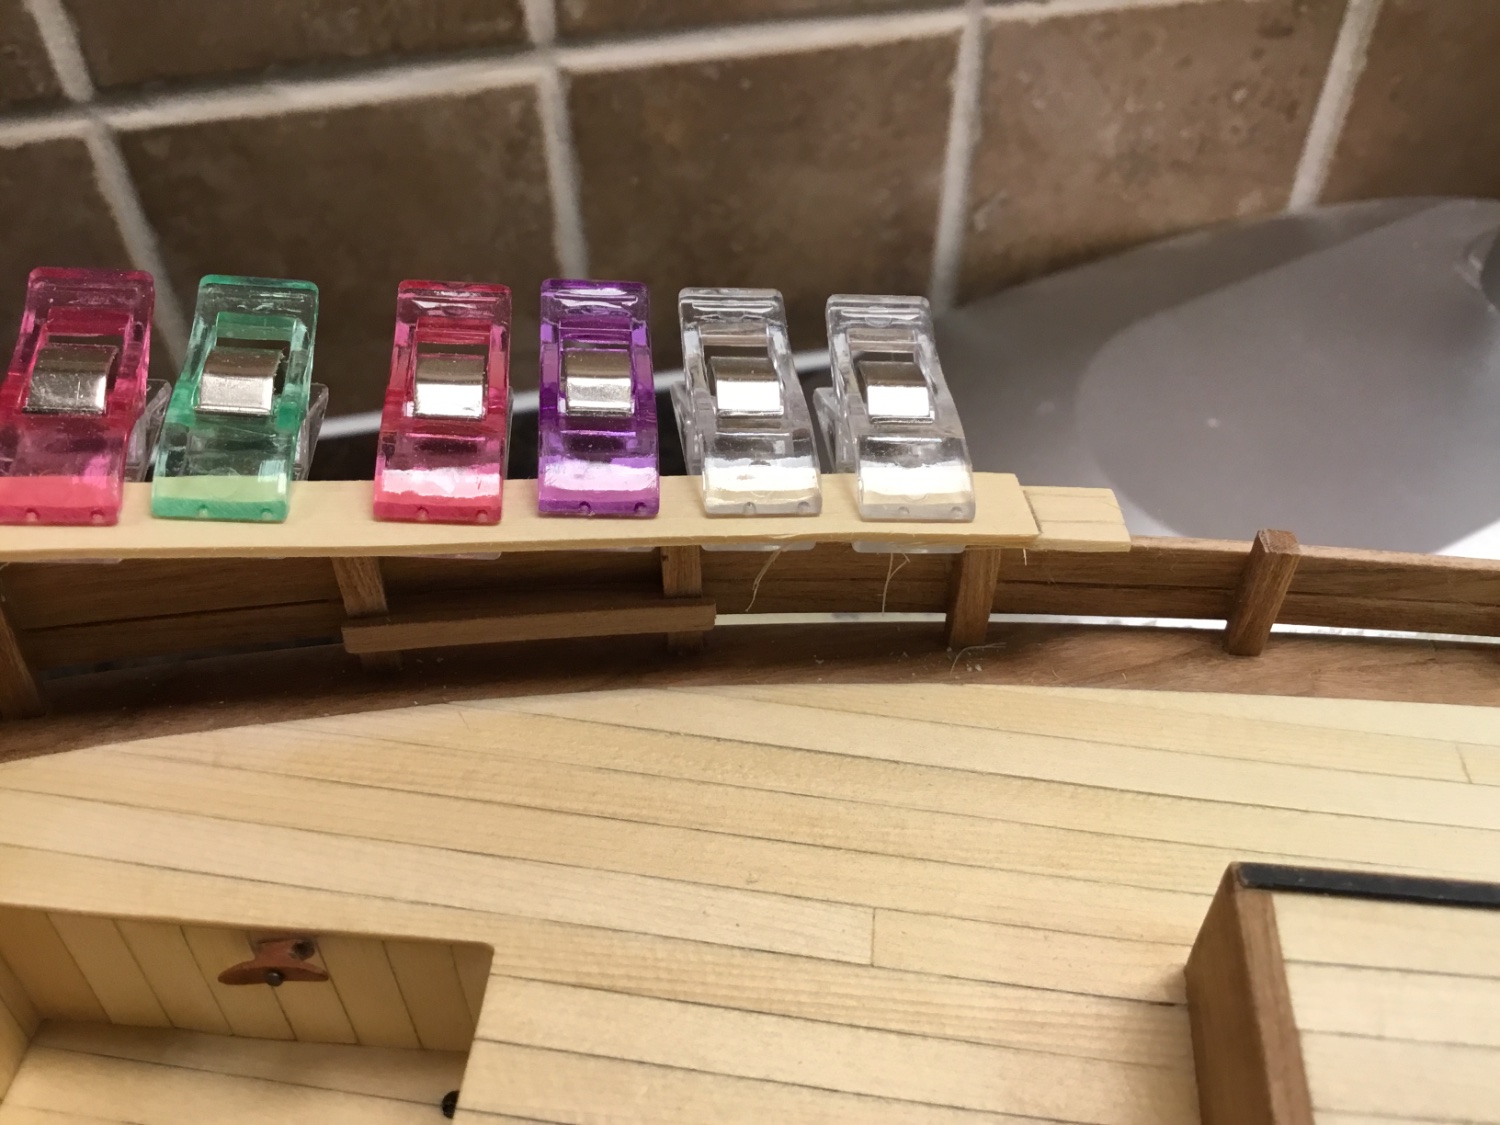
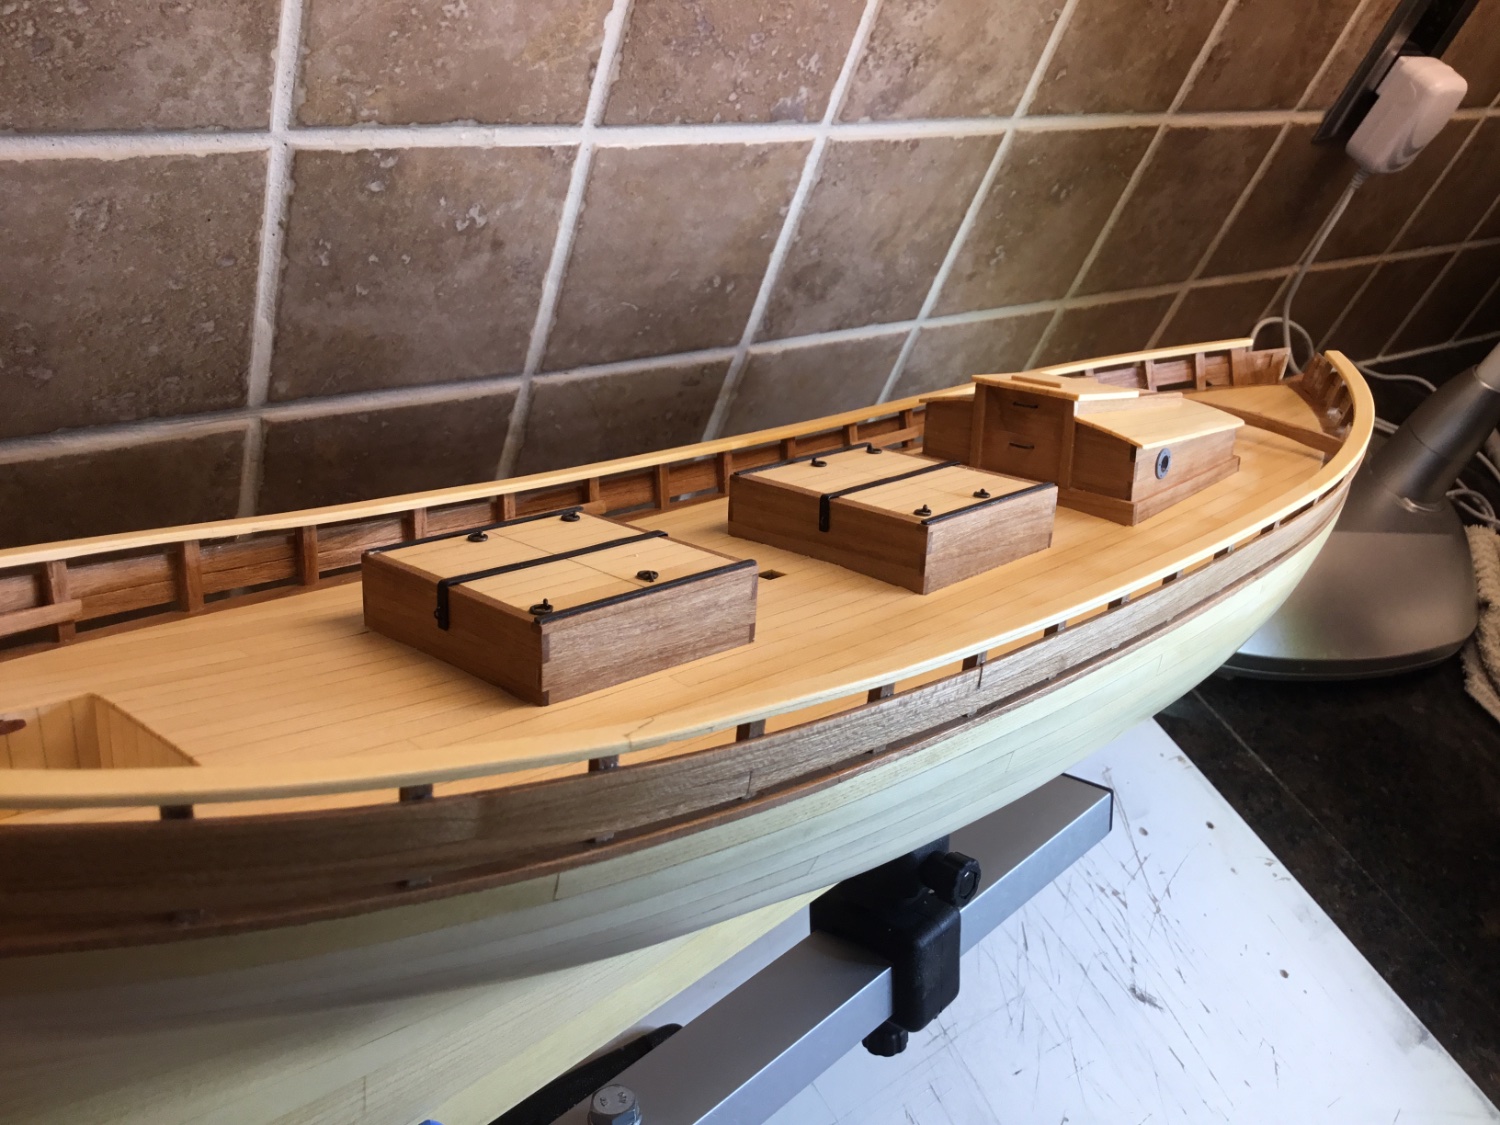
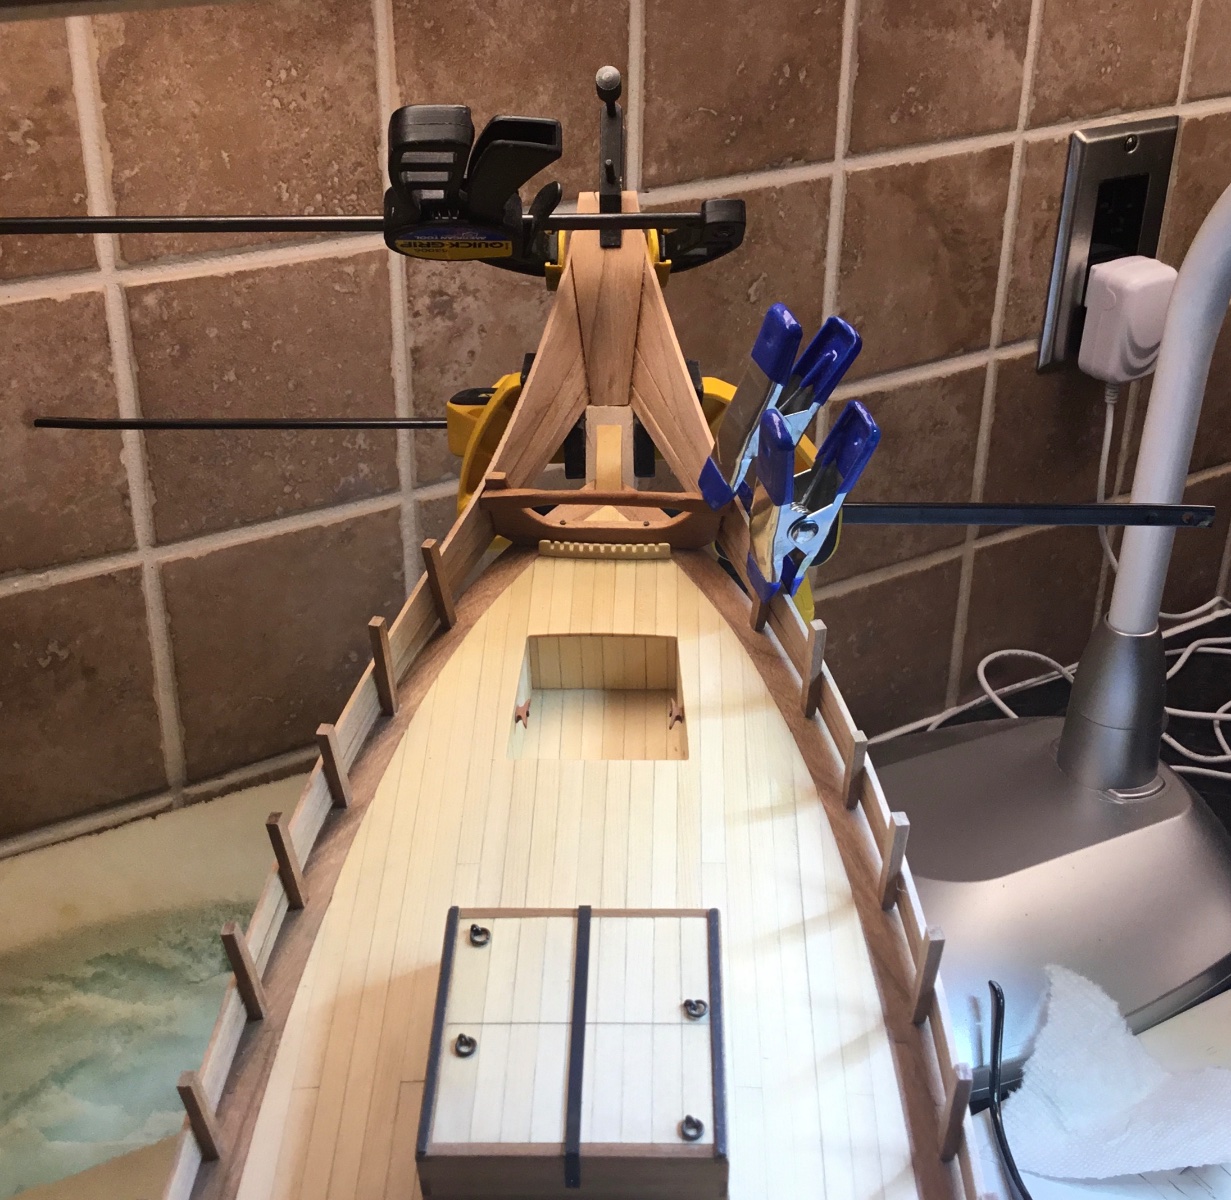
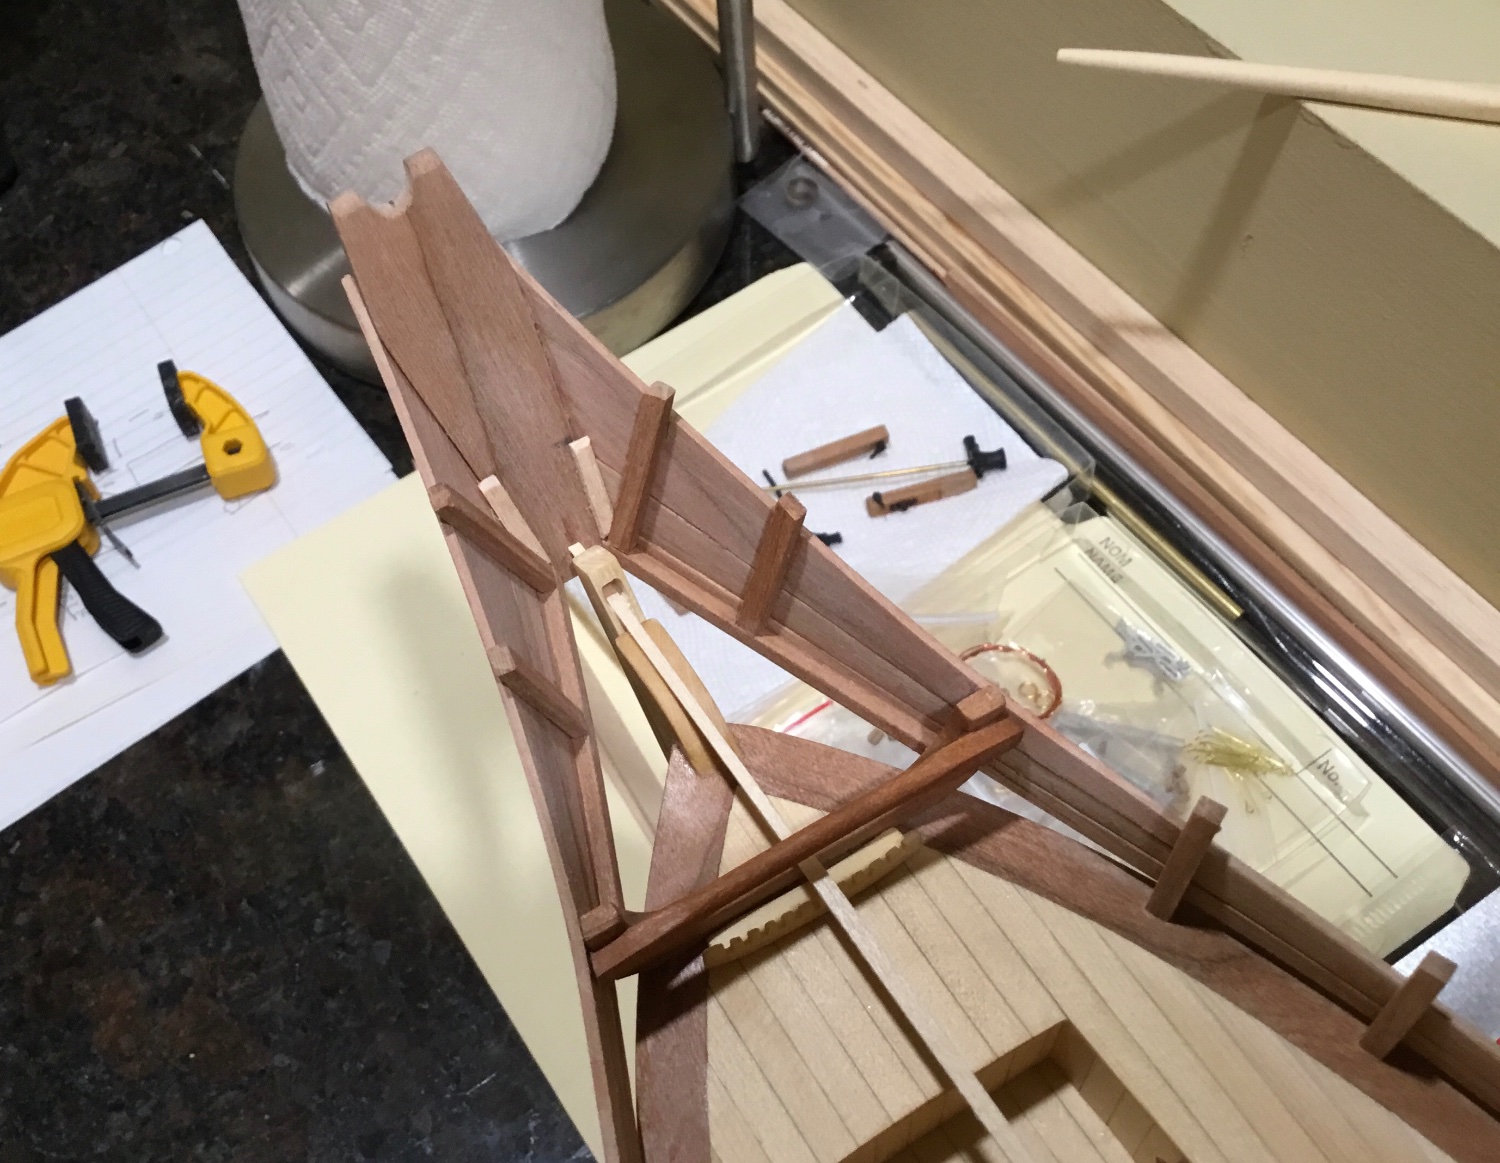
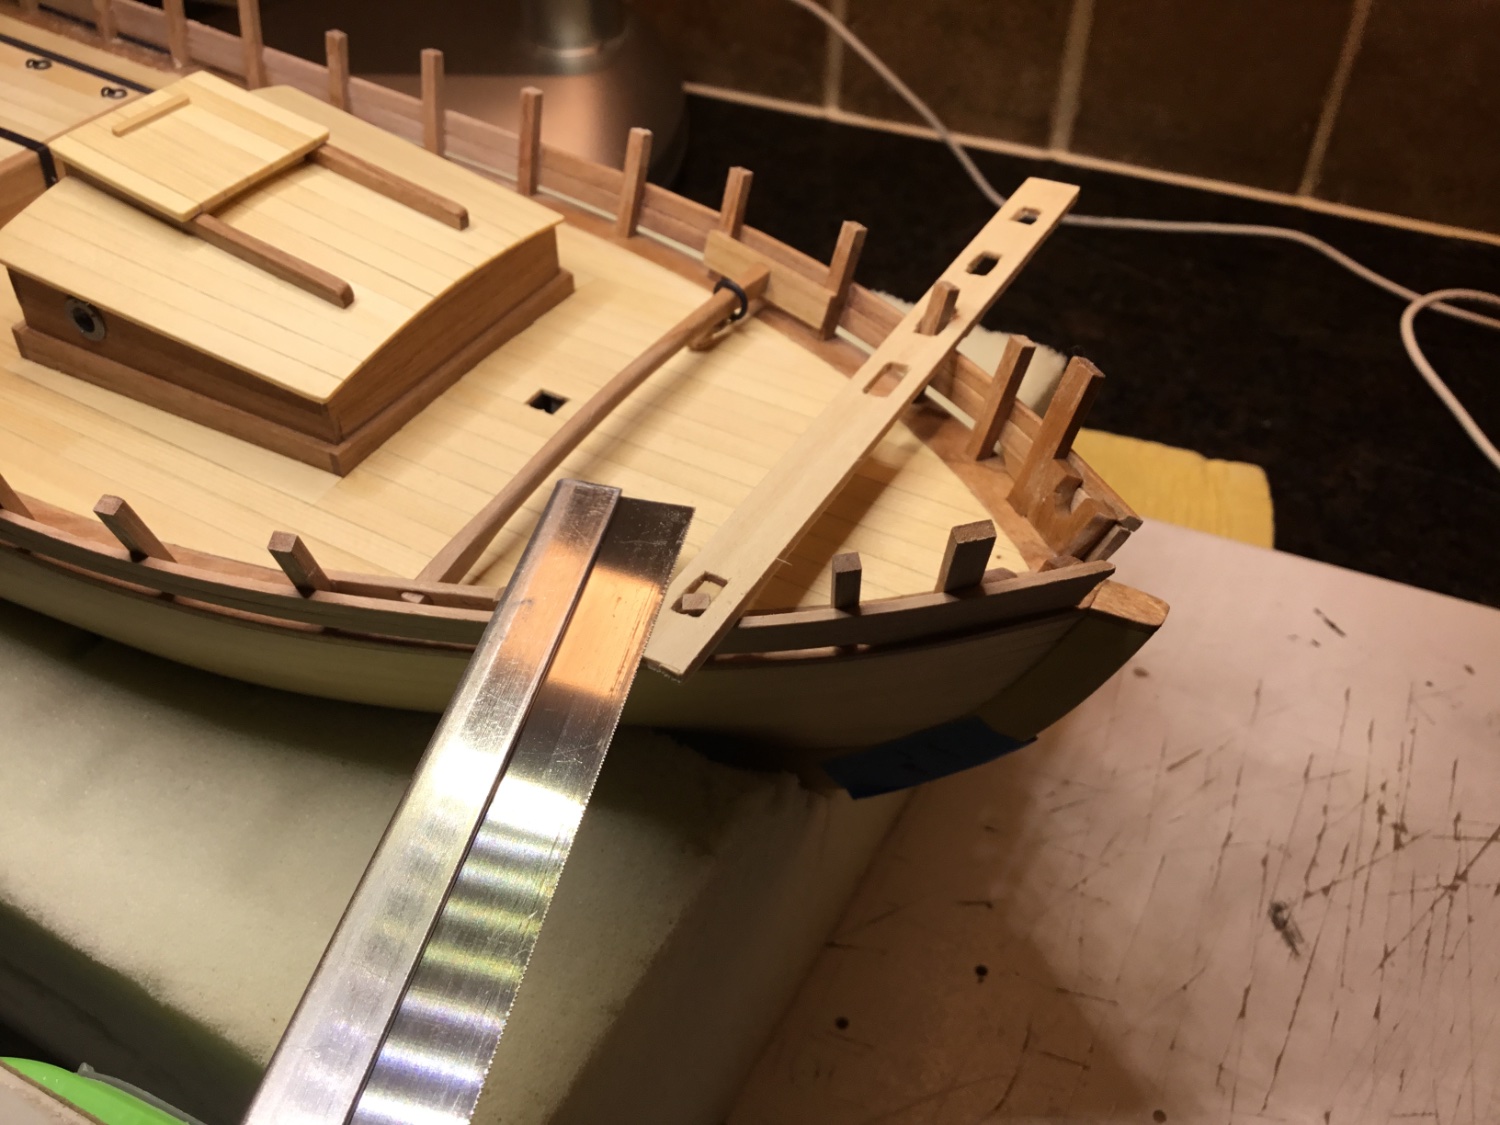
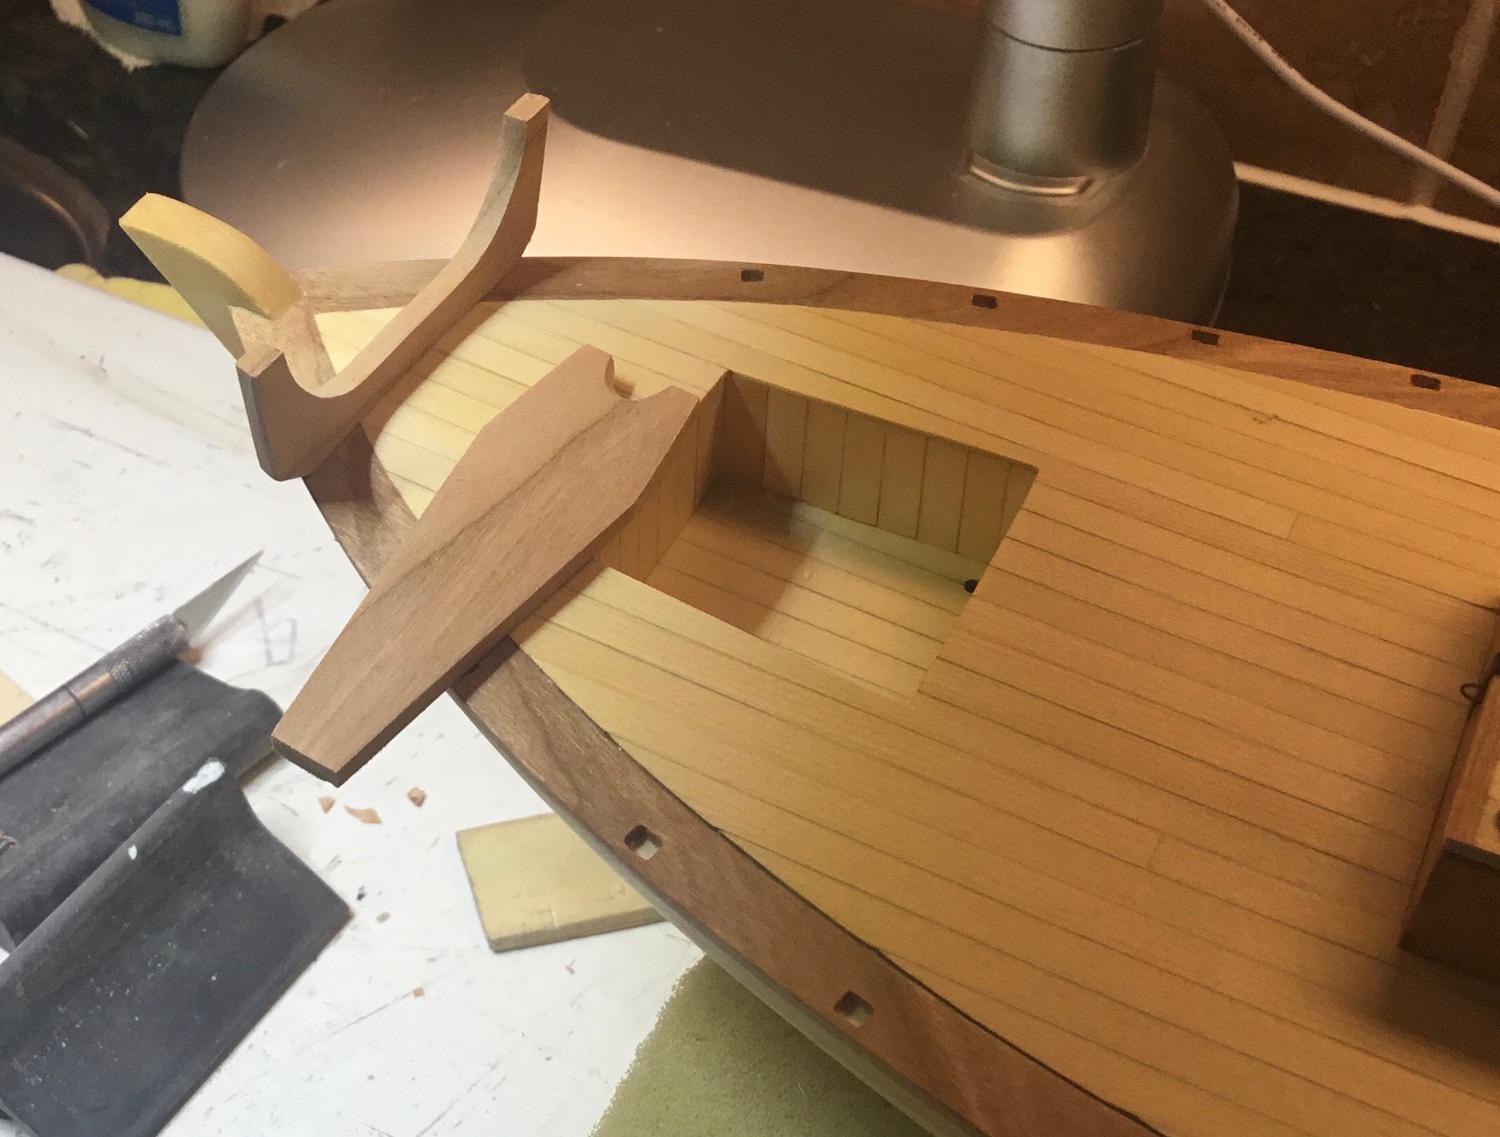
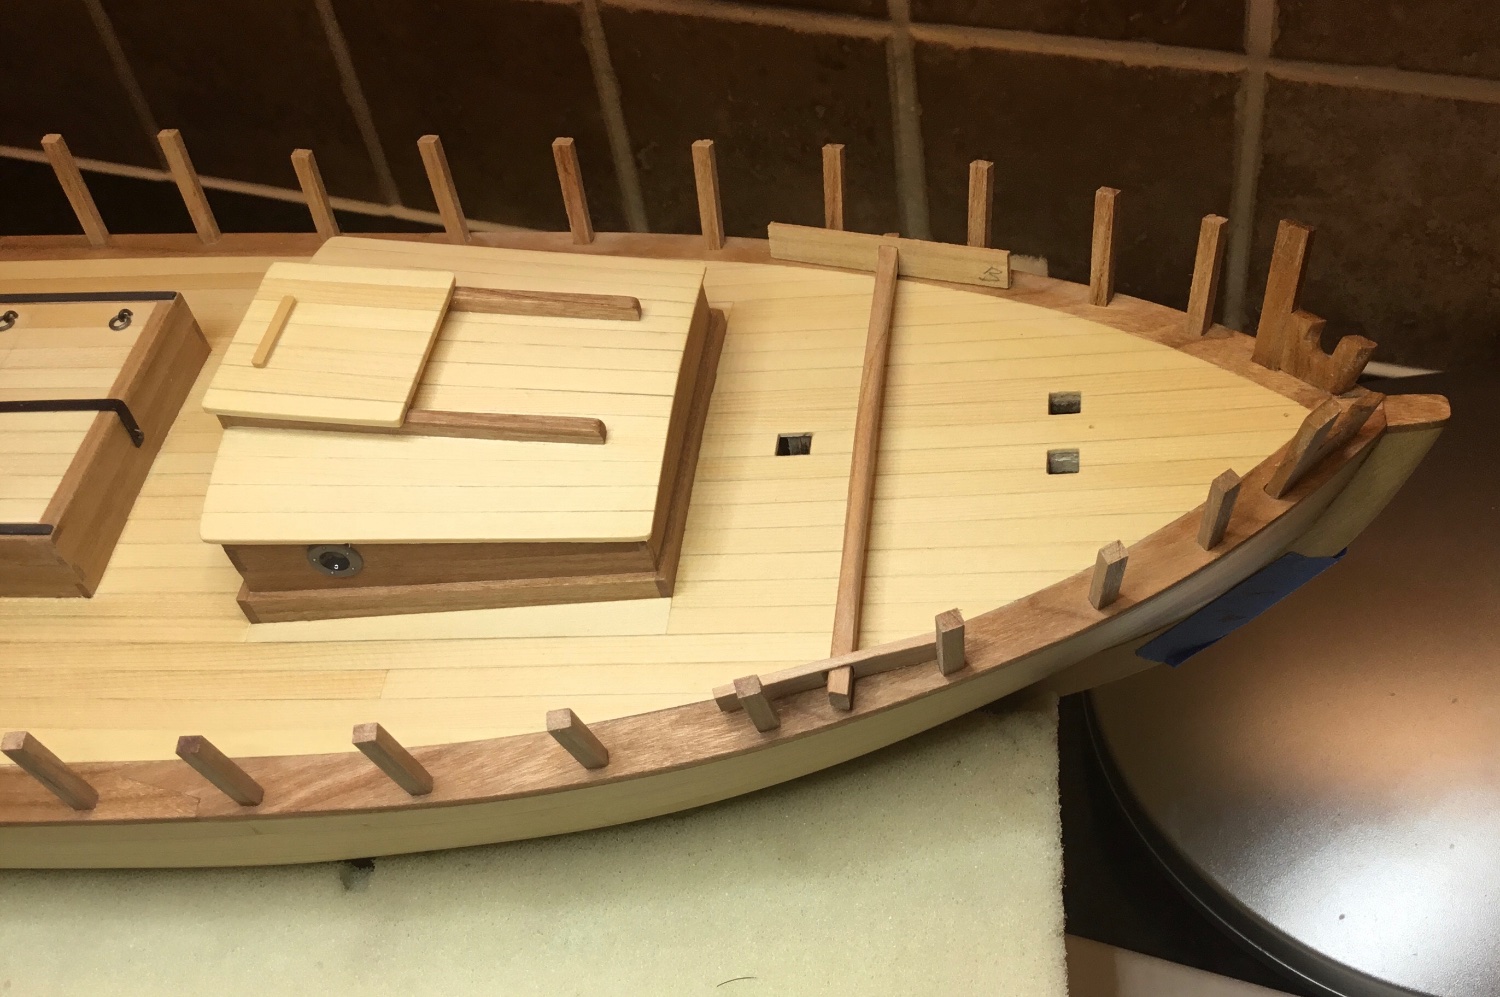
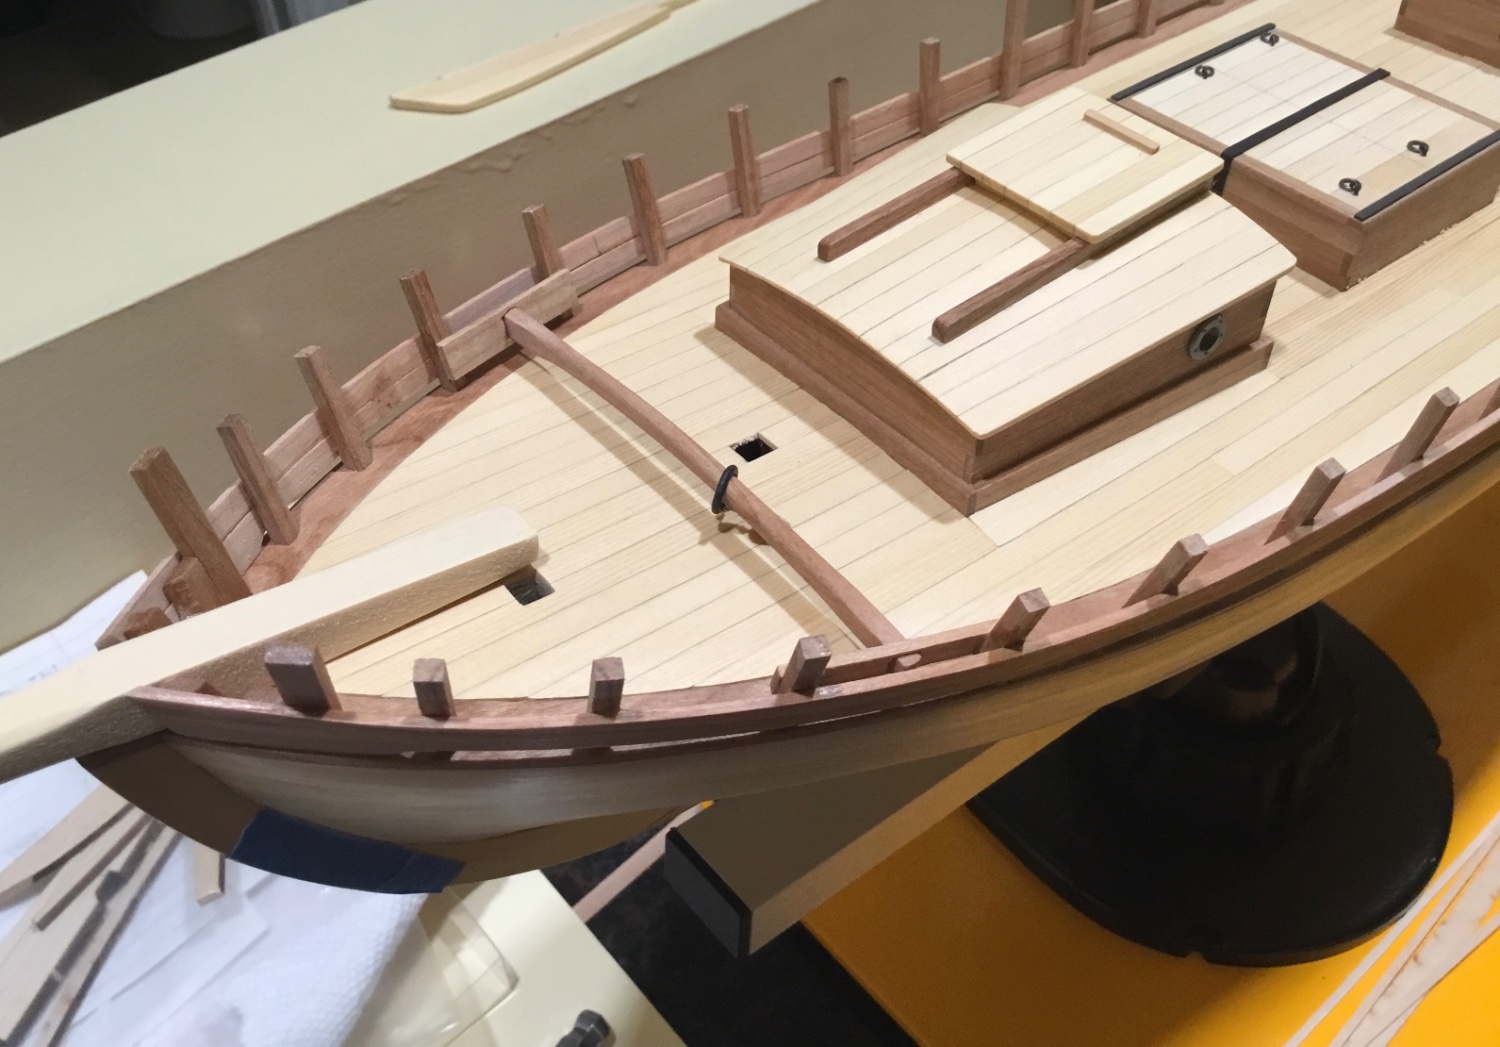
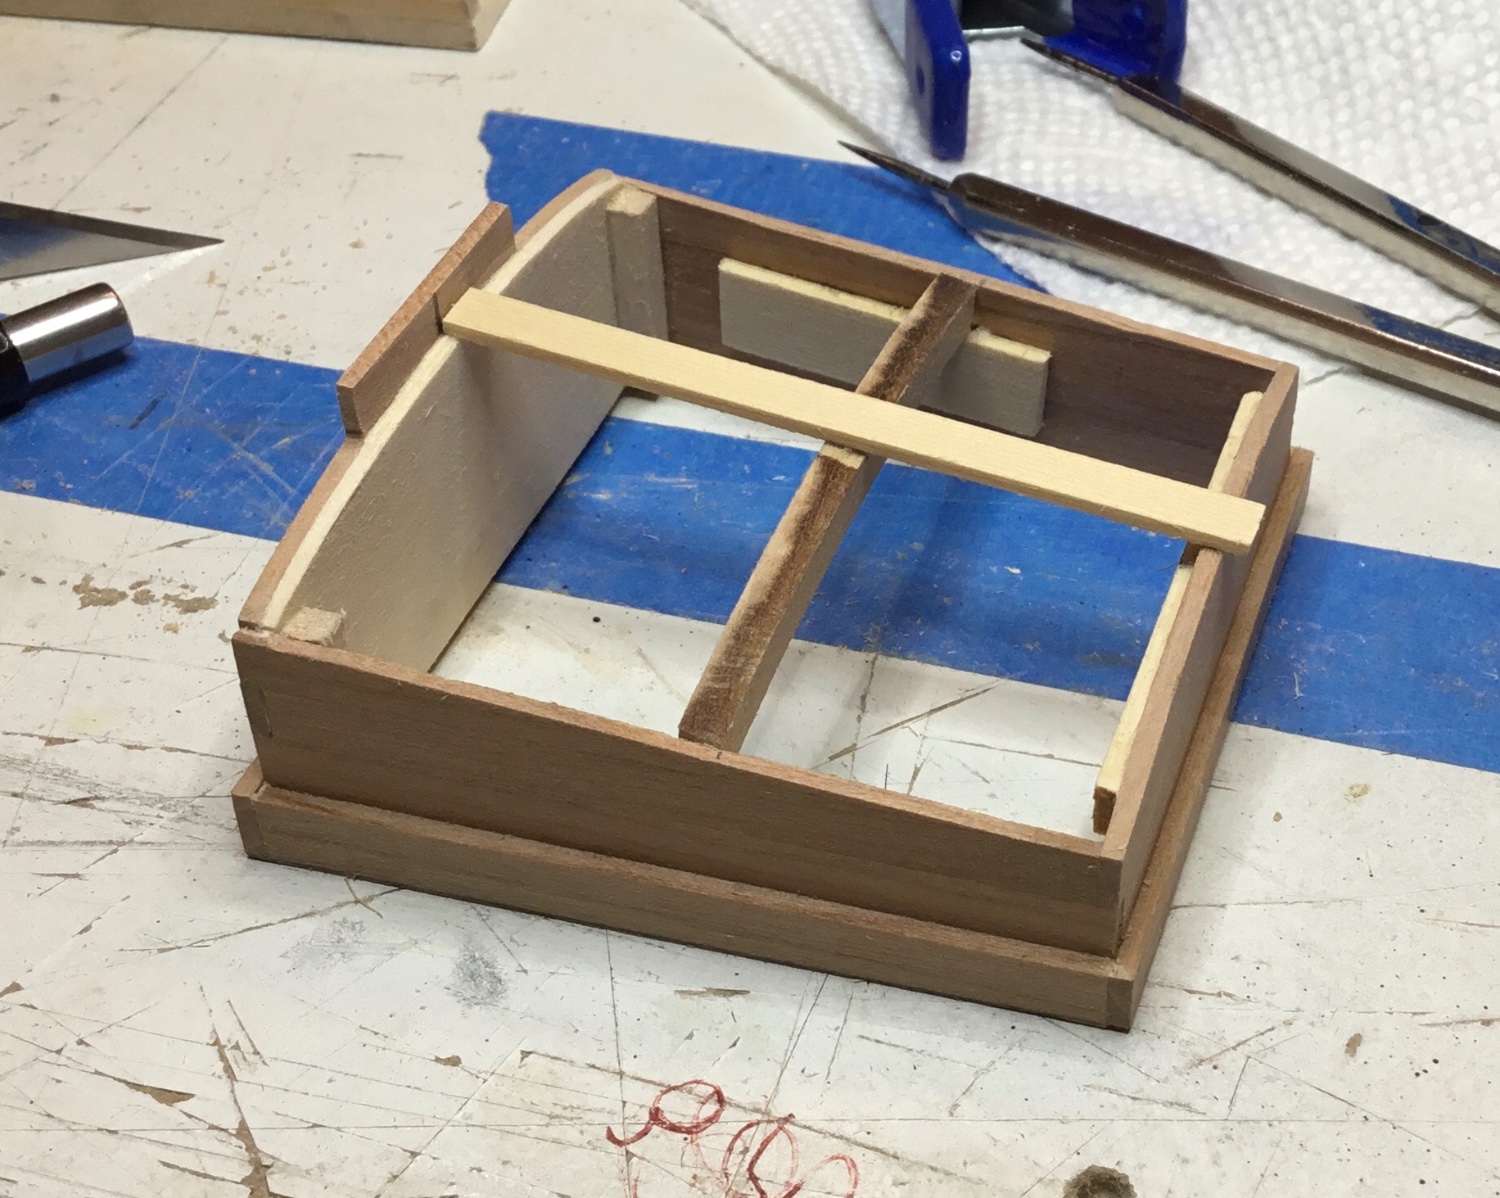
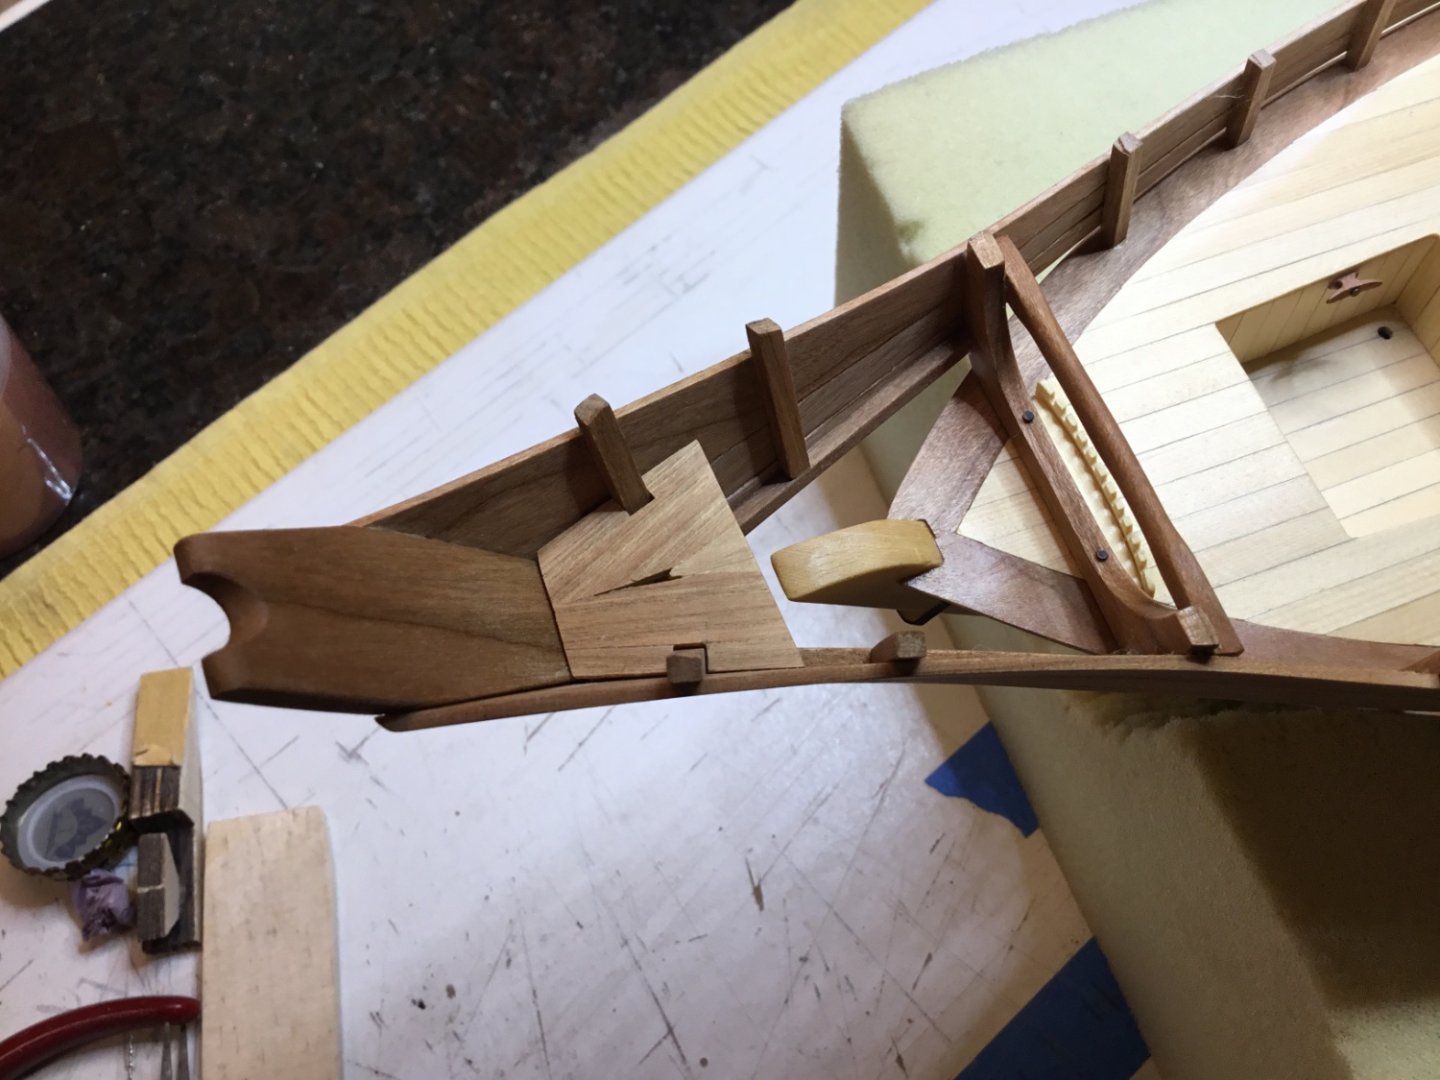
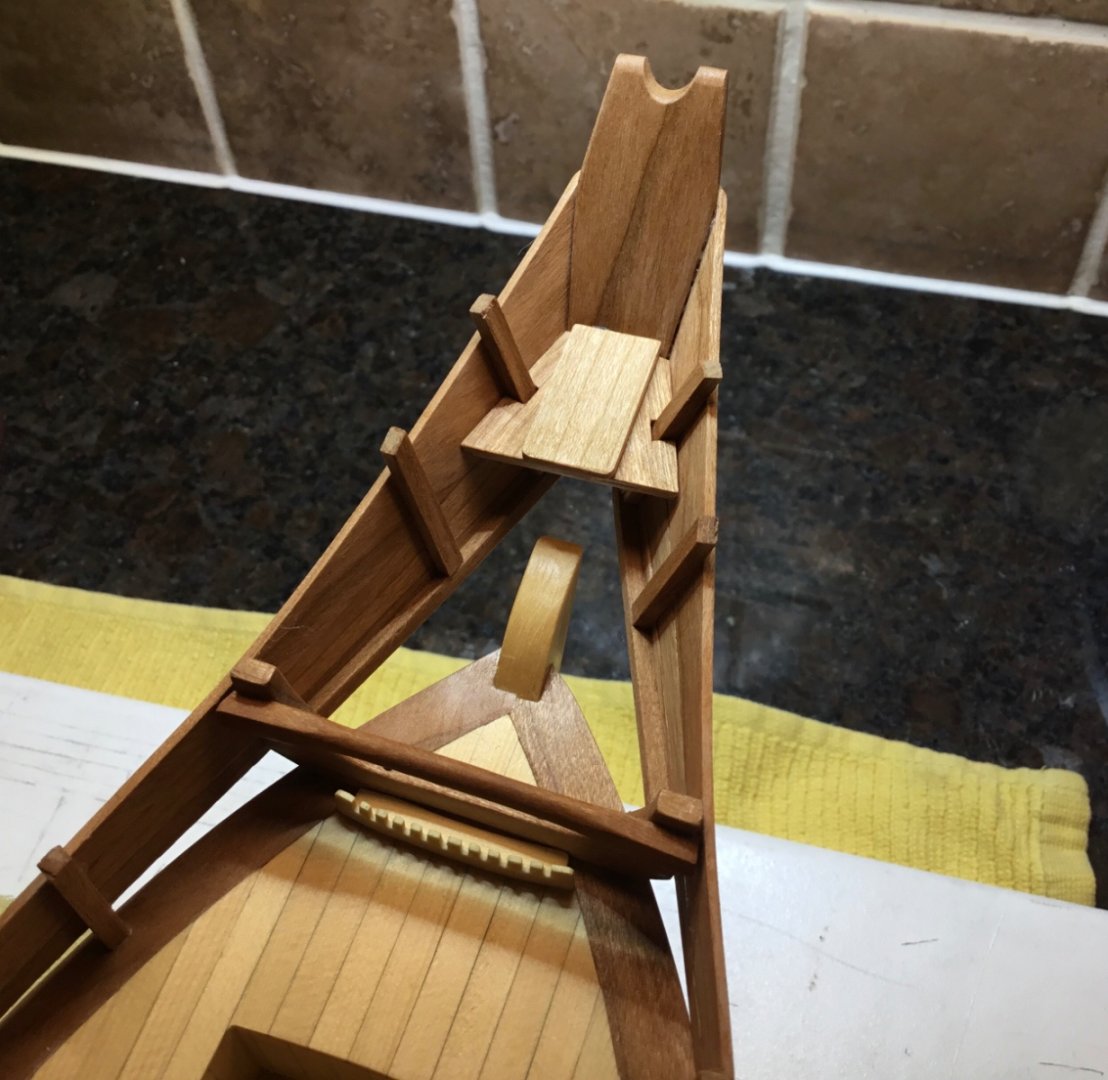
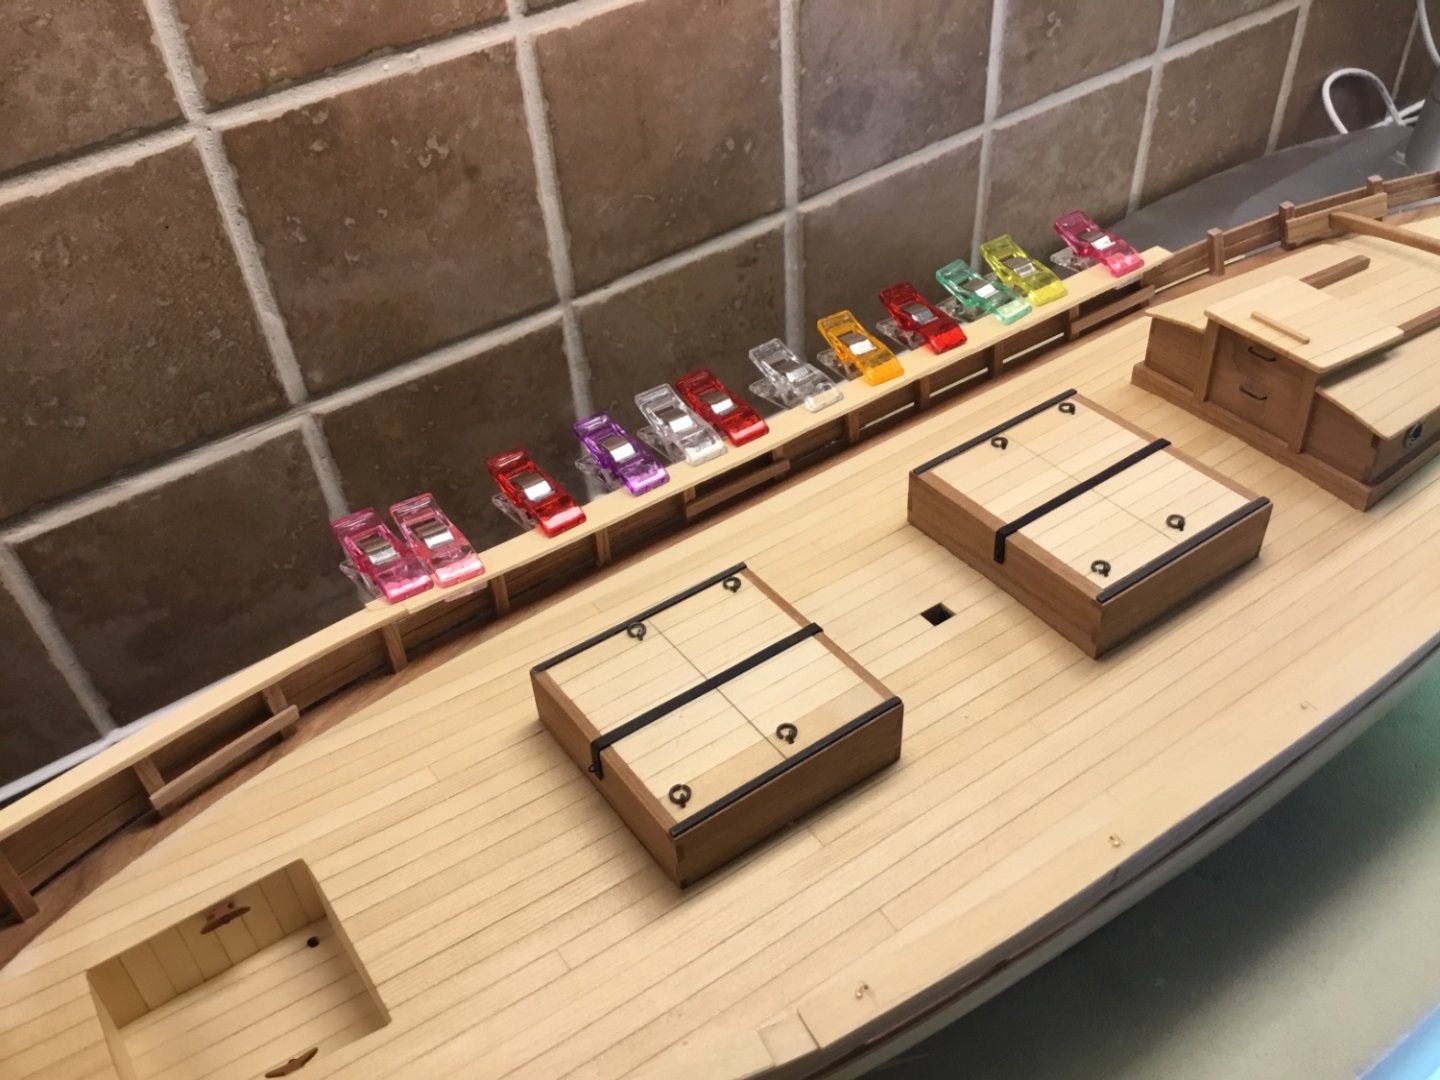
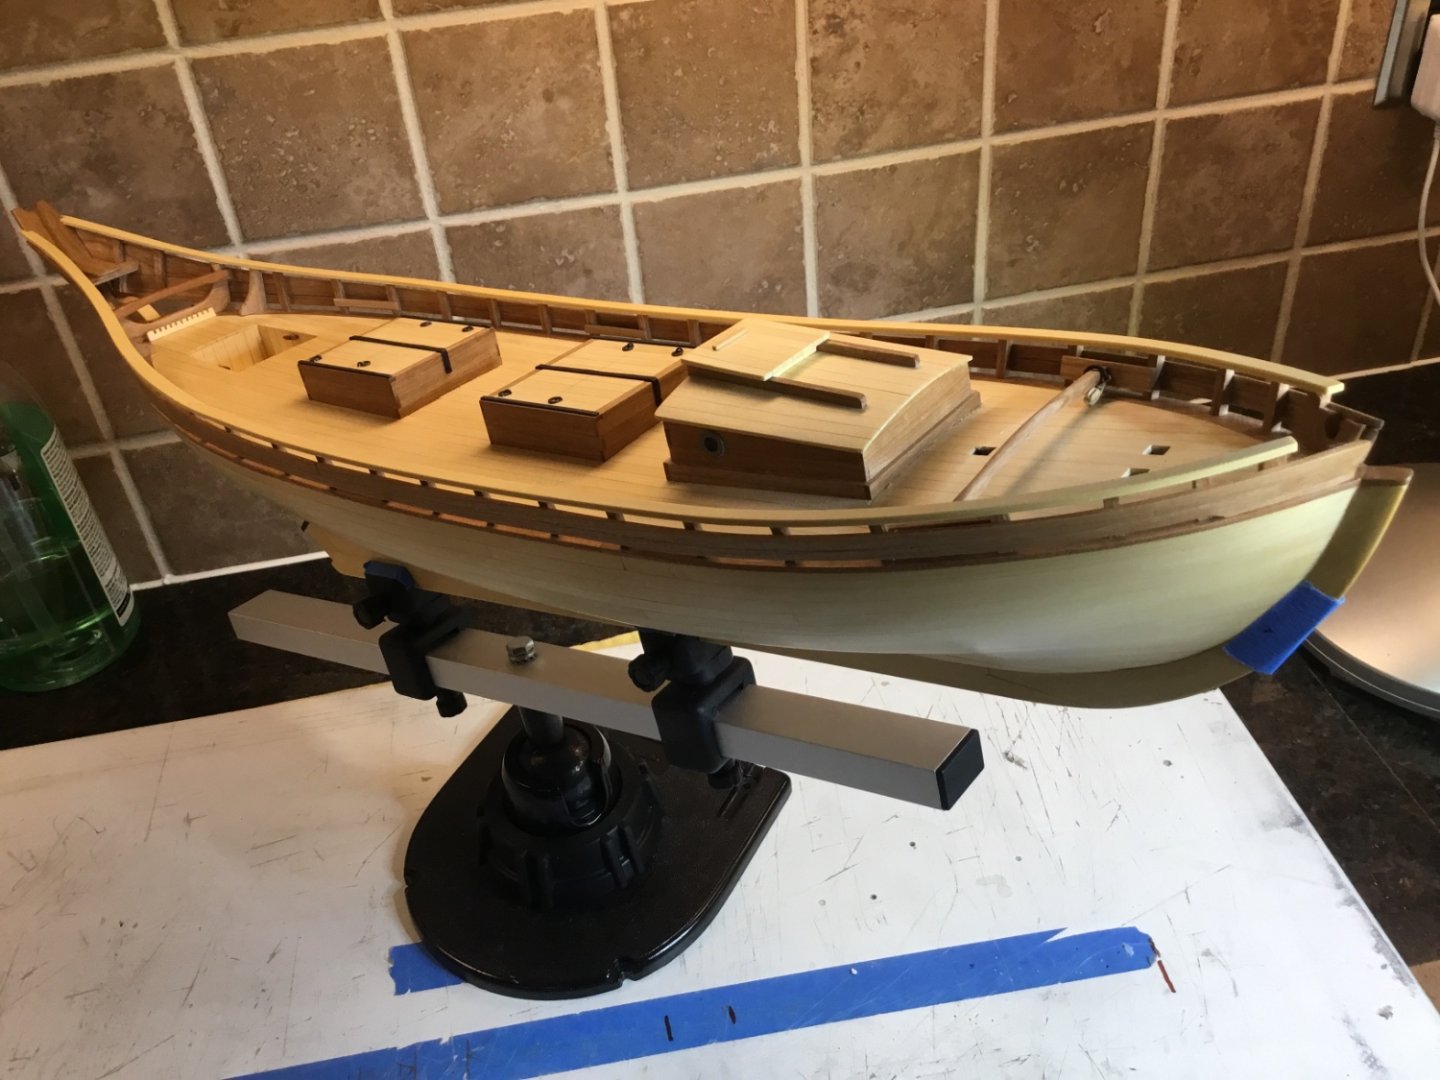
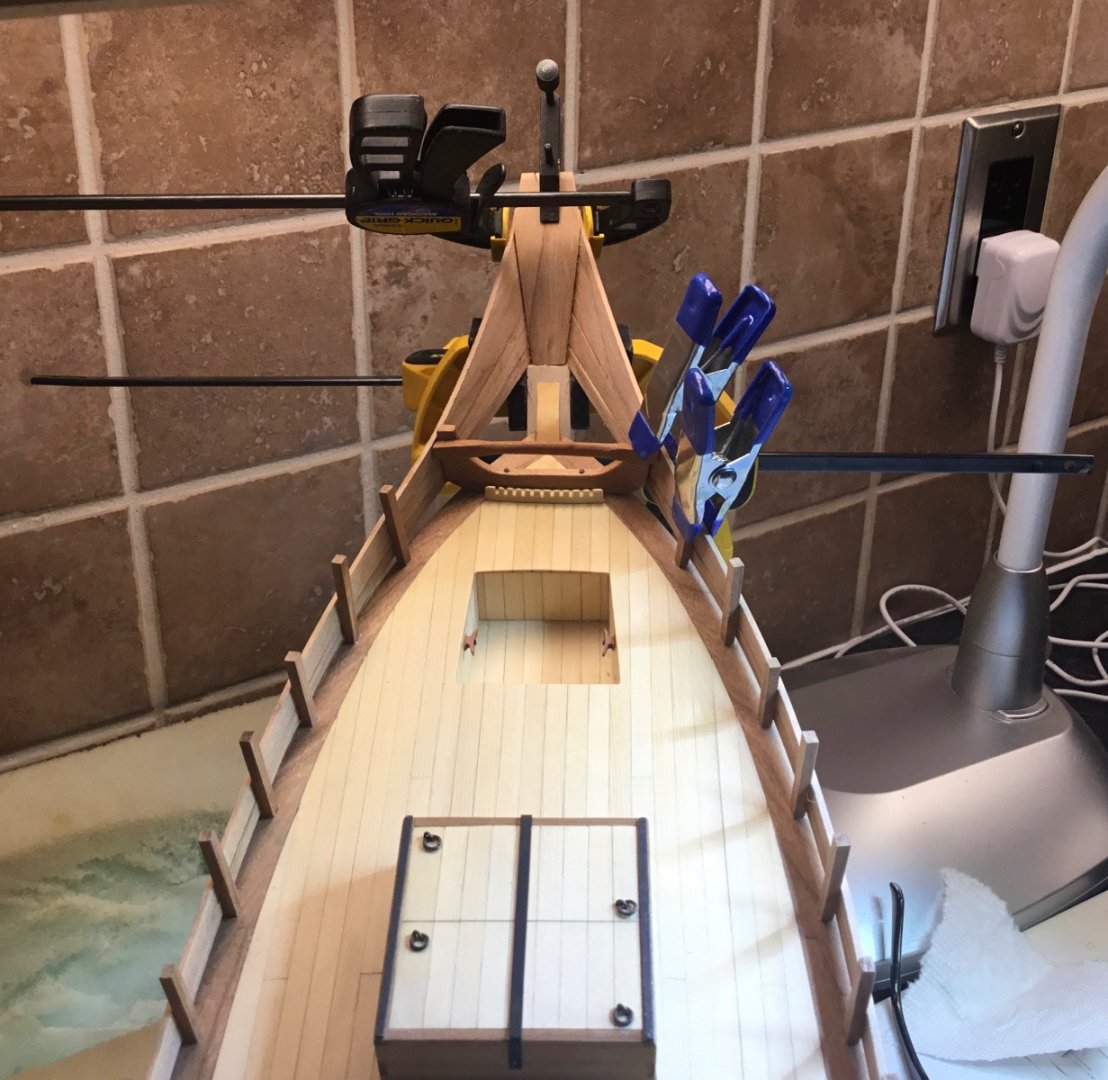
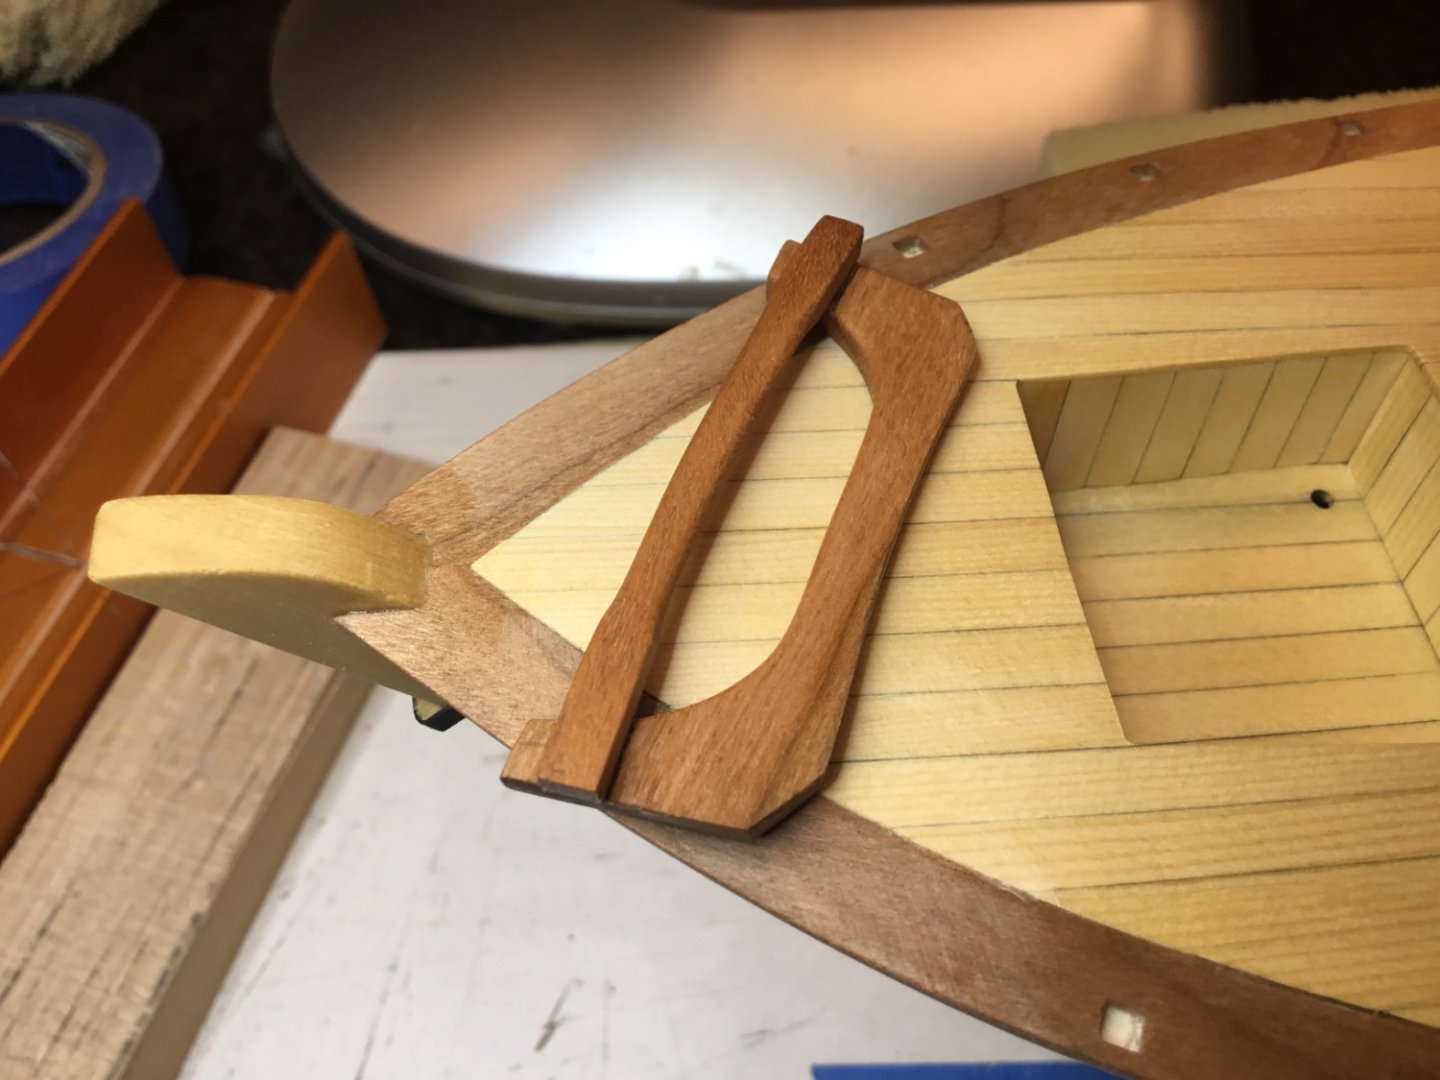
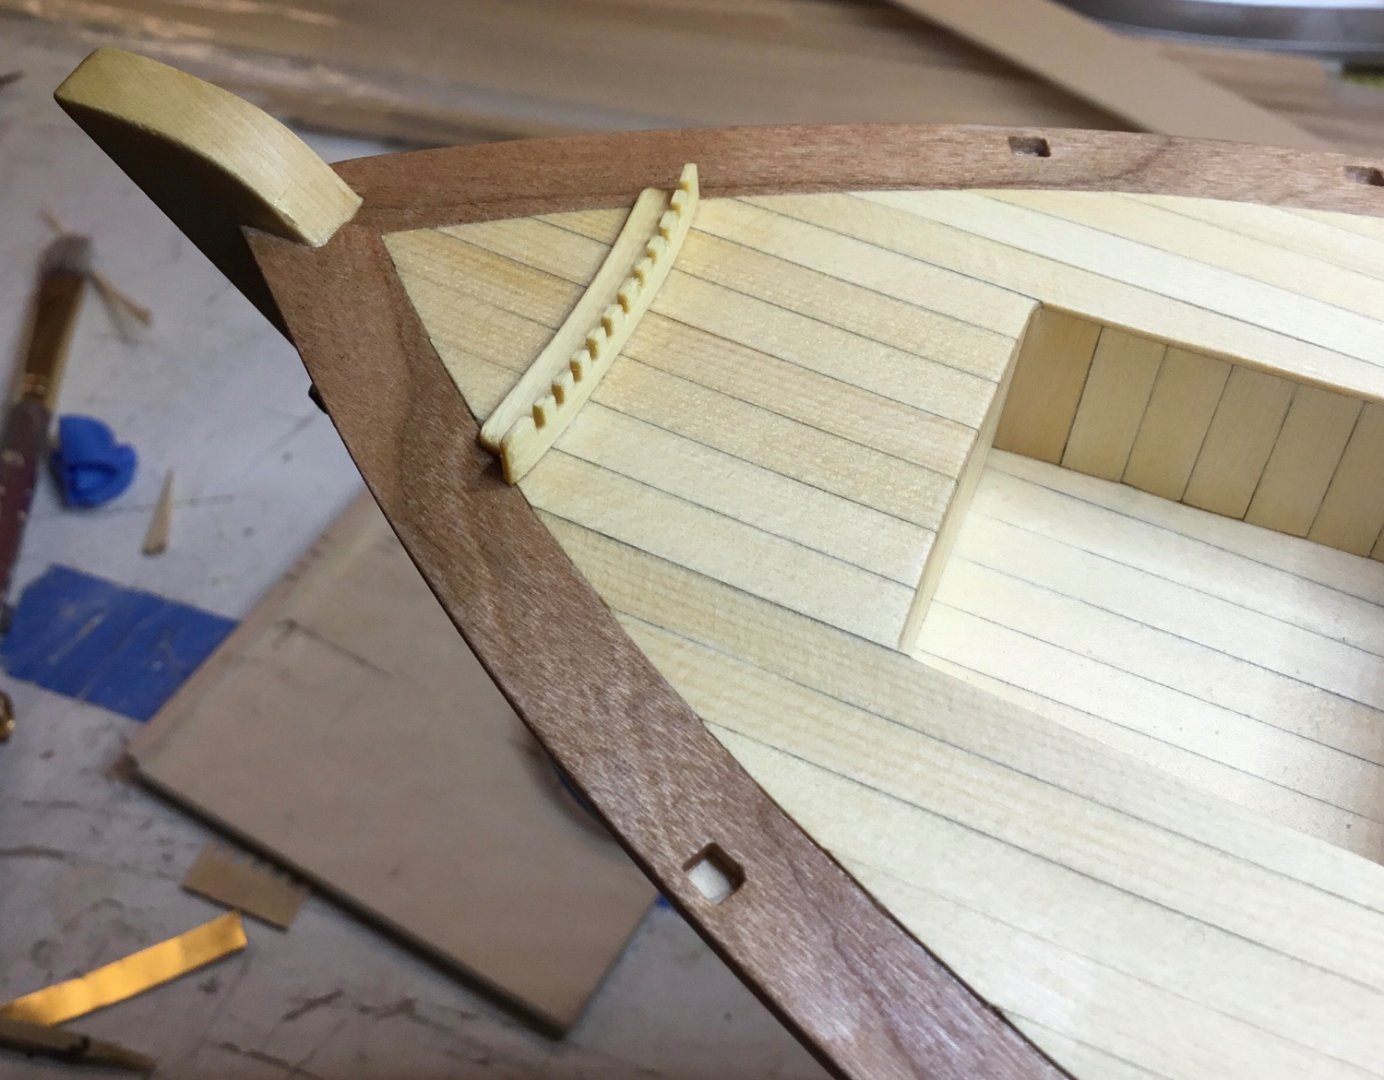
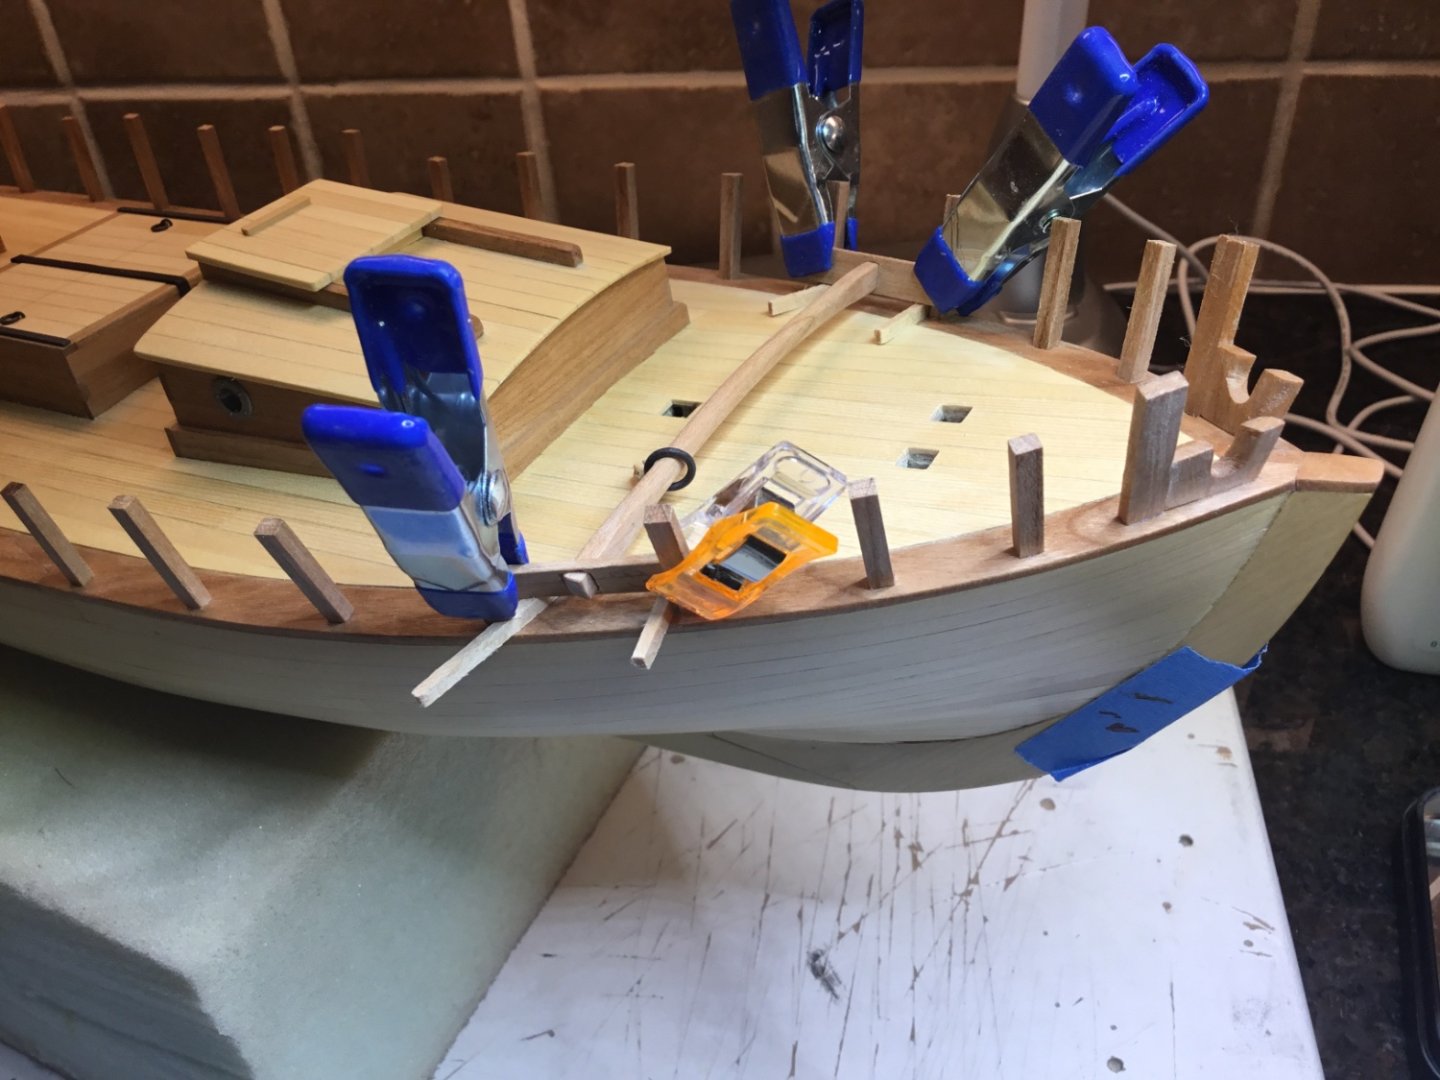
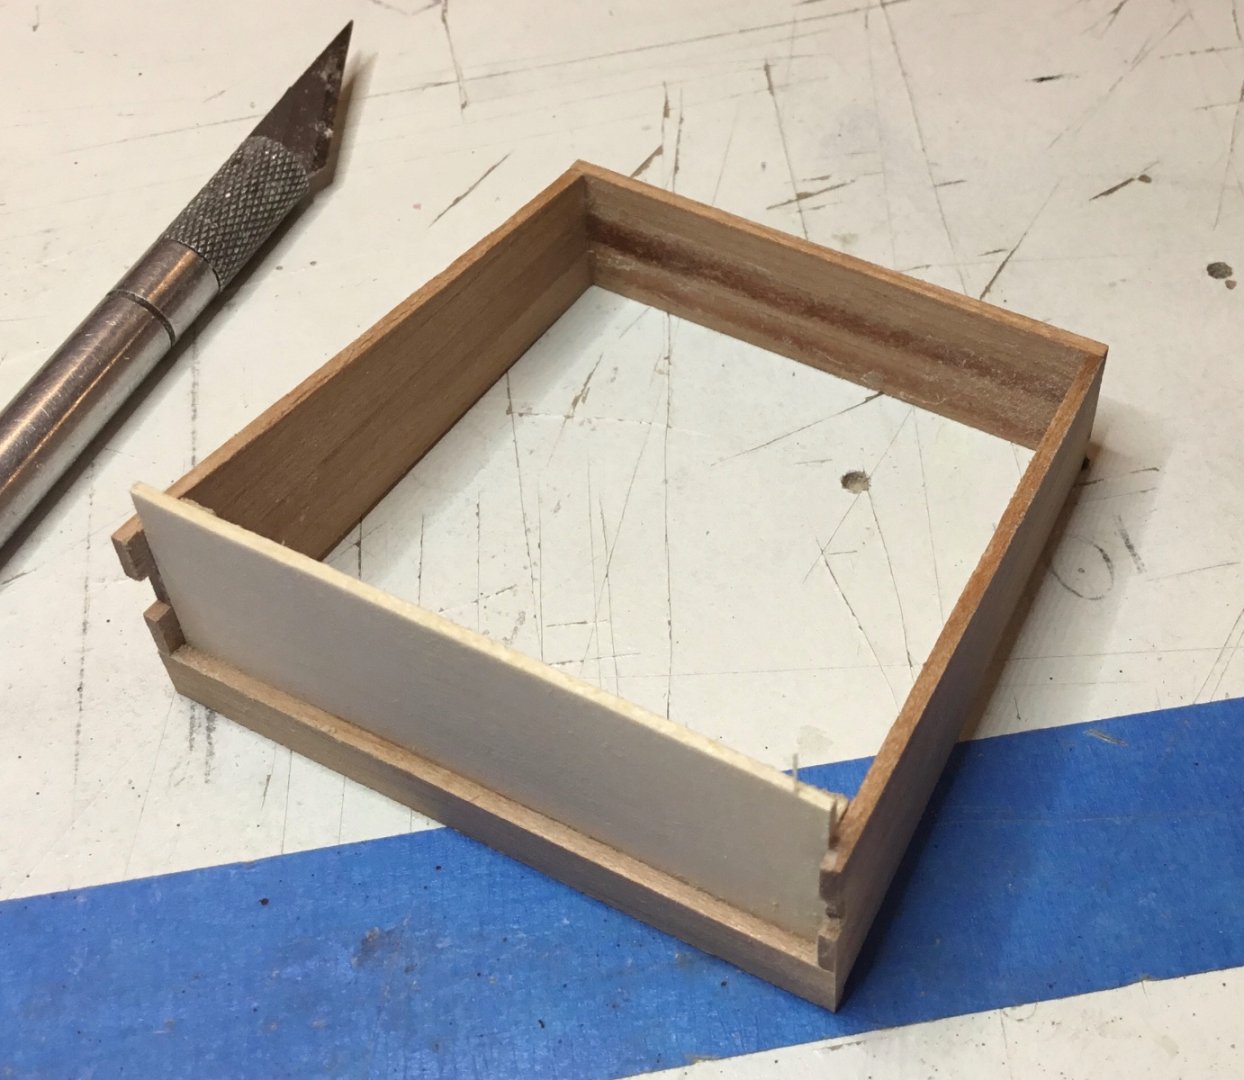
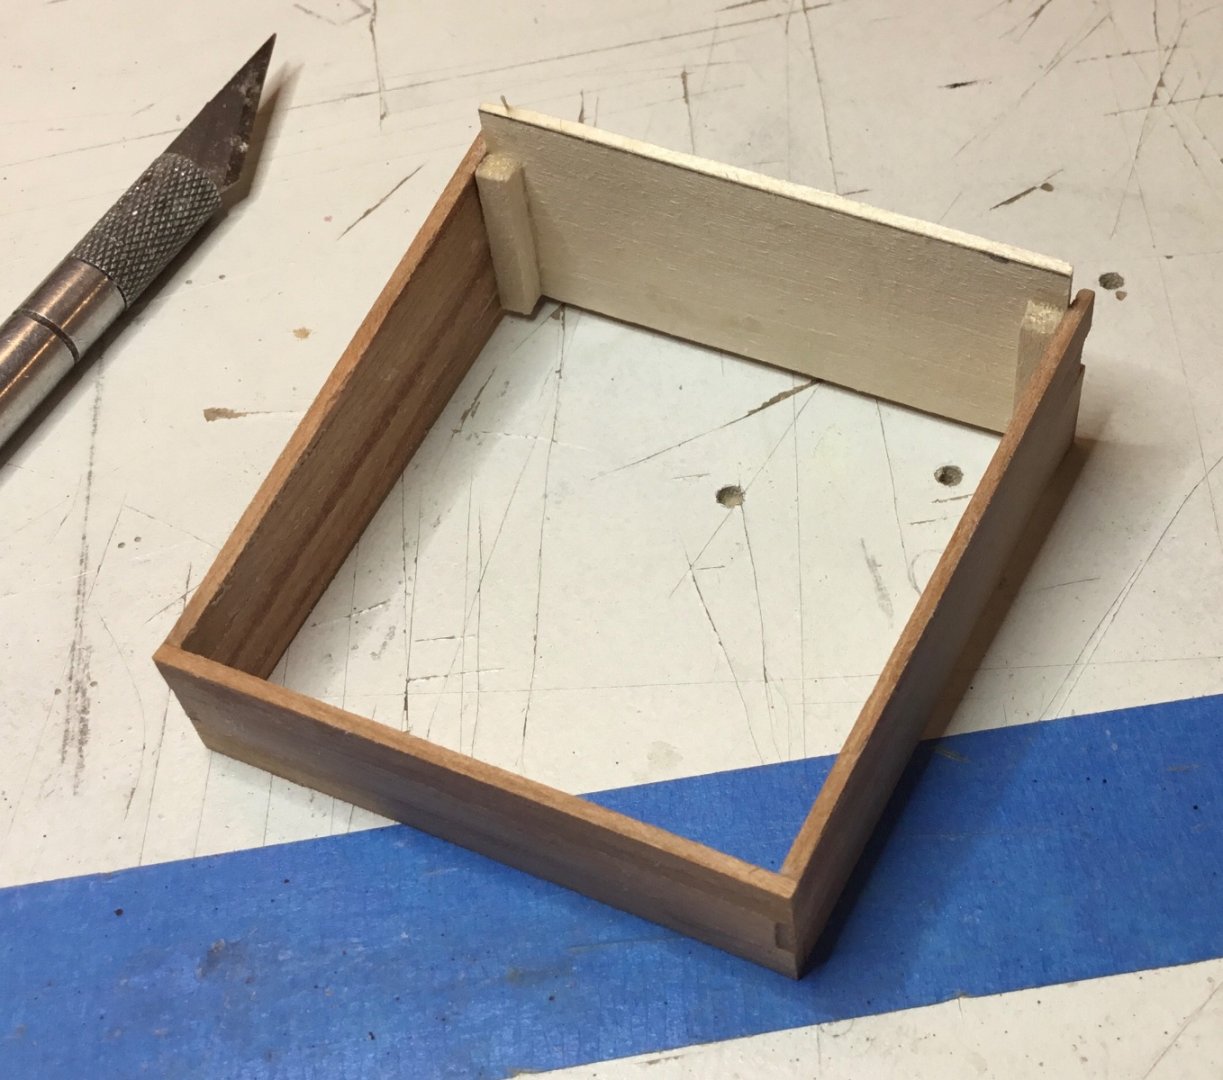
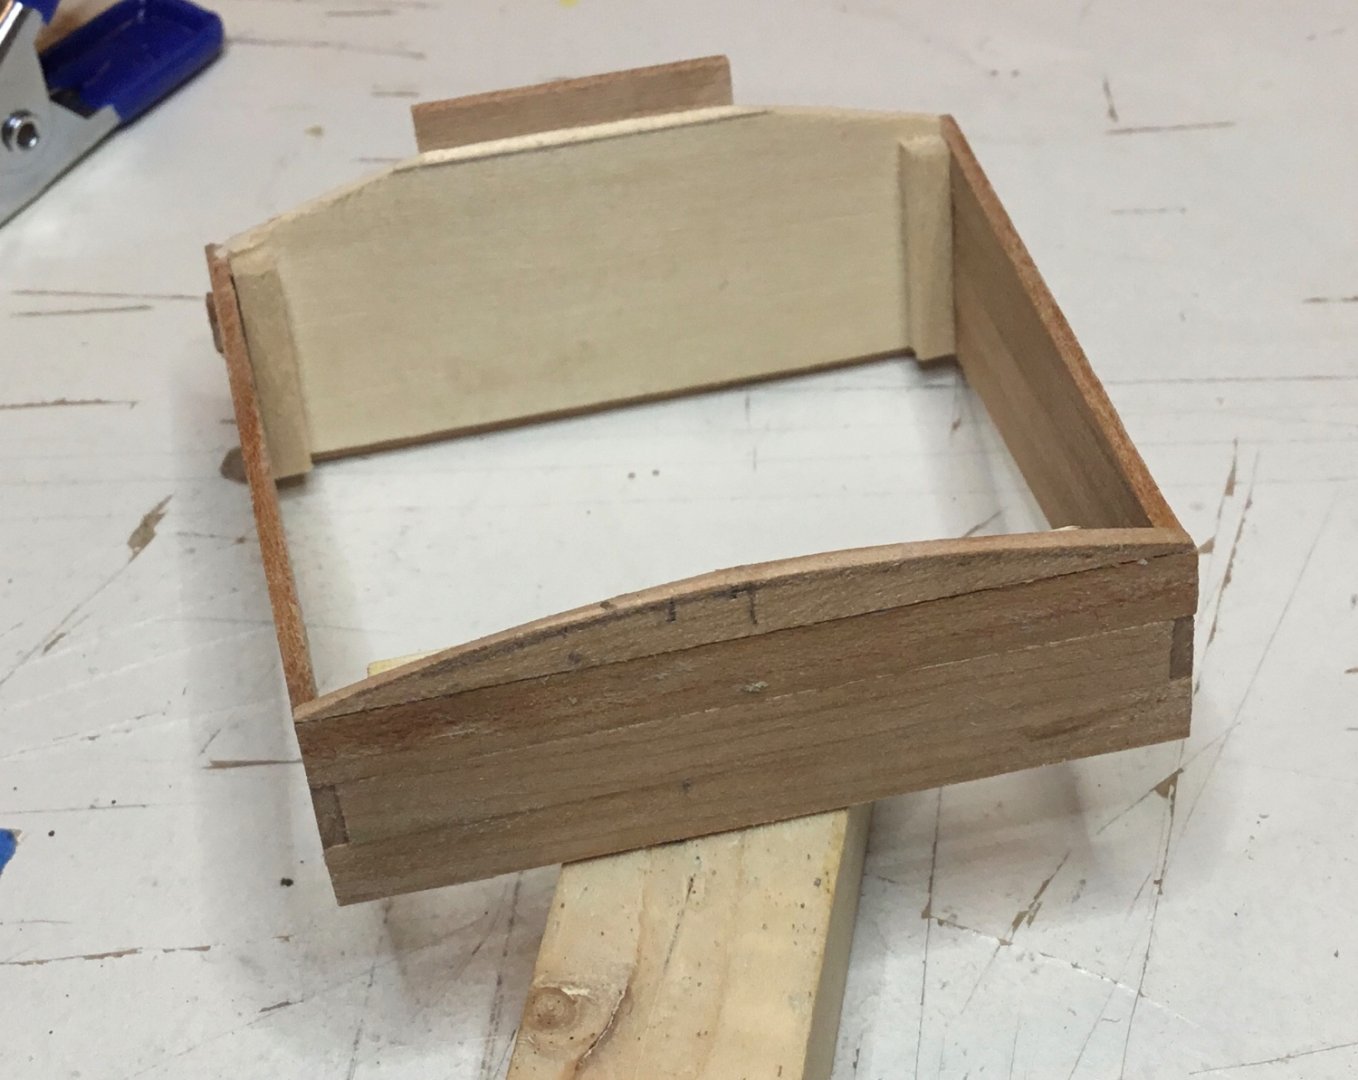
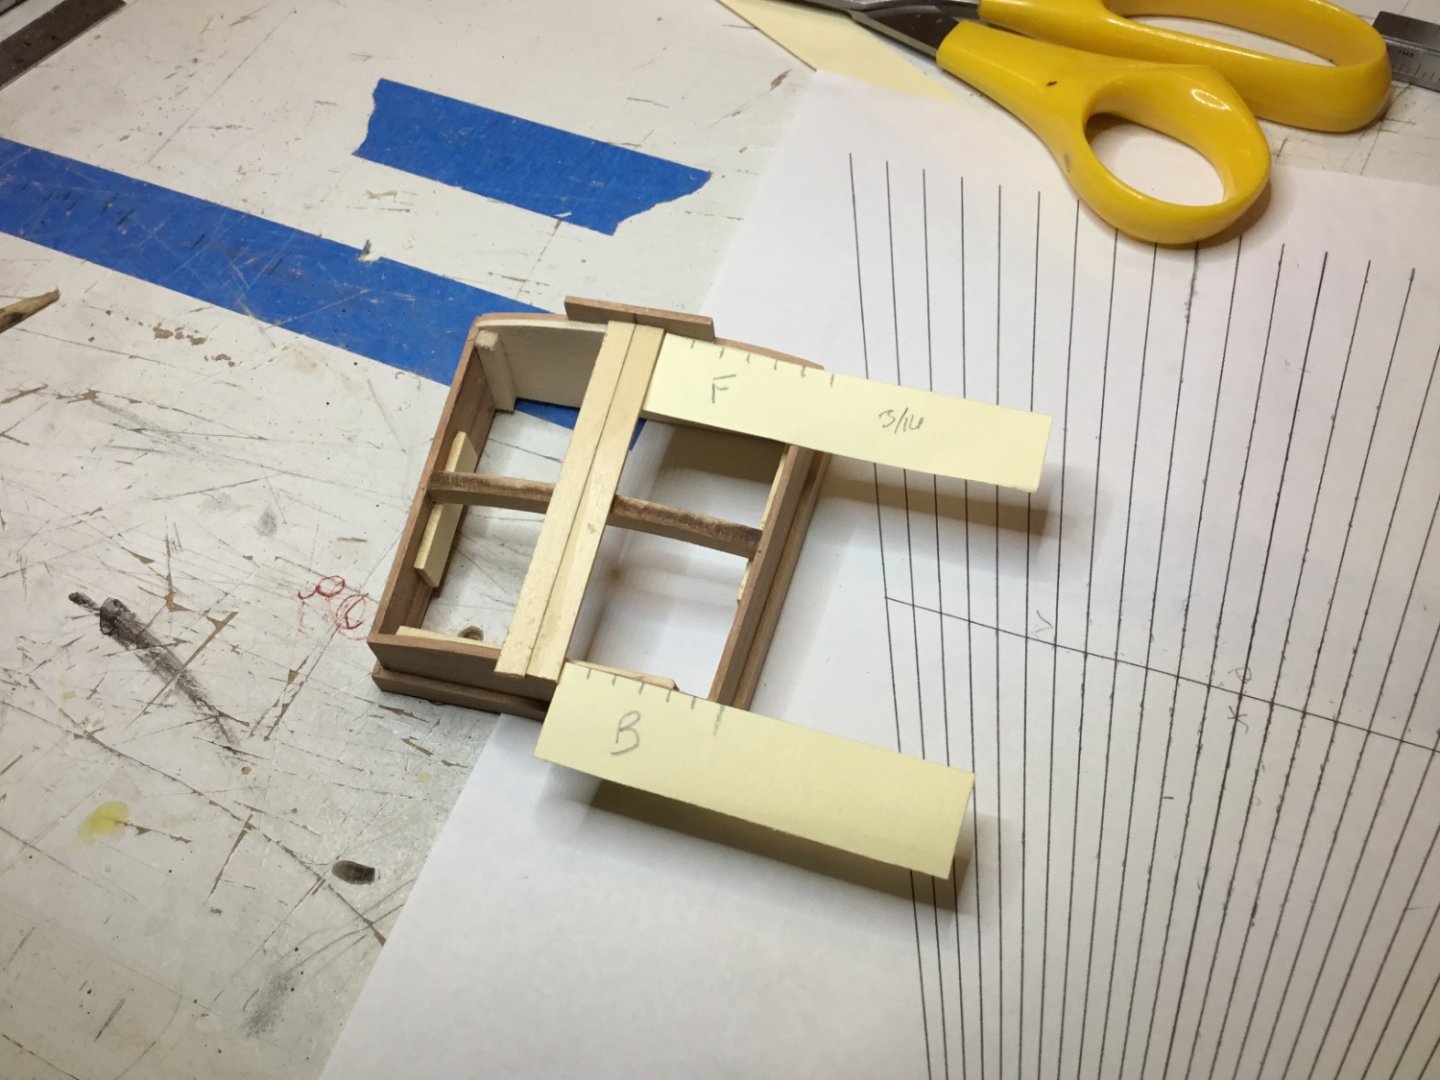
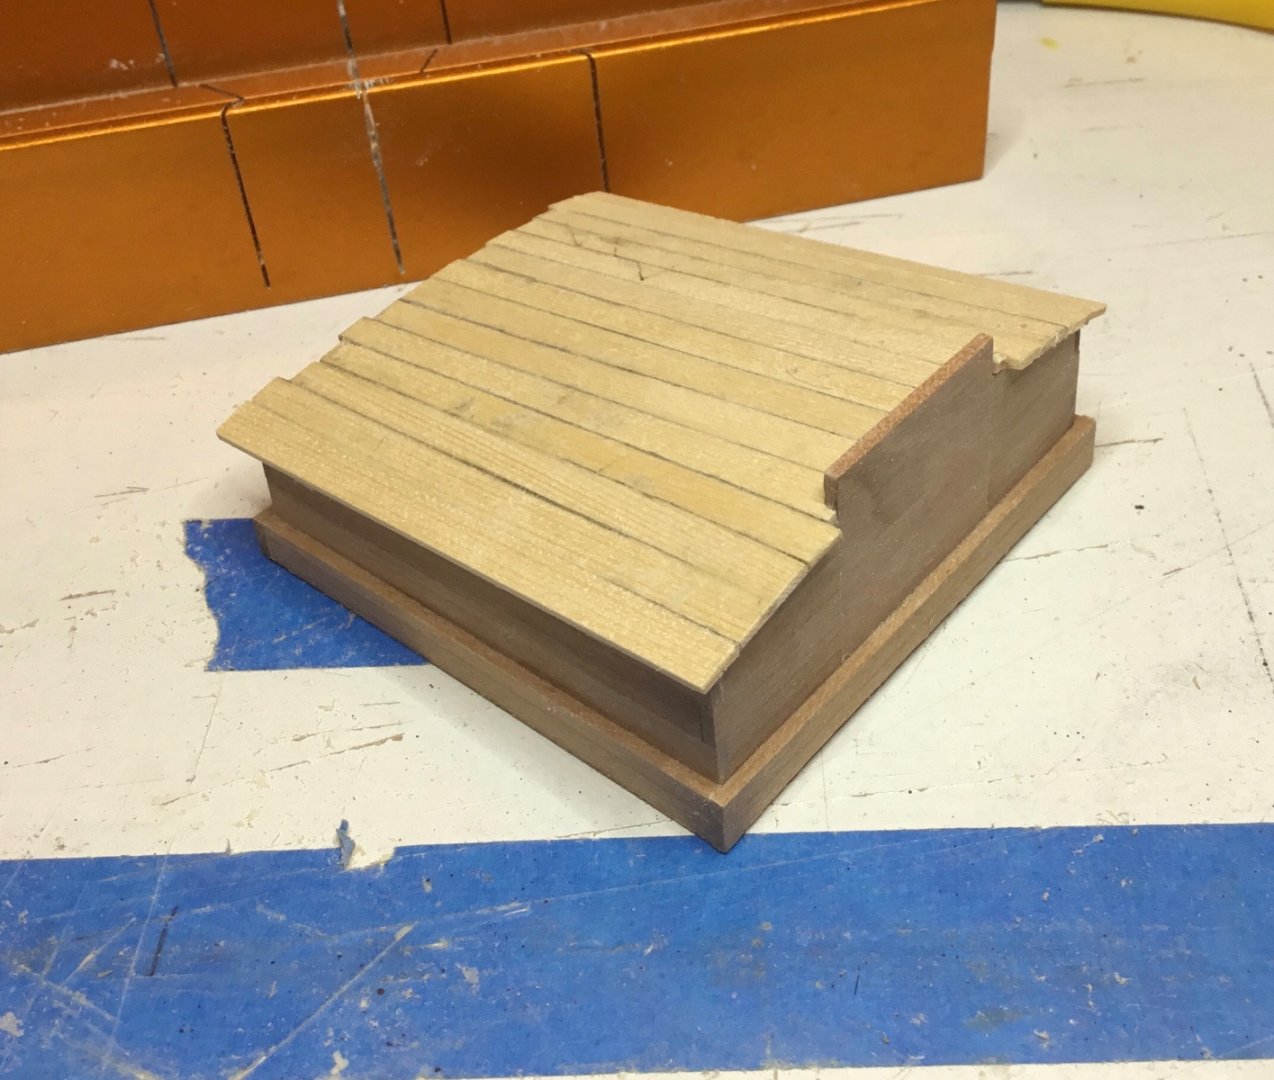
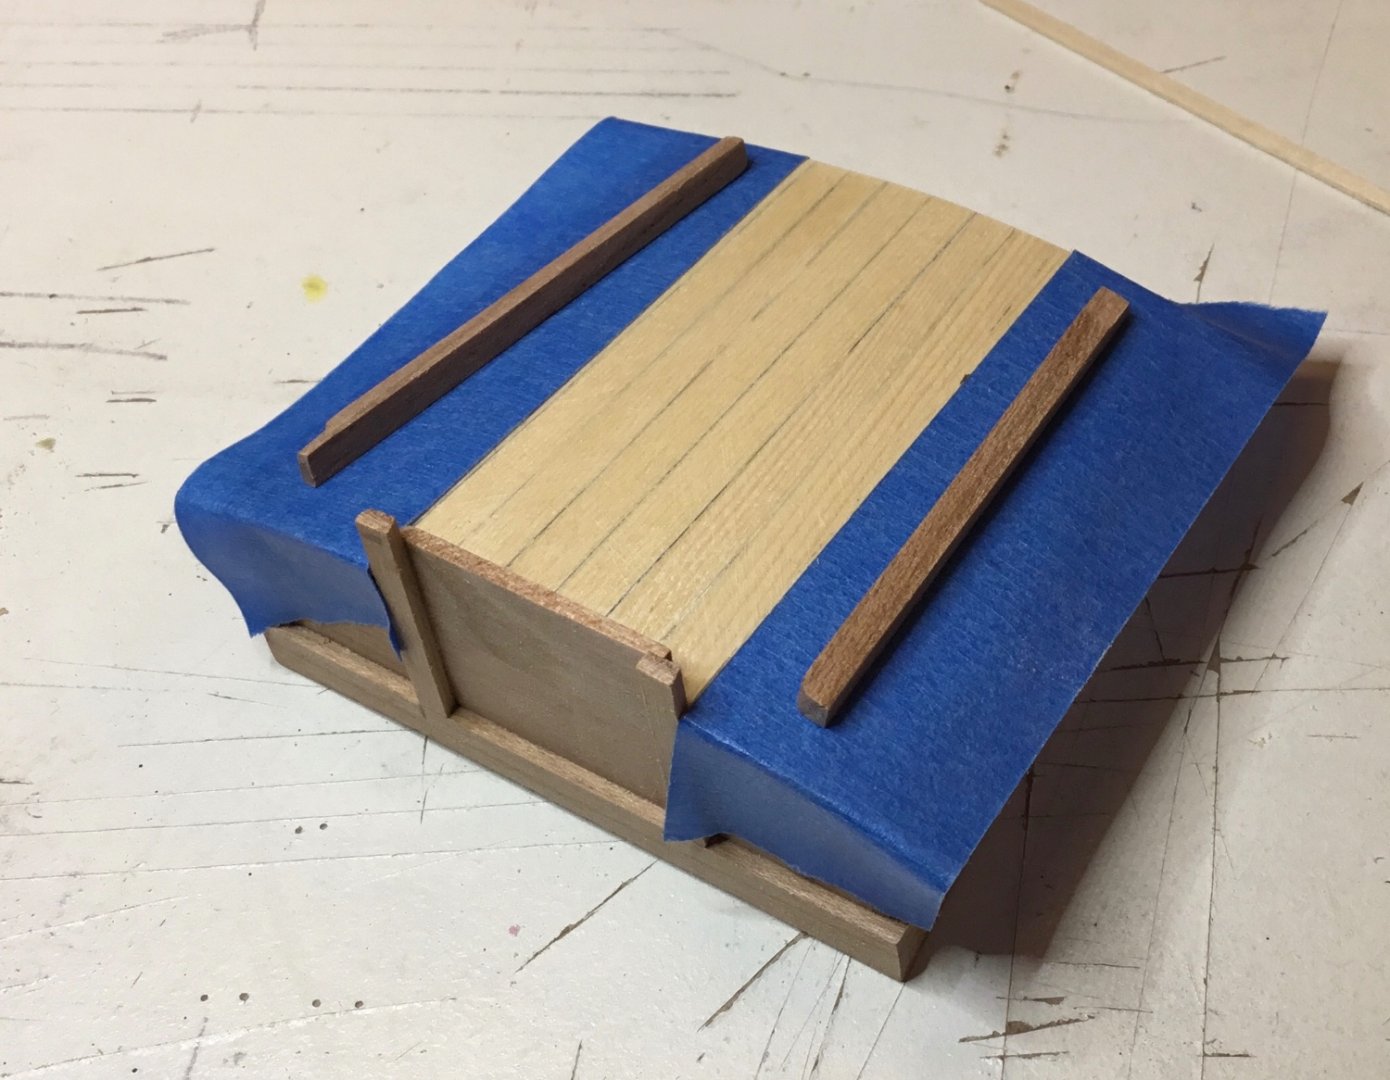
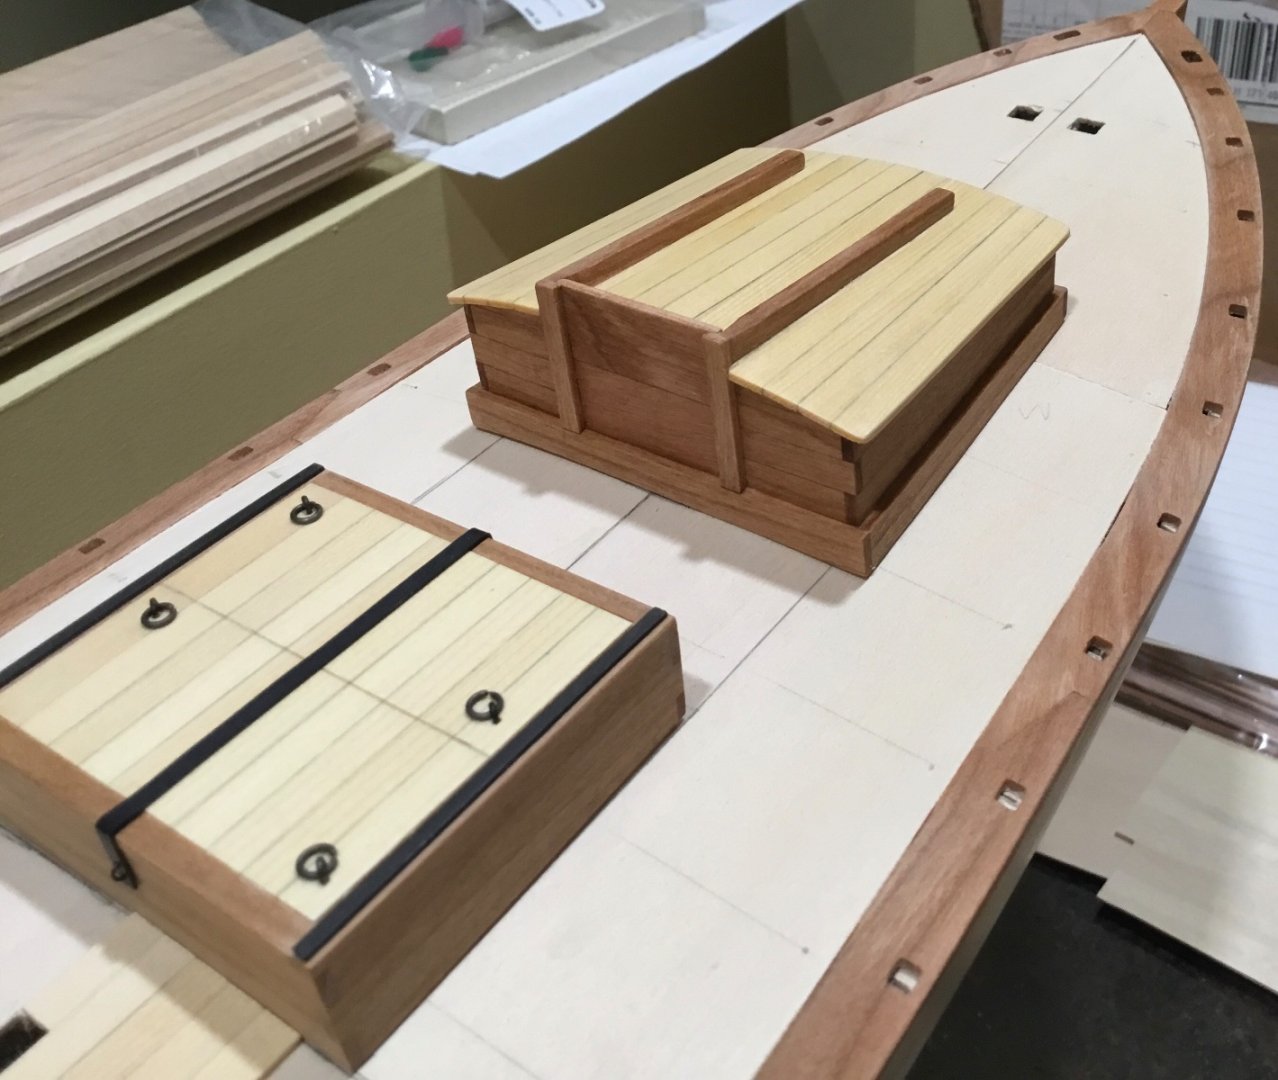
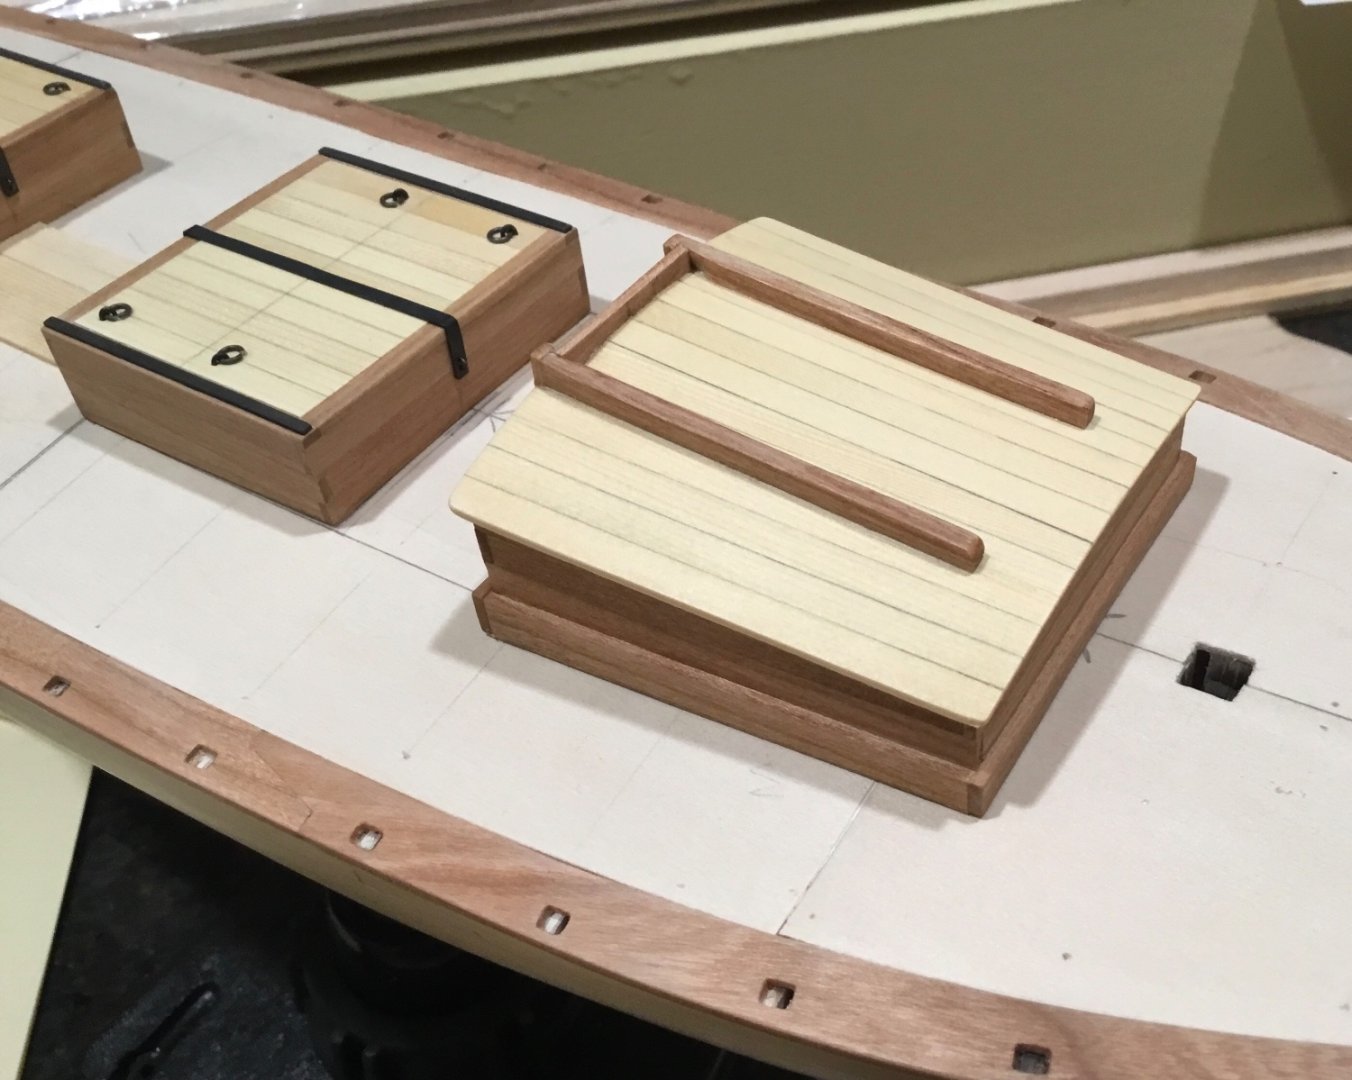
Hi Everyone, thank you so much for for all of your wonderful comments and Likes. The seat of ease was completed. The base was made from seven pieces because I found it difficult to get measurements for the notches around the frames. So many angles in this area. The cover will be closed so there is no hole in the base. The first set of knees that I made ended up being too short so two more were made from 1/8” x 1/8” strips. Then they were glued and pinned into place. Turns out that none of the kit supplied cap rails played well with the way I installed the stanchions so new ones were cut from 1/32” AYC sheet. The two layer method was used to make the cap rails mostly because it’s a lot easier to cut 1/32” thick pieces from the sheet with a knife. The first layer was glued to the stanchions with CA and pinned with copper wire The second layer was glued to the first layer using white pva The first layer just butts together at the joints and a scarf joint is cut into the top layer. Then the outboard edge of the rail was sanded flush with the outer face of the bulwark strakes. A compass was run down run down the sanded outboard edge of the rail to mark the inboard edge. The rail was then cut and sanded back to this line. Next comes making a stand for her. Hope to see you all next time.


- 72 replies
-
- 12
-
-

-
- Glad Tidings
- Model Shipways
- (and 1 more)
-
Hi Bob, I don’t know anything about Disar but if you decide to go with one of their kits , Ages of Sail also sells them
-
Hi Dave, I used Liquitex Red Oxide on my Nordland Boat. Difficult to tell until you see it in real life but as far as reds go I think it’s one of the nicer ones.
-
Hi hamilton, thank you. I appreciate your comments very much
- 72 replies
-
- 1
-
-
- Glad Tidings
- Model Shipways
- (and 1 more)
-
Hi Dsmith, thank you very much for your kind words. I keep thinking that it would be nice if more kit makers would sell their kits in stages.
- 72 replies
-
- 1
-
-
- Glad Tidings
- Model Shipways
- (and 1 more)
-
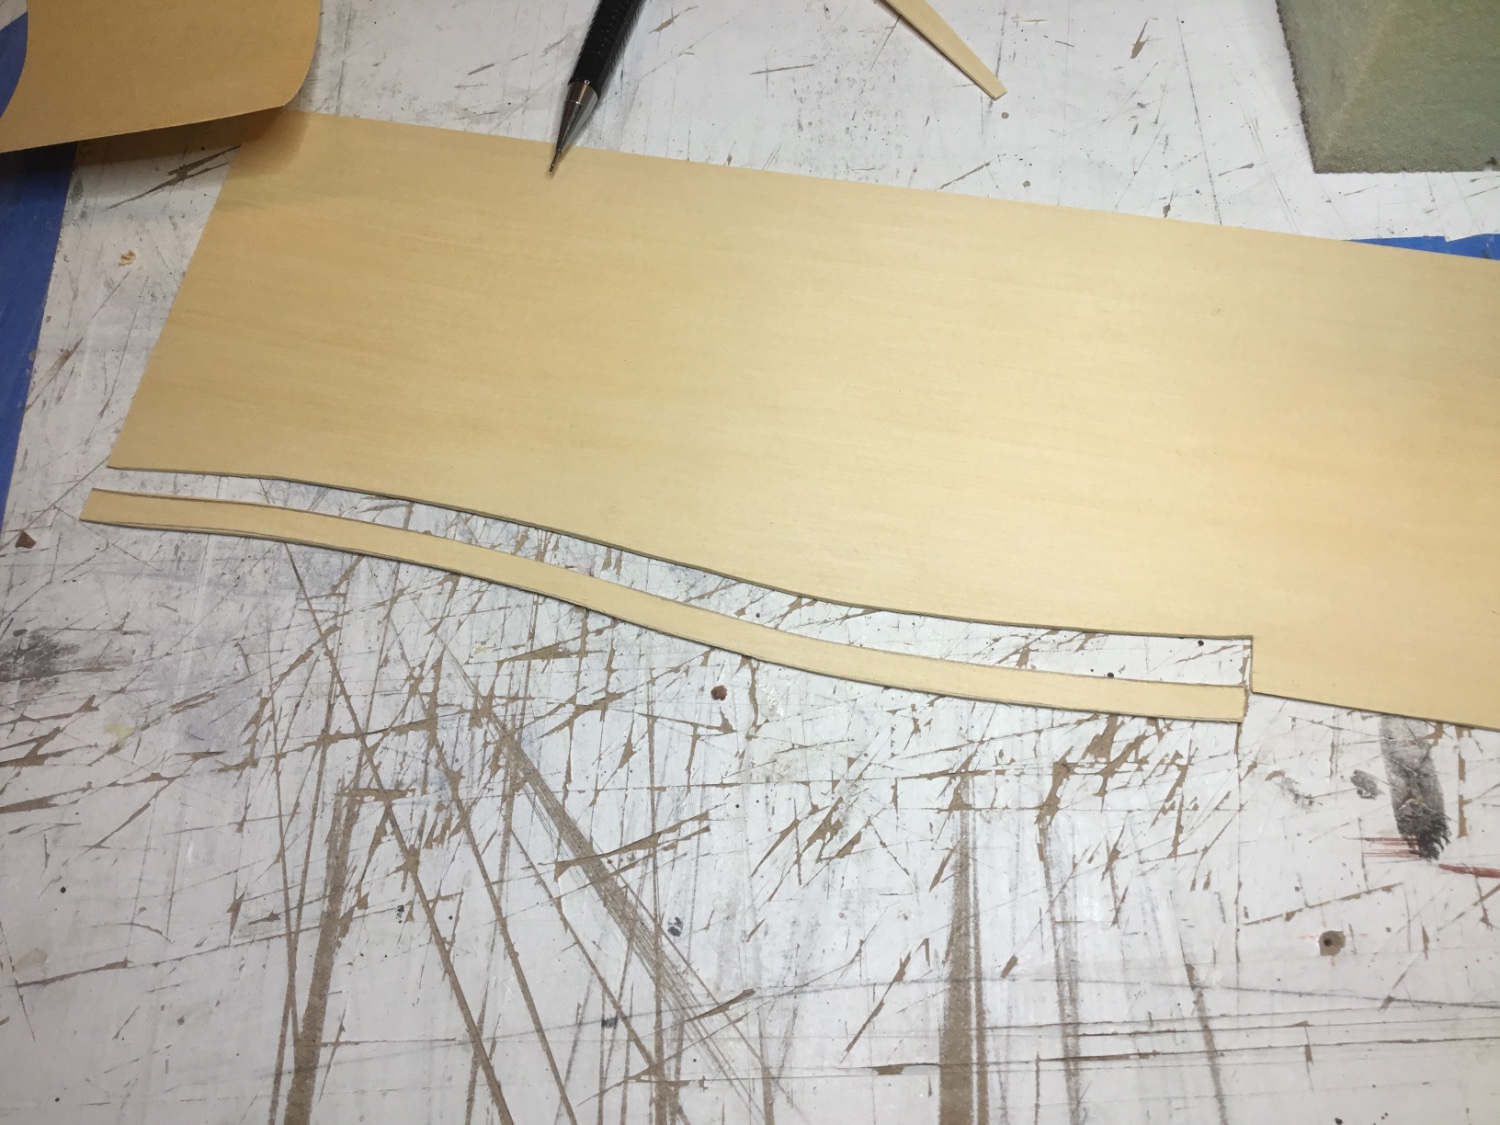
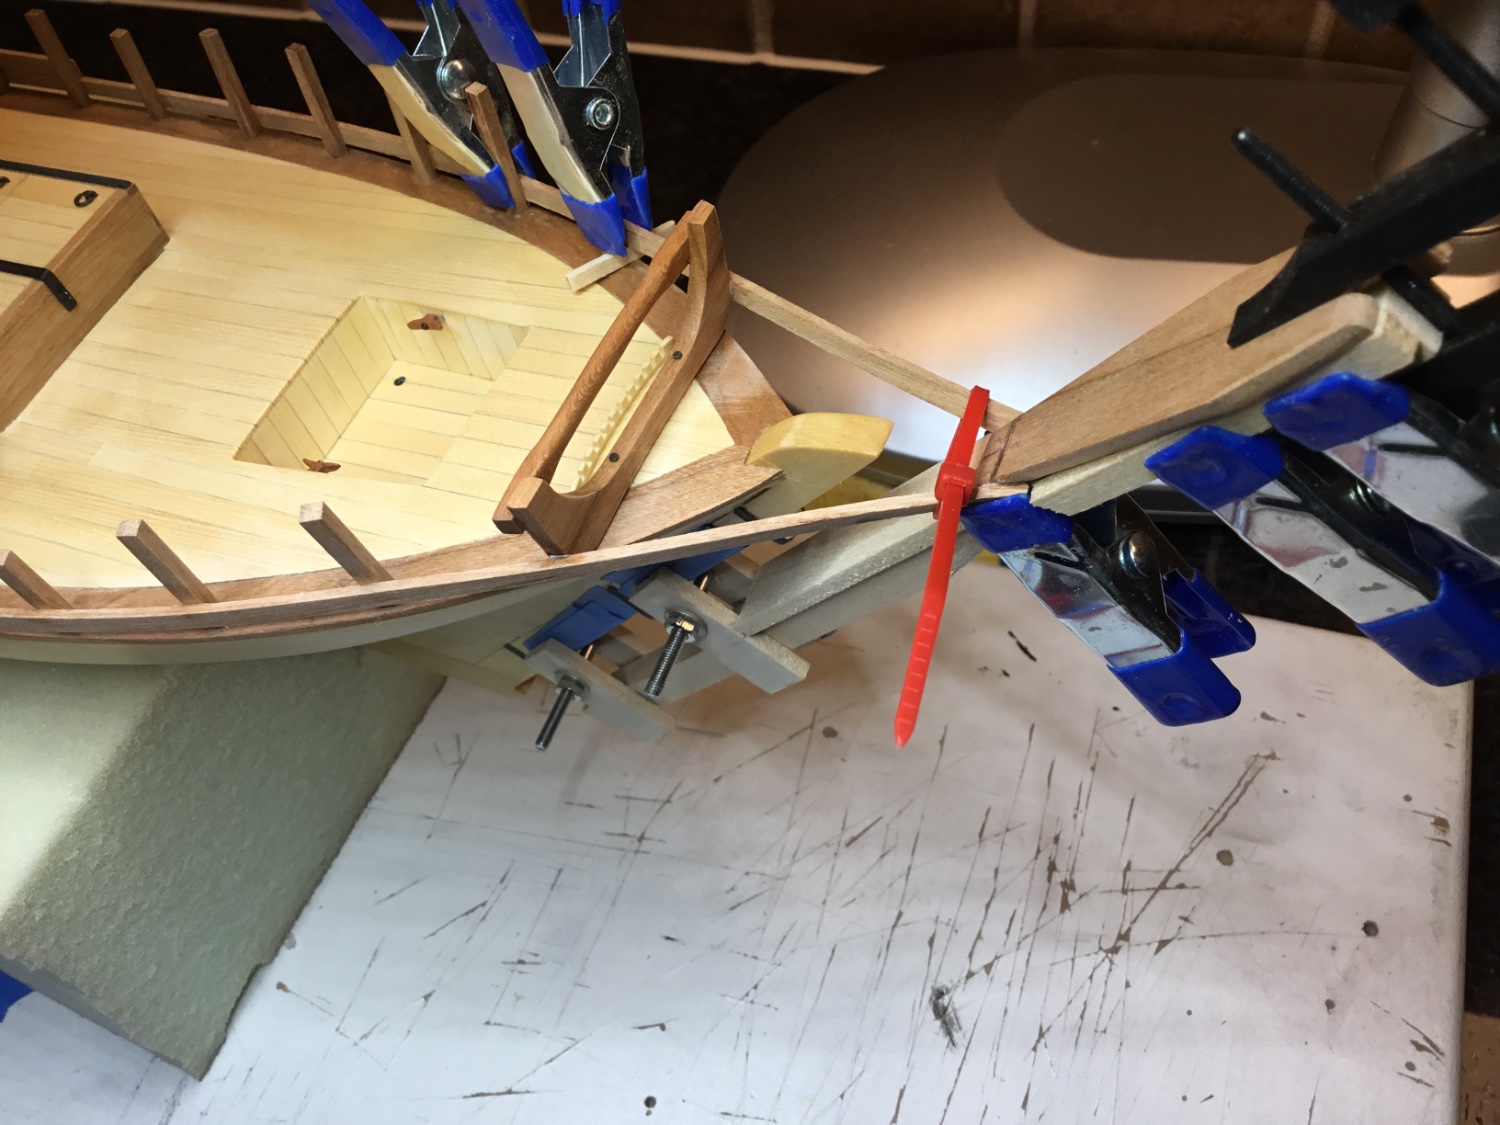
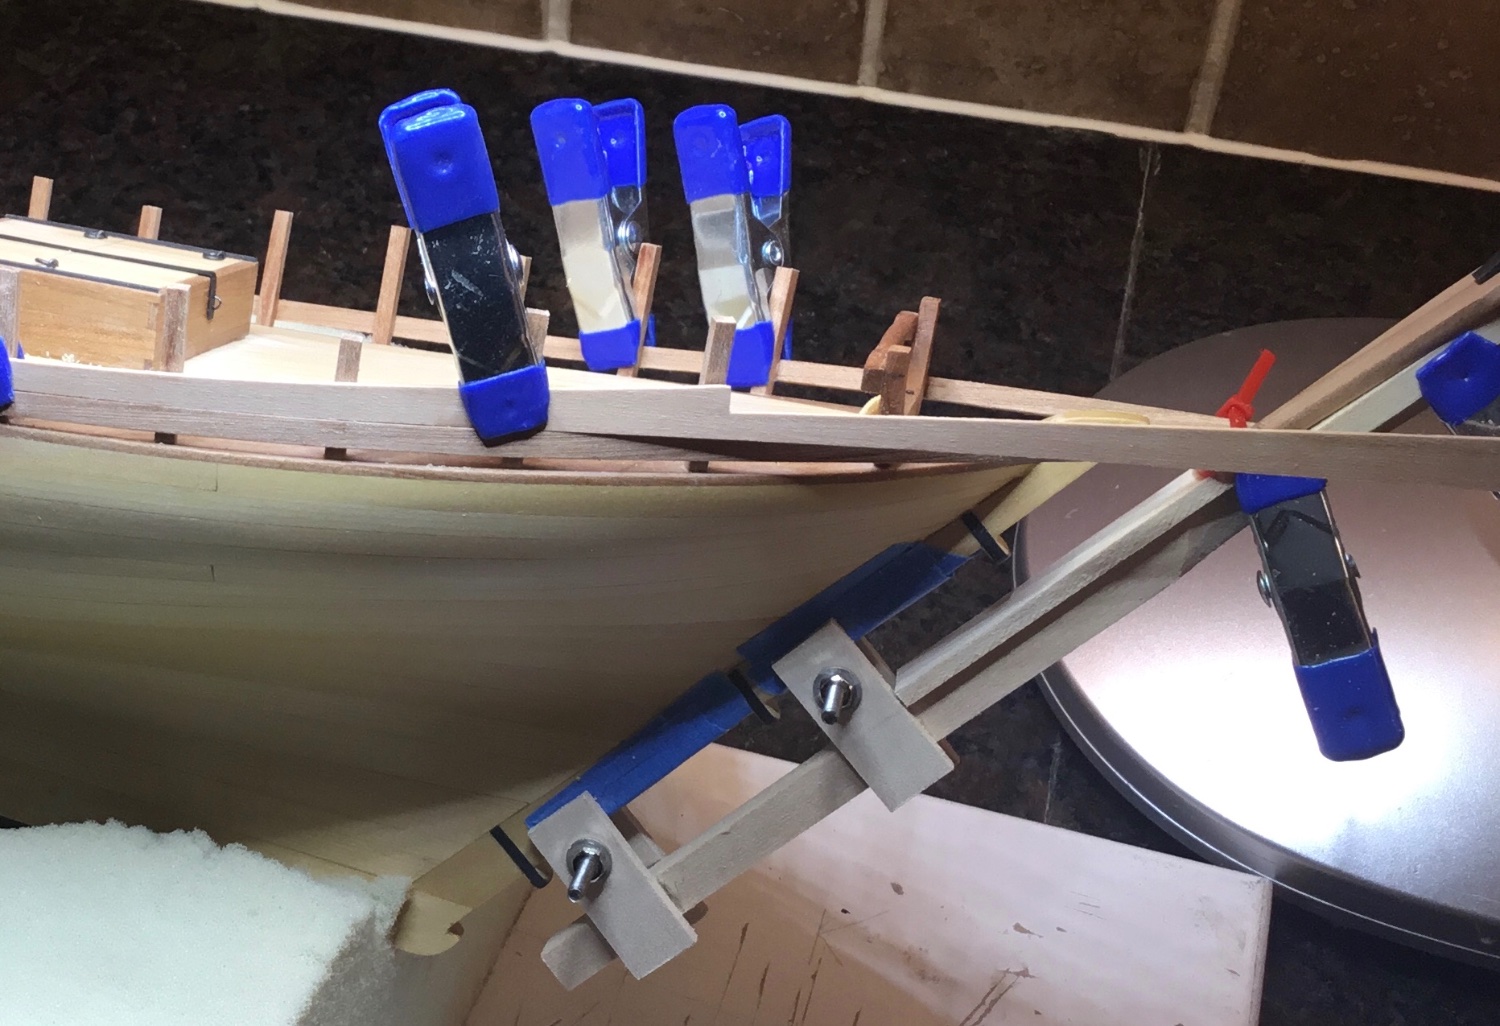
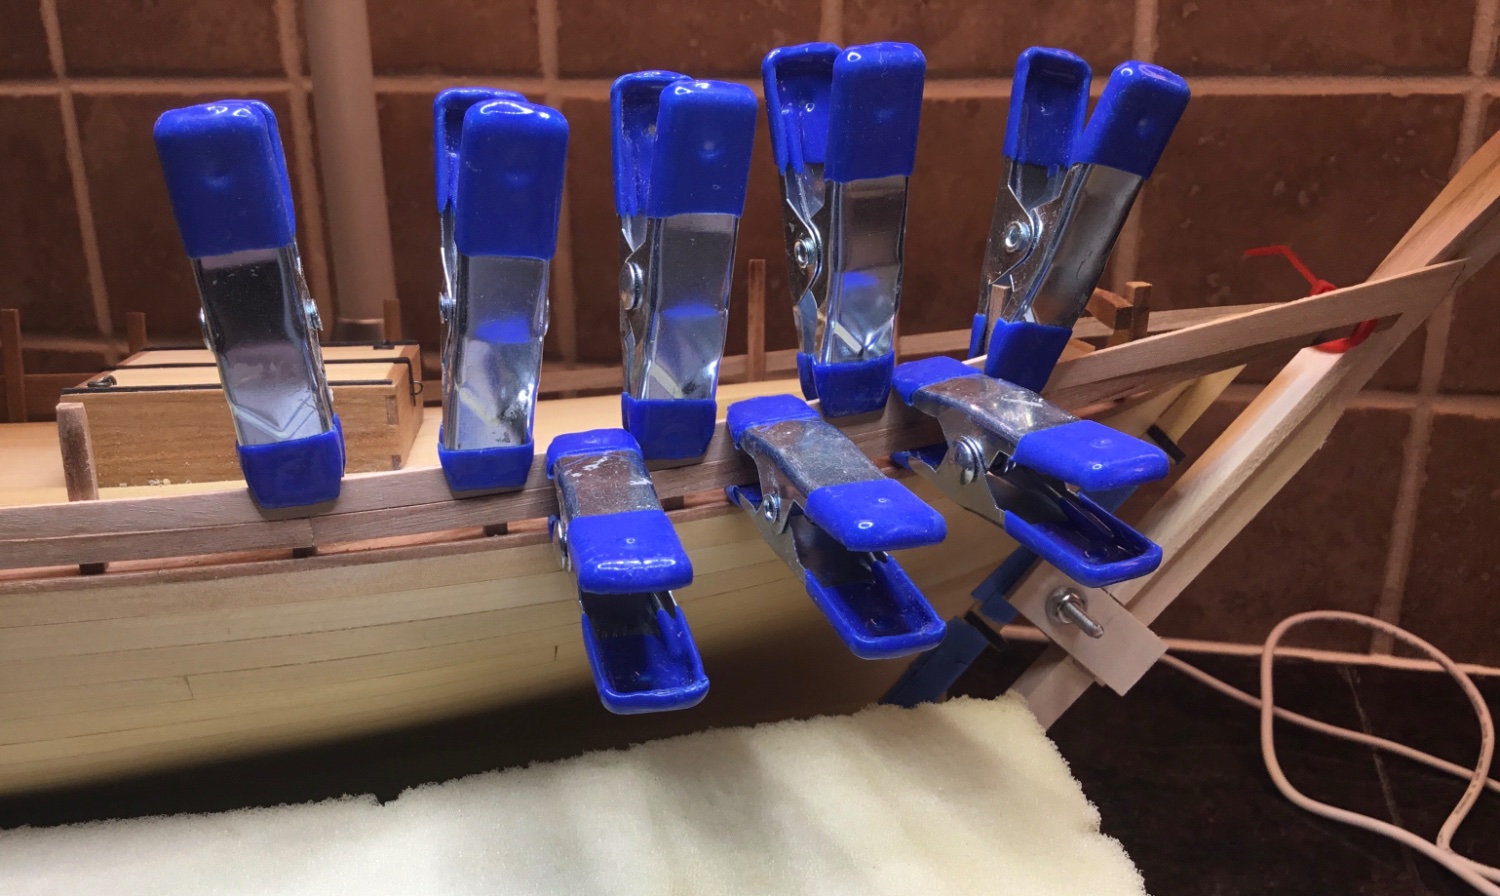
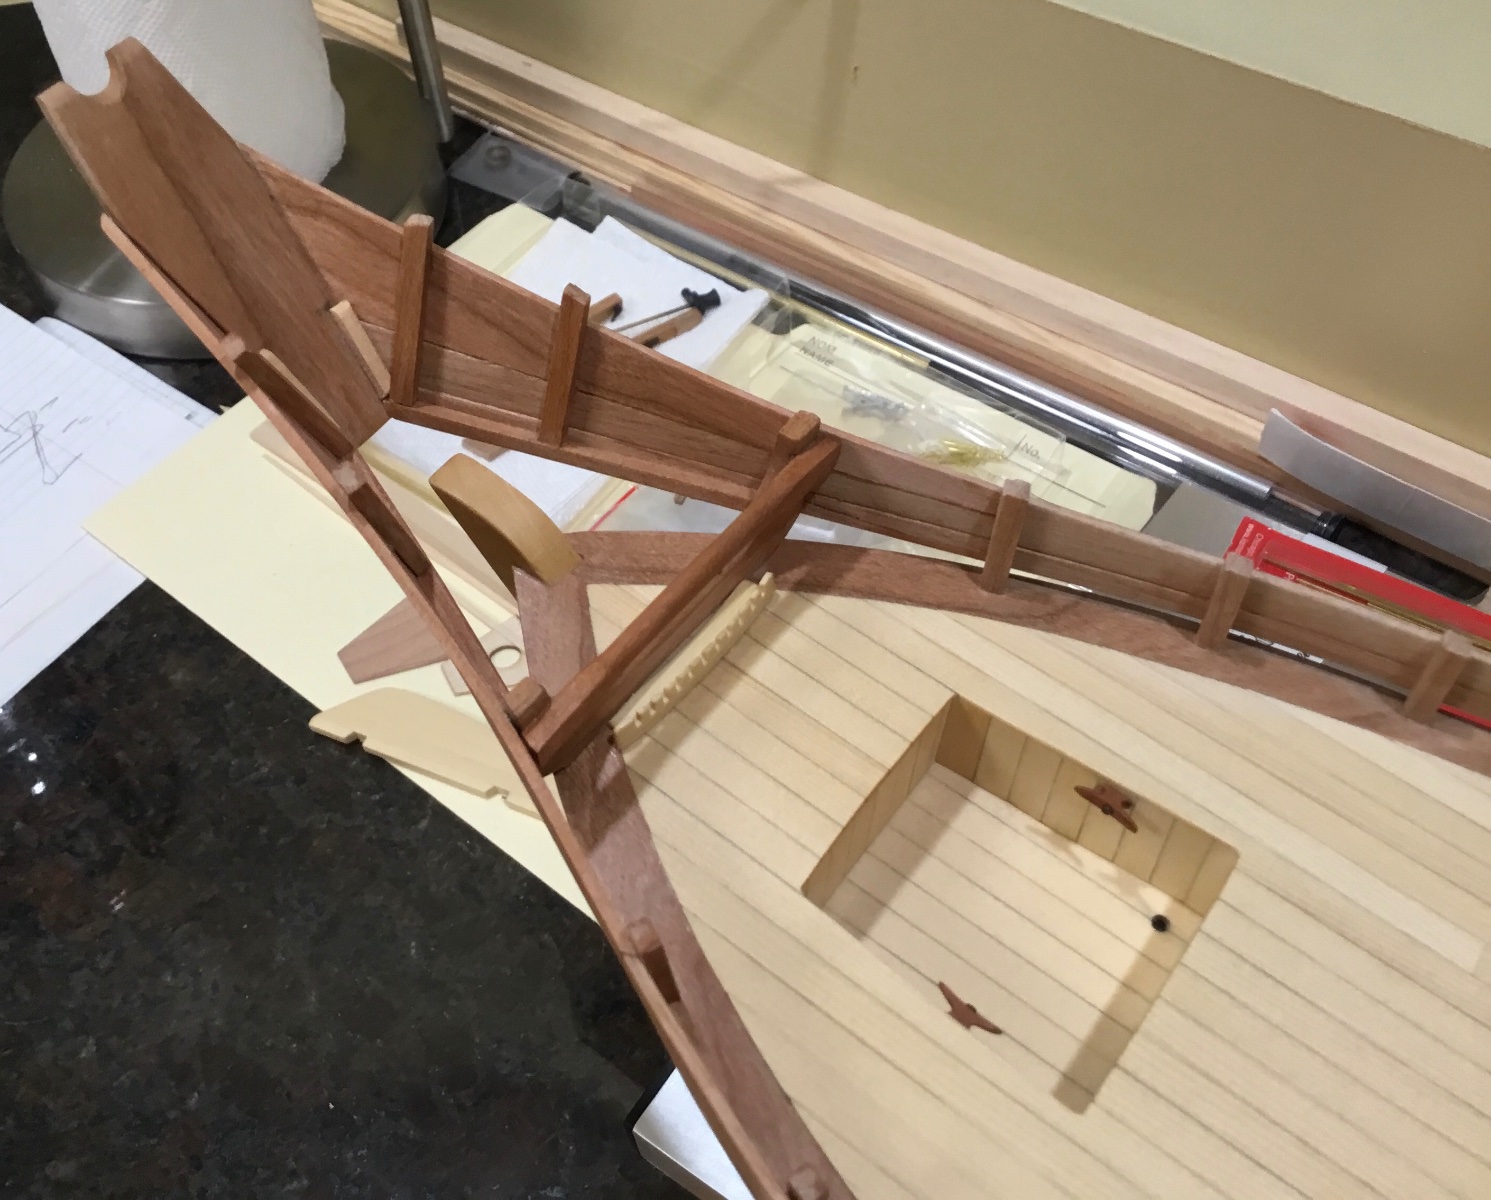
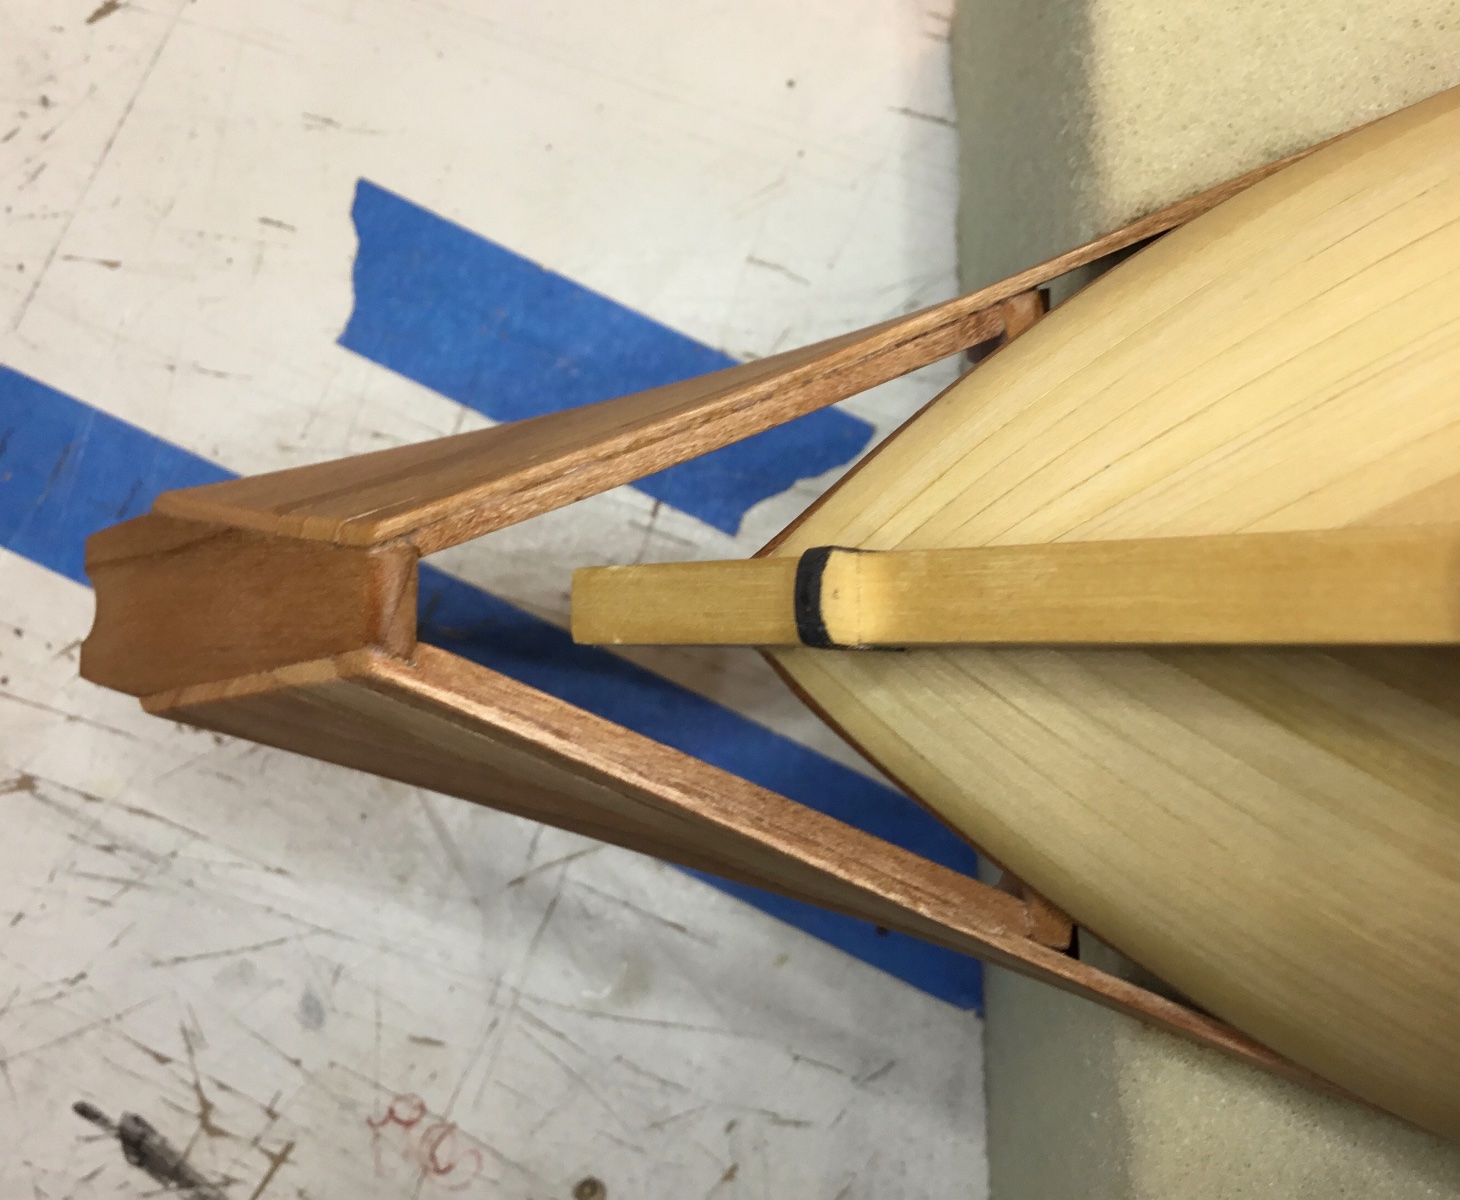
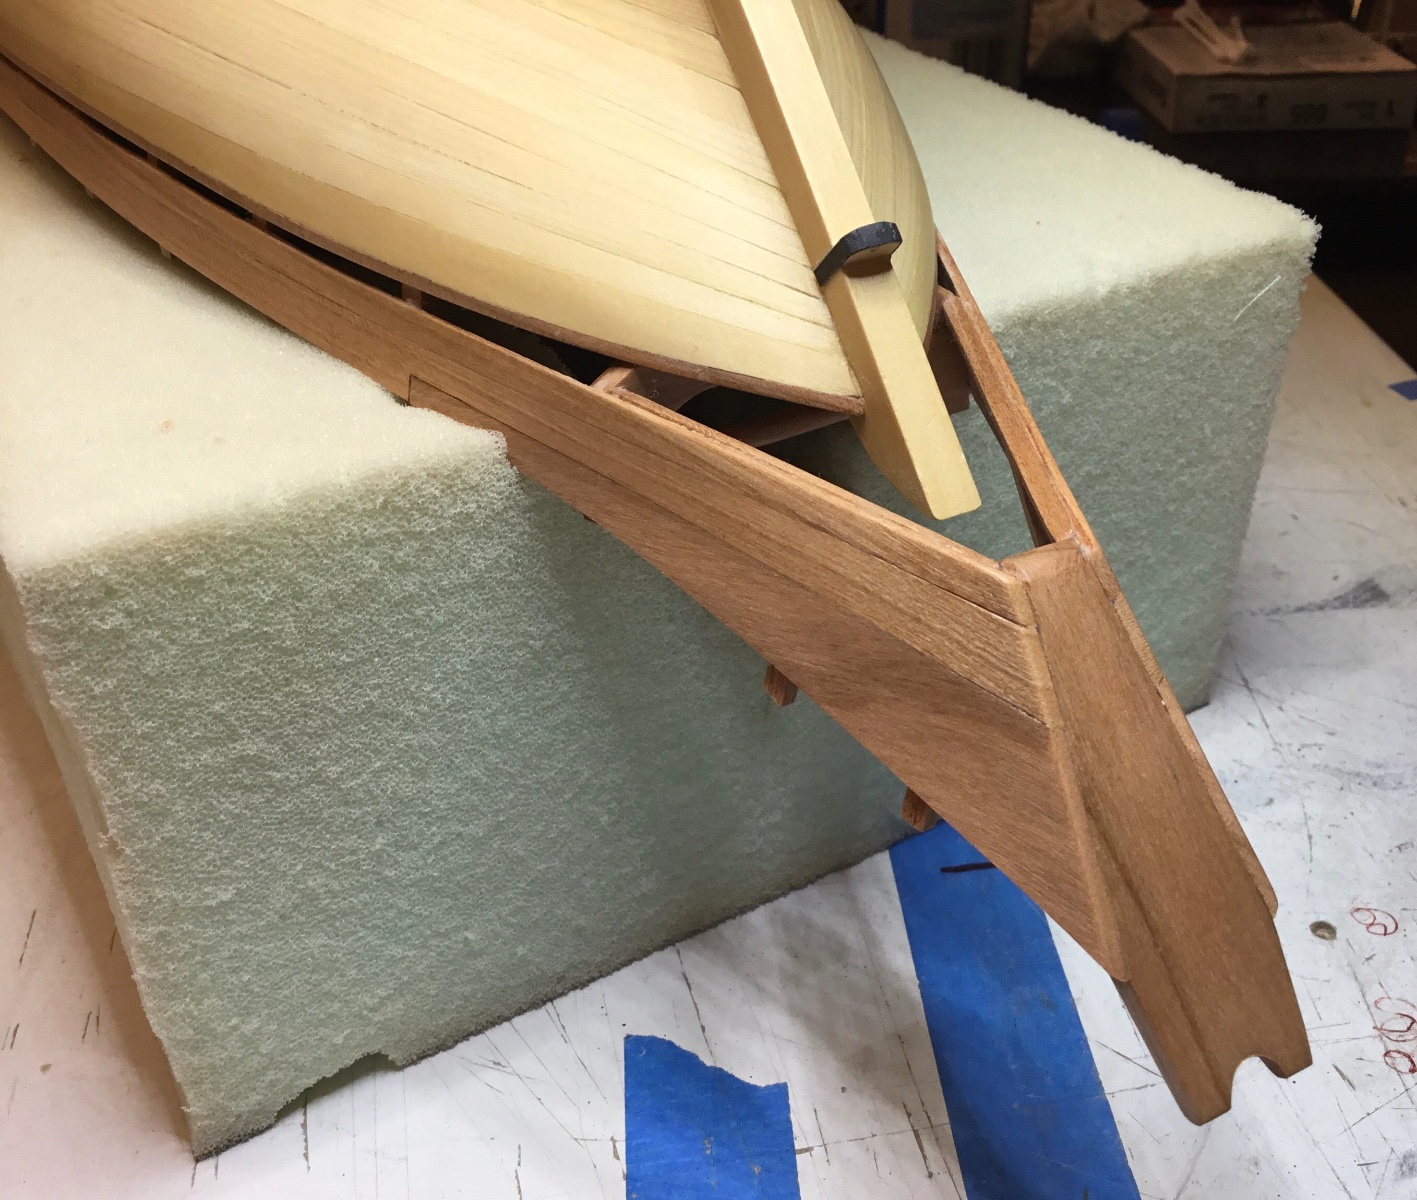
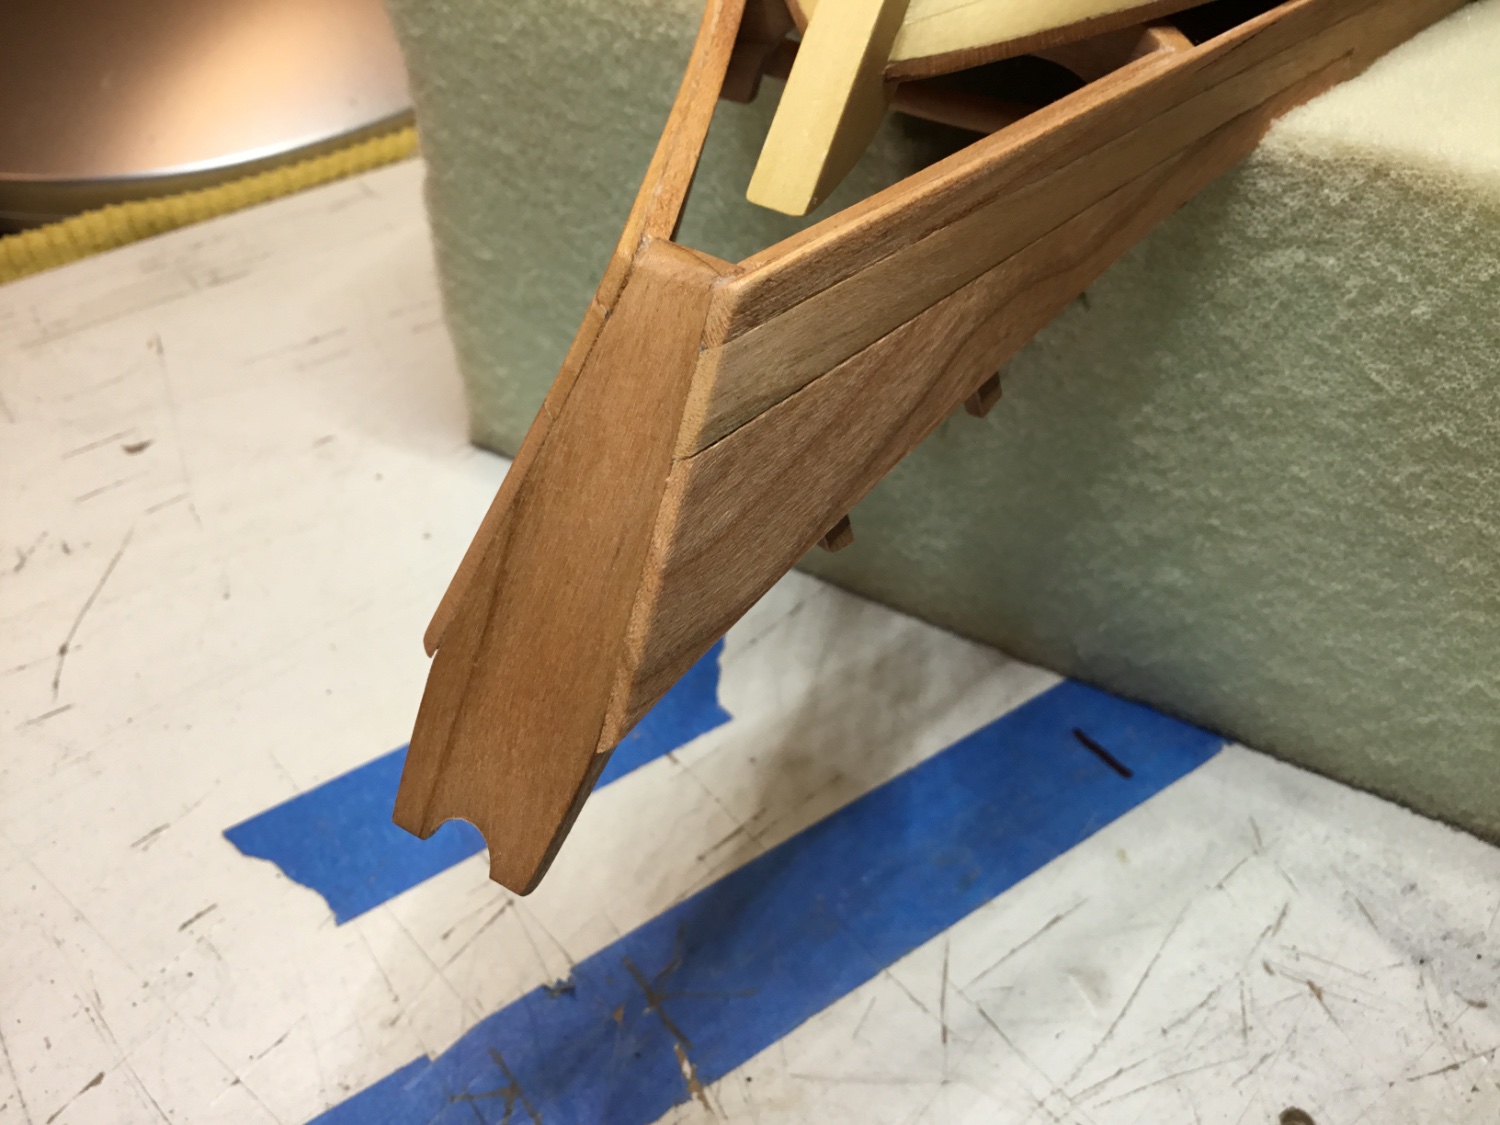
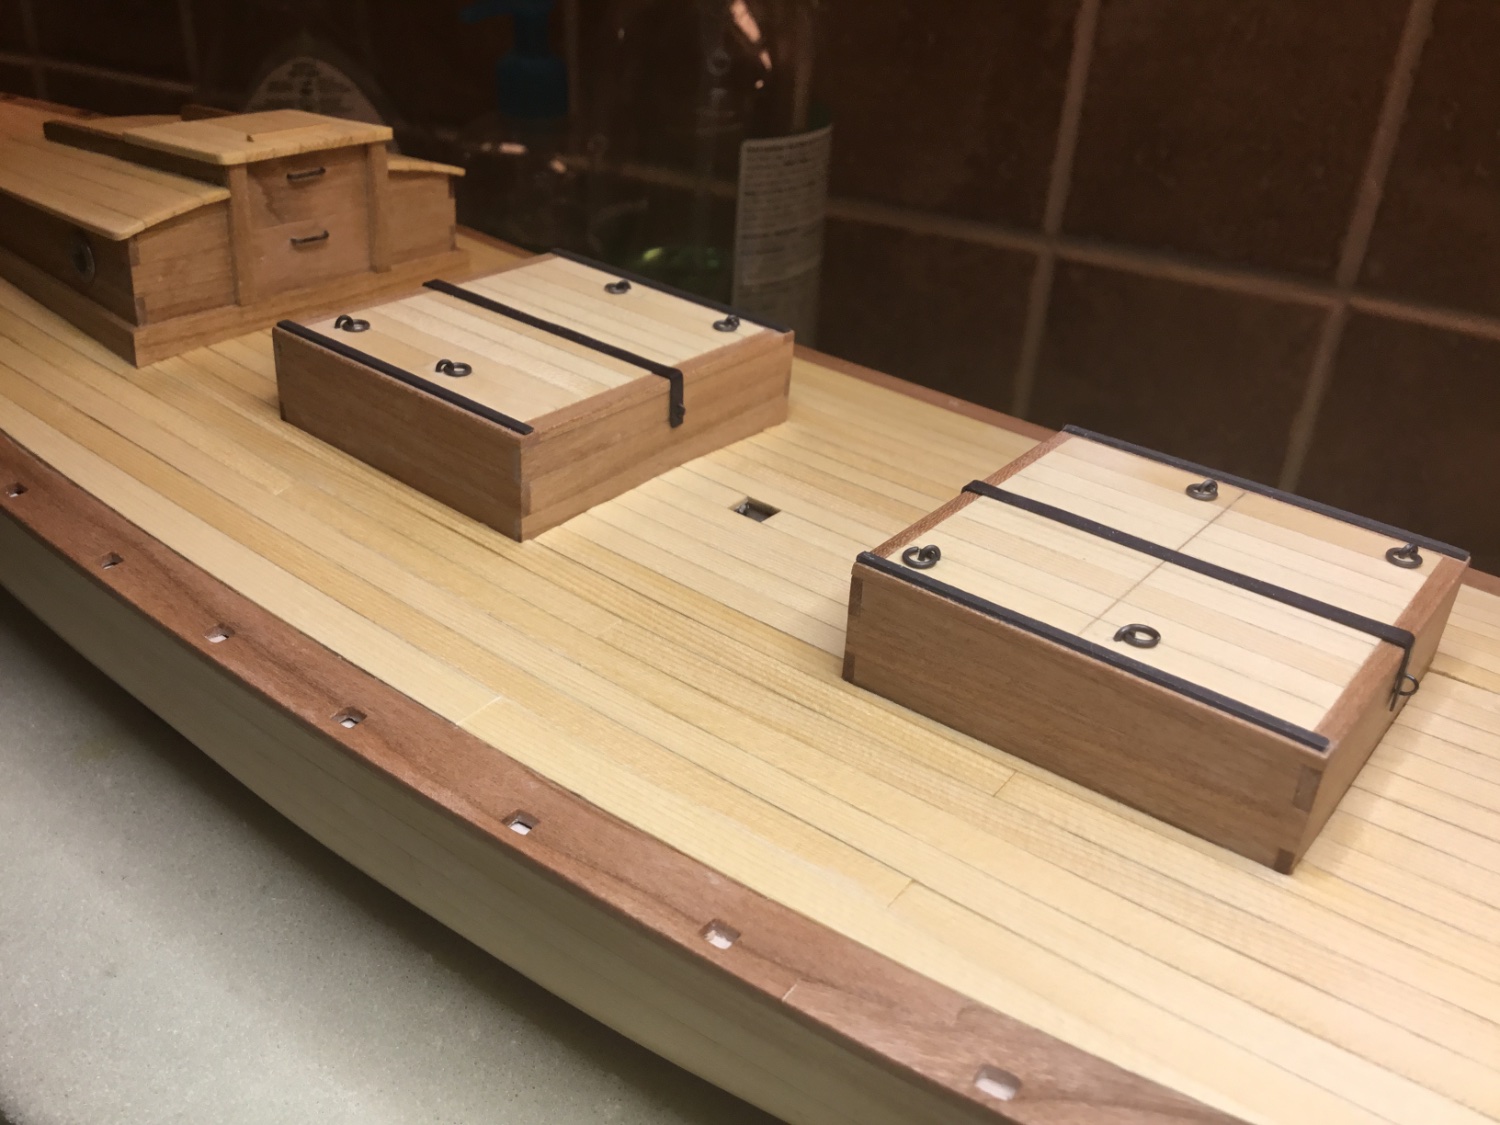
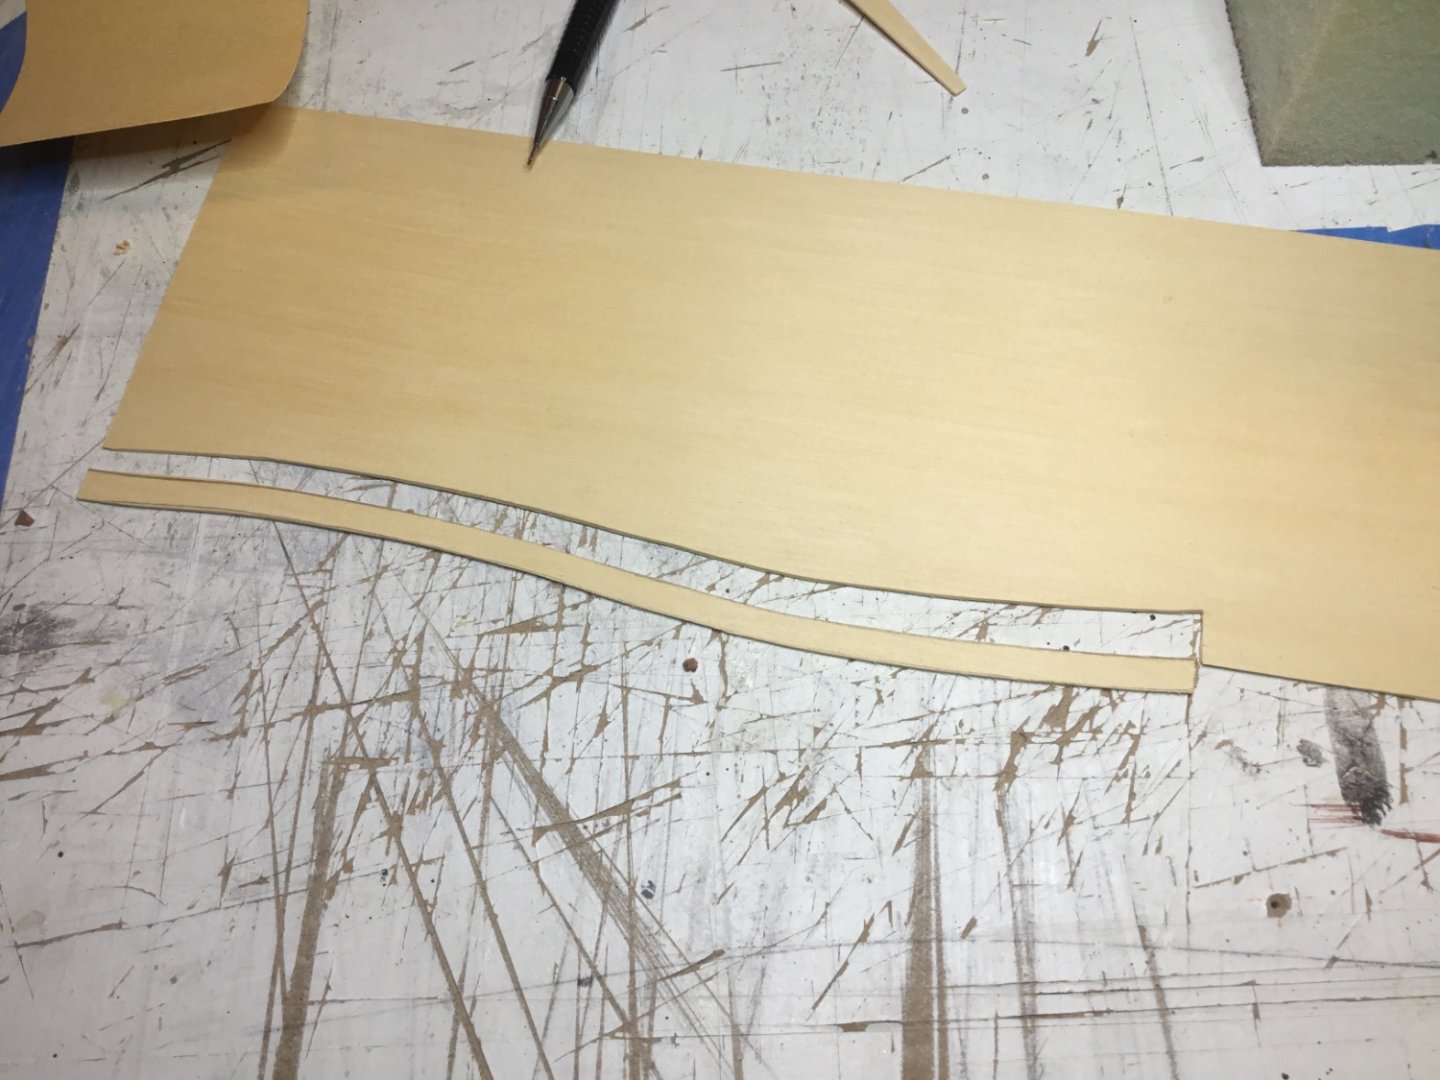
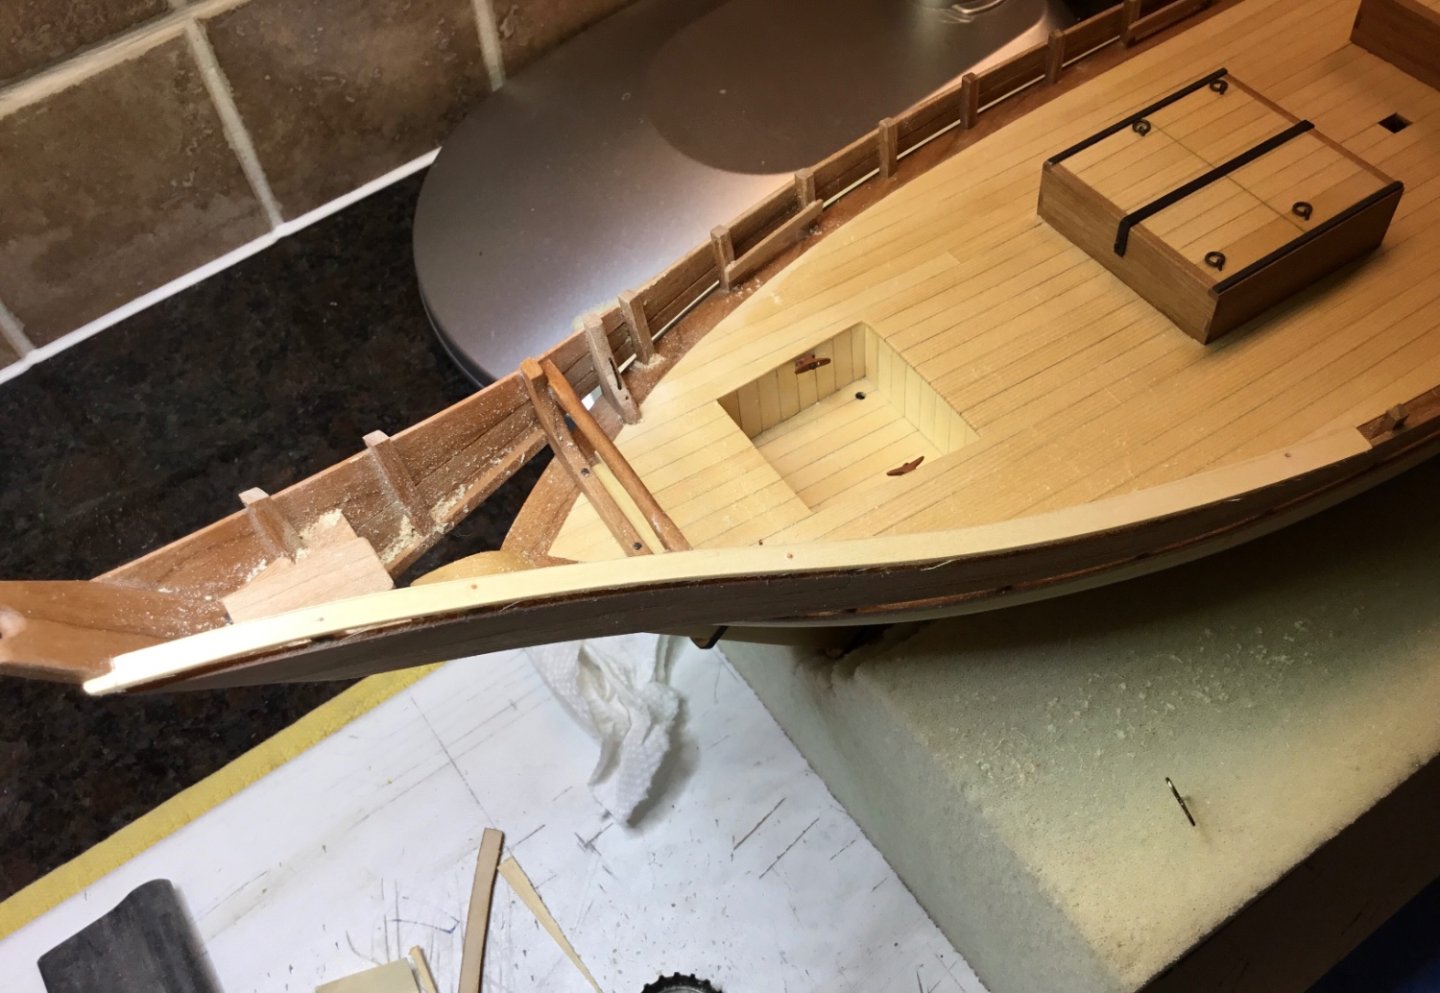
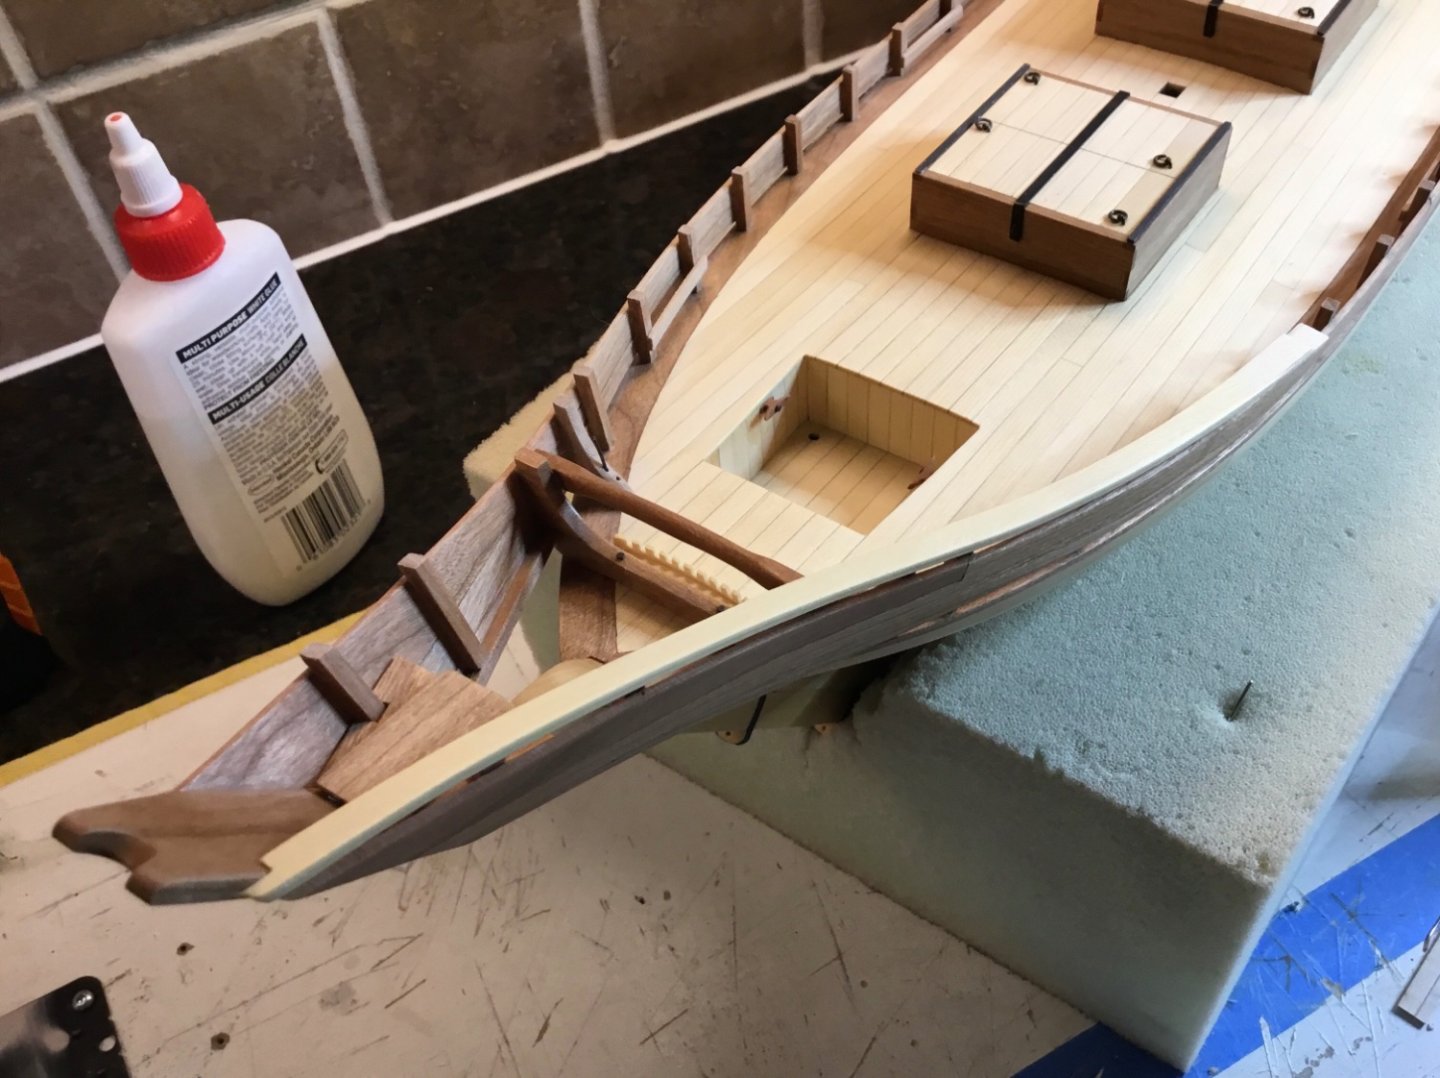
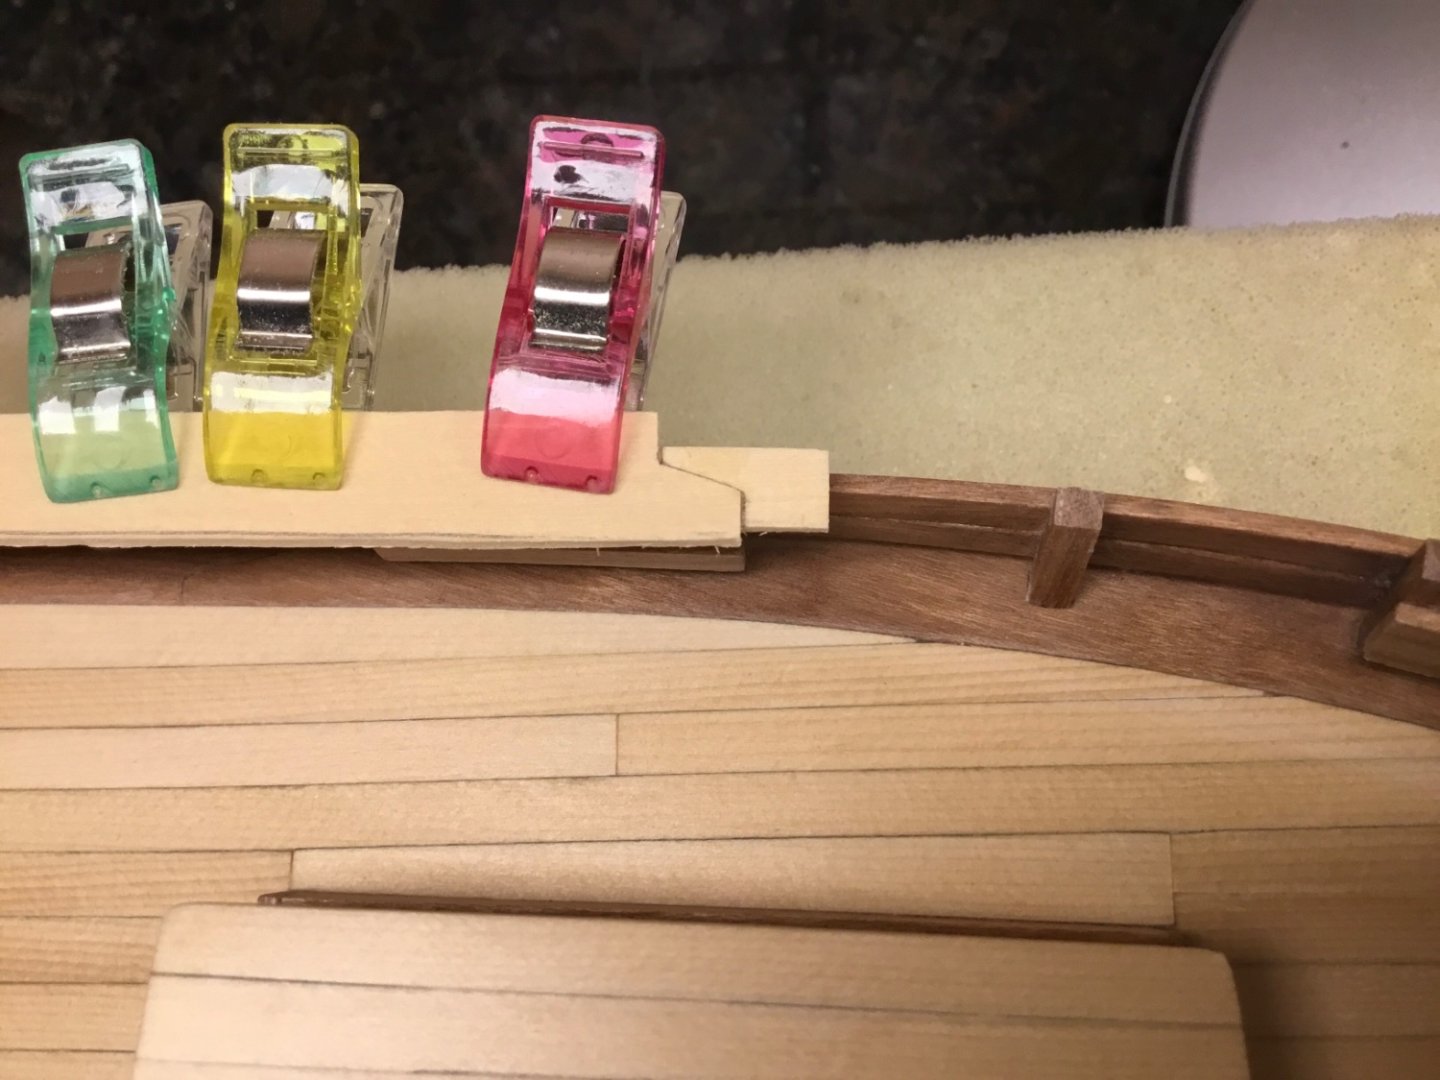
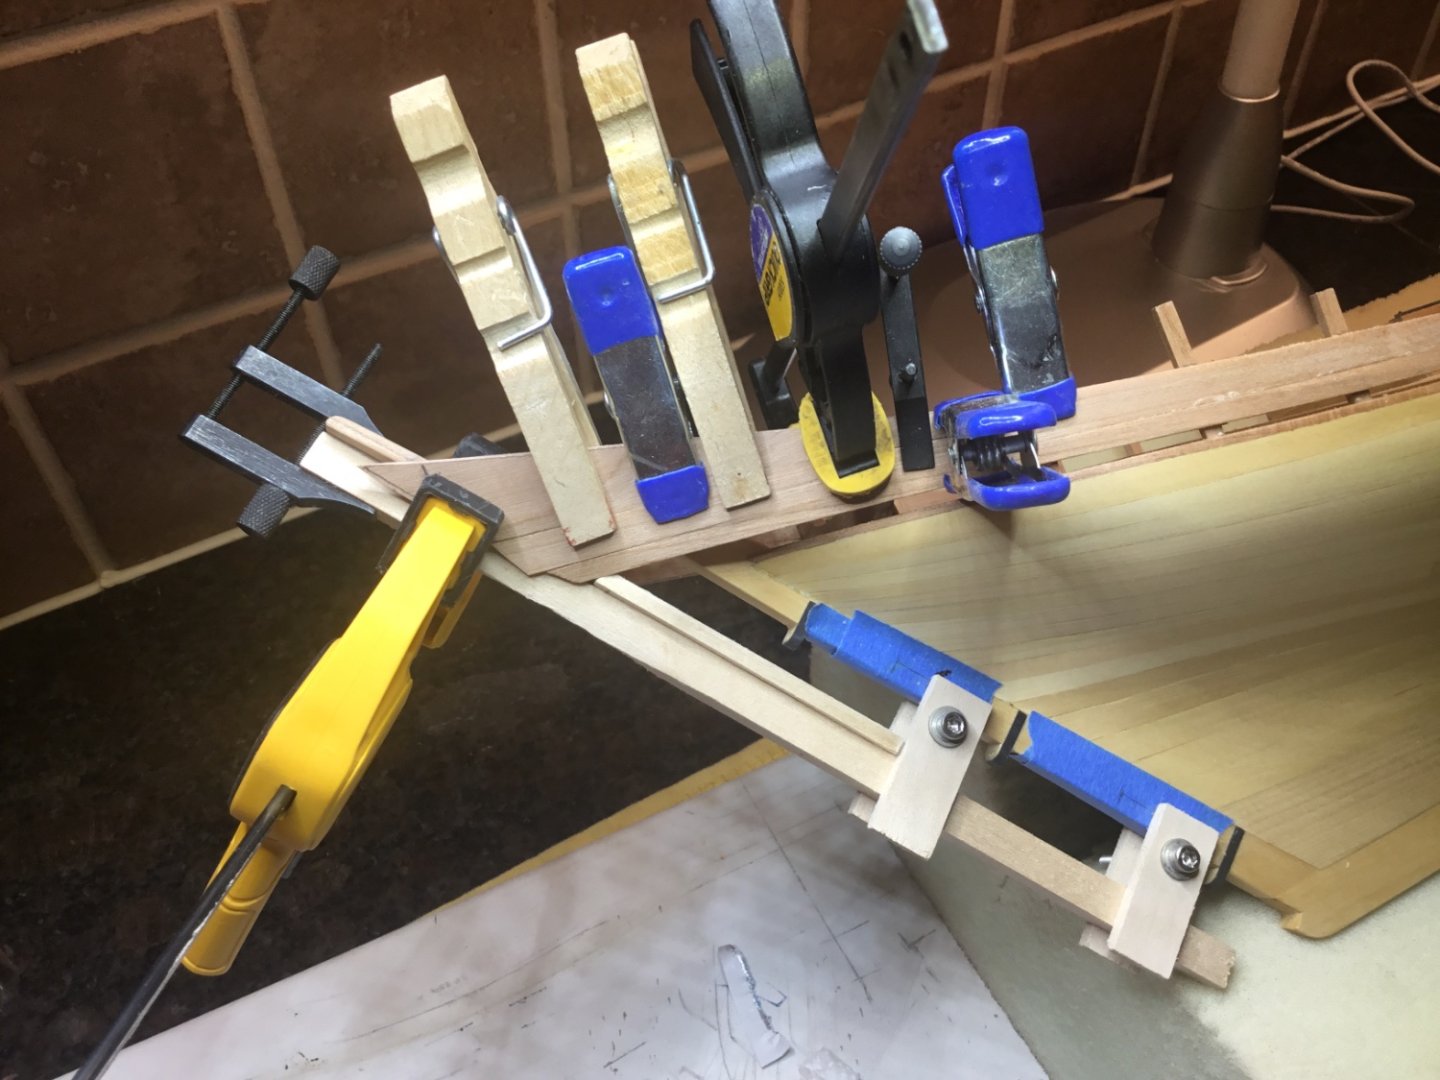
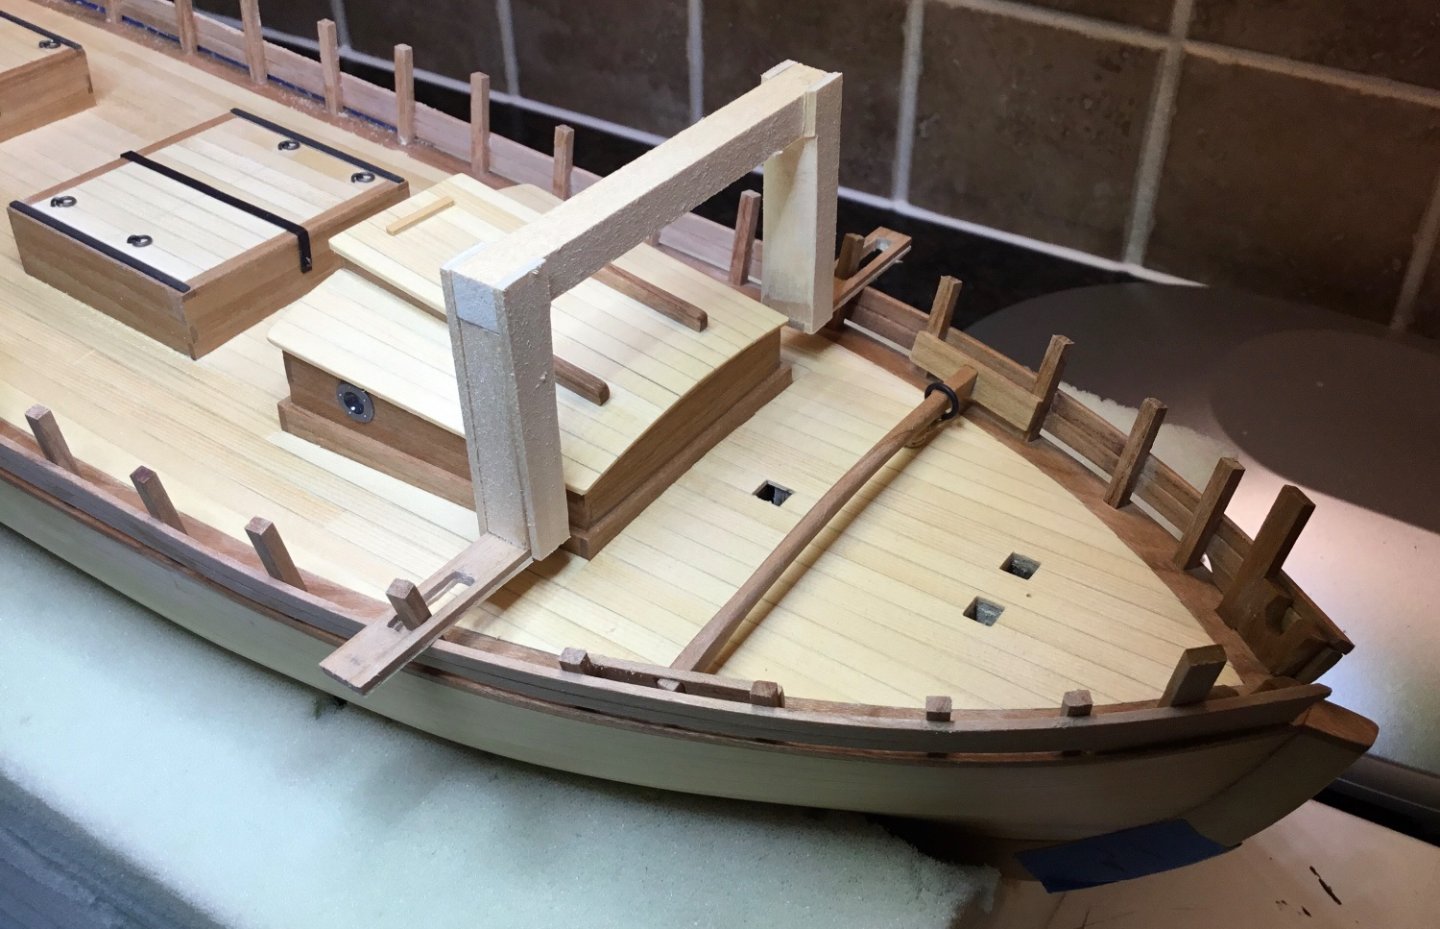
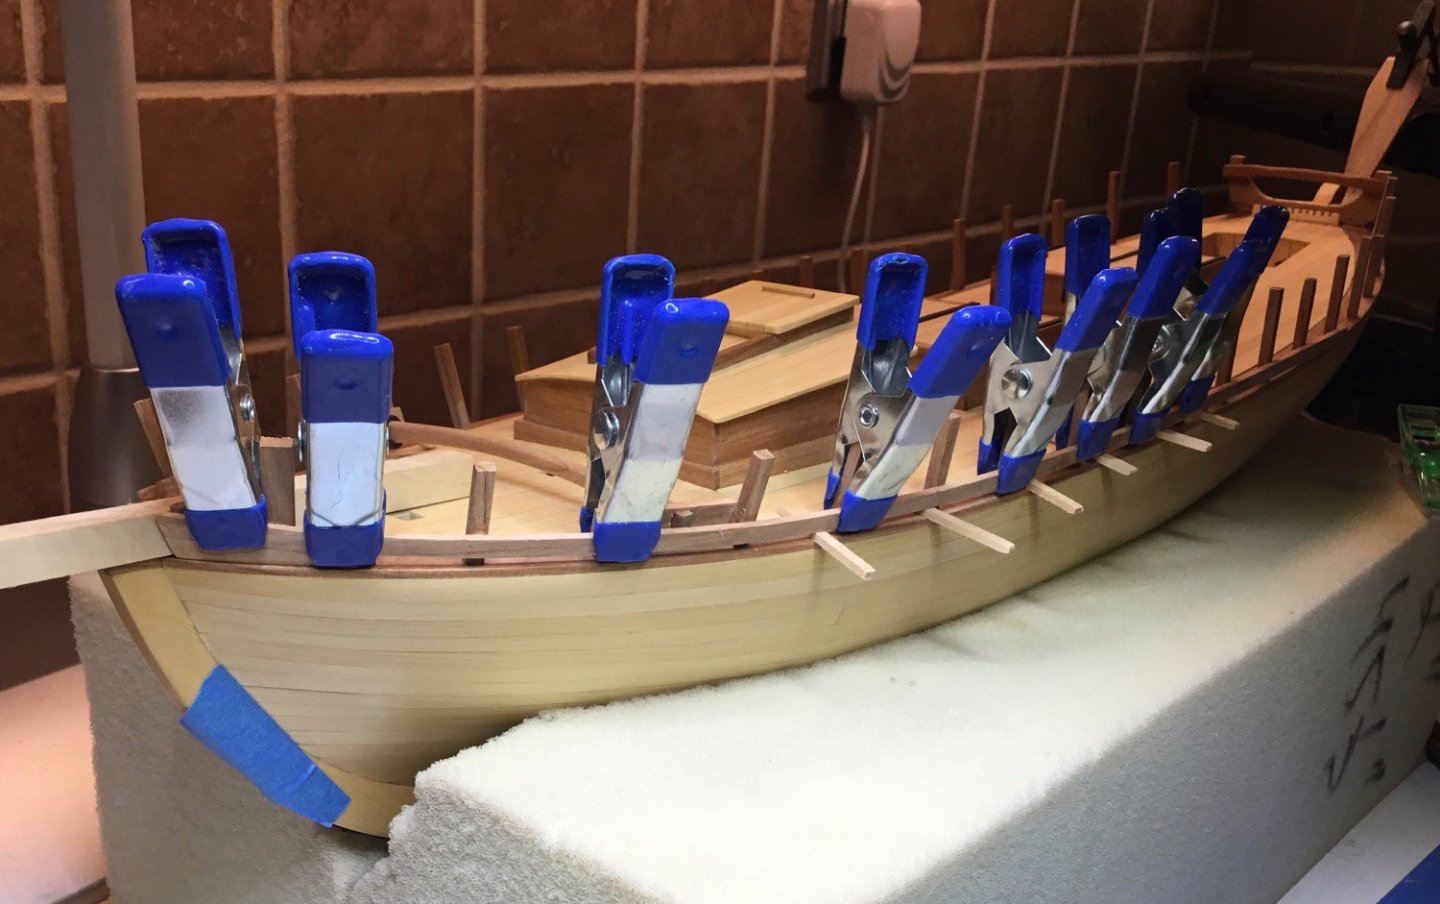
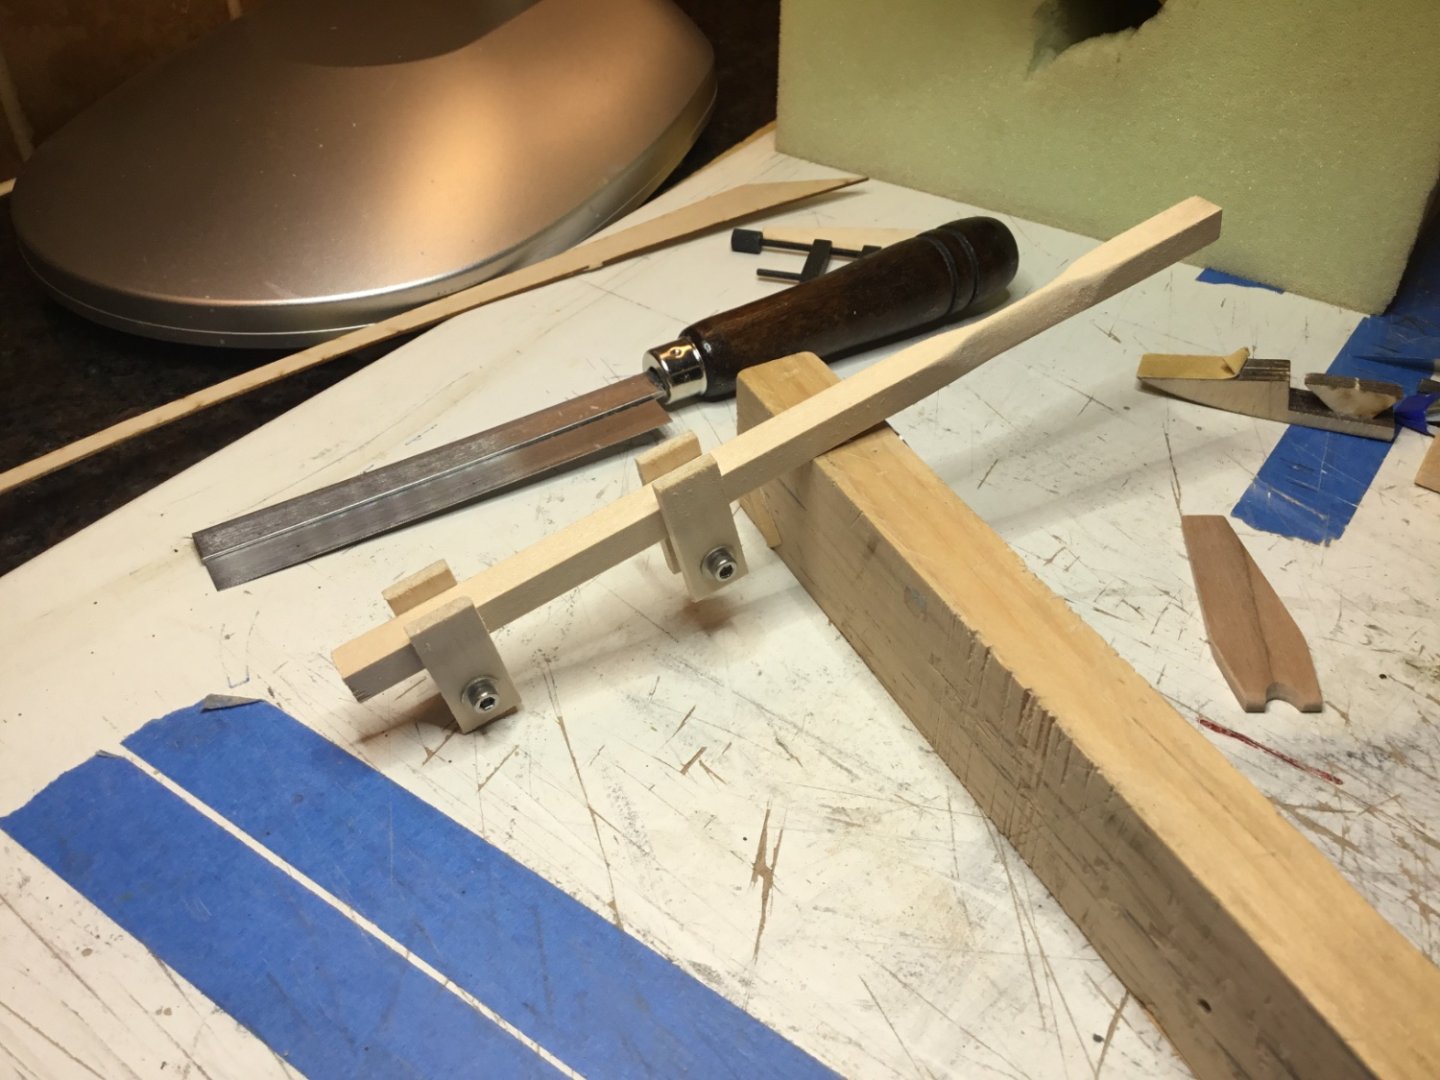
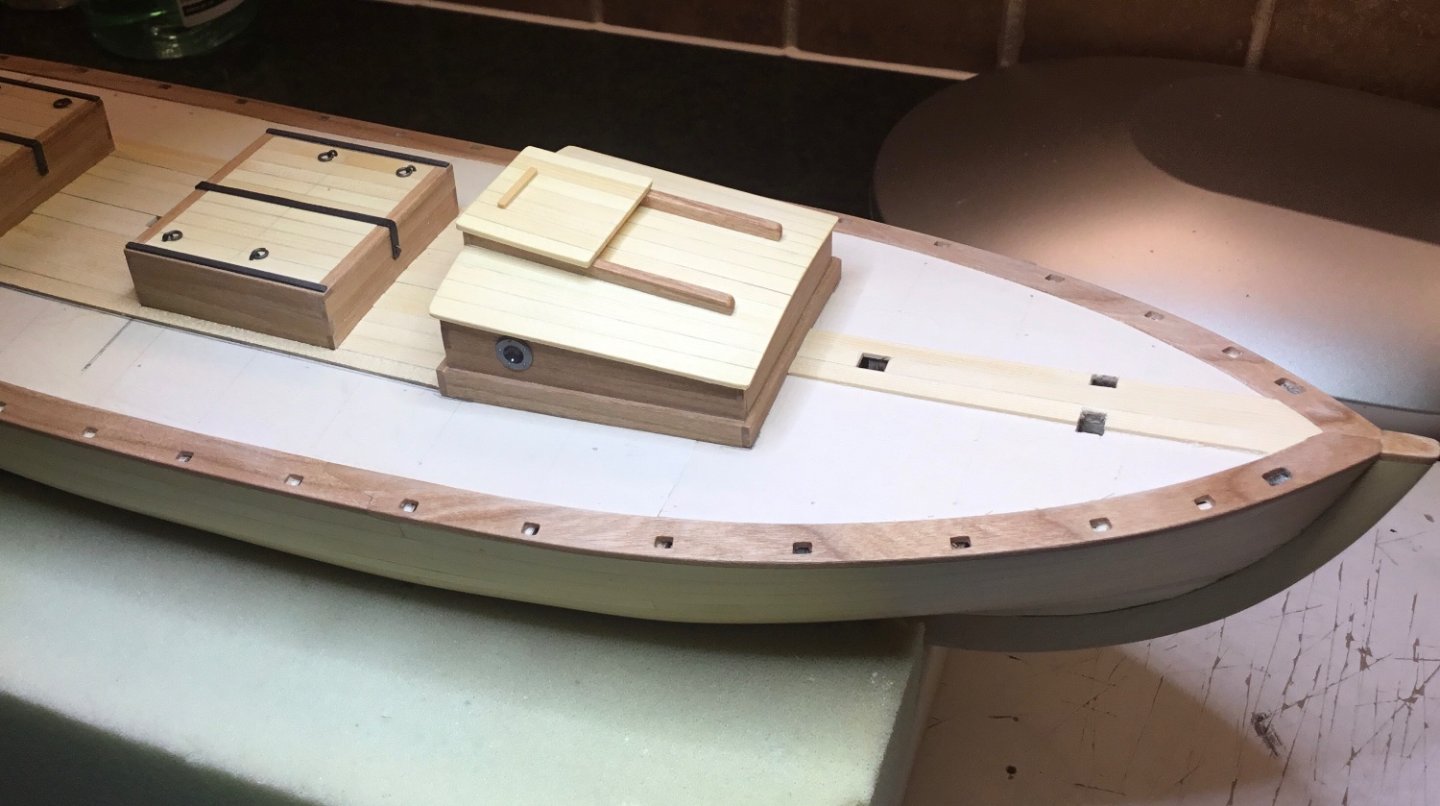
Hi Everyone, thank you for the very nice comments and Likes. The jig that holds the tombstone in place underwent a revision. A strip of wood was glued on to give the bottom strakes something to rest on. A strip of wood was clamped to each side of the jig to keep the planks from rising up and a Ty-rap was used to pull them together. The planks in the next strake were cut out of a 5/16” wide strip. The plans/ directions say that a stealer would probably have been used between the two strakes but I took the easy way out and put it on top. It was cut from 1/16” sheet. This is where the clamping derby started. The inside of the stern was framed and then I started checking the fit of the seat of ease which will be made later. A few jigs were made to assist in cutting the stanchions to the proper height. Then came lots of sanding and a coat of w-o-p. The cap rails are going to be painted so the kit supplied rails will be used except at the bow where they don’t match. Hope to see you next time.


- 72 replies
-
- 14
-
-
-
- Glad Tidings
- Model Shipways
- (and 1 more)
-
Hi Benjamin, have a look at Crafty Sailor website. They are in Calgary and they sell Falconet deadeyes made from pear.
-
Bob and Ian, thank you very much for your support. It is always appreciated.
- 72 replies
-
- 2
-
-
- Glad Tidings
- Model Shipways
- (and 1 more)
-
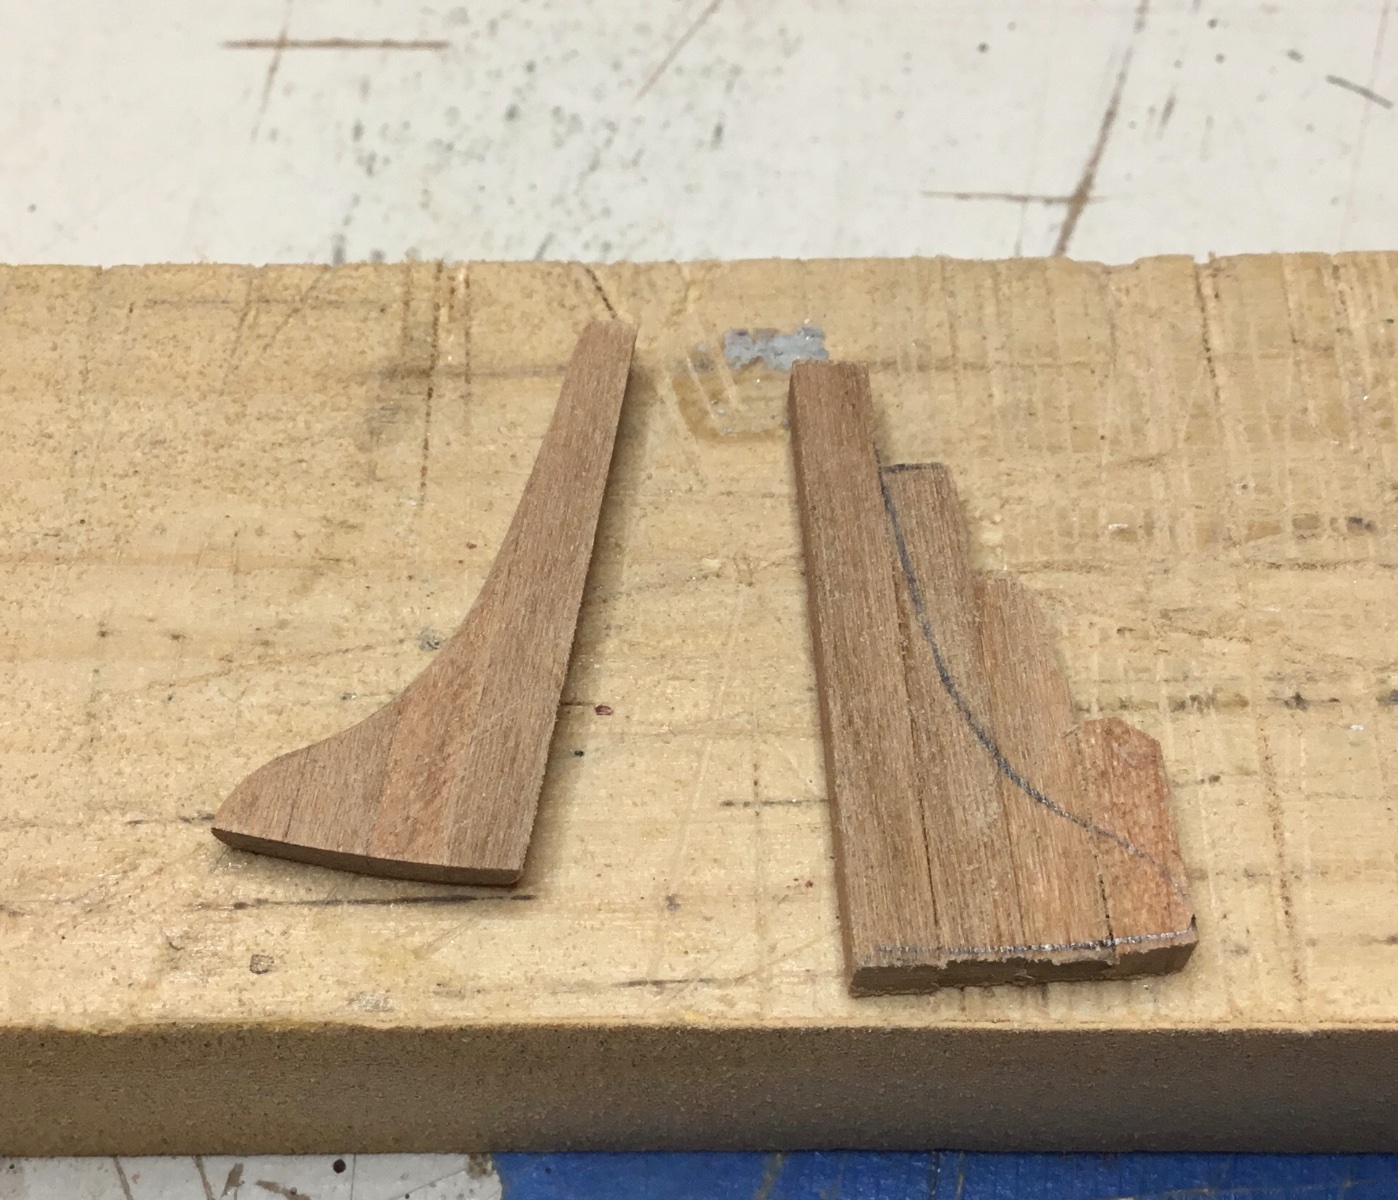
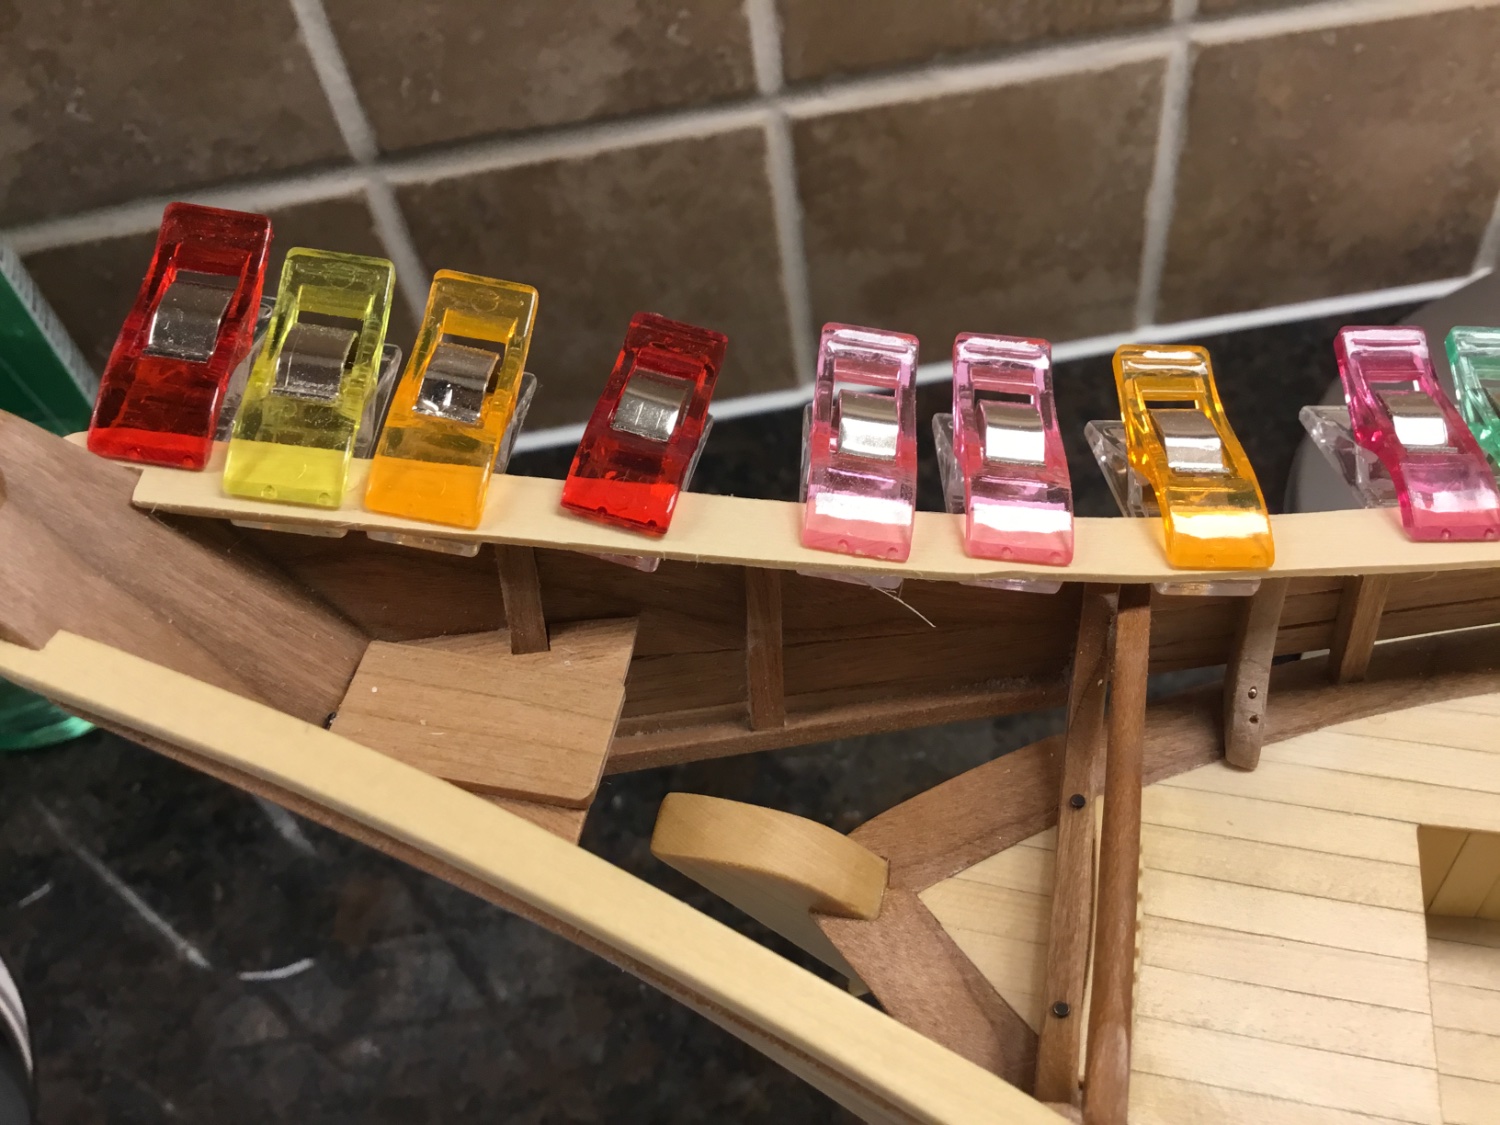
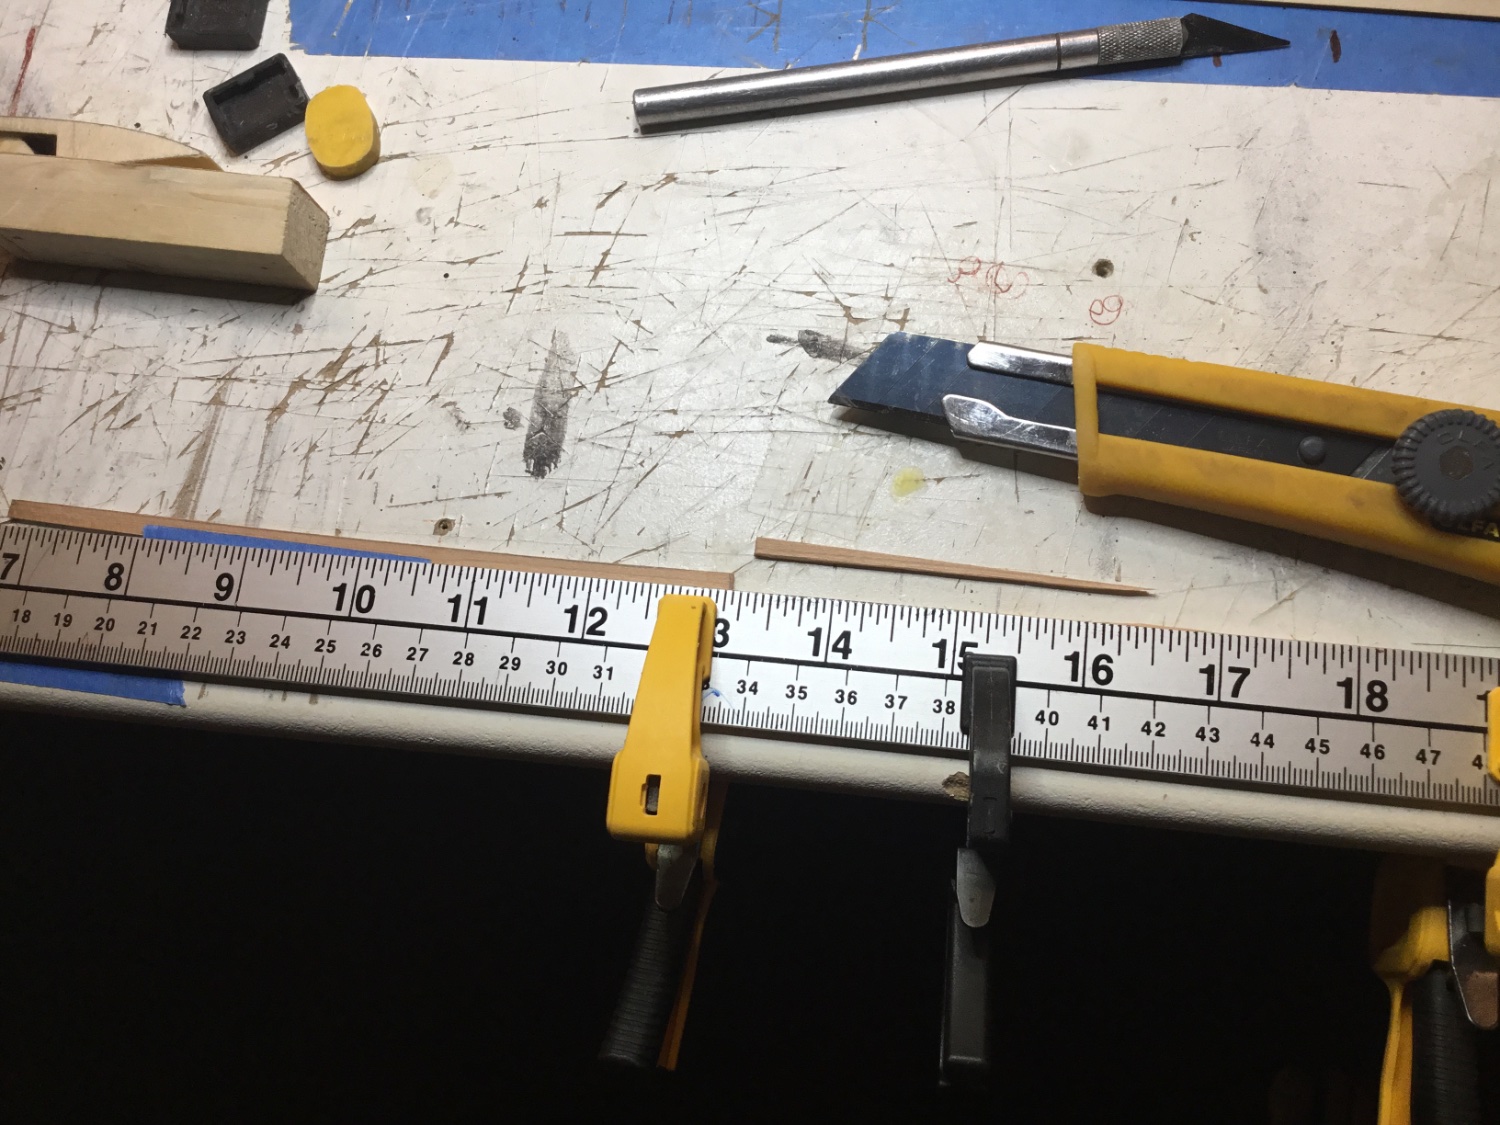
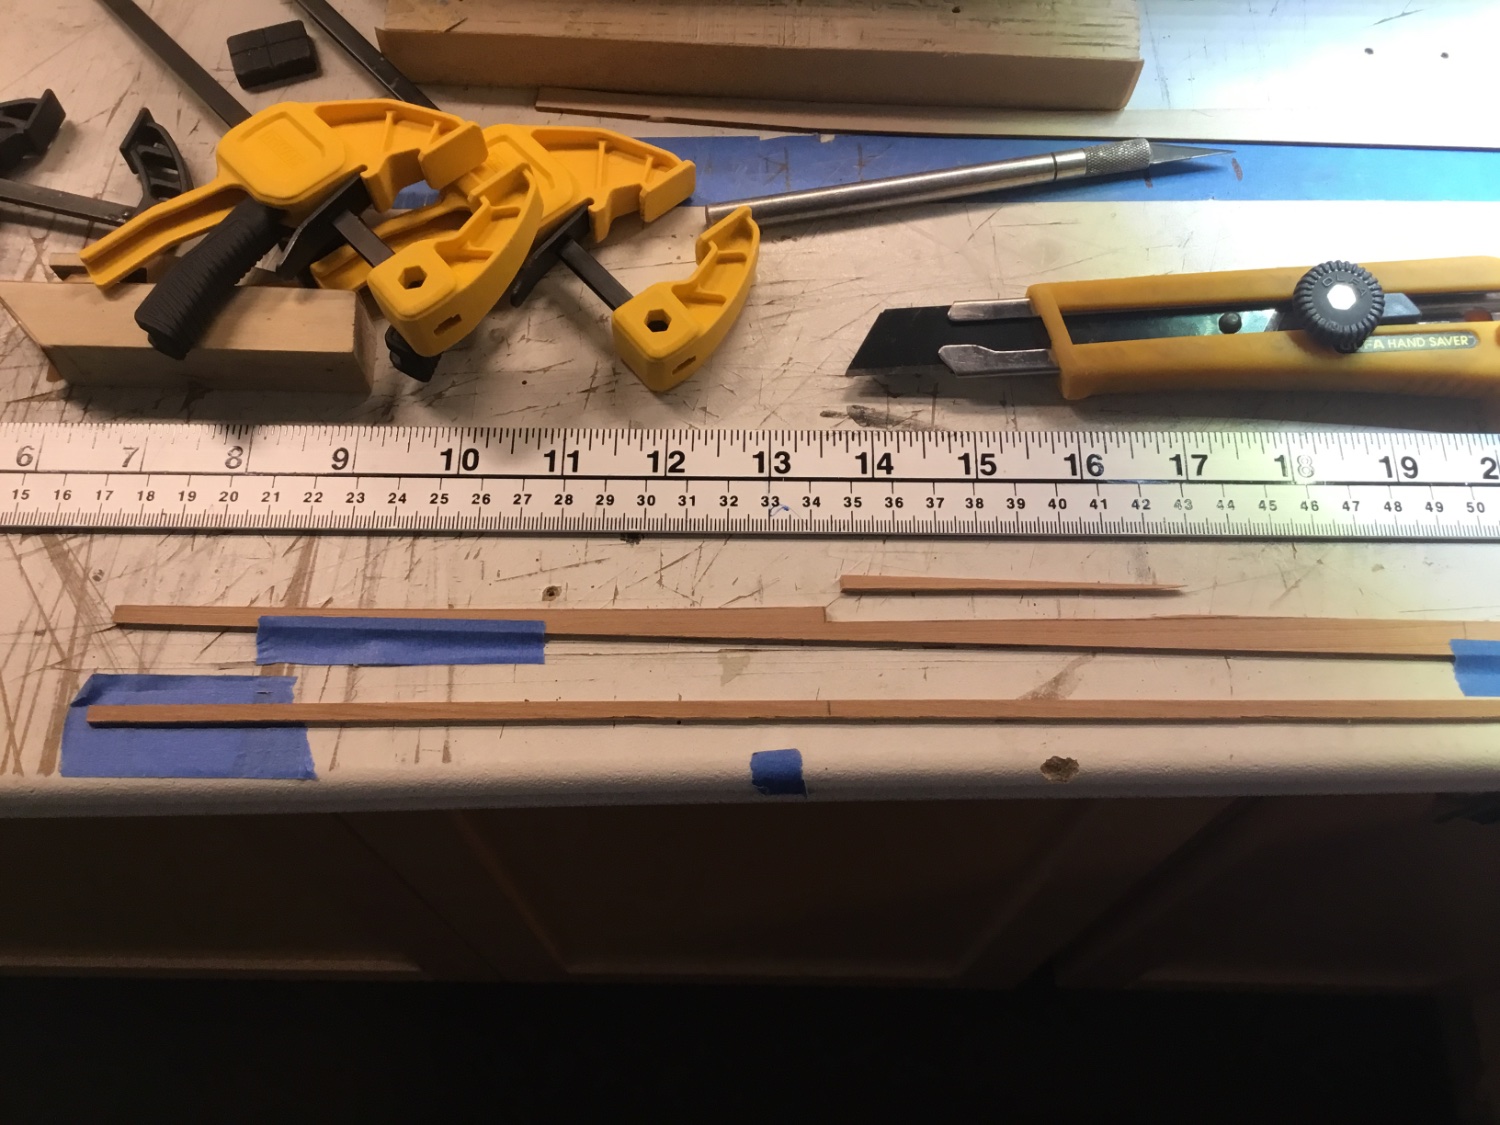
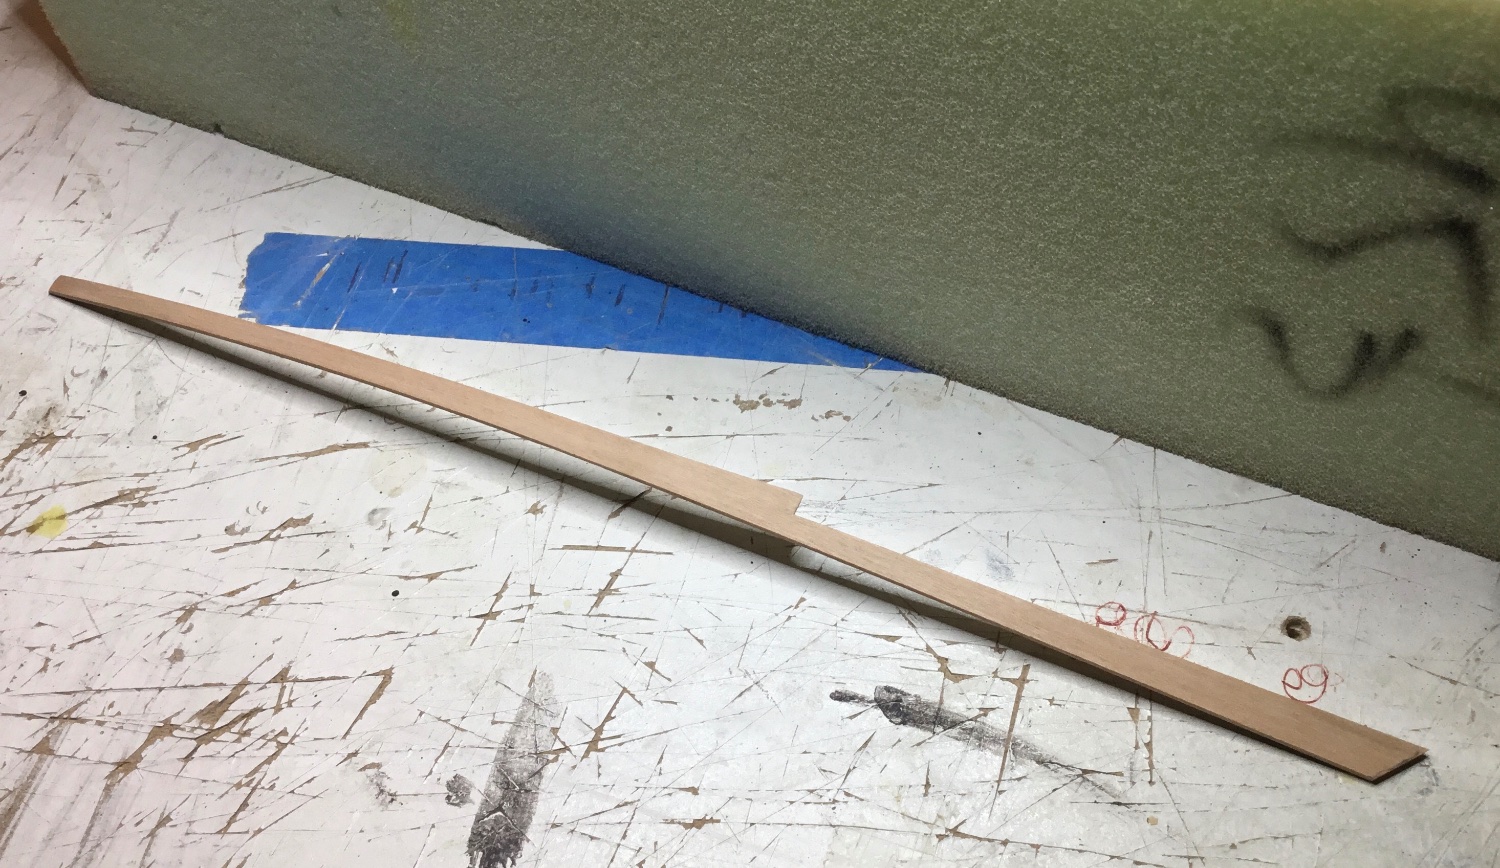
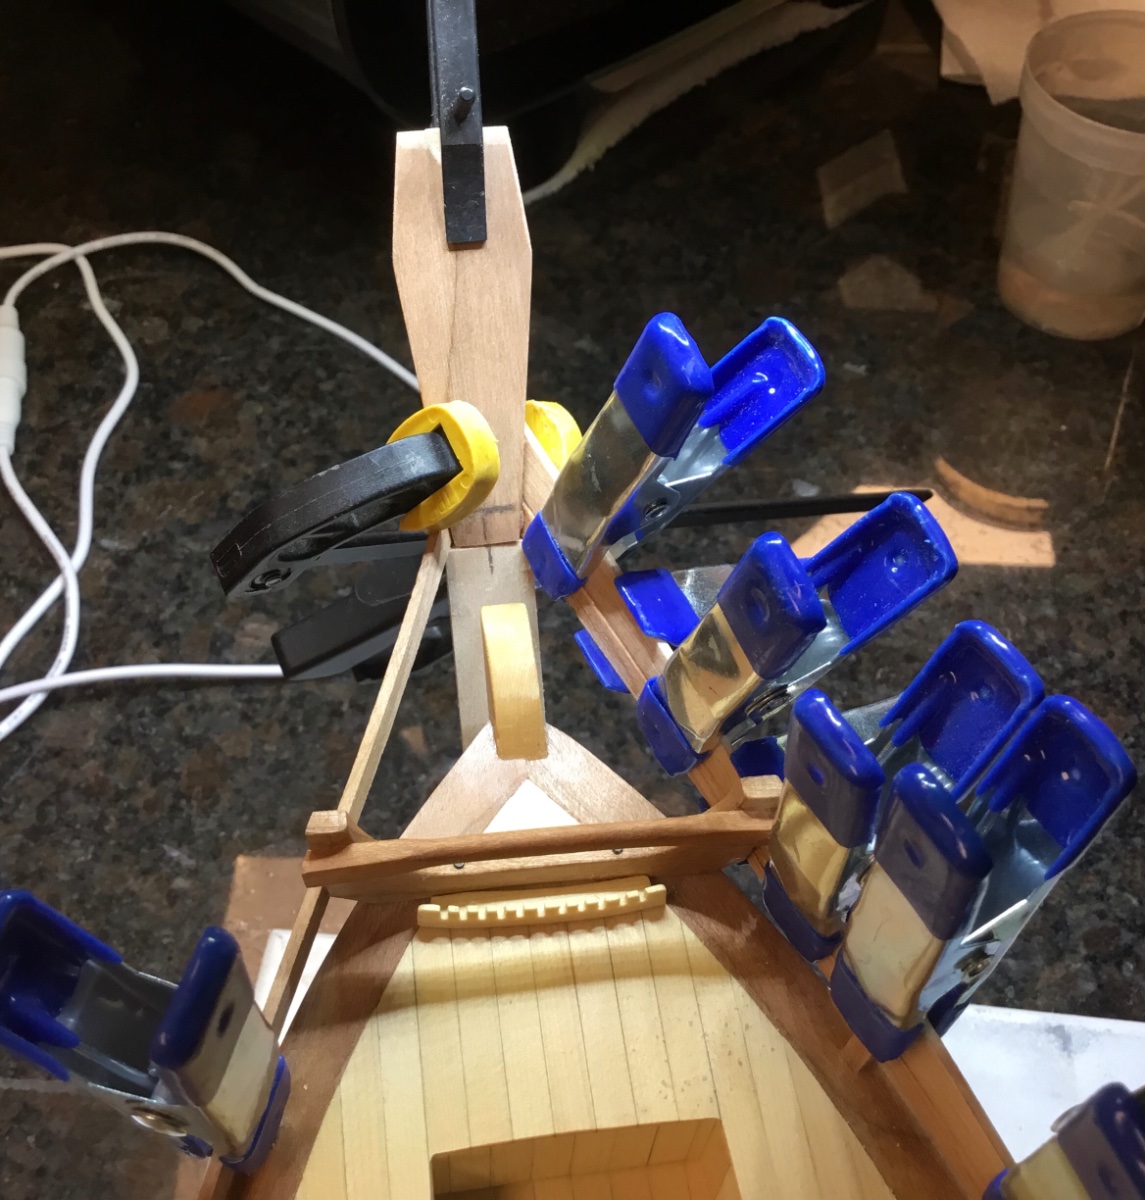
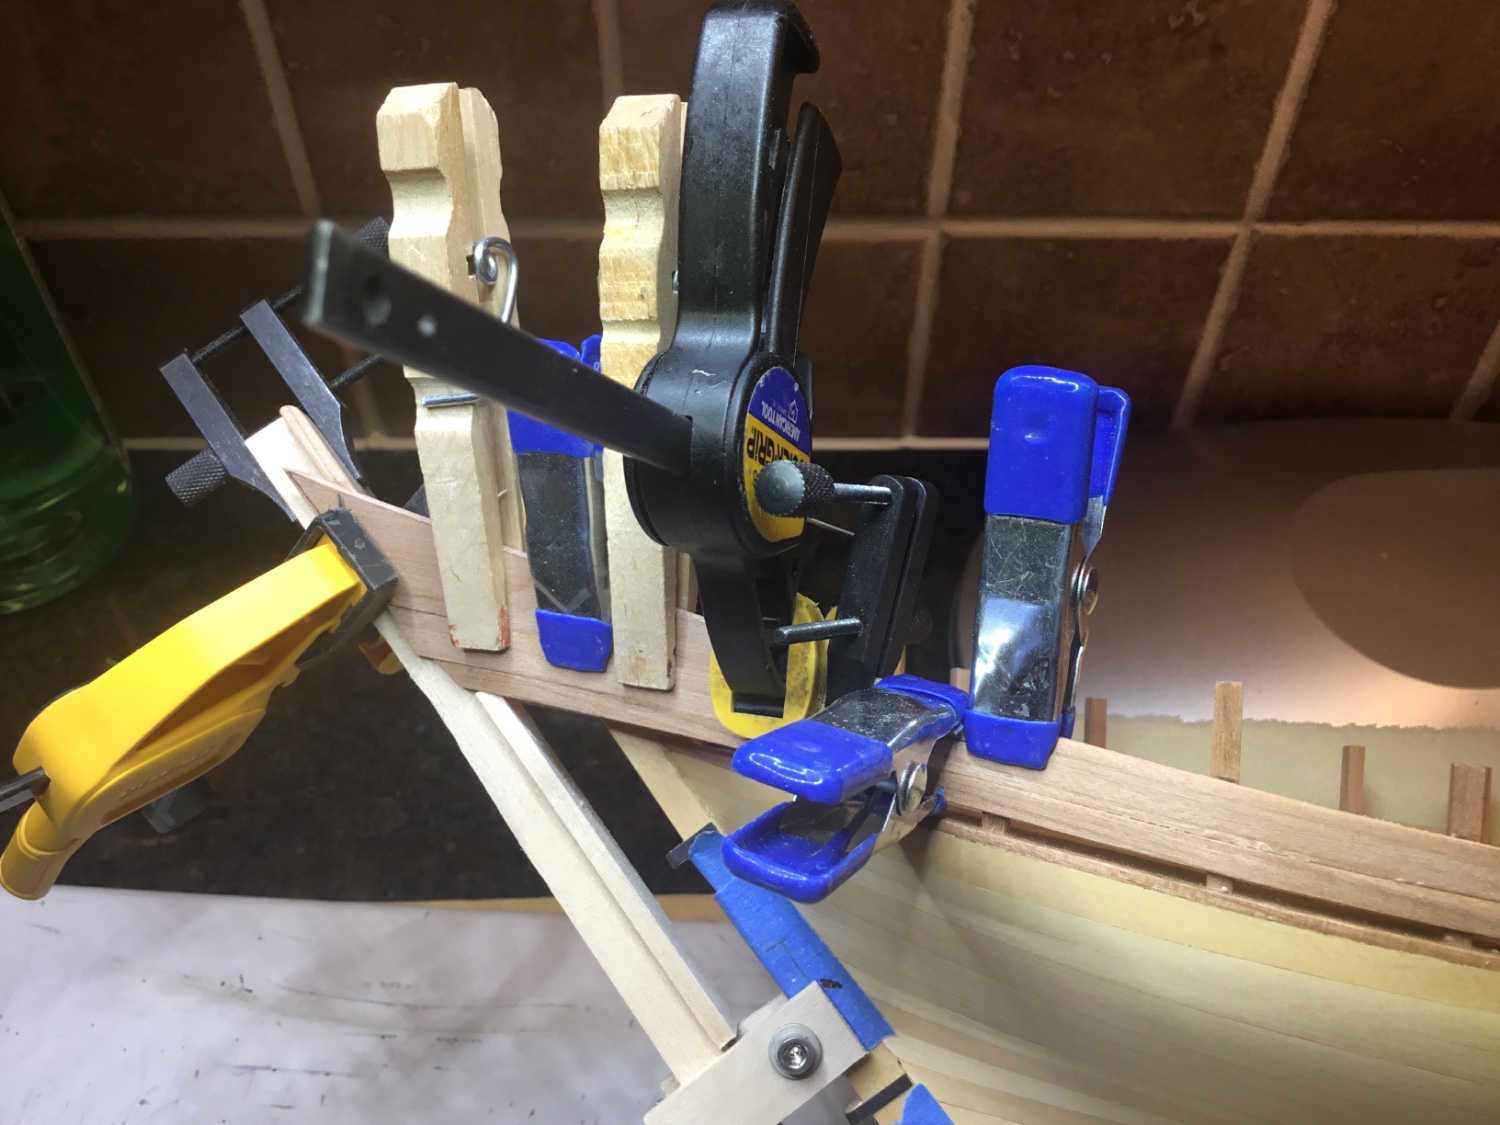
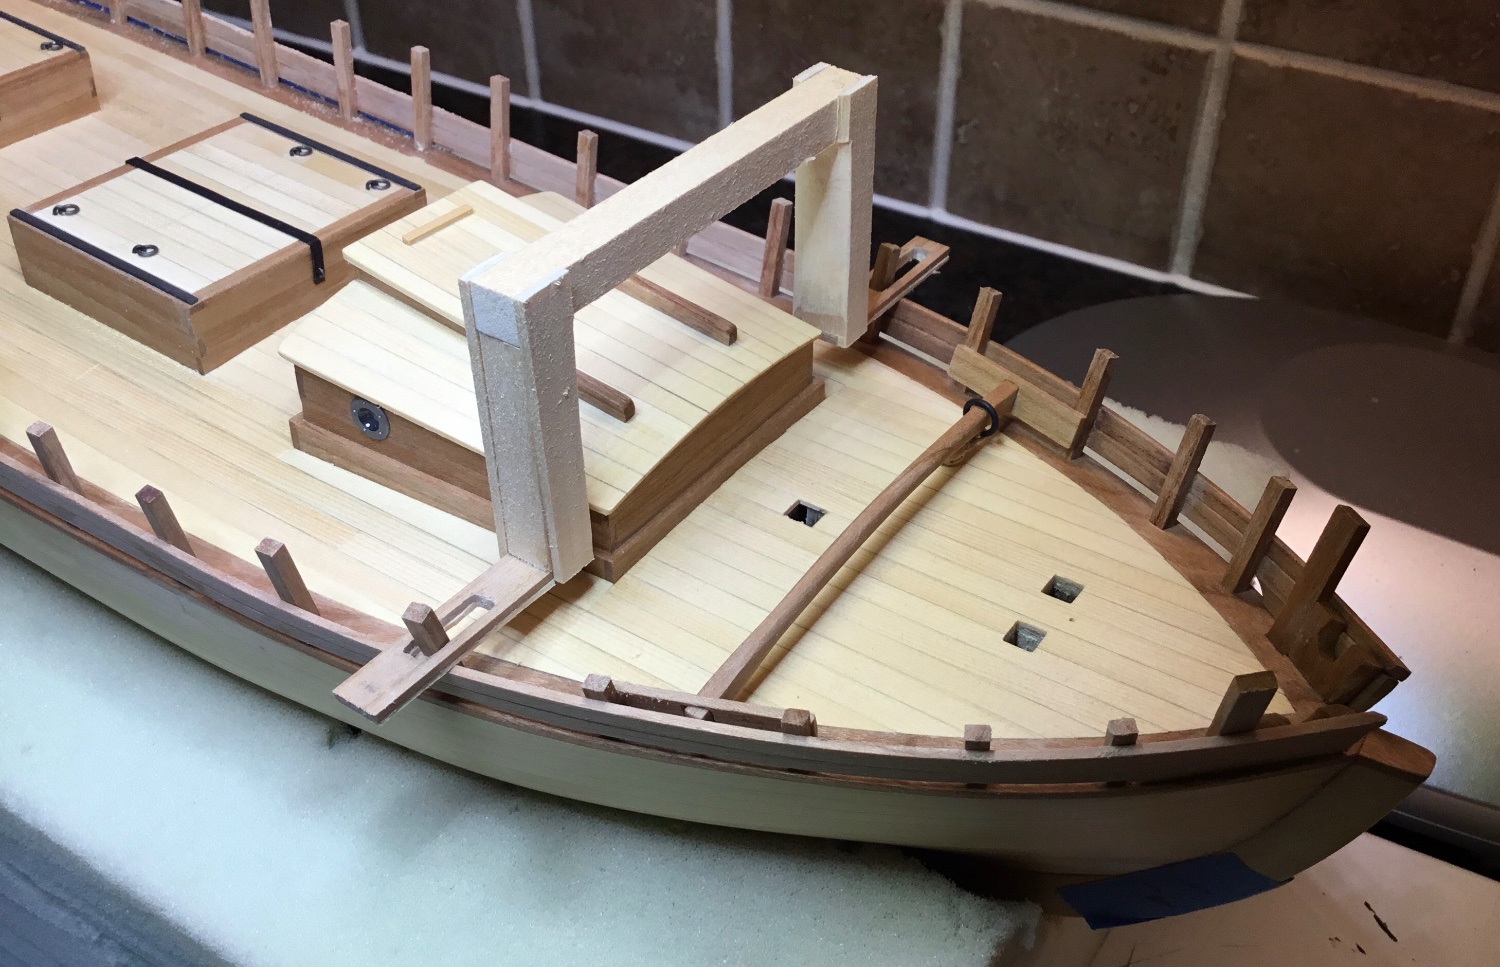
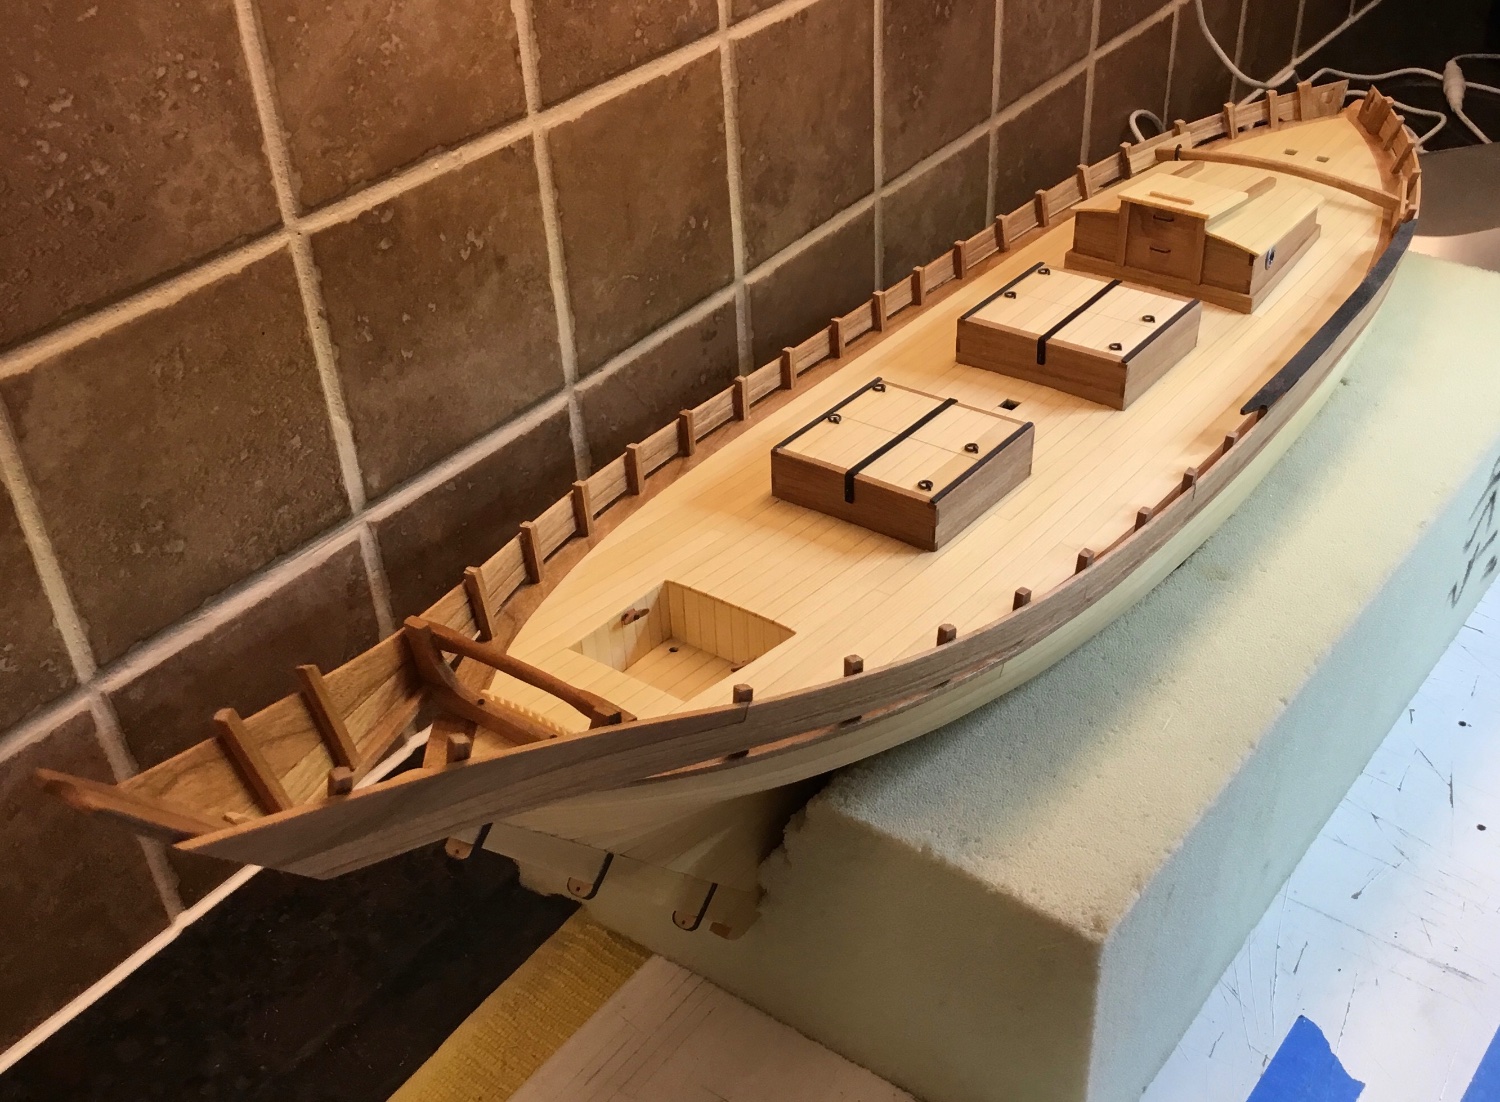
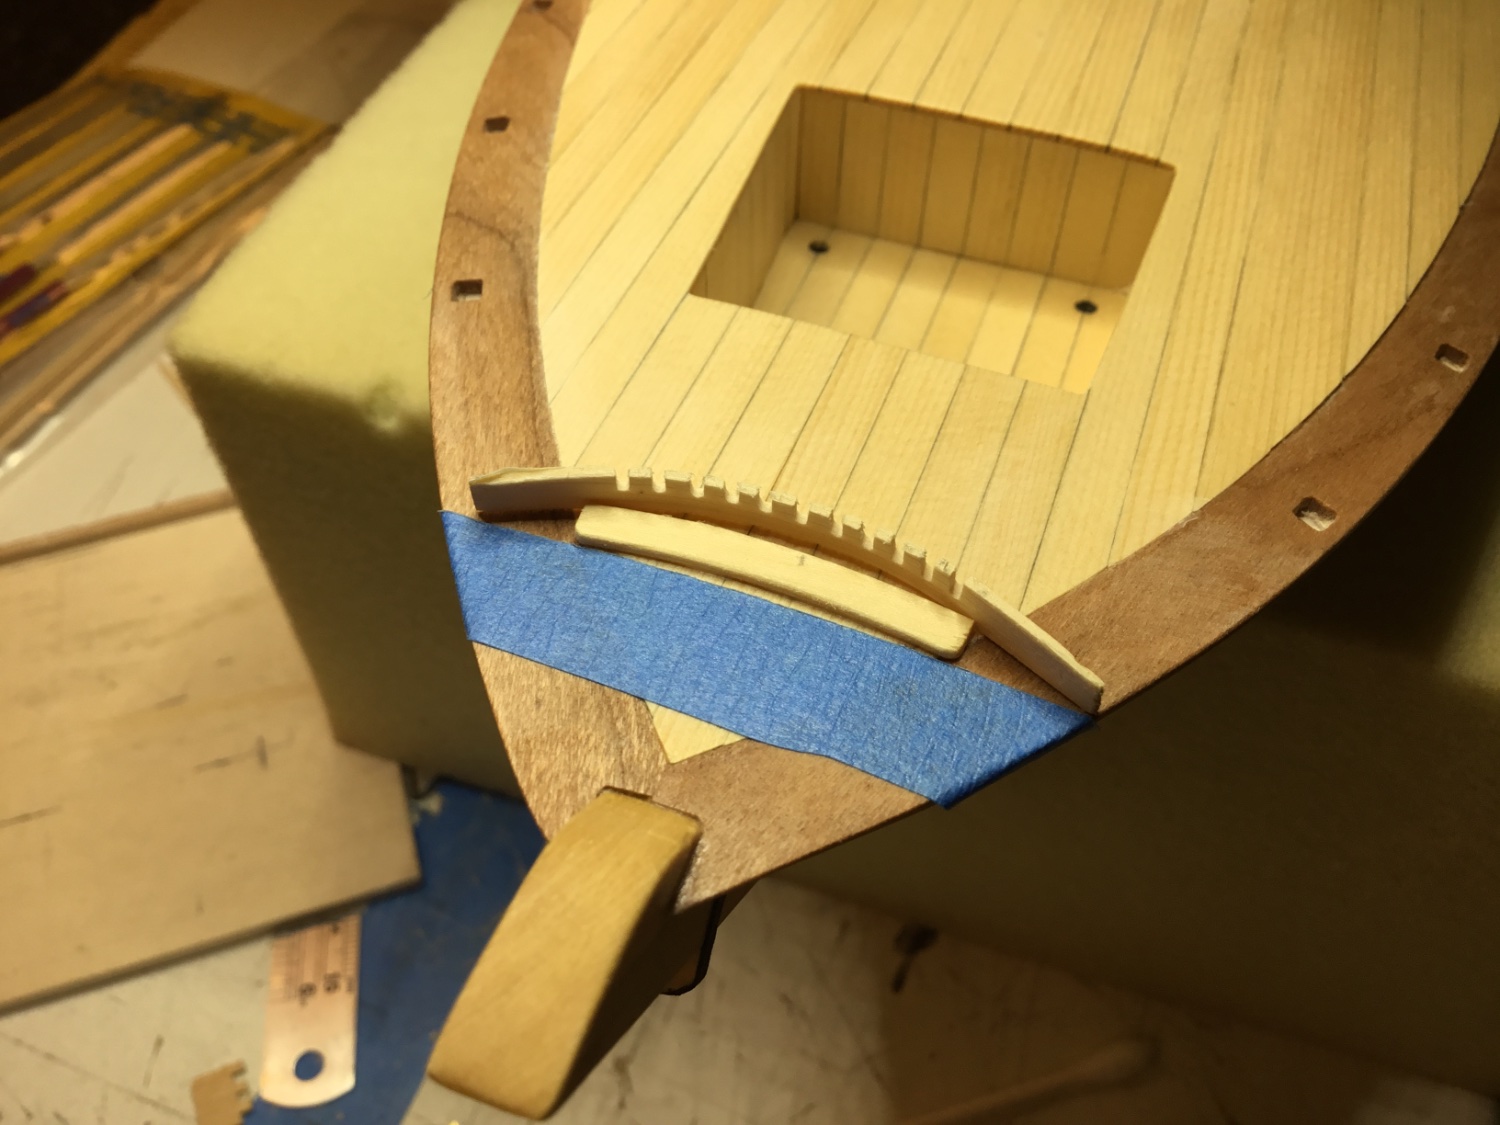
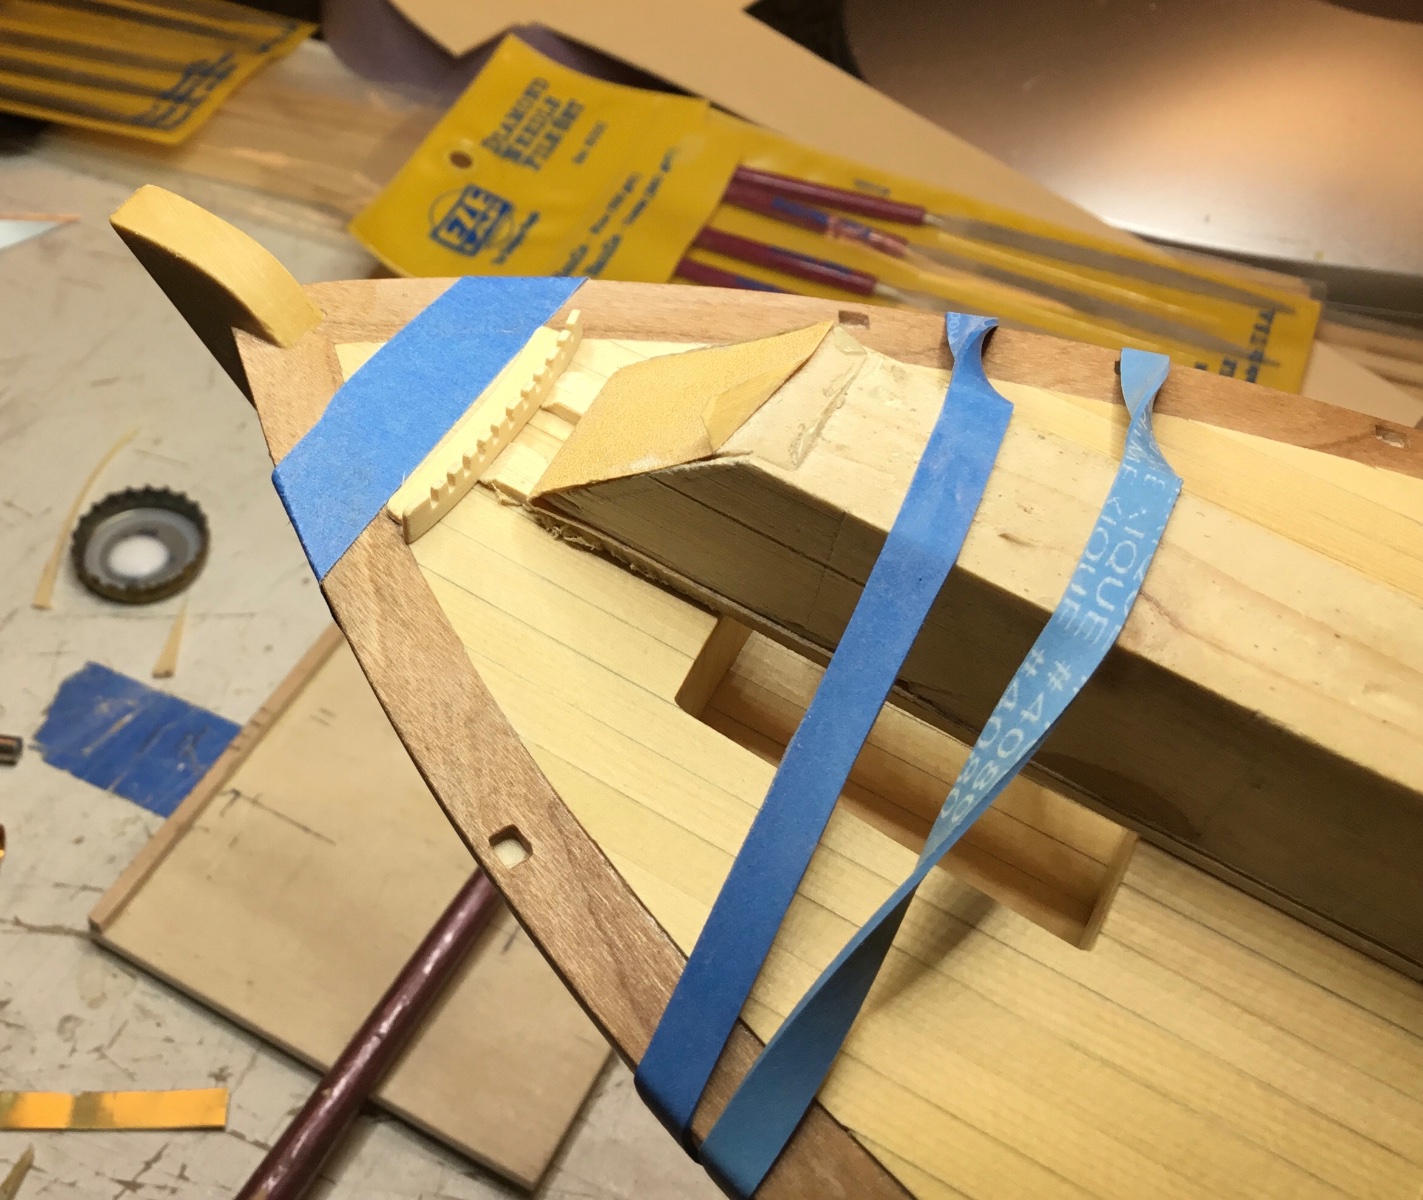
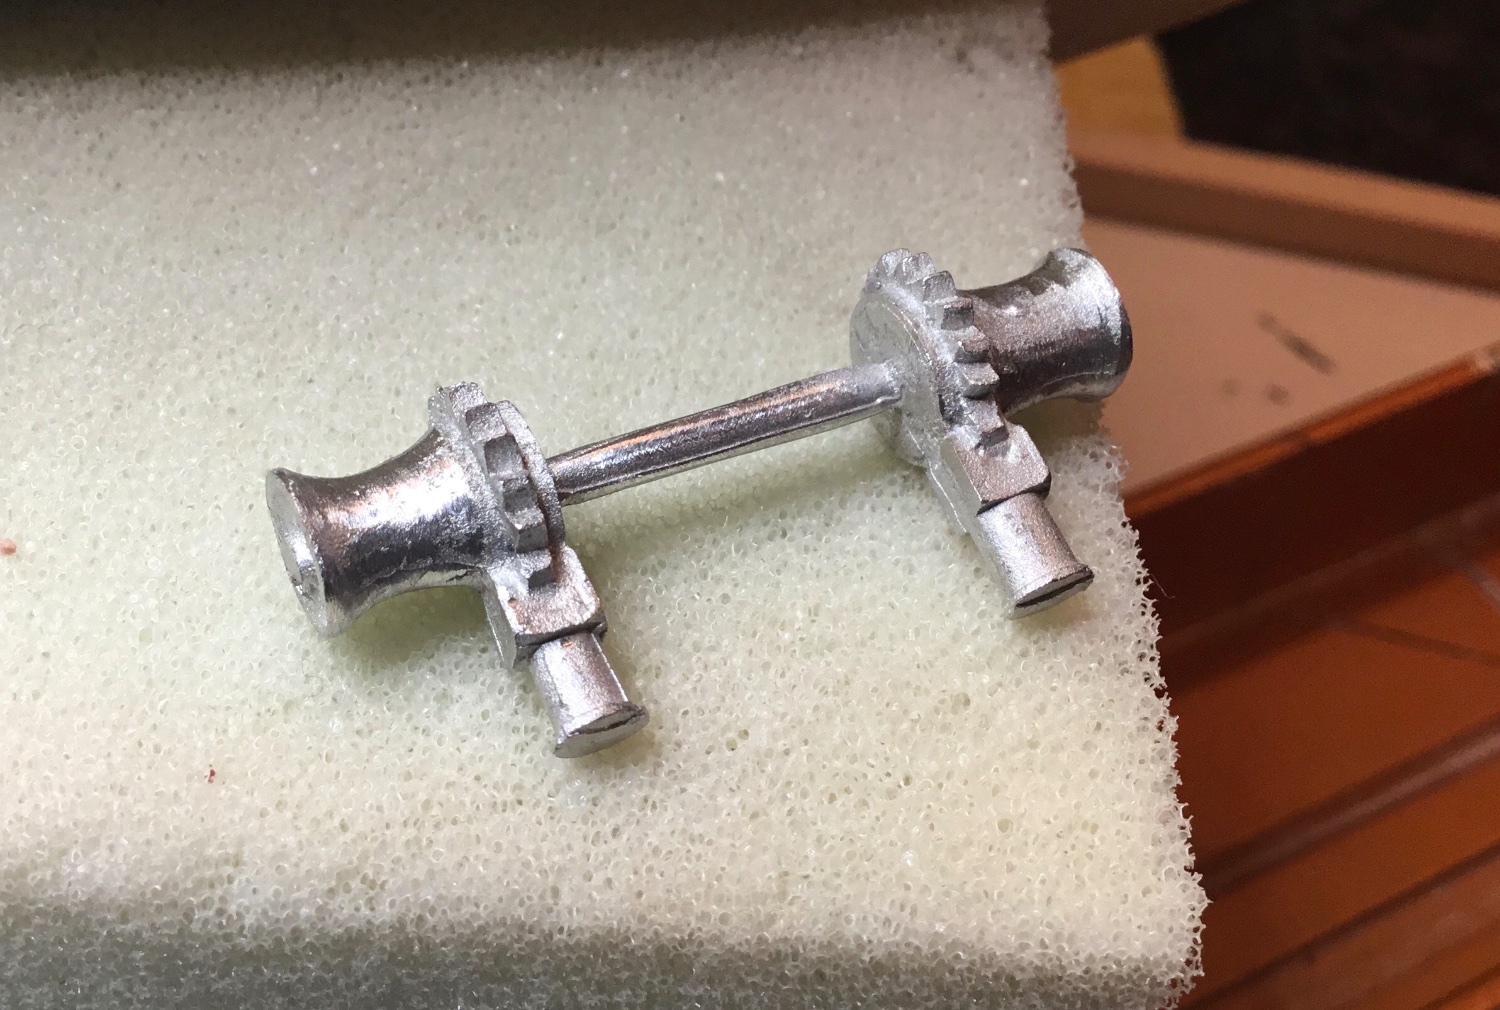
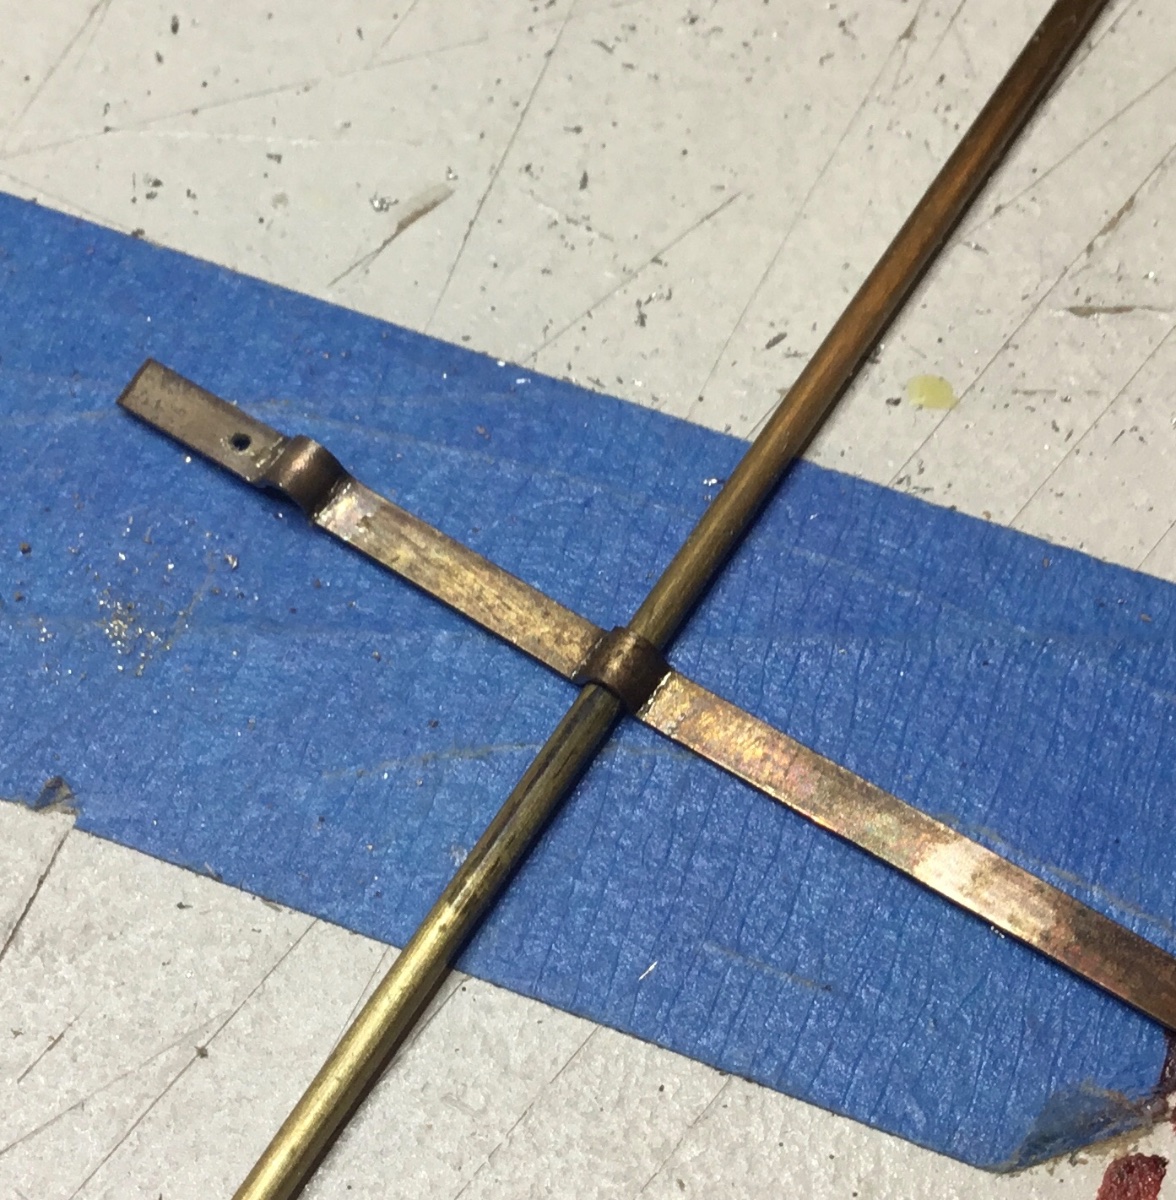
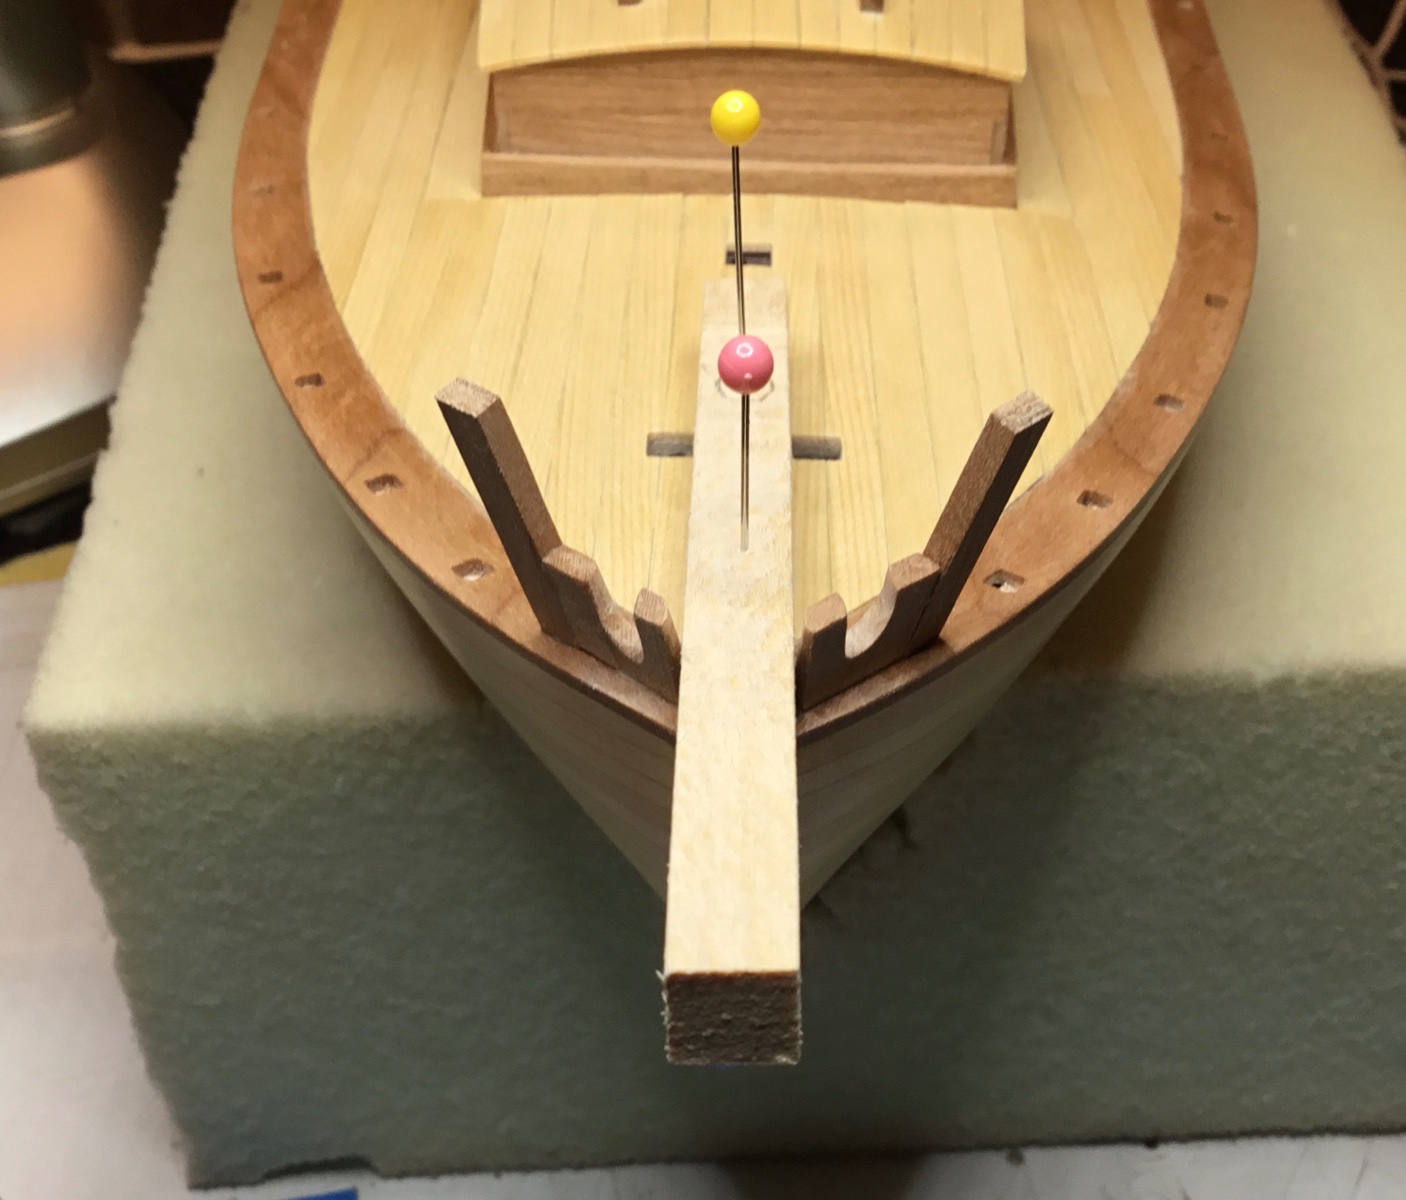
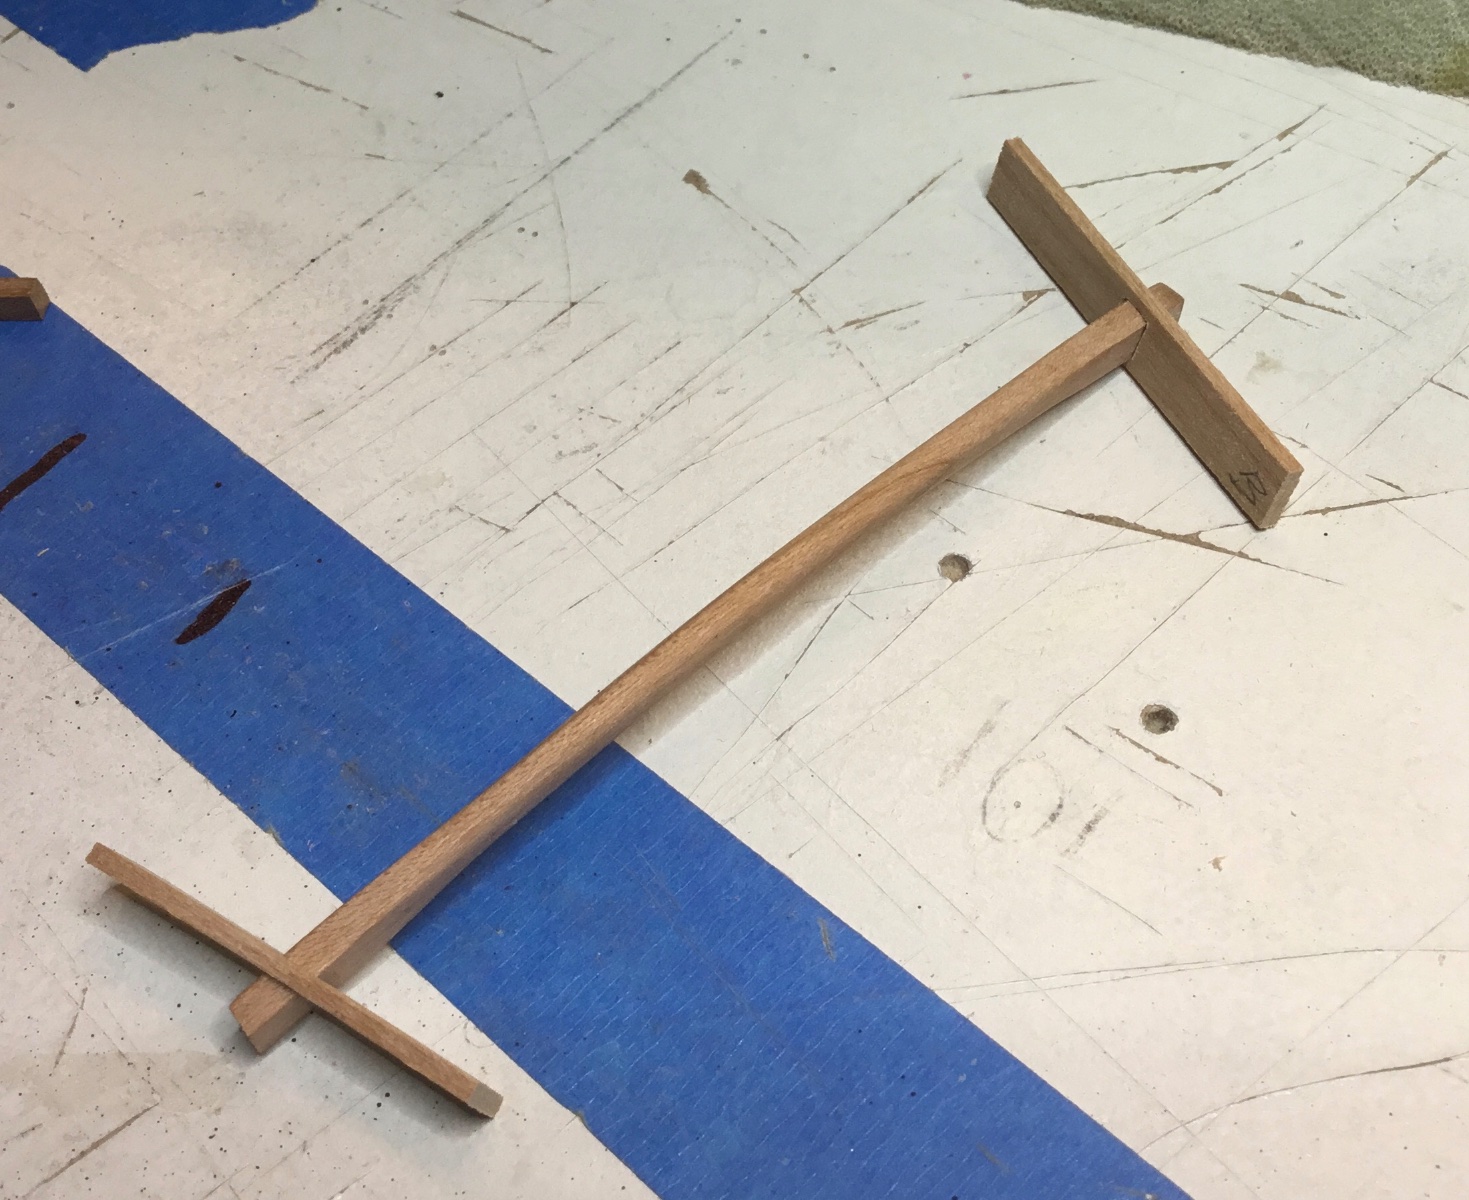
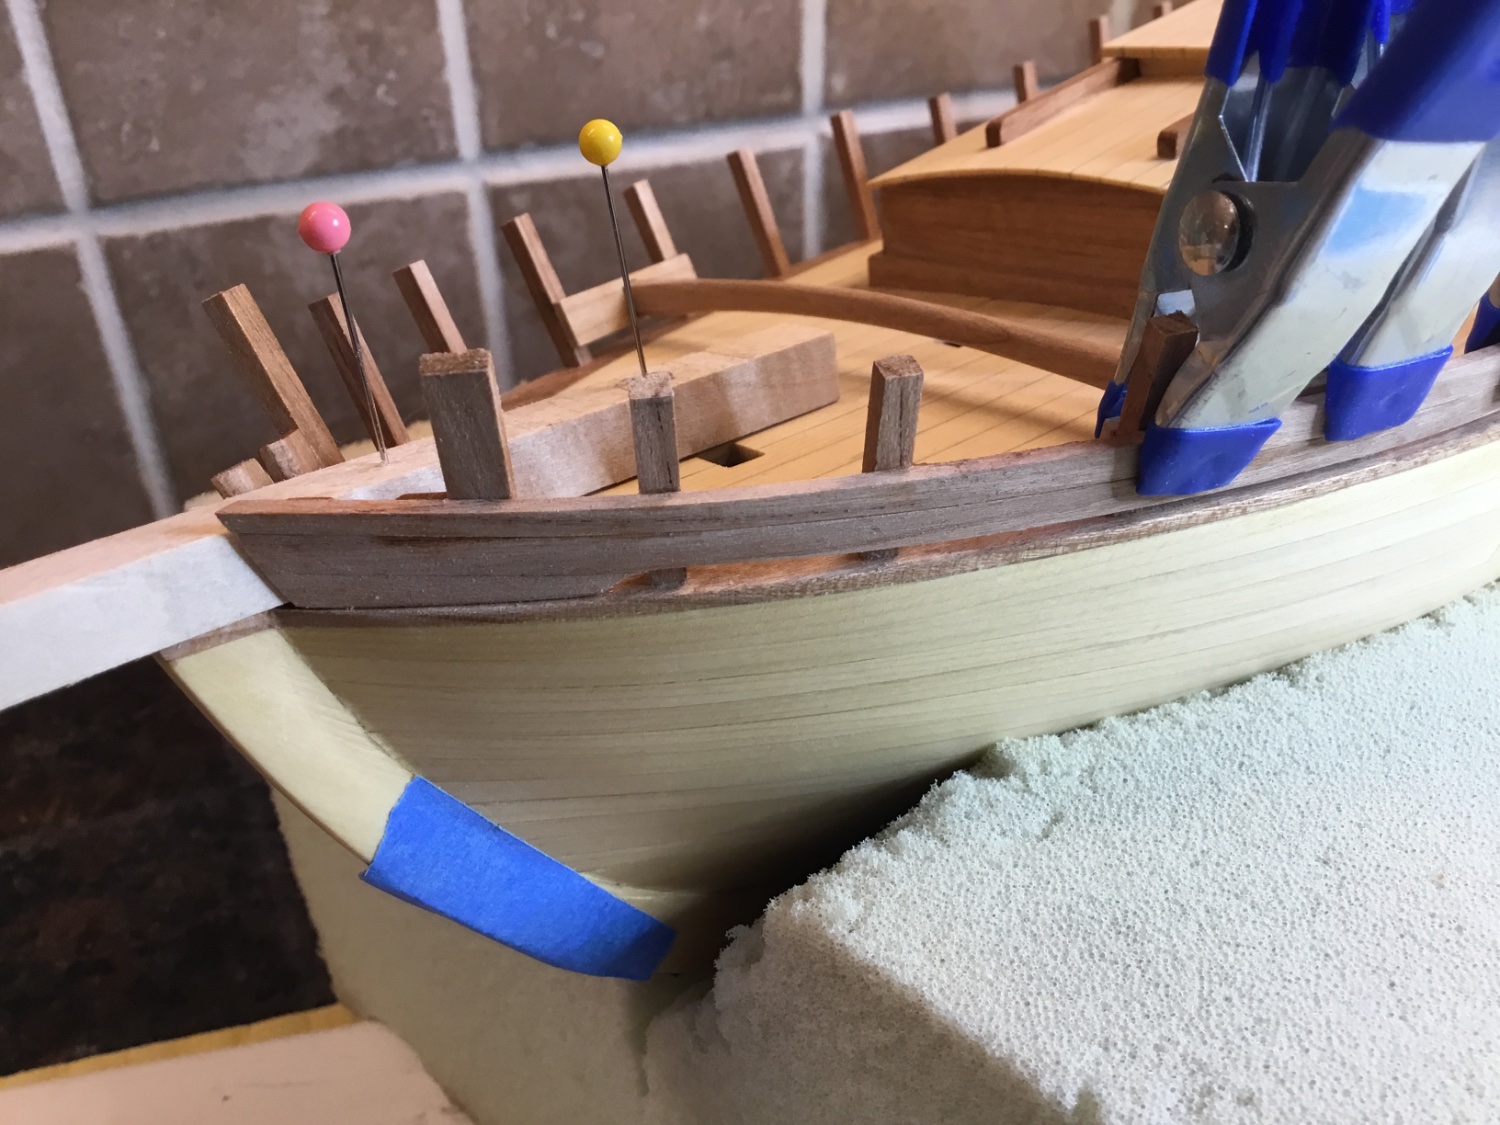
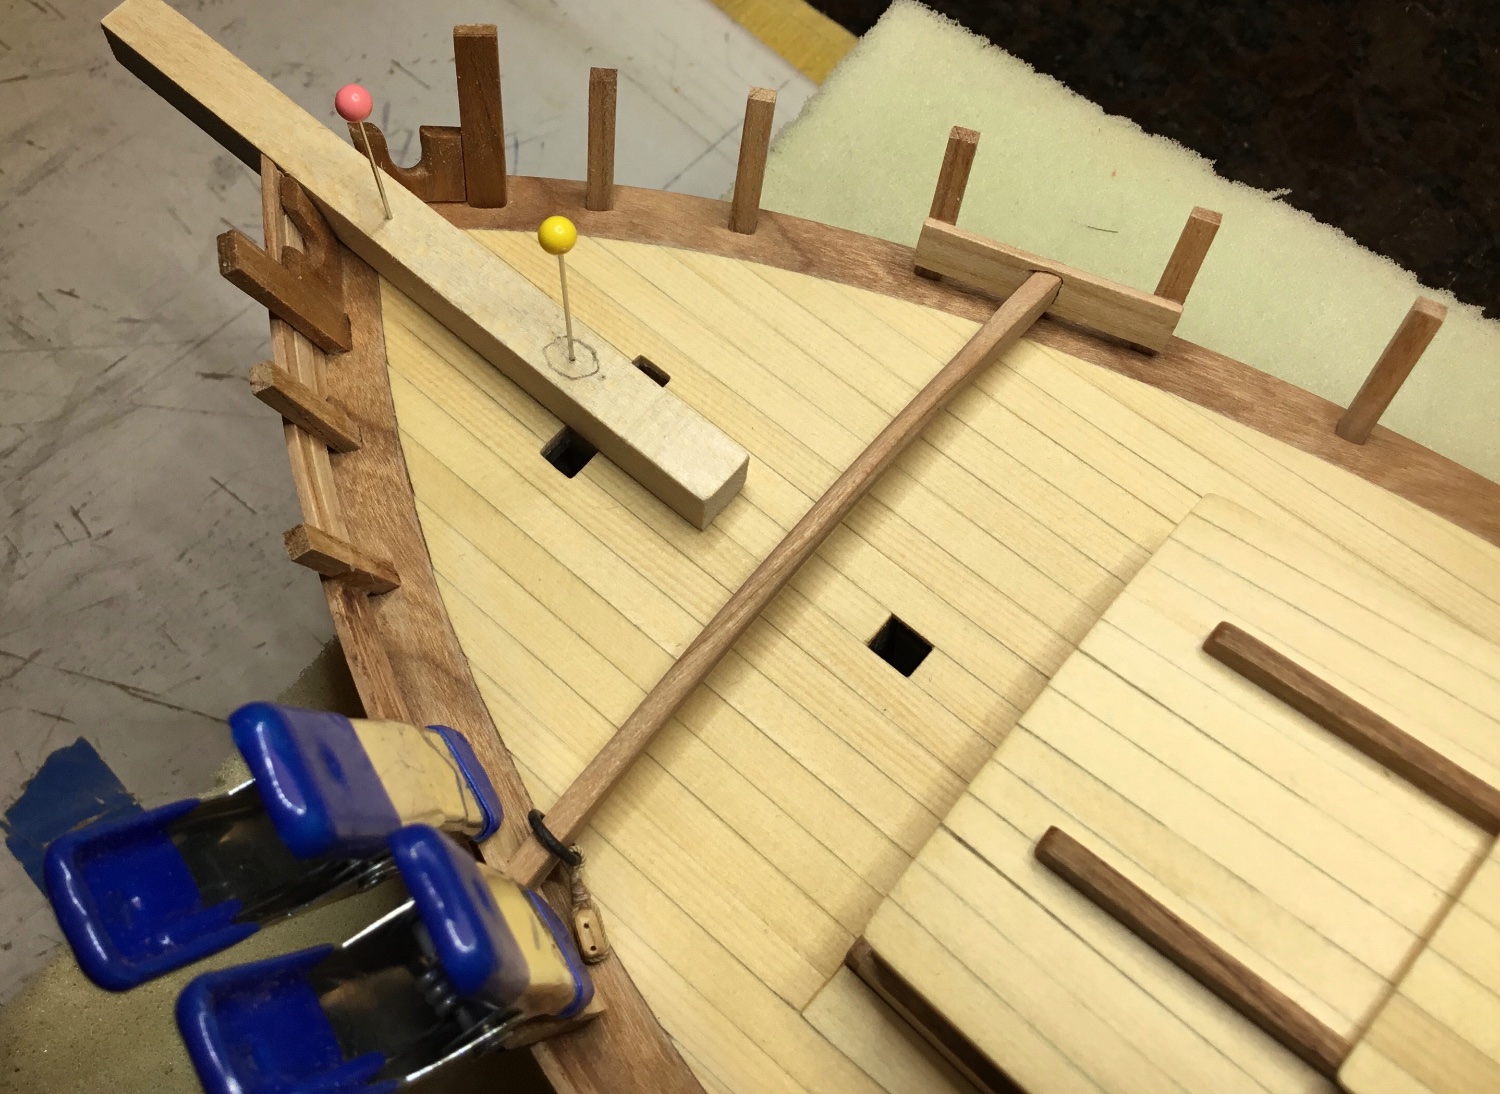
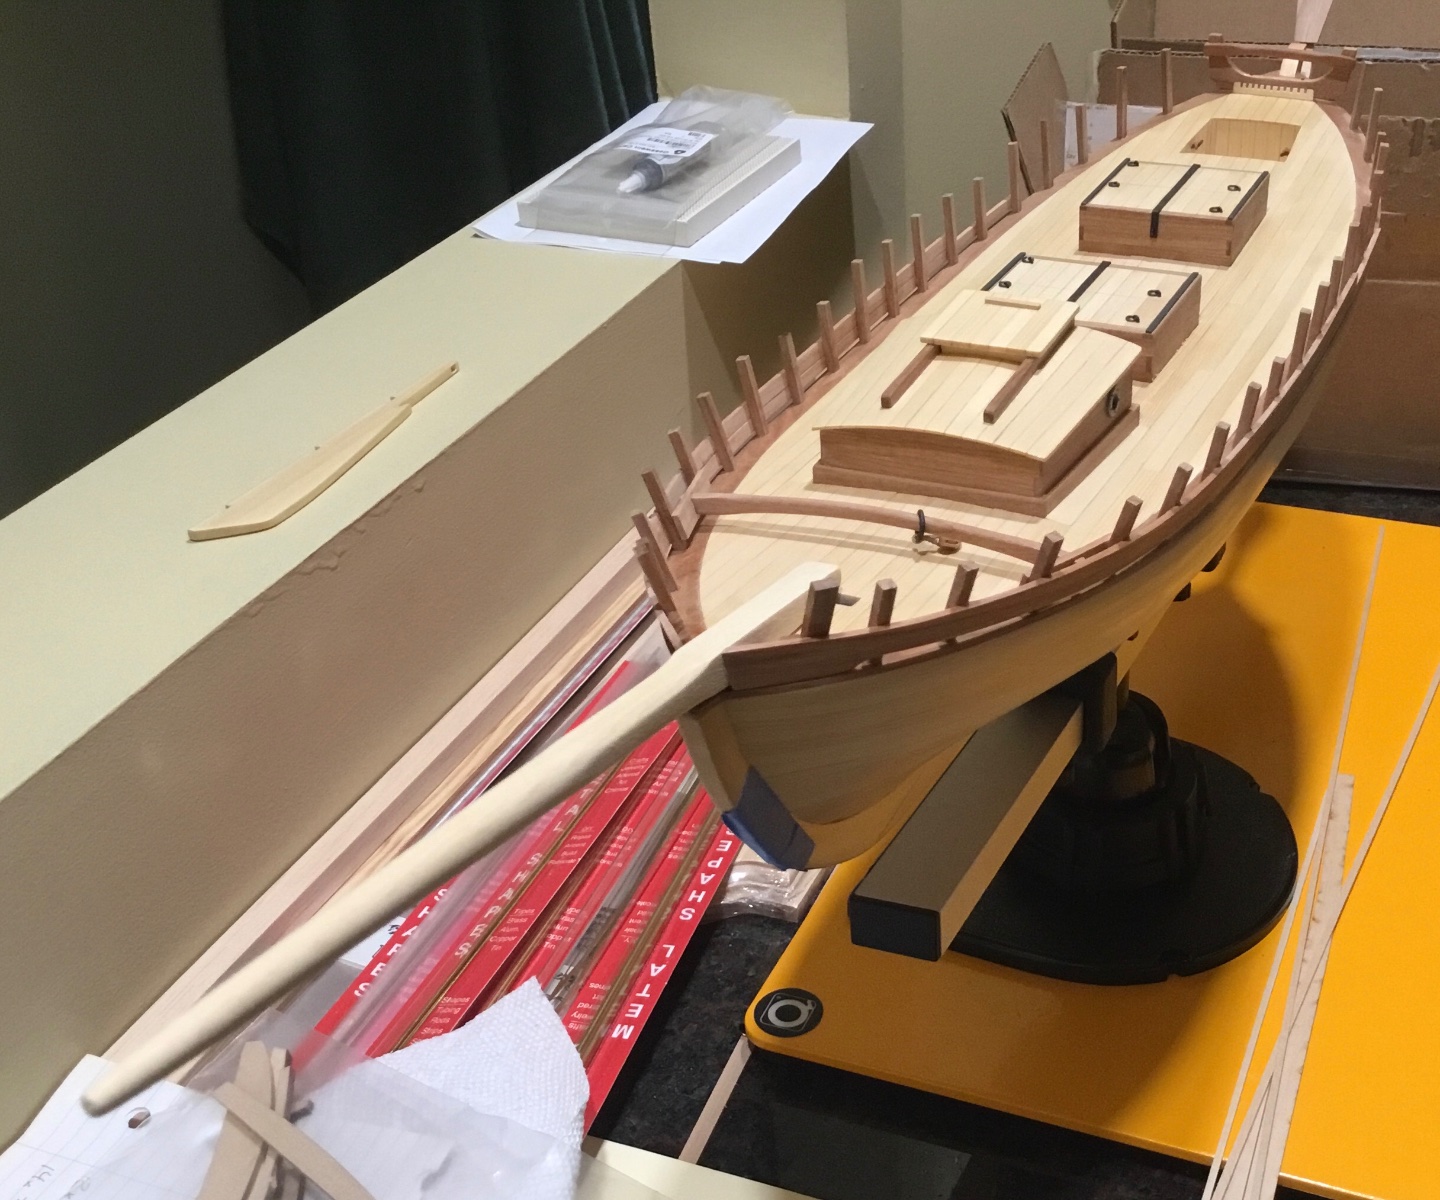
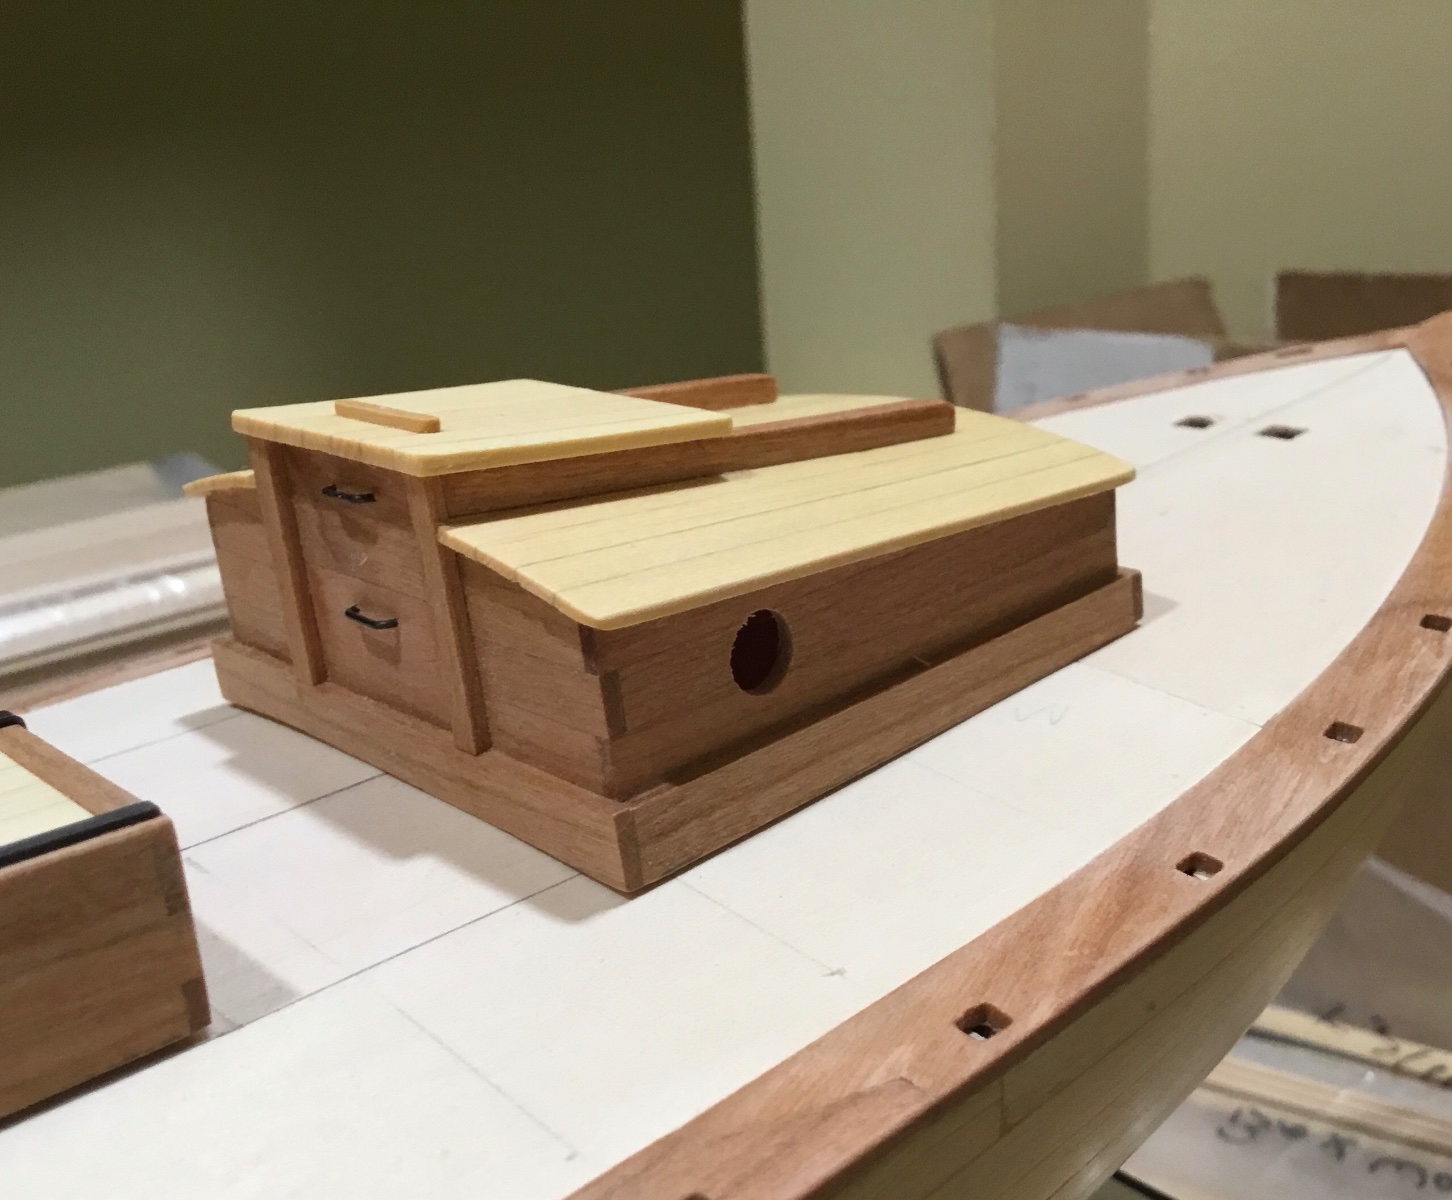
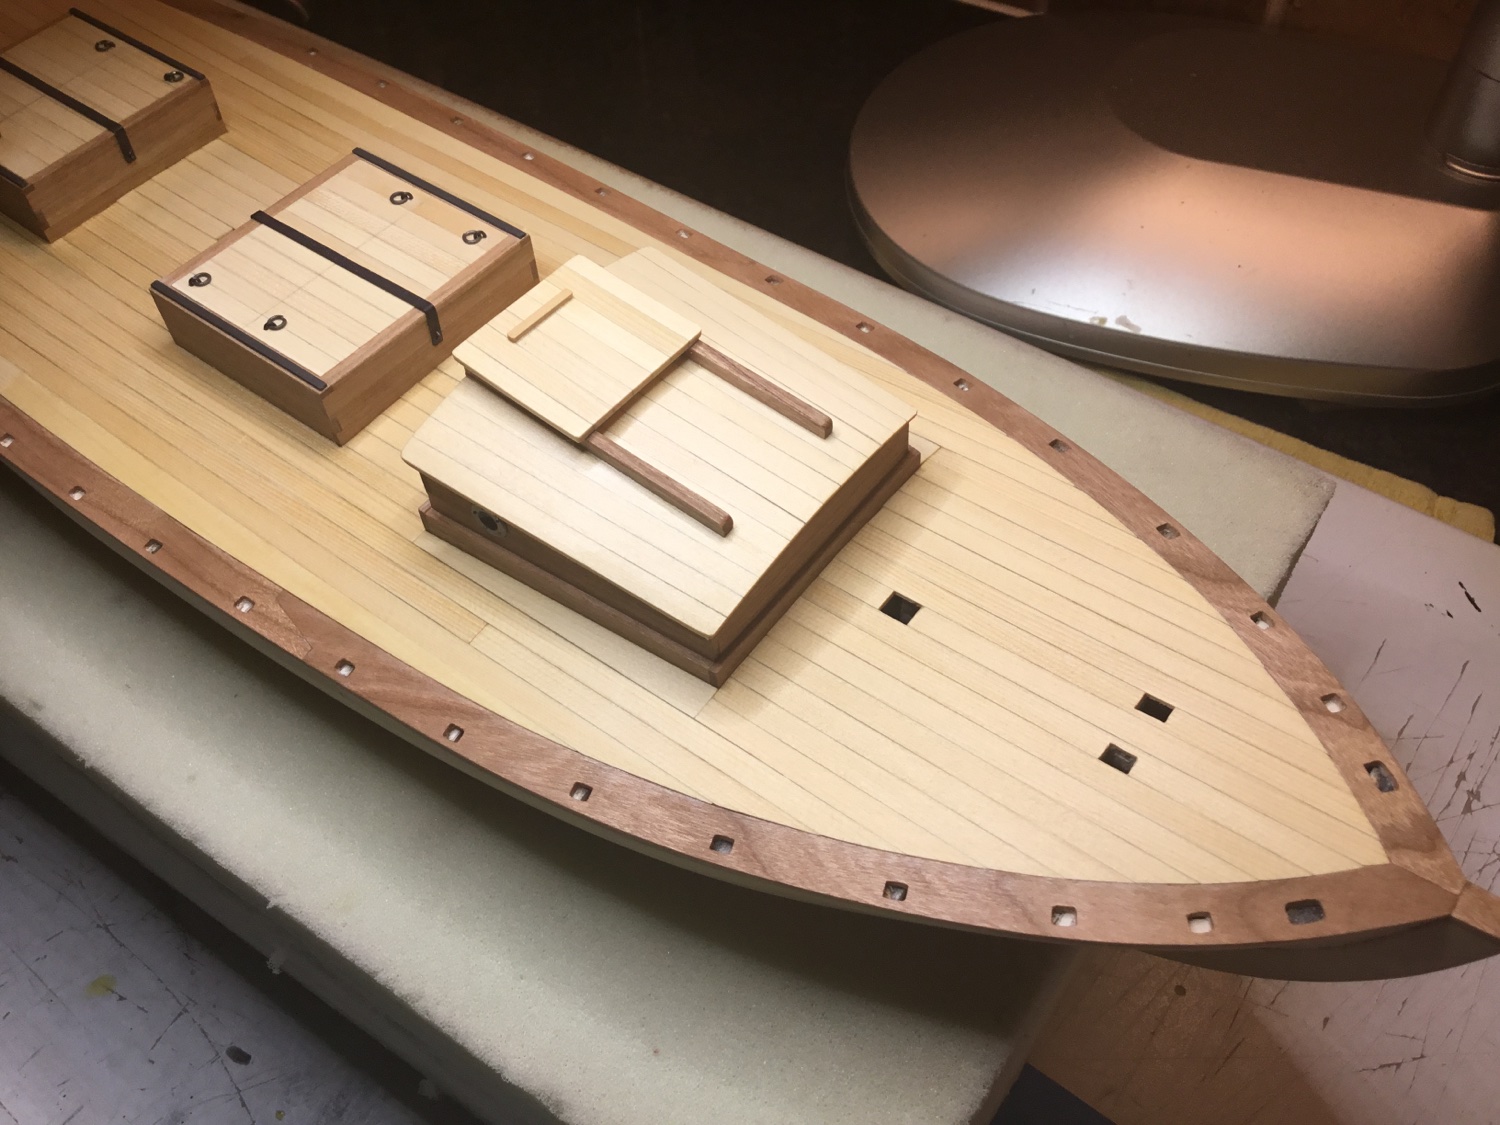
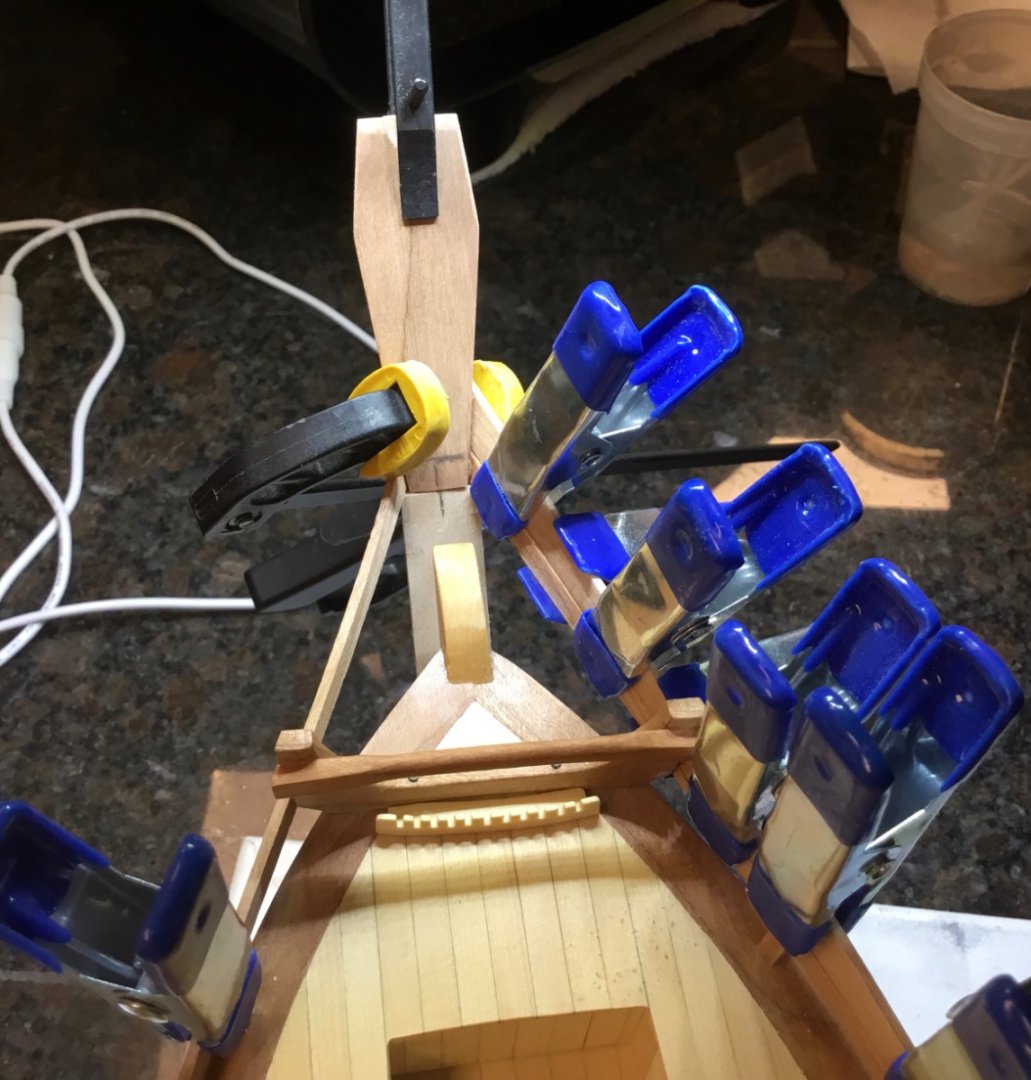
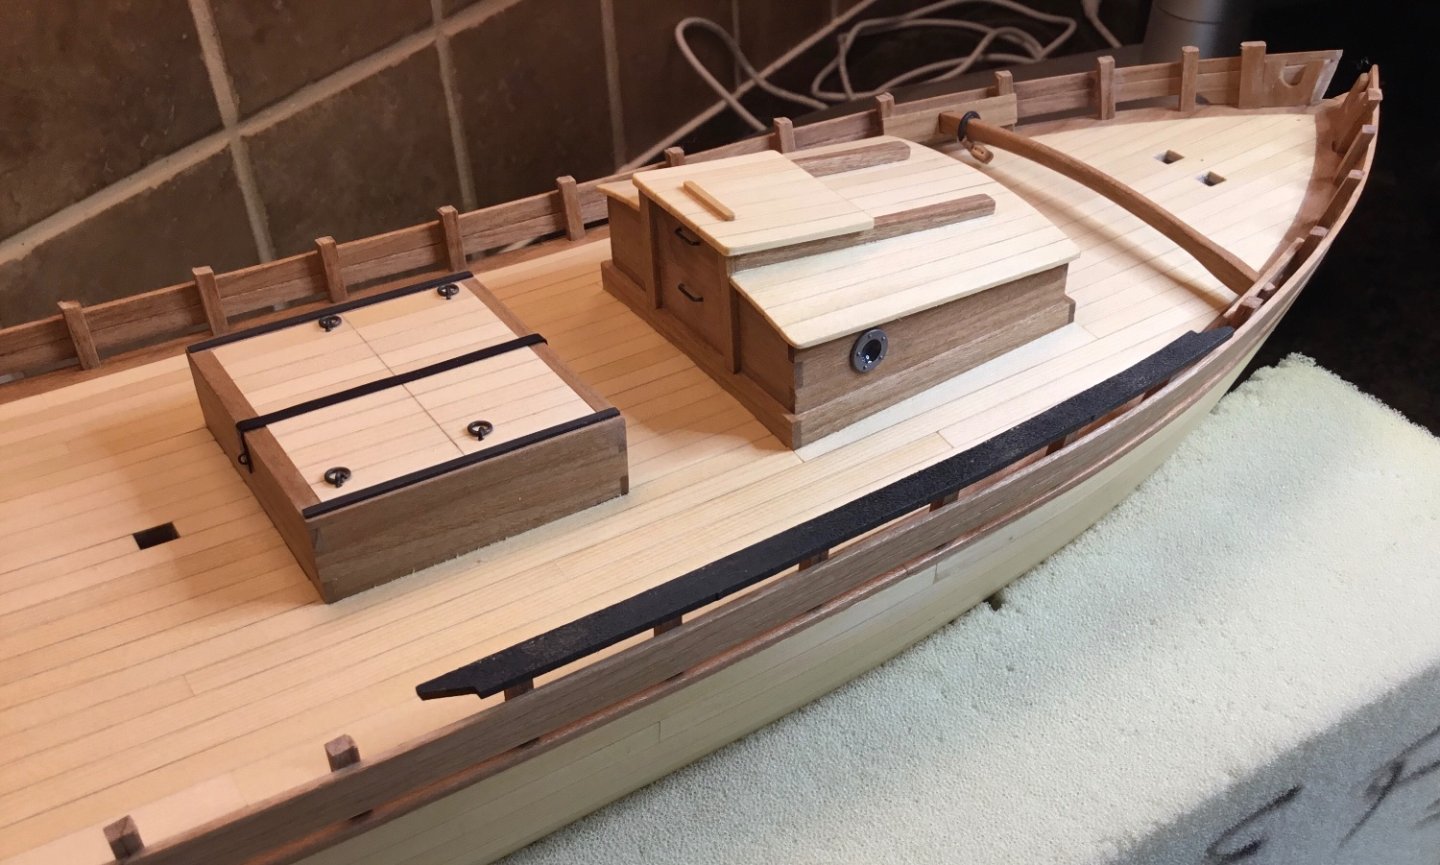
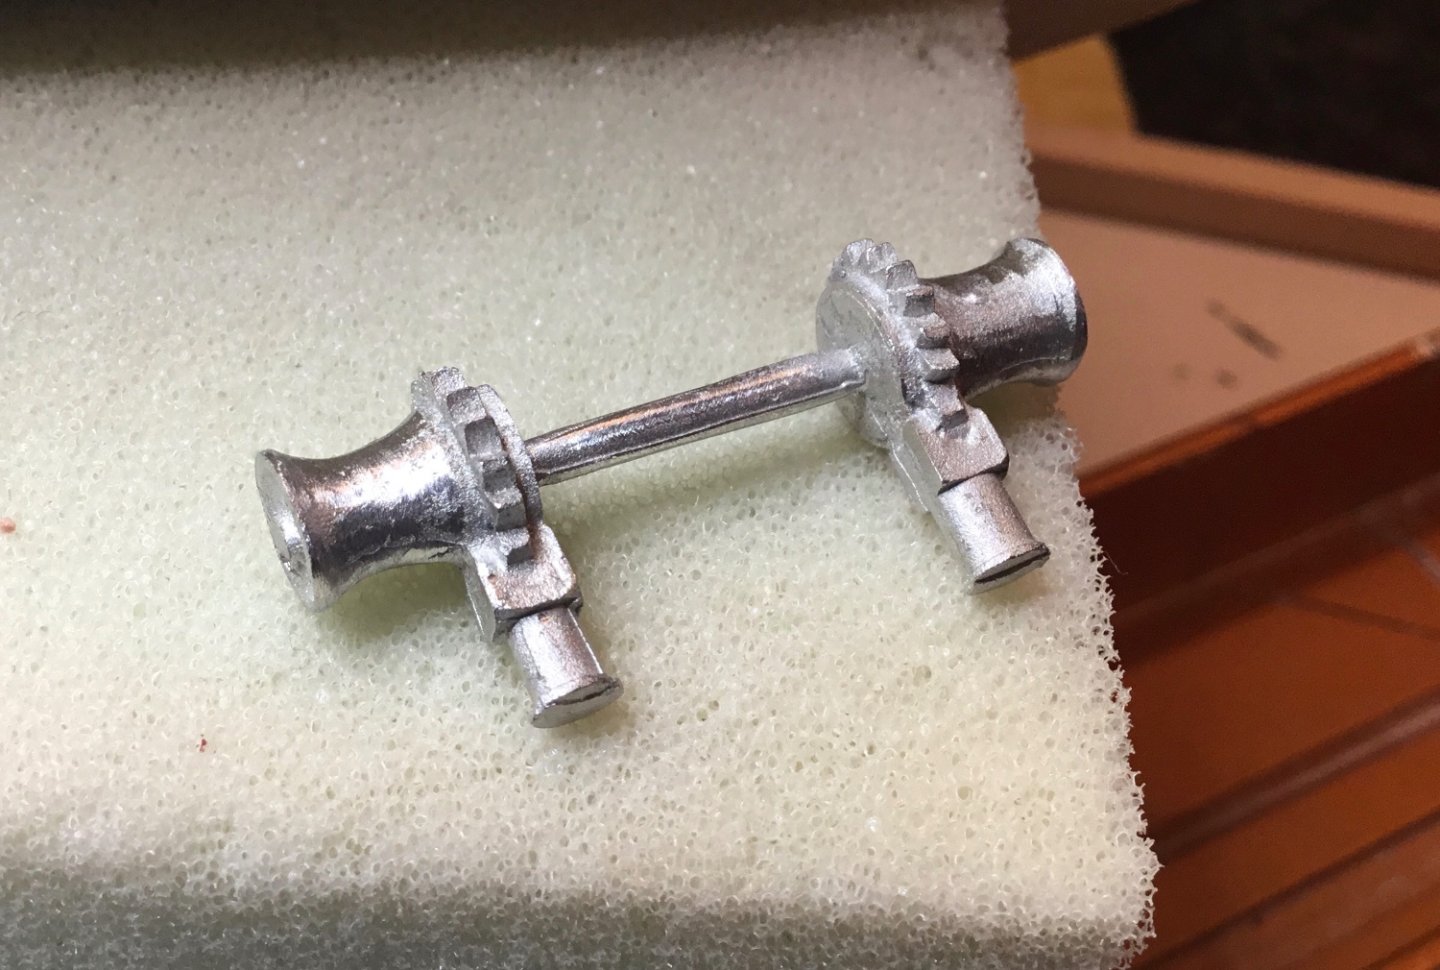
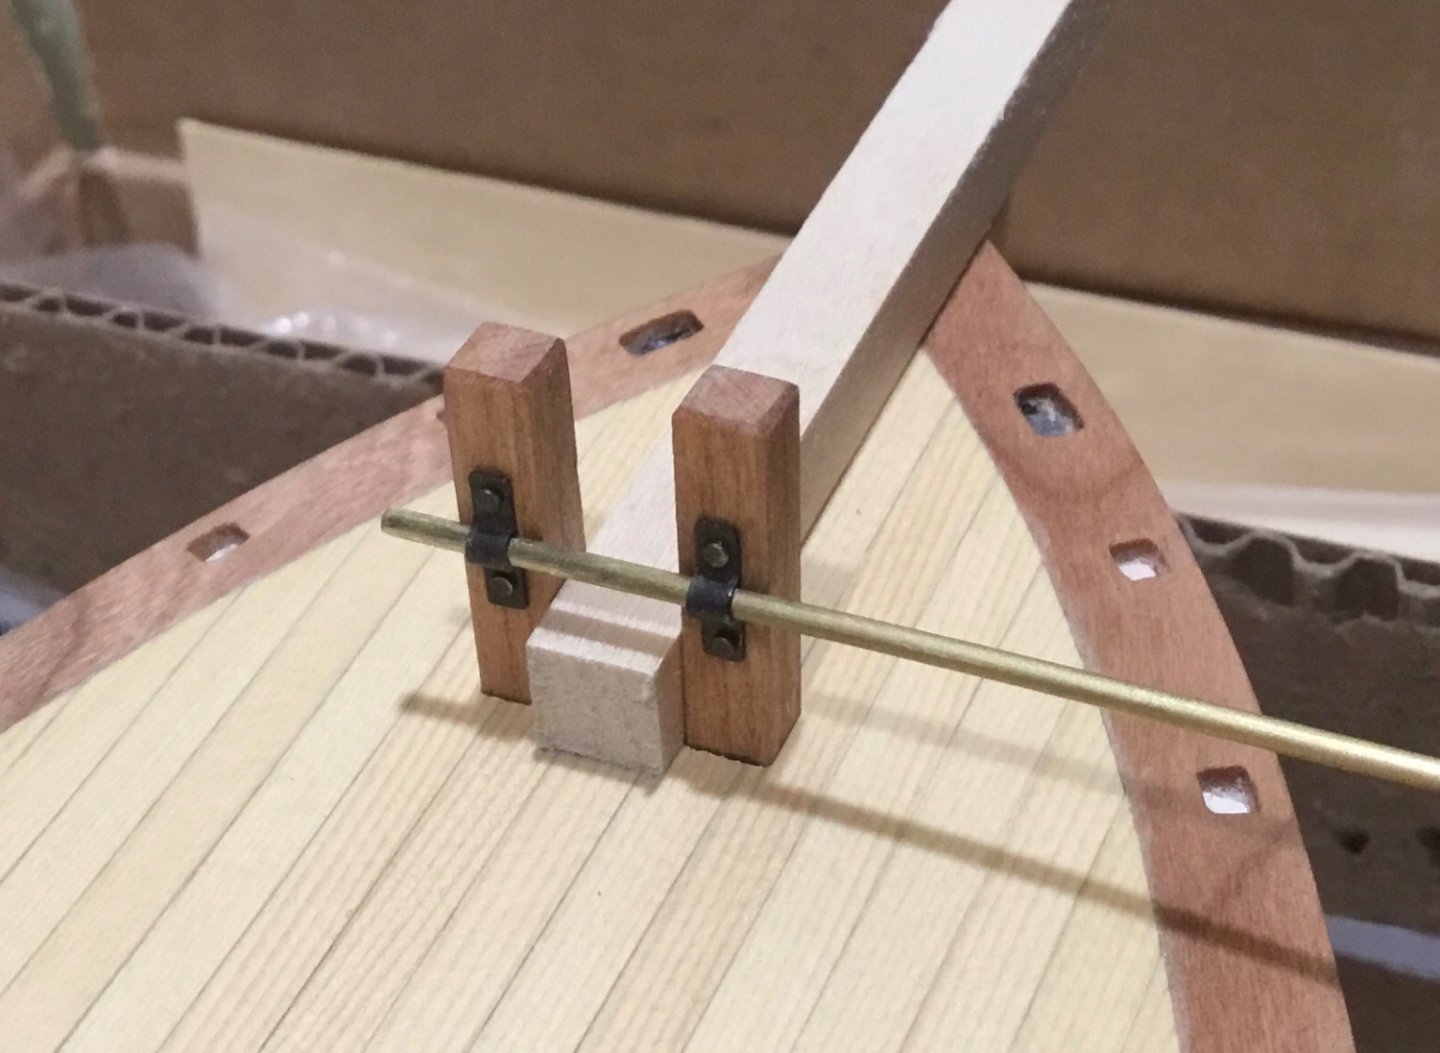
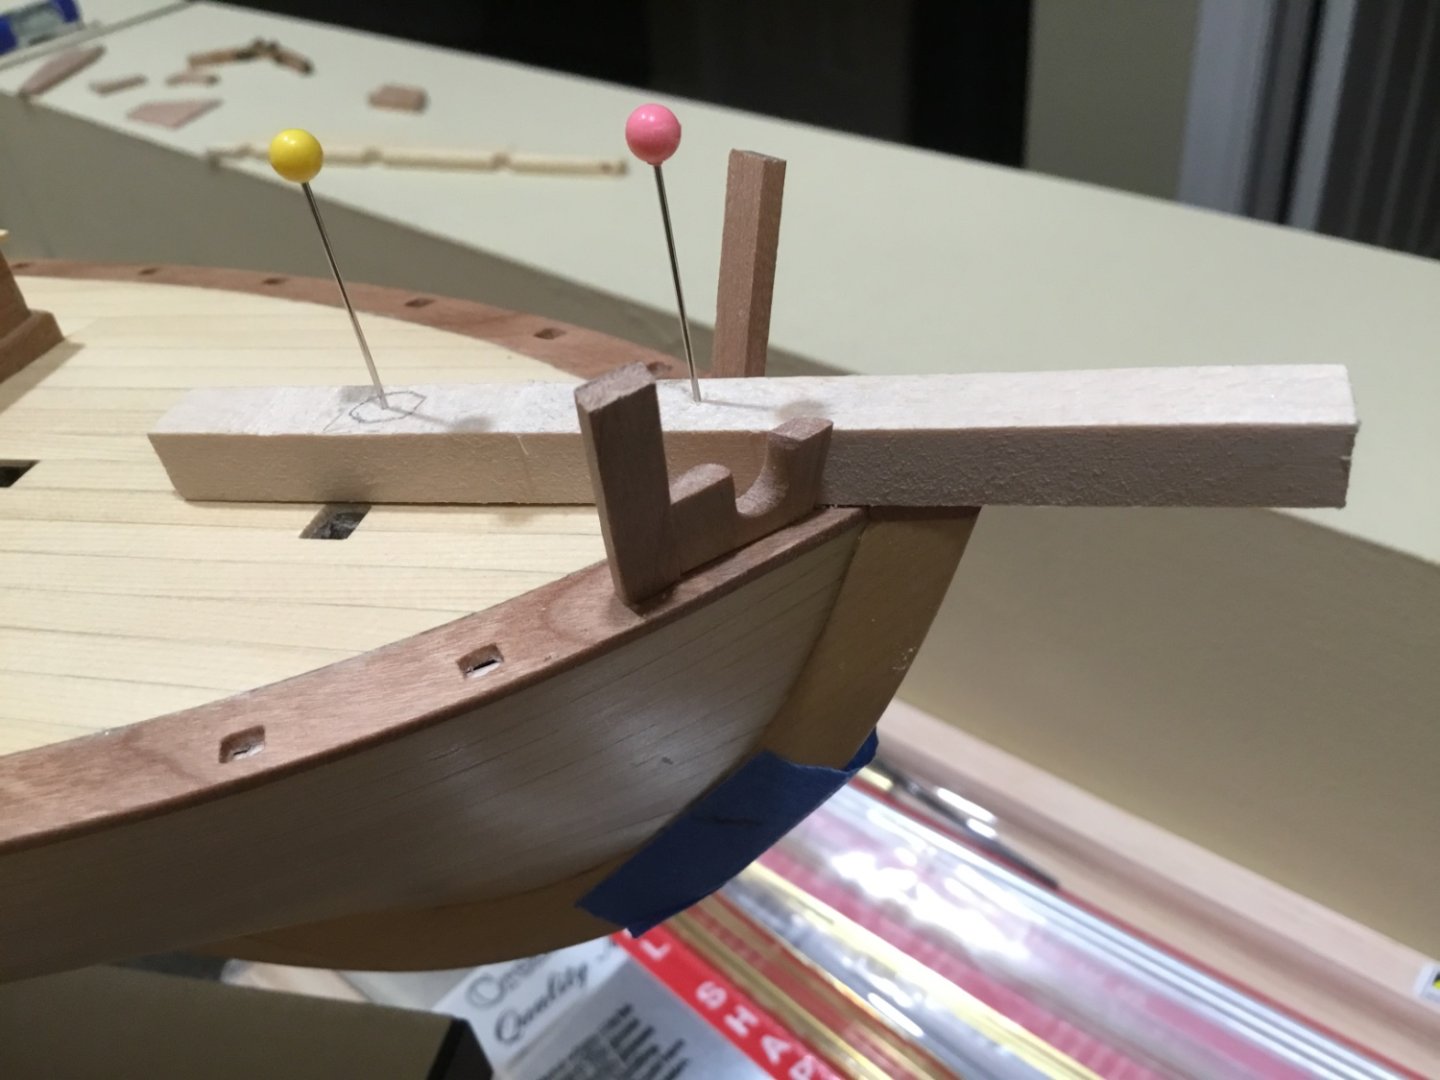
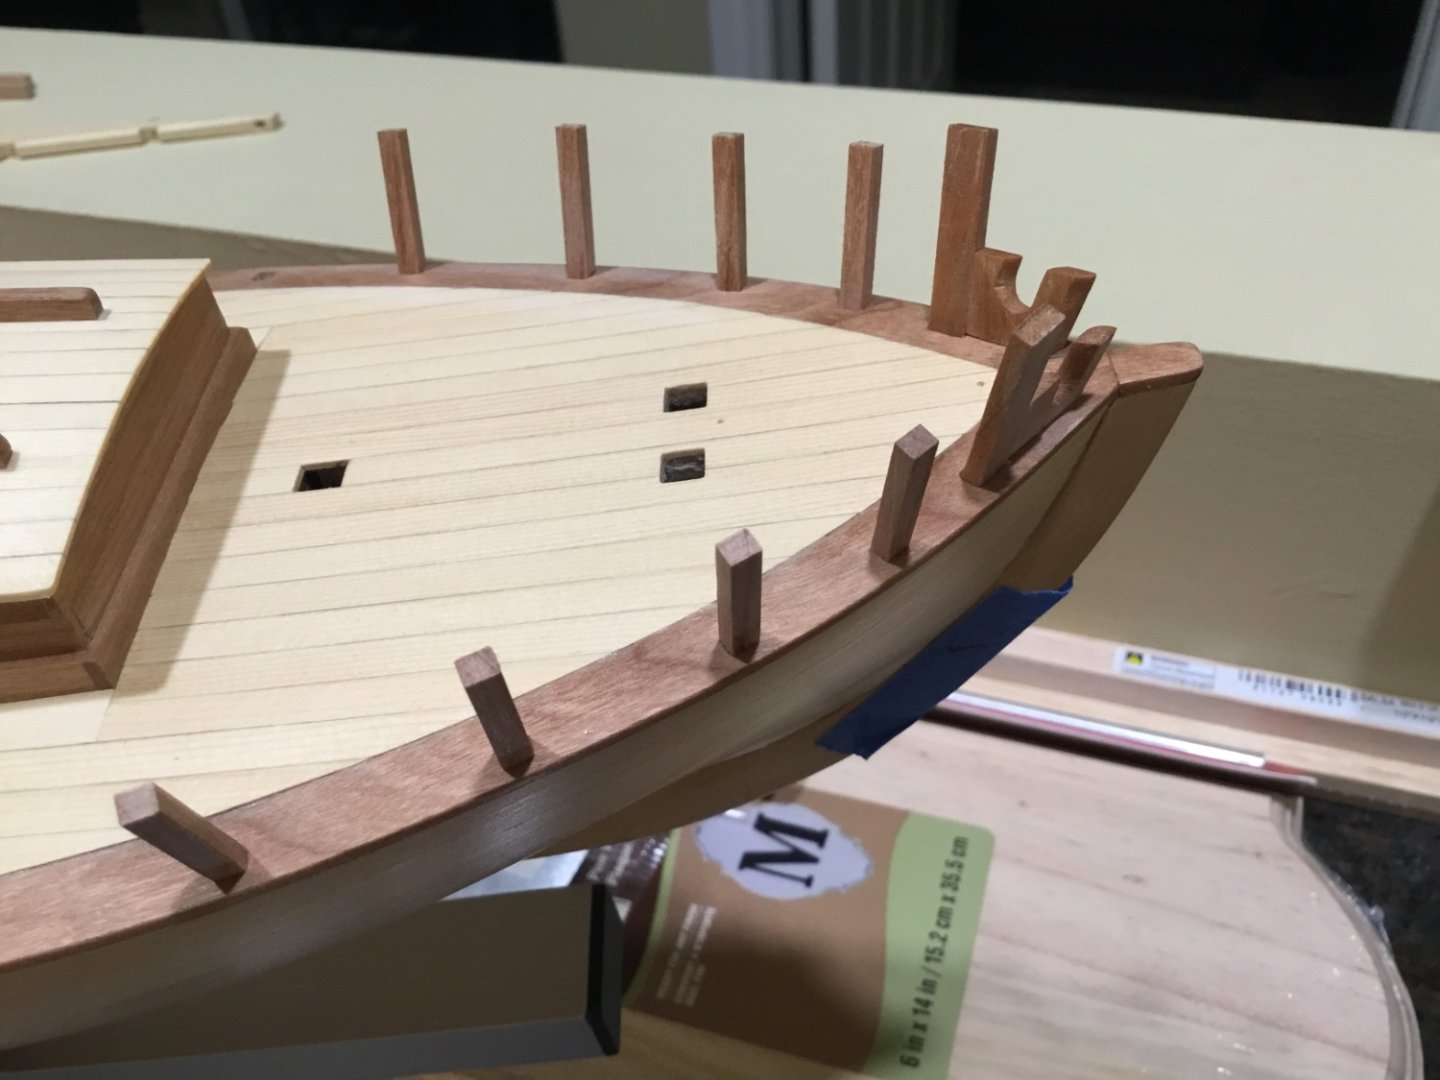
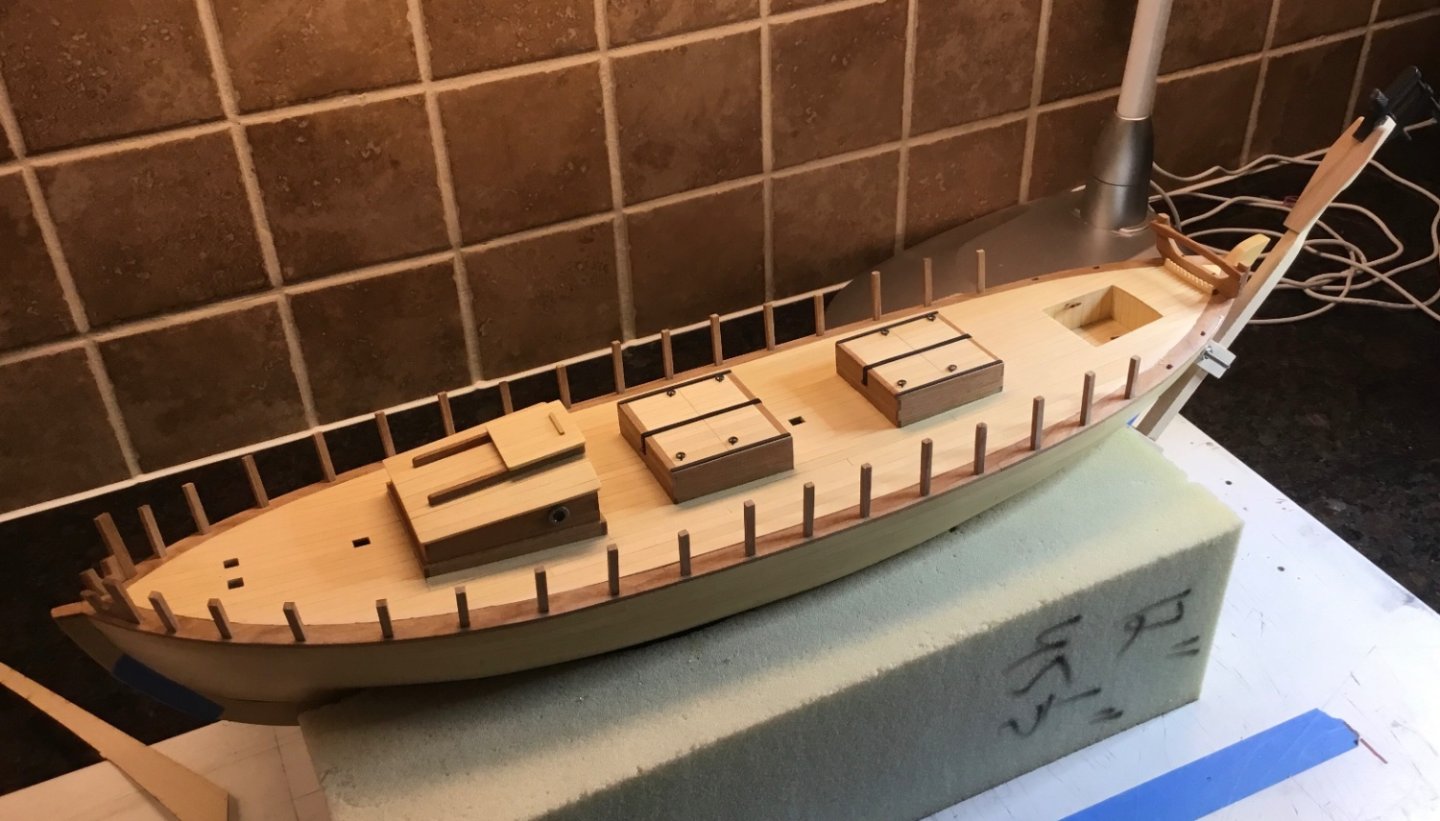
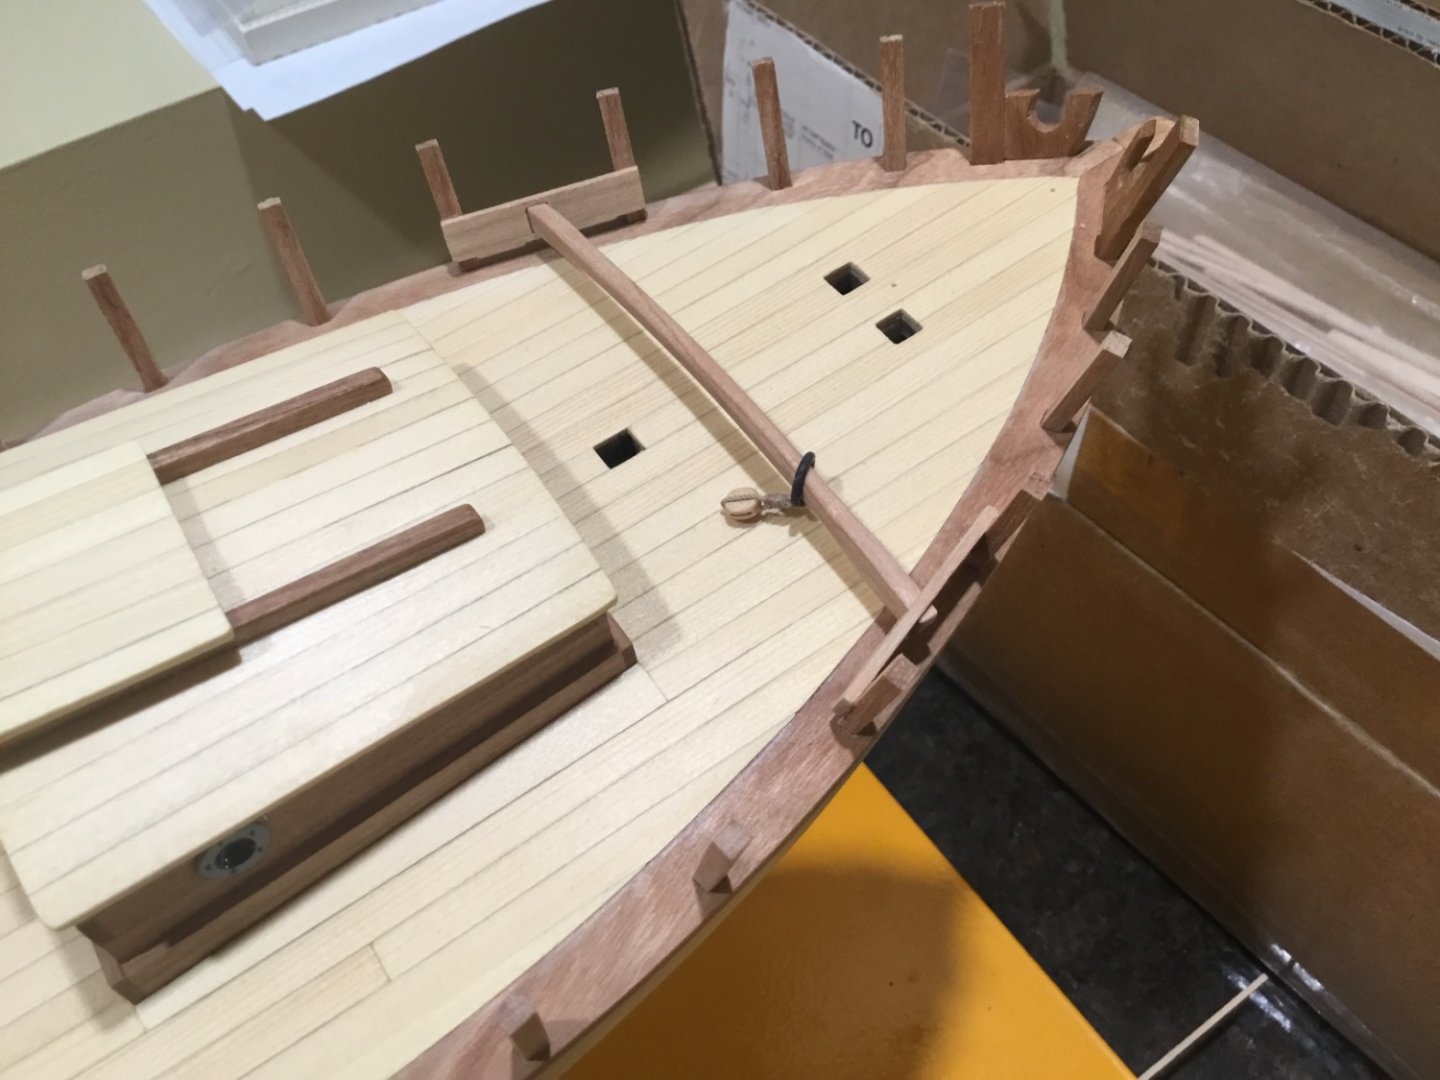
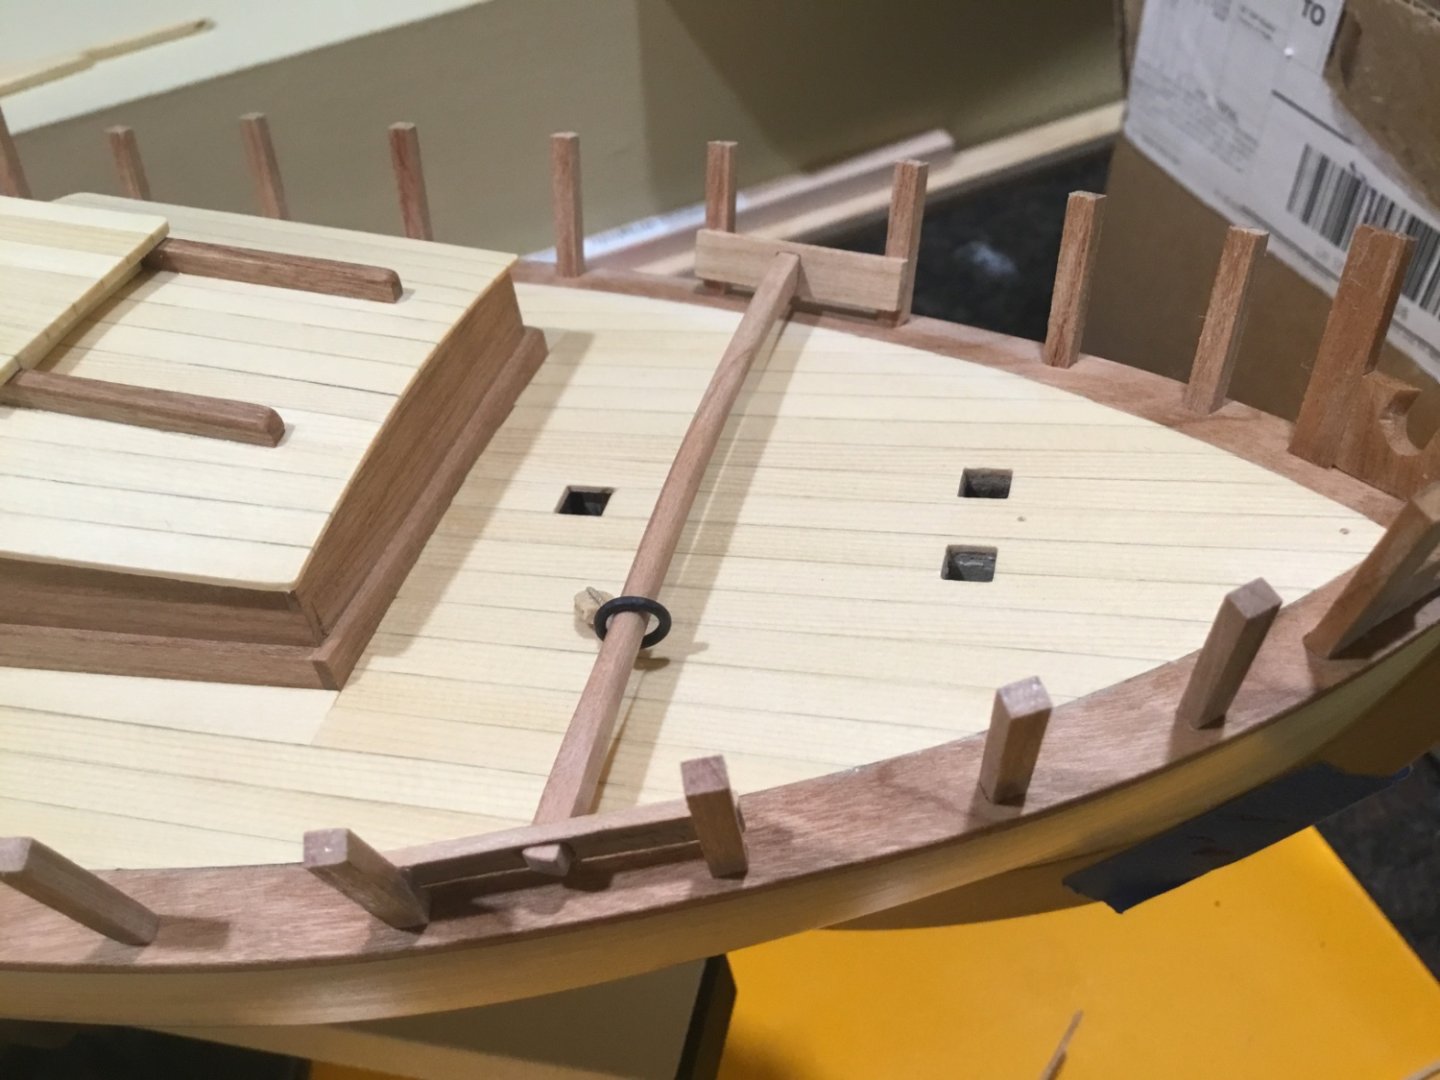
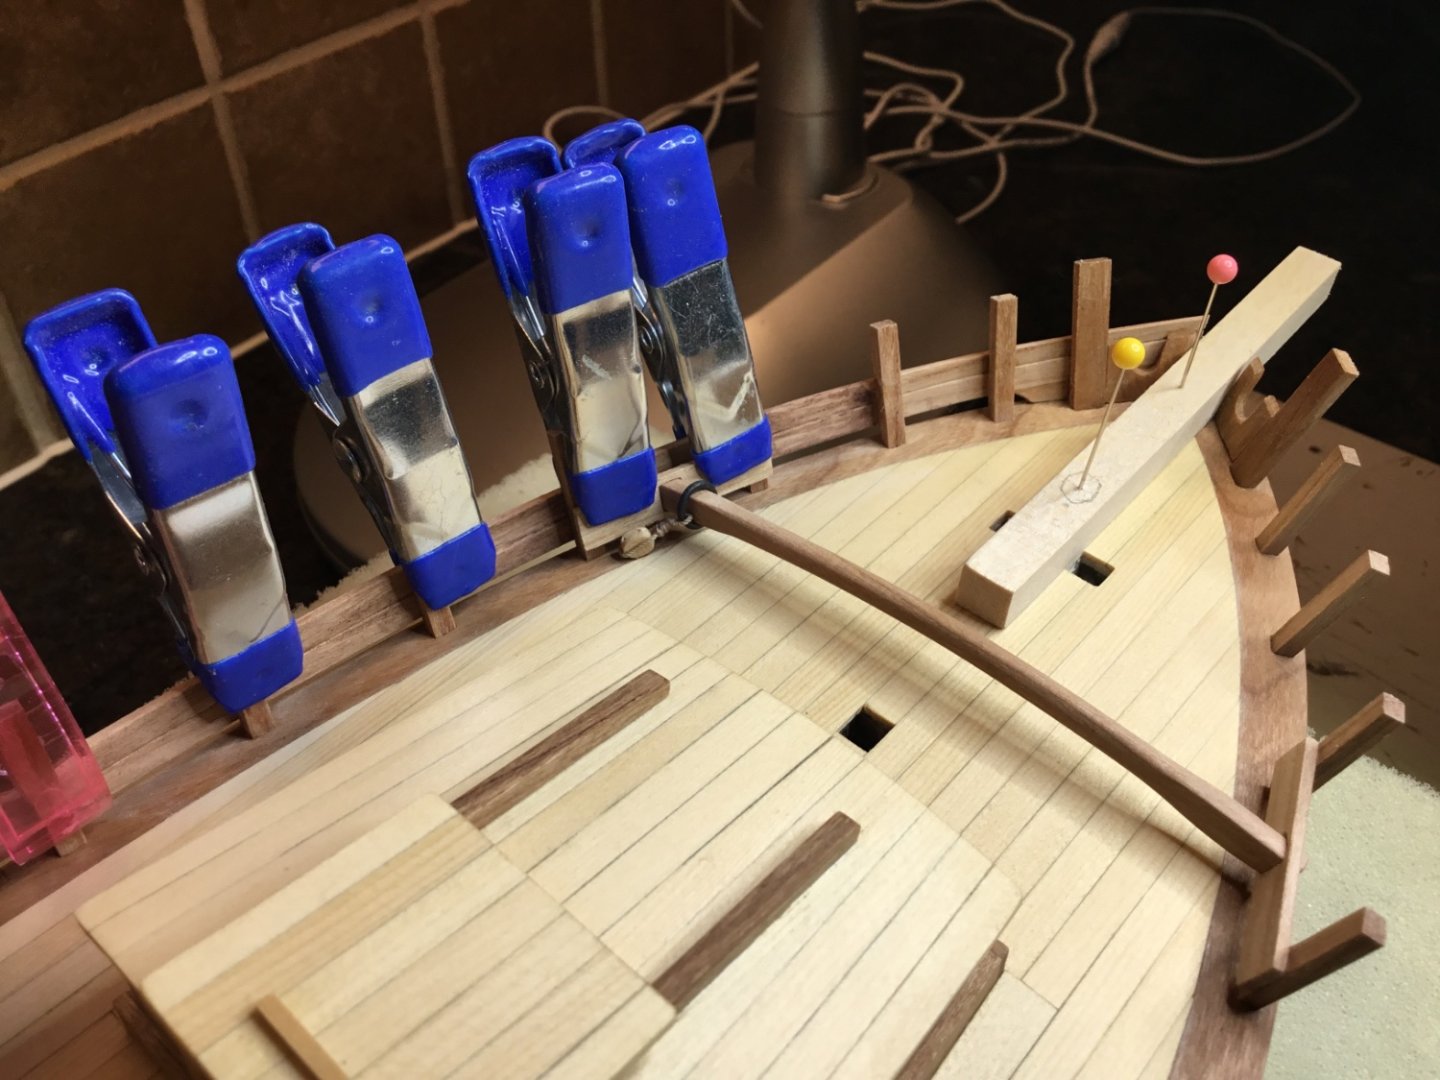
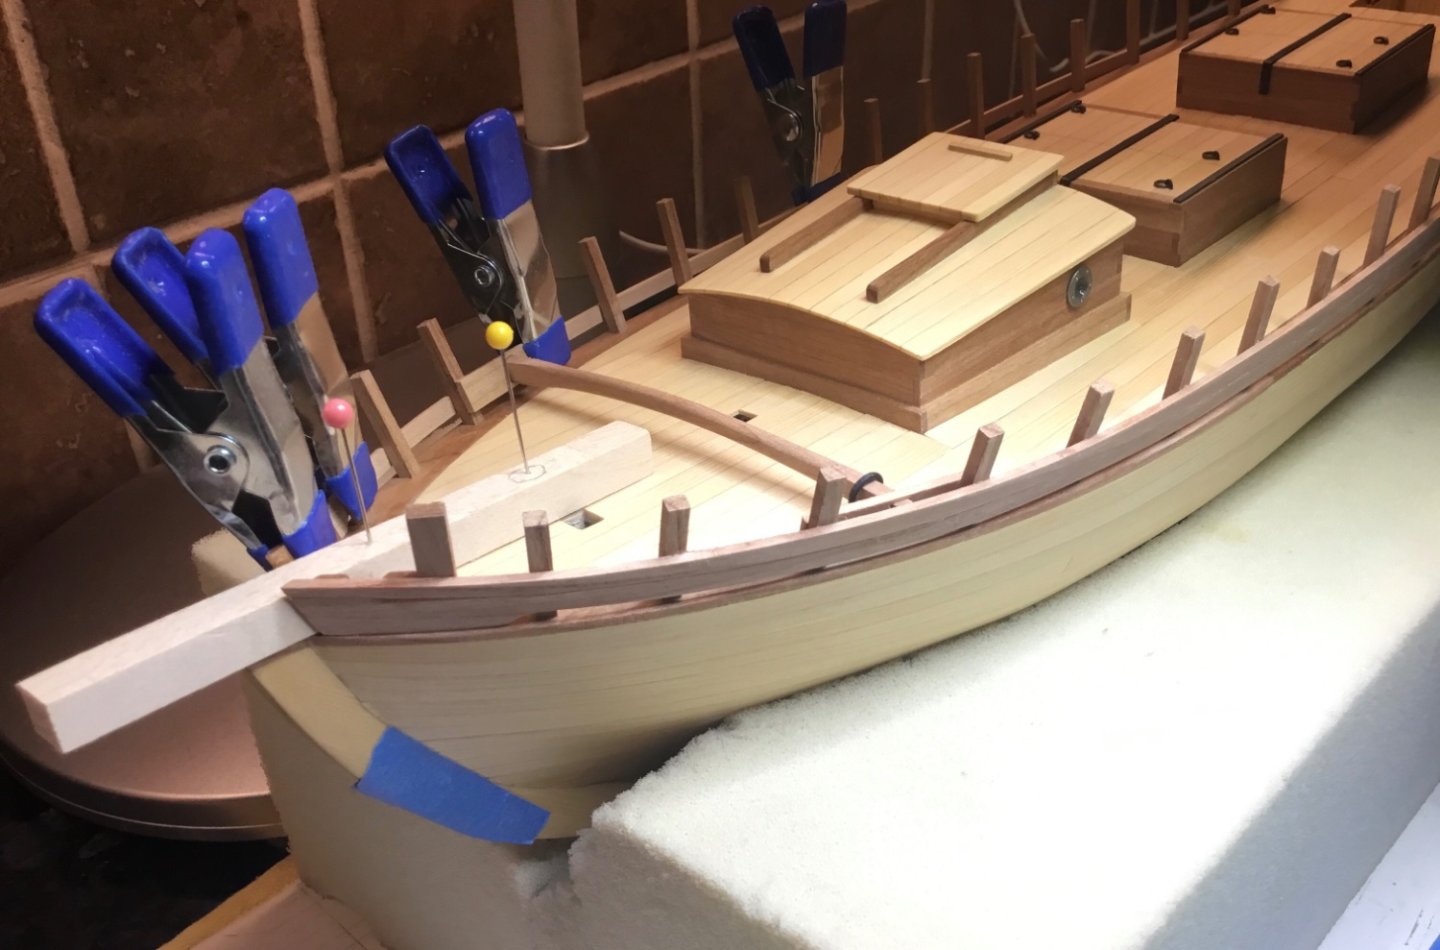
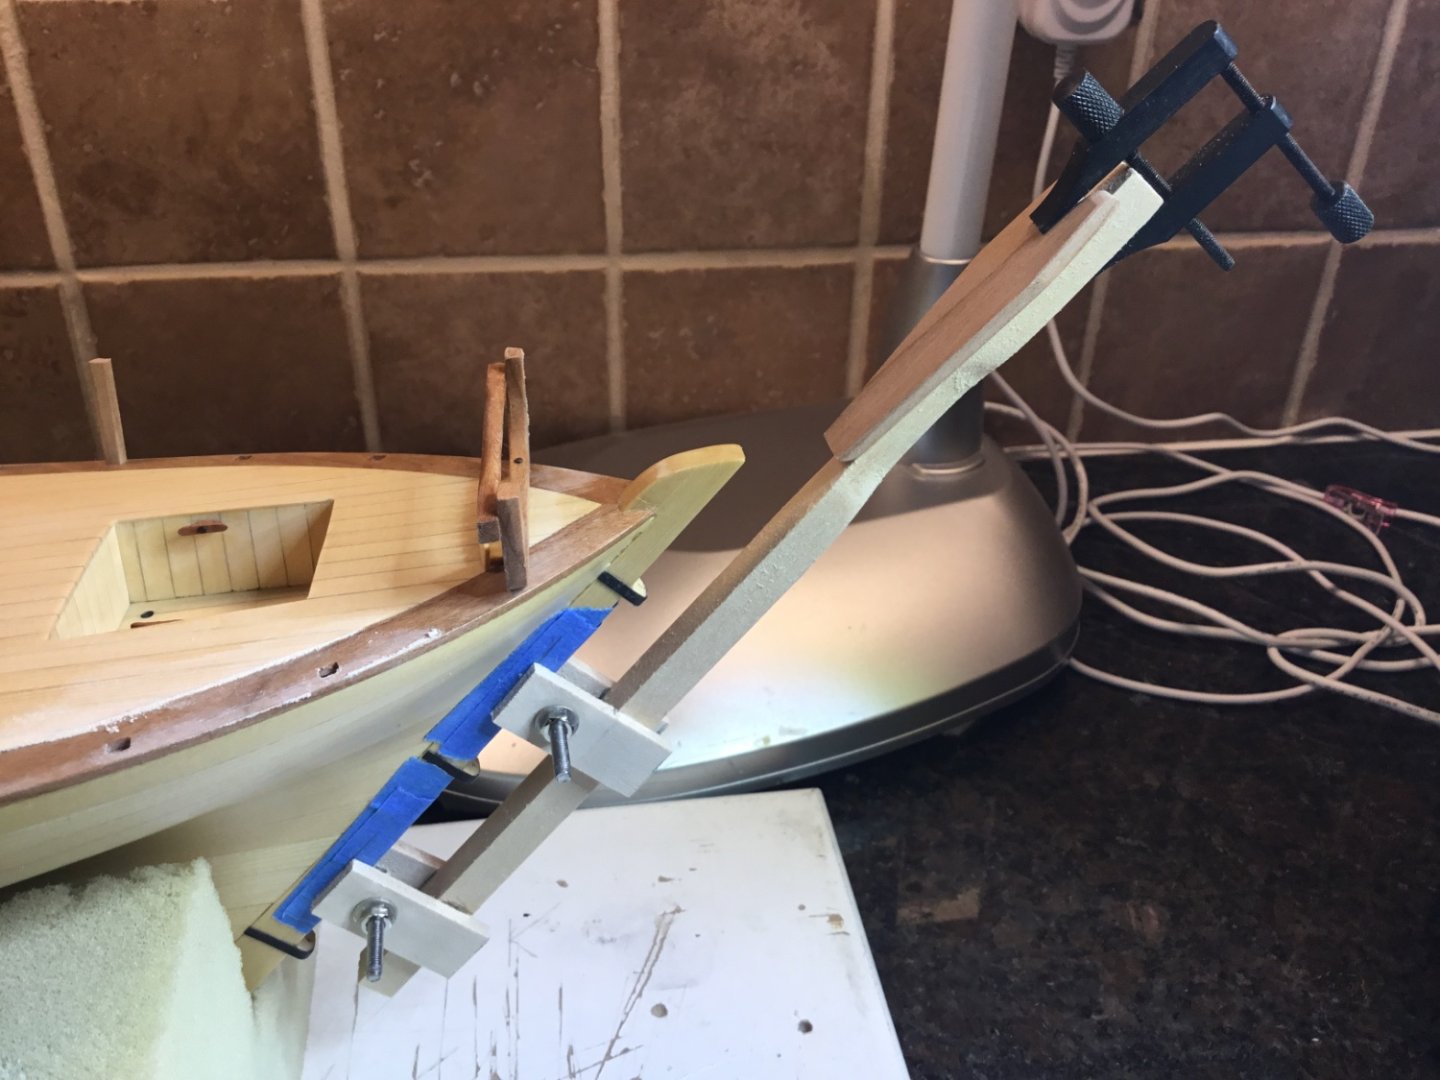
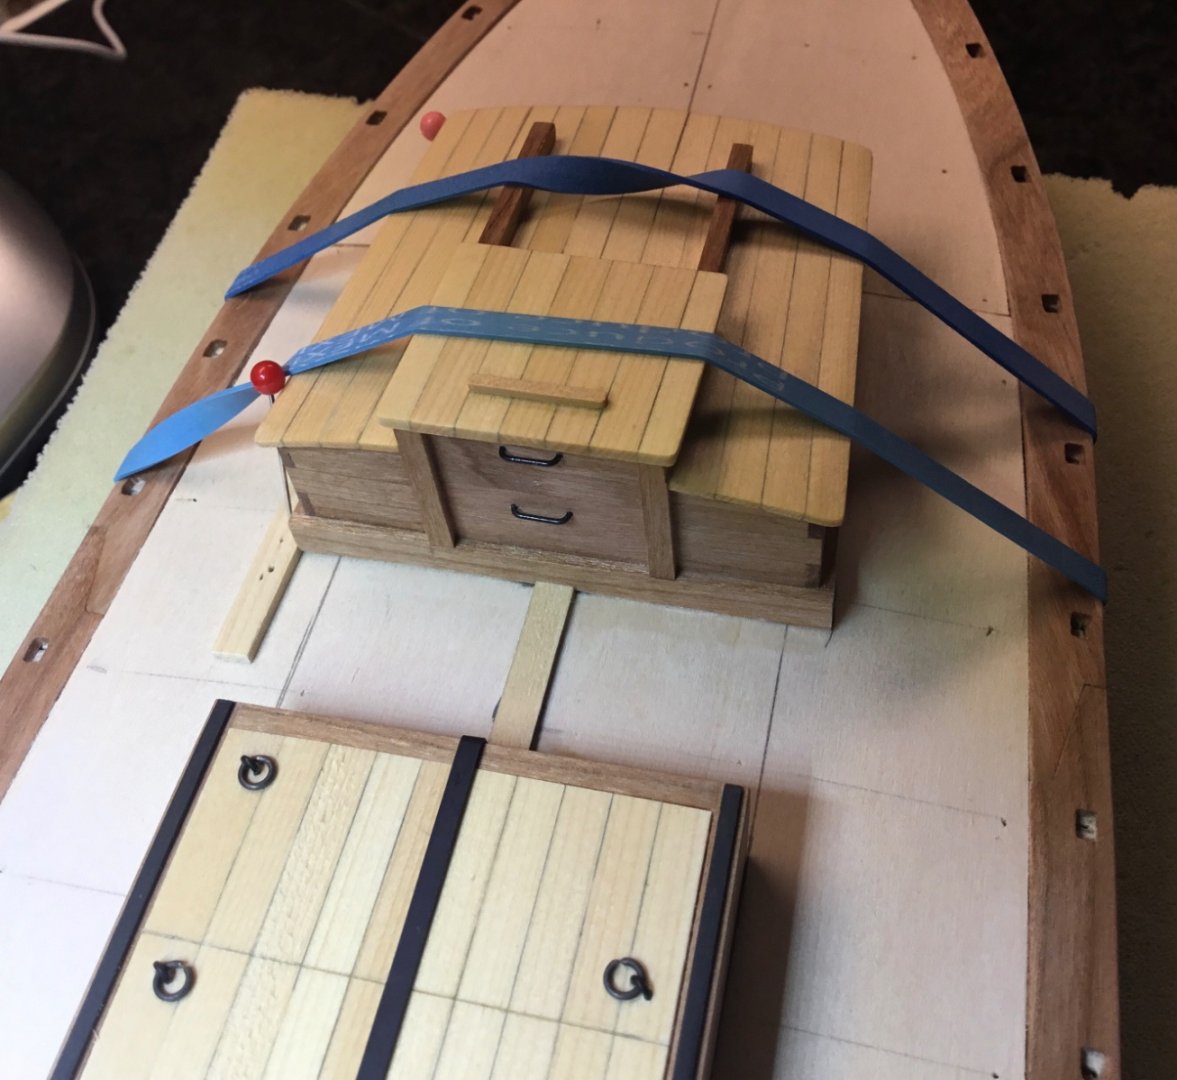
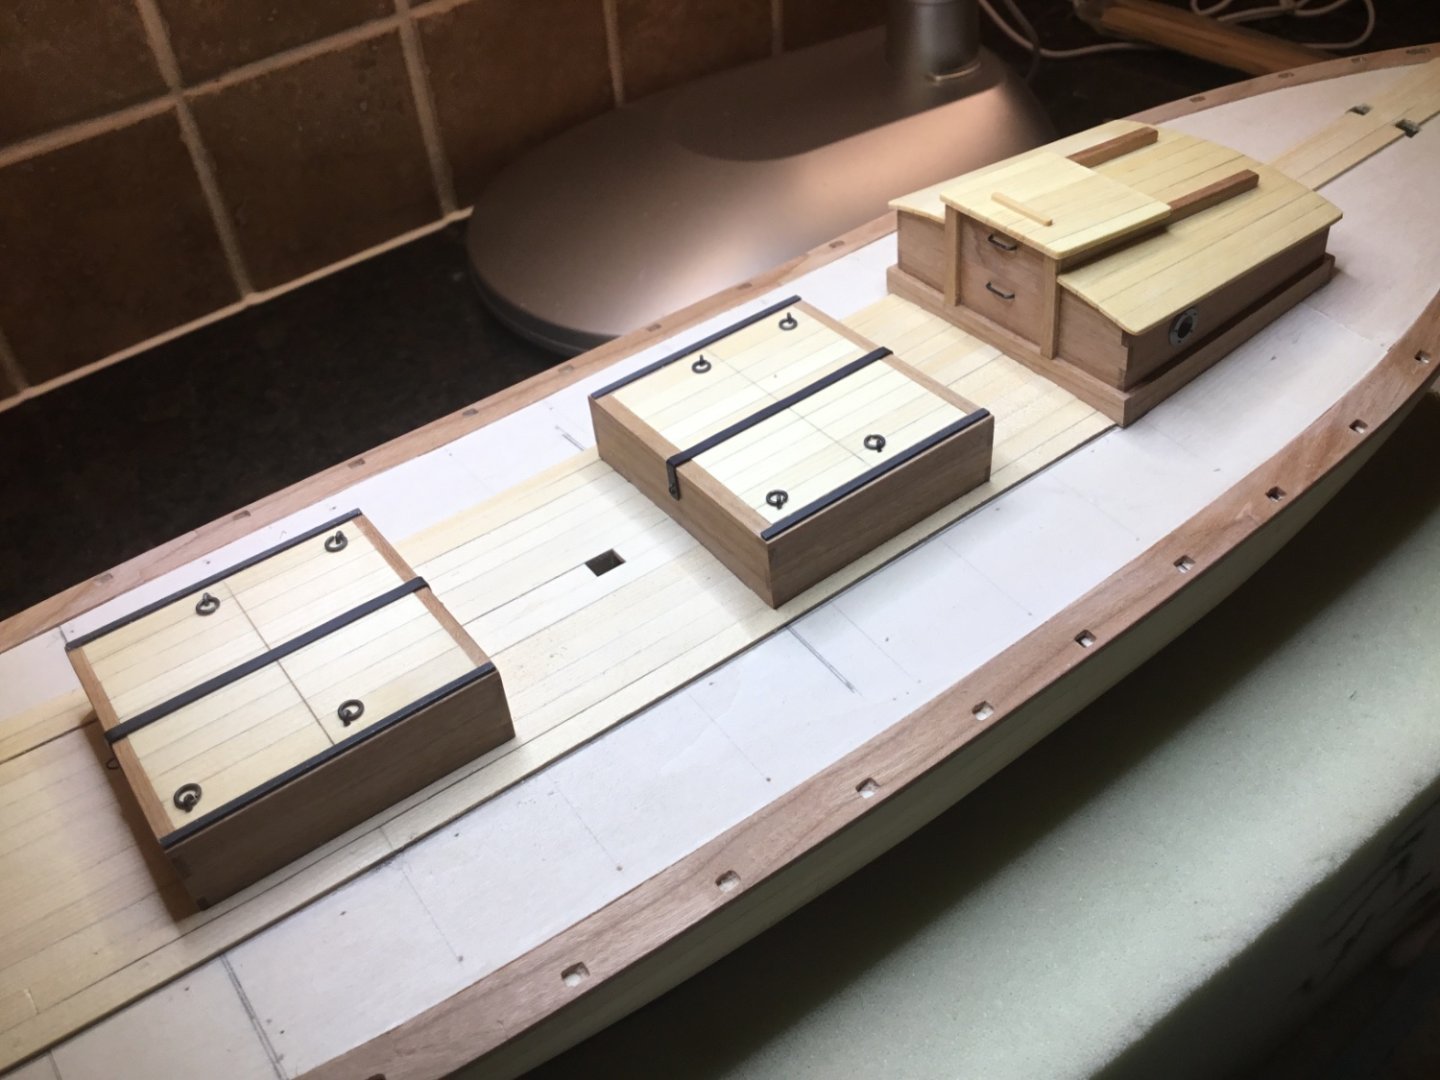
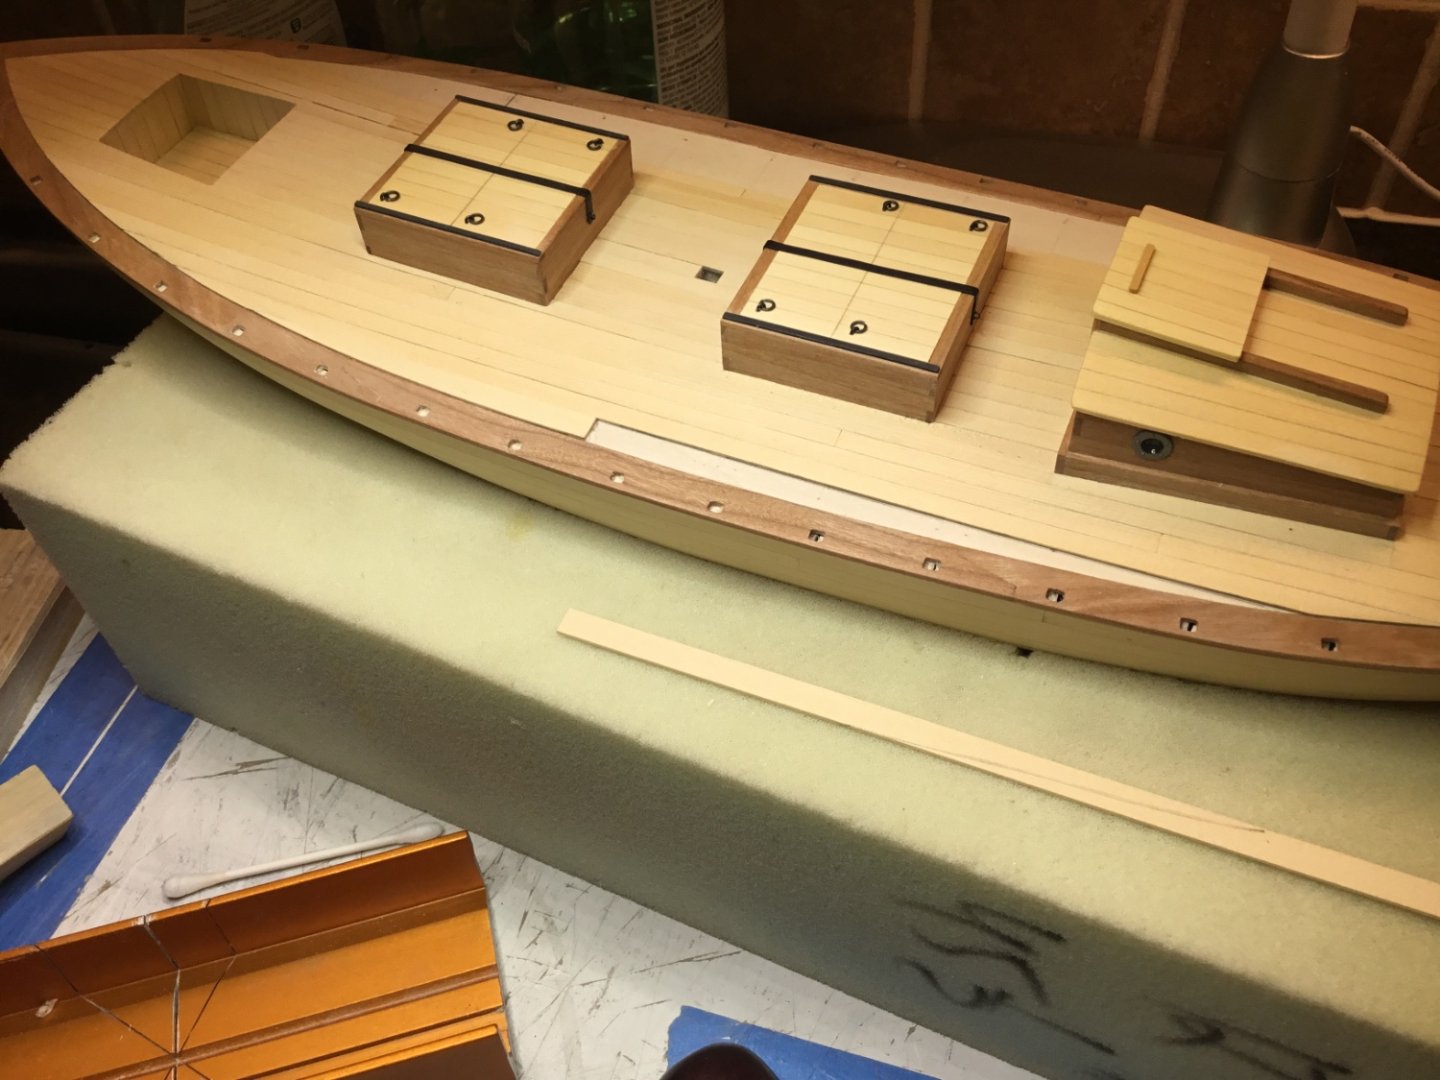
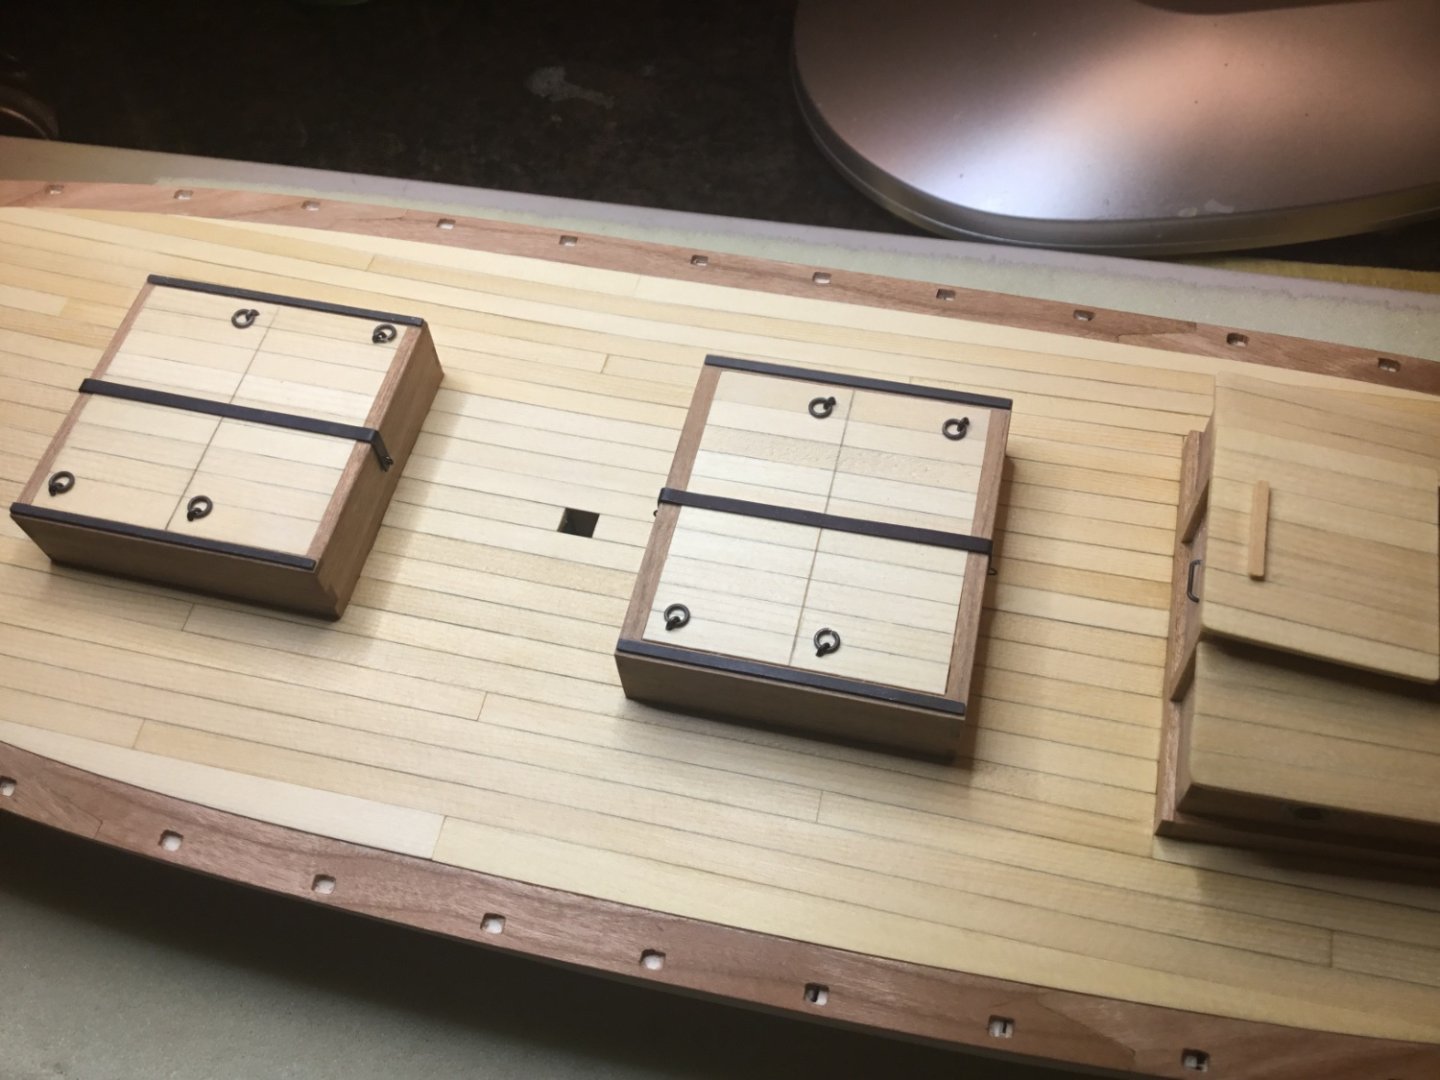
Hi Everyone, thank you for all of your wonderful comments and Likes. I thought that I should do an update because there’s getting to be too many pictures. A new long knee, main sheet horse and tombstone where made out of cherry. The plans say to make the tiller comb out of two pieces of brass but wood seemed to be an easier option for me . The curve of the deck and the curve of the comb make it a complex piece. (for me). The main sheet cleats in the cockpit are 9mm pear made by Master Korabel. It takes a bit to remove the laser char but they turn out nice. The windlass wasn’t wide enough to fit to the the bits so the connecting rod is going to be replaced with a longer brass rod. The bits were temporarily mounted so that a 5/16” pieced of wood could be pinned where the bowsprit will sit. Then came the mounting of the stanchions. It was a long process so while waiting for each batch to dry the jib sheet horse was made and installed The bulwark strakes are made out of 1/16” x 5/16” cherry ripped to 5/32”. The wide and thick planks were not very cooperative. A jig was made to support the tombstone in position. It kind of just sits out there flapping in the breeze. Next will be finishing the bulwark strakes running from midship to the tombstone. Hope to see you all next time.


- 72 replies
-
- 10
-
-
-
- Glad Tidings
- Model Shipways
- (and 1 more)
-
Even the “ unremarkable “ bench build is remarkable. Beautiful work Ian.
-
Hi Ed, I am not building the Rattlesnake, but if I was looking at this situation the first thing I think I would do is compare the distance from the top of the false keel to the top of bulkhead I with the measurement in the plans if it is shown. Then adjust that bulkhead as needed. Then using your straightedge adjust the bulkheads between I and M. It looks like K needs some material removed and J needs material added. Can’t see what’s going on with bulkhead L. Then do the same with the foredeck
-
Don and Nils , thank you very much. Nils, one day I would like to try my hand at sails but I don’t think I’m ready for the challenge just yet. You both did such a nice job with your sails
- 72 replies
-
- 3
-
-
- Glad Tidings
- Model Shipways
- (and 1 more)
-
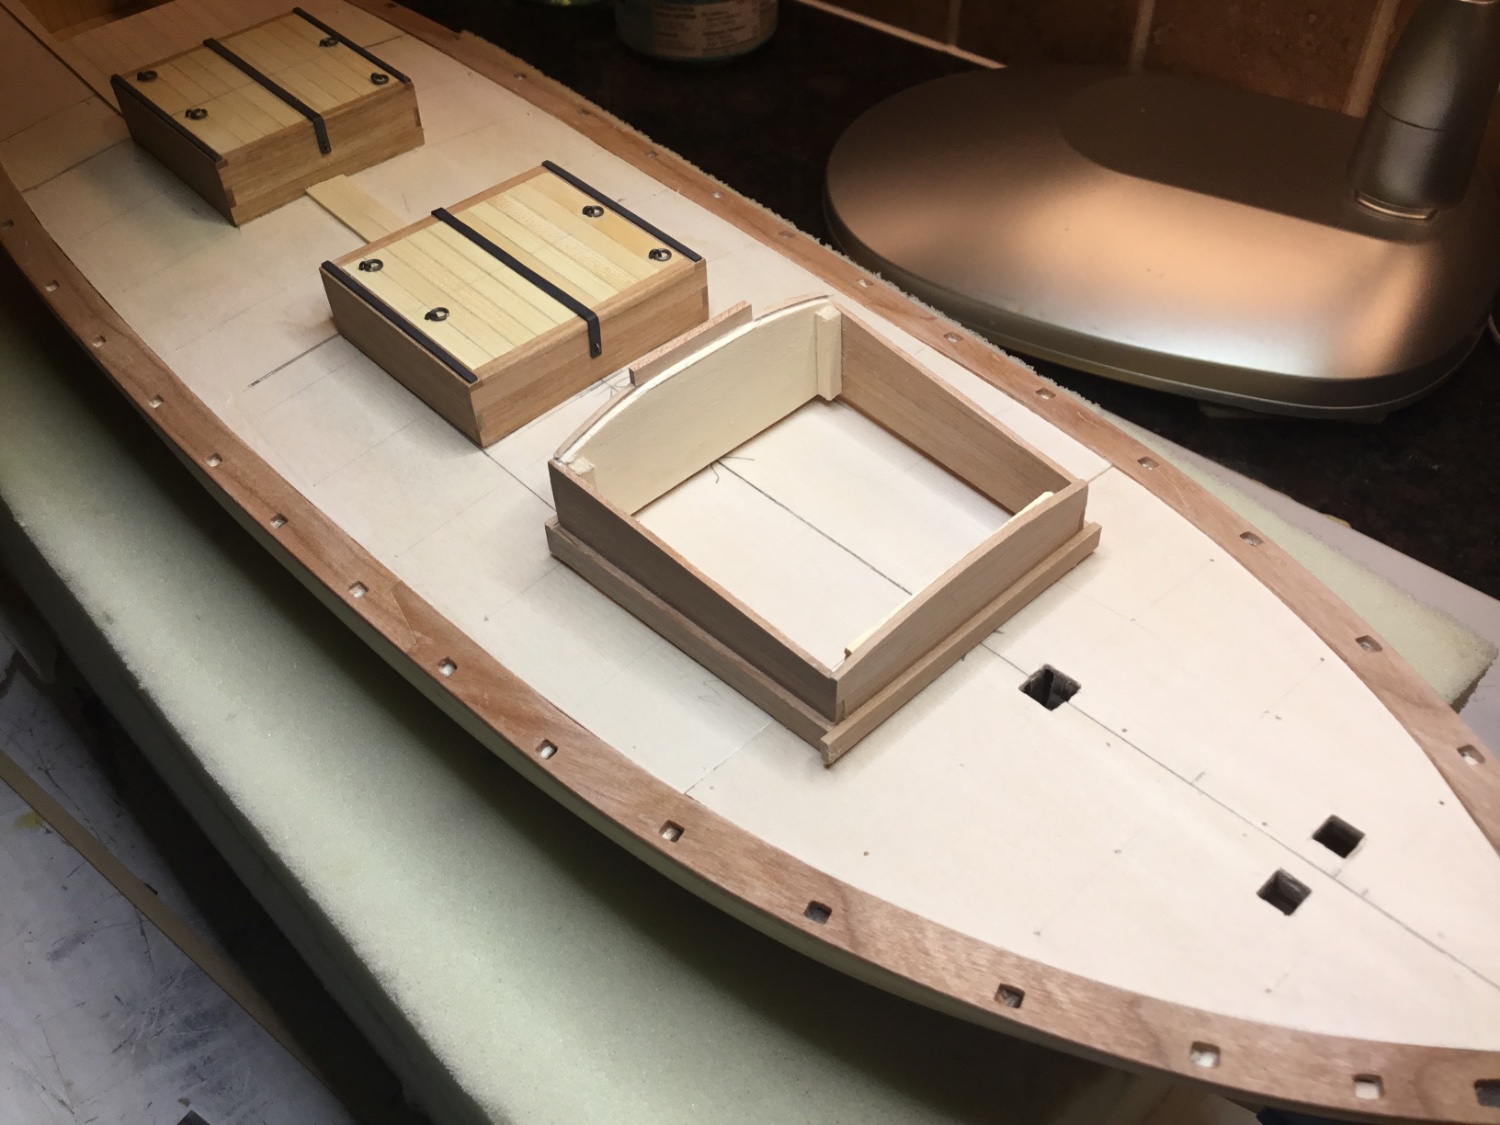
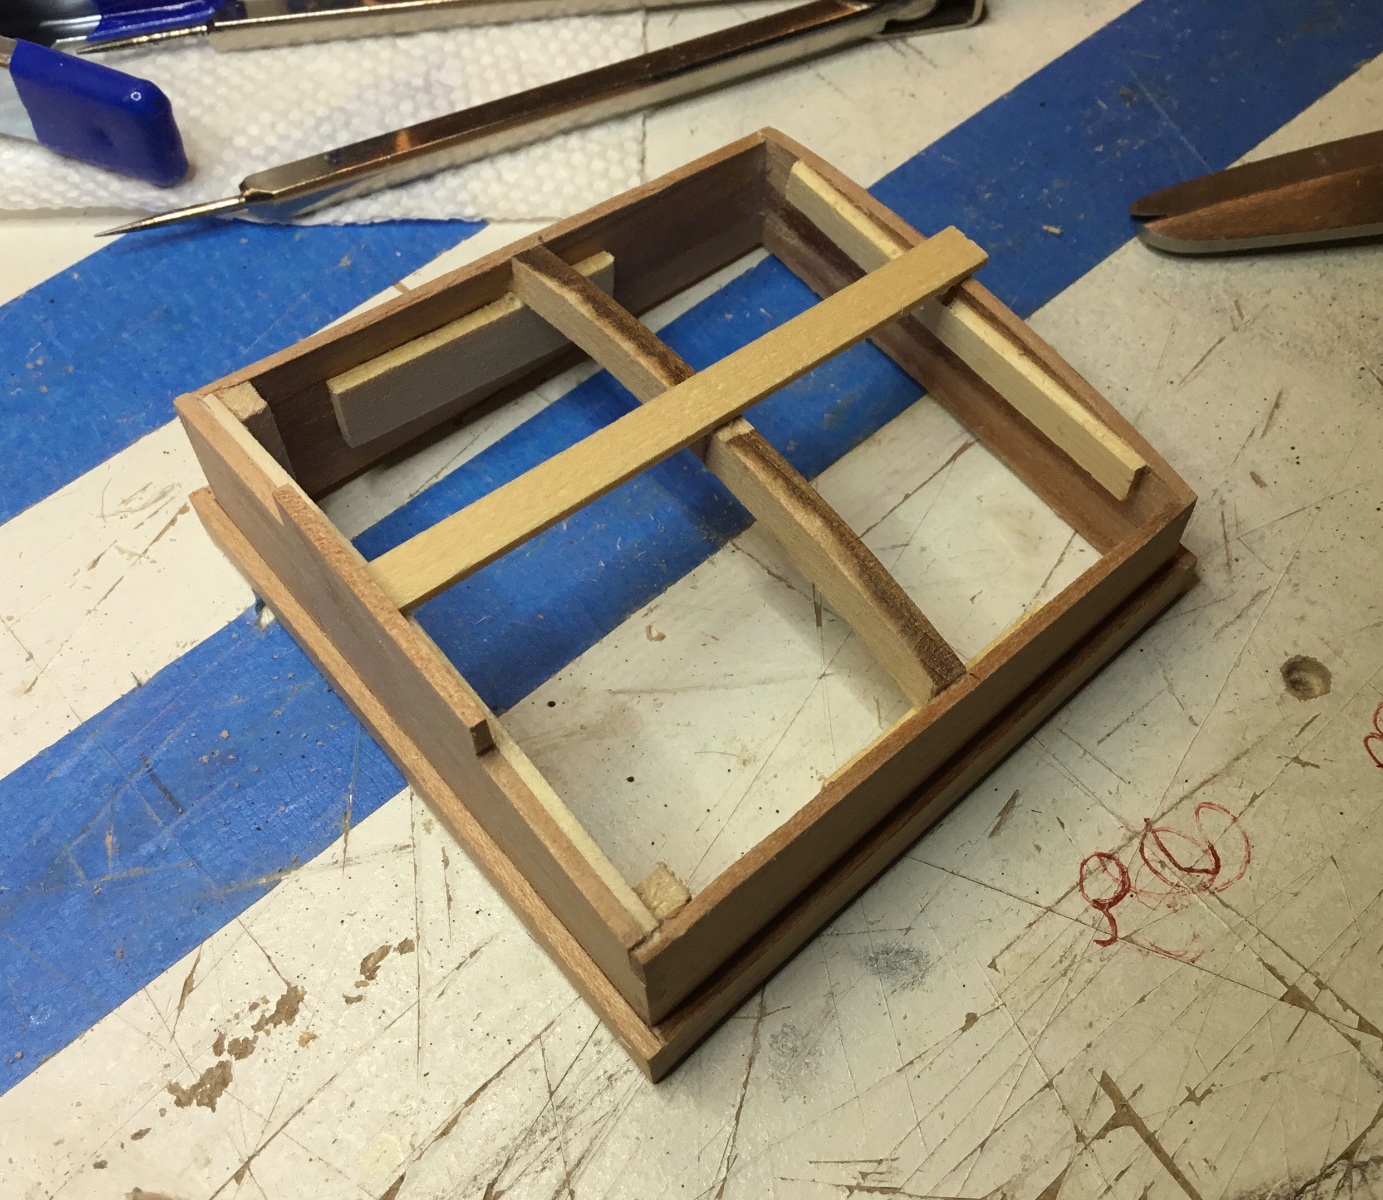
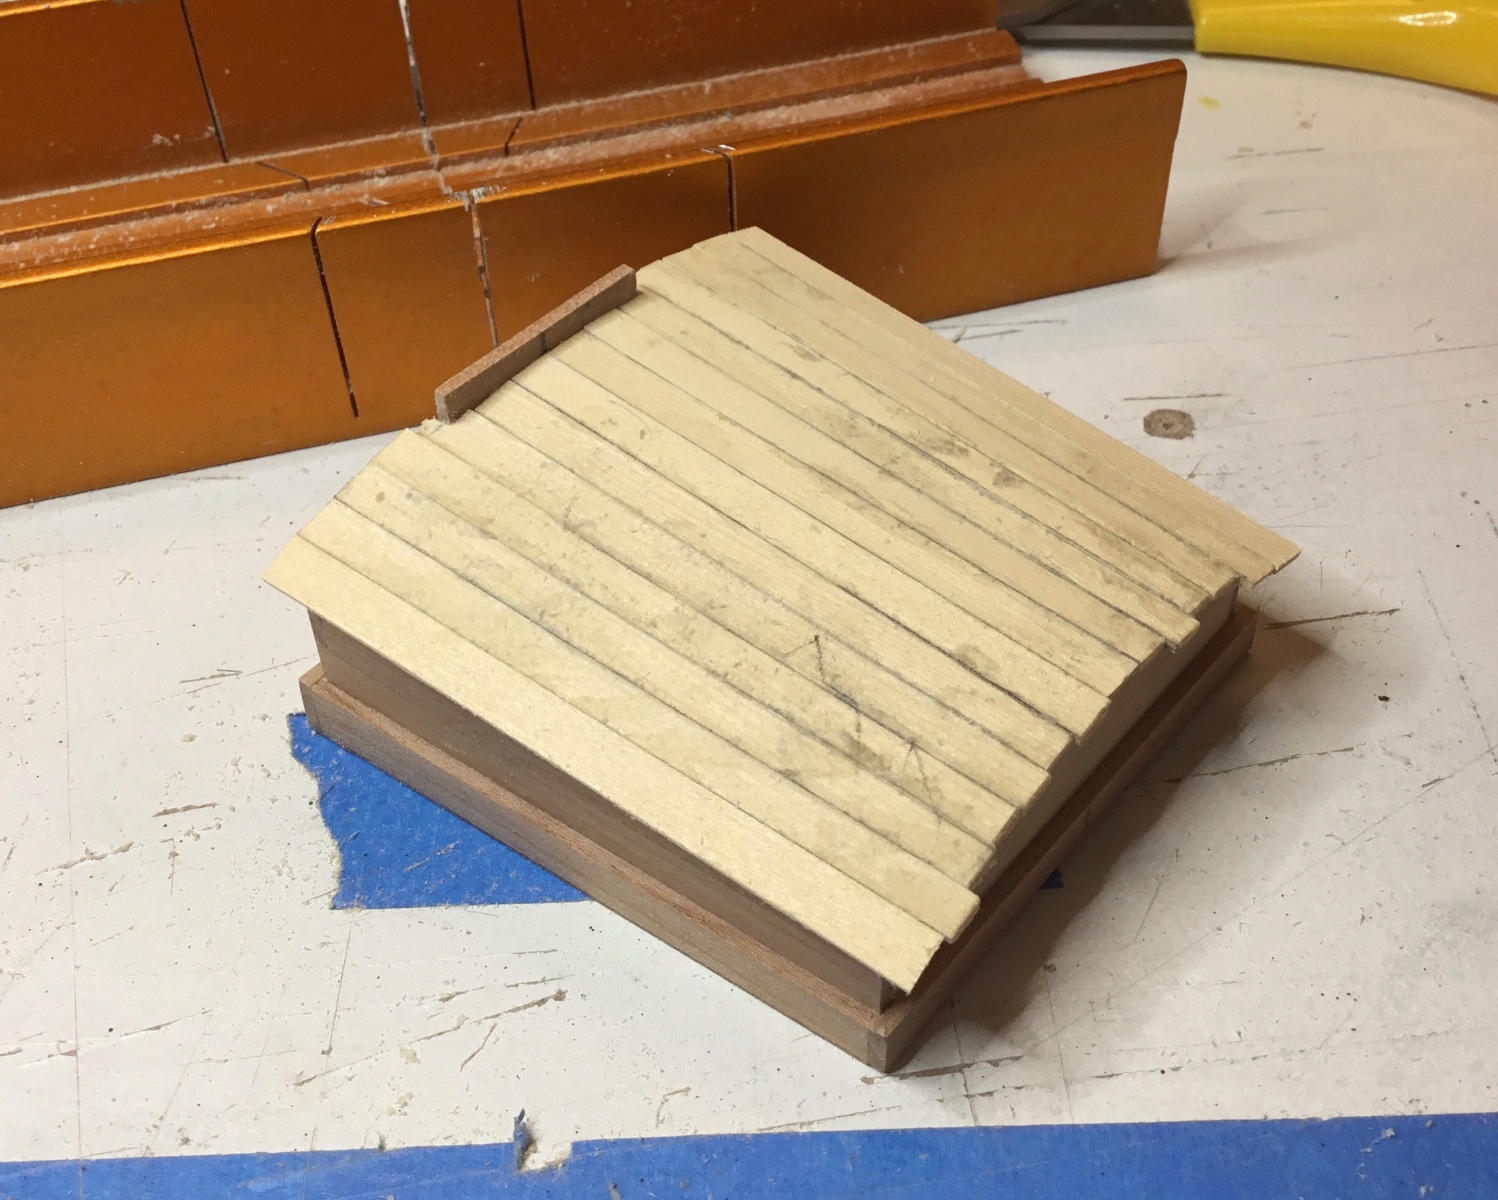
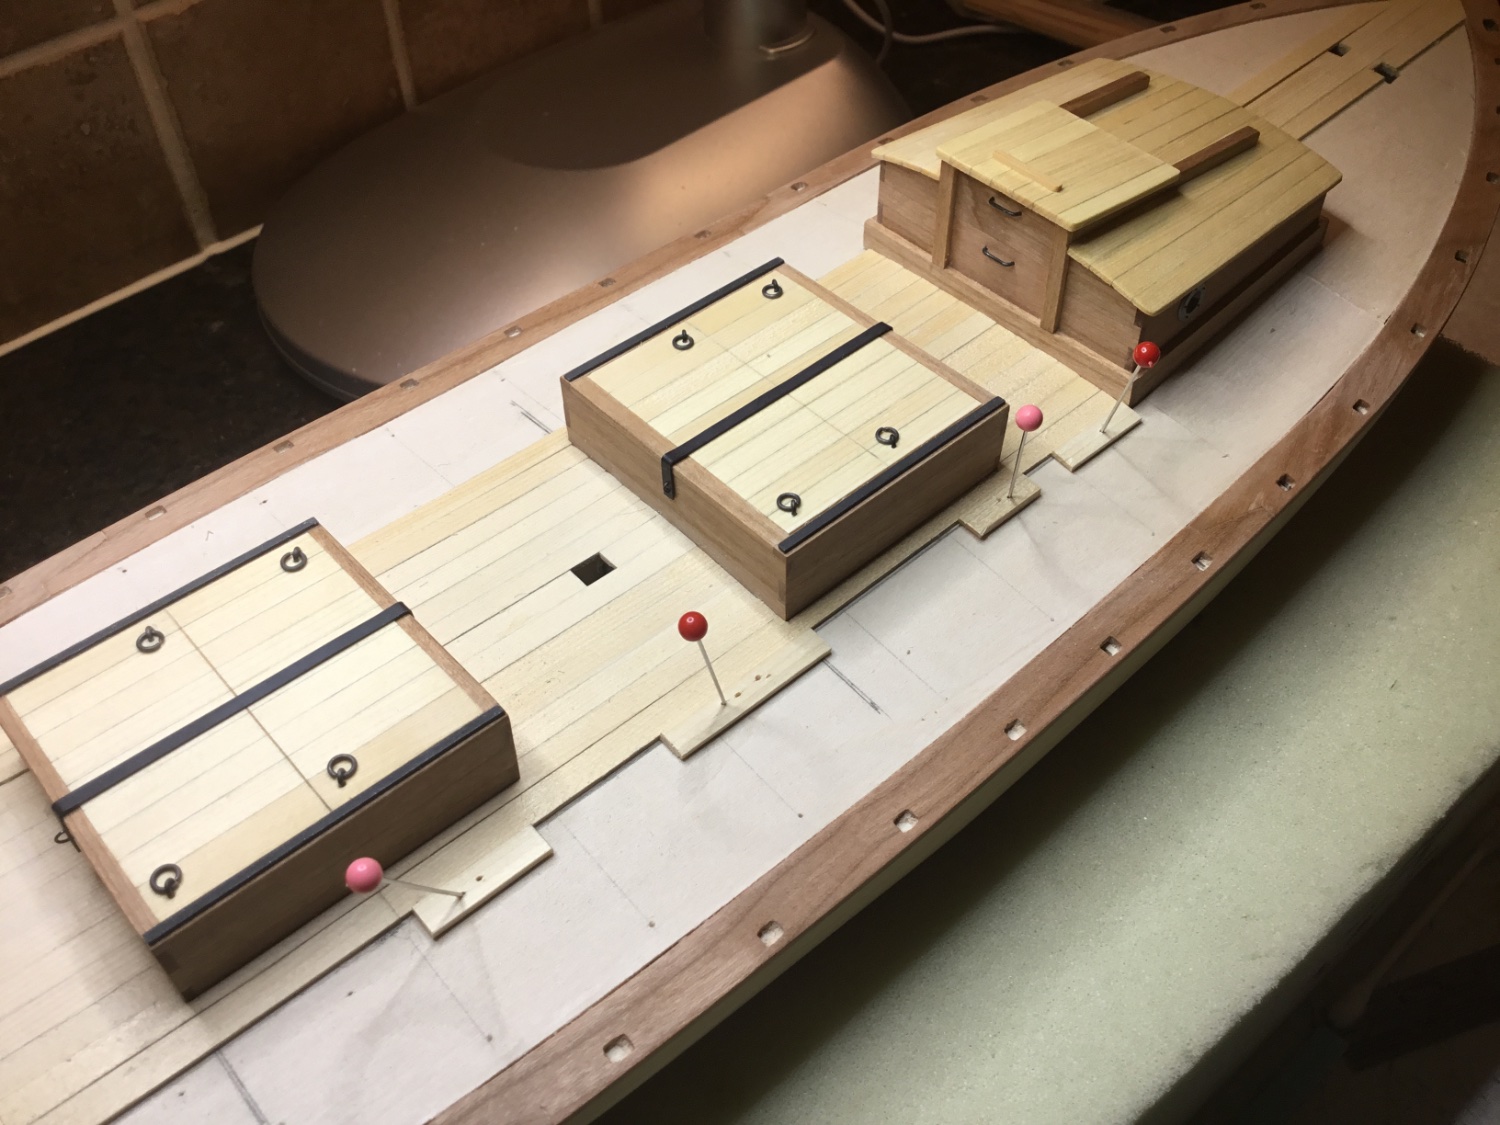
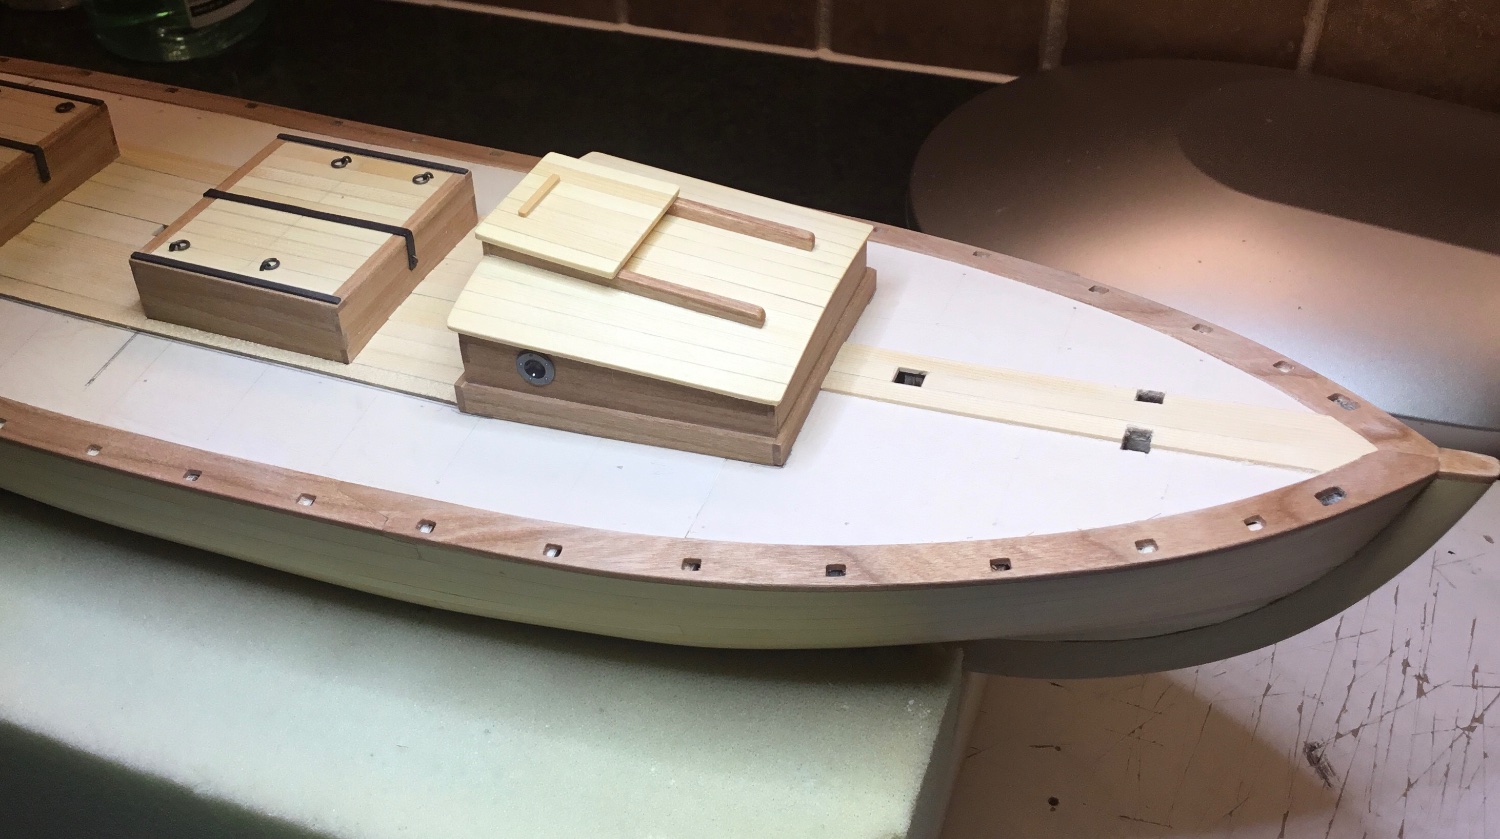
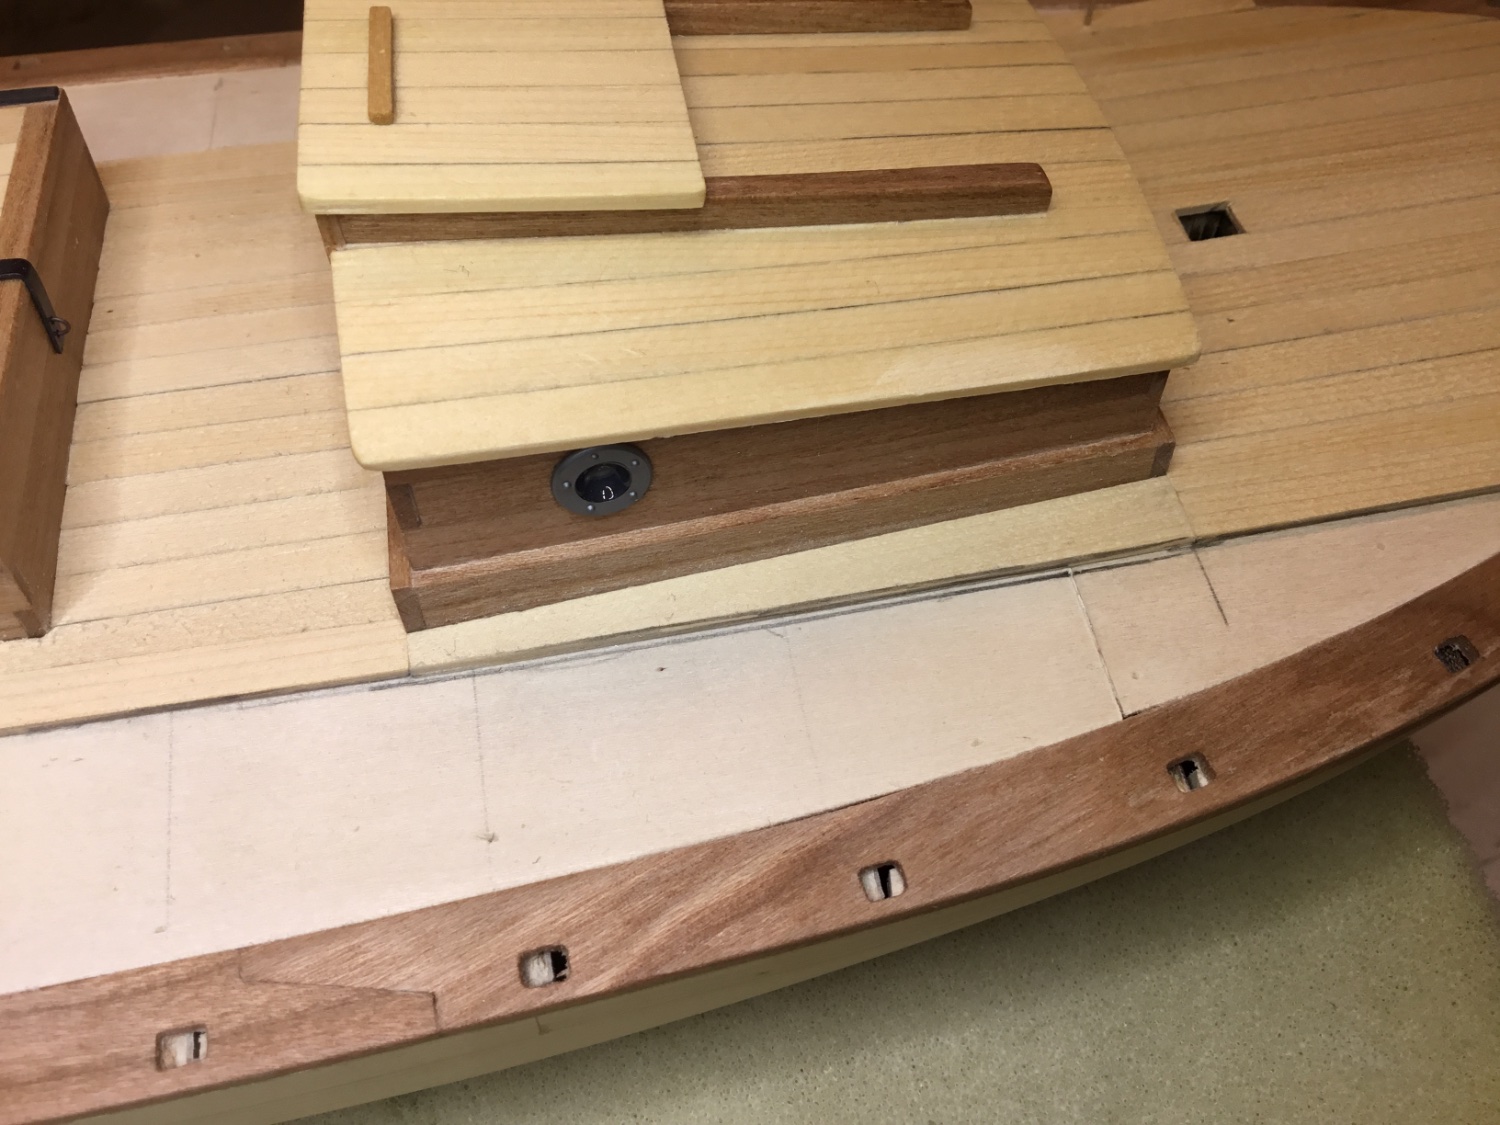
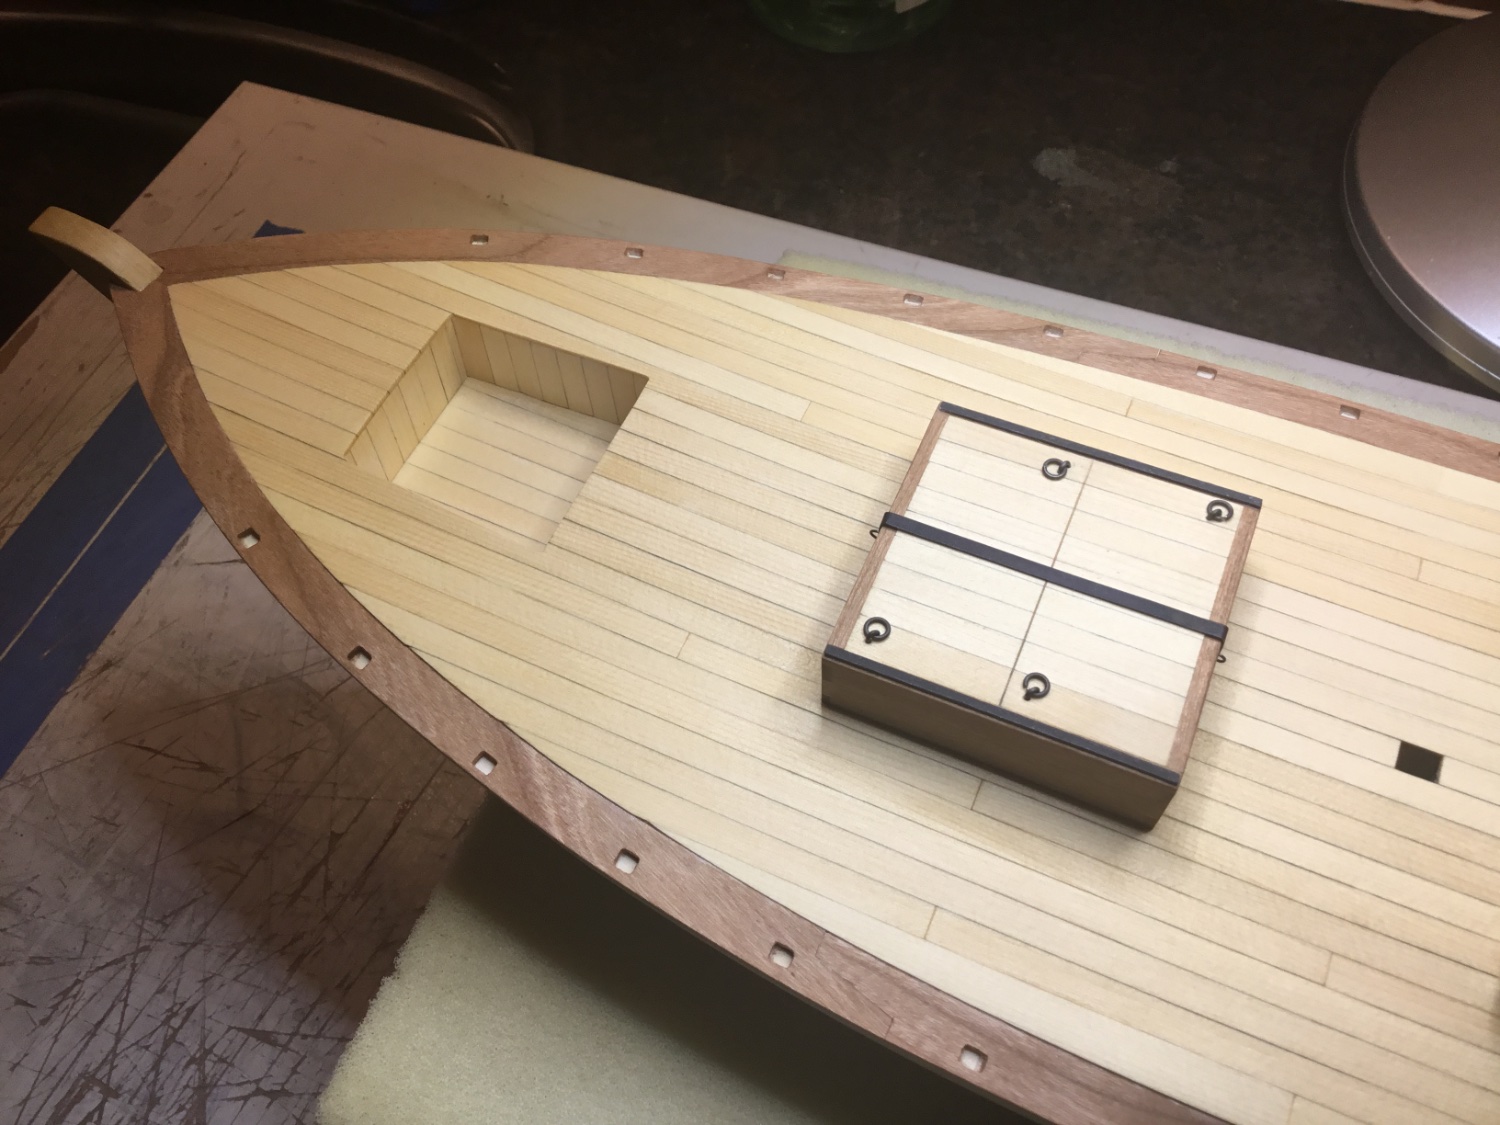
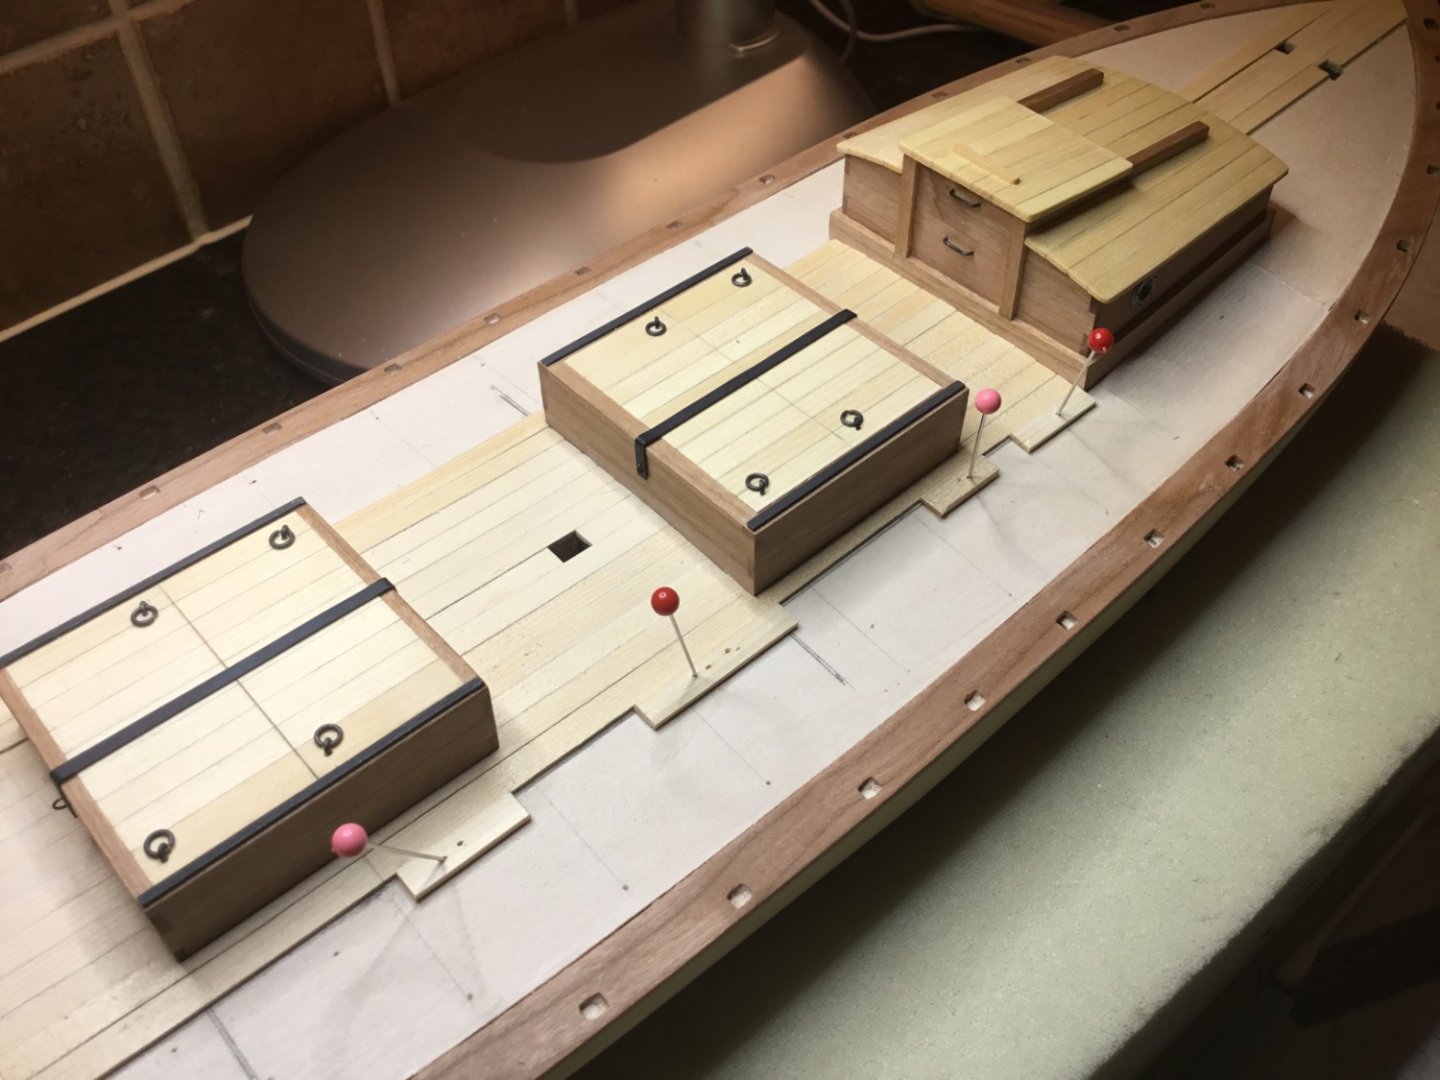
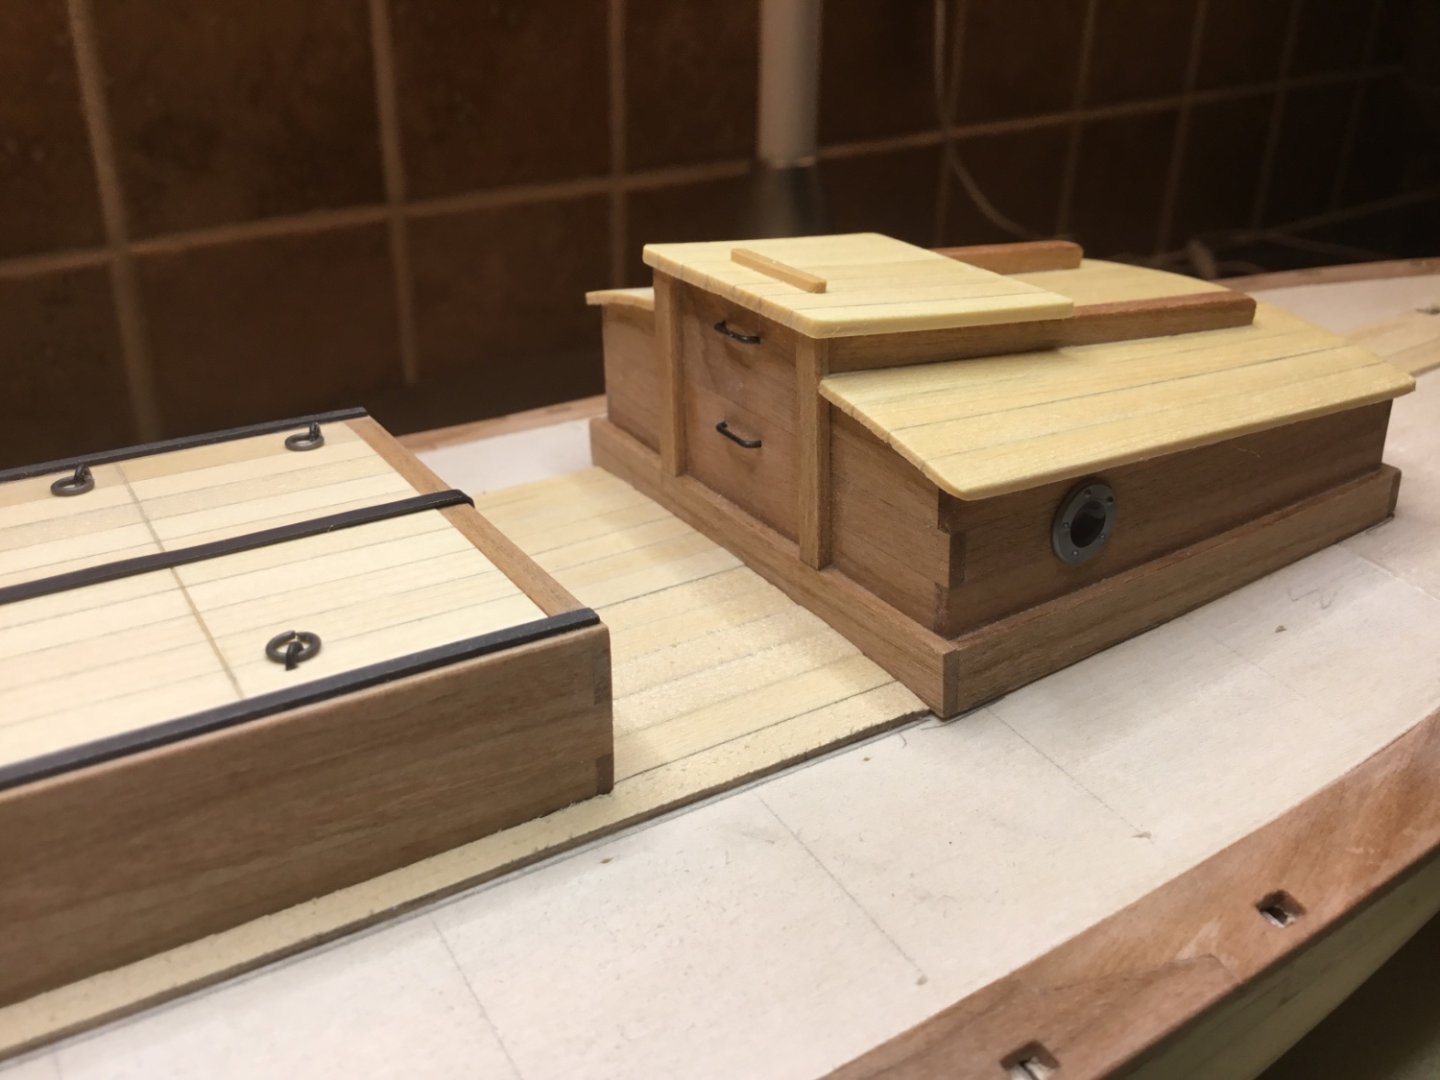
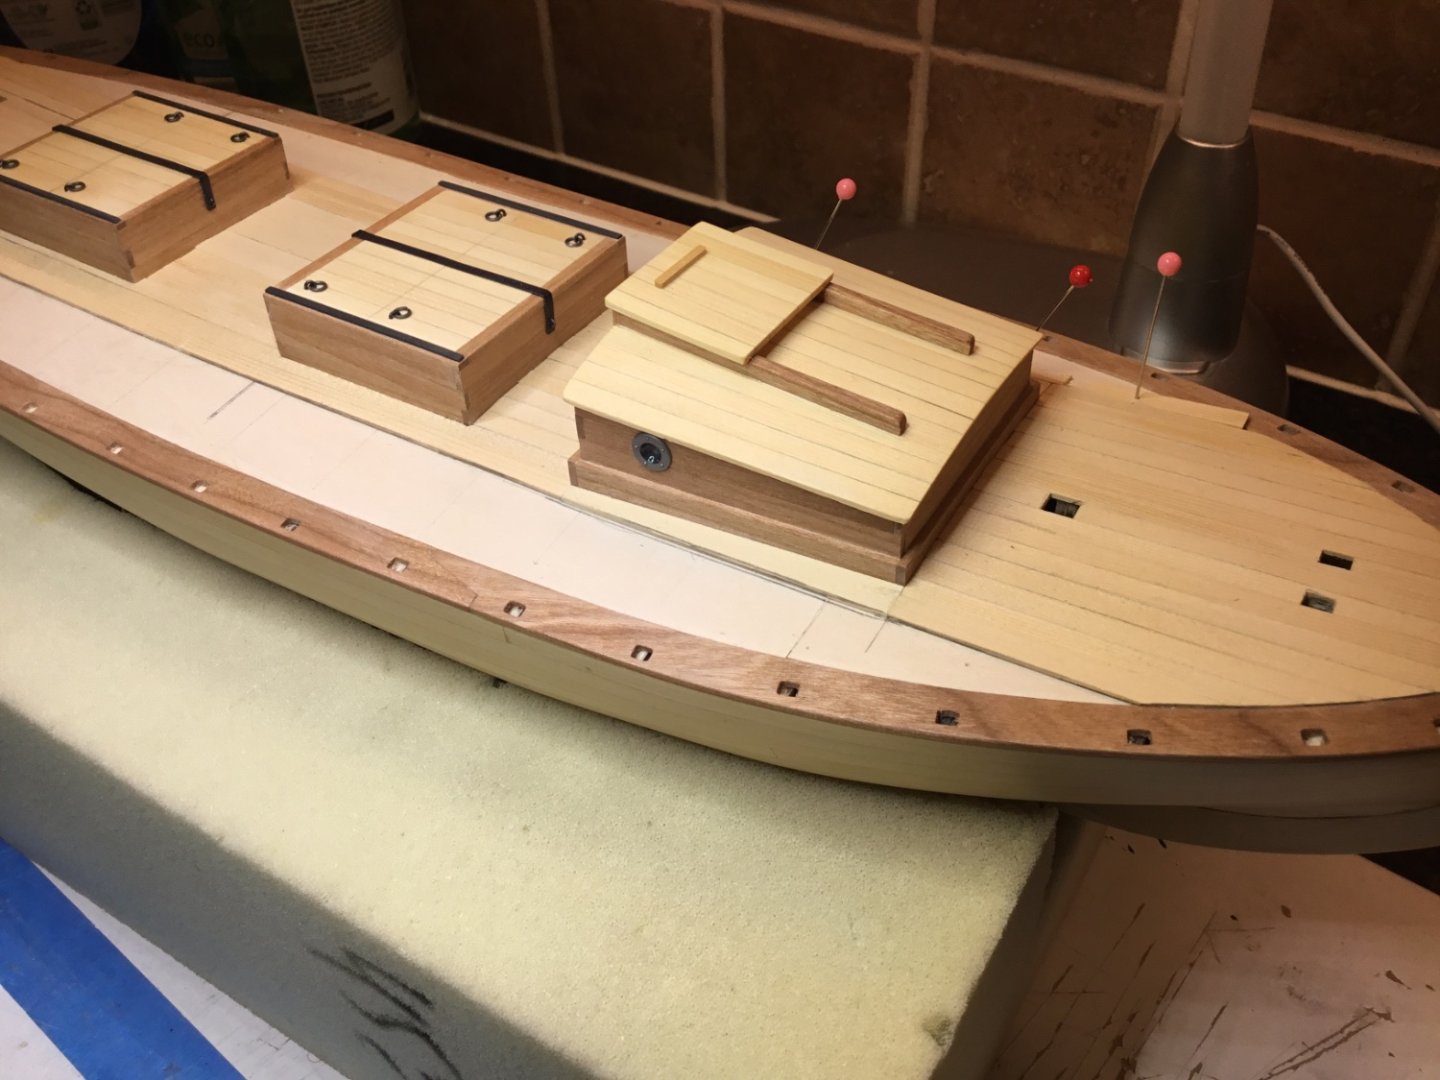
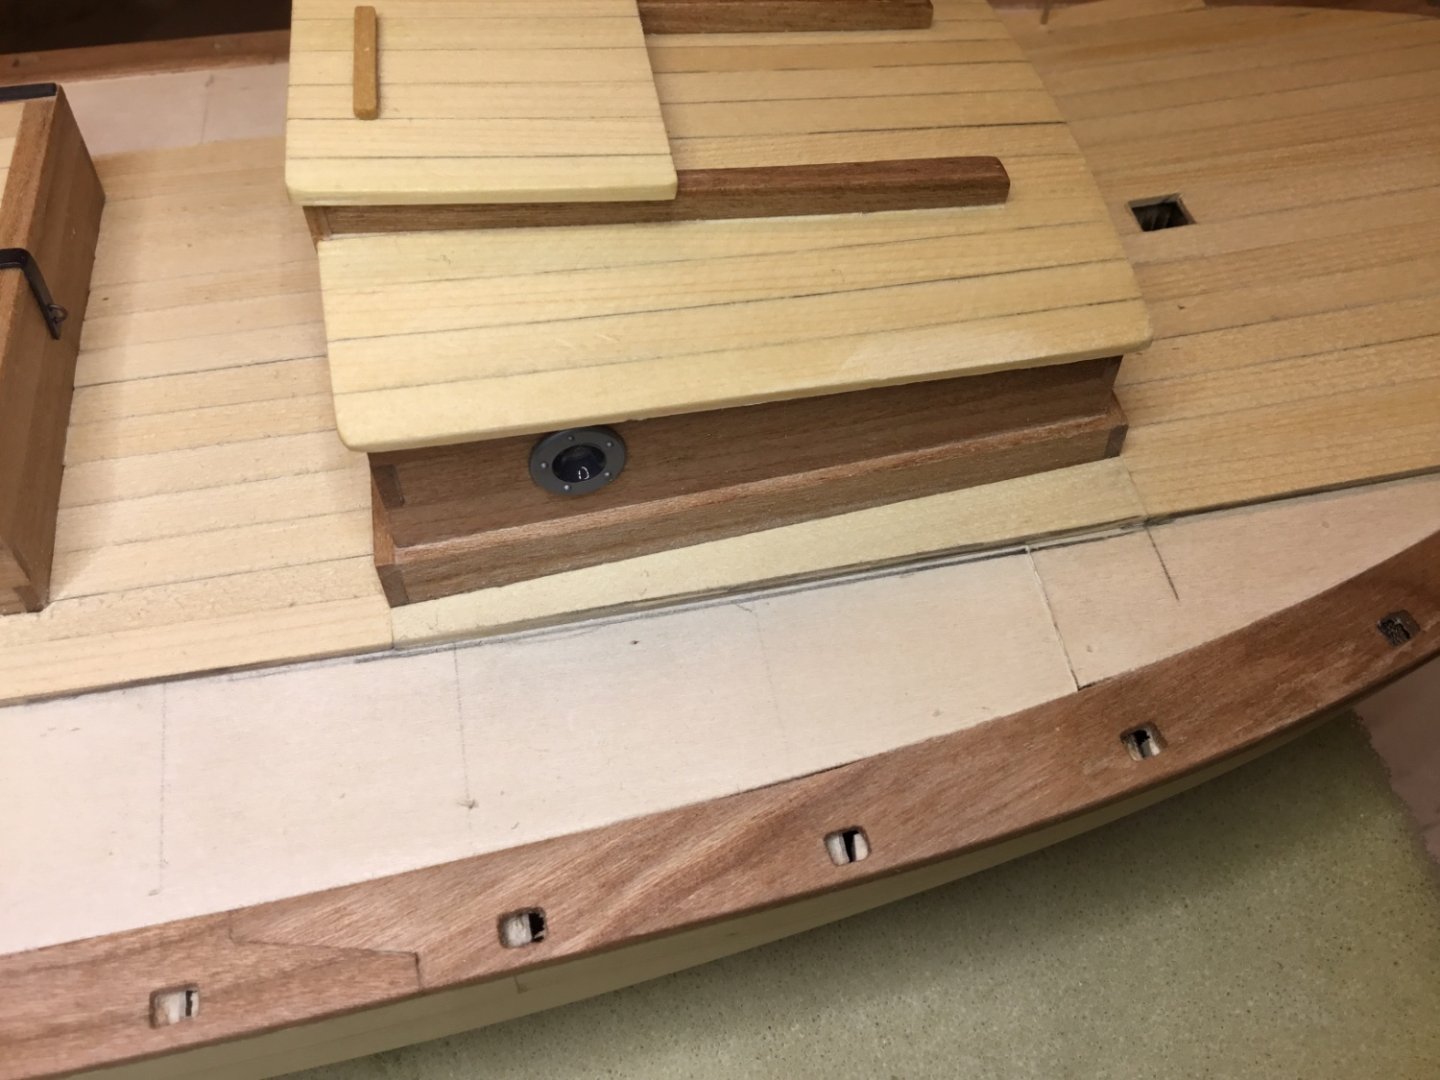
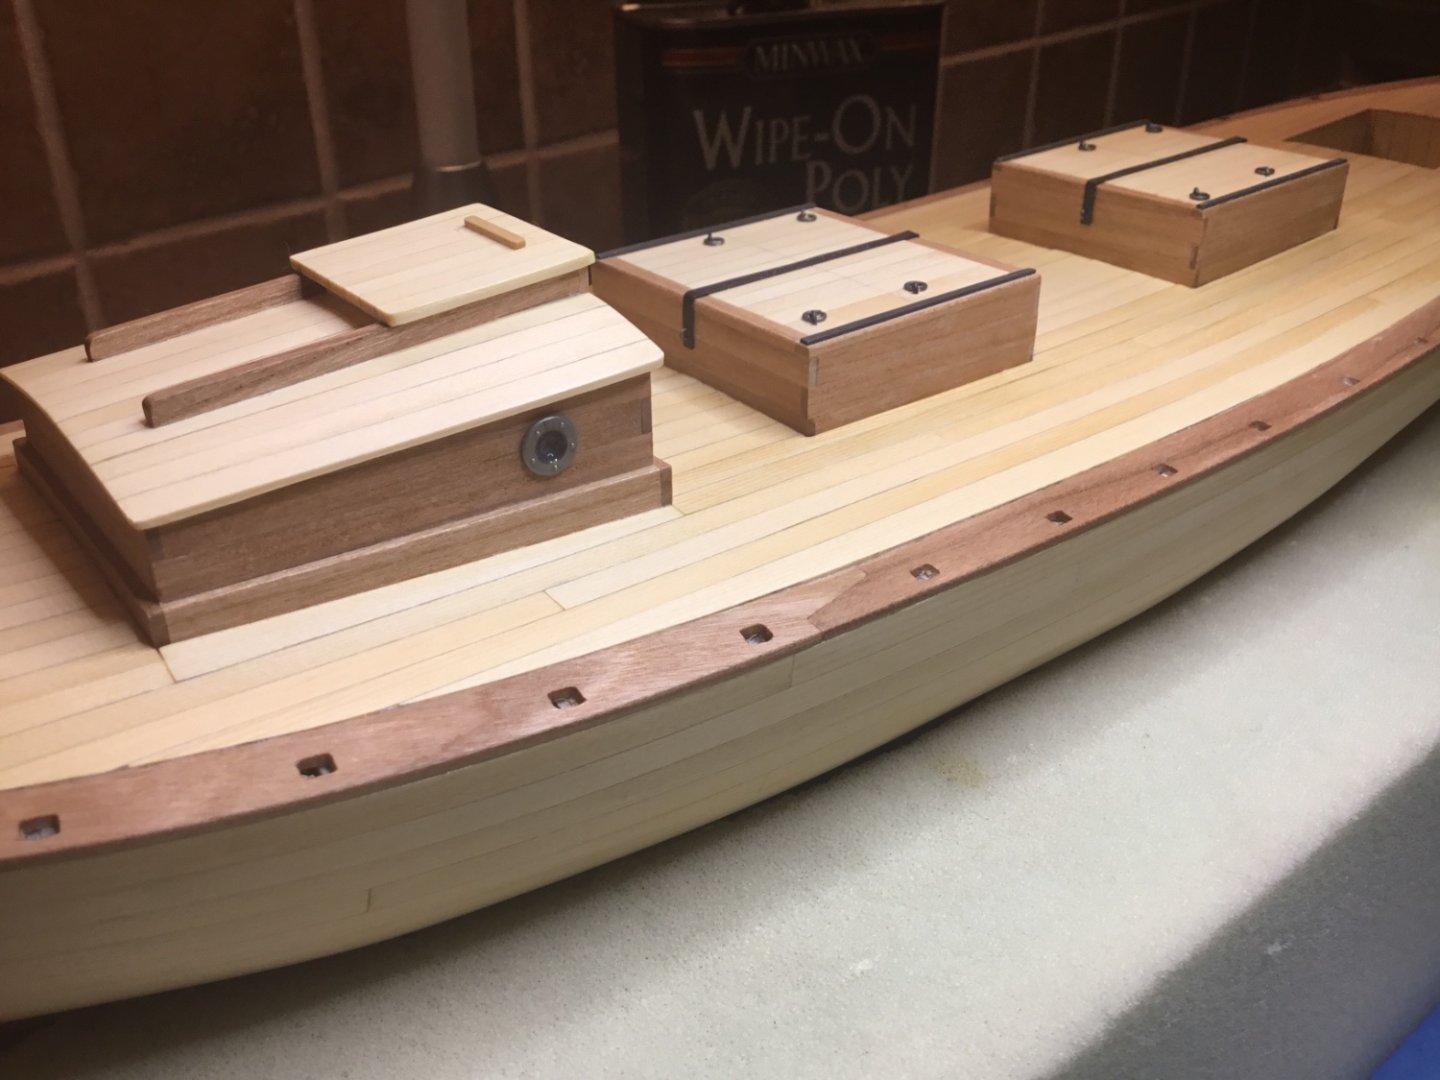
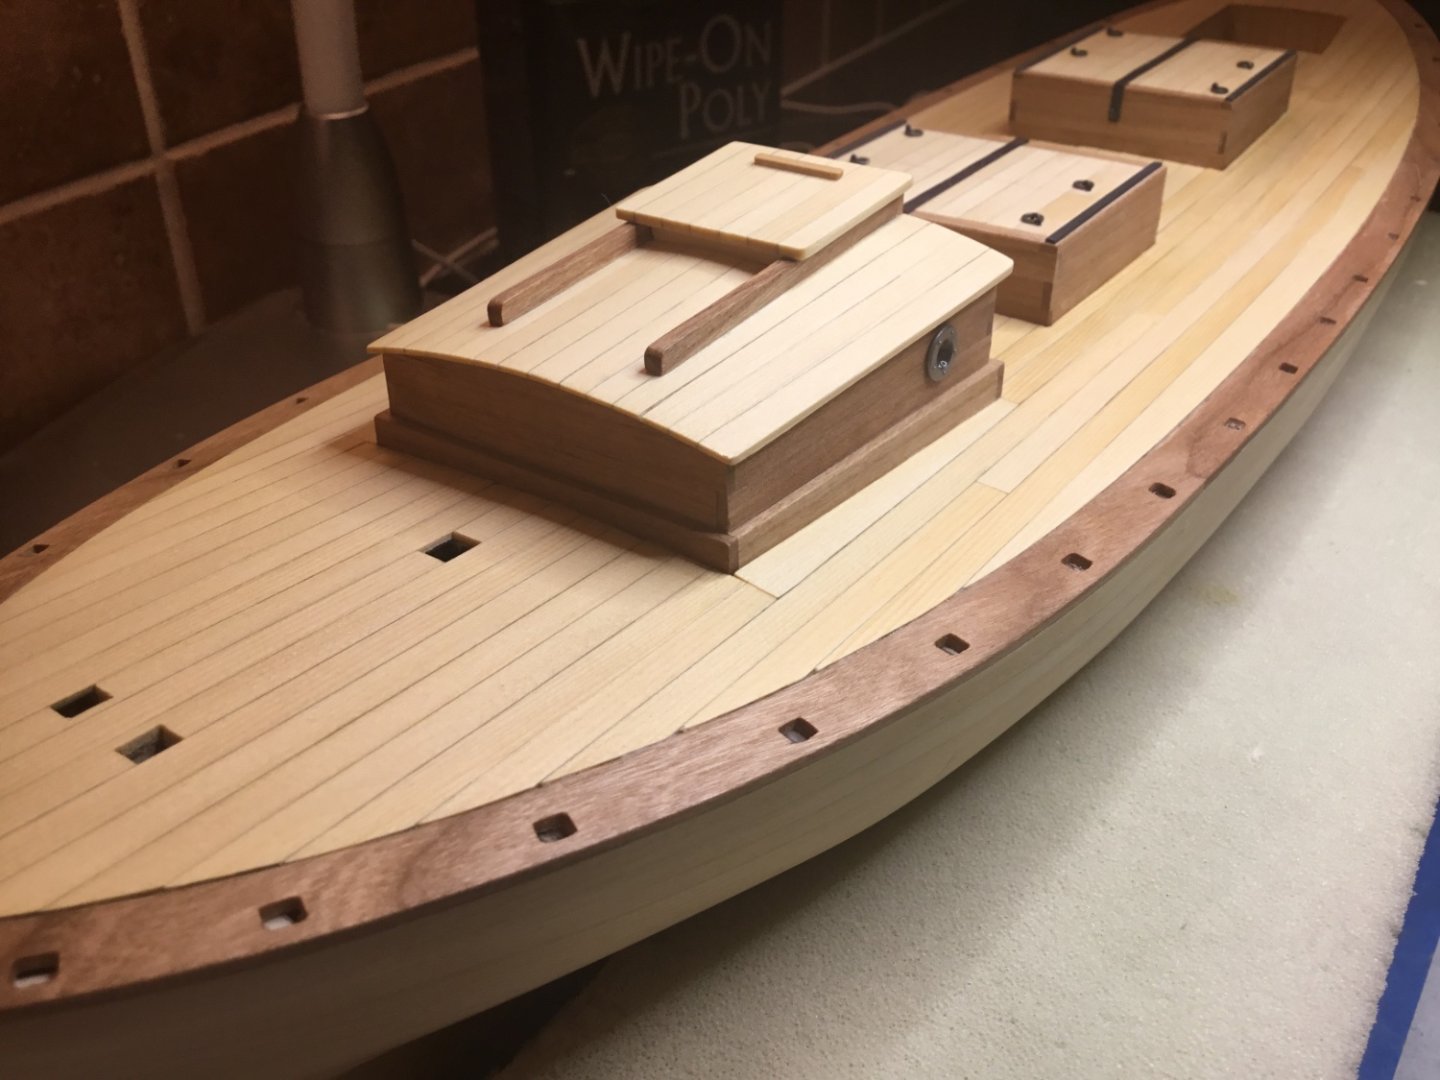
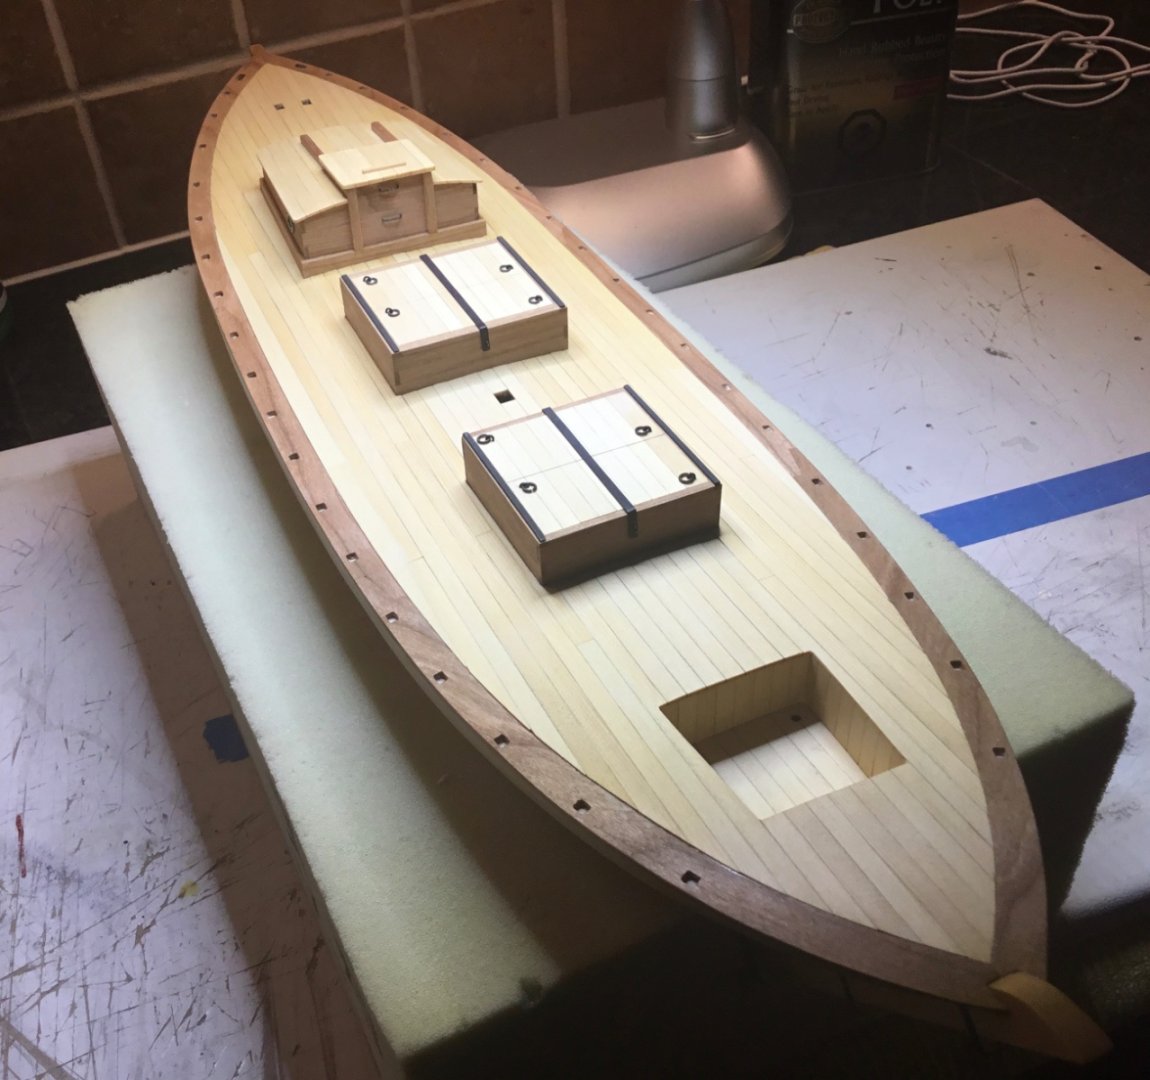
Hey Everyone, first and foremost many thanks to all of you for your comments and Likes. The cabin is finished and the deck has been laid. The cabin was made pretty well the same way as the hatches. The walls are 1/16”cherry and the roof is 3/64” AYC. One of the kit supplied cabin roof beams was used to support the roof planks. Two straight planks were laid down the center of the roof and the remaining planks were tapered. Well except for the outer two planks which will have to be sanded back to the proper amount of overhang.. After a good sanding the companionway roof slides were attached. Holes for the port lights were made. I had a couple of Billings plastic port lights laying around which I think look good so they were used. Mod Podge “ Dimensional Magic “ was used to glaze them. Then the deck planking was started. The plans and directions say that no nibbling was used and that the planks should be “feathered “ into the planksheer. Here are the photos just showing the progression of the planking. The deck was given a coat of wipe on poly. Next will be the stanchions and knees. Hope to see you next time.


- 72 replies
-
- 13
-
-
-
- Glad Tidings
- Model Shipways
- (and 1 more)
-
Hey Chris, you could buy a 4’ x 4’ sheet of half inch ply, cut it into 16” x 48” pieces and glue the pieces together so that the wows cancel each other out. I’ve had pretty good luck with that in the past. Last year I picked up what Home Depot calls a project panel. They are made of 3/4 inch 1” x 2” pieces glued together. I bought one that is 12” x 36” and it is still straight. Here’s a few pictures of it


-
Hi newbee, I am following with great interest the mods that you are making to your Golden Hind. Regarding the issues you are having with text and images, the only suggestion I have is that you make sure your cursor is positioned where you want to insert the text or image. I’ve had success by ensuring that after entering text or inserting an image I hit enter a couple of times to move the cursor down to the position where I want the next set of text or image to be placed. That way you don’t end up with text beside the image or somewhere else that you don’t want it. Moving the cursor down a couple of places will also give you a space between the images which makes them easier to differentiate from one another. Hope that’s of some help
-
Hi hamilton, thank you so much. I’ve seen a couple of pinky builds online where they stray from the plans and although the Glad Tidings hull doesn’t really look like any of the work boats in Chapelle’s book, I think it can still be passed off as a fishing boat 🙂
-
Thank you SkiBee, I appreciate your comment very much.