HOLIDAY DONATION DRIVE - SUPPORT MSW - DO YOUR PART TO KEEP THIS GREAT FORUM GOING! (Only 36 donations so far out of 49,000 members - C'mon guys!)
×


Thunder
-
Posts
583 -
Joined
-
Last visited
Content Type
Profiles
Forums
Gallery
Events
Everything posted by Thunder
-
Hi, Caldercraft / Jotika do the Pickle: http://www.cornwallmodelboats.co.uk/acatalog/caldercraft_schooner_pickle.html I think you can sample the instructions here: http://jotika-ltd.com/Pages/1024768/Heritage_4.htm
-
Hi, it is a little more complicated than that. The Caldercraft / Jotika kits instructions vary depending on the age they were first manufactured. The Pickle has very good instructions but if you picked their Supply then you will find them poor. There is the odd discrepancy with either also which people here could help you avoid. The Victory kits look pretty good but not as thorough as the Pickle. The Lady Nelson is quite basic.
-
I wouldn't knock yourself about your Victory, it looks a cracking job for your first vessel. I am pretty amazed that you have showed the determination to stick at it and get to this stage. Assuming that is a wooden plank on bulkhead kit then you have started with one of the hardest models available. The Lady Nelson could help iron out some skills and be completed more quickly but after the Victory it may prove to be under your skill level. Saying that, I have one myself, waiting to complete as a model between bigger projects. The choice is yours but I think you could handle any of them kits.
-
Hi, only just catching up on this topic. I have built the same kit, well almost, from a Revell package. Definitely the same kit, marketed as the Flying Dutch Man but not 'glow in the dark'. Your build has encouraged me to finish as I have left it without masts. I read your discussion on kit origin, the other Pirate ship shown looks either to be the old Pyro 'French man of War' or the Saint Louis. Most of the kits in this vein are copies and pop up between Lindberg, Revell and Heller. I have kits of them all using each others moulds as well as the odd use by them of Pyro and Airfix moulds. For sails I have used the plastic on the larger scales but worth trying thin paper for some. I sawed the bolt ropes, etc, on whilst soaked through and applied to yards then re-soaked when rigged. By drying with a hair dryer and coating with a dope they look like they are wind blown. Clewed up sails look good as can do correctly whilst wet. It is worth a go. Love the build.
- 140 replies
-
- 1
-

-
- jolly roger
- lindberg
- (and 1 more)
-
A great example of what can be a accomplished even with a kit of this quality. Inspirational.
-
Hi thanks for the reply, my issues are with the bulkheads, the transom sections and now the deck construction. Perhaps I should start a build log but I am not organised enough to remember to take the photographs.
-
Hi, I acquired this 'kit' some time ago and have just started the build. I have already come up against a lot of issues so wondered if anyone else has done or is building this kit. It may be you are building from the plans which would be the same as the kit is near scratch build anyway. The kit has a booklet by Bill Shoulder, a kit plan for bulkheads, keel and masts and some lovely plans which are taken from the originals in NMM. The main problem is that you have to cut parts to the kit plans but work to the NMM plans for measurements. THEY DO NOT MATCH!!! Bulk heads were provided but didn't match either and on remaking found that kit plans are not symmetrical to the centre line. Or course, as most kits seem to do, the bulkheads positions do not align with the body plans, Is this just to confuse the modeller? Any help would be great. Thanks.
-
Hi, From what I can see in the photographs the planking looks really well done. You cannot really avoid some clinker effect as your first planking is thicker planks. The only way to avoid would be a lot of steaming and pre-shaping. In real practice each plank would possibly be cut to suit the position, which would not be practical with the supplied material. You can however divide your hull into sections and then divide up the bulkheads by amount of planks required at the middle of the hull. from this you can work at the taper of the planks and shape each to suit before application. I don't tend to start at top or bottom of the hull but at the wale position.
-
Wood masts for a plastic model... Tips?
Thunder replied to SomethingIsFishy's topic in Plastic model kits
Hi, checked my kit, it has been on my bedside cabinet for 10 years with plastic masts and is fine. -
I think he is referring to 'as it is now' because there is evidence that she is not like she was at Trafalgar. Wishful thinking for the 1765 option, that is something I have always wanted myself and would struggle to stop myself from buying.
-
Wood masts for a plastic model... Tips?
Thunder replied to SomethingIsFishy's topic in Plastic model kits
When I built that particular model I had no trouble with the plastic masts as, unlike Heller's war ships, the masts are reasonably solid. It is still on show after 20 years so will check it for you when I get home to see how it has faired. The top tip I would give you, for building that model, is to get the Noel C L Hackney book for the Airfix Mayflower. This is a step by step guide to building the model at three different levels of expertise and is brilliant. That Revell kit is very good but this will help you achieve museum standard. If the masts are hollow you can use metal rod glued inside. For the yards you can replace studding sail booms with metal rod to strengthen the yard ( obviously not on your ship). -
After reading the Keith Julier books I purchased some permagrit files on blocks, I since purchased a set of needle files by the same company and a set of larger files of various shapes and grit. Unless I need something more flexible these are all I need. Hi, Below is the website: http://www.permagrit.com/index.php They do more than when I last took a look so will be looking at getting some more myself. I have had some for many years now and have used the blocks for Kitchen fitting and DIY as well and am still on my first set. The only thing I would say is that the flexible sheets are not that flexible, unless they have improved them.
-
Announcing the Model Ship World Ship Kit Database Project
Thunder replied to SkerryAmp's topic in Wood ship model kits
Hi, are you going to be listing discontinued kits? only reason i ask is that people may have information that is valuble as they often come up on web sites for sale. -
The period of the Clipper ships saw a rise in the chinese pirates that would prey on any unprepared western merchant vessel. They used Junks that were heavily armed with large crews.
-
Wood masts for a plastic model... Tips?
Thunder replied to SomethingIsFishy's topic in Plastic model kits
You can buy various dowel rods from craft stores on line beech being good but you can find other wooden rod from other sources, wooden cotton buds, tooth picks or if you go to a ladies beauty salon they have a device called orange sticks for pushing back nail cuticles which is good quality wood. I Have some vary large cotton buds that are sold for cleaning equipment but cannot remember what for now, mine were from a lumonics laser printer. Keep your eye open when out and about, sometimes stirring sticks from well know fast food outlets come in handy! When doing my plastic kits I would rig in the same order as a real ship but add temporary forward stays to prevent rigging the back stays pulling the masts out of true. Just make sure you do not use thread with a tendency to shrink. -
What a great log and inspiration. I did a similar process with this kit and ended up selling it before starting as decided there was just too much work to make it more accurate. I don't understand these kit manufacturers surely it would be easier to do it correct when plans are available than make it up! Saying that, I moved on to the Caroline and ended up modifying her.
-
Hi, it may be worth checking something before moving on. Have you removed too much material from the bottom of bulkheads 2 and 3? it will be worth putting a piece of the first and second planking at these points to check that they will extend down to the walnut keel. you don't want a bit of the ply false keel showing. Checking now will save a lot of heart ache and work later. They will extend further down at this area due to the angles of the bulkheads but worth a check.
- 69 replies
-
- 2
-
-
- lady nelson
- victory models
- (and 1 more)
-
Need Community's Input on Best Kit Manufacturer
Thunder replied to Bandue's topic in Wood ship model kits
Hi, What is most important to you, historical accuracy, good plans and instructions or quality materials? If I was going for historical accuracy I would say Victory models or Caldercraft. If you don't want nearest fit parts but want them designed specifically for your kit then I would say Caldercraft. For best timber I would say Corel, Amati or Victory. For plans I would say Victory. I have no experience of American kit manufacturers so, as would every one else's unless they have experience of all manufacturers, my views are restricted. Kits I can compare are Corel, Mantua, Panart, Sergal, Victory, Revell, Jotika/caldercraft, Billings, Ark, Artesania Latina, euromodel, constructo, Mamoli, and model shipwright as I have kits by these but they vary per model. I would pick the subject you are interested in and then compare the offerings from each.- 10 replies
-
- 3
-
-
- Kits
- model kits
- (and 1 more)
-
Hello Hyposphagma, thank you for that, it will be very useful. The kit is very different to model shipways, judging by what you have sent me, obviously not derived from that one. Photographs of scratch built and other model makes seem very different to the Model Shipways kit especially in regard to hull proportions. Is this what builders have found or is it just the kit art photographs that give this impression.
-
It does have English translations on the box sides and on the plans, it is only the instruction book that only has German. Makes me think that it did at one time have an English booklet as well. A shame because, judging by diagrams, it looks to be in-depth. Does anyone know what other kits they did and if they were brought up by another company? Could this be the Mamoli kit for instance?
-
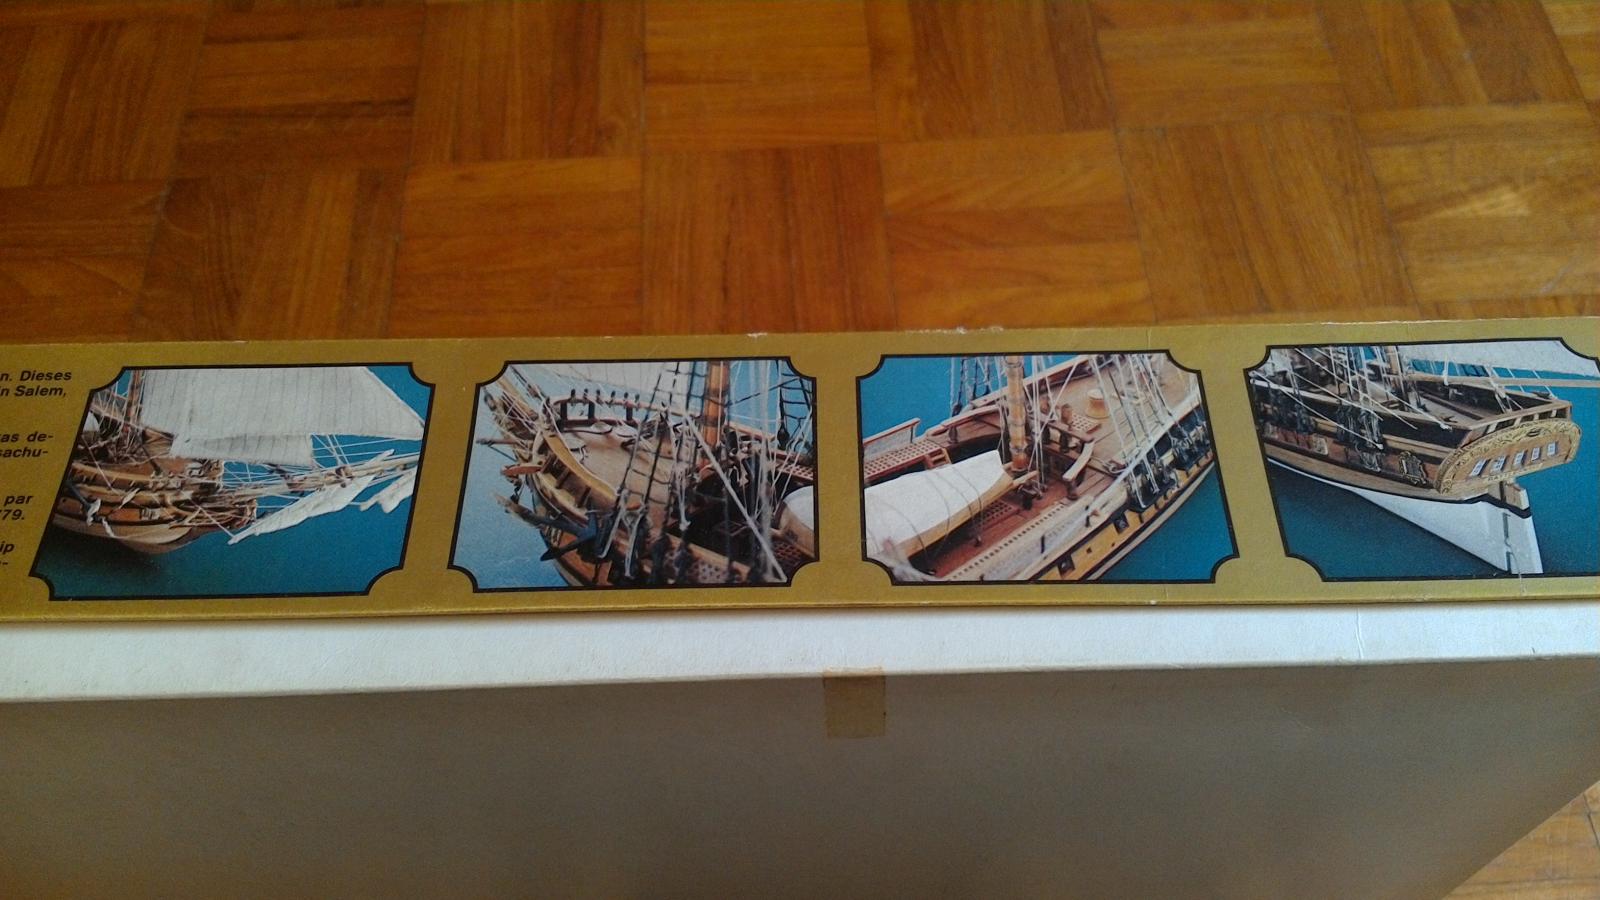
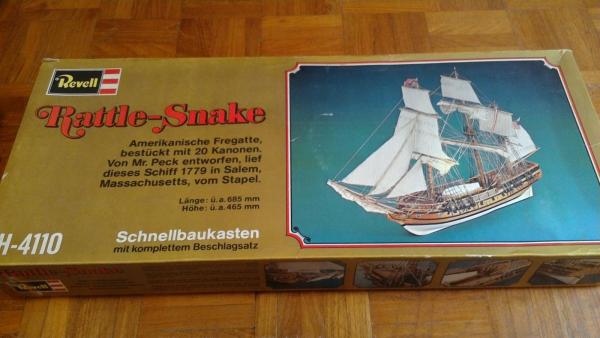
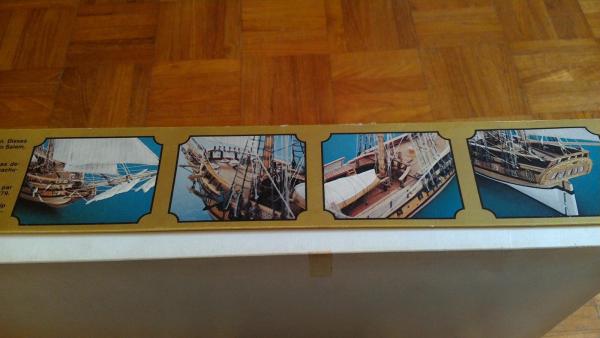
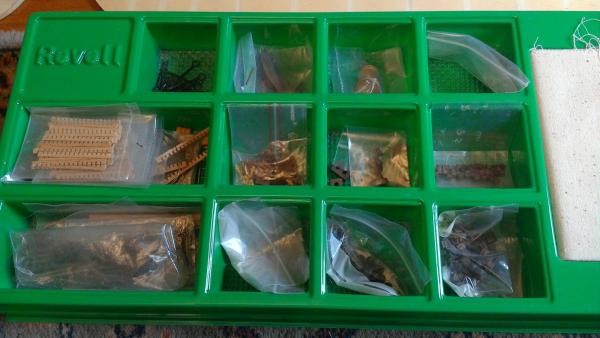
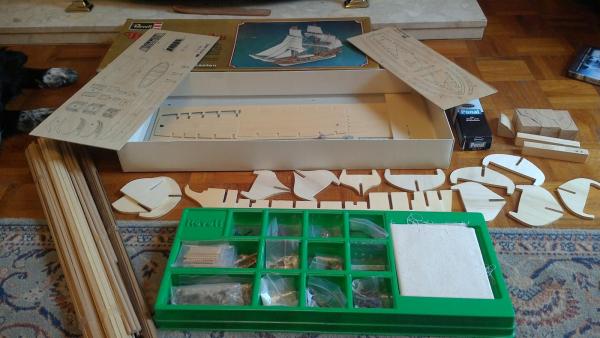
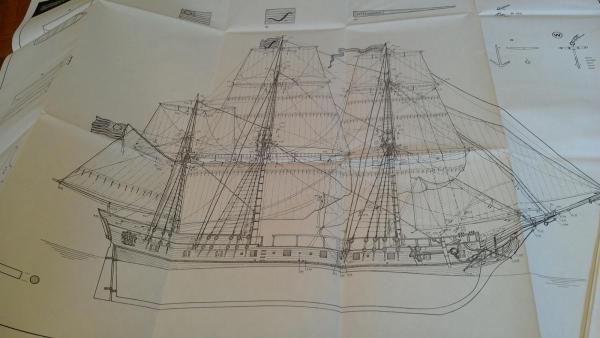
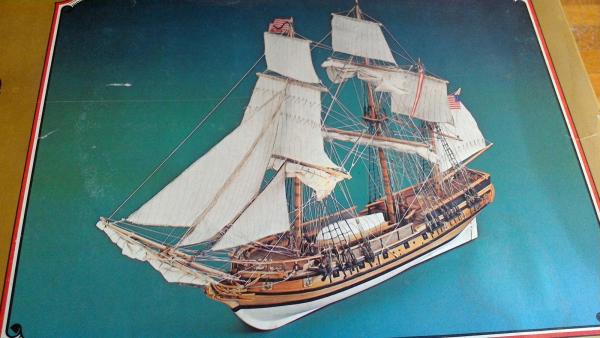
Revell Ratlesnake 1779 I came across this kit by chance and would like more information on it. I have been able to find very little searching the internet. I believe it to be a re-badge of a 'Hegi' kit or 'Tris'. I have found photographs of the kit with both of these kit manufacturers some where in the instructions. There is a date of 1978 0n the box. Not sure of scale but kit is 685mm long by 465 high. It is double planked with the usual plank on bulkhead construction. It comes with 5 sheets of plans and an instruction book which, unfortunately for me, is in German. Materials supplied are comparable with most of the modern Italian manufacturers although I may have some re-working of bulkheads to do and plywood sheets are not laser cut so will test my scroll saw cutting abilities.

-
Hi, I have found the box out, it is so similar to the photographs above but on the green segmented section Revell has been moulded over the 'Tris'. Interestingly, I have only found two references to the kit on the internet. One still has 'Tris' in the moulding but box is Revell and the other, and mine, has references to a company called 'Hegi'.
-
yes, Instructions are all in German but is not a bad kit, came across it by chance and have been trying to find out more details but in vain. I will post photos when I get a chance. Kit number was H-4110.
-
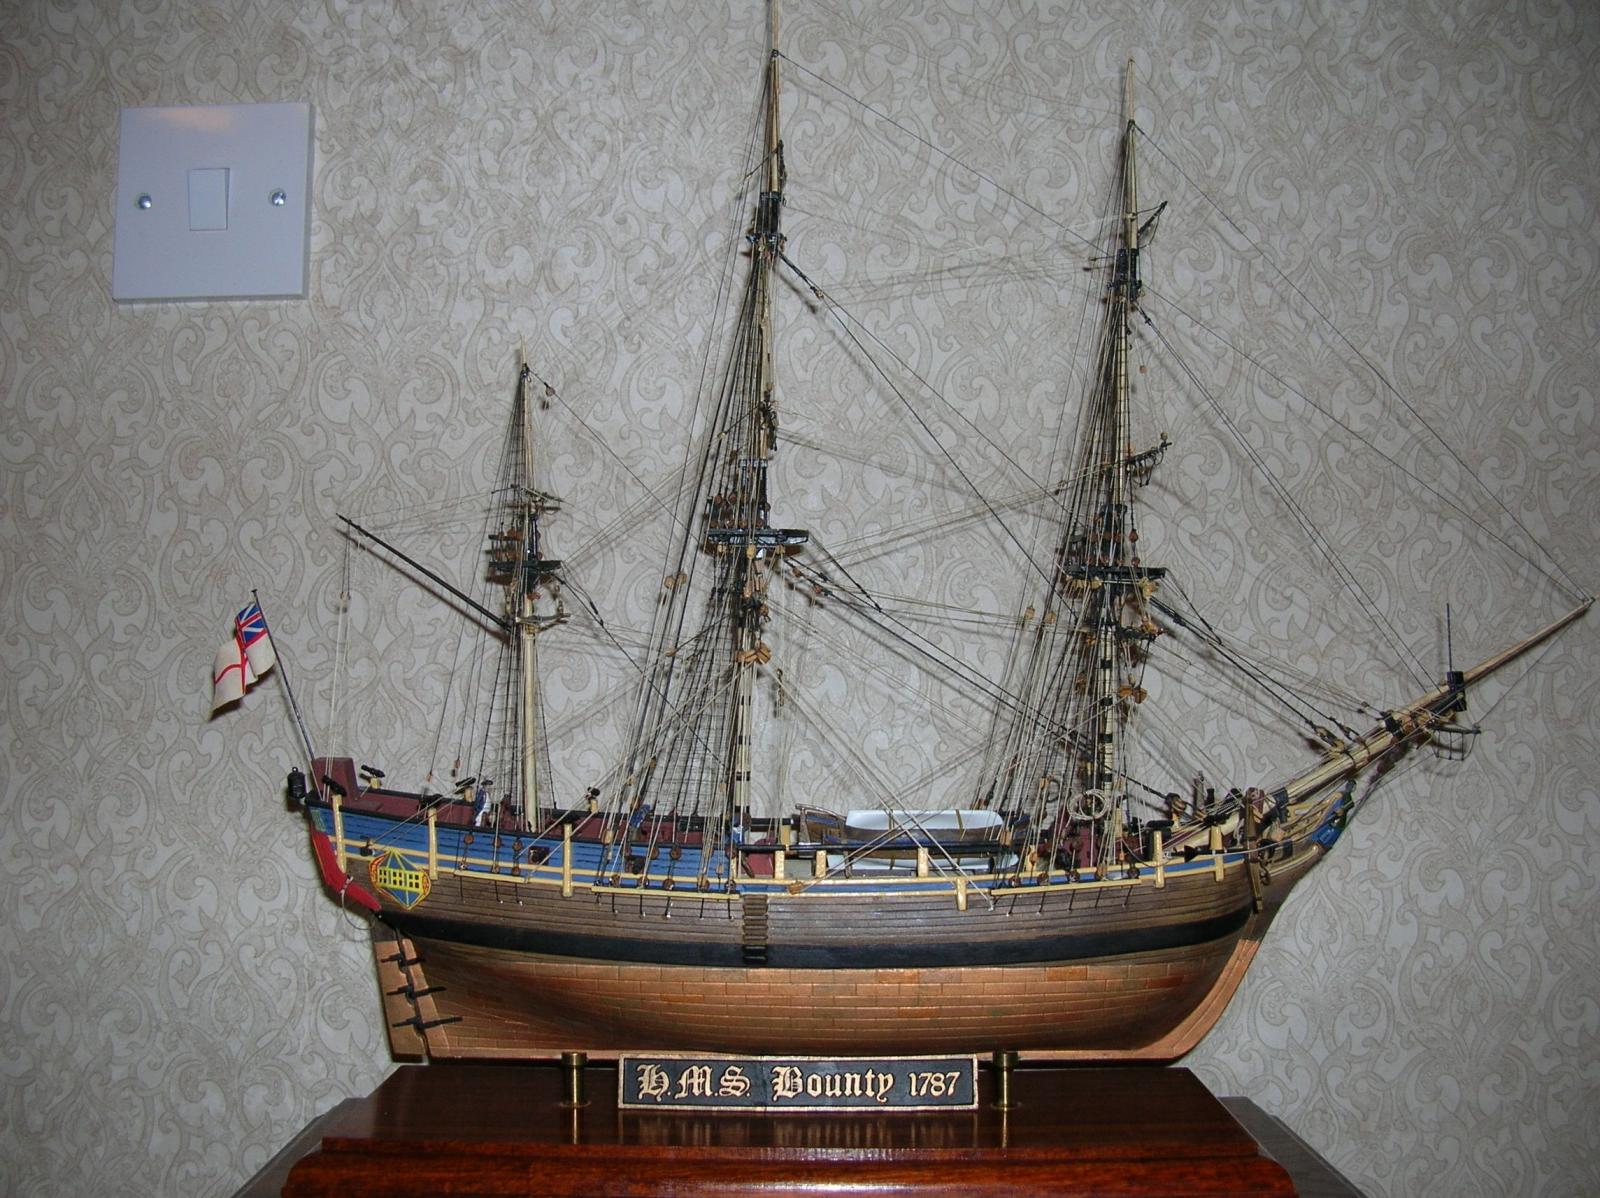
Hi, I used the Anatomy of the ship book to build my airfix bounty and am sure there is a table in the back giving all rope and cable sizes for each item of the rig along with the block size. Then it was a bit of maths to get the thread size. The Revell shrouds are awful and you will find it both easier and more rewarding to make your own. At that scale (Airfix kit, I believe is 1:87) I would keep the chain plate, cut off the dead eyes above ( and put to one side) and bits below, drill holes through where the dead eyes were, run the shrouds down from the mast heads, through the holes in the chain plate and into holes drilled into the hull where the bits below the chain plate would of attached. Then glue the kit deadeye moulded assemblies onto the shrouds. It will look even better if you can file a small groove into the back of the moulded dead eyes to except the thread. This method, calculating the threads required and making of own deadeyes if you should want to go even further, are explain in the Noel C L Hackney books I mentioned on your other thread. Thunder.
-
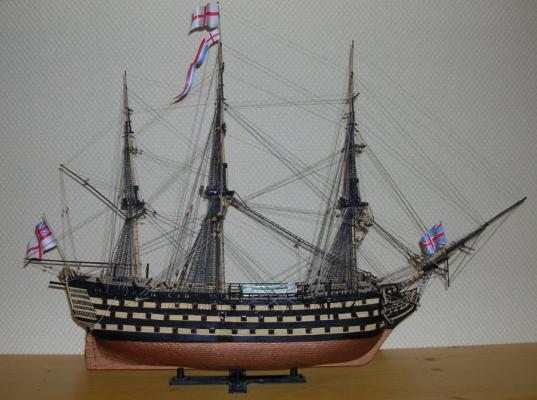
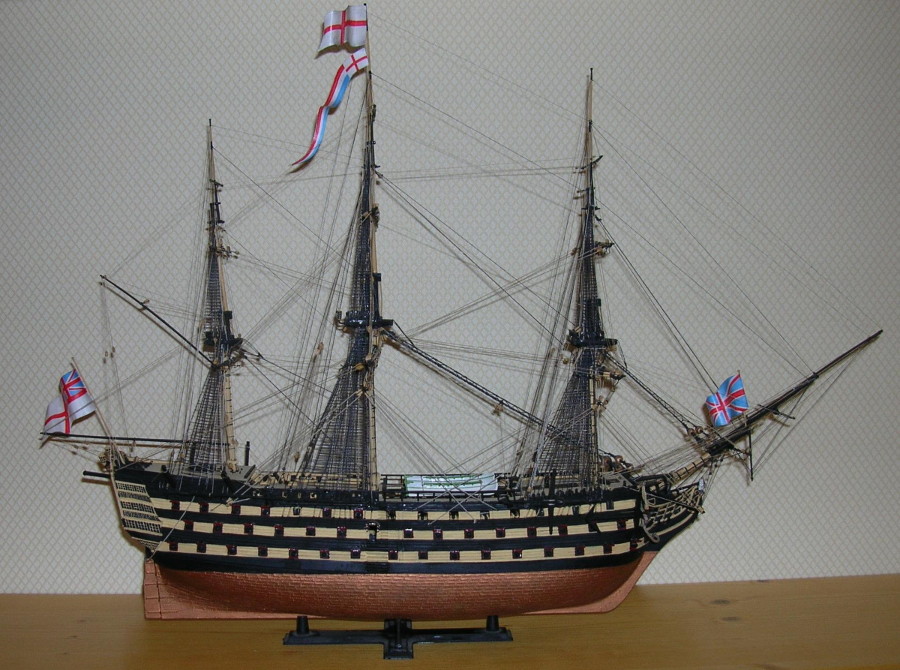
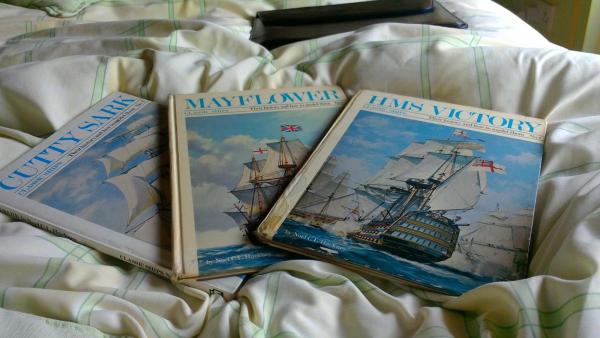
My advice would be to pick up the airfix Victory, Mayflower or Cutty sark and have a search for the guide books written by Noel C L Hackney that went with them. You then get a thorough guide to building with suggested modifications to improve. You also get full rigging plans and a method of completing the rigging for any ship going forward. If you get all three books then you get a guide for the three main era's of sail history. I still use these methods even with my wooden models. My favourite model was Airfix's Bounty. Not because of itss accuracy but it provided the best basics for a real good kit bash. I will try and get some photos on when I get home. Thunder. Here are the Photographs, The victory is a kit I built 20 years ago using the book below: