

pompey2
-
Posts
511 -
Joined
-
Last visited
Content Type
Profiles
Forums
Gallery
Events
Posts posted by pompey2
-
-
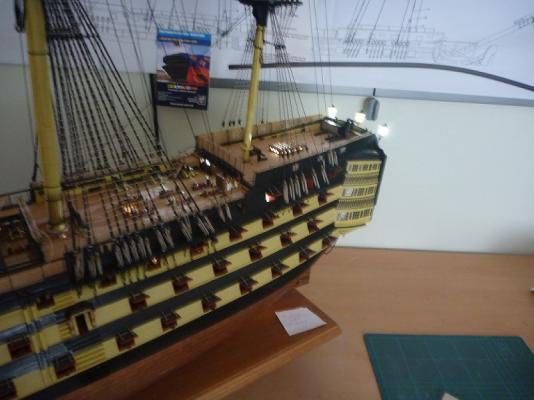
I am building the Caldercraft Version.
it is a costly kit certainly but I think you get what you pay for.
It seems to me that all the parts are specific, no generally available parts.
The three manuals are well written but do assume a reasonably experienced builder.
18 full size drawings, very helpful
My timber was all good quality, CC replaced one sheet of cut items due to a split.
many sheets of etched brass.
The upper hull templates for first planking mean that gun ports get correctly aligned which is a huge benefit.
All in all it would be my recommendation.
Nick
- hornet, Mike Dowling, Canute and 1 other
-
 4
4
-
Hi John
I got a good one from good old John Lewis.
Looks like the one I got has been updated a bit.
Clamps to desk with a ring of lights around the magnifier.
Nick
-
Anybody that would like to see some of the Chesapeak's timbers could come down my neck of the woods and visit Chesapeak Mill where a lot of them ended up. The Mill also has a room dedicated to the history of its origins including a lot on the ship. Although I very much doubt that there is much original content.
Nick
-
Hi Dominic
Just caught up on your Log
You are steaming on there and doing a great job of it
She is looking really nice.
Nick
-
Hi Ian
Great to see another CC Victory log.
It is a big undertaking but very rewarding, looks like you have made a great start, really nice work so far.
I thought that the Quarter Galleries and the Bow were the hardest parts so take your time.
Keep enjoying
Nick
-
-
Wow they have some great products, nice ideas.
Check the lamination stencil and what it looks like on a wooden propeller.
-
-
-
I think you're right Joel, the 'pink' is a little misleading, it is really a lighter yellow
-
I have read some of the evidence refuting the claims.
And certainly there are certain facts disputed.
However they are single targeted facts with different explanations given.
The papers I saw did not claim to deny the possibility that the underlying trips were possible.
Either way I don't offer it as truth, just a good read.
Nick
-
I have been reading a really fascinating book - '1421 The Year China Discovered the World' by Gavin Menzies. It is a big old book but completely captivating. The Author was a British submarine captain and has (obviously) a good knowledge of the worlds winds, currents etc. as well as being a navigator. He has applied this knowledge to the incredible voyages made by vast Chinese fleets in the title year around the whole globe. He then carries out research to back up his presumptions. He uses and unpicks a lot of historic maps that were presumably copies from older maps made by the Chinese, he offers very creditable arguments with a wealth of supporting facts. His research suggests that these fleets discovered and mapped most of the places we currently give Old World Europeans (Magellan, Columbus, Cook etc.) the credit for, including both coasts of North and South America, Antarctica, Australia, New Zealand, rounding Cape Horn and Cape of Good Hope. Really recommended.
Nick
-
-
Like most I use PVA for wood to wood wherever possible.
I limit CA to metal to metal or to wood.
But what does not seem to get a lot of comments here is two pack epoxy
For anything to anything I find it is the best bond.
Drawbacks are setting time, needs clamping.
And often leaves excess showing at joints, difficult to clean off.
Mixing means extra effort but if I want to be absolutely sure of a joint, especially with limited contact area it is my go to solution.
Things like : eye bolt (pins) into decks, metal parts directly to wood, Bits when directly on deck, dead eye strops to channels, cleats etc.
Nick
-
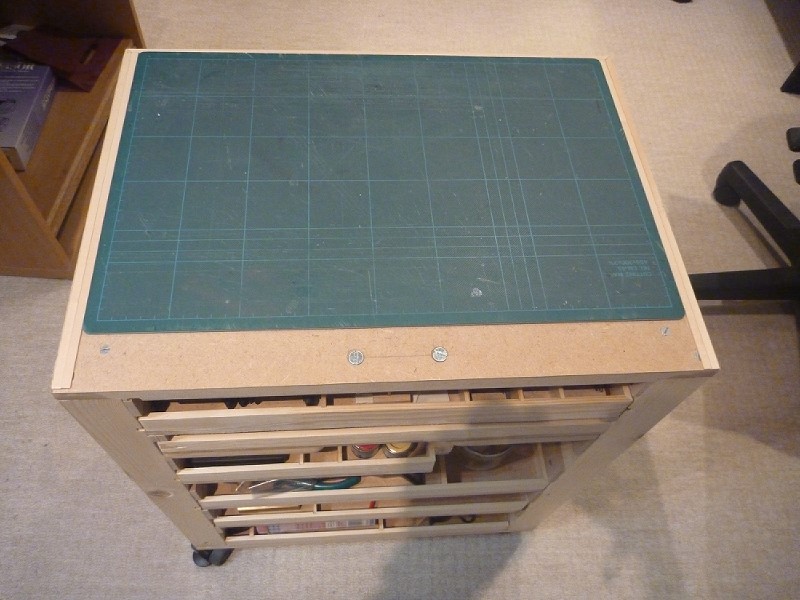
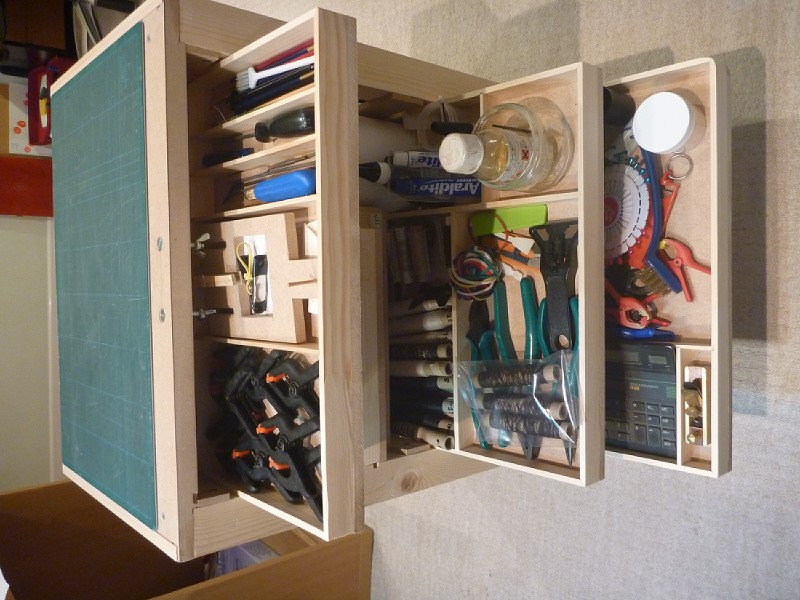
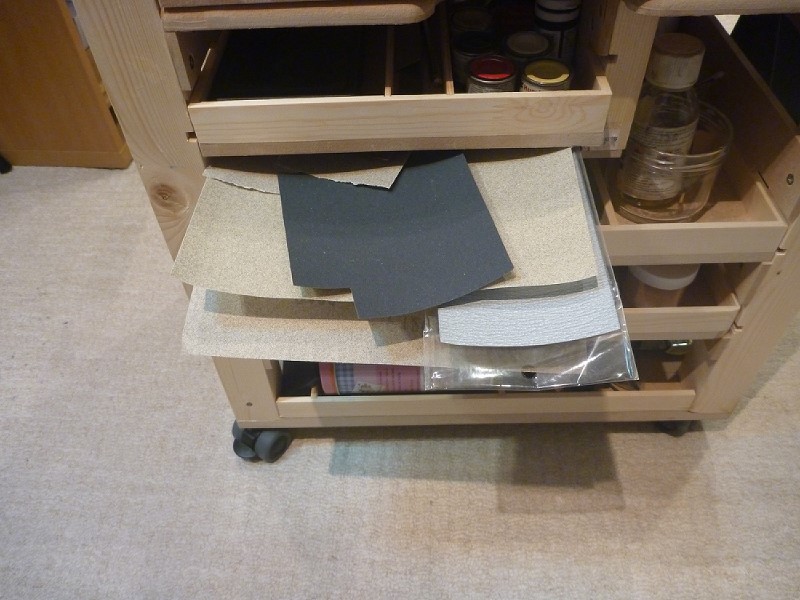
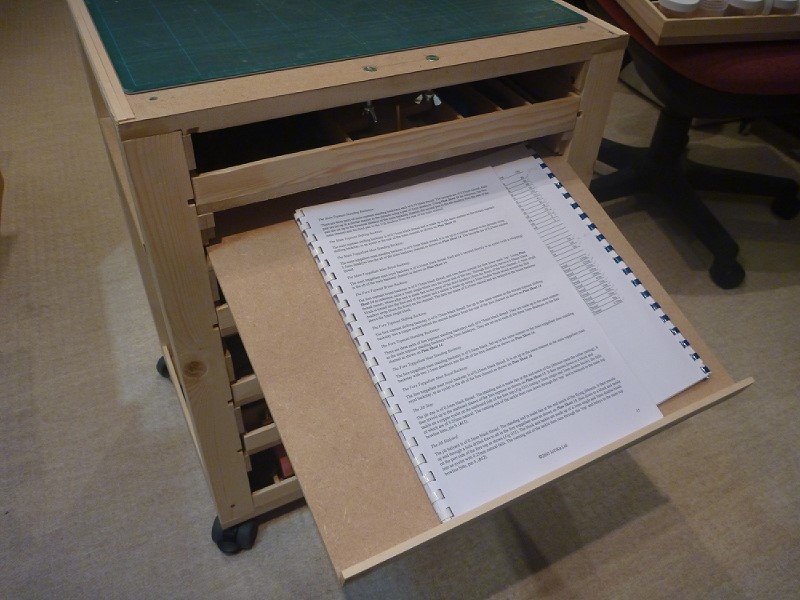
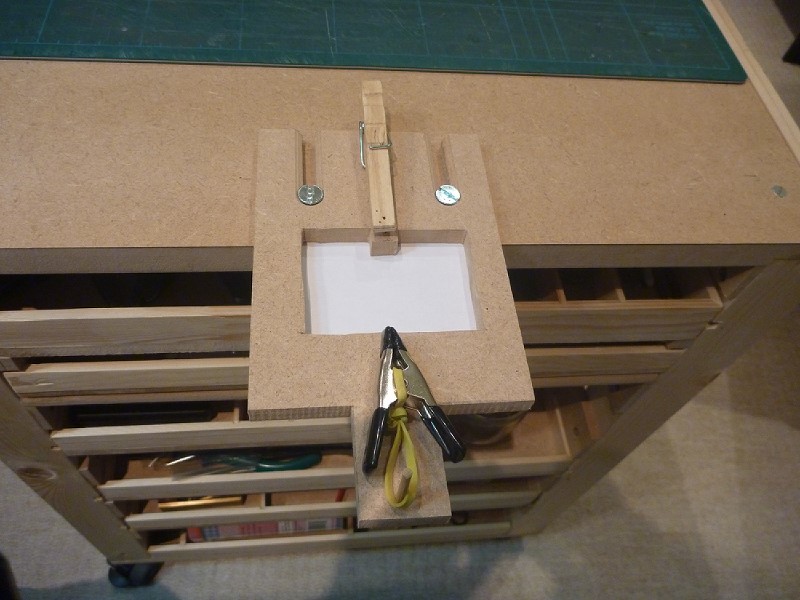
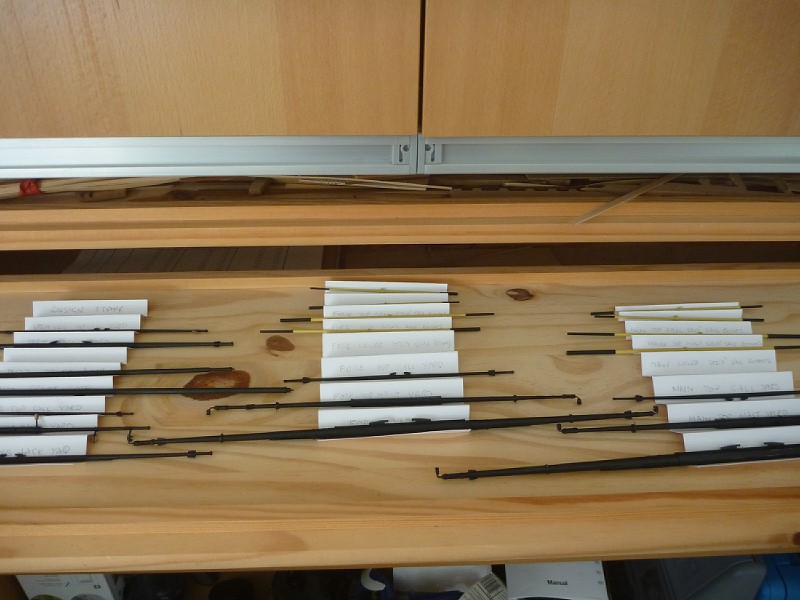
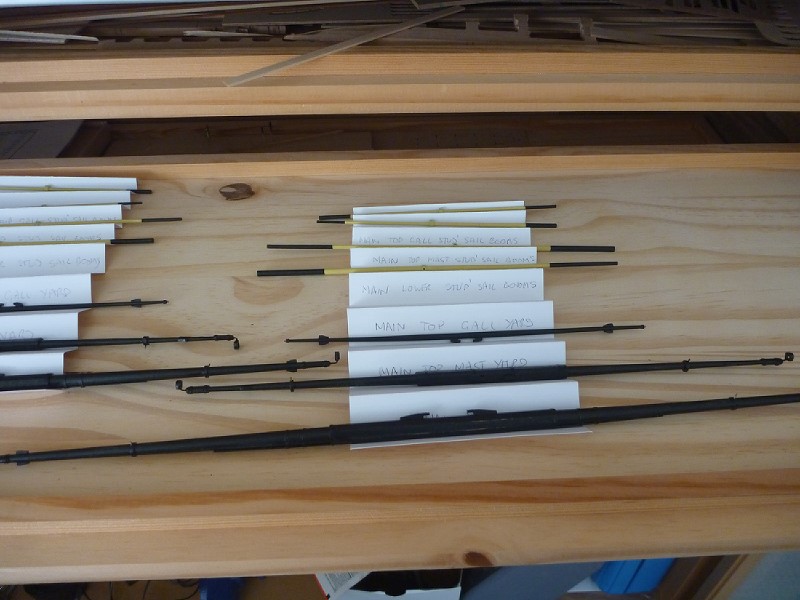
I never did get back to show the finished article.
But it all went to plan and I have been using it for a few months.
It does help keep my workbench clear of debris but I still have my hand tools close at hand.
Here are some photos.
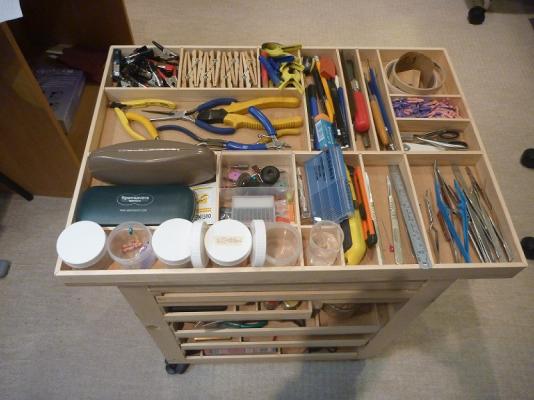
The tool tray that sits on the top

The tray lifts off to access a cutting mat below.
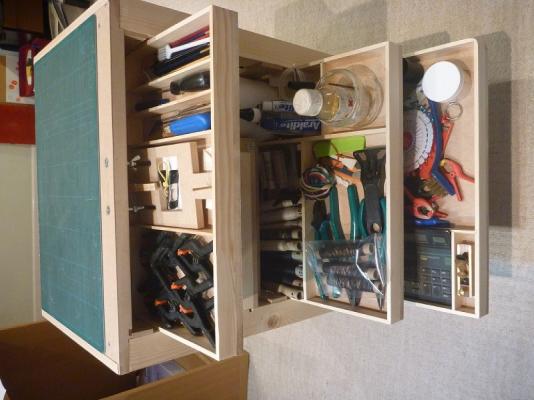
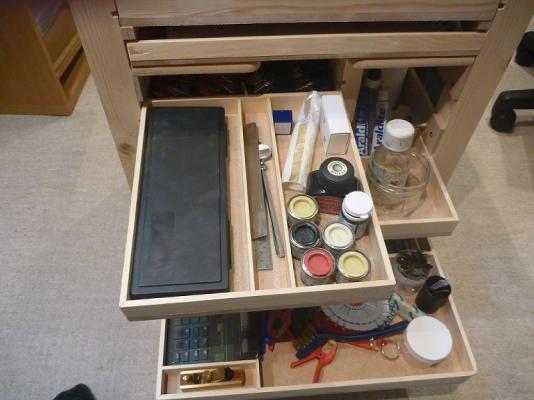
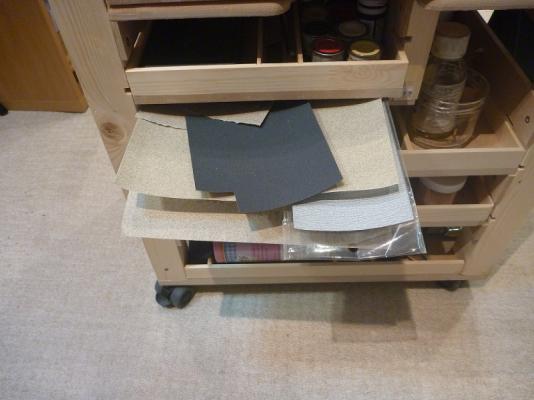
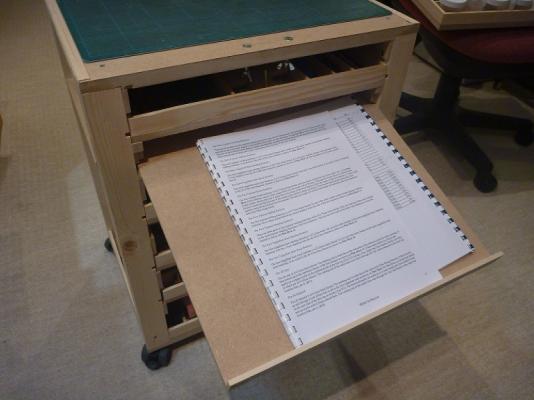

It has some fittings to hold the little jig I use for seizing blocks etc.
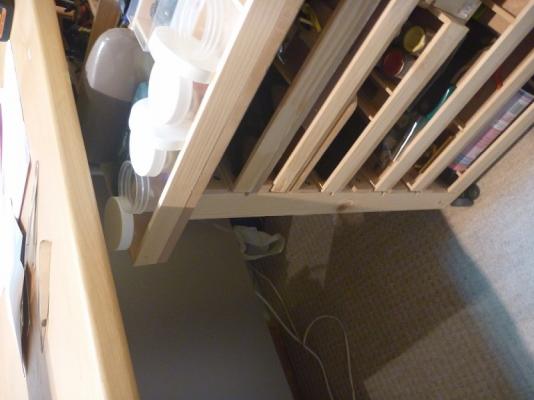
And the whole thing is low enough to roll under my workbench to keep things tidy when I'm done.
Nick
-
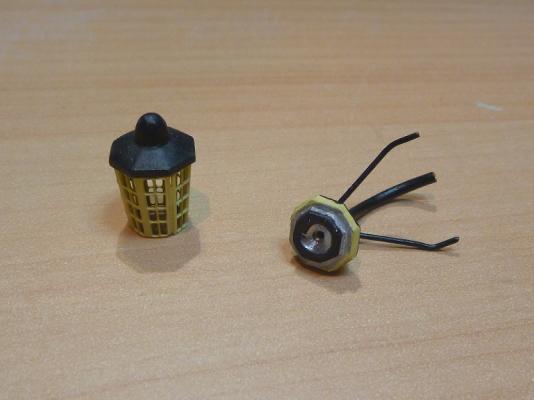
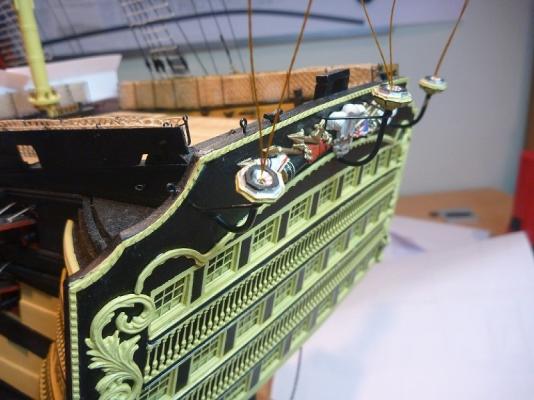
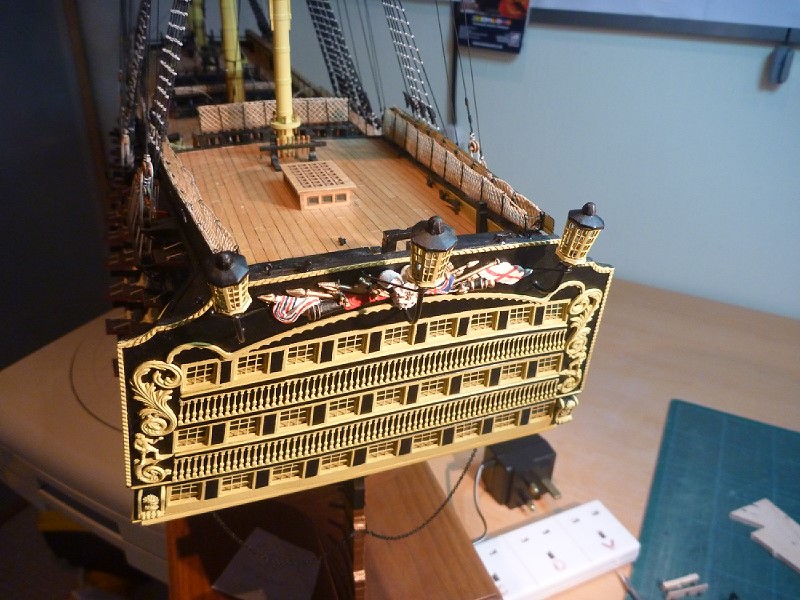
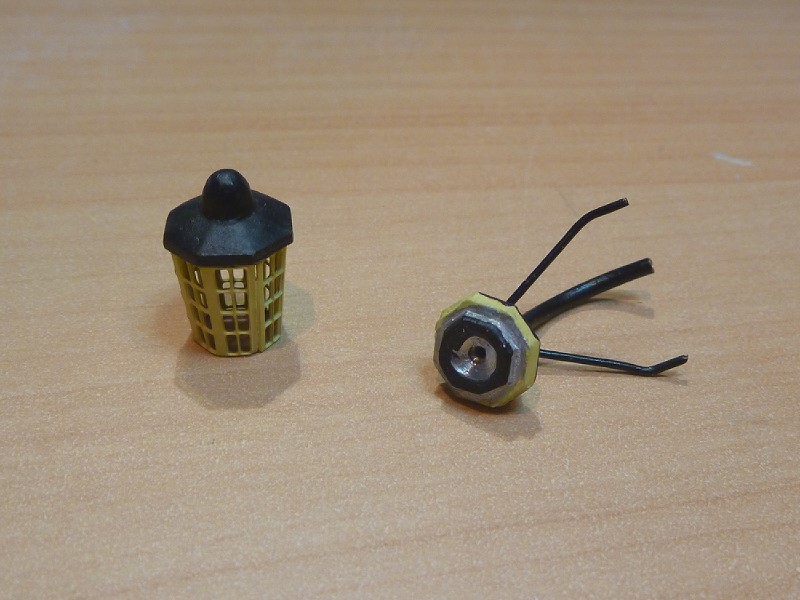
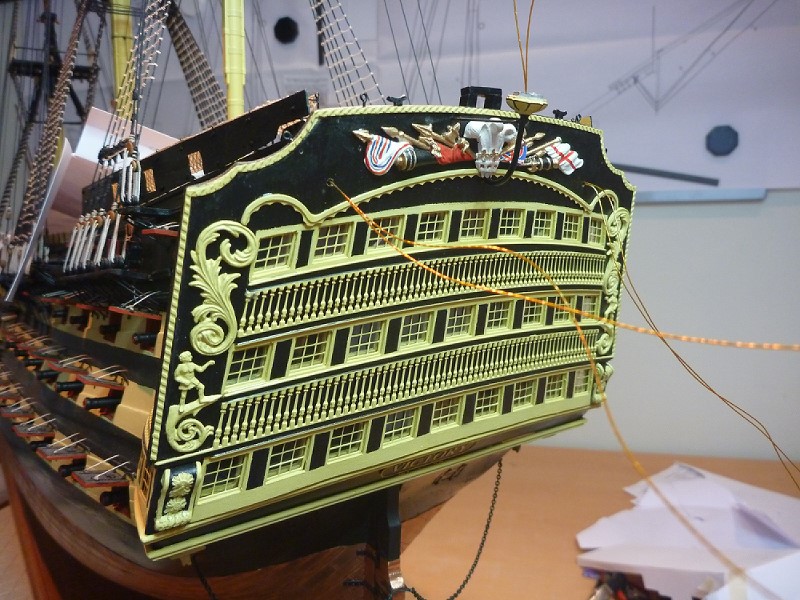
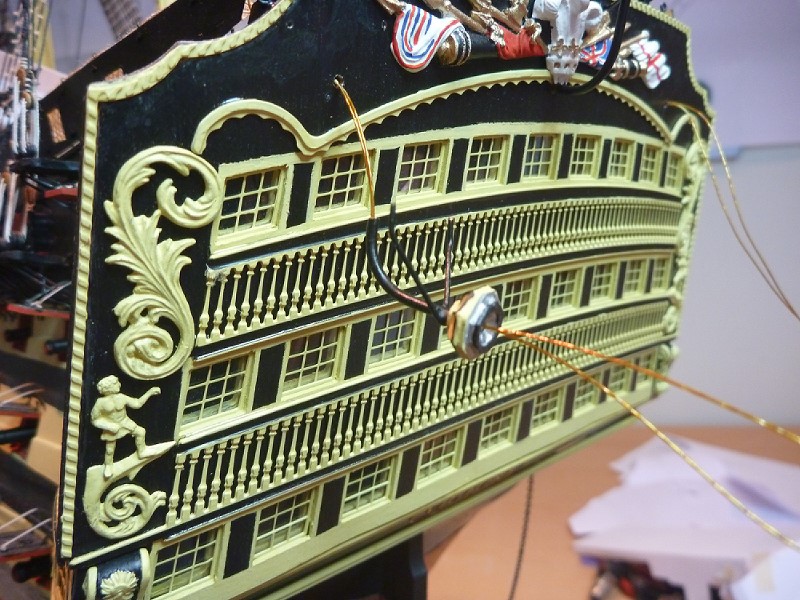
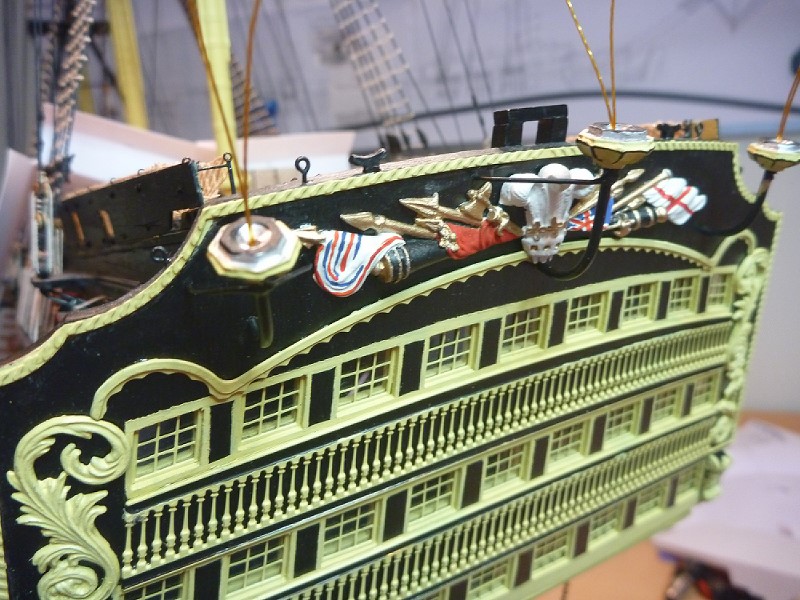
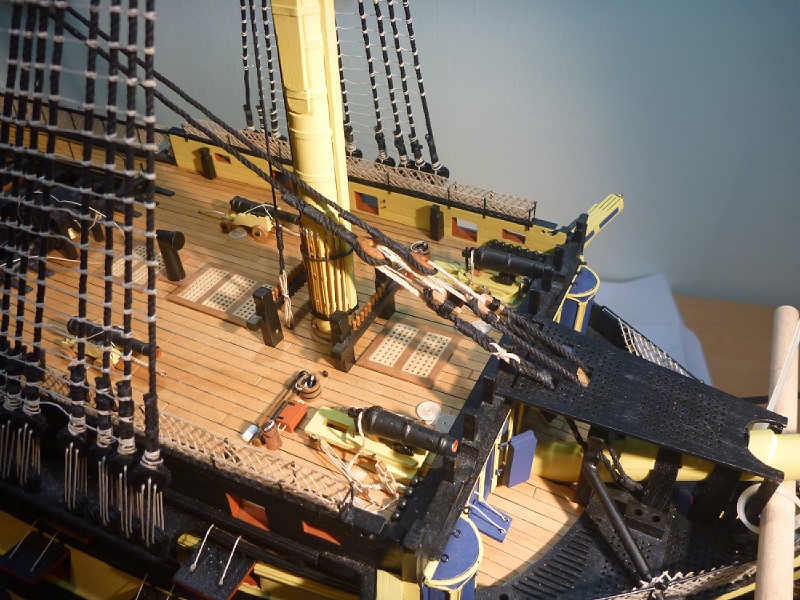
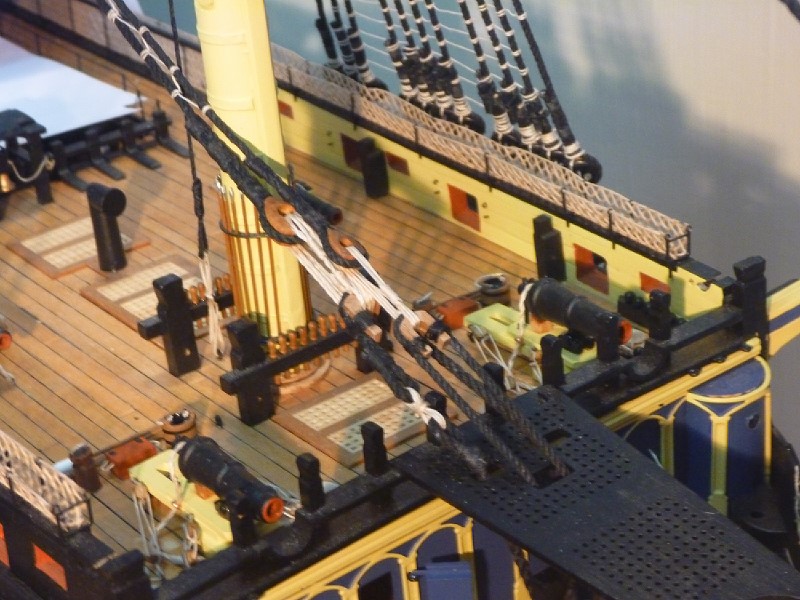
Final instalment for the time being
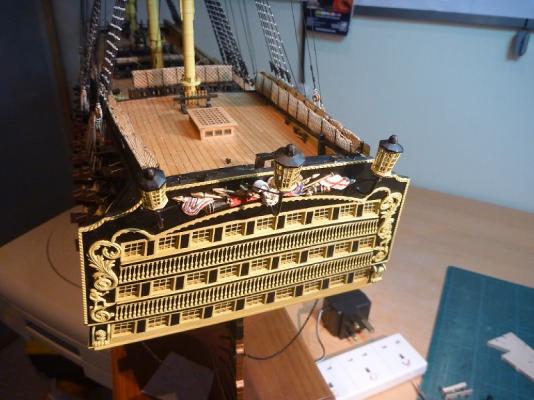
The lanterns now full fitted.

And how they look with the lamps lit.
Then a bunch of photos showing other views with the lighting switched on.

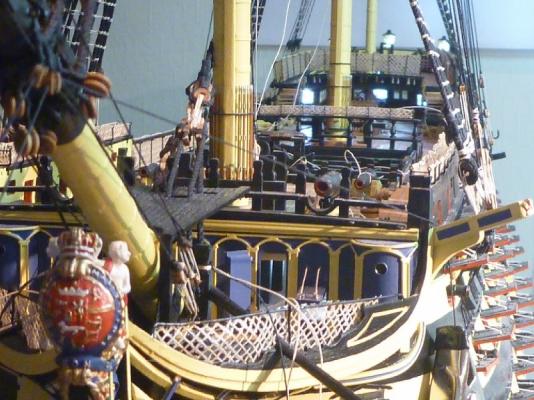
I'm pretty pleased with how the lighting worked out I must say, especially the three lanterns.
That's it for now, thanks for looking
Nick
-
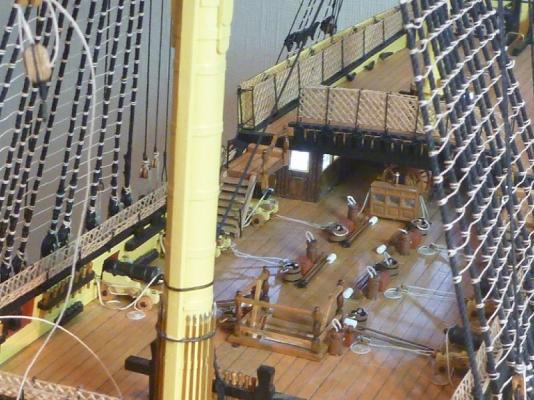
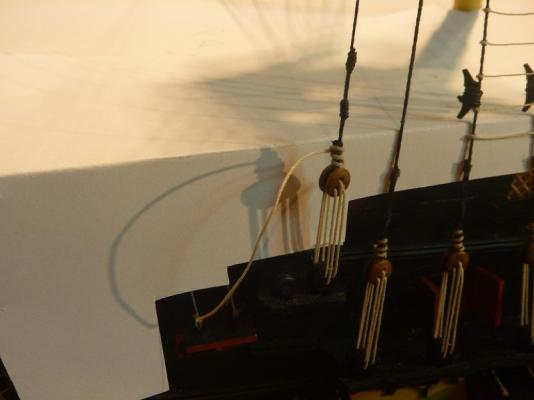
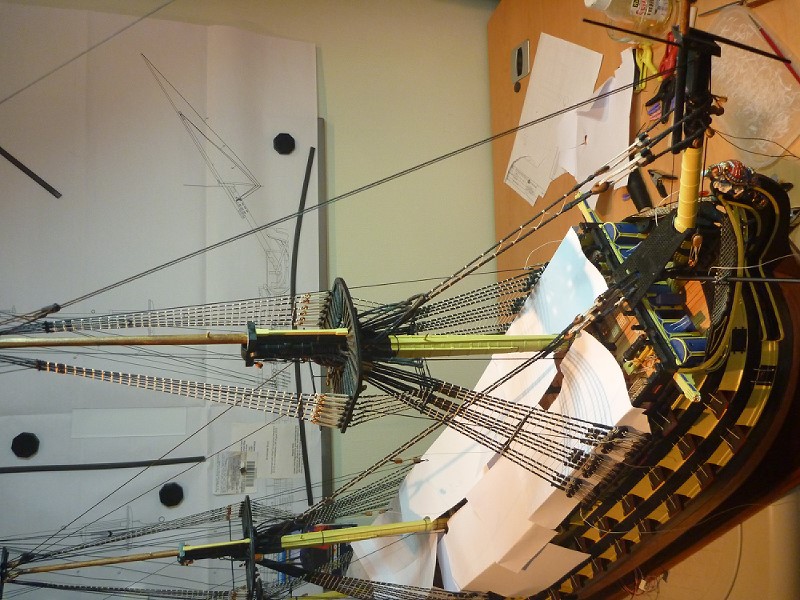
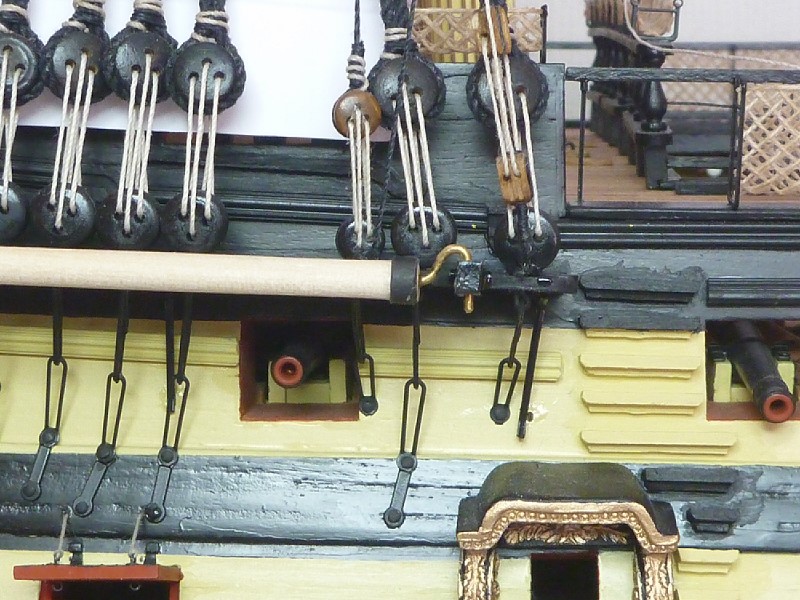
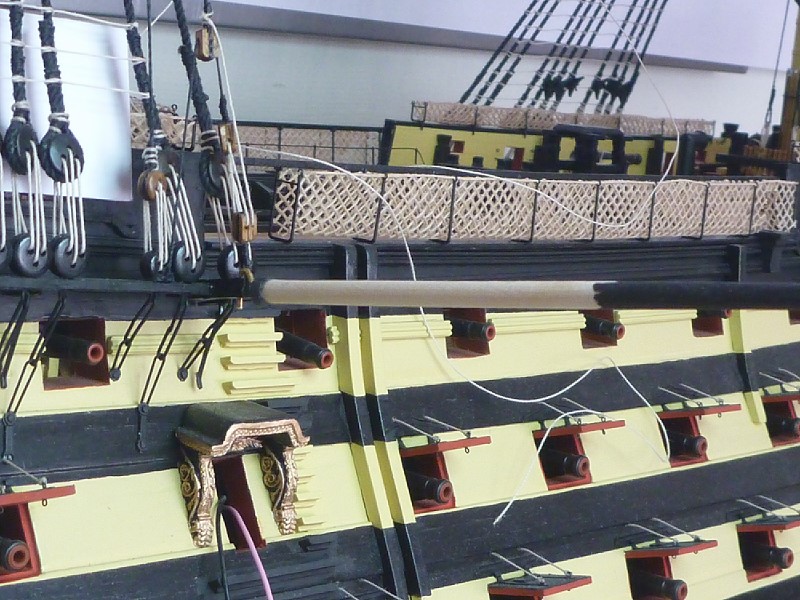
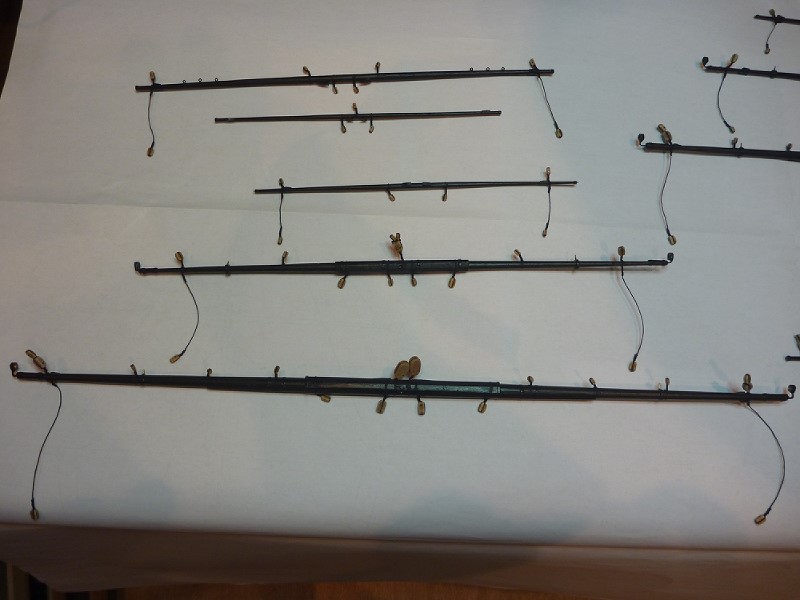
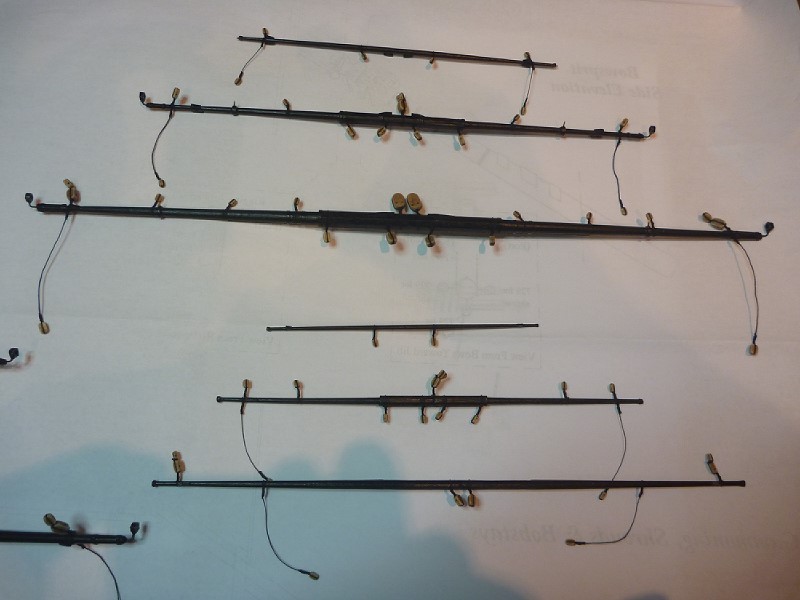
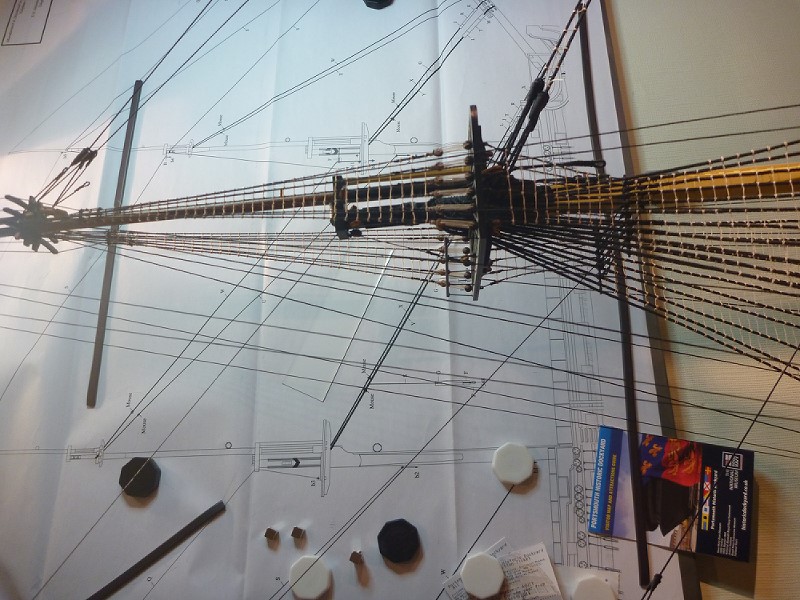
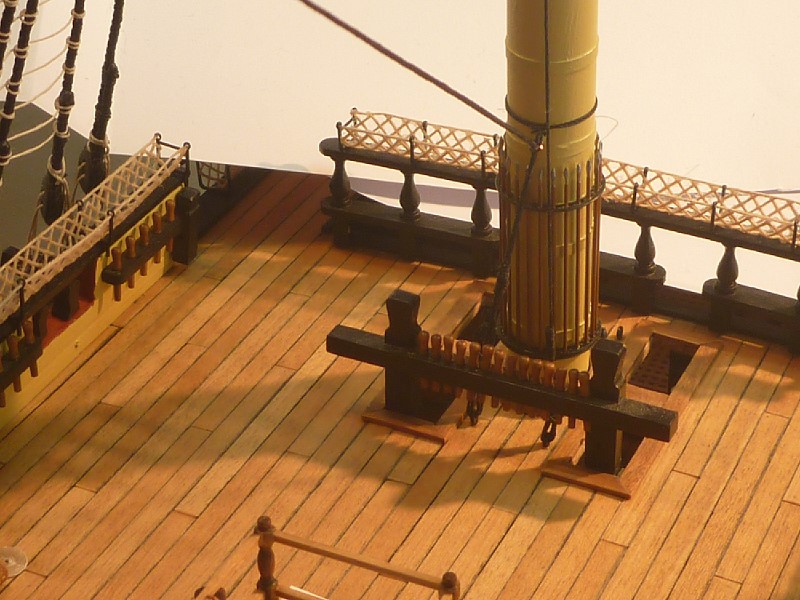
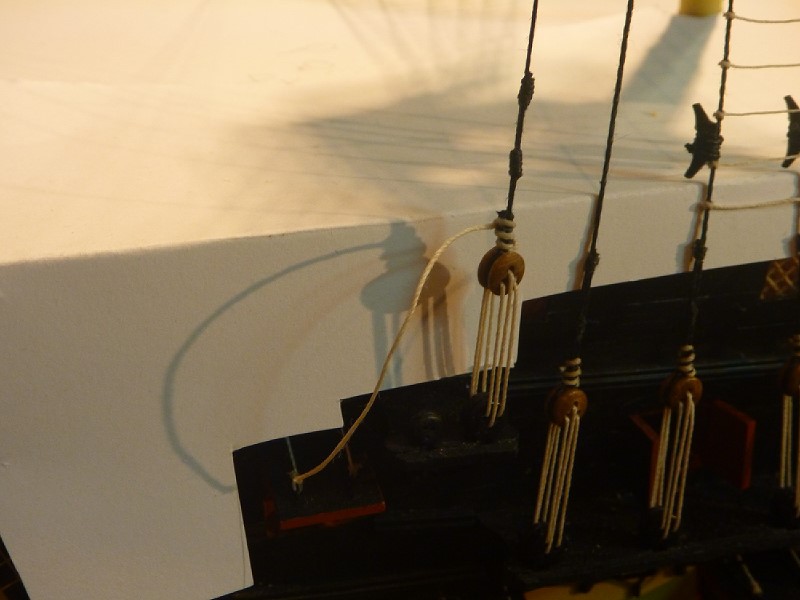
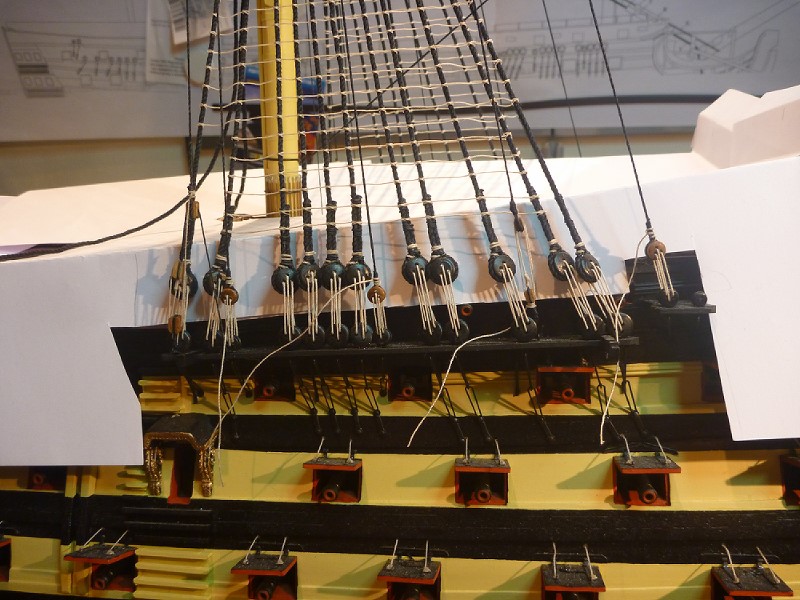
To continue
Fore stays
Belaying Fore topmast stay
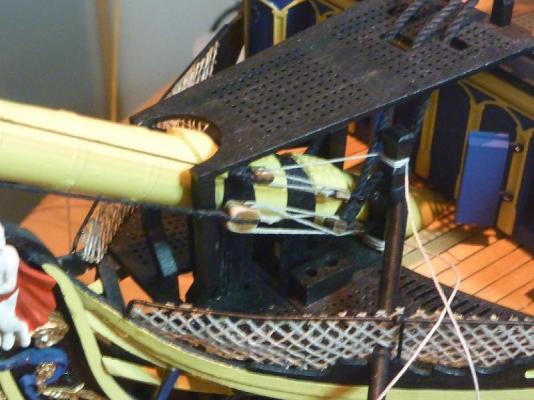
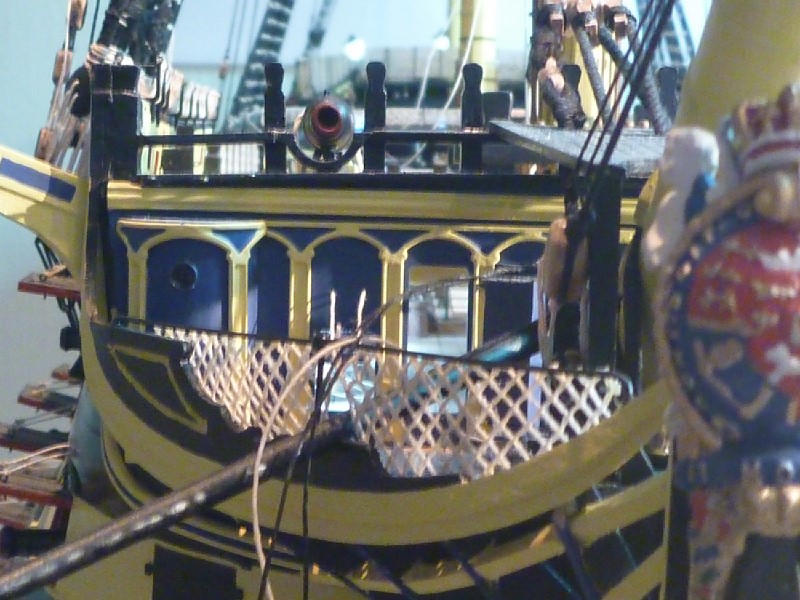
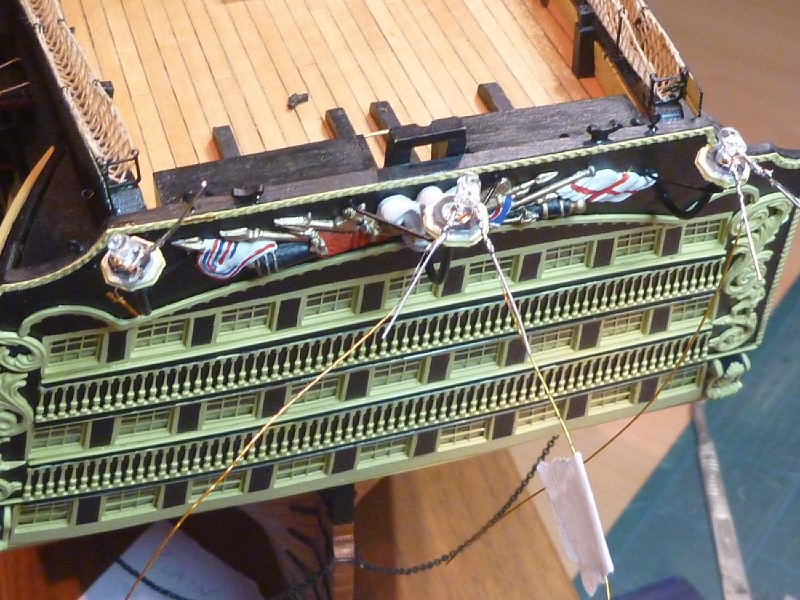
Next onto a job I have been avoiding but needs to be done so here goes.
I have rigged the ship with LEDs, most of which were fitted way back below decks.
But I also plan to put LEDs into the three stern lanterns.
Sourced a brass tube as small as I could find that would accommodate the wiring.
Here is the top of one of the lanterns and a made up bracket with the tube ready for fitting.
Dry fitting the bracket.

Then pull the wiring through the tube.
I am using very fine Kapton coated wires, real thin.
Next glue the brackets into position with epoxy for a good solid fix.
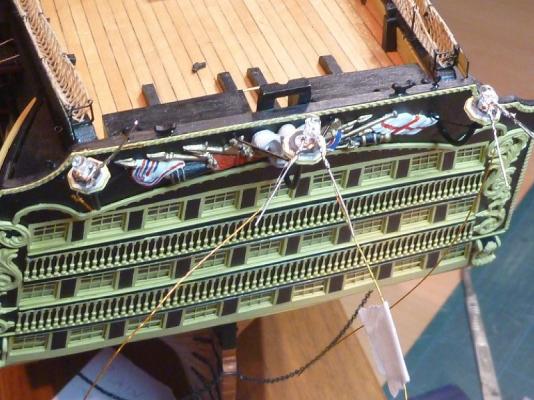
I made up a little wooden jig to clamp the LED into the lamp base whilst I soldered the legs to the wires.
Soldering is not my strong suit but they tested out ok.
Once tested I sealed the soldered legs by applying a coat of epoxy which is a good insulator.
Then I trimmed the legs and bent them upwards so they would fit into the lanterns.
More to follow
- mort stoll and dafi
-
2
-
-
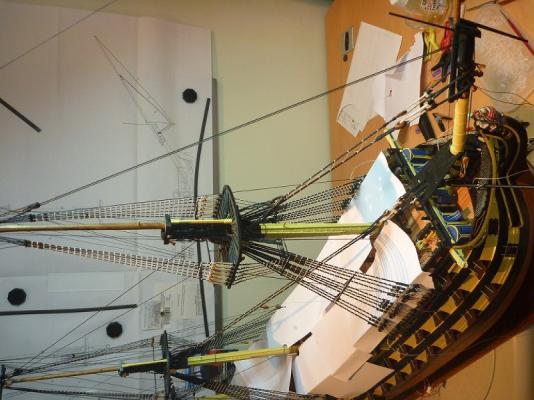
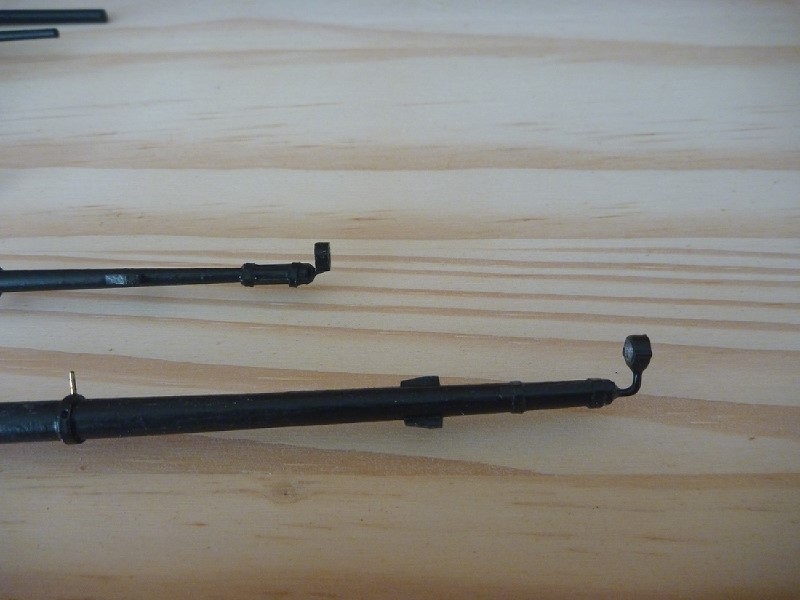
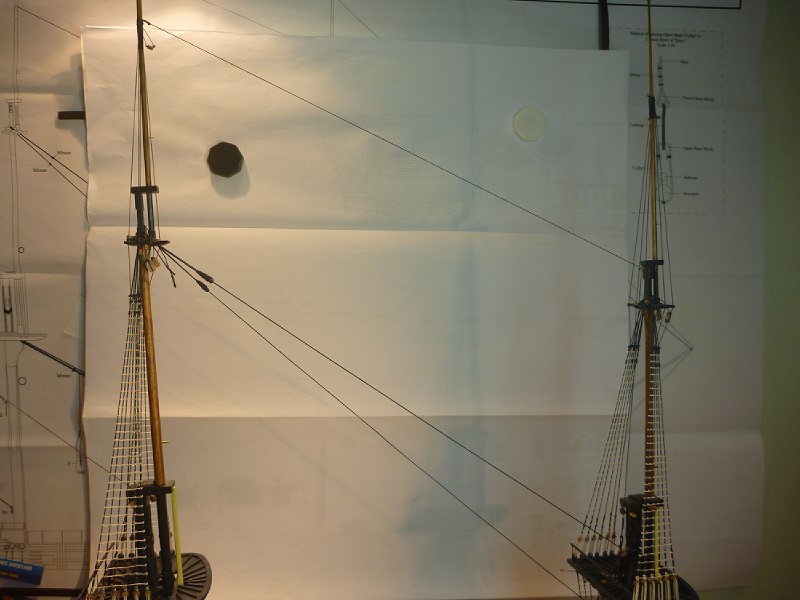
To Continue, next to fit the Bowsprit
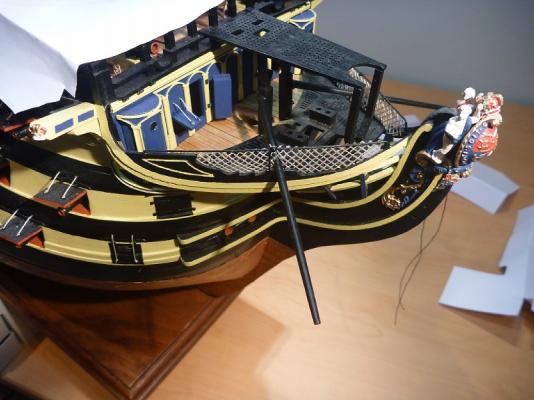
But first I had to repair a broken Boomkin.
I managed to catch it and snap it off.
So turned a new one, managed to get the knighthead off.
Made up a new assembly and fitted it.


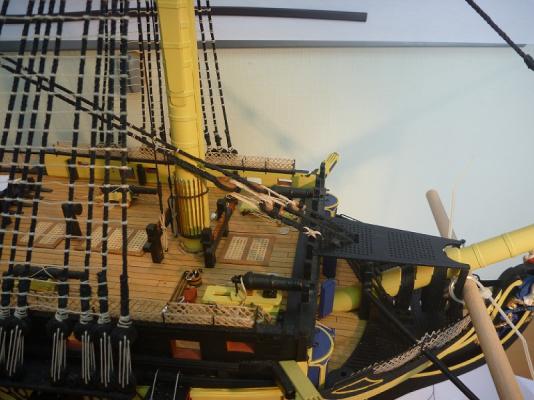
Once the Bowsprit was on I finished rigging the Main stay and preventer.
And did the snaking.

Then rigged the pair of tackle pendants.
Main stays and backstays now done
Forestay open heart block being prepared.
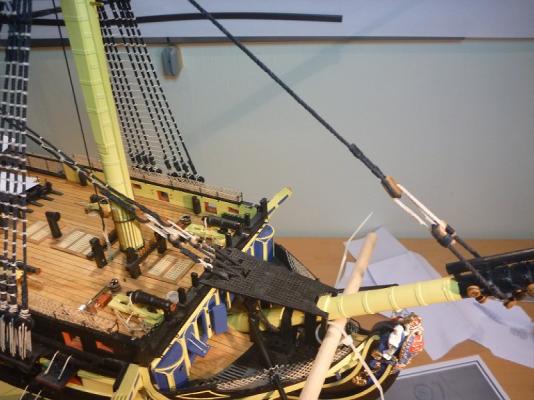
Fore Stay being rigged.
And will continue on another post.
- dafi and mort stoll
-
2
-
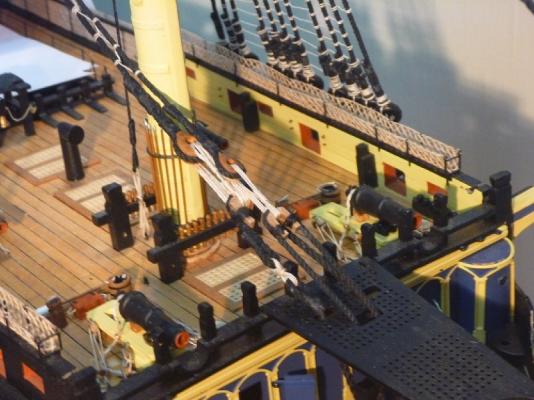
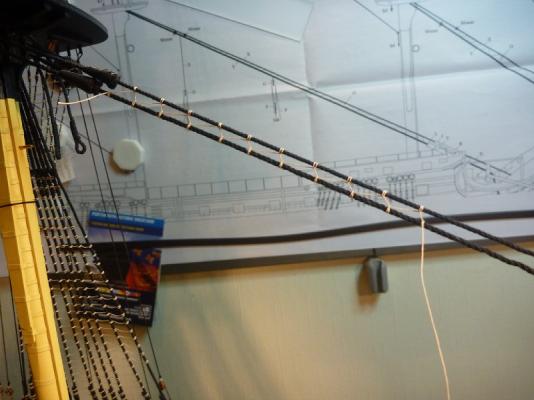
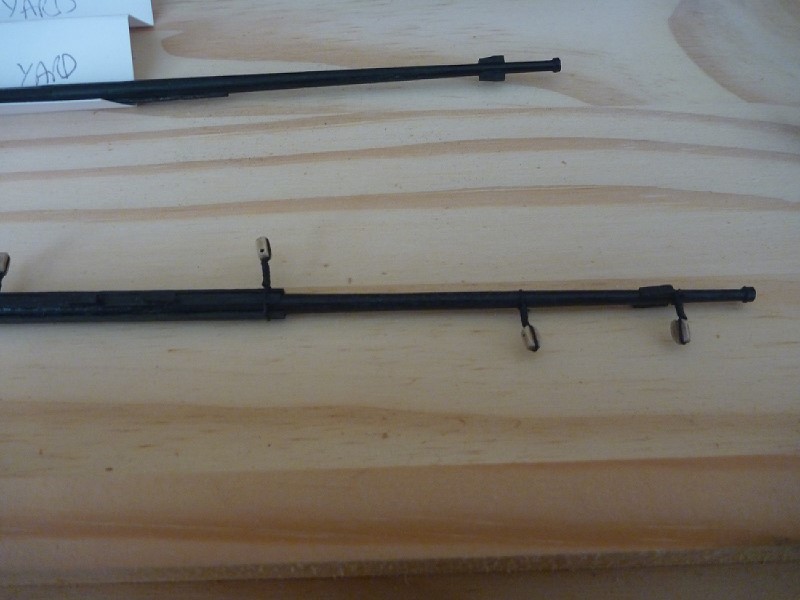
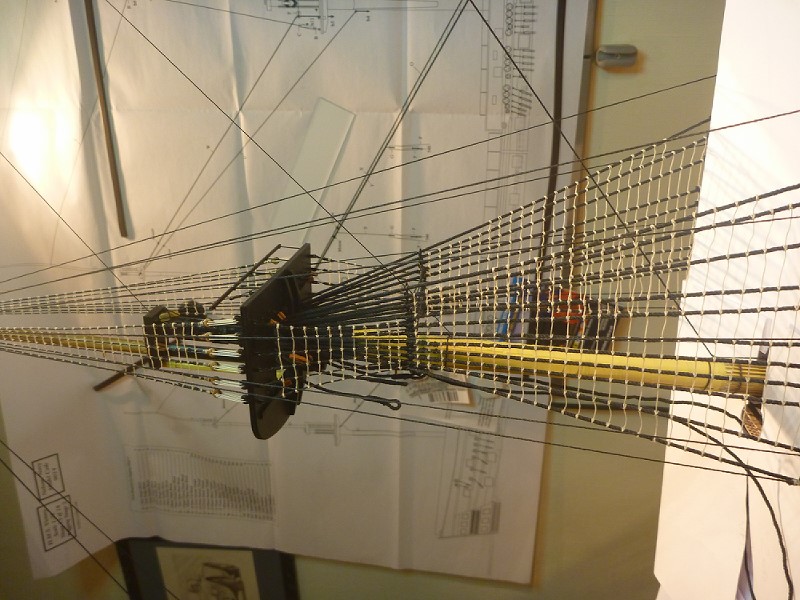
So it's about time I posted an update, it's been an age.
I moved onto the stays.
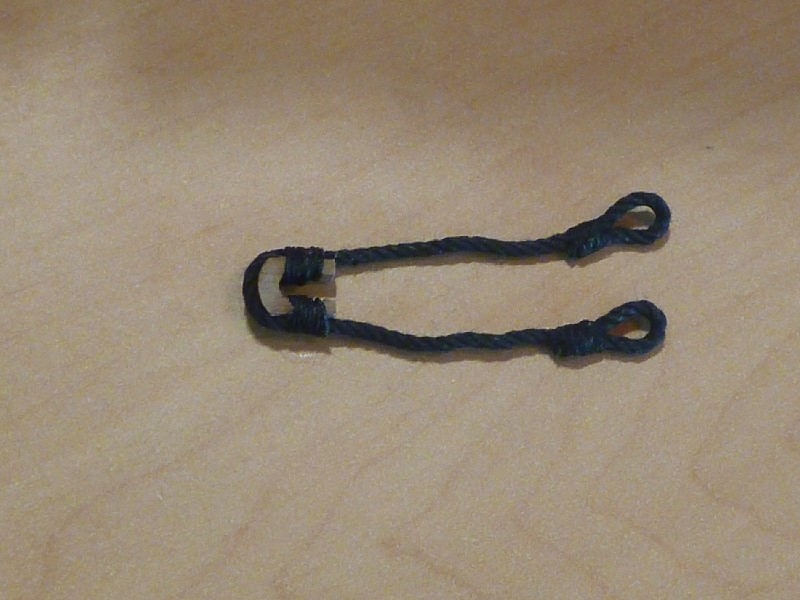
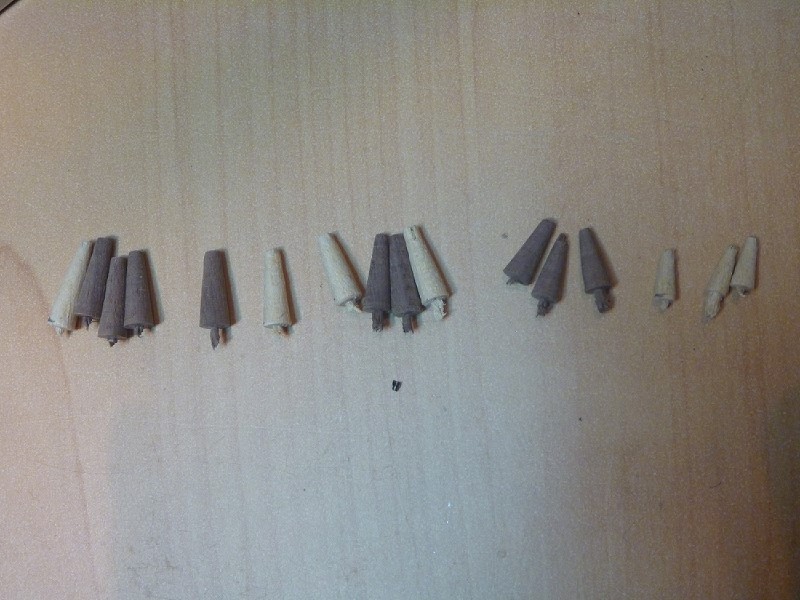
I decided to turn up some mouse formers in a variety of sizes
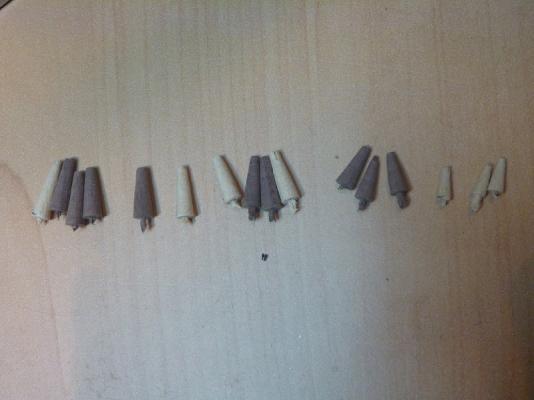
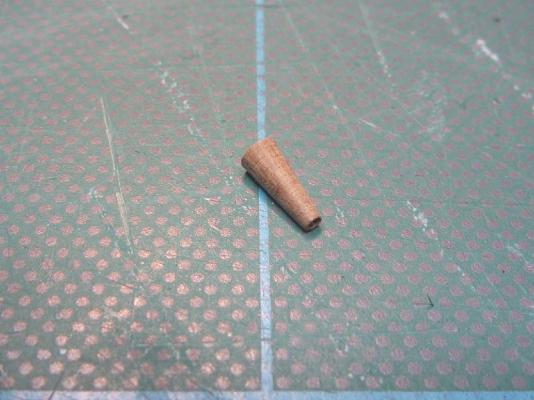
They each have a hole to suit the rope size in question.
A difficult bit of fine turning but did lots of extras and picked the best.
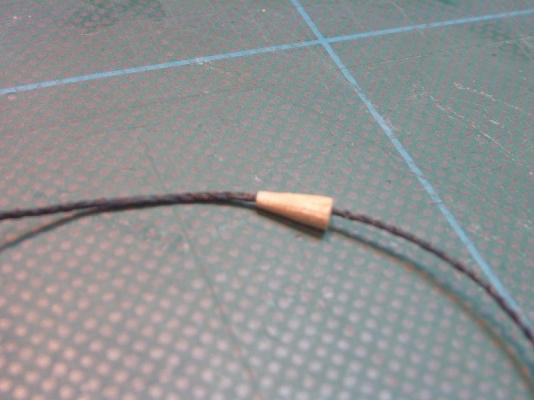
Then glued them in place and served over them.

Here is the Mizzen stay going into position.

And belayed to the deck by the Main.


And the other Mizzen and Main stays.
I haven't mounted the Bowsprit yet so have not made off the ends at the moment.

So then moved onto the backstays.
Fitting backstay with deadeyes

And the others.
Will continue on another post.
- mort stoll and dafi
-
2
-
Hi Rich
Just been looking through your log, looking good, great work, keep it up.
I found that the best way with cannon rigging is to do what you can on the cannon first.
Workout the thread lengths and have the rings set in them beforehand.
Then when fitting the cannon it's much easier to just glue in the rings rather than try and rig them in situ.
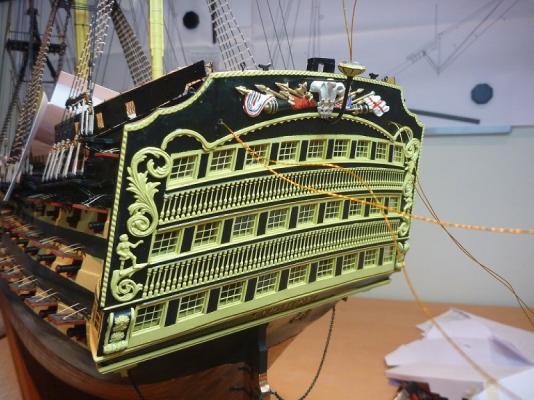
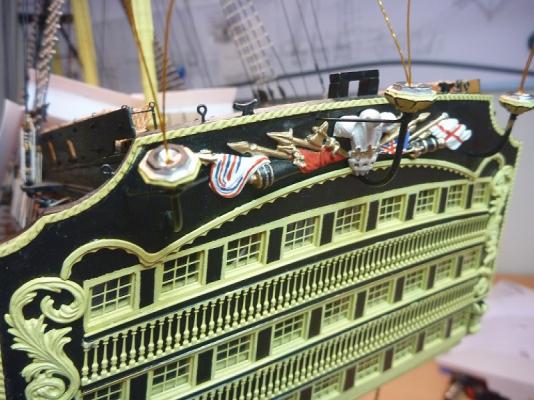
Nice to see another Portsmouth Victory build!!
Mine is getting very near to completion, working on a cabinet.
Cheers
Nick
-
Hi Peter
Just been looking through your log, only just found it.
Wow you are certainly shooting through with the build.
My Caldercraft Victory is taking years by comparison.
You are making a fine job of it, I hope you are enjoying the trip.
Nick
-
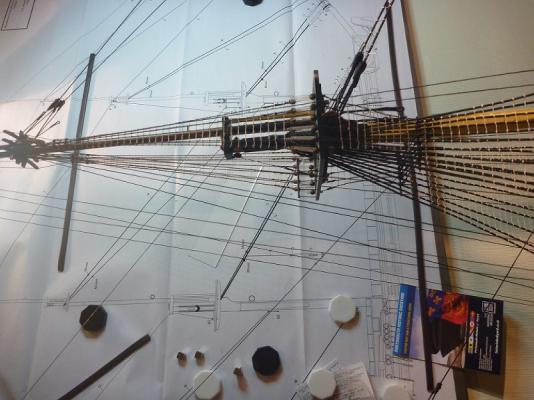
I also spent time planning my rigging (Victory)
I created a list with thread size and colour, belay point etc.
I also read through my manual and reference books, poured over the drawings and made reference notes against each of my lines.
That way when you get to the line in question you can jump to your references.
I often find that I am reading something and find unconnected detail of something I completed already.
Often the new information would have been invaluable at the time and even contradicts what I actually implemented.
Nick
-
In a forest grown for ship making often the shapes were made by planting saplings adjacent to the trunks.
Put a few saplings on one side and the main trunk would begin to swing away in a search for light.
Much later put saplings on the other side and you get a 'bend' suitable for a knee.
- avsjerome2003 and Piet
-
2


How to prepare rigging rope?
in Masting, rigging and sails
Posted
I do similar to Mark with the PVA/water mix.
But I do mine before I rig.
I moisten my fingers and pull the thread through, then hang with a weight to tension.
This also flattens the stray hairs.
Nick