chris watton
-
Posts
2,205 -
Joined
-
Last visited
Content Type
Profiles
Forums
Gallery
Events
Everything posted by chris watton
-
 I may try that one day, but please bear in mind I have around 15 different figures, with most in 4 different scales, with the files already made for these. I would need to do the same again without the base.
 -
Hi Tim, Honestly, I am not sure as I have never tried to remove the base. I guess a Dremel would work if you are careful.
-
Lovely work CRI-CRI, and I also love you profile picture , you look startled!
-
You have some eyelets on their way to you (Forgot to tell you....)
- 125 replies
-
- 2
-

-

-
- Trial
- Vanguard Models
- (and 1 more)
-
I am hoping to have most of my boats in 3-d print resin form at some point, I have a talented guy working on these, one at a time, for me - starting with another cutter, as clinker planked boats are much more difficult to make from wood. And very well done, BE, Indy looks gorgeous, a real credit to your skills!
- 648 replies
-
- 4
-
-
- Indefatigable
- Vanguard Models
- (and 1 more)
-
Thank you! Next month, a YouTuber will start a build of Sherbourne, so this may also be of help for you: Tagliamare - YouTube
- 817 replies
-
- 15
-
-
I have very few completed models in my house, no room! All the models I did for other companies are with them. I only have a few fully completed models here, Alert, Speedy, Trial, Adder and Sherbourne, and then some of hull only for Duchess, Fifie and Zulu, and then only three prototope hulls (what I used to check designs) for Indy, Sphinx and the re worked Speedy.
- 96 replies
-
- 7
-
-
- Sphinx
- Vanguard Models
- (and 2 more)
-
The smallest fiddle blocks I can get are 7mm, way, way too big for the scale
- 587 replies
-
- 5
-
-
- Indefatigable
- Vanguard Models
- (and 1 more)
-
By just adding one clamp at a time from the bow to the stern, and slowly... You can use water to soak them, but you must leave them in place for a couple of days so the moisture dissipates completely - if not, then the part will be bigger than it should be, and will shrink to proper size after you glued it, which would not be good.
- 143 replies
-
- 3
-
-
- Adder
- Vanguard Models
- (and 1 more)
-
I didn't soak them, I just left them clamped in place overnight, and the patterns kept their bend (more or less) If soaked, I would leave in place for at least 2 days, to make sure all traces of water has gone.
- 143 replies
-
- 5
-
-
- Adder
- Vanguard Models
- (and 1 more)
-
If only we knew then what we know now....
-
What you could do now is start planking from the bottom to the top, this may make the run of the planks a little less severe. For a bow like Adder's, I did taper more than I usually do for each plank, less than half width at the front, so more, perhaps 75%. There are only 12 planks per side, so not too bad.
- 143 replies
-
- 5
-
-
- Adder
- Vanguard Models
- (and 1 more)
-
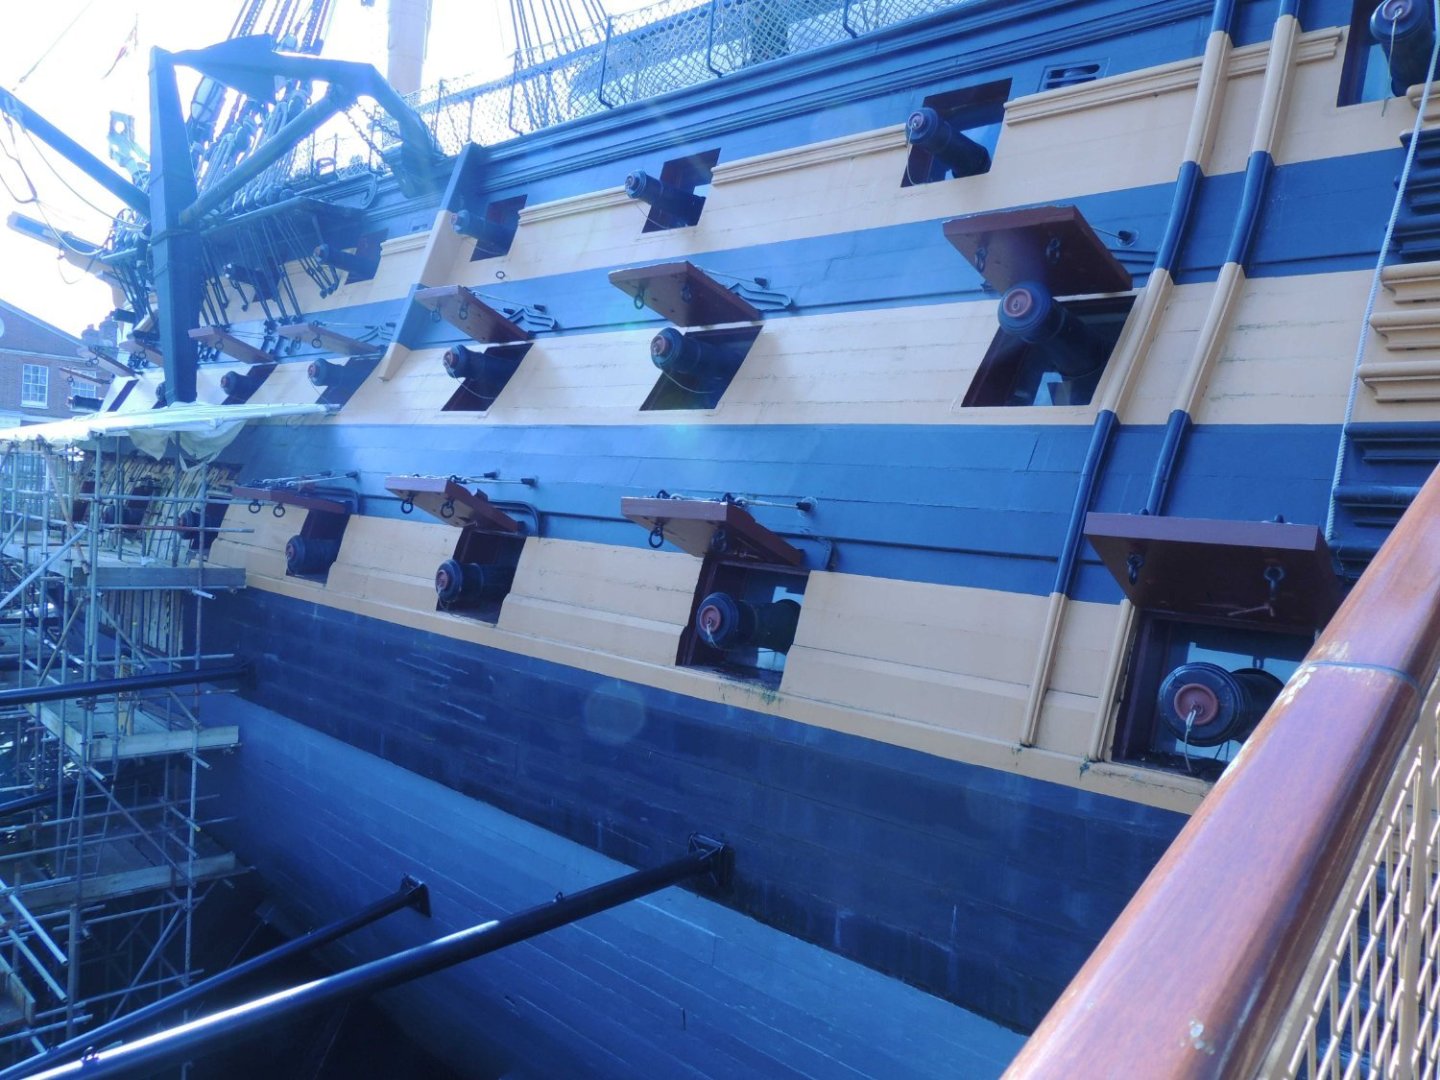
This is one of the pics I took when visting Victory, for research when developing Amati 64th scale version. Gun port linings are top and sides, and not lower ledge.
-
You did indeed, almost out of these and I cannot get anymore for the time being, with Russia being a sanctioned country.
- 422 replies
-
- 2
-
-
- Vanguard Models
- Sphinx
- (and 1 more)
-
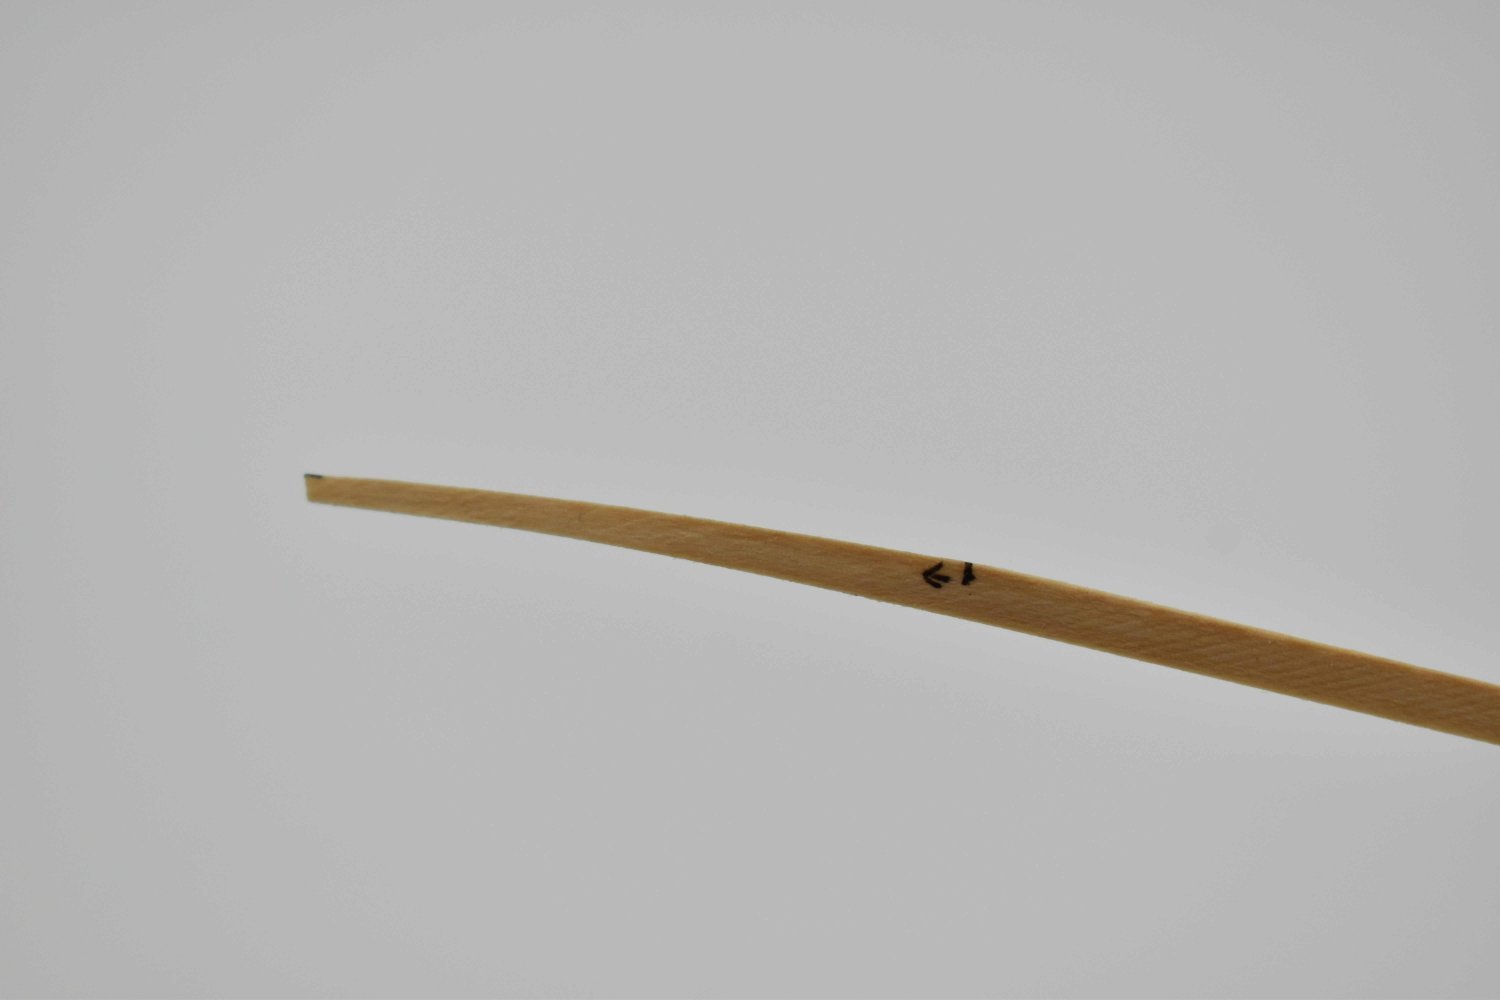
This picture of one of the bevelled and edge bent 1x5mm strips is from the Sherbourne manual. No tools were used except a Stanley Knife and steel rule for the taper after just a little soaking, and then while still wet, the bend was manipulated using just my fingers. I use this method for most bending, even for the huge Amati Victory hull. Looking at your second plank down, it doesn't seem to have enough taper at the front. My basic rule of thumb is always taper to half the planks width, and then ease off a little once then planks start to run a little more naturally further down.

-
Regarding the rear most bulkhead, I decided to remove the tab at the end of the longitudinal brace, as it would have been too difficult to slot into place. I should have deleted the holes in the pear stern, but forgot – but they are not at all important to the overall assembly, just surplus. When designing in CAD, on the PC, designs look great - but sometimes, they do not work so well when put into practice. The stern tabs was one such example.
- 143 replies
-
- 9
-
-
- Adder
- Vanguard Models
- (and 1 more)
-
Sherbourne actually only carried 6 x 3-pounders, with the last three ports per side the likely homes for these cannon. But people always think every single port opening must be populated with cannon - this was very rarely the case. (I have seen many models burdened with so many cannon where they shouldn't really be, that if the ship pitched in heavy weather, it would just keep heading down to the bottom of the sea) I really wanted to give the official numbers for armament, but I know I would receive countless emails telling me I didn't add enough for all the gun ports....
- 5 replies
-
- 10
-
-
-
To those who have bought a Sherbourne kit, I have just noticed an issue with one in every eight laser etched decks. If you have the deck on the left of the picture, with the bitt square hole not aligned like it is on the right of the picture, please contact me so that I can arrange a replacement deck.

- 817 replies
-
- 14
-
-
Actually, no. I used the AotS Diana for those, coupled with James Lees The Masting and Rigging of English Ships of War 1625-1860. No Victory references were used at all for Indy.
- 648 replies
-
- 4
-
-
- Indefatigable
- Vanguard Models
- (and 1 more)
-
3D Printing Cannons in Resin
chris watton replied to thibaultron's topic in 3D-Printing and Laser-Cutting.
Nice thread. I have found that I have a 99% success rate by positioning the barrels almost vertital (with slight tilt). This minimises the areas for the supports, as commercial products would not look too great if the customer had to file/sand off all the support 'poc marks' the whole length of the barrel. It may take longer to print, but this is offset somewhat by the increased number of barrels that will fit on the build plate, and they will have much less clean up. Also, in the Winter months, I will have my oil heater on, and I have the tub of resin and build plate sitting on top of the heater overnight, so in the morning, both are nice and warm. -
Grecian is a kit I would consider 'Medium Size', with a hull length of over 500mm (vessels with a main deck length of around 100 feet, give or take a few feet). Speedy and Duchess would be Small/Medium, and Sphinx Medium/Large.
- 817 replies
-
- 10
-
-
-
Just an update on what I am doing right now, and what is planned for the next year. I did mean to have a couple of weeks off after Sherbourne and Adder, but cannot help myself, so started designs for the 17th kit. The next two kits will be medium size. The one I am working on now, once designed and plans drawn, will be built by Jim, along photos and text for manual. This then frees me up to concentrate on the 18th medium kit – so after a very large kit like Indy, there will have been 3 mediums and 3 smaller kits done. After this, the 19th kit will be large, and hopefully, we will have moved to larger premises by then, as space is a major issue now – so another very large kit like Indy is out of the question until we have more space. Also slowly building back up my stock of materials, pear sheet especially, and photo etched sheets for each of the kits. Finally, I already mentioned this, I would like to commission someone to produce more 3-d printed boat files for me – if you feel you can/want do this, let me know.
- 817 replies
-
- 23
-