


rlwhitt
-
Posts
161 -
Joined
-
Last visited
Content Type
Profiles
Forums
Gallery
Events
Posts posted by rlwhitt
-
-
Thanks Allen! The things that sort of look like belaying pins are actually cannon barrels. Well, just the tips, which is all this has, sort of faked. I’m not going to bother with these, rather I will have the port lids closed. This one has Kevels, those bits that sort of look like letter “A”s.
-
25 minutes ago, Gregory said:
12mm
I think extending it with a dowel or metal rod using a good coupling would be relatively simple, but I am going to start with rotating the head and elevating the table.
I am waiting for delivery of my rotary table today. Hope to have update today or tomorrow.
I think I can see where you are going. I too would have to find a solution that did not involve metal work. If you have a sturdy board to mount your rotary table to, then behind that a block mounted to the board to which in turn you could screw the rotated base of the press. -
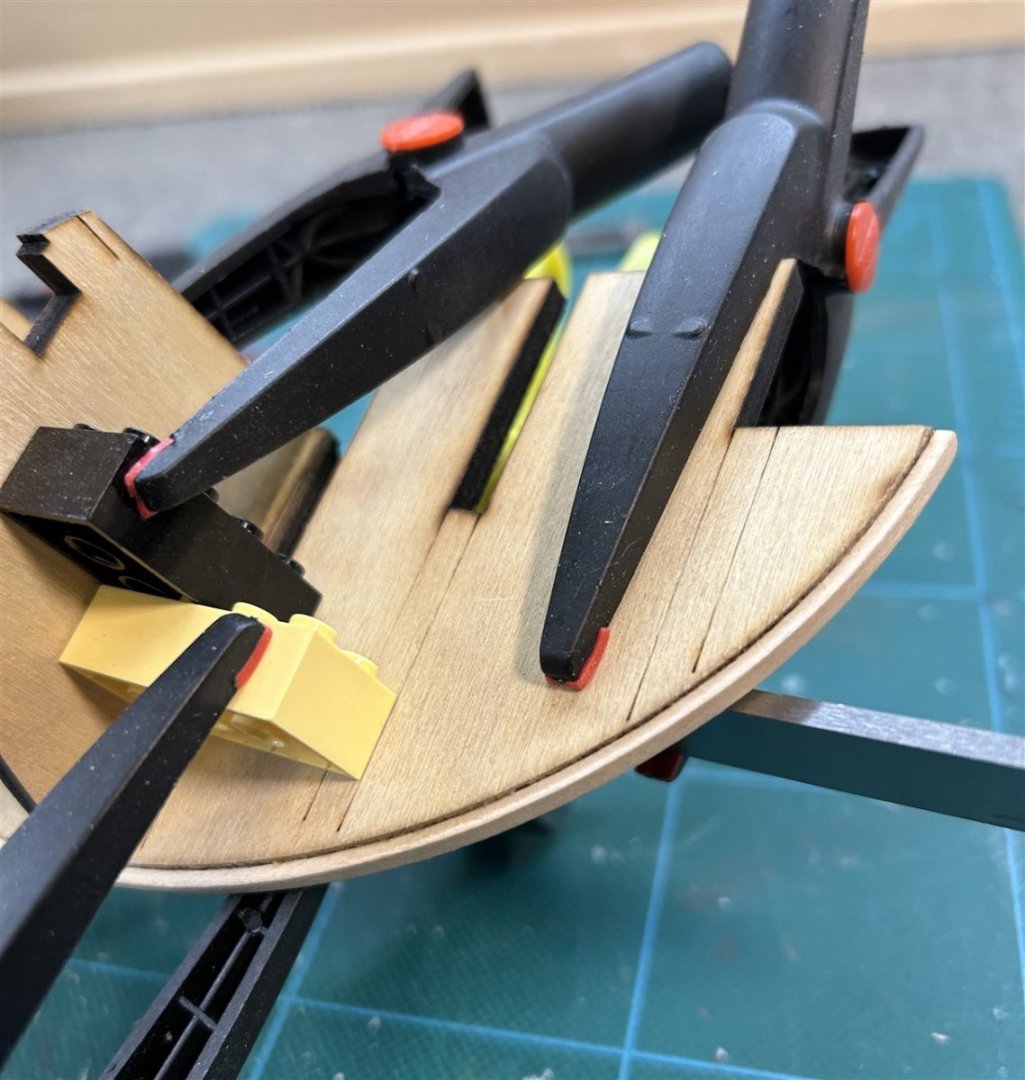
Start of Planking
First step in planking is to plank the lower stern and counter. Here this is complete, with the tiller hole cut in. As you can see in the photo, I used 2 different 1/32 strips and they are not the same color. As is often the case on these things it's much less apparent in person than in the photo but it's still there. Luckily this is painted white later.
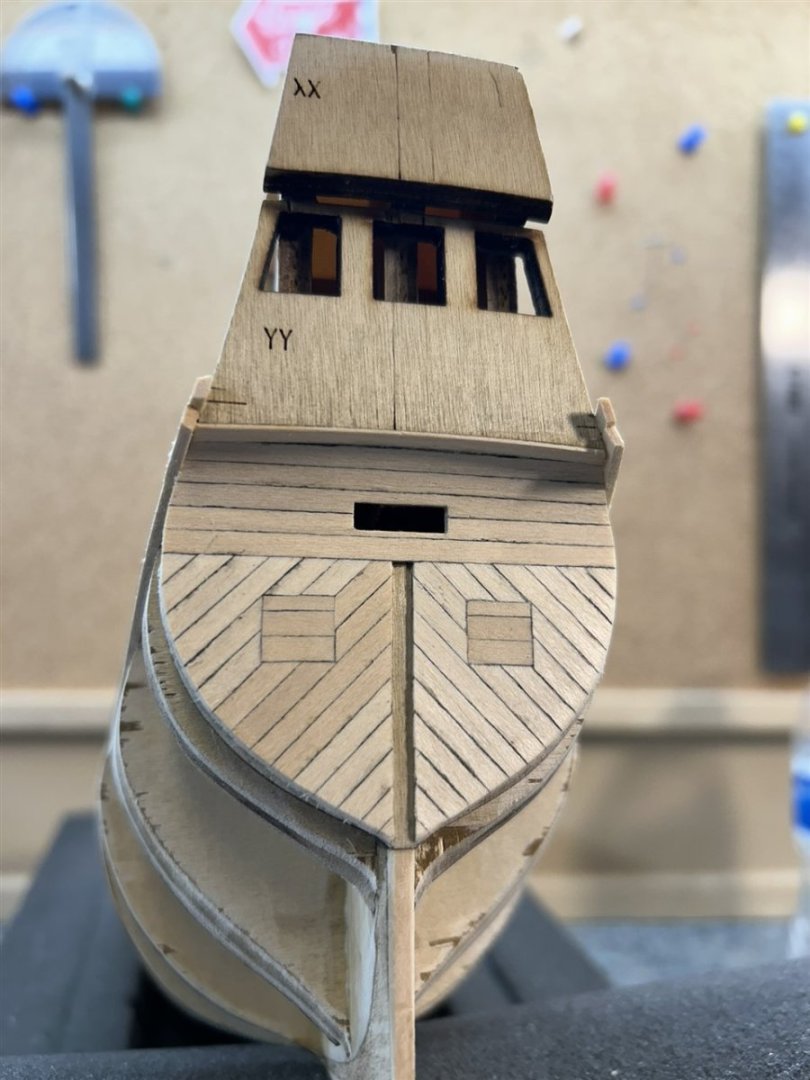
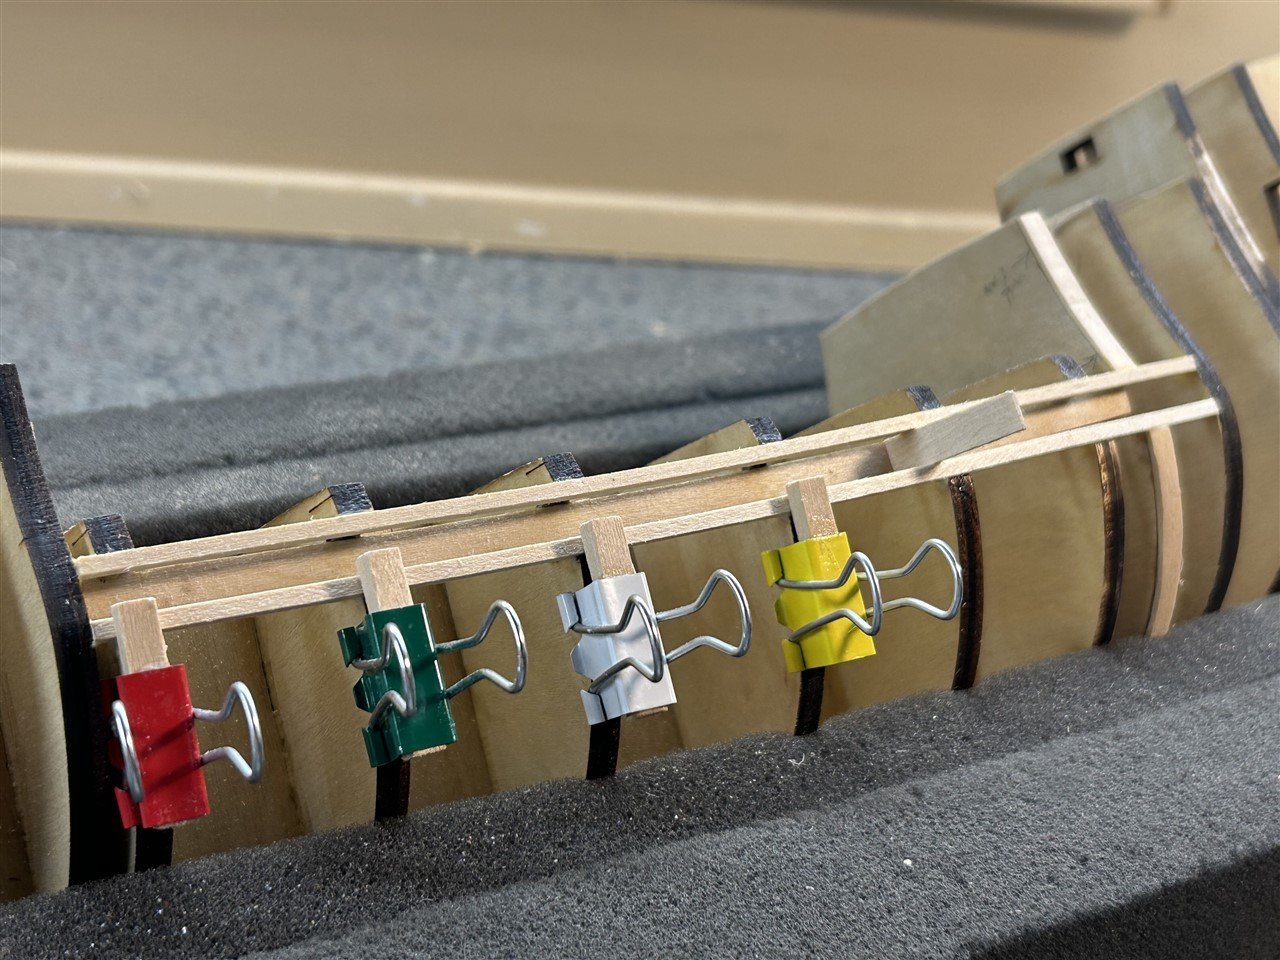
Next it's on to the first layer of planking the sides with 1/16" x 1/8". I didn't take a photo in the proper sequence, so I faked it a bit here. First step is to use the bulwark template as a guide to set the top line of the first plank. There are marks scored onto the bulkheads in the approximate location of where this line is. So, you pin the bulwark template to the framing, trying to align to as many of these marks as possible. Like the instructions say, "more or less". They won't all align perfectly. I think it's important to get the elevation and fore-aft alignment correct at both ends, and let the rest fall where it may. Then you pencil mark the bottom of the template, which will become the top line of the top plank.
I just propped the bulwark template up for the photo here after I already made the first couple of rows, to sort of illustrate the concept.
The first planking step complete and roughly sanded, which is the first 6 rows covering the gun port area. The bottom of this area will roughly be the waterline. These planks are all sanded down to 80% width at the bow, gradually narrowing from about 3" back. Then they are flat-bent to fit the bluff bow. Later planks will use a slightly different bending (edge) according to the instructions. I'm anxious to see how well this will work, as opposed to true spiling.
- GrandpaPhil, Baker, tarbrush and 3 others
-
 6
6
-
3 hours ago, Gregory said:
I'm working on putting together a small vice and X-Y table. I will need to elevate the drill press.
Hope to post update soon.
I will be very interested to see what you come up with. Some of these on Amazon are being sold with a little plastic vice that looks pretty lame. Thanks for you valuable research!
- mtaylor, Gregory, Chuck Seiler and 1 other
-
4
-
Hi BE, impressive work all around! I like what you did with the cannon shot, they look quite realistic. Can you tell us the source you used for those balls? I've been looking for something better than the plastic ones too. One option I've found is lead shot from a shotgun shell. They look right, but they are not very consistent size - you have to pick through a whole bunch to get a set the same size.
- mtaylor and Blue Ensign
-
2
-
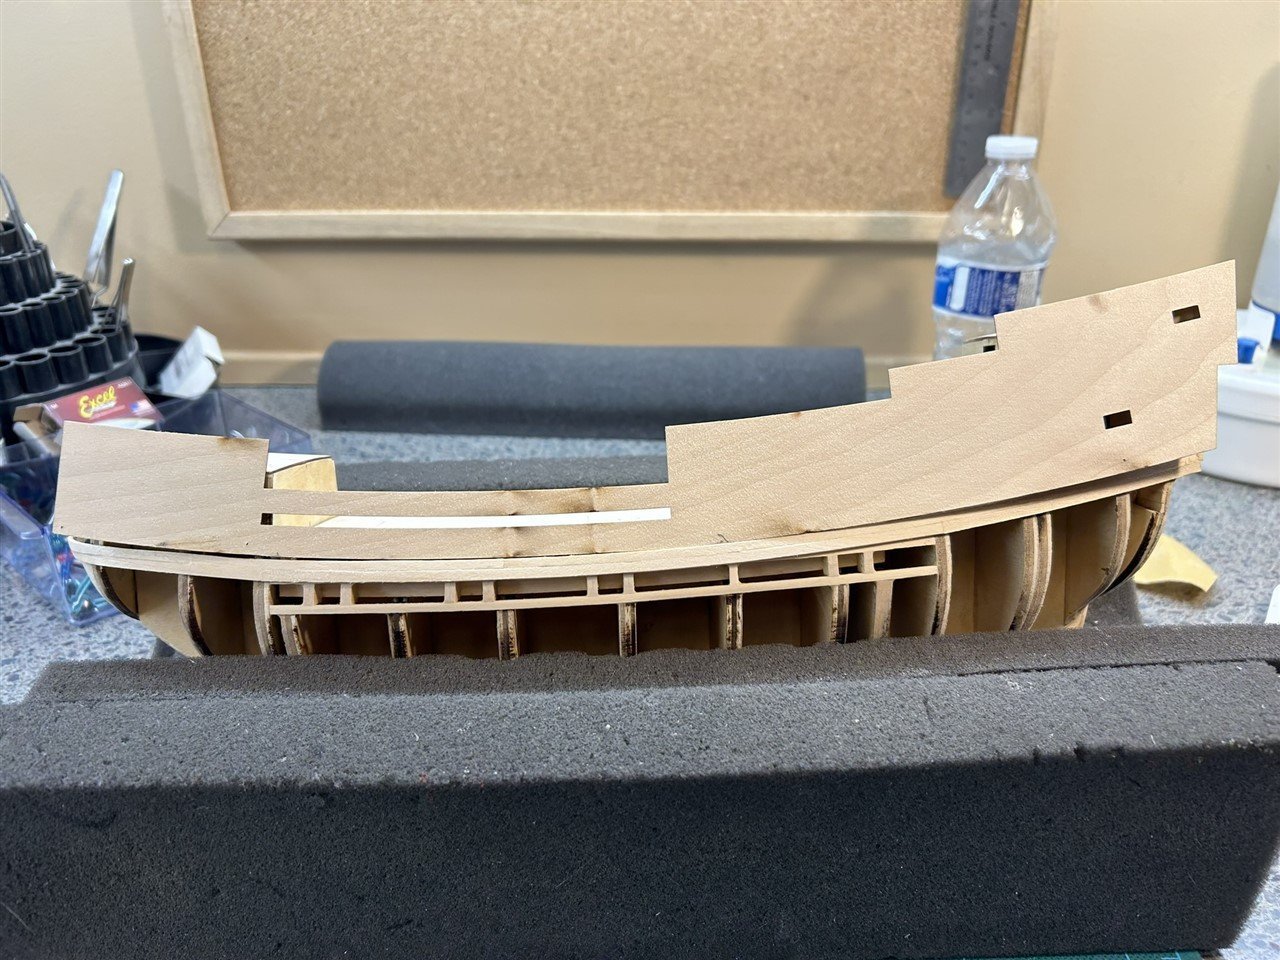
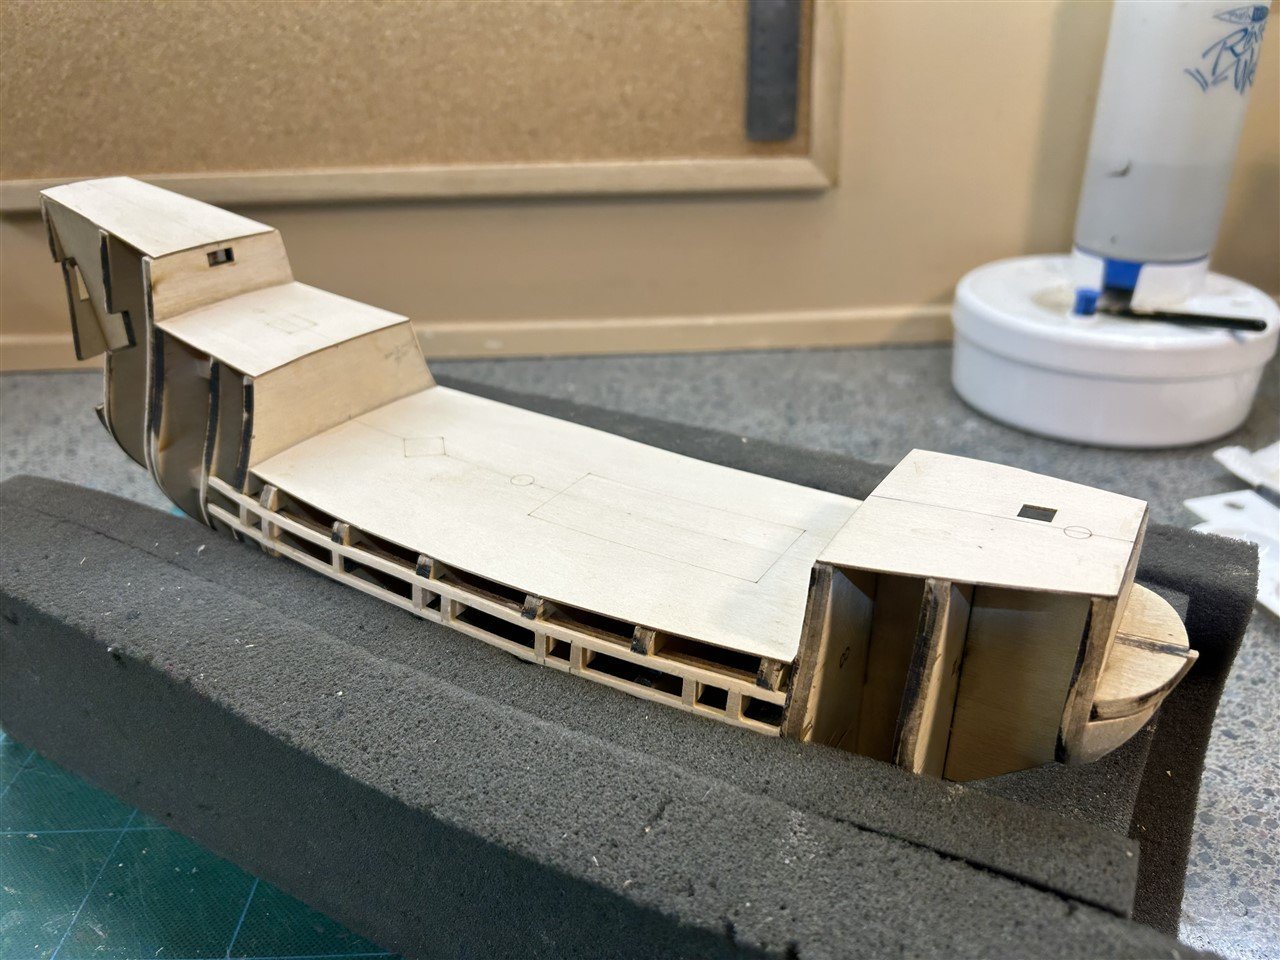
Gun port framing & beginning of fairing
Before leaving the framing subject, I wanted to mention that something I really like about this design is that the frame and former joints are TIGHT. This is really nice, especially since on my last build of Essex they were so loose they all had to be shimmed. On this one you'll have to at least sand off all the laser char and maybe a little more to get them to slide in, which is really really nice, IMHO.
To finish up the framing, we do the gun ports. Upper and lower framing is done with 2 long strips. The formers are already notched out for these, requiring only a little adjustment. I used a scrap of 1/4" stock to gauge and adjust all the way down. You can see here that I needed to add a bit of shim to former 2b on the port side, as it was looking a little short. As I get into the fairing a bit more I'll see if my eyeballing was accurate or not.
Here the vertical bits were added, taking reference points from the framing plan.
The instructions have you make the uprights with the same square stock as the upper and lower, but I founds that to be a bit fiddly. So I instead laminated 2 pieces of 1/16 x 1/4 and cut pieces long enough to reach back to the false back stringer. Very strong and I found it easier to place. Note that there is one single upright in there that is not part of a gun port. It was not shown in the prototype build, but the plan shows it and it seems to be a landing point for a planking joint.

I have started the rough fairing. Before I got too far though, I went ahead and fitted all the false decks to get the fairing of the upper parts of the formers in line.
- Mr Whippy, GrandpaPhil and Baker
-
3
-
3 minutes ago, jfhealey said:
You don't think it will leak a bit do you Chuck?
Fred
Might require a little more than a halfpence - worth of tar
")
- Jack12477, Ryland Craze, FrankWouts and 4 others
-
3
-
 4
4
-
17 minutes ago, MikeR said:
Hi Rick
I purchased a 4 oz.bottle of Liver of Sulphur Extended Life Gel from "The Contenti Company". I mix 1/4 teaspoon of liver of sulfur with 3 oz of hot water. After I clean the copper with acetone I dip the piece in the solution or use a paint brush. It does not rub off very easily. It works great on copper and not well on brass.
Mike R
That's good to know as kits use so many brass fittings (thinking about eyebolts and split rings) and PE items, so maybe not the best choice.
- thibaultron, mtaylor and Canute
-
3
-
Hi all,
Just saw the product in the subject mentioned by @allanyed in TJM's Flirt build thread and wanted to know more. Not wanting to hijack his thread, here we are. Allan, or anyone else that's used this: How does it compare in effect with the other blackening solutions like Birchwood Casey's? Does it tend to rub off like those can? I see it on Amazon in gel and more solid forms to mix with water. What sort of consistency are you going for - really liquid like the BC blackener, or more thick?
Thanks for any input!
- thibaultron, mtaylor and Canute
-
3
-
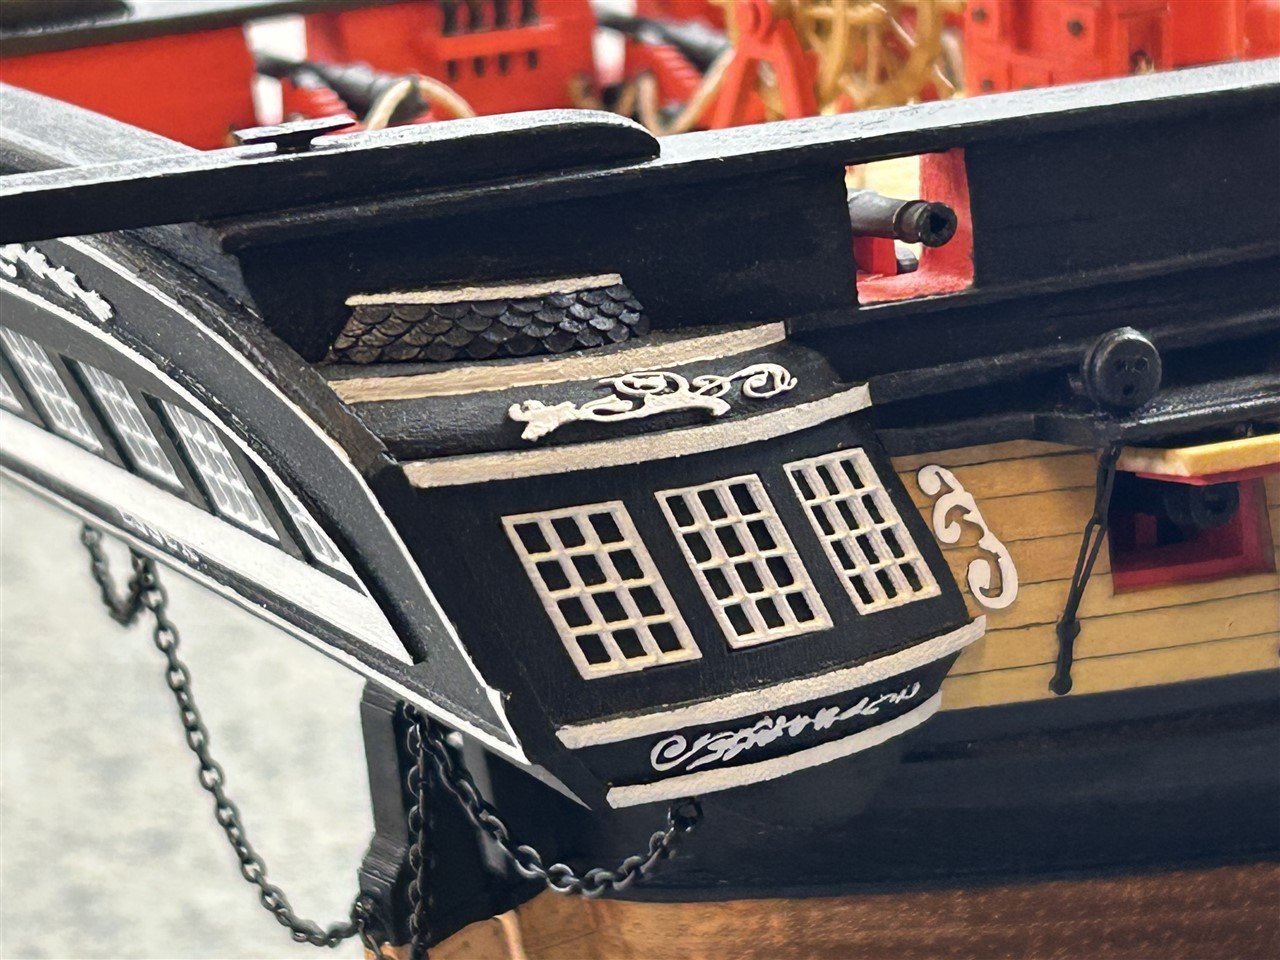
13 hours ago, Der Alte Rentner said:
Thank you Rick. I looked up your Essex build and am likewise impressed with your finished product. I will be referring to that build when/if I do the copper plating. I wish you had included more detail on the processes, especially the gallery window build. Beautiful.
Thanks again.
Peter
Thanks Peter. As for the gallery windows I just used the stock laser cut window frames and cut my skins to fit.
-
I'm impressed that you're able to plank these gallery drops at all, and they look great!
- Der Alte Rentner and ERS Rich
-
1
-
 1
1
-
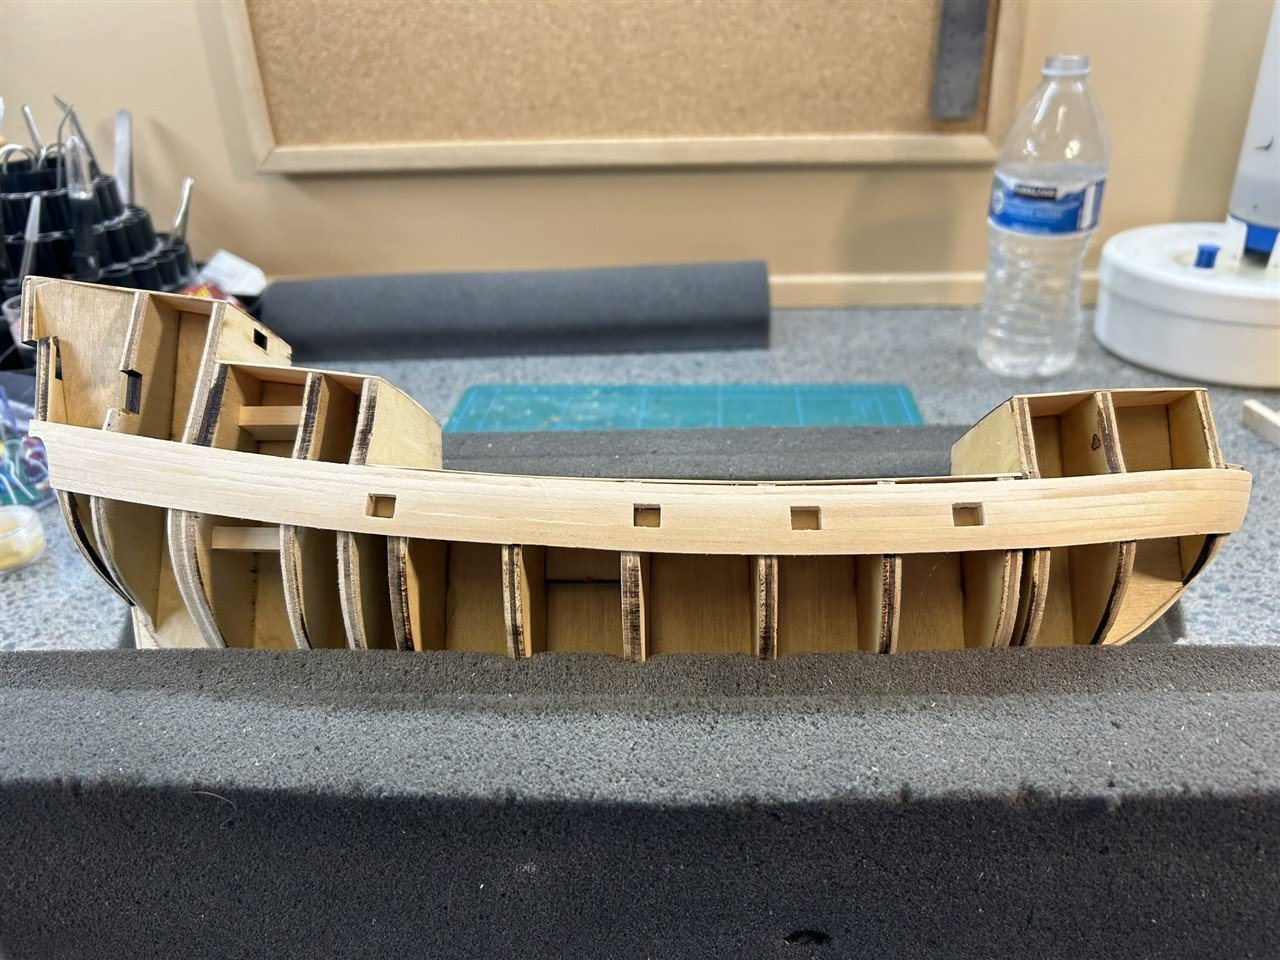
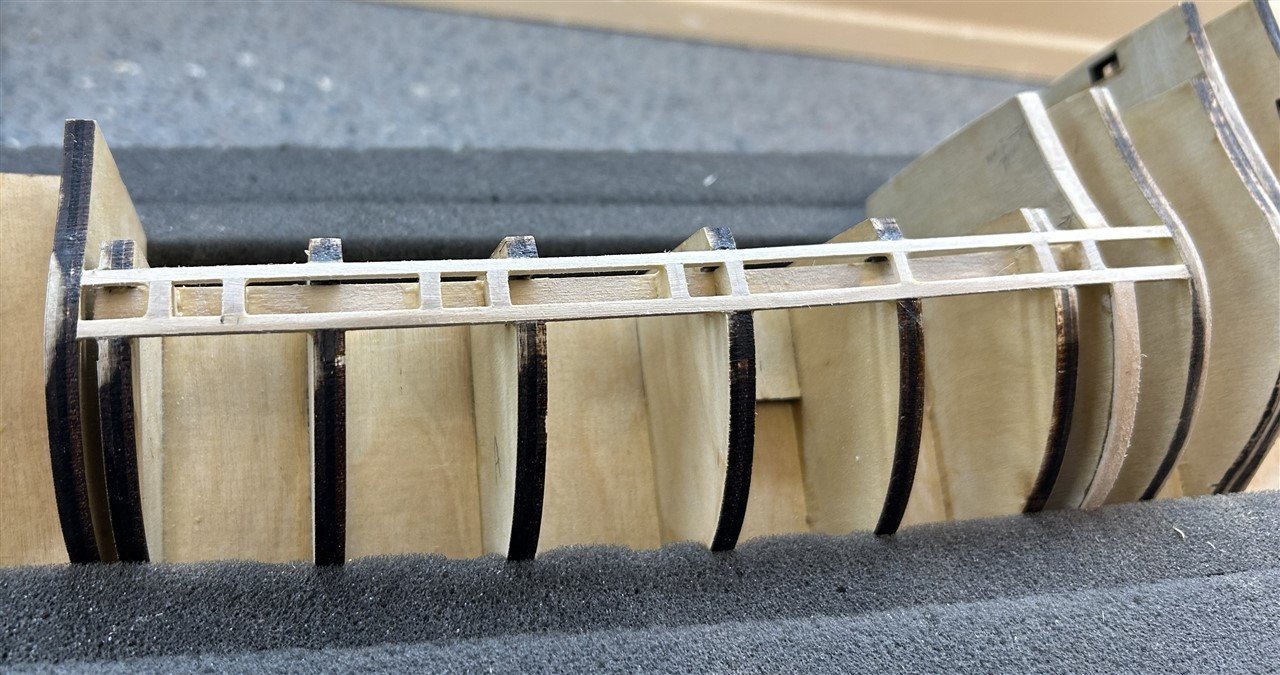
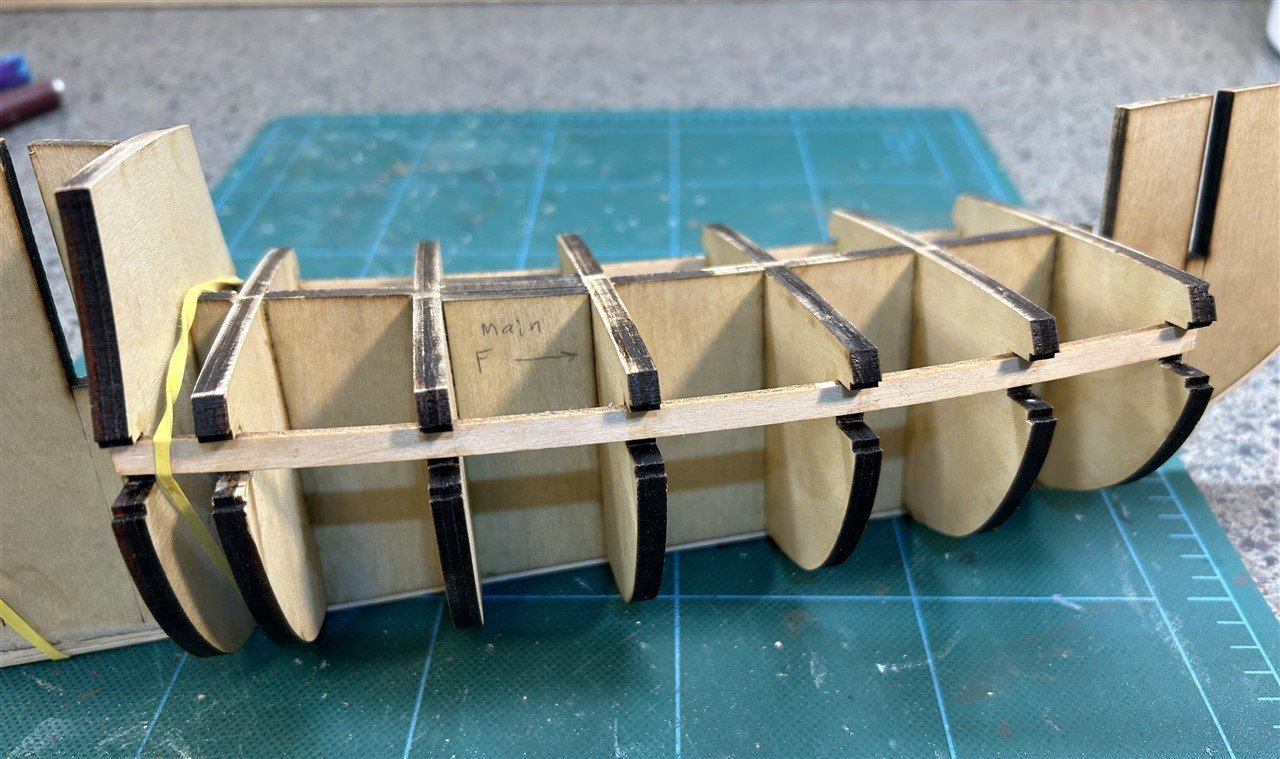
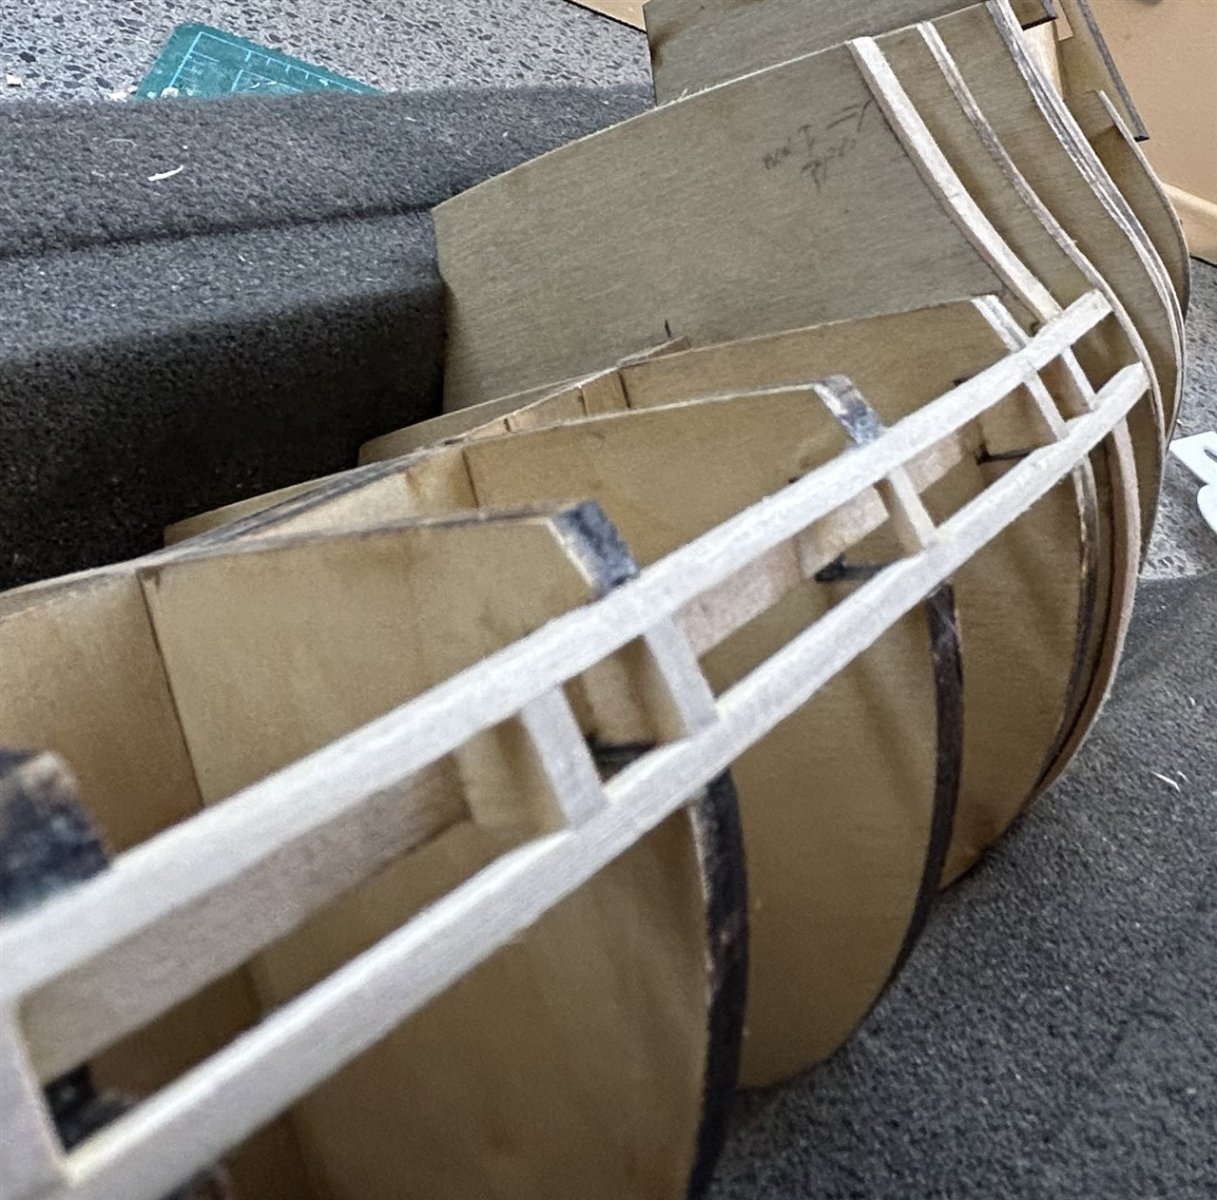
Framing Highlights
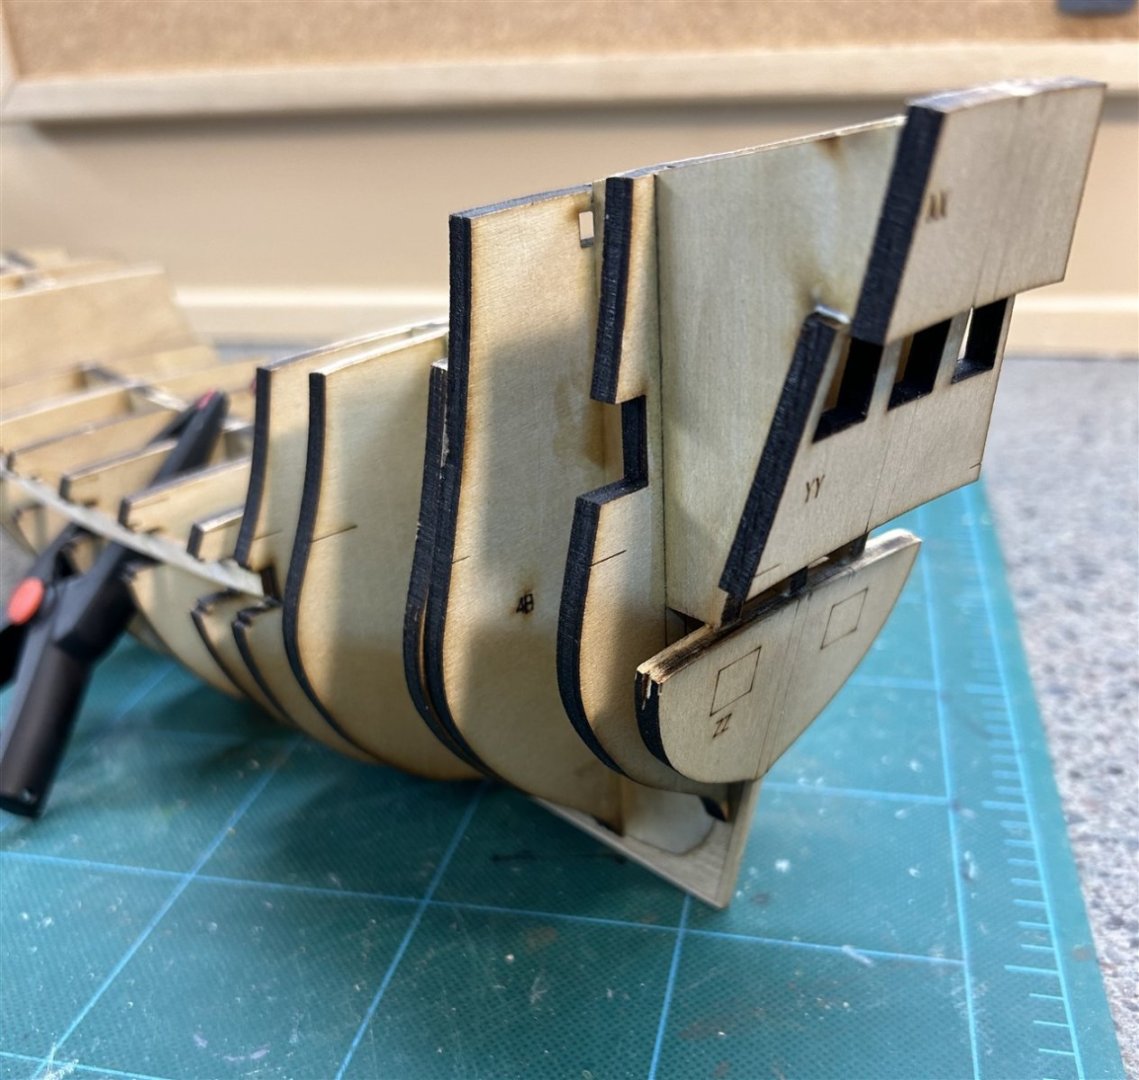
Firstly, to deal with the warped Keelson. A little water, lots of heat gun, heavy weights, bending in the opposite direction, etc, etc. Fussed with this thing for a couple of days and finally got it pretty flat. But I suspected it would not stay that way, and sure enough it sprung back a little over time. To cope with this and get a final straightening, I added the middle section of bulkheads that are slotted for a false gun backing strip and then propped the assembly so I could bend it straight and then glue on these backing strips to hold everything in place. Bit of balancing act, but I think it worked. Shown here are those bulkheads with the strips glued in place. Not going to show the Rube Goldberg mess I had to use to get it all propped up
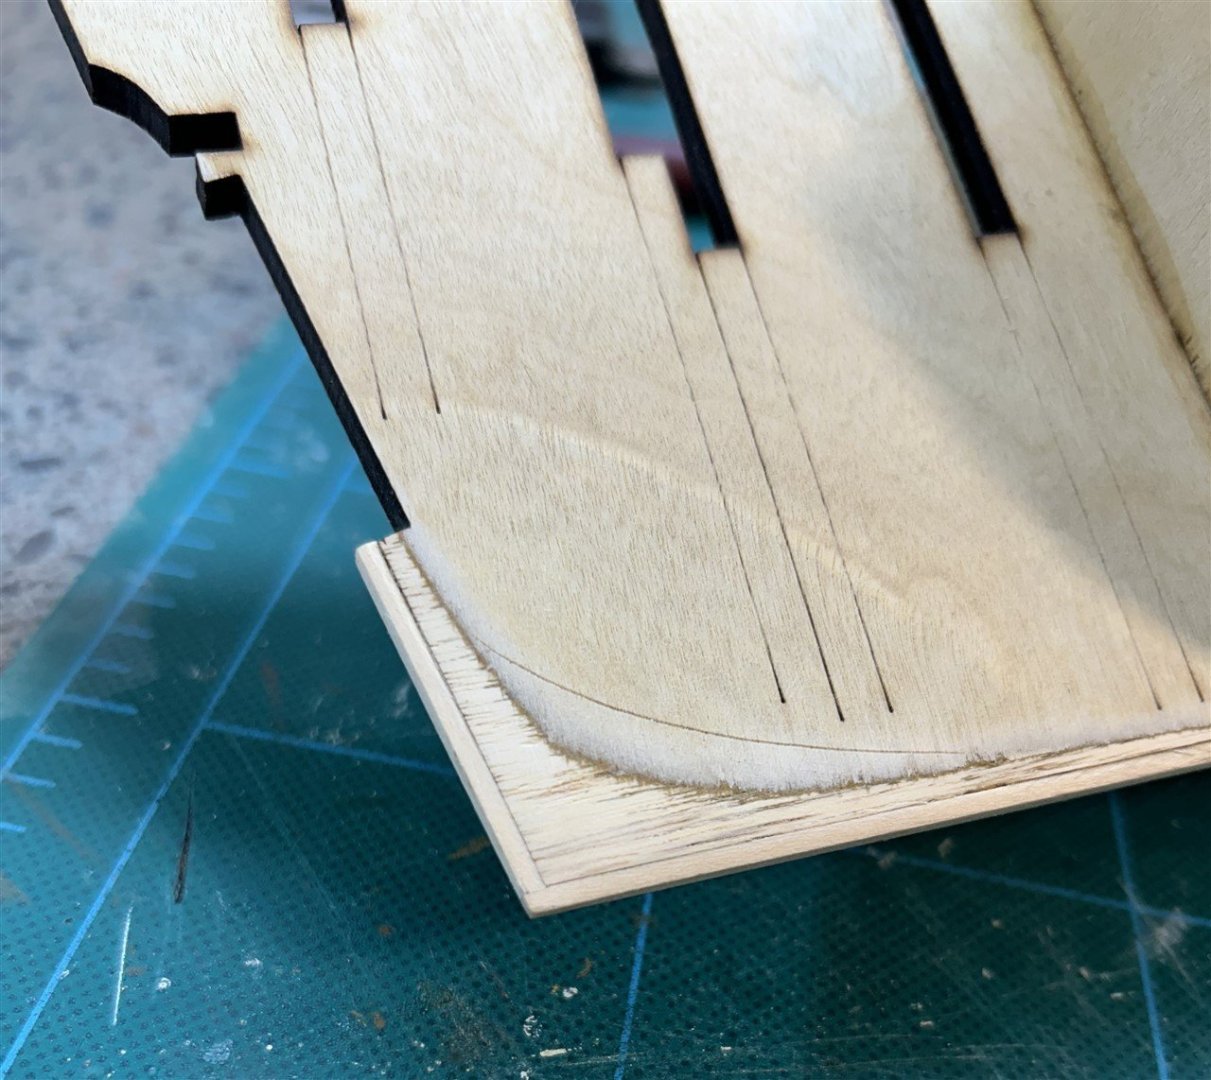
Prior to all this I had added the rabbet strip and tapered the stern at the bearding line, as shown. This rabbet strip method seems to be a standard feature of Chuck's designs and I really like the simplicity of it, as opposed to carving the rabbet as a groove into the keel/keelson. Note that I've taken these photos somewhat out of construction order.
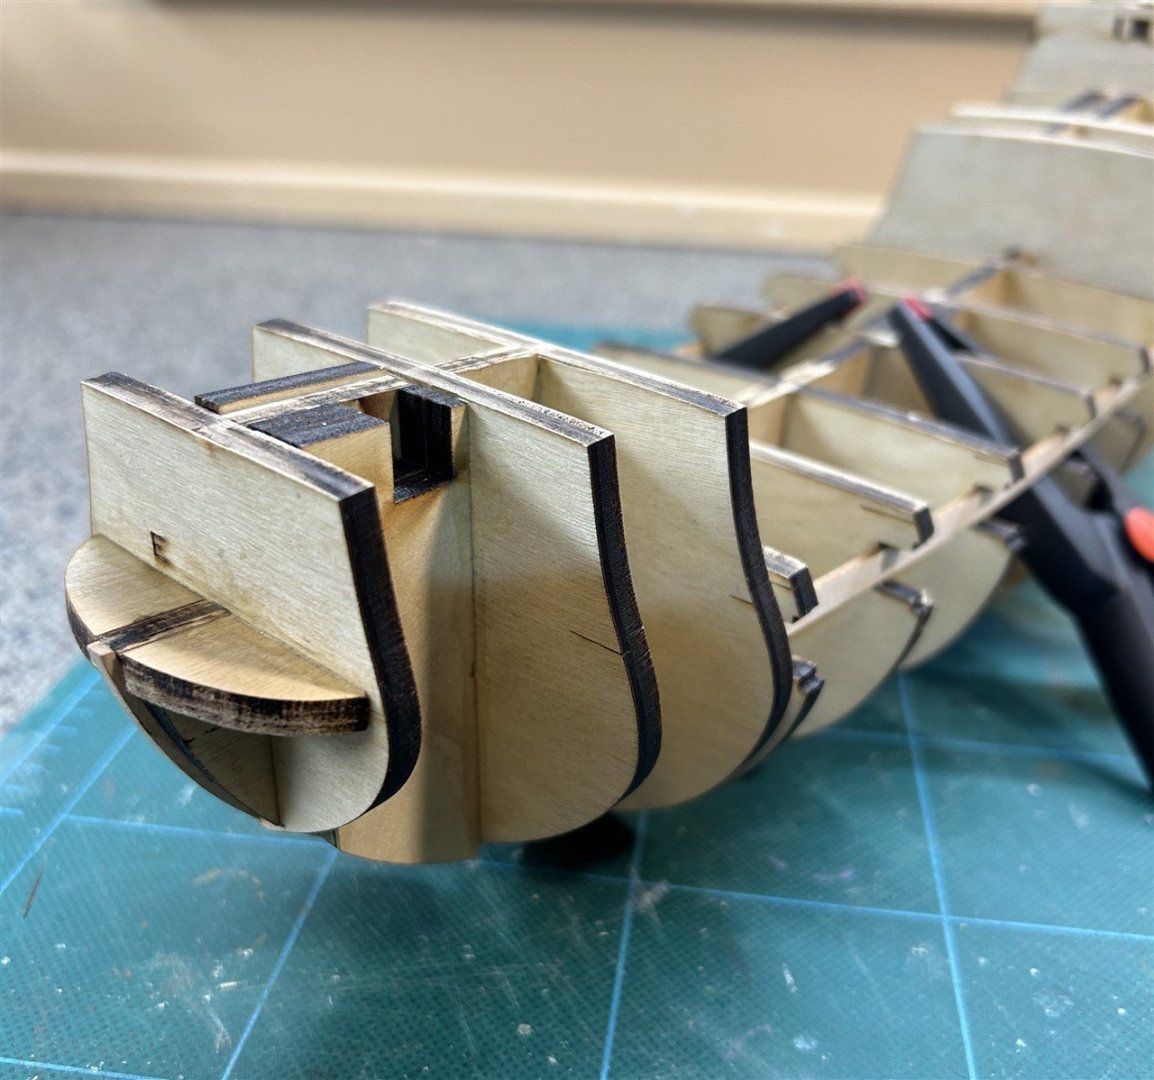
Finally, the completed rough framing. Next we'll need to frame the gun ports and then tackle the fairing work.
I'll be doing the gun port framing as a placeholder for the lids, which I will be showing closed, not placing the dummy gun barrels.
-
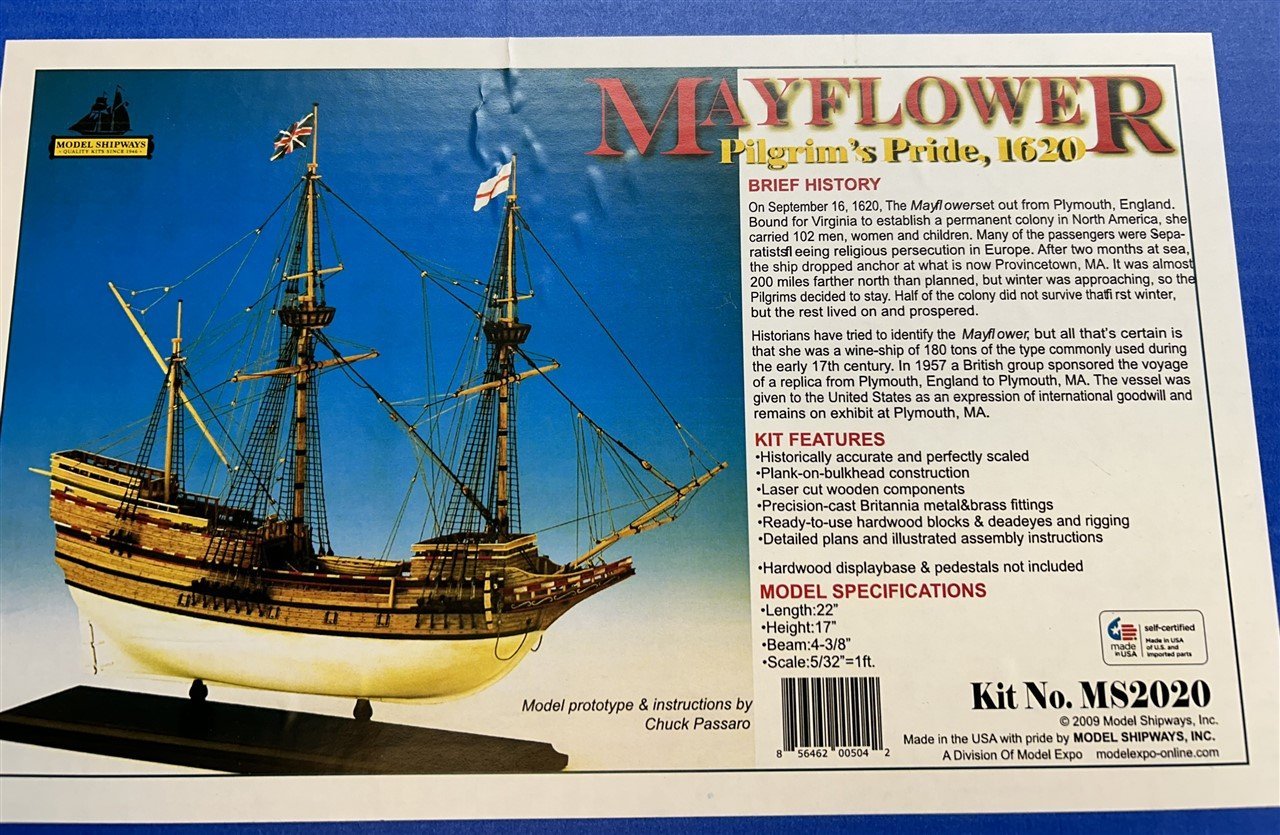
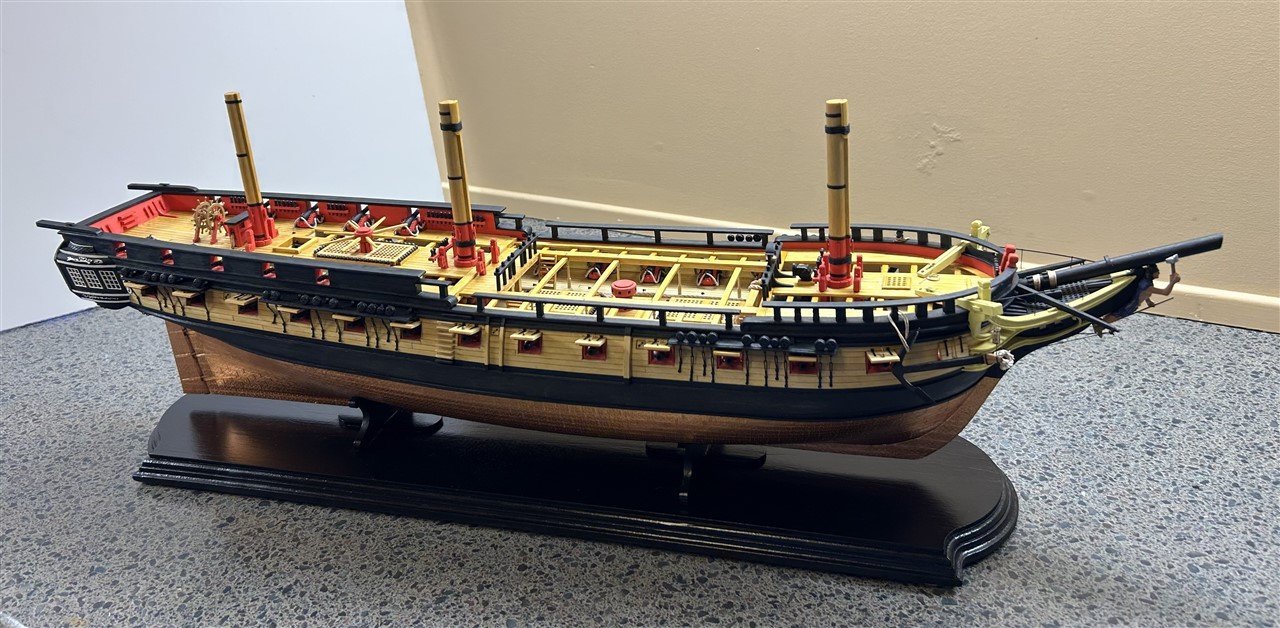
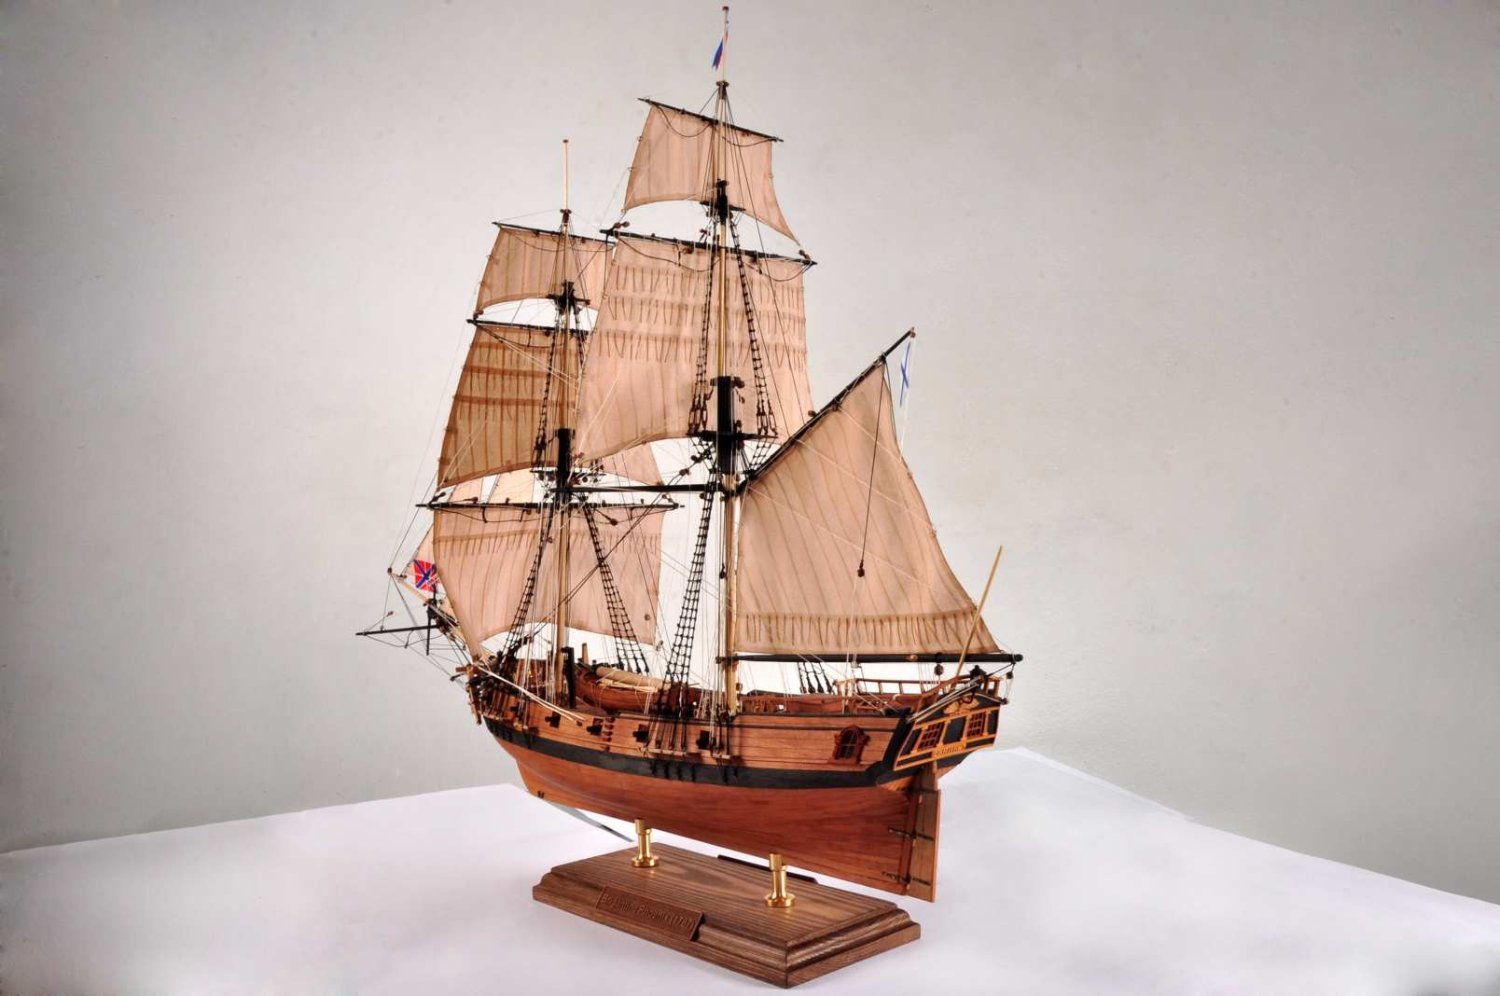
My next build will be the the Model Shipways Mayflower 1620, MS2020. To be a little pedantic, this is really a model of the Mayflower II replica of 1956, based on research of William Baker and the best knowledge of what Mayflower of 1620 might have looked like. The replica ship was sailed from the UK to the US in 1957 where it was gifted to us and exists today as a floating museum. It has recently been undergoing a new restoration, where the color scheme has changed from the original Baker scheme as depicted on the box cover shown below. At some point I will need to decide if I want the designed scheme or to follow the changes of its current incarnation.
This is not a terribly complex kit, parts wise. There are 4 sheets of plywood parts for the framing, and 4 others of assorted parts, plus the usual strips, dowels and other bits. I will make just a few observations of the contents quality here.
Firstly, the keelson piece (bulkhead former) was quite warped. As this forms the whole basis of hull alignment, that was a disappointment. Got to get this bit straight or else you end up with a banana boat! More on this later. Also the cutting on the plywood could be better. Several parts were not cut all the way through, so there was some work to do to finish the cuts. The plywood in my kit was quite "splintery" at the edges and tended to get a good bit of delamination when cutting or sanding. That's going to present some challenges while fairing.
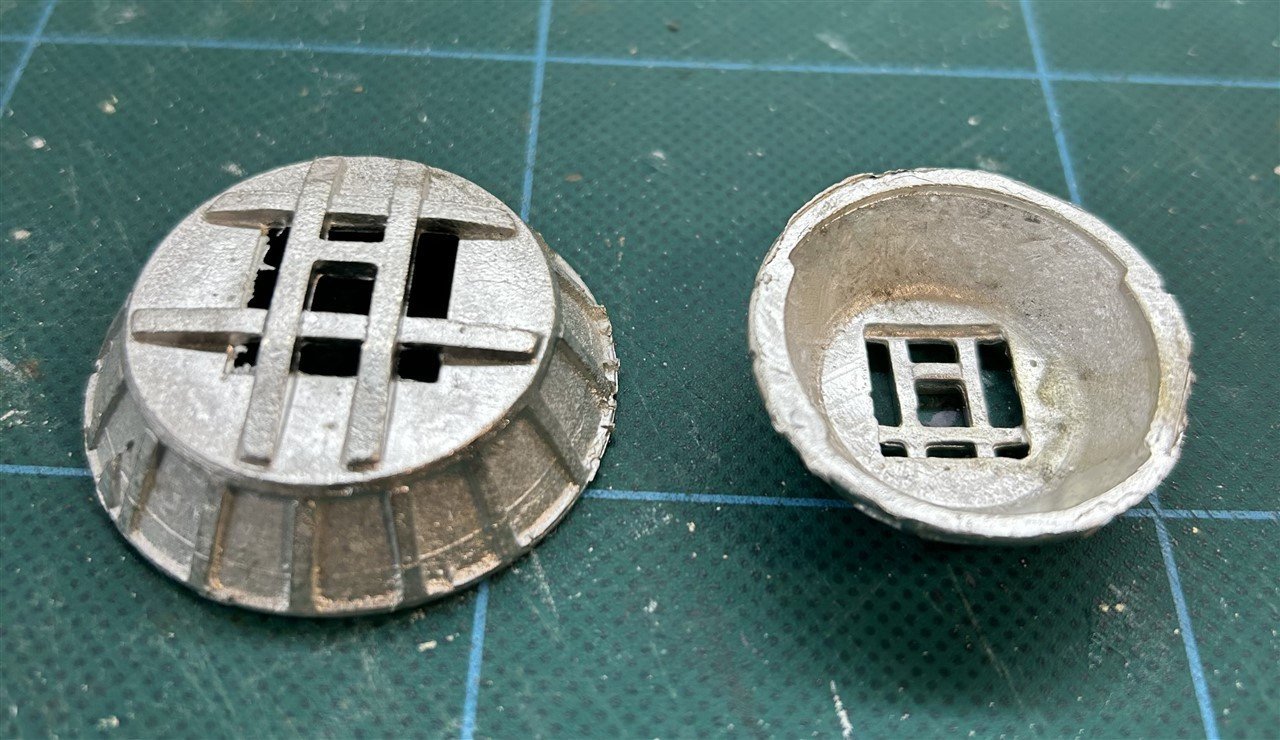
One thing I tend to fuss about is Britannia metal parts and how badly they tend to be made. I was pleasantly surprised in this kit because as these things go (low expectations, I know) , these are not too bad. Even the crows nests might be usable, though there is a good chance I might want to scratch build new ones when I get there.
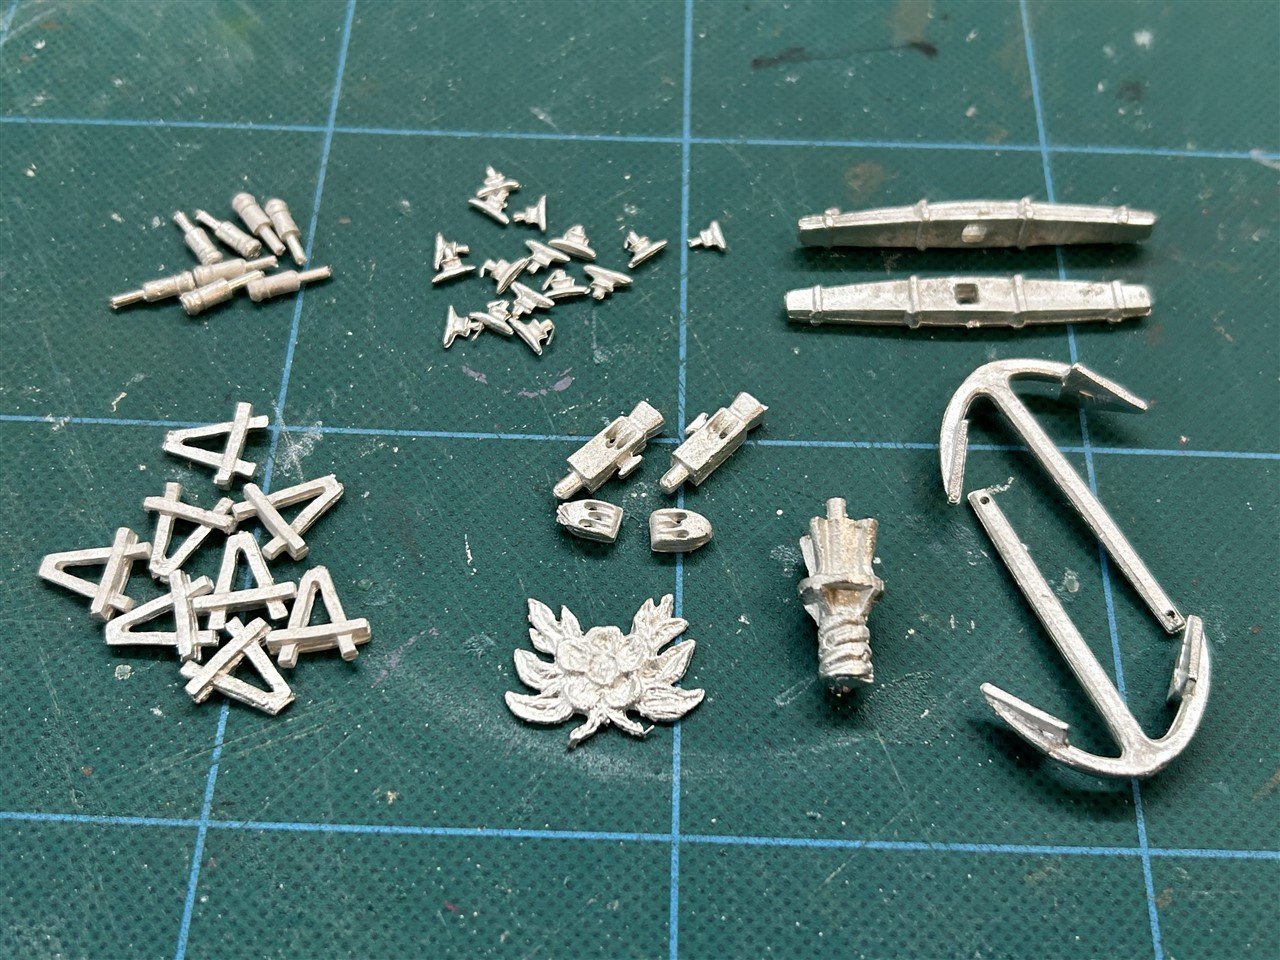
The blocks and "rope" provided are typical MS fare, which is to say not very good. I will be making an order to Syren to get proper materials.
-
26 minutes ago, Gregory said:
I don't anticipate doing any work that can't be done with the 1/8 shank micro drills, and I have them at least as small as #81.
I've got a set of shanked bits for the little Arrowmark drill I just got, so I'd be OK even if it didn't go down to 0. Thanks!
- Canute, thibaultron, mtaylor and 1 other
-
4
-
Gregory, thanks for posting this review. This is an interesting product, I'm looking for something like this. I'll be interested to see what can be done for fixing the work to the base. Looks like at minimum with all those slots it might be pretty simple to get a fence on there.
Have you tested to see how small a bit that chuck can handle?Went back and looked at the Amazon listing detail. Looks like 0.7mm
Thanks!
- thibaultron, Canute and mtaylor
-
3
-
4 hours ago, ccoyle said:
Love both of their design philosophies. The MK hull structure feels incredibly solid and hefty -- I saw this with their Cannon Jolle kit as well. I have not had a single one of the plywood frame extensions snap off yet, even the beveled ones; this is an object lesson some manufacturers could stand taking to heart.
I came across another potential color scheme I really like. This builder chose to stick with the natural wood theme and painted the hull decorations with an orange-toned shade of ochre that I think complements the wood very nicely. I knew I was going to end up waffling on this particular decision! 😬

That's a nice look. Do you know if they used actual orange tinted paint, or perhaps orange shellac?
-
-
2 hours ago, glbarlow said:
I wonder how many threads there are on this topic, it always serves to bring out the the same comments and commenters.
I use the best glue for the job, for framers and bulkheads it’s Titebond wood glue, for planking it’s Smith Industries CA(not all CA glue is the same), because I heat bend and fit each plank first. For other work it’s White PVA.
For those sensitive to CA, Smith Industries makes an odorless version.
Use what works for you, for more opinions (and entertainment) do a search on this site on this topic.
Glenn,
with regard to the Bob Smith CA, for planking what thickness do you usually use? I see that they make 3 basic ones.
Thanks!
-
I just tried your tool, and wow, nice work, this is very handy! Good way to archive your own threads in case the unthinkable forum crash were to happen, but even better I can pull down one or more past build threads when I'm doing the same subject for reference without having to go into the forums for each new look. Kudos and Thanks!
FYI, my PDF landed in the same folder as the app .exe
- Ryland Craze, oakheart, mtaylor and 1 other
-
4
-
-
-
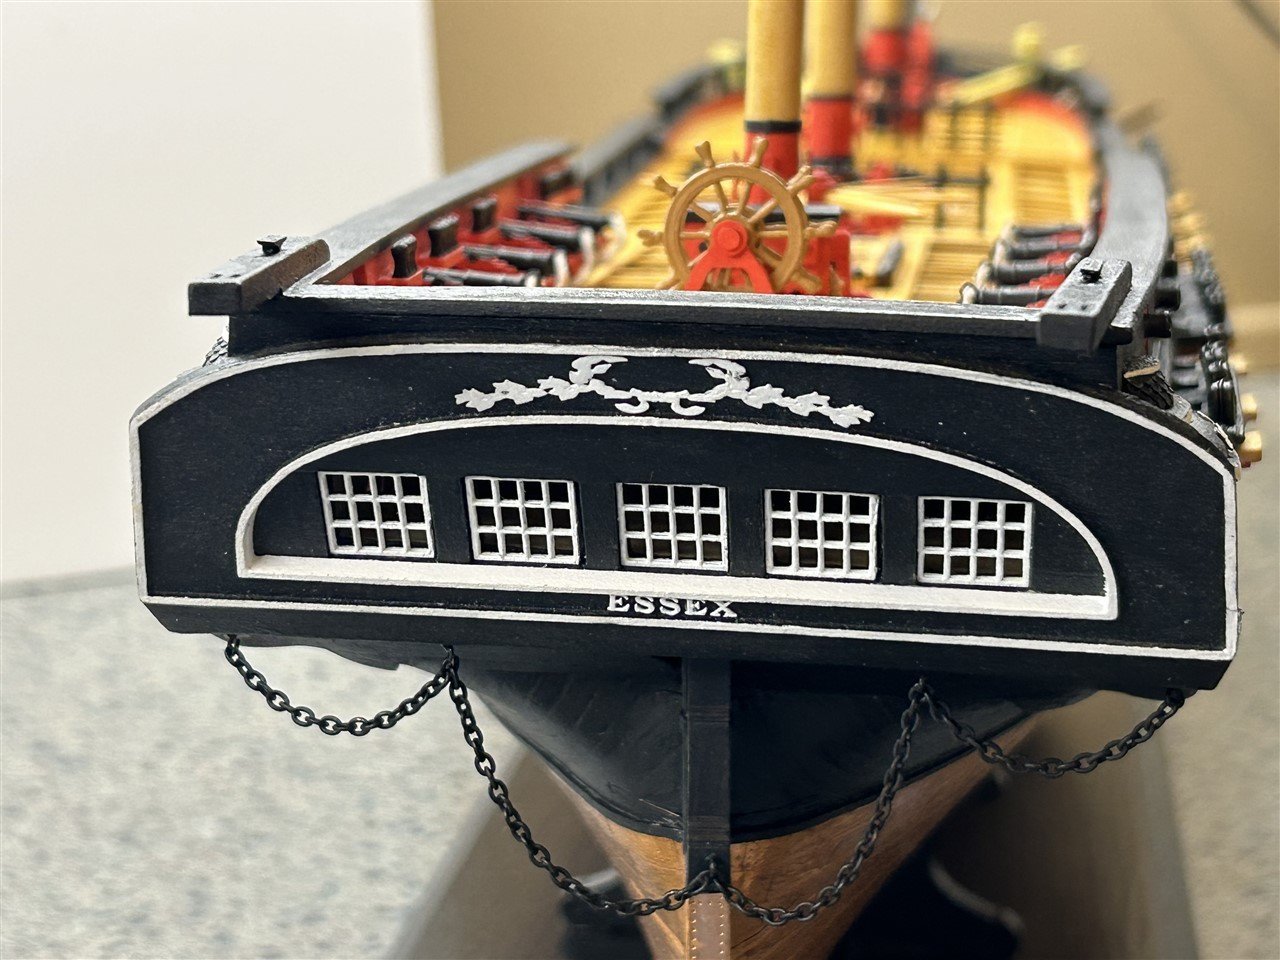
Completion
Fini! Well, except for a stern lantern. The britannia metal one in the kit was about as sad as the quarter gallery parts, so had to be replaced. Found one the right style and size from Caldercraft and it's winging it's way from the UK so it'll get fitted (along with some cat head lions) when it gets here.
I have not made this a detailed log so I've missed a lot of specific comments on this kit, so I'll try to summarize here. All in all an enjoyable kit to build for me. I'd say there were a number of design issues and plan mismatches (none too big) and some part quality (metal) issues that made it necessary to bash and scratch a little bit. There were a few places where you'd expect a recently designed kit to have some parts laser cut at least a starter but expected you to make from stock. Not a big deal, but if you expect a lot of hand holding and perfect detail in instructions you could get a bit frustrated. Not a beginner project! One nice thing is that where some parts might be a challenge to finish there were ample spares laser cut, and plenty of extra strip stock left over. I strayed a bit in places like not doing the hammock netting (I hate those things). Maybe not as accurate, at least not according to plan, but it pleases me. I also didn't do the ship's boat, but the kit includes one. It has it hanging from the stern davits, but I didn't like the look of it there, obscuring the stern works.
I'm going to take a short breather and build a plastic model of my Miata that I scored at a club raffle, then plow back in with the Shipways Mayflower. That will be a different sort of challenge as I will rig it, but then I'll escape back into hull model world with the USF Confederacy.
Thanks all for the looks, likes, and comments!

- BrochBoating, schooner, Lt. Biggles and 17 others
-
11
-
 9
9
-
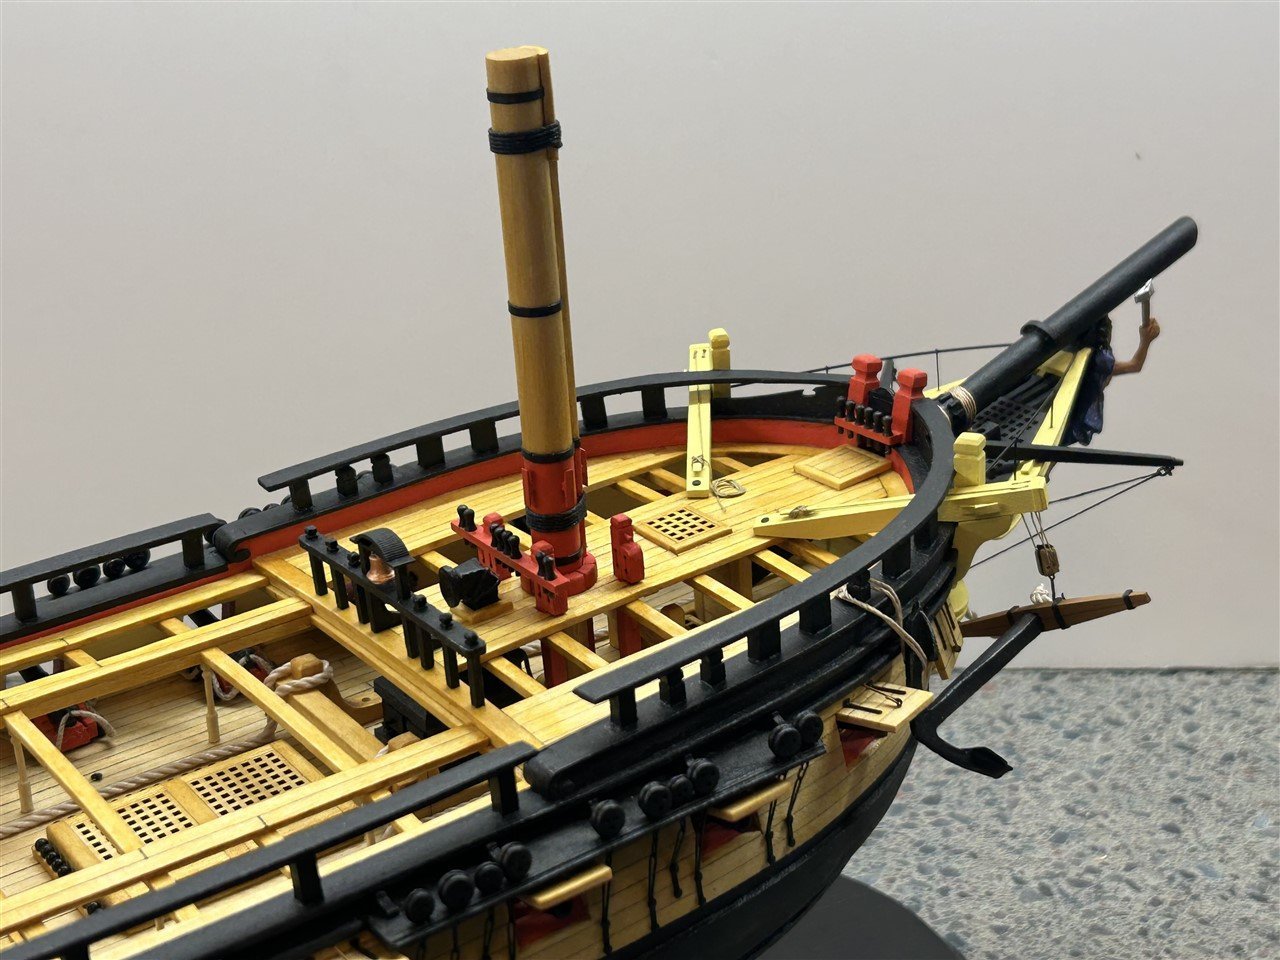
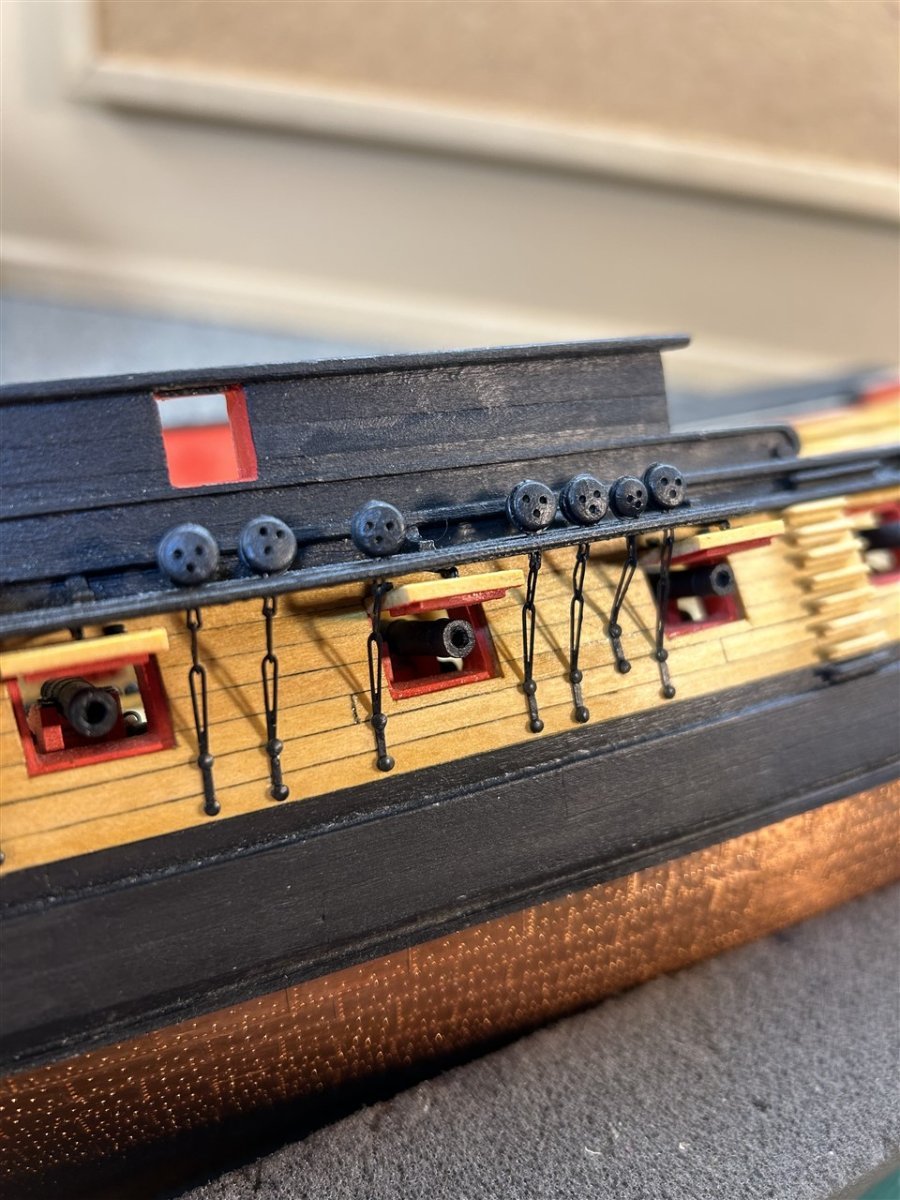
Deadeyes and Head Works
I have done all the deadeyes and chain plates, plus all the gun port doors that sit under the channels. I put these on now since they are a bit protected by the channels, but will wait until near the end to put on the batch that are out in the open. Otherwise I'll just knock them off! This is a sample section:
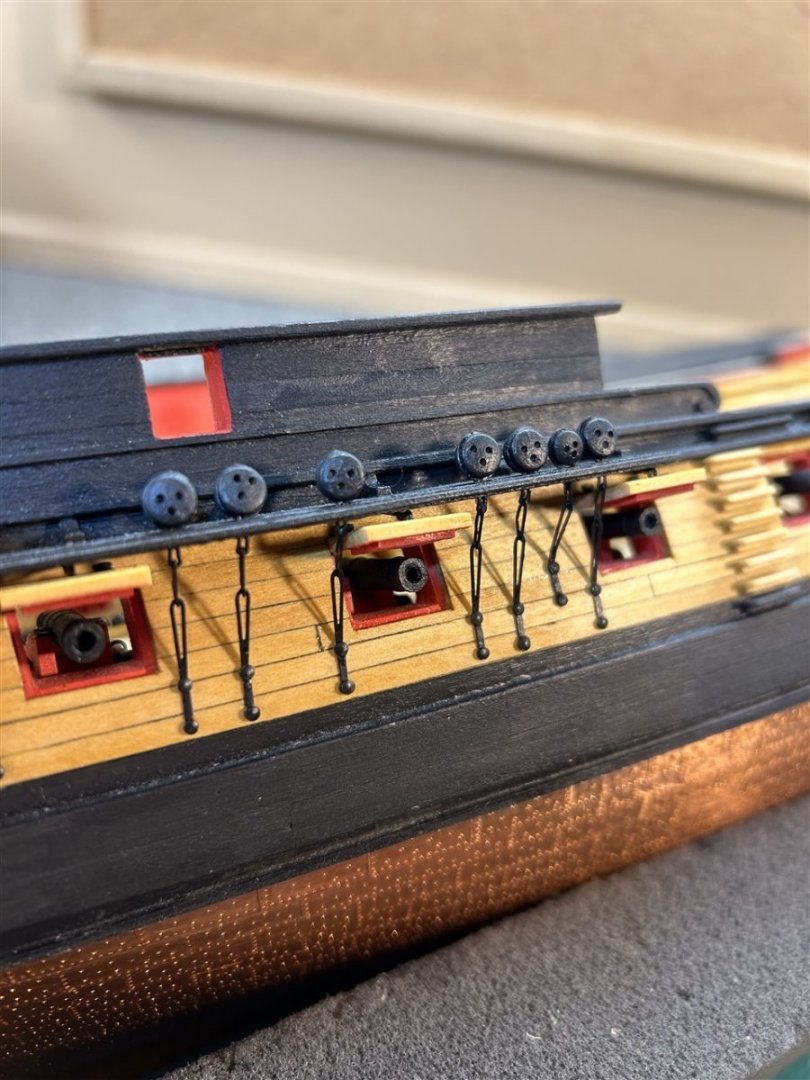
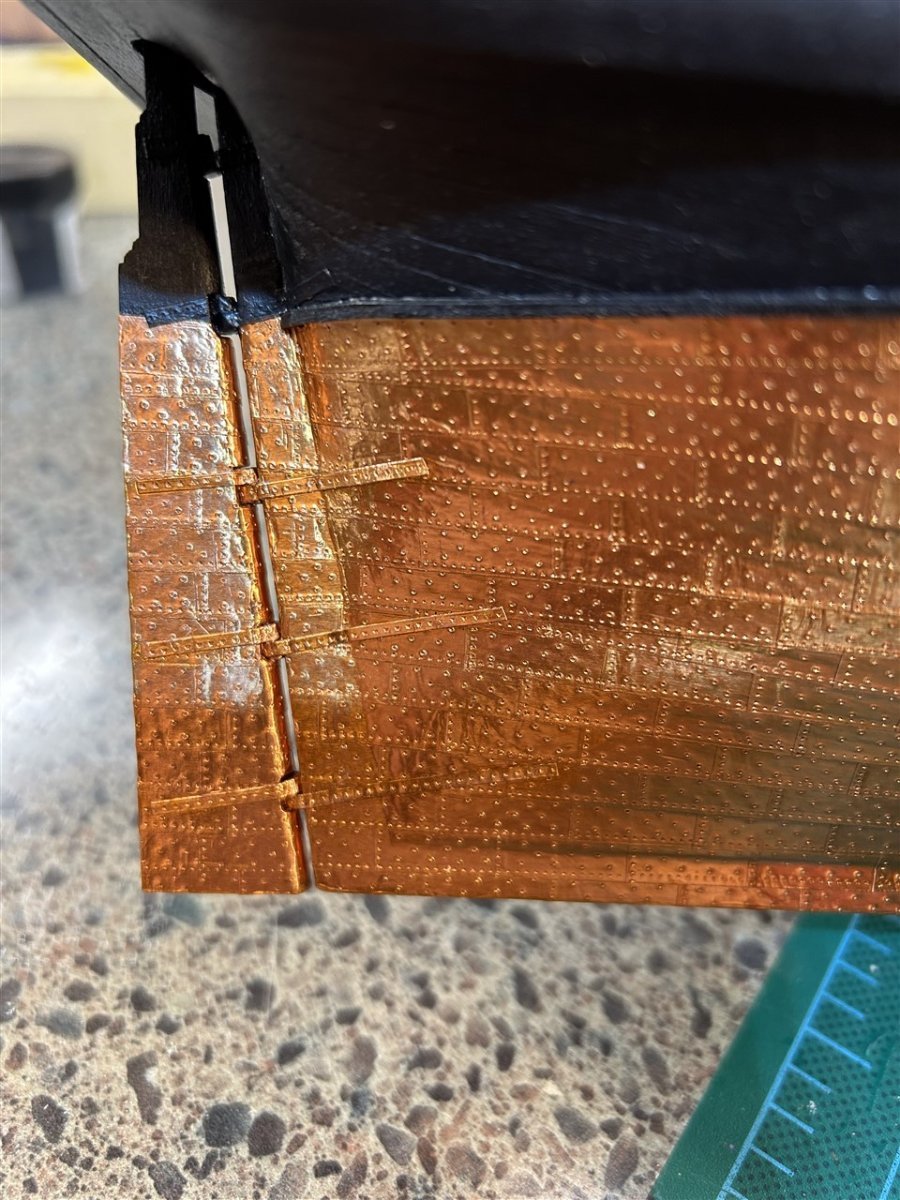
Have also fixed the rudder. I chose to go with copper tape strips for the pintles and gudgeons rather than brass (easier to work with) and some bits of toothpick for the hinges.

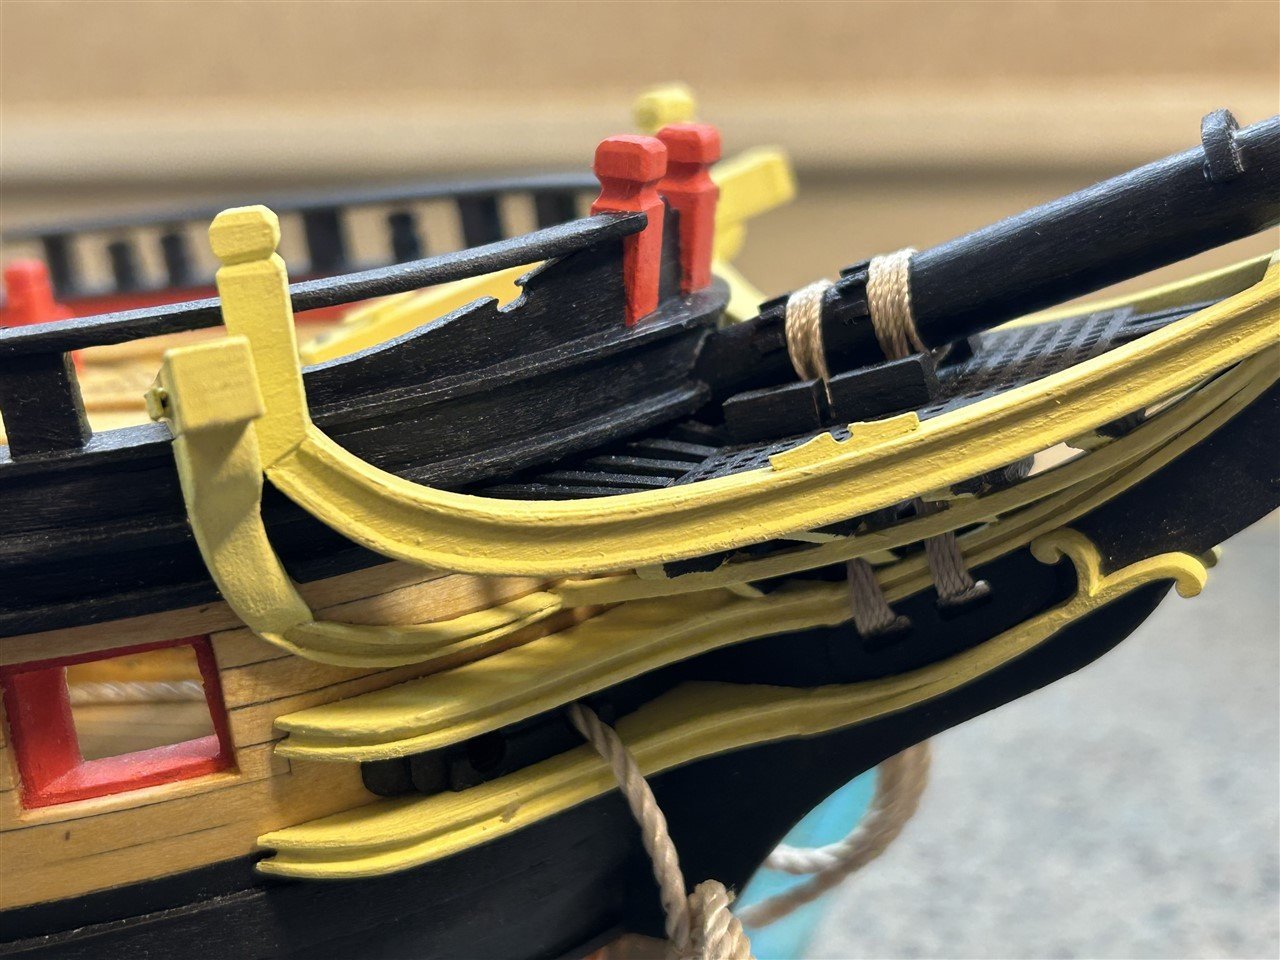
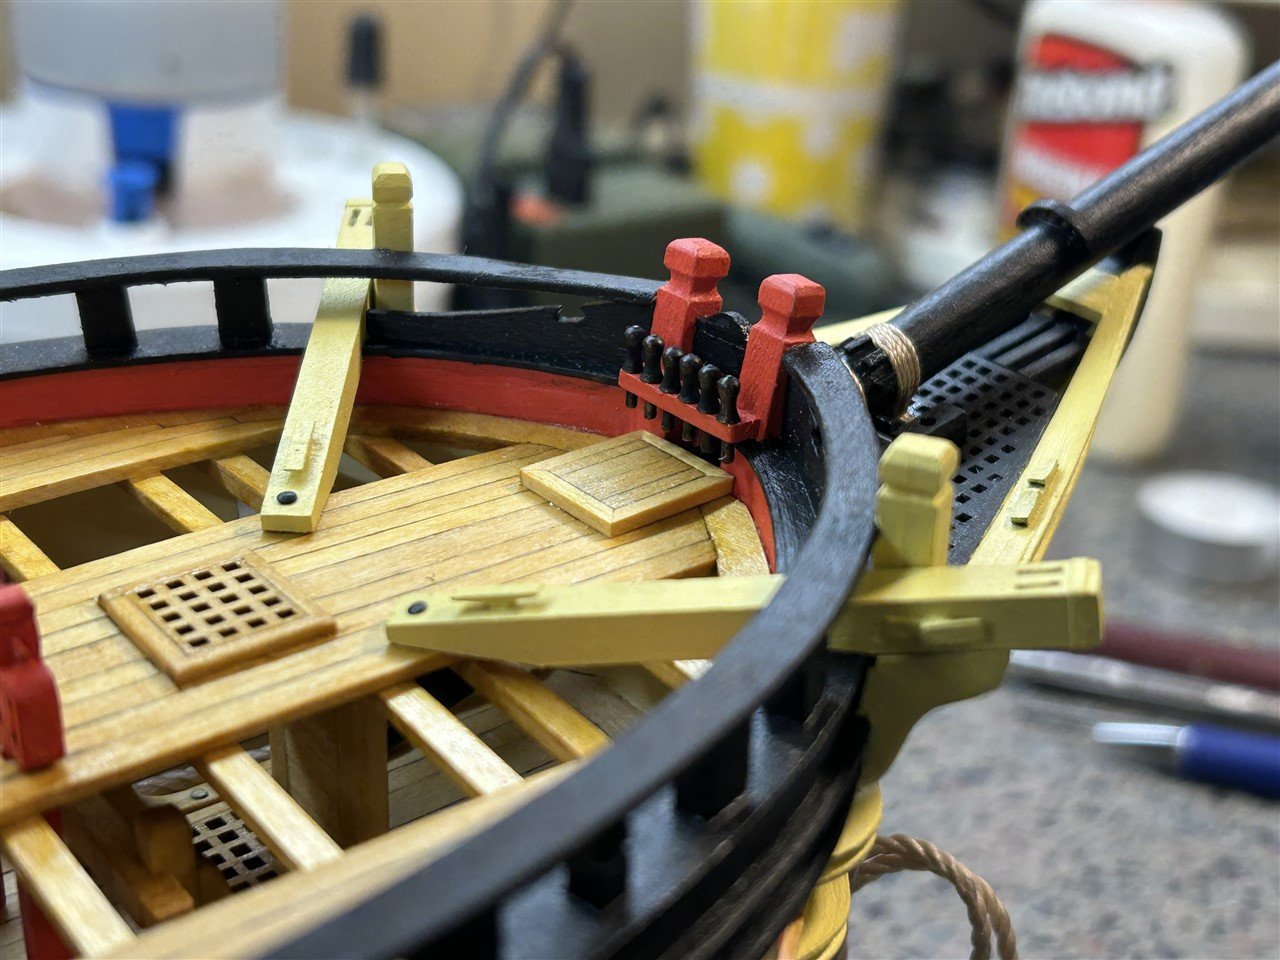
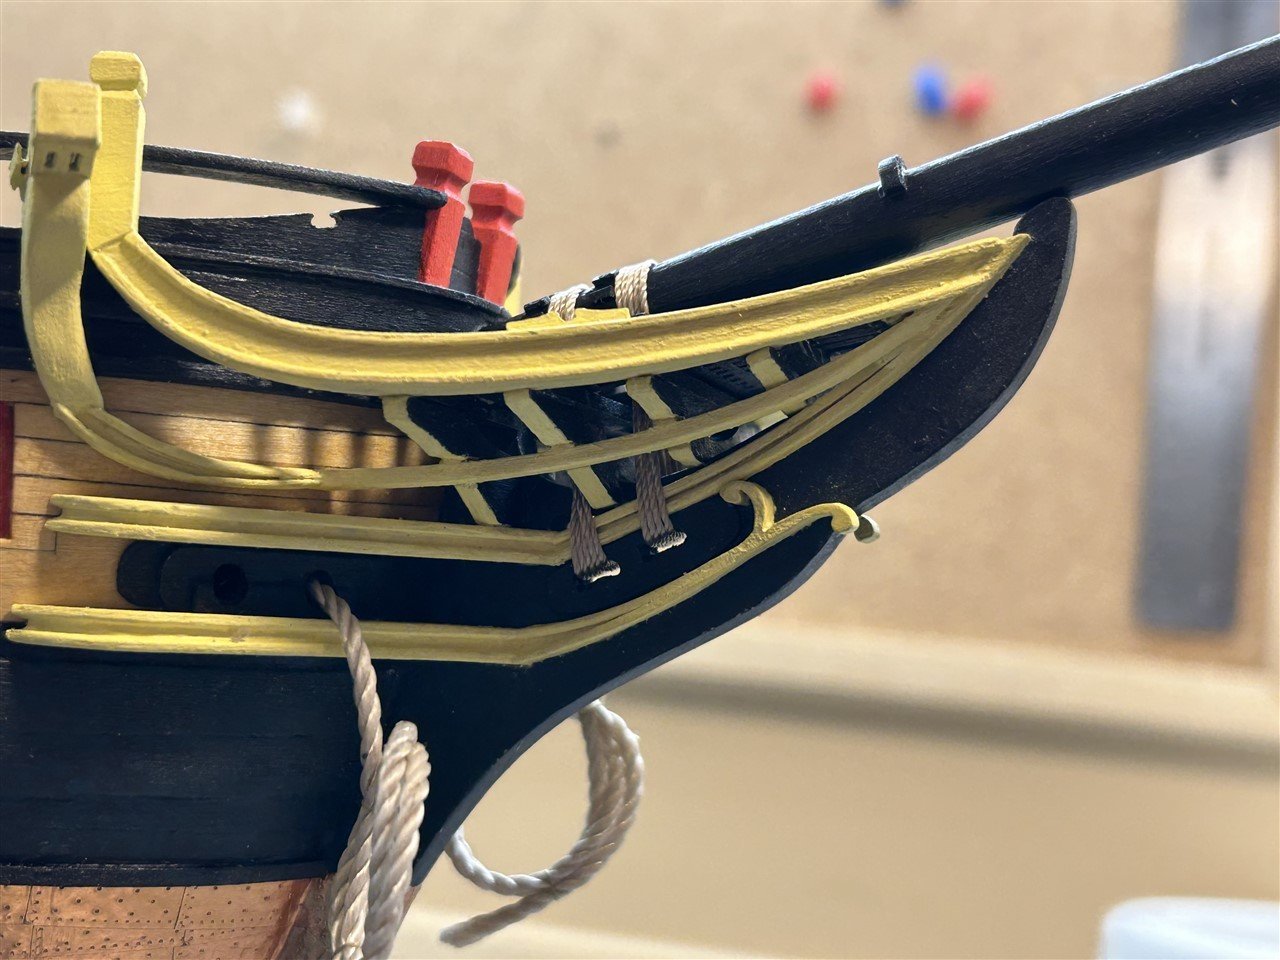
Next up I went back to the Head Works and bowsprit to get most of that area completed. Left to do are the more fragile bits like the boomkins and horse rails - will do those and some of the other more wispy stuff last.
-
On 11/30/2023 at 1:47 PM, schooner said:
First of all let me say that you are doing a GREAT job on this build, very clean and sharp!
I've had my eye on this kit for a while because I don't have the room for a rigged ship of that size. I've done a fair number of wood kits but I was wondering if you used anything other than hand tools in your build? The only power tool I have is a Dremel that I use for sanding (I might buy a small disc or belt sander to help with the frames).
Thanks and keep up the great work!
Hi Tim.
So sorry I'm so late responding. For some reason I didn't see the reply come in. Thanks for the kind words! As for the size of this ship kit finished, it's a hull-only, with just 4" high mast stubs (optional), so display size for me is just going to be a bookcase shelf. I'm in the same "boat" so to speak, I won't have a bunch of room for fully rigged ship display. Also I'm not a fan of doing rigging, so the hull only "Admiralty Style" is going to be my main focus (I am planning to fully rig the Mayflower next, but it's a pretty small model even so).
I indeed am only using the simplest hand tools. I too have a dremel, and a Proxxon detail sander, but that's it for power tools. I've considered a disk sander but until/unless I get into some (semi)scratch building, I think it'd be overkill for me. I do plan to get a little manual tool called a "Sand-It" for making good square and mitered ends. Mostly I'm making do with simple stuff that I carried over from my Card Modelling past. And I plan to keep it that way as I don't have a ton of working space and I sort of like the feel of keeping it old school. As long as I'm doing kits (for the foreseeable future) I think that's going to be enough to keep me happy.


HM Cutter Cheerful 1806 by Erik W - 1:48 scale
in - Build logs for subjects built 1801 - 1850
Posted
Looks perfect! Can’t imagine what might not have turned out as you’d liked. 😁