


marktiedens
-
Posts
1,737 -
Joined
-
Last visited
Content Type
Profiles
Forums
Gallery
Events
Posts posted by marktiedens
-
-
Thanks Chuck & Bob & for all the likes
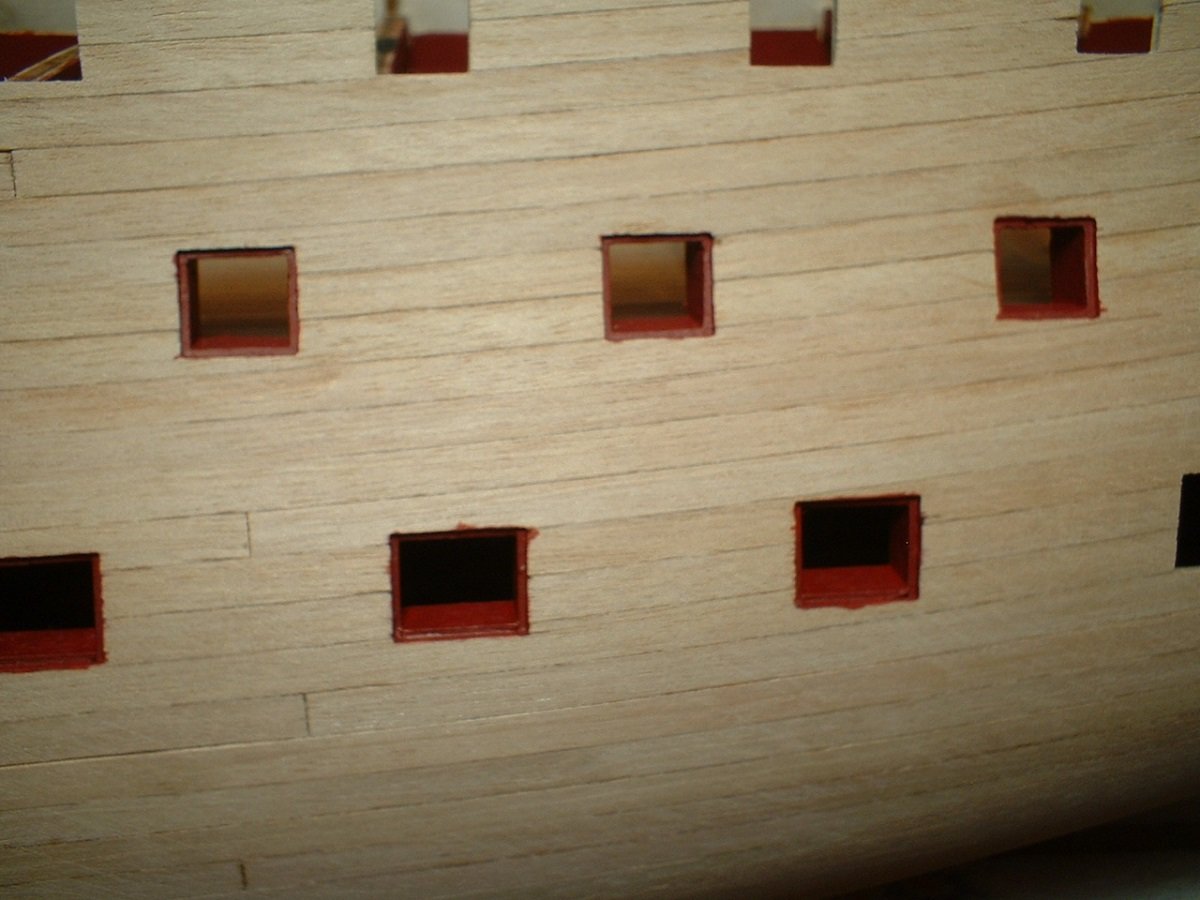
 . The paint work is a little messy,but it doesn`t really matter since the hull will be painted black & yellow around the ports.
Mark
- Old Collingwood, zappto, CDW and 1 other
-
 4
4
-
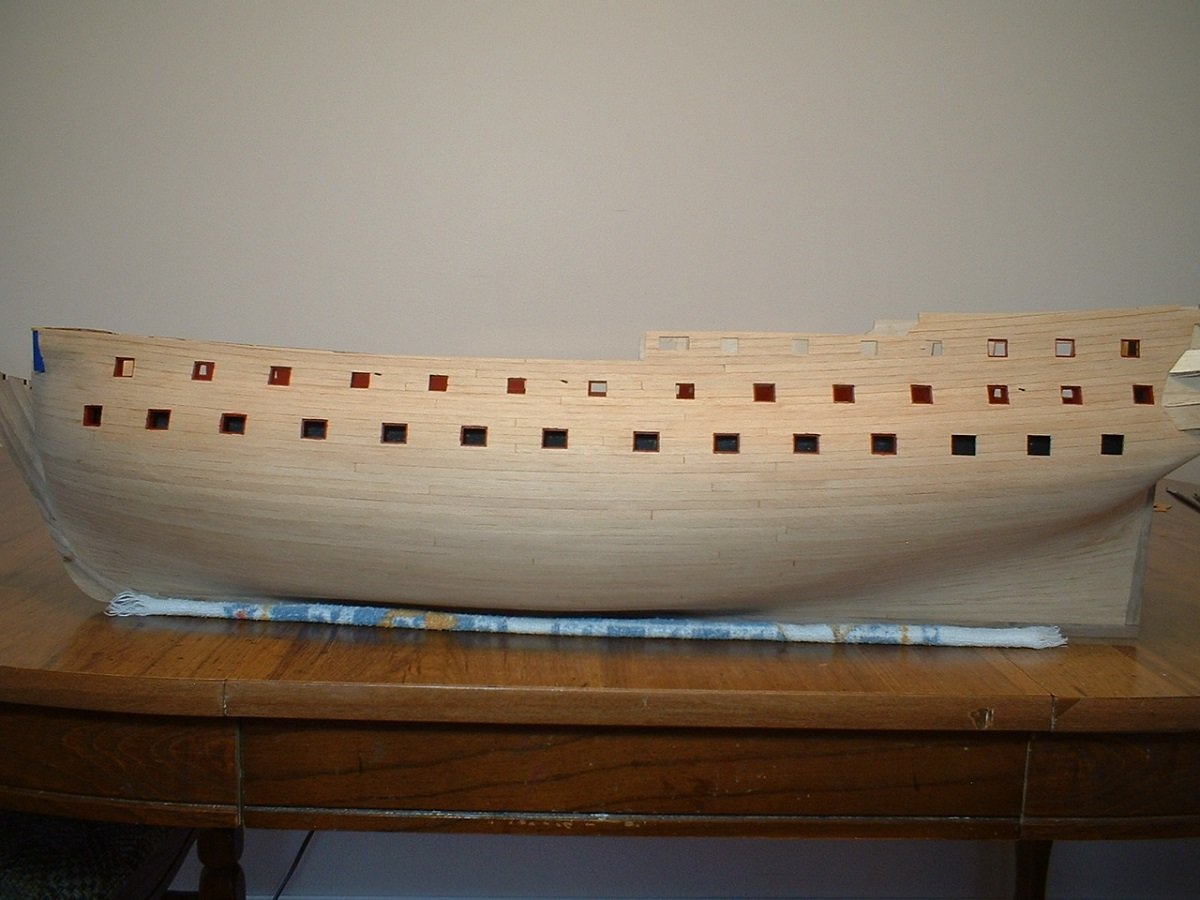
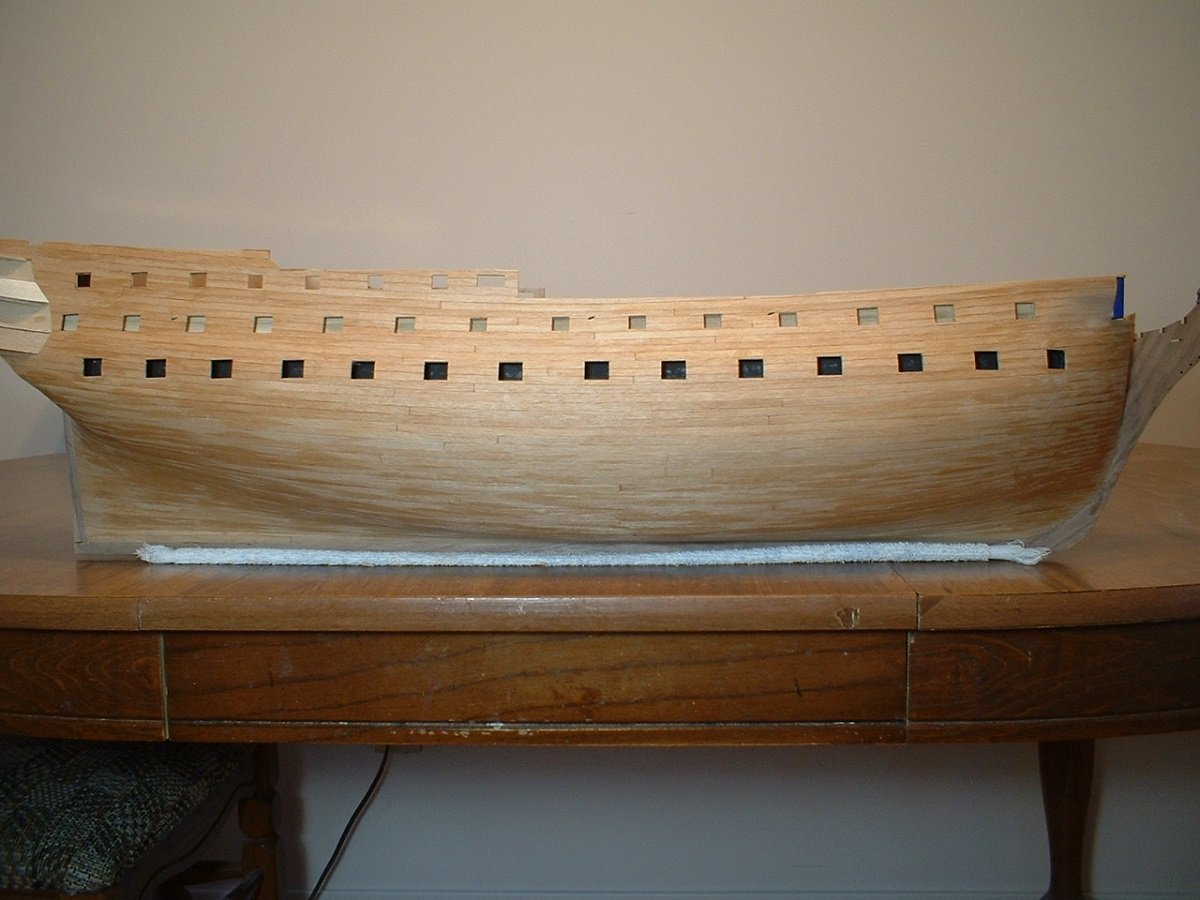
Update - hull sanded & gunports lined & opened up & painted. The last 3 on the lower deck will be finished up after the main wale is in place. I probably should have waited do line the last few ports on the upper gun deck, but will just work around them.
Mark
- Retired guy, fmodajr, KARAVOKIRIS and 16 others
-
19
-
Love the weathering - really gives it a "ghostly"look
.
Mark
- EJ_L, popeye the sailor and Canute
-
3
-
Thanks Snow - The design of the kit makes it relatively easy to build them.
Thanks Richard - much appreciated
") .
.
Mark
-
Thanks for the info,but my camera has no focus mechanism - neither auto or manual. It only has a switch for either close-up or distant. Someday when I get around to getting a cell phone I will probably use it instead.
Mark
-
-
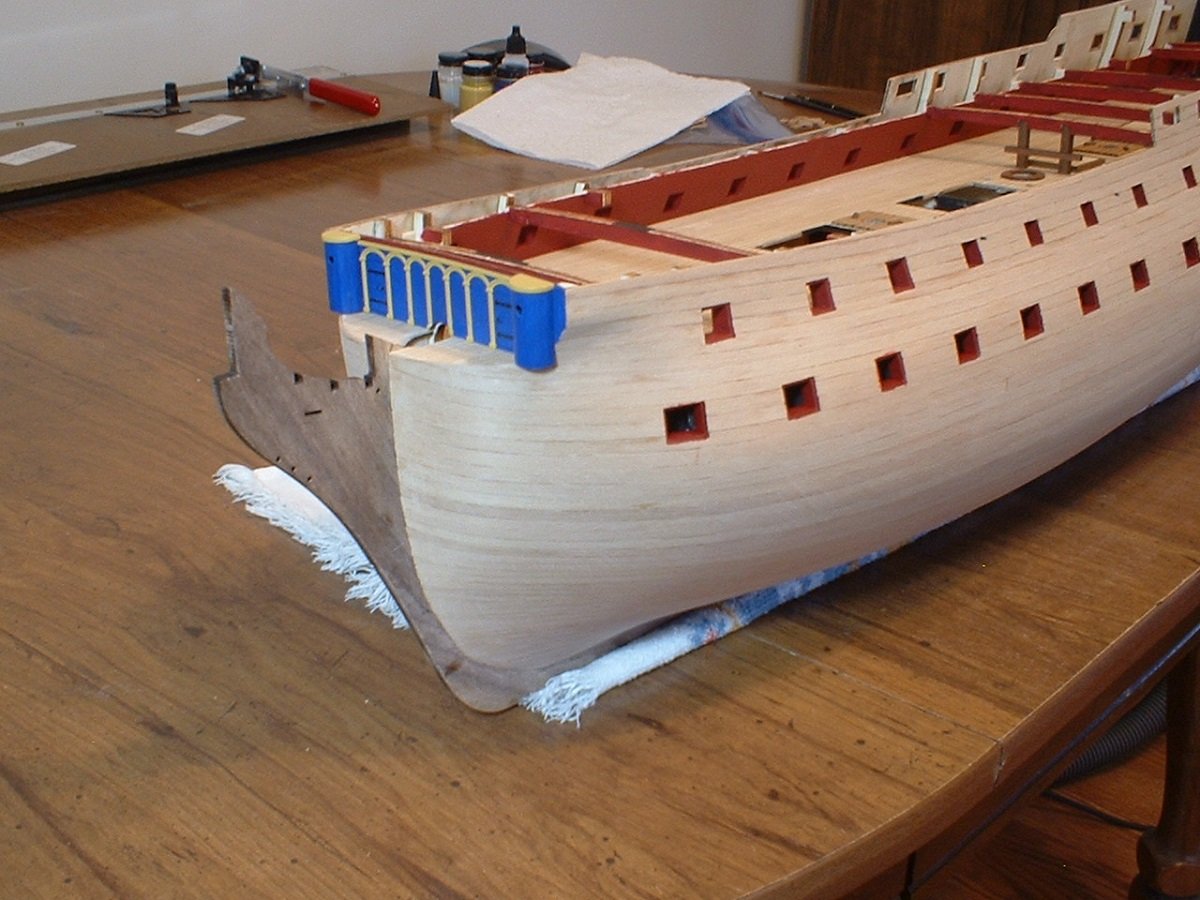
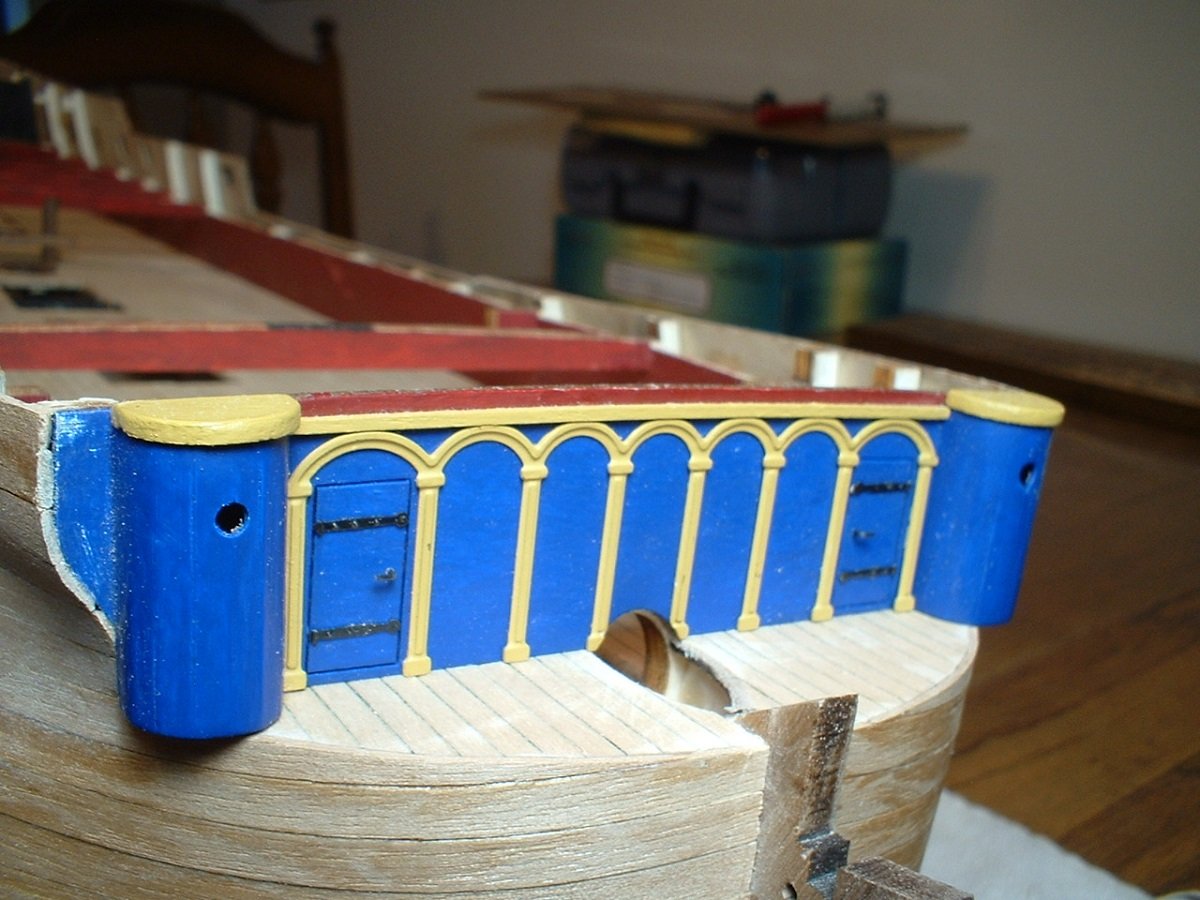
Thanks Frank - those arches are photo etched brass from the kit. No way I could make them that nice. This kit has 11 or 12 sheets of etched brass - lots of nice details. The blue & yellow are not as bright in person as the photo shows - I used a very bright LED lamp to take the picture. I only have a point & shoot camera,so some of my photo`s are not that good - the range of focus is awful.
Mark
-
Thanks very much O.C. !
Mark
-
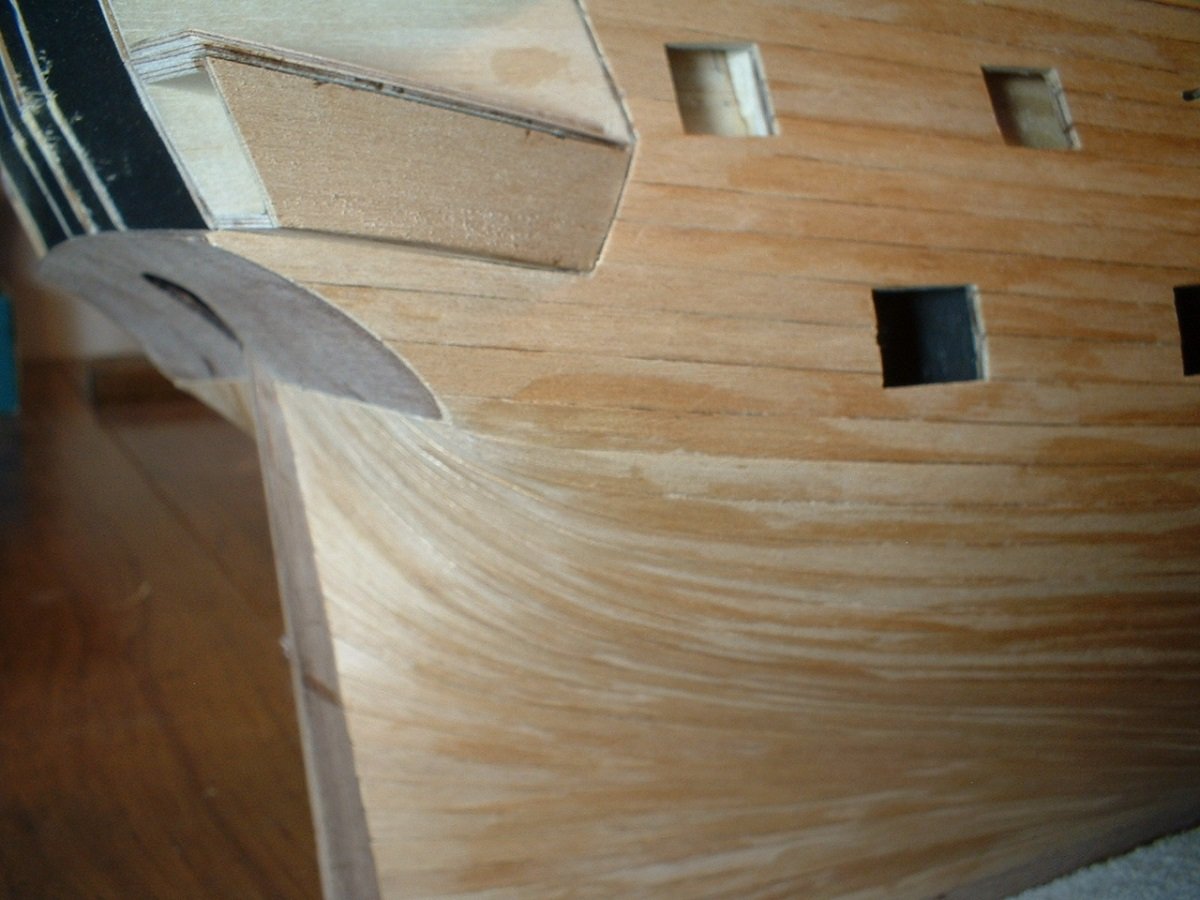
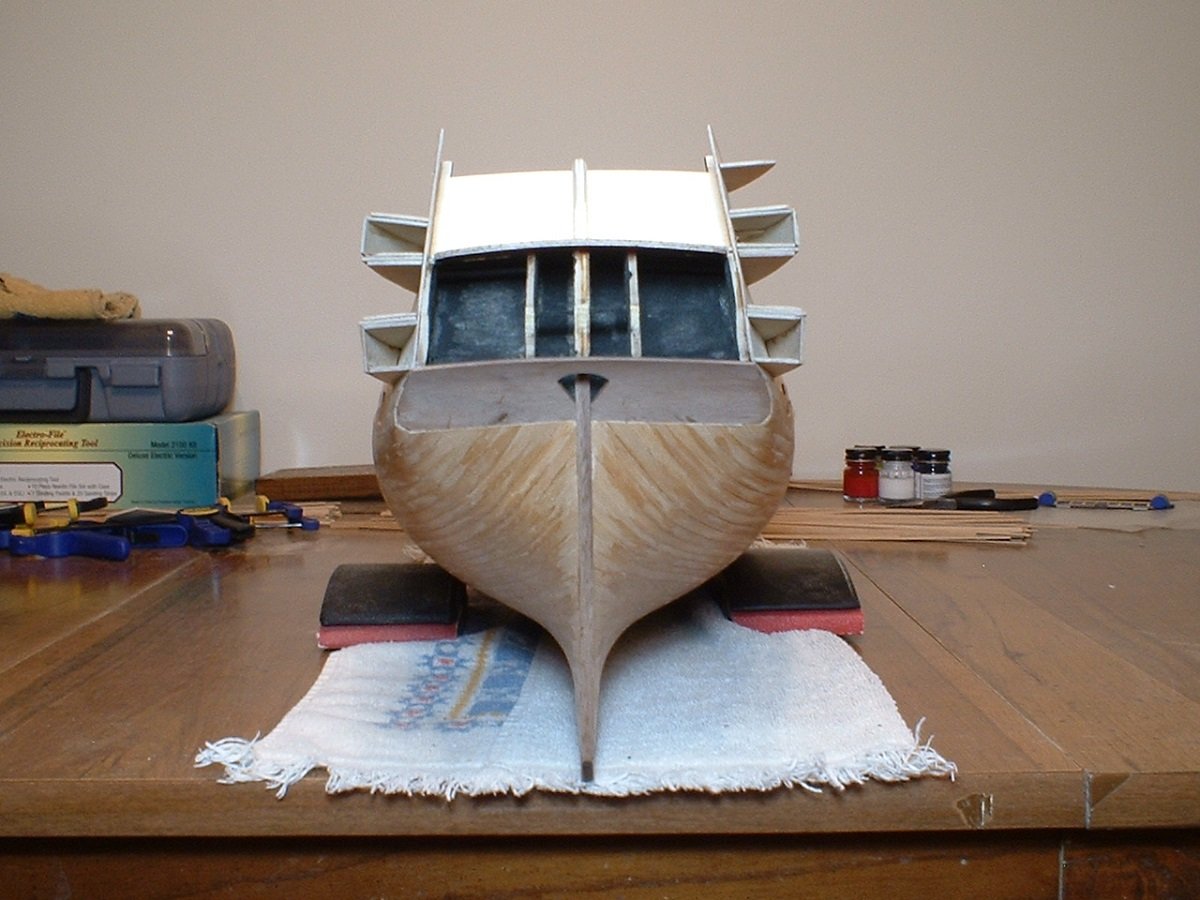
Beakhead bulkhead installed & second planking finished. Lots of sanding to go yet,then the upper gun deck ports will be opened up & lined. Pardon the dust - I haven`t cleaned anything up yet. A little paint touch-up will be needed after sanding. Plenty of planking strips were supplied - I probably have enough left to plank a small ship!
Mark
- rafine, md1400cs, Retired guy and 19 others
-
22
-
Very nice! Wonderful job
 .
.
Mark
- EJ_L, Old Collingwood, fmodajr and 1 other
-
4
-
Thanks O.C. - much appreciated!
Mark
-
Thanks for the info,Alan. That would be quite a road trip
 . I may see if I can find something similar locally. We have a store in my area called the Woodsmith Store which carries most of the same things as Lee Valley plus a lot of exotic woods(except pear & box unfortunately).
Mark
-
-
Thanks Richard
. The coppering is a ways off yet. The planking looks a little splotchy with glue smears,but will sand out nicely. I may do some tests on some scrap with different finishes to see which finish the copper tape sticks to the best.
Mark
-
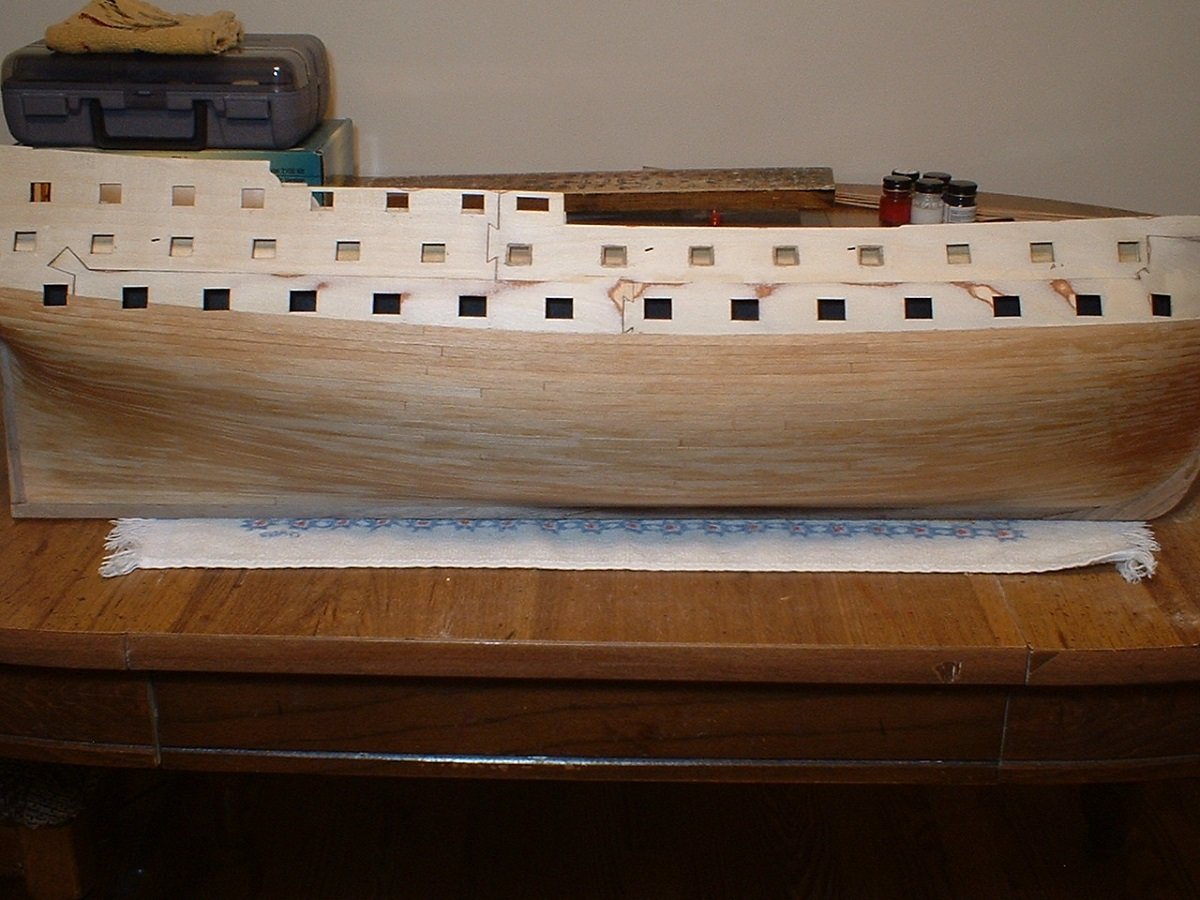
Another little update - the lower hull is now planked
 Not perfect,but will be a good base for the coppering after some sanding. Thinking ahead,I am wondering if I should put some gloss polyurethane on the lower hull - tape seems to stick better to a smooth,glossy surface (the copper tape supplied has a self adhesive backing).
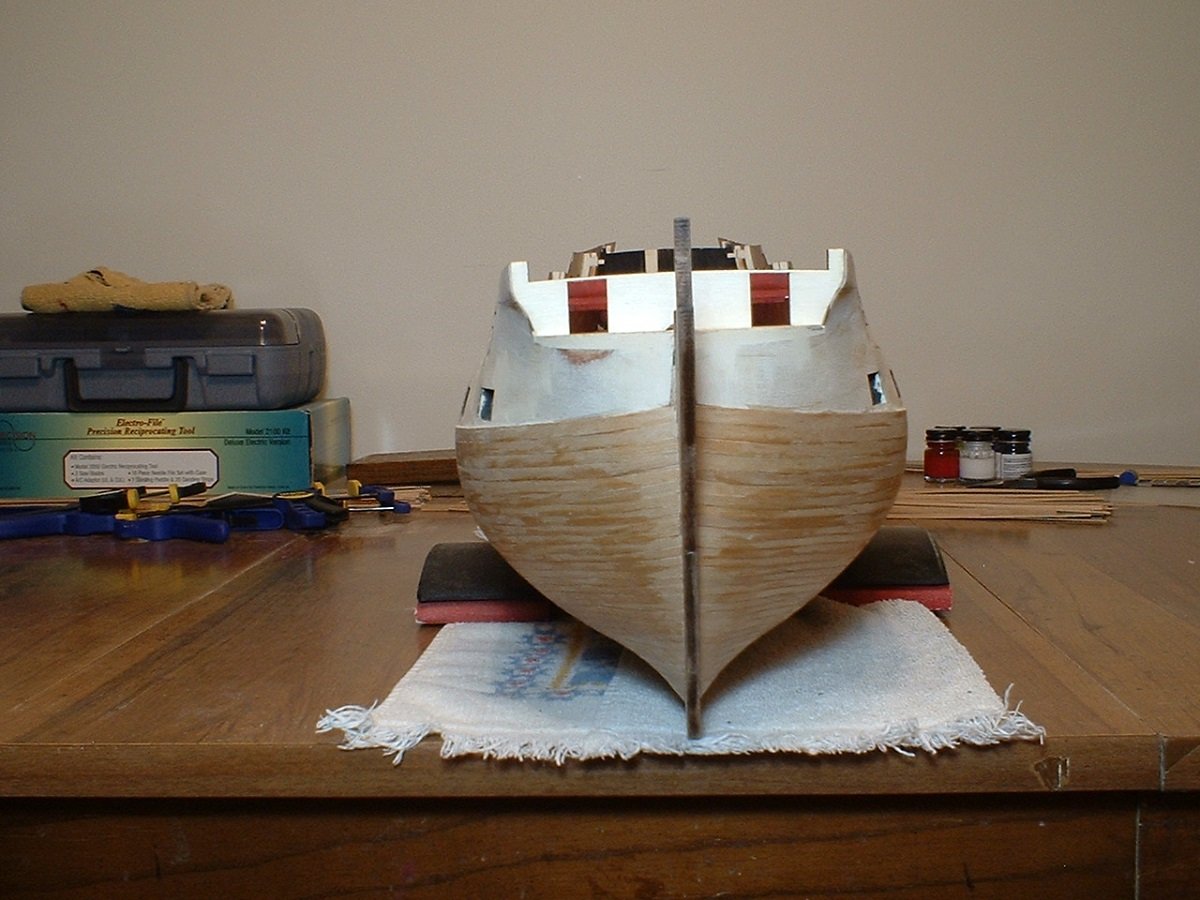
Mark
-
Nope,never tried that. I don`t have one of those small irons anyway. With no admiral here I don`t buy things that need ironing
.
Mark
-
I know exactly what you mean
. I will admit,though,I have snapped a few planks when bending them - mostly the ones that didn`t have straight grain. Also,as you can imagine,the harder the wood the harder it is to bend. Thicker planks of hardwood may need more wetting to ease the bending without snapping.
Mark
-
-
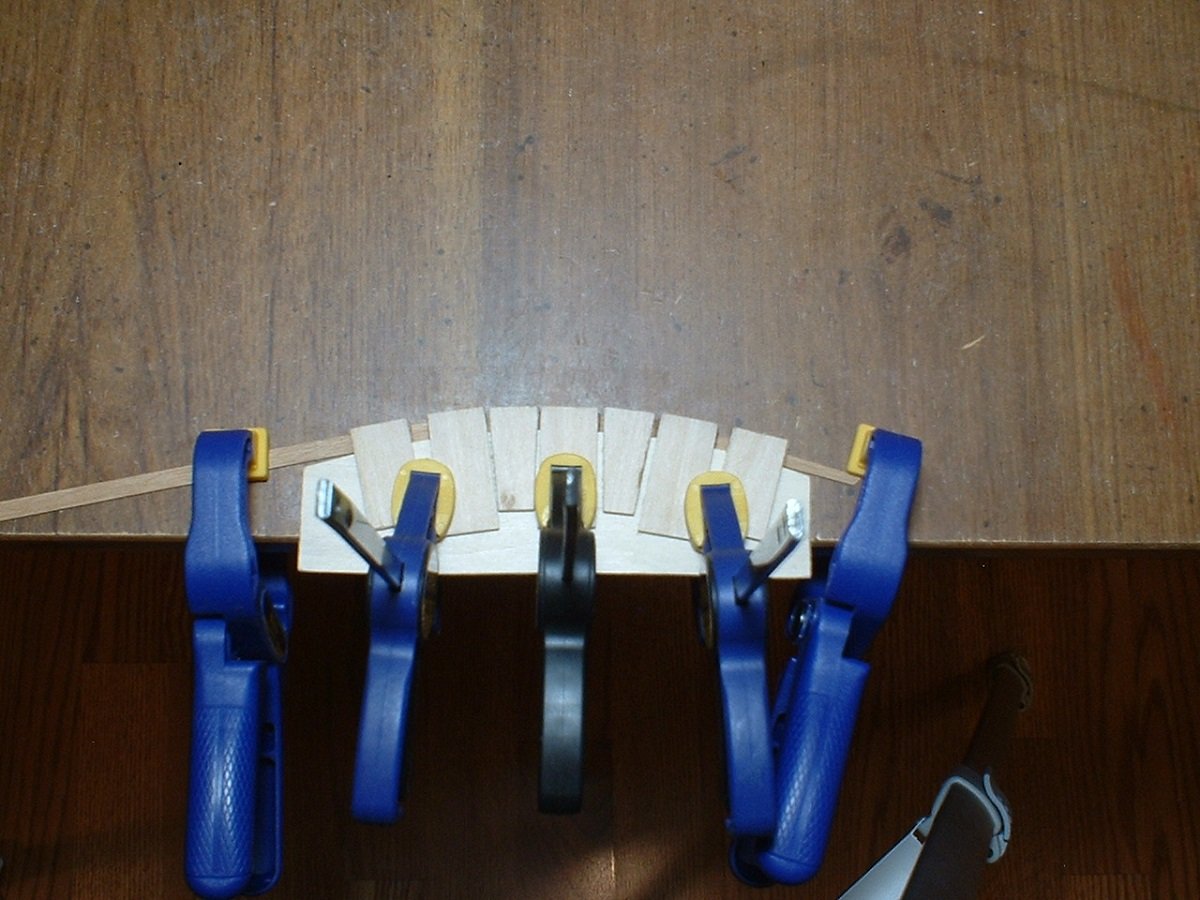
Hi Peter - not sure what post he put it in,so I will just show what I did. The form is just a piece of wood with a curve on one side with some tabs glued on it to keep the plank from buckling when it`s bent. I just wet the plank slightly with some water on my finger - no need to soak it - then after setting the plank in the form I use a heat gun to heat the plank. You could also use a hair dryer. Chuck uses an iron,but I don`t have enough space between the hold-down tabs to use an iron. I had to use closely spaced tabs because my planks are less than 1mm thick & would otherwise buckle very easily. Then let it cool before removing it from the form. After letting it cool there is a just a small amount of spring- back, but not much. The heat softens the lignens in the wood,which harden when the planks cool off. The form is just clamped to the edge of my table. Hope you can understand my explanation.
Mark
-
Hi Bjorn & welcome to my log! It will be interesting to see the differences in our kits. I am not always good at explaining what I do,but will try my best.
Mark
-
-
Thanks Frank & a Happy New Year to you also!
Mark
-
Thanks Chuck
- love your Winnie! Your work is an inspiration to me.
Mark
- Chuck and popeye the sailor
-
2
-
Thanks guys
. The planking is listed as walnut in the parts list,but I don`t think it is real walnut. Also,they are not all the same width & the edges are quite rough & splintery - took me 2 days to sand the edges smooth enough to use. The planks are not long enough to reach the full length of the hull,so I`ve had to sort through them & match up the widths for each planking run. Some of the planks are not the same width along their entire length also. A bit disappointing since most of the other wood in the kit is of good quality,but it`s not that big a deal since it will all be painted & coppered - just time consuming.
Mark
- popeye the sailor and Henke
-
2
HMS Vanguard by marktiedens - Model Shipways - scale 1:72
in - Kit build logs for subjects built from 1751 - 1800
Posted
Thanks Richard - could have been a little better if not for the splintery wood,but good enough as a base for coppering & paint") (I am always overly critical of my work).
(I am always overly critical of my work).
Mark