


marktiedens
-
Posts
1,737 -
Joined
-
Last visited
Content Type
Profiles
Forums
Gallery
Events
Posts posted by marktiedens
-
-
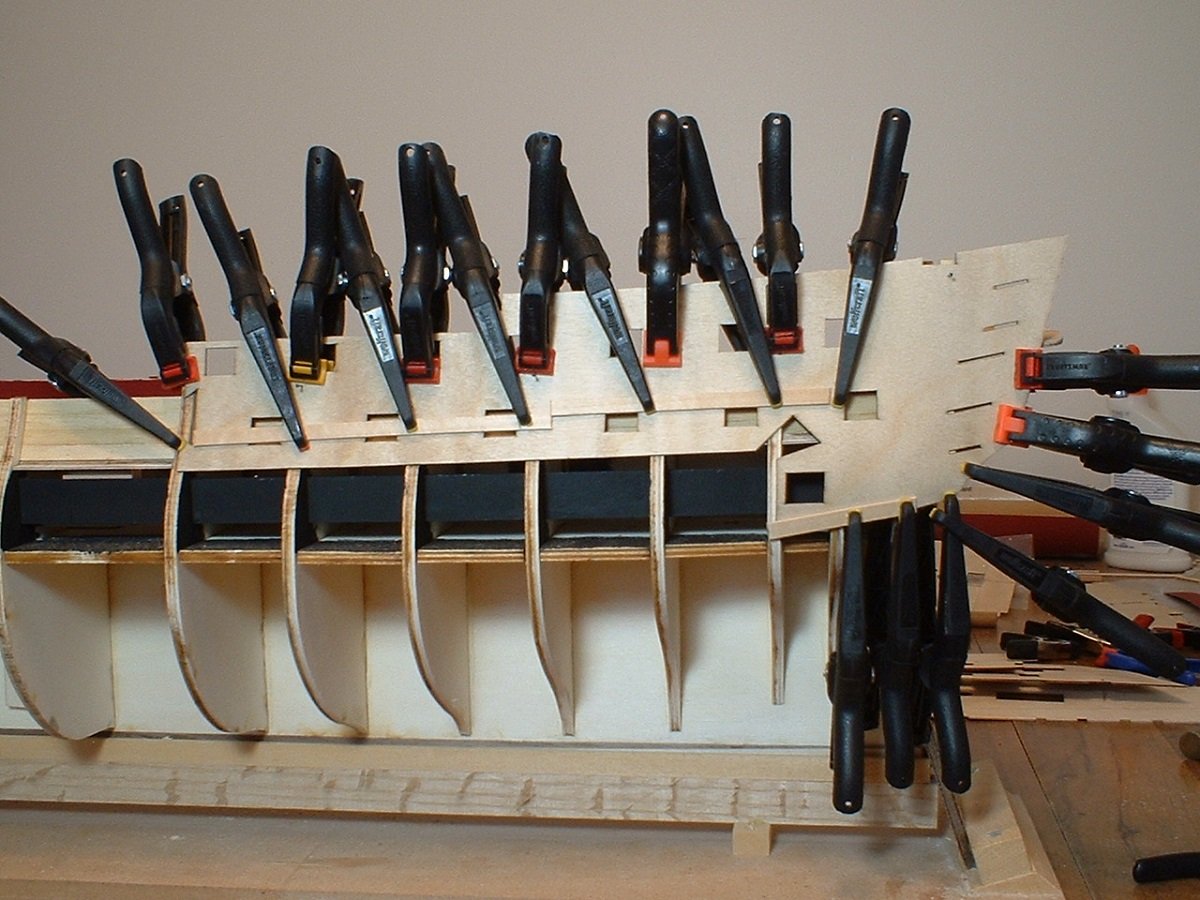
Hi all - starboard jigsaw puzzle,er,I mean gunport strips done
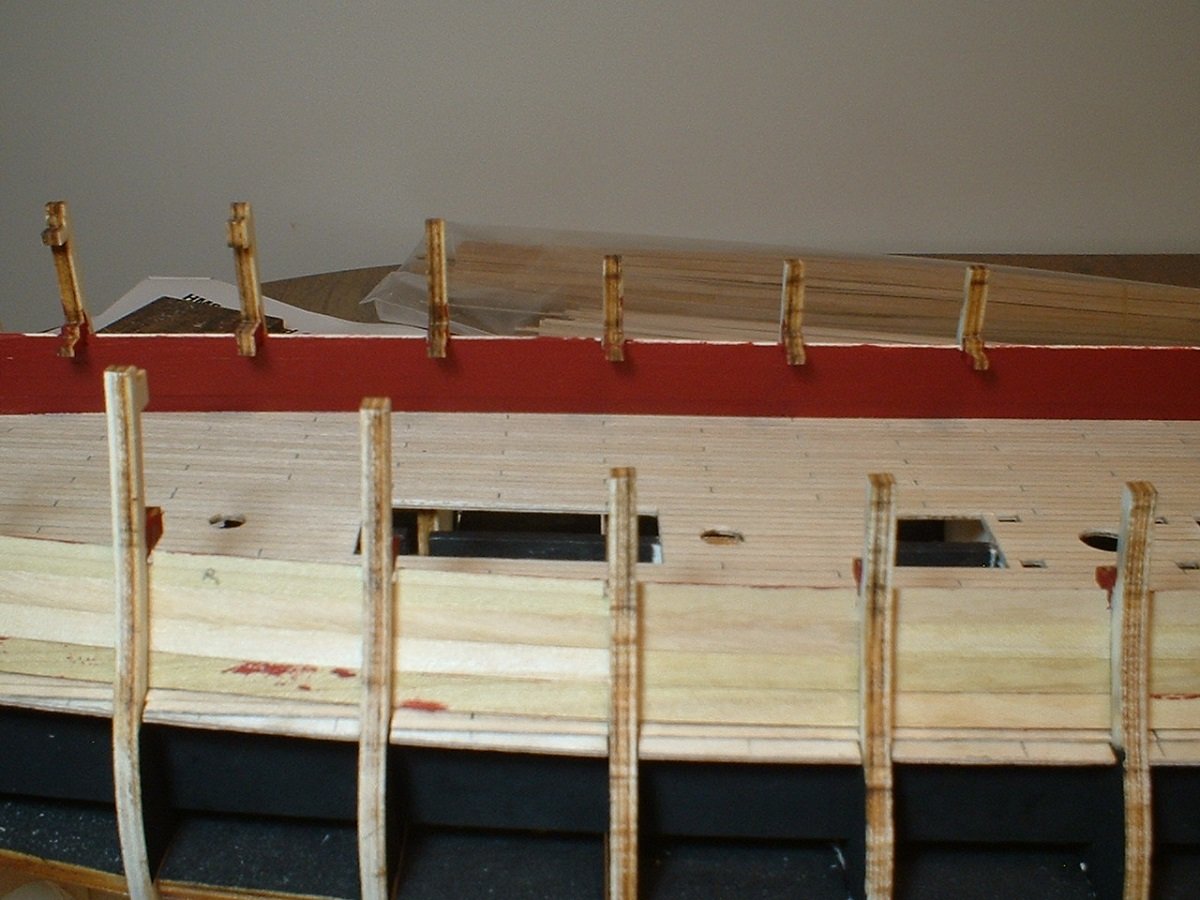
") . It was really puzzling(pun intended) figuring out how to clamp these in place. The strips are 1mm thick ply,so I had to soak them in some water for about 30 minutes to make them pliable enough to fit the curves. Not perfect,but a little bit of filler in spots & a lot of sanding should make a decent surface for the second planking. Still have to finish the port side.
. It was really puzzling(pun intended) figuring out how to clamp these in place. The strips are 1mm thick ply,so I had to soak them in some water for about 30 minutes to make them pliable enough to fit the curves. Not perfect,but a little bit of filler in spots & a lot of sanding should make a decent surface for the second planking. Still have to finish the port side.
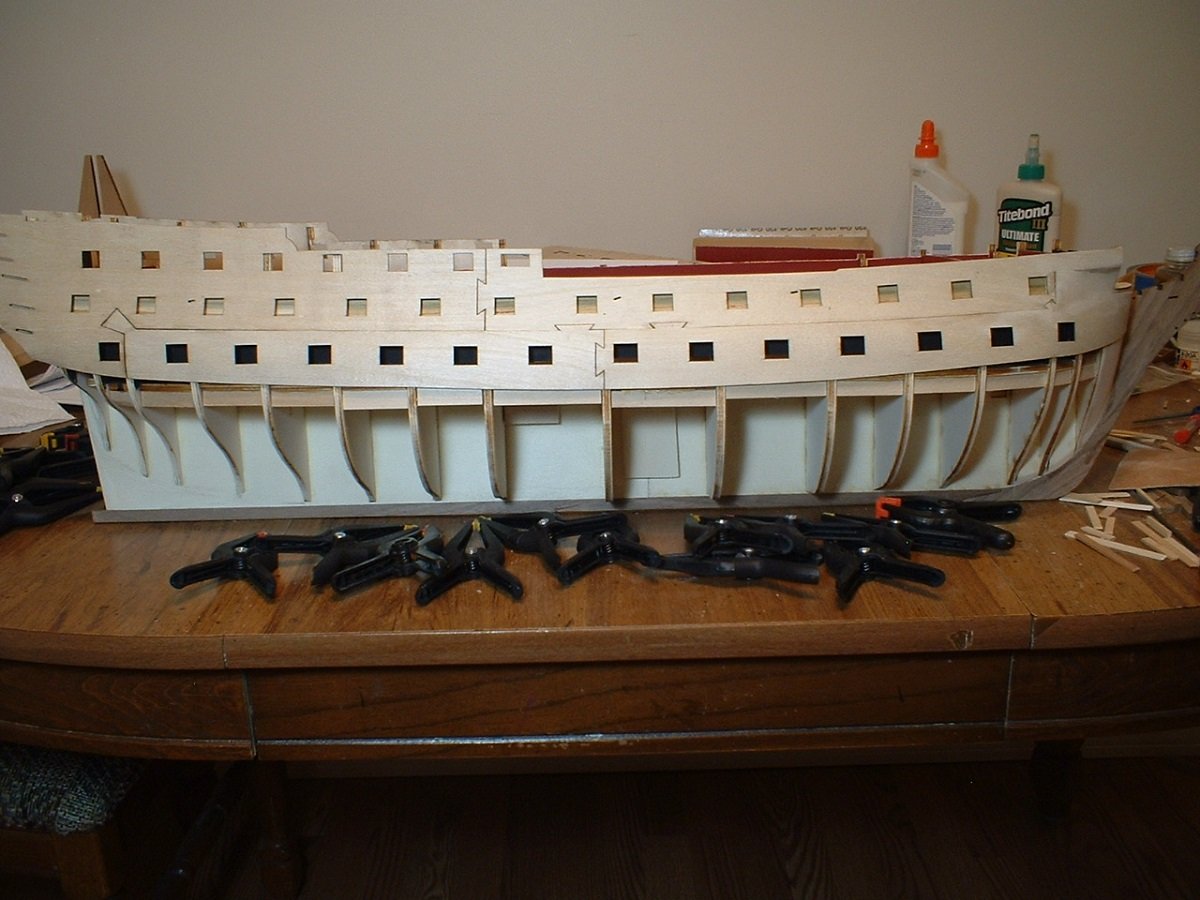
Mark
- GrandpaPhil, JayCub, Retired guy and 16 others
-
 19
19
-
-
-
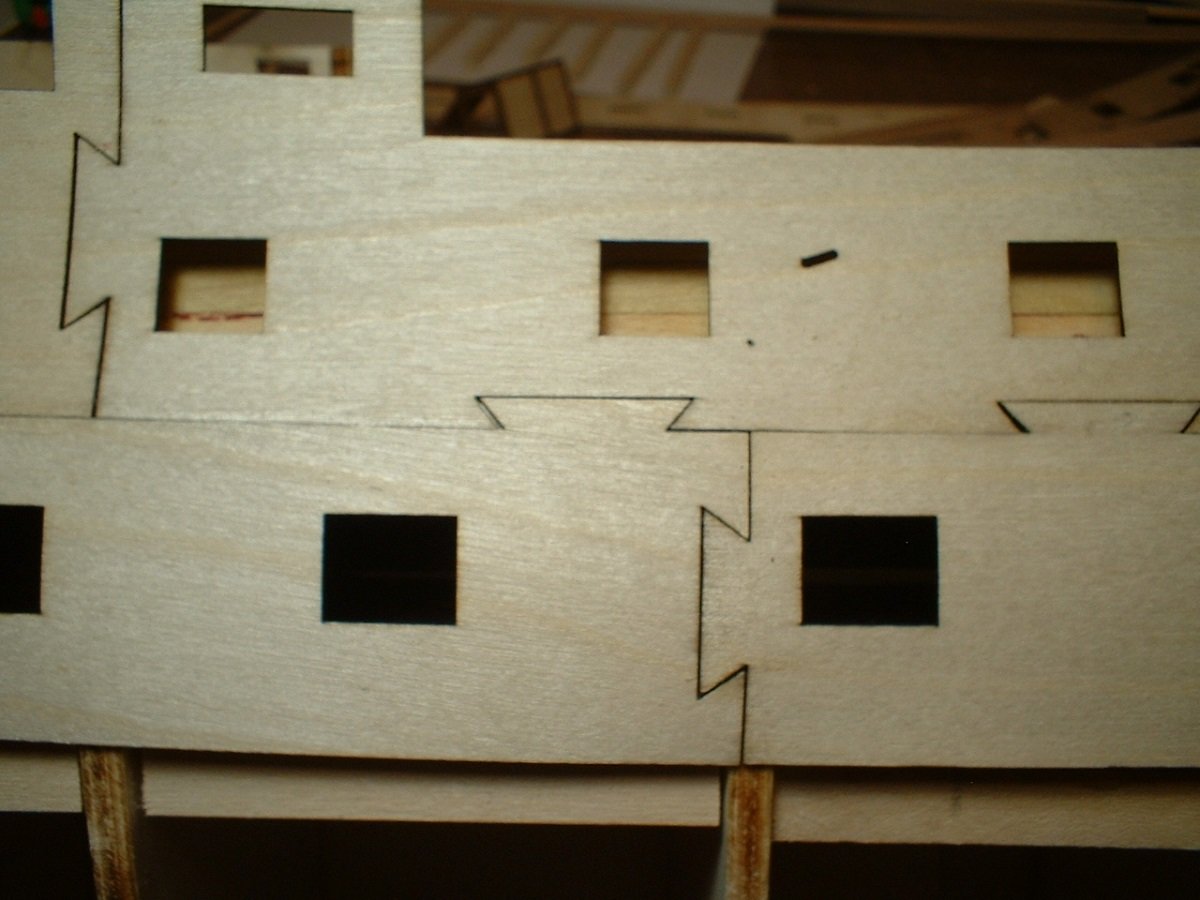
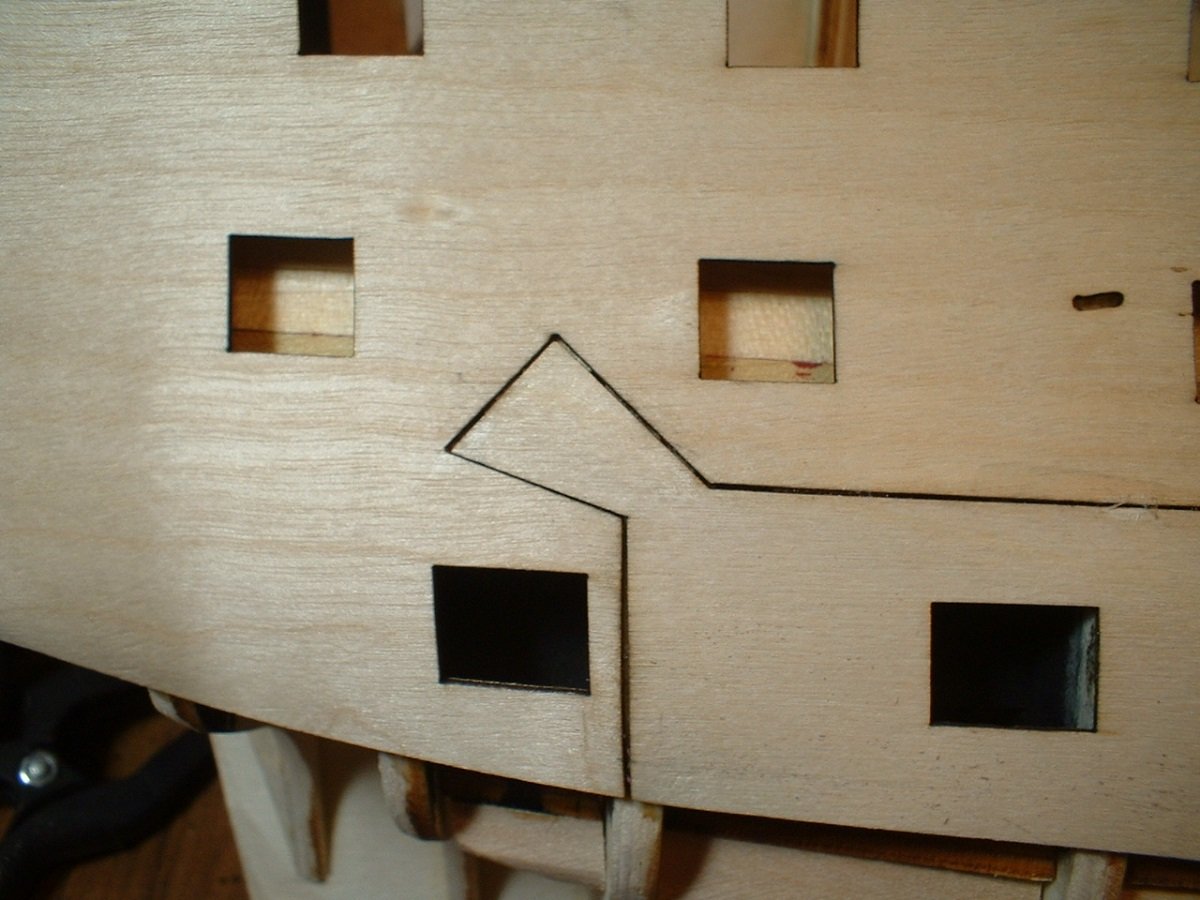
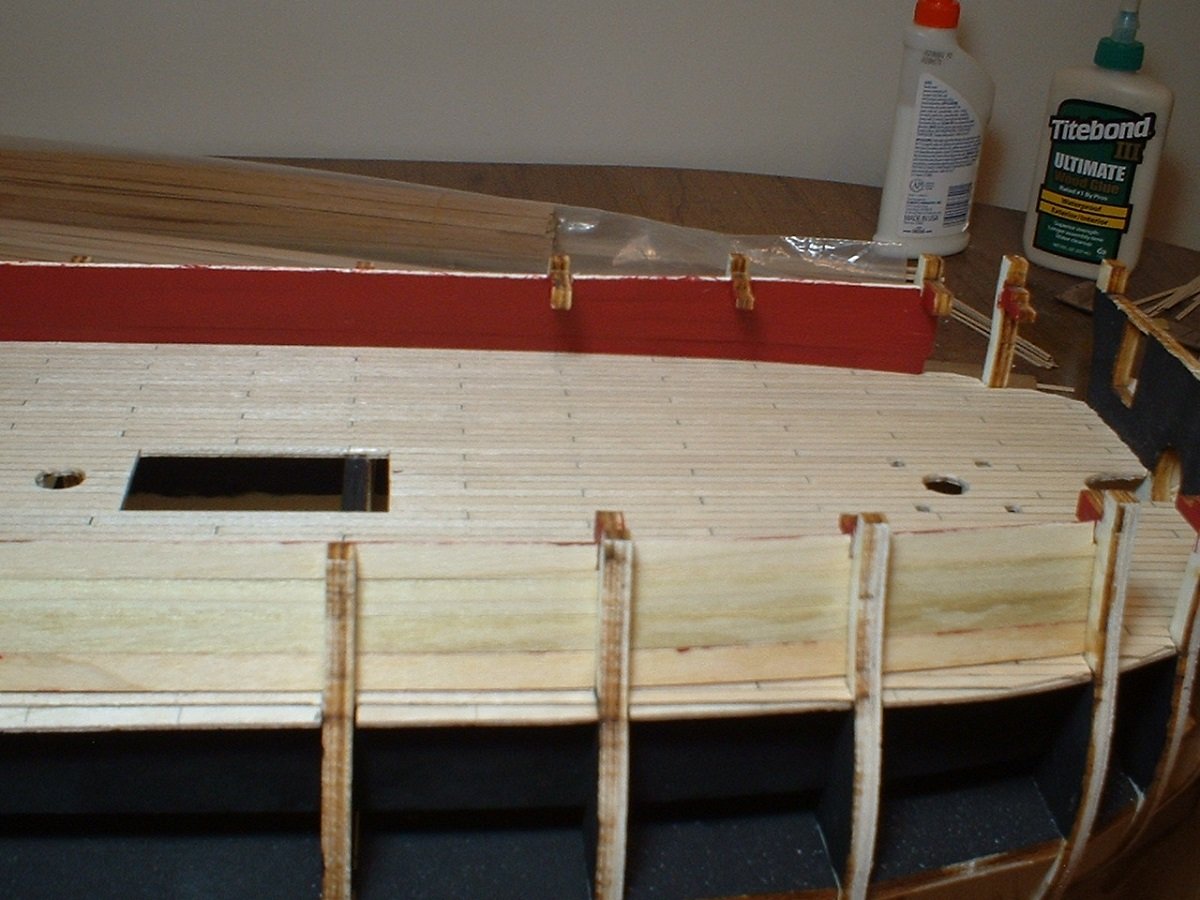
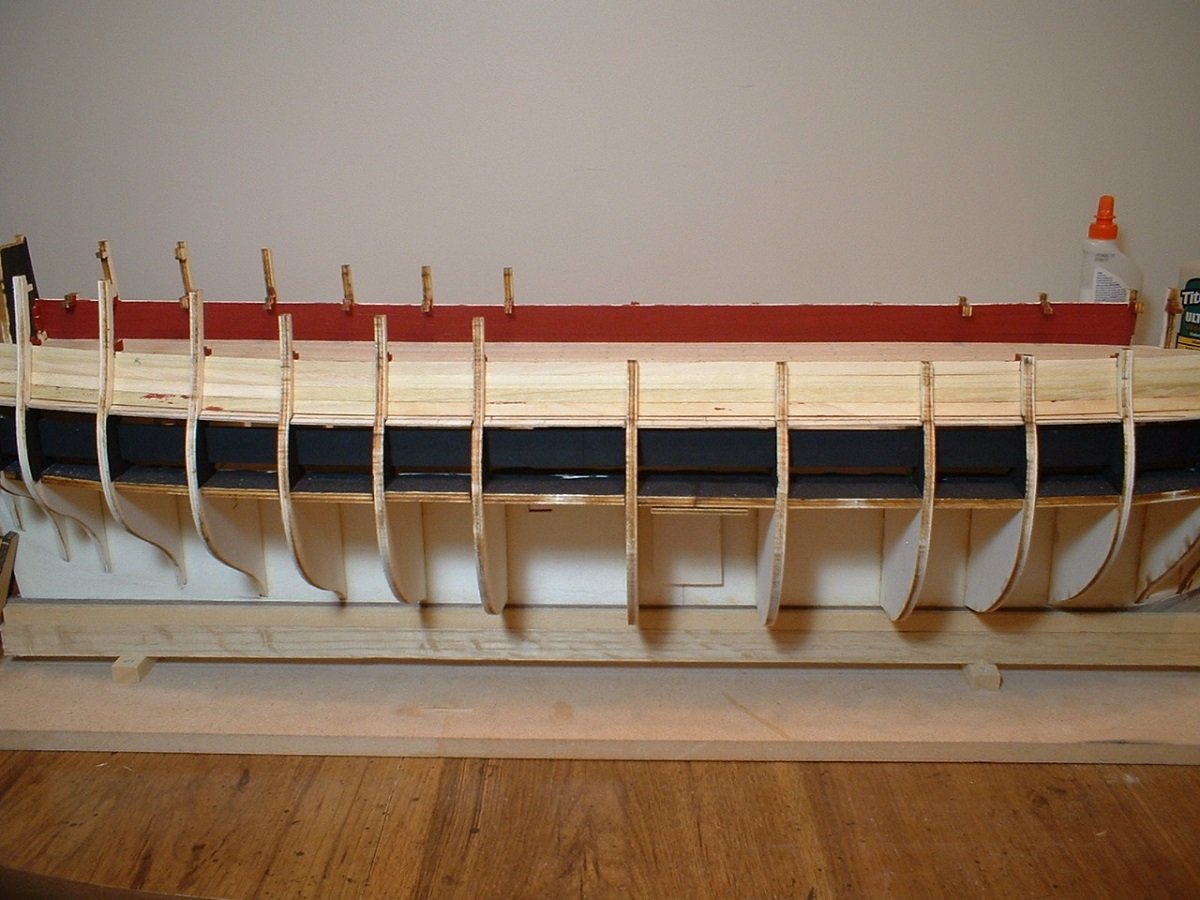
Hi all - started work on the gunport strips. First thing I did was create the correct curves in the stern fascia & lower counter pattern by soaking them for about 15 minutes. Then they were clamped to a round surface - a waste basket for the fascia & a hard plastic mug for the counter pattern - then left to dry. They were then clamped in place to determine the correct placement of the gunport strip so the side gallery patterns would line up with the window openings in the fascia plus the lower counter curve. The gunport strip was soaked in water for 20 minutes & clamped in place to dry(you can`t have too many clamps). After drying I will see how well it holds it`s shape - nothing is glued yet.
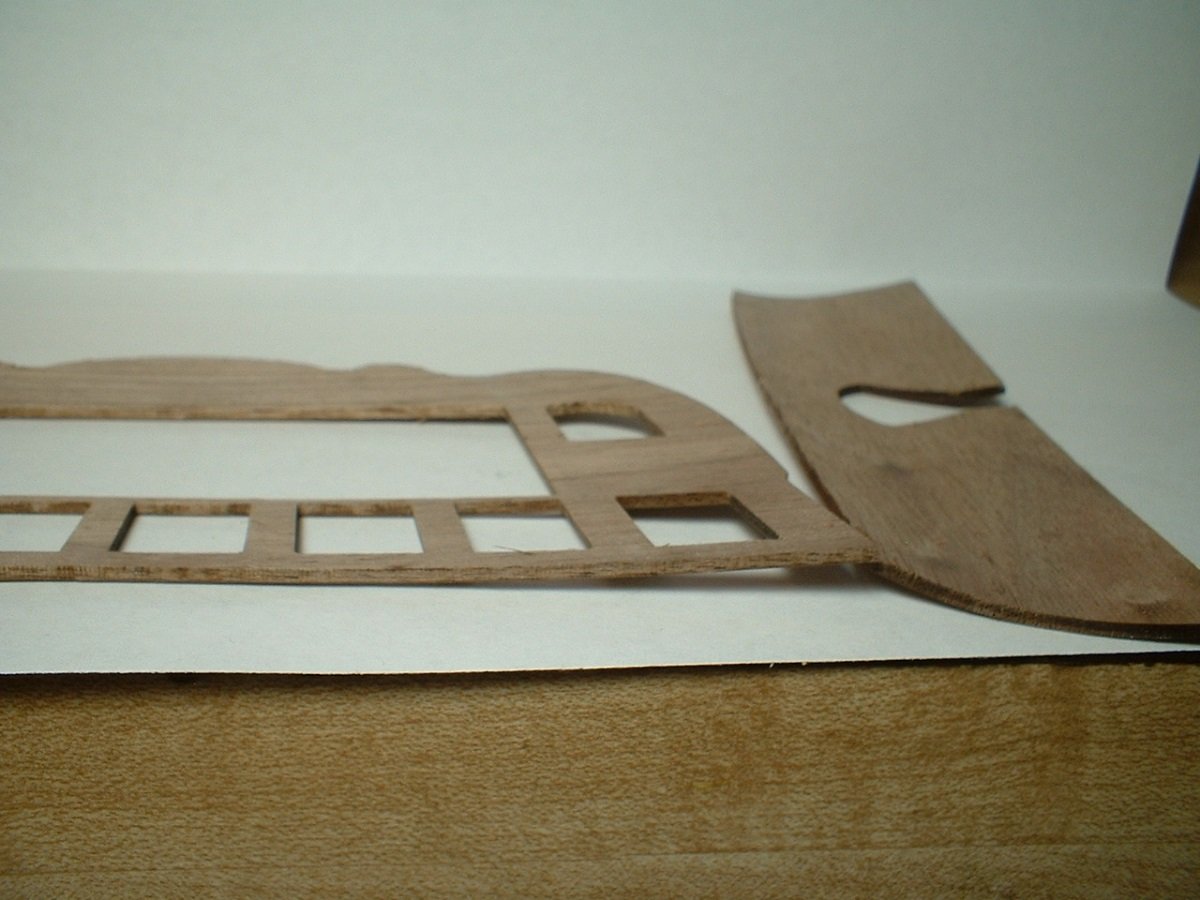
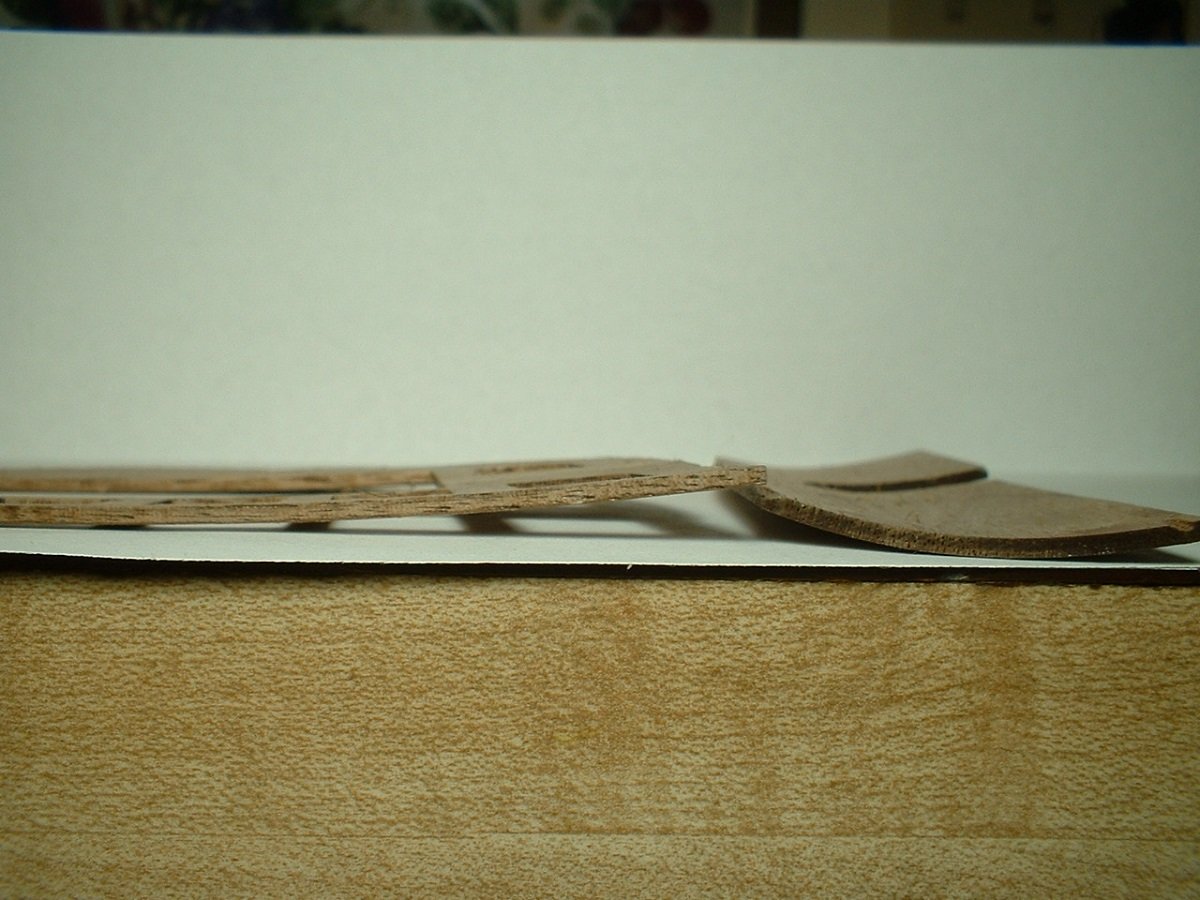
Mark
- Retired guy, fmodajr, rafine and 13 others
-
16
-
Too much for me,also. There seems to be lots of other wood species that look nice & are much cheaper & more plentiful(unless you are building for a museum
).
There is a woodworking store near me thats has a lot of exotic woods - most anything from alder to zebrawood,but even they don`t have box or pear!
Mark
-
Thanks James - I haven`t seen the Amati kit personally,so I was not aware they used MDF instead of plywood. I am having no problems with the plywood - it is of good quality,easy to sand,& most importantly,this the best laser cutting I have seen in a kit. The laser char is very light & the parts fit well with very little "adjustments". I was a little disappointed with the basswood they supplied for the decks at first,but I think it looks ok after a good scraping & sanding & a coat of poly. On another note,I am very pleased they provide wood gun carriages instead of those odd looking metal ones in the Amati kit.
Peter - I see what you mean. Shows how much I know about some of these details
 . it`s too late to fix them - I don`t think I have enough grating strips to re-do them. I will do the upper deck gratings correctly & see if I have enough strips left to re-do the already done ones that are visible. You are not being a nag - I don`t mind being corrected if I do something wrong. It`s how we all learn. Thanks for your observation.
I am working with those gunport strips right now,so I may not have much to post for a while.
Mark
-
Had to do a little surgery on the stern - when glueing the stern counter patterns on the instructions said to glue the outer patterns tilted slightly inward. I was test fitting the balcony deck which sits on top of the counter patterns & could see that I tilted them in way too far. I was able to pop them loose without damaging anything & re-glued them with a little extra bracing To keep them in place. I will probably add a couple of braces to the inner patterns also. Gotta love re-do`s!
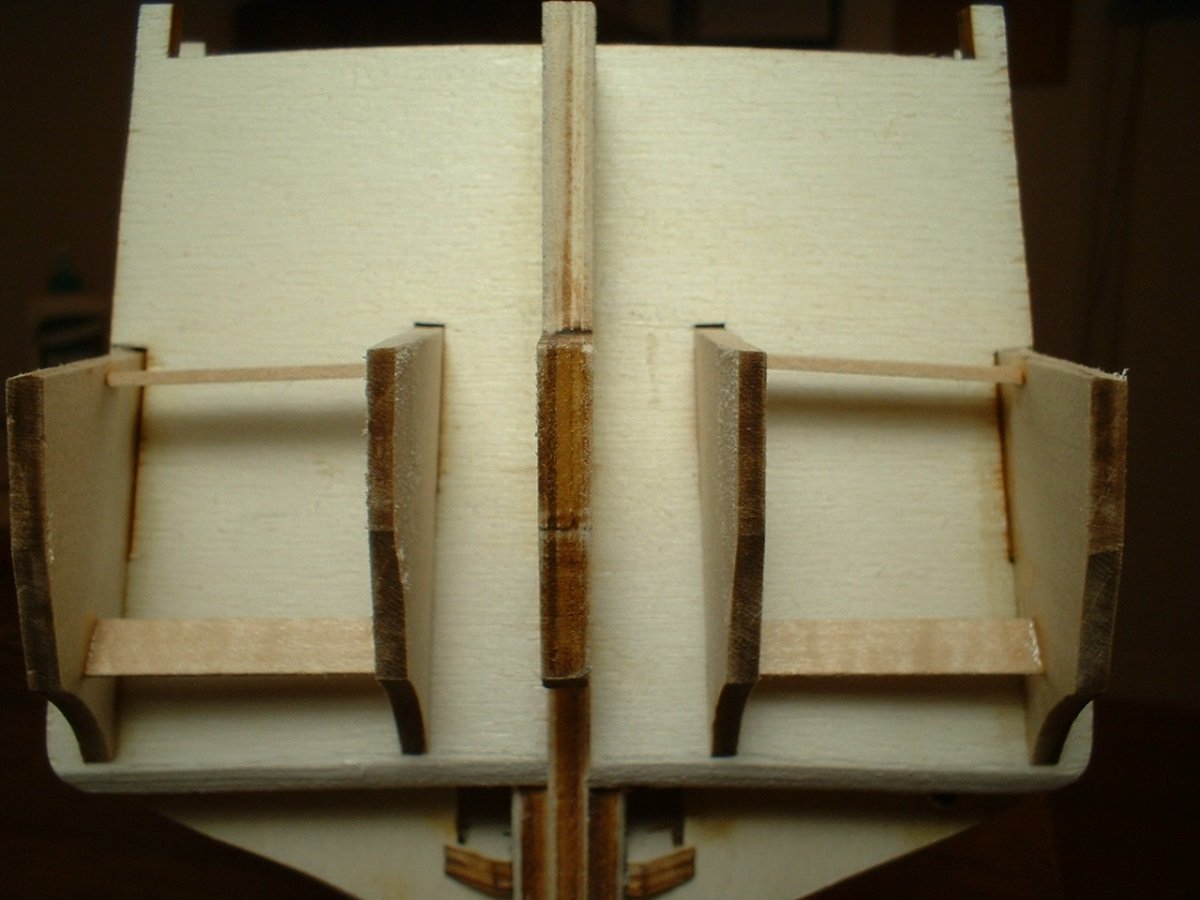
Mark
- Retired guy, Edwardkenway, JpR62 and 12 others
-
15
-
Wow - very nicely done!
Mark
-
Thanks Richard - the kit is already nicely detailed, but I like to add some of the finer details.
Thanks Frank - I was surprised by the stove detail because it is pretty much hidden under the deck.
Mark
-
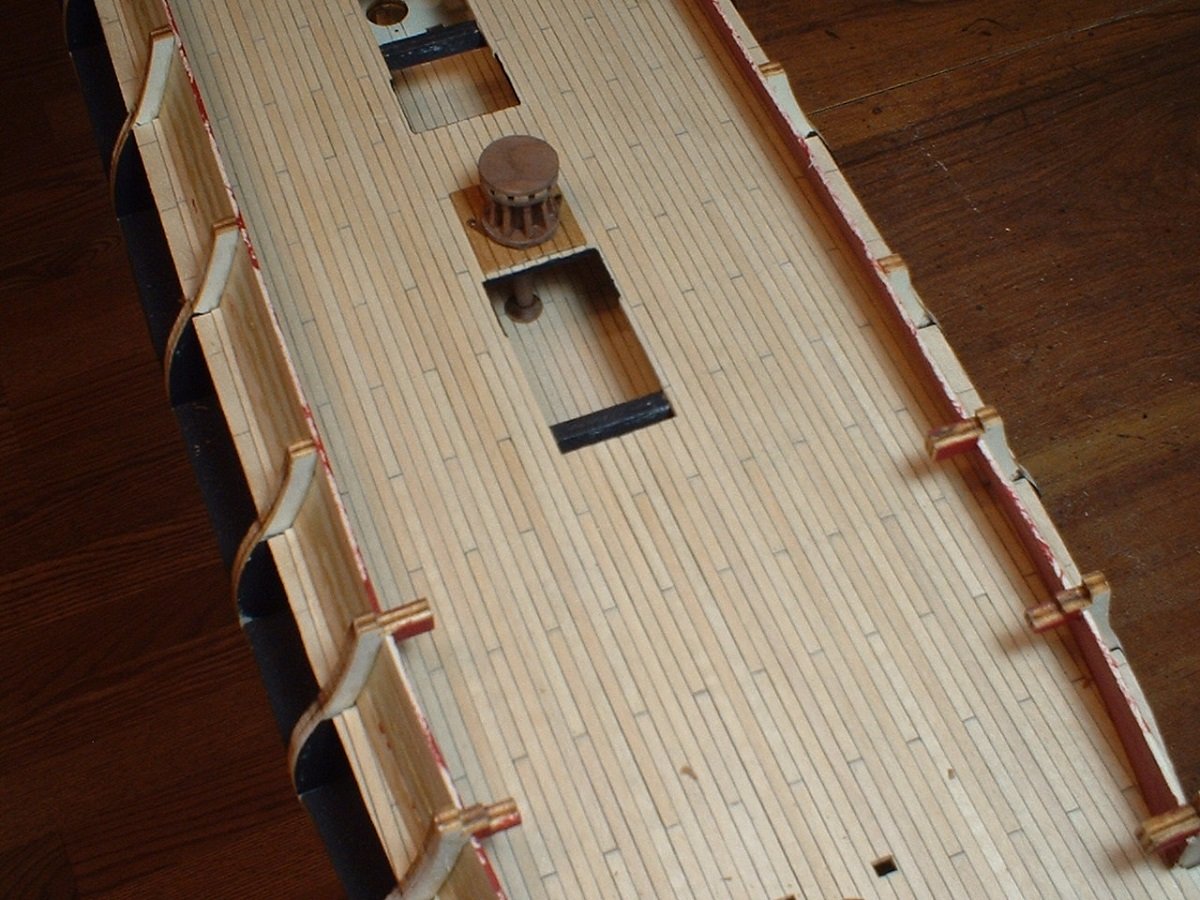
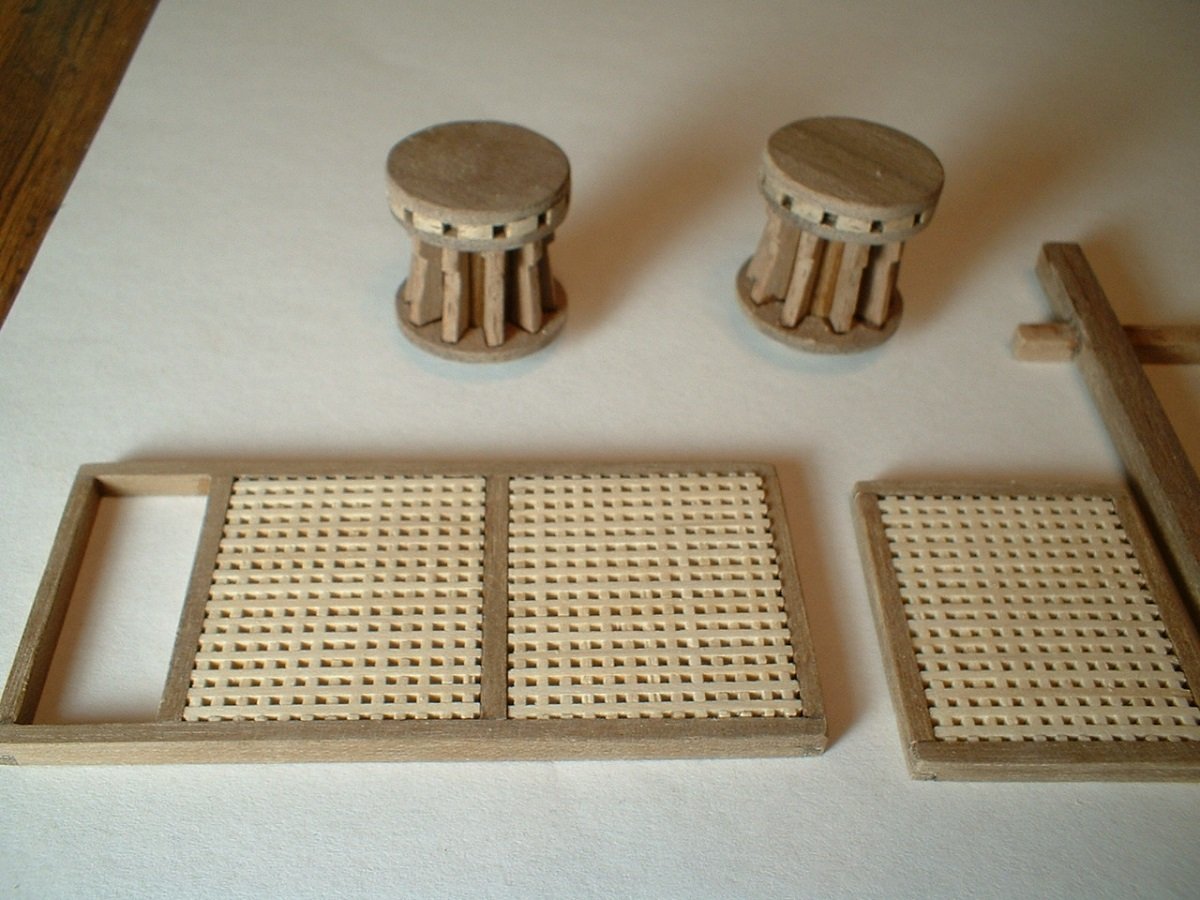
I`ve decided to add a little extra to the capstans. First,I added some "teeth" to the bottom of the capstans & made some pawls along with the raised platforms. Second,since a small portion of the lower deck can be seen I added an extension plus a base to the bottom of the capstan. This was only done to the forward one as the aft opening is blocked by a portion of the keel former - it would not be visible anyway. Sorry about the not so perfect pictures.
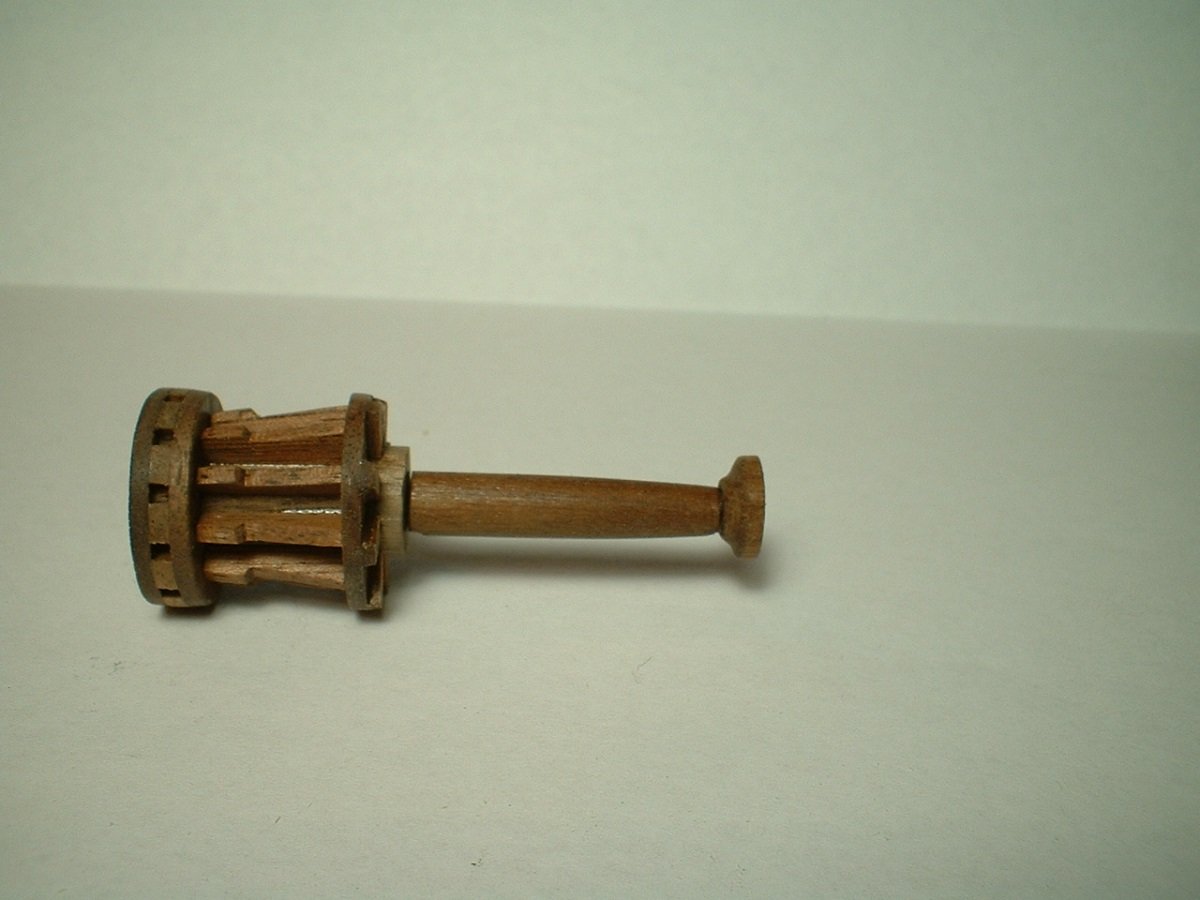

cheers,Mark
-
Thanks for the nice comments & likes - much appreciated
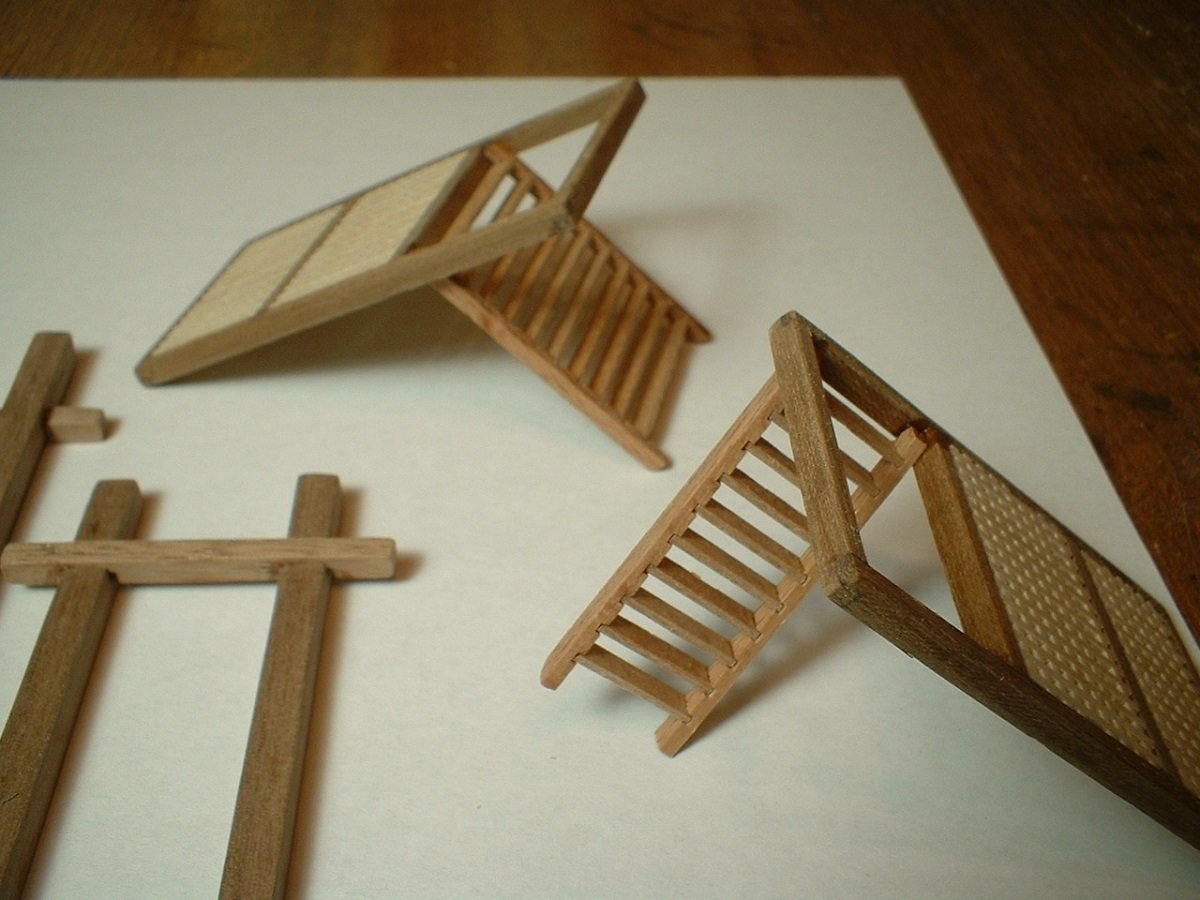
 . O.C. - The angle of the cuts in the stair risers allows them to be installed more vertical than most kit ladders - much more realistic.
Mark
-
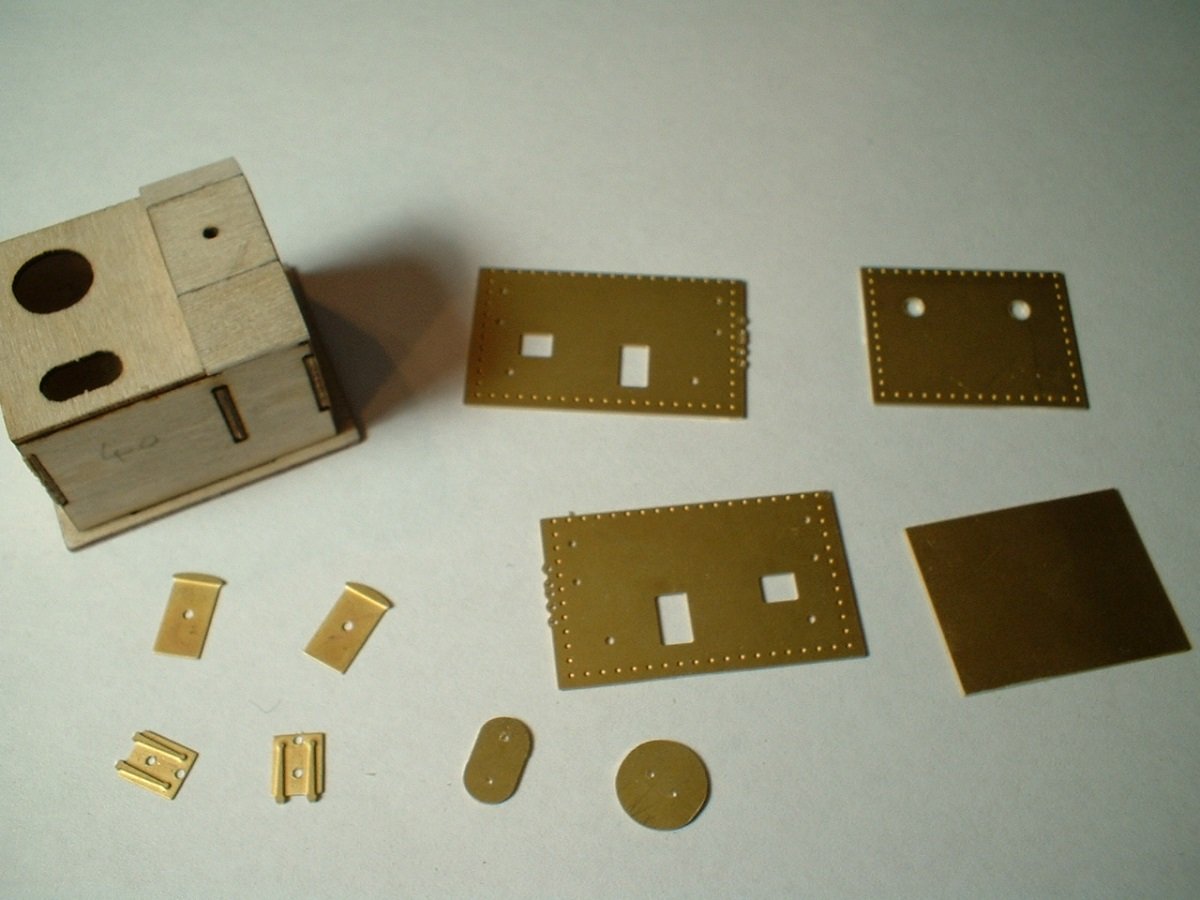
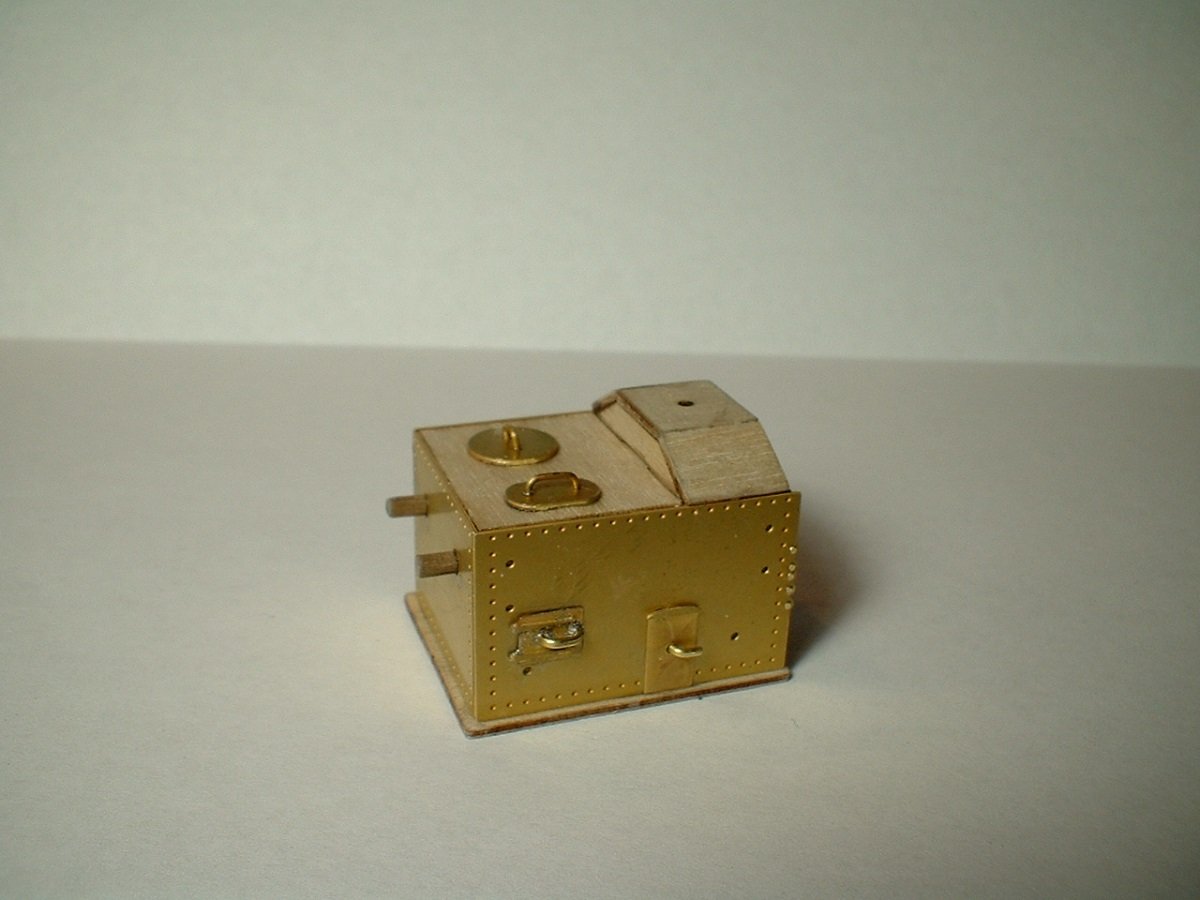
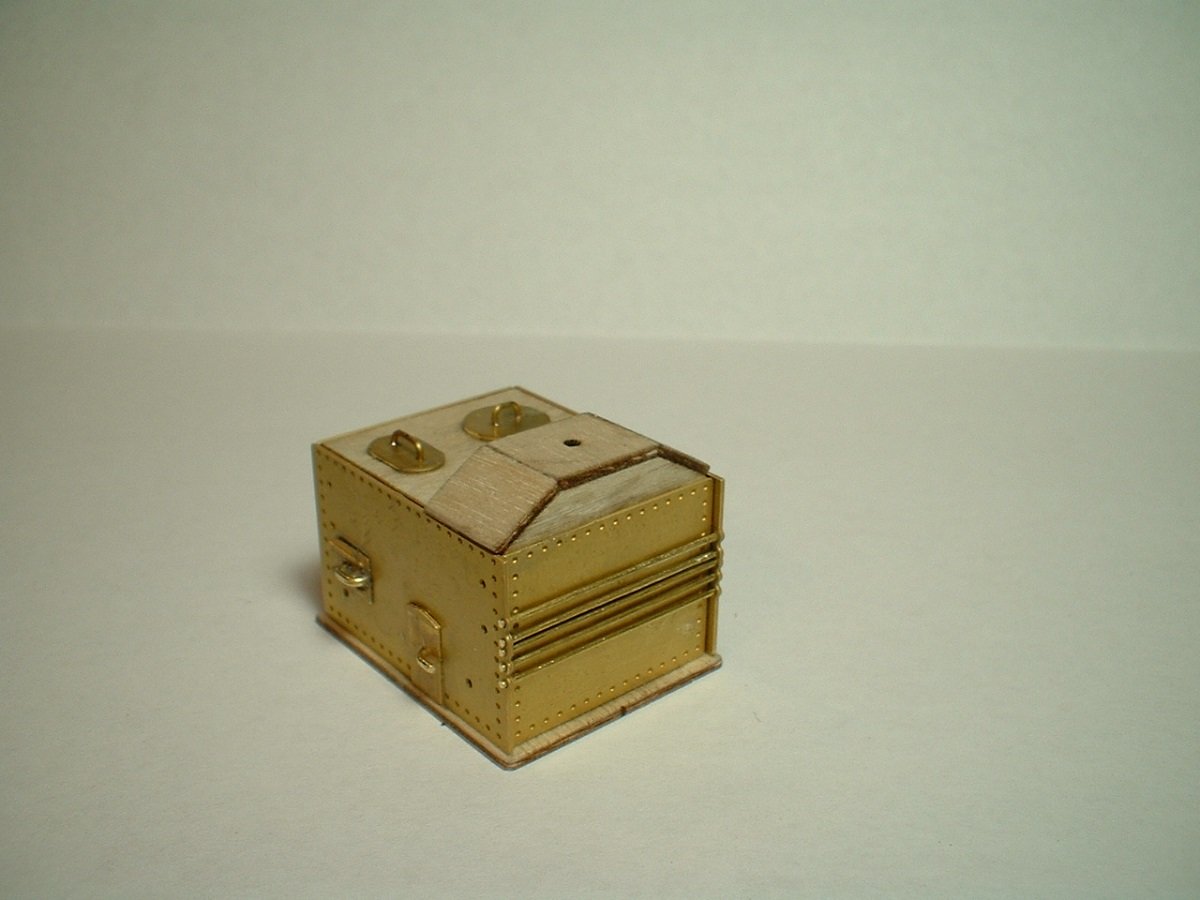
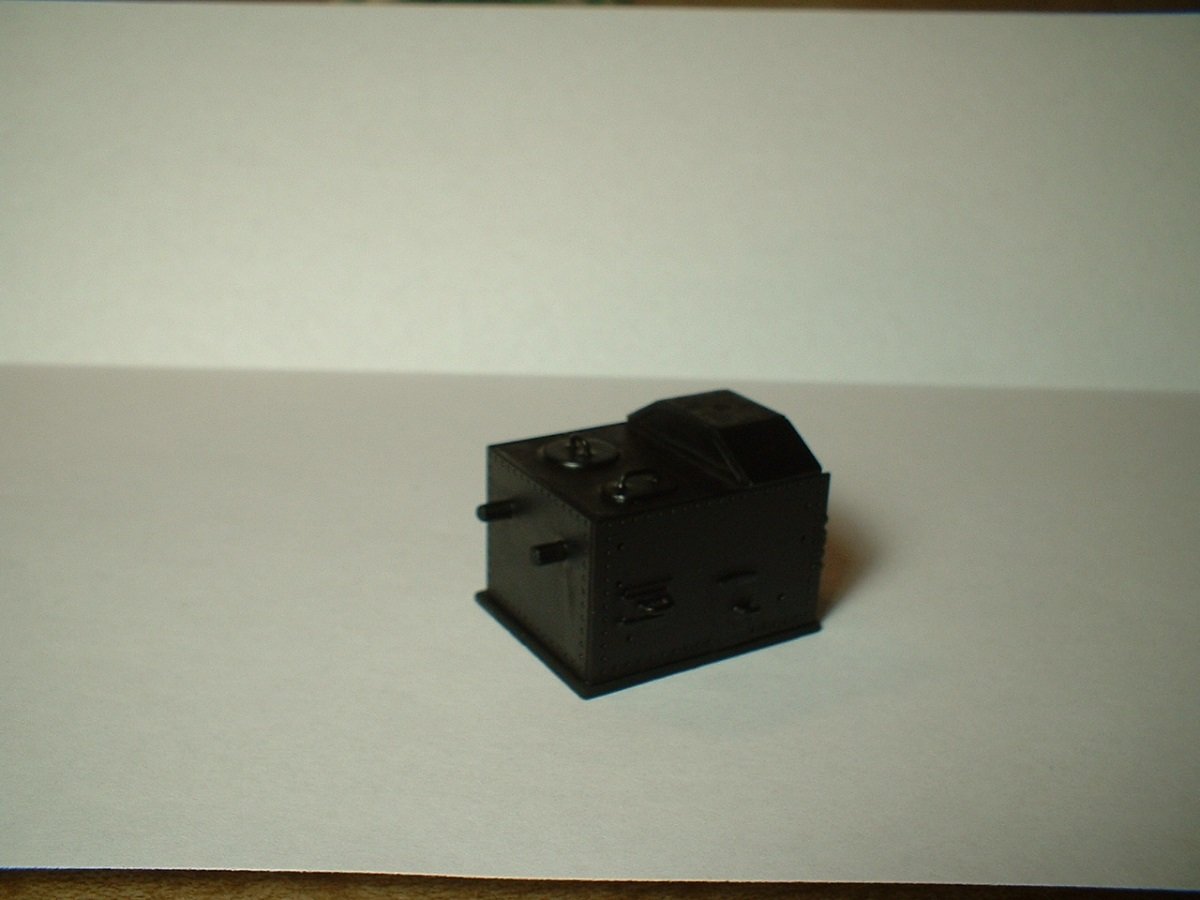
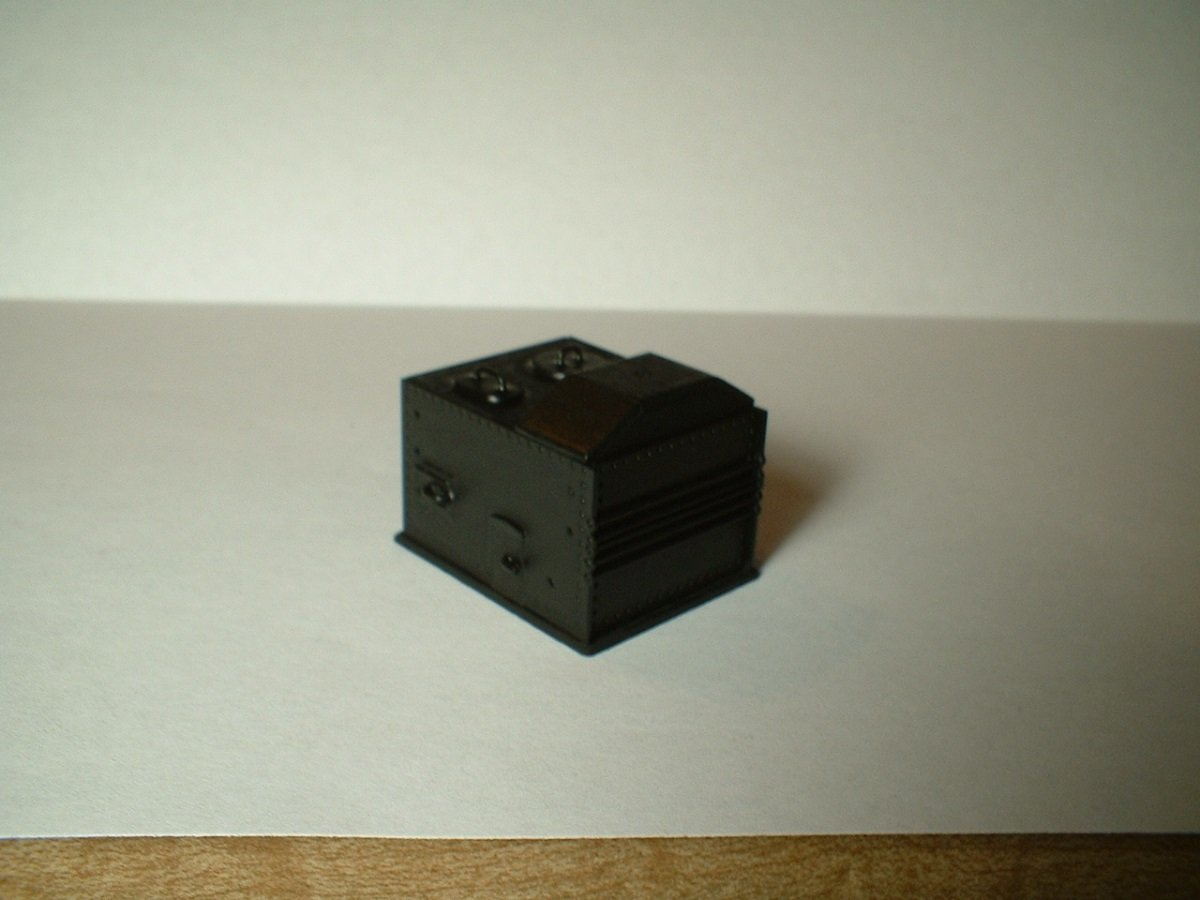
On to the ships`s stove. The basic stove is provided as laser cut wood & went together quickly. The best part is all 4 sides of the stove are covered with etched brass & fit perfectly. some doors & lids are also provided. The handles were formed from brass wire & soldered in place. After fitting all the brass parts it was painted flat black. The chimney will be added later as it will have to go through a hole in the upper deck. Too bad this little gem will be nearly invisible after the upper decks are in place. Thanks for looking in.
Mark
-
Some fiddly work done - made up the capstans,some of the bitts,gratings, & ladders. I glued the ladders to the gratings so I could better determine where to put the stanchions for the handrail ropes - it would otherwise be difficult to install them with the gratings in place. I made half-lap joints for the coamings. No finish has been put on these assemblies yet - I try to make up as many of the sub-assemblies as I can before applying a finish. The fewer times I open the can of poly,the less likely it will dry up in the can. Some of the plan sheets show a base for the capstans & some don`t,so I think I will add them - I don`t think they would sit directly on the deck planks. The ladder parts are nicely made - not too thick & clunky looking like most kit ladders.
Mark
-
Thanks zappto
- so far,this seems to be a very nice kit. If this is on your wish list you would have to get the Amati kit as Model Shipways no longer makes it. Welcome aboard!
Mark
-
Thanks Richard - I like to show them,but also try to make them as unobtrusive as possible. They are almost invisible at arm`s length. I`m not that crazy about the color of the planks - looks more like fresh cut wood than a deck that has been out in the weather for a while & turned more gray.
Mark
- Old Collingwood, CDW, Edwardkenway and 1 other
-
4
-
-
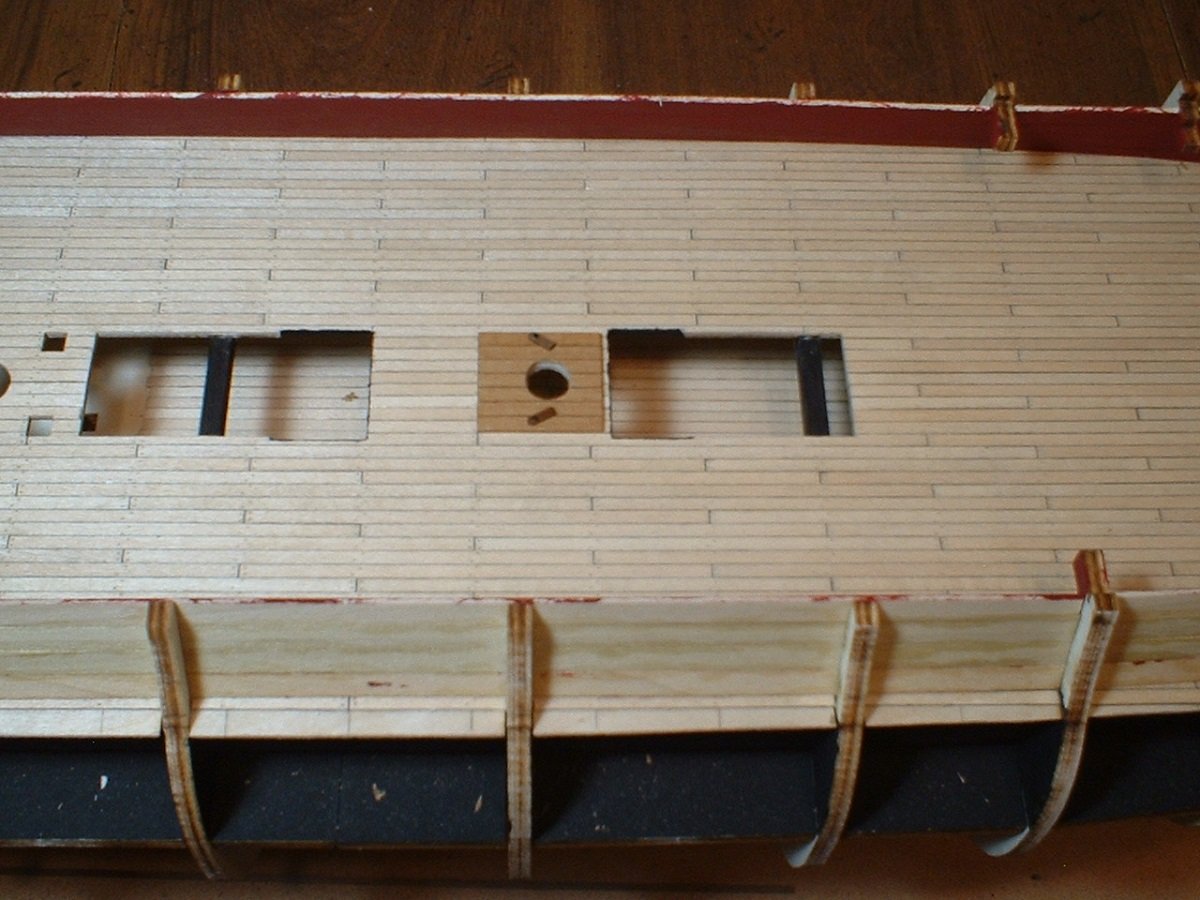
Hi - managed to get some planks down on the lower gun deck
. The ends of the planks on the left opening will not show - the grating will cover that area.
Mark
- flyer, coxswain, GrandpaPhil and 14 others
-
17
-
Thanks Michael. The quality seems quite good so far - the laser cutting is spot on with all the parts fitting together nicely. There are a few trade-offs such as the deck planking is basswood instead of the tanganyika called for in the instructions & copper tape instead of plates for the hull. On the other hand,wood gun carriages are provided instead of the metal ones in the Amati kit. The changes from the Amati kit are probably why this kit was much lower priced. I have a long way to go & am very pleased with the kit so far. By the way,I hope everyone in CA. can stay safe with all the wildfires that have popped up again.
Mark
-
Hi Peter - I see what you mean. I think I can add some planks down below without too much trouble. I don`t always think far enough ahead
 . Thanks for the tip. I am always open to advice or suggestions.
Mark
-
A couple of mountain lions have been seen in my area in the past year - very unusual for this part of the midwest.
Mark
- mtaylor, lmagna, popeye the sailor and 1 other
-
4
-
A little progress - the inner bulwarks were planked & painted red. I pre-painted the lowest plank before glueing in place so I didn`t have to mask anything off. Next will be the fittings for this deck - they need to be done before fixing the upper decks in place. The ship`s stove should be interesting - it is provided in etched brass!
Mark
-
Hi Frank - superior work as always
. Sorry to hear about your father - lost mine in 2004 so I know what you are going through .
.
Mark
-
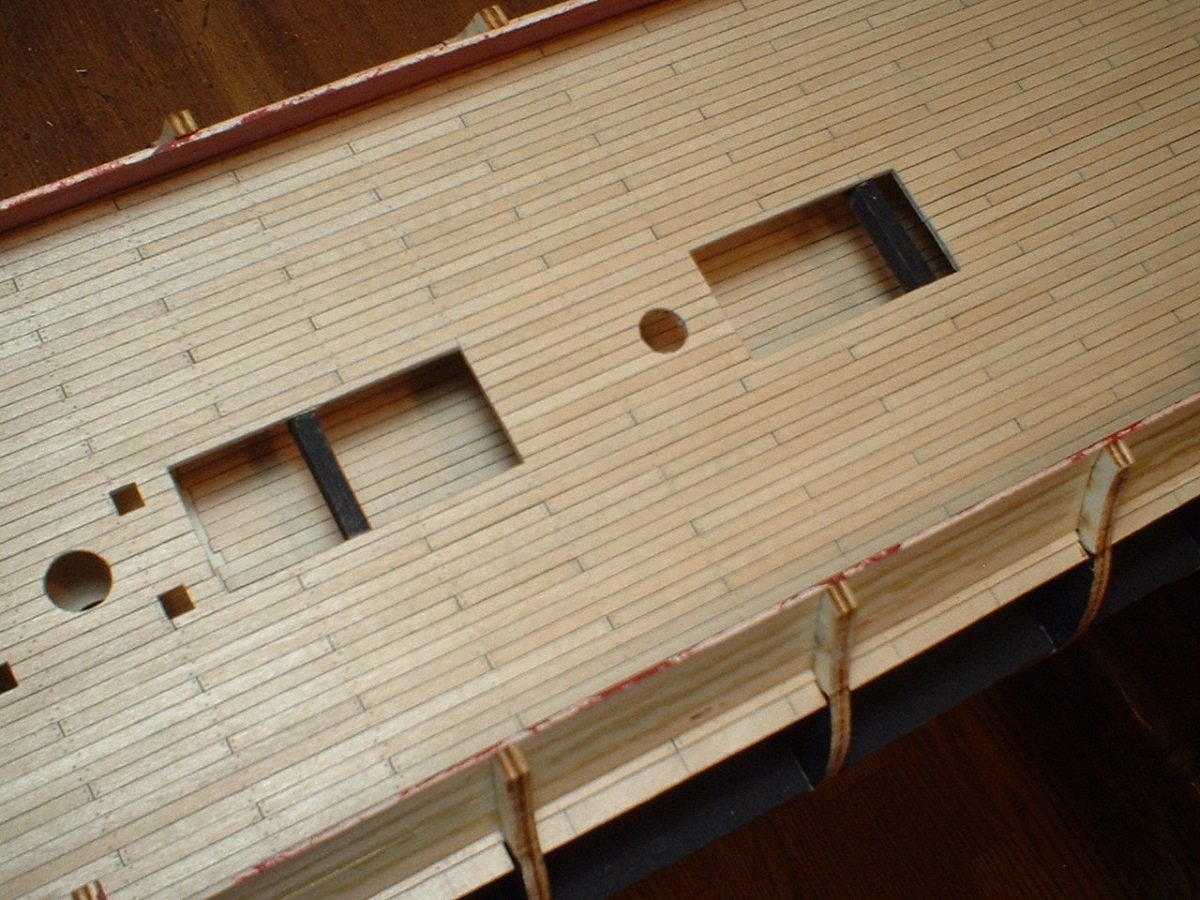
Hi everyone. The gun deck is now planked & false treenails added. I did the false treenails by just giving a small twist with a #77 drill bit - just enough to break the surface. A coat of poly then makes them visible,but not too overdone. I only did the treenailing to the part of the deck that will be visible. Also the edges of the planks were darkened with a #2 pencil before glueing down.
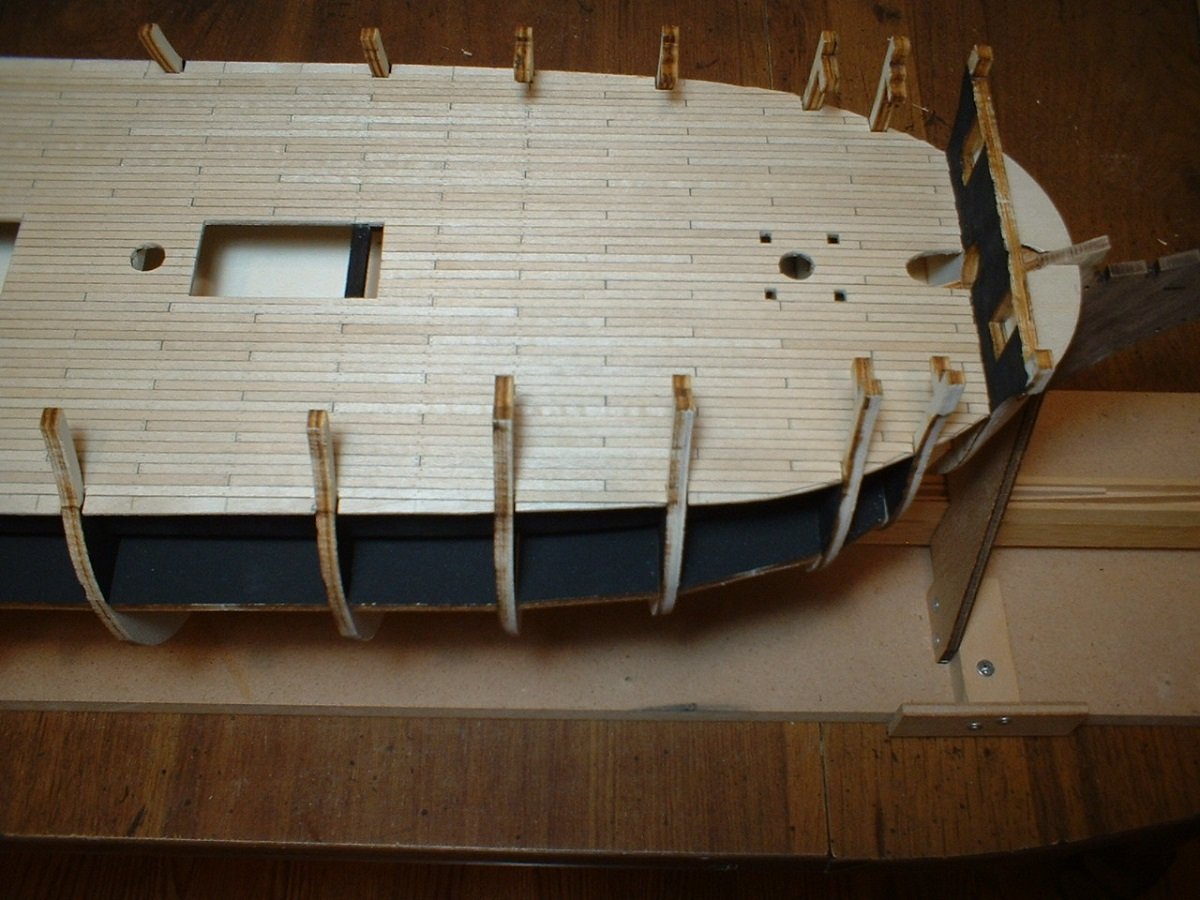


Mark
- GrandpaPhil, md1400cs, FrankWouts and 19 others
-
22
-
Thanks guys
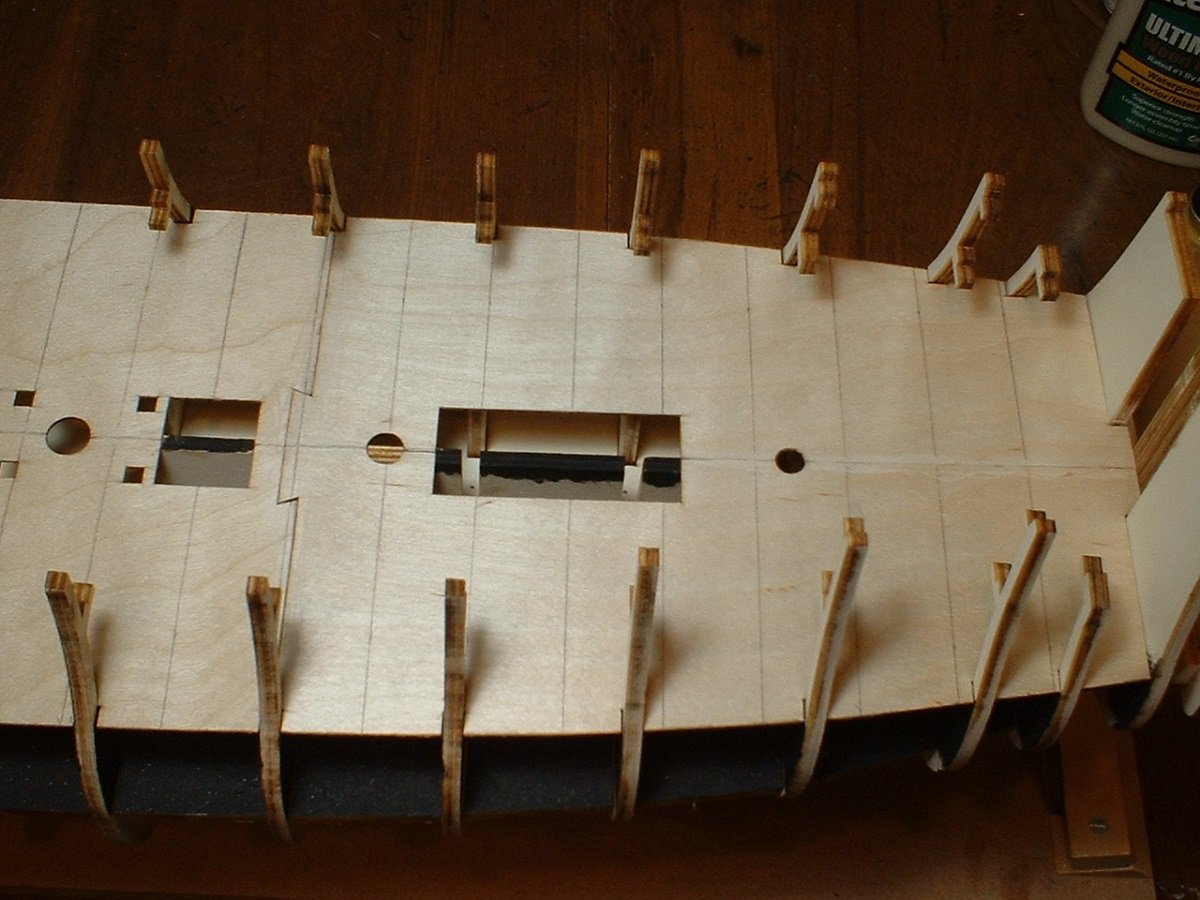
. On to the upper gun deck. The deck is provided in 2 pieces - a front & rear half. I cut both halves down the middle in order to ease installation & they fit almost perfectly.so they were glued in place. The written instructions say to plank this deck with tanganyka strips,so I looked through all the wood strips & couldn`t find them. I finally realized that the deck planking strips are provided as basswood. I have some tanganyka strips in my stash.but not nearly enough so I will go ahead & use the basswood from the kit.
I also lined off the deck for a four plank shift using 100mm long planks.
.JPG.648ef6f8f887aeaf837a7e8a19c2d632.JPG)
Mark
") .
.
HMS Vanguard by marktiedens - Model Shipways - scale 1:72
in - Kit build logs for subjects built from 1751 - 1800
Posted
Thanks Richard . I kind of like the "instant" gunports, although getting them in the right position is a bit fiddly - took 2 days just to get the first 2 on. The position is critical for the correct alignment of the stern parts.
Mark