


marktiedens
-
Posts
1,737 -
Joined
-
Last visited
Content Type
Profiles
Forums
Gallery
Events
Posts posted by marktiedens
-
-
-
Hi Greg - nothing special to space the pins. just dry fit them to see how it would look & then glued them in place. I was going to space them farther apart but after laying them out I liked the close together look better.
Mark
-
Thanks Frank - welcome aboard
 . Have you started on your next project yet - I think it was a stagecoach?
Mark
-
Thanks John - it may be awhile before I post again - just started the second planking.
Mark
-
Thanks Don - your thoughts are appreciated.
Mark
-
Hi Keith -filing them down to fit in the space wasn`t the hard part - painting all those little pieces was the fiddly part. The pins were painted before gluing them in but the metal piece they fit into was painted using a 10-0 pointed brush freehand - no masking. The old hands are still pretty steady
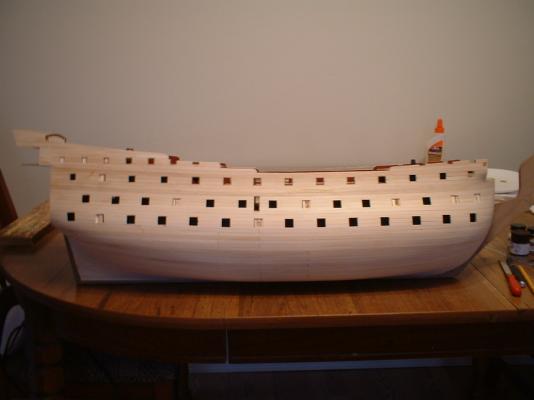
 . Starting on the second planking next. I intend for the planking to follow the curve of the wales so a little edge bending might be required - hopefully not too much as I don`t have any extra wide planks to do proper spiling. I am using the kit wood - would love to use something better like pear but it`s not in the budget.
Mark
-
Thanks Nigel,Michael,& Mike. It was very fiddly working with those belaying pins - they were only 6mm long to begin with. Also the black paint I am using is semi-gloss - dead flat black to me looks just that - dead
 .
.Mark
-
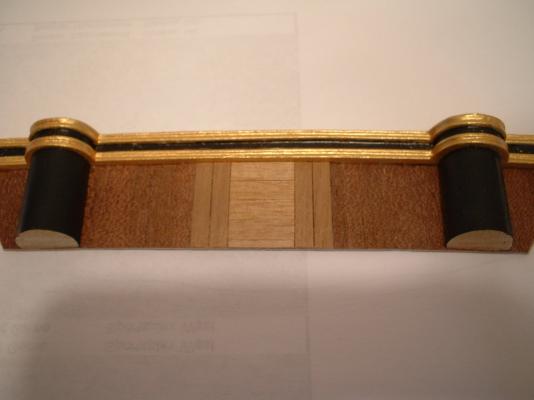
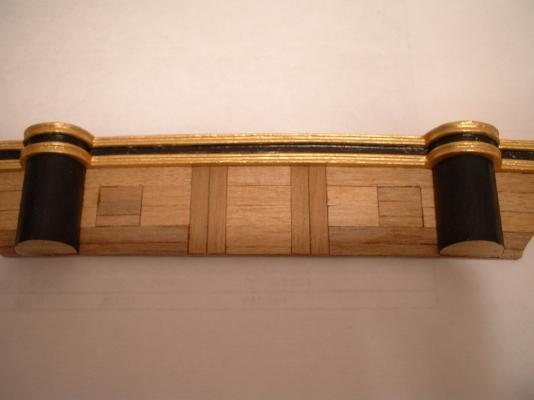
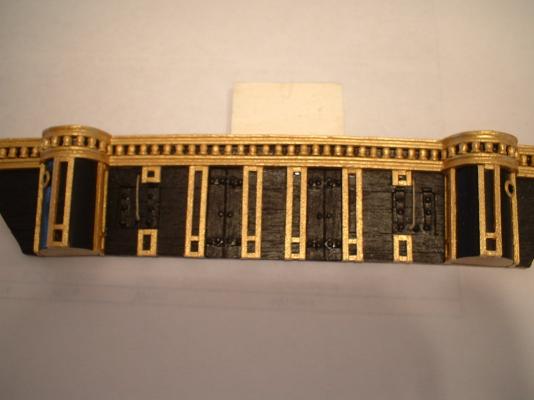
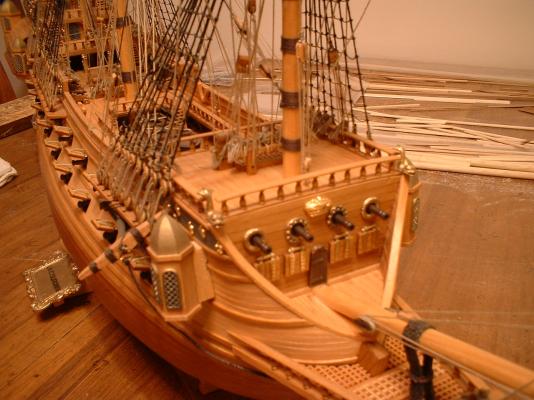
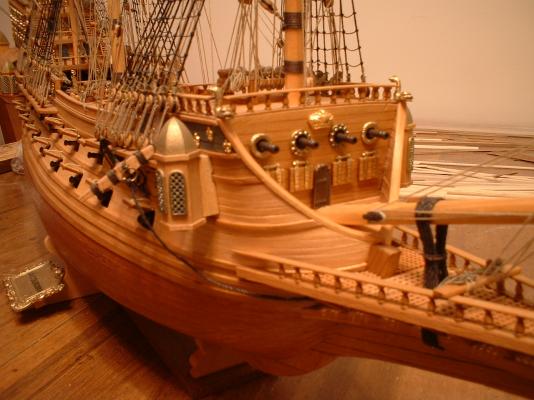
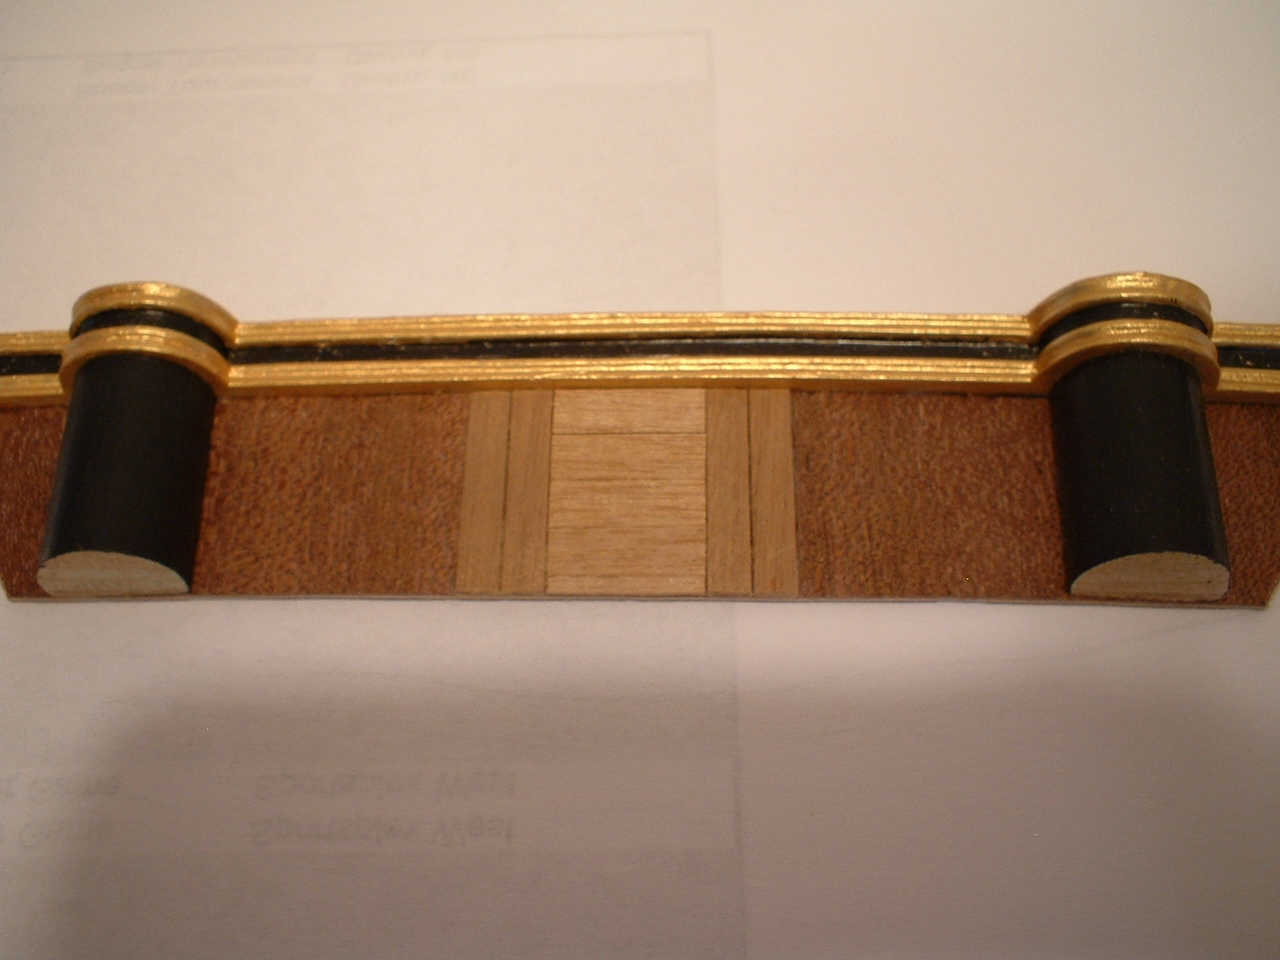
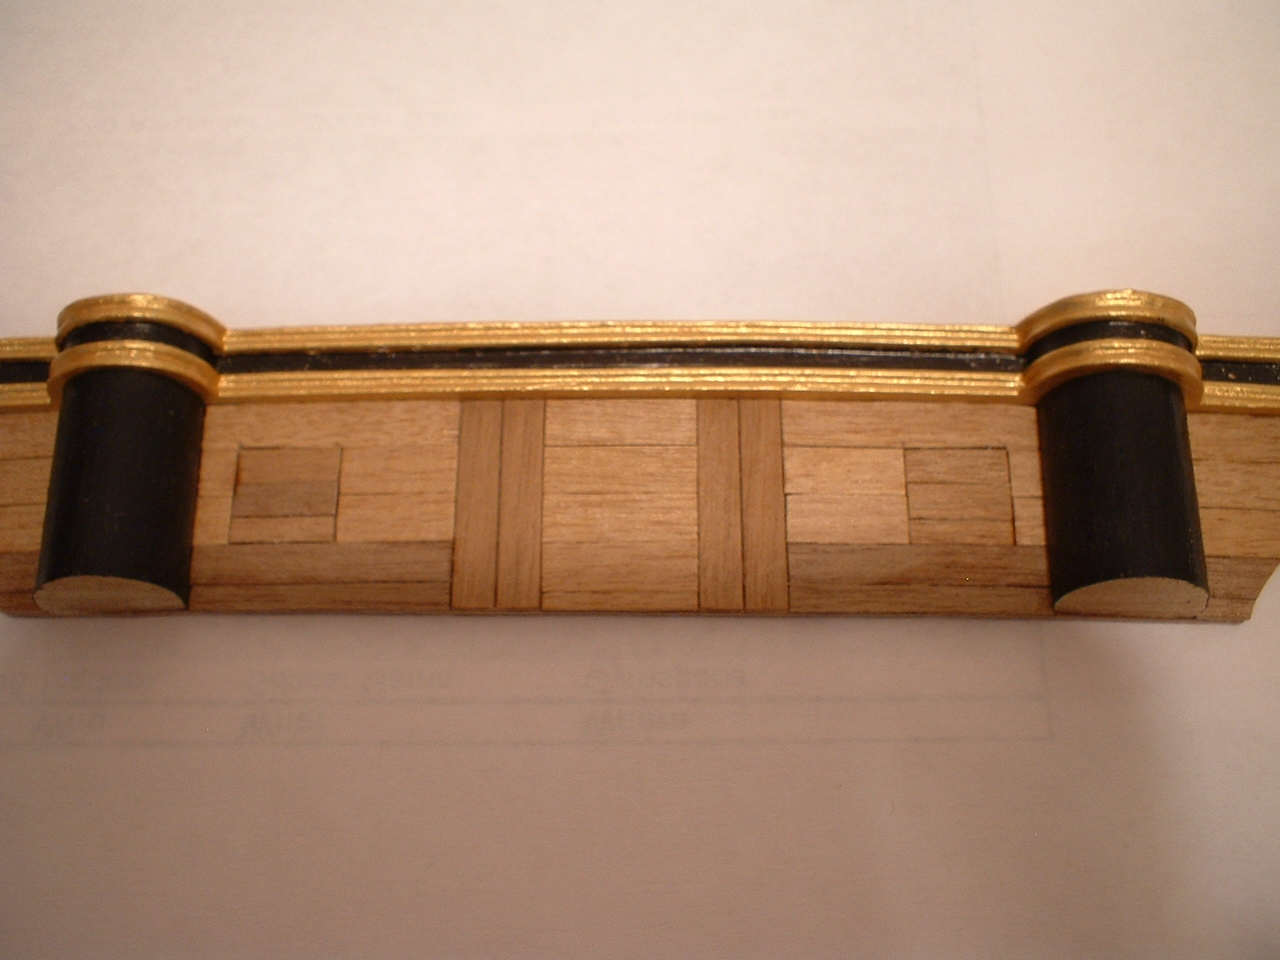
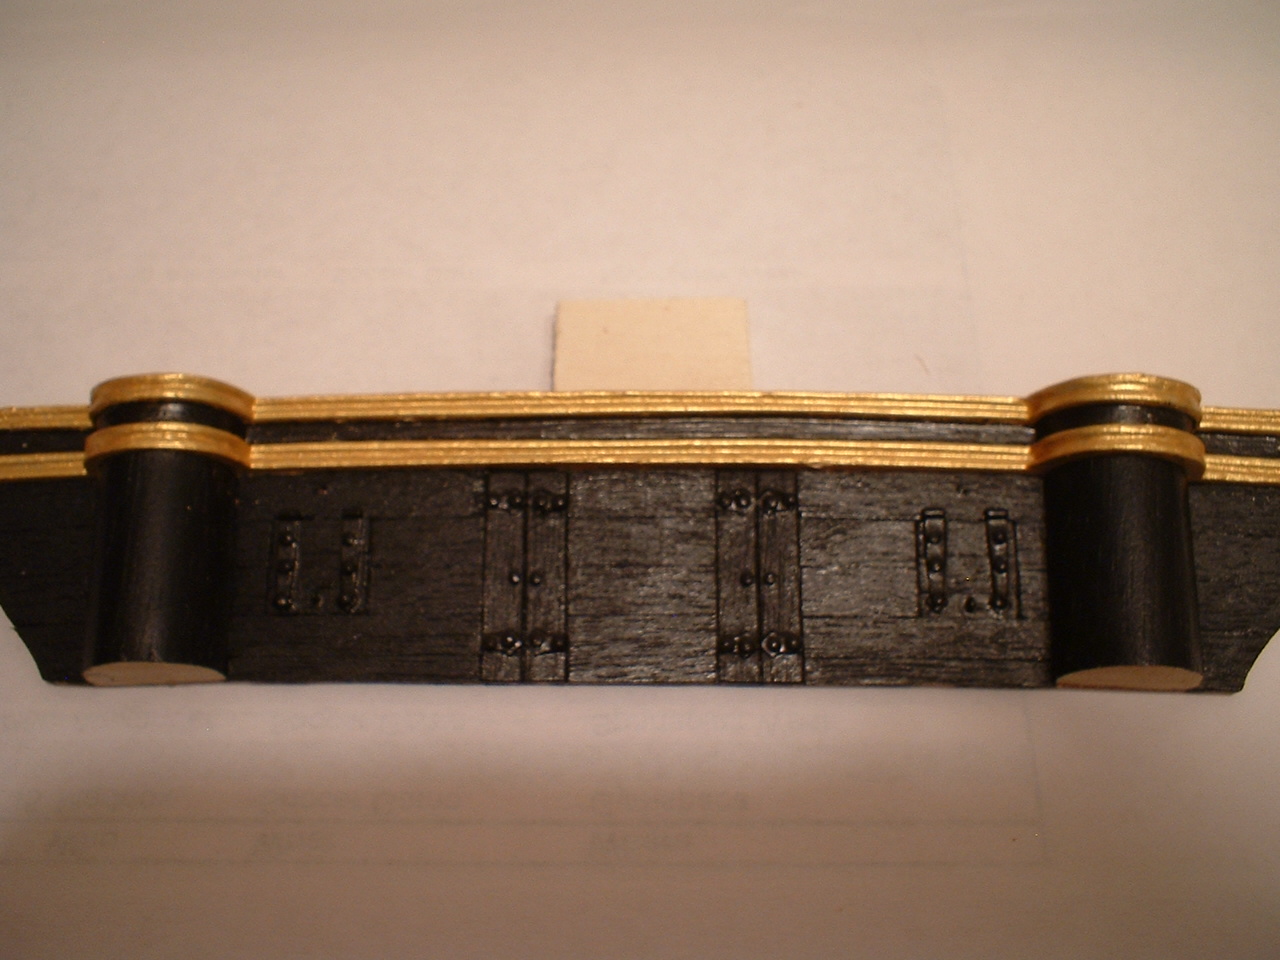
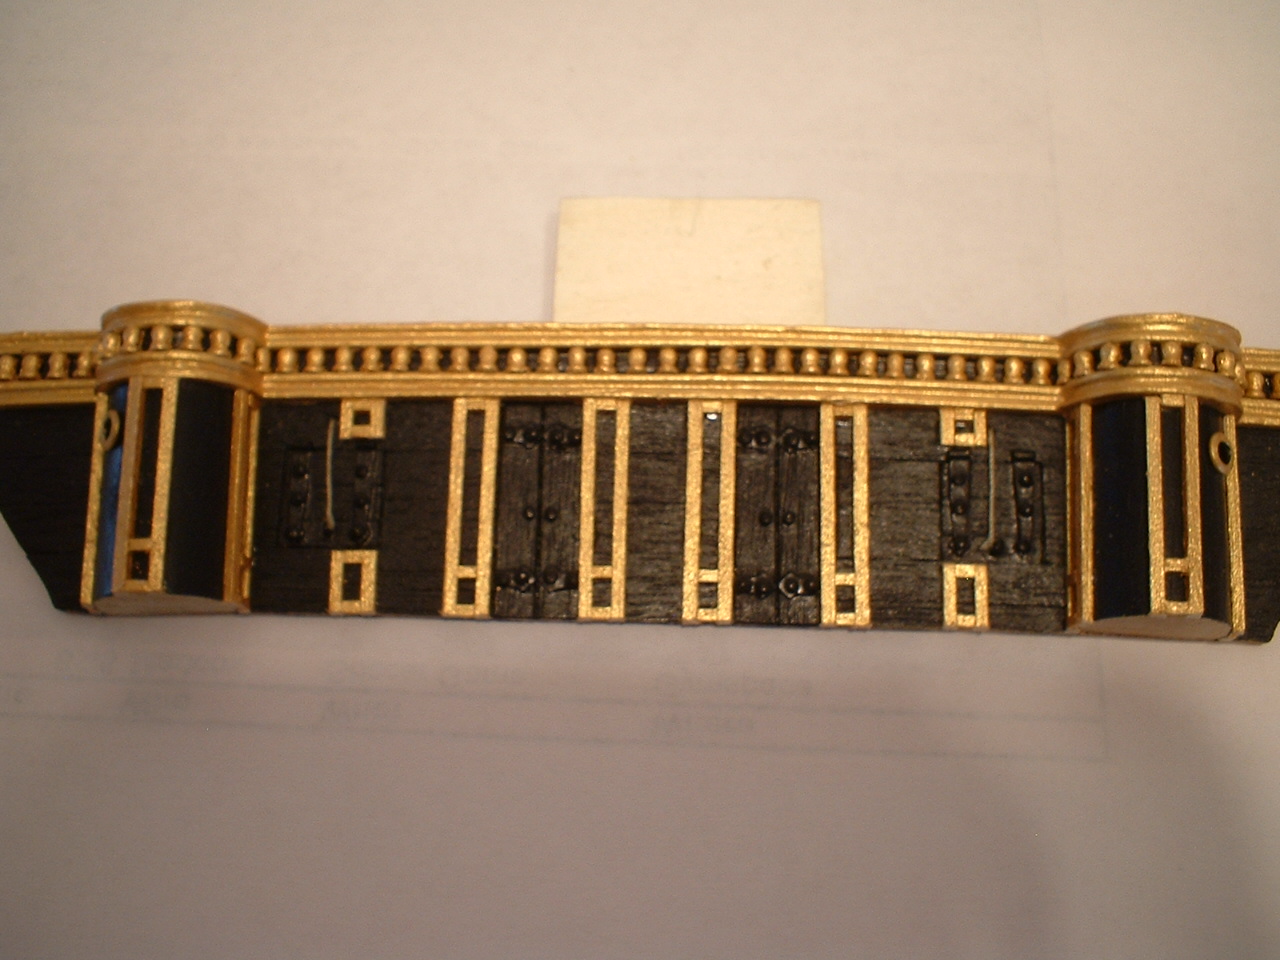
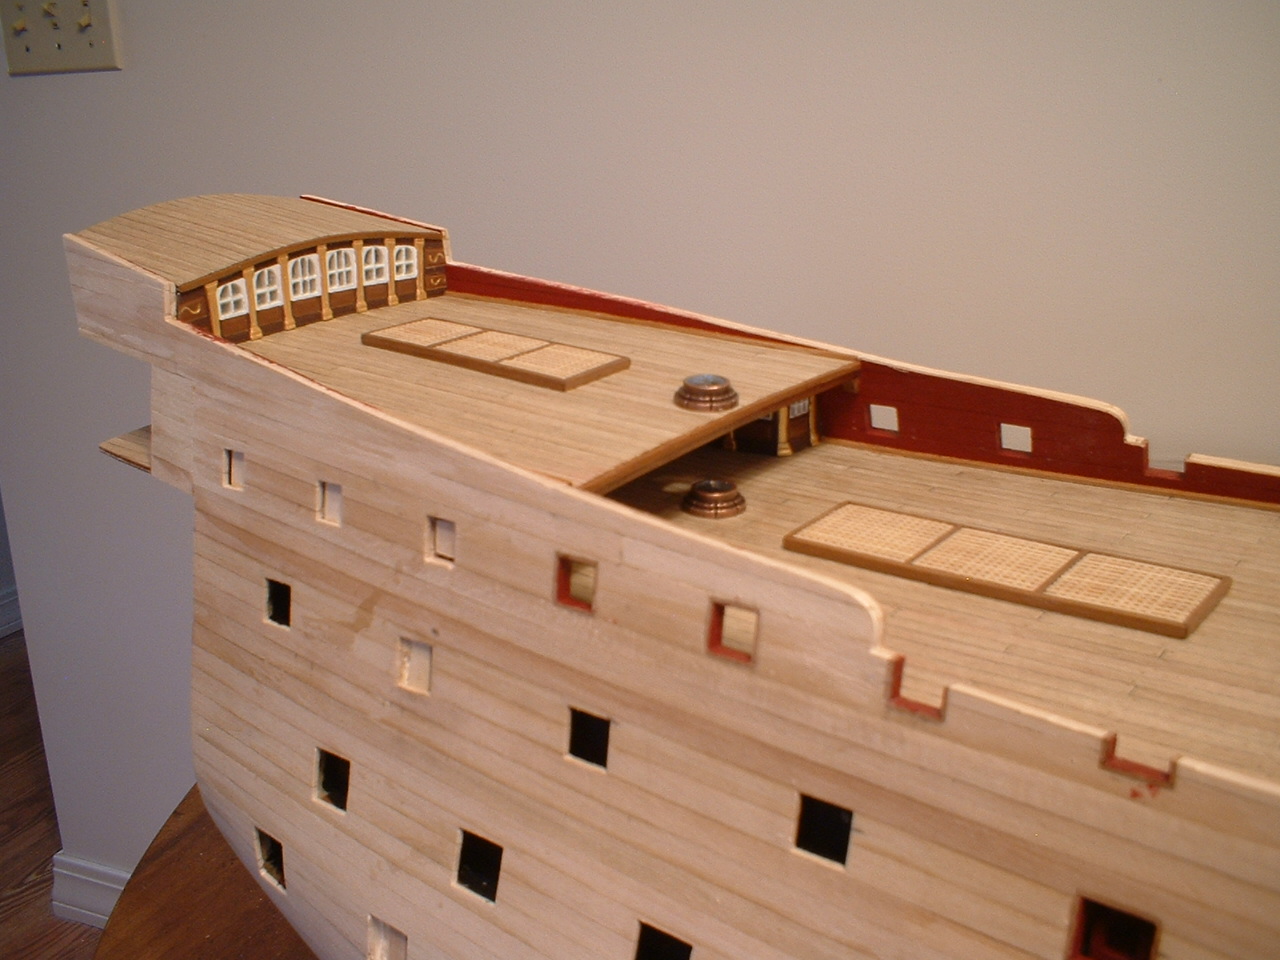
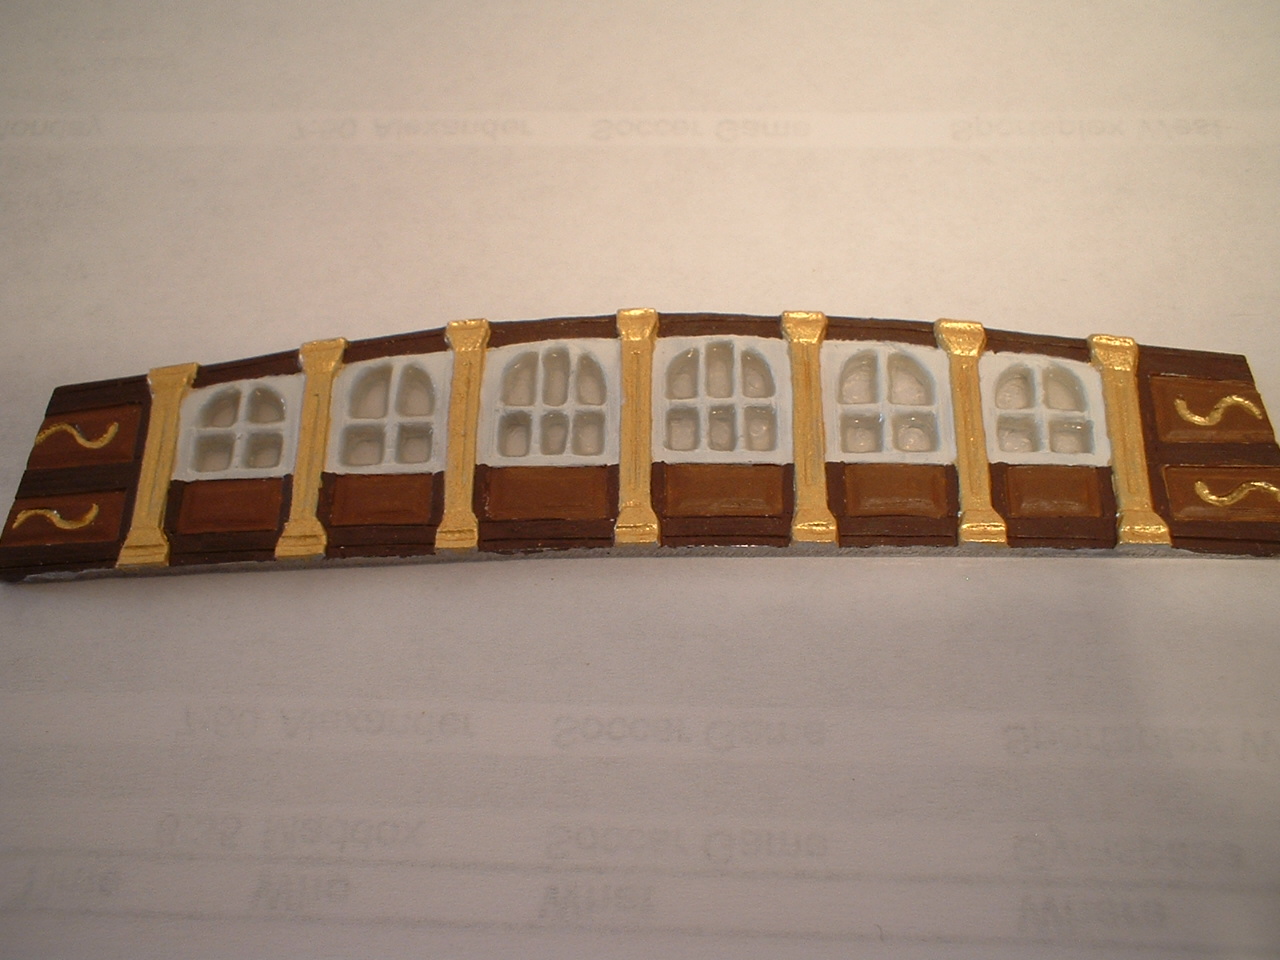
Update - I thought I would work on the bow bulkhead next. First I cut a piece of leftover false deck plywood to match the previously built forward most bulkhead. After painting the metal decoration I glued it to the top of the false bulkhead. I made the roundhouses by cutting a 12mm dowel in half. Then I laid out the strips for the double doors & gun port lids. After painting it black I added the trim using some 1mm strips painted gold. The "portholes" are brass eyelets from the fabric shop. Finally the stanchions across the top were made using very small belaying pins filed flat on one side & cut the bottom of the pins off & painted gold. the gold paint I am using is a vallejo color called polished gold - very nice paint.

Mark
-
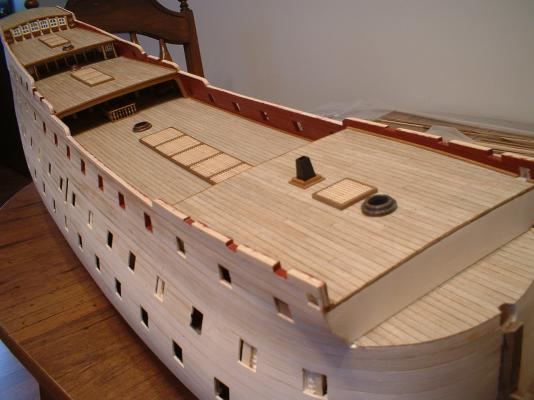
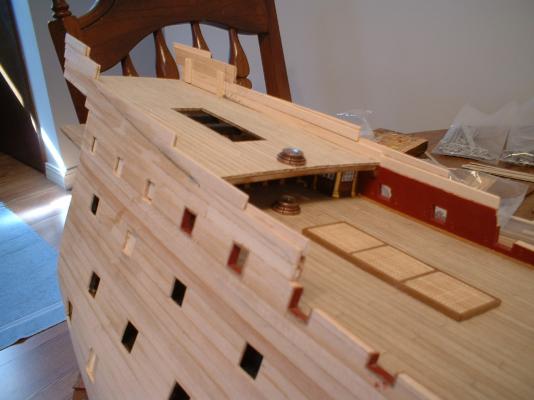
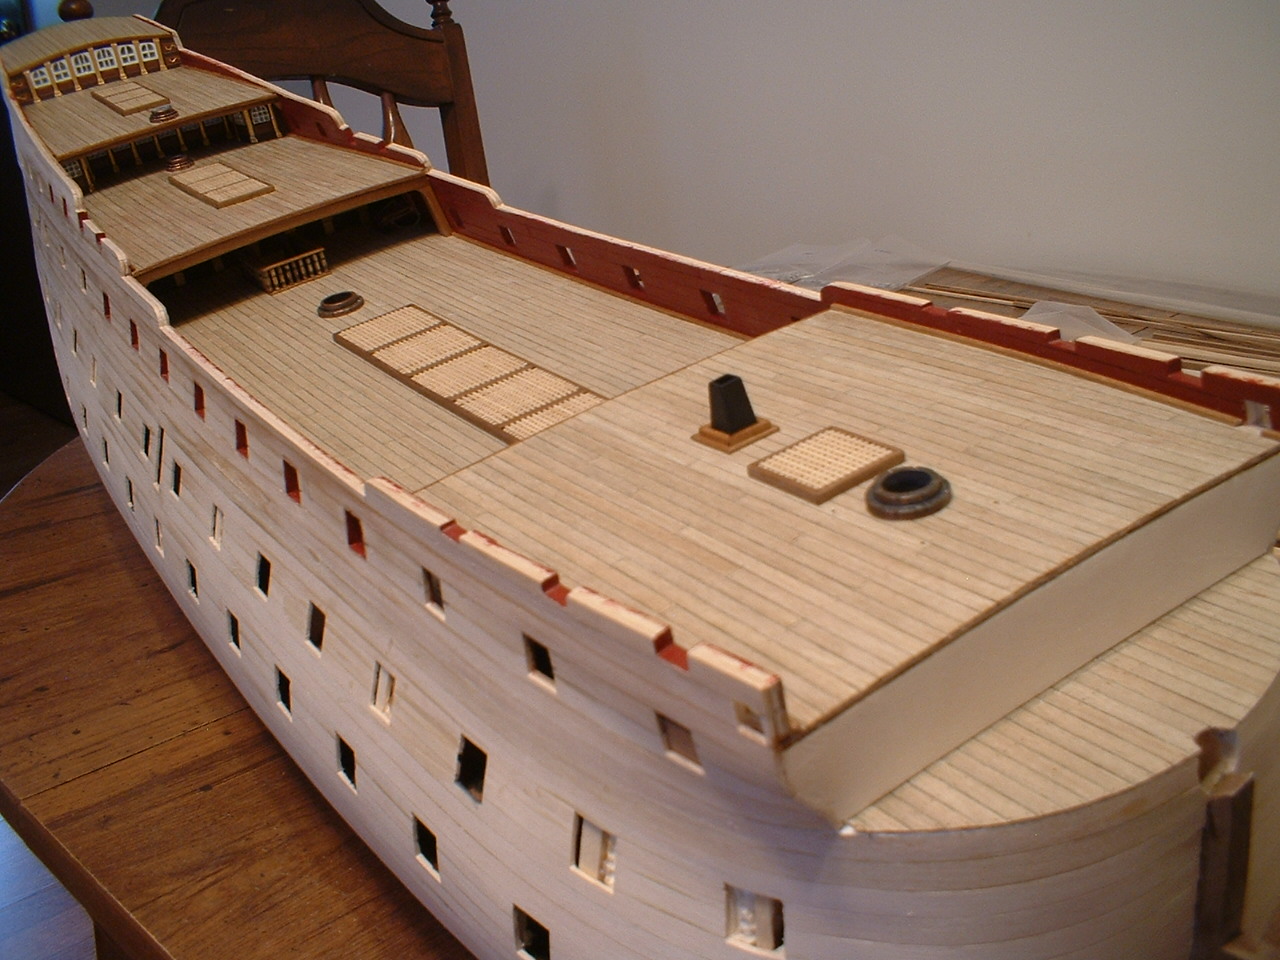
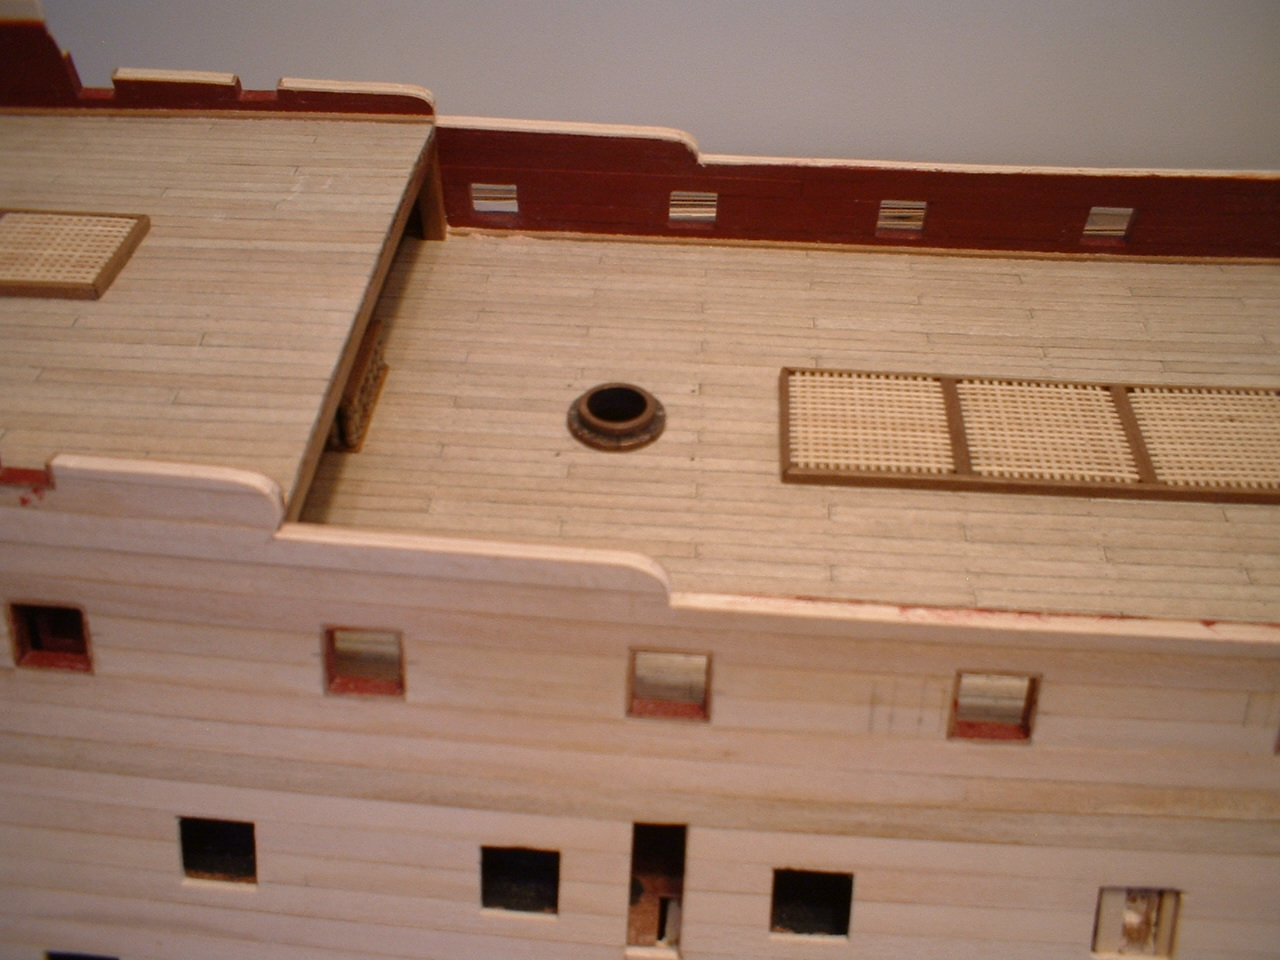
A little more progress - all decks now finished & gratings in place. I ended up cutting the openings for the gratings larger to match the plans. After laying out all the side ornamentation castings I marked out & cut the bulwarks down to very close to their final shape. Difficult to see but I added some narrow strips to the edges of all the decks to cover the plywood & ends of the deck planks.
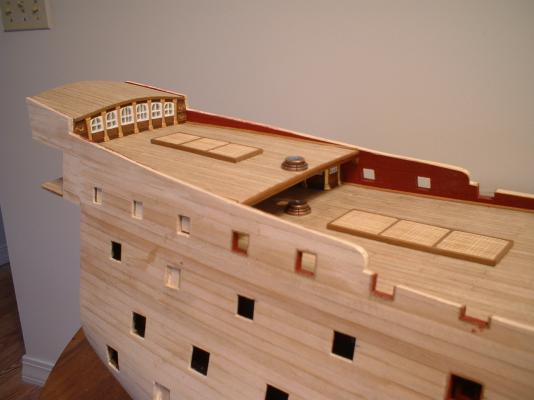
Mark
-
Well,for what it`s worth here`s what I did on mine.
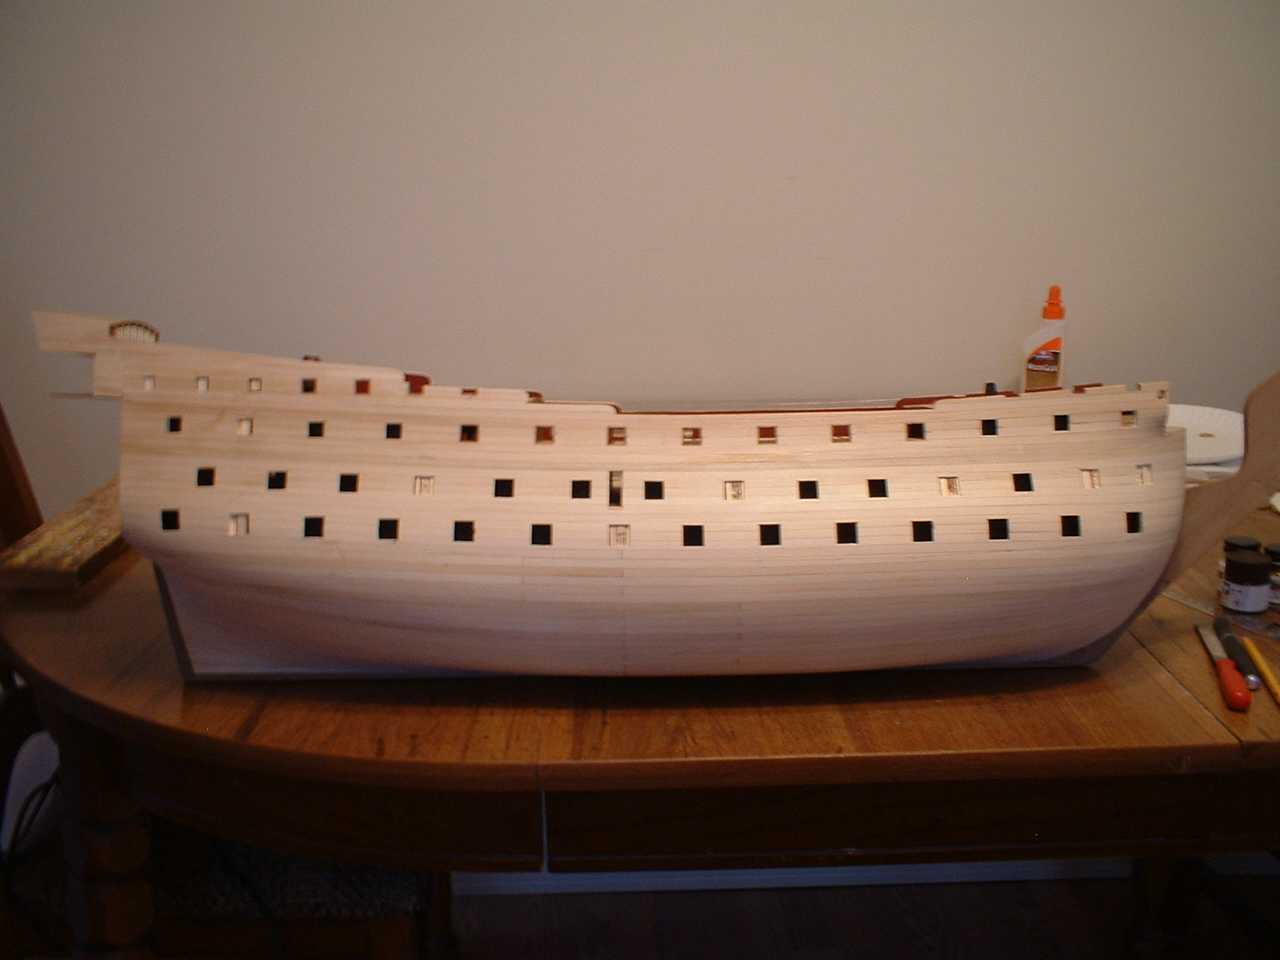
This was built about 20 years ago so it is probably incorrect. I built it with the bowsprit centered. I put the 4 false guns in the upper openings & put lids on the lower 4. After looking at mine it doesn`t seem right - I don`t know how they would fire the lower guns without hitting the planking that curves around the front
 . I was pretty much a novice then so I just built it to look like the picture on the box.
Mark
-
-
No glue on the bulkheads? Very interesting - I may have to pull up a chair on this one & follow along
 .
.Mark
- Seventynet, mtaylor, igorsr and 5 others
-
 8
8
-
Thank you very much Edwin,Keith,& Don. Also for all the looks & likes.
Keith - after triple checking the measurements on the plans I located where I thought the metal bulkhead should sit from the front edge of the upper quarter deck - about 138mm. then I test fit the poop deck & the rear edge lined up almost exactly right. Just a little sanding needed at the rear corners. I had to cut some off the sides,but that was to be expected. I am also building the poop deck first so I can get the upper edge of the bulwarks cut down to size before starting the second planking. It may be a mistake,but that`s my plan.
Mark
-
Peter - thanks for your nice comment. My camera is a simple point & shoot - I sometimes have to take 2 or 3 pictures to get a decent one. I am behind the other builds so I am just following their leads.
Denis - I thought the heel is the very bottom of the mast where it sets on the keel. Maybe I will just call them "the round things on the deck where the mast goes through"
 . Just kidding.
Mark
-
-
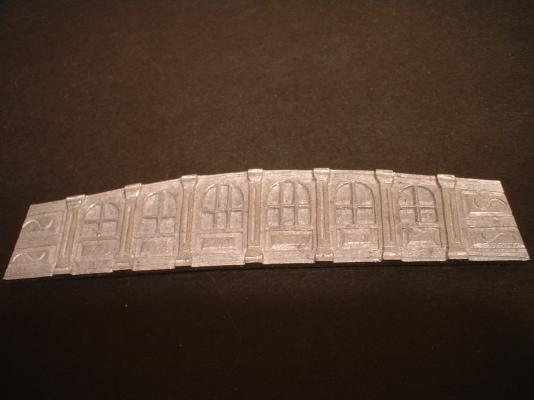
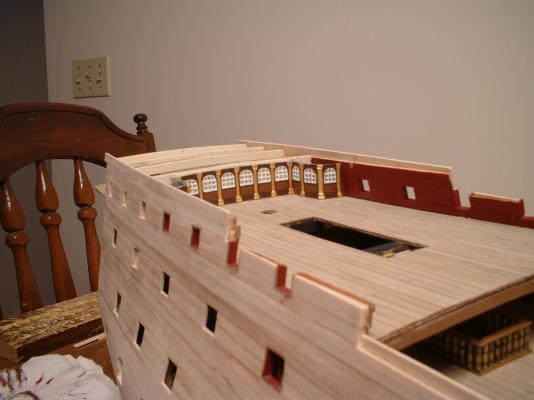
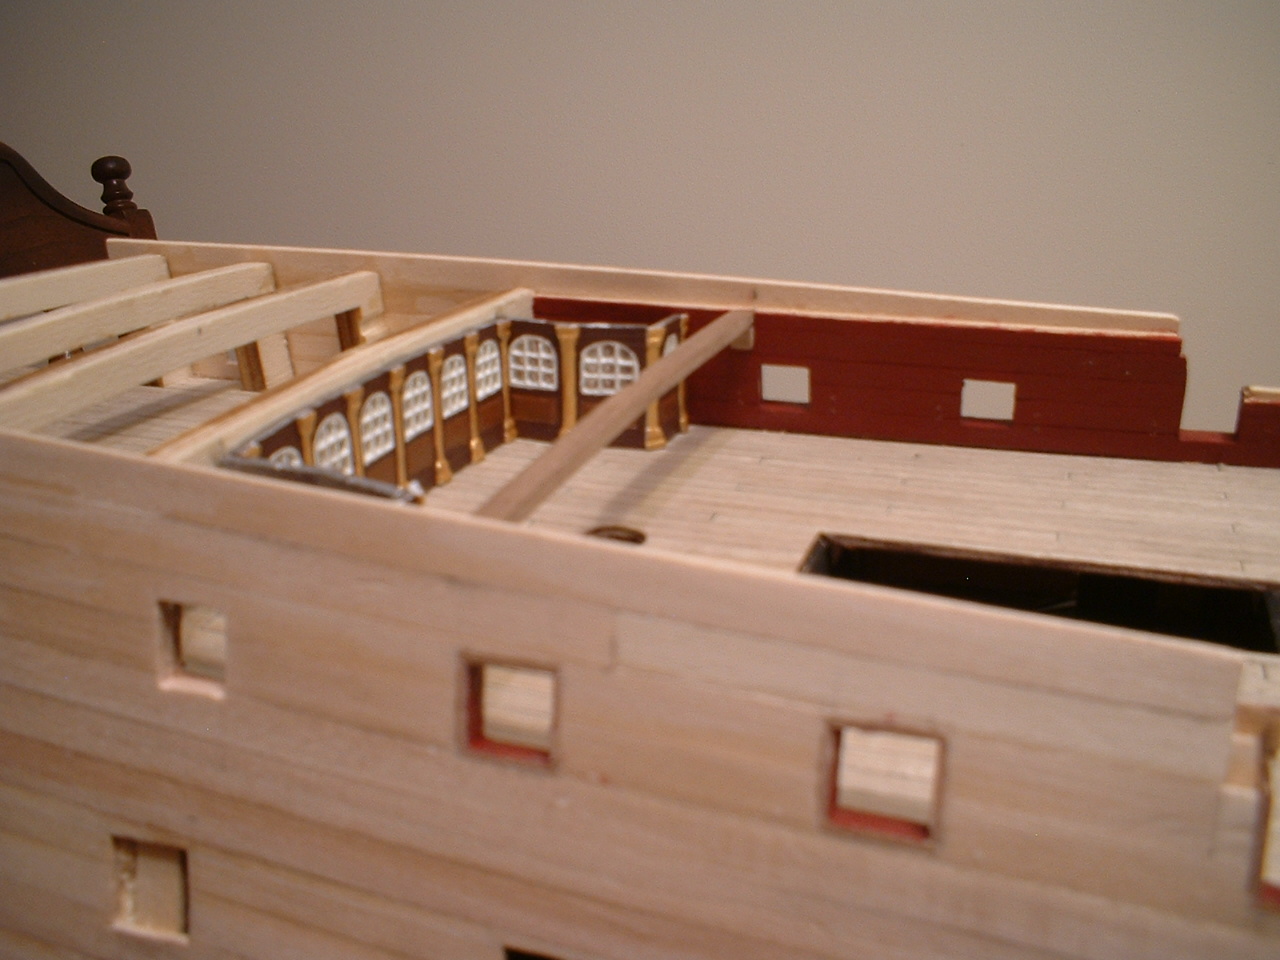
update - I got the upper quarter deck installed & planked. Then I found some mast coats at Ages of Sail & glued them to the decks - had to file them out slightly for the masts to go through.
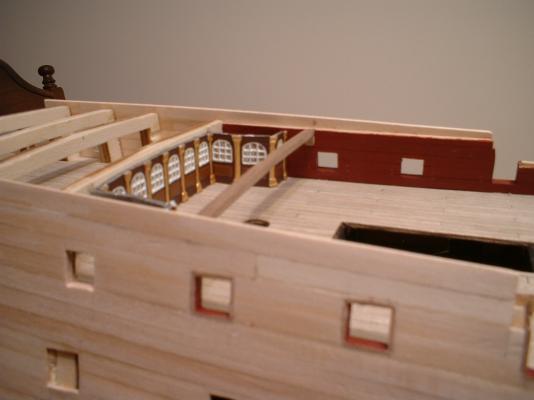
Then I located the cast metal bulkhead that fits on the upper quarter deck. After cutting out & painting it doesn`t look too bad - may still need to do a little touch up. also made the windows with the Kristal Klear window maker liquid.

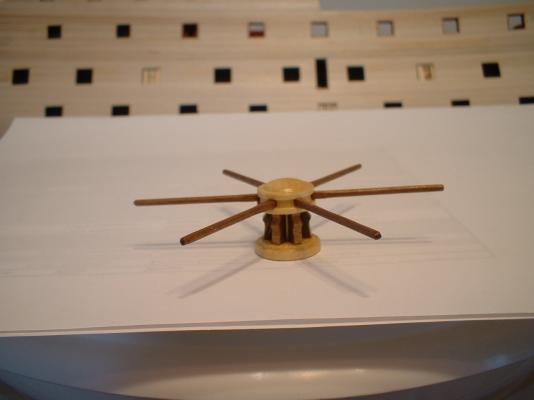
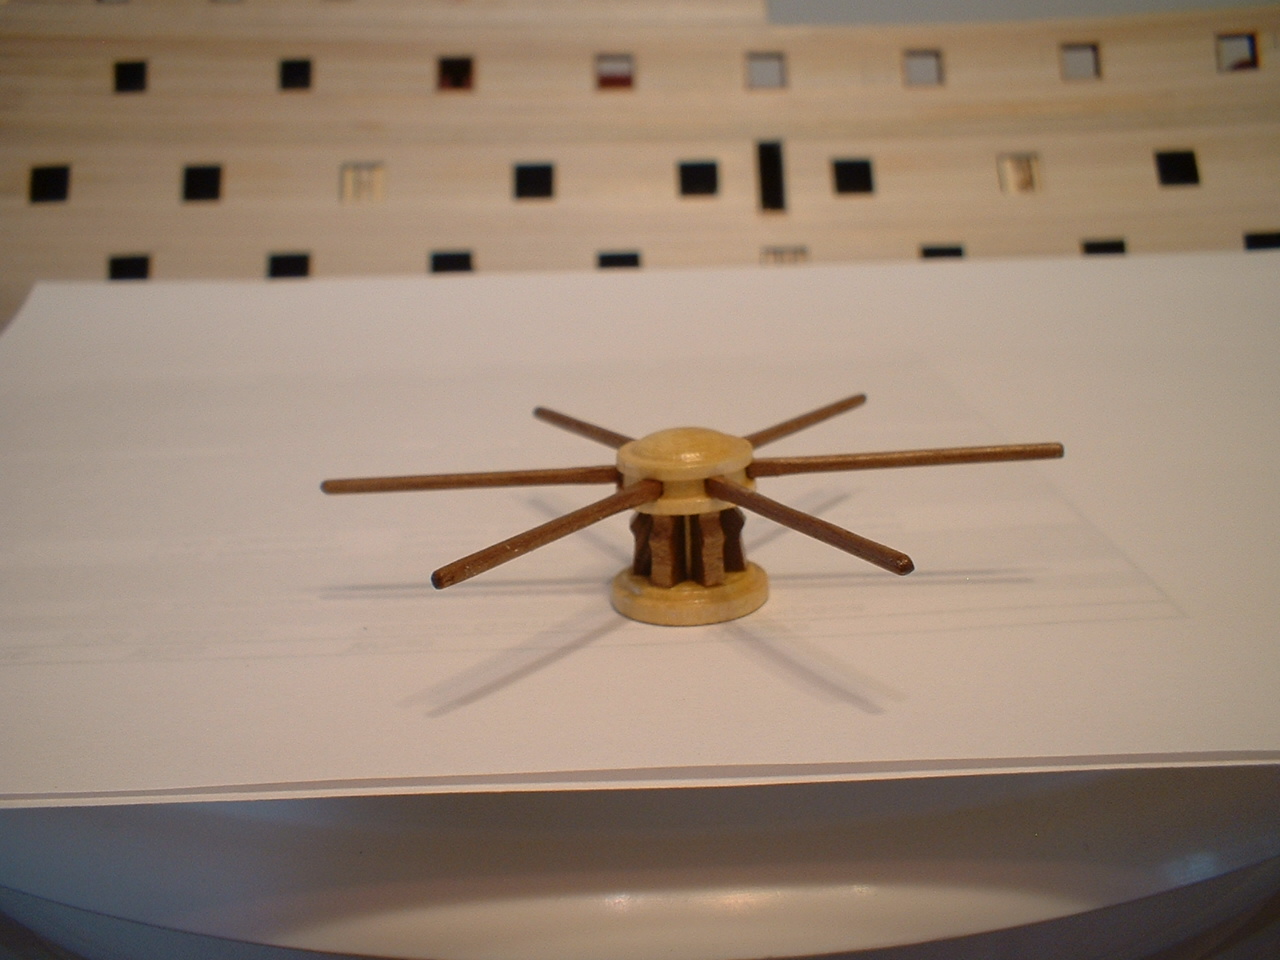
While waiting for paint to dry I thought I would make the bitts & capstan. I had to shorten the capstan to fit under the forecastle deck beam, but it still looks ok.
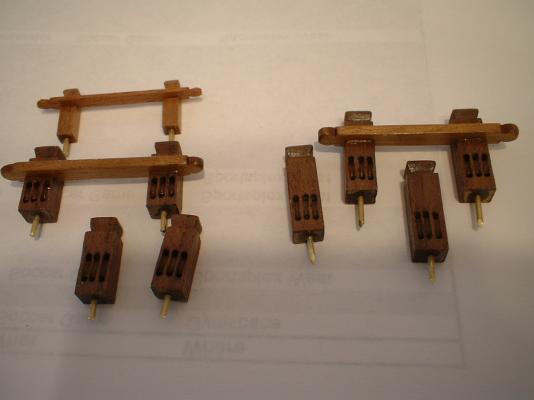
Mark
- md1400cs, edmay, Seventynet and 4 others
-
7
-
-
It will be awhile - I`m in the middle of the Royal William right now & don`t really have room to do 2 large models at once.
Mark
- mtaylor, Canute and thibaultron
-
3
-
I have the Model Shipways Vanguard kit. It`s still in the box but I believe some of the differences are slightly different instructions,cast cannons instead of turned brass,& copper tape instead of copper plates. I haven`t started it yet but after looking through the box it appears to be a nice kit.
Mark
- Canute, jwvolz, justsayrow and 2 others
-
5
-
-
-
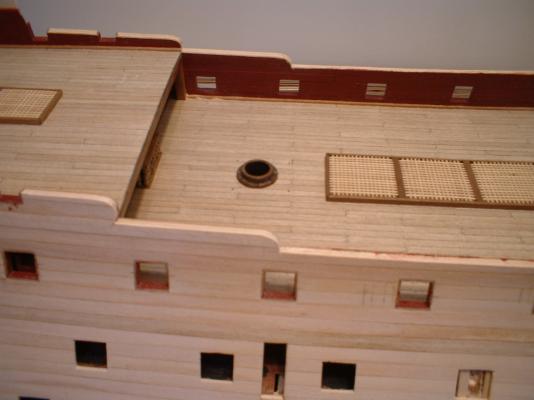
Update - first thanks to all for looking in & your likes. I drilled out all the window sections of the quarter deck panels & filled them with some kristal klear window maker - all 108 of them. Needless to say my fingers are a little sore. Sorry I forgot to take some close ups of them. After gluing them in place I made an upper quarter deck support beam & glued in place. I had to make some short knees for it - full length beams would have been in the way of the gun carriages & their rigging.
Mark
-
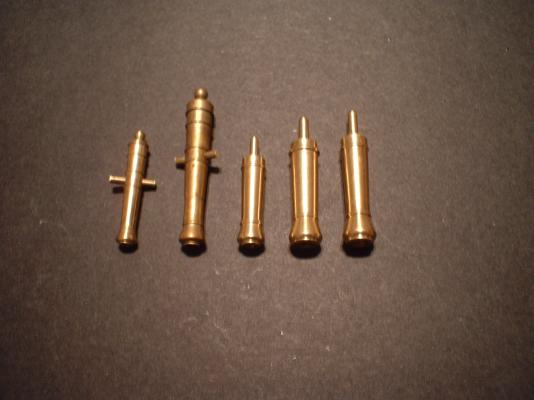
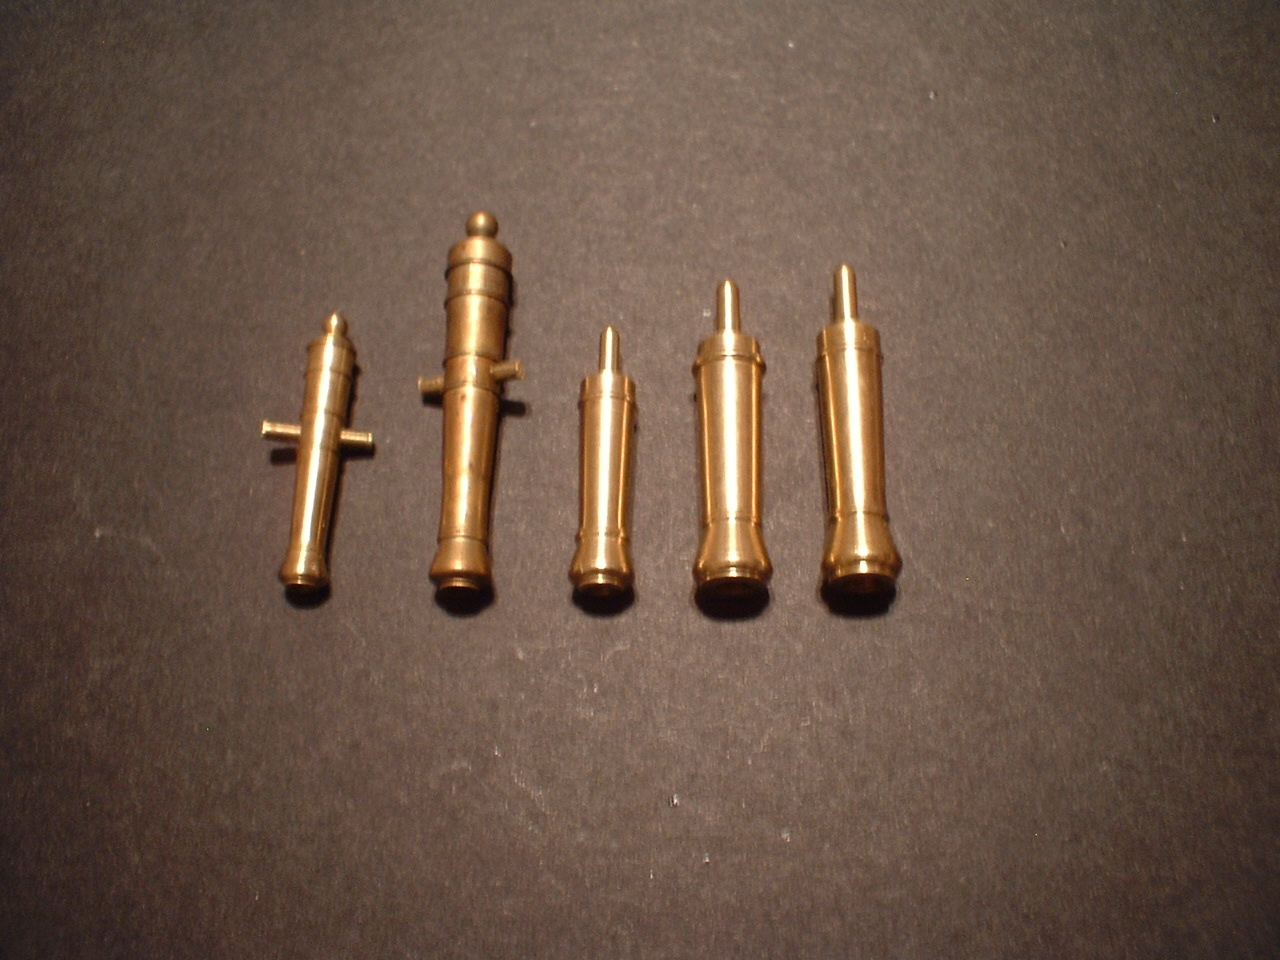
Hi again Vince - I took a picture of all the guns in my kit. From left to right - quarter & forecastle gun,main deck gun,main deck half gun,second gun deck half gun,lower gun deck half gun. The sizes & quantities are correct in my parts list. Maybe you have an older or newer one than mine. Anyway it`s no big deal - I may just leave those 3 rear ports closed. Only 2 of them are shown open anyway.
Mark
-
Denis - I have not checked with Peter.
Edwin & Greg - thanks for looking in & your nice comments.


Vasa by marktiedens - FINISHED - Sergal - scale 1:60
in - Kit build logs for subjects built from 1501 - 1750
Posted
Hi Michael
First let me say your seizings look pretty good to me. It is a bit difficult to explain exactly how I did mine ,but I will try. First i simply held the deadeye at the right distance from the lower one & wrapped the shroud around it,having both sides of the shroud held tightly around the deadeye with two fingers of one hand - in my case my left hand since I am right-handed. The trick I use to keep the shroud in place around the deadeye is a couple of drops of CA. I know it is nasty stuff but it really holds so I can continue to work without waiting an hour or two. With the shroud stuck to the deadeye I can them use both hands to install the seizings. I start with a simple overhand knot as close to the deadeye as I can get,then just wrap the line around any number of turns as I want to & apply a drop of glue to hold it. Same thing for the rest of the seizings. I almost forgot to mention at the beginning is when I am holding the shroud around the deadeye I keep some downward pressure on the deadeye so that when I tension the lanyards the distance between the deadeyes will not change. I hope you can understand my explanation. I will say it would be a lot easier if I had three hands! Also I should mention that each shroud pair should be looped around the mast & tied together before starting so you can put the downward pressure on the shroud without it slipping.
Mark