


marktiedens
-
Posts
1,737 -
Joined
-
Last visited
Content Type
Profiles
Forums
Gallery
Events
Posts posted by marktiedens
-
-
I will echo what Amateur said in post #7,but in a larger scale such as 1/64 or 1/72.
I would love to see a historically accurate kit at a reasonable scale (1:96 or 1:192) of a Dutch two or threedecker, like the Gouden Leeuw.
I would like: advanced, building time: long, price around 400 euro, (but higher is open for discussion)
I would like a POF, but with the option to build the interior from th lower gundeck upwards.
I would prefer serious wood, not the usual kit-stuff
i would prefer historicall accurate
i would prefer non-guilded, resin (?) 'carving'
I would prefer fullguns, and not those silly half-guns. (At 1:192 resin casting is OK with me)
I am not a large fan of an 'assembly kit' in which all parts are lasercut, and only need to put together. (Although the resulting model greatly benefits from those lasercutassembly parts)
Second type of kit iI would be seriously be tempted: navyboard style English first or second rate.
(Again 1:192, serious wood, historically accurate, and all other remarks i made above)
JanMark
- Seventynet, EJ_L, Canute and 2 others
-
 5
5
-
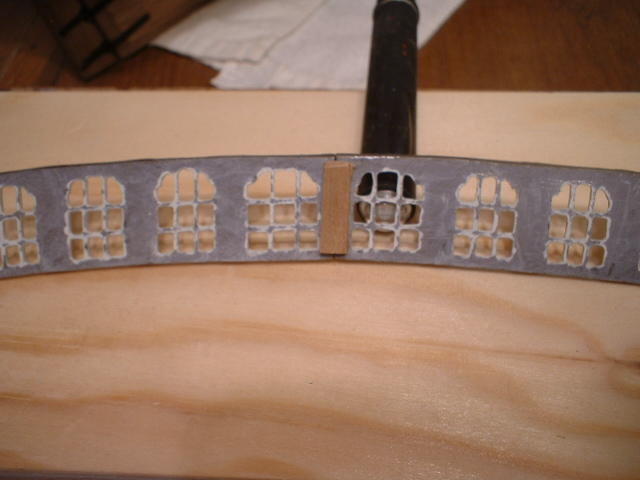
Greg - I cut out the windows before bending them. I thought that would be easier. The bending needs to be done slowly & with a little heat applied - not too much or they will start to melt.
David - I thought about that for a while,but if I thinned them down enough to be a scale thickness I think they would break just by looking at them. It is a different kind of metal than what is in most other kits - soft enough to bend,but if you go too far or too fast it will snap. They are not really designed to have those panes cut out - I am just trying to do a little more than painting the solid windows blue or black. Also they are quite heavy & if thinned down too much they might just bend under their own weight while holding them.
Mark
-
Hi Matt - The window frames are about 3mm thick. If I put glass on the inside of the frames,the surface of the glass would be set back 3mm from the outside of the frames,which would not look good. If I put the glass on the outside it would look even worse. There is no way I could cut each individual pane to fit into the openings. Anyway,glass back in the day was not perfectly clear & smooth.The metal of the frames is just too soft to try & thin them down. The best solution would probably be to cut out the entire window frames & make new ones a bit thinner out of wood,but I am not going to do that.
Mark
-
Keith - you are too modest. Your RW is really nice with better planking wood,building the galleries from scratch for lighting,& the fancy paint work on the bow bulkhead. As far as the window glass goes,I would prefer to use clear acetate but the frames are way too thick. The acetate or slide glass would be inset too far to look good. I don`t really have a way to thin them down without fear of destroying them. A mill might work,but the high speed of a mill would probably melt that soft metal. I don`t have a mill anyway. It would be really nice if they made the windows available in photo etch.
Thanks again Edwin - your thoughts are appreciated.
-
-
Thanks Edwin!
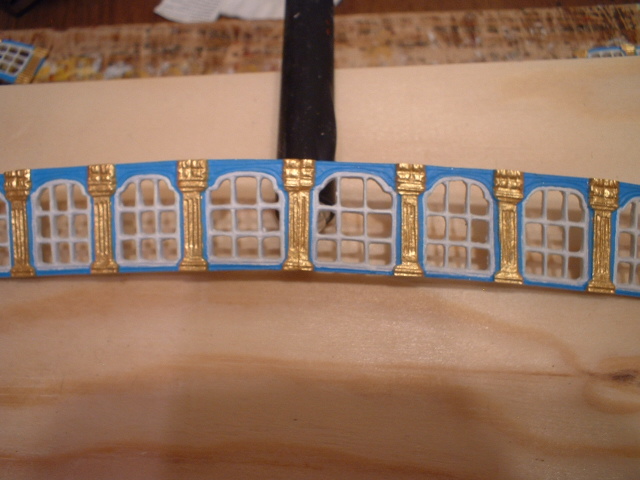
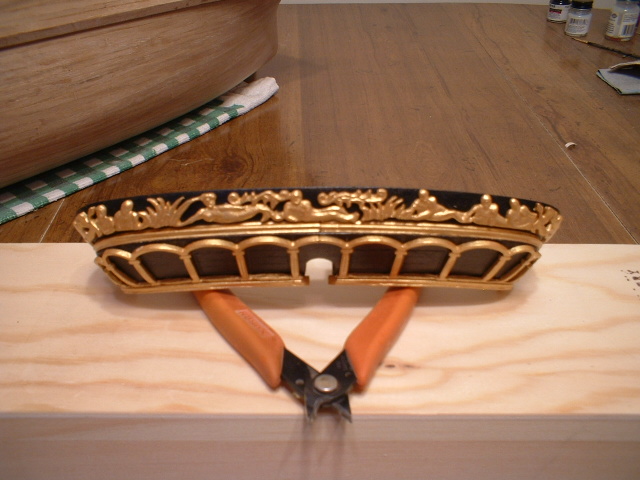
A little more progress to report. The lower windows are made up of 6 pieces. After drilling & filing out the window areas I CAREFULLY bent the pieces to fit. Then I painted the window frames white,the surrounding areas with Vallejo light sea blue,& the columns gold. After gluing them in place I think they look ok. I will use the liquid window maker to simulate the glass after all the glue is dry. The windows across the back slant outward pretty close to what the plans show. The joints between the windows fit good,so I didn`t need to use any filler - just a couple of paint spots to touch up.

Mark
-
-
-
Thanks Frank - the stern is so far the most difficult part to do.
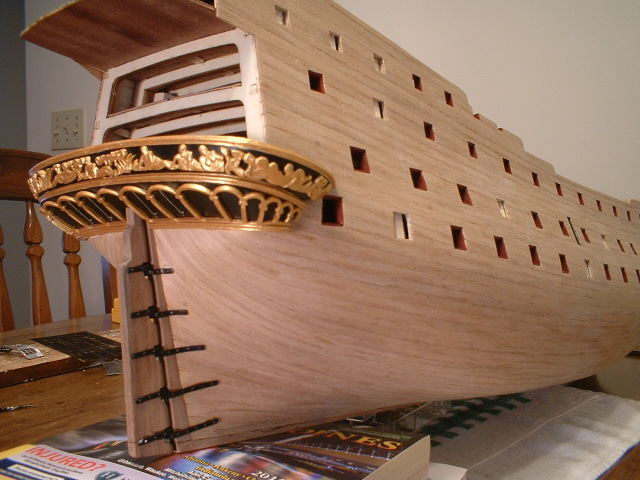
Hi Matt from another central Iowan. All the decorations are metal castings. They are somewhat soft so they can be bent to fit. All the windows are also metal castings. I am drilling & filing out the panes so I can use liquid window maker - looks much better than just painted. You can see an example in post #53. The paint is a Vallejo game color called polished gold - it`s the best gold paint I have found.
Mark
- Seventynet, MEPering and edmay
-
3
-
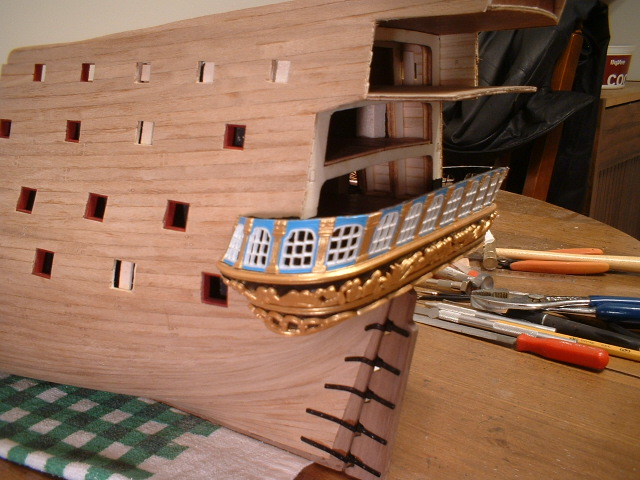
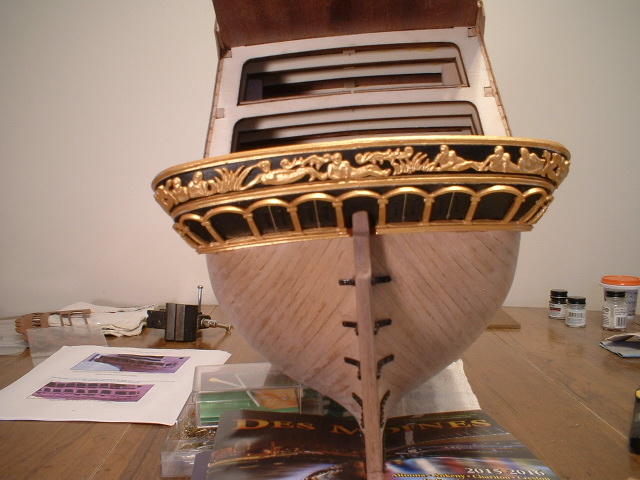
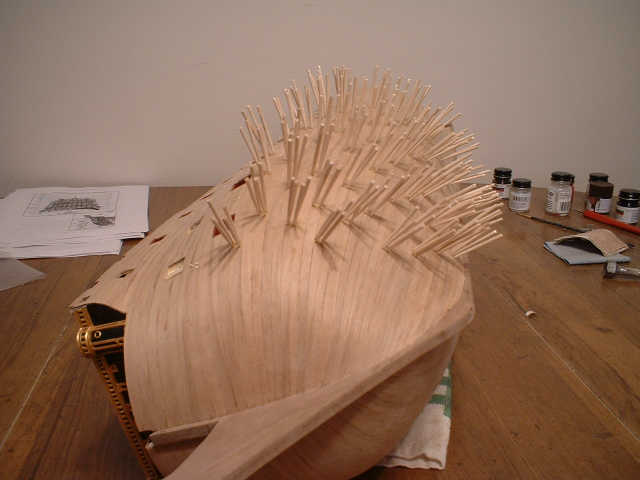
Hi all thanks for looking in. Progress has been slow due to outdoor activities but I did manage to get the transom support finished.Now on to the lower row of windows.
Mark
- Mirabell61, petervisser, janos and 13 others
-
16
-
-
Good move with the balsa filler. I used those 2by2 strips on mine & it looked awful.
Mark
- Ulises Victoria, mtaylor, Elijah and 1 other
-
4
-
-
-
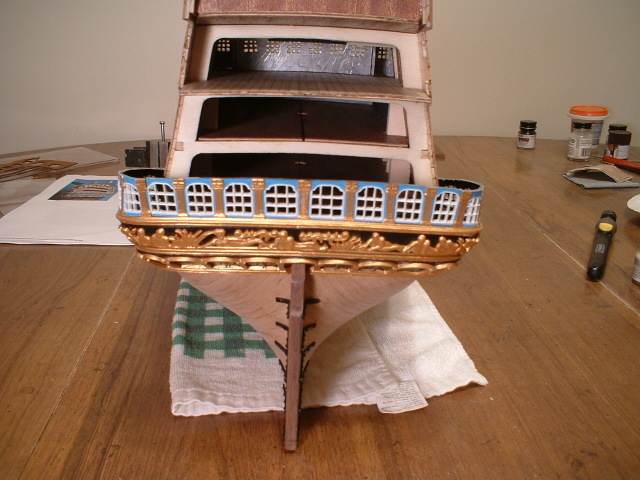
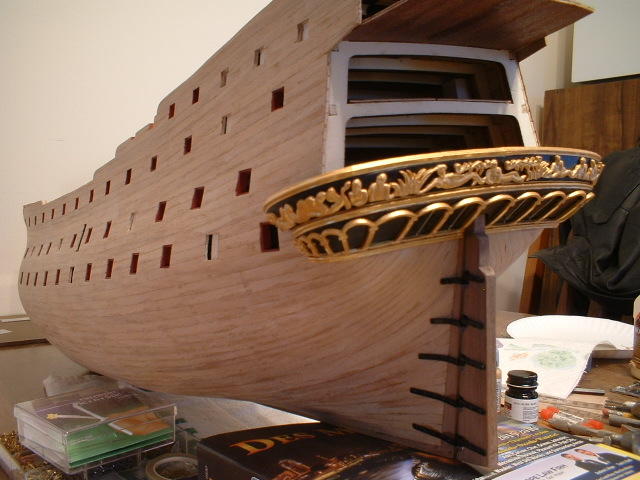
A little update - lower transom almost finished. I am waiting to see what Chuck at Syren is going to come up with for gun port hinges - the kit hinges are not very good. They seem to be a bit short for the bottom 2 rows of lids. In the mean time I am doing a little treenailing - not any particular pattern,mostly just at the plank ends. Some are actual ends,but most are just scribed on the planks. I didn`t make the lower part of the transom as concave as some others,but I think it looks ok.
Mark
-
I totally agree with you Keith,especially regarding gun port one above.
Mark
-
Thank you very much Scott.
Mark
-
-
I have built the Corel & Sergal versions. Corel`s is by far the worst - very poor cast figures,poorly shaped stern,etc.,etc. Sergal`s is quite large & better than Corel`s - all decorations are cast bronze,but many are not accurate although better than Corel`s. Both need a LOT of work to get even close to correct. For the price & accuracy it looks like the Billings kit is probably the best.
Mark
- mtaylor, coxswain, mtdoramike and 3 others
-
6
-
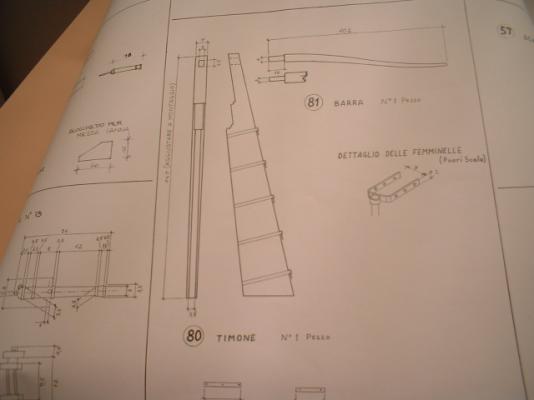
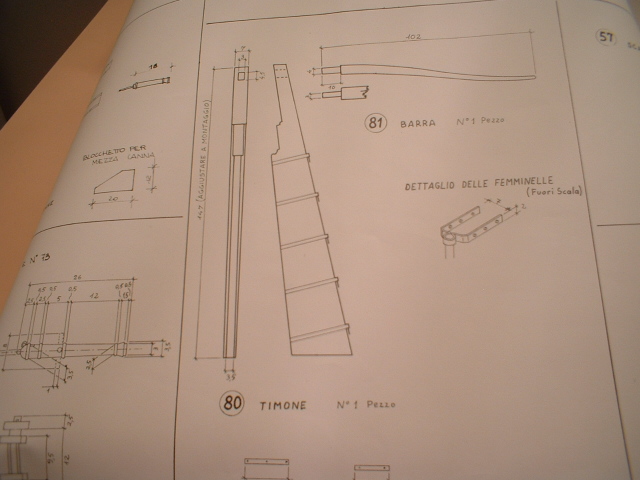
Scott - if I had added timber to the front edge the rudder would be too long. As it is now it matches the width & spacing shown on the plans.
Mark
-
That makes sense - thanks Pete. I see also that the plans show a taper on the rudder - from top to bottom & front to back. I did not taper mine due to all the hinges being the same width. It`s a minor detail that would not be noticed anyway.
Mark
-
Jason - thanks very much.
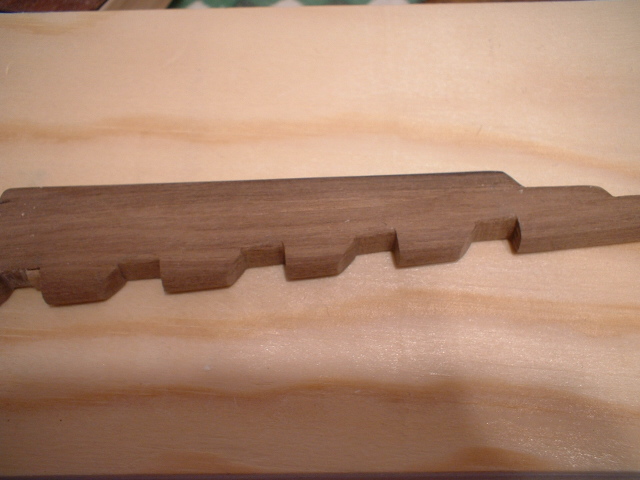
Keith - That`s right - the front edge was perfectly straight. If I had just glued the hinges on without filing out the insets there would have been about a 5mm gap between the rudder & the post. It could have been the way they made the rudder at the time mine was made. My plan sheet does not show the insets. The overall views on the plans show about a 1mm gap between the rudder & the post. The hinges would have to be awfully tiny to accomplish that with no insets
 .
.
Mark
-
Hi all - I thought I would take a little break from that nasty transom & work on the rudder. The laser cut rudder supplied in the kit has the front edge straight with no cut outs for the hinges - forgot to take picture
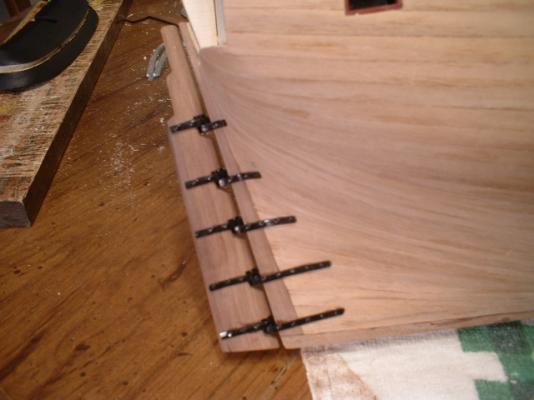
. The thickness of the hinges seemed to make the rudder sit too far away from the post,so I cut out the parts of the rudder where the hinges fasten to inset them. After bending the hinges to fit around the curves of the hull I painted them black & glued them all in place. I decided to go ahead & mount the rudder before installing the transom support - much easier. The rudder is glued in place,but if it were to turn the rounded front edge would keep it from binding against the post. Now back to the transom..........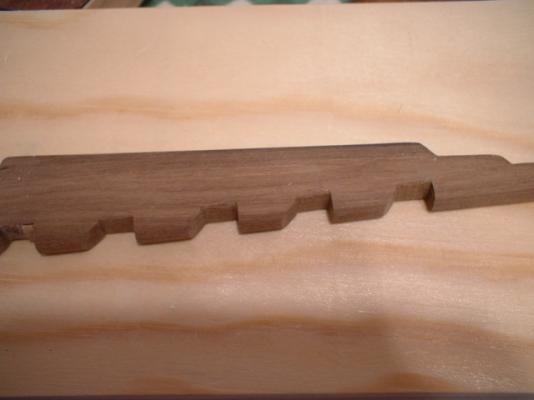
Mark
-
Keith - you are right about needing a few improvements. The gun port positions are very critical - just a little bit off & it throws everything off. Did you know that Chuck at Syren is working on photoetch hinges? Knowing him they will be very nice. A template that you could tape to the side of the ship to mark gun ports would be nice. I suppose you could cut up one of the plan sheets to do that,but the plans are in 2D,& probably would not be good to put on a 3D surface. Mantua provides gun port templates for some of their larger models,which is a big help.
Mark

Wasa by md1400cs - FINISHED - Corel - 1:75
in - Kit build logs for subjects built from 1501 - 1750
Posted
Michael - I figured that the railings would be a pain to do after rigging the shrouds - that`s why I did them beforehand. I was just really careful not to mess them up . You are doing a marvelous job - much more detailed than mine.
Mark