


NenadM
-
Posts
3,254 -
Joined
-
Last visited
Content Type
Profiles
Forums
Gallery
Events
Posts posted by NenadM
-
-
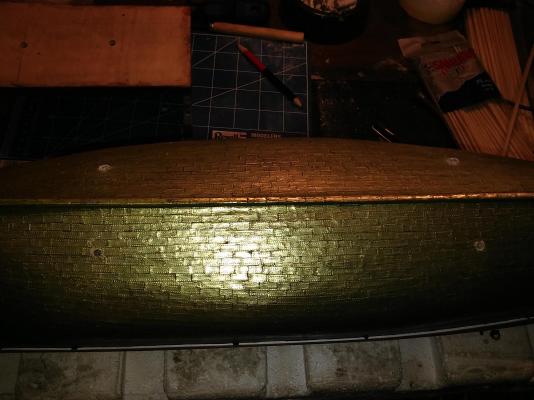
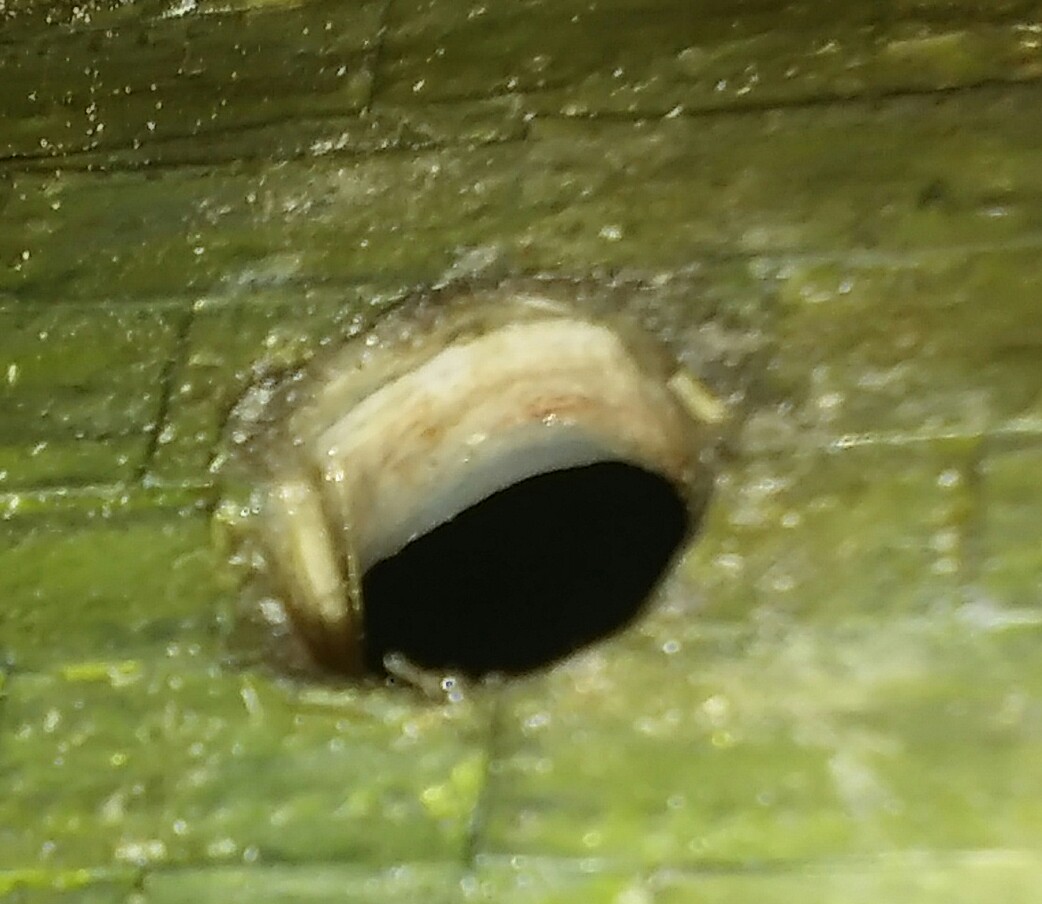
Here are me again. Couple of days I was pretty quiet, because I have got a little flue, and also there was not visible progress. Today I can proudly pronounce that my four "black holes" losed their "black" atributes, and have turned in regular holes, with bottom I can reach. Filling is slowly coming to end.
You will get it my friend. Cheers.
I know it Dave, but it needs a time for filling material to dry, and I have to work in thin layers, to avoid danger of leaking glue etc etc through deck planking. Her Majesty is turned upside down, I suppose - a last time in Her life time, and holes are opened to up during filling process. So, put one relative thin layer of material, and must wait for it to dry. And on that way, every day. about hour for four holes. The end is on horizon ...
I will re-post what I deleted yesterday. The only way I can see to put some meat inside the hull using your existing hole, is to form a thin-walled cup from some flexible rubber type of material. I would try making a form from what you have on hand in the shape of a flat bottomed cone. The idea is that you can insert the rubber cone inside the hull through the existing hull by rolling it up. When you get the cup inside the hull and opened up you will need a way to pull it firmly against the hull, I thought of using 4 o5 small wires placed around the bottom of the cup, long enough to pull the cup against the hull, then bending them over as an anchor, those wire would need to be part of the bundle inserted through the hole. will need adhesive around the lips of the cup to attach it to the inside hull. When the cups are securely in place, fill them with the material of your choice. The coned cups if sized right should provide for a surface contact with the inside of the hull at least 4 times the area of the drilled hole. Roll this around in your mind and put your own ideas into it, then test and do. I have no doubt you will solve your mounting hole problem, you are good at working through things like this.
jud

Helo Jud, I have readed your post before you deleted it. I used rolled paper sodden with glue cleated to bottom of hole, and covered with thin layer of BBQ strip pieces, with another thin coat of glue. Idea with wire is something valuable to think about. So, bunch of strips rise over time, and now it is only 1-2 cm under hole entrance, so final filling can start
Nenad
Thinking about your hull mounting I wonder if a small dowel with a hole through the middle and some hose or tube connected to it like this diagram then if you were to force some epoxy down the tube it would overflow inside and create a large washer like surround. similar to a wall mount in plasterboard.
Just an Idea.
Michael
I was thinking about epoxy, Michael, but I gave up, because I was afraid of leaking through the deck planking. Particularly, I can not find in near shops adequate epoxy. In Belgrade there are not shops like "Hobby-lobby" and another such a type I have read on MSW, there are only a few similar, but with poor choice of such a things, materials tools etc etc ( mainly plastic kits, acrylic, brushes, cheep Chinese scalpels etc etc). So I have to manage with things I have
or even better yet......how about fitting those holes with the same size dowel plugs........1/2 inch to 1 inch long should do it. cement them in place and then drill a center hole in all of them, about the size of your screws. then you'll have something for the screws to bite into when securing the stand.
you gotta figure that all the glue and stuff you've put into the hull, has added some ballast.........how much more does that hull weigh?
My idea is similar Denis : to fill hole with material to the top, when dry and harden, drill through a new hole for 4mm dowel, drill 1-1,5mm hole in dowel, glue dowel in new hole and align it to the surface of hull. And after that mount stand with screw or a new thin dowel, or wire. Just for remind, main problem is balsa 2x5mm strips used for hull planking
Hi Nenad,
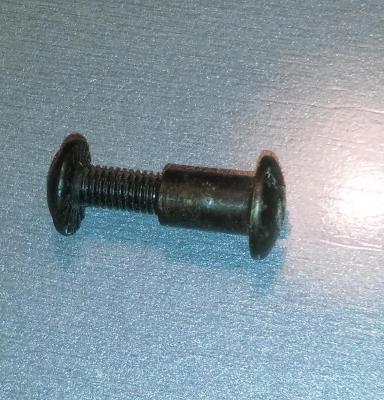
perhaps the hollow-room dowel for M3 screw may be useful for your purpose.....
replace the hook by a M3 screw
http://www.eibhandel.de/Schneider-1241009-Hohlraumduebel-DUO-MAX-X6mm-Hkn-M3-rot
Nils
Hello Nils. That was my first idea, and I made some testing with such a solution, but I was scarred of possibility that balsa strips can not withstand direct force. That was a reason I decided to reduce that direct force giving some "meat" to hold dowel and to distribute direct force from hole entrance to whole "meat" in which dowel will be embedded. Problem is in fact that I know with whom I am dealing with ... un patience, and awkward Nenad, and I just have to make something strong enough to keep me and my work from - me
So, another booooring period is coming to end, and I hope soon to continue with deck stuff challenges
-
-
-
What type of chain you use ?
-
Dowel is main idea. I am fighting now to make some "meat" for dowel inside large space under holes. It is necessary because I used balsa planking (?!?!)/Considering possible angle of holes in stand, simple one dowel can not be mounted, so here will be kind a "dowel for dowel" or "dowel in dowel"
- Piet, SawdustDave, GLakie and 2 others
-
 5
5
-
-
-
Briliant work, Jens !!!
- popeye the sailor and Elijah
-
2
-
looking very nice Jens.........the Dolphin striker looks super. really great pictures
 I have the Sergal Thermopylae.....can't wait to start it
So do I, Denis
- Elijah, popeye the sailor and omarcs
-
3
-
-
Hi Nenad
I share your pain. Perhaps in retrospect, maybe a resin would've been better?
Cheers
Patrick
Resin ... hmm ... there could be something ...
Are you trying to fill the hull with glue, Nenad? I'm not sure how much glue you've pumped in there so it could be too much is trying to dry/cure.
Not only with glue, Mark. Pieces of BBQ strips with a drops of glue over just to slip through and connect them to each other
Hi Nenad,
Probably best to be careful with the glue type.
Is a large percentage of the filling glue? How much does it shrink when it dries?
As Patrick said above, perhaps resin would be better.
It doesn't shrink much and does not need evaporation to harden.
If the hull is to a large percentage filled with water based glue (the rest being wood, leaving no air), it will dry very slowly, and shrink as it does.
If air cannot come in to replace the lost volume, the hull might come under strong (imploding) stress!
Might deform the planking inwards, perhaps not straight away, but if the glue takes a very long time to dry, perhaps in a year or more.
Please be careful.
/Peter
Hi Peter. Caution reasons lead me to do make first layer of glue/BBQ pieces very thin ( I was afraid that glue can find a little hole inside and to enter to deck. Fortunately, this did not happened) . Idea was to use this first layer to impregnate lower inside surface of deck). Actually, I think there is no danger here for planking, because my deck has three layers ( plywood, first planking, and re-planking layer) covered with matt acrylic varnish. And the fact is that Nenad did not think about chemistry issues how glues work ... need some air ...
For now, I am thinking about first move in this situation - to be to careful and to put inside holes some hot air from hairdryer ... or to put inside very thin layer of alabaster dust to pick up excess of moisture from glue
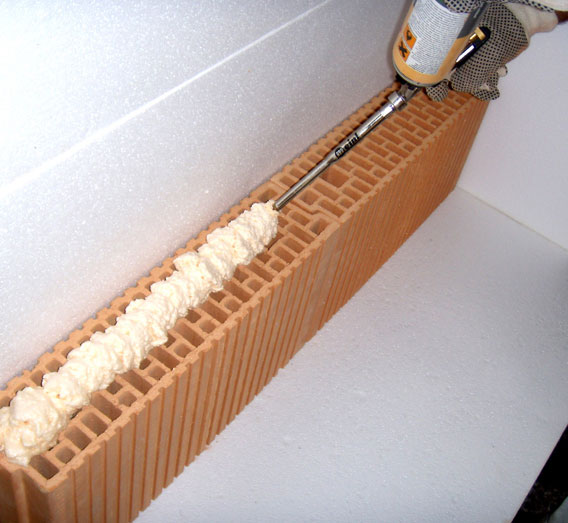
Or maybe foam ...

But ... it also need air ...
Here are we ... in a swamp again ... and I like challenges .... very much ...( lying)
- CaptainSteve, mtaylor, Piet and 3 others
-
6
-
-
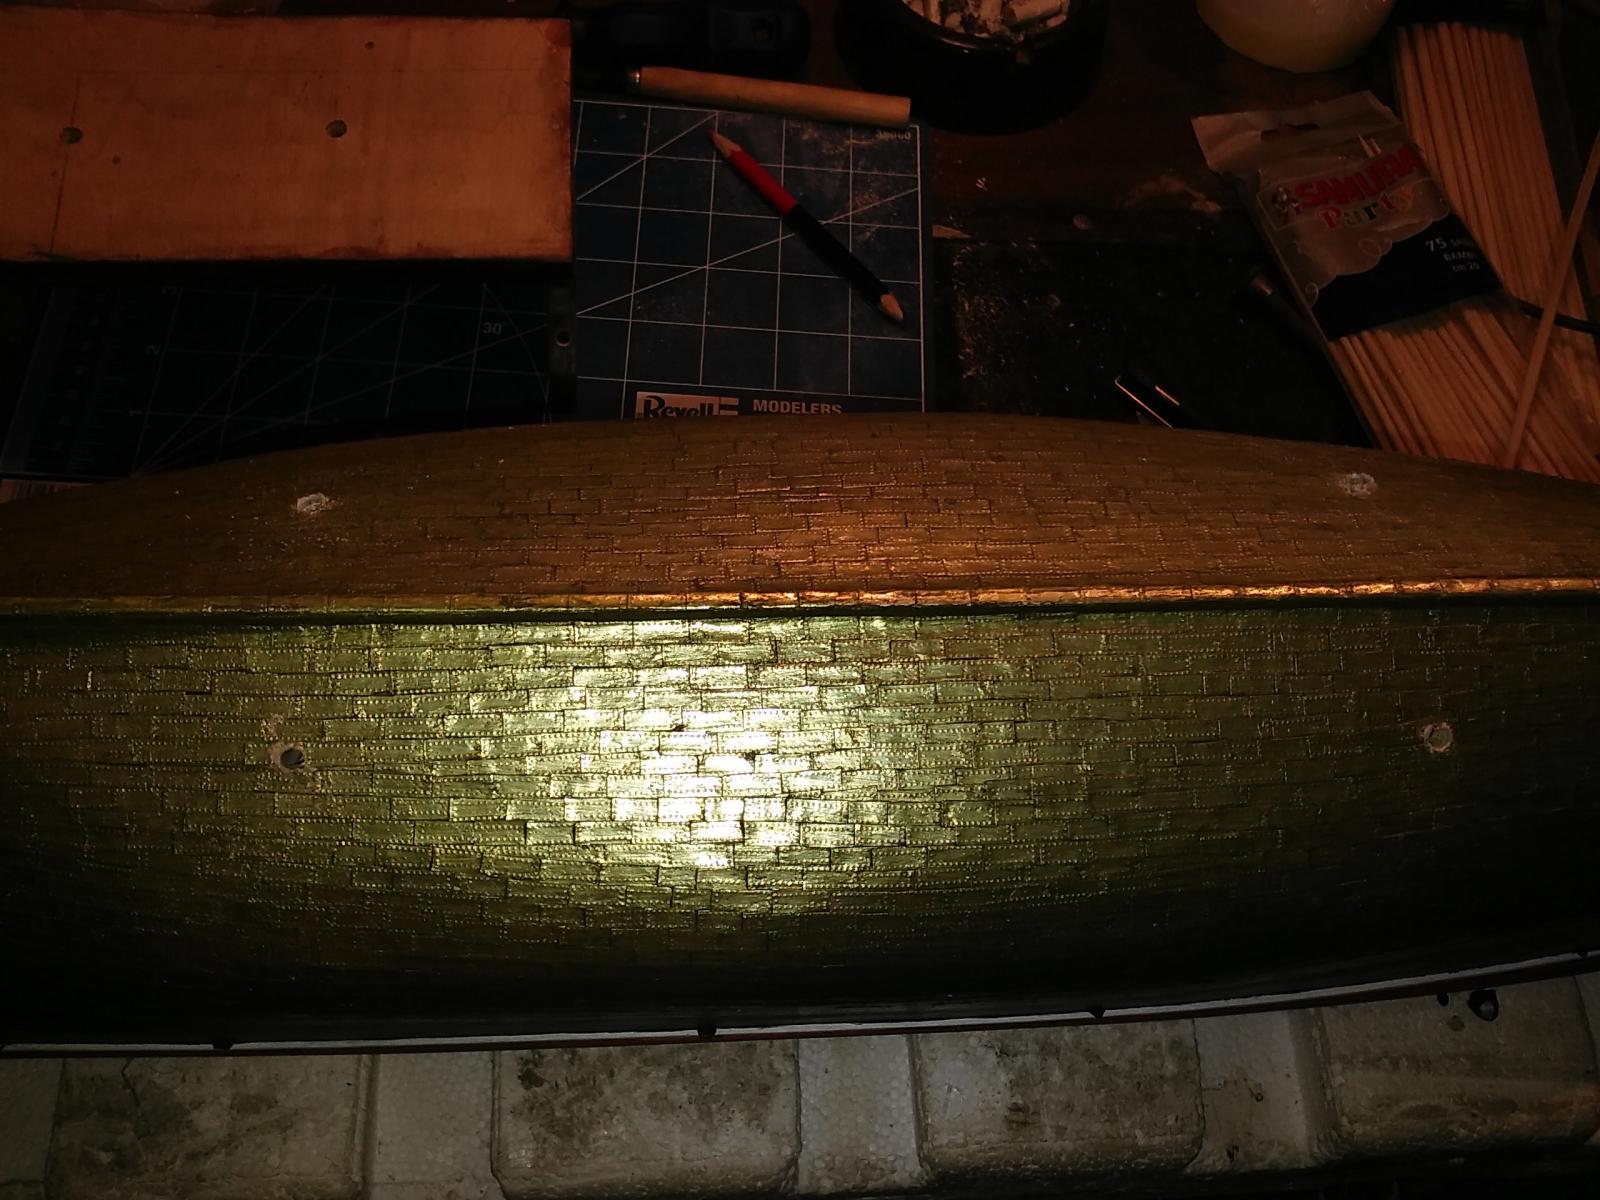
Feel the taste of white glue!
Filling process started. Layer of pieces of BBQ strips, layer of white glue, next hole, repeat, next hole ....
Deep holes, as black holes, swallow everything I put inside, so testing piece which I use to spread pieces and check progress did not show anything going forward
Patience, Nenad, patience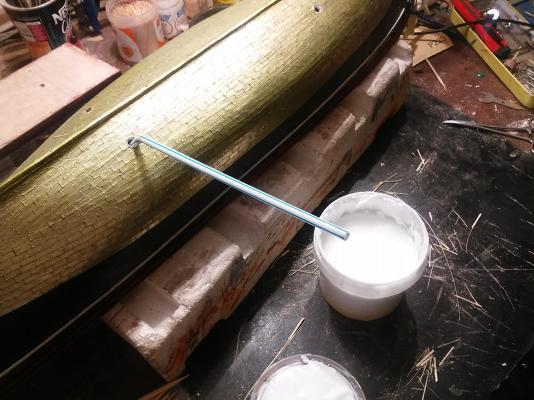
-
And real fun begins! Good luck!
- popeye the sailor and Elijah
-
2
-
Hull drilling starts. Wish me luck
-
Forward ...
Princess recovered and go to down-town, and I steal some time from office for myself
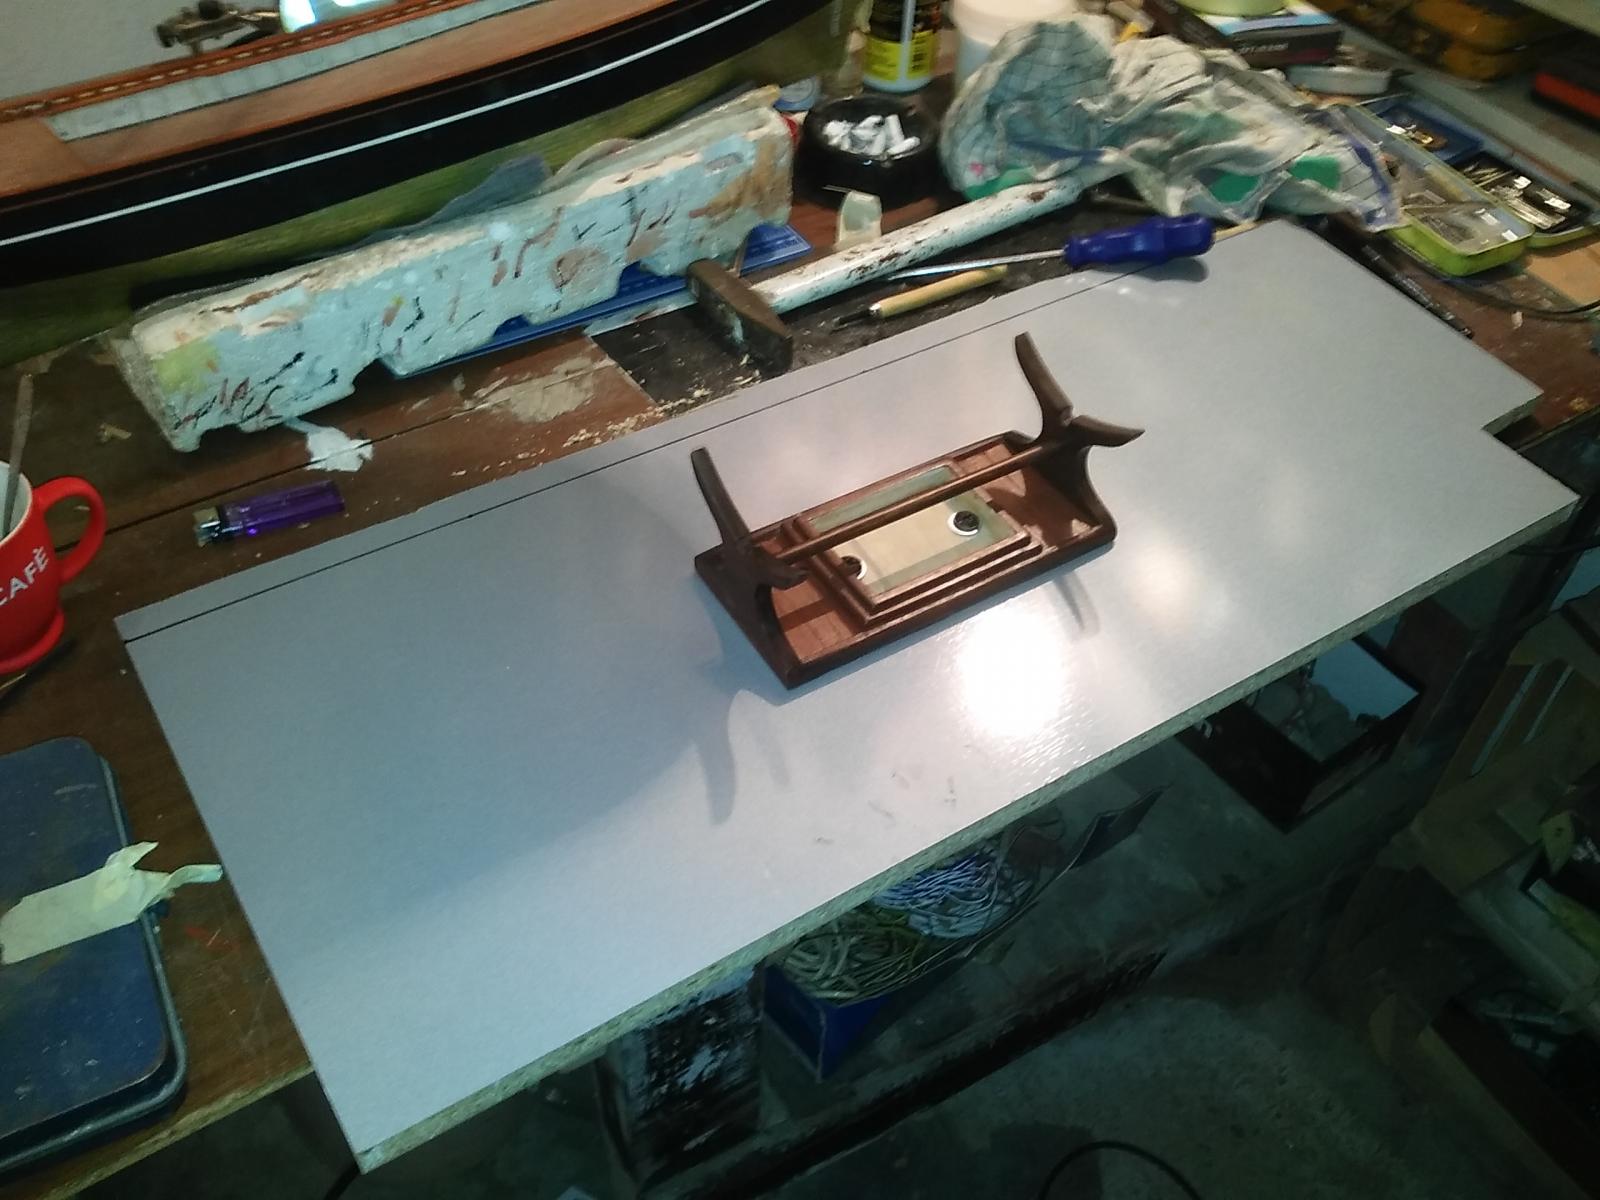
First I take out Hotheads bike under stairs in garage from it`s winter house, to get approach to old pieces of plywood which remains from my furniture carpenter works, to find adequate piece for temporary stand .. this beast has 175 kg ... Dust, dust, dust ... I must clean that space ... one day ...
I have a habit to cannibalize and keep every piece of shackle from old furniture, and have found in my man cave a piece just what I needed to realize my idea
Drilling a hole in a throne ...

and mount throne on temporary stand
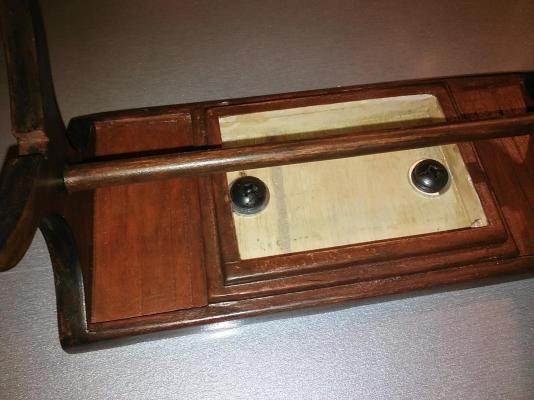

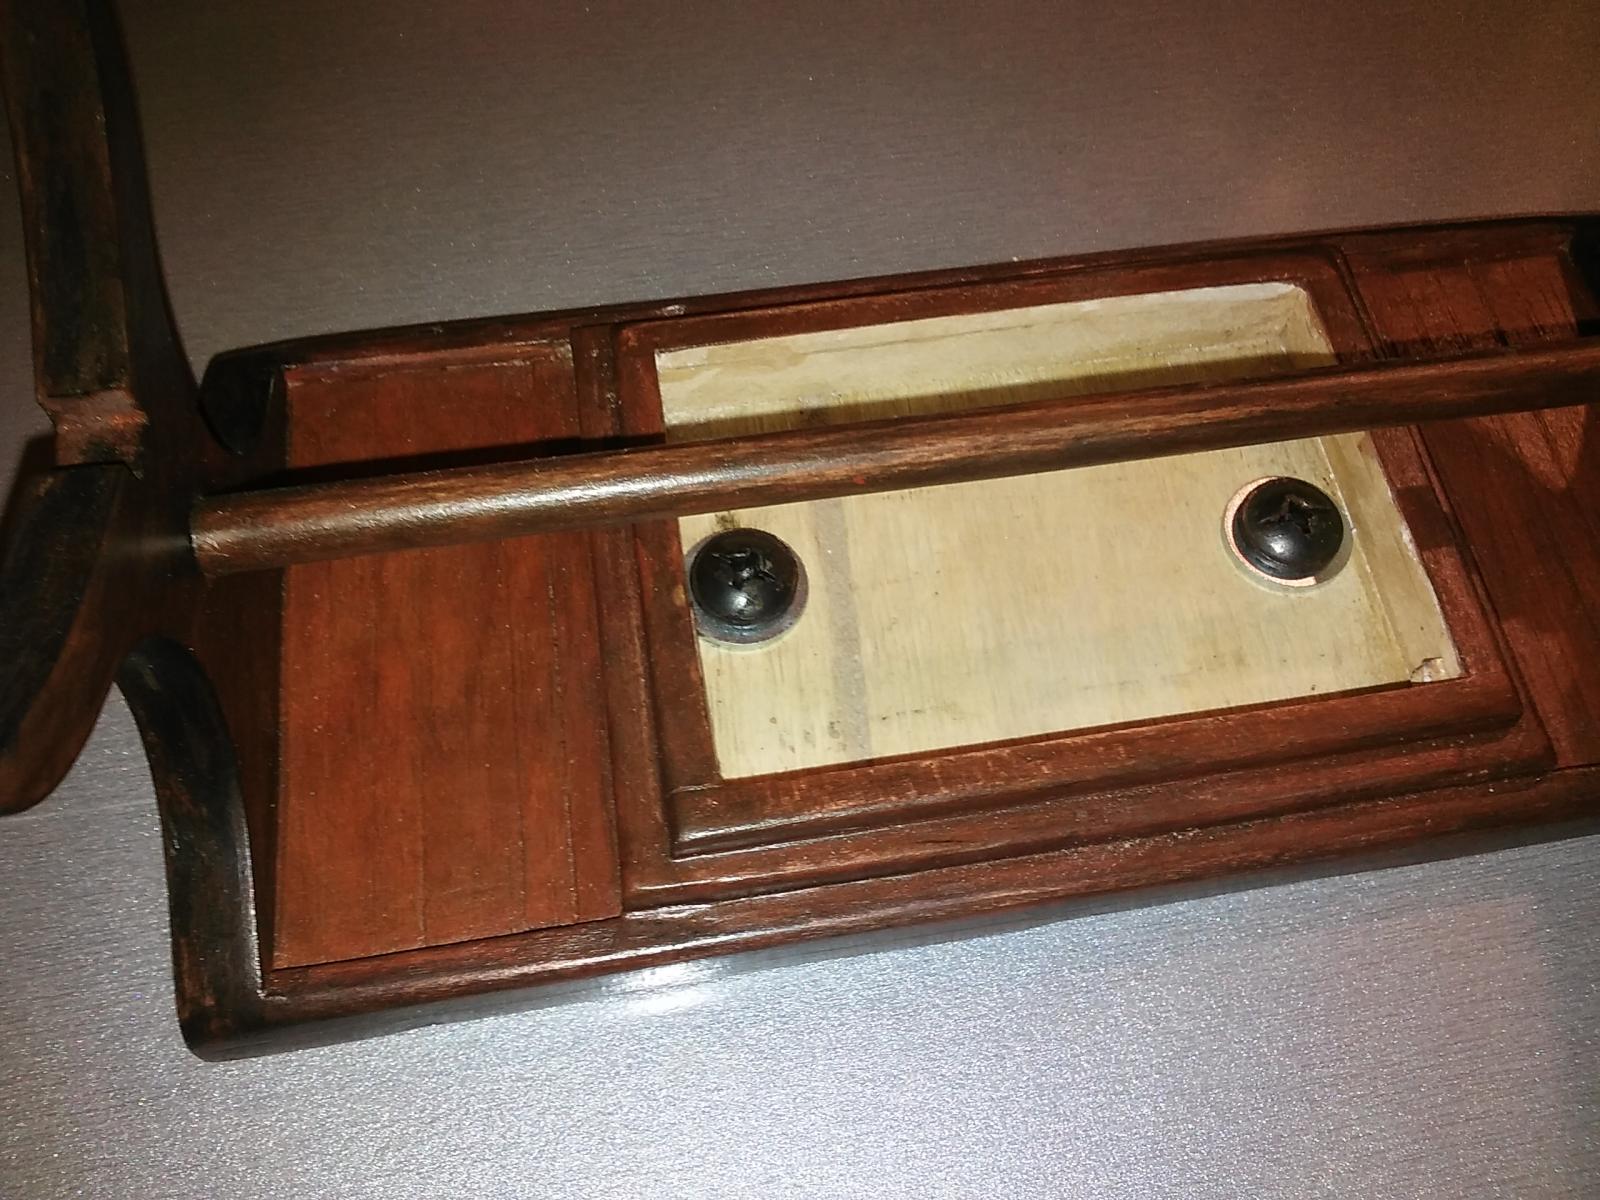
At this stage, my idea with a "box" in stand becomes clear. Box fuse will hide screws, and at the same time, I shall be able one day to remove throne from temporary stand, and to mount it on final place without any damage. Connection is very firm
After that, I continued with drilling holes in upper arms of throne, to use that holes for marking place where to drill in hull
Two ideas arises here
one - to use screw
another - to use BBQ bamboo
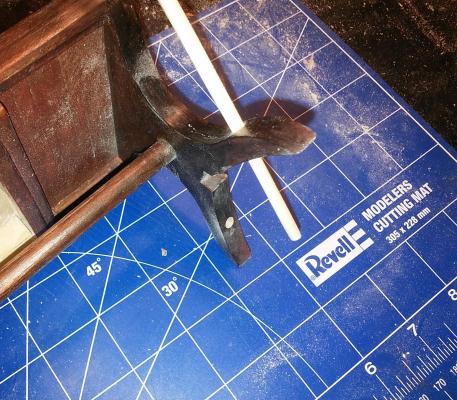
Something to think about during filling hull spaces
If I use bamboo, connection will be a bit more elastic, and I can level outer surface of arm to zero, and paint it a bit just not to be visible. This kind of connection is a bit weaker, which can be better. Or not
If I use screw, I must wide inlet to hide head of screw, which could get a bit weak arm, But connection will be stronger. and less elastic. Or not
Hmmm
Always there is something to think about
-
Thank you for nice words to everybody
Proud to announce that "scientific" experiment is a success ! Nothing moves, every single plank (and a pipe
 of course ) is on it`s place
So, Nenad , found some courage, and bravely start drilling real holes in hull !!!

- Piet, CaptainSteve, Omega1234 and 5 others
-
8
-
-
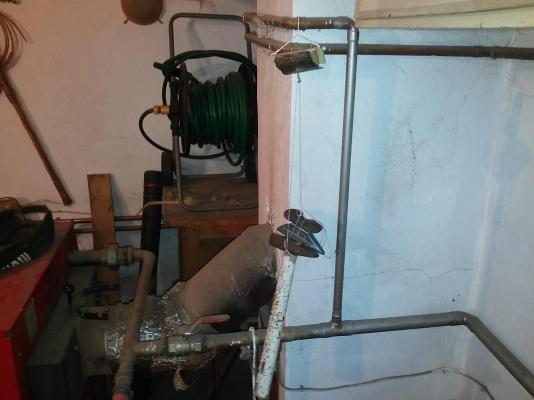
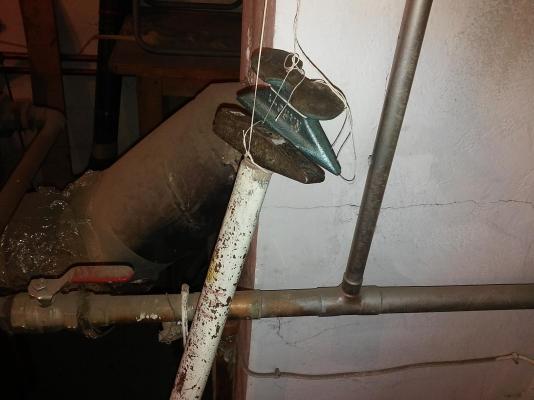
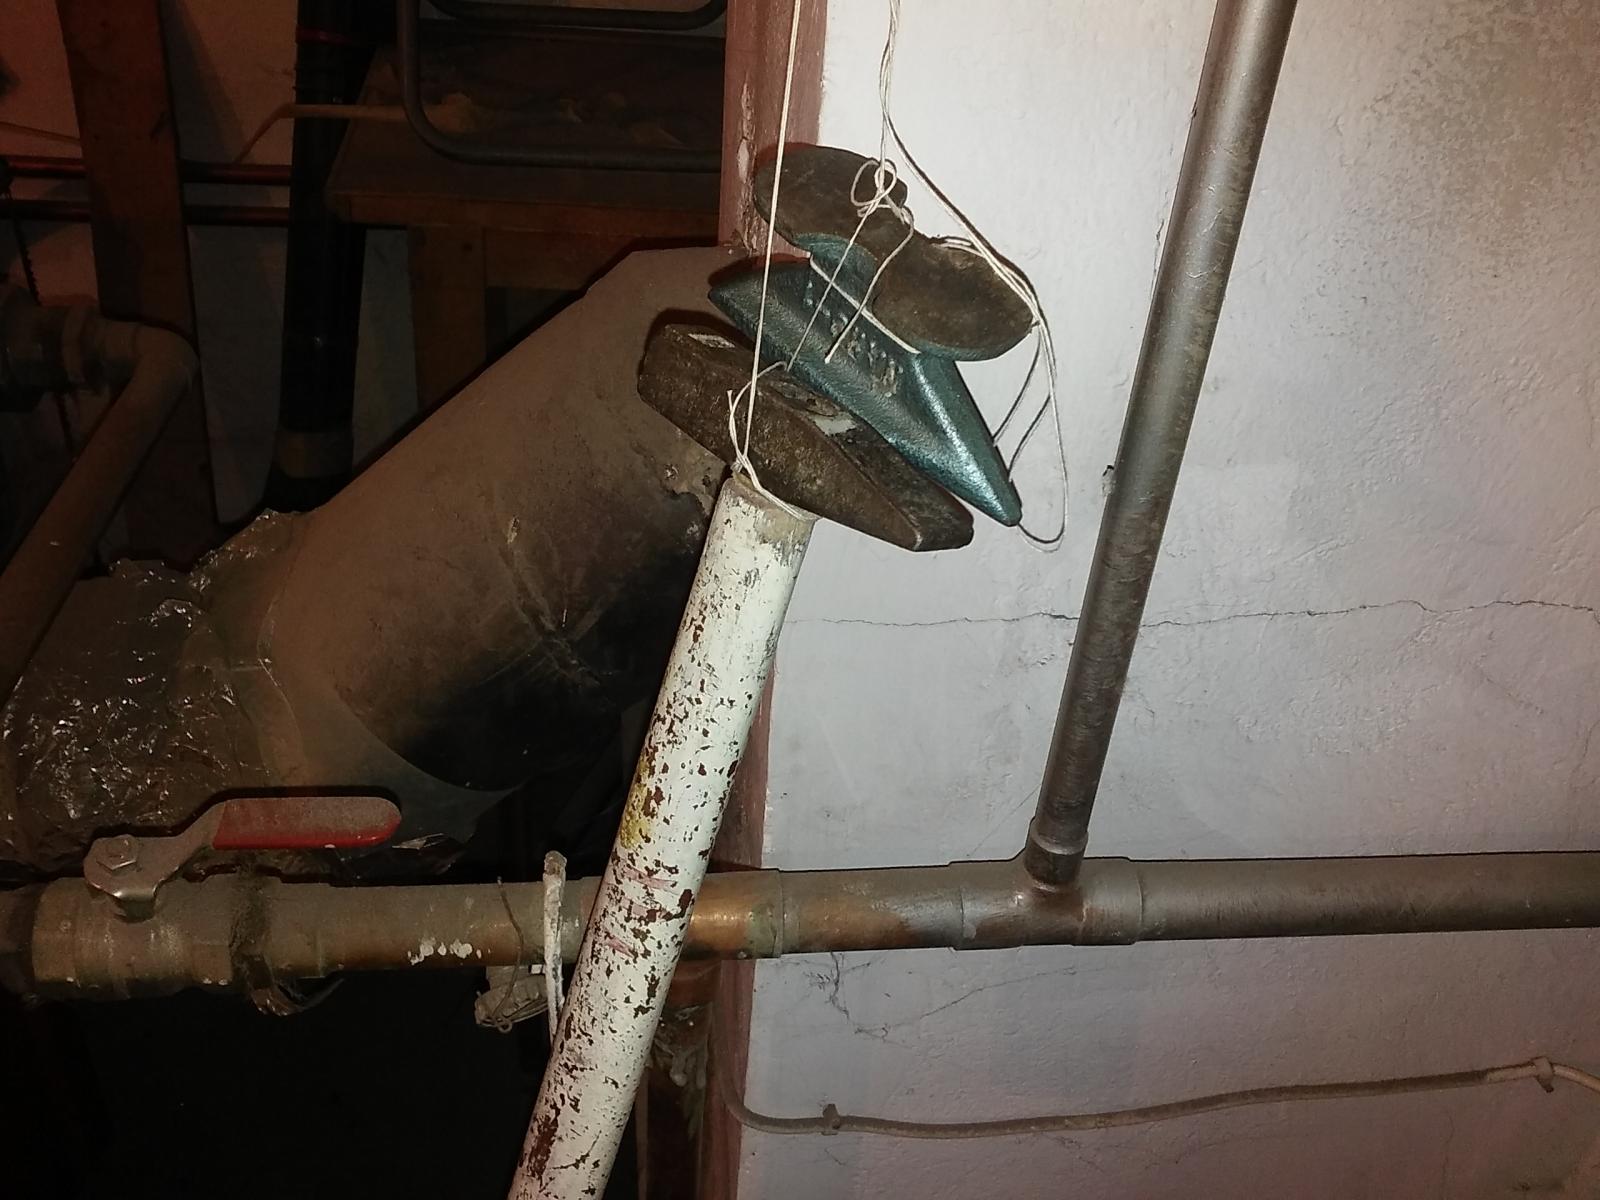
Final testing ... A bit overloading ... If it holds tonight, no more testing needed
- popeye the sailor, mtaylor, GLakie and 6 others
-
9
-
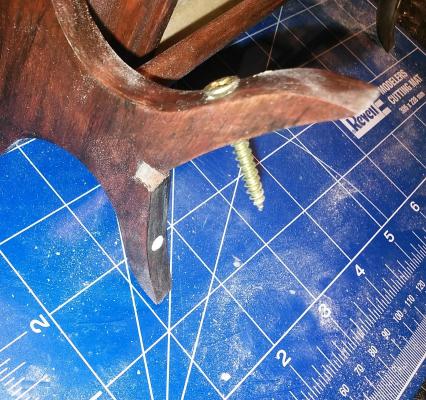
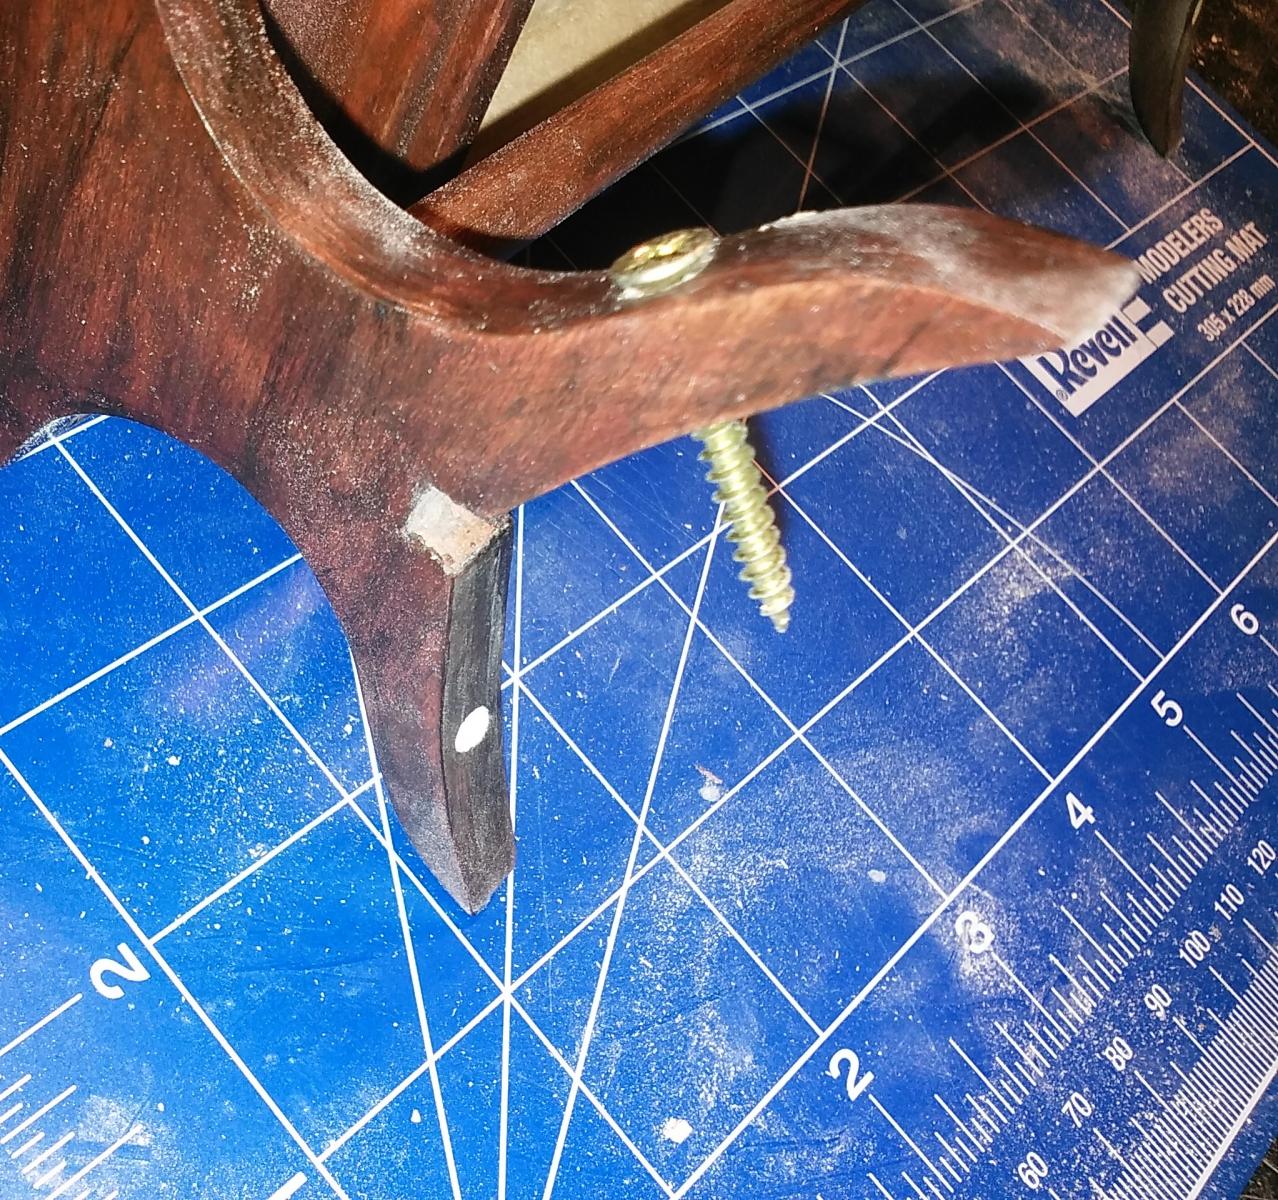
Hole ~4mm drilled and filled with white glue, then testing anchor ~4mm made from rounded molding turned in hole
When glue started to dry, testing screw get in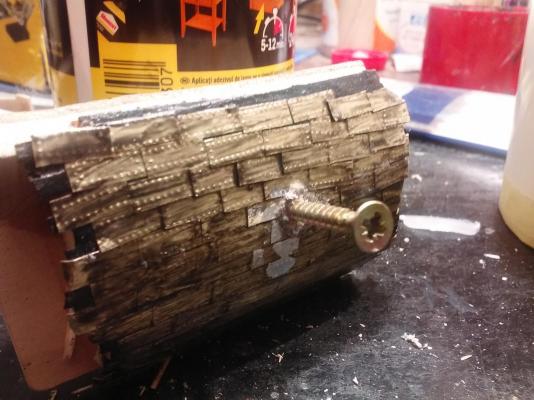
Have to wait until tomorrow for glue to dry , and to apply final weight and force test over night
Testing shows that anchor must have larger dia (~5mm), and that whole structure get more stronger
Yes, Piet, it seems that this will work. Send my regards to your dentist
In mean time, I discovered that SOMEBODY get my precise measuring tool and sent it to hell ... Enough work for today, I'm going upstears to nurse ill Princess. Nothing serious, stomach flue, but Ill doctor? Strange... -
Nenad your stand is perfect. I always like to see people put their own ideas and spins on a project. Great job.
Greg H.
Hello Greg and well come. There is a hidden idea inside which will be exposed later
Hi Nenad
Sorry to hear that last week was hell. All the best for your mother in law's health.
Cheers
Patrick
Thanks Patrick. I knew that this epilogue will come, only do not know when
I'm sorry to hear about her also, Nenad. I'm glad for you this "hell week" is over. I hope there won't be another for a long time to come.
Thanks Mark, I hope too
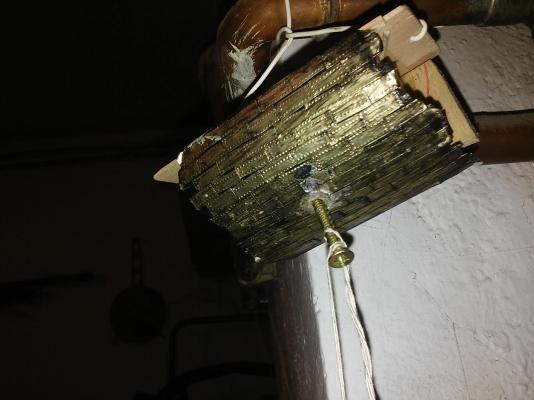
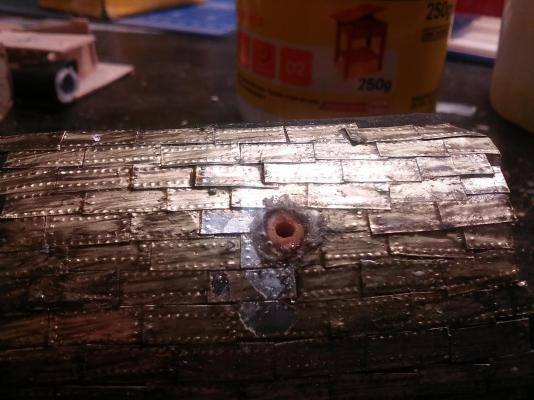
And here is main idea
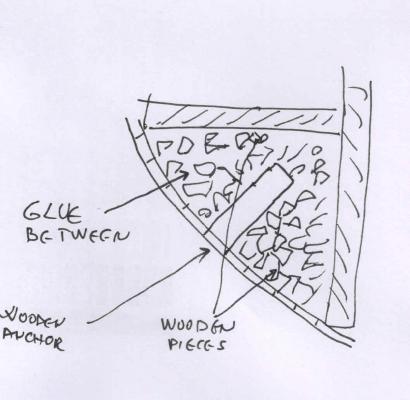
Idea is to spread and wide force from point where a screw go through planks to a rib and hull
Wooden pieces are of bamboo and linden (? - toothpicks), and white glue keep them very strong ( large size of glued surface with many small pieces)
-
The Old lady has got stomach pains, and her energy reduced by 20%, which causes need for continuous care. So She is in local old man care and health center from yesterday, where she has 24/7 care by nurses and doctors. Center is 600m from my house which makes things a bit easier. Hell week passed. It helps a lot She has positive attitude to that solution all Her life. Princes and My work starting suffer, and this was necessary solution
After detail cleaning of house (cca 200m2), and after doing periodical cleaning service of home heating system, which can not be done with ill and old person in home, I found some time to continue with experimenting ... Everybody who lives in house sometimes faced with some "filling a big hole" issue, and applied different technique for it ... In my life I did it many times, on walls, furniture repairing etc etc, so I started with filling my "fake space between ribs" I have made earlier, with pieces of toothpick and BBQ nails, covered with white glue. Idea is, when this harden, to drill 3-5 mm hole through, and to put in and glue rounded molding of hard wood. On that way forces on connecting point will spread from soft wood on planks. Drawing and photos tomorrow, so tired now- CaptainSteve, GLakie, Jack12477 and 4 others
-
7
-
Very nice, very real!
- Elijah and popeye the sailor
-
2
-


Cutty Sark by NenadM
in - Build logs for subjects built 1851 - 1900
Posted
I added extra ballast earlier, my friend, so I think whole thing now has a little less than 1 kg