NenadM
-
Posts
3,254 -
Joined
-
Last visited
Content Type
Profiles
Forums
Gallery
Events
Everything posted by NenadM
-

Cutty Sark by NenadM
NenadM replied to NenadM's topic in - Build logs for subjects built 1851 - 1900
Thanks Denis. I must figure out something. Our vac is too strong one ("Rainbow") and I am afraid to use it ( it will soak whole model at all), but ... wait ... it has opportunity to push air out !!!! Fortunately sails are not set !! Izzy I can not help you with ants, I have fight with them in my attic and roof mouldings ...but I can speak with little dwarfs working with me, living under main deck ... but be carefull with them ... they like to drink beer when work and have a bear as a pet, sometimes let bear play with model and make mess for me .. they work in darkness usually when I am sleeping, and I will send them a note. I am old fashioned, and don't use nano-bots. Maybe better solution? Bots do not drink and do not have pets- 4,152 replies
-
- 6
-

-
- cutty sark
- tehnodidakta
- (and 1 more)
-
Cutty Sark by NenadM
NenadM replied to NenadM's topic in - Build logs for subjects built 1851 - 1900
You, boys (and girls ?) are really ... something special ... your support turn me on to try to do my best, and to learn a lot Thank you very much !!! On the way to mount windlass after some fine trimming of windlass ... Lesson learned: I hurry with glueing cages on place ... now they are full of dust ... turn on your brain, even occasionaly, Nenad !!! You realy like extra work?
- 4,152 replies
-
- 8
-
-
- cutty sark
- tehnodidakta
- (and 1 more)
-
Isn't She beauty? Very nice work
-
I am amazed by details you put on Her ... what a complex structure .. What a beautifull build
- 956 replies
-
- 2
-
-
- andrea gail
- trawler
- (and 1 more)
-
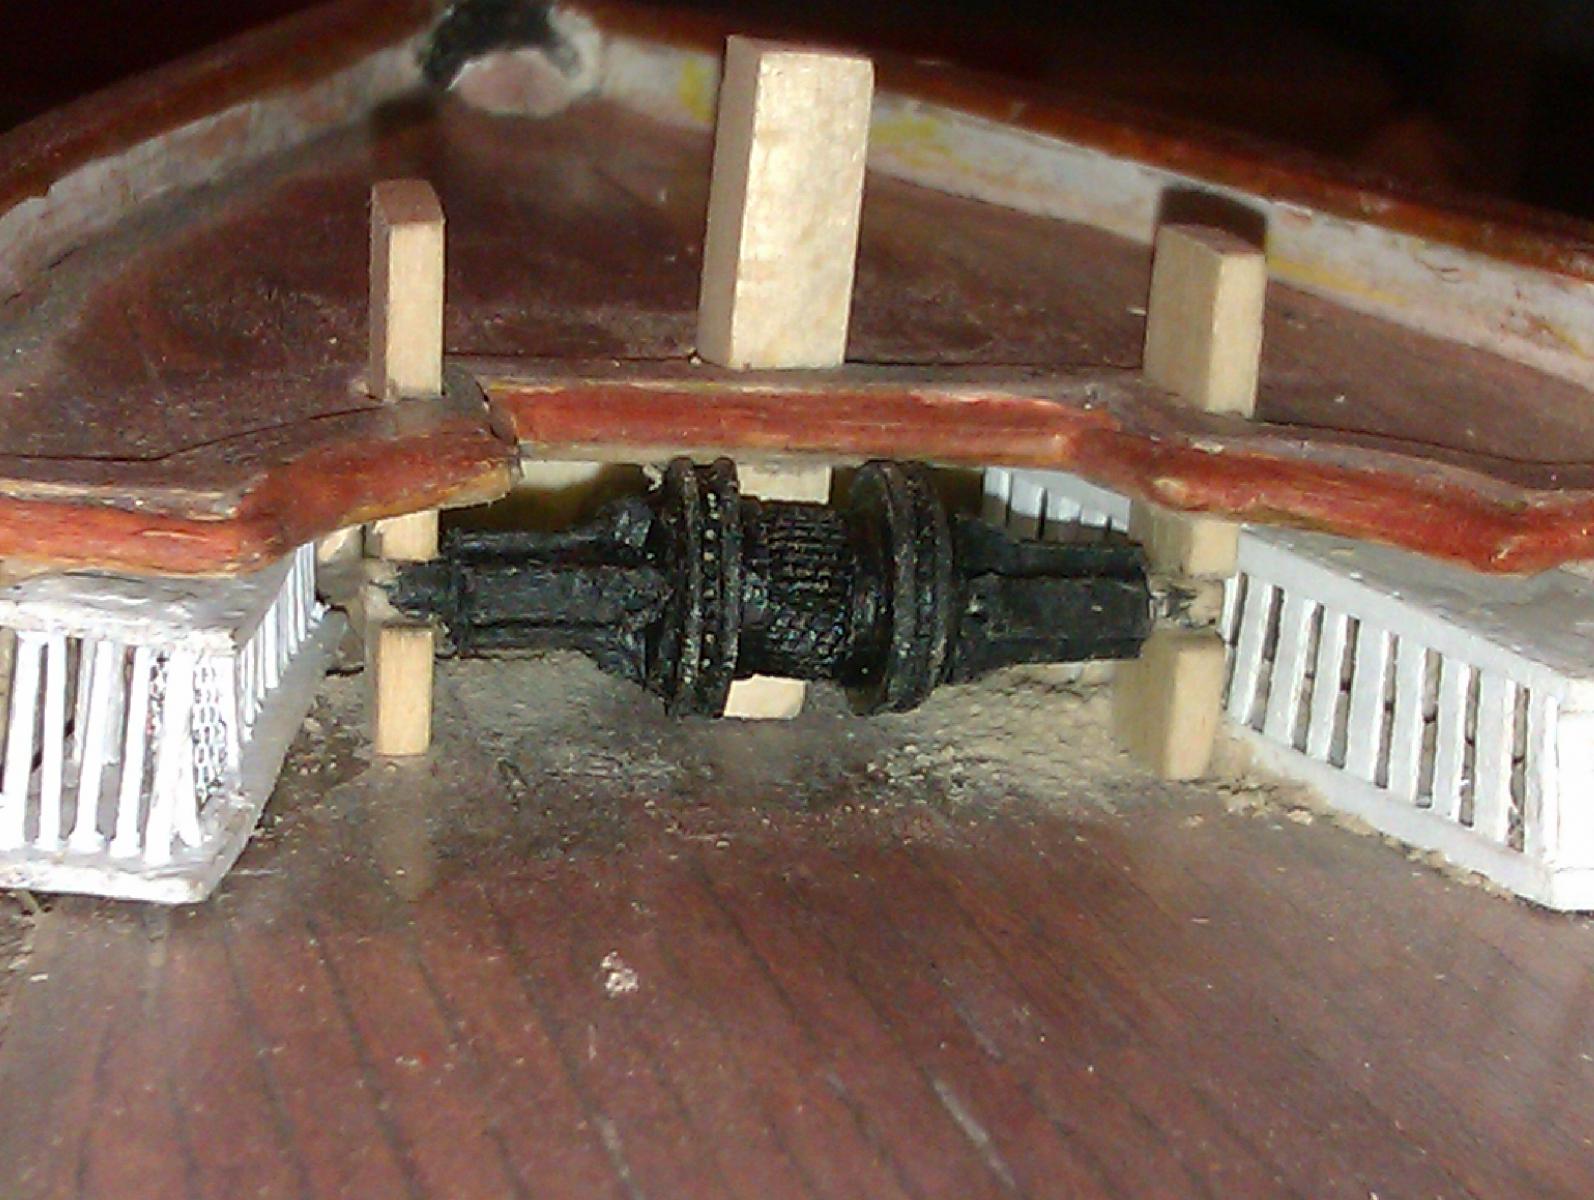
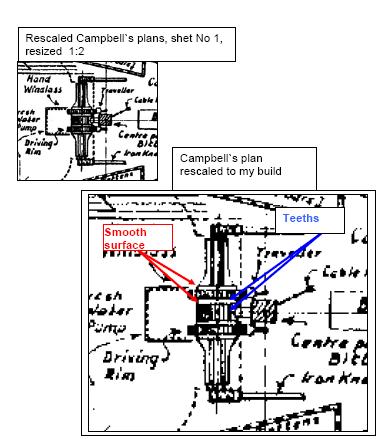
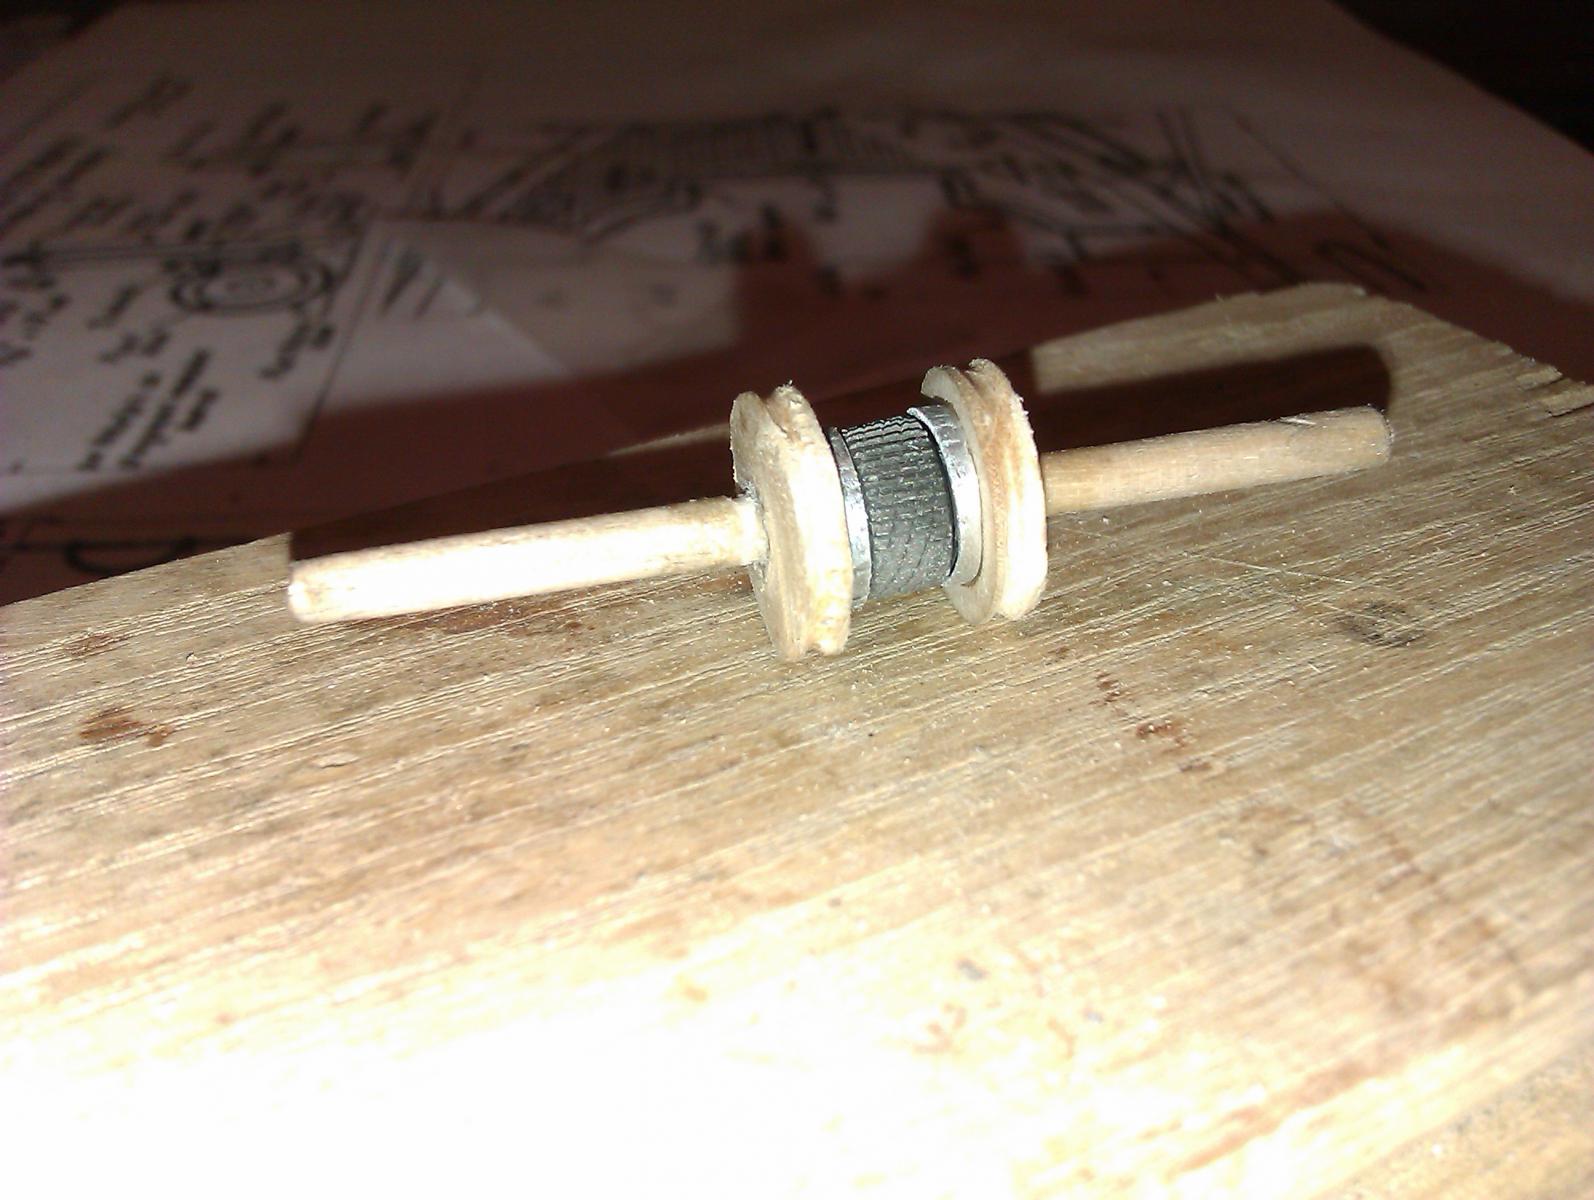
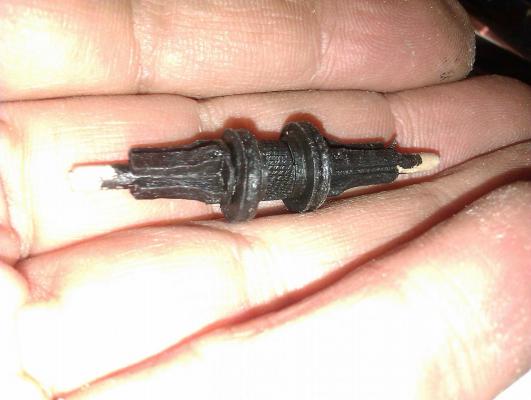
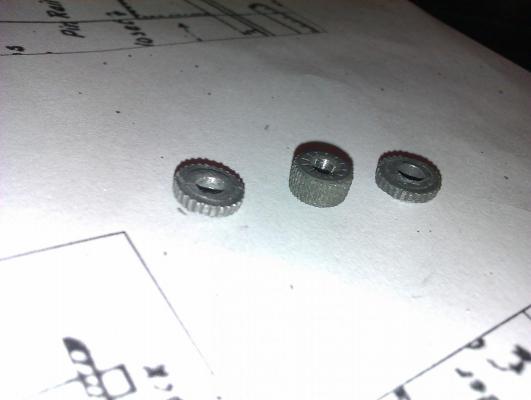
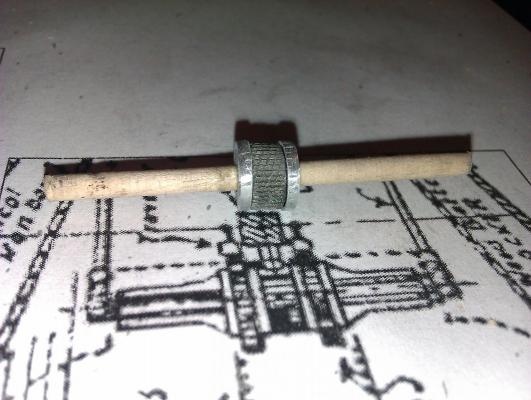
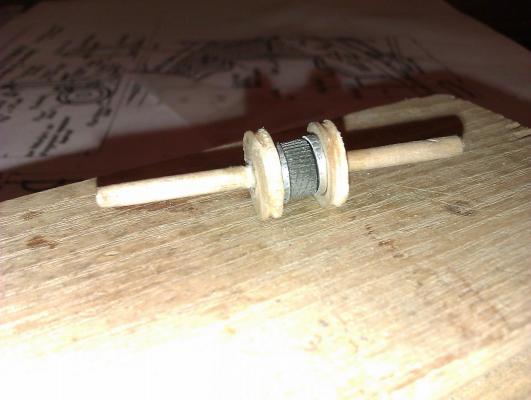
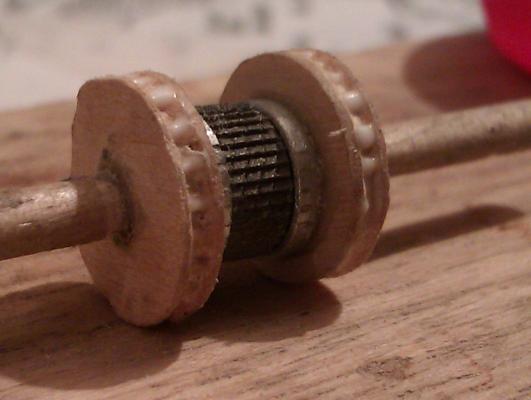
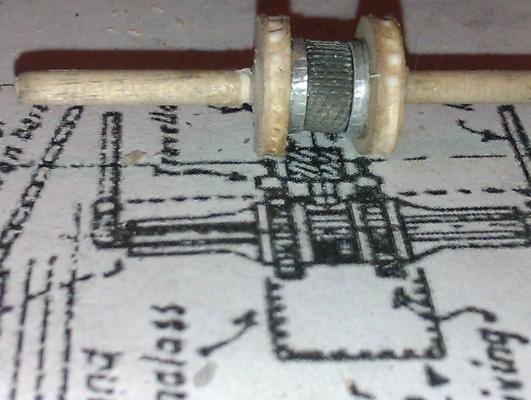
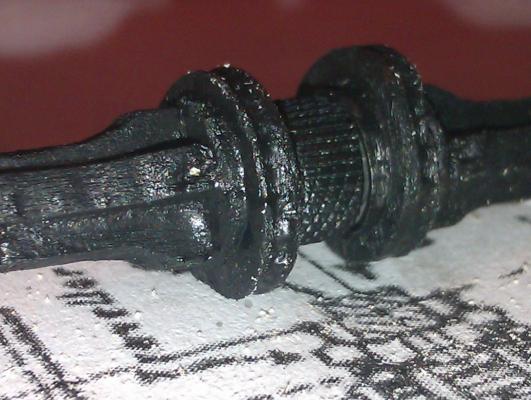
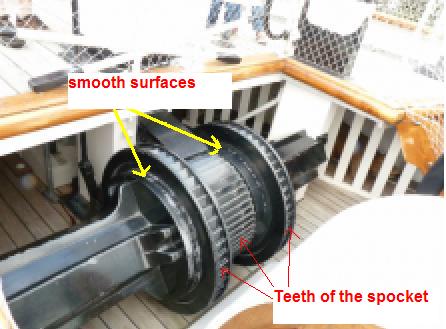
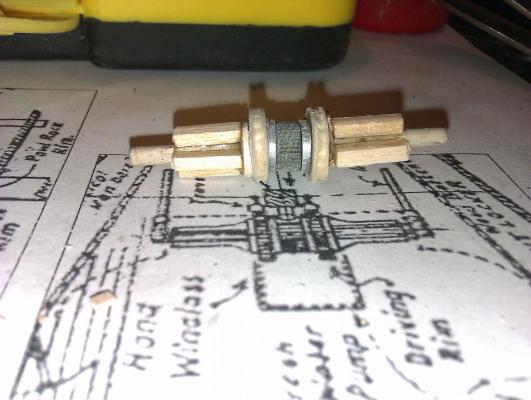
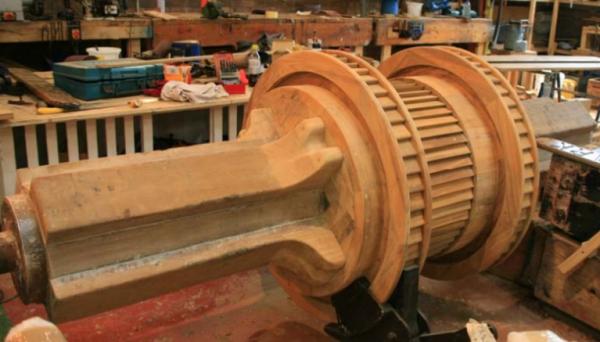
STIKER WHEEL FROM A LIGHTER Working on my Cutty Sark, I reached to windlass, and faced with couple of problems first - complex structure, only 2,8 cm long second - I deadly want to show teeth on spockets third - my skills are limited to make teeth by my own fourth - material I have, or, do not have, and impatience to order something from internet and to wait So, what to do ? Here is goal You can see there 3 surfaces with teeth, and 4 surfaces which are smoth Campbell`s plans are accurate, and here is how it is shown on plans Watching around me, considering I am insane smoker, and that there is always a couple of lighters around me, I noticed that stiker wheel of lighter has almost same structure as central piece of windlass So, let`s try First, canibalize lighter ( phrase stollen from M.Taylor) Drilling hole for future axle, parts get apart, and after that it is easy to move forward with tearing off teeth from wider parts, and thinning them to scale On axle, cemented with CA. Axle is made of famous, almighty BBQ toothpicks Next "layer" made of wood, with little circle trench arround for teeth Attempt to make teeths with dots of glue ( have to be corrected this days, I was so inpatient to finish ) at the same way I made little rivets on CS Checking scale Next soft layer of wood, and preparing for second stage After coloring with black acrylic I think it will work well, considering how little this is, and also windlass is a half-hidden under fore deck and a bit covered visually by entrance to tween deck After little triming


- 396 replies
-
- 16
-
-
- Idea
- Bright Idea
- (and 1 more)
-
Poopcorns... where are poopcorns? I wanna sit near poopcorns and watch Good luck sailor ... ups ... Captain with your build ... wish you succesfull bashing ... with/without hairy cooconuts
-
Cutty Sark by NenadM
NenadM replied to NenadM's topic in - Build logs for subjects built 1851 - 1900
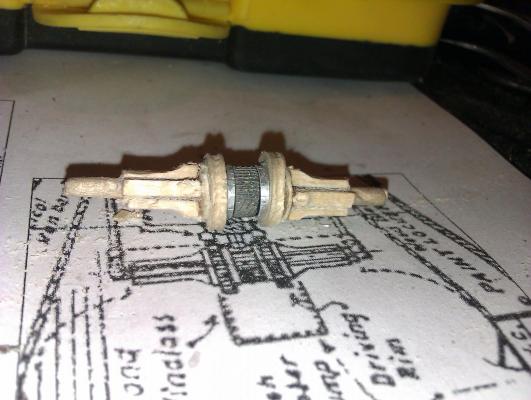
Windlass ... Canibalized lighter wheel for central strucrure Rest is wood Scale is ok, and look and feel are ok What do you say ?


- 4,152 replies
-
- 13
-
-
- cutty sark
- tehnodidakta
- (and 1 more)
-
Are you quite sure you do not make mess in future stage after succesfuly redo this first stage? And then again from the begining? etc etc forever in circle ... I suggest you to go forward with this build to learn a way how to fix and mask mistakes. Result can be great at the end. And you just can not know in which moment reguired patience and skill will wake up deep inside of you But, this is your ship and your build, so means - your move Anyhow you decide, I'll follow
- 79 replies
-
- 5
-
-
- cutty sark
- airfix
- (and 1 more)
-
Denis, you are happy man, my Admiral see and clean dust BEFORE it appear !!!!!! i joke her that she is "self-moving dust cleaning clothe" when she overhit with that. Fortunately she do not enter and clean in my working cave
-
Cutty Sark by NenadM
NenadM replied to NenadM's topic in - Build logs for subjects built 1851 - 1900
Snow ... what snow ... I forgot this winter how it looks ... and how it is to clean 80m of street alone if I want to pull out car from garage and go somewhere ... Toward windlass ... I remembered something ... almost perfect look, but 1-2mm less in diameter ... lighter wheel ... let it be over night, maybe I get some of my silly or bright ideas how to resolve this Morning is by default smarter than evening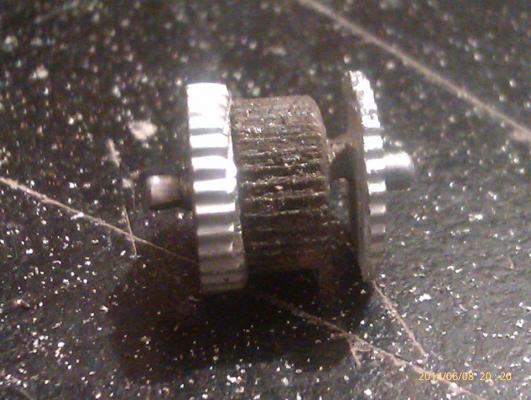
- 4,152 replies
-
- 9
-
-
- cutty sark
- tehnodidakta
- (and 1 more)
-
Cutty Sark by NenadM
NenadM replied to NenadM's topic in - Build logs for subjects built 1851 - 1900
Here is extracts from original specification So, a lot of them . Really a lot Abybody knows their storage?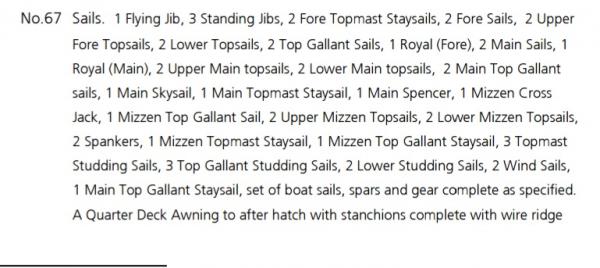

- 4,152 replies
-
- 3
-
-
- cutty sark
- tehnodidakta
- (and 1 more)
-
Cutty Sark by NenadM
NenadM replied to NenadM's topic in - Build logs for subjects built 1851 - 1900
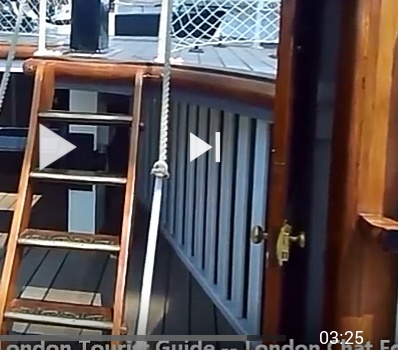
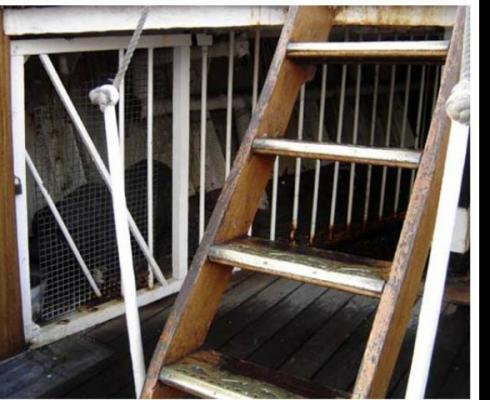
Denis, in Campbell's plans they are called/named Paint locker and Pig pen. In actual Cutty Sark, you can see a piggy model in Pig pen, and nothing in Paint locker. To me it seems impossible to put there any sail ... when you need to get sail from there, you have to go under ladder (if there were ladders), to jump over windlass and to dive under fore deck .... I do not believe that was the way ... but in my mind a long time ago is a questuon about - where they keep all this when not in use. On spars? I don't think so. Anybody? Btw, war was in my place too, Denis ( Nenad VS Wild gras. Nenad wins. Nenad deadly tired to make windlass.) In the back in thiis picture you can see over 1mm high memory hill for death enemy soldiers
- 4,152 replies
-
- 7
-
-
- cutty sark
- tehnodidakta
- (and 1 more)
-
Waiting for your building log !!!!!!!! Please let me know ehen you start!
-
Cutty Sark by NenadM
NenadM replied to NenadM's topic in - Build logs for subjects built 1851 - 1900
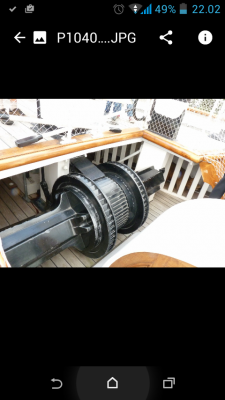
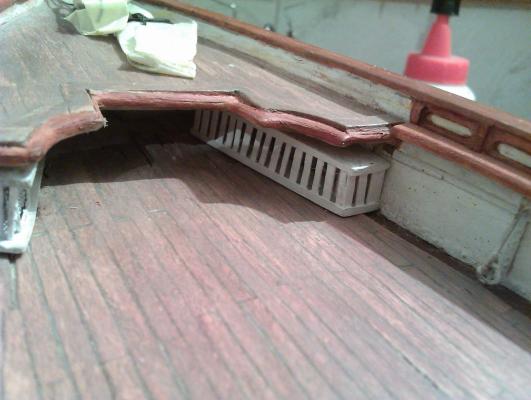
Thank you for kind words, Denis... almost hit in a middle ... let the spice flow again Next is paint locker Paint locker finished, both mounted under fore deck. Different kind of bars - here are wooden modings, and with pigpen are iron. So, I use thin veneer cutted to 1mm wide strips, and thinned more after mounting before painting As usual, there are two mistakes First, wrong angle of outside edge, do not match with line of deck. But, there will be closet to cover it all, so, who cares Second, LHL again. Both pieces are at the same height, but deck is not. I think closets, ladders and windlass will cover it at all. And learned something for future build. When I was making my last reconstruction of fore deck, I left under deck temporary supporting mouldings and another garbidge, so it was some kind of digging all of this to leave a room for pigpen and paint locker. It was not fun. So, never leave garbidge under deck, sailor! Next is windlass I found this picture with bright shown details. This is next challenge, because in my scale, windlas has to be inly 28mm long between "Carrick Bitte" (pillars) as Campbell signed them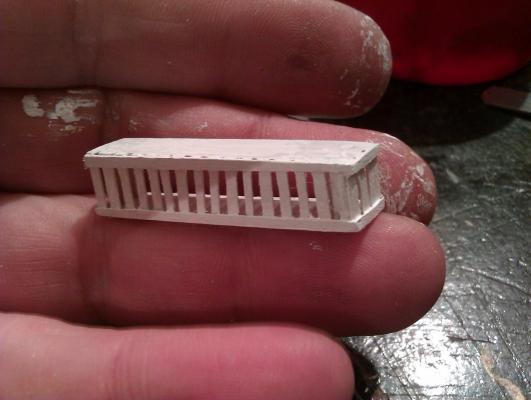

- 4,152 replies
-
- 5
-
-
- cutty sark
- tehnodidakta
- (and 1 more)
-
If it help: Wash brush well and often during work better more thin layers than 1 thick use small amount of color, it dry faster than you need, and don't use it when start drying prepare the thinnest brush you can find use magnifier for precise painting Play with mixing colors and transparent thin layers Always do some tests before applyin acrylic And use acrylic thinner (I do not) for washing brushes and corre ting mistakes
-
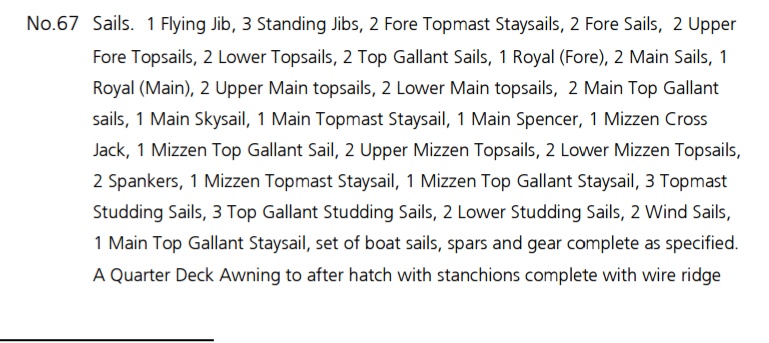
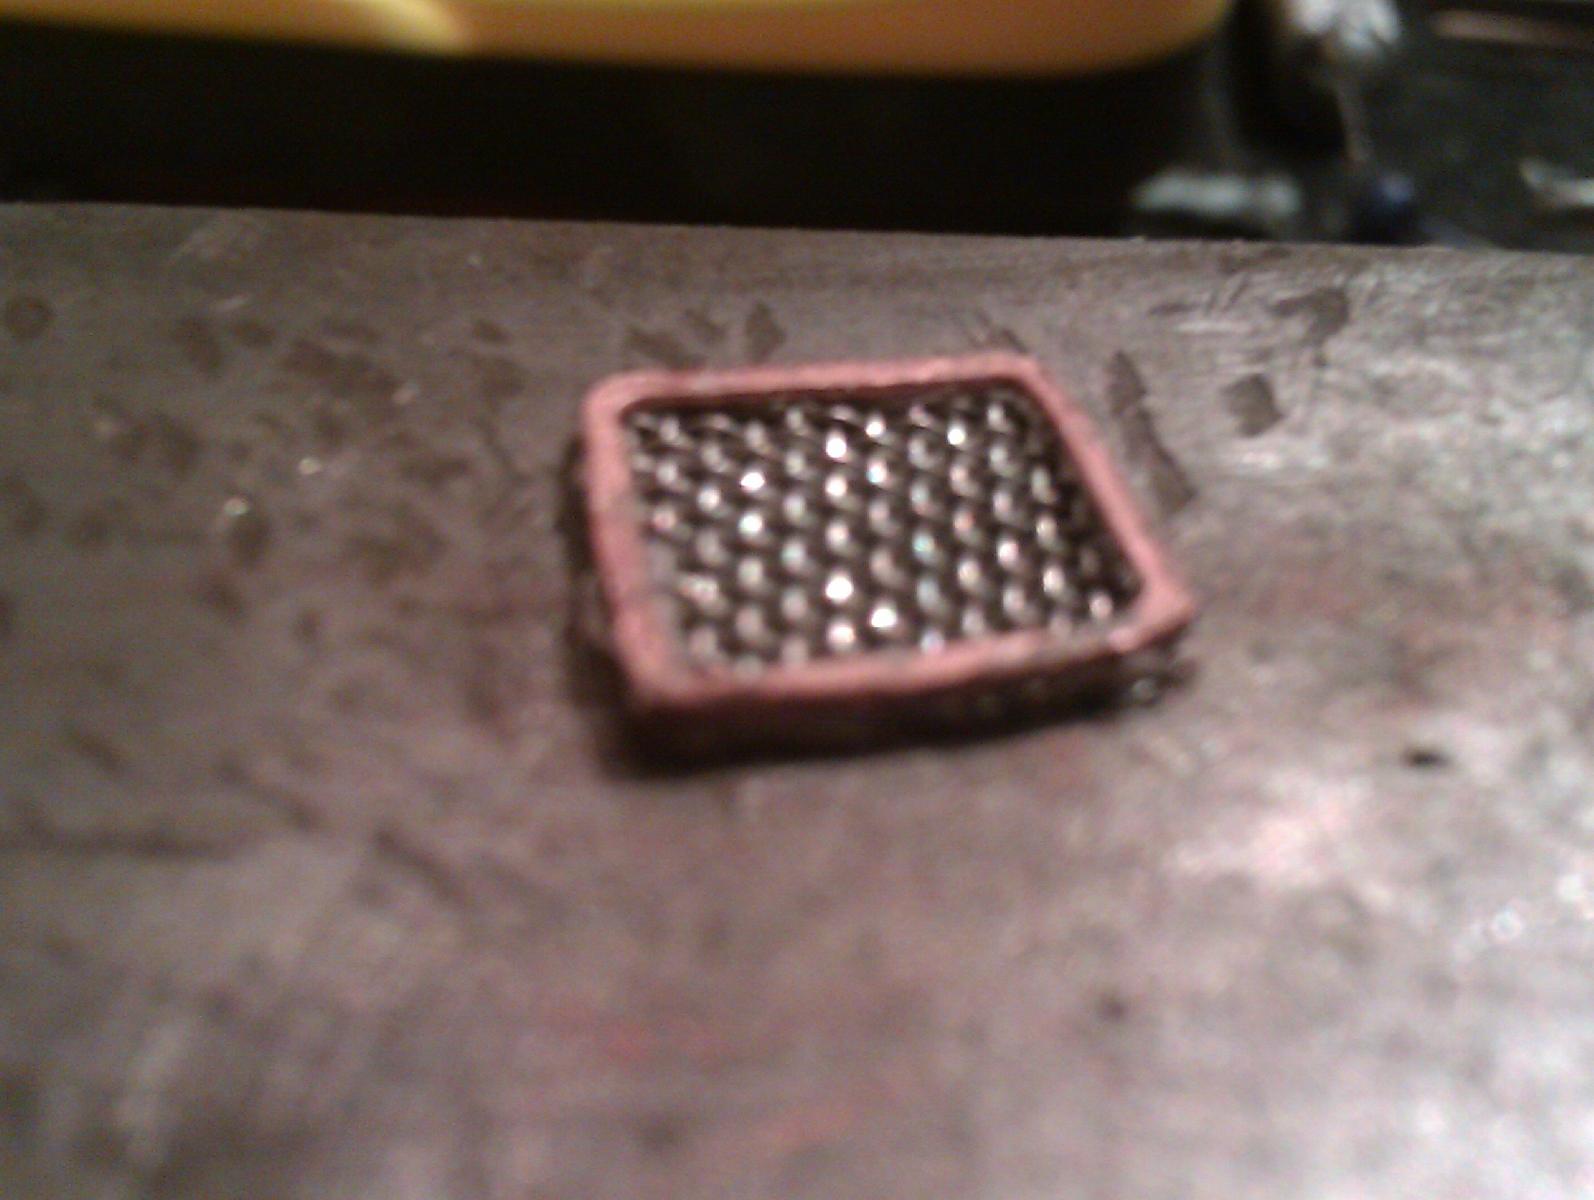
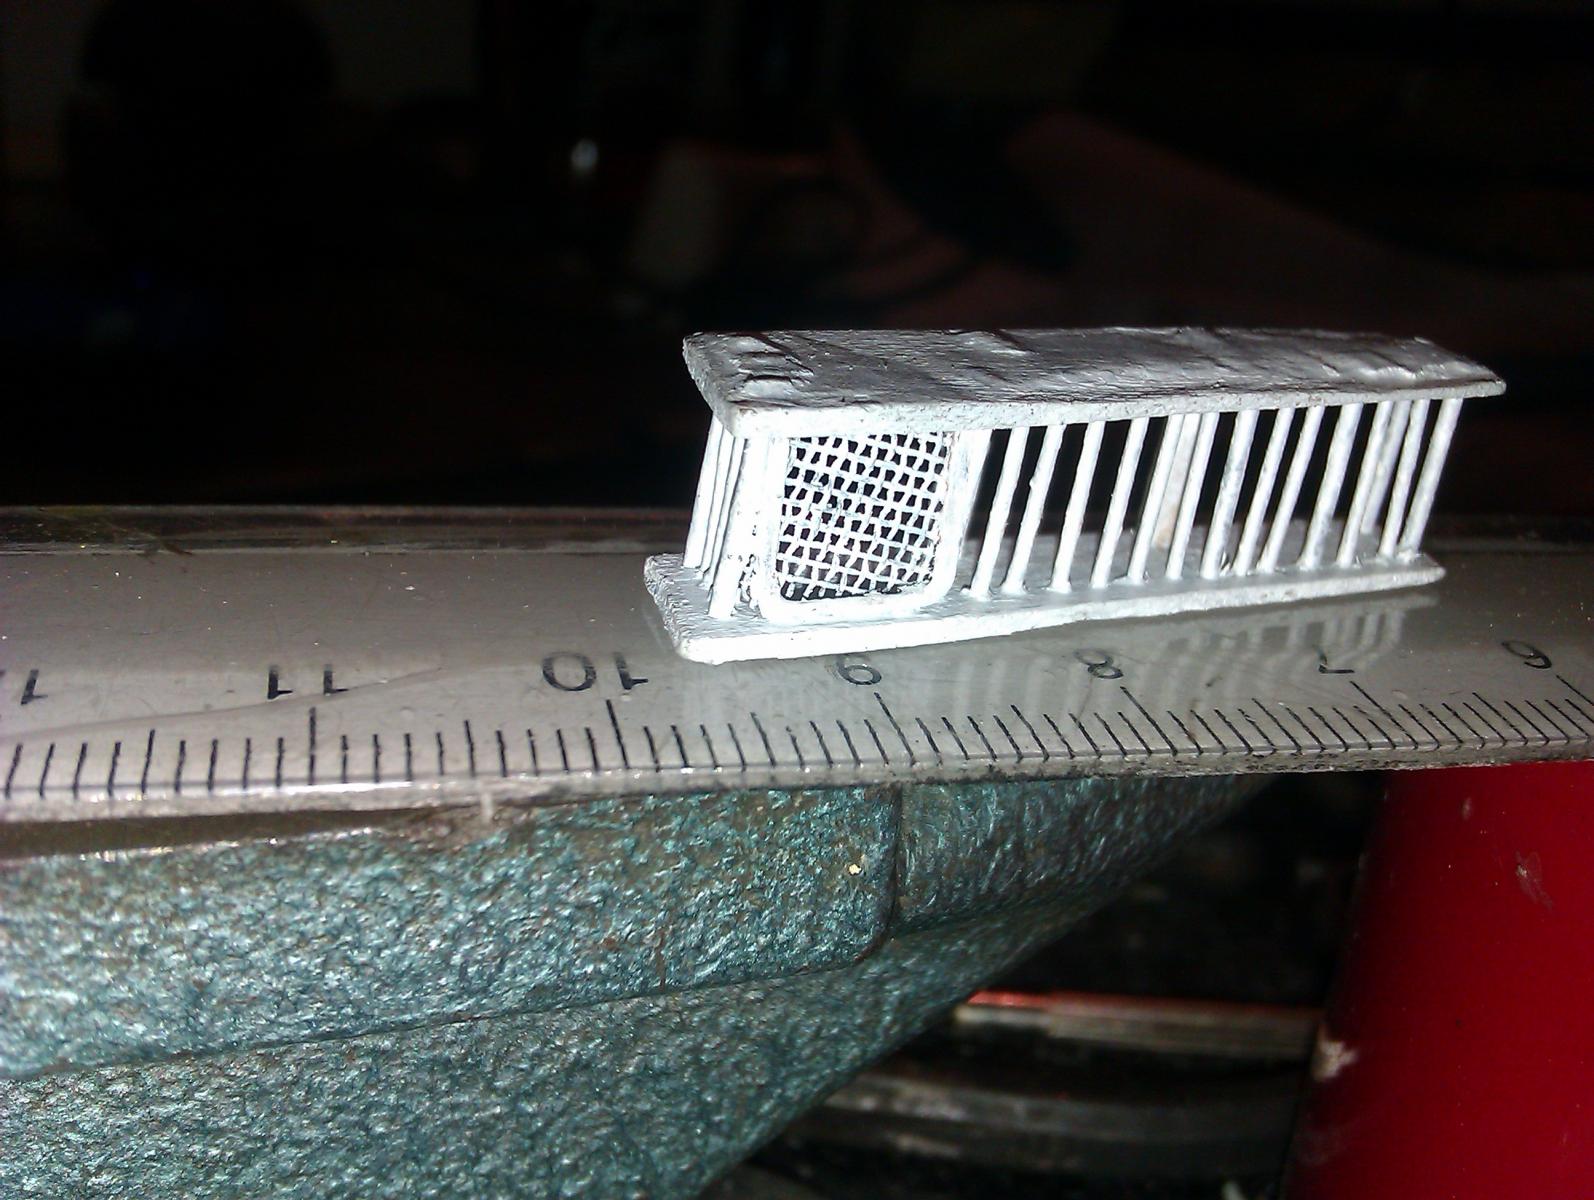
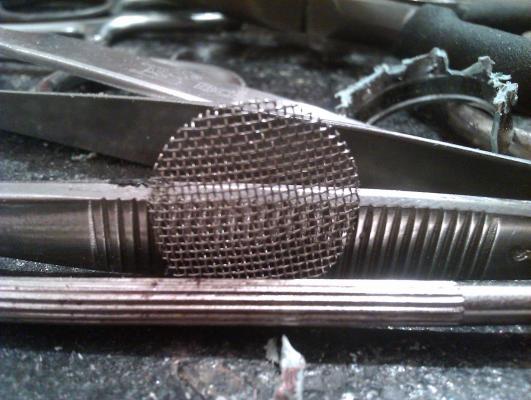
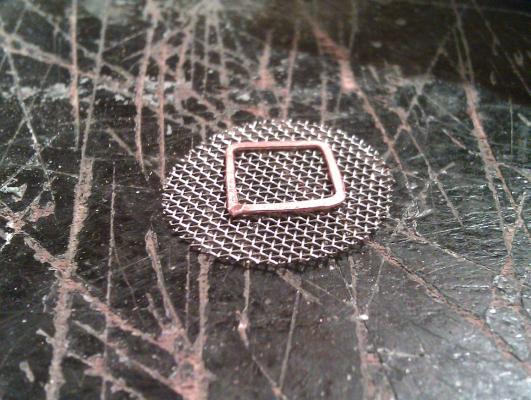
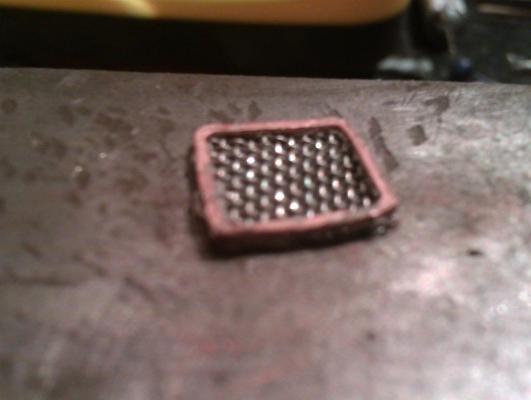
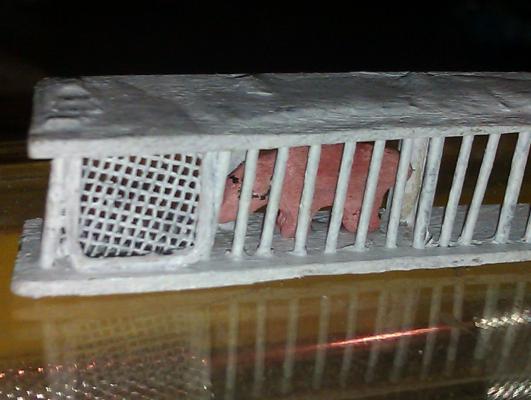
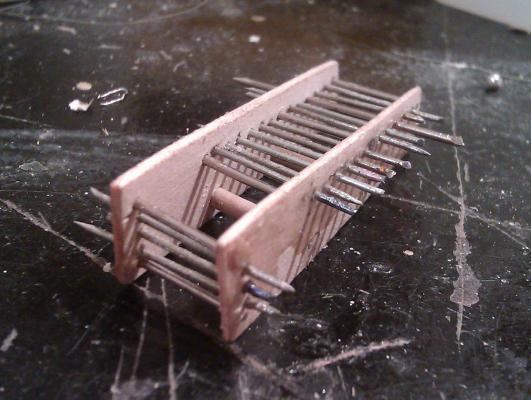
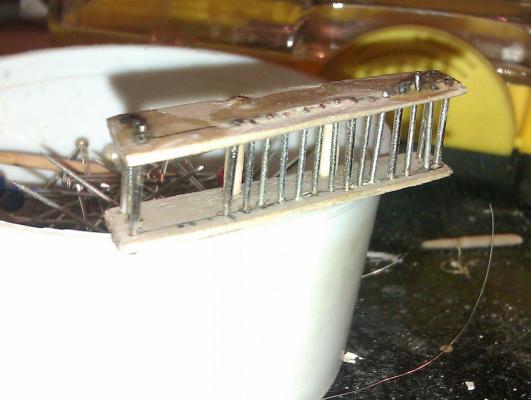
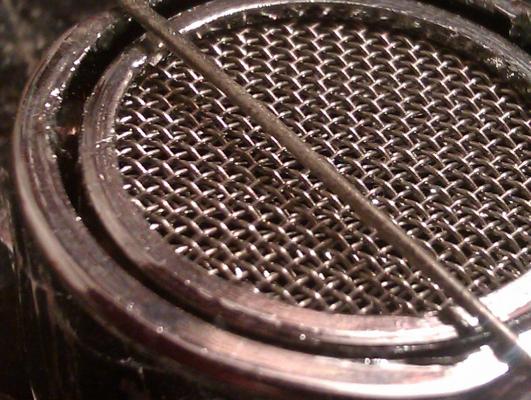
NEEDLES/PINS AND PROTECTIVE NET FOR KITCHEN PIPE Under fore deck on Cutty Sark there is almost hidden pigpen. In scale cca 1:100, pigpen is only about 9-10mm high. Two points were significant for me - bars on cage, and a net on door. Bars ... after some experiments with rope (too hairy) and holly telephony and other thinner wires (too soft) solution was in needles/pins Ok, this was seen already in variations But ... net ... Great provocation, and a challenge to me from Mark Taylor Whole day I was banging my head where I had seen such a fragile net with so small fields ... A ha - wrong bought protective attachment to kitchen pipe, hanging on wall in workshop direct in front my eyes After carefull canibalizing of this, I have got two thinny nets Frame is made from telephony wire Fixed with CA, cutted excess of net and fitted with Dremell thing Mounted and painted (yes, there is little piggy inside, my first carving attempt)


- 396 replies
-
- 12
-
-
- Idea
- Bright Idea
- (and 1 more)
-
Cutty Sark by NenadM
NenadM replied to NenadM's topic in - Build logs for subjects built 1851 - 1900
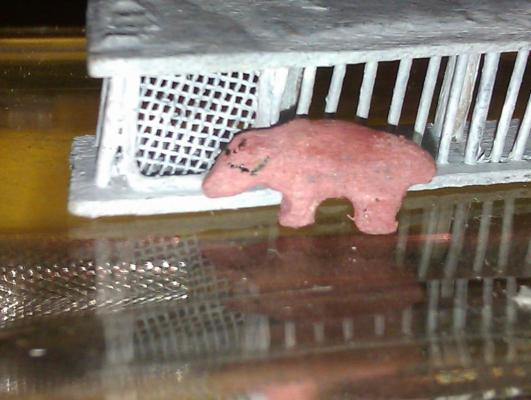
Denis, there are two things with ship modeling I am/shall be sorry forever ... first - why I made 30 years break ... thinking I coud have today more skills, and second, why I started building CS on messy way without brain and patience ... whatever ... milk is spilled away, and there is no return Anyhow, pigpen is finished, with a net on the door of cage Hey, look who is here .... Bob's runaway pet ... Let's get it inside where it belong Who is interested how door net is made, please visit Captain Steve's bashing galaxy log modelshipworld.com/index.php/topic/4679-the-kit-bashers-guide-to-the-galaxy/page-14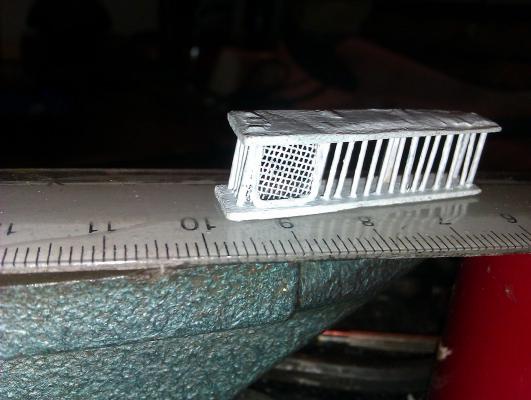
- 4,152 replies
-
- 12
-
-
- cutty sark
- tehnodidakta
- (and 1 more)
-
Ahh ... I catch you ... here is where you are hiddin... Can I follow ?
-
Sounds familiar ..... battlestage: SPRINGCLEANING vs SHIPMODELING Grass in homeyard has strange habit to grow ... and to get wild in spring Who will win? Rise your bets, gentleman !!!! Ride your vacumcleaners, rise your dust cloth flags, and bravely enter the battle to earn your free time !!!

- 956 replies
-
- 5
-
-
- andrea gail
- trawler
- (and 1 more)
-
Cutty Sark by NenadM
NenadM replied to NenadM's topic in - Build logs for subjects built 1851 - 1900
I accept Mark ... when time comes ... just remind me when deck houses come to line
- 4,152 replies
-
- 3
-
-
- cutty sark
- tehnodidakta
- (and 1 more)
-
Cutty Sark by NenadM
NenadM replied to NenadM's topic in - Build logs for subjects built 1851 - 1900
And I think, Cap, it will be nice article for bashing galaxy, If I am right, and if there are two side by side nets ad I suppose- 4,152 replies
-
- 3
-
-
- cutty sark
- tehnodidakta
- (and 1 more)
-
Cutty Sark by NenadM
NenadM replied to NenadM's topic in - Build logs for subjects built 1851 - 1900
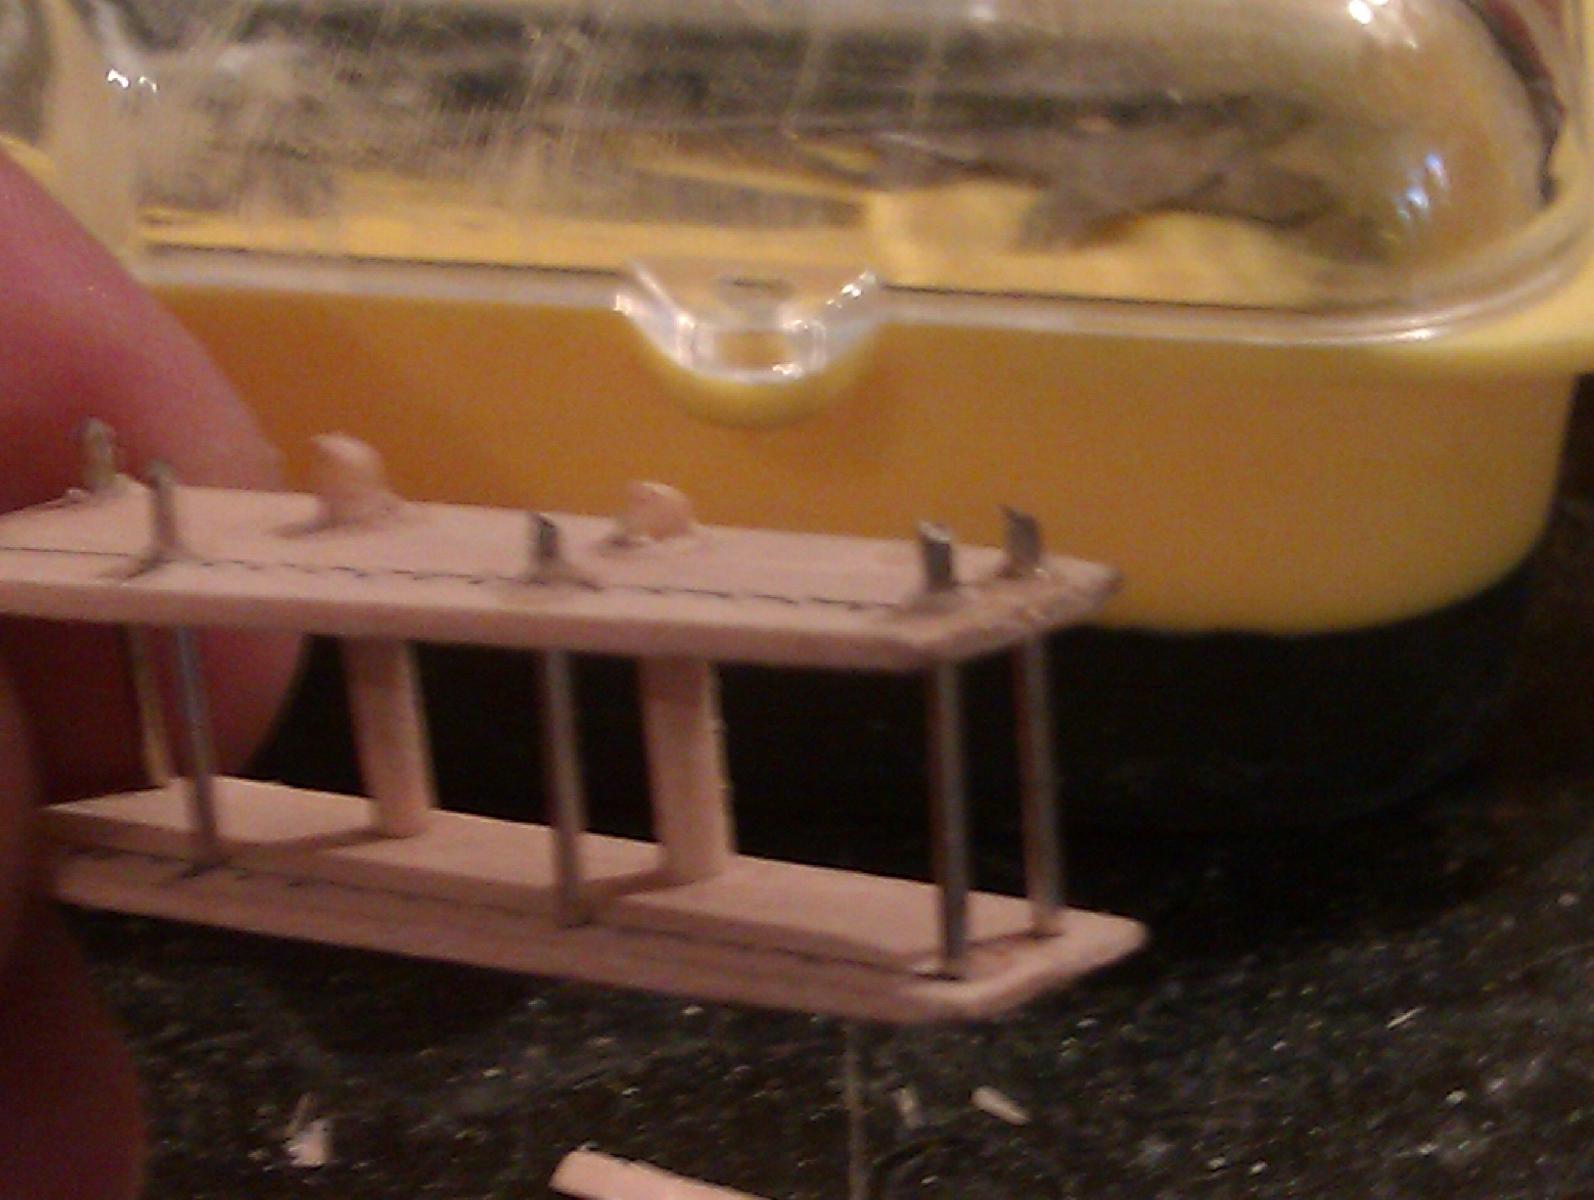
Mad man ... flammable like gasoline ... 200 km drive, watched GoT and at 21:00 went down to apply ideas I was thinking whole day, ignoring Admiral's comments about my maddens ... Thin wire - no! Too soft. Rope - too hairy. Needle ? Yes Here is first stage And future door net. (Chinese net for kitchen pipe) . On top is needle to see how little are net fields
- 4,152 replies
-
- 9
-
-
- cutty sark
- tehnodidakta
- (and 1 more)
-
Cutty Sark by NenadM
NenadM replied to NenadM's topic in - Build logs for subjects built 1851 - 1900
I accept your challenge Mark. Yes I do, just found solution. You'll see when I return from Novi Sad, watch GoT, sleep, turn tomorrow first working day and reach to my evening !!!- 4,152 replies
-
- 2
-
-
- cutty sark
- tehnodidakta
- (and 1 more)
-
weathering sailing ship's
NenadM replied to stevetuck56's topic in Painting, finishing and weathering products and techniques
Ulises, I am breathless !!!!