HOLIDAY DONATION DRIVE - SUPPORT MSW - DO YOUR PART TO KEEP THIS GREAT FORUM GOING! (83 donations so far out of 49,000 members - C'mon guys!)
×


yvesvidal
-
Posts
3,607 -
Joined
-
Last visited
Content Type
Profiles
Forums
Gallery
Events
Everything posted by yvesvidal
-
 Great kit. I built the Matchbox version in the late 70's and had a blast. I will build it again, from Revell with all the modern PE and wood decks. I am looking forward to watching your build. Yves
 -
What a lovely model!! Yves
-
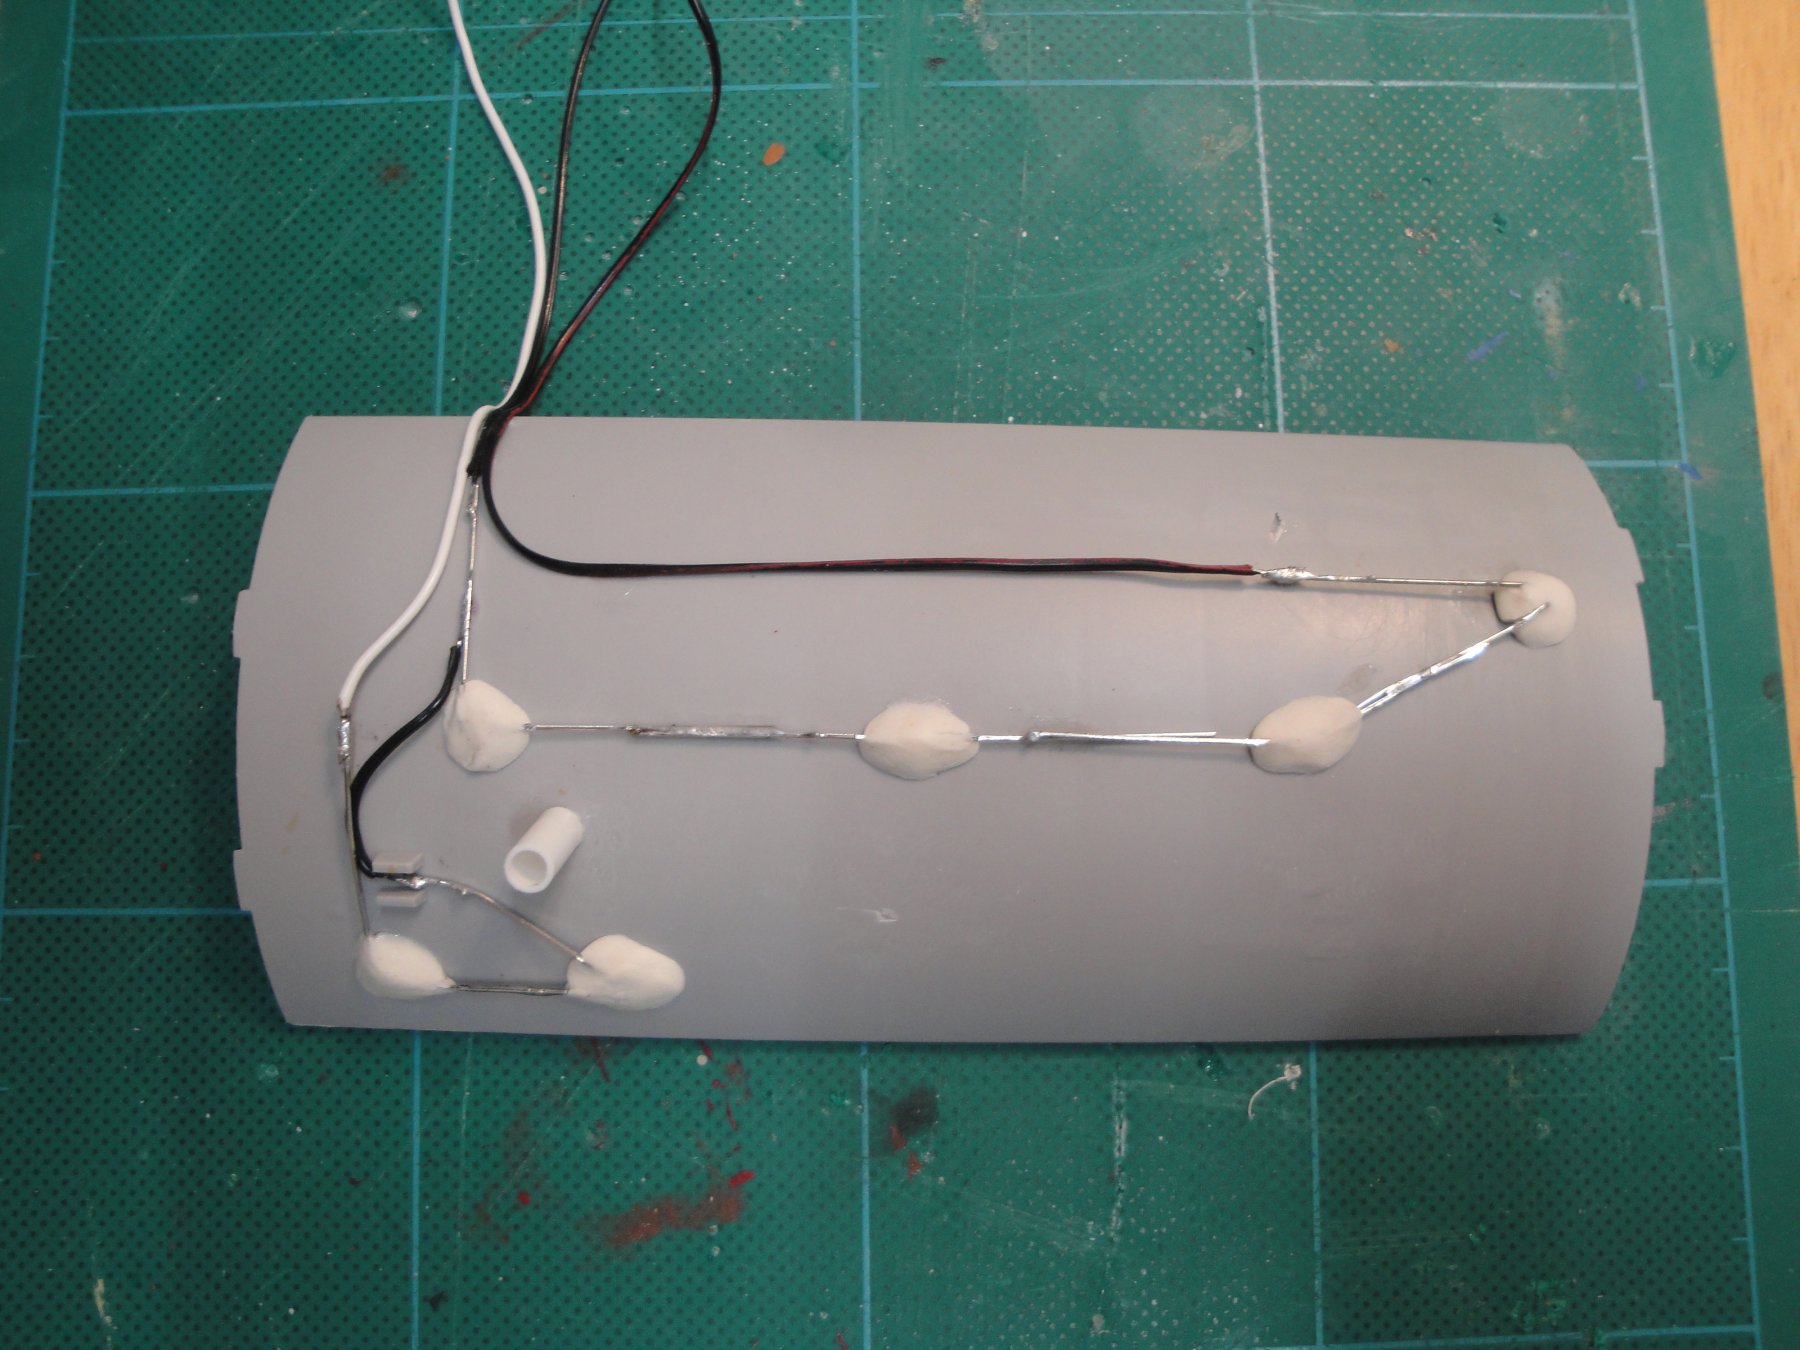
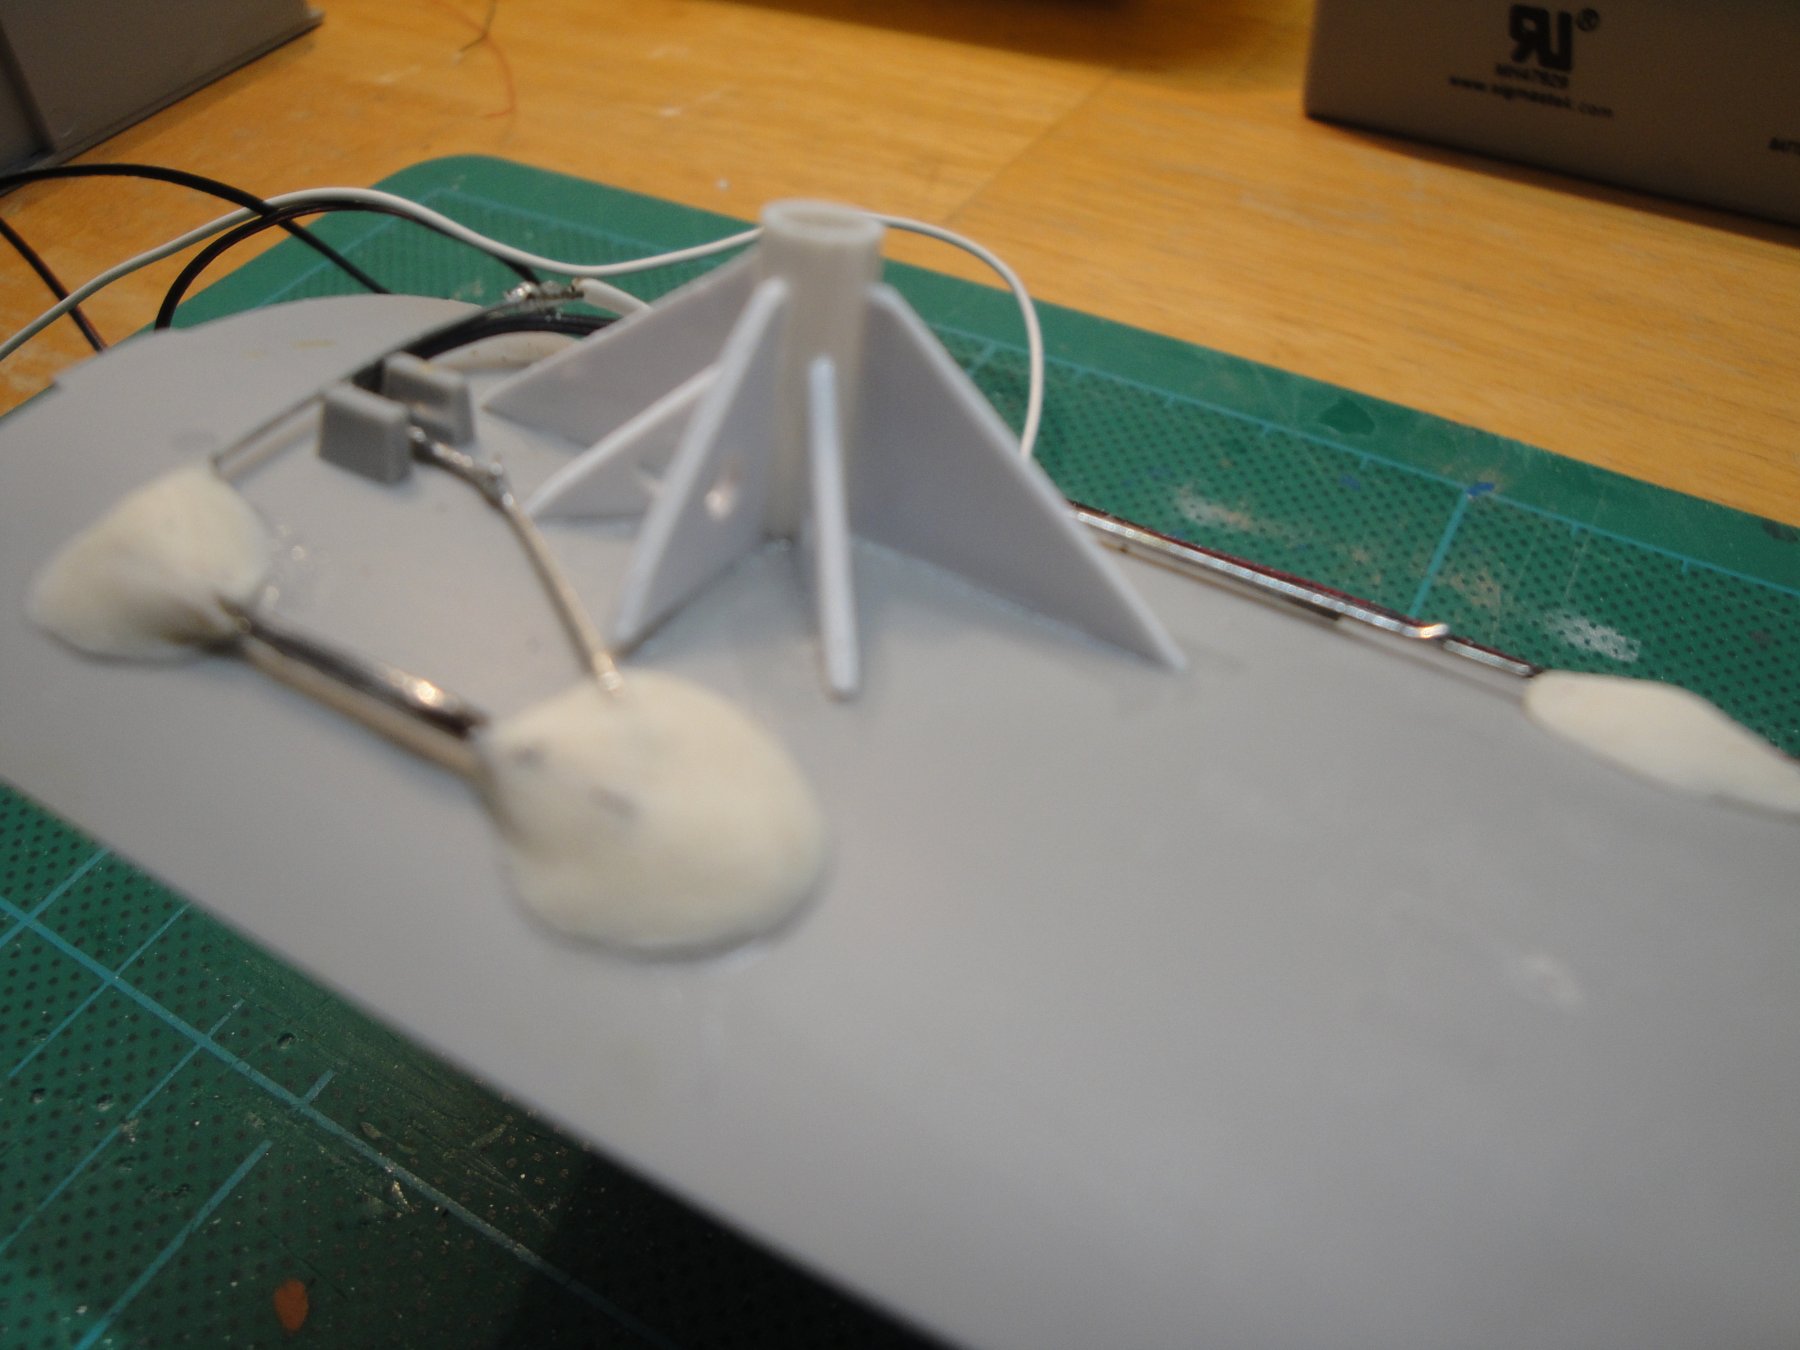
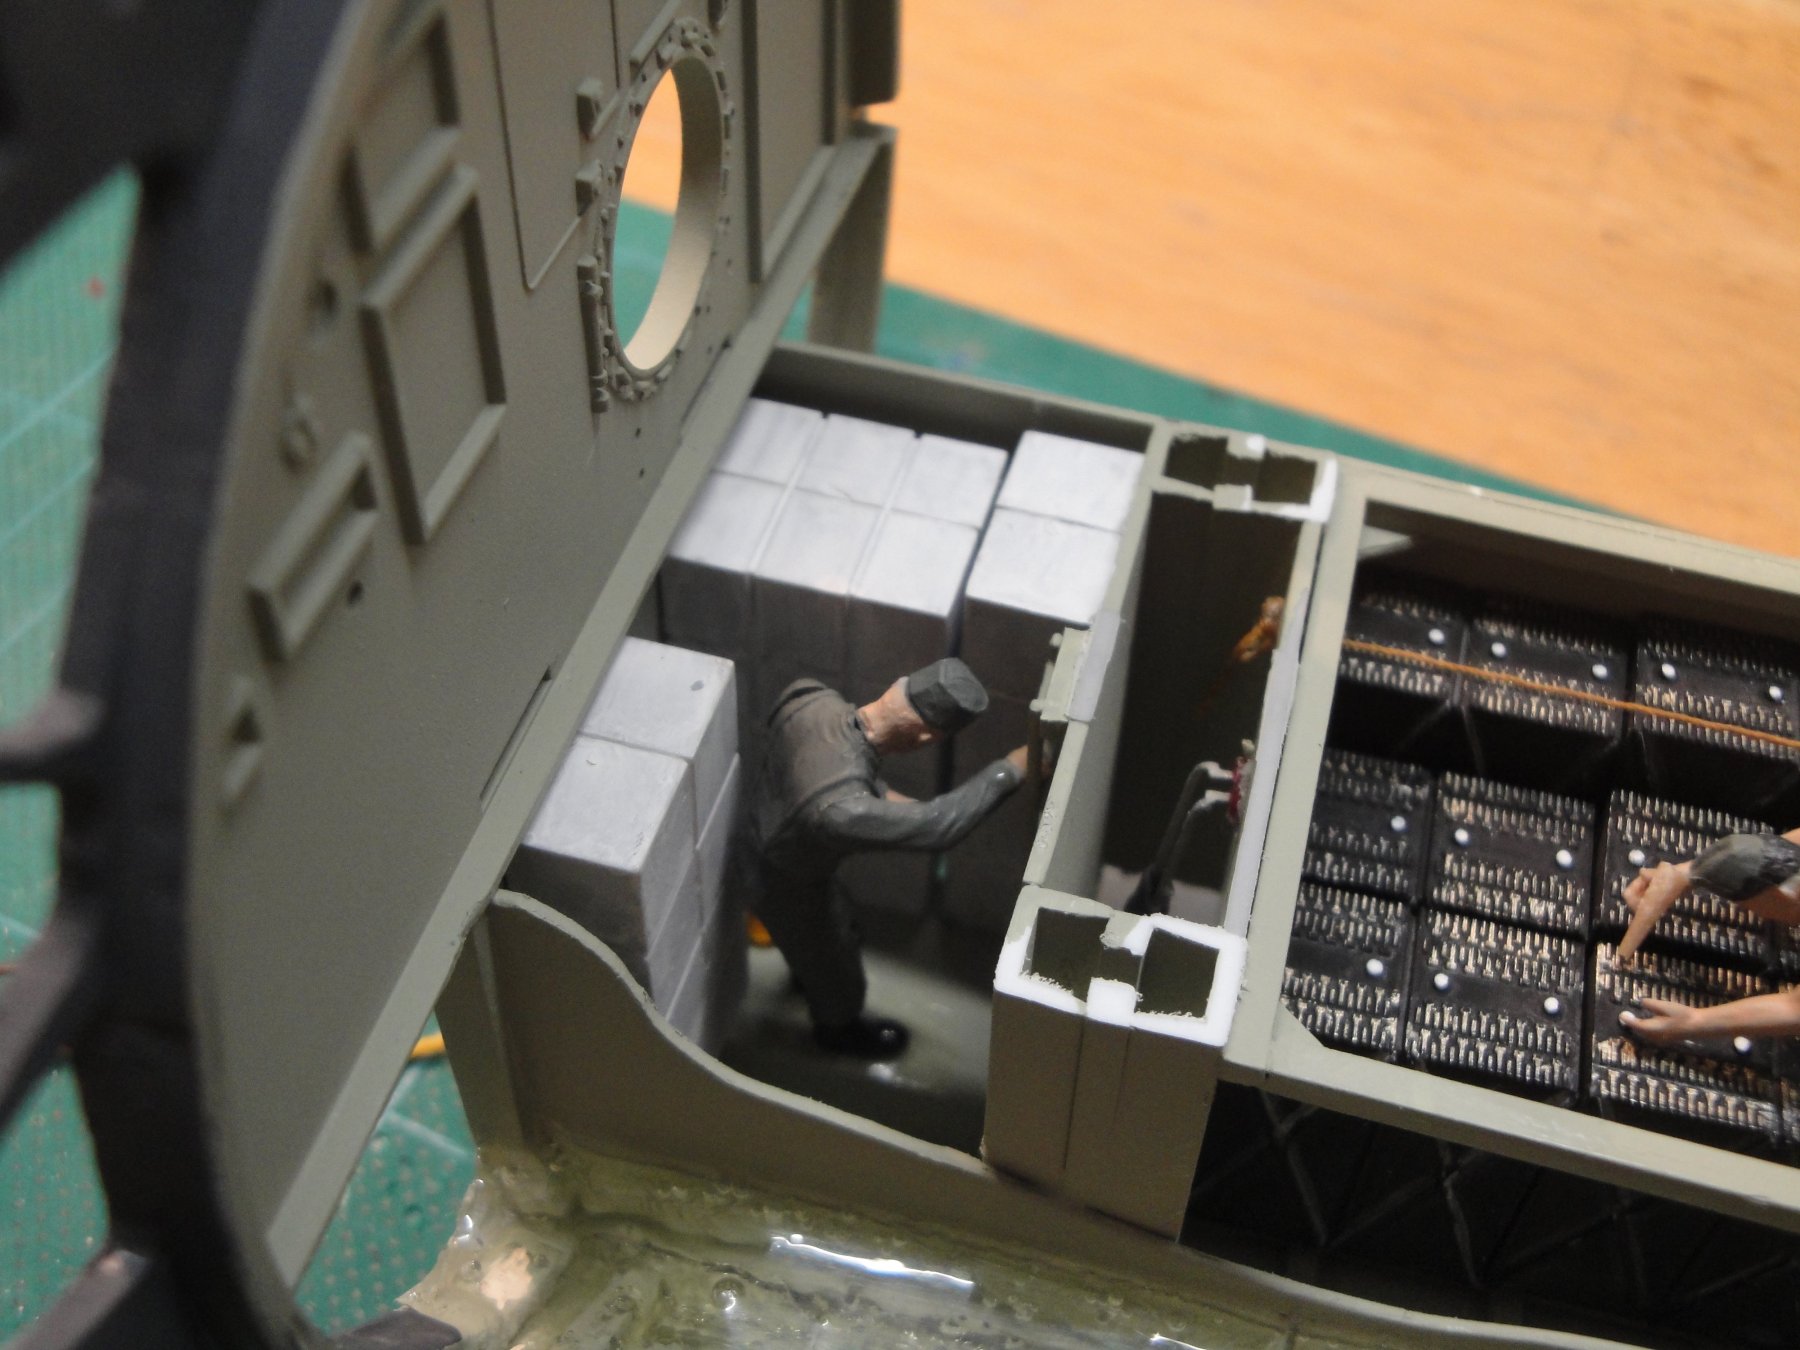
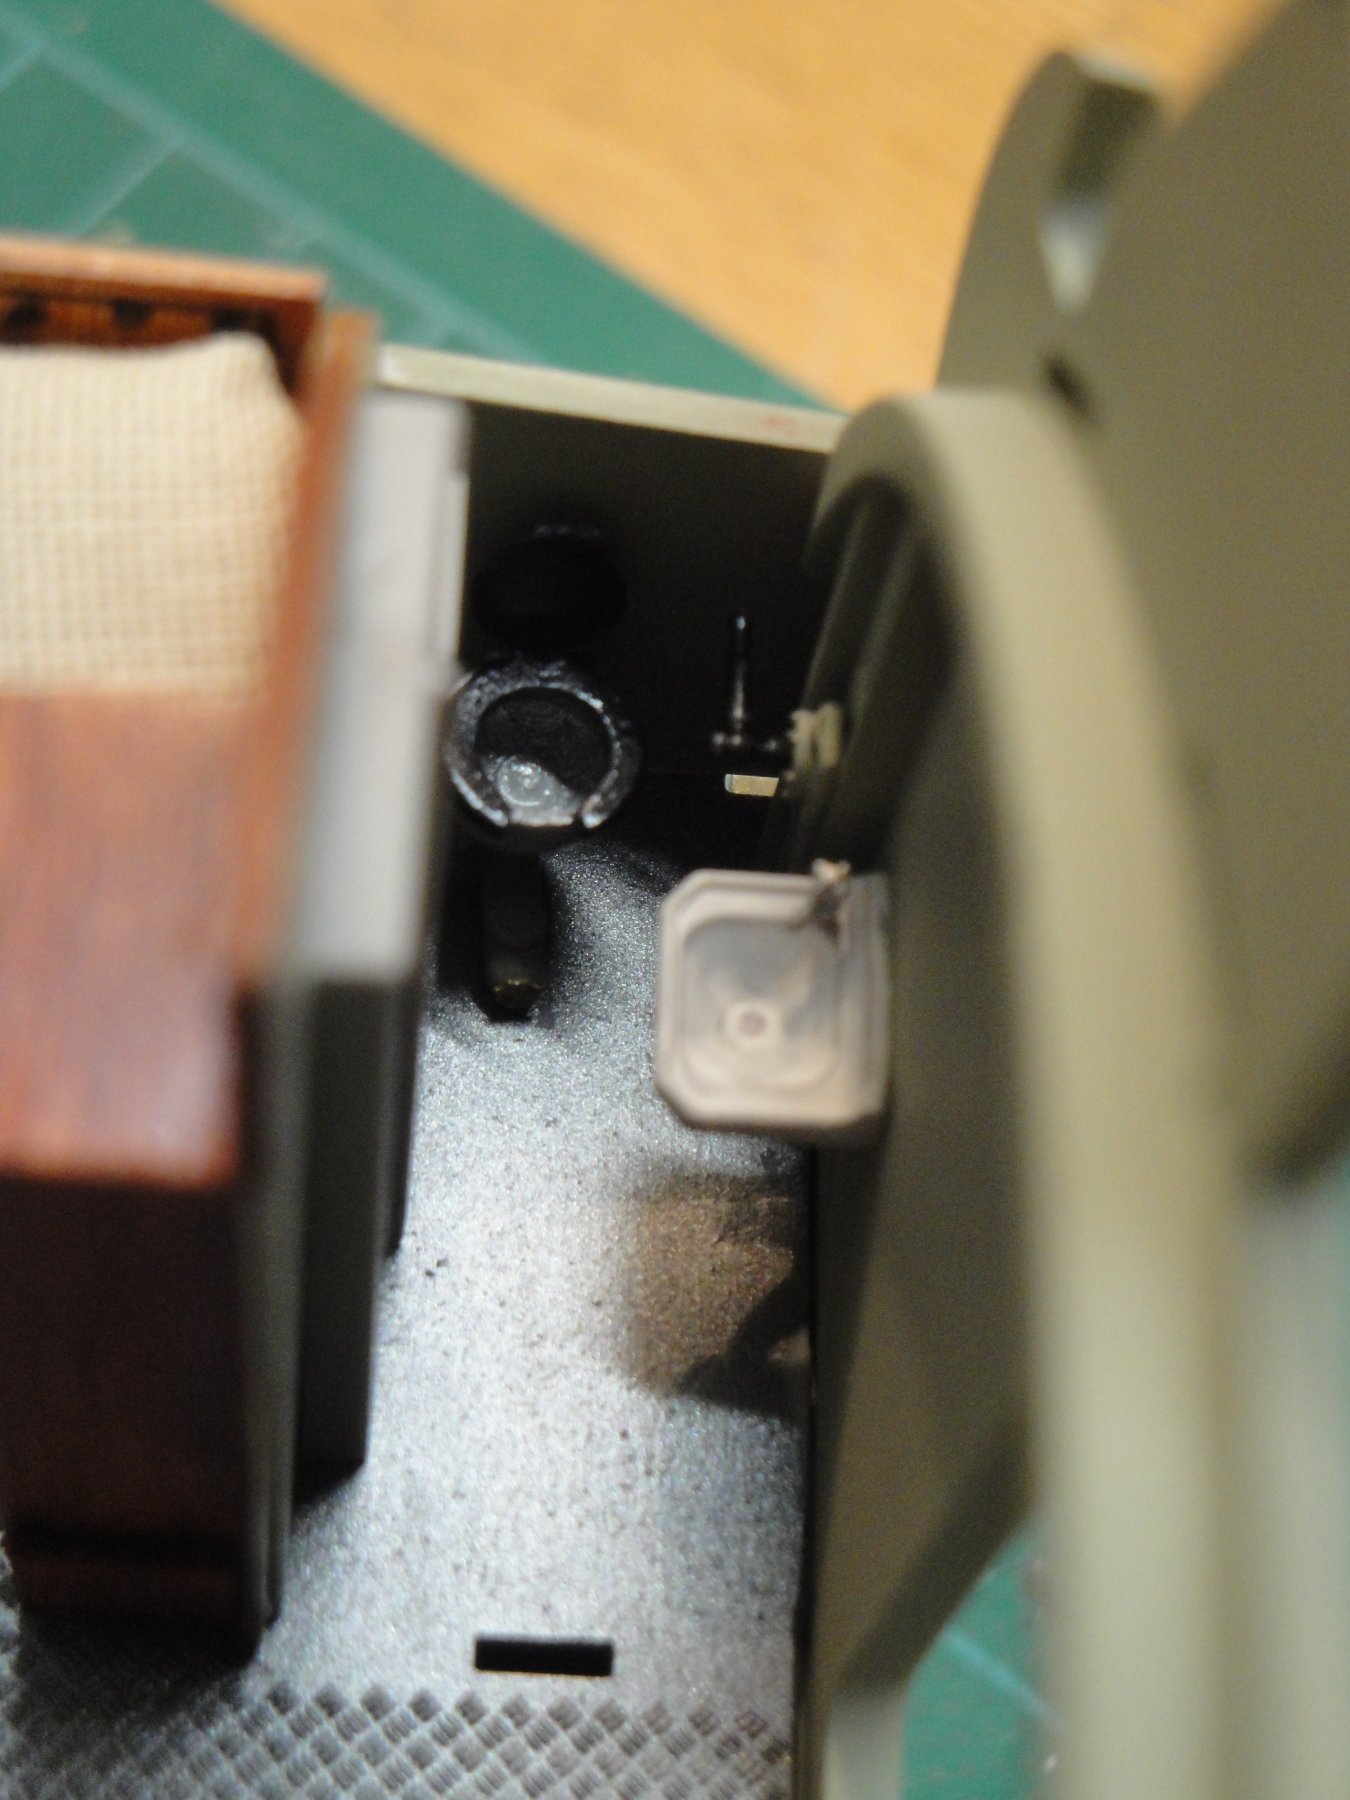
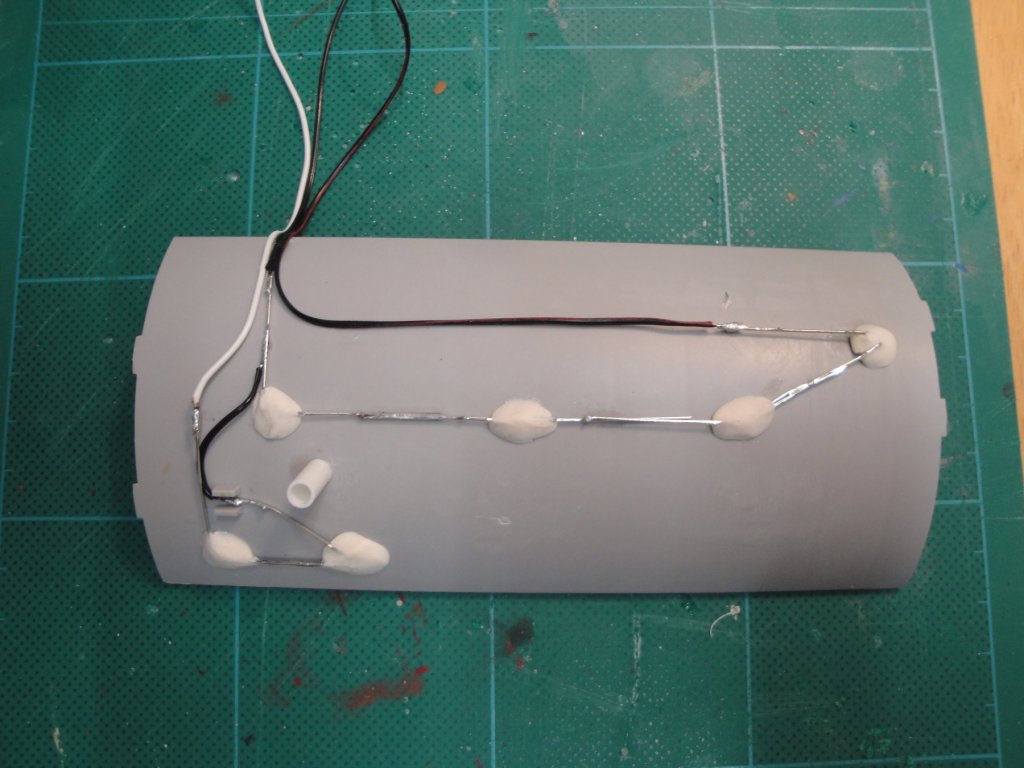
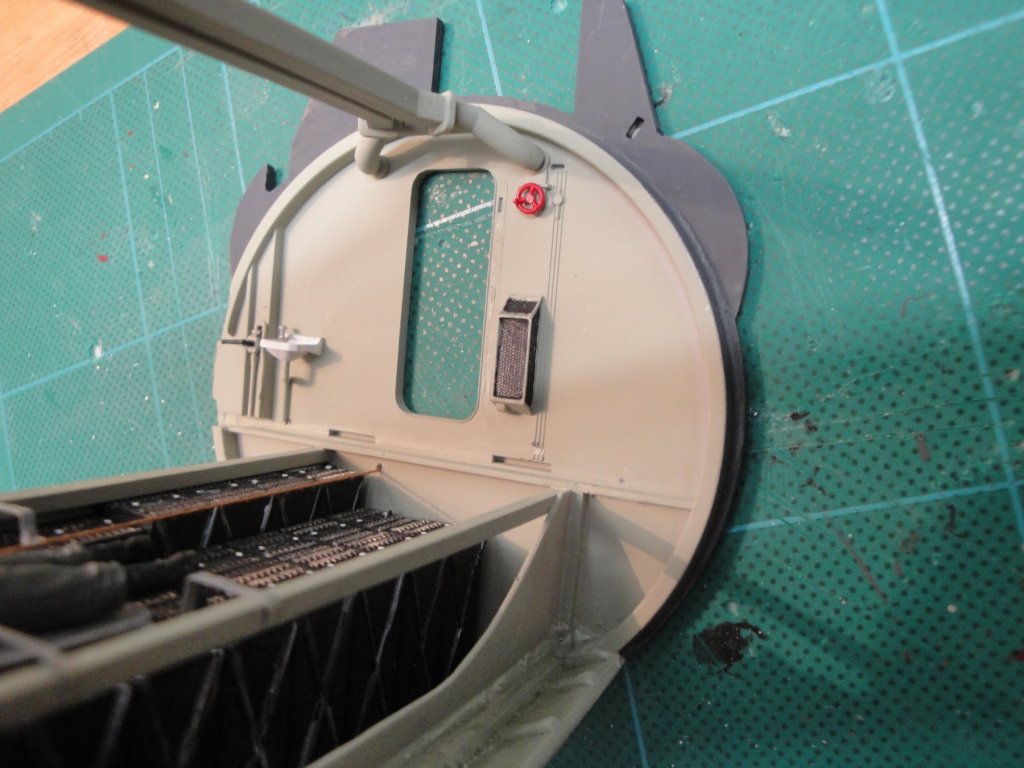
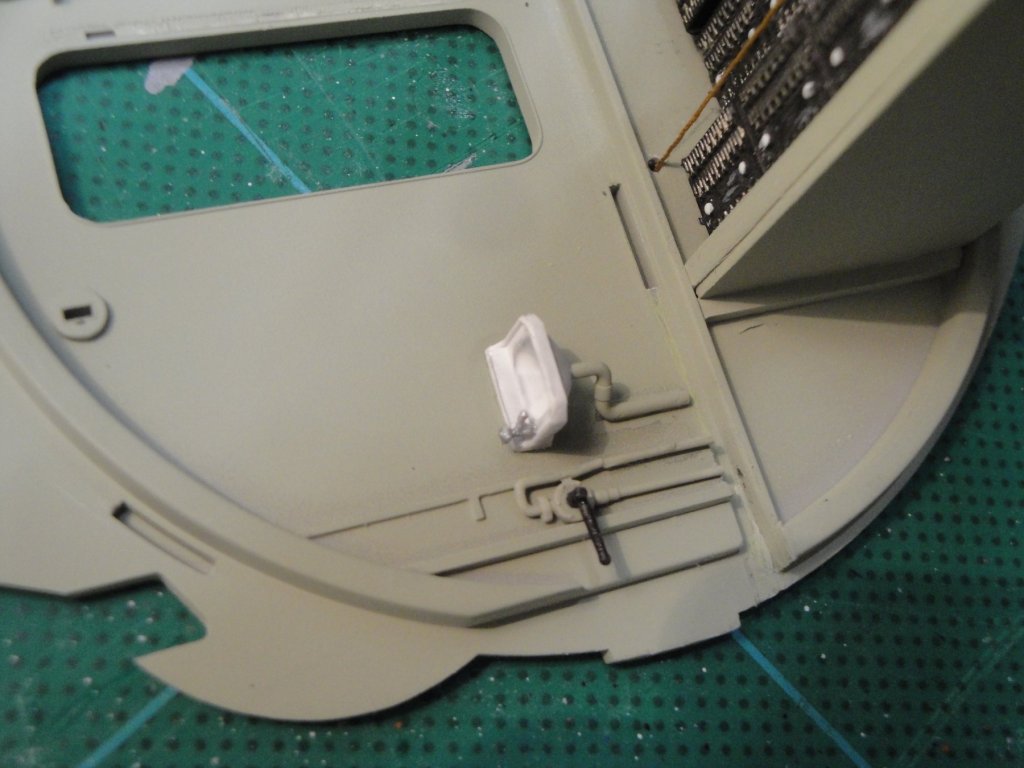
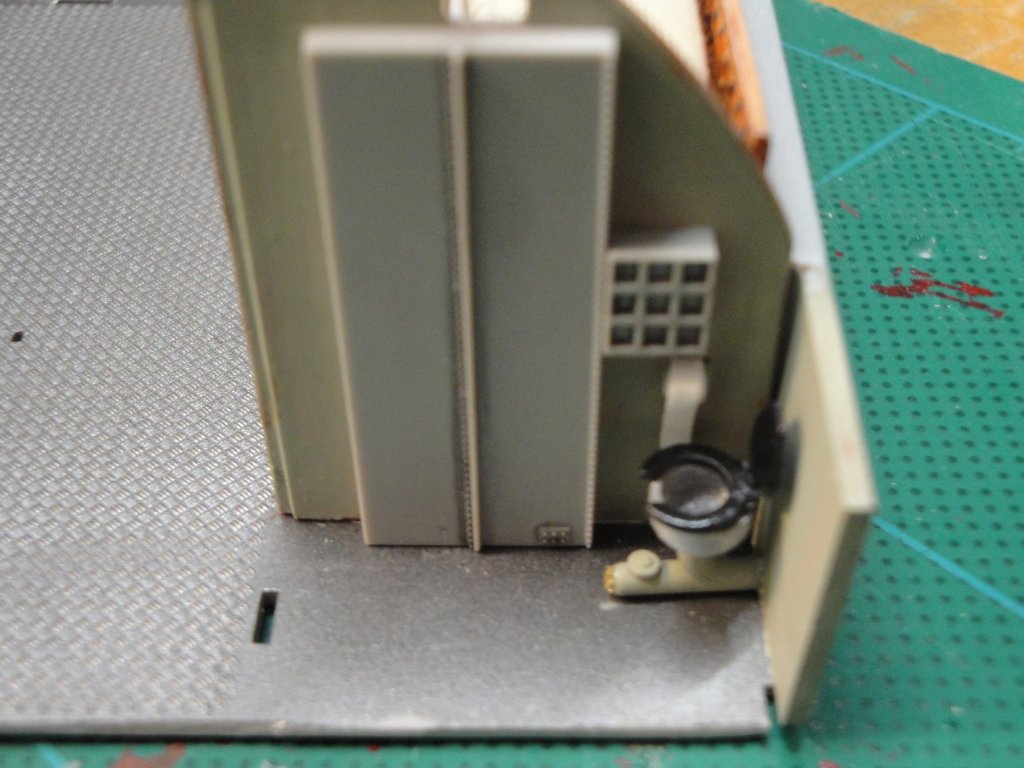
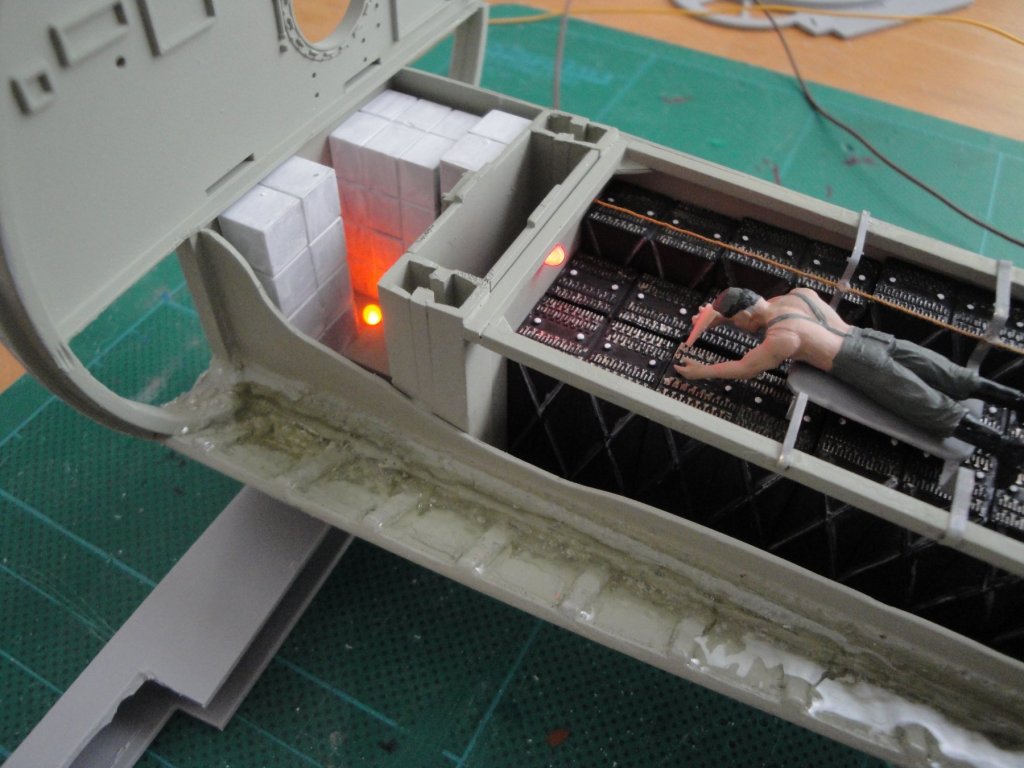
Working on some more details of the Officers Compartment. It is taking a lot of time and progress are limited. First, the lights for the Officers' quarter and the Radio/Sonar room. This is done on two separate circuits with common ground. These white LEDs requires close to 2.7 volts to work under 15-10 mA current. By placing them in series (four of them), I am getting close to 12 volts which will be the power source for this model. A variable resistor in each circuit will allow me to fine tune the light intensity of each room. When using only two LEDs, a larger resistor will be required. The reason why the Radio and Sonar rooms are not on the same circuit, will become apparent once the top floor is finished. The putty is to prevent light leaks through the pressure hull. Once dry, it will be painted dark grey. Then, the canon stand: It will be barely visible but I am happy to know that there is some of it. Then, a few details on the front bulkhead. I have removed the door that was preventing to get a glimpse of the John's (through the food closet) and will most likely glue it shut, isolating this quarter from the noisy and stinky front torpedoes compartment. In the ceiling, you can see the large air circulation pipes. One brings fresh air to the front Torpedoes compartment, the other one expels the polluted air from it. Air circulation is mostly done by two large fans located in the Machine compartment. Finally, a close look at the sailor checking the contents and good condition of the ammunition. Next to him, the inner fuel/diesel tank. Once the top floor is installed, it will be almost impossible to see anything down there. Yves


- 760 replies
-
- 19
-

-
That is such a lovely model. Yves
-
Sorry, I don't. The U-Boat Owner's Workshop Manual by Haynes has a very detailed description (in plain English) on how to operate the John's. It is very complicated and that is why one sailor was responsible for its correct working. The Haynes Manual describes also the kind of chaotic atmosphere surrounding the Restroom, before or shortly after an attack. One place for a crew of 44 is not exactly luxury. The second toilet was usually fully packed with food and not accessible for its intended purpose. I did not replicate the Haynes manual in this thread, because of potential Copyrights issues. Yves
-
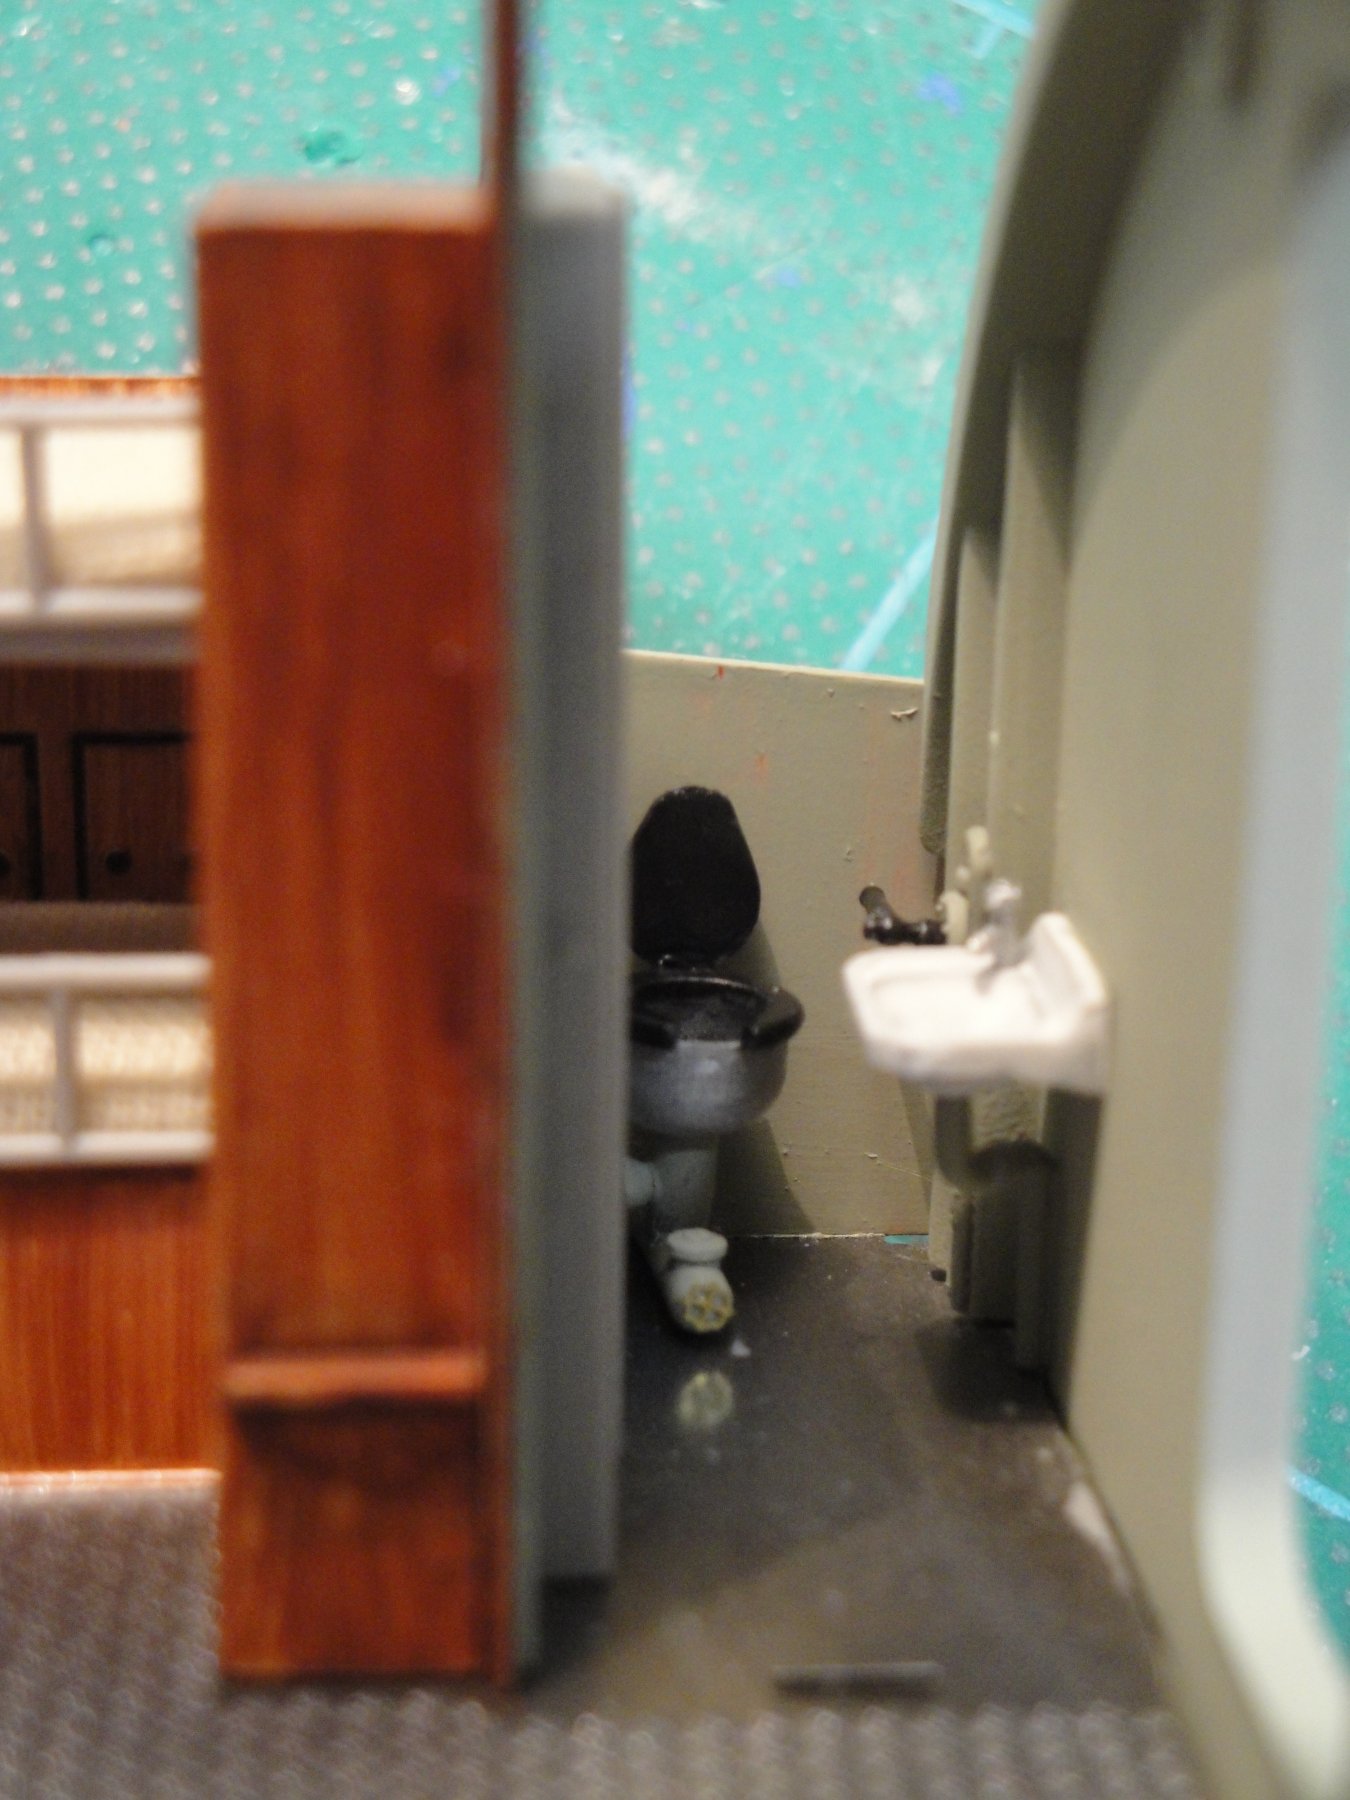
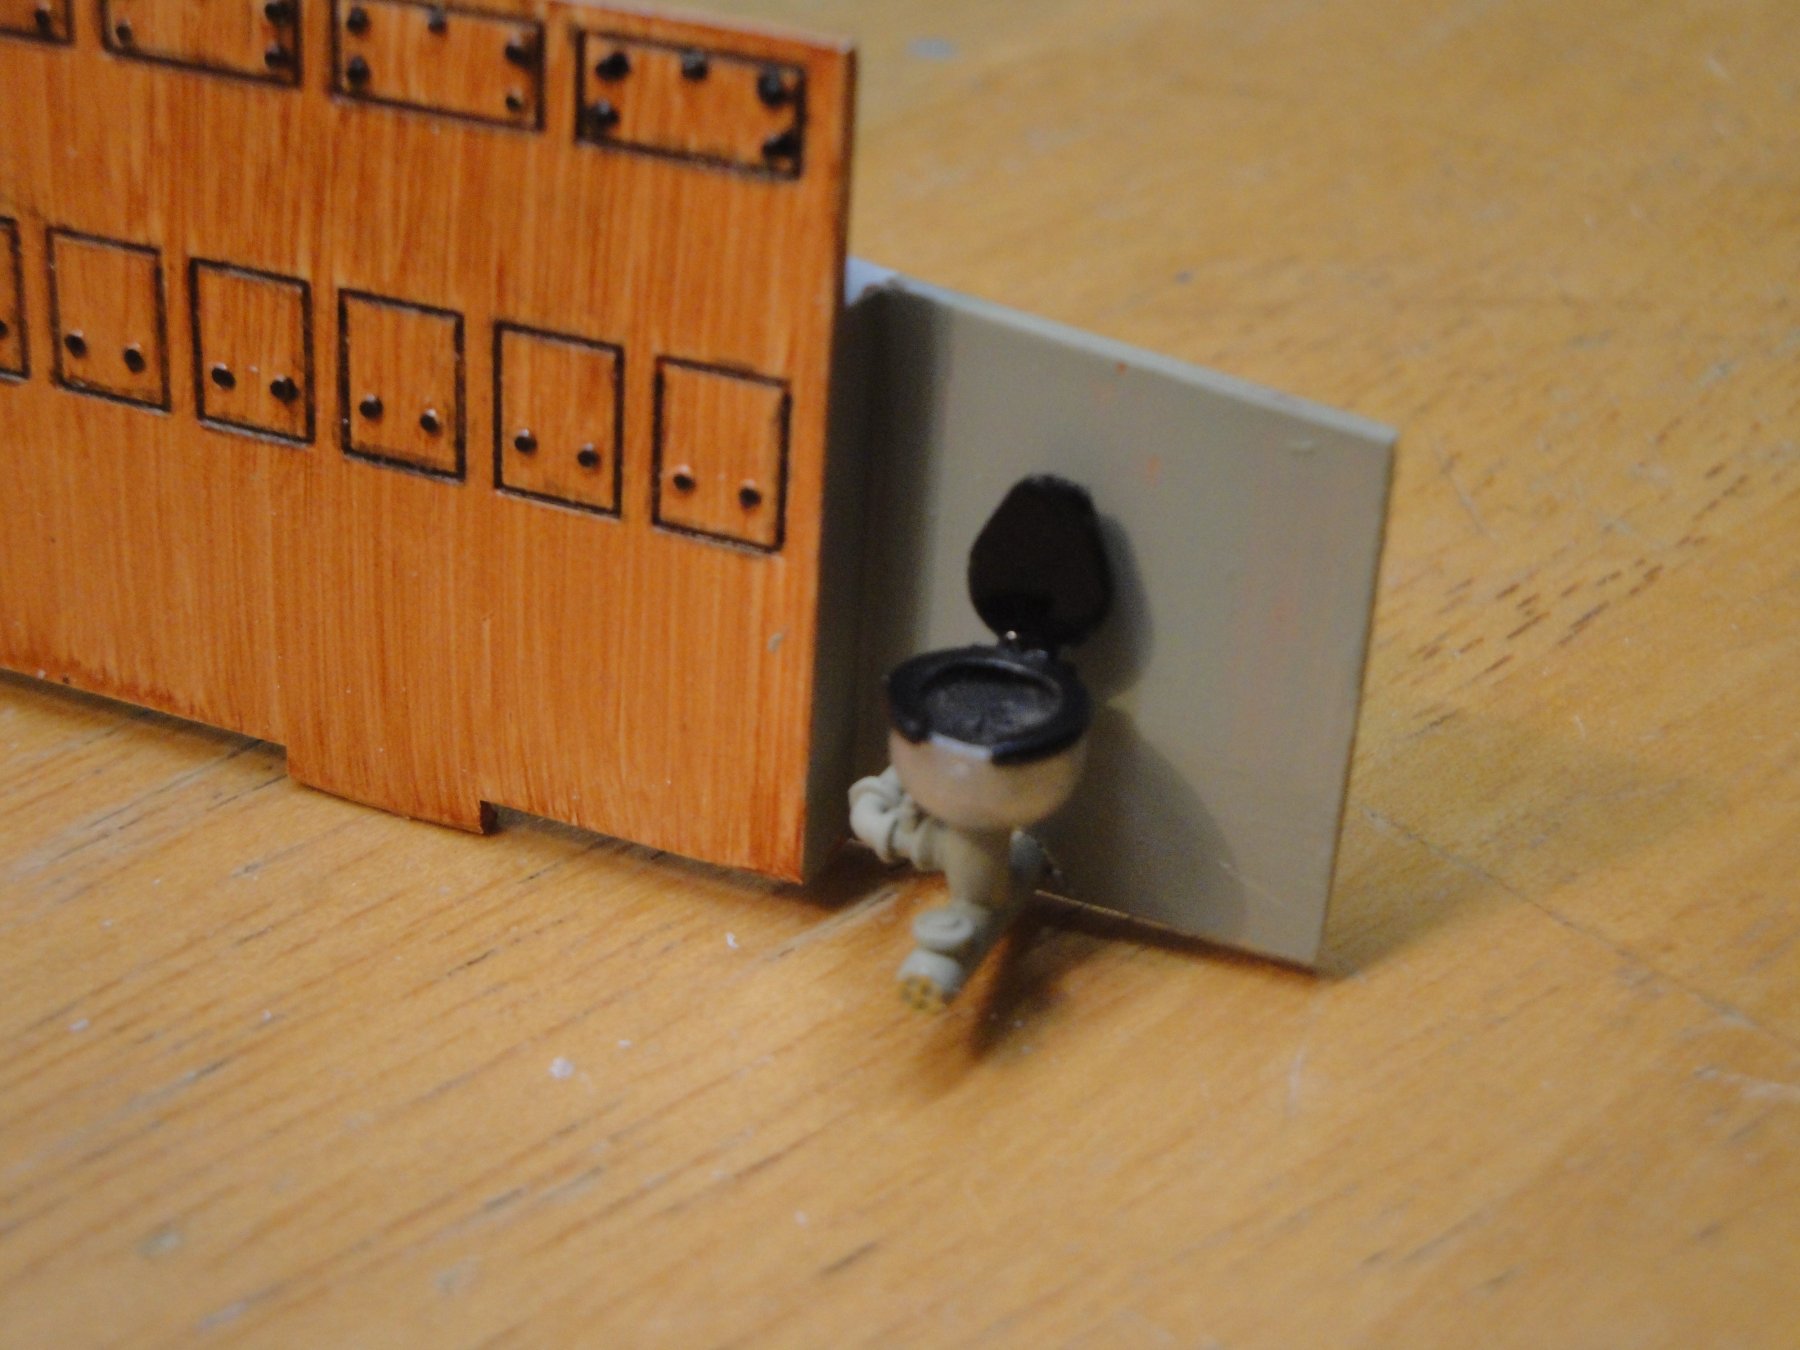
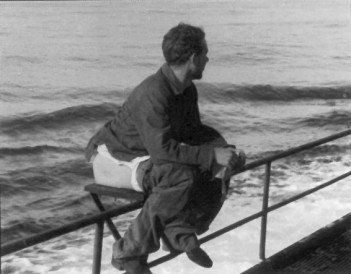
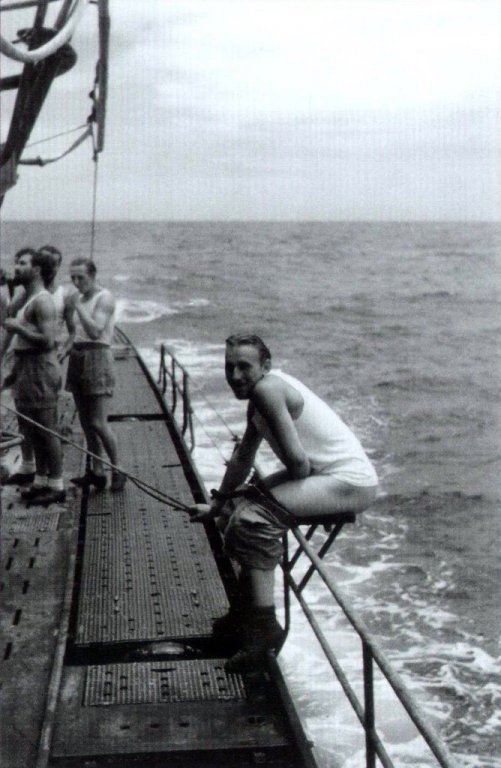
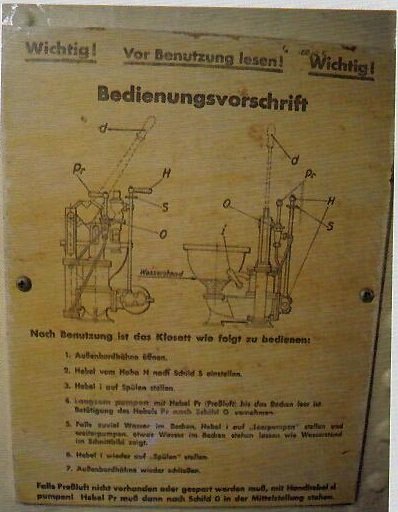
Not much progress since I was out of town. Still working on the bathroom and the Officers quarters: The toilet apparatus was far from being easy to use. Among the crew, a voluntary sailor was in charge of operating that delicate and precious "resource", especially when submerged. It is important to realize that the flushing could only be done at periscope depths and that deeper dives required the use of the internal sewage tank or pails distributed among the crew, when total silence was required. The following explains (in the language of Goethe) how to operate that "facility": For most sailors, the best was to do everything outside and it is interesting to note that the deck railing was designed for that specific need: When nature calls.....you have to bend to it! Yves


- 760 replies
-
- 15
-
-
Wow...I need my sunglasses to look at that little marvel. A true advertisement for Photo-Etched kits. Yves
-
Little progress on the Officer compartment: It still needs a lot of refinement and details. The companion to the toilet paper roll.... Yves

- 760 replies
-
- 20
-
-
A Classic! Pure beauty and form, designed to win! Yves
-
This is coming along nicely. Very good progress Kevin. YVes
- 337 replies
-
- 4
-
-
- finished
- mountfleet models
- (and 1 more)
-
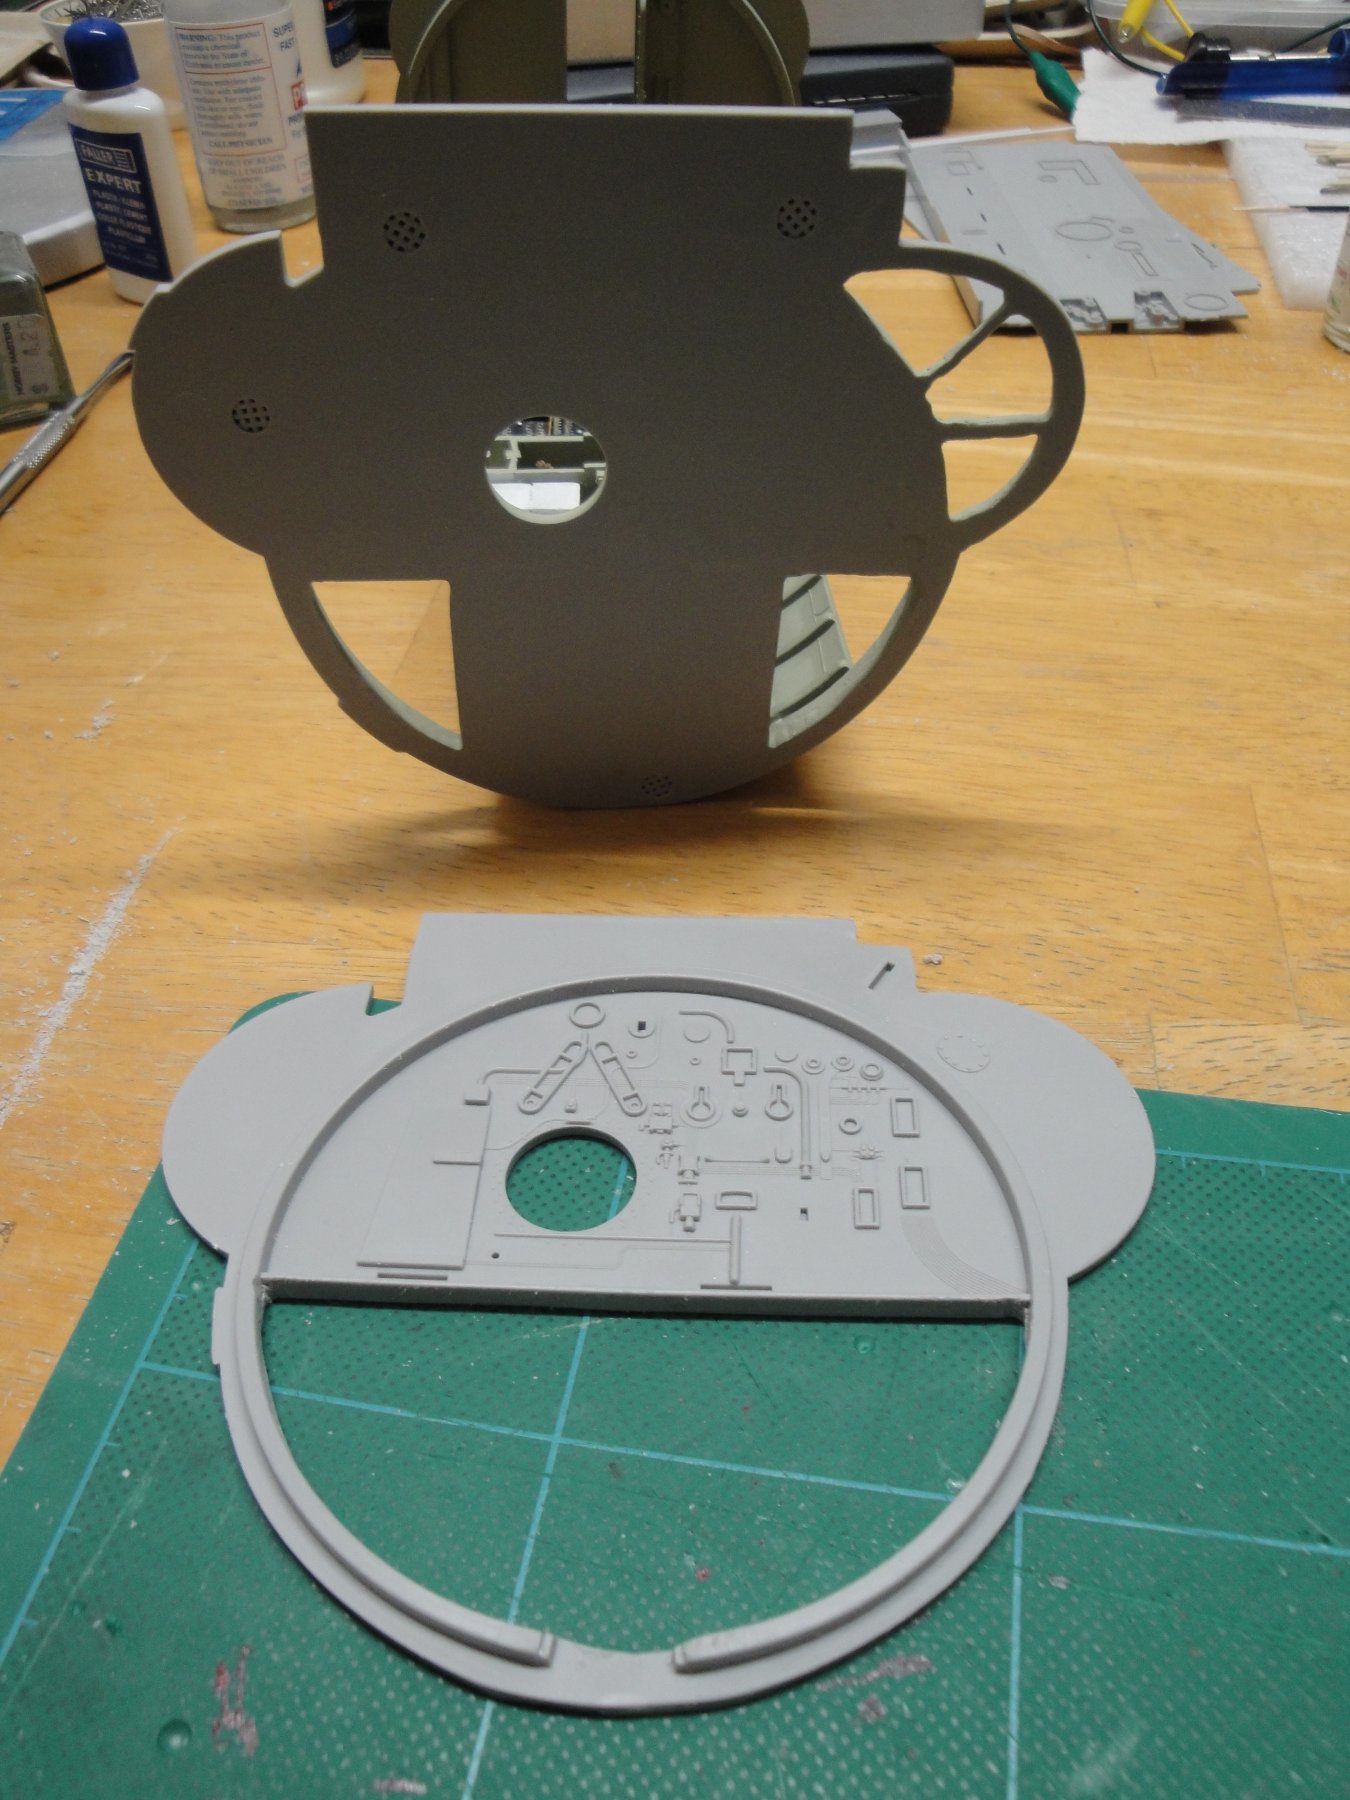
Working on the Officer's quarters. I am no longer following Trumpeter's guidance, because of the arrangement done underneath. In the official manual, you are not supposed to glue the final bulkhead until the end. My approach is a little bit more complicated and delicate. Nothing near the bulkheads can be installed yet. The main floor will slide into the pressure hull from behind: And the toilet facility: Yes, real paper.... Yves

- 760 replies
-
- 22
-
-
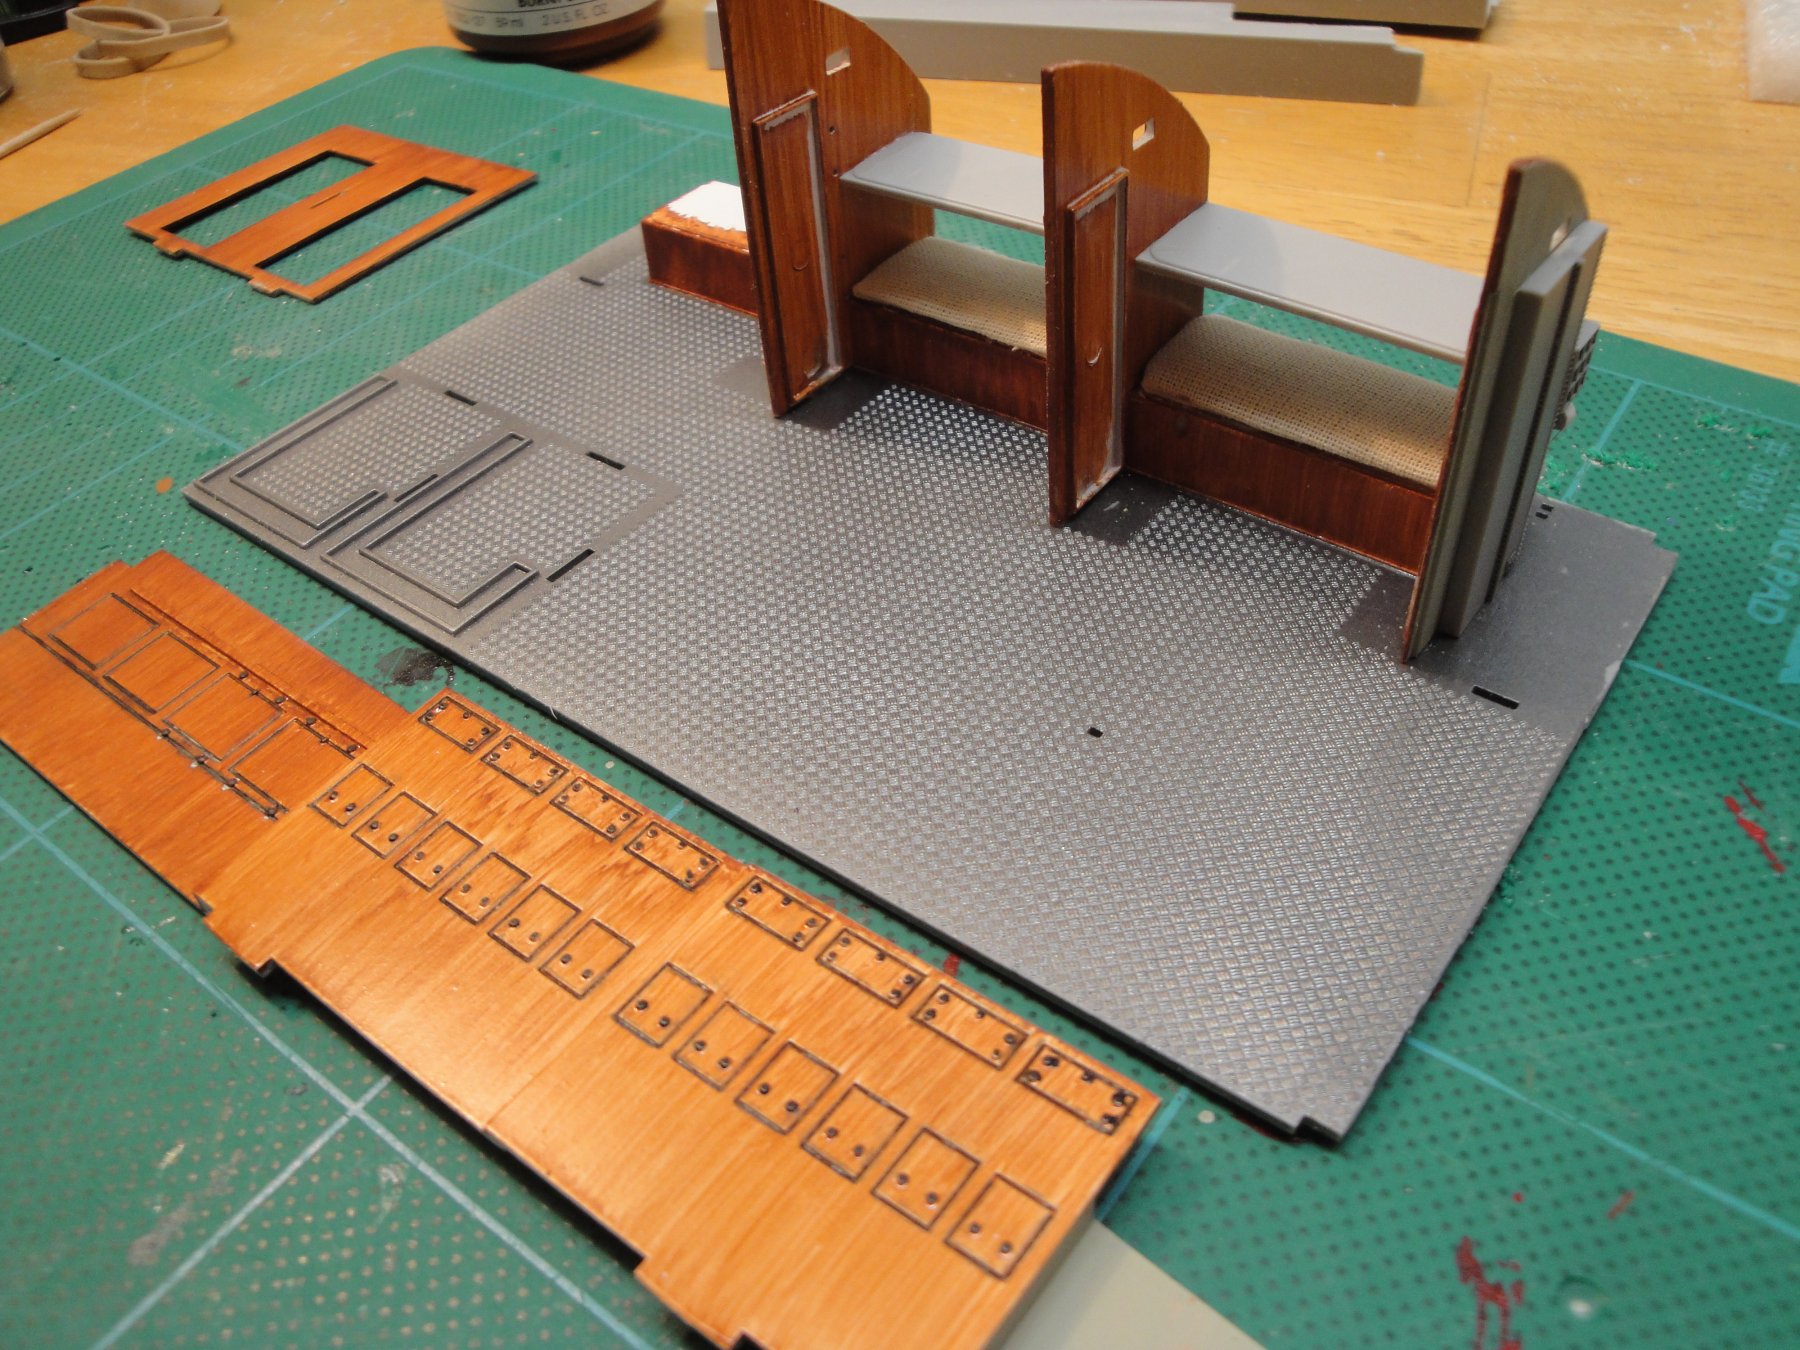
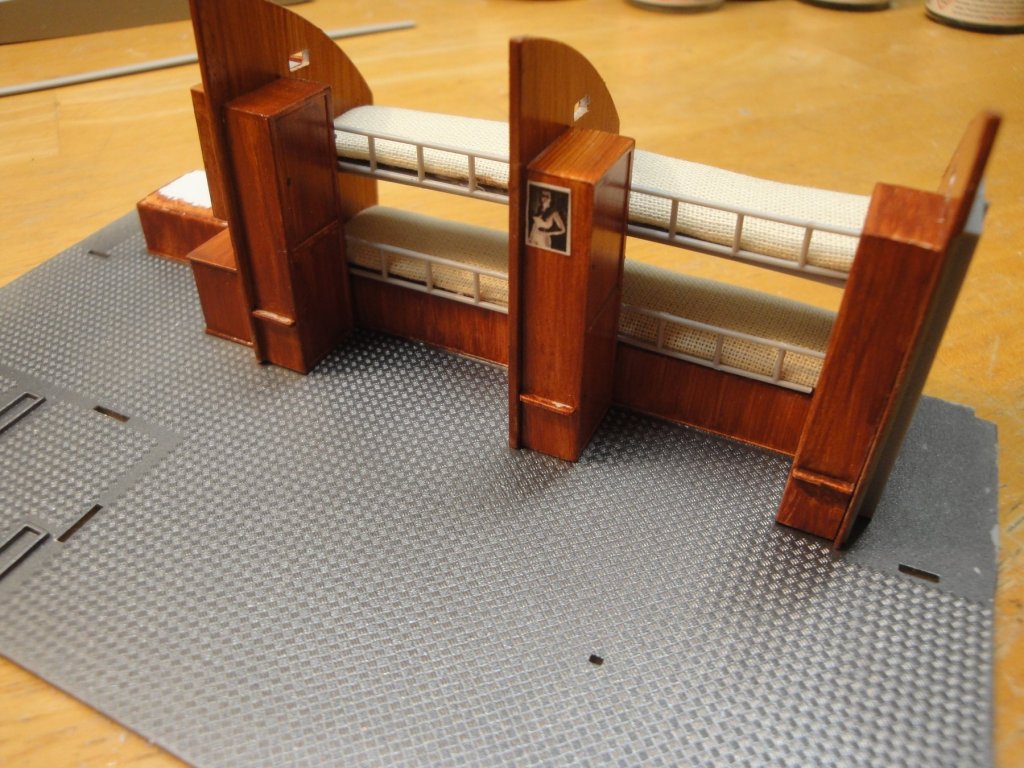
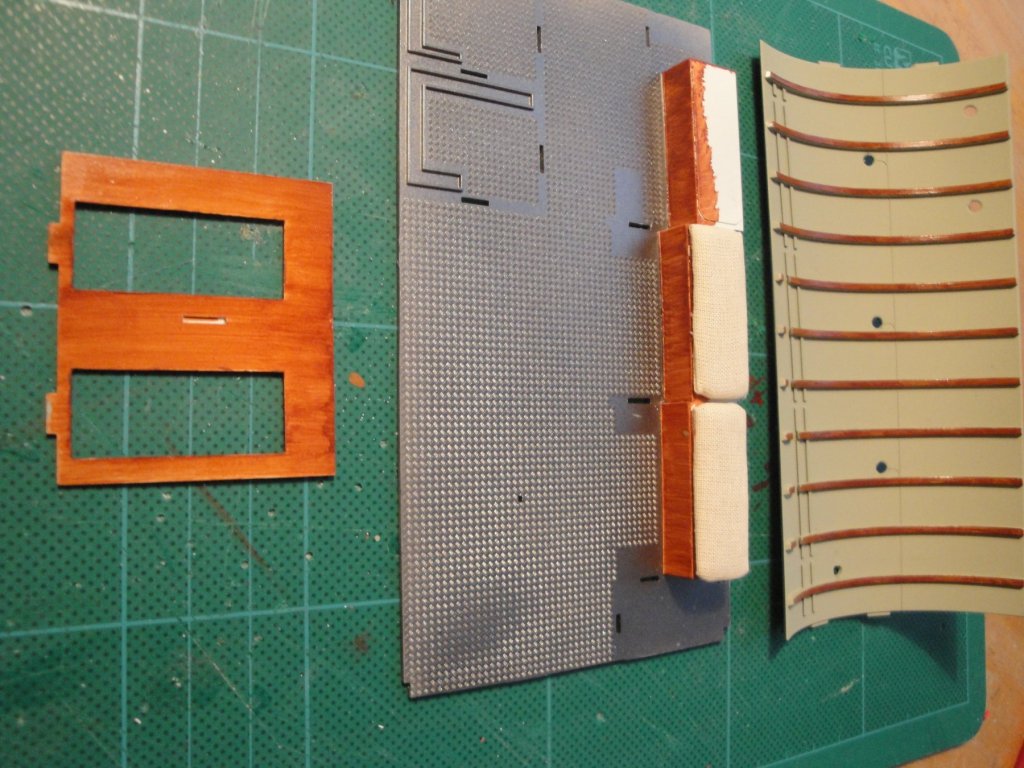
And so it is.... The wood effect is created by first painting all the parts flat white. Then with Burnt Sienna acrylic paint, do a very light dry brush with a flat and wide brush. Go gently first, and then increase as you wish. Finally, a coat or two of ClearKote to varnish the whole. Personally, I do not want my woods too shiny. I doubt that during the war, they had perfect and highly polished sheets of wood installed on all these submarines. Beds are done with micro-bubbles plastic sheet (the one provided in the Kit, to protect the sprues) covered with real fabric, neatly folded and glued. The last bed is the Captain's bed and I need to find something that will mimic the leather. Yves
- 760 replies
-
- 14
-
-
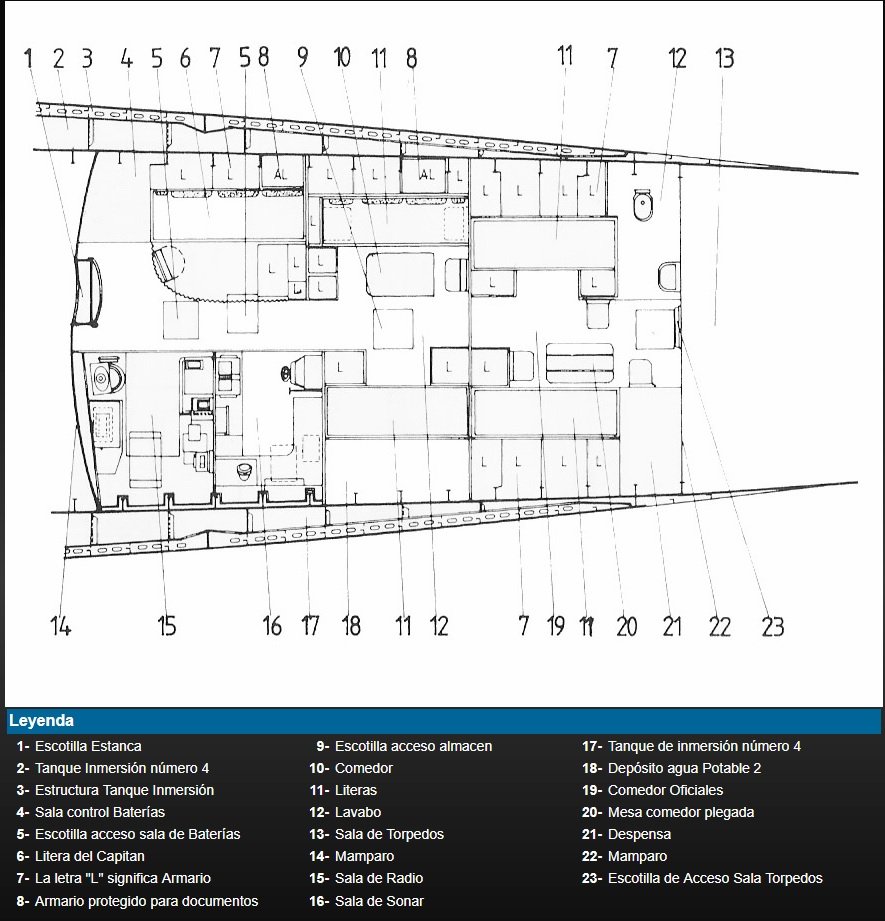
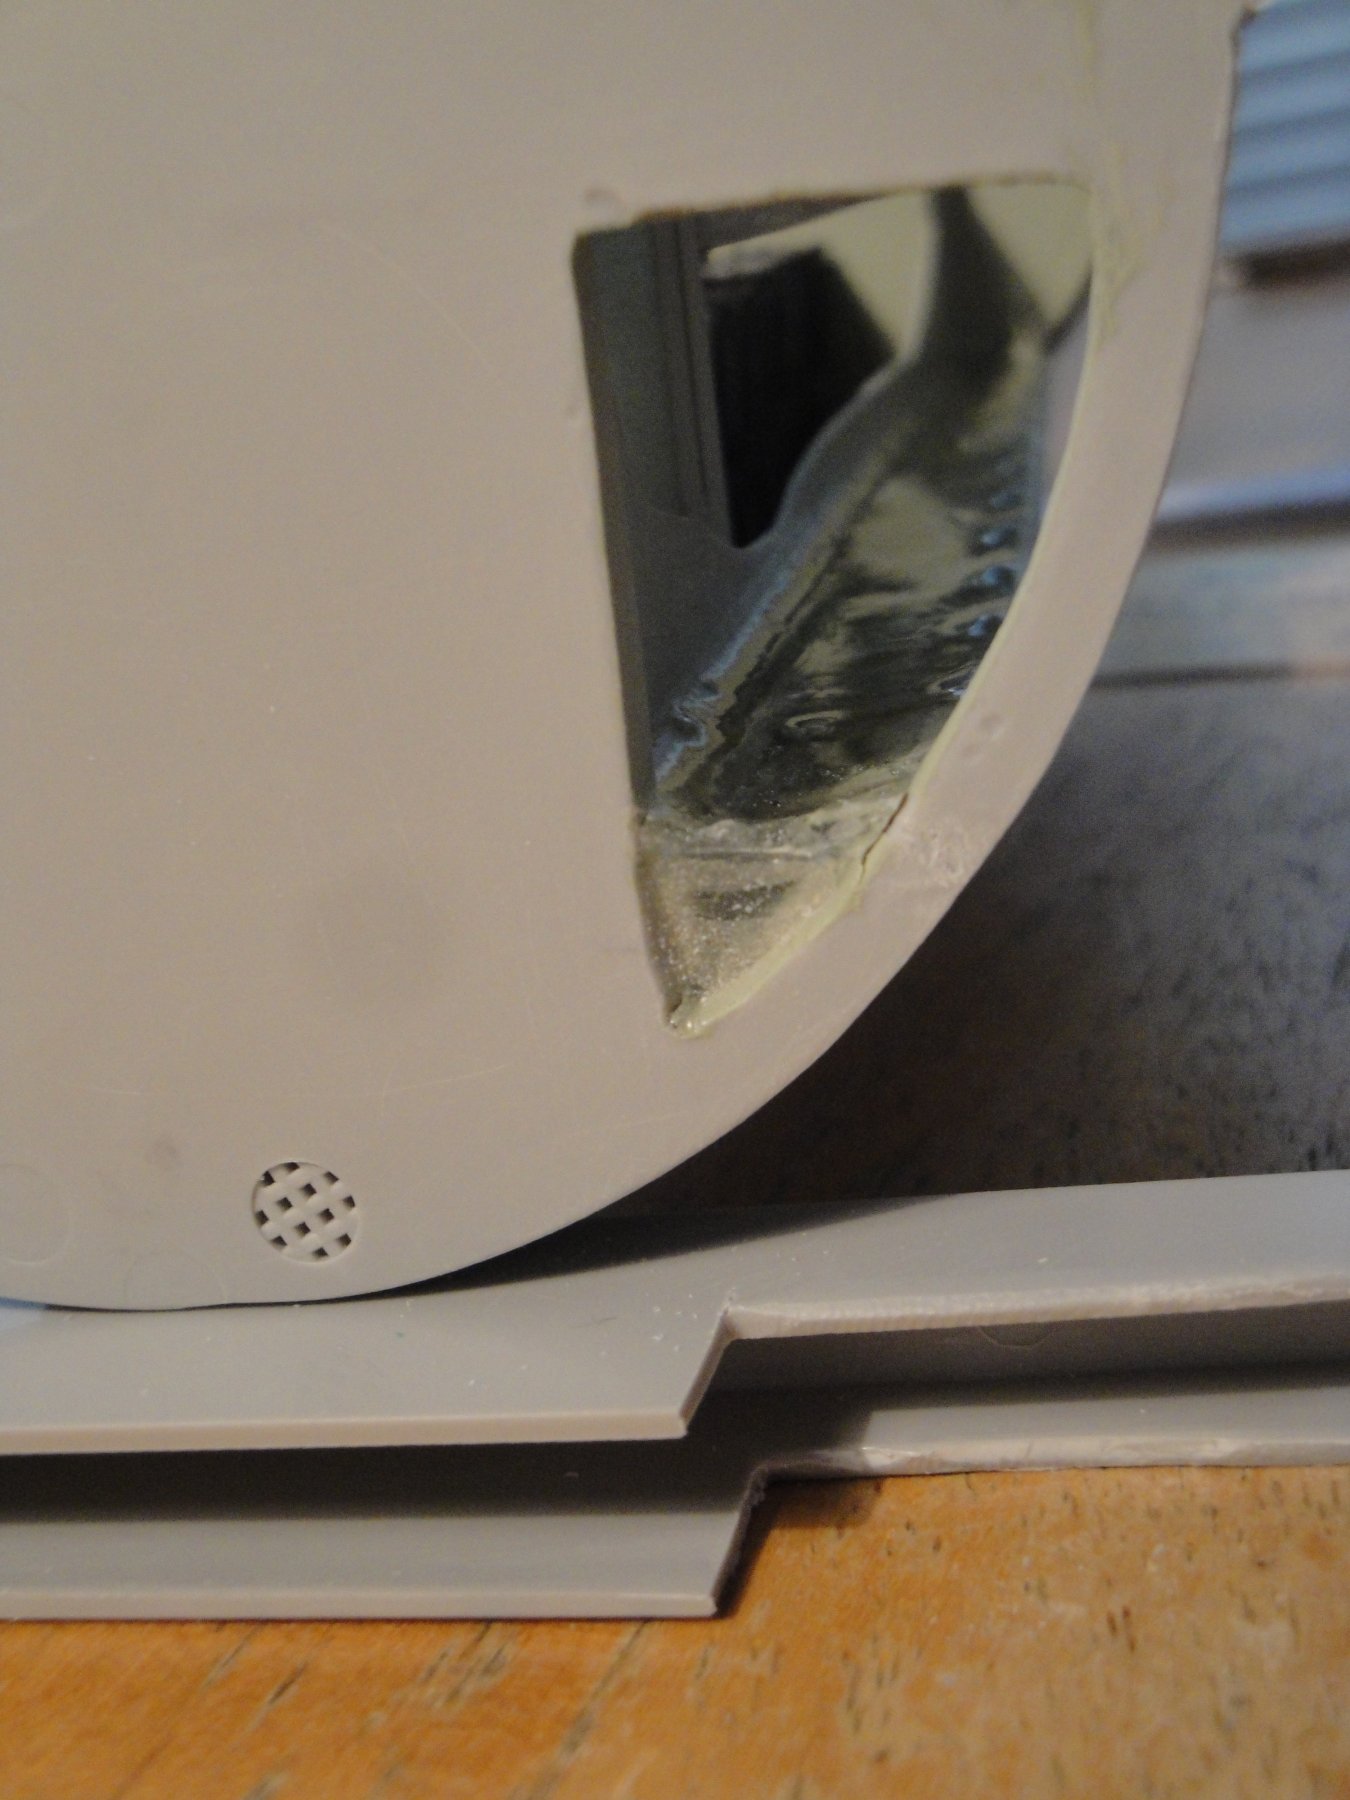
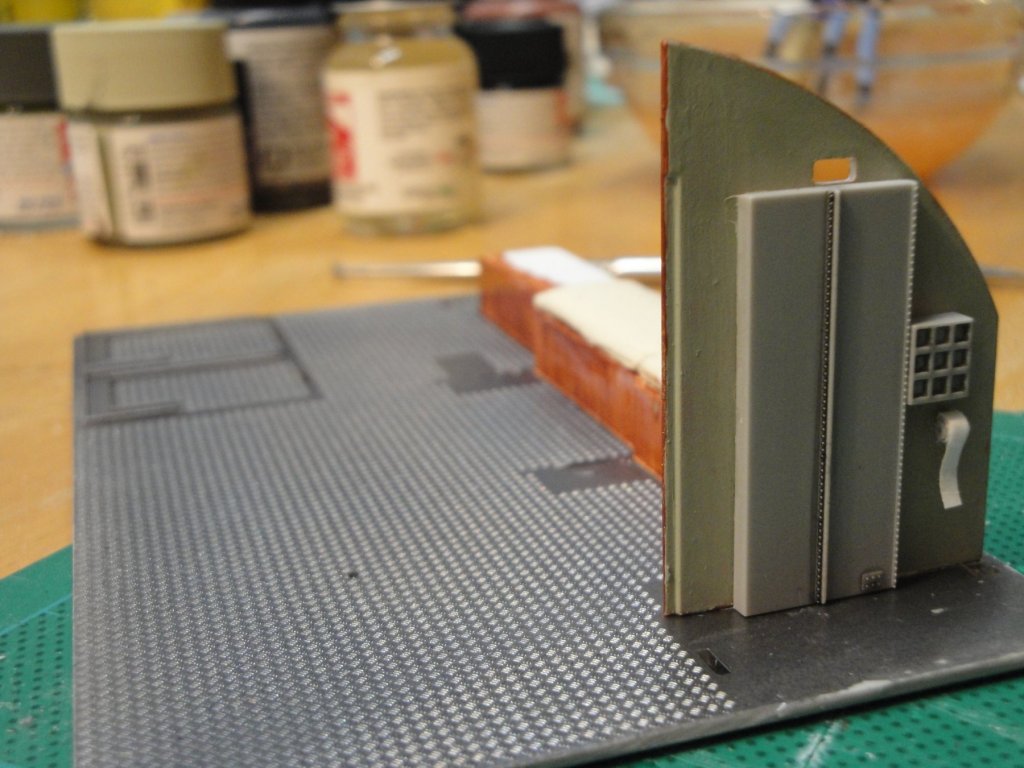
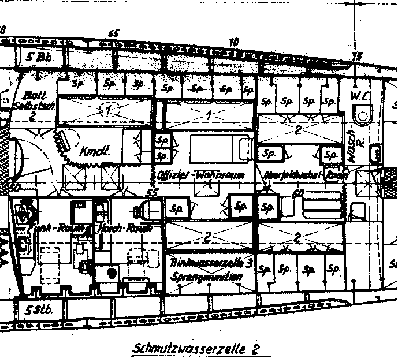
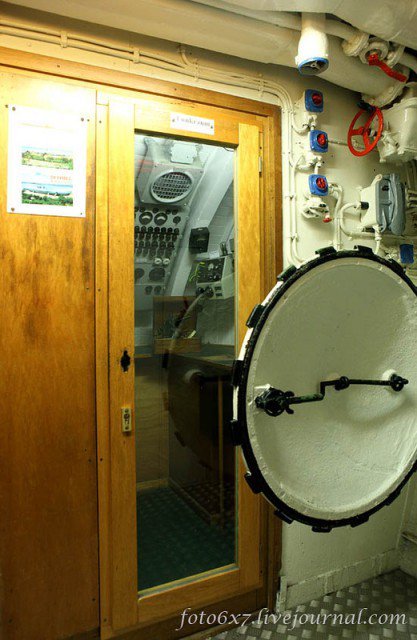
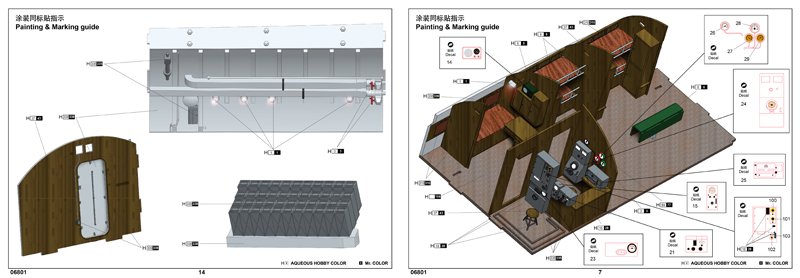
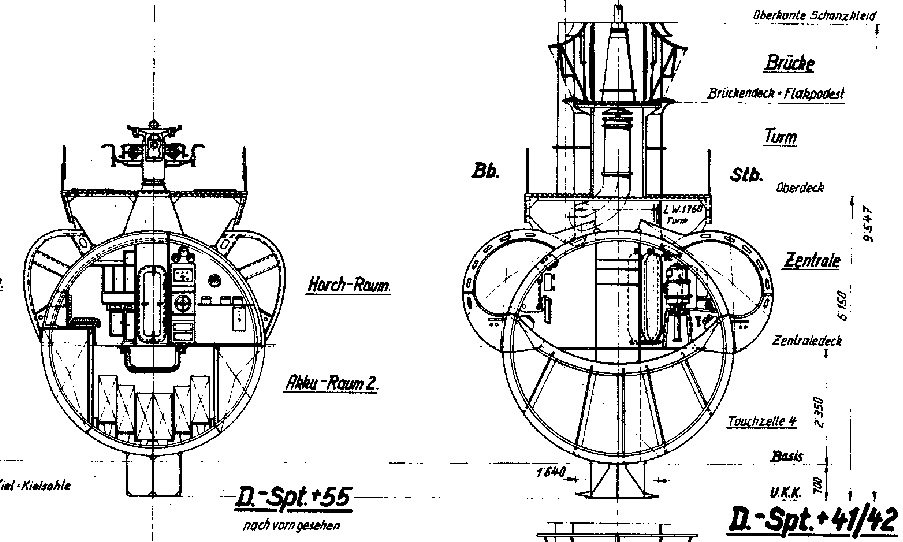
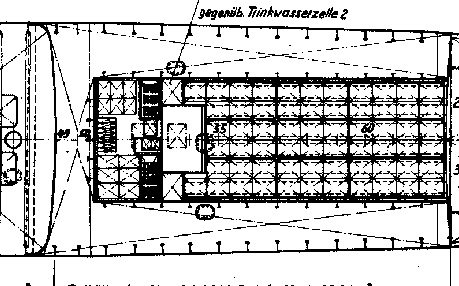
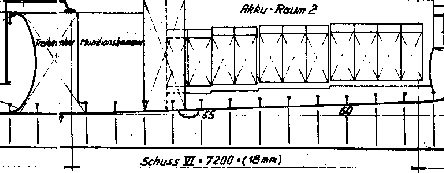
We are now moving to the top floor of that section of the ship. Let's present the challenges with a few plans: From the right (bow) to the left (stern), we have: - Toilet room with a small lavatory (port side) - Groceries/Food closet on the other side (starboard) - Four bunks for the less ranked officers. That included the chief mechanic and Engineers. A table is permanently erected to allow them to write or take their meals. This area is located between Frames 71 and 74. - Four other bunks for the main officers. Usually there were only three of them in service and thus one of the top bunk was always folded against the wall. On the starboard side, there is a tank with fresh water that will not be represented on this model. Space is between Frames 71 and 68, approximately. - The captain quarter: only one to have some kind of privacy with a curtain, a small table and a bunk covered with leather (and not fabric like all the other bunks). - On the starboard side, we have the listening room (hydrophones and early Sonar systems) and then the Radio room. - On the Port side, there is an electrical closet where all the wires from Battery bank #2 are terminated and switched. - In the hallway, there are three openings: one to access the ammunition magazine (left side), one opening to access the waste tank and one opening to access the battery bank #2 (center). These are used to replace cells or to allow a technician to perform the maintenance of the batteries on the little sliding tray, suspended to the ceiling. The doors to the radio and listening room are missing from the Trumpeter kit. The doors that are currently on the U-995 have been installed to prevent the public from tampering with the delicate and precious radio and electronic equipment (left picture). In fact, when looking carefully at the plan and from archive pictures, the doors were likely made of two panes such as below (right picture): The final drawing from U-Historia clearly shows the internal arrangement: Below is the Trumpeter rendition of the compartment under study: Lots of work and details in perspective..... Yves

.jpg.3329f20a2cc95987eb6f2d7573604e96.jpg)

-
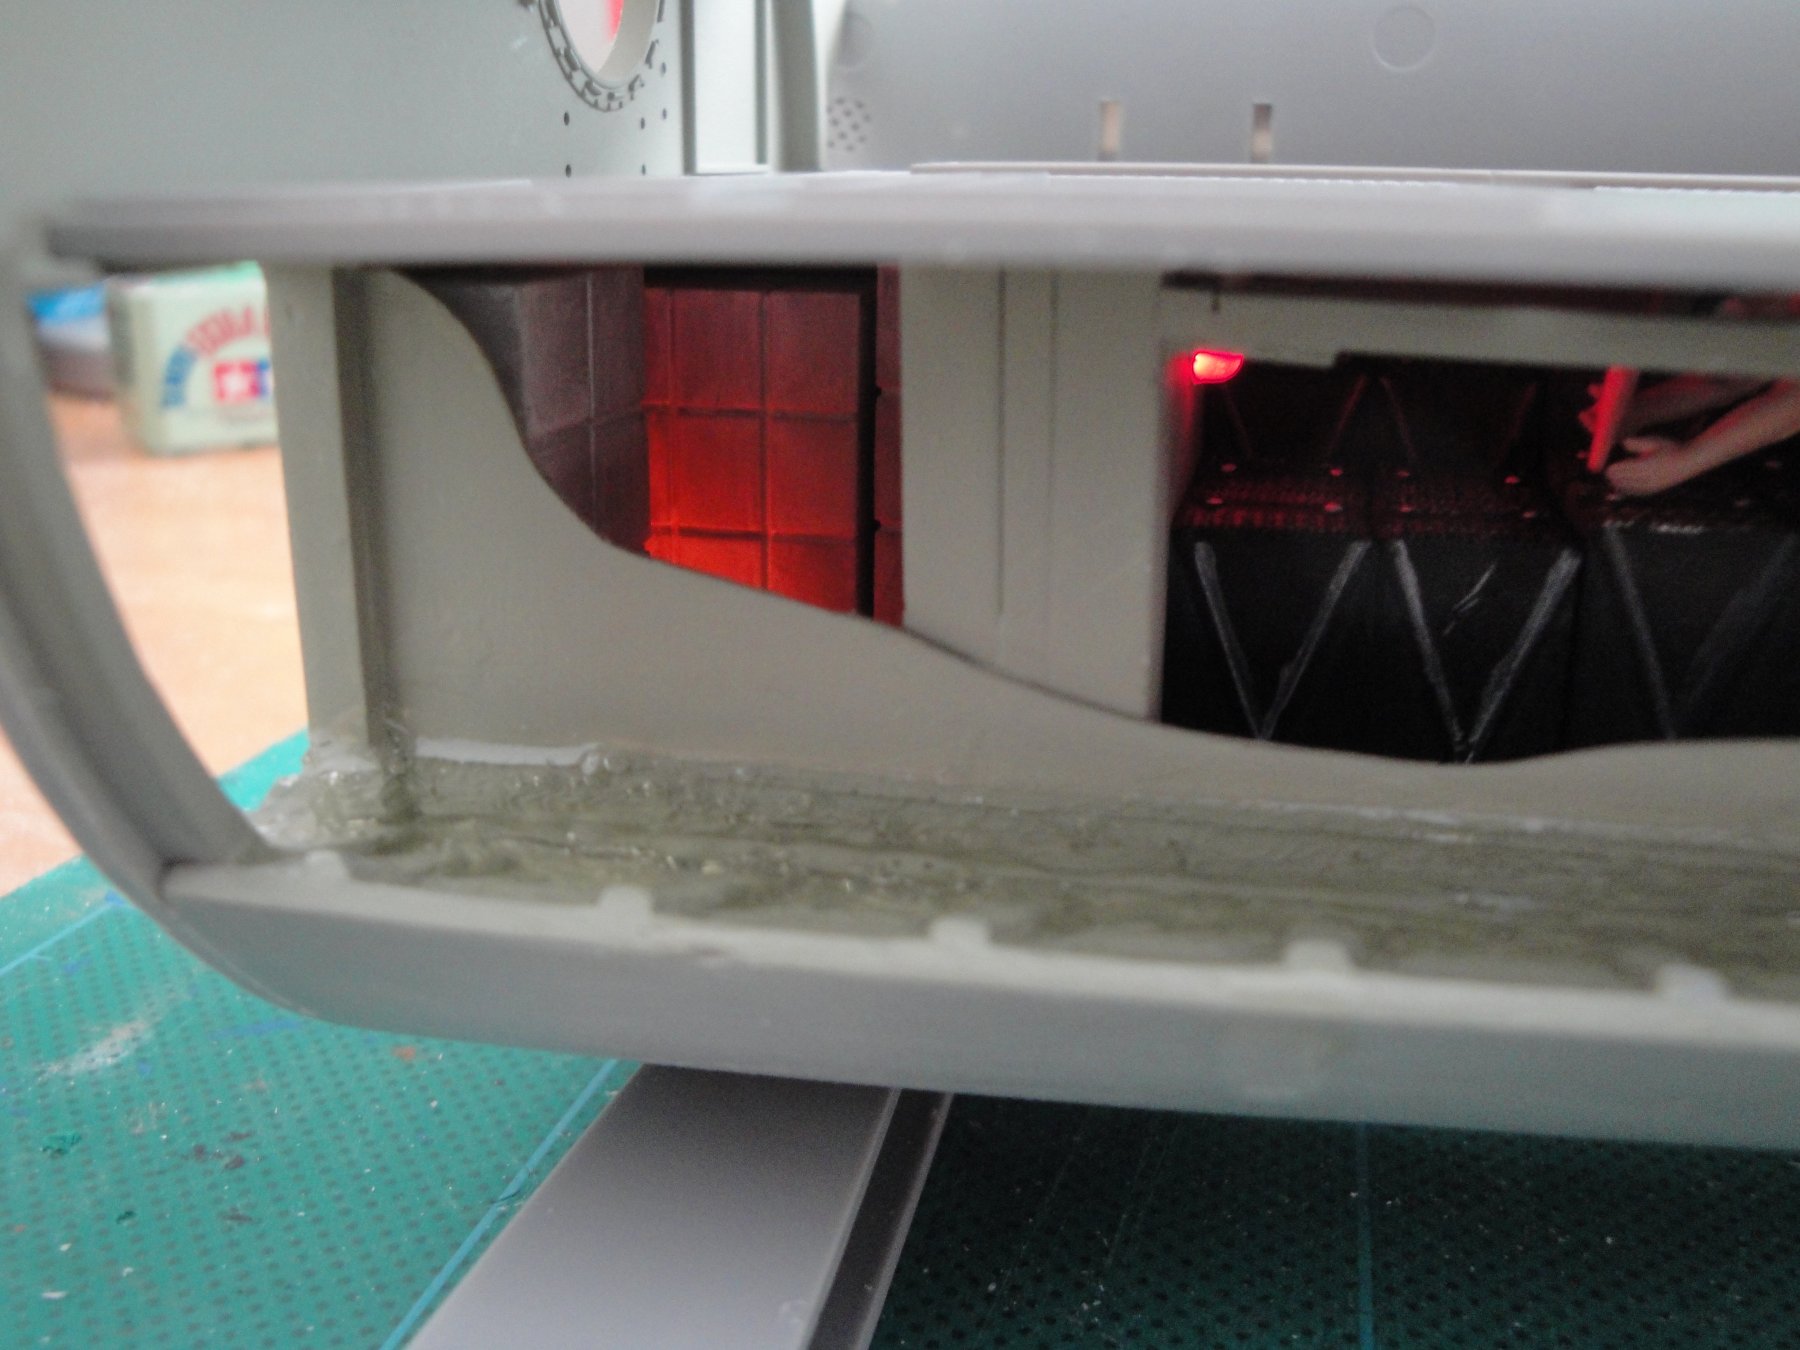
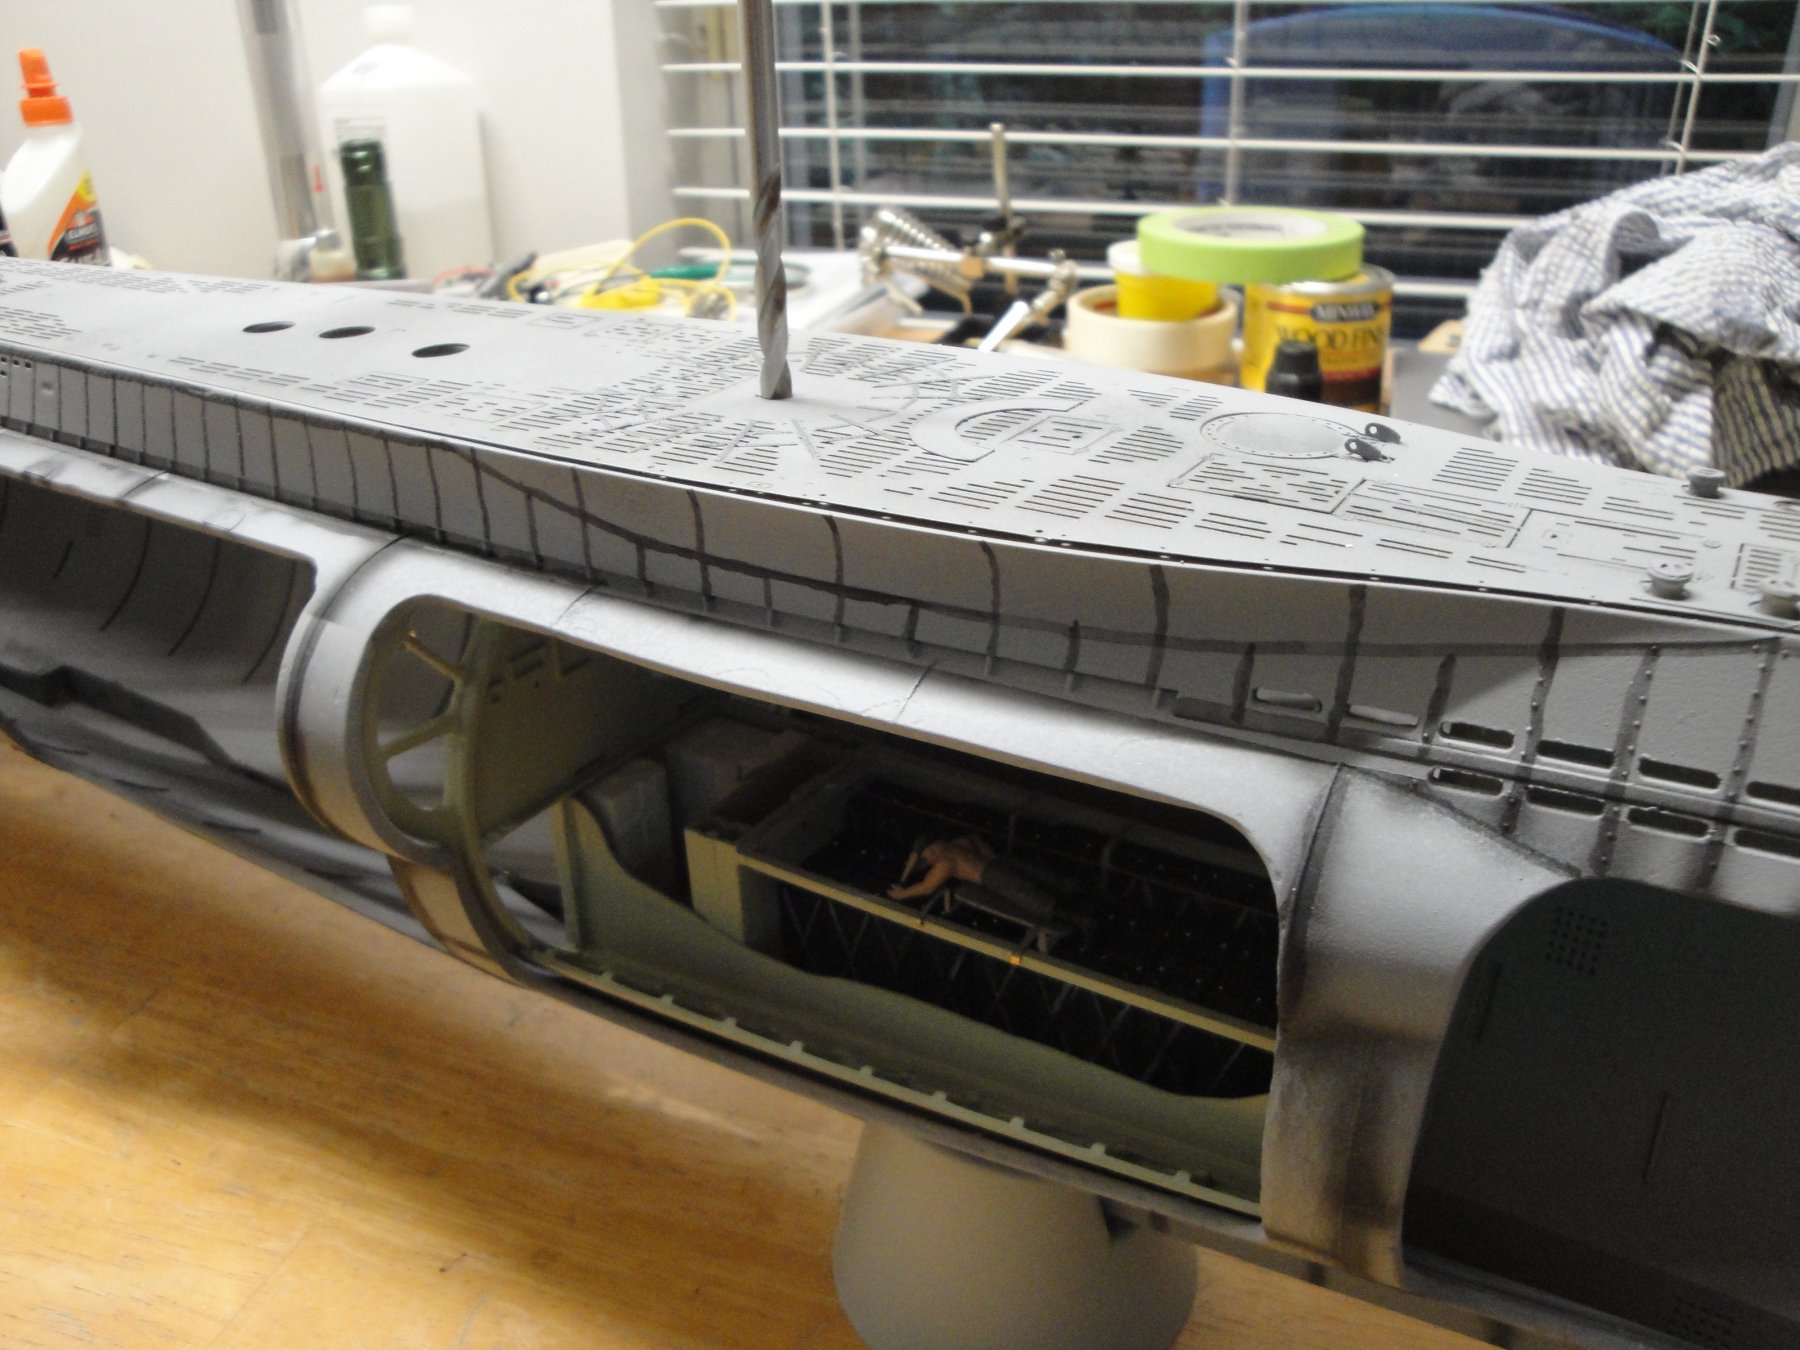
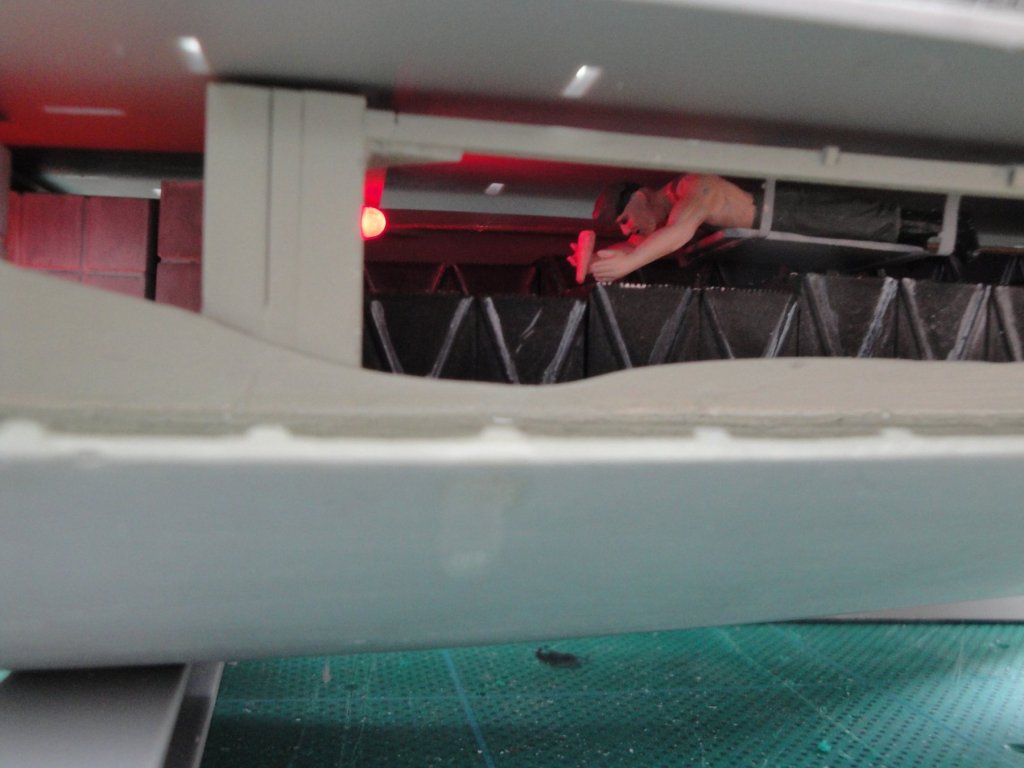
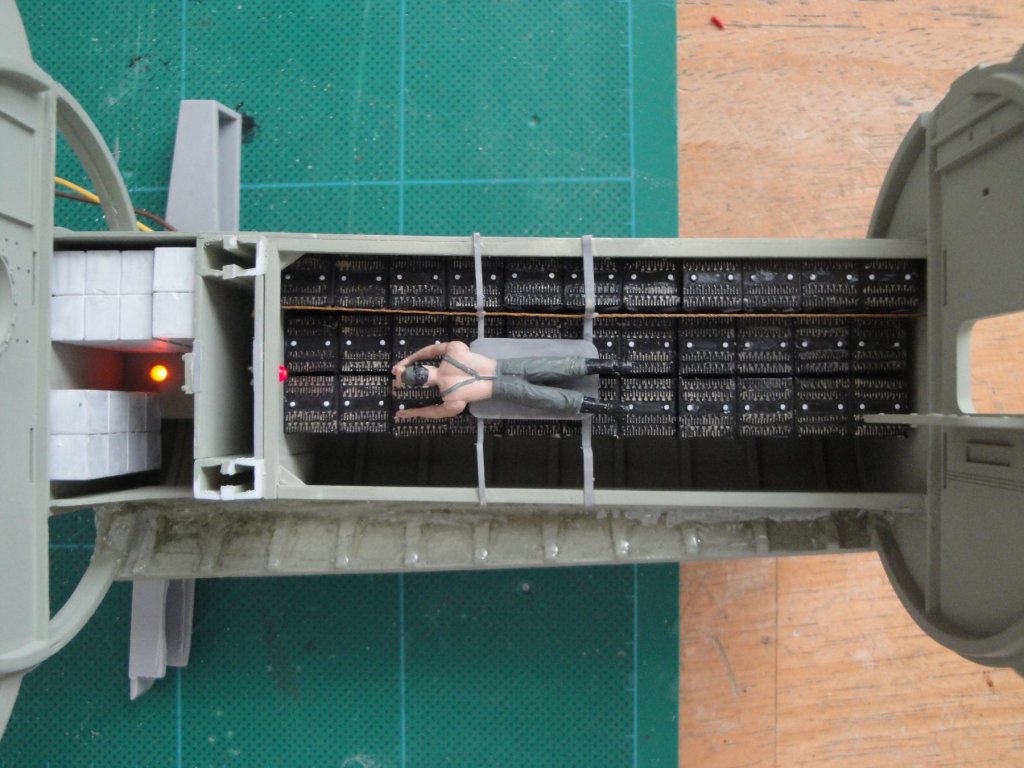
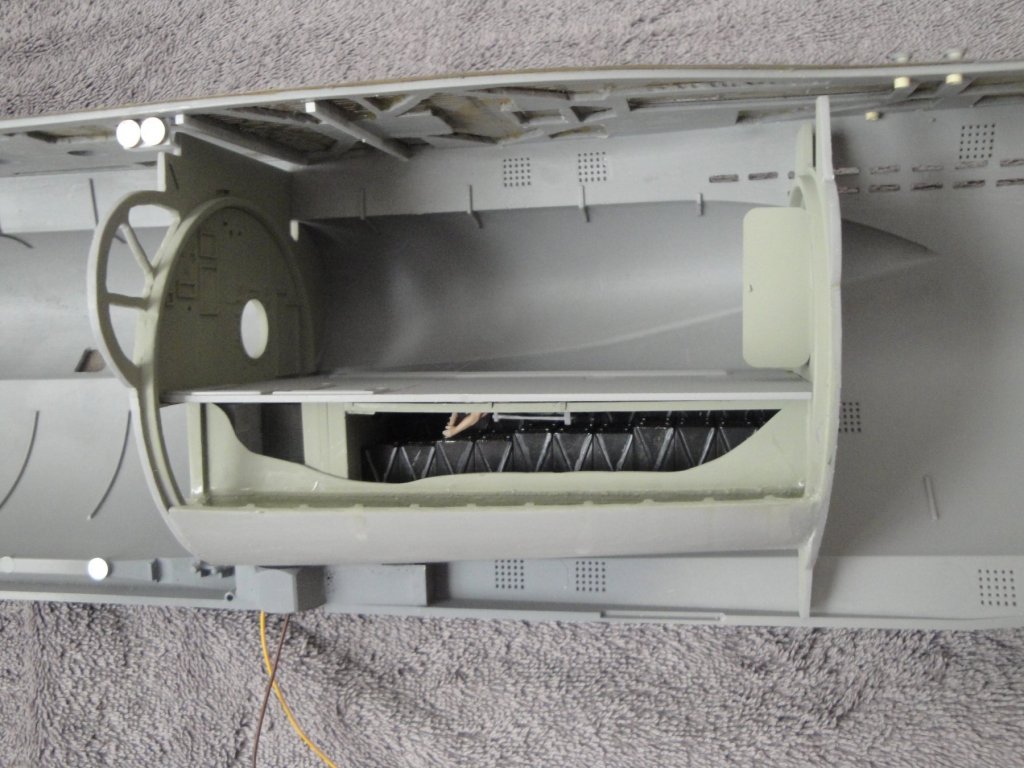
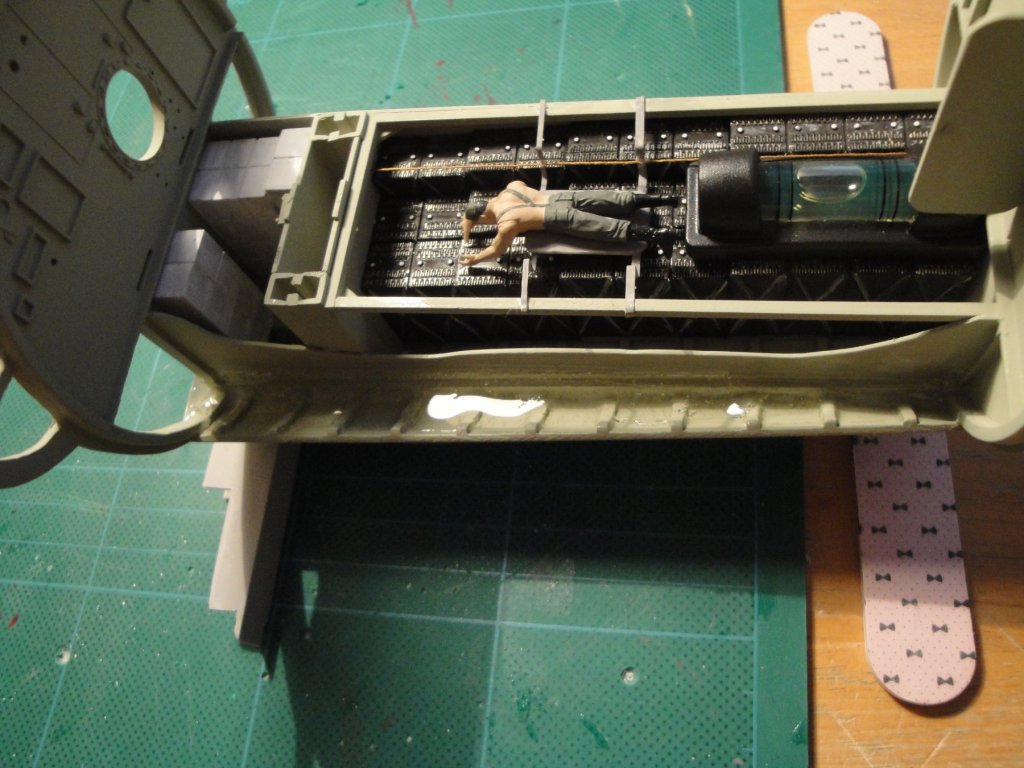
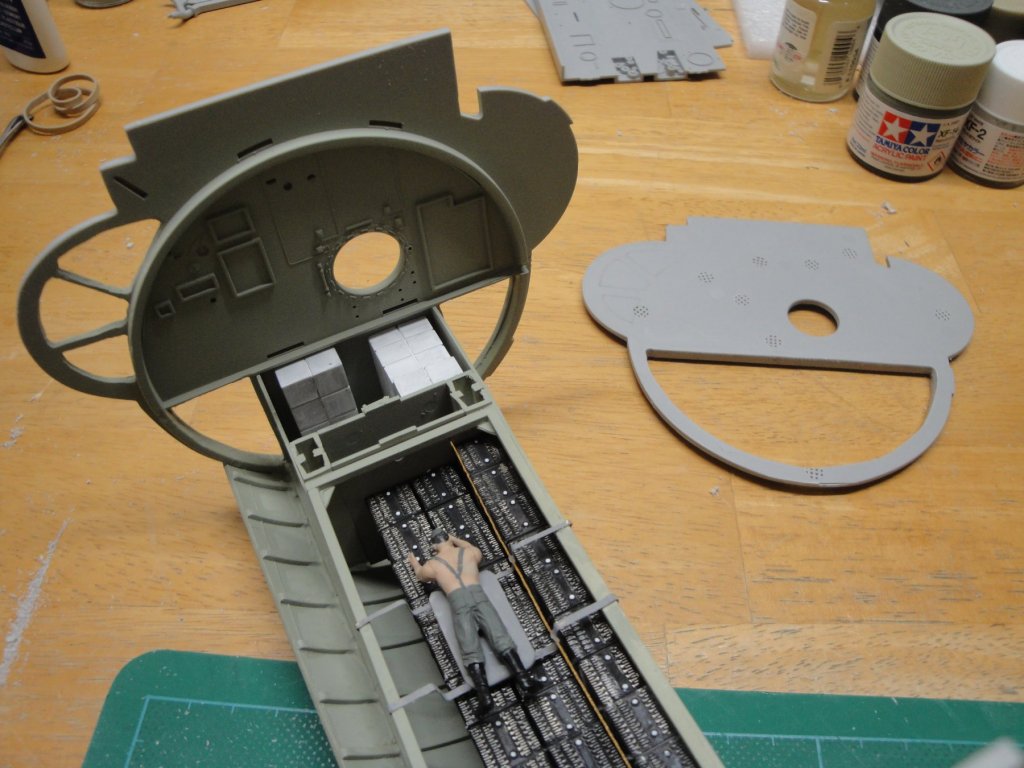
We are coming to an end for the lower section of that Officers/sub-officers compartment. I have spent enough time on that little area of the ship, which will be barely visible from the outside. Again, it is just the pleasure to know that it is there, as it should be. The diesel fuel has been completed (at least for that section): This is done with three heavy coats of automotive clearcoat. It is actually pretty realistic and depicts the clear diesel fuel sitting at the bottom of a somewhat dirty tank. This fuel will also be present under the next module (control room). To help the observer and draw his/her attention to that specific location, I have installed two LEDs: one for the battery compartment and one for the ammunition magazine. The magazine will have a fellow sailor, resting one hand on the ladder, while inventorying the ammunition. From the outside, not much will be visible and you will have to twist your neck and strain your eyes to perceive the essence of that section: One last picture before we seal the battery compartment for ever.... From left to right, ammunition magazine, wasted water tank (middle), two fresh water tanks and a large Battery bank #2. On each side, fuel tank #2, merging under the control room (module located to the left). The second half of the fuel tank (port side) has not been represented. Enough insanity like that. Finally, the module in place in the hull: Next: - The gun stand - The officers and radio compartment. Lots of wood simulation for that one. Yves


- 760 replies
-
- 17
-
-
What a lovely boat: The perfect daysailer. I am looking forward to see how you will build that model. Yves
-
The insanity continues. I have decided to show some fuel (Diesel) in the tanks: This is done with Automotive Clearcoat (not pulverized/sprayed) and therefore a lot less toxic. Diesel fuel being transparent, epoxy resin did not fit too well (at least I do not have a clear resin at hand). We will see how it goes and if it finally dries as there is a thick coat in that tank. Next is the support for the canon, on the deck: Please someone calls the "White Coats"...... Yves

- 760 replies
-
- 20
-
-
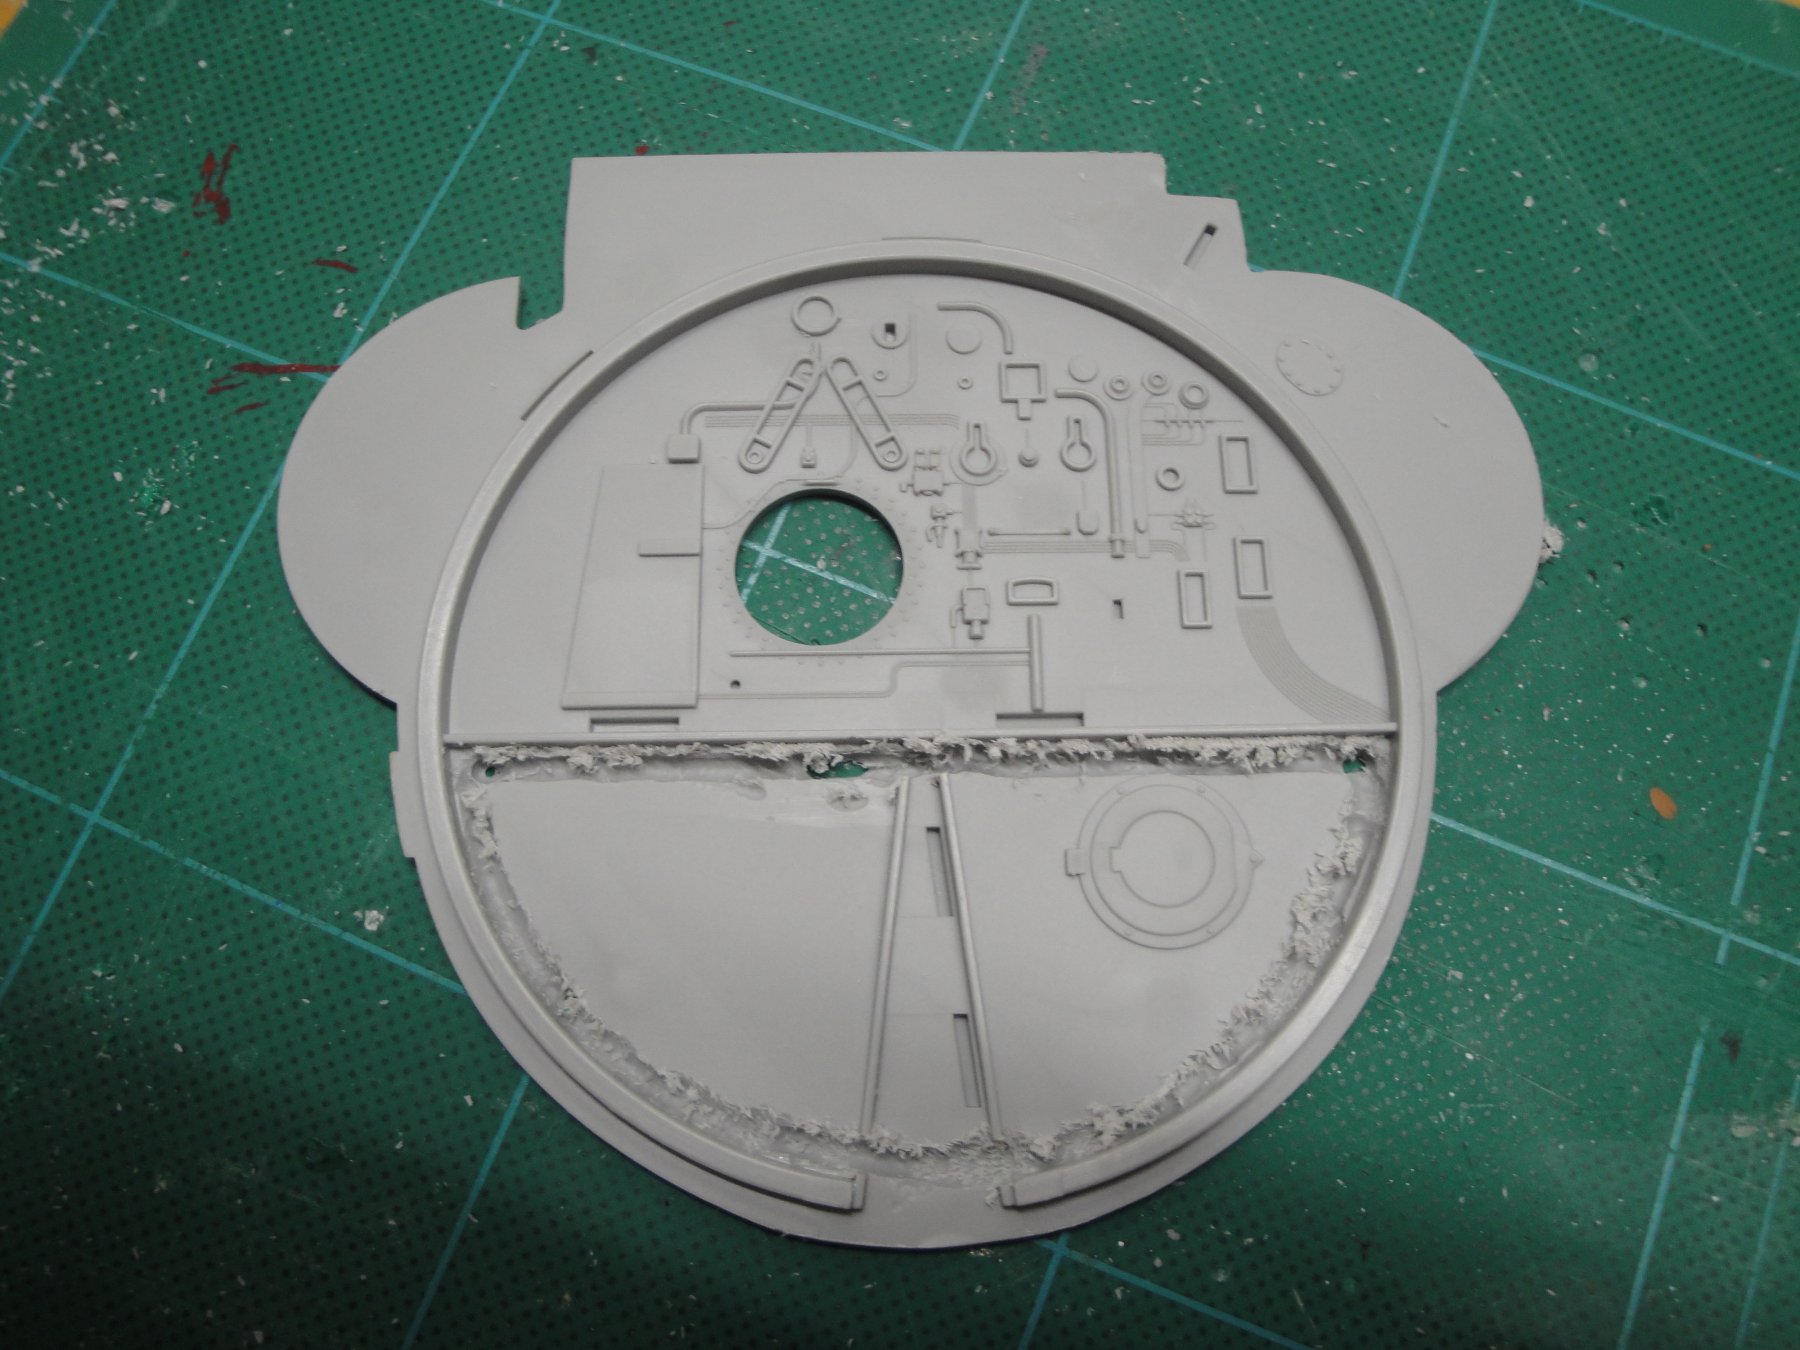
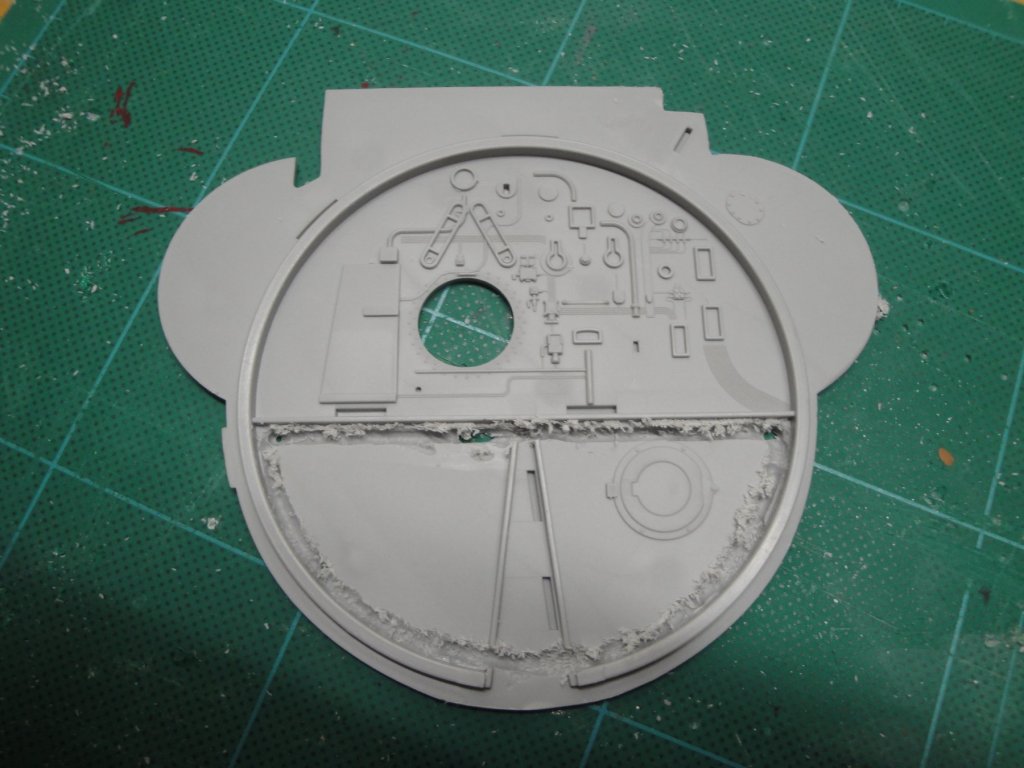
I have been doing more reading and studying the plans of the Type VIIc and there is no way I can accept the crude implementation of "the Trumpeter" for my model. So, we are going to do some delicate surgery to open the bulkhead and represent the Fuel tanks in the correct way: Basically a "U" shaped tank located under and around the batteries and slightly under the control room. Below is the bulkhead between the Battery #2 compartment and the Control room (in the process of being cut): After cleaning the opening: Similarly the battery compartment is opened to match the contours of the fuel tanks on each side: and... I still have to cut the openings for the saddle tanks. More details will follow. I need to fabricate a round shape to implement the end of the fuel tank. There is a big mistake (not the first, and not the last) in the Trumpeter kit and it has to do with the floor of the control room. The kit provides a flat control room floor, where in fact the main platform was concave with just a flat plate in the middle. It is just impossible (at least for me) to modify the kit and that would prevent the observer to look into the control room and appreciate all the details of that very complex room. So, it will remain flat..... Yves


- 760 replies
-
- 13
-
-
Jack, That boat is a statement of your incredible skills. Very impressive. Yves
- 190 replies
-
- 2
-
-
- ragusian
- marisstella
- (and 1 more)
-
Should you not have a hole under the latrines, or are they using buckets? Yves
- 315 replies
-
- 3
-
-
- master korabel
- avos
- (and 1 more)