HOLIDAY DONATION DRIVE - SUPPORT MSW - DO YOUR PART TO KEEP THIS GREAT FORUM GOING! (Only 13 donations so far - C'mon guys!)
×


yvesvidal
-
Posts
3,589 -
Joined
-
Last visited
Content Type
Profiles
Forums
Gallery
Events
Everything posted by yvesvidal
-
 Fantastic. And thank you for detailing all the "secret" recipes for painting 🙂 Yves
 -
I love the sub-board that you are using to display the hull: very nice rendition of the water. Yves
-
35 years. I have seen the complete destruction of all Model Railroad clubs (O, HO, N, LGB) and most Hobby Shops. There is only one Hobby Shop left in Raleigh, NC called Nick's Trains. Small place but very useful. The reason the guy is still there is because he owns the land and the building. Yves
-
You guys are lucky. The HO layout is fantastic and the G scale outside is pretty neat. Great location to be in an old railroad station. Here in Raleigh, NC there is nothing and all the model railroad clubs have disappeared with one exception. Being the Capital of the state, the city council is more interested by filling up their pockets with the developers and the price of rents has killed all clubs one by one. Being in the "Triangle" with more than 4 millions people, it feels very lonely to be one of the rare people who model in 2 rails O scale and Scale 1. There used to be also a guy with a fantastic outdoor layout on Ten-Ten road, where you could actually ride on the cars. Parents started using his facility as a "watch-my-kids" place, while they went shopping elsewhere. He had to close his layout to the "stupid" public. The other great place (The Red Barn in Wilson) closed a few years ago, after being flooded and their HO layout on the second floor was dismantled. Very sad state of affairs around here. Yves
-
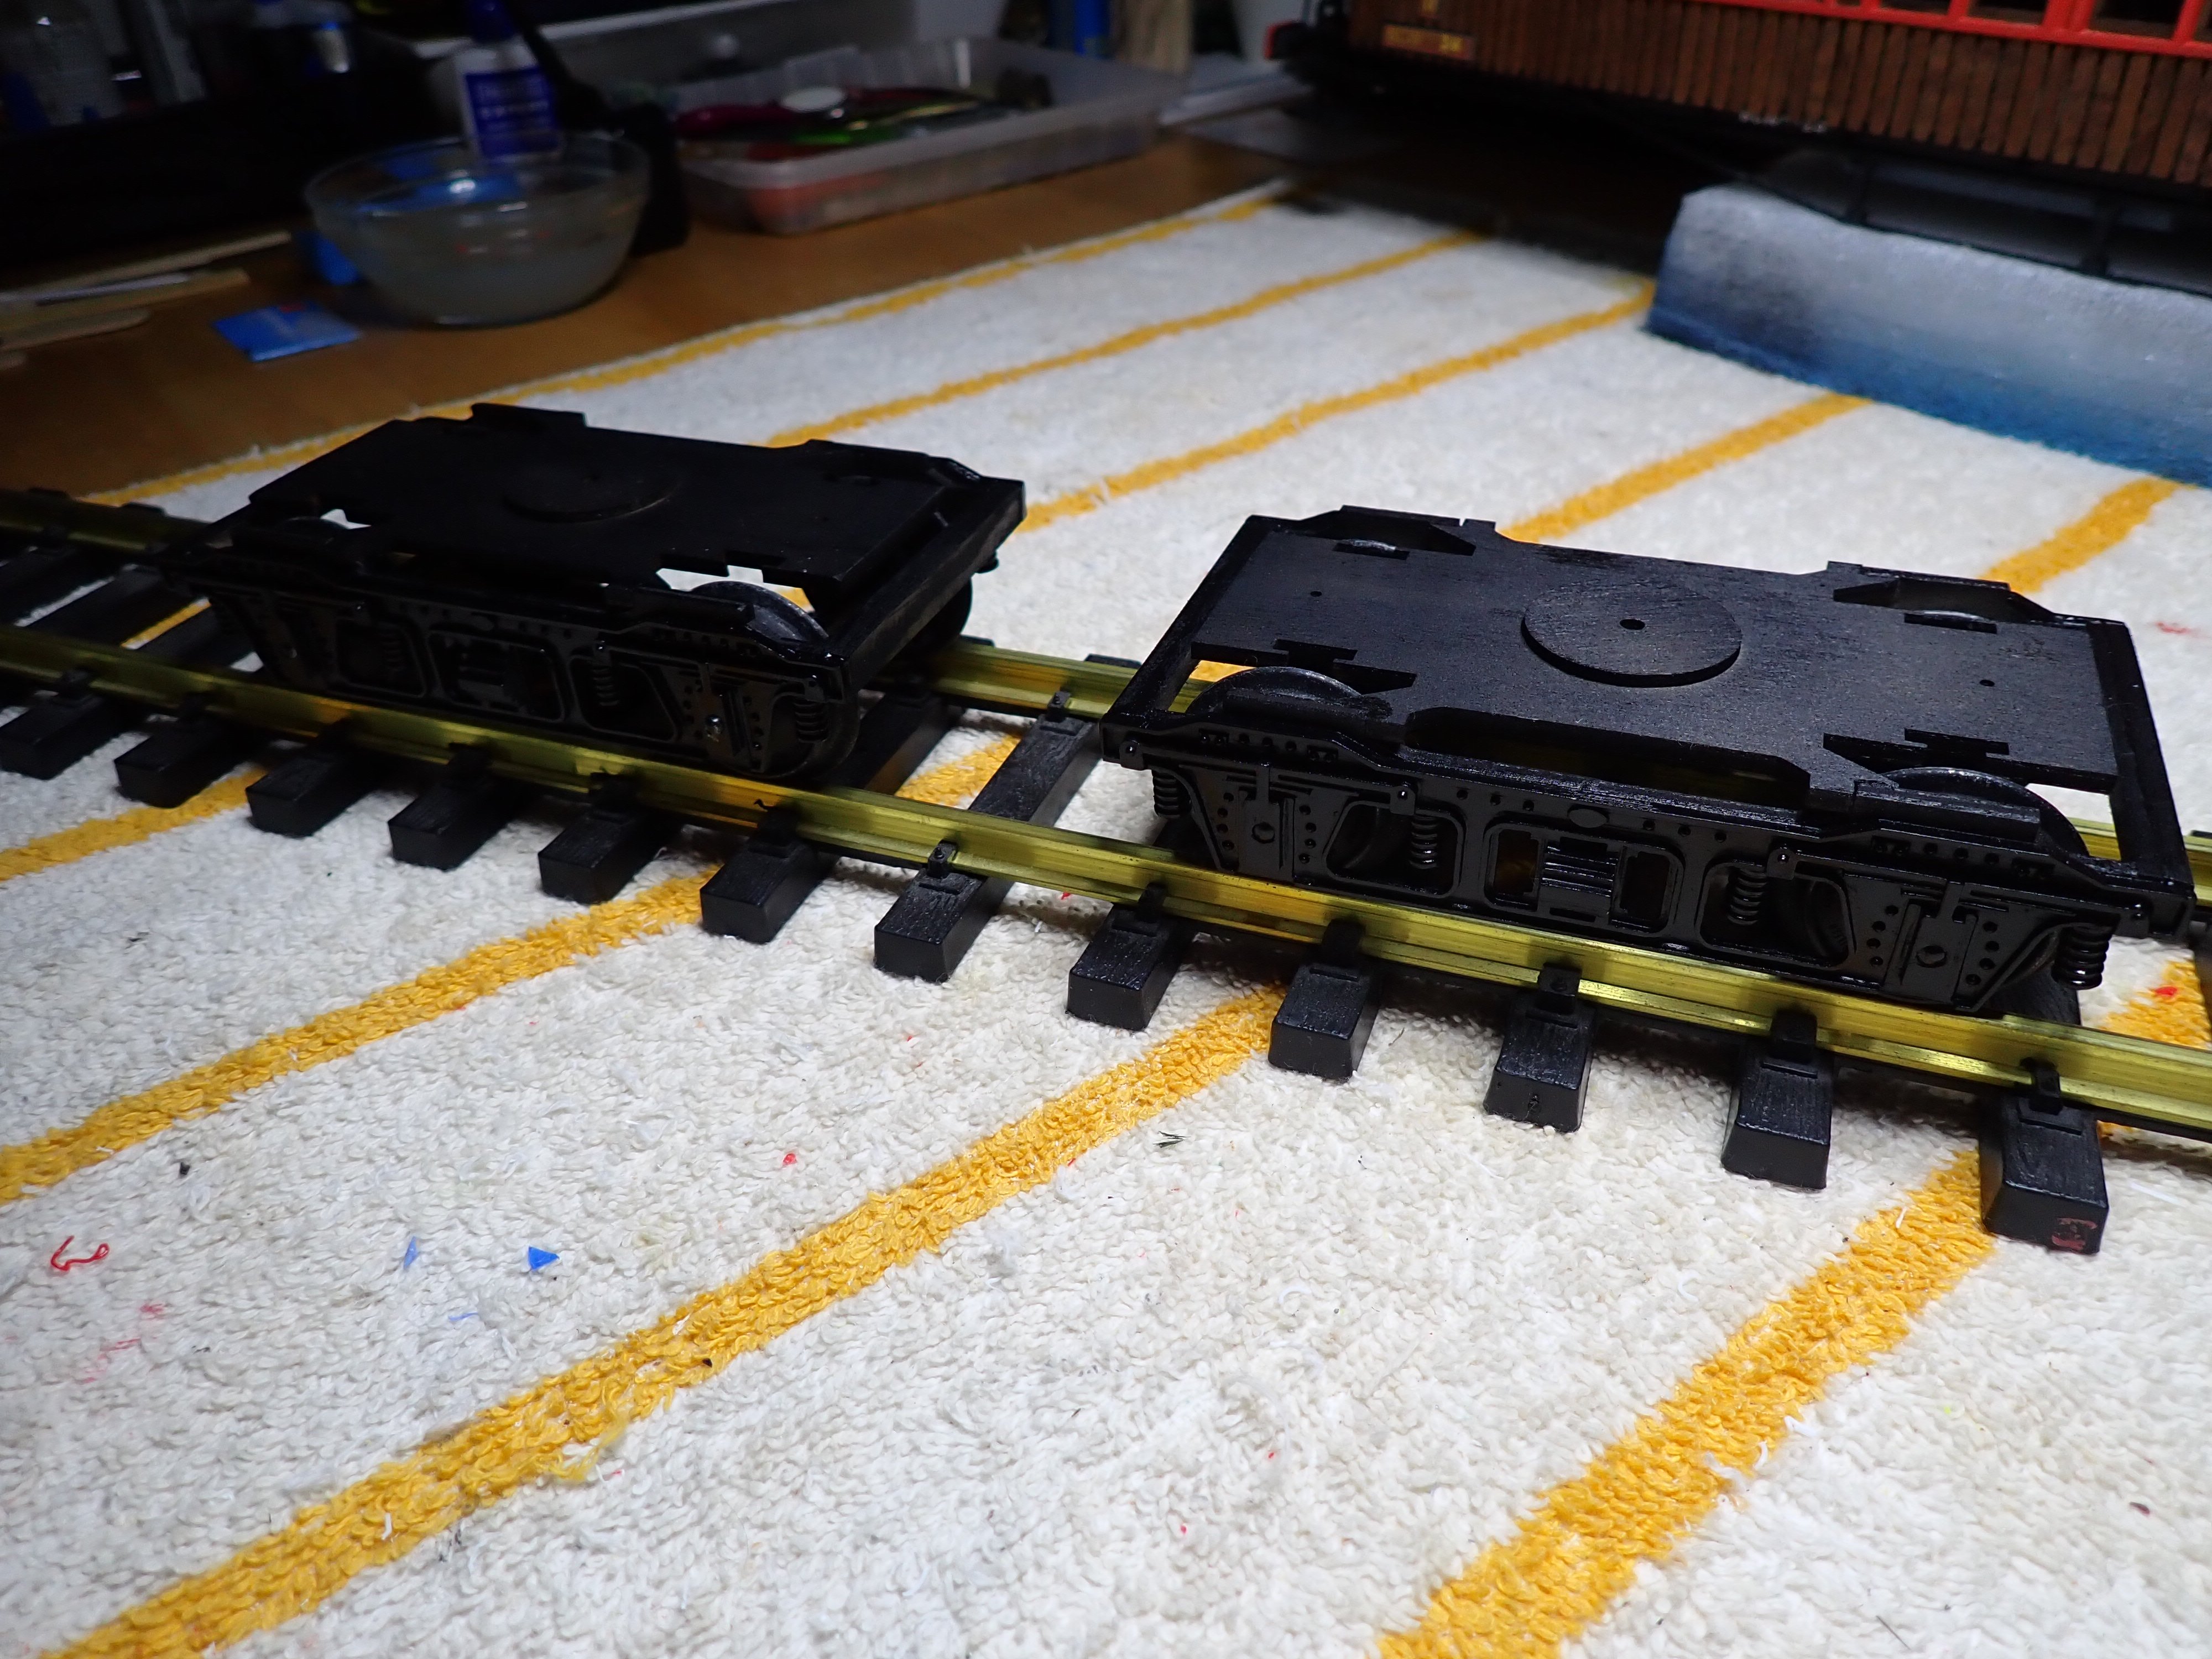
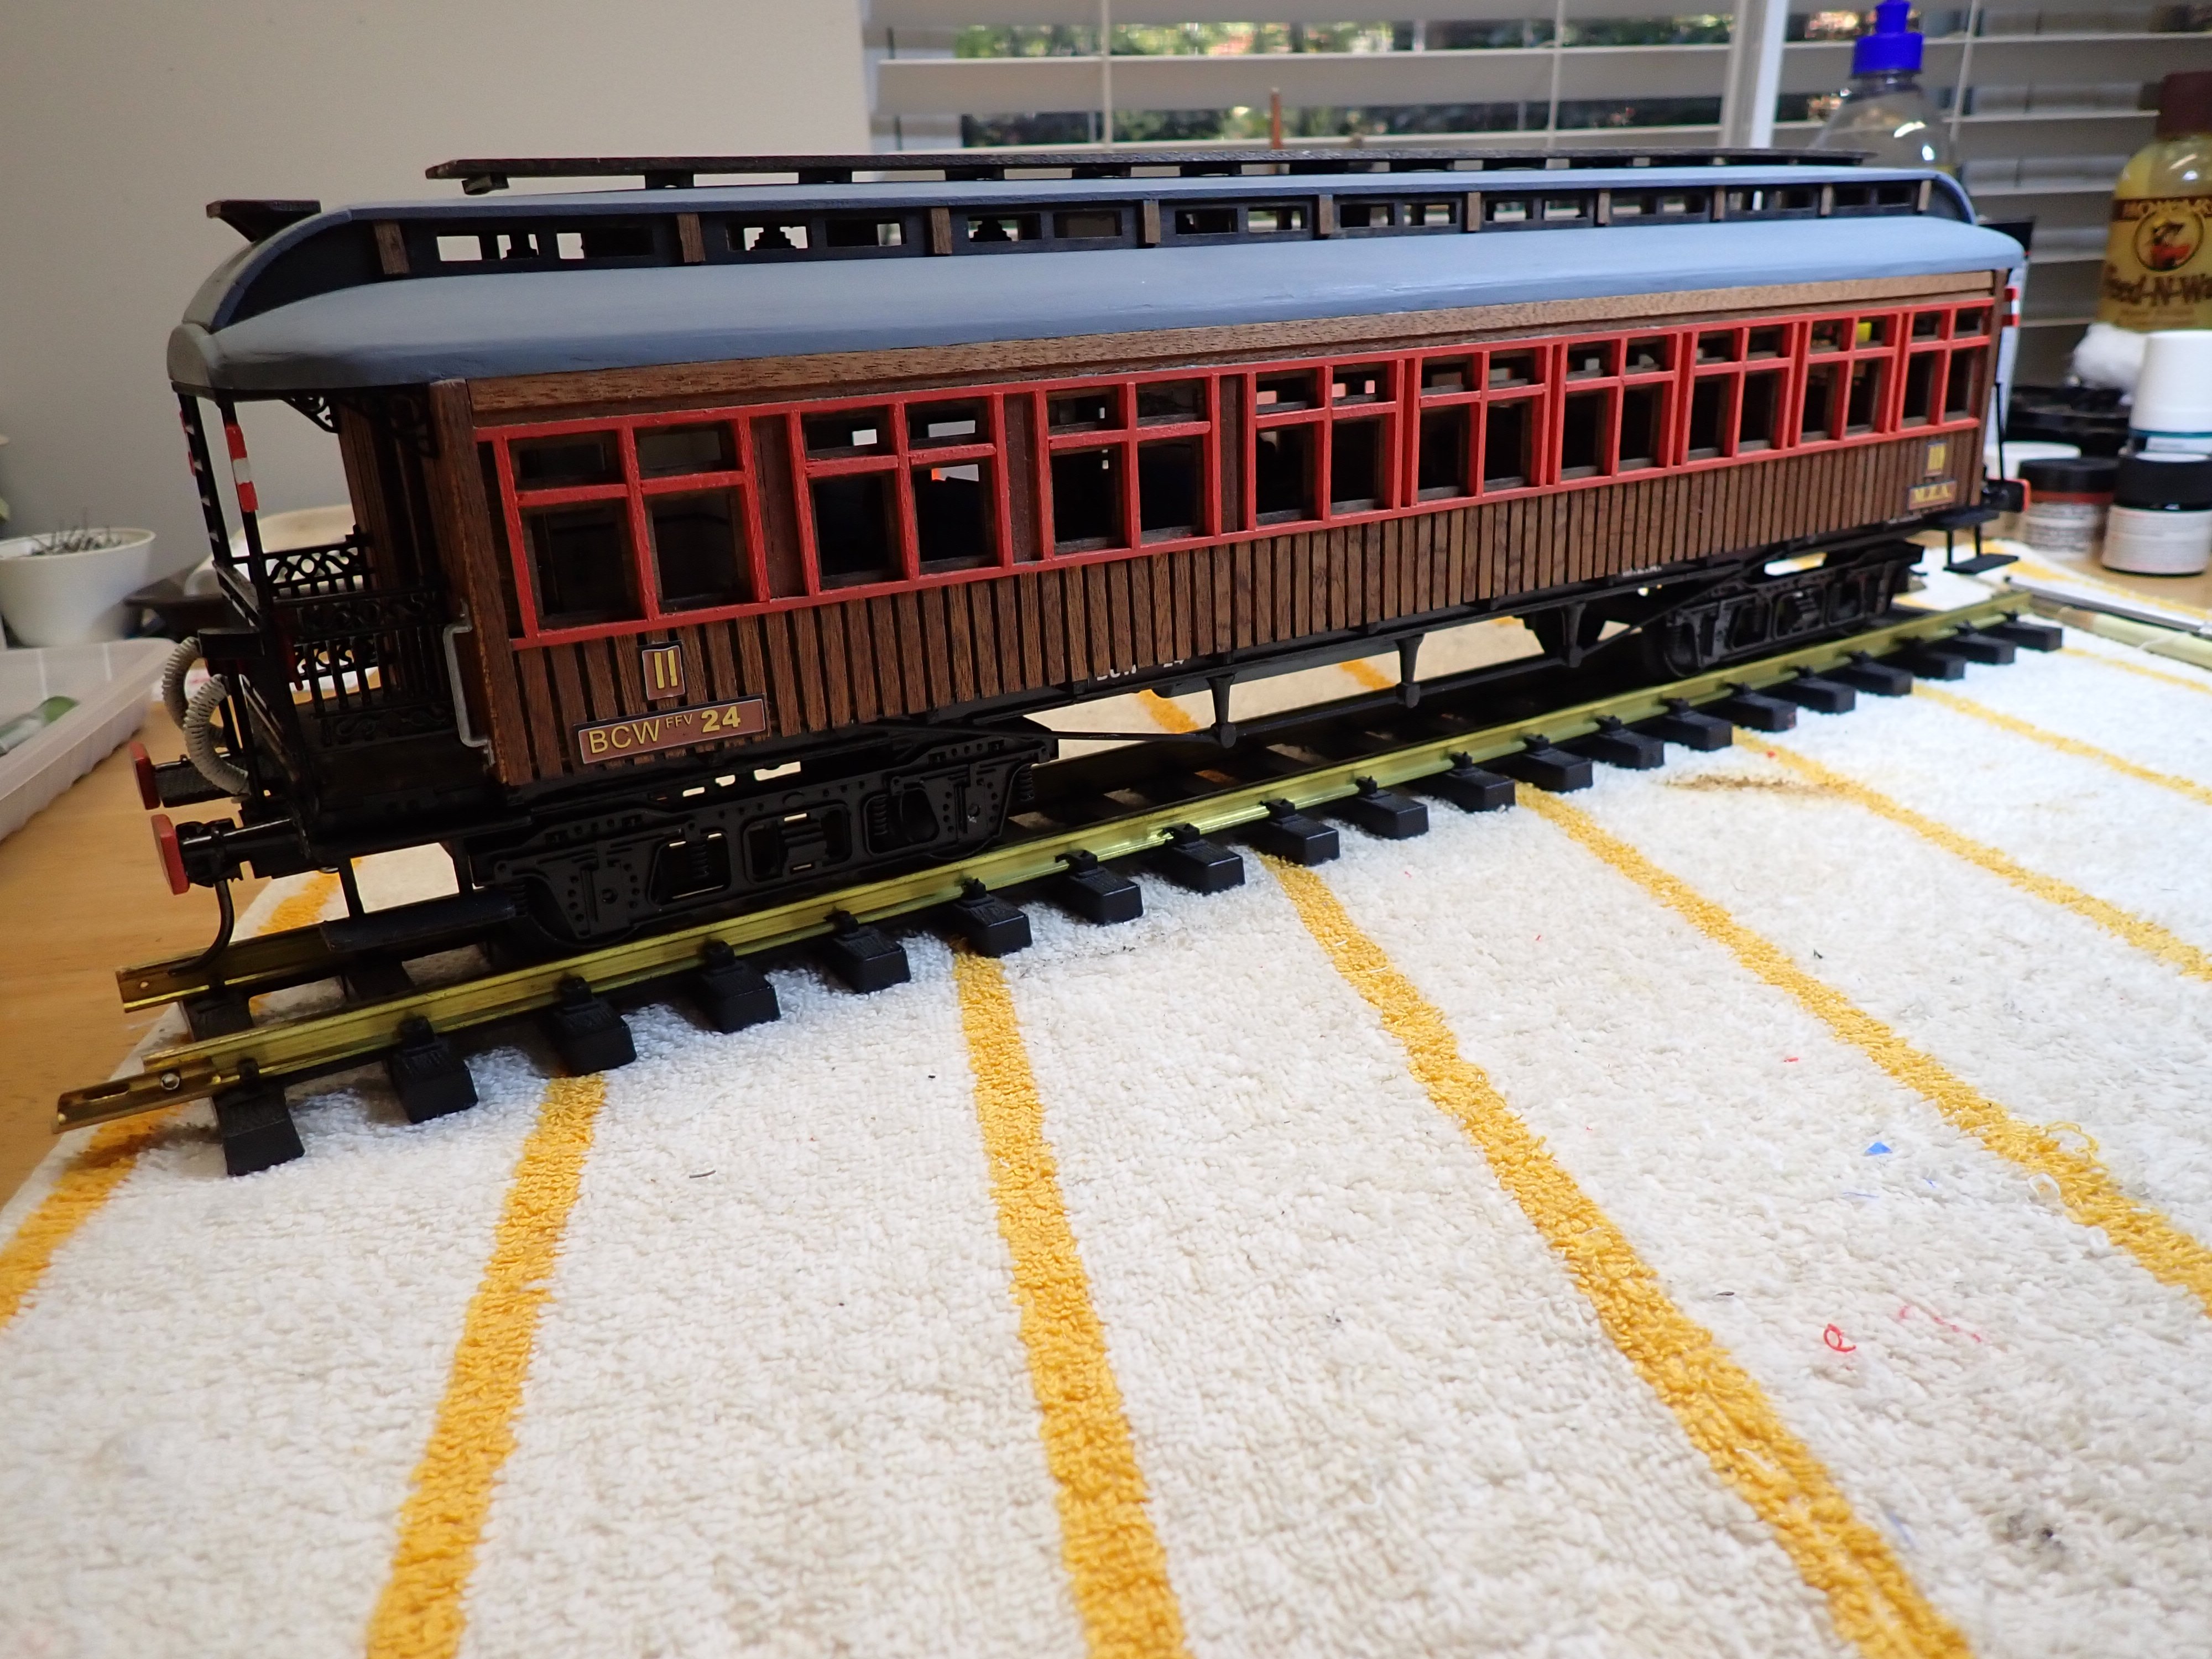
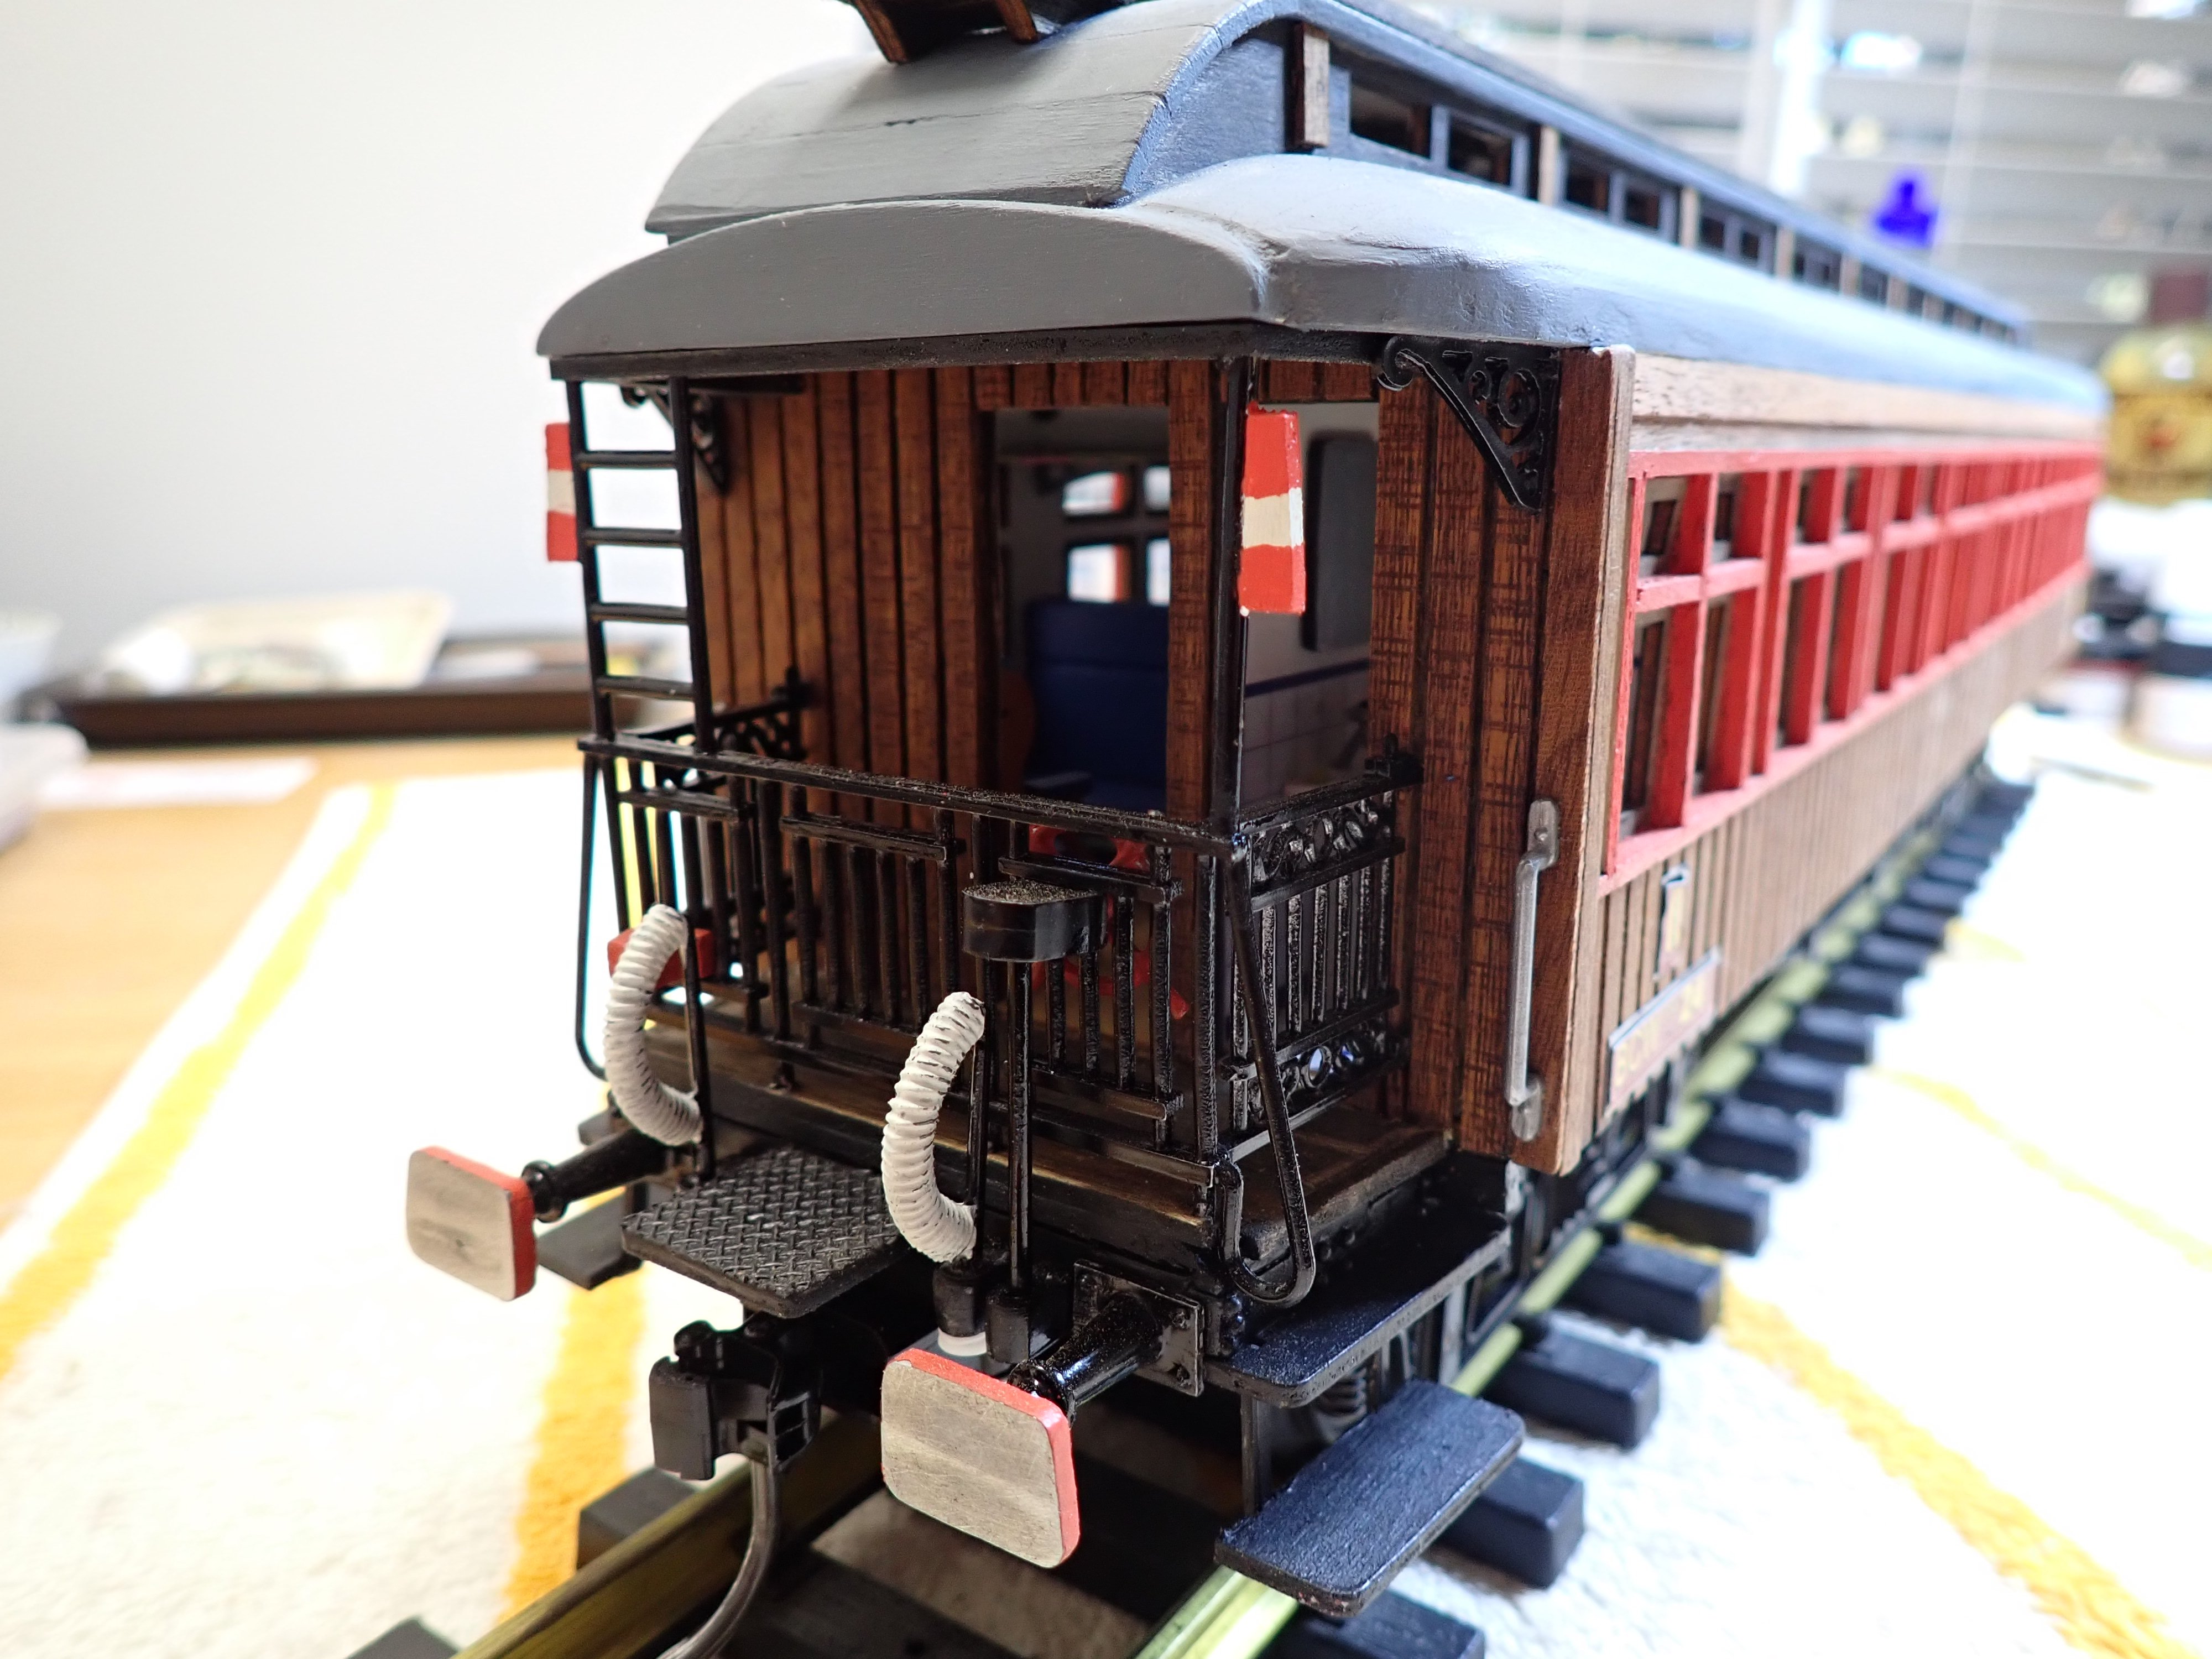
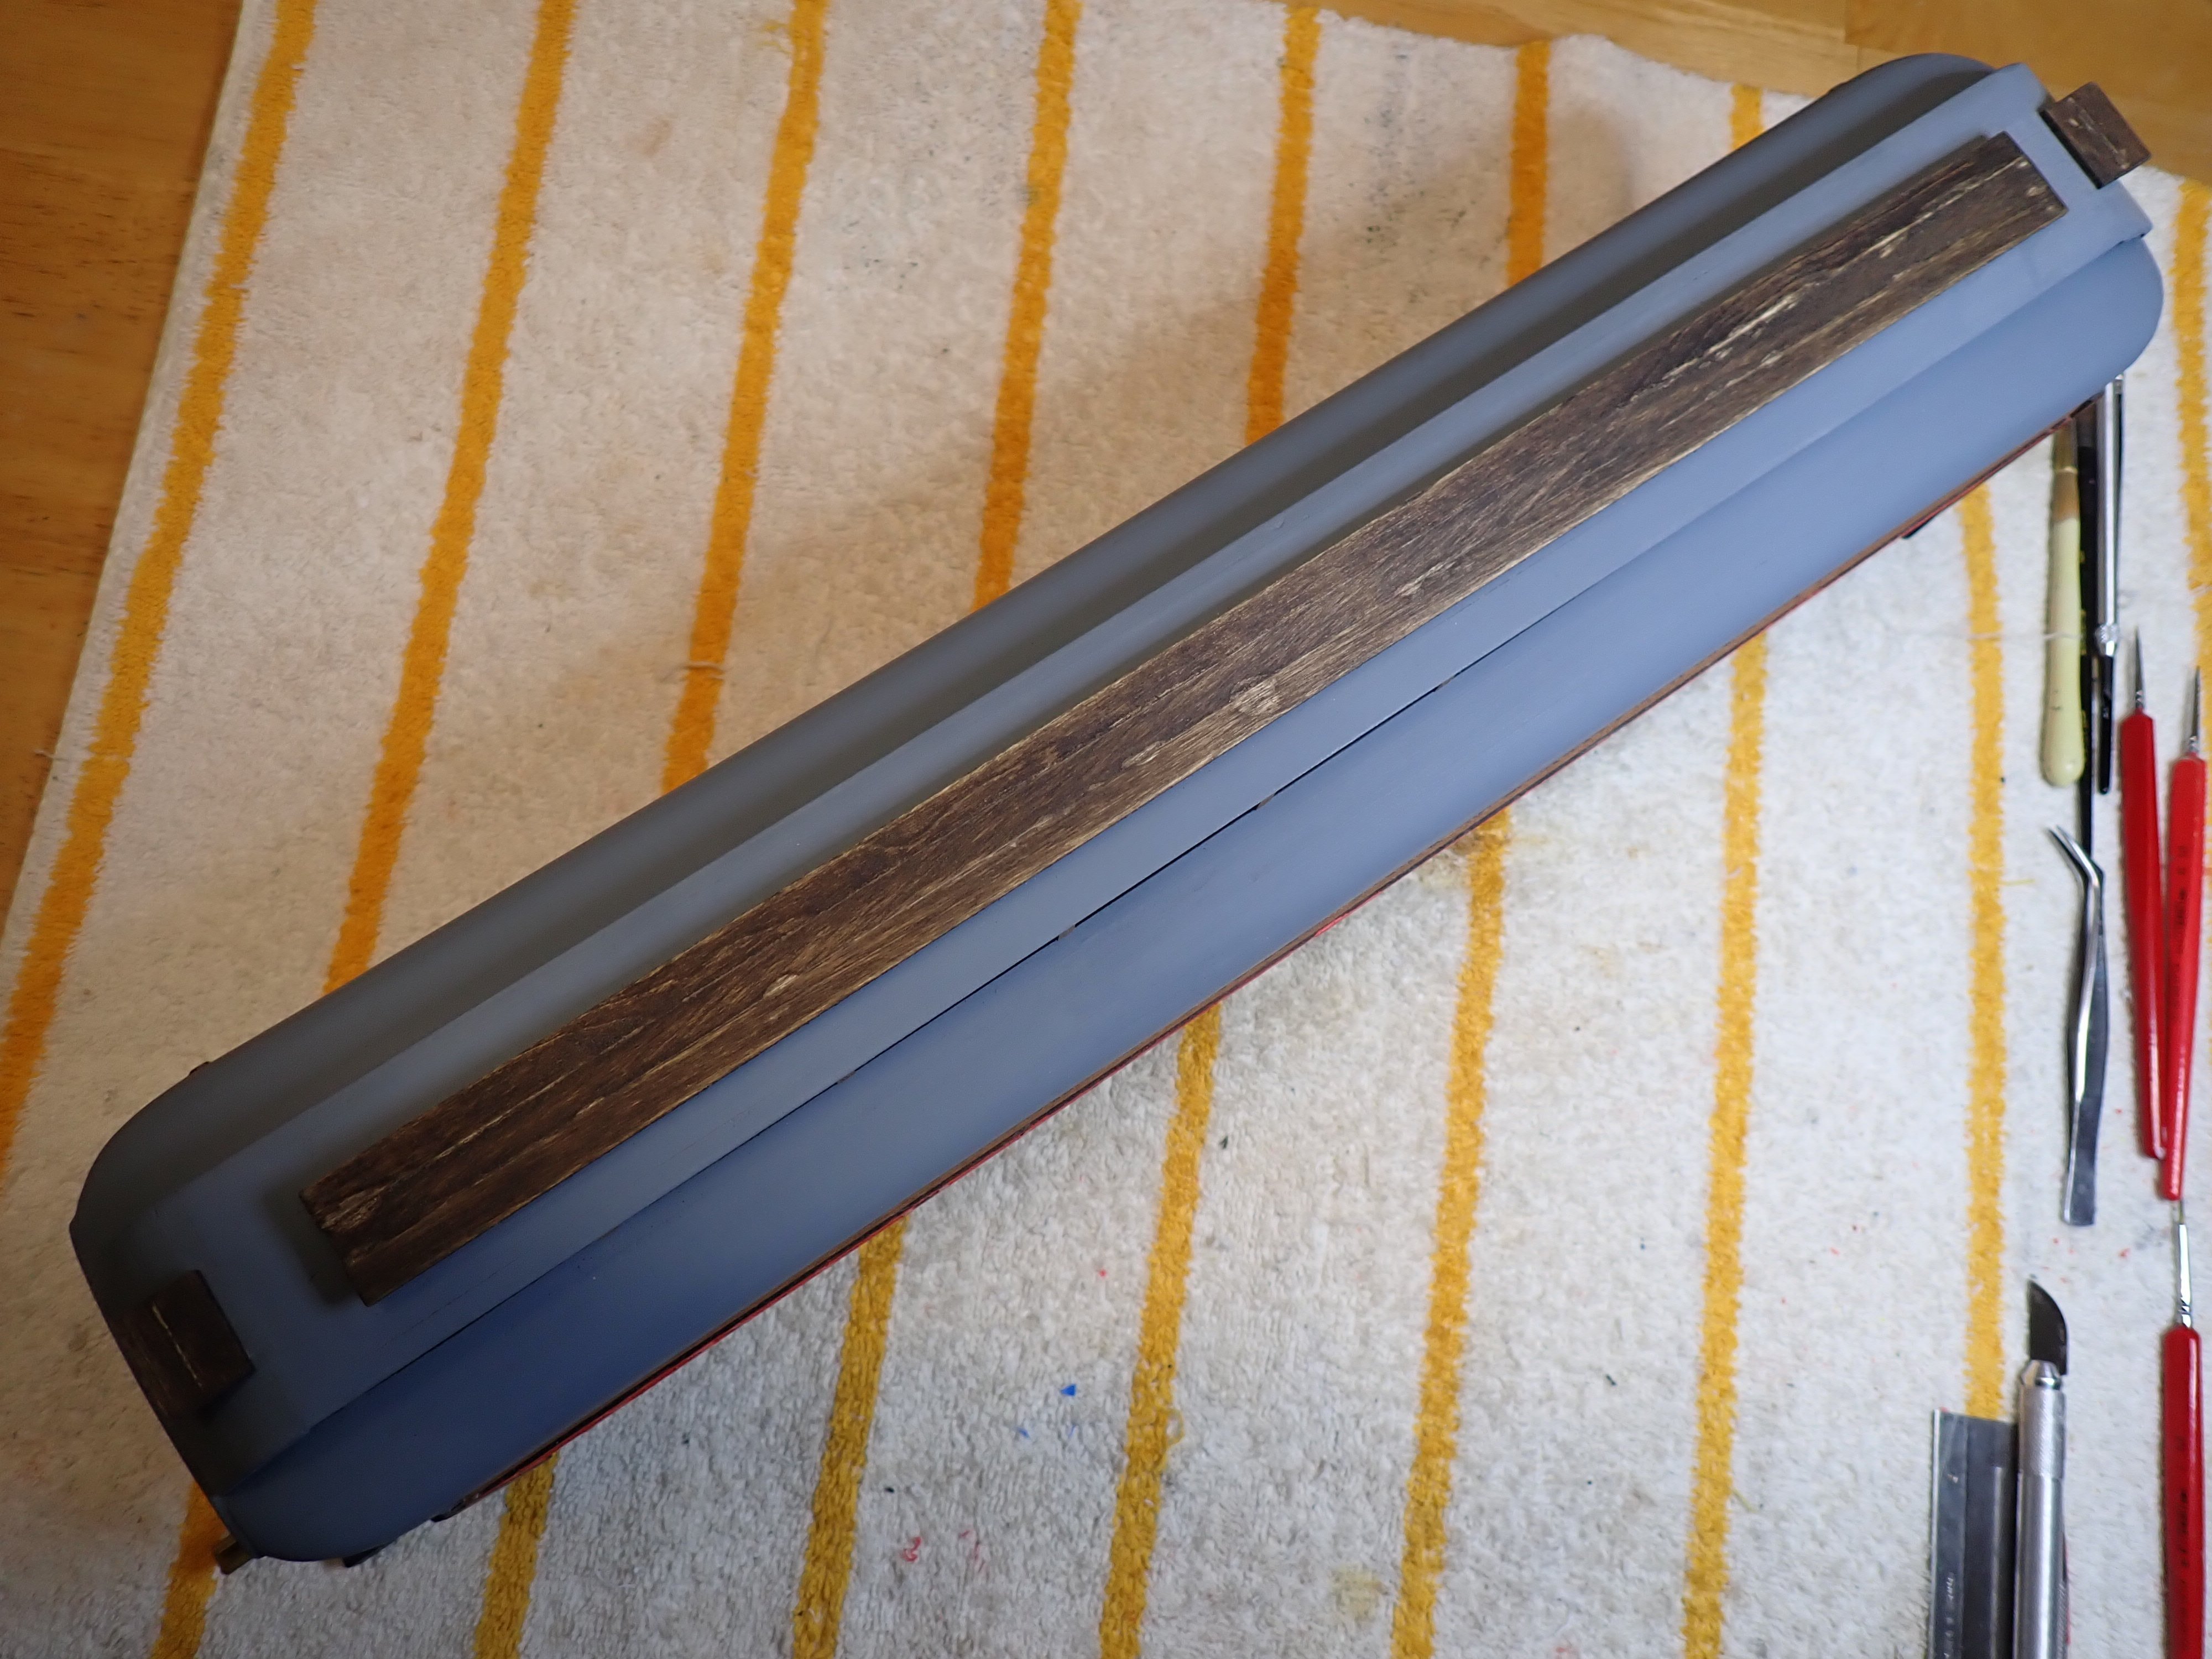
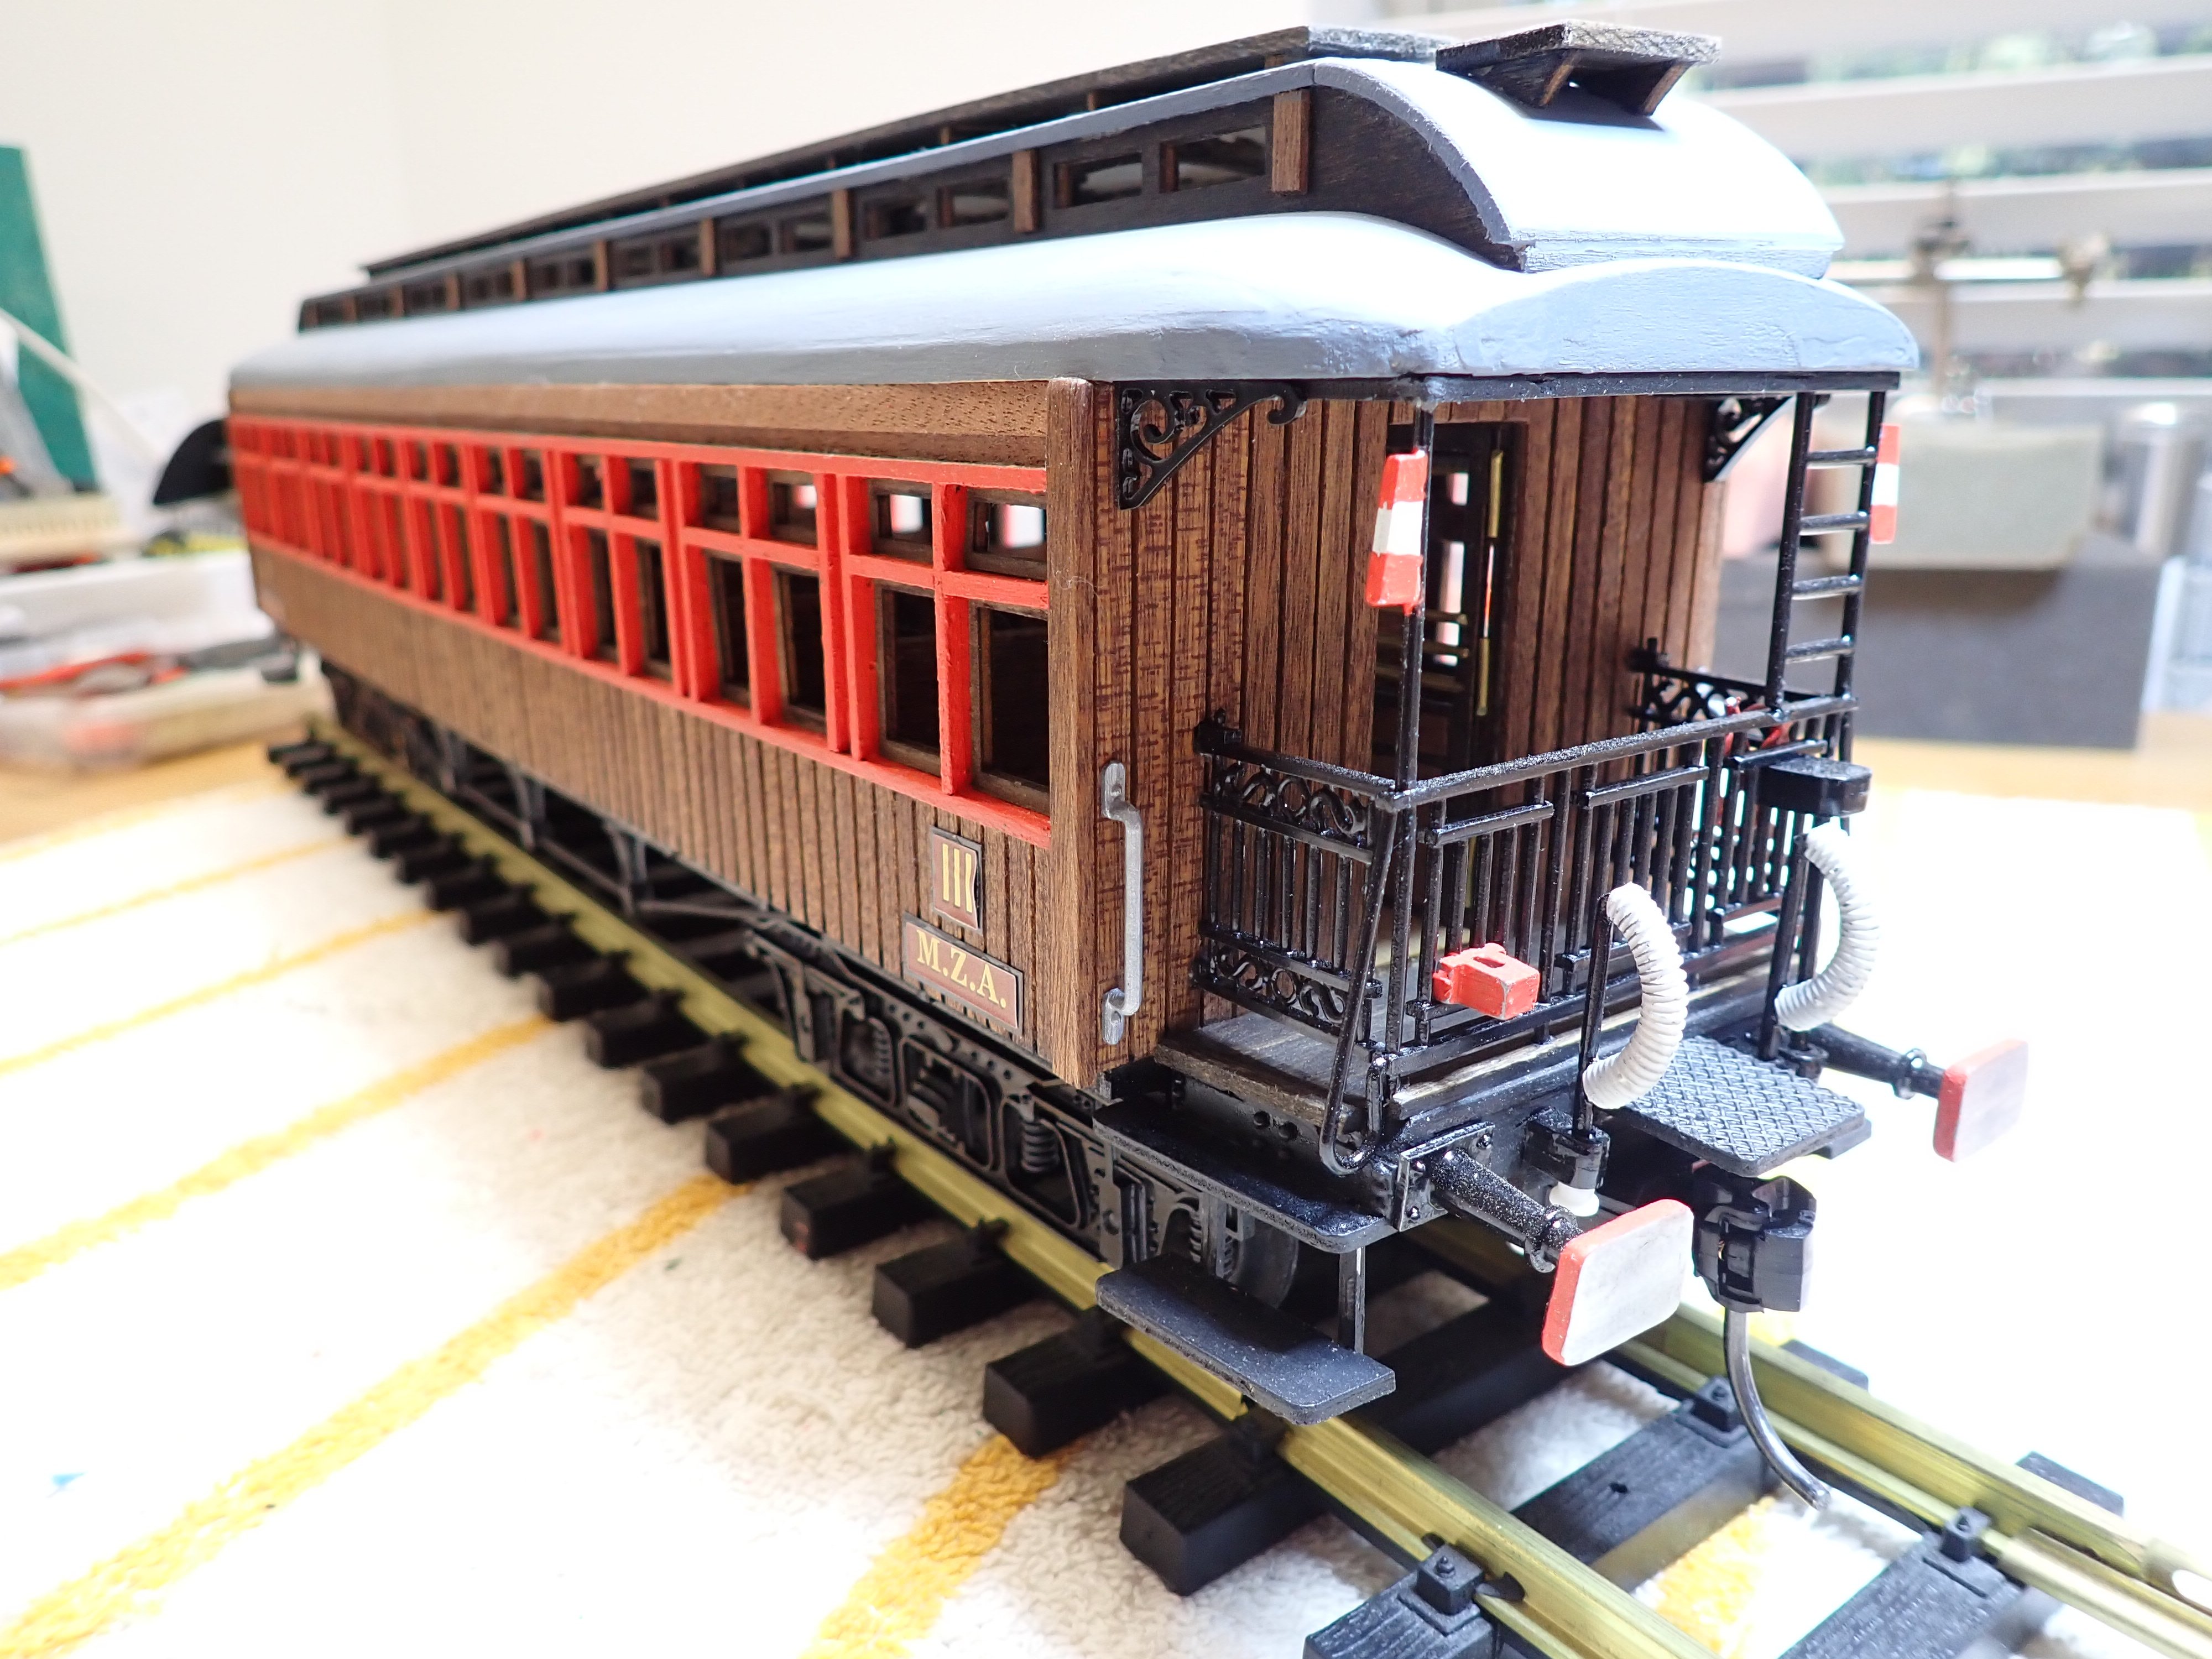
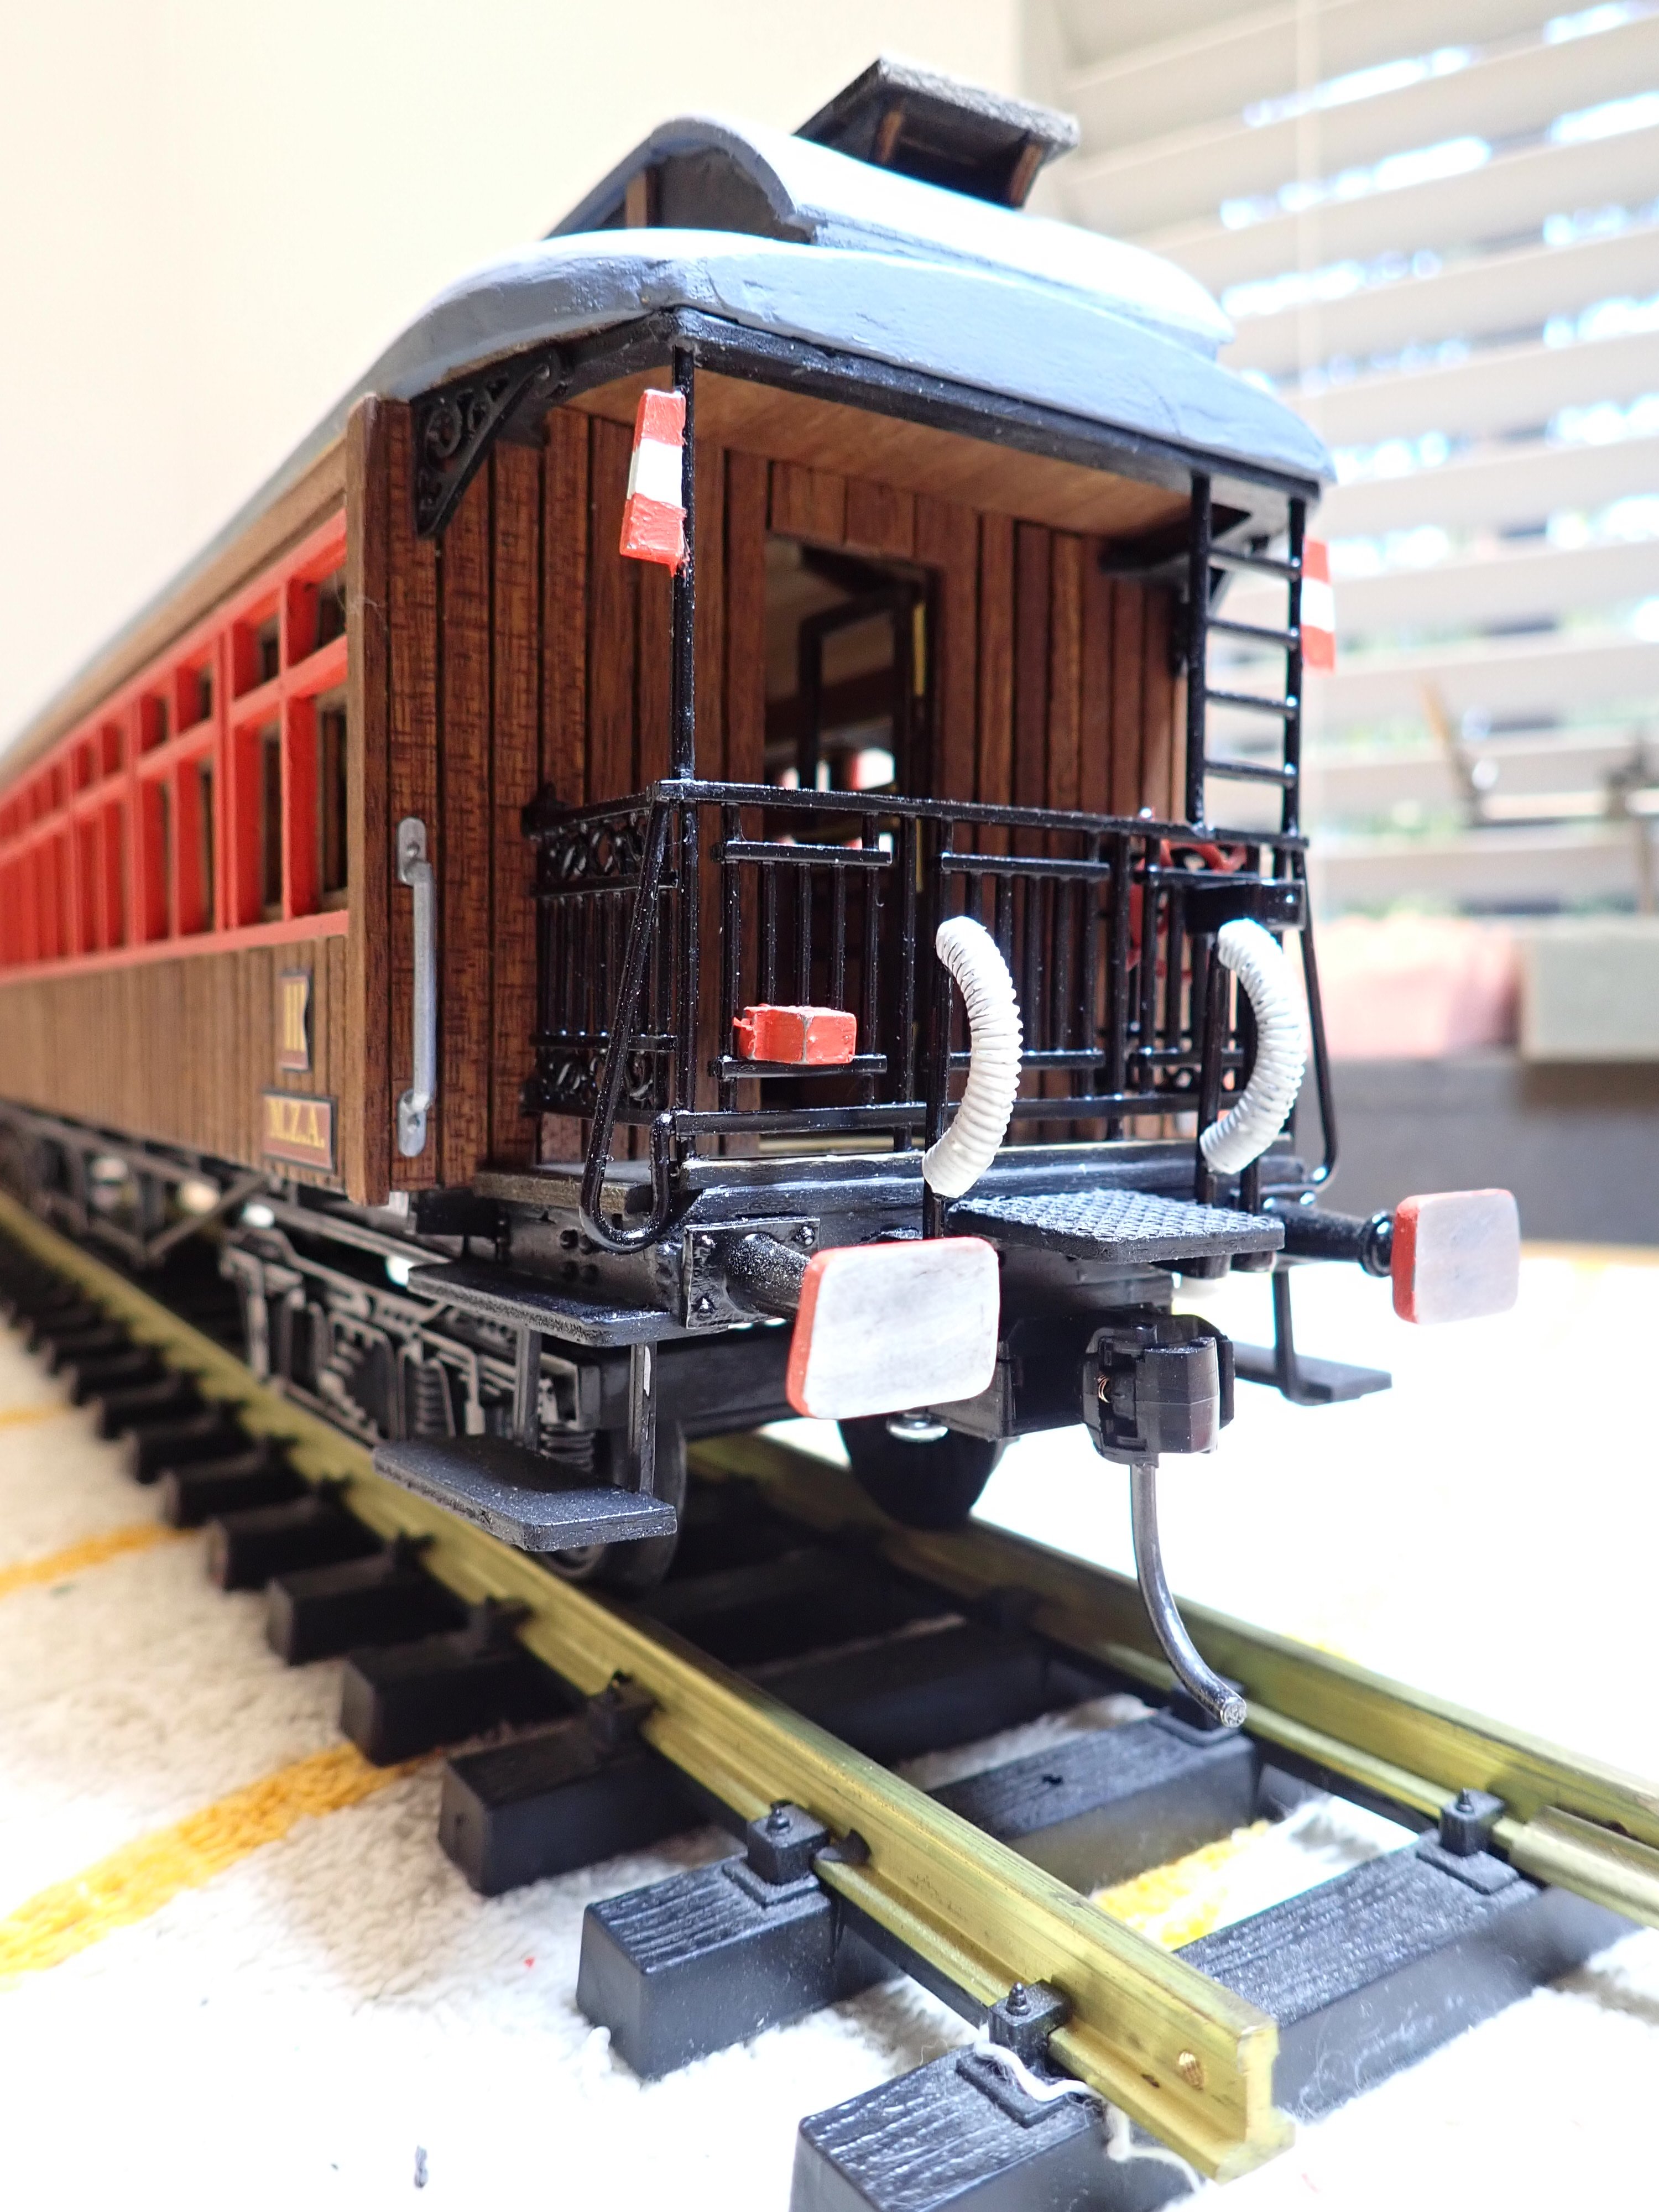
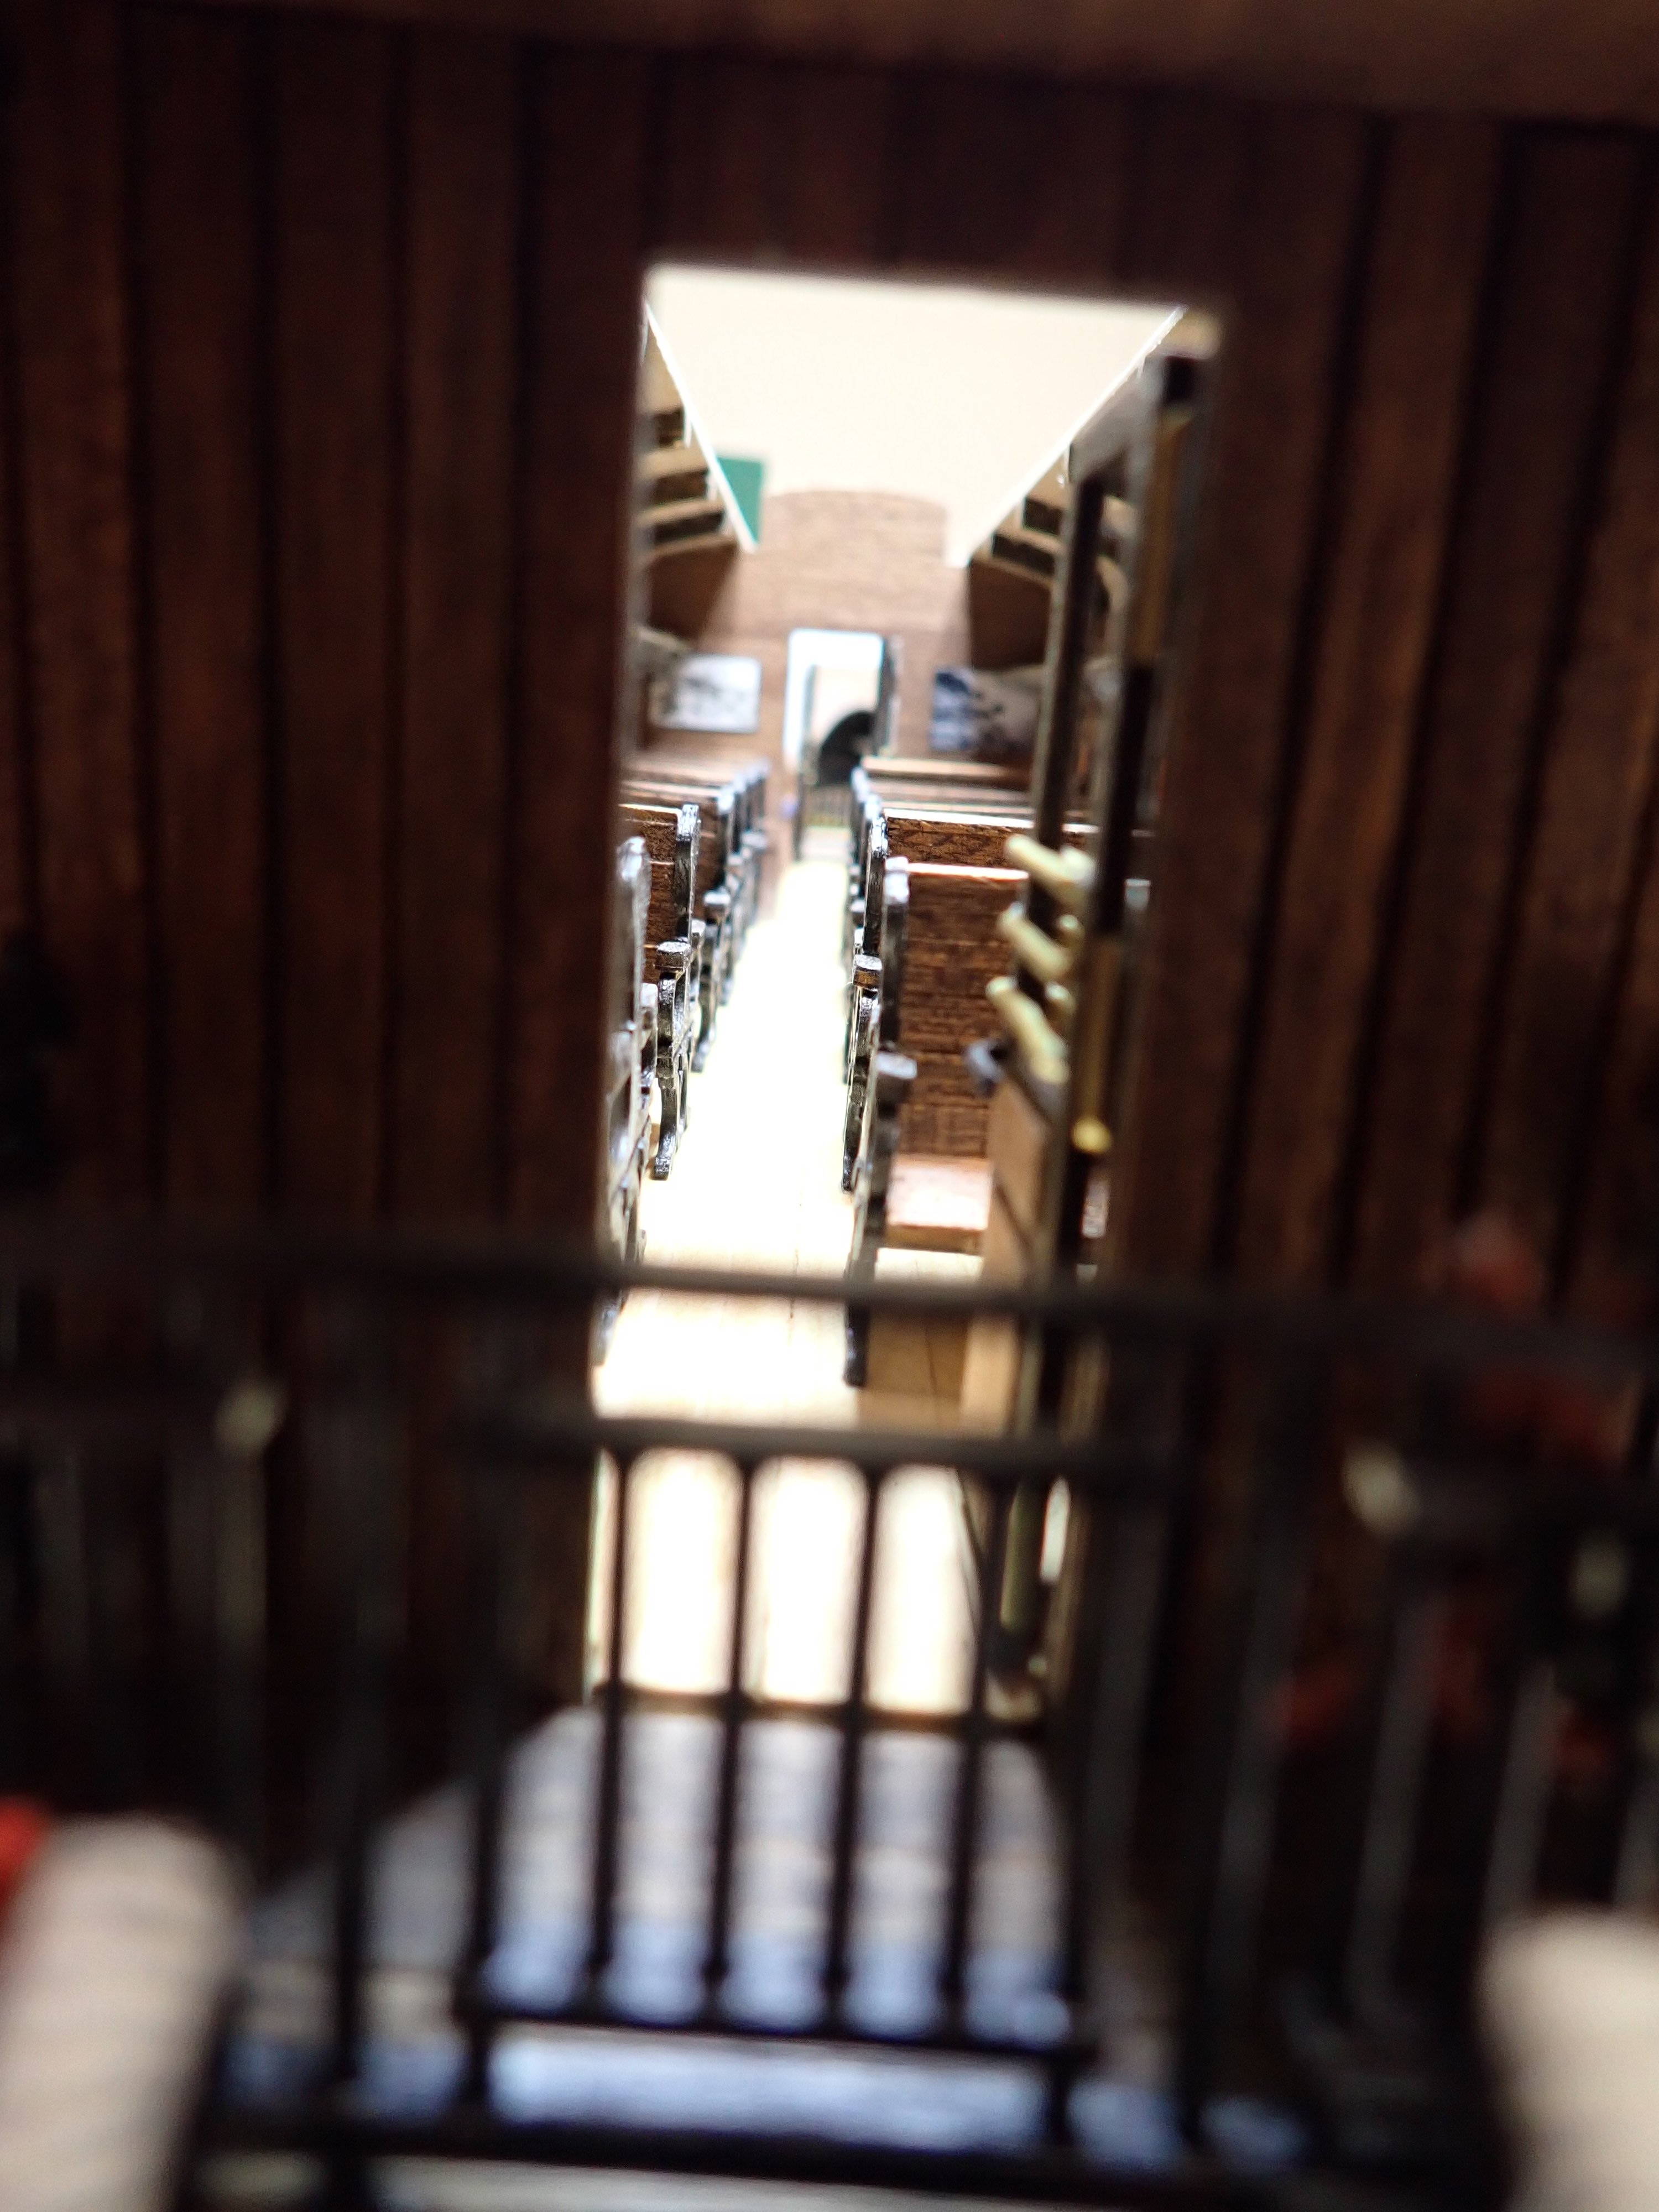
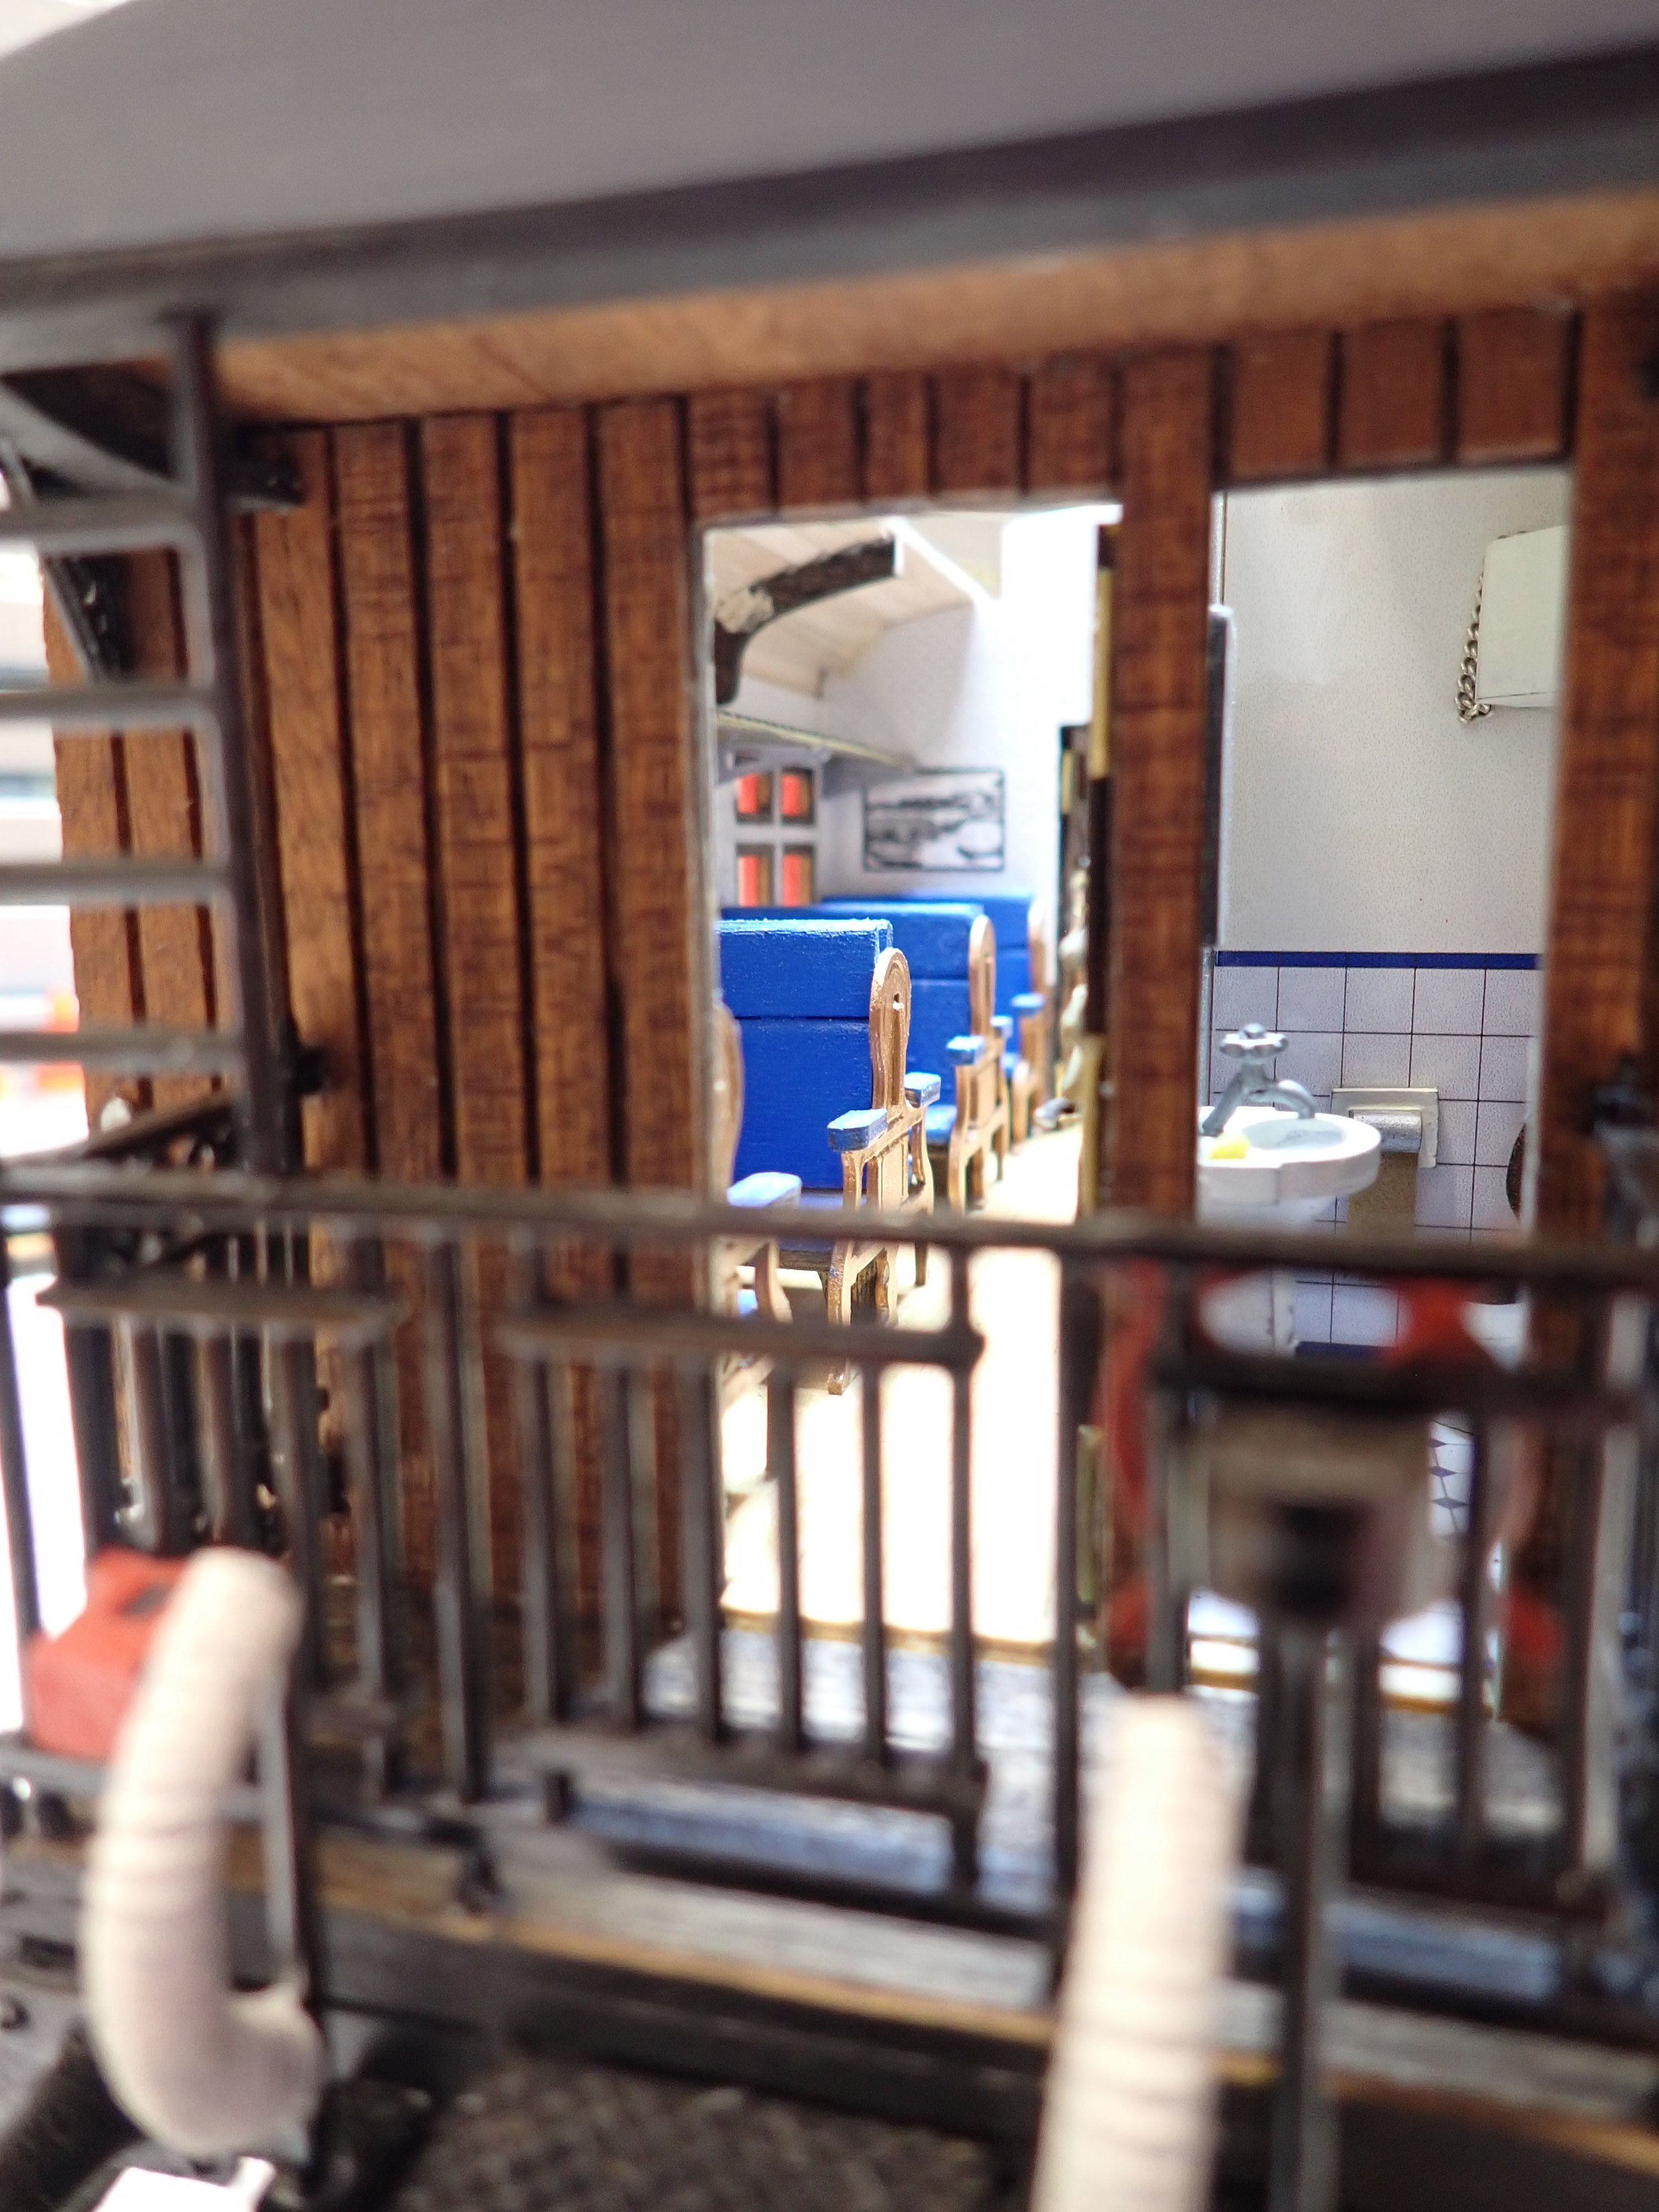
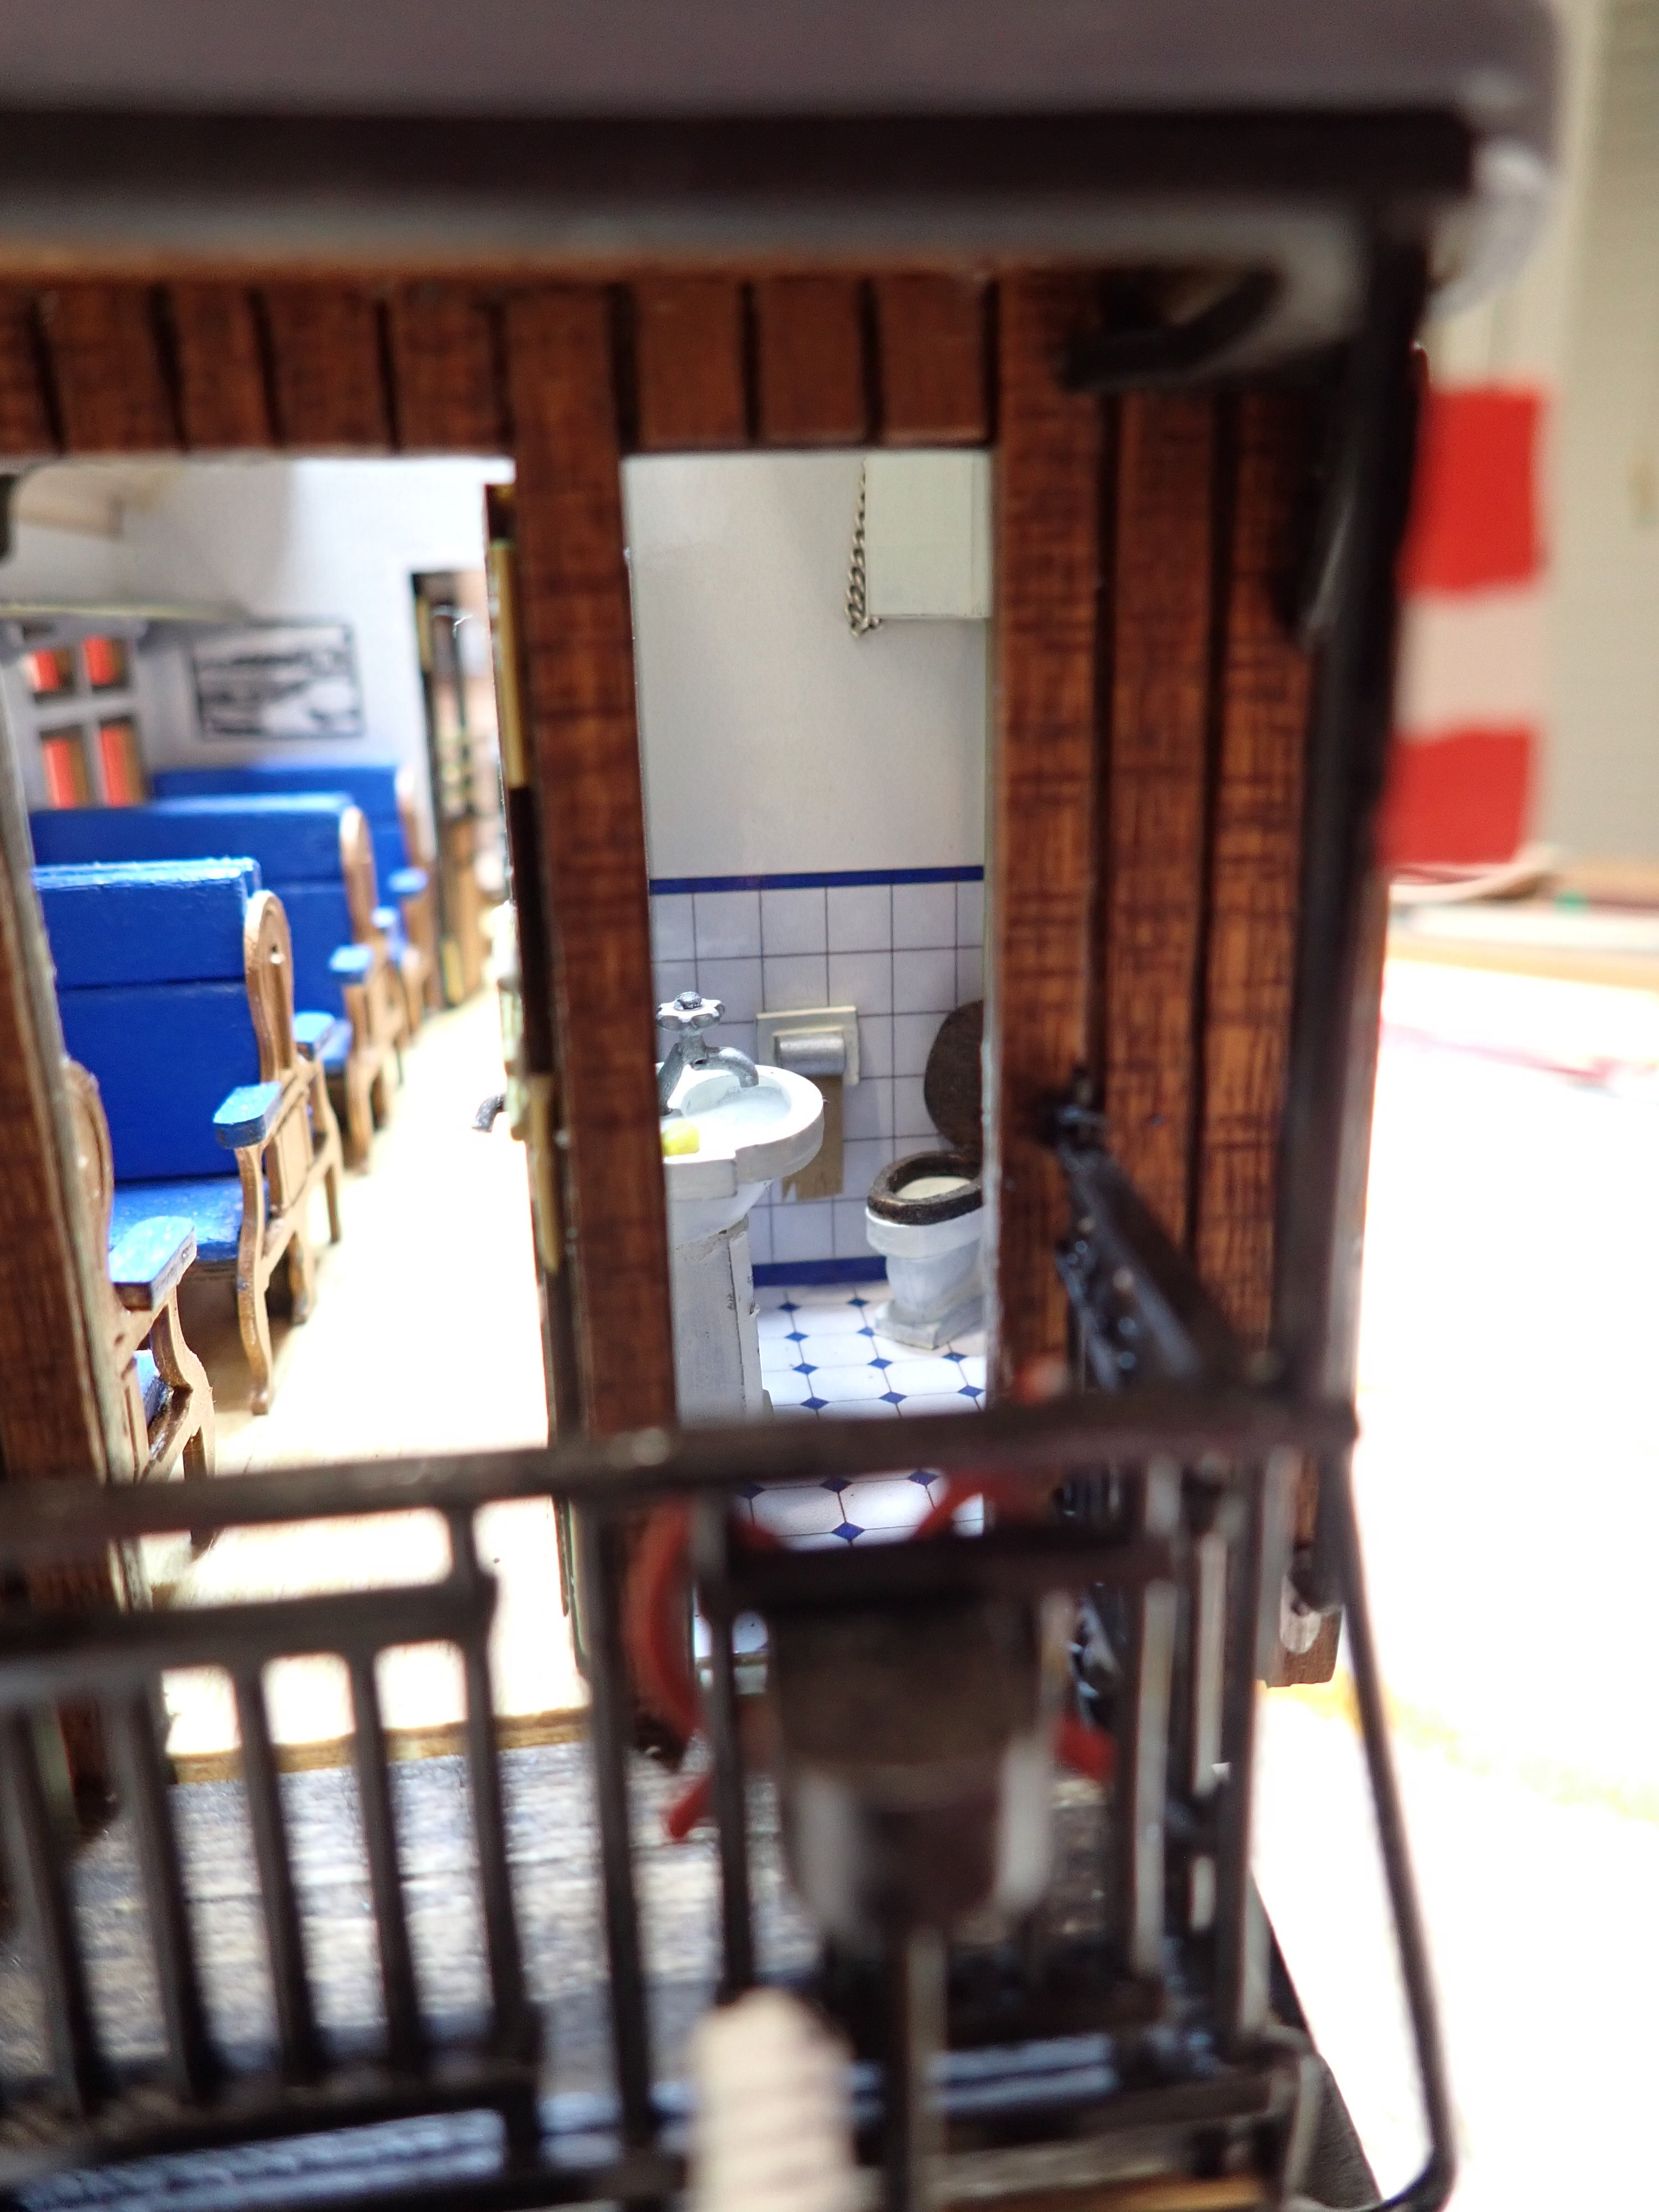
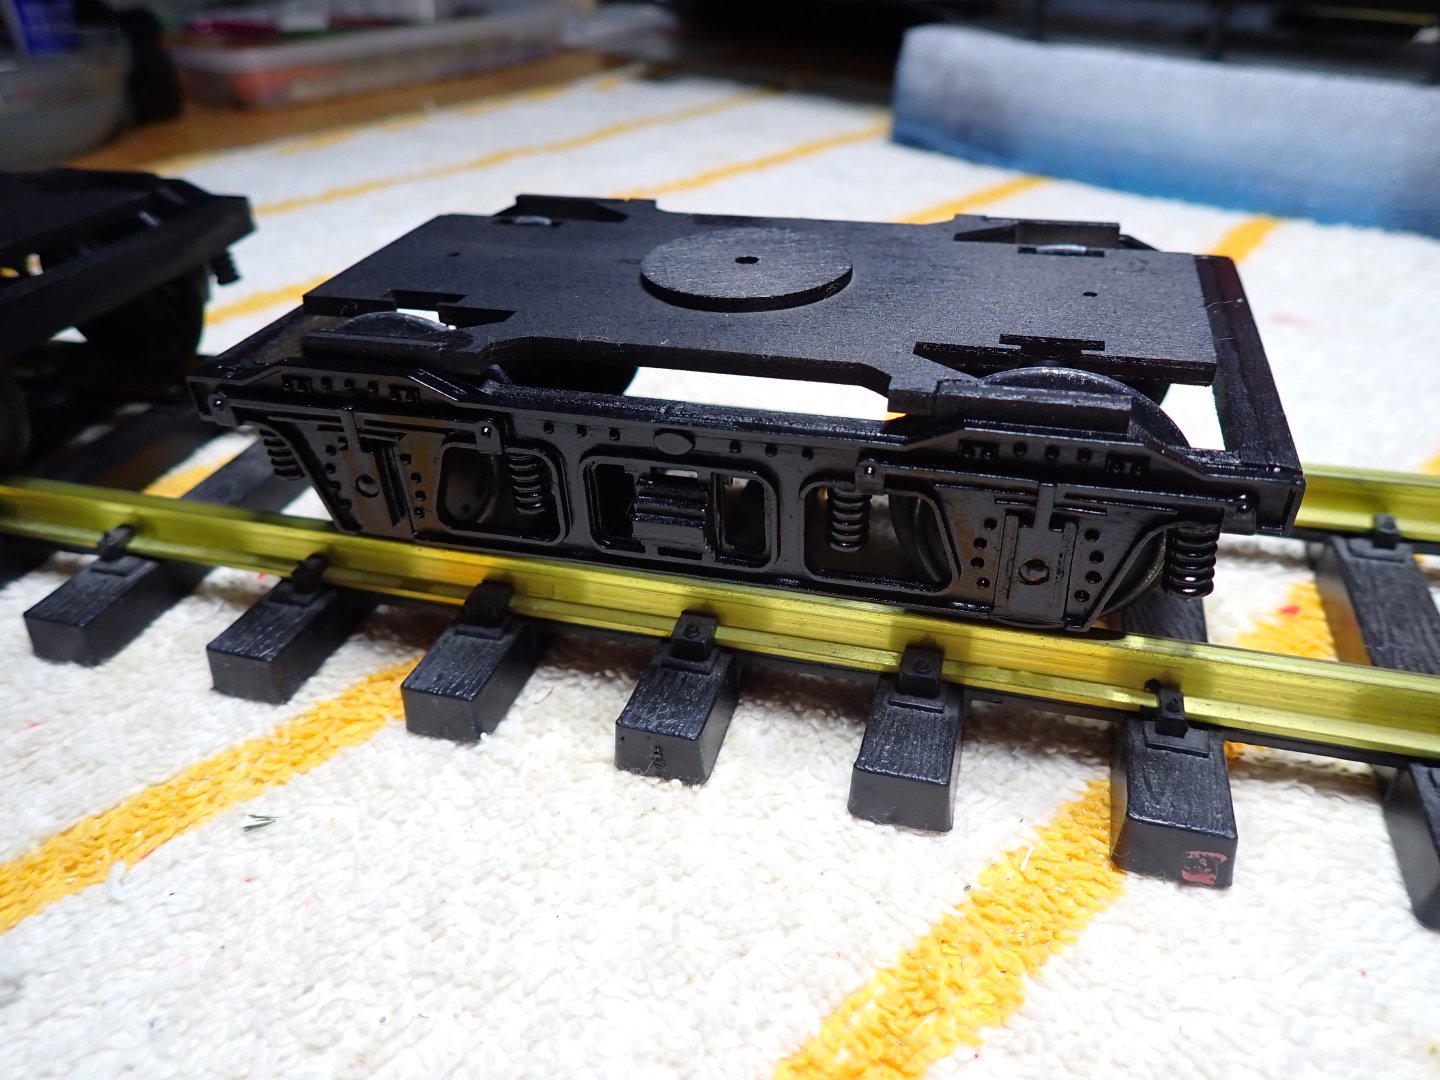
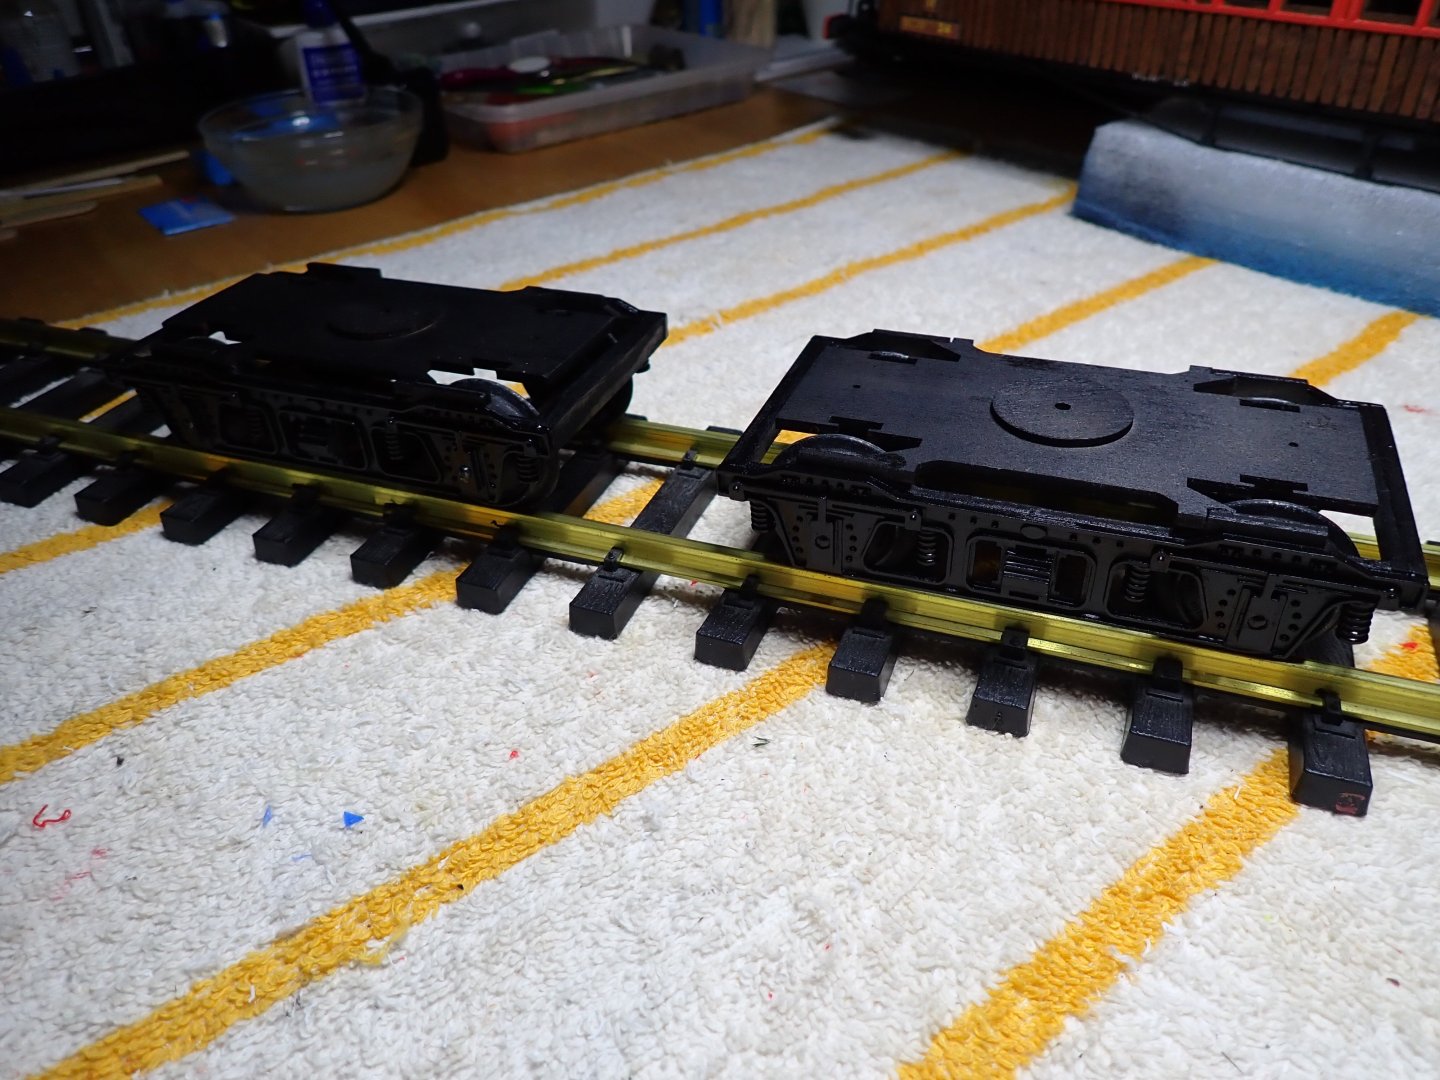
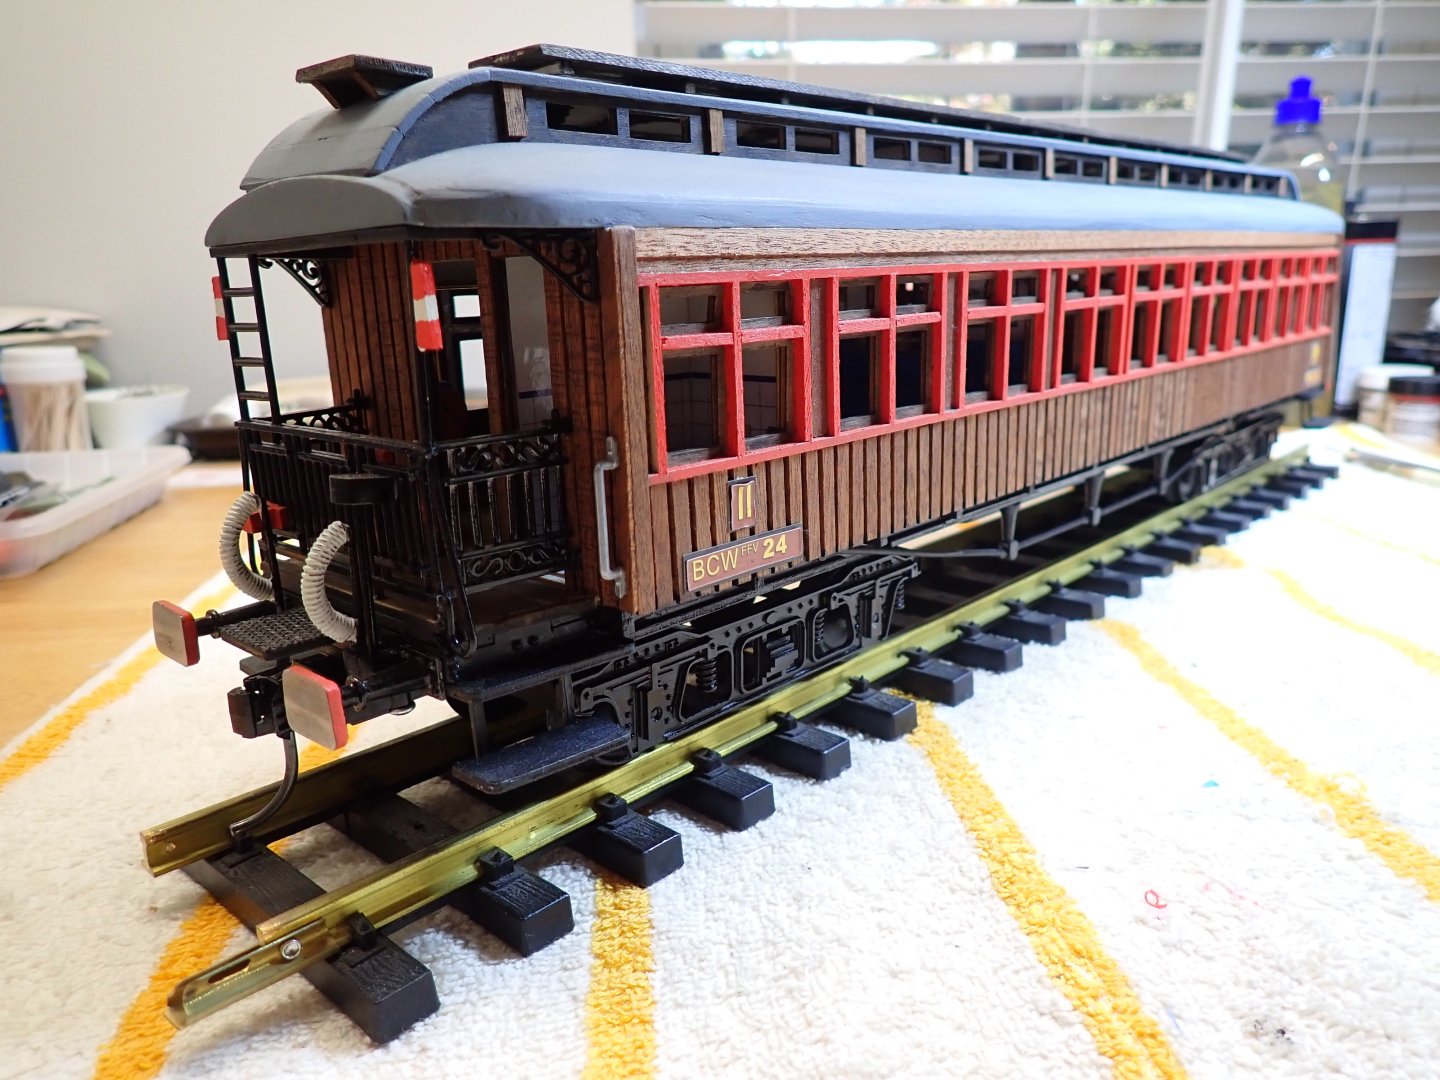
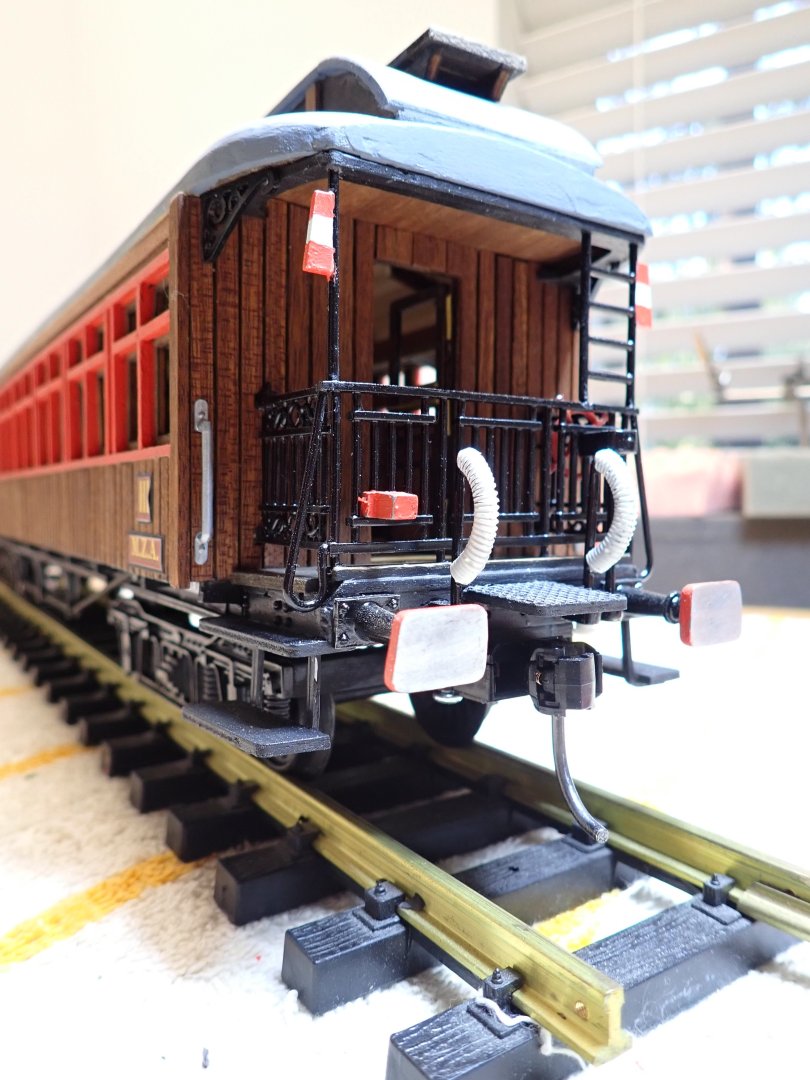
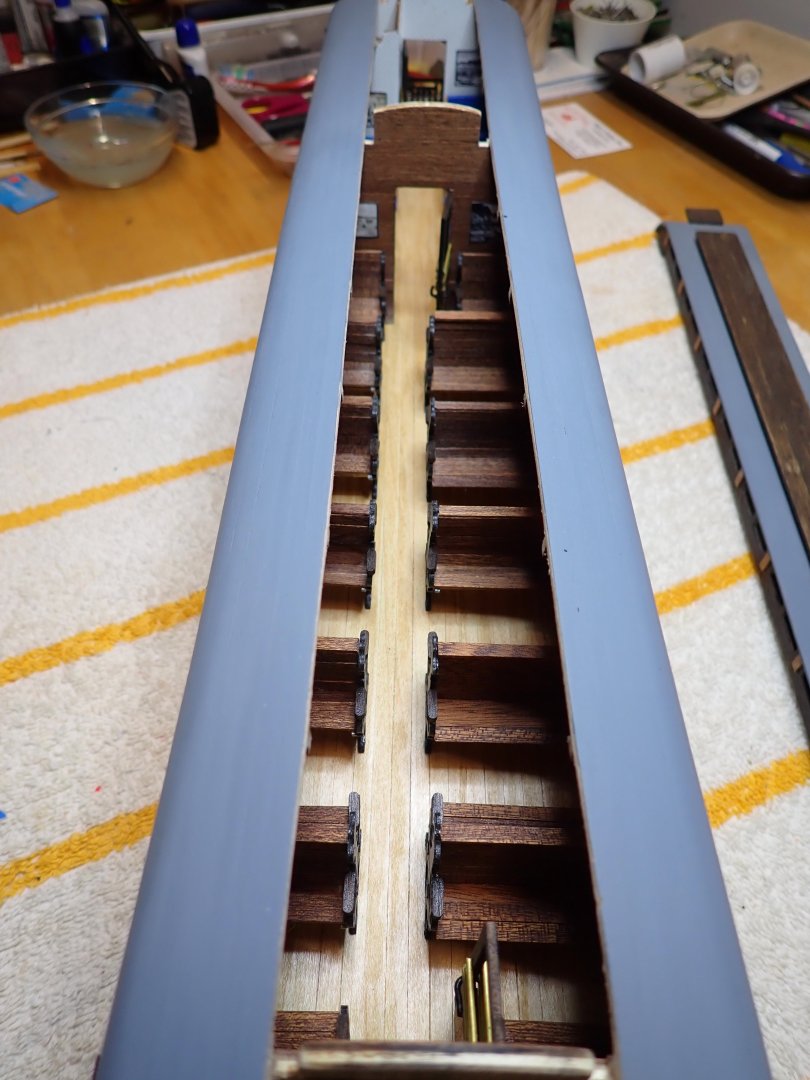
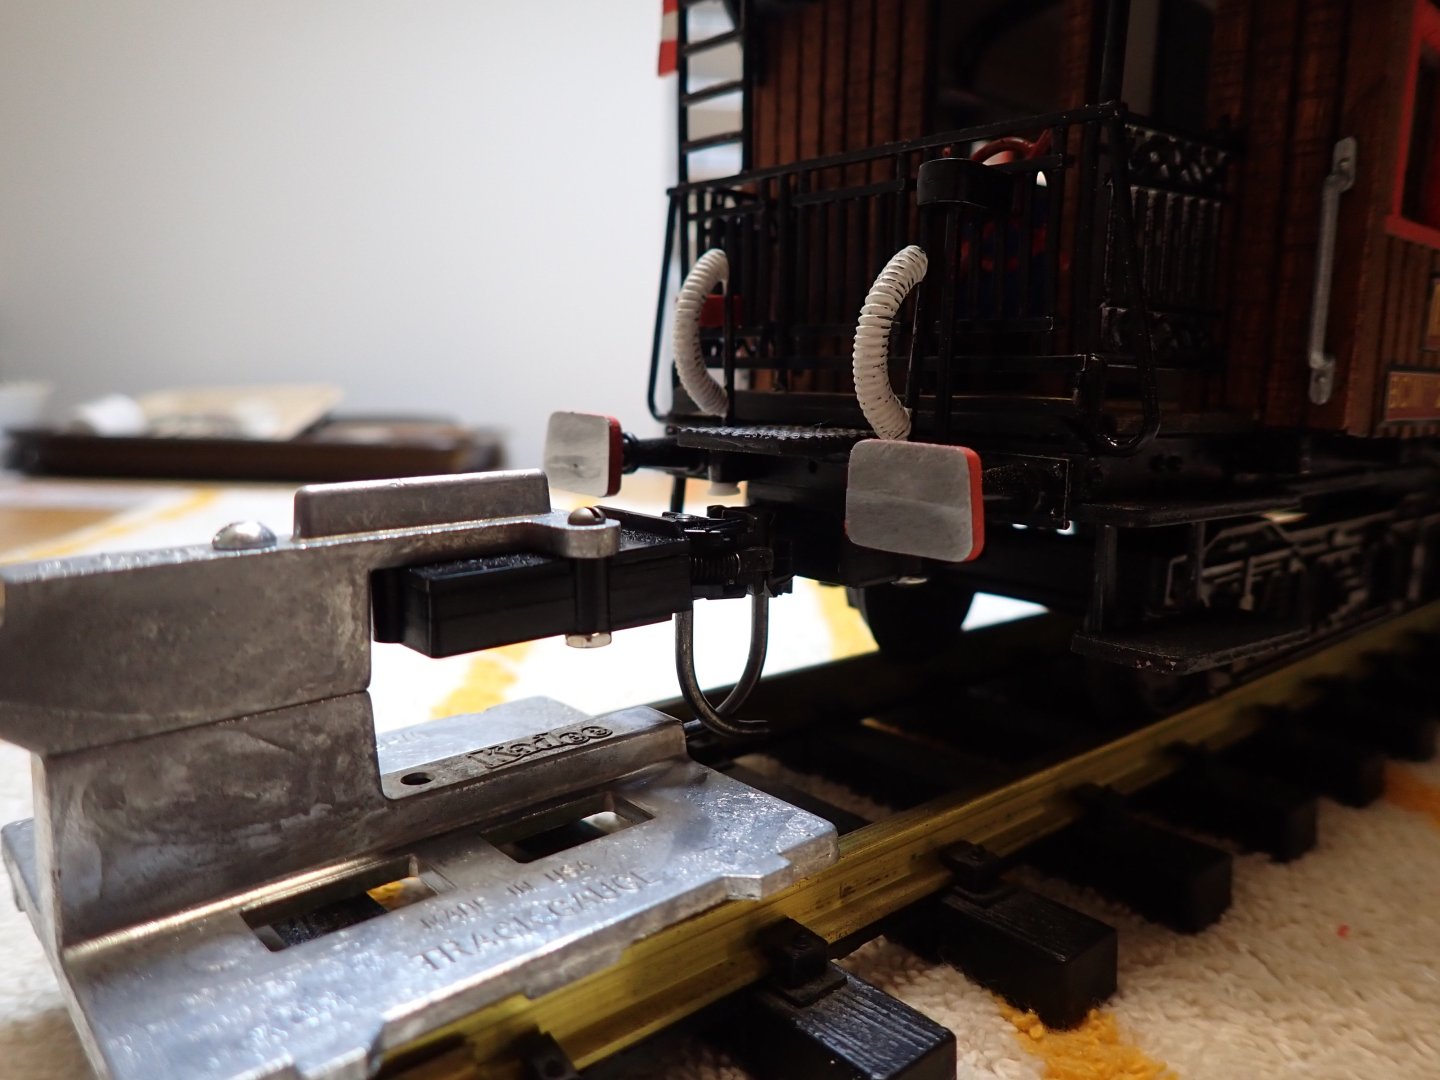
I realized that I never posted the final pictures of the finished model. There, they are: The trucks, painted and lubed for a smooth rolling: The car on its truck, ready to go down and up the Costa Brava and pick up all the sun tanned Catalan girls from the beaches: The couplers are not the European/Spanish couplers. I converted them to American style that will allow me to run that car pulled by one my engines (if I ever get more than 4 or 5 feet of tracks): That's it. It was not an easy kit to build and I would strongly encourage the modifications of the trucks, if you intend to use your model as a rolling/operating car. Yves


- 91 replies
-
- 14
-

-

-
VTOL(s) by yvesvidal - FINISHED - 1/48th - PLASTIC
yvesvidal replied to yvesvidal's topic in Non-ship/categorised builds
Below are a couple of interesting YouTube videos about these failed prototypes: -
VTOL(s) by yvesvidal - FINISHED - 1/48th - PLASTIC
yvesvidal replied to yvesvidal's topic in Non-ship/categorised builds
Thank you Dan. Well, I hope they planned for a variable section, otherwise the lift forces would cancel each other. I am sure, the French engineers thought about this and they may have done some tests with models, before spending all that money for nothing. The net result is that when trying to position the plane horizontally, the pilot lost control of it, as the prototype dived to the ground. Yves -
Impressive hull. Yves
-
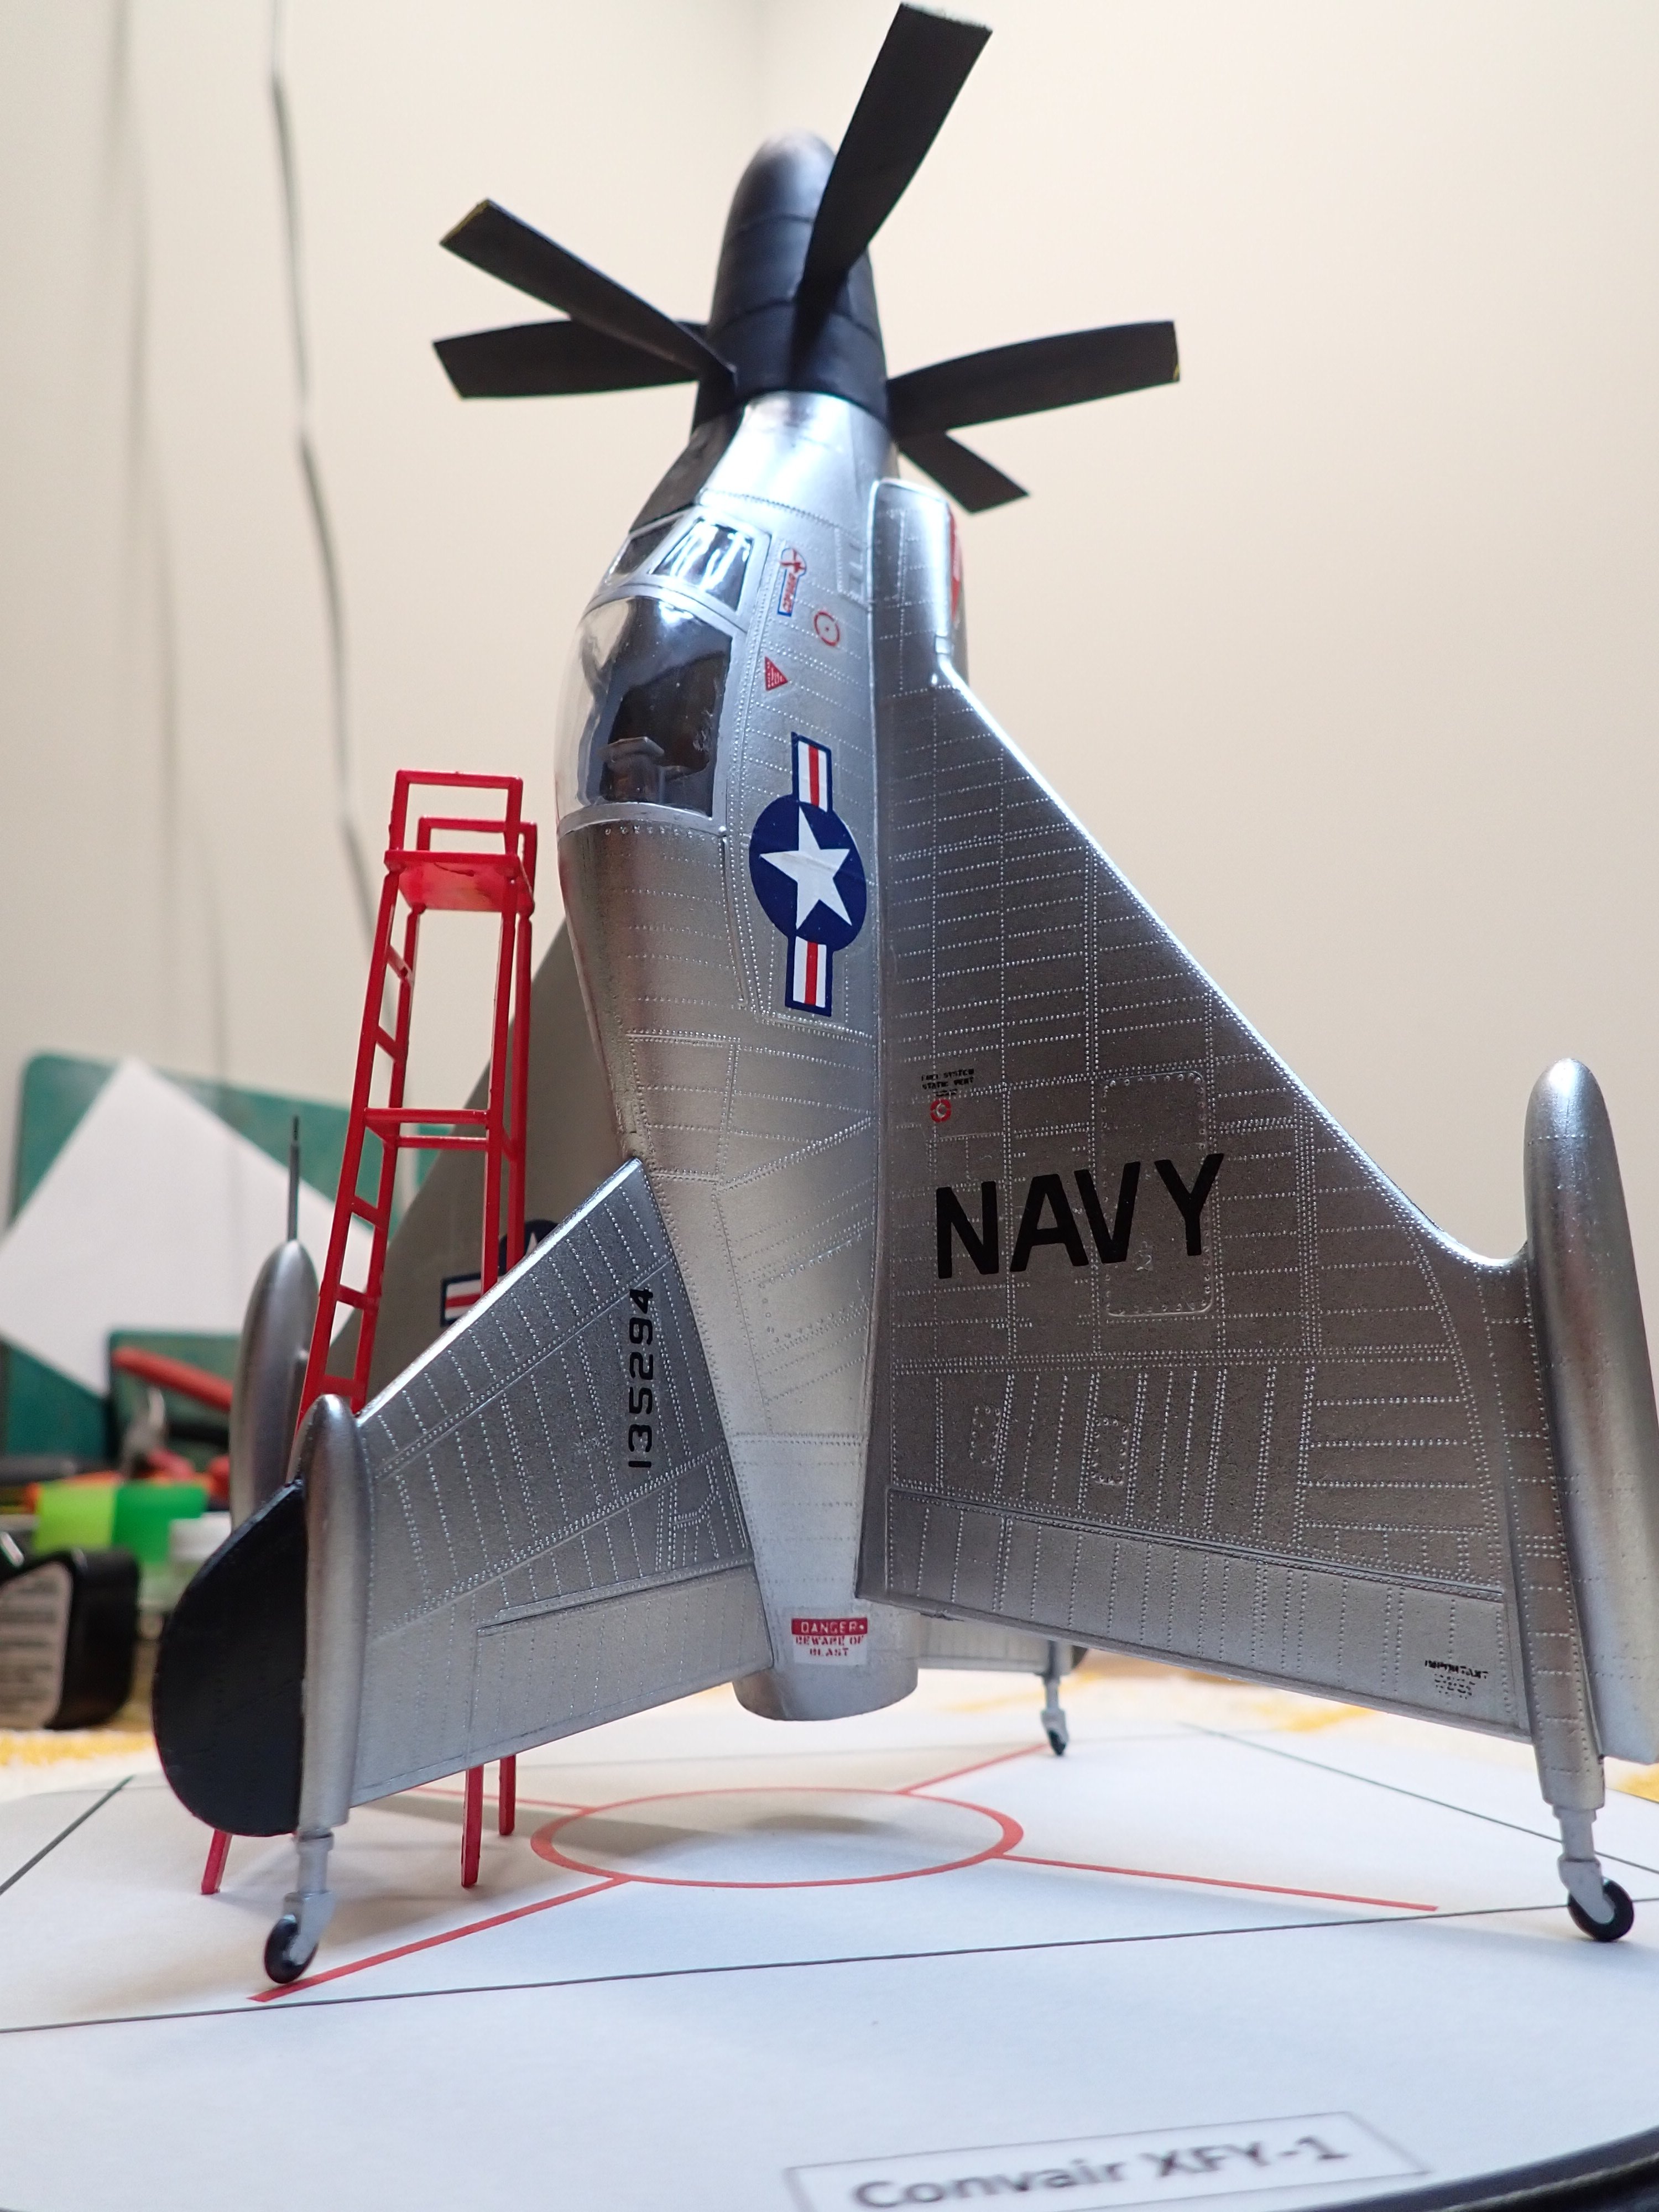
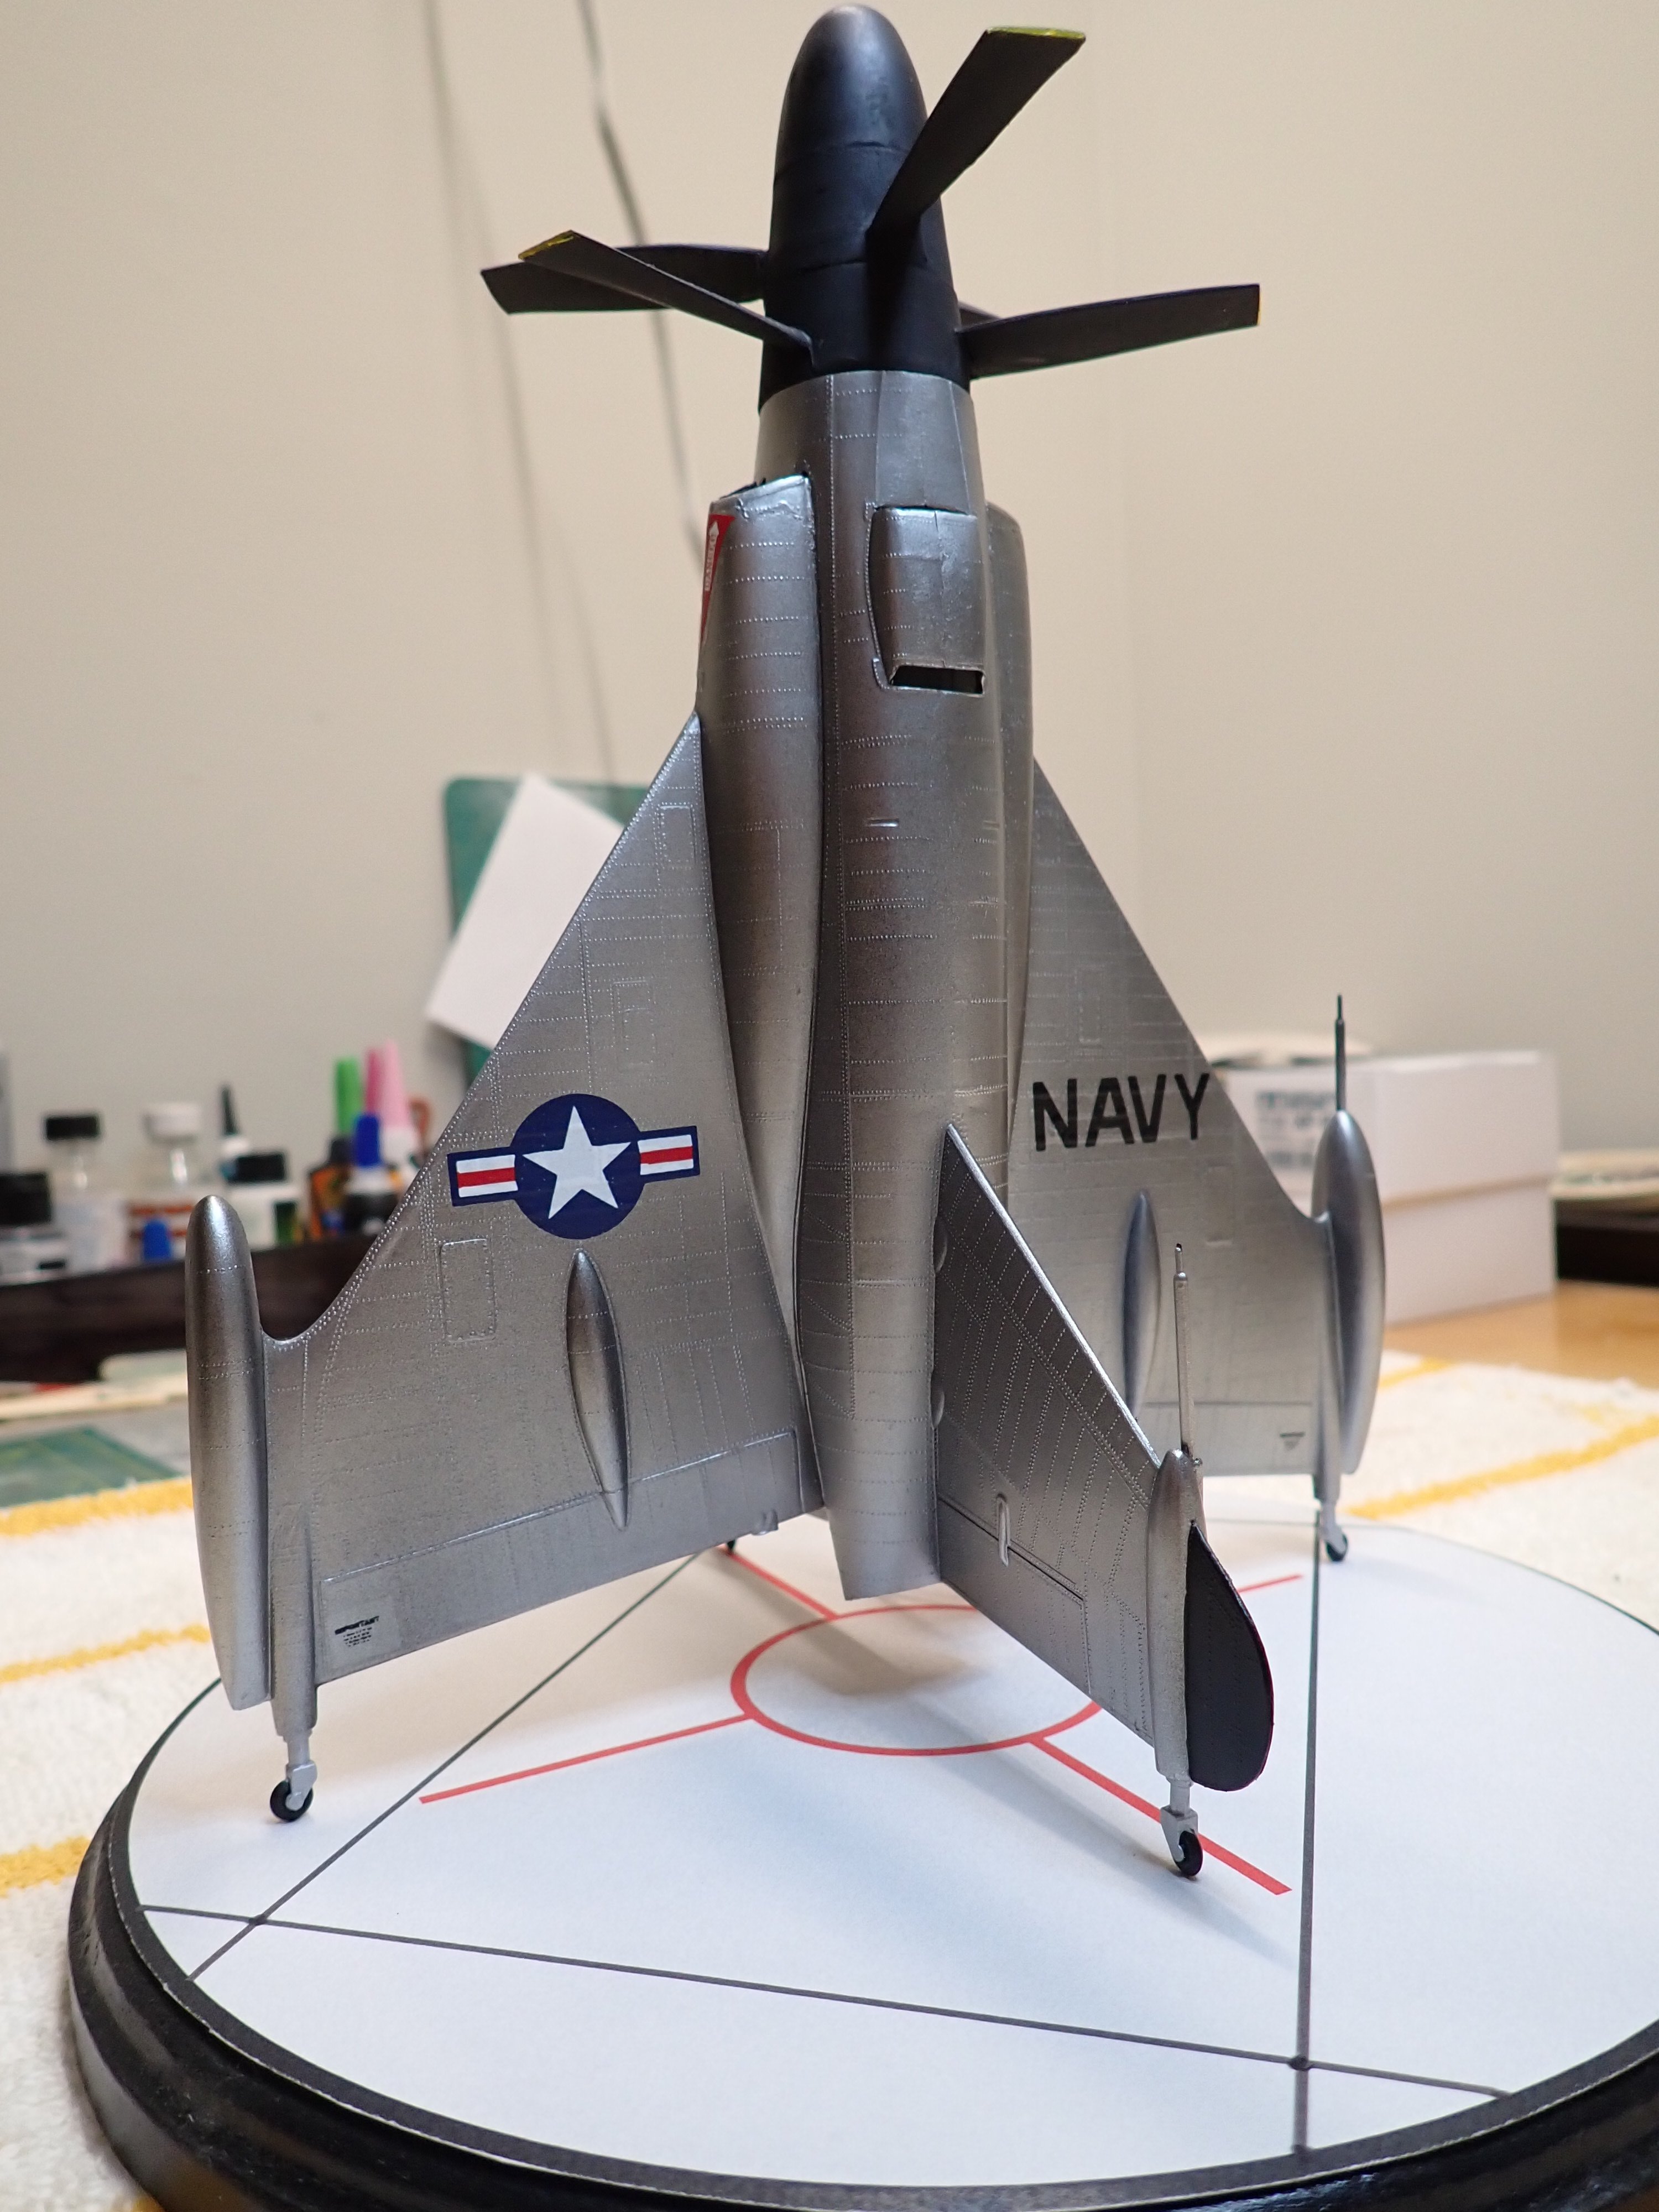
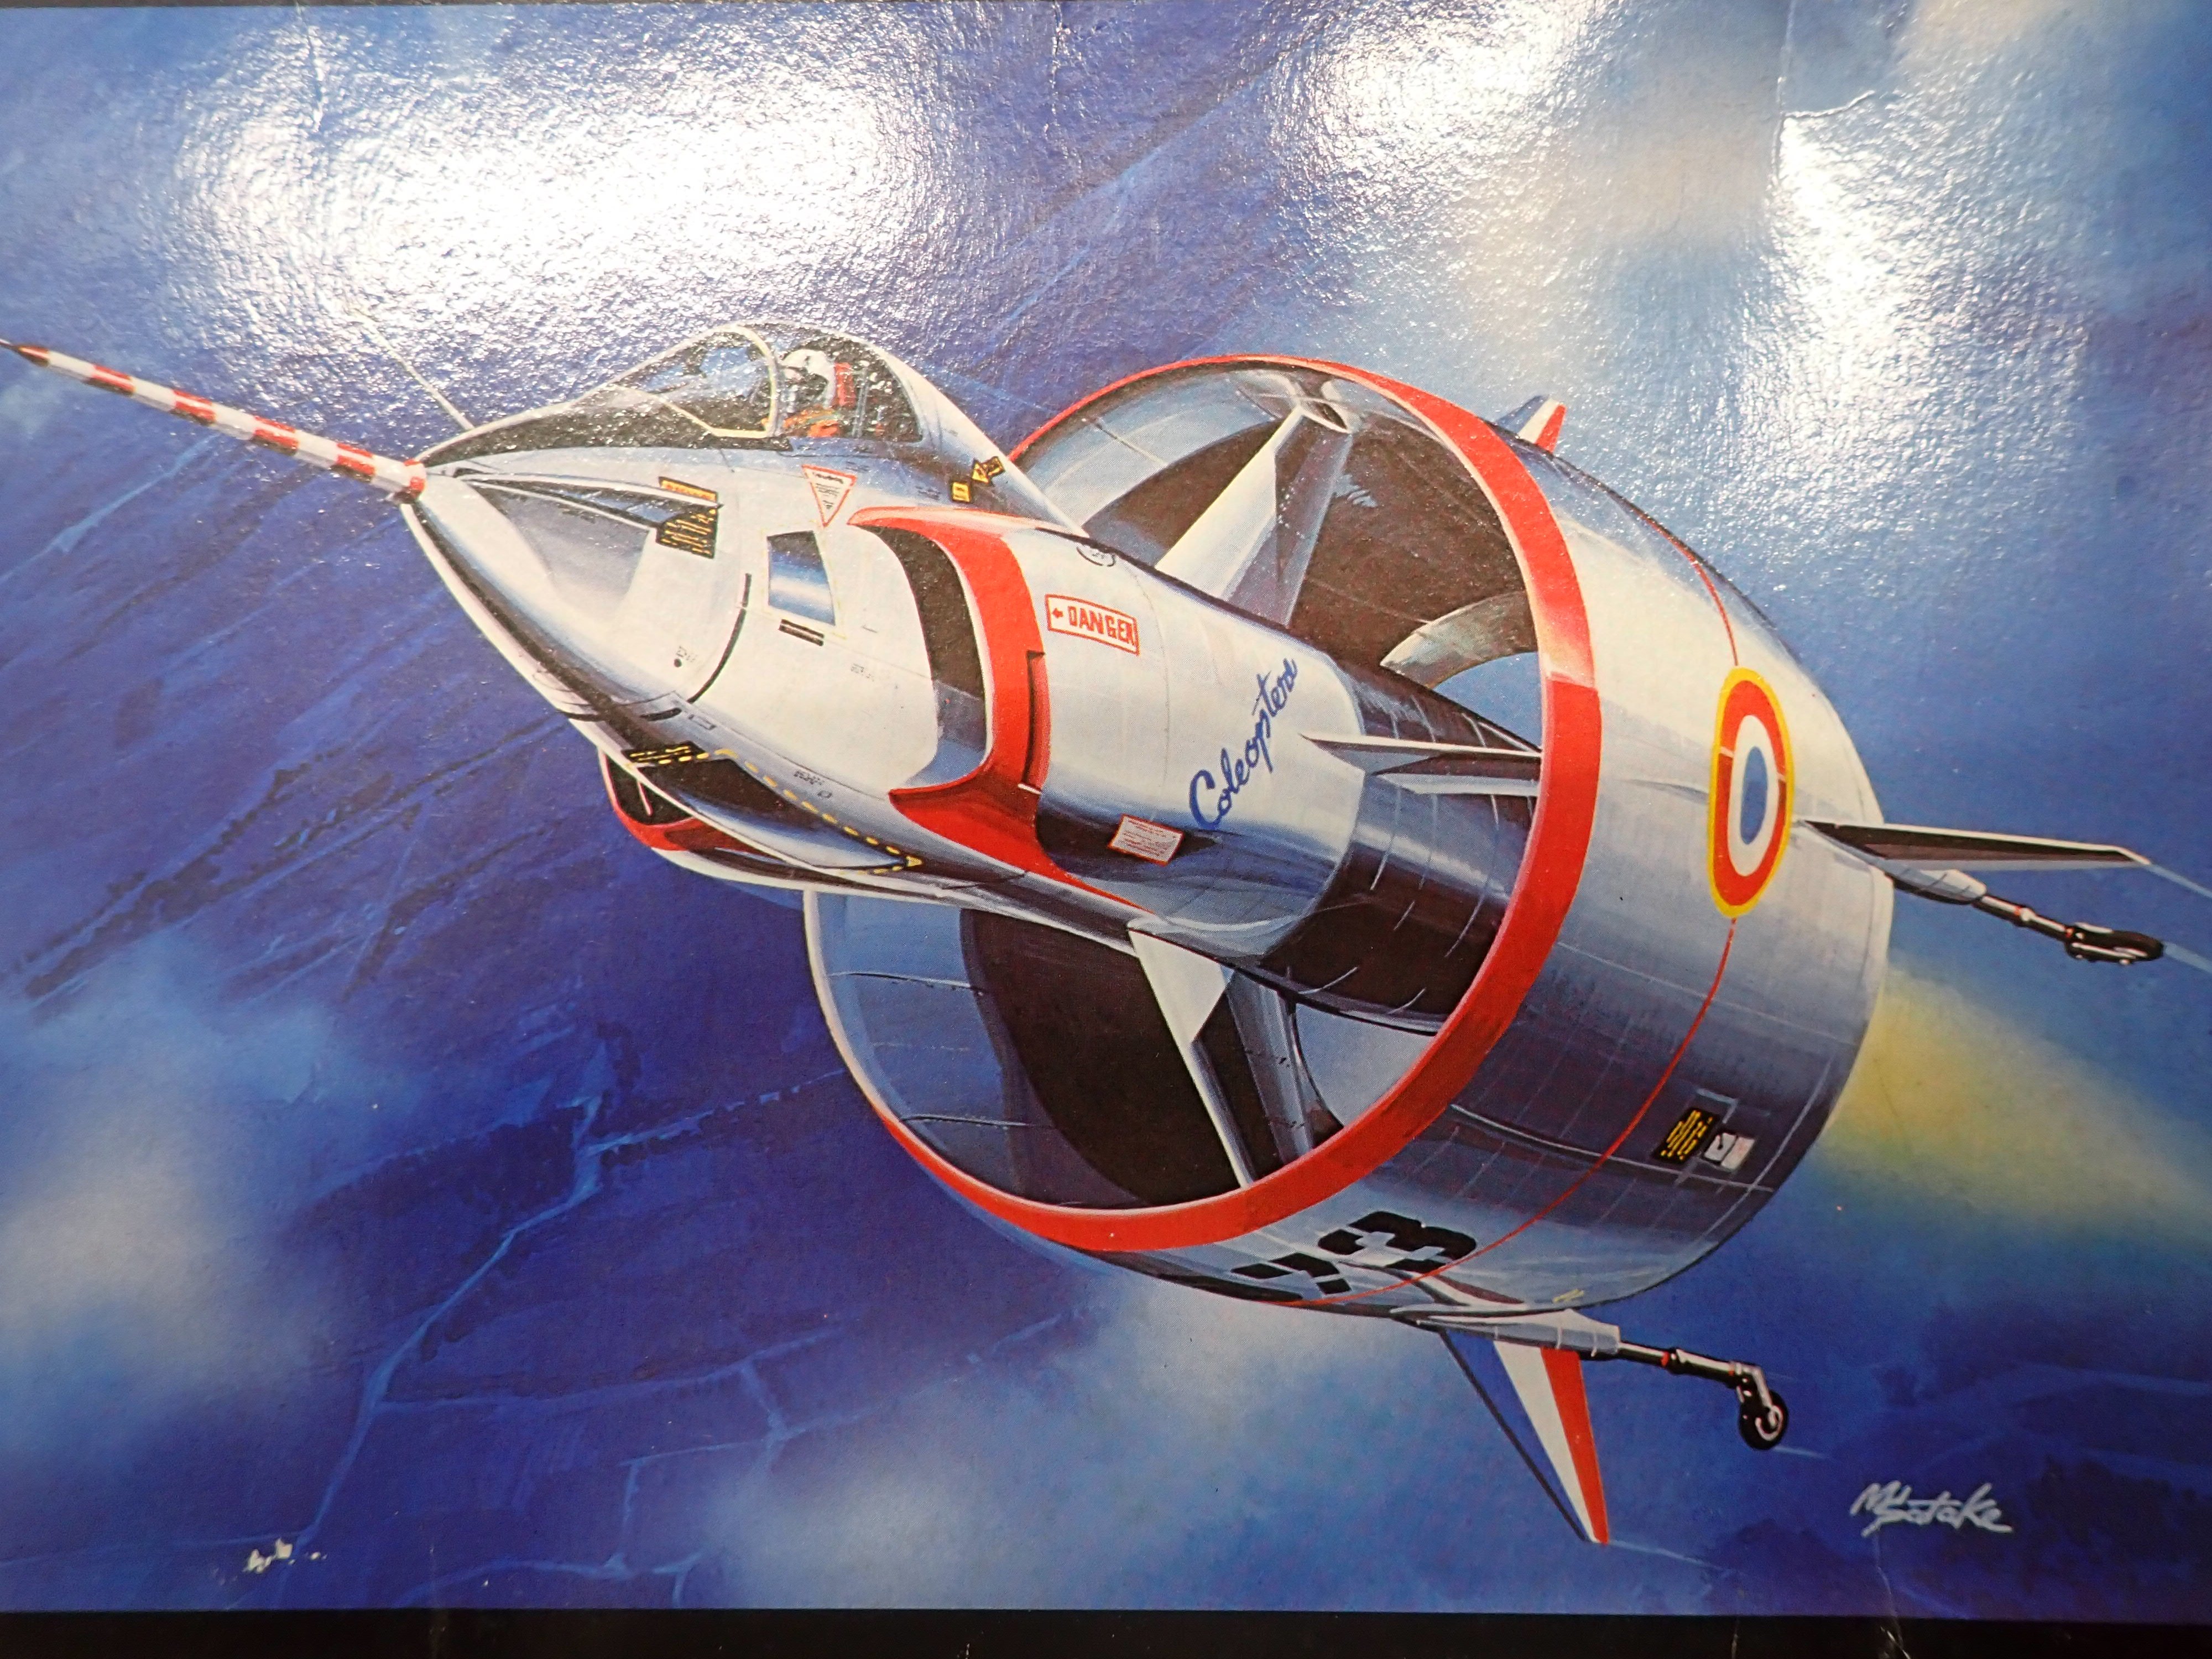
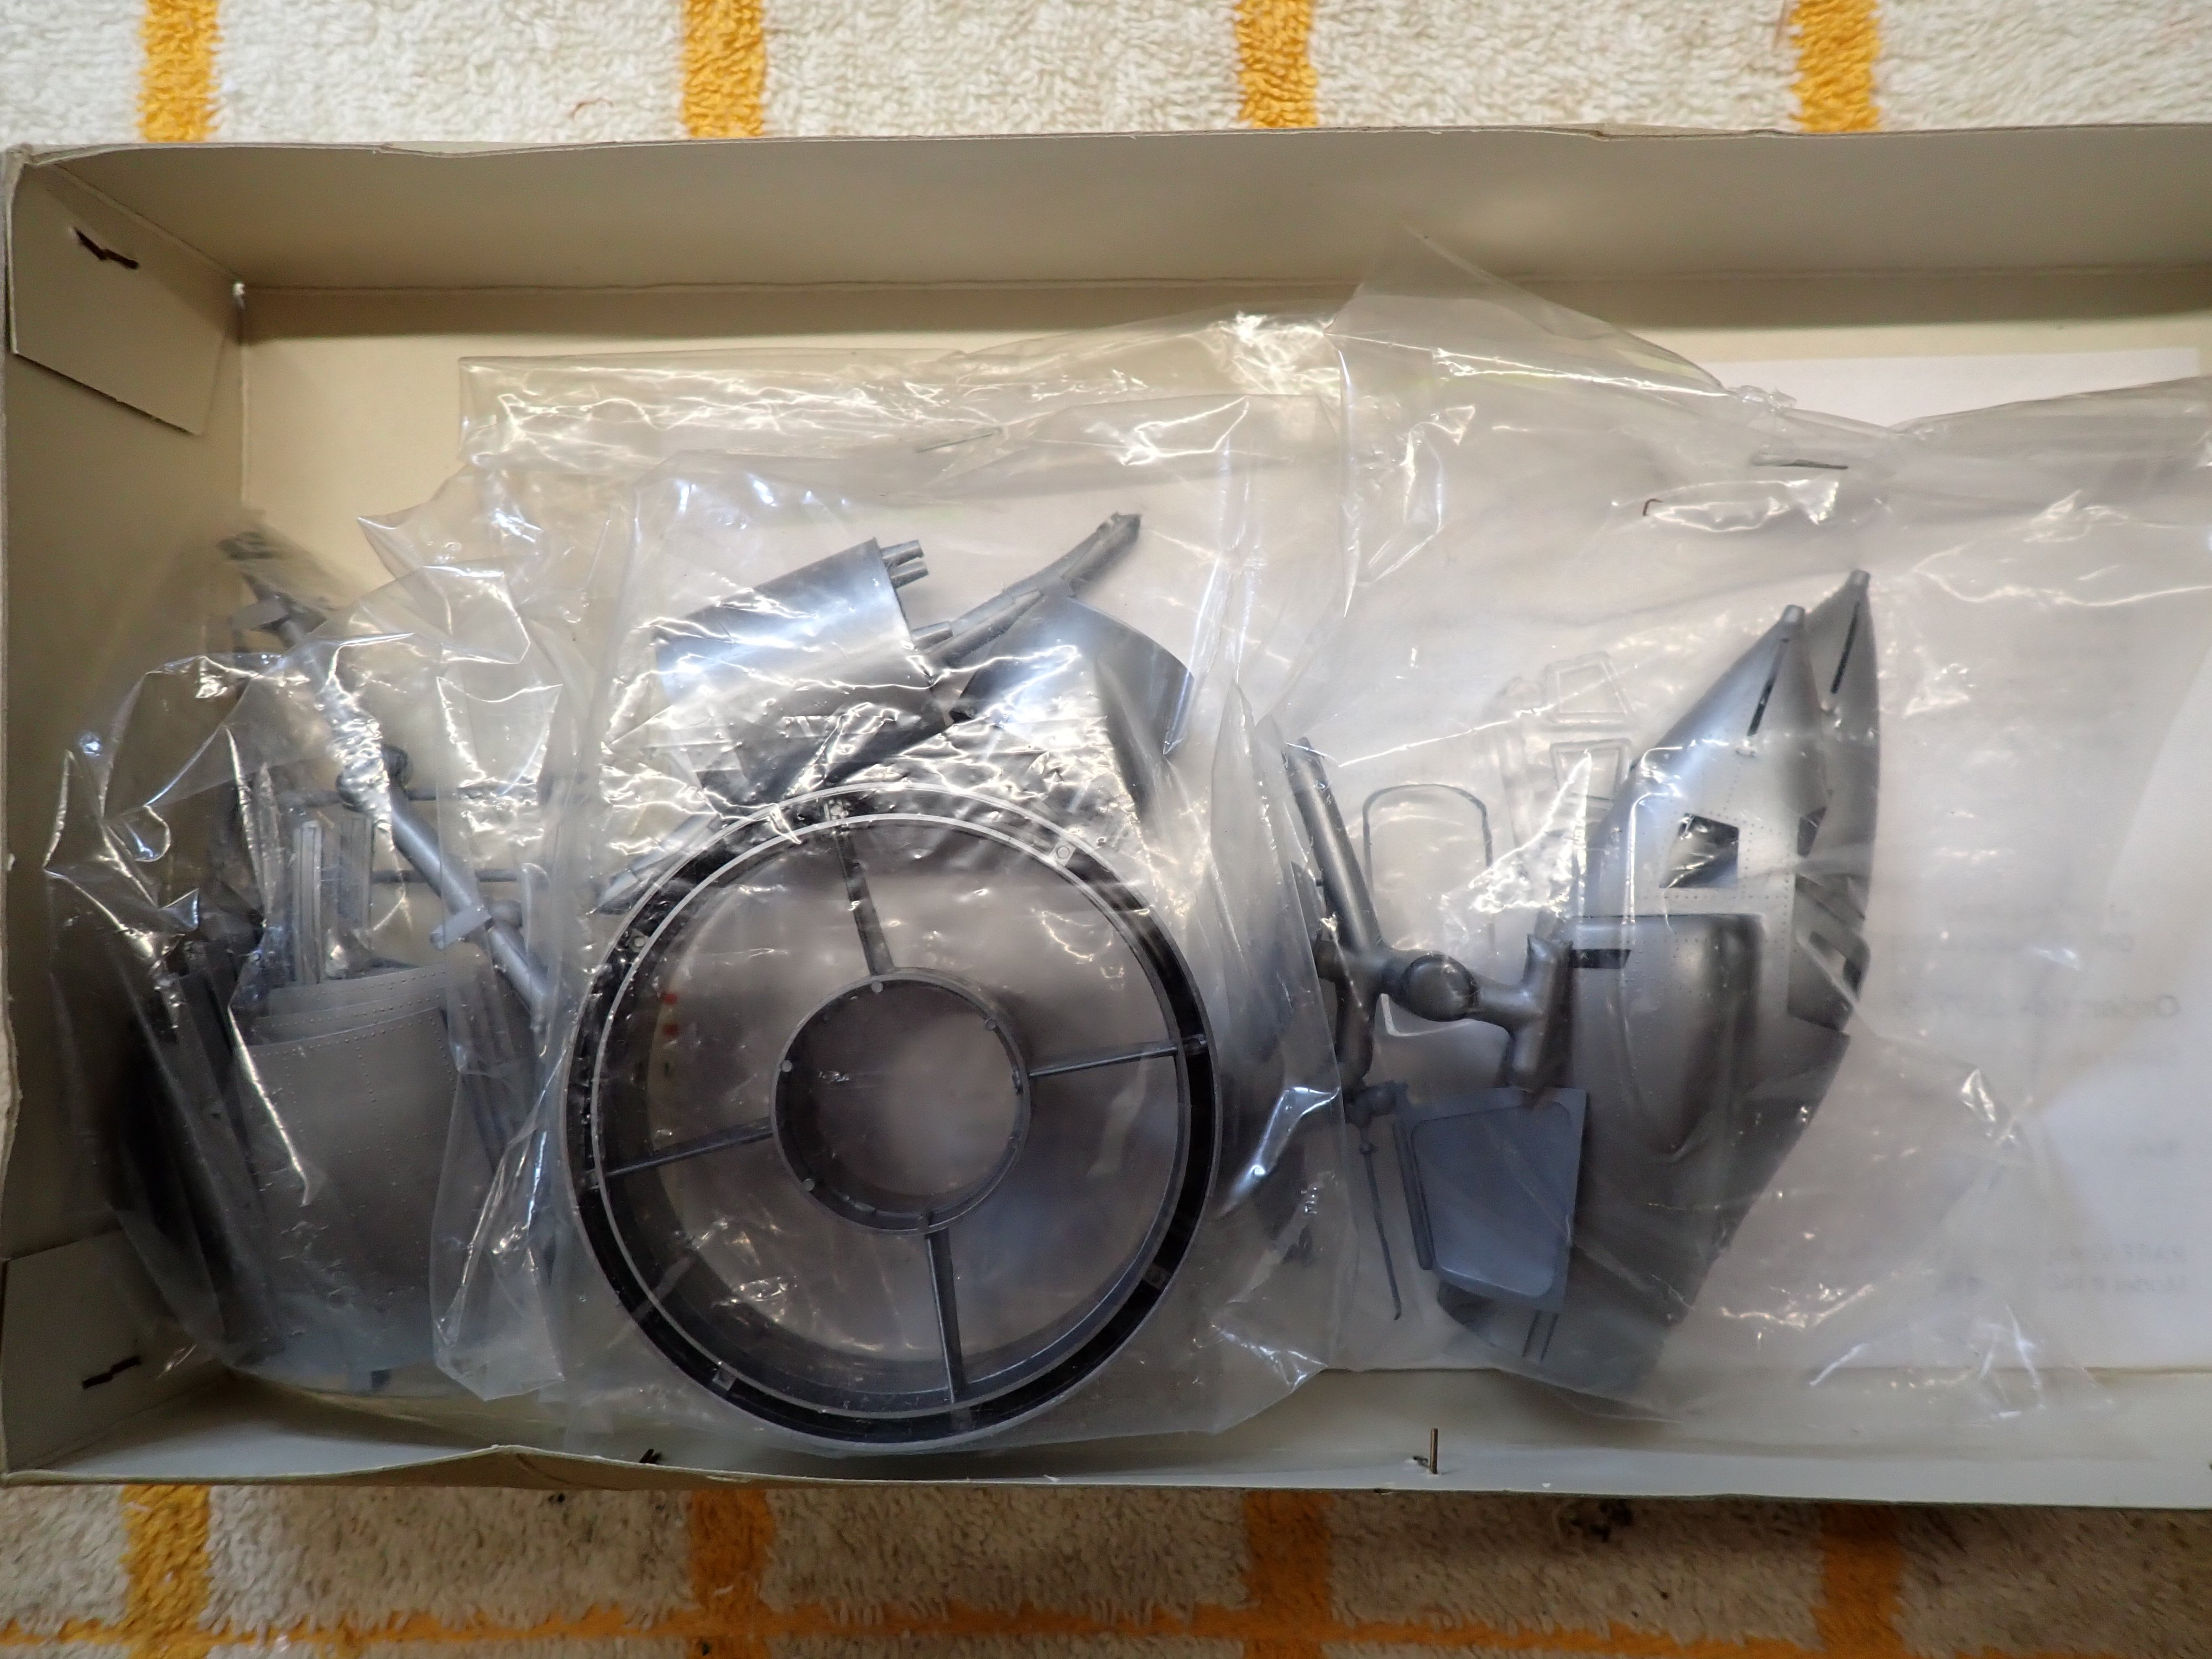
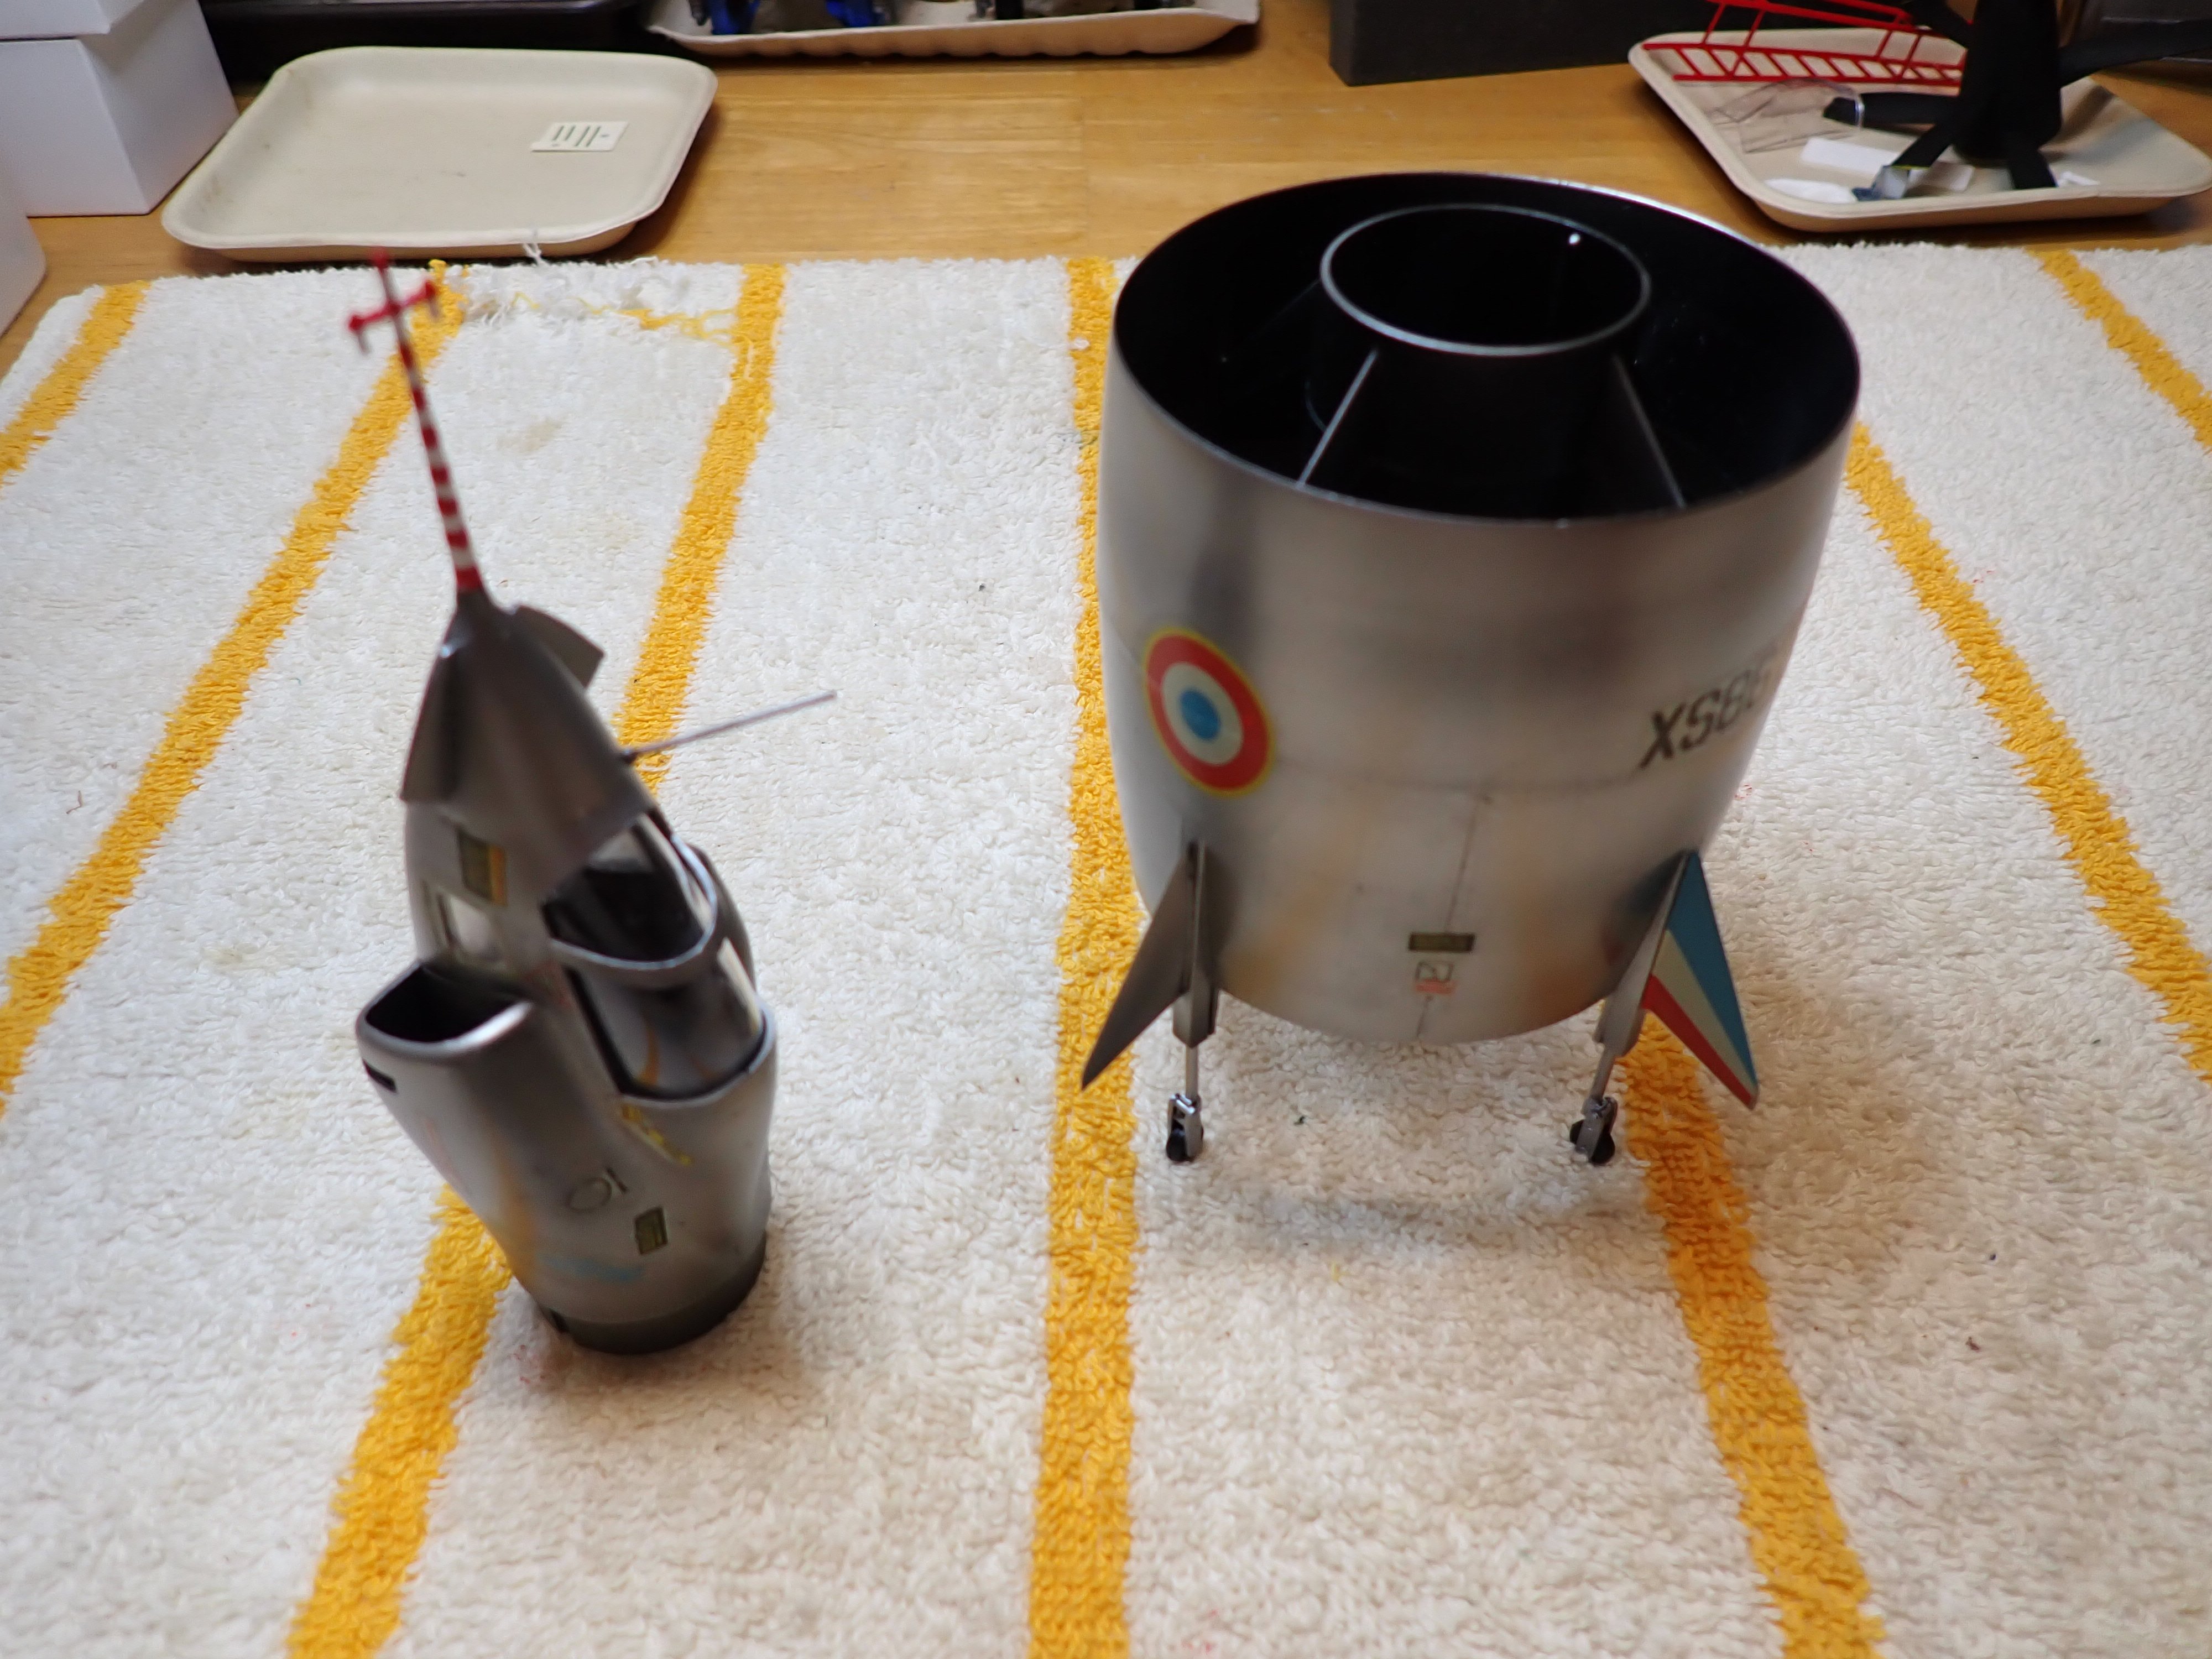
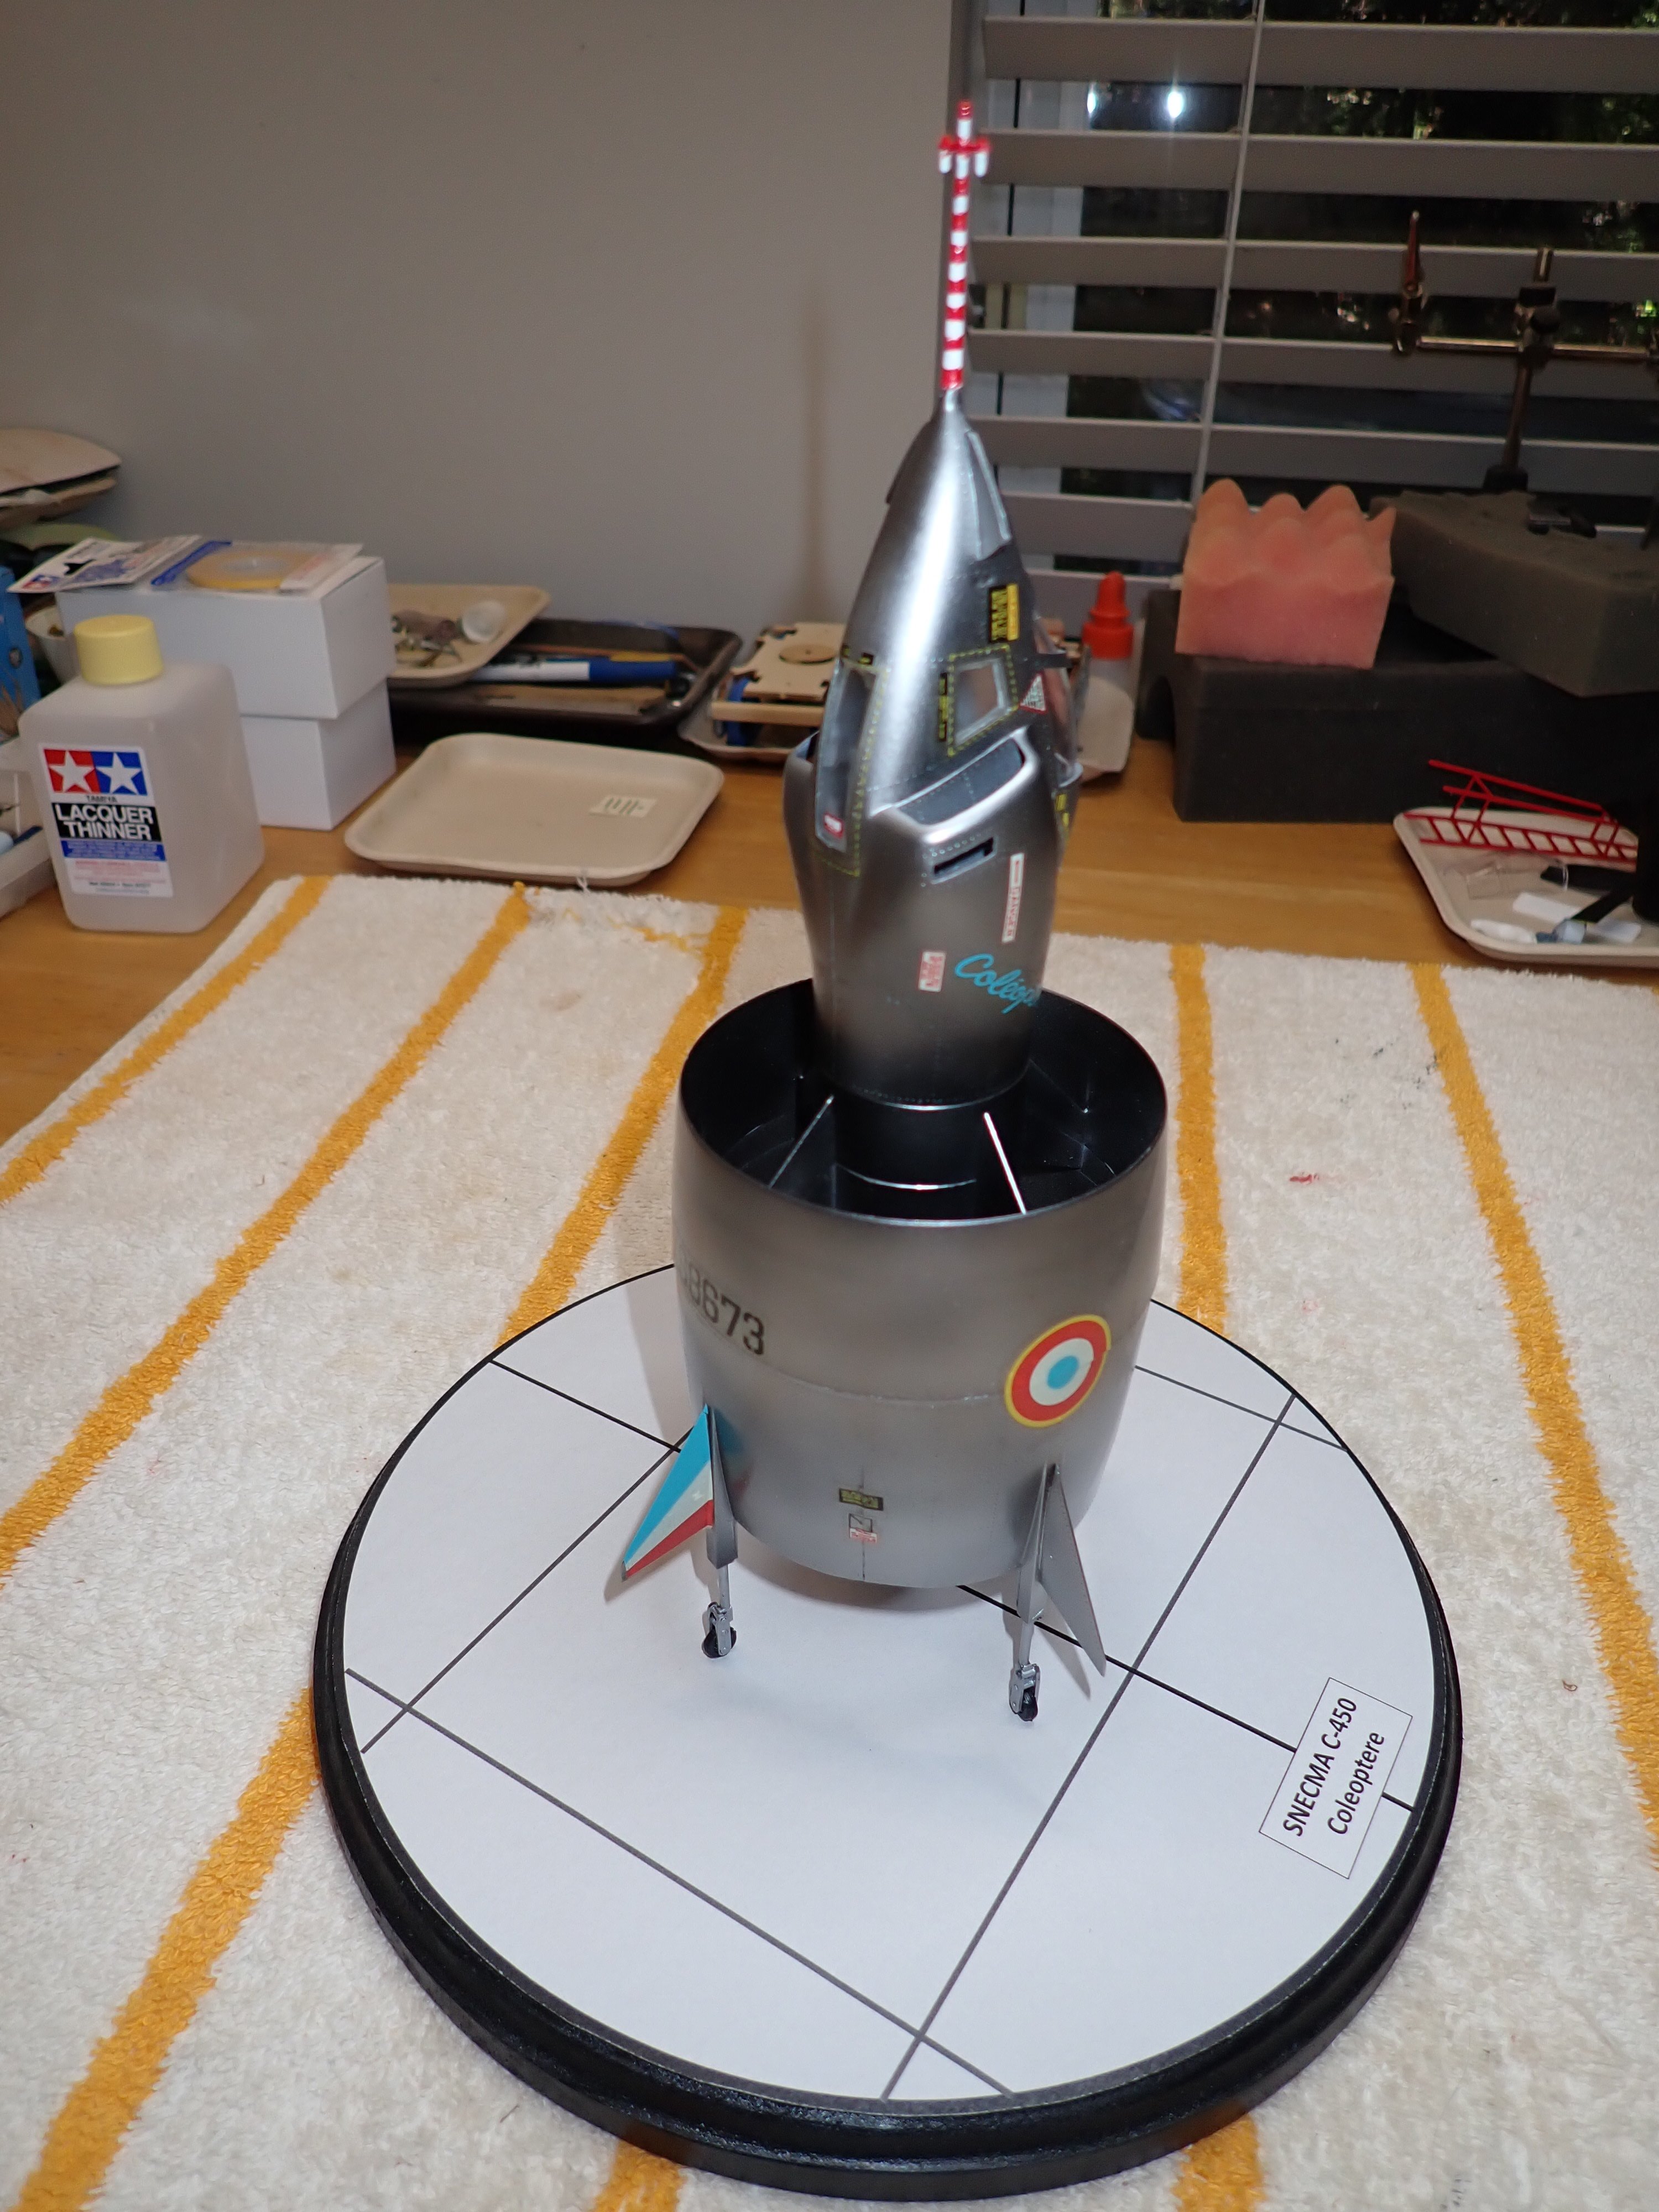
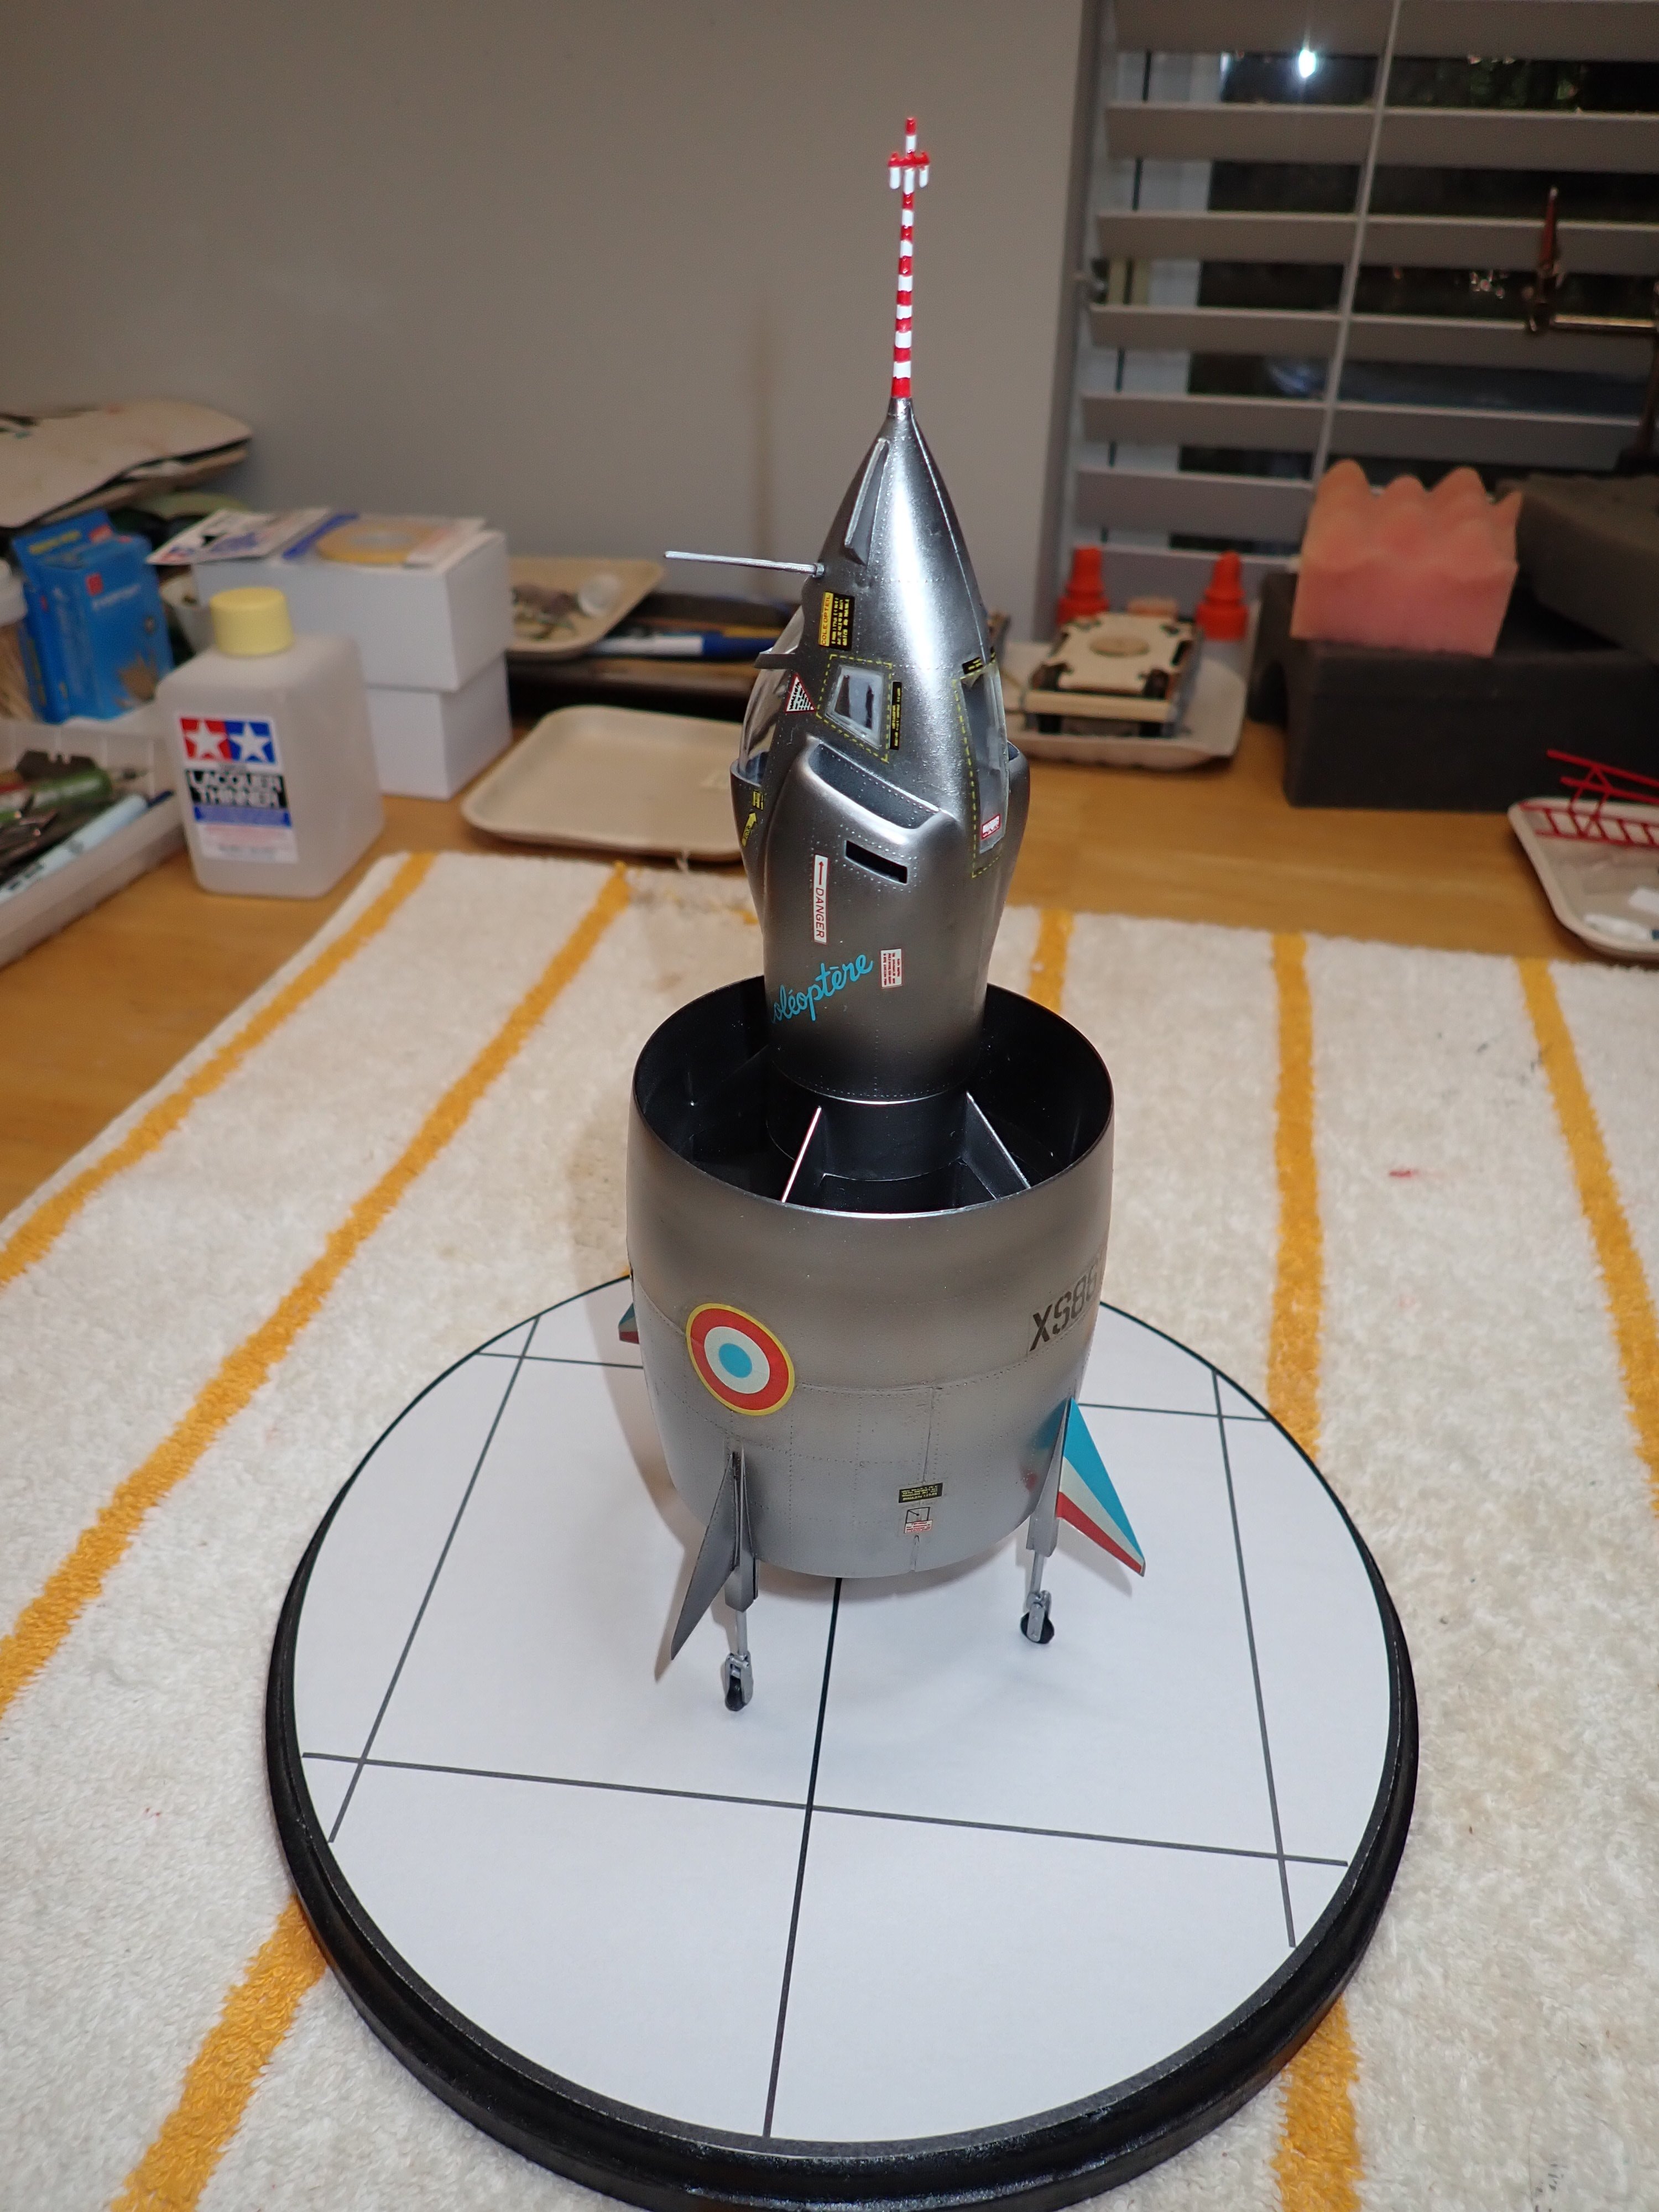
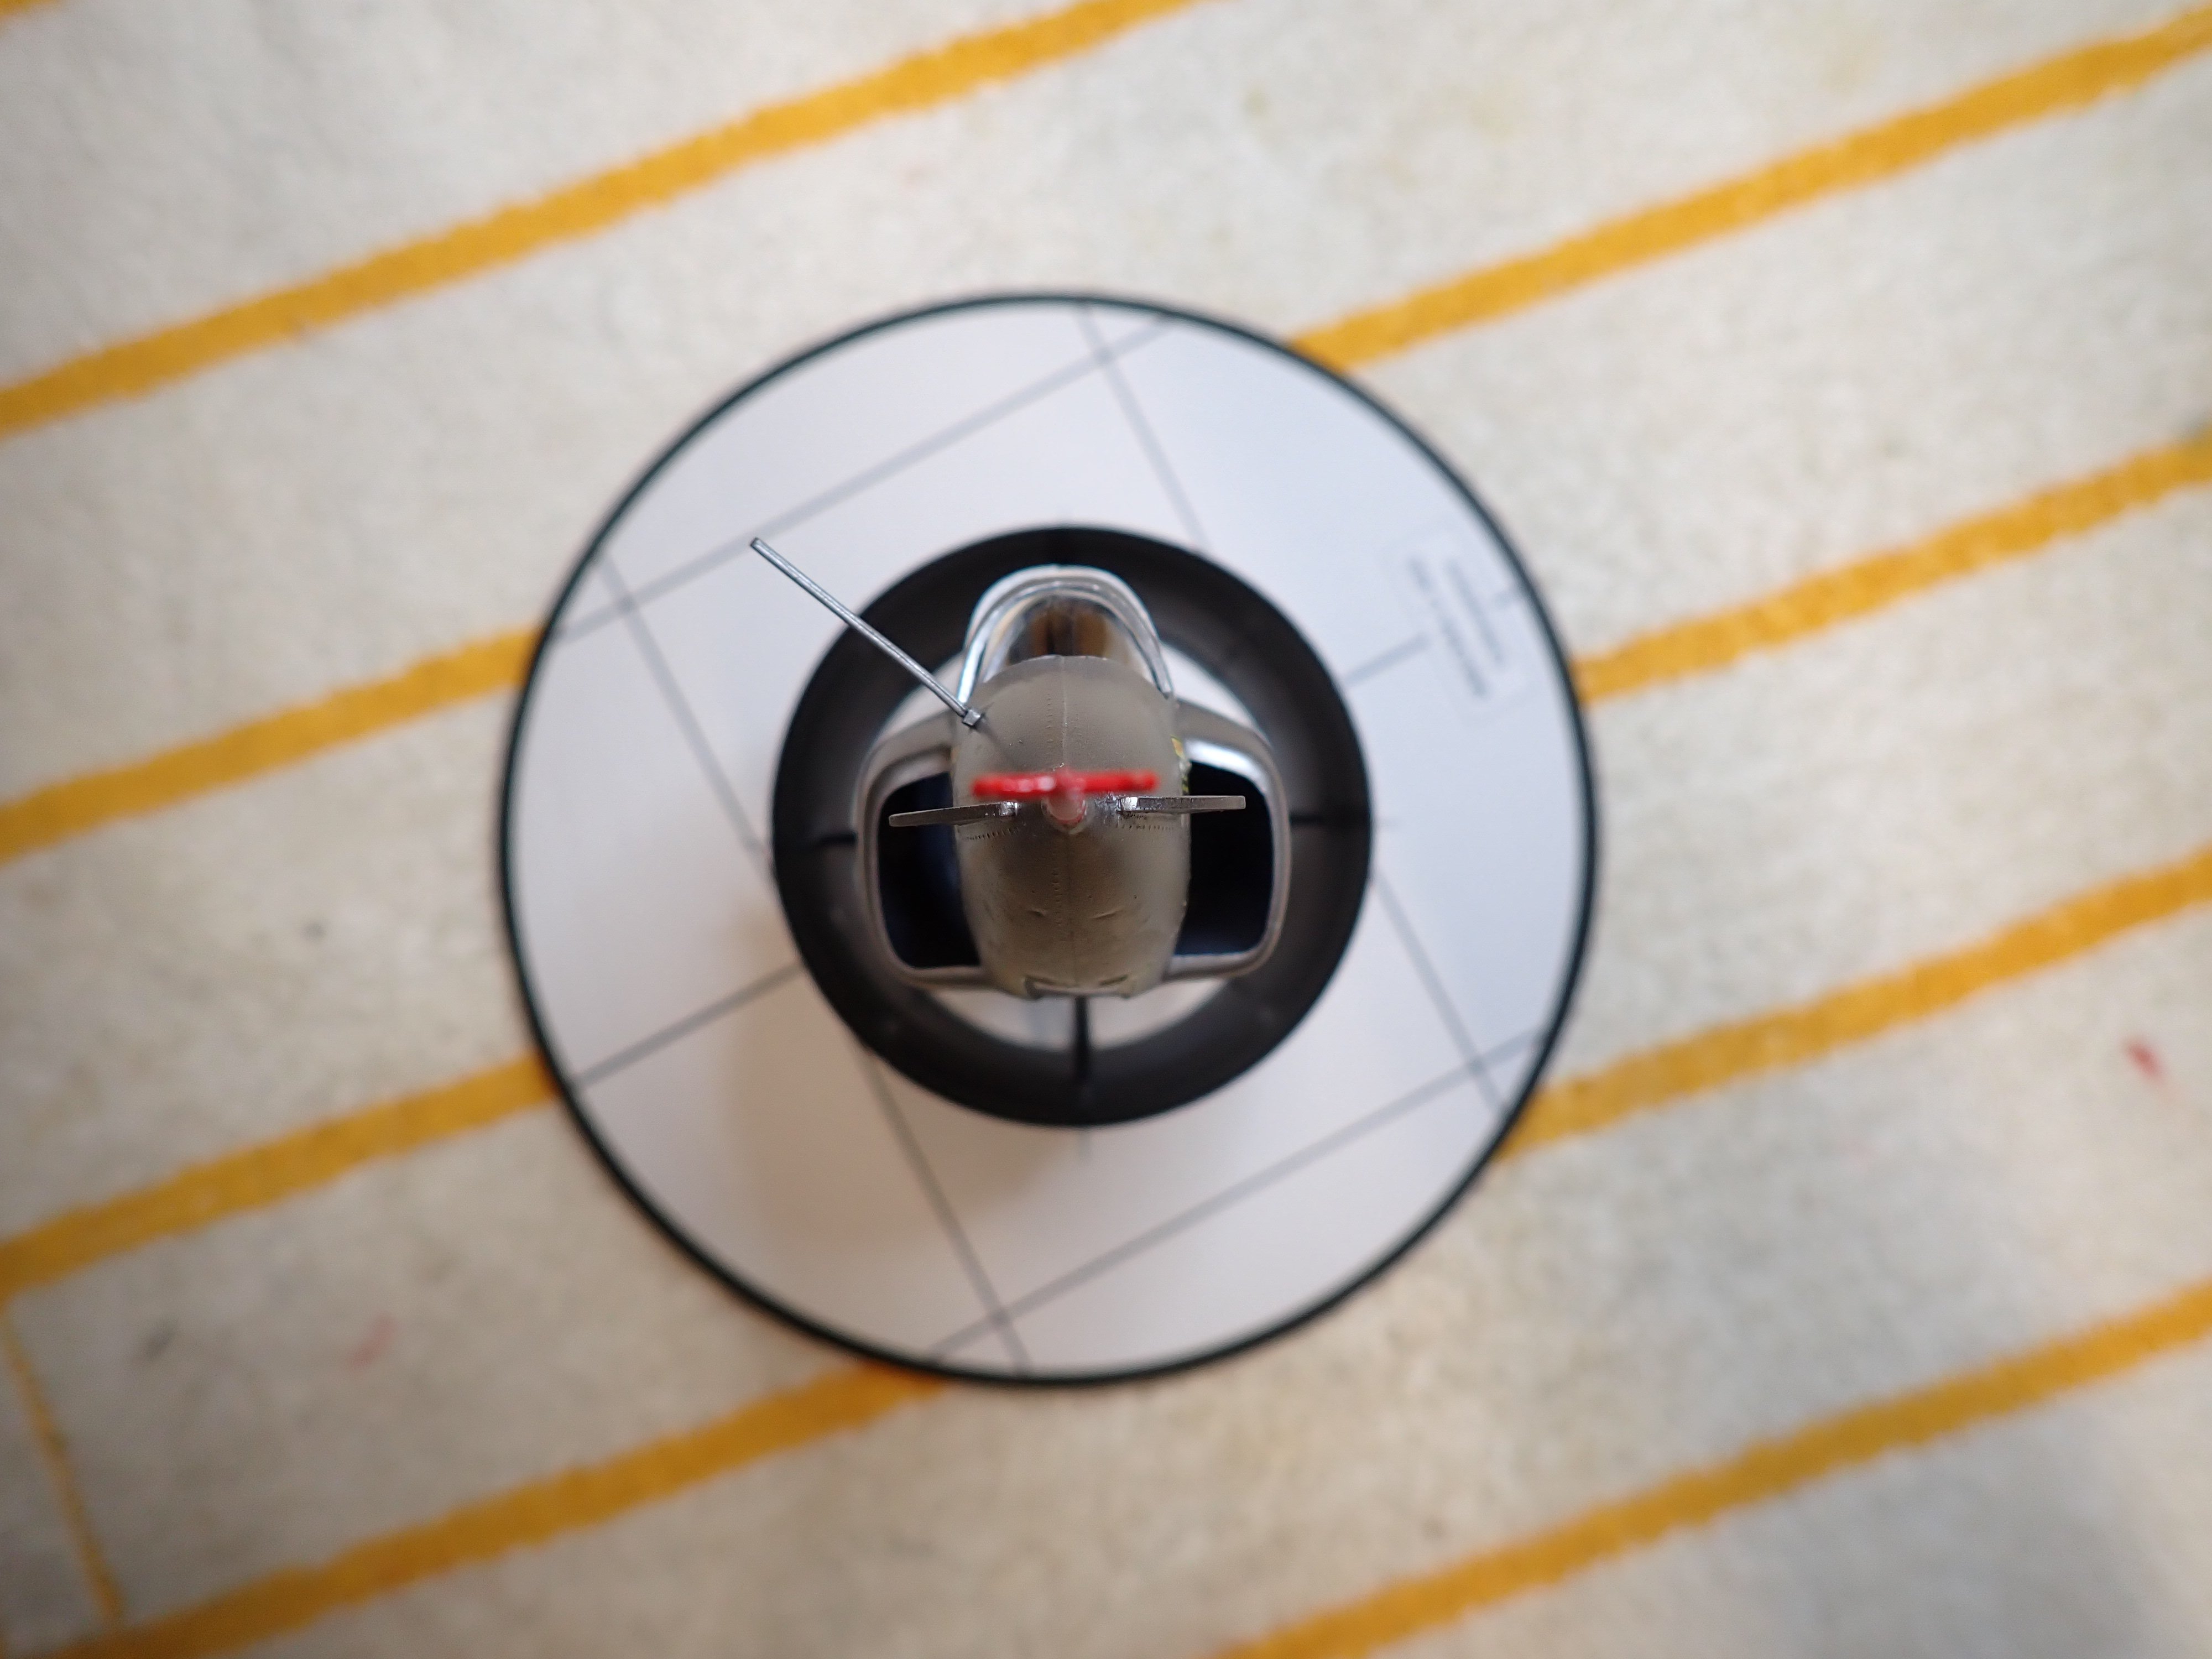
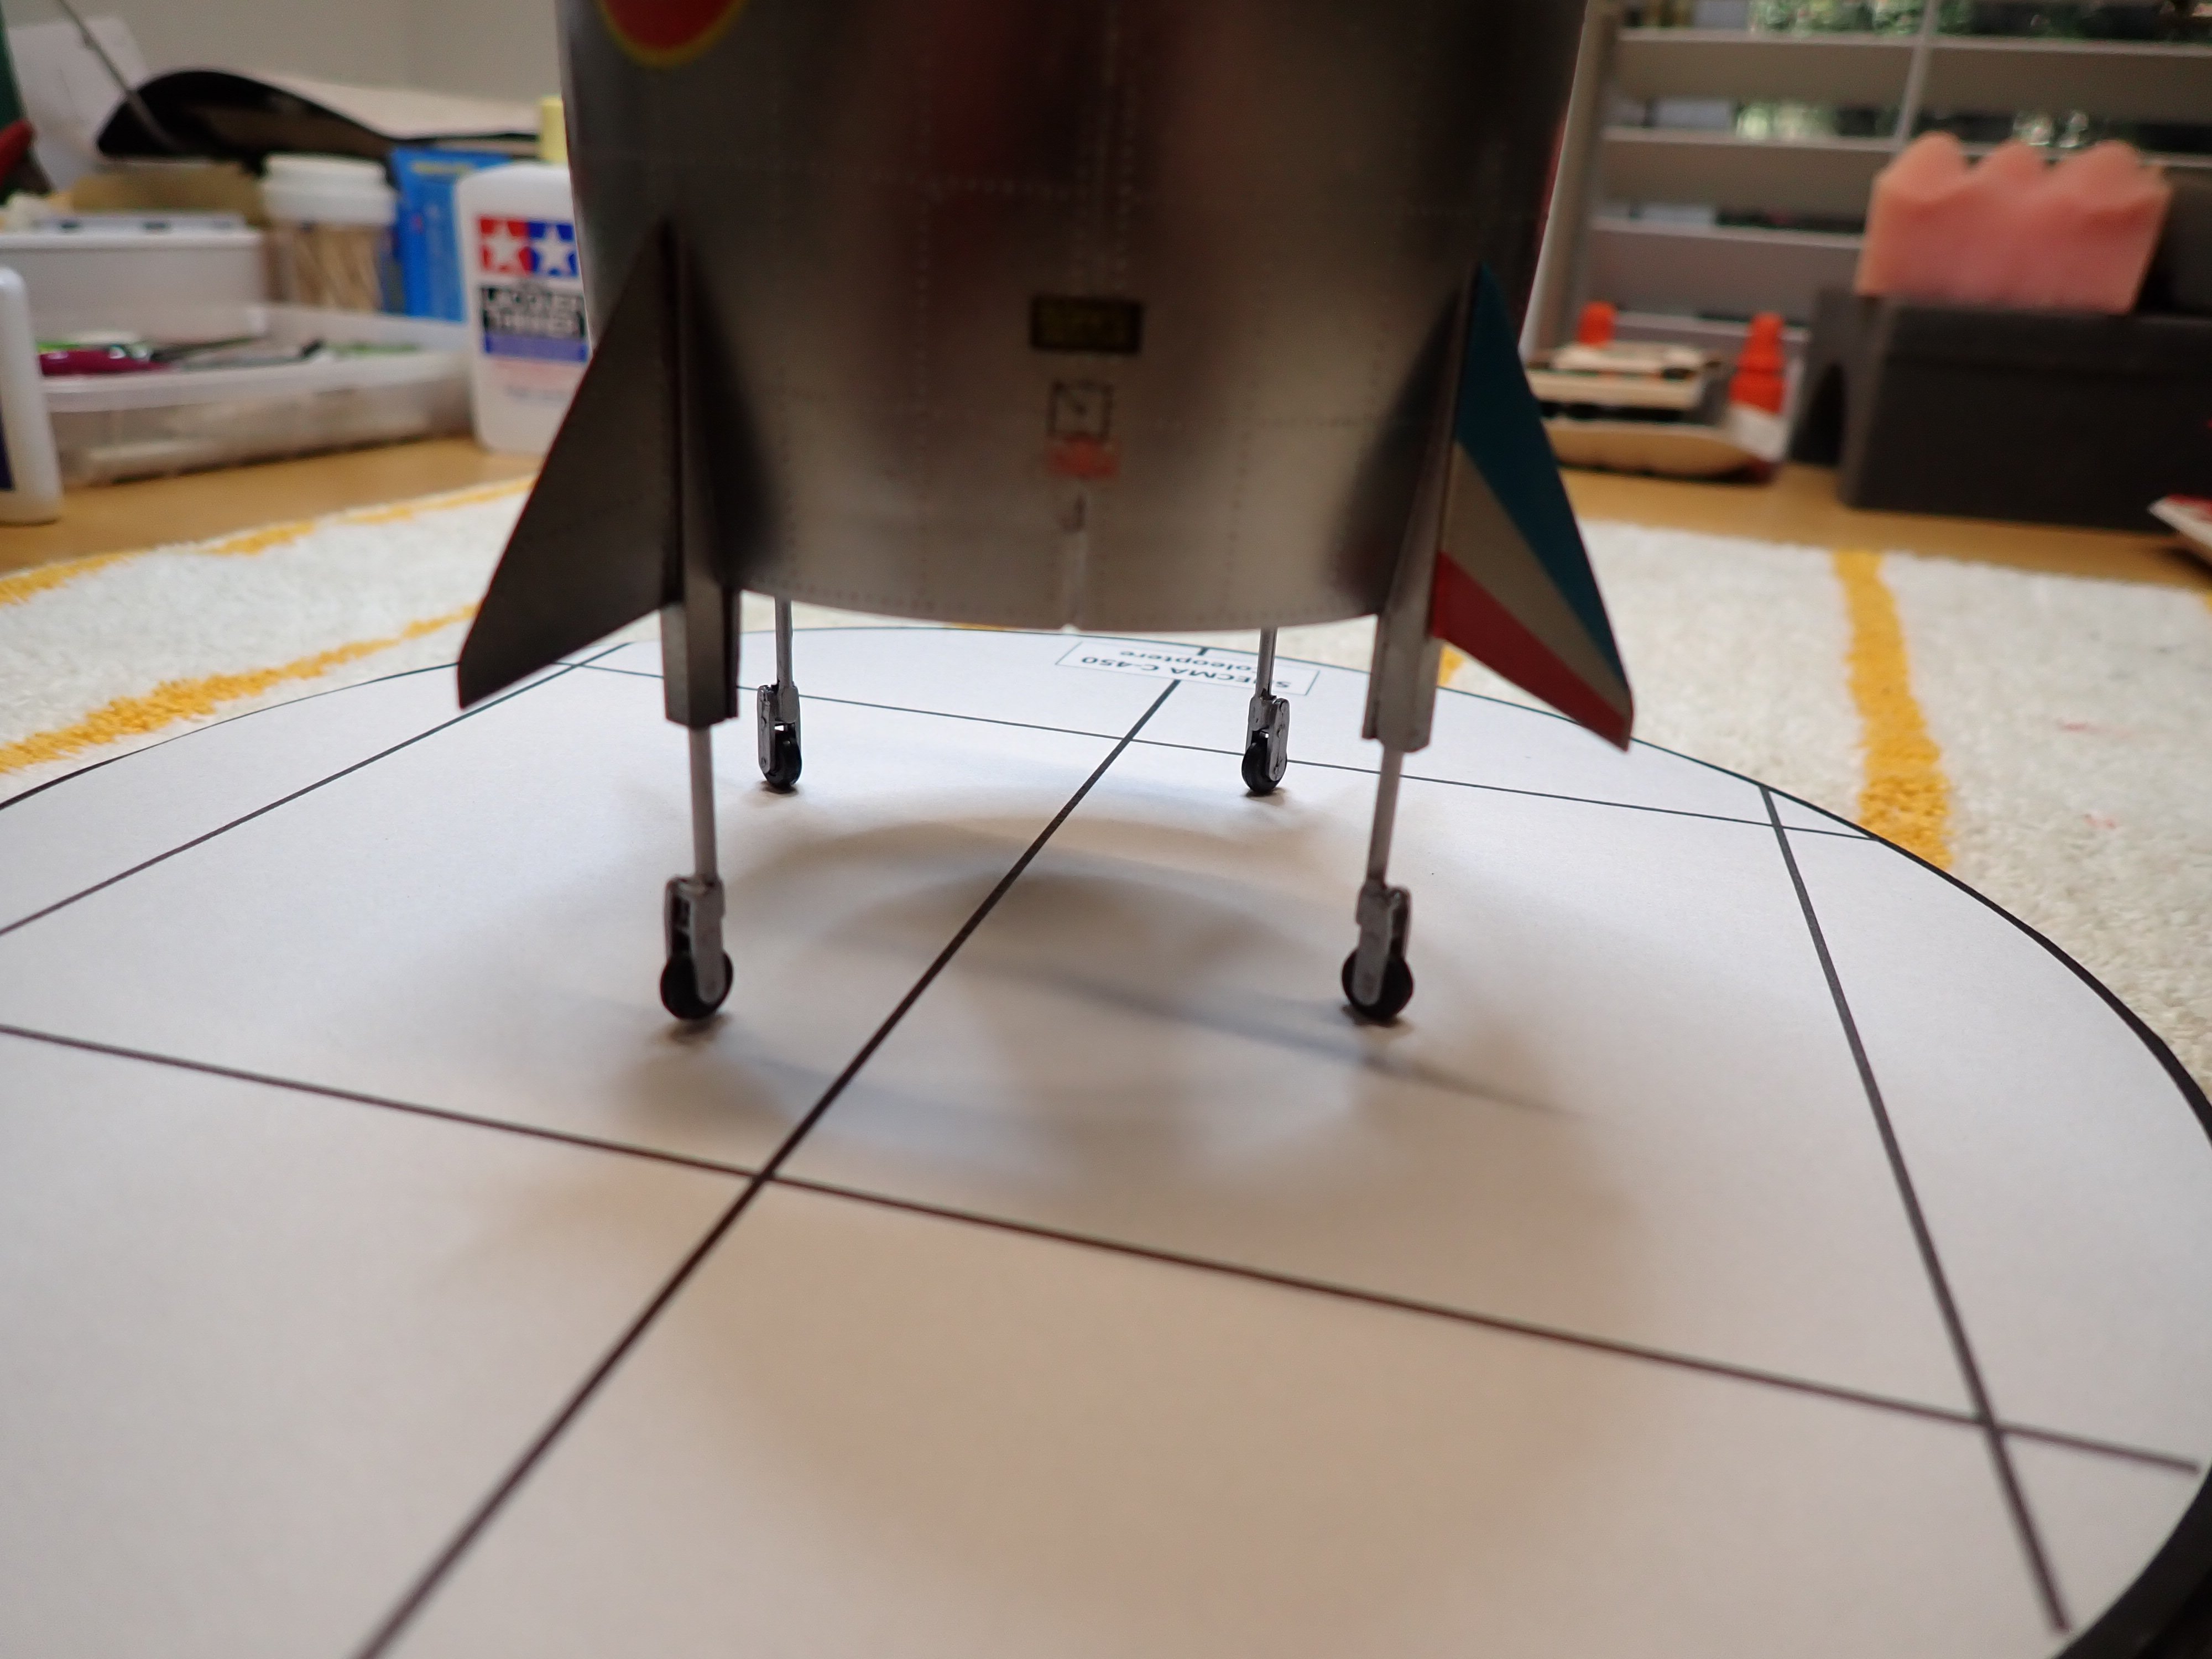
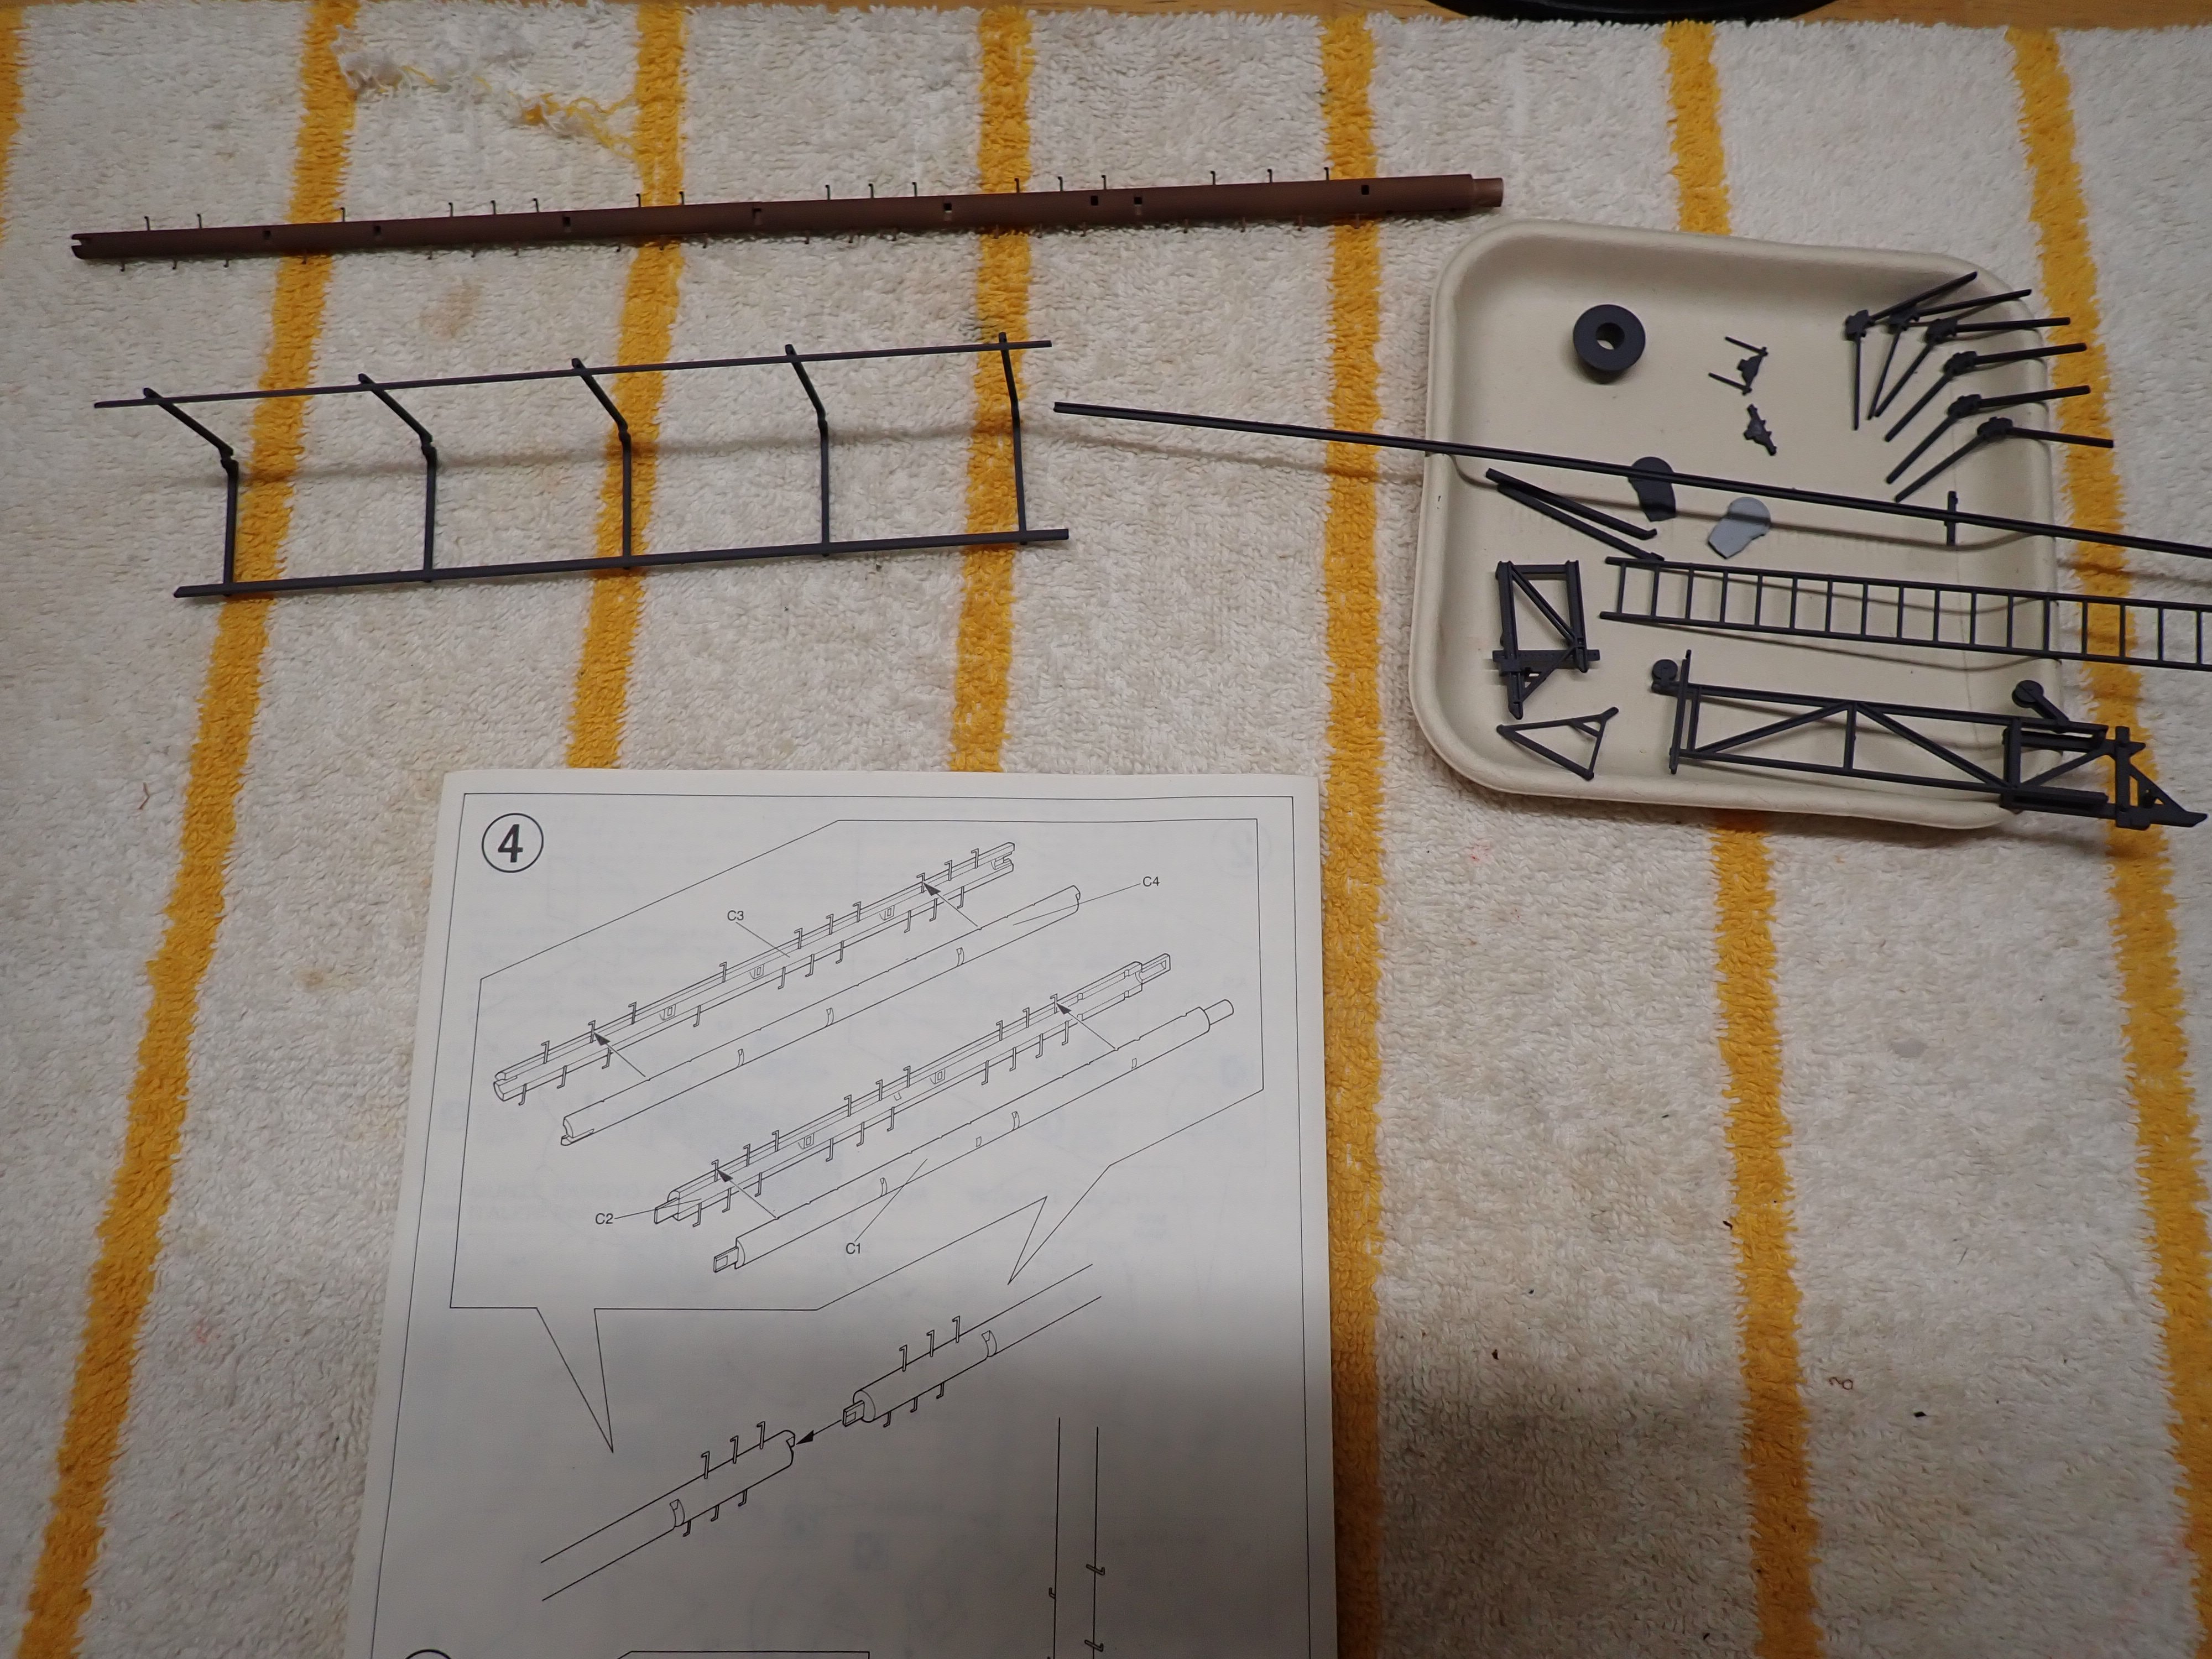
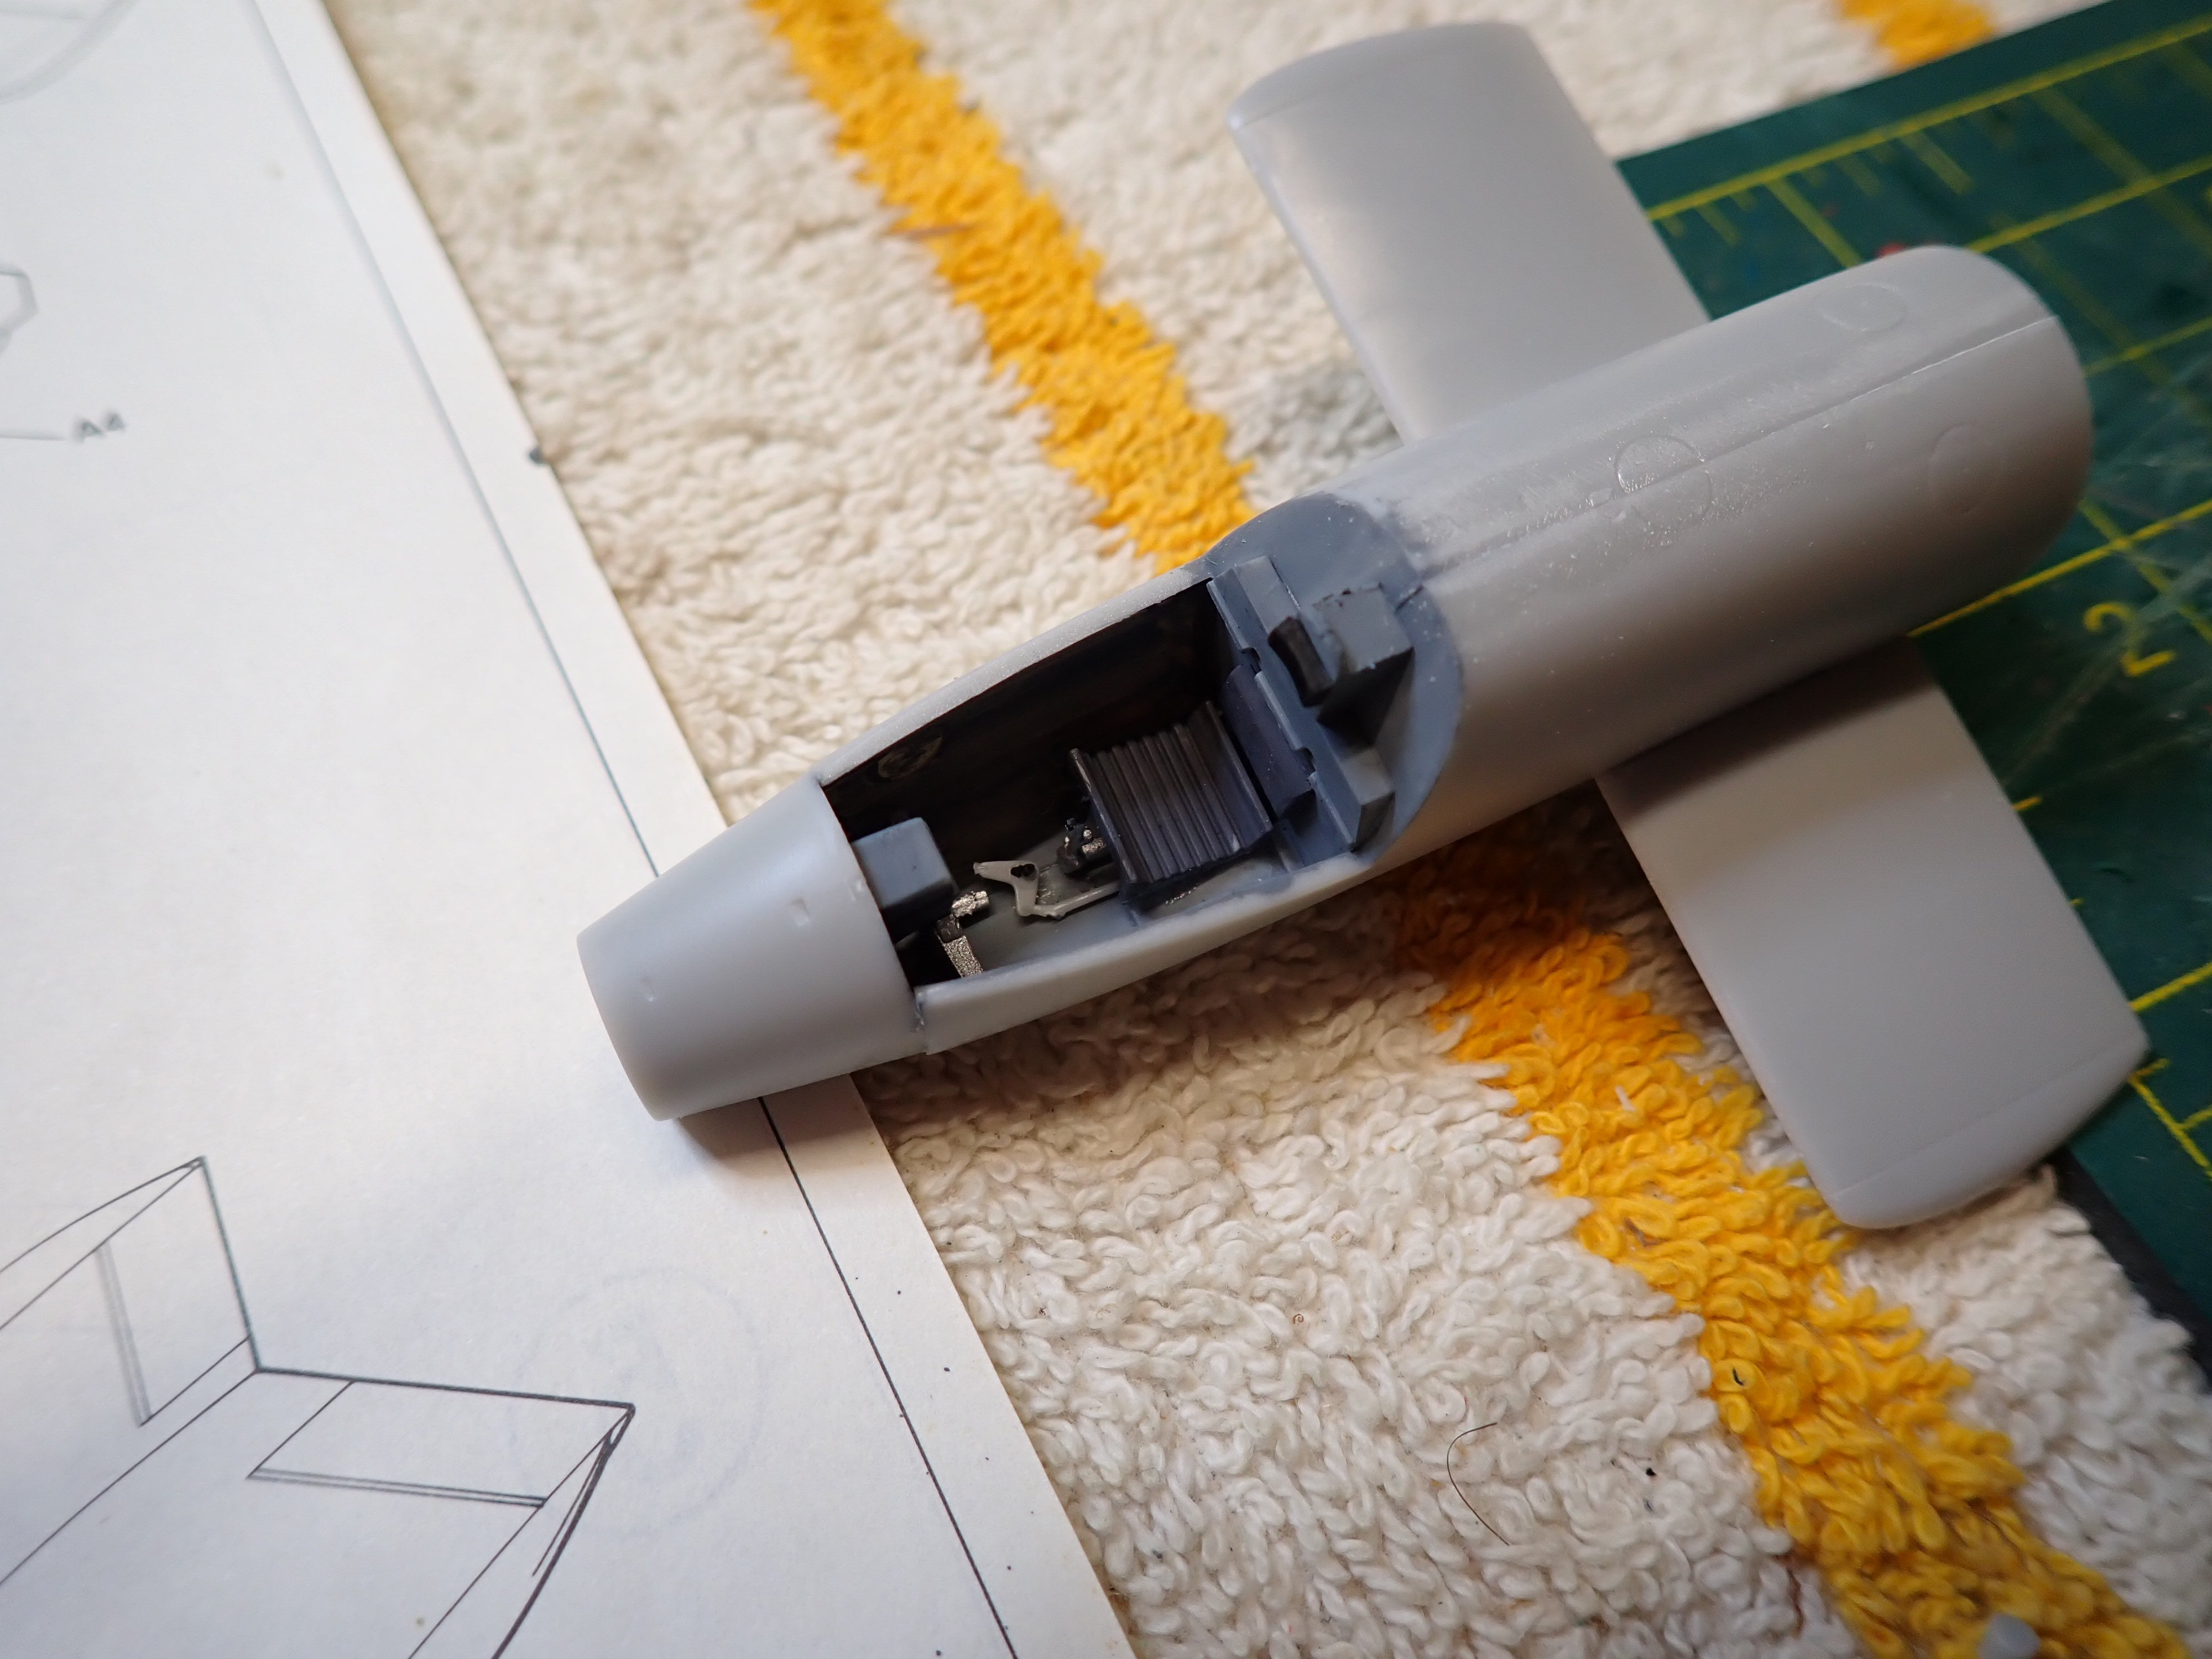
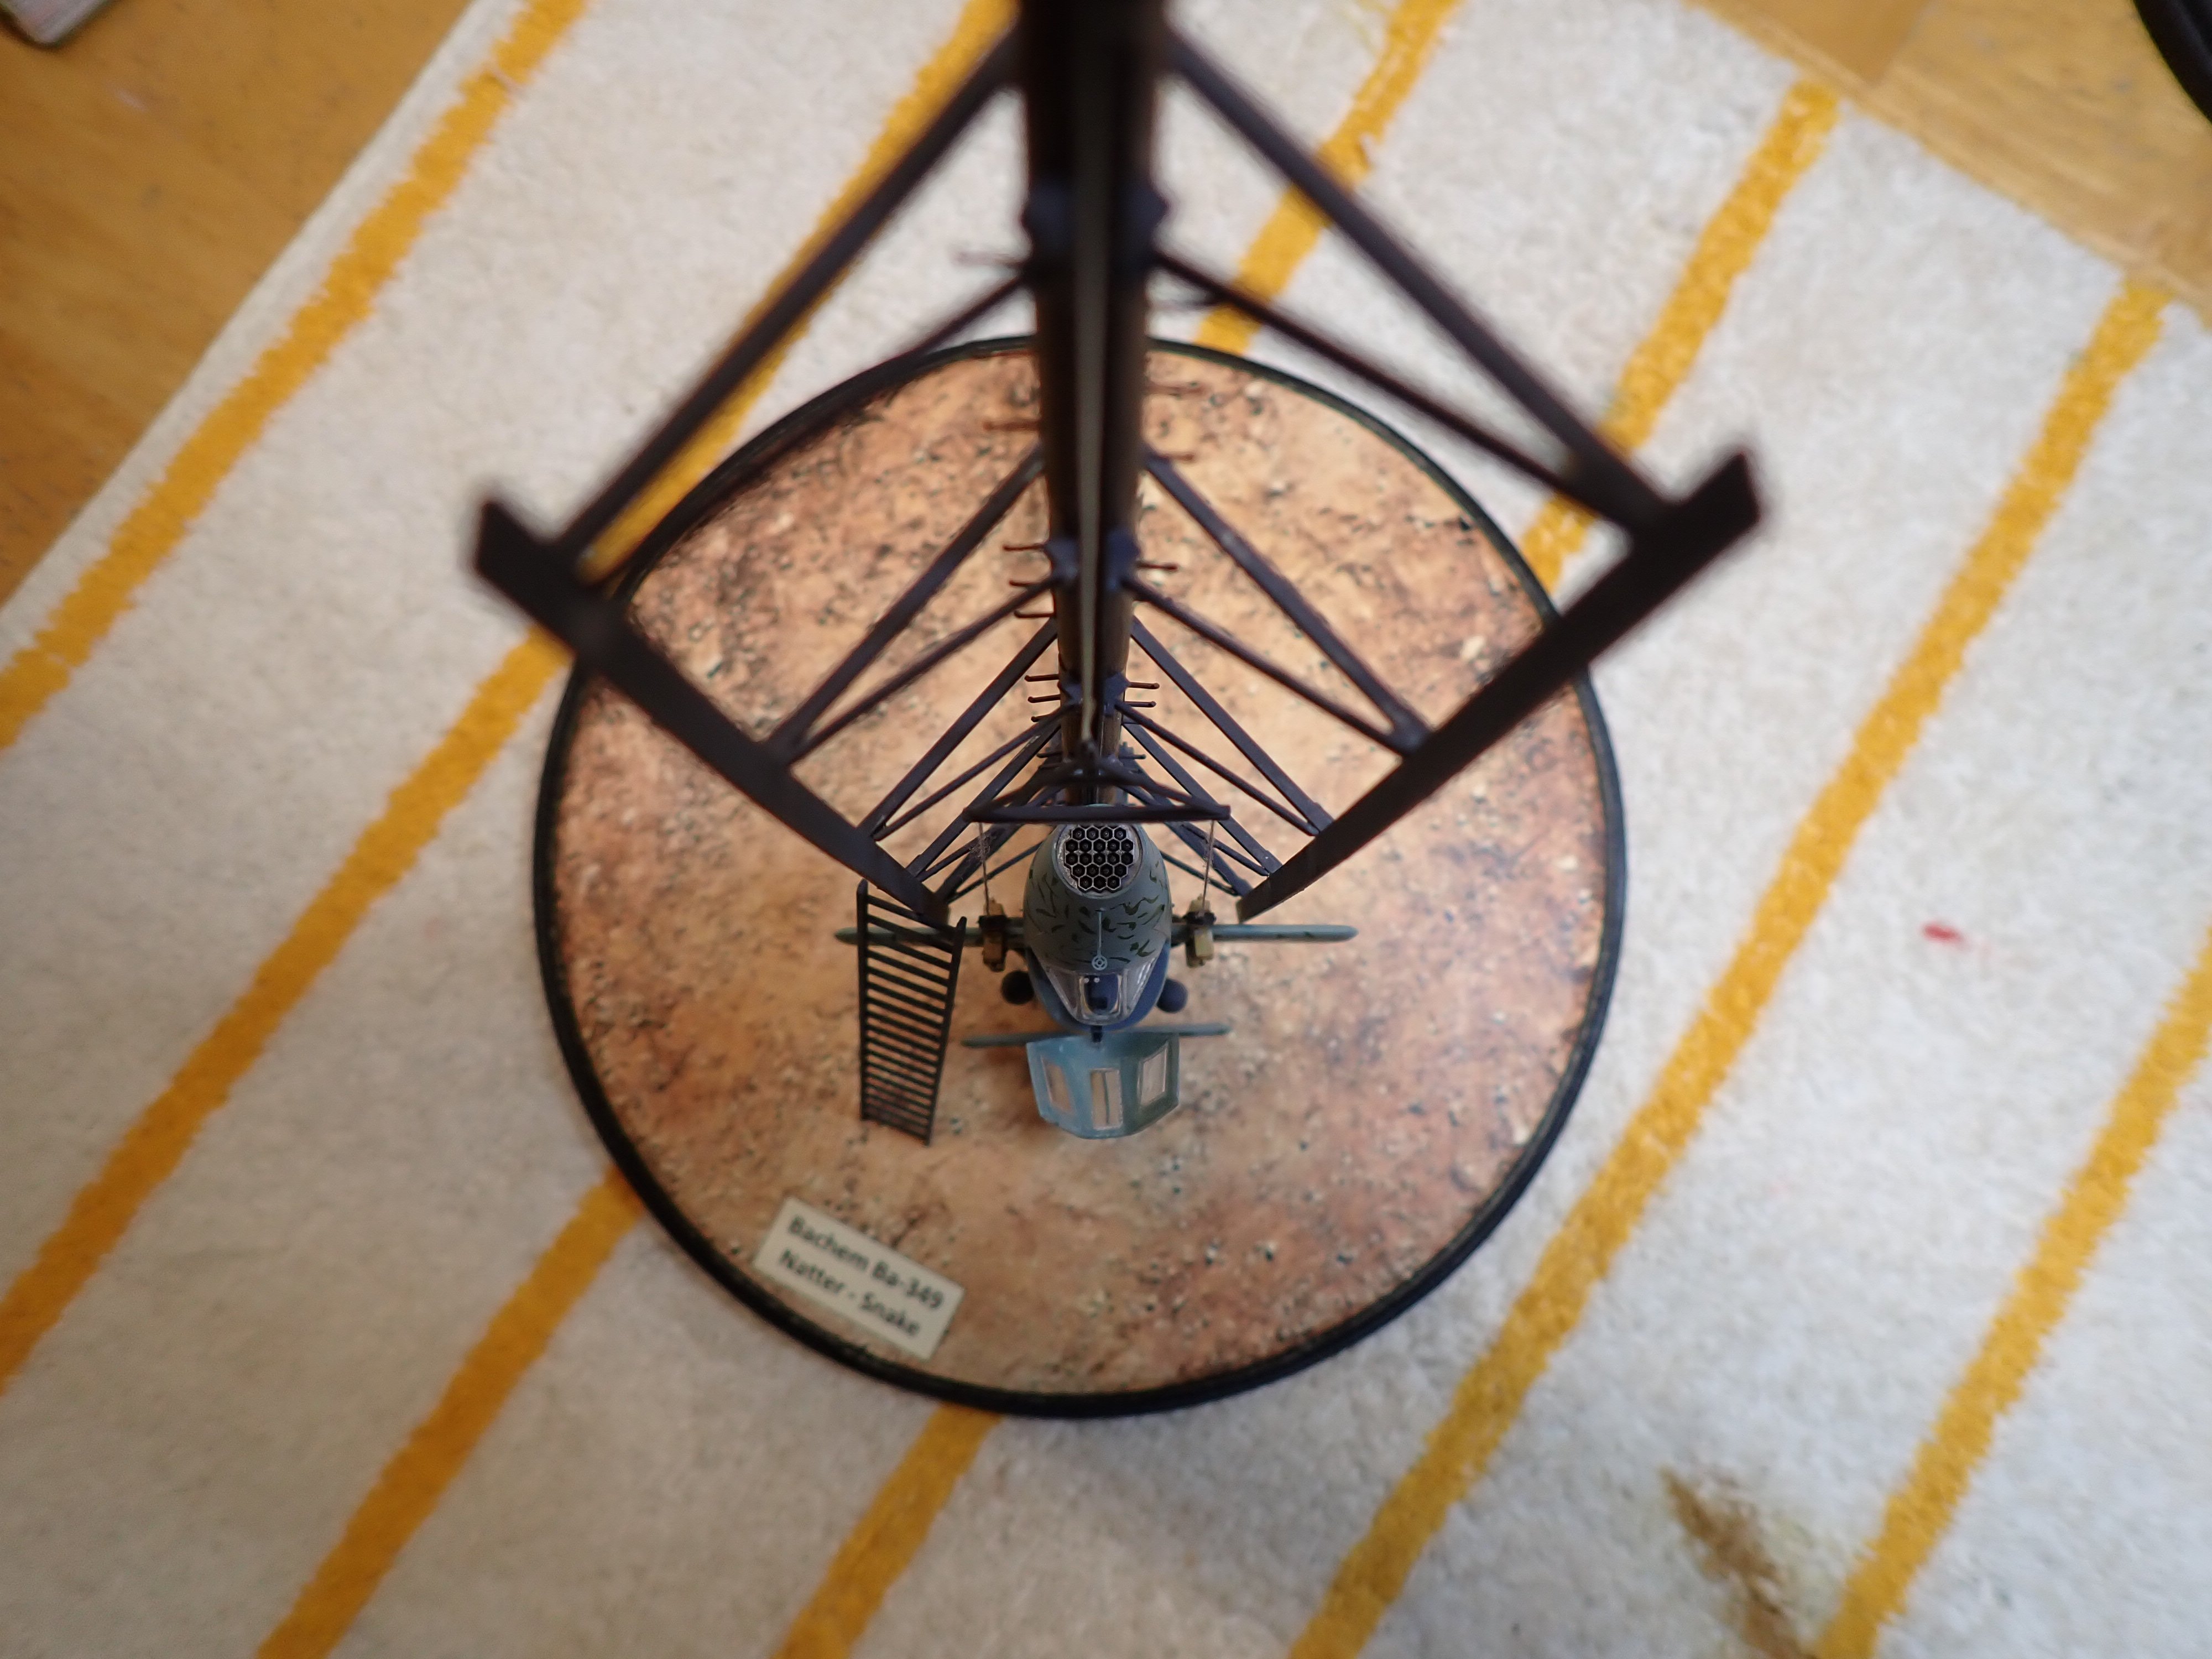
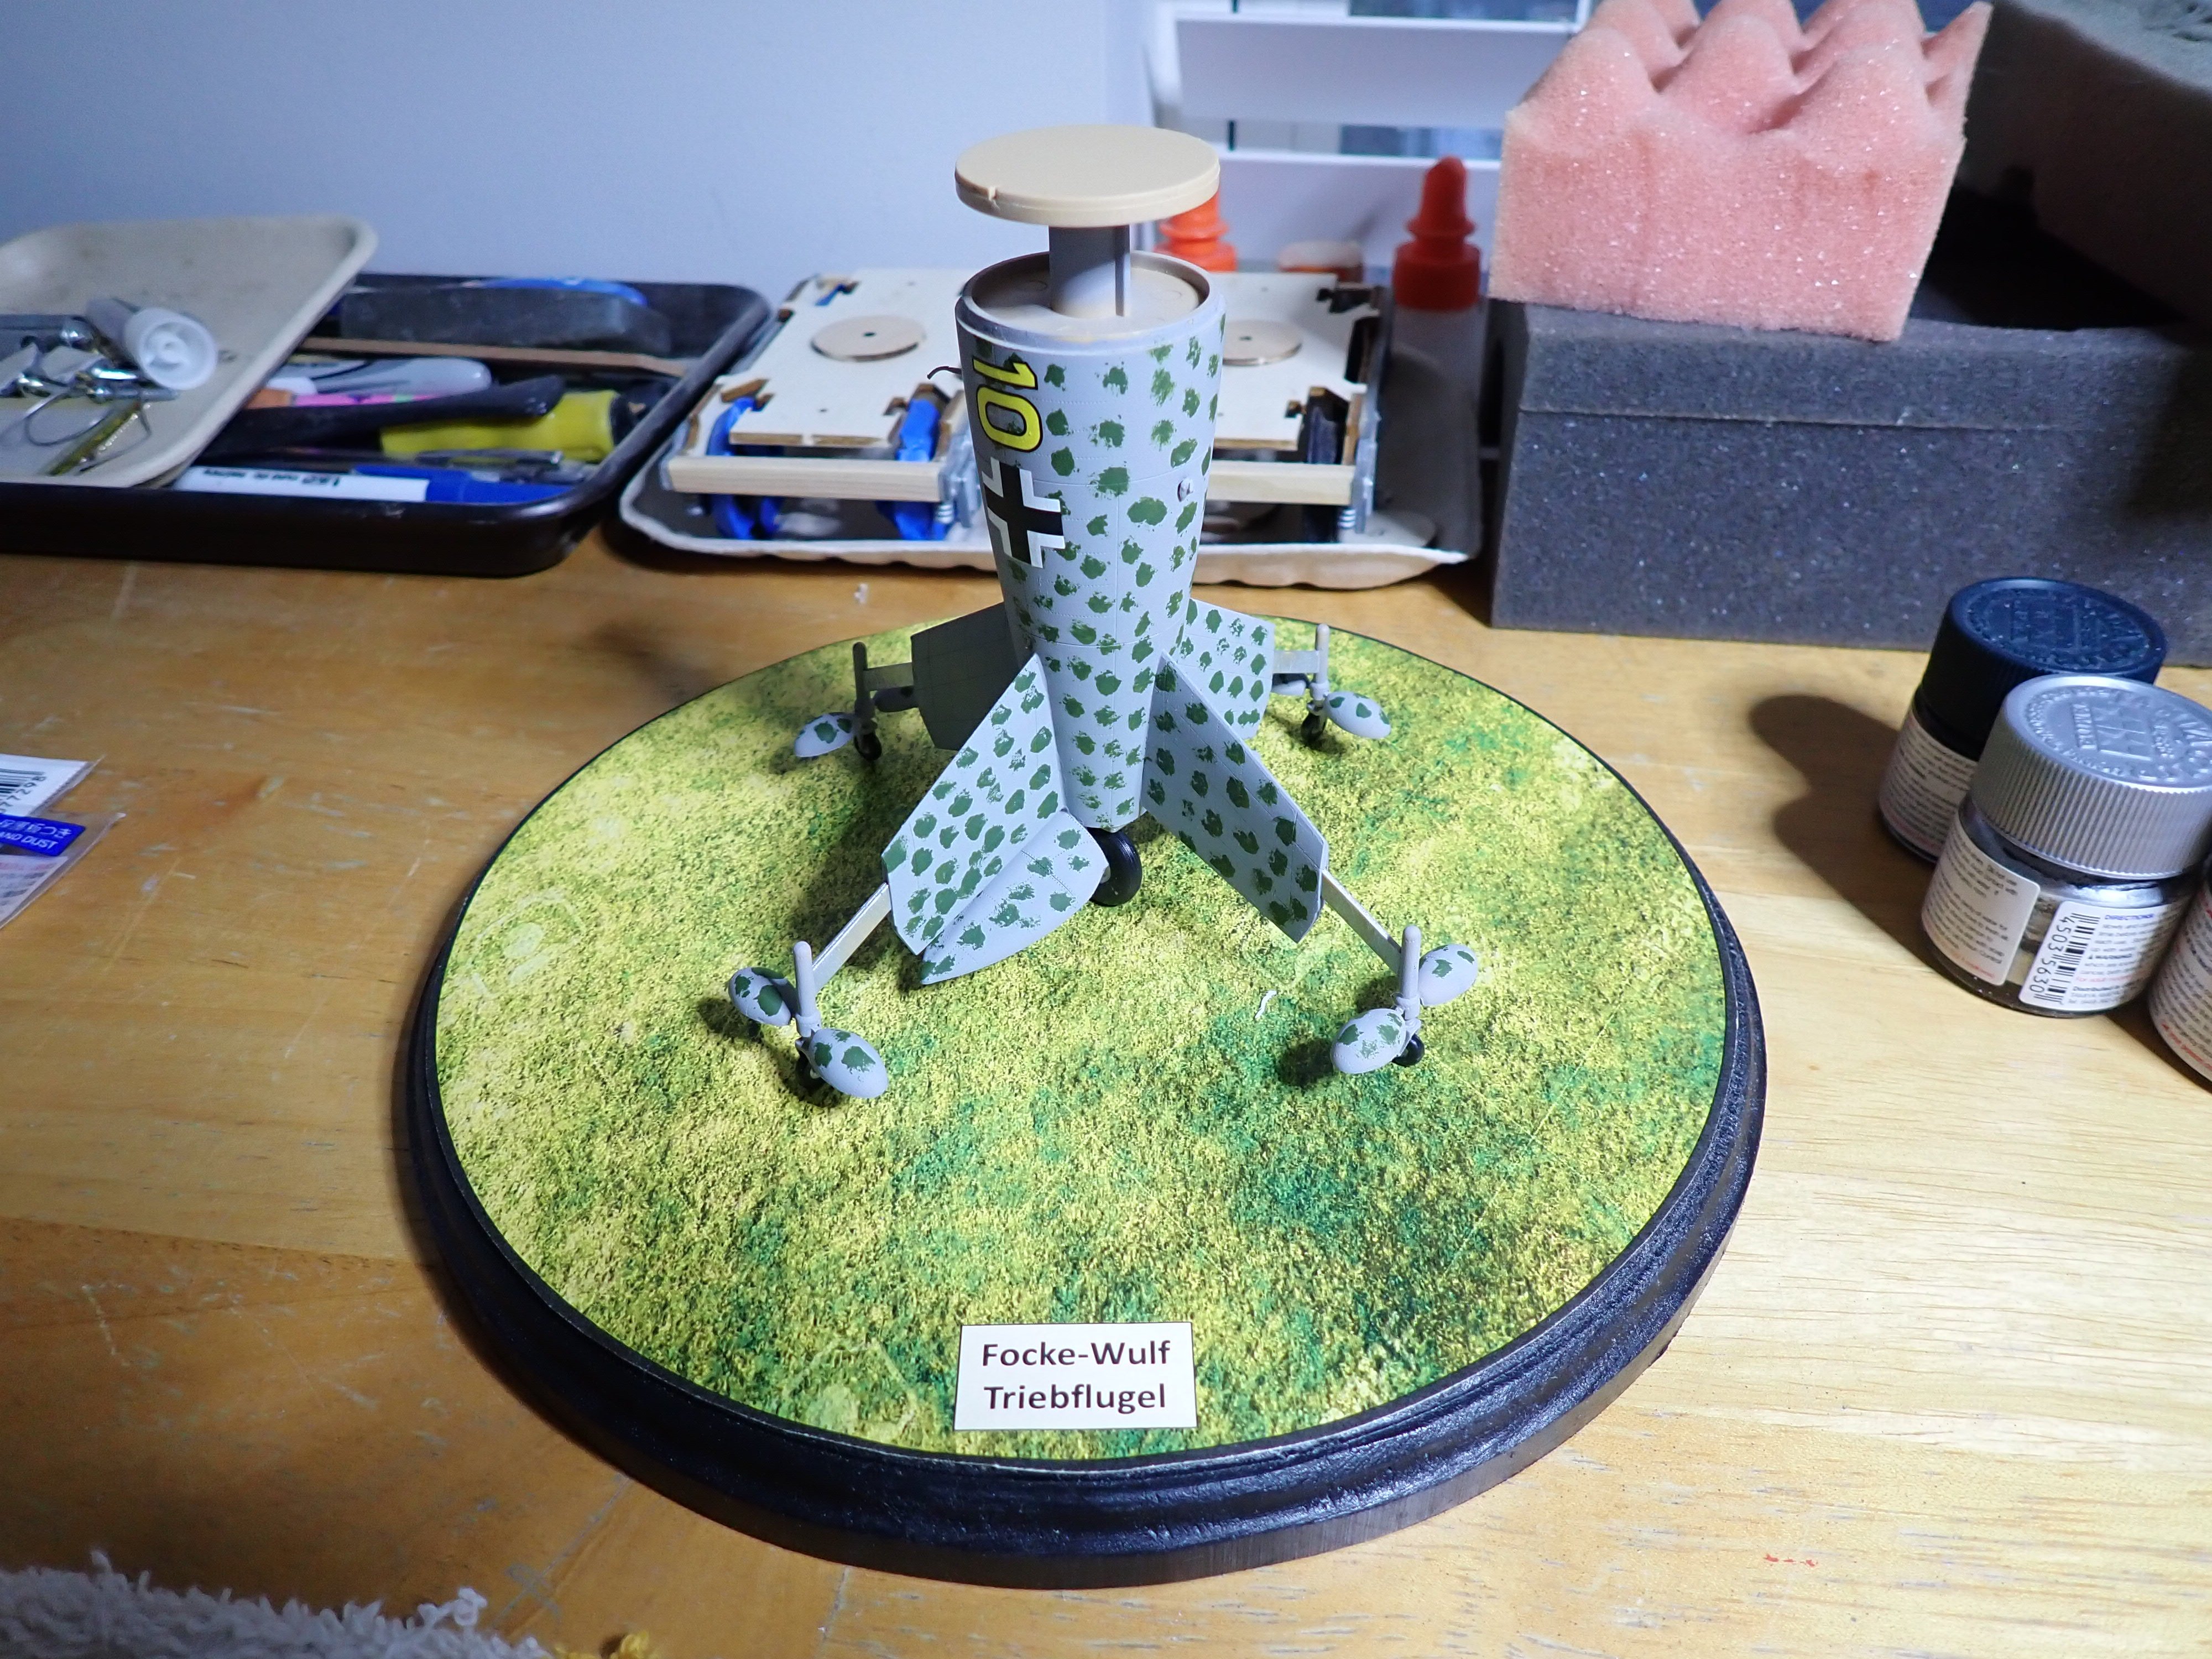
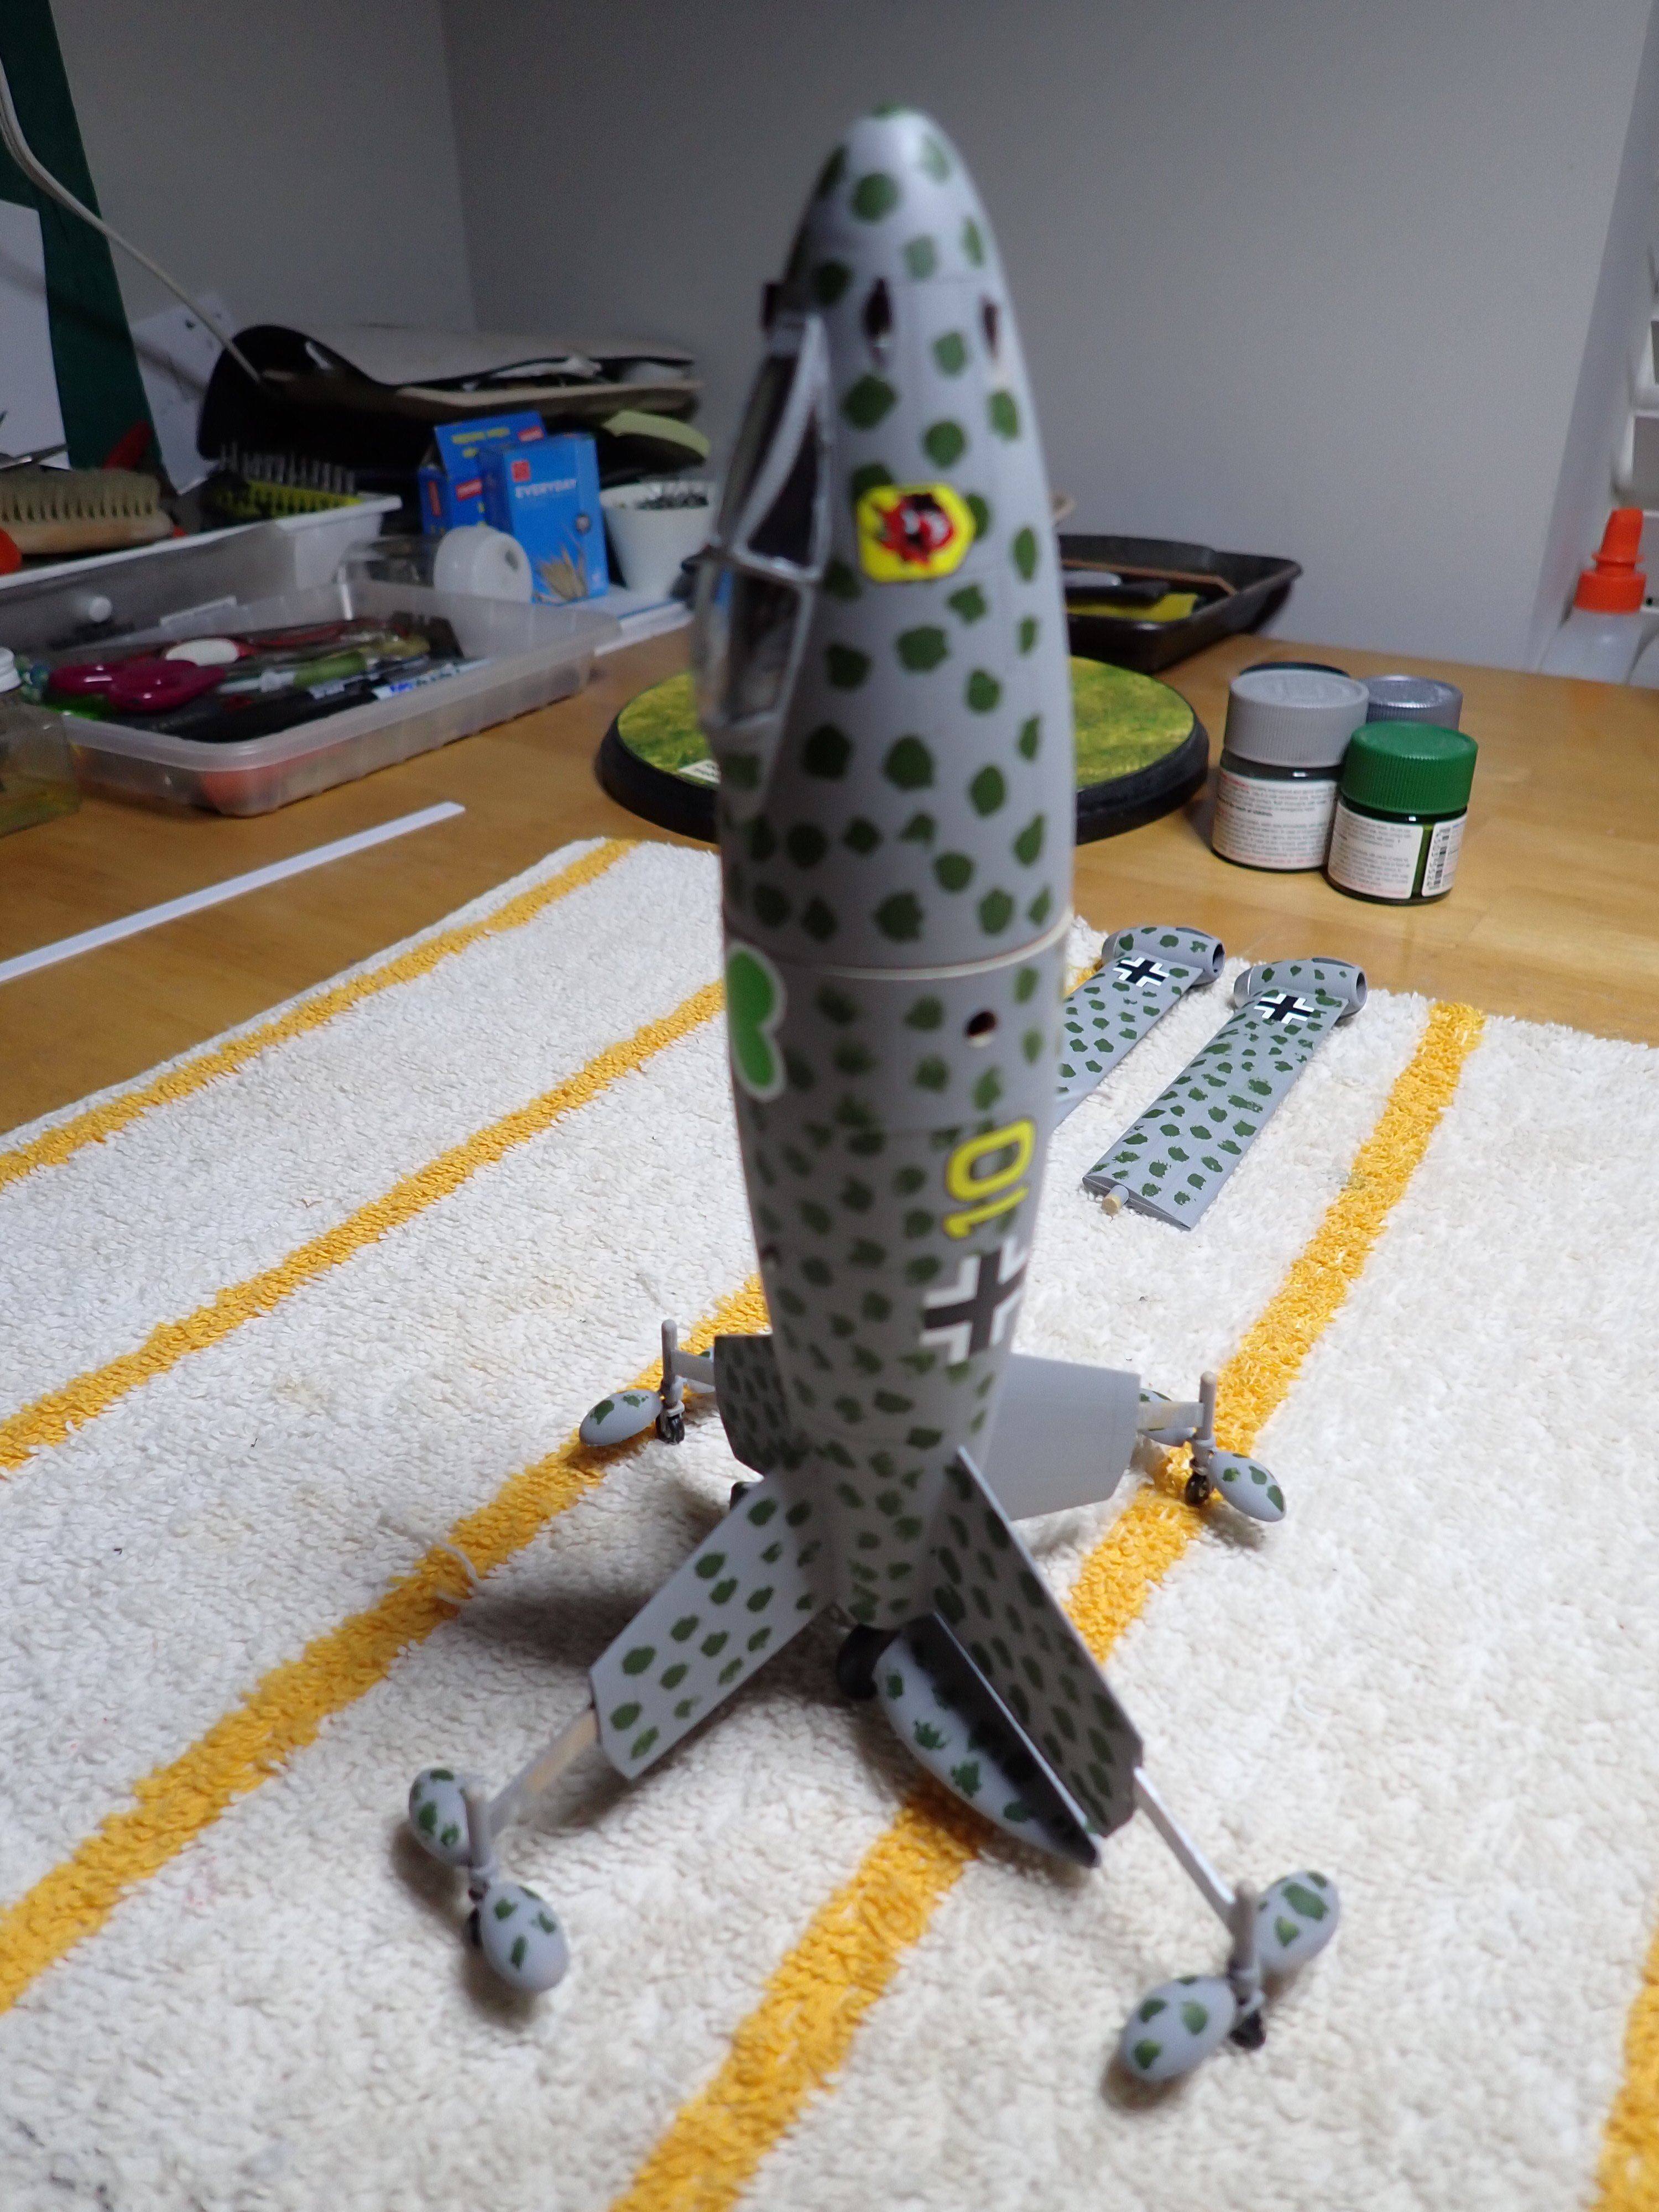
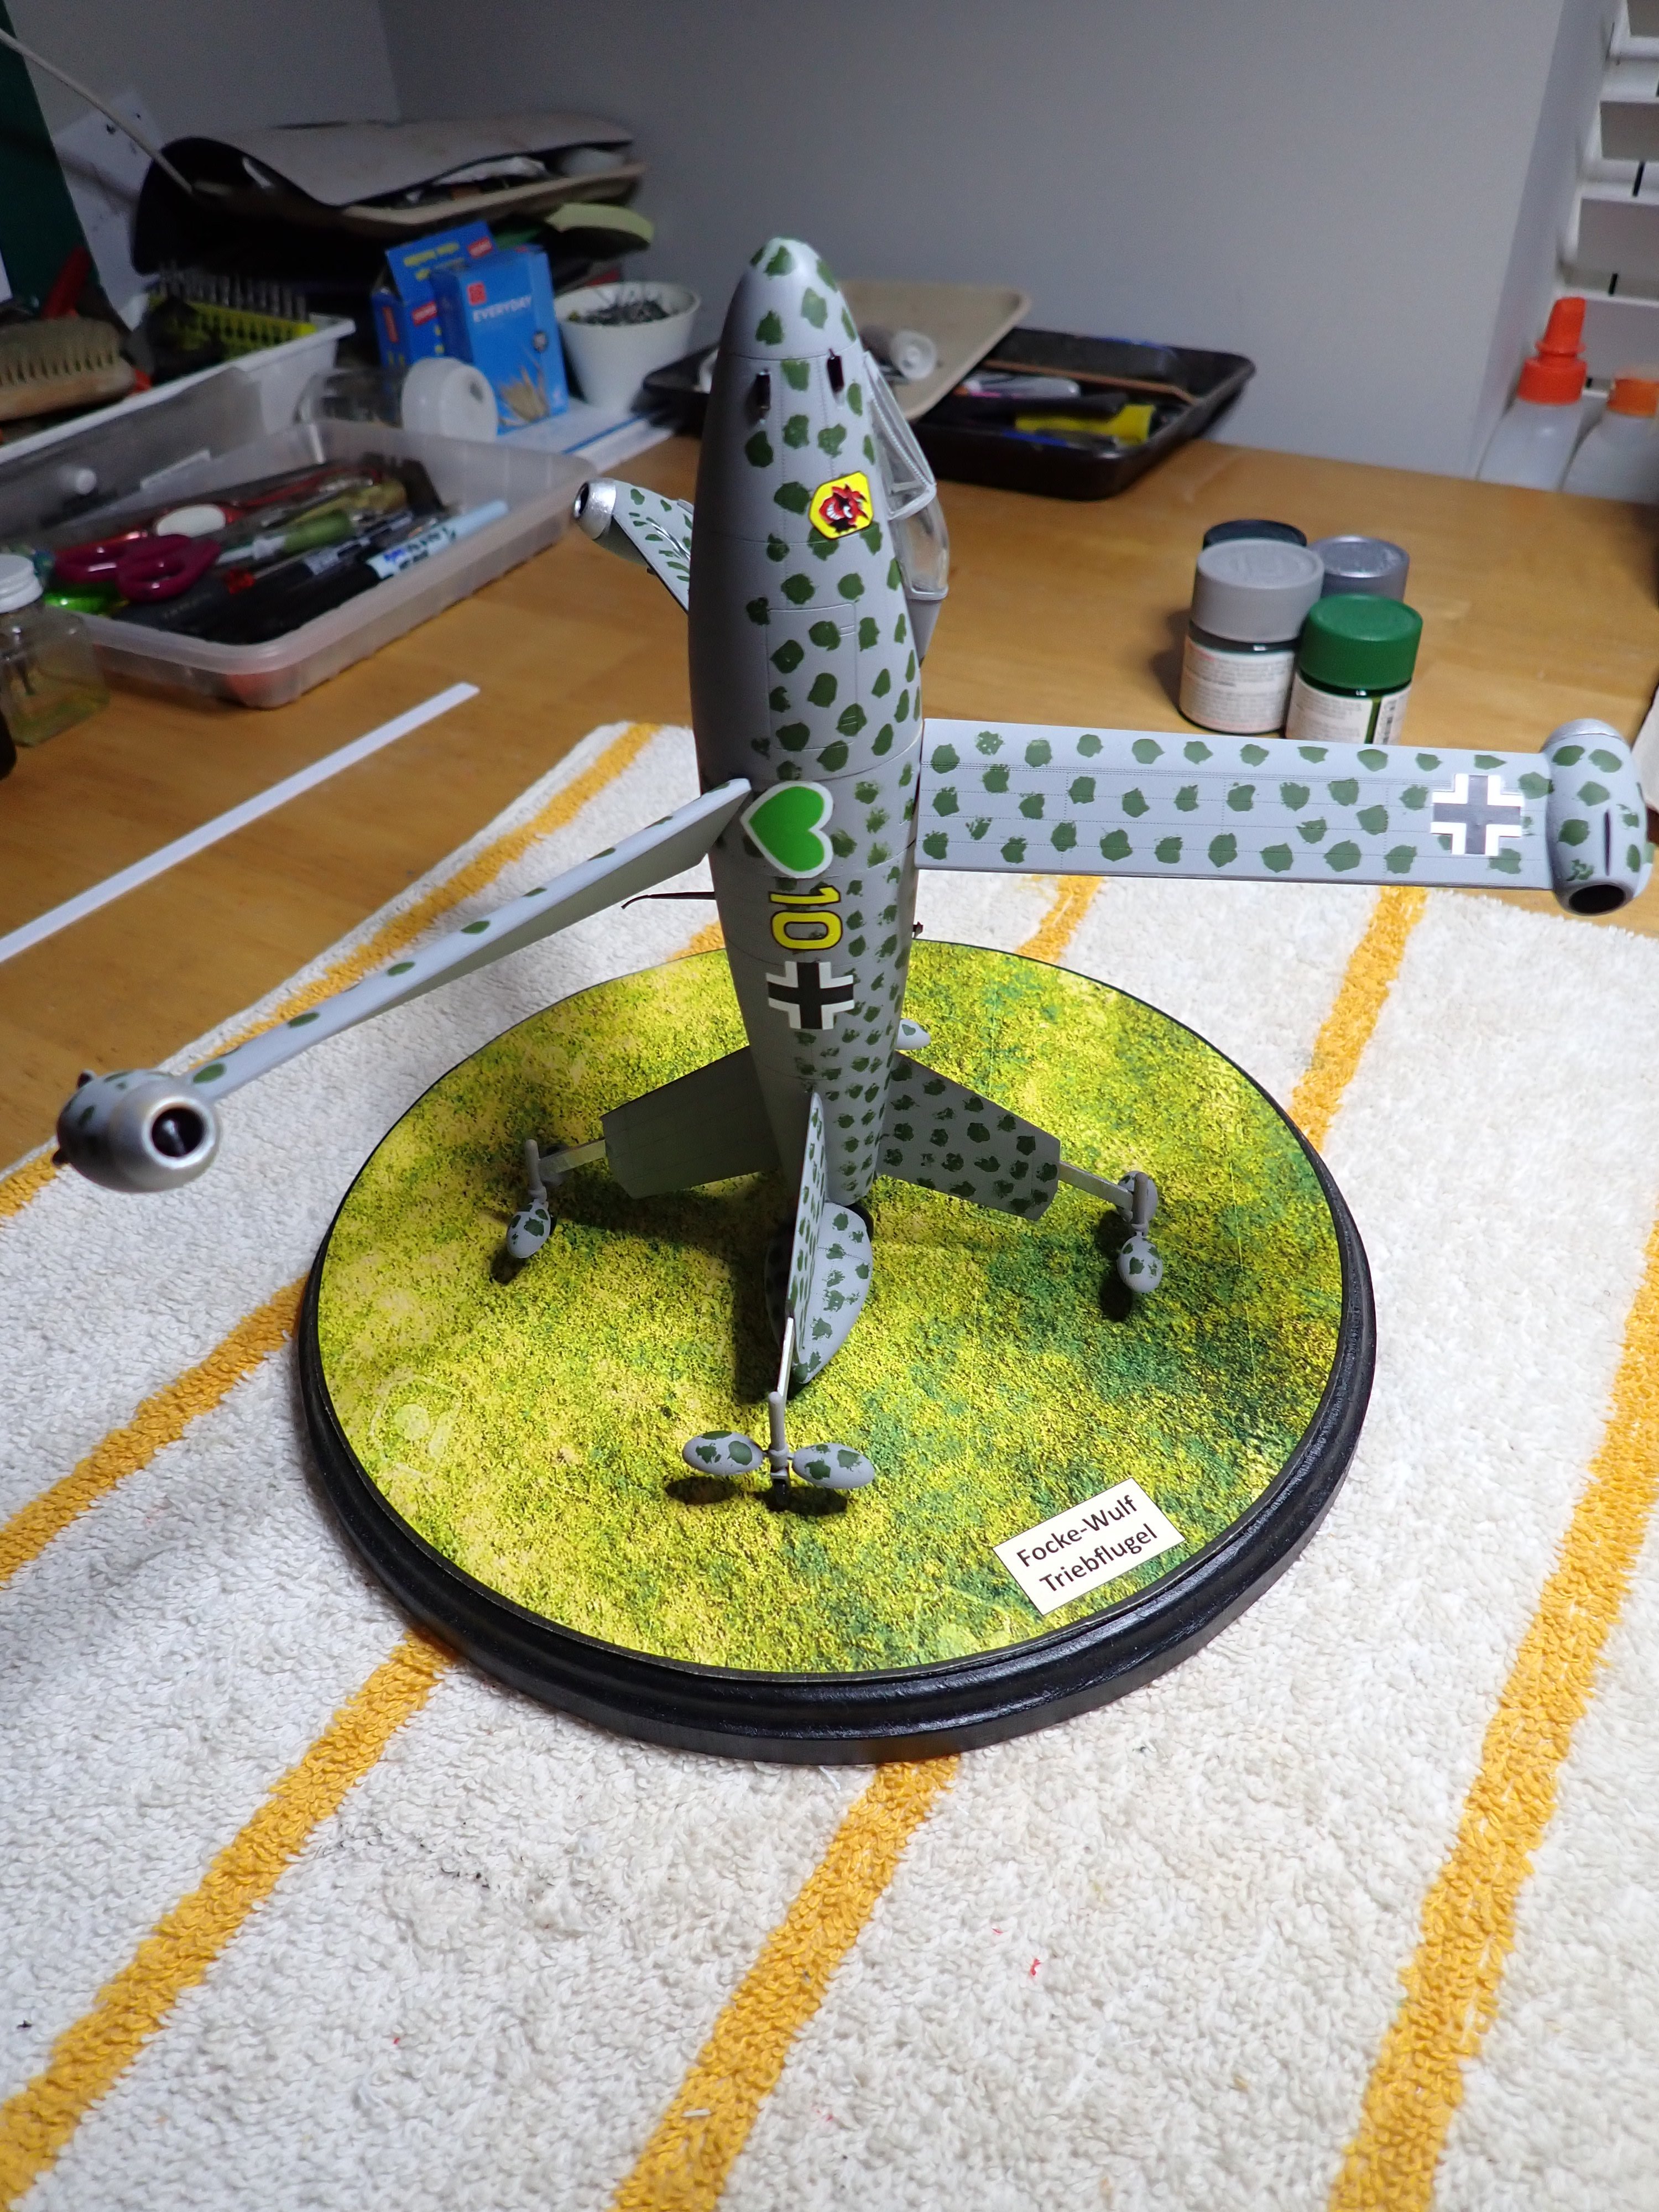
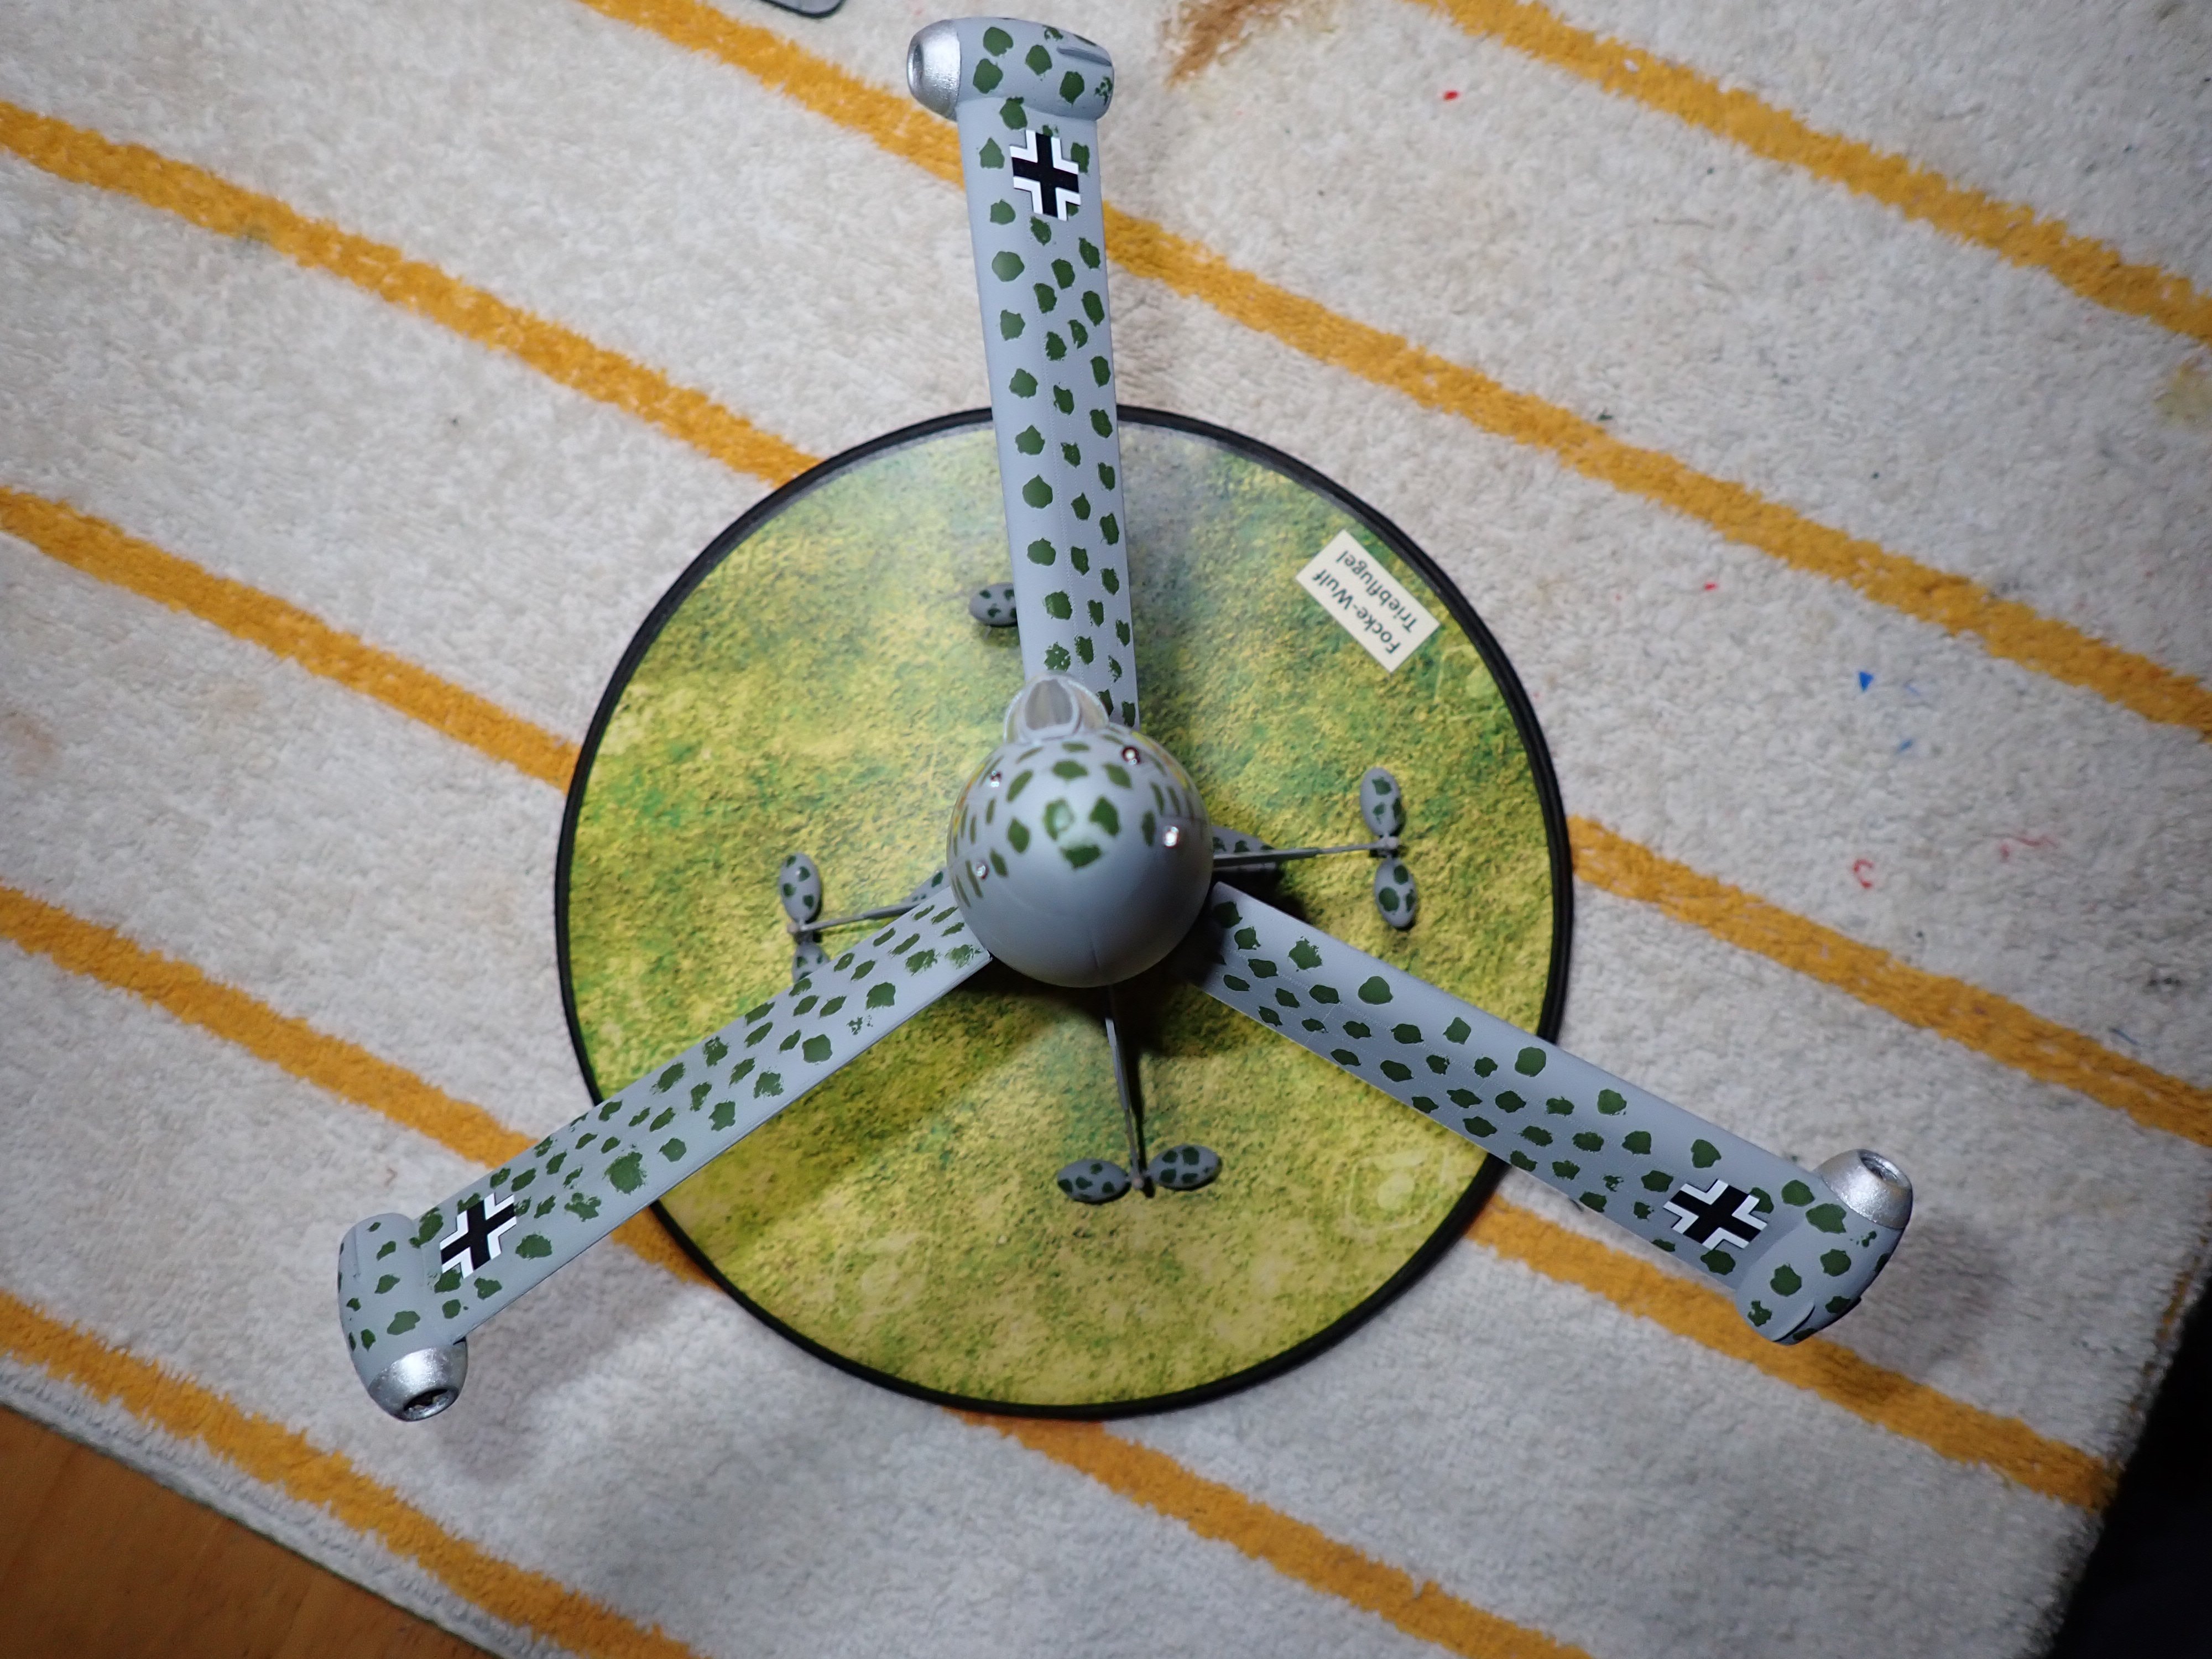
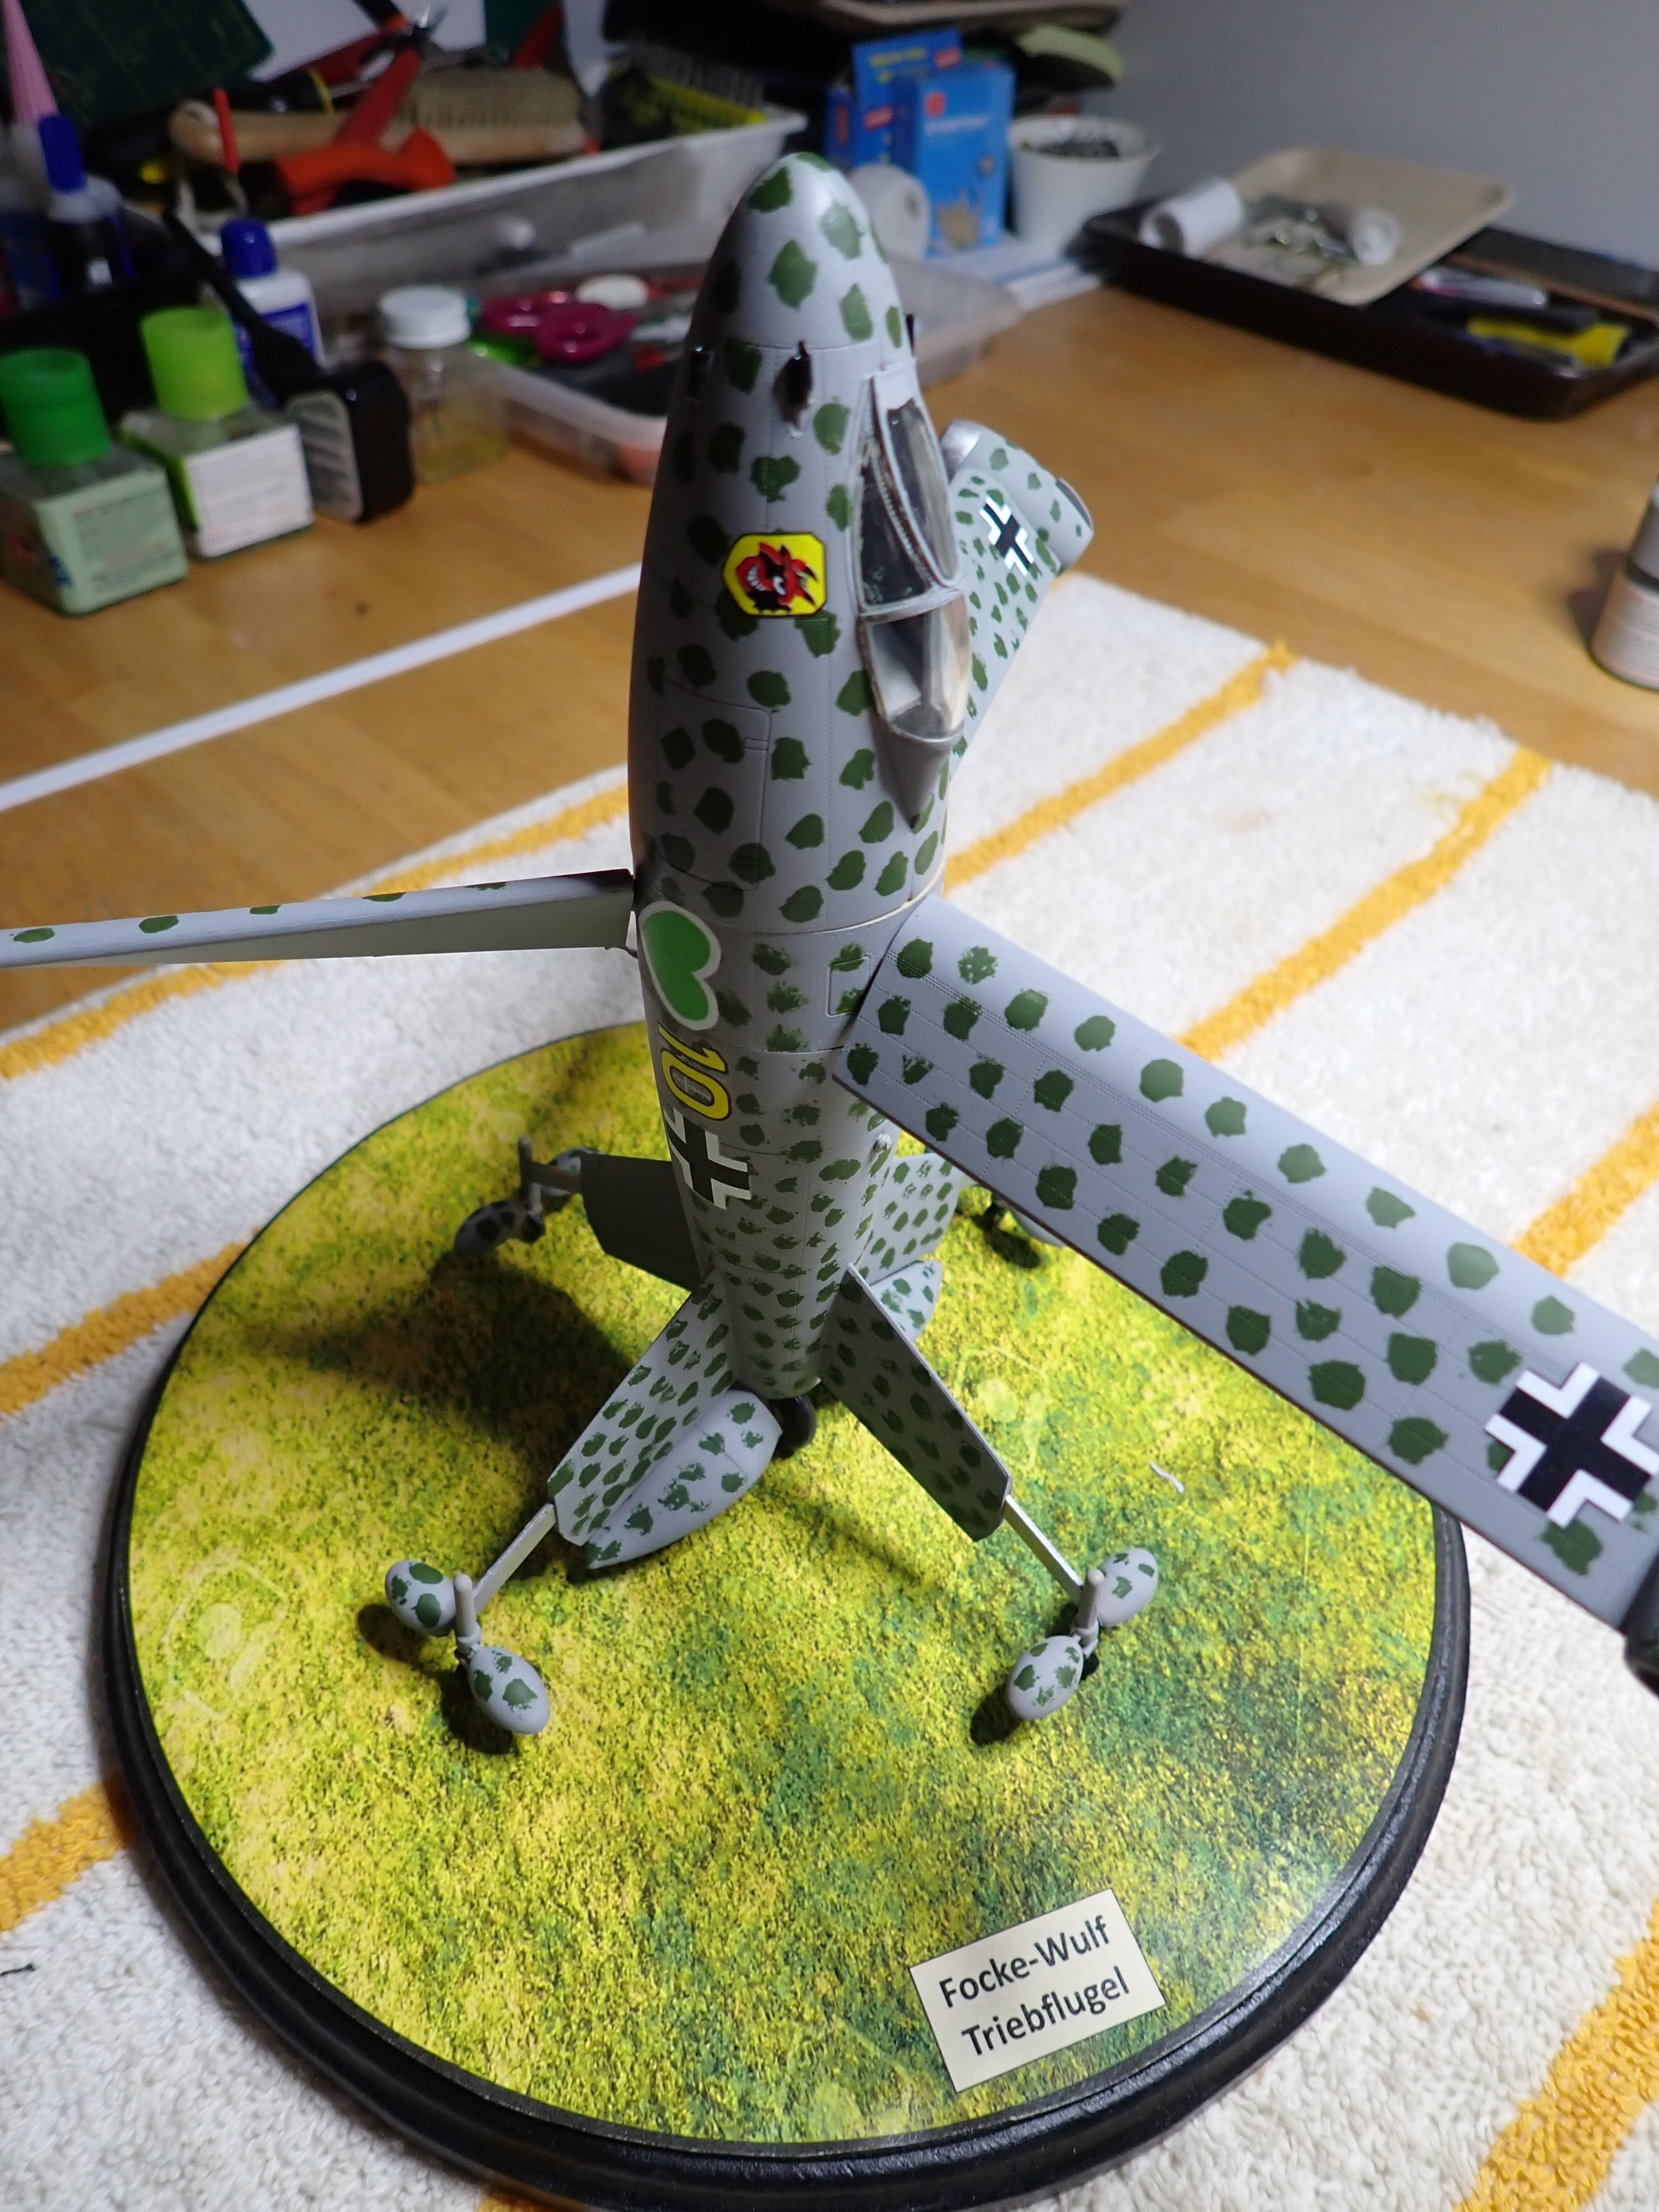
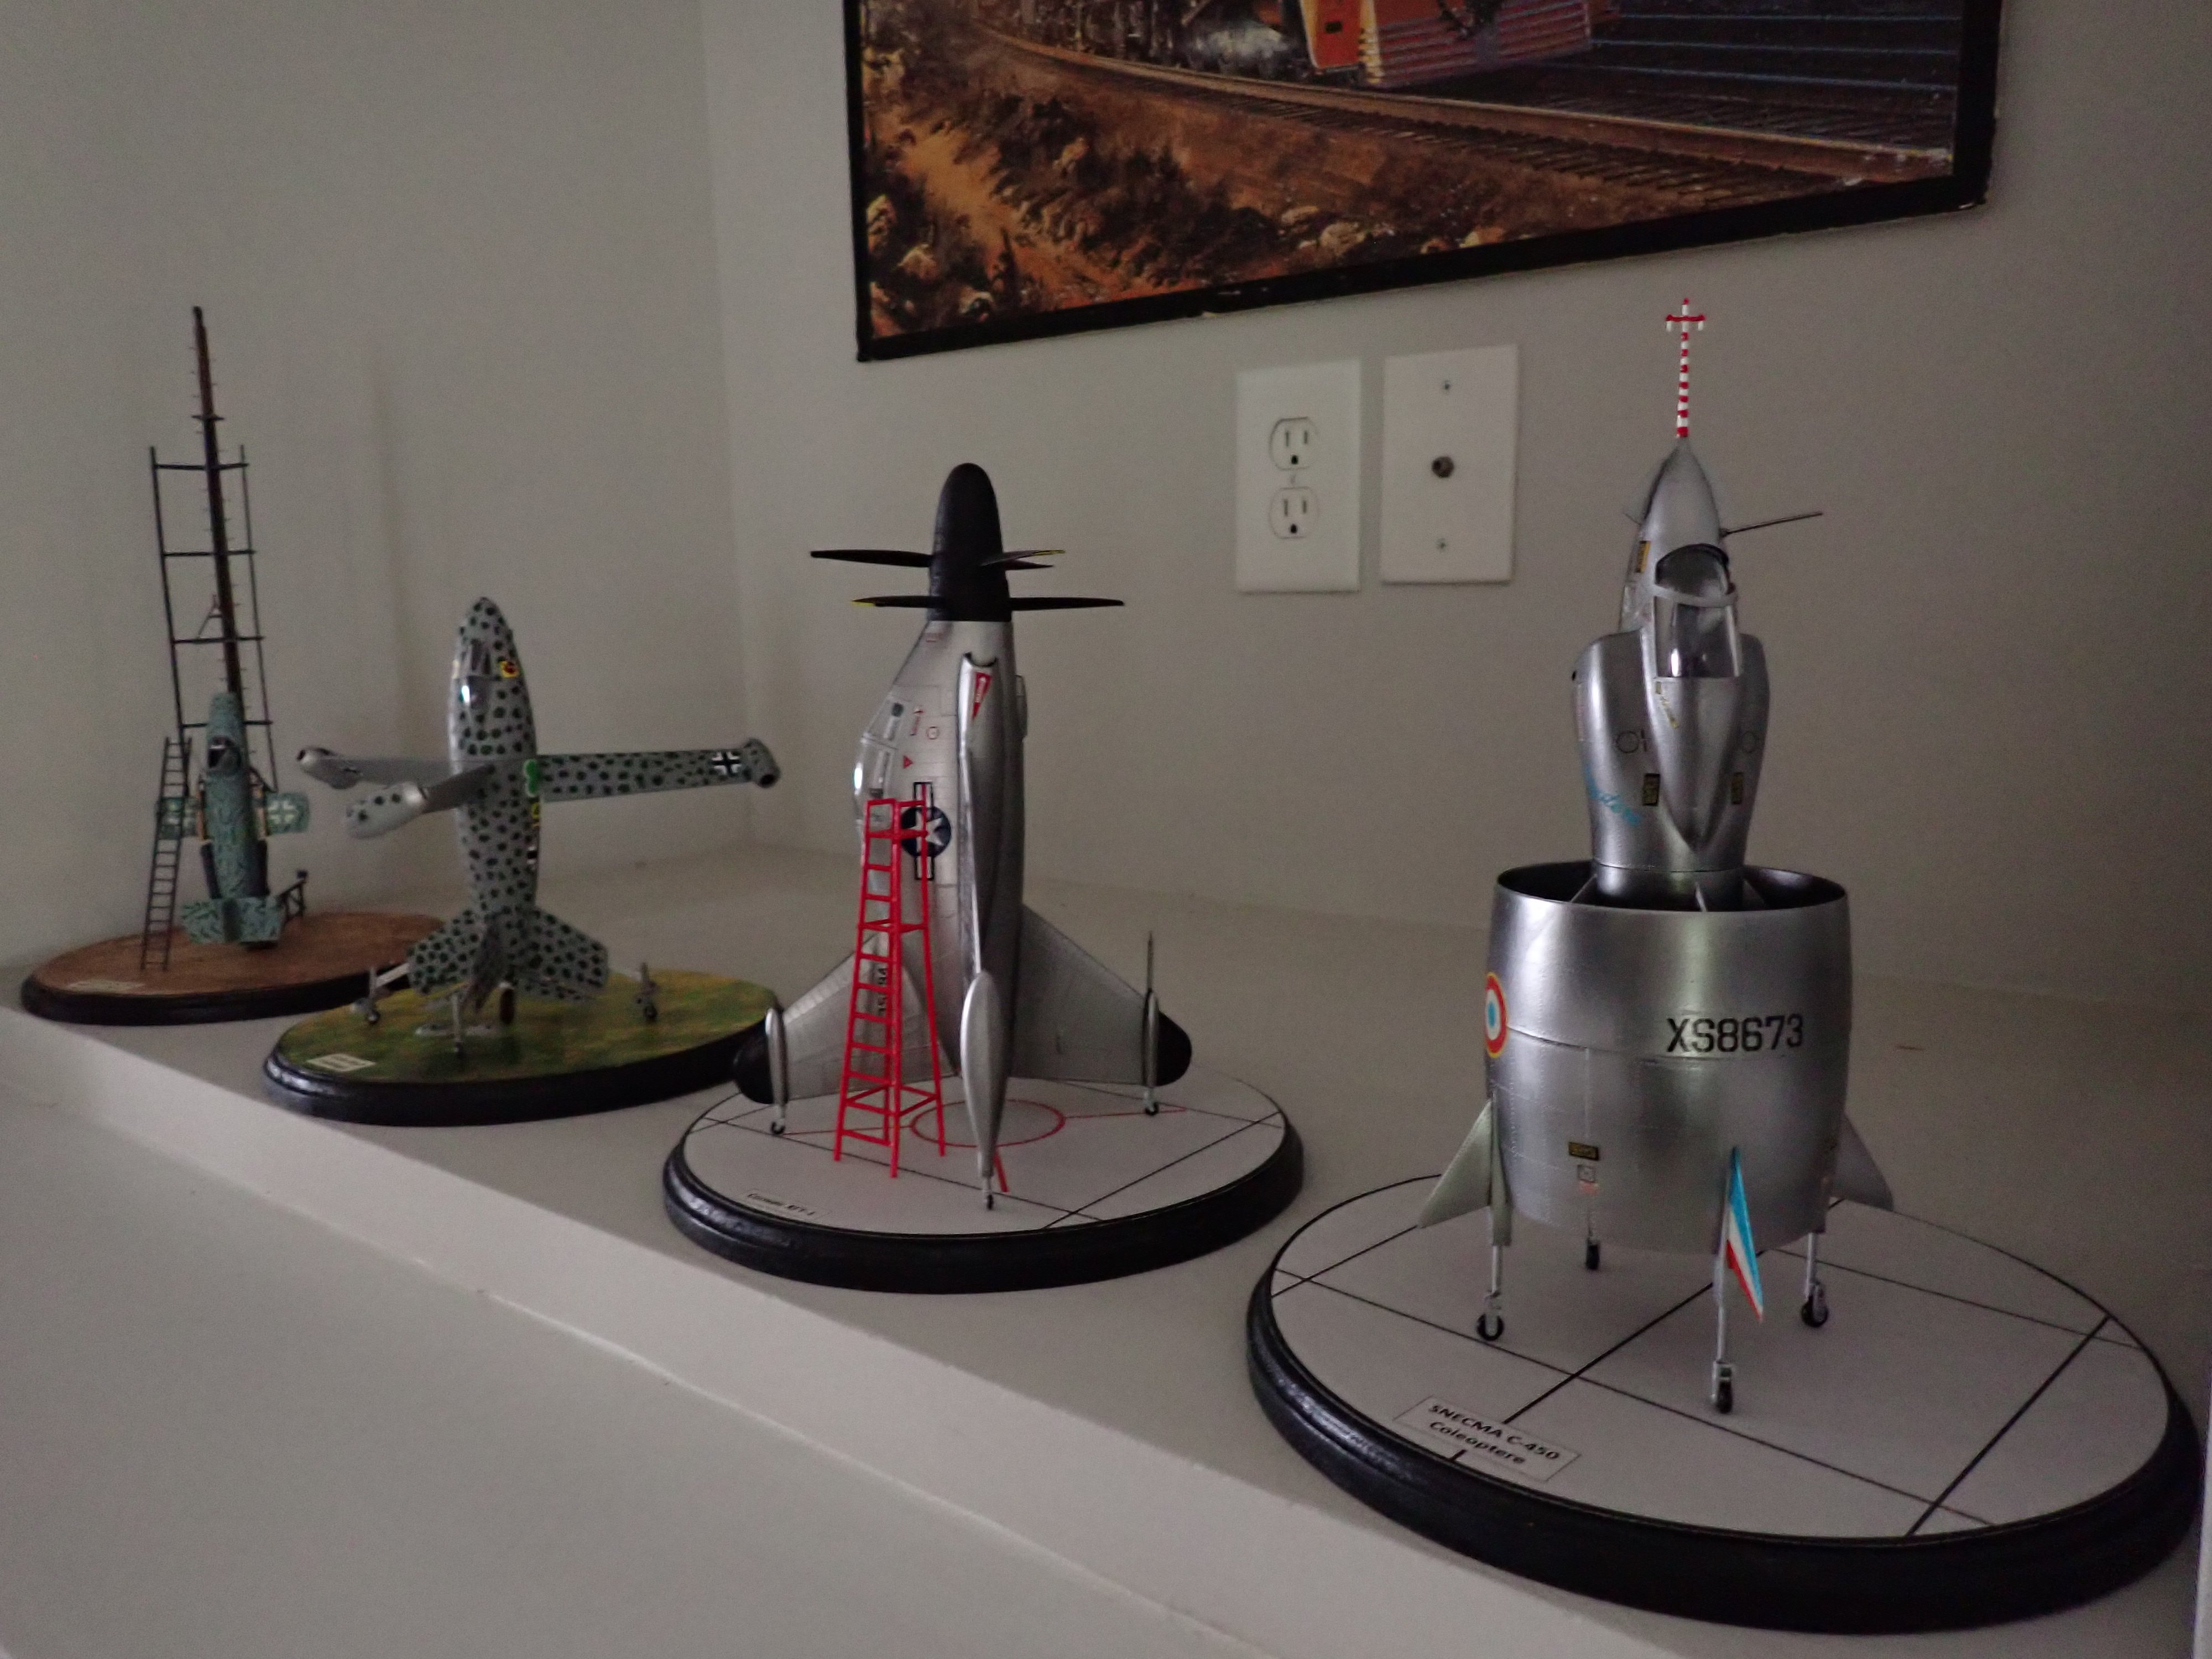
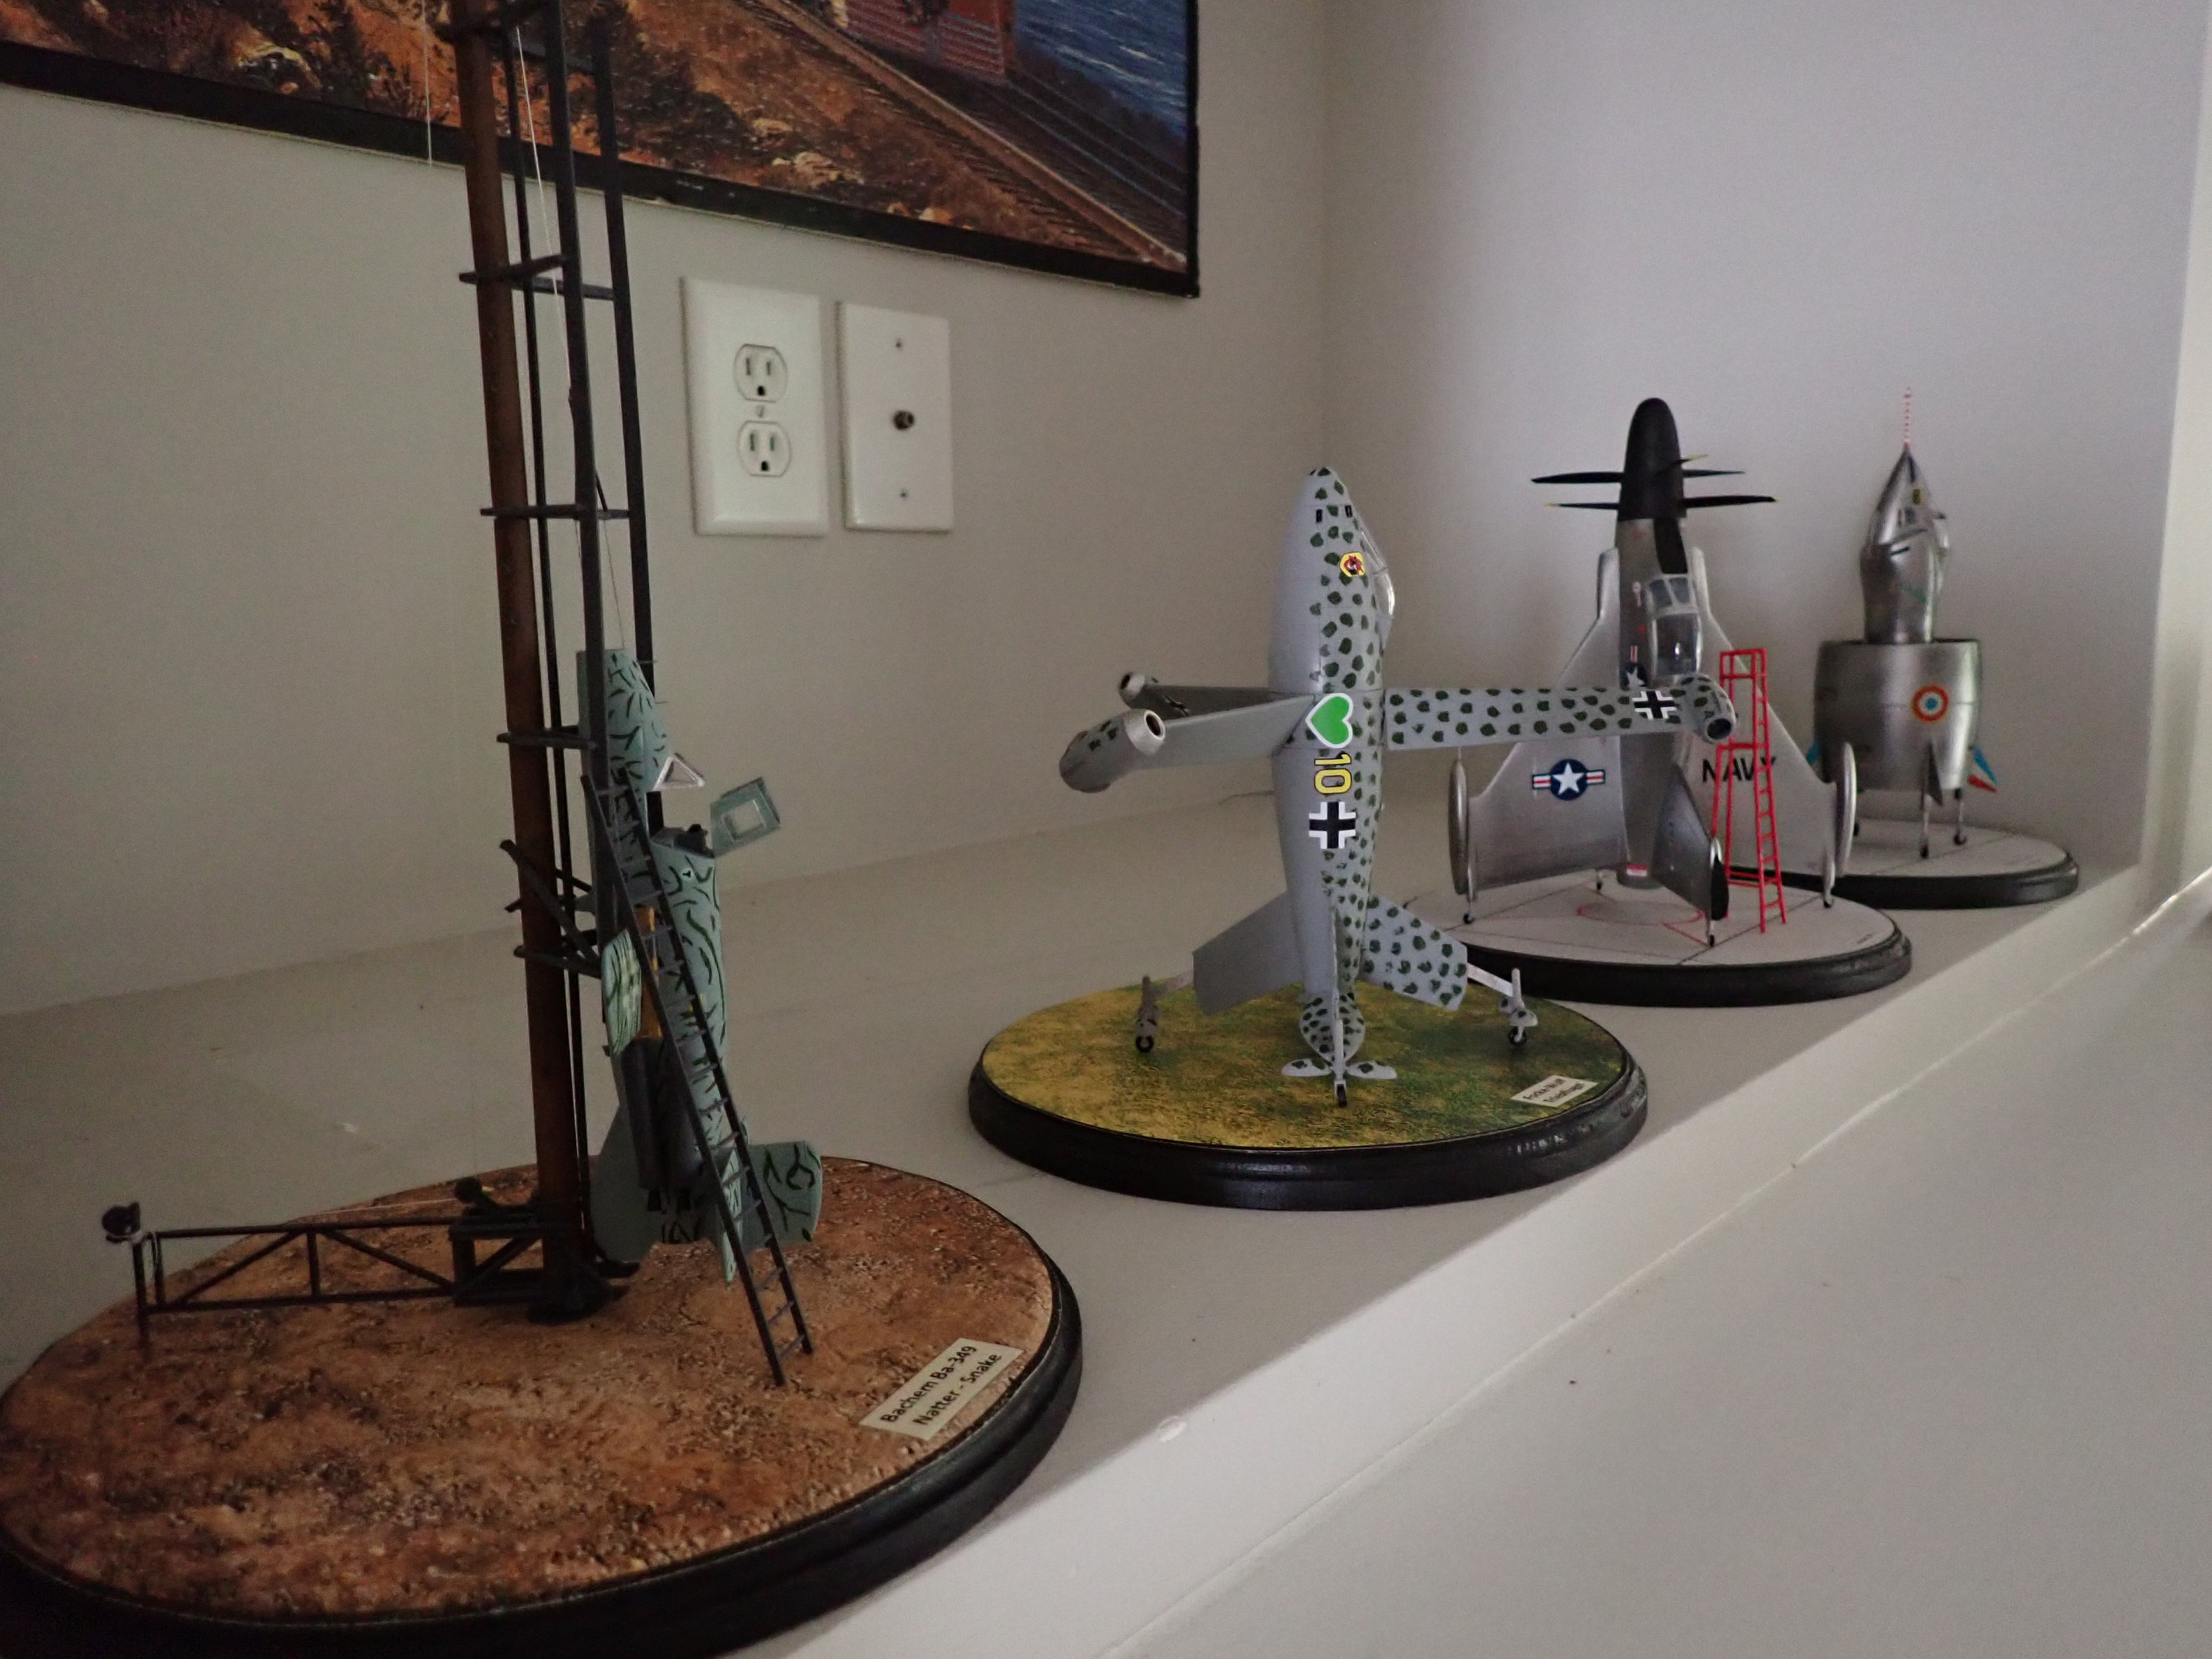
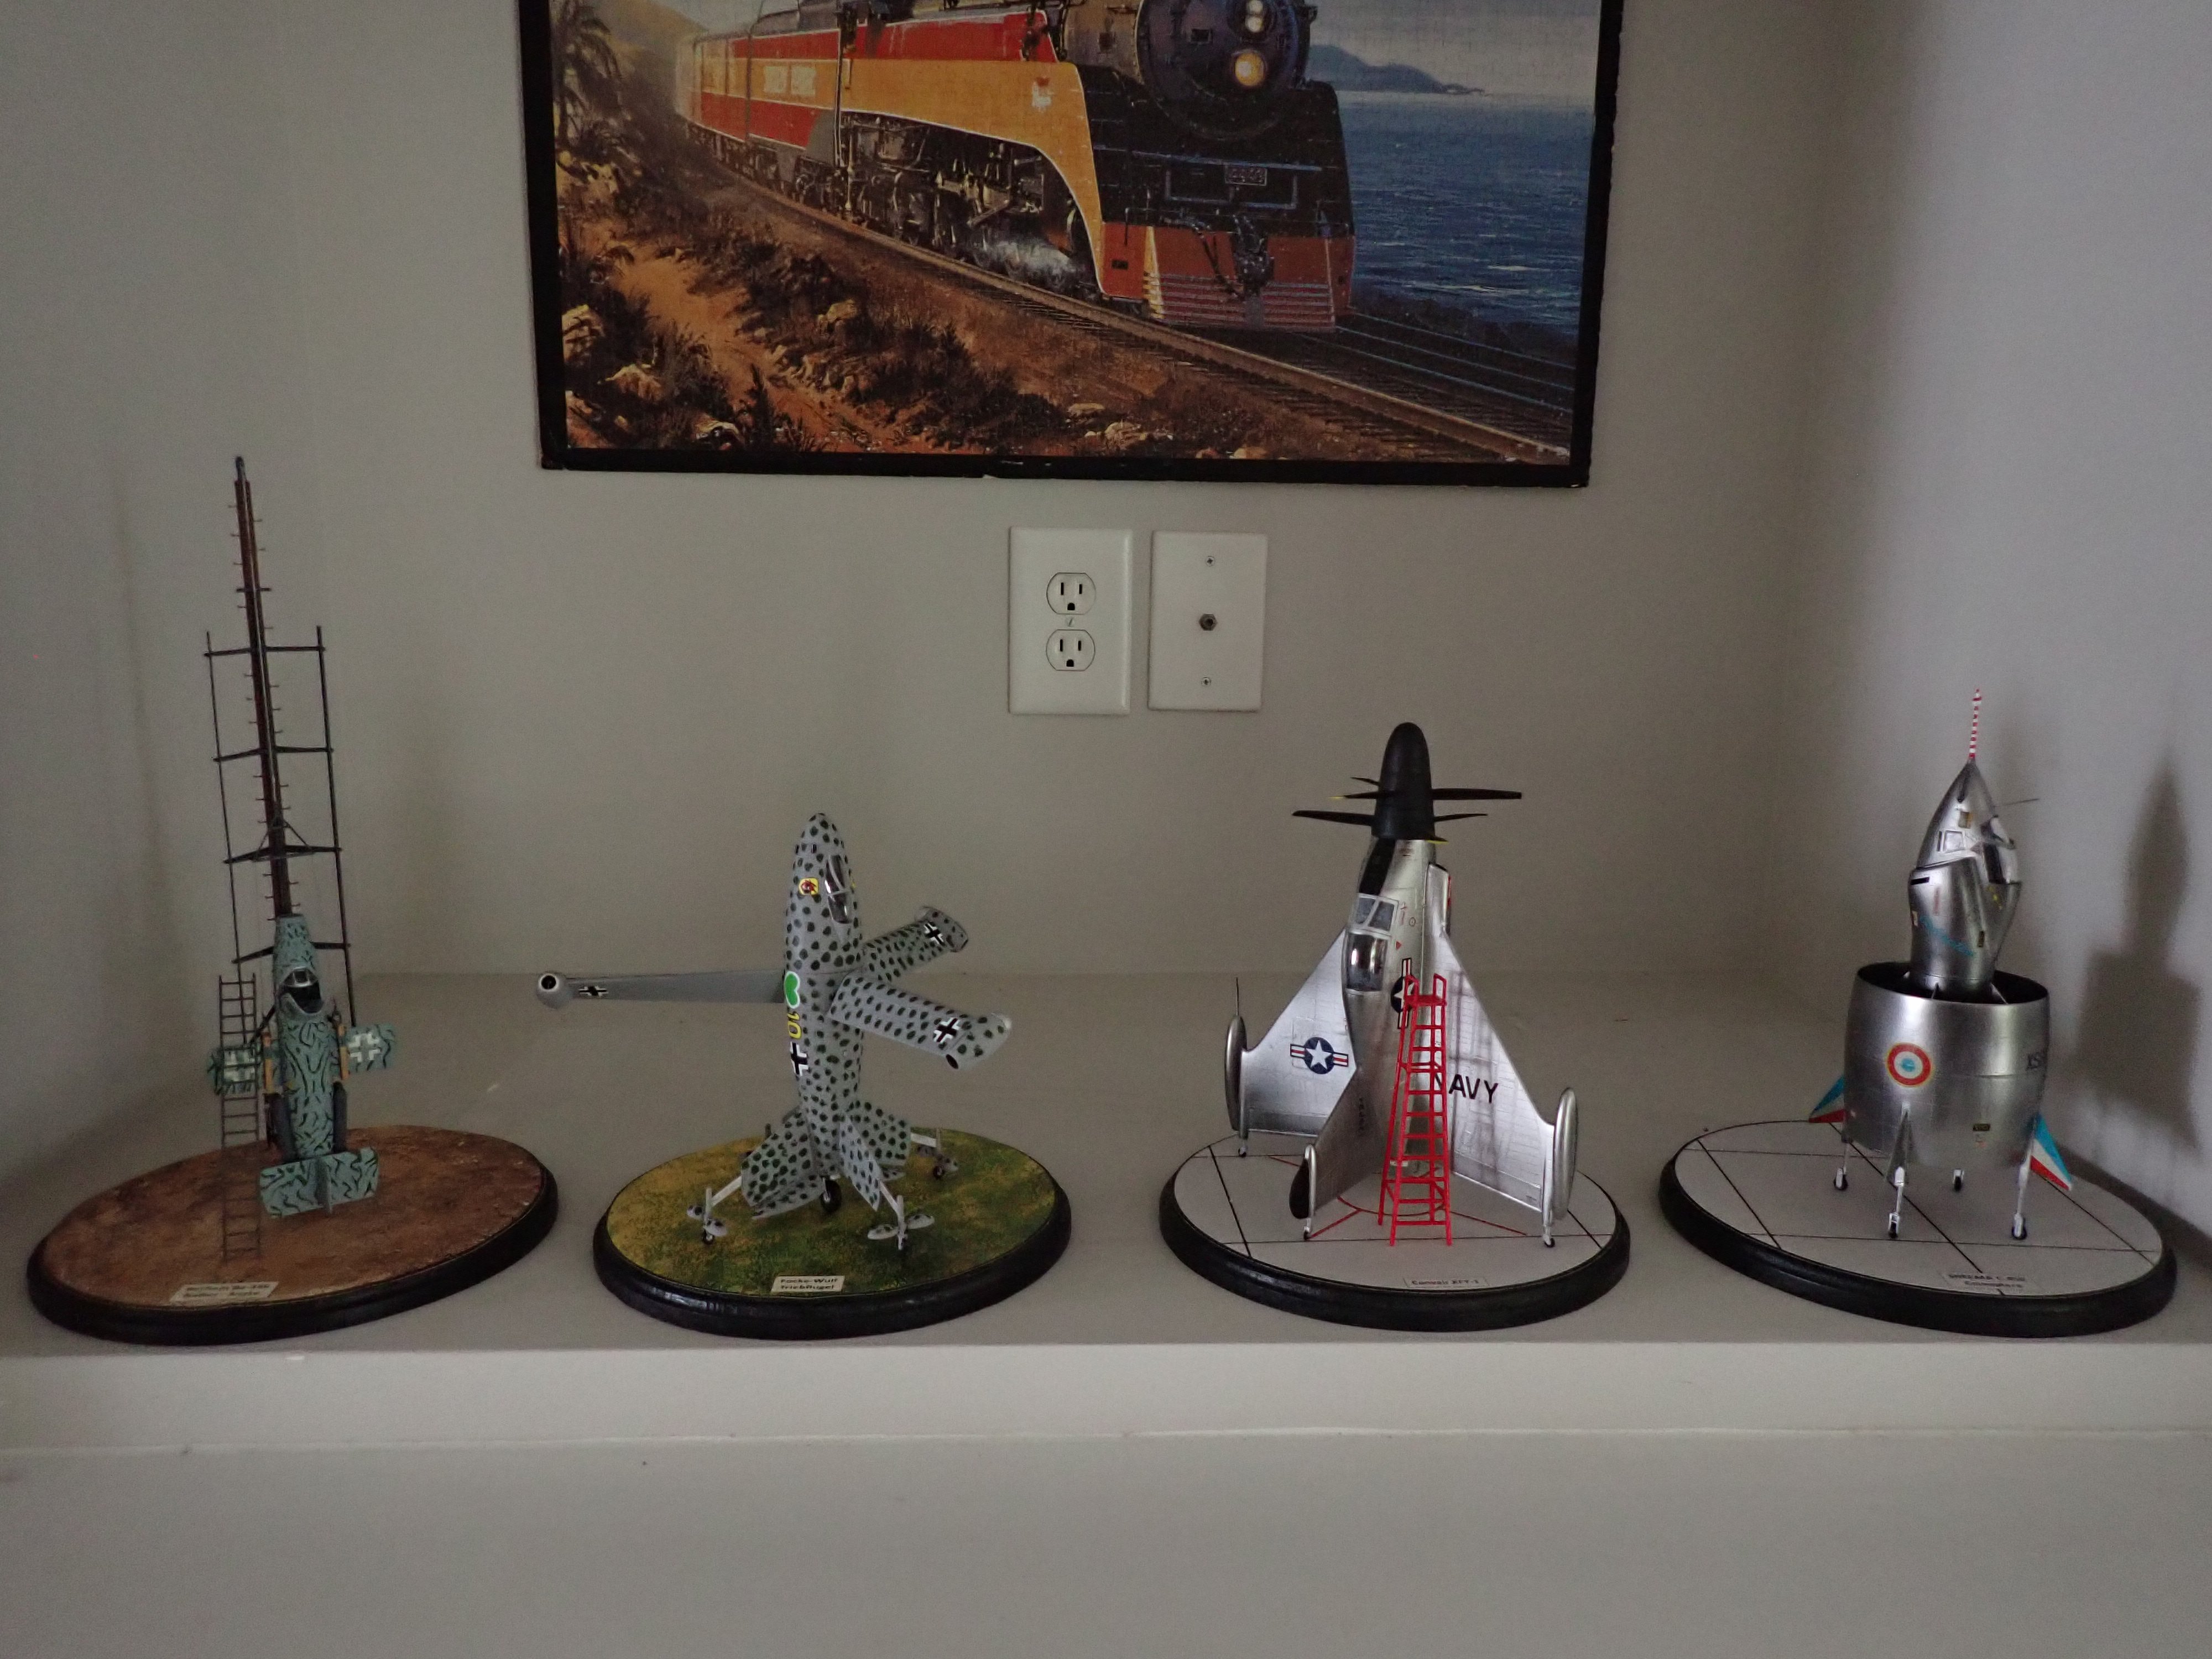
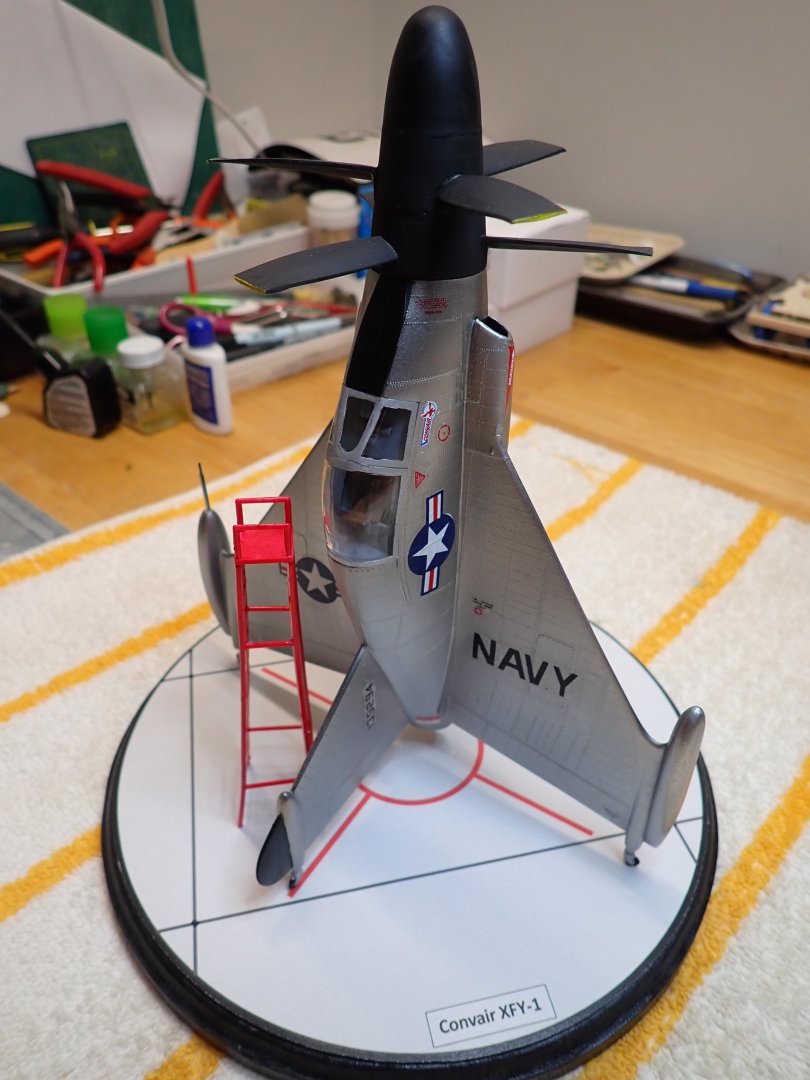
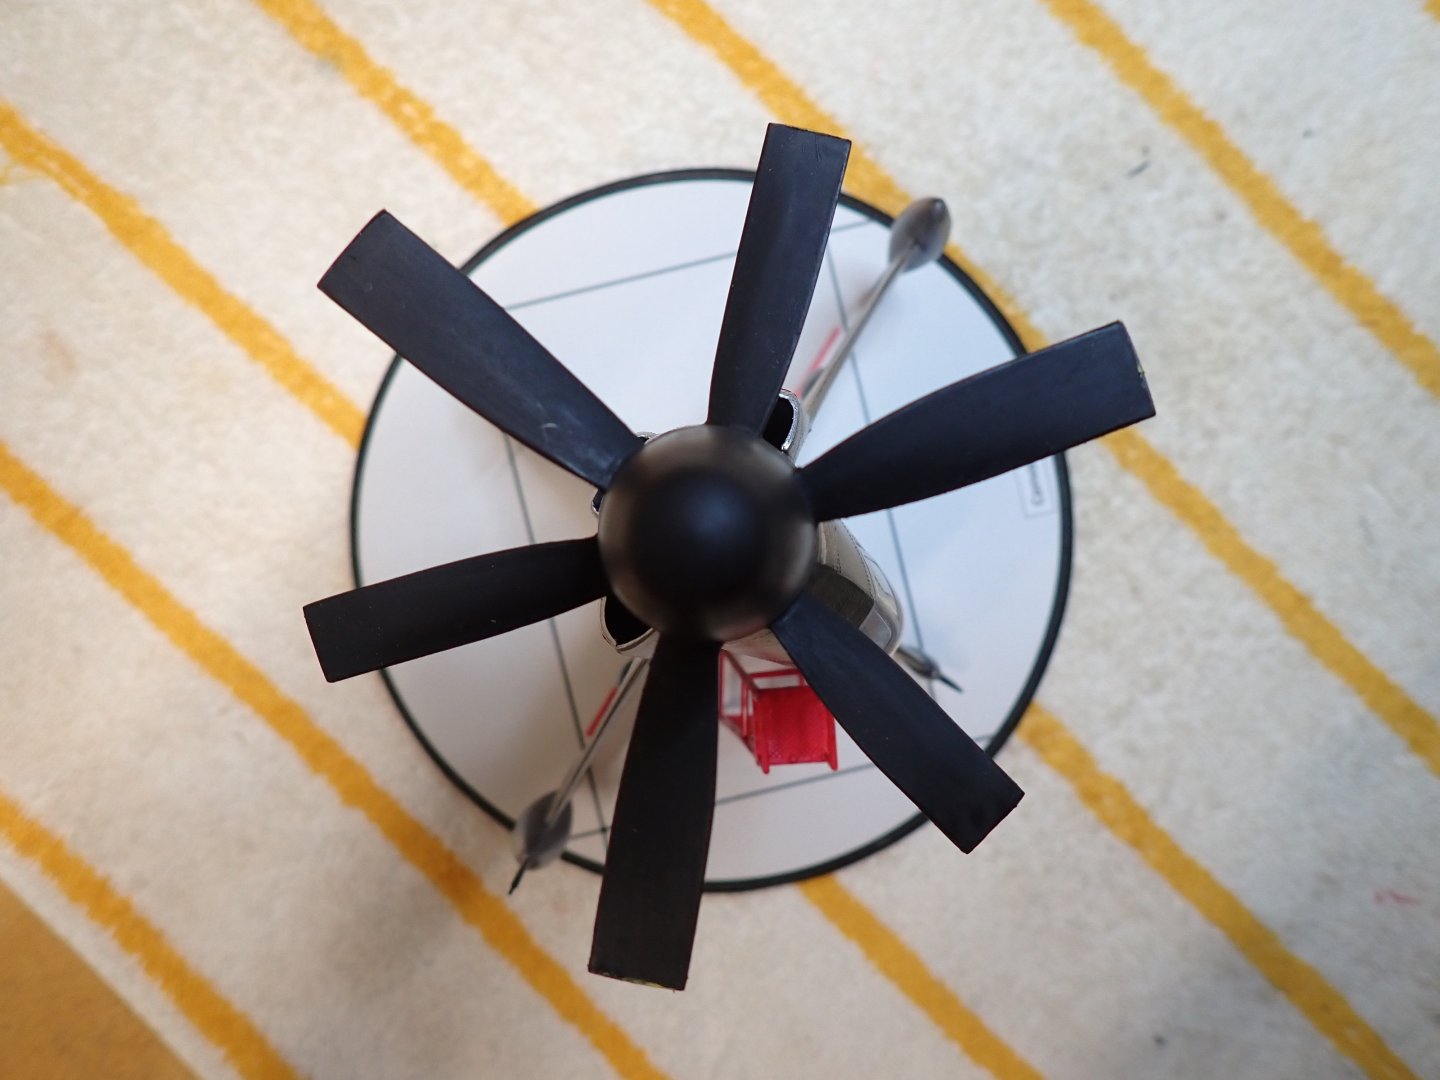
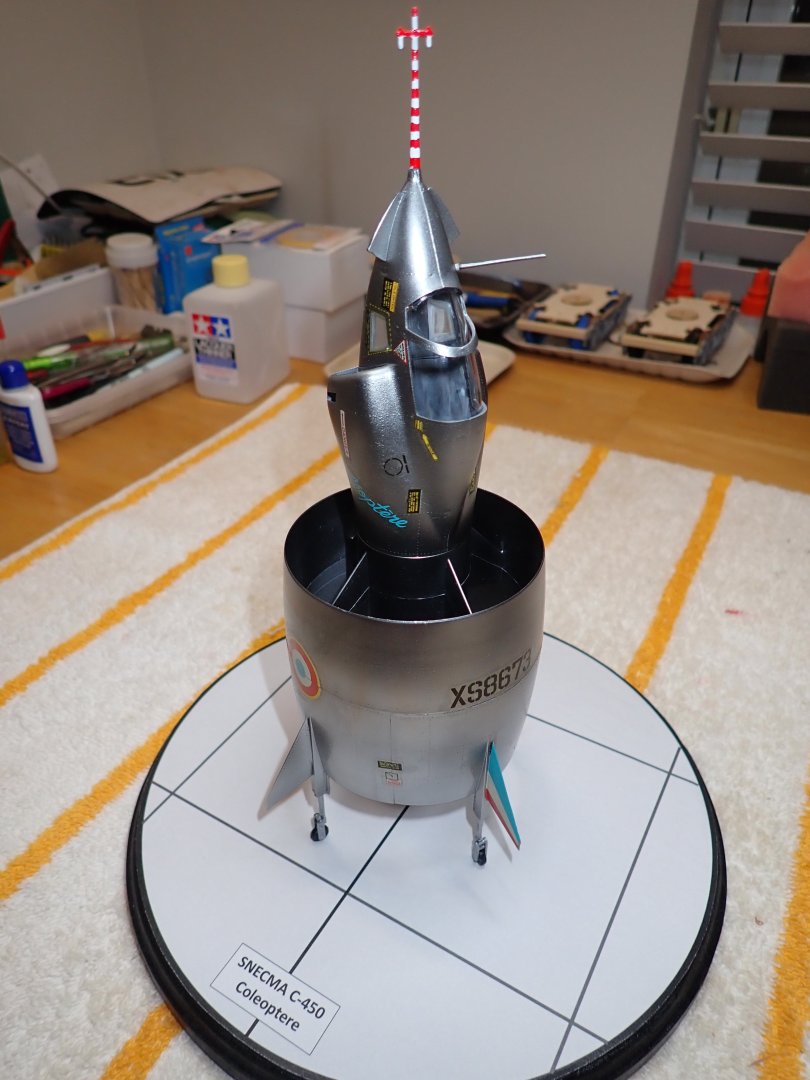
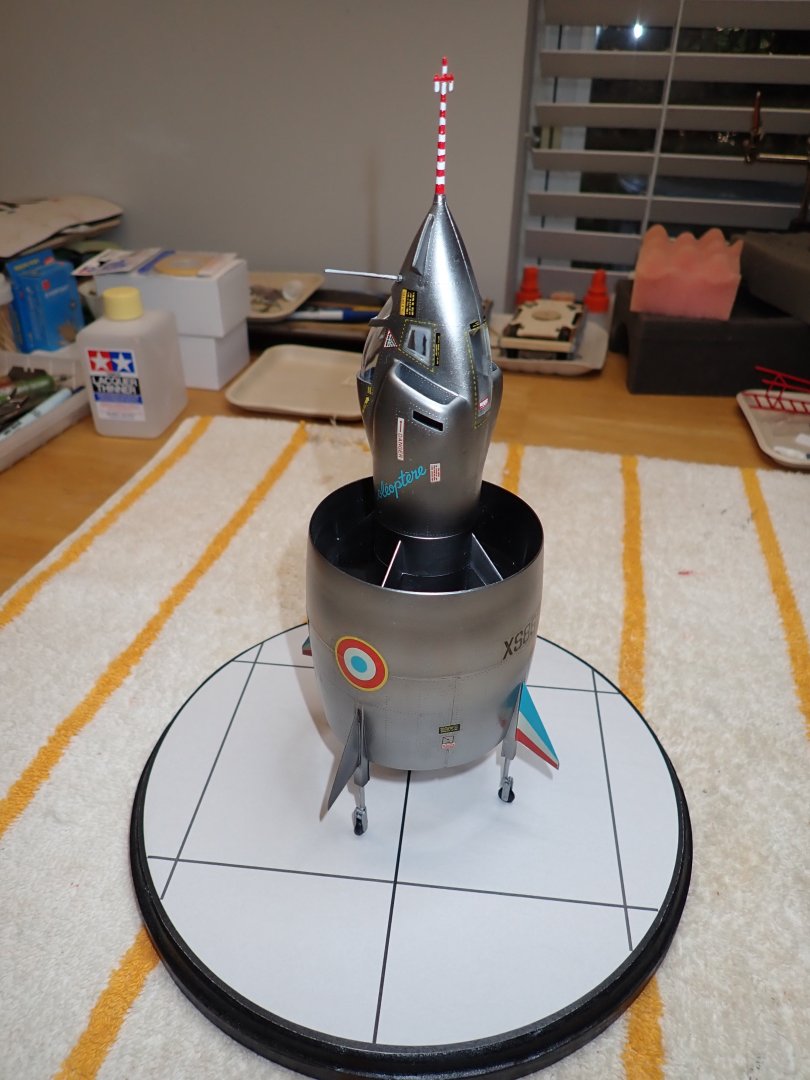
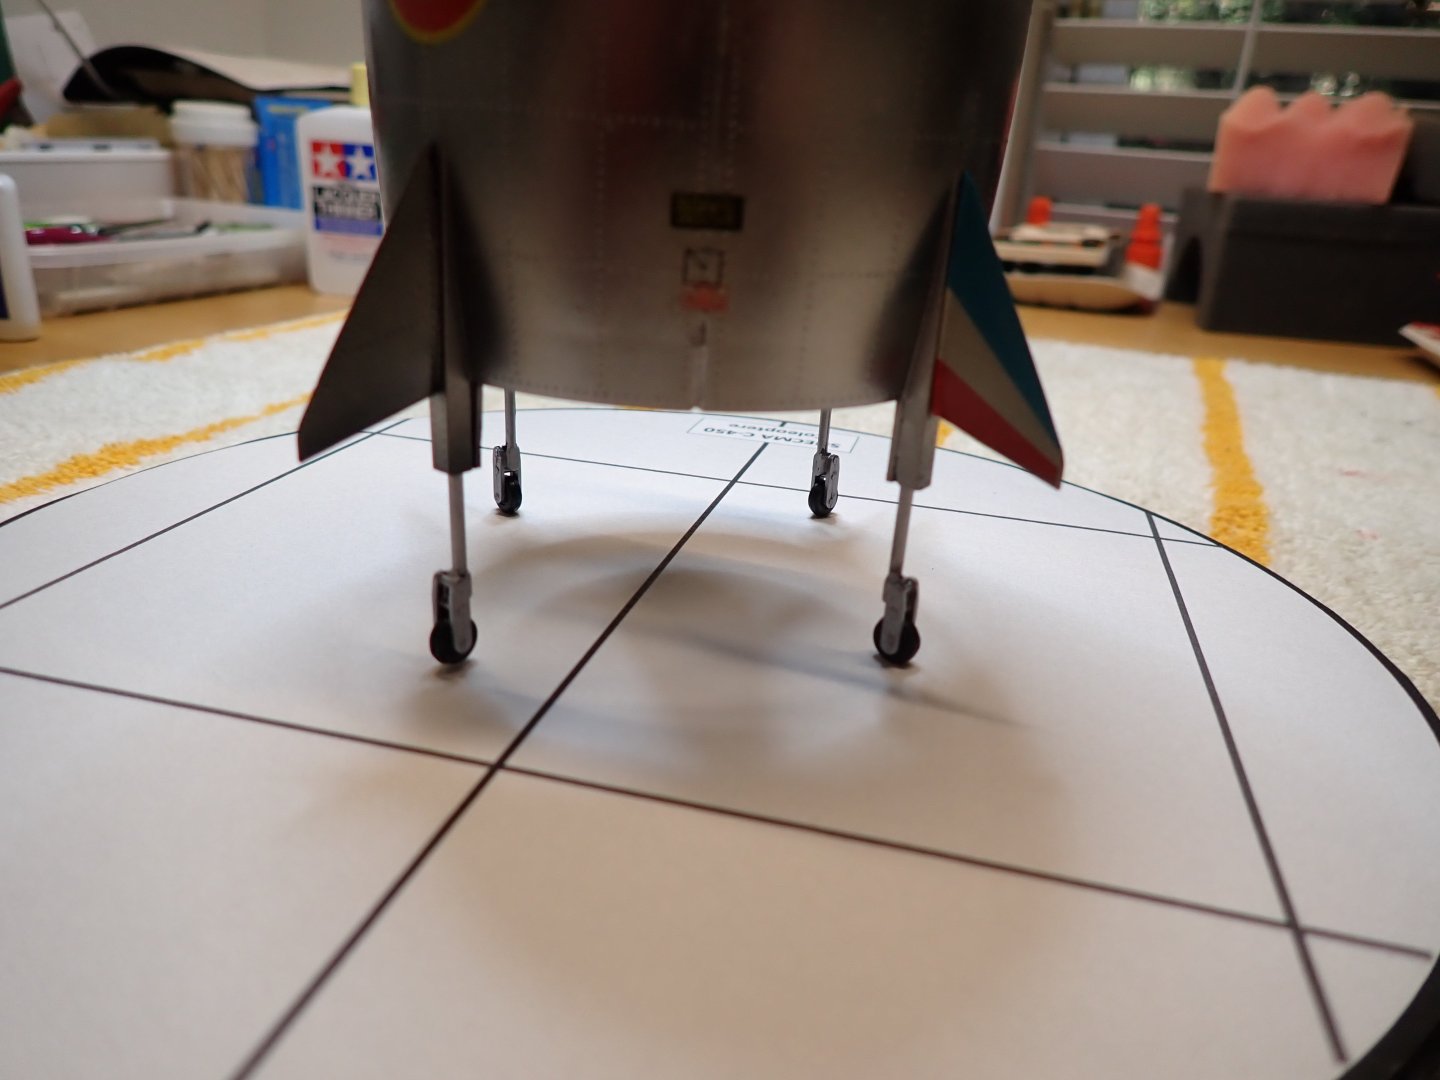
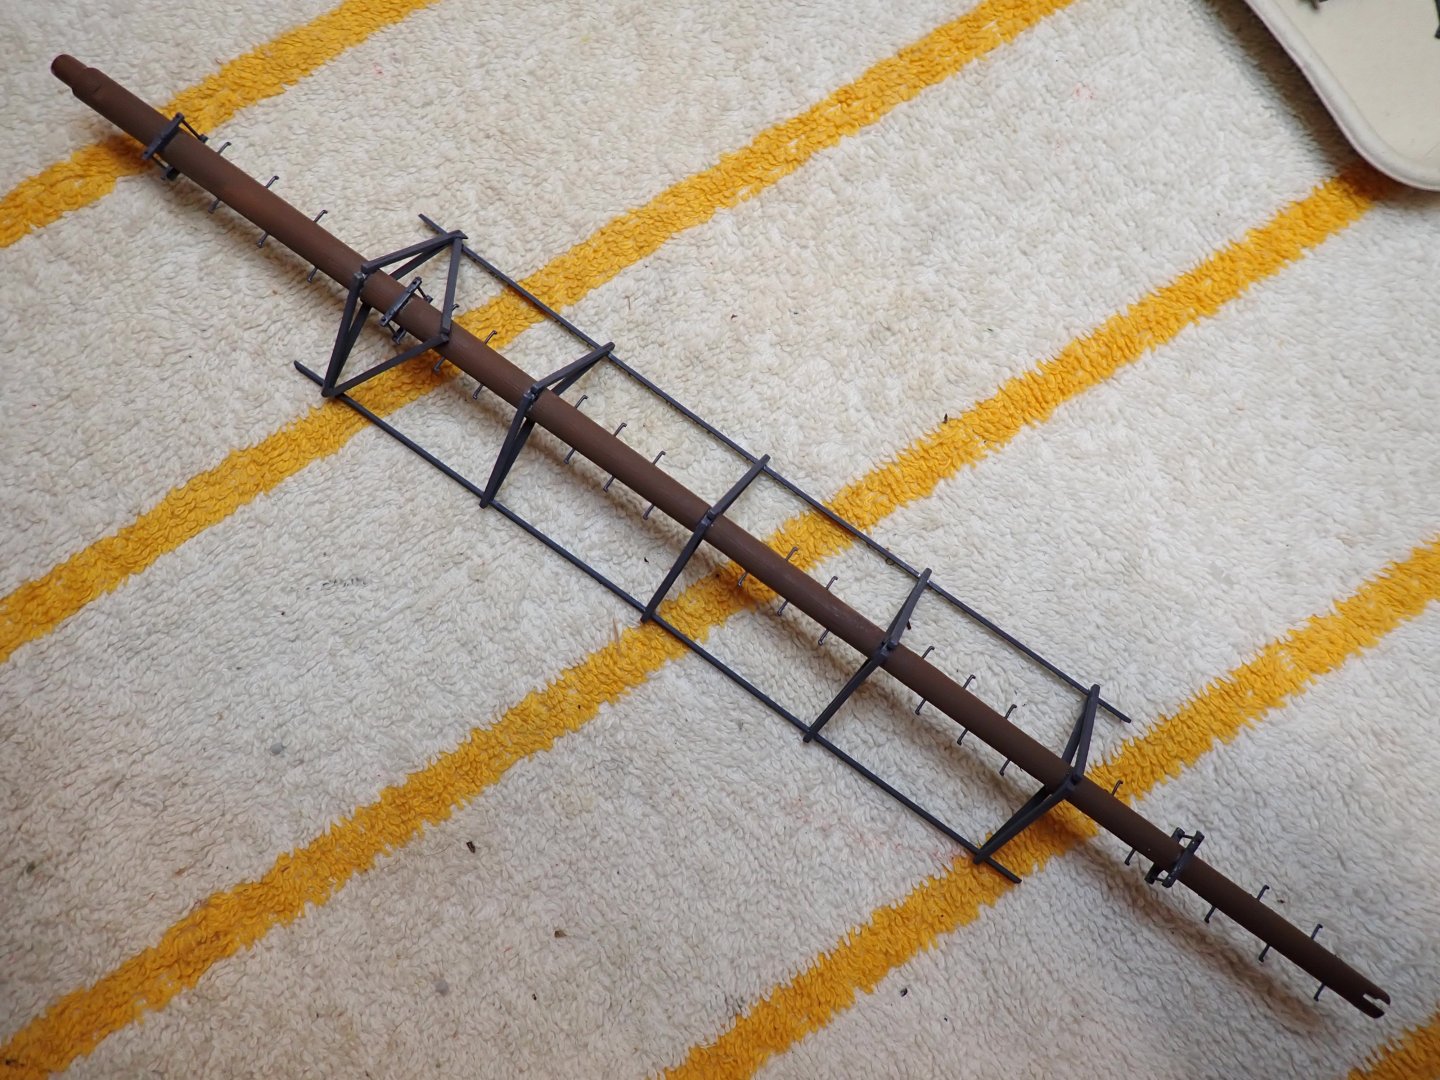
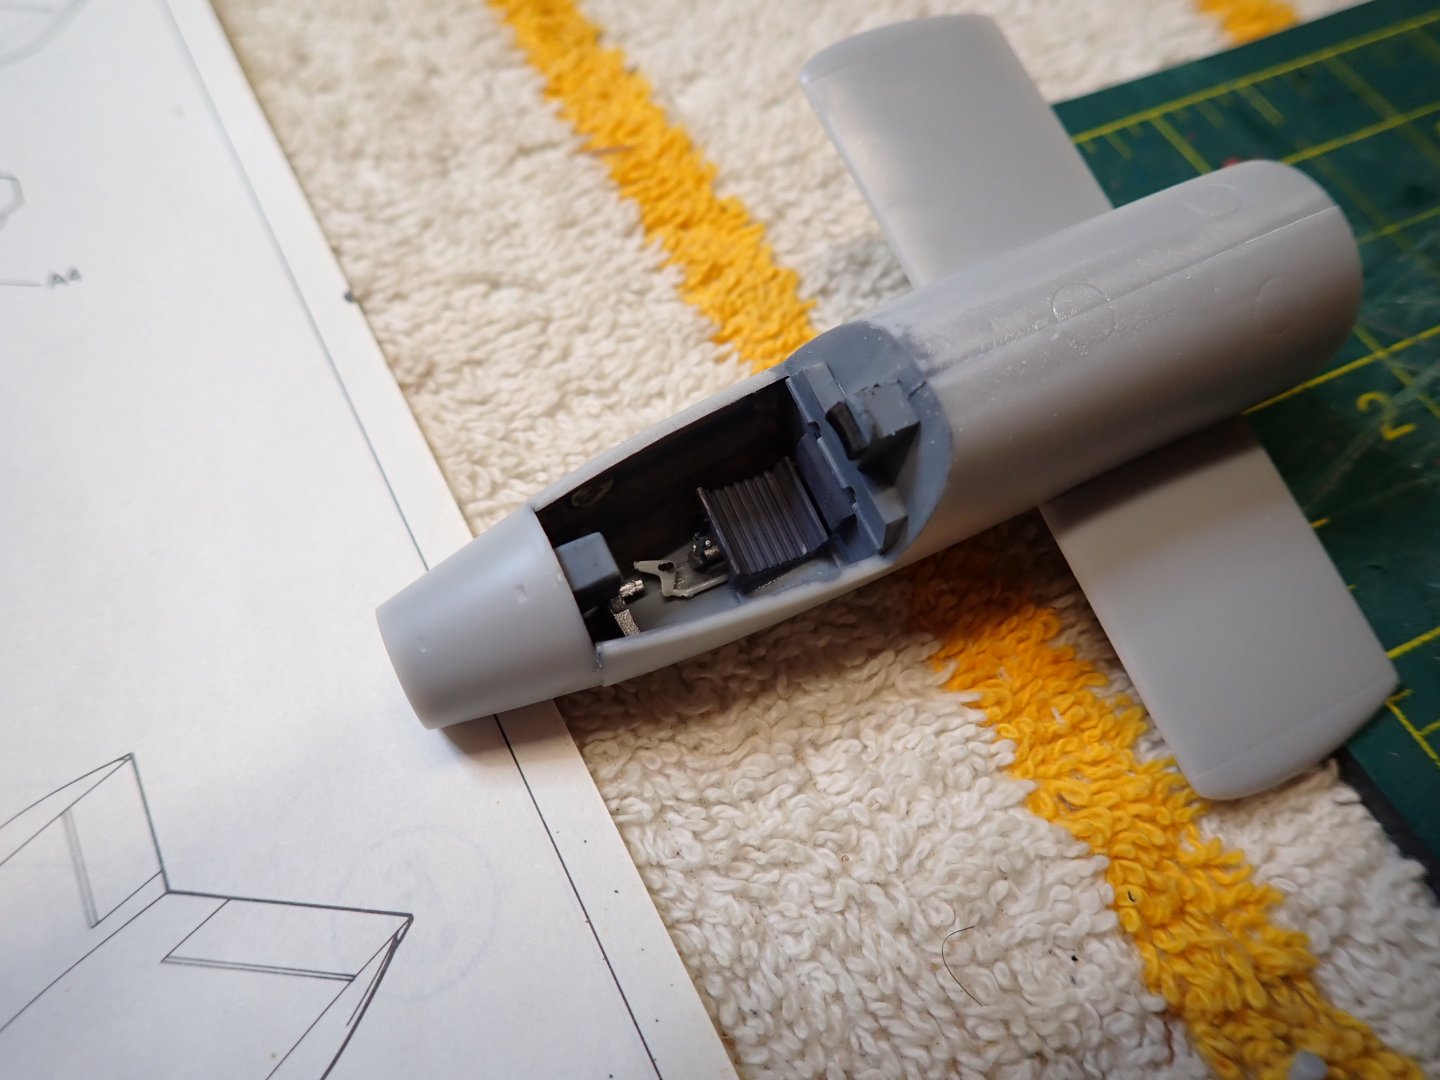
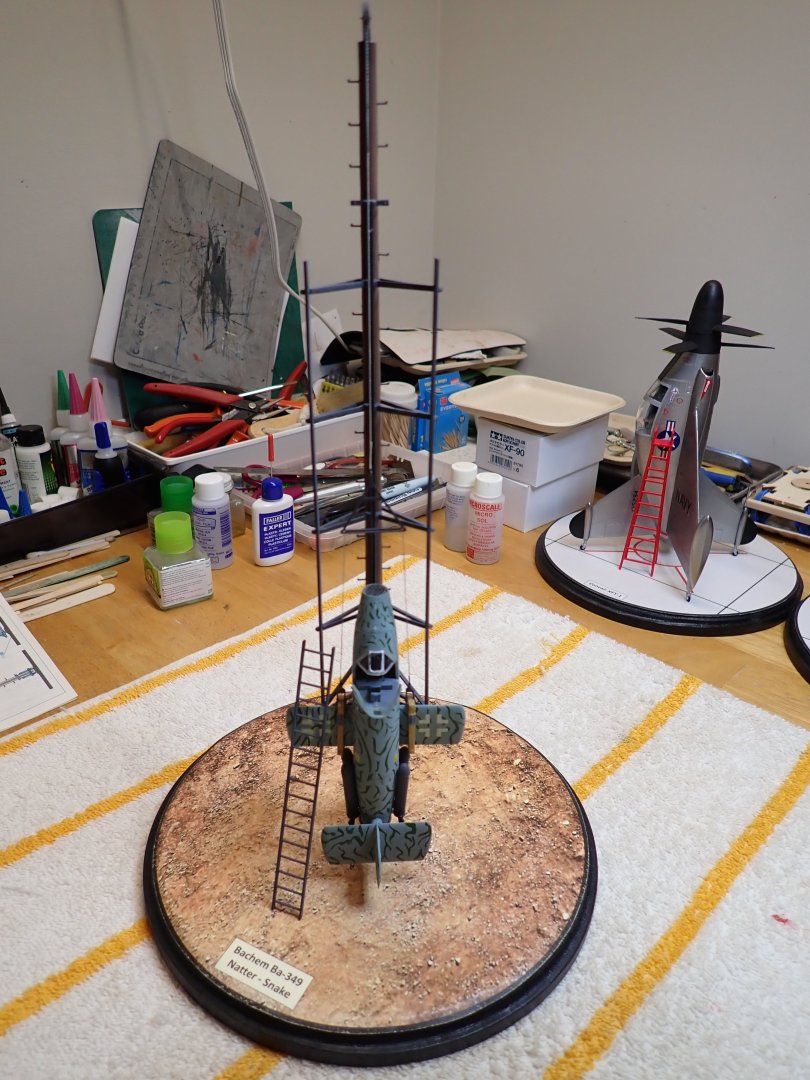
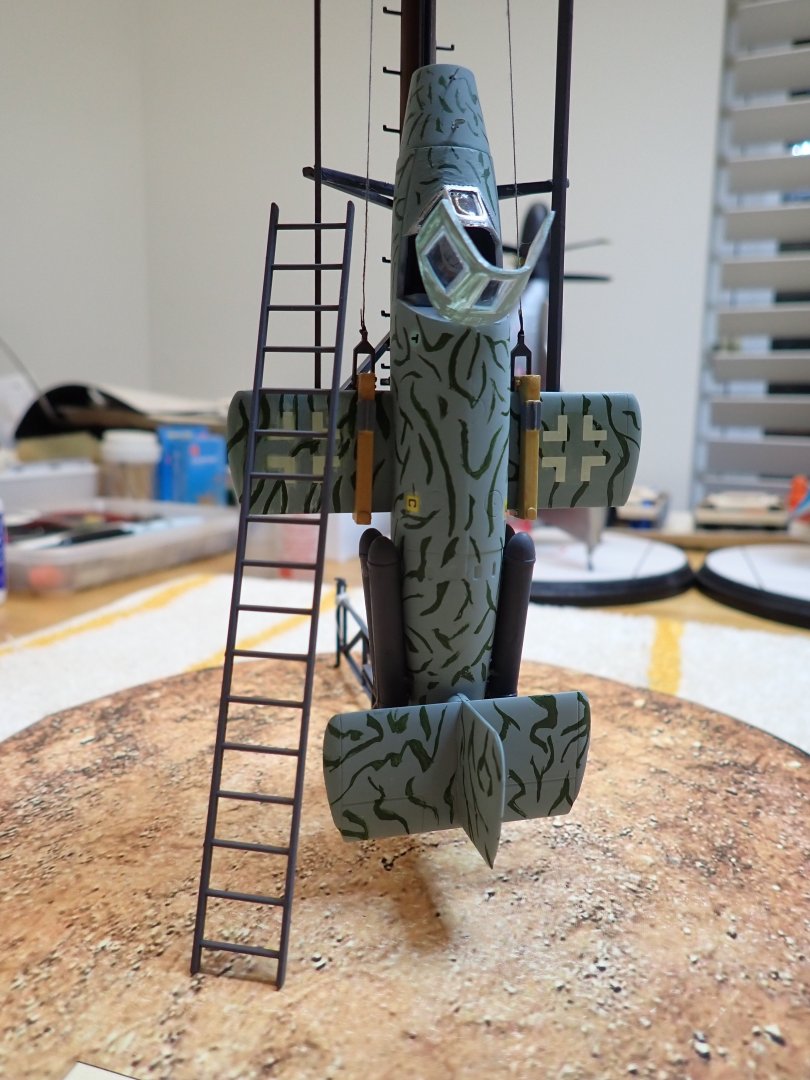
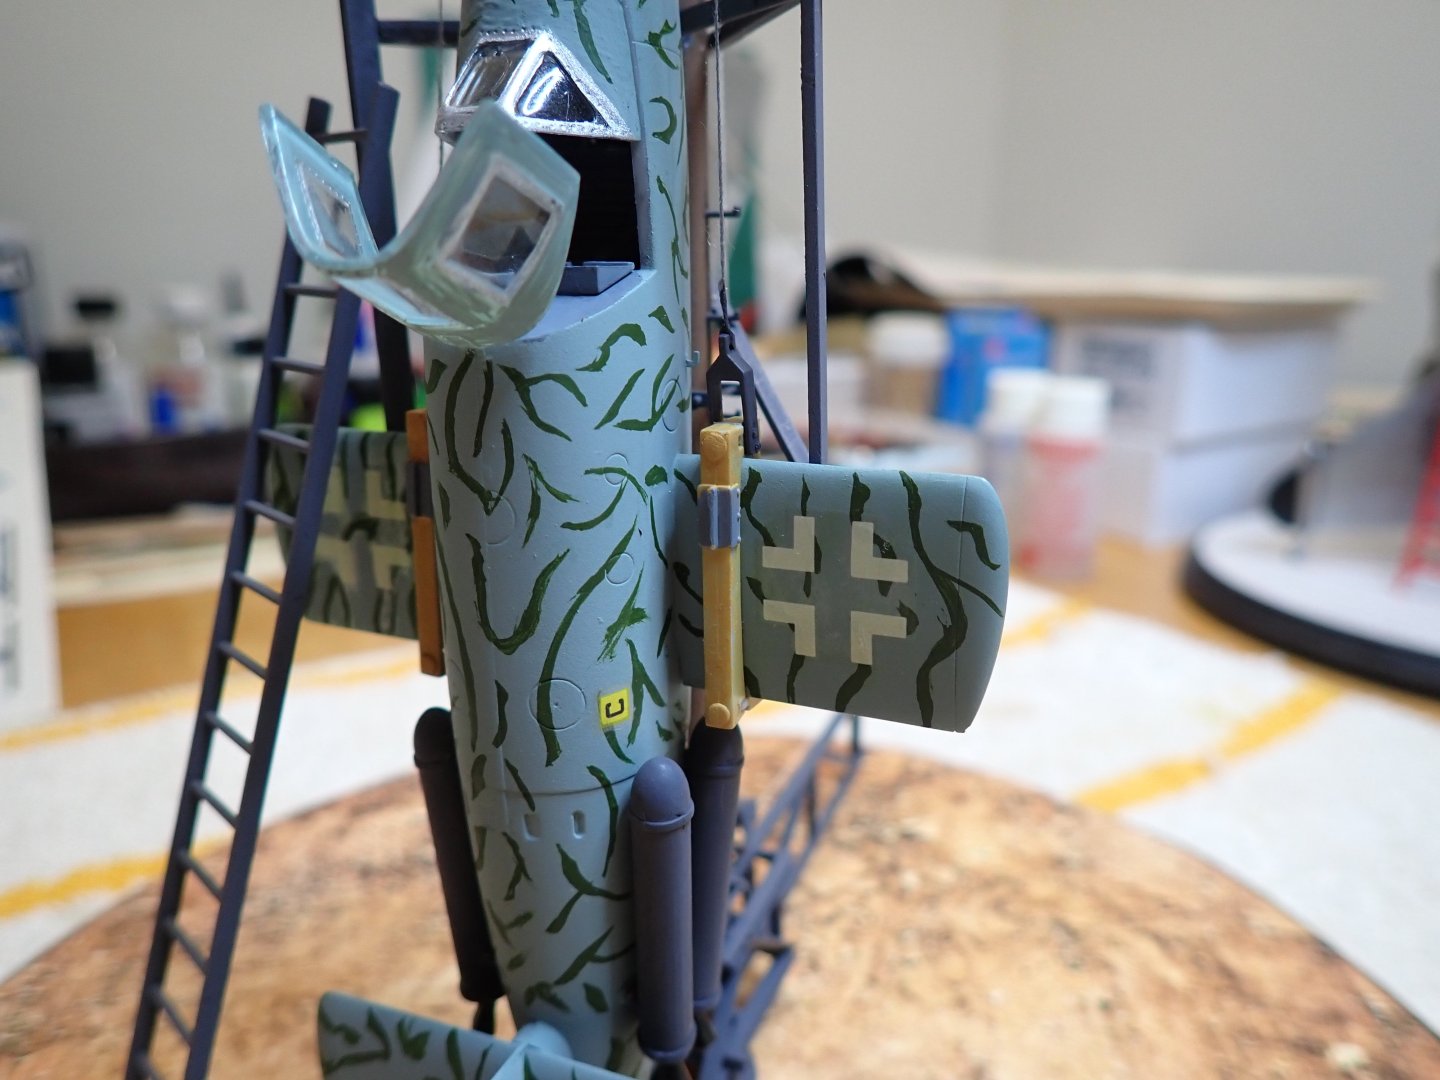
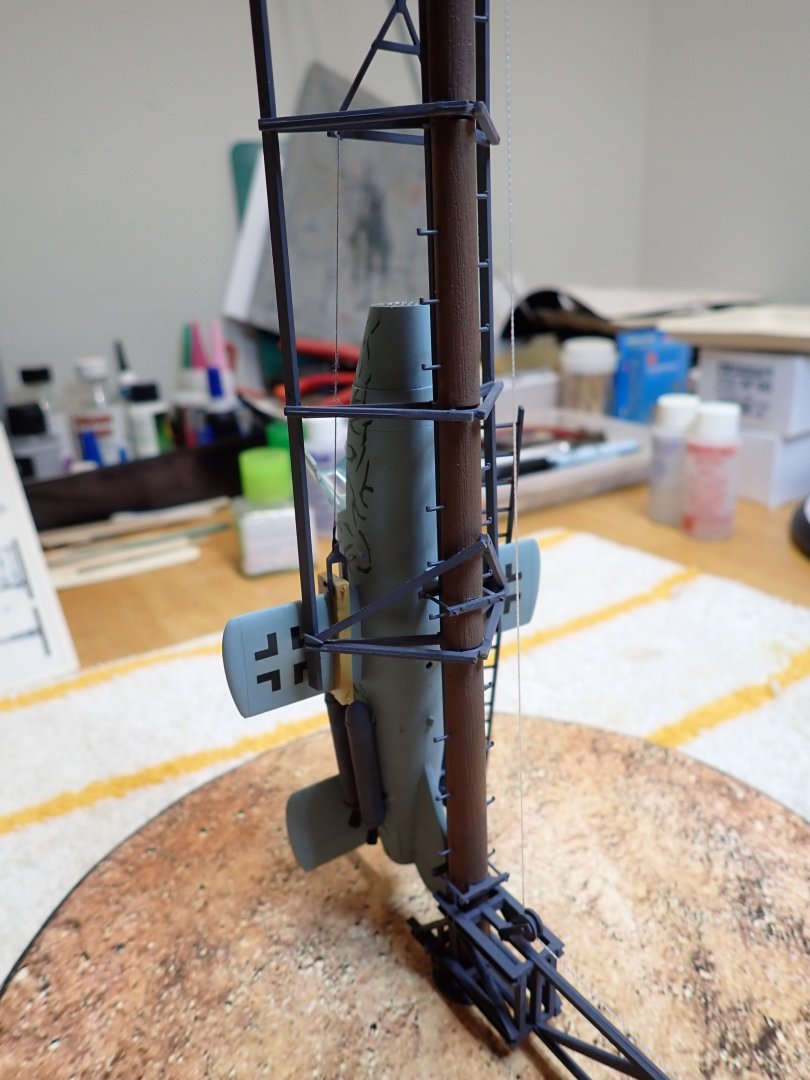
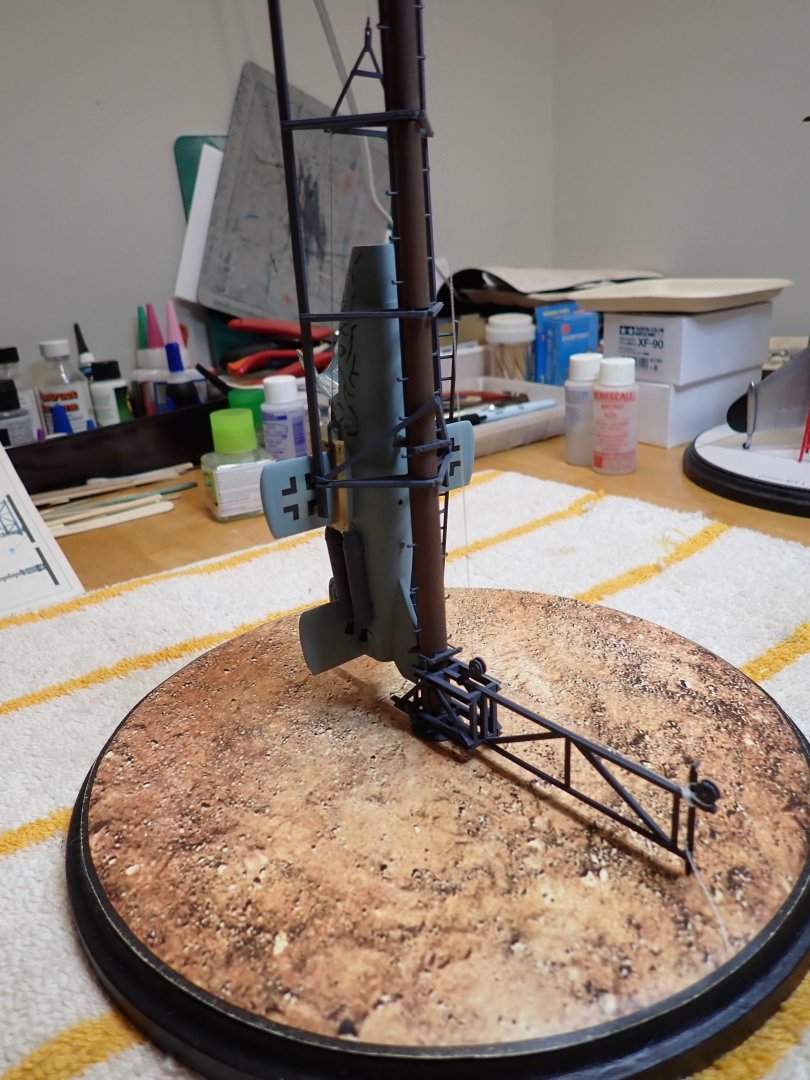
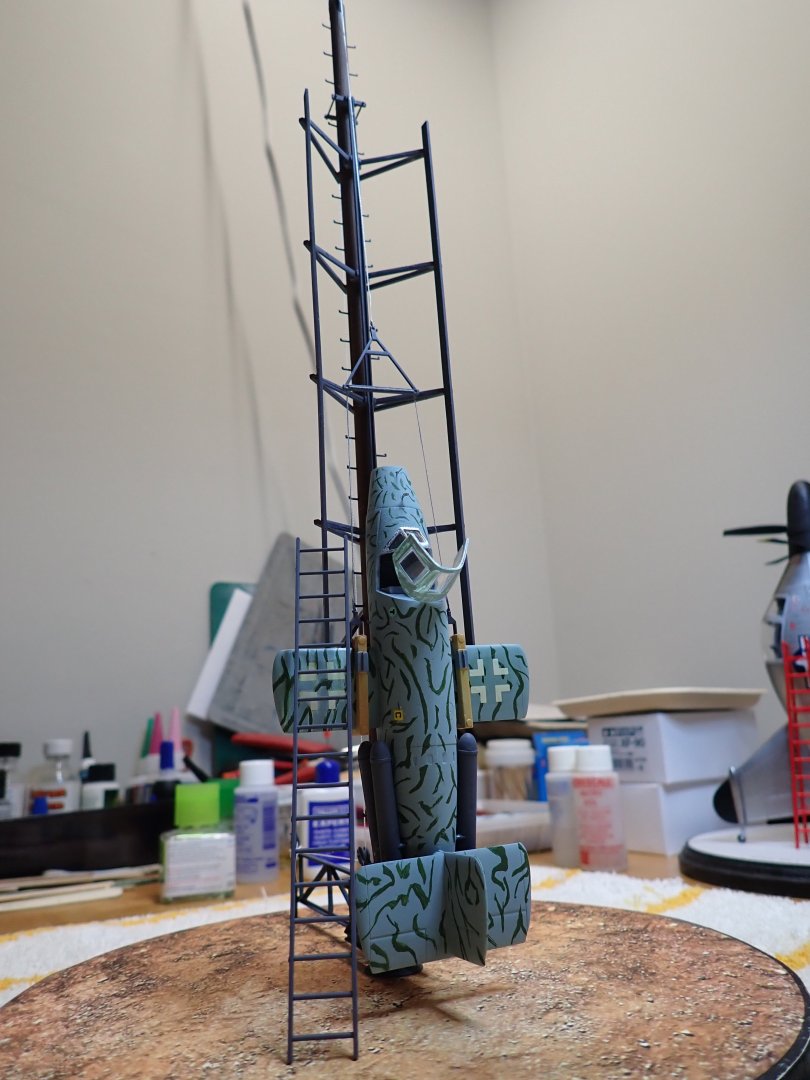
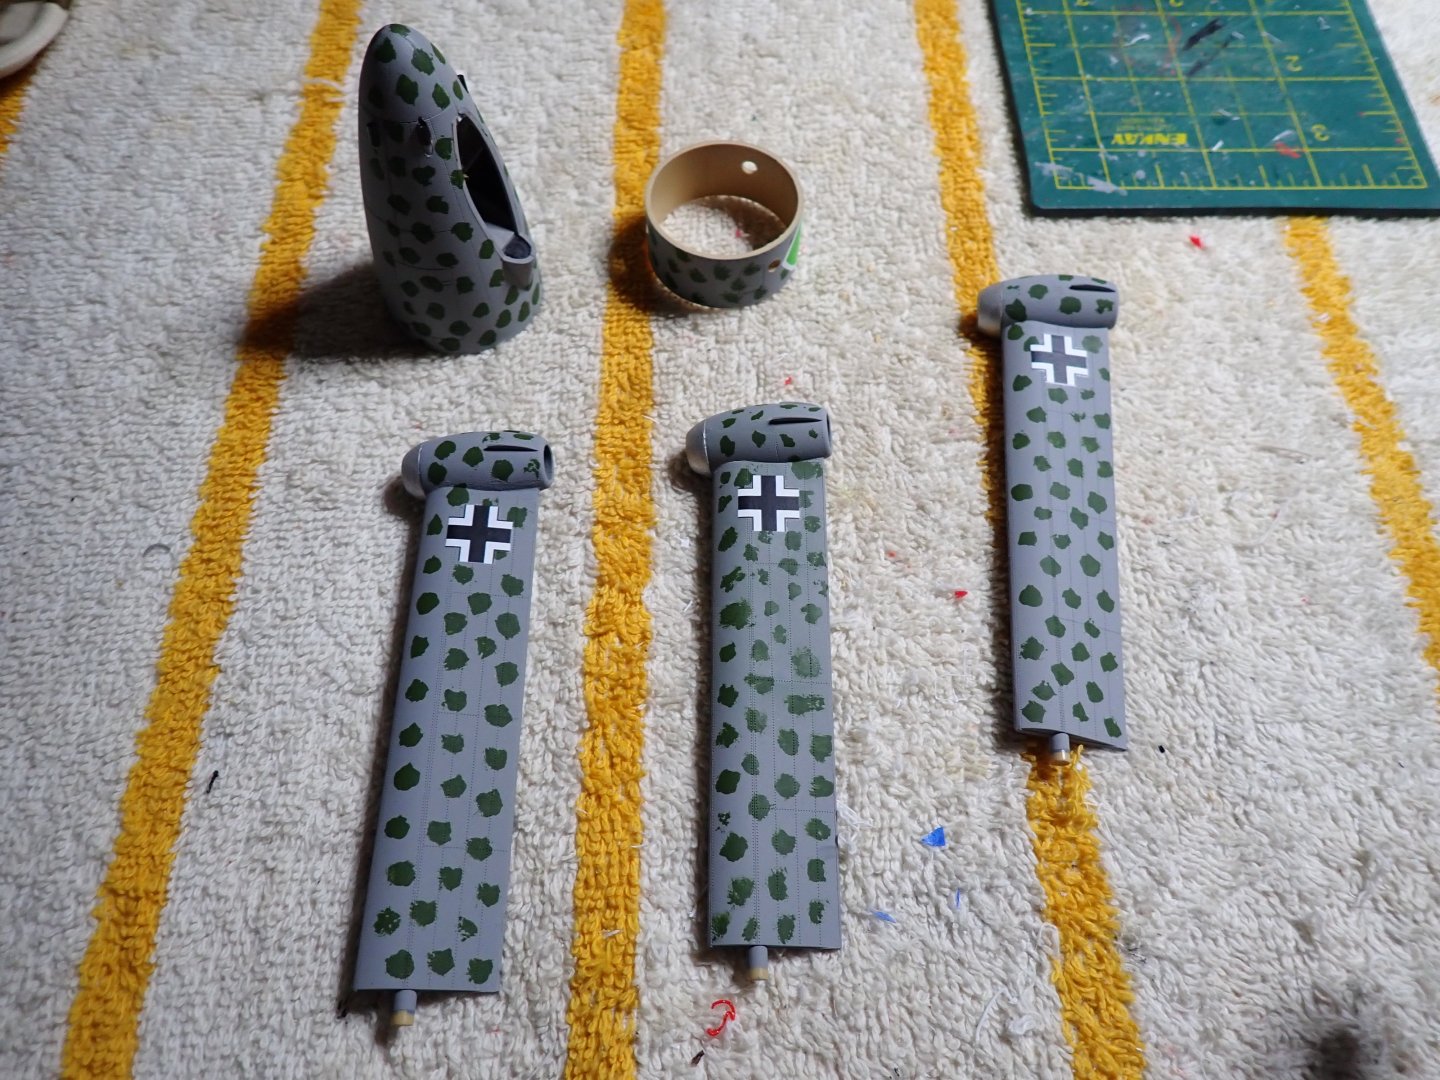
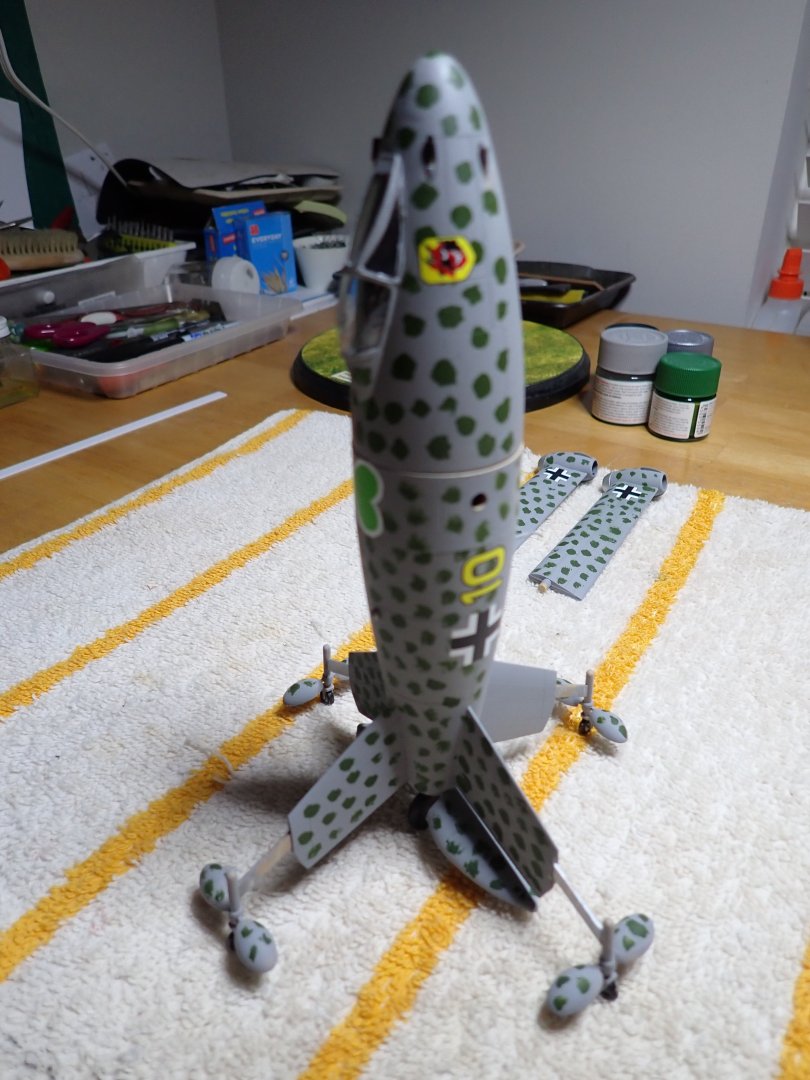
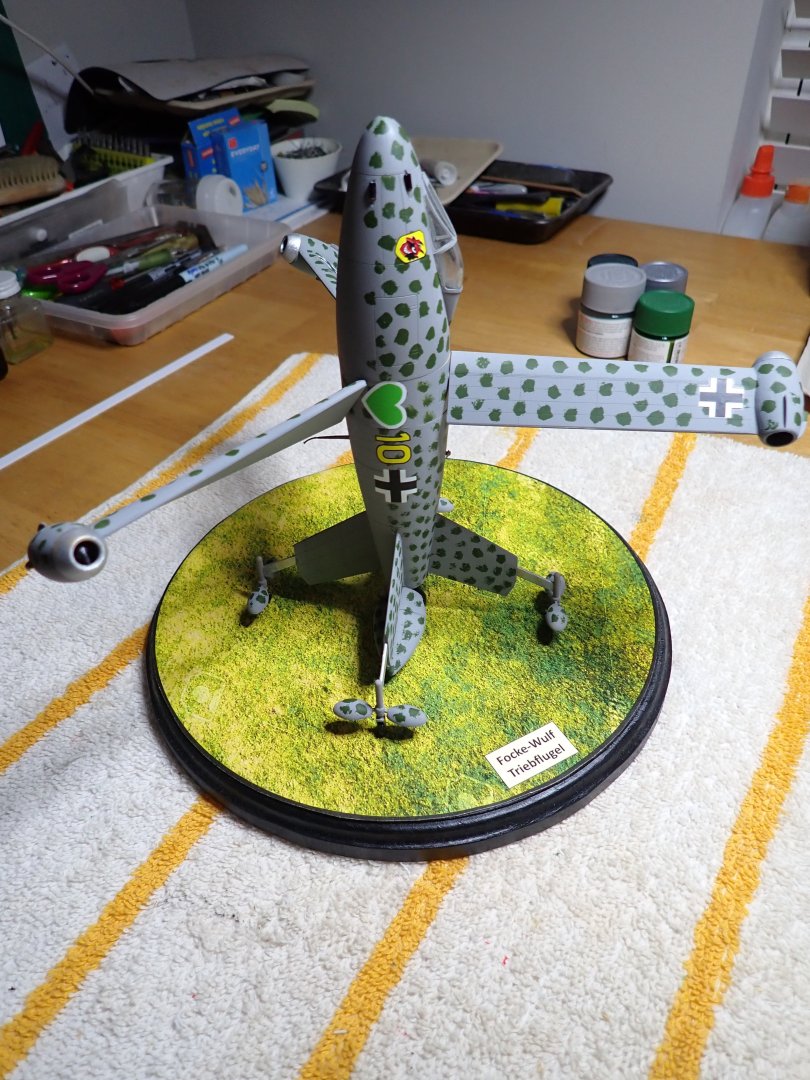
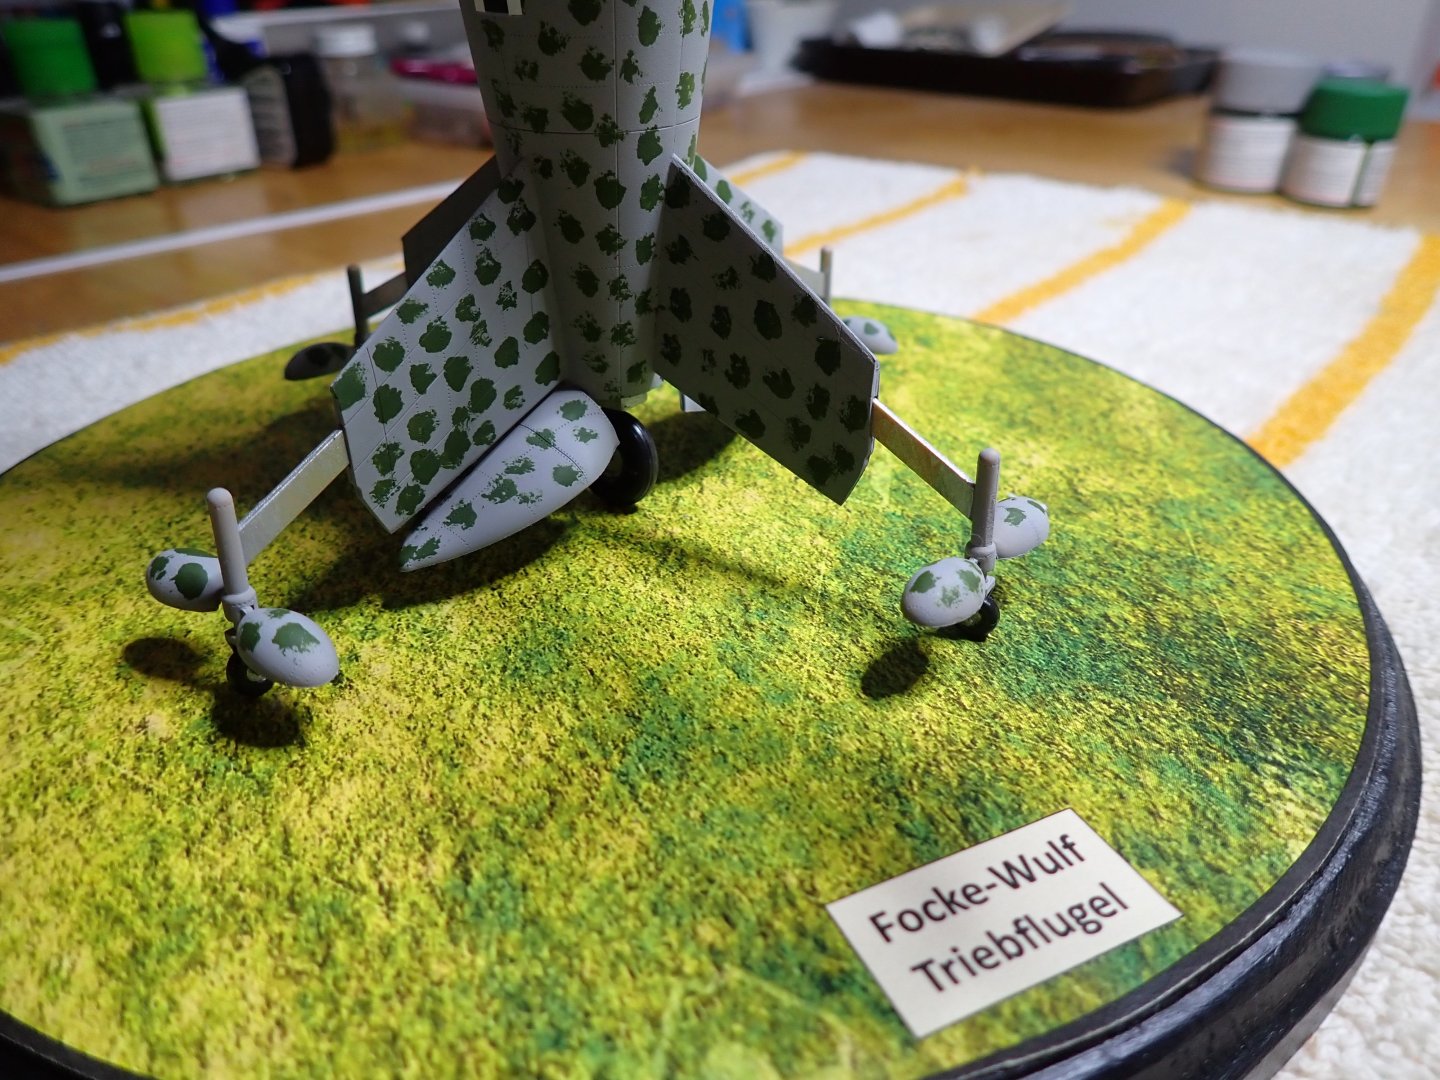
Folks, a silly idea came into my mind as I wanted to build some VTOL aircraft that were all absolute fiasco, one way or the other. It was also a nice break from the wood dust and the realization that I have lost a lot of my plastic model skills. And because I model pretty much exclusively in 1/48th, the choice of these strange beasts came to: Convair XFY-1 SNECMA C-450-01 Coleoptere Bachen Ba349A Natter Focke Wulf Triebflugel The first three planes were complete disaster one way or the other and the last one did not go beyond some models being tested in a wind tunnel. The Convair XFY-1 was actually the best of all four aircraft as it did not kill its test pilots. YouTube has a couple of very informative videos and testimonies from the test pilot, clearly showing the impossibility to fly that plane (actually to land it) without helicopter assistance and radio communication nearby. Of the four prototypes, it was also the only one that could fly normally, as expected from a plane. The kit is from Lindberg and is showing its age, specifically the decals. It was the first time I used ALCLAD2 paints to recreate the aluminum finishing of the plane structure. Thanks to DocRob and a couple of tutorials, I was able to achieve a decent rendering. A new set of decals was sourced from E-Bay and allowed me to finish the model. Interestingly enough, Lindberg recreated the contra-rotating motion of the enormous propellers, with miniature gears. It is pretty cool. The second model of that crazy group, is the infamous French SNECMA C-450-01 Coleoptere. The kit was produced by Heller in 1958 or 59 and later on re-issued by a Japanese distributor. I was able to procure the Japanese kit for an hefty amount. The C-450 was a radical departure in engineering and was a platform developed to study VTOL and RAMJET at the same time. Although the only prototype did not implement the Ramjet engine, the annular/circular wing was quite interesting and must have been a challenge as the profile of the wing had to change progressively all along its circumference if the plane was to ever fly. The French test pilot Morel, managed to take off and land the contraption 8 times, thanks to a rotating seat and additional windows on the sides and below his feet. The pivoting seat allowed the pilot to always have a clear view of the ground and the horizon. On the ninth flight, the pilot decided to place the aircraft in an horizontal position and that is when all hell broke loose. The plane could not fly (annular wing had not enough lift...?) and the pilot ejected, unfortunately too close to the ground. He spent many months in an hospital and survived this catastrophe. The program was cancelled by the French government. The model assembles quite easily and the 50 years old decals had to be coated before being used. I absolutely love the shape of the bird. It is so unusual. Our third candidate is the Bachen Ba349 Natter (snake). The Natter was a last minute effort by the Germans to come up with a solution to destroy the heavy bombers that were leveling the Germany, when most of the airfields had been destroyed. The natter was built of wood and plywood, powered by the chemical jet engine of the Komet and four JATO rockets to help it get off the ground. The plane was armed with a bunch of small rockets in the nose. After destroying a bomber or a couple of them, the pilot would eject, come down with his parachute, while the plane splits itself in two sections, coming down to the ground with their parachutes. A lot of waste in equipment for some poor results, but the Natter was made of cheap plywood and the German were desperate. The first few test flights were done unmanned. The only manned flight of the Natter, was done with a young pilot who was knocked out by the initial acceleration and could not do anything to prevent the Natter from crashing and exploding a few kilometers away. The allied forces were able to bring back a few samples of that plane and one of them is in the National Air and Space Museum, near DC (waiting to be restored). The kit is an old Dragon kit and is extremely detailed. In fact, the ramp/pylon to launch the plane is much more difficult to build than the plane itself. Overall, it is a very delicate but extremely detailed model with even some PE parts. Our last VTOL is the Focke-Wulf Triebflugel. A crazy concept studied towards the end of WWII by Focke-Wulf which never ended up being built, by lack of time and resources. The design is quite incredible and only Germans with their incredible mechanical skills could have made such engineering challenge. A rotating structure in the middle of the fuselage, holding three rotating wings propelled by three ramjets, located at the tip of the wings. The plane would take off like an helicopter and transition to an horizontal flight line at a certain altitude. The landing would be done i reverse and would have presented an incredible challenge, even for the German ace pilots. The kit is distributed by Amuzing Hobby, A Japanese company and is very interesting to put together. The central section rotates nicely and the three wings can be positioned as you wish. The shape of the fuselage is really cool and I would almost be tempted to build the 1/32nd version of that same concept. Our four VTOL aircraft are now displayed next to each other: Et voila. A collection of insanity and crazy engineering dreams, that went nowhere. Yves


-
Craig, we missed you and your beautiful models. Very happy to see you back online. Yves
-
I am sure you have already thought about a successor...... Yves
-
Excellent rendition of these massive ships. I admire your tenacity and skills, especially when dealing with paper models. You have created a very unique piece and should be proud of the result. Yves
- 288 replies
-
- 5
-

-
-
- Card
- Pre-Dreadnought
- (and 3 more)
-
Lotus 49C by DocRob - FINISHED - Ebbro- 1/20 - Plastic
yvesvidal replied to DocRob's topic in Non-ship/categorised builds
Another museum quality piece, Rob. Fantastic work. Yves -
Superb model and exquisite presentation of the Longboat. A true museum piece. Yves
- 38 replies
-
- 3
-
-
-
- 18th Century Longboat
- Model Shipways
- (and 1 more)
-
Beautiful work. You did a good job on the stern, which is not easy. Yves
-
What a collection !!! You are the king of 3D printing. Yves
- 34 replies
-
- 1
-
-
- Queen Mary 2
- 3d printed
- (and 1 more)
-
Beautiful and realistic davits. You are an expert at soldering and bending brass tubes. Yves
-
You should try printing a 1/200 scale model to fit with most military ships. That would be immense but quite spectacular. Yves
-
Chris, this is superb. And what a treat to not have to paint: I find that to be the most difficult (for me) in building a model. I truly love the look and proportions of that Vindicator, done in an era where planes were designed to really fly and not just be a cockpit pushed by big engines (basically a rock when the engine shut down). Yves
-
I just bought that kit on Da-Bay a few weeks ago. Always wanted to build that monster and ominous beast. Following your build will be very helpful. I have purchased the metal landing gears from Valiant Enterprises ($20). It may be a better fit for this large and heavy plane and perhaps you should consider it, too. Yves
-
Lotus 49C by DocRob - FINISHED - Ebbro- 1/20 - Plastic
yvesvidal replied to DocRob's topic in Non-ship/categorised builds
Another masterpiece in the making.... Yves -
It is a big bird, for sure. Superb construction as always. Yves
-
That is a very nice model in my favorite scale. I will be following your progress. Yves
-
I like that blue. Gorgeous model. Yves
-
Fantastic model and beautiful boat. I love the contrast between the different varieties of wood and the exceptional finish and precision of the parts. Absolutely superb. Yves