HOLIDAY DONATION DRIVE - SUPPORT MSW - DO YOUR PART TO KEEP THIS GREAT FORUM GOING! (Only 75 donations so far out of 49,000 members - C'mon guys!)
×


yvesvidal
-
Posts
3,607 -
Joined
-
Last visited
Content Type
Profiles
Forums
Gallery
Events
Everything posted by yvesvidal
-
 Thanks Nil. I know you have built that model too (yours was scratchbuilt, I think) so you know about the lack of straight lines and flat surfaces on this vessel. I am making some slow progress, which I hope to present in a few days. As always, I am moving away from the official "Instructions" and going all over the place, as needed. Yves
 -
Rob, are you available to polish my real size car? 🙂 I do have an orbital buffer to help your sore arms.... Your results are just amazing on that model. It looks better than the real car. Yves
-
Great progress Kevin. The wood decks make such a difference. There is no substitute for that. This stuff is so ominous and massive.... Yves
-
You may have to put another layer of clear coat..... Yves
-
Big sanding block is the way to go, in my opinion. Yves
-
Valeriy, since these models are static models, why do you line the hull with fiberglass and epoxy resin? Is it to make sure the wood does not warp or expand? Is it to increase the solidity and resilience of the hull to shocks? Have you considered just brushing epoxy resin on top of the wood and skipping the fiber glass? I would welcome your opinions and recipes. Yves
-
I can't wait to see some paint on that fantastic hull. Yves
-
Lovely !!! That should be a very unusual and interesting model. Yves
- 35 replies
-
- 4
-

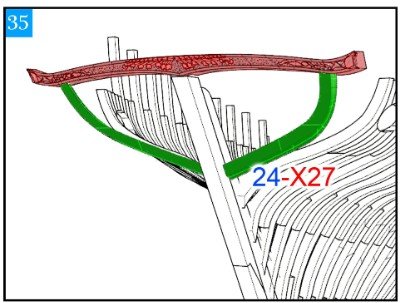
-

-
- Britannia
- Mountfleet Models
- (and 1 more)
-
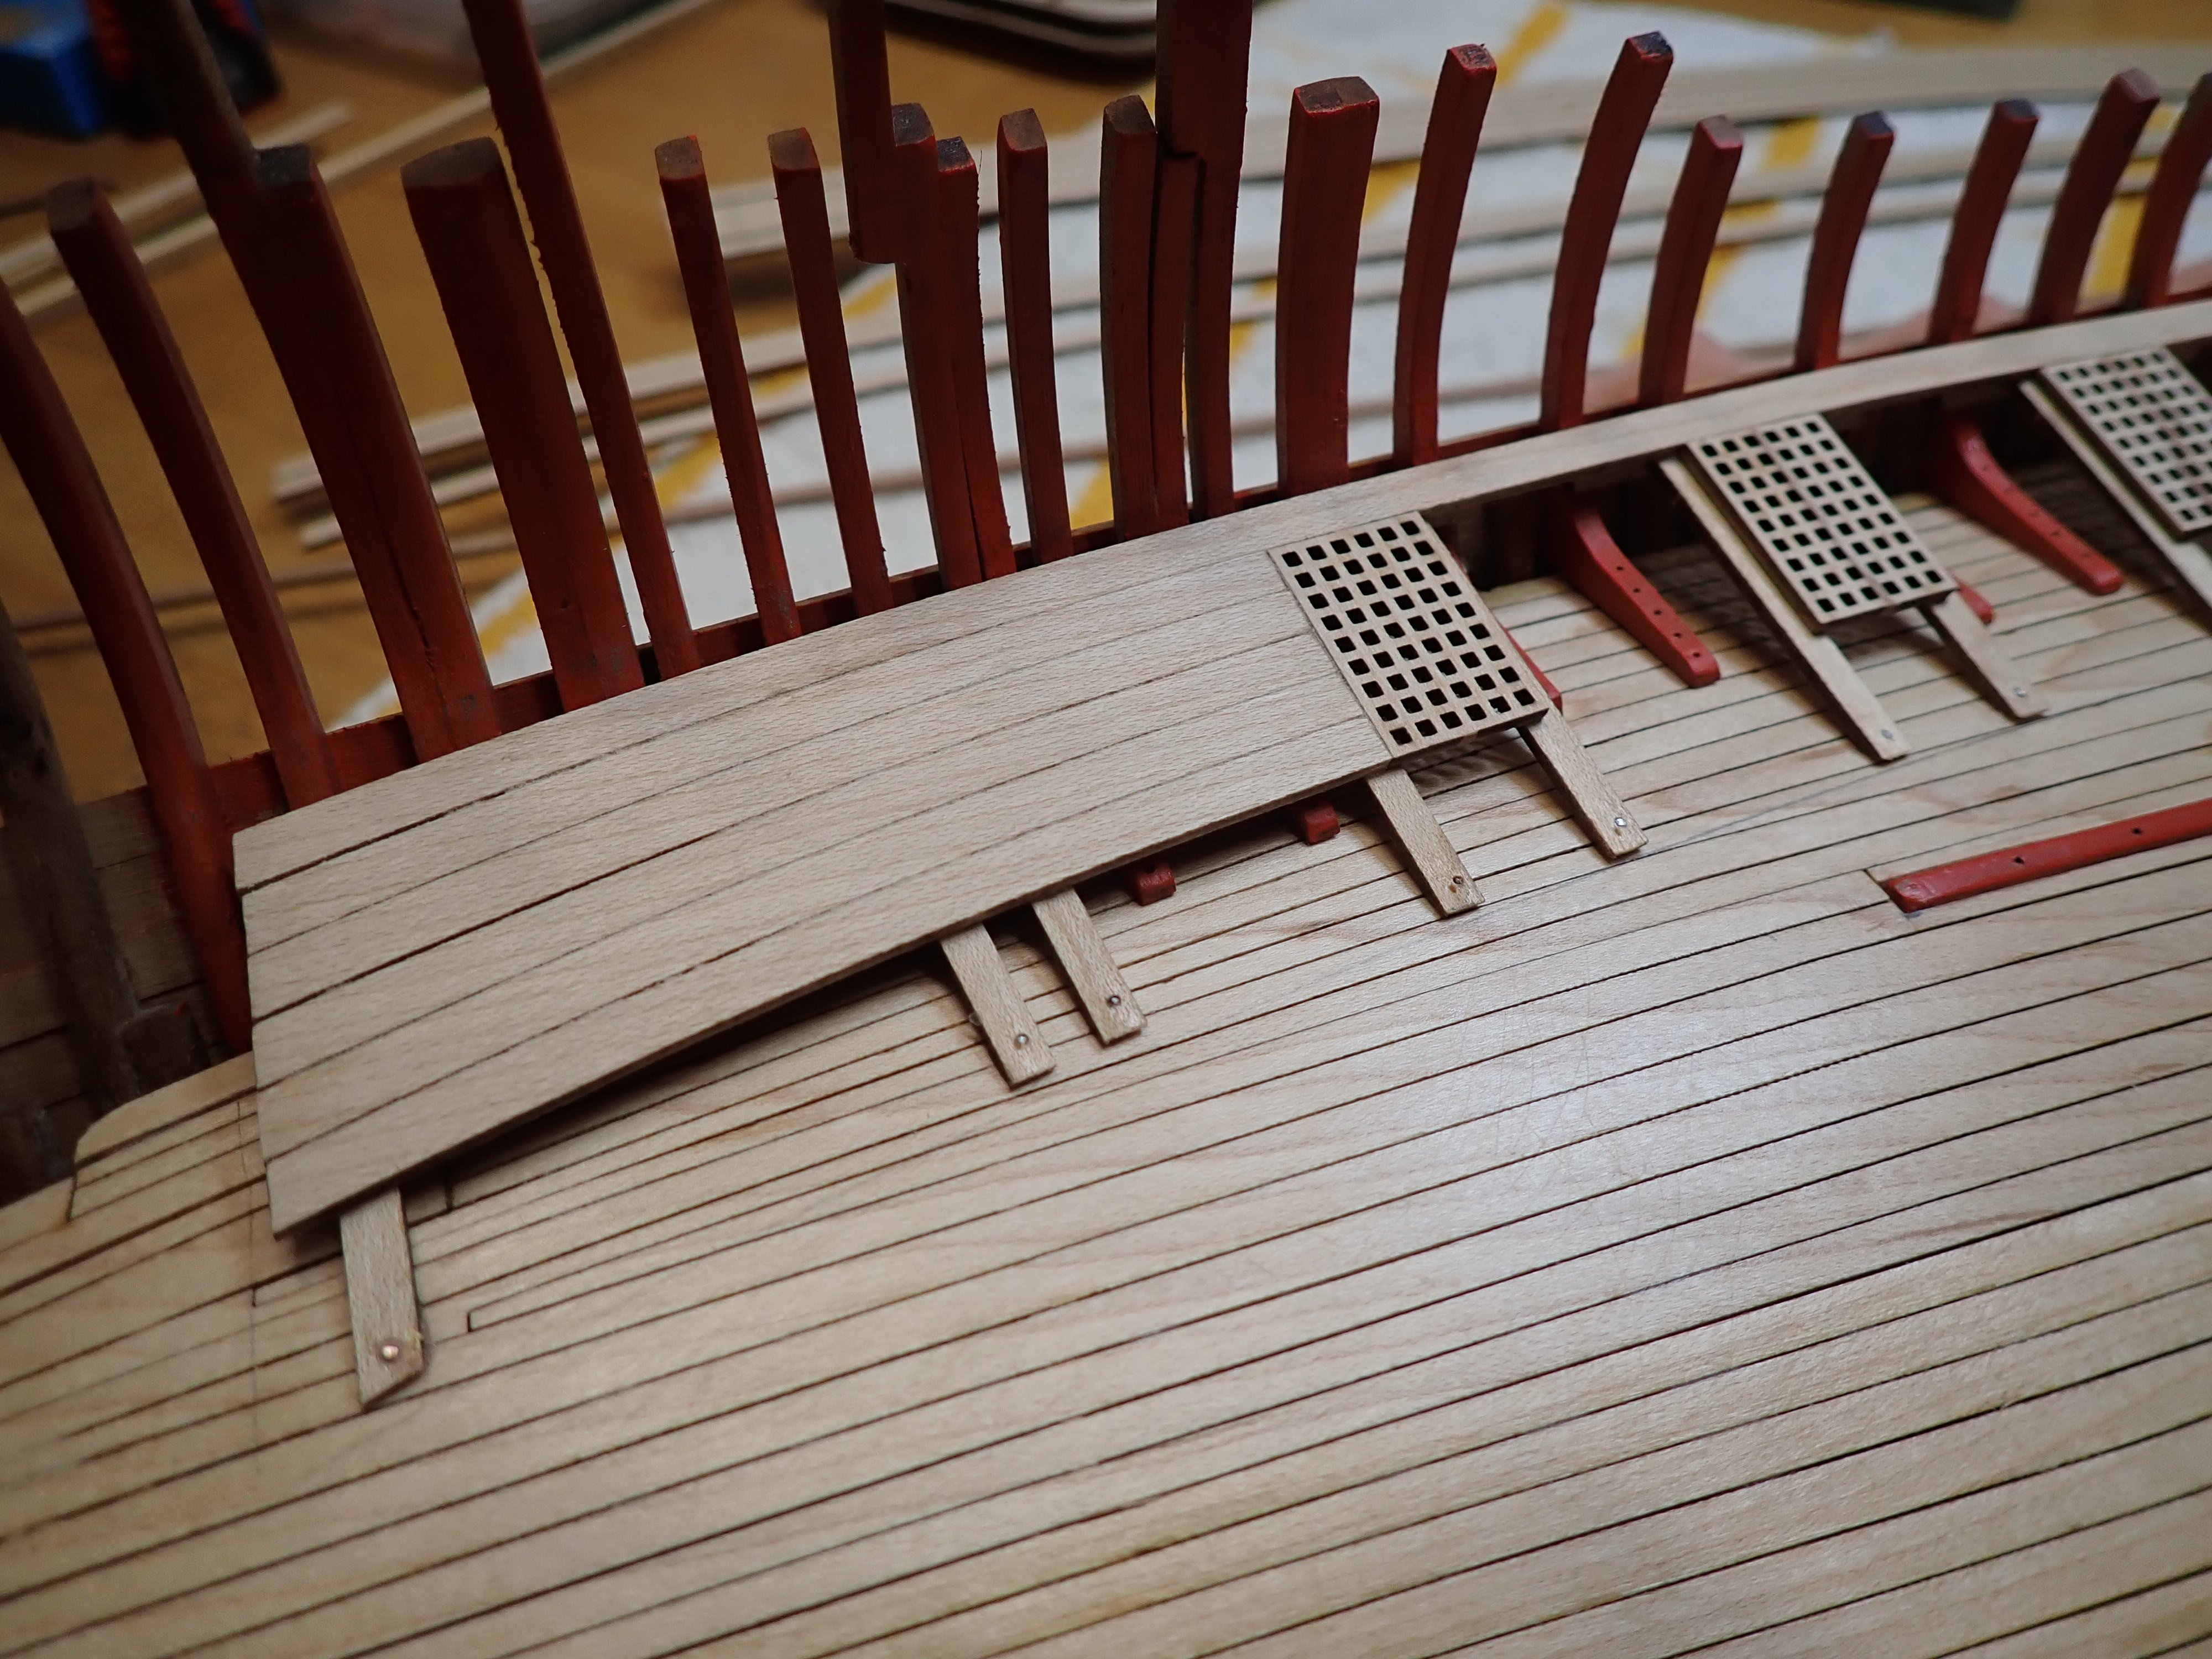
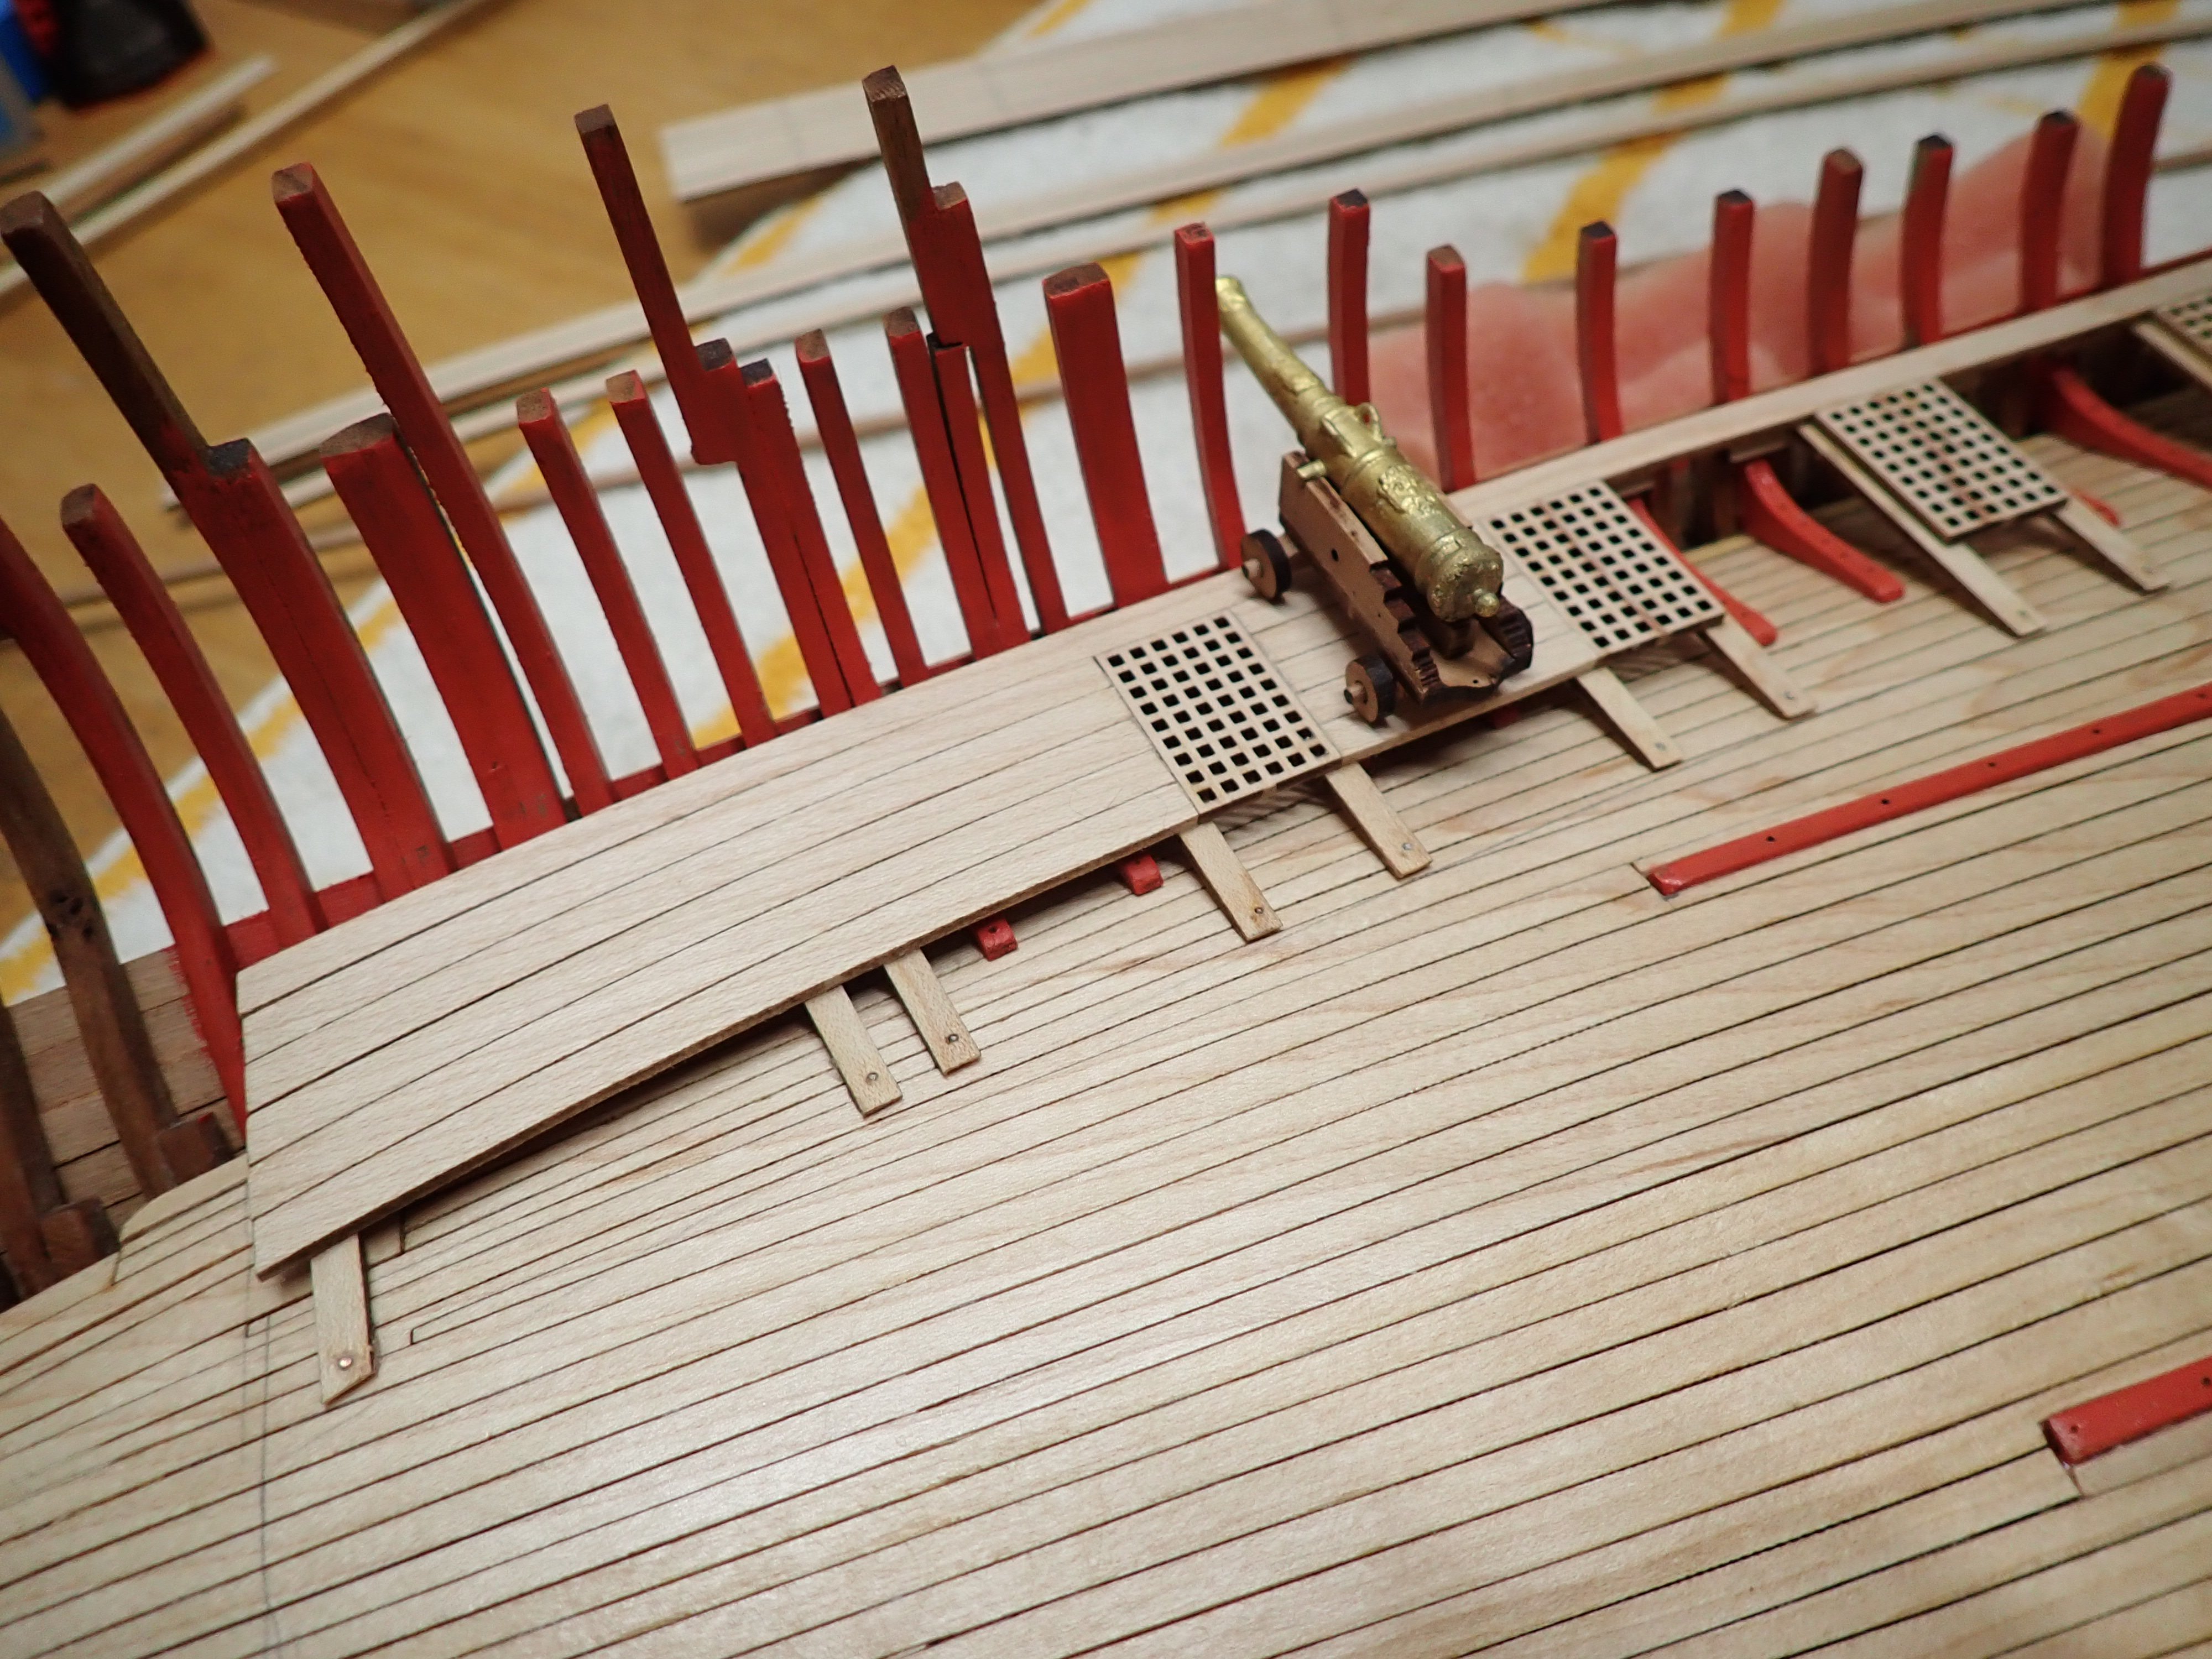
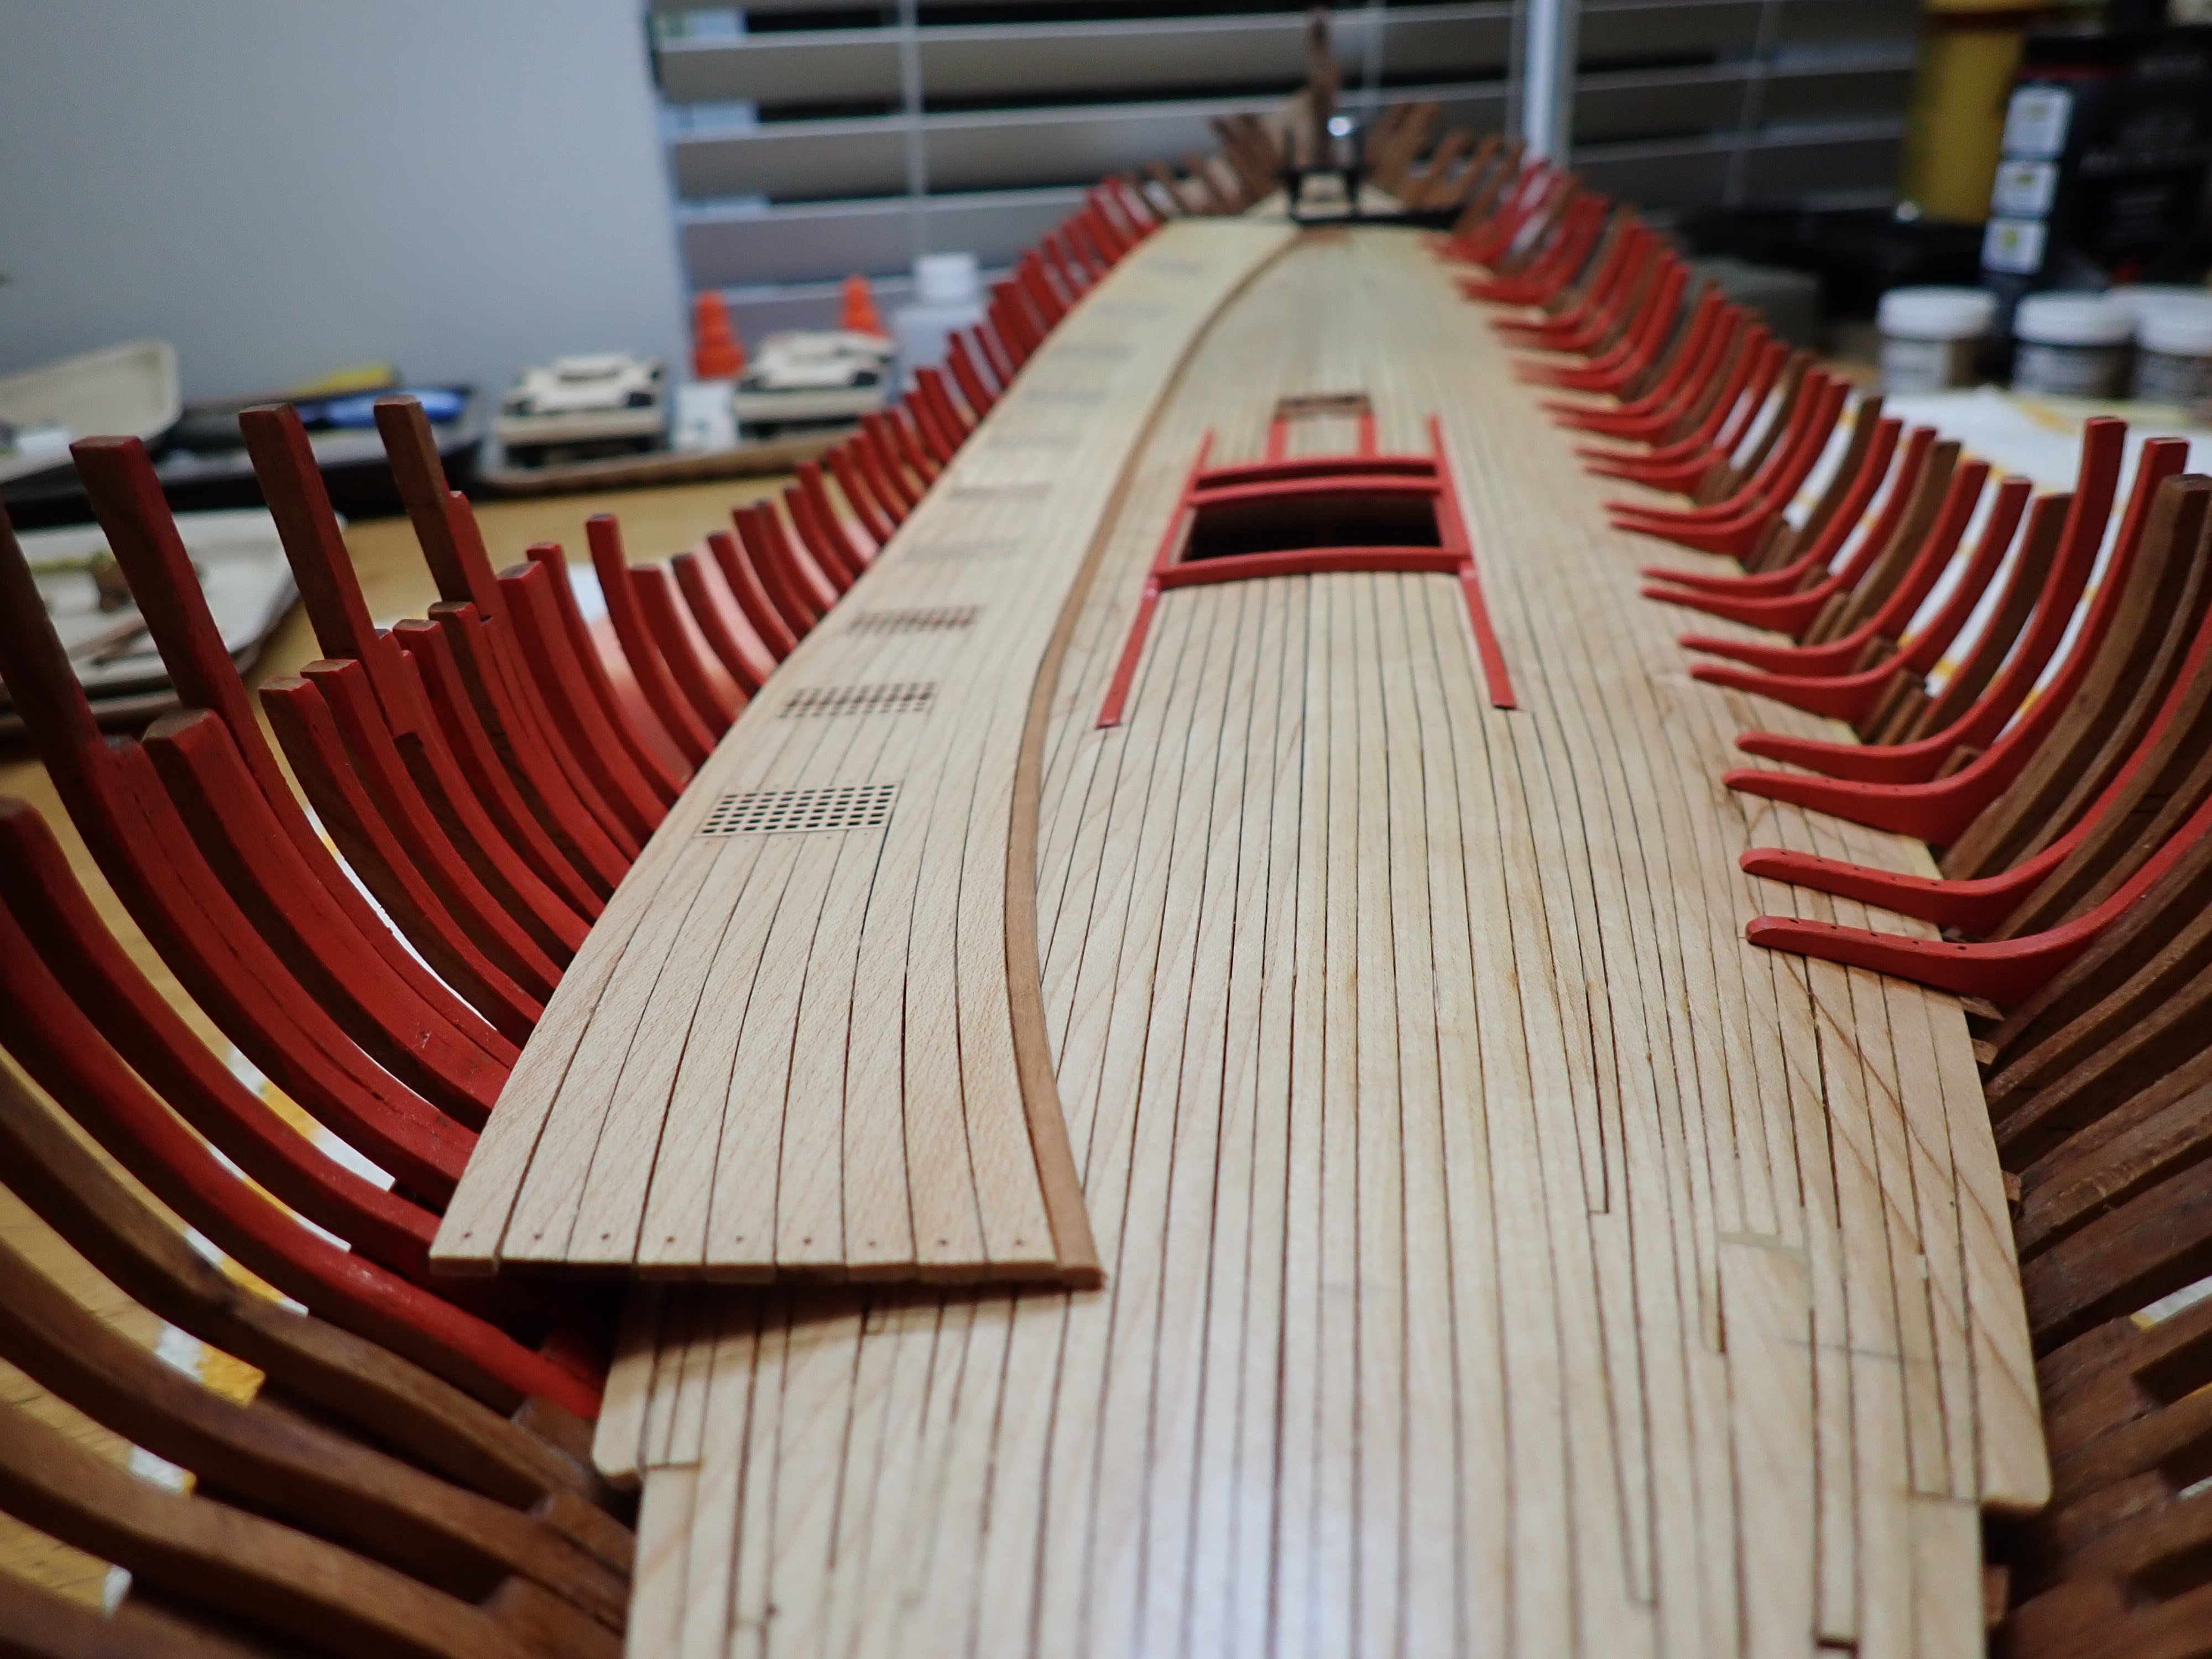
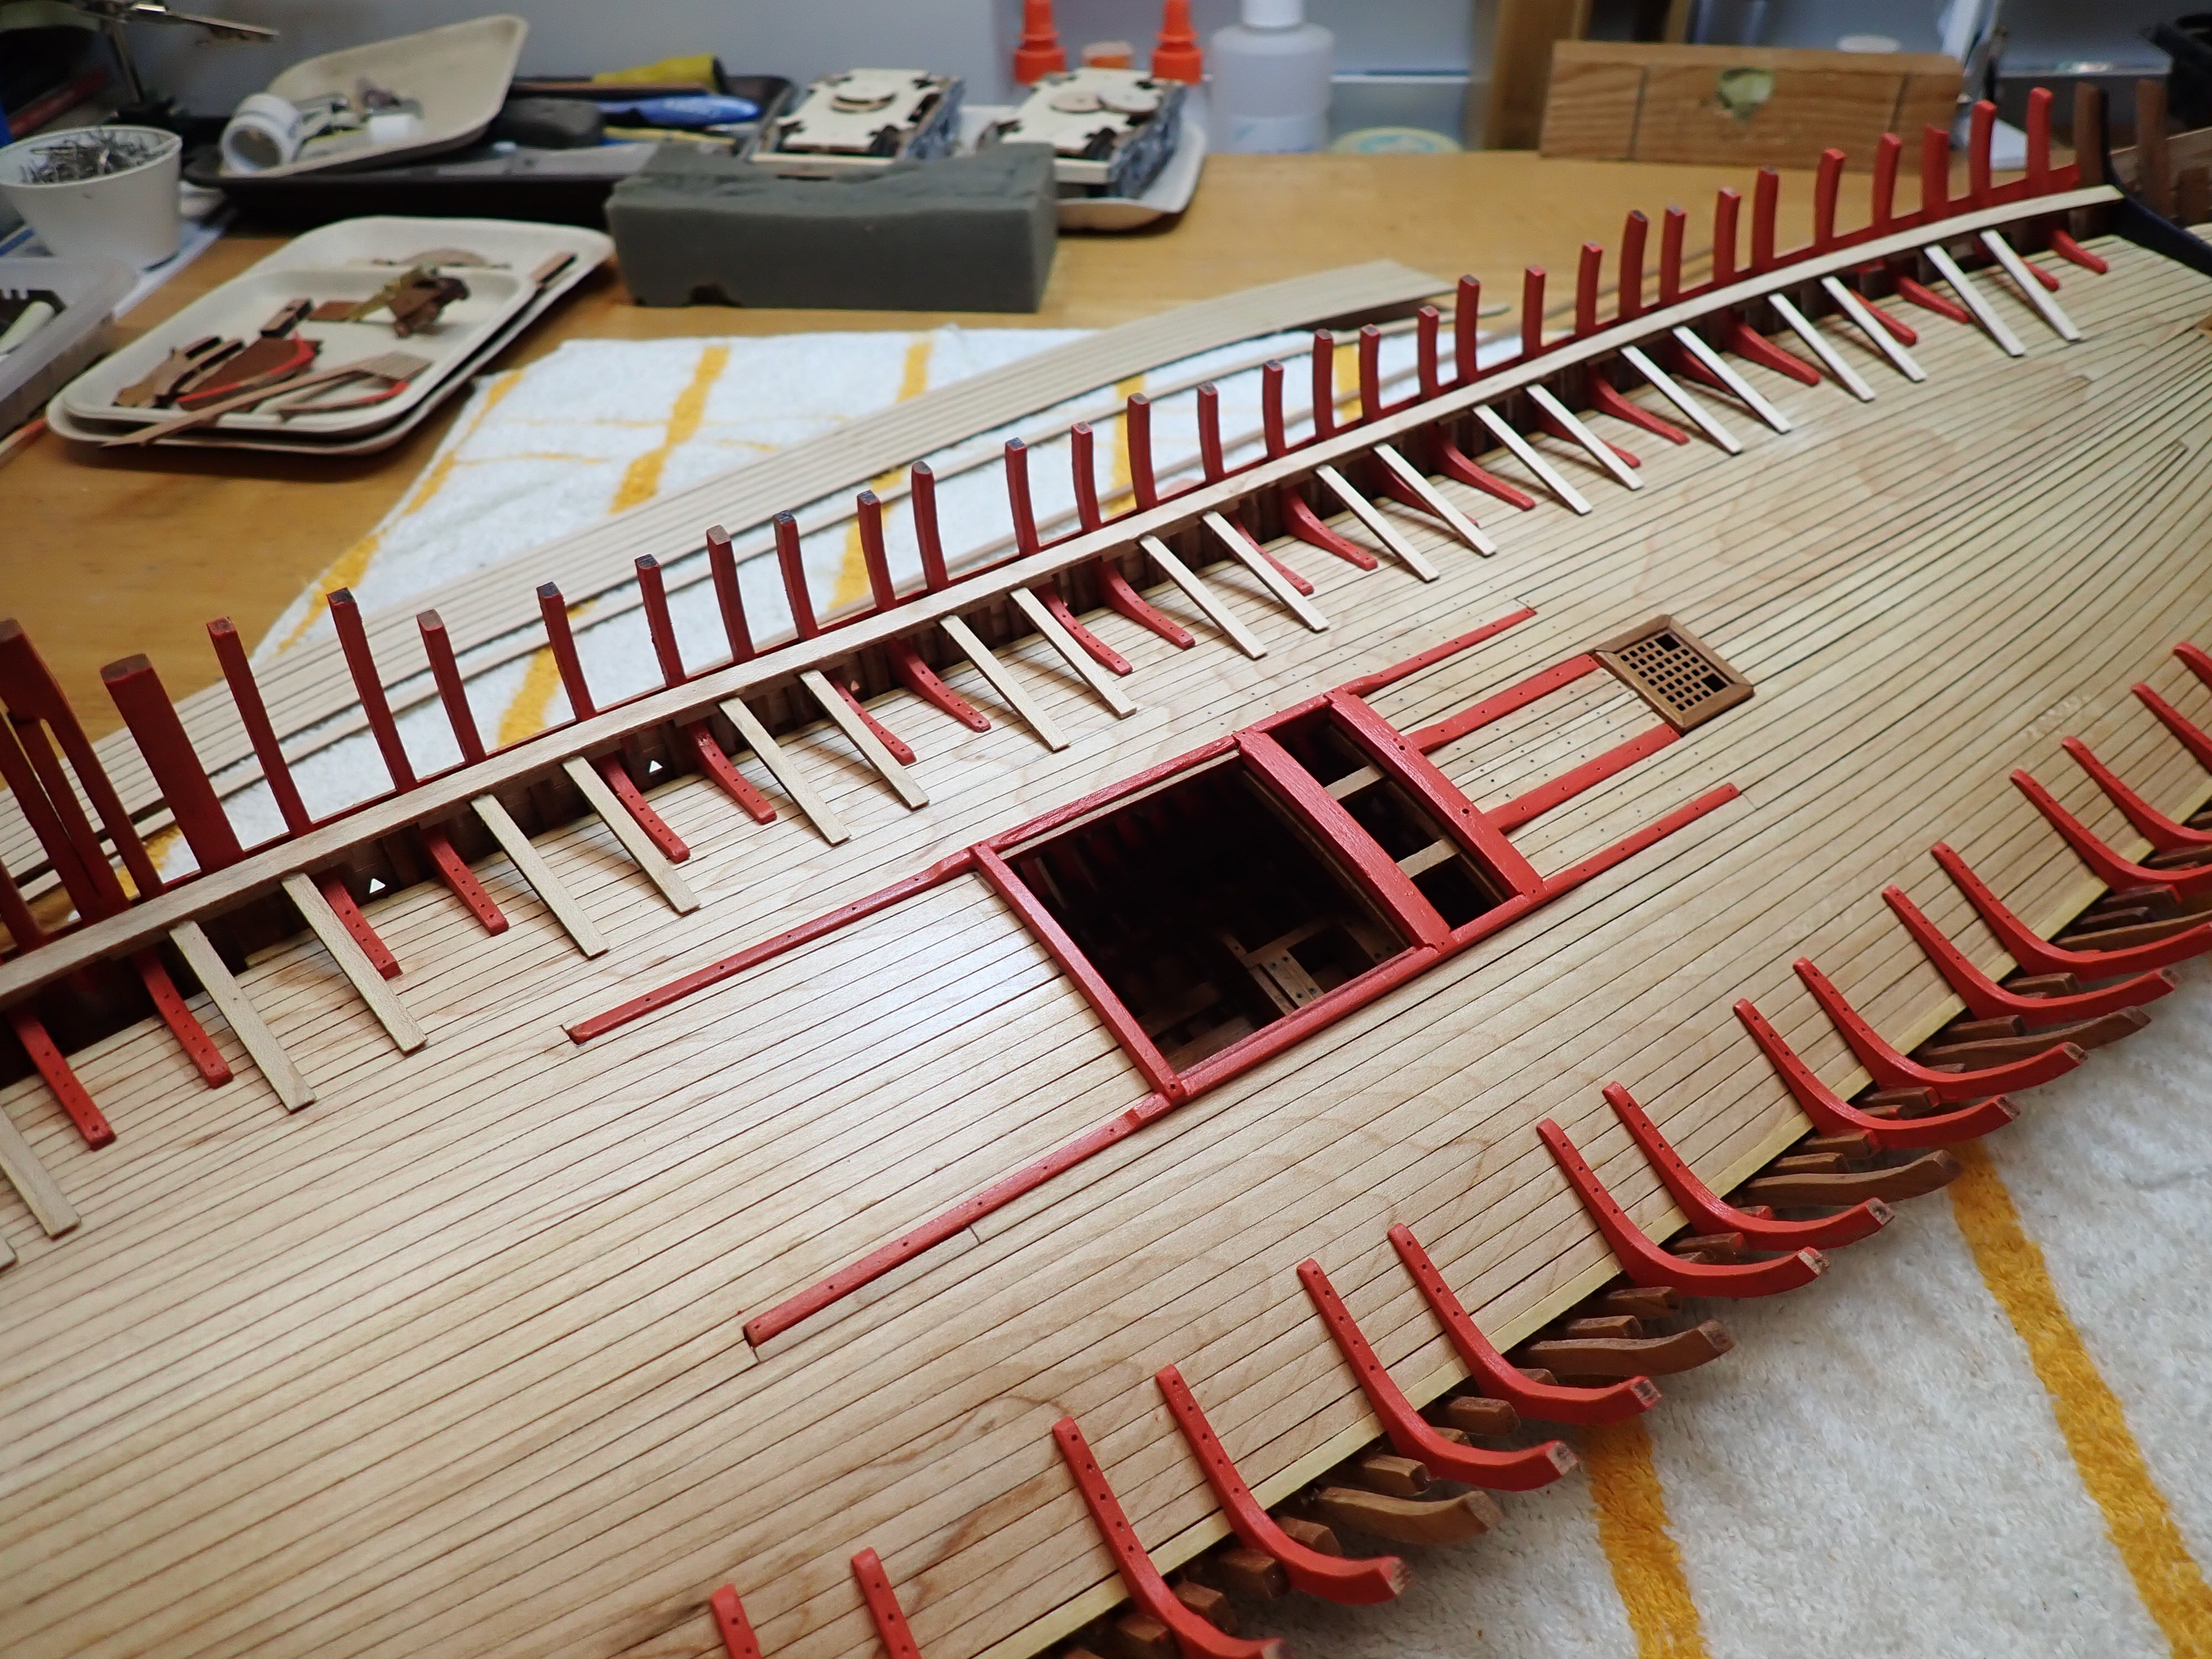
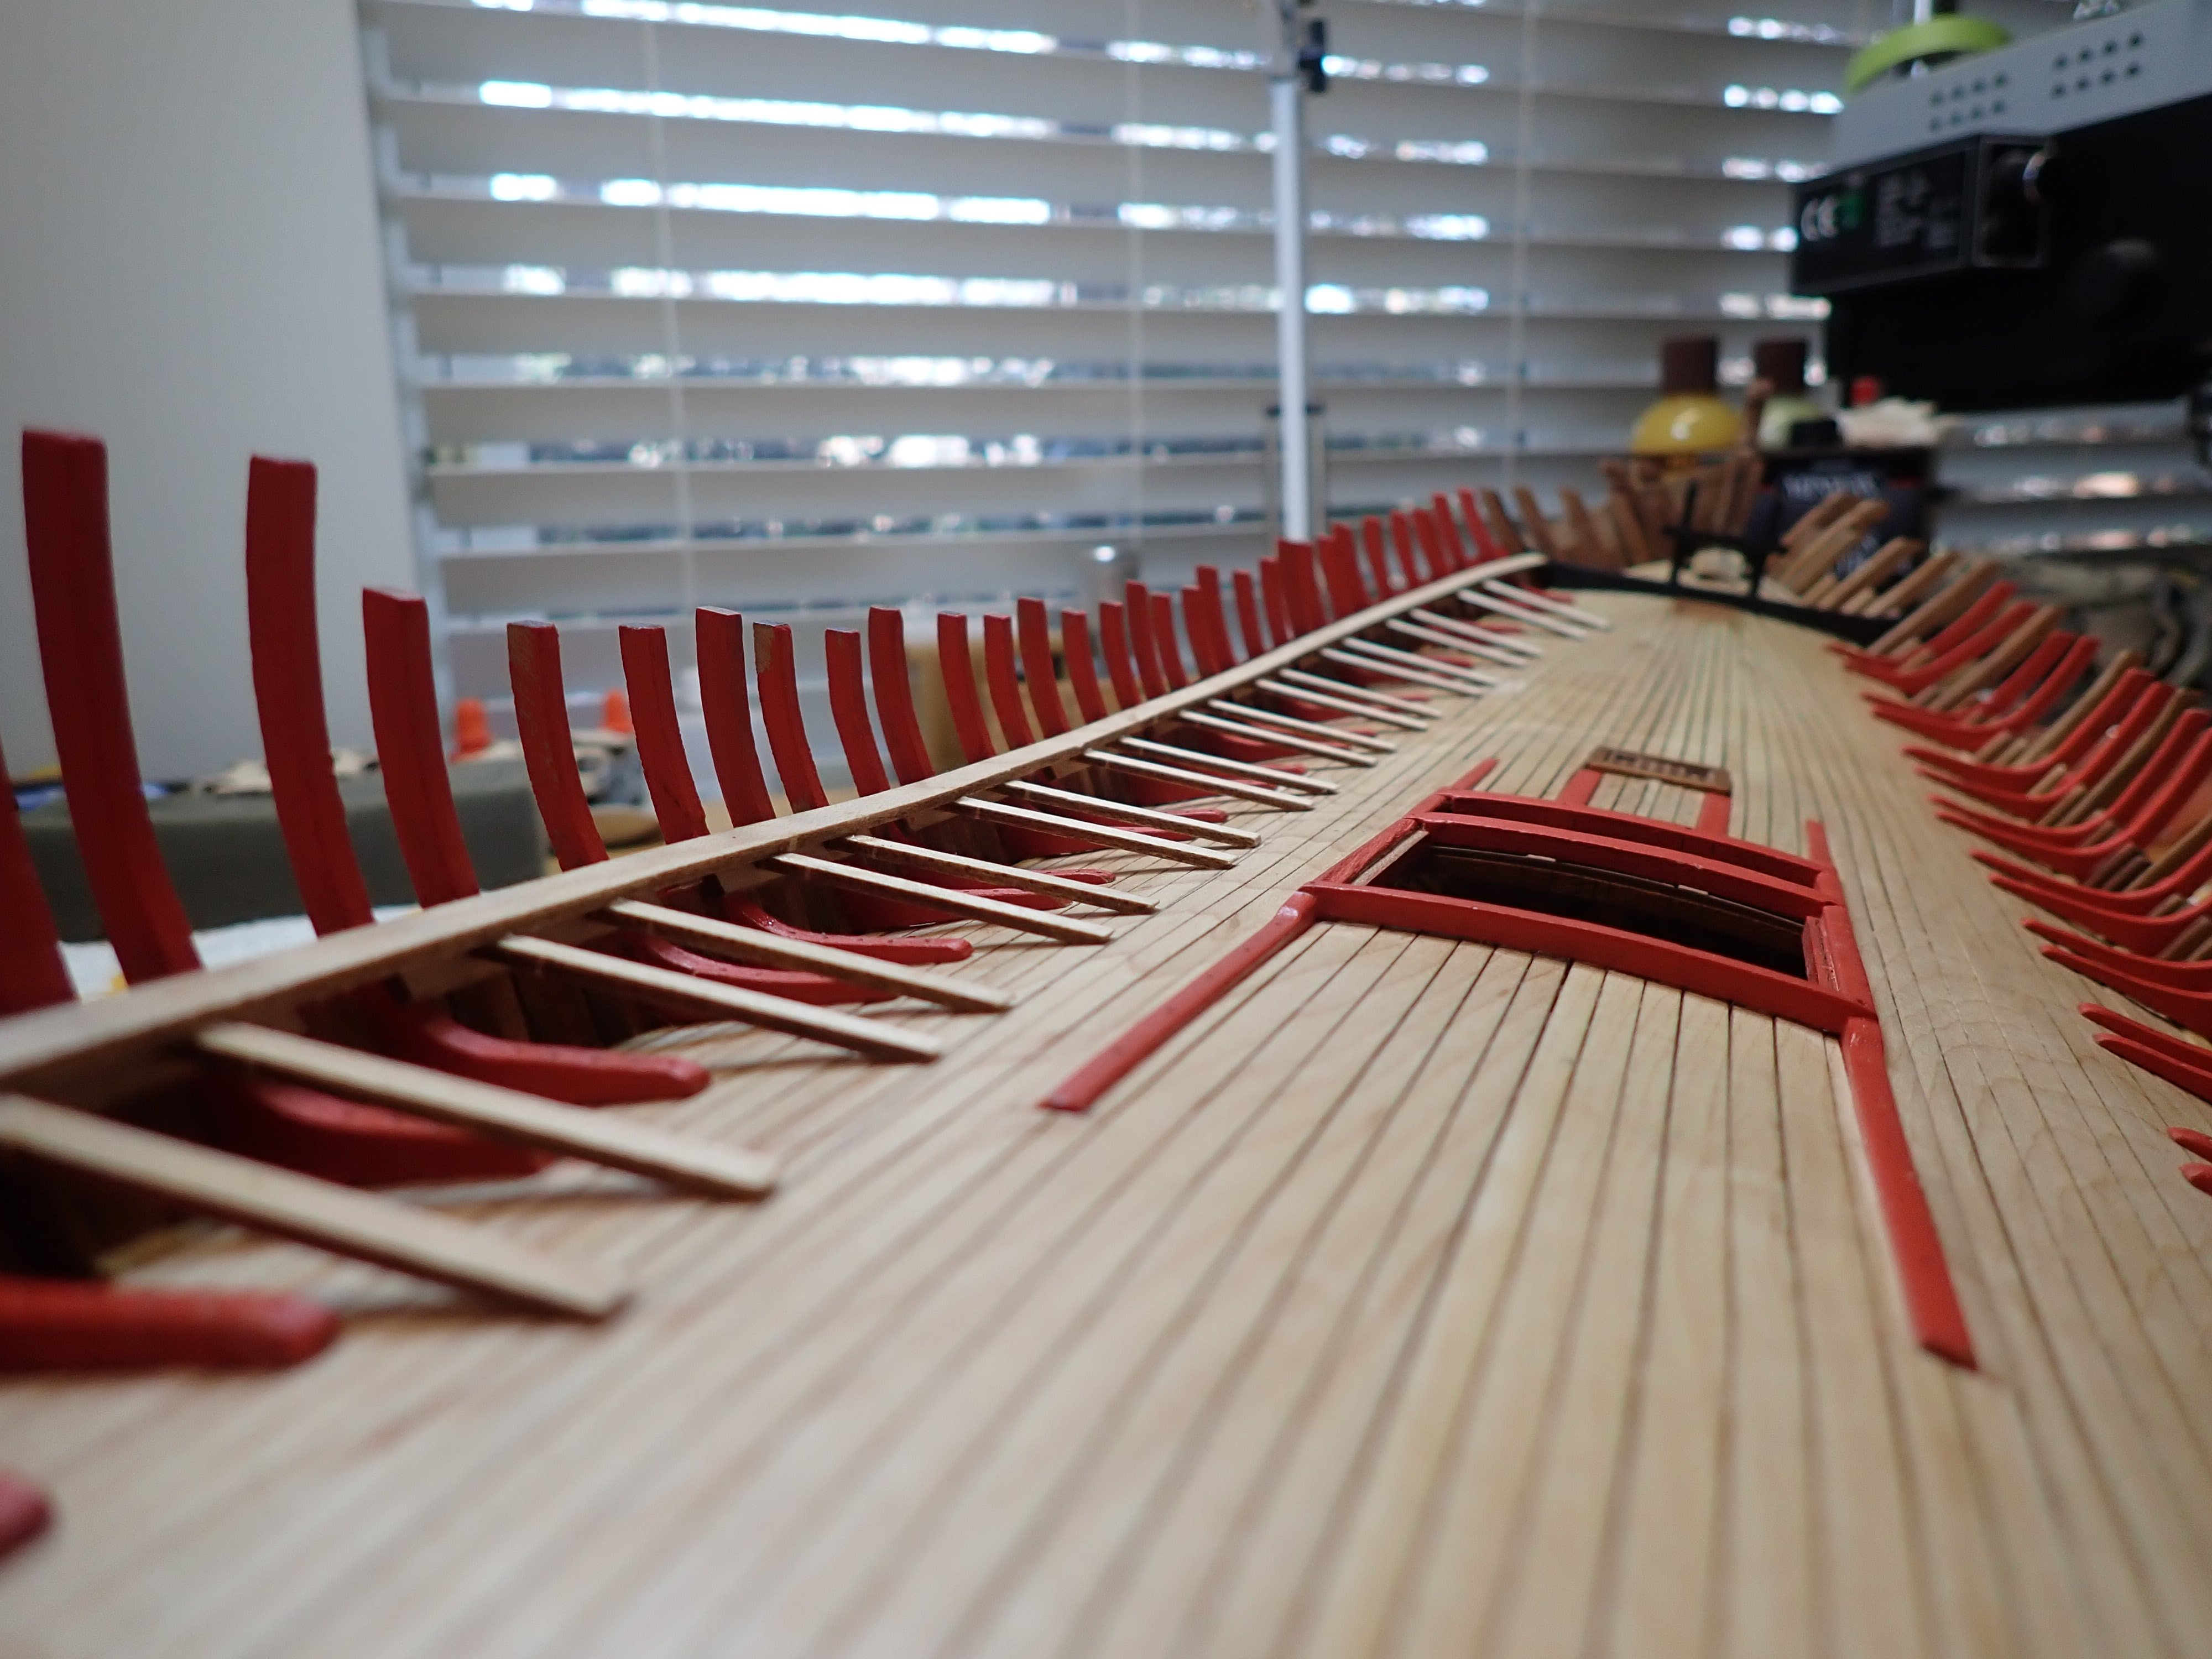
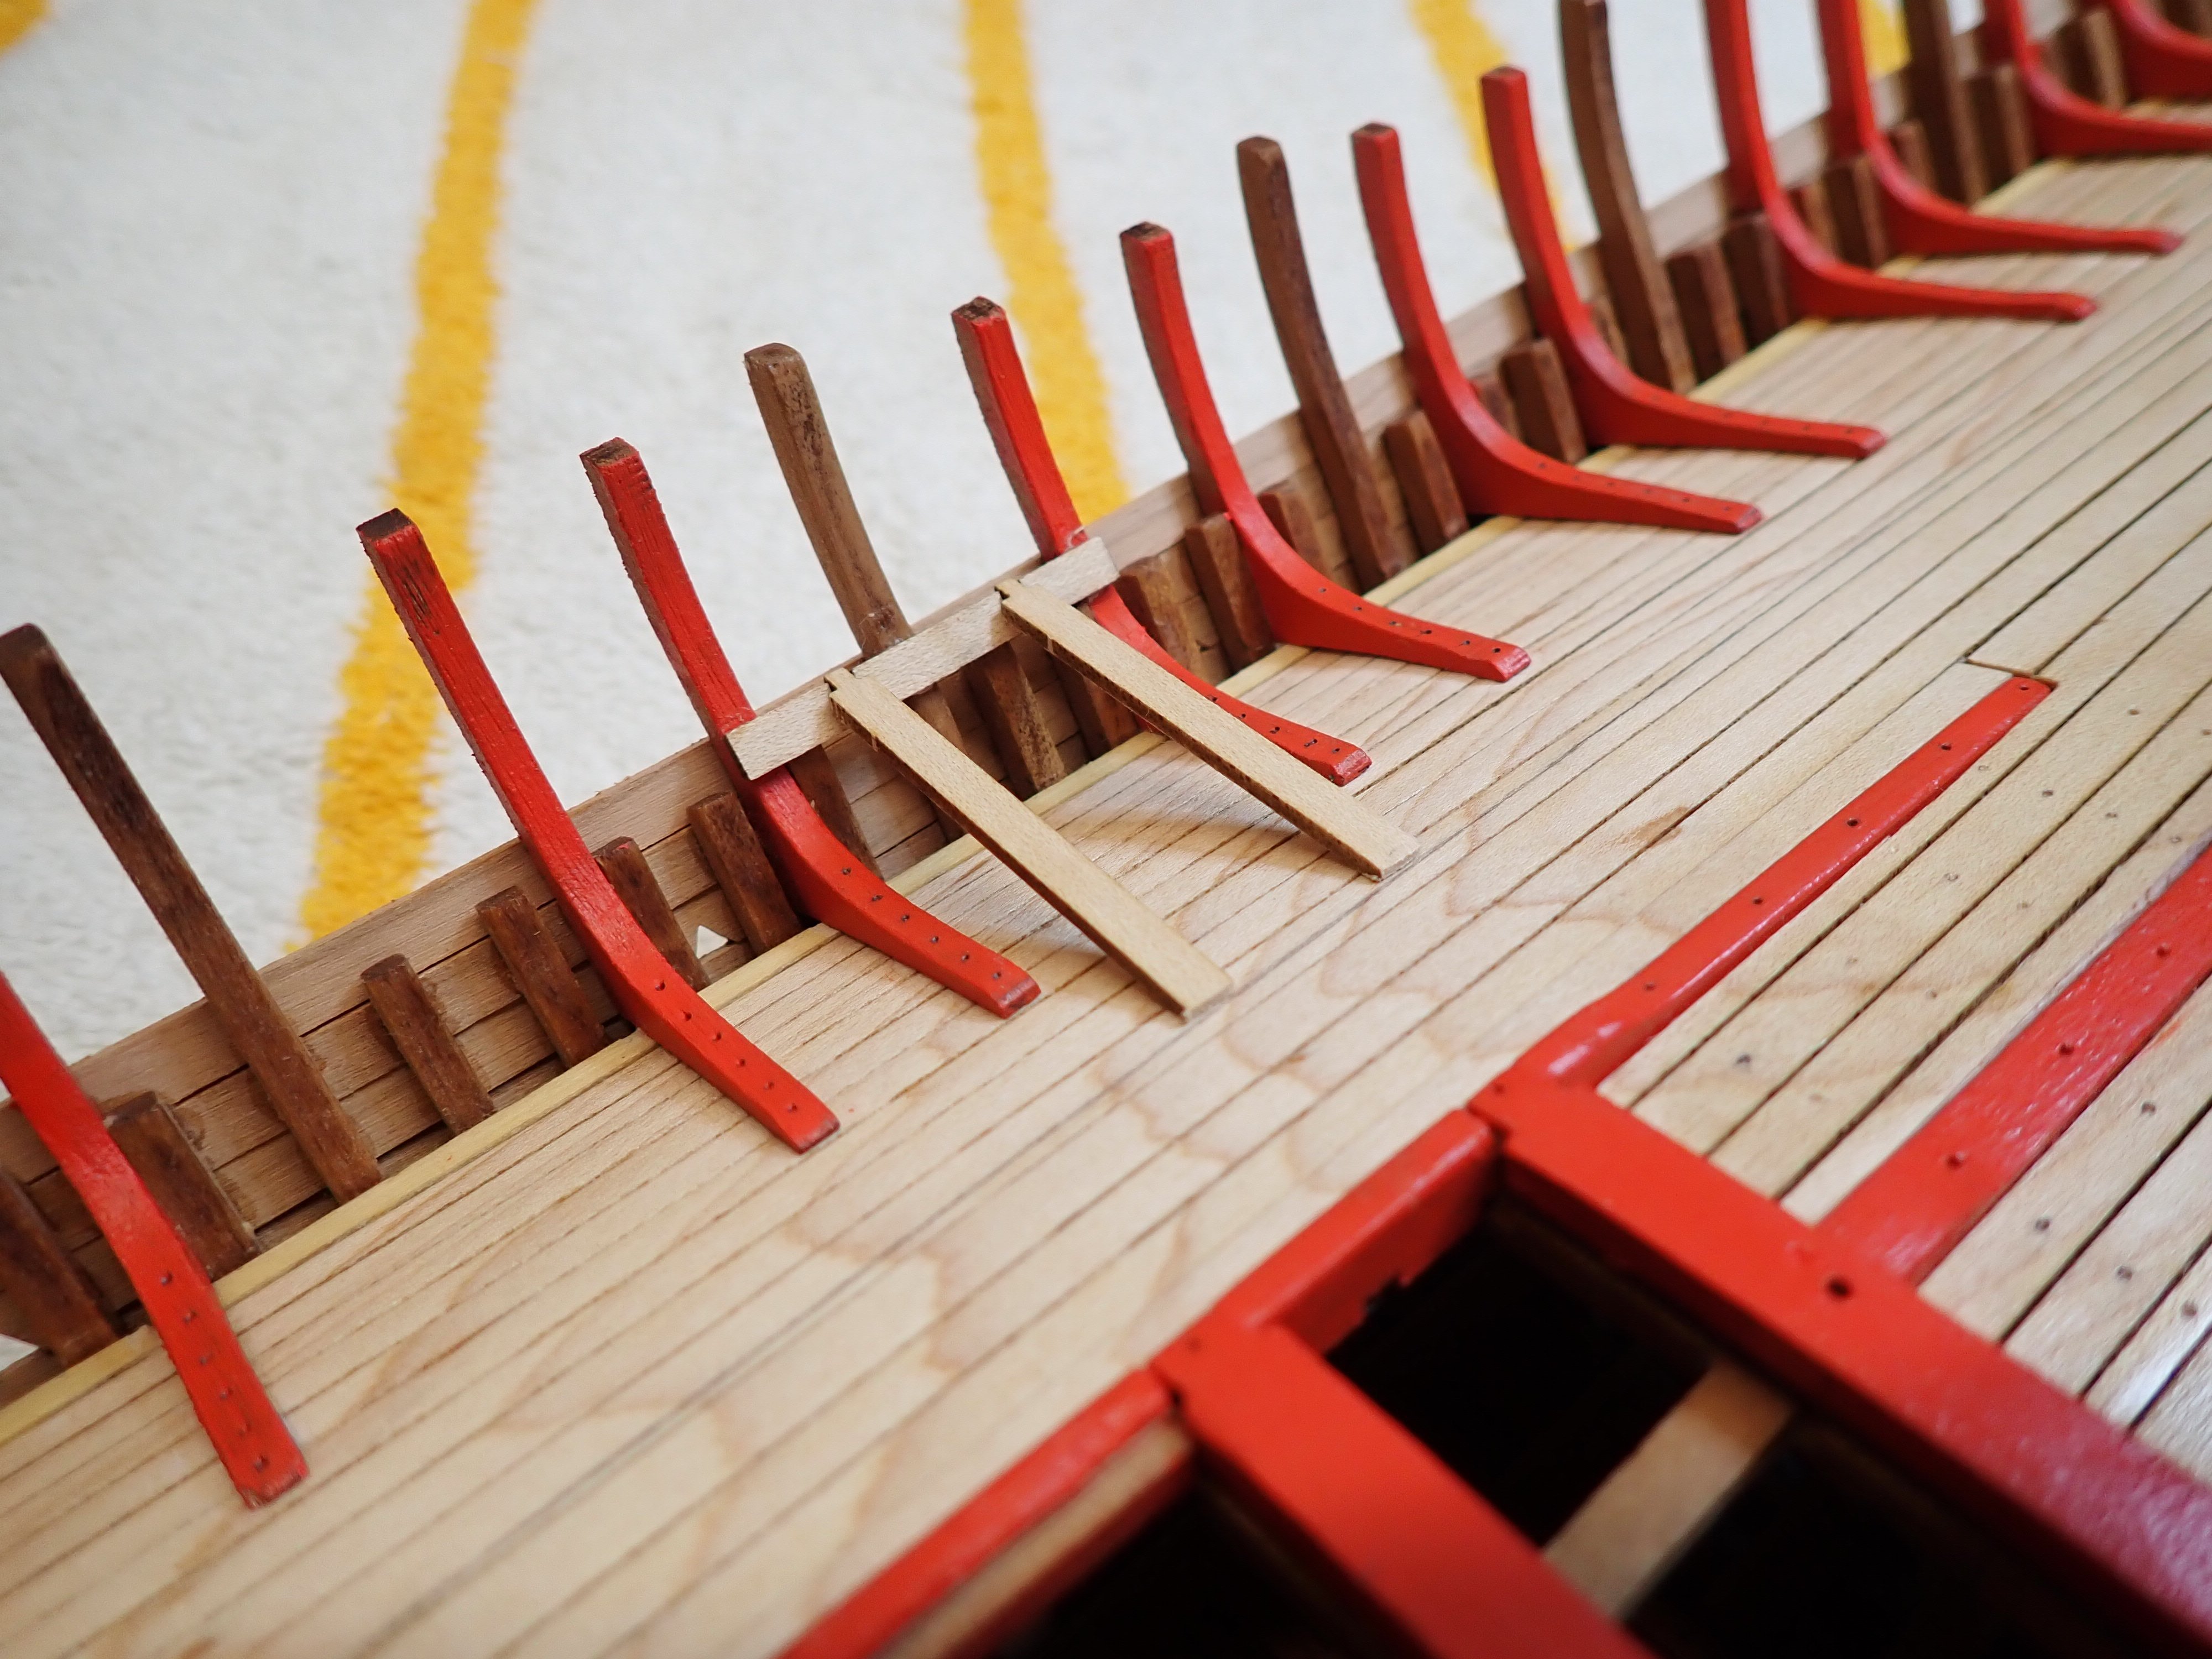
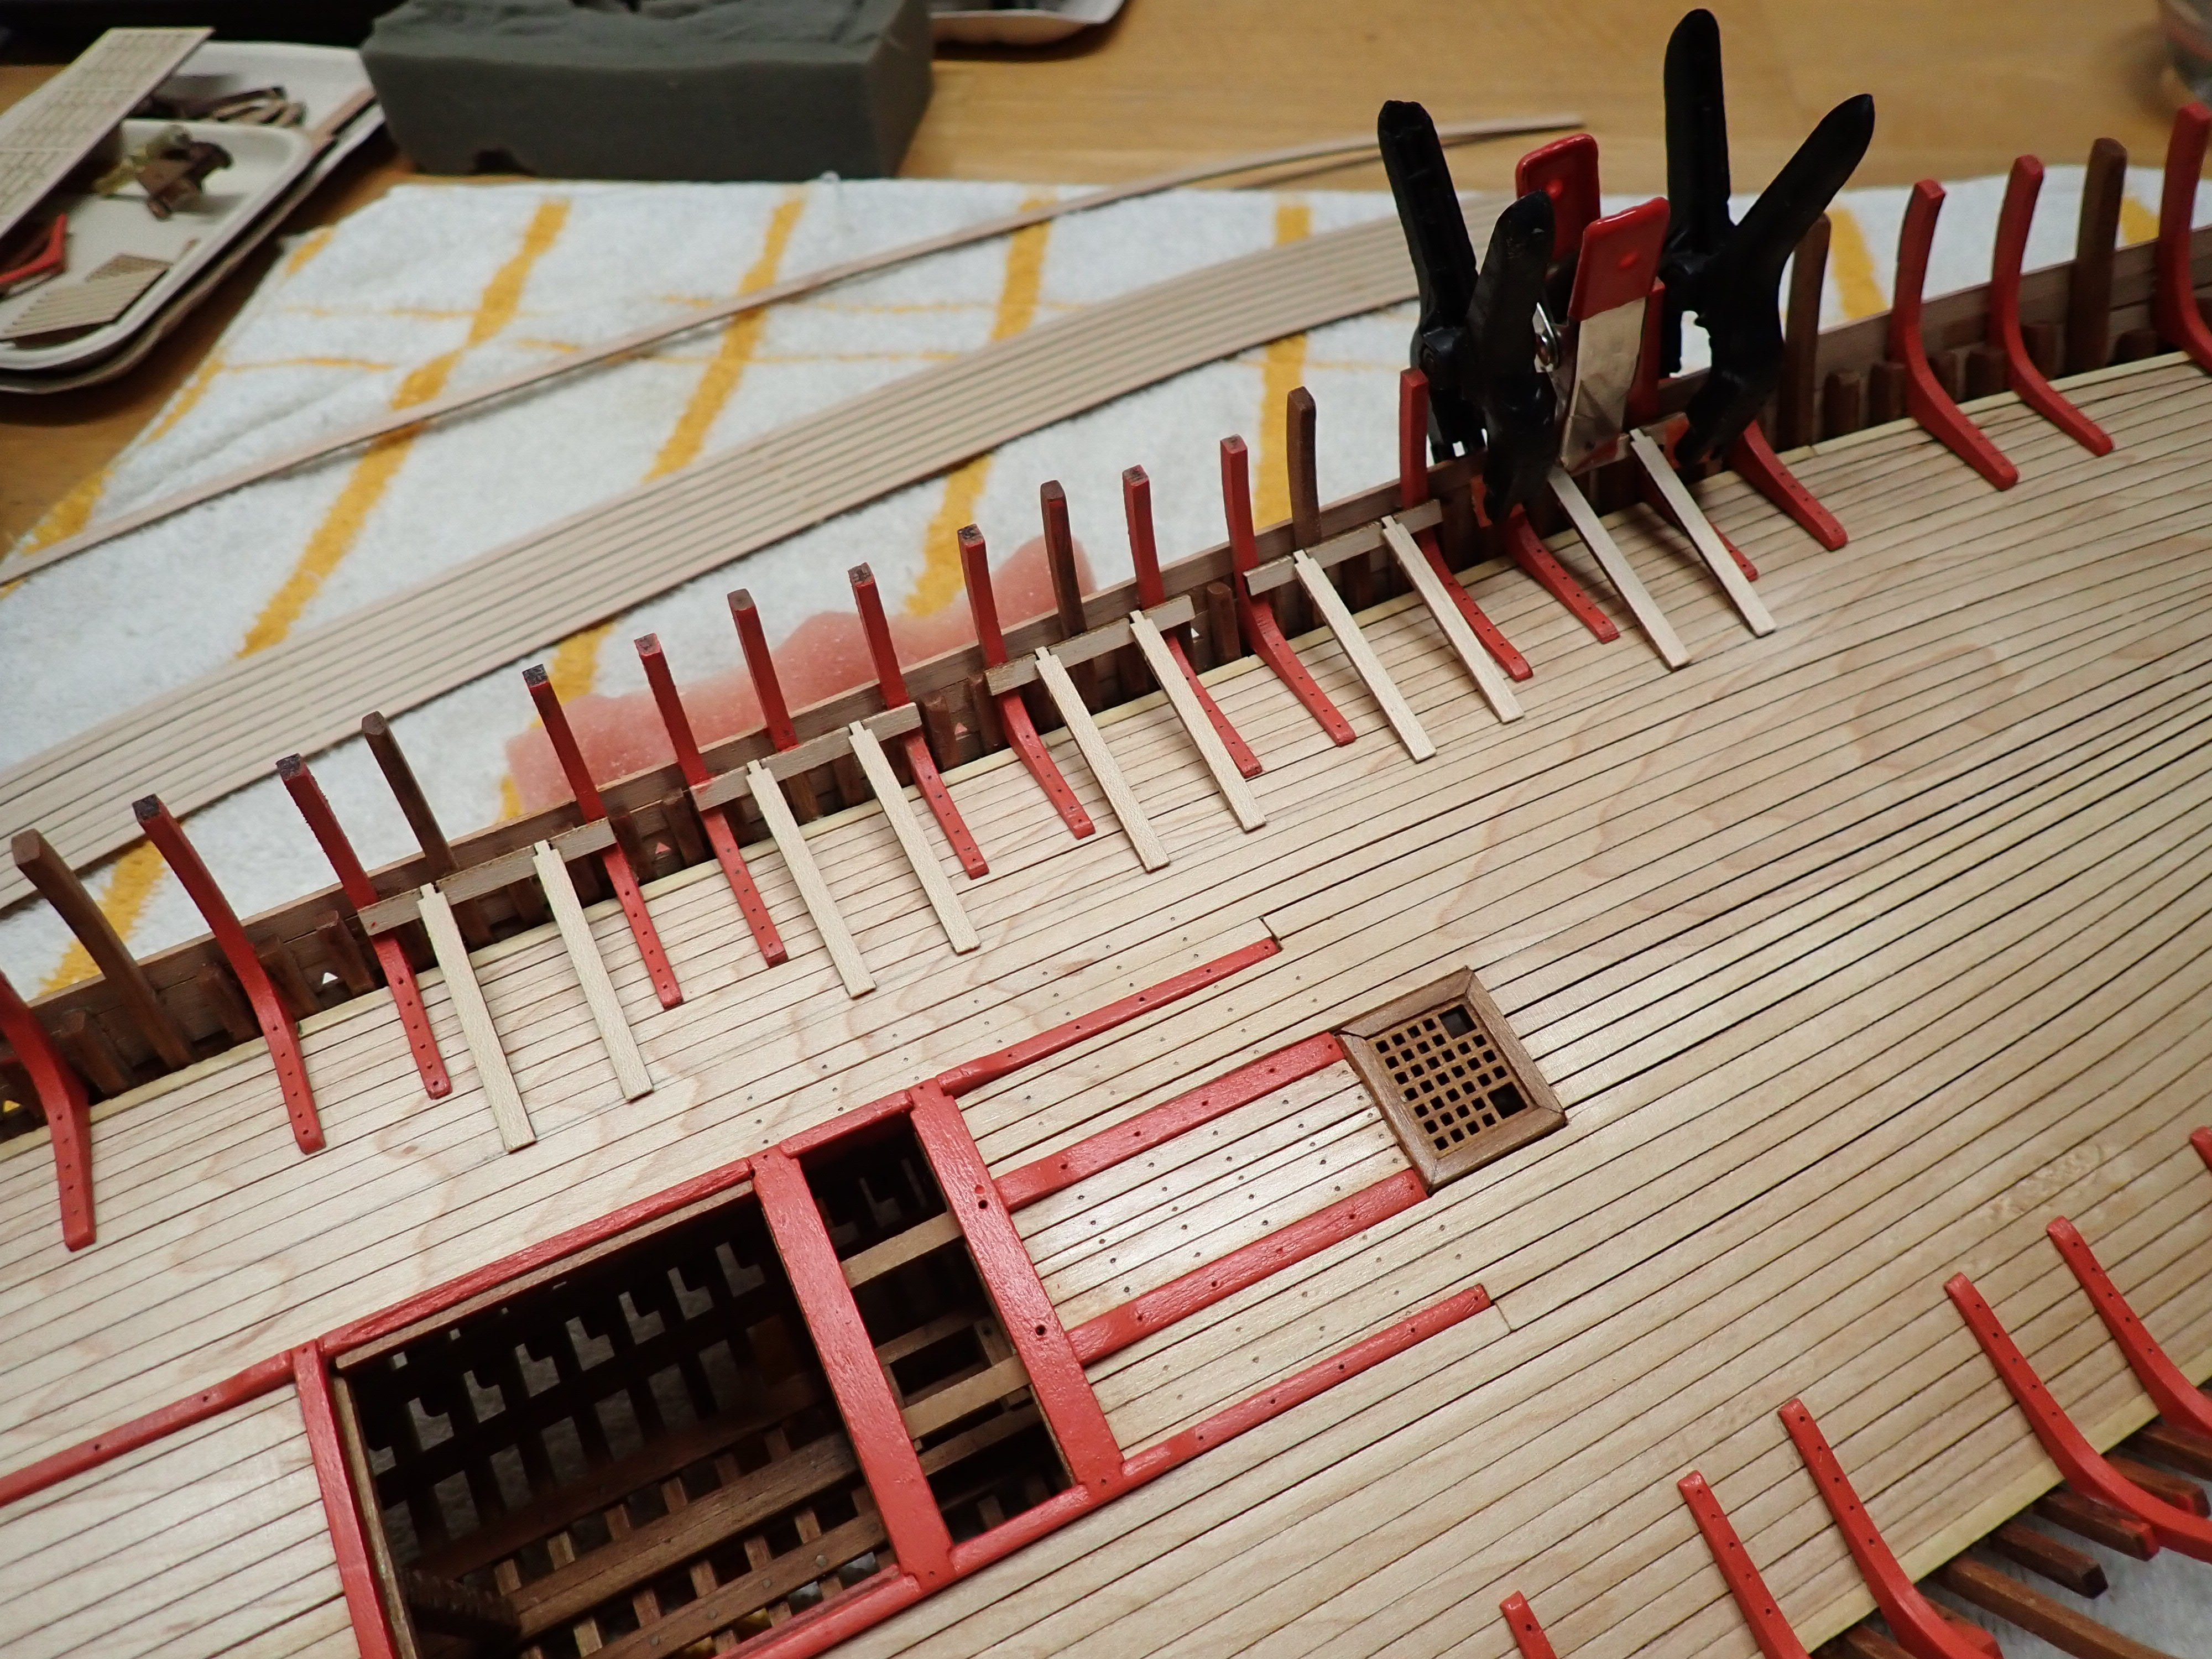
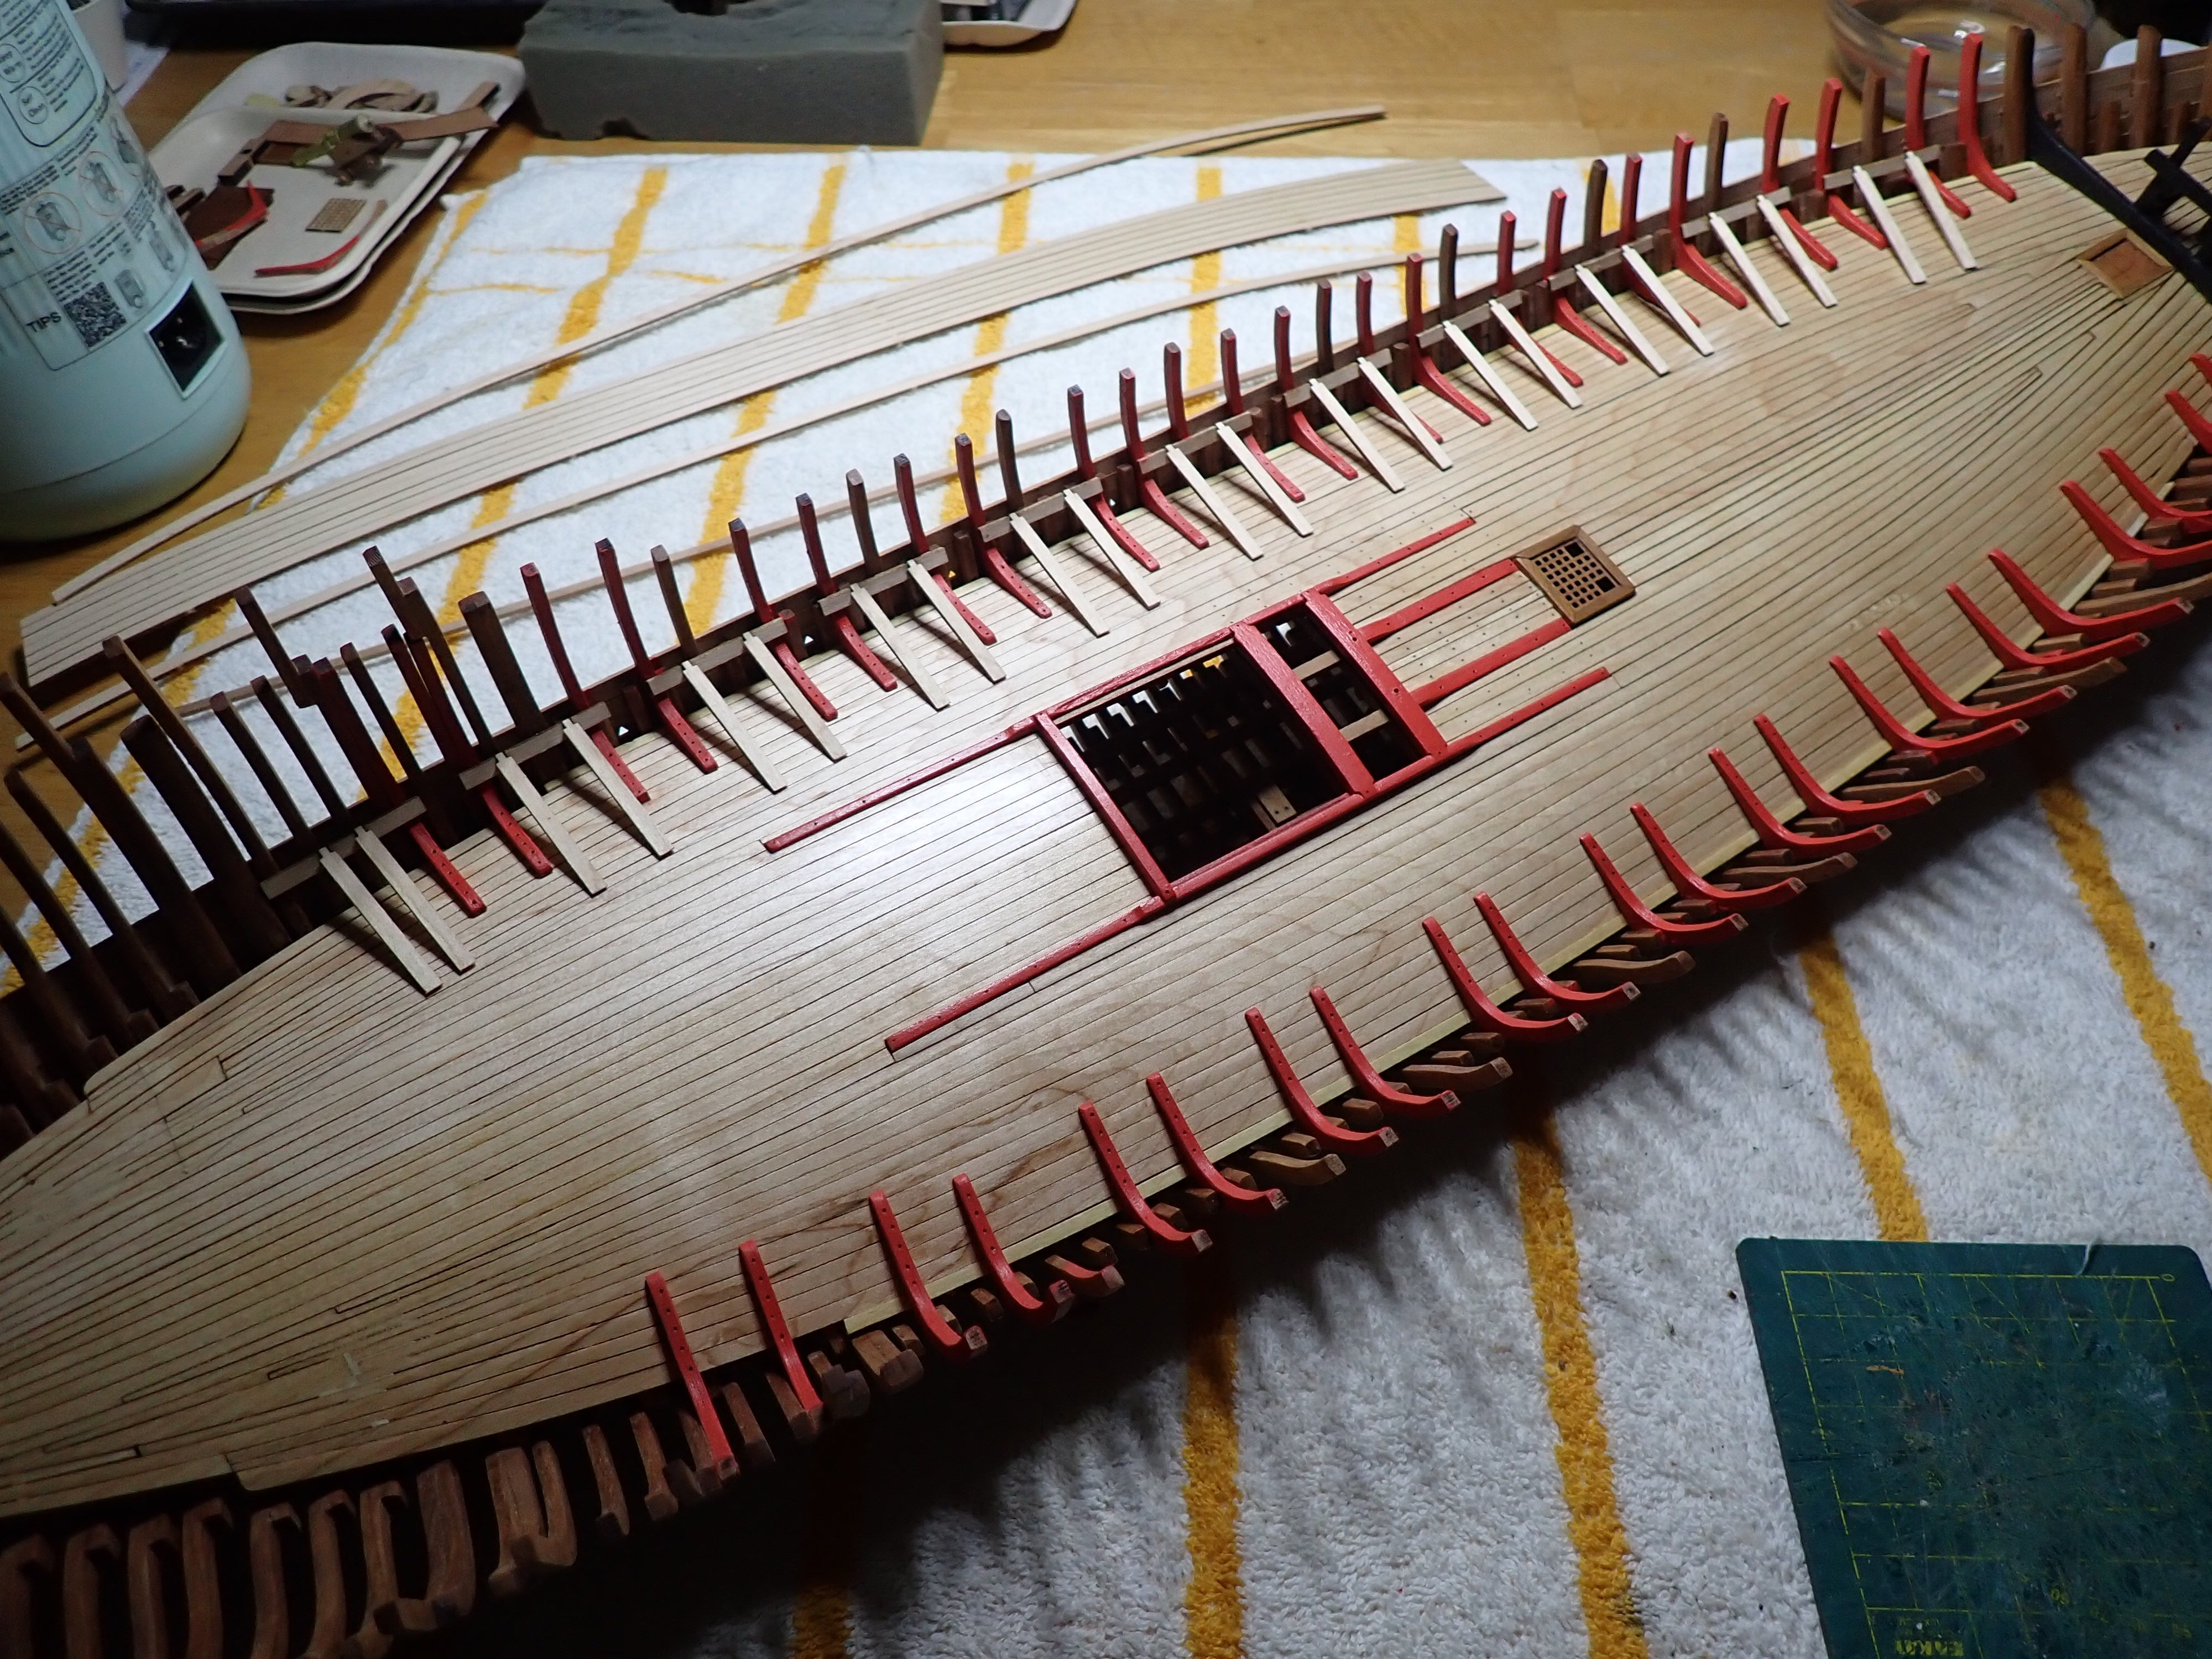
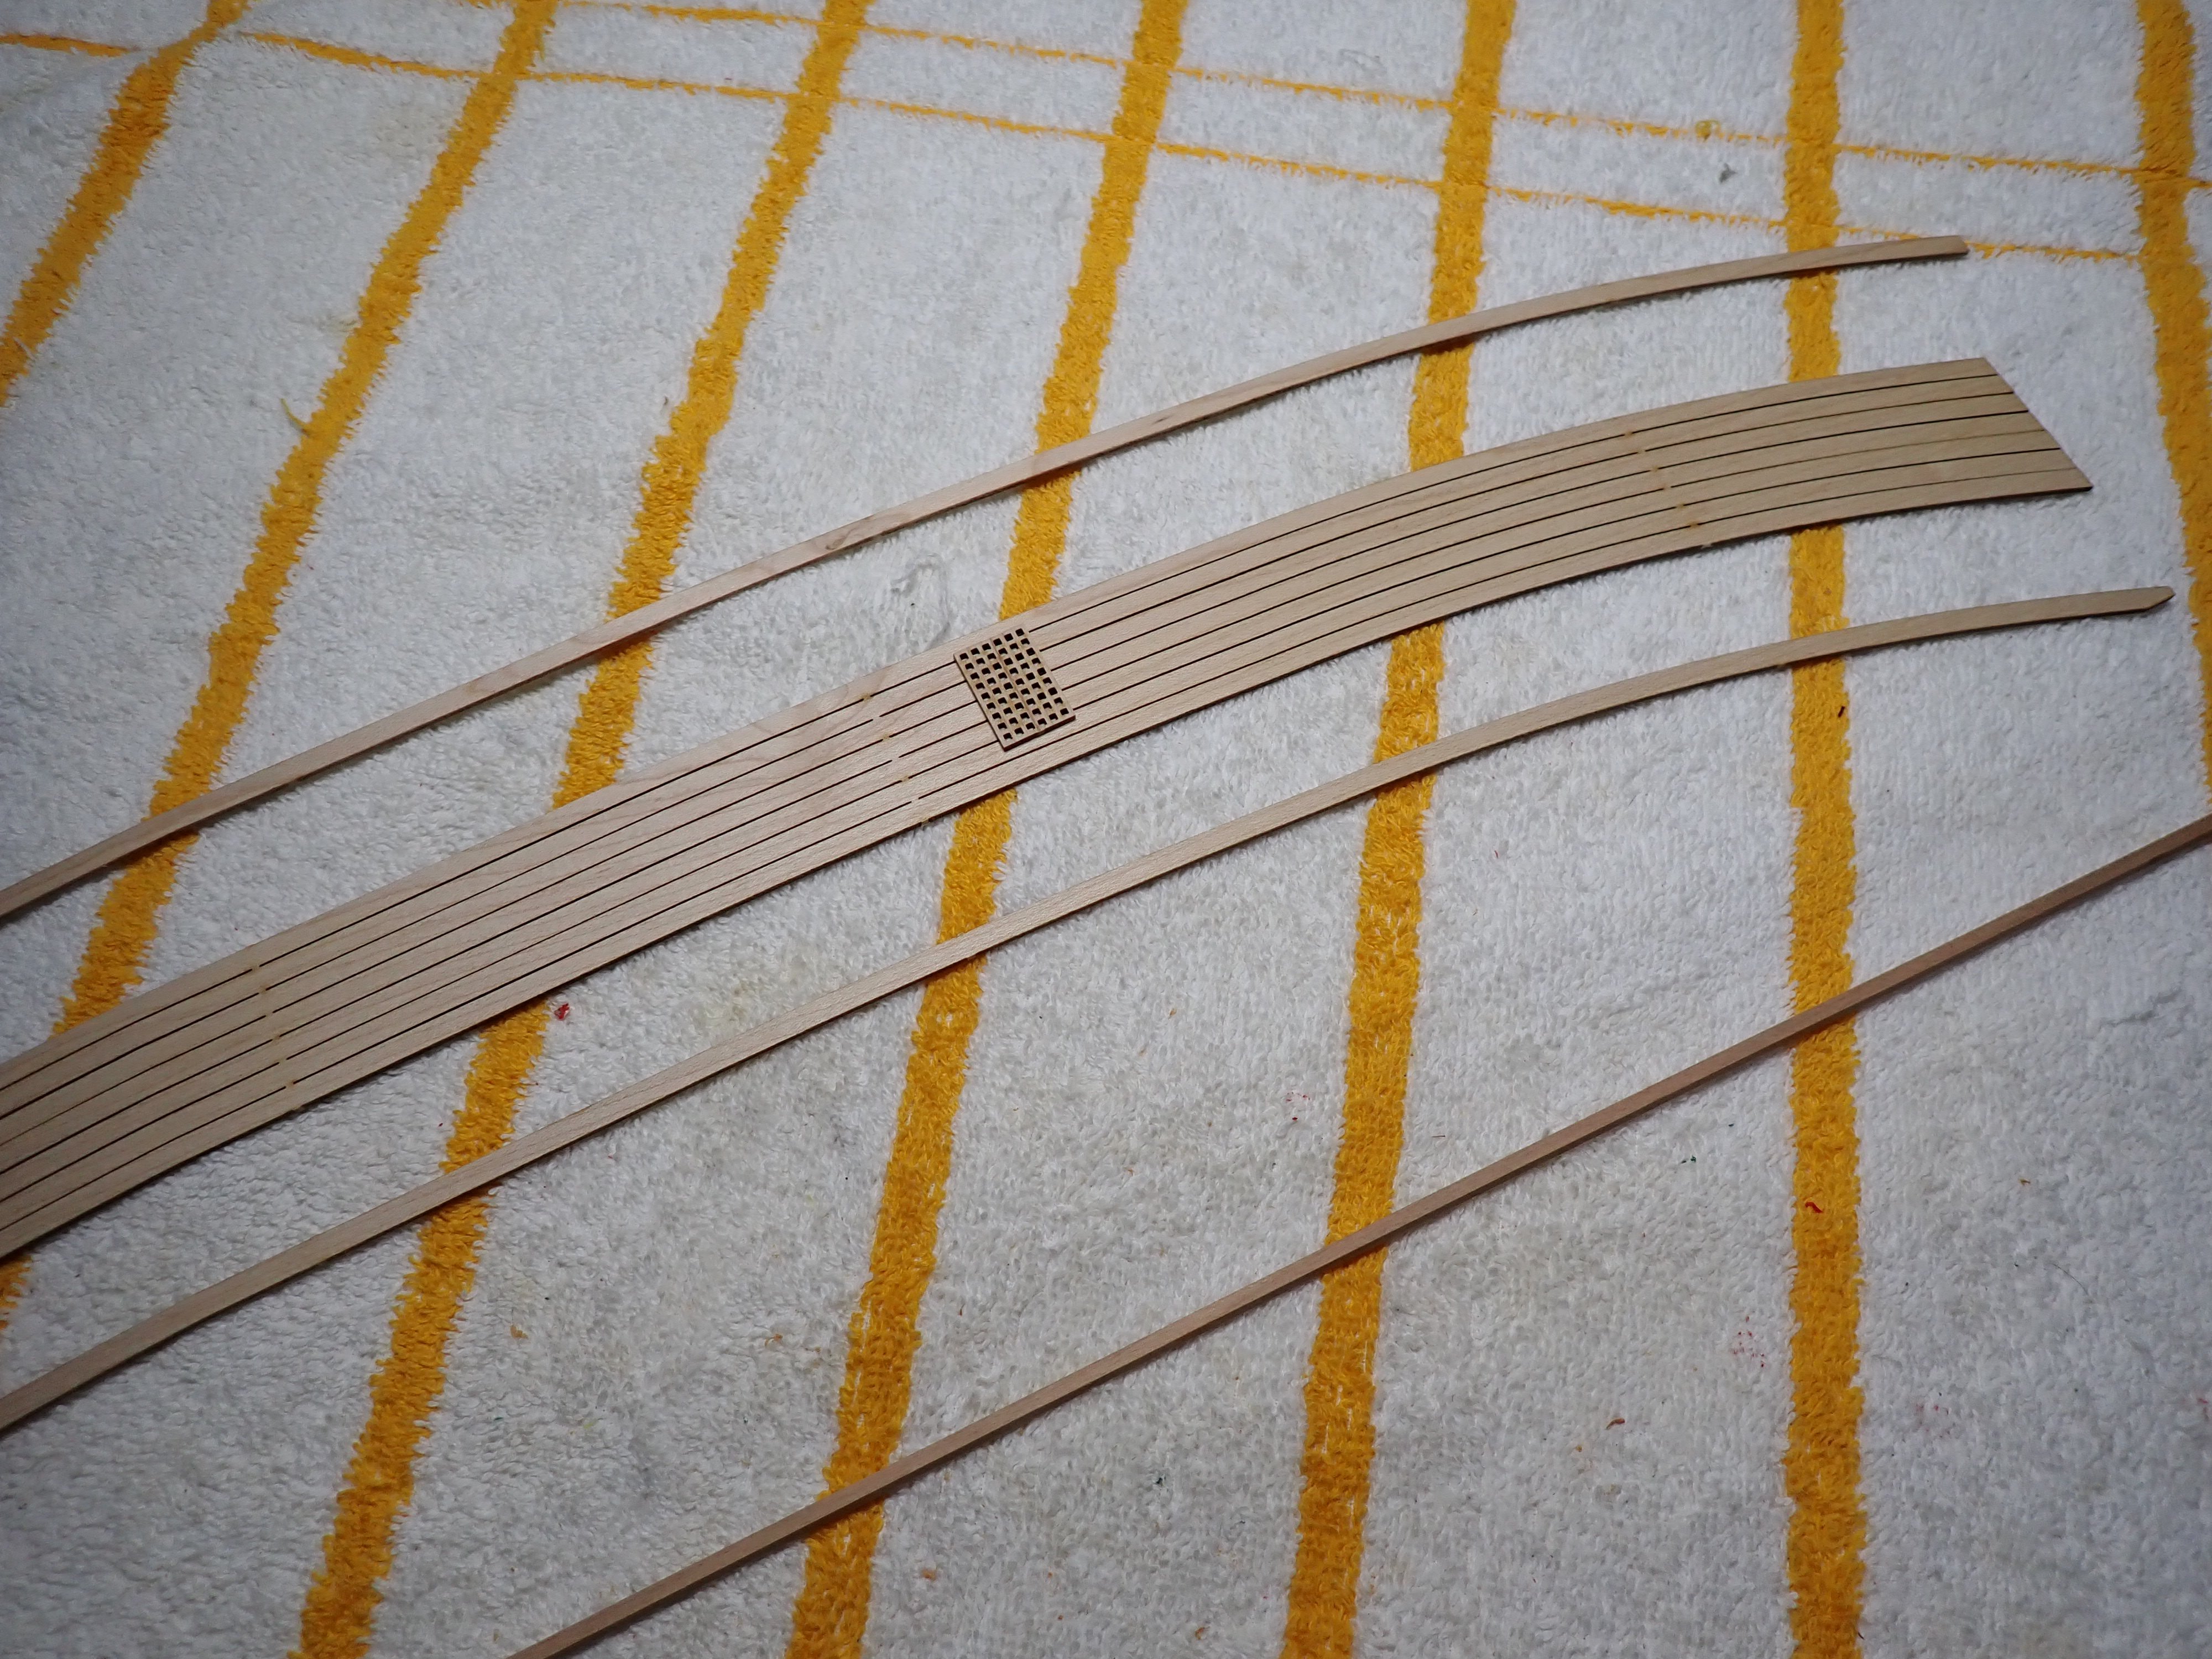
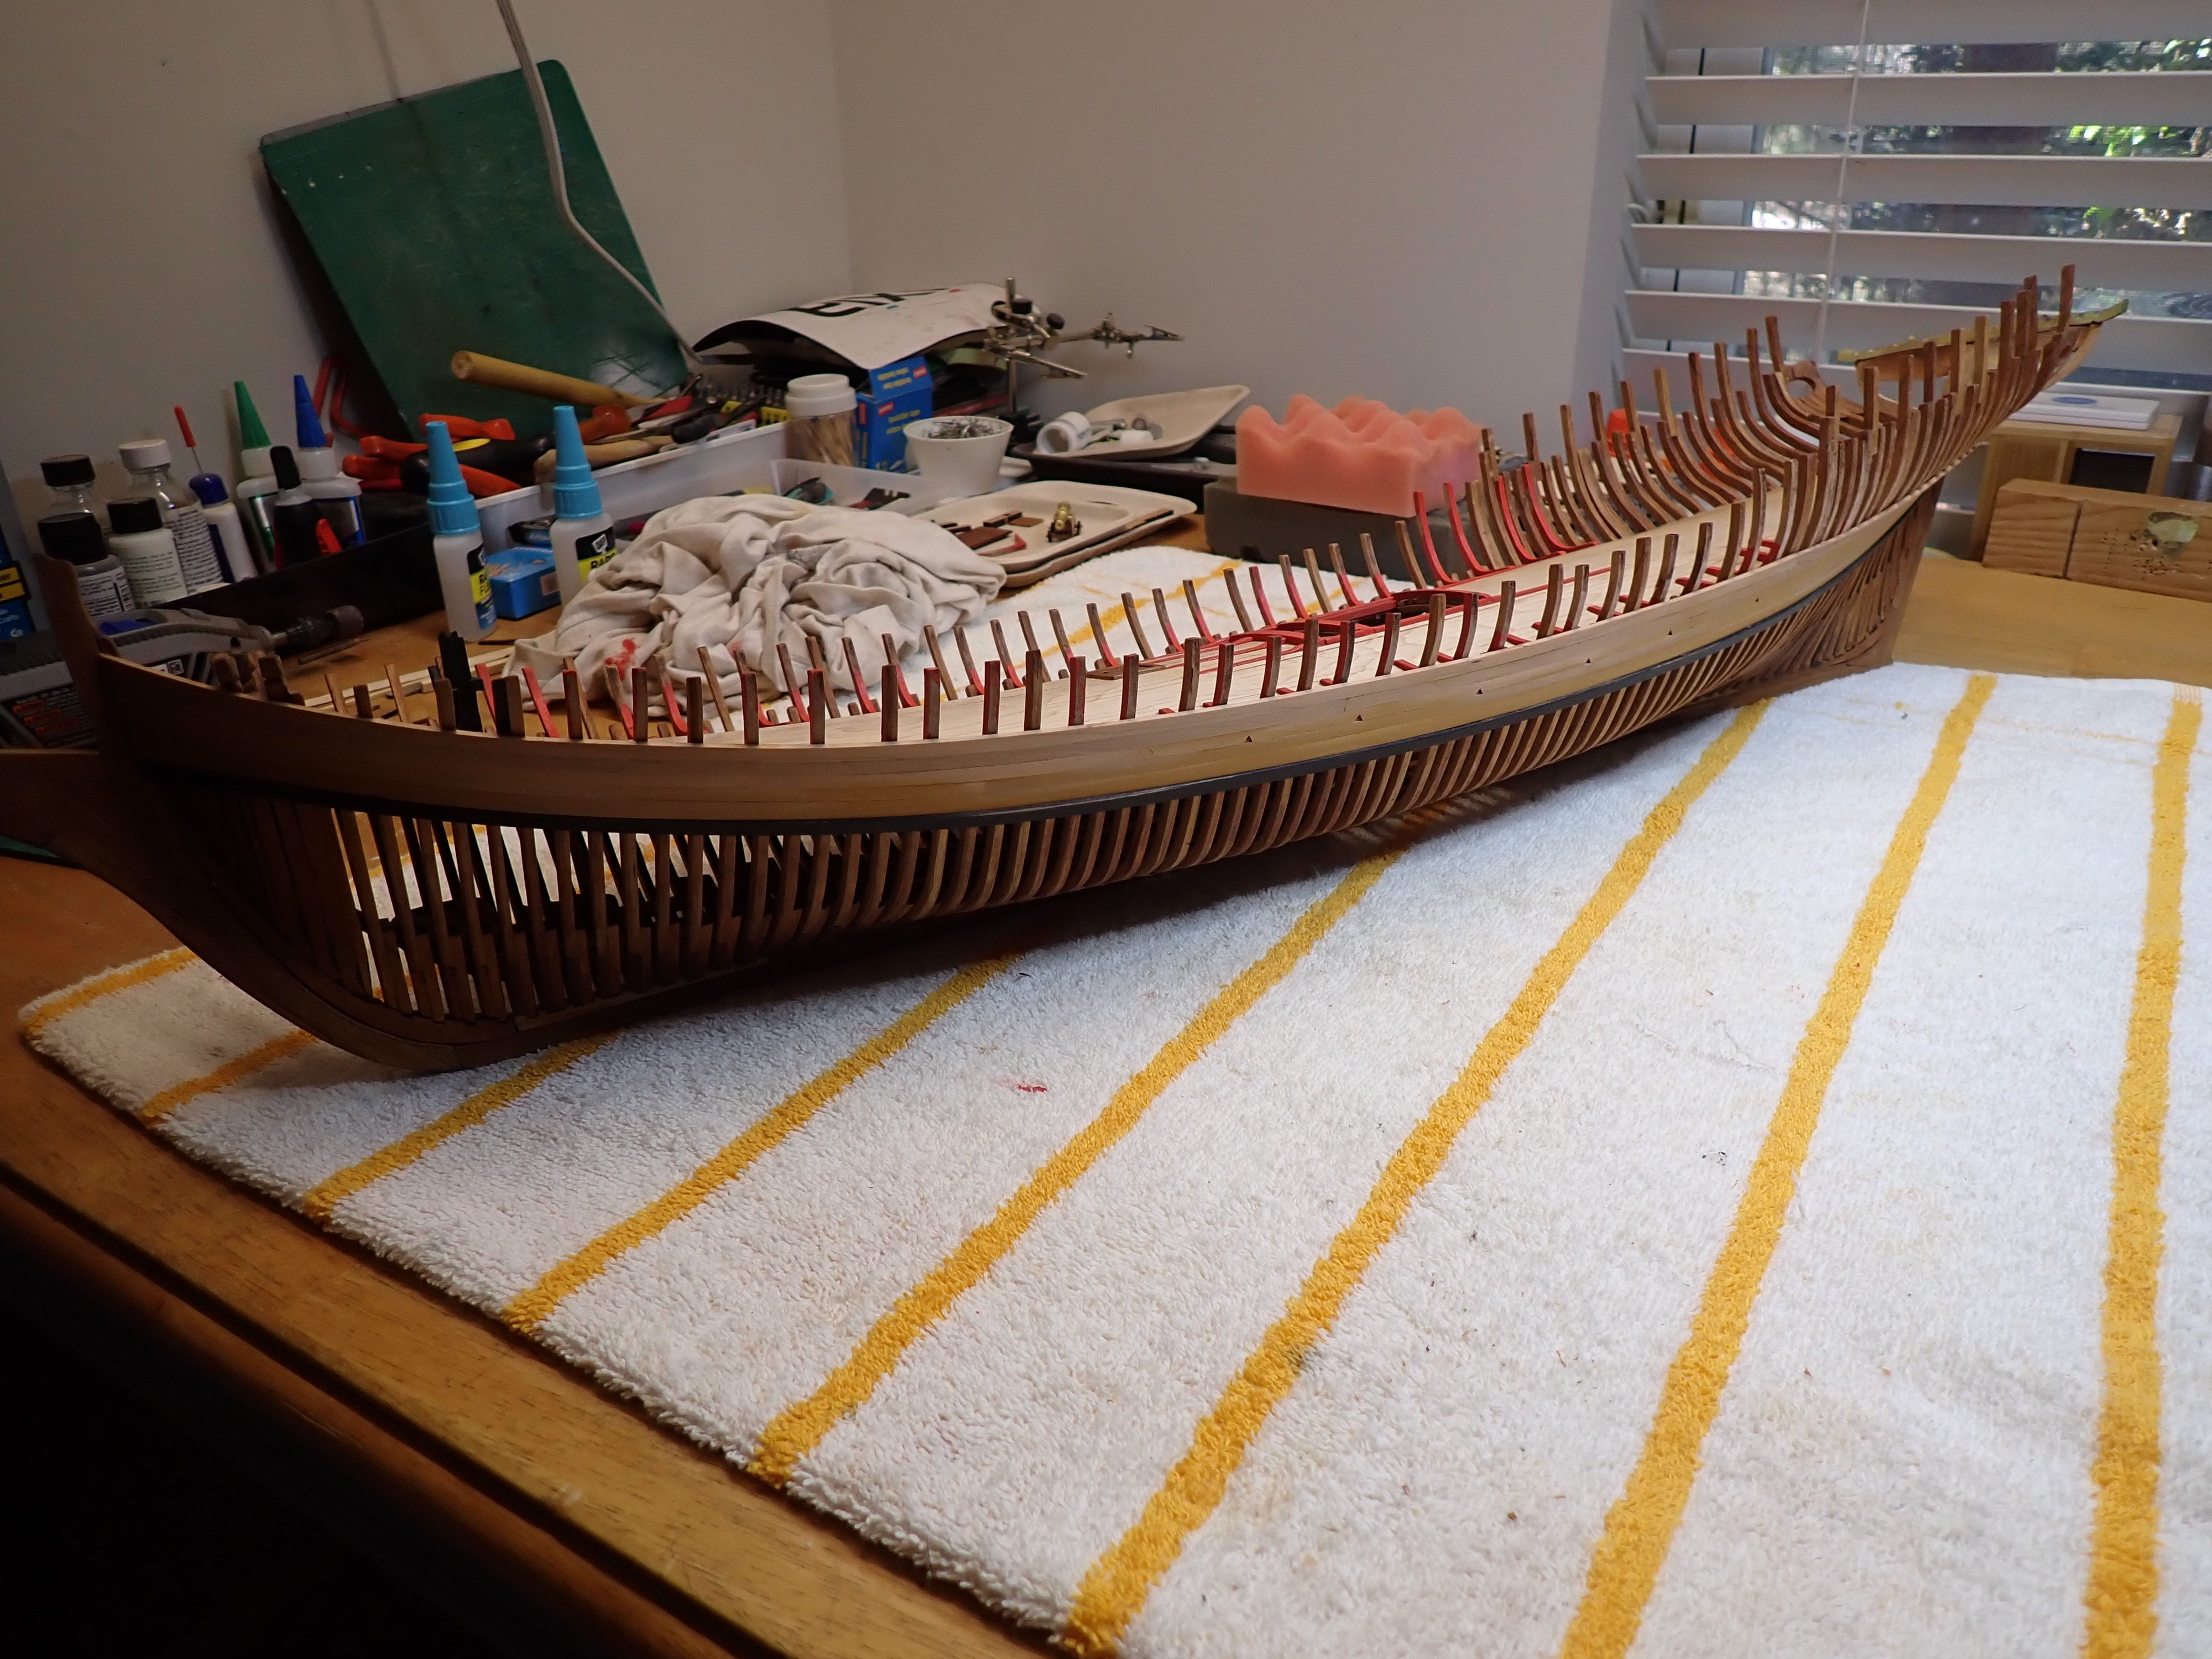
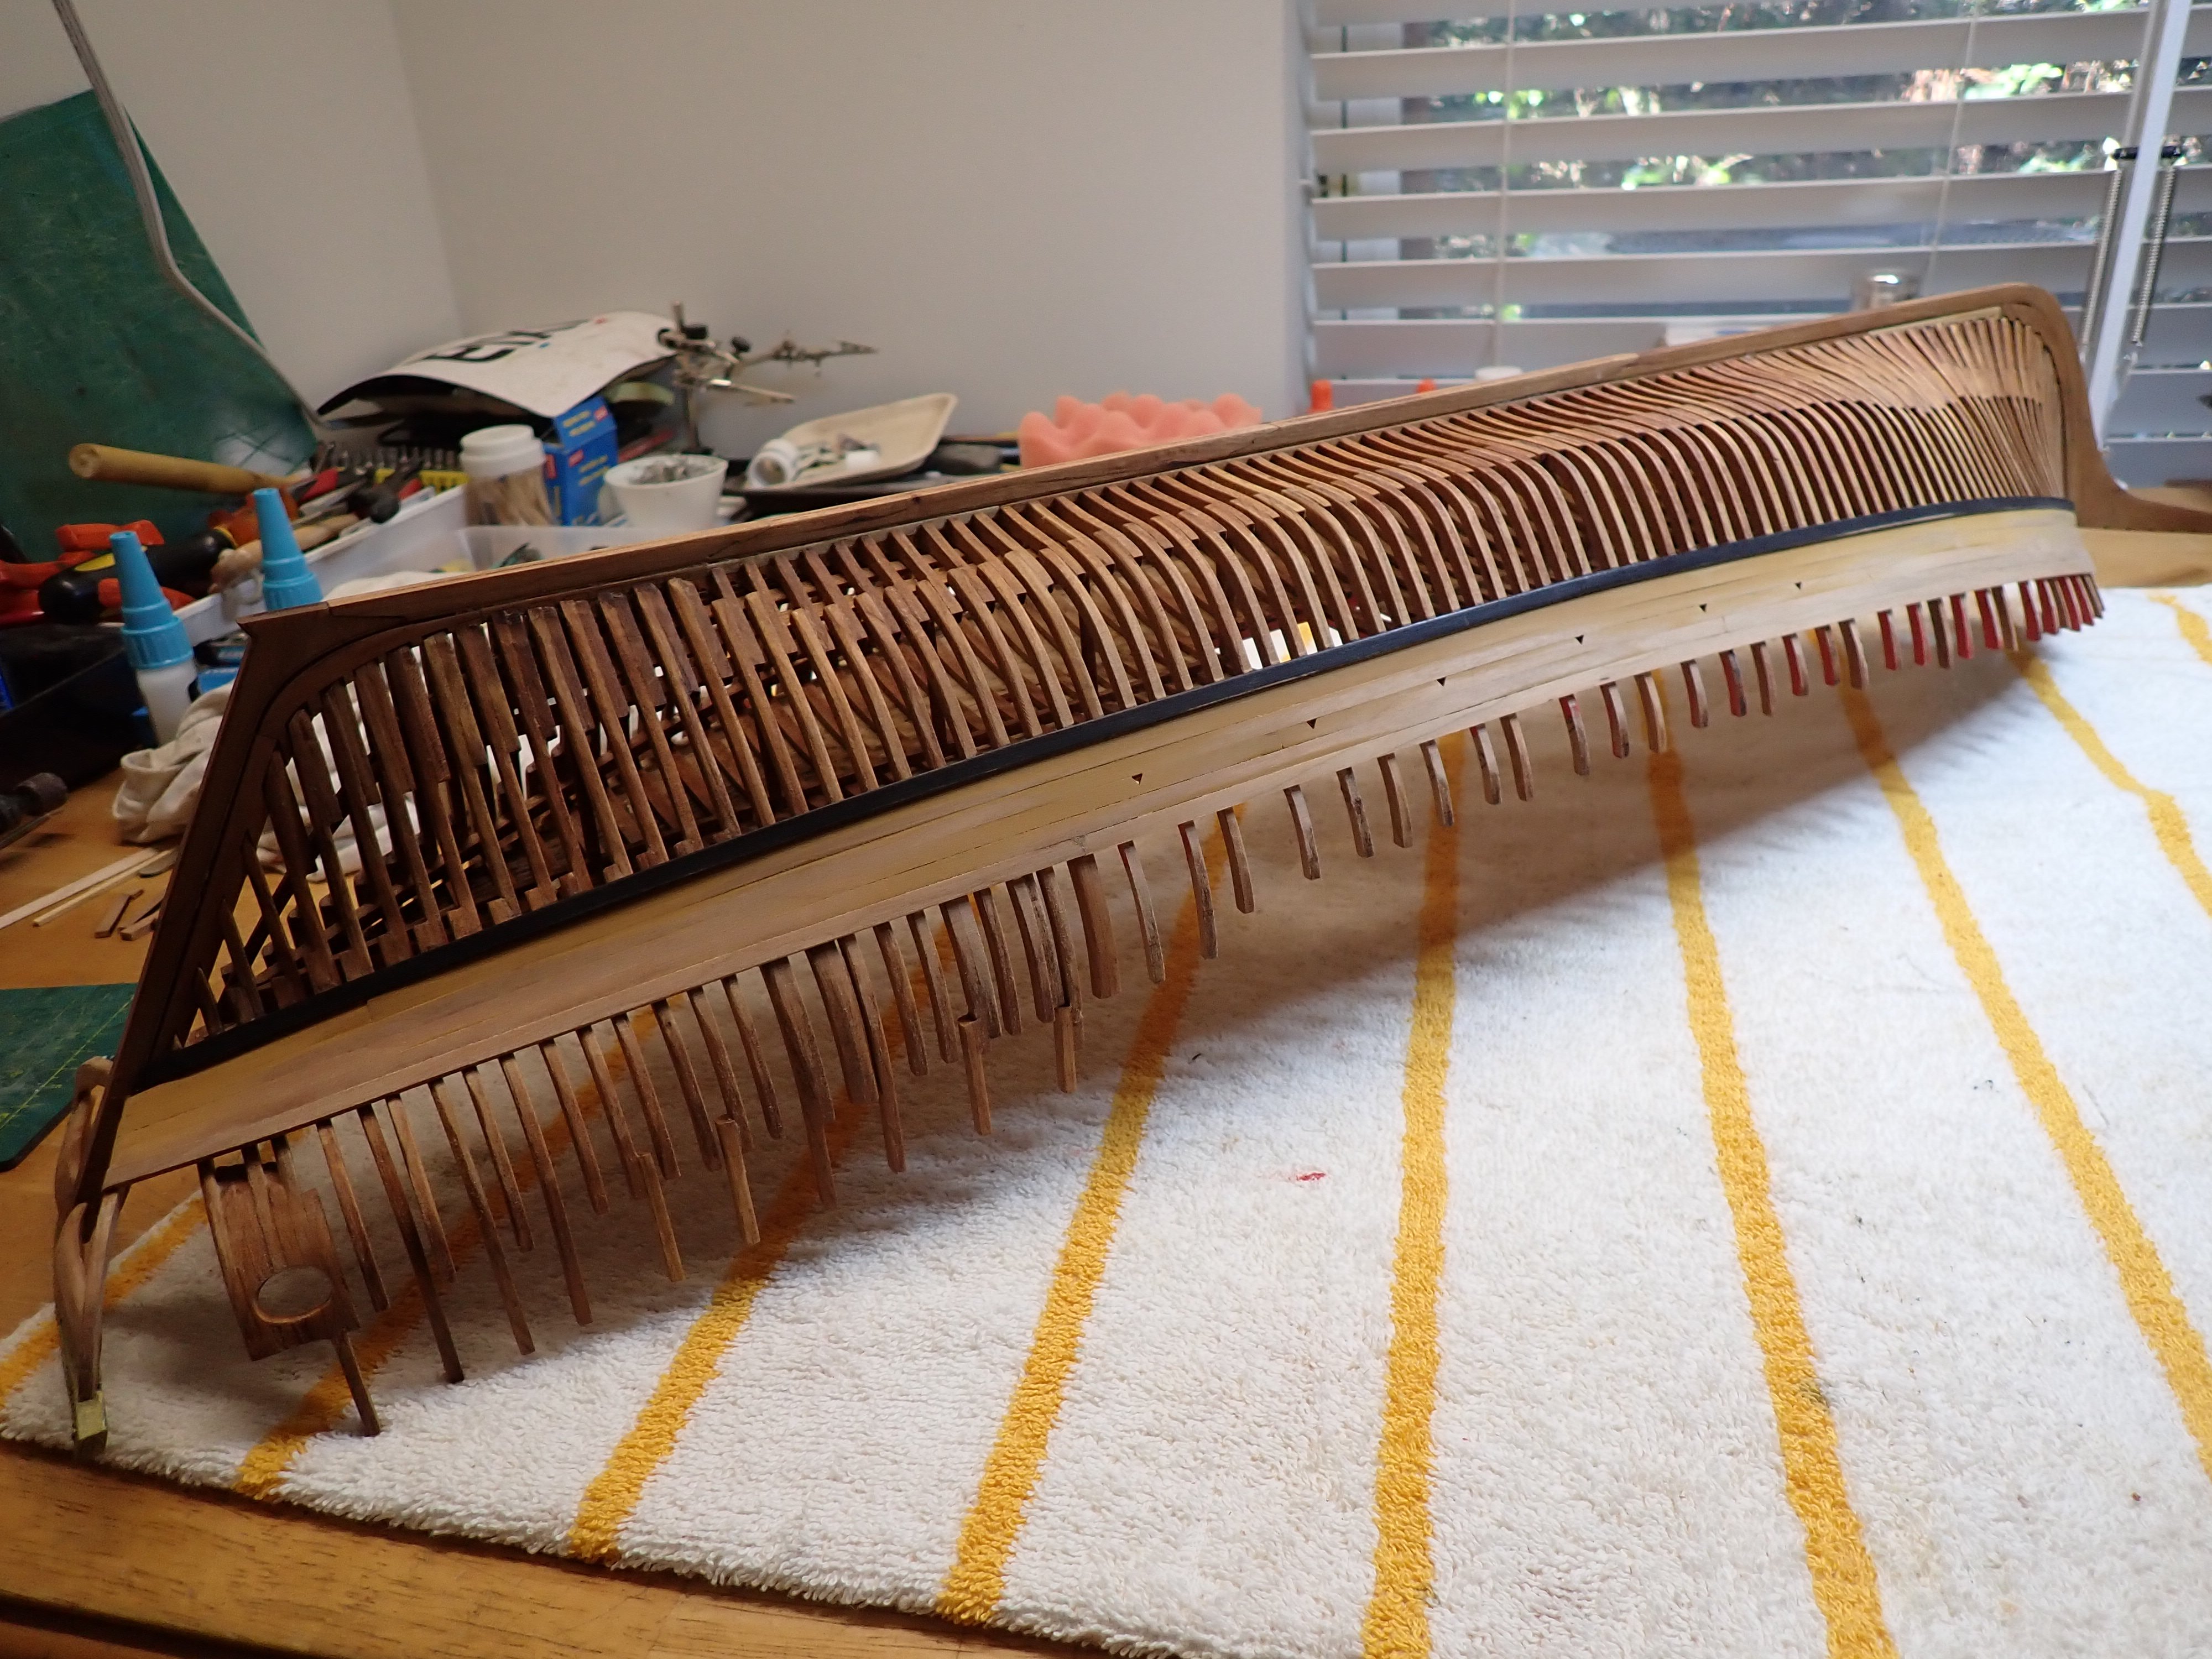
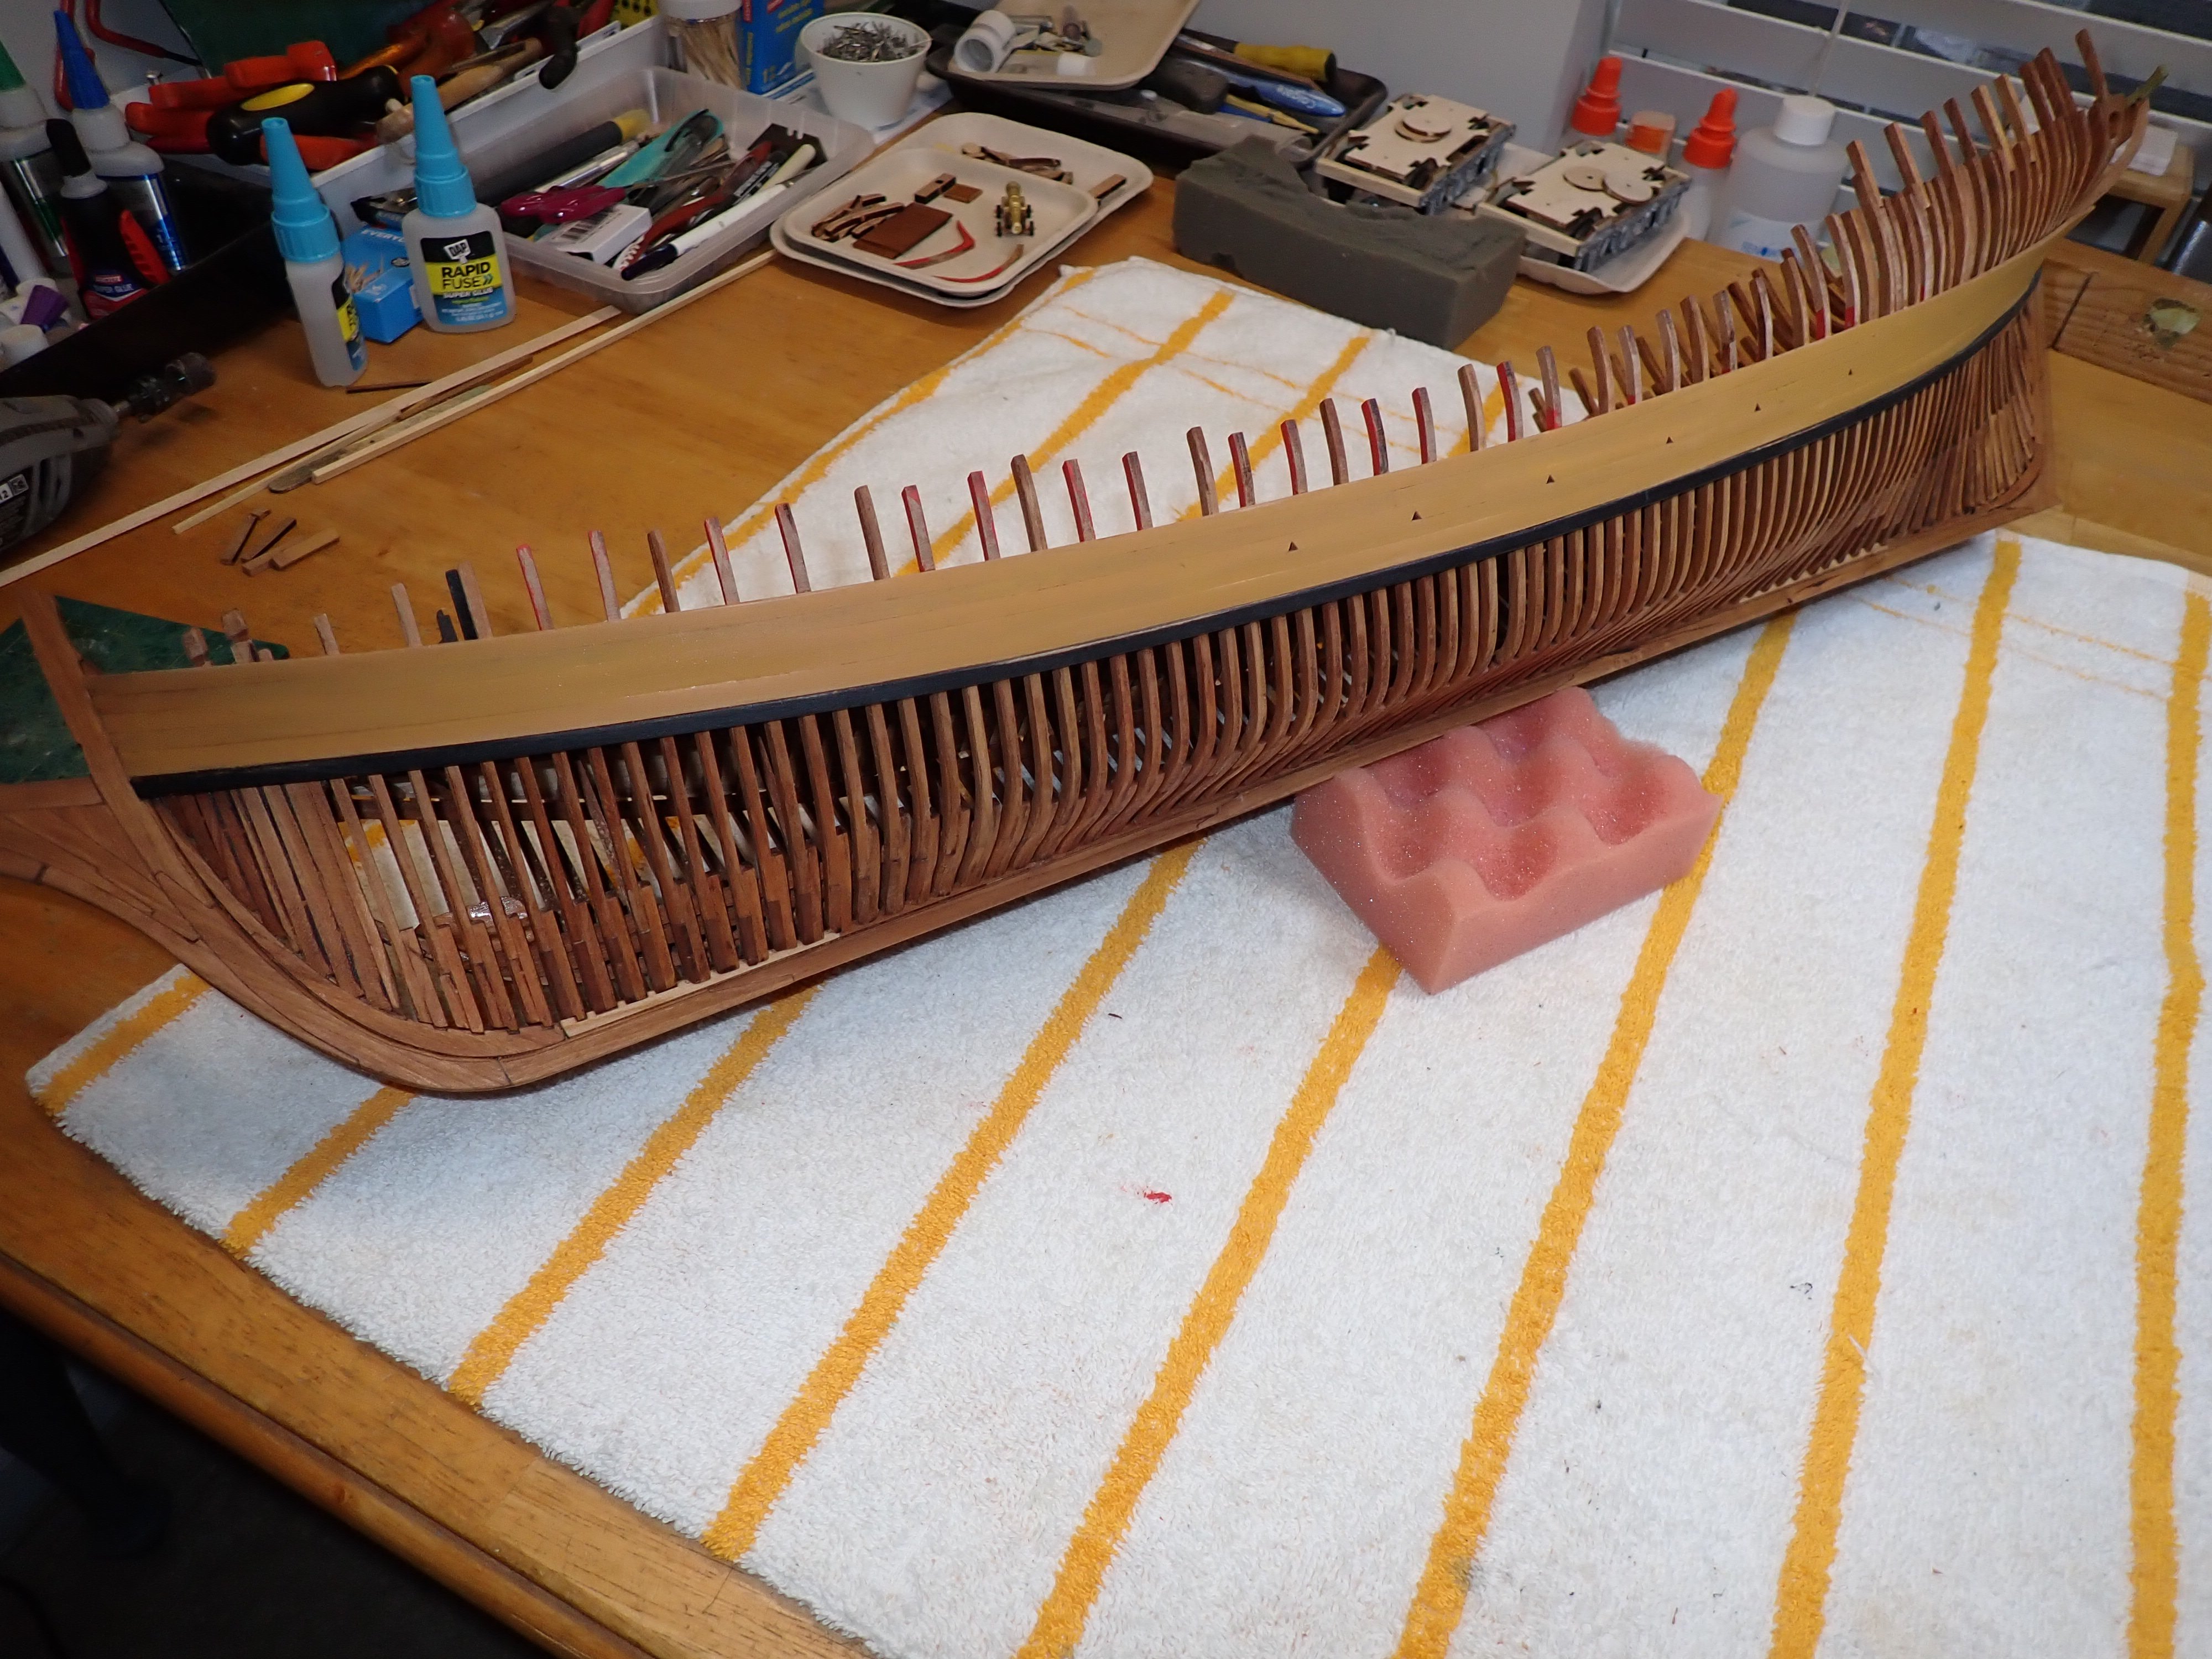
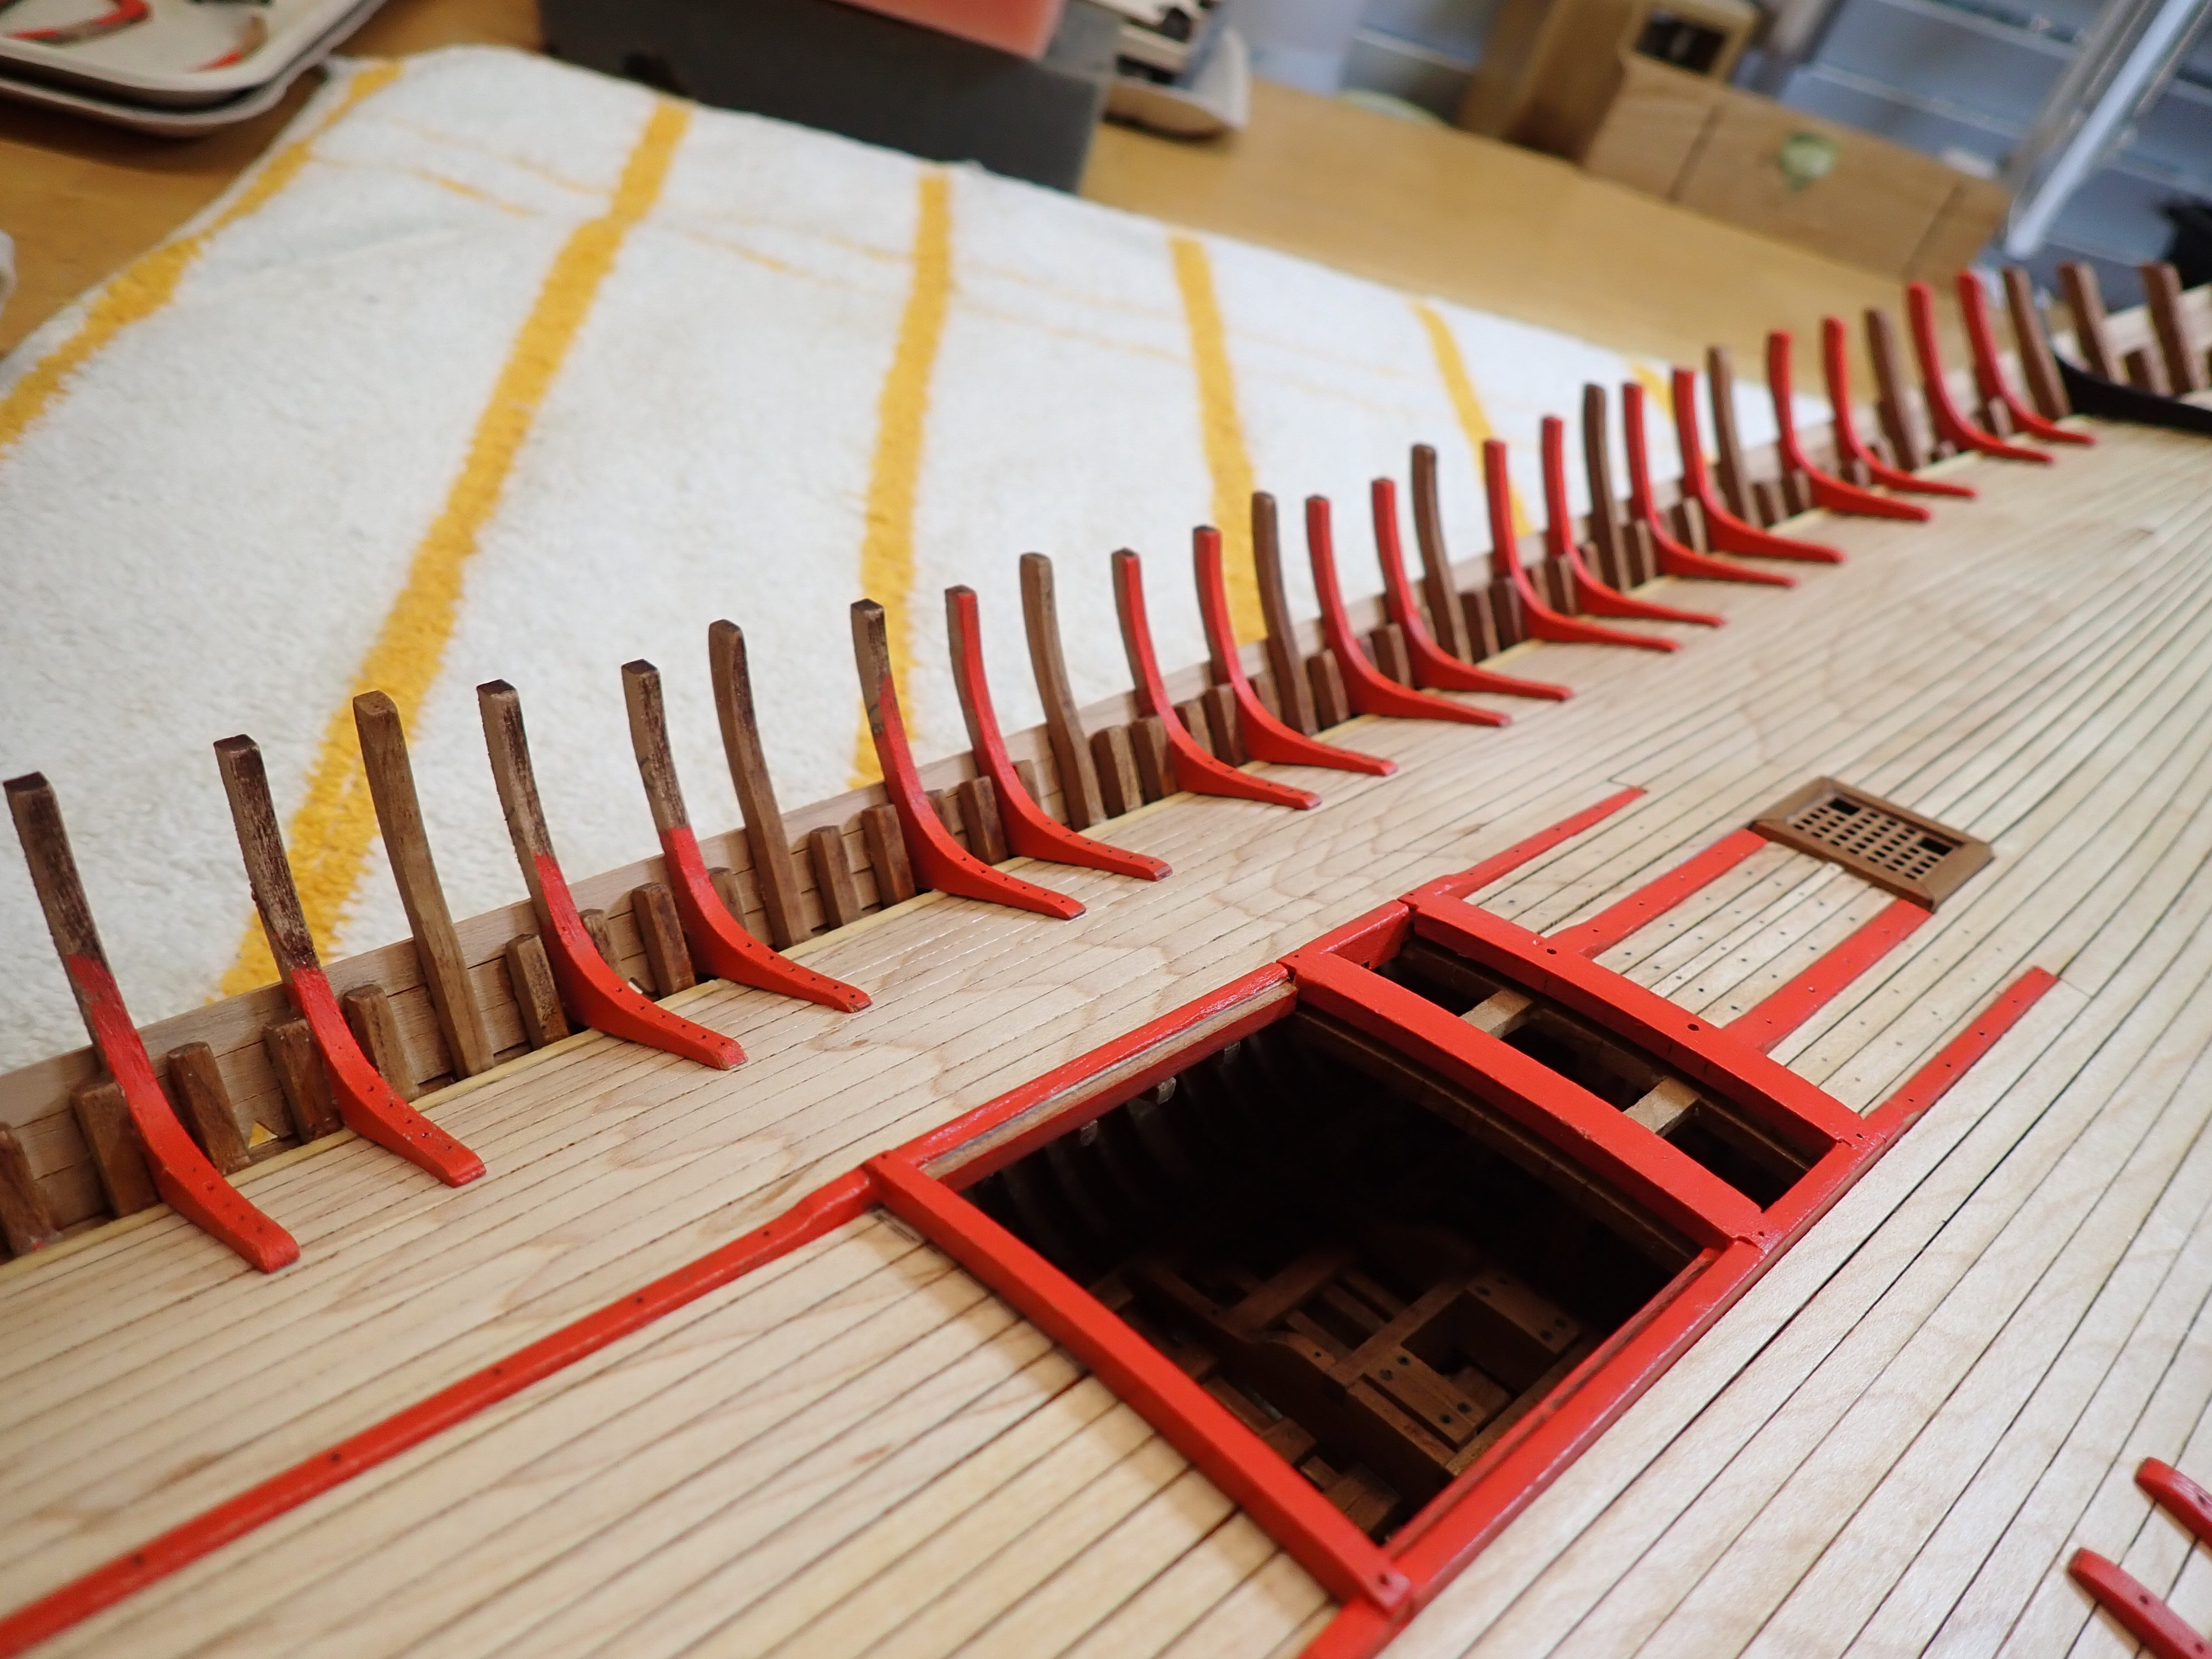
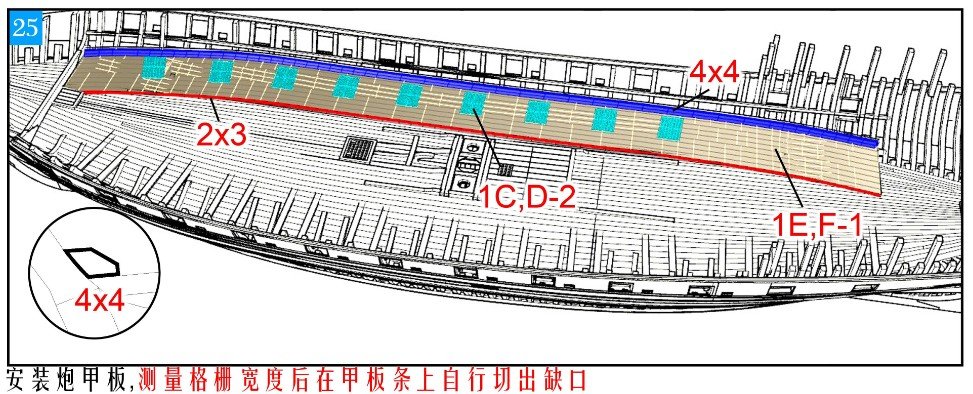
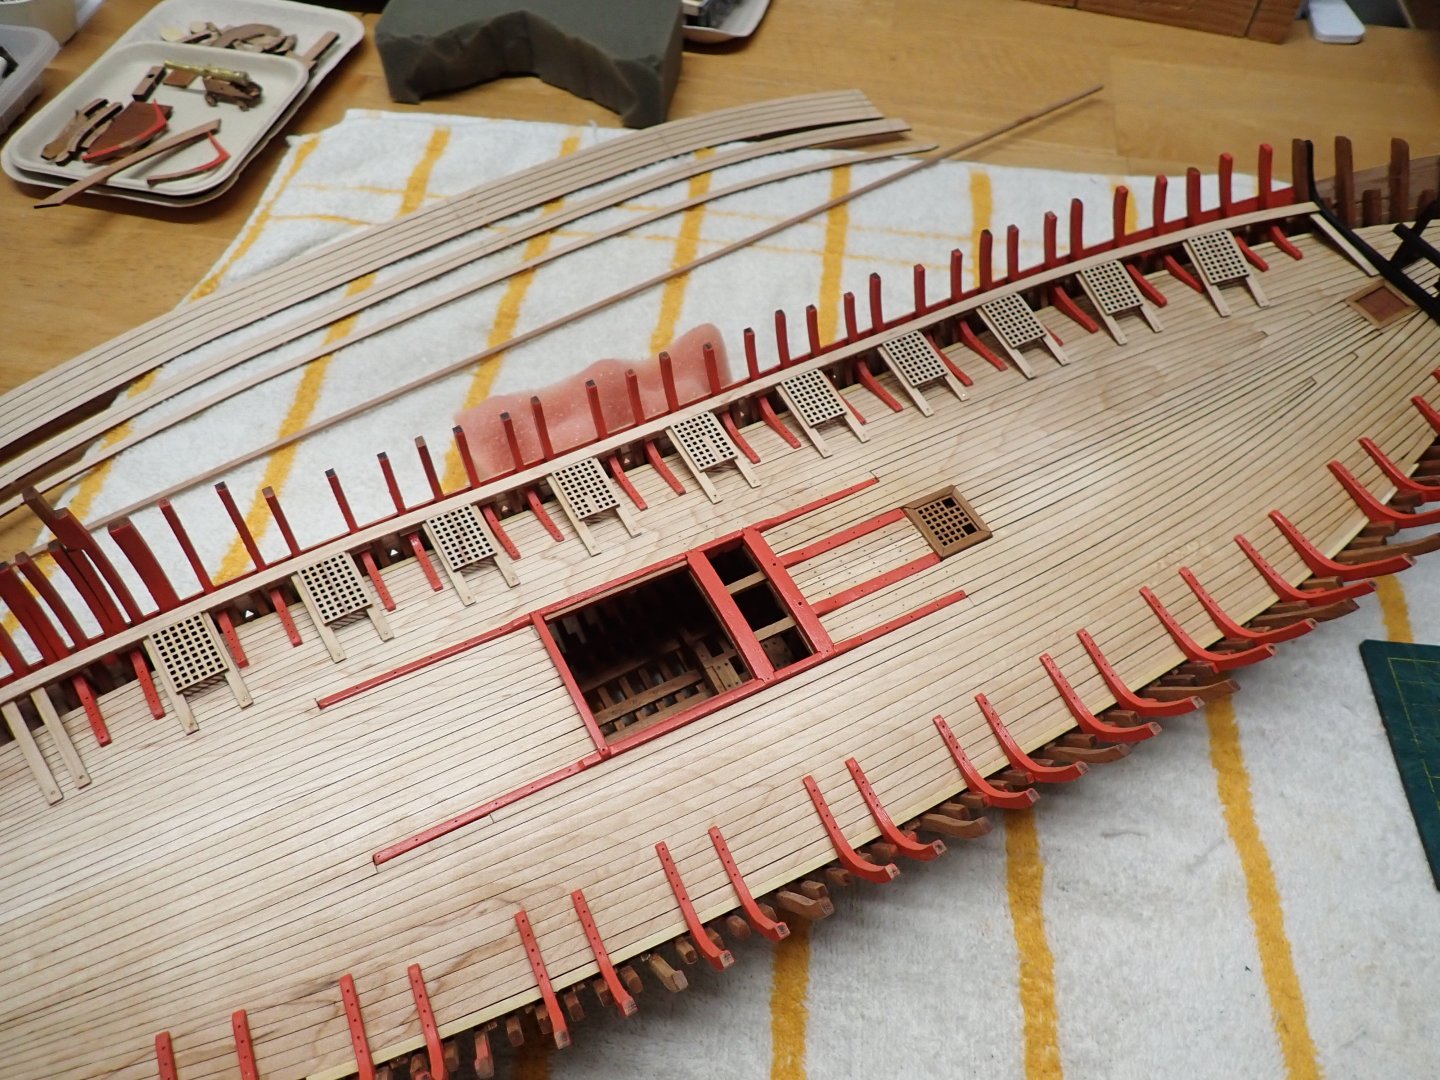
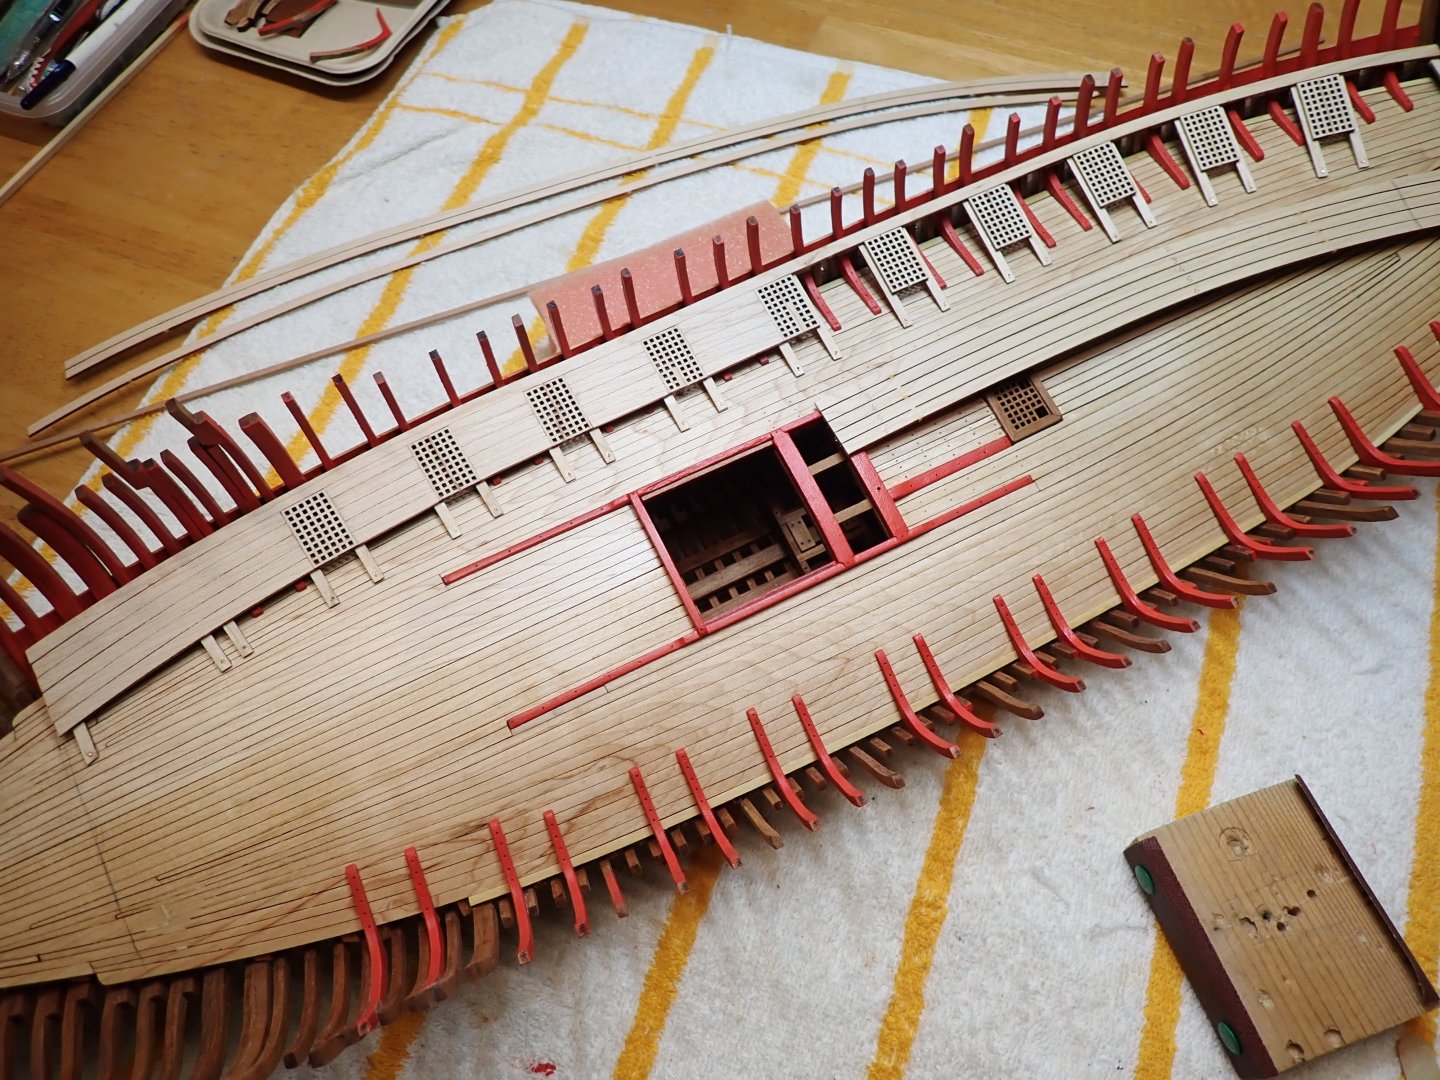
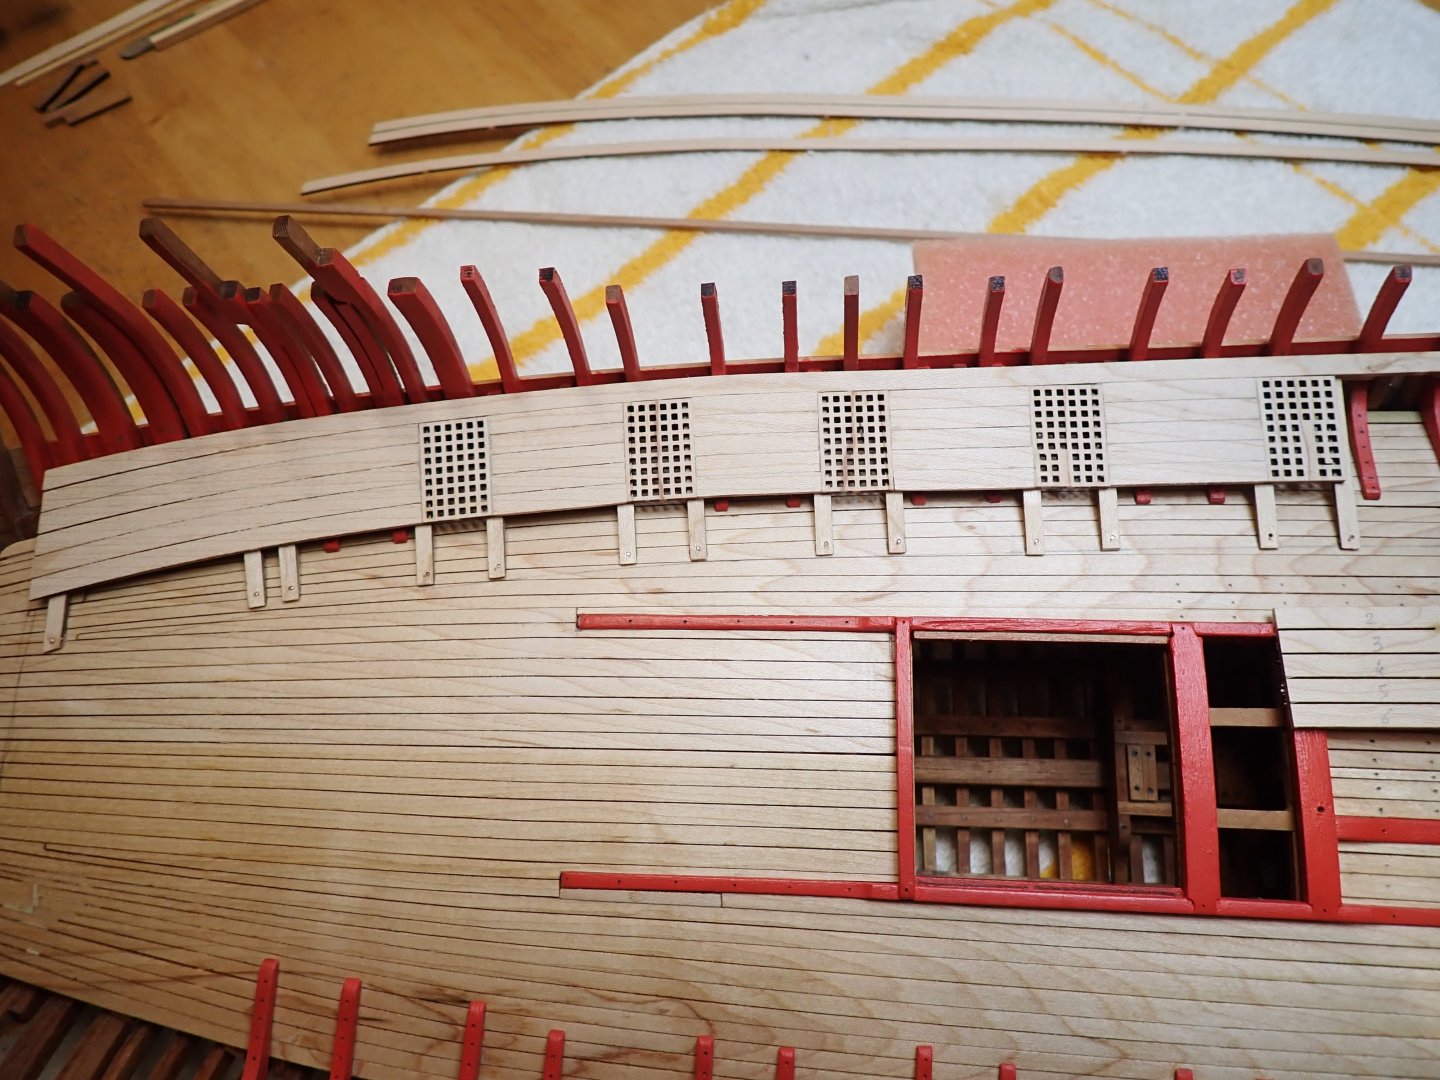
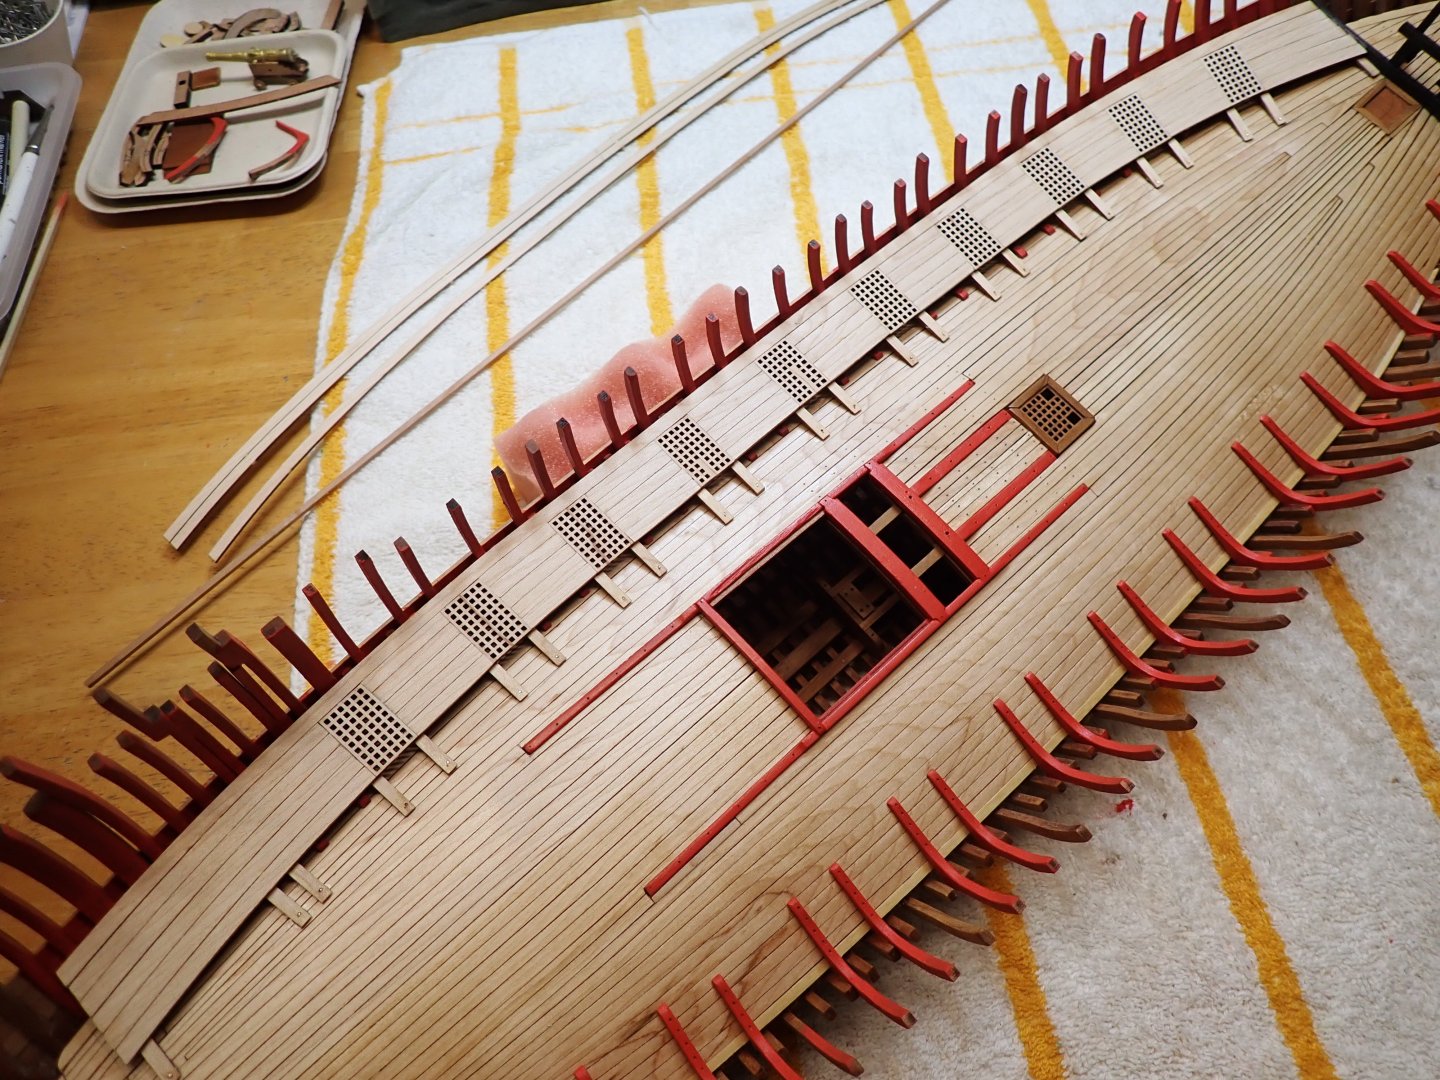
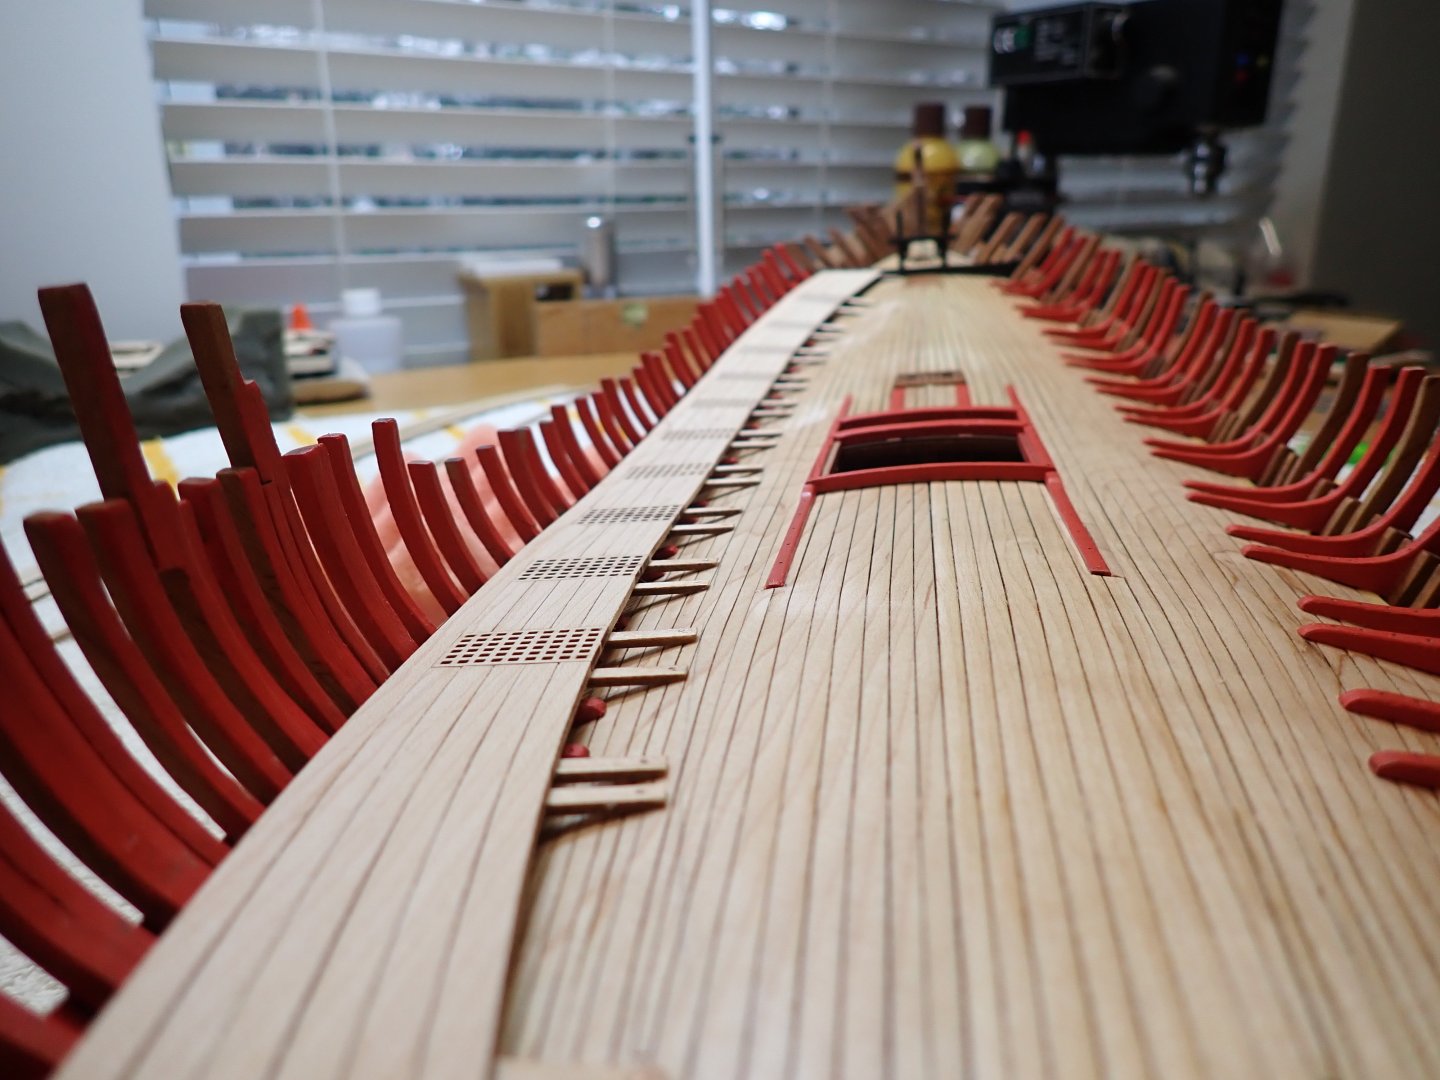
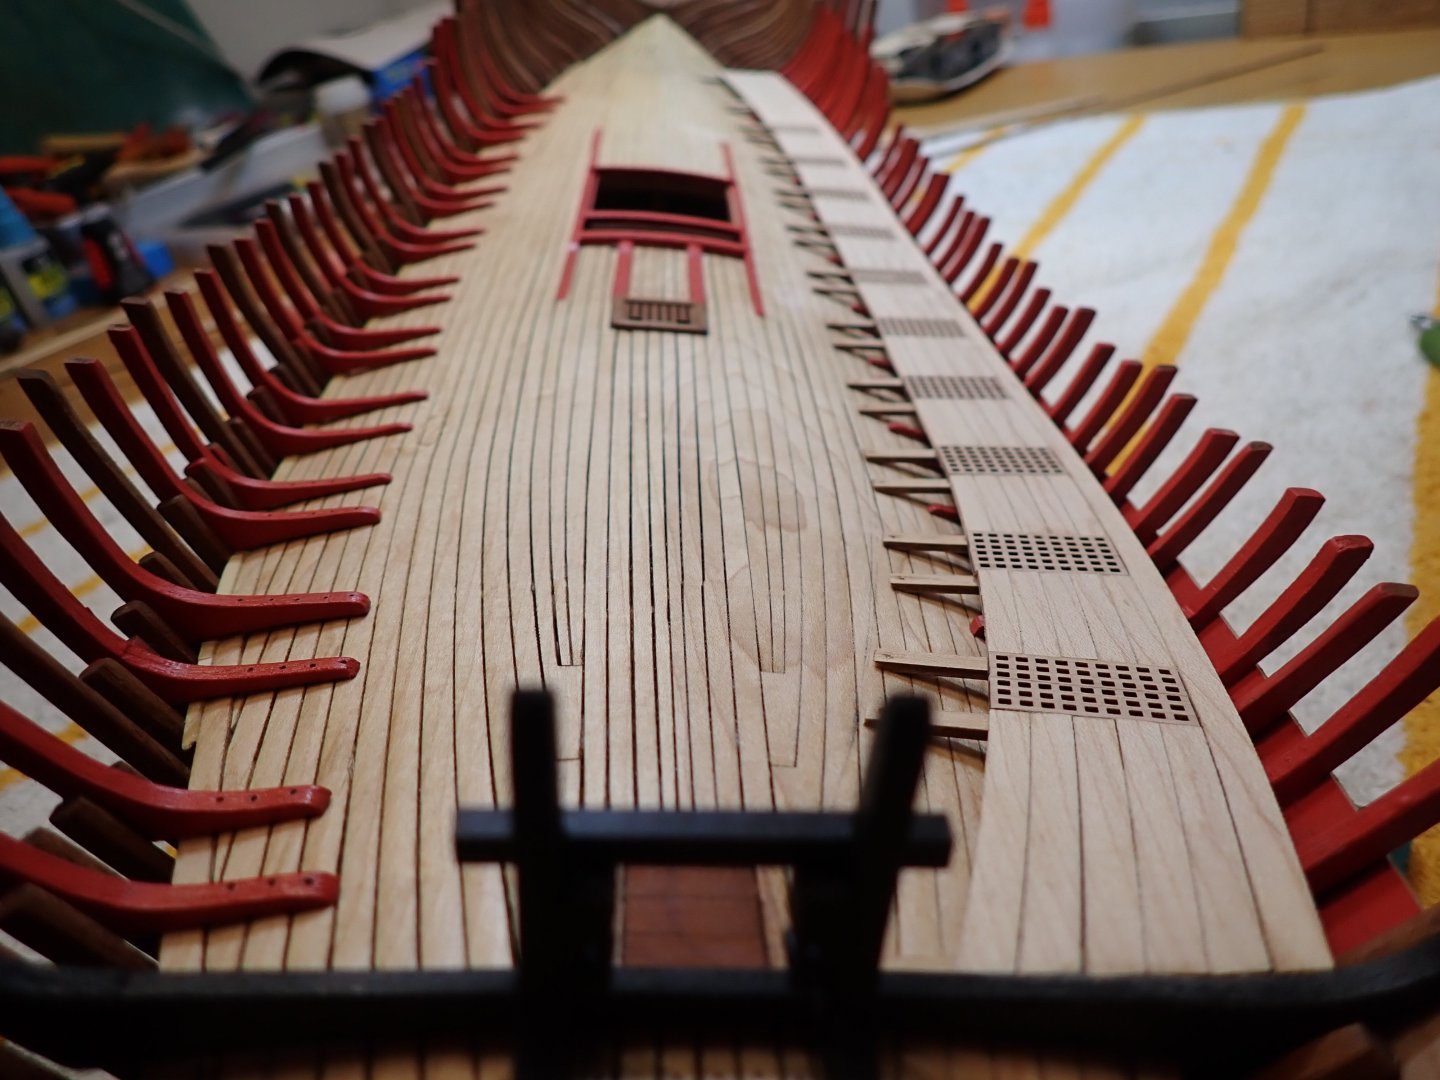
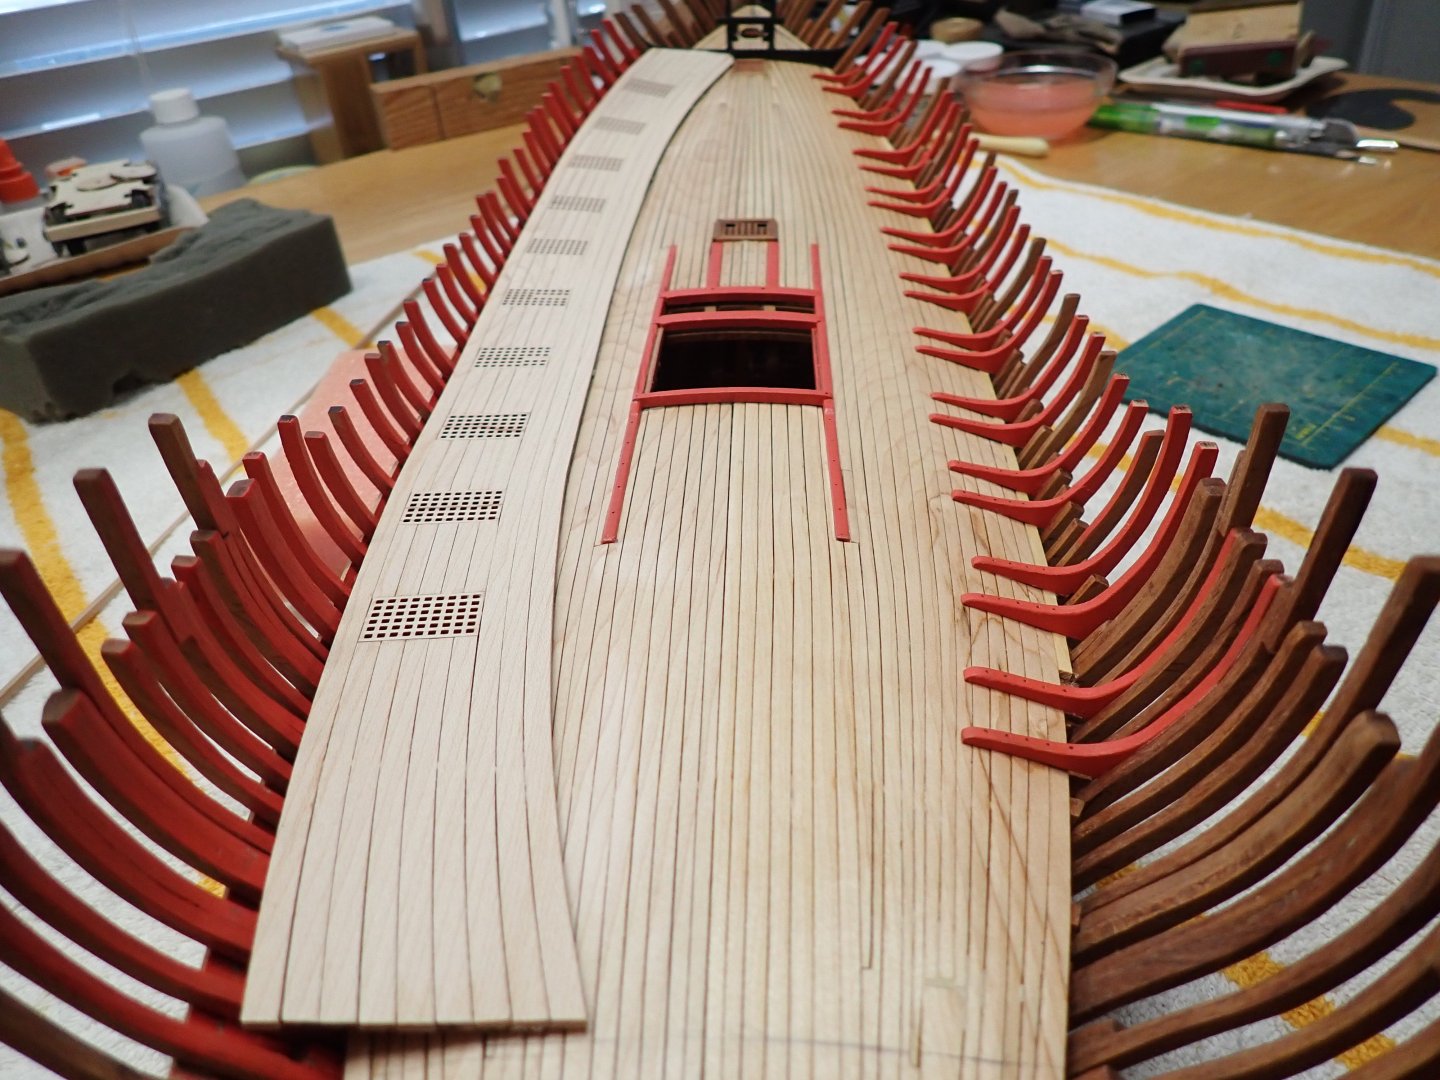
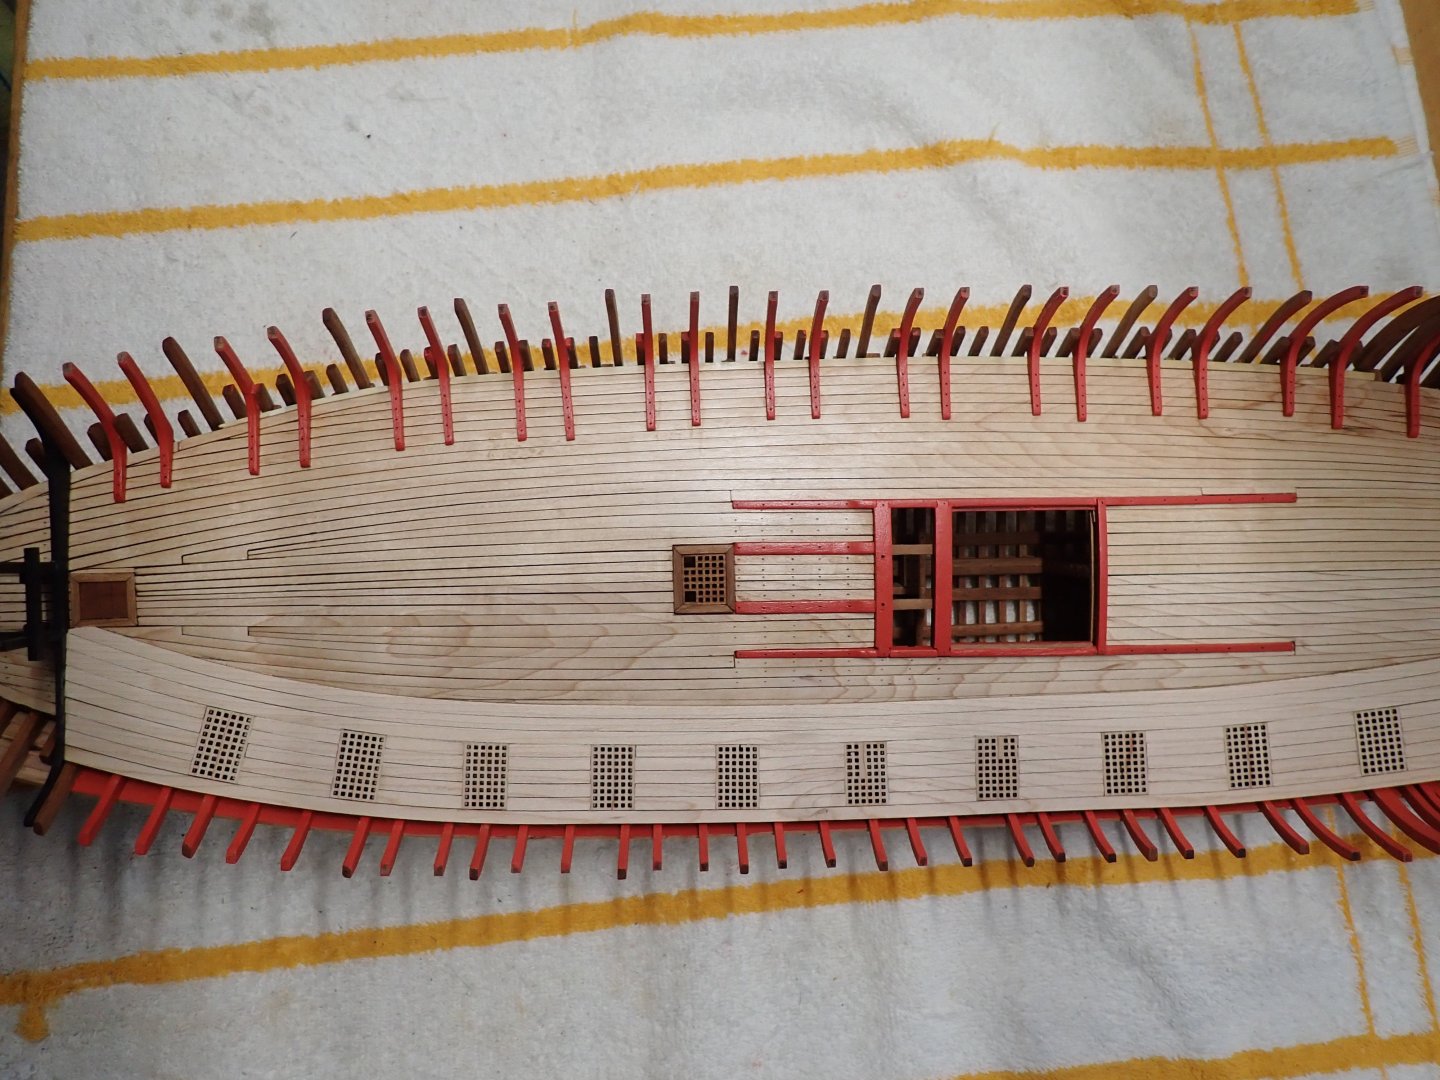
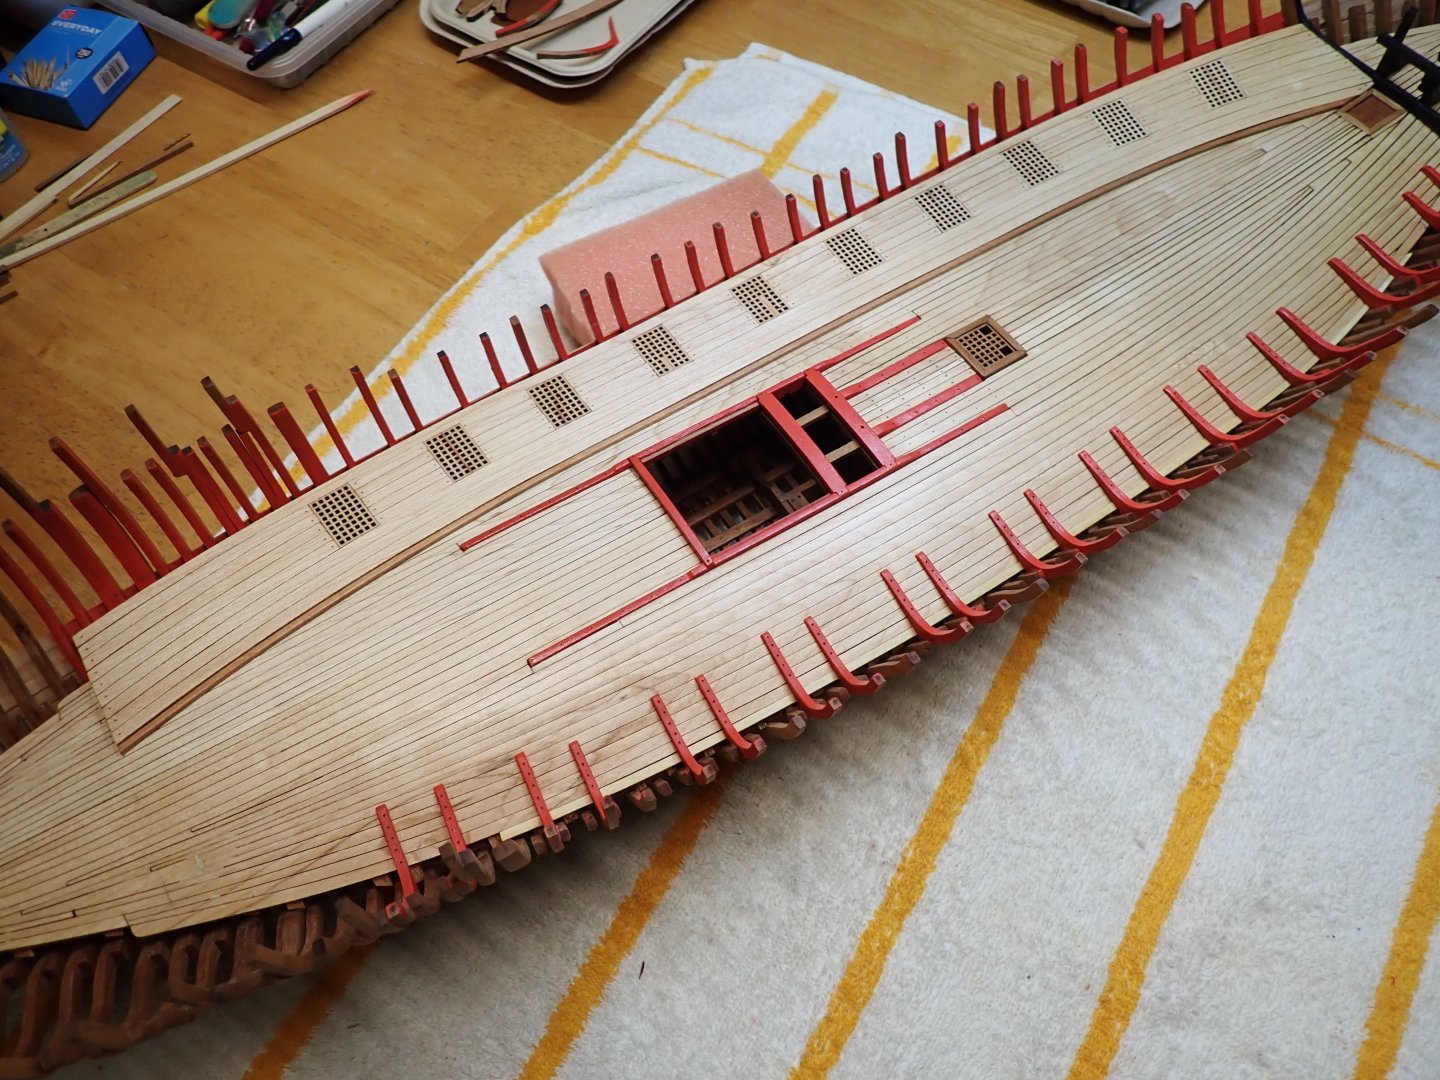
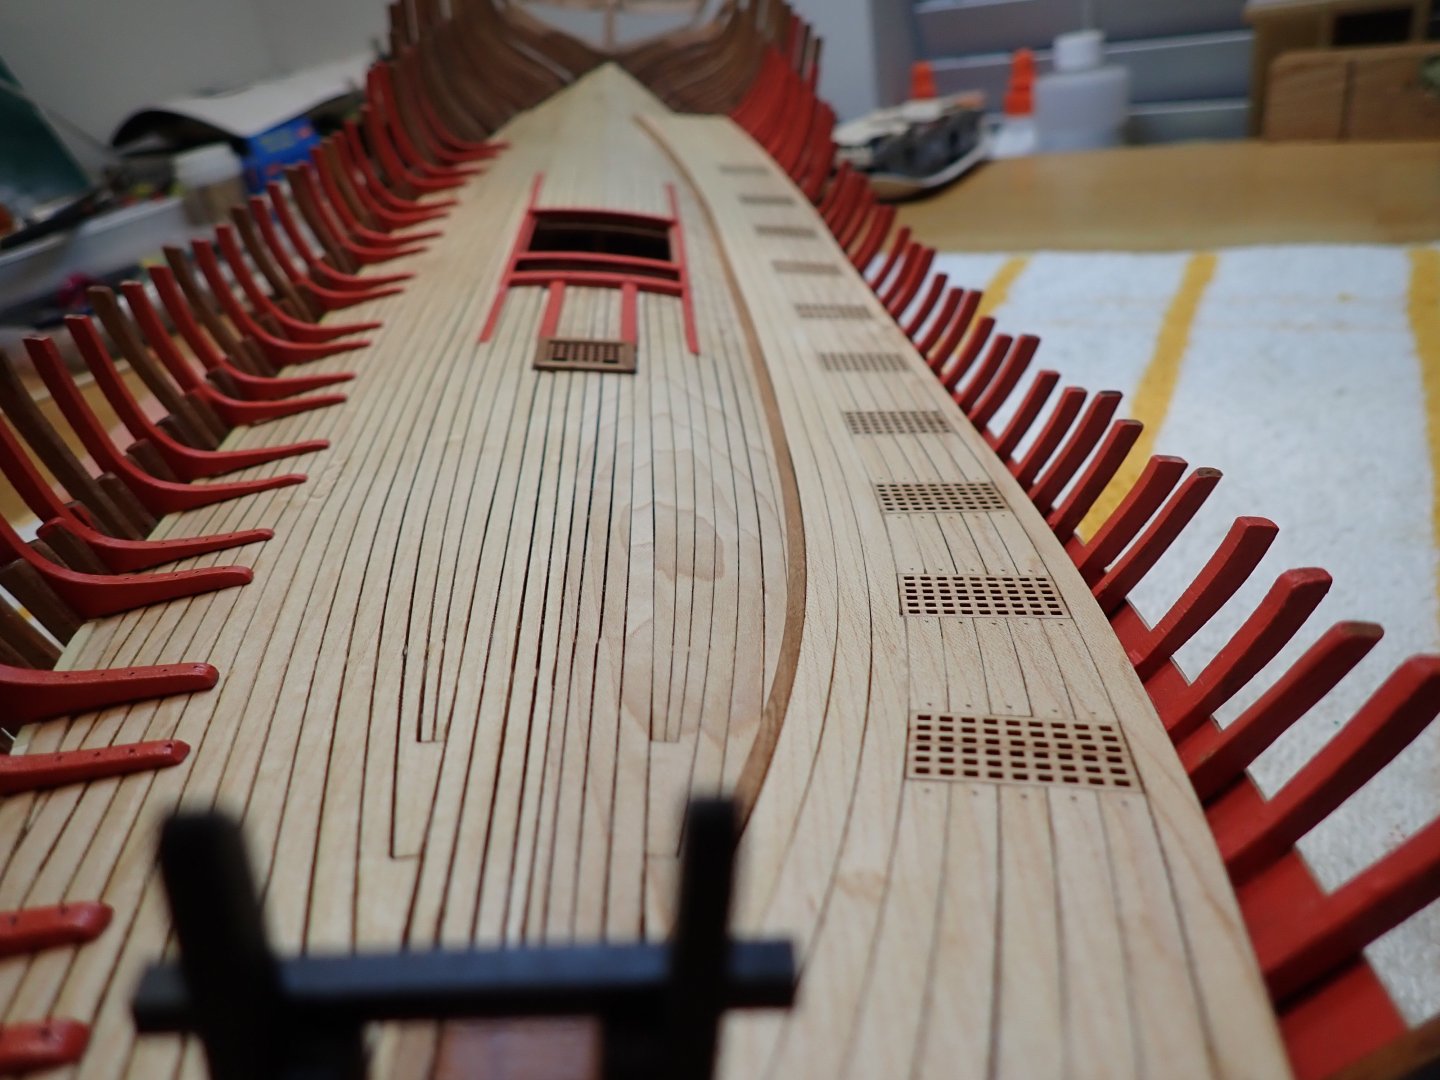
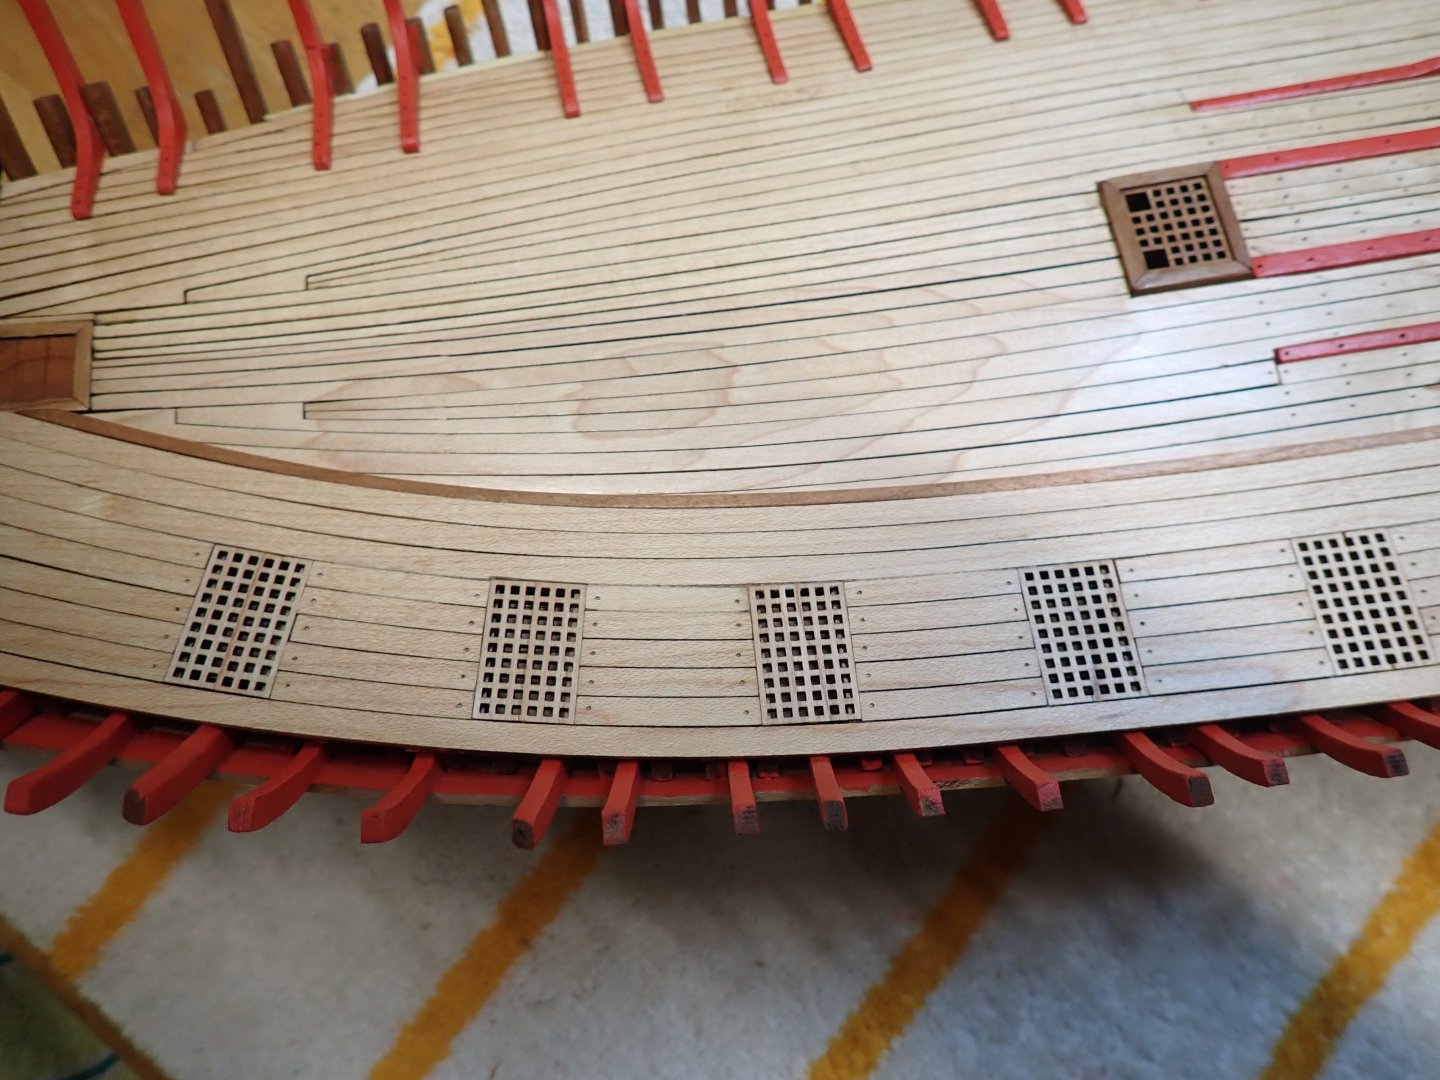
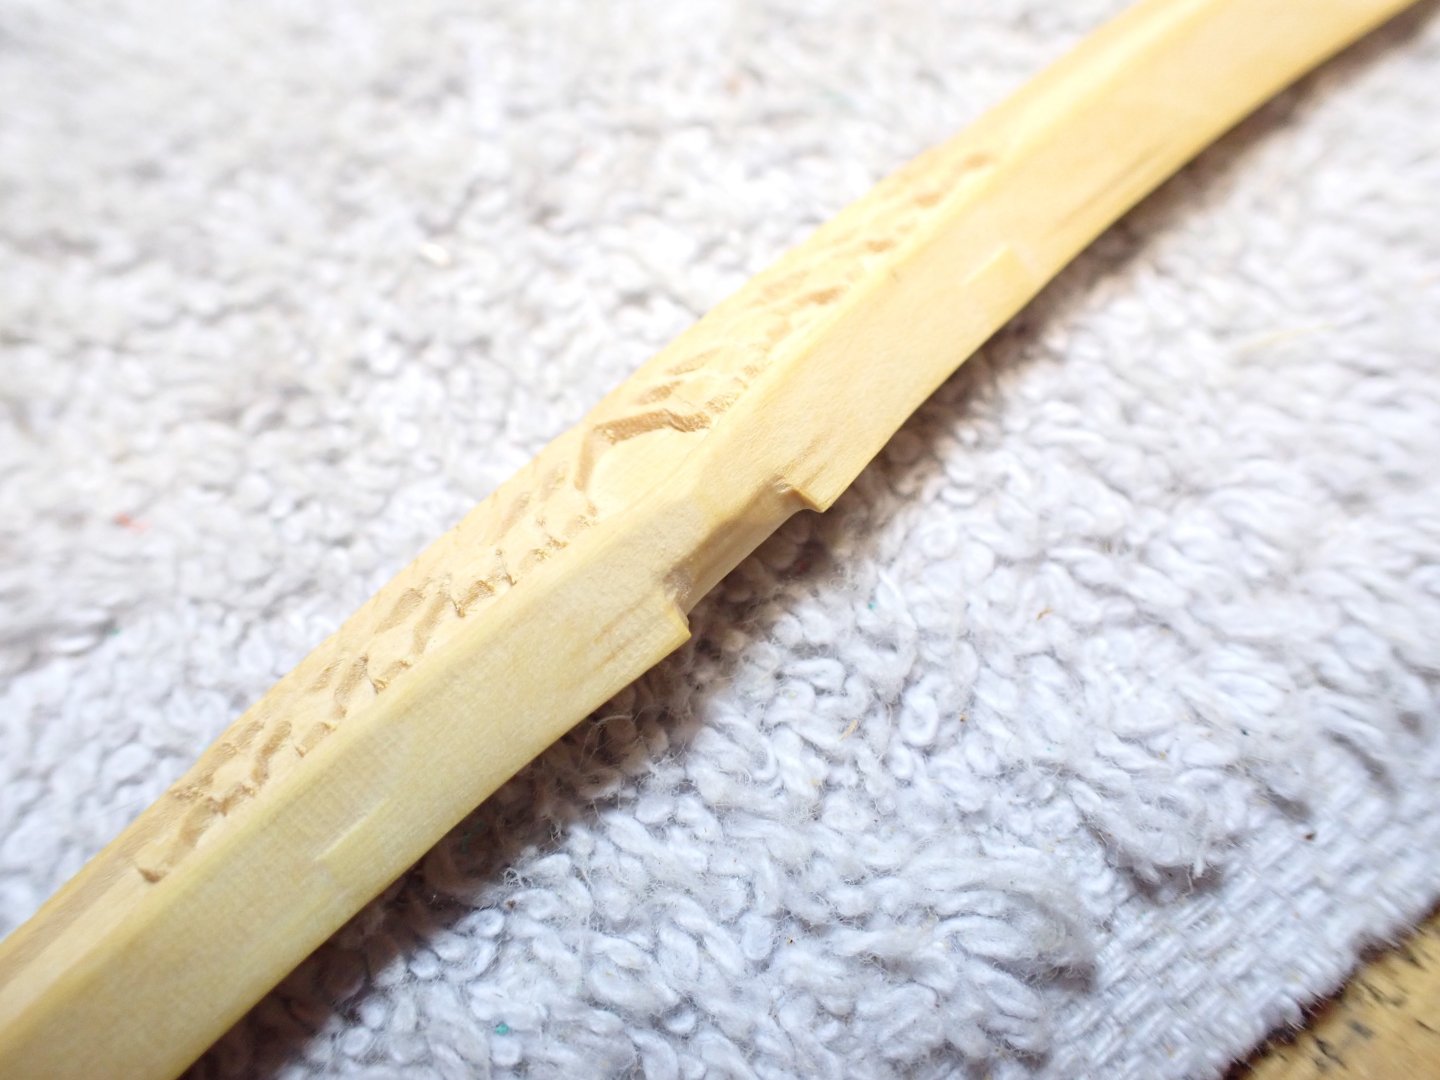
Moving along with one gun deck, on the Port side. But first, the "Instructions": The first thing I did was to glue all the grates on their respective supports: The grates must be flush with the planking: no stumbling during the action!! Planking can then begin. I start from the stern and go back to the bow, keeping the front of the planking as a reference. This way, I make sure that the curves are correctly matched between the planks. Numbering them is also a great idea: Planking will butt against the cabin wall, near the stern. Moving forward.... About half way done... Planking around the grates, has been completed: Did you notice? Nothing is flat or straight on that vessel.... Three more planks to install: A little cherry wood strip to finish the edge: A couple of Wipe on Poly coats and it is pretty much finished. The gun deck at the bow of the boat is a little bit high and the gun is not fitting perfectly. I will have to be creative to find a solution. Contrary to British ships with large gun ports, these French vessels have very small gun ports and the adjustment required to match the hull openings with the gun carriages is tricky. I am not installing the 4x4 strip preventing the guns from rolling into the sea yet. I want to make some progress on the hull planking and finish painting the bulwark. Yves


- 185 replies
-
- 23
-
-
Paul, you are back to the "Normal" and "Standard" world. Yves
-
You are making terrific progress. I love when it takes shape like that. Yves
-
Ras, I hope I am not hijacking your thread with this post, but there is a modeler in Spain who has been building the San Pablo in the 1/35th scale: https://www.ebay.com/itm/326240588162?itmmeta=01JMJ20BHNV76DFB5CNMDBBQCS&hash=item4bf5745182:g:ZyUAAOSwZupggtEC It is a very impressive model and I thought that some of his pictures may help you. That Spanish gentleman is definitely the "Rey of the the Styrene sheets". I love his models. Yves
-
So funny that you would find information in the Modeles Reduits de Bateaux magazine (MRB). My father and I later, have been reading and collecting this magazine since the early 1960's. Fantastic source of information and very exciting model that you are starting to build, Ras. Yves
-
They definitely ruin the fantastic shape of that timeless hull. I would not install them. Plus they will get broken in the process of building the superstructures and handling the hull. Yves
-
I like the two semi-hulls assembly system, promoted by Billing Boats. So much easier and faster to plank and get a very nice, straight and sturdy hull. Yves
-
I love that yellow. It is going to be a stunning model, Craig. Yves
-
Excellent work. Very impressive. Yves
-
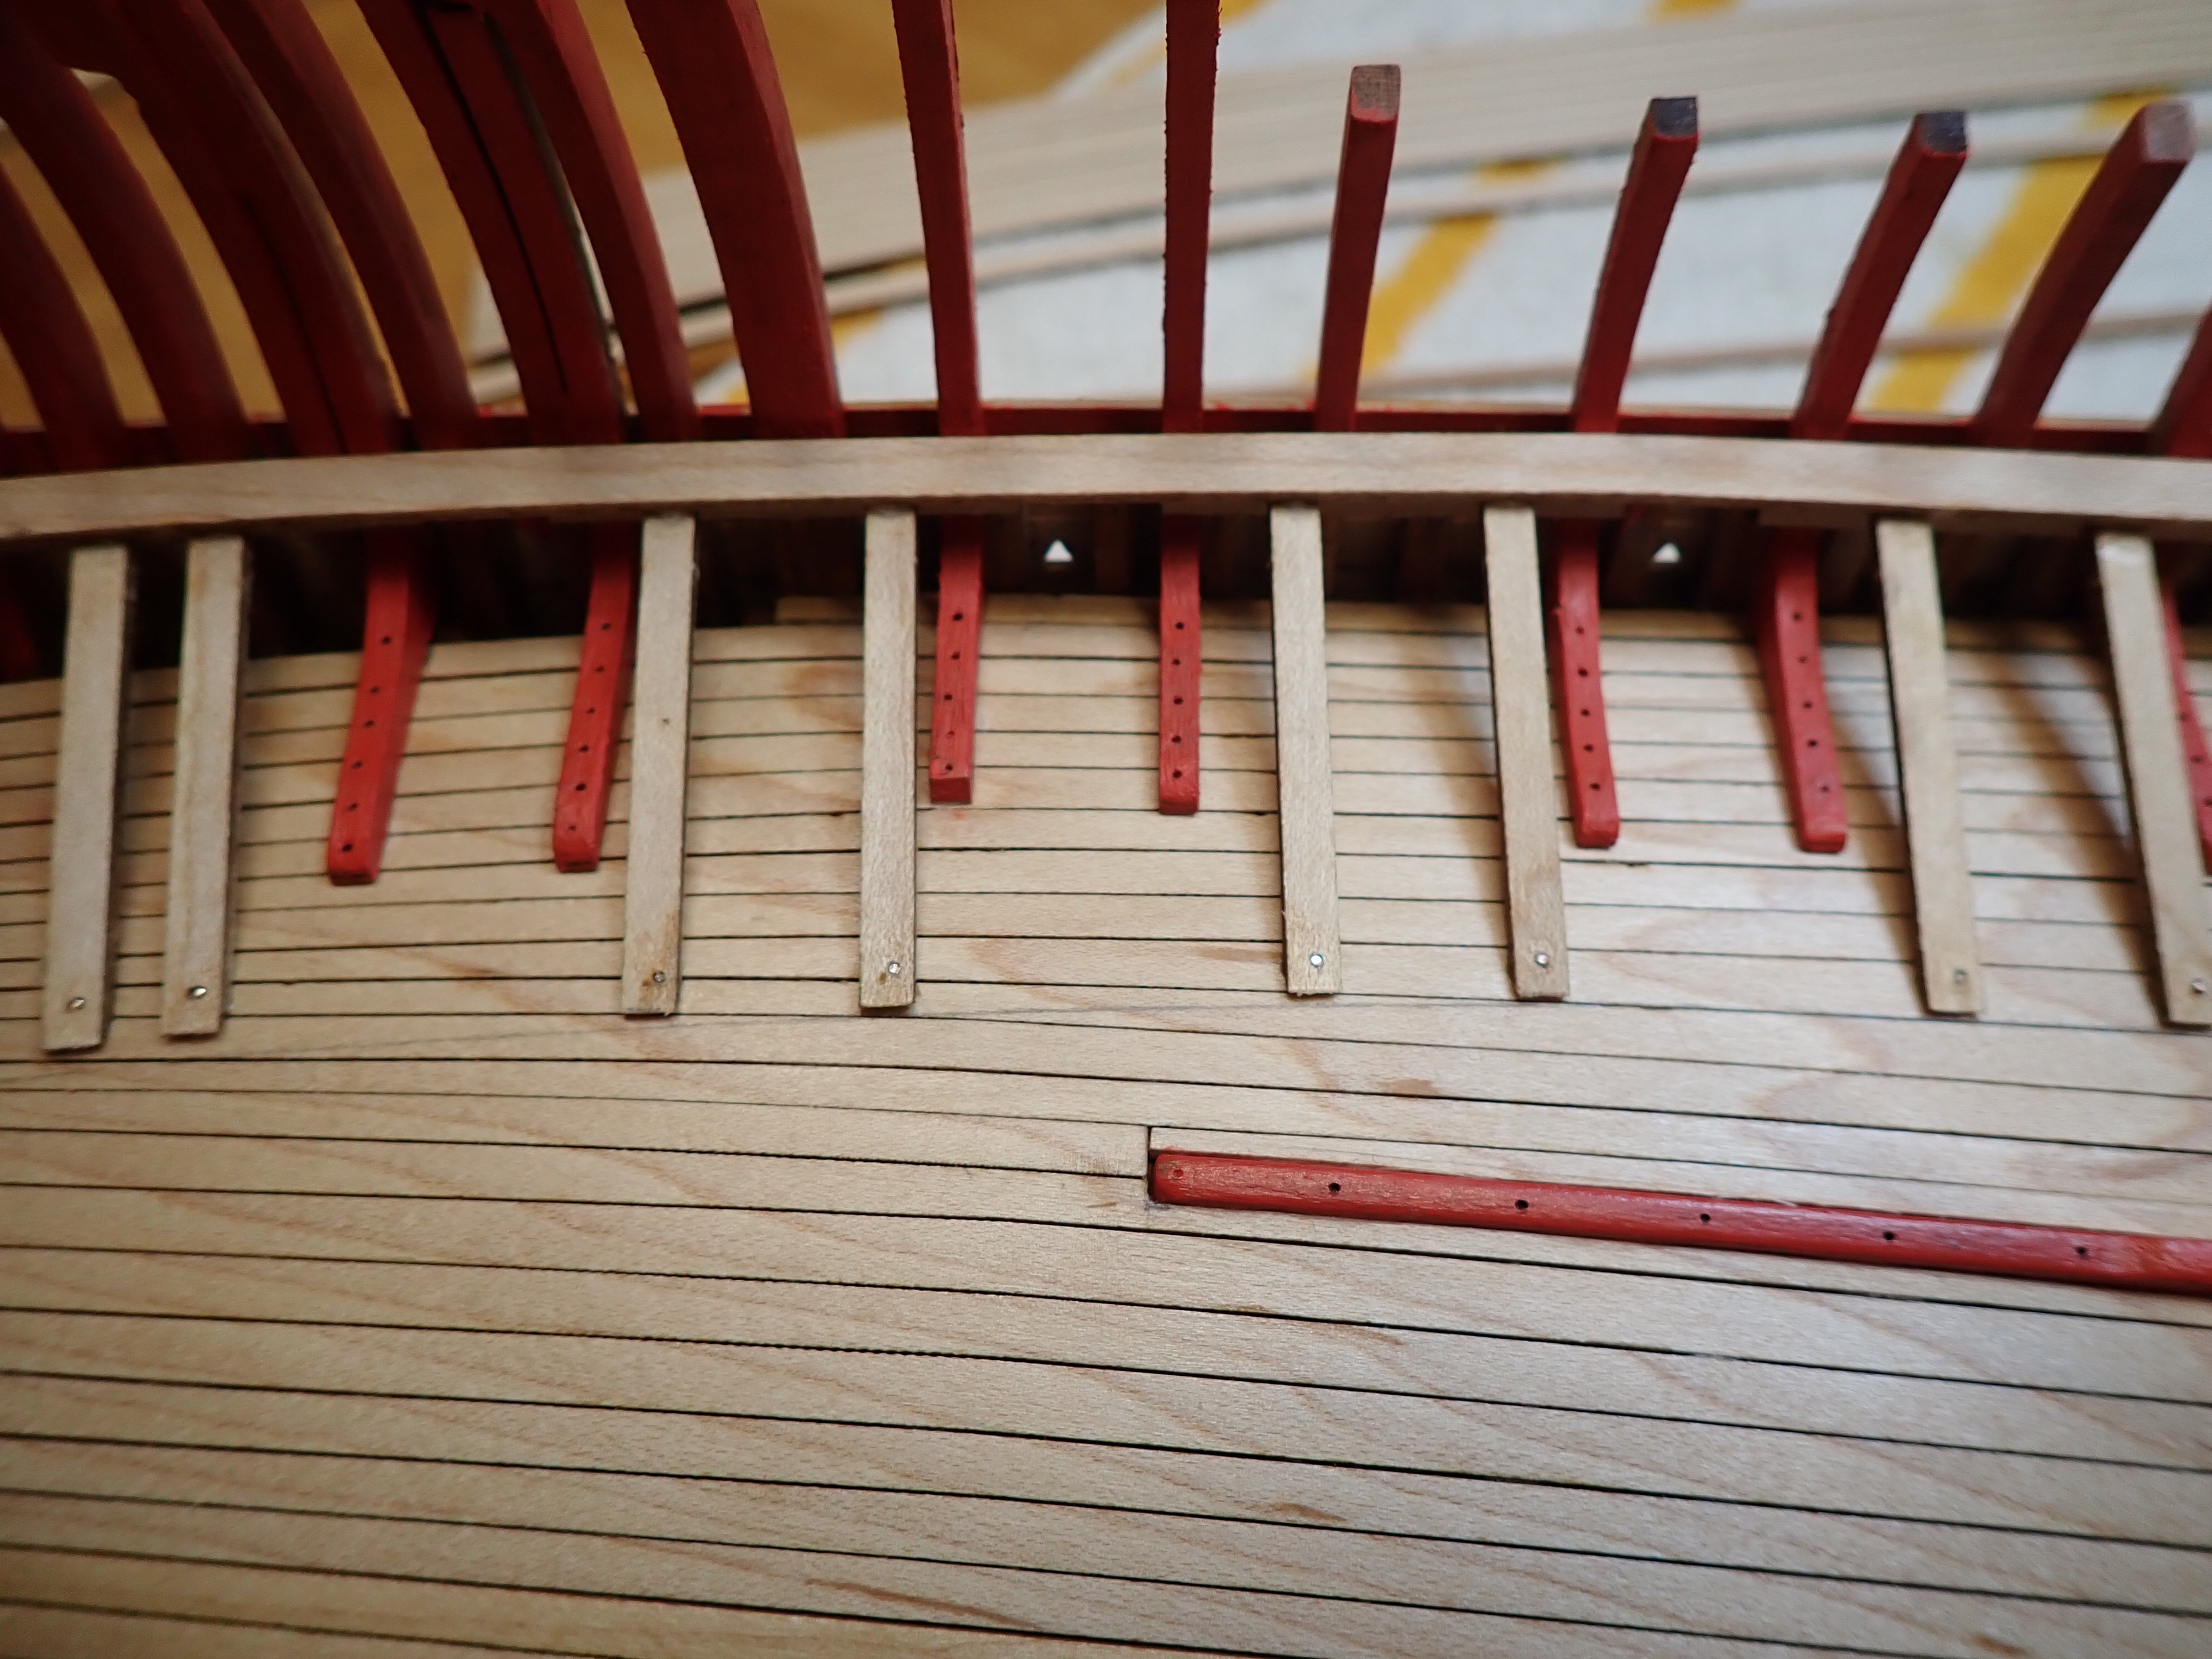
A quick improvement over the kit, that I would recommend dearly: Nail (for real), the gun deck supports. I used again nickel silver nails made with electronic component pins. Add at the stern and the bow some re-reinforcements for the end of the gun deck planking: With these improvements behind us, we can now start the planking, properly speaking. First plank goes against the frames (at least that is the way I am approaching it): Then installation of the grates and tons of precise cuts..... Yves


- 185 replies
-
- 12
-
-

-
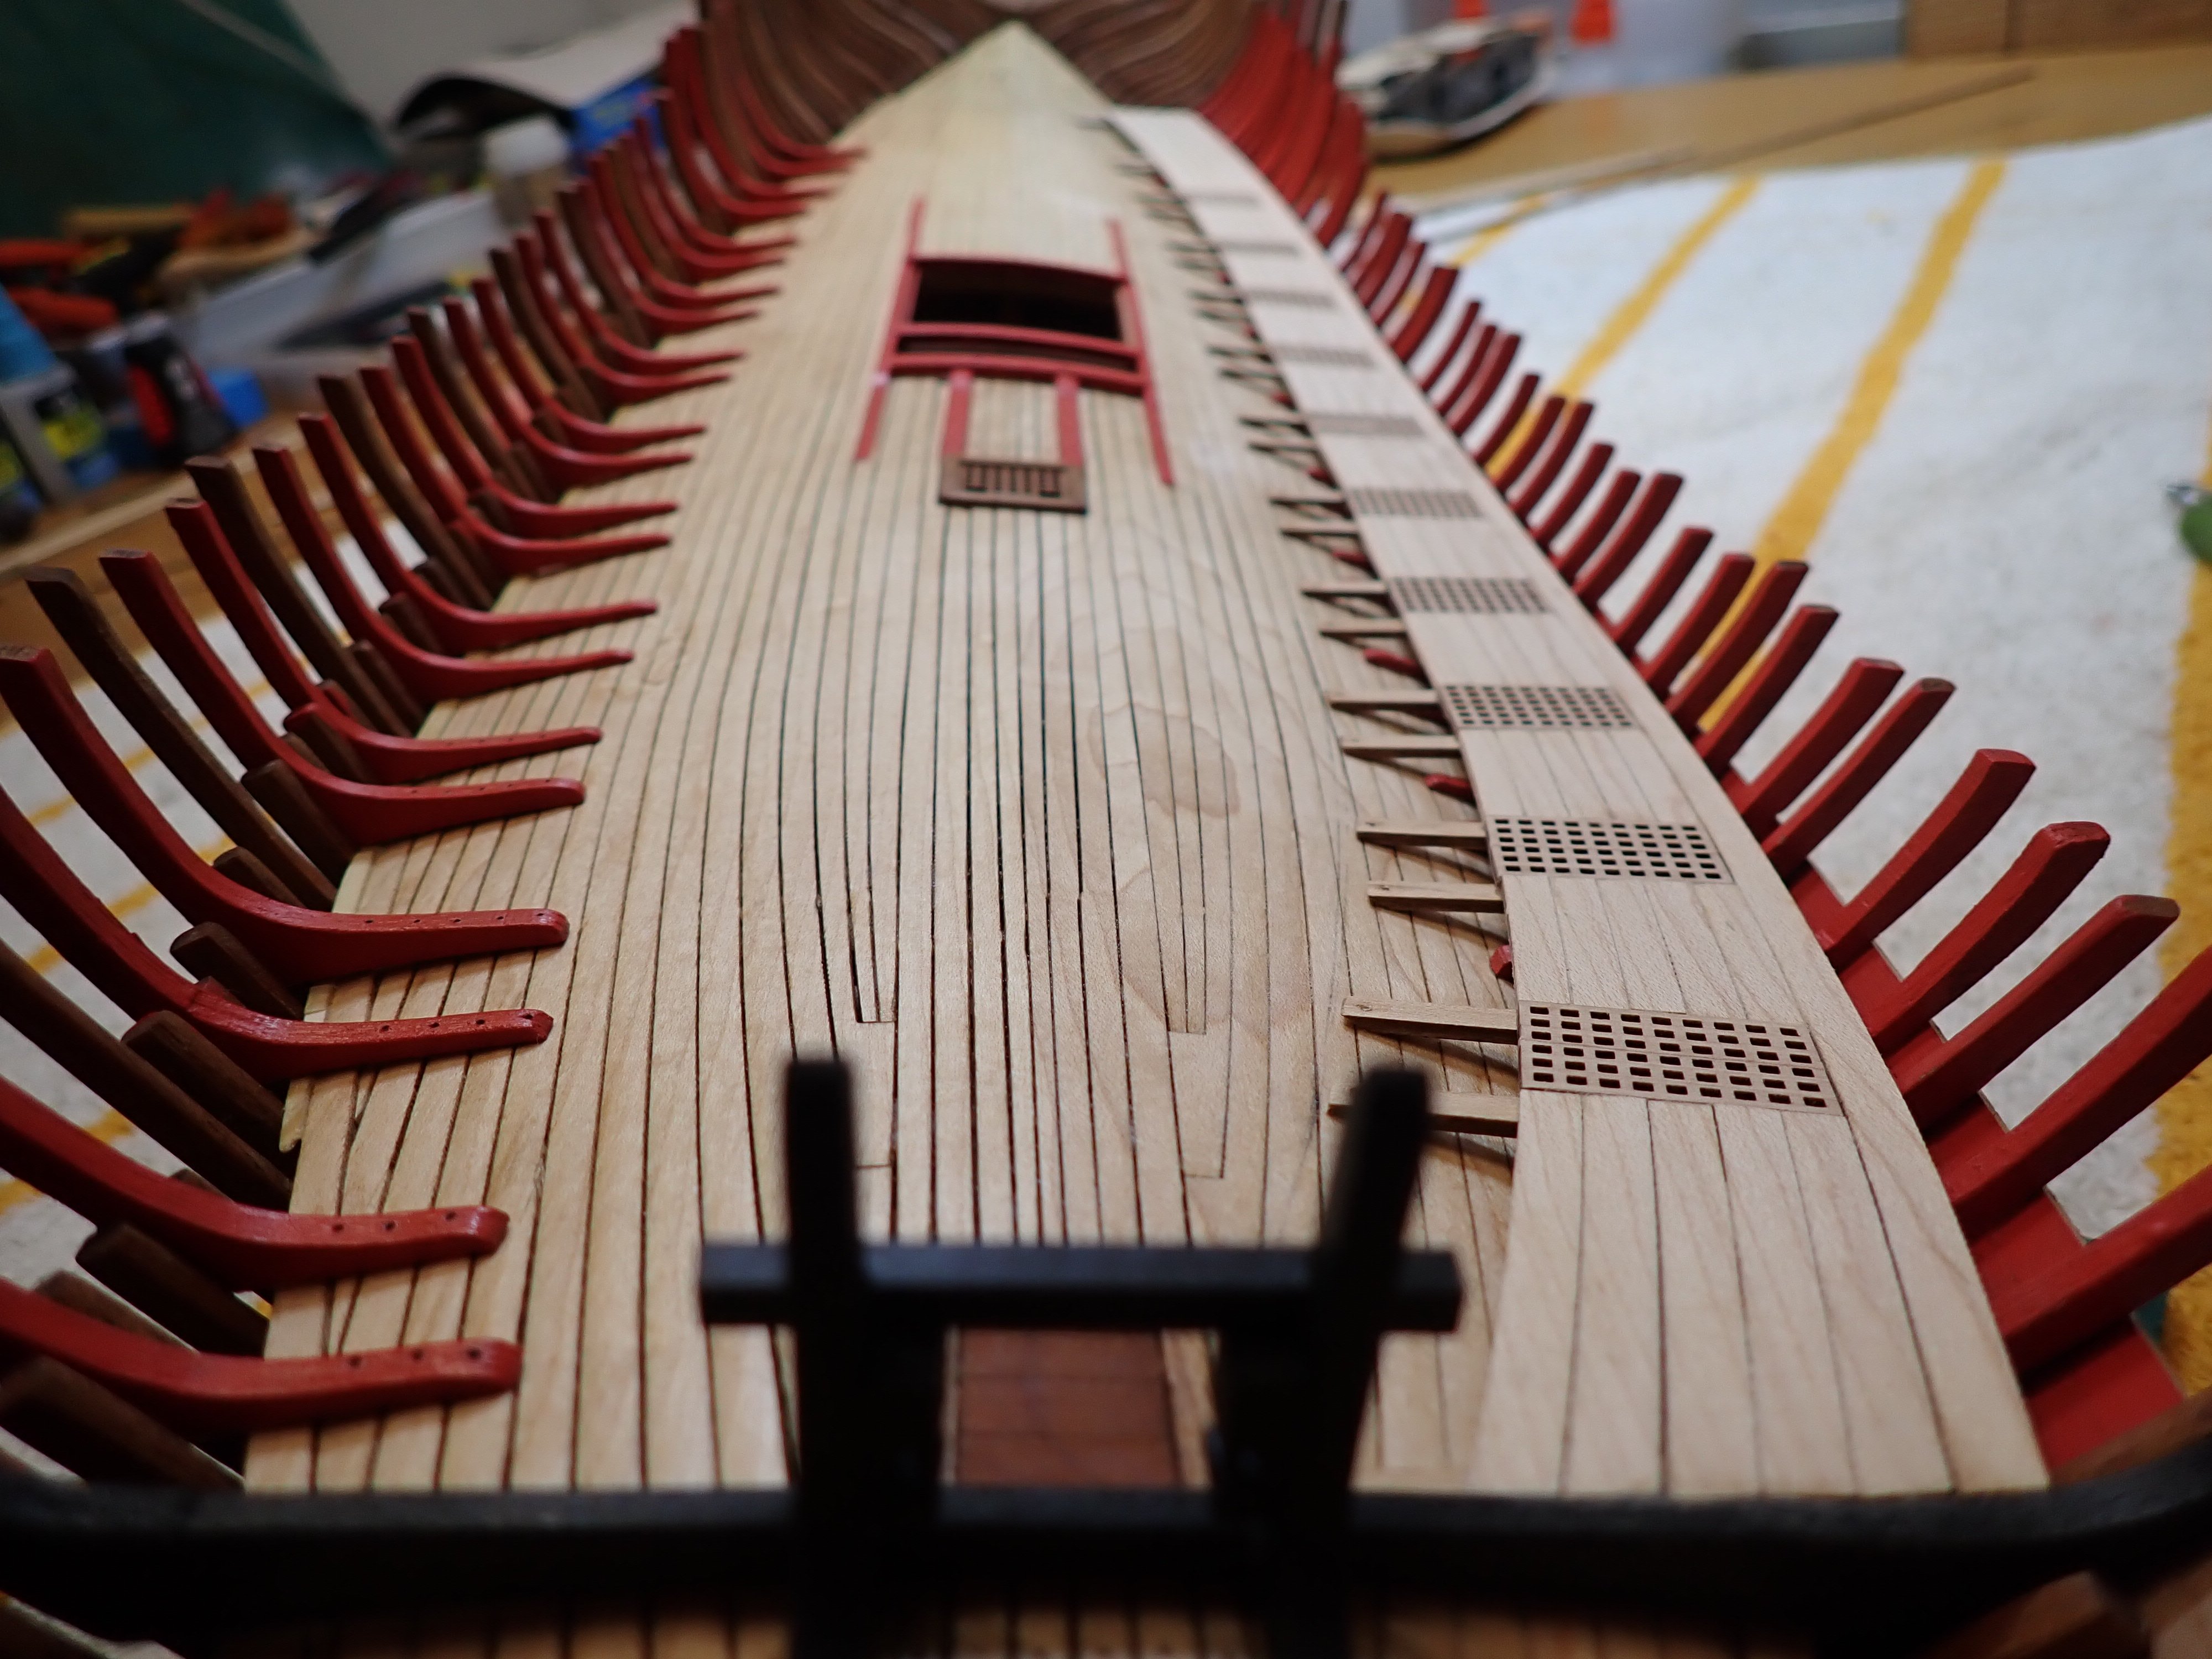
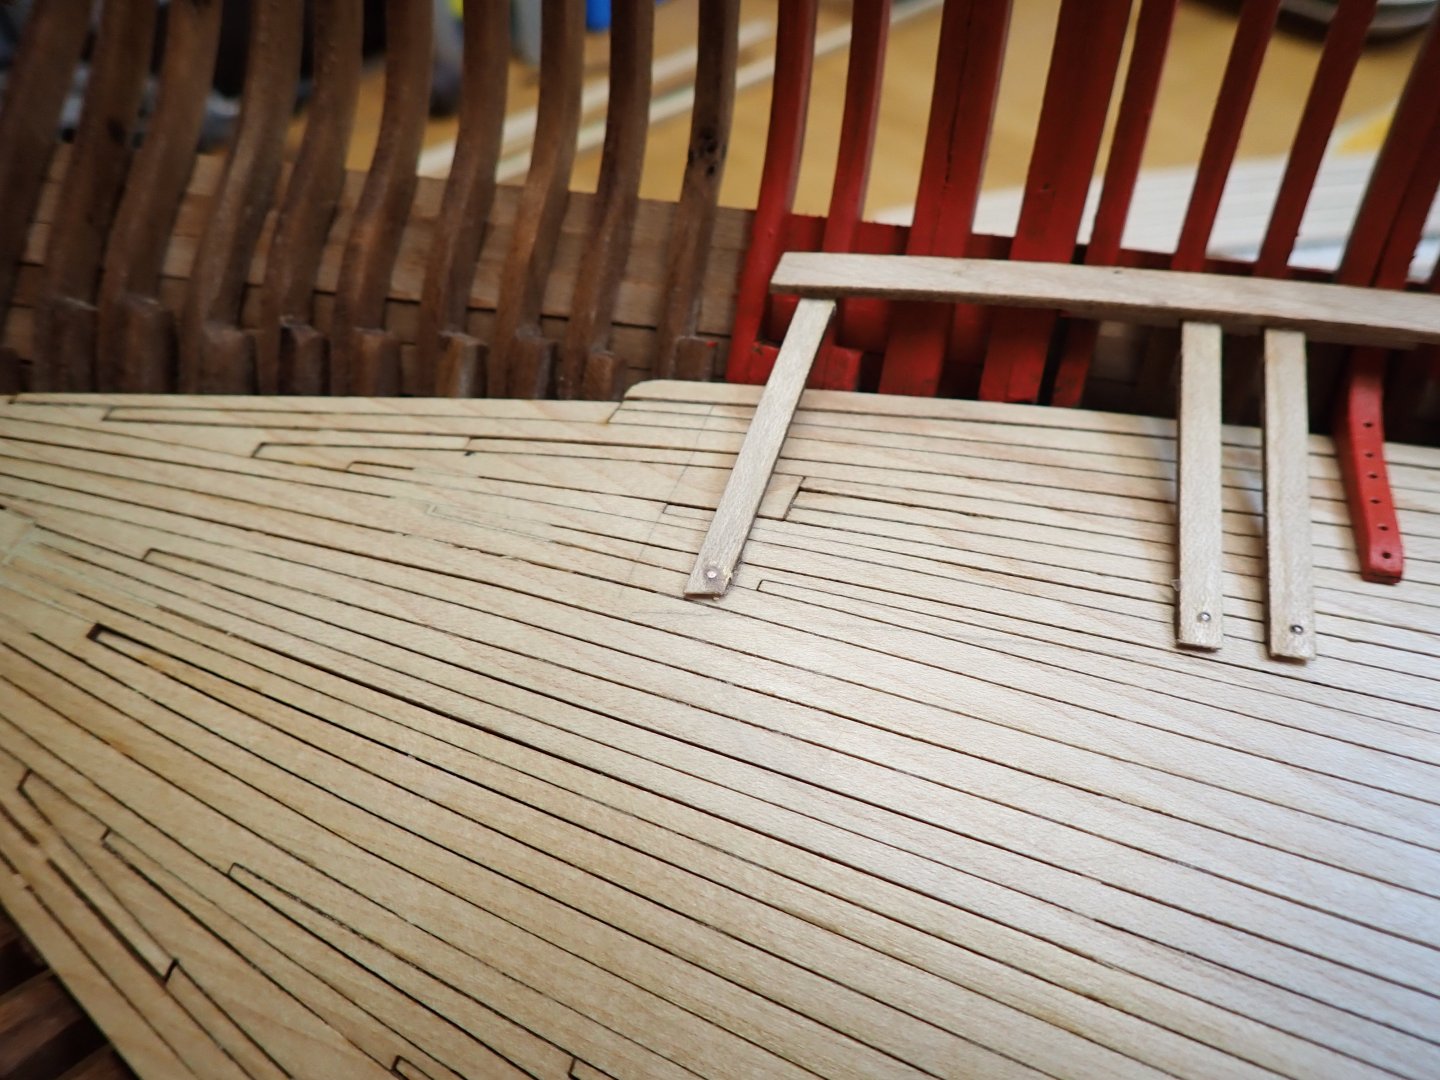
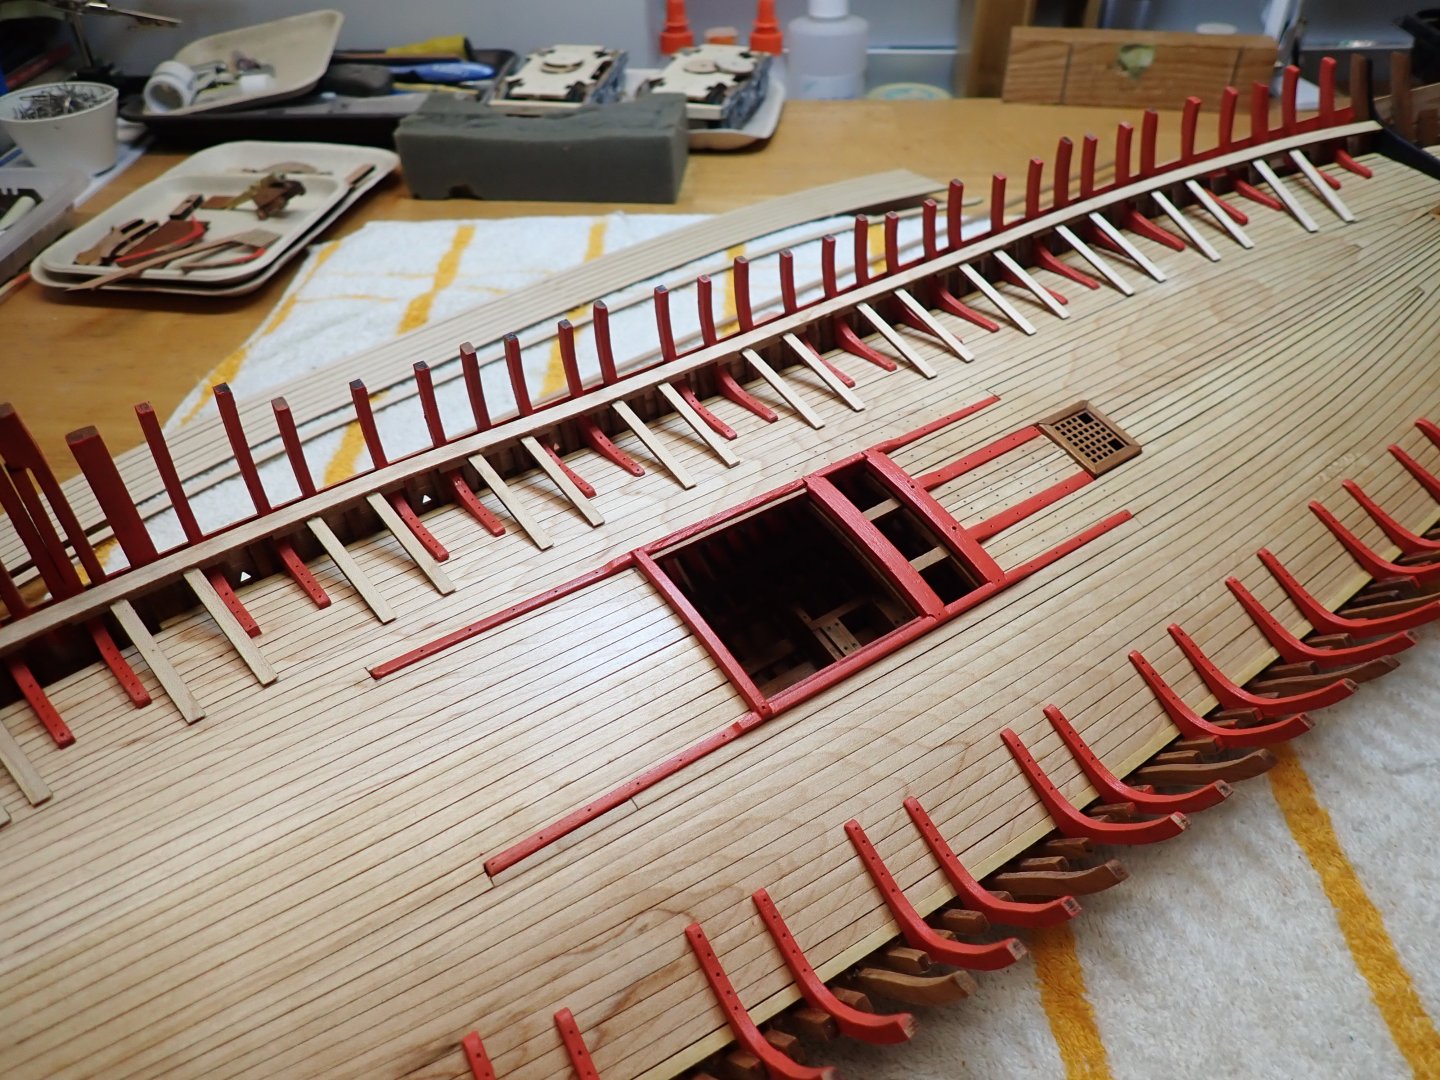
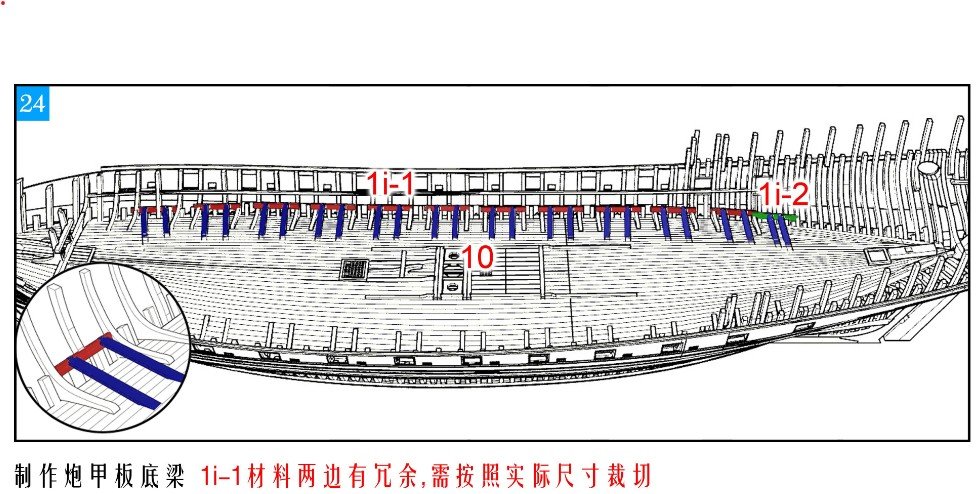
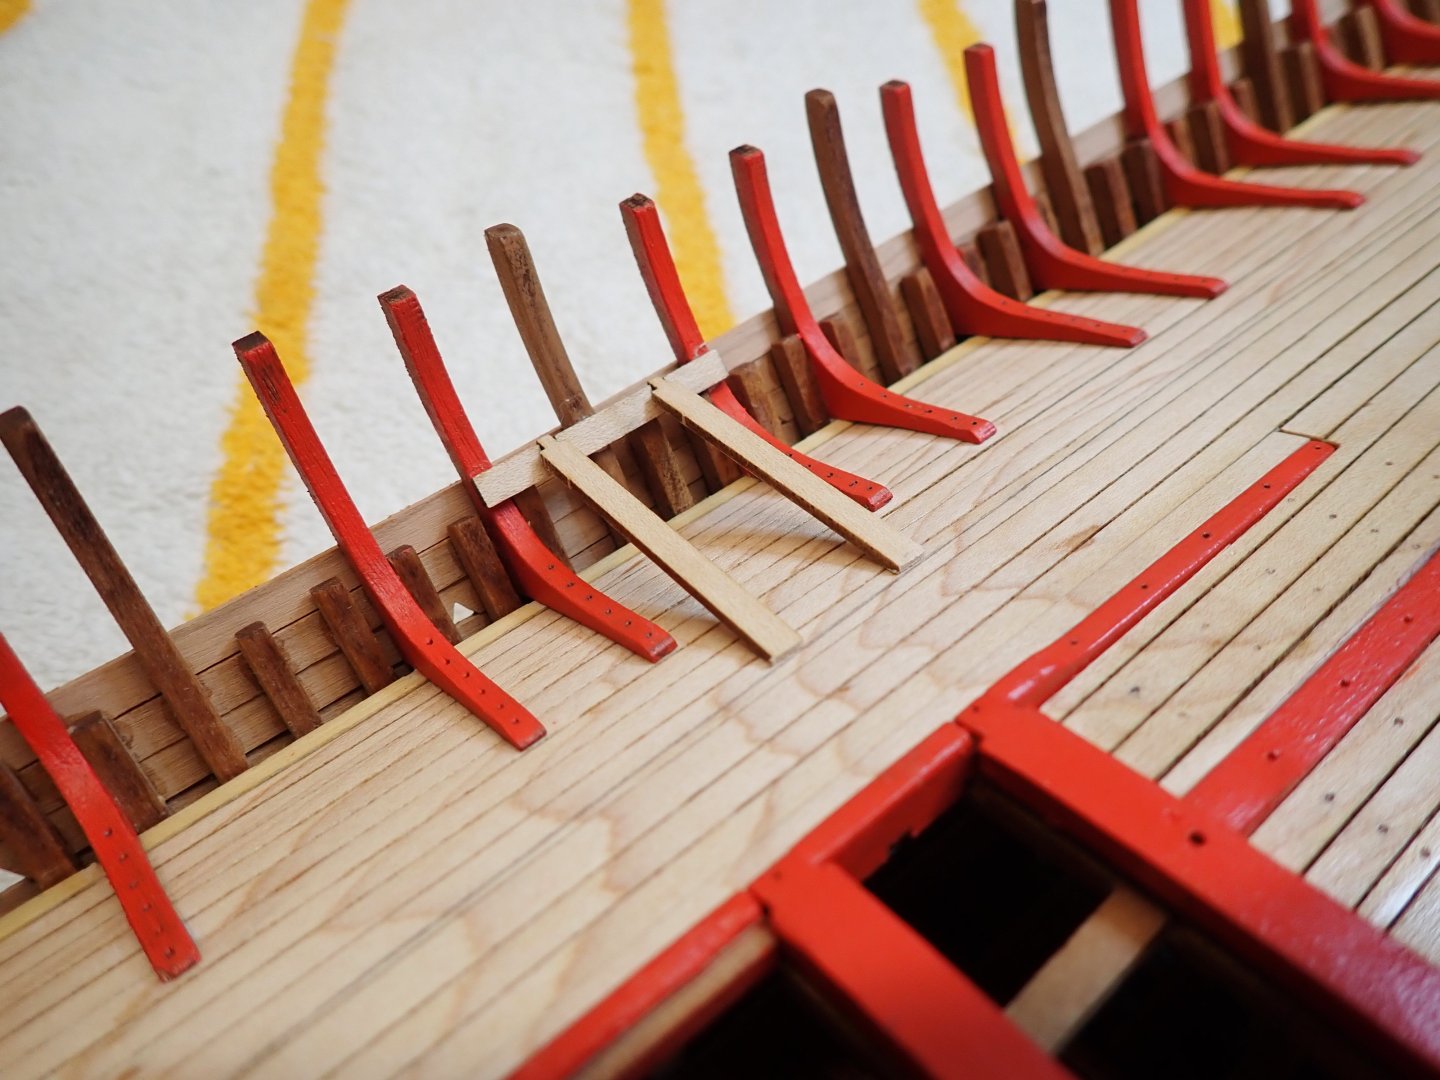
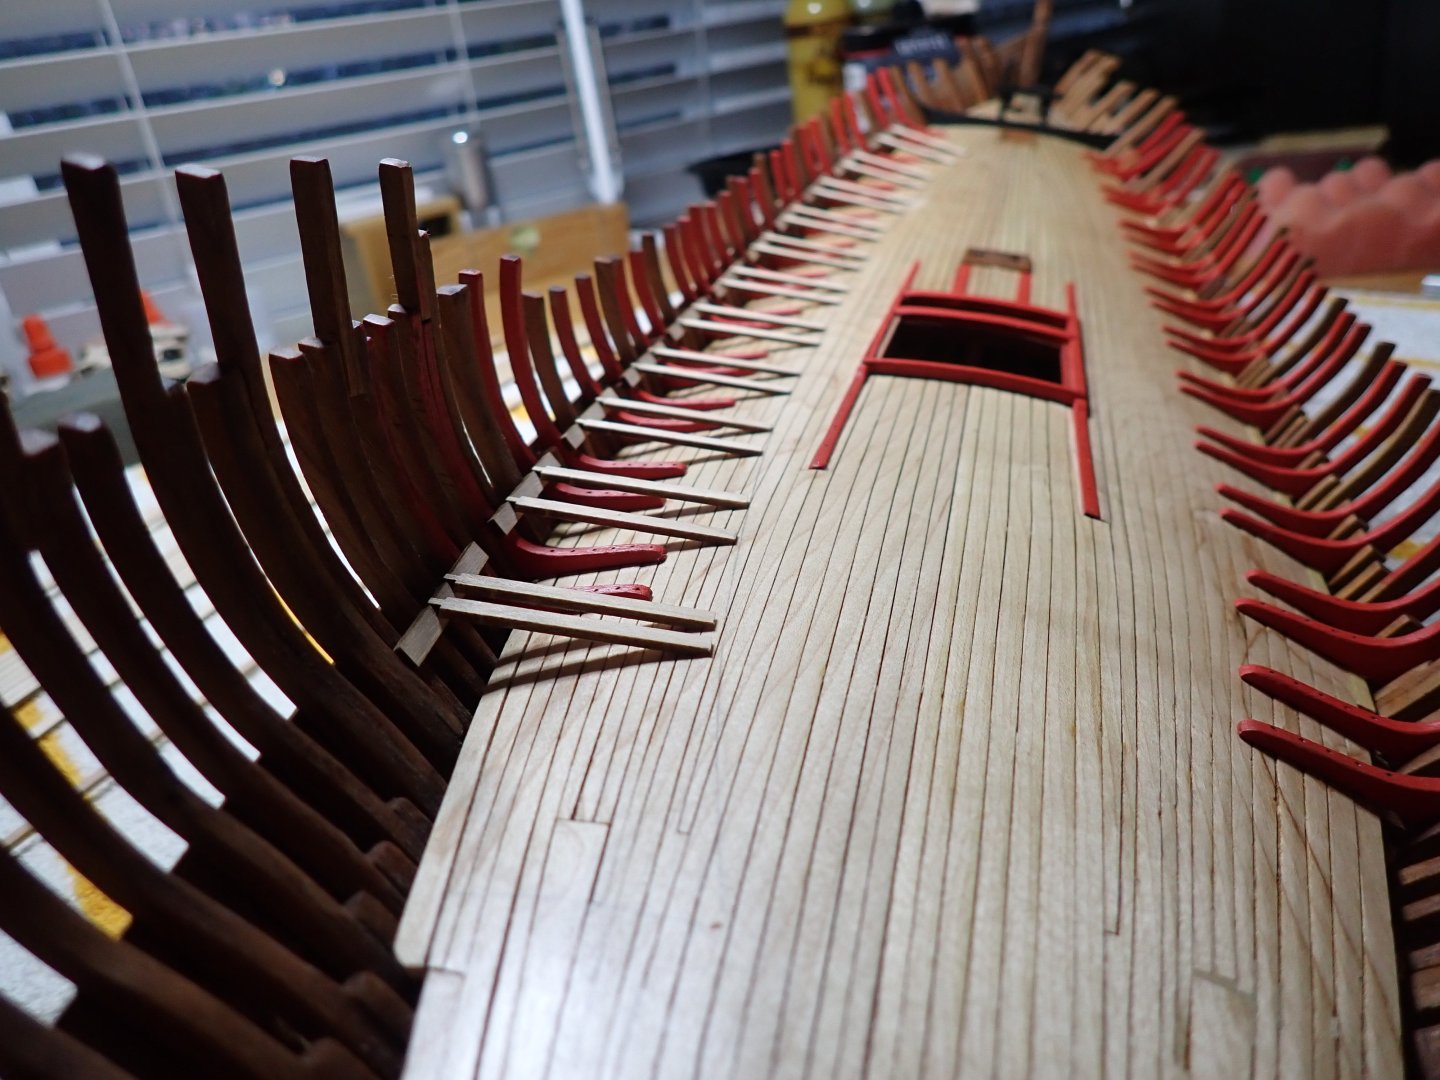
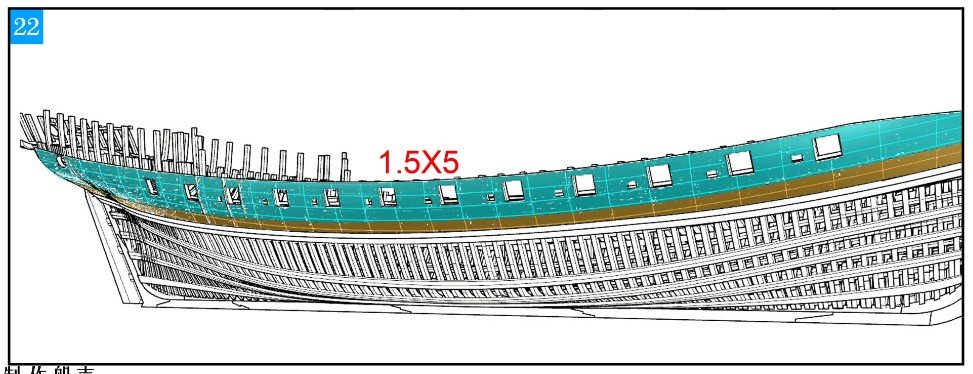
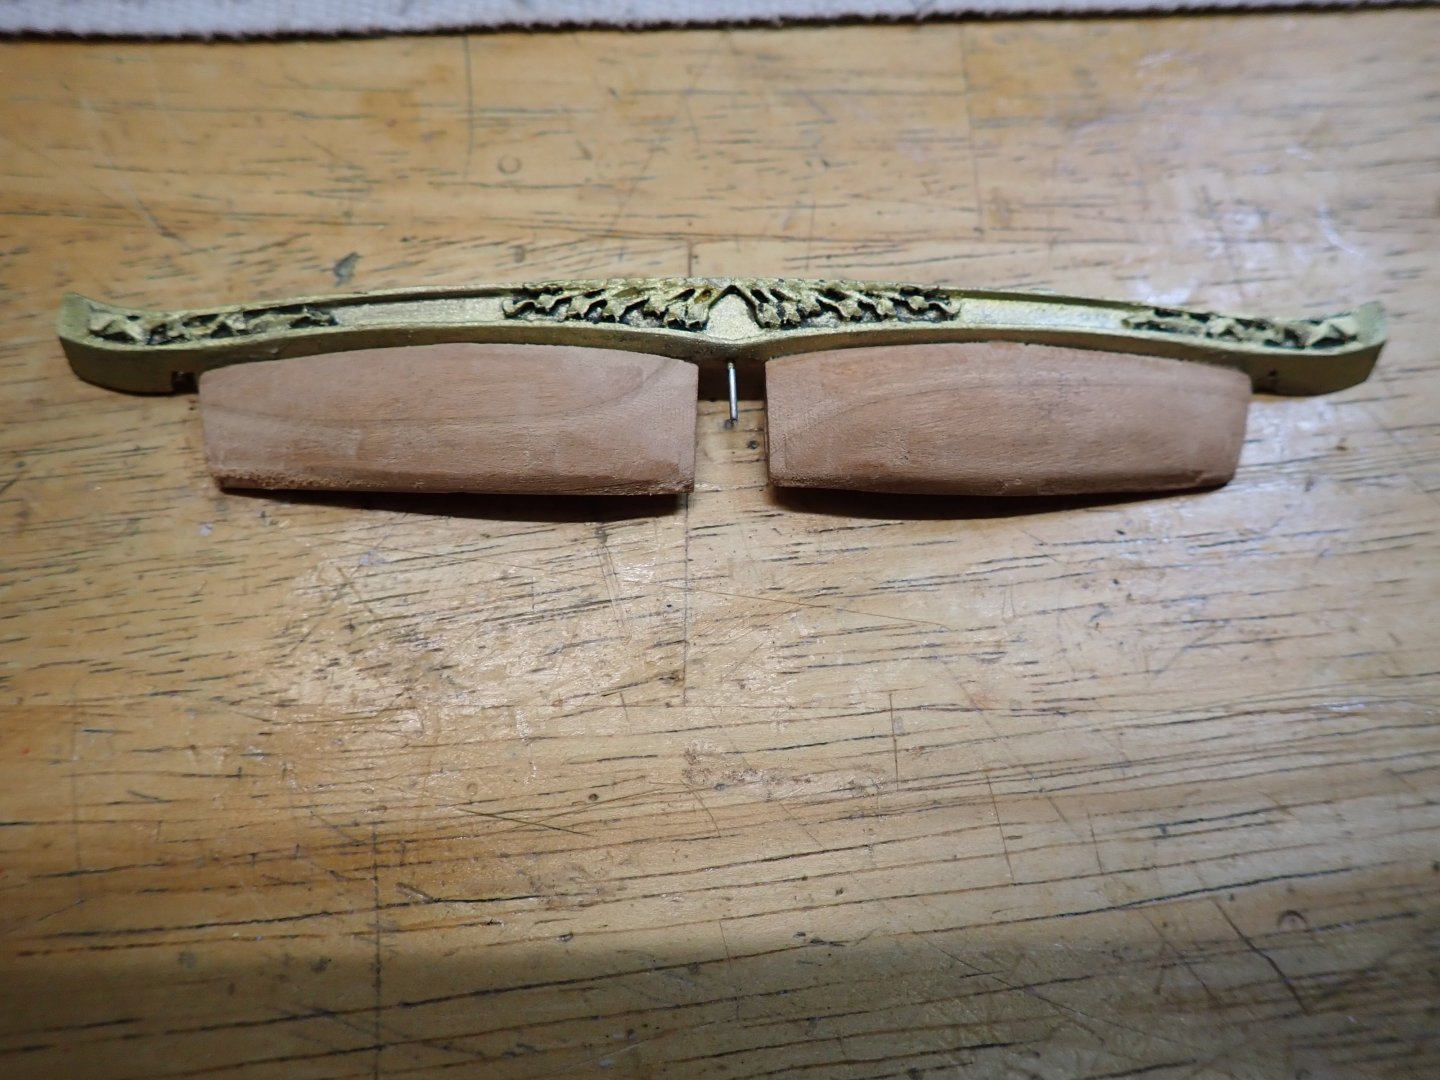
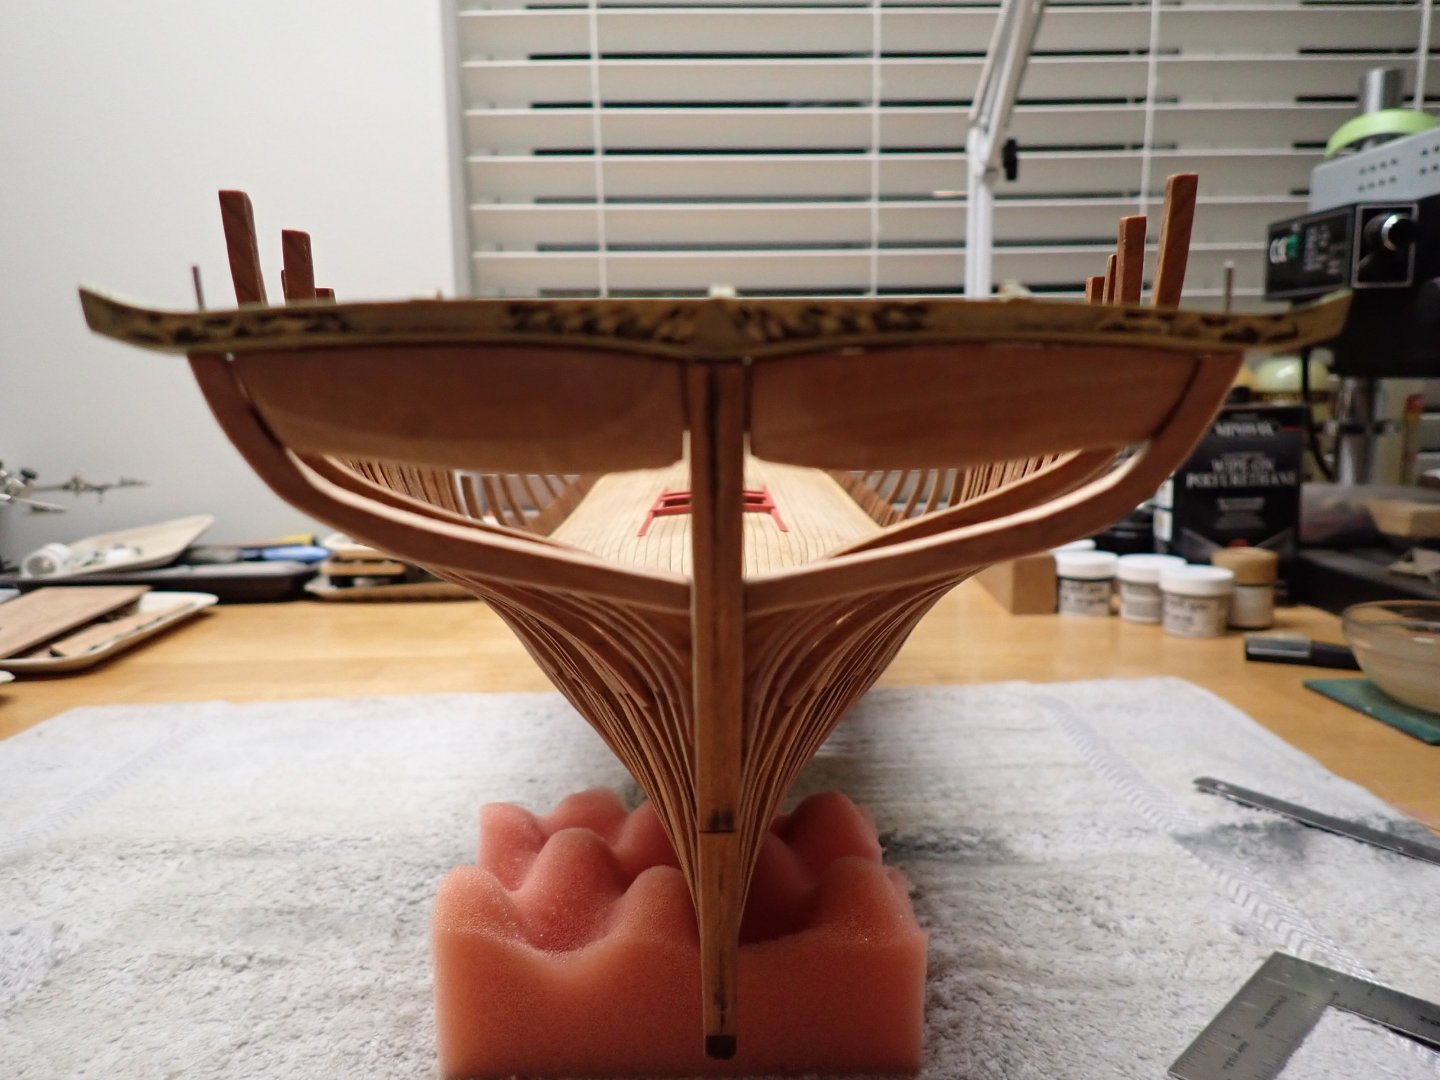
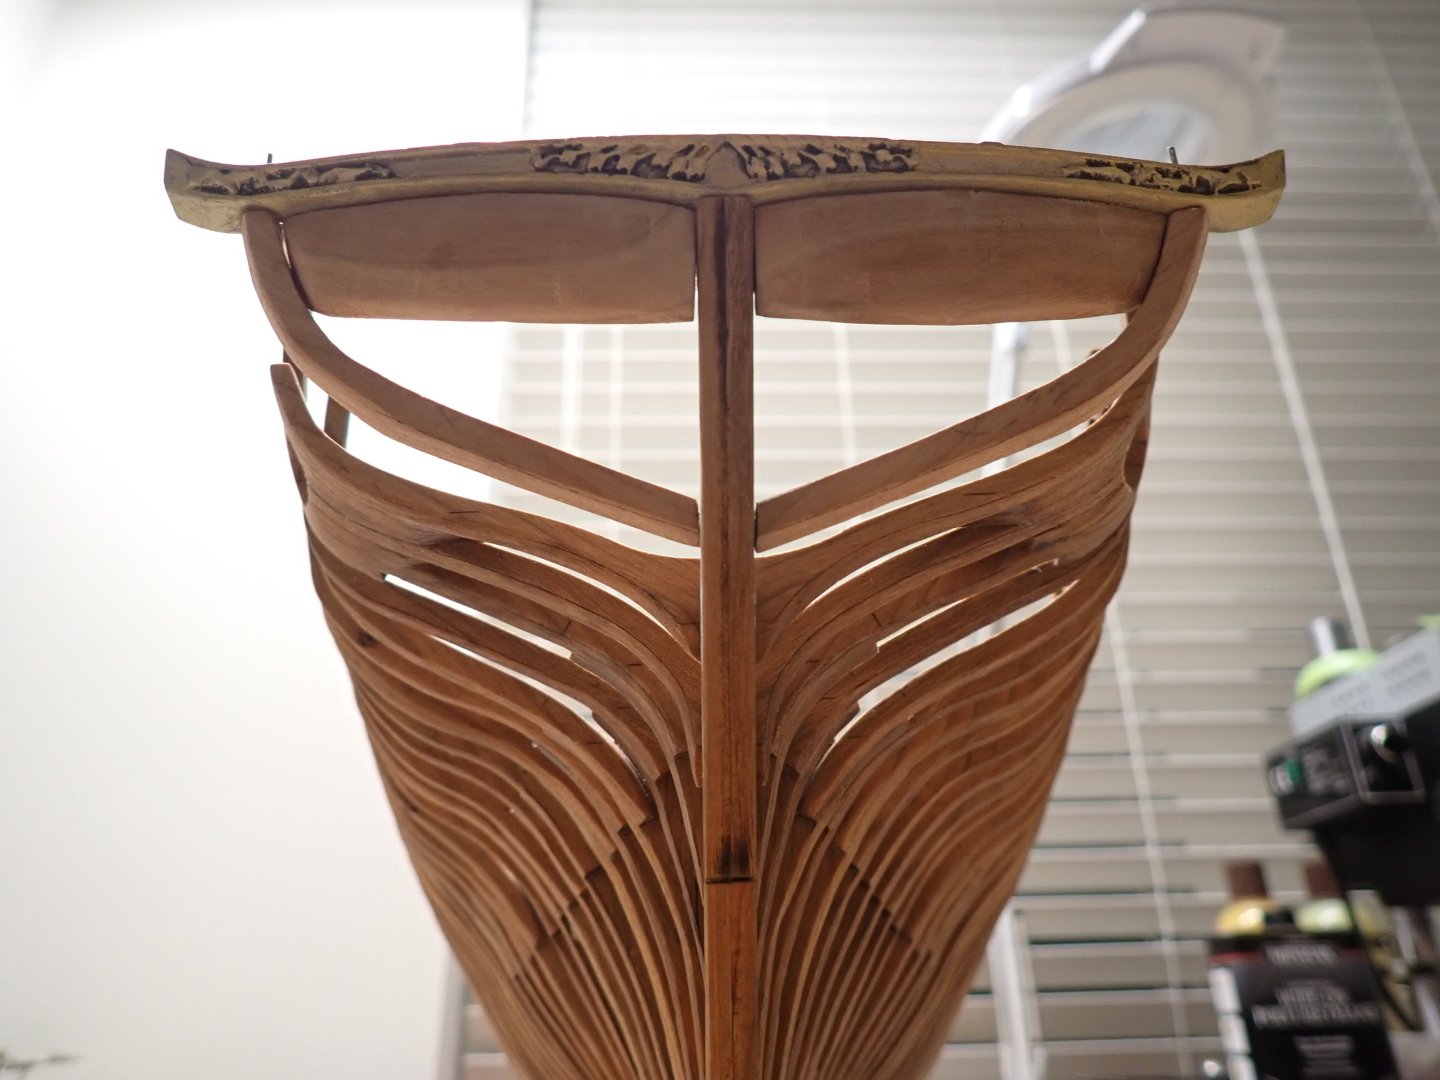
Before moving further with the planking, I have decided to take a look at the gun decks and see how these are being built. There is nothing easy on that model, as we have nothing flat and straight, besides the bottom of the keel. As always, the instructions are scarce: The Chinese ideograms are simply indicating that you can cut the blue parts to the correct length. Thank you. Nothing is really being said about where the red parts are to be sitting against the frames and the plan is of little use as well. So, after digesting plans, Monograph and the above picture, I decided to place them so that the gun deck would be horizontal as much as possible. I traced a delineation line on the deck, using the gun deck planking provided in the kit. That line allows me to determine the length of the support bars. After installing a gun on the support bars, the gun seems to be about horizontal, so it may work. At this stage, all supports have been installed and the planking seems to fit nicely, more or less. The picture above gives a clear understanding how this ship is architectured. With such a convex deck, platforms to hold the guns were absolutely necessary. The picture below shows the upcoming gun deck planking. It is composed of 9 planks and 9 grates which are sitting on the deck supports. There will be a lot of cutting and fine adjustments to make it look decent. In the meantime, I am painting the bulwark in red, as the Monograph seems to indicate. That is done in a much easier way by limiting the height of the hull planking. With this kit, you have to approach the various tasks in a scrambled and mixed way.... Not easy!! Have I said that before? Yves


- 185 replies
-
- 10
-
-
I think it needs an extra coat of clear.... Yves
-
Amazing and beautiful work, Rob. That blue is fantastic. Yves
-
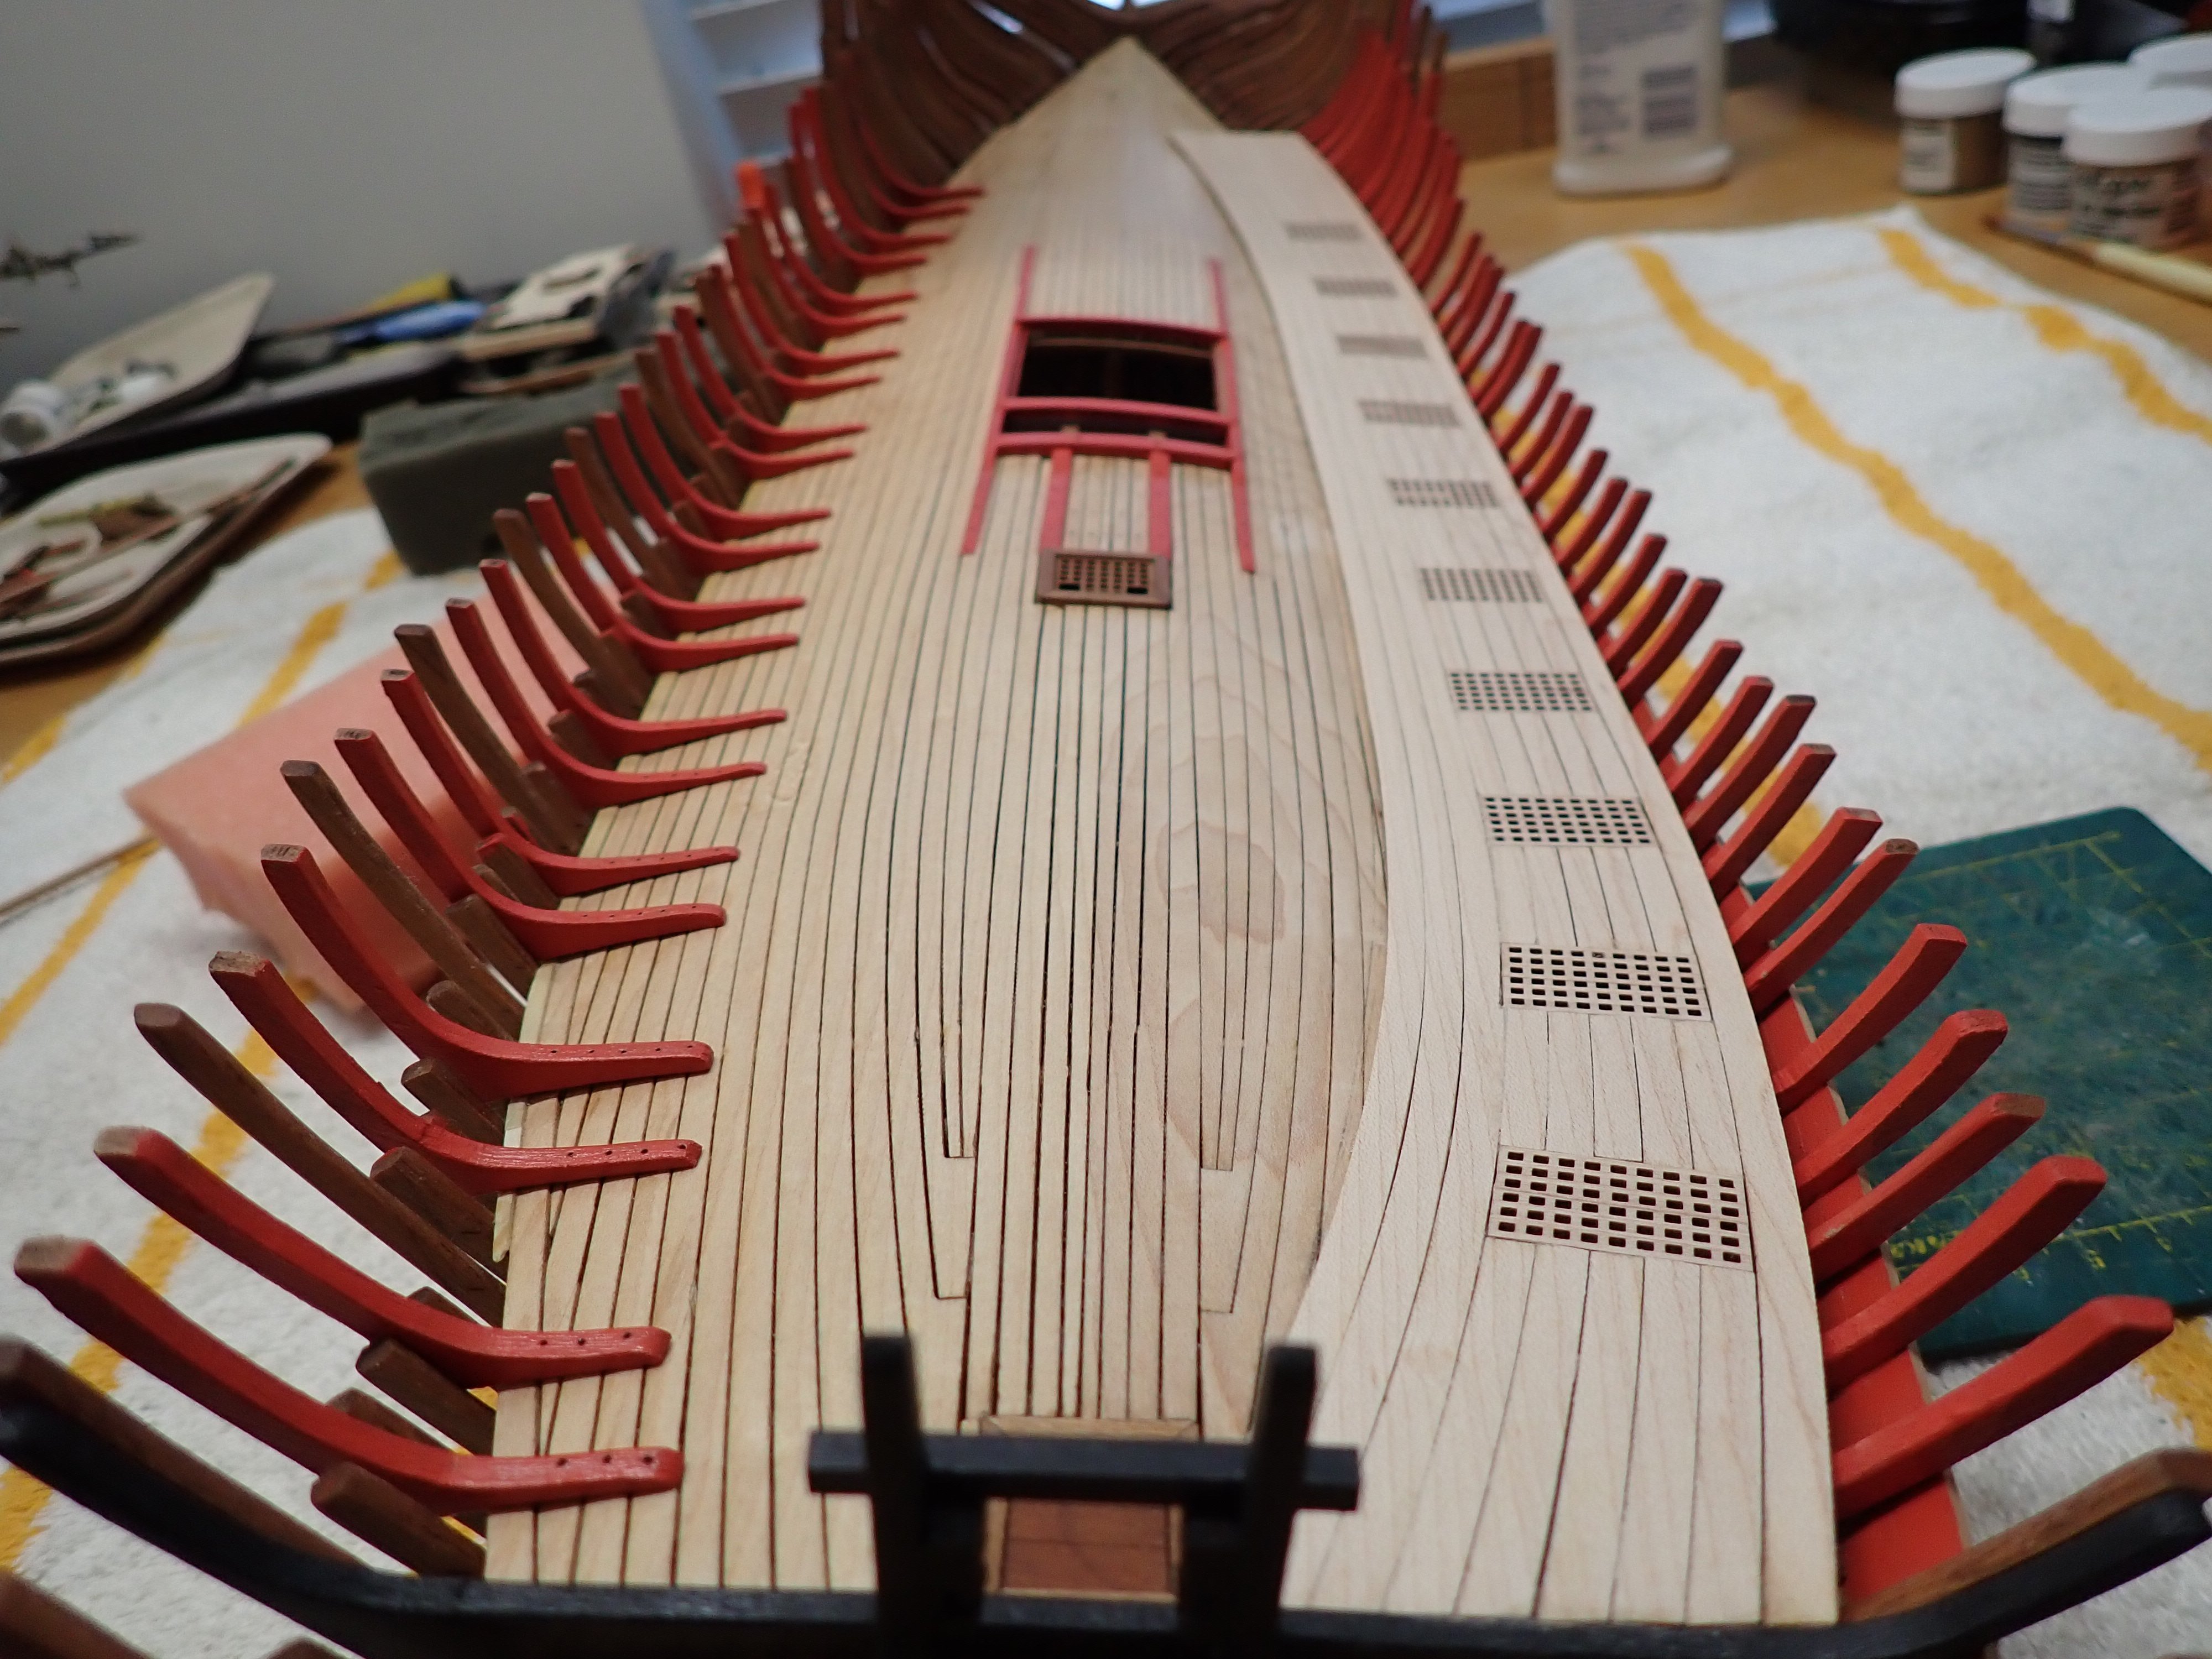
Before moving further, I am planking one side of the ship to get a better grasp on how the guns decks are positioned and built. With a coat of Model Shipways Yellow Ochre: I still have to sand a little bit the planking... The following picture shows the deck and where the gun decks will be built: That will be for another update. Yves


- 185 replies
-
- 14
-
-
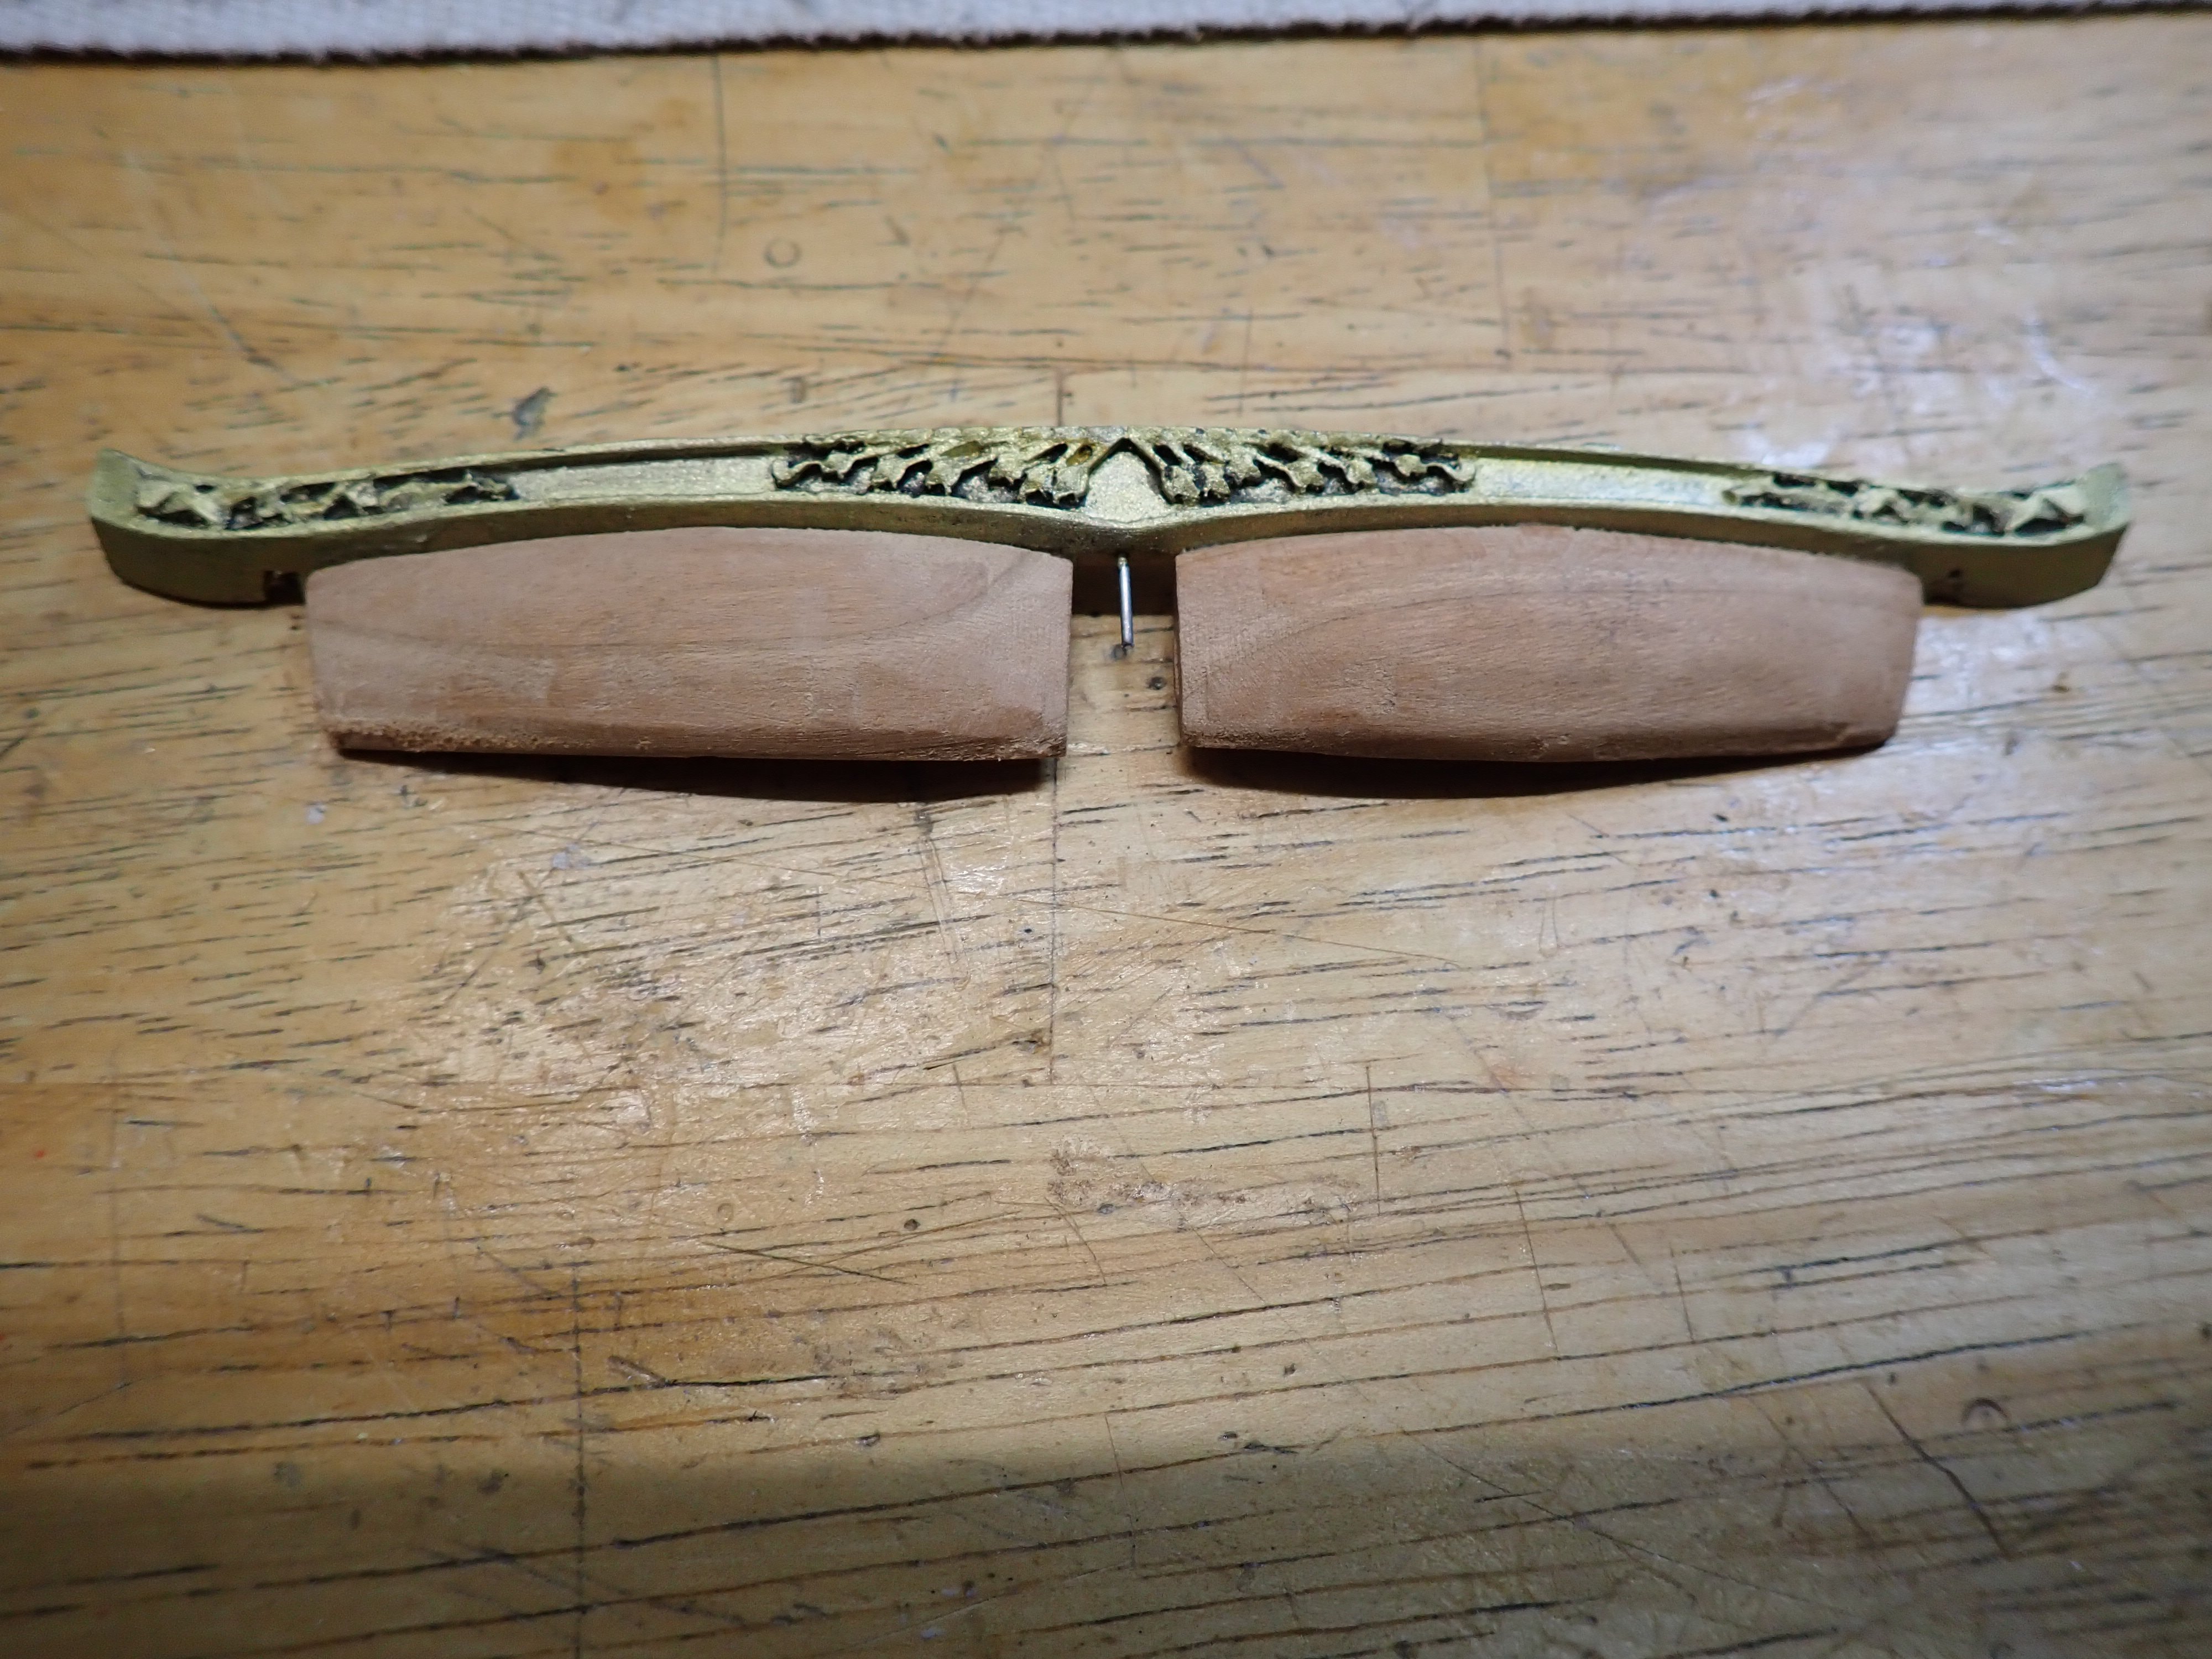
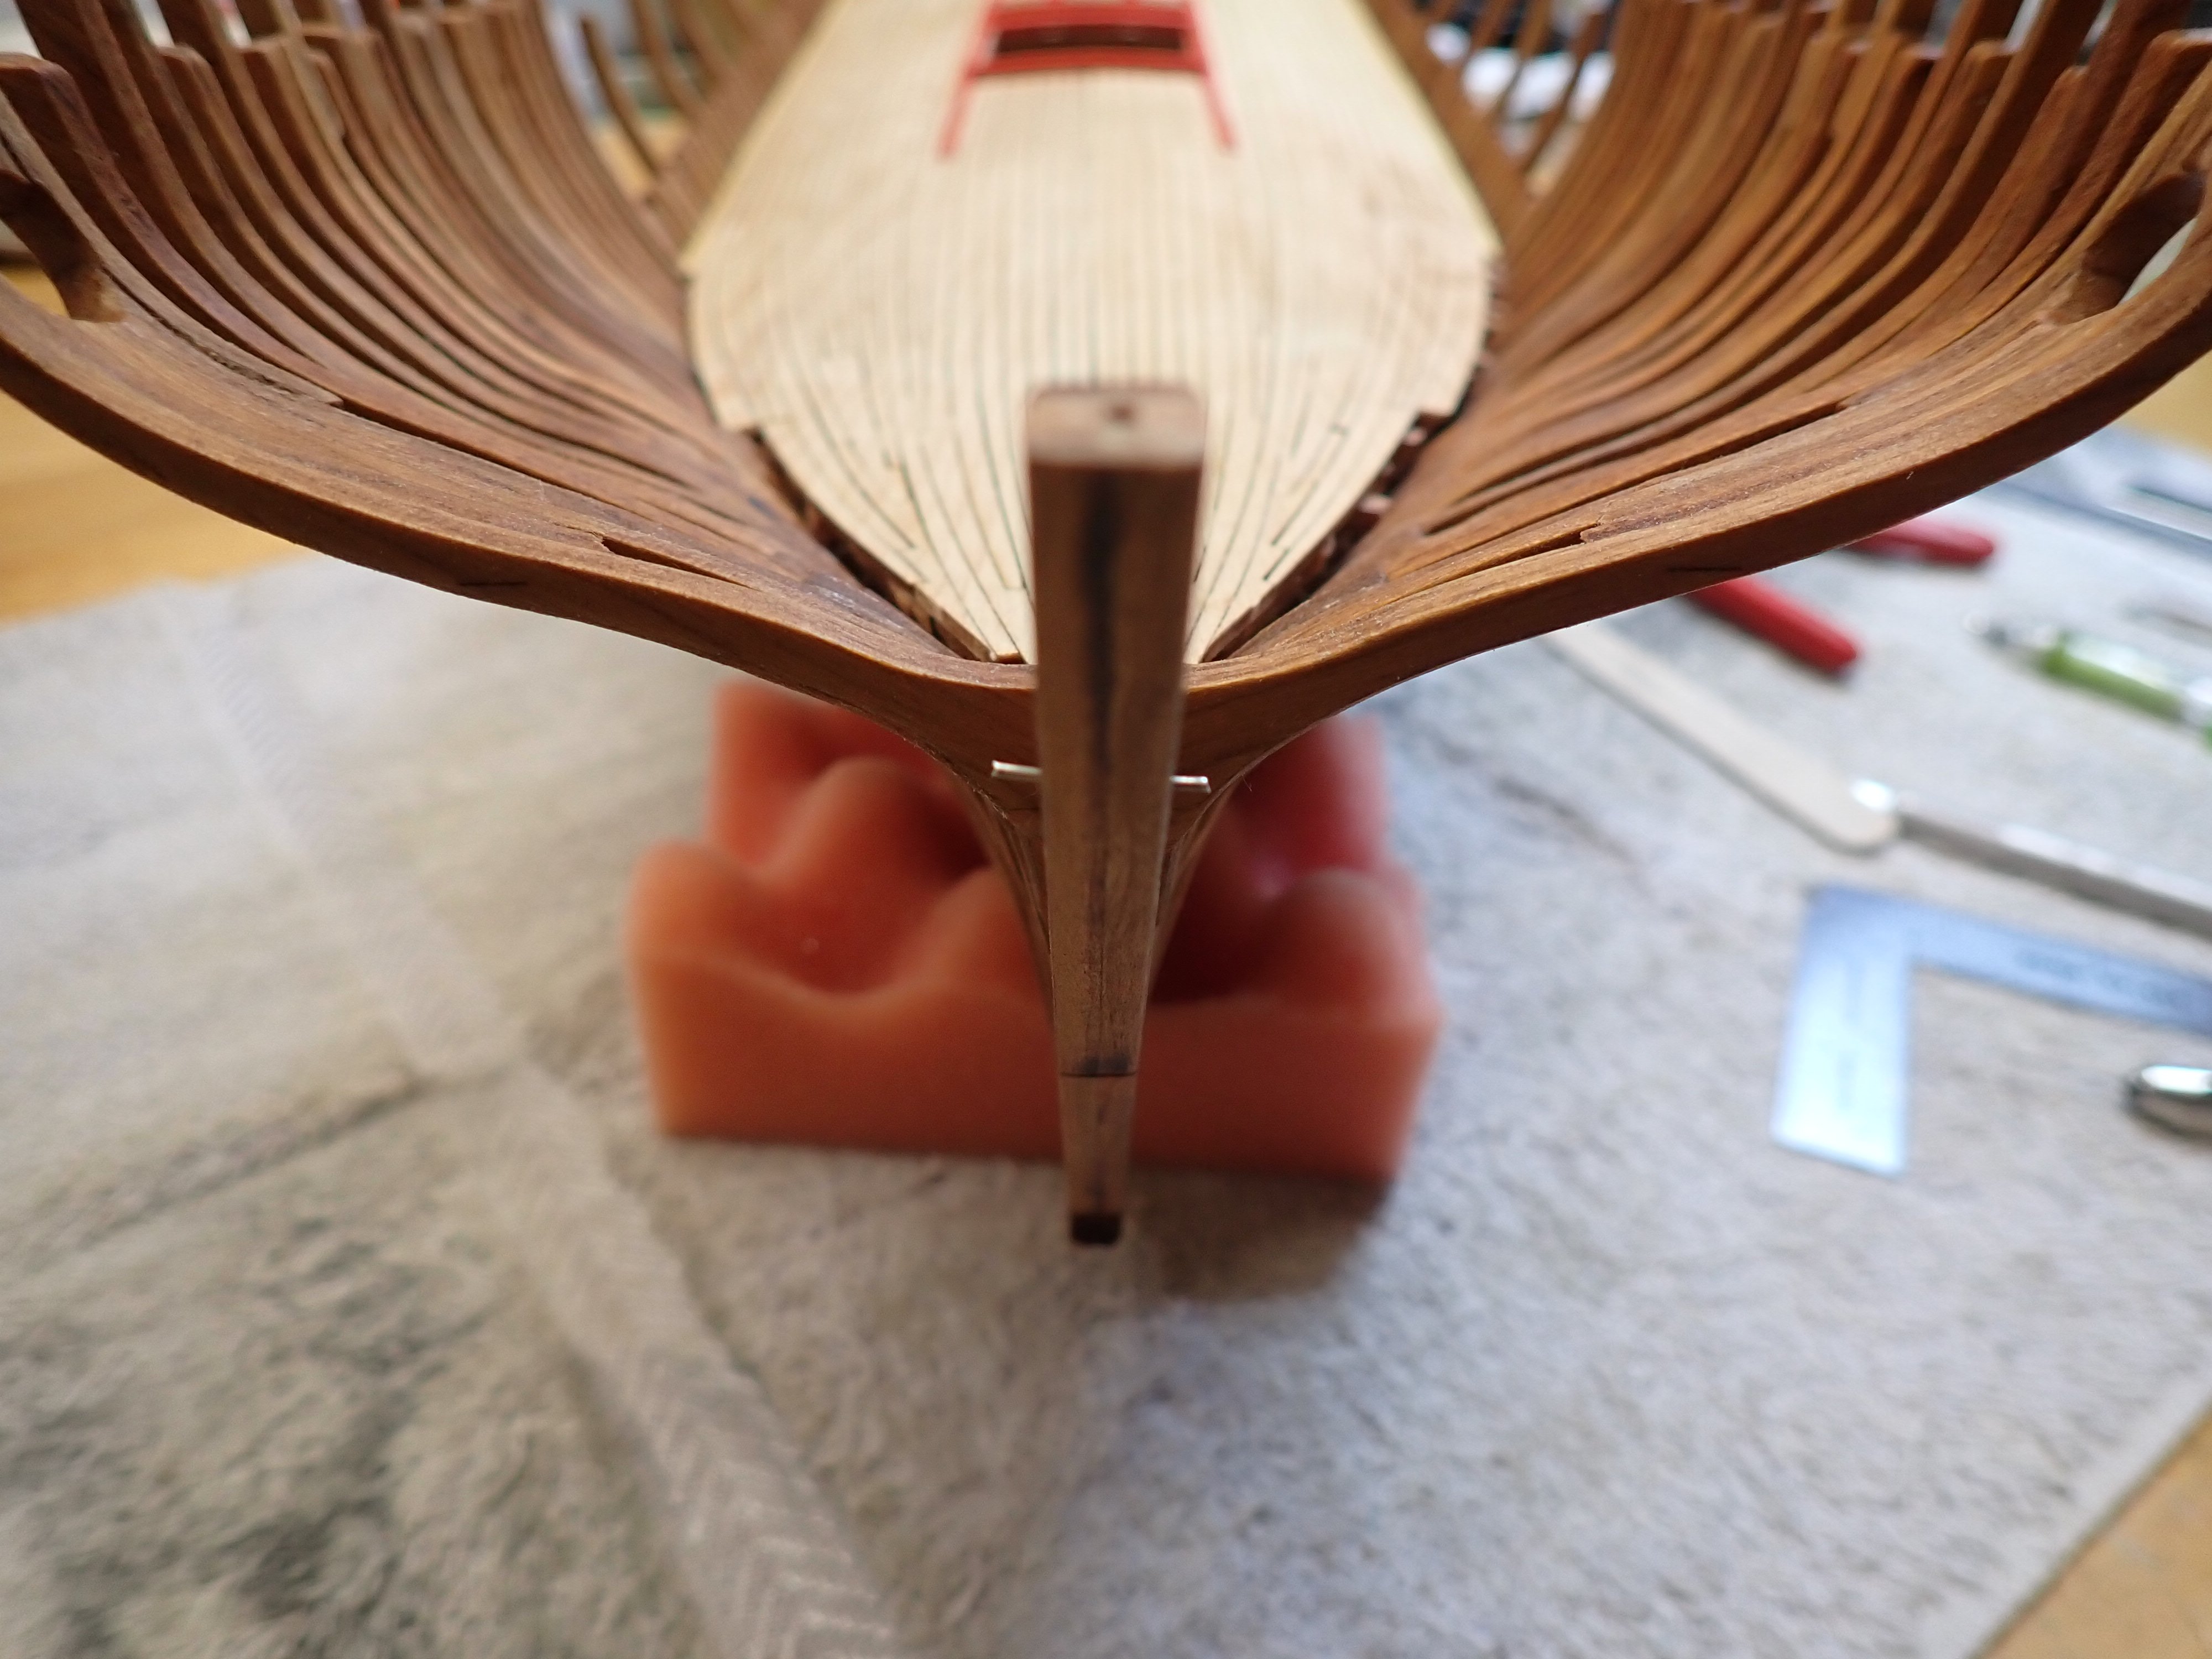
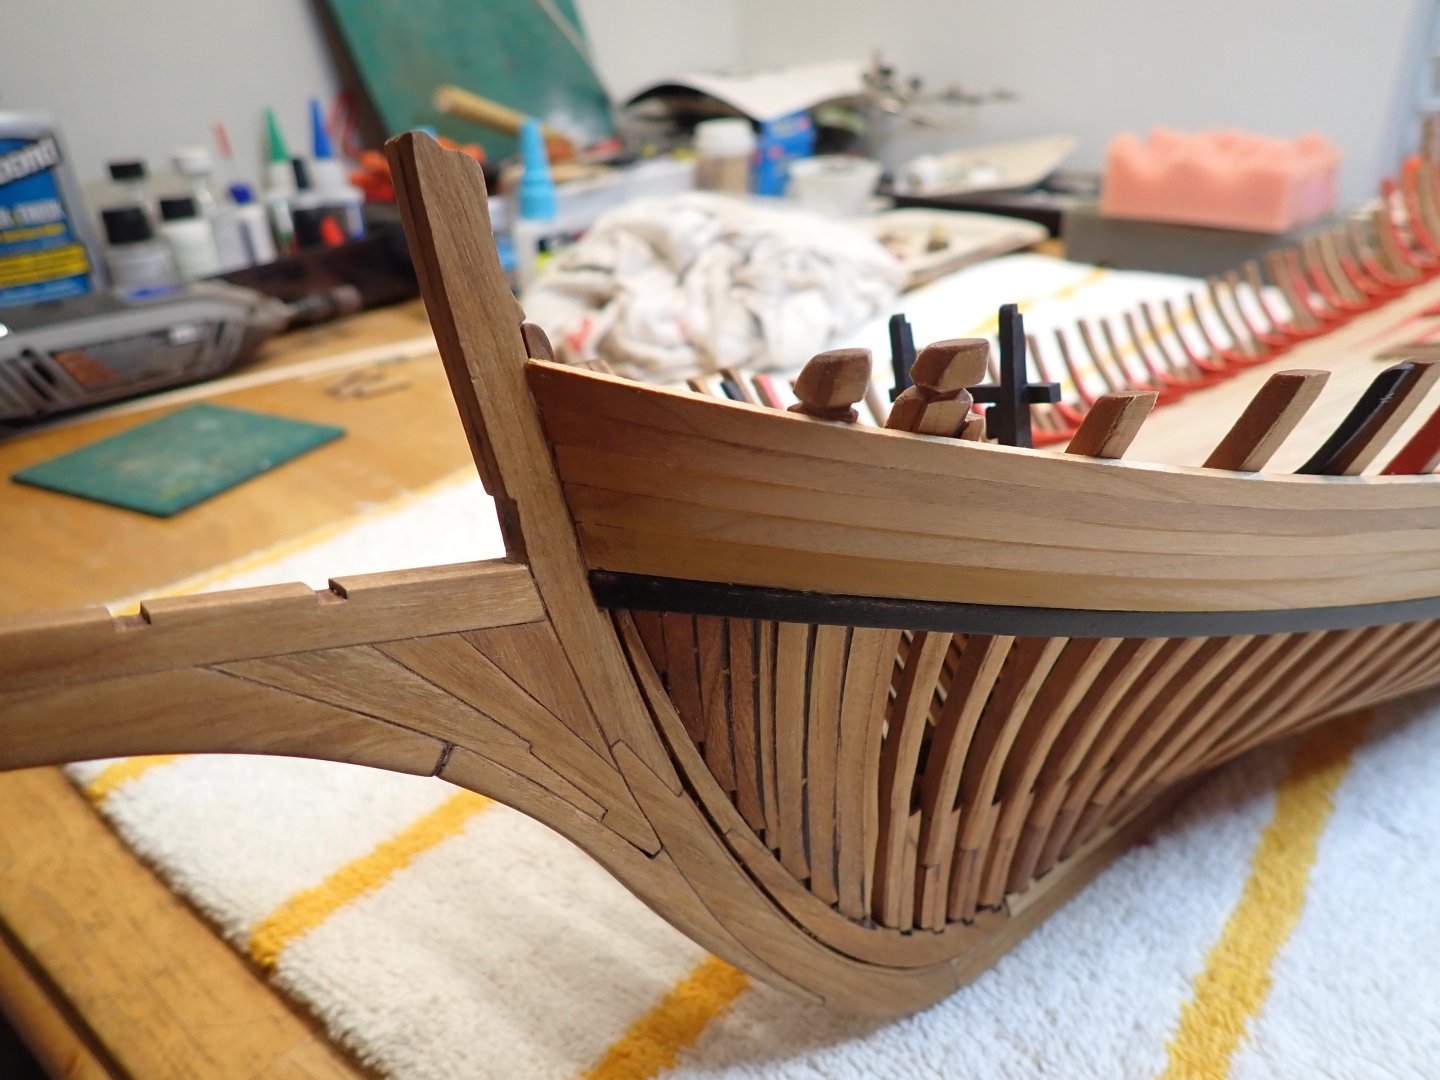
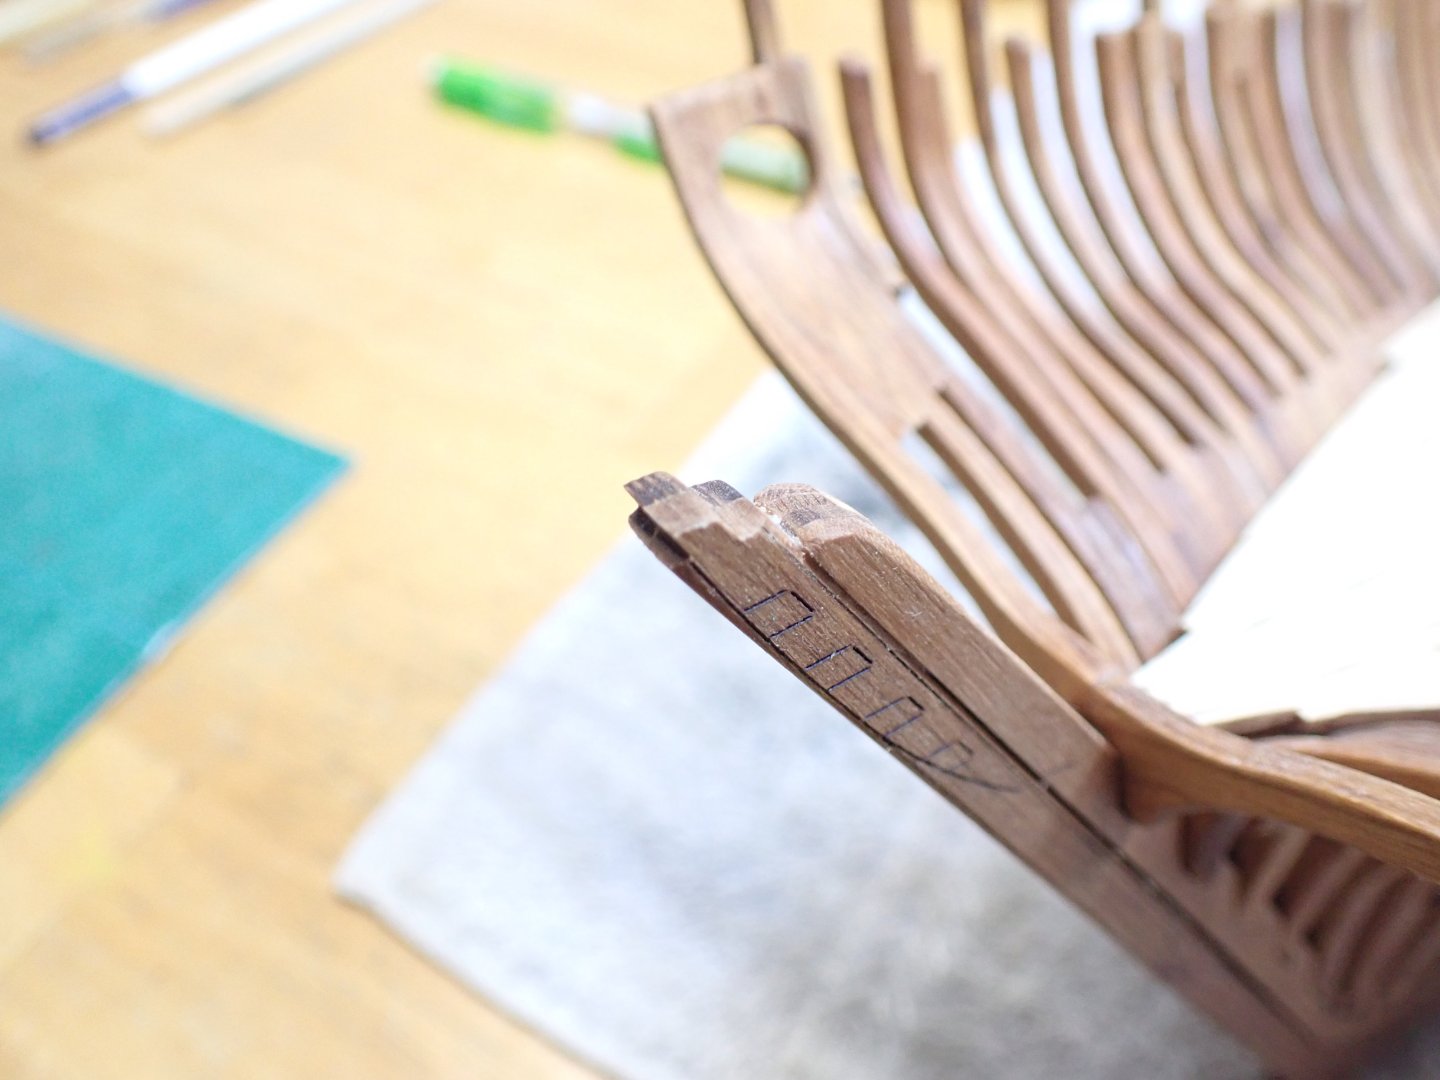
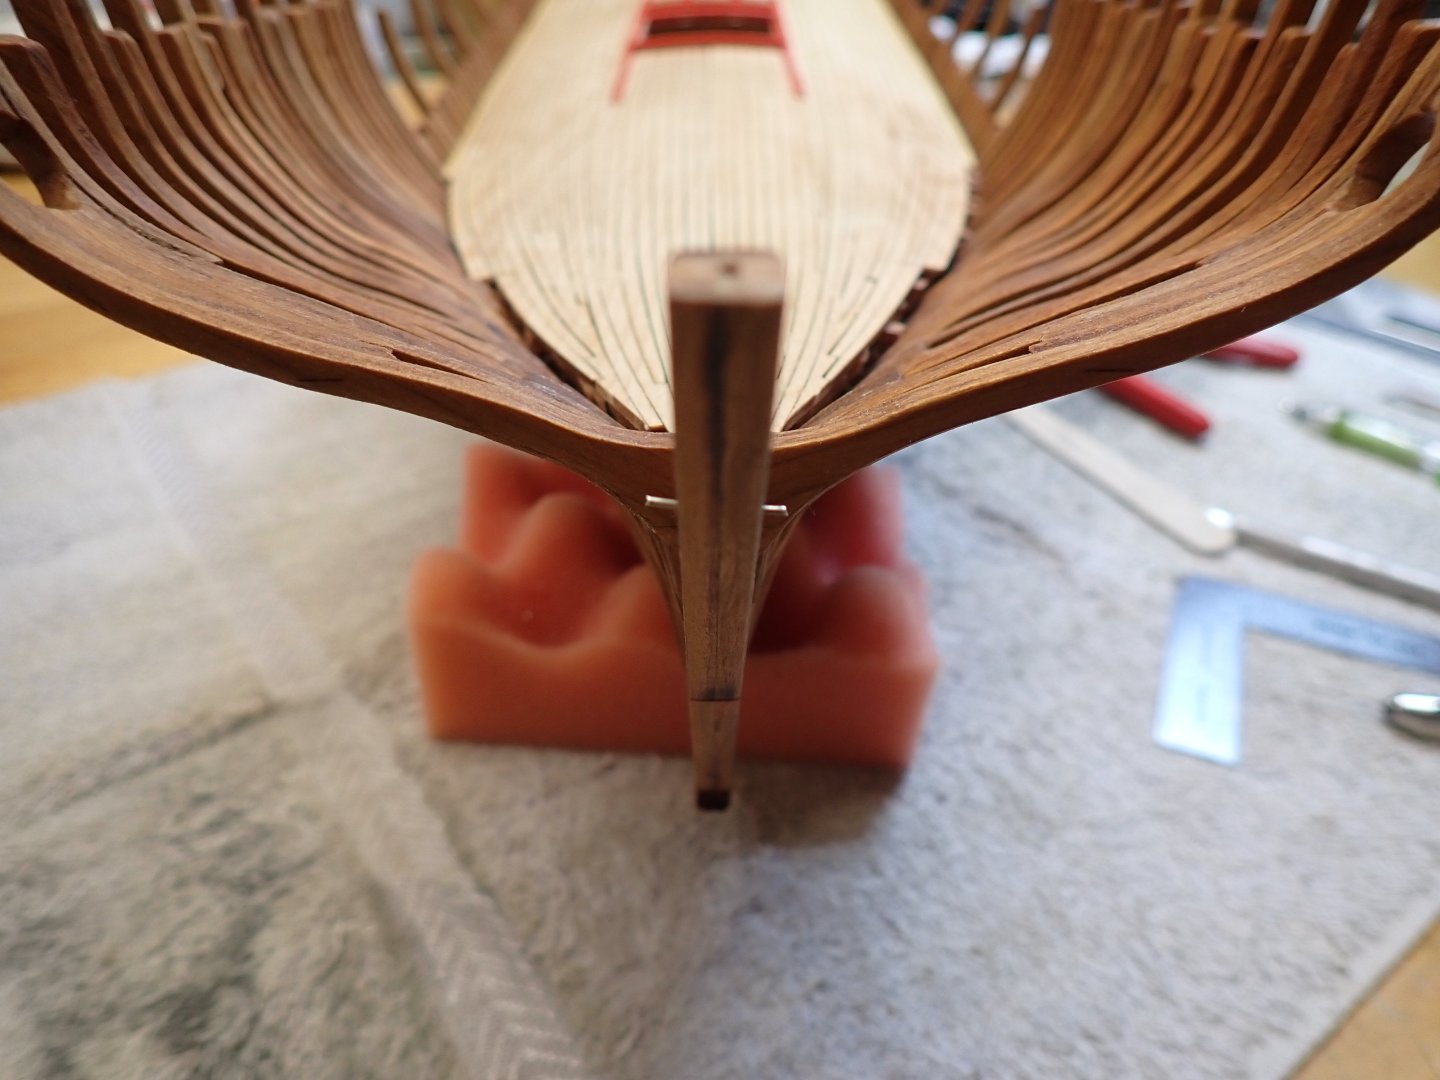
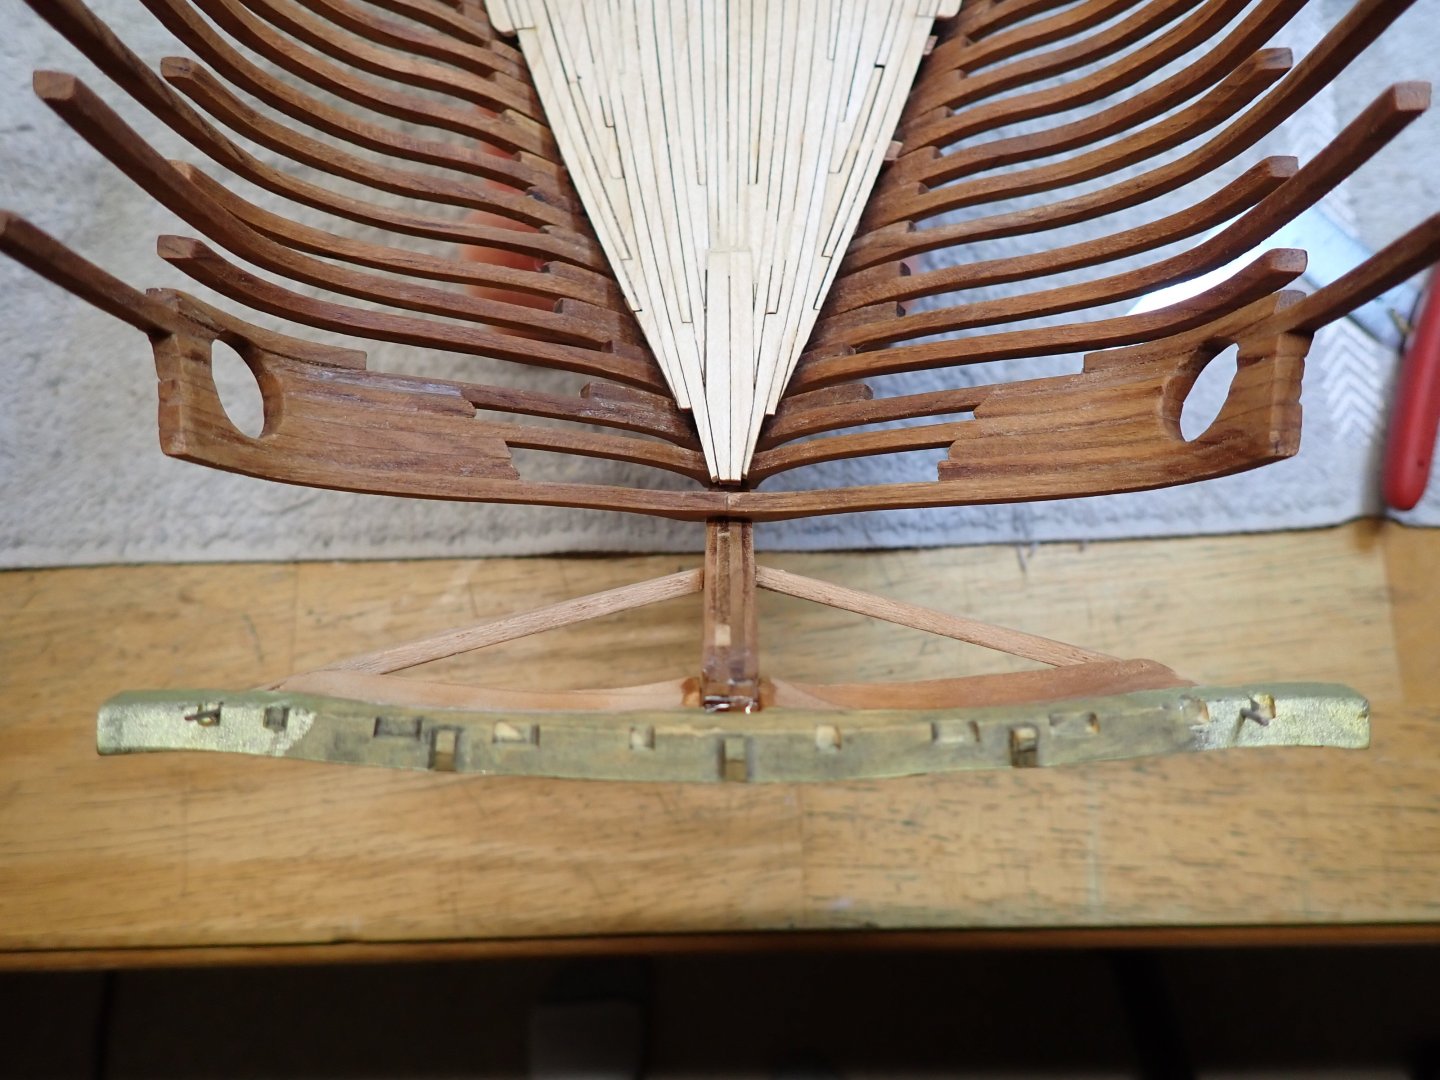
Before doing the planking, I finally resolved to build the stern. It is not easy at all, and nothing has been designed in the kit to help the novice modeller. I will present what I have been doing so far. At times, it felt like flying in the clouds without any IFR instrumentation. First the instructions: The plans do not bring much details and confirms that the freeze must be flush with the rear keel. Otherwise the rudder will not fit. Because nothing will hold by itself, I had to resort to pinning the parts: The instructions provide two ways of assembling the stern. I am going with the easier path: You can see one of the pins that is used to attach the parts (above). More pins are introduced to hold every single part (below): Final assembly.... Once glued and dry, the assembly is surprisingly robust. Yves


- 185 replies
-
- 11
-
-
-
HMS ANSON 1781 by albert - 1/48 - 64 guns
yvesvidal replied to albert's topic in - Build logs for subjects built 1751 - 1800
Getting there, for sure. Beautiful work. Yves