-
Posts
3,637 -
Joined
-
Last visited
Content Type
Profiles
Forums
Gallery
Events
Everything posted by yvesvidal
-
From my experience building a similar boat (Chebec Requin) from a different manufacturer (CAF Model), the only way to plank the deck is to do it one plank at a time. As you indicated, the deck is convex in one direction and concave in the other direction, and as such a flat piece of wood will never fit. It is one of the most difficult vessel to build, because nothing is flat or straight. In your instructions manual (Figure 06), it seems that you have to trace lines on the sub-deck and then cut along these lines and install the various panels, one at a time. Yves
-

BR-18 Locomotive by Greg Davis - OcCre - 1/32
yvesvidal replied to Greg Davis's topic in Non-ship/categorised builds
Great model. I have almost finished the Coasta Passenger car from Occre and can see a few similar parts between the two kits. I will be following your build, for sure. Yves -
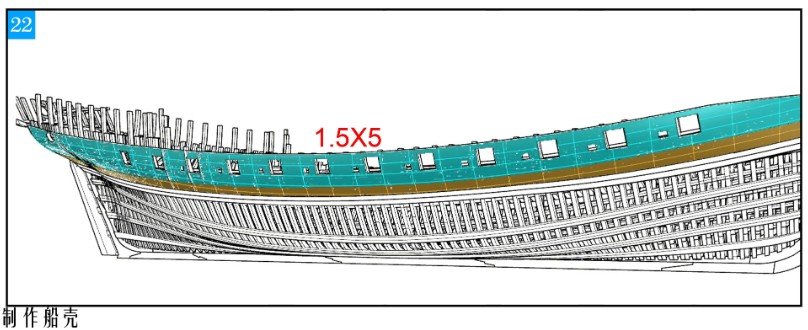
After building the gun deck (on one side...), I wanted to see how the planking is going to match and fit the gun ports and the overall allure of the hull. As you can see and in my usual way of building a model, I am not exactly following the instructions and the way CAF Models suggests to do it. I am using 1.5 x 5 mm planks as suggested by the kit. First, I tried to paint the planks in Ochre Yellow wood color to hide certain of my mistakes. But after seeing the beauty of the wood and its incredible smoothness when sanded, I have decided to leave the wood natural and will be removing all the paint from the hull. Above, most of the gun ports have been defined and built. I now need to move to the two gun ports located in the stern section, and these are much more difficult to build since they require cutting some of the frames: Planking is done little by little, to get an exact position of the ports. After some delicate surgery, I have come to a point where it is not too bad: I have also added a small strip of wood (not provided in the kit) at the top of the gun ports and planking, to offer a more stable platform to glue the railing. It also makes the bulwarks much more solid and realistic. Some fine sanding remains to be done but the hull is starting to look like a Chebec ship. Honestly, the shape and smoothness of this hull is almost sensual and I do not tire of holding that hull in my hands. What will it be when both sides will be planked....? Now, I have to do it all over again, on the other side.... or should I leave it un-planked...? Probably not. Yves
-
Thanks Nil. I know you have built that model too (yours was scratchbuilt, I think) so you know about the lack of straight lines and flat surfaces on this vessel. I am making some slow progress, which I hope to present in a few days. As always, I am moving away from the official "Instructions" and going all over the place, as needed. Yves
-
Valeriy, since these models are static models, why do you line the hull with fiberglass and epoxy resin? Is it to make sure the wood does not warp or expand? Is it to increase the solidity and resilience of the hull to shocks? Have you considered just brushing epoxy resin on top of the wood and skipping the fiber glass? I would welcome your opinions and recipes. Yves
-
Lovely !!! That should be a very unusual and interesting model. Yves
- 35 replies
-
- Britannia
- Mountfleet Models
-
(and 1 more)
Tagged with:
-
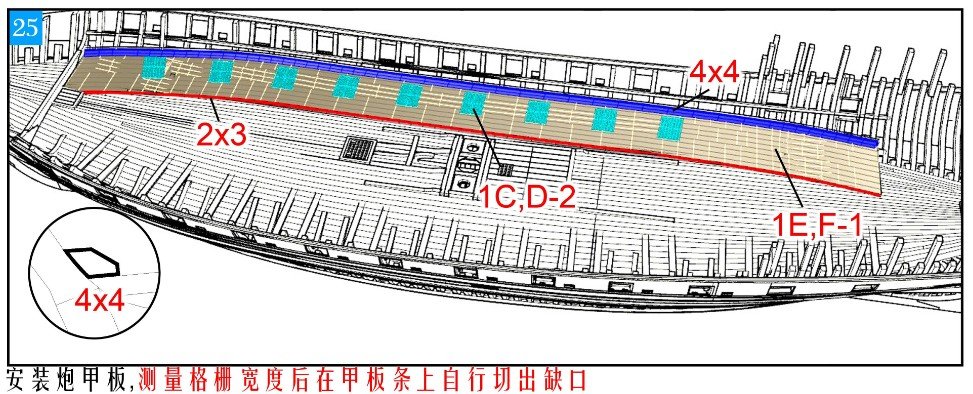
Moving along with one gun deck, on the Port side. But first, the "Instructions": The first thing I did was to glue all the grates on their respective supports: The grates must be flush with the planking: no stumbling during the action!! Planking can then begin. I start from the stern and go back to the bow, keeping the front of the planking as a reference. This way, I make sure that the curves are correctly matched between the planks. Numbering them is also a great idea: Planking will butt against the cabin wall, near the stern. Moving forward.... About half way done... Planking around the grates, has been completed: Did you notice? Nothing is flat or straight on that vessel.... Three more planks to install: A little cherry wood strip to finish the edge: A couple of Wipe on Poly coats and it is pretty much finished. The gun deck at the bow of the boat is a little bit high and the gun is not fitting perfectly. I will have to be creative to find a solution. Contrary to British ships with large gun ports, these French vessels have very small gun ports and the adjustment required to match the hull openings with the gun carriages is tricky. I am not installing the 4x4 strip preventing the guns from rolling into the sea yet. I want to make some progress on the hull planking and finish painting the bulwark. Yves
-
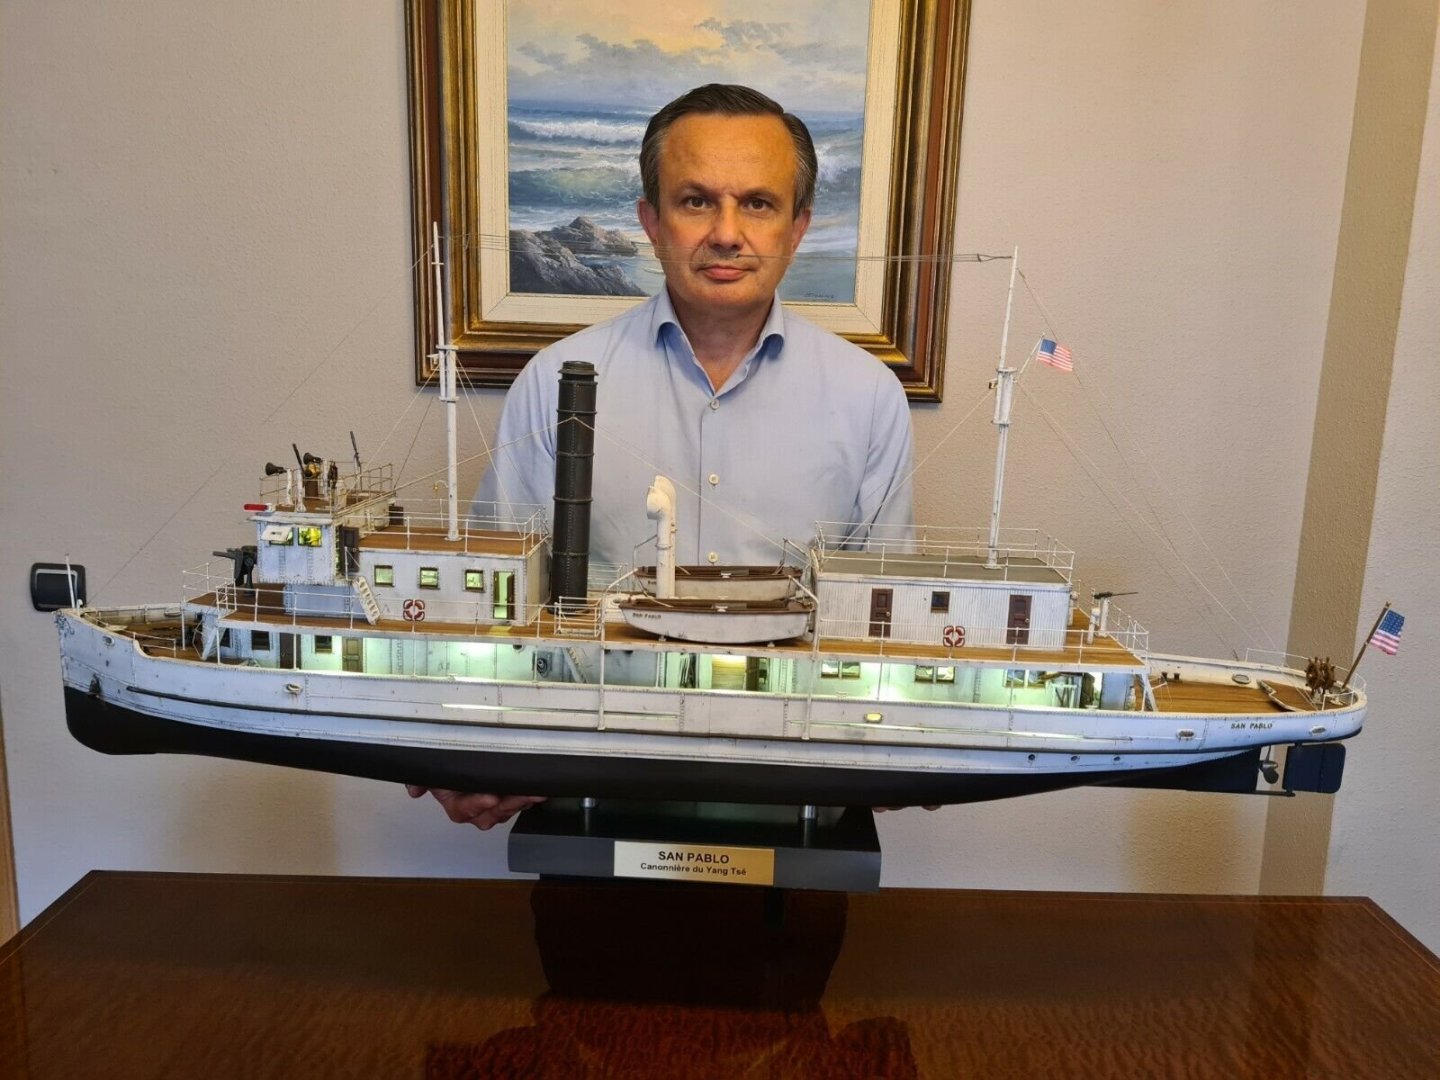
Ras, I hope I am not hijacking your thread with this post, but there is a modeler in Spain who has been building the San Pablo in the 1/35th scale: https://www.ebay.com/itm/326240588162?itmmeta=01JMJ20BHNV76DFB5CNMDBBQCS&hash=item4bf5745182:g:ZyUAAOSwZupggtEC It is a very impressive model and I thought that some of his pictures may help you. That Spanish gentleman is definitely the "Rey of the the Styrene sheets". I love his models. Yves
-
Kevin, it is good to see you back on the Thorn. Yves
- 1,132 replies
-
A quick improvement over the kit, that I would recommend dearly: Nail (for real), the gun deck supports. I used again nickel silver nails made with electronic component pins. Add at the stern and the bow some re-reinforcements for the end of the gun deck planking: With these improvements behind us, we can now start the planking, properly speaking. First plank goes against the frames (at least that is the way I am approaching it): Then installation of the grates and tons of precise cuts..... Yves
-
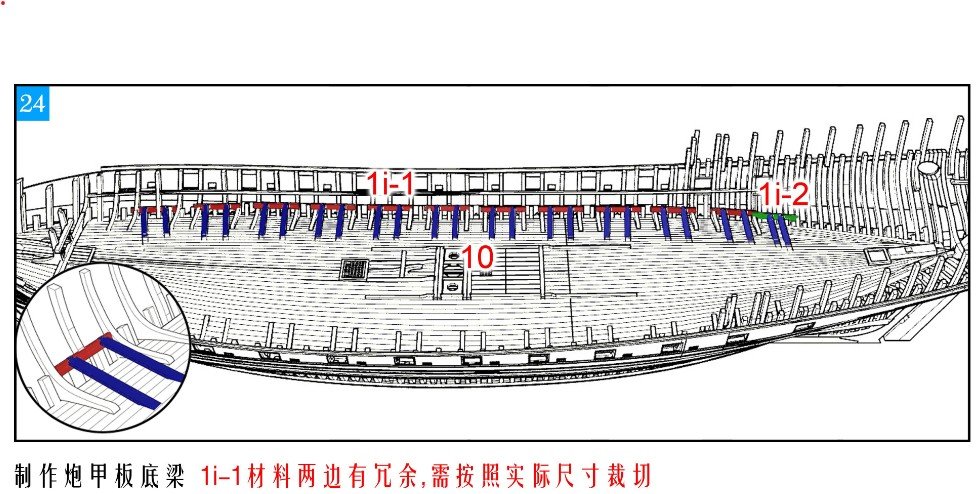
Before moving further with the planking, I have decided to take a look at the gun decks and see how these are being built. There is nothing easy on that model, as we have nothing flat and straight, besides the bottom of the keel. As always, the instructions are scarce: The Chinese ideograms are simply indicating that you can cut the blue parts to the correct length. Thank you. Nothing is really being said about where the red parts are to be sitting against the frames and the plan is of little use as well. So, after digesting plans, Monograph and the above picture, I decided to place them so that the gun deck would be horizontal as much as possible. I traced a delineation line on the deck, using the gun deck planking provided in the kit. That line allows me to determine the length of the support bars. After installing a gun on the support bars, the gun seems to be about horizontal, so it may work. At this stage, all supports have been installed and the planking seems to fit nicely, more or less. The picture above gives a clear understanding how this ship is architectured. With such a convex deck, platforms to hold the guns were absolutely necessary. The picture below shows the upcoming gun deck planking. It is composed of 9 planks and 9 grates which are sitting on the deck supports. There will be a lot of cutting and fine adjustments to make it look decent. In the meantime, I am painting the bulwark in red, as the Monograph seems to indicate. That is done in a much easier way by limiting the height of the hull planking. With this kit, you have to approach the various tasks in a scrambled and mixed way.... Not easy!! Have I said that before? Yves
About us
Modelshipworld - Advancing Ship Modeling through Research
SSL Secured
Your security is important for us so this Website is SSL-Secured
NRG Mailing Address
Nautical Research Guild
237 South Lincoln Street
Westmont IL, 60559-1917
Model Ship World ® and the MSW logo are Registered Trademarks, and belong to the Nautical Research Guild (United States Patent and Trademark Office: No. 6,929,264 & No. 6,929,274, registered Dec. 20, 2022)
Helpful Links
About the NRG
If you enjoy building ship models that are historically accurate as well as beautiful, then The Nautical Research Guild (NRG) is just right for you.
The Guild is a non-profit educational organization whose mission is to “Advance Ship Modeling Through Research”. We provide support to our members in their efforts to raise the quality of their model ships.
The Nautical Research Guild has published our world-renowned quarterly magazine, The Nautical Research Journal, since 1955. The pages of the Journal are full of articles by accomplished ship modelers who show you how they create those exquisite details on their models, and by maritime historians who show you the correct details to build. The Journal is available in both print and digital editions. Go to the NRG web site (www.thenrg.org) to download a complimentary digital copy of the Journal. The NRG also publishes plan sets, books and compilations of back issues of the Journal and the former Ships in Scale and Model Ship Builder magazines.


