SJSoane
-
Posts
1,655 -
Joined
-
Last visited
Content Type
Profiles
Forums
Gallery
Events
Everything posted by SJSoane
-
 Peter, brilliant! I am so glad you are pioneering along with using Fusion for ship modeling. I have discovered that there is a lot of "what if I try this" to make Fusion work, and you are clearing away a lot of dead ends to this process. Mark
 -
Alan, looks great! Let me know when you have a showable 1:64 cannon! Mark
-
Peter, I tried your method, and it worked perfectly. Thanks so much! Mark
-
Katoom, thank you for your description of these postings as a novel! On reflection, posting updates to this website is a little like journaling for a writer--almost a flow of consciousness while trying to think things through. Only with the huge advantage of an international group of people with great insight and skill looking over my shoulder and helping out! Mark
-
Beautiful, Gaetan! Nice to see her underway in the new year. Mark
-
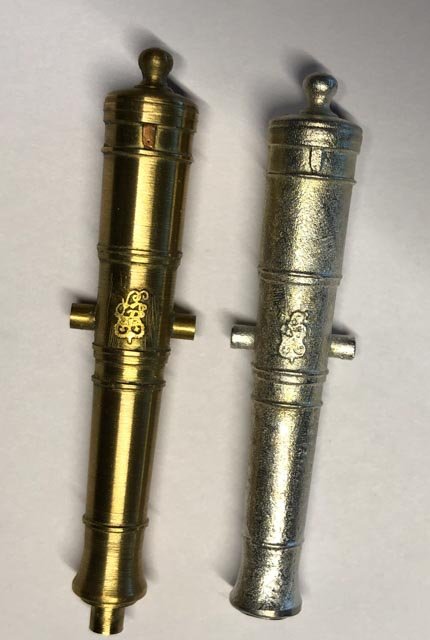
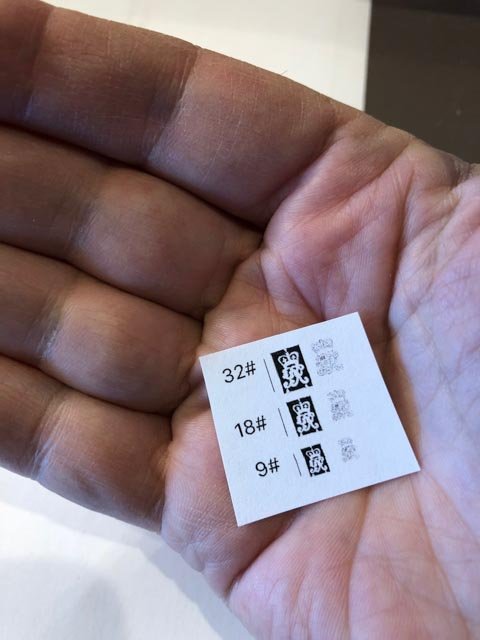
Looking at the cannon in Siggi's photos above, I notice that the king's cypher is somewhat smaller than I had been drawing. Look at the second photo down, third cannon up; and the last photo. It looks to me like the cypher is about one half the length of the distance between the mouldings on the second reinforce. Based on this, my required cyphers would be 3/16" and ⅛" (too small a difference between the 18# and the 9# to show). That would be Chuck's sizes for sale. I will try the paper idea, and if that doesn't look good I will then reflect on how I feel about purchasing rather than making from scratch this detail. The photo below shows how, at this scale with my skills, the cypher is just a suggestion of detail after being cast. Mark
-
Hi John, I like your advice about moving on. The MicroMark kit seems well designed, it includes two pieces of plexiglass and four clamps to get everything very flat. I don't know what the resist film is (it comes with a protective film on each side that has to be removed at various stages in the process); the resist developing solution is ¼ oz Sodium Hydroxide mixed into quite a bit more water. I never did get to the stage of actually etching the metal, although if I had, it uses Ferric Chloride. I regret that I never did study any chemistry to understand more of this. Hubac's Historian, I should have had those whiskeys with you. After my technological failure with the photo-resist, yesterday I got a CD stuck in my Apple drive, and it won't come out for love or money. Not my day for technology... You have got me thinking about paper. Why not? I may have been overthinking this whole thing. At 3/16" scale, these are really tiny, and I looked again at some earlier experimental pewter castings I made with a very good cypher given to me by Greg; after casting and darkening, they turn out as a general impression of detail, not anything close to the level of detail that I kept seeing in my mind's eye with the digital drawings. I will get a fresh blade in my scalpel, and see what I can accomplish. A sheet of bond paper is just about as thick as the brass in the etching kit, giving about a ½" actual thickness to the cypher. Mark
-
Hi Dan, Yes, it is disappointing not to have learned this skill; maybe another time I will try again on another project. But for now, I want to keep moving forward with another idea than photo-etching. I did consider Chuck's excellent monograms, but I think they are the wrong size for me. Based on the drawings in David Antscherl's Fully Framed Models, the sizes I need relative to the sizes of my cannon are ¼", ⅜" and 5/32". Chuck's are 5/32", ⅛" and 3/32". I would love to be wrong on the size and have Chuck's monograms work for me... My next plan is to try Alan's colleague's idea of sculpting with Weldbond Adhesive. Let's see what happens. I somehow knew this cannon project was going to take me all winter! Best wishes, Mark
-
Hi everyone, Well, I am going to have to admit defeat at the hands of photo-etching. Third attempt today, and the entire resist washed off in the developer. Not even a trace of the resist. I may not have the right mind-set or aptitude for this kind of work. There are dozens of steps, each of which requires judgment as to how clean, how much water, how much exposure, how much brushing, etc. At any point, the process can fail, and then you start all over again from scratch. I had thought that the third time through to the development stage, I would have learned from most of my mis-judgments, so it was a surprise when this was the worst example of losing the resist altogether. I somehow managed to get through my entire education with only physics and no chemistry. Either I was not suited to something like chemistry, or the lack of this education put me at a big disadvantage when it comes to the mysteries of chemical actions in photo-etching! Maybe I will come back to this another time, but for now I will explore a couple of other ways to get these xxx$?x& cyphers onto my cannon masters. I only need 4... I tip my hat to those of you who have mastered photo-etching! Best wishes, Mark
-
Hi Peter, Exceptionally clever! I never would have thought to do it that way. I will try it myself and see how it works. Fusion has just the right tool for everything, it seems, if just you can find it. Mark
-
druxey, what are the wooden structures immediately behind the gunports? Mark
- 607 replies
-
- 3
-

-
- winchelsea
- Syren Ship Model Company
- (and 1 more)
-
John, thanks, that sounds very helpful. A bit frustrating to have it all wash off. Mark
-
Hi Mike, Fair enough! Purism should never win out over maintaining high quality of craftsmanship if a choice has to be made, as far as I am concerned. I wonder how good a job the sailors did out at sea, cutting paint to that outer edge. It might have looked like smeared lipstick! My wife the retired architect, never, ever, specified paint to change color at an outer edge because it is impossible to get a clean line. Mark
- 607 replies
-
- 6
-
-
- winchelsea
- Syren Ship Model Company
- (and 1 more)
-
Hi MIke, Beautiful work! I somehow got the idea in my head that the red paint at the gunports would extend out along the revealed edges of the planking, to meet the face of the planking at the outer edge, not the inner edge. Do you have another understanding, or are you planning to paint those edges later? I have been fretting over how to do this myself, assuming I did not misunderstand this detail! Best wishes, Mark
- 607 replies
-
- 6
-
-
- winchelsea
- Syren Ship Model Company
- (and 1 more)
-
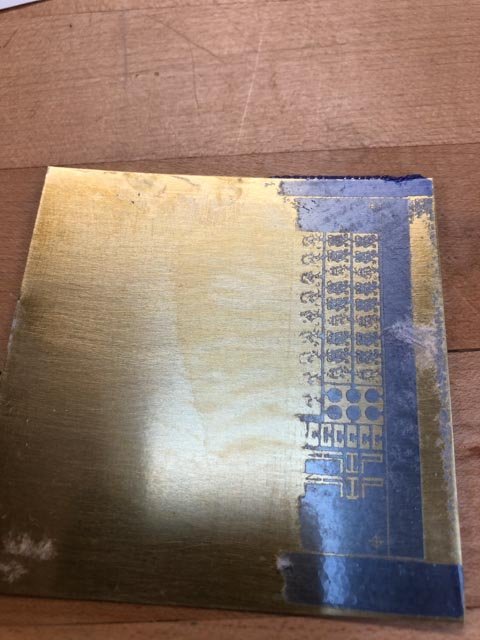
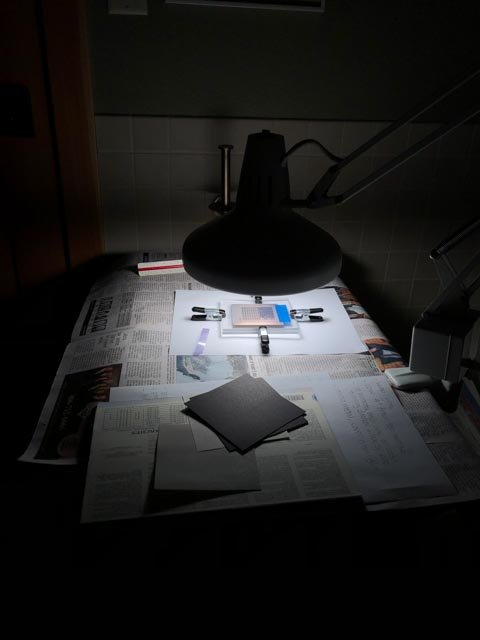
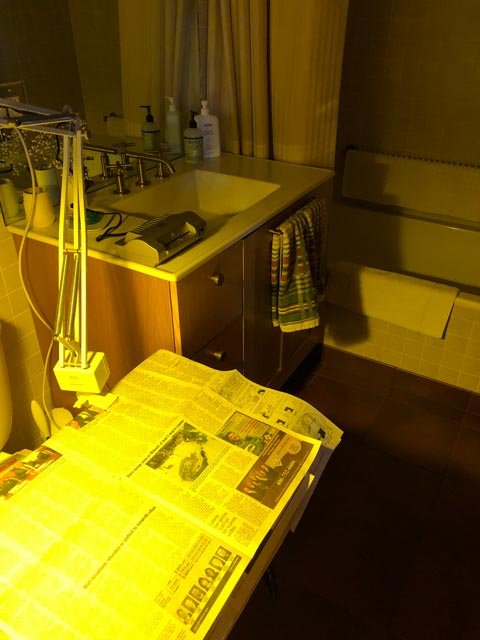
Hi Alan, I might still be trying that. I learned more about photo etching today, getting as far as exposing and then developing the resist. I discovered (after talking to the great tech support at Micro Mark) that I had probably not cleaned the metal enough and/or run it through the laminator enough times. The resist had not stuck properly to the metal, and washed off completely in big areas. So, the artwork is good, now I need to start again with the metal prep, exposure and development of the resist. My wife is very patient about me taking over the guest bathroom for my developer studio... Mark

-
Hi John, It has taken a little mental adjustment to think about everything as a negative. It makes intellectual sense as I read it, but it doesn't stick intuitively that the black is what will be eaten away, especially since it is exposure to light that makes the mask. I am intrigued by your circuit board experiments. How did it go? I hope to see soon just how well this resolves. Interestingly, I had access to two printers for making the artwork; a relatively high end large format Canon printer that my wife used in her architecture practice, and our cheap home scanner/printer also by Canon. I was pretty amazed to see that the cheaper printer had finer resolution. It is a few years newer, but I didn't think the print resolution on inkjets had improved that much, and lower down the price range. Hard to keep up with everything! Mark
-
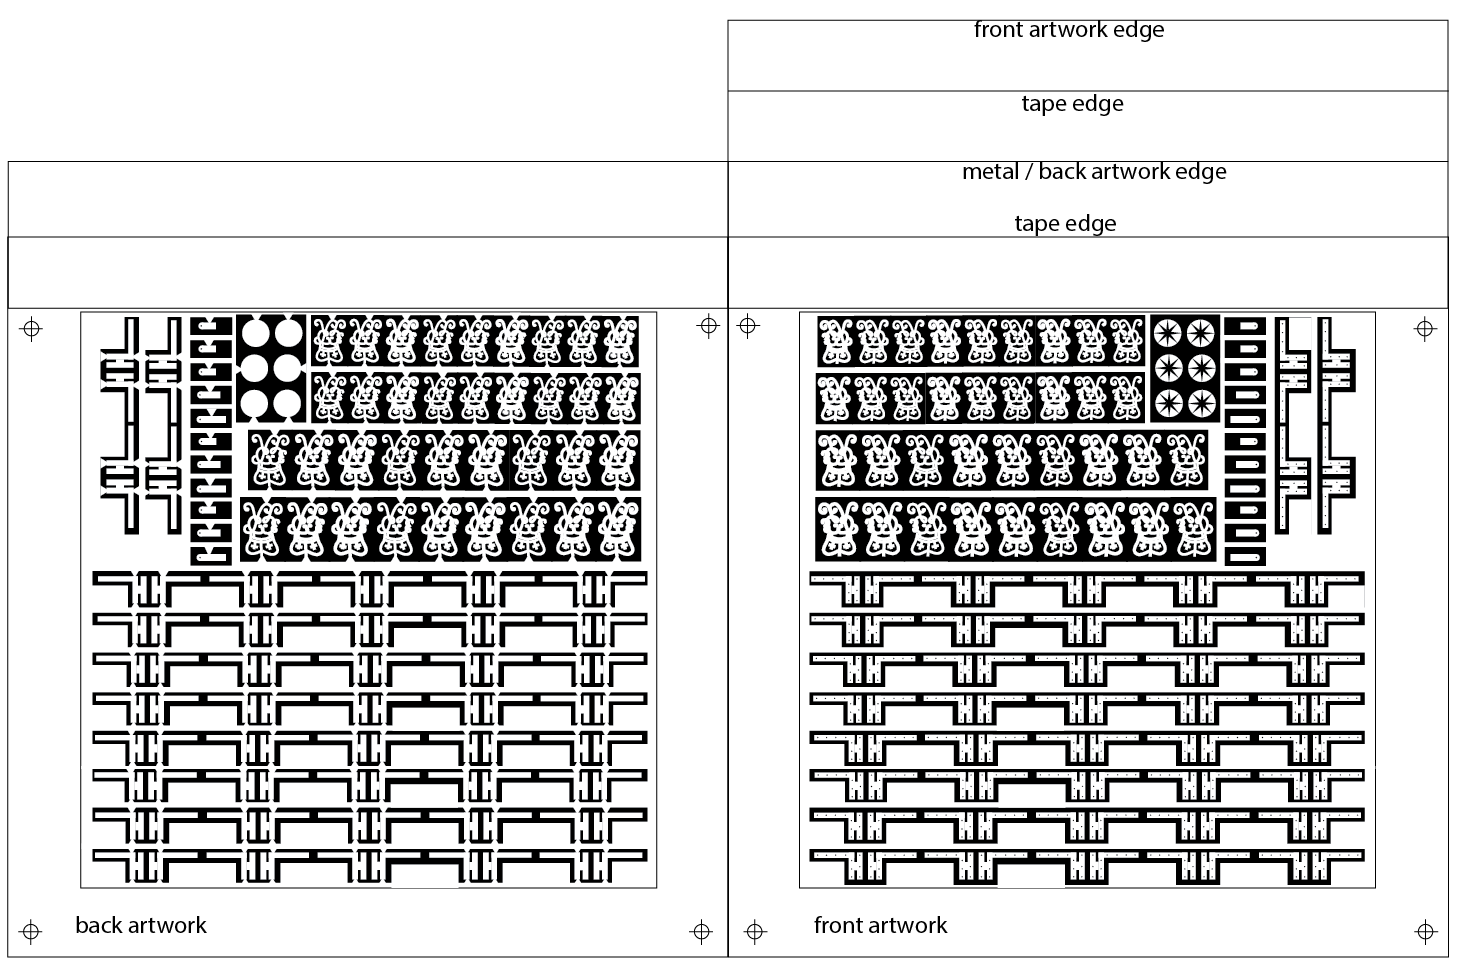
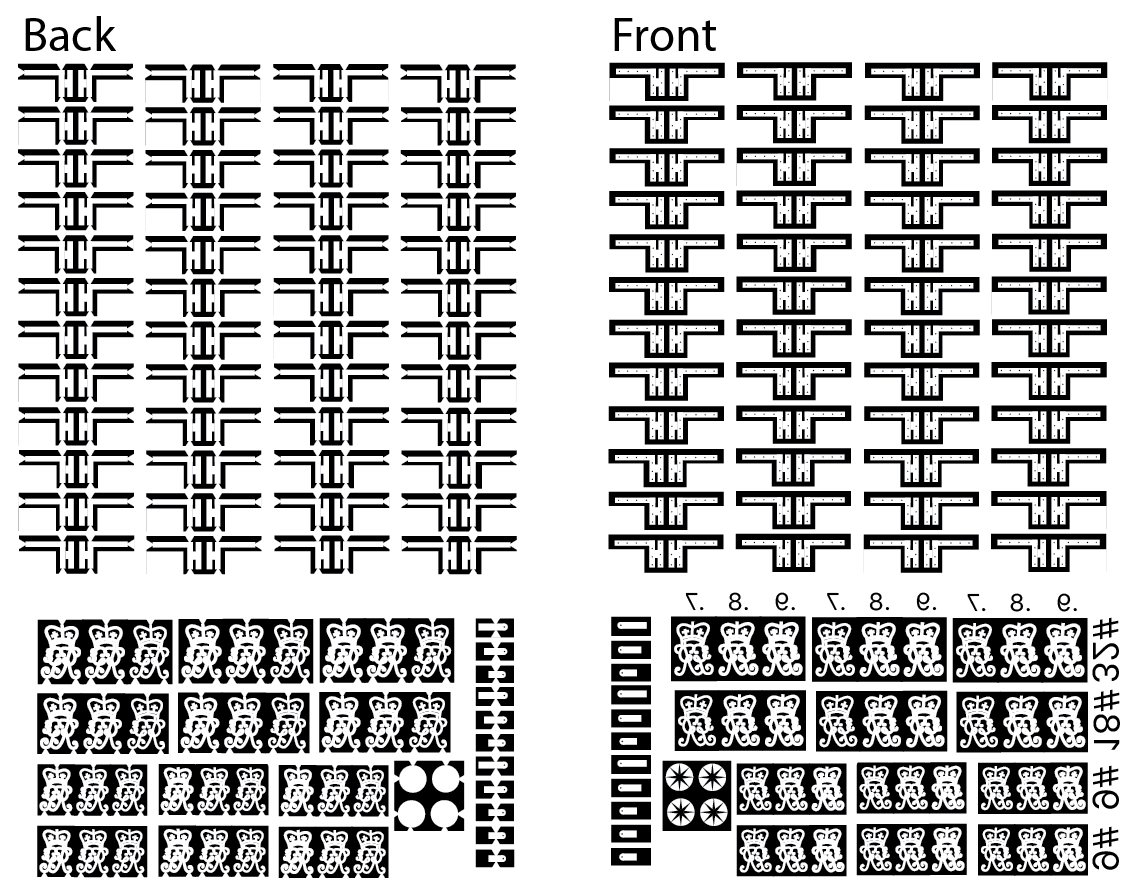
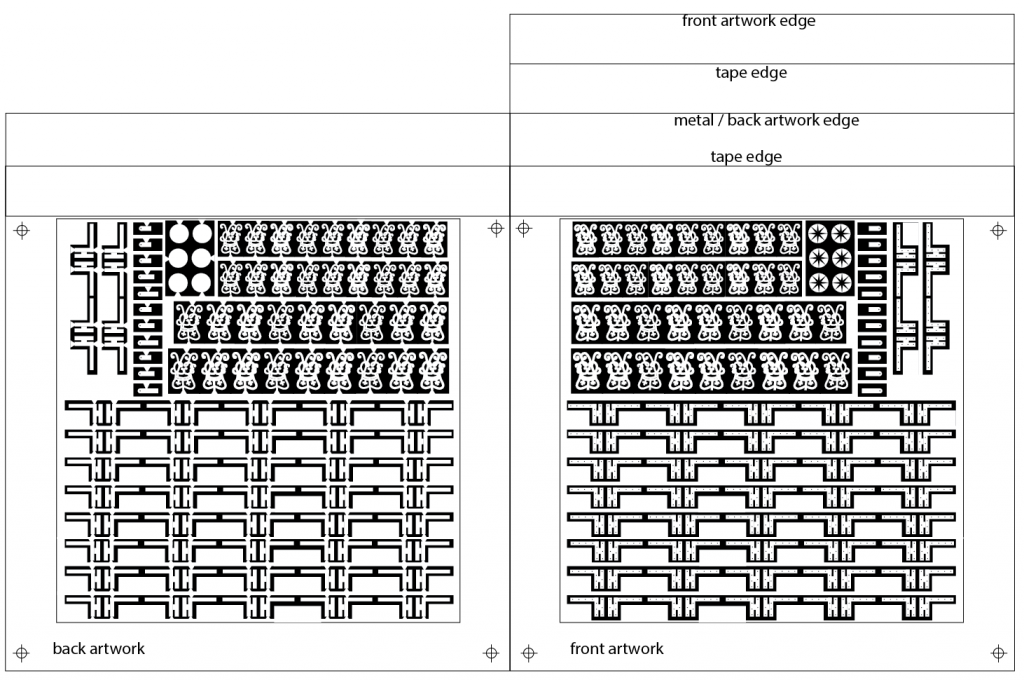
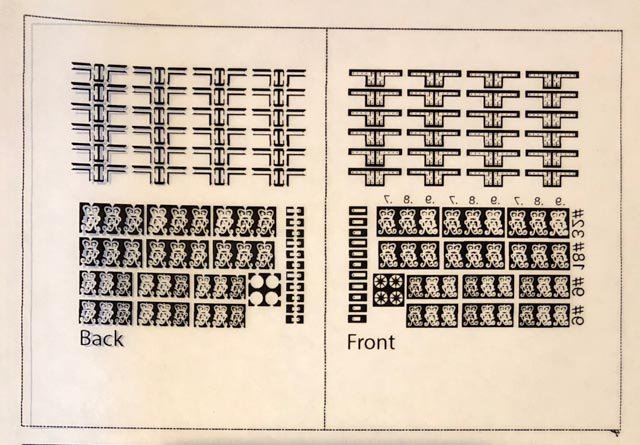
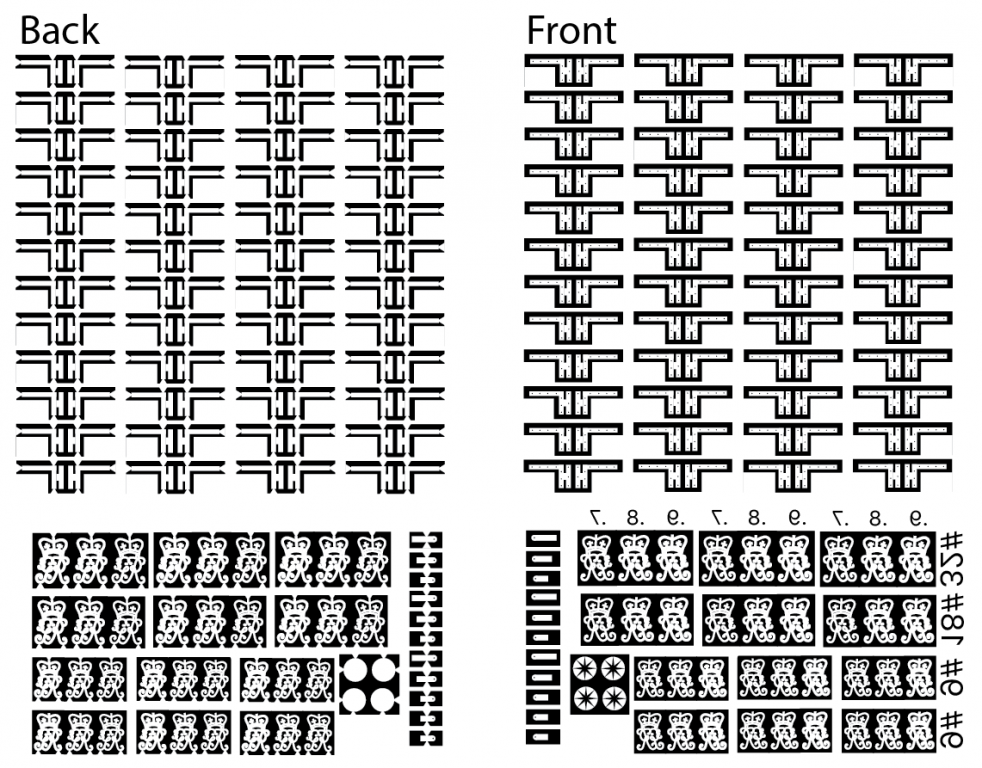
I learned a lot today about photo etching. First, the instructions and I came to a misunderstanding about the required length of the artwork film on front and back. They have to be taped together back to back while registering exactly. One side has to be longer so the other side can be taped to it, to form a hinge at the top. The metal then slips in between. I did it wrong, leaving too short a distance at the hinge to allow the artwork to slip down to be centered on the metal. So as long as I had to do the film again, I reworked the art so that I could get all of the hinges on. I also placed registration marks at the corners to help with aligning these to each other. I also talked to tech support at Micro Mark. They were very helpful. They said that the exposure to a 60 watt bulb will do the job well. 100 watts tends to deform the plexiglass that the metal and artwork is temporarily sandwiched within, and fluorescent takes all day. 60 watts takes about 10 minutes per side. Time does not seem to be critical; the film will turn a darker blue when properly exposed, and there is no danger of too much exposure. Basically, the resist under the exposed areas (white) is being hardened by the UV light, so the unexposed areas (black) can be washed away to reveal the metal for etching. It apparently cannot be over-hardened with too much exposure. Also, the ink side of the art work is placed directly against the resist film on the metal, which is why the artwork has to be reversed to read properly. So there is only the thickness of the ink to cast any shadows when being exposed, which appears to be negligible. I had hoped to be further along today, but there was no rush because the sun never showed up here... Mark
-
Beautiful work, Ed. It is always hard to imagine, when looking at a finished model, just how much time and thinking went into it. Your posts tell that story exceptionally well. Mark
- 3,618 replies
-
- 4
-
-
- young america
- clipper
- (and 1 more)
-
Wow, Doris, those stands look fabulous! You built those so quickly, with such great craftsmanship and artistic vision. I am very impressed! I am also inspired to do something like that when I eventually get to that stage with my project. Mark
- 1,035 replies
-
- 5
-
-
- royal katherine
- ship of the line
- (and 1 more)
-
John, I once lived in Denver, Colorado, which also had something like 300 days of sunshine a year. I appreciate what you have got in Brisbane! I should have done these guns two years ago before I moved. The weather report for here tomorrow no longer shows sunshine, which was going to be the only sunshine for the next 15 days. Druxey, I am going to call Micro Mark tomorrow and see if they can shed any light (so to say) on how I can do this with a lamp. Moving the lamp around is an interesting idea. As usual, nothing quite goes as one expects. I printed out the artwork on the film and got satisfyingly high resolution, higher than the printer does on regular paper. However, I did not read the fine print in the instructions that the maximum recommended size is 3" by 3" for the metal, not the artwork; the artwork needs to have a margin of ½" within the metal all around. So my artwork was too big. A few failed attempts later, I finally got the film printed to the correct size. Used up the entire first sheet of film getting it right. And I don't have enough door hinges at this point. So there will be a round 2... Best wishes, Mark
-
Thanks, Ed, that was good advice. I have blocked out some of the wasted cutouts. In case the sun does not cooperate with me in the next little while, did you have any experience and success with exposing the photoresist to an incandescent bulb? Mark
-
Thanks, druxey and John, this makes sense. I will see which bulb I can find! Mark
-
Hi druxey, Quite true. They call my area the "banana belt" of Montana, ignoring the grey in the winter. I just heard that I can drive to the top of a ski resort near here, where the lodge is at the top of the mountain. It often has sunshine when the rest of the valley is socked in due to a lake effect. That might be a way if the weather here does not cooperate. But then I will have to ski first! By the way, do you think the Micro Mark instructions would be correct in saying that I can pull the photo resist material out of the black bag while using a yellow bug bulb, to avoid exposure to UV until everything is ready? I used to use a red light for old time photographic development, but this appears to be a different kind of exposure to a different aspect of the light. Wish I had paid more attention in those physics classes... Mark