
HOLIDAY DONATION DRIVE - SUPPORT MSW - DO YOUR PART TO KEEP THIS GREAT FORUM GOING! (83 donations so far out of 49,000 members - C'mon guys!)
×


SJSoane
-
Posts
1,649 -
Joined
-
Last visited
Content Type
Profiles
Forums
Gallery
Events
Everything posted by SJSoane
-
 Astounding work. It is hardly conceivable how you work in so much detail. And you must be creating gigantic digital files! Mark
- 54 replies
-
- 1
-

-
- 3d cad
- cleveland class
- (and 1 more)
-
Thanks, Ed, good advice. the bottom vent is going in. Mark
-
welfalck, that explains very nicely the difference between the metal and wood workers regarding this clocking idea. Thanks. Mark
-
Thanks, druxy, that makes sense. I have made my gunheads ⅓ the length of the barrel, with a 70 degree angle on the sides of the gunhead. I expect that should give enough mass? For my first effort, I used a conical gunhead shape that I saw in the David Antscherl Fully Framed Model section on gun casting, and had no problems with the voids. Then I got too clever on the second effort, and made a gunhead like I saw in an 18th century contemporary engraving, with a narrowed neck at the top of the gunhead. That is when I got into the void problems. So I am back to the Fully Framed Model idea, which is where I should have stayed. But I learned why the gunhead needs to have greater volume! One learns more from mistakes than from first successes; when it is successful right off the bat, you don't know what variables you got right and yet are sensitive to change. Mark
-
Paul, you would sure want to know if anyone was planning on running out the cannon, before choosing that seat of ease! But then I guess no one would be allowed forward if the ship was coming into action... Mark
-
Michael, nice idea, using plexiglass for the shooting board. Mine is baltic birch ply, and the surface the plane slides along is starting to get pretty grungy from the metal of the plane. Works, but unsightly. I forgot to ask: did I read somewhere correctly that "clocking" screws means lining up the slots with each other? Best wishes, Mark
-
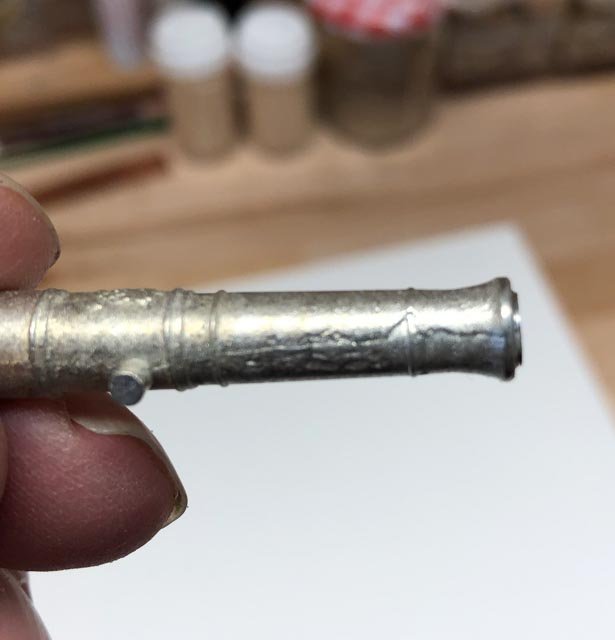
Thanks, druxey. I added more dimples in a second version of casting when the first version slipped around a little, leading to some offset castings. But I notice that my second set of dimples was a little deeper, which may have been the reason for greater alignment the second time around. I was also thinking that dimples closer to the master itself would help ensure alignment where it most matters. In both cases, I had enclosed the mound in a plaster shell. Ed, I welcome your thoughts on a vent at the bottom. Neither of my previous casting efforts had a vent at the bottom, and the button filled without voids. But I did have problems at the muzzle end, of long, thin voids just on the surface (see below). I assumed that my gunhead was not big enough, and the pour right at the top was cooling before the last metal got in. But could it be that venting the bottom would have helped avoid this problem at the top? These were done with my original pewter, which I now know melts at a temperature much higher than the rubber mould likes. Maybe this was part of the casting problem, in addition to degrading the moulds. Mark
-
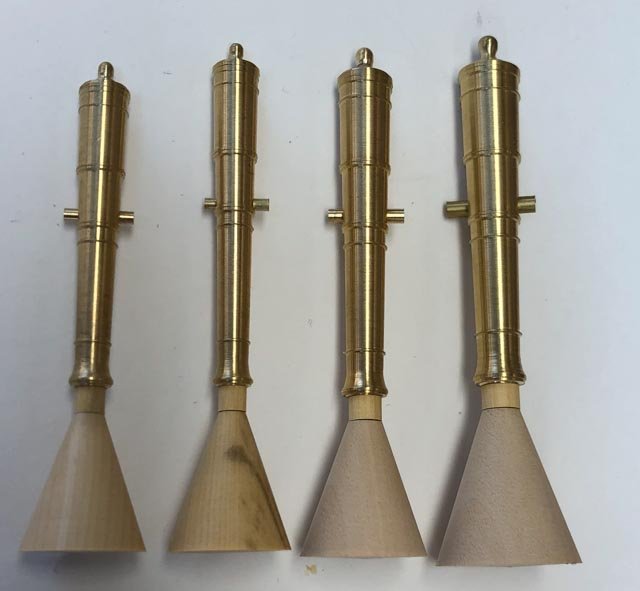
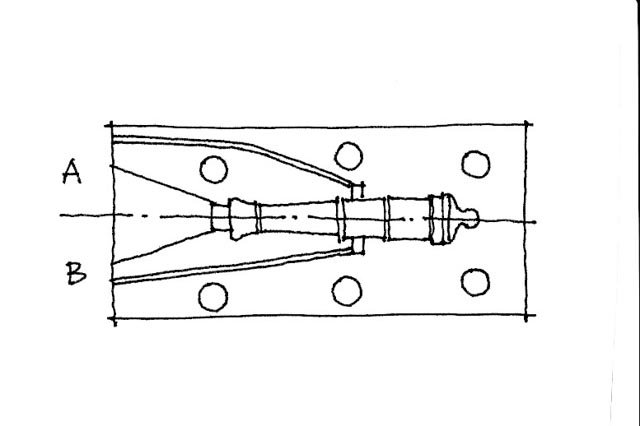
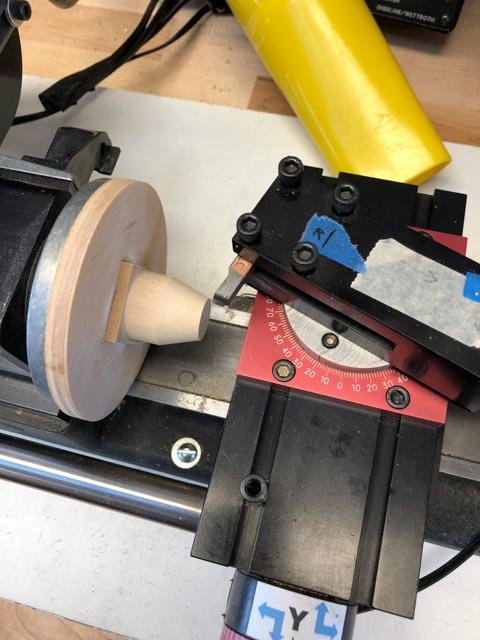
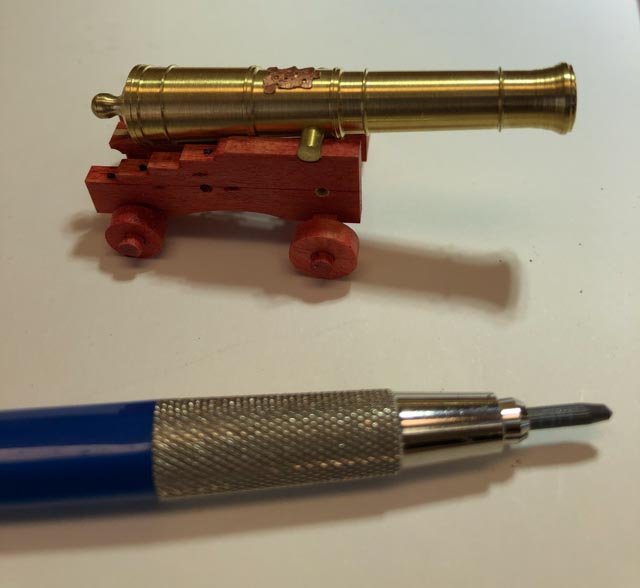
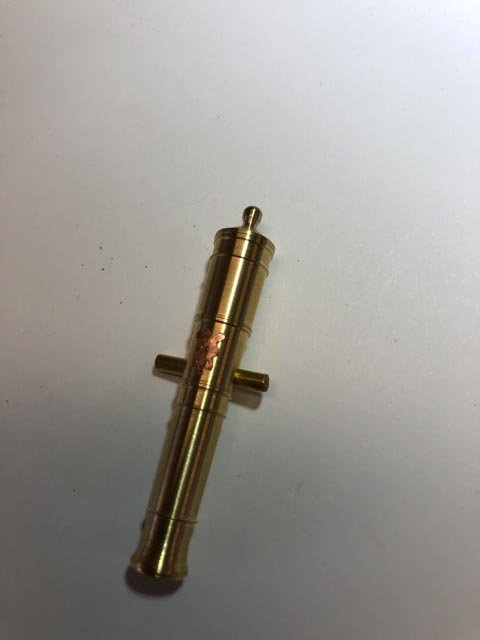
Hi everyone, I went to the mountain top to reflect on 18th century cannon cyphers (view from the top of Whitefish Mountain ski resort, just west of Glacier National Park, looking towards the Canadian Rockies). The mountains told me to stop spinning my wheels on the cyphers. Despite my usual perseverance, I discovered a limit to my tools and skill for making such tiny parts at the same standard as the rest of the build. So rather than compromise the rest, I am gratefully using Chuck's cyphers, made to the right size, for the master moulds. Maybe next spring, when the sun shows up again down in the valley where my shop is, I can try photo etching using the sun rather than an incandescent bulb (the mountains told me this was the problem, since the resist kept washing away even where the exposure was supposed to harden it). I really would like to find out what was not working. But I need to move on or I will never get this ship done. I am proceeding to create the moulds for the cannon. I turned the gunheads using the Sherline compound angle device. I also added a little collar between it and the cannon; this appendage on the cast cannon will temporarily be clamped in the tailstock drill chuck of the lathe, to center the casting before drilling the bore and cleaning up the face of the muzzle. The diagram shows two ways to vent the trunnions in the mould, one straight and the other curved. The curved one in "A" would allow the location dimples (the round circles) to sit closer to the muzzle, while "B" has a straight vent to the top. Experienced casters out there, do you see any strong reasons one way or the other to do "A" or "B"? Best wishes, Mark

-
Nice, very nice! Mark
-
Igor, incredible drawings! What software did you use? Mark
-
Incredible detail, Michael, even to the orientation of the screw slots. You continue to set the highest standard! Mark
-
Nice! Mark
-
Hi Michael, Yes, it is. I can't imagine life without yet another building challenge to work through. And don't we hope these challenges build character when the going gets tough! Mark
-
Admiralty model query
SJSoane replied to iMack's topic in Building, Framing, Planking and plating a ships hull and deck
The best books, in my view, for understanding the entire scratch build process with every step spelled out, are 1) The Fully Framed Model, HMN Swan Class Sloops 1767-1780, vols. 1,2,4 by David Antscherl and vol. 3 by Greg Herbert, and 2) Ed Tosti's books, especially for the period of your intended subject, Frigates of the Royal Navy: The Naiad Frigate. These show how much there is to do, but break it down into manageable parts with lots of drawings and photos, and clear explanations. I have learned immensely from these fine craftsmen and authors. Mark -
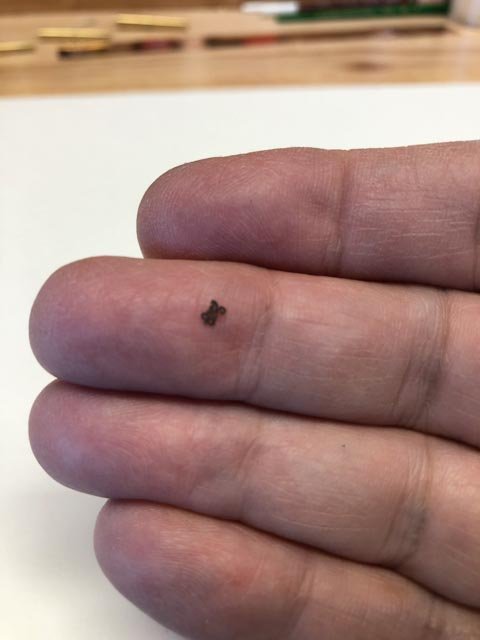
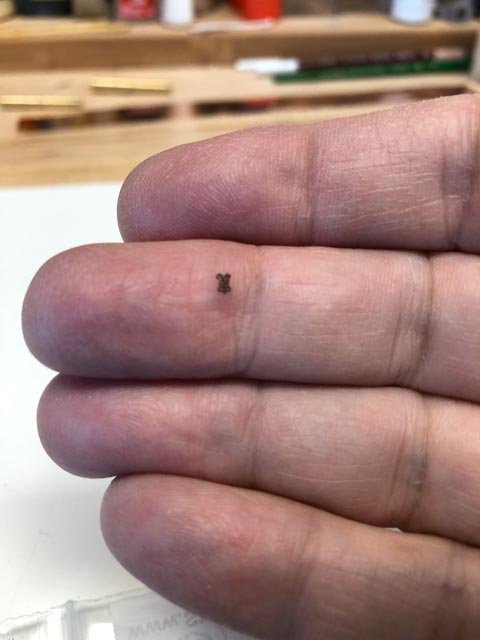
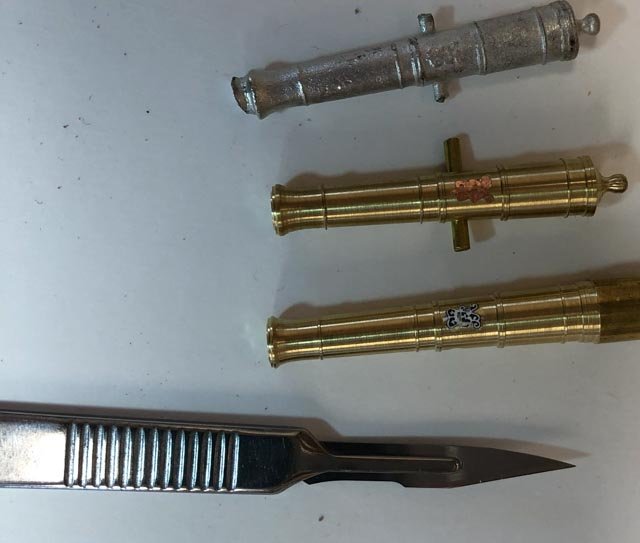
Hi Chuck, Thanks, I will likely take you up on that idea. I will try one more time to see just how small I can work with reasonable quality. You web site shows how great your's look really close up. For everyone else, here is just how small these little puppies are. These are Chuck's small and medium. Mark

-
Thanks, Greg, I forgot about the multiple teams of craftsmen of the 18th century. druxey, if you promise to send the social workers if this doesn't work out, I will try to make the little ones, just to see...
-
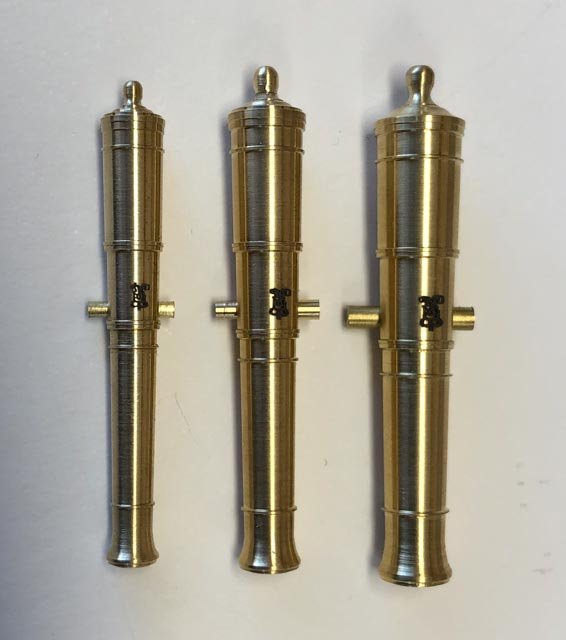
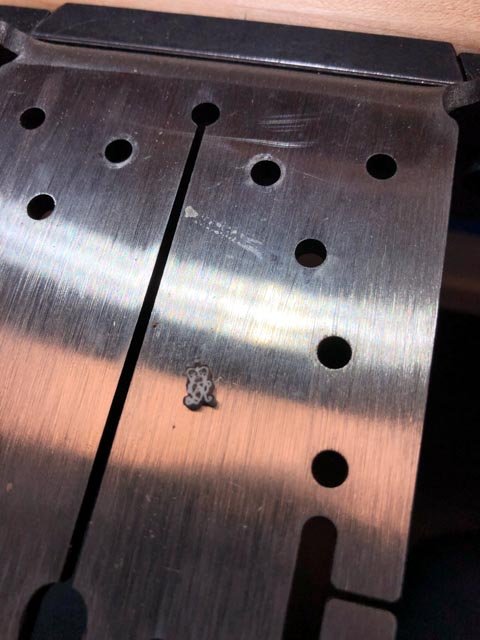
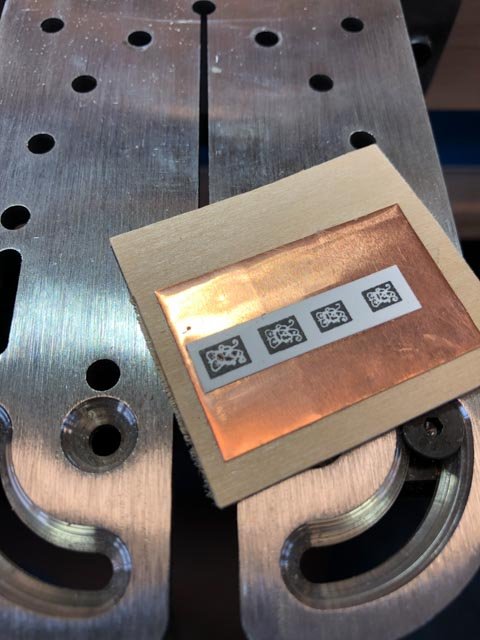
HI everyone, Another week of working on cyphers. The paper idea did not work, for two reasons: 1) ragged fibrous edges at this size, and 2) the angle of the scalpel blade got in the way of seeing where I was cutting to. Then I tried cutting it out of copper shim, first attaching to thin wood with carpet tape. Using a 4/0 jeweler's saw and a 77 drill, I was able to rough out something that might work with more care the second time through. I also purchased Chuck's cyphers, which are marvelous to see. The largest one is about the right size for the smallest cannon, and I may use this for the final because it is just about microscopic to see and therefore exceedingly difficult to create on my own. But these are too small for my larger cannon, and so I will have to keep working on cutting my own. I have reflected on whether it is OK to purchase any parts at all for this build, since I want to say I made it all. But I did read in Longridges' The Anatomy of Nelson's Ships that he hired an engineering works to make a contour cutter for turning his cannon, and also hired Mr. Hammond, the great seal engraver at Hatton Garden, to make a steel die of the cypher. Longridge then used this to punch out thin shim cyphers, which he then soldered to the cannon. So obtaining a part which is then used to cast my own cannon doesn't seem quite so bad...does it? If you don't obsess about this, and they fit your scale, Chuck's cyphers are truly spectacular. I think I am getting dangerously fanatical about these things; the pewter cast below reveals how little of this really shows up, especially when it is blackened. I am not sure why I keep questing after something more perfect on this tiny detail. Some psychological help might be in order... Mark
-
Peter, brilliant! I am so glad you are pioneering along with using Fusion for ship modeling. I have discovered that there is a lot of "what if I try this" to make Fusion work, and you are clearing away a lot of dead ends to this process. Mark
-
Alan, looks great! Let me know when you have a showable 1:64 cannon! Mark
-
Peter, I tried your method, and it worked perfectly. Thanks so much! Mark
-
Katoom, thank you for your description of these postings as a novel! On reflection, posting updates to this website is a little like journaling for a writer--almost a flow of consciousness while trying to think things through. Only with the huge advantage of an international group of people with great insight and skill looking over my shoulder and helping out! Mark
-
Beautiful, Gaetan! Nice to see her underway in the new year. Mark