


SaltyScot
-
Posts
867 -
Joined
-
Last visited
Content Type
Profiles
Forums
Gallery
Events
Everything posted by SaltyScot
-
 I agree, she is coming along nicely. Don't overthink it mate
 -
Good evening, ladies and gents. I have just spent a week out on the shores of the Outer Banks (Ocracoke to be specific) surf fishing. It was a spontaneous visit sprung on me by an old friend. I have returned in one piece and the shipyard is open (once again).

-
Well, I just HAVE to follow this one now, don't I
-
I am with you all the way on that point. I like the bands you put around those catheads, a nice touch. I am going to enjoy watching this come together. I still have my rudder to mount too. I scratch built that too but am not quite happy with the tiller I made.
-
Sometimes taking a nice break empowers us with new ideas, Trevor. Stepping away is a healthy thing! She looks sharp through my eyes, sir.
- 167 replies
-
- 3
-

-

-
- Norwegian Sailing Pram
- Model Shipways
- (and 1 more)
-
You have the patience of a saint, Glen. Nice save. If that had happened to me (twice) I would be replacing a window about now.
- 156 replies
-
- 4
-
-

-
- Queen Annes Revenge
- bottle
- (and 1 more)
-
I agree, Phil, the detail you are adding here is quality stuff. Very inspirational indeed.
- 482 replies
-
- 1
-
-
- minesweeper
- Cape
- (and 1 more)
-
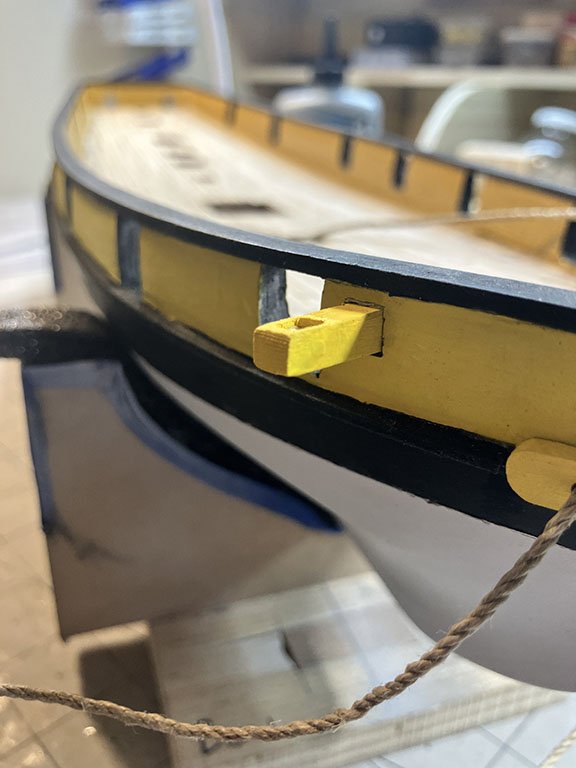
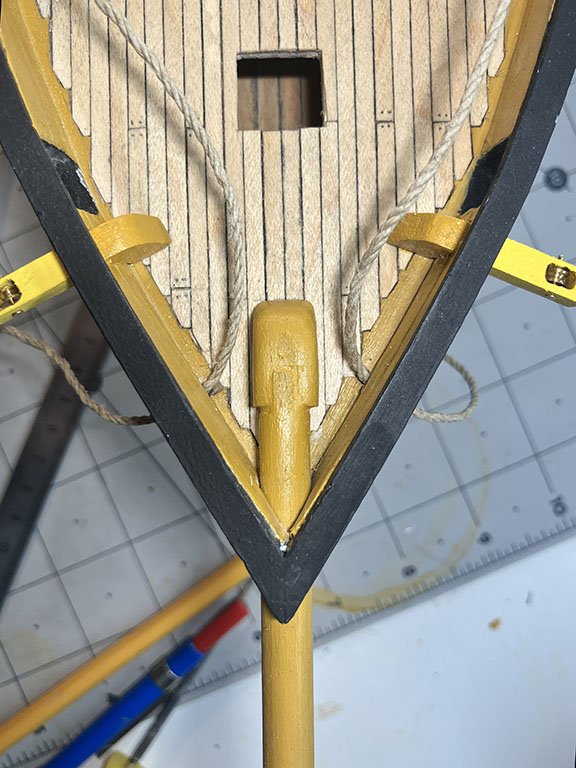
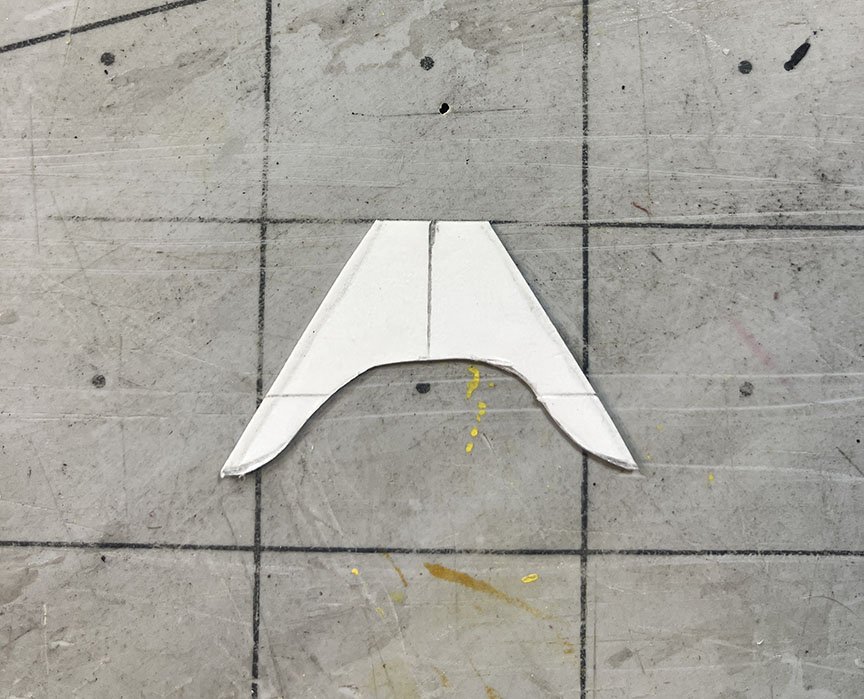
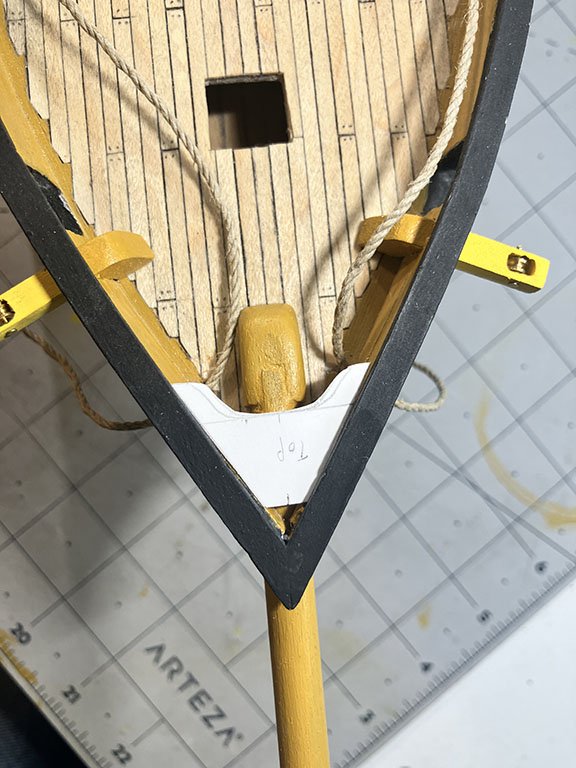
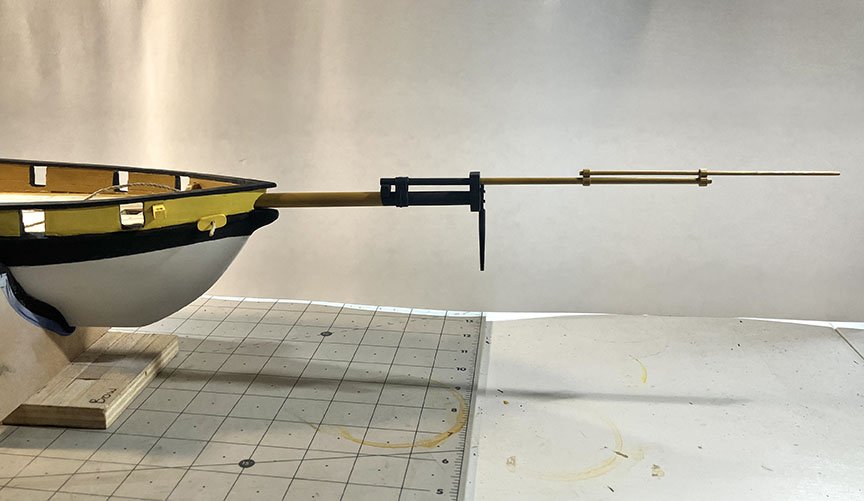
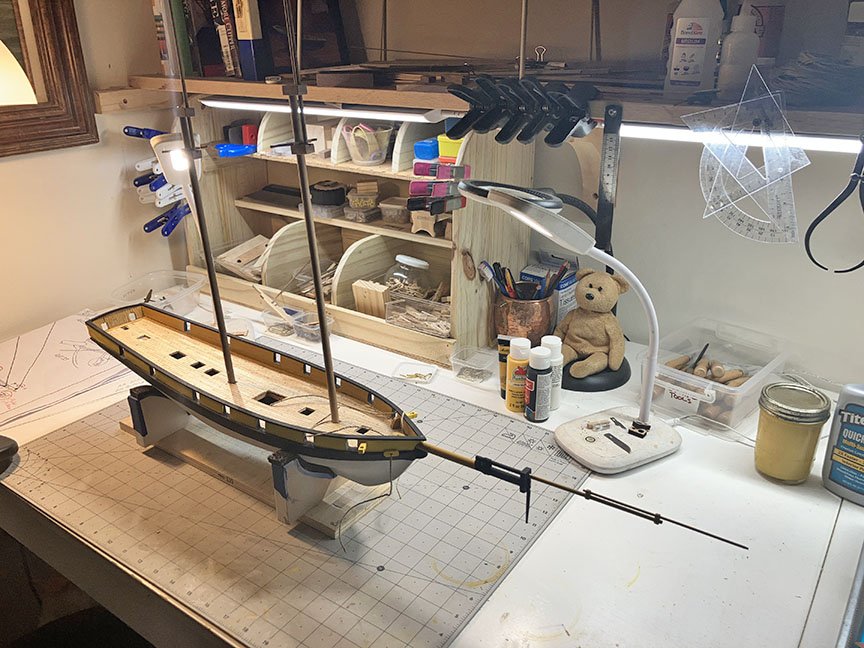
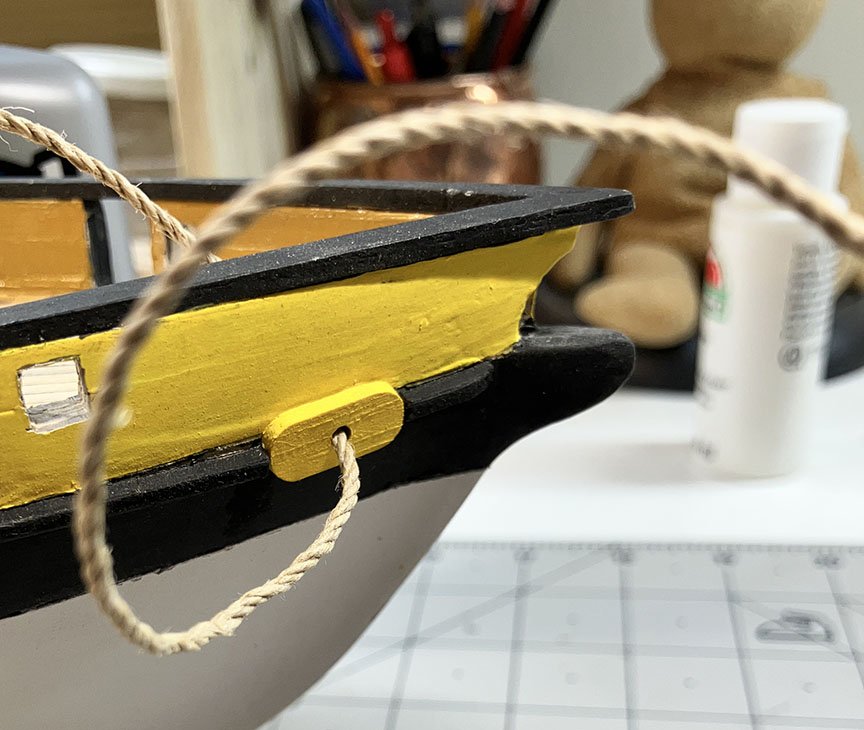
A small update on the build. I did a lot of fiddly work today, cleaning up a few things here and there. The cathead sheaves were filed down flush and the catheads were given another layer of paint: The bowsprit was finally placed and glued down. I cleaned up the butt joint and gave all that another final coat of paint. The strap will be added once the paint is nice and dry: There is a "plate" that sits above the bowsprit butt joint. I am not sure what it is called (but I am certain someone here can tell me). The plywood kit supplied one was scrapped. I will be making one out of the maple I have used on this model before. I started by making a template out of card stock: I will take this to the wood shop tomorrow and get it cut out on the scroll saw. With her bowsprit mounted she looks quite regal. I dry fitted the masts to get a good idea of how she will look. I am pleased with the progress thus far:
- 257 replies
-
- 13
-
-
Your build was the inspiration for me to even begin this project! I truly look forward to seeing how yours progresses. Glad to have you back.
-
Meticulous intricacy.......... AND a bucket full of patience. Fantastic work there, Glen, really. Your eye for detail is certainly inspiring. What you did with the bamboo strakes from that fan was mind boggling sir!
- 156 replies
-
- 4
-
-
-
- Queen Annes Revenge
- bottle
- (and 1 more)
-
Make a list, Tom. Never a bad thing for us older folk
- 206 replies
-
- 1
-
-
- Endurance
- Shackleton
- (and 2 more)
-
And THAT is why I have been scratch building a lot of the bad plywood parts from this current Lynx build, Terry. You are progressing nicely, sir, really. Take your time with the planking, slow is pro. I look forward to more updates and will also follow along!
-
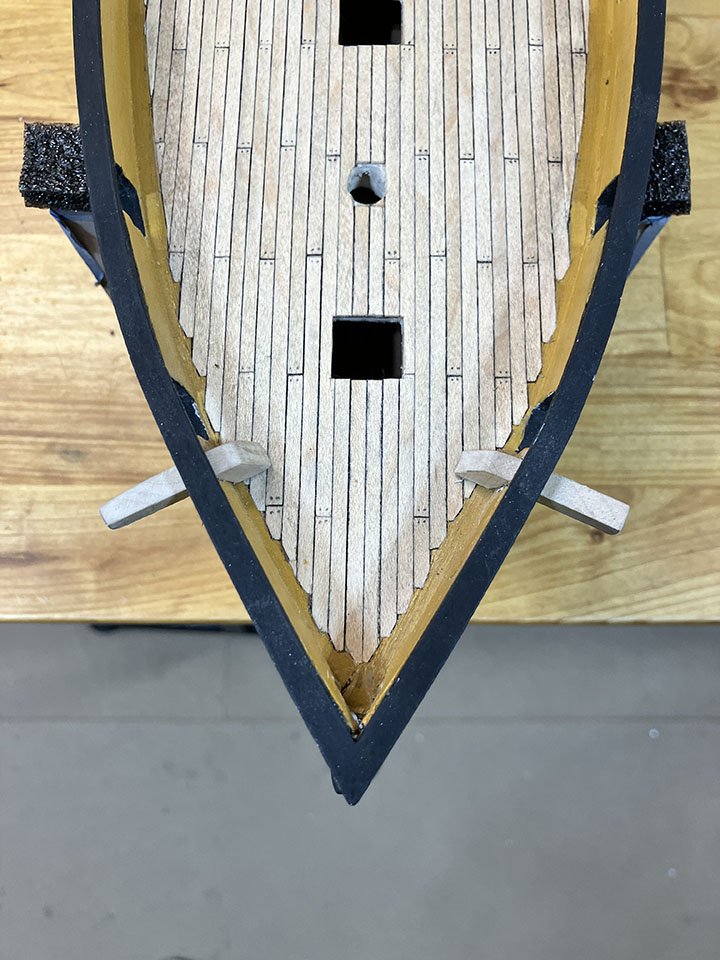
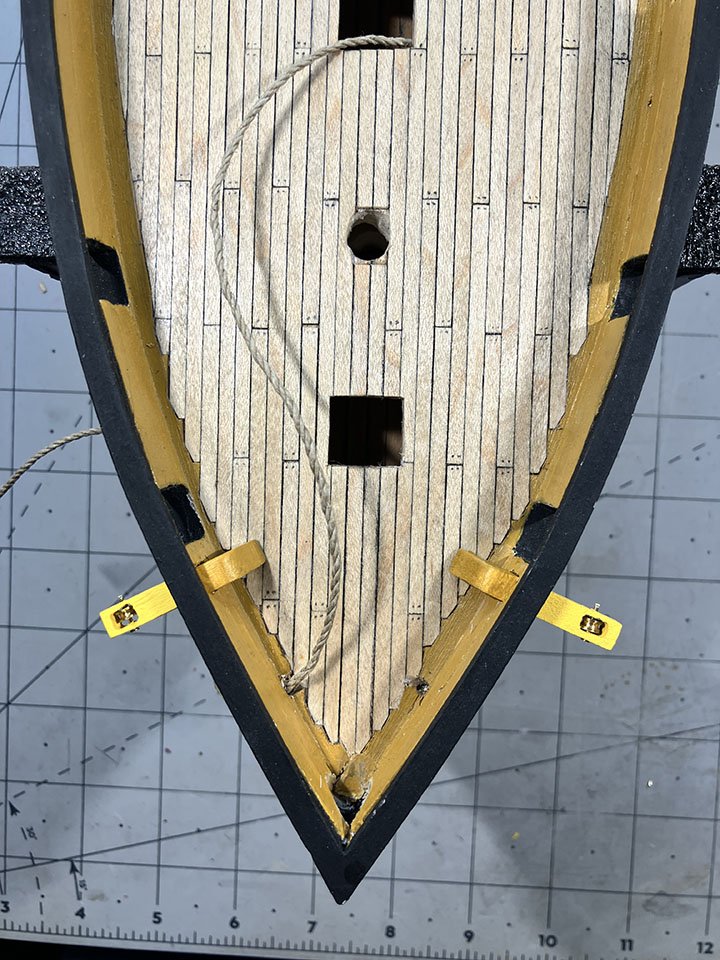
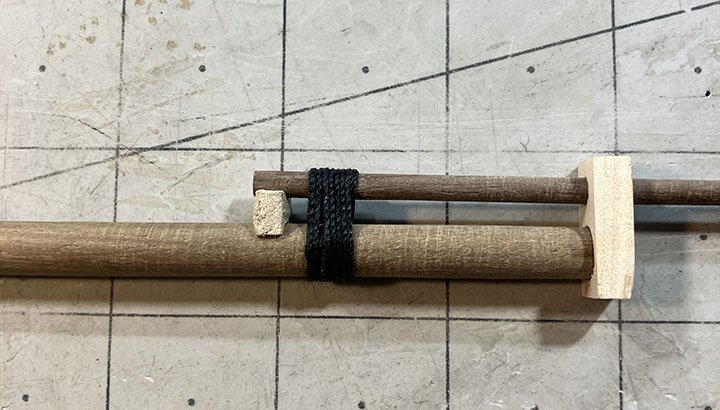
Today was the day to drill some more holes in my finished hull 🤔 I decided to install the catheads and the hawse hole covers. The catheads were first. I drilled a small hole and then filed it with a square pin file to match the catheads that I had made out of maple stock earlier on in the build: Once dry fitted the procedure was then repeated on the other side: I removed them both and took them to my drill table to mill out the hole for the sheave. After drilling the hawse holes and making sure the anchor rope passed through them (at the time I took the pic only the starboard side hawse hole was done), I refitted both catsheads and glued them in place too (the sheave pins still need to be filed down - I was waiting for the spot of glue to dry first): By the way, for the more astute readers, that is not the correct placement for the anchor rope and I know it It is merely "hanging around" there until I get the other holes in the deck done. I still had some work to do on the bowsprit, it had not been assembled yet. I didn't get it quite finished today (the flying jib boom is still missing because I snapped it in half while I was sanding it down), but the assembly is coming along nicely. Here are the steps. I started by mounting the jib boom and securing it with the gammoning: The Martingale was made from dowel stock and added. The whole thing was then given a primer coat and, once dry, a second layer of paint: I hope to finish this work on the bow tomorrow but lately something always seems to come up that keeps me away As and when I guess, it is not a race
-
Wow! I haven't checked in in a little while and look what you have done. So very neat and clean, Phil.
- 482 replies
-
- 3
-
-
- minesweeper
- Cape
- (and 1 more)
-
I want a mill just like yours!!
-
Yep, you can p[robably see the finish line, Phil. This has been a great build, a joy to watch her grow into the imposing model she has become.
- 288 replies
-
- 4
-
-
-
- Card
- Pre-Dreadnought
- (and 3 more)
-
I too like that muted blue color, Ronald. Despite your hiccups (we all have them!), she is coming along so very well.
-
It is one of the many things on my "don't forget to do this" list, Steve. Thanks mate.
-
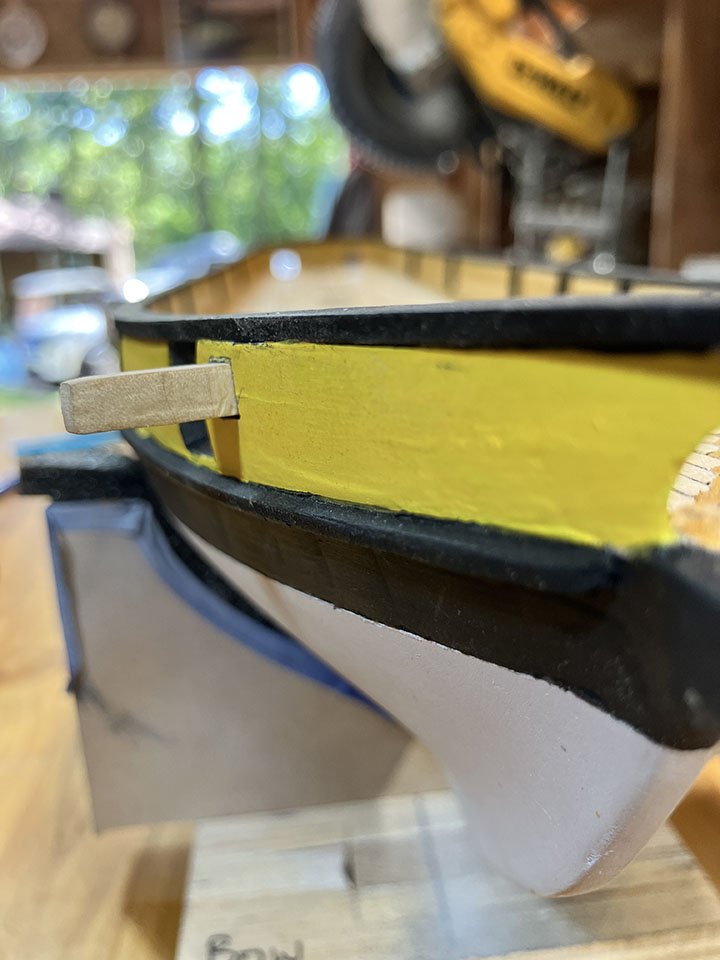
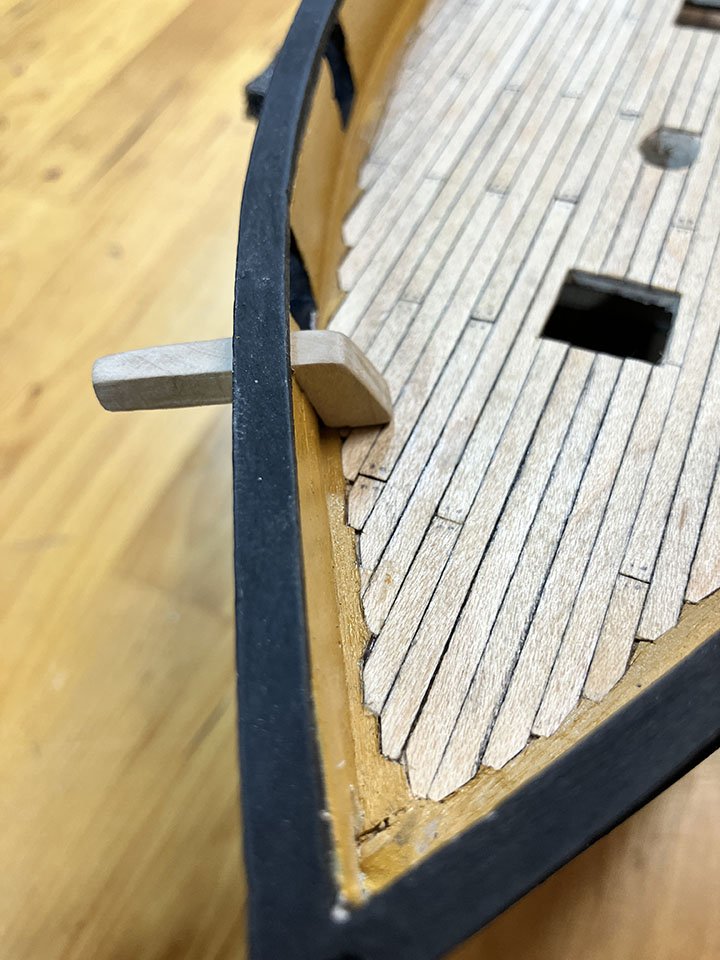
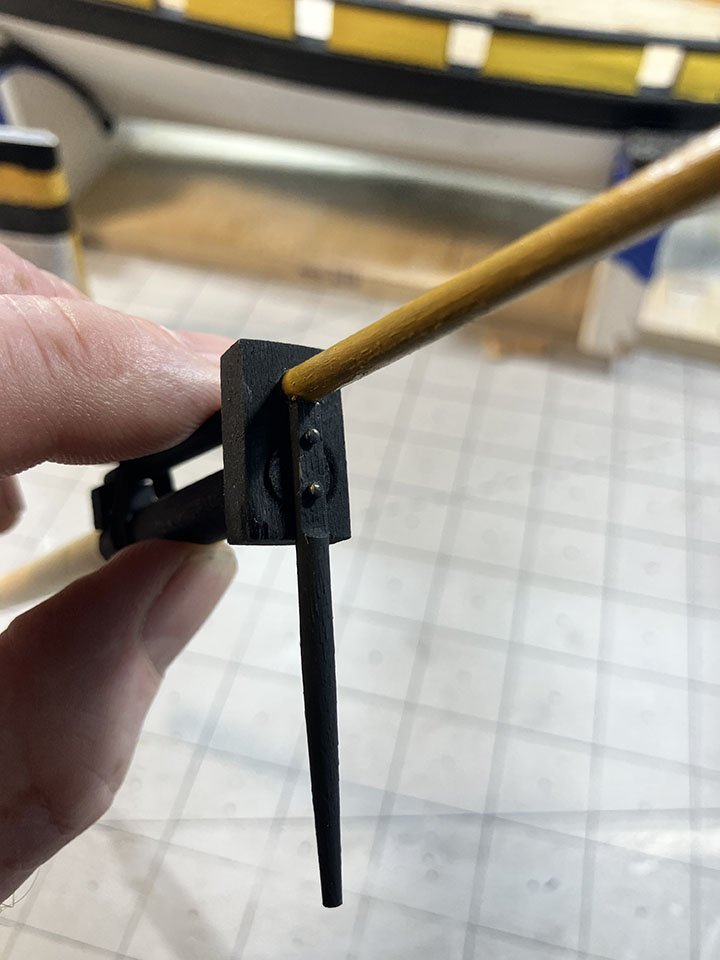
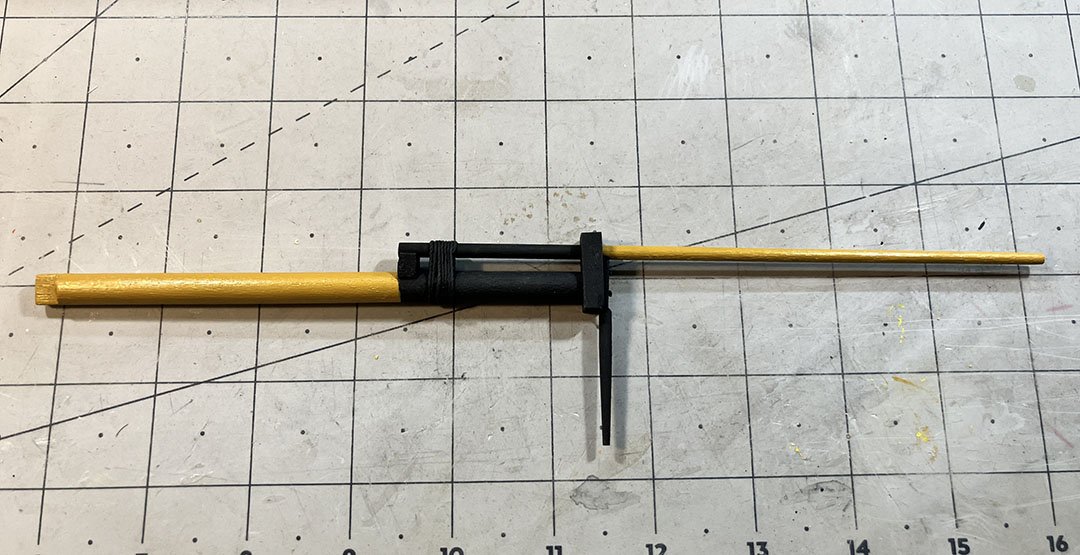
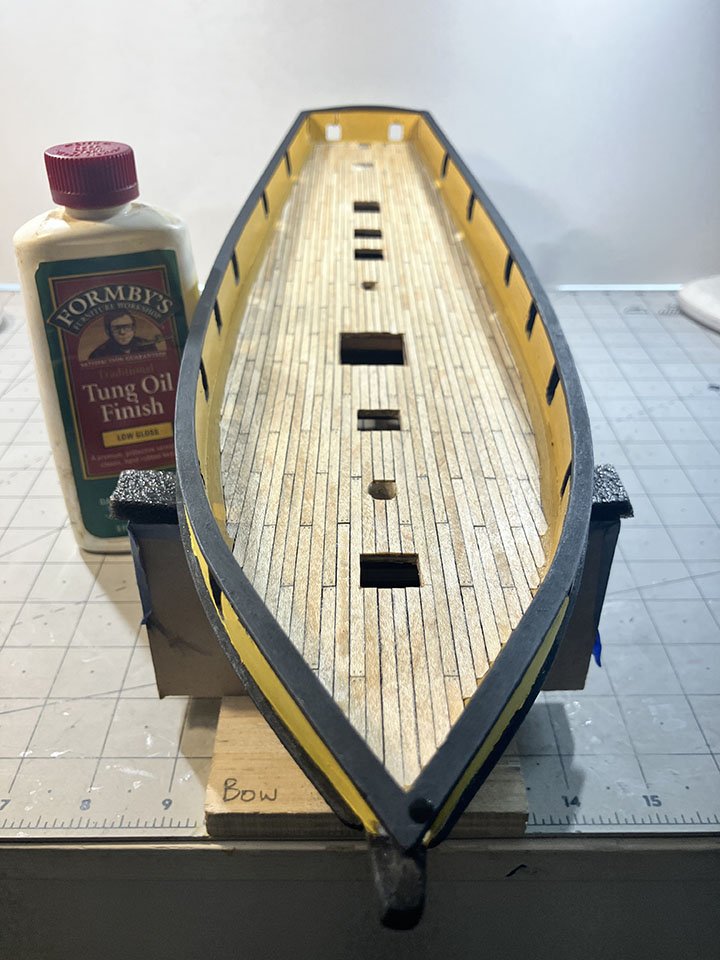
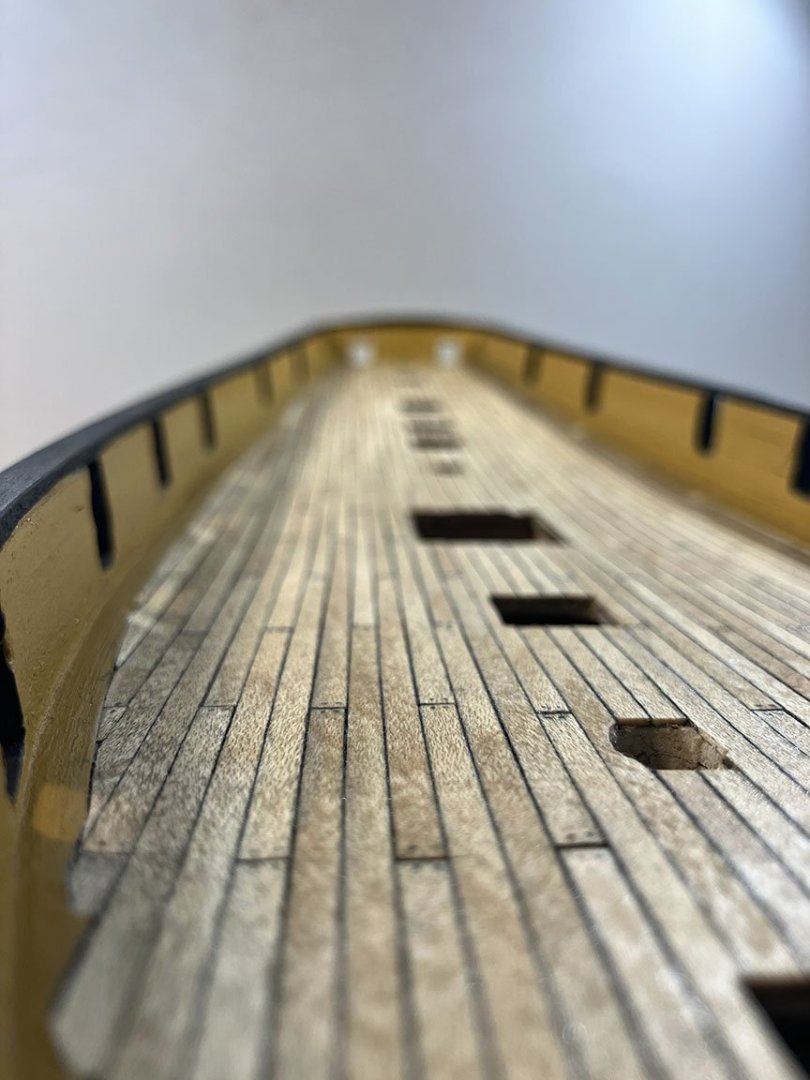
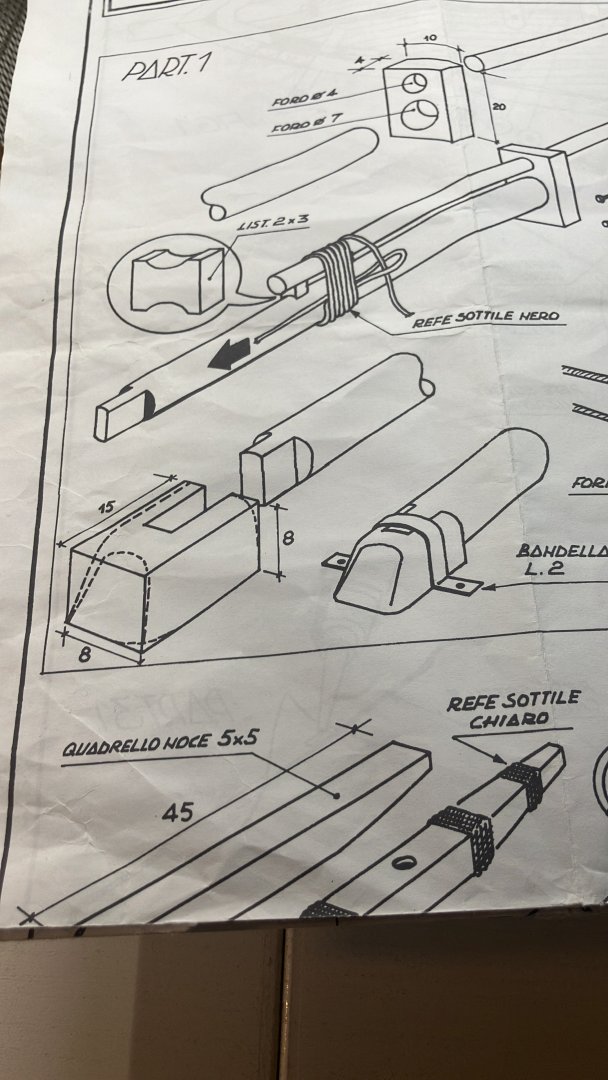
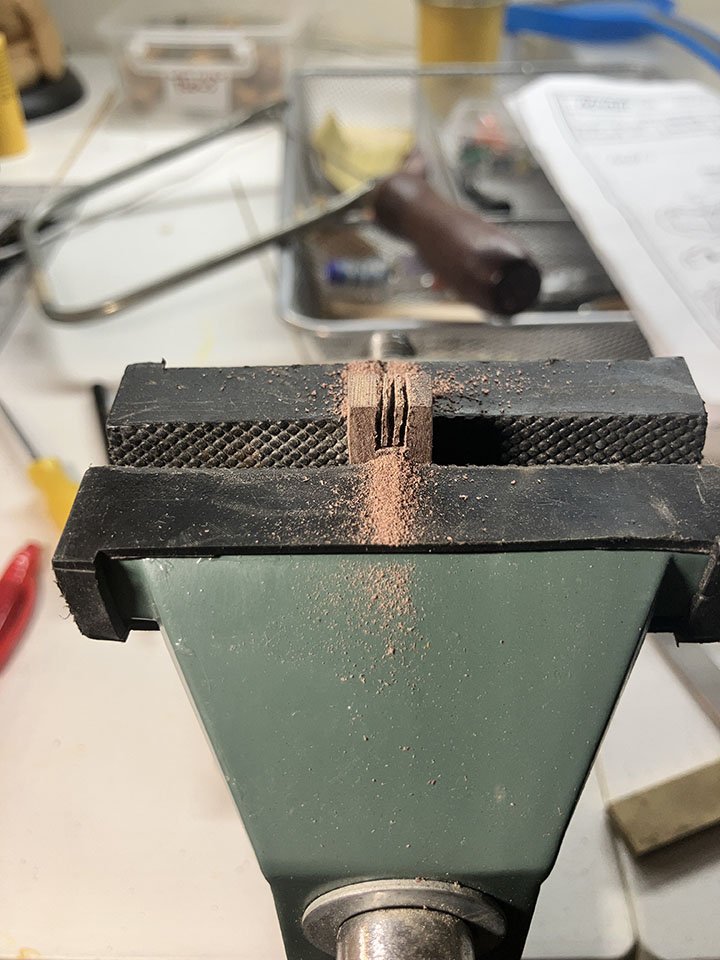
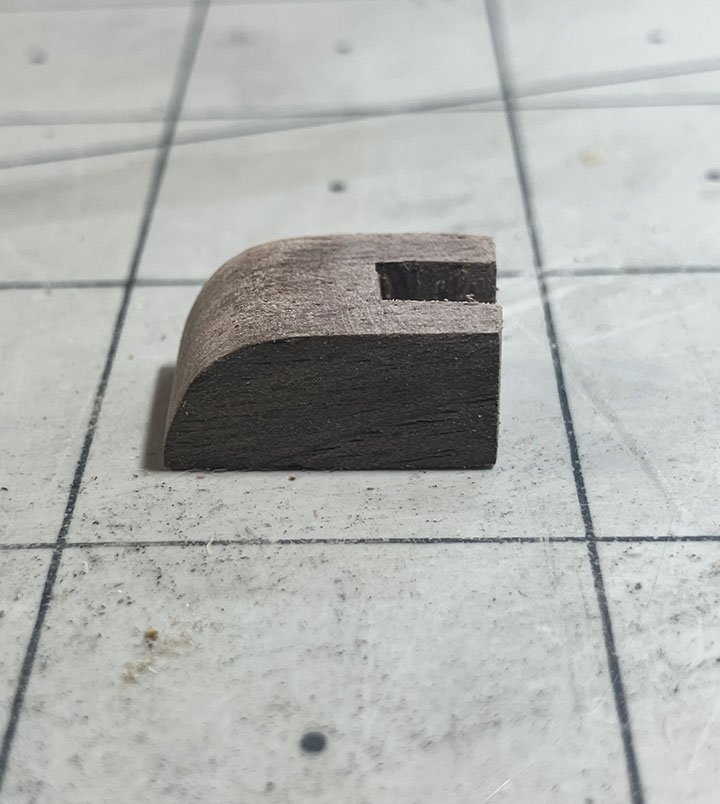
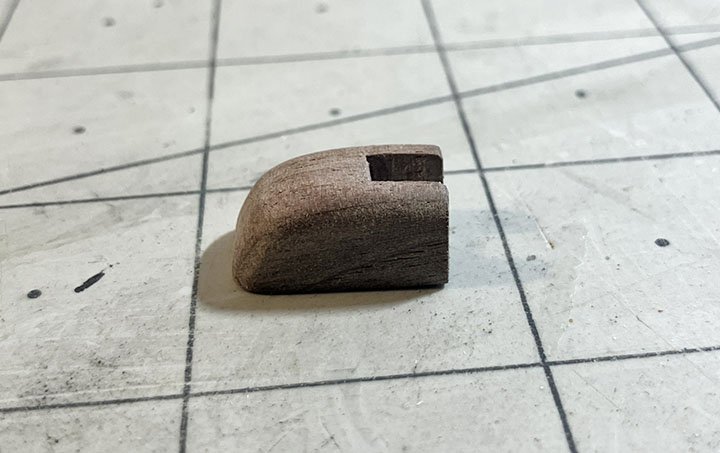
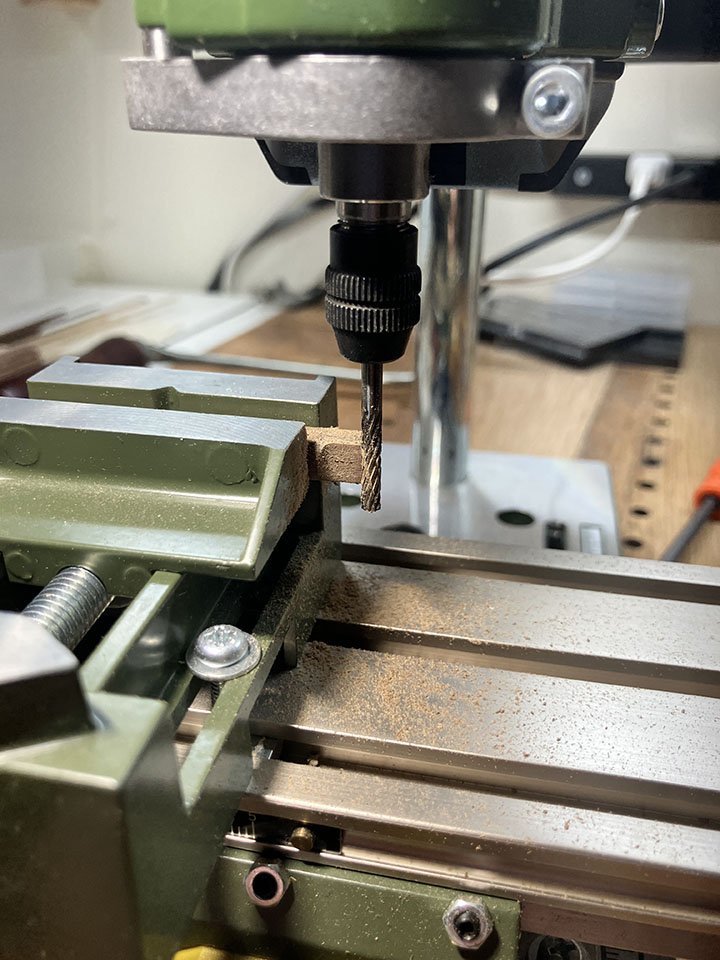
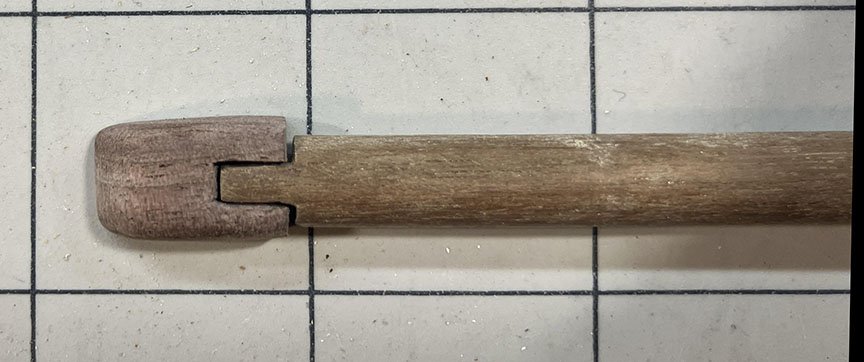
A sunny update from them shipyard (after 3 days of consistent rain - which I am not complaining about by the way, we had a very dry summer). The deck is finally done but, I do have a confession to make. After @Dr PR's correction to my joggling in post #231 I went to work on making sure the rest of the planks were laid correctly. Well, that certainly did not work out so well. I made a complete hash of the stern planking and was more than dissatisfied with the end result. I ended up removing all the planks (and that is a nice way of putting it, I tore them out in frustration if the truth be known), including the margin planking at the stern and re-did the whole thing without any joggling (nibbing). I was not going to put myself through that again. In retrospect I think I was just trying too hard to get it right. The second time around I just shaped the deck planks to fit up against the margin boards. The only "joggled" planks now are the ones at the bow. Once complete I scraped the deck with a razor blade and simulated the tree nails with a very sharp 2 HB pencil. The whole thing was then coated in a layer of tung oil to seal it up. She is sitting outside in the sunshine as we speak to dry out. In between ripping my hair out and before I gave up the whole venture entirely out of frustration, I started work on something that would take my mind off the deck for a while. The bowsprit stem was up next. I decided to use my stock walnut that I had milled down instead of the kit supplied piece that was also walnut but looked a bit fragile. I cut the wood down to size, cut out the slot for the bowsprit and shaped it according to the plans: To be able to seat the bowsprit into the stem I had to shape the end as per the instructions. As yet I have still not ordered the mill but I do have a compound table and vise on my mini drill press platform. With that and using some small bits that I have in the wood shop for power carving with the Dremel, I was able to cut the slot down nice and accurately. A little clean up with a small wood file to sharpen up the corners and it fitted nicely: Bowsprit dry fitted to see how she looks:

- 257 replies
-
- 11
-
-
The skill in modeling , or one of them at least, is the ability to duplicate things (in this case the cannons) and ahve them all look pretty much identical. You, sir, have achieved that and then some. Inspirational work indeed!
-
Exquisite is what this is......
-
I wrote that one down, good tip.


