HOLIDAY DONATION DRIVE - SUPPORT MSW - DO YOUR PART TO KEEP THIS GREAT FORUM GOING! (89 donations so far out of 49,000 members - C'mon guys!)
×


Mike Y
-
Posts
1,557 -
Joined
-
Last visited
Content Type
Profiles
Forums
Gallery
Events
Everything posted by Mike Y
-
I use the same method as Amalio, same nylon brushes (discovered it by accident), and it works great! Especially on half-dried glue. It is just much faster and simpler than water. But water works better in tight areas, for sure. Especially water plus scraping with some xacto blade.
-

ancre Le Gros Ventre by ChrisLBren - 1/36
Mike Y replied to ChrisLBren's topic in - Build logs for subjects built 1751 - 1800
No more confusion caused by many models built in parallel. Let's hope this one will turn out great! The start is pretty good anyways. Is that still your french pear? Looks very neat! -
Model Ship Building Stands And Vices
Mike Y replied to LEGION 12's topic in Modeling tools and Workshop Equipment
How come none of you broke off the keel accidentally when clamping a model like this? Should be very careful, can't sand or apply any force to the model when it is clamped this way - what is the real use for them? Proper clamp/jig should really hold the front end the back part of a hull as well... -
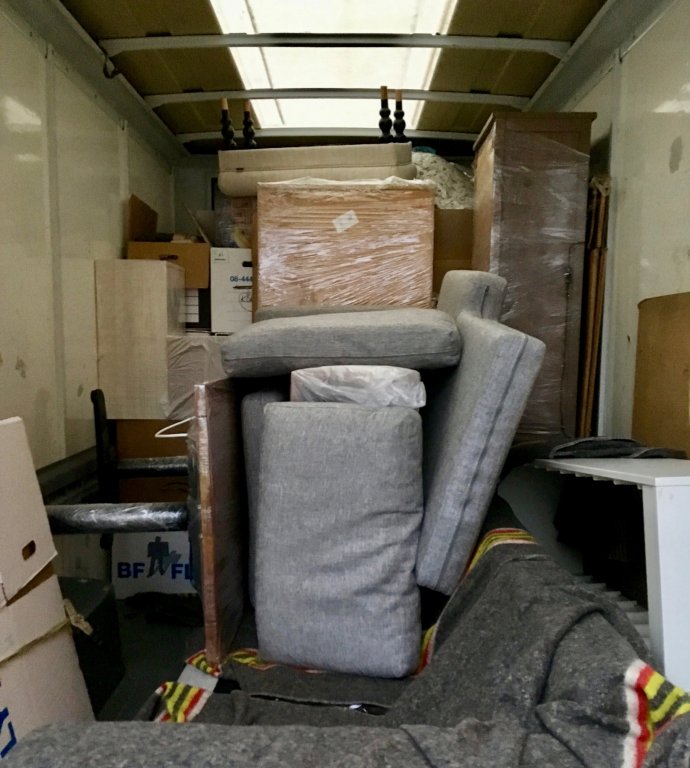
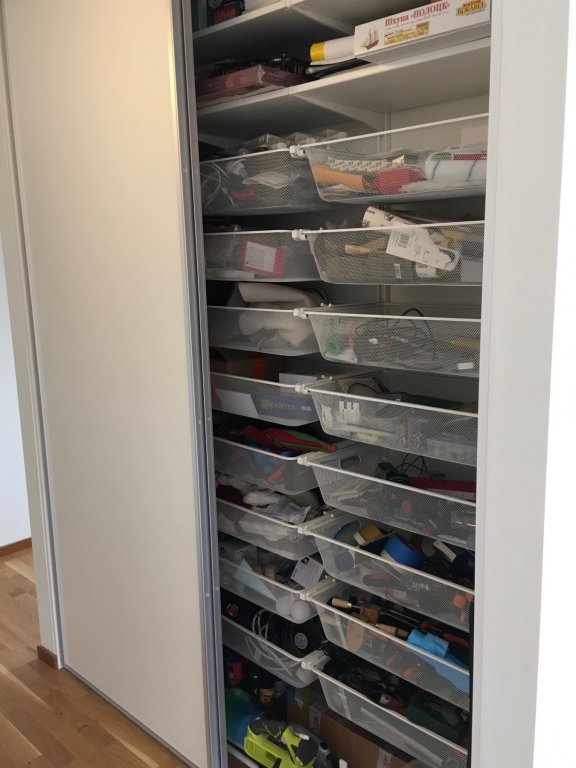
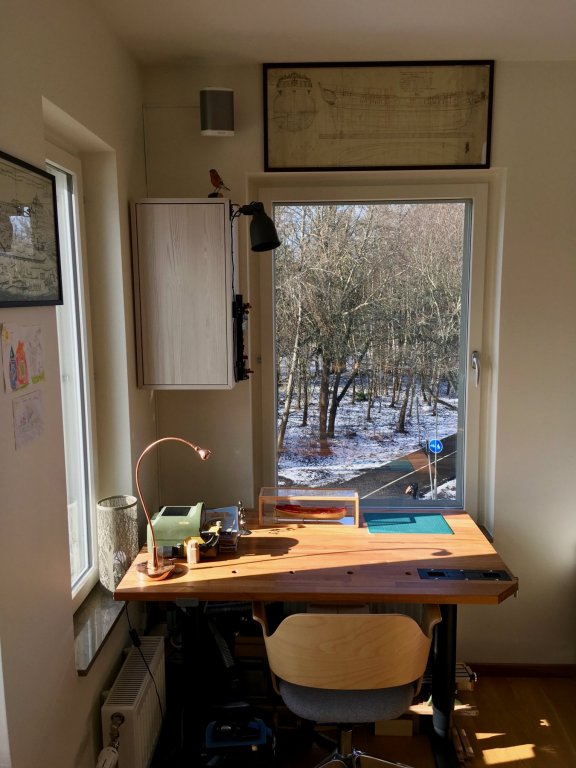
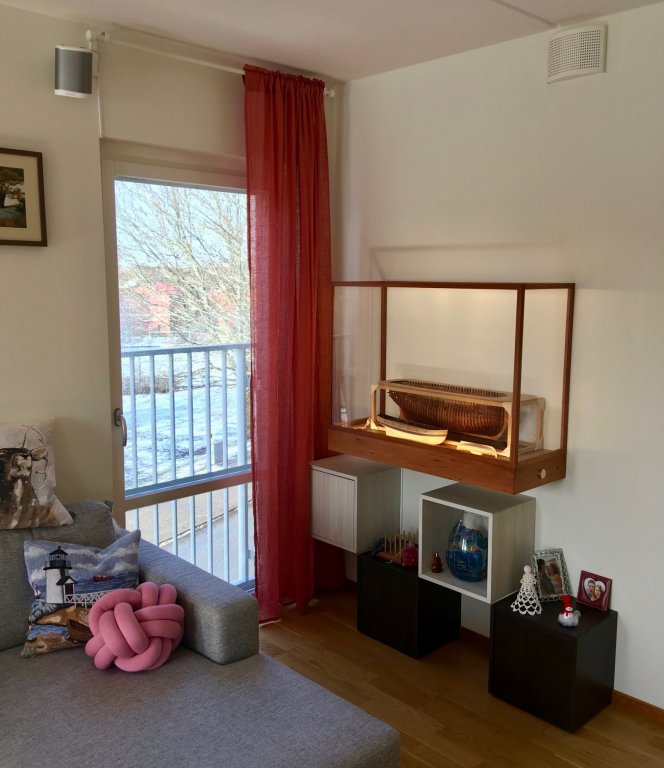
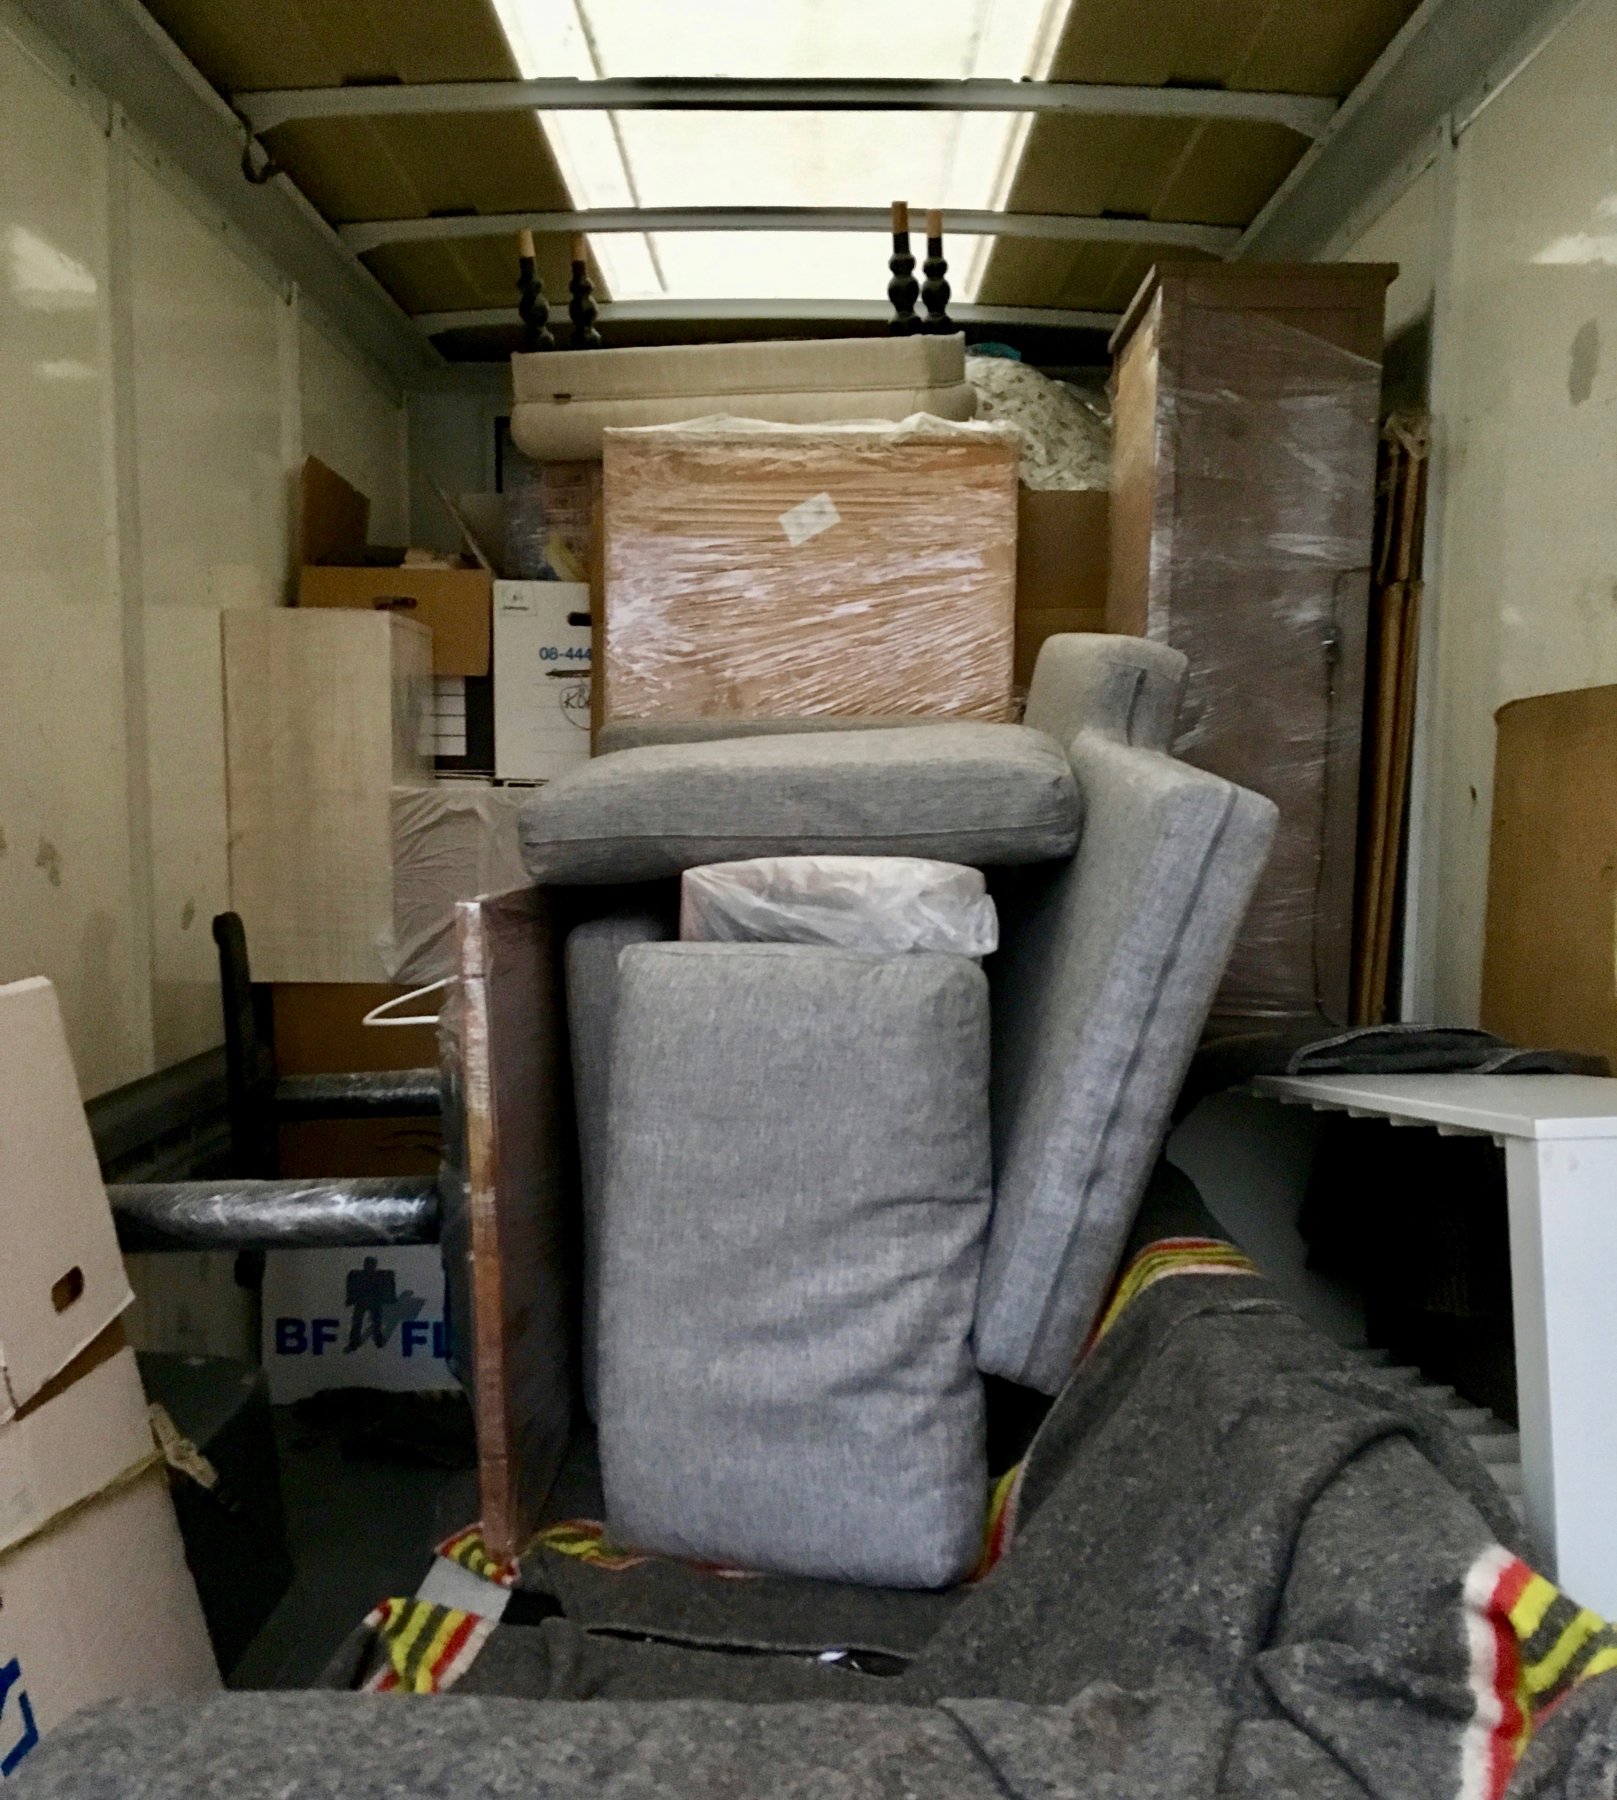
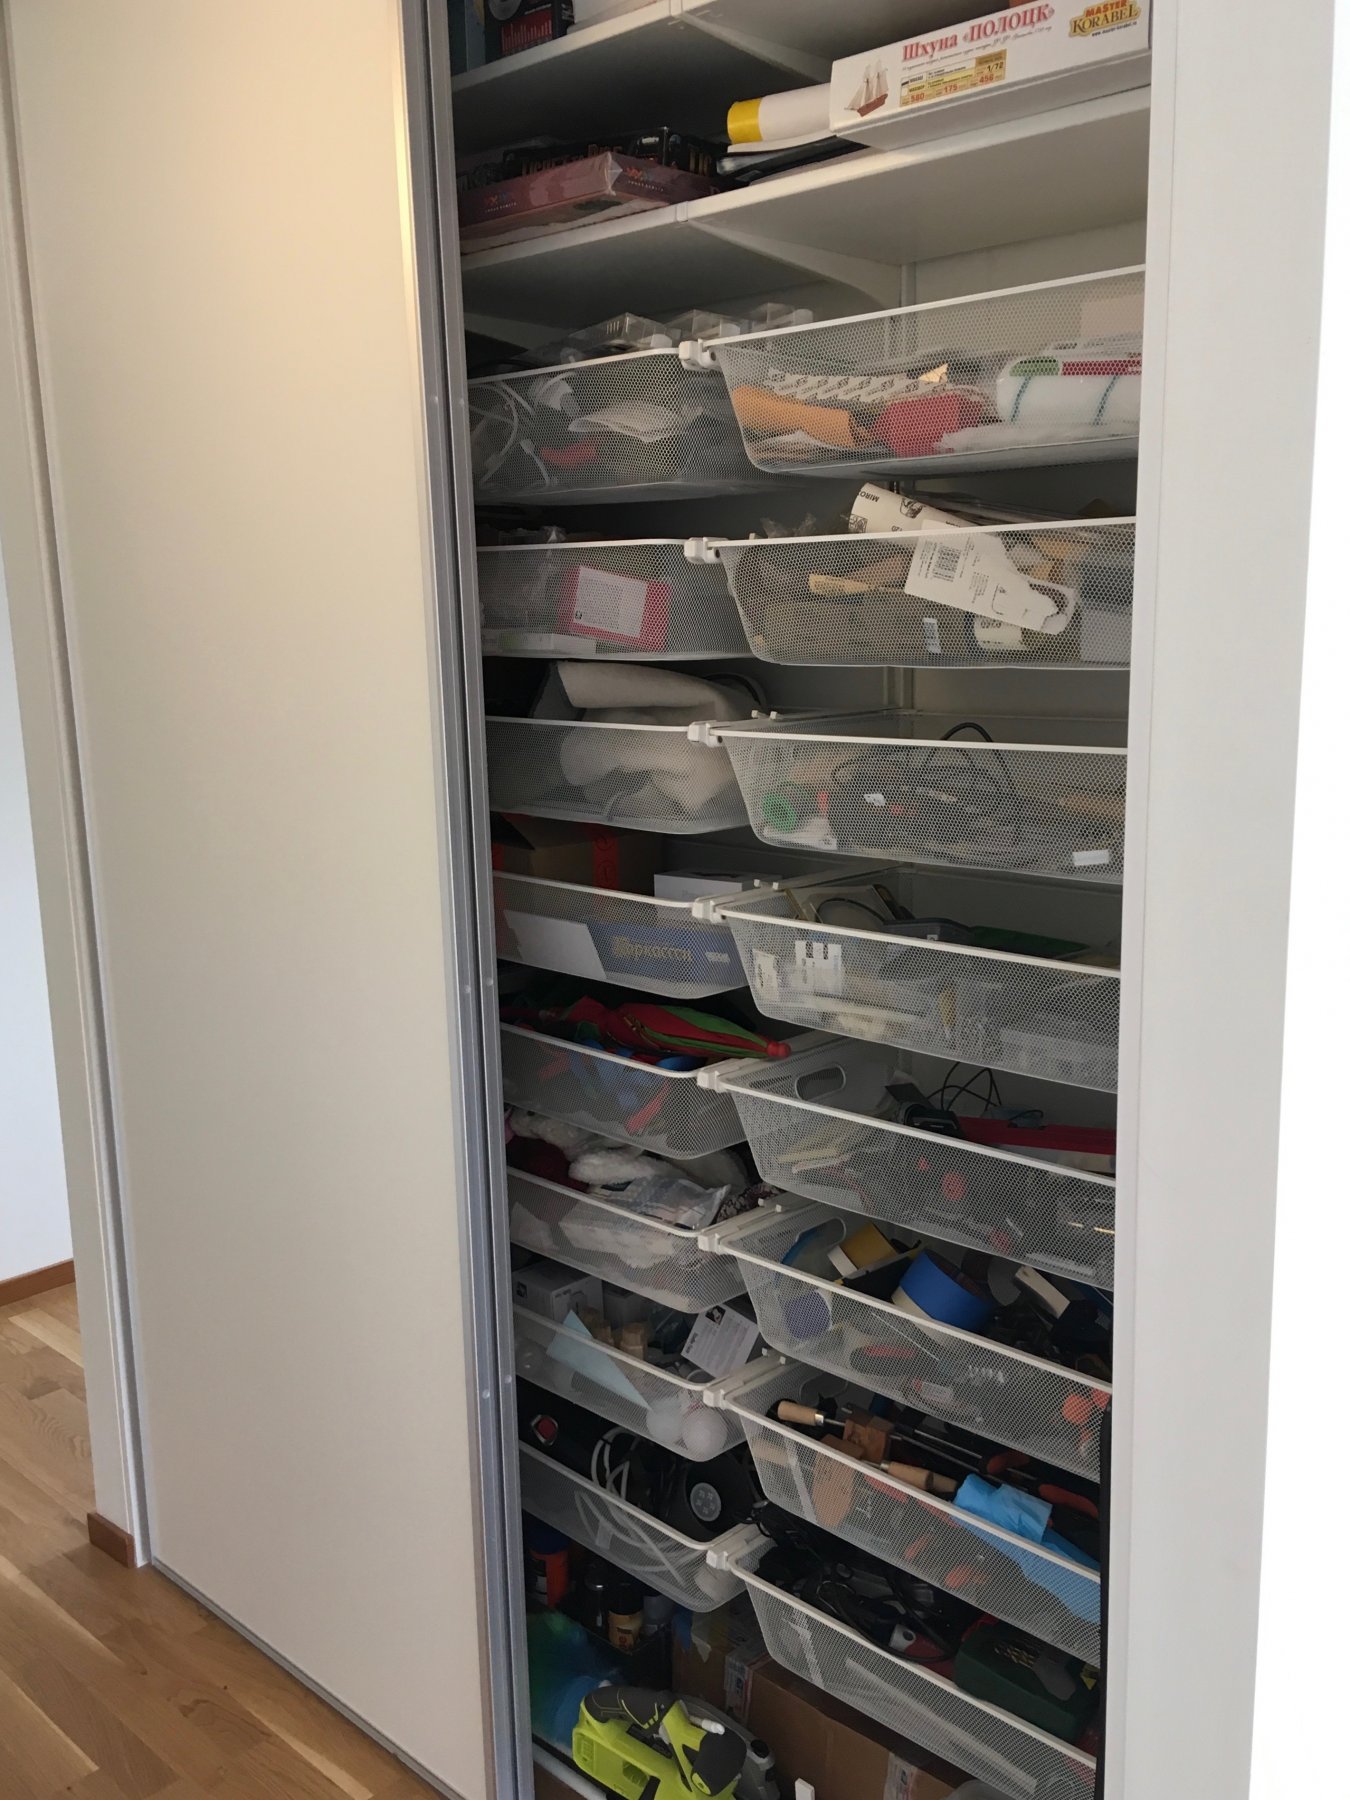
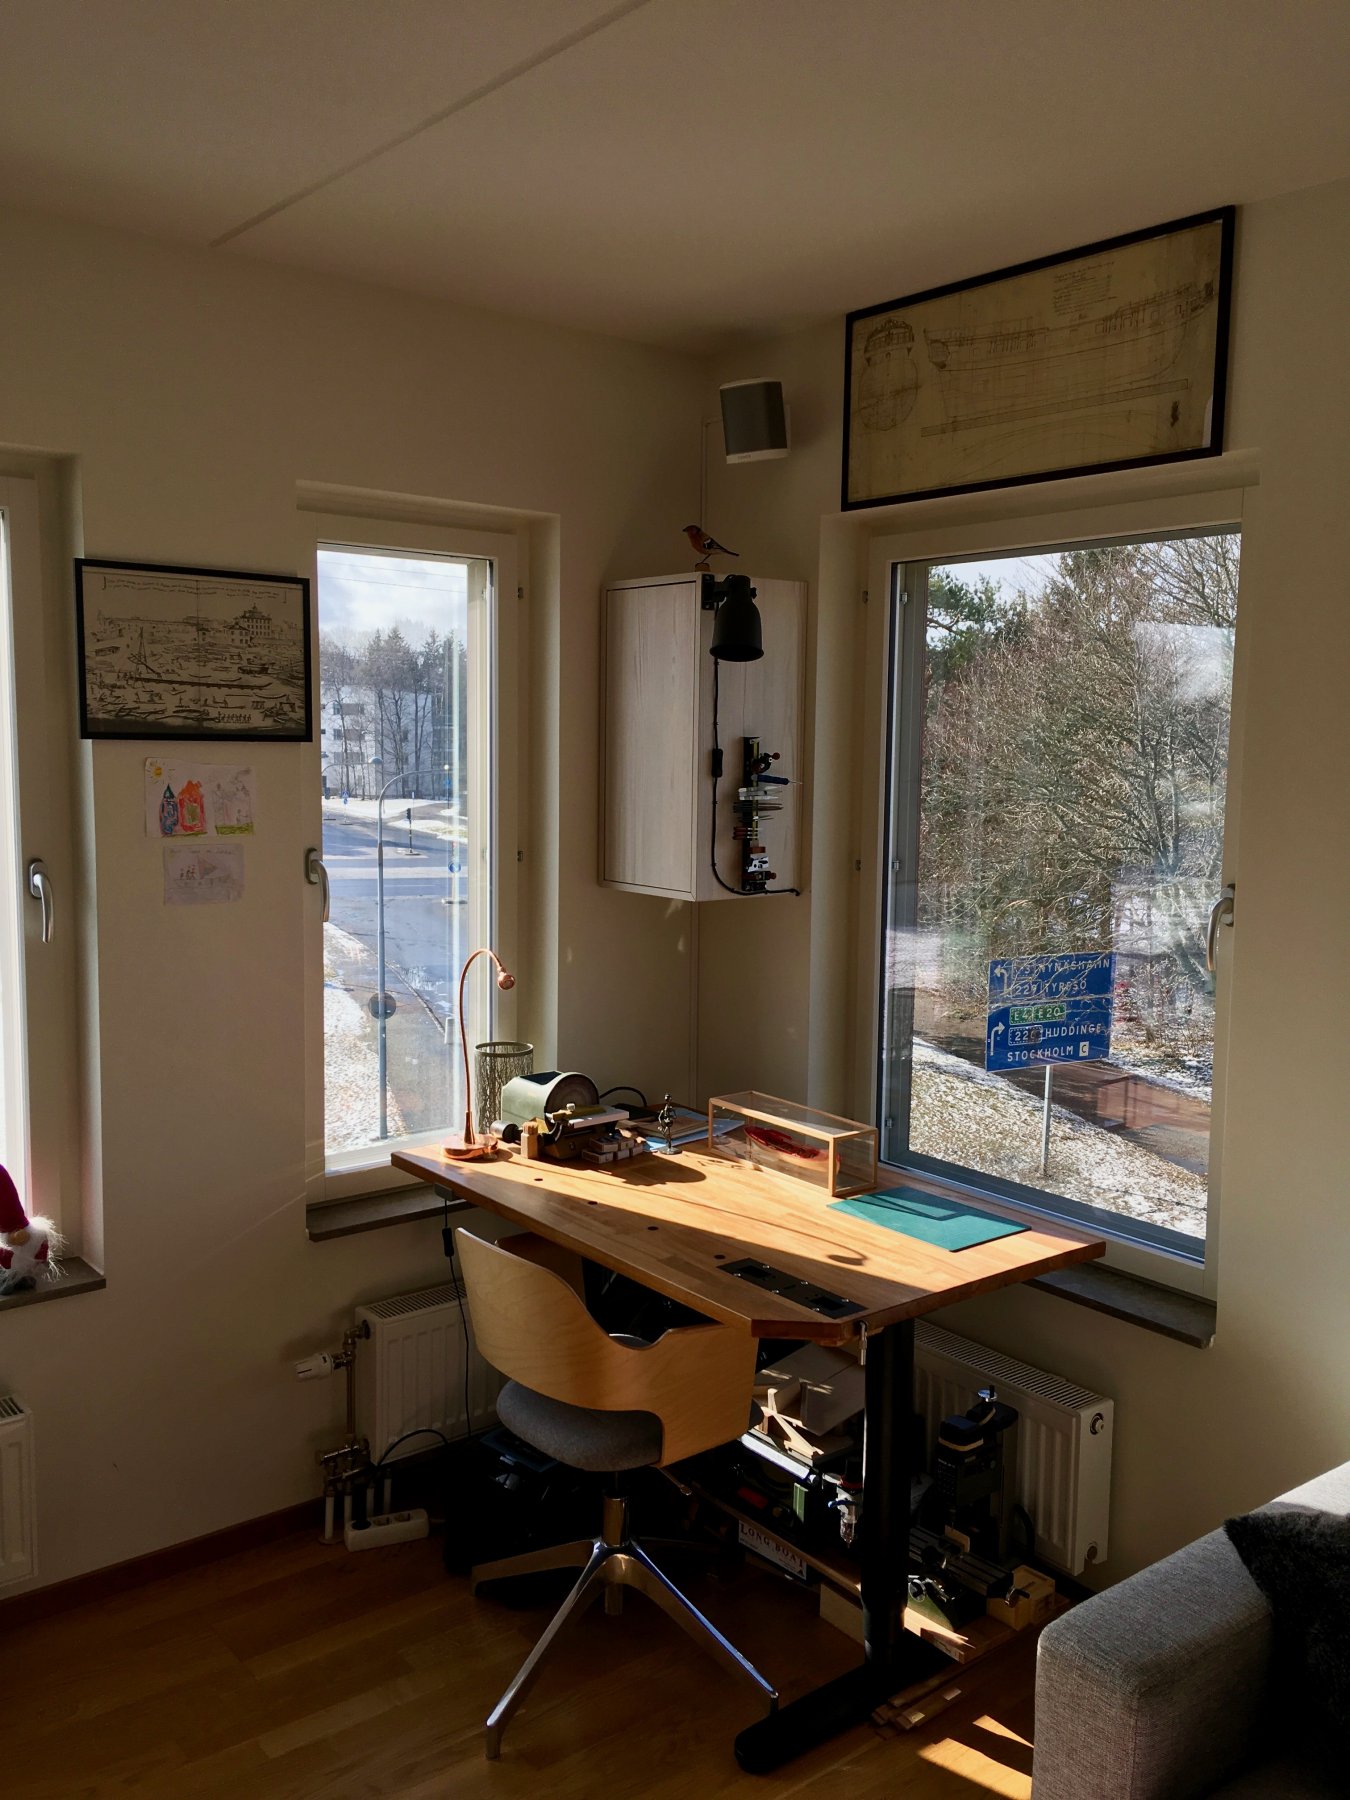
Thanks everybody for the feedback about clamps! The log was a bit silent for a while, but for a good reason. Me and Admiral finally found a good apartment worth the upgrade (larger, pretty new, pretty good neighbourhood, good school right across the street, etc), so we were busy selling the previous one, settling in a new one, etc. We moved in around Christmas, but the todo list was pretty long. So plenty of home-remodeling instead of shipbuilding Now 90% of all the renovation stuff is done, and we managed not to go crazy while doing it. Moving the display case was tricky, it is not really designed for the ease of mounting. Here it is, protected by some sofa cushions: But it survived the move pretty well, and found its new place next to a "french balcony" (don't worry, there is a real balcony on the other side): And I got a nice corner for my modelling area, super prime spot! Admiral got a whole room for her knitting hobby, so she is satisfied with the arrangement. The downside of having a lot of windows is not having enough wall area to mount shelves. Though all frequently used tools fit that single shelf pretty well. To hide the rest, I took some space in the storage area in the hall, which is pretty close by: And some tools are stored in the shelves under the display case. So I hope to finish the renovation todolist in a month or so, and get back to sawdust making!

- 968 replies
-
- 21
-

-
- hahn
- oliver cromwell
- (and 1 more)
-
Vasa deck shift
Mike Y replied to BLACK VIKING's topic in Building, Framing, Planking and plating a ships hull and deck
It might be also explained (partially) by a mix of Dutch and Swedish shipbuilding traditions - Vasa was built by a mixed team of workers, with some weird things like mixed up dimensions (there was an Amsterdam foot and Stockholm foot back then, and they were not the same). There were few rulers found inside the hull, referencing different measurement systems. Fred Hocker's book is a nice read, if one is interested... Not just the planking is off, but gunports barely line up, shifted randomly to fit the frames around them, one side is higher than the other, etc. This is a very rare artefact of human sloppiness, since I doubt that "just dig the scrap pile" was a method proudly documented for later generations. -
Hej Erik! Glad to see more POF builders from Nordics, have a good Christmas! Looking forward for some build pictures hope your wood dealer is good!
-
That should be fun! Love your logs, very informative
- 124 replies
-
- 3
-
-
- longboat
- Chaloupe Armee En Guerre
- (and 1 more)
-
Maybe it would fit their 1st April format - a line of tools for hamsters. Would love to see more of their "miniature" stuff.
- 968 replies
-
- 2
-
-
- hahn
- oliver cromwell
- (and 1 more)
-
Very nice! Just found that build log, very neat. Cherry looks good on it!
- 74 replies
-
- 2
-
-
- queen anne barge
- Syren Ship Model Company
- (and 1 more)
-
No way, this is a perfect example of the economy of scale Making them by hand and making a profit is impossible, unless somebody wants to pay hundred dollars per pair of clamps. The jaws are a perfect fit for the simple CNC router, but cutting that rods and threads will require some other machinery. And, in the end of the day, they have no market. Scratch builders, doll house builders, etc - would rather make their own, it is not difficult. Others do not really need such clamps.
- 968 replies
-
- 6
-
-
- hahn
- oliver cromwell
- (and 1 more)
-
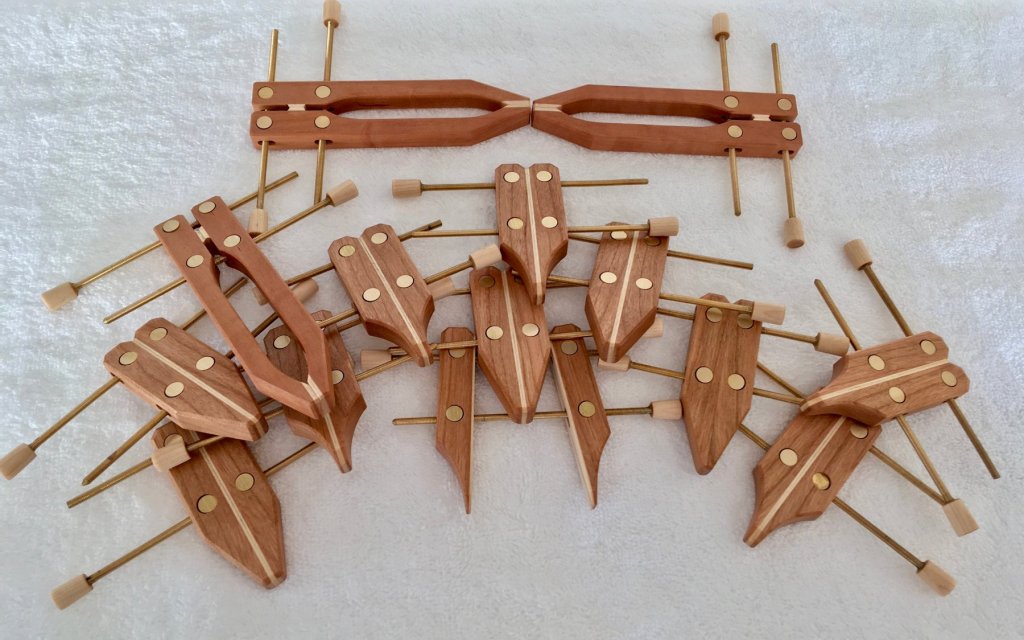
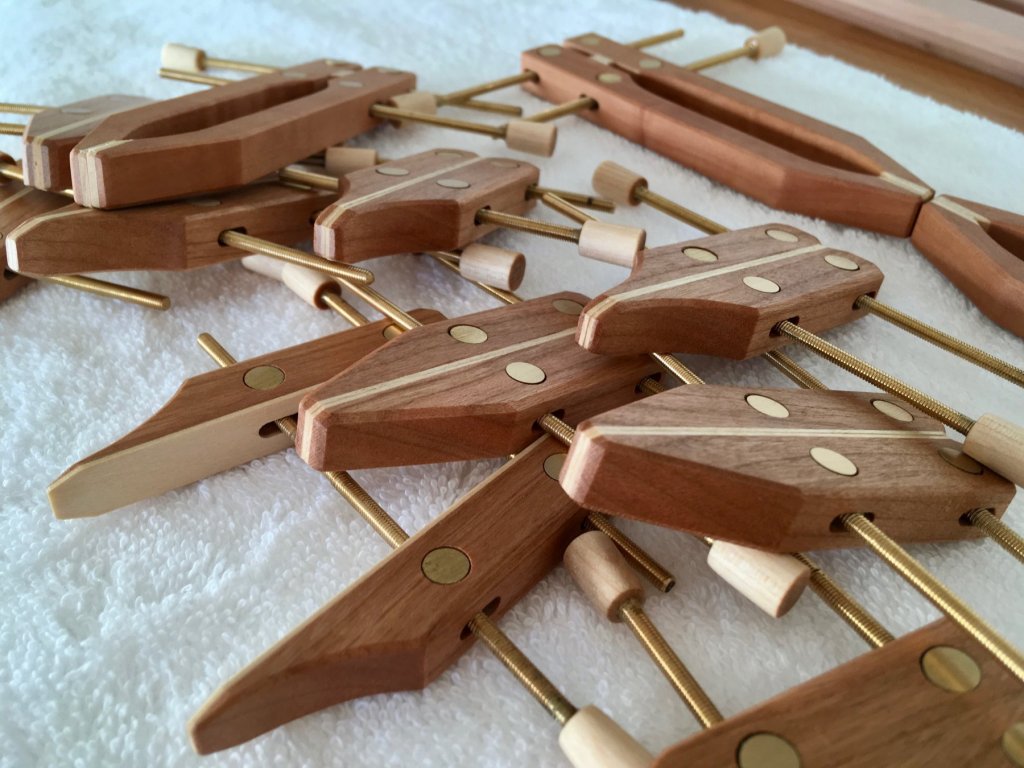
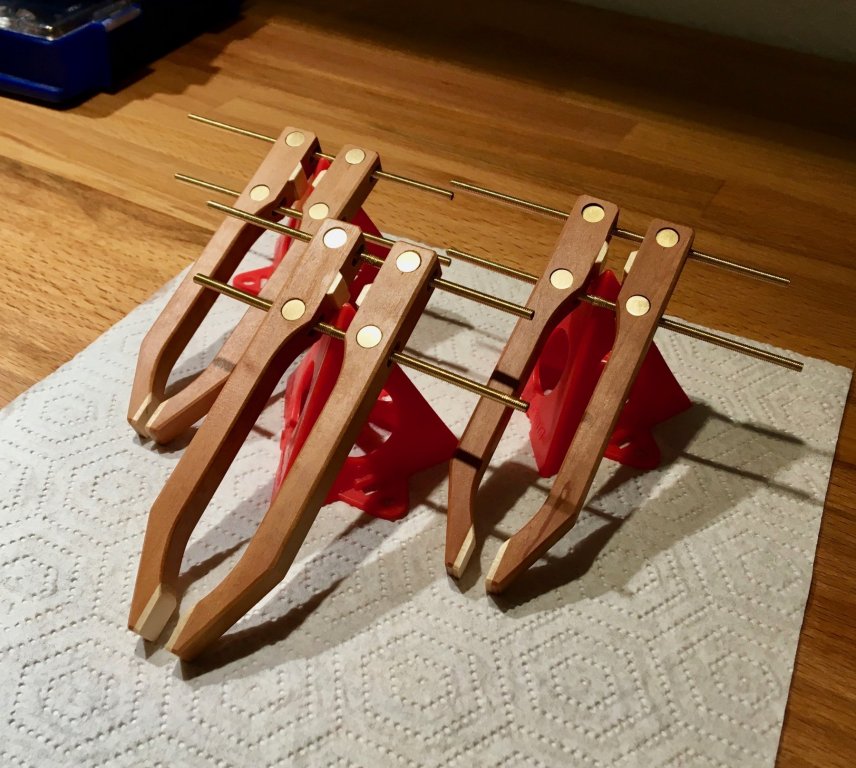
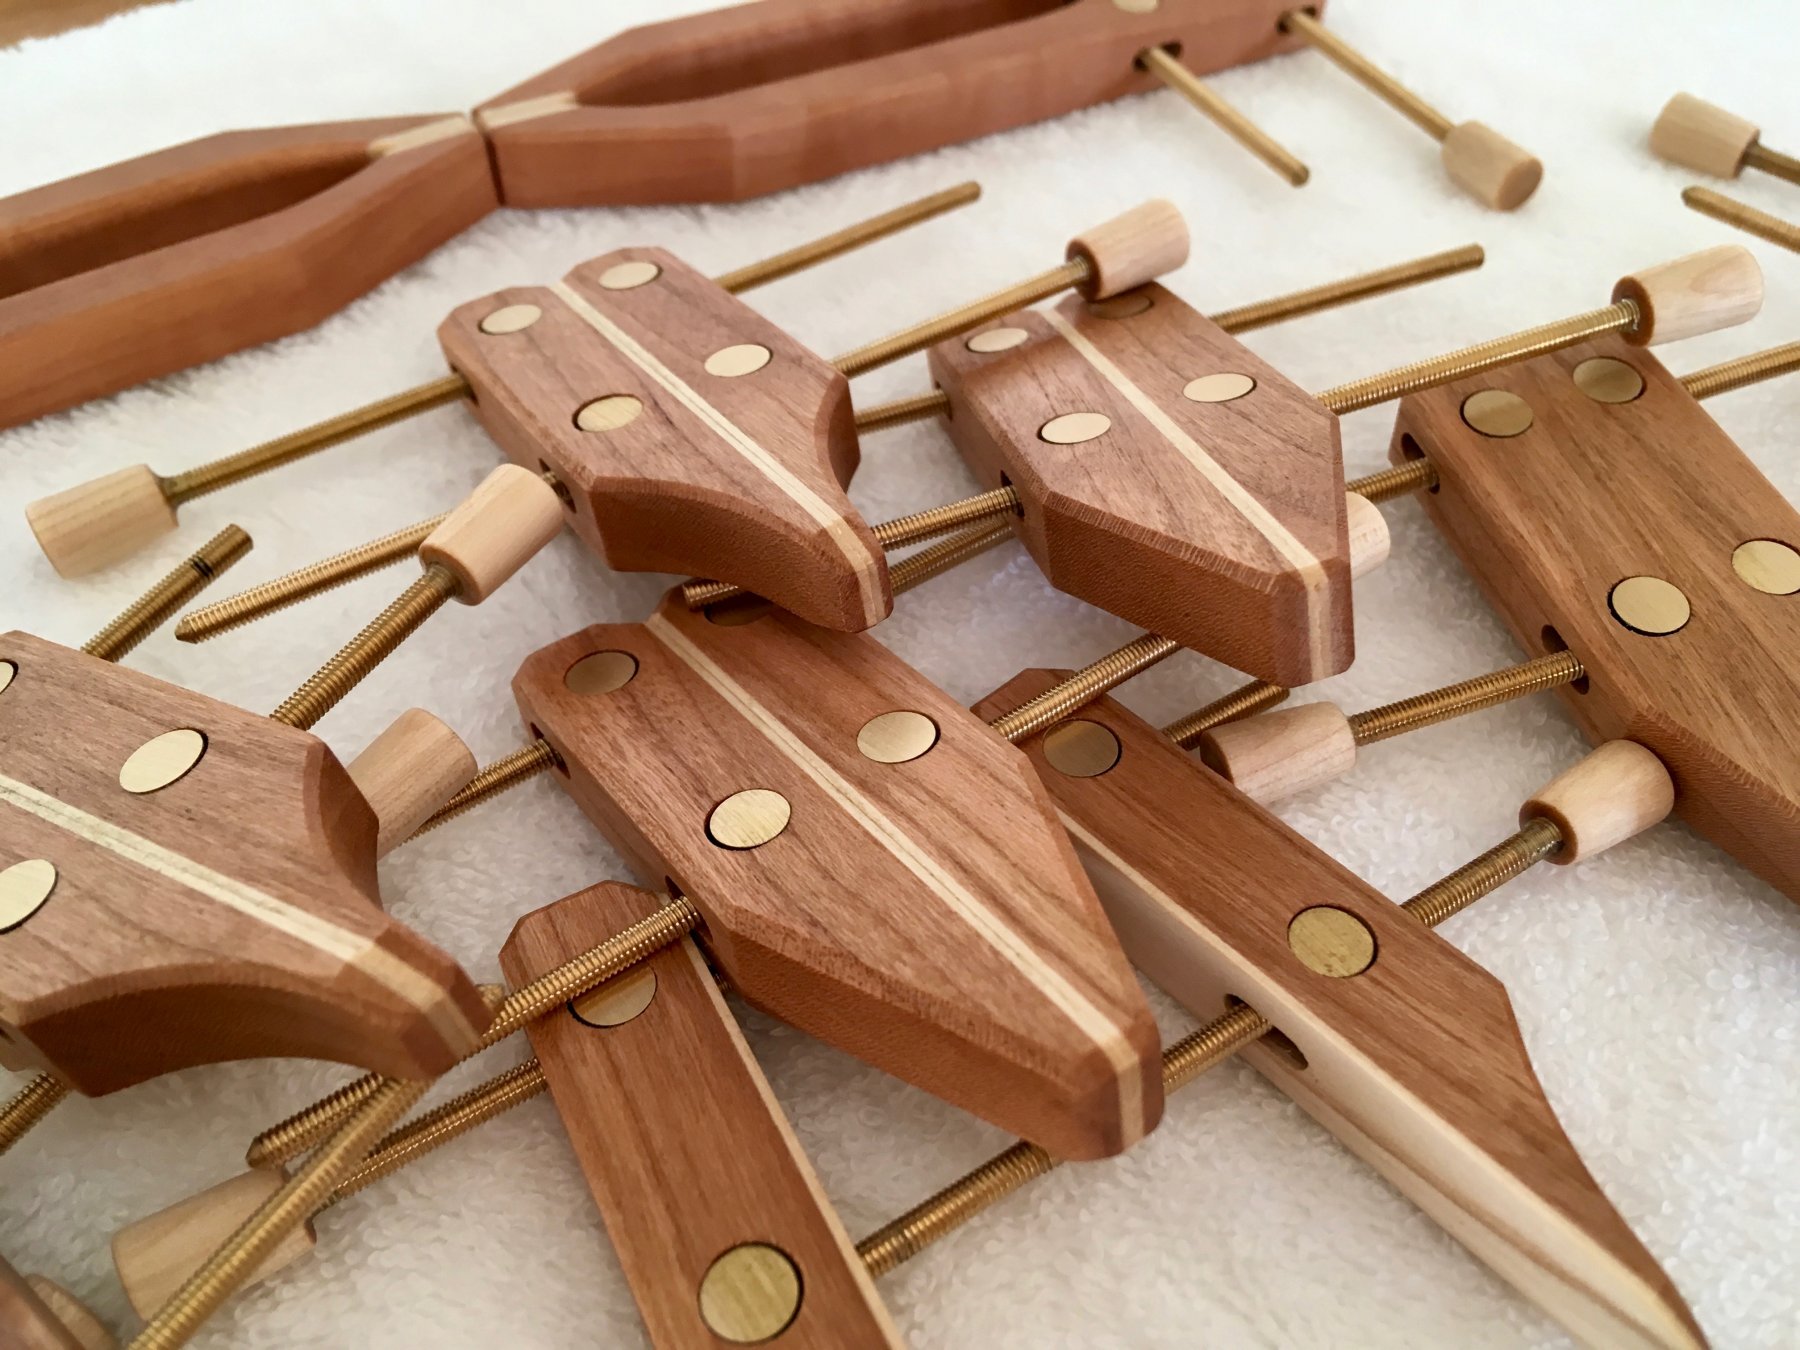
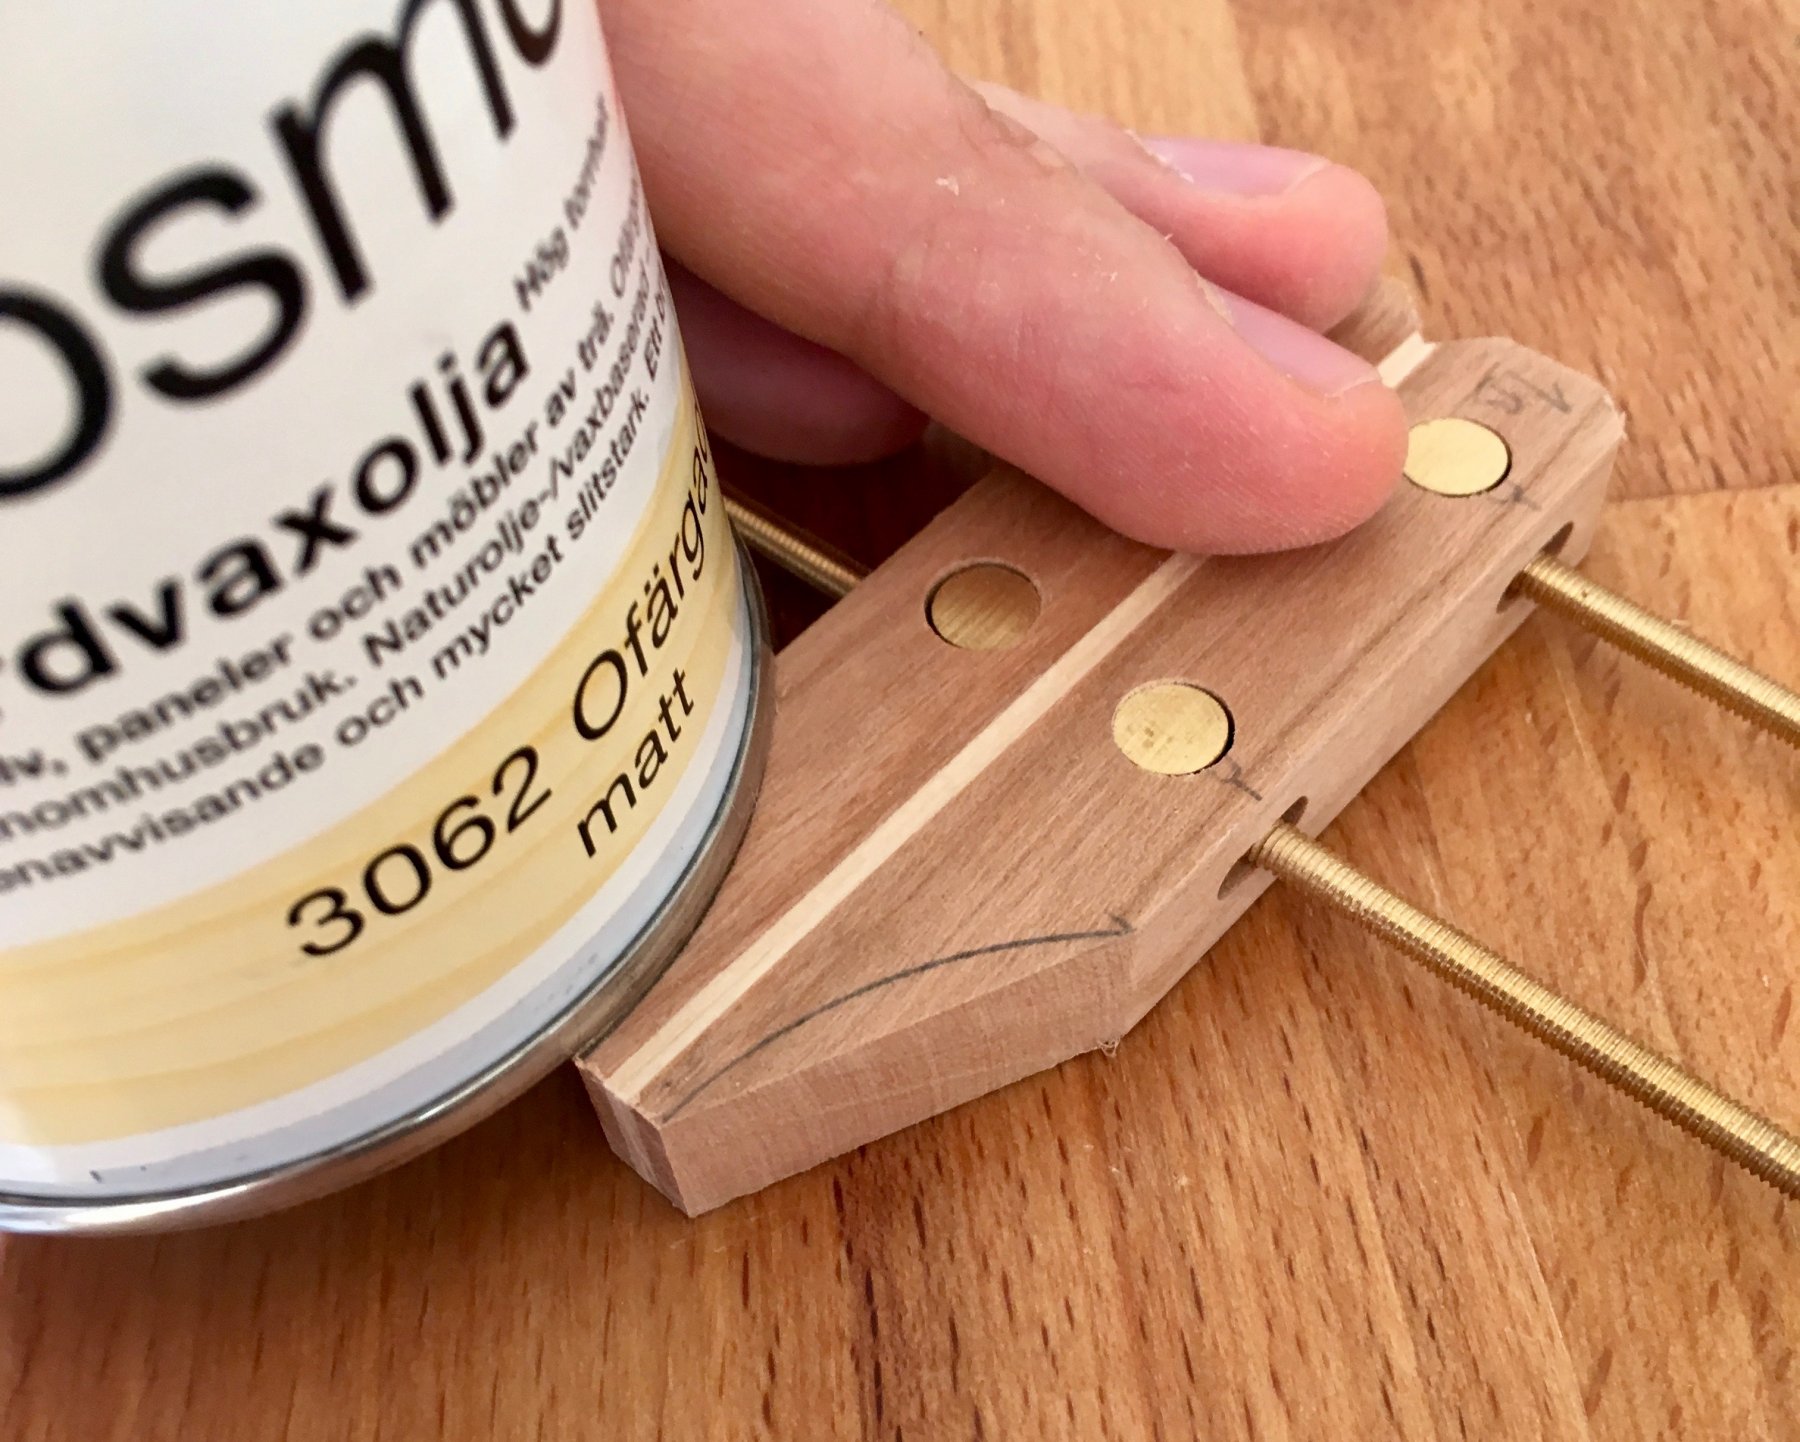
Aaaand the clamps are finally done! They work great, and I'm very happy with the result, it was a time well spent. Hope I will use them for years to come. The brass rod is a bit soft, but they are not designed for high pressure anyway. I would recommend to go with 4mm rods instead of 3mm if you are thinking about making them. Gluing handles with epoxy, using gravity to penetrate deeper. I also cut a notch on the end of all rods, to help epoxy float down and make a "key" to prevent handle from slipping. Forgot to make photos of that. The final result, everything is finished with two coats of danish oil. Note that one clamp without basswood lining, it looks darker because of fine brass dust stuck in its pores. I tried to sand it to 400 grit, recognised the mistake, others are sanded to 240 grit. 240 leads to coarser brass particles, and they are not small enough to stuck in cherry wood pores. Cherry looks like a nice wood for the purpose, the grain match looks pretty neat!

- 968 replies
-
- 25
-
-
- hahn
- oliver cromwell
- (and 1 more)
-
I had a pleasure to see Tiziano's model in person in Rochefort, it is truly amazing! Bravo! Was coming back to it over and over, there is something magnificent about it. It is made out of pear that Tiziano milled himself, and have a beautiful finish that is very unique. Very precise, there are no gaps and no cracks, even though the model is 17 years old... Spoilers: the real model is ahead of the build log by a number of years. Smart move! Tiziano was very kind to share his techniques. As usual, the main one is "go slow, do not rush"
-
I was impressed by the photos from previous French modelling festivals and decided to watch this page: http://5500.forumactif.org/f8-expositions-et-manifestations Seems like it is not in Rochefort every year, but it is the same active people from the French modelling forum who organise that events every now and then.
- 968 replies
-
- 5
-
-
- hahn
- oliver cromwell
- (and 1 more)
-
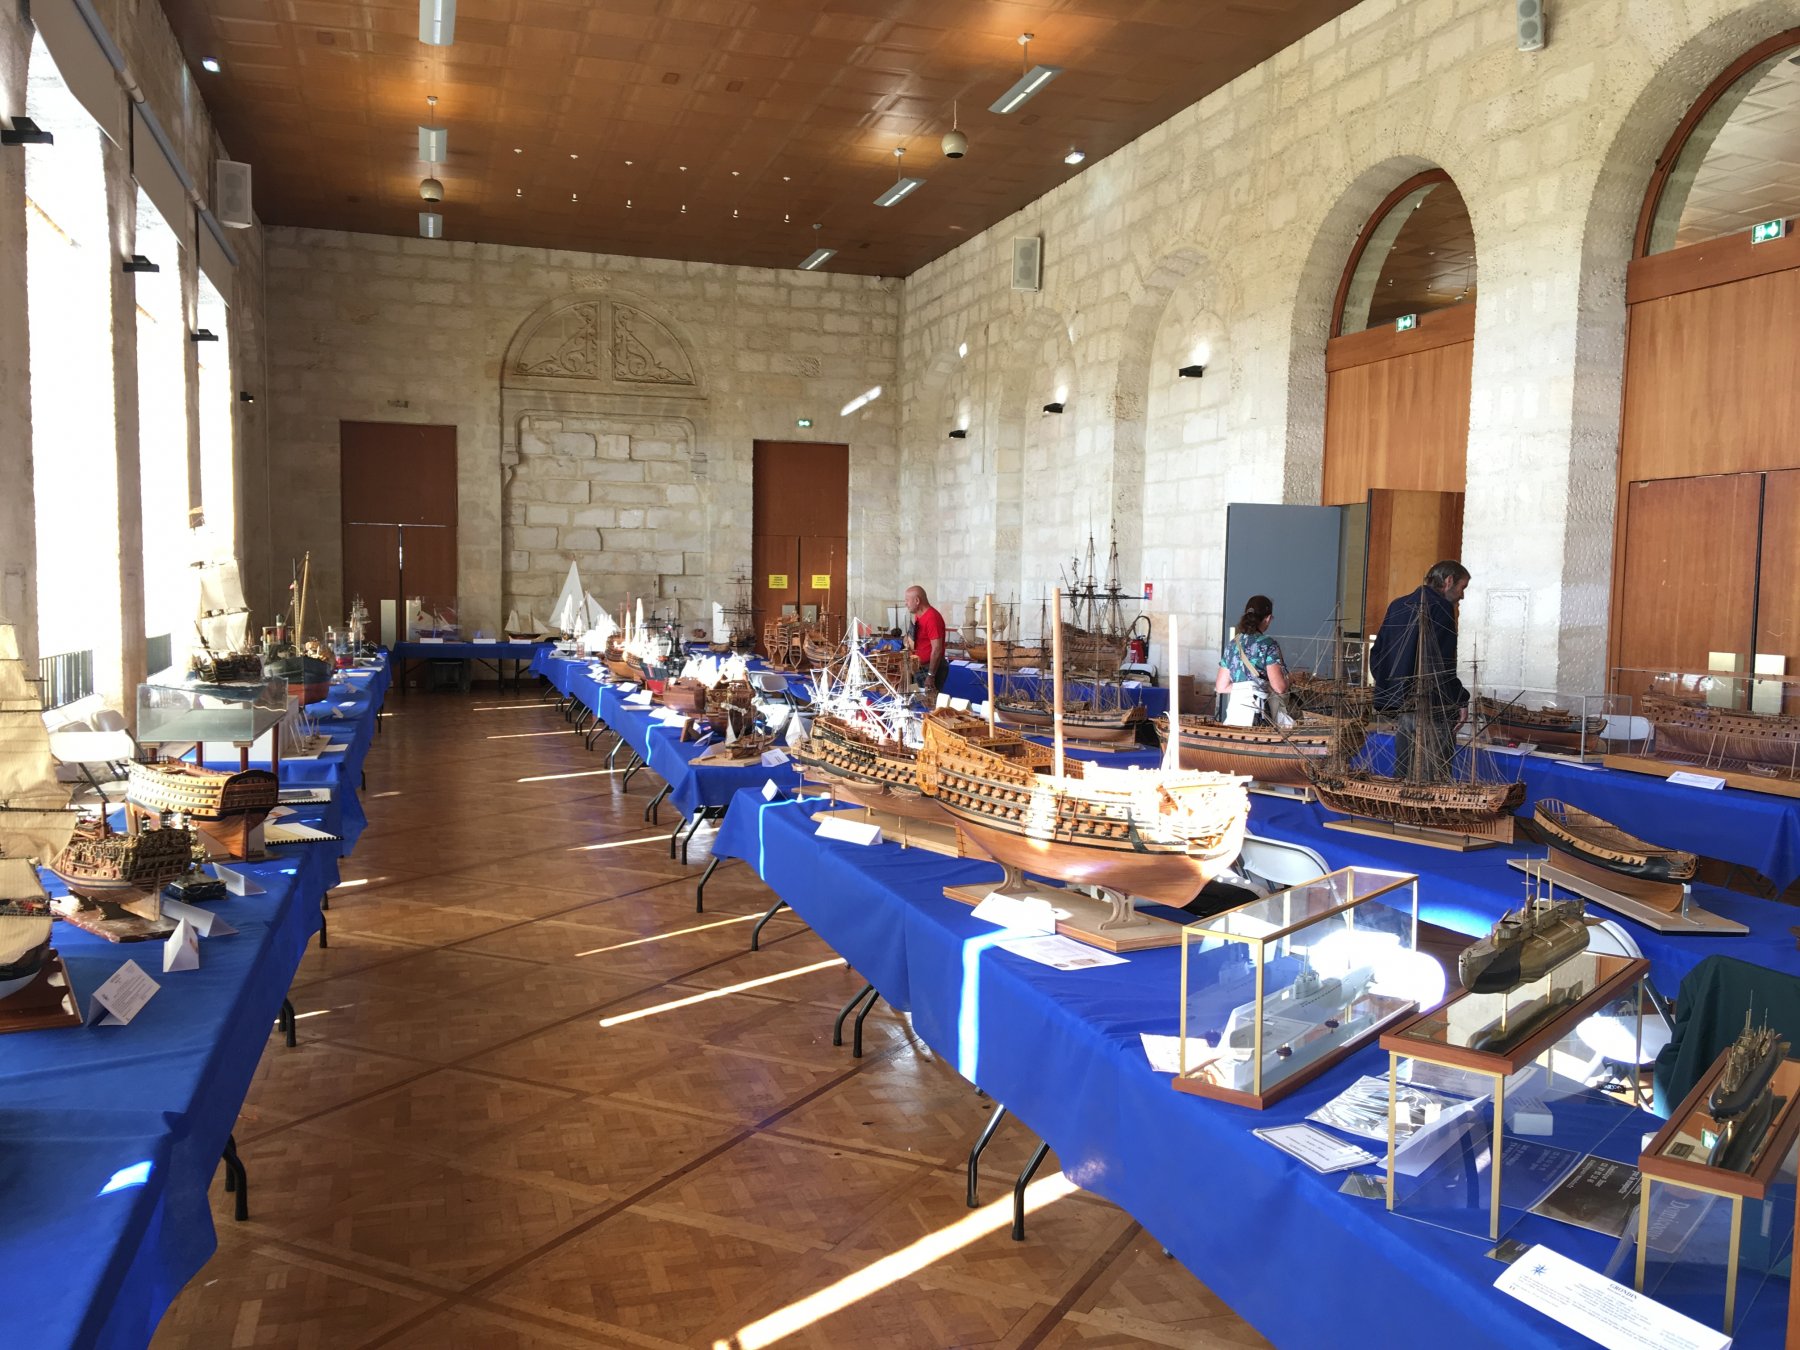
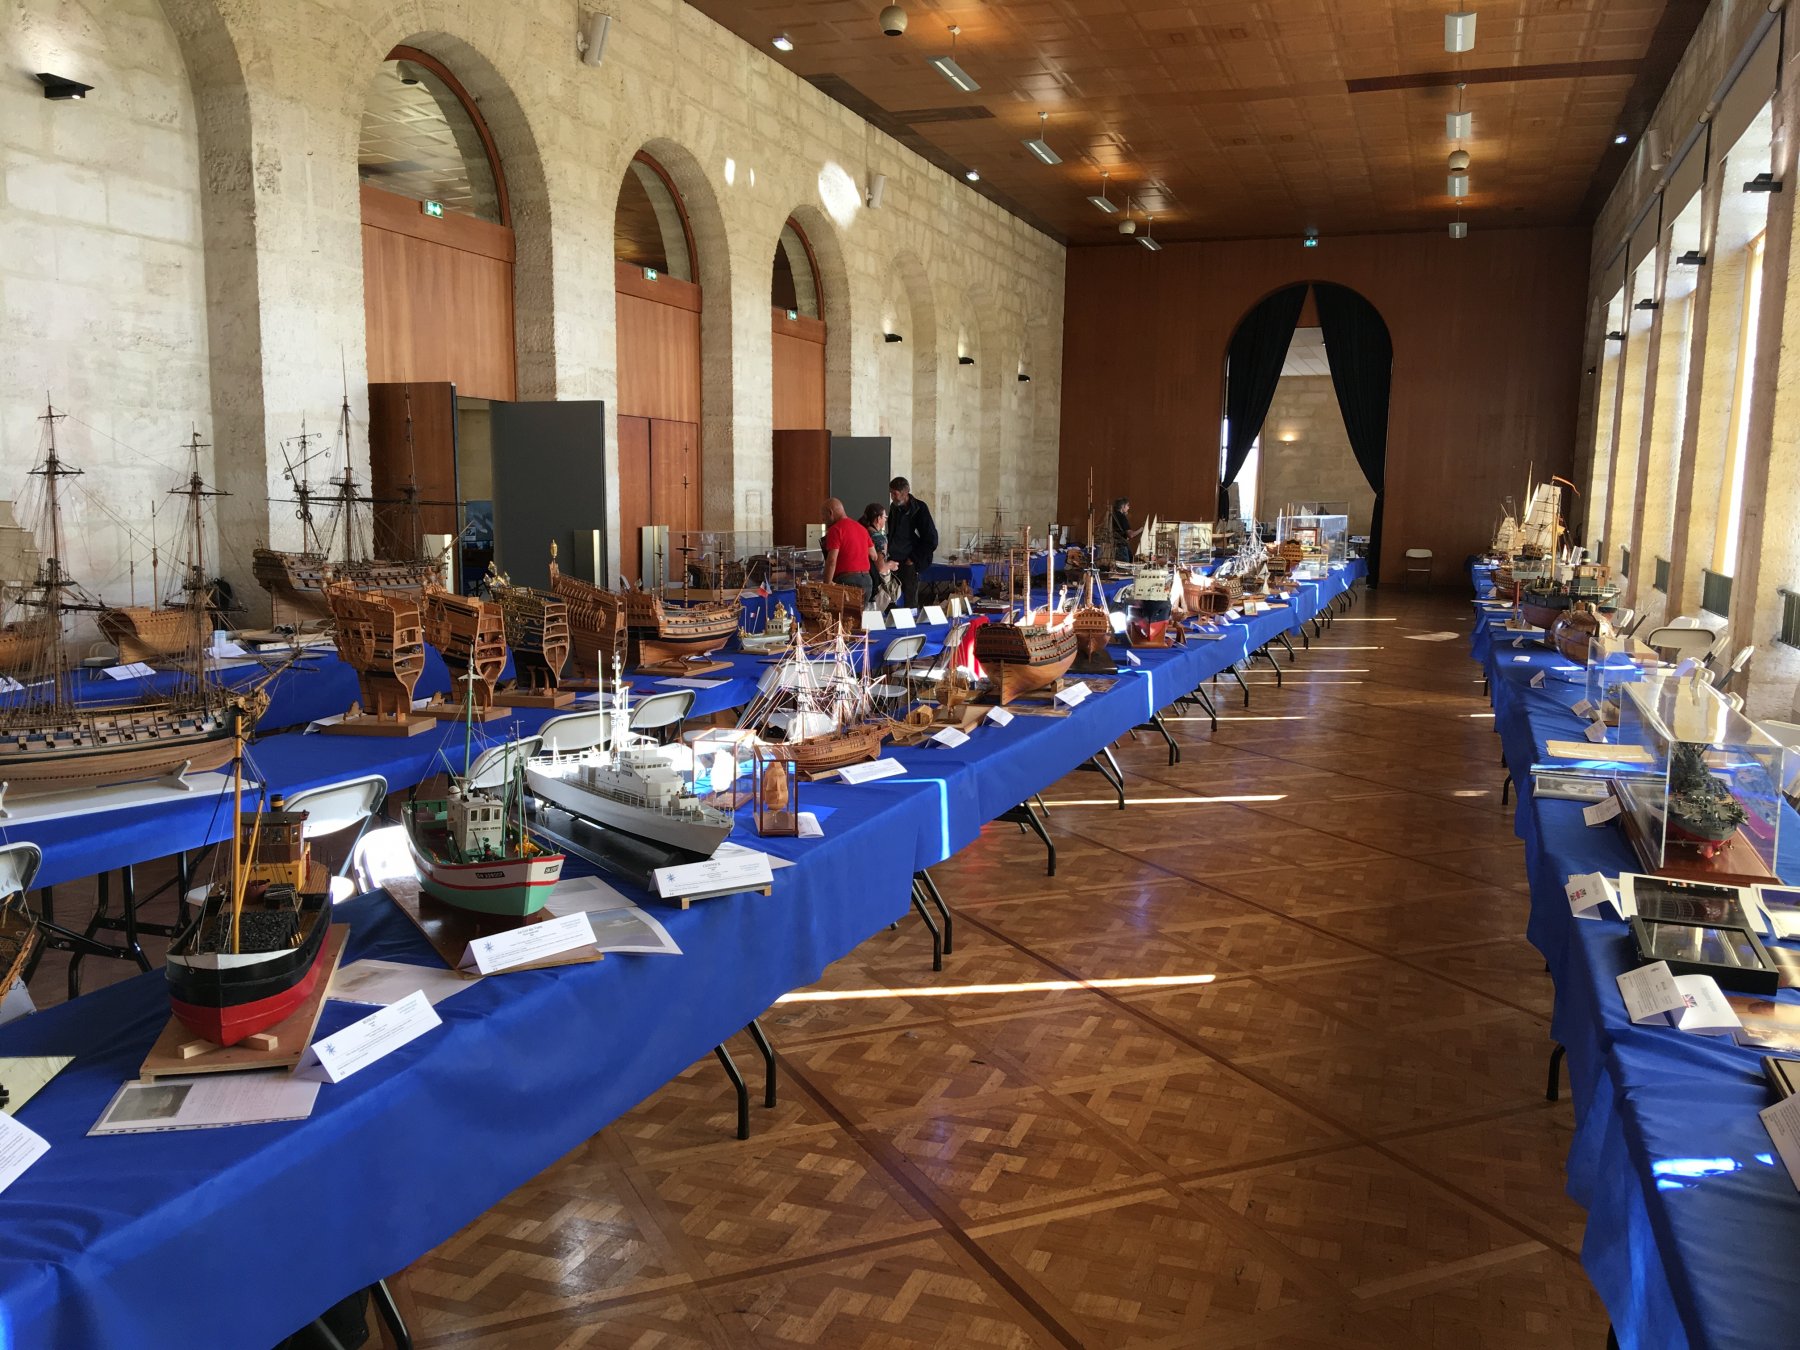
Hi Duff, Then both of us would be in a bad situation - not having enough clamps I am too scared of using sandpaper, since they will clamp finished parts. I already used soft basswood on another kinds of clamps that I used for deck clamps - it works like charm, compressing basswood fibers and leaving no traces on harder pear or boxwood. My clamps are basically ready, just need to glue in the handles with epoxy and make some final photos. They look pretty nice with the finish! I am currently in Rochefort, France, on the biggest ship modelling festival I ever saw: https://5500.forumactif.org/t3117-expo-a-rochefort-du-17-au-21-octobre-2018 100 models on display! Sneaky photo while everybody went out to enjoy some cocktails. Will post a proper photo album later, and hoping for People With Big Cameras to publish their photos as well. Met a number of people from MSW - Alex M with his Sphynx, Ricci with L'Amarante and Tiziano with his 74 gun ship. Pardon if I haven't recognised somebody! It was a unique opportunity to see a number of recently made models from some of the best people in this hobby. Apart from being in awe, I made a few interesting observations, also related to ageing of various materials, which is hard to see on your own model when it is new: Even the best craftsman have some whoopsies, gaps between planks and minor mistakes. Except Remco, I guess - he just tends to re-do everything until there are no mistakes And that small mistakes do not spoil an impression from some great models. So I should not worry too much about mistakes I made, that is very comforting! Would still try to avoid making more of them... Should be careful when simulating black caulking between the deck planks - quite a few models have that black colour leeching into the wood. Trying to darken the pear or age it is extremely tricky, if you do not want it to look smoked. Definitely calls for many many long experiments Brass treenails leave fine brass dust in pores of some woods, so one should think twice and experiment a lot before using them. They are quite common in the french modelling community, looks nice on a black ebony wales. Also, the glue that holds them might turn darker over time (or discolour the wood around the nail). Be careful there. I got that effect even when sanding clamps - they have brass rods, as soon as you start sanding with 400 grit or finer - brass dust gets into cherry and it's impossible to get it out, making cherry look dirty. Should be easier with pear though. Ebony shrinks a lot over time with humidity and temperature deviations, so most of that beautiful ebony wales and planking and headwork develop very visible cracks and gaps over time. Apparently this is pretty normal and well known, some fill that gaps with black epoxy, etc. Well, thanks, will definitely try dyed pear instead. Did not know that fact before. It is really hard to keep rigged models dust-free or clean them. On average, decks of "bare" models were much cleaner than rigged models. Rigging the model makes it very hard to look closer on deck fittings, structures inside the ship, etc. It is basically impossible, because a viewer is afraid of bumping into some mast or a boom, so need to keep quite a distance. It was much easier to explore the "bare" models. Mirror bases are interesting. There were few models displayed on a mirror, very easy to see the underside of the hull this way.


- 968 replies
-
- 17
-
-
- hahn
- oliver cromwell
- (and 1 more)
-
Had a pleasure to see the model in person in Rochefort, it is as fantastic as you would expect! Looking forward for more updates
-
It was just five years? Time flies! that is really quick for that kind of a project! Fantastic photos, and a very interesting marble base concept. It definitely looks nice!
-
Finally POF from you! Let me hop for a long and interesting journey
- 589 replies
-
- 1
-
-
- le gros ventre
- cargo
- (and 1 more)
-
Dremel rotary tool - which one?
Mike Y replied to RPaul's topic in Modeling tools and Workshop Equipment
Dremel 8050 is very nice, I use it almost exclusively, unless more power is necessary. Very good balance and no wires. The battery lasts for a while. Would definitely recommend it! Proxxon also released some battery tool, but it is much bigger and bulkier. Frankly, can't remember last time I needed a lot of power from the tool when modelling, the bigger non-battery dremel just collects dust for now. It might be useful for all-round housework, gardening and other heavy duty tasks. -
That is exactly why I am scared of not applying the finish for things that are touched, the "natural finish" you described sounds very gross But it might work for delicate parts of the model that are not supposed to be touched (beams / carlings / ledges / knees / fittings / etc). Patina will form on the wood over time, and it will look nicer. Will run some experiments later.
- 968 replies
-
- 3
-
-
- hahn
- oliver cromwell
- (and 1 more)
-
Yes, I can see the appeal - you make a few small "models", put some attention into the details and design - but also have a functional aspect to consider, and you end up with a model that could be used as a tool!
- 968 replies
-
- 3
-
-
- hahn
- oliver cromwell
- (and 1 more)
-
Thanks Paul, will try it! I am still yet to try the sanding sealers on Pear, need to prepare proper test pieces with various kinds of grain. Want to switch from oil on a model to have something that looks closer to an unfinished color of the pear. Or maybe finally stop using finish whatsoever, will see.
- 968 replies
-
- 5
-
-
- hahn
- oliver cromwell
- (and 1 more)
-
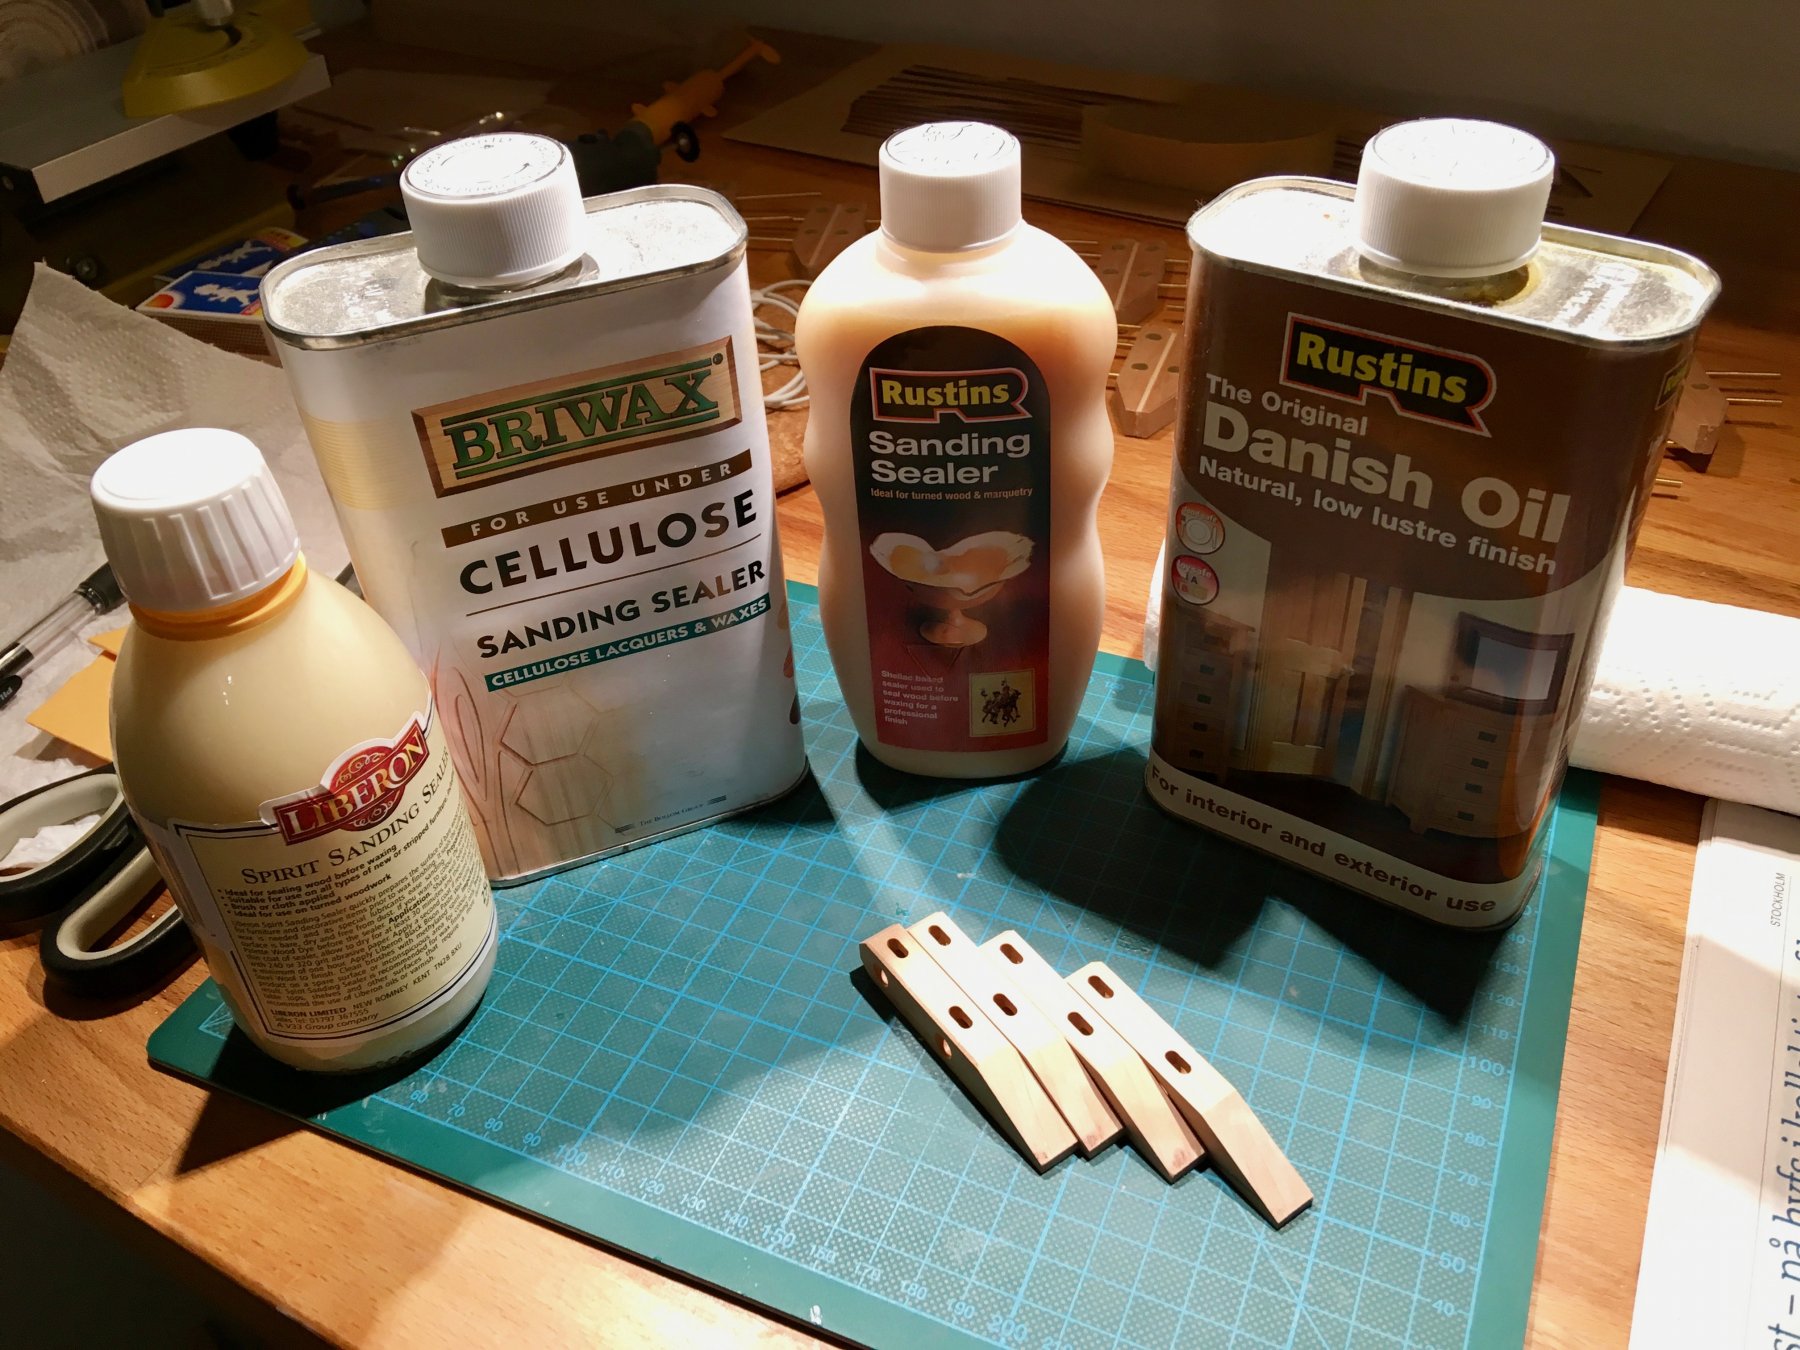
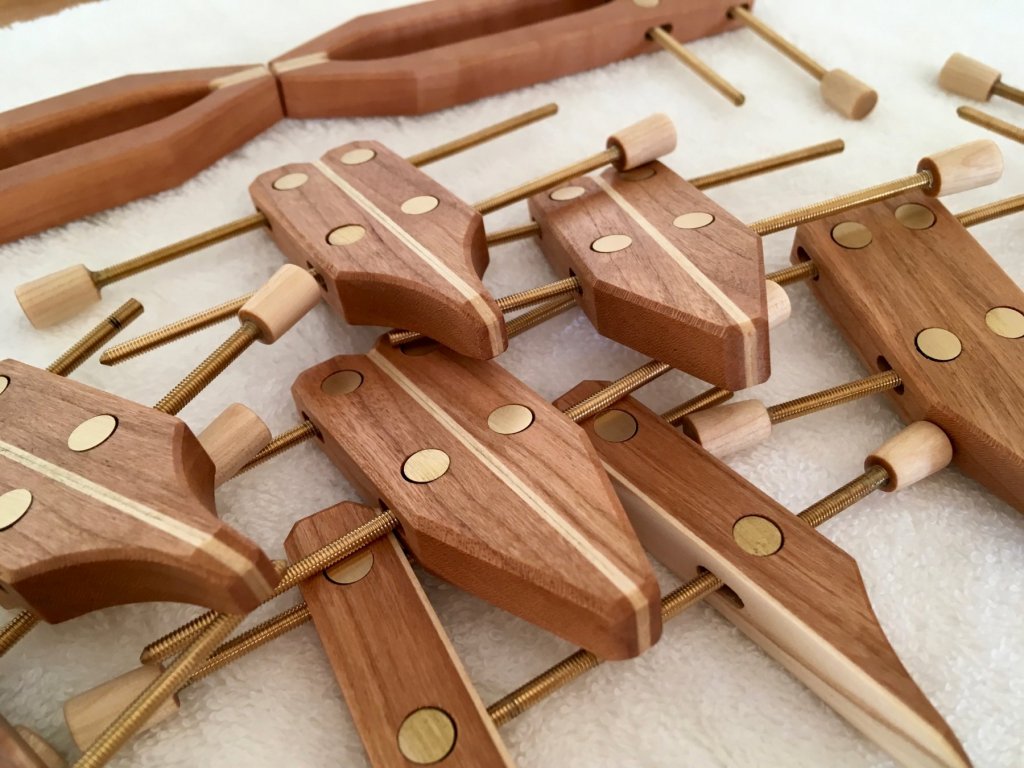
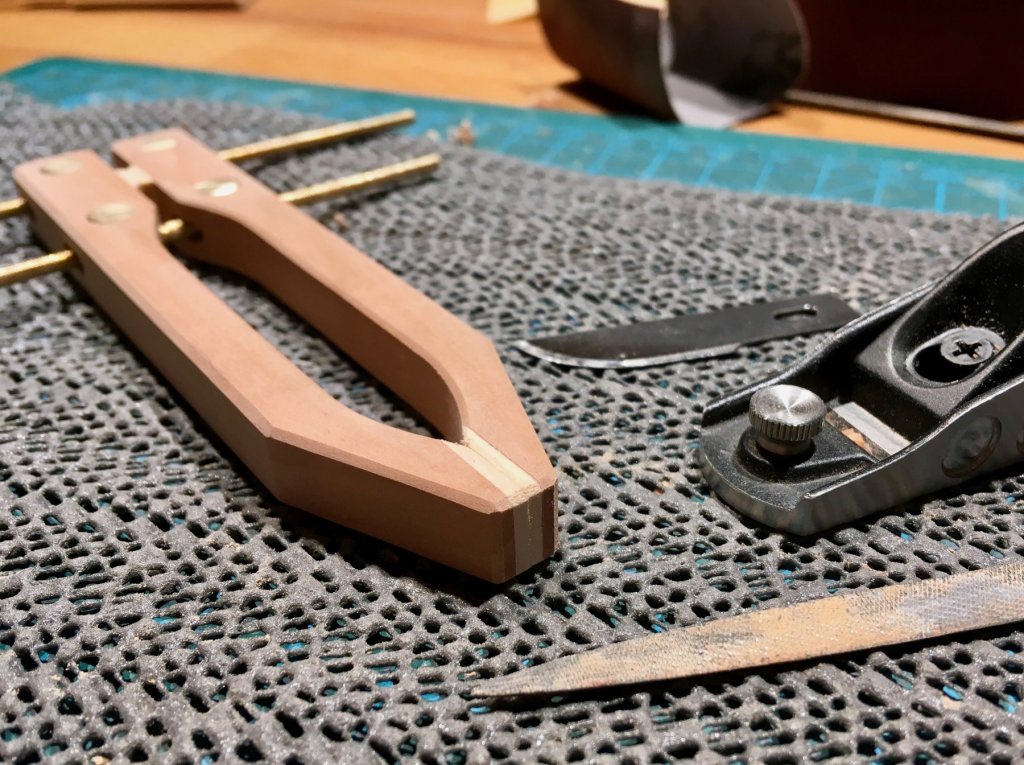
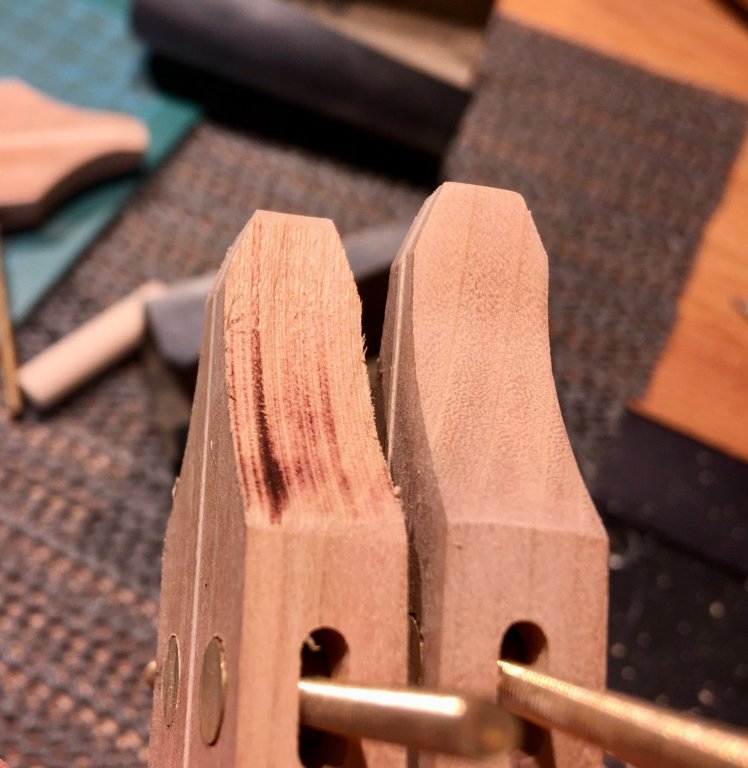
Sanding sealer test results are quite surprising. On cherry, there is no visible difference between any of them and Danish Oil (while there is a clear difference on Pear). However, the surface smoothness is different, especially on endgrain or diagonal grain. Rustins and Liberon are rough and look blotchy on a photo, while Briwax cellulose leaves a smooth and even finish, though a bit too glossy for my taste. Danish oil is slightly less smooth. Decided to go with oil since I am more used to it, and these clamps are tricky to finish (a lot of surfaces, narrow areas between the metal rods, and I do not want the finish to cause any buildup where the metal cylinders go). From left to right: Liberon, Rustins, Briwax, Danish Oil: Each clamp got a nice chamfers on all edges, primarily with a block plane and a file on a crossgrain: Half of the regular shorter clamps got that narrow tips. Simple radius looks good enough: Drum sander leaves marks on cherry, so it needs some satisfying sanding time to make it smooth and beautiful: So all short clamps are waiting for their turn to have their sides sanded. It is tedious, and brass particles get stuck in a wood, requiting some scraping afterwards to remove them. Hope it would be less of a problem for cherry. While the longer clamps are ready, and just need to get their handles (which requires to mix a batch of epoxy, so I will do it later for all clamps in the same batch):


- 968 replies
-
- 19
-
-
- hahn
- oliver cromwell
- (and 1 more)
-
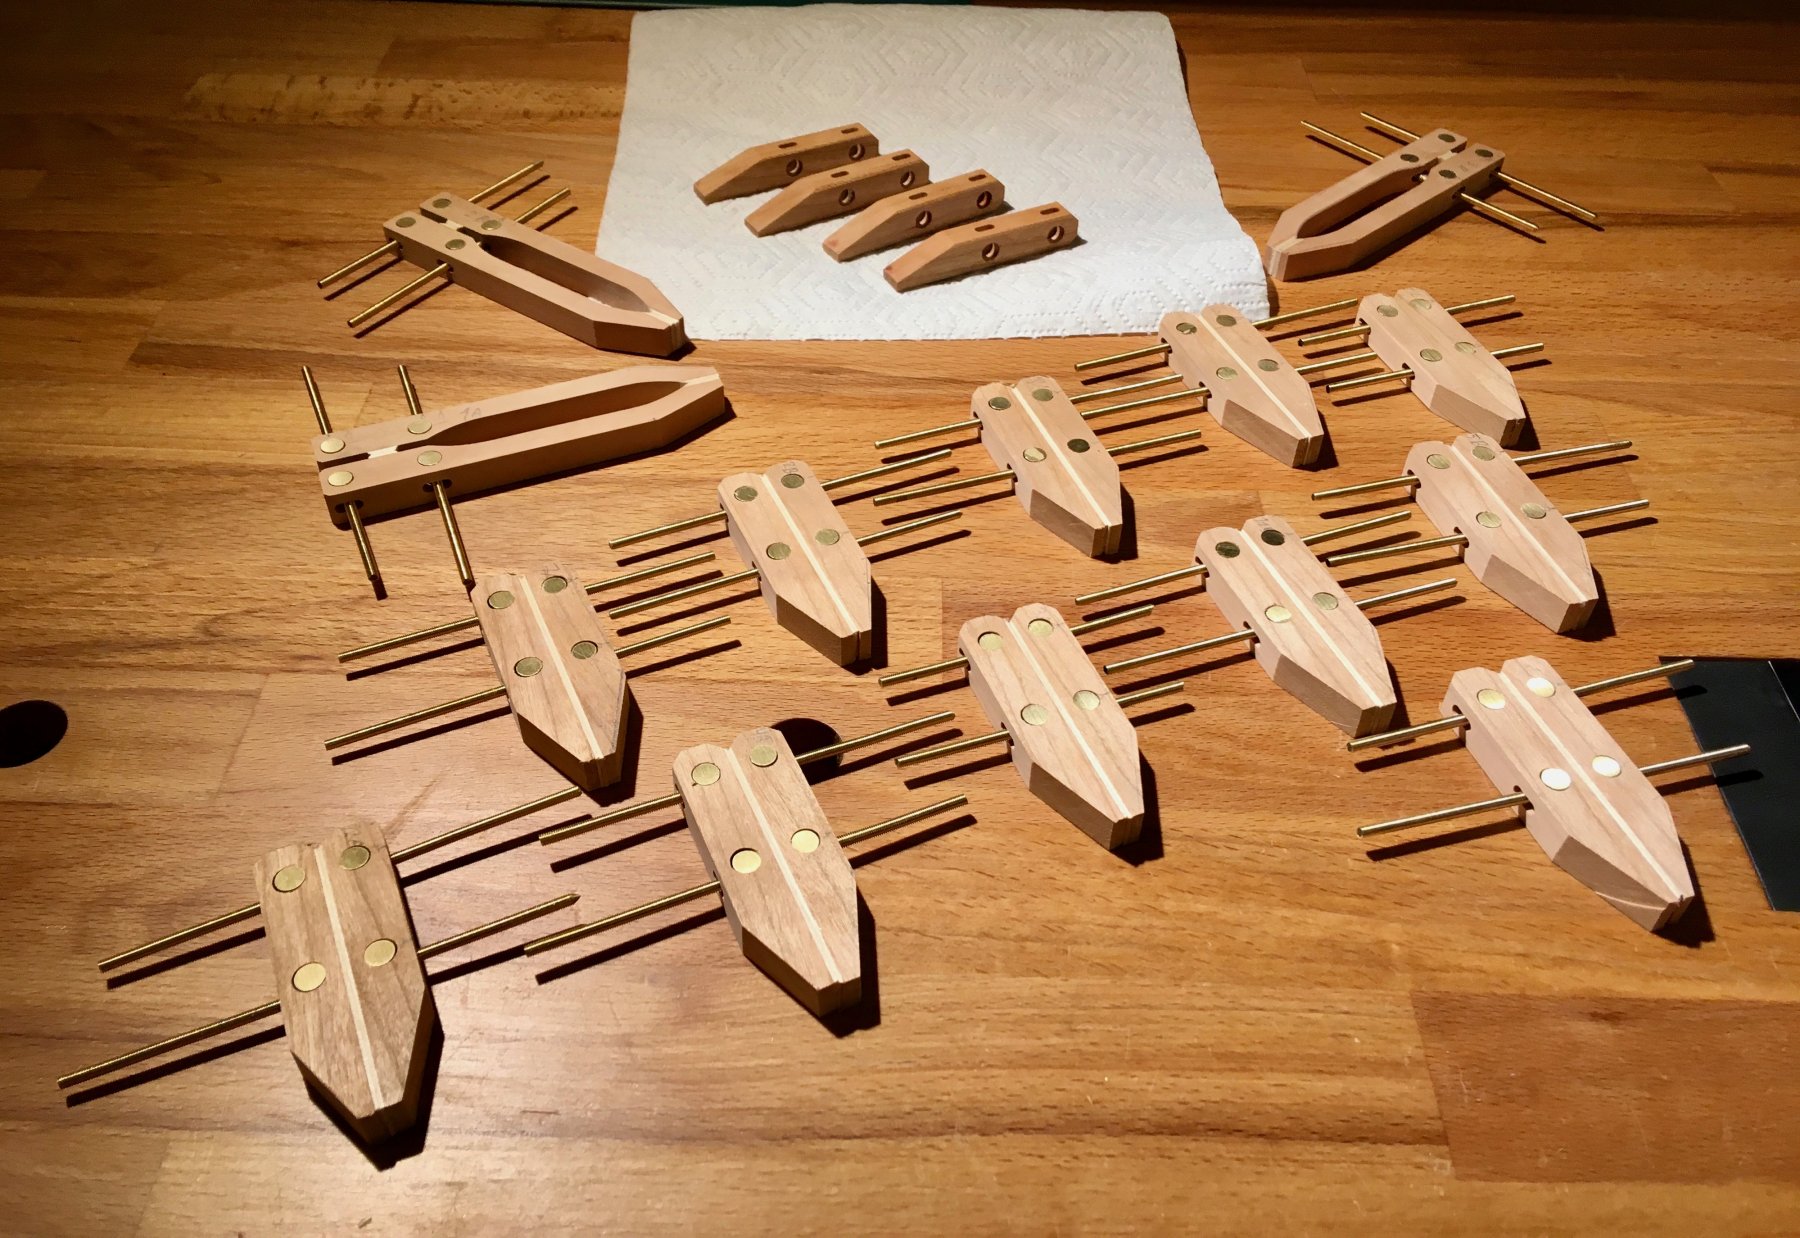
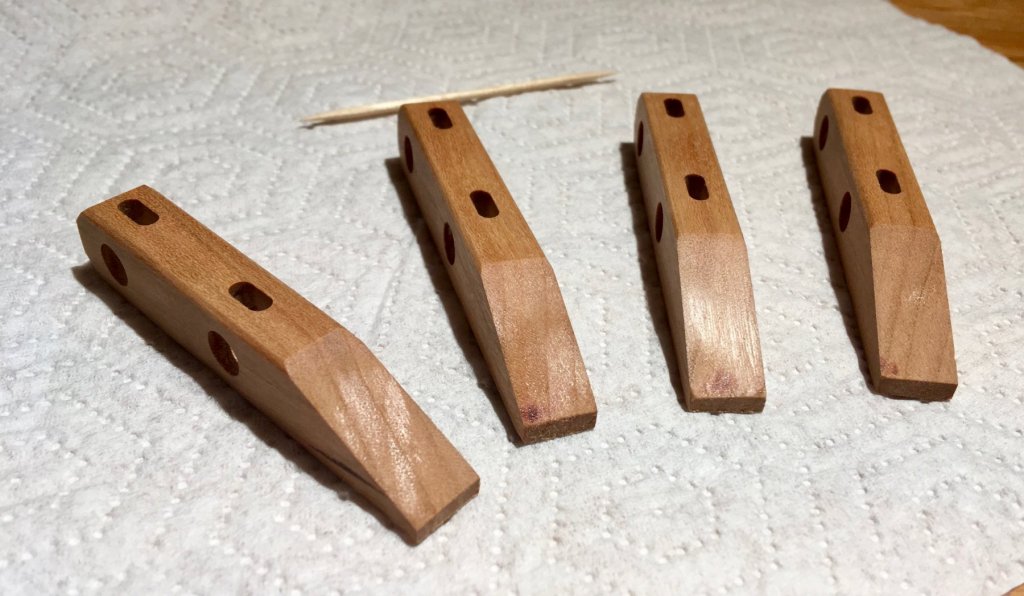
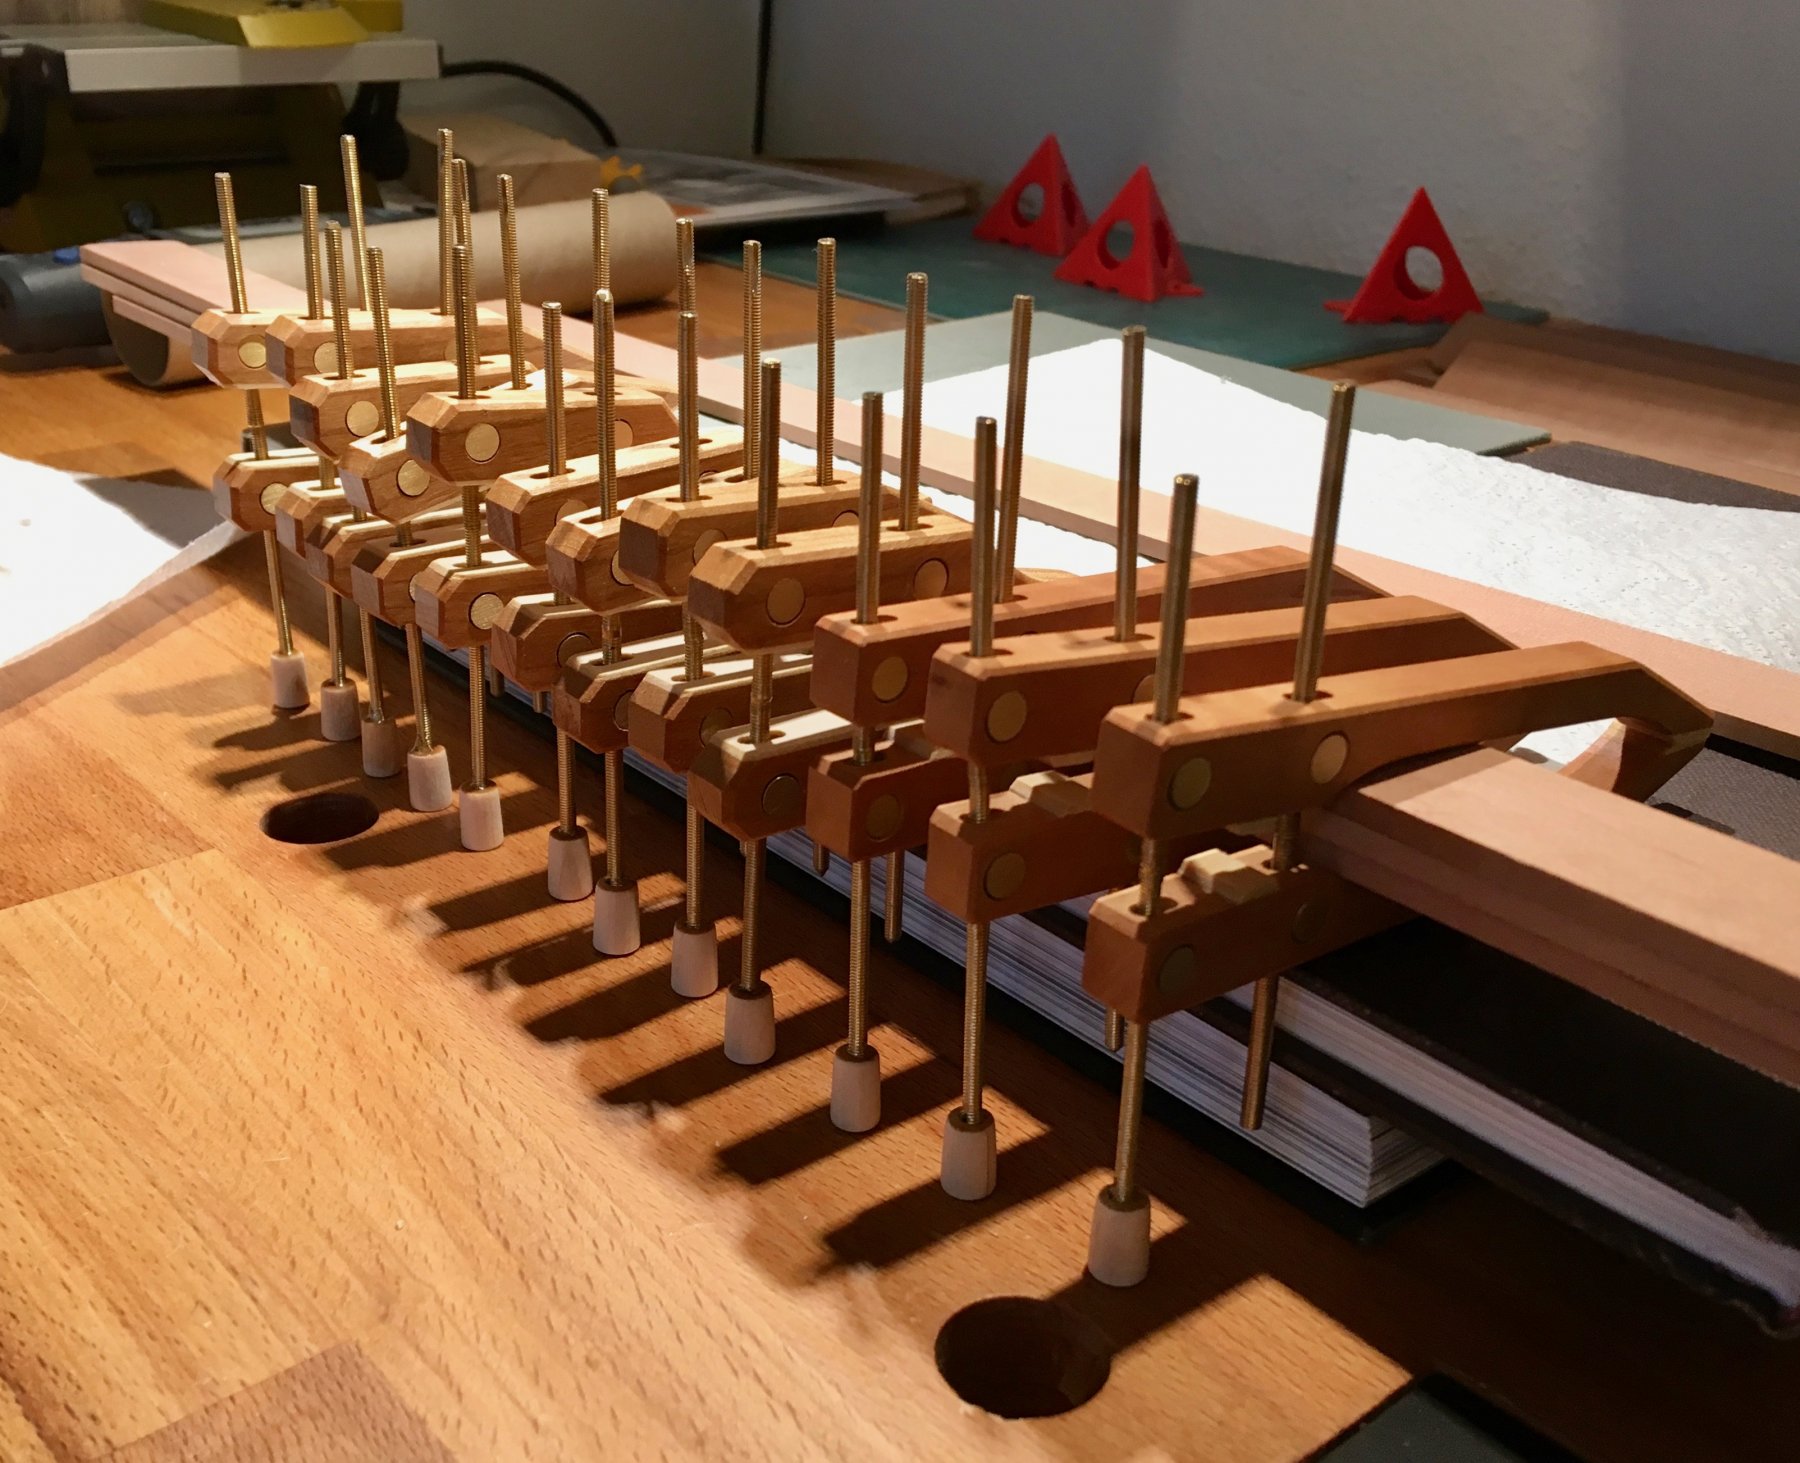
Assembly phase is very relaxing and could be easily combined with a nice music and some fine tea. No dust, no noise - perfect evening! Experimenting with finishes. I had few extra clamps as a reserve for whoopsies, ending up with no whoopsies - so using them to test the finishes. So far they all look the same when applied, but a pretty different characteristics during an application process. Will see how they look once dry. Result of the weekend: Now they just need some final shaping, handles, sanding and finishing.
.thumb.jpg.3caf504008b48c7feb971bc38f59ee96.jpg)


- 968 replies
-
- 18
-
-
- hahn
- oliver cromwell
- (and 1 more)


.jpg.7677c3792a7a1aae635bd1988527fbf0.jpg)