HOLIDAY DONATION DRIVE - SUPPORT MSW - DO YOUR PART TO KEEP THIS GREAT FORUM GOING! (89 donations so far out of 49,000 members - C'mon guys!)
×


Mike Y
-
Posts
1,557 -
Joined
-
Last visited
Content Type
Profiles
Forums
Gallery
Events
Everything posted by Mike Y
-
 Volume 2 is released now and is available in the museum shop! You can also find it on Amazon: https://www.amazon.com/Vasa-II-Rigging-material-archaeological/dp/9188909115 However volume 1 is sold out everywhere is available in a second hand market for ridiculous collectible prices (3-5k USD, sky is the limit)
 -
Charming photo! And the model, of course. Interesting subject and your level of details that goes into it 😊
-
Interesting technique! Glad that you are back building, pulling up a chair 😊
-
Amazing workshop, writing down a lot of ideas Love your dust collection system! Do you have some central vaccuum that all hoses connect to, or are you using something portable? For example that hose next to the Dremel drill press seems to be connected to nowhere..
-
Thank you for sharing it with that level of details! Just curious - what kind of larger cutters do you find useful at this scale? Any tips and experience to share? That mill has a pretty limited capacity.. 😊
-
What kind, brand and where do you buy your end mills?
Mike Y replied to rlb's topic in Modeling tools and Workshop Equipment
If in doubt - a set of Proxxon mills that are included with their MF70 mill is a great start. No problems in any kind of wood, very clean cut, can do plunge cuts as well. No burning, charring, they cut like butter. Do not use them in your rotary tool freehand though, as they would dig into the wood and jump away from you. Part number NO27116 https://proxxon-us-shop.com/products/milling-cutters -
Välkommen! Very refreshing genre and looking forward to following your build log!
-
There is a topic very close by where this is discussed: https://modelshipworld.com/topic/31657-seawatch-books-is-open/ A bit worried about Mike, no email updates since November (except a few sales) and last login to MSW in December last year. Hope it he is ok and just hiding under a lower deck until the Volume 3 is finally available Let's keep in mind that it is a small niche business that is mostly driven by enthusiasm, let's be gentle and cooperative with people who provide that invaluable service to the modelling community
-
Nice progress and thanks for sharing your tricks. Some angles remind of the Tally Ho series, indeed
-
Incredible build, how did I miss it before? As usual - appreciate showing the build methods rather than the end result of each stage, learned a few tricks. Very neat scuppers, so hard to make these tiny metal bits match the surface of the hull, but you did it nicely!
-
Very interesting wiring! Have you considered stripping the insulation and using a bare wire, since you can ensure that it would never contact another wire?
-
Its not just every part that is a reference of precision and accuracy, but also a superb photo setup!
-
La Palme by Tobias - 1:36 - POF
Mike Y replied to Tobias's topic in - Build logs for subjects built 1501 - 1750
Very beautiful build! Picking up some ideas from you, appreciate the "in progress" photos! -
Great move for international readers, where shipping + custom fees double the cost of a book! Just one things to consider (not a critique, but a food for thought). What happens with the purchase when Kotobee goes bankrupt and closes the library? That is a common problem with various connected devices and online resources, in 10 years a big share of them are just gone together with all your content. It's fine for a book that is being read once, might be a bummer if you use it for a reference or just enjoy building up a collection. Fully understand that there is no good solution here, anything downloadable will end up on torrents the day after...
-
What a fine piece of machinery! I especially like the exposed corner of the disk, allowing to shape the inside curves without a spindle sander. Had to make a cutoff in my proxxon for it. What about the dust collection, is there a way to hook up the vacuum?
-
Aawww! How does it look when LED strips are on? Never tried lighting from that angle, can you show a few photos?
- 290 replies
-
- 1
-

-
- confederacy
- frigate
- (and 1 more)
-
Miniature Russian carving tools
Mike Y replied to druxey's topic in Modeling tools and Workshop Equipment
Just for the information - looks like the order queue is pretty short now (Mikhail says that he has more time to manufacture them due to covid). My order was ready in just a few weeks (from the first email to the production process)! So if you were thinking about it, but were hesitating - now is the perfect time to order! He has some standard cutter sets, from 15-ish to 25-ish items. One can even pick and choose the desired cutter types. The price per piece is the same regardless of the cutter type, and only depends on the handle (plus box and shipping). As all the others, I am very happy with the order and its quality (got the set of 23 items with pear handles).- 73 replies
-
- 11
-
-
Sloop from Roslagen by bolin - FINISHED - 1:50
Mike Y replied to bolin's topic in - Build logs for subjects built 1851 - 1900
Thanks a lot for the detailed reply! I will try to read more about it. Eagerly waiting for the next model updates -
Sloop from Roslagen by bolin - FINISHED - 1:50
Mike Y replied to bolin's topic in - Build logs for subjects built 1851 - 1900
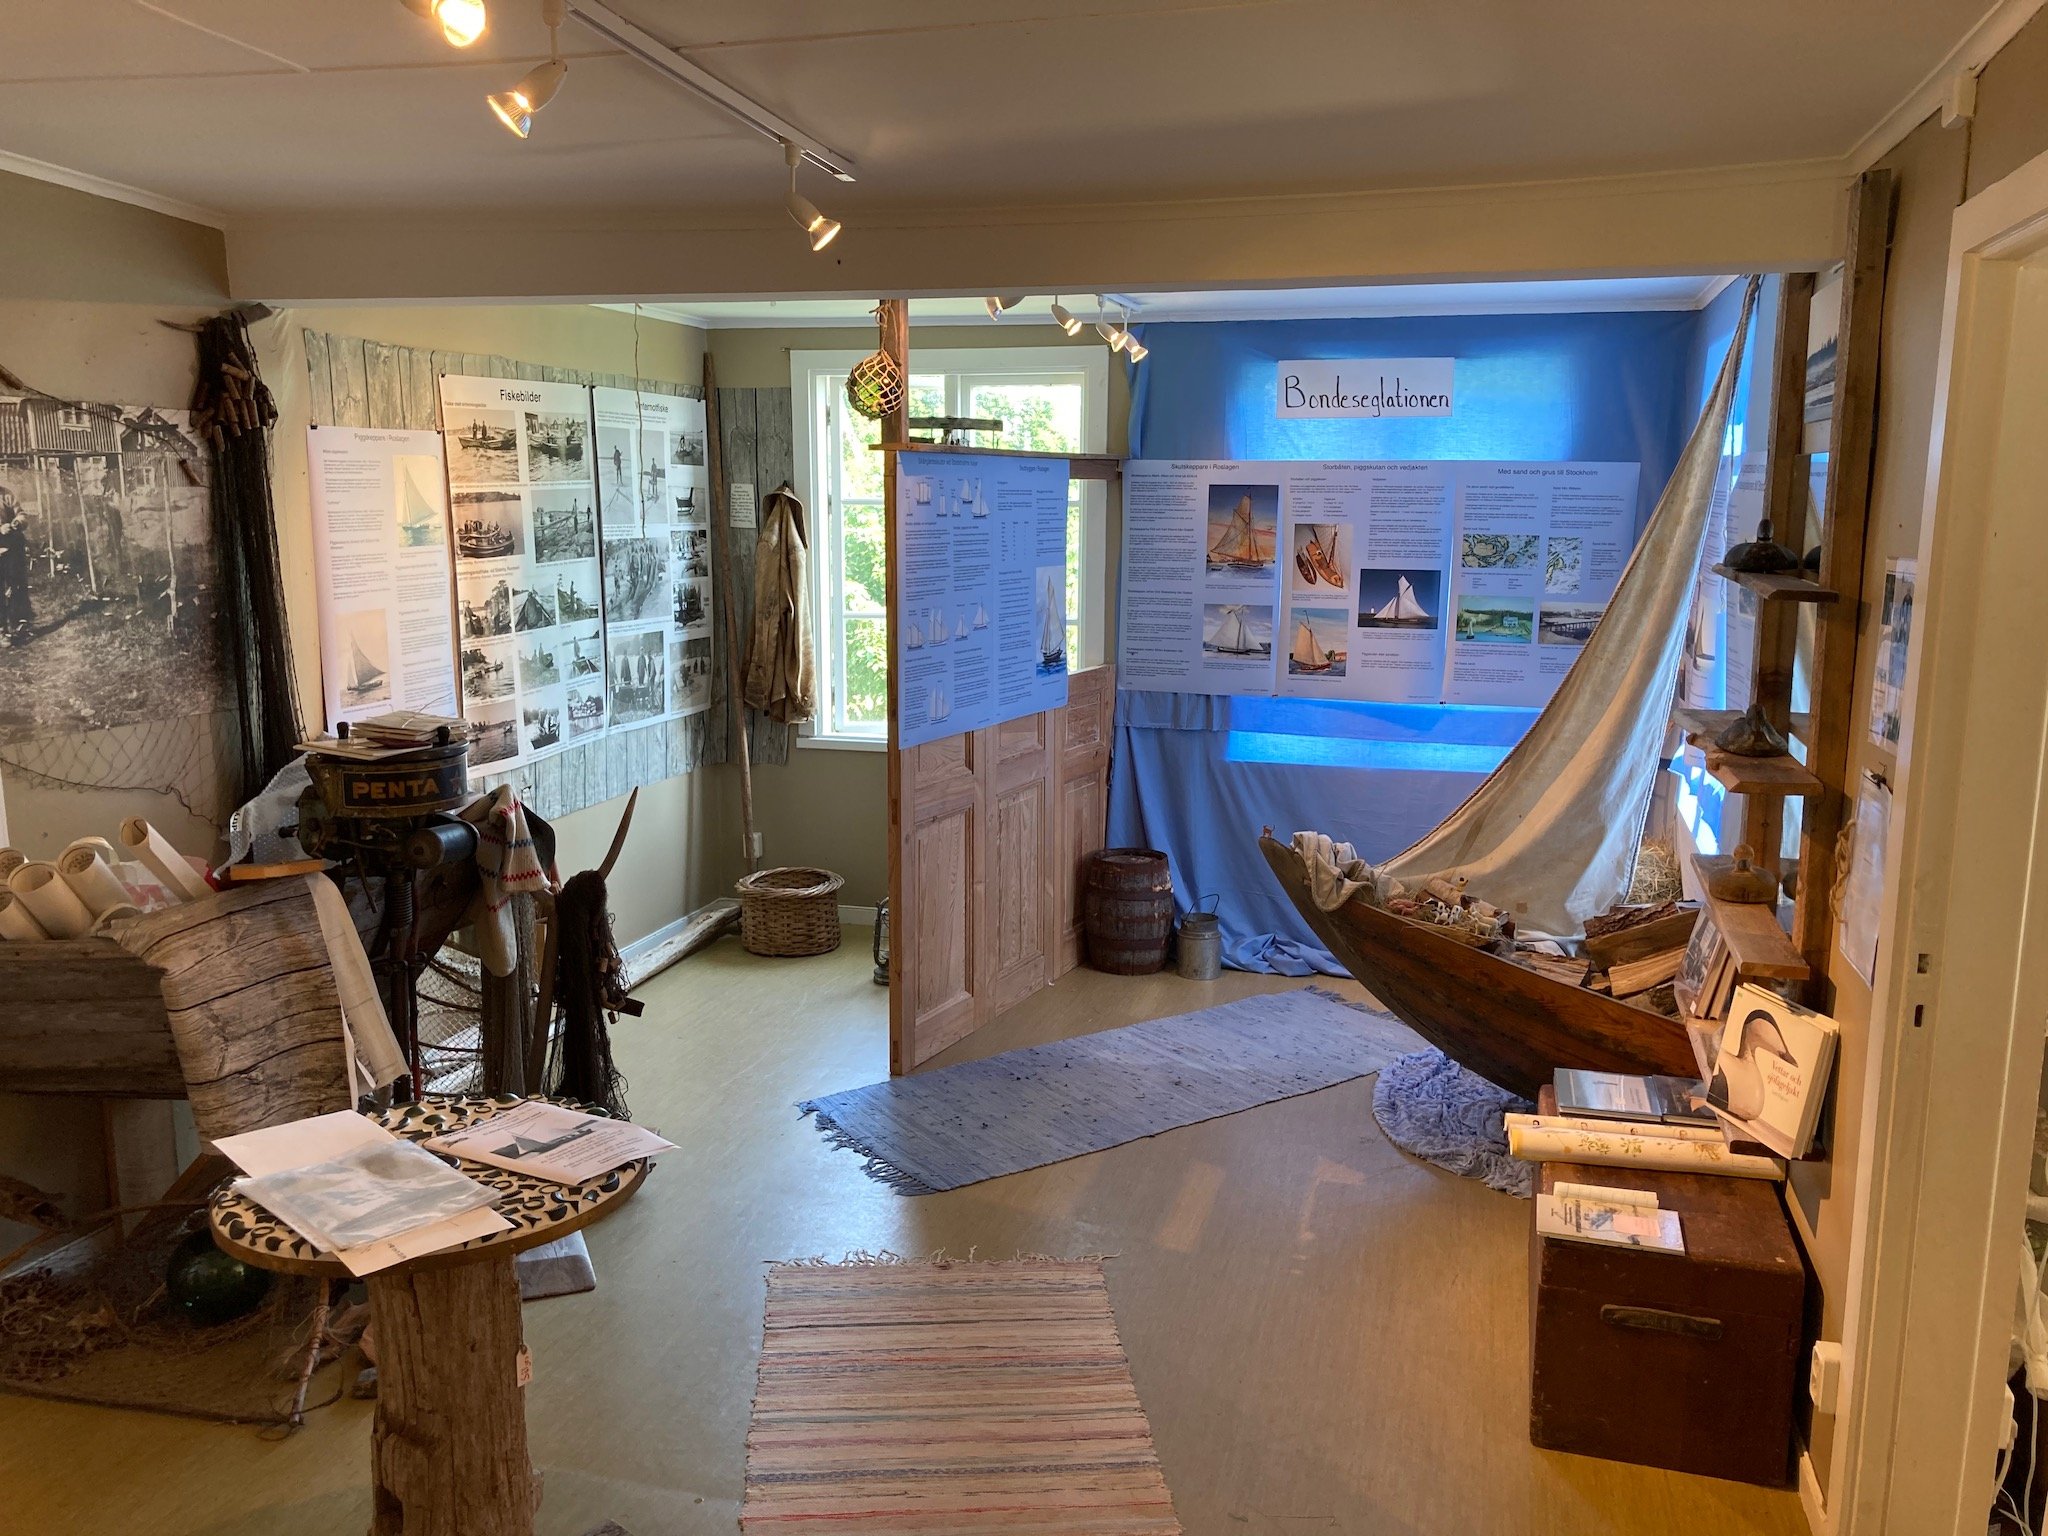
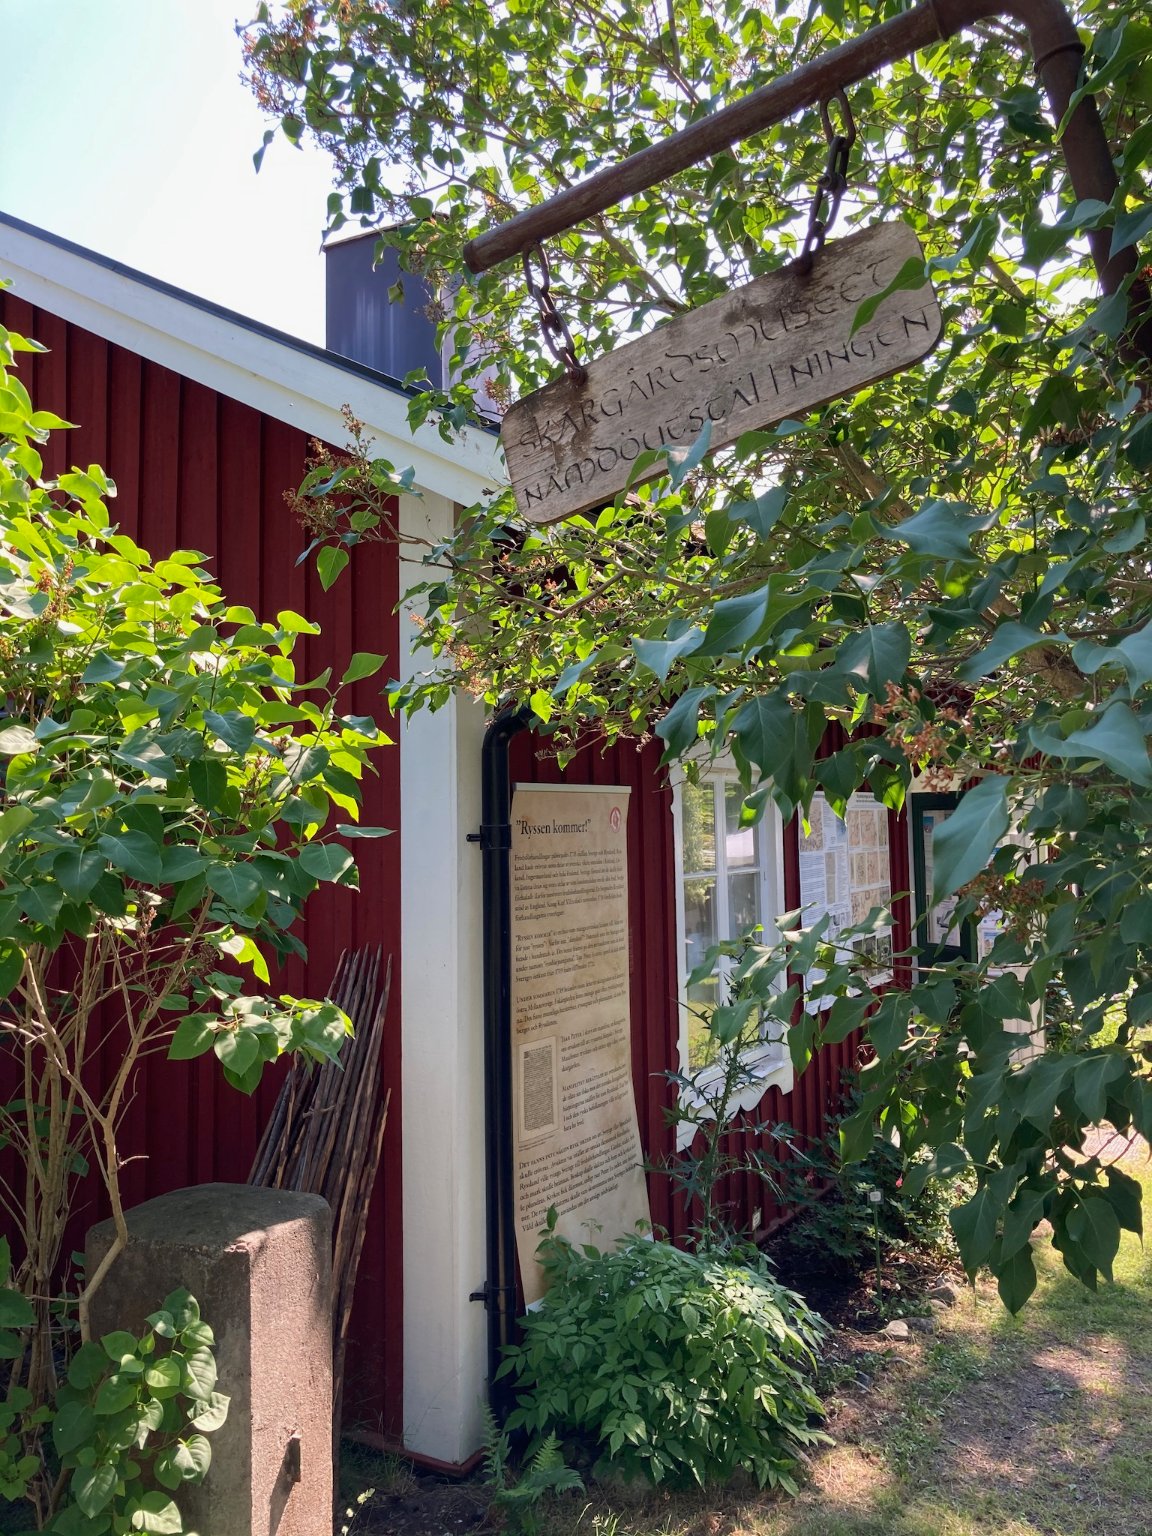
Bolin, maybe you would be an appropriate person to ask, since it is a bit related to the vessel you are building.. Last summer I had a brief visit of Skärgårdsmuseet on Nämdö, a tiny museum in the old school building on one of the islands. They had some factoids about Roslagen sloops and one thing made me puzzled: apparently there were some restrictions on the size and type of the ships that the archipelago farmers were allowed to have, and these restrictions were one of the major drivers for the design of these sloops (trying to maximise the efficiency). What was the reason for such restrictions? Do you have some sources to read to find out more? It's unlikely to be driven by natural factors (there are no critical channels in this area), sounds more like an anti-competition measure. Would appreciate if you can share more details that you've found during your research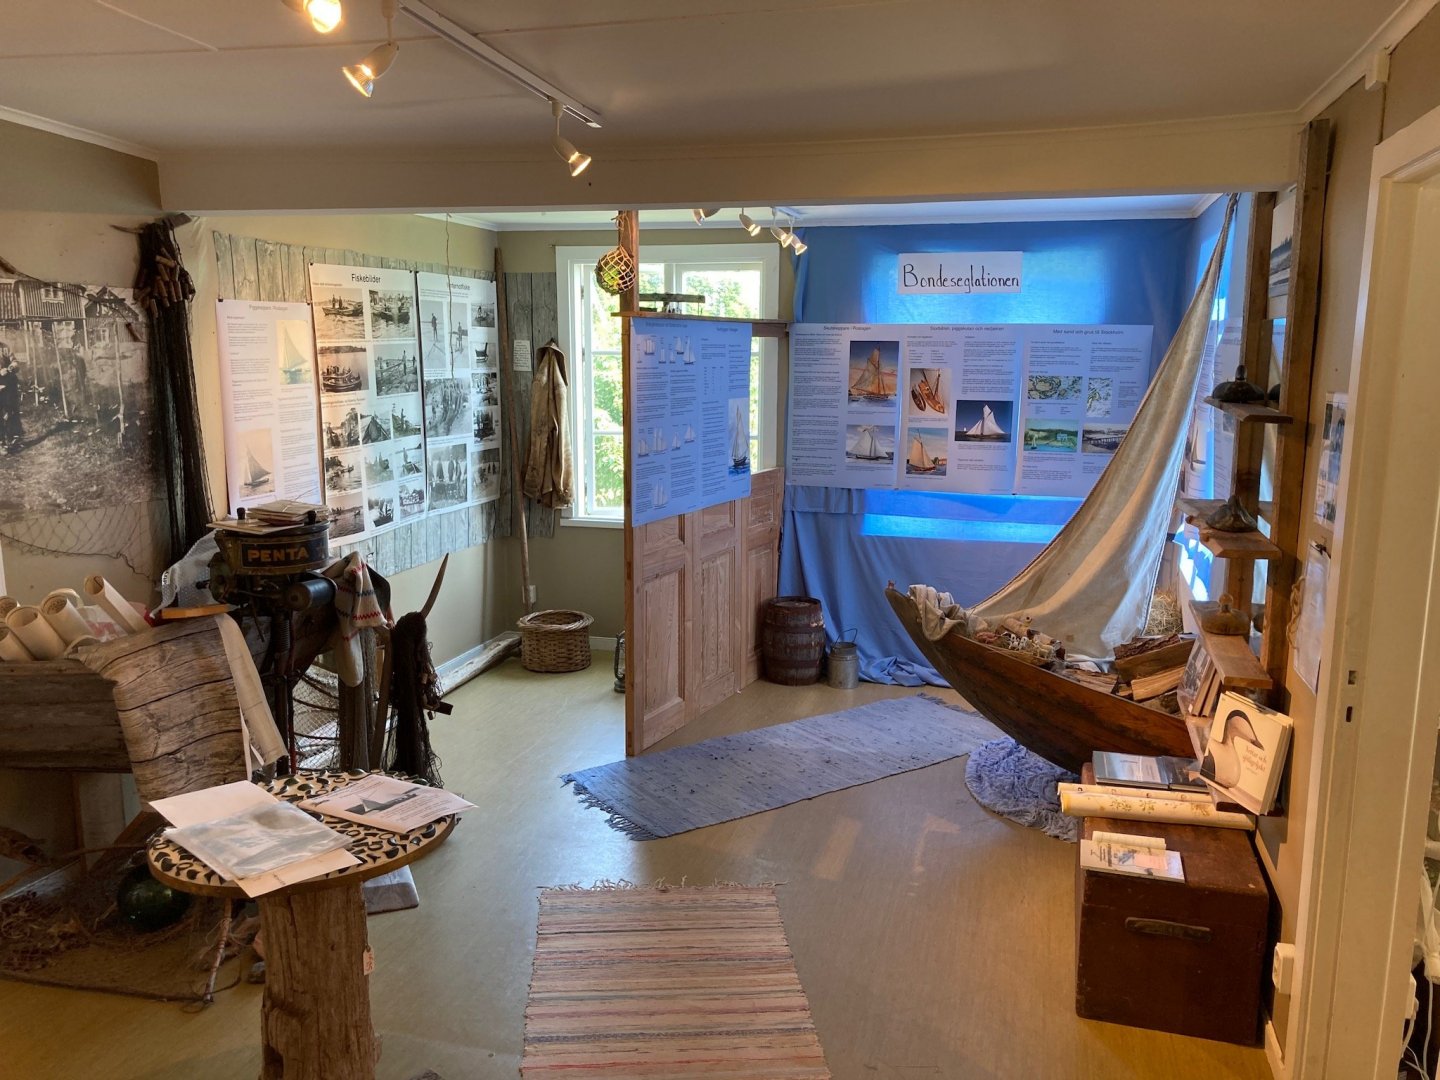

-
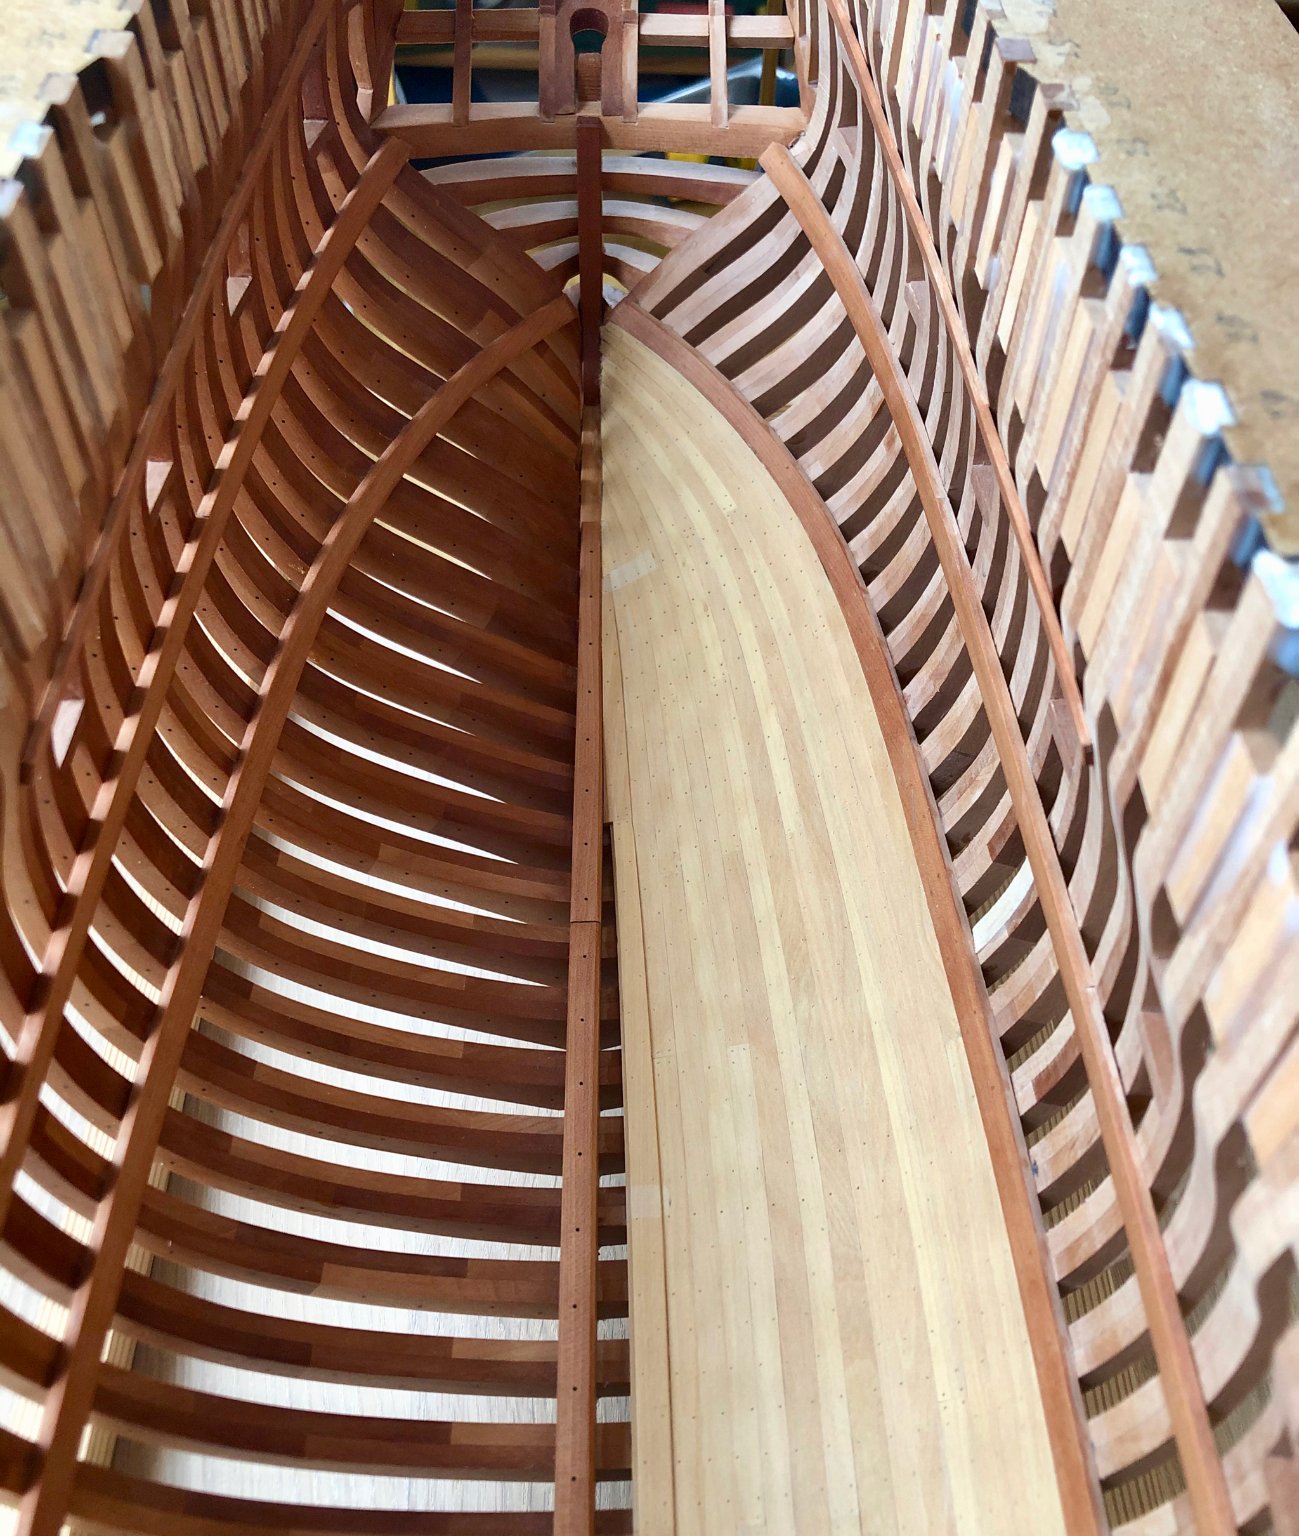
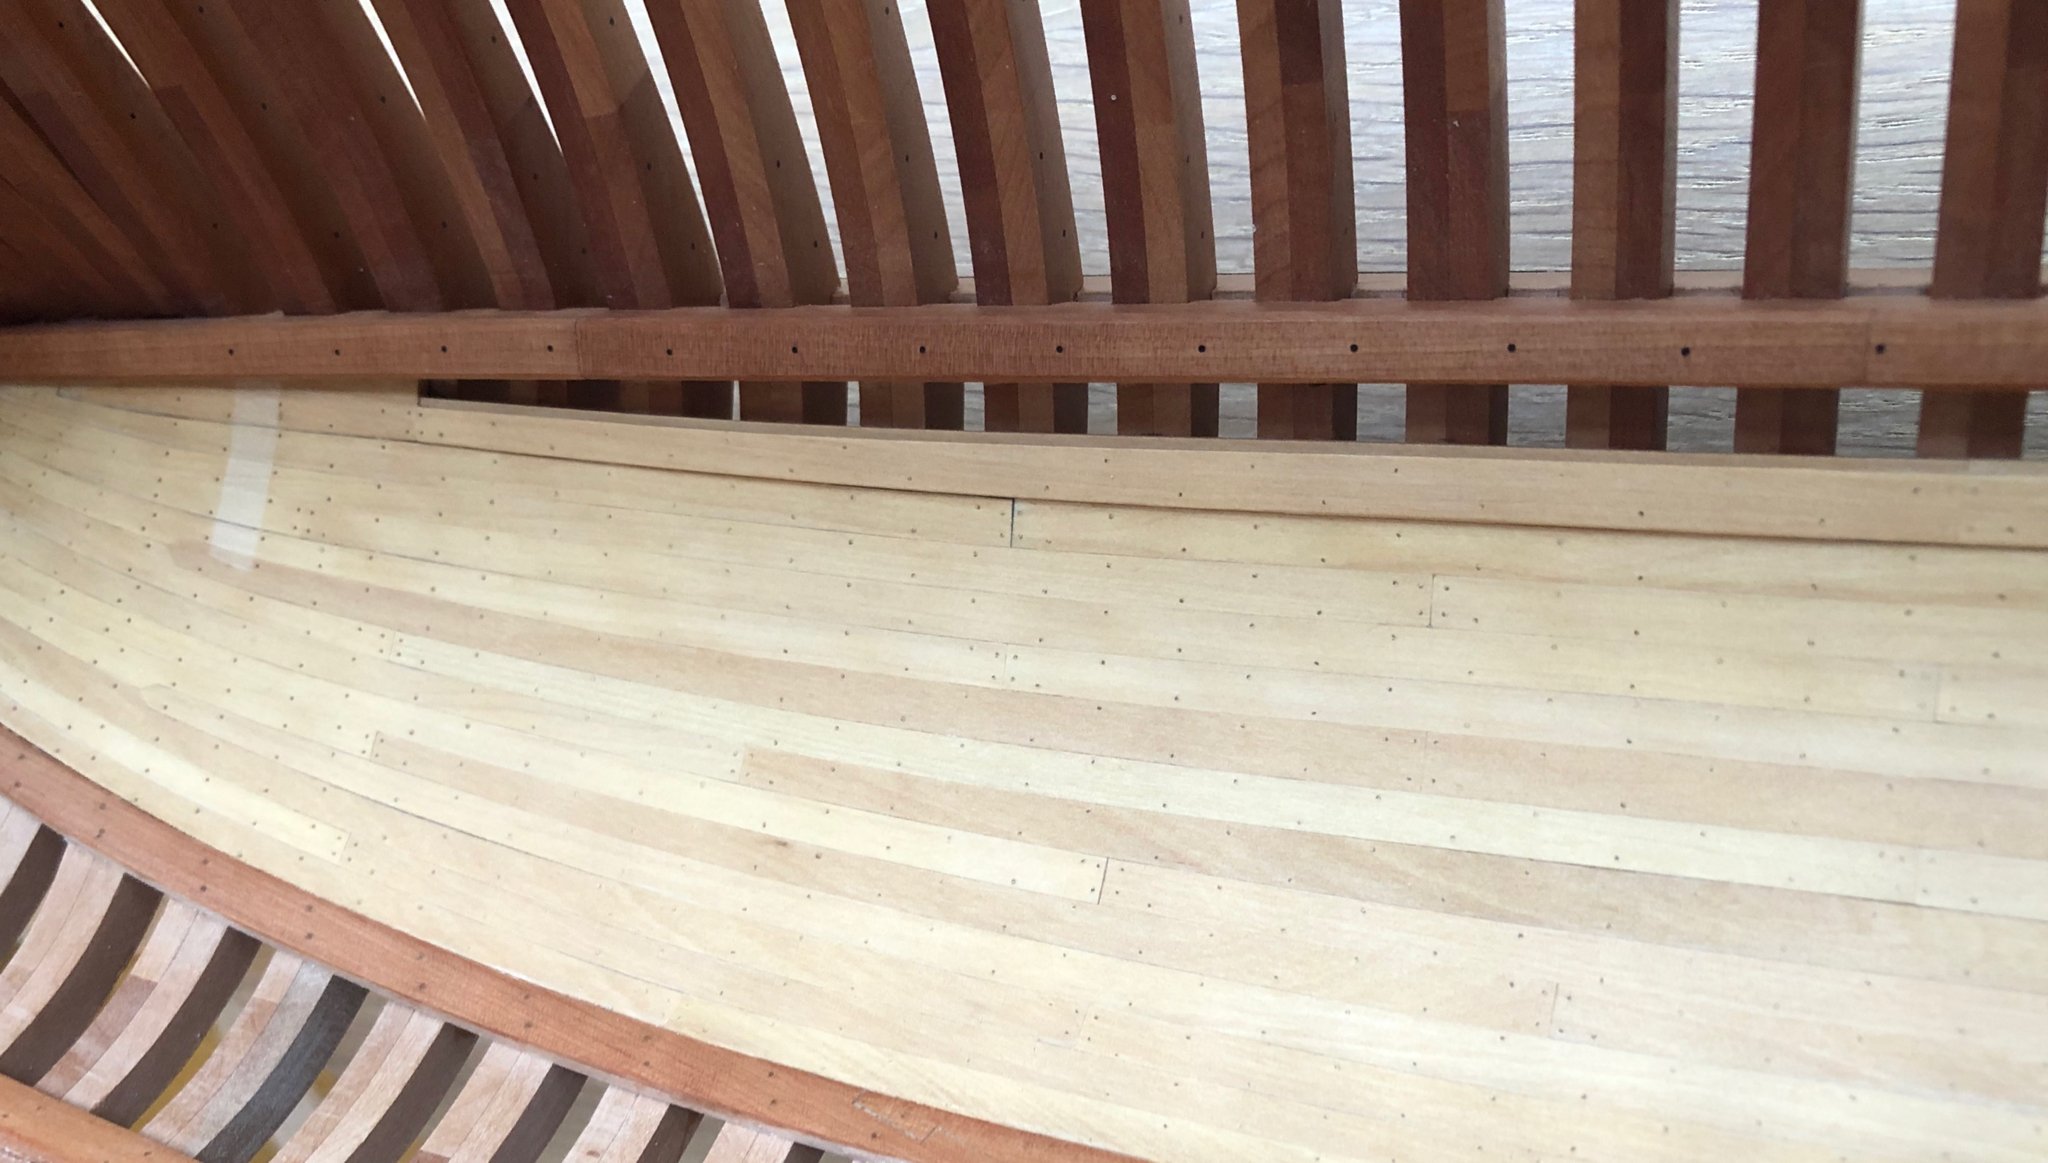
The ceiling planking is completed. Finishing was super easy and I'm happy with the resulting finish. Final result with a natural light: Not as happy with the overall result. There are some mistakes in the treenail pattern, and some lines are not so smooth and fair on the photos. Uneven treenails also bug me - even after finishing they look pretty different, some are much darker than the others. It looks like I used different wood and different diameter holes, which is not the case. Would never use bamboo treenails anymore, even if they are easier to make. But luckily that whole area would not be so visible, so no re-do is necessary. I learned a lot from doing it and hope to improve when it's time to plank more exposed areas. So now I'll spend some quiet evening time surrounded by books and plans, trying to make sense of the whole internal arrangement in the hold of the ship It's a real puzzle! As usual, Hahn plans are not so detailed, so I'm looking into various sources for the same period / type of ship and try to map it to the NMM drawing.


- 968 replies
-
- 21
-
-
- hahn
- oliver cromwell
- (and 1 more)
-
How to stain or dye boxwood?
Mike Y replied to tkay11's topic in Painting, finishing and weathering products and techniques
I did tested a water-based and a spirit-based dye, though on pear instead of boxwood (both have similar texture, pear being much cheaper). After 10 months of being exposed to an occasional sunlight the spirit based dye turned into a mess. Before: https://modelshipworld.com/topic/7297-beavers-prize-by-mike-y-148-1777-pof-hahn-style/?do=findComment&comment=455741 After: https://modelshipworld.com/topic/7297-beavers-prize-by-mike-y-148-1777-pof-hahn-style/?do=findComment&comment=514733 As usual, the finishes popular in US may be hard to find (or expensive) in UK or EU. Your results may vary... I was surprised with such a difference. I am not the only one, I remember a few logs where people faced a major discoloration and blotches appearing on their dyed wales after a while. Of course exposing your model to sunlight is not a smart idea, but if a certain finish tends to fall apart after such test - it would probably do so in a regular indoor environment too, just slower. -
Your accuracy and precision level pays off! These frame pieces look great, please avoid using that scary drawknife on them!
-
Håkan, Osmo is pretty common in Sweden, I have it in two random local hardware shops, no need to order from other countries. Plenty of sources online: https://www.pricerunner.se/sp/osmo-hårdvaxolja-3062.html For example: https://www.bygghemma.se/golv-och-vagg/malarfarg-och-tapet/olja-och-bets/hardvaxolja/hardvaxolja-osmo-orginalet-matt-3062/p-449522-427600 It is really easy to apply, you can use literally anything to just put it on your part, spread it around with a tool of your liking, and then you have around 3-5min to wipe it off carefuly with a paper towel or a cloth before it gets sticky. For a full-size woodworking applications it is recommended to use the scotch-brite pad to "get it into the wood", which is not practical on a model. I never had any problems when not using that pad. It is also easy to store - my can is 3-4 years old, nothing is clumping up or drying up, no film build-up. See this video, for example: I would not try it with an airbrush - no need, and cleaning it up afterwards would be a giant mess. Gaetan, thanks for the very detailed information! Actually I do not want any major colour change, I just want to add a bit of depth, bring up the grain and have some protection against finger stains. I was considering a non-finished version, but I like the look of a lightly finished wood, just a personal preference. I want the finish to look natural - with no visible film/layer and the least amount of sheen. Basically the opposite of a varnish. The tung oil I have is pure (at least it says so on a box), some kind of local fine woodworking / boatbuilding brand. I do not have the original package to show It behaves exactly as you say - making wood darker, and I like that effect on the frames. It is also showing the grain really well. Of course all finishes are applied before the glue-up, however I know that sometimes I would make a mistake and apply a finish too early, just to add something on top of the part a few years later. Hence the re-application test. No, absolutely not. I already see that finishes are specific to the wood type and an application you have (long grain, cross grain, darker/lighter/etc). I also see very little difference on boxwood planks, they all look very similar (except a darker tung oil), but on pear the difference is substantial. For any other wood the test needs to be done again, and on a test piece more complex than just some random cutoff. Of course, it should be sanded to the same grits as on the model. I have previously tried Osmo Polyx on Cherry and Black Walnut, and pretty happy with the results. However it was always applied in two coats, which I would not want on a model (the finish ends up too thick for a small scale).
- 968 replies
-
- 3
-
-

-
- hahn
- oliver cromwell
- (and 1 more)
-
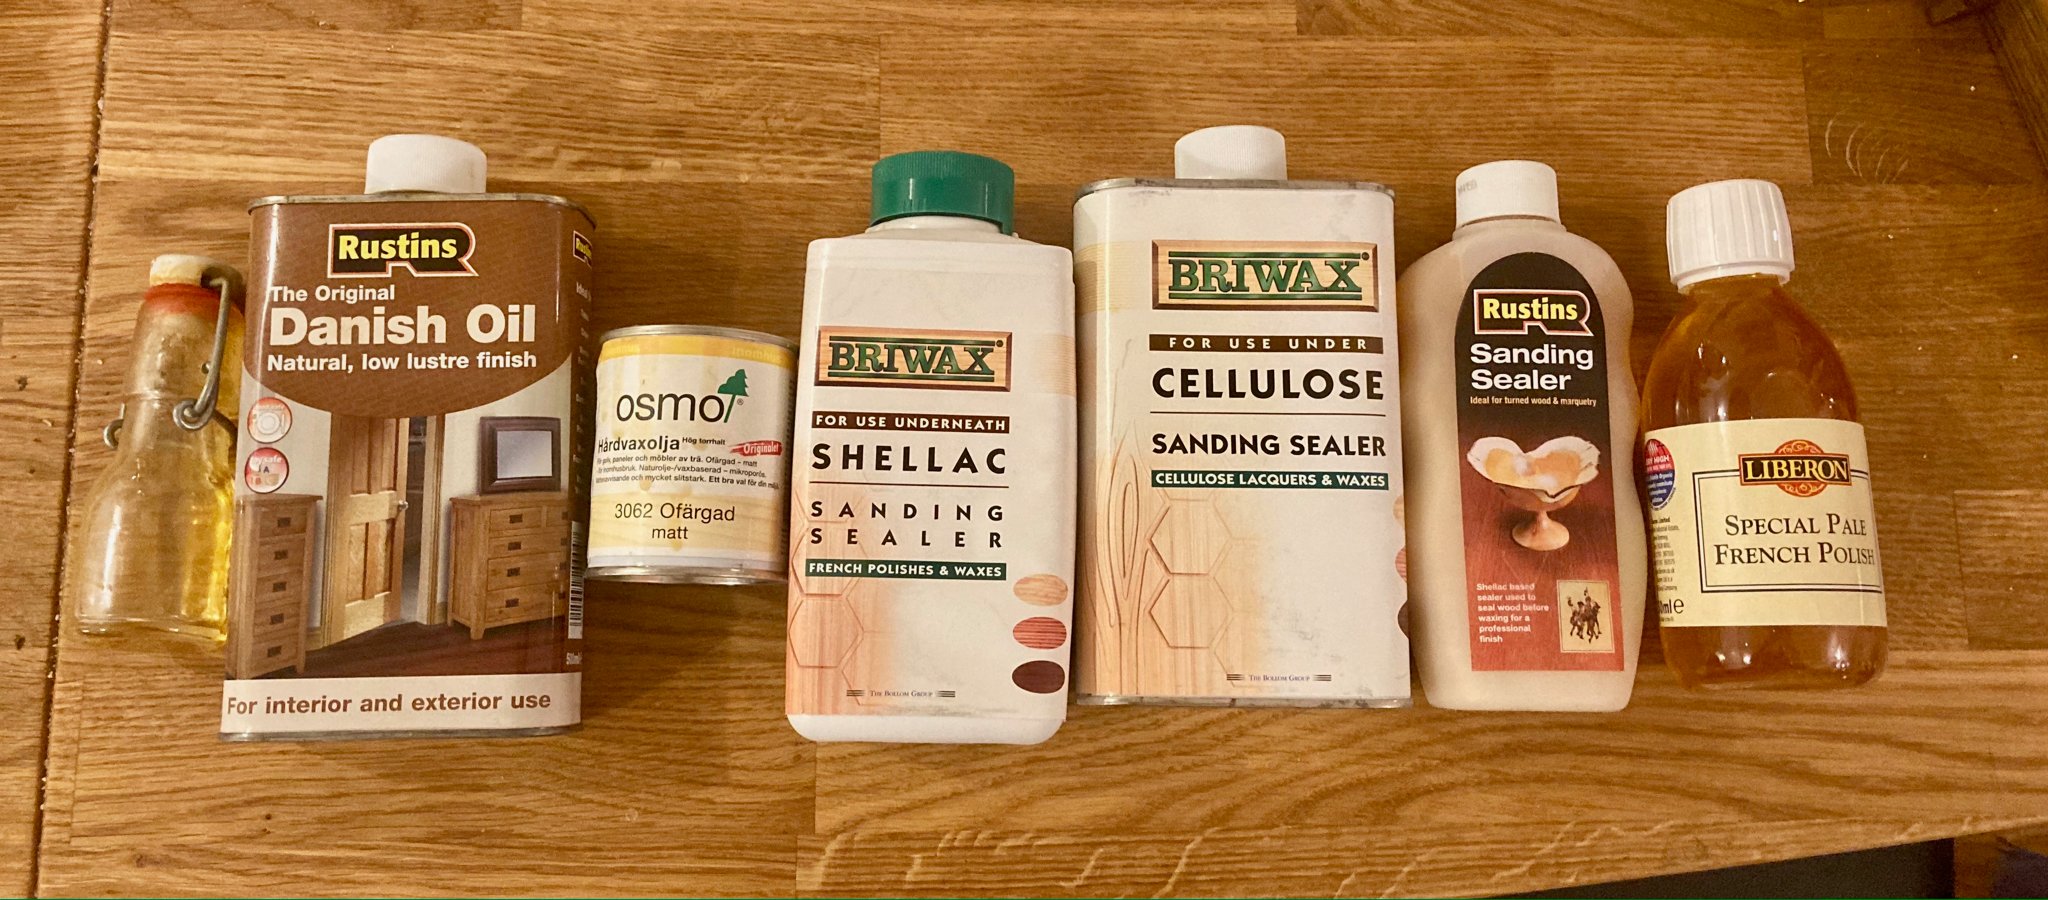
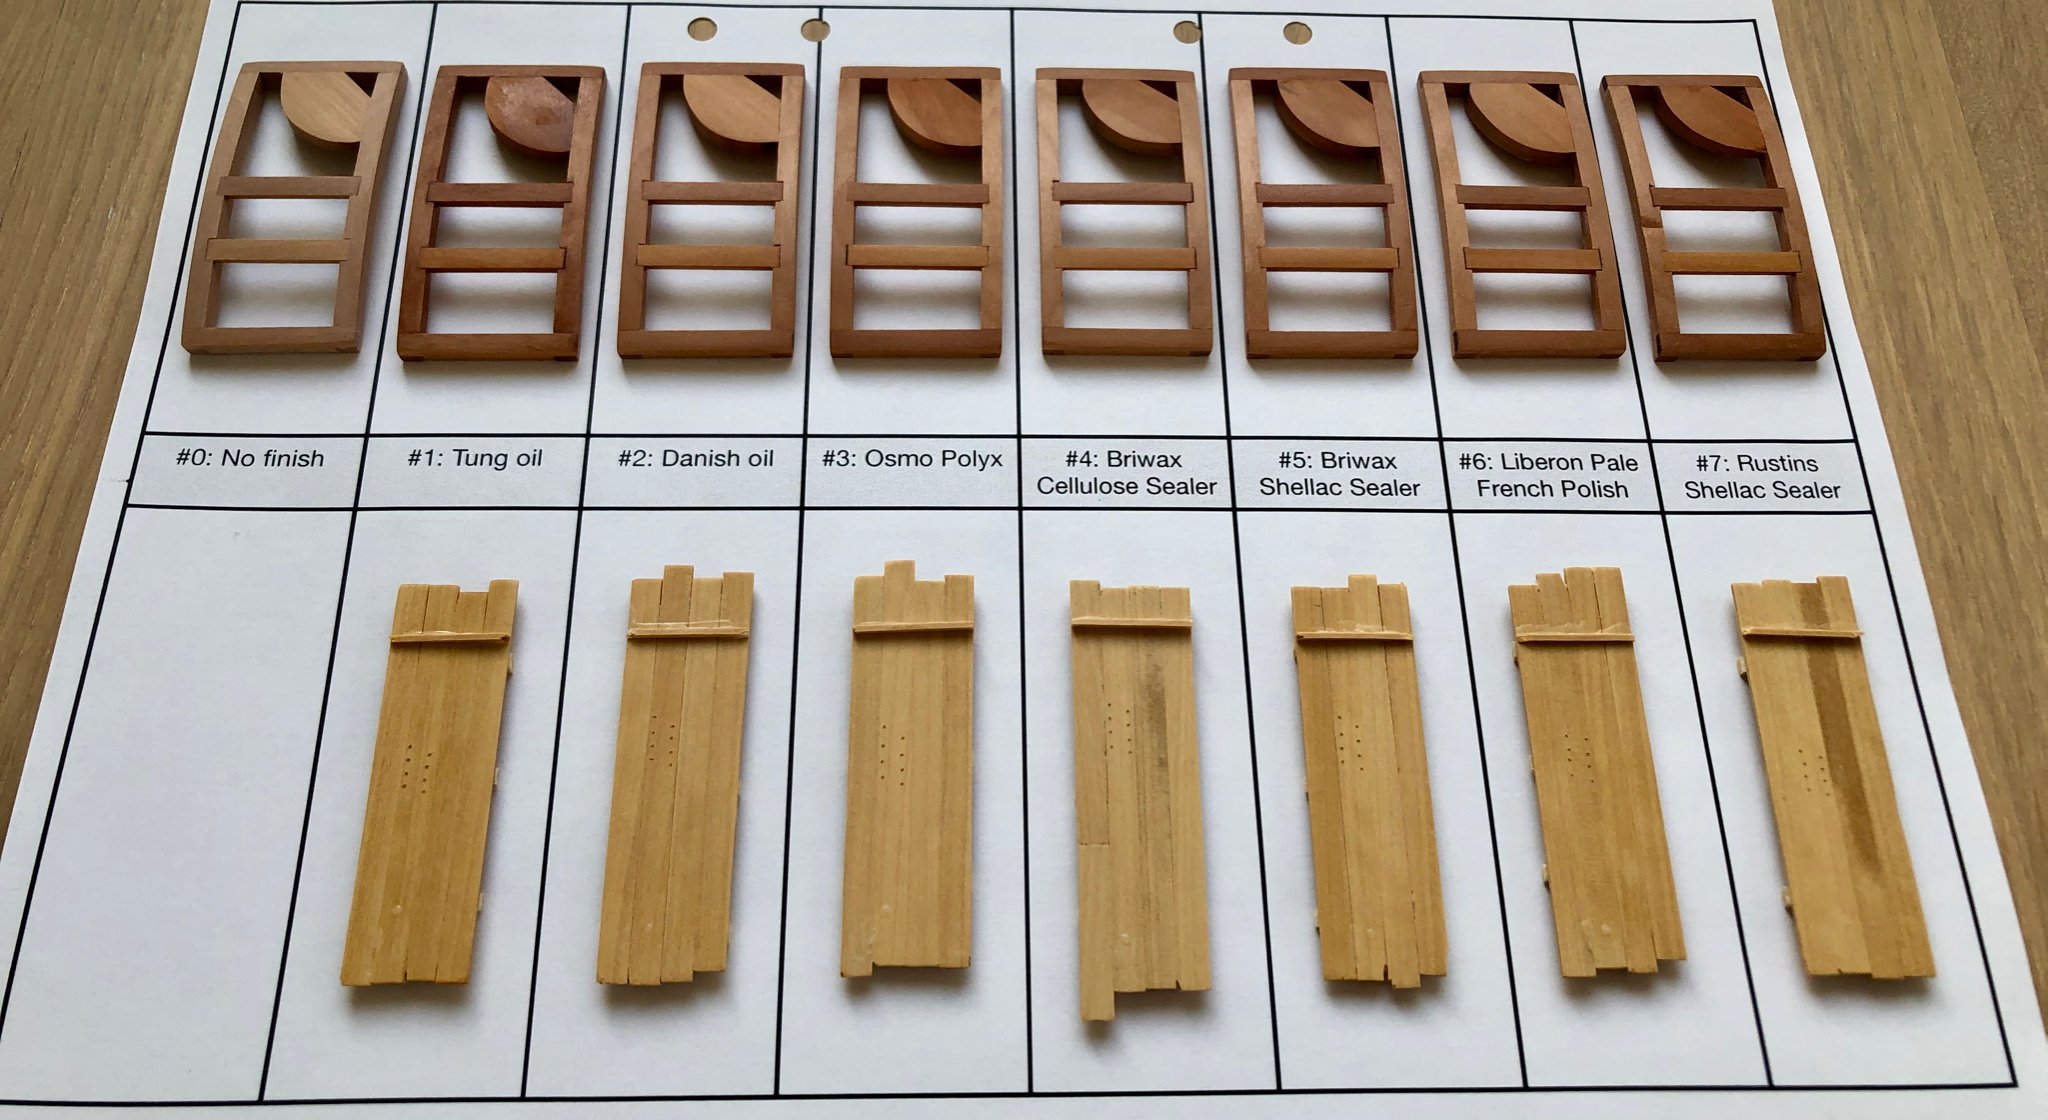
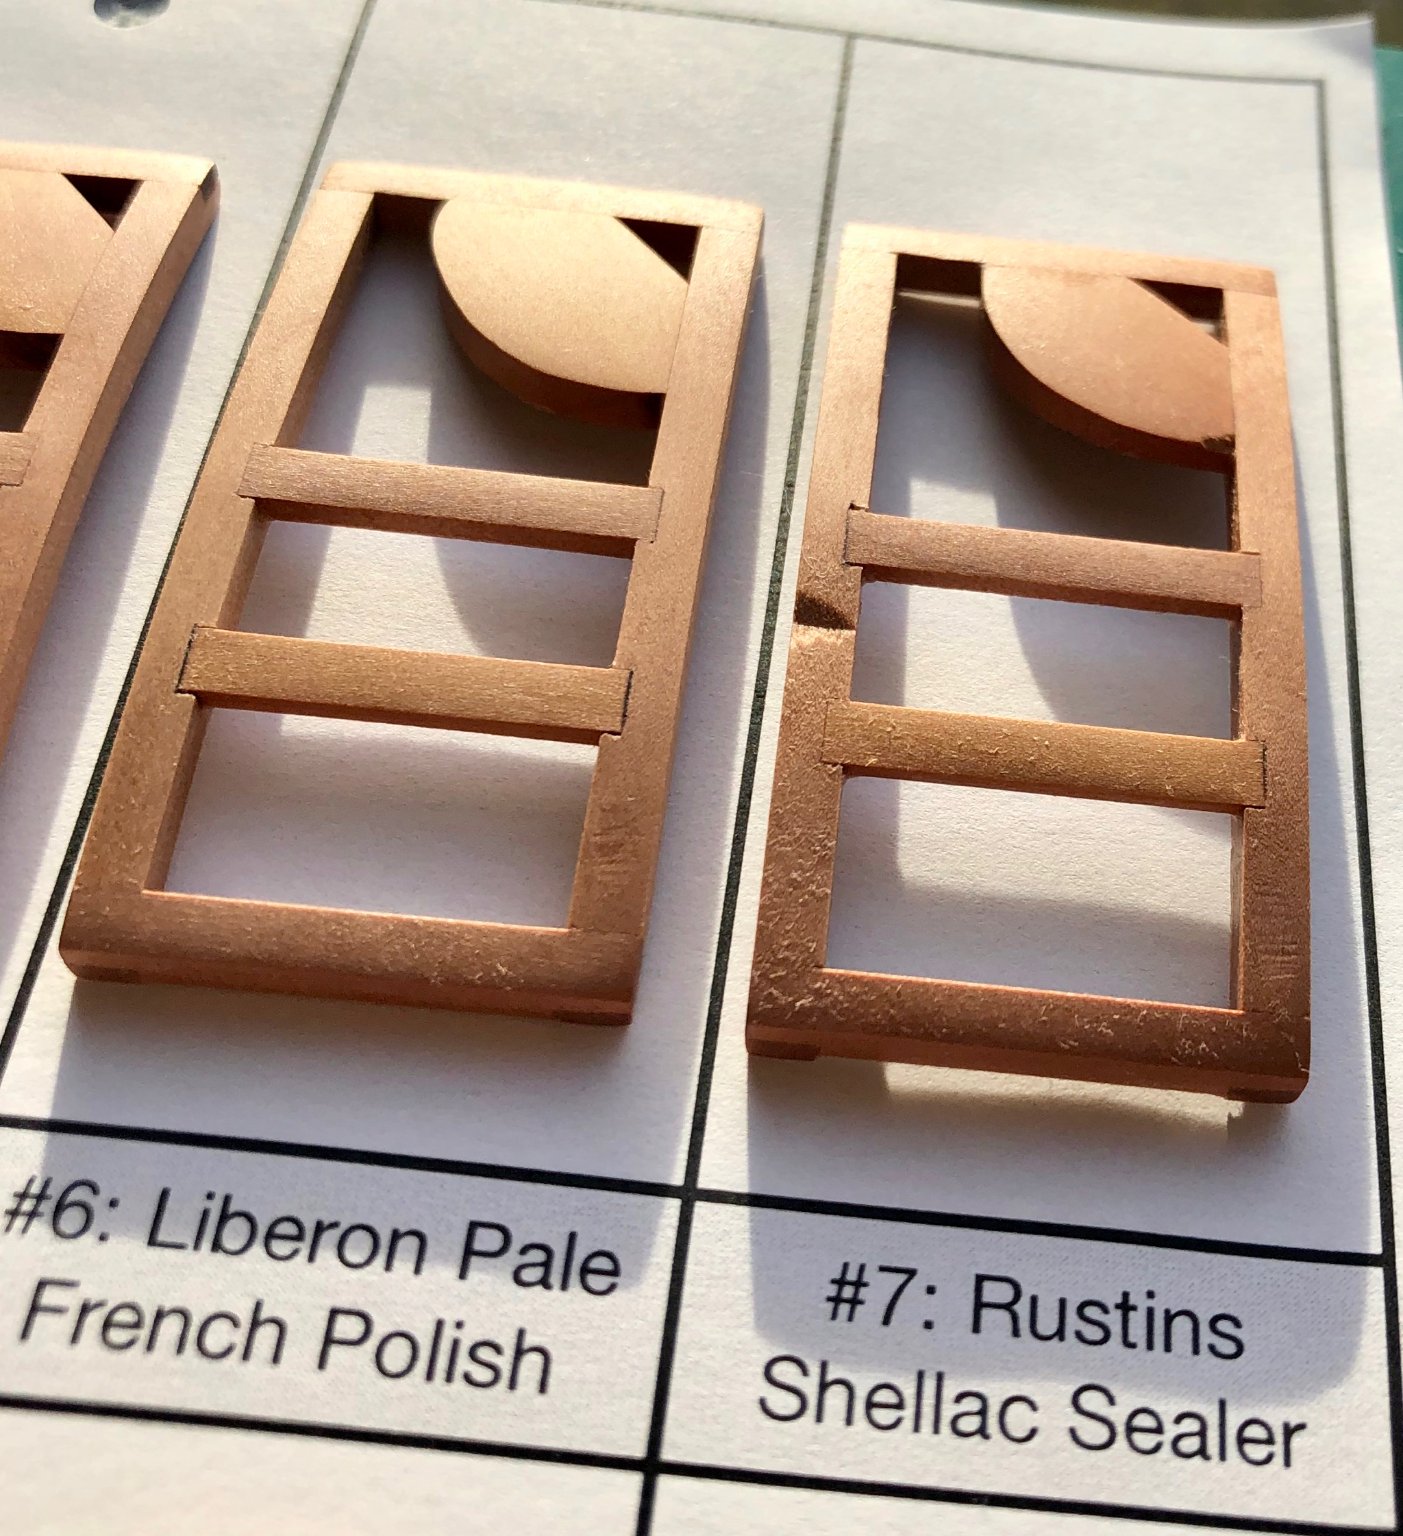
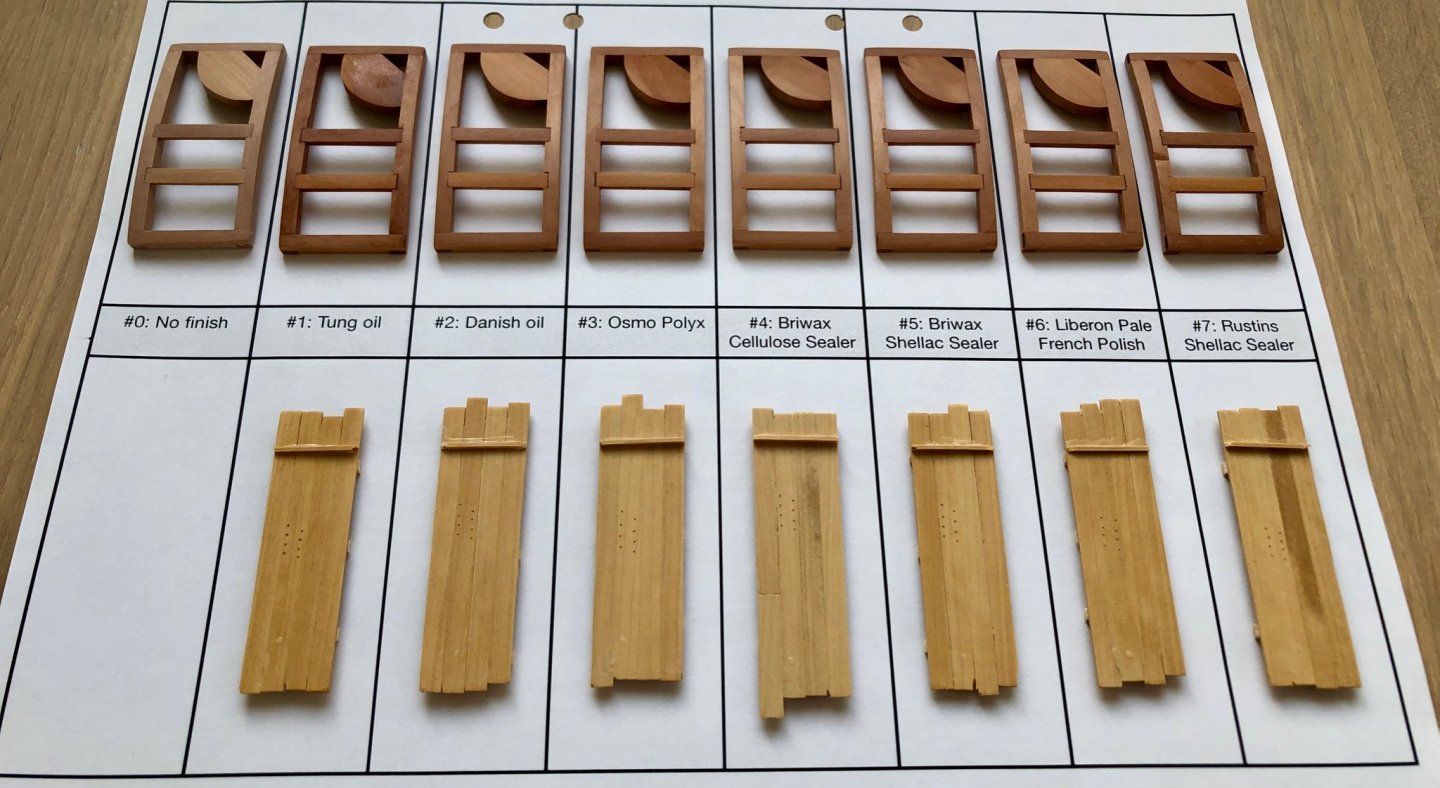
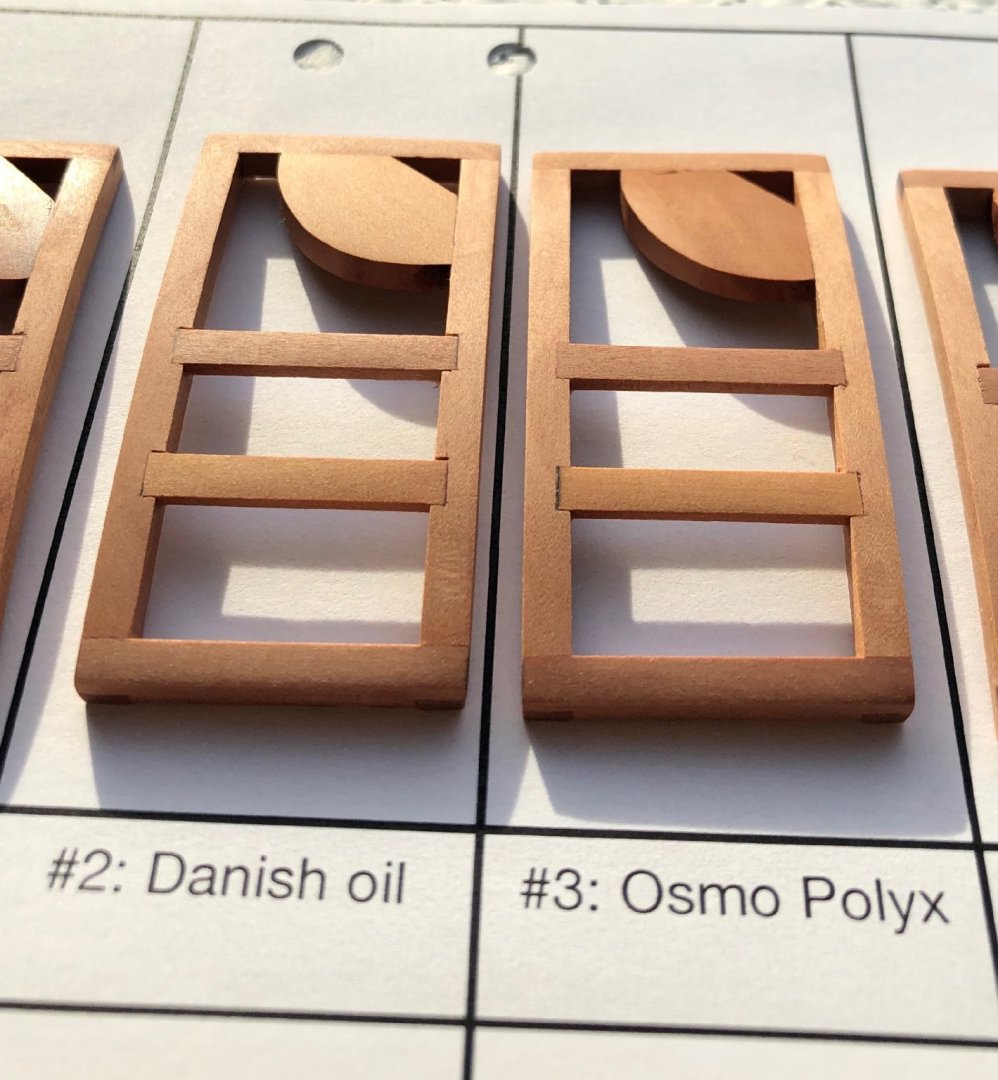
Finishes that were tested: (the bottle on the left side is a pure tung oil) Results: Unfortunately photos can't show all the nuances, I'm not a good photographer Don't want to make you bored with a full description of each test piece, just the main notes: 1) Be careful with your pure tung oil, it looks like mine started to solidify - the finished piece is full of small shiny glitter-like speckles, and the result is quite uneven. When I finished frames with the same tung oil - there was no such problem, but the oil was fresh. It is also the darkest of all the finishes. 2) Sanding sealers were hard to apply - they become sticky really fast, and the #7 Rustins Shellac Sealer was so sticky that a lot of paper fibers just got glued right away. As a result, all shellac-based sealers were too blotchy and uneven. Maybe you really need to dilute them, but I did not want to play around with that - the number of possible recipes goes up to infinity, and it's too fiddly to do The cellulose sealer was the least bad out of them all. Look on all that hairy fibers that got stuck! Eeew. 3) The leftover glue looks more or less the same for all finishes except tung oil - it makes glue whiter and shinier. 4) Tung oil also makes treenails look a bit thicker, the rest of the finishes have the same effect on treenails. As a result, I have two finalists - Danish Oil and Osmo Polyx (hard wax-oil mixture #3062). They look very similar, closest to the natural wood colour. Coincidentally they are also the easiest to apply and spot-fix! Danish oil has a little bit more shine, while Osmo is the matt-est finish of them all. I was worried about wiping off Osmo (it is supposed to be sensitive to it, no thick layers should remain). Surprisingly, a thorough inspection with optivisor could not find any problems in tight areas, no build-up or any imperfections. During the recent years I used it on a number of mini woodworking projects (boxes, pens, etc) and it holds well over time. So, surprisingly, the winner is Osmo Polyx #3062! Danish oil is the second close. Osmo is a relatively new finish, getting traction in fine woodworking, but I only found a few logs on MSW that mention it. It's not cheap, but a small can would last for a pretty long time. Based on these test results - I really encourage others to try and share what you think!


- 968 replies
-
- 14
-
-
-
- hahn
- oliver cromwell
- (and 1 more)
-
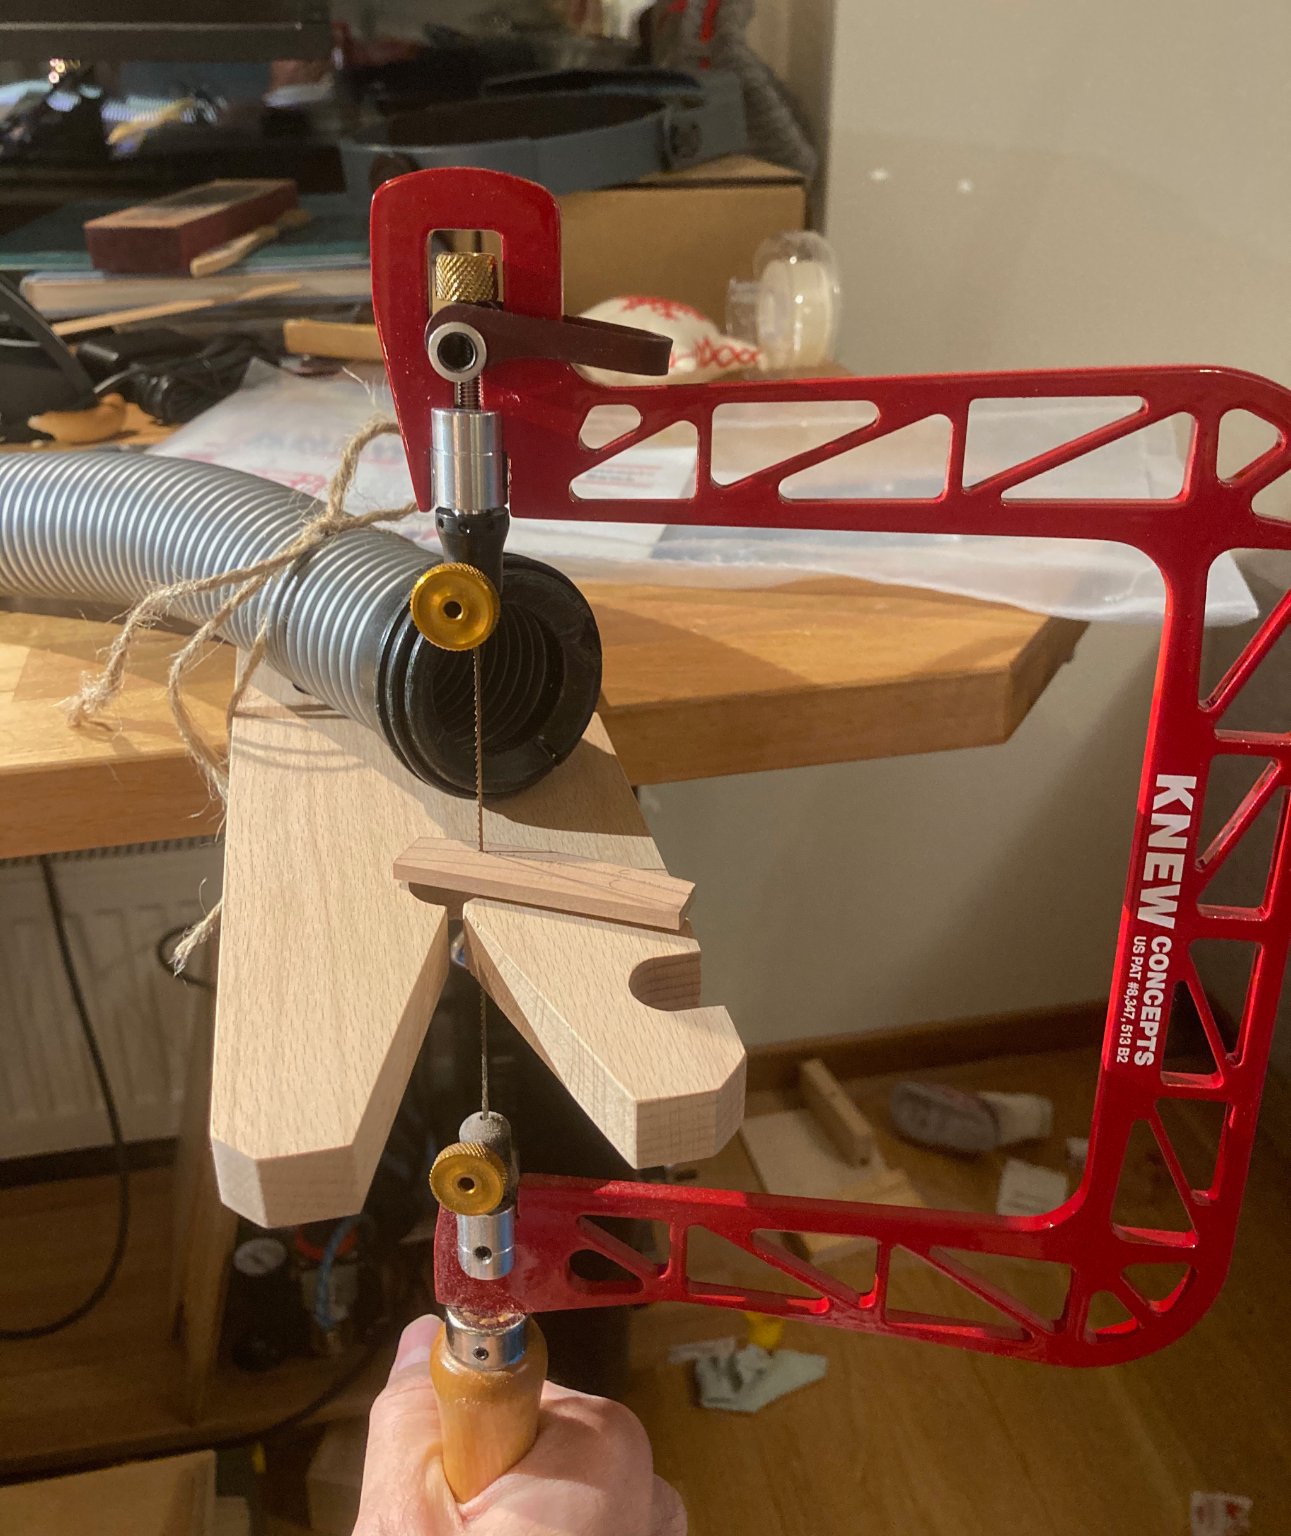
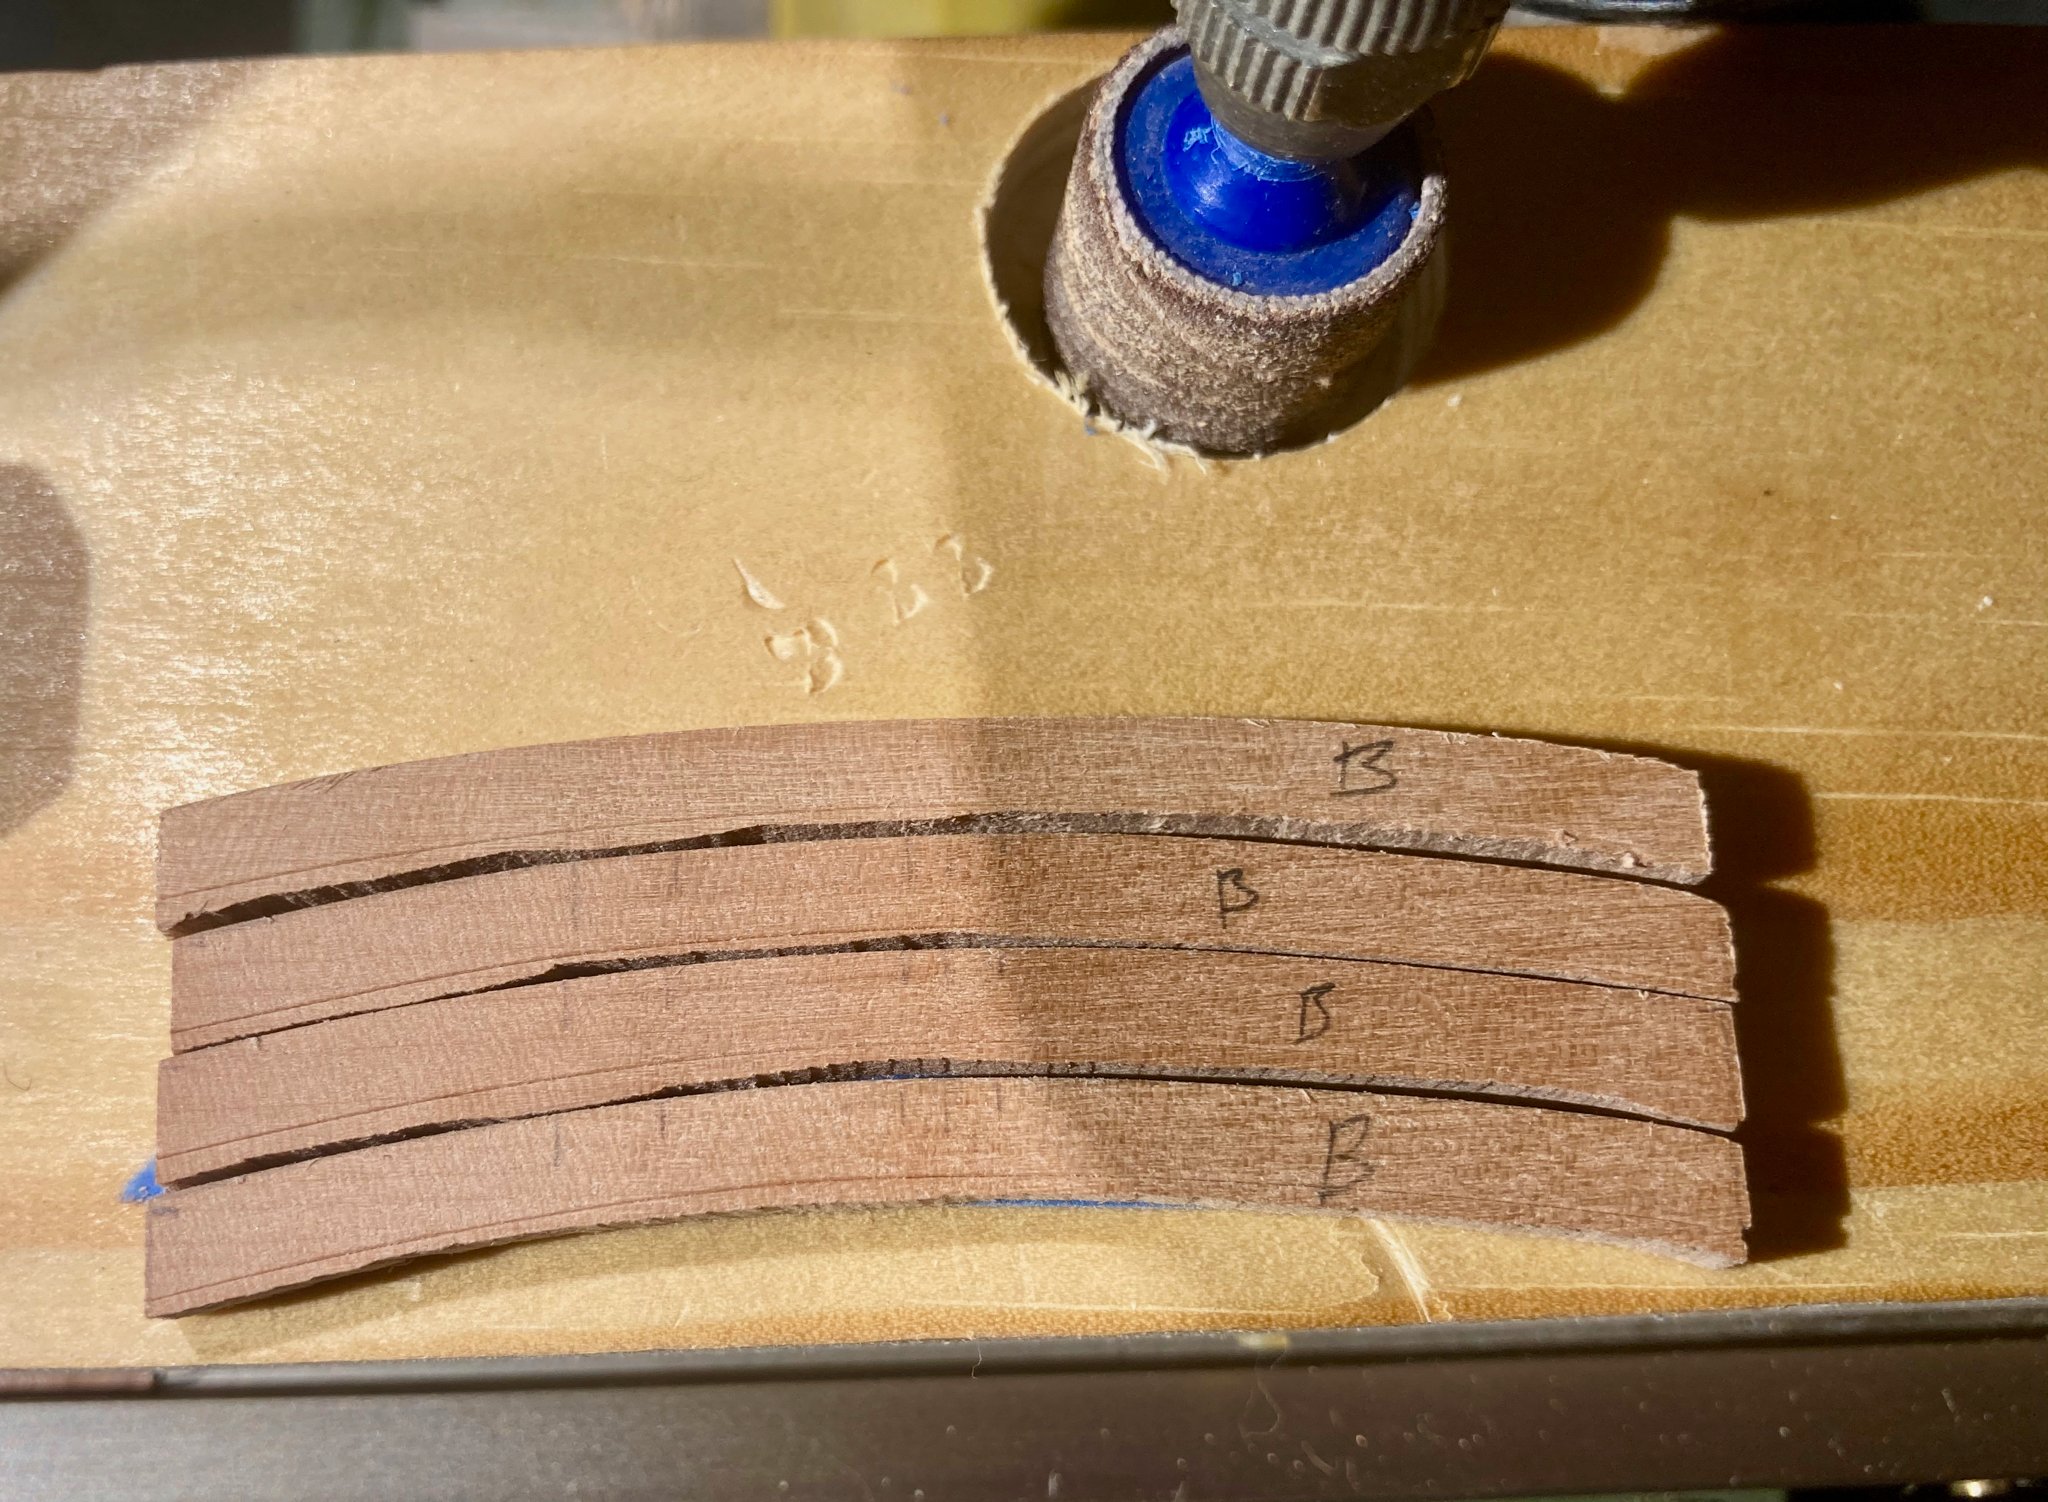
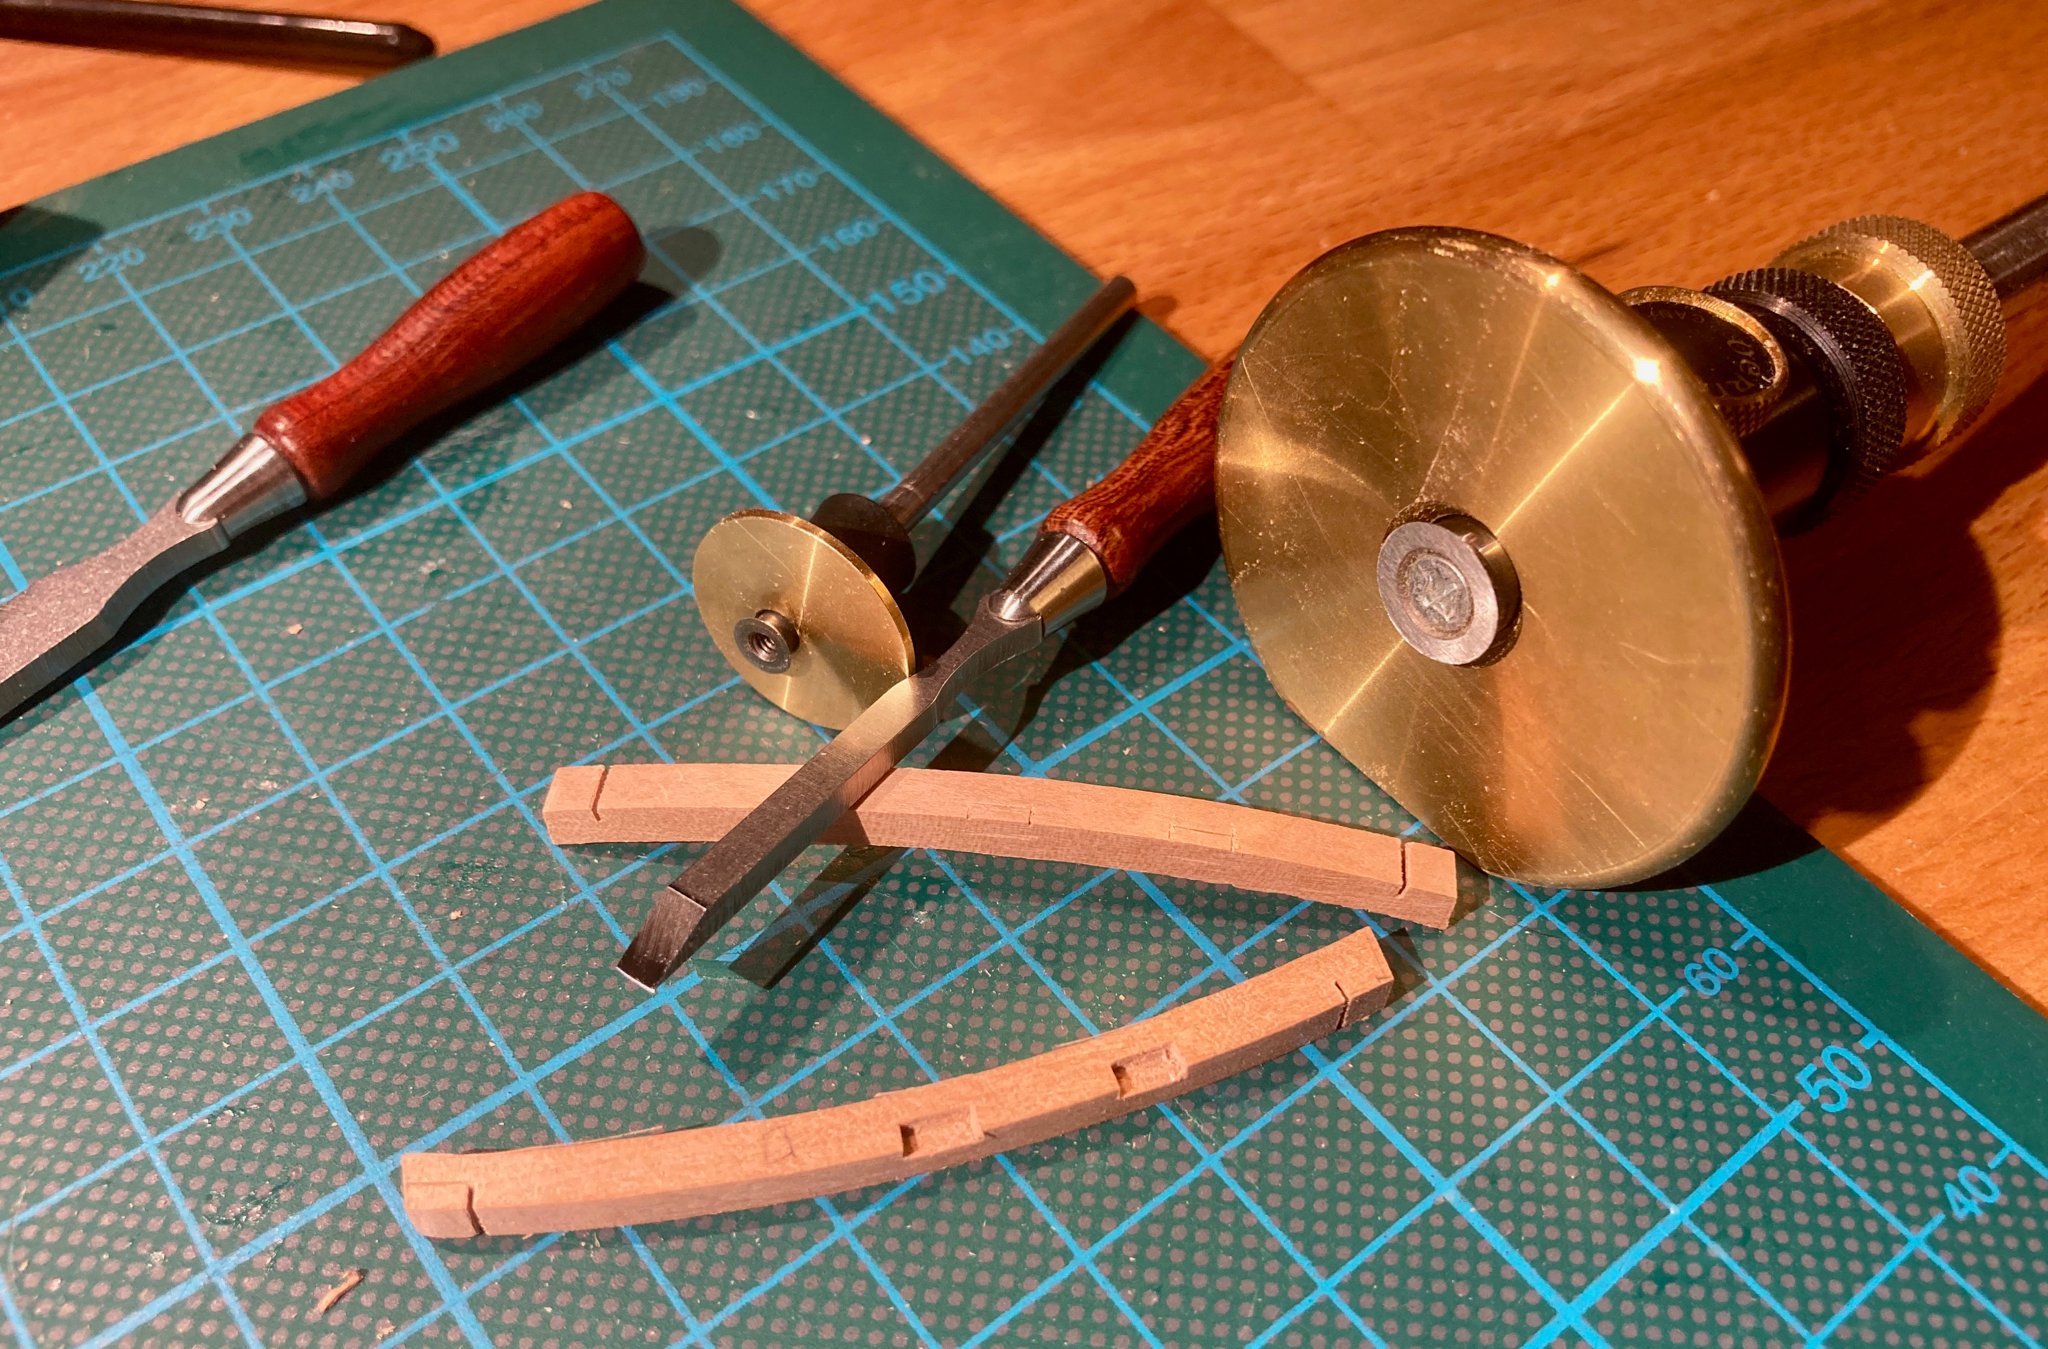
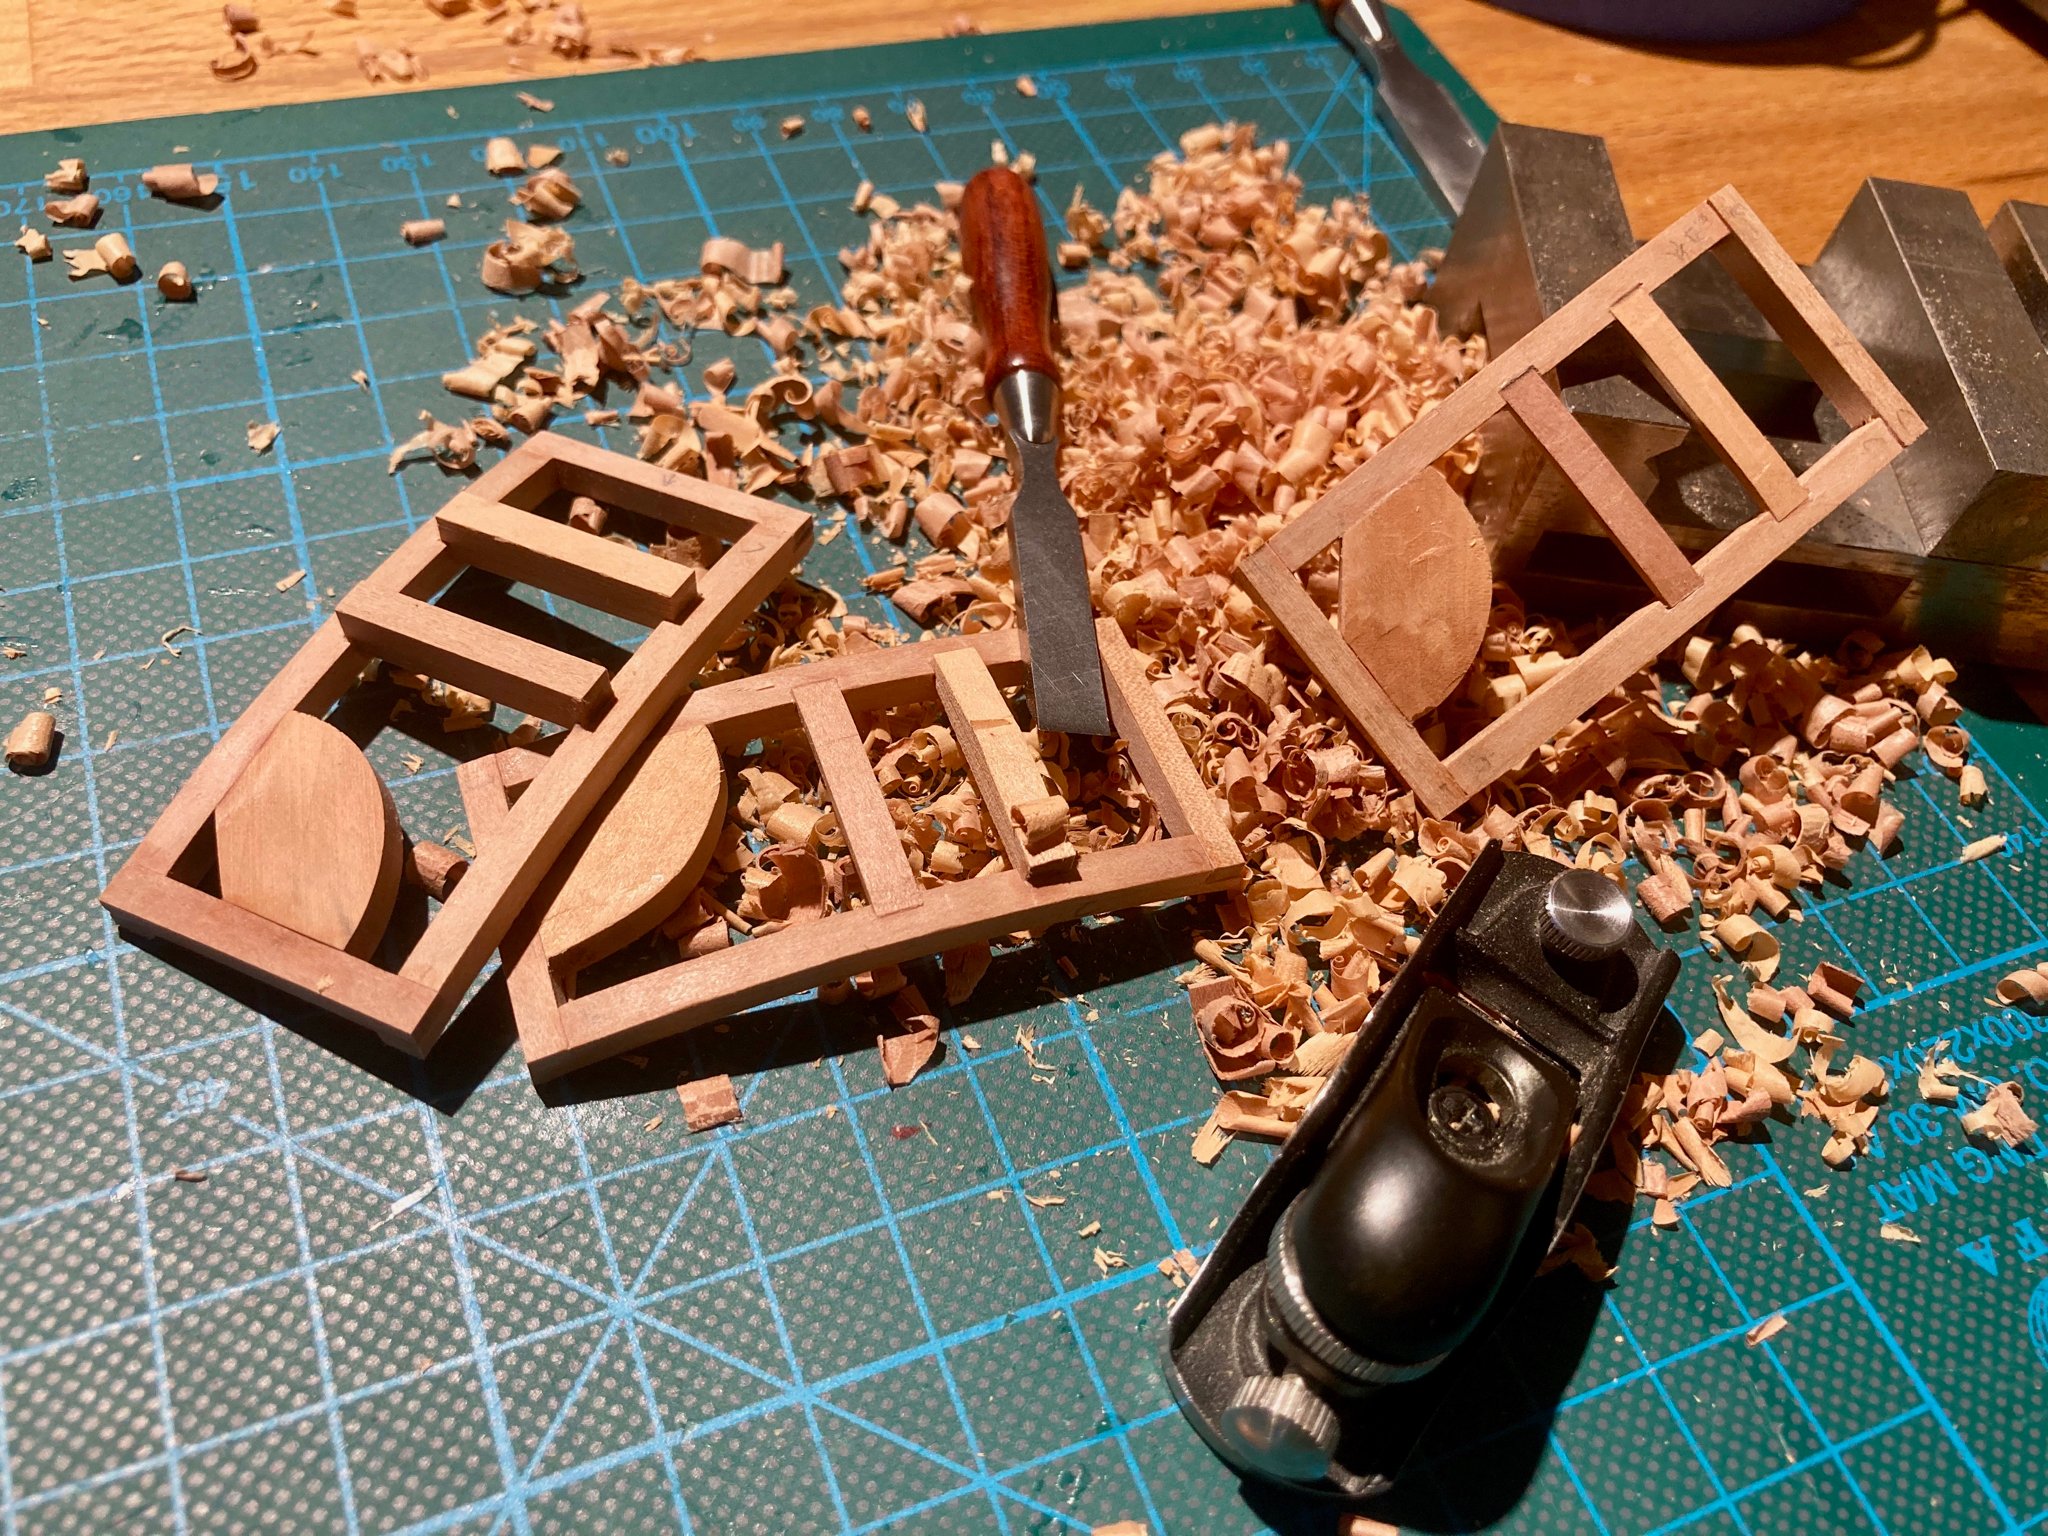
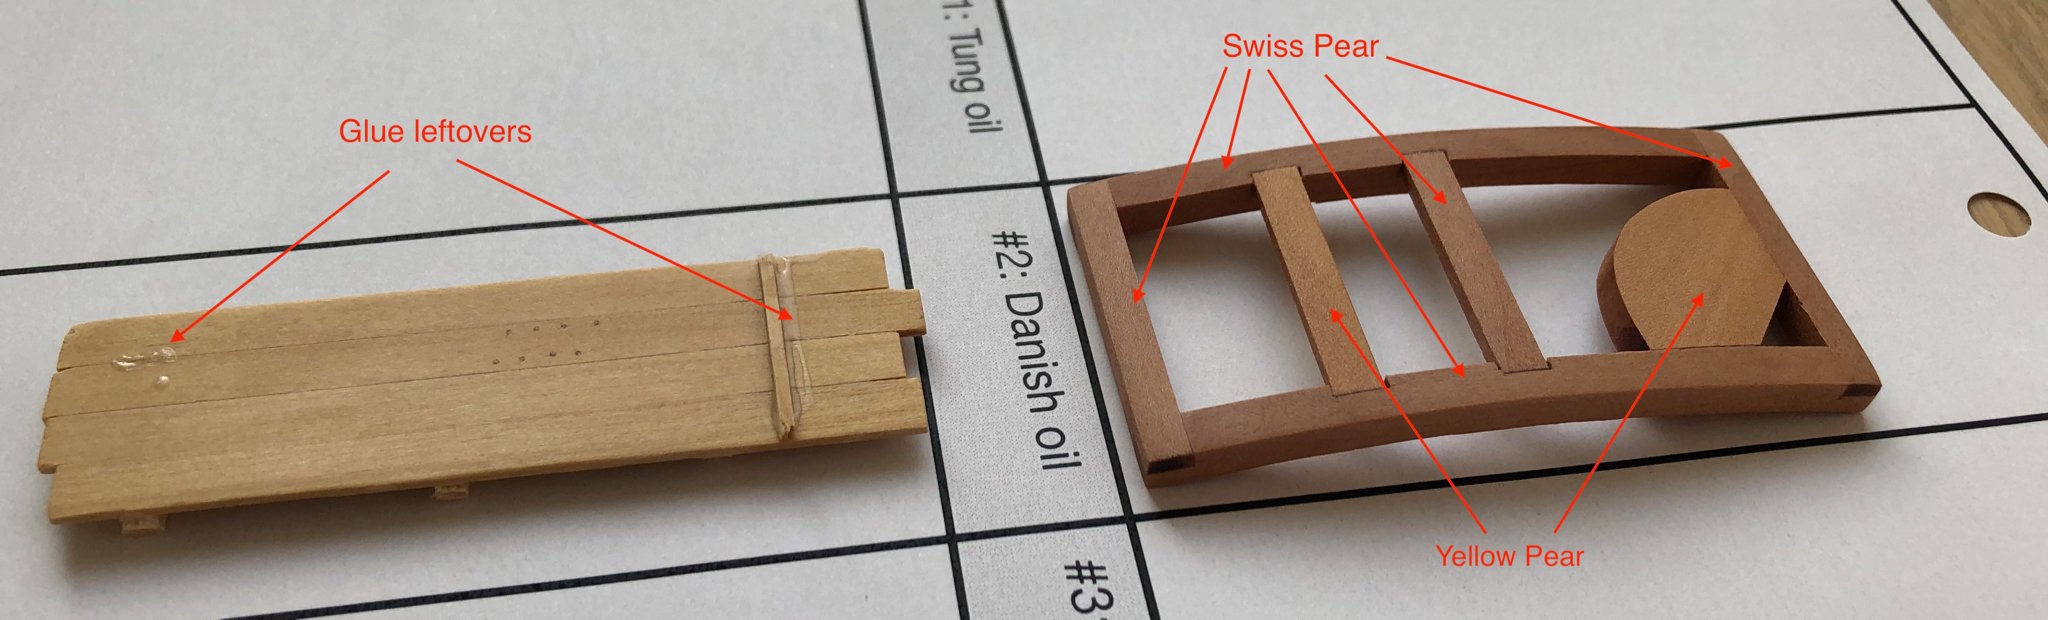
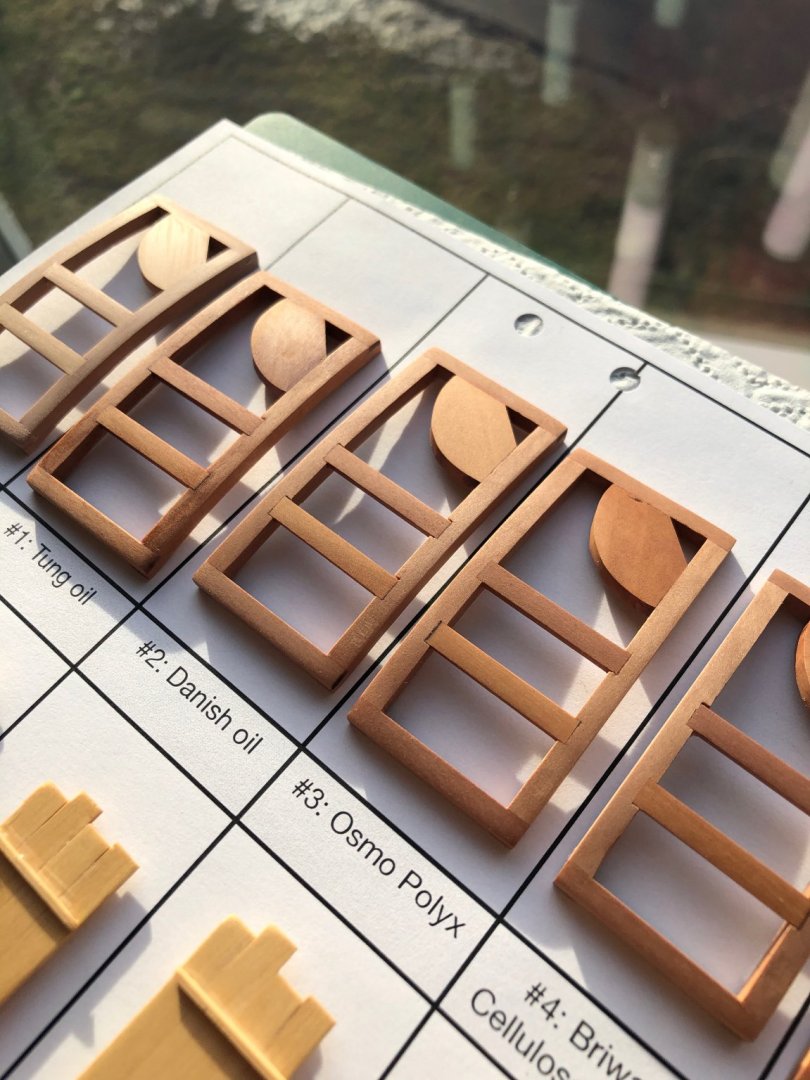
To test the finishes I made some test pieces: 1) Boxwood planking fragment. With a bit of treenails, cross-piece with a glue left over from one side, and a few glue drops specifically planted. I remember that some finishes highlight the glue drops and any imperfections, so I've made them on purpose The cross-piece makes it harder to wipe off the finish, and I want to see how the build-up in that corner would look like. 2) Deck structure imitation, with a bit exaggerated curve to see how finish absorbs into diagonal grain. Half-circular piece creates a tiny corner that is hard to clean up, again to test the build-up. Most of the piece is made using swiss pear (pink-ish), but two parts are in a yellow pear (aka regular pear, but non-steamed), leftover from the original timbering package. I am planning to use different shades (a bit like Albert on his Naiad) and curious to see how different finishes highlight that difference. This was a fun project of its own, I really enjoyed making them. It was a good opportunity to test my fancy fret saw. This brand is usually used as a decoration on a background of your woodworking youtube channel, but since I do not have one - I just cut wood with it It's quite ok, need to practice more to cut straighter, but the main benefit is quietness - I can slowly cut my pieces while the family is around, while they need to hide somewhere if I fire up a bandsaw. The common way of cutting the underside of a beam by using a mill is a bit too cumbersome with such tiny pieces, so I just scribe a line and then sand to this line with a small sanding drum: It was also a good practice in cutting notches. Two marking gauges and very handy, chisel registers in the scribed line and does not slip anywhere. The resulting quality was not always good, you can see a few gaps and dings, so this practice run was quite necessary. Each piece got one coat of finish, non-diluted, just as it says on the box. Excess wiped off more or less immediately with a paper towel. After a few days, I imitated a spot-fix (e.g. if I need to glue something to a finished part) - scraped away a small spot and re-applied a drop of finish to that area, blending it to the adjacent area. The point is to see how well it blends, if there is a visible difference between that area with two coats as compared to one coat on the rest of the piece. There was no post-finishing with steel wool - since this would be hard to do on a model, and I'm afraid of tiny metal particles getting stuck in random places and rusting after a while.


- 968 replies
-
- 12
-
-
- hahn
- oliver cromwell
- (and 1 more)